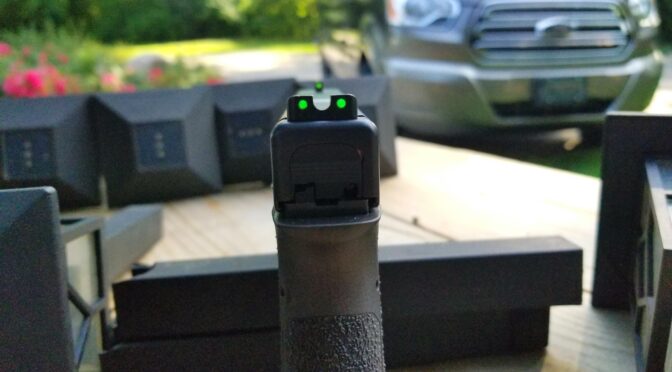
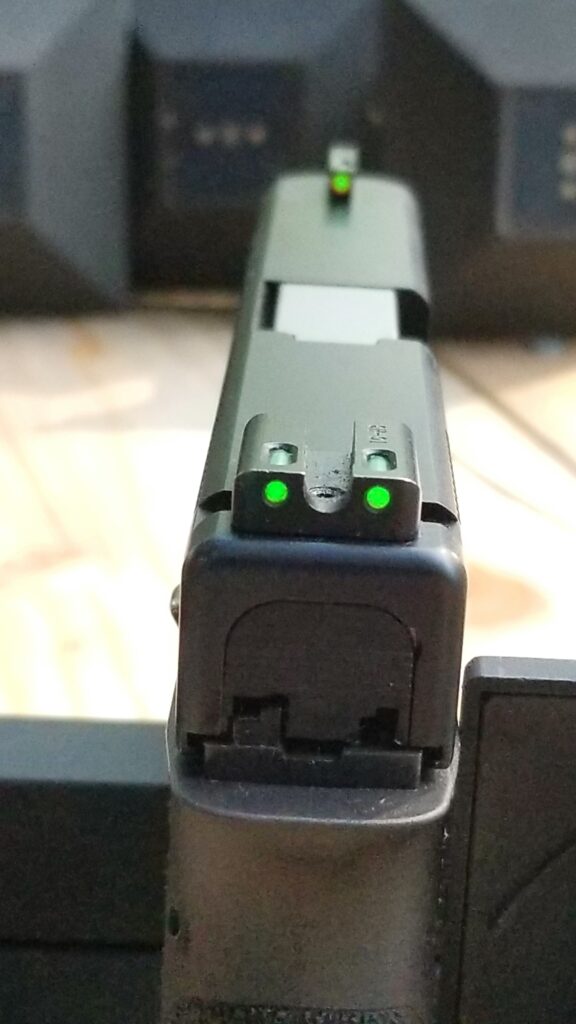
A fellow emailed me wanting to upgrade his from the generic OEM Glock sights that I don’t think really excite anyone to something that would be more visible in general and also work in the dark. My answer was immediate – go with the TRUGLO TFX Pro Tritium and Fiber Optic Xtreme sights.
The featured photo above shows how bright they are on my G17 slide on it. I bought these sights by the way – so you are getting my honest opinion.
Folks, these are my hands down favorite sights for a number of reasons:
- They are CNC machined from steel and have a durable black nitride finish — they are not soft plastic.
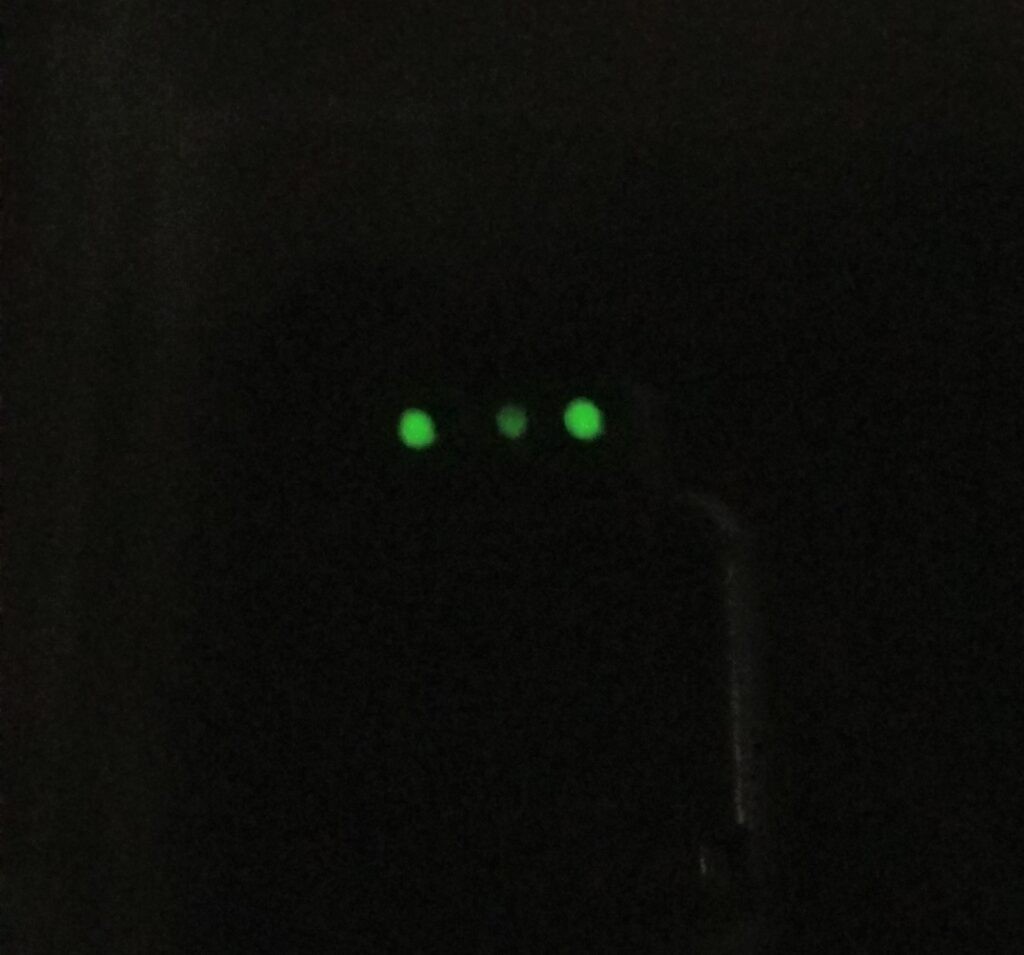
- They do not need batteries – the lit dots are via fiber optics when there is light and sealed tritium when it is dark so you are covered regardless of the light available. The tritium ought to fluoresce (emit light) for about 10-20 years and I’ll worry about replacing them then.
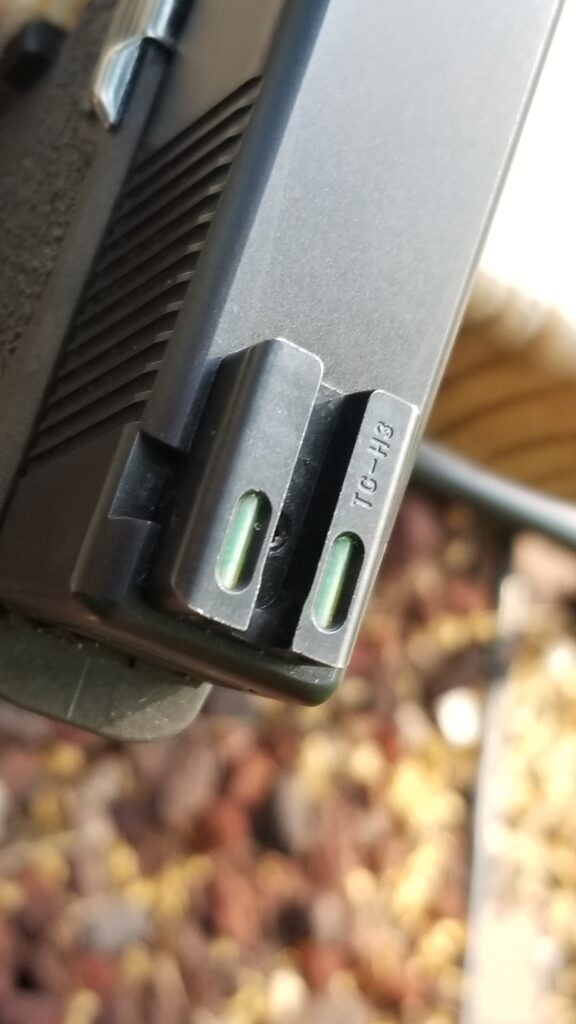
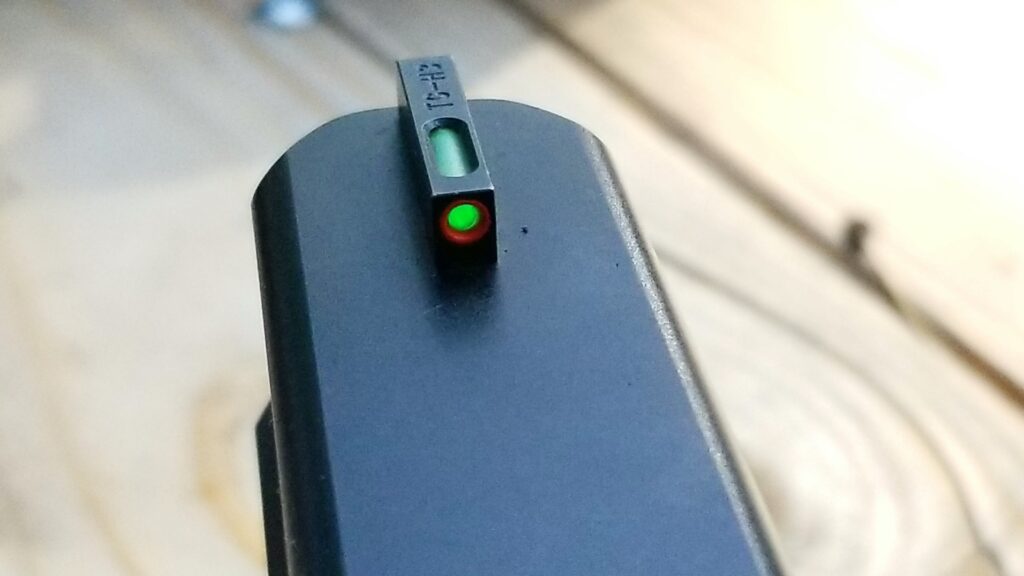
- I really like the three green dot configuration – two on the rear sight and one on the front. The front also has an orange ring that you can see when there is light but is green when operating off the tritium only.
- The rear sight goes into the slide’s groove very easily and is then secured with a set screw. Some sights can be a bear to install but not these.
- The rear sight is big enough that it can help you rack the slide one handed in a one-handed emergency.
- They have a 12 year warranty.
- They are assembled in the USA – the tritium capsules are made in Switzerland.
What Glock models are supported?
Because these are so popular TRUGLO is making a variety of models to support the different Glock configurations that are out there. I assembled the following table and you can also check their webpage if you want:
| TG13GL1PC | Glock® 17 / 17L, 19, 22, 23, 24, 26, 27, 33, 34, 35, 38, 39, 45 (Excluding M.O.S. models) |
| TG13GL2PC | Glock® 20, 21, 25, 28, 29, 30, 31, 32, 37, 40, and 41 (Excluding M.O.S. models) |
| TG13GLAPC (TFX front, Adjustable Rear) | Glock® 17 / 17L, 19, 20, 21, 22, 23, 24, 25, 26, 27, 28, 29, 30, 31, 32, 33, 34, 35, 37, 38, 39, 41, 45 (Excluding M.O.S. models) |
| TG13GL3PC | Glock® 42, 43, 43x, 48; Honor Defense® (all models) |
Personally, I use the TG13GL1PC on a G17 and G34. I bought both off sight sets off Amazon – click here to see the large selection there.
Do they have lower cost models also?
Yes, they do. The Tritium series just has the tritium for illumination in the dark and show as bright white dots during the day.
| TG231G1 | Glock® 17 / 17L, 19, 22, 23, 24, 26, 27, 33, 34, 35, 38, and 39 (Excluding M.O.S. models) |
| TG231G2 | Glock® 20, 21, 25, 28, 29, 30, 31, 32, 37, 40, and 41(Excluding M.O.S. models) |
| TG231G1A | Glock® 42, 43 |
They also make a Tritium Pro series that builds on the Tritium base model and adds an orange ring to the front sight plus the back sight is bigger and that makes it easier if you need to rack the slide with one hand.
| TG231G1W | Glock® 17 / 17L, 19, 22, 23, 24, 26, 27, 33, 34, 35, 38, and 39 (Excluding M.O.S. models) |
| TG231G2W | Glock® 20, 21, 25, 28, 29, 30, 31, 32, 37, 40, and 41(Excluding M.O.S. models) |
| TG231G1AW | Glock® 42, 43 |
| TG231G1MW | Glock® MOS 17, 19, 22, 23, 24, 26, 27, 33, 34, 35, 38 and 39 |
| TG231G2MW | Glock® MOS 20, 21, 25, 28, 29, 30, 31, 32, 37, 40 and 41 |
Do they support other brands and models of pistols?
Definitely. These are very popular lights given their great combination of quality at a fair price. I tend to see the best prices on Amazon – click here to see them.
Conclusion
I find these sights to be an incredible improvement over the plain Glock sights – they are easy to see and aid with rapid aiming. I really do like these sights and use them personally. I strongly recommend them.
I hope this helps you out.
Note, I have to buy all of my parts – nothing here was paid for by sponsors, etc. I do make a small amount if you click on an ad and buy something but that is it. You’re getting my real opinion on stuff.
Please share the link on Facebook, Forums, with colleagues, etc. Your support is much appreciated and if you have any feedback, please email us in**@*********ps.com. If you’d like to request a report or order a reprint, please click here for the corresponding page to open in new tab.