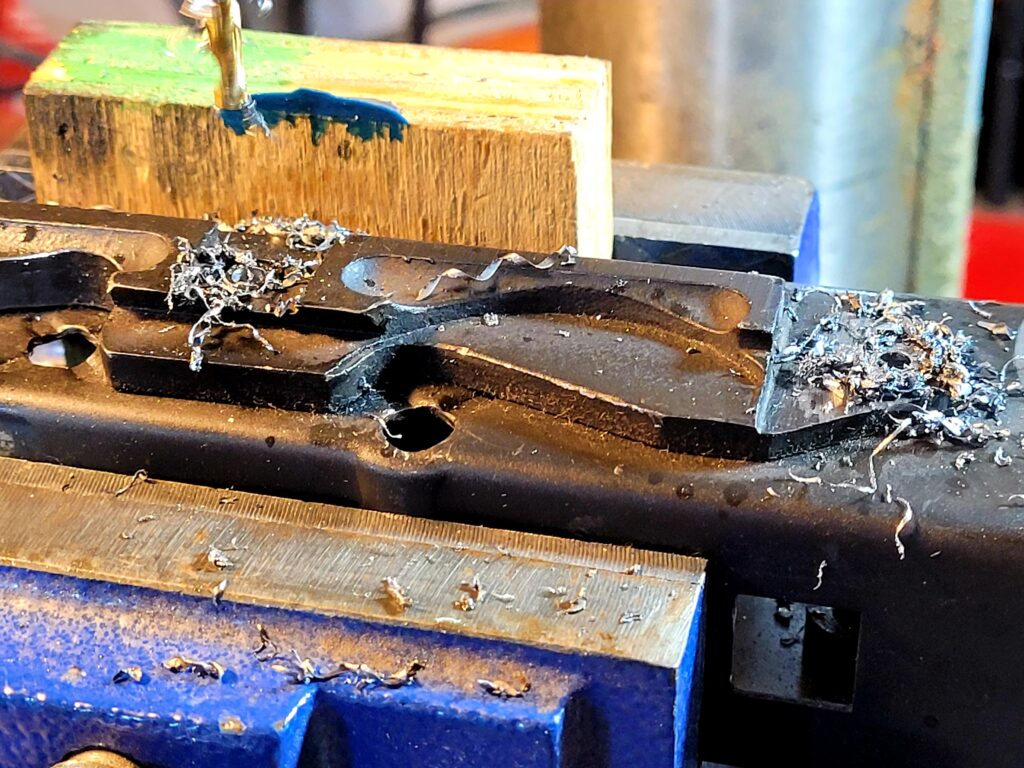
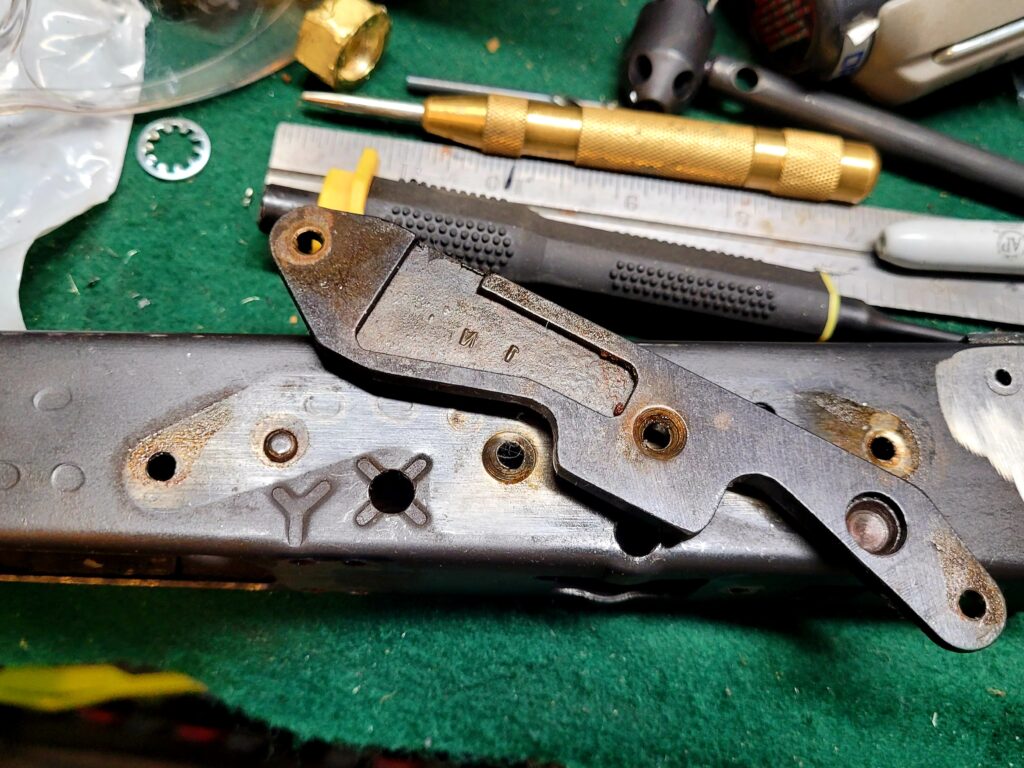
Category Archives: AKBuilds

How to build AK/Kalashnikov-type semi-automatic rifles and pistols.

How to add an AR stock to a Zastava M77

Okay, some guys hate AR gear on AKs and if it’s not your cup of tea, that’s fine. I do like AR stocks and have no problems putting whatever stock on whatever family of firearms. I’m more into pragmatism and making a firearms do what I want than arguing over AR vs. AK or whatever. This is also why I have commenting turned off on the blog.

At any rate, even before I bought the M77, I knew I was going to trick it out for my purposes and I wanted to put one of the Magpul PRS Lite stocks on it for a few reasons:

  • I like adjustable stocks like the PRS but don’t need to constantly change the length of pull or the comb (where your cheek sets) thus I didn’t need to spend the money on a full blown PRS Gen 3. By the way, in case you are wondering PRS stands for “Precision Rifle/Sniper”.
  • The M77 will never be mistaken for a carbine given its length nor do I need to collapse the stock so the fixed postion PRS Lite was fine by me.
  • There are aftermarket thick recoil pads you can put on a PRS to absorb recoil.
  • By using a buffer tube, I can slide in a mercury recoil suppressor to add weight, absorb some of the recoil and balance the rifle out a bit more to compensate for a long barrel and relatively heavy front end.
  • Last but not least, the PRS Lite reminds me a bit of a PKM stock due to the skeletonized opening. (I’m sure someone just spit their drink out reading that). I had a new mint Romanian PKM stock many years ago that I sold at some point and still wish I hadn’t. In short, I like the looks.
  • Also, the PRS Lite is a bit cheaper than a PRS Gen 3 but that wasn’t a big factor for me – the PKM look is actually what tipped me in the direction of the Lite model.
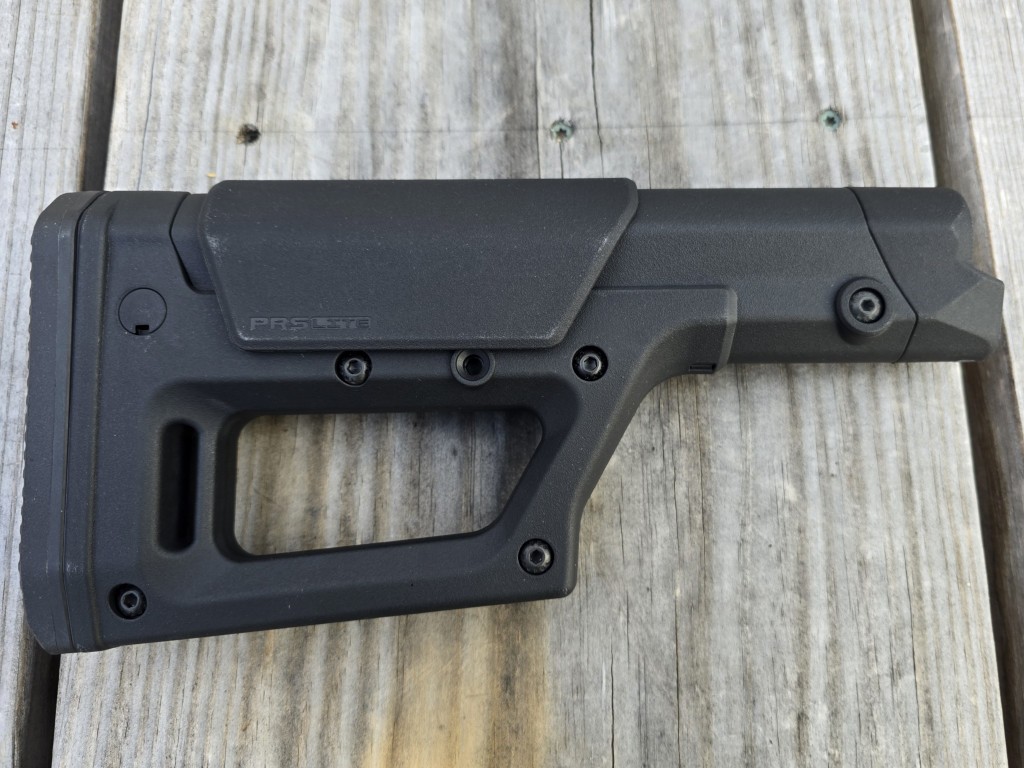
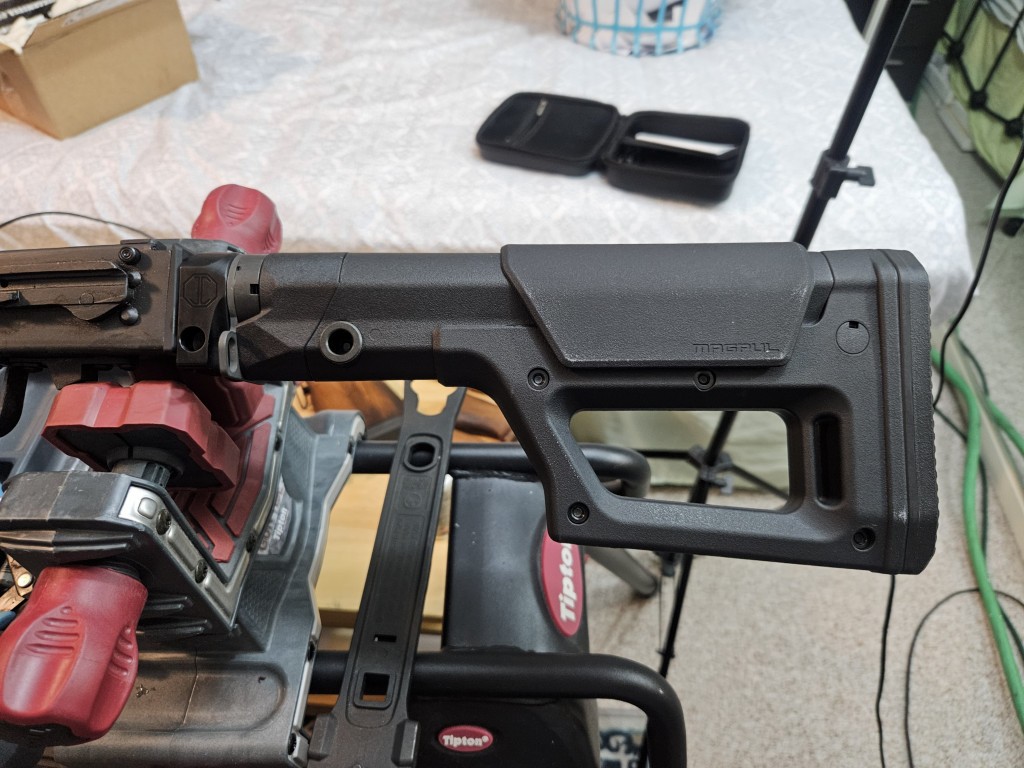
This is the MagPul PRS Lite. It’s definitely a solid stock that I like – it does what I need it to.

Parts you will need

  • Zastava/Yugo to M4 adapter – this screws into the square hole in the rear trunnion and then presents the hole the buffer tube screws into and the end plate. Go with an aluminum model from a reputable vendor like Ace, JMac Customs, Desert Fox, etc. Note, JMac went a very different route with their pioneering 1913 Picatinny rail interface for the stocks and I provide more details down during installation.
  • A buffer tube – I’d recommend a M4 six position Mil-Spec carbine buffer tube for the greatest flexibility. Rifle length tubes are rarely used on new firearms now as people want the adjustable stocks. Commercial sized buffer tubes were due to some things Colt did many years ago and thus on the way out so go with Mil-Spec which refers to the outer diameter of the tube.
  • An AR end plate – on an AR, this plate keeps the selector spring captured and also aligns the buffer tube via vertical key that sticks up and keeps the carbine buffer tube from rotating – it does help to have it for that reason and you have tons of options out there ranging from the basic to ones with sling hooks and even QD sling sockets. Not all adapter support an end plate so this might not be needed,
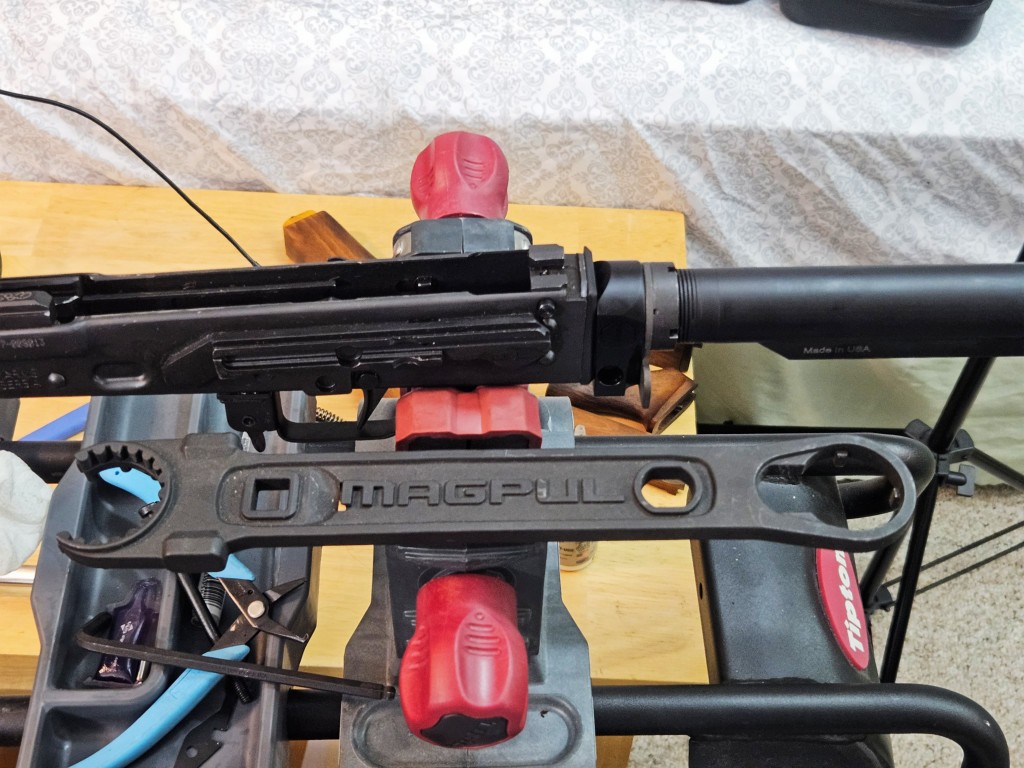
  • A castle nut – this nut is threaded on the buffer tube and then tightened down against the end plate to secure the buffer tube in place. Note, you will need a spanner wrench or specialized castle nut wrench of install or remove a castle nut without tearing it up – I recommend the Magpul wrench. By the way, the castle nut gets its name from looking like a medevial castle’s crennelated tower. Crenels are the parts that stick up like teeth to give defenders some protection.
  • Finally, whatever stock you want. Just remember to match the buffer tube to the stock. If you get a rifle stock and it needs a rifle buffer tube then get a rifle buffer tube, etc. The PRS and PRS lite have an adapter and can work with either tube type but most stocks designed for a carbine can only work with a carbine buffer tube (just make sure you match on either the Mil-Spec or commercial diameter).

Removing the old stock

The first step is to remove the recoil pad which is held in place by two beefy wood screws with allen/hex wrench sockets in them. Remove them and then the recoil pad will pull off. You then remove the buttstock bolt and the stock pulls out of the end of the rifle.
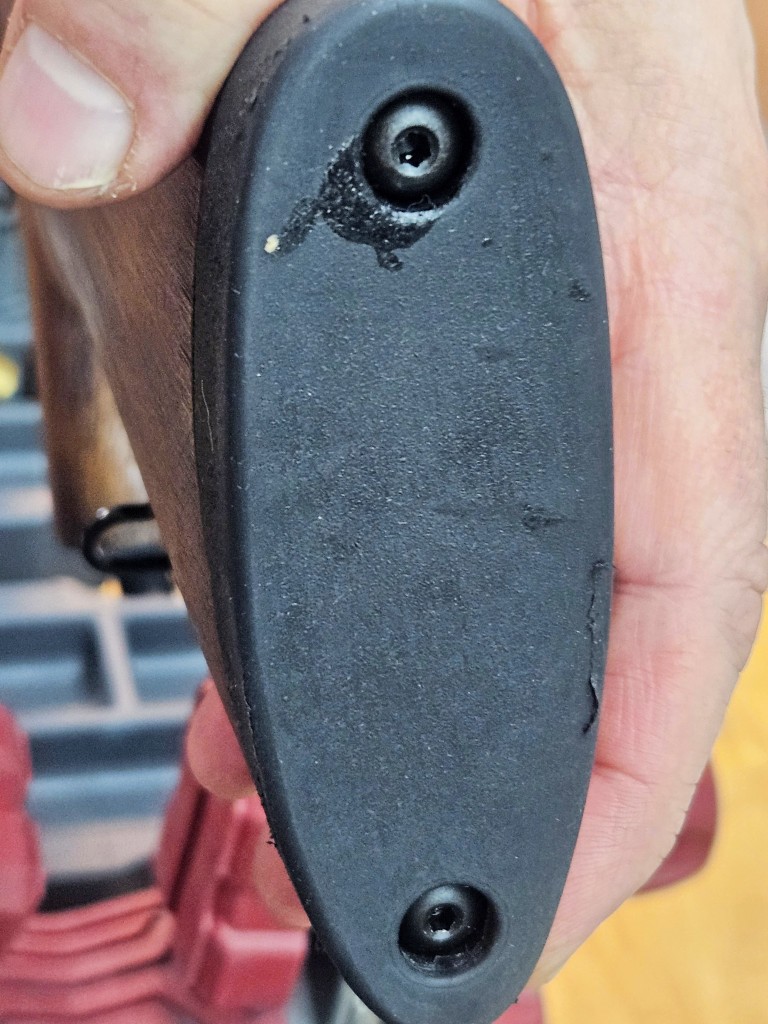
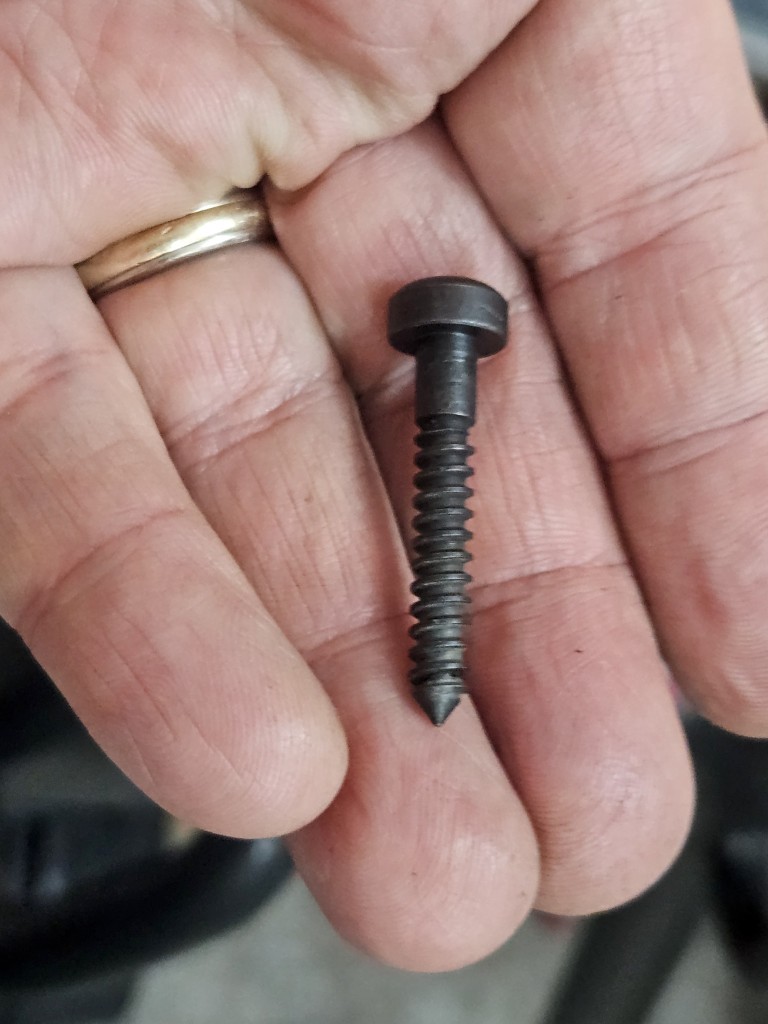
Remove these two beefy screws and the recoil pad will pull off. I’m happy to see a modern screw head vs. slotted. I would have been even happier if they were torx screws this is a nice upgrade from the old days.
I kind of felt like Crocodile Dundee when I first saw the new recoil pad screws they are using “Now this is a screw”. If you’ve not seen the movie then the reference is lost but my point is that is a really heavy duty screw.
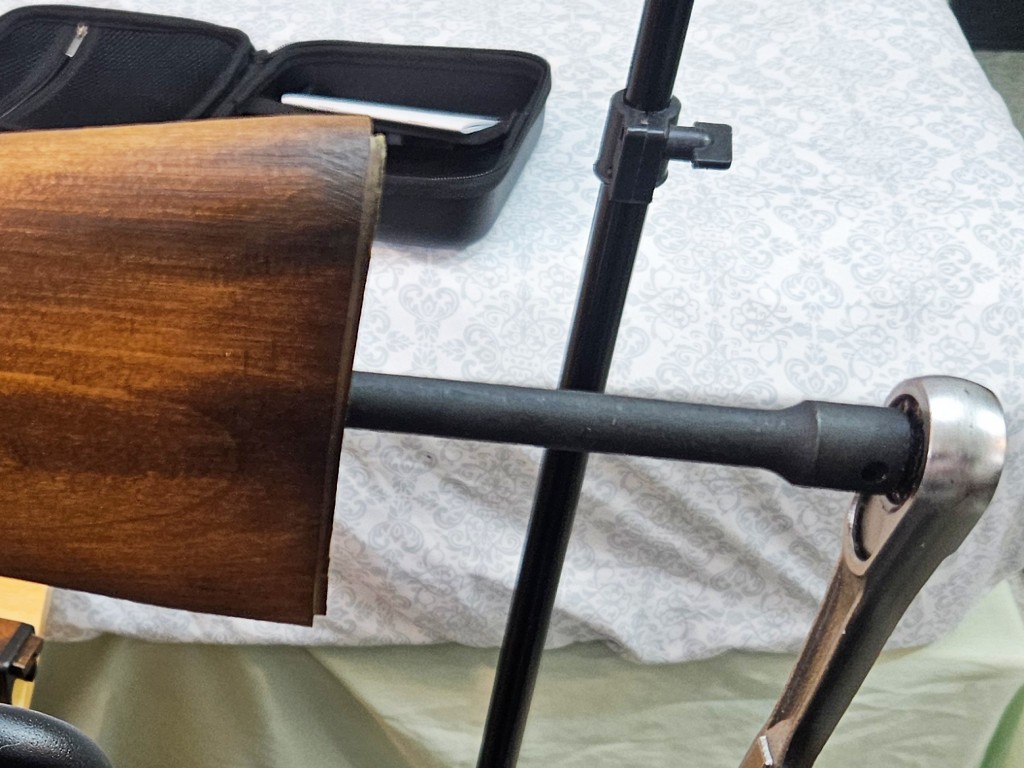
With the recoil pad off, use a 13mm socket on an extension to reach in and unscrew the buttstock bolt. Yes, that’s a bed. It was super cold out and I set up in our spare bedroom to take these photos.
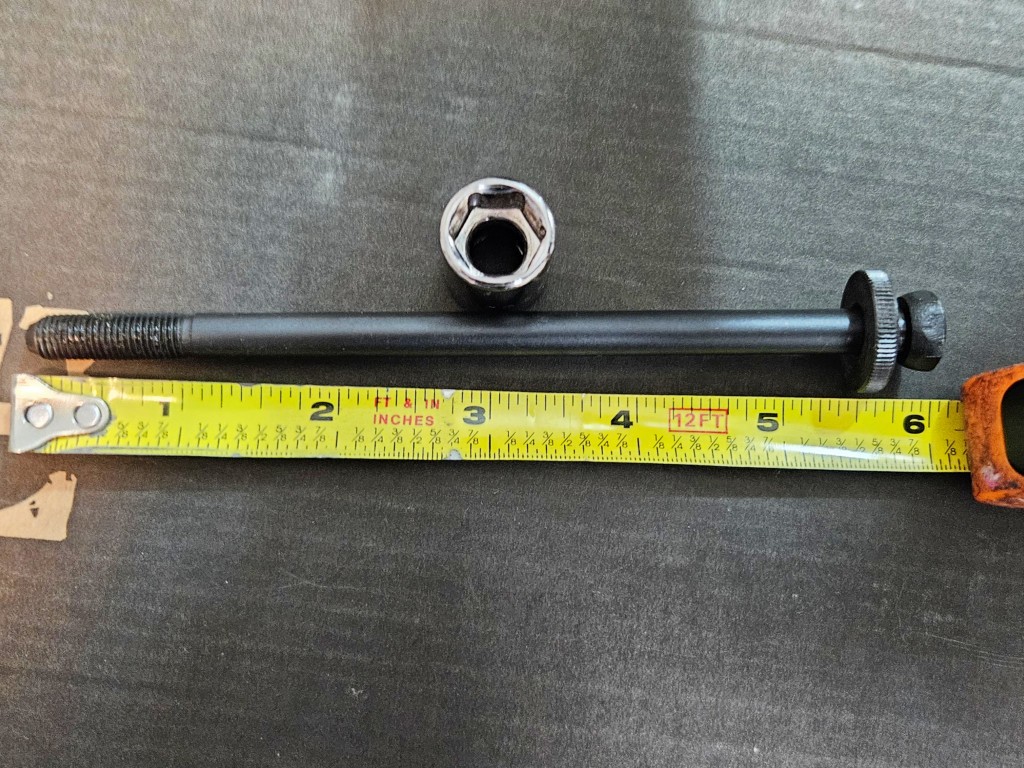
They’ve shortened the buttstock bolt considerably. I’ve considered having these made but Zastava USA seems to keep them in stock so there is no pressing demand for them unlike our original Yugo military length bolts.
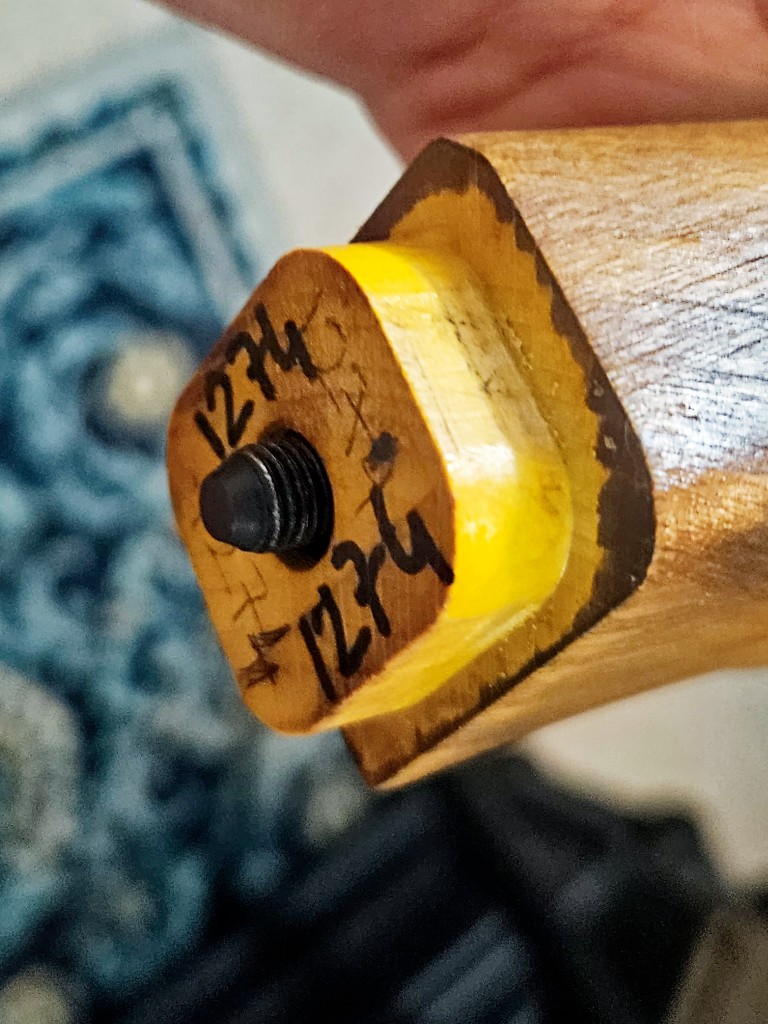
This is what goes into the rear trunnion. The numbering reflects the rifle it was fitted to. Note, these do sometimes get a wee bit stuck in the trunnion so you might need to wiggle it a bit or a few light taps with a rubber mallet and it will pull right out.
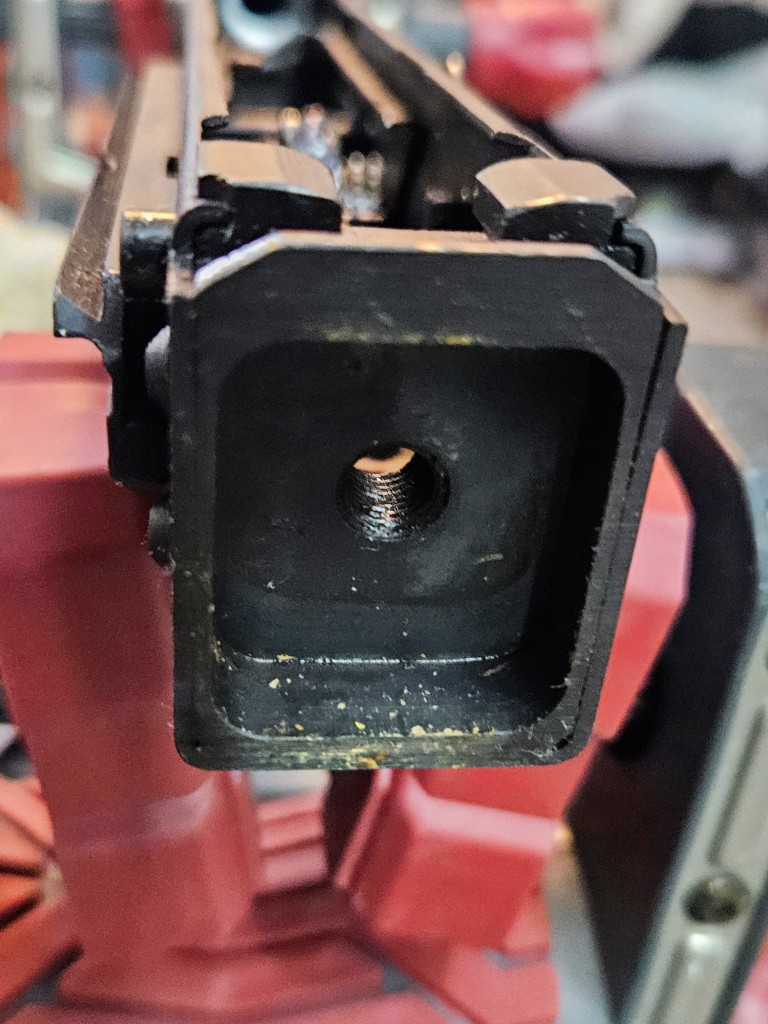
This is the rear trunnion and the use of a square hole and big bolt to secure it is one of the unique design changes the Yugoslavs did to the Soviet designs. See the finish residue and chips in there? The snug fitting of the stock, how much the finish has stuck to the metal and a bit of sawdust all combine to cause the stock to offer a bit of resistance during removal. In this case it all came out easily with just a bit of wiggling. You should remove all of that of course.

Adding the new stock

To add the buffer tube, I decided to use two parts that I happened to have in stock. I used an Ace modular adapter (“AKRBY-AR15” is the exact model) and then a JMAC modular stock to M4 adapter that has sadly been discontinued – I bought mine a few years ago so it’s not surprising things have changed.

JMac went a different route some years back and pioneered adapters that expose a 1913 Picatinny rail at the rear to which you can mount a ton of different stocks. That’s another option for you – click here. Once you have that, you add a folding mechanism, then a skeletonized tube (ST) for a cool “I’m not a normal AR look” and then your AR stock if you go that route.

Many, many years ago, Ace Riflestocks was its own company and alos quite a few years back they were acquired by Doublestar Corp – a large AR manufacturer. Same products and quality but you now see a Doublestar logo. Note, there is an Ace to M4 adapter that I have used many times but does not support the end plate. Not the end of the world but a different approach.

If you do not want the modular approach, Zastava also sells a direct adapter. It screws into the rear trunnion and gives you the mount for the M4 buffer tube.
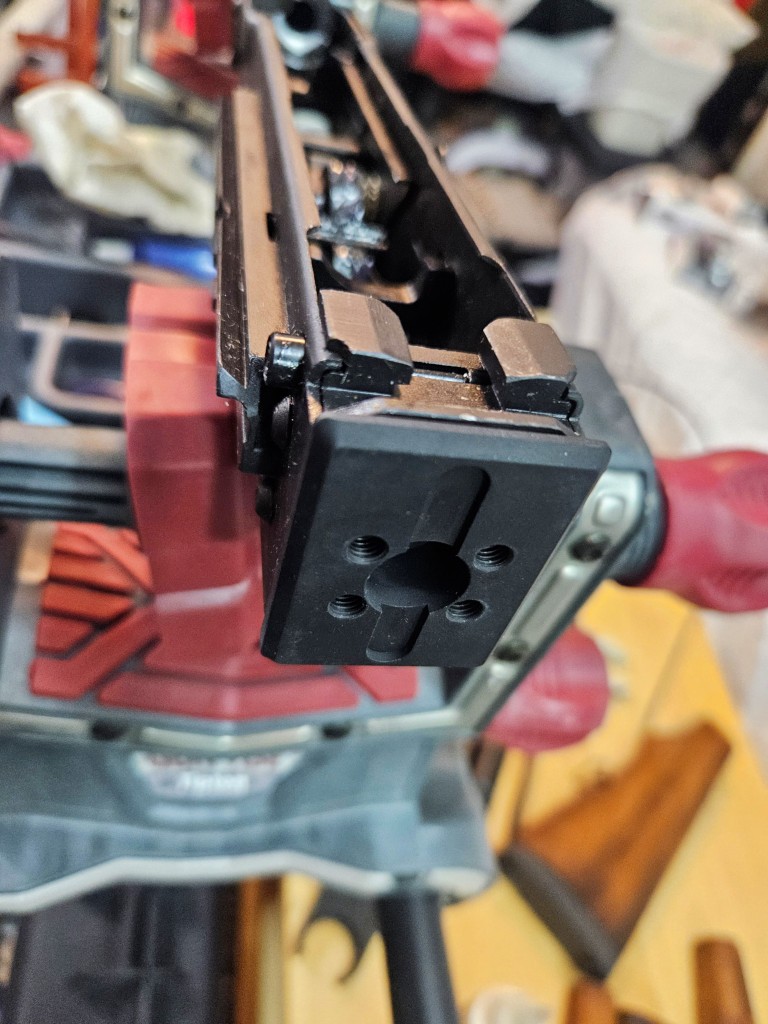
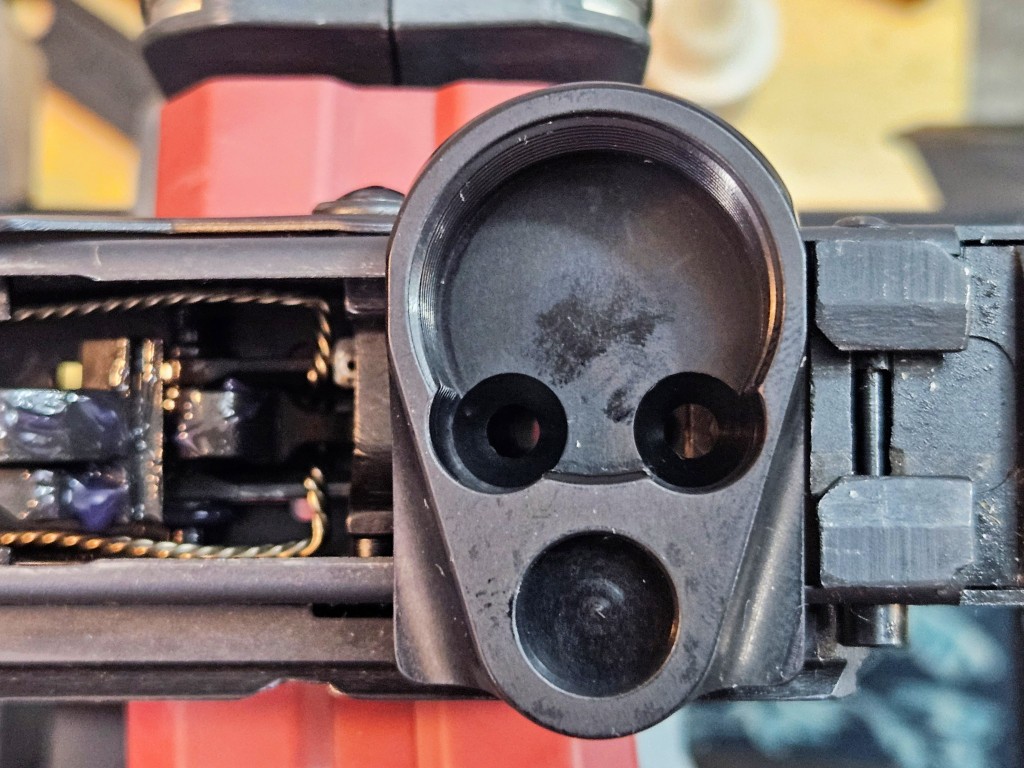
This is the Ace Zastava/Yugo modular stock adapter. Only one of the two rows of screws holes are actually used giving you a bit of vertical adjustment. The adapter is secured by an 8mm allen key socket screw. The screw holes are tapped for #10-32 screws.
The JMac M4-Ace adapter is really well made. The two horizontal screw holes are for securing the Mac Adapter to the modular stock adapter. The bottom opening is for securing the botttom of the AR end plate that in turn holds the buffer tube in position vertically.
Put medium strength Loc-tite on before you install the screws.

If you want to insert a mercury recoil reducer

This next step is entirely optional – I installed a C&H mercury reducer to add weight to the rear and absorb a bit of recoil. The completely sealed 7/8″x5″ C&H tube weighs 16oz. The liquid mercury inside sloshes inside and absorbs some of the recoil. Does it do a ton on it’s own – no. Does it and the weight help mitigate some of the recoil? The short answer is yes.
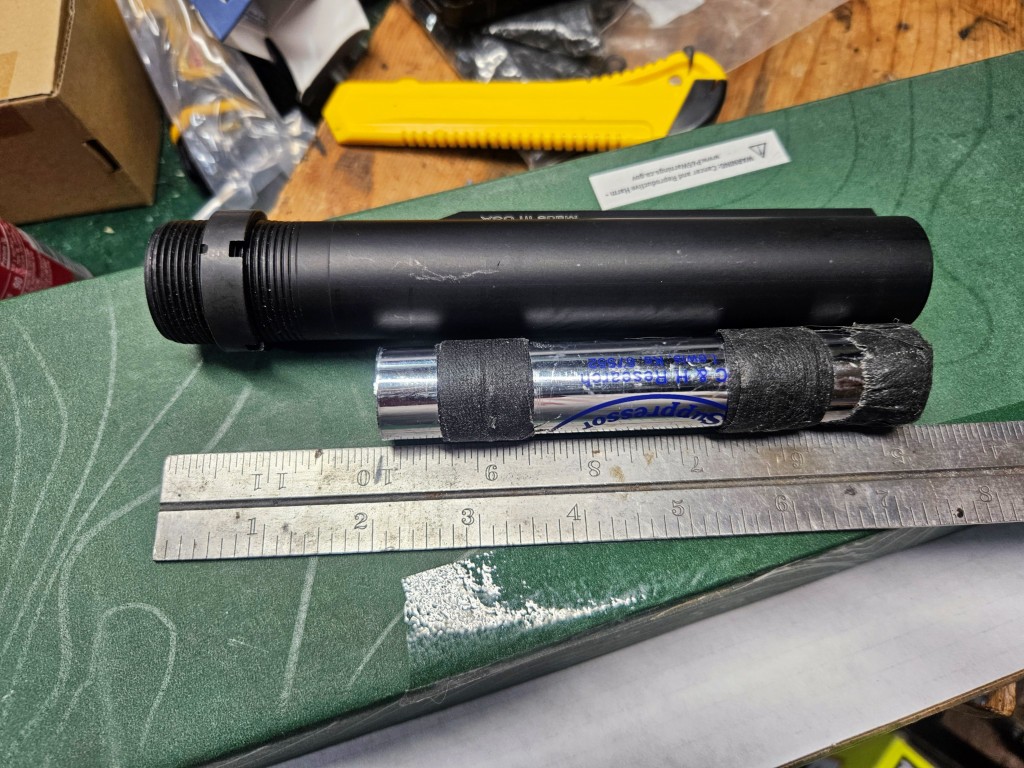
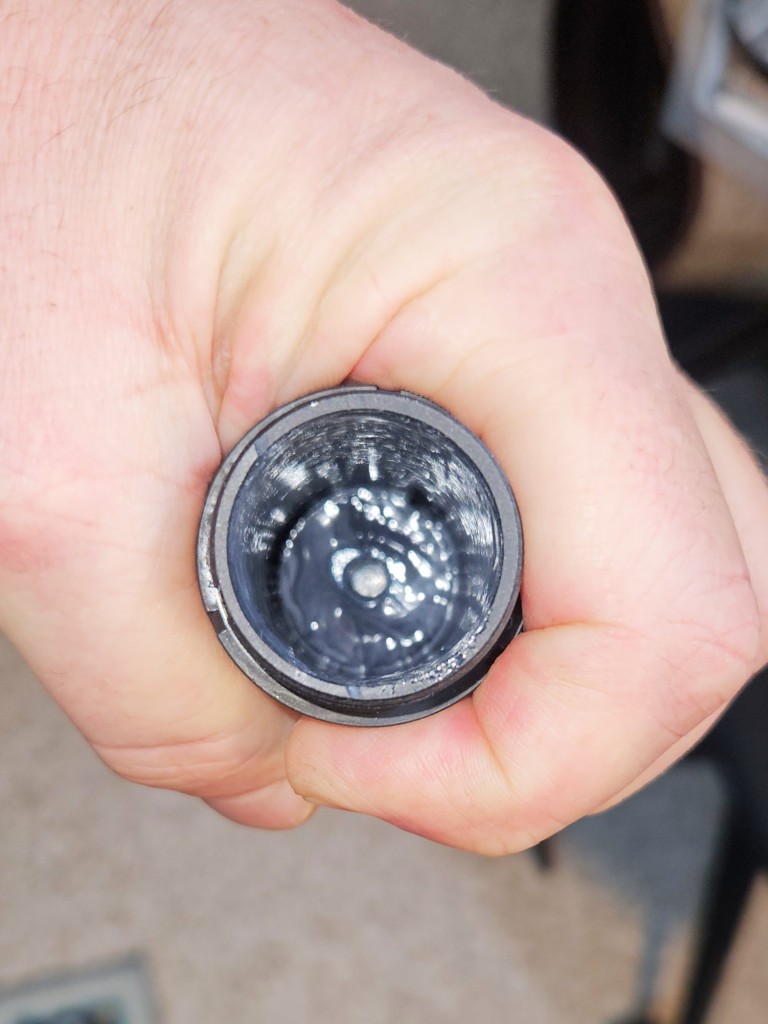
What I do is wrap tape around the C&H so it fits snug and is roughly centered. I spray brake cleaner in the tub to get any oil out. scuff it up and spray it out again. I then scuff up the C&H tube, clean it with alchol (brake cleaner makes the tape gooey), coat the C&B unit with epoxy and push it in. Some epoxy will come out the drain hole so wipe it off with a rag with brake cleaner and then close it with a piece of tape. By the way, one end of the tube is tapped for a 1/4-20 bolt to help install it. Remove the bolt before everything sets up of course.
That’s not coming out or loosen up. Use a towel with brake cleaner to remove any epoxy on surfaces you don’t want. You need to do this before it sets up. By the way, the longer an epoxy takes to cure, the better it will hold up to shocks over time. Don’t use epoxies that claim to set in just 90 seconds or 5 minutes.

Let’s continue with installing the buffer tube

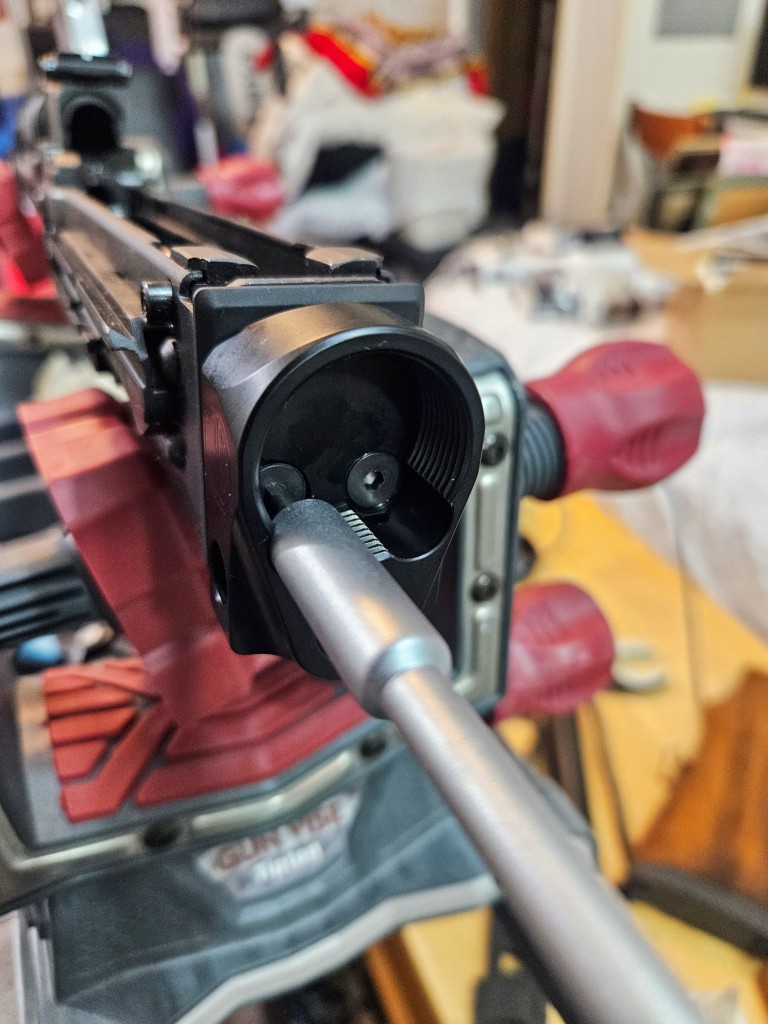
Put the castle nut on the buffer tubes with the largest slots facing backwards and thread it all the way to the bak, Then install the end plate with the “boss” (raised oval) facing forwards to it will go into the end of the AR adapter. You then insert the buffer tube into the adapter and start screwing it in place. When you can’t screw it in any further because of the plate, back it off a turn, push the plate into the adapter, tighten the castle nut with your fingers. Finally, tighten it down with the caste nut wrench – the torque spec is 38-39 ft pounds (you’ll sometimes ready 40 ft pounds but 38-39 is per USMC TM 05538/10012-IN). If you want to do farmer tight, that is up to you. I’d also recommend staking the nut – putting a divot in the nut in one of the small holes between the end nut and the castle nut so the castle nut can no longer turn without a wrench. Again, up to you.
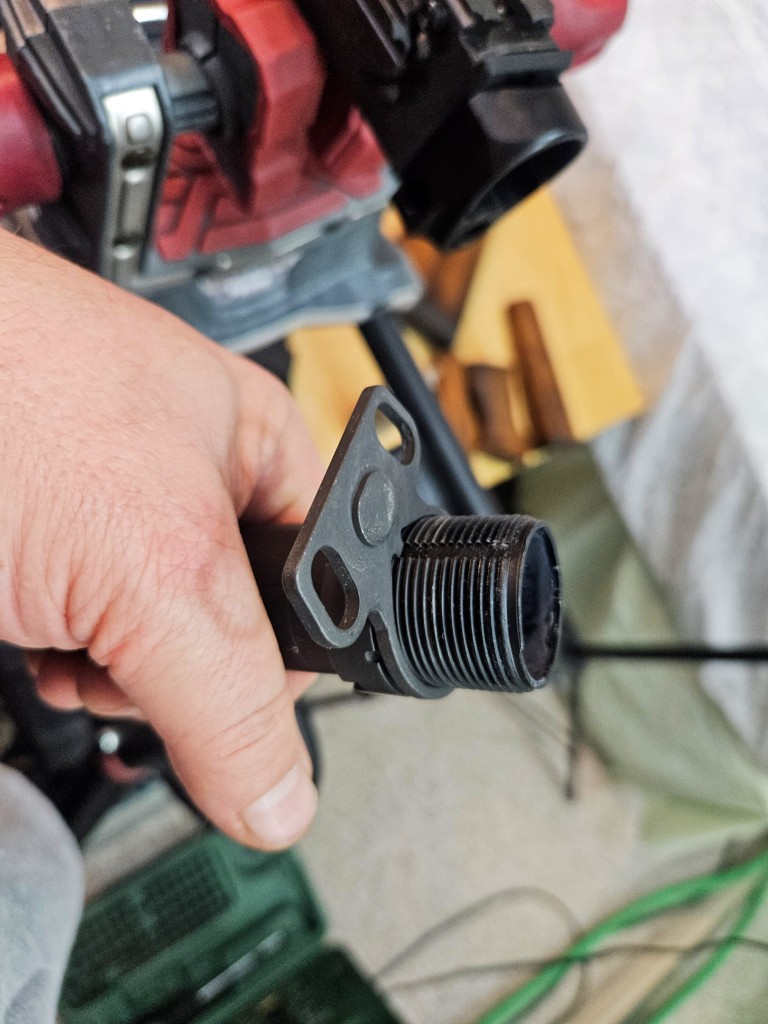
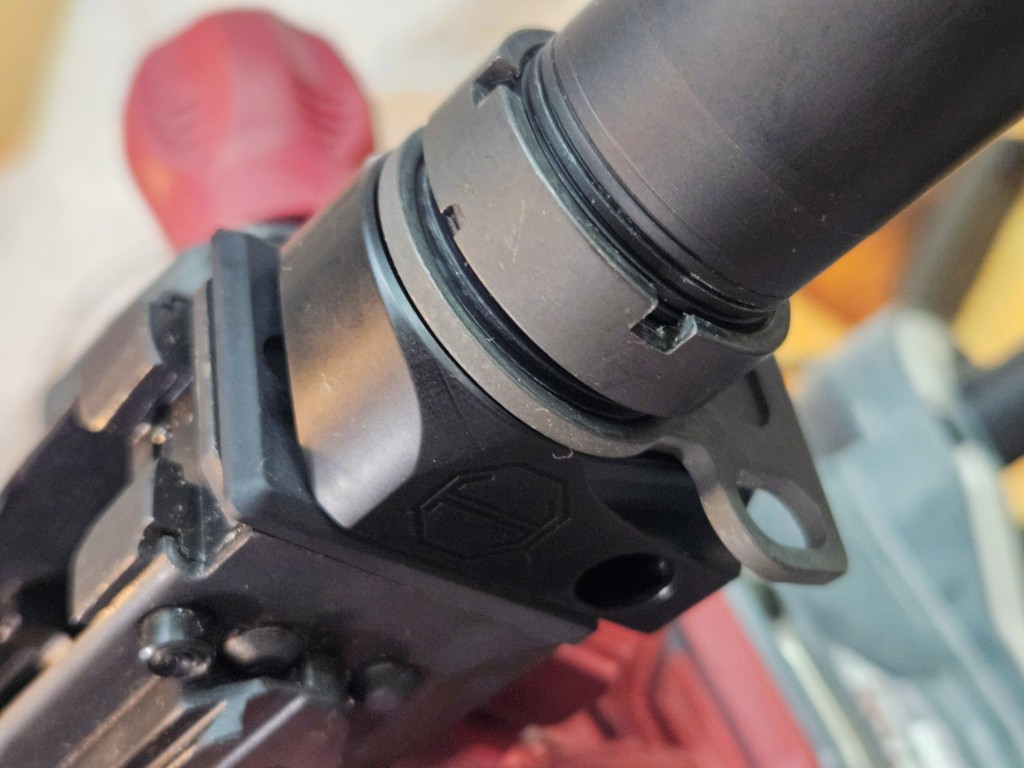
Here you can see the end plate, the groove in the buffer tube that it travels in and just a bit of the castle nut behind. All are oriented correctly.
I screwed in the buffer tube until the end plate couldn’t rotate, backed it off one turn (or so) until I could get the end plate to slide forward and go in its hole. Note the orientation of the castle nut and it is not tight yet.,
Do you mess with castle nuts a lot? Get a Magpul Armorer’s Wrench. In the photo, the right side is for the castle nut. The left is for the barrel nuts and I don’t use that one much but that castle nut portion gives you a wonderfully secure grip especially when you are breaking ones free. The square hole is for a 1/2″ torque wrench. The oval hole is for rifle receiver extensions and the groove in the castle nut end can be used on the traditional bird cage flash hiders.
Once the buffer is installed, the PRS site can go right on. Just follow the directions with the stock, You remove the screw that holds the front flush cup in place and slide the stock on. You can then put the QD swivel flush cup on whatever side you want.
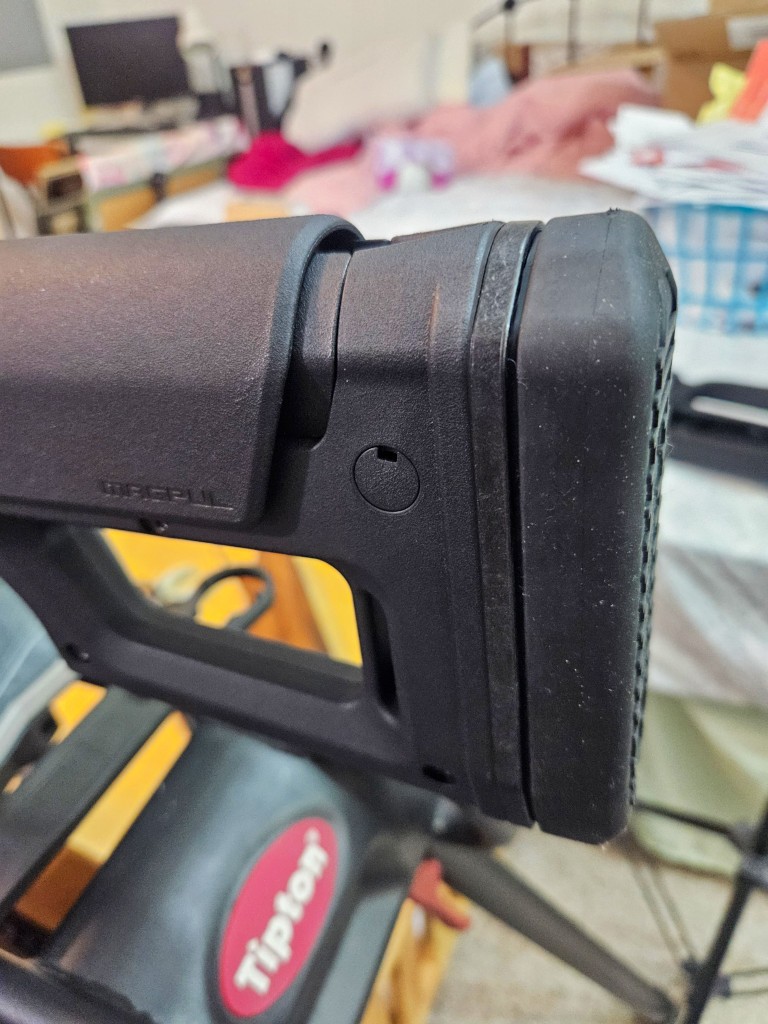
Both the full blow PRS Gen 3 and PRS Lite stocks have thin hard recoil pads that I always replace. This is a Limbsaver PRS Gen 3 recoil pad that fits both models. It’s well made, fits and feels great. I always make the swap unless the stock is going on a light recoiling rifle like 5.56 NATO. If you want the best recoil pad I have found for the PRS Gen 3 or PRS Lite, get the Limbsaver pad.

End Result

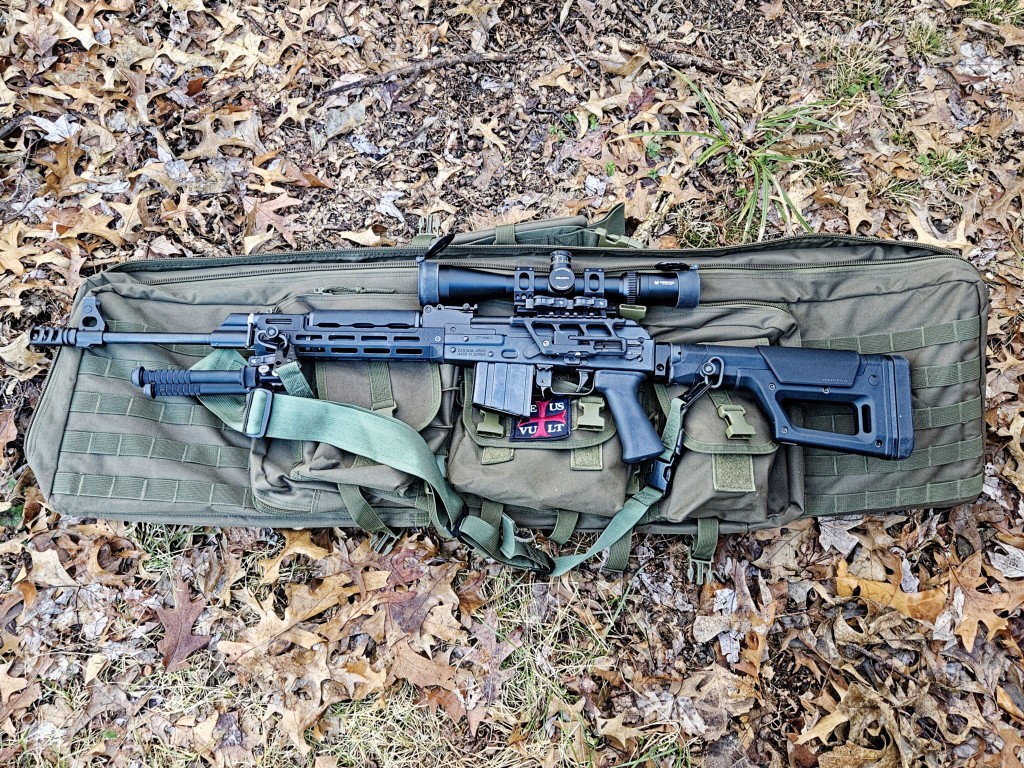
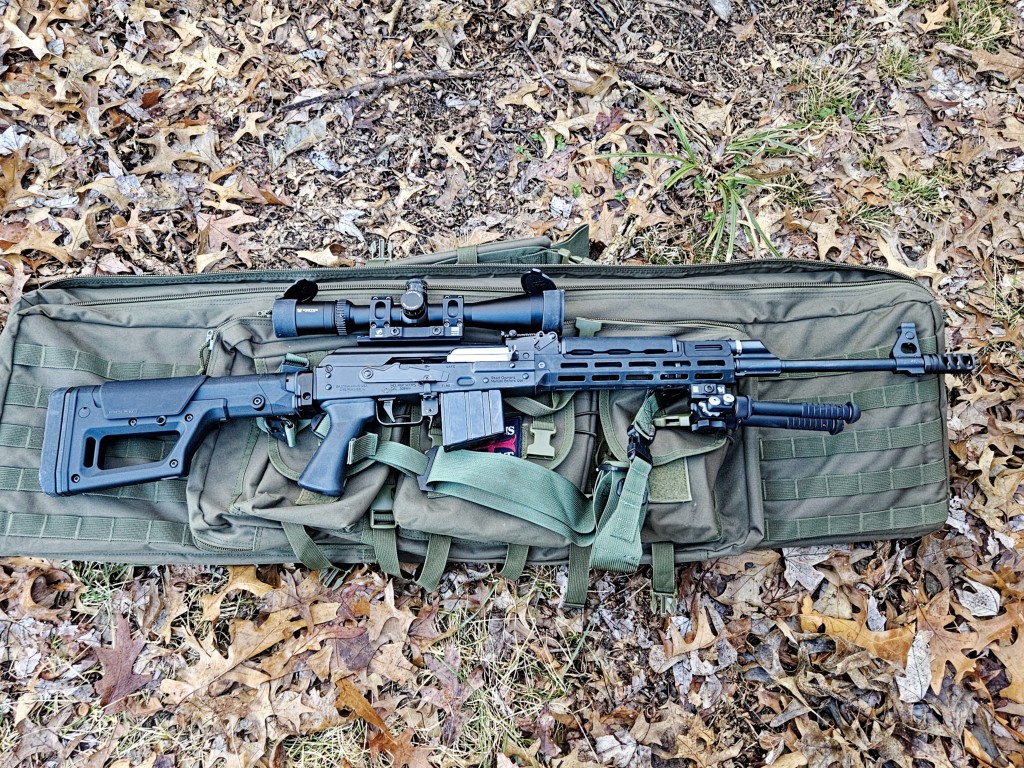
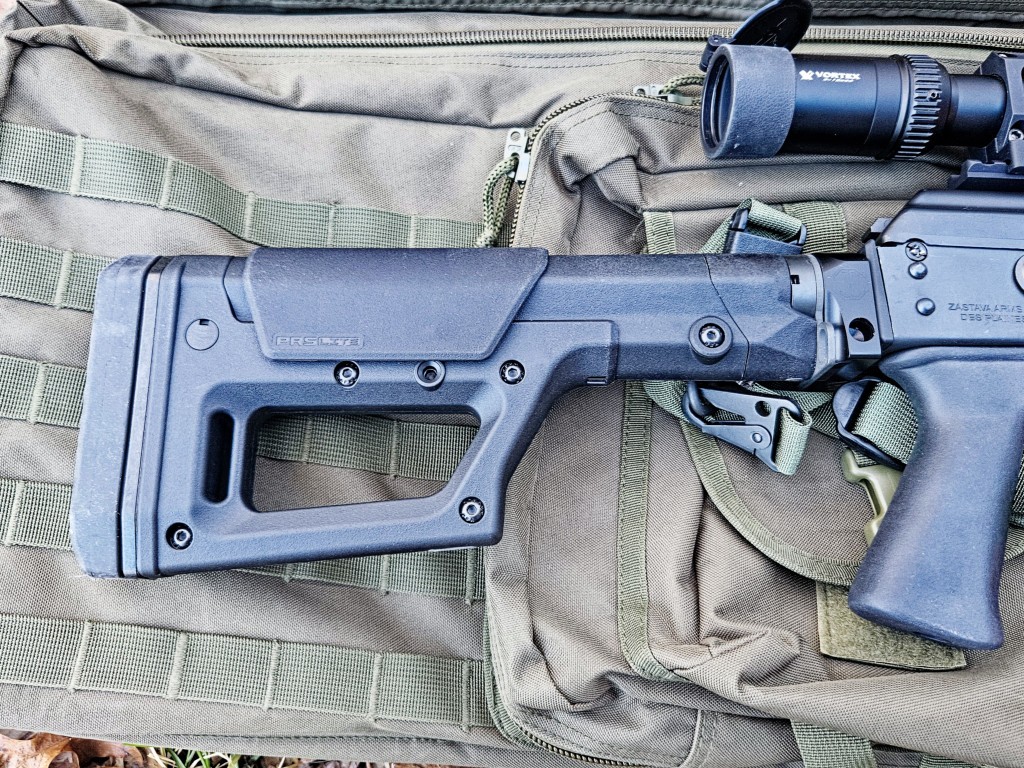
The rifle feels really good and handles well. I think it looks great also!
Summary

Once you know the parts you need, it’s a pretty easy swap to make. Once you get the M4 buffer tube installed you have tons and tons of options out there .

I hope this helps you out.


Note, I have to buy all of my parts – nothing here was paid for by sponsors, etc. I do make a small amount if you click on an ad and buy something but that is it. You’re getting my real opinion on stuff.

If you find this post useful, please share the link on Facebook, with your friends, etc. Your support is much appreciated and if you have any feedback, please email me at in**@ro*********.com . Please note that for links to other websites, I may be paid via an affiliate program such as Avantlink, Impact, Amazon and eBay.
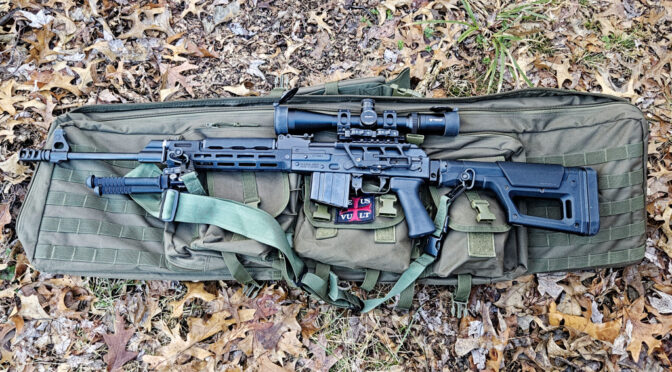
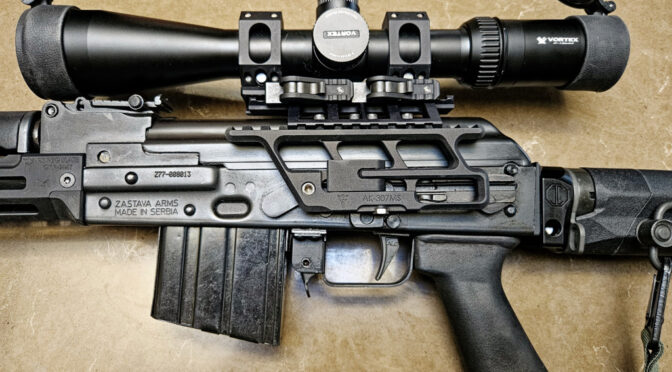
Finally, ALG AK Ultimate Triggers (the AKT-ULs) Are Back In Stock

I started seeing them two weeks ago and I just ordered two. Folks, the ALG AKT-UL is hands down my favorite AK trigger. Smooth and crisp. I can’t recommend them enough. I like the Enhanced model, which is a step down, but given the choice, I’ll go for the Ultimate.

These have been out of stock literally for years – since before COVID I think, So, they are back but I have no idea how long they will be in stock so snag them while you can.


Note, I have to buy all of my parts – nothing here was paid for by sponsors, etc. I do make a small amount if you click on an ad and buy something but that is it. You’re getting my real opinion on stuff.

If you find this post useful, please share the link on Facebook, with your friends, etc. Your support is much appreciated and if you have any feedback, please email me at in**@ro*********.com . Please note that for links to other websites, I may be paid via an affiliate program such as Avantlink, Impact, Amazon and eBay.


How to do Home Manganese Parkerizing

The Following is a Basic Do-it-yourself Manganese Parkerizing Formula

A couple of friends online, Elkaholic and Ding, got me interested in parkerizing years ago and gave me a home brew formula and process steps they use.  I have been tuning that formula for a few years and thought I would share it as I use it both for blades and firearms.  It works great as either the base for a top finish, such as Molyresin or as a finish all by itself.  You may be wondering “why not just buy a premade formula such as the great parkerizing solution from Brownell’s” – the short answer is because tinkering can be fun and more rewarding.  I like to experiment and try different things.   So, with that said, here is the recipe:

Ingredients

– 2 gallons of distilled water  (it gives more consistent results because impurities have been removed – sold at supermarkets and drug stores)
2 “biscuits” of clean plain 0000 steel wool (thinner steel wool dissolves faster hence the use of 0000 grade)
– 1 cup of Klean Strip brand Phosphoric Prep & Etch (or other phosphoric acid etching solution around 35-45% concentrate per the Prep & Etch MSDS sheet. Dilute the acid if higher. For example, if 100% pure then go 60 water:40 acid – you can always experiment with the ratio that works for you)
6 rounded tablespoons of manganese dioxide (available at pottery supply stores, Amazon or eBay)

DSC_0042

Do this outside – never in your house or shop (unless you have a great vent hood).  If you do it indoors, you will likely make stuff rust fast!

DSC_0016
DSC_0019

As you can see, I use a camp stove.  For the first couple of years I just used a Coleman stove but that was always a balancing act with my 48″ long stainless pakerizing tank that I used for barreled actions.  I found the above great Camp Chef stove at Amazon and it is fantastic but any heat source will work. I like propane because its portable and not electric (to avoid any chance of electric shock) and there are tons of propane camp stoves on Amazon.

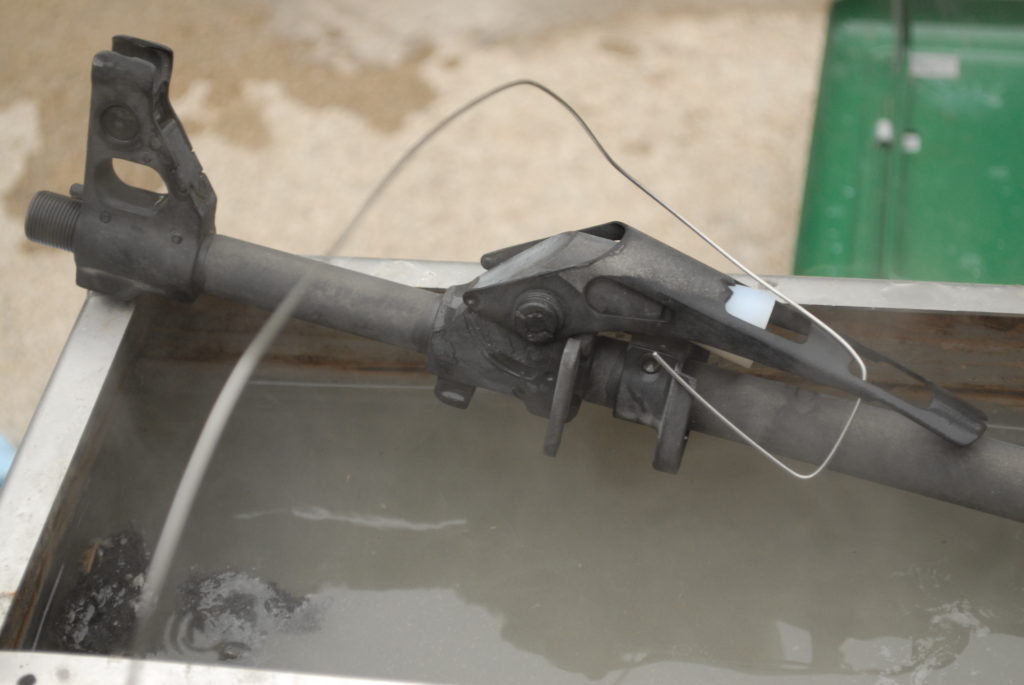
Also, be sure to use stainless steel for your tanks.  I watch for sales or buy stuff off eBay.  The big cooker above is from Walmart and the rectangular pan shown below is from Amazon and is normally the water pan for buffet lines.

For tongs to move stuff around, use solid stainless.  I tried the plastic ones and they can leave a plastic residue on blasted surfaces and mess up your finish.

Just like baking, if you want more of the solution, take the recipe and multiply it by two, four or however many multiples you want. Just be sure you have a place to store it when done.  I use 5 gallon jugs and label them.

Steps to Follow

  1. Add acid to water in a stainless pan/pot and heat to 190F – don’t boil and waste it.  I use a baking thermometer clipped to the side of the pan.
  2. Spray each wool biscuit with brake cleaner to remove oils and allow each time to dry
  3. As the solution warms shred the steel wool into the liquid and add the manganese dioxide
  4. Let the mix simmer and dissolve the steel wool before adding parts
  5. I always blast my parts before I parkerize them – I’ve heard guys tell about using a wire brush on a buffer or drill press as well but I’ve not tried that.  Blasting removes the oxides and exposes the bare steel.
  6. Make sure your parts are very, very clean and degreased — only handle with rubber gloves after they are cleaned or oils from your skin can mess things up
  7. You can suspend your parts in the liquid with stainless wire.  Leave them until the fizzing stops or about 30-40 minutes.  The time varies.
    DSC_0027
  8. Rinse the parts with boiling water thoroughly to remove the acid.
  9. Spray parts with WD40 to get the water away from the steel
  10. Wipe down with oil or apply whatever secondary finish you want – don’t do both 🙂  If you are going to apply a finish on top of the parkerized surface, use acetone or brake cleaner to remove any oils and then follow their instructions.

At the bottom of the post are links to Amazon products including long parkerizing tanks.

Cleaning Up

When you are done, let your mixture cool and strain the liquid through a coffee filter into a plastic can for future use. I use a blue kerosene 5 gallon container because it is a different color from all my other 5 gallon containers plus I label it.  Point being, you do not want to get confused and pour this stuff in when you meant to use a fuel, etc.

The precipitate, the stuff on the bottom, should be scooped onto a shallow pan, allowed to dry and be disposed of as a hazardous waste.  For example, where ever your community collects old paints, batteries, etc.

Brownells Has Great Parkerizing Solutions and Kits

Brownells sells very well regarded ready-to-use formulations. I have no hesitation at all to recommend the below items to you – they are top notch.

  • Click here for their manganese parkerization supplies. Their formula meets Mil Spec STD171
  • Click here for their zinc parkerization supplies
  • If you have a lot small parts you want to park, they have a bench top kit ready to go that you can buy – click here
  • Click here for their complete parkerizing tank system. This is a complete system for gunsmiths or others who need to park everything from small parts and pistols up to firearms and swords.

In Summary

I hope this helps you out. I’ve used the above many times and the results are solid.

Updated 2/13/24 with new sources and fixed some grammar issues.


Note, I have to buy all of my parts – nothing here was paid for by sponsors, etc. I do make a small amount if you click on an ad and buy something but that is it. You’re getting my real opinion on stuff.

If you find this post useful, please share the link on Facebook, with your friends, etc. Your support is much appreciated and if you have any feedback, please email me at in**@ro*********.com . Please note that for links to other websites, I may be paid via an affiliate program such as Avantlink, Impact, Amazon and eBay.


Fitting A Quick Takedown Pin To A Kalashnikov USA KP-9

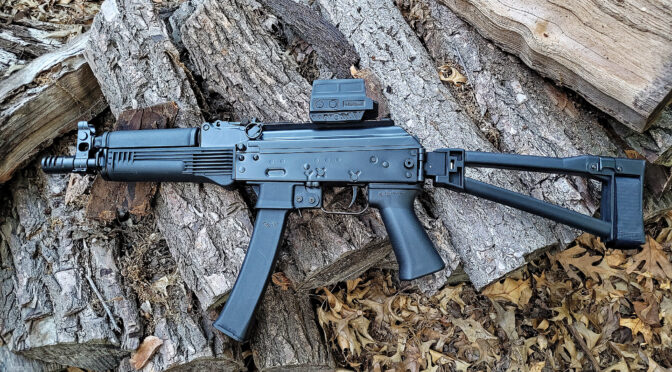
August 2024 – if you haven’t heard Kalashnikov USA has declared bankruptcy and sold off all their inventory. If you are looking for 9mm AK, I’d recommend you look at the Palmetto State Armory AK-V – click here to see them.

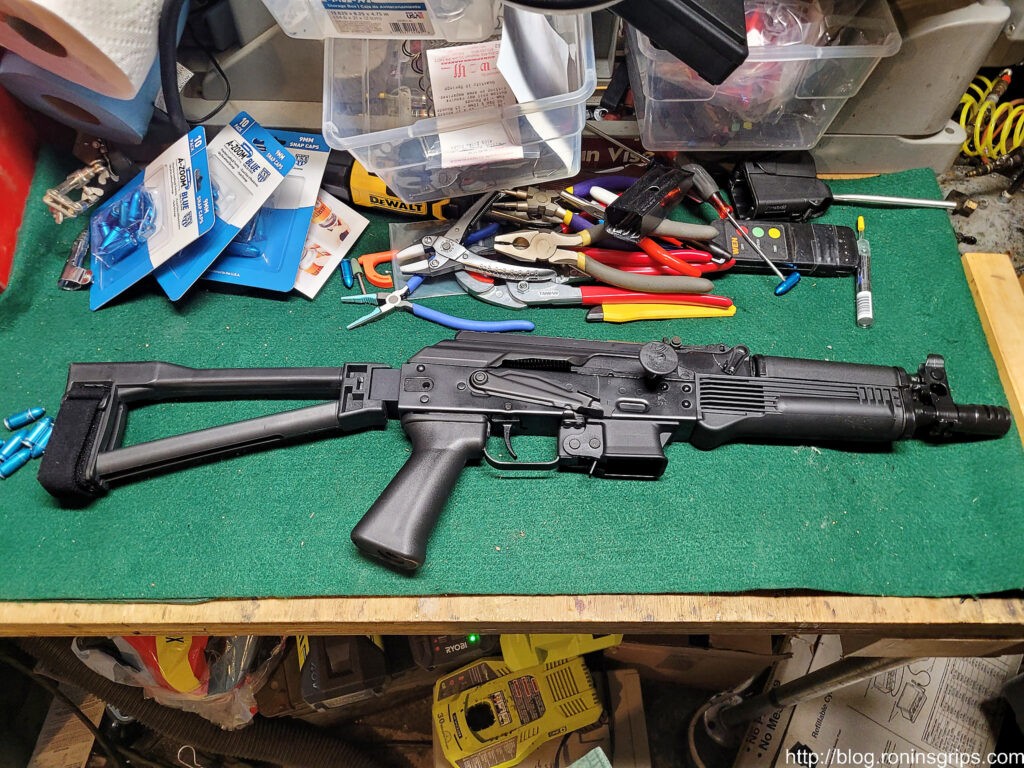
Since Kalashinkov USA introduced the KP-9, I’ve had a handful of guys ask me to make a quick takedown pin for it. Well, it turns out it is a unique size and the hinge pin would need to be around 3.75mm – smaller than what any of my vendors could reliably hit. My existing pins all have a diameter of .156″ or about 3.96mm so they would not work.

So, what to do? I’d bought a KP-9 with their brace and it was a nice weapon in terms of fit, finish, and operation. I’d pressed out the unique hinge pin and saved it so I could have replaced it but I decided to go another route. By the way, the original pin was swollen at the ends from being set but the middle measure 3.75 so that’s the number I was going with.

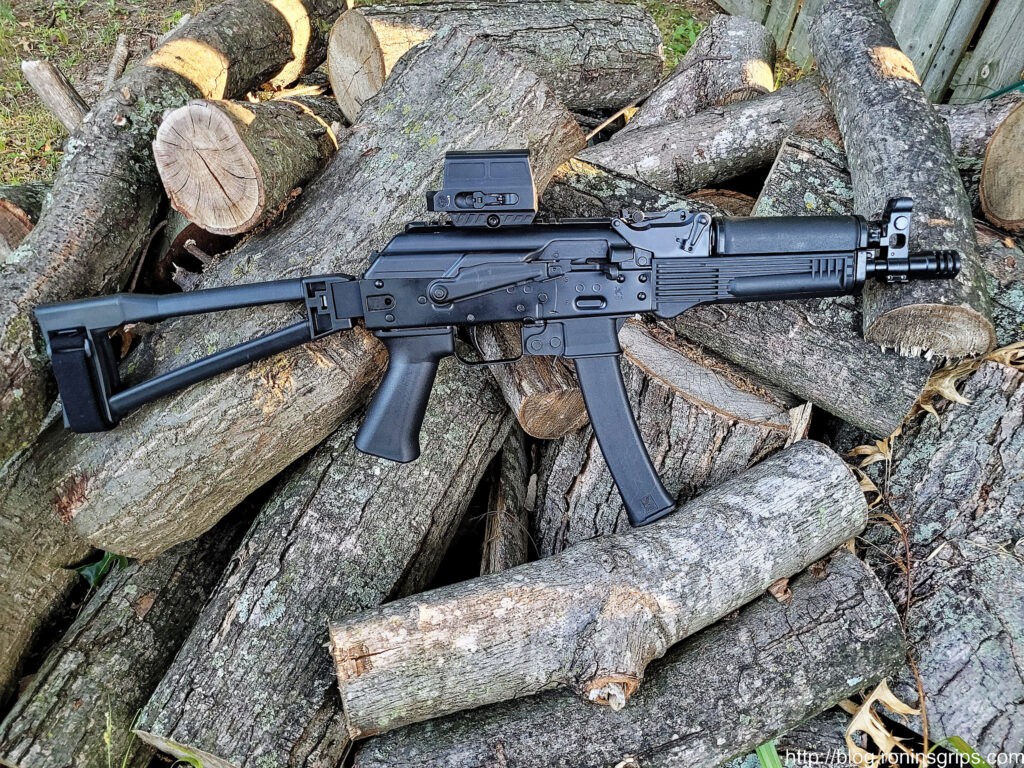
KP-9 right out of the box.
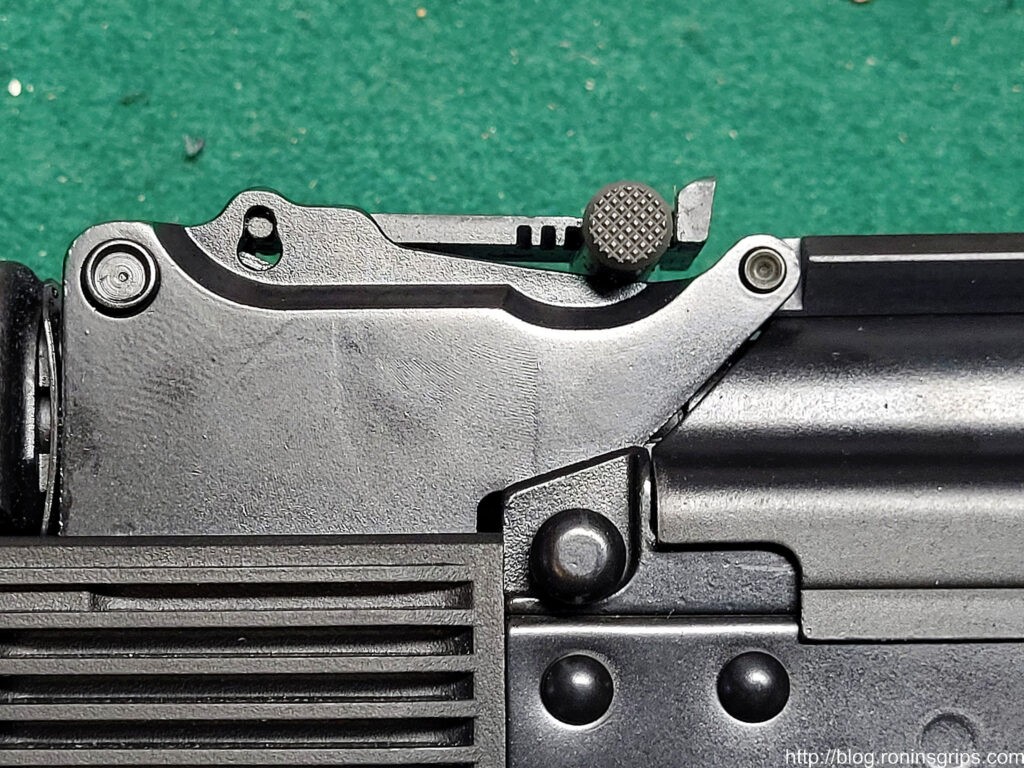
There’s the hinge pin between the rear sight and the start of the dust cover rail.
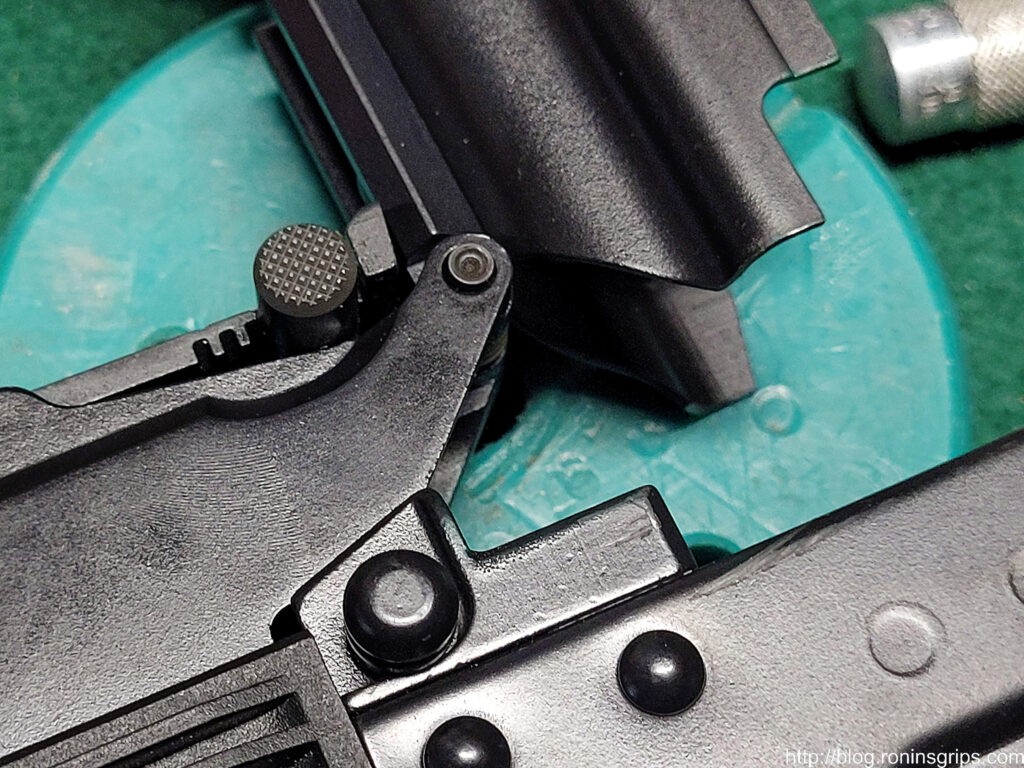
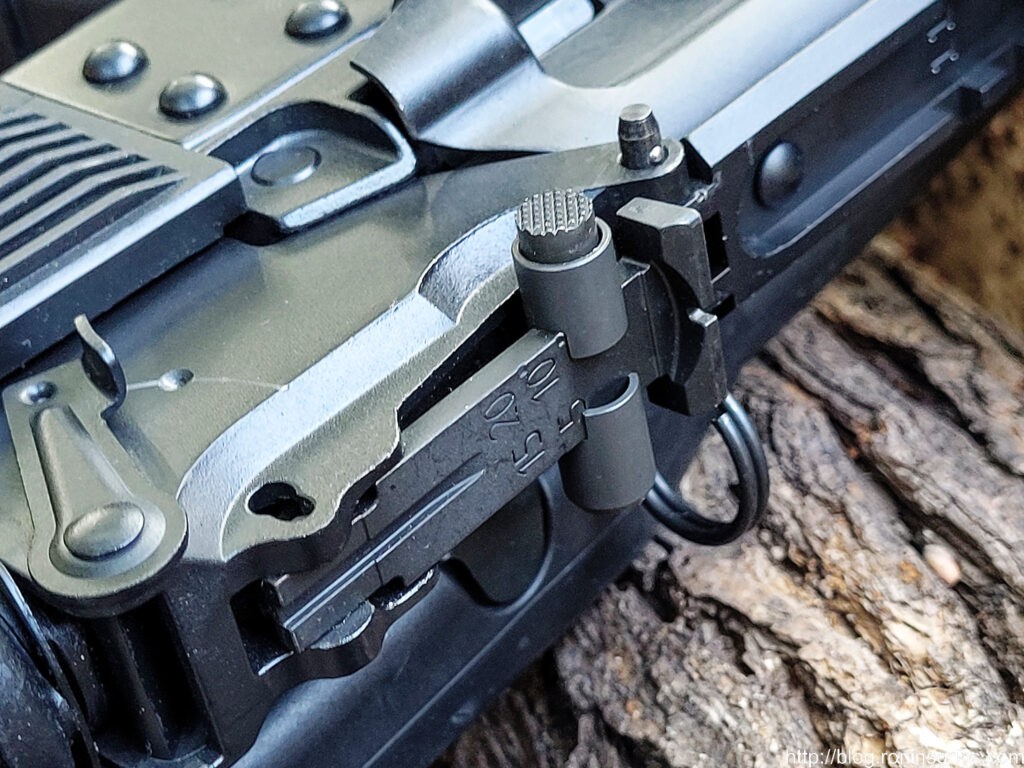
There is a spring on the pin to help the dust cover pop up when the recoil rod is pushed in. Note, the fitment of the cover to the rear sight block and rear trunnion is very good. If it weren’t for the spring, the cover would stay down. By the way, the big black round thing you see on top of the barrel pin has a groove behind it. When the brace is swung into the folded position, a tab on the brace goes into the groove and holds it in the folded position.
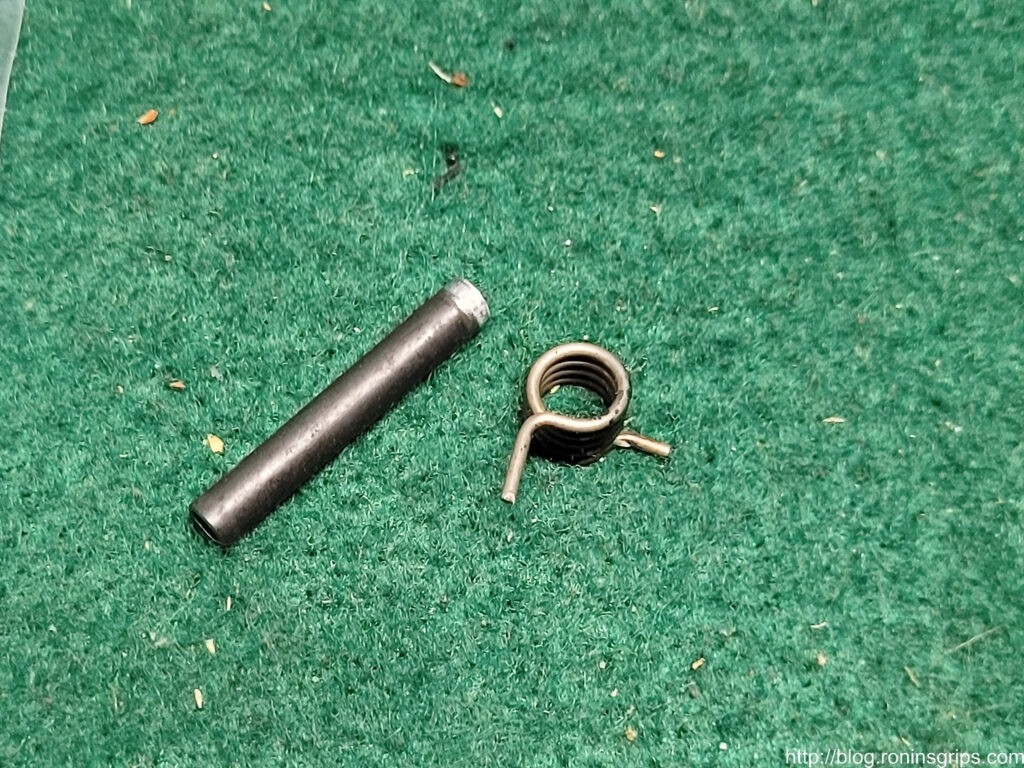
This is the original hinge pin and the spring that pops the dust cover up. The pin is 2.75mm wide and about 24-25mm long – mine measured 24.31mm after I pressed it out. Some deformation would have occurred when it was pressed in and the ends flared open.

How To Remove The Original Pin

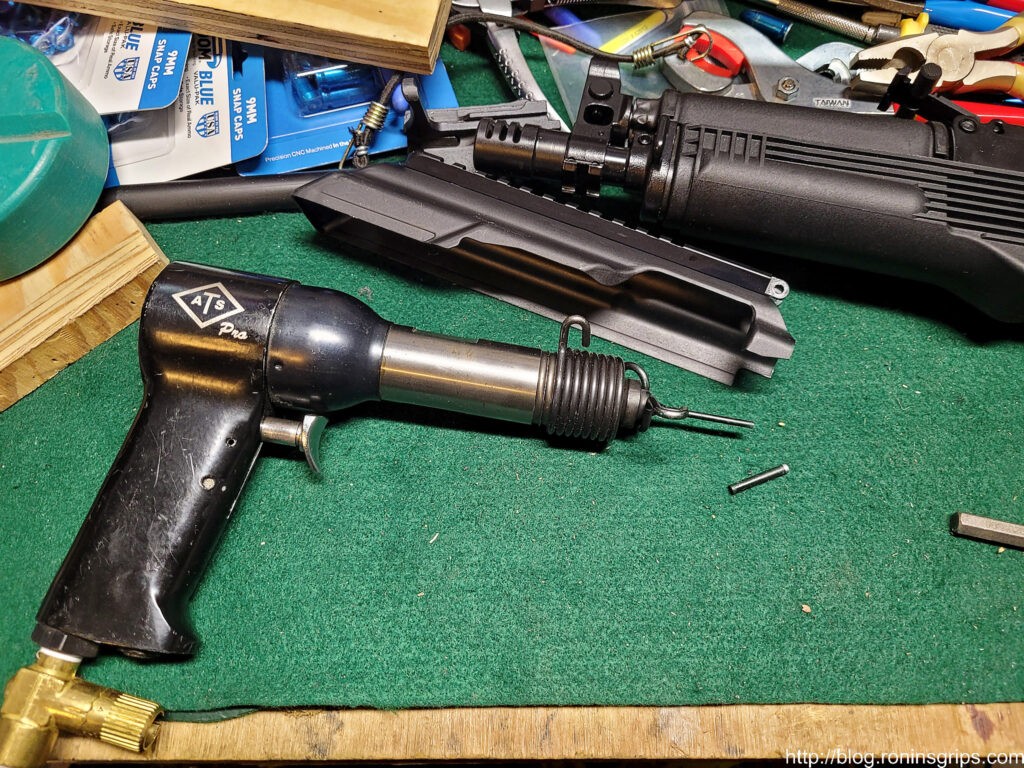
I used a punch on my air hammer to pop the old pin out. You could also press it out or drill it out.

I used my ATS air riveter to pop out the pin in a matter of seconds. You could press or drill out your pin.

Reaming the Hinge Hole

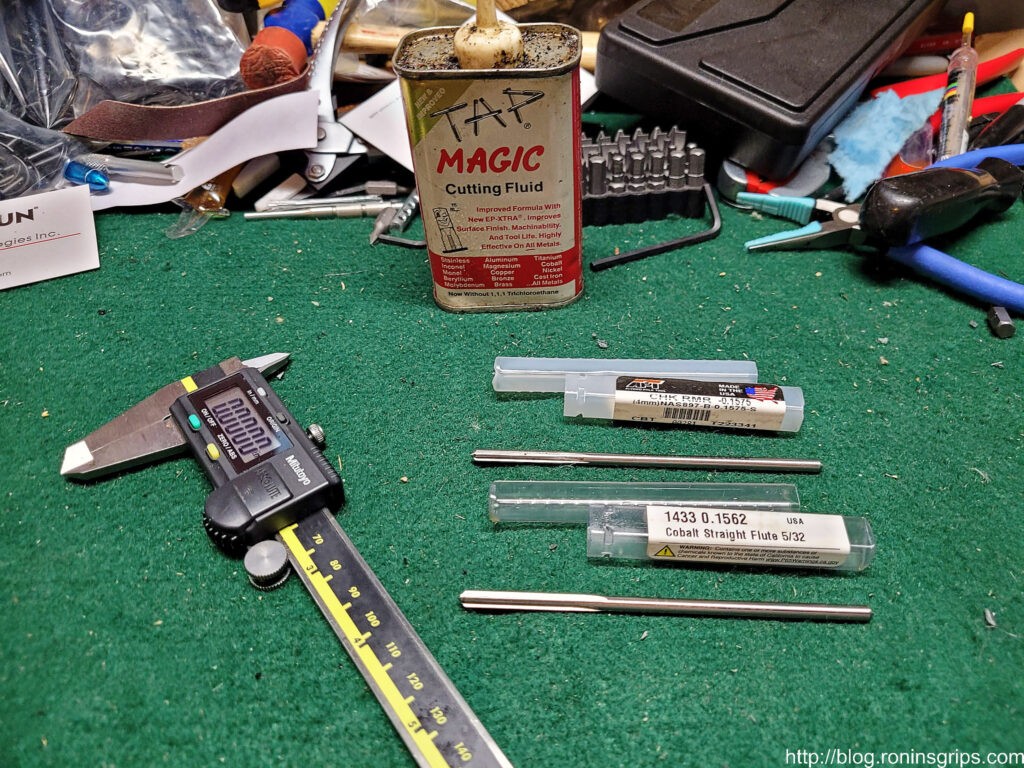
If you look at the hinge, there is enough material around the hinge pin material to ream it out a bit. I decided to get a 0.1563″ (3.97mm) cobalt reamer and a 4mm cobalt reamer. My thinking was to first try the smaller reamer and if that proved to be too small, I’d step up to the 4mm (0.1575″). I bought mine from McMaster-Carr but you can get them from any reputable vendor.

Reamers are cool – they make perfectly round holes and you can do them in a hand drill if you are so inclined, which I was. Secure your weapon in a vise so it can’t move, use a drill bit or other pin to align the hinge parts from the other direction. As you ream, this slave pin, or alignment pin, will be pushed out of the way as a reamer’s head is blunt.

Put your reamer in your drill chuck and coat it with cutting oil, then slowly insert the reamer into hole – let it cut – don’t force it. You’re not taking off a ton of material so I reamed the hole out in one go.

The slave pin did it’s job and I had a true hole in the end. Okay, the .1563″ reamer’s hole worked but was too tight – If you don’t intend to pull the pin much, it would work but it was not what I wanted. I then did the same thing by inserting a slave pin but this time used the 4mm reamer and it worked great.

You see, getting the hole size right matters a great deal compared to some weapons such as the M92 and Krinks – they want to cam the cover up so there is tension that locks everything in place. With the KP-9, the fit of the dustcover relative to the rear sight block is so good that there isn’t tension so you need the quick takedown pin to fit snugly and the detent ball to do its job.

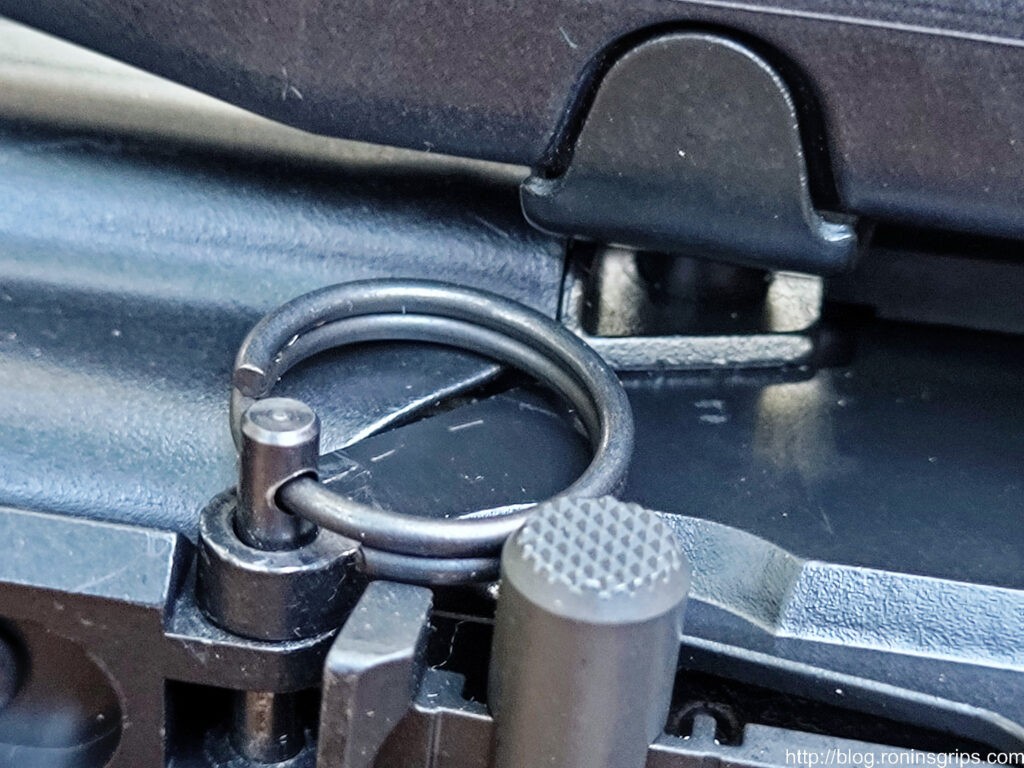
Our AK-V pin fits great. This is with the 3/4″ ring installed.
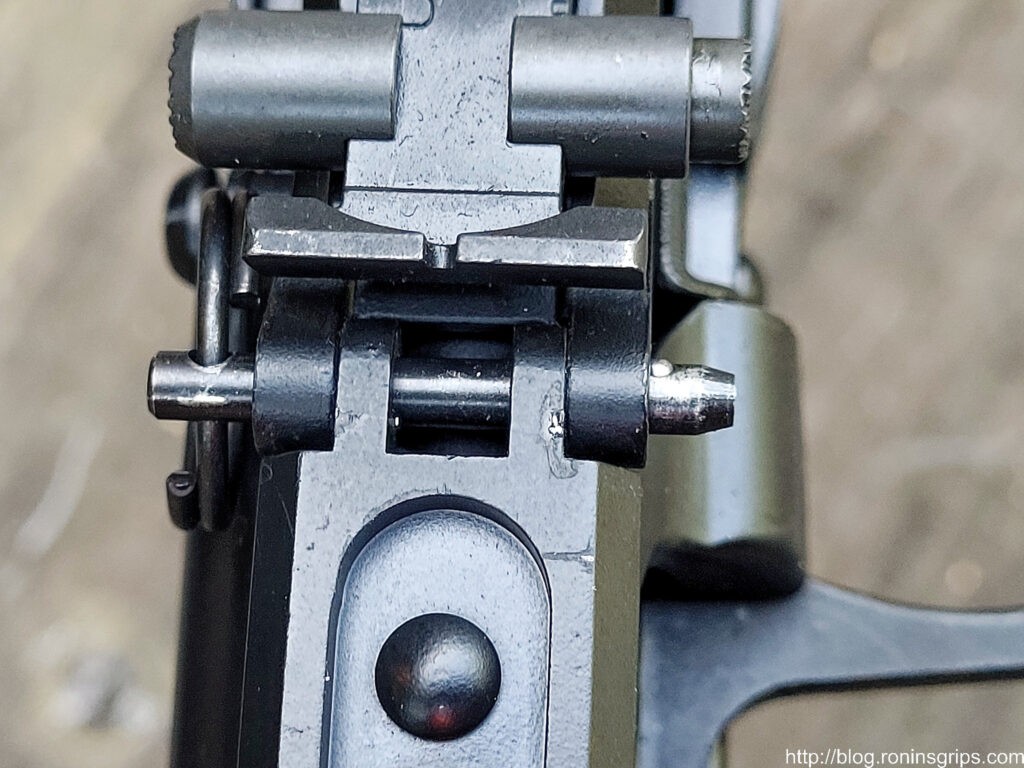
Here’s the full view of the hinge. Note the detent ball on the pin that keeps it from accidentally sliding out of the hole.
The way a quick release pin that has a ball bearing detent works is that a spring is behind the ball bearing pushing it up but it is captured in the hole. By sticking up, the ball bearing limits travel. Having a circular surface if you pull hard enough during extraction then the ball bearing is pushed down, the pin pulls free and then the spring pushes the ball bearing detent back up once it is clear.. Insertion is just the reverse.

In closing

I really like how it turned out. For folks who want to add a quick takedown pin, just order the AK-V pin [click here to open that page in a new tab] and then ream your hinge open. Note, you might want to get the same size reamers and see which you prefer – start with the smaller one first of course.

The pins make removing the dust cover really easy.

Note, I have to buy all of my parts – nothing here was paid for by sponsors, etc. I do make a small amount if you click on an ad and buy something but that is it. You’re getting my real opinion on stuff.

Super Secret AK Furniture Fitting Tool

Ok, now that I have your attention with that title, I often get asked how to fit the various furniture parts of an AK to a given rifle – the gas tube cover / upper hand guard cover, the lower handguard and the buttstock. Most of the work can be done with a secret tool – a slightly modified single cut file and patience.

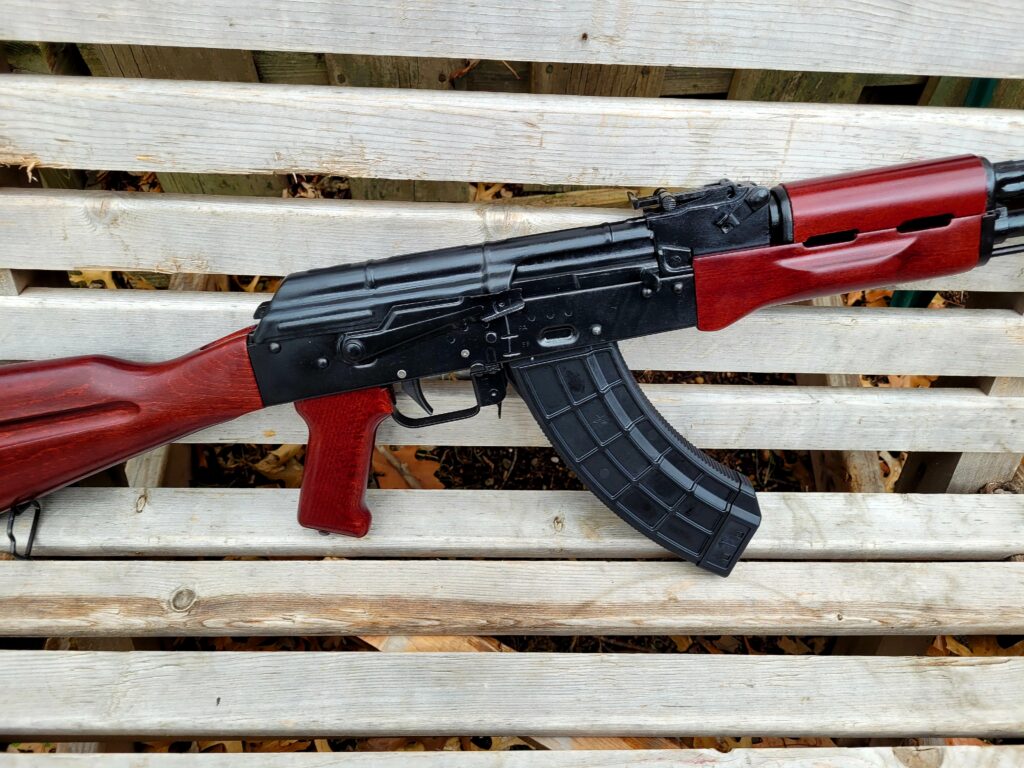
For example, this is Palmetto State Armory’s Redwood furniture set on a Romy G kit I built.

Most of the time with new furniture, you need to remove material and a single cut file works great for that. With the pictured PSA Redwood furniture set, I needed to think the half circle ends of the gas tube cover and I also had to fit the lower hand guard just a tad.

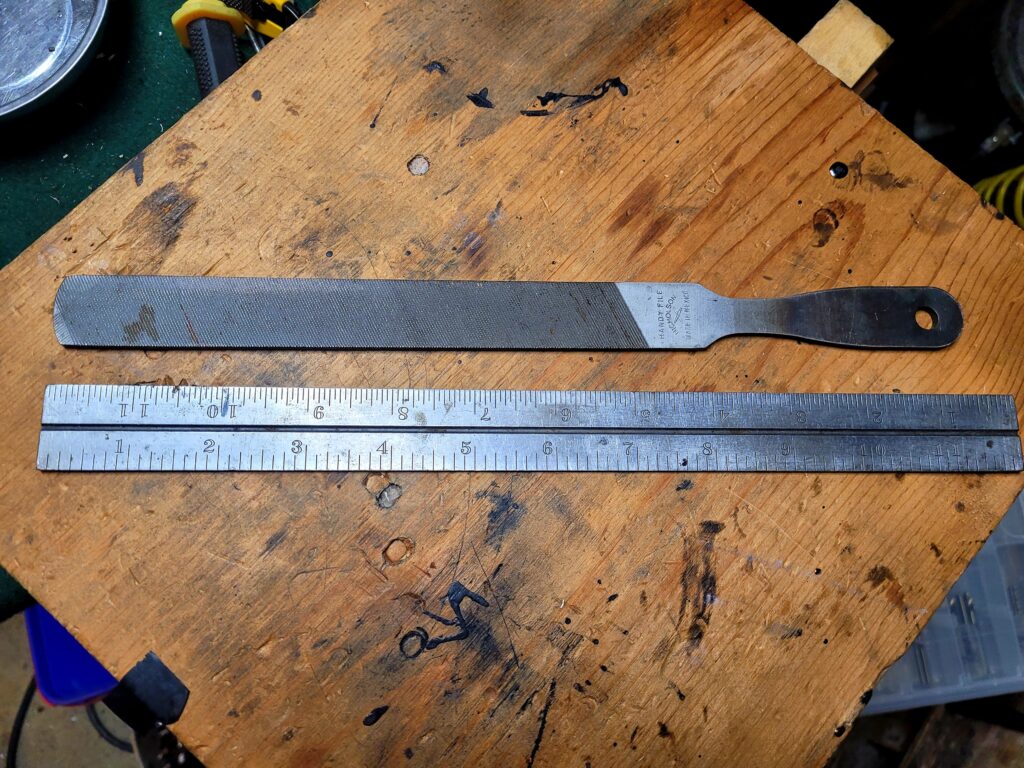
This is an 8″ single cut Nicholson Handy File that I bought many years ago and modified. I prefer a single cut file so I can go slow and not remove material too fast. Just remember an old saying – “it’s easier to take more material off than it is to put it back on.”

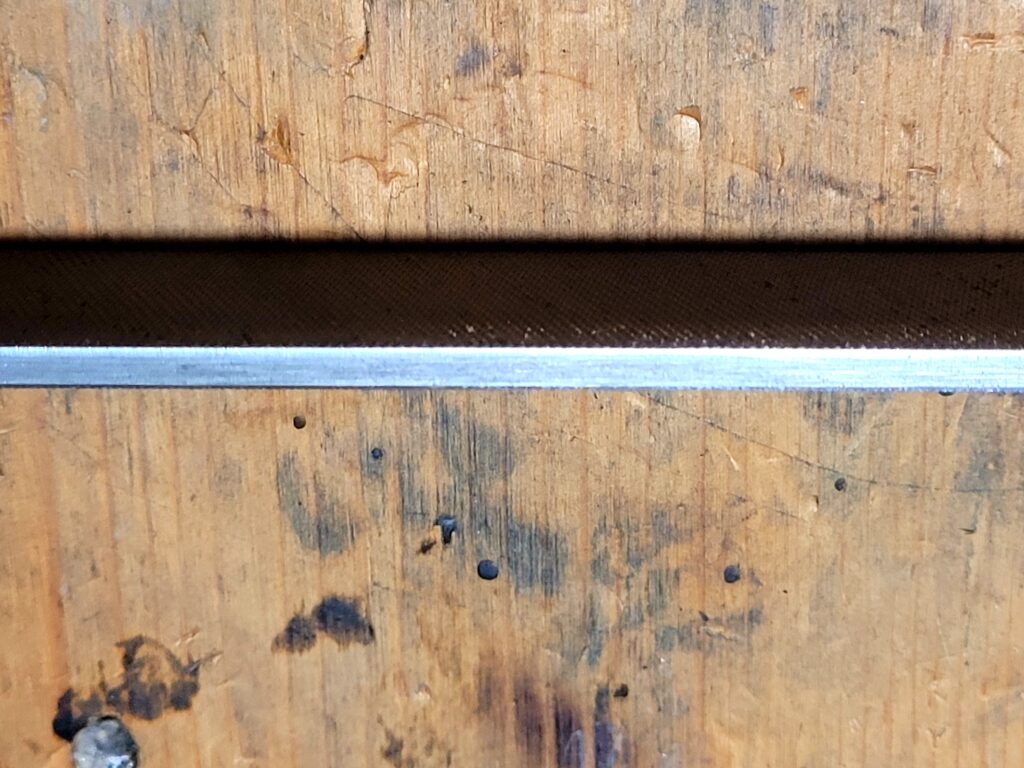
Now here’s the trick to really make this tool work for fitting furniture – grind one thin side smooth – literally get rid of the file’s teeth. This will allow you to quickly and easy run the file right against a raised edge, such as the lips of the gas tube cover, and remove material that you want while leaving the raised edge untouched.

I find an 8″ file just the right size. 8″ is the measurement from the front edge, or “point” of the file, to the base of the heel – the bottom of the main body before the tang starts. The file shown is an 8″ Nicholson Handy File but any 8″ single cut or a file with single cut on one size and double-cut on another would work.

Any brand of file ought to work. Some come with a “safe” edge meaning no teeth. Just test it first to see if any of the teeth from the perpendicular surfaces protrude enough to cut – if they do then knock them down so the smooth surface can ride on the material you are working on with zero cutting happening from that side.

I used my big belt sander and removed all the teeth from this one edge and ensure it was smooth. I purposefully left the teeth on the other thin edge.

Just be patient – look at where the furniture is binding, remove a small amount and test the fit. In general, you want AK furniture to fit snug vs. rattling around. Patience is the key though – don’t rush things. Just keep inspecting, filing off a bit and testing over and over.

So everything is installed, nothing broke because I rushed and the end result is nice snug fitting furniture.

Summary

A single cut file with one thin edge ground is the secret tool but you need to be patient when using it. I can’t even begin to guess how many lower and upper handguards I have adjusted with this file over the years plus I have learned a bit more patience as well.

I hope this helps you out.

How To Locate And Drill AK Front and Rear Trunnion Rivet Holes

Building an AK takes a fair amount of drilling, fitting and riveting that can intimidate someone thinking about building their first rifle. Lucky for them, the industry has evolved a lot of really cool tools exist to enable faster higher quality results. A good example of evolution is the location and drilling of the the rivet holes in the receiver for the front and rear trunnions.

Back around 2006 or so when I got started, you either measured the location of the trunnion holes and marked them or you could take a post it note, push it on the trunnion to get an outline of the holes and then transfer it to the receiver, again marking where to drill. You learned quick to start with a small drill bit so you could adjust a bit if you were off with either method – I got pretty good with the post it note method actually.

One of the AK-parts and tool vendors that has been around the longest is AK-Builder and he was always bringing new offerings to the market, I slowly added one of all of his tools as funds permitted. I had his rivet jig, flat bending jig, the top rail layout jig (if you remember those) and so forth. At some point he added a really, really cool jig for locating and drilling the holes for the trunnions. I bought it and swear by it to this day.

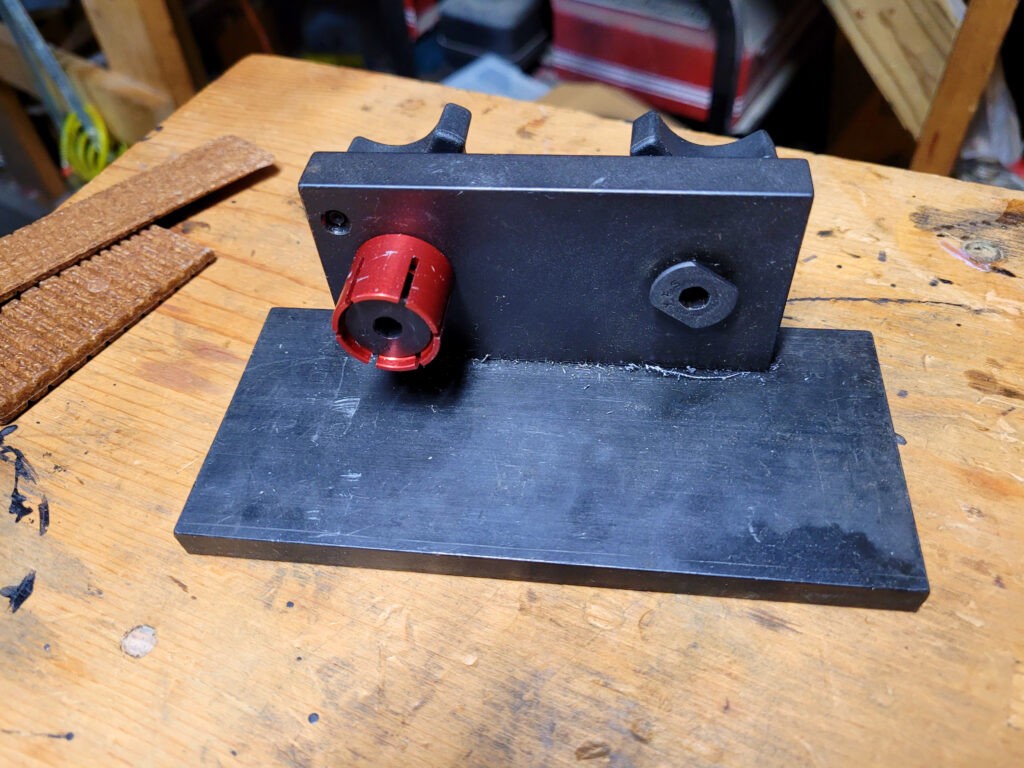
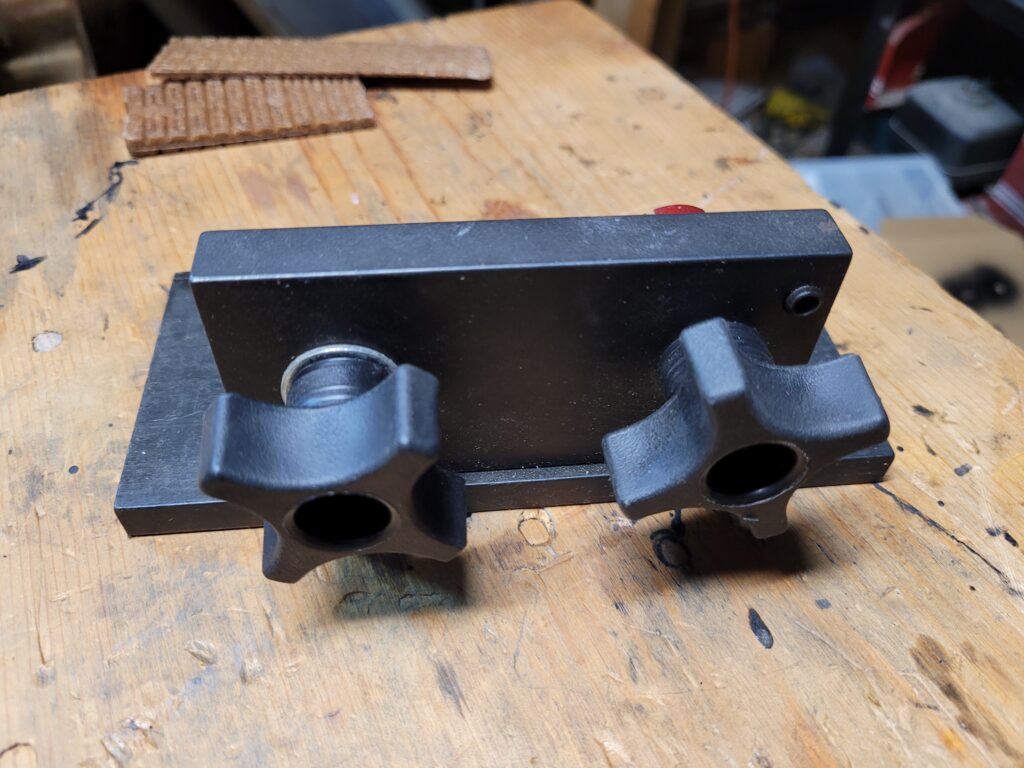
The jig is extremely well made and durable. When you buy it, you have options for the sizes of mandrels to fit different barrel channel holes. The red one you see works on 7.62 AKs and they also have one for 5.45 and the unique MAK90. The rounded rectangle on the right holds the rear trunnion.

Using It For The Front Trunnion Holes

Using this fixture is about as easy as it gets but you must have a drill press. I’d recommend an X-Y table on your drill if you plan to do this much but at least have a drill press.

  1. Securely mount the fixture to your drill press.
  2. Insert the trunnion and tighten the knob so it can’t move.
  3. Move your drill table around to line the drill bit up with the hole in the trunnion.
  4. Slide the receiver over the trunnion.
  5. Lower the drill and it will go in the exact same location as the trunnion hole you lined up on.
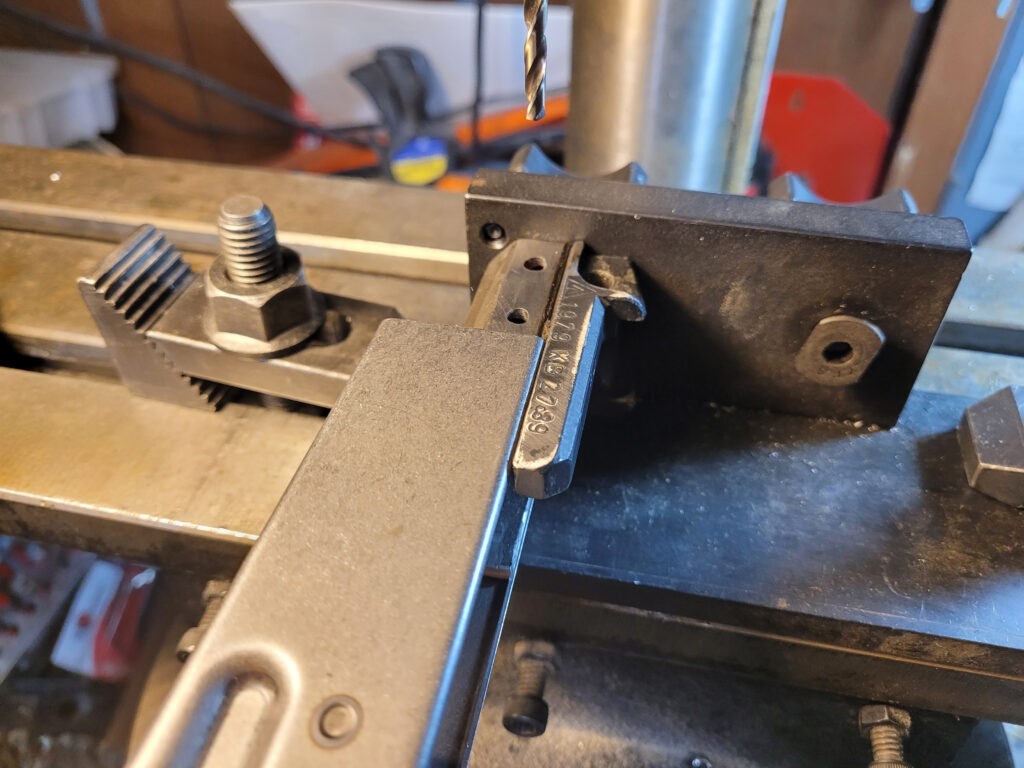
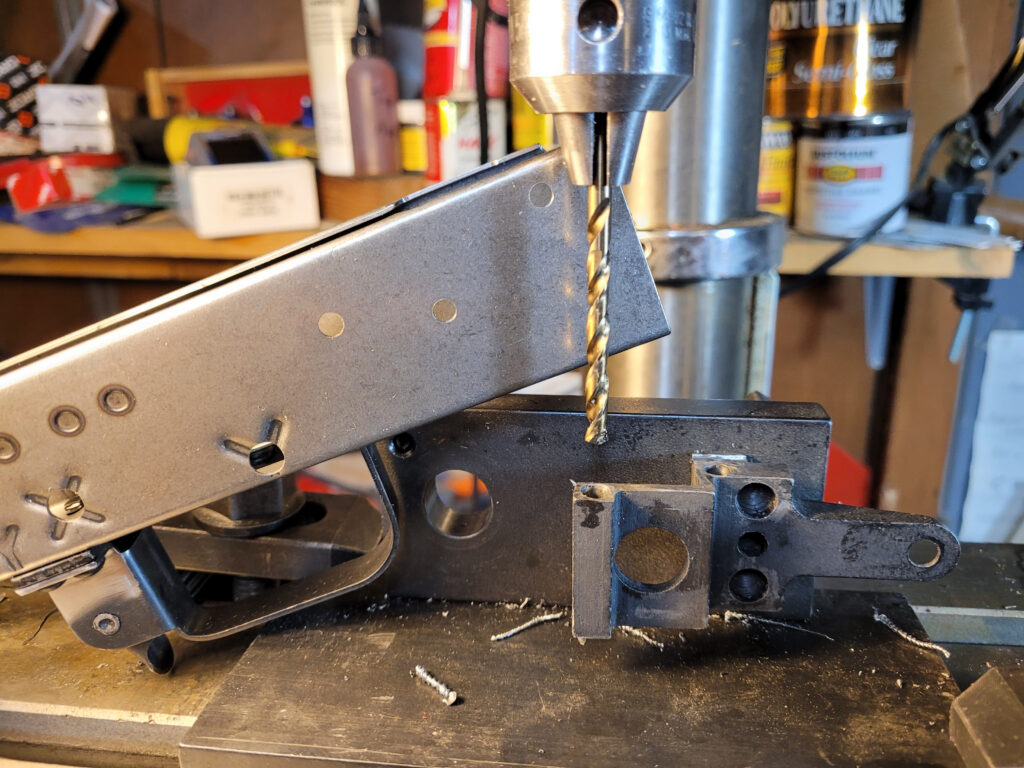
The front trunnion is being held securely by the fixture. I am sliding the receiver forward and when I bring the drill down, it will make the hole in the exact same spot as what was in the trunnion.
This fixture is the best means I have found to quickly and accurately locate and drill the trunnion holes in the receiver. I prefer undrilled receivers because with this jig I can put the holes exactly where I want them. By the way, these are AK-Builder rivets also.

Tips For The Front Trunnion Holes

  • Confirm the drill bit sizes you need before you start. For most AKMs, the front rivet holes are 4mm so you can use either a 4mm or 5/32″ (3.868mm) bit. Note, that dimension can be different so just confirm is my point. Also, I’d recommend good cobalt bits personally.
  • Use cutting fluid – I like Tap Magic personally.
  • You will drill a hole at a time – do not try to go all the way through. Small alignment errors become big problems when you do that. Avoid the grief – do a hole per rivet.
  • Make sure the table can’t move, that the fixture is secure and that the trunnion is being held firmly. If anything moves, you are hosed.
  • Line up on the hole, slide the receiver all the way on, pull it back just enough to verify nothing moved one last time.
  • After I drill the first rivet hole I carefully inspect everything is lined up. I then move to the second rivet hole and repeat the above but before I drill, I insert temporary rivets in the holes to make sure nothing moves. DO NOT SQUISH THEM – I literally am just using their bodies to keep everything lined up. It really helps avoid small movement errors.
  • If you mess up real bad for some reason, weld the hole shut and start over.
If you go to the AK-Builder product page for this jig [click here] you should note the link in their description to a page with a lot of photos and detailed instructions.

Doing The Rear Trunnion

Doing the rear rivet holes uses the other side of the drilling jig. The little rectangular tab goes into the top of the rear trunnion where the recoil spring rod normally sits and you can then crank it down tight to hold it in place while drilling.

Notice the receiver will be parallel to the jig during these operations. Again, make sure everything is secure and you need to make sure the back of the receiver is true to the rear of the trunnion.
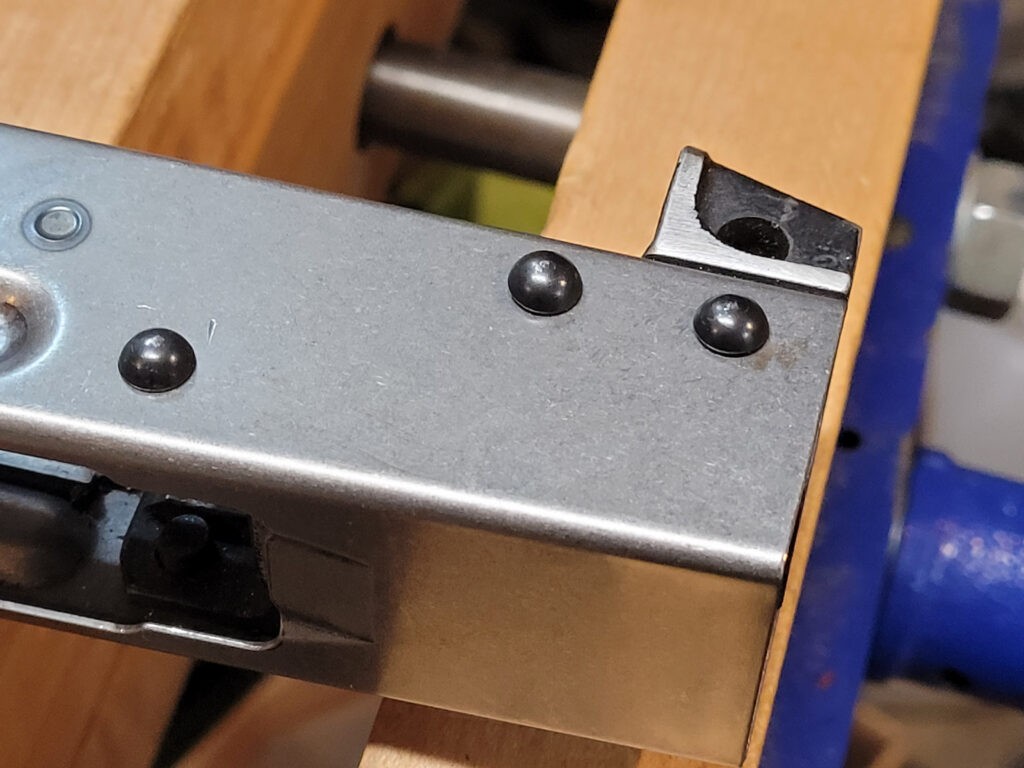
The end result will be accurately located holes. Before you set the rivets, this is when you should be thinking about a side rail for optics if you want one. I like the AKM side rail mount from AK-Builder. Those holes you will need to manually locate and drill. Use a caliper and true the top of the rail to the top of the receiver if you do install one.

Tips For the Rear

  • First, read all the tips I wrote for the front trunnion if you skipped them.
  • The key to all of this is a solid setup and nothing moving.
  • Confirm the size drill bit you need. It will probably be 4.5mm which you can do with that size drill or be close with 11/64″ (4.365mm).
  • DO NOT DRILL STRAIGHT THROUGH. I’d recommend you take your time and do a hole at a time.
  • Once you get a hole drilled and are ready to do the next, stick a rivet in it to prevent movement.

Summary

The AK-Builder drilling jig is the best tool I know to help you quickly and accurately locate and drill the front and rear trunnion holes in your receiver. I definitely recommend it.


Note, I have to buy all of my parts – nothing here was paid for by sponsors, etc. I do make a small amount if you click on an ad and buy something but that is it. You’re getting my real opinion on stuff.

If you find this post useful, please share the link on Facebook, with your friends, etc. Your support is much appreciated and if you have any feedback, please email me at in**@ro*********.com . Please note that for links to other websites, I may be paid via an affiliate program such as Avantlink, Impact, Amazon and eBay.


How To Quickly Remove AK Receiver Rivets

Okay, there are a ton of ways to remove rivets and I’ve posted some details both about removing the trigger guard and side rail rivets (if your AK has a side rail). This post is going to get straight to the point.

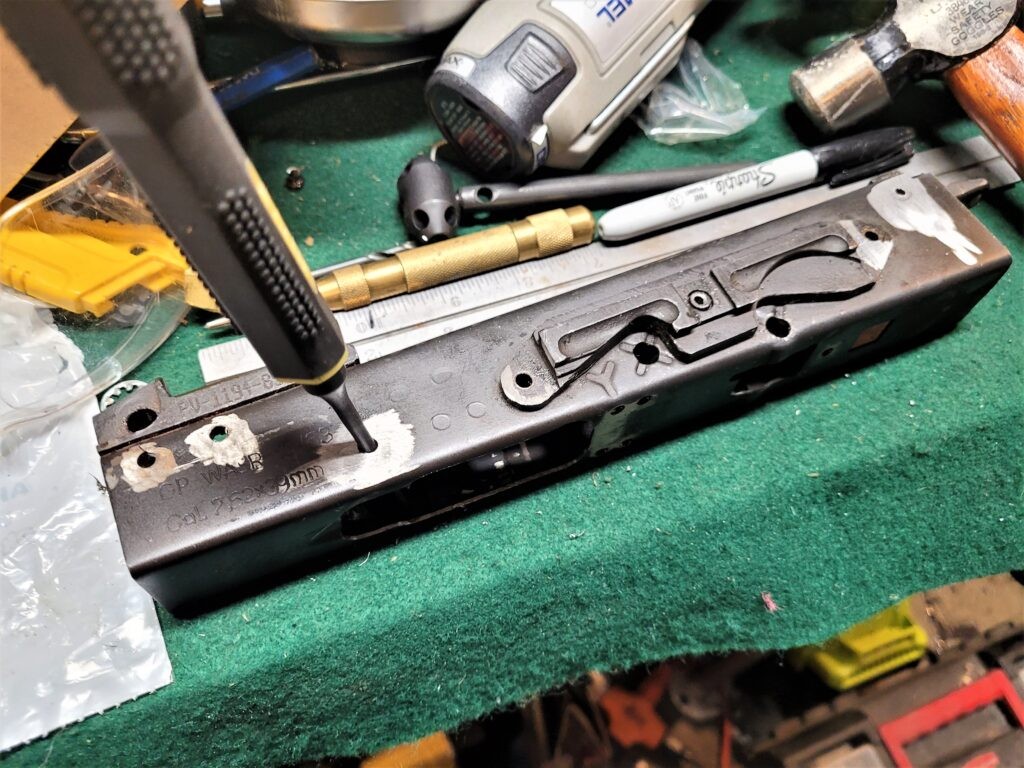
I use a 4.5″ cordless Ryobi angle grinder and take all the rivet heads down flush. Unless I plan to reuse the receiver, I don’t care how the receiver looks when I’m done. If I do care, then I will be much more careful and stop just before I get to the surface.

I then center punch all of the holes to make drilling easier. I like to use an automatic center punch so I can focus on where I want to make the divot for drilling vs. trying to keep everything aligned. If you’ve never used one, they are worth their weight in gold.

I drill an 1/8″ hold in each one use quality cobalt drill bits and cutting oil. I like to buy Tap Magic in bigger containers and then transfer the fluid as needed into smaller squeeze bottles with long metal tubular “needle” tips so I can precisely put it right where I need it.

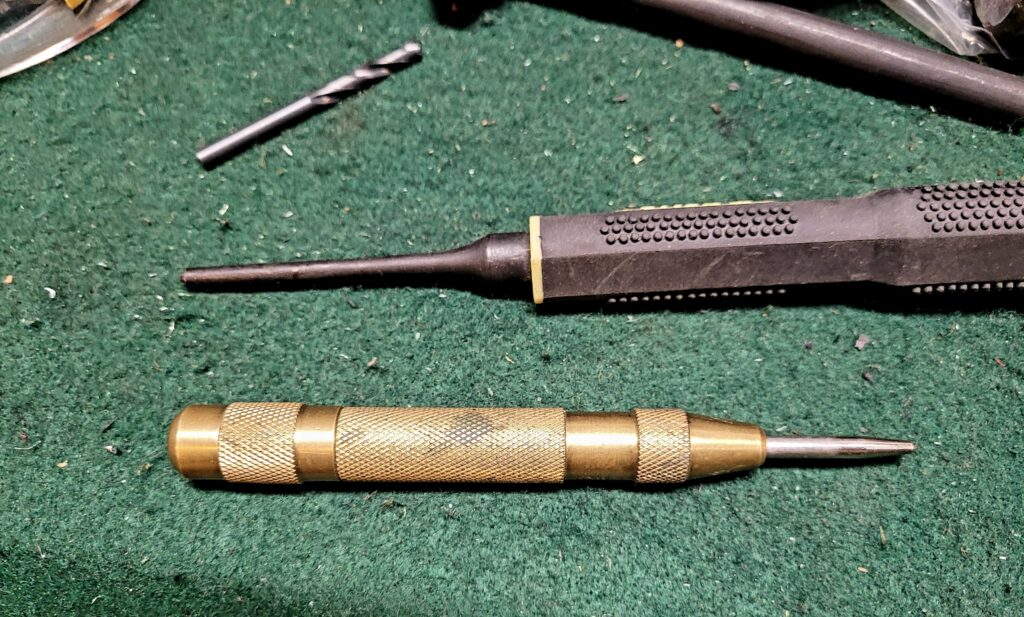
From the top – 1/8″ drill bit, roll pin punch and an automatic center punch on the bottom.

I then use a roll pin punch where the rounded tip can fit in the 1/8″ hole and the shoulder properly engage the remaining rivet. Folks, this makes removing the remaining rivets super easy except for the long trunnion rivets.

For the short rivets, I like to drill them out with an 1/8″ bit to both create a hole and relieve stress. I then use a roll pin punch to easily knock them out because the ball end of the punch keeps it centered on the rivet. If you’ve ever fought with keeping a normal punch centered while hammering, a roll pin punch centered in a hole makes a night and day difference.

Long Rear Trunnion Rivets

Okay, these take more work so we’ll make a section just for these little headaches. They’re not horrible – they just take additional time to remove but I will tell you a HUGE time saver in a moment.

In general, it’s easier to remove the rivets with the trunnion out of the receiver. If you need to save the receiver, be gentle and use successively larger drill bits to remove the rivet heads so you can then pry the sheet metal receiver open and pull it out. The balancing act is that if you make the receiver holes too big then you will need to weld them shut and drill new ones. It’s not the end of the world. I prefer welding and redrilling compared to using even bigger rivets with heads that cover the holes but are mismatched to everything else.

If you don’t care about the receiver or are removing stubs, grind those heads down and use an air hammer chisel to easily bend the receiver sheet metal away from the receiver.

With the rivet heads ground off you can clearly see the rivet body outline and thus you can mark the center.

Traditional Method – drill in from each side about 1/2 way and then punch the rivet out. Guys will use 5/32″ (3.969mm) or even 11/64″ (4.366mm) drill bits. If you are spot on the center and you have access to quality cobalt metric bits, this is usually a 4.5mm rivet so you could use that. You will read about guys suggesting 3/16″ drills but this route is problematic because 3/16″ is 4.762mm and thus too large. You’d need to use a 3/16″ rivet to properly secure the trunnion and the heads will look noticeably different from the others.

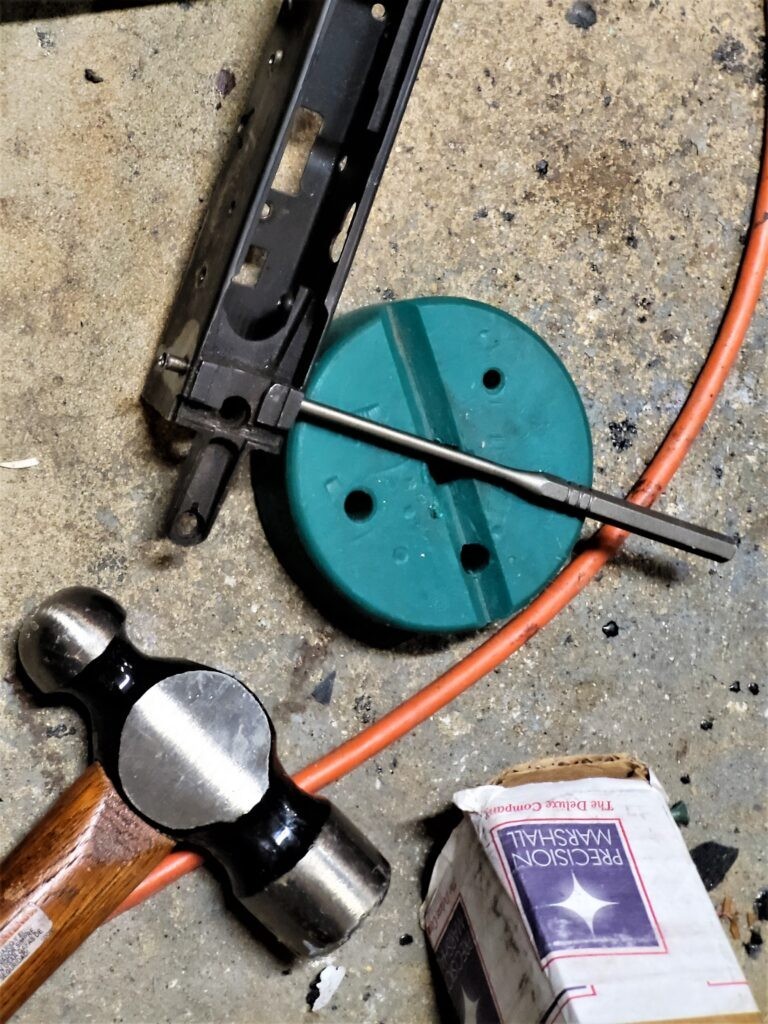
Old school – drill the rivet out most of the way and then punch it out the rest. You can see the pin exiting to the left. Note, do this on a hard surface that isn’t going to flex and absorb some of your blows. Here I am literally beating the crap out of the punch on the concrete floor. I’ve since moved on to a method using an air hammer that I will describe next.

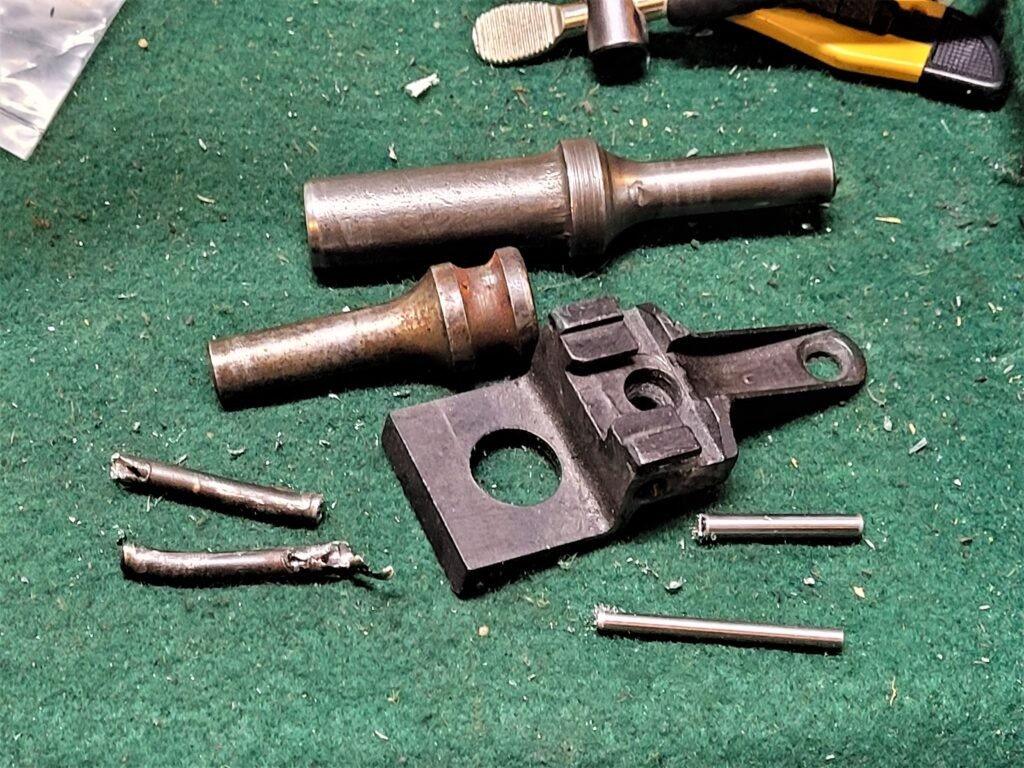
The impatient Ronin method – drill 1/8″ centered holes in one side of the rivets left in the trunnion. Make or buy an 1/8″ air hammer drift pin and chase each long rivet out in a matter of seconds. It’s amazingly fast. I don’t know who invented the air hammer but it is seriously magical when it comes to tasks like this.

I can pop out a rivet in seconds using an air hammer and my rivet fixture. I took two old .401 shank air tools and drilled center holes. One is 1/8″ and the other is 5/32″. I then have a variety of lengths of 1/8″ and 5/32 dowel pins to do the job. I built both diameters but really I just use the 1/8″ punch now. I put the trunnion in a heavy metal working vise and start with a short pin to start the push and then a longer pin to chase it all of the way out. It works like a dream. If you do this, please, please, please wear safety glasses. A hardened dowel pin can brake in these situations. For an air hammer, I am using an IR 116 – a 4x air riveter ought to work also, I have a 3x ATS but have never tried it for this.

Summary

Use an angle grinder to knock off the rivet heads, drill and punch out the short rivets. For the longer rivet, decide which of the two methods you want to use. I hope this helps you out!


Note, I have to buy all of my parts – nothing here was paid for by sponsors, etc. I do make a small amount if you click on an ad and buy something but that is it. You’re getting my real opinion on stuff.

If you find this post useful, please share the link on Facebook, with your friends, etc. Your support is much appreciated and if you have any feedback, please email me at in**@ro*********.com . Please note that for links to other websites, I may be paid via an affiliate program such as Avantlink, Impact, Amazon and eBay.


You can Easily Remove A Side Rail Scope Mount But The Receiver Is Going To Look Butt Ugly

The Kalashnikov design team took an interesting approach to mounting scopes on AK-Rifles. Rather than centering the optic over the bore they placed a mounting rail on the side of the receiver. There are different types depending on the model of rifle in question but one thing that pops up from time to time is whether one can be removed.

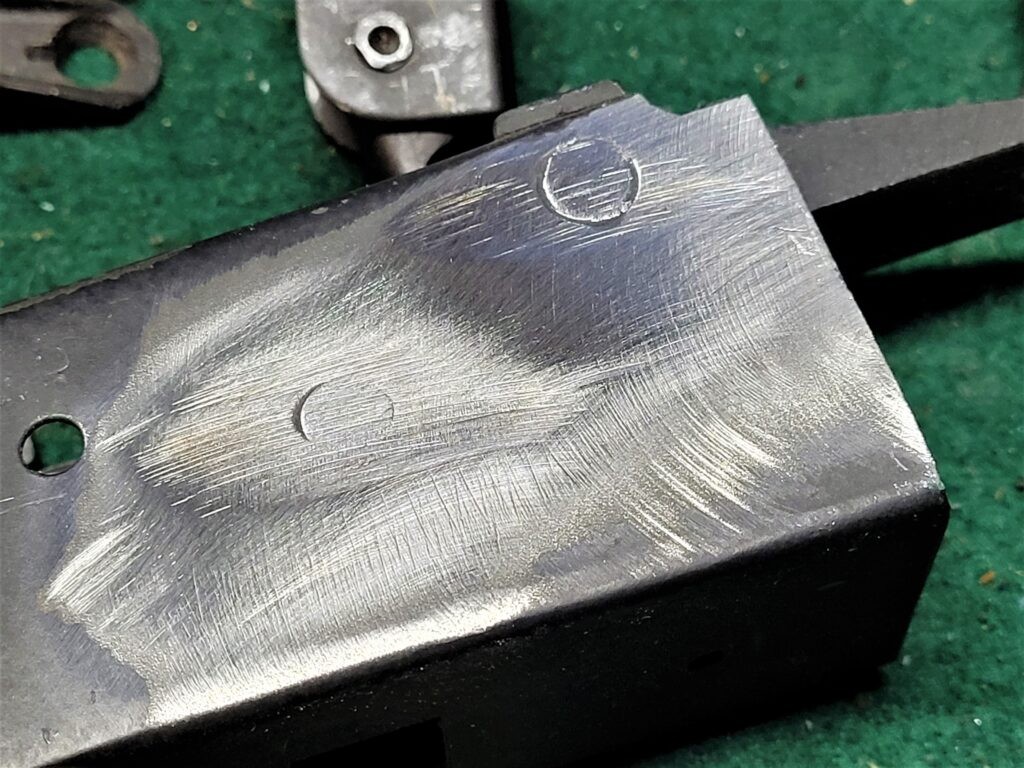
The short answer is yes. Now I add in the “but” – it is going to leave you with a receiver that not only has holes in it but receiver material that was forced into a countersink so you will have at least the center rivet area on the sheet metal receiver that will probably stick out like a little volcano taunting you.

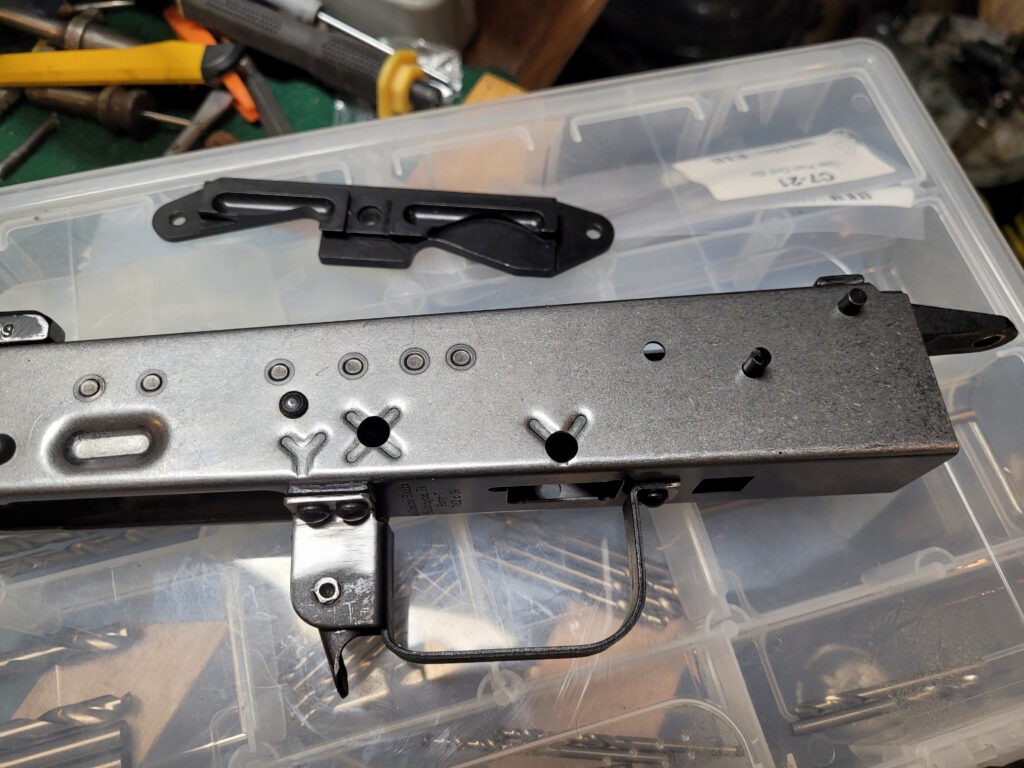
Center punch and drill out the rivets. The rear rivet is an it depends – it may either be short like you see with the AK-74 or attached via the long rear trunnion rivet. You may want to start with an 1/8″ drill and go up to 5/32″. The rear trunnion if it has a large rear trunnion rivet in it will be 4.5mm and I actually use a 4.5mm cobalt bit on that one to free up the side rail. Some guys who don’t have a 4.5mm bit will use an 11/64″ drill bit instead – it’s 4.366mm. I’ll do another post about trunnions but unless you are running a drill or mill that you know is true to the table and work piece, do not try and drill the rivet out entirely from one side, I go about half way in from each side and punch out the remainder or use an air hammer to chase out the rivet with an 1/8″ drift pin but that’s a topic for another day.
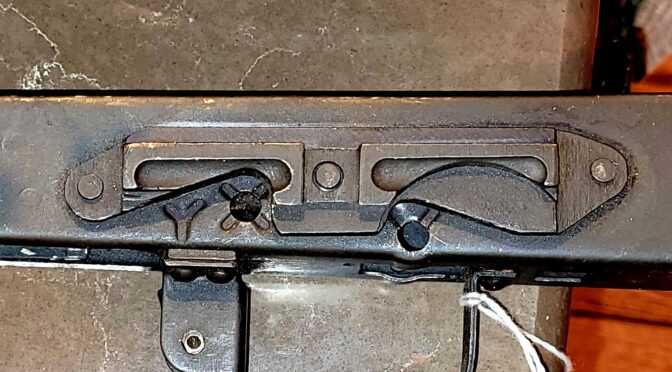
You can see the receiver material that was forced into the center hole. It really shows how secure riveting can be with countersunk rivets and holes.
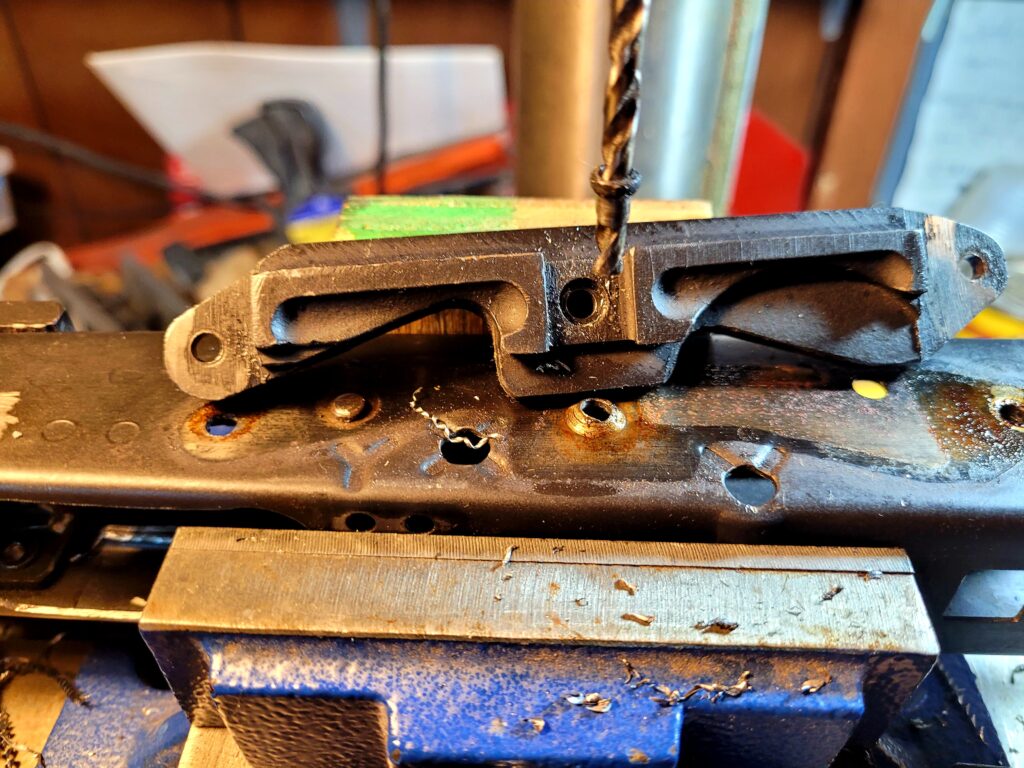
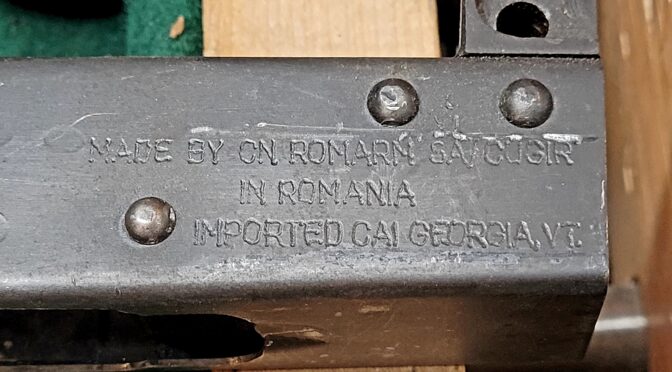
So, yes, you can drill out the rivets and use the scope mount on other rifles. The question becomes what to do with the source receiver. If it is getting destroyed then this is a non issue – follow whatever your procedures are to file a destroyed receiver/firearm record with the ATF provided it was serialized and registered to begin with unlike rifles built from a blank, etc.

Now if you want to keep the receiver, the recommeendation would give is to put a thick copper backing plate behind the holes, weld them shut and then sand the result flush. For the holes with the cones, if you have any, grind/mill them down flush first and then do the same – copper backing plate, weld the holes shut and then sand flush.

You’ll need to refinish at least the receiver and the bluing on the steel welds typically doesn’t blend with bluing on the receiver so you may want to just refinish the whole thing if you care about it looking good.

Looking at the back of the side rail is fascinating. The whole indexing of the scope rail starts with the front rivet of the rear trunnion. and then having an equal distance from the top of the receiver to the top of the side rail. Now this one is flopped 180 degrees compared to the receiver under it but look at the accomodations they have for thee selector lever and center support pin of the receiver. This is off a WASR-10 and is an AKM style plate but interestingly the rear trunnion was a split AK-74 style with two small short rivets in front on the two legs of the trunnion and a long rear trunnion vs. the ccommon AKM approach of two long rivets securing the rear trunnion. The machining is crude but it did the job. The AK-Builder plates are virtually identical but far better machined and finished. If I needed to use an AKM side rail, that’s what I would get.

Summary

Yeah, you can remove the side rail but if you plan to continue to use the receiver, you’ll need to weld the holes closed, sand, and refinish the weapon. I’m very impressed by the design they came up with – it spreads forces across the sheet metal receiver and allows ready access to the dust cover and internals if required.


Note, I have to buy all of my parts – nothing here was paid for by sponsors, etc. I do make a small amount if you click on an ad and buy something but that is it. You’re getting my real opinion on stuff.

If you find this post useful, please share the link on Facebook, with your friends, etc. Your support is much appreciated and if you have any feedback, please email me at in**@ro*********.com . Please note that for links to other websites, I may be paid via an affiliate program such as Avantlink, Impact, Amazon and eBay.