A previous post looked at the quality redemption arc made by Zastava to address legitimate concerns about their AK rifles and pistols in the US market. This report provides a more detailed analysis of the metallurgy, manufacturing methods, and heat treatment protocols for current-production Zastava civilian AK-pattern receivers sold in the United States market. The analysis reveals that the receivers are the product of a deliberate manufacturing philosophy centered on structural over-engineering and modern process control. Key findings indicate that all current ZPAP receivers are constructed from 1.5mm stamped steel, a significant increase in thickness over the 1.0mm AKM standard, and are paired with a forged, RPK-style bulged front trunnion. This robust architecture, a direct legacy of the Yugoslavian M70’s military requirement to launch rifle grenades, results in exceptional structural rigidity. Metallurgically, Zastava utilizes a formable, hardenable steel alloy for the receiver, which is then subjected to a comprehensive heat treatment process. Critically, the consistency and quality of these receivers are ensured by a recent modernization of Zastava’s production line, which now includes fully automated, high-precision heat treatment furnaces. This factory method ensures the entire component is treated for uniform hardness and durability. The synthesis of this robust physical design, strategic material selection, and modern process control results in a receiver that exhibits exceptional durability, consistency, and longevity.
Section 1: Receiver Architecture and Manufacturing Methodology
The foundational design of the Zastava ZPAP receiver sets it apart from many other AK variants available on the civilian market. The architecture is not based on the common Soviet AKM but rather on the more robust Yugoslavian M70, which itself borrowed design elements from the RPK light machine gun. This results in a receiver built to a higher standard of durability than is typical for a semi-automatic rifle.
1.1. A 1.5mm Thick Stamping
A defining characteristic of all current-generation Zastava ZPAP rifles imported by Zastava Arms USA is the use of a 1.5mm thick stamped steel receiver.1 This represents a 50% increase in material thickness compared to the 1.0mm specification of the Soviet AKM and the majority of its derivatives.5 The manufacturing process follows the standard methodology for stamped AKs, where a flat sheet of steel is bent into its characteristic U-shape, after which critical components like the front and rear trunnions are permanently set in place with rivets.7 The fit, finish, and quality of the riveting on current ZPAP rifles are consistently noted as being of high quality.8
This design choice has several direct consequences. The most immediate is an increase in mass; a ZPAPM70 weighs approximately 7.9 to 8.4 pounds, noticeably heavier than a standard 7 to 7.5-pound AKM.3 This additional weight, however, contributes positively to recoil mitigation, making the rifle a more stable shooting platform.3
The adoption of the 1.5mm receiver is not an arbitrary upgrade but a direct legacy of the Yugoslavian military’s design requirements for the original M70 assault rifle. This doctrine required the standard infantry rifle to double as a platform for launching rifle grenades.3 The immense stress imparted by this function necessitated a more robust receiver than the standard AKM. The solution was to adopt the receiver thickness and trunnion design of the RPK light machine gun, a platform already engineered for the higher stresses of sustained fire.8 For the civilian ZPAP, this “over-engineered” characteristic is retained. The primary benefit is a significant increase in structural rigidity, which minimizes receiver flex during the firing cycle. This enhanced stability provides a consistent platform for the action, contributing to long-term reliability and the preservation of headspace.
1.2. The Forged, RPK-Pattern Bulged Trunnion
Complementing the thick receiver is the universal use of a forged, RPK-style “bulged” front trunnion across the ZPAP line.2 The front trunnion is arguably the most critical pressure-bearing component of an AK, as it contains the locking recesses for the bolt and secures the barrel to the receiver. Zastava explicitly manufactures these trunnions via forging, a process that aligns the steel’s grain structure to provide superior strength and fatigue resistance compared to casting.2
The bulged trunnion design is visibly wider than a standard AKM trunnion, creating distinct bulges on the sides of the receiver where it is seated.6 This design increases the material volume and contact surface area at the rifle’s lockup point, allowing it to better withstand the high pressures of sustained fire or, in its original military context, launching grenades.1
The 1.5mm receiver and the bulged trunnion are not independent features but a synergistic engineering system. The thicker receiver sheet metal provides the necessary structural support for the larger, heavier trunnion, ensuring that firing stresses are distributed evenly across a more robust assembly. This combination reveals a core tenet of the Zastava manufacturing philosophy: a comprehensive approach to durability. The rifle is not merely made of thicker steel; the most critical stress-bearing component has been reinforced with a forged, machine-gun-grade part. For the end-user, this translates directly to exceptional longevity. The action is structurally engineered to withstand a service life that far exceeds the demands of typical civilian use, ensuring that critical tolerances like headspace remain stable over many thousands of rounds. This was empirically demonstrated in the AK Operators Union’s 5,000-round endurance test, in which a ZPAPM70 passed a “no-go” headspace gauge check at the conclusion of the test, indicating no detrimental wear or deformation.11
Section 2: Receiver Steel Alloy Specification
While Zastava Arms and its U.S. importer consistently market the receiver’s dimensions and manufacturing method, the specific steel alloy grade used is proprietary and not publicly disclosed.12 This is a common practice in the firearms industry. However, based on the known manufacturing processes and performance requirements, it is possible to make a sound engineering deduction about the class of steel being used.
The receiver begins as a flat sheet that is cold-formed (stamped) and subsequently heat-treated.7 This immediately narrows the field of candidate materials. The steel must possess sufficient ductility in its annealed state to be bent into shape without fracturing, which rules out brittle high-carbon steels. Conversely, it must contain sufficient carbon and other alloying elements to be hardenable through heat treatment to the required specification for wear resistance, which rules out simple, low-carbon steels that cannot achieve the necessary hardness.14
This places the ideal material in the low-alloy steel category. Alloys such as AISI 4130 (Chromium-Molybdenum) or a similar European-standard equivalent are the industry benchmark for high-quality stamped receivers. These alloys provide an excellent combination of formability, weldability, strength, and toughness, making them perfectly suited for this application. While the exact designation remains unconfirmed, it is highly probable that Zastava employs a steel with properties analogous to the 4130/4140 family for its receivers.
Section 3: Heat Treatment Protocol and Process Control
The most robust design and the finest materials are rendered ineffective without proper heat treatment. This metallurgical process is what unlocks the steel’s potential for hardness and wear resistance. It is also historically the most common point of failure in low-quality AK manufacturing. Zastava has made significant, verifiable investments to ensure this critical step is performed to a modern, consistent standard at its factory in Serbia.
3.1. Modernization of Thermal Processing at the Zastava Factory in 2019
In a significant upgrade to its manufacturing capabilities, Zastava Arms partnered with SECO/WARWICK in May 2019 to modernize its heat treatment facilities.16 Zastava installed a new, high-temperature box furnace featuring “tighter temperature uniformity and fully automated temperature controls”. A company representative stated the goal was to replace dated equipment and improve quality through real-time process controls.
This investment is arguably the single most important factor contributing to the consistent quality of modern ZPAP receivers. Heat treatment is a science of precise time and temperature cycles; minor deviations can lead to drastically different material properties. A modern, automated furnace from a premier supplier like SECO/WARWICK eliminates the variables of older, manually controlled systems. Tighter temperature uniformity ensures the entire receiver reaches the correct austenitizing temperature, while automated controls execute quenching and tempering cycles with digital precision and repeatability. This technological capability directly addresses the historical weak point of stamped AK production and allows Zastava to produce receivers of a consistent and high quality.
3.2. Zastava’s Factory Heat Treatment vs. Aftermarket Methods
The heat treatment of a Zastava ZPAP receiver is a comprehensive, industrial process performed at the Zastava factory in Serbia.8 Zastava utilizes its modern, automated SECO/WARWICK furnaces to subject the entire receiver to a complete thermal processing cycle. This method ensures that the whole component is brought to a uniform temperature and then properly quenched and tempered. The result is a receiver with consistent hardness and toughness across its entire structure, meeting the required specifications for critical areas like the fire control group axis pin holes and the ejector tip.18 The widely accepted industry specification for these critical areas is between 36 and 44 on the Rockwell C scale (HRC).14
This factory-level, full-component heat treatment is fundamentally different from the “spot” or “zoned” heat treatment method. The zoned approach is a technique primarily used by home builders or small custom shops who start with an unhardened, annealed steel receiver flat. This method involves using a handheld torch to selectively heat only the critical wear points—the axis pin holes and ejector—before quenching them in brine or oil. While this localized process is an inexpensive and accessible way for a hobbyist to harden the most essential areas, it is not the method employed by Zastava for its factory-produced firearms. Zastava’s investment in advanced industrial furnaces allows for a more controlled and uniform heat treatment of the entire receiver, which is a hallmark of their modern manufacturing process.
Section 4: Conclusion
An analysis of the Zastava ZPAP receiver reveals a product defined by a clear and coherent manufacturing doctrine that blends traditional military-grade robustness with modern industrial precision.
4.1. The Zastava Manufacturing Philosophy: A Synthesis
The current manufacturing philosophy for Zastava’s U.S.-market civilian receivers is a hybrid approach that leverages two core principles:
Structural Over-Engineering: The retention of the proven 1.5mm receiver and forged, bulged RPK-style trunnion provides a safety margin and durability that exceeds the requirements of semi-automatic fire when properly heat treated.
Modern Process Control: The implementation of advanced, automated SECO/WARWICK heat treatment technology ensures that the metallurgical properties of the receivers are realized with a high degree of precision, consistency, and repeatability, overcoming a historical weakness in mass-produced AKs.
This philosophy results in a product that is not simply strong by chance, but is durable by design, by material selection, and by process control. It is a systematic effort to produce a premium-tier imported AK receiver that justifies its market position through tangible engineering and manufacturing quality.
4.2. Market Implications and Final Assessment
The Zastava ZPAP receiver, as currently manufactured by Zastava in Serbia and imported, represents one of the most robust and well-executed civilian AK platforms available on the U.S. market. The combination of its RPK-derived architecture and its modern, controlled, full-component heat treatment provides a high degree of analytical confidence in its long-term durability and operational reliability.19
The establishment of Zastava Arms USA as the exclusive importer has been a critical element in this success.20 It has created a direct feedback loop with the American market, allowing the company to effectively compete against other popular imports while differentiating its product with unique Serbian design features and a demonstrable commitment to manufacturing quality.20
For the technically-minded consumer or small arms analyst, the value of the ZPAP receiver lies not just in its advertised features but in the underlying manufacturing and metallurgical doctrine. The evidence points to a systematic, factory-controlled approach to building a receiver that is engineered to exceed its expected service requirements, making it a sound investment for any user who prioritizes maximum durability and long-term performance.
Image Source
The opening image was created by the author and is of a modified semi-auto Yugoslavian-era Zastava receiver made by Childer’s. The author is using it for illustration purposes only.
This report provides an analysis of the quality and market perception of Zastava-manufactured AK-platform firearms within the United States civilian market from 2020 through the first half of 2025. Persistent concerns among consumers regarding receiver metallurgy, heat treatment, and associated failures such as cracking and deformation form the impetus for this investigation. The analysis reveals that Zastava’s quality reputation in the U.S. is best understood as a narrative of two distinct eras: the pre-2019 period dominated by third-party importation, and the post-2019 period managed directly by the company’s U.S. subsidiary.
The investigation finds that significant, documented quality control issues, particularly catastrophic receiver failures, were predominantly associated with the N-PAP series of rifles imported and modified by Century Arms. Evidence strongly suggests these failures were not the result of fundamentally inferior steel but rather a combination of mechanical and structural factors, including over-gassed systems, inadequate recoil springs, and specific design elements of the 1.0mm receivers used at the time.
In 2019, Zastava initiated a comprehensive remediation strategy by establishing Zastava Arms USA. This move brought importation, 922(r) compliance, and quality control in-house. The subsequent introduction of the ZPAP series, featuring a standardized 1.5mm thick, bulged-trunnion receiver and a chrome-lined barrel, directly addressed the primary engineering and durability complaints of the previous era.
Analysis of market sentiment and user-reported issues from 2020 to 2025 shows a dramatic positive trend. The catastrophic failures that defined the N-PAP era are virtually absent from discussions about current-production ZPAP models. Present-day complaints have shifted qualitatively, now focusing on minor, non-systemic fit-and-finish or assembly issues, such as cosmetic blemishes, stiff controls, or components that may require thread-locking compound.
The report concludes that the historical concerns regarding Zastava’s receiver metallurgy and heat treatment are a legacy issue that has been effectively rectified in current production models. The “soft metal” narrative, while rooted in the real failures of older rifles, is not applicable to the ZPAP series. The reputational risk for the brand has successfully transitioned from one of fundamental engineering integrity to one of maintaining consistent final assembly quality.
Section 1: The Provenance of Perception: A Tale of Two Importers
The reputation of Zastava firearms in the United States has been shaped by a complex history involving manufacturing in Serbia and final market preparation by different entities in the U.S. Understanding the persistent quality concerns requires a clear demarcation between two distinct periods of importation. The negative perceptions that fuel the user’s query are not inherent to Zastava’s core manufacturing capability but are inextricably linked to the importation, modification, and quality control processes of a specific, earlier era, which stands in stark contrast to the current corporate structure.
1.1 The Century Arms Era (Pre-2019): The Genesis of Quality Concerns
Prior to 2019, Zastava’s semi-automatic PAP (Poluautomatska puška, or semi-automatic rifle) series firearms, including the N-PAP and O-PAP models, were brought into the U.S. market primarily through Century Arms. During this period, the importer was responsible for modifying the rifles to comply with federal regulations, most notably section 922(r) of the Gun Control Act, which limits the number of foreign-made parts on an imported semi-automatic rifle. This process often involved swapping original Serbian components for U.S.-made substitutes, such as trigger groups, pistol grips, and stocks.1
It was during this era that the most severe and widespread quality complaints emerged. Online forums and social media platforms documented a litany of issues with early PAP rifles, including reports of “poor-quality replacement parts, sloppy assembly, and inconsistent reliability”.1 Specific failures were often traced back to the U.S.-based modification process. For instance, users reported incorrectly installed “paper clip” style shepherd’s crook retainers for the trigger and hammer pins, leading to pins “walking out” of the receiver.2 The commonly used Tapco aftermarket trigger groups were also a source of complaint, described as “terrible” in feel and contributing to other wear issues.2
The most damaging reports concerned the structural integrity of the receivers themselves. The N-PAP model, in particular, became notorious for developing cracks in the receiver sheet metal, an issue that will be analyzed in technical detail in Section 2.3 High-profile durability tests, such as those conducted by the AK Operators Union, Local 47-74, brought these failures to a wide audience. After a 5,000-round test on an N-PAP resulted in a cracked receiver, the reviewer noted the relationship with Century Arms “deteriorated very quickly,” criticizing the importer for not appearing to use the failure data to improve the product.2
For the end-user, the distinction between a Serbian-made component and a U.S.-installed part was often unclear. The rifle was sold as a “Zastava,” and any failure, regardless of its specific origin within the complex supply and assembly chain, was attributed to the Zastava brand. This confusion of the Serbian manufacturer with the American importer and modifier cemented a market perception of questionable quality that overshadowed the reputation of Zastava’s military-contract firearms.1 The issues were not limited to a single generation; they spanned the Gen 1 PAPs with their single-stack bolts and reliability problems, the Gen 2 N-PAPs where receiver cracking was most prominent, and the Gen 3 O-PAPs.3
1.2 The Zastava USA Era (2019-Present): A Corporate-Led Renaissance
The turning point in Zastava’s U.S. market presence occurred in 2019 with the establishment of Zastava Arms USA. This strategic move saw the Serbian parent company take direct control of its brand and product in the world’s largest civilian firearms market.6 Operating from a facility in Illinois, Zastava Arms USA became the exclusive importer, responsible for distribution, 922(r) compliance, warranty service, repairs, and parts fulfillment.8
This was not merely a logistical shift but a deliberate, capital-intensive initiative to reclaim the brand’s narrative and directly address the quality control deficiencies of the past. By eliminating the “middleman meddling,” Zastava could ensure that the rifles reaching consumers were assembled and configured to their own standards.1 The establishment of a dedicated U.S. entity was a clear investment in quality control as the primary lever for brand rehabilitation. The company identified that the critical point of failure was the loss of control over the final product configuration in the U.S. and invested accordingly, betting that a demonstrably higher-quality product would justify its price point and rebuild consumer trust.
The flagship product of this new era is the ZPAP M70. This model represented a “serious glow-up” over the older PAPs, with significant upgrades that directly targeted the most common historical complaints.1 The result was a rifle lauded by reviewers as being “as close to its military roots as U.S. laws allow” and arguably the “nicest new AKs on the market”.1 The market perception shifted dramatically. Where forums once buzzed with complaints about Century-imported PAPs, they now feature widespread praise for the robustness and reliability of the ZPAP, with many reviewers concluding that the current Z-PAPs are the “highest quality semi-auto AKs Zastava have ever sent to the U.S.”.11 This corporate-led renaissance successfully repositioned the brand from a budget-tier option with questionable reliability to a premium import known for its durability.
Table 1: Comparative Analysis of Zastava Import Eras
Characteristic
Pre-2019 Era (Century Arms)
Post-2019 Era (Zastava Arms USA)
Primary Importer/Distributor
Century Arms
Zastava Arms USA
Key Models
N-PAP, O-PAP
ZPAP M70, ZPAP M90, ZPAP85/92
922(r) Compliance
Performed by Century Arms, often with U.S. aftermarket parts 1
Managed in-house by Zastava Arms USA 10
Standard Receiver Spec.
Primarily 1.0mm stamped; some O-PAPs had 1.5mm 13
Standardized 1.5mm stamped with bulged RPK-style trunnion 1
Standard Barrel Spec.
Typically non-chrome-lined 1
Standardized cold-hammer-forged, chrome-lined 1
Nature of Complaints
Systemic and major: cracked receivers, poor assembly, unreliable parts 2
Minor and cosmetic: stiff controls, loose screws, finish blemishes 16
Robust, reliable, “tank-like,” one of the best import AKs 1
Section 2: Technical Analysis of Reported Failures: Metallurgy, Mechanics, and Myth
A thorough engineering analysis of the reported failures is essential to move beyond anecdotal evidence and address the core of the user’s query regarding metallurgy and heat treatment. The evidence indicates that the most severe historical issues were the result of a confluence of mechanical forces and structural design choices, rather than a simple case of “soft metal.” Differentiating between systemic design flaws, isolated batch defects, and issues arising from aftermarket modifications provides a clearer picture of Zastava’s manufacturing quality over time.
2.1 Receiver Integrity: Analysis of Cracking and Deformation
The most serious allegation against Zastava firearms, and the one that has most damaged the brand’s reputation, is that of cracked receivers. These reports were most prevalent with the N-PAP series of rifles from the Century Arms import era. Online discussions and photographs consistently show the failure occurring at a specific, predictable location: the thin metal bridge of the receiver “right between the rear trunnion rivet and the little button that releases the dust cover”.2 The consistency of the failure location is a critical data point, as it strongly suggests a predictable stress concentration point rather than a random material flaw distributed throughout the steel.
The popular narrative that emerged in the firearms community was that Zastava used “soft metal” or had improper heat treatment on its commercial-line receivers. However, a more detailed analysis points to a systems engineering failure—a causal chain of mechanical events that overloaded a specific structural weak point. Multiple sources in the user community correctly identified contributing factors, speculating that the cracking was due to a combination of “less than adequate recoil springs coupled with overgassing”.3
This hypothesis is mechanically sound. An over-gassed AK system directs more high-pressure gas than necessary onto the piston head, accelerating the bolt carrier group rearward with excessive velocity and energy. Concurrently, a weak or worn-out recoil spring—with users reporting factory springs measuring below the minimum service length of 16 inches—provides insufficient resistance to this rearward travel.3 The result is a violent impact of the bolt carrier against the front face of the rear trunnion at the end of its stroke. This repeated, high-energy impact creates significant fatigue stresses. These stresses naturally propagate to the weakest point in the immediate vicinity of the impact: the cutout in the receiver for the dust cover locking mechanism. Over thousands of cycles, a fatigue crack would initiate at this stress riser and propagate until failure. The observation by AK Operators Union that a failed N-PAP receiver could be bent by hand after cracking suggests that the metal in that specific area had lost its temper due to the stress cycles, but this is a localized result of the failure, not necessarily the root cause for the entire receiver.2
The “soft metal” rumor is, therefore, an oversimplification of a more complex mechanical reality. The problem was not necessarily that the steel itself was fundamentally substandard, but that the system’s design parameters (gas port size, spring strength) and the receiver’s geometry (1.0mm thickness with a stress-inducing cutout) were mismatched, leading to a predictable structural failure.
The engineering choices made for the current-production ZPAP M70 corroborate this assessment. Zastava’s solution was not merely to change the steel’s heat treatment protocol; it was a comprehensive structural reinforcement. The standardization of the RPK-style 1.5mm thick receiver and the heavy-duty “bulged” front trunnion creates a much more rigid and durable platform capable of absorbing and distributing these forces far more effectively.1 This was a structural fix for a structural problem.
2.2 Component-Level Issues and Incompatibilities
Beyond the critical issue of receiver integrity, other reported problems can be parsed into distinct categories: verifiable manufacturing defects, known characteristics of the AK platform, and issues created by aftermarket modifications.
Manufacturing Defects: There is clear evidence of isolated, batch-specific quality control escapes from the Zastava factory. In one instance, Zastava “admitted fault due to faulty casting on a run of [gas] blocks,” which led to some components cracking.3 Similarly, users reported a batch of bolt carriers that were “cut really thin around the bottom of the bolt channel,” leading to a handful of fractures.3 These are undeniable manufacturing defects, but their limited scope suggests they were exceptions resulting from a temporary lapse in QC rather than a systemic design flaw or persistent issue with metallurgy.
Platform Characteristics: Certain “issues” are inherent to the Kalashnikov design or Zastava’s specific variant. For example, the deformation or “peening” of the bolt carrier tail where it is struck by the hammer is a common wear pattern on virtually every AK-platform rifle.3 Another example is the use of an unfinished, “in the white” bolt carrier, which is prone to surface rust if not kept properly lubricated.3 This is a material and finish choice, representing a maintenance consideration for the owner, rather than a defect.
Aftermarket Incompatibilities: The issue of carrier tail peening is a prime example of a standard platform characteristic being exacerbated into a significant problem by aftermarket parts. Users widely report that the peening is “made much worse” by popular American-made triggers, such as those from Tapco or ALG Defense.3 These triggers often use a harder steel for the hammer and feature a more acute contact angle compared to the original factory components. This mismatch in geometry and material hardness concentrates the force of the hammer strike on a smaller area of the carrier tail, accelerating wear and deformation.3 Attributing this accelerated wear solely to poor Zastava metallurgy is an inaccurate diagnosis; the root cause is an incompatibility between components from different manufacturers with different design specifications.
Table 2: Matrix of Reported Technical Issues and Resolutions
Technical Issue
Primary Affected Models
Suspected Engineering Cause(s)
Current Status in ZPAP Series
Receiver Cracking
N-PAP (Gen 2)
Over-gassing, weak recoil spring, and stress riser at dust cover lock on 1.0mm receiver.
Resolved. Standard 1.5mm bulged trunnion receiver is structurally superior and not prone to this failure mode.
Carrier Tail Peening
All models (platform-wide)
Normal wear from hammer impact; significantly exacerbated by aftermarket triggers (e.g., ALG) with harder steel and acute angles.
Still occurs as normal wear. Remains a consideration for users installing aftermarket triggers.
Cracked Gas Blocks
Isolated batches of ZPAP
Faulty casting in a specific production run, acknowledged by Zastava.
Resolved. Considered an isolated QC escape, not a current, ongoing issue.
Fractured Bolt Carriers
Isolated batches of ZPAP
Improper machining (“skinny carriers”) on a specific production run, resulting in thin walls.
Resolved. Considered an isolated QC escape, not a current, ongoing issue.
Barrel Corrosion
N-PAP, O-PAP
Non-chrome-lined barrels, requiring meticulous cleaning, especially with corrosive ammunition.
Resolved. ZPAPs feature chrome-lined, cold-hammer-forged barrels as standard.
Galling of Barrel/Trunnion
Anecdotal reports on M70s
Extremely tight press-fit during barrel installation, possibly related to material compatibility or tooling.
Not a widely reported issue on current ZPAPs; may be an occasional assembly anomaly.
Section 3: Zastava’s Remediation Strategy and Market Communications
Faced with a damaged reputation in its most important export market, Zastava Oruzje executed a deliberate, two-pronged strategy to remediate the quality concerns. The first prong involved tangible, product-based engineering improvements. The second involved a carefully managed corporate communications strategy to reshape the brand’s narrative. This combined approach was a classic case of “show, don’t tell,” where the company chose to let a demonstrably superior product, rather than apologies or explanations, redefine its market standing.
3.1 Product-Based Remediation: The ZPAP M70 as the Embodiment of the Fix
The most compelling evidence of Zastava’s commitment to fixing its quality issues is the ZPAP M70 rifle itself. The standard features of this new line of firearms serve as a point-by-point engineering rebuttal to the primary complaints leveled against the older PAP series.
The most critical upgrade was the standardization of the 1.5mm thick stamped receiver combined with a bulged, RPK-style front trunnion.1 This “beefed-up” construction, originally designed for the rigors of launching rifle grenades, provides immense structural integrity and directly counters the fatigue-related cracking seen on the previous 1.0mm receivers.1 This change alone effectively solved the single most damaging technical issue associated with the brand.
The second major upgrade was the adoption of chrome-lined, cold-hammer-forged barrels as a standard feature.1 While non-chromed barrels can offer a slight theoretical accuracy advantage, the U.S. market overwhelmingly prizes the corrosion resistance and longevity afforded by chrome lining, especially given the historical prevalence of corrosive-primed surplus ammunition.15 Zastava’s adoption of this feature was a direct response to consumer demand and a clear signal that it was listening to its customers, rectifying a long-standing drawback of its civilian-market rifles.11
Finally, the establishment of Zastava Arms USA allowed for direct oversight of the final assembly and quality control processes. This move was intended to eliminate the “sloppy assembly that had tarnished Century’s versions”.1 Reviews of new ZPAP rifles consistently praise the overall fit and finish, noting that the rivet work is clean and the wood and metal finishes are “excellent throughout”.7 By investing in these tangible product improvements and taking control of the final steps before sale, Zastava demonstrated its remediation strategy through action, not words.
3.2 Corporate Communications and Brand Management
Complementing the product improvements was a disciplined and forward-looking communications strategy. An analysis of Zastava Arms USA’s official website, product manuals, and news releases reveals a clear pattern: the company makes no mention of, or apology for, the quality issues of the Century Arms era.6 The past is not acknowledged because the strategy is to render it irrelevant.
Instead, all corporate messaging is focused on building a narrative of historical excellence, precision, and military-grade durability. Product manuals and website copy are replete with phrases emphasizing a “gunsmith tradition since 1853,” “materials of the highest quality,” and “meticulous attention to detail”.9 The company’s history is framed as the “cradle of Serbian industry,” with a legacy of winning medals at World Fairs in the 19th century.6 This messaging consciously links the current civilian products to a long and proud history of military manufacturing.
The company’s active blog and news section reinforces this narrative by focusing exclusively on the features, applications, and upgrade potential of its current products.21 Articles discuss topics like “Tuning Gas Systems,” “Best Loads for Chrome-Lined Barrels,” and “ZPAP M70 vs Other AK Variants,” all of which position the ZPAP as a high-quality, desirable firearm.21 Even the marketing for their “DRNCH” gun cleaner connects the product to its historical use in the Yugoslav People’s Army, further strengthening the “authentic military heritage” angle.6
This strategy effectively overwrites the old, negative narrative with a new, positive one built on the foundation of the improved ZPAP rifle. Zastava does not need to engage in debates about the failures of the N-PAP because they can simply point to the robust construction and positive reviews of the ZPAP. They let the new product do the talking.
Section 4: Current Quality Trends and Outlook (2020-2025)
The ultimate measure of Zastava’s remediation strategy is the quality of its current products and the corresponding sentiment in the marketplace. An analysis of user feedback from 2020 through mid-2025 reveals a clear and positive trend. The systemic, catastrophic failures of the past have been replaced by a class of minor, non-structural issues typical of mass-produced firearms, indicating that the underlying engineering problems have been solved.
4.1 Social Media and User Sentiment Analysis (2020-2025)
A survey of discussions on platforms like Reddit, firearms forums, and YouTube comment sections reveals a significant qualitative shift in the nature of user complaints regarding new Zastava firearms. Reports of cracked receivers, deformed pin holes, or other major metallurgical failures are virtually absent in discussions pertaining to ZPAP models manufactured and sold since 2019. The consensus among knowledgeable users is that the “cracked receiver thing came from the older NPAP and OPAP rifles”.3
In the place of these critical failures, current complaints about ZPAPs are of a much less severe nature, typically related to initial assembly, fit, and finish. These include:
Loose Components: Users have reported dust cover retaining buttons and stock bolts becoming loose over time, a minor issue easily rectified with thread-locking compound.16
Stiff Controls: New rifles are often reported to have very stiff safety selectors or lower handguard retaining levers, which typically “break in” and loosen up with use.17
Initial Break-in: Some new owners have reported initial feeding or cycling issues that were resolved after a thorough cleaning to remove the thick factory packing grease or cosmoline, followed by a break-in period of a few hundred rounds.25
Cosmetic Blemishes: Minor cosmetic issues, such as visible weld marks on the receiver or small scratches from the assembly process, are sometimes noted but are generally accepted by the AK community as normal for the platform’s manufacturing style.17
Canted Sights: Occasional reports of canted front sight blocks still surface, which remains a common quality control challenge across nearly all manufacturers of AK-pattern rifles.26
Despite these minor issues, the overwhelming sentiment in the market from 2020 to 2025 is positive. The ZPAP M70 is consistently described as a “tank,” “robust,” “reliable,” and one of the “best AK’s out there currently” for its price point.1 The shift in the nature of complaints from “my rifle is broken and unsafe” to “my safety lever is a bit stiff” represents a monumental improvement in product quality and consistency.
4.2 Final Assessment and Industry Outlook
The evidence gathered and analyzed leads to a clear conclusion: the persistent concerns about Zastava receiver metallurgy and heat treatment are a legacy of the pre-2019 importation era. The systemic engineering and quality control failures that led to receiver cracking on N-PAP models have been comprehensively addressed by the design of the ZPAP series and the direct market oversight of Zastava Arms USA. For current production rifles, the “soft metal” narrative is effectively debunked.
It is plausible that production variables within the Zastava Oruzje factory in Kragujevac, Serbia, still exist. Forum discussions allude to a “local myth” that firearms destined for the demanding U.S. market receive a higher level of quality control, and also mention the possibility of “worn out machinery and underpaid workforce” leading to “occasional quality slips”.28 If true, this context makes the role of Zastava Arms USA in performing final quality assurance checks even more critical to ensuring a consistent and reliable product for the American consumer.
A significant “reputation lag” exists in the market, where the negative perception generated by N-PAP failures a decade ago still influences the purchasing decisions of less-informed buyers today. The user’s query is itself evidence of this lag. However, for the informed analyst or consumer, the trend is unambiguously positive. The risk profile for a new Zastava rifle has fundamentally changed. The primary concern is no longer the potential for catastrophic, systemic failure. Instead, it has shifted to the possibility of encountering minor assembly or fit-and-finish issues that are common in the industry and often rectifiable by the end-user.
Outlook: The quality of Zastava’s AK-platform rifles has dramatically improved. The underlying engineering and metallurgical problems appear to be solved. The forward-looking challenge for Zastava Arms USA is not one of fundamental design, but of operational execution. Continued focus on final inspection and assembly quality control will be key to eliminating the minor complaints that, while not safety-critical, detract from the premium, high-reliability brand image the company has successfully worked to build since 2019. A prospective buyer’s due diligence should now focus less on the fear of a cracked receiver and more on a practical, pre-purchase inspection for things like a straight front sight and properly secured components.
Growing up in the 70s and 80s, I was patriotic and was mainly interested in American firearms. In 2006, I read an article about building your own AK by the late great Steven Matthews and I changed course dramatically. I’ve always liked history, machines and firearms and started reading books about Mikhail Kalashnikov and his AK designs. My business, Ronin’s Grips, was born along the way.
I though it might be interesting to share how the Kalashnikov design has proliferated around the world with everyone. Thus, I did some digging to create this.
1. Introduction
The Kalashnikov assault rifle, first introduced in the Soviet Union shortly after World War II, represents one of the most influential and widely proliferated firearm designs in history.1 Its simple design, rugged reliability, and ease of mass production contributed to its adoption by numerous armed forces globally and its appearance in countless conflicts.1 The original AK-47 and its subsequent iterations, including the AKM, AK-74, the AK-100 series, and the modern AK-12, have not only served as the standard armament for many nations but have also inspired a vast array of locally produced variants and derivatives worldwide.2
This report documents the countries that have manufactured Kalashnikov-inspired rifle designs. It aims to provide a comprehensive overview of the specific models produced, their calibers, approximate dates of production, and, where available, estimated production numbers. The scope encompasses rifles directly based on the Soviet/Russian lineage—AK-47, AKM, AK-74, AK-100 series, and AK-12—as well as notable derivatives that share the core Kalashnikov operating principle.
While extensive research has been conducted, it is important to acknowledge that precise production figures for many Kalashnikov-type rifles, particularly those from less transparent or state-controlled manufacturing environments, are often estimates or remain unavailable in publicly accessible records. Nevertheless, this report endeavors to present the most accurate and detailed information possible based on the available data.
2. The Soviet/Russian Kalashnikov Lineage: The Foundation for Global Variants
The evolution of the Kalashnikov rifle series within the Soviet Union and subsequently the Russian Federation laid the groundwork for its global adoption and adaptation. Each major iteration introduced refinements in design, manufacturing, or caliber, reflecting changing military doctrines and technological advancements. Understanding this original lineage is crucial for contextualizing the myriad of international variants.
The AK-47, designed by Mikhail Kalashnikov, was officially adopted by the Soviet military in 1949, though its design work began earlier, around 1947.1 Initial production started in 1948.3 The rifle was chambered for the intermediate 7.62x39mm M43 cartridge, a defining feature that offered a balance between the power of full-sized rifle cartridges and the controllability of submachine gun rounds.3 Early models featured milled receivers (Type 1, Type 2, Type 3), which contributed to their durability.3 The AK-47 was designed for simplicity, reliability in adverse conditions, and ease of mass production using methods available in the post-war Soviet Union.3 Its long-stroke gas piston system became a hallmark of the Kalashnikov design.3 Approximately 75 million AK-47s are estimated to have been built, with the broader Kalashnikov family reaching around 100 million units.3 Key manufacturers included the Izhevsk Machine-Building Plant (Izhmash), now Kalashnikov Concern.3
Soviet AK-47, Type 2A made from 1951 to 1954/55. Image source is Wikimedia.5
2.2. AKM (Avtomat Kalashnikova Modernizirovannyj)
Introduced in 1959, the AKM was a modernized version of the AK-47, also designed by Mikhail Kalashnikov’s team.1 A pivotal change was the introduction of a stamped sheet-metal receiver, which significantly reduced manufacturing costs, lightened the rifle, and simplified mass production compared to the milled receiver of the AK-47.1 The AKM retained the 7.62x39mm caliber and the long-stroke gas piston system.4 Other improvements included a new muzzle brake (slant compensator) to reduce muzzle climb during automatic fire, an improved bayonet, and often, laminated wood furniture.6 Production of the AKM in the Soviet Union ran from 1959 to 1977, with an estimated 10,278,300 units built by Izhmash and the Tula Arms Plant.6 The AKM became the most prevalent variant of the Kalashnikov series globally, largely due to its widespread production and export by the Soviet Union and its allies.7
Photo of an AKM, manufactured in 1975. Picture taken in Managua, Nicaragua in a local firing range. Image source: Wikimedia.9
The AK-74 was developed in the early 1970s and officially adopted in 1974 as a successor to the AKM.10 The most significant change was the adoption of a new, smaller caliber, high-velocity cartridge, the 5.45x39mm M74.4 This shift mirrored developments in NATO countries towards smaller caliber service rifles, aiming for lighter ammunition, flatter trajectory, and reduced recoil, thereby improving hit probability.10 The AK-74 retained the basic Kalashnikov long-stroke gas piston operating system and many AKM components, with some early models reportedly being re-barreled AKMs.10 It featured a distinctive, prominent muzzle brake to further mitigate recoil and muzzle rise.10 Manufactured by Izhmash (now Kalashnikov Concern) and Tula Arms Plant, production of the original AK-74 ran from 1974 to 1991, with over 5 million units built.10 The modernized AK-74M, featuring a side-folding polymer stock and a universal scope rail, entered full-scale production in 1991 and continues to be produced.4
A left side view of a 5.45mm Soviet AK-74 assault rifle, top, and a 5.45mm RPK-74 light machine gun, bottom. The RPK-74 is the light machine gun version of the AK-74 and has a longer, heavier barrel, a larger magazine, and an attached bipod. Image Source: Wikimedia.12
2.4. AK-100 Series (Export-Oriented Evolution)
Introduced in 1994, the AK-100 series, developed by Izhmash (now Kalashnikov Concern), is based on the AK-74M design but was primarily intended for export markets.13 This family of rifles is characterized by black polymer furniture, side-folding polymer stocks, and the use of AK-74M internal systems, ensuring a high degree of parts interchangeability.13 A key strategic development with the AK-100 series was the offering of multiple calibers to appeal to a wider international customer base. This demonstrated a shift from primarily arming domestic and allied forces with a standardized caliber to a more market-driven approach in the post-Cold War era. The availability of rifles chambered in NATO standard ammunition alongside traditional Soviet calibers was a significant step in maintaining the Kalashnikov’s global relevance. Production numbers for the entire series are substantial, with Deagel.com indicating over 30,000 produced (though this seems low for the entire series and may refer to a specific timeframe or subset) 14, while other sources suggest much larger overall Kalashnikov production from Izhevsk which would include these models.15 The AK-100M/200 series, introduced around 2017, represents further modernization with enhanced ergonomics and Picatinny rails for accessory mounting.13
AK-101: An export version of the AK-74M chambered in the NATO standard 5.56x45mm cartridge.4 Production began around 1995.16 Over 270,500+ have been built (this number likely includes other AK-100 variants or is a broader production figure).16
AK-102: A compact carbine version of the AK-101, also chambered in 5.56x45mm NATO, with a shorter 314mm barrel.4 Production: 2000-present.17 Indonesia reportedly acquired 5,000 AK-101 and AK-102 rifles.17
AK-103: A modernized AKM chambered in 7.62x39mm M43, incorporating AK-74M features like polymer furniture and a side-folding stock.4 Production: 1994-present, with over 250,000+ built.18 It has seen significant export success, including licensed production in Venezuela and Ethiopia.4
AK-103 with GP-34 Grenade Launcher. Image Souce: Wikimedia19
AK-104: A compact carbine version of the AK-103, chambered in 7.62x39mm M43, with a 314mm barrel.4 Production began in 1994.20
AK-104 assault rifle at Engineering Technologies 2012. Image Source: Wikimedia.21
AK-105: A compact carbine version of the AK-74M, chambered in 5.45x39mm M74, with a 314mm barrel. It is used domestically by Russian forces as a shorter alternative to the full-sized AK-74M, filling a role similar to the older AKS-74U but with improved ballistics due to a slightly longer barrel and more modern features.4 Production began in 1994.23
AK-105 at the International Military-Technical Forum “Army” in 2022. Image Source: Wikimedia23
2.5. AK-12 Series (Fifth Generation)
The AK-12 represents the latest generation of Kalashnikov rifles, designed by a team including Vladimir Zlobin and Sergey Urzhumcev under the Kalashnikov Concern (formerly Izhmash).24 The project began in 2011, with serial production commencing in 2018 after undergoing trials and refinements.24 Over 150,000 units have been built, with a significant contract for 150,000 AK-12 and AK-15 rifles for the Russian Ministry of Defence between 2019 and 2021.24
The AK-12 series incorporates significant ergonomic and tactical improvements over previous generations. These include an integrated Picatinny rail on the receiver cover and handguard for mounting optics and accessories, a redesigned adjustable and side-folding telescoping stock, an improved pistol grip, and a new rotary diopter rear sight.24 Early versions featured a two-round burst mode, which was later omitted in the 2023 upgrade based on operational feedback.24 This iterative development, even post-introduction, underscores a responsiveness to user needs and battlefield experiences, a characteristic of successful military firearm evolution. The multi-caliber approach initiated with the AK-100 series continues, broadening the family’s potential applications and export appeal.
Models & Calibers:
AK-12 (6P70): Chambered in 5.45x39mm.4
AK-15 (6P71): Chambered in 7.62x39mm.4
AK-19: Chambered in 5.56x45mm NATO.4
AK-308: A battle rifle variant chambered in 7.62x51mm NATO.4
Carbine versions include the AK-12K and AK-15K.24
AK-12 from the Army 2020 Expo. Image Source: Wikipedia. 24
This is an AK-12 at the Army 2022 Expo. Compare it to the 2020 photo above from 2020 Expo. Note the different buttstock, handguard and pistol grip. The rear sight is more compact and the trigger guard was enalged to better accomodate gloves. Image Source: Wikimedia
This photo shows us the four variants – from the top: AK-12, AK-15, AK-19, and the AK-308 at the bottom. This was taken at the Army 2021 Expo. Image Source: Wikimedia
The Soviet/Russian Kalashnikov lineage showcases a remarkable evolution. The initial AK-47 prioritized ruggedness and mass producibility with its milled receiver. The AKM’s transition to a stamped receiver was a critical development, drastically reducing production costs and time, which was instrumental in its massive global proliferation.1 This ability to simplify for mass production without sacrificing core reliability is a key factor in the Kalashnikov’s enduring presence. The AK-74’s adoption of the 5.45x39mm cartridge reflected a broader military trend towards smaller, higher-velocity rounds, aiming for improved soldier loadout and hit probability.10 The AK-100 series marked a strategic pivot towards export markets, offering NATO calibers alongside traditional Soviet ones, demonstrating adaptability to global demands.13 Finally, the AK-12 series integrates modern modularity (Picatinny rails, adjustable furniture) while retaining the fundamental Kalashnikov operating system, indicating an effort to keep the platform competitive in the 21st century.24 The production numbers themselves tell a story: massive outputs of AK-47s and AKMs during the Cold War underscored Soviet military doctrine and global influence, while the export focus of the AK-100 series and the recent ramp-up of AK-12 production reflect current geopolitical realities and domestic military requirements.3 Throughout this evolution, a degree of parts and magazine compatibility (within calibers) has often been maintained, simplifying logistics for users of multiple Kalashnikov generations.18
3. Global Production of Kalashnikov-Inspired Rifles: A Country-by-Country Breakdown
The simplicity, reliability, and Soviet policy of sharing technical data packages with allied nations led to the widespread licensed and unlicensed production of Kalashnikov-type rifles across the globe. Many countries adapted the design to their specific manufacturing capabilities and operational requirements, resulting in a diverse array of variants.
3.1. Albania
Manufacturer(s): KM Poliçan & Gramësh factories; State Arsenal.27
Models & Details:
Automatiku Shqiptar 1978 model 56 (ASH-78 Tip-1): A copy of the Chinese Type 56 (itself an AK-47 derivative), chambered in 7.62x39mm. It often lacks magazine well dimples and features unique selector markings “A” (automatic) and “1” (semi-automatic).4 Production ran from 1978 to 1993, with over 100,000 estimated to have been made.27
ASH-78 Tip-2: A heavy-barreled version, analogous to the RPK.4
ASH-78 Tip-3: Equipped with grenade launching capability.4
Tipi 1982 (ASH-82): Generally a copy of the AKS-47 (underfolding stock).4 However, some rifles designated ASH-82 and dated 1981 are fixed-stock Type 56 copies with extended barrels and grenade spigots, while others dated 1986 are Type 56 copies with underfolding bayonets.31 Caliber: 7.62x39mm.
Various other AKMS-pattern rifles, some with short barrels similar to the Soviet AKS-74U, were also produced.4
Notes: Albanian Kalashnikov variants were developed during a period of national isolation and were heavily influenced by Chinese designs due to close ties after Albania’s split from the Soviet sphere.27 Albania notably supplied 30,000 ASH-78 rifles to the Afghan National Army.27
3.2. Argentina
Manufacturer(s): FMAP-DM (Dirección General de Fabricaciones Militares).33
Model: FARA 83 (Fusil Automático República Argentina), also known as FAA 81.
Caliber: 5.56x45mm NATO.33
Production Dates: Designed in 1981, initial production ran from 1984 to 1990, with a brief resumption in 1990 before cancellation due to economic difficulties.33
Estimated Numbers Produced: 1,193 in the initial run; total production numbers are unknown but limited.33 Some sources suggest “a little over 1000” were made in total.34
Notes: The FARA 83 was primarily inspired by the Italian Beretta AR70/223, particularly in its magazine and some design features.33 It utilizes a gas-operated reloading system.33 While listed as a “similar rifle” to Kalashnikovs in some sources due to design influences from the Galil and Valmet Rk 62 4, its arguably more of an influenced design rather than a direct derivative. It features a folding buttstock and tritium night sights.33
3.3. Armenia
Manufacturer(s): Not specified, but likely domestic state facilities.
Model: K-3
Caliber: 5.45x39mm.4
Production Dates: First displayed in 1996, suggesting production around that period.4
Estimated Numbers Produced: Not specified.
Notes: The K-3 is a bullpup rifle based on the AKS-74U, designed for compactness.4
Wikimedia Photo Link:(A specific Wikimedia Commons link for the Armenian K-3 was not found in the provided snippets; image search required for report inclusion if available.)
3.4. Azerbaijan
Manufacturer(s): Ministry of Defence Industry of Azerbaijan (MODIAR).37
Models & Details:
Khazri: A licensed copy of the Russian AK-74M assault rifle. Caliber: 5.45x39mm. Production commenced in 2011 under a 10-year renewable license from Rosoboronexport, with a potential total production volume of up to 120,000 units for domestic use.4
Wikimedia Photo Link: 39 A representative image of an AK-74M could be used if a specific Khazri image is unavailable.
EM-14: An AK-101 clone. Caliber: 5.56x45mm NATO.37
AZ-7.62: An AK-103 clone. Caliber: 7.62x39mm.37
Notes: Azerbaijan’s production focuses on modern Kalashnikov variants for its armed forces.37
Chinese Type 56: Utilized by Bangladeshi forces, likely imported or assembled locally. Caliber: 7.62x39mm.4
BD-08: Listed as a “Similar rifle”.4 This is likely a locally produced version or derivative of the Chinese Type 81 assault rifle, as BOF manufactures the Type 81 under license.40 Caliber: 7.62x39mm.
Production Dates/Numbers: Specific dates and numbers for local Type 56 usage or BD-08/Type 81 production are not detailed in the provided sources.
Notes: The Type 81, while visually similar to AKs and sharing the same caliber, employs a distinct short-stroke gas piston system.41
Wikimedia Photo Link:(For BD-08, a specific image search is required. For Type 56, see China section.)
3.6. Bulgaria
Manufacturer(s): Arsenal AD (Kazanlak, formerly State Factory 10).4
Models & Details (Examples):
AKK / AKKS: Copies of the Soviet Type 3 AK-47 (milled receiver) and AKS (folding stock). Caliber: 7.62x39mm. Assembly from Soviet parts began in the early 1960s, with full licensed domestic production by the mid-1960s.4
AK-47M1: A Type 3 AK-47 variant with black polymer furniture.4
AR-M1 Series: A modernized derivative of the milled receiver AKK/AK-47, incorporating features from the AK-74 such as a flash suppressor and polymer stock. It is offered in both 5.56x45mm NATO and 7.62x39mm calibers. Production: 1998-present.4
Various AKS-74U pattern carbines, such as the AKS-74UF and the AR-SF (chambered in 5.56x45mm NATO).4
Licensed production of the AK-105 is also noted.22
Estimated Numbers Produced: Arsenal (Factory 10) is estimated to have produced over 1,000,000 Kalashnikov-type rifles in total.15 A specific model, the SA M-7 Classic (a clone of the AK-47 Type 3 by Arsenal), had a limited run of only 243 units.28
Notes: Bulgaria is a significant and highly regarded producer and exporter of Kalashnikov rifles. Mikhail Kalashnikov himself reportedly stated that the finest AKs were made in Bulgaria.45 The AR-M1 series is notable for retaining the durable milled receiver design.44
Manufacturer(s): Not specified; likely imported rather than locally manufactured in significant numbers.4
Models Used: Chinese Type 56, Soviet AK-47, and AKM.4
Caliber: Primarily 7.62x39mm.
Production Dates/Numbers: Not applicable for local production based on available information.
Notes: Cambodia has historically relied on external sources for its Kalashnikov-pattern rifles.
Wikimedia Photo Link:(Refer to links for Type 56 from China, AK-47 and AKM from Soviet Union/Russia sections.)
3.8. China
Manufacturer(s): State Factory 66, Norinco (China North Industries Group Corporation), PolyTech Industries.15
Models & Details:
Type 56 Assault Rifle: A licensed copy of the Soviet AK-47. Early versions (from 1956) featured a milled receiver (based on AK-47 Type 3), while mid-1960s production shifted to a stamped receiver, similar to the AKM.47 Chambered in 7.62x39mm. Many Type 56 rifles are distinguished by an integral folding spike bayonet (often called a “pig sticker”).48
Type 81 Assault Rifle: While visually resembling the AK series and chambered in 7.62x39mm, the Type 81 utilizes a distinct short-stroke gas piston operating system (similar to the SKS) and is not a direct Kalashnikov derivative.4 Production: 1983-present. Numbers: Approximately 400,000 of the basic Type 81 rifle.40This rifle is noted as distinct due to its operating system.
Type 84S: An AK variant chambered in 5.56x45mm NATO, visually similar to the AK-74.11
Norinco AK-2000: A copy of the Russian AK-101.16
CS/LR11, SDM AK-103: Clones of the Russian AK-103.18
Notes: China has been one of the largest producers and exporters of Kalashnikov-type rifles globally, with its Type 56 being particularly widespread.
3.9. Croatia
Manufacturer(s): Končar-Arma d.o.o (a subsidiary of ARMA-GRUPA Corporation).4
Model: APS-95
Caliber: 5.56x45mm NATO.51
Production Dates: Designed in 1993, produced from 1993/1995 until at least 2007.4
Estimated Numbers Produced: Produced in small quantities; large-scale procurement was halted due to budgetary constraints.51 One source mentions “a little over 1000” for a different rifle (Argentine FARA 83) in a similar limited production context, but this is not a direct figure for the APS-95.34
Notes: The APS-95 was developed based on the South African Vektor R4 (itself a Galil derivative, thus tracing lineage to the Kalashnikov via the Finnish RK 62). It features a stamped receiver (unlike the milled receiver Galil/R4), an integrated 1.5x optical sight in the carrying handle, and a distinctive handguard and front sight assembly.51
3.10. Cuba
Manufacturer(s): Unión de Industrias Militares (UIM) is the state entity responsible for military production.4
Model(s): Copies or derivatives of the AKM.4 Specific Cuban model designations are not widely publicized.
Caliber: Primarily 7.62x39mm.
Production Dates/Numbers: Details regarding the start dates, production volume, or specific factories involved in Cuban AKM production are not specified in the provided materials.53 Cuba was a known recipient of Soviet arms and also played a role in the supply chain for other groups in Latin America.54
Notes: Cuba has a long history of utilizing Kalashnikov-pattern rifles.
Wikimedia Photo Link:(Specific images of Cuban-manufactured AKM variants are not readily available in the snippets; a general AKM image may be used as a placeholder if necessary, noting the Cuban context.)
Notes: The Vz. 58 is often mistaken for a Kalashnikov variant due to its external resemblance and shared cartridge. However, it employs a significantly different operating mechanism: a short-stroke gas piston and a striker-fired mechanism, as opposed to the Kalashnikov’s long-stroke piston and rotating hammer.4 Its parts are not interchangeable with AK-pattern rifles.56Therefore, it is not a Kalashnikov-inspired design in terms of its core operating system and will be noted as such in the summary table.
Vz.58 Rifle – while it looks similar to an AK, it is not. Image Source: Wikipedia.
3.12. East Germany (German Democratic Republic)
Manufacturer(s): VEB Geräte- und Sonderwerkzeugbau Wiesa (GSW); Volkseigener Betrieb Fahrzeug- und Jagdwaffenfabrik “Ernst Thälmann” Suhl.15
Models & Details:
MPi-K / MPi-KS: Licensed copies of the Soviet AK-47 and AKS (folding stock), respectively. Caliber: 7.62x39mm. Production began around 1957-1959 and continued into the mid-1960s.4
MPi-KM: A licensed copy of the Soviet AKM, featuring a stamped receiver and often distinctive plastic furniture (buttstock, pistol grip, handguards) with a “pebble” or “dimpled” texture. Caliber: 7.62x39mm. Production: Circa 1966 into the 1980s.4
MPi-KMS-72: A version of the MPi-KM with a side-folding wire stock.4
MPi-AK-74N: A licensed copy of the Soviet AK-74. Caliber: 5.45x39mm. Production: 1983-1990.4
MPi-AKS-74N: Side-folding stock version of the MPi-AK-74N.4
MPi-AKS-74NK: Carbine version of the MPi-AKS-74N.4
Estimated Numbers Produced: Nearly 4 million MPi series rifles in total were produced by East Germany.60 Other estimates suggest 2 million from the Wiesa factory alone 15, or 3-4 million MPi-K/MPi-KM rifles.58 Initial production was slow; the 1958 target of 30,000 rifles took nearly three years to achieve.60
Notes: East Germany was a significant producer and exporter of Kalashnikov rifles. Production ceased with the reunification of Germany in 1990.60
MPi-KM assault rifles are in service of Vietnam People’s Army and used for training. Image Source: Wikimedia.62
3.13. Egypt
Manufacturer(s): Maadi Company for Engineering Industries (Factory 54).2
Models & Details:
AK-47 copies: Egypt began producing AK-47 pattern rifles from 1958 onwards.4
Misr: An AKM copy. Caliber: 7.62x39mm.4
Maadi ARM: An AKM copy, often seen with a distinctive laminated wood stock and pistol grip. Caliber: 7.62x39mm.
Other Maadi variants include rifles resembling the RPK (long barrel).
Production Dates: AK-47/AKM type production commenced in 1958.15 Semi-automatic “MISR S/A” rifles imported into the US bear manufacture dates from the late 1990s (e.g., 1997-1999).65
Estimated Numbers Produced: Not specified in the provided sources. The Maadi factory also produced around 70,000 Hakim rifles (a different Swedish-designed system) in the 1950s-60s.64
Notes: Egyptian Maadi rifles are well-known among collectors, particularly in the United States.
3.14. Ethiopia
Manufacturer(s): Gafat Armament Engineering Complex (GAEC), part of the Metals and Engineering Corporation (METEC).4
Models & Details:
AK-47 copies: GAEC initially produced AK-47 automatic rifles after its establishment in January 1986.67 Caliber: 7.62x39mm.
Et-97/1: This is the local designation for the AK-103 assault rifle, produced under license. Caliber: 7.62x39mm.4
Production Dates: GAEC began AK-47 production in 1986.67 Licensed production of the AK-103 is ongoing.14
Estimated Numbers Produced: Not specified.
Notes: There are reports suggesting North Korean advisors assisted Ethiopia with establishing its small arms manufacturing capabilities.67
3.15. Finland
Manufacturer(s): Valmet; SAKO.2
Models & Details:
RK 60 (Rynnäkkökivääri 60): The initial version of the Finnish Kalashnikov derivative, produced in 1960. It was internally almost a copy of the AK-47 but featured a metallic buttstock, plastic handguard and pistol grip, and notably lacked a trigger guard for easier use with winter mittens.68 Caliber: 7.62x39mm.
RK 62 (Valmet M62): The main production model, designed between 1957-1962 and produced from 1965 to 1994. It is a highly regarded AK-47 derivative known for its quality and accuracy, featuring a milled receiver, distinctive tubular stock on early models (later polymer), unique front sight/gas block combination, and aperture rear sight on the receiver cover.2 Caliber: 7.62x39mm.
Estimated Numbers Produced: Over 350,000 units of the M62 (RK 62) were jointly manufactured by Valmet and Sako.68
Valmet M78: A light machine gun variant based on the RK 62 design.4
RK 95 TP (Sako M95): A further modernized version of the RK 62, featuring a side-folding stock and other improvements. Caliber: 7.62x39mm. Approximately 20,000 were made.4
Notes: Finnish Kalashnikov derivatives are renowned for their high manufacturing quality and design improvements over the basic Soviet models. The RK 62 notably served as the design basis for the Israeli Galil assault rifle.69
3.16. Hungary
Manufacturer(s): Fegyver- és Gépgyár (FÉG).4
Models & Details:
AK-55: A domestic copy of the Soviet 2nd Model AK-47 (milled receiver). Caliber: 7.62x39mm. Production started around 1956.4
AKM-63 (AMD-63 in the US market): A modernized version of the AK-55, featuring a distinctive sheet metal handguard with an integrated forward pistol grip, and a fixed wooden stock. Caliber: 7.62x39mm. Production estimated from circa 1963 to 2000.4
AMD-65M (Automata Módosított Deszantfegyver): A shorter-barreled version of the AKM-63 designed for paratroopers and armored vehicle crews, featuring a side-folding single-strut stock and often a shorter 20-round magazine. Caliber: 7.62x39mm. Production: 1965-1980.4 “Tens of thousands” were produced.73
This team has the distinctive AMD-65M rifles -note how Hungary used leather slings also. Image Source: Wikimedia
AK-63F / AK-63D (Military designations AMM / AMMSz): These models are closer copies of the Soviet AKM and AKMS (stamped receiver), featuring traditional wooden or later polymer furniture, but often retaining the straight pistol grip of the AKM-63. Caliber: 7.62x39mm. Production: 1977–2001.4 Approximately 7,700 AK-63s were modernized to the AK-63MF standard for the Hungarian Armed Forces.72 Around 7,000 semi-automatic SA-85M versions were imported into the US before the 1989 import ban.72
NGM-81: An export version chambered in 5.56x45mm NATO.4
Estimated Numbers Produced: Specific overall numbers for FÉG’s AK production are not available in 15 (“N/A”). However, “tens of thousands” of AMD-65s were made 73, and around 11,000 AK-63s were reportedly exported to Central America during the 1980s.72
Notes: Hungarian Kalashnikovs often feature unique ergonomic (or not so ergonomic_ and design choices, particularly the early models like the AKM-63 and AMD-65.
3.17. India
Manufacturer(s): Ordnance Factories Board (OFB); Armament Research and Development Establishment (ARDE) for design; Indo-Russia Rifles Private Limited (IRRPL) for AK-203 production.2
Models & Details:
INSAS (Indian Small Arms System) Rifle: While incorporating features from other rifles, the INSAS is primarily based on the Kalashnikov (AKM) operating system, utilizing a long-stroke gas piston and rotating bolt.78 Caliber: 5.56x45mm NATO. Development began in the mid-1980s, it entered service in 1990, with mass production starting in 1997.4 The rifle has faced criticism for reliability issues, particularly in extreme conditions.79 Design influences include the Galil and, at least indirectly, the Valmet RK 62..
AK-103: India has arranged for licensed production of the AK-103.13
AK-203: A significant contract was signed for the licensed production of over 600,000 AK-203 rifles in India by IRRPL, a joint venture between Indian OFB and Russian Kalashnikov Concern. An additional 70,000 rifles were to be imported directly from Russia.13 Caliber: 7.62x39mm.
Trichy Assault Rifle: An Indian-produced clone of the Bulgarian AR-M1 series (itself an AK derivative).44
Notes: India’s adoption of the INSAS marked a move to a NATO standard caliber, though its performance has been controversial. The recent large-scale adoption and licensed production of the AK-203 indicates a renewed reliance on the Kalashnikov platform.
KLS: A copy of the AK-47/AKM with a fixed wooden stock. Caliber: 7.62x39mm.4
KLF: A copy of the AKS/AKMS with an underfolding metal stock. Caliber: 7.62x39mm.4
KLT: A copy of the AKMS with a side-folding metal stock. Caliber: 7.62x39mm.4
AK-103 copies: Iran produces licensed versions designated AK-133 and unlicensed copies called KL-133. Additionally, some AK-103s were directly imported from Russia.13
Production Dates/Numbers: Specific production dates and quantities for the KLS/KLF/KLT series are not detailed, though these rifles typically feature seven-digit serial numbers.80
Notes: Iranian Kalashnikov variants are often based on Soviet and Chinese models.
3.19. Iraq
Manufacturer(s): Al-Qadissiya Establishments.4
Models & Details:
Tabuk Sniper Rifle: A designated marksman rifle (DMR) chambered in 7.62x39mm. It is a modified version of the Yugoslav Zastava M76 sniper rifle, which itself is an AK-pattern derivative. The Tabuk features a longer barrel than a standard AKM and is designed for semi-automatic fire only.4
Tabuk Assault Rifle: These are direct clones of the Yugoslavian Zastava M70 series of assault rifles (which are AKM derivatives), available with fixed or underfolding stocks. Caliber: 7.62x39mm.4
Production Dates: Production of the Tabuk Sniper Rifle began in 1978 and is reported as ongoing.84 The Tabuk Assault Rifles (M70 clones) were produced from 1978 into the 1990s.83
Estimated Numbers Produced: Not specified.
Notes: The machinery and technical assistance for establishing Iraqi Kalashnikov production were provided by Zastava Arms of Yugoslavia.84
Manufacturer(s): Israel Military Industries (IMI), later privatized as Israel Weapon Industries (IWI).2
Models & Details:
IMI Galil: An assault rifle family developed in the late 1960s and adopted in 1972. The Galil’s design is heavily based on the Finnish RK 62 (Valmet M62), which is a high-quality AK-47 derivative. The first Galils were even manufactured using Valmet Rk 62 receivers.69 It features the Kalashnikov long-stroke gas piston system.86
Calibers: Primarily 5.56x45mm NATO and 7.62x51mm NATO.70
Production: IMI produced the Galil from 1972 to 1998; IWI continues to export and develop versions.70
Variants: ARM (Automatic Rifle Machine-gun, with bipod and carry handle), AR (Automatic Rifle), SAR (Short Automatic Rifle).70
IWI Galil ACE: A modernized and redesigned version of the Galil, introduced in 2008. It retains the core Galil/Kalashnikov mechanism but incorporates modern materials, Picatinny rails, and improved ergonomics.4
Calibers: 5.45x39mm, 5.56x45mm NATO, 7.62x39mm, and 7.62x51mm NATO.87
Estimated Numbers Produced: Specific numbers for the original Galil are not provided. The Galil ACE production is ongoing.
Notes: The Galil is a highly respected Kalashnikov derivative, known for its reliability, particularly in harsh desert environments, and improved ergonomics over basic AK models. It has been licensed for production to several other countries, including Italy, Colombia, South Africa (as the R4), and Vietnam.85
Comparison of the Hungarian AMD-65 (top), the American M16A1 with A2 handguard (middle) and the Israeli Galil ARM (bottom). Image Source: Wikipedia.
3.21. Italy
Manufacturer(s): Vincenzo Bernardelli S.p.A..4
Models: Bernardelli VB-STD / VB-SR
Caliber: Likely 5.56x45mm NATO, as Bernardelli produced the IMI Galil (which was available in this caliber) under license.86
Production Dates/Numbers: Not specified in the provided materials.
Notes: The Bernardelli VB-STD and VB-SR are listed as “similar rifles” to the Kalashnikov family.4 Given that Bernardelli held a license to produce the Israeli Galil 86, these models are almost certainly Galil derivatives, and therefore share the Kalashnikov-derived operating mechanism. The VB-SR is specifically noted as a modified Galil.
3.22. Nigeria
Manufacturer(s): Defence Industries Corporation of Nigeria (DICON).4
Models & Details:
OBJ-006: A Nigerian copy of the AK-47 assault rifle. Caliber: 7.62x39mm. Production began in 2006.4
Licensed Polish Beryl: DICON has acquired rights to manufacture a copy of the Polish FB Kbs wz. 1996 Beryl assault rifle.90 Caliber: 5.56x45mm NATO.
Production Dates/Numbers: OBJ-006 production started in 2006; specific numbers are not available. Timelines and quantities for the Beryl production are also not specified. DICON has partnered with a firm called D7G to enhance local defense production, including establishing AK-47 assembly lines.89
Notes: Nigeria is working to increase its indigenous small arms manufacturing capacity.
Wikimedia Photo Link (OBJ-006):93
3.23. North Korea
Manufacturer(s): State Arsenals, including Factory 61 and Factory 65 in Chongjin.4
Models & Details:
Type 58 (A/B): A direct copy of the Soviet AK-47, specifically the Type 3 with a milled receiver. The Type 58A is the fixed-stock version, and the Type 58B (or Type 58-1) is the underfolding stock version (AKS equivalent).4 Caliber: 7.62x39mm. Production: 1958–1968.94
Estimated Numbers Produced: Approximately 800,000 units.94
Type 68 (A/B): A copy of the Soviet AKM (stamped receiver) and AKMS (stamped receiver, underfolding stock). Caliber: 7.62x39mm. Production began in 1968 to replace the more time-consuming Type 58.4 The Type 68-1 features a weight-reducing holed underfolding stock.94
Type 88: A copy of the Soviet AK-74 (primarily AKS-74 with side-folding stock). Caliber: 5.45x39mm.4 The Type 88 carbine is noted as a localized copy of the AK-105.23
Notes: Initial North Korean production of the Type 58 utilized Soviet-supplied components before transitioning to fully domestic parts.94 North Korean Kalashnikovs have been exported to various countries and non-state actors.94 Identifying marks include a five-point star in a circle and model designations in Hangul script.94
Manufacturer(s): Pakistan Ordnance Factories (POF) for some models; numerous small workshops in the Khyber Pass region for unlicensed copies.4
Models & Details:
Khyber Pass Copies: A general term for a wide variety of often crudely made, unlicensed copies of Kalashnikov assault rifles (AK-47, AKM, and others). Quality and specifications can vary significantly. Caliber: Typically 7.62x39mm.4
POF PK-10: Listed as a POF product.4 Specific details are sparse in the provided material.
POF PK-21: An unlicensed clone of the Russian AK-103, manufactured by Pakistan Ordnance Factories.18 Caliber: 7.62x39mm.
Production Dates/Numbers: Production of Khyber Pass copies has been ongoing for decades and is decentralized, making numbers impossible to track. Specific production dates and numbers for POF’s PK-10 and PK-21 are not detailed.
Notes: The Khyber Pass region is notorious for its artisanal firearms production, including many Kalashnikov variants. POF produces a range of military hardware under license and develops indigenous designs.
Wikimedia Photo Link:(No specific links for PK-10/PK-21 found. Khyber Pass copies are too varied for a single representative image. An image of a POF-produced rifle would require a specific search.)
pmK (kbk AK) / pmKS (kbk AKS): Licensed copies of the Soviet AK-47 and AKS (folding stock). Caliber: 7.62x39mm. Production started in 1957.4
kbk AKM / kbk AKMS: Licensed copies of the Soviet AKM and AKMS. Caliber: 7.62x39mm. Production: Circa 1965 until 1992, with a short additional run in 2000 primarily from leftover parts.4
kbk wz. 1988 Tantal: An assault rifle chambered in 5.45x39mm, based on the AK-74 but with distinct Polish design features, such as a unique fire selector mechanism allowing for semi-auto, full-auto, and 3-round burst fire, and a side-folding wire stock. Production: 1989–1994.4
Estimated Numbers Produced: Approximately 25,000 units.100
skbk wz. 1989 Onyks: A compact carbine version of the Tantal.4
kbs wz. 1996 Beryl: An assault rifle chambered in 5.56x45mm NATO, developed to meet NATO standards and replace the Tantal. Production: 1997–present.4
Polish Beryl wz. 96 (version C), made by Fabryka Broni “Łucznik”. Image Souce: Wikipedia92
kbk wz. 1996 Mini-Beryl: A compact carbine version of the Beryl.4
Estimated Numbers Produced: For the Tantal, around 25,000 units.100 The Radom factory had a capacity of 70,000 rifles per year in the late 1980s/early 1990s.99
Notes: Polish Kalashnikov derivatives are generally well-regarded. The Tantal and Beryl represent significant indigenous developments on the Kalashnikov platform.
3.26. Romania
Manufacturer(s): Cugir Arms Factory (now part of ROMARM), with some limited production outsourced to Uzina Mecanica Sadu.4
Models & Details:
PM md. 63 (Pistol Mitralieră model 1963): A licensed copy of the Soviet AKM. A distinctive feature of many md. 63 rifles is a forward-pointing laminated wooden vertical foregrip integrated into the lower handguard. Caliber: 7.62x39mm. Production: 1963–present.4
PM md. 65 (Pistol Mitralieră model 1965): The underfolding stock version, equivalent to the AKMS. To accommodate the folding stock, the vertical foregrip, if present, is often canted rearwards or is absent on some sub-variants. Caliber: 7.62x39mm. Production: 1965–present.4
A Romanian soldier armed with a PM md. 65 in 1989. Image Source: Wikipedia
PA md. 86 (Pușcă Automată model 1986): A Romanian derivative of the Soviet AK-74, chambered in 5.45x39mm. It features a distinctive side-folding wire stock (similar to East German designs) and sometimes a 3-round burst capability. It retained some AKM elements like the gas block design.4 Production: Late 1980s–present.
PM md. 80: A short-barreled AK variant, often with a unique side-folding stock and a combined front sight/gas block.4
PM md. 90: A 7.62x39mm rifle that incorporates the side-folding wire stock of the PA md. 86.4 There is also a short-barreled carbine version of the md. 90.
Estimated Numbers Produced: “Several million” total PM md. 63/65 rifles have been produced.105 Over 400,000 were acquired by the Romanian armed forces.105
Notes: Romanian Kalashnikovs are widely exported, often under the designations AIM (for fixed stock md. 63 types) and AIMS (for folding stock md. 65 types).106 Versions marked with a “G” on the trunnion were semi-automatic rifles produced for the Romanian Patriotic Guards and are well-known in the US parts kit market as “Romy G’s”.104
US Air Force personnel with AIM md. 65s during a training exercise in 1985. Image Source: Wikipedia.
3.27. Serbia (formerly Yugoslavia)
Manufacturer(s): Zastava Arms (Kragujevac).4
Models & Details (Examples):
M64: An early Yugoslav Kalashnikov derivative, which led to the M70.
M70 (Automatska Puška M70): The standard issue rifle of the Yugoslav People’s Army, based on the AK-47/AKM design but with several distinct Yugoslav features. These often include a thicker RPK-style receiver (1.5mm stamped or milled on early versions), a longer handguard with three cooling slots, an integral grenade launching sight, and typically a non-chrome-lined barrel.4 Caliber: 7.62x39mm. Production: 1970–present.83
M72: A light machine gun version, analogous to the RPK, based on the M70 design.4
M76: A designated marksman rifle chambered in 7.92x57mm Mauser, based on the long Kalashnikov action.4
M77: A battle rifle chambered in 7.62x51mm NATO, also using the Kalashnikov action.4
M85: A compact carbine chambered in 5.56x45mm NATO.4
M90: An assault rifle chambered in 5.56x45mm NATO.4
M92: A compact carbine version of the M70, chambered in 7.62x39mm (similar to AKS-74U in role).4
M21: A modern assault rifle system chambered in 5.56x45mm NATO, incorporating Picatinny rails and modern furniture, but still based on the Kalashnikov operating system.4
Notes: Yugoslavian/Serbian Kalashnikov derivatives are known for their robust construction and unique features tailored to Yugoslav military doctrine, such as integrated rifle grenade launching capabilities. They often differ significantly in receiver construction and furniture from Soviet models. We have posts on the M70 and M72 families of rifles.
3.28. South Africa
Manufacturer(s): Lyttelton Engineering Works (LIW), later Armscor, now Denel Land Systems.2
Models & Details:
Vektor R4: A licensed variant of the Israeli IMI Galil ARM (which is itself a derivative of the Finnish RK 62, tracing back to the AK-47). The R4 was adapted for South African conditions, featuring a longer stock made of high-strength polymer and other polymer components to reduce weight. Caliber: 5.56x45mm NATO. It entered service with the South African Defence Force (SADF) in 1980.2
Estimated Numbers Produced: Approximately 420,000 units.109
Vektor R5: A carbine version of the R4, similar to the Galil SAR, with a shorter barrel and handguard. It lacks a bipod.85
Vektor R6: An even more compact carbine version designed for paratroopers and vehicle crews.85
Truvelo Raptor: Mentioned as a “similar rifle” with AK-basis.4 Specific details are sparse in provided material.
Notes: The R-series rifles are a clear example of the Kalashnikov design’s adaptability, modified through several iterations (AK -> RK 62 -> Galil -> R4) to suit specific national requirements.
Manufacturer(s): Military Industry Corporation (MIC).4
Model: MAZ
Caliber: Assuming its basis on the Chinese Type 56 4, that strongly suggests the 7.62x39mm cartridge.
Production Dates/Numbers: Not specified in the provided materials.110
Notes: The MAZ rifle is reported to be based on the Chinese Type 56 assault rifle and manufactured using Chinese-supplied machinery.4
3.30. Turkey
Manufacturer(s): Sarsılmaz Silah Sanayi A.Ş..4
Models & Details:
SAR 15T: Described as an AK-47 clone.4 Caliber is likely 7.62x39mm given its AK-47 clone designation.
SAR 308 (V2): Also listed as an AK-47 clone.4 The “308” in its name might suggest the 7.62x51mm NATO (.308 Winchester) cartridge, which would make it more of a battle rifle or DMR if based on the Kalashnikov action, rather than a standard assault rifle. 4 lists it as “SAR 15T/308(V2)”. Further clarification on caliber would be needed for precise classification.
Production Dates/Numbers: Not specified. Sarsılmaz is a major Turkish arms manufacturer founded in 1880 and exports to over 80 countries.112
Notes: Sarsılmaz produces a wide range of firearms for military, police, and civilian markets.
3.31. Ukraine
Manufacturer(s): State Space Agency of Ukraine (for Vepr); Interproinvest (IPI) / Krasyliv Assembly Manufacturing Plant (for Malyuk).4
Models & Details:
Vepr (“Wild Boar”): A bullpup conversion of the AK-74 assault rifle. Designed in 1993-1994 and announced in 2003. It retains the AK-74’s operating mechanism and 5.45x39mm caliber.4
Malyuk (“Baby” or “Vulcan”): Another Ukrainian bullpup assault rifle based on the Kalashnikov operating system (derived from AKM/AK-74 and lessons from the Vepr project). Development started in 2005, it debuted publicly in 2015, and has been in service with Ukrainian special forces since 2017.4
Calibers: Available in 5.45x39mm, 7.62x39mm, and 5.56x45mm NATO.117
Production Dates/Numbers: Specific production numbers and detailed timelines are not extensively provided.
Notes: Both the Vepr and Malyuk represent efforts to modernize existing Kalashnikov-pattern rifles into more compact bullpup configurations, suitable for modern combat scenarios, particularly in confined spaces. The Malyuk notably features ambidextrous controls and improved ergonomics.117
3.32. United States
Manufacturer(s): Numerous commercial and custom manufacturers, including:
Notes: The vast majority of US-produced Kalashnikov-pattern firearms are semi-automatic versions intended for the civilian market, complying with US firearms regulations (e.g., 922R compliance for imported parts). Quality and adherence to original Kalashnikov specifications can vary widely among manufacturers.
3.33. Venezuela
Manufacturer(s): CAVIM (Compañía Anónima Venezolana de Industrias Militares).4
Model: AK-103 (produced under license from Russia)
Caliber: 7.62x39mm.4
Production Dates: The license agreement was made in 2006. Factories were officially opened in 2012, and initial deliveries of CAVIM-made AK-103s to the Venezuelan Army occurred in 2013. Full-scale production was planned to commence by the end of 2019, but the project faced significant delays and challenges, including issues with the Russian contractor and allegations of fraud, forcing CAVIM to attempt to complete construction themselves. The current operational status and output of the plant are unclear.119
Estimated Numbers Produced: The plant was planned to have an annual production capacity of approximately 25,000 rifles.119 However, actual numbers produced are not specified and are likely much lower than initially planned due to the aforementioned issues.
Notes: Venezuela also planned to produce over 50 million rounds of ammunition annually at an associated plant.119 The project has been a subject of scrutiny due to delays and costs.
3.34. Vietnam
Manufacturer(s): Z111 Factory.4
Models & Details:
AKM-1 / AKM-VN: Local designations for AKM pattern rifles, possibly upgraded or locally assembled versions of the Soviet AKM [4 (STL-1A from AKM)]. Caliber: 7.62x39mm.
TUL-1: A light machine gun, likely based on the RPK.4 Caliber: 7.62x39mm.
STL-1A: An upgraded version of older AKM rifles, featuring new polymer handguards, a folding buttstock, an ergonomic pistol grip, an updated muzzle brake, and compatibility with M203-type grenade launchers.122 Caliber: 7.62x39mm.
STV Series (Súng Trường Việt Nam): A family of modern assault rifles based on the IWI Galil ACE design (itself a Kalashnikov derivative), chambered in 7.62x39mm and using standard AK-47/AKM magazines. These were revealed around 2019-2020 and are becoming standard issue for the Vietnam People’s Army.4
STV-215: Carbine version with a 215mm barrel.121
STV-380: Standard rifle version with a 380mm barrel.121
STV-410: Rifle with a 410mm barrel and adjustments to handguard/gas block for grenade launcher compatibility.121
STV-416: Similar to STV-410 but lacks Picatinny rails.121
Production Dates/Numbers: Production of older AKM types and upgrades is ongoing. The STV series entered production more recently (post-2019). Specific numbers are not provided.
Notes: Vietnam has a long history of using Kalashnikov-pattern weapons and has more recently moved towards producing modern derivatives like the Galil ACE-based STV series. Z111 Factory also produces the Galil ACE 31/32 under license.4
4. Summary Table of Kalashnikov-Inspired Rifle Production by Country
The following table summarizes the countries identified as producers of Kalashnikov-inspired rifle designs, along with key details for representative models. It is important to note that “Estimated Numbers Produced” are often broad estimates or refer to total production of all AK types by a specific factory or country, rather than individual models, unless specified. “N/A” indicates data was not available in the provided sources.
Country
Representative Model(s)
Caliber(s)
Manufacturer(s)
Production Dates (Period)
Estimated Numbers Produced
Notes
Soviet Union / Russia
AK-47
7.62x39mm M43
Izhmash (Kalashnikov Concern), Tula Arms Plant
1948–Present (family)
~75 million (AK-47s), ~100 million (Kalashnikov family total) 3
Palmetto State Armory, Kalashnikov USA, Century Arms
Ongoing commercial
Varies by manufacturer
Semi-auto civilian market versions.
Venezuela
AK-103 (licensed)
7.62x39mm
CAVIM
From 2012 (initial deliveries)
Planned 25,000/year; actual output unclear due to delays 119
Licensed Russian AK-103, production issues.
Vietnam
STV-380 / STV-215
7.62x39mm
Z111 Factory
c. 2019–Present
Not Specified
Based on Galil ACE design.
Photo Sources
Main photo of Mikhail Kalashnikov superimposed over a map with countries using or licensing firearms based on his designs highlighted was generated by Ronin’s Grips using Sora. It is release to the creative commons as long as blog.roningsgrips.com is cited as the source.
The majority of photos were obtained from Wikimedia and Wikipedia and are unaltered. Links to their respective pages are included and they remain the copyright of their respective authors.
Zastava Arms, or Zastava oružje (Застава оружје) as it is known in its native Serbia, stands as a monumental testament to the nation’s industrial and military history. With origins stretching back to the mid-19th century, this Kragujevac-based manufacturer has not only equipped generations of soldiers but has also been a significant contributor to Serbia’s (and formerly Yugoslavia’s) defense industry and a notable exporter on the global stage.1 Its story is one of resilience, adaptation, and an enduring role in the complex tapestry of Balkan and European history.
A Tale of Two Zastavas: Arms and Automobiles
It is crucial at the outset to distinguish Zastava Arms from its erstwhile sibling, Zastava Automobiles (Zastava Automobili / Застава Аутомобили). While both giants of Serbian industry sprang from the same foundational industrial complex in Kragujevac (Крагујевац), their paths diverged. Zastava Arms remained true to its martial origins, focusing on ordnance and firearms, whereas Zastava Automobiles carved its niche in vehicle manufacturing.1 The original cannon-casting plant, established in 1853, is the direct progenitor of the Zastava Arms we know today.1 Although an automobile section was inaugurated within the broader Zastava enterprise in 1904, and the entire complex was later known as Zavodi Crvena Zastava (Заводи Црвена Застава, Red Flag Factories) after World War II, a pivotal decision in 1953 saw a significant portion of the Zastava plant dedicate itself exclusively to automobile production. This bifurcation led to the emergence of Zastava Automobiles and Zastava Arms as distinct, specialized entities.1 This report will navigate the rich history of Zastava Arms.
The parallel development and eventual separation of Zastava’s arms and automotive divisions reflect a broader pattern in state-led industrialization efforts, particularly in nations striving for self-sufficiency. Military requirements often served as the initial catalyst for heavy industry, with civilian applications and diversification emerging as secondary, albeit significant, outcomes. The foundational enterprise was a cannon foundry, driven by the Principality of Serbia’s defense needs.1 Early automotive activities also had military links, such as assembling Ford and Chevrolet trucks for the Yugoslav Army.8 This trajectory suggests that national security imperatives often paved the way for broader industrial capabilities. The eventual split signifies that both sectors achieved a scale and specialization warranting independent operation, but their shared genesis underscores a strategic, state-influenced approach to building national industrial capacity.
The remarkable longevity of Zastava Arms, enduring through multiple state formations, devastating wars, international sanctions, and profound political transformations, highlights not only its intrinsic resilience but also its perceived indispensability to the Serbian state throughout its various iterations. The company’s existence spans the Principality of Serbia, the Kingdom of Serbia, the Kingdom of Yugoslavia, the Socialist Federal Republic of Yugoslavia (SFRY), the Federal Republic of Yugoslavia (FRY), the State Union of Serbia and Montenegro, and the modern Republic of Serbia.4 It has weathered the storms of World War I, World War II (during which it sustained heavy damage), the turbulent dissolution of Yugoslavia, crippling UN sanctions, and direct NATO bombardment.4 Such persistence through extreme adversity implies a consistent level of state support, a deep-rooted institutional adaptability, and a continuous demand for its products, underscoring its strategic importance.
Table 1: Key Milestones in Zastava Arms History
Year
Milestone
1851
Decision rendered to relocate the Gun Foundry from Belgrade to Kragujevac (Крагујевац).3
1853 (Oct 27)
First cannon barrels cast in Kragujevac; official founding of Zastava Arms, initially as the Topolivnica (Тополивница, Cannon Foundry).1 The broader institution was also known as the Vojno-Tehnički Zavod (Војно-технички завод, Military Technical Institute).8
1880
Major Kosta Milovanović designs the Mauzer Milovanović M.1880 repeating rifle, popularly known as the Kokinka (Кокинка).10
1889
The Gun Foundry wins several medals at the Large World Fair in Paris.3
c. 1924-1928
Ministry of the Interior signs contracts with FN Herstal (Belgium) for licensed production of M24 series Mauser bolt-action rifles; new factory for rifle and ammunition production established.4
Post-WWII
The factory complex is renamed Zavodi Crvena Zastava (Заводи Црвена Застава, Red Flag Factories).1
1948
Production of the M48 bolt-action rifle, based on the Mauser design, commences.3
1953
Significant portion of Zastava plant pivots to automobile production, leading to separation of Zastava Arms and Zastava Automobiles. Zastava Arms begins production of the M53 Šarac (Шарац) machine gun.1
1964-1970
Development of indigenous Kalashnikov-pattern assault rifle begins, culminating in adoption of Zastava M70 by Yugoslav People’s Army (JNA) in 1970.4
1990s
United Nations imposes economic sanctions on FR Yugoslavia due to Yugoslav Wars, impacting production and exports.4
1999
Zastava factory complex in Kragujevac sustains damage during NATO bombing.5
2005
Significant restructuring commences; Memorandum of Understanding signed with Remington Arms (USA) for export.4
2019
Zastava Arms USA established as exclusive importer for US market.4
Forging an Arsenal: From Topolivnica to the Great War (1851 – 1918)
The Birth of Serbian Arms Industry in Kragujevac
The genesis of Zastava Arms lies in a strategic decision made in 1851 by the Principality of Serbia to relocate its Gun Foundry from Belgrade to the more centrally located city of Kragujevac.3 This move was a clear statement of intent: to establish an indigenous capability for arms production, thereby reducing reliance on foreign powers. On October 27, 1853, this ambition materialized with the casting of the first cannon barrels at the new facility.1 This date is not merely a historical footnote; it is celebrated as the official founding day of Zastava Arms and marks the dawn of Serbia’s domestic arms industry. The initial output consisted of four four-pound cannons and two short howitzers.4
The foundry was initially known as the Topolivnica (Тополивница, Cannon Foundry).1 The critical task of organizing these early operations and training the first generation of Serbian arms craftsmen fell to a French engineer, Charles Loubry (referred to as Lubry in some Serbian sources), who oversaw the casting of a battery of six-pounder cannons. After Loubry’s departure in 1854, Milutin Jovanović assumed leadership, progressing to the production of twelve-pounder cannons.14
The Kragujevac Cannon Foundry in its working days, originally built in 1856. The drawing is from Wikimedia – the exact date and author are unknown. It was contributed to Wikimedia by SimonKTemplar
The establishment and early development of Zastava Arms were direct consequences of Serbia’s pressing need for military self-reliance in a volatile geopolitical neighborhood. This drive for sovereignty in defense procurement shaped its initial trajectory and institutional character, with the choice of Kragujevac being a deliberate strategic move for a national arsenal. The official narrative emphasizes the goal of achieving Serbia’s “own production of arms and equipment” 3, breaking dependence on foreign suppliers. The era was marked by frequent regional conflicts and the overarching influence of larger European powers, making an independent arms source vital for the Principality, and later Kingdom, of Serbia.
Institutional Framework and Early Technological Prowess
The Topolivnica was intrinsically linked to, and indeed formed the core of, the Vojno-Tehnički Zavod (Војно-технички завод, Military Technical Institute or VTZ) in Kragujevac.8 The VTZ itself was established by a decision of the Serbian government in 1850, with construction spanning from 1851 to 1853.14
The Kragujevac facility rapidly became a beacon of technological advancement in 19th-century Serbia. It housed the nation’s first steam engines, witnessed the first electric light (the first electric bulb in Serbia was illuminated in the Čaurnica / Чаурница, Cartridge Casing Plant, a building within the VTZ complex, in 1884), established the first formal technical school for industrial training, and implemented the first recognized quality control systems.3 This commitment to quality and innovation garnered early international acclaim when the Gun Foundry was awarded several medals at the prestigious Large World Fair in Paris in 1889.3 Between 1856 and 1860, the facilities underwent significant upgrades, enabling the plant to produce weapons with full parts interchangeability, a hallmark of modern manufacturing.4 The Vojno-Tehnički Zavod was more than just an arms factory; it served as a significant catalyst for broader industrial and technological modernization within Serbia. The documented introduction of Serbia’s “first steam engines, first electric light, first technical school, first quality system” at the VTZ 3 highlights its role as an industrial vanguard. The lighting of the first electric bulb in Serbia within the VTZ complex 14 is a symbolic marker of this pioneering status. This indicates that the investment in defense production had spill-over effects, driving technological diffusion and contributing to the overall modernization of the Serbian economy and society.
Pioneering Firearms: From Cannons to the Kokinka Rifle
While cannons were the initial focus, the evolving nature of warfare demanded modern infantry firearms. By 1878, the Serbian military recognized that its existing “Piboduša“ Model 1870 Peabody rifles, with their large 14.9mm caliber, were becoming obsolete, prompting a concerted effort to modernize its armaments.4
Following a research project and competitive tender in 1879, a new rifle design emerged. In 1880, Serbian Major Kosta “Koka” Milovanović, a key figure in Serbian ordnance, developed an updated version of the Mauser Model 1871 bolt-action rifle. This rifle, chambered in a unique 10.15x63mmR Serbian caliber and featuring Milovanović’s innovative “progressive rifling” (where the grooves reduced in diameter from breech to muzzle), became Serbia’s first domestically designed repeating rifle.4
Known officially as the Mauzer Milovanović M.1880, it earned popular monikers such as the “Mauser-Koka” or, more affectionately, the „Kokinka“ (Кокинка).4 While initially manufactured in Germany by Mauser (as the Mauser-Milovanović M1878/80), Zastava Arms is also listed as a manufacturer, suggesting later production or assembly in Kragujevac.15 Approximately 110,000 of these rifles entered the Serbian arsenal and saw their first major combat use in the Serbo-Bulgarian War of 1885.15 The Old Foundry Museum (Muzej Stara Livnica / Музеј Стара Ливница) in Kragujevac prominently features this historic rifle.24 Zastava’s early operational model, characterized by the assimilation of advanced foreign technology (French engineering expertise for cannons, German Mauser rifle designs) coupled with indigenous innovation (Milovanović’s progressive rifling), established a foundational pattern of pragmatic technological development. The engagement of French engineer Charles Loubry for cannon production and training 14 demonstrates an openness to leveraging external expertise. The Mauser-Koka, while based on a German design, incorporated unique Serbian modifications 10, showcasing adaptive innovation. This blend of acquiring proven foreign technologies and adapting them to specific national requirements, while simultaneously nurturing local talent, proved to be a highly effective strategy for a smaller nation seeking to build a credible defense industry.
Arming the Nation: The Balkan Wars and World War I
The Mauser-Koka rifles, including variants converted around 1907 in Kragujevac to fire the 7x57mm Mauser cartridge from a 5-shot magazine (these conversions often referred to as Đurić Mausers / Ђурић-Маузер), were the mainstay of the Serbian infantry during the Balkan Wars (1912-1913) and World War I (1914-1918).15
The Vojno-Tehnički Zavod in Kragujevac served as the primary arsenal, responsible for producing and maintaining weapons for the Serbian army throughout these critical conflicts.3 On the eve of the Great War, Kragujevac, with a population of nearly 17,000, was home to seven industrial enterprises, with the VTZ being by far the most significant.26
During World War I, Serbia faced severe ammunition shortages, a common problem for many belligerents. The crisis was overcome through a combination of factors: crucial aid from Entente allies (primarily France and Russia), ammunition “borrowed” from then-neutral Greece, and, critically, the maximized efforts of domestic production at the Kragujevac works, where ingenuity and intense labor were applied to produce as many shells as possible.28 The Serbian army even had a permanent delegation at the Schneider factory in Creusot, France, to oversee ordnance matters.28 The co-location of a technical school with the foundry 3 points to a far-sighted strategy for developing the human capital necessary to sustain and advance this critical industry.
Interwar Growth and Technological Assimilation (1919 – 1939)
Post-WWI Rejuvenation and Expansion
Following the devastation of World War I and the creation of the Kingdom of Serbs, Croats, and Slovenes (later Yugoslavia), the Vojno-Tehnički Zavod (VTZ) in Kragujevac embarked on a period of significant reconstruction and modernization. The museum guide’s reference to “VTZ između dva rata | Obnova” (VTZ between the two wars | Restoration) underscores this phase of rebuilding and renewed development.3
The factory underwent substantial expansion. By the late 1930s, on the eve of World War II, it had transformed into a veritable “industrial giant,” employing a workforce of nearly twelve thousand individuals and operating approximately ten thousand machines.3 This scale made it one of the largest and most important industrial enterprises in the Balkans. The massive expansion of Zastava’s workforce and machinery during this period cemented its role as a cornerstone of the regional economy in Kragujevac and a significant contributor to national employment and industrial output. Such a large workforce indicates that the factory was a primary economic engine for Kragujevac and the surrounding Šumadija (Шумадија) region. The demand for skilled and semi-skilled labor would have spurred vocational training and created a substantial industrial working class, extending its impact far beyond purely military considerations.
Strategic Alliances: FN Herstal and the Yugoslav Mauser M24
A pivotal development in the interwar period was the establishment of a close partnership with the renowned Belgian arms manufacturer, Fabrique Nationale d’Herstal (FN Herstal). Between 1924 and 1925, the Ministry of the Interior of the Kingdom of Yugoslavia concluded significant contracts with FN Herstal.4
These agreements facilitated the licensed production of the M24 series bolt-action rifles, a Yugoslav variant of the Mauser 98 system, chambered in the standard 7.92x57mm Mauser caliber.4 Yugoslavia became a major adopter and producer of this Mauser pattern, which was a proven and respected military design.11
Yugoslavian M1924 Mauser. Photo obtained from Wikimedia. Author is The Swedish Army Museum.
To accommodate this large-scale production, a new, modern factory dedicated to the manufacture of rifles and infantry ammunition was constructed in Kragujevac. Ammunition production commenced on March 22, 1928, followed by rifle production on October 15, 1928—a date chosen to coincide with the 75th anniversary of the first cannon casting at Kragujevac, symbolizing continuity and progress.4
The M24 rifle became a standard infantry weapon. Notable variants included the Sokolski karabin M.1924 (Соколски карабин М.1924, Sokol carbine M.1924), a slightly shorter version designed for youth paramilitary training and target practice, and the Jurišna puška M.1924 ČK (Јуришна пушка М.1924 ЧК, Assault rifle M.1924 ČK), designed for specialized assault units, featuring a bent bolt handle and additional sling swivels.16 Bayonets produced for these rifles at the Kragujevac arsenal were typically marked “BT3” (VTZ Cyrillic).30
The interwar era was transformative for Zastava, marking its maturation into a large-scale industrial enterprise capable of mass-producing modern weaponry. This was achieved through a deliberate strategy of acquiring proven foreign technologies via licensing agreements. The contracts with FN Herstal for the M24 Mauser rifle were not merely for a design blueprint but involved establishing comprehensive production lines for both rifles and ammunition.4 This implies a significant transfer of manufacturing technology and quality control processes from a leading European arms maker, allowing for rapid modernization of the Yugoslav military’s arsenal.
Diversification through Czechoslovakian Licenses
Beyond the Belgian collaboration, Zastava also looked to other advanced European arms industries for technology. In 1930, the factory secured a license from Czechoslovakia to produce 26 mm M 1929 signal pistols.4
Furthering this relationship, in July 1936, Zastava obtained a license from the prominent Czechoslovakian arms manufacturer Zbrojovka Brno (Збројовка Брно) to manufacture their highly regarded ZB vz. 26 light machine gun. This weapon, chambered in 7.92x57mm Mauser, was designated the M 1937 in Yugoslav service.4 Approximately 5,000 of these light machine guns were produced by Zastava.11 This strategy of “technology assimilation” allowed the Kingdom of Yugoslavia to equip its forces with reliable, contemporary weapons relatively quickly, enhancing its defense posture in an increasingly unstable Europe.
Nascent Automotive Activities
While this report focuses on Zastava Arms, it is pertinent to note that the broader Zastava industrial complex in Kragujevac also began to engage in automotive assembly during this period, primarily for military needs. In 1930, Ford trucks were assembled for the Yugoslav Army, and in 1939, assembly of Chevrolet military trucks commenced.8 These early forays into vehicle production laid the groundwork for what would eventually become the separate entity of Zastava Automobili.
Under Fire: Zastava Arms in World War II (1939 – 1945)
Cessation of Operations under Occupation
The outbreak of World War II and the subsequent Axis invasion of Yugoslavia in April 1941 brought a sudden and brutal halt to the burgeoning operations at the Vojno-Tehnički Zavod in Kragujevac. Production ceased as the country was overrun and occupied.8
The city of Kragujevac, home to this vital arsenal, suffered grievously under occupation. A particularly horrific event was the Kragujevac Massacre of October 20-21, 1941, where German occupation forces, as a reprisal for partisan attacks, executed thousands of civilian men and boys from the city and surrounding areas.31 While the sources do not explicitly state that Zastava workers were singled out, the massacre decimated the local male population from which the factory drew its workforce, casting a dark shadow over the city and the plant.
Wartime Damage and Destruction
Throughout the war, Zastava Arms (then VTZ) sustained heavy damage.3 As a key military-industrial asset, it would have been a strategic target for various warring factions.
Liberation and Swift Resumption of Production
The city of Kragujevac was liberated from Axis occupation on October 21, 1944, by Yugoslav Partisan forces.4 Demonstrating its critical importance to the newly emerging Yugoslav authorities, the Zastava weapons factory was rapidly repaired and brought back into working order within a matter of months following liberation.4
Production recommenced almost immediately. The first firearm to be developed and produced in this new post-liberation phase was the 9mm M 1944 B2 submachine gun, a design initiated in the very same year as the liberation, 1944.4 This quick turnaround underscores the urgency of re-establishing arms production.
The alacrity with which the Zastava factory was repaired and production restarted post-liberation, even amidst the widespread chaos and devastation of war’s end, underscores its paramount strategic value to the nascent communist-led Yugoslav state. This urgency was likely driven by the immediate need to arm the victorious Partisan forces, consolidate control, and lay the foundations for national defense in a volatile post-war European landscape. The phrases “repaired to working order within months” and “production began shortly after” 4 signify a high-priority effort. The immediate development of the M 1944 B2 submachine gun 4 points to a clear focus on equipping forces for ongoing or anticipated needs. This mirrors the factory’s original founding principle: the imperative of indigenous arms production for national security.
The wartime experience of occupation, the brutal Kragujevac Massacre, and the extensive damage to the factory likely had a profound psychological and strategic impact, further solidifying Yugoslavia’s post-war commitment to military self-reliance. The trauma of events like the Kragujevac Massacre 31 and the vulnerability exposed by “heavy damage” 4 would have served as powerful motivators to ensure future defense capabilities were domestically controlled. This may have influenced design philosophies towards weapons that were robust, reliable, and suitable for mass production, as seen in some later Zastava products like the M70 rifle, known for its ruggedness.21
The Red Star Rises: Zavodi Crvena Zastava in SFR Yugoslavia (1945 – 1991)
A New Name for a New Era: Zavodi Crvena Zastava
Following World War II and the establishment of the Socialist Federal Republic of Yugoslavia (SFRY) under Marshal Tito, the Zastava industrial complex in Kragujevac was nationalized and renamed Zavodi Crvena Zastava (Заводи Црвена Застава), meaning “Red Flag Factories”.1 This symbolic renaming, utilizing a potent communist emblem, reflected the new socialist political order and the factory’s integration into the state-controlled economy, emphasizing its role in serving the collective and the Jugoslovenska Narodna Armija (JHA / Југословенска народна армија, ЈНА, Yugoslav People’s Army).4
Iconic Firearms Production
The post-war era saw Zastava produce some of its most iconic and widely recognized firearms, becoming a cornerstone of Yugoslav defense and a significant exporter.
M48 Rifle: Building on its Mauser expertise, Zastava began production of the 7.92x57mm Mauser Model 1948 rifle.3 This rifle, based on the earlier M24 and the German Kar98k, became the standard service rifle of the JNA from the early 1950s until it was gradually replaced by the M59/66 semi-automatic rifle.38 Several variants were produced, including the M48 (all machined parts), M48A (incorporating some stamped parts like the magazine floor plate to speed production and lower cost), M48B (additional stamped parts, intended for export), and M48BO (bez oznake / без ознаке, unmarked, for export).11
M53 Šarac (Шарац) Machine Gun: In 1954, Zastava commenced production of the 7.9mm M53 Šarac machine gun.4 This weapon was a near-identical copy of the formidable German MG42 general-purpose machine gun from World War II. Yugoslavia utilized captured German machinery and technical data to produce the M53, retaining the original 7.92x57mm Mauser caliber, which remained in widespread Yugoslav service alongside Soviet calibers.12 A key modification was a reduction in the cyclic rate of fire to around 950 rounds per minute, compared to the MG42’s 1,200 RPM, making the M53 more controllable.12 Captured MG42s refurbished to this standard were designated M53/42.39
PAP M59 Semi-Automatic Rifle: As infantry doctrine evolved, Zastava began batch production of the 7.62x39mm Poluautomatska puška M59 (Полуаутоматска пушка M59, Semi-automatic rifle M59), commonly known as the PAP M59, in 1964.4 This rifle was a Yugoslav-produced version of the Soviet SKS carbine. A notable variant, the M59/66, incorporated an integral 22mm NATO-standard grenade launcher and a flip-up grenade sight.11
M70 Assault Rifle Family: Perhaps Zastava’s most famous product line, the M70 assault rifle family, emerged from Yugoslavia’s independent military development path. Development of an automatic rifle based on the Kalashnikov (AK-47) system began in 1964, initially designated the M67 in 1967.4 The Zastava M70, an unlicensed derivative of the Soviet AK-47 (specifically the Type 3 milled receiver variant), was subsequently developed in the 7.62x39mm caliber.4 Due to political differences between Yugoslavia and the Soviet Union, particularly Yugoslavia’s refusal to join the Warsaw Pact, Zastava was unable to obtain official technical specifications and instead reverse-engineered the AK design.17 The JNA officially adopted the M70 assault rifle into its arsenal in 1970.4 The Yugoslav M70 incorporated several unique features distinguishing it from Soviet AKs, including a grenade launching sight bracket mounted on the gas block (which also functioned as a gas cut-off when raised for grenade launching), a thicker receiver (initially milled, later stamped), and often, teak wood furniture.17 Later versions, such as the M70B1 and M70AB2 (folding stock), featured stamped receivers, with some incorporating heavier RPK-style bulged trunnions for increased durability, especially for grenade launching.17 Zastava also produced derivatives of the M70 chambered in Western bloc ammunition, such as the M77 in 7.62x51mm NATO and models in 5.56x45mm NATO, for export.4
Other Military Arms: The factory’s output during this period also included the M56 submachine gun, which bore a close resemblance to the German MP40 and was chambered in 7.62x25mm Tokarev 4; the M49 submachine gun, a design that synthesized elements of the Soviet PPSh-41 and the Italian Beretta Model 38 11; the M57 pistol, a Yugoslav derivative of the Soviet Tokarev TT-33 pistol, also in 7.62x25mm 4; and the M70 pistol (distinct from the rifle), a compact handgun chambered in.32 ACP (7.65mm Browning).4
The M53 Šarac Machine Gun. Image obtained from Wikimedia. The Author is Aleksej fon Grozni.
Afghan Local Police (ALP) candidates practice basic rifle marksmanship at a Coalition Forces site in Arghandab district, Kandahar province, Afghanistan, Oct. 16, 2012. The candidates undergo a three-week course which covers basic marksmanship, patrolling, improvised explosive device recognition and security techniques. The ALP program allows Afghans to provide security for their home villages and districts. Note: These are a variant of the M70 rifle as they do not have the grenade launching sight found on the Yugoslav-era M70B1 rifles. Photo obtained from Wikimedia. The author is Petty Officer 2nd Class Ernesto Hernandez Fonte.
Zastava’s arms production during the SFR Yugoslavia era clearly reflects the country’s unique non-aligned geopolitical stance. The decision to utilize and adapt both Eastern bloc (AK-47, SKS) and Western-influenced (Mauser, MG42 concepts) arms technologies, and even to develop unique hybrids or derivatives, demonstrates a pragmatic approach to defense procurement and industrial development. This strategy allowed Yugoslavia to avoid sole reliance on one superpower bloc, maintaining a degree of military autonomy. The production of the M70 as an unlicensed derivative, born out of political rifts with the USSR 17, particularly underscores Yugoslavia’s independent path. Furthermore, the development of weapon variants in NATO calibers 4 suggests a forward-thinking approach towards export markets or ensuring compatibility beyond Warsaw Pact standards, aligning with its non-aligned status and economic needs.
Development of Hunting and Sporting Arms
Alongside its military production, Zavodi Crvena Zastava significantly developed its line of hunting and sporting firearms. This diversification was likely a strategic move to utilize existing manufacturing capacity more fully, generate vital foreign currency through exports, and cater to a growing civilian market, thereby reducing the factory’s sole dependence on fluctuating military contracts.
Production of air rifles and sporting rifles, often based on the robust M48 Mauser rifle action, began as early as 1953.3 In 1954, Zastava further expanded its civilian offerings to include shotguns and small-bore rifles.3
The LK M70 hunting rifle (Lovački Karabin M70 / Ловачки Карабин М70), typically built on a Mauser 98-pattern action, became a particularly well-known and respected civilian product, offered in a variety of popular hunting calibers.4 Other sporting rifles, such as the M85 (a mini-Mauser action for smaller cartridges), were also developed and found success in domestic and international markets.22 The efficiency of basing many of these civilian arms on existing, proven military actions, like the Mauser, streamlined production and maintained a reputation for reliability. Exports of these hunting and sporting weapons became an increasingly important part of Zastava’s business.3
Technology Transfer
The official Zastava Arms website notes that “Years of experience in the field of development of products, technology and capacities created conditions for the transfer of technology to other countries”.3 While specific examples of Zastava Arms licensing its own designs for production in other countries during the SFRY period are not extensively detailed in the provided materials, the statement implies that such transfers were considered or occurred. The primary mode of technology interaction during this era appears to be Zastava receiving and adapting foreign technologies (e.g., Mauser, SKS, AK-47). However, the experience gained in mass-producing these adapted designs would have built considerable institutional knowledge and capacity, potentially laying the groundwork for later technology exports or licensed production agreements with other nations, particularly within the Non-Aligned Movement or other friendly states.
Weathering the Storm: Dissolution, Sanctions, and Bombing (1991 – 1999)
The Impact of the Yugoslav Wars (1991-1999)
The violent dissolution of the Socialist Federal Republic of Yugoslavia, beginning in 1991 and continuing through a series of brutal conflicts until 1999 (and beyond in some aspects), created immense instability that directly and profoundly impacted Zastava’s operations, its traditional markets, and its supply chains.11 As the primary arms manufacturer for the JNA and a supplier to various republican territorial defense forces, Zastava weapons, particularly the ubiquitous M70 assault rifle and its variants, were widely used by all factions involved in the Yugoslav Wars.17 The M53 machine gun also saw widespread use during these conflicts.39 The breakup effectively shattered Zastava’s large, unified domestic market.
UN Sanctions and Their Effect on Operations
In response to the conflicts, the United Nations imposed comprehensive economic sanctions, including an arms embargo, on the Federal Republic of Yugoslavia (FRY), which then consisted of Serbia and Montenegro.4 These sanctions, which were in effect for significant periods during the Yugoslav Wars (notably Resolution 757 in 1992 and subsequent resolutions), severely hampered Zastava’s ability to legally export its products, import necessary raw materials or specialized components, and maintain its international business relationships.4 Production inevitably slowed as a result of these restrictions. The experience of Zastava Automobili, which saw exports halted and parts supply disrupted 8, would have been mirrored, if not amplified, at Zastava Arms due to the direct applicability of the arms embargo.
This period represented an existential threat to Zastava Arms. The combination of losing its primary domestic market (the unified Yugoslav state), severe disruption to supply chains and export capabilities due to international sanctions, and ultimately direct physical destruction from NATO bombing, would have been insurmountable for most industrial enterprises. The fact that Zastava Arms continued to operate, and even managed to develop new products under such dire circumstances, speaks volumes about its deeply embedded strategic importance to the Serbian state and an almost wartime operational footing.
NATO Intervention and Damage to the Kragujevac Facilities (1999)
The Kosovo War, which escalated in 1998-1999, led to direct military intervention by the North Atlantic Treaty Organization (NATO). From March 24 to June 10, 1999, NATO conducted an extensive aerial bombing campaign against military and strategic targets in the Federal Republic of Yugoslavia.13
The Zastava factory complex in Kragujevac, being a critical component of Yugoslavia’s defense industry, was specifically targeted and sustained significant damage from NATO airstrikes.4 Reports indicate that the Zastava kovačnica (Застава ковачница, Zastava Forge) was bombed on April 9, 1999.18 The company’s Shotgun Shop was also reportedly destroyed during the bombing and was not subsequently restored.11 The NATO bombing, while aimed at degrading military-industrial capacity, inadvertently created a situation where significant rebuilding and, consequently, opportunities for modernization would become a necessity for Zastava in the post-conflict era.
Continued Product Development (Pre-Bombing/During Early Conflicts)
Despite the immense turmoil of the early and mid-1990s, Zastava Arms managed to continue some level of product development. In 1992, as conflicts were already underway, the factory completed the development and initiated batch production of the 7.62x39mm M92 carbine. This compact weapon was based on the earlier M85 carbine (a 5.56mm AK variant) but chambered in the more common 7.62x39mm round.4
Zastava M92 semi automatic rifle on display at “Partner 2011” military fair. Obtained from Wikimedia. Author is Srđan Popović.
Additionally, leveraging its long experience with Mauser bolt-action mechanisms, Zastava developed the M93 Black Arrow (Crna Strela / Црна Стрела) long-range anti-materiel rifle during this period. This heavy rifle, typically chambered in 12.7x108mm or.50 BMG, was designed for engaging targets at extended distances.4 The development of such specialized weapons even under conditions of conflict and sanctions underscores the factory’s retained engineering capabilities and the ongoing demand from military forces.
Zastava M-93 Black Arrow, 12.7 mm. Obtained from Wikimedia. Author is Marko M.
Rebuilding and Rebranding: Zastava Arms in the 21st Century (2000 – Present)
Restructuring and Modernization Efforts
The dawn of the 21st century found Zastava Arms grappling with the aftermath of wars, sanctions, and bombing. A period of significant restructuring was initiated, formally lasting from 2005 to 2014, aimed at adapting the company to a new political and economic reality.4 The factory, damaged during both World War II and the 1999 NATO air raids, was largely rebuilt with substantial government assistance.19
In a move to integrate it more formally within the national defense framework, Zastava Arms became part of the Defense Industry of Serbia in 2003, a decision by the Ministry of Defense that facilitated state support.7 On March 10, 2005, the Serbian government passed a decision to actively support the company’s restructuring process.7 A significant milestone in its international standing occurred on August 30, 2005, when Zastava Arms was placed on the United Nations list of proven suppliers of arms and military equipment.7
Technologically, the company has sought to modernize its design and production processes. It employs CATIA (Computer-Aided Three-dimensional Interactive Application) software for product design, enabling a more agile response to evolving market demands.3 Furthermore, Zastava Arms applies a Quality Management System (QMS), holding SRPS ISO 9001:2008 and SNO 9000/05 certificates, to ensure product quality and process improvement.3
Current Military Product Lines
Zastava Arms continues to produce a wide array of military firearms. According to its 2019 military catalog and other company information, its current offerings include 4:
Assault Rifles: The M21 series chambered in 5.56x45mm NATO (the standard service rifle of the Serbian Armed Forces), the M05E series in 7.62x39mm (upgraded M70 versions), the classic M70 B3/AB3 in 7.62x39mm, and the M90 in 5.56x45mm.
Submachine Guns/Carbines: Compact versions of the M21 and the M92 carbine in 7.62x39mm.
Light Machine Guns: The M72 RPK-style LMG in 7.62x39mm.
Sniper Rifles: The M91 (7.62x54R Dragunov-style), the M07 (bolt-action, various calibers including 7.62x51mm and.308 Winchester), and the M17 (7.62x51mm).
Long Range/Anti-Materiel Rifles: The M12 Black Spear (Crno Koplje / Црно Копље) and the M93 Black Arrow (Crna Strela / Црна Стрела), both available in.50 BMG and 12.7x108mm.
Machine Guns: The M84 general-purpose machine gun (PKM derivative in 7.62x54R), the M87 heavy machine gun (NSV derivative in 12.7x108mm), and the M02 Coyote heavy machine gun (12.7x108mm).
Automatic Grenade Launcher: The M93 (BGA / БГА – Bacač Granata Automatski) in 30mm.
Underbarrel Grenade Launchers: The BGP 40x46mm and BGP 40mm (for M70 pattern rifles).
Pistols: The CZ 999, EZ 9, and EZ 9 Compact, available in 9mm Parabellum and.40 S&W.
Zastava М21 rifle of Serbian Gendarmerie. Photo obtained from Wikimedia. The author is Boksi.
Zastava M12 Black Spear on display during Partner 2013 arms fair, Belgrade. Photo obtained from Wikimedia. The authors is Proka89.
Civilian Hunting and Sporting Arms
Zastava maintains a strong presence in the civilian firearms market, particularly with its hunting and sporting rifles known for their Mauser-based actions and Kalashnikov-derived semi-automatics 22:
Hunting Rifles (Bolt-Action): The flagship LK M70 series (Lovački Karabin M70), based on the Mauser 98 action, is offered in a wide range of calibers (e.g.,.243 Win,.270 Win,.30-06,.308 Win,.300 Win Mag, 7×64, 8×57 JS, 9.3×62,.375 H&H Mag,.458 Win Mag). Other models include the LK M85 (mini-Mauser action for calibers like.223 Rem, 7.62x39mm), M808, and precision-oriented M07 Match and M12 models.
Sporting Rifles (Semi-Automatic): The PAP series (Poluautomatska Puška / Полуаутоматска Пушка, Semi-automatic Rifle), derived from the Kalashnikov action, is highly popular. Key models include the ZPAP M70 in 7.62x39mm and the PAP M77 in.308 Winchester/7.62x51mm. The M2010 is another semi-automatic offering. The ZPAP M70, particularly as imported by Zastava Arms USA, is noted for its robust construction, often featuring a heavier 1.5mm thick RPK-style receiver and a bulged front trunnion.21
Small Bore Rifles: Models like the MP22 (.22 LR) and MP17 (.17 HMR).
Pistols: A range including Tokarev-pattern pistols like the M57A and M70A (chambered in 7.62x25mm and 9mm Para respectively), the compact M88A (9mm Para), and modern double-action designs like the CZ 999 and EZ9/EZ40 series (9mm Para /.40 S&W).
The product line demonstrates a dual strategy: maintaining and updating Kalashnikov-pattern weapons (M70, M05E, ZPAP series) for markets familiar with their robustness and reliability, while also developing more modern, modular systems (like the M19 Modular Rifle mentioned in some catalogs 54, and the M21) and precision long-range rifles (M07, M12, M93) to compete in different segments and meet evolving military and civilian marksmanship requirements. This diversification is crucial for a global exporter.
Table 2: Overview of Current Zastava Arms Product Categories
Export remains the lifeblood of Zastava Arms, with the company stating that 95% of its product placement is through international sales.7 It exports hunting and sporting weapons to over thirty countries 3 and military products to over forty countries worldwide.4
Zastava Arms USA: A pivotal development was the establishment in January 2019 of Zastava Arms USA, based in Des Plaines, Illinois. This subsidiary serves as the exclusive importer and distributor of Zastava Arms products for the lucrative US market, also handling warranty, repair services, and parts.4 This move was partly aimed at exercising greater control over product quality and presentation in the US, addressing issues that had arisen with previous third-party importers who sometimes made modifications that caused reliability concerns.56 The establishment of Zastava Arms USA represents a critical strategic pivot, allowing direct management of its brand and quality in its most significant export market.
Yugoimport SDPR: Domestically, Yugoimport SDPR (Југоимпорт СДПР), the Serbian state-owned defense equipment company, is a key partner for Zastava Arms, often facilitating international defense contracts and joint participation in global defense exhibitions like IDEX in the UAE.7
International Golden Group (UAE): Zastava Arms lists International Golden Group, based in the United Arab Emirates, as an important international partner, indicative of its reach in the Middle Eastern market.7
Past Partnership with Remington Arms: In 2005, a memorandum of understanding was signed with the American company Remington Arms to export Zastava-made hunting and sporting firearms (often Mauser-action rifles) to the United States, Canada, and Mexico.4 However, this cooperation was later discontinued, reportedly at Remington’s initiative due to its own financial difficulties. Zastava then sought new US mediators, such as EA Armory, to maintain its presence in the US market prior to forming Zastava Arms USA.58
Key Export Markets and Contracts: Asia, Africa, and the United States are consistently cited as major destinations for Zastava’s products.4 Historically, Zastava rifles like the M48 were exported to countries including Burma, Egypt, Indonesia, Iraq, Syria, Algeria, and Chad.11 More recent specific export deals mentioned in news reports include contracts with Armenia 59 and a large announced contract for hunting and sporting arms to the US valued at $235 million (reported in 2021).60 In a notable instance of military aid, Canada supplied 35,000 Zastava M70 assault rifles to Ukraine in 2022 as part of support efforts during the Russo-Ukrainian War.62
Recent Developments, Financial Status, Achievements, and Challenges
Zastava Arms navigates a complex environment characterized by its strategic importance, historical legacy, financial pressures, and the demands of a competitive global market.
Financial Situation and Government Support: The company has faced persistent financial challenges. As far back as 2013, it was reported to owe over 80 million euros in unpaid taxes, the largest debt among Serbian defense industry companies.4 By June 2019, its total debt was estimated at around 145 million euros.4 A 2014 article in Privredni pregled (Привредни преглед, Economic Review) noted that Zastava Oružje was operating with significant losses.63 More recently, the Serbian news outlet Nova Ekonomija (Нова Економија, New Economy) reported in November 2023 that the factory had accumulated losses exceeding seven billion dinars (approximately 60 million euros) over the preceding six years under a controversial supervisory board.64 Despite these financial burdens, the Serbian government continues to provide support, recognizing Zastava’s strategic role. An investment of 9.7 million euros was made in 2017 for factory modernization to meet defense industry needs.4 The Serbian state remains a major shareholder (the Wikipedia entry from May 2025 lists the Government of Serbia as 48% owner 4, although a 2025 company document regarding a shareholders’ meeting mentions a more complex structure involving social capital shares 66).
Production and Sales Performance: Notwithstanding its financial difficulties, Zastava Arms has reported periods of strong production and sales. For instance, firearm production reportedly increased by 20% in 2020, with deals concluded that year valued at $95 million, primarily with buyers from Asia, Africa, and the United States.4 The aforementioned $235 million US export contract announced in 2021 also points to significant market activity.60
Controversies and Allegations of Mismanagement: Zastava Arms has not been immune to controversy. Reports from Serbian media, including Nova Ekonomija 64, and discussions on international forums referencing articles from the Serbian weekly NIN (Недељне информативне новине, Weekly Informational Newspaper) 67, have detailed serious allegations of mismanagement by past leadership. These allegations include claims of unfavorable export contracts, particularly with Zastava Arms USA, where fixed prices for firearms were reportedly maintained despite sharply rising material and energy costs, to the detriment of the Kragujevac factory.67 There were also accusations of questionable deals with domestic private companies, resulting in further financial losses for Zastava Arms.67 The Independent Trade Union at Zastava Arms filed criminal charges against the former president of the supervisory board, Ivica Marjanović, citing abuse of official position and responsibility for the factory’s decline.64 Concerns have also been voiced by users and observers about the condition of some of the factory’s machinery being worn out and an underpaid workforce potentially leading to occasional quality control issues in production, although export samples for the US market are often perceived to be of better finish.68 The entire supervisory board was eventually replaced in late 2023.64
Achievements and Ongoing Activities: Despite its challenges, Zastava Arms’ enduring legacy of over 170 years in continuous operation is a significant achievement in itself. It maintains a substantial export reach and continues to develop new products, such as the M19 Modular Rifle 54, to meet contemporary demands. The company remains a cornerstone of the Serbian defense industry.4 Zastava Arms actively participates in major international arms fairs, including SHOT Show in Las Vegas, USA, and IWA OutdoorClassics in Nuremberg, Germany, showcasing its products to a global audience.7 Recent company news includes the reopening of its “Old Gun Foundry” museum in Kragujevac in November 2023, emphasizing its rich heritage 69, and its participation in the “Zastava 2024” military capability display of the Serbian Army in June 2024.70
Zastava Arms appears to operate in a precarious yet persistent balance: it is a strategically vital state-supported defense asset with an remarkable historical lineage, yet it is simultaneously burdened by significant accumulated debt and the shadow of past mismanagement allegations. Its future trajectory will likely depend on a confluence of factors: continued and effective state backing, successful and profitable penetration of competitive export markets (especially the US), and sustained improvements in internal governance and operational efficiency.
Conclusion: Zastava Arms – A Legacy Forged in Steel
The history of Zastava Arms is a compelling narrative of industrial ambition, technological adaptation, and national identity, forged over more than 170 years in the heart of Serbia. From its humble beginnings as the Topolivnica in Kragujevac, casting its first cannons for a nascent Principality of Serbia intent on self-reliance, the factory has evolved into a globally recognized arms manufacturer. Its journey mirrors the tumultuous history of the Balkan region and Serbia itself—a saga of nation-building, devastating wars, profound political transformations from monarchy through socialism to a modern republic, economic booms, and periods of acute crisis including sanctions and foreign bombardment.
Throughout these epochs, Zastava Arms has demonstrated remarkable resilience. It armed Serbian and later Yugoslav forces through the Balkan Wars, two World Wars, and the tragic conflicts accompanying the dissolution of Yugoslavia. It assimilated and adapted technologies from both West and East, reflecting Yugoslavia’s unique non-aligned stance during the Cold War, producing iconic firearms like the Mauser-pattern M48, the MG42-derived M53 Šarac, and the Kalashnikov-based M70 family. This ability to absorb, modify, and mass-produce diverse weaponry underscores a deep-seated engineering capability and a pragmatic approach to fulfilling national defense needs.
In the 21st century, Zastava Arms continues to be a pivotal entity in the Serbian defense industry and a significant exporter. The establishment of Zastava Arms USA signifies a strategic commitment to directly engage with its largest and most demanding civilian market, aiming to enhance its brand presence and profitability. However, the company also contends with substantial challenges. A legacy of financial debt and recent allegations of mismanagement have cast shadows, necessitating ongoing restructuring and a reliance on state support. The competitive nature of the global arms market demands continuous innovation, stringent quality control, and agile business practices.
The story of Zastava Arms is, in many ways, a microcosm of Serbia’s own historical trajectory—a narrative defined by a persistent quest for sovereignty and agency on the world stage, often in the face of formidable external pressures and internal complexities. The inherent tension between its role as a strategically vital, state-influenced national asset and the commercial imperatives of the global arms market—including financial sustainability, technological competitiveness, and the ethical considerations of arms exports—will undoubtedly continue to shape Zastava’s path forward. Its enduring legacy, however, is already forged in steel: a symbol of Serbian industrial heritage and a testament to the enduring human endeavor of arms making.
Image Sources
The main photo is from Wikimedia and here’s how the author described it (translated into English from Serbian): “The SM-1 Zastava NTV drone command vehicle of the Serbian Armed Forces exhibited at the “Colonel Pilot Milenko Pavlović” military airport on the occasion of the “Zastava 2024″ display of the capabilities of the Serbian Armed Forces.” Author is Srdjan Popovic.
The Kragujevac Cannon Foundry in its working days, originally built in 1856. The drawing is from Wikimedia – the exact date and author are unknown. It was contributed to Wikimedia by SimonKTemplar
Yugoslavian M1924 Mauser. Photo obtained from Wikimedia. Author is The Swedish Army Museum.
The M53 Šarac Machine Gun. Image obtained from Wikimedia. The Author is Aleksej fon Grozni.
Afghan Local Police (ALP) candidates practice basic rifle marksmanship at a Coalition Forces site in Arghandab district, Kandahar province, Afghanistan, Oct. 16, 2012. The candidates undergo a three-week course which covers basic marksmanship, patrolling, improvised explosive device recognition and security techniques. The ALP program allows Afghans to provide security for their home villages and districts. Note: These are a variant of the M70 rifle as they do not have the grenade launching sight found on the Yugoslav-era M70B1 rifles. Photo obtained from Wikimedia. The author is Petty Officer 2nd Class Ernesto Hernandez Fonte.
Zastava M92 semi automatic rifle on display at “Partner 2011” military fair. Obtained from Wikimedia. Author is Srđan Popović.
Zastava M-93 Black Arrow, 12.7 mm. Obtained from Wikimedia. Author is Marko M.
Zastava М21 rifle of Serbian Gendarmerie. Photo obtained from Wikimedia. The author is Boksi.
Zastava M12 Black Spear on display during Partner 2013 arms fair, Belgrade. Photo obtained from Wikimedia. The authors is Proka89.
Okay, some guys hate AR gear on AKs and if it’s not your cup of tea, that’s fine. I do like AR stocks and have no problems putting whatever stock on whatever family of firearms. I’m more into pragmatism and making a firearms do what I want than arguing over AR vs. AK or whatever. This is also why I have commenting turned off on the blog.
At any rate, even before I bought the M77, I knew I was going to trick it out for my purposes and I wanted to put one of the Magpul PRS Lite stocks on it for a few reasons:
I like adjustable stocks like the PRS but don’t need to constantly change the length of pull or the comb (where your cheek sets) thus I didn’t need to spend the money on a full blown PRS Gen 3. By the way, in case you are wondering PRS stands for “Precision Rifle/Sniper”.
The M77 will never be mistaken for a carbine given its length nor do I need to collapse the stock so the fixed postion PRS Lite was fine by me.
There are aftermarket thick recoil pads you can put on a PRS to absorb recoil.
By using a buffer tube, I can slide in a mercury recoil suppressor to add weight, absorb some of the recoil and balance the rifle out a bit more to compensate for a long barrel and relatively heavy front end.
Last but not least, the PRS Lite reminds me a bit of a PKM stock due to the skeletonized opening. (I’m sure someone just spit their drink out reading that). I had a new mint Romanian PKM stock many years ago that I sold at some point and still wish I hadn’t. In short, I like the looks.
Also, the PRS Lite is a bit cheaper than a PRS Gen 3 but that wasn’t a big factor for me – the PKM look is actually what tipped me in the direction of the Lite model.
This is the MagPul PRS Lite. It’s definitely a solid stock that I like – it does what I need it to.
Parts you will need
Zastava/Yugo to M4 adapter – this screws into the square hole in the rear trunnion and then presents the hole the buffer tube screws into and the end plate. Go with an aluminum model from a reputable vendor like Ace, JMac Customs, Desert Fox, etc. Note, JMac went a very different route with their pioneering 1913 Picatinny rail interface for the stocks and I provide more details down during installation.
A buffer tube – I’d recommend a M4 six position Mil-Spec carbine buffer tube for the greatest flexibility. Rifle length tubes are rarely used on new firearms now as people want the adjustable stocks. Commercial sized buffer tubes were due to some things Colt did many years ago and thus on the way out so go with Mil-Spec which refers to the outer diameter of the tube.
An AR end plate – on an AR, this plate keeps the selector spring captured and also aligns the buffer tube via vertical key that sticks up and keeps the carbine buffer tube from rotating – it does help to have it for that reason and you have tons of options out there ranging from the basic to ones with sling hooks and even QD sling sockets. Not all adapter support an end plate so this might not be needed,
A castle nut – this nut is threaded on the buffer tube and then tightened down against the end plate to secure the buffer tube in place. Note, you will need a spanner wrench or specialized castle nut wrench of install or remove a castle nut without tearing it up – I recommend the Magpul wrench. By the way, the castle nut gets its name from looking like a medevial castle’s crennelated tower. Crenels are the parts that stick up like teeth to give defenders some protection.
Finally, whatever stock you want. Just remember to match the buffer tube to the stock. If you get a rifle stock and it needs a rifle buffer tube then get a rifle buffer tube, etc. The PRS and PRS lite have an adapter and can work with either tube type but most stocks designed for a carbine can only work with a carbine buffer tube (just make sure you match on either the Mil-Spec or commercial diameter).
Removing the old stock
The first step is to remove the recoil pad which is held in place by two beefy wood screws with allen/hex wrench sockets in them. Remove them and then the recoil pad will pull off. You then remove the buttstock bolt and the stock pulls out of the end of the rifle.
Remove these two beefy screws and the recoil pad will pull off. I’m happy to see a modern screw head vs. slotted. I would have been even happier if they were torx screws this is a nice upgrade from the old days.I kind of felt like Crocodile Dundee when I first saw the new recoil pad screws they are using “Now this is a screw”. If you’ve not seen the movie then the reference is lost but my point is that is a really heavy duty screw.With the recoil pad off, use a 13mm socket on an extension to reach in and unscrew the buttstock bolt. Yes, that’s a bed. It was super cold out and I set up in our spare bedroom to take these photos.They’ve shortened the buttstock bolt considerably. I’ve considered having these made but Zastava USA seems to keep them in stock so there is no pressing demand for them unlike our original Yugo military length bolts.This is what goes into the rear trunnion. The numbering reflects the rifle it was fitted to. Note, these do sometimes get a wee bit stuck in the trunnion so you might need to wiggle it a bit or a few light taps with a rubber mallet and it will pull right out.This is the rear trunnion and the use of a square hole and big bolt to secure it is one of the unique design changes the Yugoslavs did to the Soviet designs. See the finish residue and chips in there? The snug fitting of the stock, how much the finish has stuck to the metal and a bit of sawdust all combine to cause the stock to offer a bit of resistance during removal. In this case it all came out easily with just a bit of wiggling. You should remove all of that of course.
Adding the new stock
To add the buffer tube, I decided to use two parts that I happened to have in stock. I used an Ace modular adapter (“AKRBY-AR15” is the exact model) and then a JMAC modular stock to M4 adapter that has sadly been discontinued – I bought mine a few years ago so it’s not surprising things have changed.
JMac went a different route some years back and pioneered adapters that expose a 1913 Picatinny rail at the rear to which you can mount a ton of different stocks. That’s another option for you – click here. Once you have that, you add a folding mechanism, then a skeletonized tube (ST) for a cool “I’m not a normal AR look” and then your AR stock if you go that route.
If you do not want the modular approach, Zastava also sells a direct adapter. It screws into the rear trunnion and gives you the mount for the M4 buffer tube.
This is the Ace Zastava/Yugo modular stock adapter. Only one of the two rows of screws holes are actually used giving you a bit of vertical adjustment. The adapter is secured by an 8mm allen key socket screw. The screw holes are tapped for #10-32 screws.The JMac M4-Ace adapter is really well made. The two horizontal screw holes are for securing the Mac Adapter to the modular stock adapter. The bottom opening is for securing the botttom of the AR end plate that in turn holds the buffer tube in position vertically.Put medium strength Loc-tite on before you install the screws.
If you want to insert a mercury recoil reducer
This next step is entirely optional – I installed a C&H mercury reducer to add weight to the rear and absorb a bit of recoil. The completely sealed 7/8″x5″ C&H tube weighs 16oz. The liquid mercury inside sloshes inside and absorbs some of the recoil. Does it do a ton on it’s own – no. Does it and the weight help mitigate some of the recoil? The short answer is yes.
What I do is wrap tape around the C&H so it fits snug and is roughly centered. I spray brake cleaner in the tub to get any oil out. scuff it up and spray it out again. I then scuff up the C&H tube, clean it with alchol (brake cleaner makes the tape gooey), coat the C&B unit with epoxy and push it in. Some epoxy will come out the drain hole so wipe it off with a rag with brake cleaner and then close it with a piece of tape. By the way, one end of the tube is tapped for a 1/4-20 bolt to help install it. Remove the bolt before everything sets up of course.That’s not coming out or loosen up. Use a towel with brake cleaner to remove any epoxy on surfaces you don’t want. You need to do this before it sets up. By the way, the longer an epoxy takes to cure, the better it will hold up to shocks over time. Don’t use epoxies that claim to set in just 90 seconds or 5 minutes.
Let’s continue with installing the buffer tube
Put the castle nut on the buffer tubes with the largest slots facing backwards and thread it all the way to the bak, Then install the end plate with the “boss” (raised oval) facing forwards to it will go into the end of the AR adapter. You then insert the buffer tube into the adapter and start screwing it in place. When you can’t screw it in any further because of the plate, back it off a turn, push the plate into the adapter, tighten the castle nut with your fingers. Finally, tighten it down with the caste nut wrench – the torque spec is 38-39 ft pounds (you’ll sometimes ready 40 ft pounds but 38-39 is per USMC TM 05538/10012-IN). If you want to do farmer tight, that is up to you. I’d also recommend staking the nut – putting a divot in the nut in one of the small holes between the end nut and the castle nut so the castle nut can no longer turn without a wrench. Again, up to you.
Here you can see the end plate, the groove in the buffer tube that it travels in and just a bit of the castle nut behind. All are oriented correctly.I screwed in the buffer tube until the end plate couldn’t rotate, backed it off one turn (or so) until I could get the end plate to slide forward and go in its hole. Note the orientation of the castle nut and it is not tight yet.,Do you mess with castle nuts a lot? Get a Magpul Armorer’s Wrench. In the photo, the right side is for the castle nut. The left is for the barrel nuts and I don’t use that one much but that castle nut portion gives you a wonderfully secure grip especially when you are breaking ones free. The square hole is for a 1/2″ torque wrench. The oval hole is for rifle receiver extensions and the groove in the castle nut end can be used on the traditional bird cage flash hiders.Once the buffer is installed, the PRS site can go right on. Just follow the directions with the stock, You remove the screw that holds the front flush cup in place and slide the stock on. You can then put the QD swivel flush cup on whatever side you want.Both the full blow PRS Gen 3 and PRS Lite stocks have thin hard recoil pads that I always replace. This is a Limbsaver PRS Gen 3 recoil pad that fits both models. It’s well made, fits and feels great. I always make the swap unless the stock is going on a light recoiling rifle like 5.56 NATO. If you want the best recoil pad I have found for the PRS Gen 3 or PRS Lite, get the Limbsaver pad.
End Result
The rifle feels really good and handles well. I think it looks great also!
Summary
Once you know the parts you need, it’s a pretty easy swap to make. Once you get the M4 buffer tube installed you have tons and tons of options out there .
I hope this helps you out.
Note, I have to buy all of my parts – nothing here was paid for by sponsors, etc. I do make a small amount if you click on an ad and buy something but that is it. You’re getting my real opinion on stuff.
I am often asked if some model of grip will fit a Yugo surplus or current day commercial Zastava rifle and the answer is a bit of an “it depends”. Let me tell you why.
When Zastava was still located in the former country of Yugoslavia, they did a number of modifications to the base Soviet AK-47 design. Relevant to this post whas their decision to use a retained grip nut that is riveted to the receiver. This is different from AKMs that have a removable forged grip nut that drops down through a square hole between the trigger guard and the rear end of the receiver.
All AK-based rifle designs that I know of have this grip nut “strap” that is riveted in place. Note how the trigger guard rides higher than a normal AKs and a longer rivet is used to pass through the trigger guard, strap and the receiver itself.
When it comes to grips, that strap and its rivets are the problems. If you have a grip with very limited space in the top, it will not fit – at least not without modification. The AK-12 grip has a tight backstrap that goes along the bottom of the receiver and I don’t think it could even be made to fit.
Notice the extra rivets sticking up behind the round grip screw hole.This is our version of a Russian AK-12 grip. It’s very comfortable and a grip I like a great deal.The middle of the top and some of the back aren’t going to clear the grip nut strap and rivets. I could carve/Dremel the middle out but there is very little material to work with in the back. Might it work? Maybe but I didn’t have time to give it serious try.
If you look at the top of a traditional Zastava black polymer grip, you’ll notice the top is wide open. It has plenty of room to accomodate the grip strap. So, a grip like a Russian Molot will work as well.
The Molot’s top is wide open.Due to the wide open top, a Molot grip can readily go on a Zastava.
Summary
Grips with shallow tight tops will not fit on a Zastava rifle, unless modificatios are made. Examples of grips like this are Hungarian AMDs, IMI Galils, Polish Beryl eronomically styled grips, and Russian AK-12s.
What will fit are grips with big top mouths such as many traditional AKMs (Romanian and Egyptian), plus newer grips like the Bulgarian ARMs, and Russian Molots.
I hope this helps.
Note, I have to buy all of my parts – nothing here was paid for by sponsors, etc. I do make a small amount if you click on an ad and buy something but that is it. You’re getting my real opinion on stuff.
Scot Hoskinson owns RS Regulate and is a meticulous engineer. His products are top notch and one thing I would tell you is to always read the instructions. He puts a lot of effort into documenting what you need to do so find the instructions and follow them.
Trust me – read and follow the instructions to install a RS Regulate handguard. Note the instruction sheet is for the old part number GKR-9Y. Scot revised the part number and it is now the GKR-9DY — same handguard but different part number.Per the instructions in steps 3 and 4, I tapped the end cap into place. Note, you do need to test fit and make sure it will fit. You aren’t beating it into place with a ton of force. Mine went in without any filing needed but I did need to tap it to get it fully seated. You want the end cap to sit in the receiver firmly – not loose.
I don’t have photos of every step Scot lists, but I do want to mention step 5 – the front retainer set screws are backed out towards the receiver with the allen heads facing the rear. Once you have the front retainer in place and screwed to the handguard in step 10, you then tighten down the set screws to make everything nice and tight.
In all of his steps, be sure to follow the torque specifications and use blue loc-tite or your favorite medium strength thread locker. If you don’t, then the screws will risk coming loose and potentially falling out.
You can see the rifle’s handguard retainer is locked in place because the cam lever is rotated backwards. Looking down past the barrel you can see one of the two front retainer set screws waiting to be snugged down.I used a long Bondhaus ball head allen key to reach in and tighten the set screws. Let me spare you some future grief – buy quality sets of allen wrenches that properly engage your fasteners. The cheap import keys are prone to poor fitment and/or rounding over the edges and both will mess up your fasteners.I applied Blue Loc-Tite before I snugged down the set screws. I removed the residue with a shop towel.
To remove it, rotate the locking lever on the rear sight base. Zastava is one of the makers that make that lever really tight. I use a large adjustable wrench’s jaws to hold the lever while I rotate it up. You can also use a hammer with plastic heads to tap the lever up. Once it is rotated, the rear of the tube closer to the receiver can be lifted up and the unit brought back just a tad to clear the front gas block. By the way, the bolt carrier must be removed or the long gas piston will be in the tube and block removal.
I didn’t get a picture of the gas tube with the wood before I removed it so we’ll just pick up here. This is one of our high-temp Yugo/Zastava gas tube covers. The spring clip is from the wood set and pops into the our cover to help provide tension and support. If you don’t have the clip, I would recommend buying one vs. skipping it. Check Apex Gun Parts, Robert RTG, Numrich, Centerfire, etc.The spring clip just presses into the pocket molded foir it in the cover.I like to use a vise to hold the forged end of the gas tube. DO NOT try and clamp the thing circular end or you will crush it. The vise you see has smooth jaws and will not hurt the forging – if your vise has aggressive jaws to hold material, use something to protect the gas tube like jaw covers, pieces of wood, etc. In this photo, the cover is fully rotated into position. You may find it easier to rotate your cover to the left or to the right when it comes to installation or removal. If it will not turn, carefully inspect why and remove a bit of material as needed with a file, Don’t rush – you want a firm fit and for it to look good.What it looks like when done.
RS Regulate makes some great lower handguards for a variety of AKs including for the Yugo/Zastava M70 and M77s. It takes a little bit of effort to install and is very much worth it. You can optionally use your wood gas tube cover or buy one of our polymer units.
Note, I have to buy all of my parts – nothing here was paid for by sponsors, etc. I do make a small amount if you click on an ad and buy something but that is it. You’re getting my real opinion on stuff.
Years ago, I had a Zastava M77 and regretfully sold it back in 2014. It was one of those situations where I had to sell it to fund other projects but I didn’t even get a chance to shoot it. I also had a custom M76 (the 8mm version) for a while but I did sell that one – mainly because it was a primer popper. That is a known issue because the firing pin hole opened up out of spec due to corrosive ammo use and didn’t adequately support the primer as a result but I digress.
I had resisted buying another one until Zastava decided to release what they called the “Battleworn” model (ZR77308W) and I caved. On one hand, it comes with some really nice retro looking Europen beech wood furniture. What really got me was that it was way cheaper than their other models that had optics and/or polymer furniture at that time.
Why the M77?
So, I had wanted to get back into the Zastava designated marksman’s rifle (DMR) game for a while and was just biding my time. The reason I wanted the M77 was due to all of the quality match 7.62×51 and match .308 match ammo that is out there. In comparison, try finding affordable true match grade 8mm ammo for the M76 or match 7.62x54r for the M91. You can find it once in a while but it’s not cheap and choices are limited here in the US. On the other hand, match 7.62×51 and .308 plentiful and affordable.
So, the main reasons were the ammo and the second was the M77 Battleworn model being very affordable in the Late Summer of 2023. As I am writing this, a quick search on GunBroker shows the Battleworn model selling fro $1369 with one 20-rd magazine up to $1,499 with five 20 round mags plus the various models are a lot closer in price. I paid less last summer but you get the idea. (In 2014 I bought a M77 with a thumbhole polymer stock and polymer handguard set for $600 or 700 from Centerfire Systems but that’s the way pricing goes – any vendor will raise prices to what they think the market will bear to try and maximize profits.)
Taking a Closer Look
It’s well packed in an egg foam box. Note the CSSpecs 25 round magazine on the box cover. Honestly, the wood is really nice. It’s very reminiscent pf the M76 wood with a few minor exceptions – the grip does not have a ferrule, the recoil pad uses allen head screws and the stock bolt is one of their modern commerical shorter ones vs. the long Yugo military 8x1x260mm (about 10.23″ long).Like many aspects of the original designs, the Yugoslavs modfield their scope rails and how they mount The result is more to the rear and is often refered to as “rear-biased” so they need a scope mount vs. an AKM pattern rail.Honestly, the wood is cool. It has almost rough hewn look but better finished if that makes sense. The grip reminds me of one that Matt Shuster of Ironwood Designs came up with many years ago before he passed. I think he called it the “mini fat cap” – if someone remembers, please tell me. He made the M76 Fat cap patterned after the original wierd awkward really fat but oddly short M76 grip but without a ferrule. Then he came up with a far more elegant smaller one and this Zastava design reminds me of it. Folks, Matt helped me get started years ago and was a genius with wood. God rest his soul and take care of his family.It has the mile long 19.7″ cold hammer forged barrel. The silver disc on the gas tube is the three position gas regulator. It has a slant brake on it and 14x1mm left hand threads under it just like any other AK. A M76’s long flash hider is actually part of the front sight assembly but that is not the case with the M77 – you can install whatever you want. Also, note the cleaning rod.Here’s a view of the rifle looking at the operating side. The chromed bolt jumps right out in contrast.The M77 uses a bulged trunnion and the oversized AK receiver needs to accomadte it. These bigger 1.5mm thick receivers are beefy. They both hold the various component assemblies in position and the thicker receiver means more steel to compensate for any metalurgical or hardening shortcomings.Zooming in on just the receiver. Note the notched selector/safety lever and the relatively tall selector stop. In the top right you can see the other side of the operating rod lock.
Opening it up
The locking dust cover was introduced in the M70 Yugo rifles because their doctrine made extensive use of rifle grenades. They didn’t want the cover top pop off so they added a sliding lock that holds the rear recoild spring assembly in place and, thus, the top cover in place. By the way, one of the really nice side benefits is that when you reassemble a rifle with one of these locks, you put the recol spring in front, install the dust cover without fighting the spring, push the button and the recoil rod pops out the back.Looking at the locking assembl, the plunger button the operator pushes is at the bottom of the photo. The slightly elevated portion under the top lip of the trunnion (top in this photo – right side in real life looking down – is what slides out of the way wehn pressed so the recoil spring assembly can come forward for removal. What you don’t see is the hidden compression spring. If you ever need these parts, CNC Warrior make and sells both the whole assembly.Looking down at the classic double hook AK trigger and double wound spring. I’ve had guys ask me why did they double these? The answer is fault tolerance. The second hook is there if the first should fail and the second spring winding is there should one of the two fail. In all of my years working on civilian AKs, I’ve never seen a hook fail but I have seen springs fail although very, very rare and usually from a surplus kit build.Look at those hooks! They are forged and not stamped. The bevels in the front and the back help the bolt carrier pass by.Here’s a better view of the three position gas regulator disc. Note the vent holes in the gas block itself.One oversized bolt assembly. Despite what some may tell you, the PSLs and these M76/M77/M91 families of rifles are oversized AKs. The SVD Dragunovs use very different bolt carrier assemblies.Longer than a normal AK gas pistol and chrome plated to improve corrosion resistance.View from the side. Some of the machining is crude but effective in places.Bolt extended in the carrier.I chuckled when I saw this. There are two numbering systems on some of the parts – crisp machined ones and ones done by hand with an electropencil like you would see on some kits.You an see the numbers of the key parts and they should all match.Interesting – more holes to vent propellant gasses.A better view of the upper and lower handguard assembly,A view of the grip.The buttstock has the distinctive grip area like you would see on the M76 military stocks. I have never had the purpose of that grip area explained to me.It uses a classic Yugo military sized recoil pad. What’s noteworthy is that they have ditched the old slotted screws for allen/head-head screws.
Summary
This gives you an overview of the M77 battleworn model right out of the box. Nothing really surprised me and the quality looked good. Sometimes I buy stuff and regret it but not this time.
If you know me, you also know I could not going to leave it alone and the customizations will be in future posts.
Note, I have to buy all of my parts – nothing here was paid for by sponsors, etc. I do make a small amount if you click on an ad and buy something but that is it. You’re getting my real opinion on stuff.
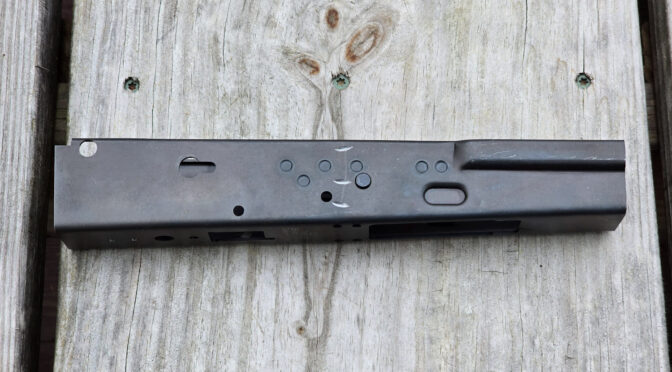

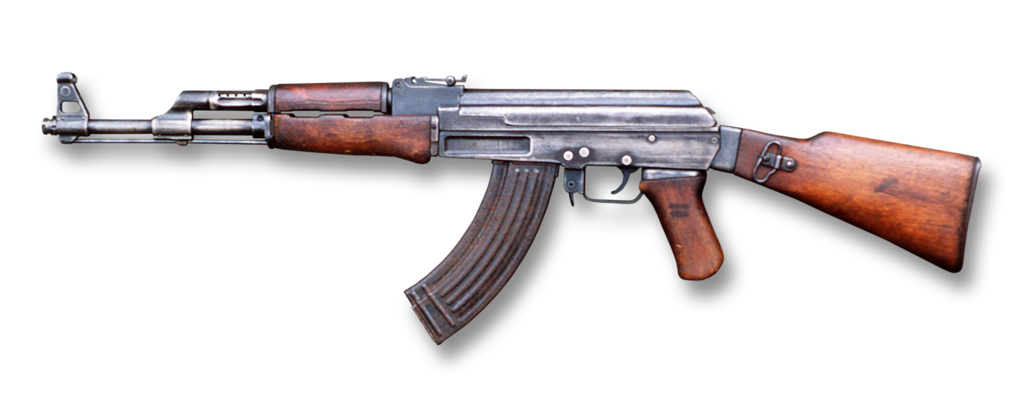

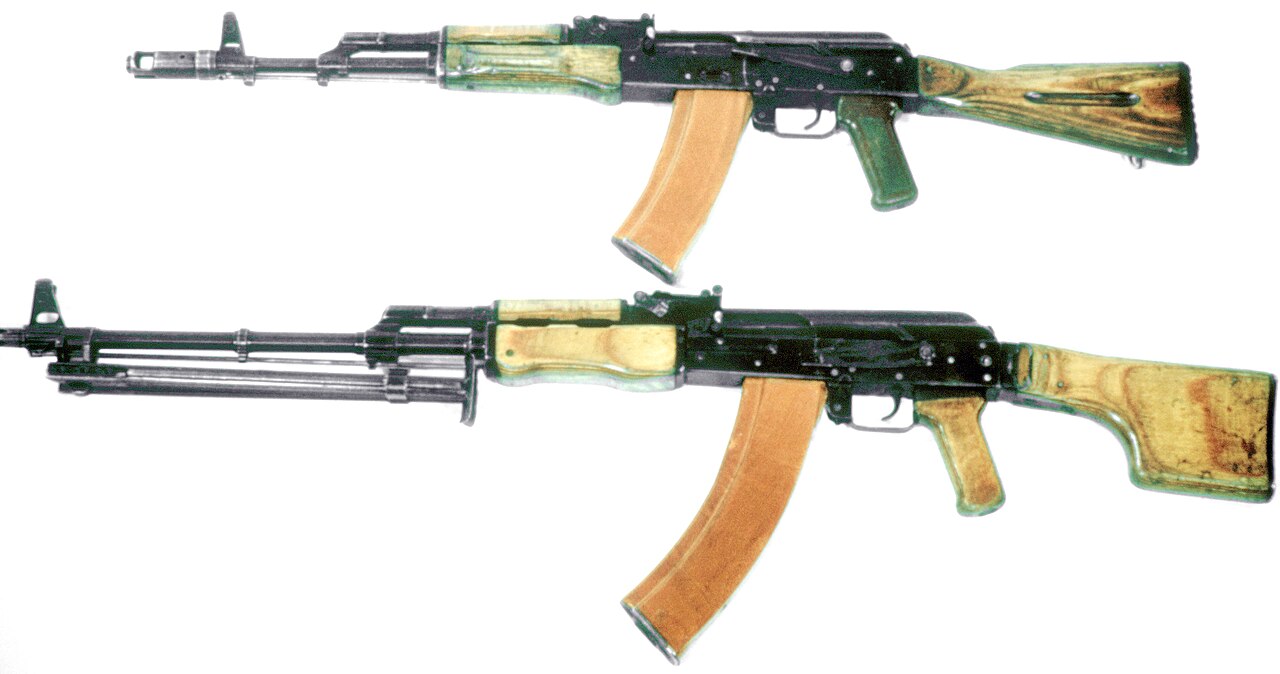
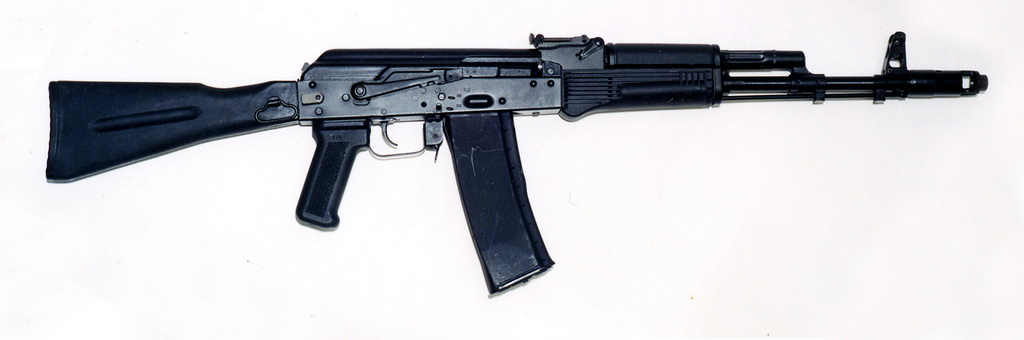
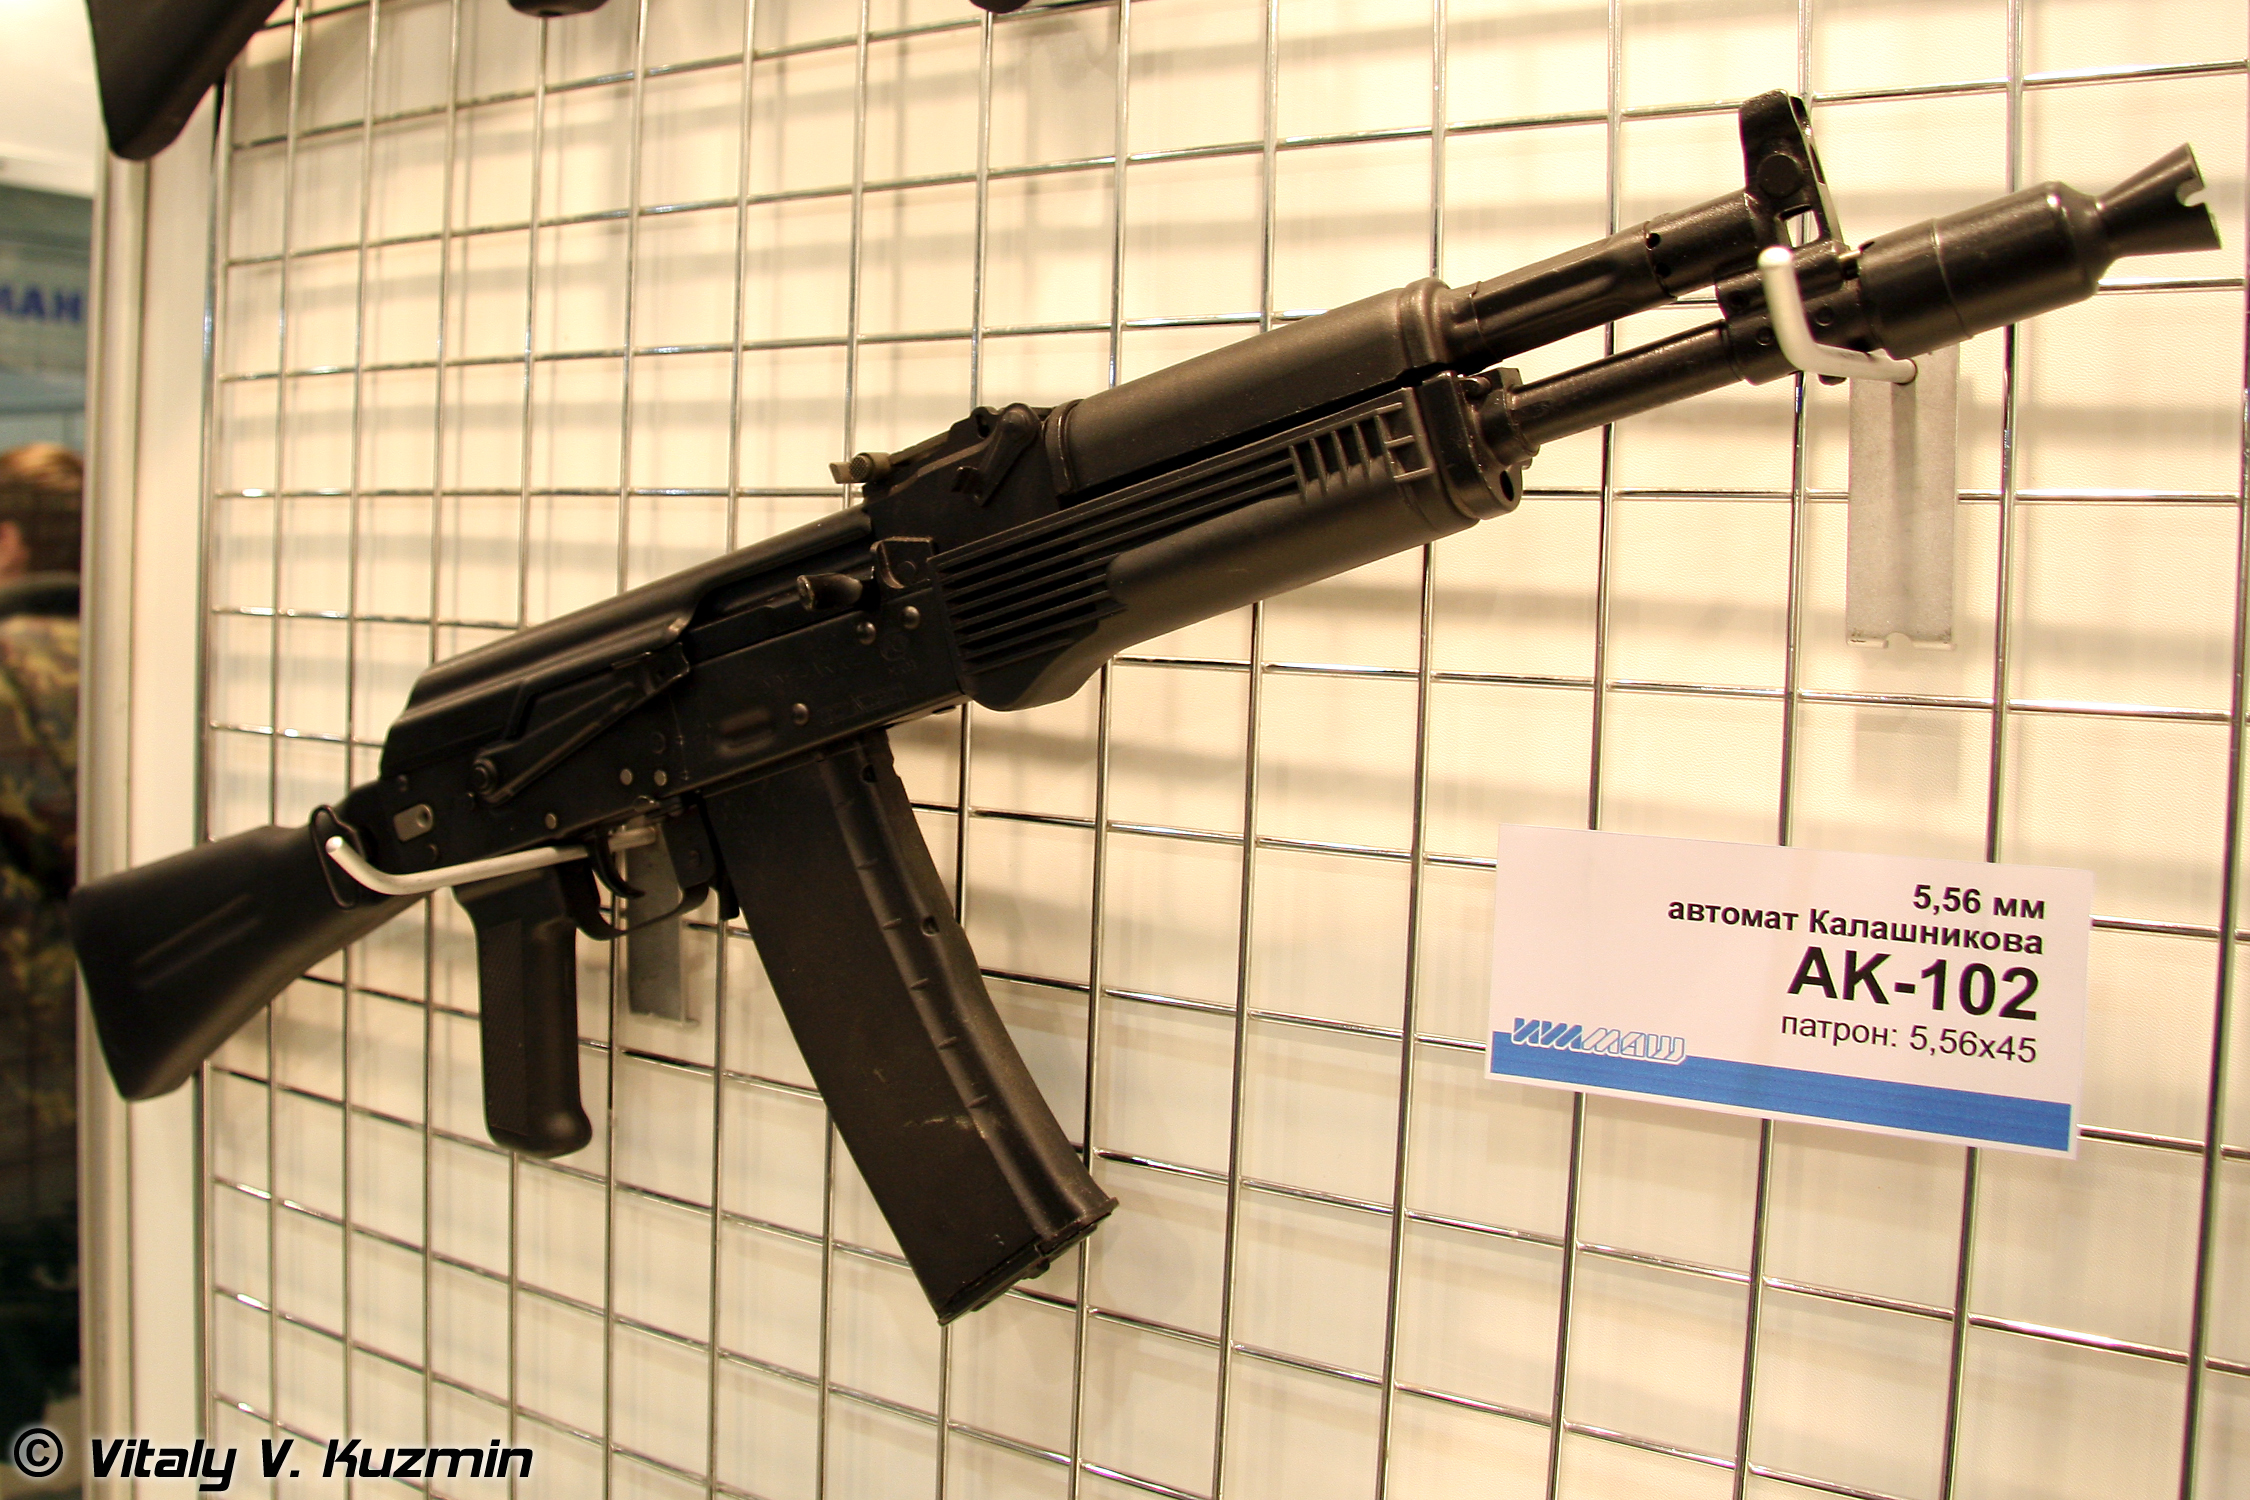


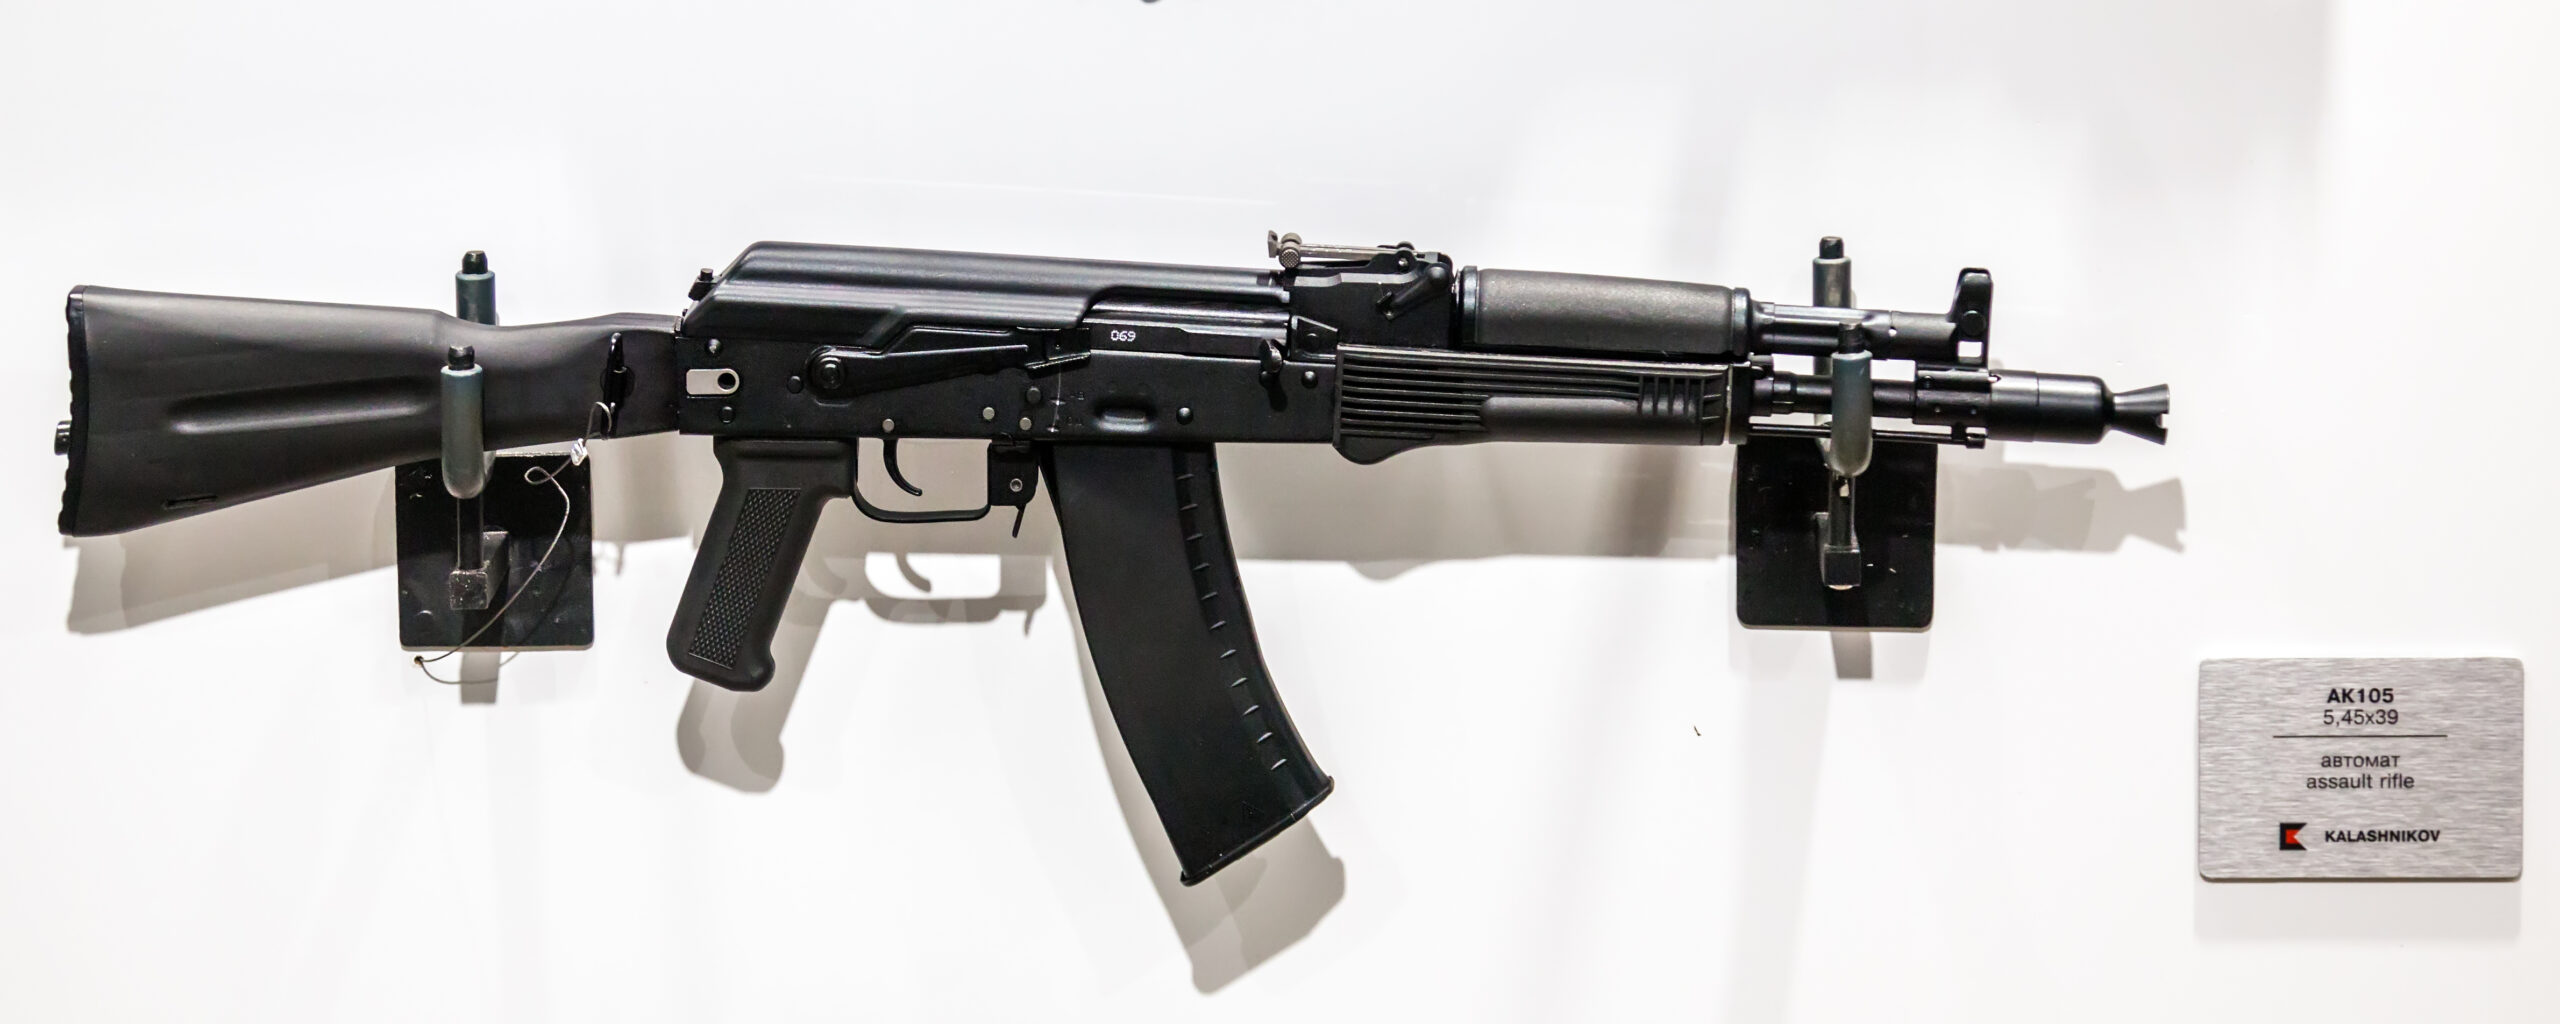
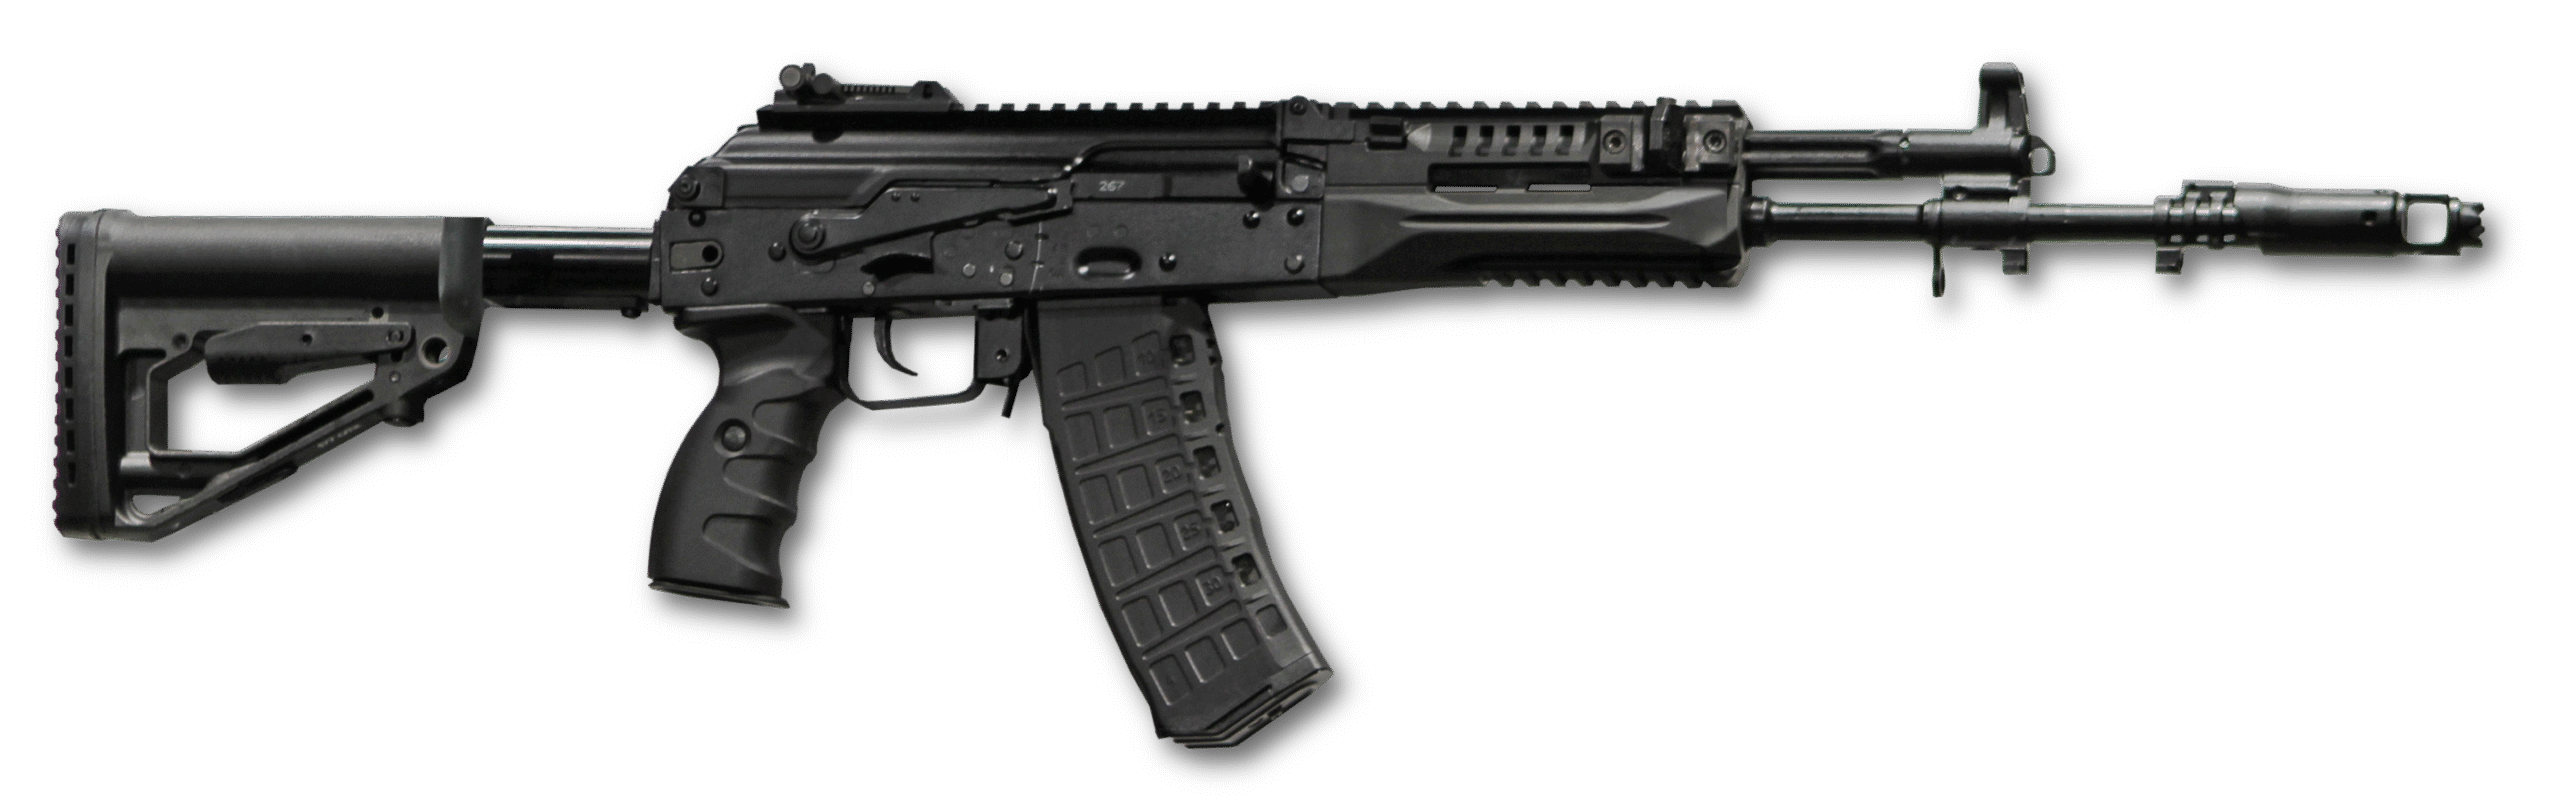
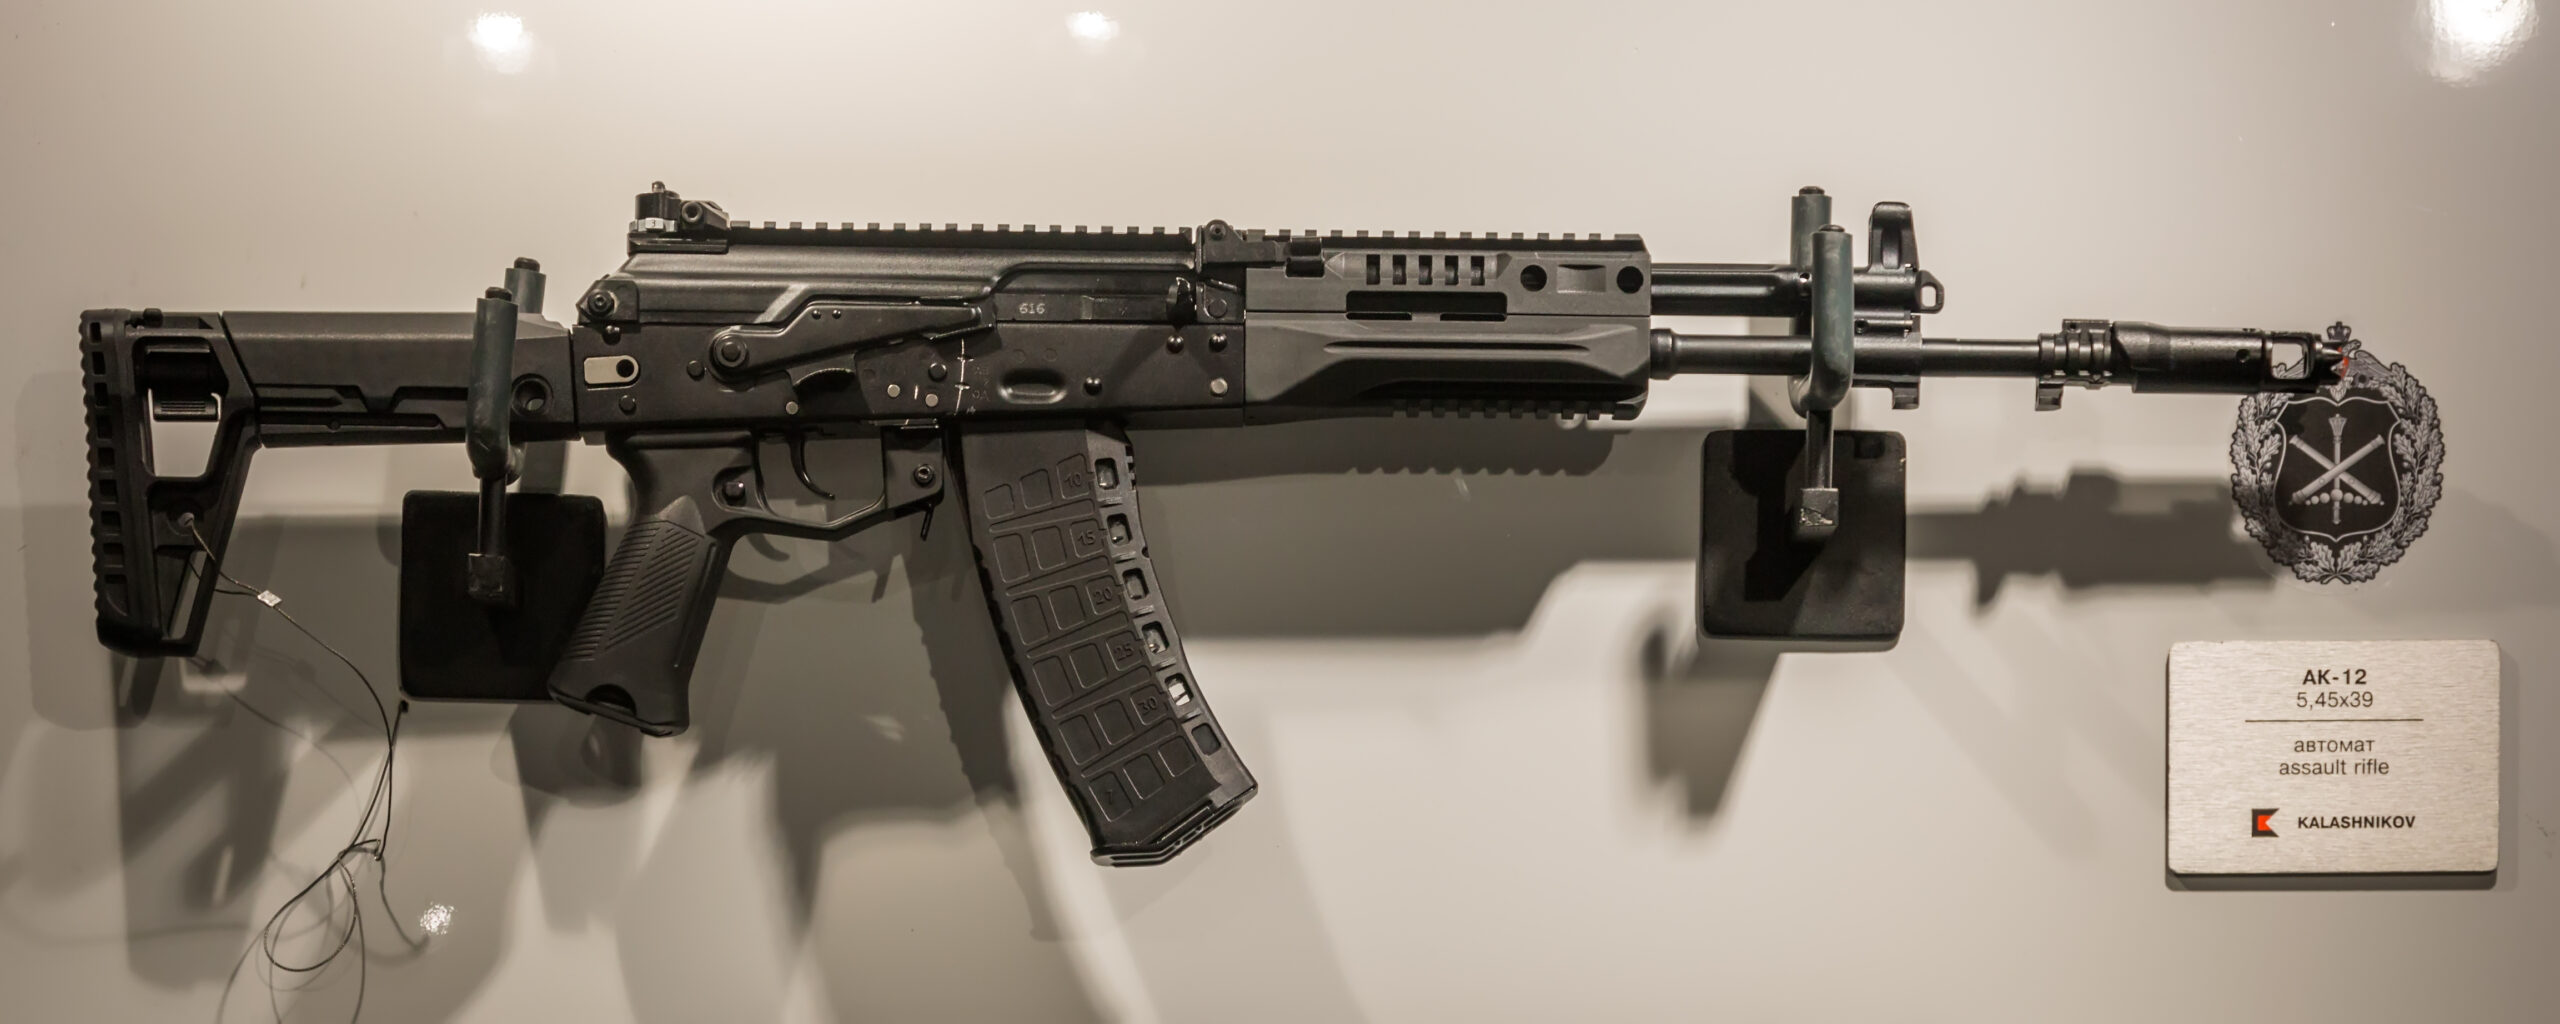
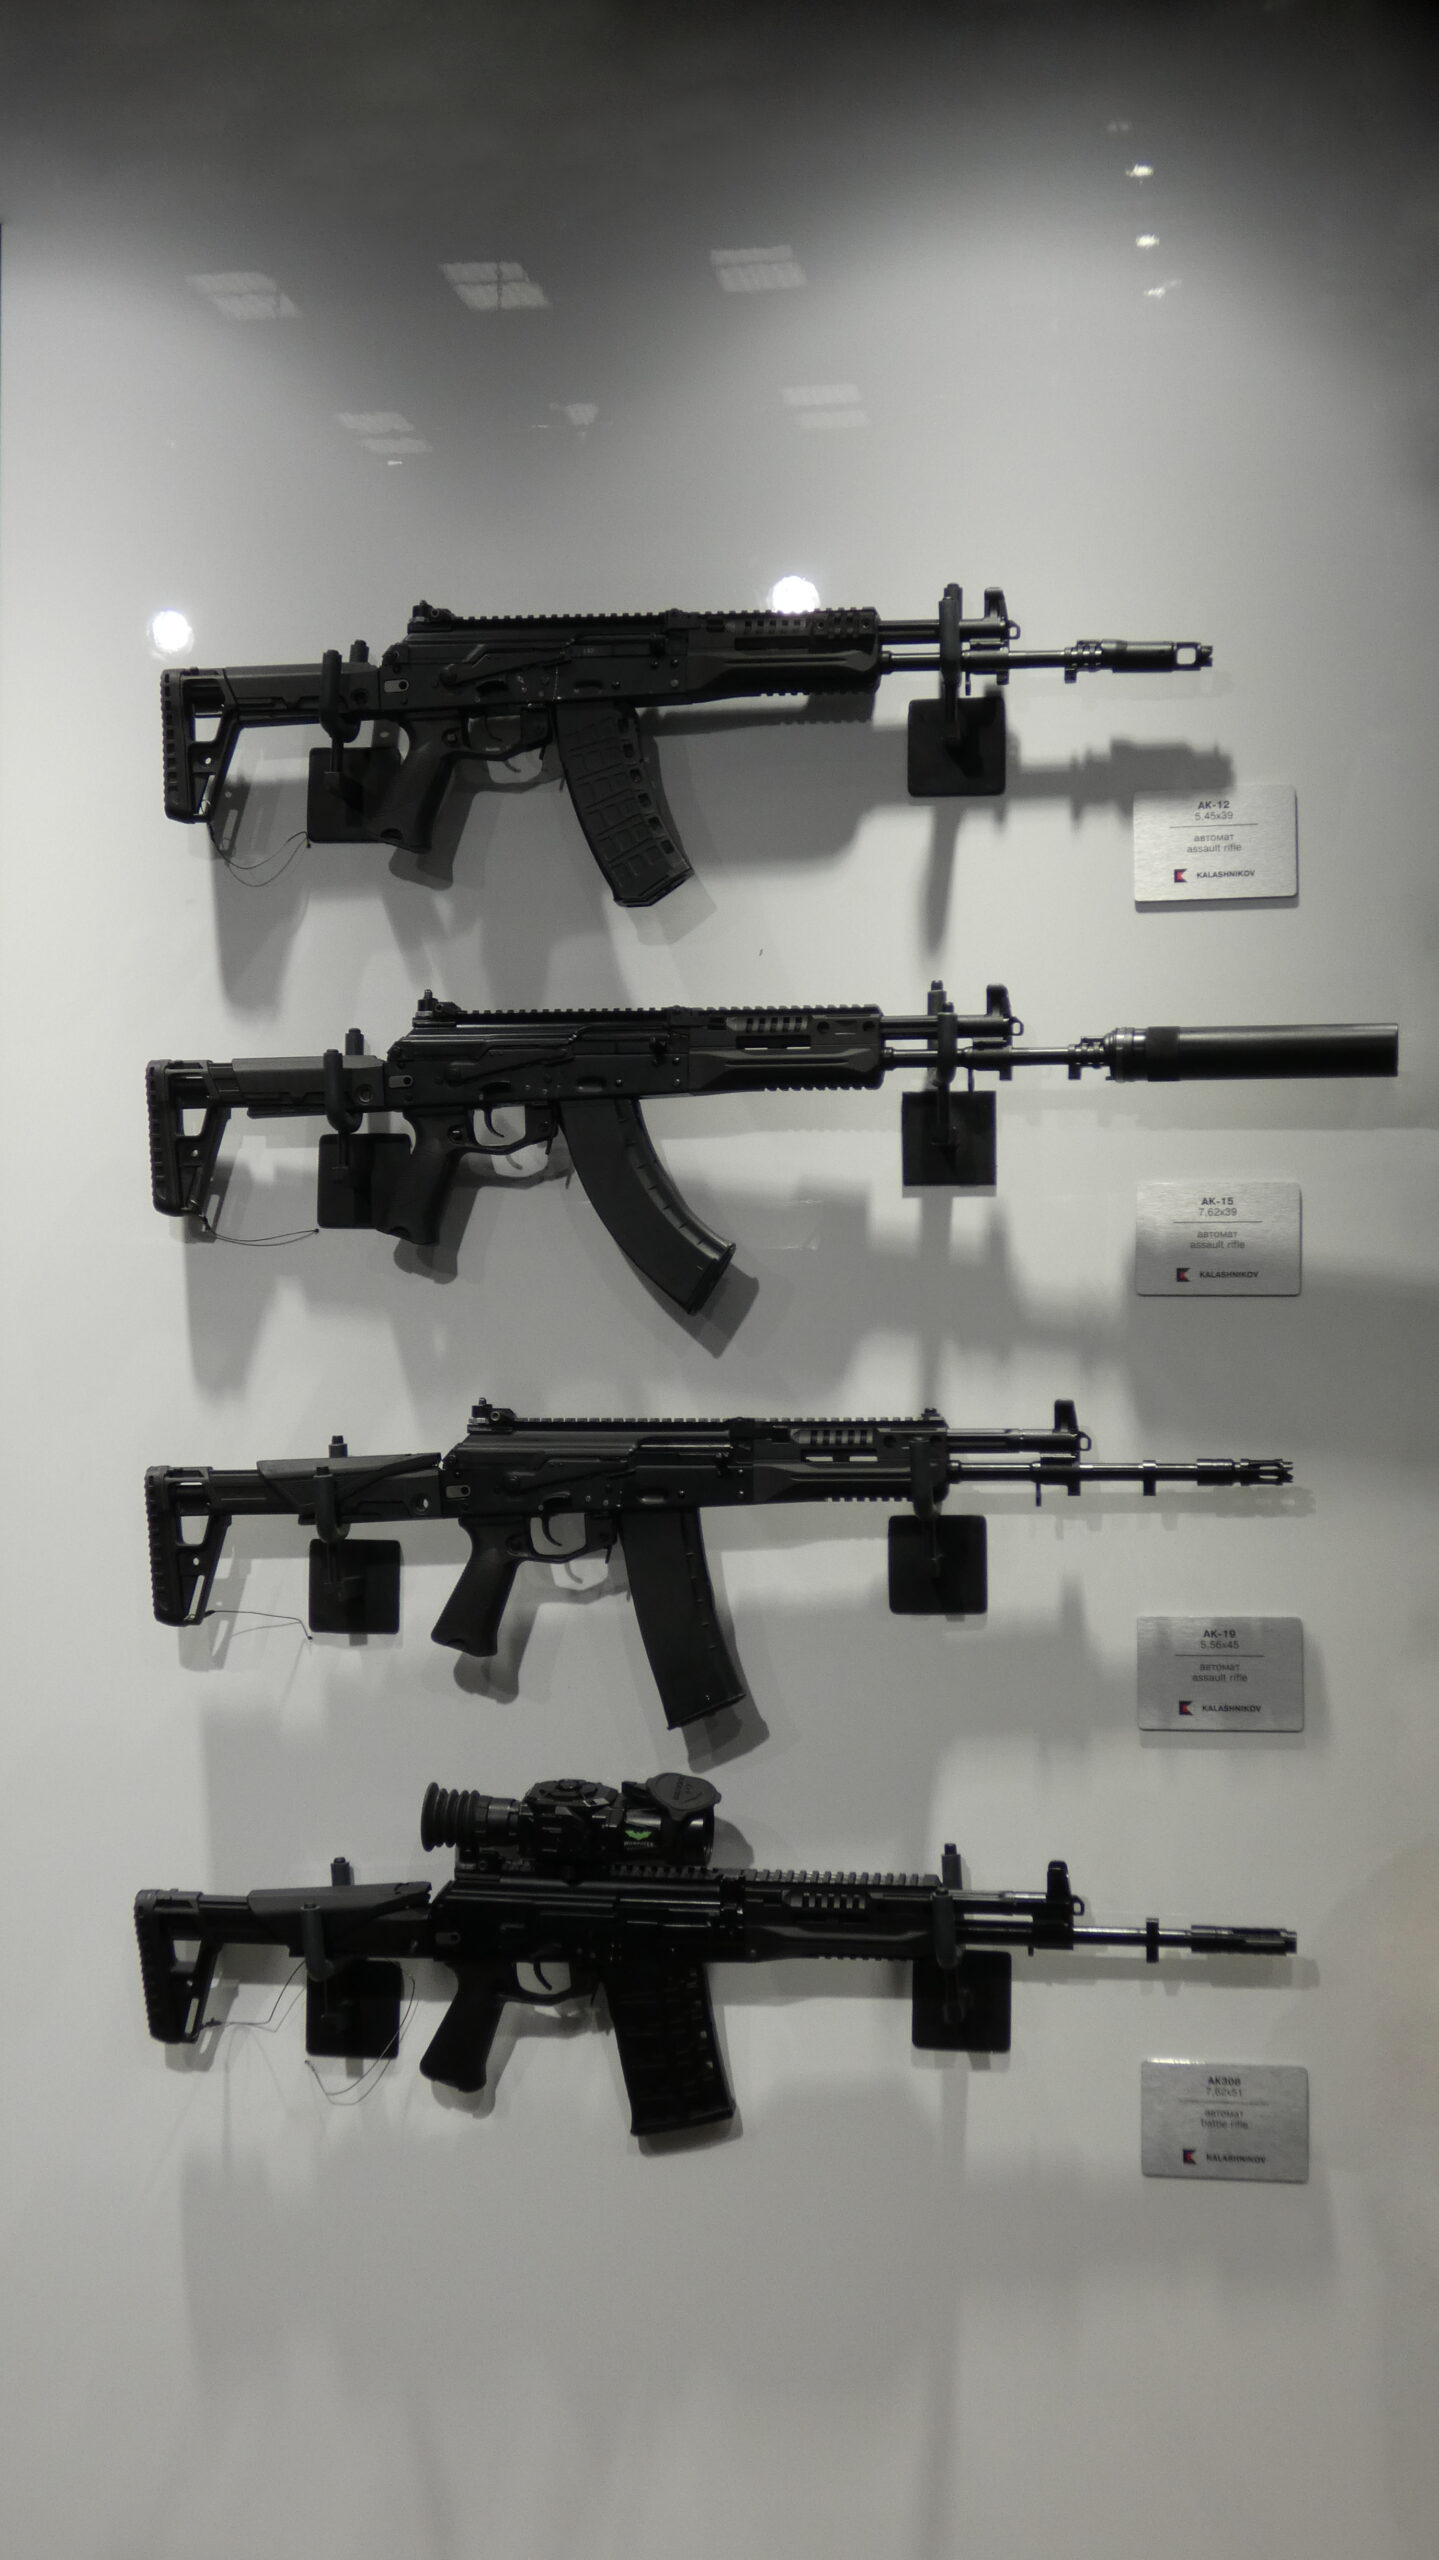
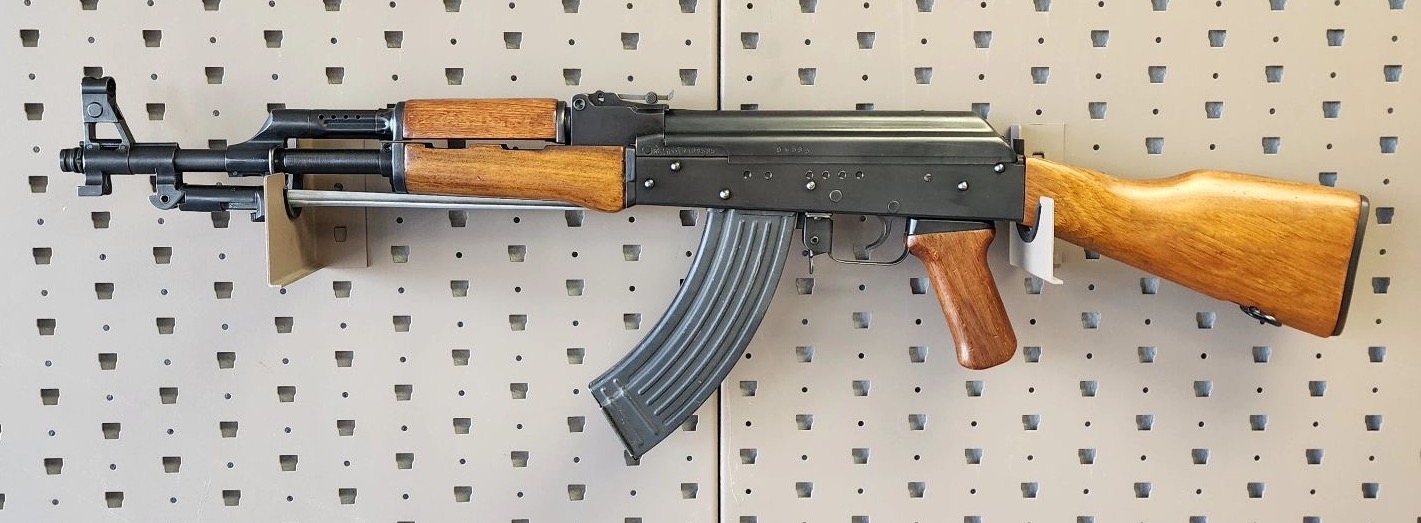
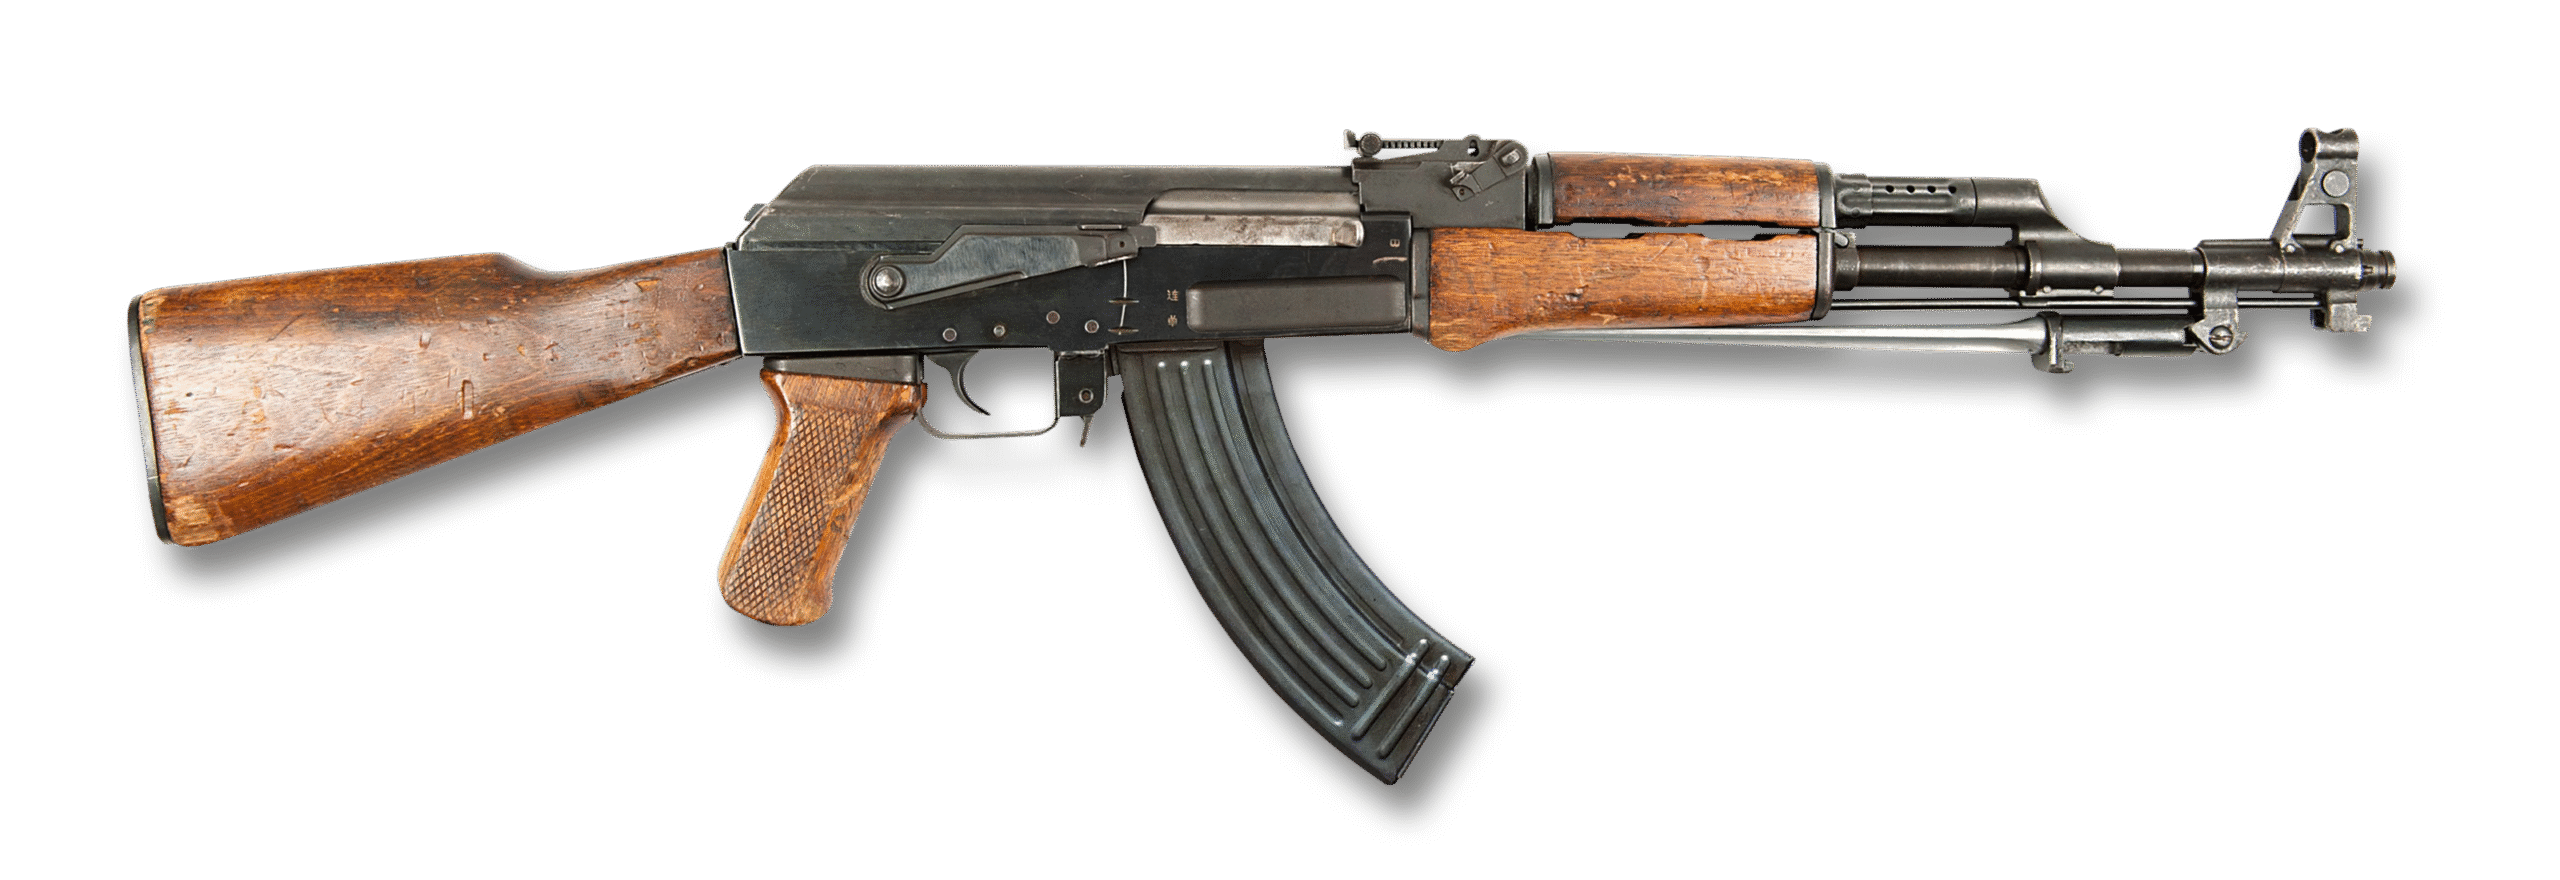


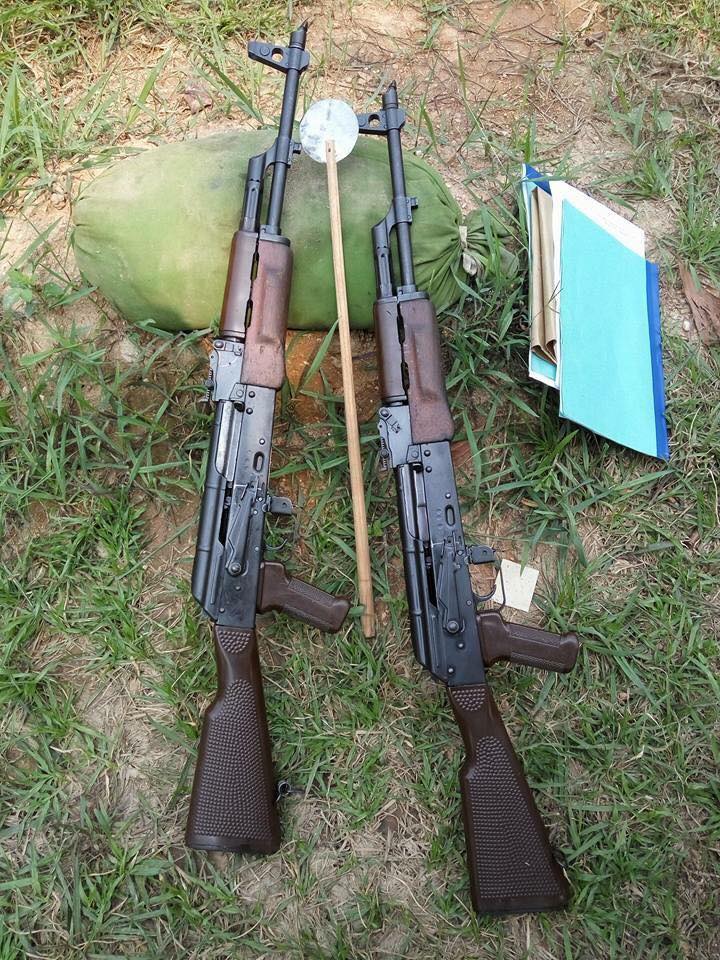
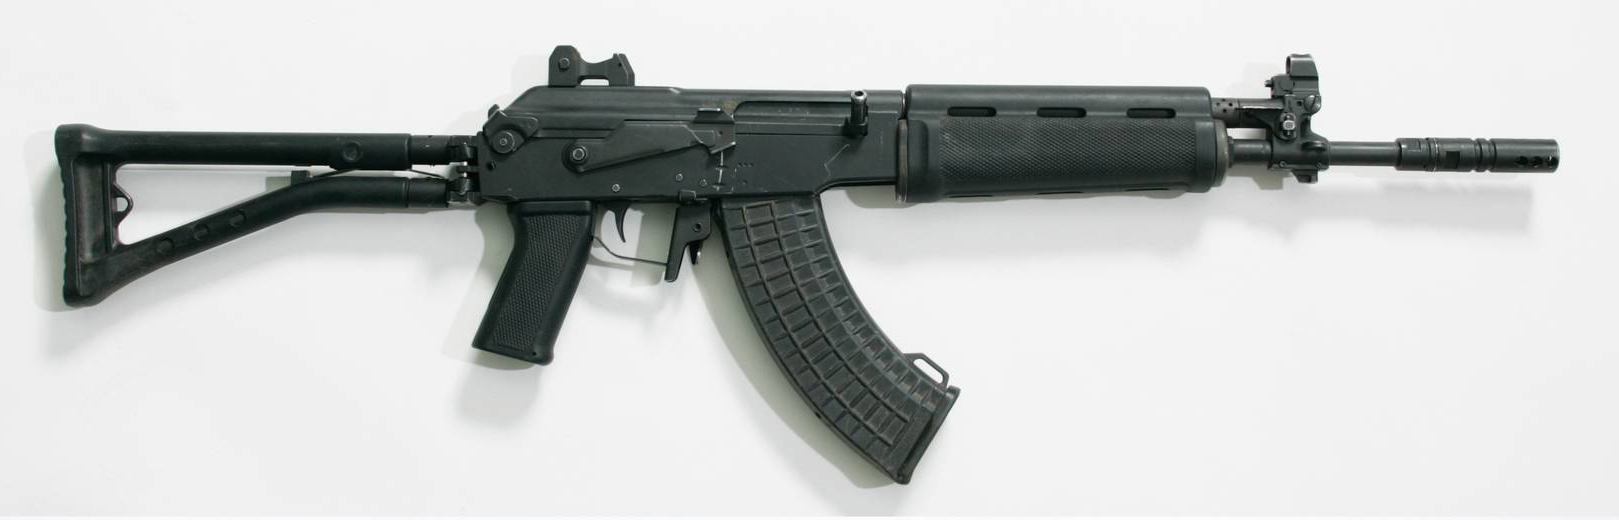
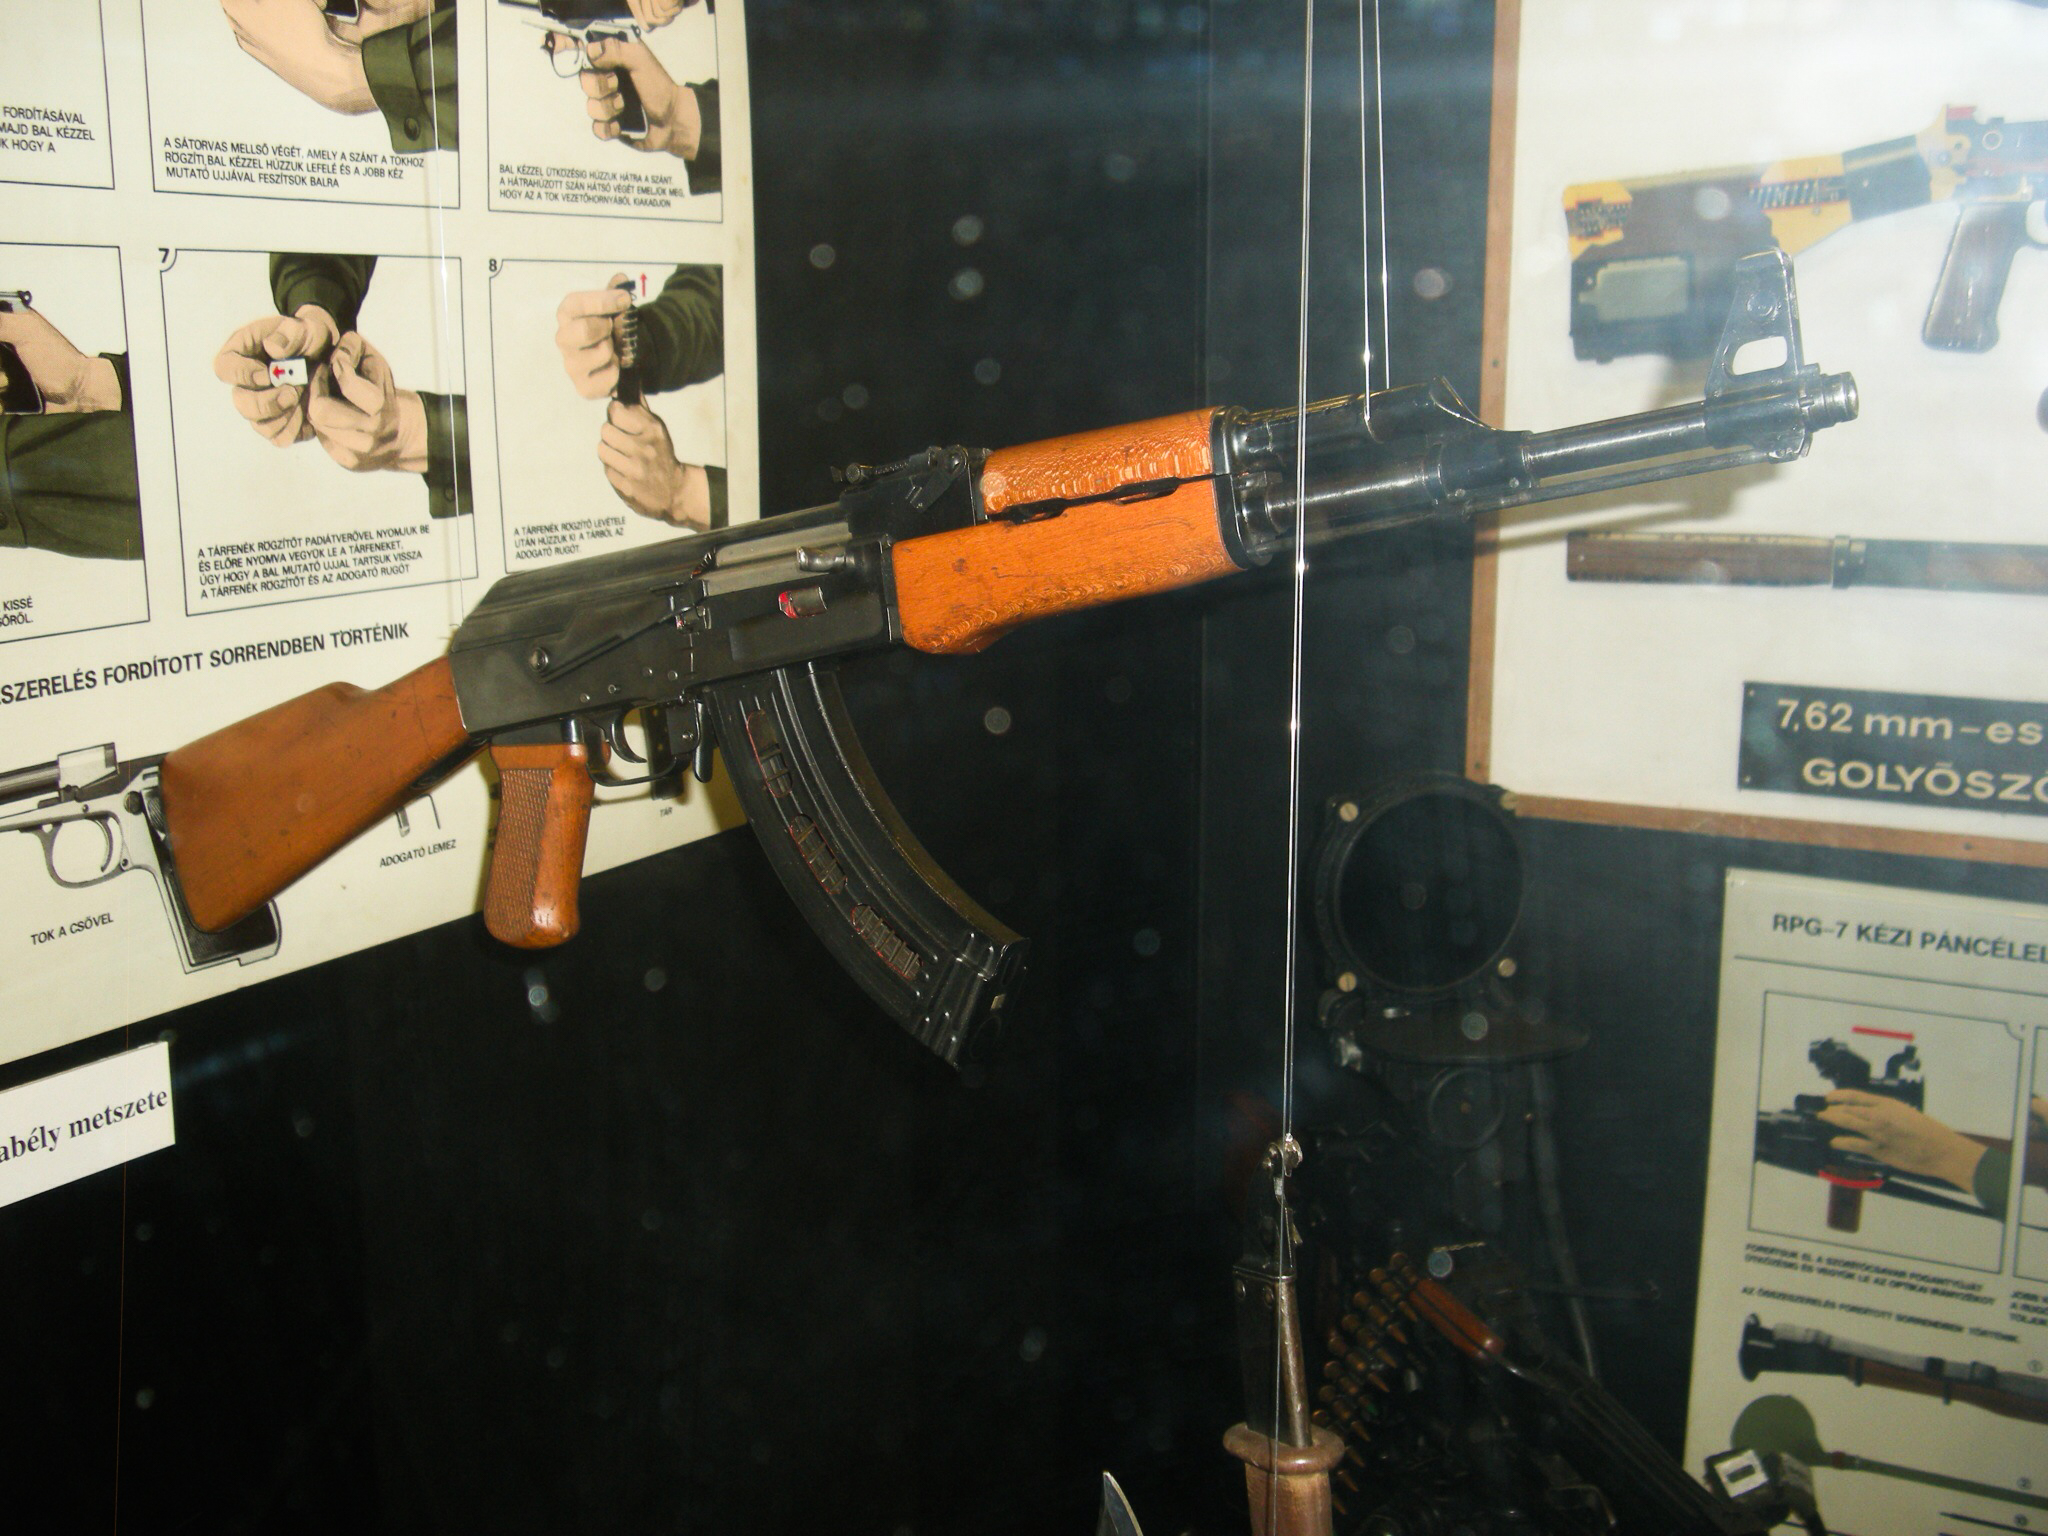


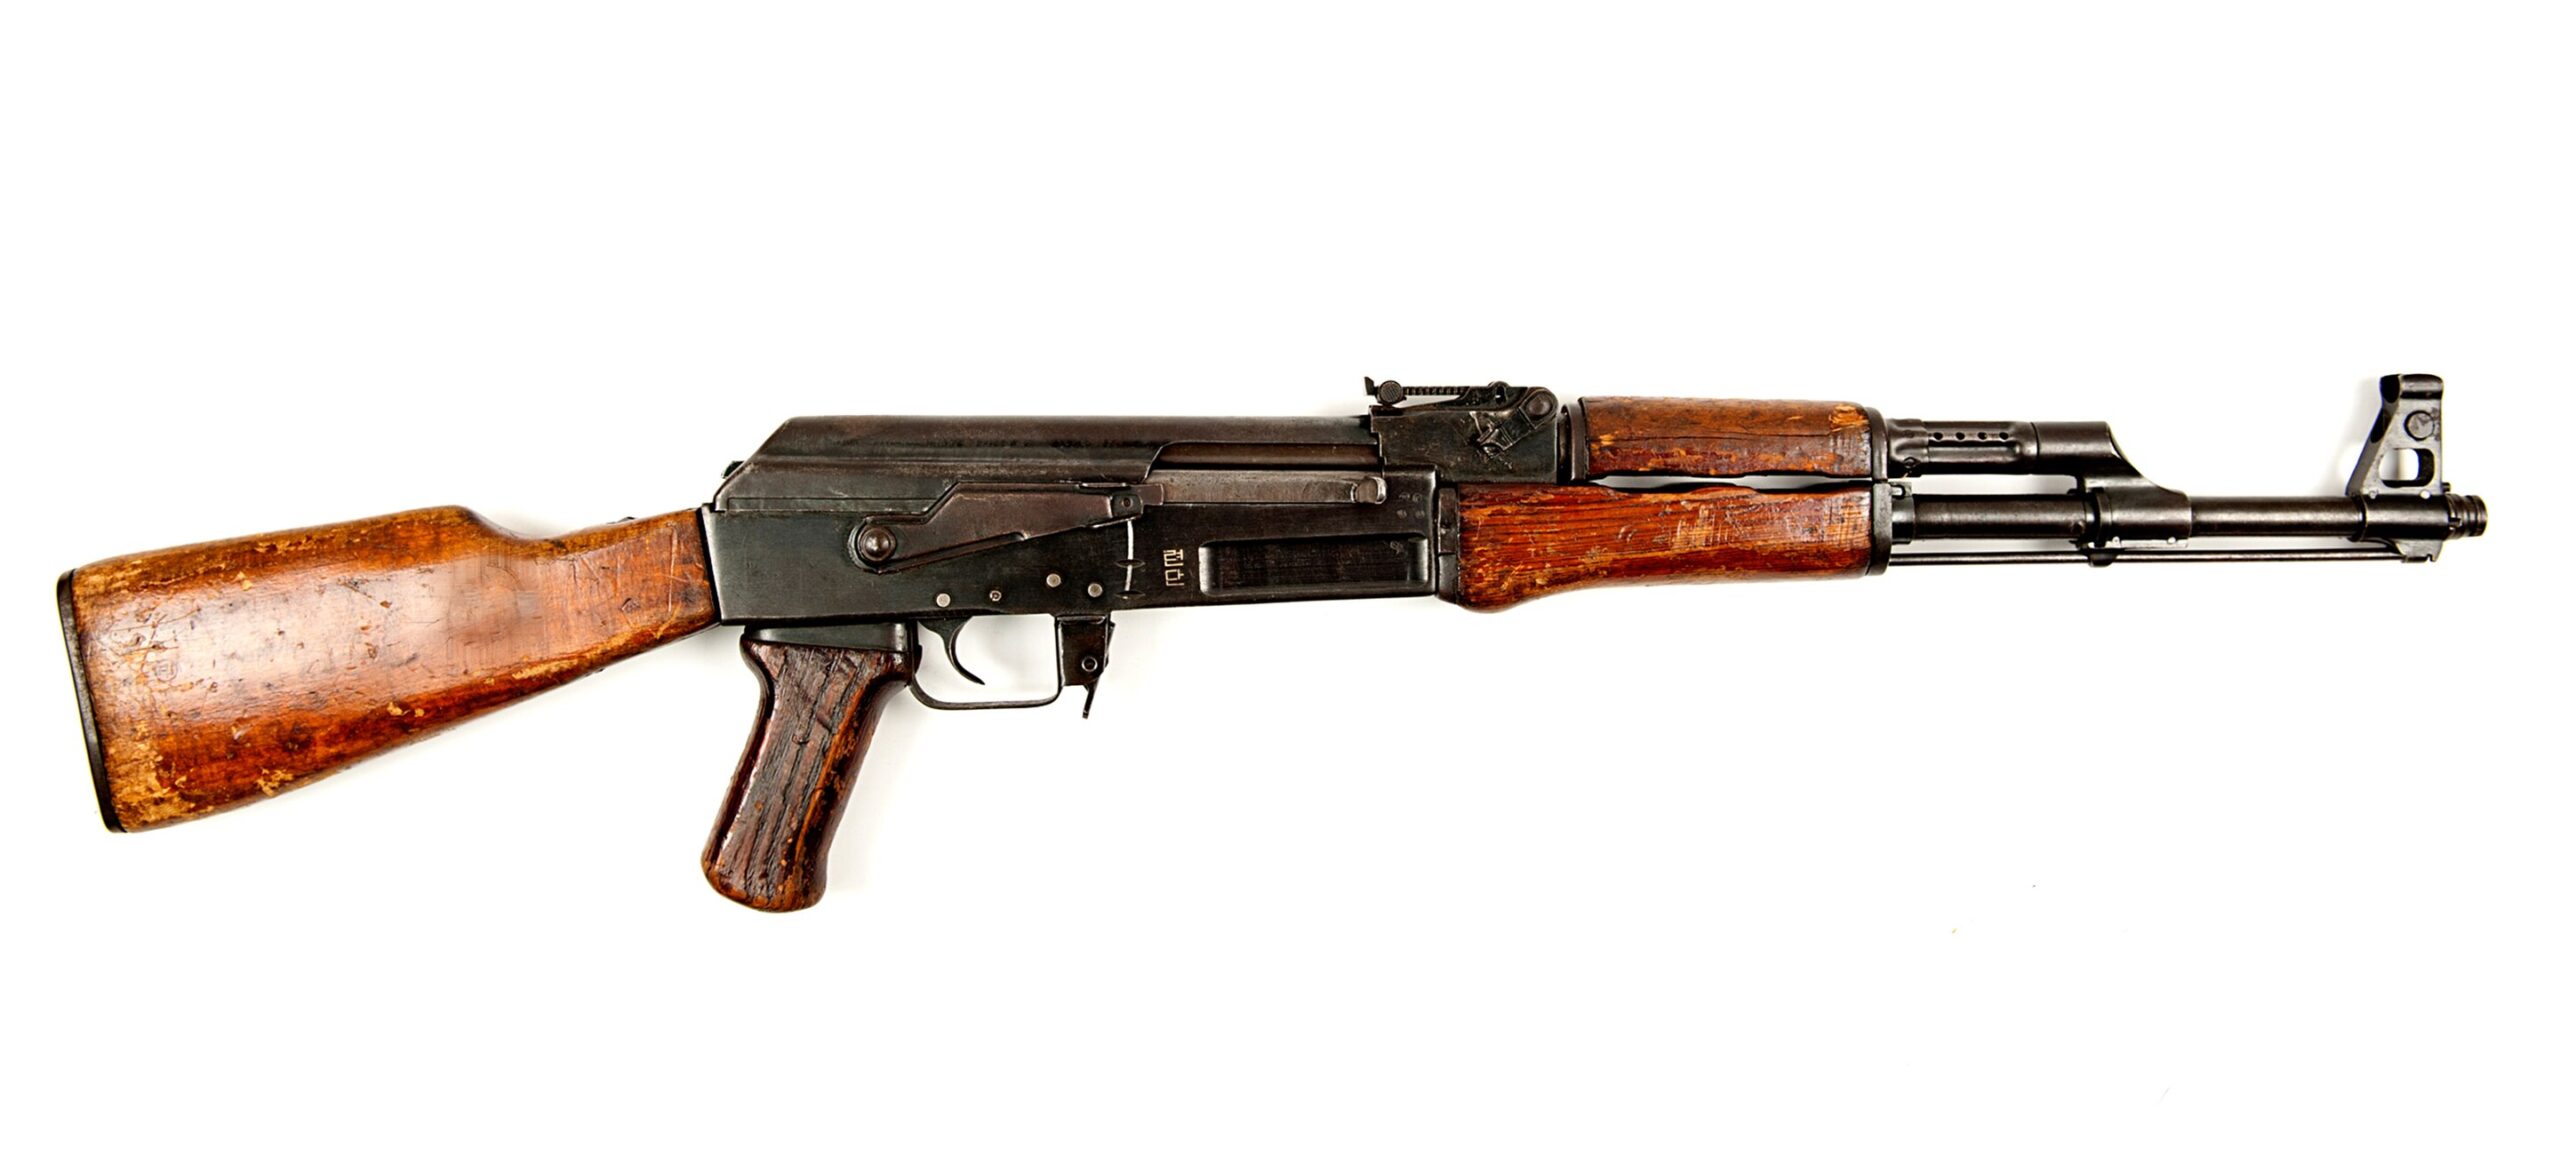
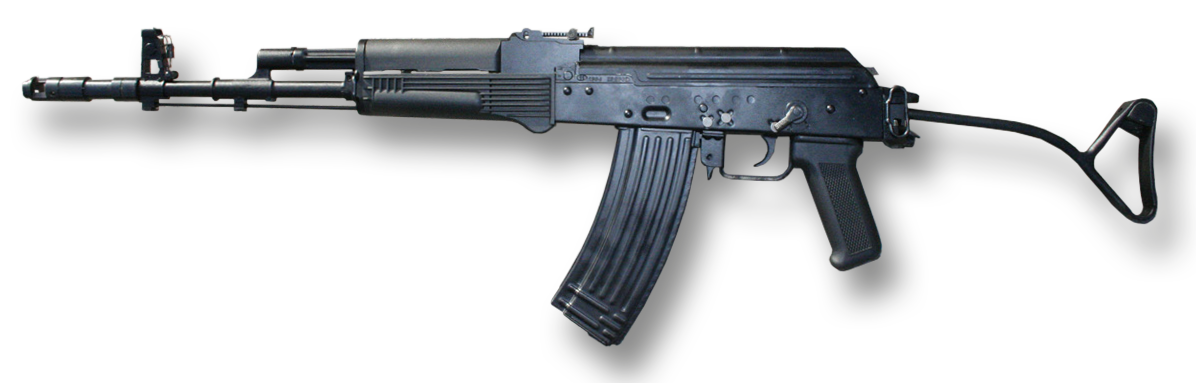
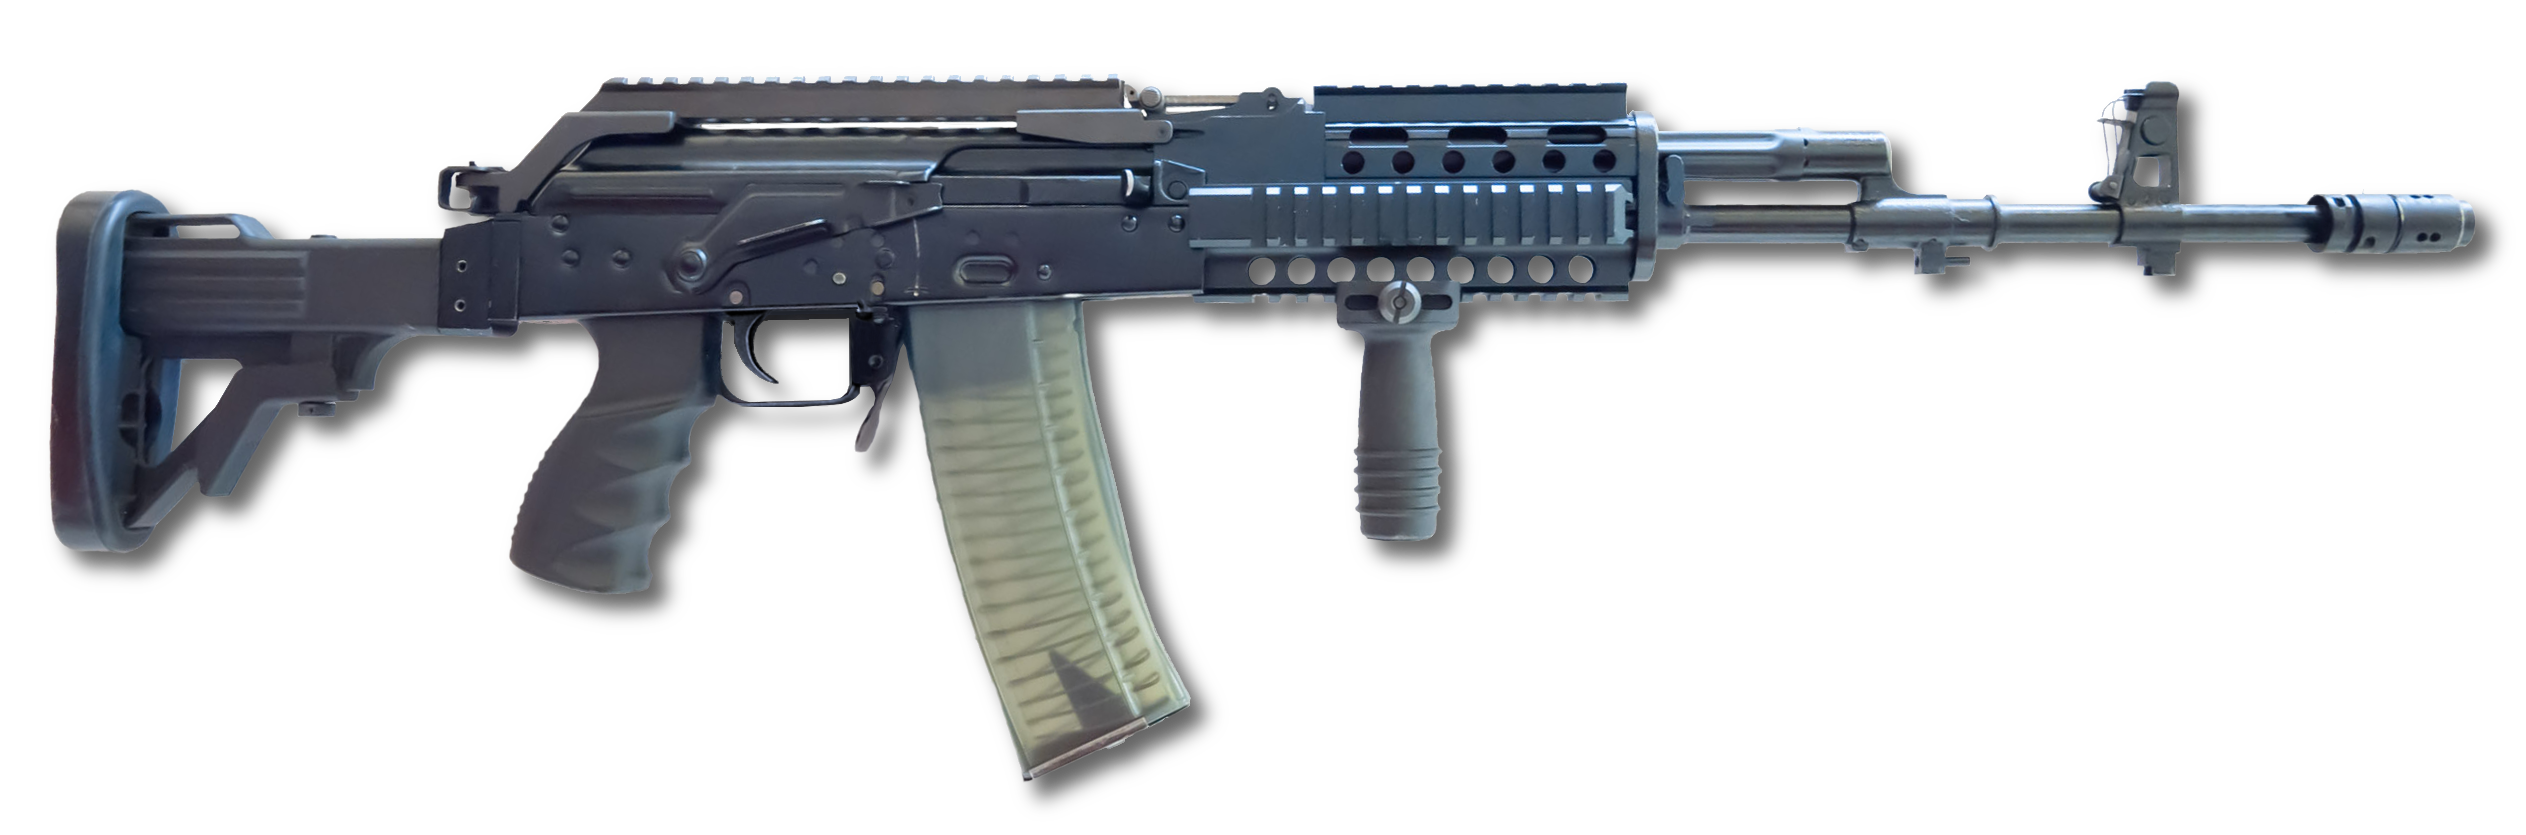

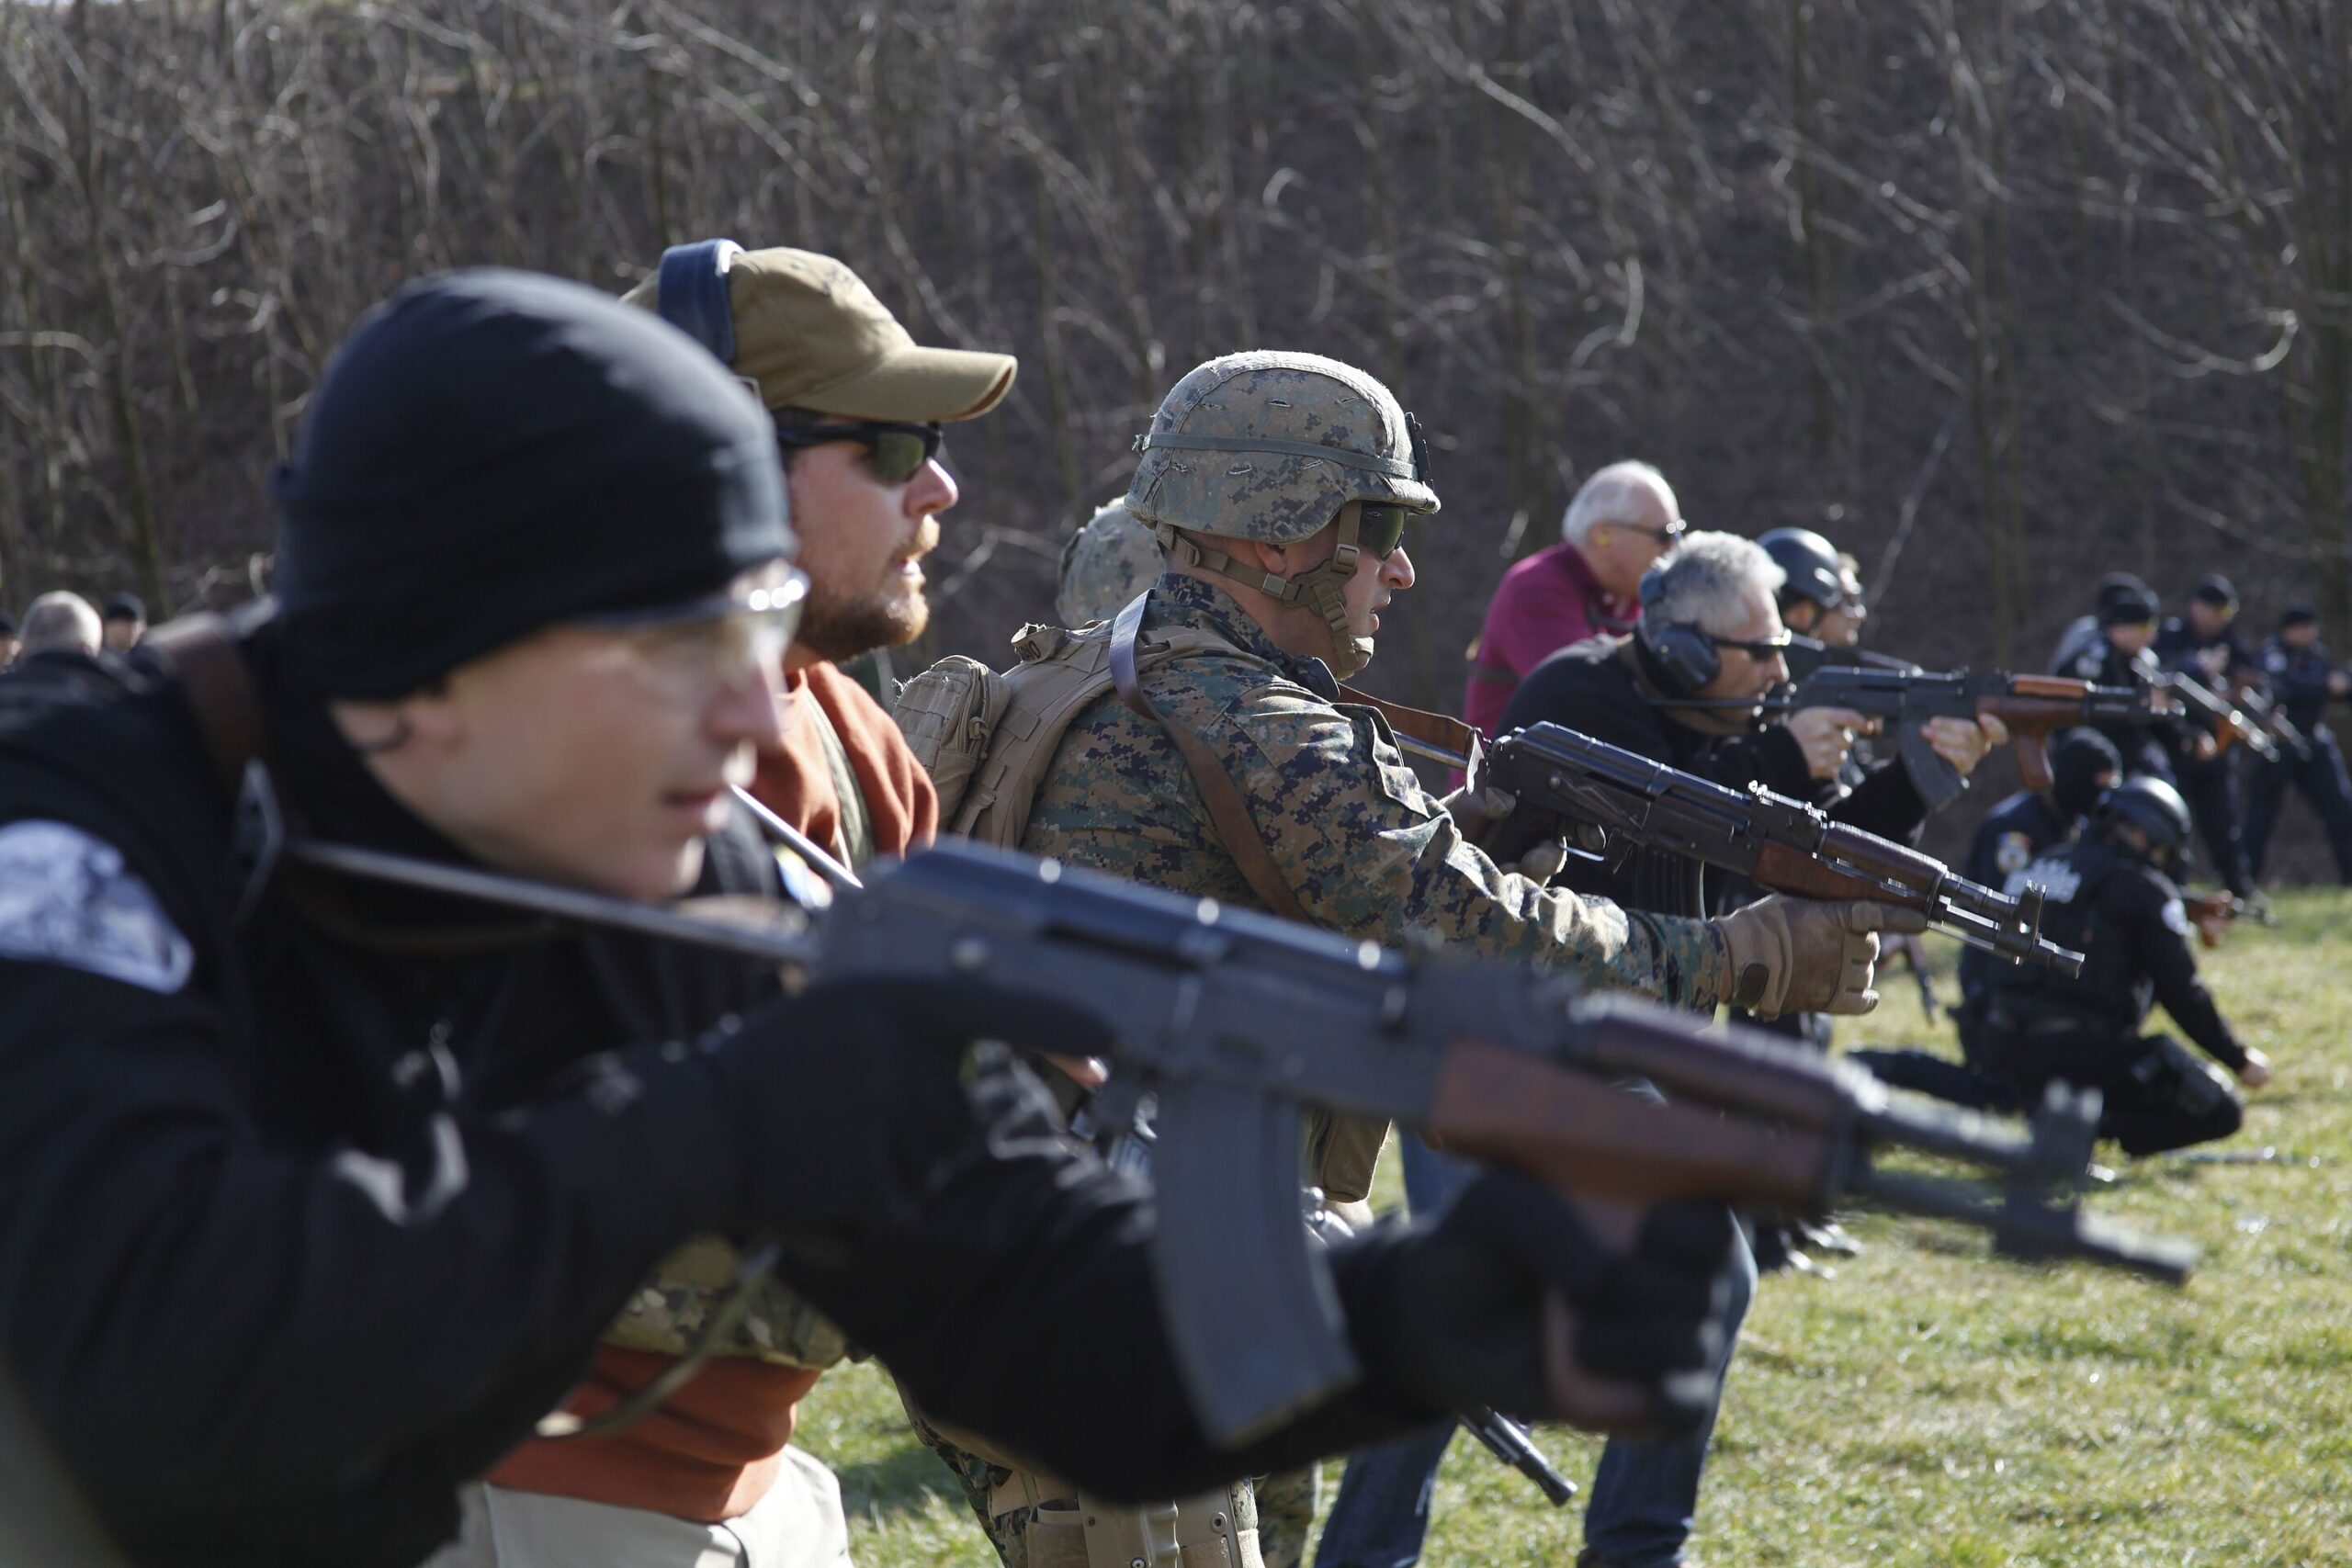
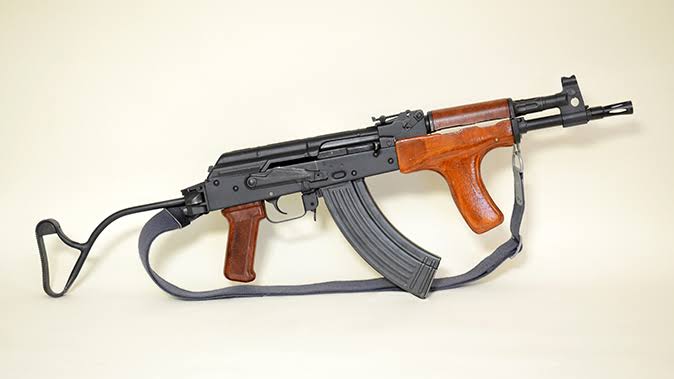
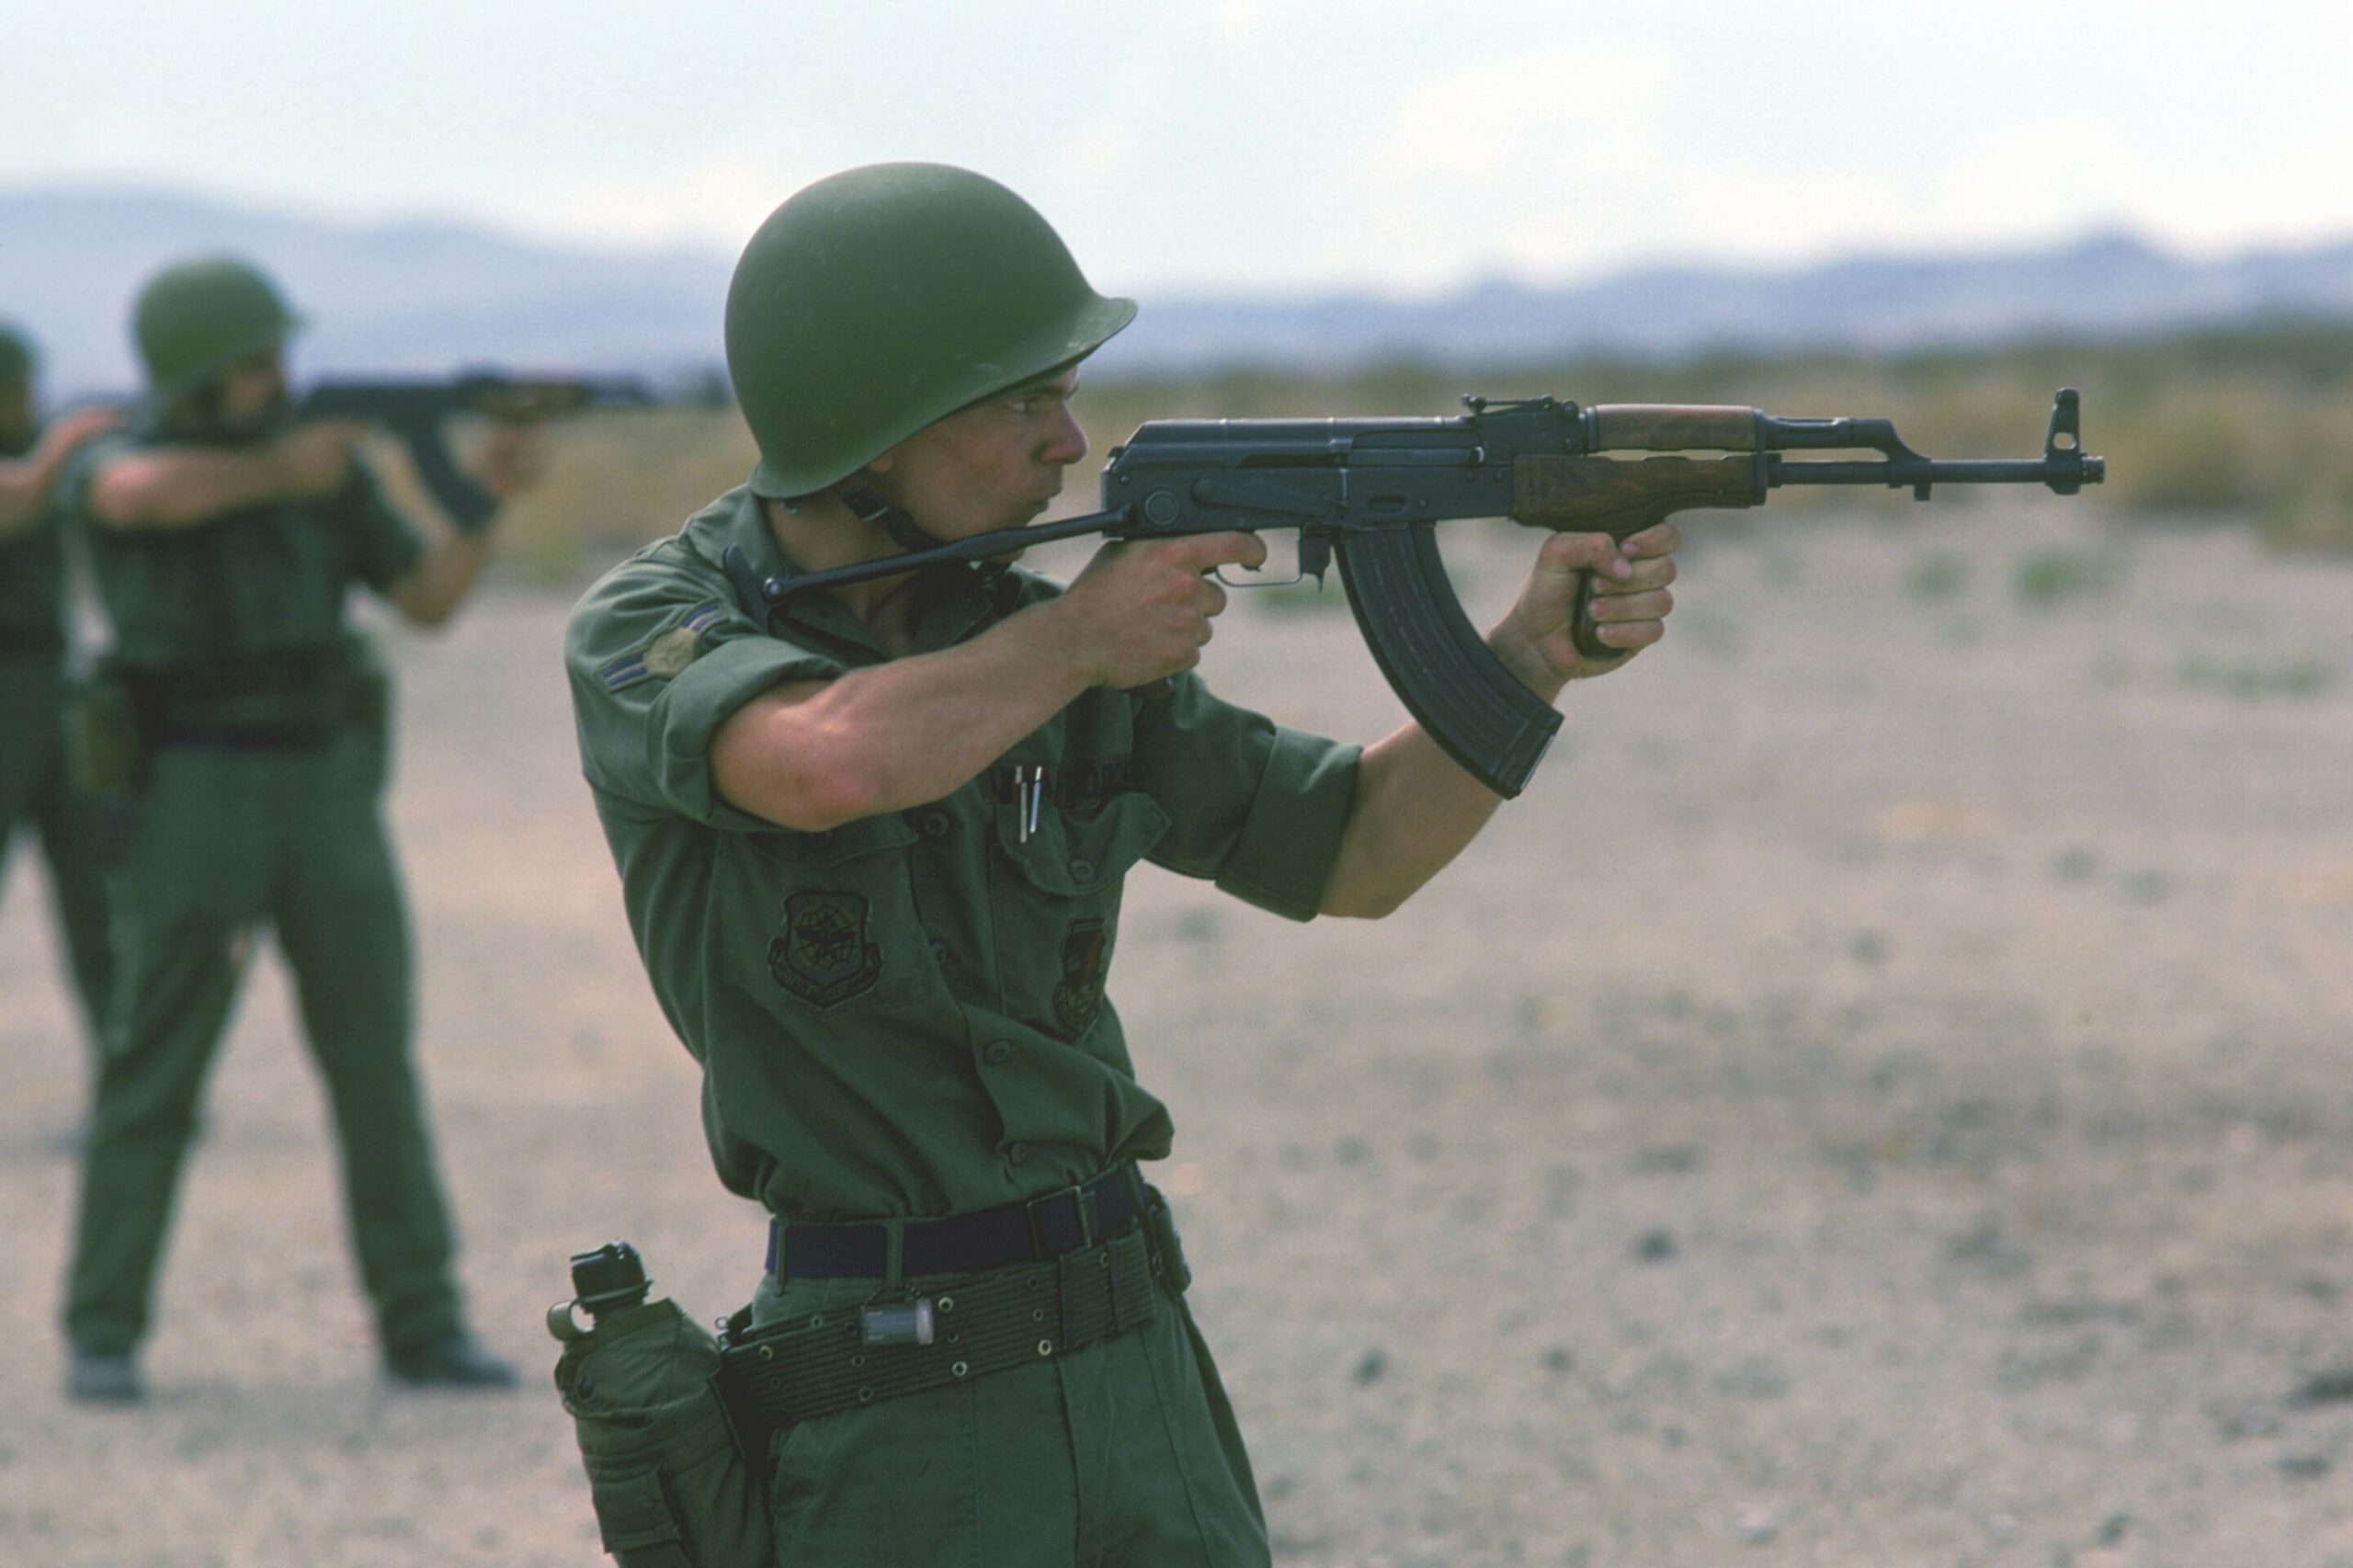
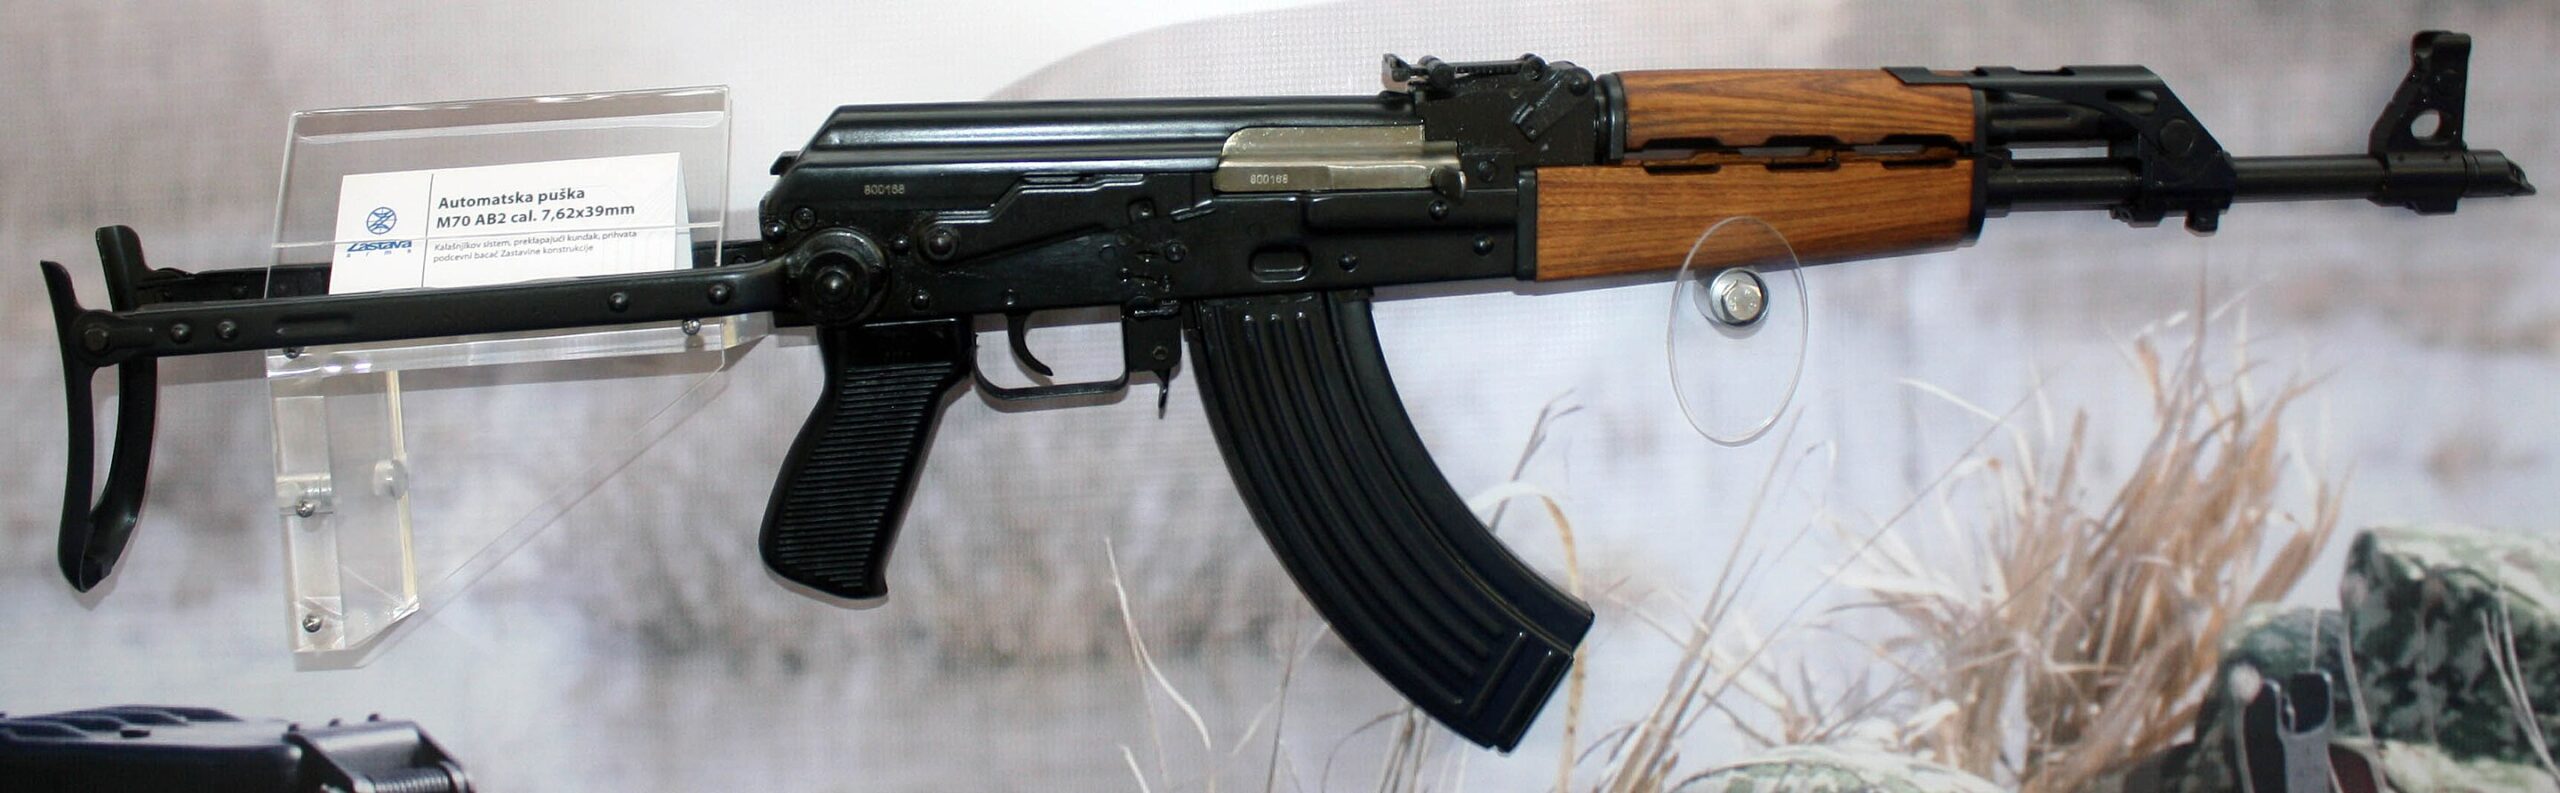
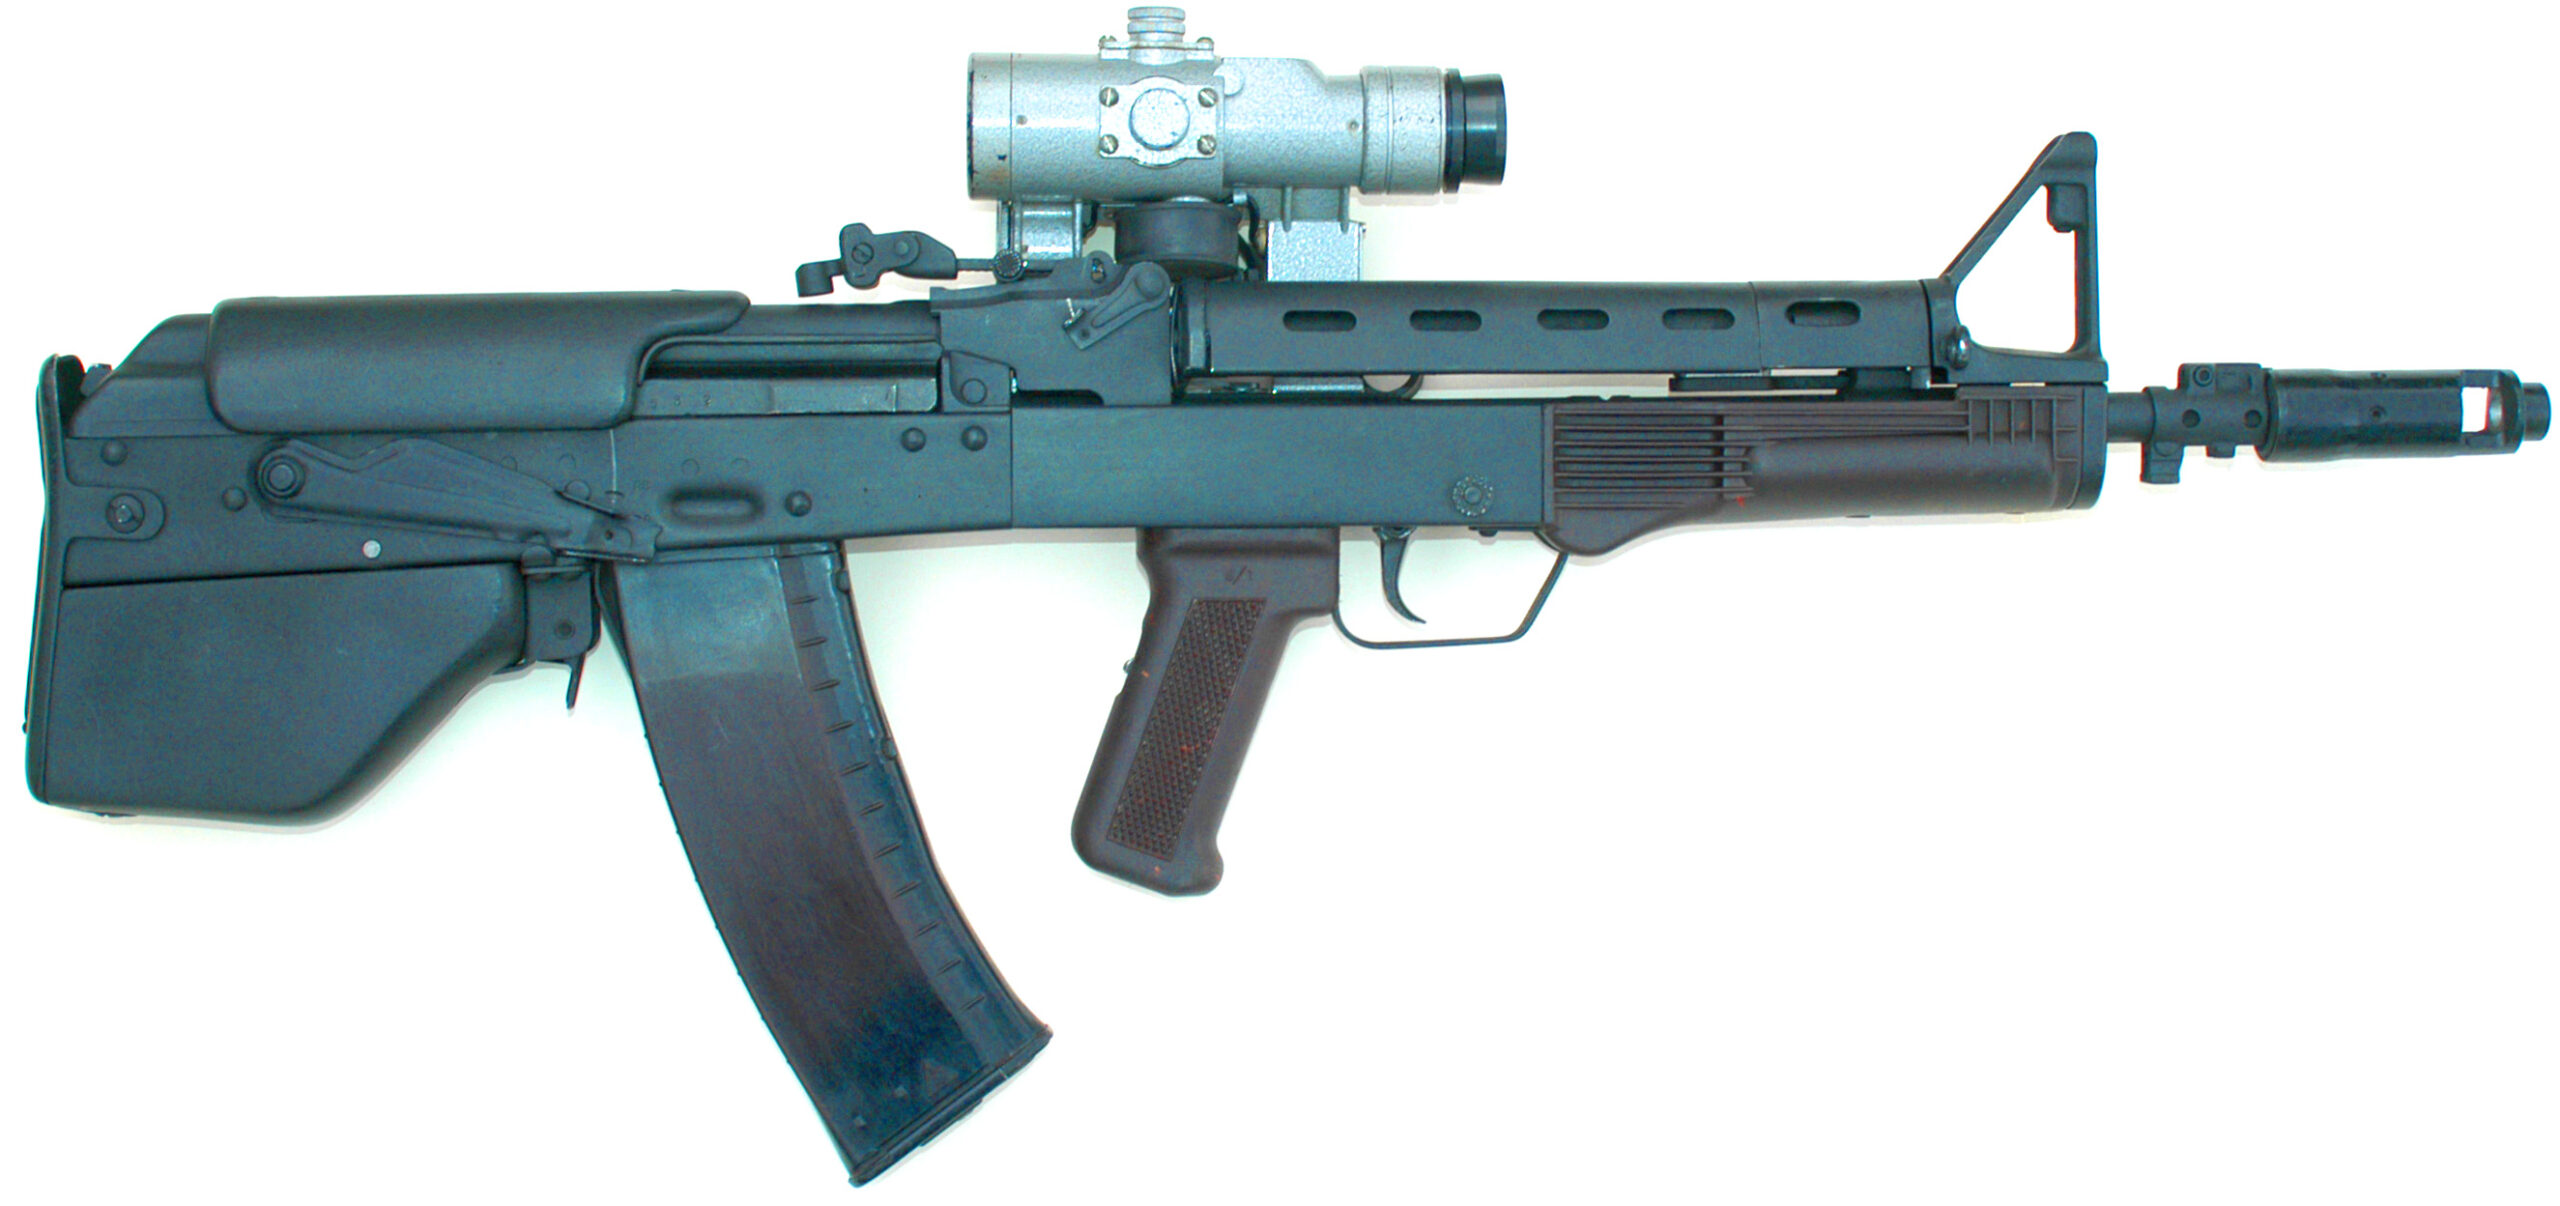
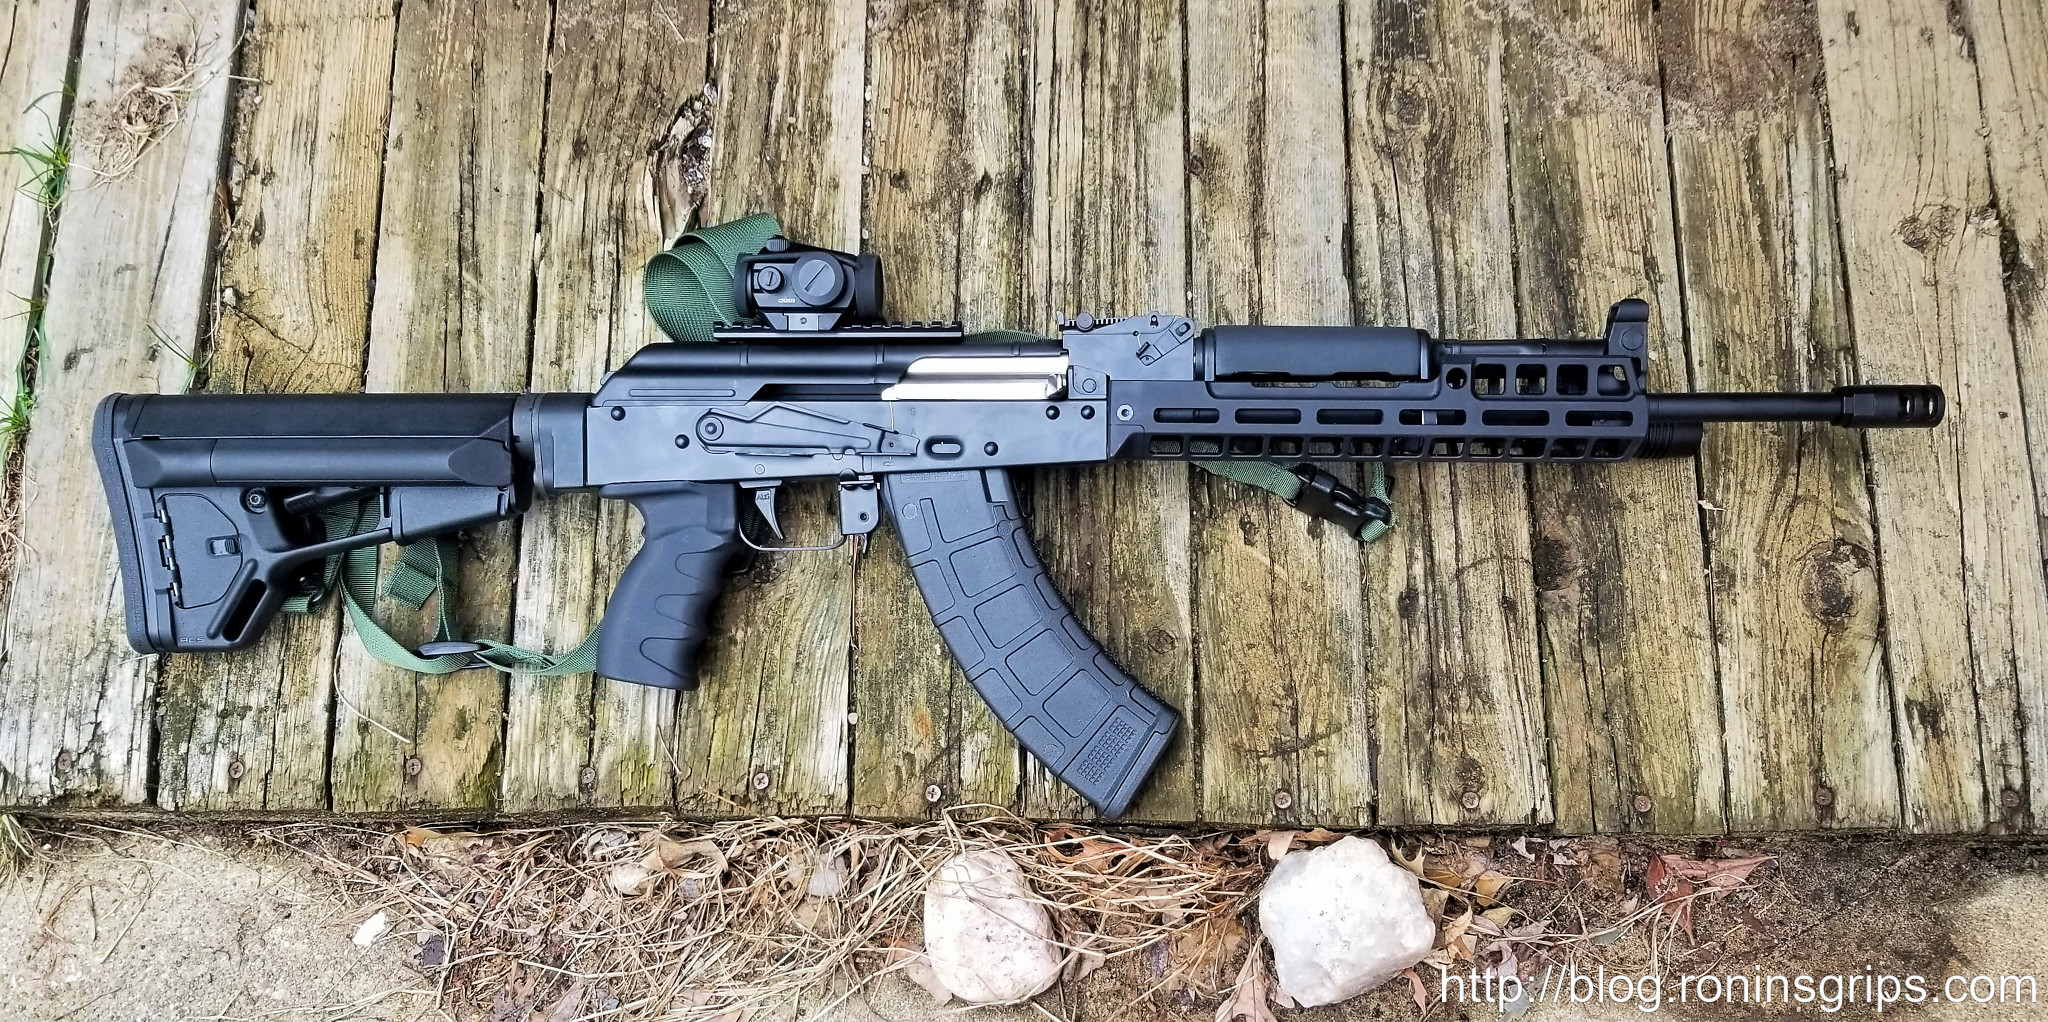

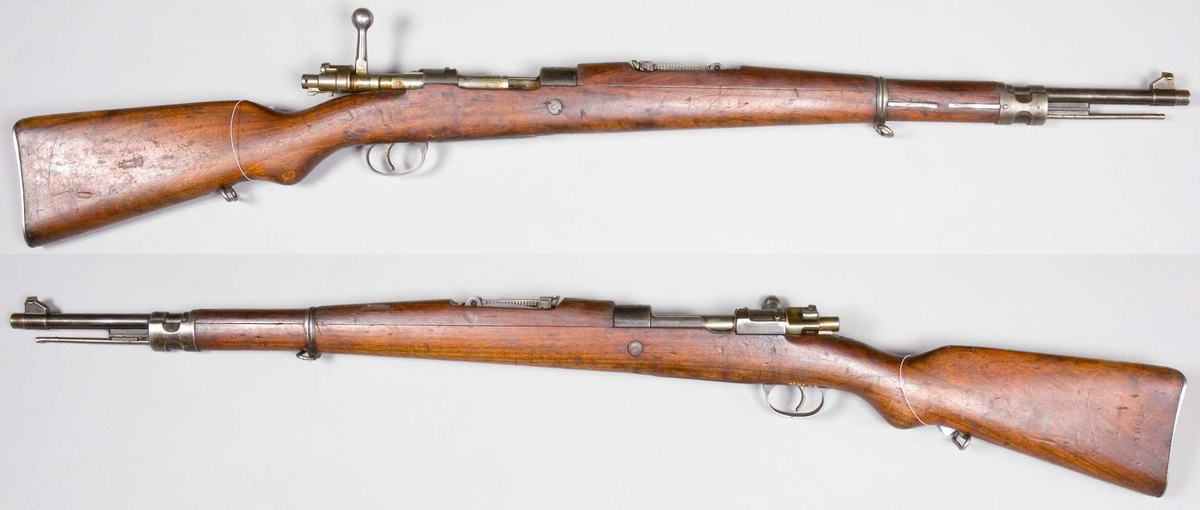
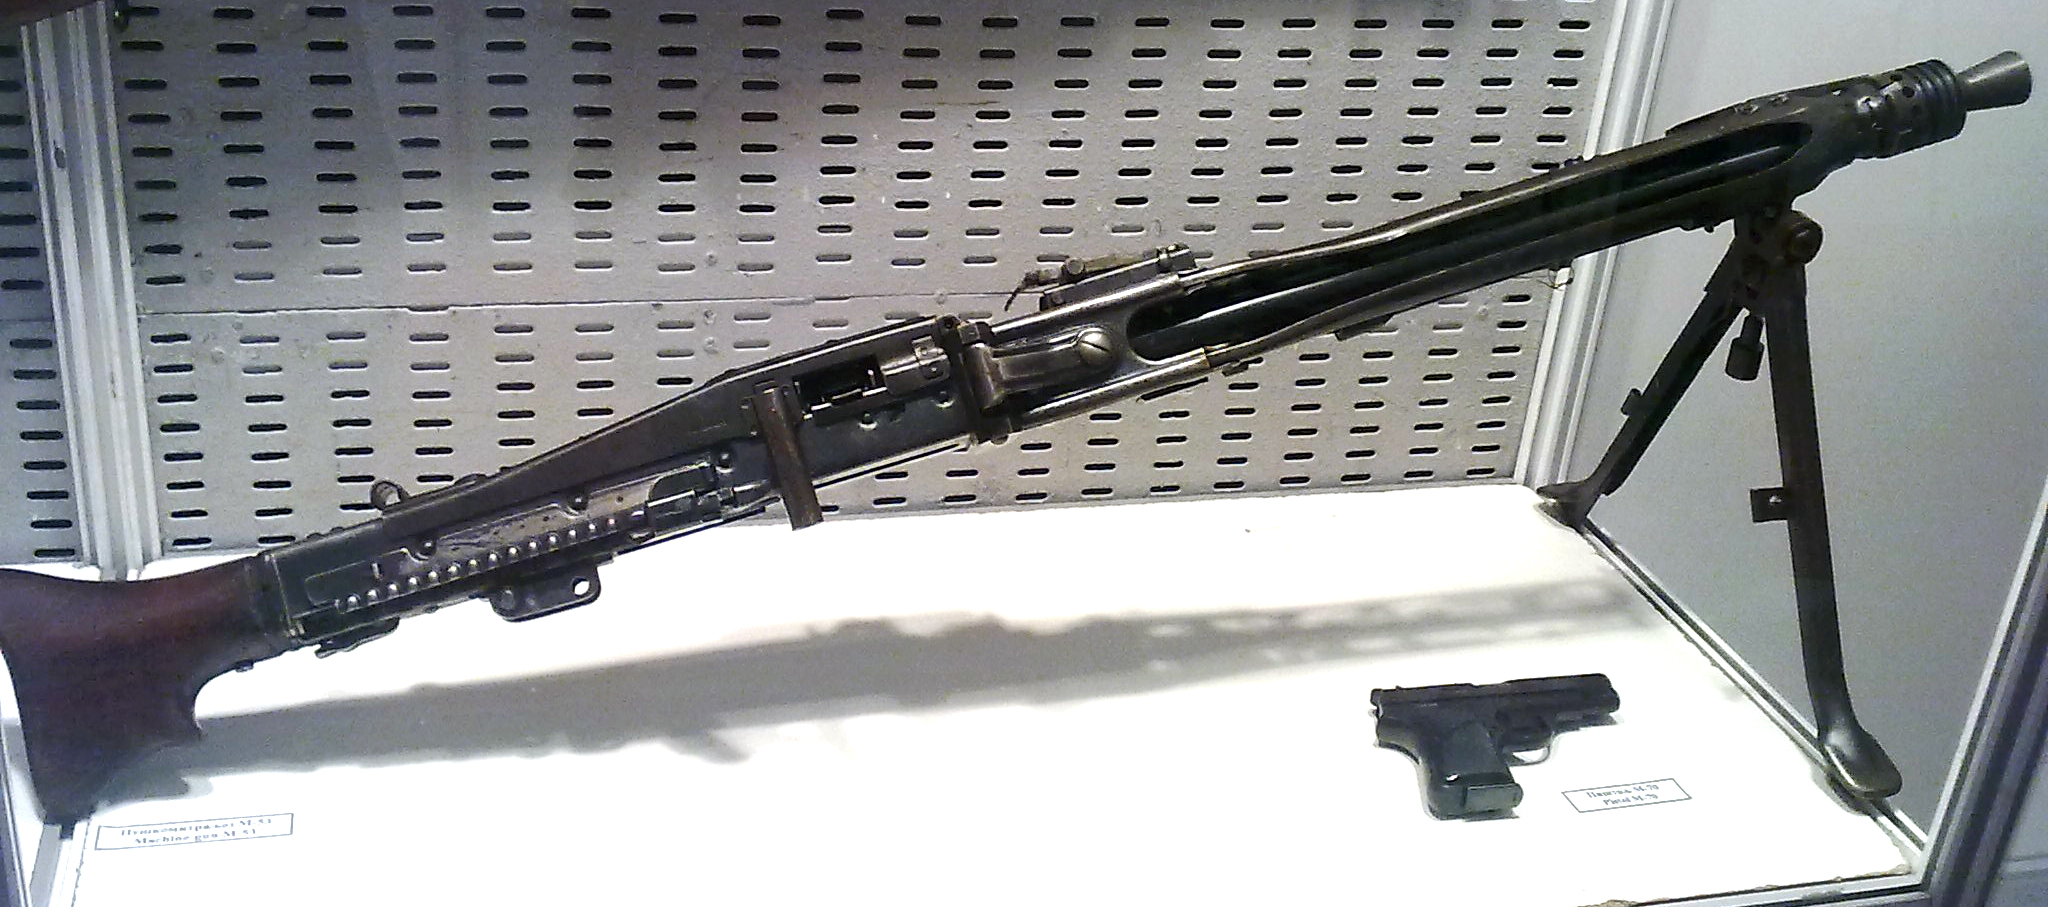
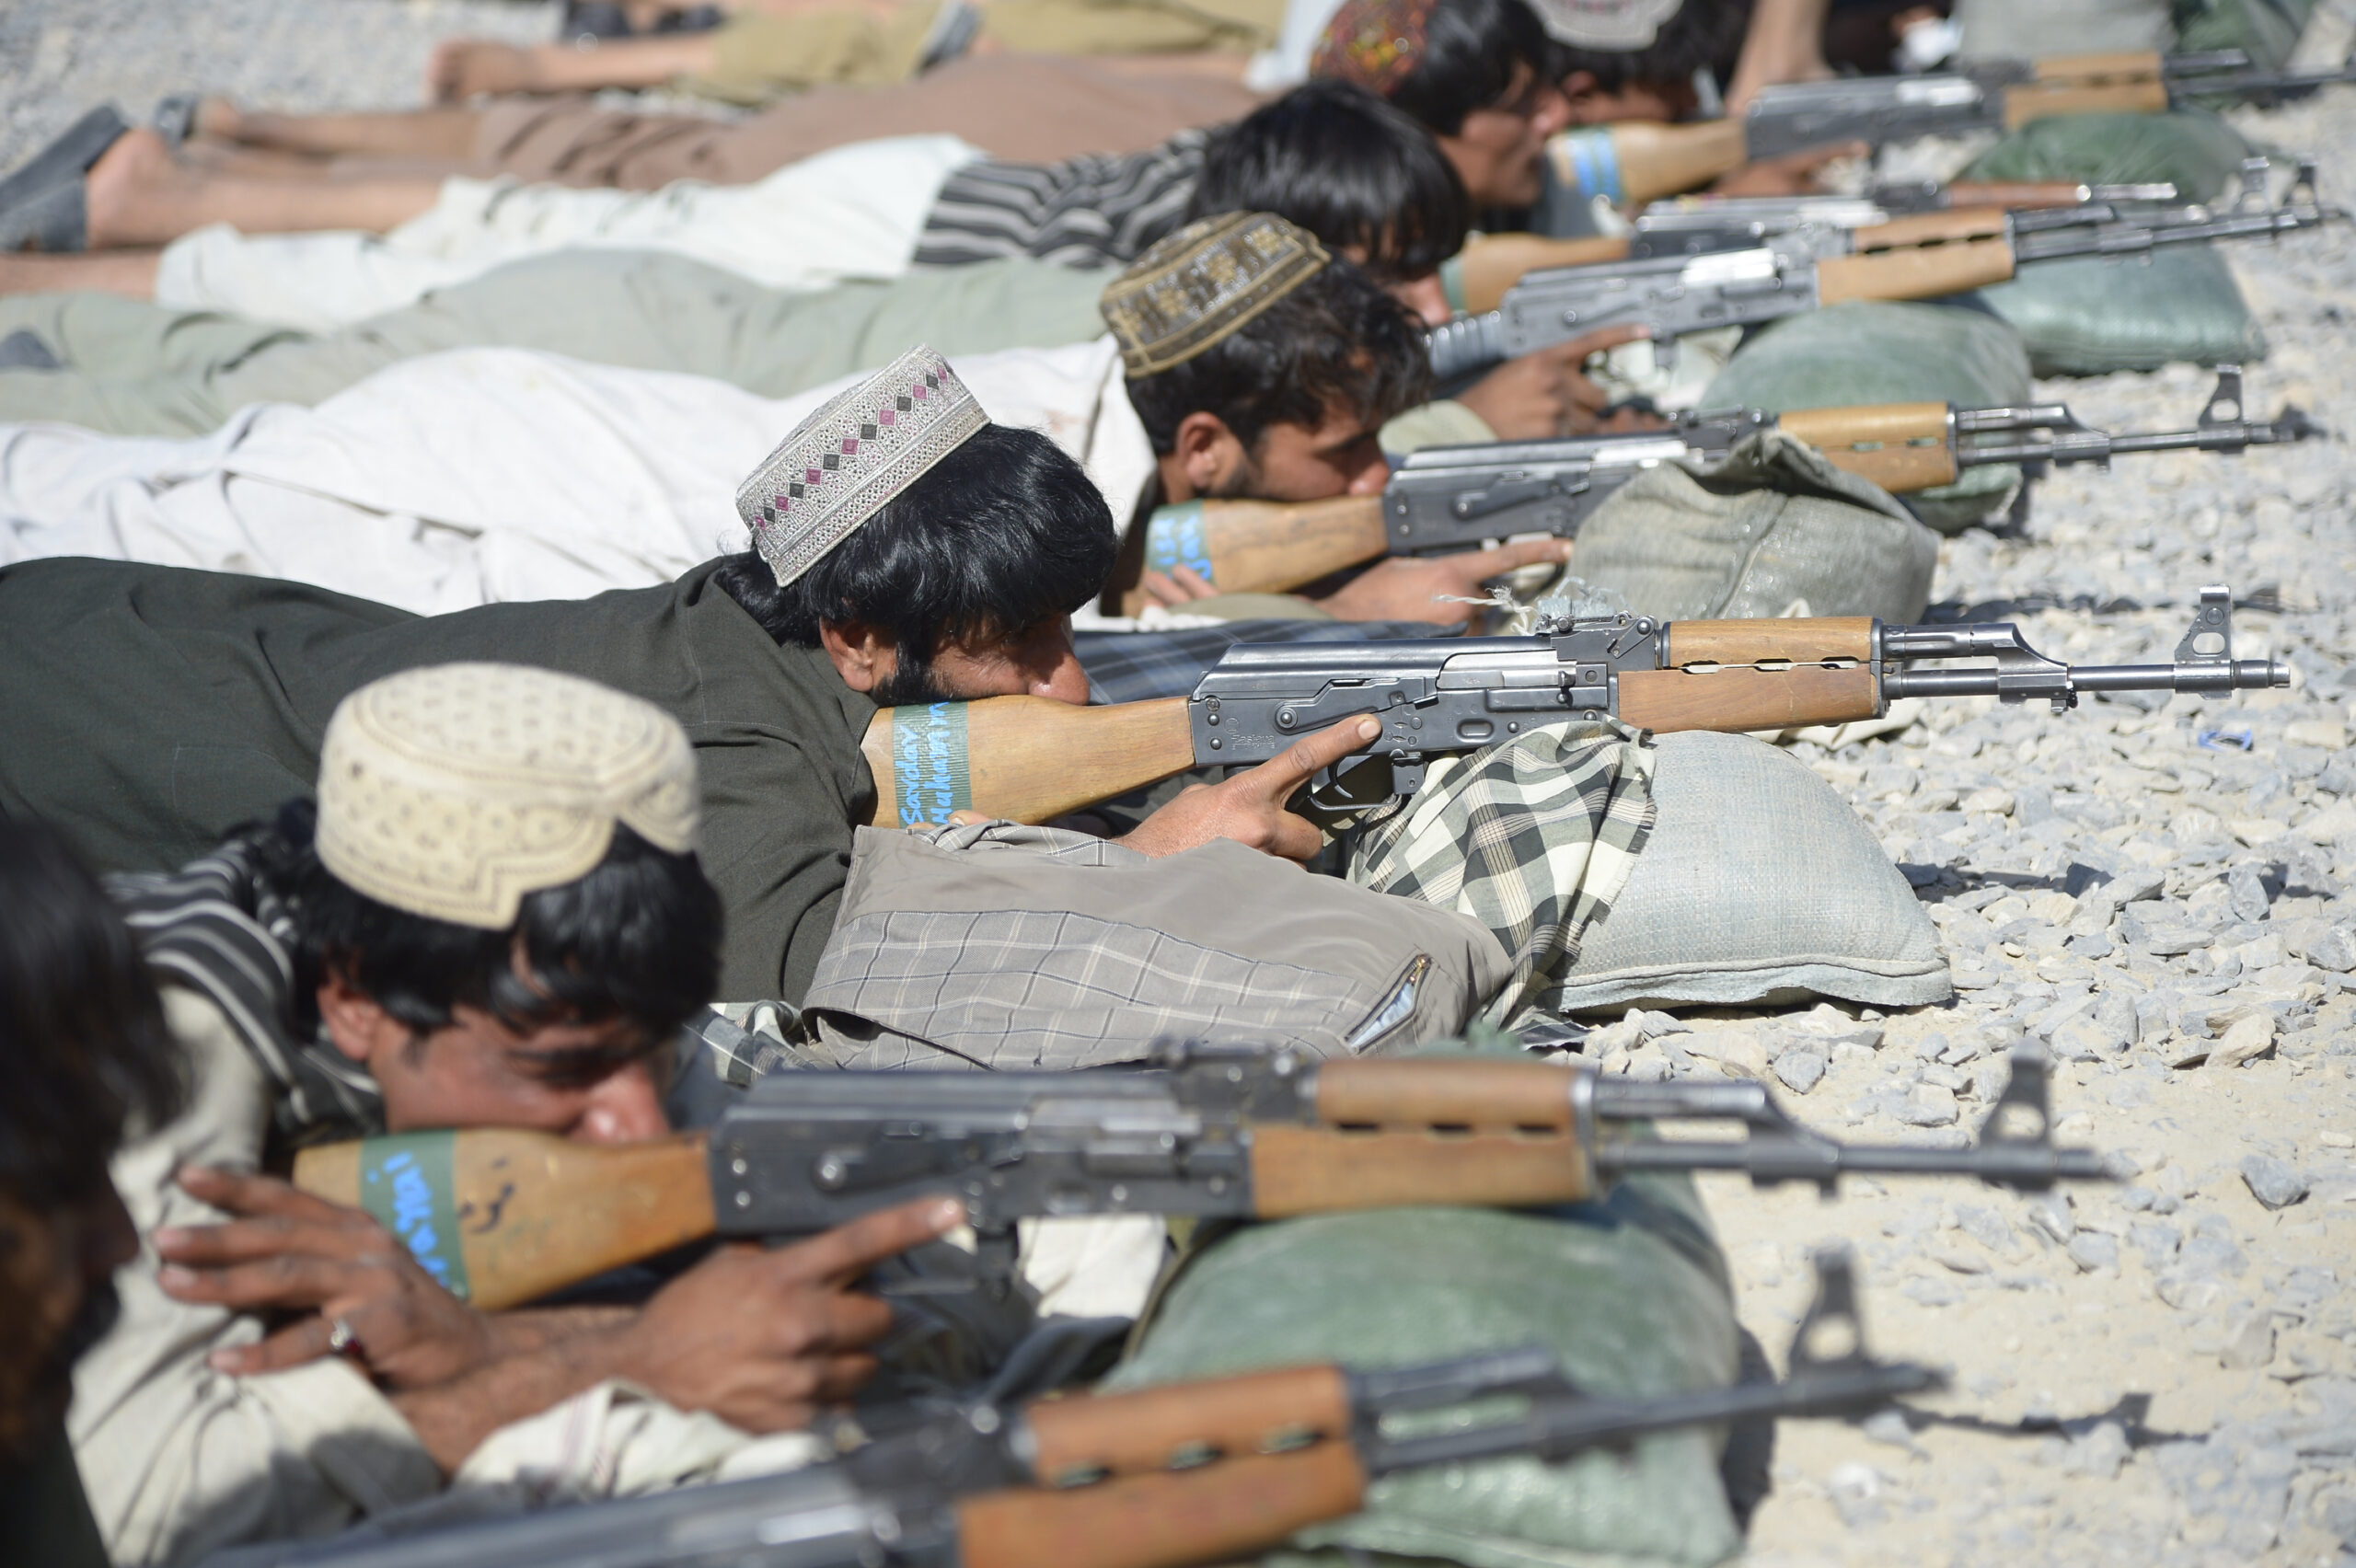
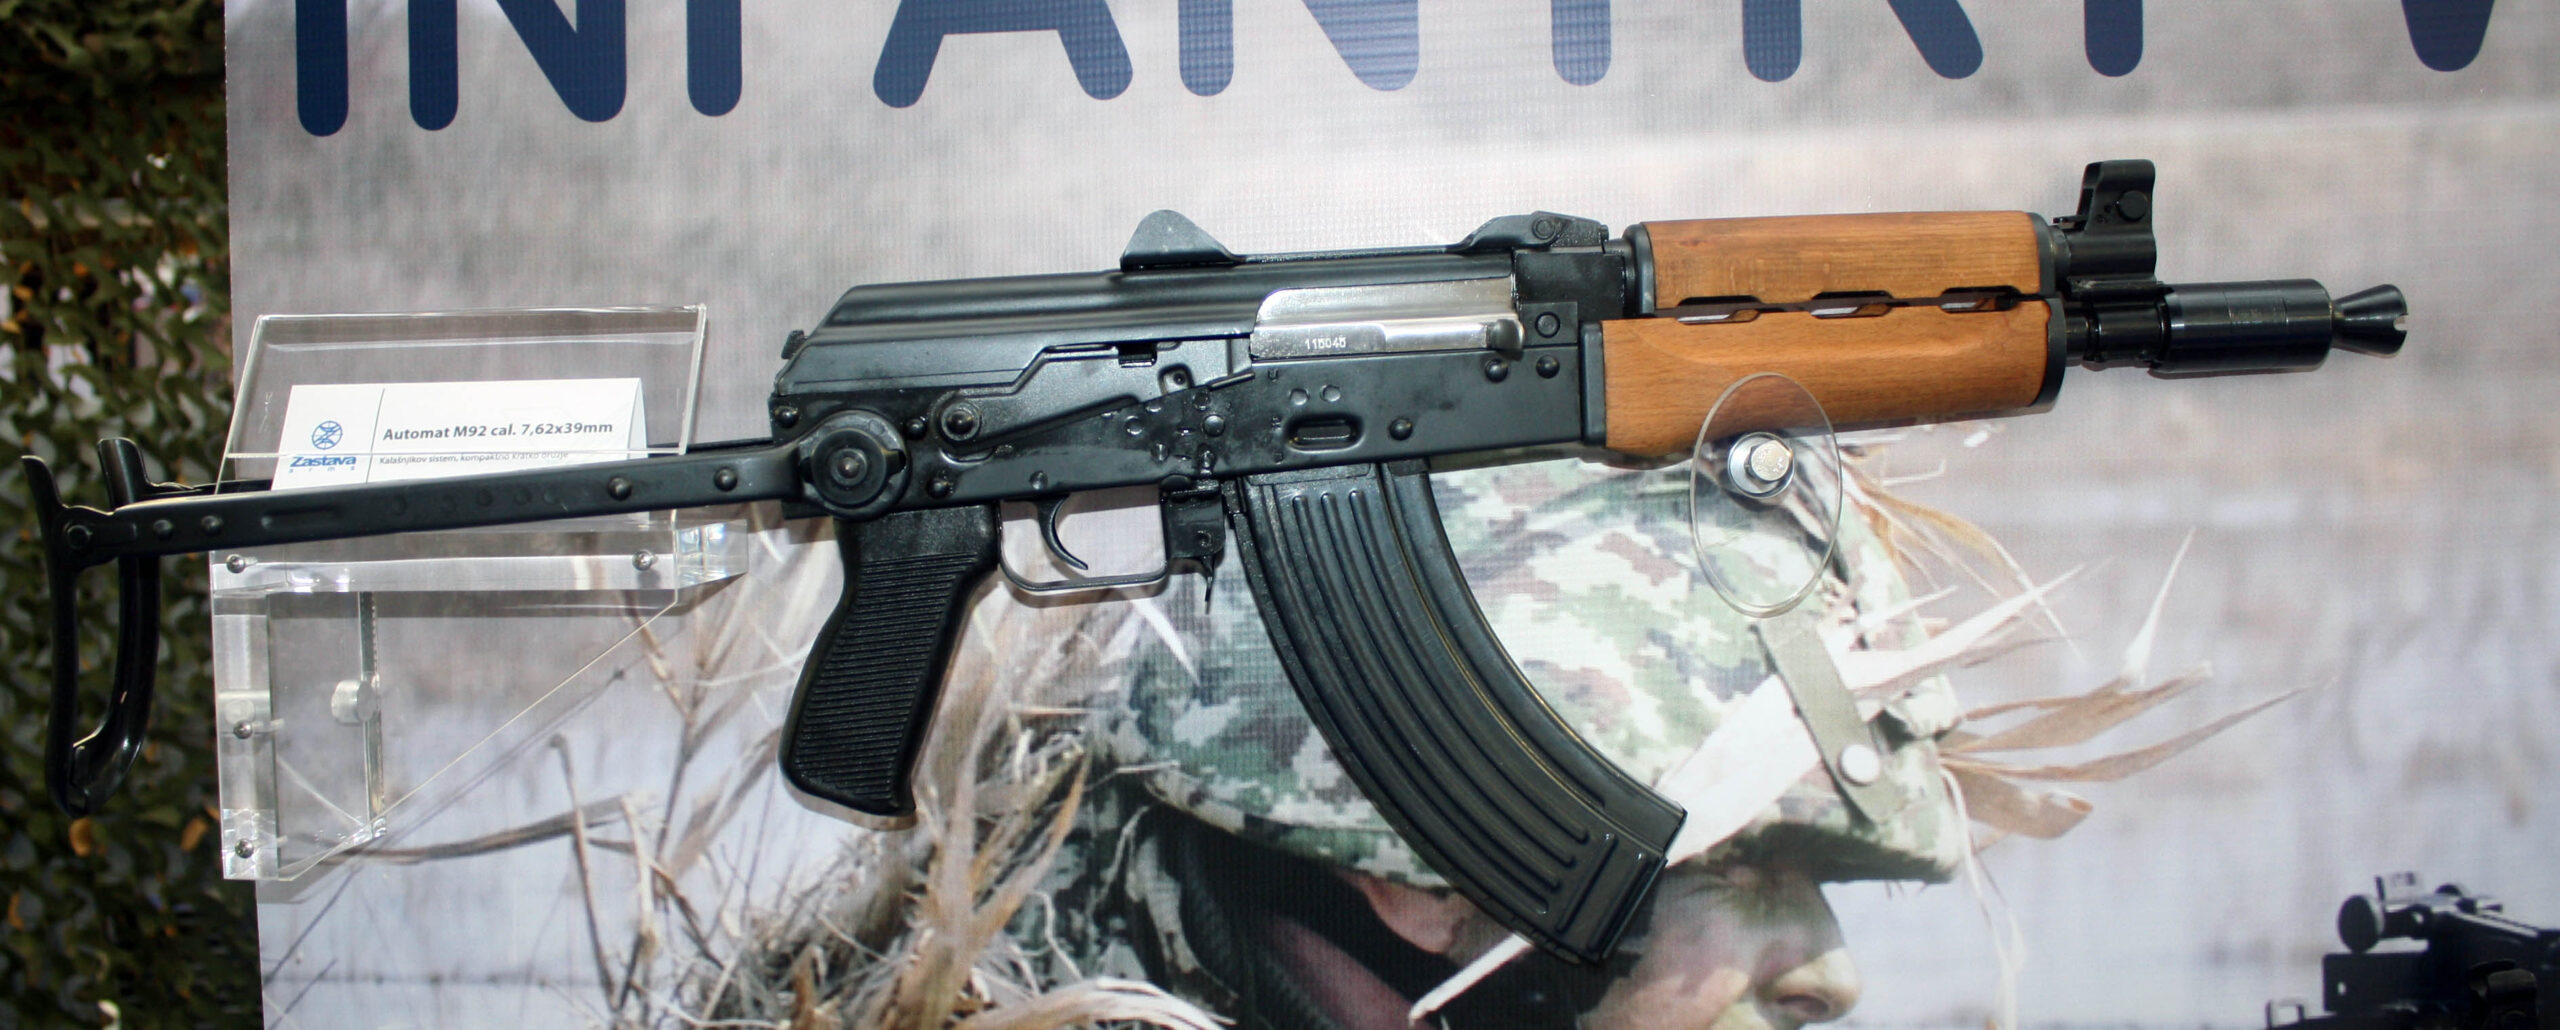
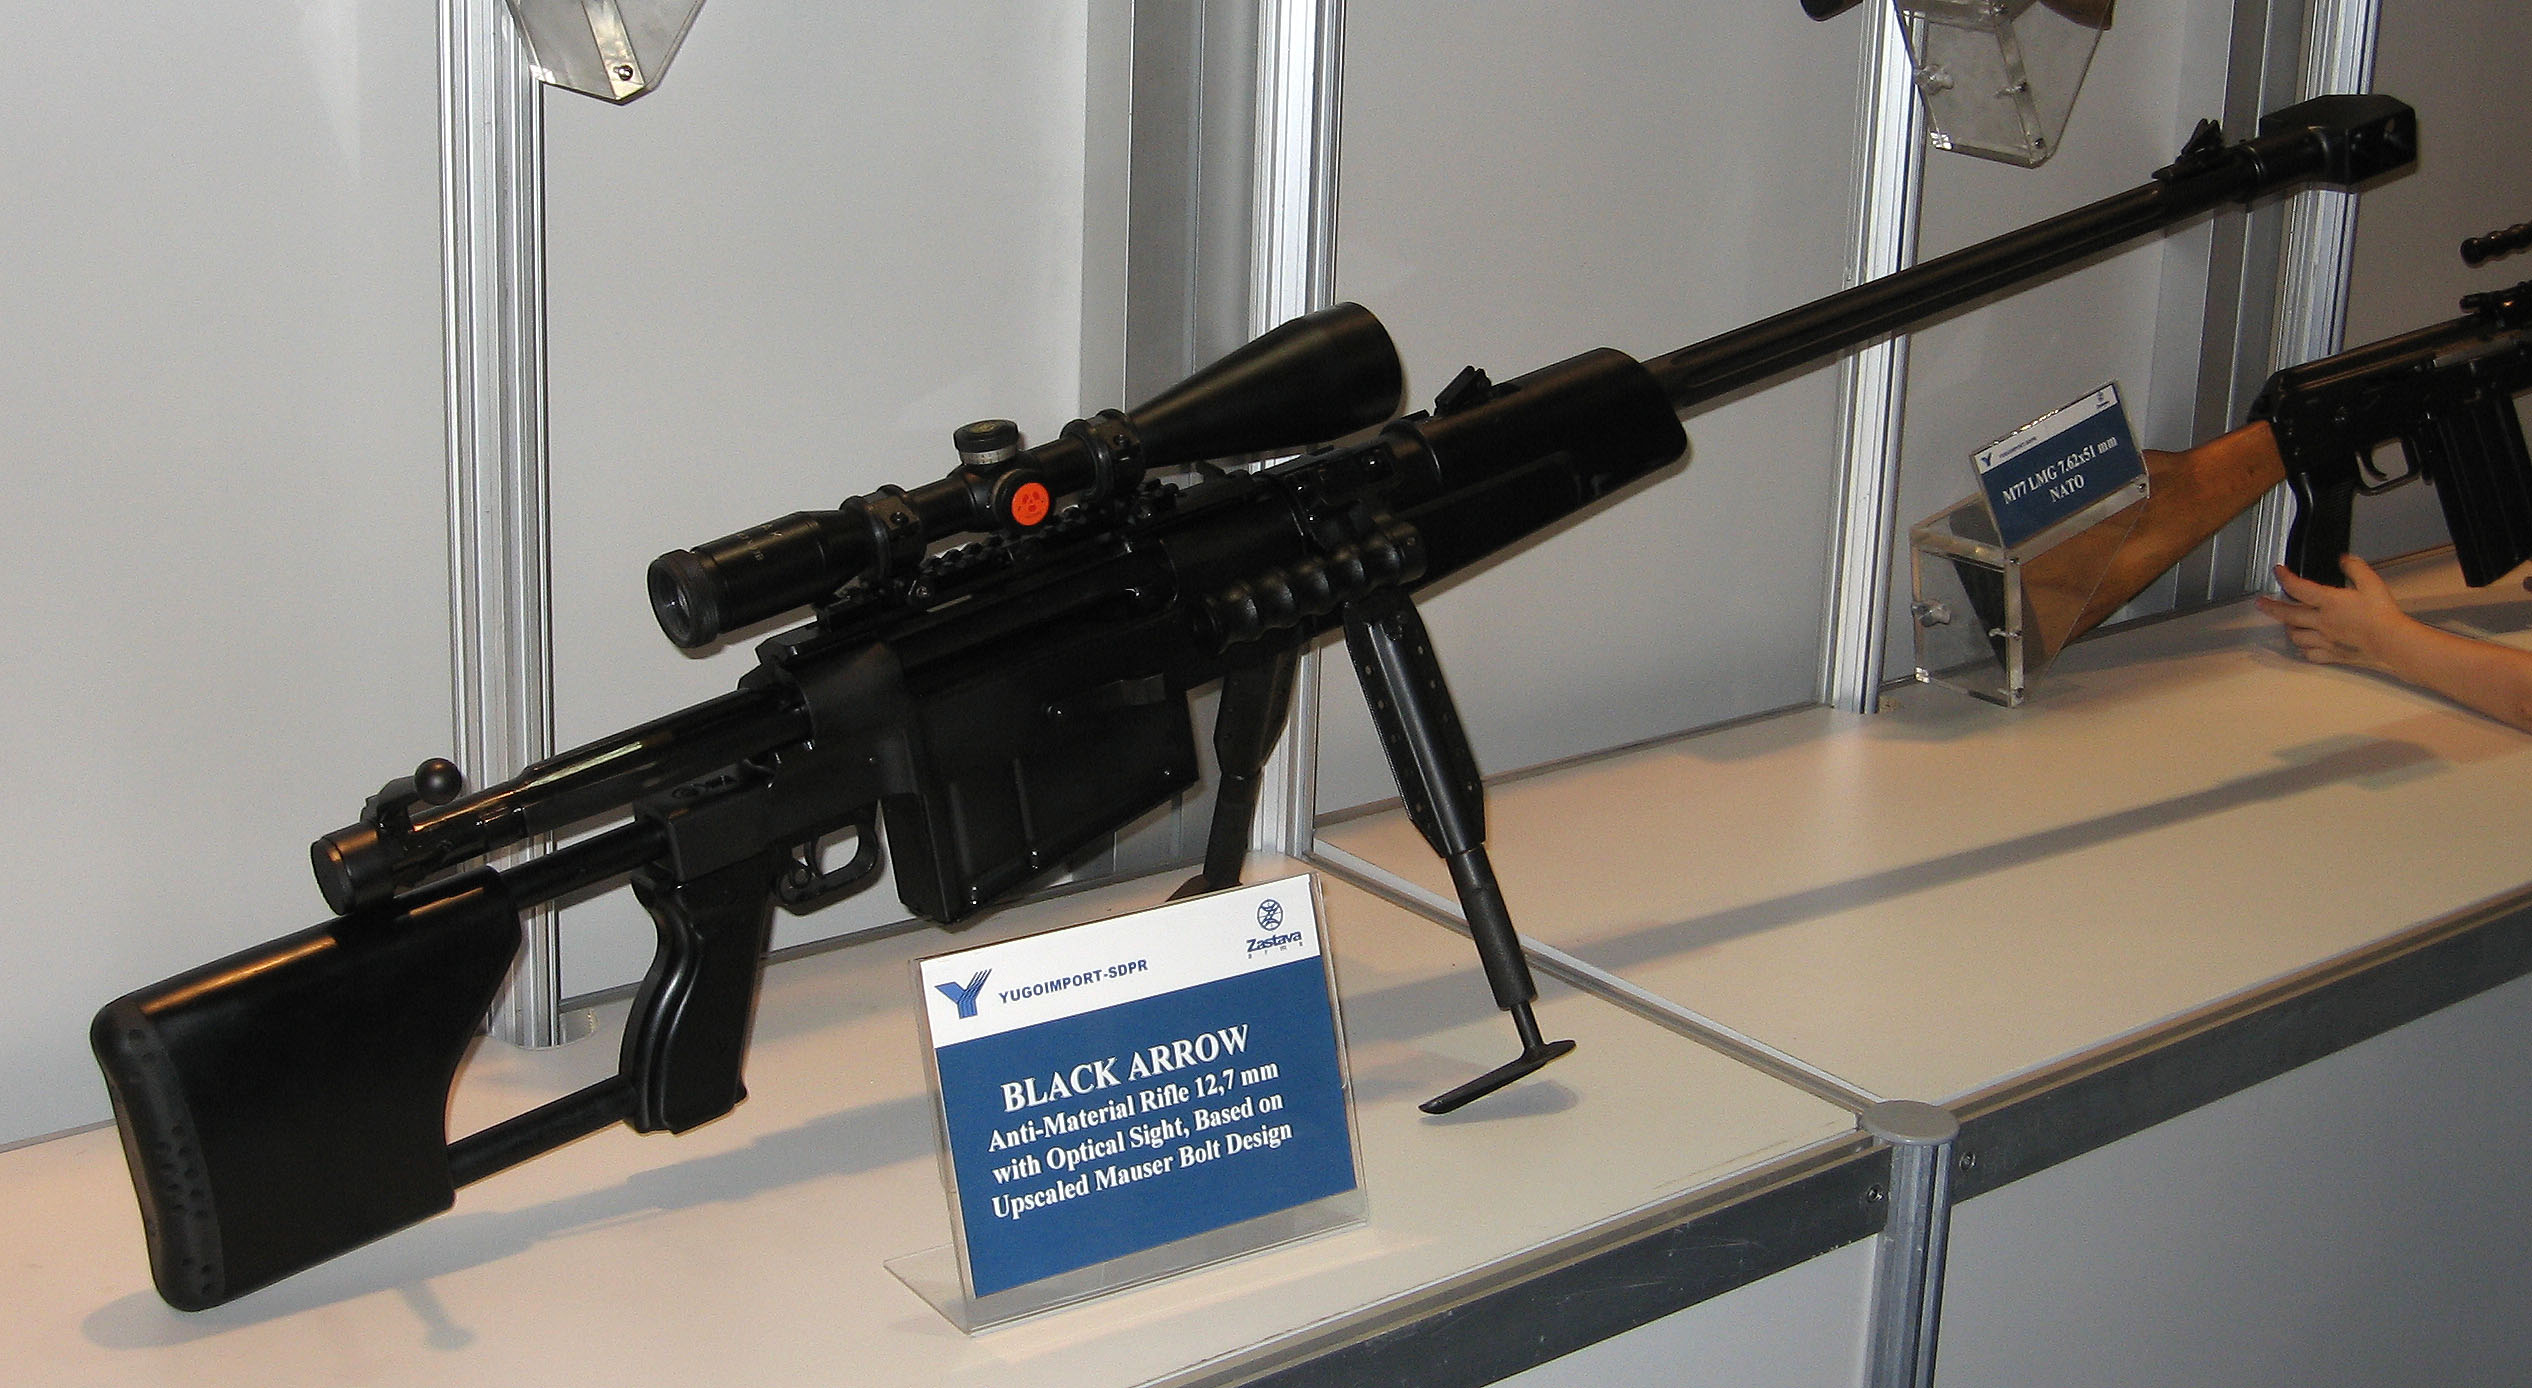
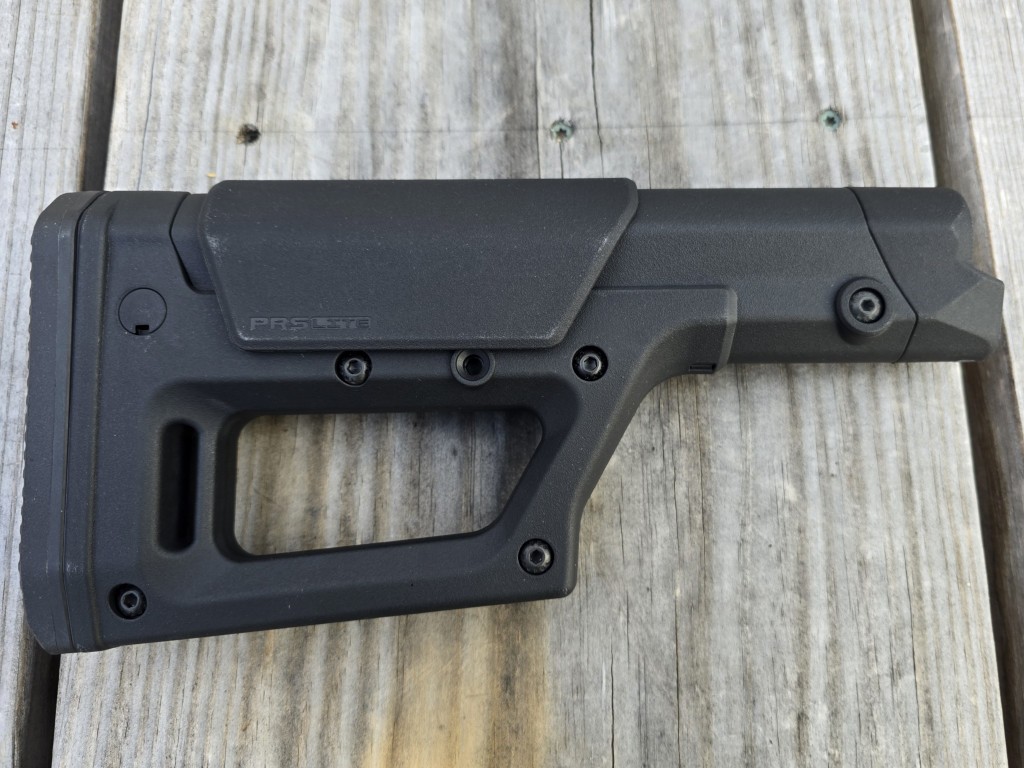
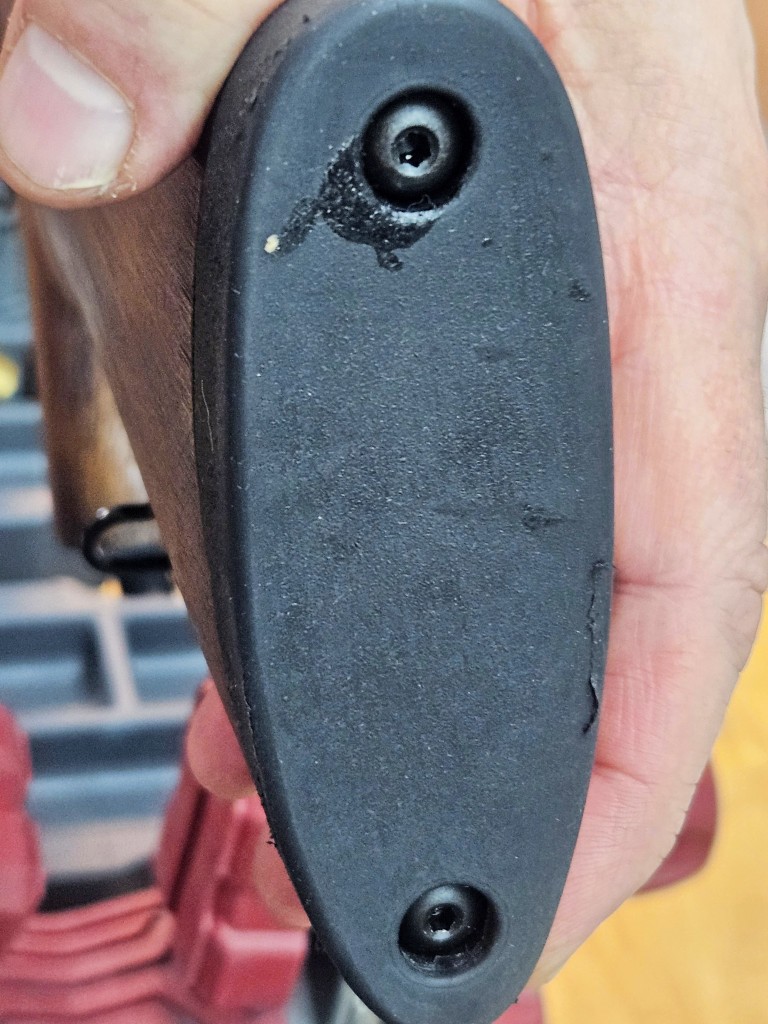
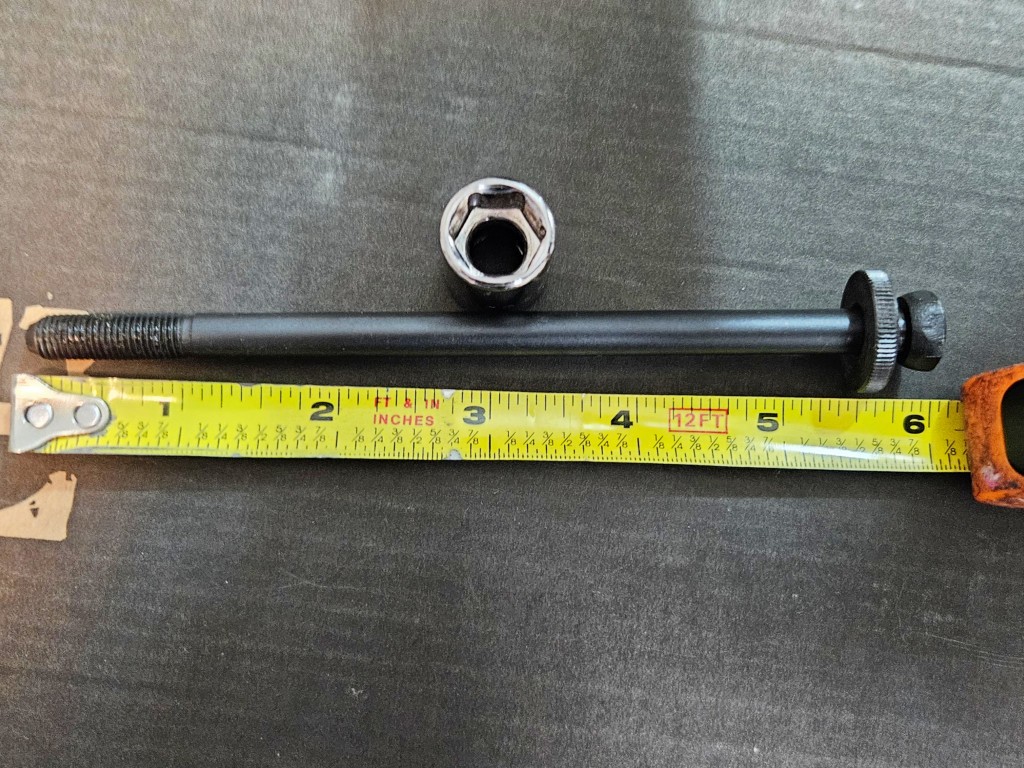
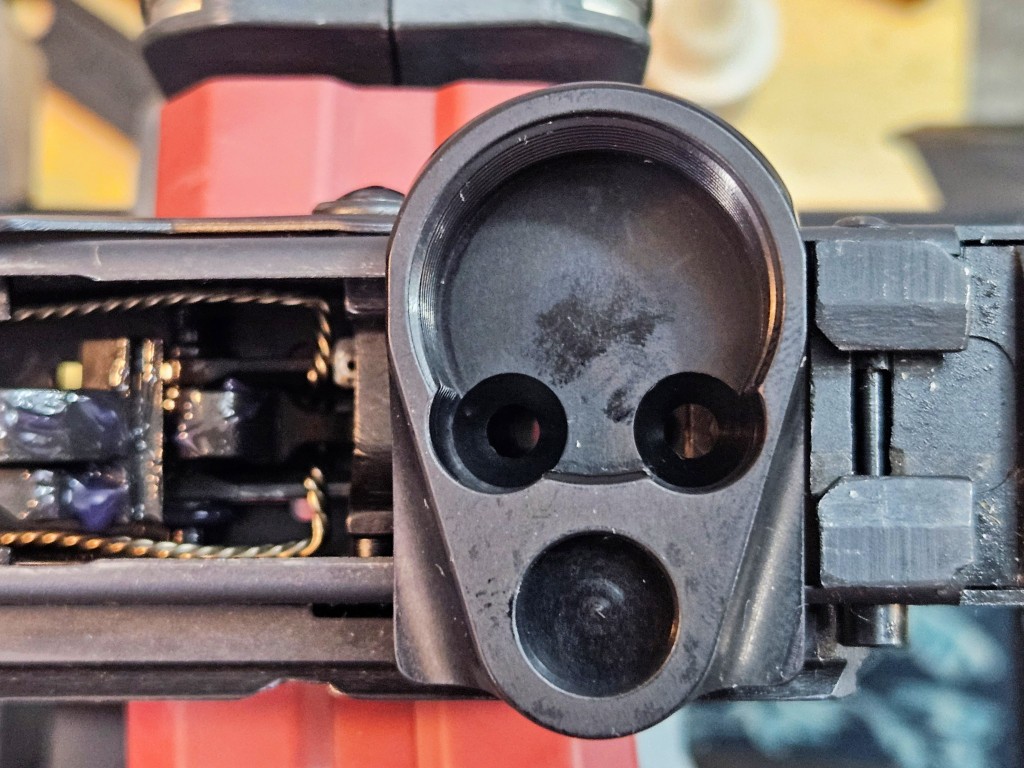
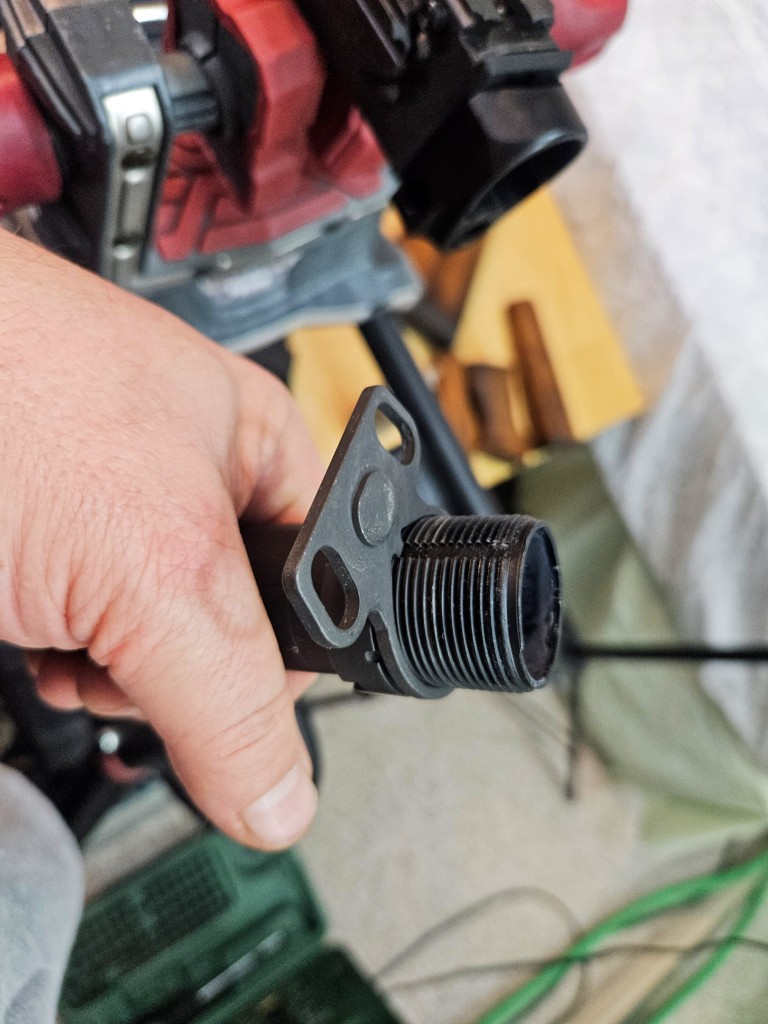
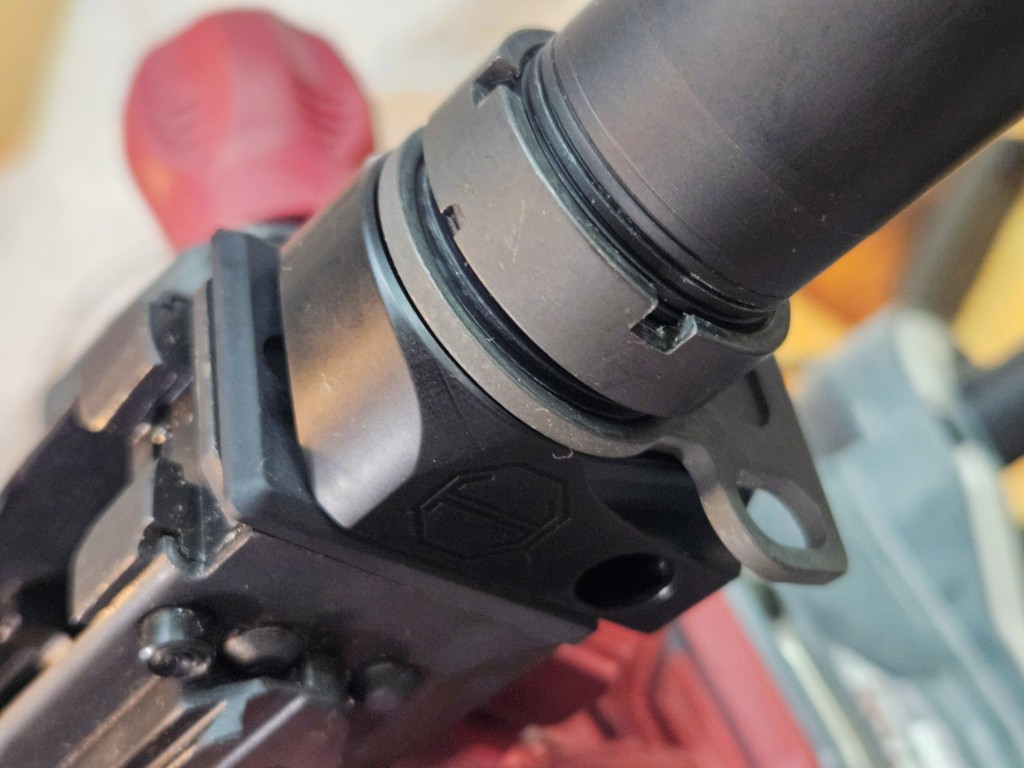
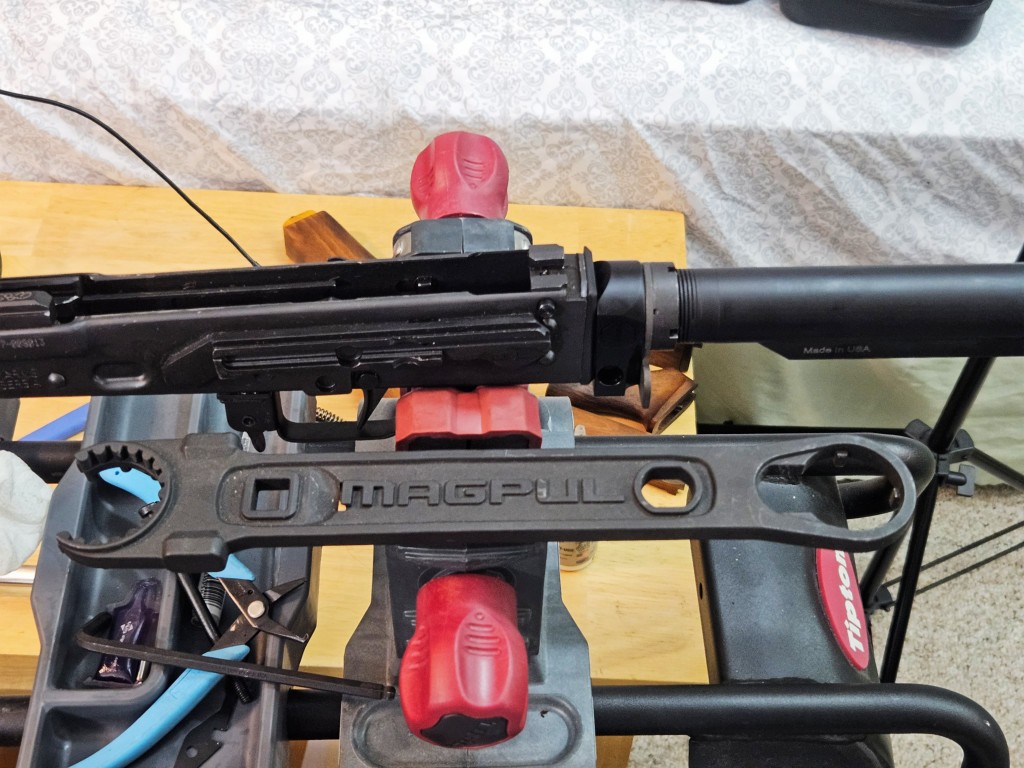
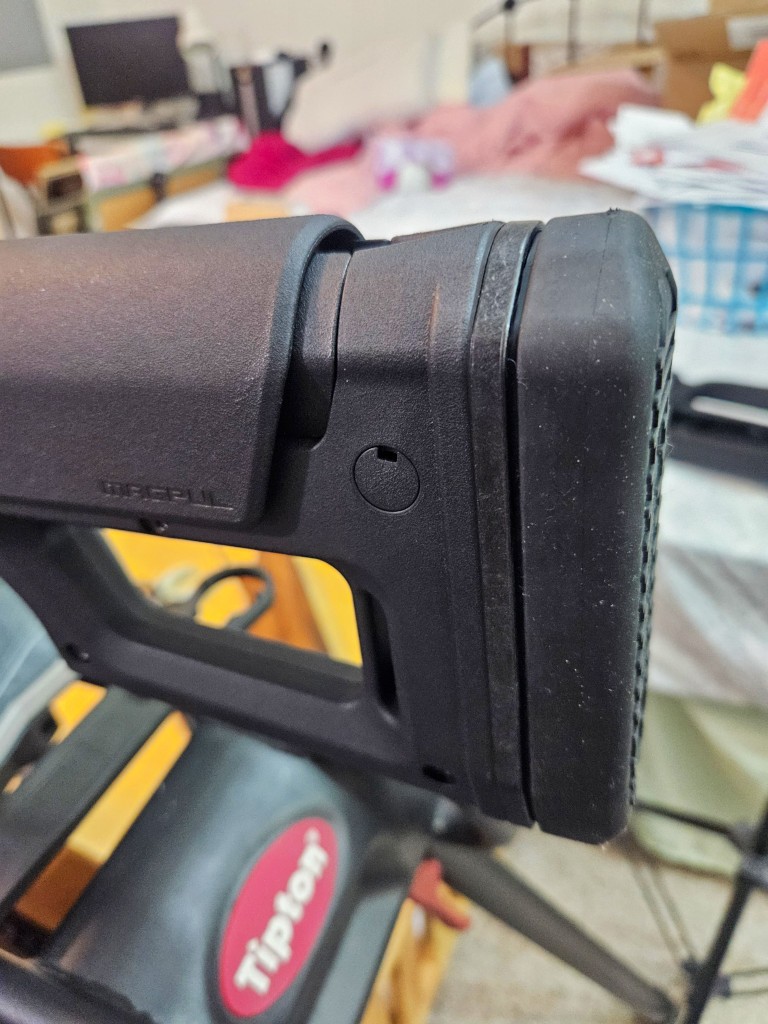
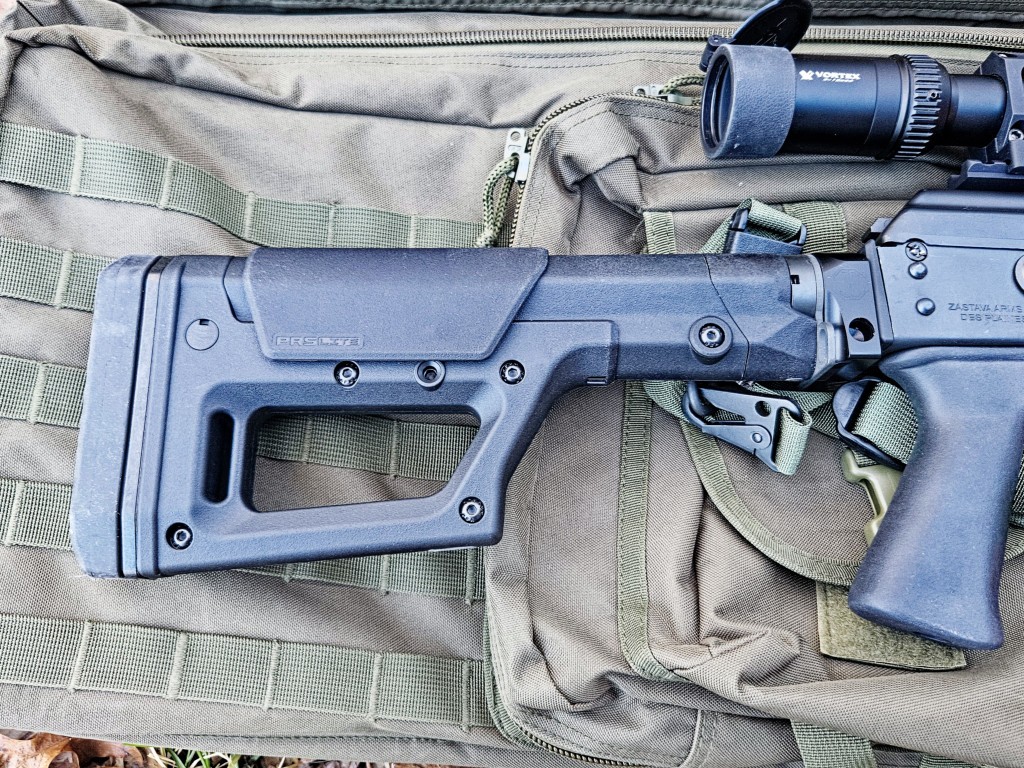
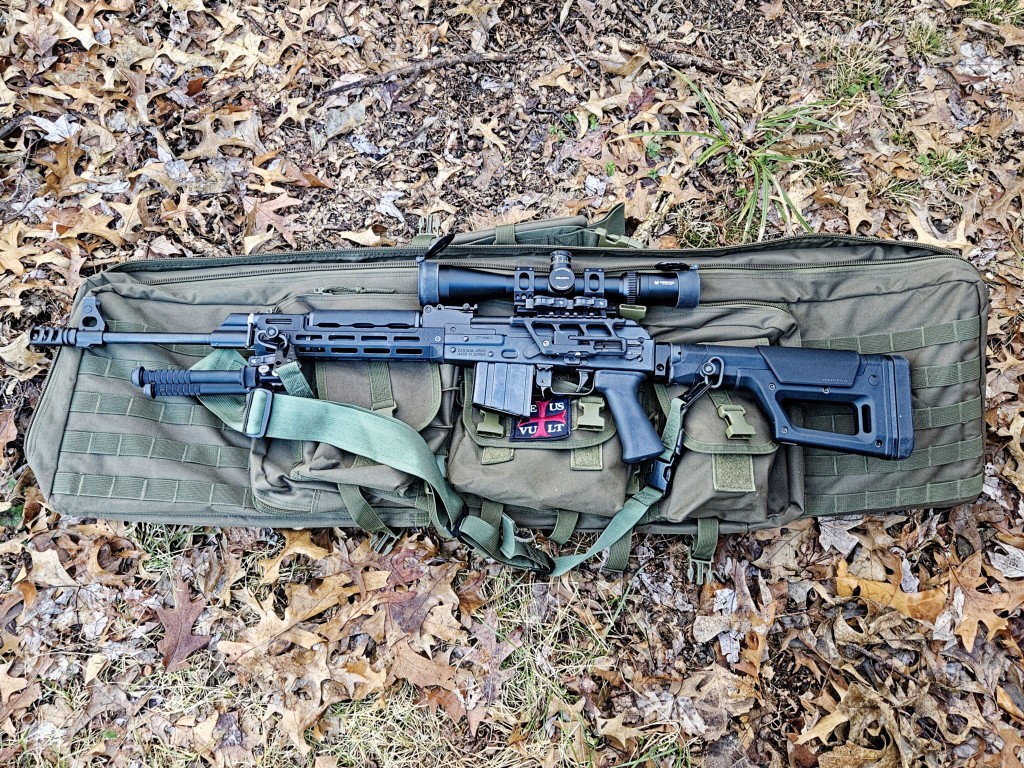
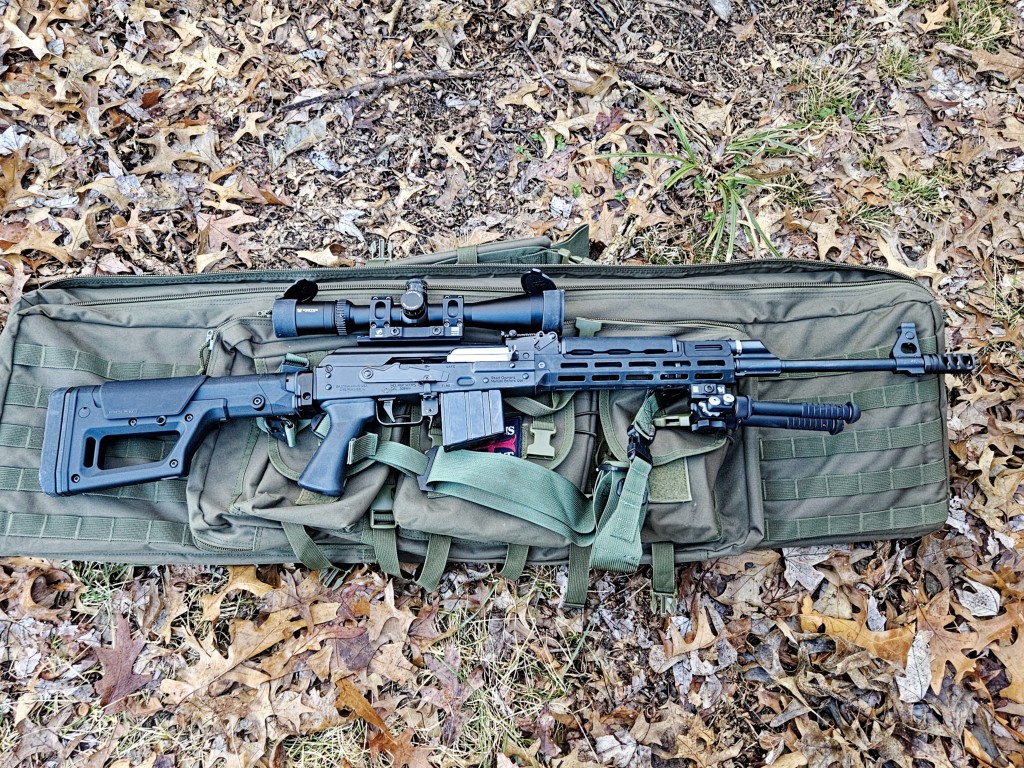
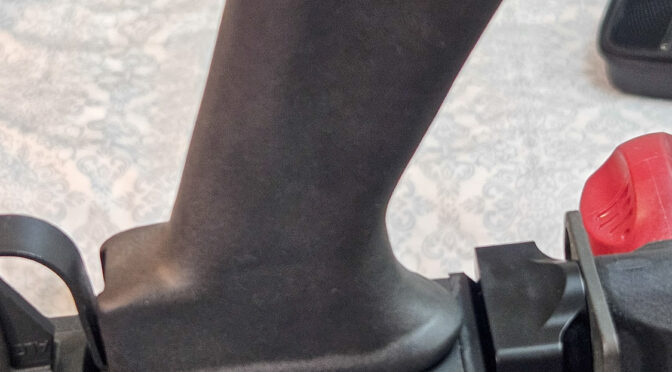
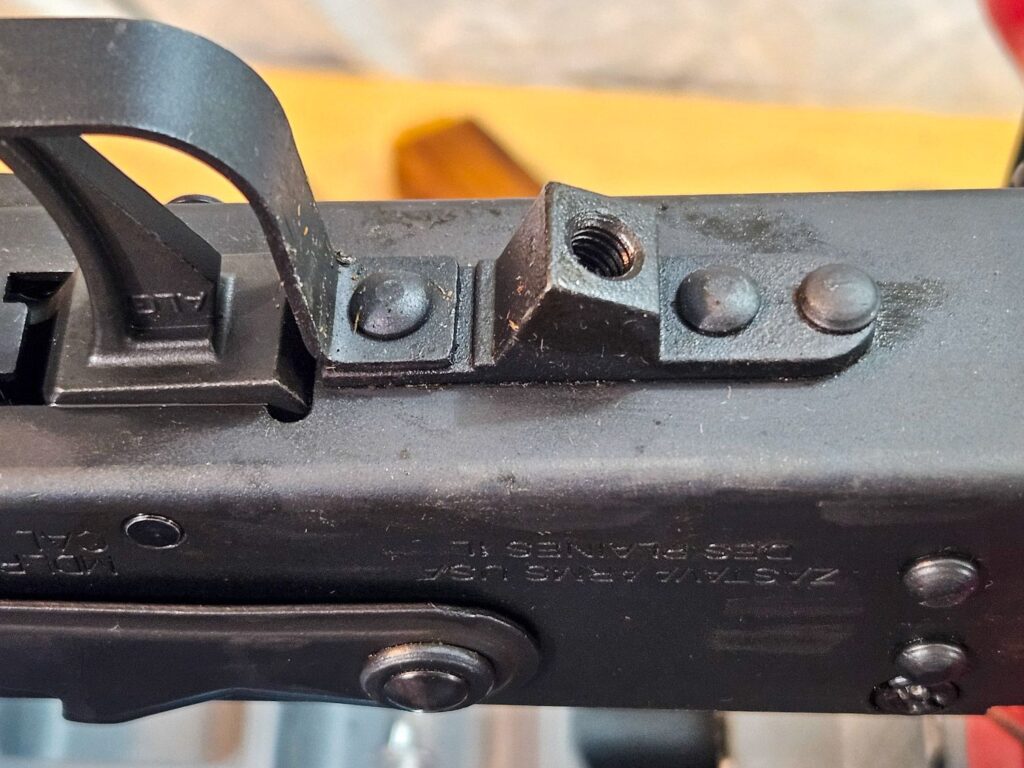
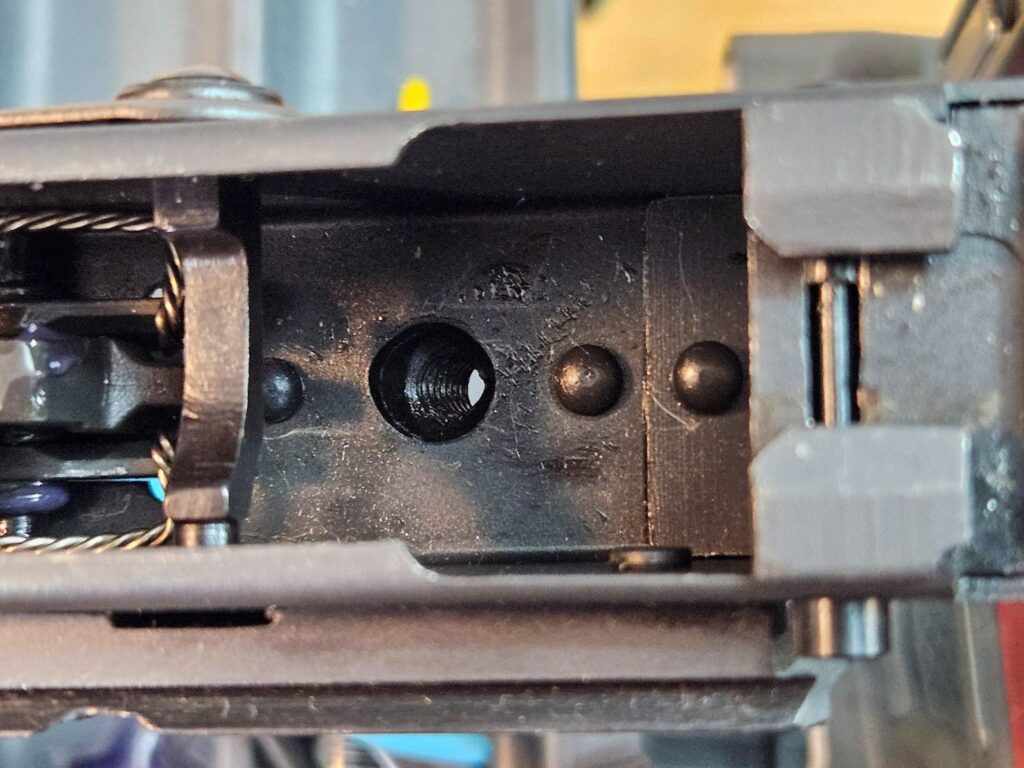

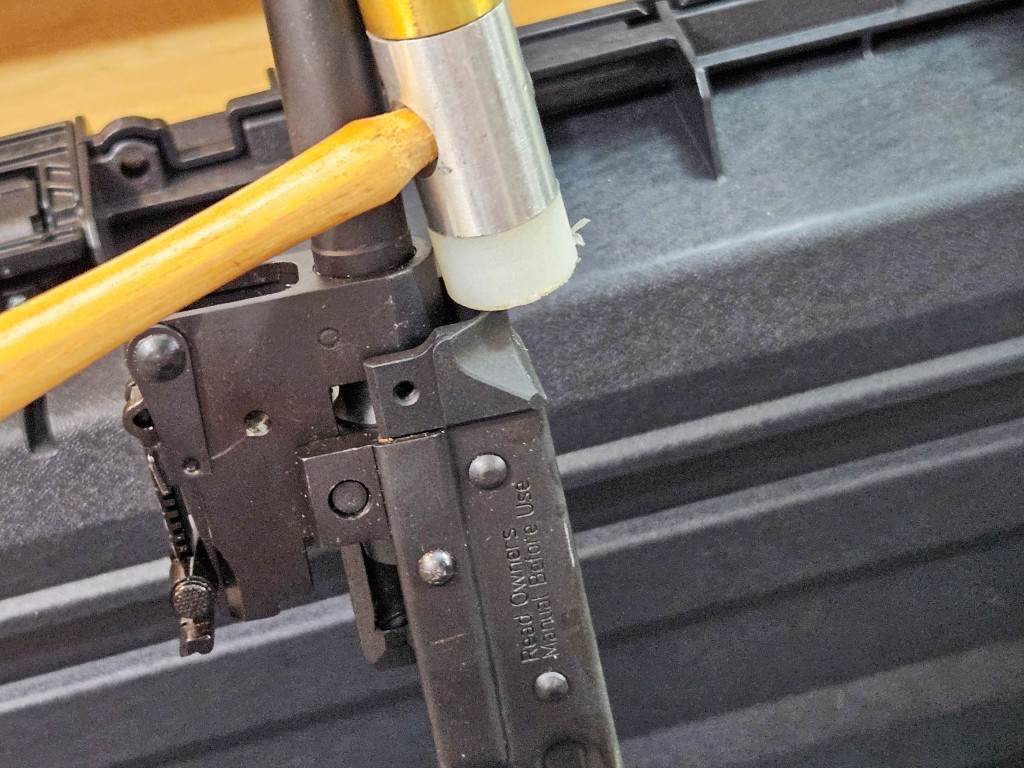
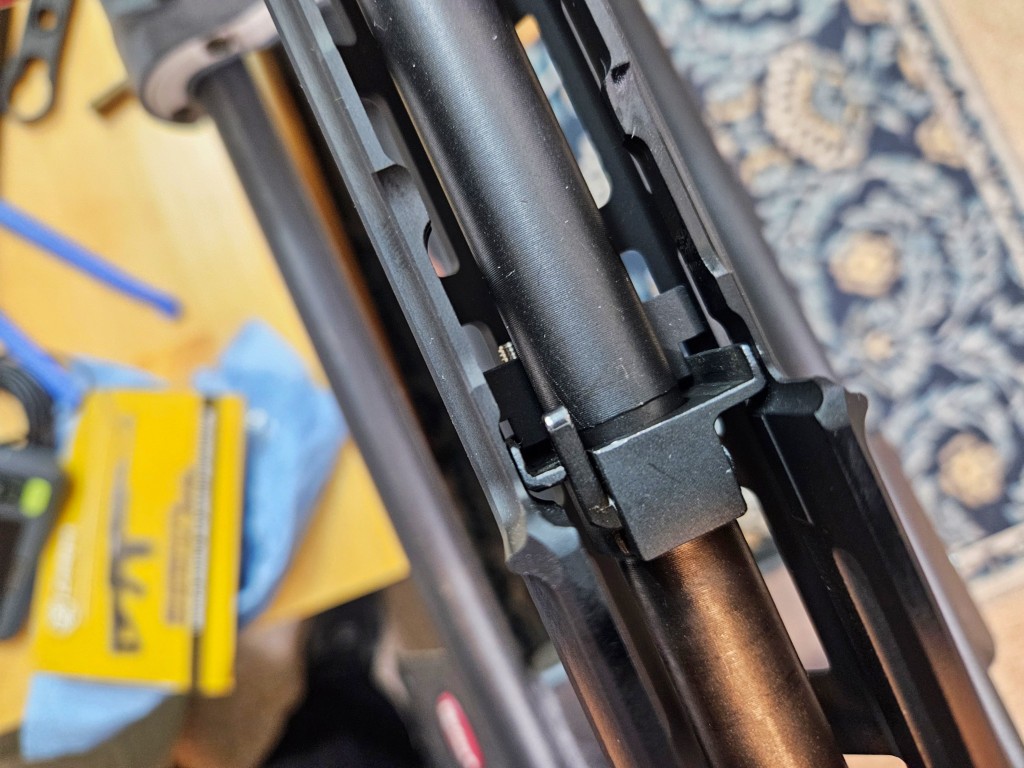
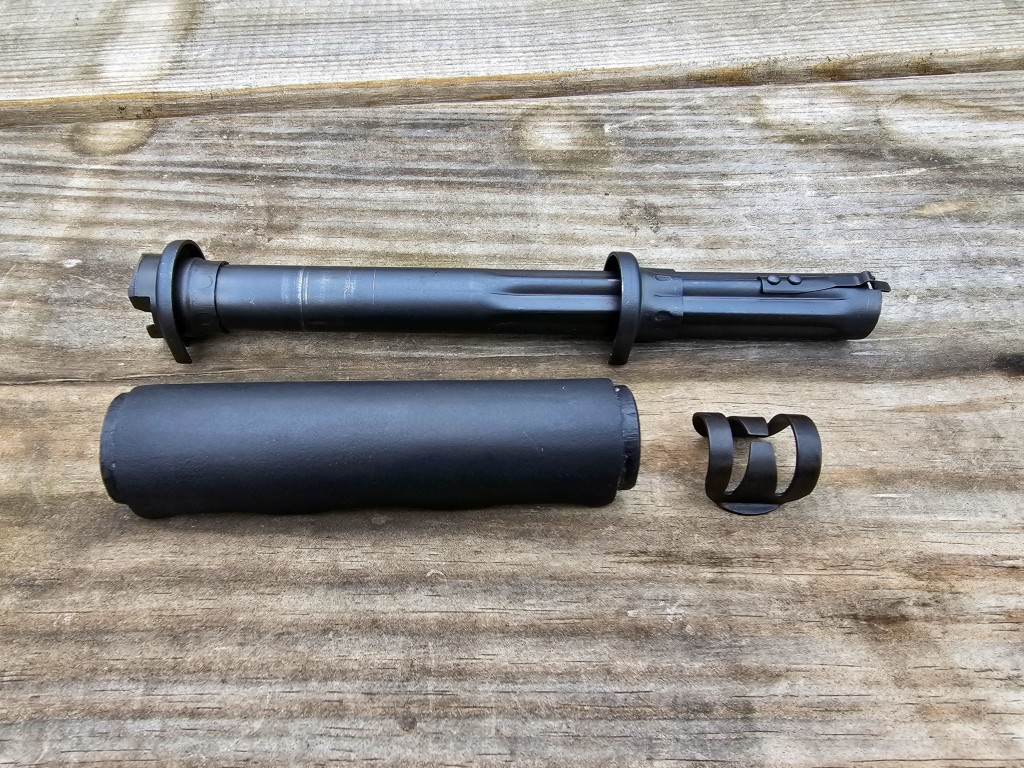
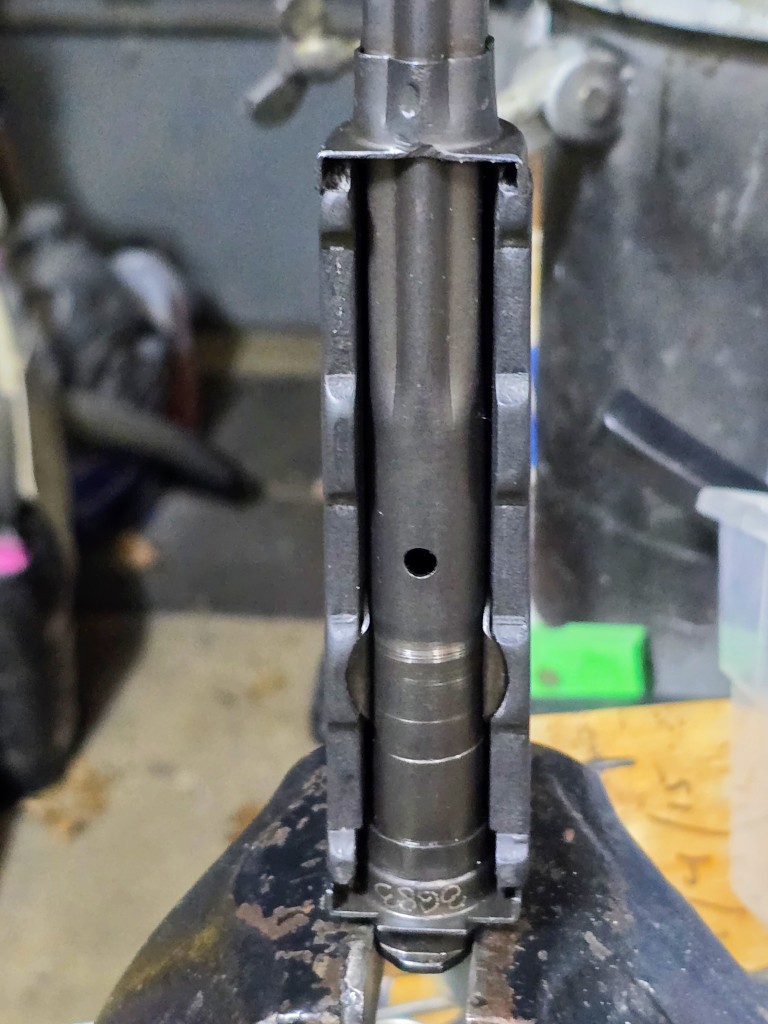
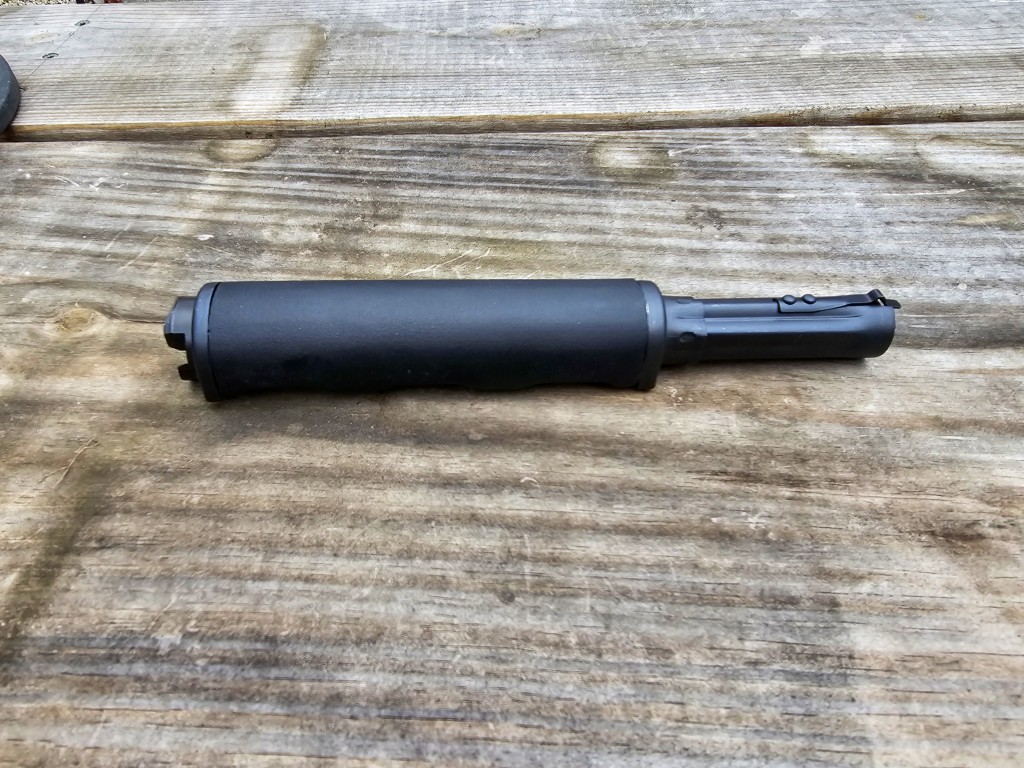
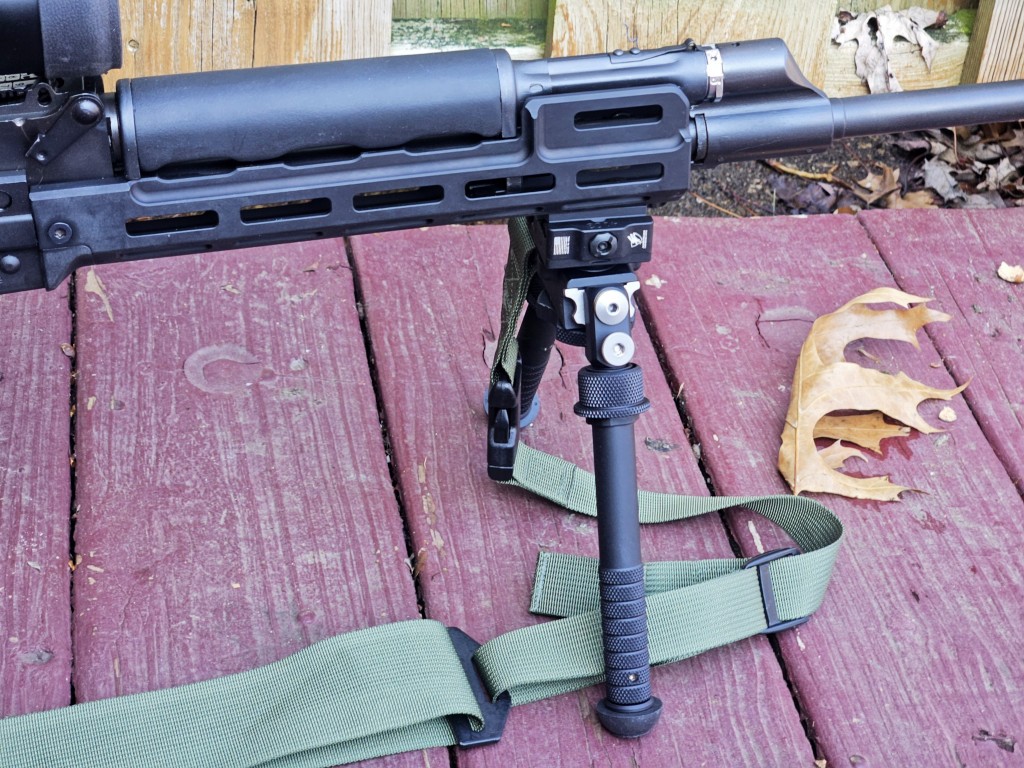
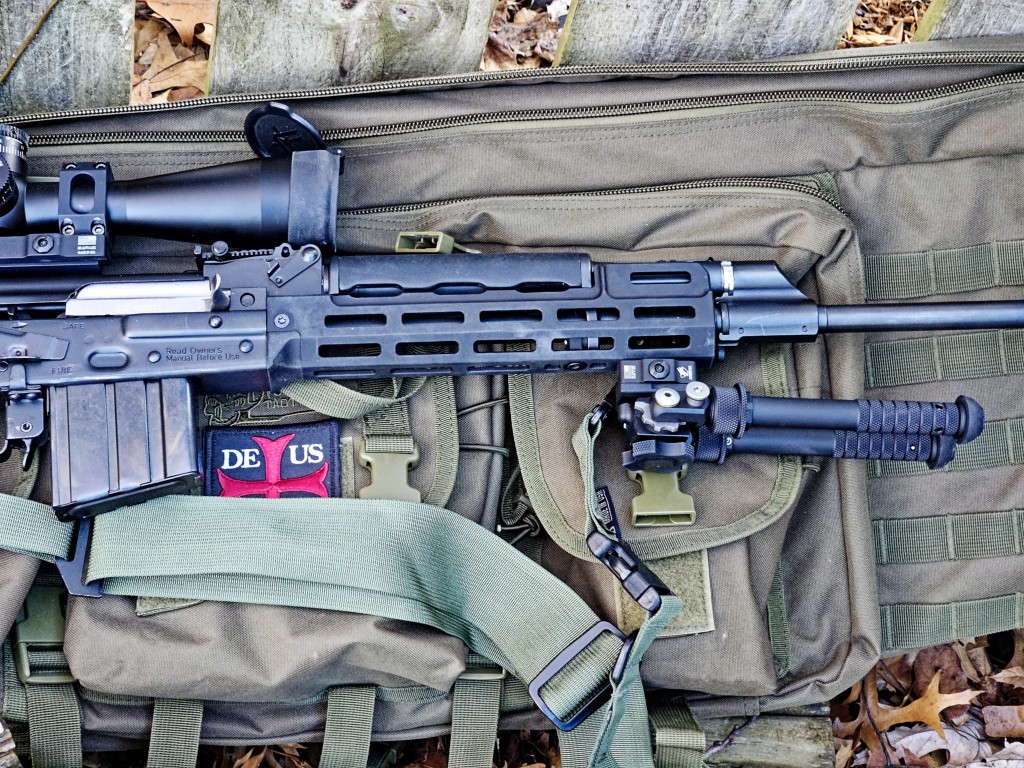
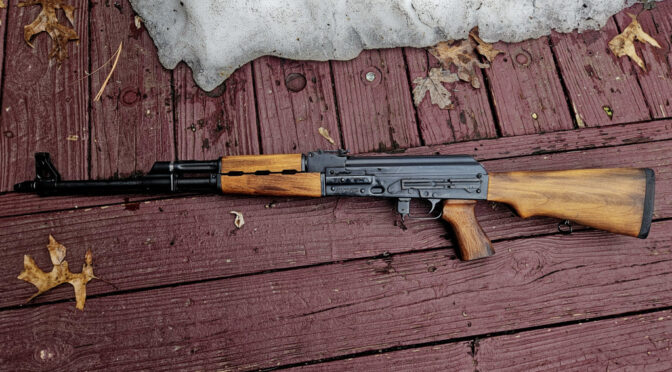
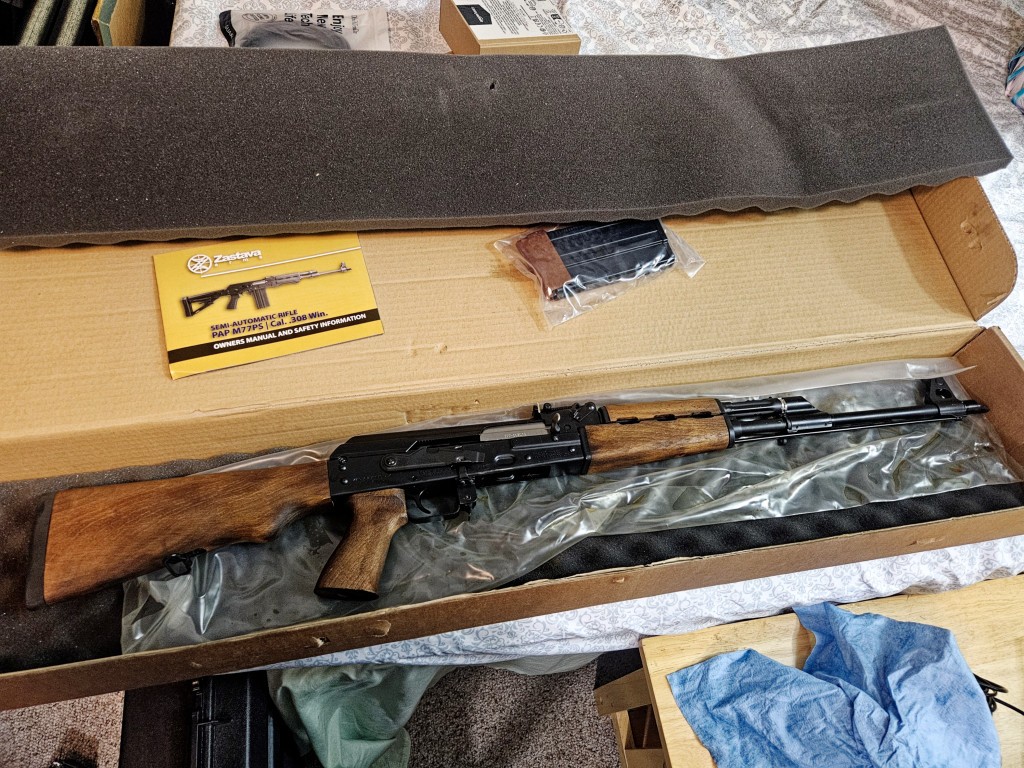
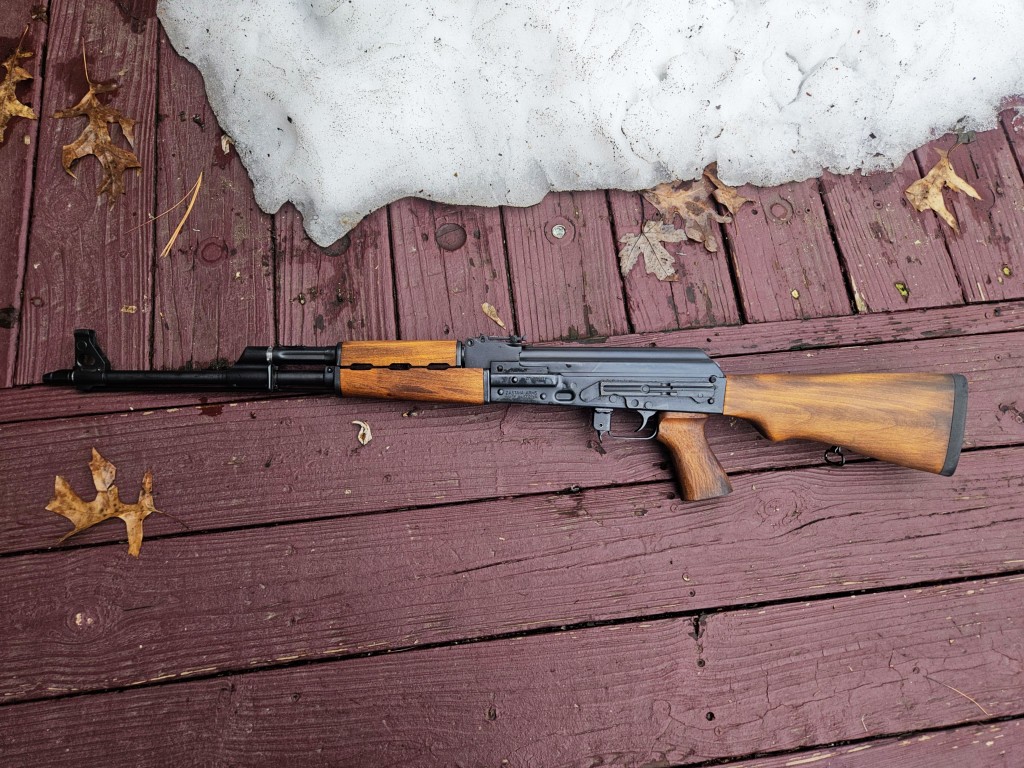
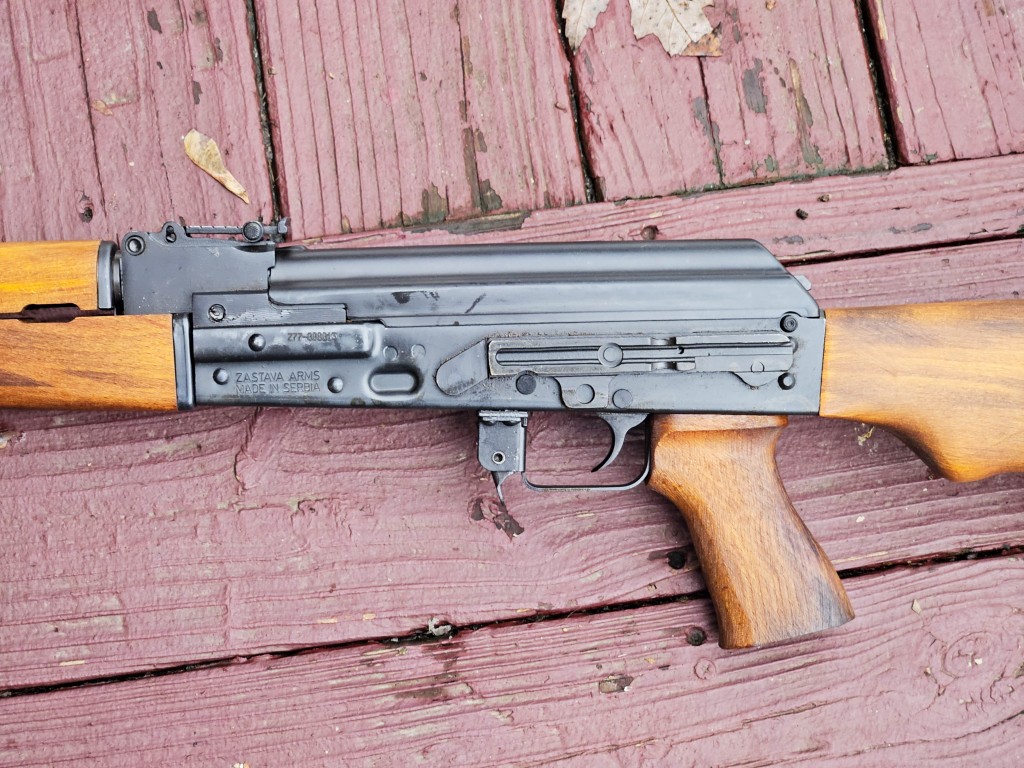
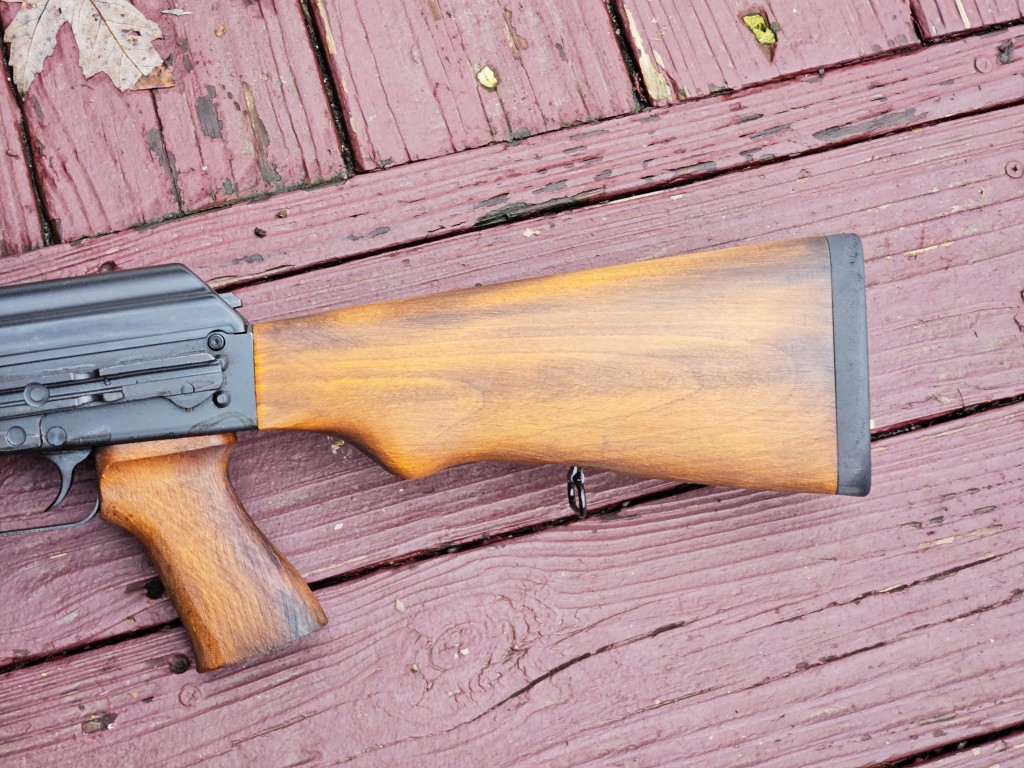
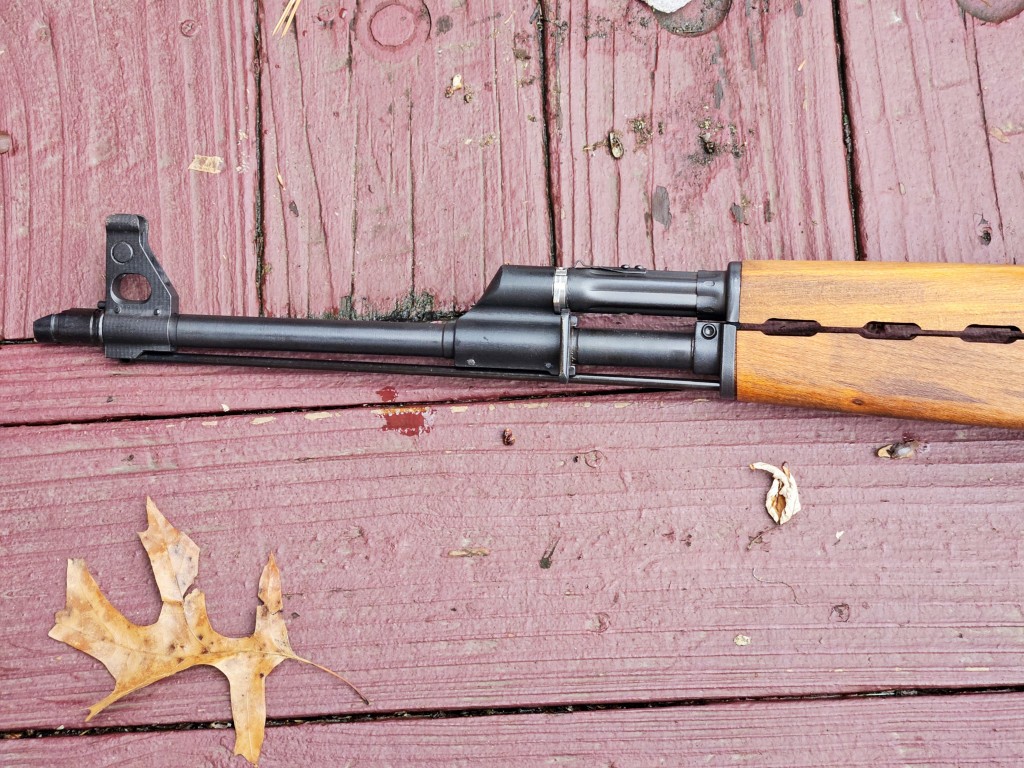
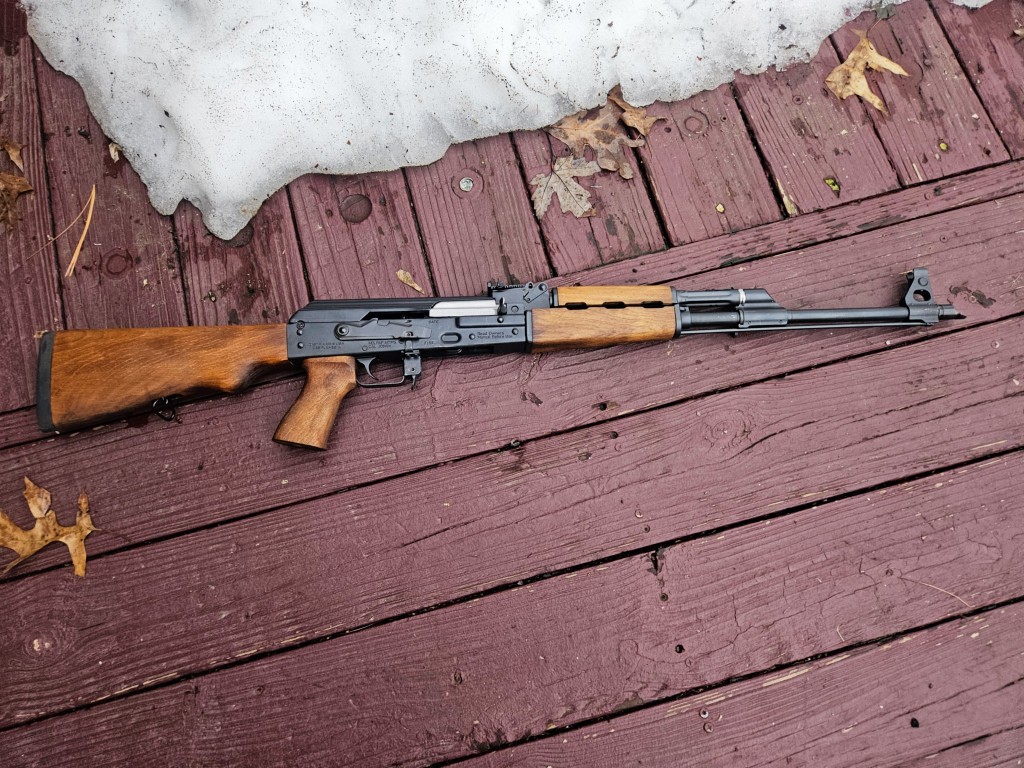
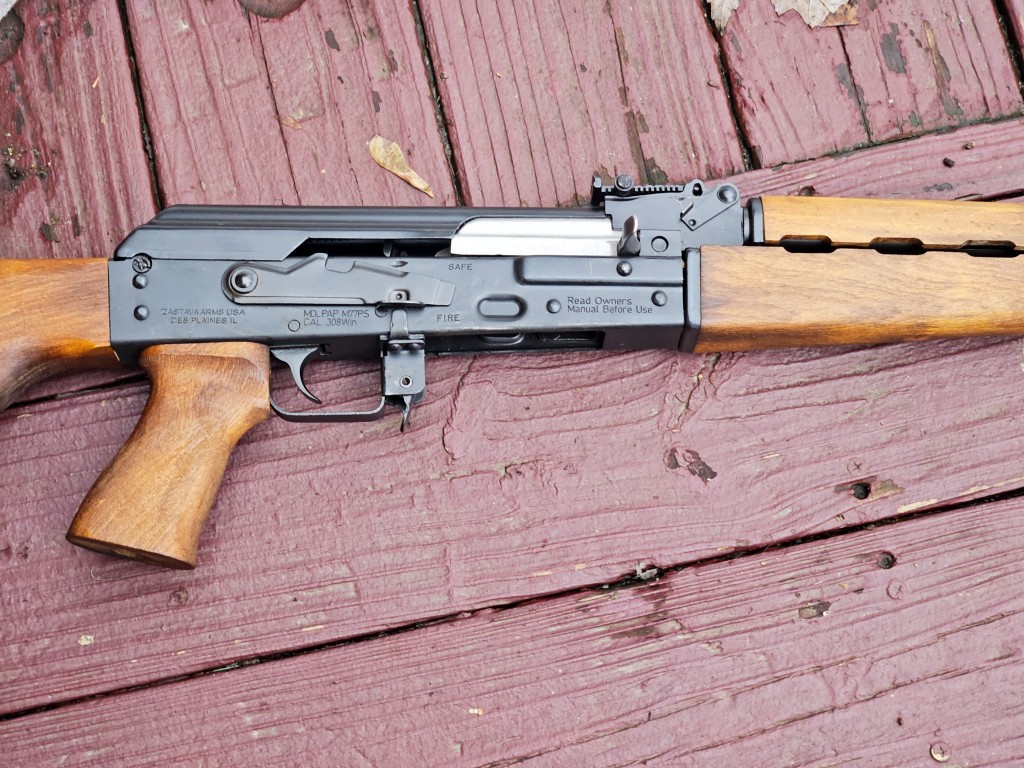
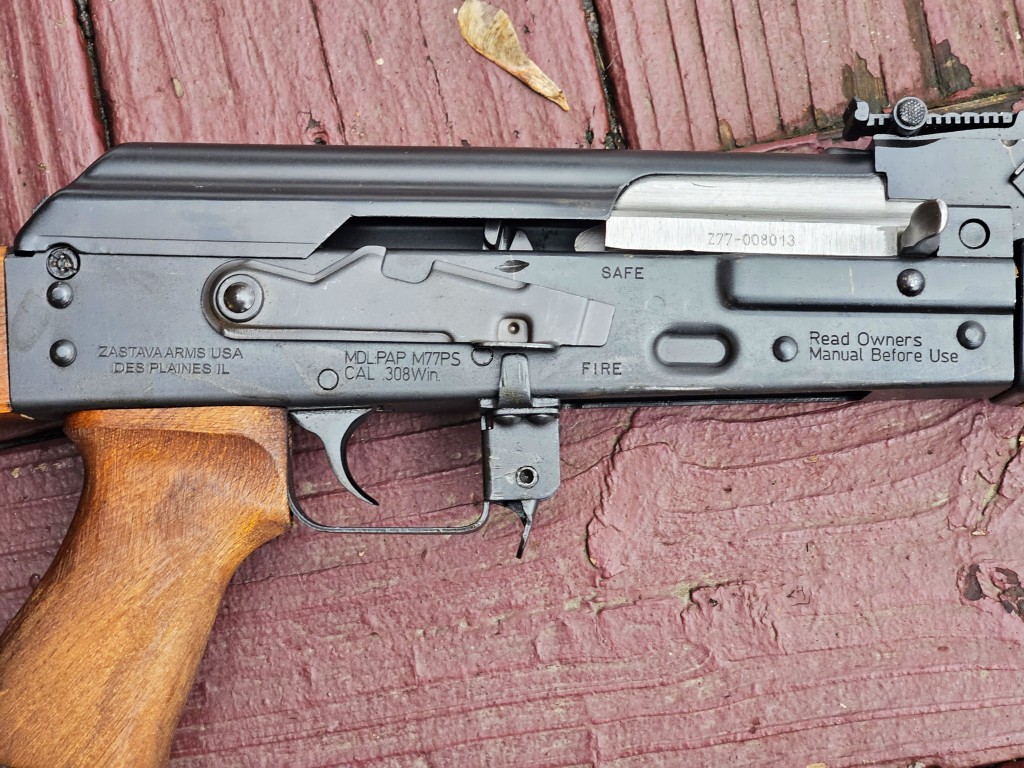
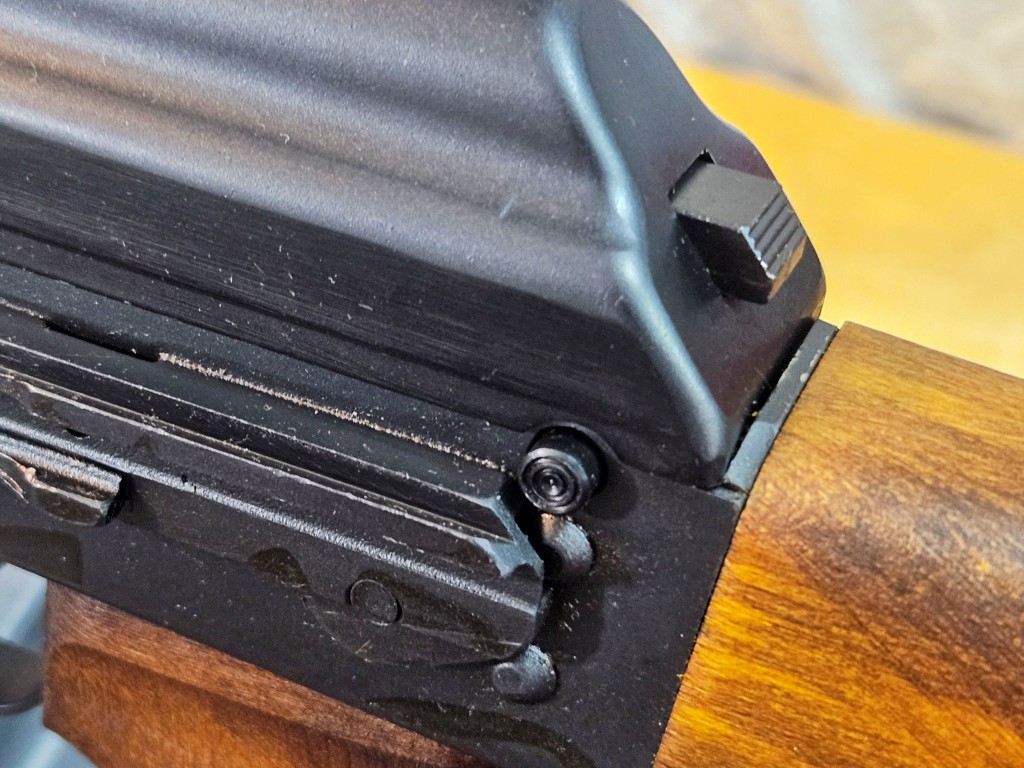


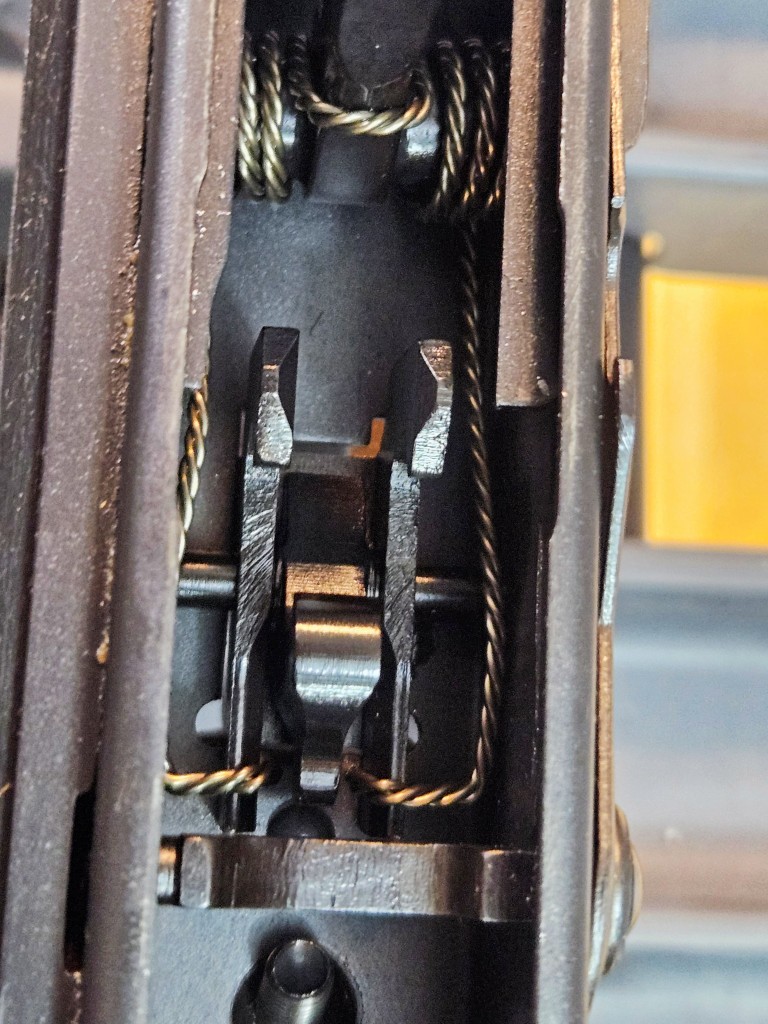
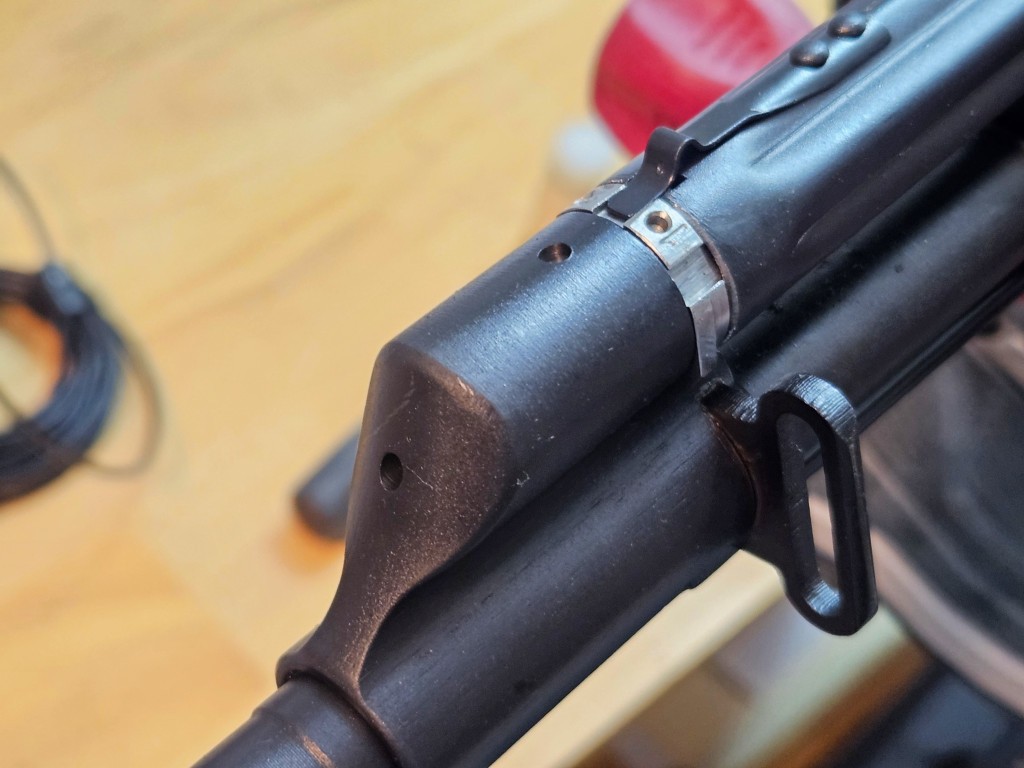
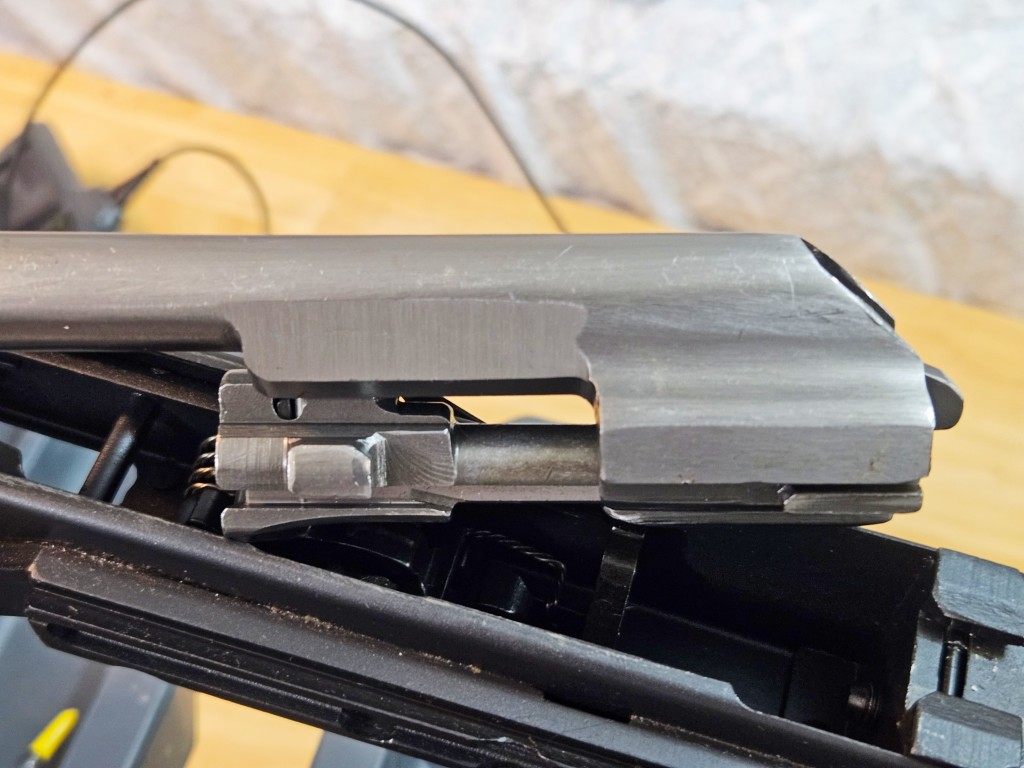
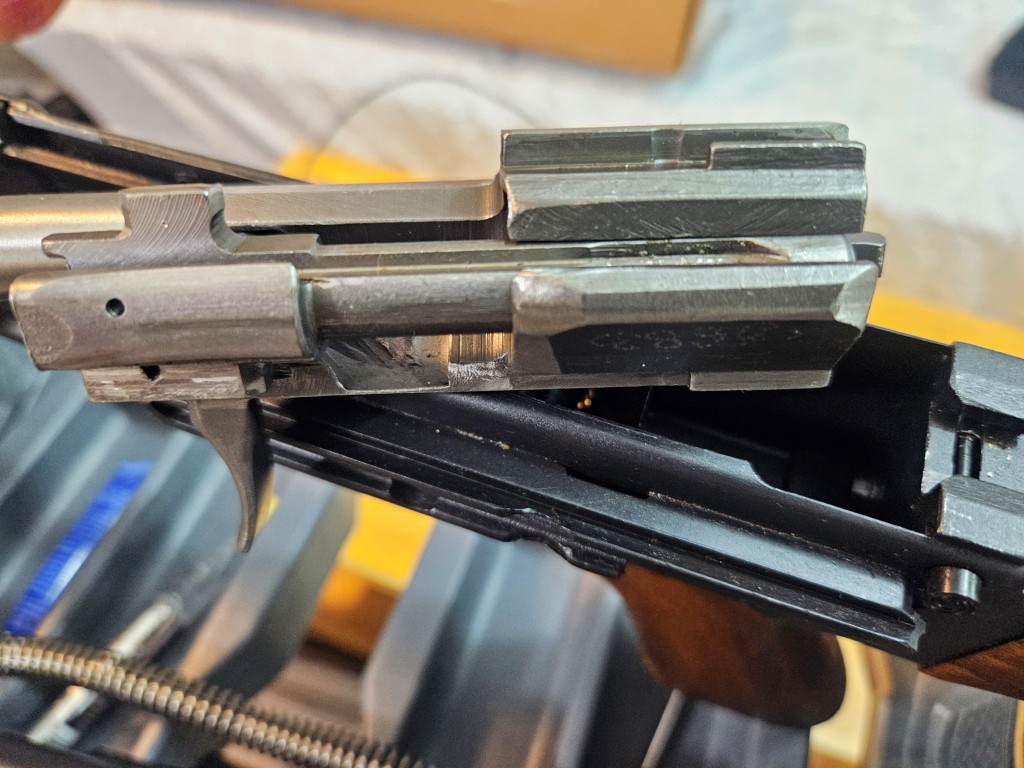

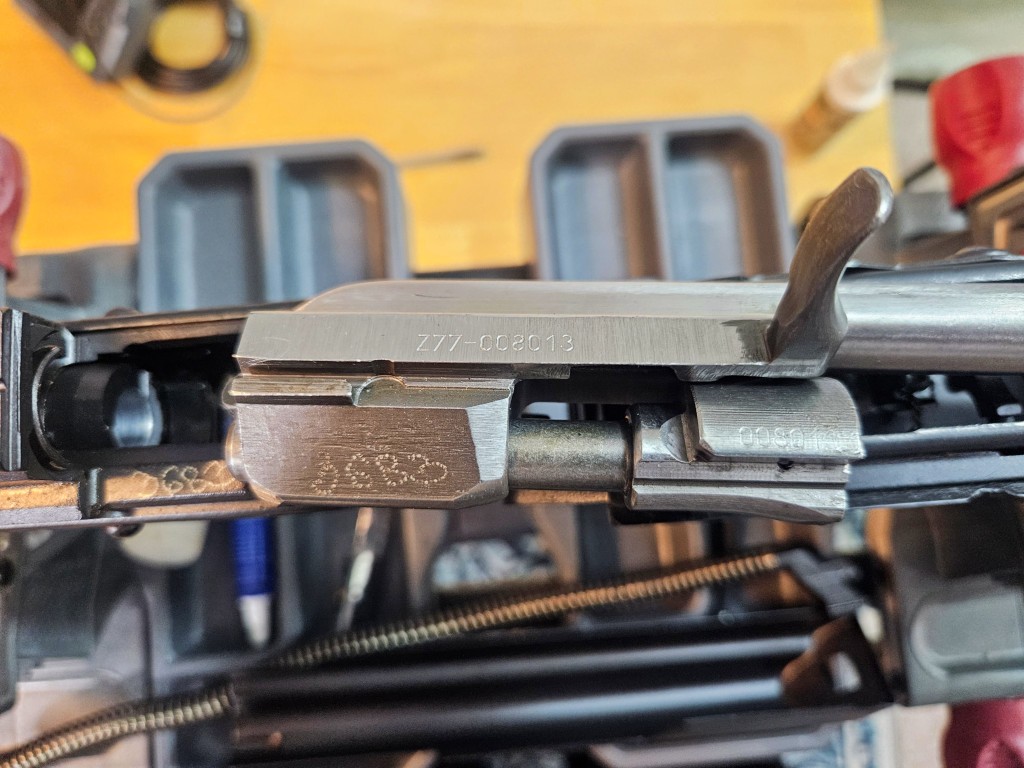
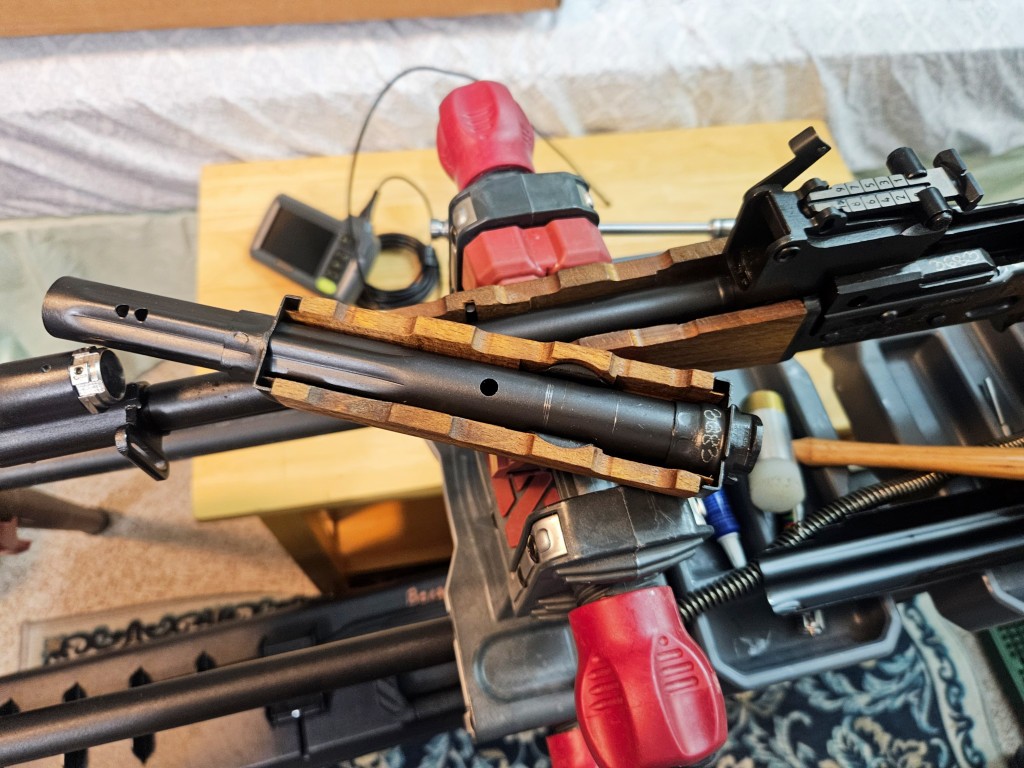
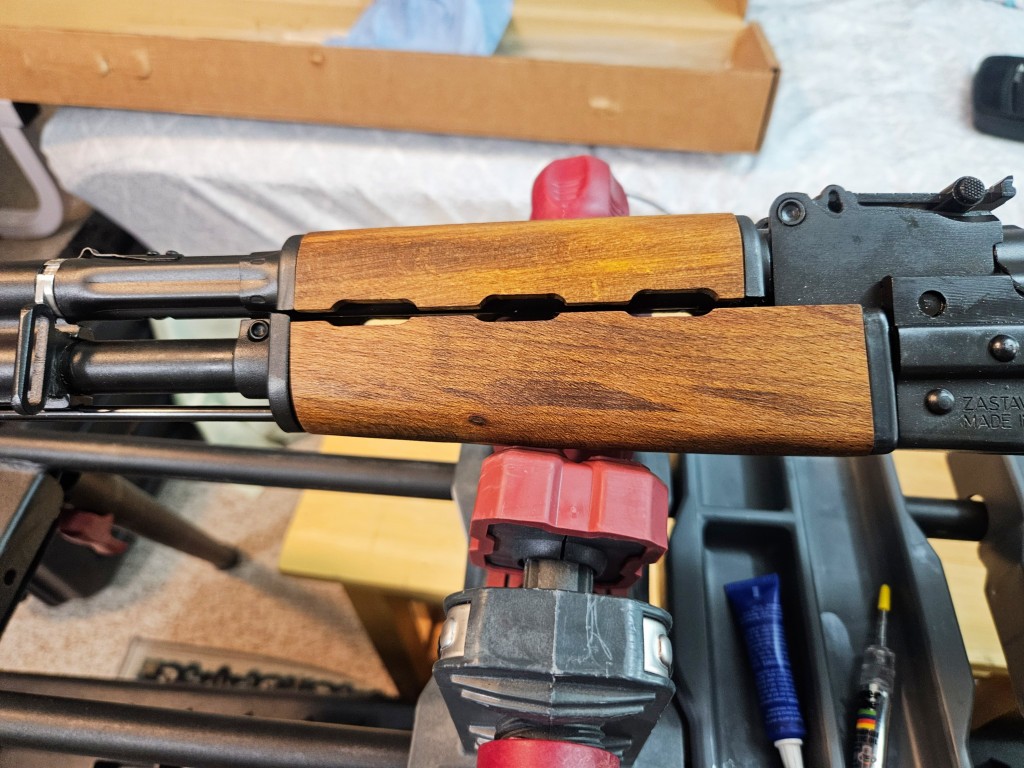
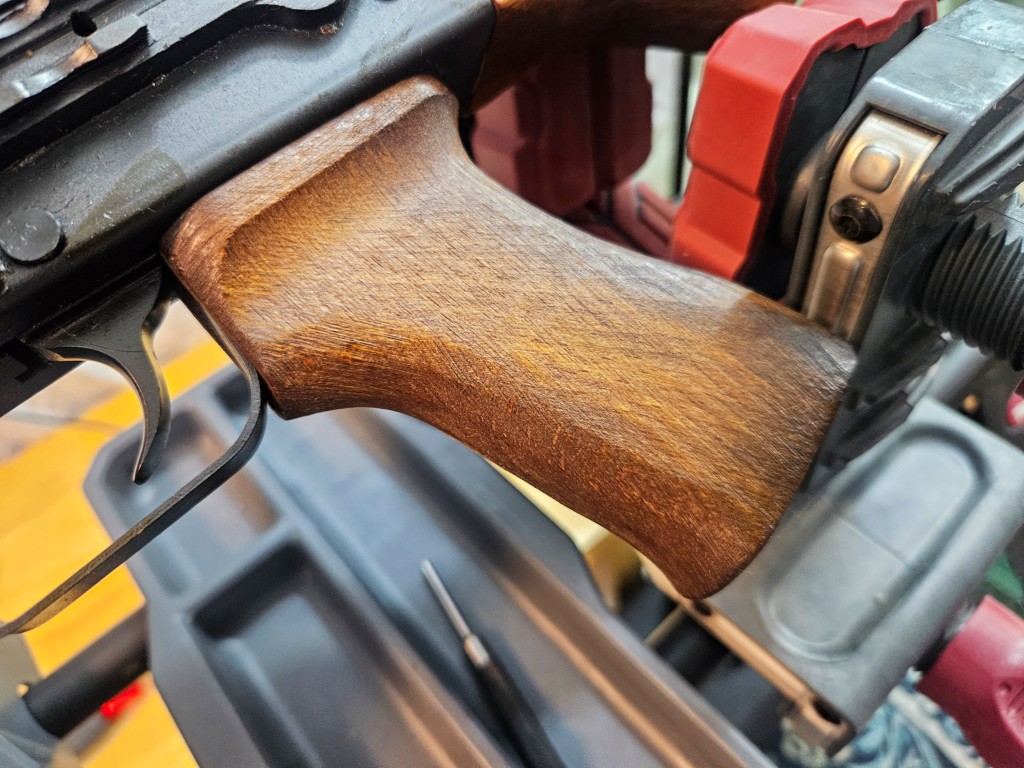

.jpg)
.jpg)