This report provides an in-depth analysis of two of Russia’s most significant small arms manufacturers: JSC Kalashnikov Concern and Molot-Oruzhie OOO. While both are rooted in the Soviet arms production system and are globally recognized for their Kalashnikov-pattern firearms, they represent divergent models of the modern Russian defense industry.
Kalashnikov Concern stands as the flagship of the Russian arms industry, a sprawling, state-backed conglomerate that produces approximately 95% of the nation’s small arms.1 Formed from the historic Izhmash and Izhmekh arsenals, it has evolved far beyond its origins as a rifle manufacturer. Today, it is a diversified defense-technology corporation with significant holdings in shipbuilding, armor development, and, most critically, unmanned aerial systems (UAS) and loitering munitions. This strategic pivot reflects a direct alignment with the priorities of the Russian Ministry of Defence, driven by the lessons of modern conflicts. Its latest small arms, such as the AK-12 and AK-200 series, demonstrate an embrace of modern ergonomics and modularity, yet its future growth is clearly oriented toward high-technology warfare.
In contrast, Molot-Oruzhie is a legacy specialist, historically defined by its role as the sole producer of the RPK light machine gun. This specialization endowed its civilian products, the Vepr line of rifles and shotguns, with a reputation for extreme durability, built upon the RPK’s reinforced receiver and heavy barrel. However, this niche excellence proved to be a critical vulnerability. Plagued by financial instability and lacking Kalashnikov’s diversification, Molot became entirely dependent on the Western civilian market for its Vepr sales. Following the 2014 sanctions on Kalashnikov Concern, Molot briefly became the primary channel for Russian AK-pattern rifles into the United States. This prominence was short-lived. In 2017, Molot itself was sanctioned, officially for acting on behalf of Kalashnikov Concern to circumvent existing restrictions.2
This event crystallized the true nature of their relationship. In Russia’s state-controlled defense sector, Western concepts of corporate competition are subordinate to state imperatives. Molot, the smaller and financially weaker entity, was effectively used as a disposable asset to serve the strategic interests of the state and its chosen champion, Kalashnikov Concern.
Today, their futures are starkly different. Kalashnikov Concern is poised for continued growth as the primary industrial engine for the Russian military’s modernization, with a heavy focus on drones and next-generation systems. Molot-Oruzhie, cut off from international markets and with no apparent high-tech pivot, survives as a domestic supplier, producing its legacy designs for the Russian armed forces. Its independent future remains tenuous. The story of these two arsenals is a clear illustration of the primacy of state power and geopolitical strategy in shaping the Russian defense industry.
Kalashnikov Concern: The State-Sanctioned Defense Behemoth
Historical Lineage: From Imperial Arsenal to Global Concern
The entity known today as Kalashnikov Concern is not a modern creation but the inheritor of a legacy deeply embedded in Russian military history. Its origins trace back to June 10, 1807, when Emperor Alexander I decreed the establishment of a state-of-the-art firearms factory in the city of Izhevsk.1 The location was strategic, chosen for its proximity to established ironworks, ensuring a reliable supply of raw materials, and its position on the Izh River, which powered the plant’s machinery.4
From its inception, the Izhevsk arsenal was a center of innovation and mass production. Its main building, a massive four-story structure, was one of the first multi-story industrial buildings in Russia, designed for a vertical production flow where work began on the ground floor and finished arms were assembled on the top floor.1 Production ramped up quickly; within its first few years, the factory was producing thousands of newly developed No. 15 17.7mm muskets, and by 1814, in response to Napoleon’s invasion, annual output had surged to 10,000 guns and 2,500 swords.1
Throughout the 19th and early 20th centuries, the arsenal adapted to the changing technologies of warfare, producing Gartung short rifles, Phalis breech-loaders, and later, the Berdan and Mosin-Nagant bolt-action rifles that would arm the Imperial Russian Army through World War I.1 The Soviet era brought profound transformation. In 1922, the facility was reorganized, and by the 1930s, it had become the Soviet Union’s Chief Designer Bureau for small arms.4 It was here that legendary designers like Sergei Simonov and Fyodor Tokarev developed their weapons, and the plant mastered flow-line and conveyor belt production methods, churning out over 11 million Mosin-Nagant rifles during World War II.4
The post-war period marked the beginning of its most famous chapter. The factory hired a former tank mechanic, Mikhail Kalashnikov, whose design for an “automatic rifle” would become the legendary AK-47. Kalashnikov remained at the facility for the rest of his career, developing the entire family of weapons that bears his name, including the AKM, AK-74, and RPK.4 In parallel, another designer at the plant, Yevgeny Dragunov, created the iconic SVD sniper rifle.4
The final evolution came in 2013, when the Russian government, under the umbrella of the state-owned Rostec corporation, consolidated the Izhevsk Machine-Building Plant (Izhmash) with the Izhevsk Mechanical Plant (Izhmekh). This merger created the modern JSC “Kalashnikov Concern,” a unified and powerful corporate group designed to be the flagship of the Russian defense industry.1
Corporate Structure and Strategic Holdings
Kalashnikov Concern is structured not as a single company but as a corporate group or “concern,” a model analogous to Western conglomerates like Stellantis (Jeep, Chrysler, Dodge) where multiple distinct brands and companies operate under a unified management system.4 This structure gives it immense scale and a diversified portfolio that extends far beyond the Kalashnikov brand. The Concern is the dominant force in Russian small arms, accounting for approximately 95% of the country’s total production and exporting to more than 27 countries (prior to expanded sanctions).1
The ownership structure reflects its strategic importance to the Russian state. While a majority of the company (74%) is held by private investors, the state-owned defense conglomerate Rostec retains a critical 26% blocking stake, ensuring government oversight and strategic alignment.1
The group’s holdings are extensive and specialized, indicating a clear strategy of vertical integration and diversification into key defense sectors. These holdings demonstrate that Kalashnikov Concern’s identity has evolved from a firearms maker into a comprehensive defense systems provider.
Table 1: Kalashnikov Concern – Key Corporate Holdings & Specializations
| Subsidiary/Division | Specialization | Source(s) |
| Kalashnikov Concern | Core division for military small arms (assault rifles, sniper rifles), UAVs, guided munitions, and vehicles. | 5 |
| Izhevsk Mechanical Plant (IMZ) | Russia’s largest producer of pistols (Makarov, MP-443), service shotguns, and hunting/air guns under the “Baikal” brand. | 5 |
| TsNIITochMash | Central research institute for small arms R&D, ammunition, and development of advanced combat equipment like the “Ratnik” soldier system. | 5 |
| Research Institute of Steel | Specializes in the development of advanced armor, composite materials, and protective structures for vehicles and personnel. | 5 |
| Rybinsk Shipyard / Nobel Bros. | Shipbuilding and repair, producing high-speed transport and assault boats for special operations forces. | 5 |
| Zala Aero / IzhBS | Key divisions for the research, development, and mass production of unmanned aerial vehicles (UAVs) and loitering munitions. | 5 |
| Mytishchi Machine-Building Plant (MMZ) | Produces unique special-purpose tracked and wheeled chassis for military systems. | 5 |
| Triada-TKO | Manufactures professional combat wear, body armor, and tactical gear. | 5 |
| Kalashnikov Academy | A youth technology park focused on engineering education, creating a pipeline of talent for the Concern. | 5 |
This diversified structure is the foundation of the Concern’s resilience and its capacity for strategic pivots, allowing it to leverage expertise from across the defense spectrum to develop integrated systems for the modern battlefield.
Modern AK-Pattern Firearm Portfolio
While the Concern has diversified, its core identity remains rooted in the AK platform. Its modern firearms portfolio represents an evolutionary path, seeking to adapt the legendary reliability of the Kalashnikov system to the demands of 21st-century warfare and international markets.
The AK-12/AK-15: The Ratnik Standard
The AK-12 is the current pinnacle of Kalashnikov’s assault rifle development and the standard-issue service rifle for the Russian military, adopted as a key component of the “Ratnik” future soldier combat system.7 Chambered in the high-velocity 5.45x39mm cartridge, its counterpart, the AK-15, is chambered in the traditional 7.62x39mm, providing troops with a choice of caliber.7
The AK-12 represents a significant departure from previous generations in terms of ergonomics and modularity. Its most critical feature is the redesigned receiver cover, which is more rigid and features an integrated MIL-STD-1913 Picatinny rail for the stable mounting of modern optics.7 This solves a long-standing issue with traditional AK side-mounts. Other key upgrades include:
- A free-floating handguard with Picatinny rails for mounting accessories like lights, lasers, and grips without affecting barrel harmonics.7
- A four-position, adjustable, side-folding polymer buttstock, allowing the rifle to be adapted to different shooter sizes and body armor.7
- An improved pistol grip with an internal storage compartment and a redesigned fire selector with an added thumb paddle for easier manipulation.7
Battlefield experience in Ukraine has driven further iterative improvements. In 2023, Kalashnikov unveiled an updated AK-12 model that addressed criticisms of the initial design, featuring a stronger handguard, improved materials, and other refinements, demonstrating a direct feedback loop between combat use and production.9
The AK-200 Series: A Modernized Platform for the Global Export Market
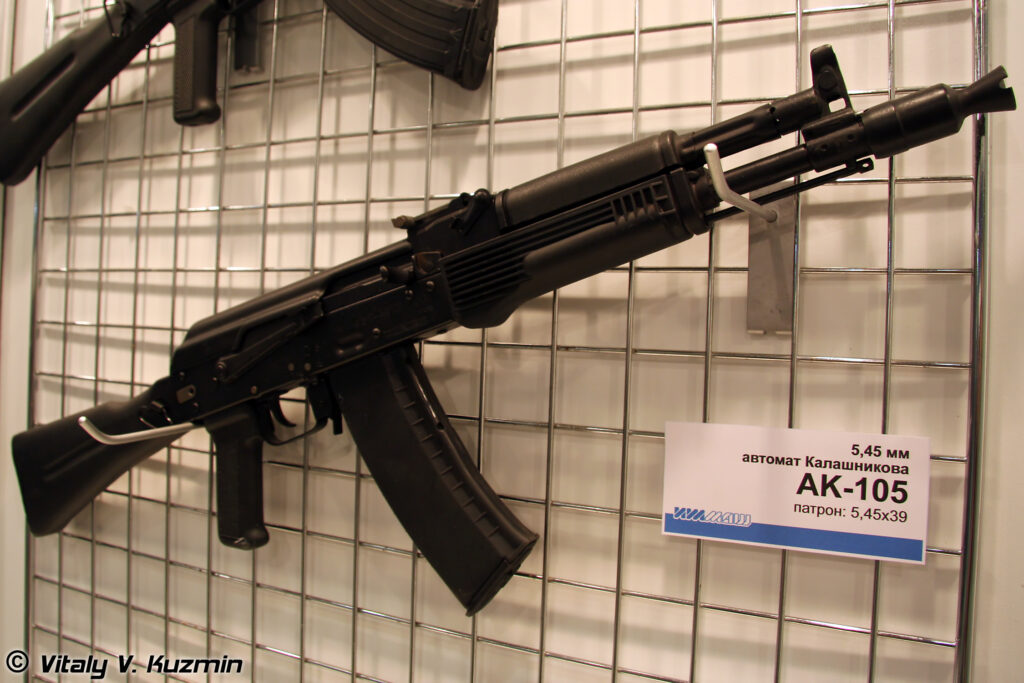
The AK-200 series serves as an export-focused family of rifles, acting as a technological bridge between the legacy AK-74M and the advanced AK-12.10 This series, which includes models like the AK-200, AK-203, and AK-205, was developed to offer a modernized, reliable, and cost-effective solution for international customers who may not require the full feature set of the AK-12.10
The AK-200 series incorporates many of the ergonomic and modular upgrades of the AK-12, including the adjustable folding stock, improved pistol grip, and extensive Picatinny rails on the handguard and dust cover.10 However, it is built upon the more traditional and proven AK-74M receiver and operating group. This approach likely reduces production costs and simplifies the transition for armies already familiar with the classic AK platform.
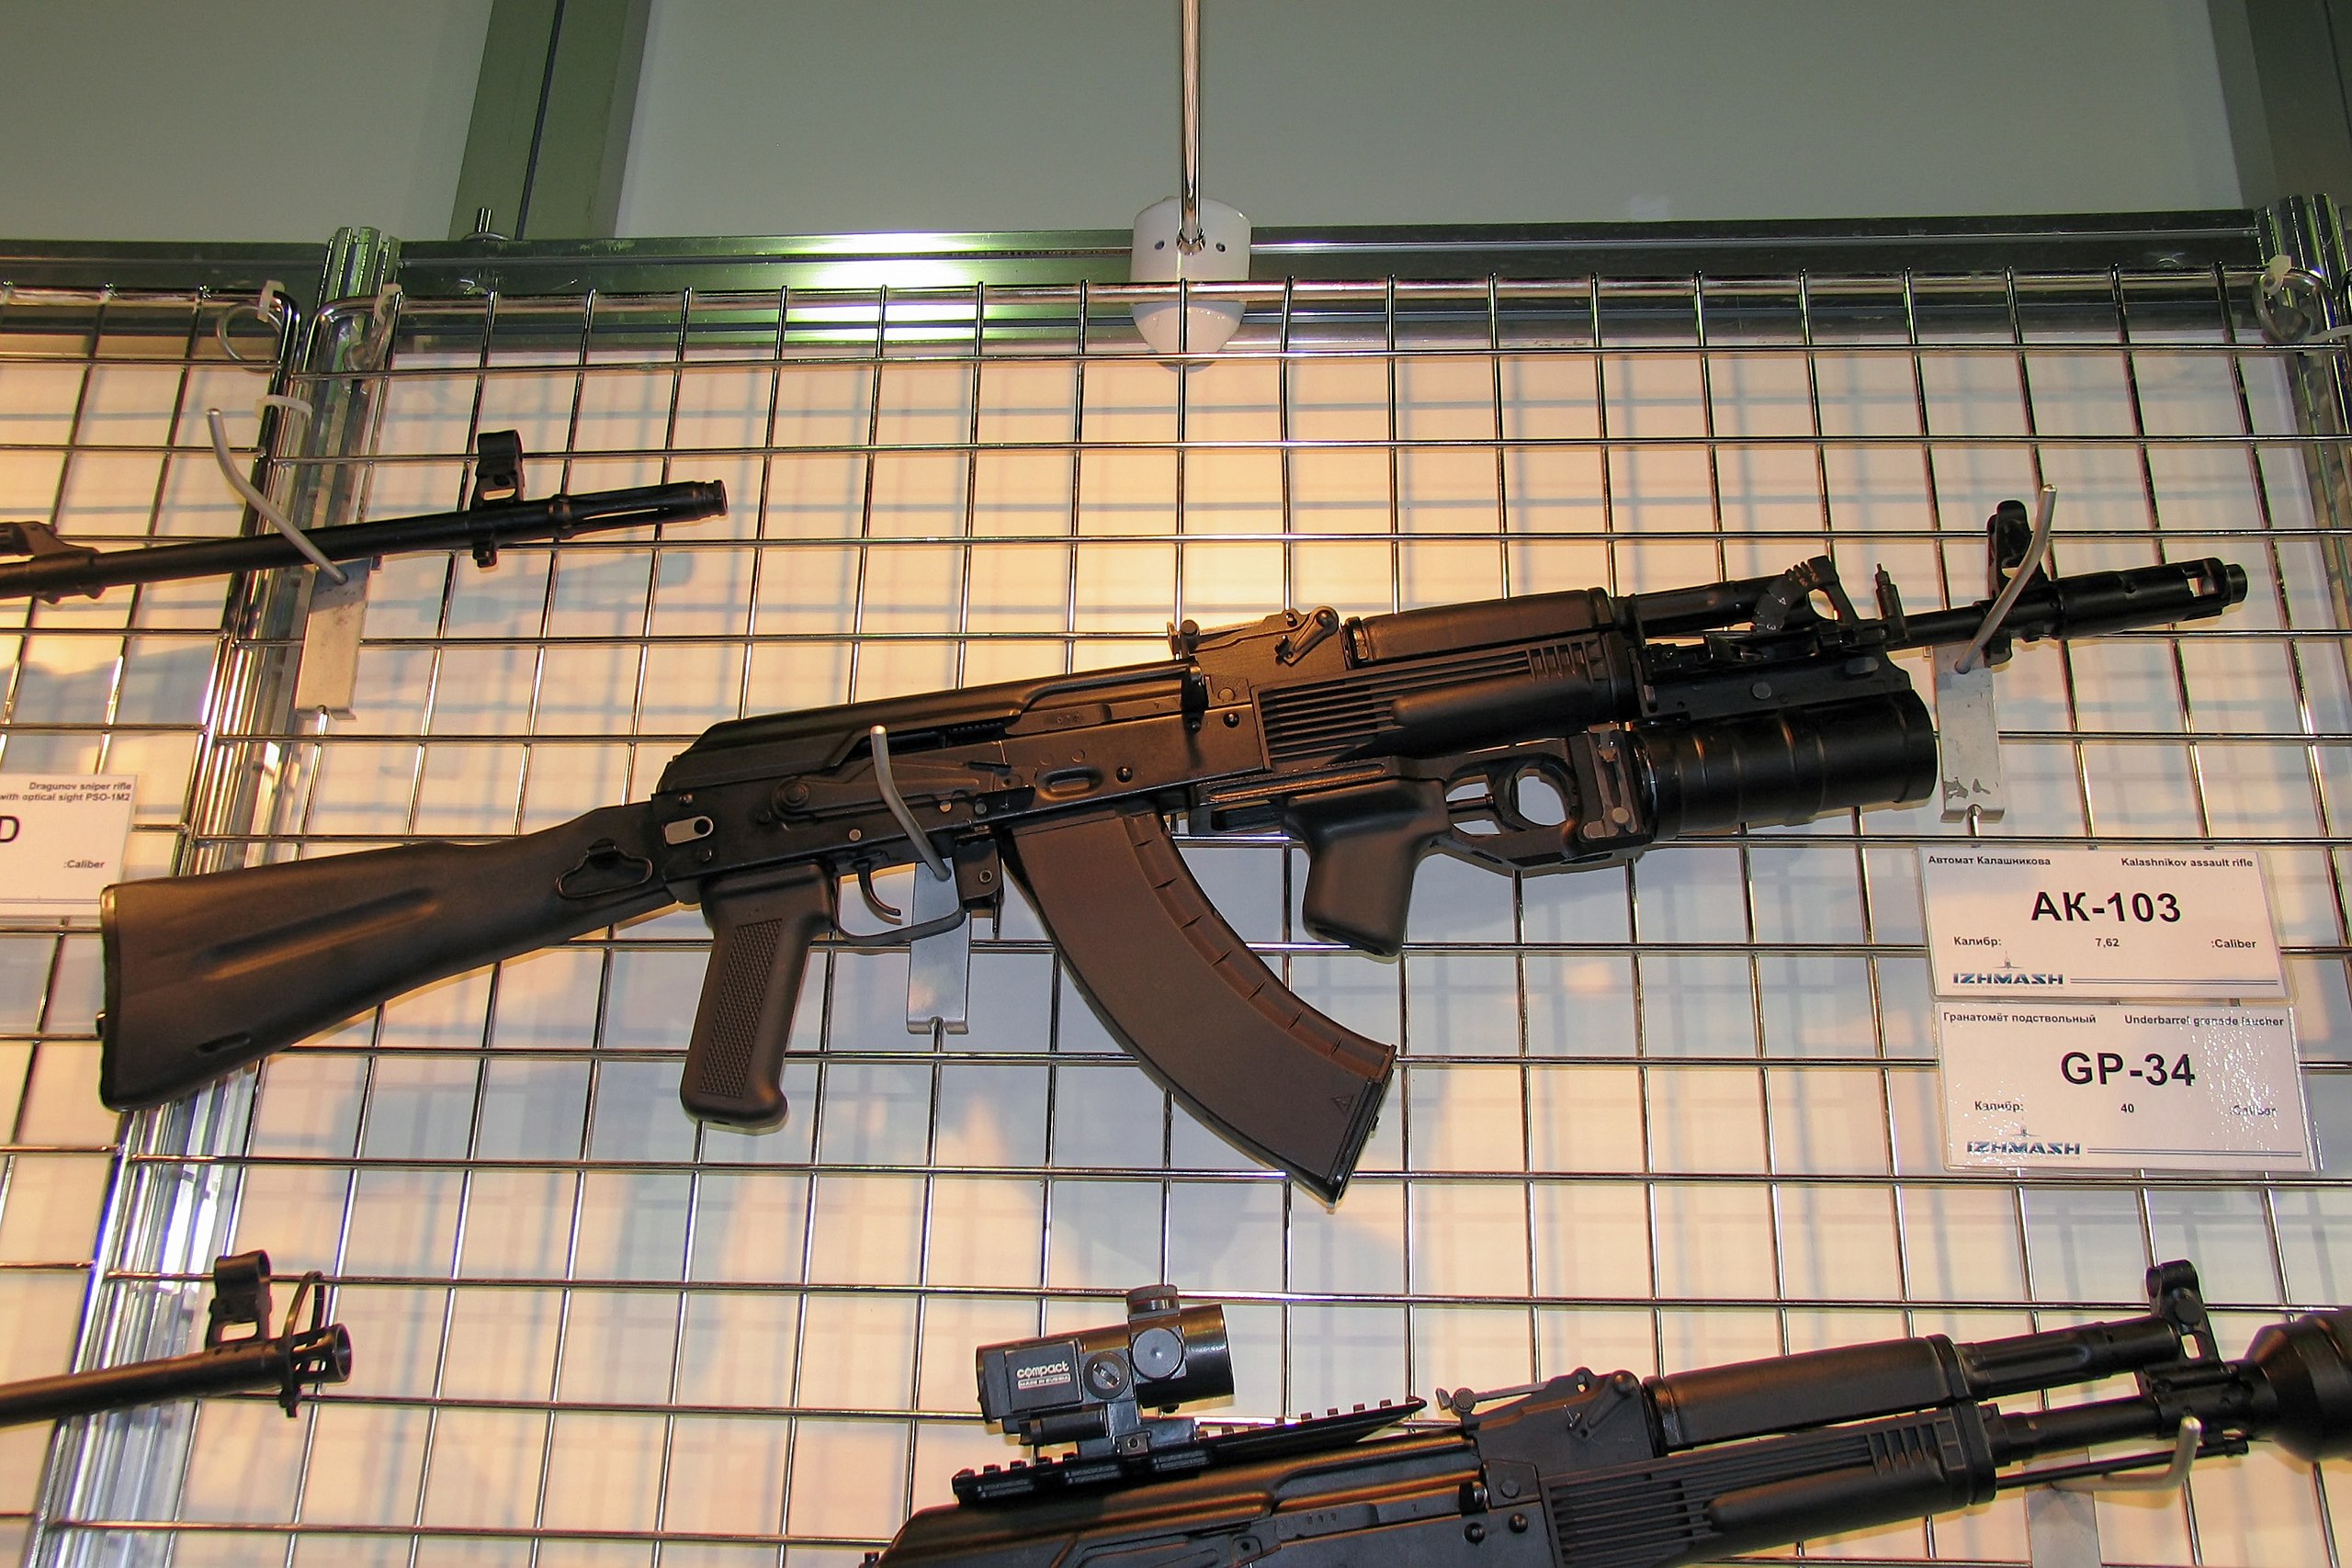
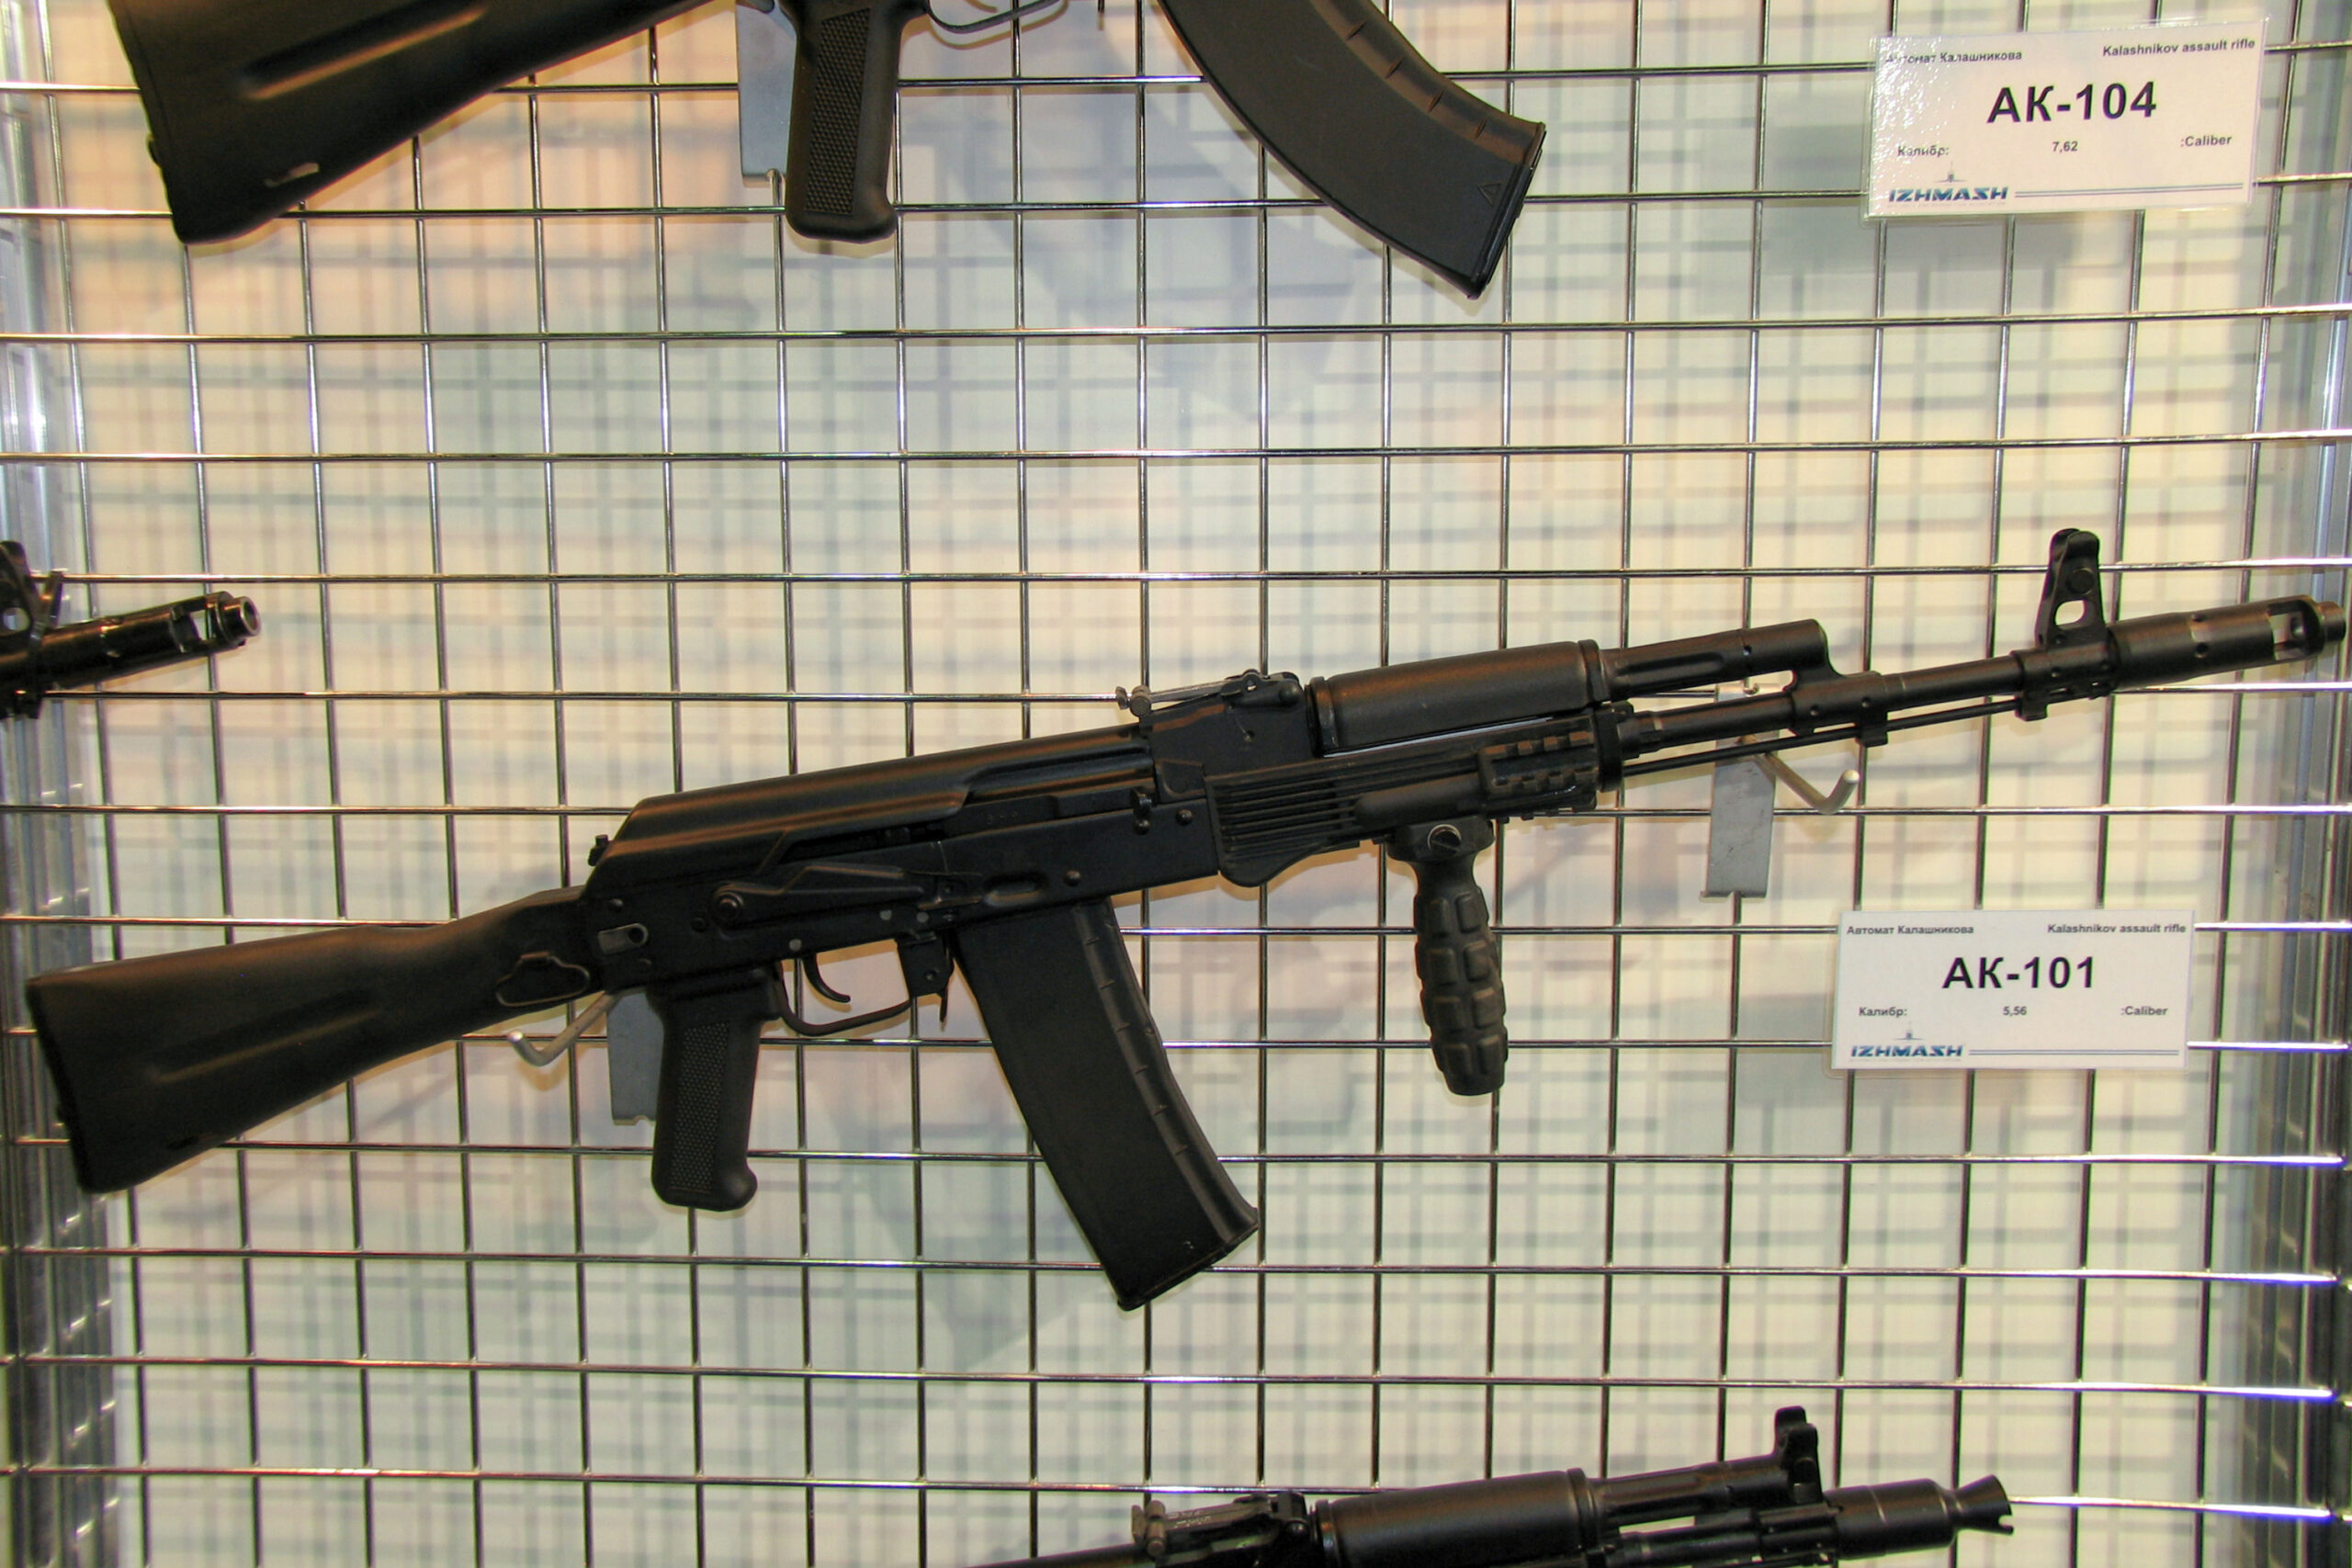
To maximize its appeal on the global market, the series is offered in all major intermediate calibers:
- AK-200/205: 5.45x39mm
- AK-201/202: 5.56x45mm NATO
- AK-203/204: 7.62x39mm 12
The Saiga Platform: The Civilian AK Legacy
The Saiga family of semi-automatic rifles and shotguns represents the civilian adaptation of the Kalashnikov military action.14 Manufactured at the same Izhmash plant as their military counterparts, Saigas were marketed for hunting and sport shooting.1 To comply with U.S. import regulations, particularly Section 922(r), they were typically imported in a “sporter” configuration with features like a traditional rifle stock (often a thumbhole design), a relocated trigger group, and magazines with limited capacity.16
Despite these modifications, the core of the rifle—the Russian-made receiver, bolt, and chrome-lined, hammer-forged barrel—was authentic. This made them immensely popular among American enthusiasts, who often undertook “conversions” to restore the firearms to a more military-correct AK-style configuration with a pistol grip and standard-capacity magazines.18 This high demand underscored the desire in the civilian market for genuine Russian-made AKs.
This thriving market came to an abrupt halt in 2014 when the U.S. government imposed sanctions on Kalashnikov Concern.19 The sanctions prohibited the importation of all new Saiga firearms. Overnight, the existing supply of Saigas in the United States became finite, instantly transforming them from readily available sporting rifles into highly sought-after and increasingly valuable collector’s items.2
Table 2: Kalashnikov Concern – Modern AK-Pattern Rifle Specifications
| Feature | AK-12 | AK-200 | AK-203 | Saiga (7.62×39 Sporter) |
| Caliber | 5.45x39mm | 5.45x39mm | 7.62x39mm | 7.62x39mm |
| Receiver Type | 1.0mm Stamped AK-74M Type | 1.0mm Stamped AK-74M Type | 1.0mm Stamped AK-74M Type | 1.0mm Stamped AK-100 Series |
| Barrel Length | 415 mm | 415 mm | 415 mm | 415 mm |
| Weight (kg, empty) | 3.7 kg | 4.1 kg | 4.1 kg | 3.6 kg |
| Key Features | Standard “Ratnik” rifle, free-float handguard, enhanced ergonomics, rigid railed dust cover. | Export model based on AK-74M with modern furniture and Picatinny rails. | Export model in 7.62mm with modern furniture and Picatinny rails. | Civilian sporter, based on AK-103. Imports banned since 2014. |
| Source(s) | 7 | 10 | 11 | 14 |
Strategic Pivot: Beyond Small Arms
The most significant trend defining the modern Kalashnikov Concern is its aggressive, state-supported diversification into high-technology warfare systems. This strategic pivot is not merely a business decision to enter new markets; it is a direct, top-down response to the operational realities and technological demands of the war in Ukraine. The Concern’s product development roadmap now serves as a clear indicator of the Russian military’s strategic priorities.
The clearest evidence of this shift is the massive expansion of its Unmanned Aerial Vehicle (UAV) and loitering munition capabilities. Through its subsidiaries like Zala Aero and IzhBS, the Concern has dramatically scaled up production. Plans were announced to increase UAV output tenfold in 2024, with further growth projected for 2025, driven by the immense demand from the “Special Military Operation” zone.20
This includes the development and battlefield deployment of a range of loitering munitions, or “suicide drones.” Models like the KUB, KUB-2-E, and the larger KUB-10E have been showcased and proven effective in combat.21 This focus on unmanned systems demonstrates a fundamental understanding that modern conflicts are increasingly defined by precision, remote-operated, and autonomous weapons.
While this high-tech pivot is the priority, small arms development continues, albeit with a similar focus on battlefield lessons. The planned 2025 mass production of the AM-17, a lightweight, compact rifle with a polymer receiver intended to replace the venerable AKS-74U, was finalized after combat trials in Ukraine.9
Simultaneously, the Concern is broadening its industrial base into non-military sectors, such as expanding production of screw-cutting lathes and developing its high-pressure metal injection molding (MIM) technology.6 This indicates a long-term strategy to enhance Russia’s overall domestic industrial capacity, reducing reliance on foreign technology and machinery. This evolution from a pure arms maker to a diversified defense-tech conglomerate, whose R&D is dictated by the immediate needs of the state, marks Kalashnikov Concern’s new role as the primary industrial arm for implementing Russia’s adaptations to 21st-century warfare.
Molot-Oruzhie: The RPK Specialists of Vyatskiye Polyany
Historical Lineage: From Wartime Production to RPK Specialization
The history of Molot-Oruzhie is distinct from that of the Izhevsk arsenal, forged in the crucible of World War II. The Vyatskiye Polyany Machine-Building Plant was established in 1941 with the urgent task of arming the Red Army.25 Its first and most famous contribution to the war effort was serving as the main producer of the iconic PPSh-41 submachine gun, a weapon that became a symbol of the Soviet soldier.25
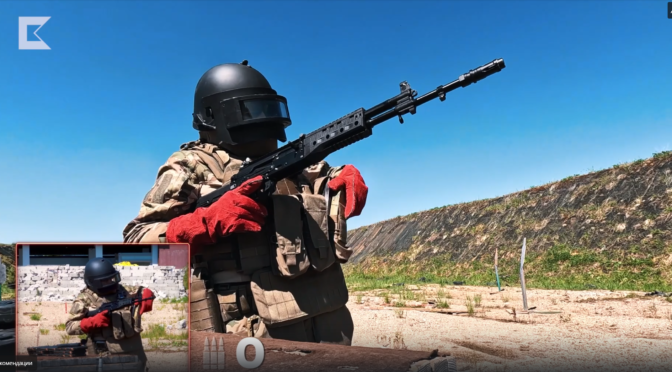
After the war, the plant transitioned to other products but found its defining identity in the early 1960s. When Mikhail Kalashnikov developed a light machine gun variant of his new AKM rifle, the RPK (Ruchnoy Pulemyot Kalashnikova), the Vyatskiye Polyany plant was chosen as its exclusive manufacturer. From 1961 to 1978, Molot produced the RPK for the Soviet military and its allies.25
This specialization was formative. The RPK was not simply a standard AK; it was designed as a squad automatic weapon, intended for a higher volume and greater intensity of fire. This required a fundamentally more robust construction. The manufacturing processes and engineering philosophy at Molot became centered on this principle of overbuilt durability, a characteristic that would define its products for decades to come and become the core of its brand identity.25
Corporate Status and Enduring Challenges
In stark contrast to Kalashnikov Concern’s state-backed stability and growth, Molot-Oruzhie’s recent history has been defined by corporate fragility and immense external pressures. Operating as a limited liability company (Molot-Oruzhie, OOO), the plant has faced significant financial headwinds.2 It entered bankruptcy proceedings as early as 2012, and by 2017, reports indicated it was being controlled by a bankruptcy managing company.27 In March 2017, Russian news outlets reported that the factory was officially bankrupt and would be auctioned, with Kalashnikov Concern considered the most probable buyer.28 This persistent financial weakness left it vulnerable to external pressures and state influence.
This vulnerability was compounded by international sanctions. While it initially avoided the 2014 sanctions that targeted Kalashnikov, Molot was added to the U.S. Treasury Department’s Specially Designated Nationals (SDN) list in June 2017.2 Since then, it has been targeted by a comprehensive international sanctions regime, including measures from the European Union, Canada, Switzerland, and Ukraine.29 These sanctions effectively severed its access to Western financial systems and, crucially, its export markets, which were vital for its civilian product lines.
The Vepr Platform: An RPK for the Masses
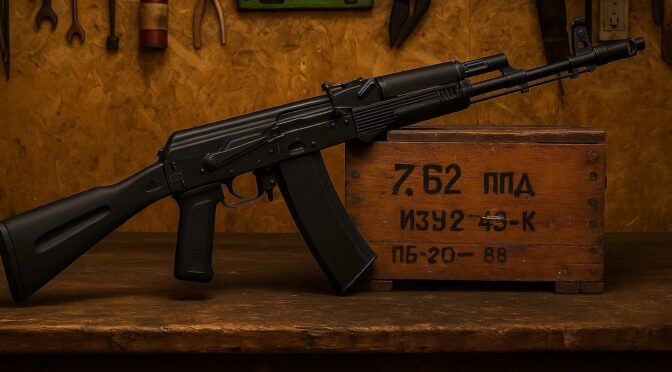
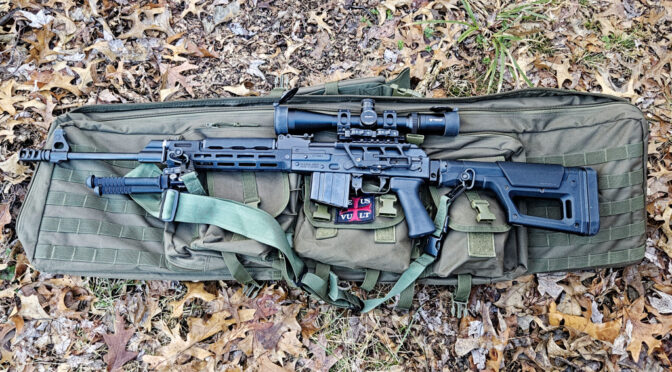
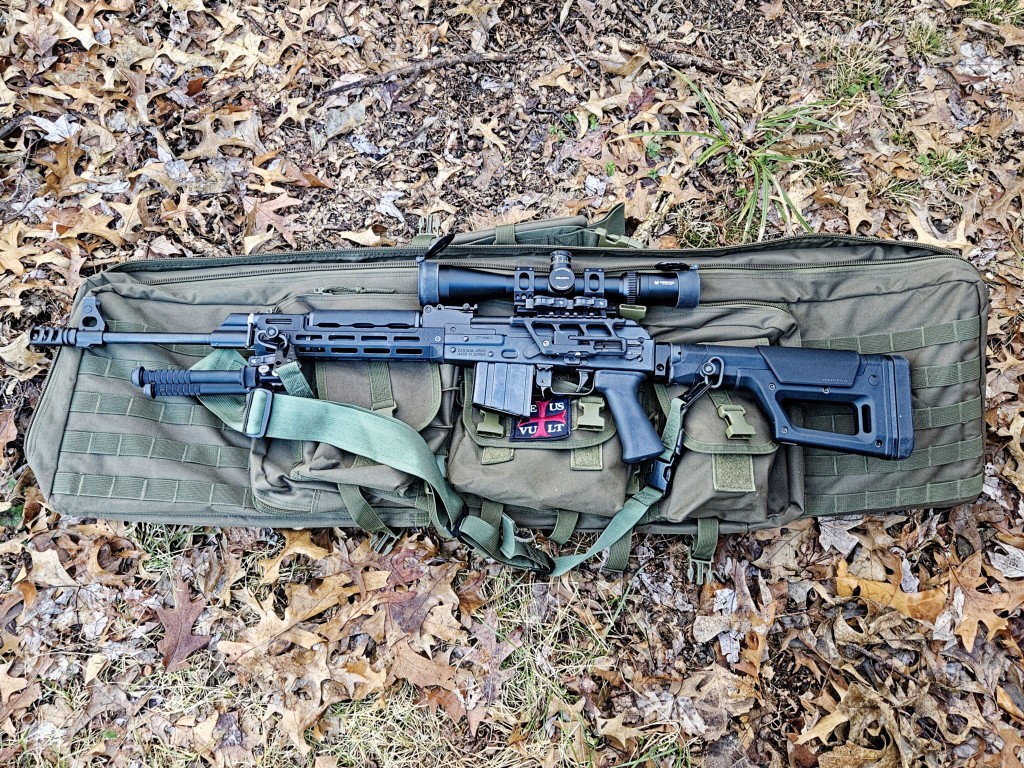
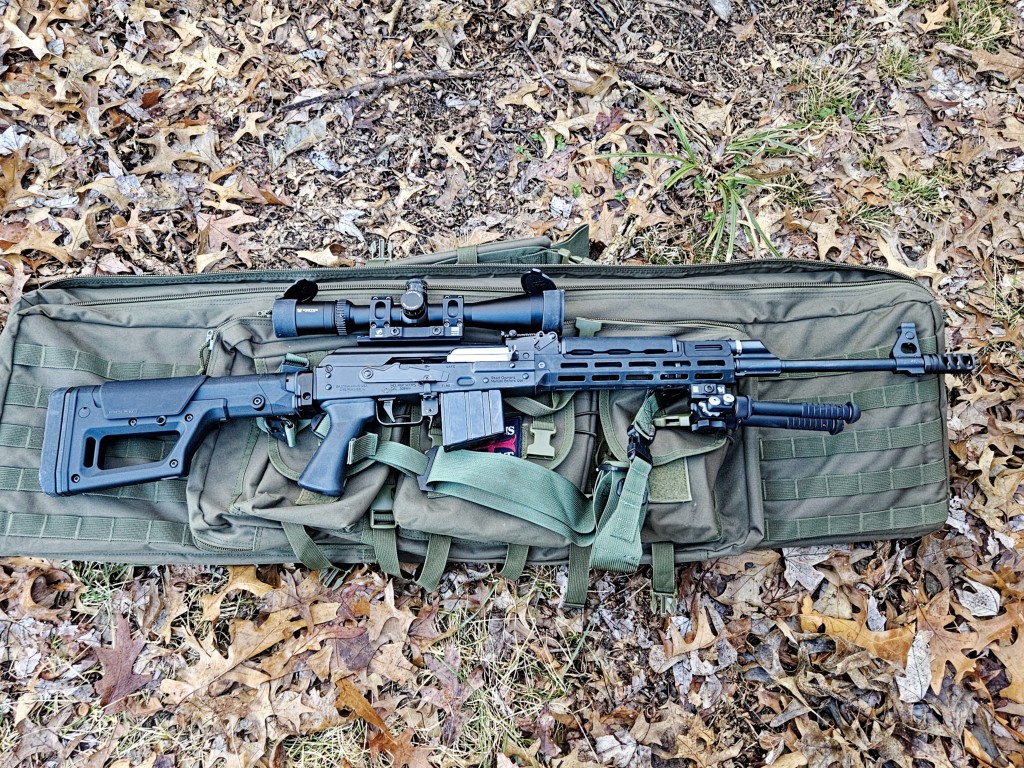
Molot’s flagship civilian product line, the Vepr (“Wild Boar”), is a direct commercial application of its military RPK manufacturing heritage.16 Marketed as high-end sporting rifles and shotguns, the Vepr’s primary selling point was its extreme durability, derived directly from the RPK design philosophy.25
The features that made the Vepr legendary among firearms enthusiasts are the same ones that defined the RPK:
- A Heavy-Duty Receiver: Vepr rifles are built on a stamped receiver made from 1.5mm thick steel, which is 50% thicker and more reinforced than the 1.0mm receiver of a standard AKM. This provides superior rigidity and a much longer service life under heavy use.26
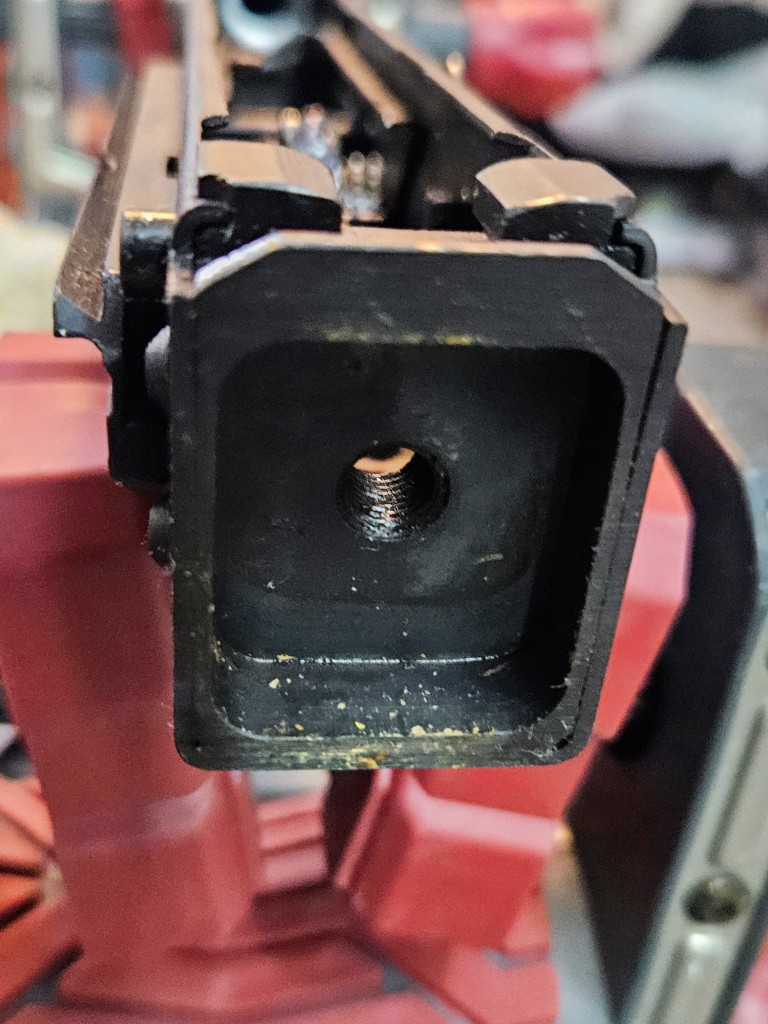
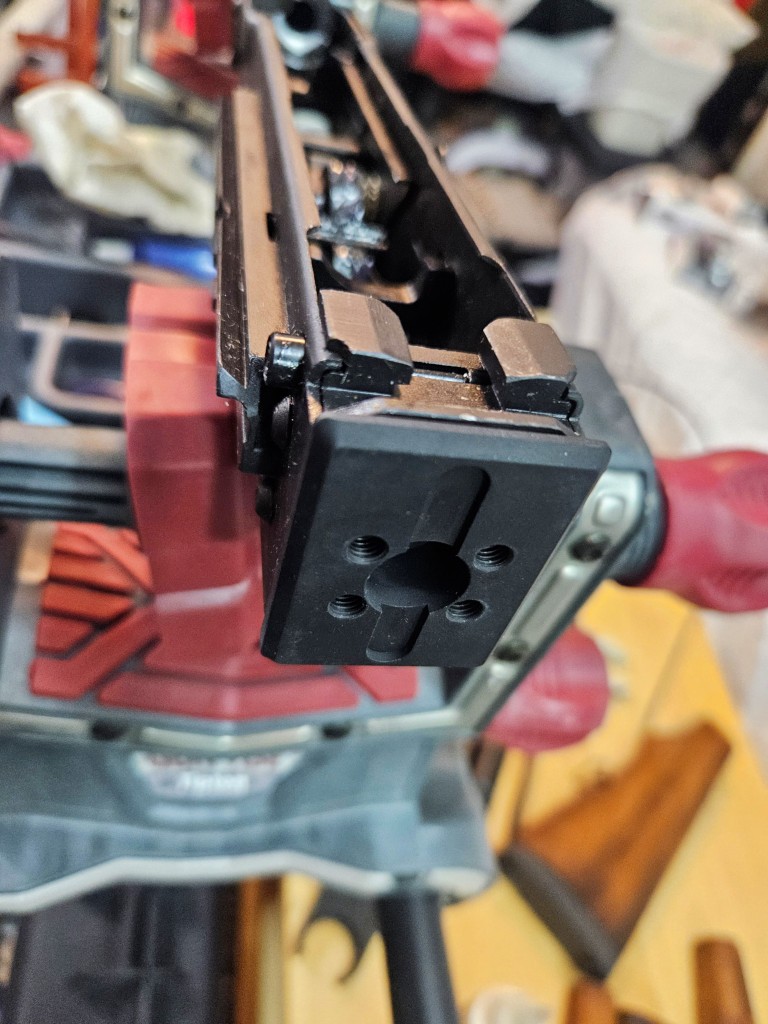
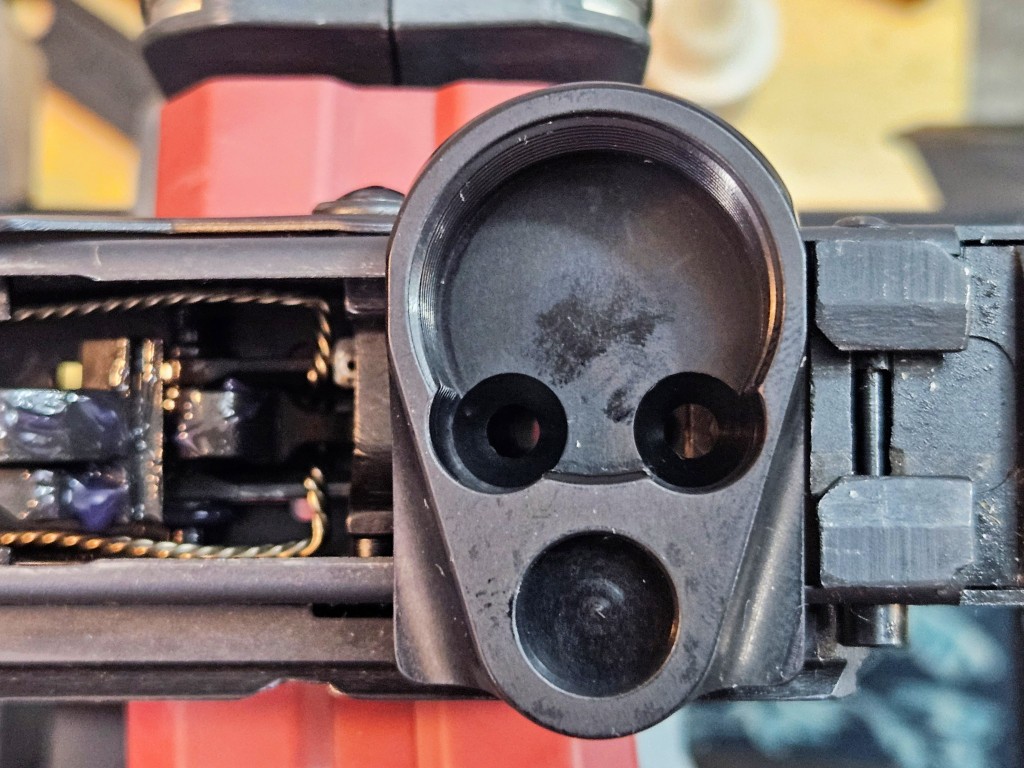
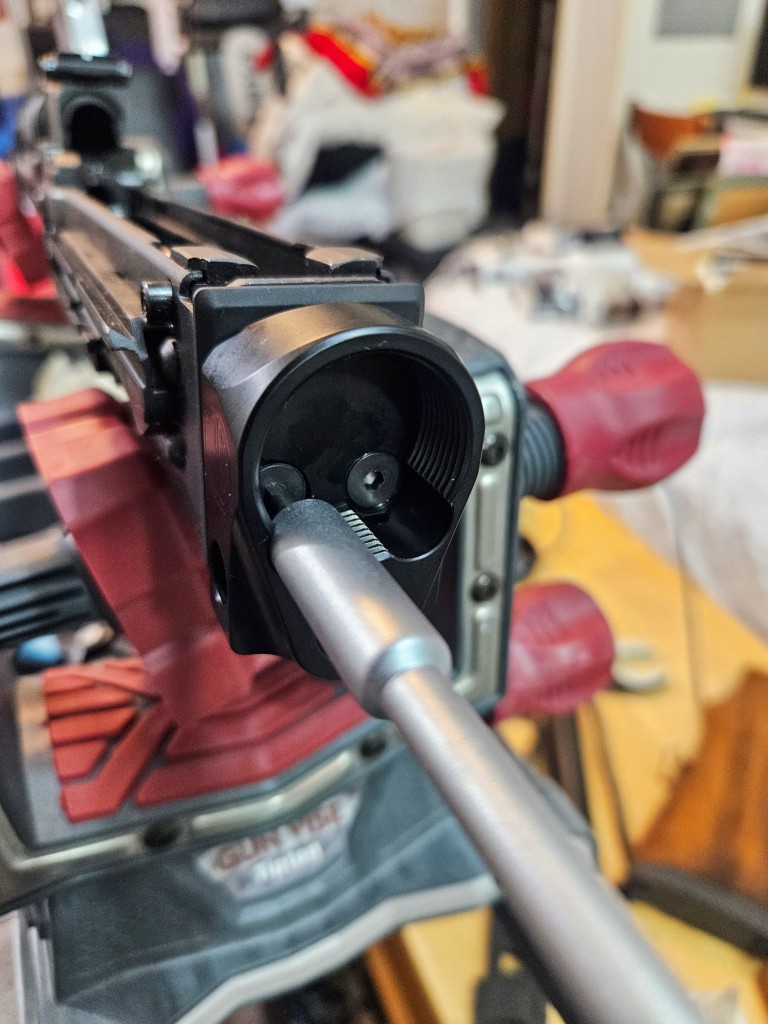
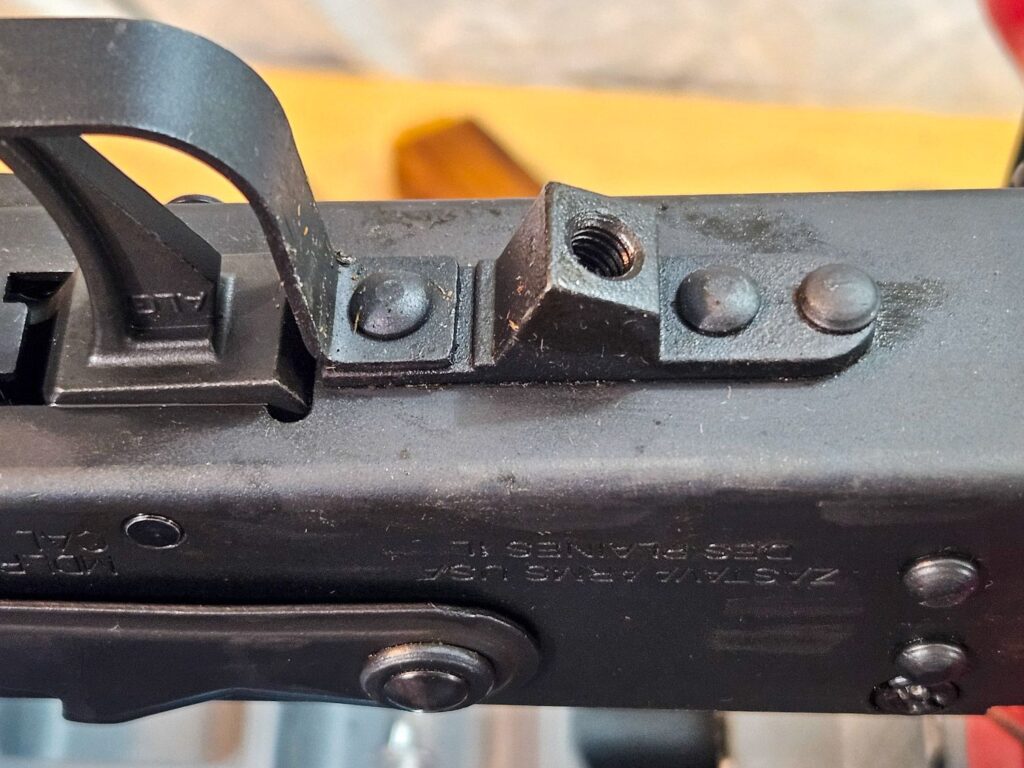
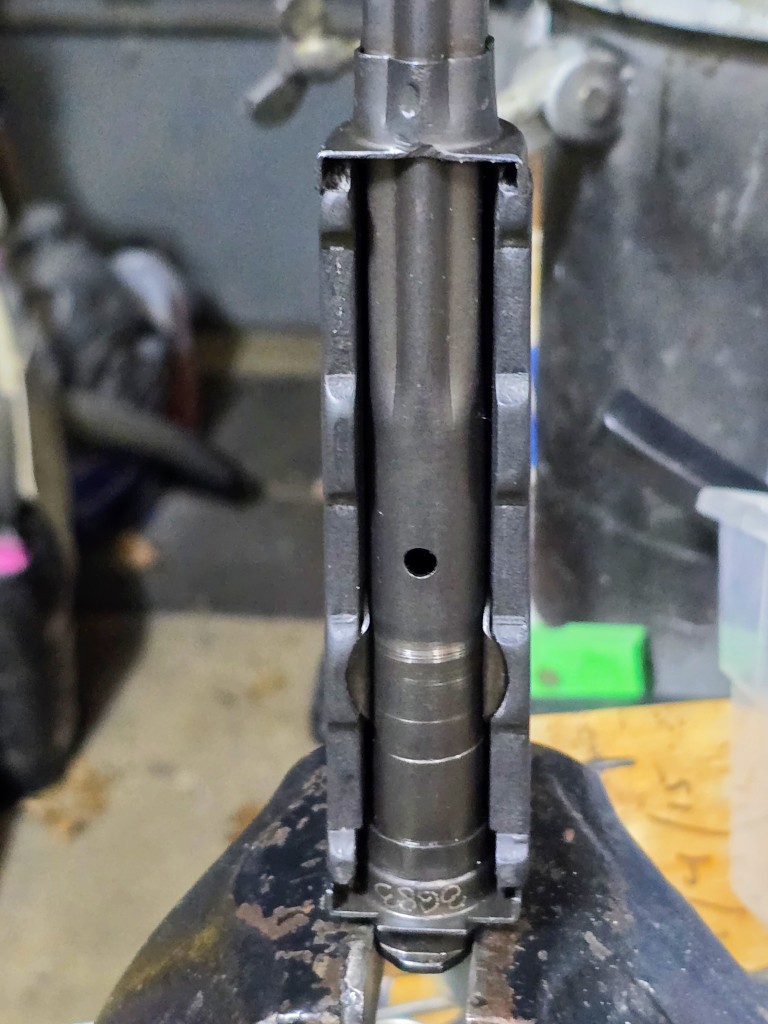
- A Reinforced Front Trunnion: The front trunnion, the critical component that locks the bolt and holds the barrel, is a bulged, wider design, necessary to support the heavier barrel and withstand the stresses of sustained fire.26
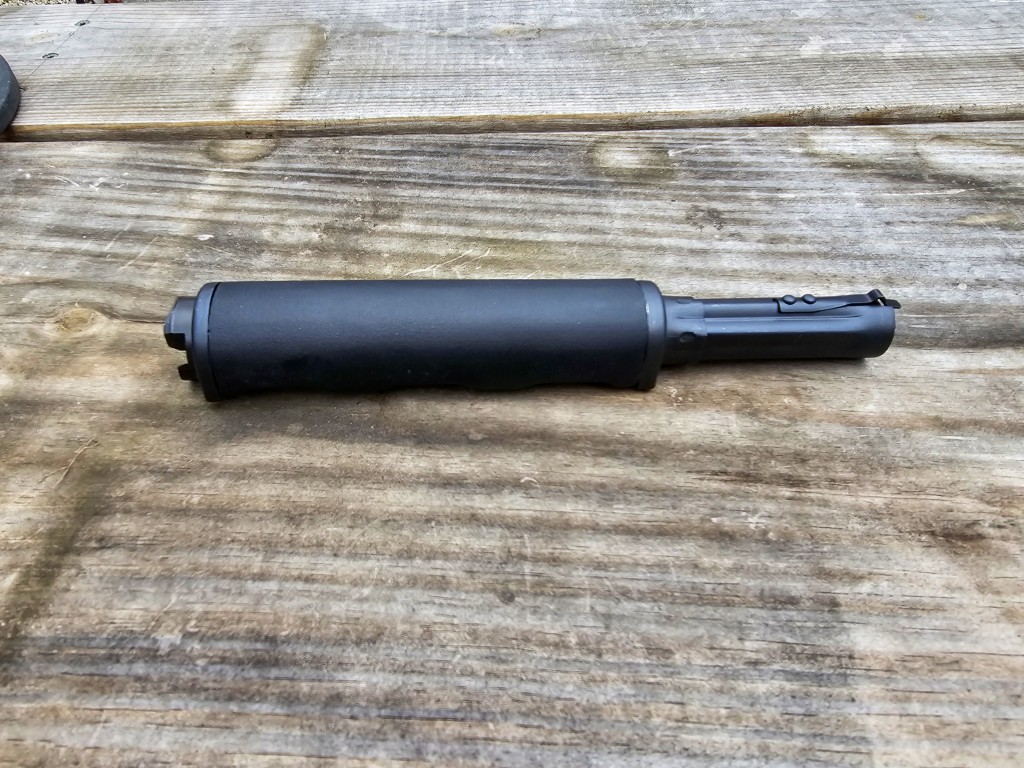
- A Heavy-Profile Barrel: Unlike the “pencil” profile barrel of a standard AKM, the Vepr features a heavy, chrome-lined, hammer-forged barrel. This adds weight but significantly improves heat dissipation and maintains accuracy during rapid firing.25
From 2015 until the 2017 sanctions, FIME Group was the exclusive importer of Vepr firearms to the United States, offering them in a wide array of popular calibers like 7.62x39mm, 5.45x39mm,.308 Winchester, and the powerful 7.62x54R, as well as shotgun gauges including 12, 20, and.410.25 The imposition of sanctions in 2017 immediately cut off this supply, making all existing Vepr firearms in the U.S. instant collector’s items and valuable heirlooms, prized for their authentic Russian RPK lineage.16
Table 3: Molot-Oruzhie – Representative Vepr Platform Variants
| Model | Caliber/Gauge | Receiver | Barrel | Key Feature | Source(s) |
| Vepr FM-AK47 / RPK-47 | 7.62x39mm | 1.5mm RPK Stamped | Heavy Profile, Chrome-Lined | A semi-automatic clone of the classic RPK light machine gun. | 30 |
| Vepr RPK-74 | 5.45x39mm | 1.5mm RPK Stamped | Heavy Profile, Chrome-Lined | A semi-automatic clone of the later RPK-74 light machine gun. | 31 |
| Vepr-12 Shotgun | 12 Gauge | 1.5mm RPK Stamped | Heavy Profile, Chrome-Lined | A highly robust, magazine-fed semi-automatic shotgun popular in competition. | 35 |
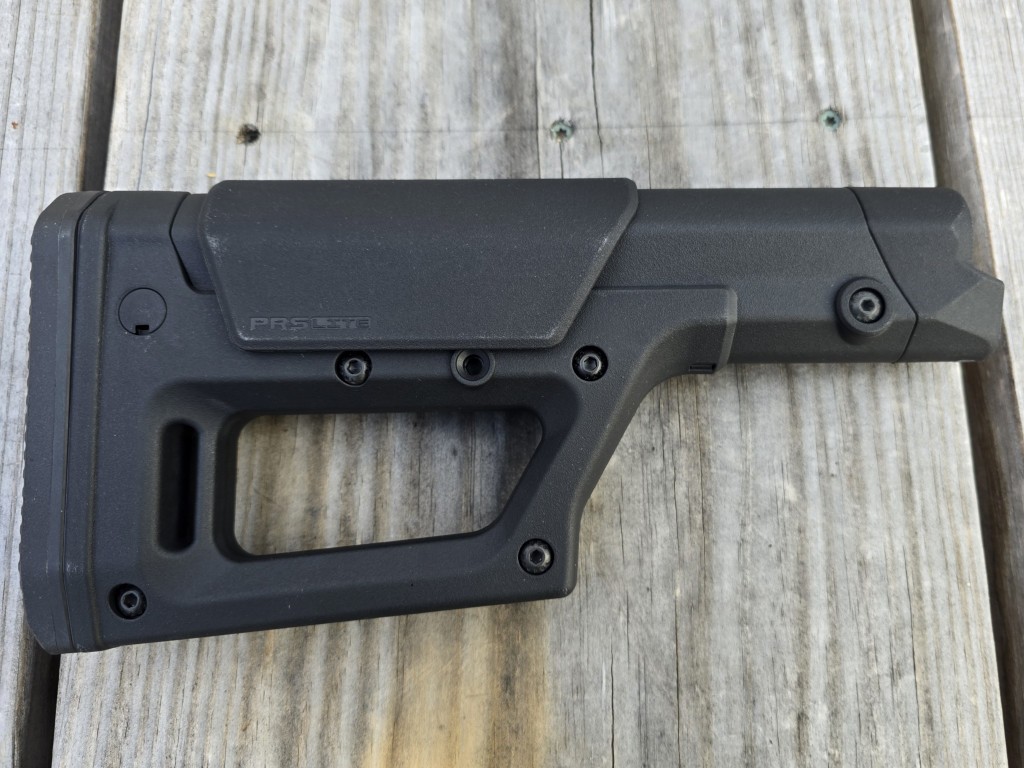
| Vepr Sporter (7.62x54R) | 7.62x54mmR | 1.5mm RPK Stamped | Heavy Profile, Chrome-Lined | A designated marksman rifle (DMR) style sporter, often with a thumbhole stock. | 16 |
Current Production Focus
The comprehensive sanctions regime has forced a complete reorientation of Molot’s business model. With the lucrative Western commercial markets permanently closed, the company’s survival is now entirely dependent on securing domestic contracts from the Russian Ministry of Defence and other state law enforcement agencies.29
Official sanction documents from the EU and Switzerland explicitly identify Molot-Oruzhie as a supplier to the Russian Armed Forces, noting its production of Vepr-12 shotguns and various modifications of the RPK-74 machine gun for use in the war against Ukraine.29 This confirms its pivot from an international commercial exporter to a domestic military supplier.
Unlike Kalashnikov Concern, there is no available evidence to suggest that Molot is diversifying into high-technology sectors like UAVs, guided munitions, or advanced electronics. It appears to remain a traditional firearms manufacturer, leveraging its specialized production capabilities to fulfill a specific niche for the Russian state. This specialization, once its greatest strength in the civilian market, has now become its defining limitation, tethering its future to its past successes in heavy-duty firearm manufacturing.
A Tale of Two Arsenals: Competition, Collusion, and Geopolitics
The Pre-Sanctions Market: A Niche Competitor
Before the geopolitical shifts of 2014, Kalashnikov Concern (then primarily as Izhmash) and Molot-Oruzhie coexisted in the U.S. civilian firearms market as distinct, albeit unequal, competitors. Izhmash, with its Saiga line, offered the “standard” Russian AK experience, providing a direct, authentic link to the AK-74M and AK-100 series rifles.17 Molot, with its Vepr line, occupied a more premium niche. It catered to a discerning segment of the market willing to pay a higher price for the Vepr’s “overbuilt” RPK-based construction, which promised superior durability and robustness.28
Their relationship was not without friction. In 2006, Izhmash successfully sued Molot for patent infringement related to the manufacture of AK-type rifles. The Russian courts sided with Izhmash, ruling it was the sole legal entity to produce such firearms and ordering Molot to pay royalties and penalties. Unable to pay, Molot was reportedly forced to cede significant assets to Izhmash.19 This legal precedent established a power imbalance and gave Kalashnikov significant leverage over its smaller competitor long before sanctions entered the picture.
The Sanctions Catalyst: 2014 and 2017
The international response to Russia’s 2014 military intervention in Ukraine acted as a catalyst, fundamentally reshaping the Russian arms industry and the relationship between its two key players.
In July 2014, the Obama Administration sanctioned Kalashnikov Concern, prohibiting the importation of its products, including the popular Saiga rifles and shotguns, into the United States.19 This created a significant vacuum in the market for authentic Russian-made AKs.
This vacuum created the “Molot Gap.” As Molot was not included in the initial 2014 sanctions, it instantly became the sole remaining major source of new Russian AK-pattern firearms for the U.S. market. Its Vepr rifles, once a niche product, were thrust into the spotlight, and sales surged as it filled the void left by Saiga.3 For a brief period, Molot was the face of the Russian firearms industry in America.
This period of prominence ended abruptly on June 20, 2017, when the U.S. Treasury Department added Molot-Oruzhie to the sanctions list.2 The official justification provided was explicit and revealing. The Treasury Department stated that Molot was being designated for “acting or purporting to act for or on behalf of, directly or indirectly, Kalashnikov Concern.” It further alleged that in 2016, the already-sanctioned Kalashnikov Concern had “advised a foreign company to use Molot-Oruzhie, OOO to falsify invoices in order to circumvent U.S. and EU sanctions”.3
This official designation moved the relationship from the realm of competition to one of collusion. It suggests that Molot’s role as the sole exporter was not an independent market success but a coordinated strategy, likely directed by the state, to maintain a channel for Russian arms revenue despite the sanctions on its flagship concern. Molot’s financial weakness and prior legal subjugation to Kalashnikov would have made it highly susceptible to such pressure.
Technical Divergence: A Comparative Platform Analysis
The distinct market roles and ultimate fates of Kalashnikov and Molot are rooted in a fundamental technical divergence that dates back to the 1960s. The standard Kalashnikov rifle (like the AKM) and the Molot-produced RPK were both designed by Mikhail Kalashnikov, but for entirely different battlefield purposes. The AKM was designed as a lightweight, mobile, and cost-effective assault rifle for the individual soldier. The RPK was designed as a heavier, more durable light machine gun to provide sustained, suppressive fire for the squad. This doctrinal difference is physically manifested in their construction.
The civilian Saiga rifles produced by Kalashnikov Concern are based on the standard AKM/AK-100 series platform, while the Vepr rifles from Molot are based on the RPK platform. This makes a comparison of the AKM and RPK platforms essential to understanding the products of both companies.
Table 4: Comparative Technical Analysis – Standard AKM vs. RPK Platform
| Feature | AKM Platform (Kalashnikov/Saiga) | RPK Platform (Molot/Vepr) | Implication / Purpose |
| Receiver Thickness | 1.0 mm Stamped Steel 41 | 1.5 mm Stamped Steel 26 | Mobility vs. Durability: The AKM’s lighter receiver prioritizes ease of carry for an individual soldier. The RPK’s 50% thicker receiver provides superior rigidity to prevent flexing during sustained automatic fire and offers a much longer service life. |
| Receiver Construction | Standard U-shaped stamping with standard front and rear trunnions fastened by rivets.41 | U-shaped stamping, often with reinforcing ribs and a distinct, bulged front trunnion.26 | Standard Duty vs. Heavy Duty: The AKM receiver is sufficient for the firing schedule of an assault rifle. The RPK’s reinforced construction is designed to handle the increased stress and heat of a light machine gun role. |
| Front Trunnion | Standard, non-bulged profile, adequate for a standard barrel.41 | Bulged, wider, and heavily reinforced to support the mass of a heavy barrel and absorb greater recoil forces.26 | Barrel Support: The bulged RPK trunnion is the critical interface that allows the use of a heavy barrel, preventing stress fractures and ensuring a solid lockup under continuous fire. |
| Barrel Profile | Lightweight “pencil” profile, designed to minimize weight for the infantryman.41 | Heavy, thicker “bull” profile, designed to act as a heat sink and resist accuracy degradation from heat.26 | Heat Management: The RPK’s heavy barrel can absorb and dissipate more heat before it begins to warp or “droop,” allowing for longer bursts of fire than an AKM. |
| Barrel Length | Standard rifle length (approx. 415 mm) for a balance of maneuverability and velocity.41 | Longer LMG length (approx. 590 mm) to increase muzzle velocity, extending the effective range of the 7.62x39mm cartridge.26 | Effective Range: The longer barrel gives the RPK a ballistic advantage over the AKM, crucial for its role in providing fire support at greater distances. |
| Overall Weight | Lighter weight (approx. 3.1 kg empty) for individual mobility and reduced soldier fatigue.41 | Heavier weight (approx. 4.8 kg empty) to provide a more stable firing platform and mitigate recoil, especially when firing from the bipod.26 | Stability: The added mass of the RPK makes it inherently more stable and controllable during automatic fire, a key requirement for a support weapon. |
This technical comparison reveals that the perceived quality difference between a Saiga and a Vepr is not a matter of one being “good” and the other “better,” but of them being built to two entirely different military specifications. The Vepr’s celebrated toughness is a direct consequence of its RPK lineage, designed for a role that Kalashnikov’s standard rifles were not.
The saga of these two companies illustrates that in Russia’s state-capitalist defense ecosystem, corporate dynamics are ultimately governed by the strategic needs of the state. Geopolitical events, not market forces, were the final arbiters of their fates. The 2014 sanctions created a strategic problem for the Kremlin, which was solved by leveraging the unsanctioned “competitor,” Molot, to fill the void. The subsequent 2017 sanctions on Molot, justified by its role in aiding Kalashnikov, confirm that their actions were not independent but part of a state-directed industrial policy. Molot, the financially weaker and more specialized entity, was ultimately a pawn sacrificed to serve the interests of Kalashnikov, the state’s primary strategic asset.
Future Trajectories and Concluding Analysis
Kalashnikov Concern’s Path Forward: The High-Tech Arsenal
The future trajectory of Kalashnikov Concern is clear, ambitious, and inextricably linked to the strategic direction of the Russian state. Its focus has decisively shifted from being merely a world-class small arms manufacturer to becoming a diversified, high-technology defense conglomerate poised to equip the Russian military for future conflicts.
The dominant theme of its forward strategy is the massive investment in and expansion of unmanned systems. The Concern is aggressively scaling its production of reconnaissance UAVs and, most notably, loitering munitions like the KUB series.20 This is not speculative R&D; it is a direct, large-scale industrial response to the proven effectiveness of these systems in the Ukraine war. The plan to increase UAV production tenfold in 2024 is a testament to this strategic realignment.20
Small arms development, while continuing, now occupies a secondary, albeit important, role. The evolution of the AK-12 and the development of next-generation platforms like the polymer-receiver AM-17 are driven by battlefield feedback, aiming to provide incremental advantages to the soldier.9 However, this is now a legacy business line, not the primary engine of strategic growth. The Concern’s market focus has also been forcibly narrowed. With Western commercial and military markets closed indefinitely by sanctions, its future lies almost exclusively with the Russian Ministry of Defence and a handful of sanctions-friendly export partners. Kalashnikov Concern is no longer a global commercial competitor in the Western sense; it is the dedicated, high-tech arsenal of the Russian Federation.
Molot-Oruzhie’s Constrained Future: The Legacy Supplier
The future for Molot-Oruzhie appears far more constrained and uncertain. Cut off from the international commercial markets that were the lifeblood of its Vepr product line, its survival now depends entirely on its utility to the Russian state as a domestic military contractor.29 Its path forward is one of survival, not strategic growth.
The dominant theme for Molot is the continued production of its legacy systems. Its role is to be a reliable supplier of the specific, robust firearms it has always specialized in—namely, RPK-based machine guns and Vepr-12 shotguns for Russian military and law enforcement units.29 There is no evidence that Molot is undertaking a high-tech pivot similar to Kalashnikov’s. Its future appears to be tied to its past, leveraging its existing expertise in traditional manufacturing to fill a specific niche in the state defense order.
Its ultimate corporate fate remains a key variable. Given its history of bankruptcy and its current status as a sanctioned entity with limited prospects for independent growth, the possibility of its full absorption by Kalashnikov Concern or another state-owned entity is high.27 Molot’s continued existence as a nominally separate company is tenuous and likely depends on its continued, albeit limited, usefulness to the state as a specialized production facility.
Final Assessment: Two Fates Intertwined with the State
The divergent paths of Kalashnikov Concern and Molot-Oruzhie offer a compelling case study in the nature of Russia’s modern, state-controlled defense industry. They represent two distinct models of a state defense enterprise, whose fates were ultimately determined not by market competition, but by strategic state interests and the powerful impact of geopolitics.
Kalashnikov Concern is the chosen national champion. It is a strategic asset that the Russian state is actively transforming from a legacy firearms maker into an integrated defense-technology powerhouse, equipped to fight the wars of the future with drones, guided munitions, and advanced systems. Its deep diversification and alignment with state priorities have ensured its stability and growth, even in the face of severe sanctions.
Molot-Oruzhie is the legacy specialist. Its historical expertise in building overbuilt, RPK-based firearms created a line of products revered by civilian enthusiasts for their quality and durability. However, this niche specialization, combined with financial instability, left it critically vulnerable. Its independent future in the global marketplace was sacrificed to serve the Kremlin’s geopolitical goals, first as a sanctions-evasion cutout and then as a casualty of expanded sanctions.
The unique technical histories of the Izhevsk and Vyatskiye Polyany arsenals gave rise to distinct and iconic firearms. But the final chapter of their respective stories was written not on the design floor or in the marketplace, but in the strategic calculus of the Kremlin and the subsequent geopolitical response from the West. Their tale is a definitive illustration of the primacy of state power in the modern Russian defense industry.
Please share the link on Facebook, Forums, with colleagues, etc. Your support is much appreciated and if you have any feedback, please email us in**@*********ps.com. If you’d like to request a report or order a reprint, please click here for the corresponding page to open in new tab.
Works cited
- Kalashnikov Concern – Wikipedia, accessed August 6, 2025, https://en.wikipedia.org/wiki/Kalashnikov_Concern
- Alert: U.S. Government Expands Ukraine Sanctions to Include Russian Firearms Manufacturer Molot-Oruzhie, OOO – Constant Contact, accessed August 6, 2025, https://myemail.constantcontact.com/Alert–U-S–Government-Expands-Ukraine-Sanctions-to-Include-Russian-Firearms-Manufacturer-Molot-Oruzhie–OOO.html?soid=1115396448343&aid=nbjqhsKOMhU
- Feds add Molot to list of sanctioned Russian companies – Guns.com, accessed August 6, 2025, https://www.guns.com/news/2017/06/21/feds-add-molot-to-list-of-sanctioned-russian-companies
- Kalashnikov Concern: History Behind the AK Brand, accessed August 6, 2025, https://www.pewpewtactical.com/kalashnikov-history/
- About || Kalashnikov Group, accessed August 6, 2025, https://en.kalashnikovgroup.ru/about
- Kalashnikov Concern – TAdviser, accessed August 6, 2025, https://tadviser.com/index.php/Company:Kalashnikov_Concern
- AK-12 || Kalashnikov Group, accessed August 6, 2025, https://en.kalashnikovgroup.ru/catalog/boevoe-strelkovoe-oruzhie/avtomaty/avtomat-kalashnikova-ak-12
- AK200: Specs || Kalashnikov Media, accessed August 6, 2025, https://en.kalashnikovgroup.ru/media/ttkh-2018/ak-200-ttkh
- Kalashnikov Concern to start production of replacement for AKS-74U in 2025 – Militarnyi, accessed August 6, 2025, https://militarnyi.com/en/news/kalashnikov-concern-to-start-production-of-replacement-for-aks-74u-in-2025/
- AK-200 || Kalashnikov Group, accessed August 6, 2025, https://en.kalashnikovgroup.ru/catalog/boevoe-strelkovoe-oruzhie/avtomaty/avtomat-kalashnikova-ak200
- AK-203 – Kalashnikov Group, accessed August 6, 2025, https://en.kalashnikovgroup.ru/catalog/boevoe-strelkovoe-oruzhie/avtomaty/avtomat-kalashnikova-ak203
- Kalashnikov rifle – Wikipedia, accessed August 6, 2025, https://en.wikipedia.org/wiki/Kalashnikov_rifle
- Beyond the AK-12; modern Russian Kalashnikovs in 5.56, 7.62x39mm, and 9x19mm. AK-200, AK-15, AK-19. – YouTube, accessed August 6, 2025, https://www.youtube.com/watch?v=RL-Ey70-lZI
- Saiga semi-automatic rifle – Wikipedia, accessed August 6, 2025, https://en.wikipedia.org/wiki/Saiga_semi-automatic_rifle
- Civilian products Kalashnikov, accessed August 6, 2025, https://kalashnikovgroup.ru/upload/iblock/ae2/Civilian%20Products.pdf
- Russian-Built AK: Molot-Oruzhie Vepr Sporter – Guns.com, accessed August 6, 2025, https://www.guns.com/news/reviews/russian-built-ak-molot-oruzhie-vepr-sporter
- Izhmash Saiga Russian AK Sporters In America (Imports, Variants, & Sanctions) – YouTube, accessed August 6, 2025, https://www.youtube.com/watch?v=az4pjdPB2JU
- Izhmash Saiga 7.62×39 16” Semi-Auto Rifle Russian AK-47 AKM Red Wood – LSB Auctions, accessed August 6, 2025, https://lsbauctions.com/izhmash-saiga-7-62×39-16-semi-auto-rifle-russian-ak-47-akm-red-wood/
- A Closer Look At The Molot Sanctions – The K-Var Armory, accessed August 6, 2025, https://blog.k-var.com/news/politics/closer-look-molot-sanctions/
- Kalashnikov Concern increases UAV production volumes – RuAviation, accessed August 6, 2025, https://ruavia.su/kalashnikov-concern-increases-uav-production-volumes/
- Kalashnikov Group, accessed August 6, 2025, https://en.kalashnikovgroup.ru/
- Kalashnikov Concern Set to Massively Expand Production of ‘Suicide Drones’ in 2025, accessed August 6, 2025, https://defencesecurityasia.com/en/kalashnikov-concern-set-to-massively-expand-production-of-suicide-drones-in-2025/
- Kalashnikov to Begin Mass Production of AM-17 Rifle in 2025, accessed August 6, 2025, https://en.kalashnikovgroup.ru/news/kalashnikov-to-begin-mass-production-of-am-17-rifle-in-2025
- Kalashnikov Concern Ramps up Civilian Products Output, accessed August 6, 2025, https://en.kalashnikovgroup.ru/news/kalashnikov-concern-ramps-up-civilian-products-output
- Molot – FIME Group, accessed August 6, 2025, https://fimegroup.com/molot/
- RPK – Wikipedia, accessed August 6, 2025, https://en.wikipedia.org/wiki/RPK
- Vyatskiye Polyany Machine-Building Plant – Wikipedia, accessed August 6, 2025, https://en.wikipedia.org/wiki/Vyatskiye_Polyany_Machine-Building_Plant
- Unexpected Collectibles: Molot VEPR Rifles | An Official Journal Of The NRA, accessed August 6, 2025, https://www.americanrifleman.org/content/unexpected-collectibles-molot-vepr-rifles/
- Molot-Oruzhie, OOO – OpenSanctions, accessed August 6, 2025, https://www.opensanctions.org/entities/NK-mfmGT7gfxSBpmGkk82w3EG/
- MOLOT VEPR FM-RPK47 7.62×39 23” Semi-Auto Rifle Russian AK-47 AKM – LSB Auctions, accessed August 6, 2025, https://lsbauctions.com/molot-vepr-fm-rpk47-7-62×39-23-semi-auto-rifle-russian-ak-47-akm-2/
- Molot Vepr RPK47-33 7.62x39mm Black Semi-Automatic Rifle with Folding Buttstock – K-Var, accessed August 6, 2025, https://www.k-var.com/molot-vepr-rpk47-33-762×39-ak-rifle
- Why No More Russian Molot VEPR AK Imports – Sanction 2017 – YouTube, accessed August 6, 2025, https://www.youtube.com/watch?v=HnXcyg7NaIA
- Molot VEPR RPK-47 7.62×39 23.2″ Rifle – Shark Coast Tactical, accessed August 6, 2025, https://sharkcoasttactical.com/product/molot-vepr-rpk-47-7-62×39-23-2-rifle/
- Molot Vepr RPK74-33 5.45x39mm Black Semi-Automatic Rifle with Folding Buttstock, accessed August 6, 2025, https://www.msrdistribution.com/vepr-rpk-47545×39-232-in-barrel-black-furniture-left-side-folding-rpk-style-buttstock-14mm-lh
- Vepr-12 – Wikipedia, accessed August 6, 2025, https://en.wikipedia.org/wiki/Vepr-12
- Vepr Shotguns – FIME Group, accessed August 6, 2025, https://fimegroup.com/shotgun/
- Kalashnikov USA – Wikipedia, accessed August 6, 2025, https://en.wikipedia.org/wiki/Kalashnikov_USA
- Molot Oruzhie | laststandonzombieisland, accessed August 6, 2025, https://laststandonzombieisland.com/tag/molot-oruzhie/
- Treasury Designates Individuals and Entities Involved in the Ongoing Conflict in Ukraine, accessed August 6, 2025, https://home.treasury.gov/news/press-releases/sm0114
- Sanctions Related to Ukraine Conflict Hit Firearms Manufacturer Molot and Their VEPR, accessed August 6, 2025, http://blog.gunlink.info/2017/06/20/sanctions-related-to-ukraine-conflict-hit-firearms-manufacturer-molot-and-their-vepr/
- AKM – Wikipedia, accessed August 6, 2025, https://en.wikipedia.org/wiki/AKM