The Kalashnikov assault rifle, more commonly known as the AK-47, represents one of the most significant and prolific small arms designs of the 20th century. Its global proliferation is a testament to its rugged simplicity, reliability, and ease of manufacture. While its origins are Soviet, the story of the Kalashnikov is incomplete without examining the contributions of the nations that produced it under license. Among these, the People’s Republic of Bulgaria stands out. Bulgaria was not merely another licensed producer; its unique geopolitical position and deep-rooted industrial capabilities allowed it to become a manufacturer whose products earned a distinct reputation for quality and durability. This reputation was built upon a foundational manufacturing decision: the mastery and continued use of the robust, hot-die hammer-forged milled receiver, a method that set Bulgarian-made Kalashnikovs apart from many of their contemporaries. This report provides a comprehensive analysis of the adoption and evolution of the Kalashnikov platform in Bulgaria. It will trace the nation’s journey from its post-war political realignment and integration into the Warsaw Pact, through the establishment of its domestic arms production, to its current status as an innovative and respected competitor in the international arms market. The analysis will provide a detailed engineering breakdown of each major rifle model, exploring the strategic, economic, and technical imperatives that drove their development and cemented Bulgaria’s lasting legacy in the world of small arms.
The Southern Flank: Geopolitical Imperatives and Warsaw Pact Standardization
The decision for Bulgaria to adopt and manufacture the Kalashnikov rifle was not made in an industrial vacuum. It was the direct result of the immense geopolitical pressures that shaped post-war Europe, placing Bulgaria in a critical, high-stakes position on the front lines of the Cold War.
Post-WWII Realignment and Soviet Hegemony
Bulgaria’s path into the Soviet sphere of influence was forged during the final, tumultuous years of World War II. After initially aligning with the Axis powers in March 1941, a decision driven by the desire for territorial expansion, Bulgaria found itself on the losing side of the conflict.1 In September 1944, with German fortunes collapsing on the Eastern Front, the Soviet Red Army entered Bulgaria, meeting little resistance.1 This military occupation precipitated a coup d’état on September 9, 1944, led by the communist-dominated Fatherland Front, which effectively ended the monarchy and brought a pro-Soviet government to power.2
In the years that followed, the Bulgarian Communist Party (BCP), with direct Soviet backing, systematically consolidated its power. Political opponents were purged through a series of “people’s courts,” which resulted in thousands of executions and imprisonments.1 By 1946, a referendum abolished the monarchy, proclaiming the People’s Republic of Bulgaria and fully cementing the nation’s status as a Soviet satellite state.1 This political transformation was absolute, creating a state apparatus that was deeply and ideologically aligned with Moscow. Bulgaria’s loyalty to the Soviet Union was exceptional, even among Eastern Bloc nations. It was often referred to colloquially as the “16th Soviet Republic,” a reflection of its unwavering political and military allegiance.3 This profound loyalty was a cornerstone of state policy under leader Todor Zhivkov, who on multiple occasions formally proposed that Bulgaria be fully incorporated into the USSR, a testament to the depth of the Soviet-Bulgarian relationship.4
The Warsaw Pact and the Doctrine of Standardization
The formalization of this alliance came on May 14, 1955, with the creation of the Warsaw Pact. Established as a direct military and ideological counterweight to the North Atlantic Treaty Organization (NATO), which had just admitted West Germany, the Pact unified the armed forces of the Soviet Union and its Eastern European satellites, including Bulgaria, under a single command structure headquartered in Moscow.6
Within this new security architecture, Bulgaria held a position of immense strategic importance. It formed the “southern flank” of the Warsaw Pact, sharing contentious borders with two NATO members: Greece and Turkey.10 This geography placed the Bulgarian People’s Army (BPA) in the position of a frontline force, expected to bear the initial brunt of any potential conflict erupting in the Balkans or the Black Sea region. The military doctrine of the Warsaw Pact was predicated on the principles of unified command, operational interoperability, and logistical simplicity, all designed to facilitate massive, coordinated military action.6 This doctrine demanded absolute standardization of military equipment. From tanks and aircraft to ammunition and field gear, every piece of materiel needed to be interchangeable across the armies of the member states. For the individual soldier, this meant the universal adoption of the Kalashnikov assault rifle.
The pressure on Bulgaria was therefore twofold: an intense political imperative to conform to Soviet doctrine and an equally intense military imperative to be capable of independently defending a critical NATO border. This dual pressure created the political will and, crucially, secured the necessary Soviet assistance to build a first-rate domestic arms industry. The Soviet Union provided extensive technical and financial support, including military aid valued at $16.7 billion between 1946 and 1990, to ensure its allies could meet these standardization and modernization goals.13 The establishment of a sophisticated domestic arms production capability in Bulgaria was not merely about enforcing conformity; it was a strategic calculation by Moscow to fortify a critical and exceptionally reliable partner. This foundation, built out of Cold War necessity, would become Bulgaria’s most valuable industrial asset after the Pact’s dissolution.
From State Arsenal to “Factory 10”: The Genesis of Bulgarian Arms Production
The successful implementation of the Kalashnikov platform in Bulgaria was dependent on an industrial base capable of producing the weapon to exacting Soviet standards. Fortunately, Bulgaria possessed a long, if modest, history of arms manufacturing that provided a solid foundation for this new endeavor.
A Legacy of Arms Making: The Arsenal Factory
The origins of Bulgaria’s primary arms manufacturer, Arsenal AD, date back to 1878 with the establishment of the Rousse Artillery Arsenal to supply the newly formed Bulgarian army following the country’s independence from the Ottoman Empire.14 For strategic reasons, the facility was relocated to the capital, Sofia, in 1891. After Bulgaria’s defeats in the Second Balkan War and World War I, the arsenal was moved once more in 1924 to the centrally located town of Kazanlak, where it was officially named the State Military Factory.14 Its state-sanctioned mandate was clear: “to produce and repair all military equipment necessary for the army, the police, the border troops and all state security organs”.14
Following the communist takeover and the creation of the People’s Republic, the factory was fully integrated into the new centralized state economy. In 1948, it was absorbed into a state holding company called “Metalchim” and its oversight was transferred from the Ministry of Defence to the Ministry of Industry and Crafts.14 It was at this point that it was given the nondescript designation “Factory 10”.14 This renaming was part of a deliberate Warsaw Pact strategy of obfuscation. By masking military production under civilian-sounding industrial names and co-producing civilian goods—such as machine tools and even automobiles like the Bulgarrenault-8—the state could conceal the true scale and nature of its military-industrial capacity from Western intelligence.14 This industrial camouflage was a key element of Cold War-era strategic deception.
The Technology Transfer: From Assembly to Licensed Production
In the late 1950s, the Bulgarian People’s Army was initially equipped with standard-issue AK-47 rifles imported directly from Soviet arsenals.17 However, in line with the goal of creating self-sufficient defense industries within the Warsaw Pact, the process of technology transfer soon began. This followed a classic Soviet model used throughout the Eastern Bloc, progressing in distinct phases.
The first phase began around 1956-1958, when “Factory 10” started assembling complete Kalashnikov rifles using parts kits manufactured in and imported from the Soviet Union.14 This crucial step allowed Bulgarian engineers, machinists, and assembly line workers to gain intimate, hands-on familiarity with the weapon’s design, components, and manufacturing tolerances without yet needing the full industrial capacity to produce every part themselves.
Bulgaria’s pre-existing, century-long history of arms manufacturing provided a significant advantage, likely accelerating this transition. Unlike some satellite states that had to build a defense industry from the ground up, Bulgaria possessed an institutional knowledge base in metallurgy, precision machining, and ordnance production. The Soviets were not seeding an industry in barren ground; they were upgrading and re-tasking an existing, experienced one. This pre-existing industrial culture was a vital, often overlooked, factor in explaining the subsequent high quality of Bulgarian manufacturing.
By the mid-1960s, having mastered the assembly process and with continued Soviet investment in tooling and machinery, the Kazanlak facility was equipped to begin the final phase: full, licensed domestic production of the Kalashnikov rifle and all of its component parts.16 The first assault rifle produced entirely with Bulgarian-made parts rolled off the assembly line in 1958, marking Bulgaria’s emergence as a self-sufficient and highly capable arms producer within the Soviet bloc.15
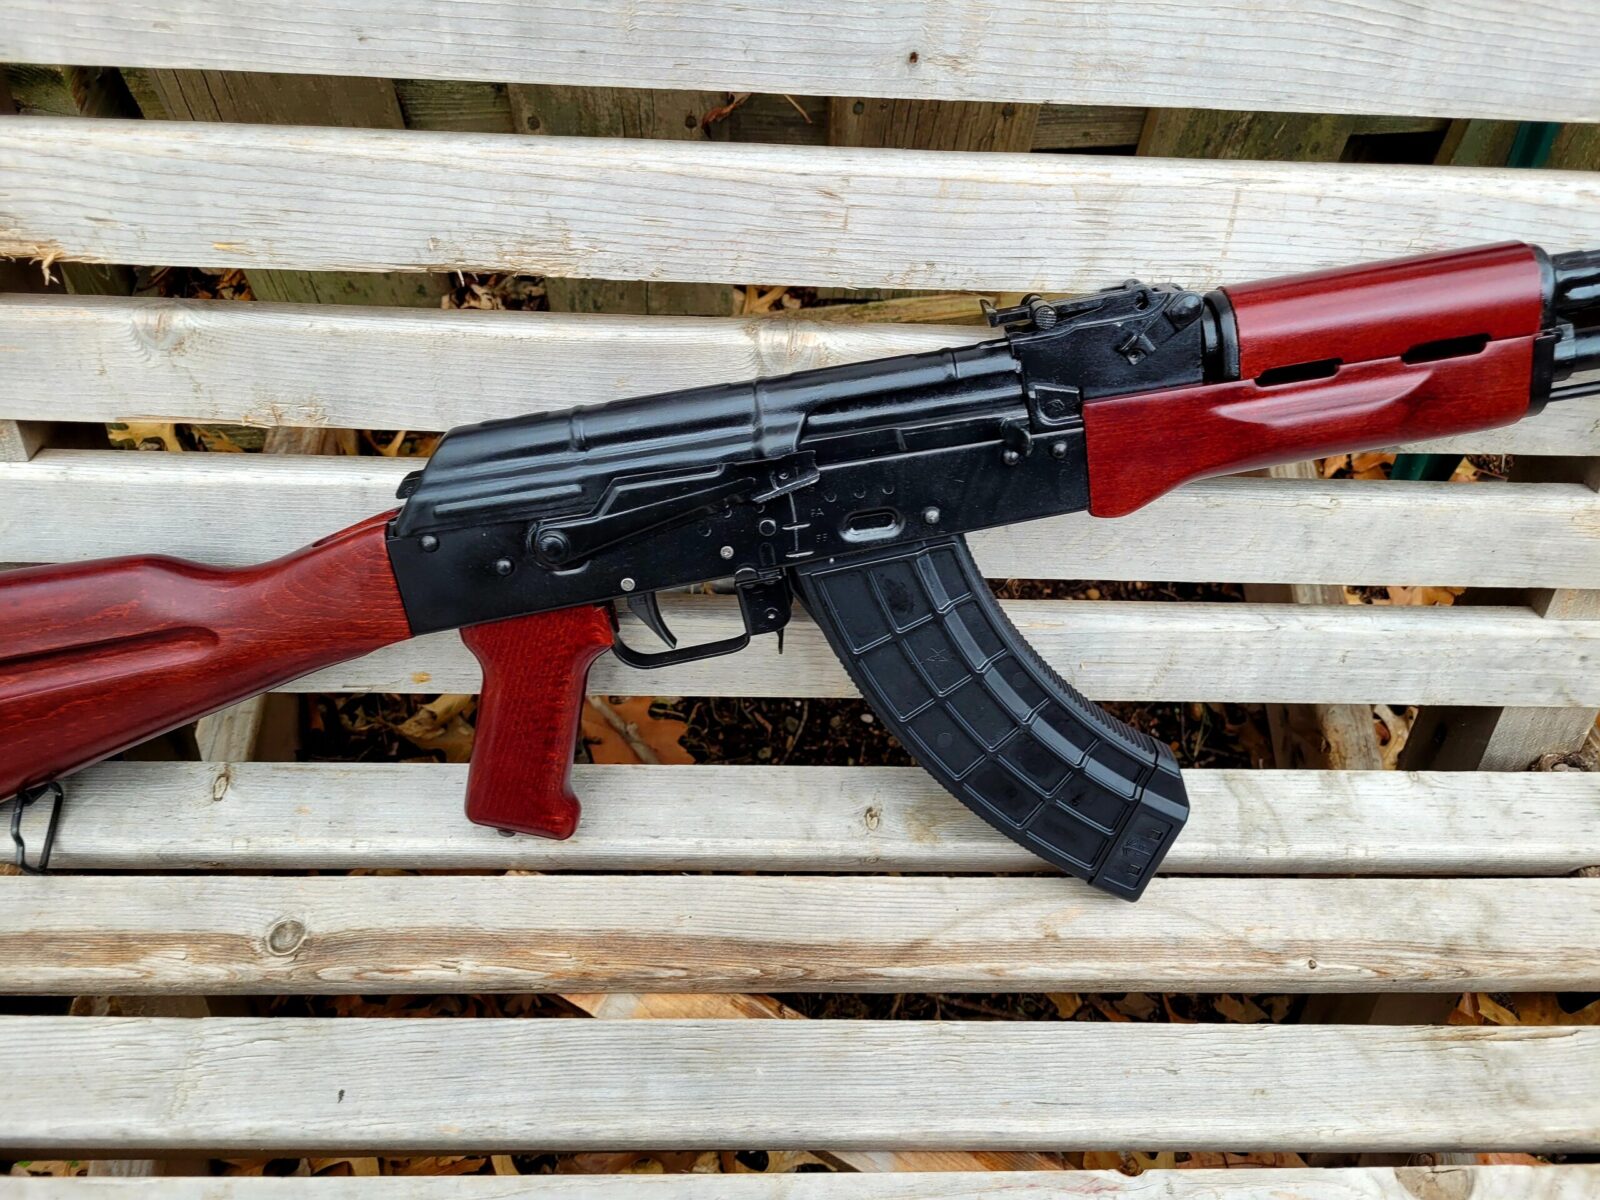
The Milled Masterpiece: A Detailed Analysis of the AKK and AKKS
The first generation of domestically produced Bulgarian Kalashnikovs set a standard for quality that would come to define the nation’s reputation in the small arms world. This was largely due to a pivotal engineering decision to base their production on the most robust, albeit most complex, version of the original AK-47.
The AKK: A Near-Identical Copy of the Soviet Type 3
The first standard-issue Kalashnikov rifle produced entirely in Bulgaria was designated the AKK. It was a direct, licensed copy of the third and final iteration of the original Soviet AK-47, a model widely known among collectors and historians as the “Type 3”.17
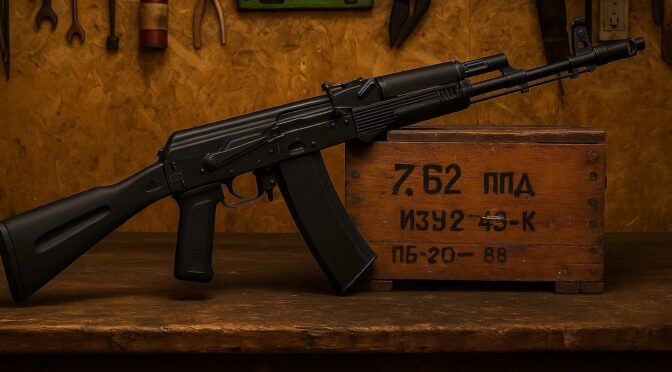
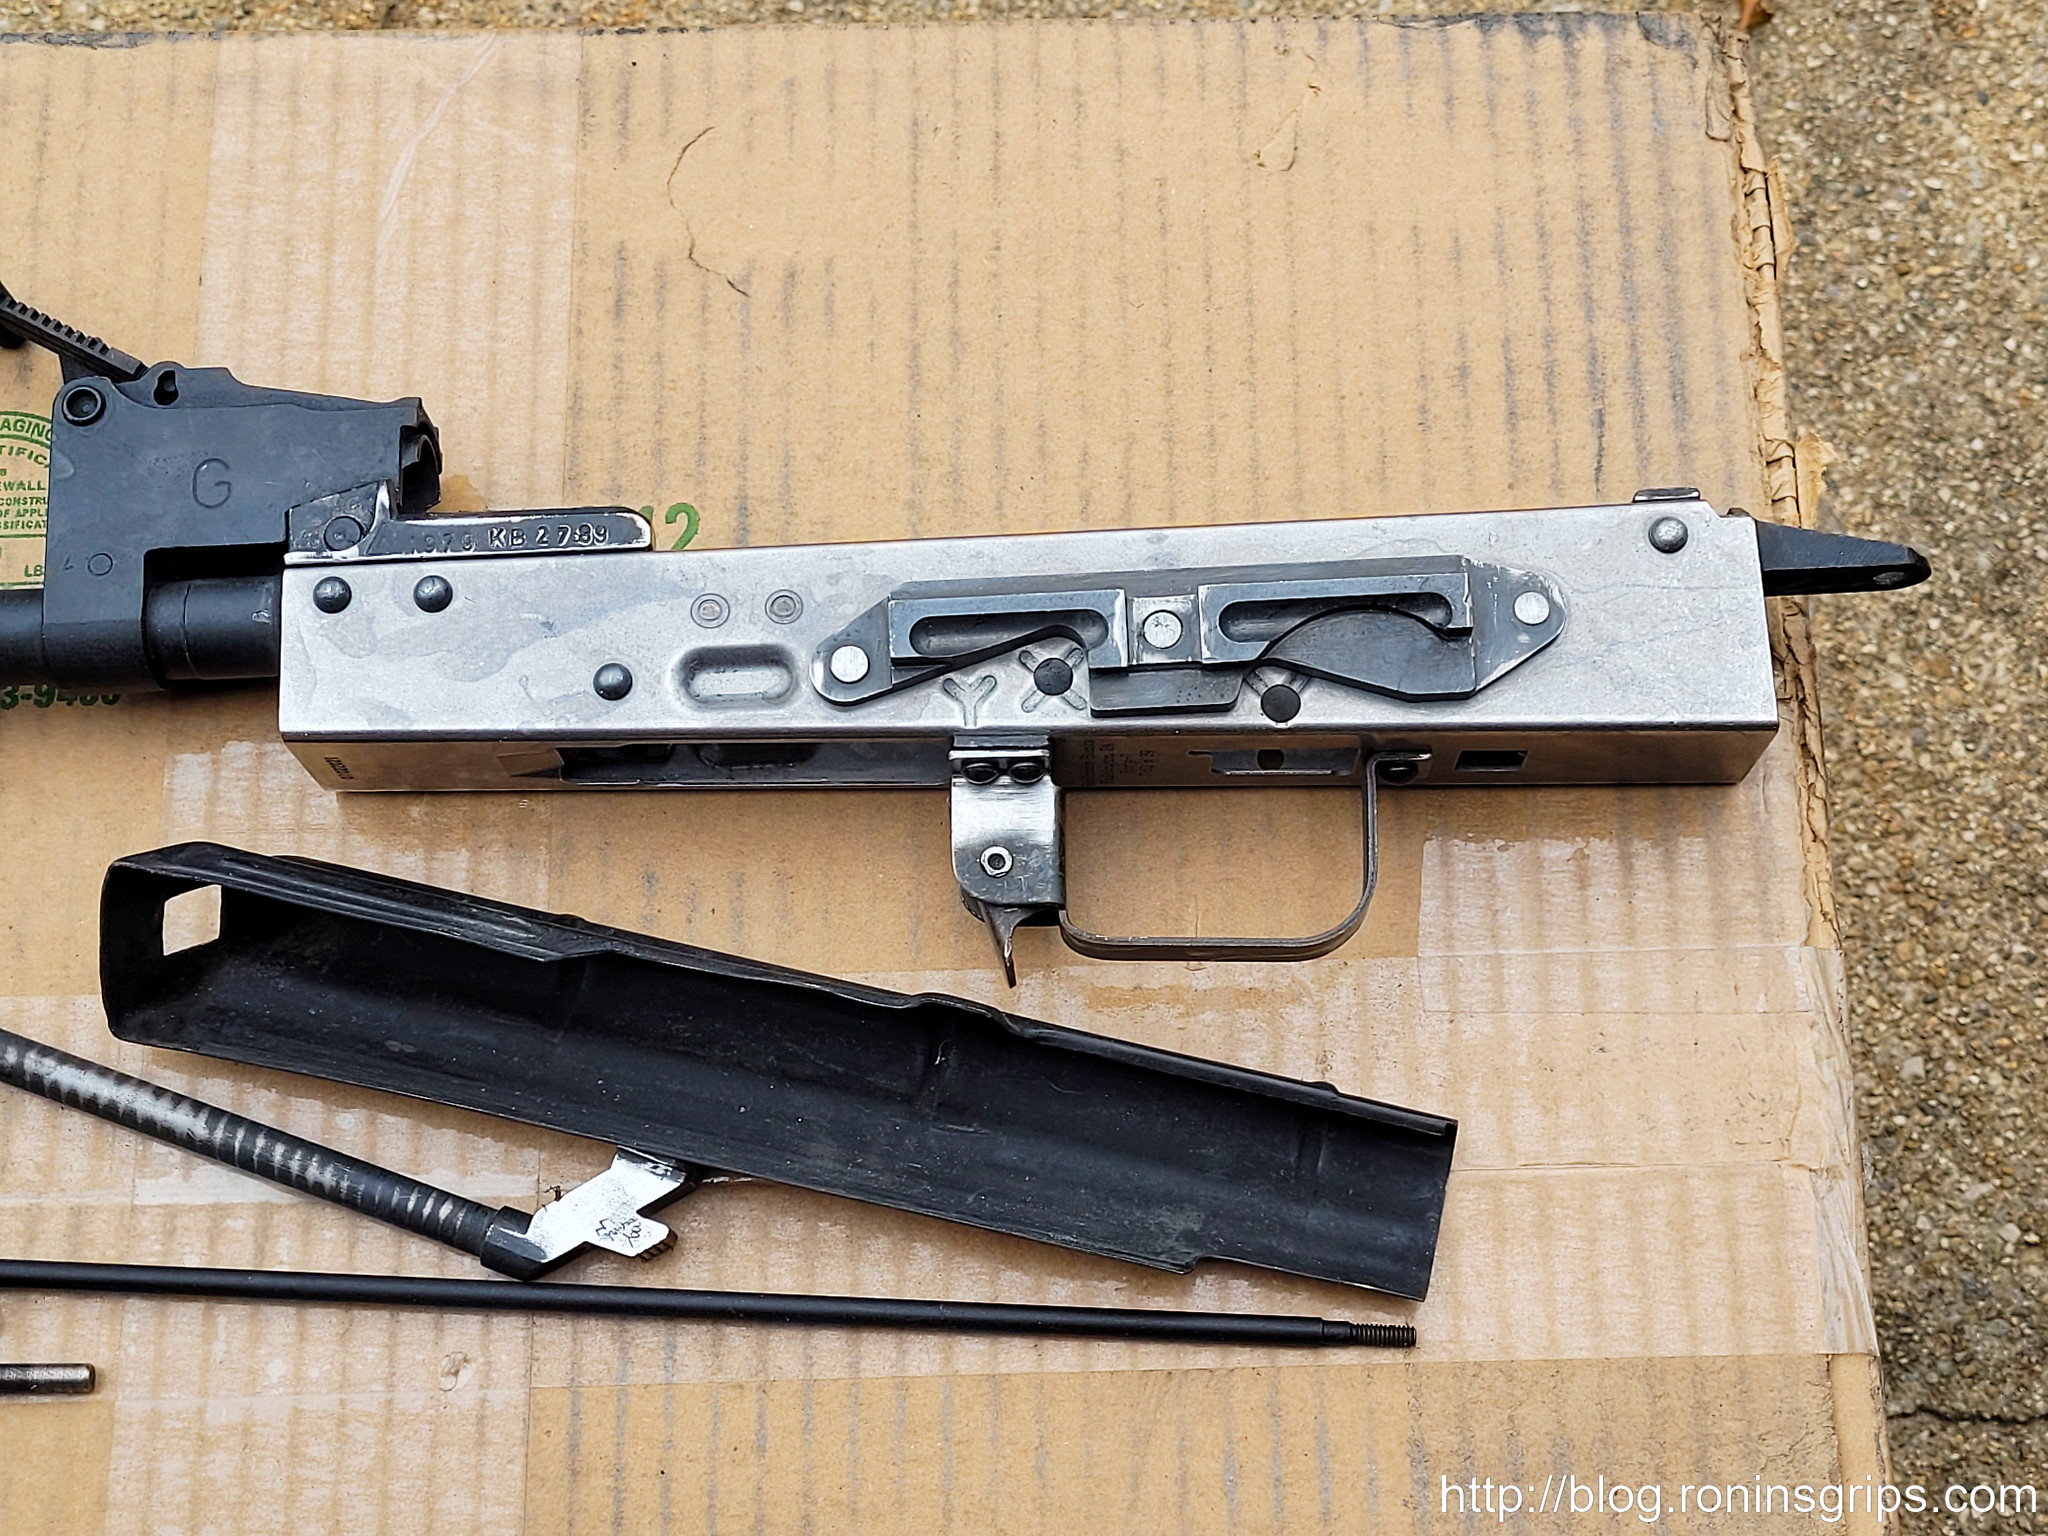
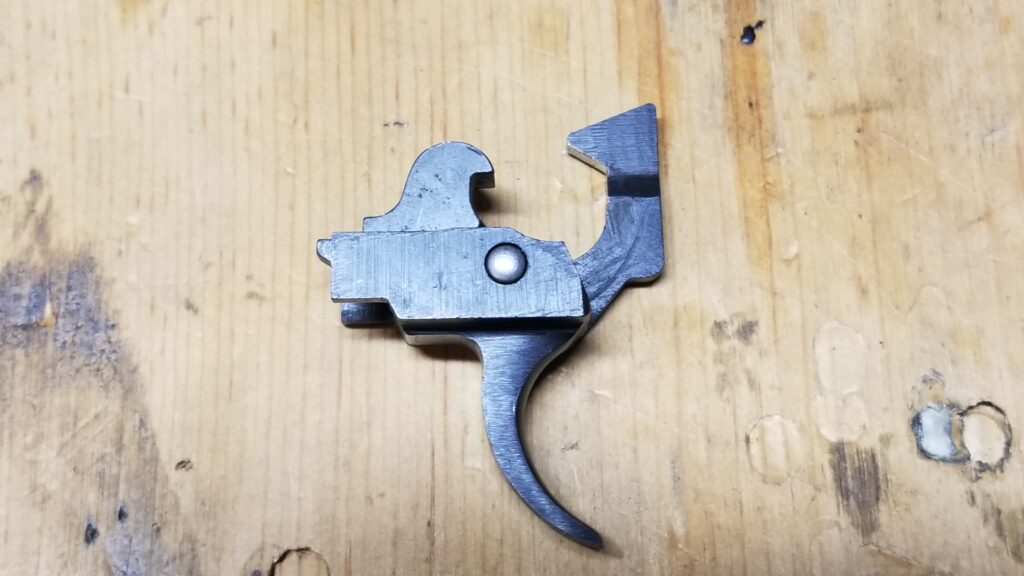
The keystone of the AKK’s design, and the feature that would become its hallmark, was its milled receiver. Unlike the later, more common AKM, which used a receiver made from a stamped sheet of steel, the AKK’s receiver was machined from a single, solid block of steel. This manufacturing process is significantly more time-consuming and expensive, but it results in a receiver that is heavier, more rigid, and exceptionally durable.
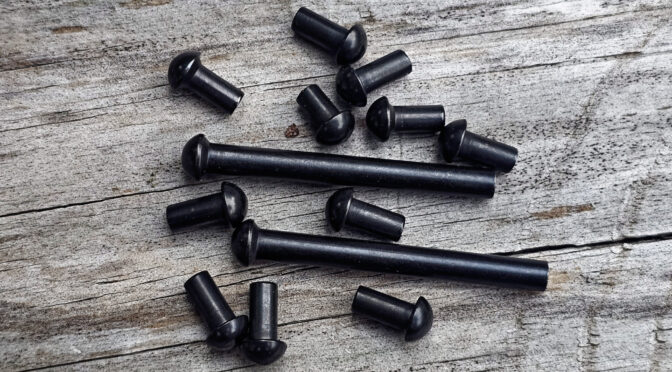
Critically, the Bulgarian approach to the milled receiver was more advanced than simply machining from bar stock. Arsenal perfected a process known as hot-die hammer forging. In this method, a solid steel blank is heated and then struck with a 5-ton hammer into a die, roughly forming the shape of the receiver.20 This forging process aligns the grain structure of the steel, eliminates microscopic internal voids, and produces a final component of unparalleled strength and resistance to stress and fatigue.20 After forging, each receiver blank still required over 5.5 hours of precision milling to bring it to its final dimensions.20 This meticulous, multi-stage process resulted in what many experts consider to be the most durable Kalashnikov receivers ever produced.
Other than the manufacturing process of the receiver, the AKK was a faithful reproduction of the Soviet Type 3. It featured a 415 mm chrome-lined barrel for corrosion resistance, the famously reliable long-stroke gas piston operating system, and was chambered for the 7.62x39mm M43 intermediate cartridge.24
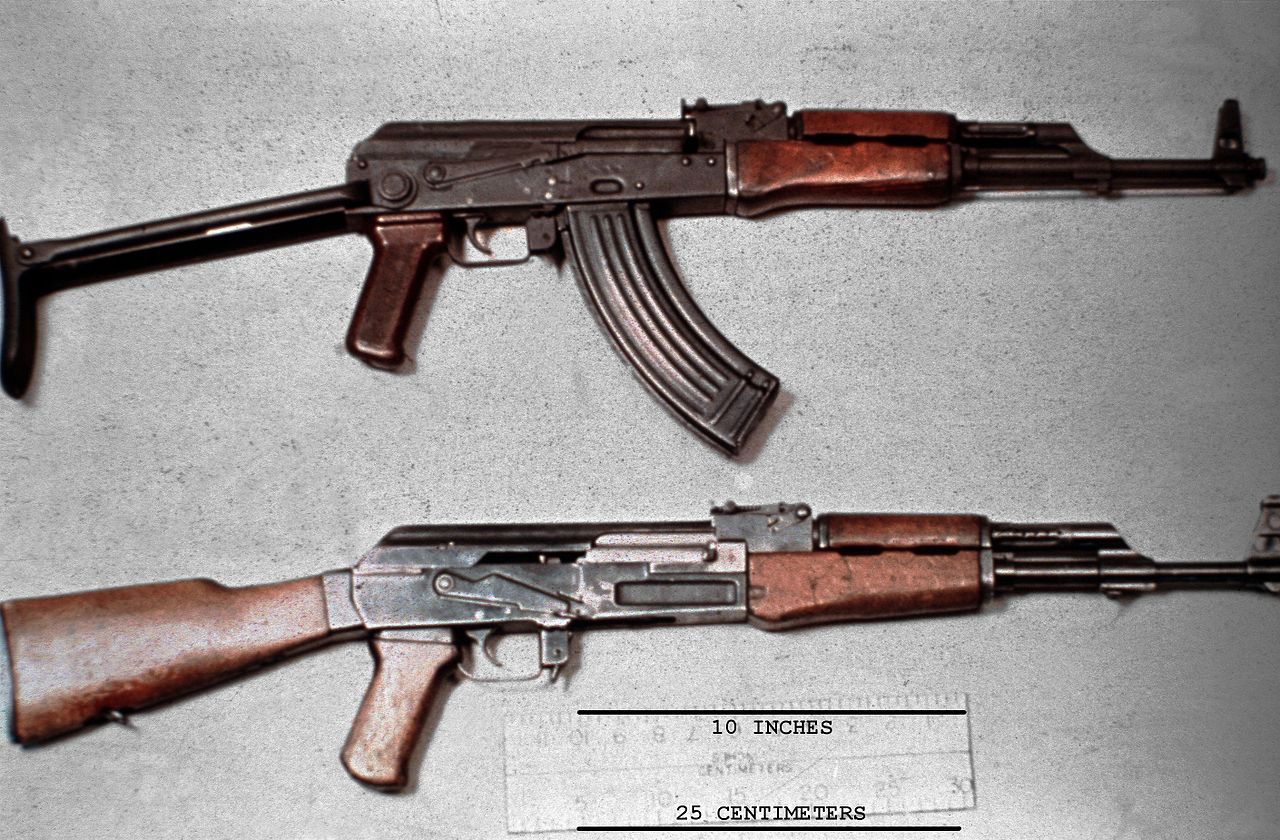
The AKKS: Compact Firepower for Specialized Roles
To meet the needs of specialized military units, Bulgaria also produced the AKKS, a direct copy of the Soviet AKS-47.17 The primary engineering difference from the standard AKK was the substitution of the fixed wooden stock for a stamped steel, double-strutted under-folding stock.27 When folded, this stock dramatically reduced the rifle’s overall length, making it a far more compact weapon. This was a critical feature for units such as paratroopers, who needed to jump with their weapon, and for armored vehicle crews, who operated in the confined spaces of tanks and armored personnel carriers.27 Apart from the stock and its mounting mechanism, the AKKS was mechanically and ballistically identical to the AKK, retaining the same robust hot-die forged and milled receiver and all internal operating components.
The decision to retain the milled receiver, even as the Soviet Union was transitioning to and popularizing the cheaper and lighter stamped-steel AKM in 1959, was a pivotal moment for the Bulgarian arms industry. This choice was likely driven by a pragmatic assessment of their specific industrial strengths and strategic reality. Re-tooling an entire factory for high-quality stamping is a massive capital and technical undertaking. It was more efficient and produced a superior, if heavier, product to continue with and perfect their existing forging and milling techniques, which were already a part of Arsenal’s industrial heritage.14 This decision inadvertently created the “Bulgarian AK” brand identity. In the global firearms market that emerged decades later, Bulgarian milled receivers came to be regarded as the “gold standard” of Kalashnikov production, prized for their durability and craftsmanship.23 This reputation for producing rifles of arguably “better than Soviet” quality is a direct, long-term consequence of an industrial decision made out of necessity during the Cold War.
Table 1: Specifications of Early Bulgarian Milled-Receiver Rifles
| Specification | AKK (Type 3) | AKKS |
| Cartridge | 7.62×39mm M43 | 7.62×39mm M43 |
| Action | Gas-operated, rotating bolt | Gas-operated, rotating bolt |
| Receiver | Hot-die hammer-forged, milled steel | Hot-die hammer-forged, milled steel |
| Overall Length | 880 mm | 880 mm (stock extended) |
| Folded Length | N/A | 645 mm |
| Barrel Length | 415 mm | 415 mm |
| Weight (unloaded) | approx. 3.7 kg | approx. 3.9 kg |
| Magazine Capacity | 30 rounds | 30 rounds |
| Muzzle Velocity | approx. 715 m/s | approx. 715 m/s |
| Rate of Fire (Cyclic) | approx. 600 rounds/min | approx. 600 rounds/min |
| Stock | Fixed wood | Under-folding steel |
| Furniture | Wood | Wood |
Data compiled from.17
Caliber and Cost: Adoption of the AKM and AK-74 Platforms
Despite its expertise with milled receivers, Bulgaria’s position within the Warsaw Pact necessitated alignment with broader Soviet-led modernization efforts. This led to the adoption of two new platforms: the cost-effective, stamped-receiver AKM and the revolutionary small-caliber AK-74.
The AKKM: The Stamped Steel Solution
While production of milled rifles continued, Bulgaria also adopted the Avtomat Kalashnikova Modernizirovanniy, or AKM. The Bulgarian-produced version is designated AKKM.18 The introduction of this model represented a significant shift in manufacturing philosophy, driven by the need for faster and more economical mass production.
The primary engineering change was the move from the heavy, time-intensive milled receiver to one formed from a 1.0 mm thick U-shaped sheet of steel.31 Forged front and rear trunnions, which house the barrel and stock respectively, were then riveted into this stamped shell to provide structural integrity. This method drastically reduced machining time, material waste, and overall cost, while also making the rifle approximately 1 kg lighter than its milled predecessor, the AKK.31
The Bulgarian AKKM also incorporated other standard AKM improvements. A distinctive slanted muzzle compensator was threaded onto the barrel, which redirected propellant gases upward and to the right to counteract the natural tendency of the rifle to climb during automatic fire.31 The smooth receiver cover of the AKK was replaced with a ribbed, stamped steel cover for added strength, and a rate reducer (often called a “hammer retarder”) was added to the trigger group to improve reliability and control during automatic fire.31 The co-existence of both milled AKK and stamped AKKM production lines suggests a dual-track procurement strategy. The less expensive stamped rifles were likely intended for mass issuance to the conscript-heavy Bulgarian People’s Army, allowing for rapid mobilization and logistical alignment with the rest of the Warsaw Pact at a sustainable cost. The premium milled receiver line was likely maintained for export contracts or to equip elite units where absolute durability was prioritized over cost.
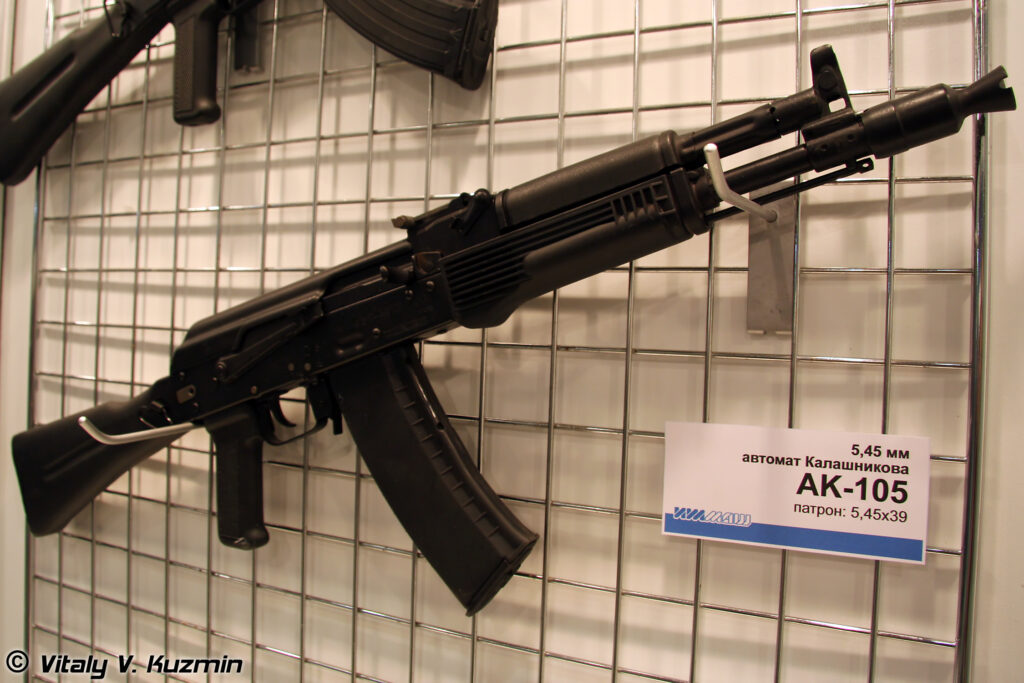
The AK-74 and AKS-74: The 5.45mm Revolution
The next major evolution came in the 1970s, following the Soviet Union’s response to the American M16 and its 5.56mm cartridge. The Soviets developed their own small-caliber, high-velocity round, the 5.45x39mm, and a new rifle to fire it: the AK-74.34 To maintain interoperability, Bulgaria licensed and began domestic production of this new platform.35
The adoption of the AK-74 was driven by a ballistic imperative. The lighter 5.45mm projectile traveled at a much higher muzzle velocity (approx. 900 m/s) than the 7.62mm round. This resulted in a significantly flatter trajectory, which simplified aiming and increased the effective range at which a soldier could engage a target.37 The new cartridge also produced noticeably less recoil, making the rifle more controllable during automatic fire and allowing soldiers to carry more ammunition for the same weight.38
Several key engineering features distinguished the Bulgarian AK-74 from its predecessors:
- Muzzle Brake: The most prominent feature was a large, cylindrical, multi-chamber muzzle brake. This highly effective device was essential for taming the high-pressure 5.45mm cartridge, dramatically reducing felt recoil and muzzle climb.34
- Gas Block and Front Sight: The gas block was redesigned with a 90-degree port relative to the barrel, and the front sight base was also modified. These are subtle but key identifiers of the AK-74 platform.34
- Magazines: The steel magazines of the AKK/AKKM were replaced with new, lighter magazines made initially from a distinctive reddish-orange “Bakelite” (an early polymer composite) and later from plum or black polymers.38
Bulgaria also produced the AKS-74, the folding-stock variant for airborne and special forces. This model marked a significant design improvement over the old under-folding AKKS. The AKS-74 adopted a much more robust, triangular-shaped steel stock that folded to the left side of the receiver.40 This design provided a more stable shooting platform, was more comfortable for the user, and did not interfere with the magazine or charging handle when folded.
The Bulgarian AK-74 represents the zenith of the country’s small arms development within the Warsaw Pact system. However, with the fall of the Berlin Wall in 1989 and the subsequent dissolution of the Soviet Union, this advanced platform became a potential evolutionary dead end. Its 5.45mm chambering had limited commercial appeal outside the former Soviet sphere. This new reality forced Arsenal to innovate, leading directly to the hybrid export designs of the post-Soviet era. The AK-74 was thus both the peak of one era and the catalyst for the next.
Table 2: Comparative Specifications of Bulgarian Stamped-Receiver Rifles
| Specification | AKKM | AK-74 | AKS-74 |
| Cartridge | 7.62×39mm | 5.45×39mm | 5.45×39mm |
| Action | Gas-operated, rotating bolt | Gas-operated, rotating bolt | Gas-operated, rotating bolt |
| Receiver | Stamped steel | Stamped steel | Stamped steel |
| Overall Length | 880 mm | 943 mm | 940 mm (extended) |
| Folded Length | N/A | N/A | 700 mm |
| Barrel Length | 415 mm | 415 mm | 415 mm |
| Weight (unloaded) | approx. 3.1 kg | approx. 3.07 kg | approx. 2.97 kg |
| Muzzle Velocity | approx. 715 m/s | approx. 900 m/s | approx. 900 m/s |
| Sighting Range | 1000 m | 1000 m | 1000 m |
| Stock | Fixed wood/polymer | Fixed wood/polymer | Left-side folding steel triangle |
| Muzzle Device | Slant compensator | Large multi-chamber brake | Large multi-chamber brake |
Data compiled from.31
A New Marketplace: Post-Soviet Innovation and the AR-M Export Series
The collapse of communism in Eastern Europe and the formal dissolution of the Warsaw Pact on July 1, 1991, created an existential crisis for Bulgaria’s defense industry.6 The vast, state-guaranteed procurement system vanished overnight, forcing a radical transformation from a state-controlled arsenal into a competitive, market-driven enterprise.
The Collapse of the Bloc and the Pivot to Export
With the end of the Cold War, the former “Factory 10” was privatized, becoming Arsenal JSCo and later Arsenal AD.14 To survive, the company had to pivot aggressively from supplying the Bulgarian People’s Army to competing in the fierce international arms market.16 This required a fundamental shift in design philosophy. No longer bound by Soviet standardization, Arsenal was free to innovate and adapt the Kalashnikov platform for a new global clientele, one that increasingly demanded compatibility with NATO standards and modern accessories.
Arsenal’s leadership made a brilliant strategic decision. They recognized that their most valuable asset was not their newest design (the 5.45mm AK-74), but their oldest and most respected manufacturing process: the hot-die hammer forging of milled receivers. In a world market about to be flooded with inexpensive stamped-receiver AKs from former Soviet stockpiles, Arsenal chose to compete on quality, not price. They built their modern export brand on this foundation of “old-world” craftsmanship, effectively repurposing a legacy technology for a new era.
The AR-M Series: A Synthesis of Old and New
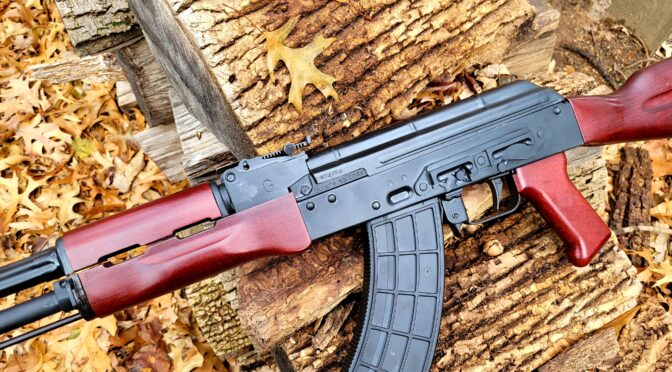
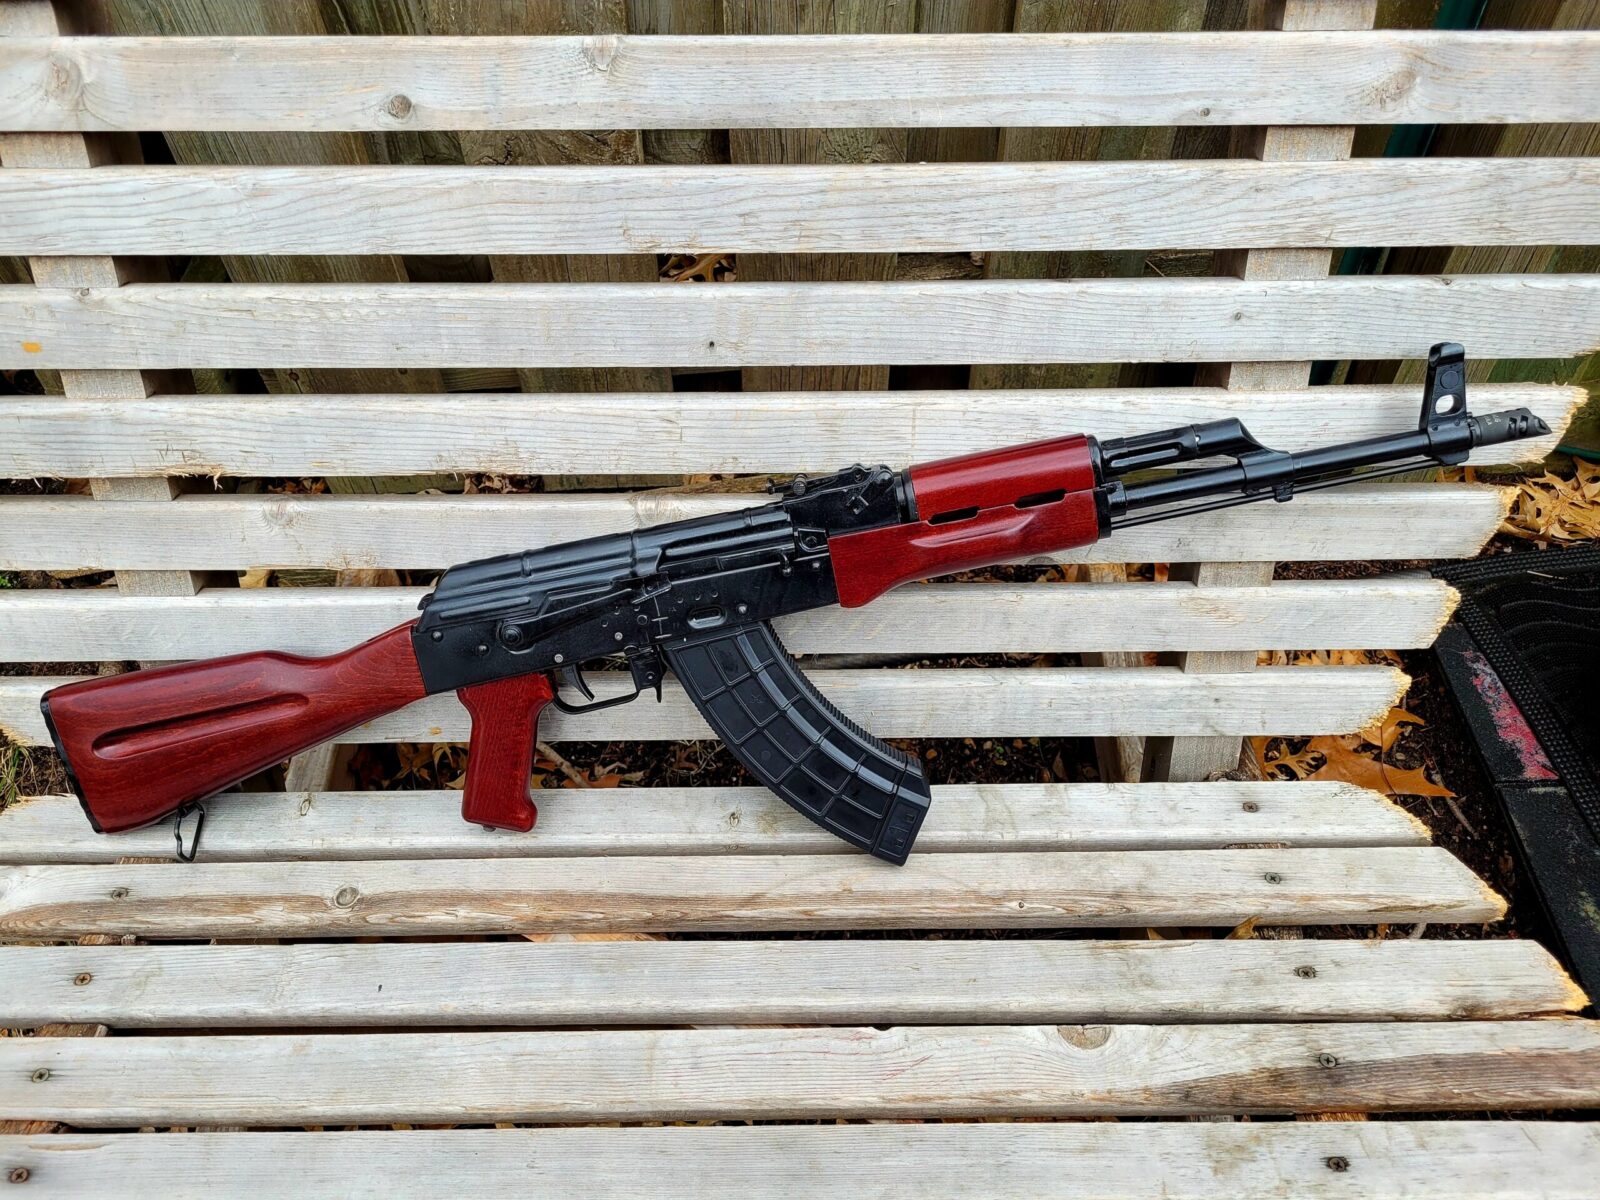
The flagship of Arsenal’s post-Soviet production is the AR-M series of assault rifles.17 The core engineering philosophy behind this family is a synthesis of the best elements of Bulgarian Kalashnikov history. Every rifle in the series is built on their signature hot-die forged and milled receiver, immediately signaling a premium product and capitalizing on their hard-won reputation for durability.17
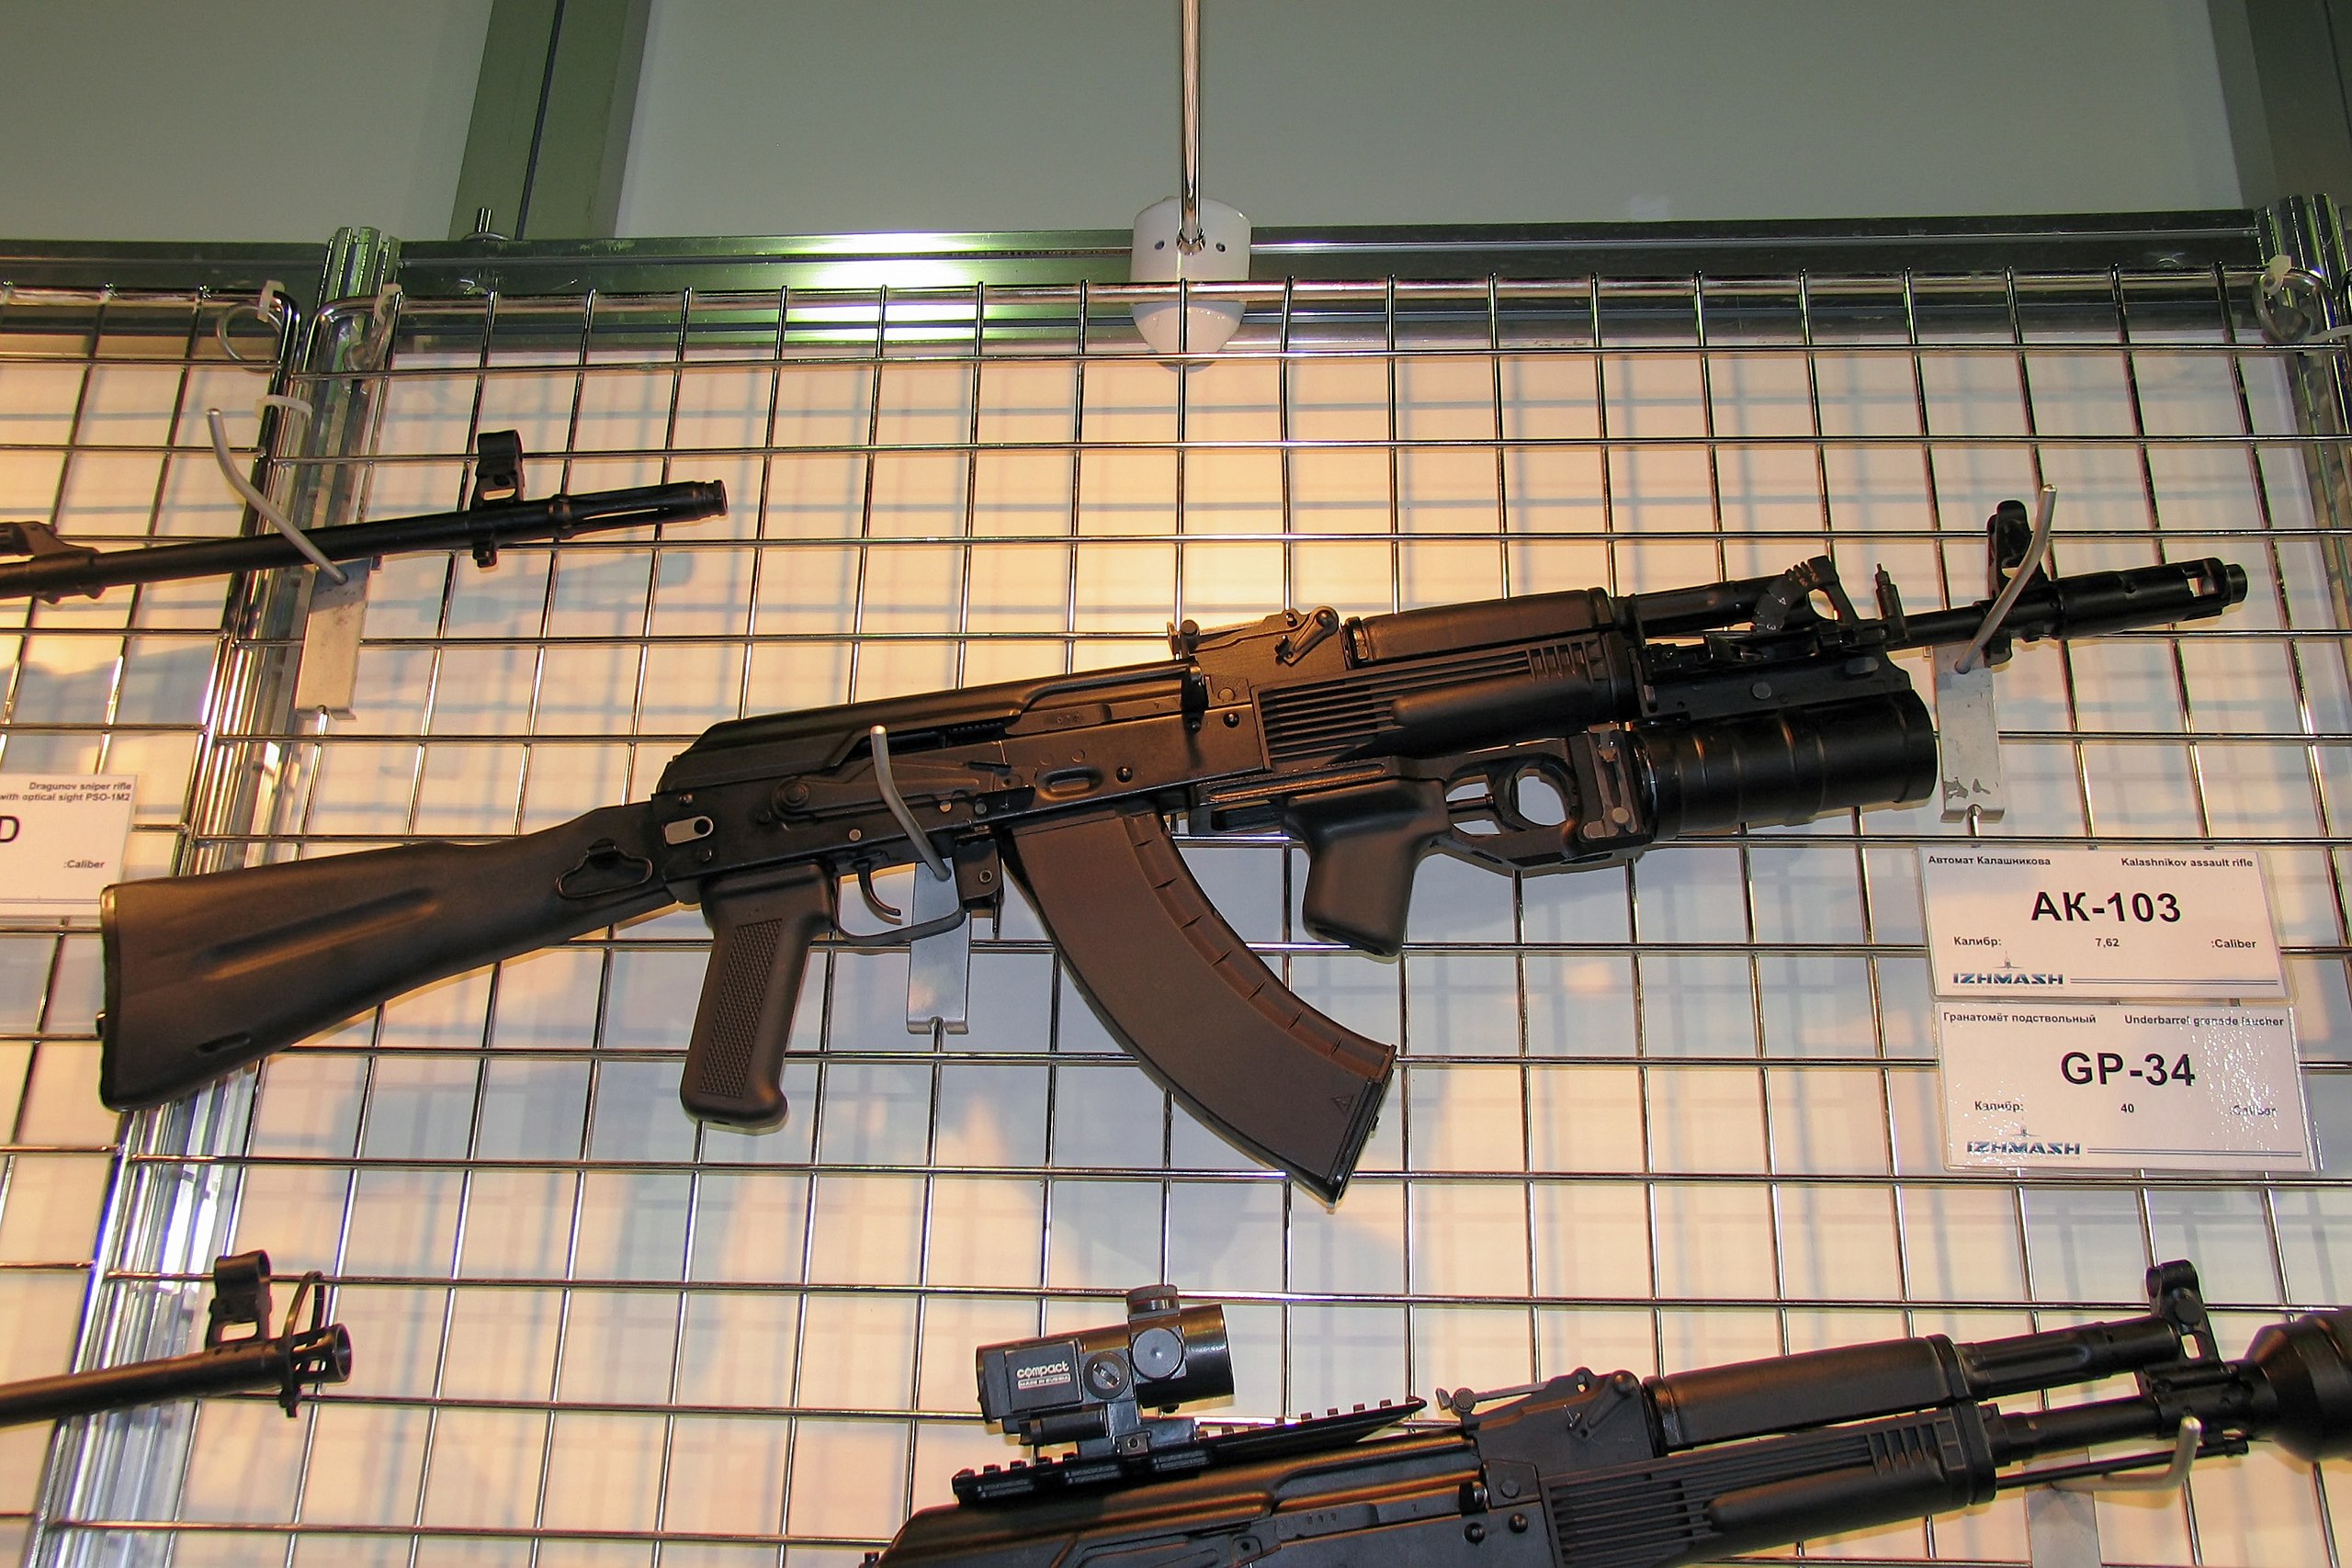
However, these are not simply re-branded AKKs. The AR-M series rifles are sophisticated hybrids, integrating the robust milled receiver of the past with the more advanced features of the AK-74 and Russian AK-100 series rifles.17 Key modernizations include:
- AK-74 Components: The rifles incorporate the superior 90-degree gas block and the more effective multi-port muzzle brake designs from the AK-74 platform.17
- Modern Polymer Furniture: The traditional wood stocks and handguards were replaced with durable, lightweight, and weather-resistant black polymer furniture, bringing the rifle’s ergonomics and appearance into the modern era.17
- Integrated Optics Rails: Recognizing the importance of modern optics, a standard Warsaw Pact-style side-mount rail was integrated onto the left side of the receiver, allowing for the secure and repeatable attachment of a wide variety of optical and red-dot sights.17
- Caliber Diversification: In the most significant departure from their Warsaw Pact past, Arsenal began offering the AR-M platform chambered not only in the traditional 7.62x39mm but also in the NATO-standard 5.56x45mm cartridge. This decision opened up a vast new market of nations and civilian consumers aligned with Western ammunition standards.17
Key Export Models and Engineering Details
The AR-M series has evolved into a wide range of models tailored to different tactical roles and customer requirements:
- AR-M1: This is the foundational model of the export series, essentially a modernized AKK. It features the milled receiver, a standard 415 mm barrel, black polymer furniture, an AK-74 style muzzle brake, and is offered in both 7.62x39mm and 5.56x45mm NATO.17 Variants with folding stocks are designated AR-M1F.17
- AR-M9: A direct evolution of the AR-M1, the AR-M9 incorporates significant ergonomic upgrades. The most notable is an ambidextrous, thumb-operable fire selector lever located on the pistol grip, allowing the shooter to change fire modes without removing their hand from its firing position—a major improvement over the traditional long-throw Kalashnikov safety lever.17 It also features a different style of polymer furniture and is available in fixed (
AR-M9) and folding stock (AR-M9F) versions. - Specialized Variants: Leveraging the modularity of the platform, Arsenal has developed an extensive catalog of specialized rifles. These include short-barreled carbines like the AR-M4SF with a 215 mm barrel for close-quarters combat, and tactical models that come factory-equipped with Picatinny rail systems on the handguards for mounting lights, lasers, and vertical grips.17
The commercial success of these export models, particularly in the demanding US civilian market, has established the “Bulgarian pattern” as a distinct and highly desirable category of Kalashnikov rifle.16 The specific combination of a hot-die forged milled receiver, a 90-degree gas block, and an AK-74 style front sight/muzzle device is now recognized globally by enthusiasts and other manufacturers as a specific, premium configuration. Arsenal did not just evolve the AK for its own needs; it created a new benchmark that has influenced the perceptions of the entire international market.
Table 3: Specifications of Modern Bulgarian Export Rifles (AR-M1 & AR-M9 Series)
| Specification | AR-M1 (7.62mm) | AR-M1 (5.56mm) | AR-M9F (7.62mm) | AR-M9F (5.56mm) |
| Cartridge | 7.62×39mm | 5.56×45mm NATO | 7.62×39mm | 5.56×45mm NATO |
| Receiver | Milled (Hot-die forged) | Milled (Hot-die forged) | Milled (Hot-die forged) | Milled (Hot-die forged) |
| Overall Length | 940 mm | 940 mm | 970 mm (extended) | 970 mm (extended) |
| Folded Length | N/A (Fixed Stock) | N/A (Fixed Stock) | 720 mm | 720 mm |
| Barrel Length | 415 mm | 415 mm | 415 mm | 415 mm |
| Weight (unloaded) | 3.65 kg | 3.65 kg | 3.85 kg | 3.85 kg |
| Muzzle Velocity | approx. 710 m/s | approx. 910 m/s (M193) | approx. 710 m/s | approx. 910 m/s (M193) |
| Key Features | Polymer furniture, AK-74 brake, side rail | Polymer furniture, AK-74 brake, side rail | Right-side folding stock, thumb safety | Right-side folding stock, thumb safety |
Data compiled from.17
Concluding Analysis: The Enduring Legacy and Global Reputation
The history of the Kalashnikov rifle in Bulgaria is a compelling narrative of adaptation, industrial excellence, and strategic reinvention. From its origins as a mandated piece of military hardware for a loyal Soviet satellite, the Bulgarian AK has evolved into a globally respected benchmark for quality and durability. This journey can be understood through three distinct eras.
First was the Warsaw Pact Foundation of the 1950s and 60s. Driven by the geopolitical imperative to defend the Pact’s southern flank, Bulgaria adopted the Soviet Type 3 design. In doing so, it established a reputation for superior manufacturing through its mastery of the hot-die hammer-forged milled receiver, resulting in the highly durable AKK and AKKS rifles.
The second era was one of Soviet Modernization during the 1970s and 80s. To maintain logistical and doctrinal alignment with the rest of the Eastern Bloc, Bulgaria adopted stamped-receiver manufacturing for the AKKM and transitioned to the small-caliber, high-velocity 5.45x39mm cartridge with the AK-74. This period represented the peak of its development within the Soviet military-industrial complex.
The final and current era is one of Post-Soviet Innovation. The collapse of communism forced the newly privatized Arsenal AD to pivot to the global market. The company made the astute decision to build its new brand on its old reputation, creating the AR-M series. These rifles ingeniously combined the legacy strength of the milled receiver with the modern features of the AK-74 and the market-driven necessity of NATO caliber compatibility.
Bulgaria’s enduring success in the small arms industry is not accidental. It is the direct result of leveraging a historical manufacturing competency, born from the specific industrial and strategic pressures of the Cold War, and intelligently adapting it to meet the demands of a new geopolitical and commercial landscape. The nation transformed a Warsaw Pact obligation into a globally recognized symbol of premium Kalashnikov craftsmanship. Today, as a member of NATO, Bulgaria and its domestic arms industry are in the unique position of bridging two worlds, capable of supplying both legacy Eastern-bloc clients and contributing to Western-aligned defense needs.11 The Bulgarian Kalashnikov, forged in the Bloc, has successfully transcended its origins to secure a lasting and respected place in the world of modern small arms.
Please share the link on Facebook, Forums, with colleagues, etc. Your support is much appreciated and if you have any feedback, please email us in**@*********ps.com. If you’d like to request a report or order a reprint, please click here for the corresponding page to open in new tab.
Works cited
- Bulgaria – WWII, Axis, Allies – Britannica, accessed July 24, 2025, https://www.britannica.com/place/Bulgaria/World-War-II
- History of Bulgaria – World War II – Britannica, accessed July 24, 2025, https://www.britannica.com/topic/history-of-Bulgaria/World-War-II
- People’s Republic of Bulgaria – Wikipedia, accessed July 24, 2025, https://en.wikipedia.org/wiki/People%27s_Republic_of_Bulgaria
- Active and Sharp Measures: Cooperation between the Soviet KGB and Bulgarian State Security – MIT Press Direct, accessed July 24, 2025, https://direct.mit.edu/jcws/article/23/4/3/107902/Active-and-Sharp-MeasuresCooperation-between-the
- The day before the crash – Bulgarian‑Soviet relations in the nineteen eighties, accessed July 24, 2025, https://sdr-ihpan.edu.pl/images/volume47SI/Baewa.pdf
- Declassified: What was the Warsaw Pact? – NATO, accessed July 24, 2025, https://www.nato.int/cps/en/natohq/declassified_138294.htm
- The Warsaw Pact is formed | May 14, 1955 – History.com, accessed July 24, 2025, https://www.history.com/this-day-in-history/may-14/the-warsaw-pact-is-formed
- Warsaw Pact | Summary, History, Countries, Map, Significance, & Facts | Britannica, accessed July 24, 2025, https://www.britannica.com/event/Warsaw-Pact
- Warsaw Treaty Organization – UNTERM, accessed July 24, 2025, https://unterm.un.org/unterm2/view/UNHQ/7F7F481093AF0154852569FA0000E31E
- Bulgaria Turkey Cold War – Balkan Military History, accessed July 24, 2025, https://www.balkanhistory.org/bulgaria-turkey-cold-war.html
- The Bulgarian Armyafter World War Two | National Museum of Military History, accessed July 24, 2025, https://militarymuseum.bg/en/exhibitions/chronological-exhibition/development-of-the-bulgarian-army-after-the-world-war-ii/
- Development of the Bulgarian Army after the World War II – Meer, accessed July 24, 2025, https://www.meer.com/en/43149-development-of-the-bulgarian-army-after-the-world-war-ii
- Bulgaria–Russia relations – Wikipedia, accessed July 24, 2025, https://en.wikipedia.org/wiki/Bulgaria%E2%80%93Russia_relations
- Our history – Arsenal JSCo. – Bulgarian manufacturer of weapons and ammunition since 1878, accessed July 24, 2025, https://www.arsenal-bg.com/about/history
- Arsenal AD – Wikipedia, accessed July 24, 2025, https://en.wikipedia.org/wiki/Arsenal_AD
- Bulgarian AK History, Arsenal Factory 10 – Faktory 47, accessed July 24, 2025, https://www.faktory47.com/blogs/kalashnikov/bulgarian-ak-history
- AR-M1 – Wikipedia, accessed July 24, 2025, https://en.wikipedia.org/wiki/AR-M1
- Kalashnikov rifle – Wikipedia, accessed July 24, 2025, https://en.wikipedia.org/wiki/Kalashnikov_rifle
- Milled receiver Bulgarian AKK rifle. Identical to the Russian AK47 but with plastic furniture Stock Photo – Alamy, accessed July 24, 2025, https://www.alamy.com/stock-photo-milled-receiver-bulgarian-akk-rifle-identical-to-the-russian-ak47-43761019.html
- Arsenal, Inc. > Rifles > SAM7 Series 7.62x39mm caliber Bulgarian milled rifle, accessed July 24, 2025, https://www.arsenalinc.com/usa/firearms/rifles/sam7-series/
- Tested: Arsenal Inc. SAM7SF-84G Bulgarian AK-47 | An Official Journal Of The NRA, accessed July 24, 2025, https://www.americanrifleman.org/content/tested-arsenal-inc-sam7sf-84g-bulgarian-ak-47/
- Arsenal SAM5 5.56x45mm Semi-Auto AK-47 Rifle with AK-74 FSB AK-133S, accessed July 24, 2025, https://armedinmichigan.com/product/arsenal-sam5-5-56x45mm-semi-auto-ak-47-rifle-with-ak-74-fsb-ak-133s-flash-hider-and-30rd-mag/
- ARSENAL SAM7 R BULGARIAN MILLED AK-47 – YouTube, accessed July 24, 2025, https://www.youtube.com/watch?v=Fb2SO8zWJJ4
- Kalashnikov AK-47 (& close derivatives) – Small Arms Survey, accessed July 24, 2025, https://www.smallarmssurvey.org/sites/default/files/SAS-weapons-assault-rifles-Kalashnikov-AK-47.pdf
- AK-47 – Wikipedia, accessed July 24, 2025, https://en.wikipedia.org/wiki/AK-47
- AK 47 “Kalashnikov” Assault Rifle | Armaco JSC. Bulgaria, accessed July 24, 2025, http://www.armaco.bg/en/product/assault-rifles-c2/ak-47-kalashnikov-assault-rifle-p493
- Kalashnikov AKS 47 – Capital Shooting Range Budapest, accessed July 24, 2025, https://capitalshooting.eu/kalashnikov-aks-47/
- Shotgun news, accessed July 24, 2025, https://www.arsenal-bg.com/uploads/2016/06/583abffafca0f9dd4ae3c8ba685a074c.pdf
- AK47 Arsenal – Milled Bulgarian – YouTube, accessed July 24, 2025, https://www.youtube.com/watch?v=HQ_tFtbHiDU
- AK-47 – Weapon Systems, accessed July 24, 2025, https://old.weaponsystems.net/weaponsystem/AA04%20-%20AK-47.html
- AKM Russian 7.62mm Automatic Assault Rifle – ODIN, accessed July 24, 2025, https://odin.tradoc.army.mil/WEG/Asset/81938b91ee77ceadcef64a66bf7c3f23
- AKM – Wikipedia, accessed July 24, 2025, https://en.wikipedia.org/wiki/AKM
- AKM Assault Rifle | Armaco JSC. Bulgaria, accessed July 24, 2025, http://www.armaco.bg/en/product/assault-rifles-c2/akm-assault-rifle-p492
- AK-74 – Wikipedia, accessed July 24, 2025, https://en.wikipedia.org/wiki/AK-74
- 5.45×39 mm – AK 74 Assault Rifles – Armatec, accessed July 24, 2025, https://www.armatec.bg/products/5-45×39-mm-ak-74-assault-rifles
- AK-74 – Simple English Wikipedia, the free encyclopedia, accessed July 24, 2025, https://simple.wikipedia.org/wiki/AK-74
- AK-47 | Definition, History, Operation, & Facts – Britannica, accessed July 24, 2025, https://www.britannica.com/technology/AK-47
- Bulgarian AK-74 5.45x39mm – Athlon Outdoors, accessed July 24, 2025, https://athlonoutdoors.com/article/bulgarian-ak-74-5-45x39mm/
- Kalashnikov AK-74 – Small Arms Survey, accessed July 24, 2025, https://www.smallarmssurvey.org/sites/default/files/SAS-weapons-assault-rifles-Kalashnikov-AK-74.pdf
- AK74 Rifles for Sale | Nampa Idaho – Northwest Gun Supply, accessed July 24, 2025, https://www.northwestgunsupply.com/ak-74
- AKS-74 “Kalashnikov” Assault Rifle with folding butt | Armaco JSC …, accessed July 24, 2025, http://www.armaco.bg/en/product/assault-rifles-c2/aks-74-kalashnikov-assault-rifle-with-folding-butt-p495
- AK-74 “Kalashnikov” Assault Rifle | Armaco JSC. Bulgaria, accessed July 24, 2025, http://www.armaco.bg/en/product/assault-rifles-c2/ak-74-kalashnikov-assault-rifle-p494
- Warsaw Pact Countries 2025 – World Population Review, accessed July 24, 2025, https://worldpopulationreview.com/country-rankings/warsaw-pact-countries
- Assault Rifles – Arsenal JSCo. – Bulgarian manufacturer of weapons and ammunition since 1878, accessed July 24, 2025, https://www.arsenal-bg.com/c/assault-rifles-24
- AR-M1, accessed July 24, 2025, https://wikipedia.nucleos.com/viewer/wikipedia_en_all/A/AR-M1
- Arsenal AR-M1 Assault Rifle, accessed July 24, 2025, https://arsenal-defense.com/product/firearms/rifles/arsenal-ar-m1-assault-rifle/
- 5.56×45 & 7.62×39 mm ARSENAL Assault Rifles AR-M9, accessed July 24, 2025, https://arsenal-defense.com/wp-content/uploads/spec-sheets/AR-M9.pdf
- 5.56×45 mm and 7.62×39 mm AR-M9 – Assault Rifles – Arsenal JSCo., accessed July 24, 2025, https://www.arsenal-bg.com/c/556×45-762×39-mm-assault-rifles-barrel-length-415-mm-44/556×45-mm-and-762×39-mm-ar-m9-43
- Arsenal, Inc. > Rifles > SAM5 SERIES, accessed July 24, 2025, https://www.arsenalinc.com/usa/firearms/rifles/sam5-series/
- 7.62×39 mm AR-M1 – Assault Rifles – Arsenal JSCo., accessed July 24, 2025, https://www.arsenal-bg.com/c/556×45-762×39-mm-assault-rifles-barrel-length-415-mm-44/762×39-mm-ar-m1-49
- 5.56×45 mm and 7.62×39 mm AR-M1 – Assault Rifles – Arsenal JSCo., accessed July 24, 2025, https://www.arsenal-bg.com/c/556×45-762×39-mm-assault-rifles-barrel-length-415-mm-44/556×45-mm-and-762×39-mm-ar-m1-30
- AR-M1F Assault Rifle – 7.62x39mm with Folding Butt – bulcomersks, accessed July 24, 2025, https://bulcomersks.com/military-products/weapons/assault-rifles/ar-m1f-assault-rifle-7-62/
- Arsenal AR-M9 Assault Rifle 5.56 and 7.62 Fixed Polymer Buttstock, accessed July 24, 2025, https://arsenal-defense.com/product/firearms/rifles/arsenal-ar-m9-assault-rifle-556-762-fixed-polymer-buttstock/
- 5.56×45 mm and 7.62×39 mm AR-M9F – Assault Rifles – Arsenal JSCo., accessed July 24, 2025, https://www.arsenal-bg.com/c/556×45-762×39-mm-assault-rifles-barrel-length-415-mm-44/556×45-mm-and-762×39-mm-ar-m9f-44
- The Definitive History of The Arsenal Bulgaria AK47 (Episode I: 1993-2006) – YouTube, accessed July 24, 2025, https://m.youtube.com/watch?v=7QxCWWnJ6Ec
- File:AK-47.png – Wikimedia Commons, accessed July 24, 2025, https://commons.wikimedia.org/wiki/File:AK-47.png
- File:Ak-74mpdomain.JPG – Wikimedia Commons, accessed July 24, 2025, https://commons.wikimedia.org/wiki/File:Ak-74mpdomain.JPG
- File:BulgAR.jpg – Wikimedia Commons, accessed July 24, 2025, https://commons.wikimedia.org/wiki/File:BulgAR.jpg