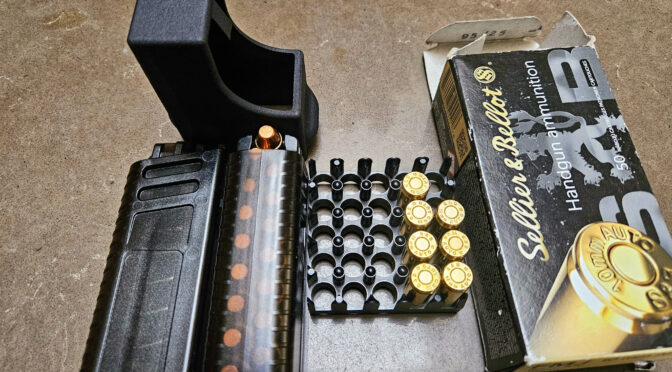
The Stribog line of subguns, pistols and pistol caliber carbines are really cool. When the brace fiasco erupted, I sold my 9mm SP9A1 and regretted it. When Grand Power said they were coming out with a 10mm, I was an early buyer. One question popped out though – what was out there to help load the 20 round 10mm magazines? I hate loading magazines with stiff springs as many hands start to cramp so I needed to find a loader.
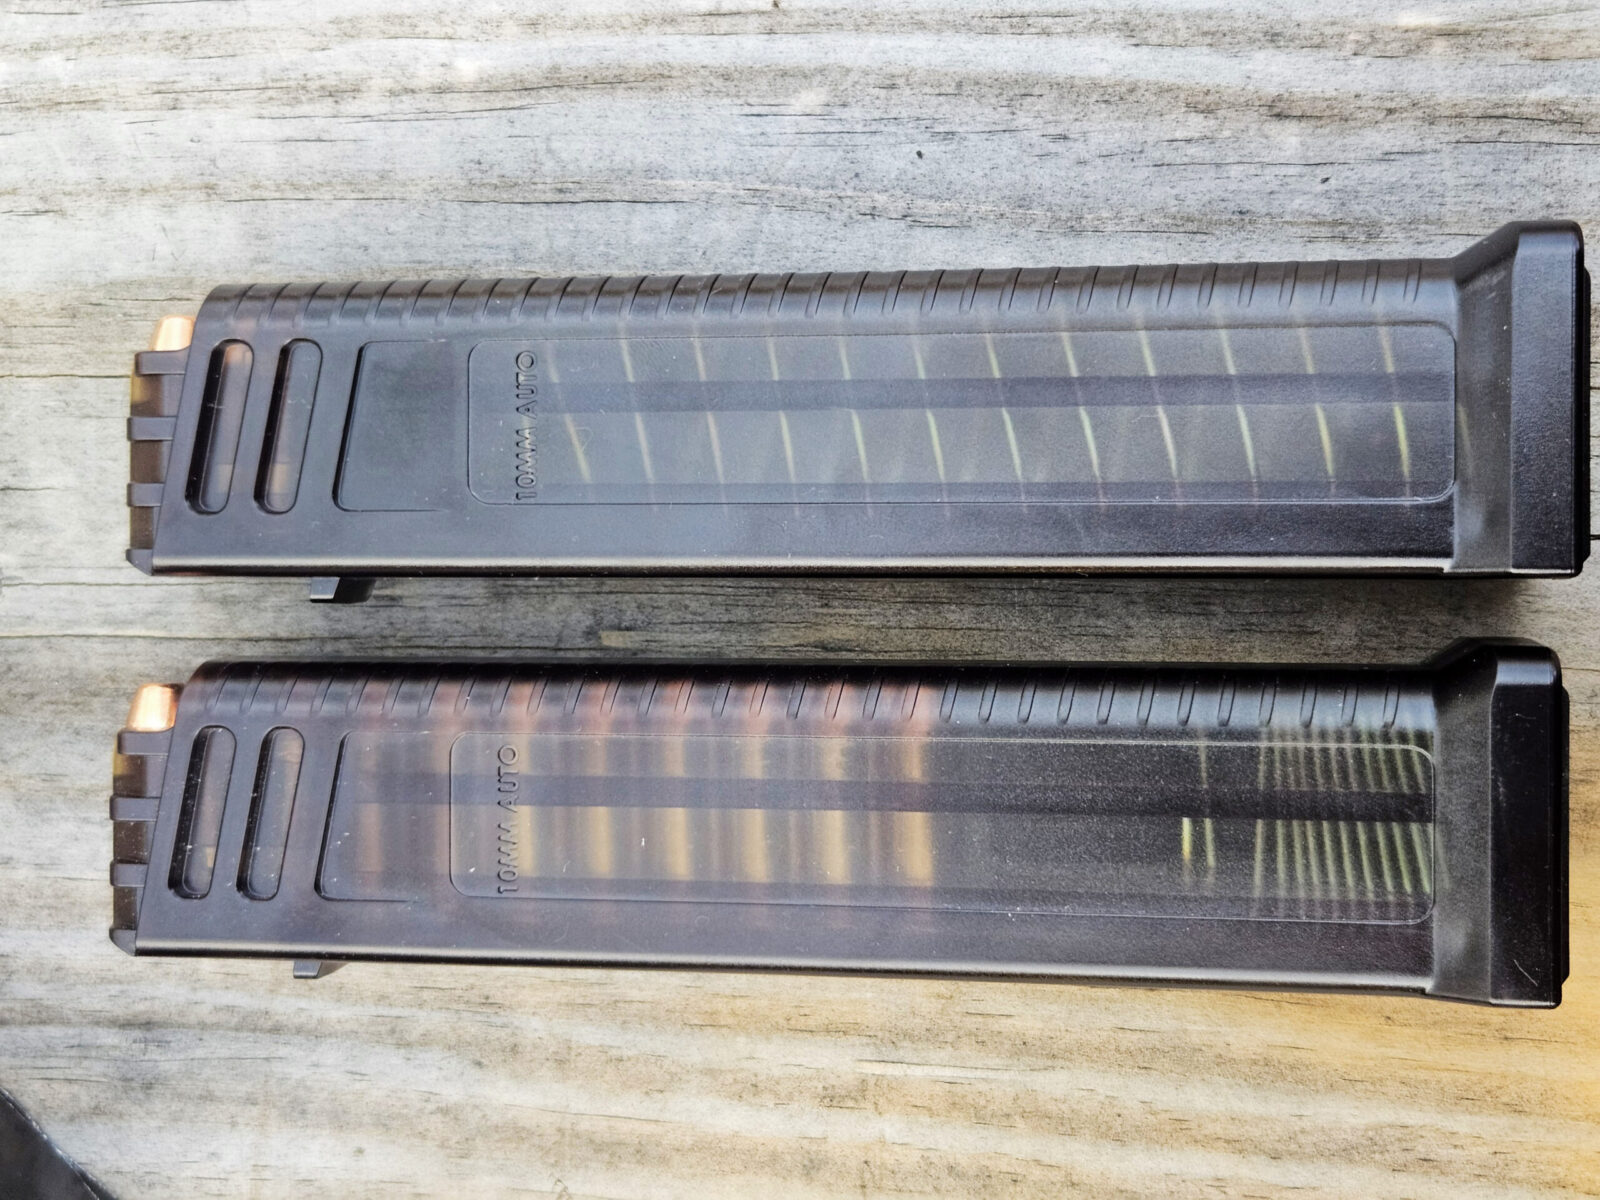
First off, they are HK UMP pattern magazines
The Stribog 10mm mags are nicely made, beefy as hell and based on HK’s UMP magazines. I like that – I am really tired or proprietary mags where you have one and only one option. Using an existing mags opens up options. Now, are UMP magazines all over the place and cheap? No, they aren’t – especially not 10mm mags. HK doesn’t make 10mm UMP magazines any longer.
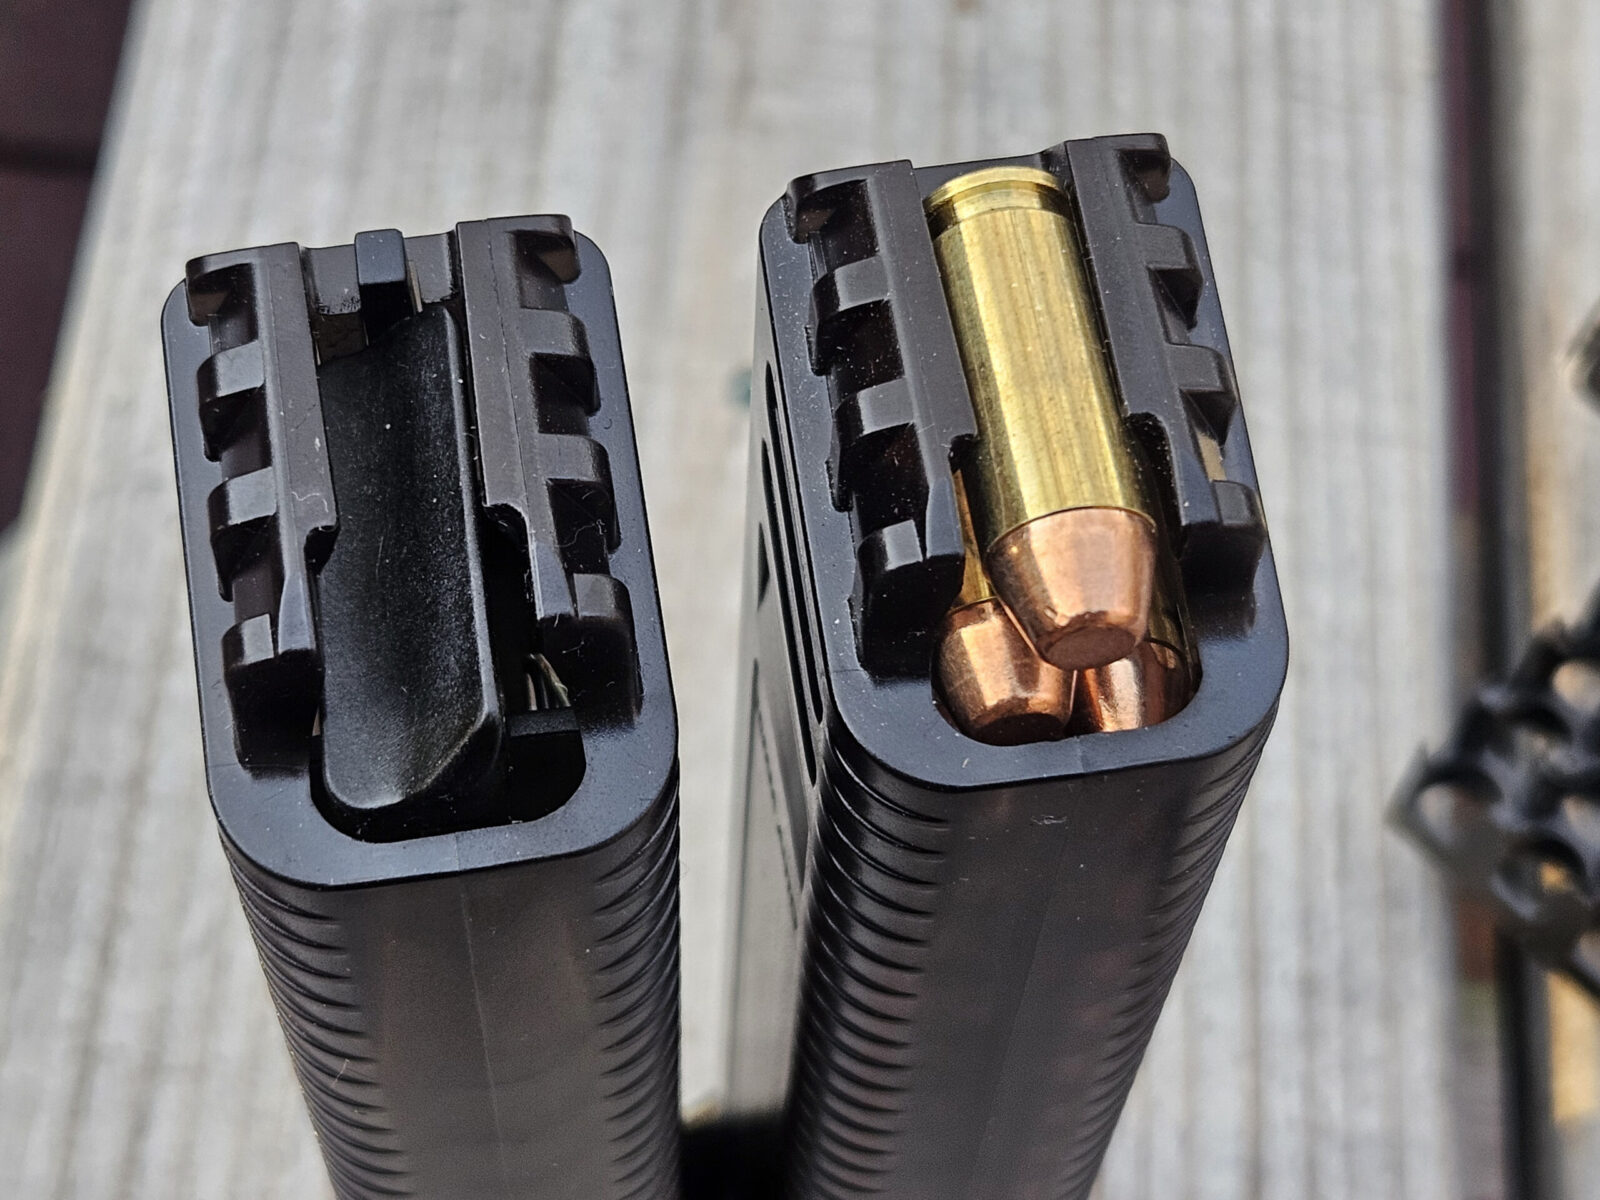
The 20 round magazines have stout springs and it takes a lot of work to manually insert cartridges
Real HK 10mm mags have starting costs around $139 but are 30 rounds so there is a perk for the price. Considering Stribog mags list at $45 and can sometimes be found for $39.99, I’ll stick with Stribog mags.
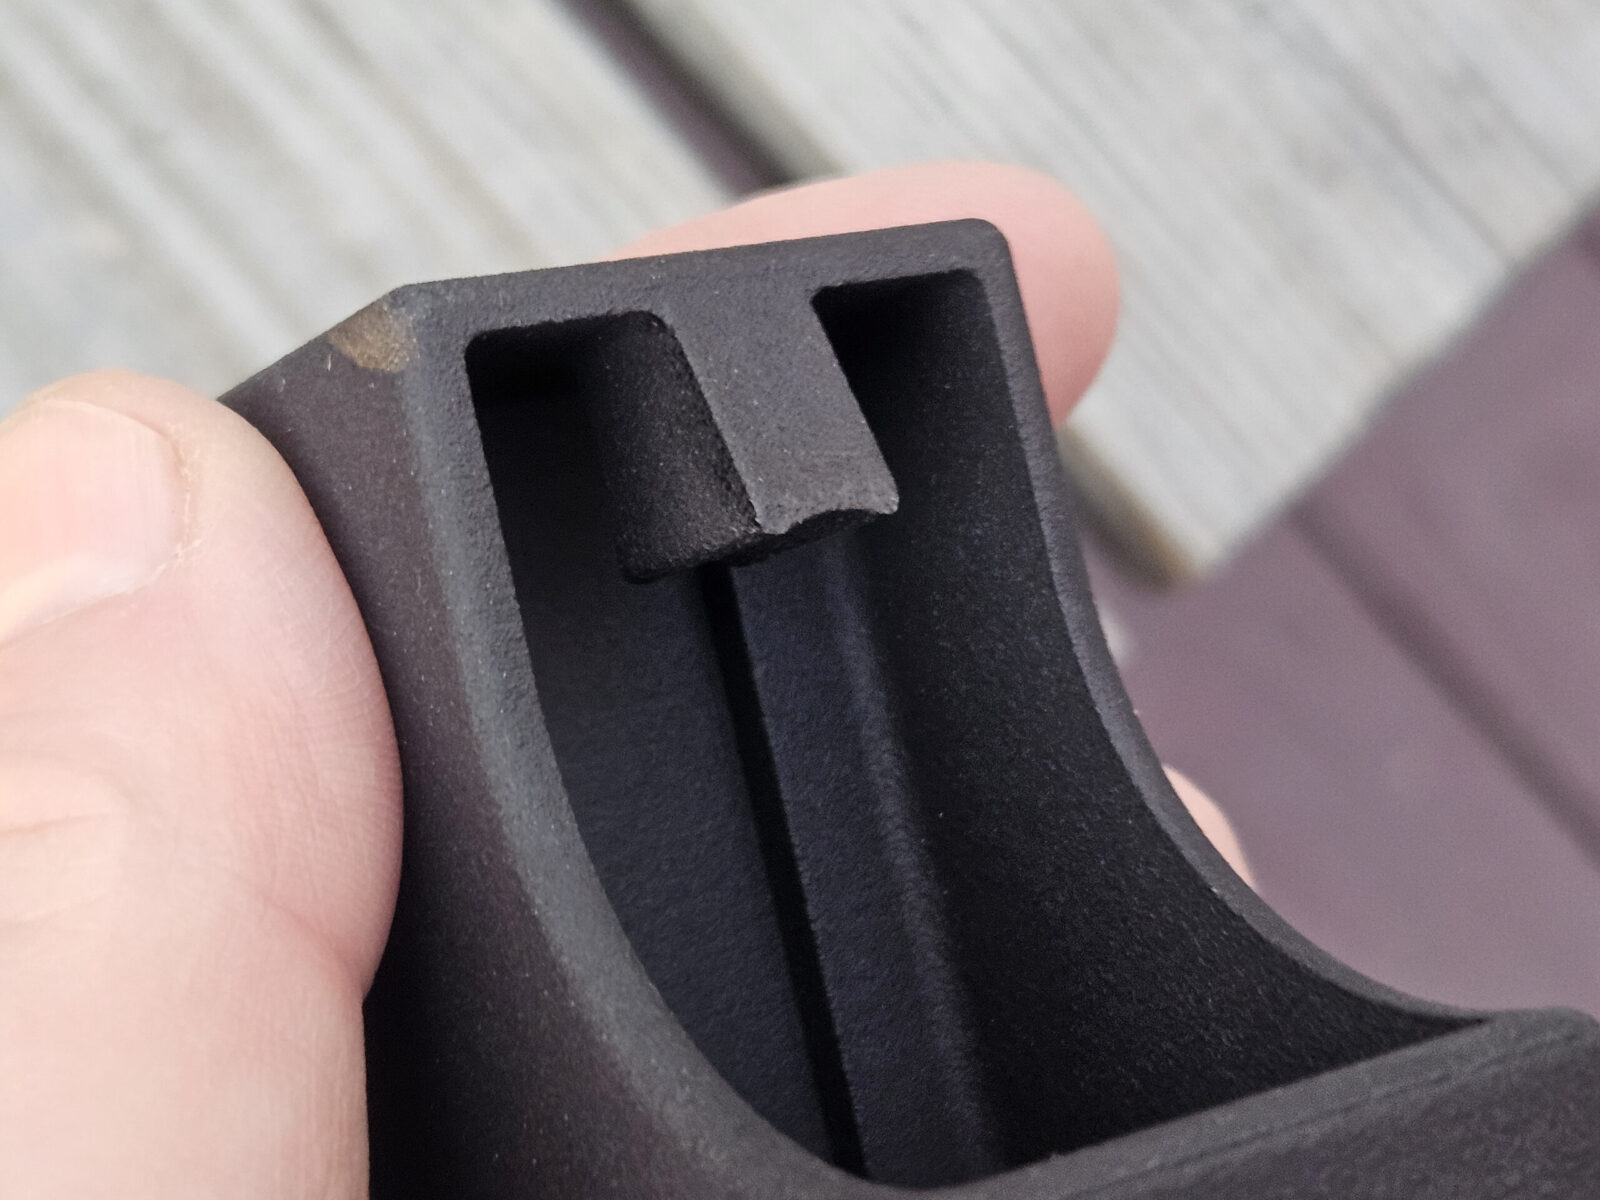
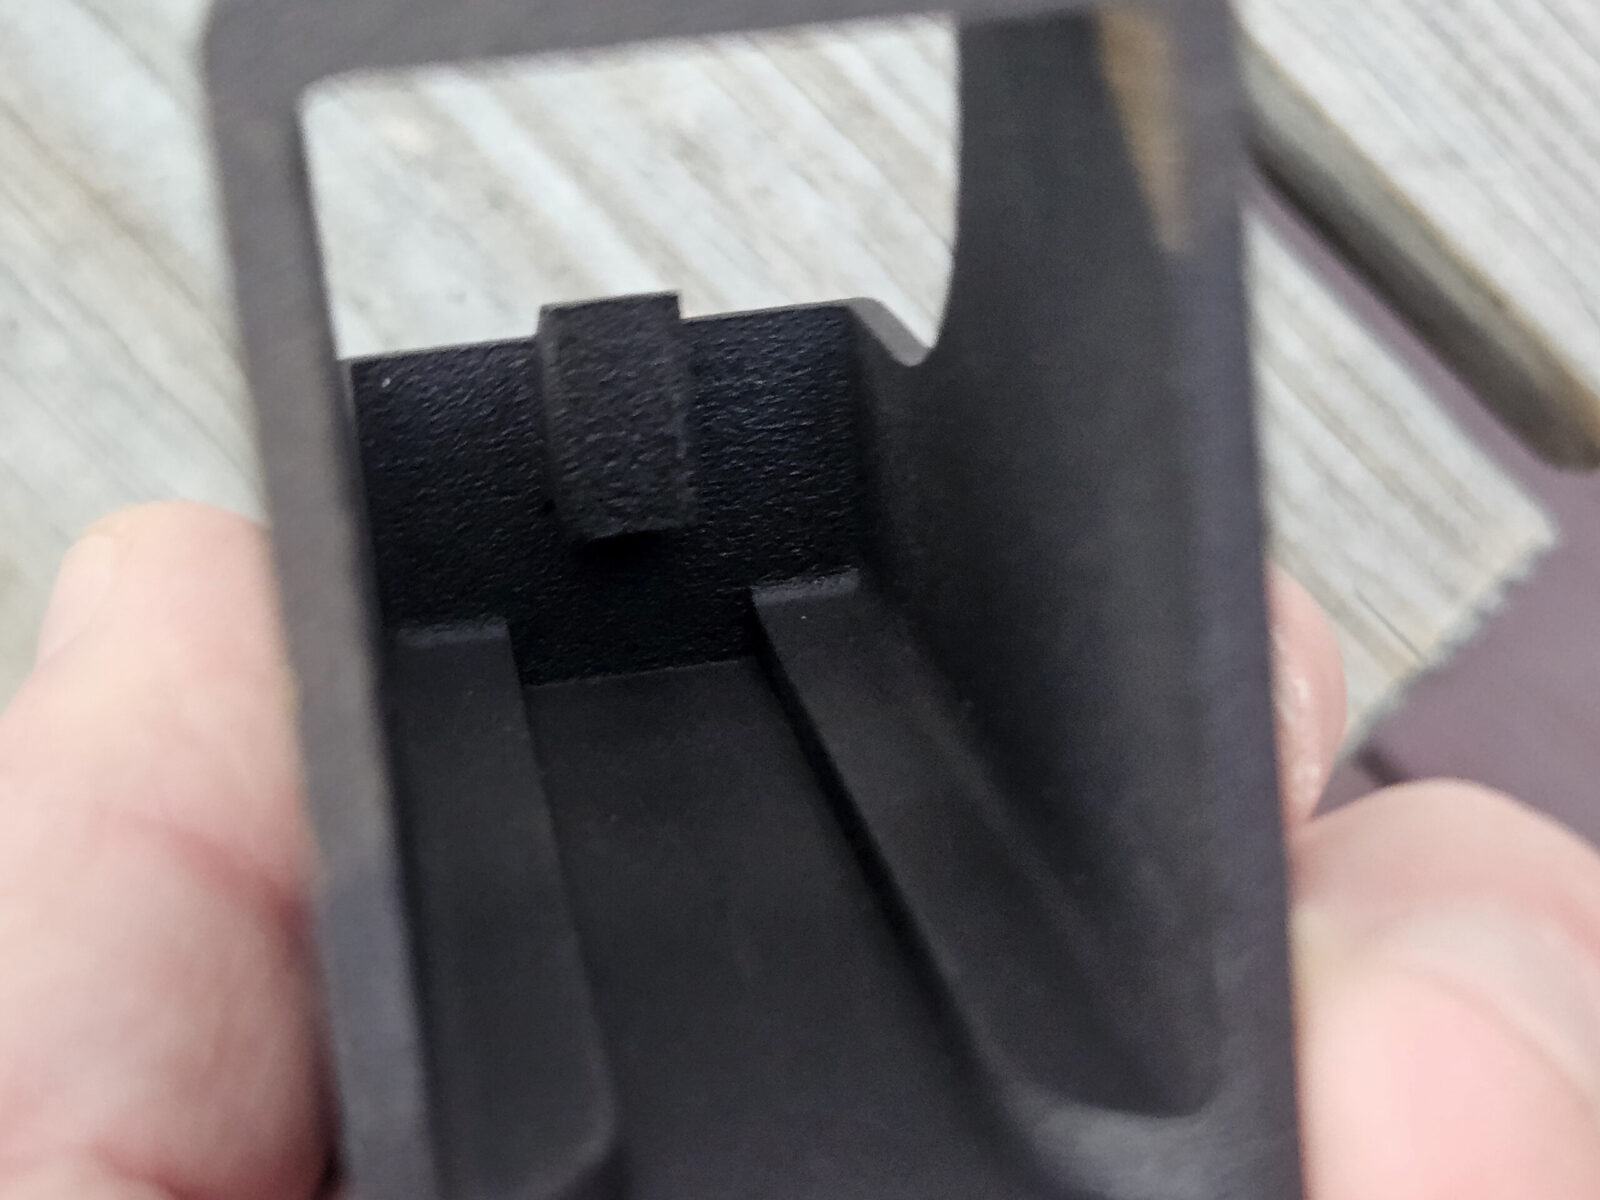
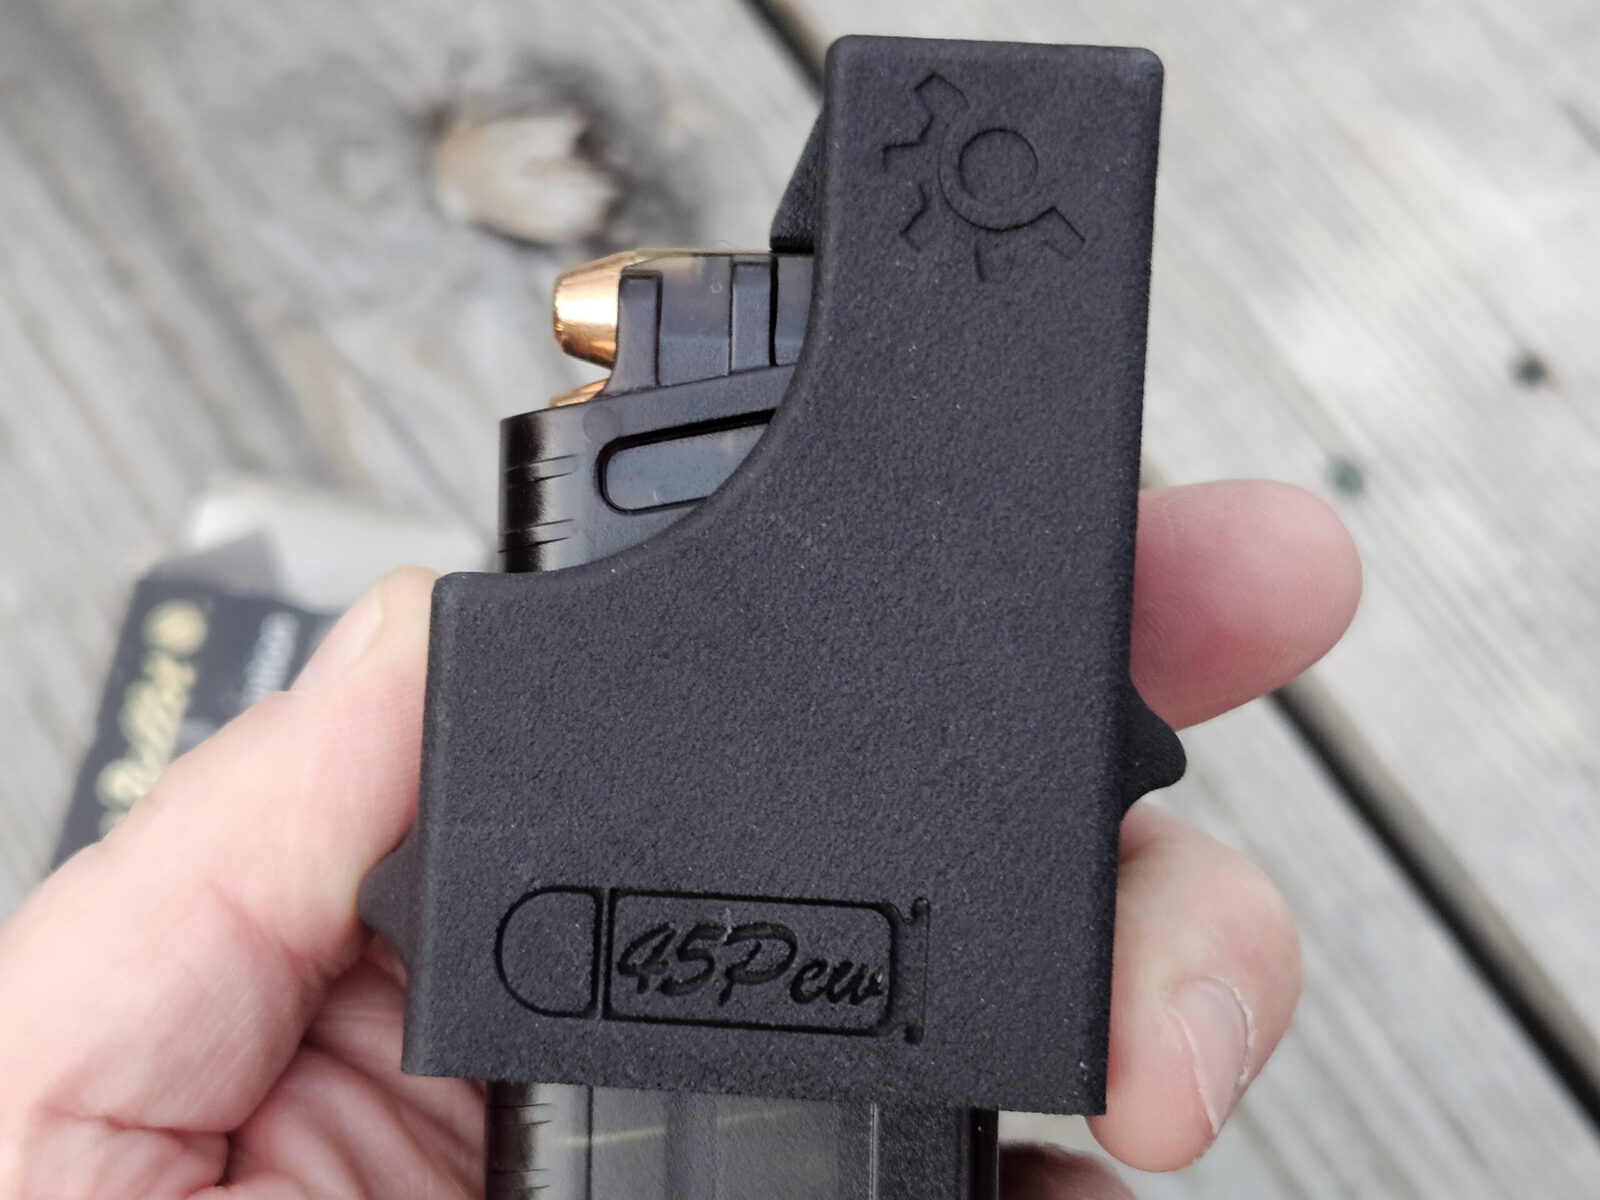
Stribog 10mm magazines are built like a tank
This is both a pro and a con. The top sports a lot of reinforcements making for a quite a large magazine in terms of circumference. They will not fit inside a Maglula Universal loader – I had hoped they would but it is a no-go.
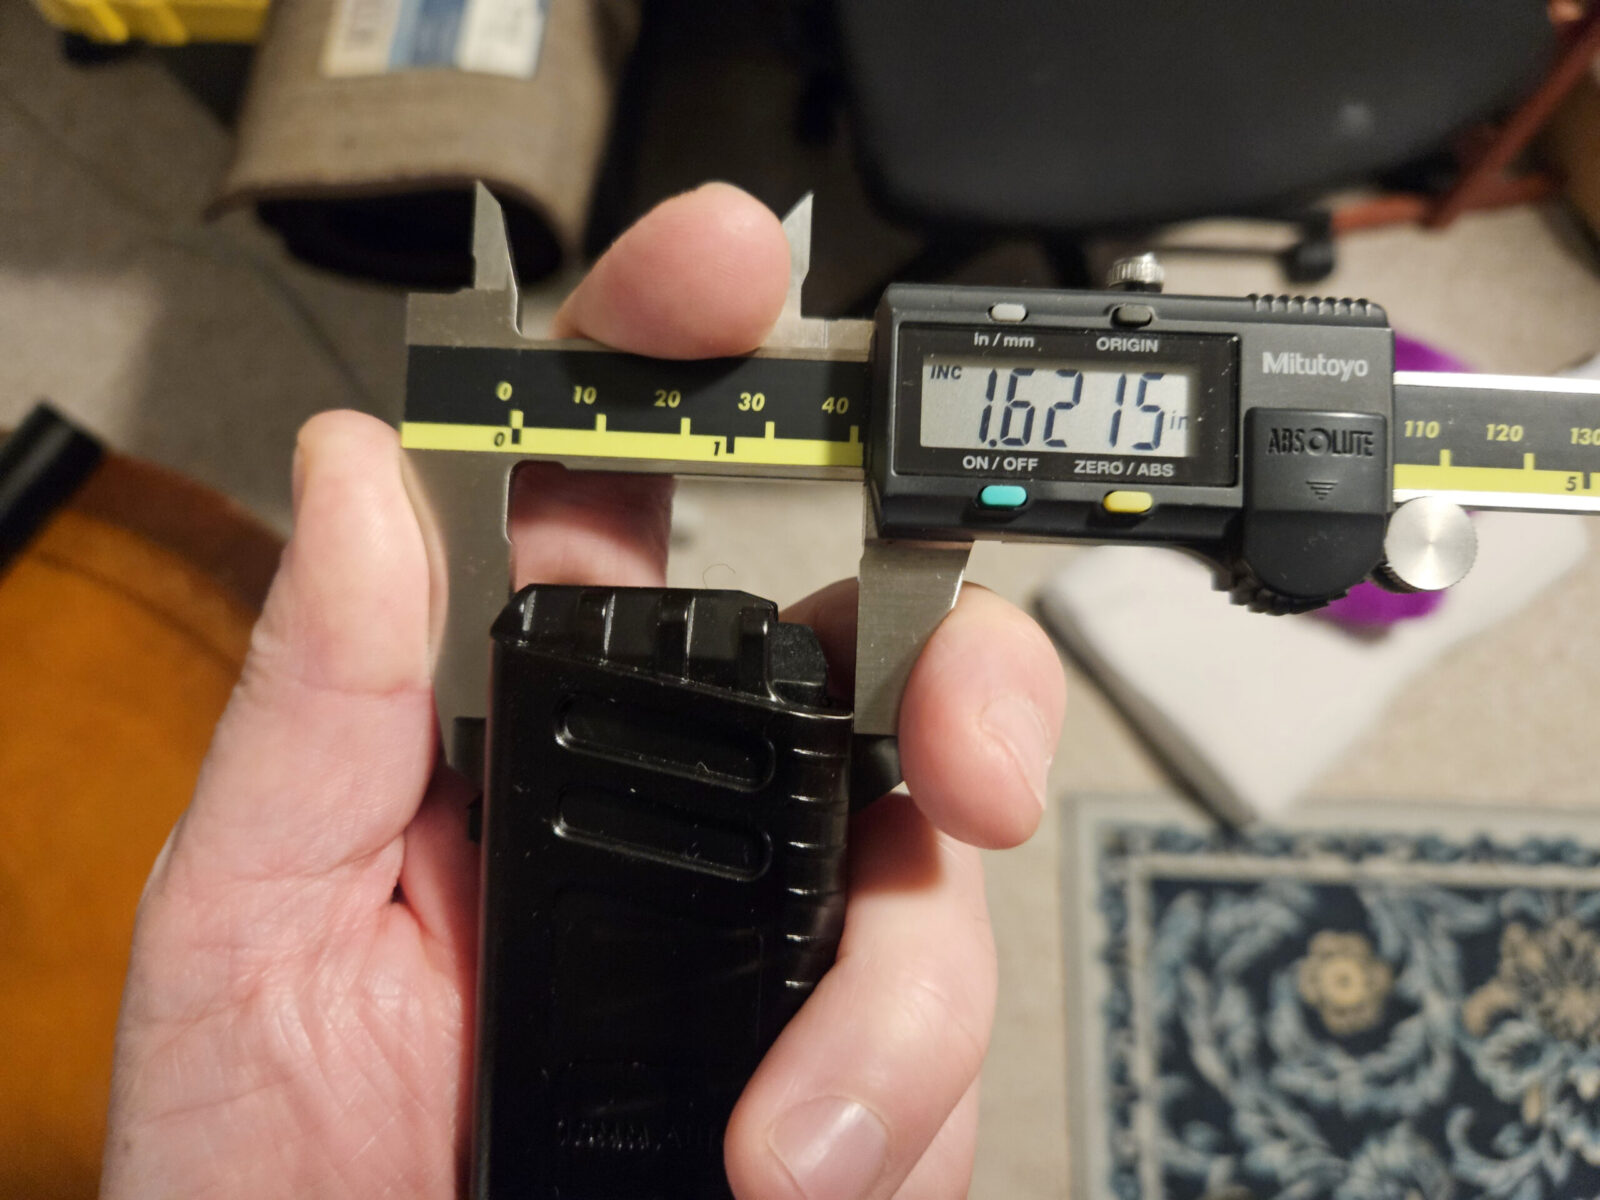
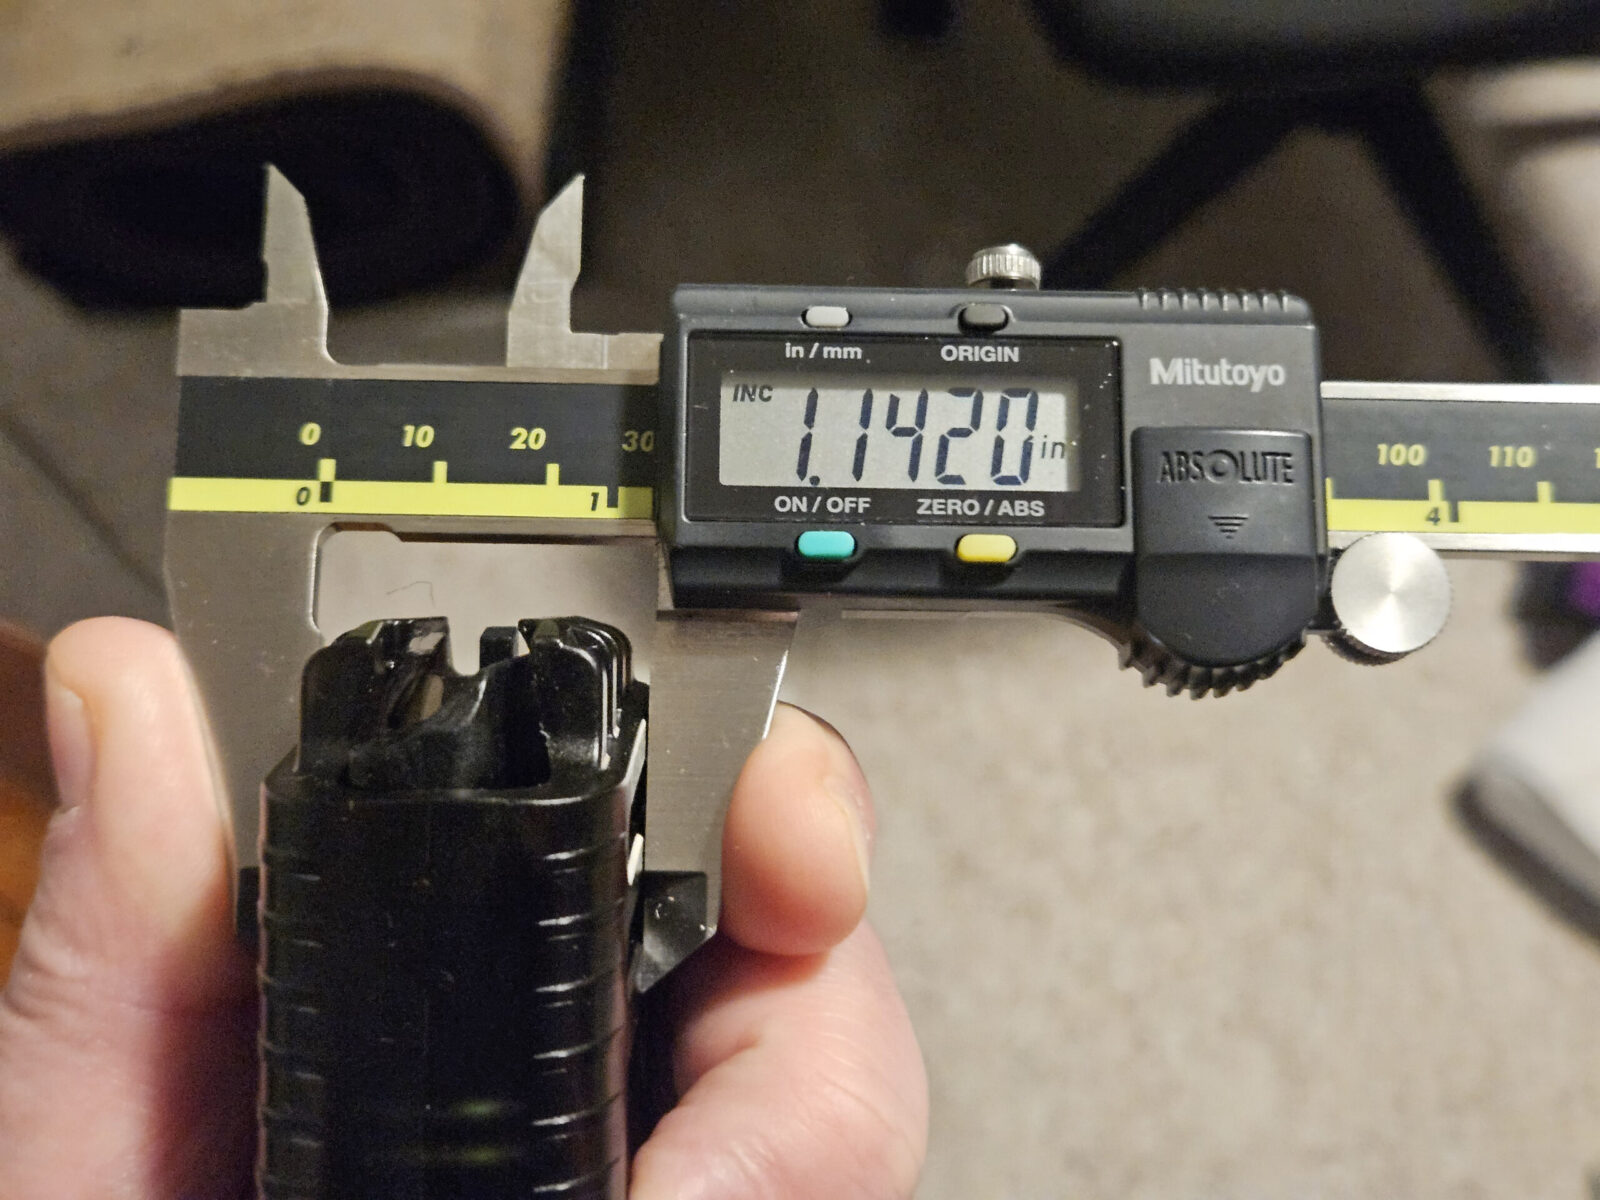
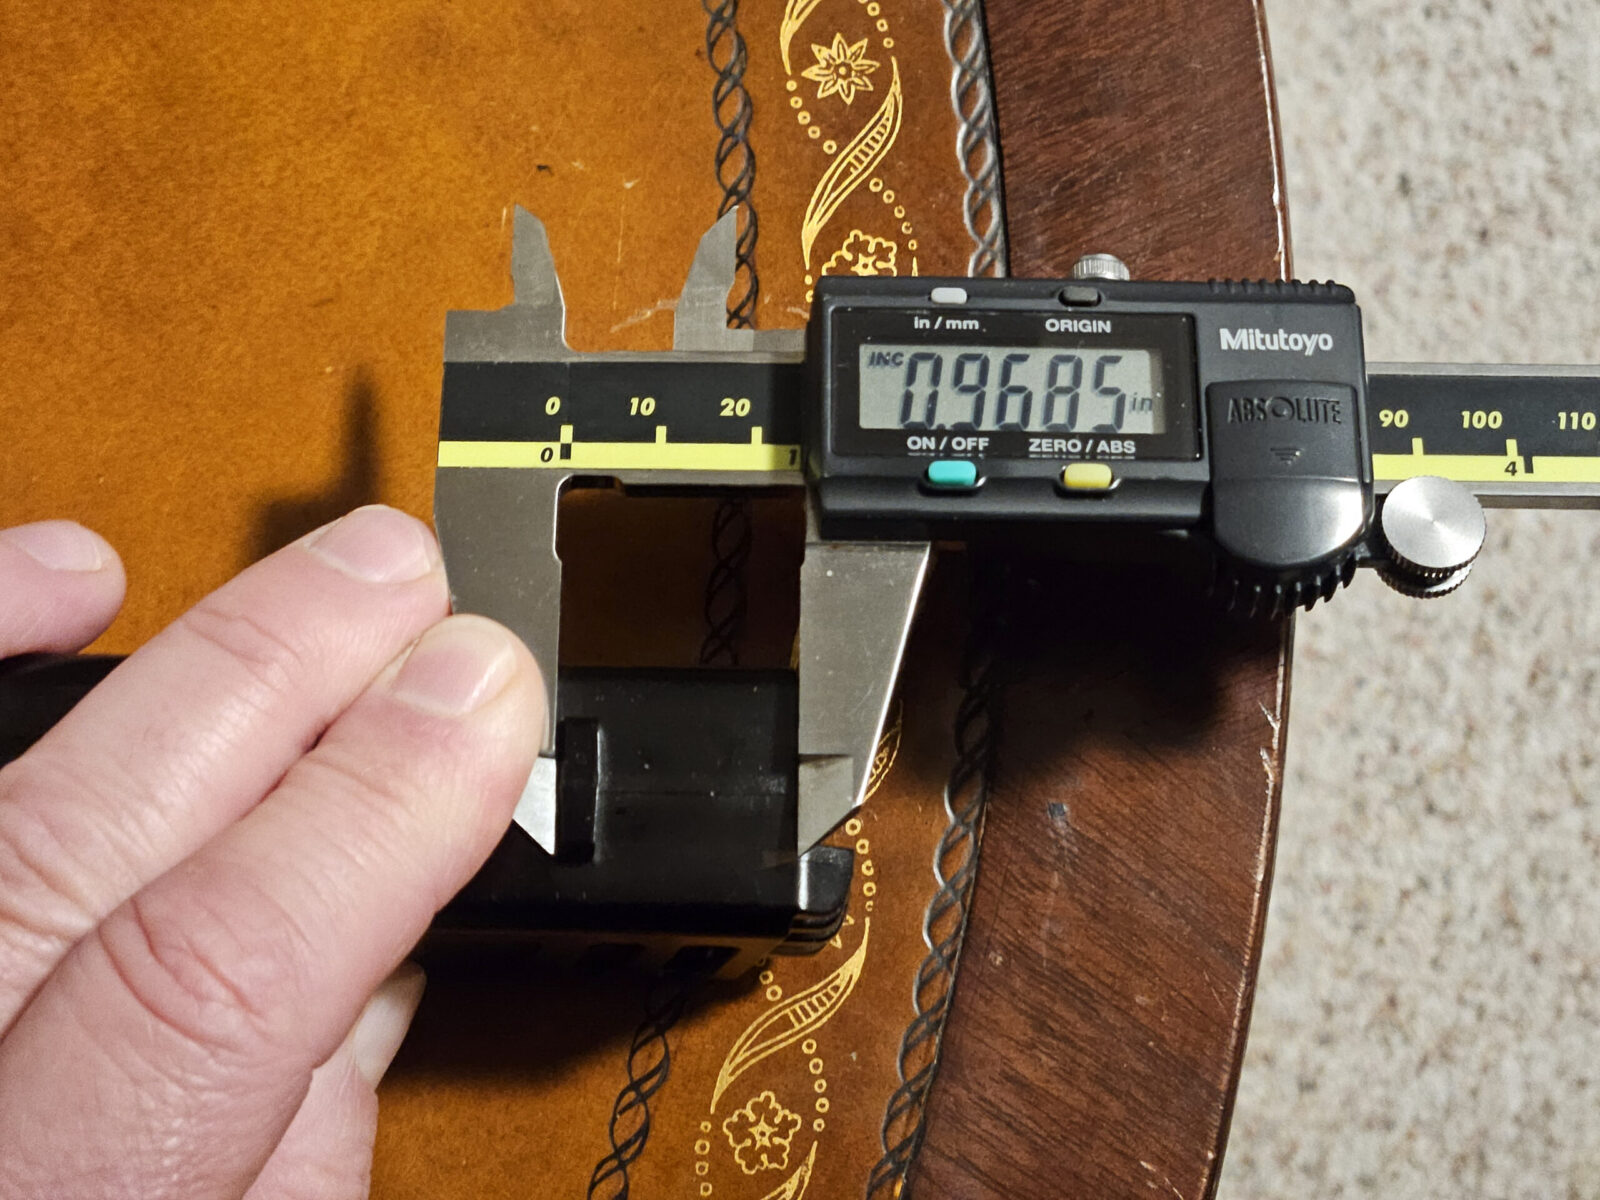
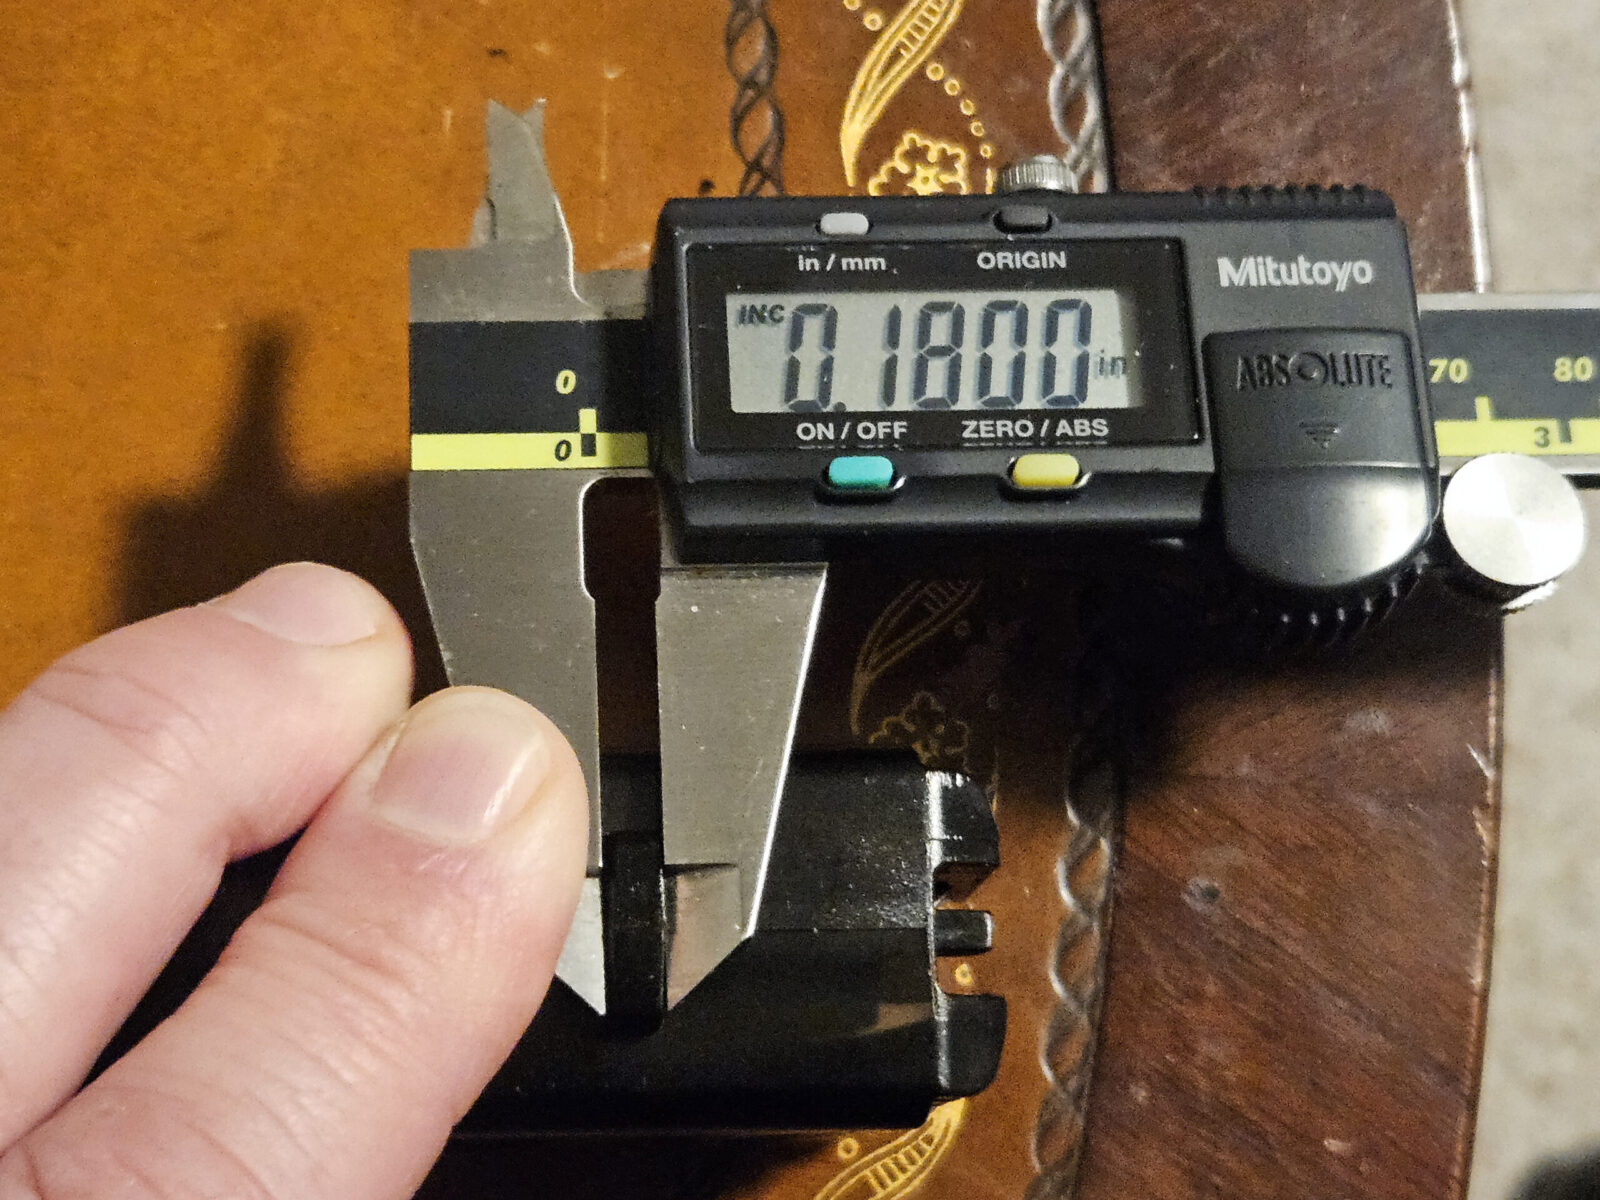
The girth of the heavily built mags means most loaders will not fit them. On the other hand, those are some impressive reinforcements on the mag lips and thick walls.Front to back is about 1.62″Left to right is approximately 1.14″Distance from the botttom of the locking tab to the top of the magazine body is about 0.96-0.97. It’s molded so there’s a bit of ballparking as to the exact top.The magazine locking tab is about 0.18″ thick.
Playing a hunch
Ok, so I did some searching on .40 caliber and 10mm UMP loaders and then played a hunch. I make magazines for Rock Island Armory’s A2 HC .40 and 10mm pistols. They use a staggered magazine and my source tube for the custom mags I make is actually a Mec-Gar .45 mag. What if a UMP .45 loader would work? I had a pretty good hunch it would so I started researching them.
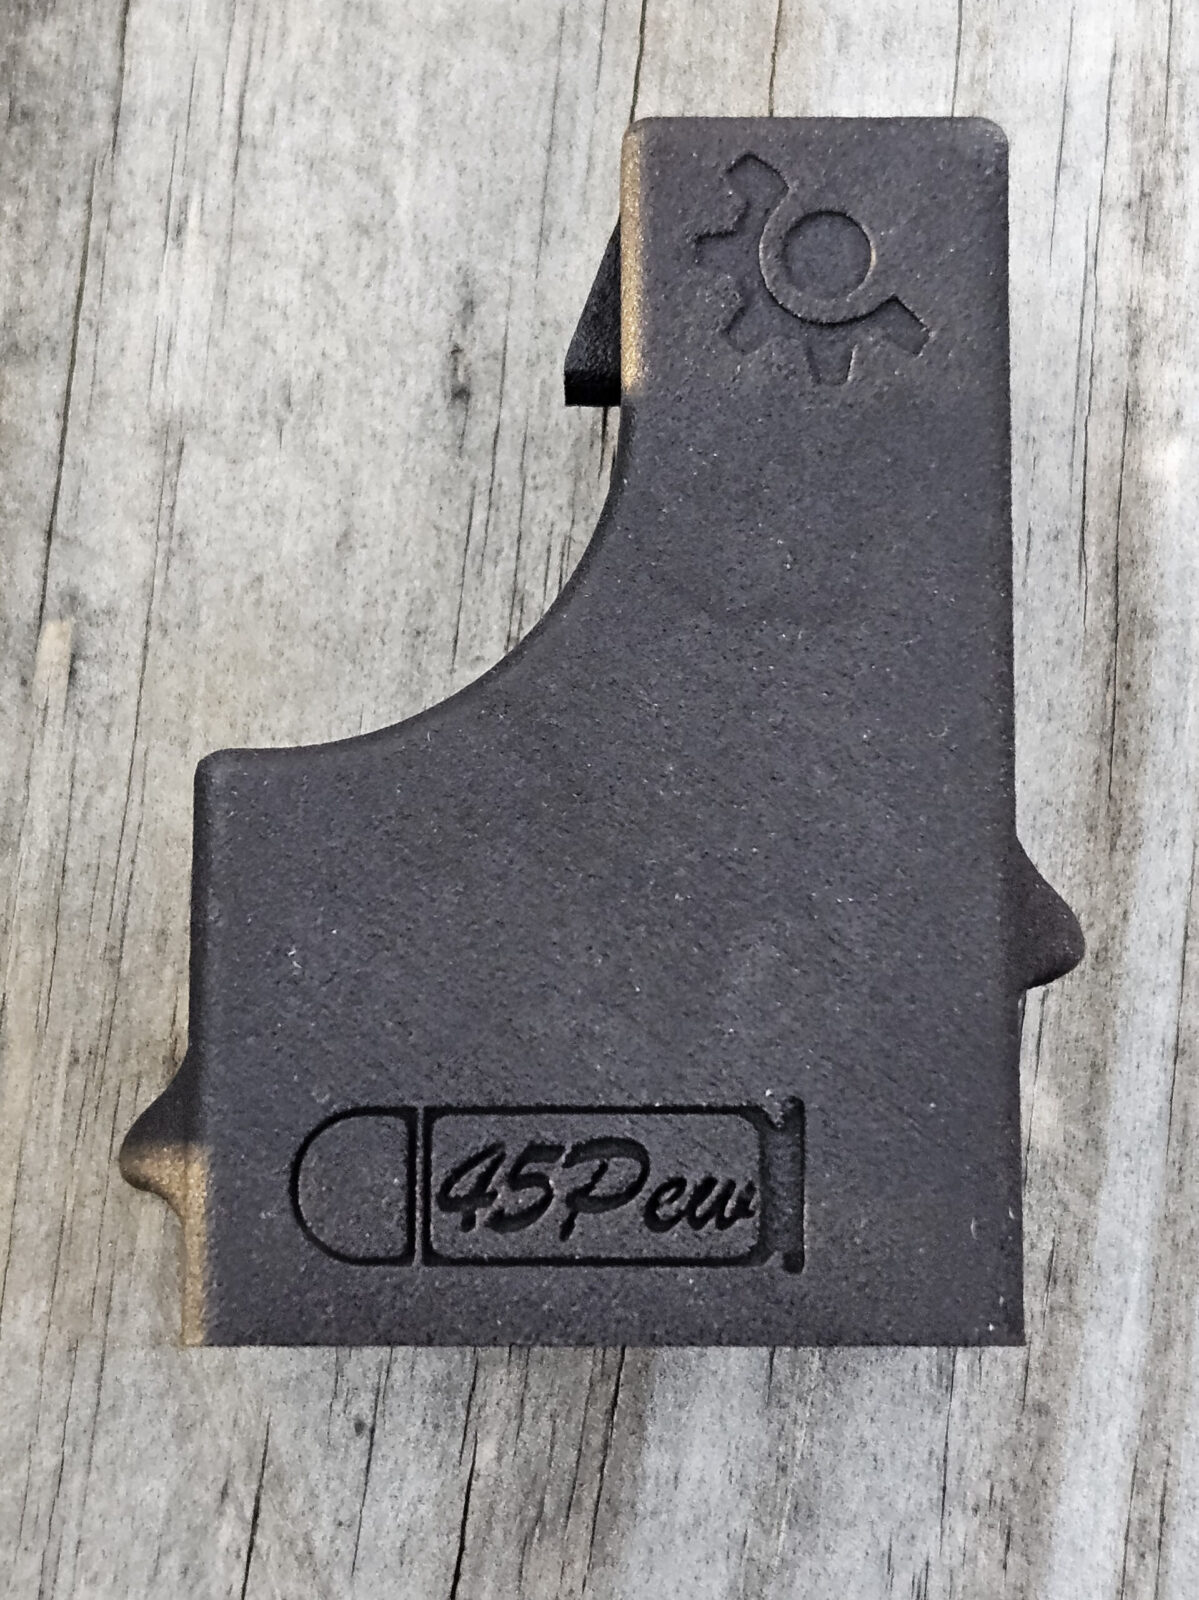
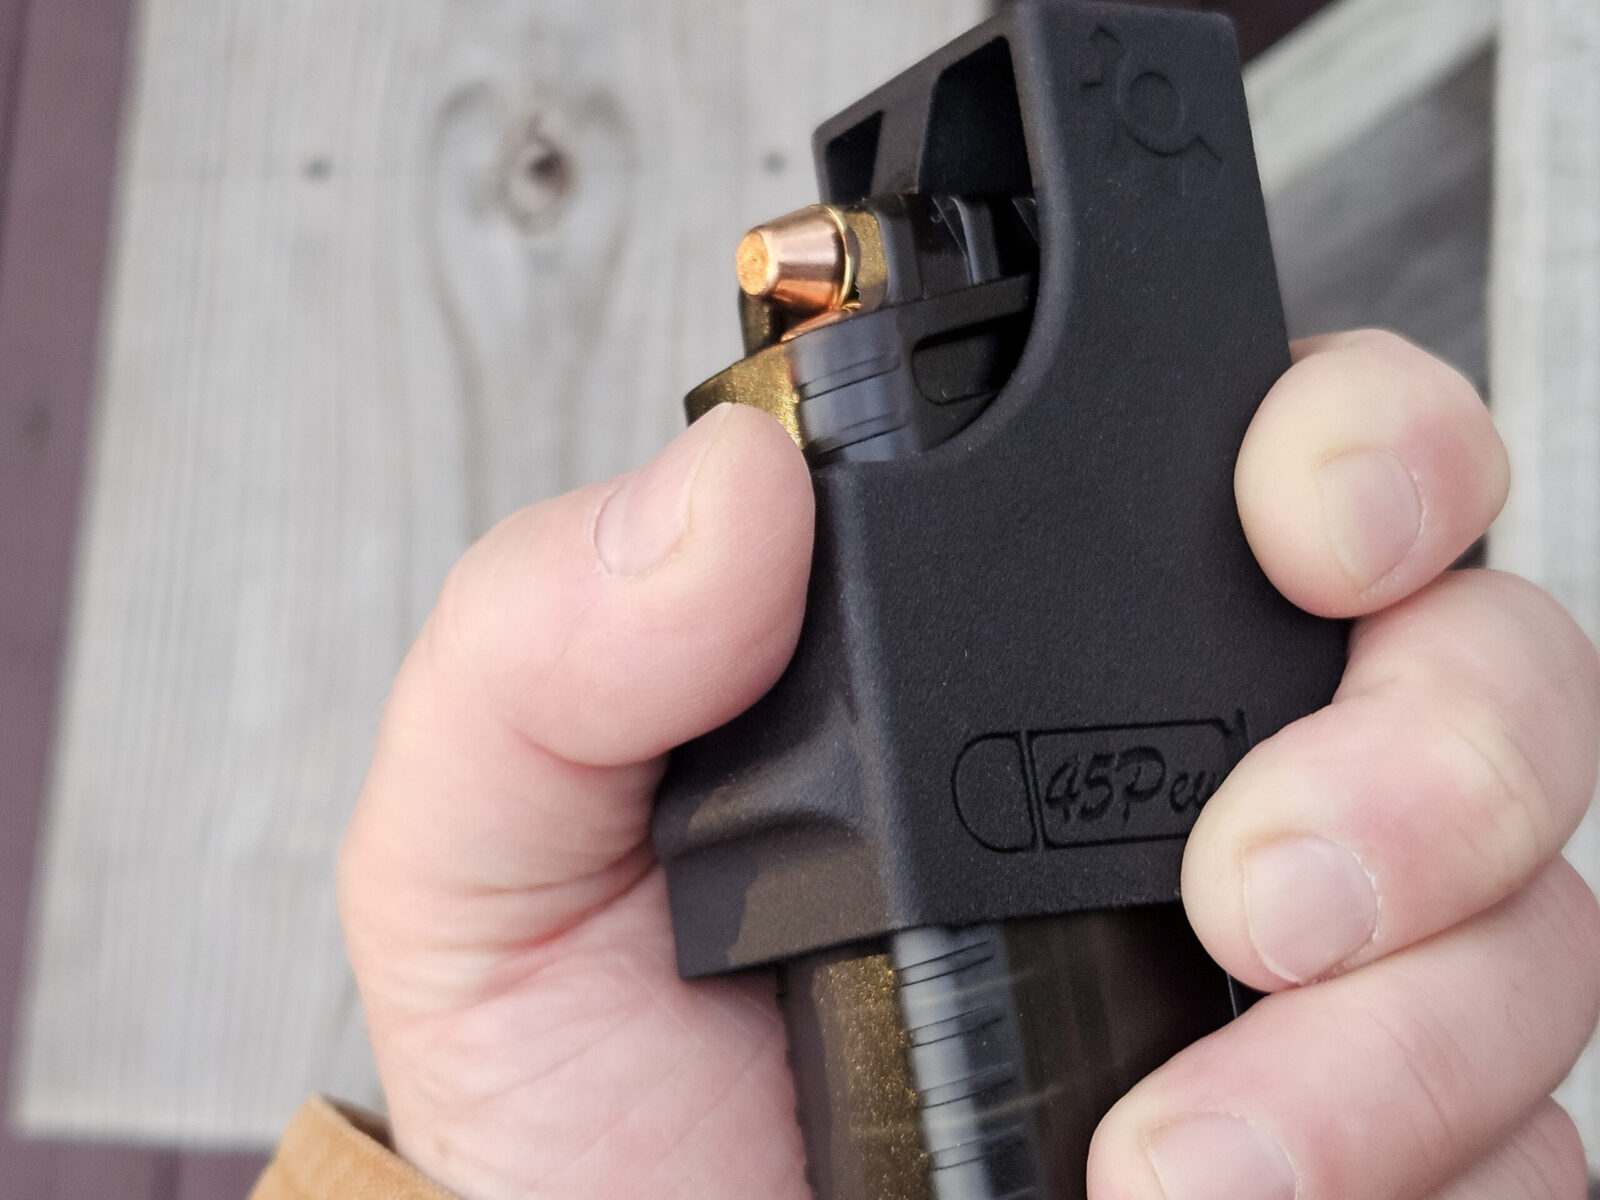
The UMP .45 is much more common so I had options. The one that caught my eye was from Custom Smith so I ordered it and must say I am impressed.
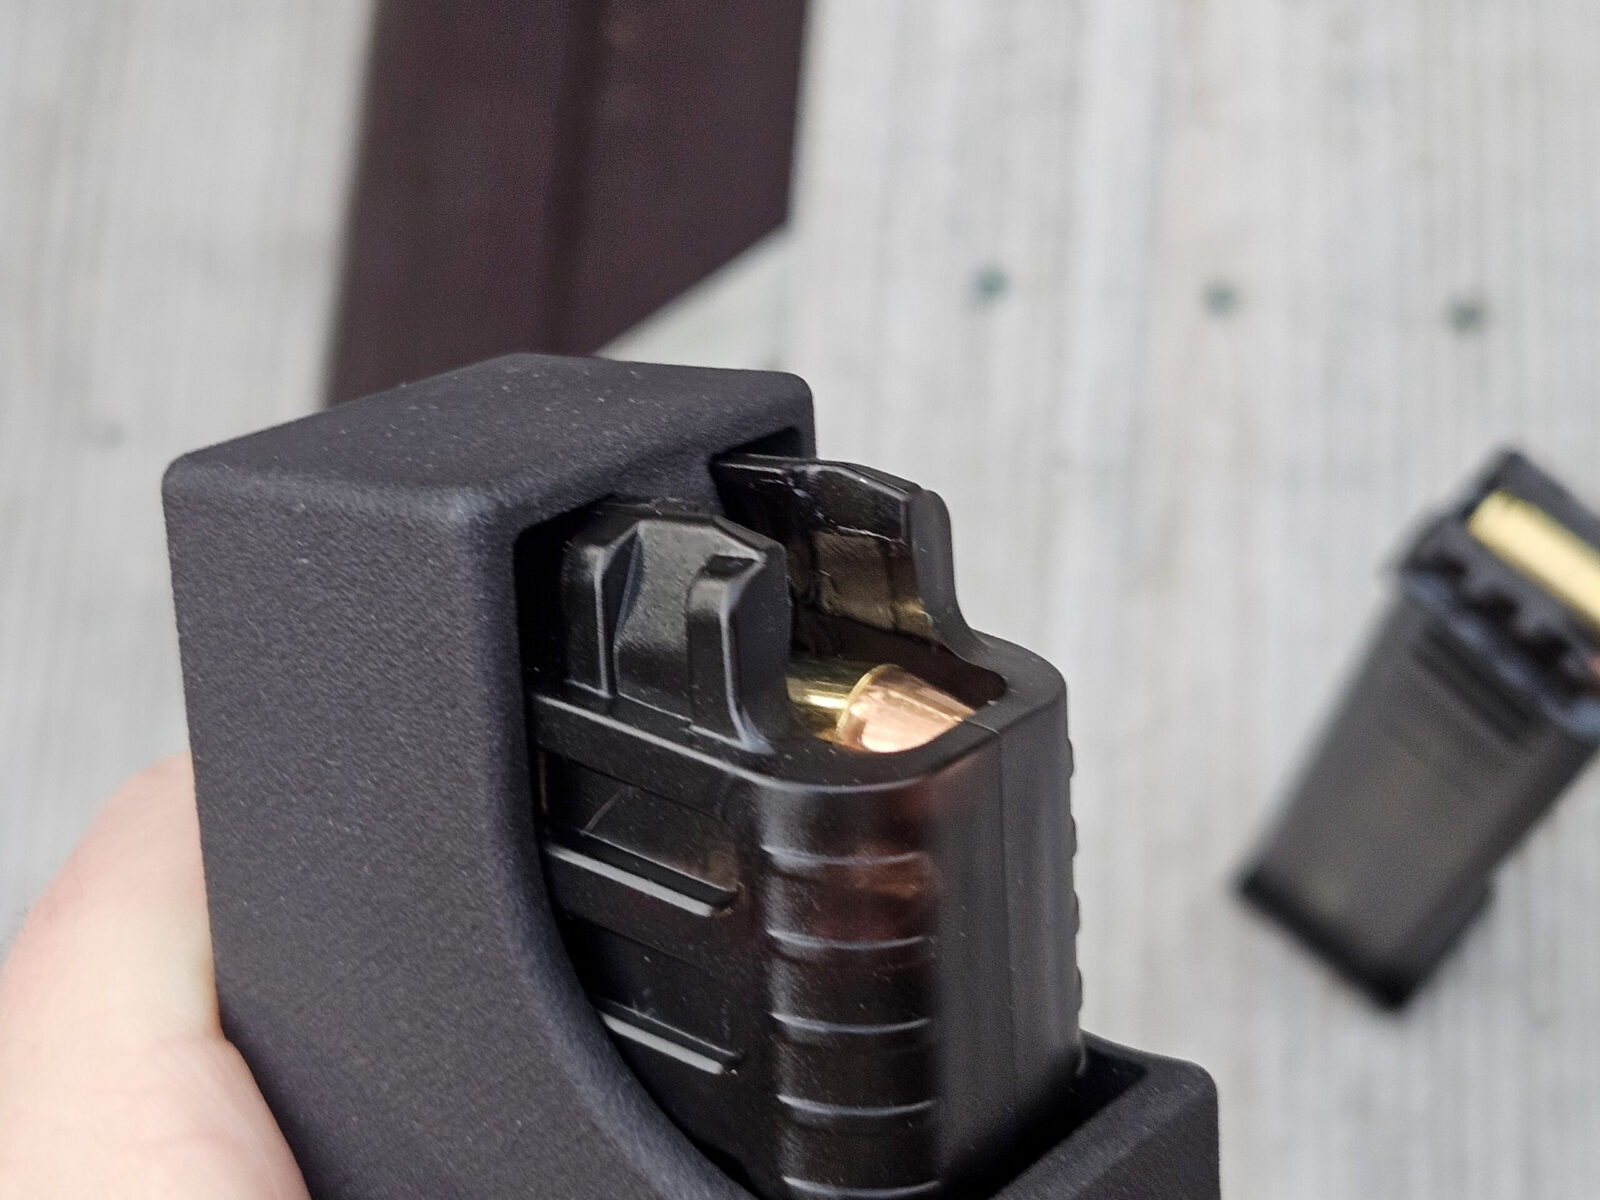
It is 3D printed and nicey done. Everything seems thick enough to have proper rigidity. I like finger rests on the sides to give your hand something to get hold of. I promptly loaded two mags super easy. You push down, slide the cartridge in part way, lift the loader up, slide the cartidge in the rest of the way and repeat.
Side shotThe ram that pushes the cartridges done is beefy and nicely done.Inside is nice and clean also.The UMP .45 loader fits great.The ram does a great job pushing the last cartridge down so you can slide the base of the next cartridge part way in. You then move the loader out of the way, push the cartridge all of the way in and move on to the next round.Parting photo – it works great.
Summary
Grand Power Stribog’s 10mm model uses magazines based on the HK UMP design. The Grand Power magazines are affordable and relatively easy to find. You may need to dig just a bit as the 10mm Stribog sales are outpacing magazine availability but I am sure the mag availability will catch up.
No, I wasn’t paid to write this – I had to buy it because I wanted the 10mm Stribog and manual mag loading kills my hands.
By the way, S&B 180 grain FMJ 10mm is my goto range ammo. It’s affordable and runs great. I use it for breaking in and target practice with all of my 10mms.
Have you ever wondered how well your magazines are going to hold up? I know I’ve wondered that not to mention there are tons of armchair warriors on the Internet offering up their opinion or parroting others. So, what are the facts?
Hope this helps you out – I found it very interesting. Finally results from a real study that you can review. Kudos for them to take the time and money to produce and share this!
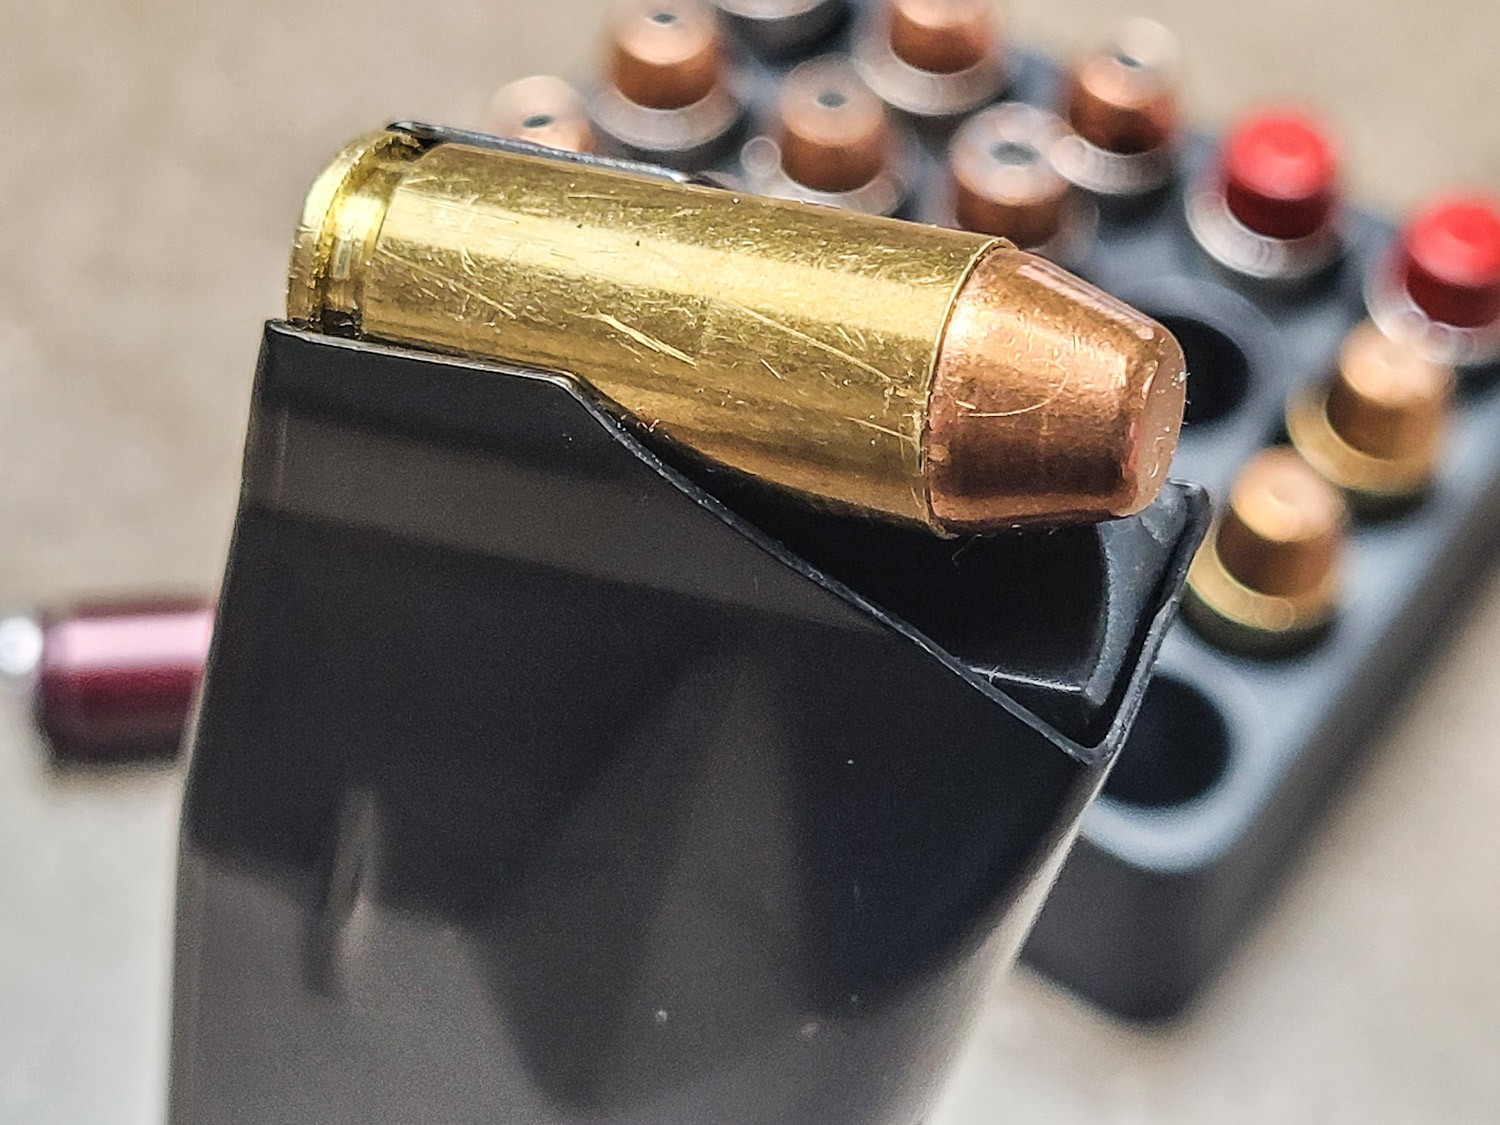
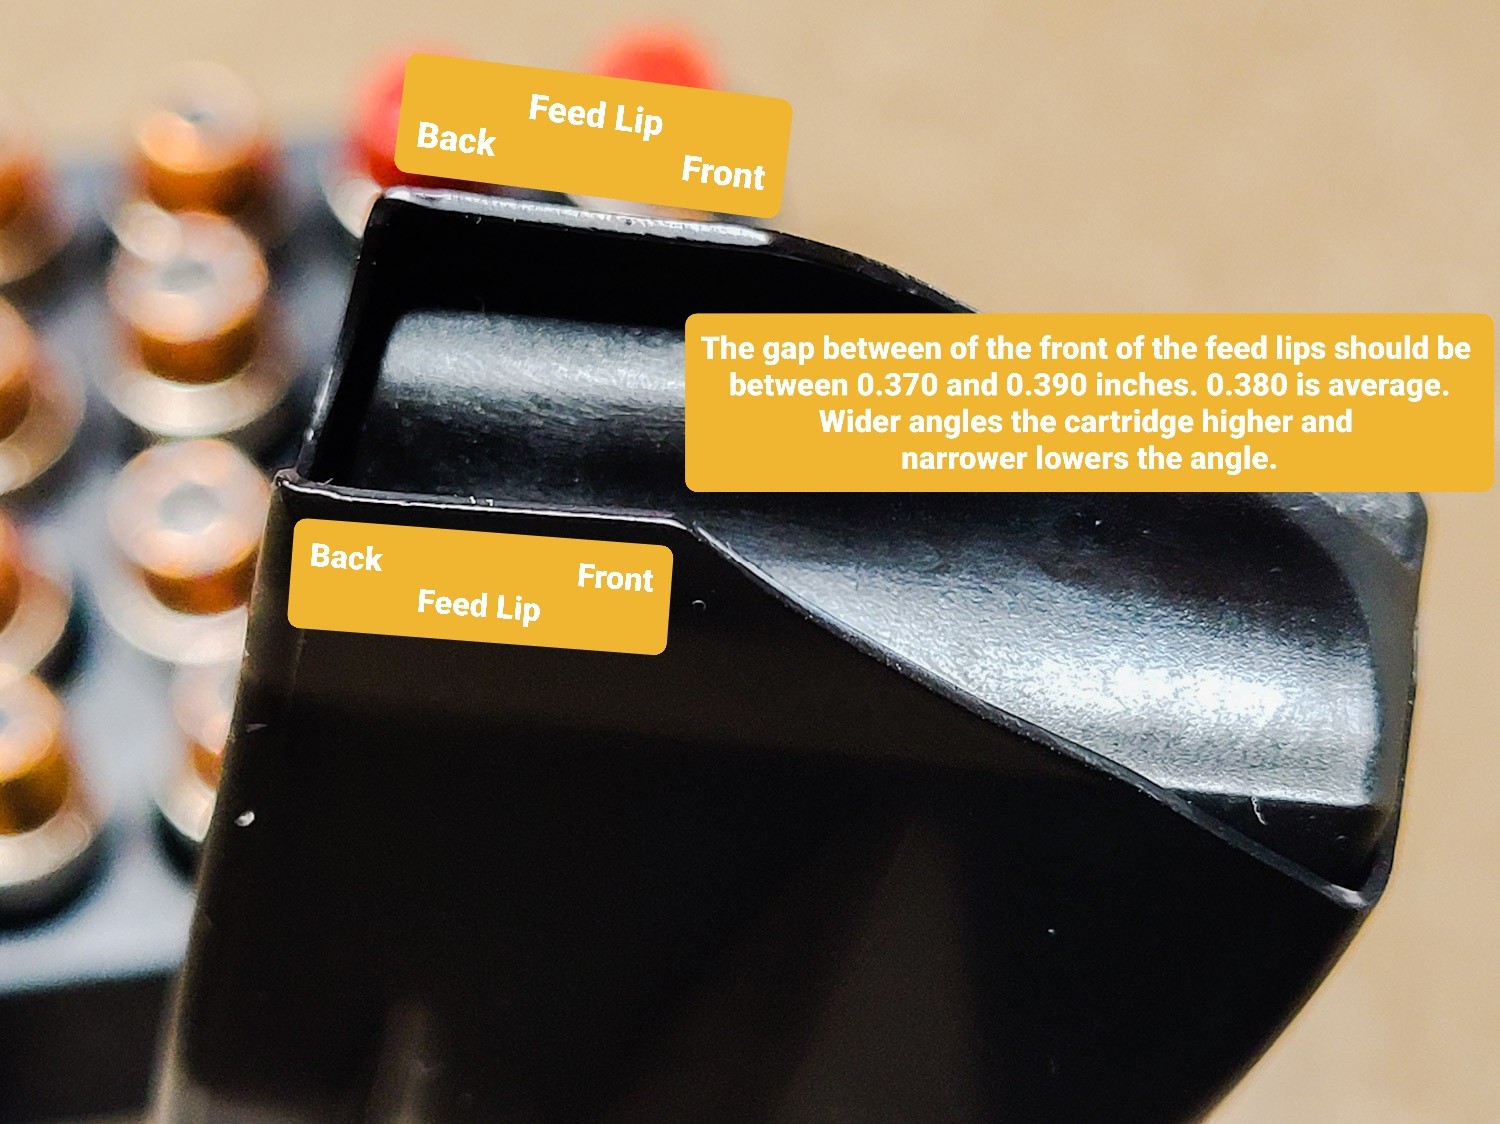
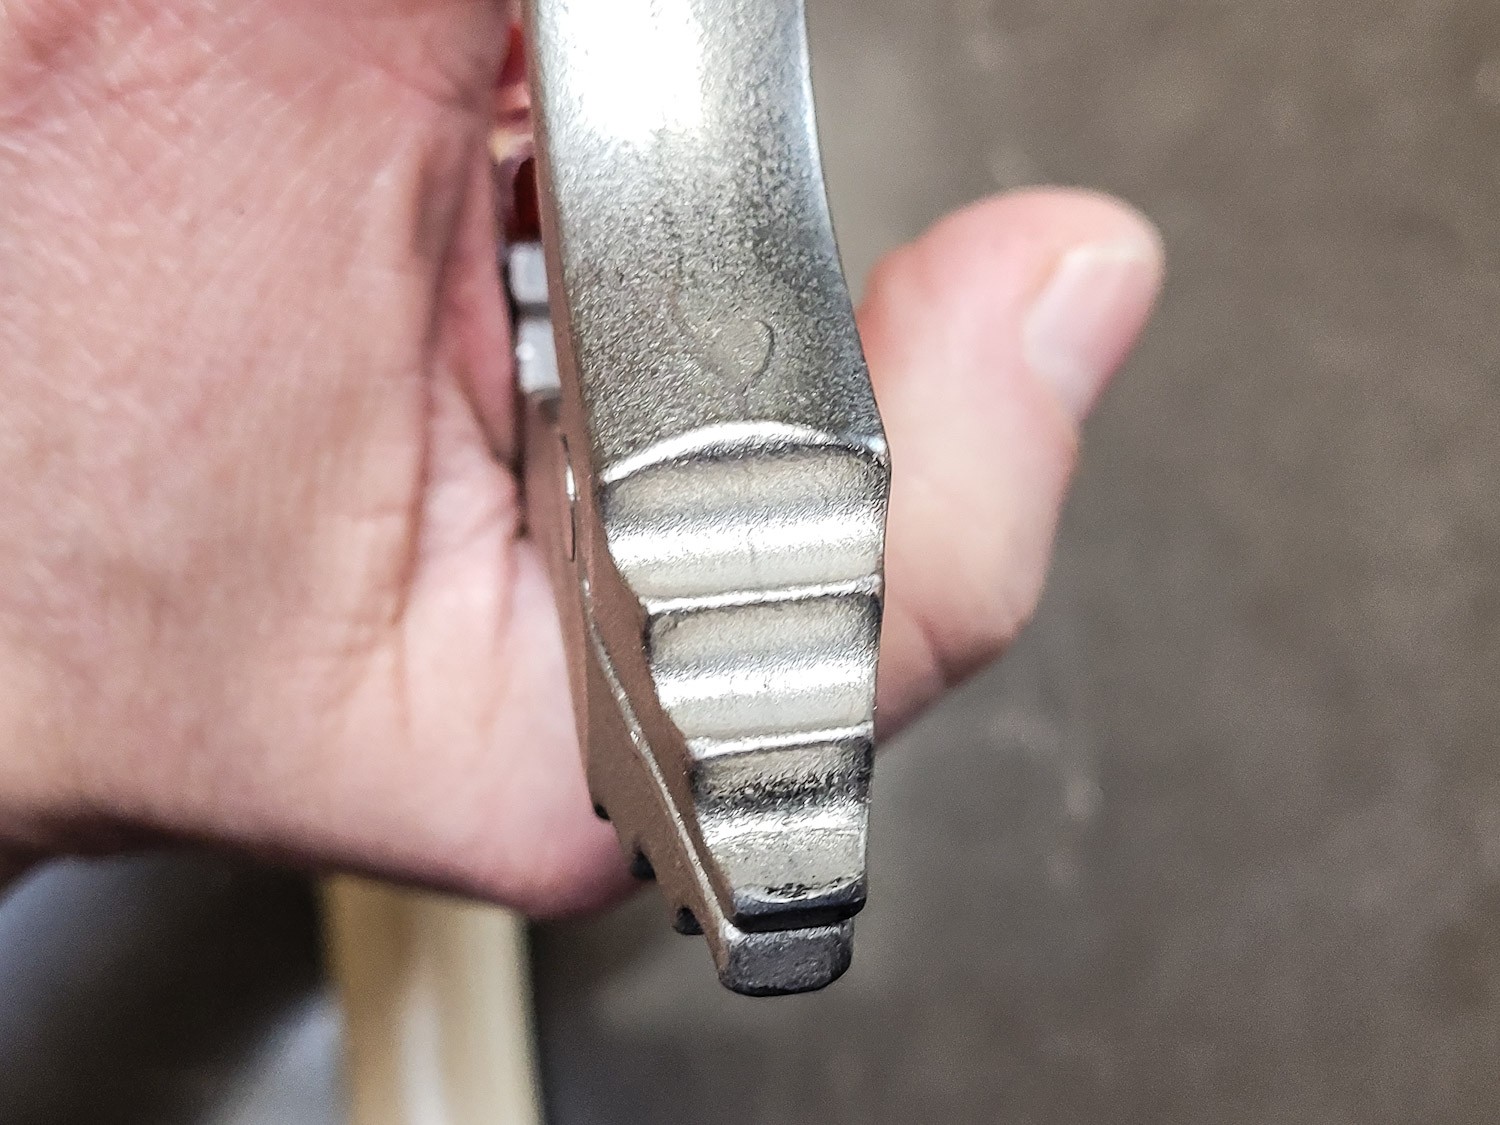
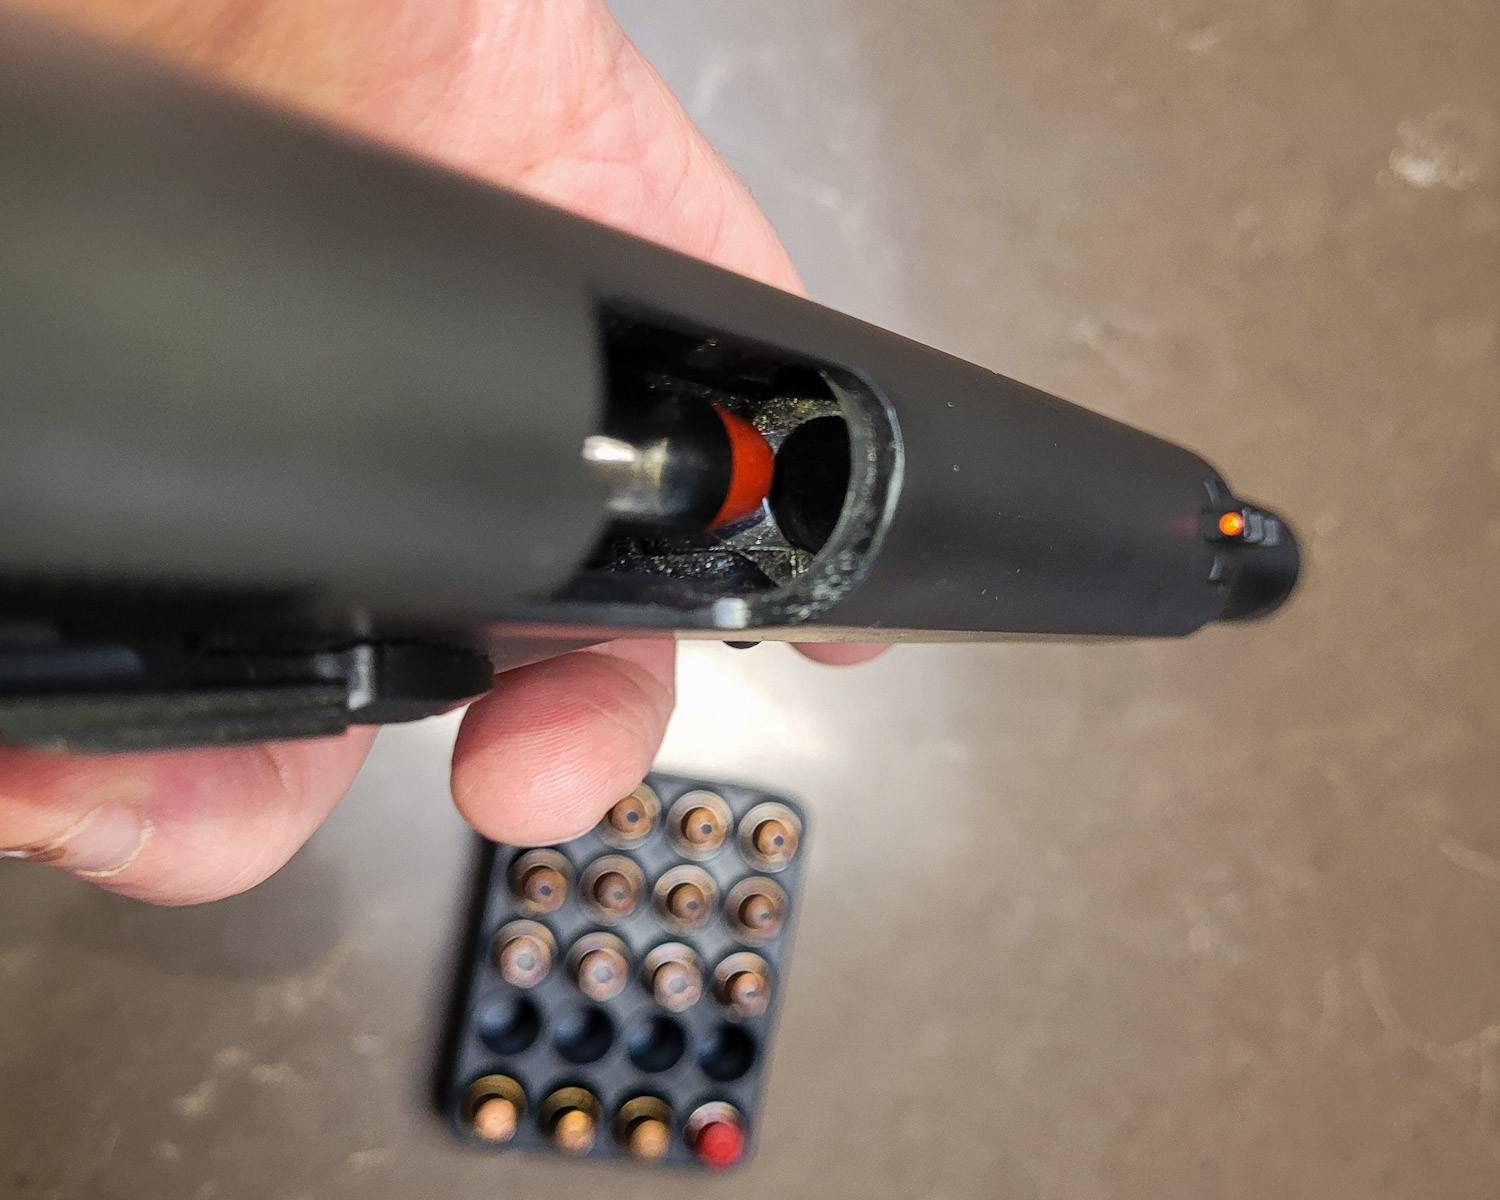
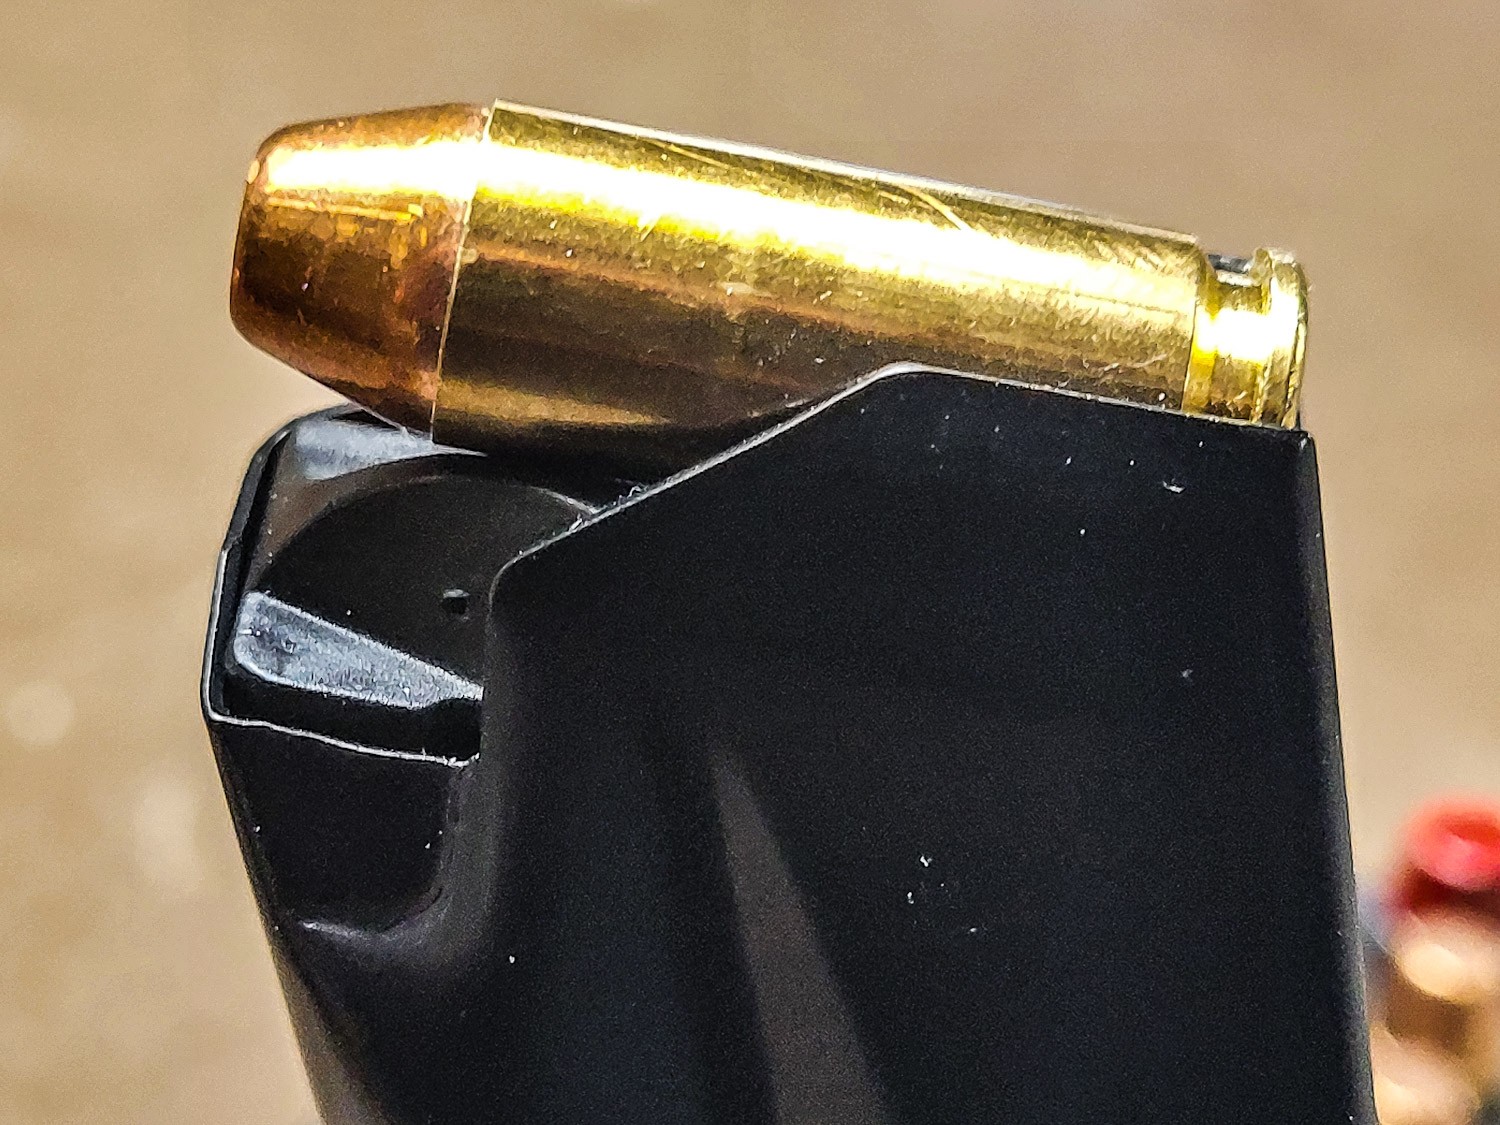
S&B 180gr FMJ round. The black “flaps” over the back of the cartride are known as the “feed lips”. They serve to limit how far the cartridge sticks up, the vertical angle as well as the left-to-right angle. On our magazines, it is the front of the lips, or right right edge of the lips in this photo, that are key for proper positioning of the round.
When I first started the magazines, I was setting the front edge of the feed lips between 0.36 and 0.375. In talking with customers who have bought the mags and were having feeding problems (notably stovepiping) , when the magazine lips were down at the lower end of 0.360″. I’d walk them through setting the gap for their pistol and at the end, I would have them measure the final front lip gap that worked. It was usually between 0.370 and 0.390″ and averaged 0.380″.
June 2024: The nominal front feed lip gap is 0.375 +/- 0.002. 0.380 seems to be the average maximum but the best average gap is that 0.373-0.377 range. Your pistol might vary so look at how the bullet points towards the chamber – either straight in or just slightly below. Some tinkering will help you figure out what is best for your pistol and the types of ammo you are shooting.
Here is a photo with labels.
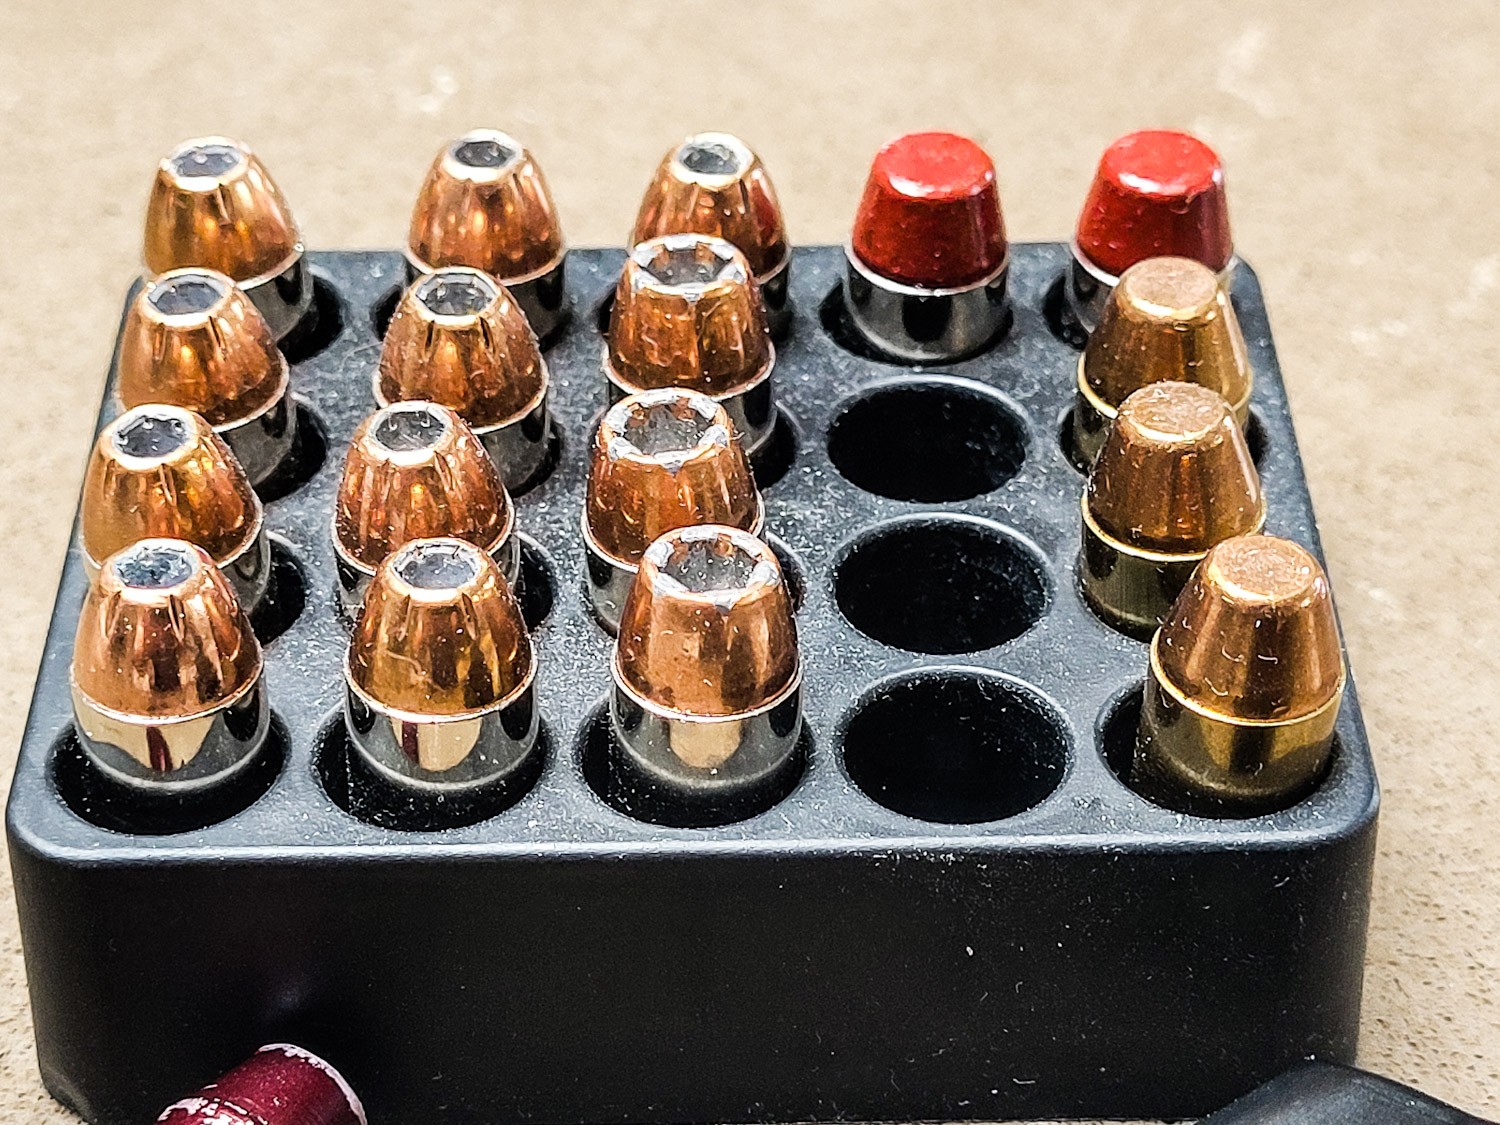
There are a lot of different 10mm cartrdiges on the market. Look at the different bullet shapes – the different angles can all affect reliable feeding which is one of many reasons why you may find one pistol likes one ammo and can cycle it all day long but not another.
Adjusting the Feed Lips Isn’t Hard
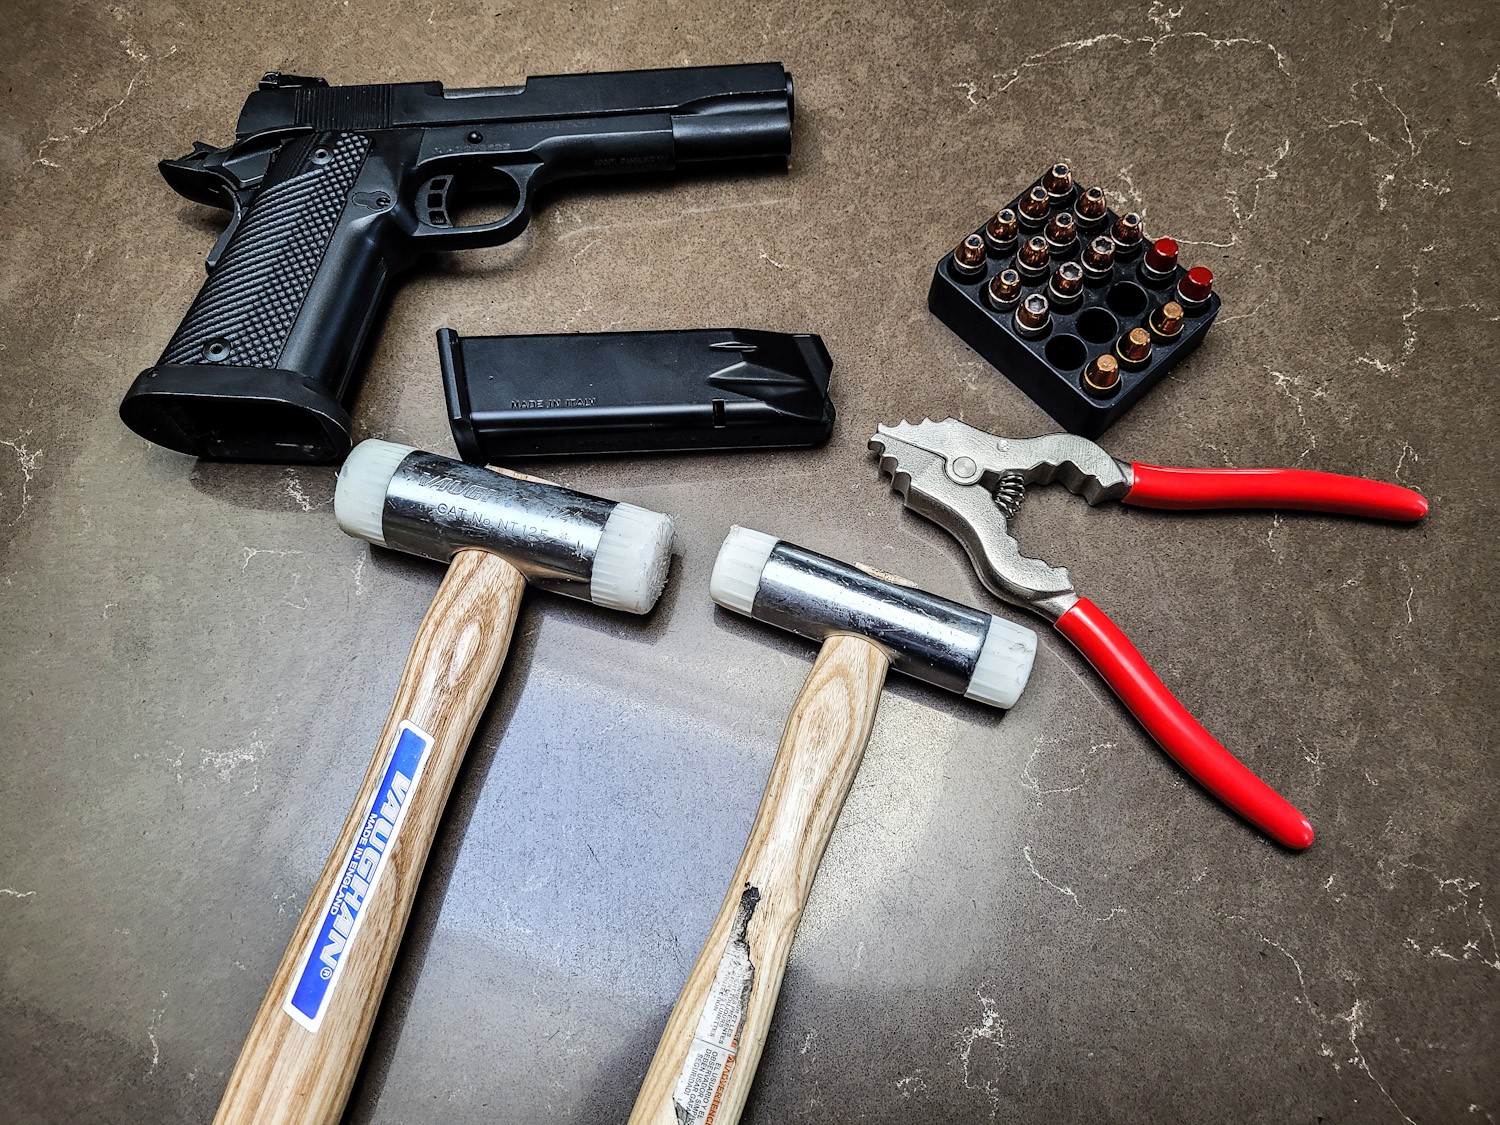
I’d recommend the following tools for the adjustments:
1/2-3/4 pound non-marring mallet – or even both. A lighter one for fine adjustments and a heavier one for coarse adjustments. It doesn’t take much to bend the lips. (May 2024 Update: I started using sheet metal hammers maybe a year and a half ago and find that they work great. The force of the strike bends the metal very nicely and doesn’t hurt the finish so while the photos all say use a non marring mallet – I would tell you to get some basic light sheet metal / body work hammers. Cheap ones break down quickly as the face of the hammer is weak so read reviews and get a good one. You just need a decent flat face and not a lot of weight – look at Martin, Fairmount, Performance Tool, etc.)
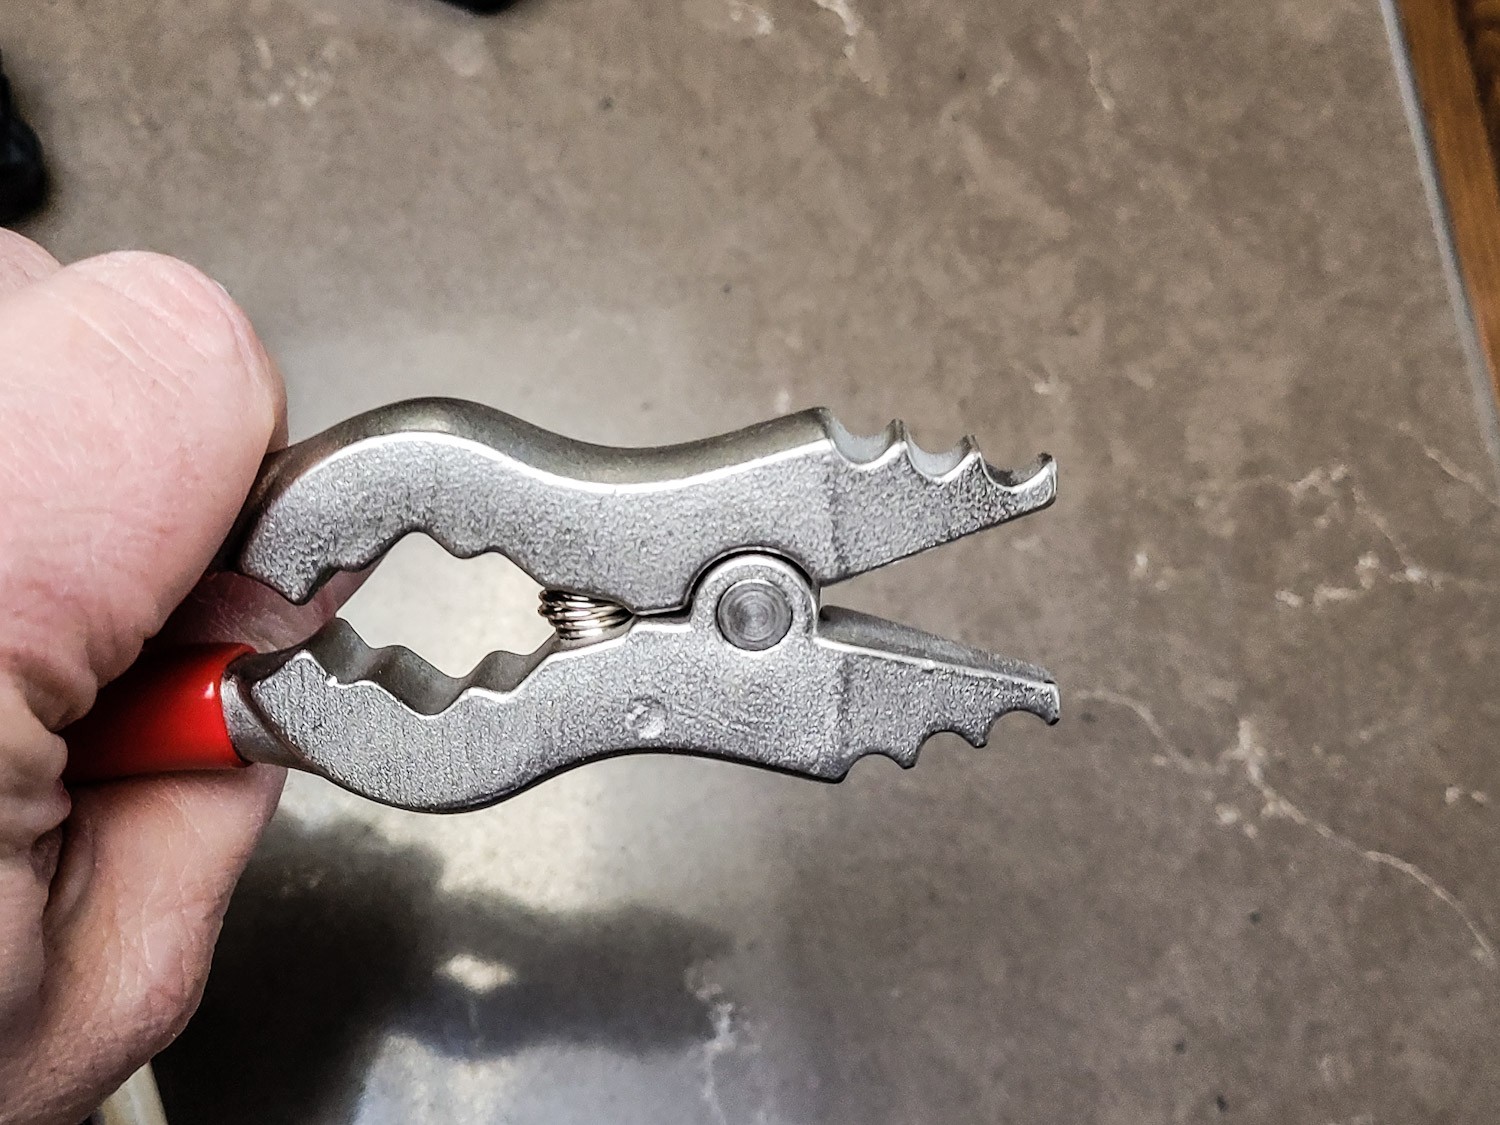
A pair of snap ring or malleable chandalier pliers that can spread the lips open. I highly recommend the Westinghouse 70099 pliers specifically because they have nice wide jaws that really help you make solid contact with the lips. Other brands have narrower jaws, probably to lower costs, that work but want to roll over on you while you are adjusting.
A pair of straight plastic jawed pliers come in hand if you need to tweak the lips left or right. I like the Beadsmith Parallel Pliers with nylon jaws for this work.
A vise with non-marring jaws or some means to hold the mag without crushing or excessive scratching
Use Zoom Snap Caps to test cycling vs live ammo. In general, snap caps or action proving rounds are a good idea to avoid misfires. There’s also a second reason – the recoil springs in the RIA pistols are robust and if the bullet from a live round or dummy round (a bullet loaded into a case that does not have powder or a primer) smacks hard into something, it will get pushed back further and further into the case plus they deform easily. All of my testing is done with solid aluminum snap caps now. I use A-Zoom 10mm Snap Caps for both my 10mm and .40 S&W mags. I’ve had positive feedback from owners of .40 S&W pistols so I know they work for both. Note I do NOT use A-Zoom snap caps for 9mm as the bullet shape does not remotely reflect common 115gr FMJ ammo at all.
From left to right bottom row: Vaughan 3/4 pound NT-125 mallet, Vaughan 1/2 pound NT-100 mallet and Westinghouse 7009900 lighting fixture chain pliers. The Vaughan mallets hold up great – the plastic is both pretty solid and robust so tapping in the feed lips goes very smoothly.
The Westinghouse pliers make opening the feed lips wider a very easy job. You could also use snap ring pliers but they will not distribute the pressure the same or be as easy to use.
The Westinghouse pliers have wide jaws – meaning left to right in the photo above. I’ve bought a number of chain pliers and the cheaper ones do not have as wide of jaws and have a tendency to want to roll when you are applying pressure. They work – but take a bit more control on your part.
Procedure to follow
Ensure your pistol is unloaded and no ammo is immediately nearby that might get accidentally loaded during testing.
Okay, let’s walk through the steps:
Checking Cartridge Alignment
Lock the slide open
Put a snap cap in the magazine
Insert the magazine into the pistol
From different angles, look at where the catridge is pointing in the chamber. Imagine a line from the center of the bullet going straight forward – where is it hitting? You will want to make small adjustments and test over and over until you get that bullet pointing into the center of the chamber (no, it does not need to be perfect).
The front edge of the feed lips are adjusted such that the cartridge is aiming into the middle of the chamber vertically and horiztontally.
Adjusting The Vertical Angle
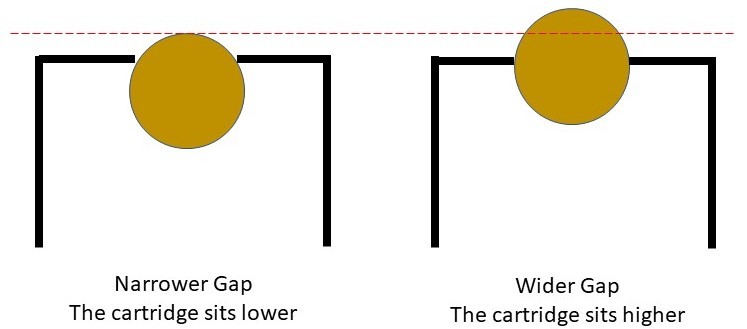
On most mags, including our’s, the angle the bullet sits at is adjusted by changing the gap of the front mag lips. The back can’t be adjusted because it will buckle or crack given the right angle bend to the back. What happens is that by opening the front of the mag lips, the front of cartridge sits higher (meaning it is a steeper angle). Correspondingly, by narrowing the front of the mag lips, the cartridge can’t rise up as far and the bullet sits lower.
The circle representing a cartridge is the same size in both figures. By making the gap wider on the right, the circle rises up higher before it contacts the black feed lips.
The angle is often the biggest problem. If the bullet isn’t angled enough, it gets stripped from the magazine by the slide and will either slam straight into the feed ramp and stop or it will hit, shoot up at a 45 degree angle jamming the pistol open – this is known as “stovepiping”. In both of these cases, you would want to open the lips up until there is proper feeding.
There is such a thing as the lips being too wide and hitting the top of the chamber or literally falling out. The feed lips need to be narrower than the case diameter of 0.421″ for sure otherwise the case will literally fall right through the lips.
I set the lips at 0.375 +/- 0.002 and you will need to see what works best for your pistol and the type(s) of ammo you are shooting. You may find you need a couple of mags at one gap for the type of HP ammo you are shooting and a couple of mags for FMJ. Personally, my pistols run all of my S&B, Buffalo Bore and Underwood ammo with that 0.373-0.377 range.
To open the front of the lips, use the chain pliers shown above on the front of the feed lips. It doesn’t take much pressure to open (or close) the feed lips so you will need to get the “feel” for how much to squeeze.
To close the front of the lips, tap the left feed lip in and then the right feed lip in equal amounts using the mallet. If you aren’t careful then you are liable to have the bullet pointing too far left or right even though the gap is the same.
Note, it doesn’t take much force with the mallet to move the lips. If you go crazy and crush the lips such that the gap dips below 0.33″, you may find that the throat of the magazine bent and the follower will not longer be able to pass. You don’t want this to happen so make small adjustments, measure and test over and over.
Adjusting the Horizontal Angle
You have a few ways to adjust the left to right horizontal angle. The first is to tap the lips in the direction you need. You can hit in the outside edge of the lip to close it or the right side to open it. I don’t use this because I find it takes too long.
I like to use parallel plastic jawed pliers that fit right inside the lip and let me easily adjust the angle with a good deal of control.
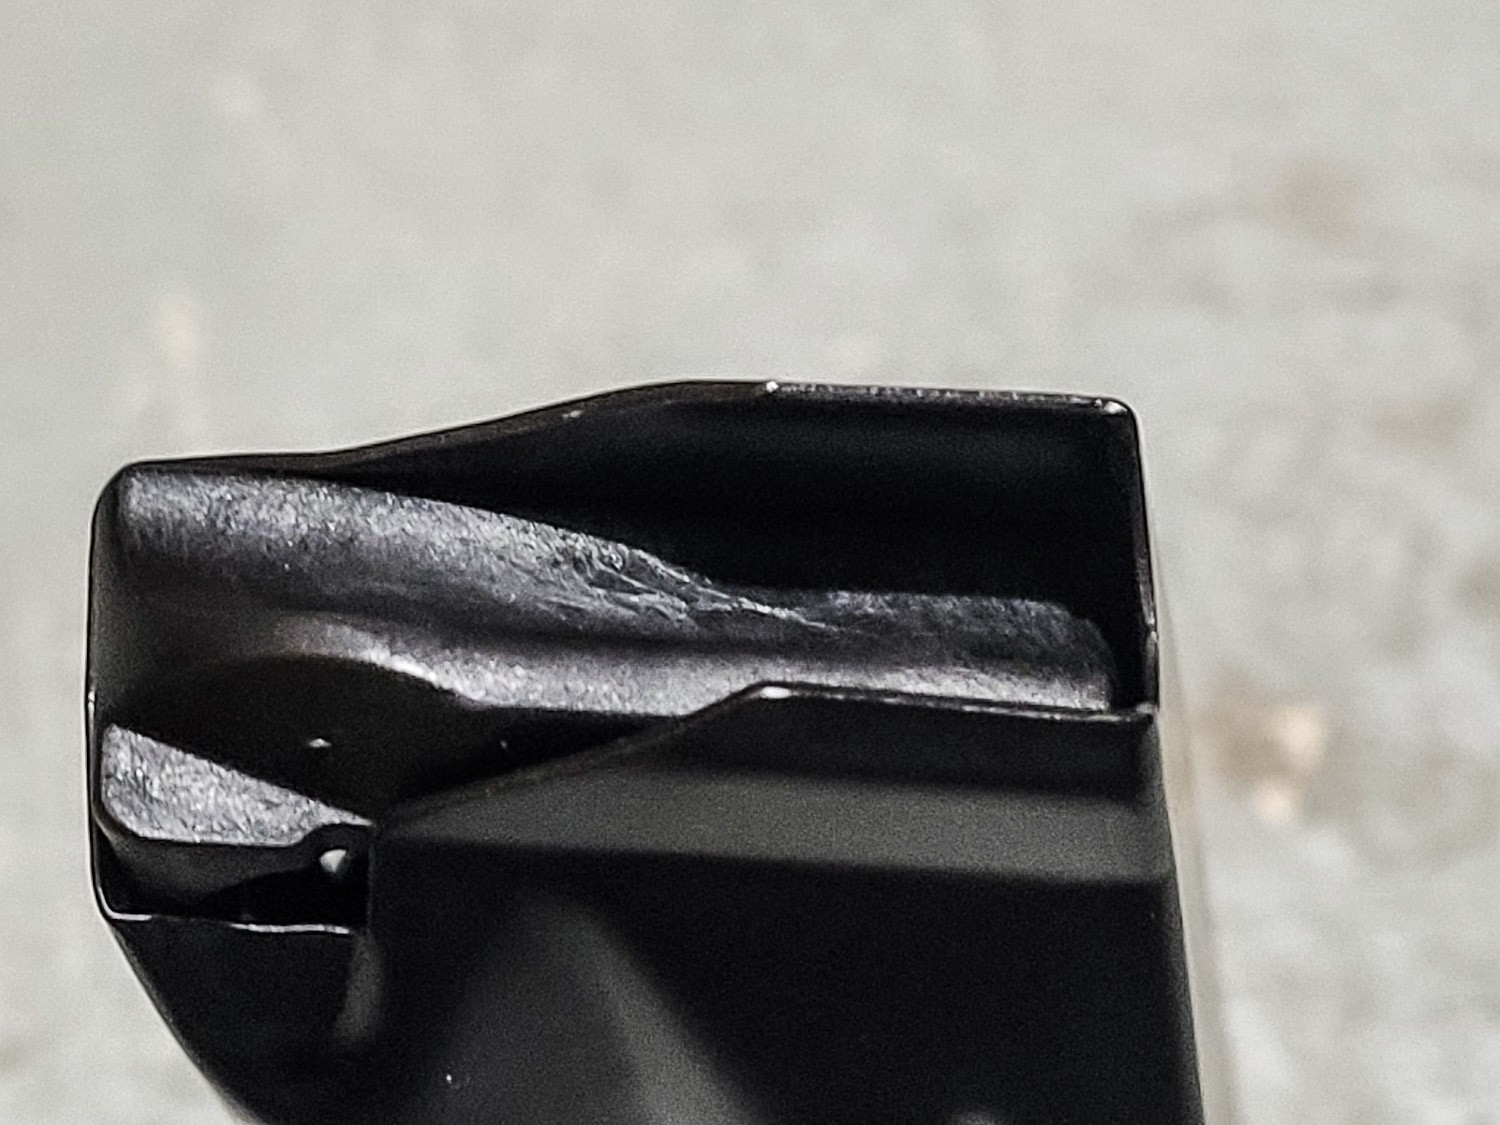
Here’s another look at the lips without a cartridge present.
Here’s a magazine with a 180 grain FMJ round by S&B loaded.
It really helps to number your magazines so you can keep track of feed lip gaps, which ones are having problems, etc.
Summary
Each pistol can vary slightly so each magazine may need different feed lip gaps. Going forward, the feed lip gap on our 10mm and .40 S&W magazines will vary between 0.370 and 0.380″. This gives you a starting point but you may find a bit of final tweaking of the feed lips beneficial.
If you are reading this and are not using our magazines, your feed lip gap may differ.
Note, I have to buy all of my parts – nothing here was paid for by sponsors, etc. I do make a small amount if you click on an ad and buy something but that is it. You’re getting my real opinion on stuff.
In this short video, Ian gives a brief overview of Soviet magazines – notably the slab side, ribbed, waffle and bakelite. As always, Ian does a great job and this is worth a watch!
The first generation was a heavily built (over-built) magazine known as the “slab side”.After the slab side, they developed the ribbed magazine that was copied by many countries.To reduce weight they developed the aluminum waffle magazines- so named due to all the reinforcement ribs. It was relatively short-lived because it was not durable enough.After the waffle mag, they moved to the Bakelite magazine that actually was a glass reinforced polymer. This gave them what they wanted – light weight and durability.When the AK-74 was developed, they went straight to polymer and never developed steel mags. Note, other countries did build steel AK-74 magazines but the Soviets did not.
The Video
I hope you found that video useful. Ian is a wealth of information and you can learn more about his work at Forgotten Weapons.
Please note that all images were extracted from the video and are the property of their respective owner.
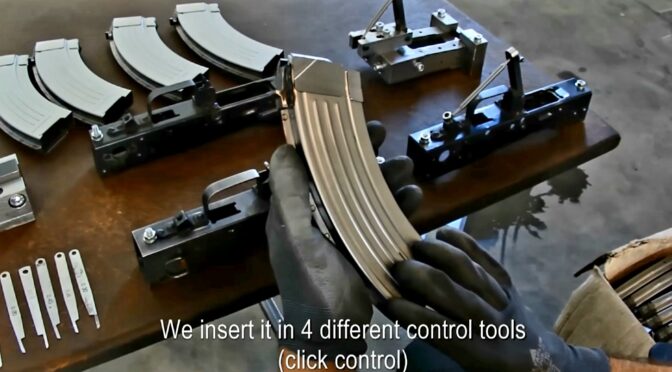
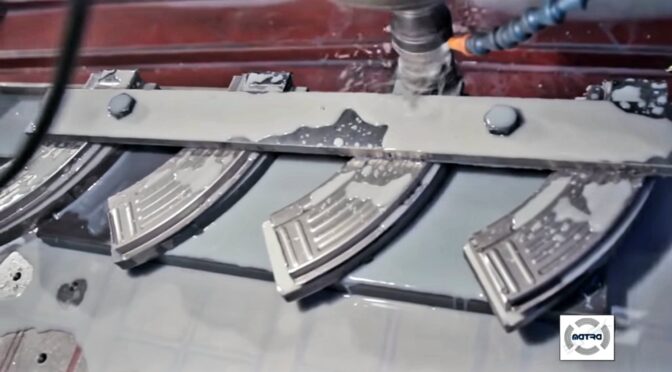
While digging for videos on AK magazines, I found this one posted by Apex Gun Parts in 2016. It shows their Croatian AK-47 magazines being manufactured. While they don’t come right out and say they are being made by Zastava, I have a hunch that they are.
I would like you to compare this video to the one I previously posted showing Matra Group’s process. Matra is using older general purpose machines and there isn’t much attention paid to worker ergonomics and lighting.
Now, watch this video and not the differences. This video is showing a much more modern plant where there is also detail provided on their quality control processes and they show the jigs that they use.
The Video
I hope you find the video interesting. Apex Gun Parts is definitely a group that I buy stuff from and have no problems recommending them. I don’t have any experience with these mags so this video is really to let you see the differences in manufacturing.
Please note that all images were extracted from the video and are the property of their respective owner.
The AK-47 rifle and it’s “banana” 30 round magazine are classics of rugged functional design. While I’ve posted many videos and how-to articles relating to various rifle and pistol variants, I’ve not really covered the steel magazines at all.
I was surfing around and found Matra Group located in Bosnia-Herzegovina. In 2015 this small manufacturer produced a video showcasing their small facility that makes a variety of steel magazines for AK-47, AK-74 and even Lee-Enfield rifles. The Lee-Enfield may be due to those rifles being supplied to the Yugoslav Partisans in WWII to fight th axis armies.
In the video, they show employees starting with sheet metal and stepping through various steps including stamping, machining and spot welding. For the most part, you will see a very labor intensie process using older general purpose machines. If you like videos that showcase how something is made in and old-school fashion, you will find this very interesting.
Here they are cutting the initial sheet down into usable blanks.Making the front piecee that will lock onto the front trunnion.Spot welding the two body halves together.Gettingg ready for final assembly.
Just a quick note – when you get a bare receiver, you are literally getting a chunk of aluminum with nothing installed. I really like Palmetto State Armory (PSA) lower build kits and they sell them with different types of components such as just the basics for rifles, for pistols, Magpul furniture, etc. What I like is that the machining is very good and I think they have some of the best Mil-Spec basic triggers that aren’t gritty. I’ve used Anderson and other brands of build kits and just think the PSA kits are superior. Bear in mind that I say this as a customer – nobody paid me to tell you this.
With that said, let’s start building. You’ll notice on any AR magazine on the right side there is a rectangular notch. This is where the magazine catch engages to hold it in place. Okay, so the first step is to install the magazine catch assembly. It’s made up of the “L” shaped catch itself, the mag catch spring and the magazine button.
Now I grease everything that slides with Tetra Gun Grease. Tetra has worked well for me but I also know guys who use all kinds of greases. As a rule of thumb, if it slides, apply grease. It it rotates then apply oil. So grease the shaft and insert it into the round hole on the right end of the recessed area for it on the right side of the receiver. Note, be careful when installing the catch or you may scratch your receiver.
When you turn it over you will see the threaded end of the shaft and you put the spring down over it.
Next, you will screw the magazine button onto the threaded shaft. Before you do, look at the button. You should see that one end is smooth (that is the bottom) and the other has grooves (that is the top). Carefully start screwing the button on but stop before you get near the receiver so you don’t scratch anything. Push the button in, and then turn the long lever arm to continue threading the shaft into the button. Now stop before the lever arm scratches the receiver.
To screw the catch in the rest of the way you need to push the bullet button in all the way so the catch sticks out as far as it can on the other side so the lever arm can clear the parts of the receiver as the button is screwed on. At this point, I use a small pusher tool made from plastic to push the button in even further so I can keep turning the lever arm until the screw is relatively flush with the top of the button. Note, before I had the tool I would use a wood dowel. Just use something non-metallic to protect the finish. There is a model of the tool shaped just like the oval button but I don’t know where mine went so I used a takedown tool and got the job done 🙂
The catch is now installed. To function test, push the magazine button. You should feel spring resistance and see the magazine catch’s lever arm push out. When you ease off the button, the lever arm should smoothly go back into place.
There are a lot of reputable AR parts vendors online but beware of eBay and bargain basement dealers that sell airsoft parts and tell you they will stand up to firearm use – they will not. At any rate, here are my top sources of AR parts:
Please note that there are three posts in this series. The method in the third post would fix just about any magazine while the other two helped some of the magazines:
Ok, in the first couple of tries, I had some success loosening the center screw on a couple of the sluggish mags. Marginal improvement with dry lube but that didn’t fix two. What resurrected the two worst magazines was to disassemble the magazines and move the spring’s anchor leg to the center hole. What this did was to increase the tension of the spring and boy, did that fix the problem in spades. In the future, I would try loosening the center screw and if that didn’t work, I’d go right to this spring adjustment:
Here are the steps:
Note where the spring is at currently my looking in the holes in the back of the magazine. If you see metal, that is the leg of the spring. All of my mags have had the spring’s leg in the same place from the factory thus far:
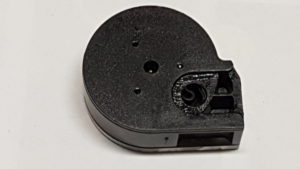
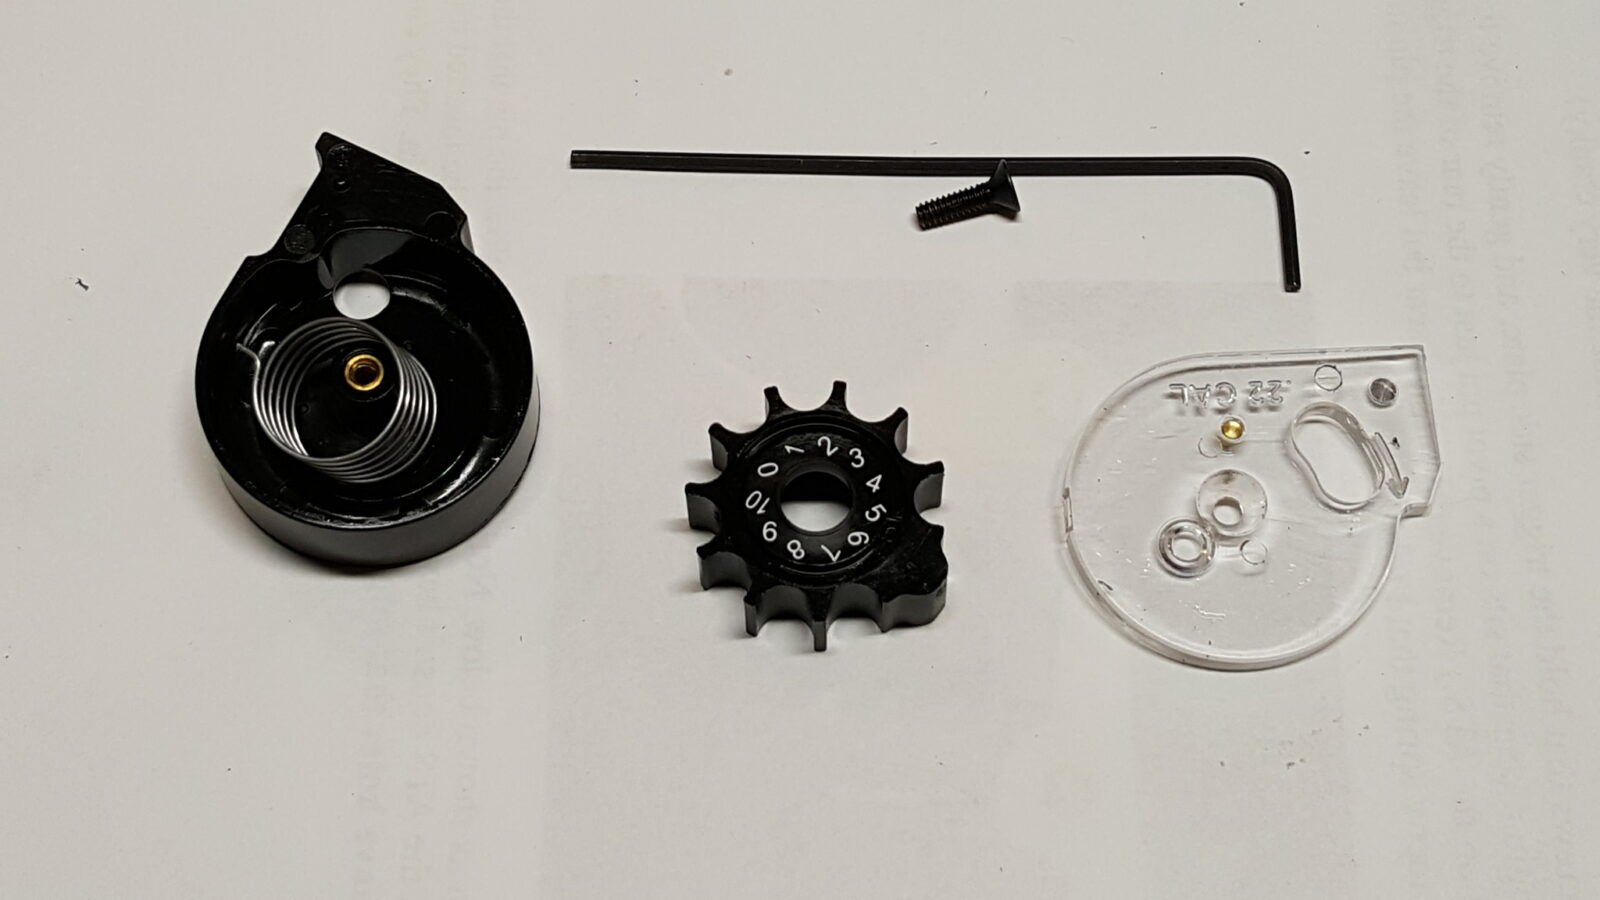
Remove the center screw and disassemble the magazine with a 1/16″ hex key. Pay attention to how it fits together and also look for any debris or burs that might be causing drag: In this next photo, look at the spring. The downward leg is the bottom and the sideways leg is the top and the center of the drum has a slot that the top part of that spring nestles into:
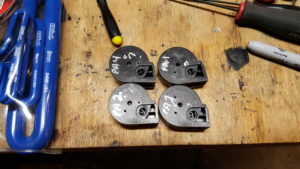
Move the drum’s spring to the center hole in the track where the pellets are carried. .See the oily crap … I mean “film” in the mag? That is courtesy of the 3-in-1 supposed dry lubricant that I will never use again and got cleaned out right after I took this photo: If you aren’t sure what hole I mean, look at this next photo. Magazines PA2 and PA4 have the spring located to the new hole half way around the magazine track. PA1 and PA3 still have the springs in the original hole and seem to work ok. This is also a good example of how labeling your mags helps you keep track of what is going on. PA1 was the worst by far.
Align the drum with the top of the spring and then carefully rotate the assembly clockwise slightly angling the long part of the drum so it will clear the part of the magazine that forms the start/end of the magazine area that holds the actual pellets.
Install the top so the brass pin that is embedded in the clear magazine cover rides in the groove of the drum. I slide the cover on upwards from the bottom while keeping the center secure otherwise it will fly out.
Re-install the screw. Tighten it down until the cover can’t lift up and adjust the screw in/out until you feel the right amount of tension on the cover and it can move.
Test by turning the top – you should feel way more spring tension now.
So in my testing, this worked great. If just loosening the cover a bit works for you, then great. If not, take it apart and move the spring. Note – I did try spraying the good Dupont Teflon dry lube in one of the magazines and I can’t say that there is a noticeable difference. You can if you want to experiment, but I’m not going to bother going forward.