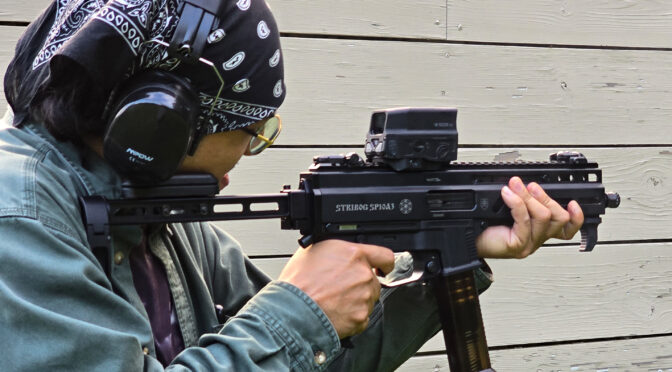
I posted about the modifications to the SP10A3 as well as magazine loaders and now it is time to talk about how it performed. One of my brother-in-laws and nephews were in town and ready to help me try it out. First off, we had a lot of fun and second, the 10mm Stribog ran stunningly well.
Preparing For the Range
When the Stribog arrived, I field stripped, cleaned and lubricated it. This is always a good idea because you never know what all will be in a firearm – preservatives, dirt or even dry with no lubricant.
The manual is well written so read it. The sections on field stripping, cleaning, and oiling are worth your time. I would also recommend hand cycling the action a few hundred times to accelerate your parts getting to know each other – also known as wearing in.
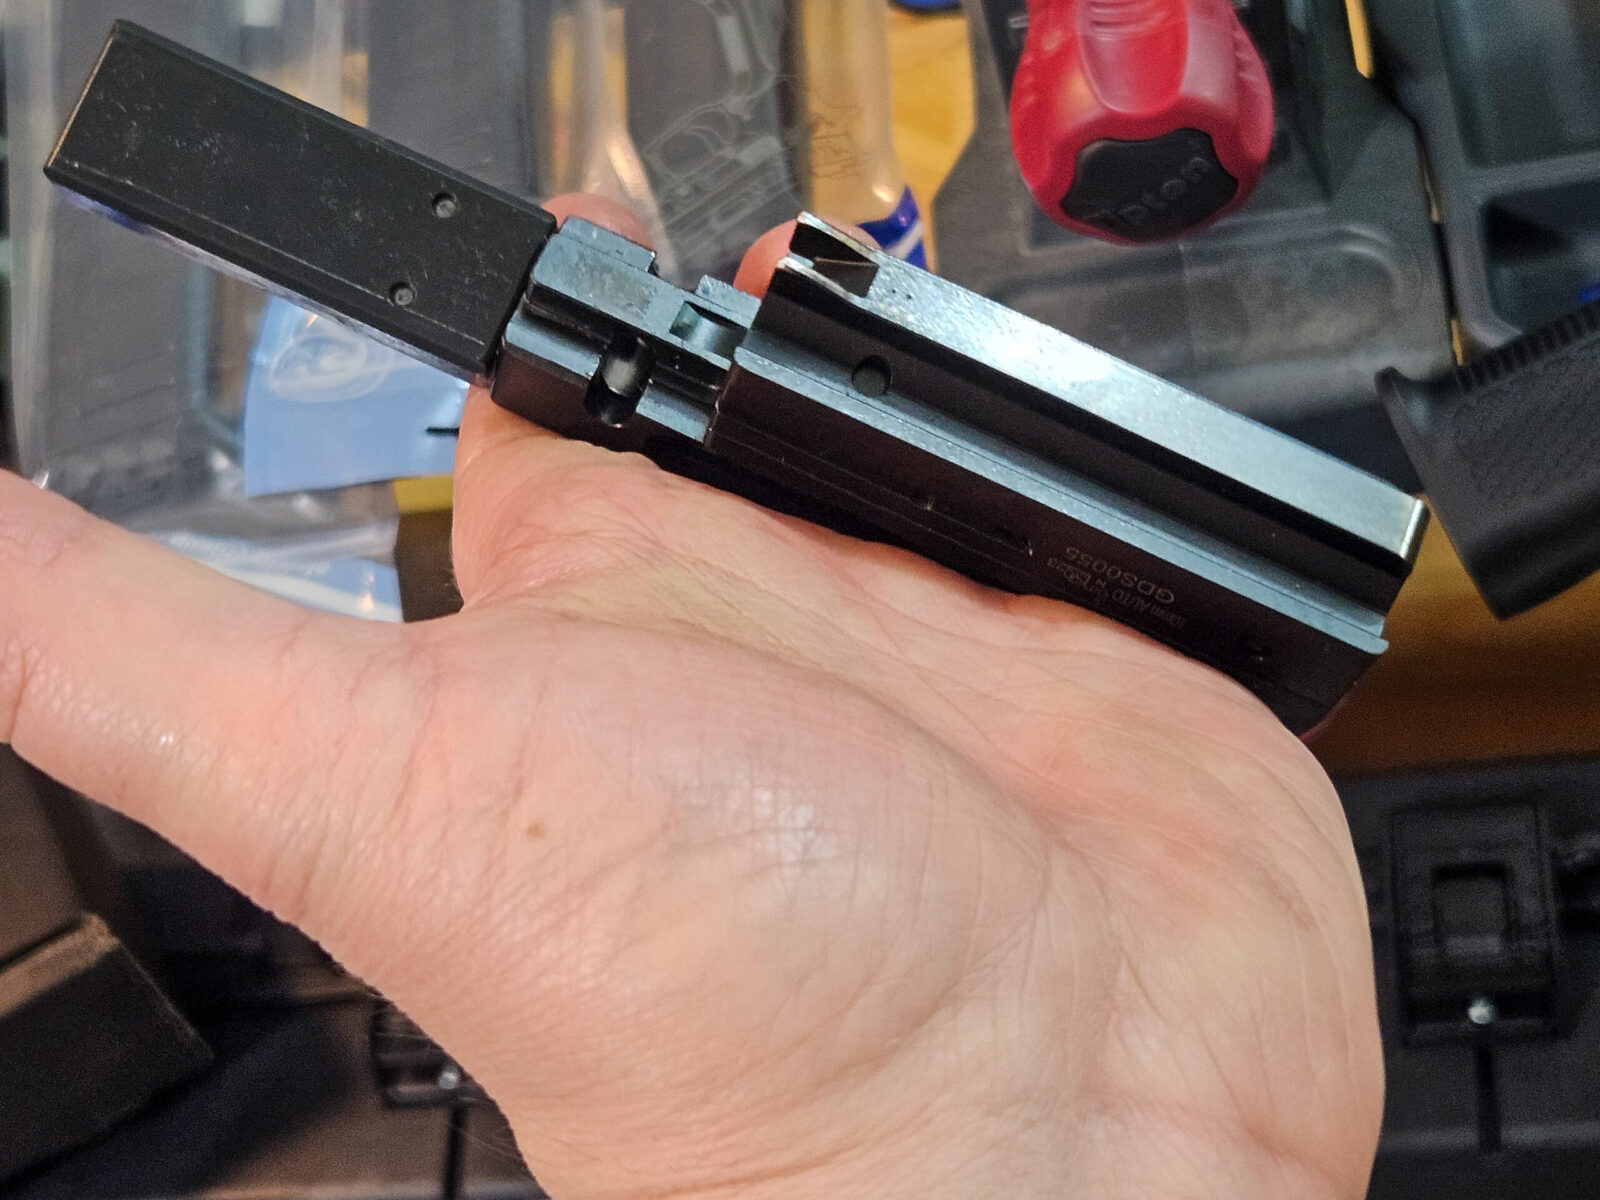
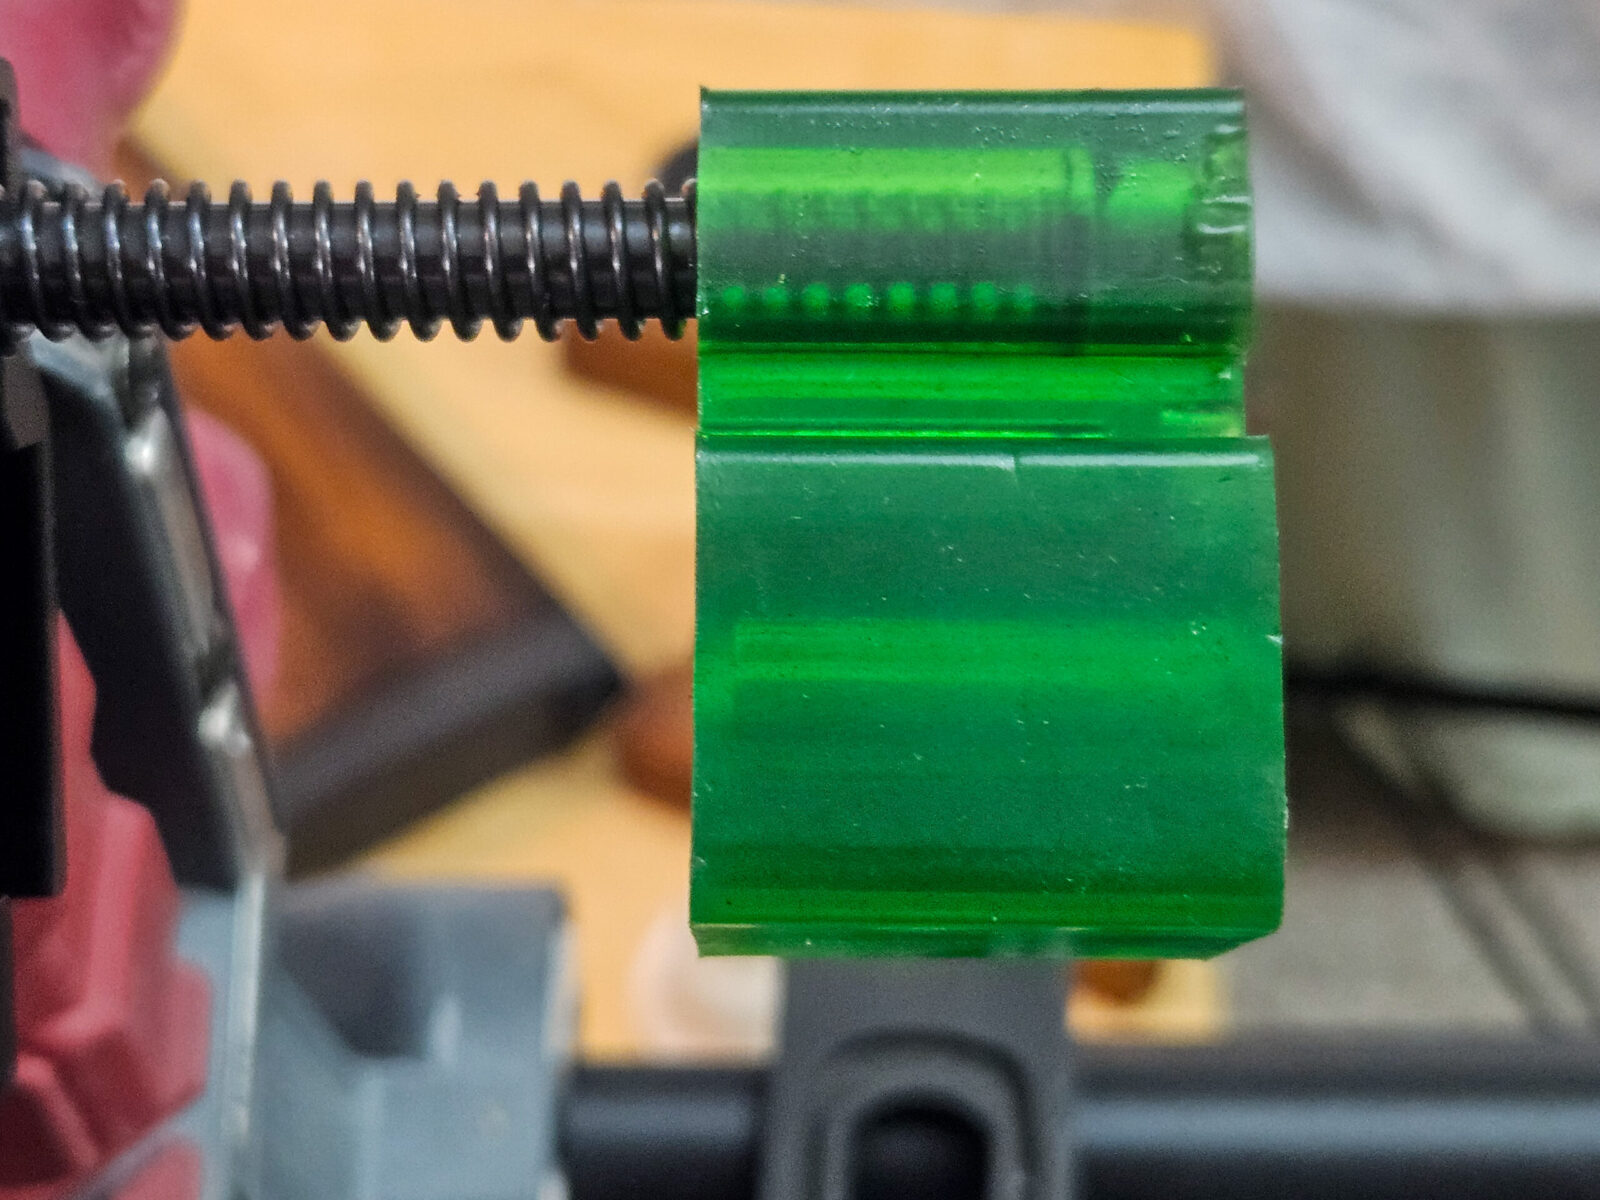
The bolt assembly made up of the large carrier to the rear (right) and the bolt head in front (left), is enormous. A lot of the 10mm recoil is eaten up by inertia, the recoil spring and then a giant buffer block. It’s no wonder the recoil is incredibly mild. Also, when you have something this big, there can be a ton of friction so you need to lubricate it.This giant rubbery green thing is the recoil buffer. I honestly don’t recall ever seeing one this big – every. If the inertia of the bolt and recoil spring leave enough energy to drive the bolt carrier into this buffer, it can handle it without a doubt.
Visiting the Range
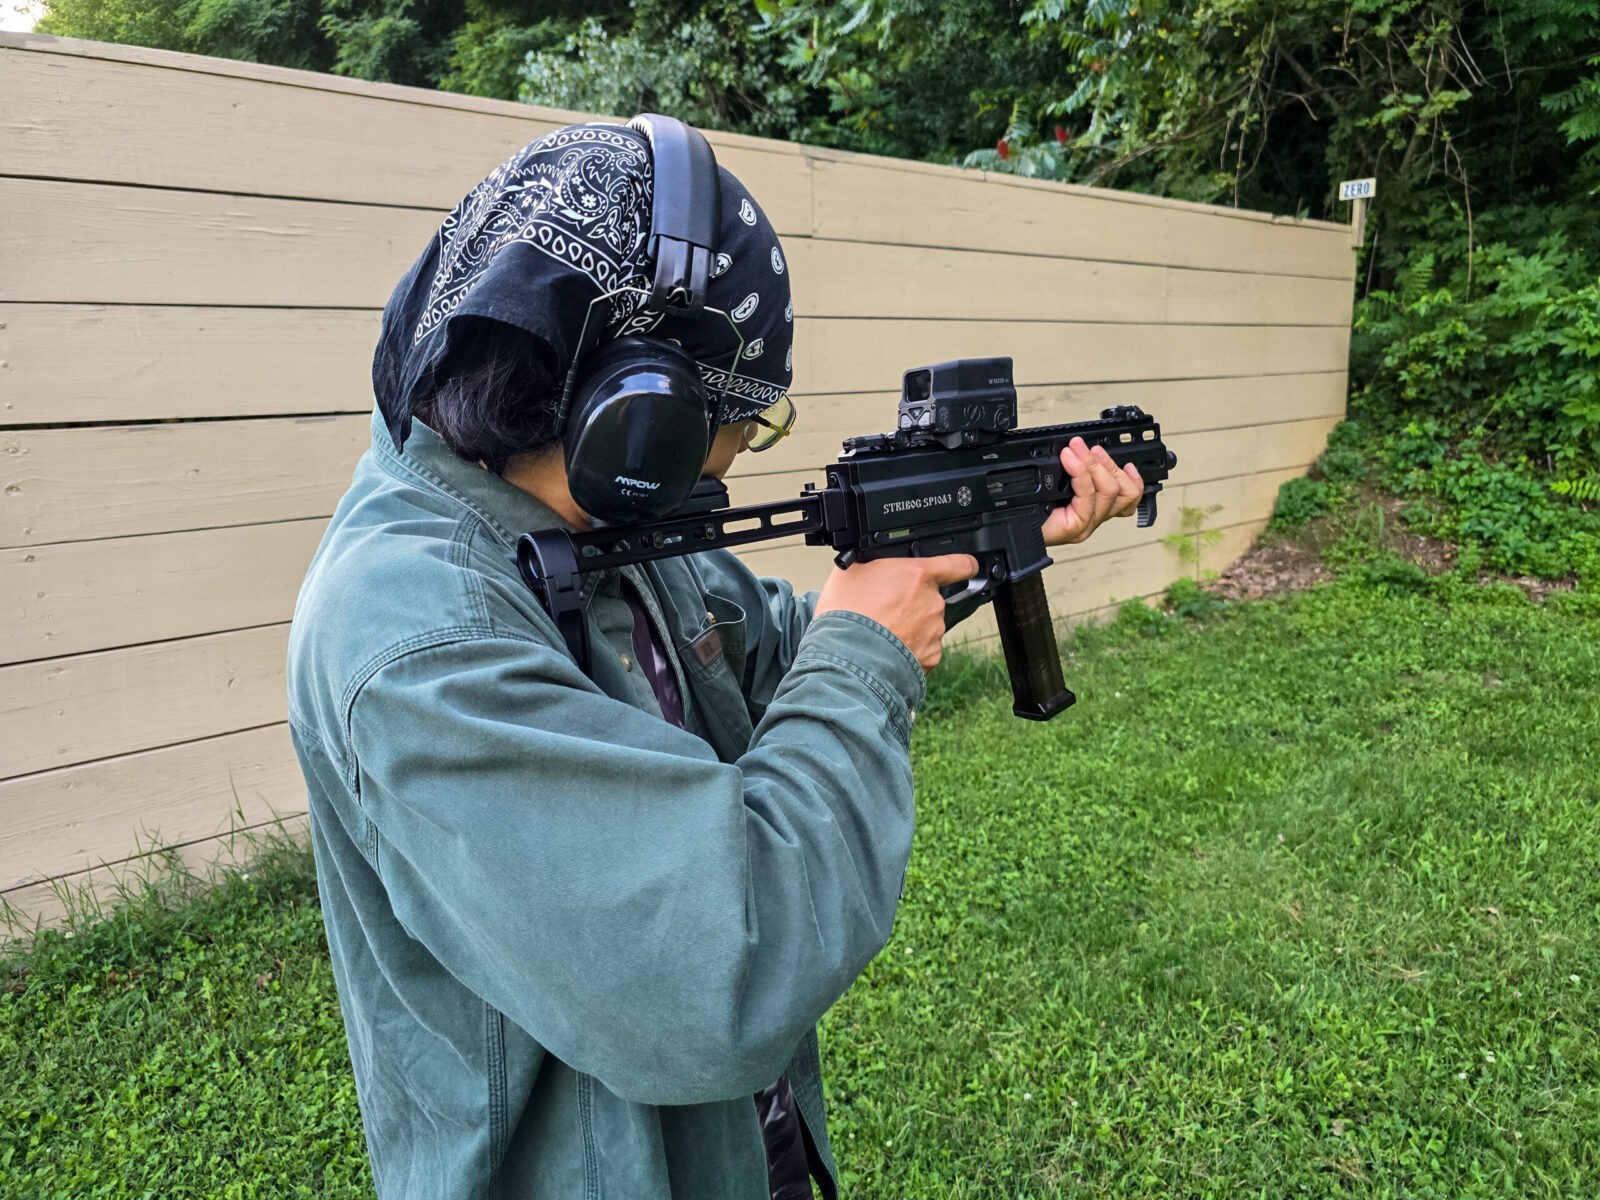
My brother-in-law, Banduy, and nephew, Julian, headed to the range to have some fun and break in the Stribog. It was a great day as we unloaded and set up the targets, moved the bench into place and got ready.
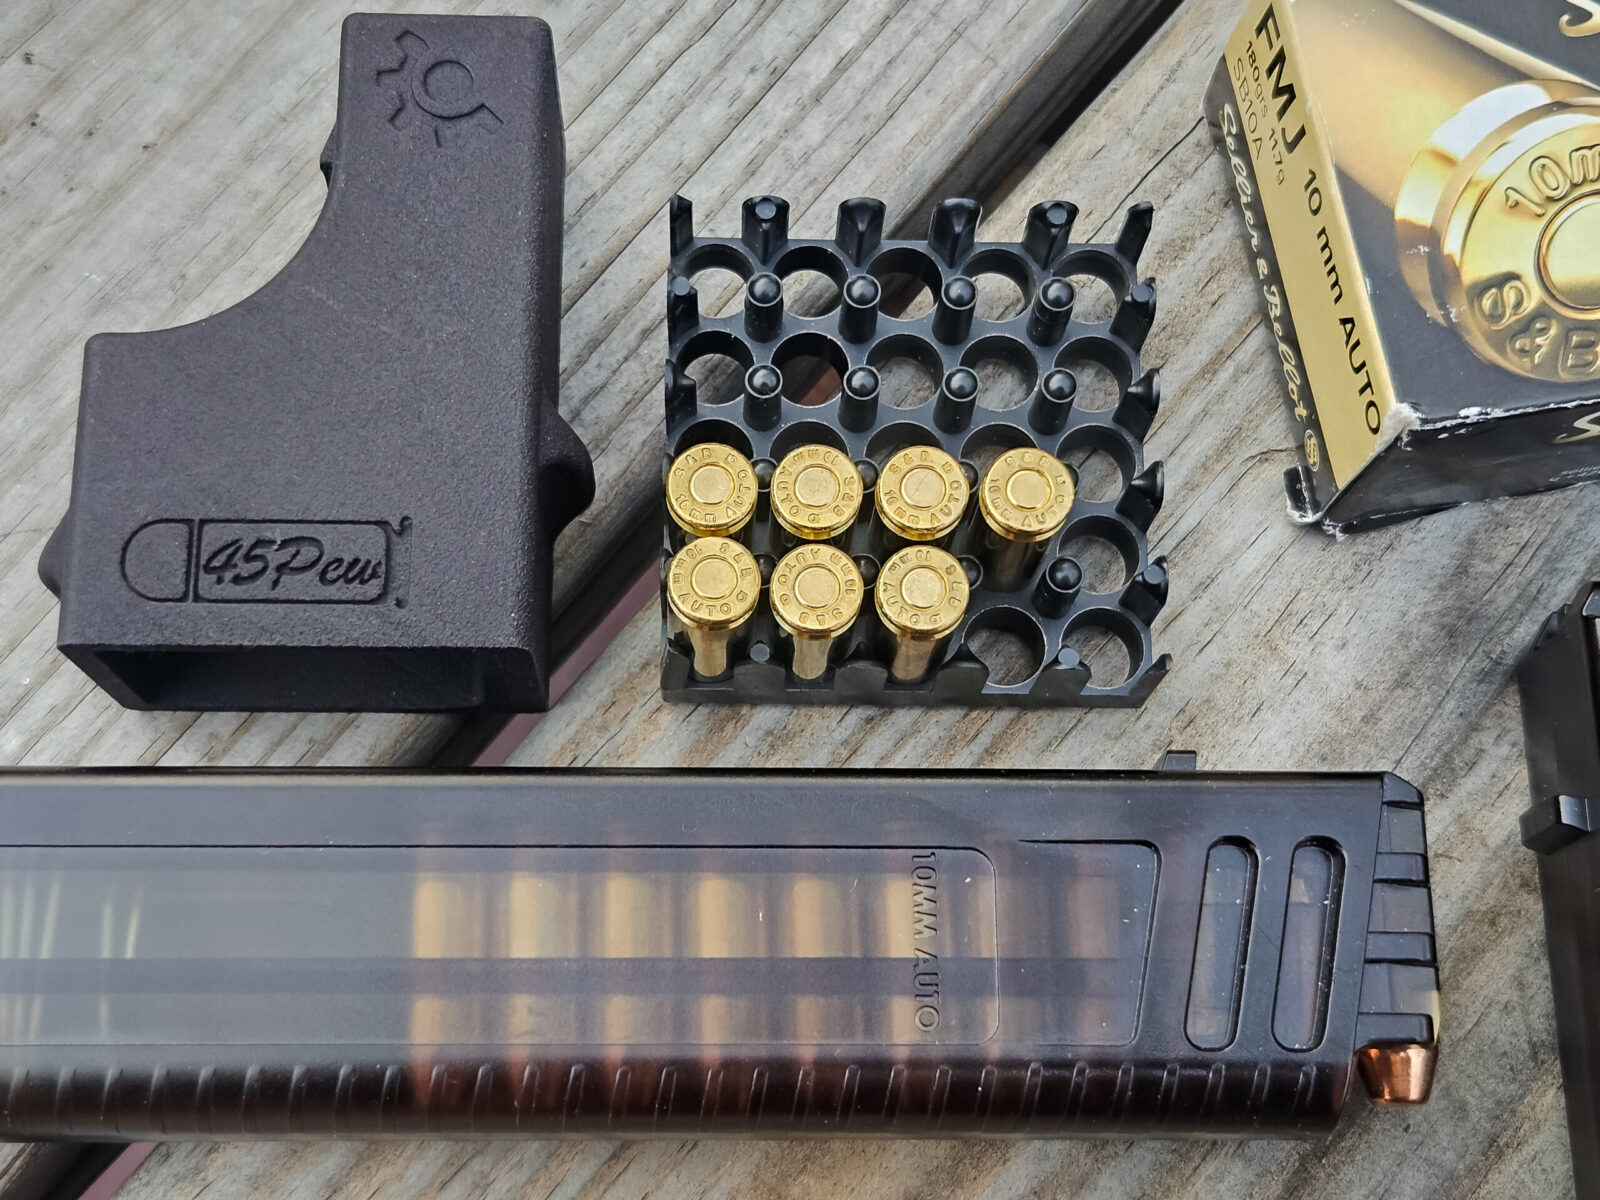
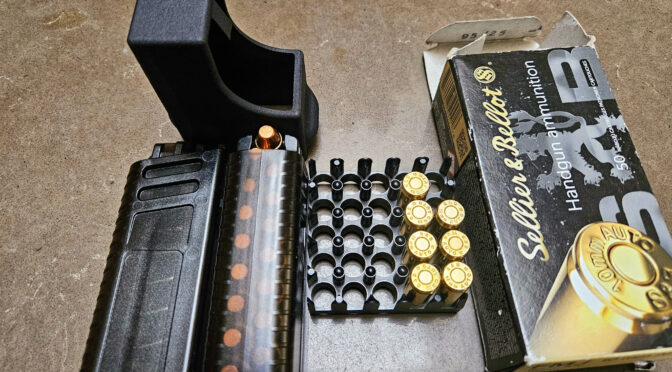
We used the Custom Smith .45 UMP loader to fill up four 20 round magazines with S&B 180gr FMJ. Folks, I have shot cases of this stuff and it’s fantastic range ammo in all of my 10mm pistols and now the Stribog.
I shot the first magazine and was very impressed. The action was smooth with very little felt recoil. I did need to dial in the UH-1 a bit as the laser boresight allowed me to get the UH-1 in the vacinity if the round impacts on the paper.
By the way, I initially had a quick connect sling loop on the A3 Stribog adapter just about the top rear of the grip. It was really annoying and I got rid of it very quickly. Maybe someone with smaller hands wouldn’t notice it but I sure did.
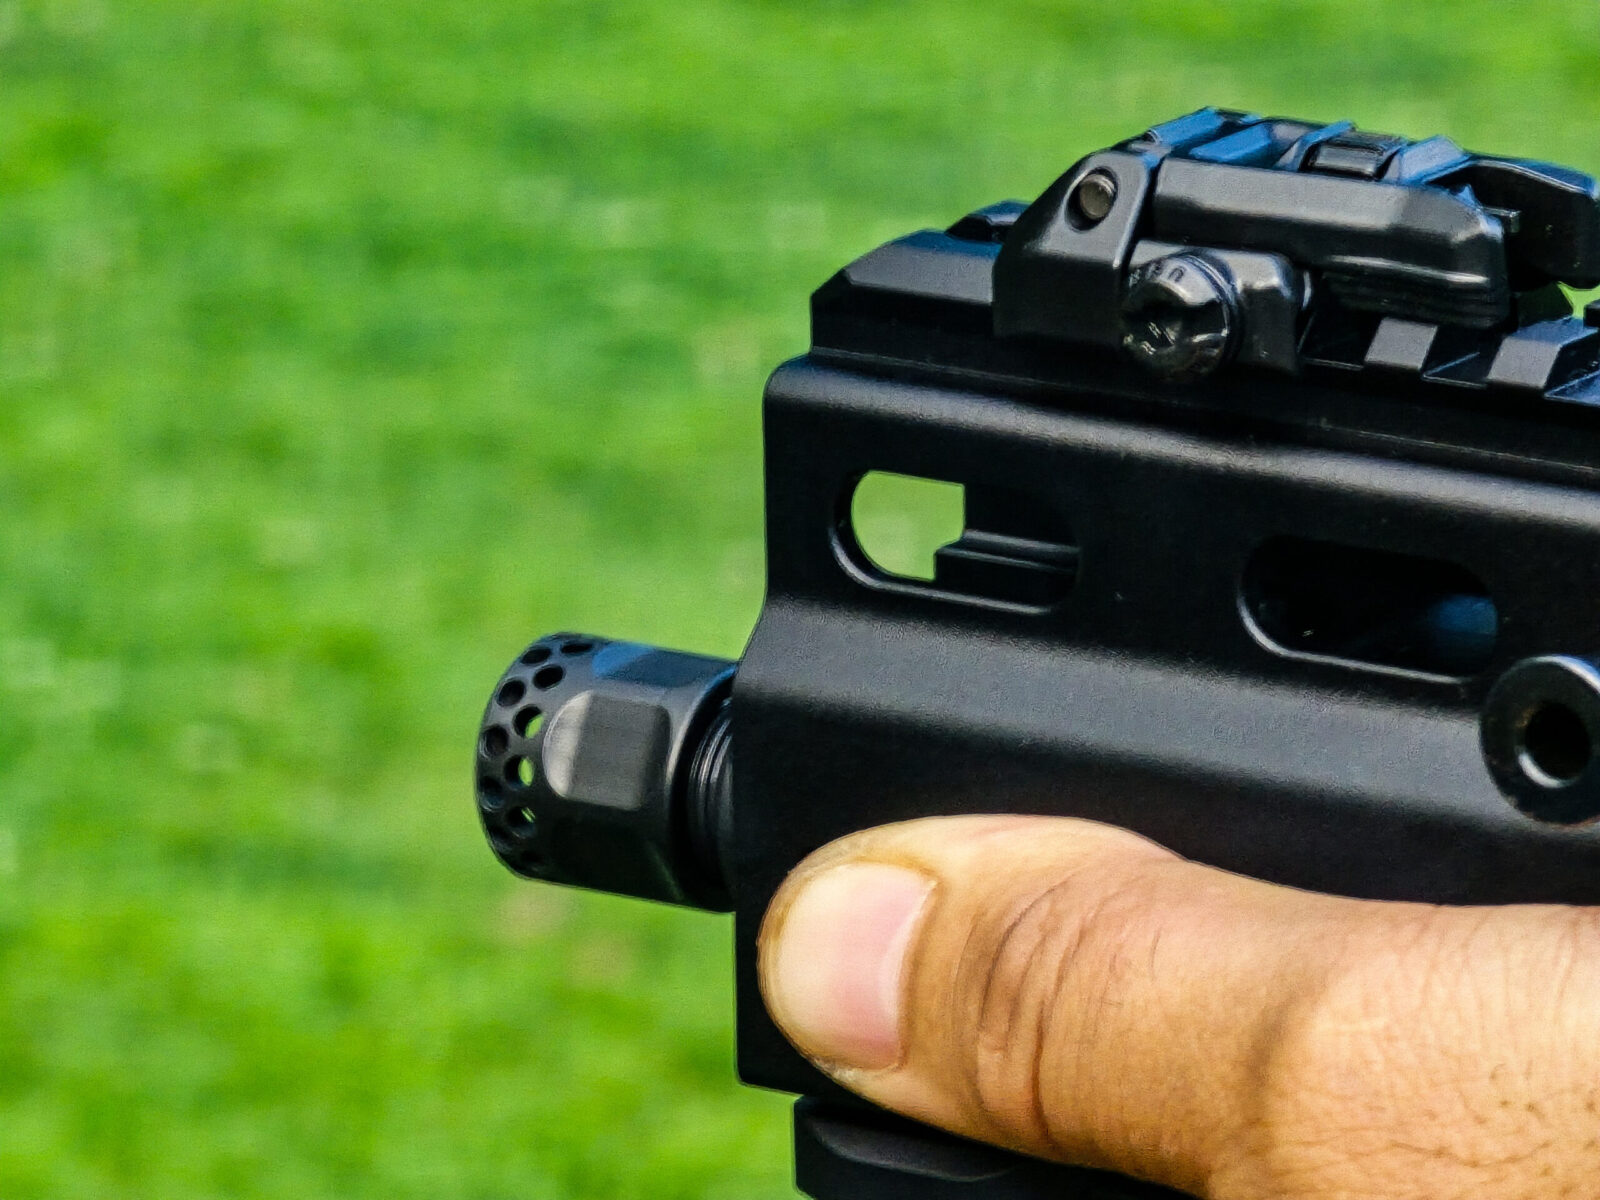
Julian has been shooting with me for almost 20 years now. Time flies by. He was next up and with practiced skill did a steady 20 round set standing freehand with no problems at all.This was his first 20 round set as he got used to the Stribog. He was about 25-40 feet back getting started.His dad was up next and did a good run. I haven’t done a comparison of felt recoil with the micro compensator and without. I can tell you that it is incredibly smooth with it on.We had a lot of fun. The Stribog just rocked it, No failures of any kind through 200 rounds of ammo. The one thing I realized after the outing was that I could shoot through a case of 10mm pretty quick with the SP10A3.
Summary
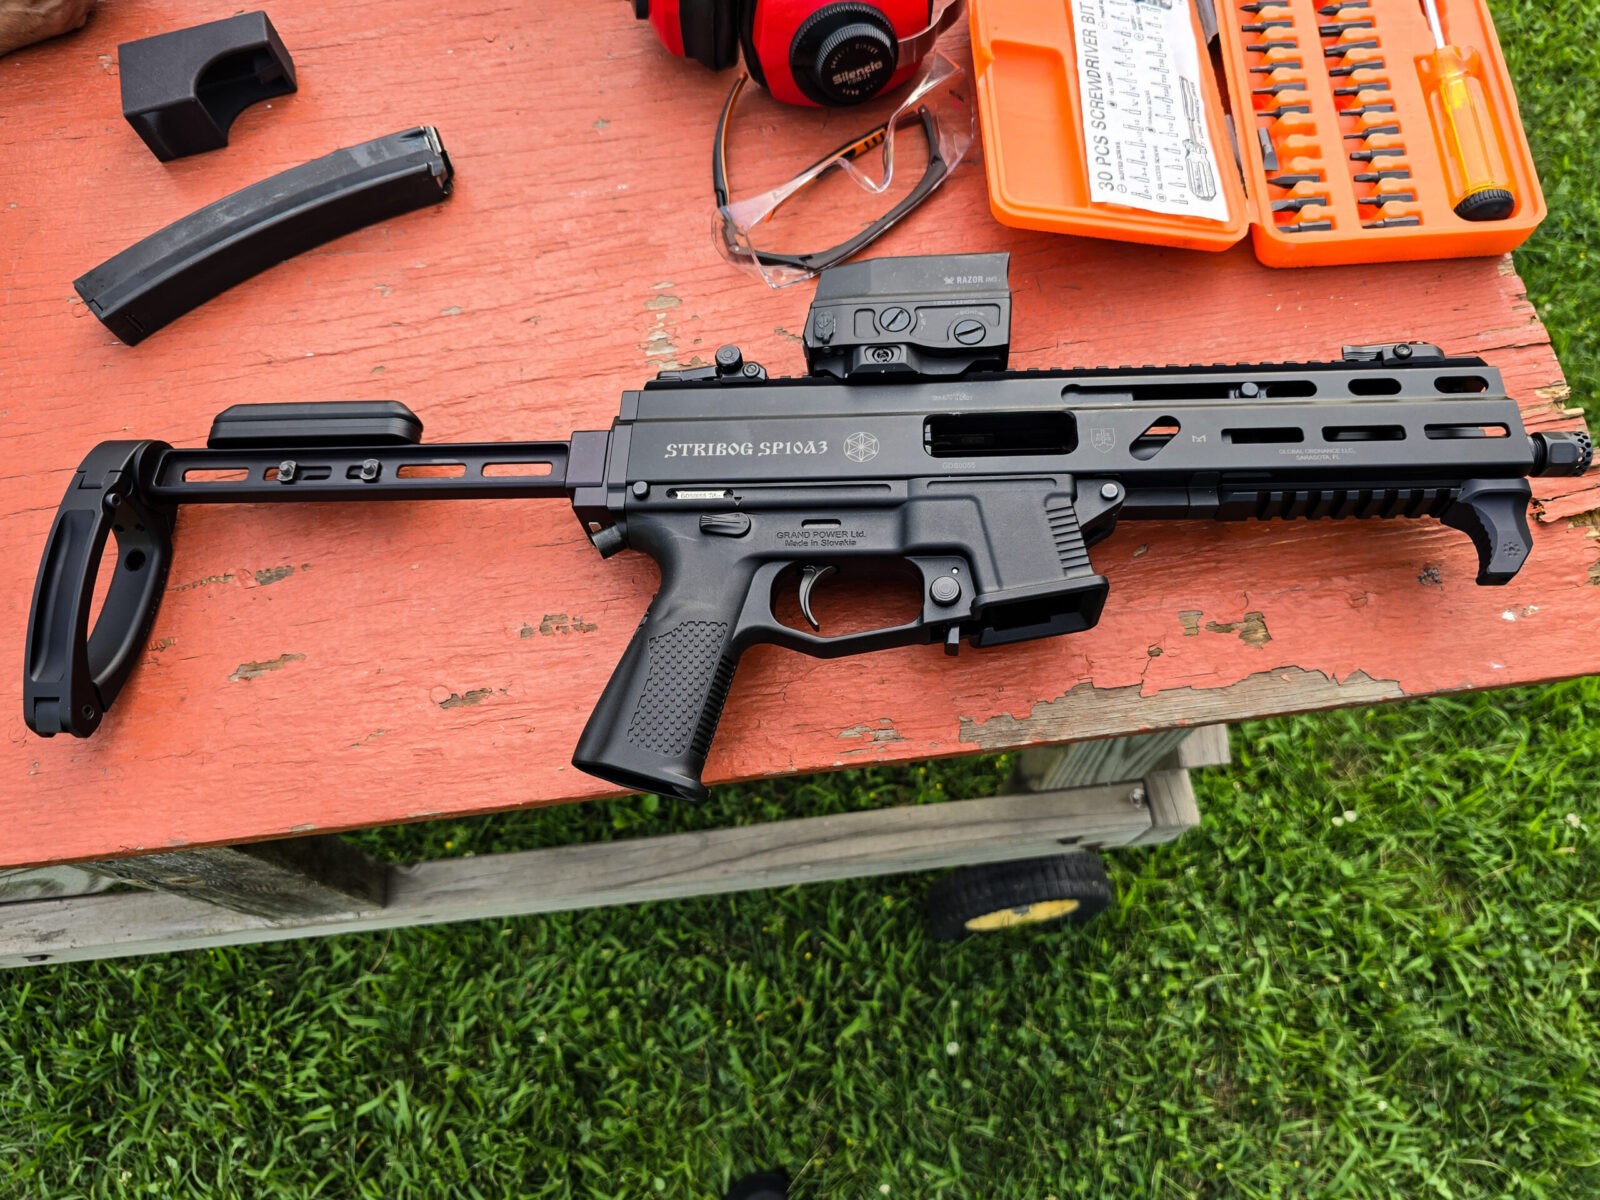
We shot the Strbog freehand back to about 25 yards and found it to be a delight to shoot. It definitely filled my desire for a 10mm carbine vs. my various 10mm pistols and would highly recommend it. GrandPower did another great job with the SP10A3.
I’ve since had it out a couple of more times and it’s run great everytime. Yes, I did have to buy more S&B 180gr ammo because of it 🙂
I hope this helps you out.
Note, I have to buy all of my parts – nothing here was paid for by sponsors, etc. I do make a small amount if you click on an ad and buy something but that is it. You’re getting my real opinion on stuff.
The Stribog line of subguns, pistols and pistol caliber carbines are really cool. When the brace fiasco erupted, I sold my 9mm SP9A1 and regretted it. When Grand Power said they were coming out with a 10mm, I was an early buyer. One question popped out though – what was out there to help load the 20 round 10mm magazines? I hate loading magazines with stiff springs as many hands start to cramp so I needed to find a loader.
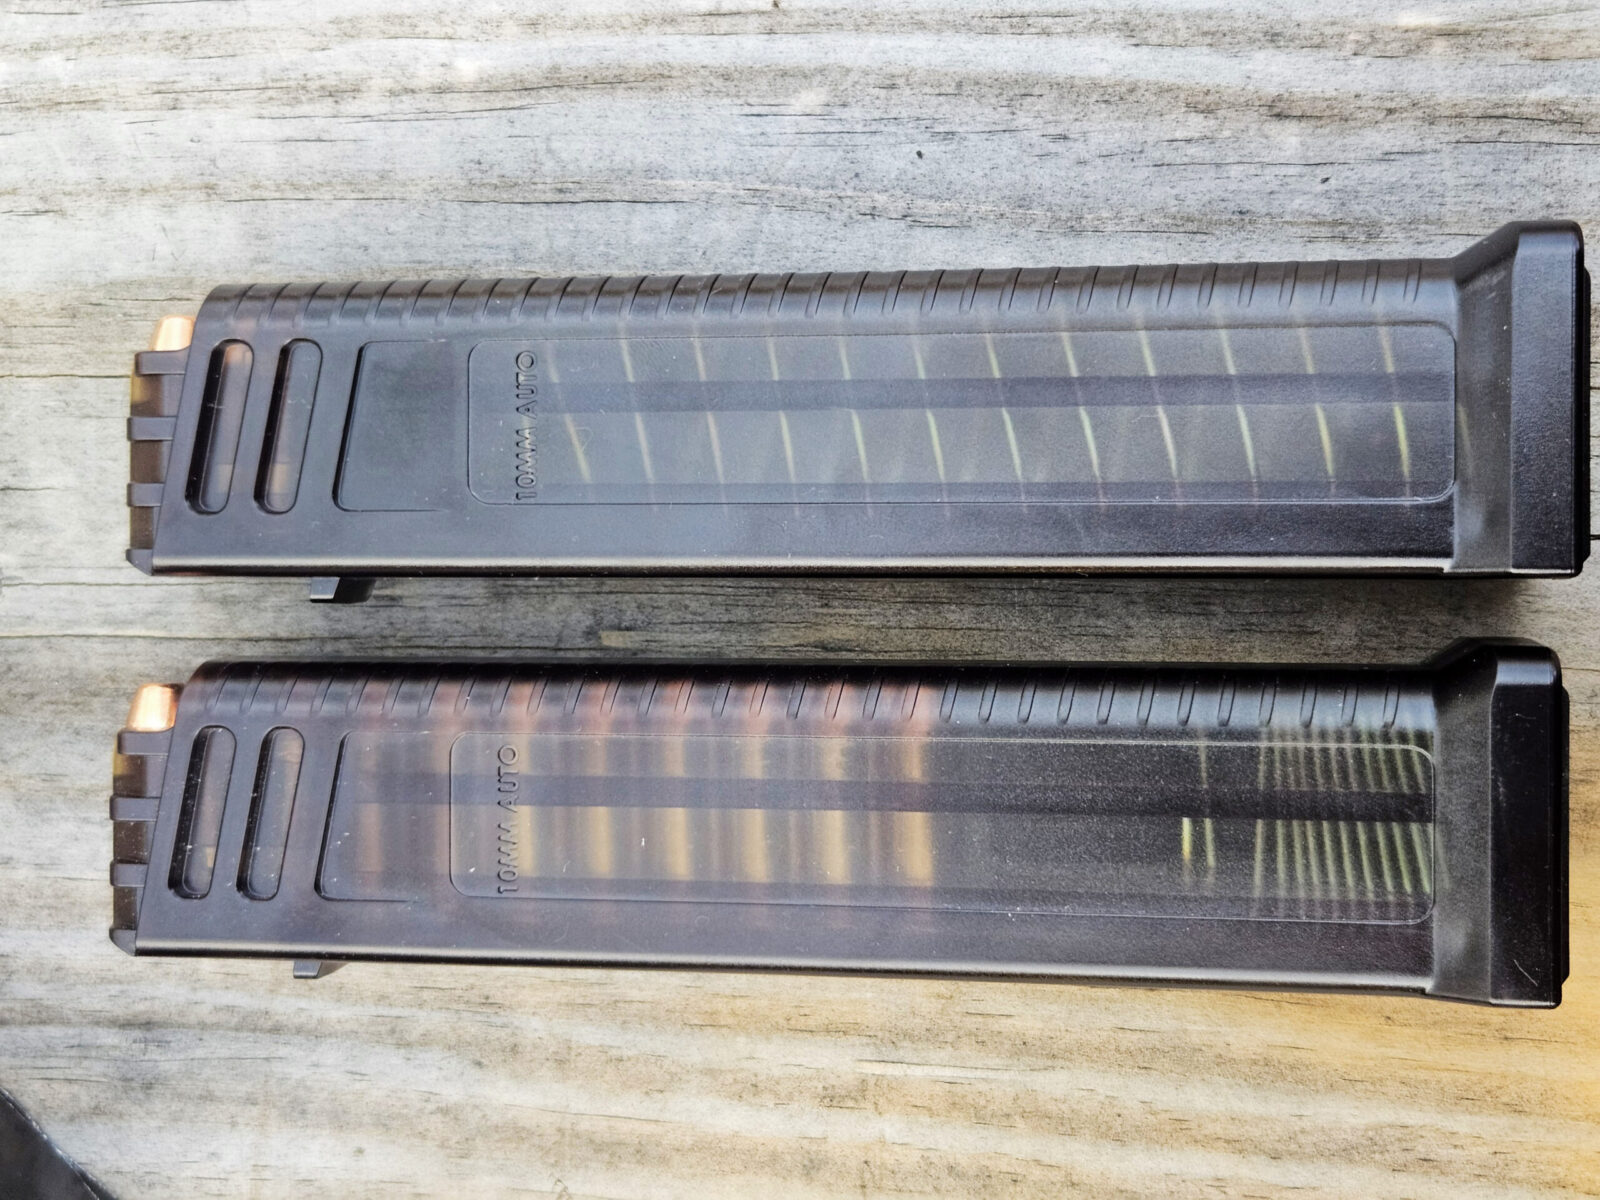
First off, they are HK UMP pattern magazines
The Stribog 10mm mags are nicely made, beefy as hell and based on HK’s UMP magazines. I like that – I am really tired or proprietary mags where you have one and only one option. Using an existing mags opens up options. Now, are UMP magazines all over the place and cheap? No, they aren’t – especially not 10mm mags. HK doesn’t make 10mm UMP magazines any longer.
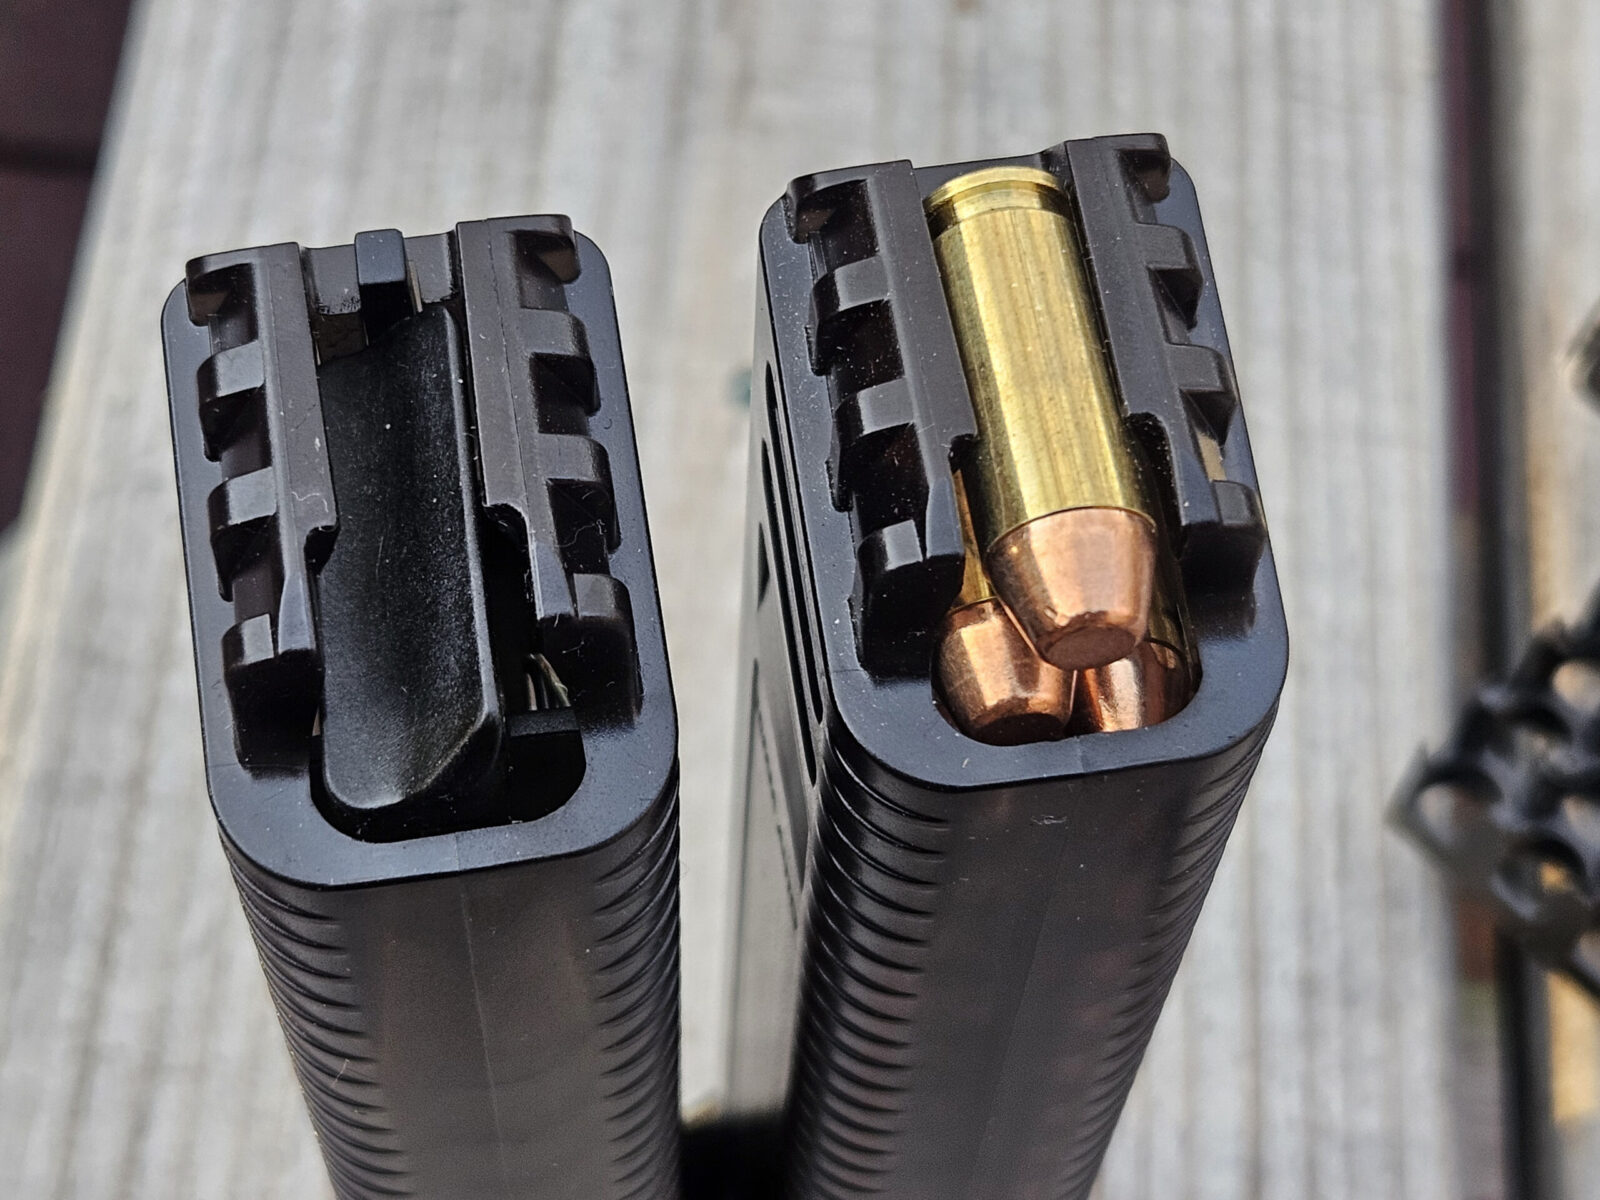
The 20 round magazines have stout springs and it takes a lot of work to manually insert cartridges
Real HK 10mm mags have starting costs around $139 but are 30 rounds so there is a perk for the price. Considering Stribog mags list at $45 and can sometimes be found for $39.99, I’ll stick with Stribog mags.
Stribog 10mm magazines are built like a tank
This is both a pro and a con. The top sports a lot of reinforcements making for a quite a large magazine in terms of circumference. They will not fit inside a Maglula Universal loader – I had hoped they would but it is a no-go.
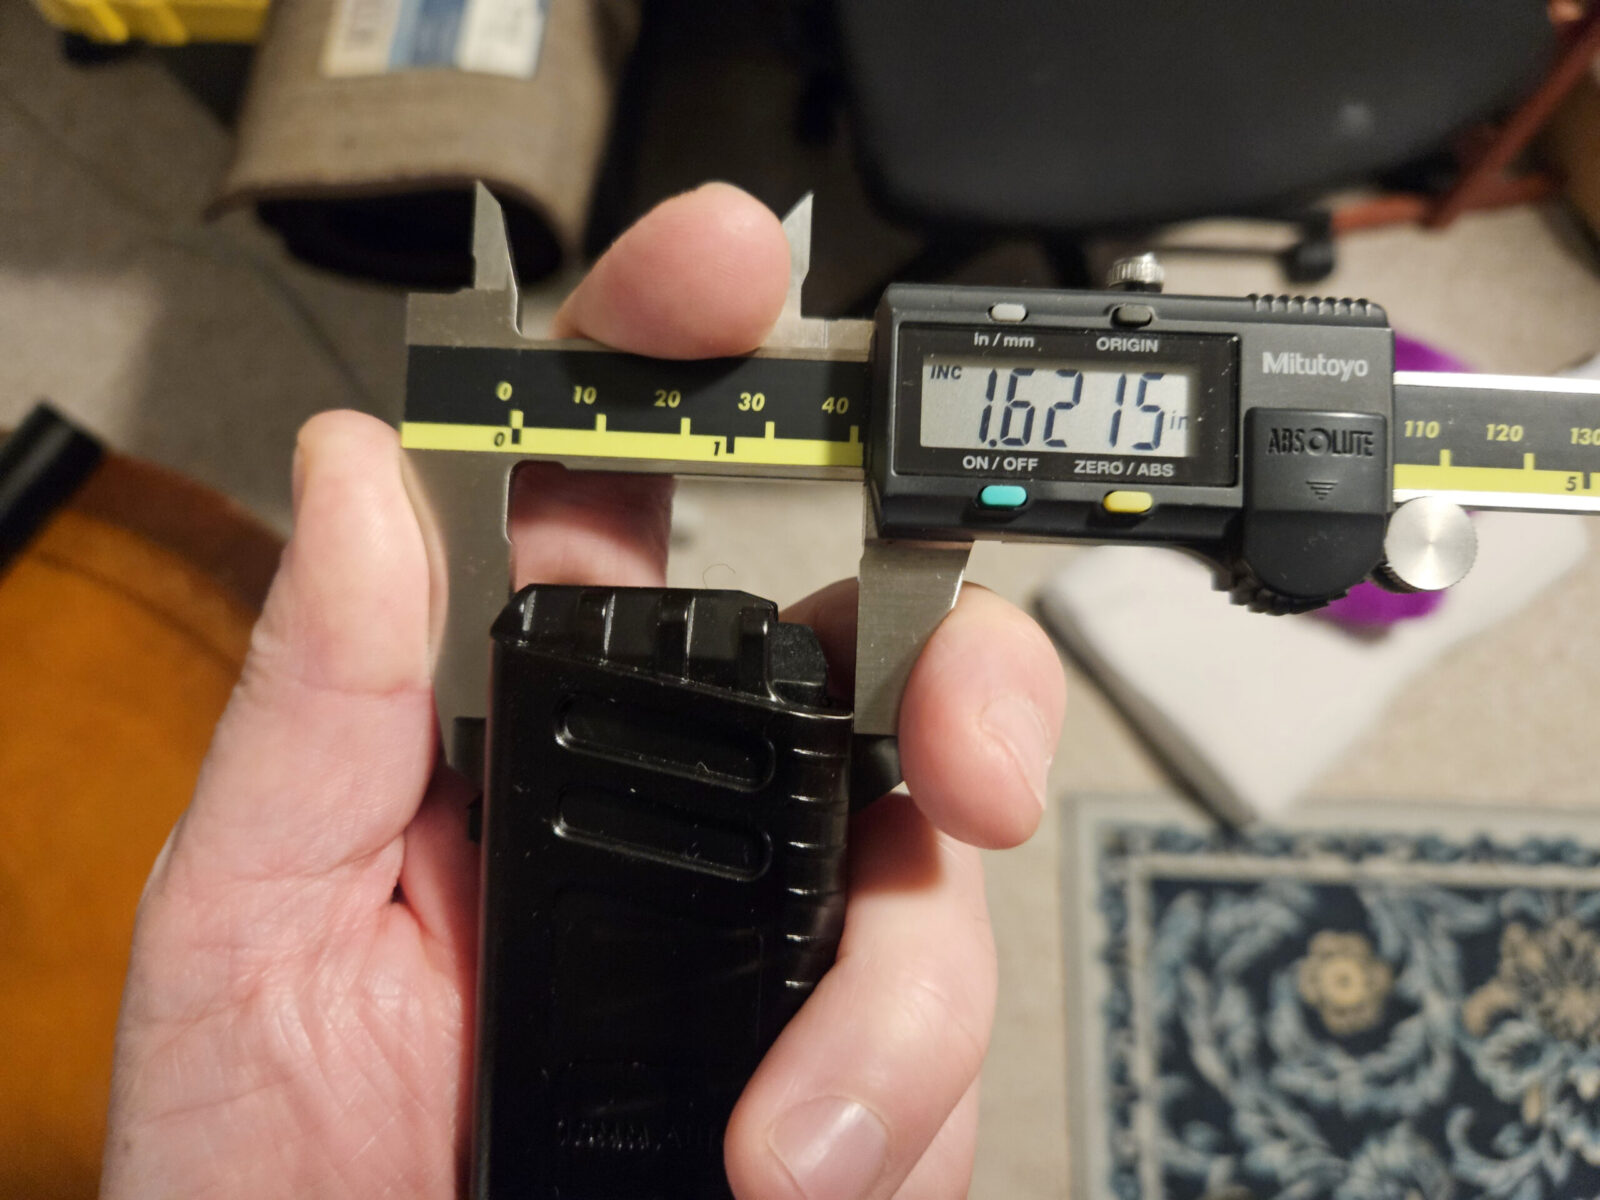
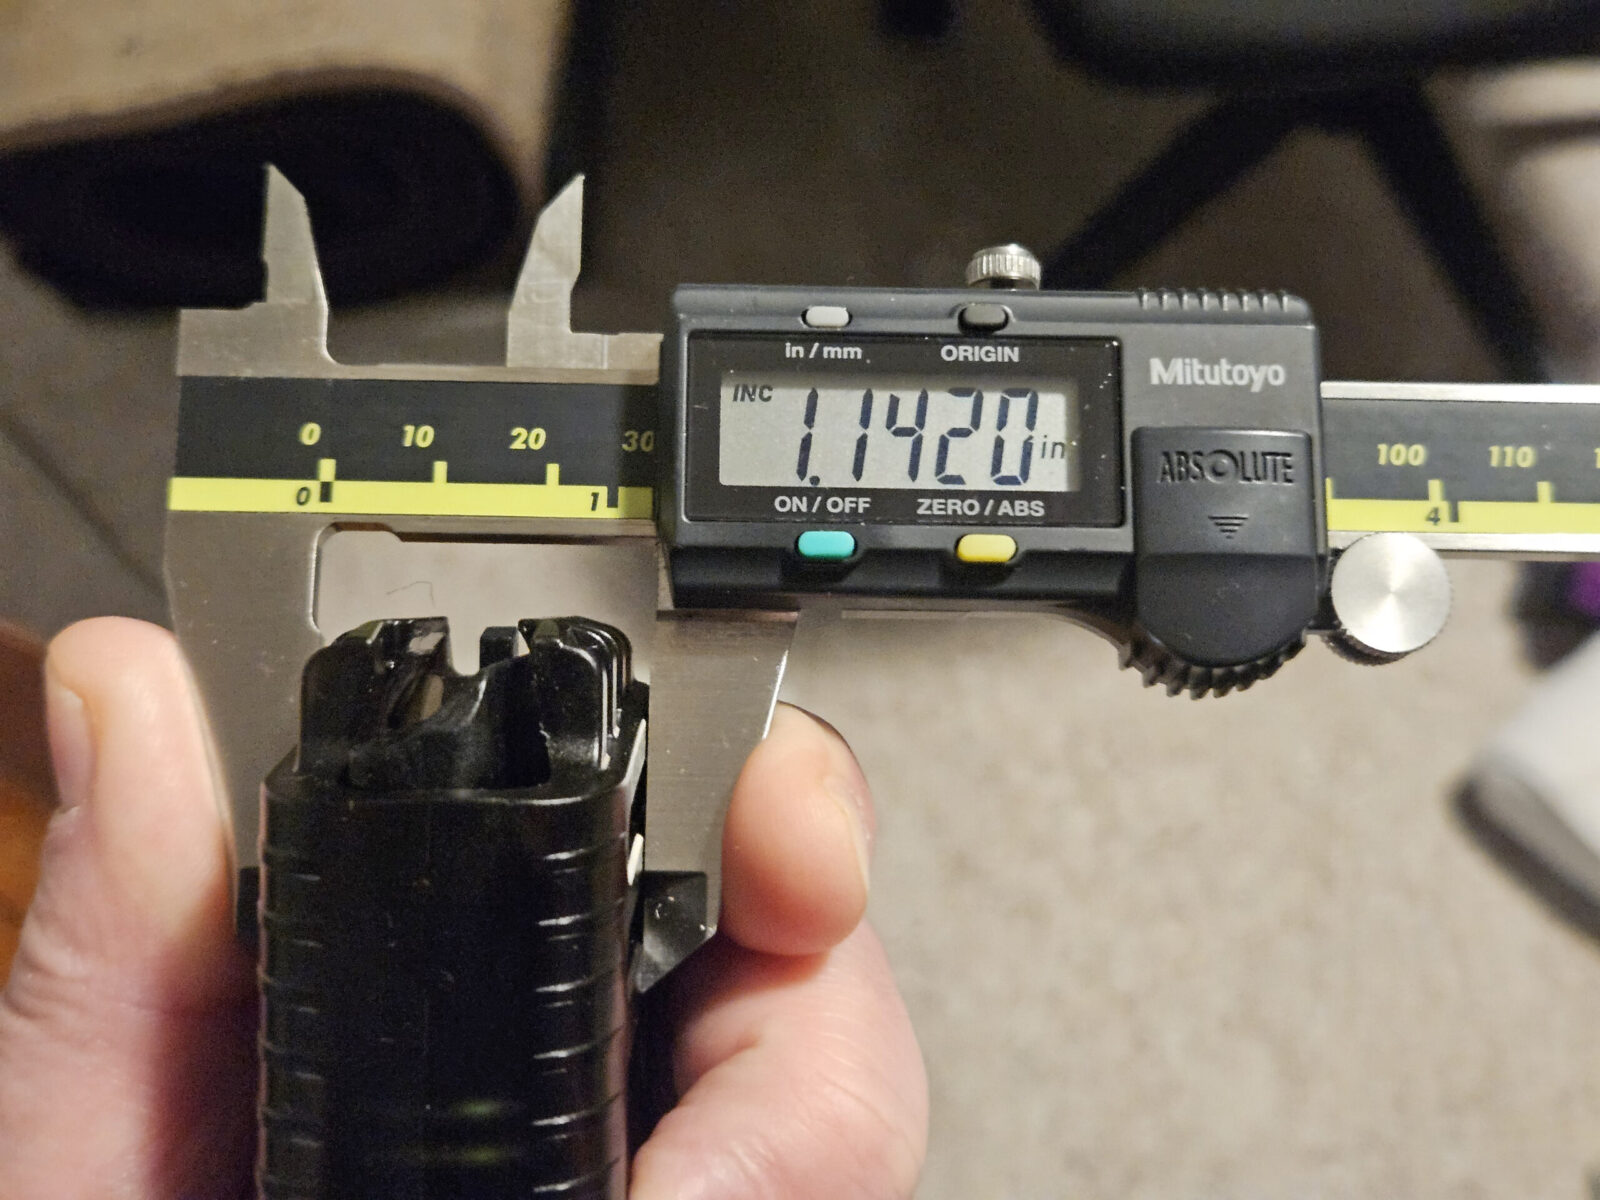
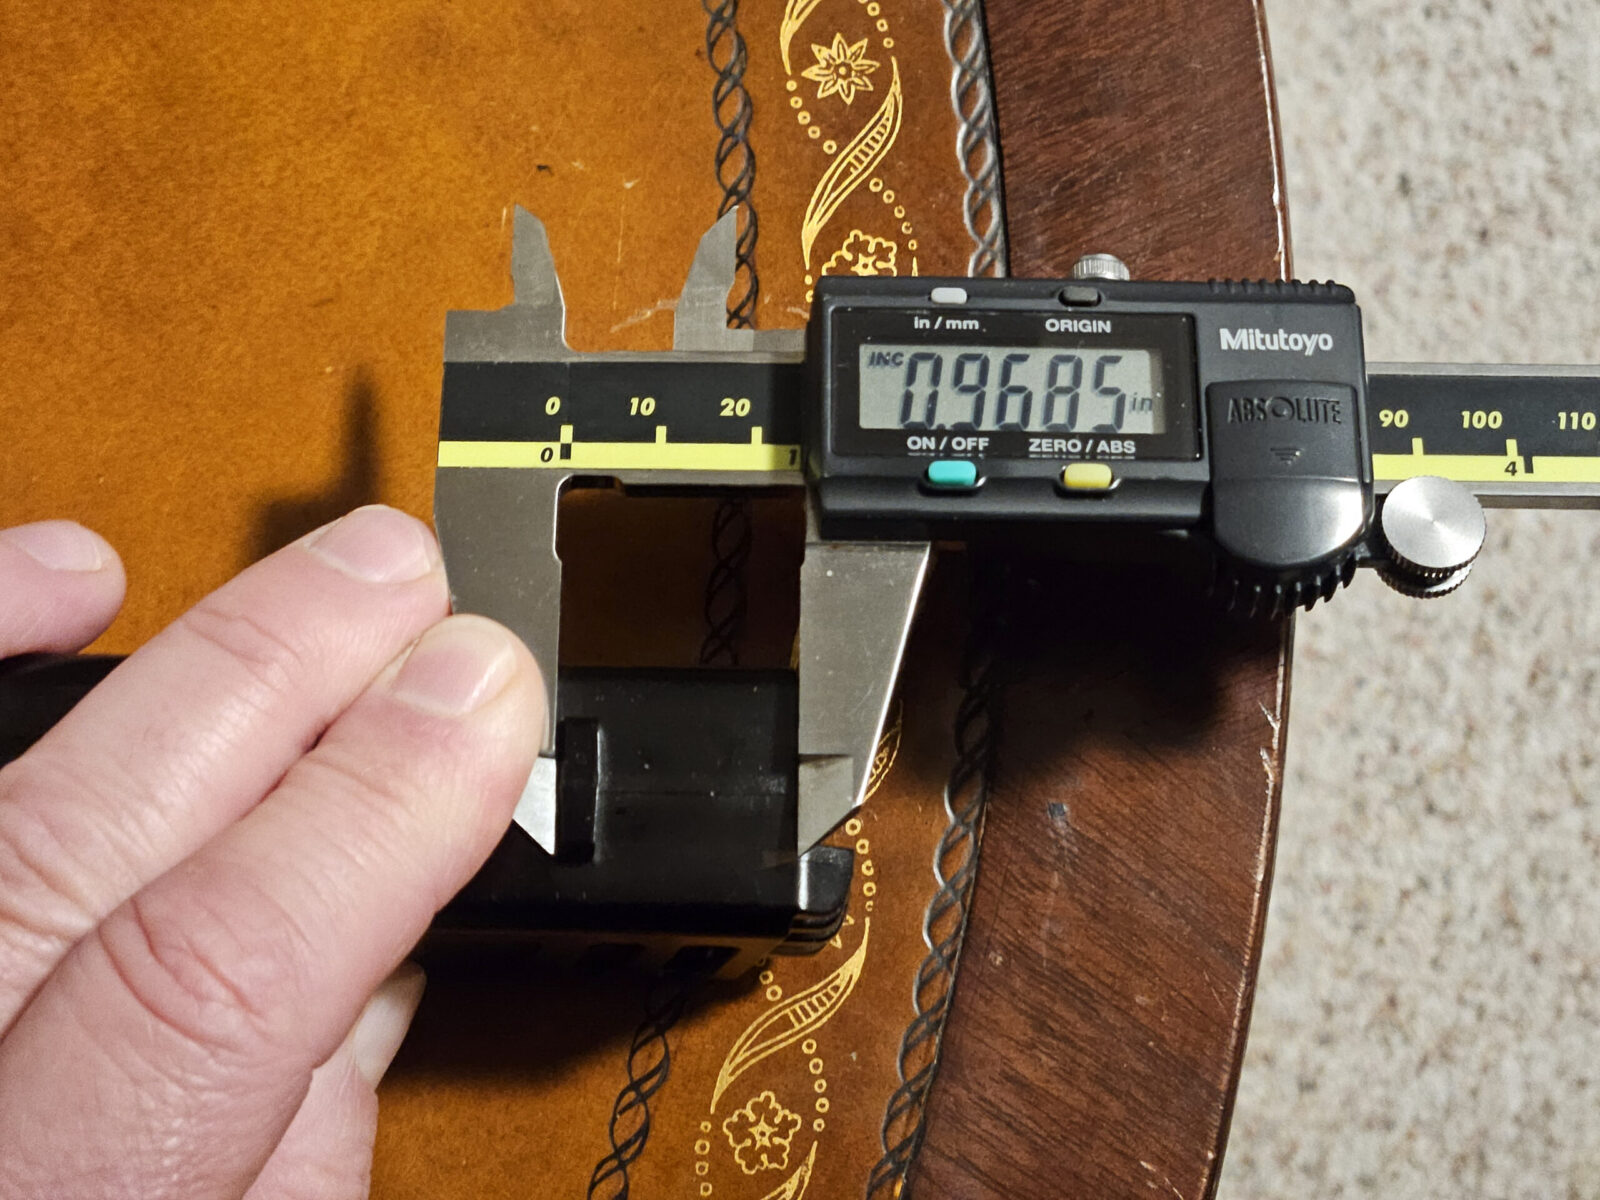
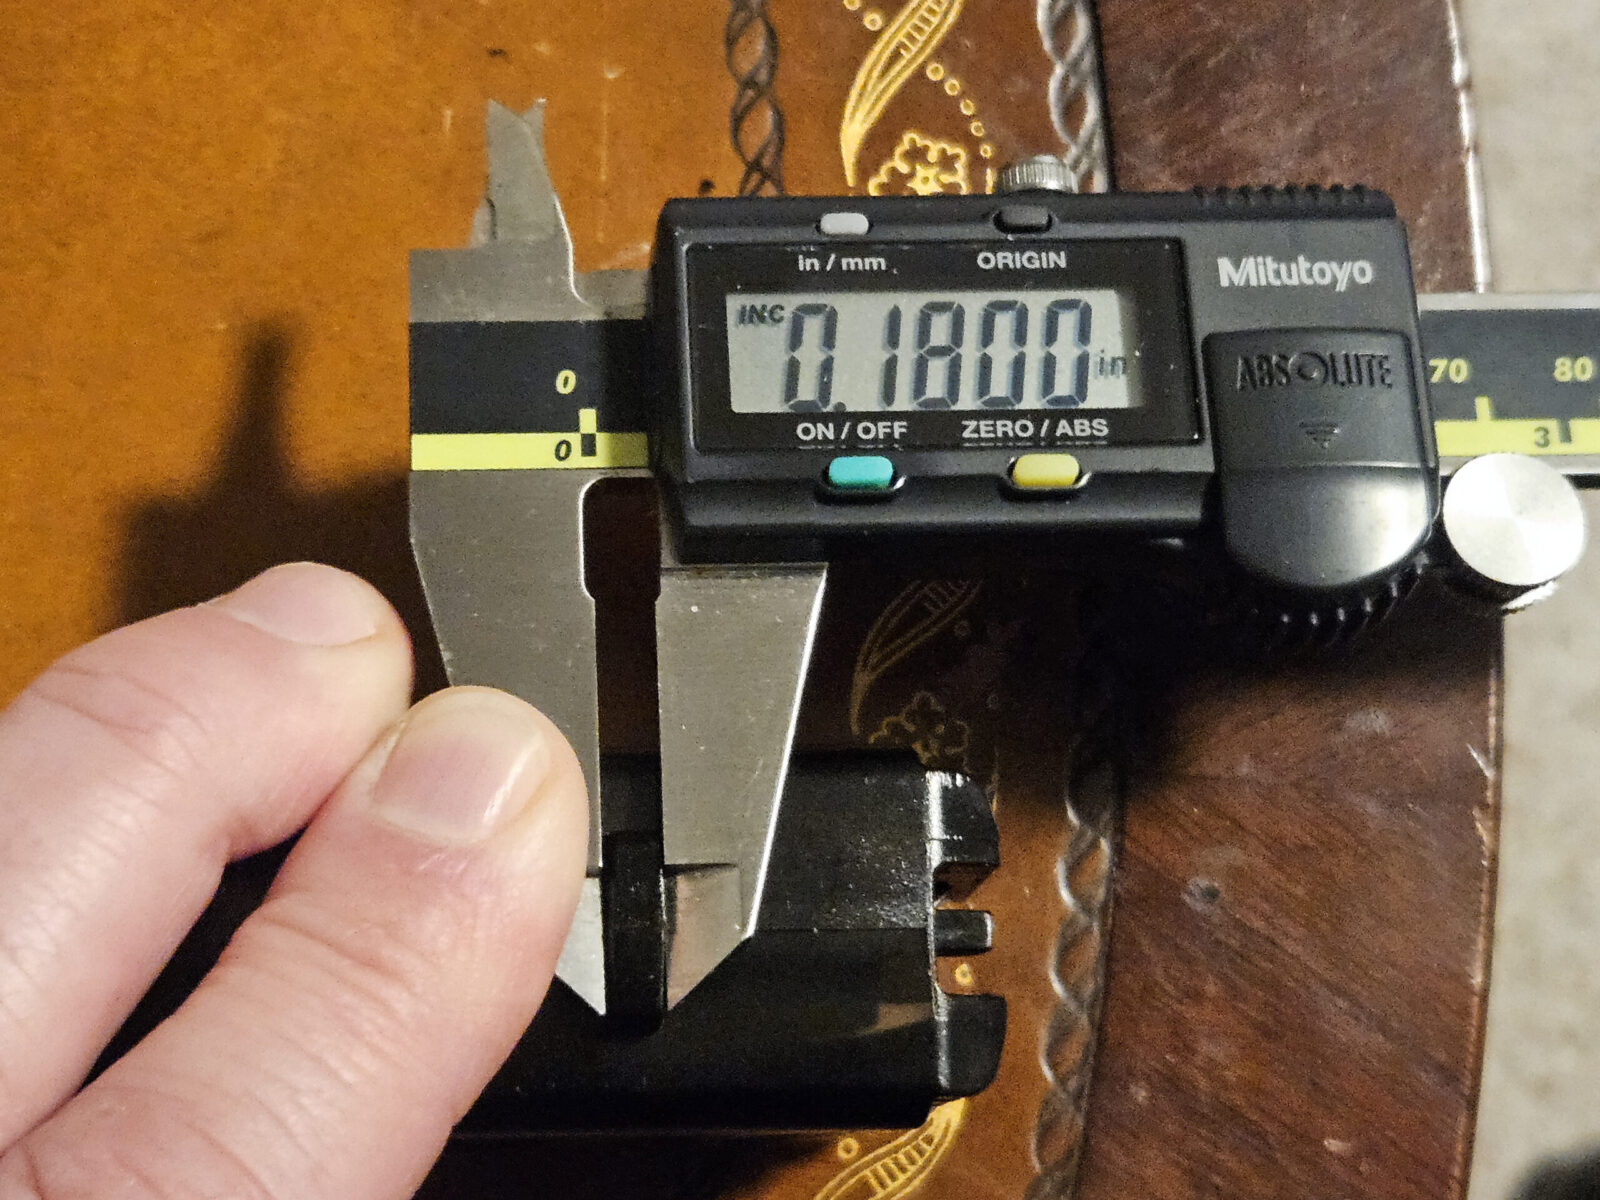
The girth of the heavily built mags means most loaders will not fit them. On the other hand, those are some impressive reinforcements on the mag lips and thick walls.Front to back is about 1.62″Left to right is approximately 1.14″Distance from the botttom of the locking tab to the top of the magazine body is about 0.96-0.97. It’s molded so there’s a bit of ballparking as to the exact top.The magazine locking tab is about 0.18″ thick.
Playing a hunch
Ok, so I did some searching on .40 caliber and 10mm UMP loaders and then played a hunch. I make magazines for Rock Island Armory’s A2 HC .40 and 10mm pistols. They use a staggered magazine and my source tube for the custom mags I make is actually a Mec-Gar .45 mag. What if a UMP .45 loader would work? I had a pretty good hunch it would so I started researching them.
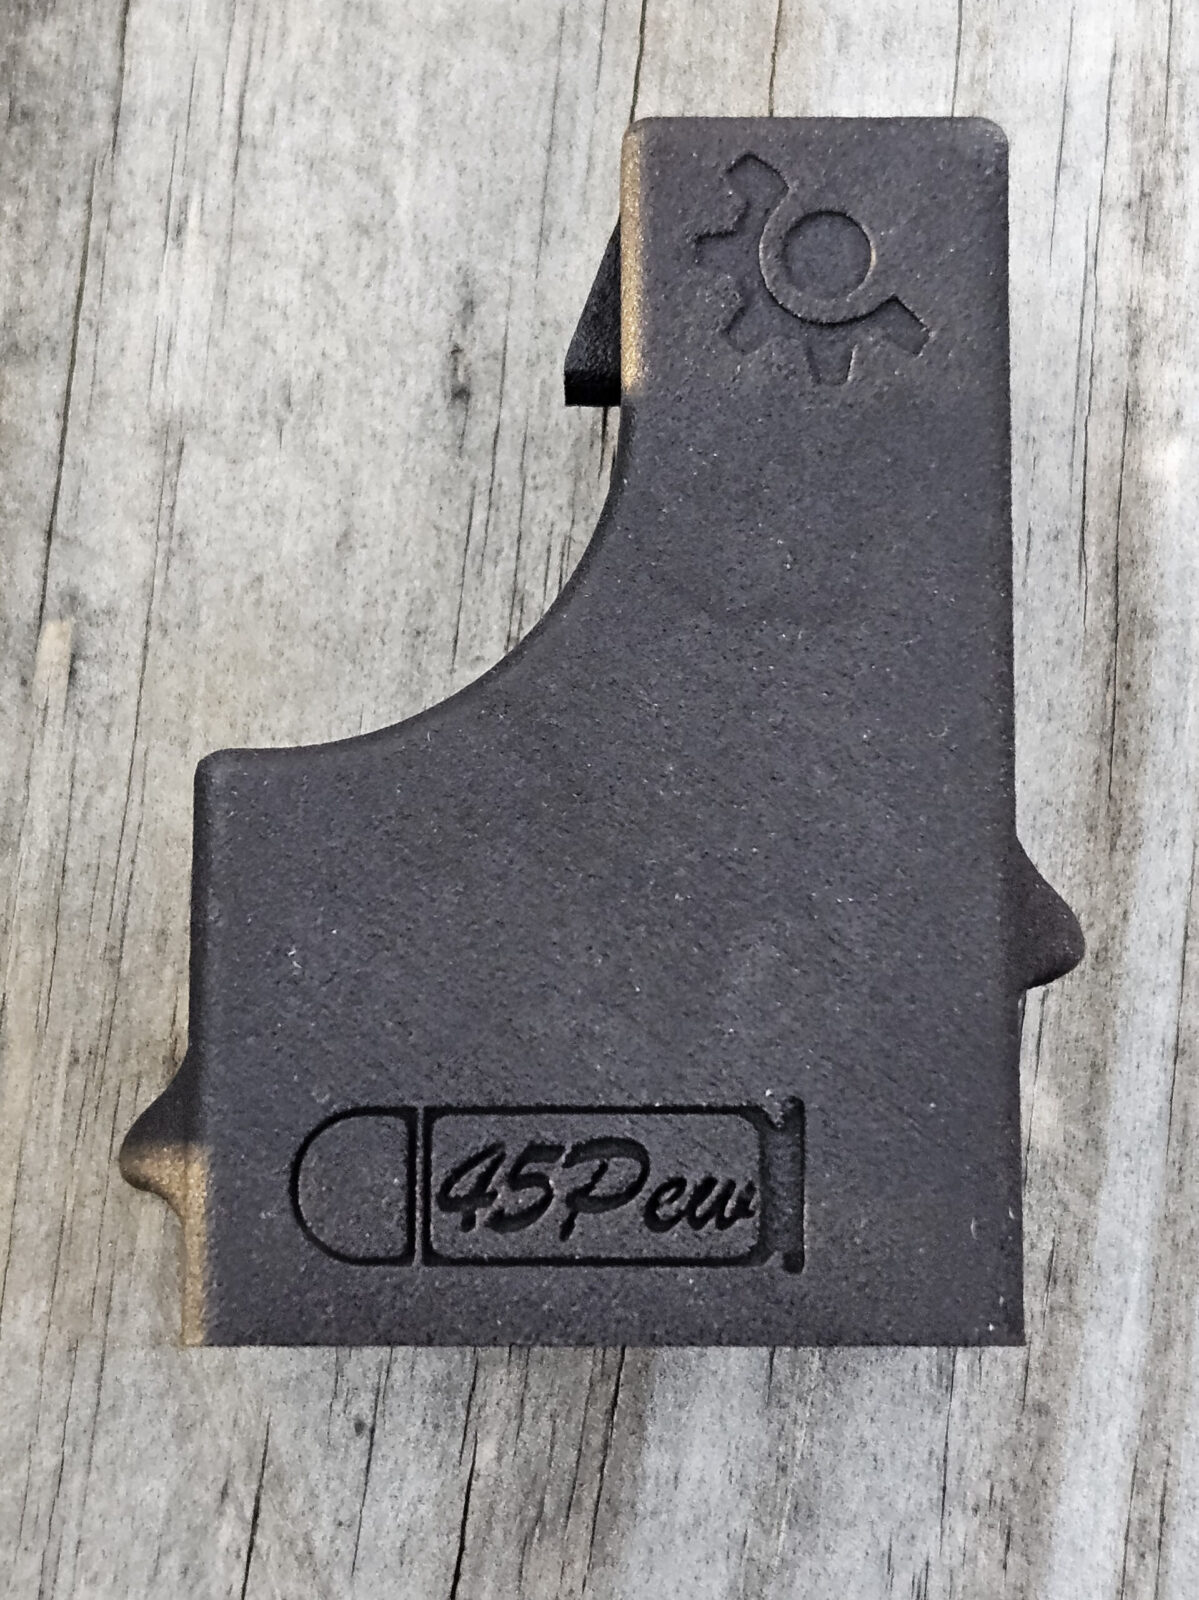
The UMP .45 is much more common so I had options. The one that caught my eye was from Custom Smith so I ordered it and must say I am impressed.
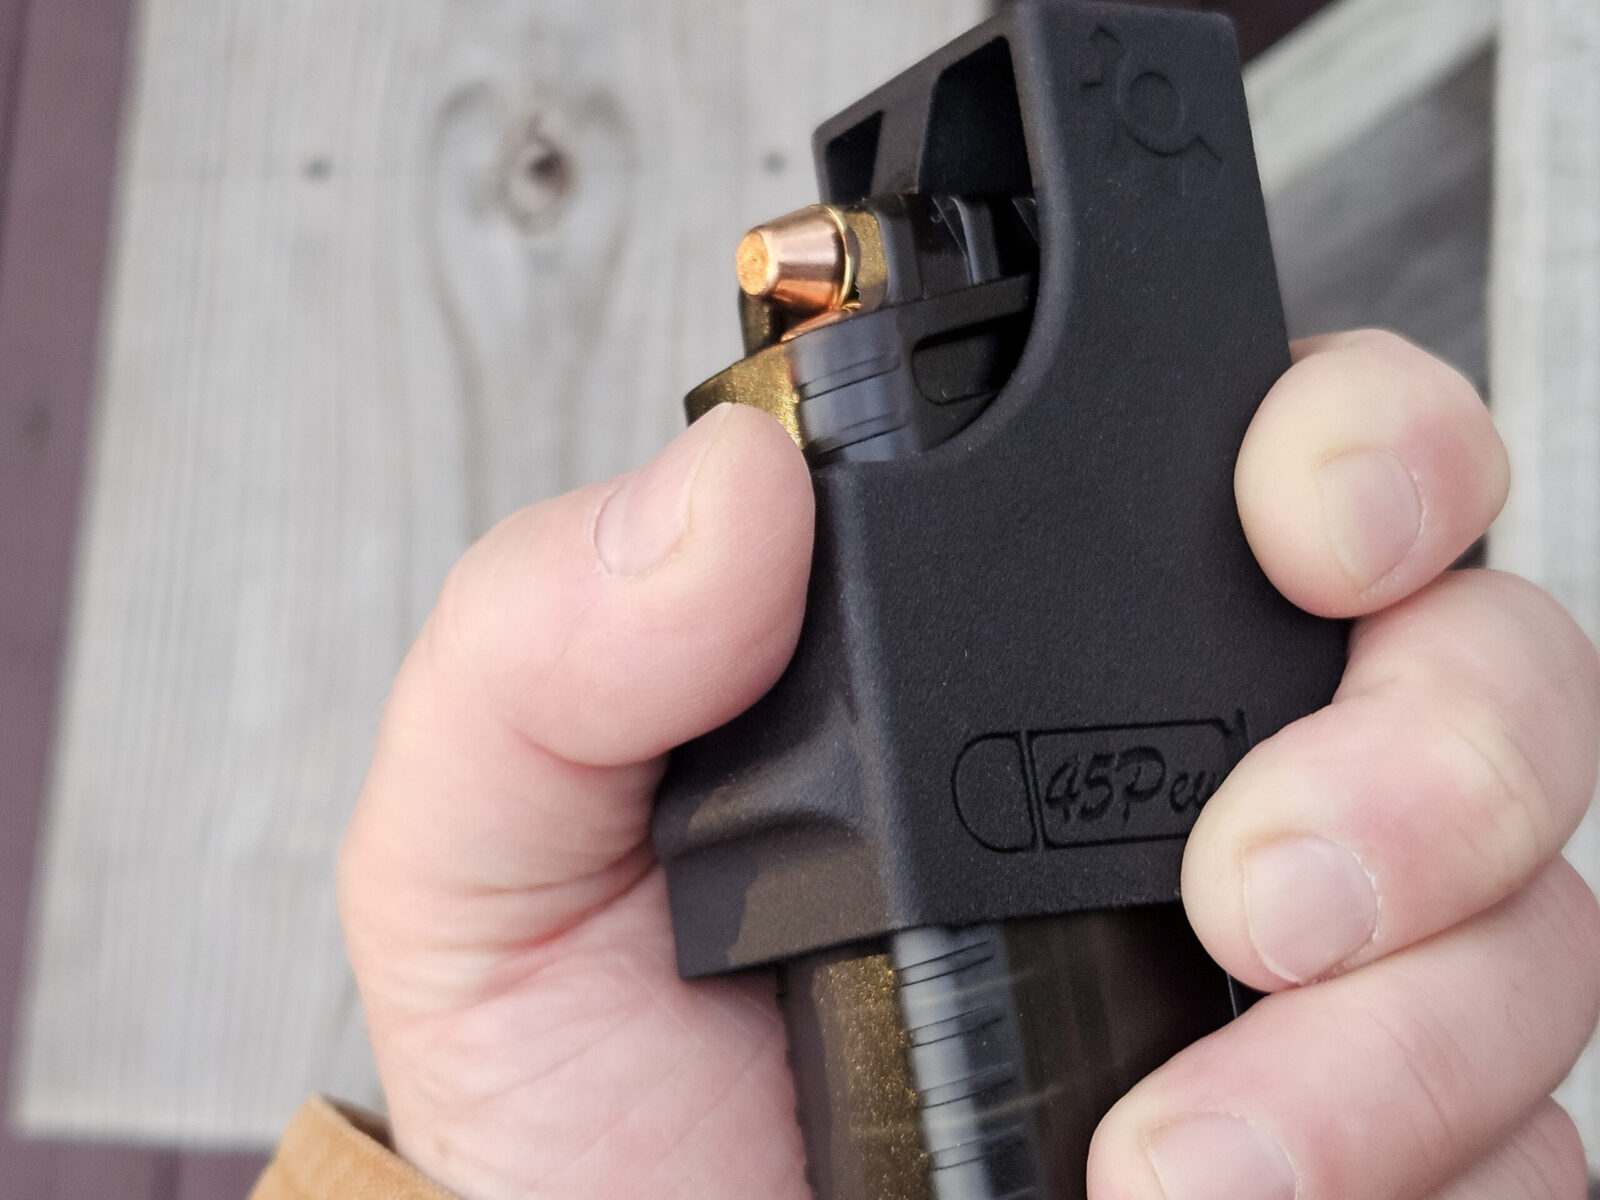
It is 3D printed and nicey done. Everything seems thick enough to have proper rigidity. I like finger rests on the sides to give your hand something to get hold of. I promptly loaded two mags super easy. You push down, slide the cartridge in part way, lift the loader up, slide the cartidge in the rest of the way and repeat.
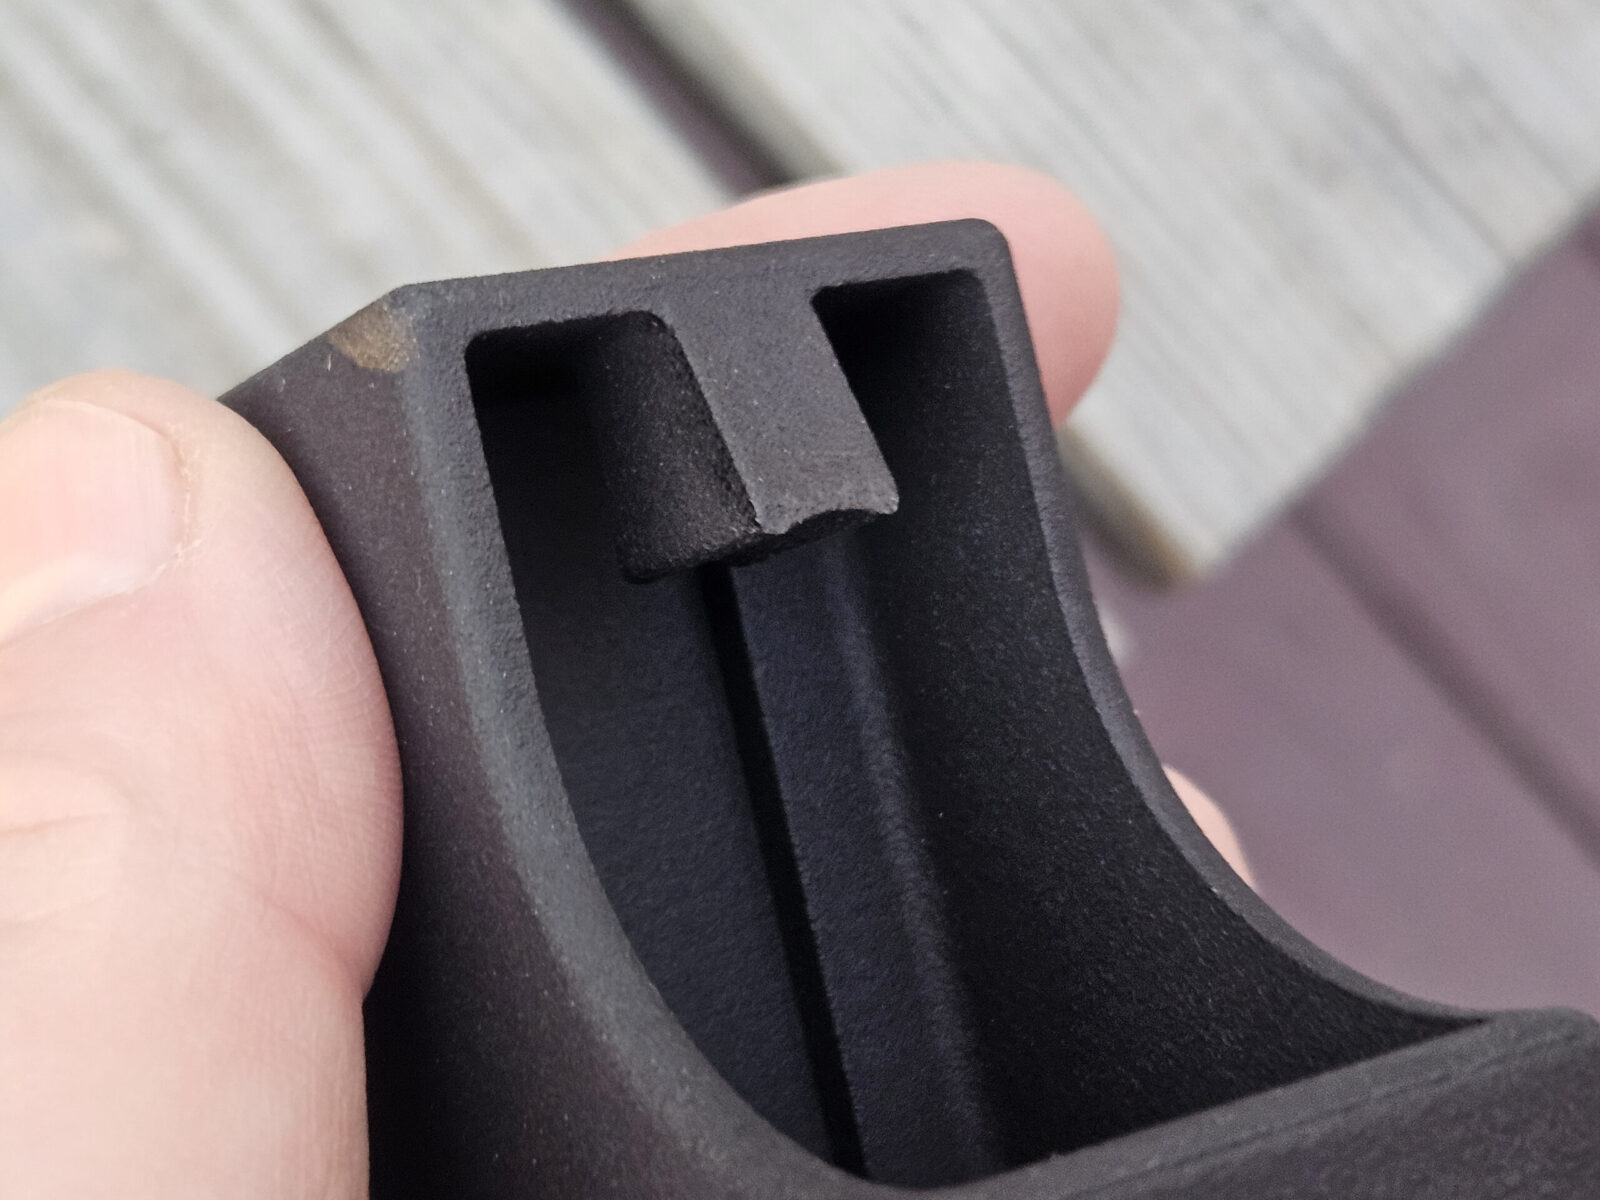
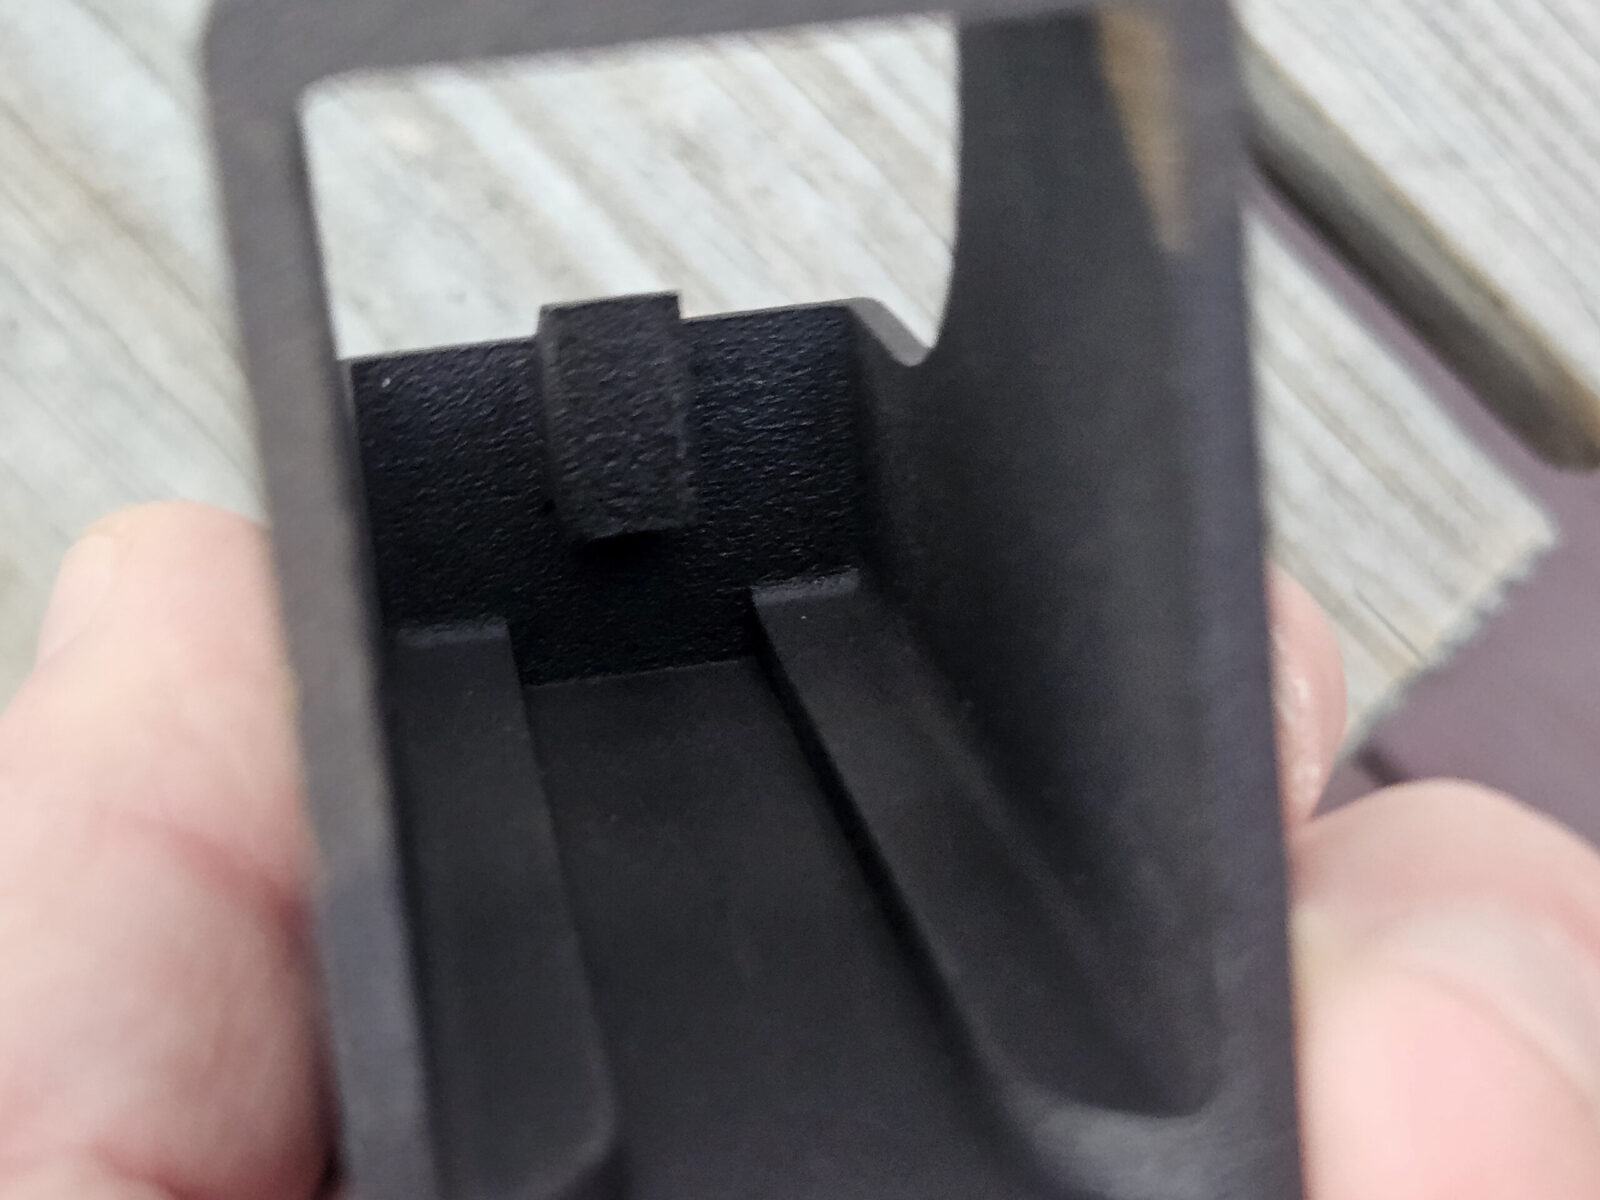
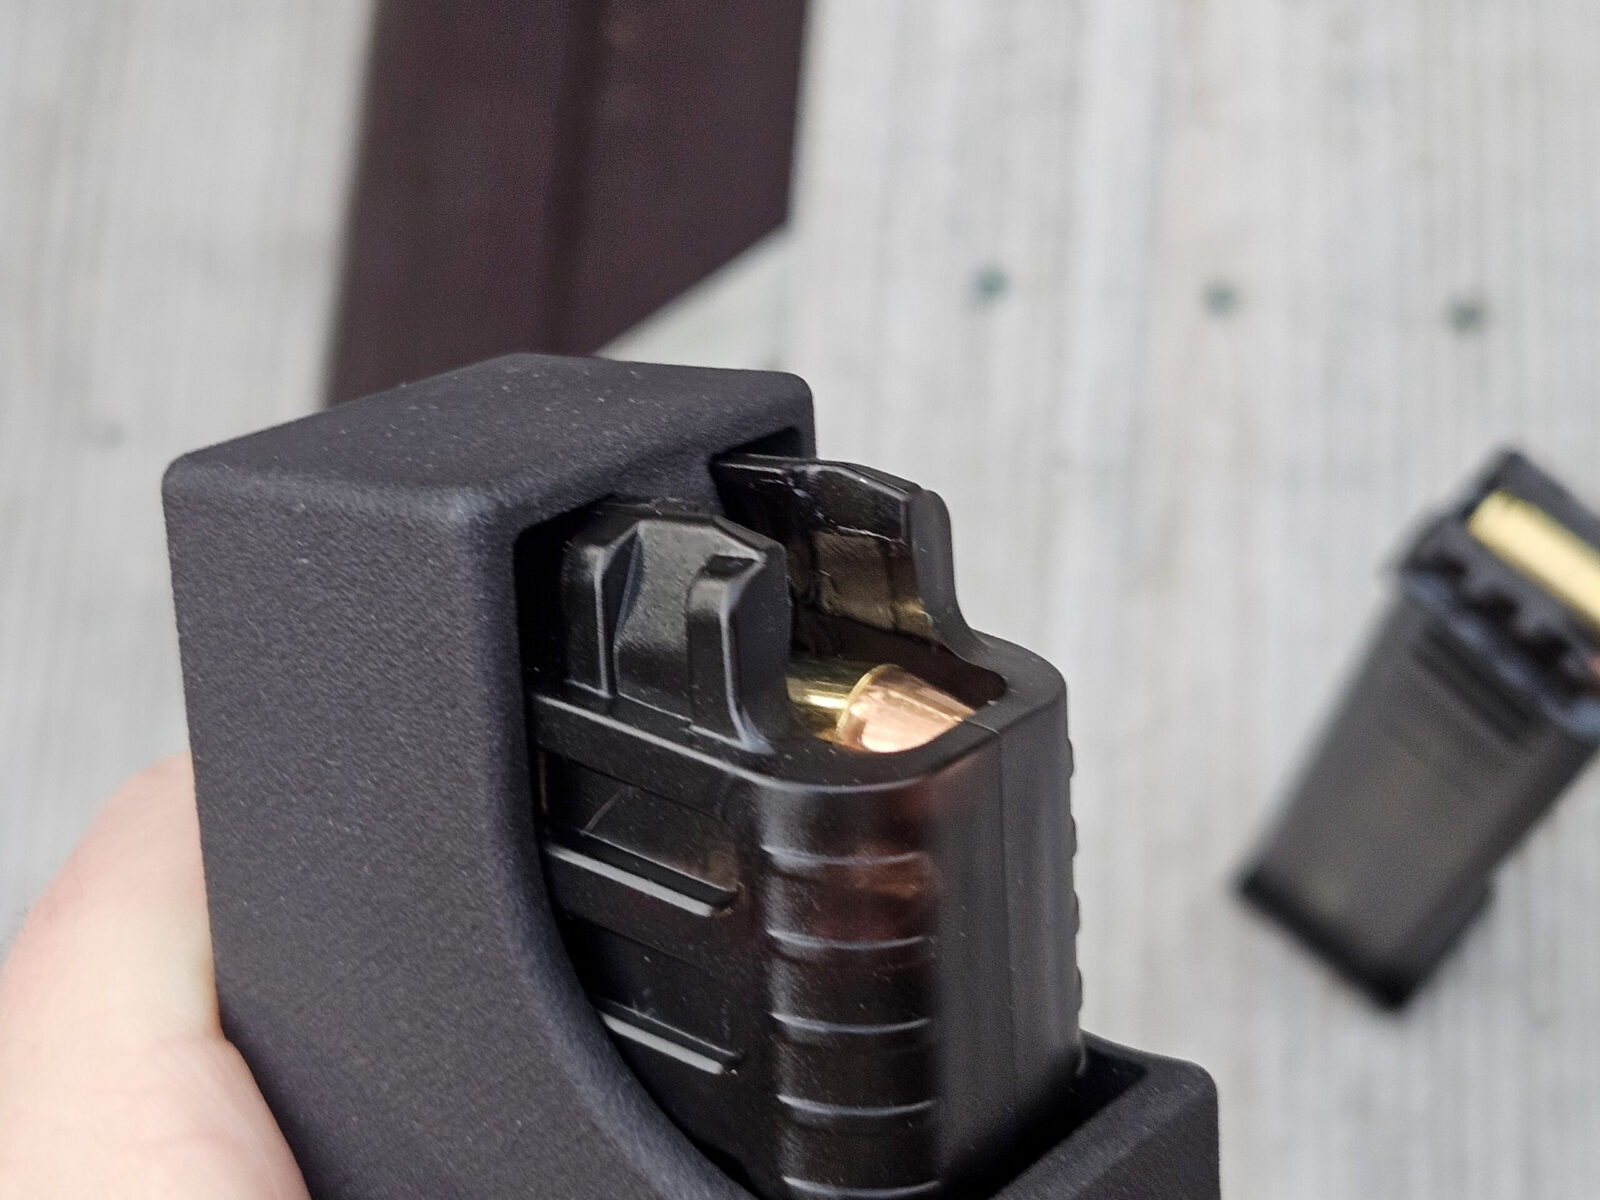
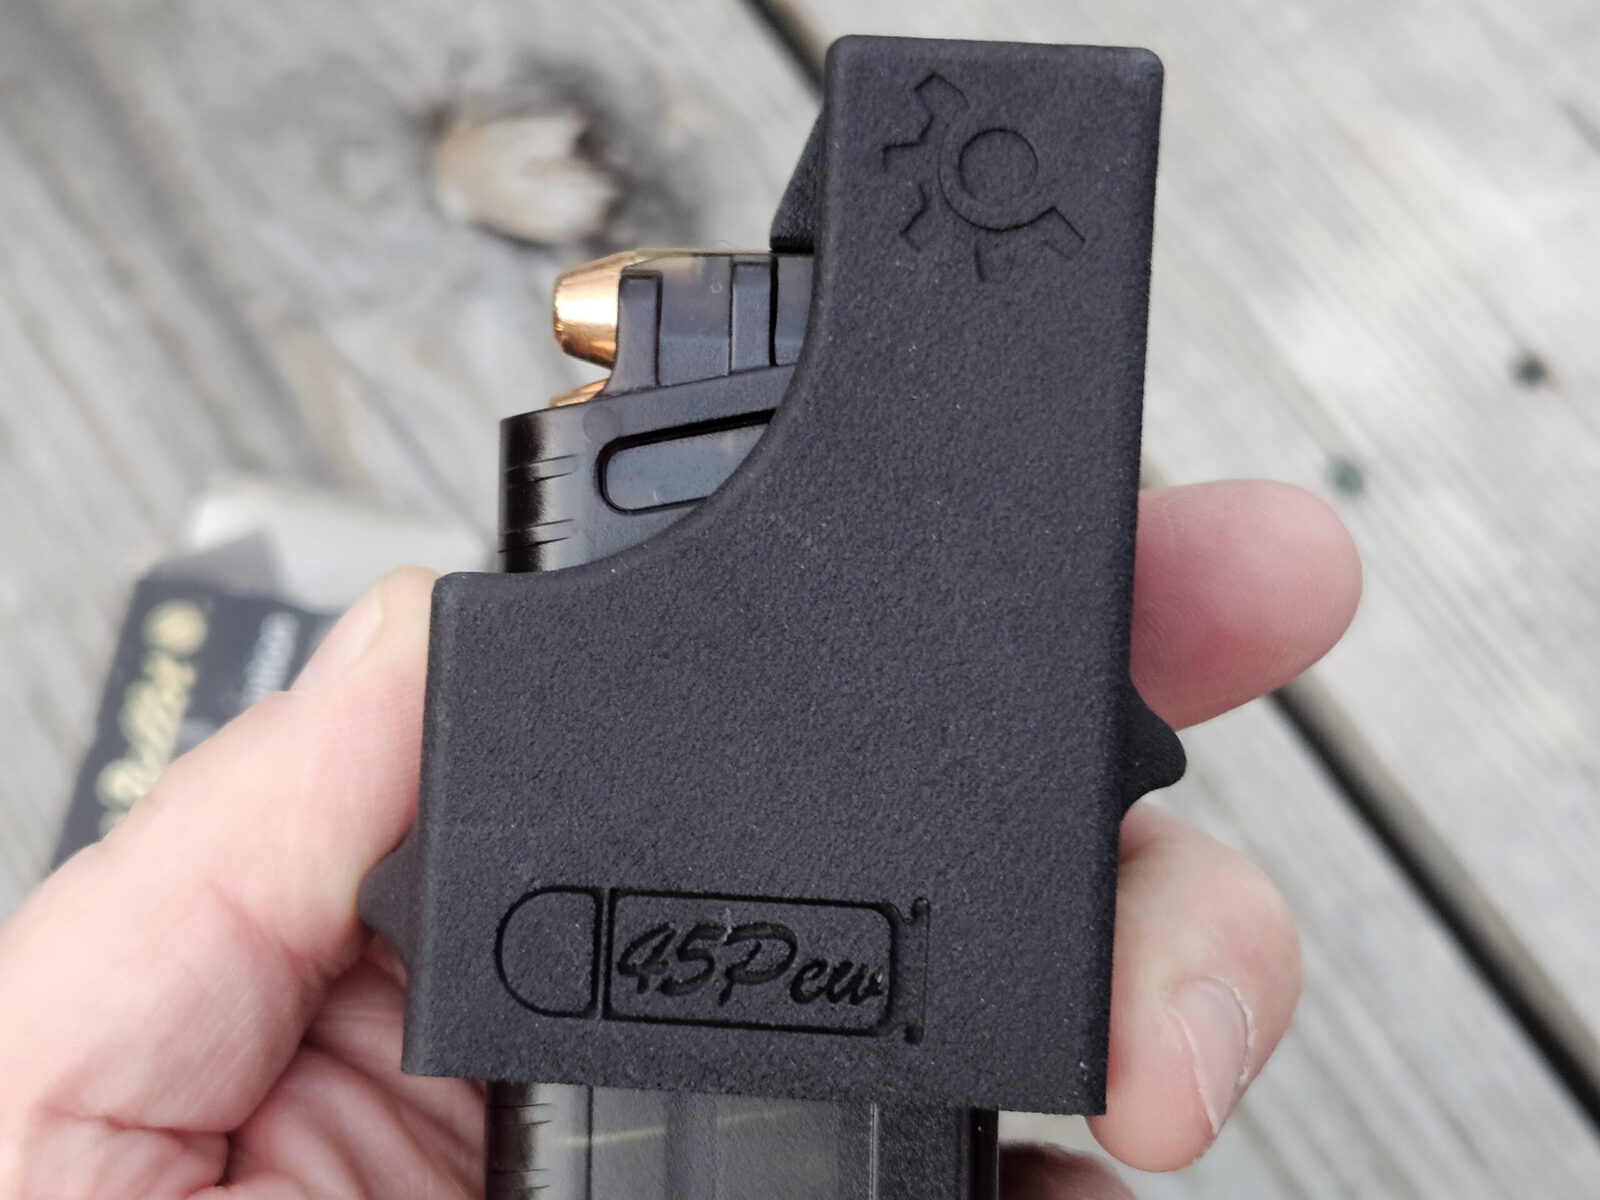
Side shotThe ram that pushes the cartridges done is beefy and nicely done.Inside is nice and clean also.The UMP .45 loader fits great.The ram does a great job pushing the last cartridge down so you can slide the base of the next cartridge part way in. You then move the loader out of the way, push the cartridge all of the way in and move on to the next round.Parting photo – it works great.
Summary
Grand Power Stribog’s 10mm model uses magazines based on the HK UMP design. The Grand Power magazines are affordable and relatively easy to find. You may need to dig just a bit as the 10mm Stribog sales are outpacing magazine availability but I am sure the mag availability will catch up.
No, I wasn’t paid to write this – I had to buy it because I wanted the 10mm Stribog and manual mag loading kills my hands.
By the way, S&B 180 grain FMJ 10mm is my goto range ammo. It’s affordable and runs great. I use it for breaking in and target practice with all of my 10mms.
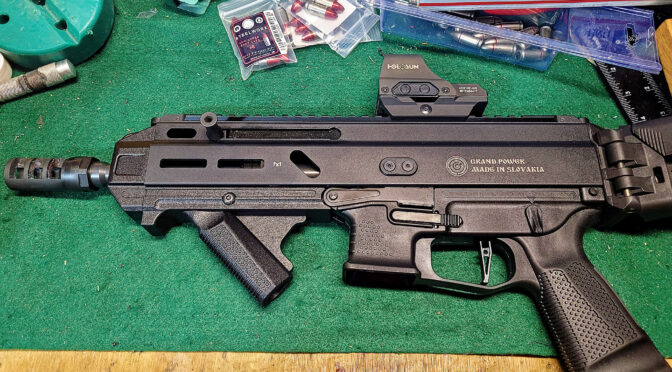
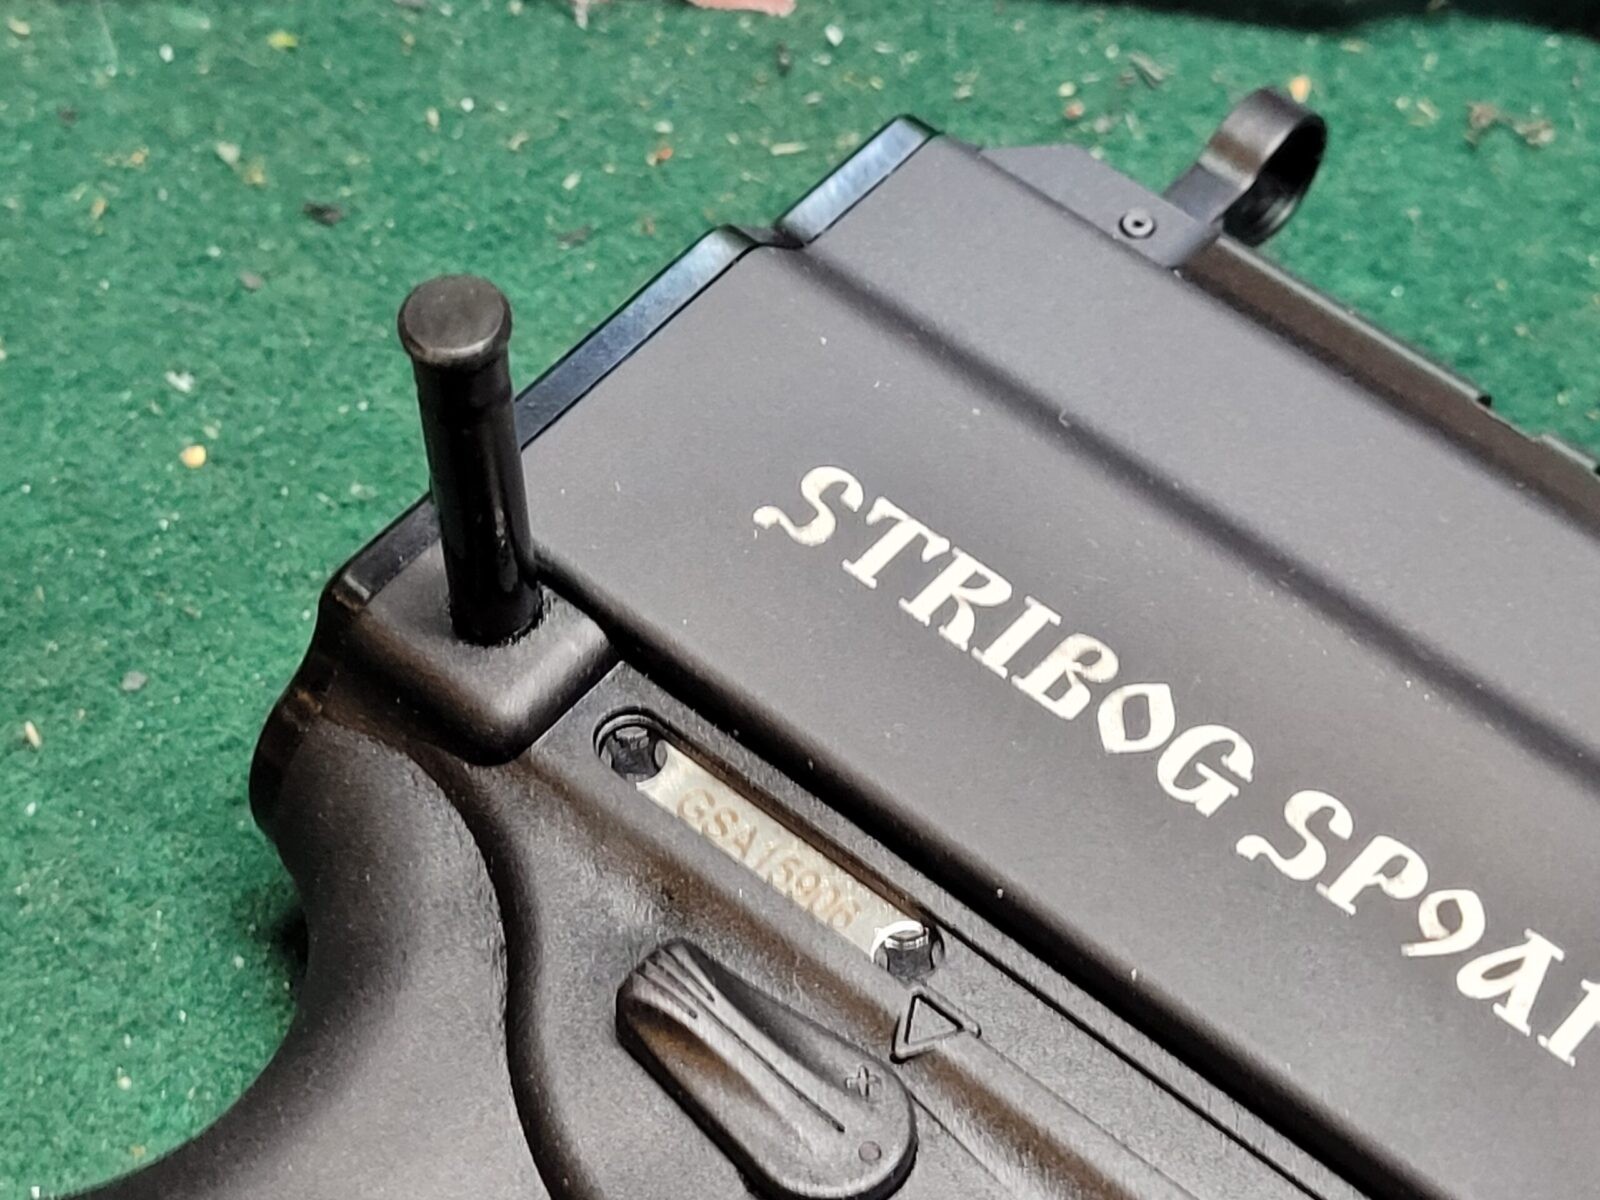
I’ve really enjoyed my Stribog SP9A1 but one of my small complaints is that the cocking handle is uncomfortable. When the Stribog was first released, it had a reciprocating charging handle – meaning it would go back and forth with the slide carrier. They listened to customer (fortunately) and introduced a non-reciprocating charging handle. Somewhere along the line, the made the charging handle it could be installed on either the left or right side depending on the shooter’s preference. Now here’s my gripe – the stock handle – it’s a knob really – has a fairly narrow diameter in the middle. It’s tapered from both ends to the middle so your finger finds the middle real fast for a positive grip but it’s just too small. I decided to look into options and fix it because I really liked the Stribog otherwise.
Thanks to a zoom lens, the charging handle/knob looks big in this photo but the middle narrow part is just a bit too small to be comfortable in my honest opinion – I just don’t care for the feeling.
HB Industries Ambi Charging Handle Kit
When I research parts, I tend to do some searching with Google plus I know certain websites that have products of the type I want – Global Ordnance is my first “go-to” site for Stribog accessories. Two options caught my eye – a folding charging handle that seemed a bit more than I wanted for some reason – or I could go with the HB Industries “Ambi Charging Handle Kit” and that was what I had in mind – a bigger knob to grab a hold of and it happened to come with a slightly smaller knob for the other side. All I really wanted was the bigger knob – having a backup knob on the other side was just a bit of a perk. Having started pistol caliber carbines (PCCs) with MP5s back in day, I actually prefer the left side charging handle as I am right handed and I never have to let go of the Stribog when racking the slide.
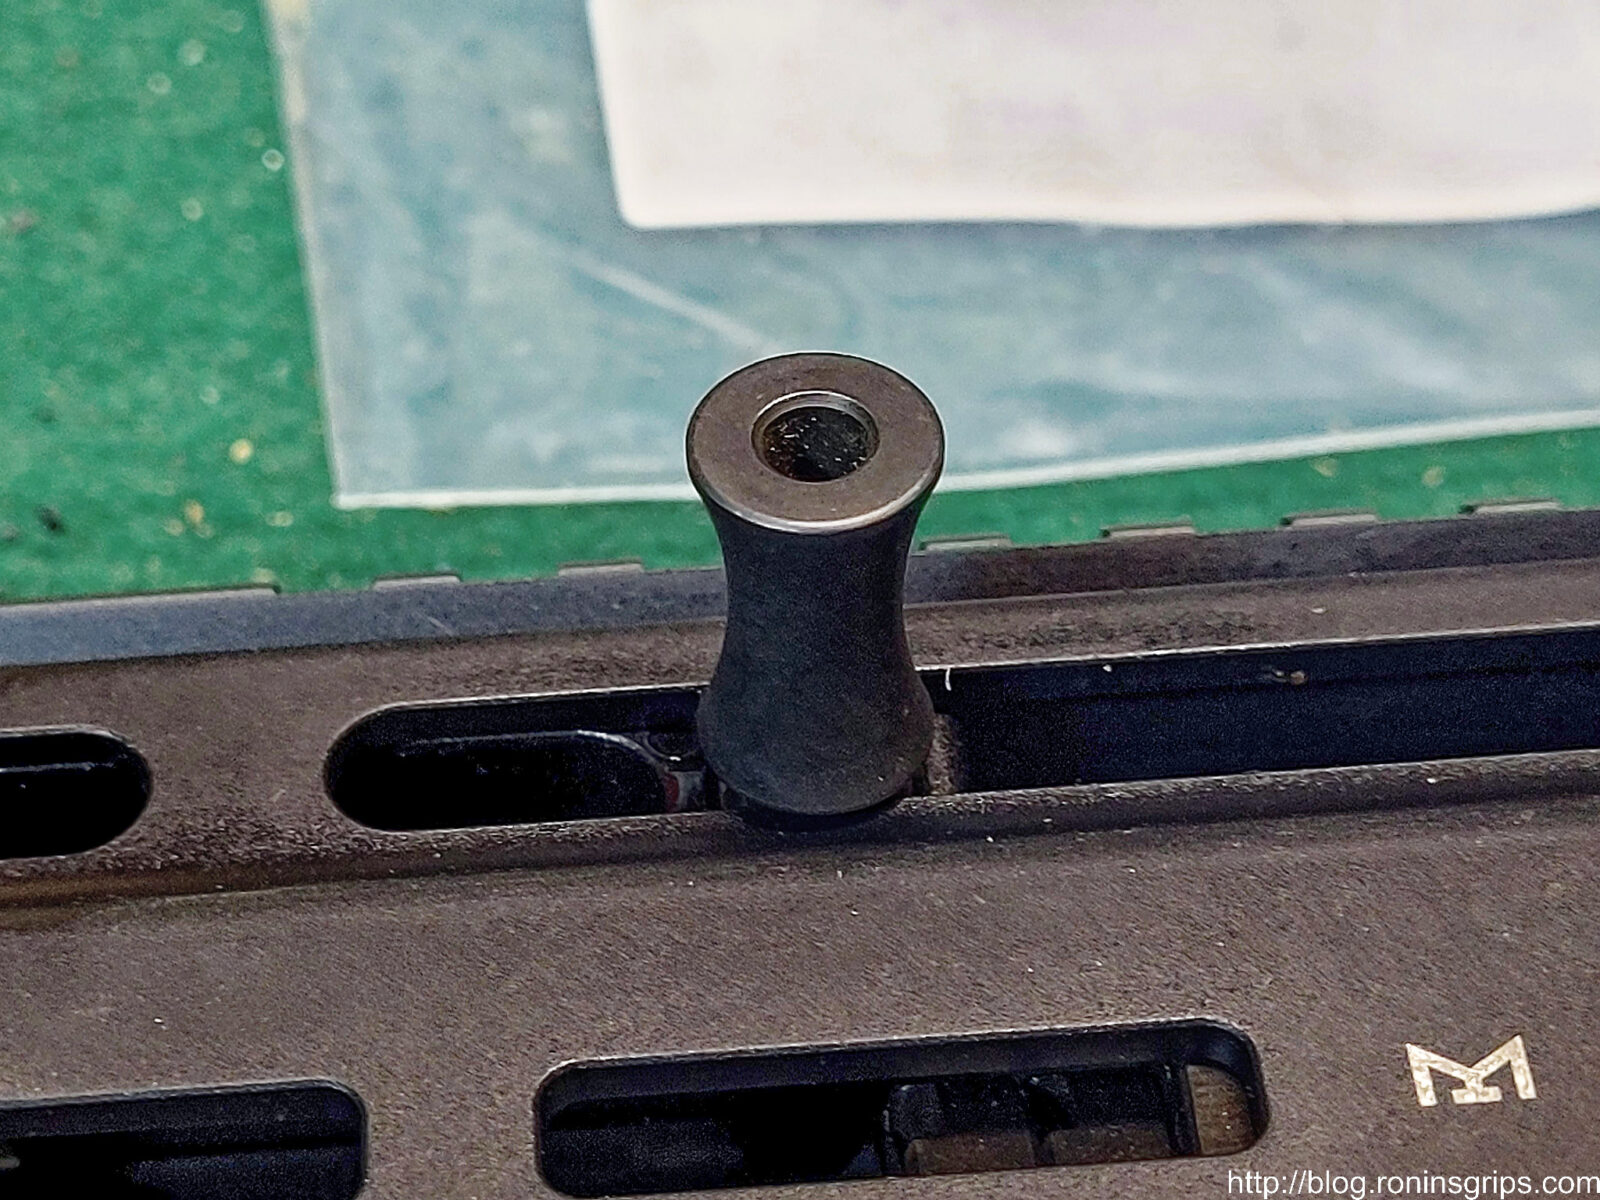
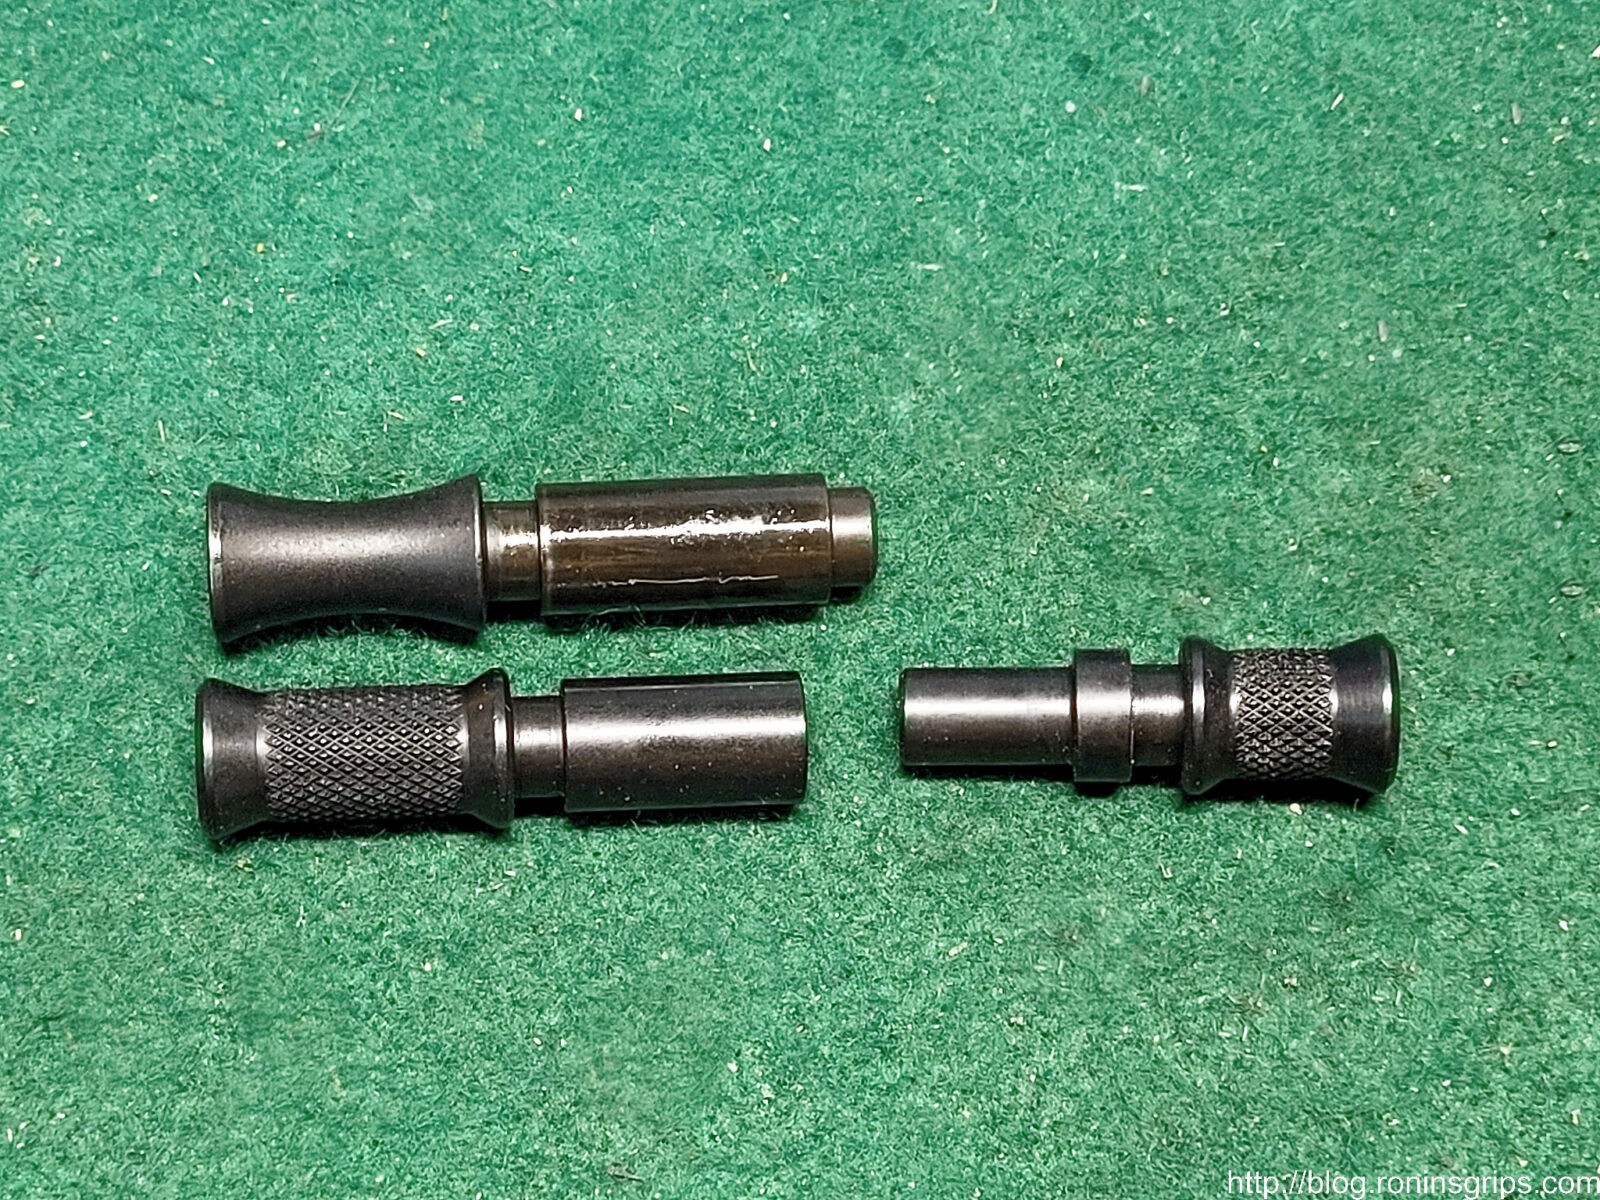
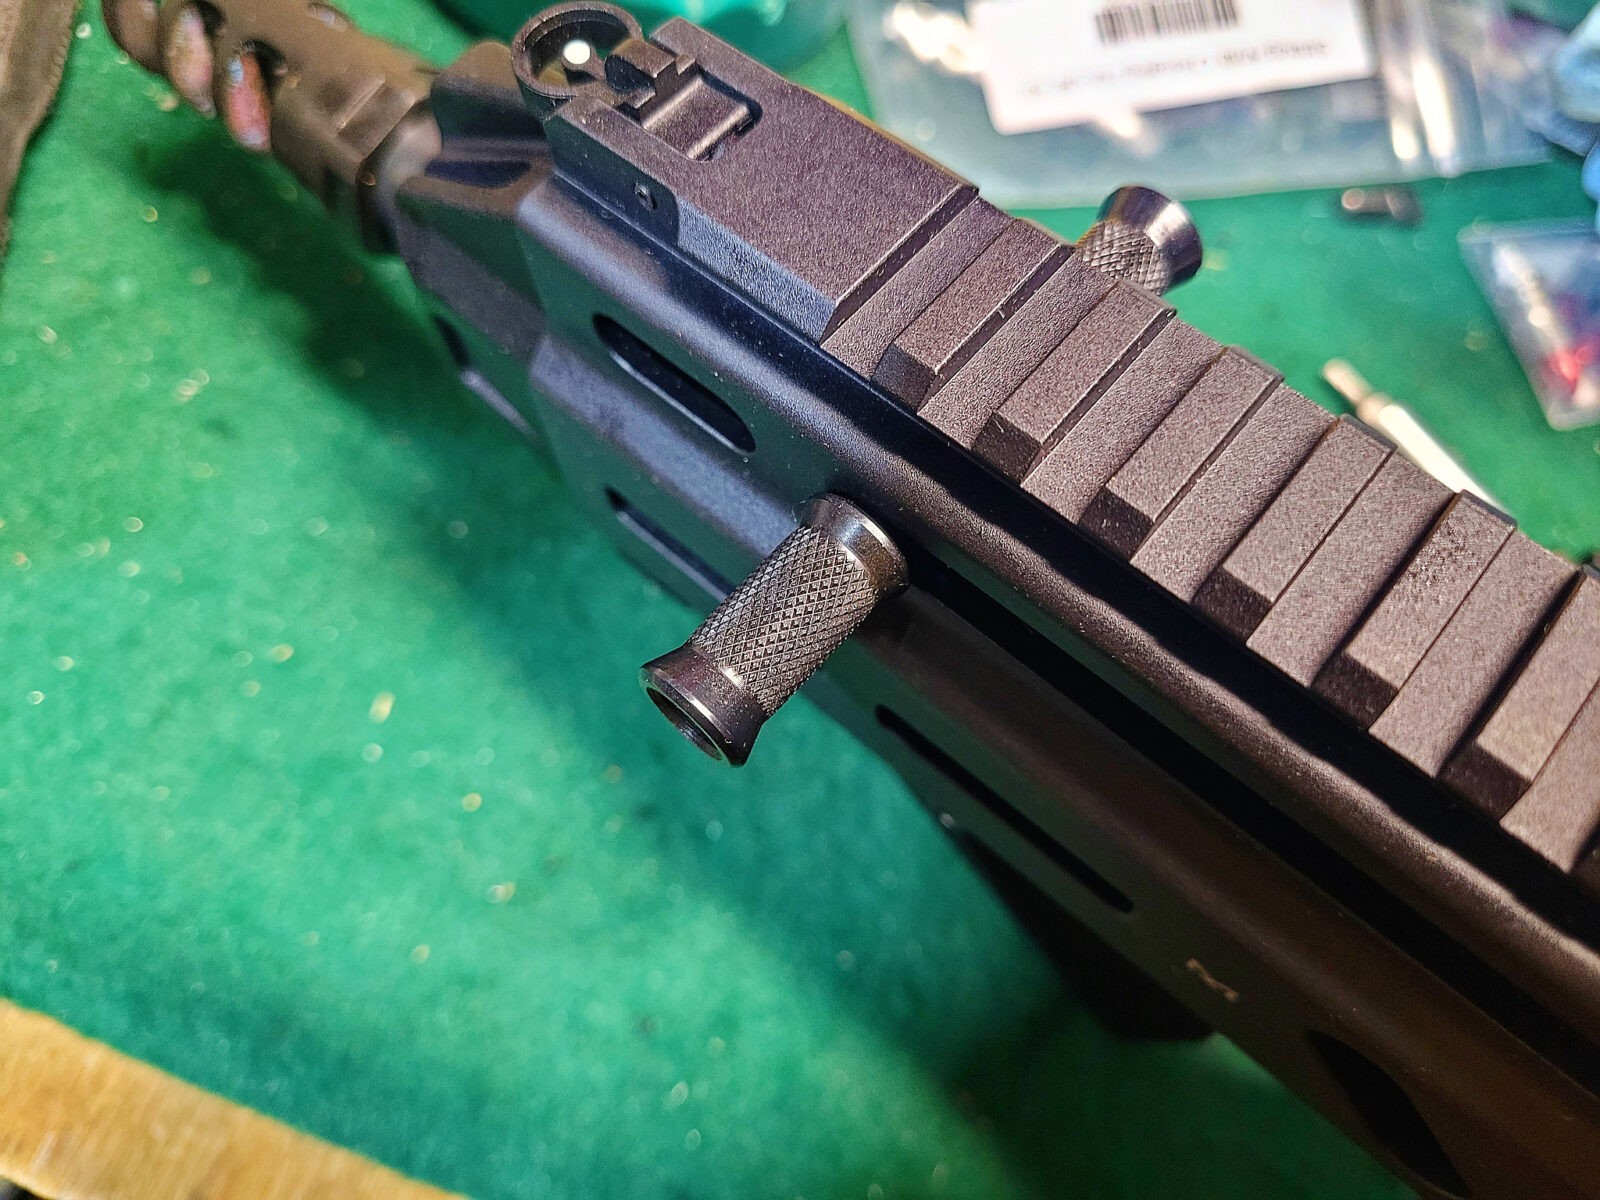
This is the HB Industries Ambi Charging Handle Kit. Notice how there is a larger 23mm knob and a smaller 16mm knob. You can decide how you want to use them. Notice the center is nice and wide and has knurling.
Installation
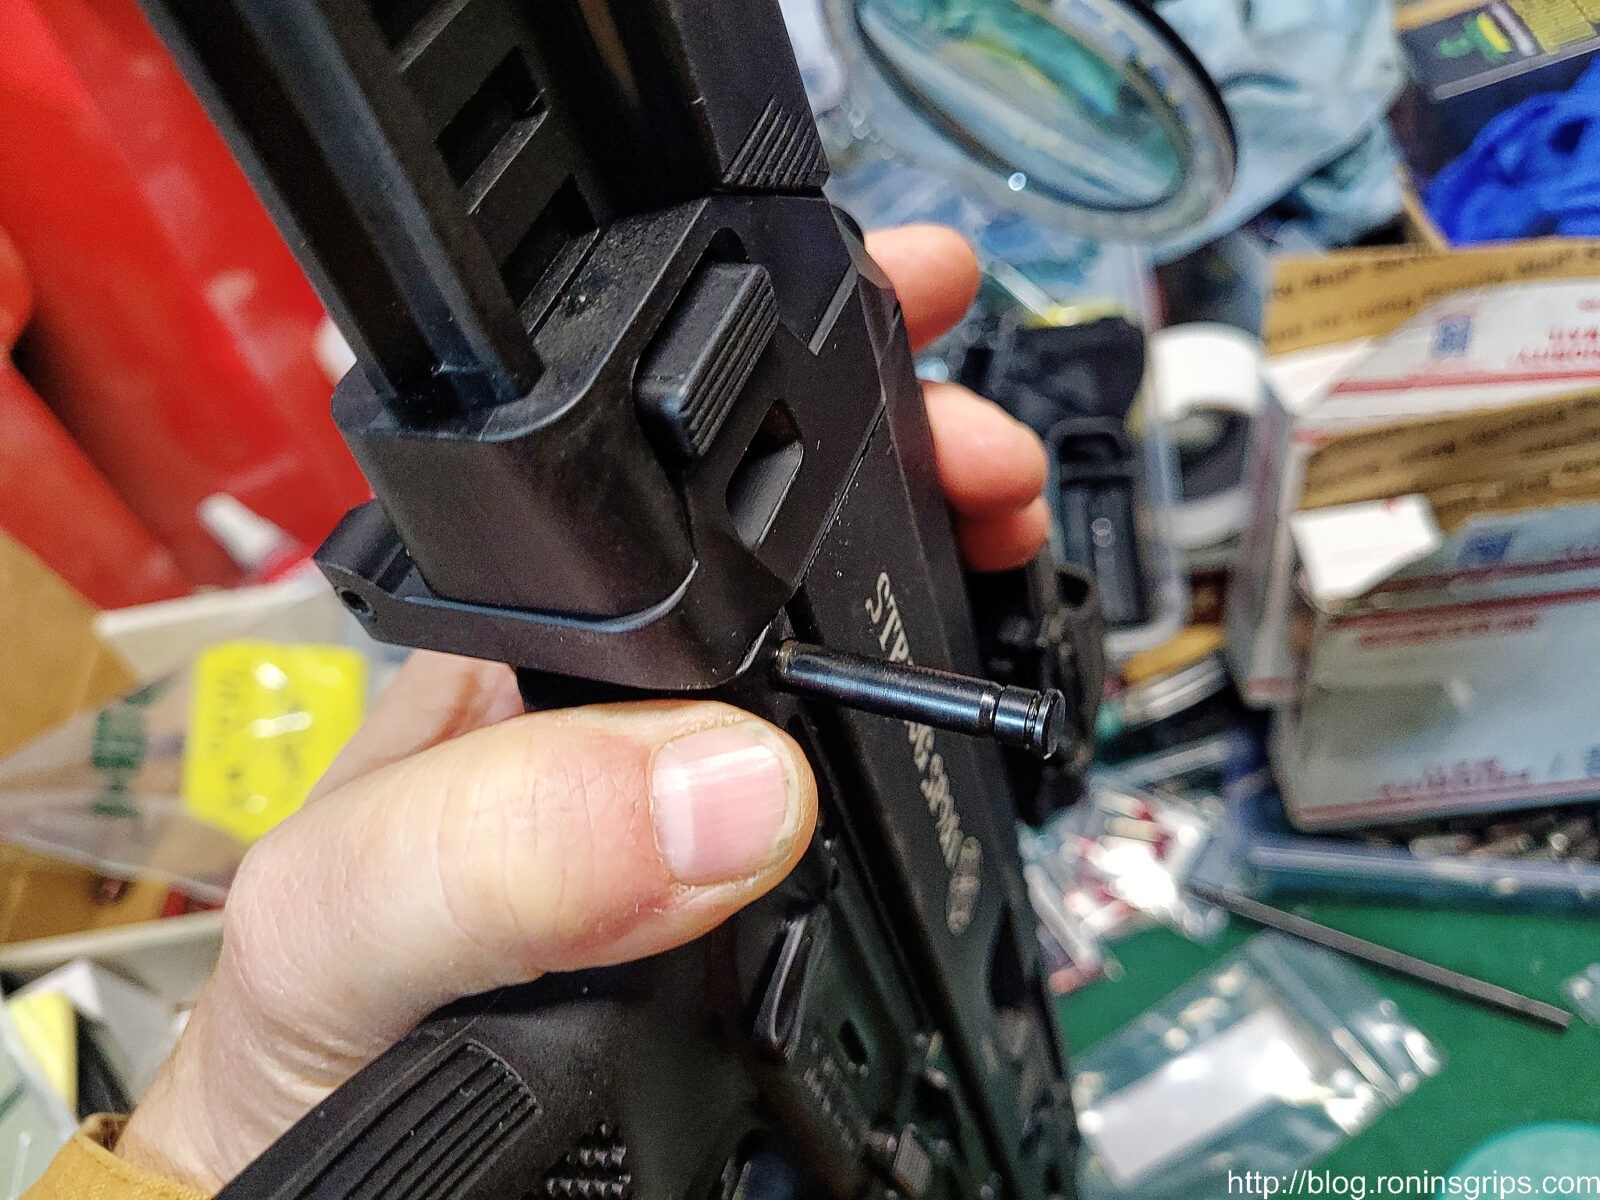
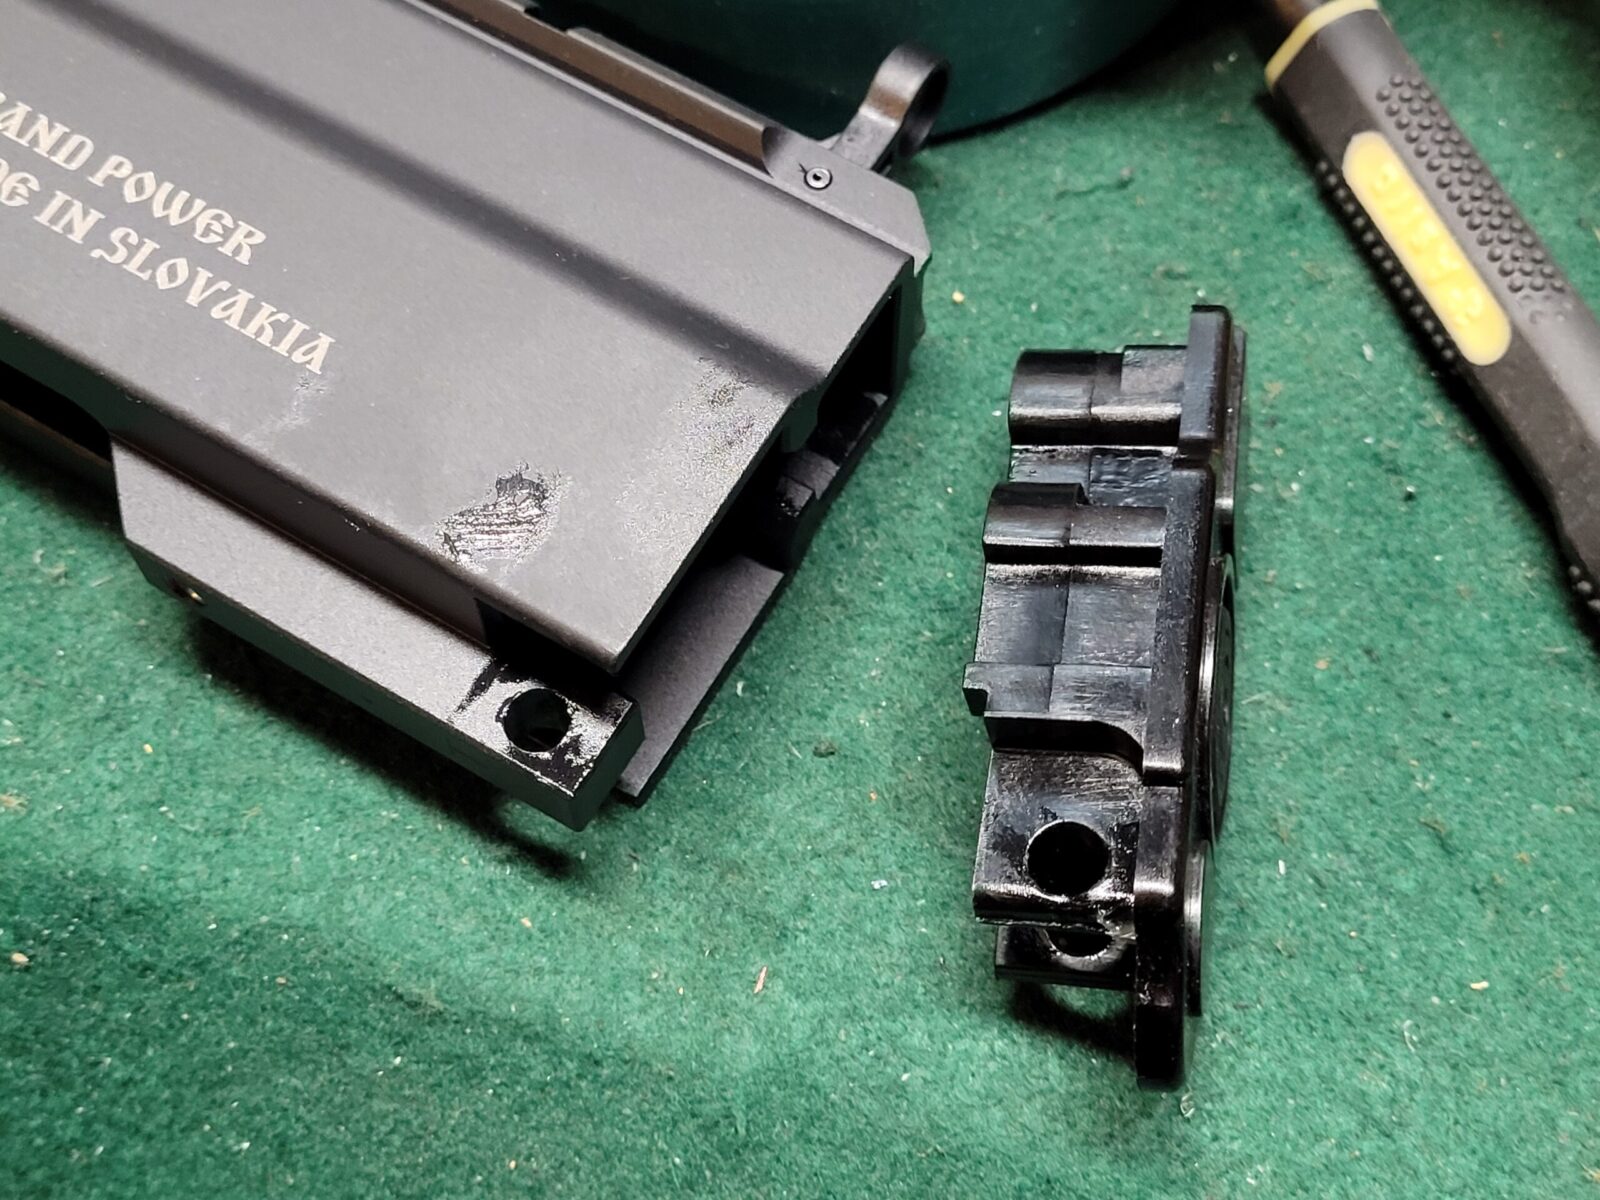
Basically, you remove the bolt group, slide the non-reciprocating charging handle block to where the big circular opening is and the pull the charging handle right out!
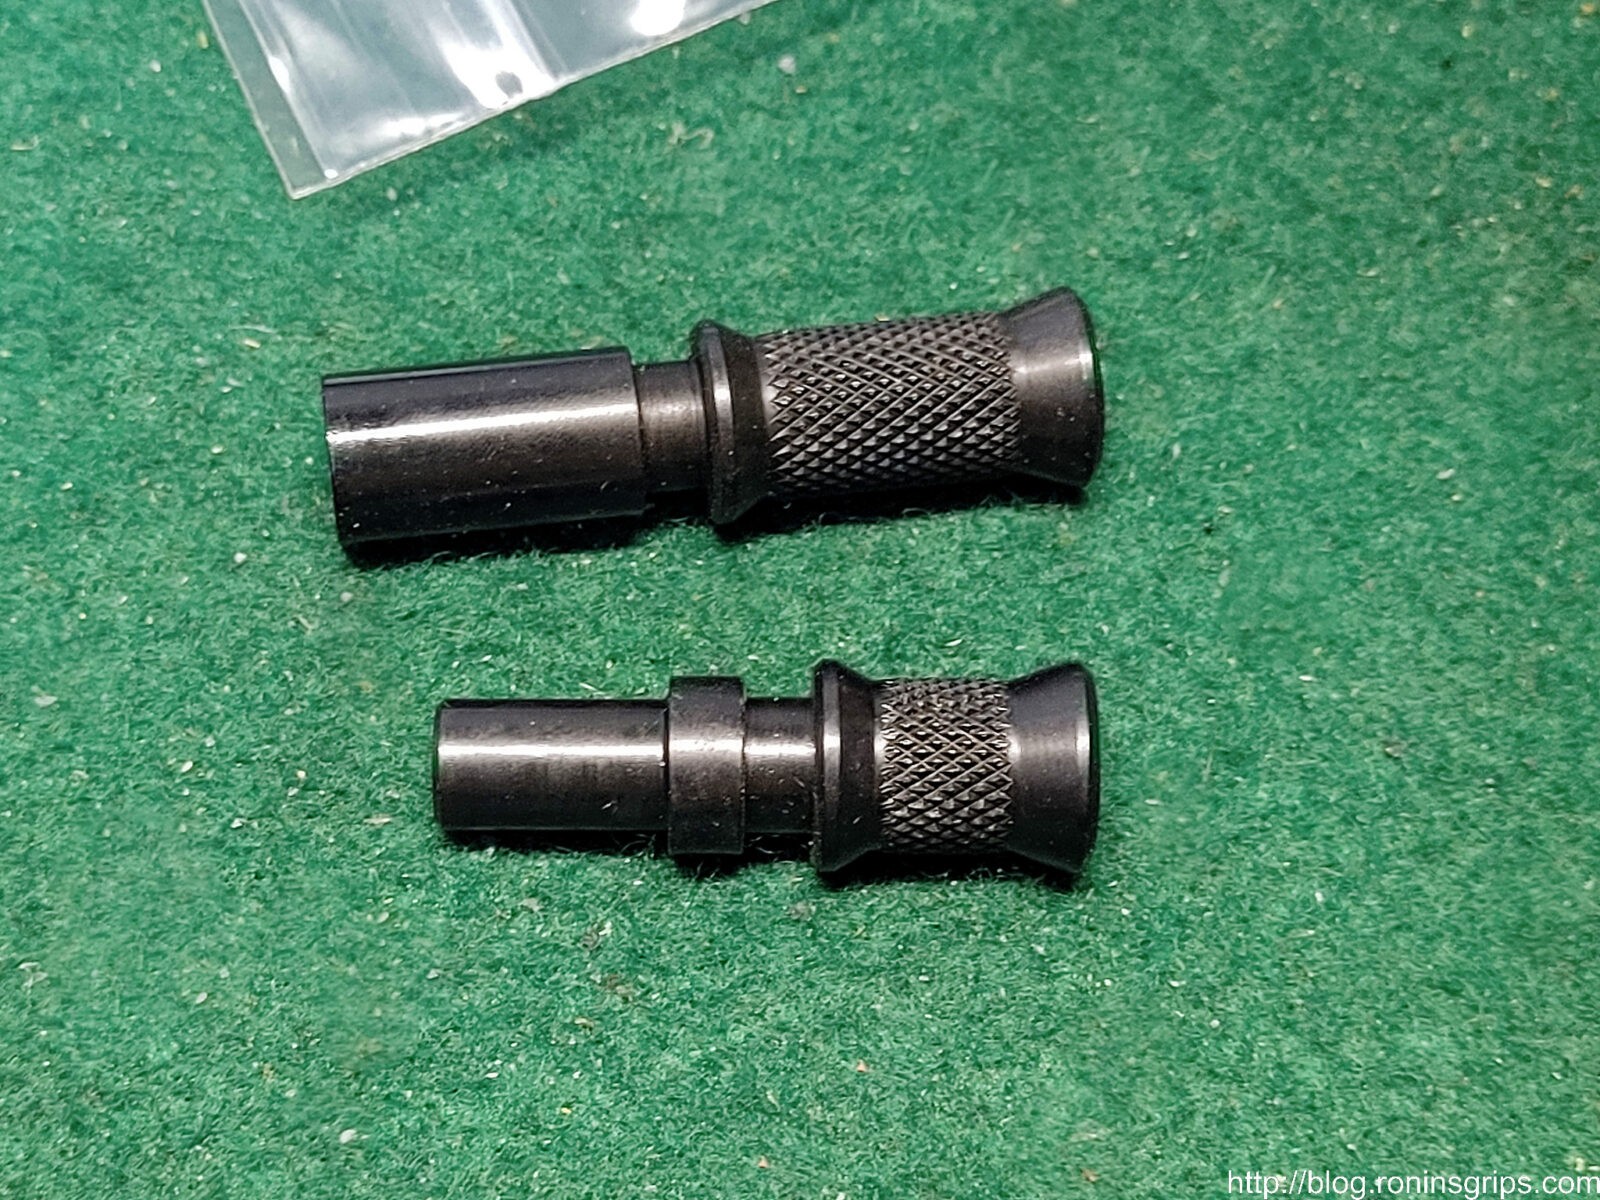
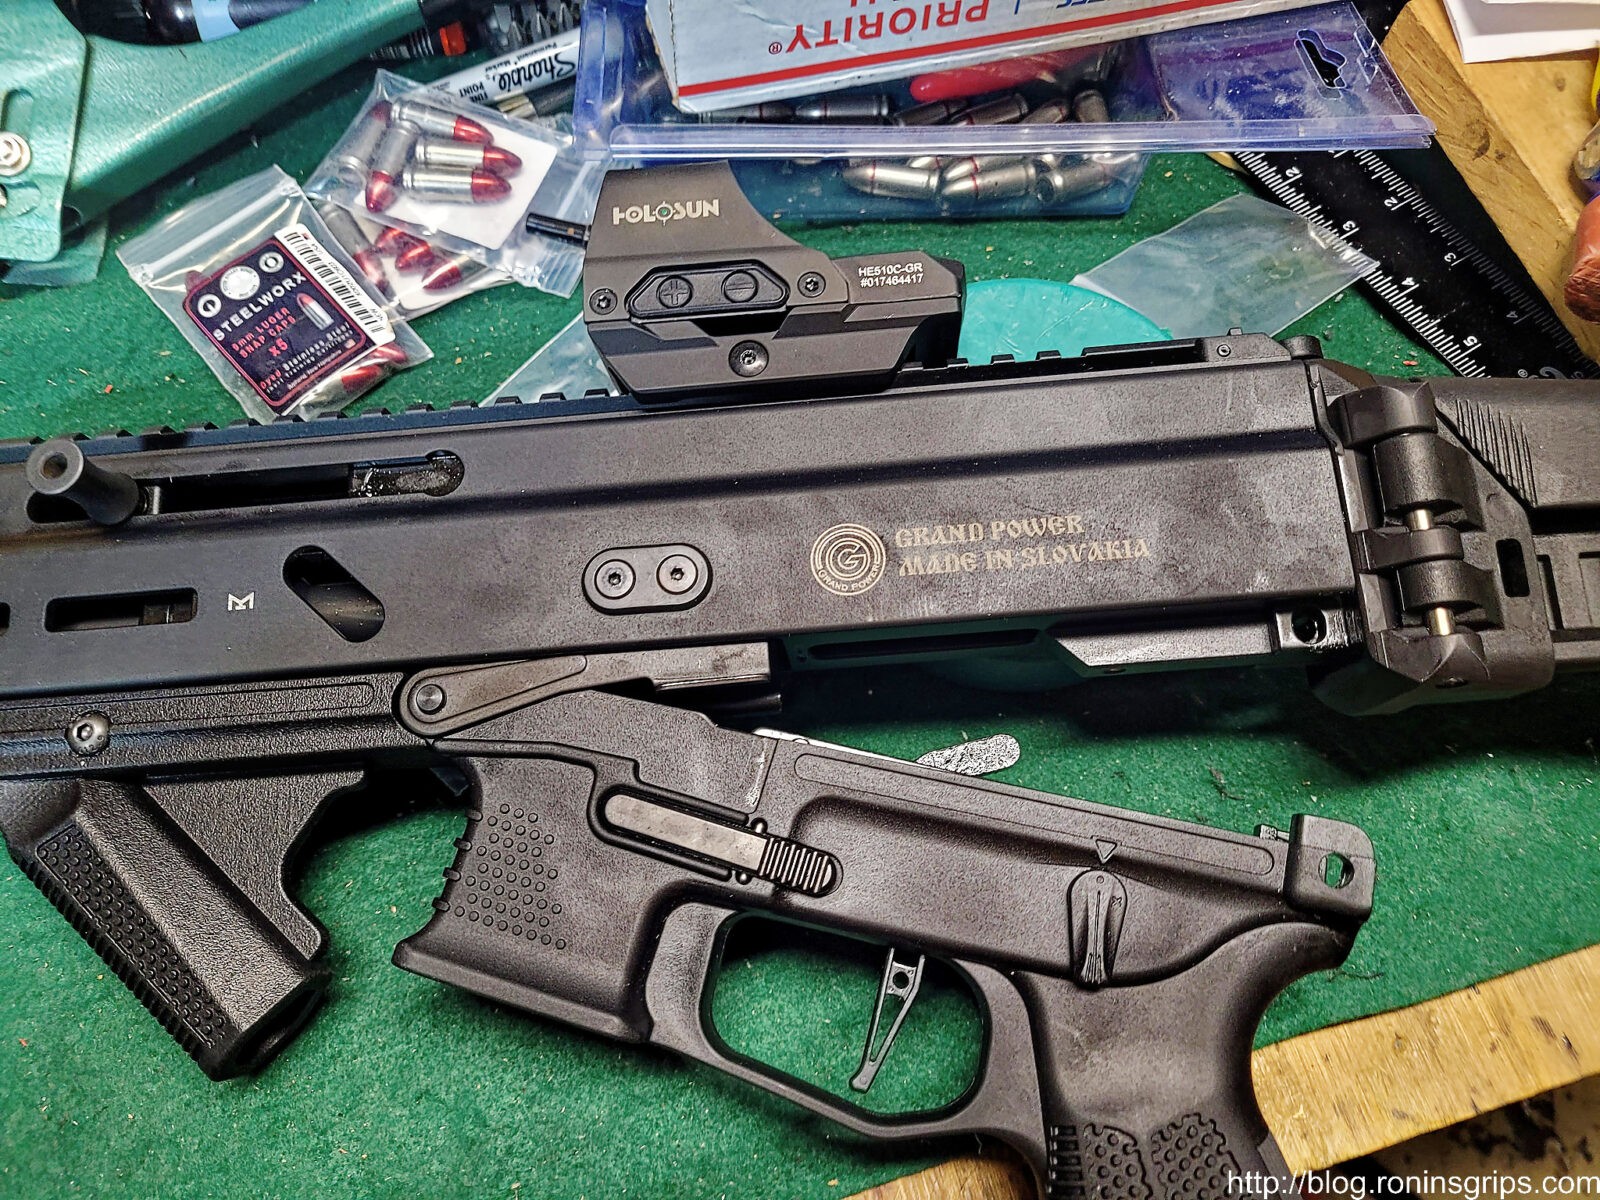
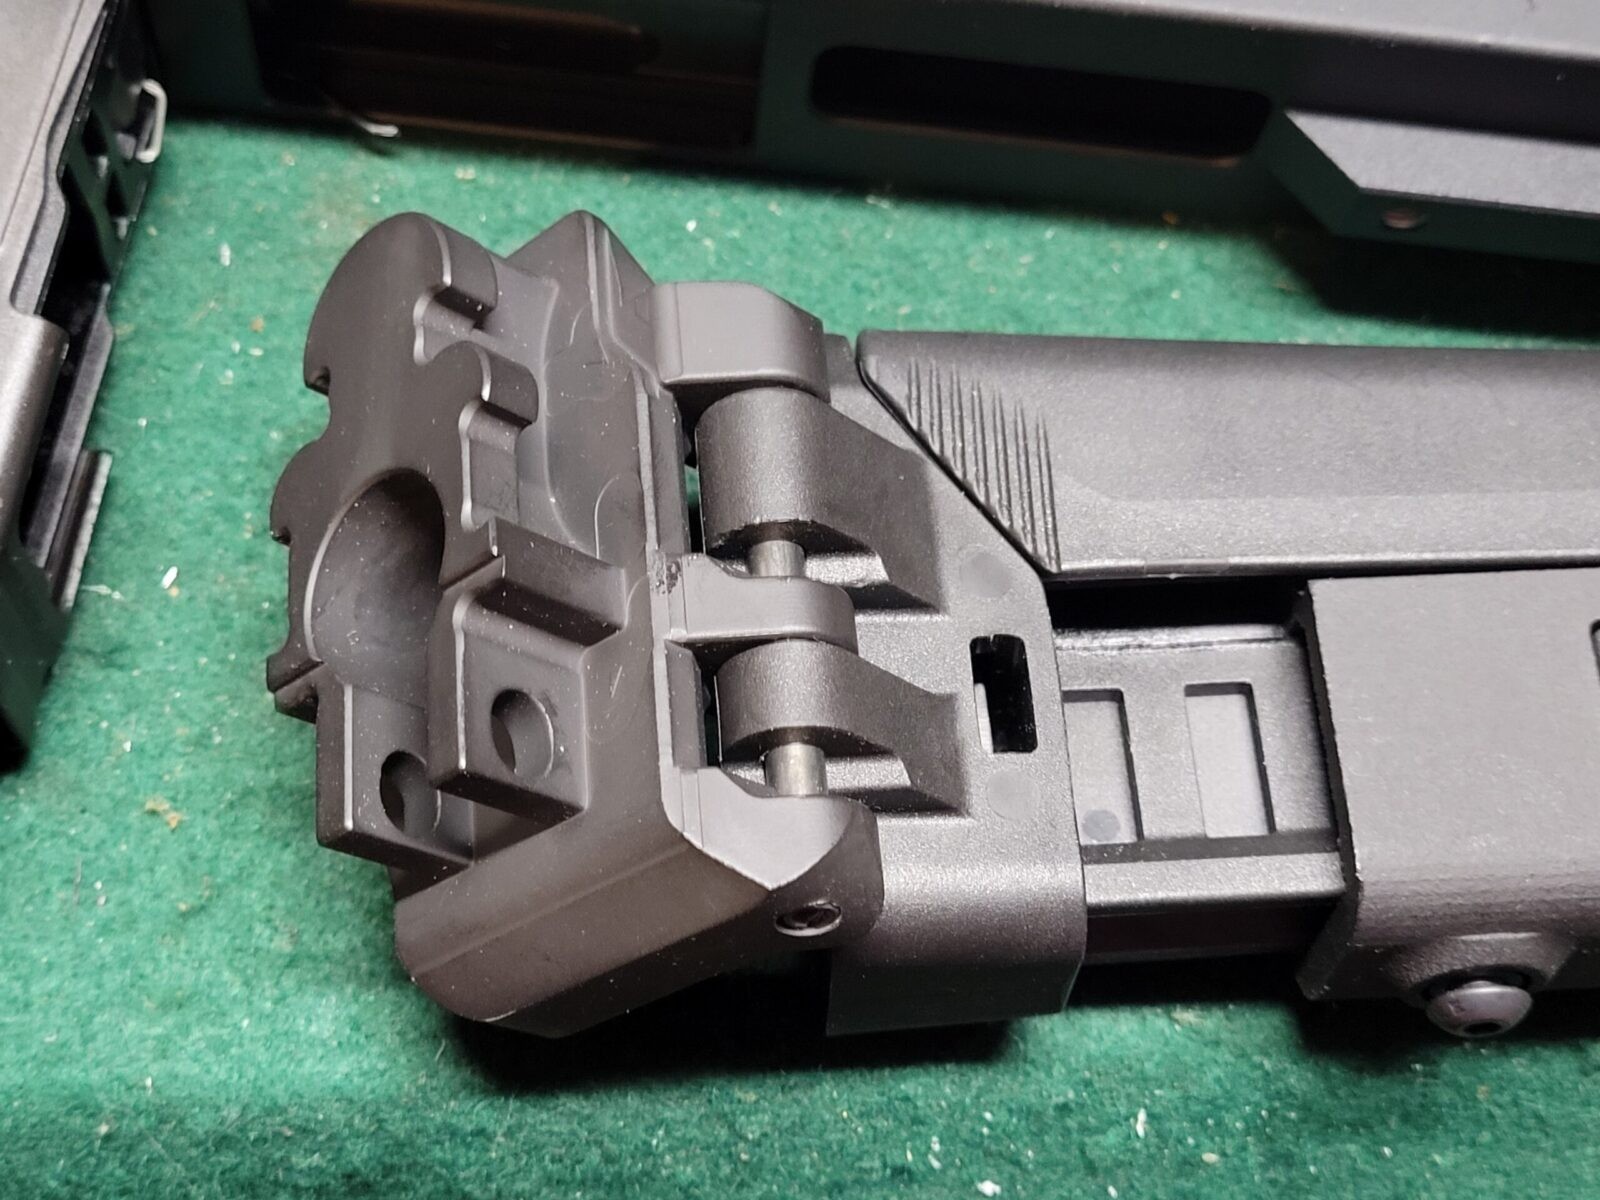
Push the lower takedown pin out of the way so you can remove the end cap, brace, stock or whatever you have back there. In my case, it’s an F5 modular brace that I think is fantastic.
That lower pin is captured so don’t try to drive out out. You will feel it stop on the other end and you can then pivot the lower portion out of the way.
So you swing the lower out the way so you can remove the end cap, brace or whatever. I tend to find I need to do a light downward tap on top of the brace and then it pulls straight back and out. The bolt carrier group then is pulled straight out the rear and set out of the way.
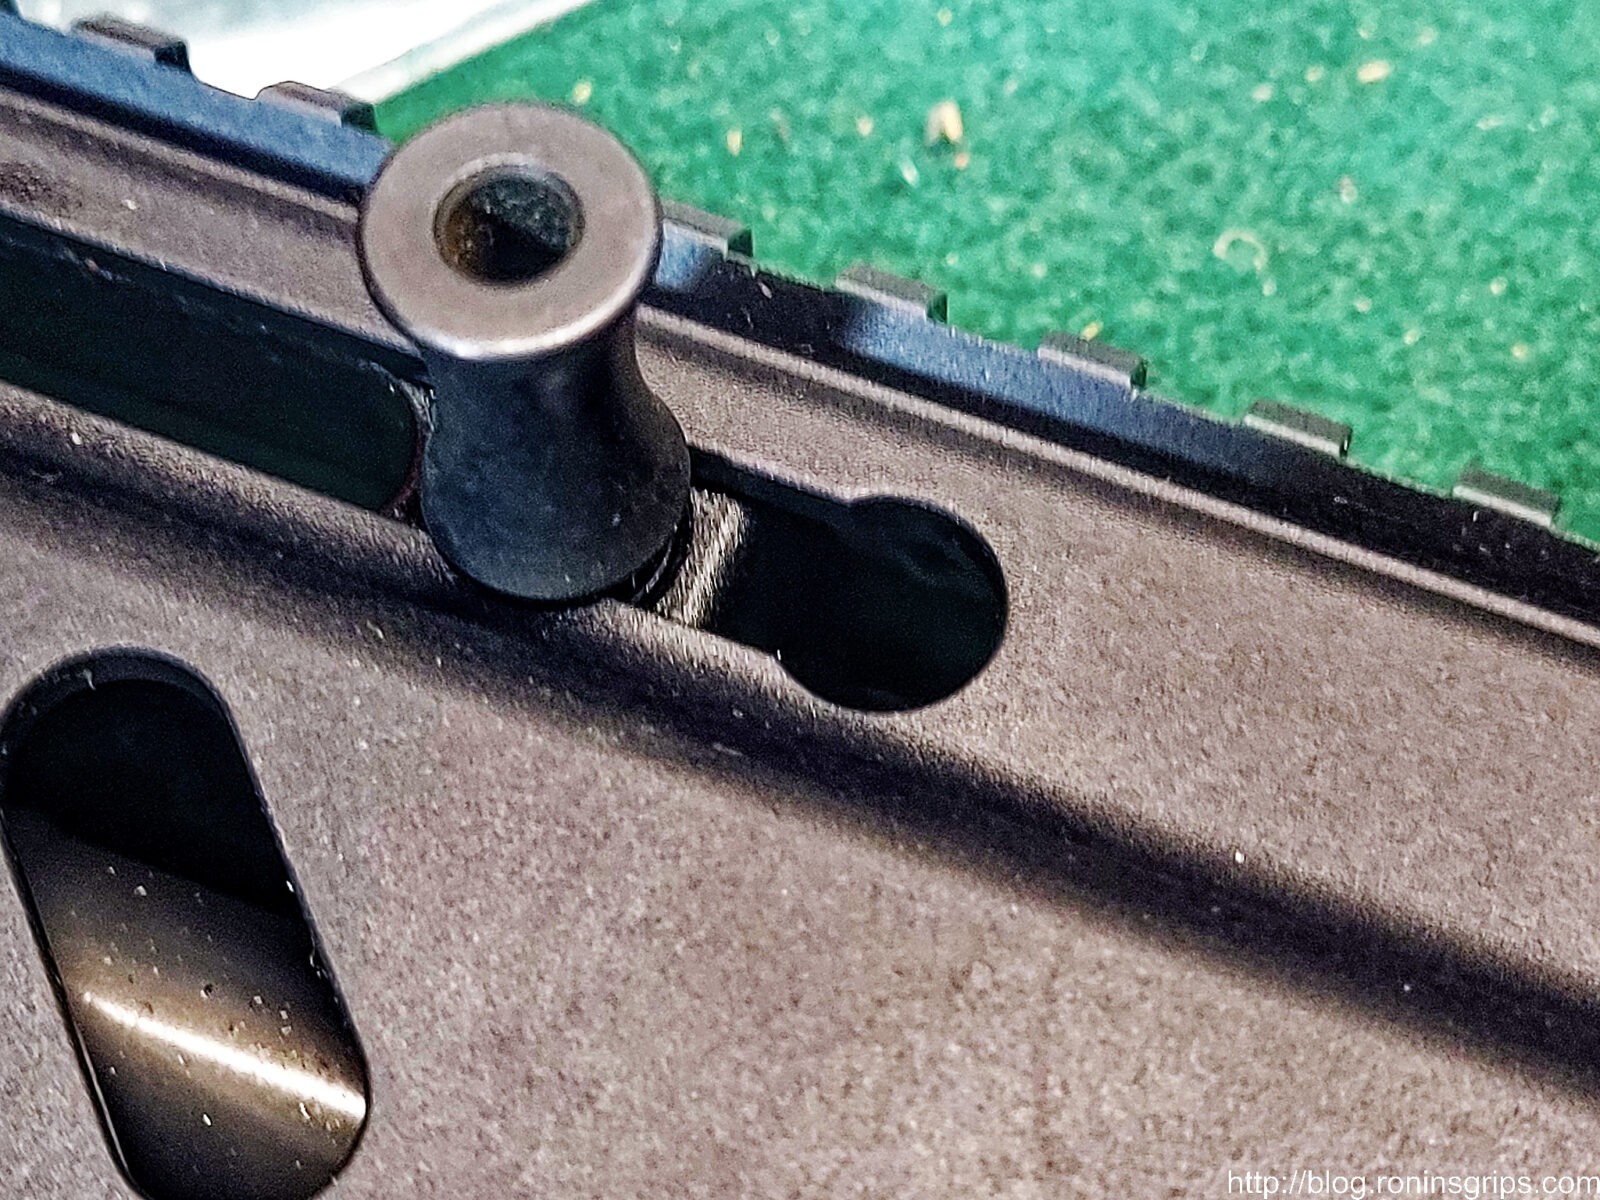
With the bolt carrier out of the way, you then slide the charging handle carrier all of the way to the rear where the big “O” is at because the narrower part of the channel is what actually retains the charging handle. It’s a nice tool-less design.
The charging handle is pulled out. See the groove in the charging handle’s pin portion? That is what goes back and forth in the channel. The inner and outer parts of the pin are too big and it effectively keeps the charging handle right where you want it. It’s also a good reason to put just a bit of oil on the body before you install a new pin or re-install the old one for that matter.
HB Industries did some elegant design work here – the original pin is at the top. Note how it is longer and needs to reach both sides of the channel but is only actually retained on the left because that is all that is needed. The HBI part has two halves – the larger one and the smaller one that sits inside the larger pin’s housing. They both have the grooves to ride in the charging handle channel and, both grooves serve to capture and hold each half in place in the channel. I love stuff like this – simple and does the job.
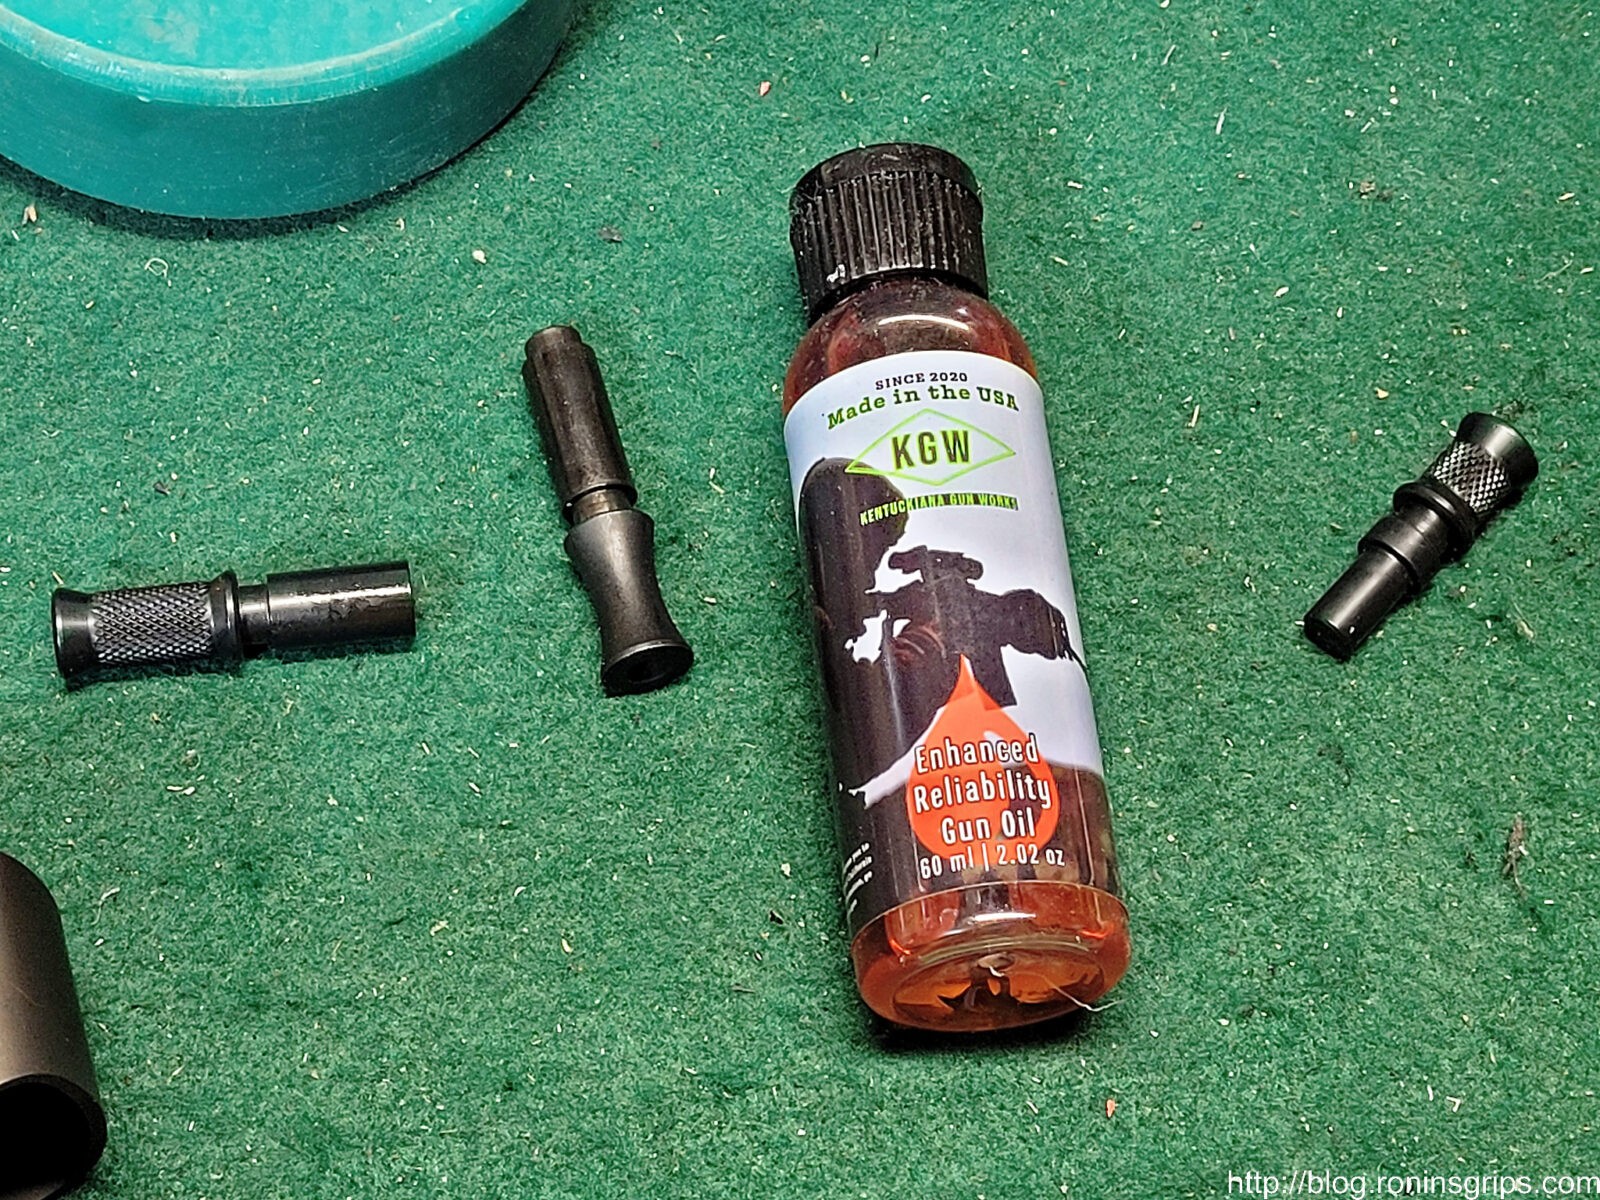
I started using Kentuckiana Gun Works Enhanced Reliability Gun Oil this year. I actually just had an issue that made me use it even more that I will do another post on. I used to use Super Lube quite a bit but when my shop was 32F and two of my RIA 9mm pistols that are in there all the time also were that cold, I went to do magazine work and the slides were sluggish. It would appear the Super Lube thickened up some at that temperature. I did not have the same problem with the KGW product — so I’m using KGW on all firearms going forward and have stopped SuperLube all together except for when I need a grease.
Once you install the two handles and slide them forward out of the way, the rest of the installation is the reverse – install the bolt carrier group, install the brace or whatever you have, swing the lower back up, push the pin back in and then test the weapon.
Summary
I really like the feel and am glad I made the change. If you are considering changing the handle, it’s very straight forward and I hope you found this post useful.
Note, I have to buy all of my parts – nothing here was paid for by sponsors, etc. I do make a small amount if you click on an ad and buy something but that is it. You’re getting my real opinion on stuff.
In the last post, I told you a little bit about the Stribog and the modifications I made [click here if you missed it]. I took it to the range twice over the summer and ran about 400-500 rounds through it flawlessly – really. So let’s talk about the details.
Prepping to go to the range
One thing I have learned over the years is that most semi-automatic weapons need to break in and that includes the Stribog. Never take a weapon out of the box and expect it to work. Instead, field strip the weapon, clean and oil it. After that, cycle the slide manually a few hundred times (literally) to get a jump start on the break in process.
What happens during wear-in or break-in is that surfaces that rub together – either by sliding or rotating start to have the surface smooth down. Despite what you may see, most surfaces have thousands of tiny ridges and spikes sticking up that cause friction and screw up operation. As the weapon cycles, these little edges are worn down. A decent oil or light grease can help with this as it fills in these areas and the luibricity enables the parts to slide or rotate while they are wearing in.
This is to be expected of most weapons unless you are buying a custom firearm where the builder has probably meticulously polished everything. By the way, firearms with parkerized parts need wearing in the most. On the other hand, other finishes, such as Nickel Boron, may need it less.
What’s my tip for you? If you want to have an enjoyable first range visit, clean, lube and cycle your weapon at least 200 times.
Function tested the Stribog
Just to be safe, I function tested the Stribog to make sure the fire control system was working right:
Make sure the weapon is clear
Try pulling the bolt back and let go. The spring should forefully return the bolt to the home position. If it doesn’t, take the weapon apart then clean, lube and try this again. If it still doesn’t then something is wrong and you should talk to who sold it to you, Grand Power or do some searching online – just be cautious because not everyone posting advice knows what they are talking about so be a healthy skeptic.
Cycle the bolt, pull the trigger and you should hear a click. If not, you have a problem.
Make sure the hammer is not cocked (pull the trigger if you need to – See #1). Now, pull the trigger and hold it down and cycle the bolt – you may hear or feel a light click as you release the trigger – that should be the disconnector catching the hammer so it doesn’t follow the bolt back. When you squeeze the trigger you should hear the normal click of the hammer hittin the firing pin. If the hammer isn’t getting caught, you have a problem.
Cycle the bolt, turn the safety to on and try to pull the trigger – it should have little to no movement and you should not hear the hammer hit the firing pin. If you do hear the hammer hit the firing pin – make sure you did turn the safety lever the corrrect direction and all of the way to safe. If it still fires, you have an unsafe weapon that needs to be serviced / returned for warranty repair.
Range Trips
The Stribog has been to the range twice as of my writing this. The first visit was with my friend Jim and we used 124 grain S&B FMJ ammo. I like to use the 124 grain ammo during initial break in of 9mm firearms as there is a bit more recoil impulse to overcome remaining friction.
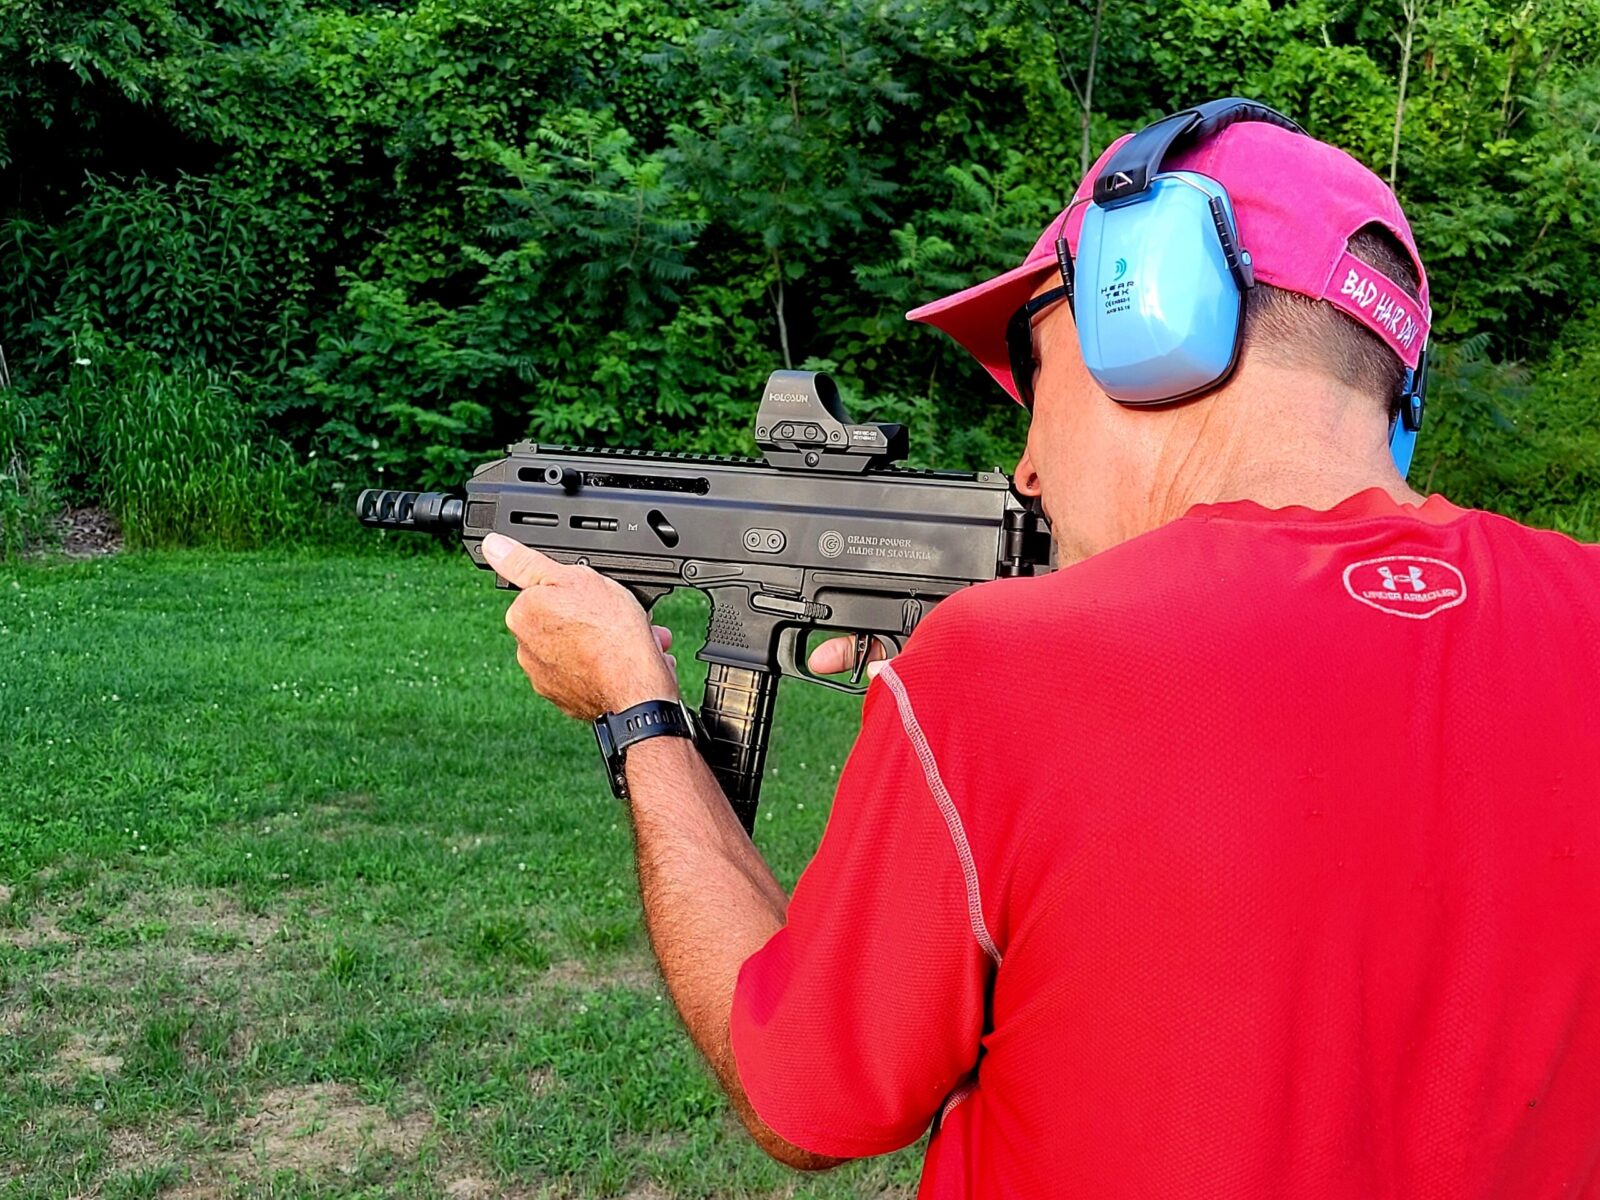
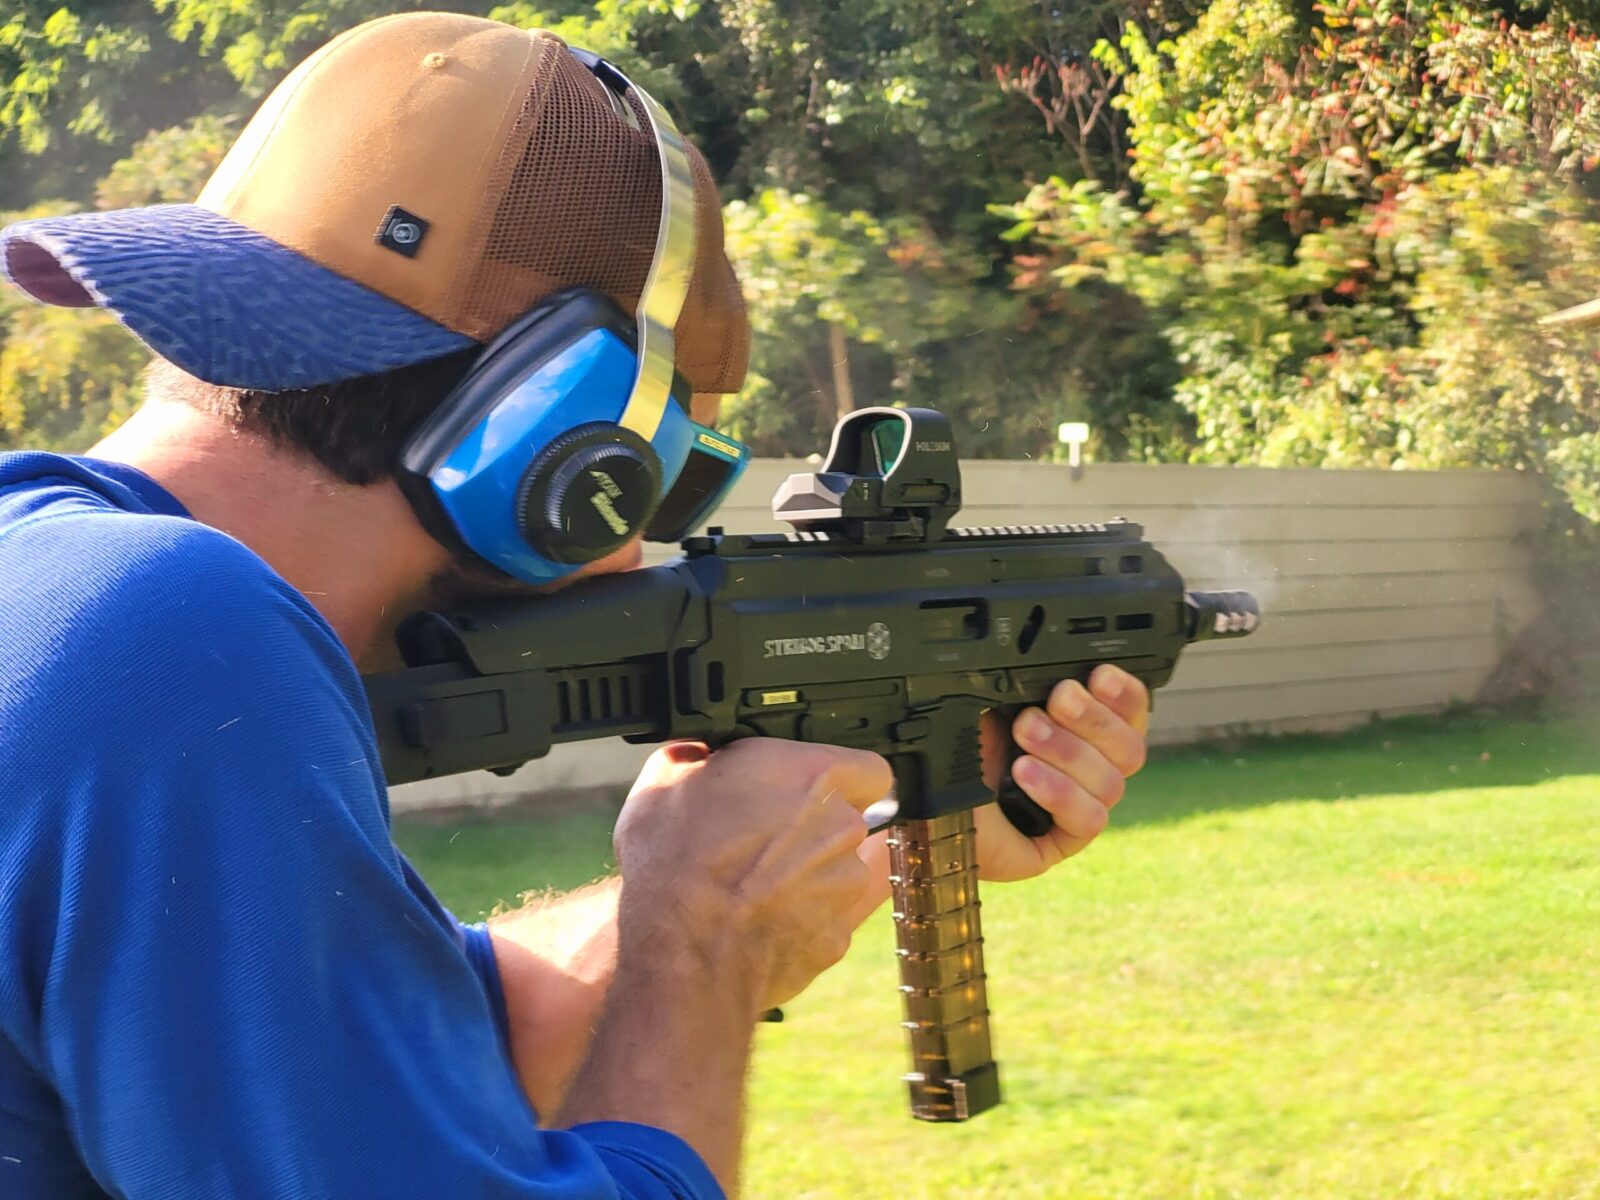
Jim putting 124gr FMJ rounds down range through the Stribog. We were both vey impressed. Ok, about the pink hat – Jim forgot his hat and it was a bright sunny day. The only spare hat in my truck was my wife’s. Sooo… Jim wore that hat and has endured good natured ribbing ever since. He’s a very good friend and a great shooter … even with a pink hat on – Hi Jim 🙂
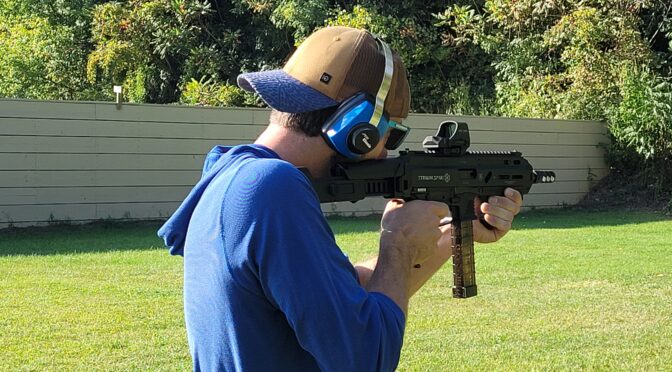
Niko is cutting loose. You can see some smoke rising from the muzzle. It was toasty from all the rounds. Niko is about 6′ 2″ tall and I’m only 5′ 8″. The adjustable brace worked really well for both of us as a result. By the way, that F5 modular brace system is incredible. I am running it on both my Stribog and CZ Scorpion Micro.
It ran great – I think we put about 90-120 rounds through it with no problems at all. In the second trip, we ran about 60 rounds of the 124 grain S&B FMJ. We then ran probably 300 rounds of 115 grain CCI Speer FMJ bulk box ammo and wrapped up with about 30 rounds of the IMI 124 grain +P black dot hollow points through it.
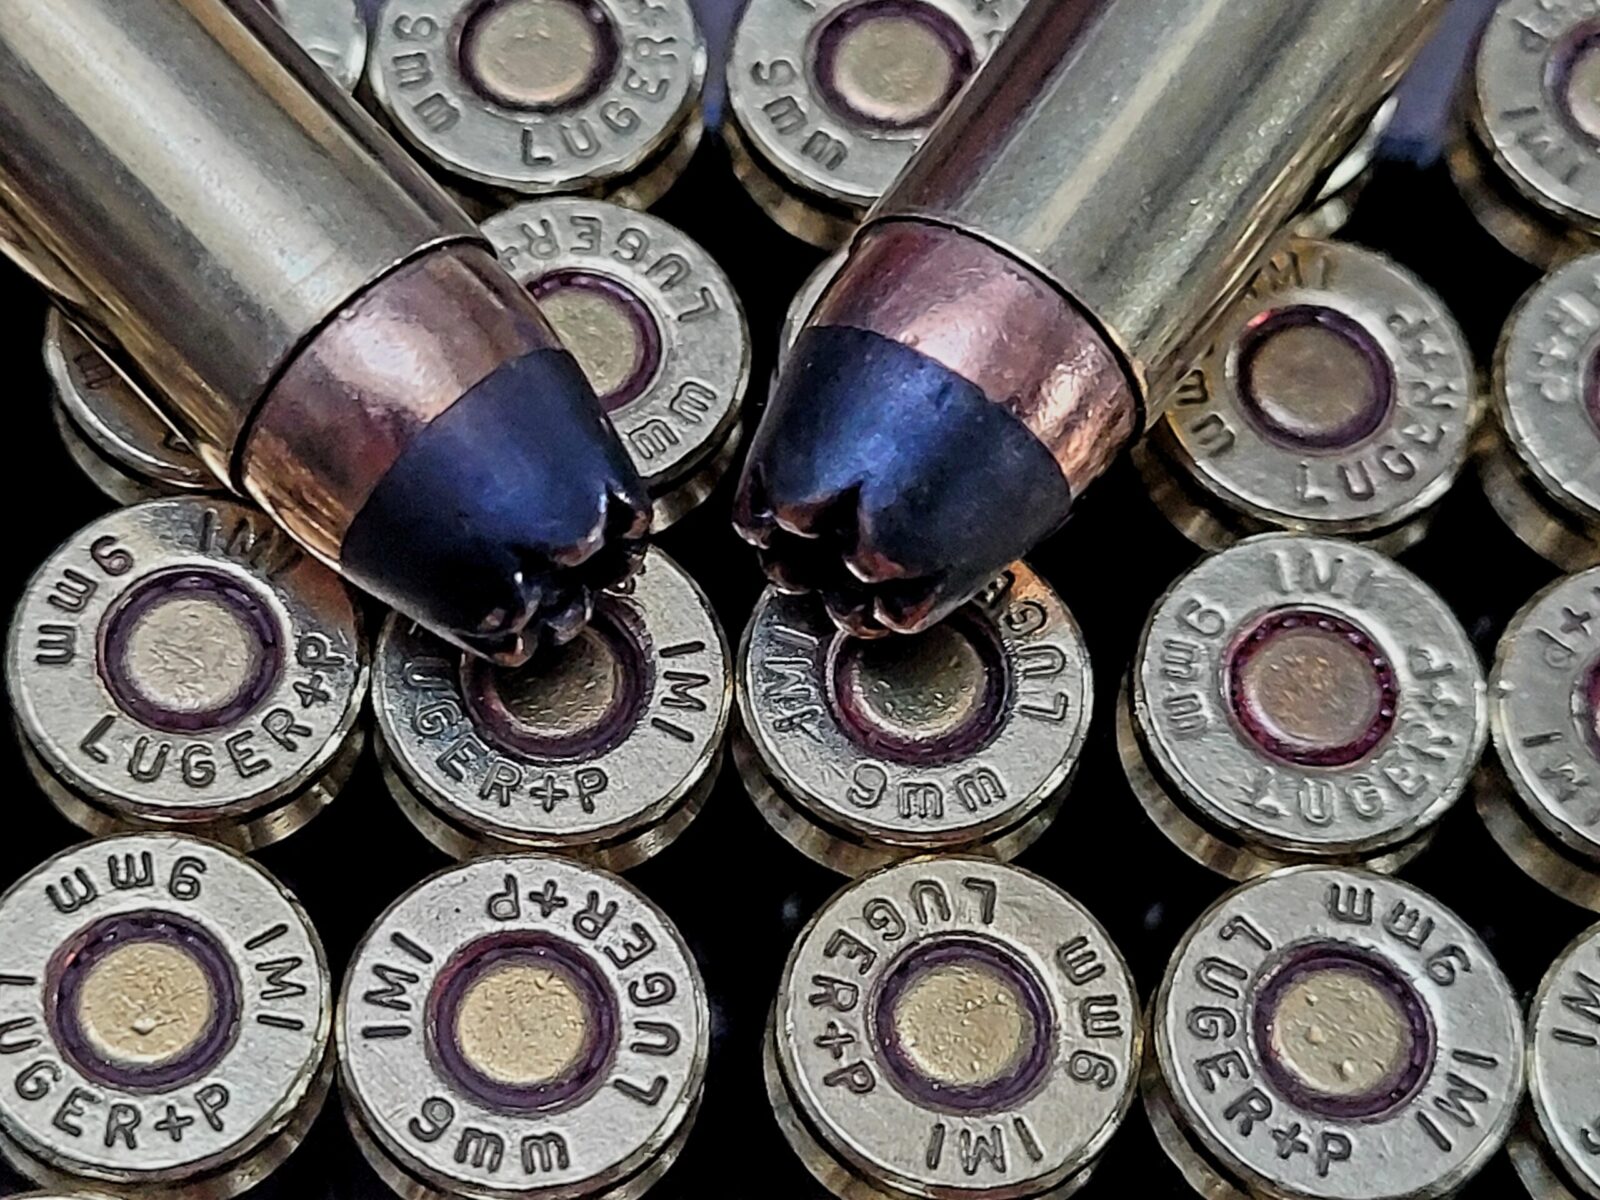
The IMI +P 124gr load is decent. The black paint is used to identify it is a +P load. It’s just a paint and not any form of special coating. If you read the reviews, it’s a decent HP load at the end of the day. I wish I’d brought some other HP loads to try as well. We didn’t have any issues but people have reported problems in the past with HP loads,
What was amazing was the we had zero, none, nada failures to feed (FTF) or failures to eject (FTE). I attribute this to how I break in all semi-autos before I go to the range the first time as mentioned above. It should also tell you that the Stribog is pretty well thought out and made.
The Stribog really performed great during both of its range trips. Note, we only used straight 30 round mags and none of the curved ones. I had the curved mags buried in my range bag and we simply didn’t get to them. We used mags both with and without the steel reinforcing lips and did not have anyu issues with either one.
So what else did I notice?
In both cases, we were shooting paper targets and plates at about 10-15 yards from the standing position. The combination of the Stribog, Holosun Optic and F5 modular brace proved to be excellent.
Controlling the Stribog even during rapid fire was easy. The relatively small 9mm cartridge has very little recoil to begin with and fired from the Stribog with a brake, it’s very easy to keep the muzzle on target. I’m sure the brake helped some but givent he weight of the Stribog and an 8″ barrel, it probably would have been ok without it. If nothing else, the brake looks better than the threaded muzzle protector.
The trigger is perfectly decent. It’s not a match trigger but it is one of the better factory triggers I have encountered out of the box in a pistol caliber carbine. I used my Wheeler digital trigger pull gauge to collect some test data – I carefully pulled the trigger 10 times and found that the average pull was 5 pounds 10.8 ounces. The minimum was 4 pounds 10.2 ounces and the maximum pull was 6 pounds 6.8 ounces. Not bad. There is a spring set to reduce the pull that can be bought but I don’t reallly think the pull needs to be changed given close quarter use.
By the way, I always compare triggers mentally to the worst triggers I have felt out of the box. The worst trigger award goes to H&K and clone MP5s. Yuck. I’d described those triggers as pulling a truck with no wheels through the mud. With practice you get used to them – I guess with enough practice you can get used to just about anything and they do wear in a bit – but they suck out of the box.
Moving on, I do wish the charging handle was a tad bigger to spread the load a bit more. It’s jost a tad too narrow for me but that’s just me. There is a folding charging handle option I plan to try at some point.
I do wish the charging handle was a tad thicker. See how it tapers in the middle? I do plan to upgrade to a folding charging handle in the future. The controls overall are well thought out and easy to use. The safety is just above the pistol grip, the magazine reease is above and to the front of the trigger and the slide release is immediately above the magazine release.
Summary
The Stribog really delivered. It was fun, accurate and reliable at the range. I wish I had brought some other hollow points to try but it didn’t cross my mind. I actually bought a case of the IMI +P 124gr HP rounds specifically for my PCCs if self defense was required – I really only shoot FMJ at the range.
To wrap up, I like the SP9A1 Stribog and have no hesitation recommending it to others given my experience. There is a growing aftermarket so you can customize the pistol to fit your needs.
I hope this helps you out!
Note, I have to buy all of my parts – nothing here was paid for by sponsors, etc. I do make a small amount if you click on an ad and buy something but that is it. You’re getting my real opinion on stuff.
I do a lot of reading and a few years ago I read about a new pistol caliber carbine (PCC) called a “Stribog” by Grand Power. It was a blocky looking thing but it was getting good reviews. The more I read, the more positive real-world reviews I encountered. Finally, in a fit of obsessive compulsive behavior, I ordered one in and now it’s my favorite PCC. Well, that would be too short of a post so let me back up a bit and give you some background.
Where did the name “Stribog” come from?
First off, “Stribog” is pronounced “Stry-Bog” and refers to an anicent Slavic diety that can be interpeted as the god of wind or, depending on the translation, the god of annihilation or war. Others say he was the gold of the cold but regardless, that’s what it was in centuries long past. [If you want to read more, click here for a cool post on Wikipedia].
Who makes it?
The Stribog is made by Grand Power, a relatively new company located in Banská Bystrica – Slovenská Ľupča (Slovakia). Mr. Jaroslav Kuracina started the company just before 2012 when he then got funding from friends and the rest is history. They now are producing 2,000 firearms per month on CNC machines based on Jaroslav’s designs.
By the way, Jaroslav’s patented design is how the barrel locks into the slide by rotating. This matters for two reasons – first, it reduces barrel rise meaning you can get back on target faster. Second, it reduces felt recoil – enabling the shooter to better stay on target also.
In 2008 they started exporting to the US and today, Global Ordnance of Sarasota, FL, is their US distributor. In a relatively short amount of time, they have not only entered the US market but created a good reputation in the process. You can now find the Stribog being sold by many different vendors including Global Ordnance directly, Palmetto State Armory, GrabAGun and many others.
Which model did I get?
I bought a SP9A1 with a folding SB Tactical brace in November 2021. It is my understanding that at some time prior to that the charging handle was of the reciprocating type – meaning it would travel forward and backward as the bolt cycled. One thing I made sure of was that it did have a non-reciprocating handle and it did. I would bet by the time you read this you will only find new firearms for sale with the non-reciprocating handle but buying one used might be a different story.
Chambered for 9×19 NATO (9mm Luger) and fire +P loads. 9mm NATO tends to be hotter than 9mm Luger so +P ammo is not a challenge for it.
8″ barrel with 1/2″x28 threads – this thread is commonly used for 9mm muzzle devices so you can readily add compensators, suppressors, etc.
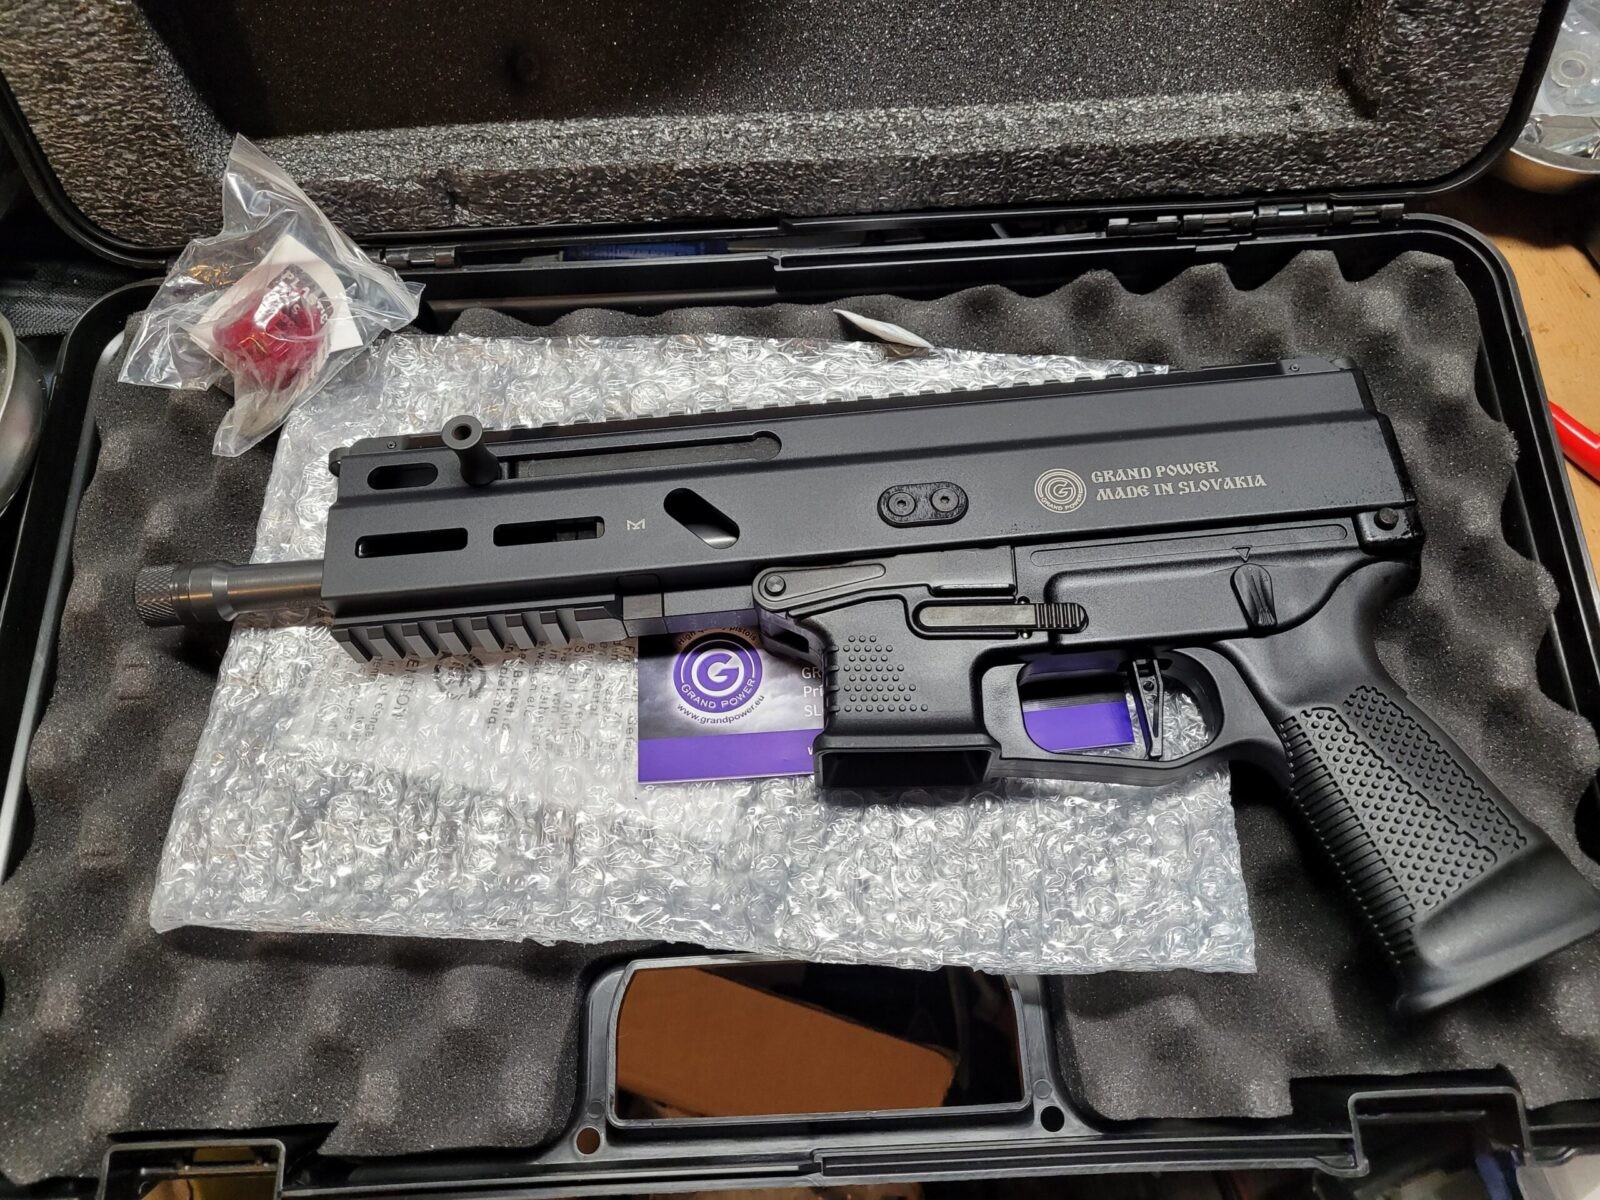
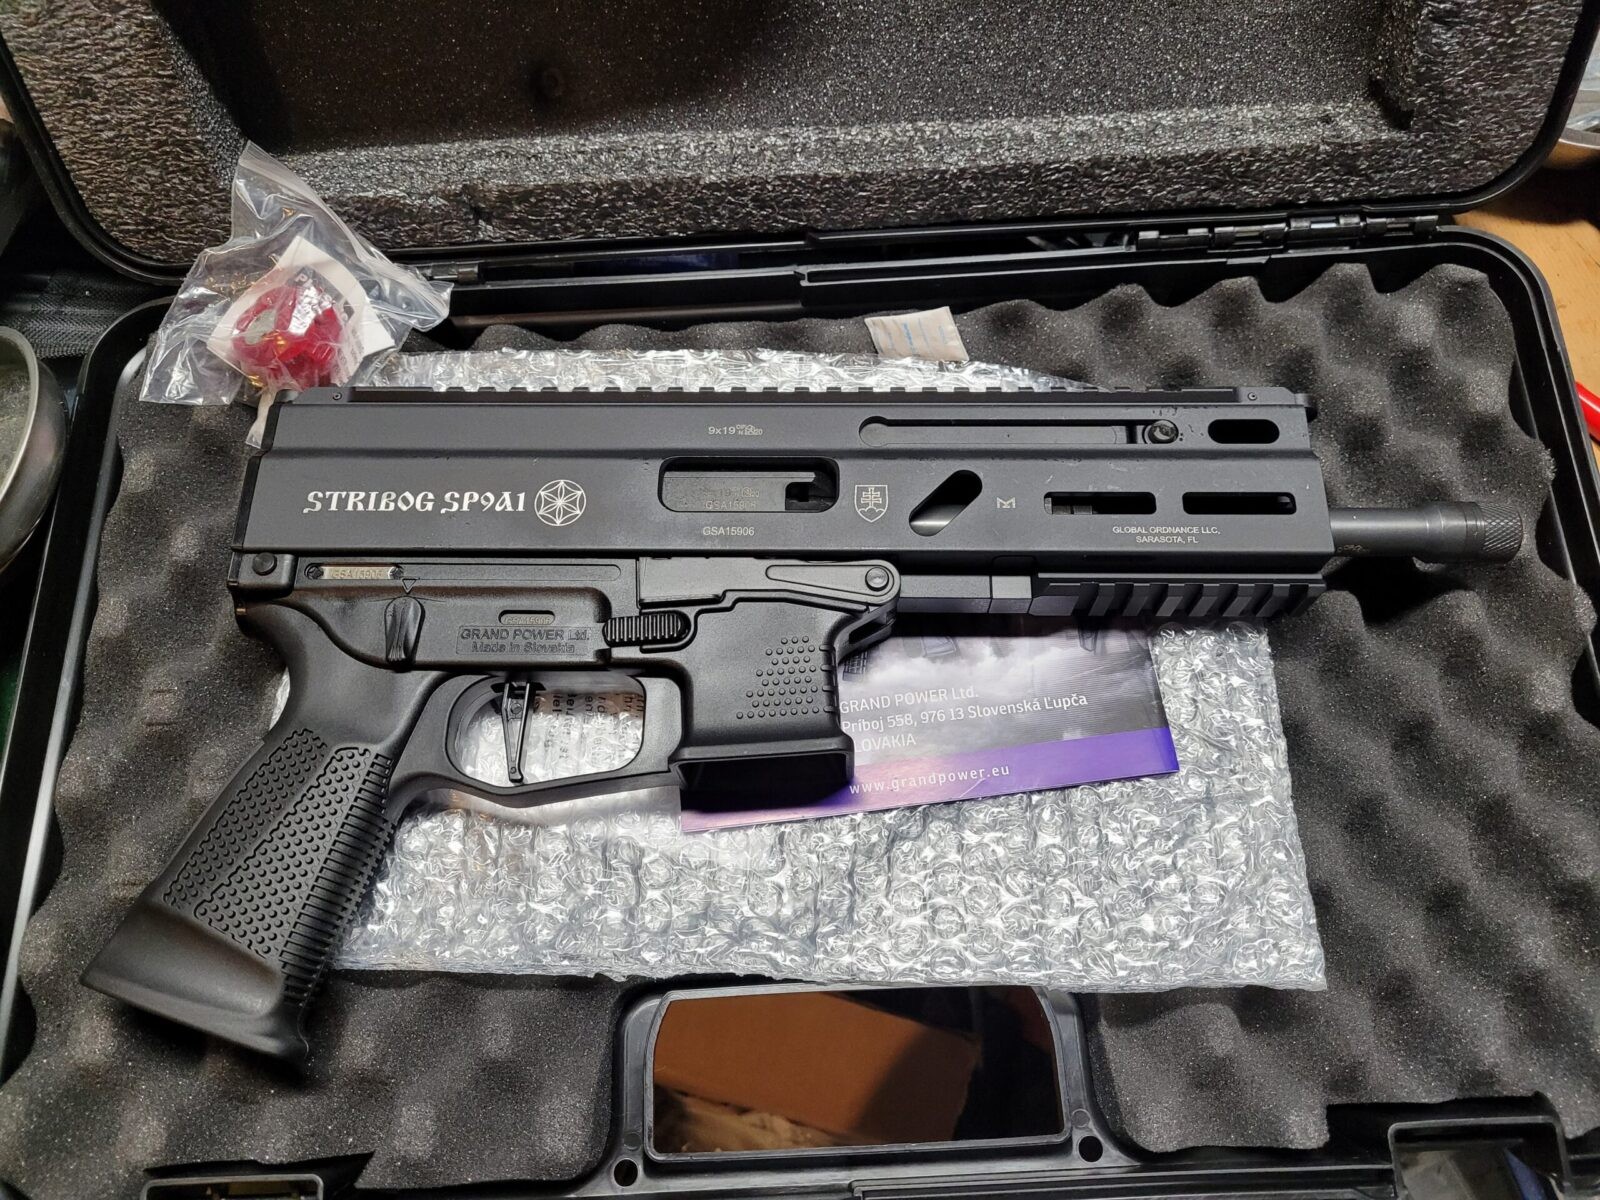
The Stribog arrived nicely packed in a hard case.
Here;s looking at it from another angle. Honestly, I can do without the screen printed white text and graphics.
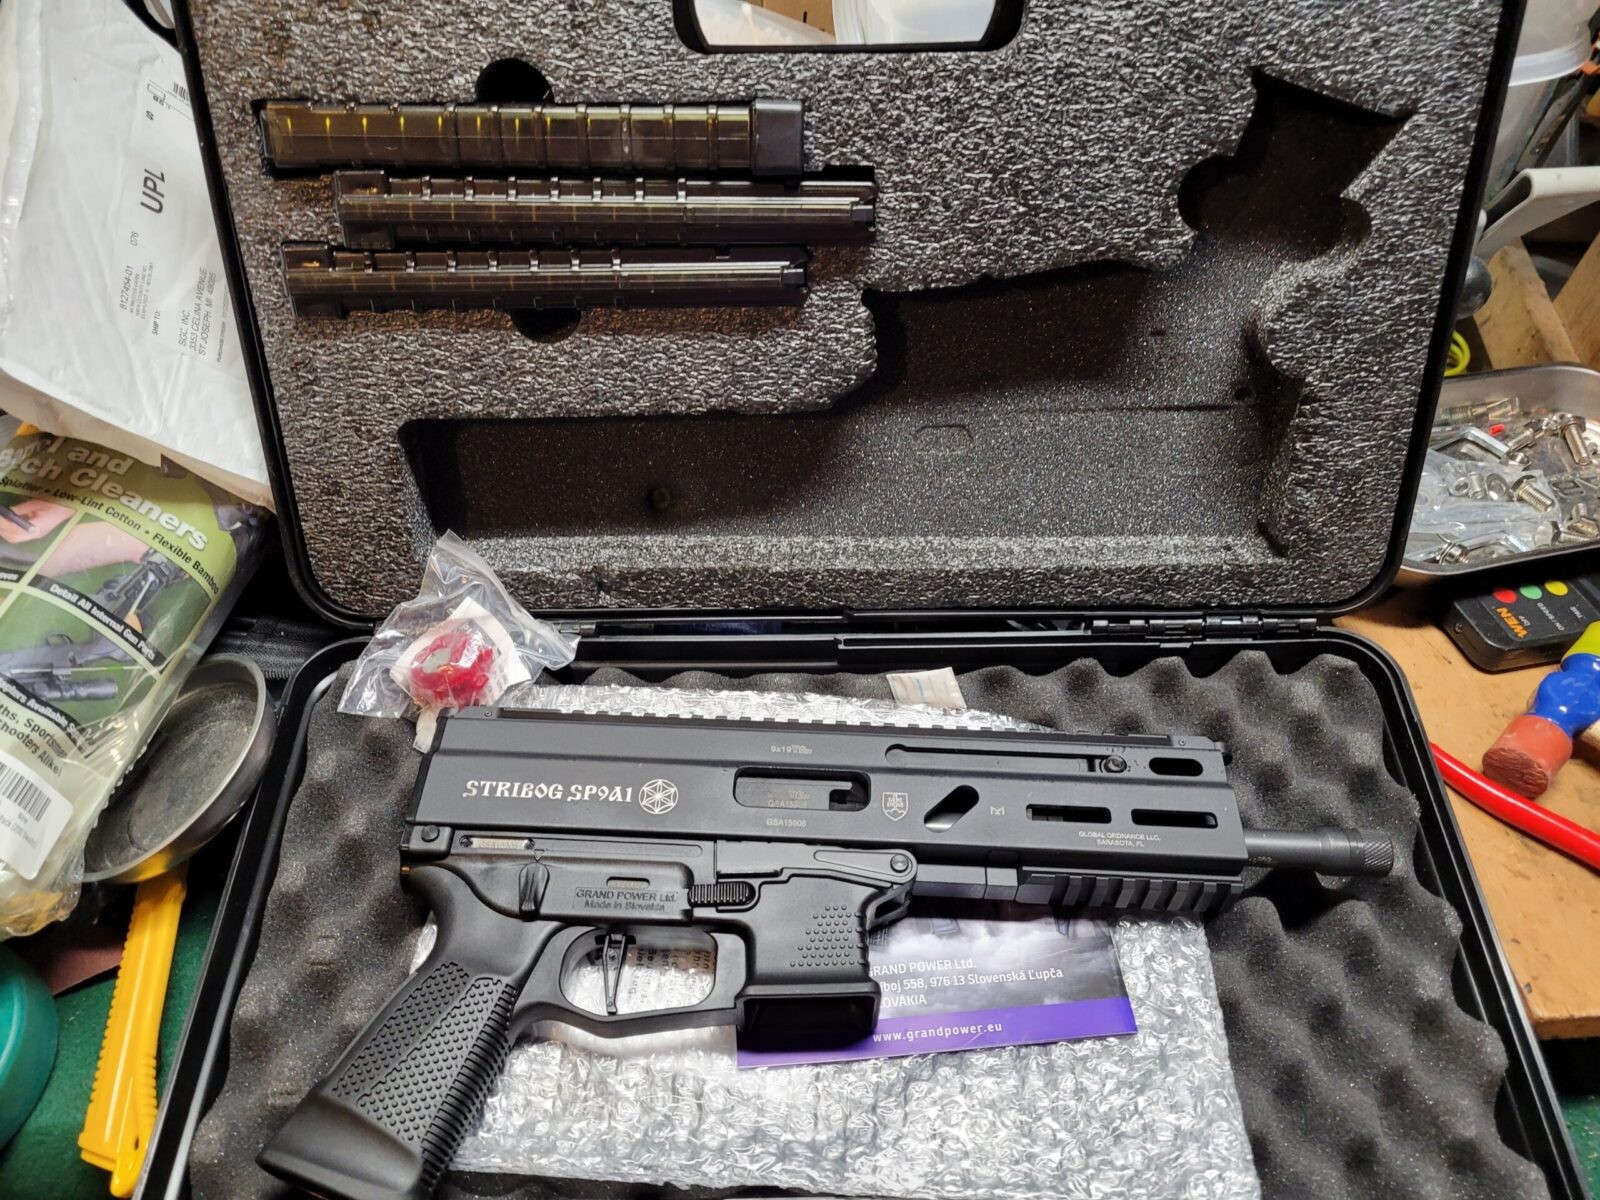
It took me a minute before I looked at the lid and noticed the three magazines tucked in there.
In looking the pistol over, there were a few areas for improvement. First, I do not like the trangular SB Tactical brace. It works but doesn’t suit my taste. I also wanted to do something with that 8″ barrel poking out the front of the handguard, install a muzzle brake and a reflect optic.
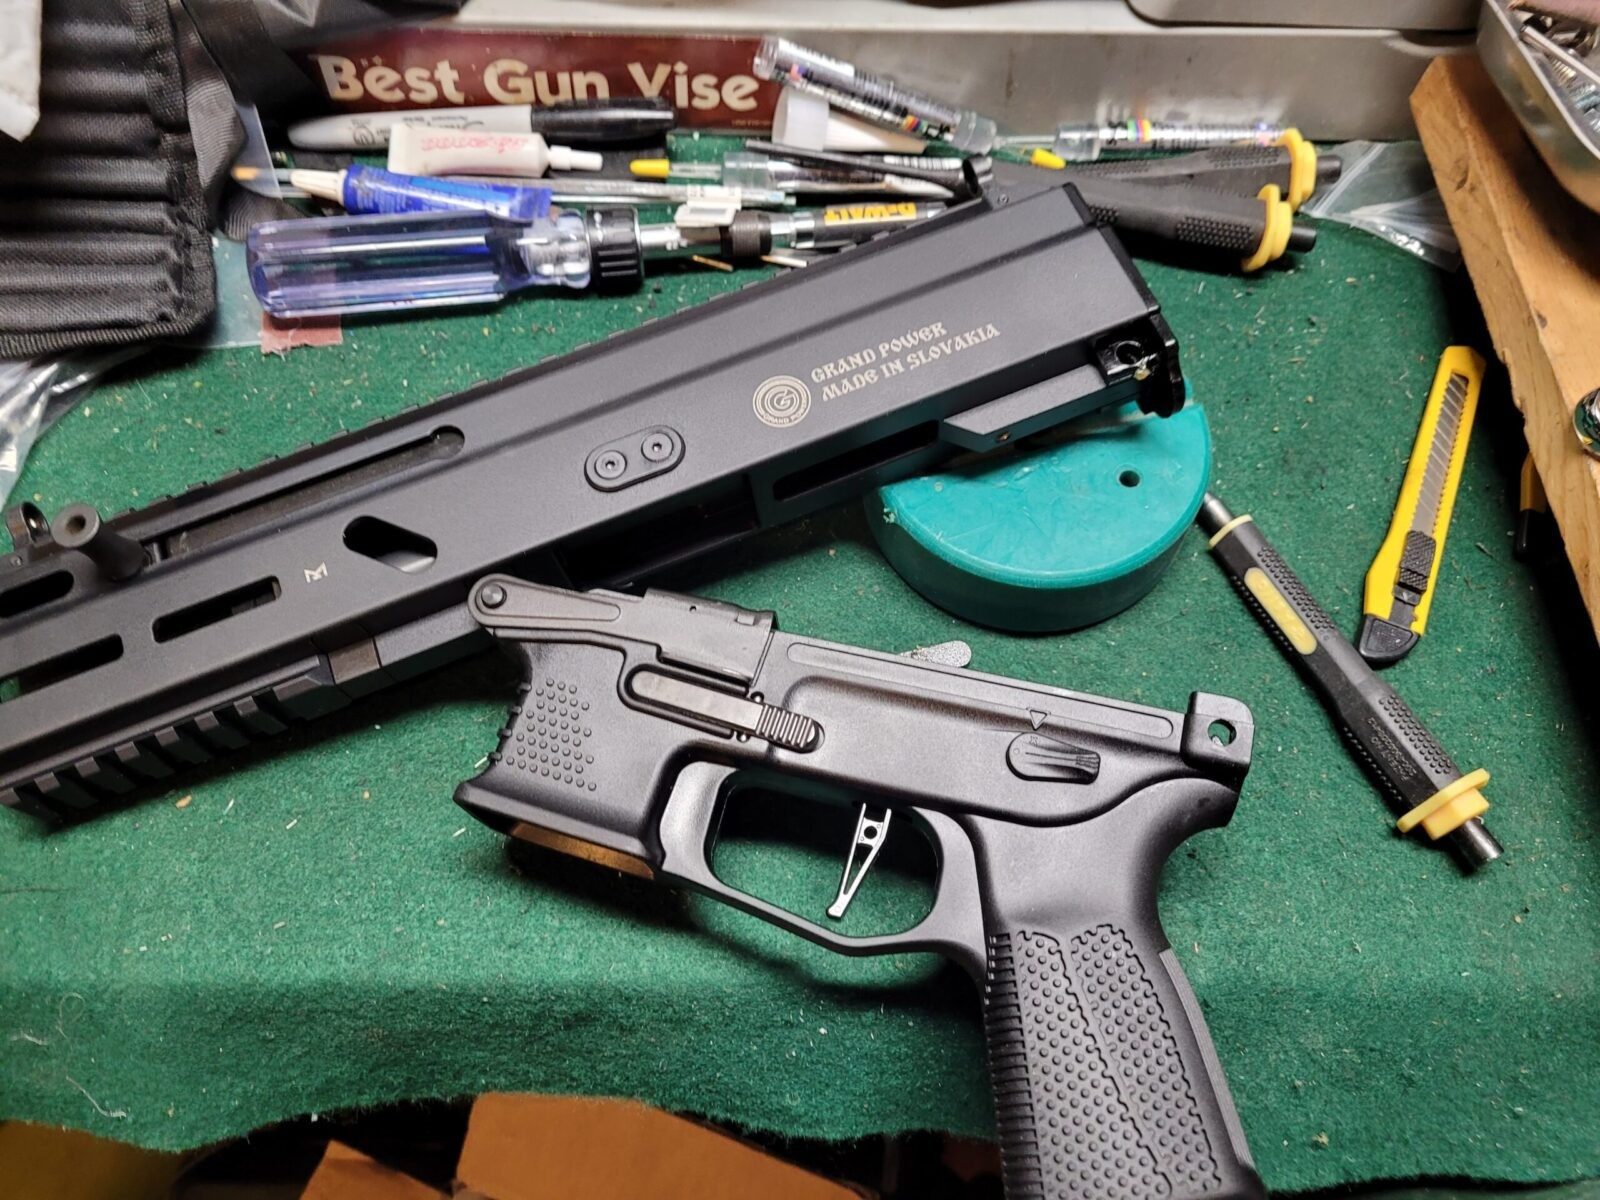
Pop out the back lower pin and you can then change the rear plate in the top half. The pin is captive meaning it will push through but will not exit the other side so don’t force it.
This is as far as the pin will push out. You do need to push it until it stops so you can remove the back plate but don’t force it out.
Push the plate down slightly and then it will pull out.
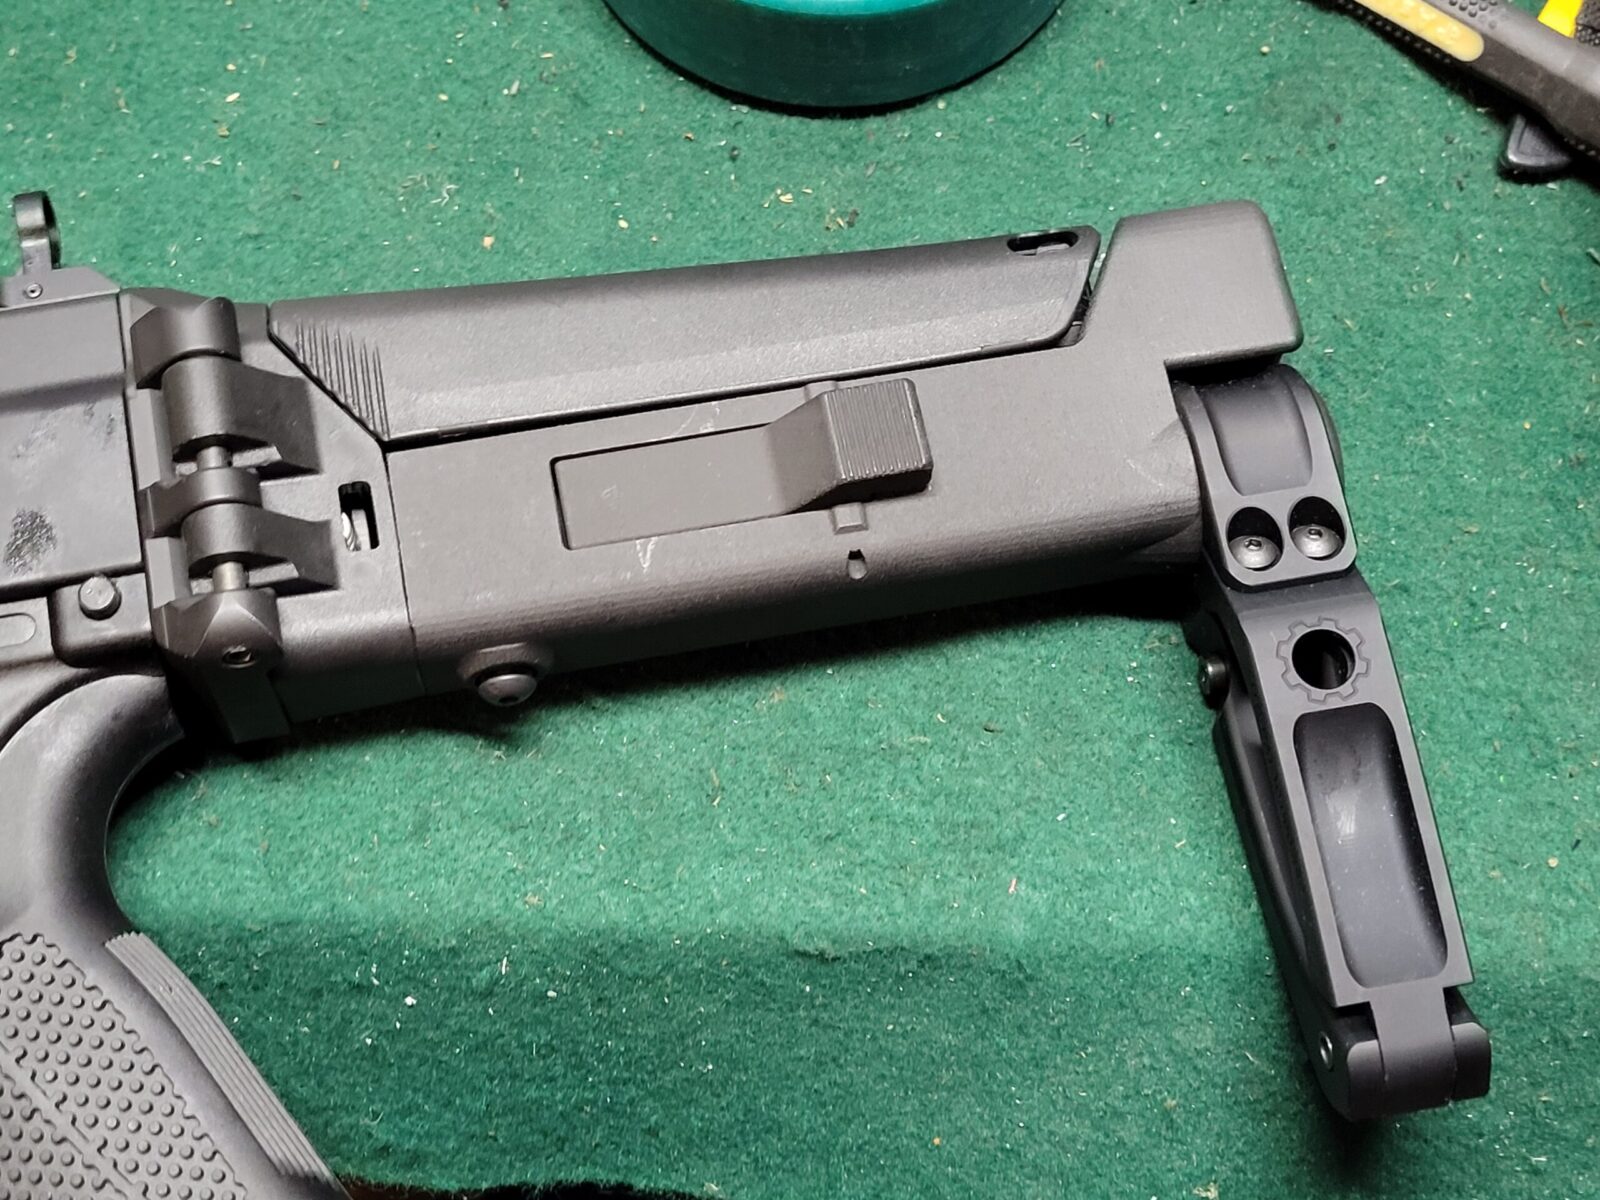
The F5 literally slides right back in place of the plate. It’s very nicely done – my unit did not require any fitting.
For the brace, I switched over to the cool F5 Manufacturing’s modular brace system that then holds a Tailhook brace. I like the modular system because it is adjustable and reminds me of a SCAR.
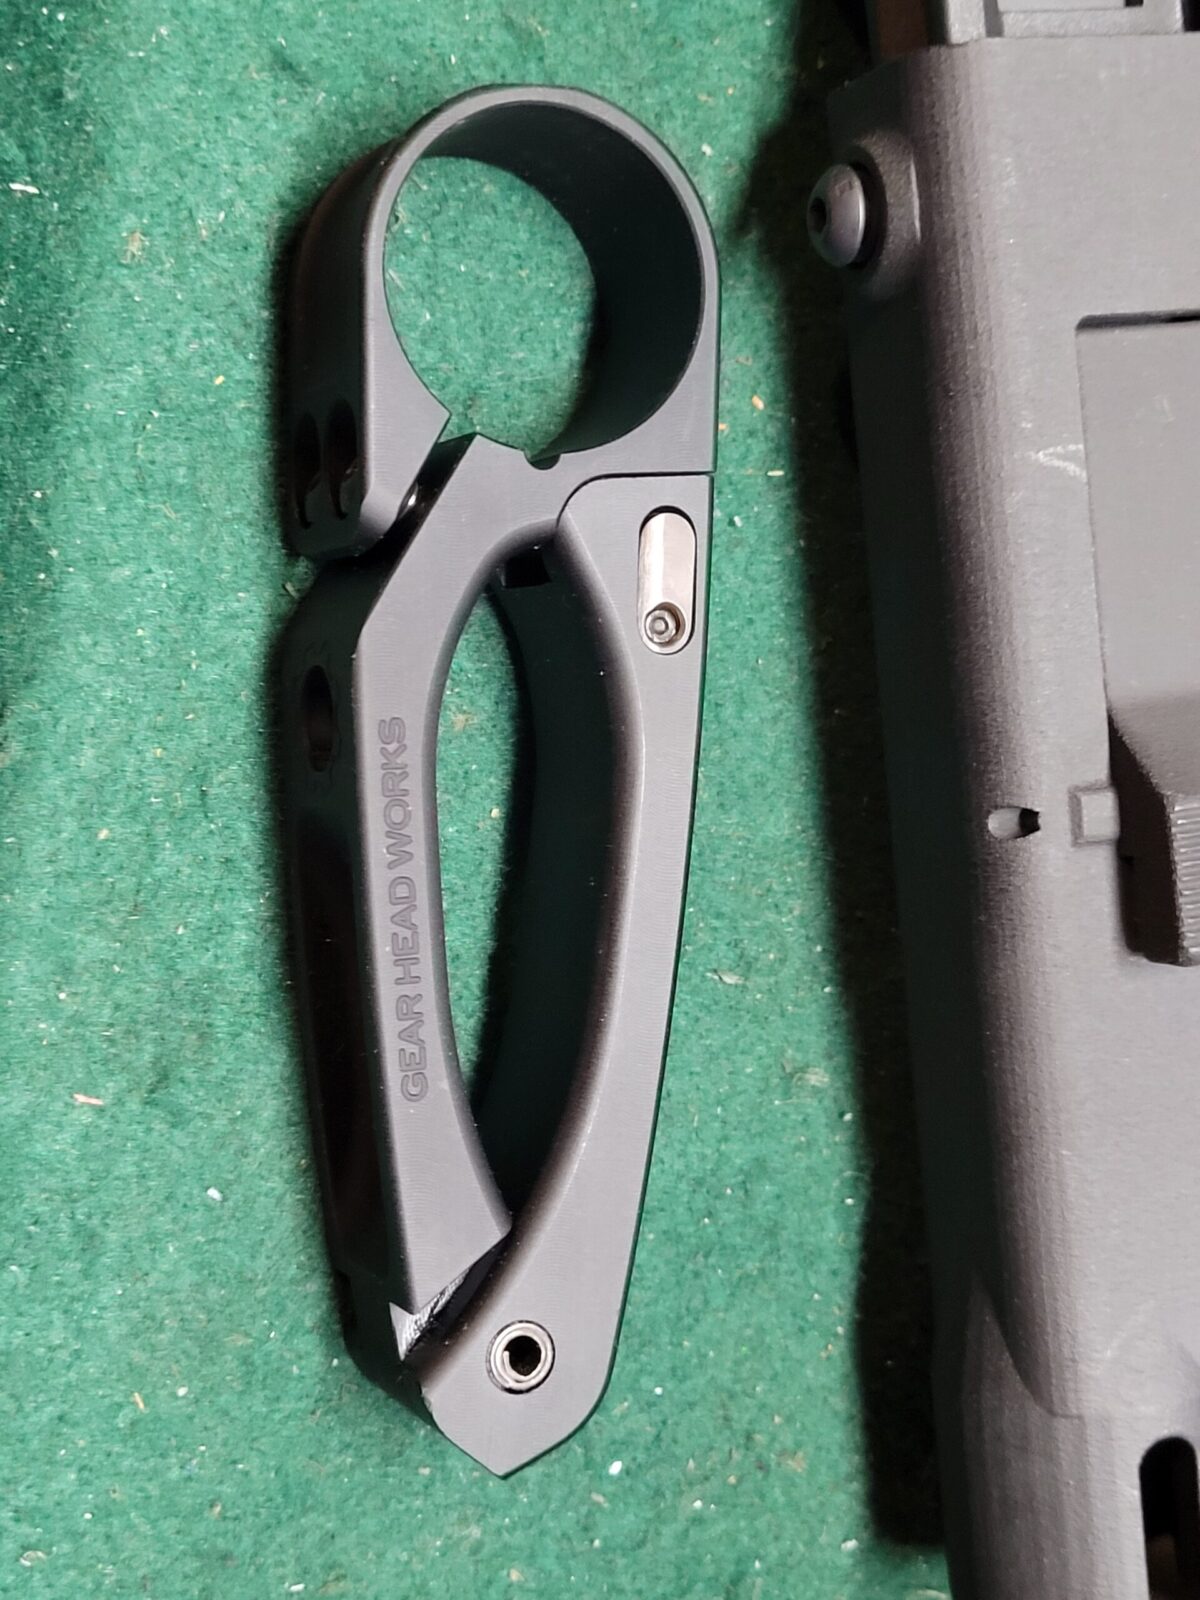
The GearHeadWorks Tailhook is one of the slickest braces in my opinion. It’s made from aluminum and the hook is deployed by pushing a button and folding the it outwards.
The Dragon Snout
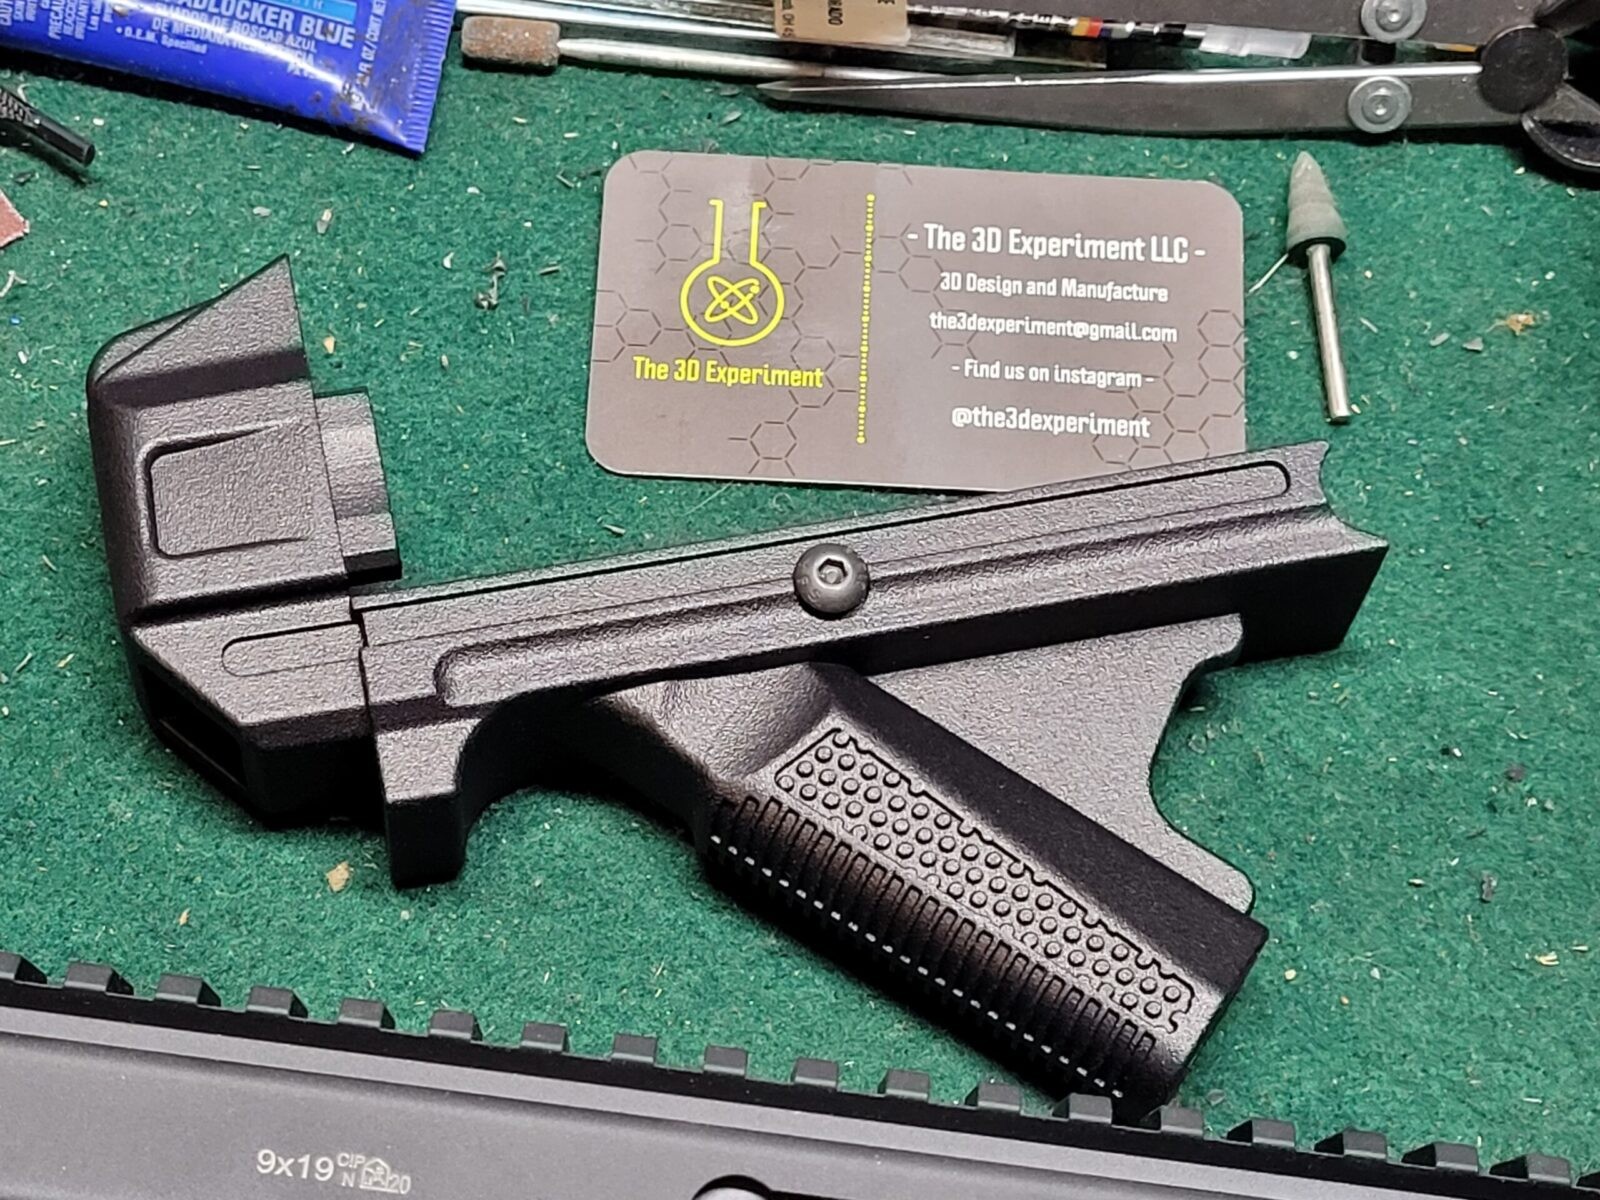
There is actually a neat 3D printed angled forearm extension made for the Stribog known as “the Dragon Snout”. It’s made by 3D Experiment and is sold by Global Ordnance.. It fits and feels great plus aesthetically I like covering up the approximate 3″ of barrel that stick out of the factory handguard.
First off, it’s a great name! It’s also very well done.
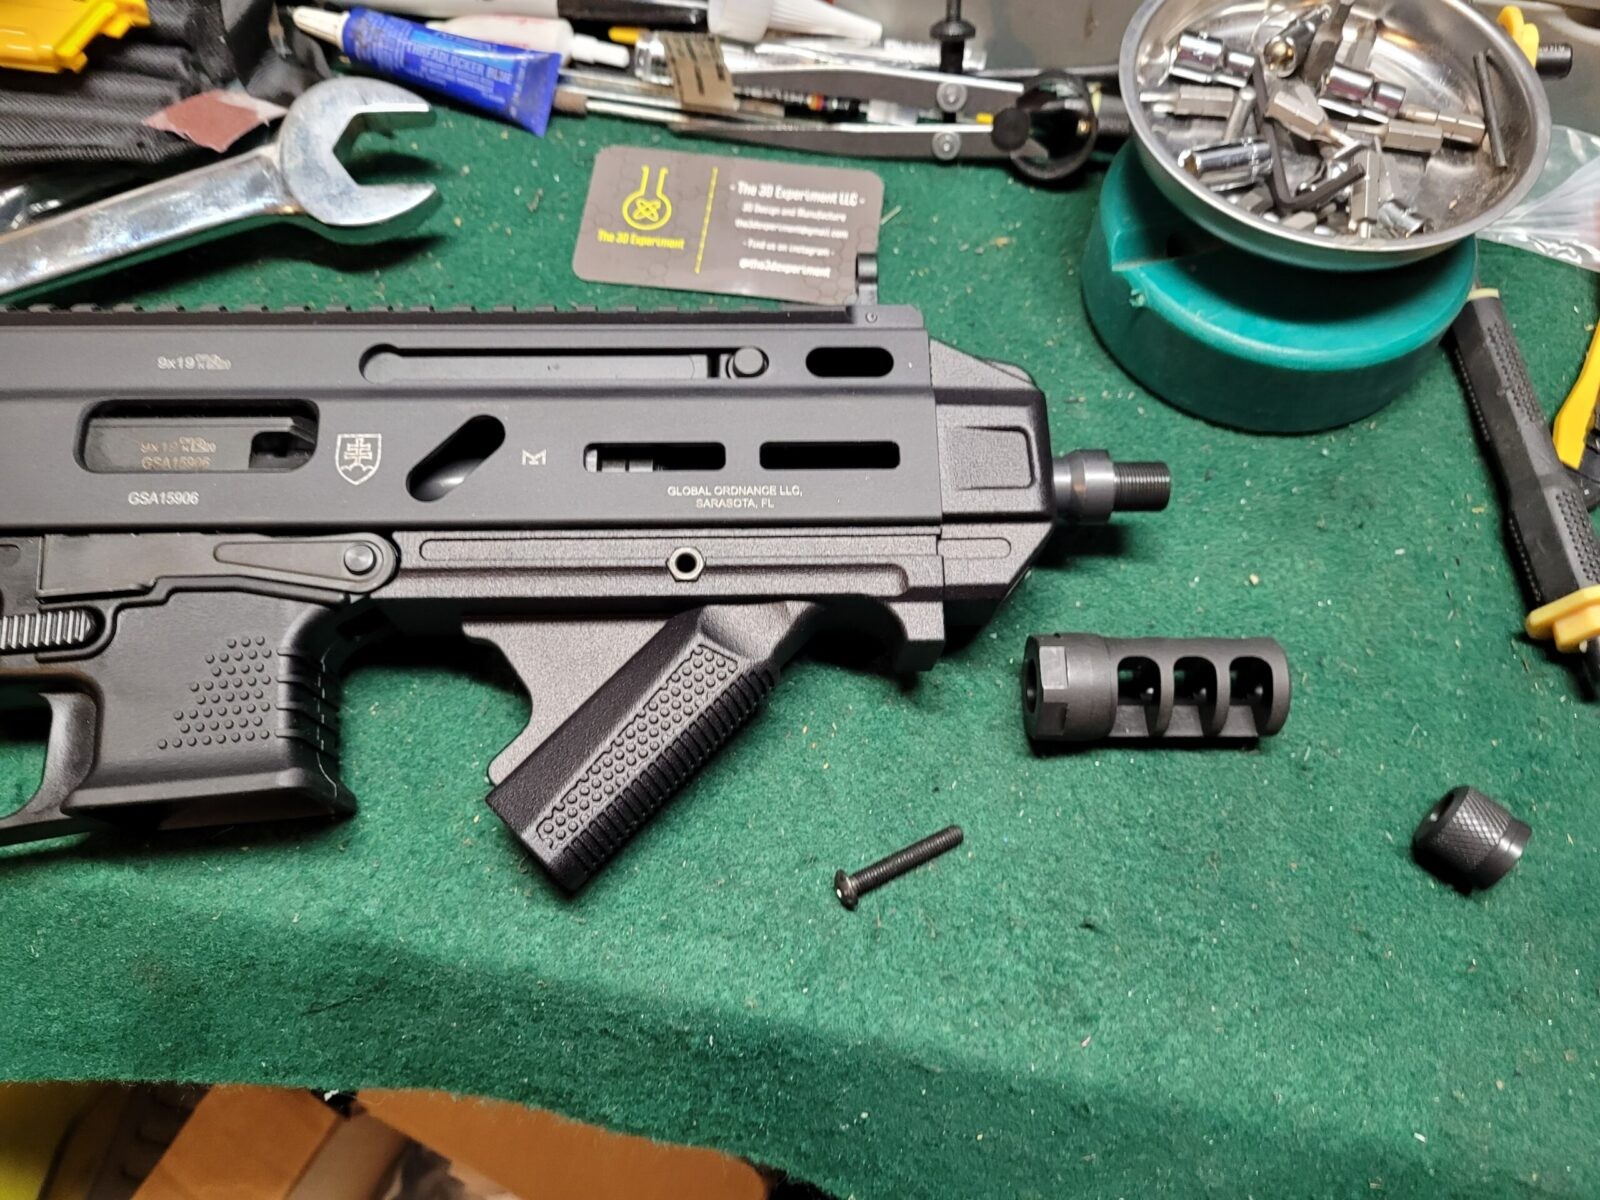
The Dragon Snout mounts by sliding it onto the existing 1913 Picatinny Rail on the bottom of the pistol’s handguard. One minor detqail – the Dragon Snout will likely need to go on before your muzzle device. For the Grand Power S9 shown, it did need to be mounted after the Dragon Snout.
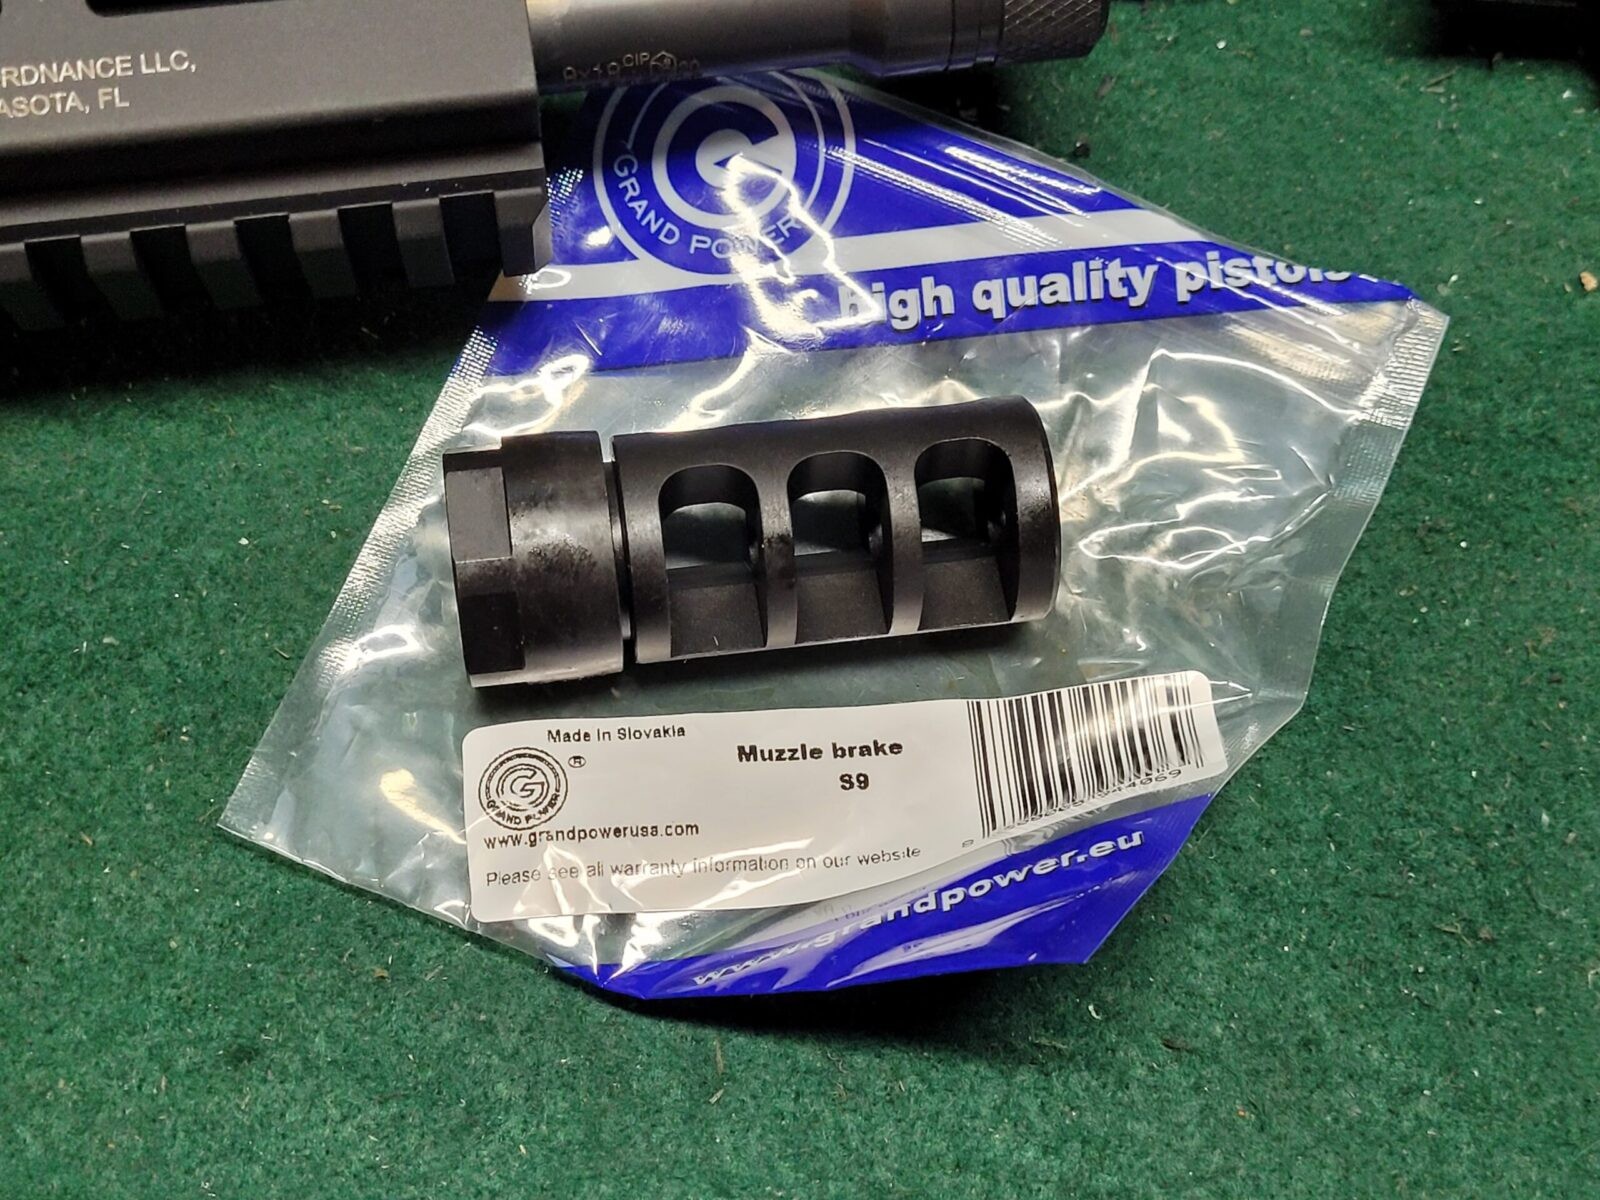
Grand Power S9 Muzzle Brake
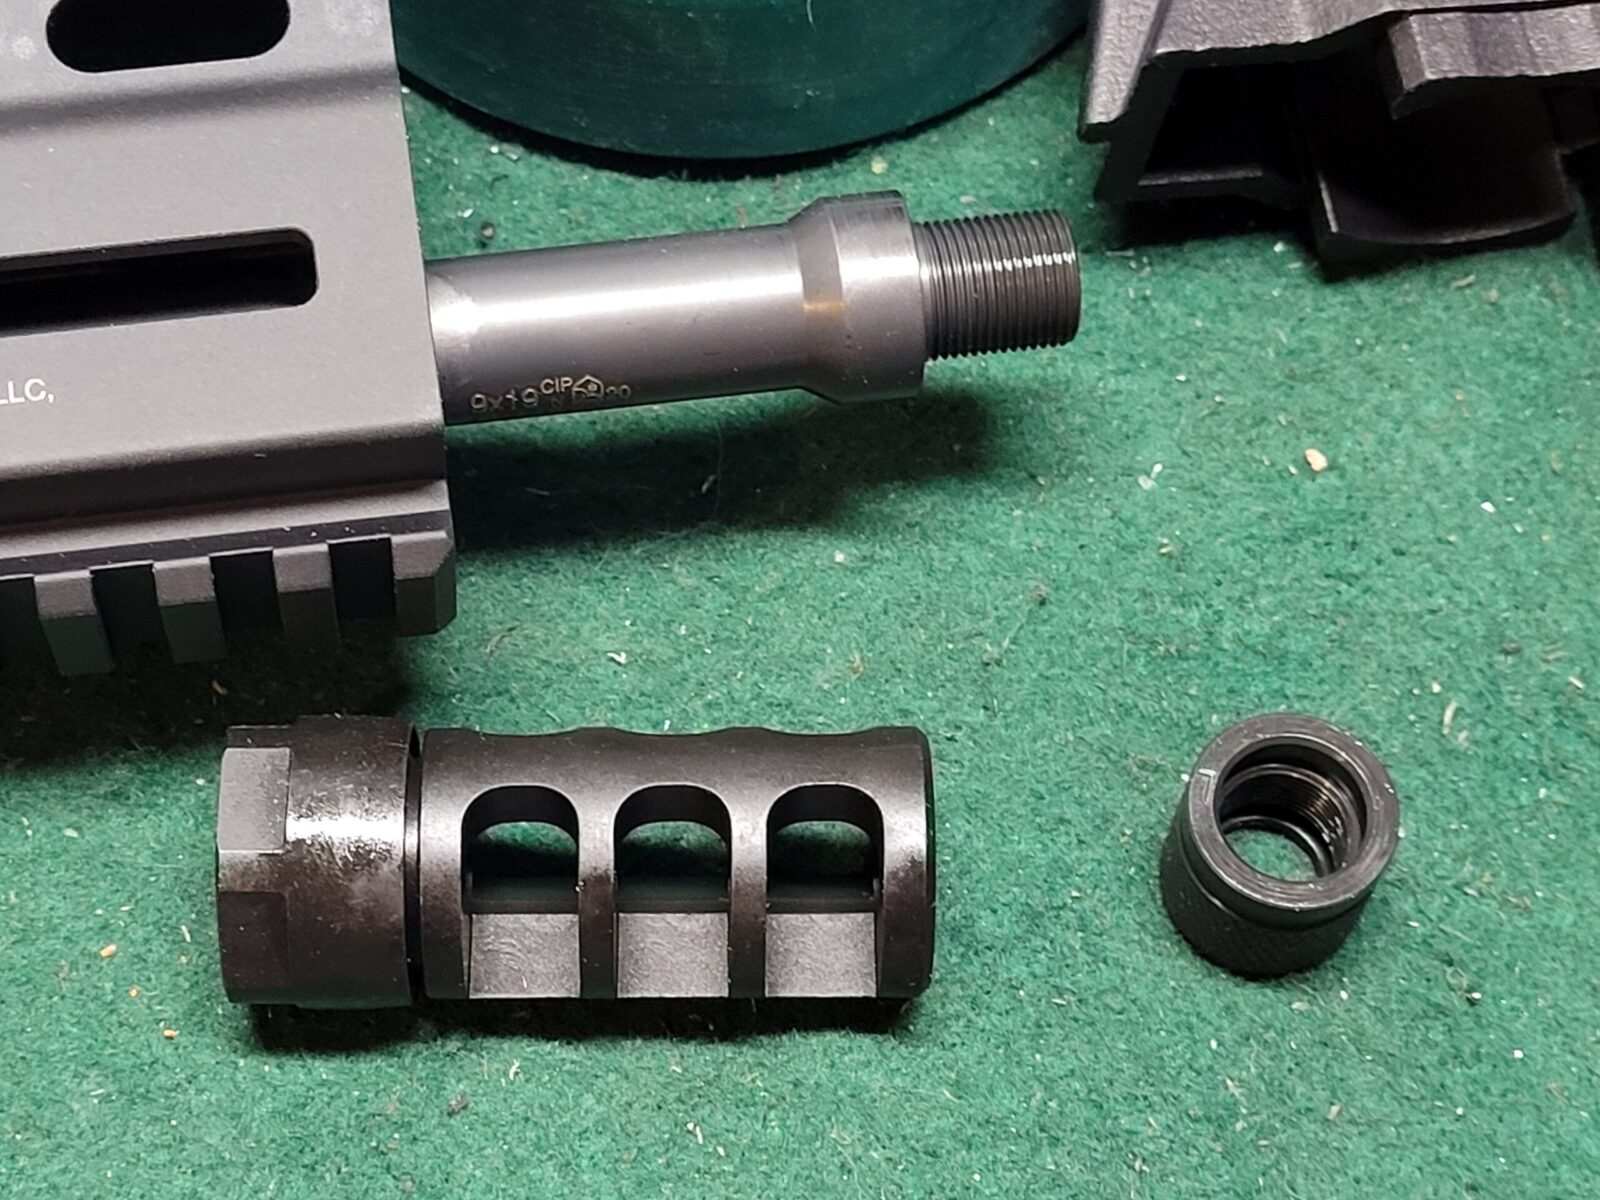
I went with a Grand Power 9mm brake that has an integral locking nut. Unfortunately, I do not see it for sale right now anywhere so I can’t link to it. Here are some photos of it.
The S9 brake is seems to work quite well and it was easy to install.
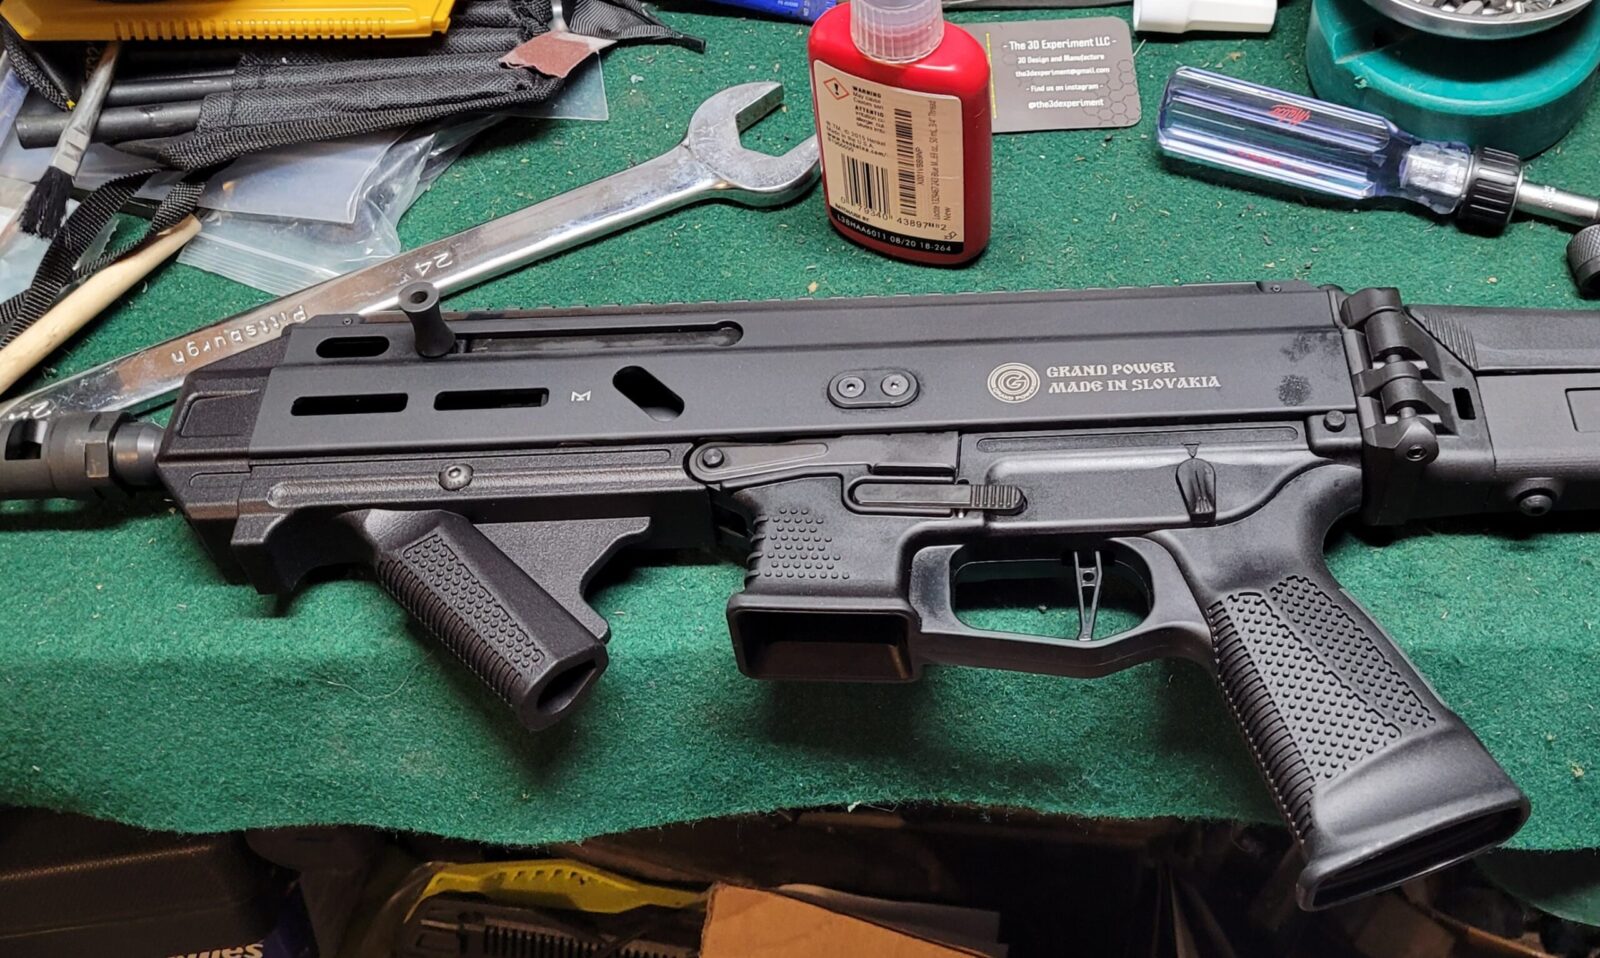
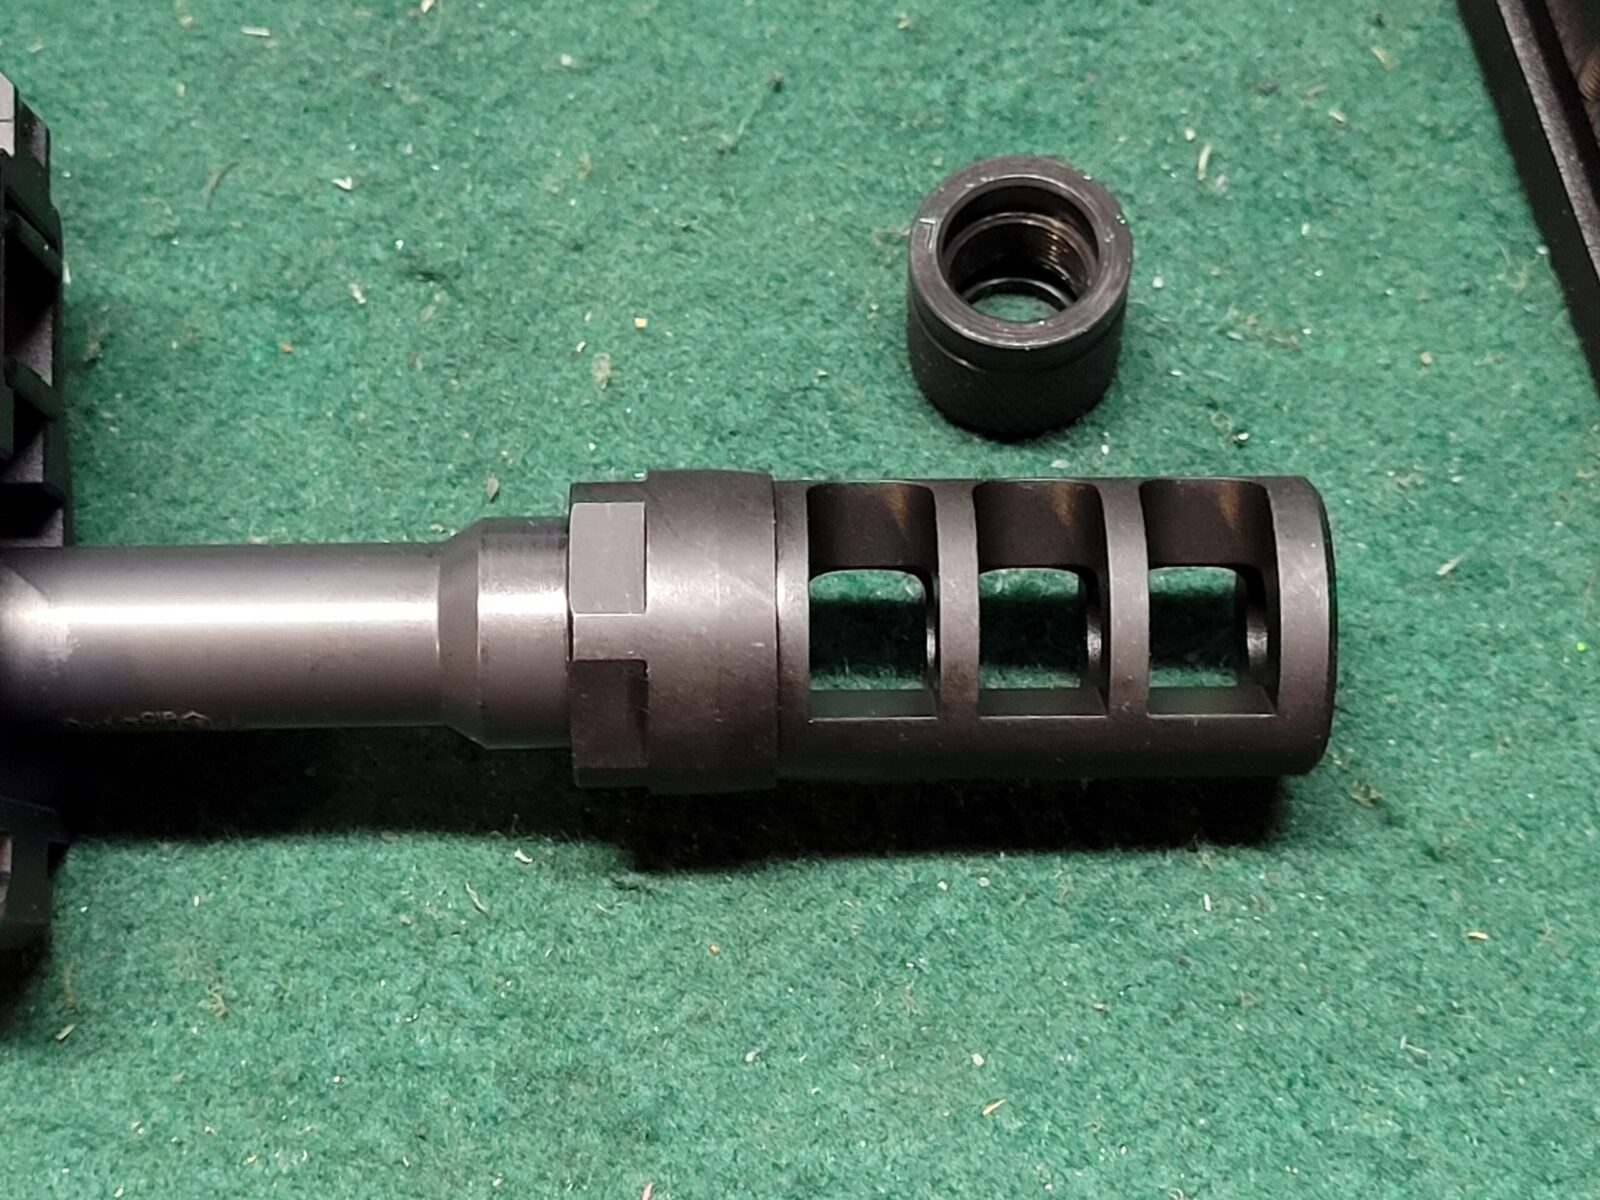
The threads are protected by a barrel nut so you remove it and thread on the new brake. It’s interesting to note the proof mark on the barrel 9×19 CIP – CIP is a European standards group that does the work of SAAMI there. CIP and SAAMI standards are often close but not exactly the same due to differences in where they collect pressure data. SAAMI also has +P and +P+ whereas CIP does not.
When installing a brake, thread it on as far as you can and then back it off only as much as you need to “clock” it (align it) and then tighted the locking nut.
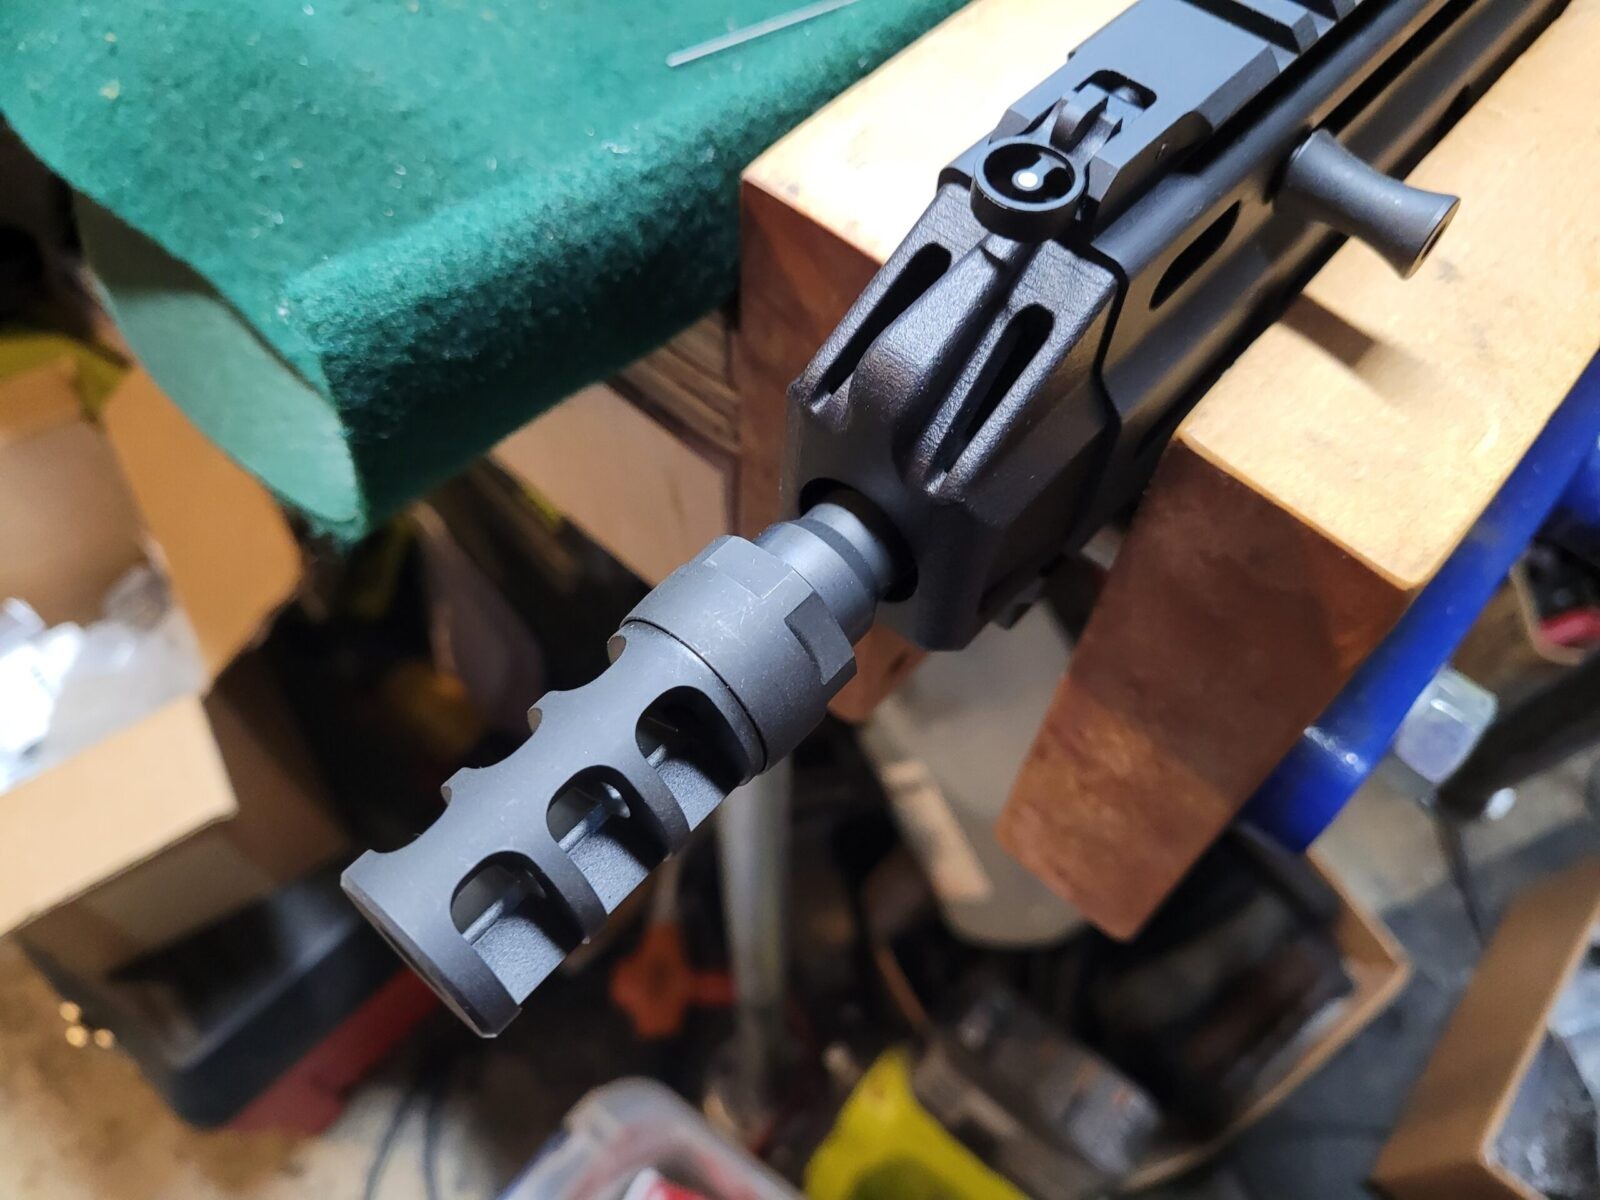
Here’s a good photo of the brake and how it is larger than the Dragon Snout’s front hole. You can also see the integral iron front sight and charging handle.
The Stribog was really shaping up and I liked both the balance and the way it felt when I brought it up.
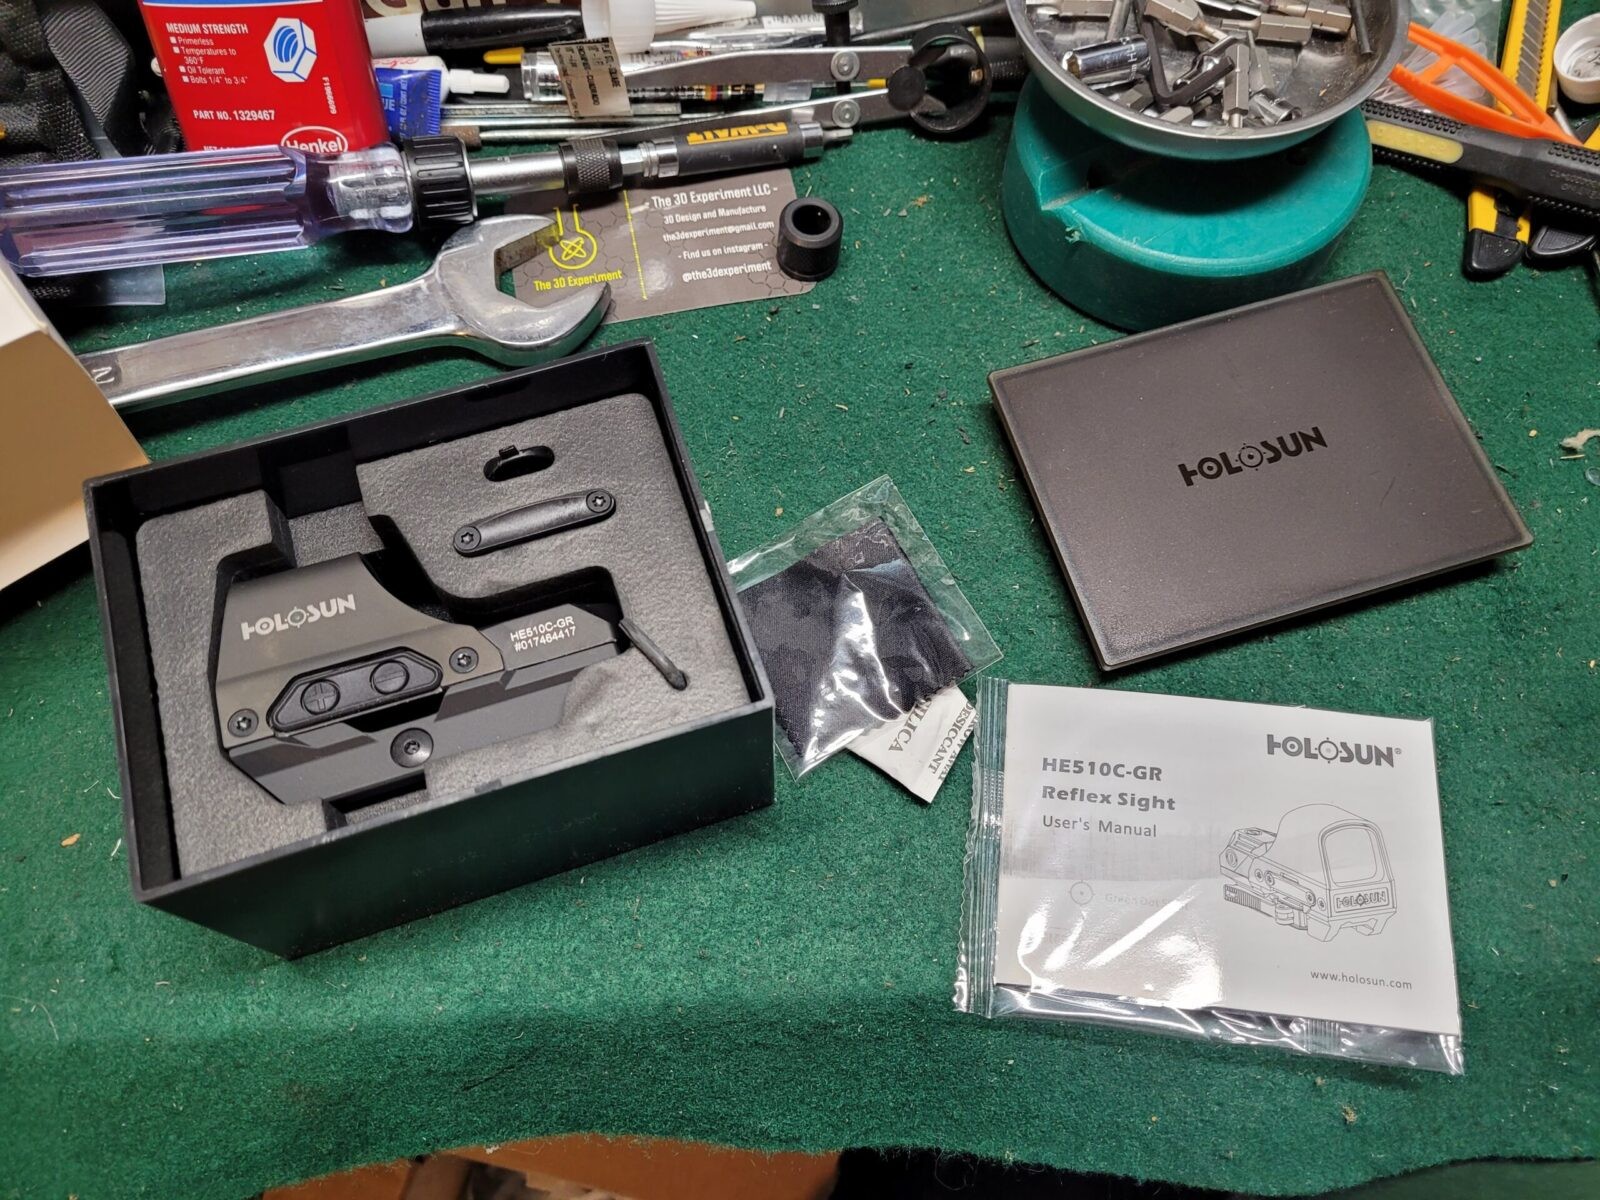
Adding a Holosun HE510C-GR Green Reflex Sight
My opinion of Holosun optics has improved quite a bit over the last two years – mainly because I started using the versus just reading about them. My go-to holographic sight is the Vortex UH-1 when I can afford it. When I can’t, I have found the Holosun optics to be very decent affordable choices. I especially like the HE510C-GR.
In general, I like Holosun’s use of two power sources – battery and solar plus you can either manually shut off the optic or use the shake awake feature that turns the unit and then off after a period of inactivity.
I find the green colored reticle super easy to find. Bringing the Stribog up and acquiring the target is both very straight forward and fast.
The HE510C-GR arrives well protected in its box ready for you to install the battery and mount it.
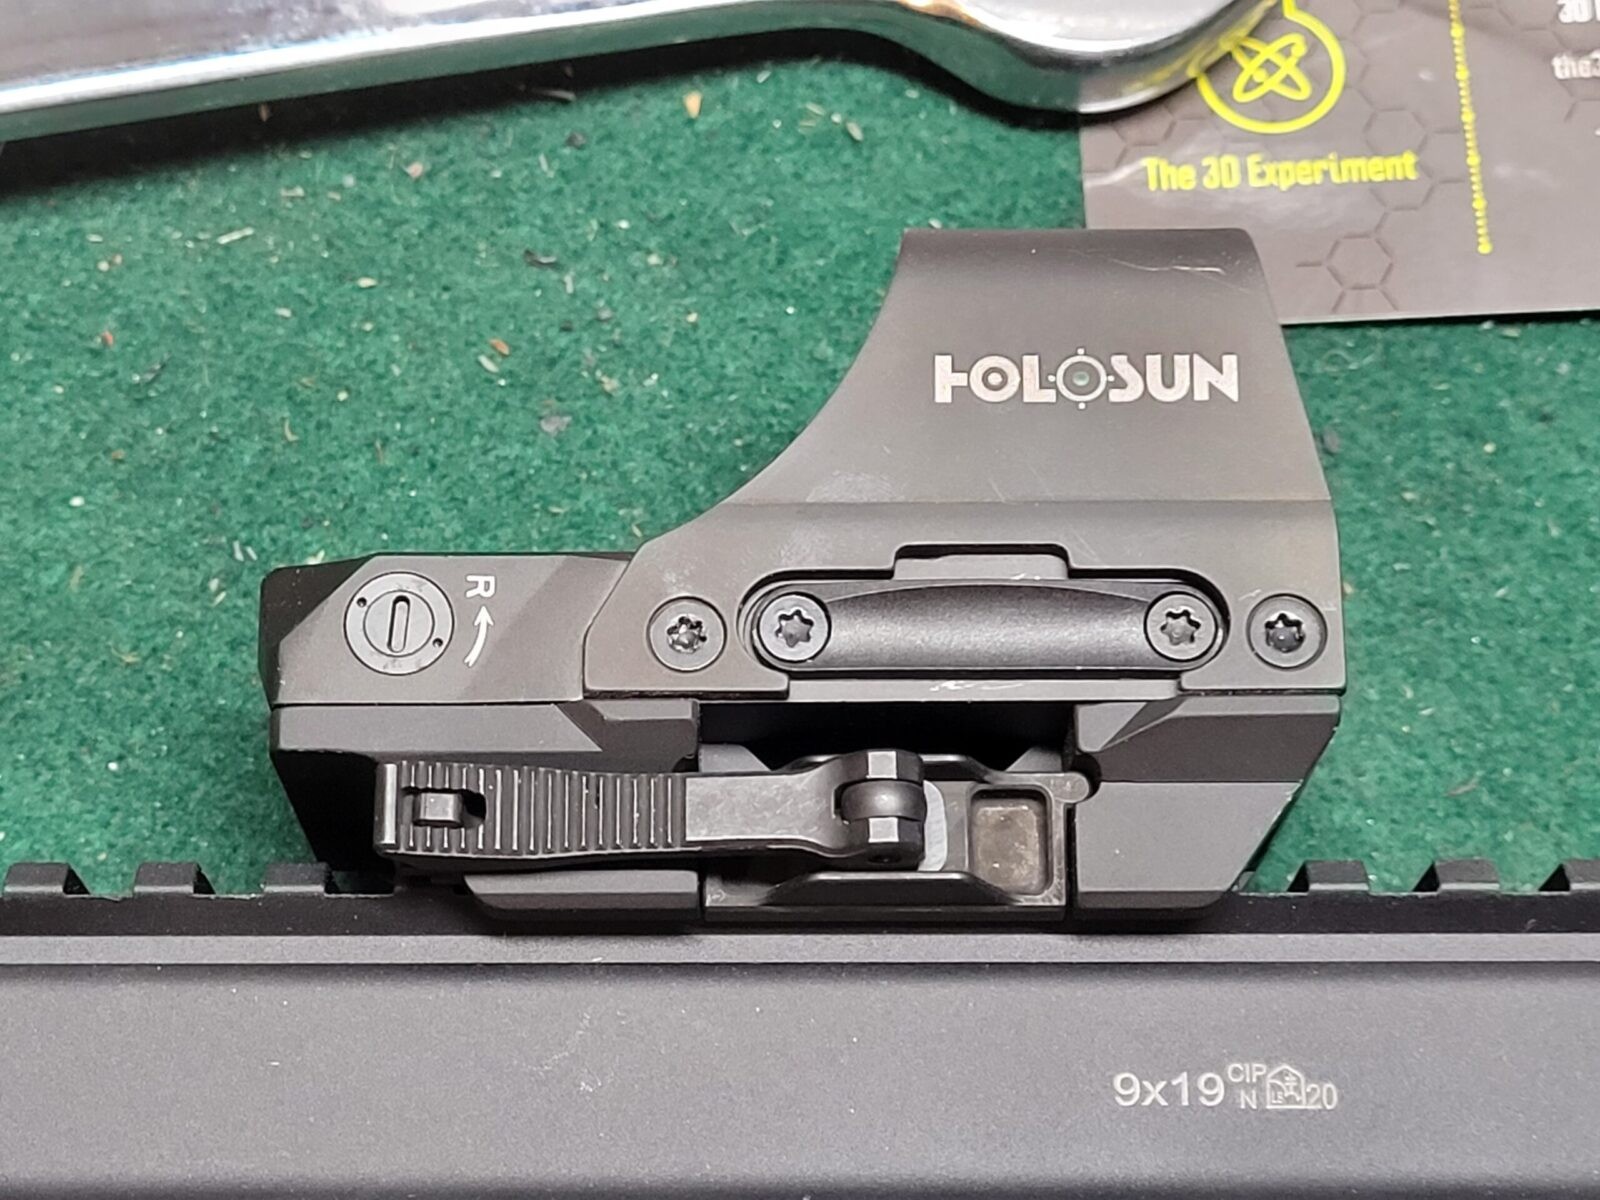
The unit has a quick release lever so you can remove the optic quickly either for cleaning or if you need to get it out of the way. I really prefer optics with quick release levers because there are any number of reasons why you may need to get it out of the way in a hurry. For example, if this Holosun were to fail, I’d remove it and quickly fail over to using the integral backup iron sights that are built into the Stribog’s top rail. Those sights flip up but are too short to use with the Holosun so I just leave them folded down.
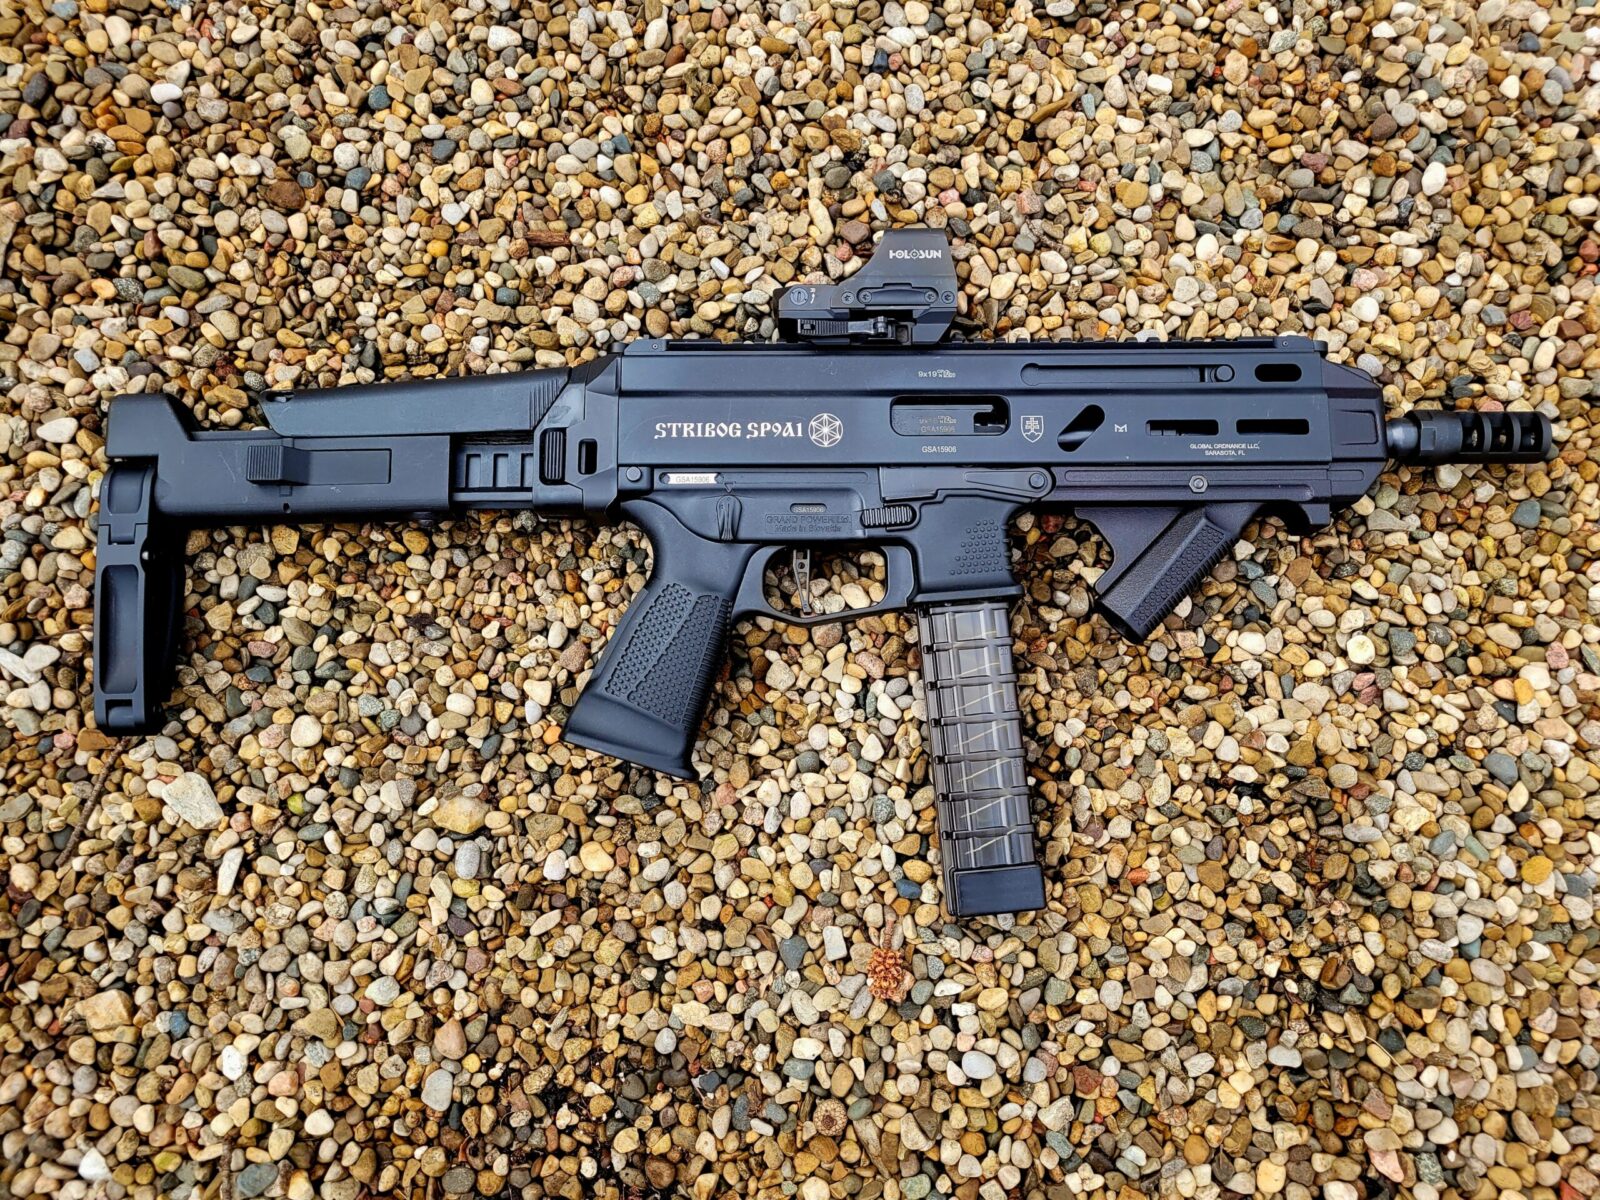
The Final Result
I was very happy with the weapon – it all came together in a nice package:
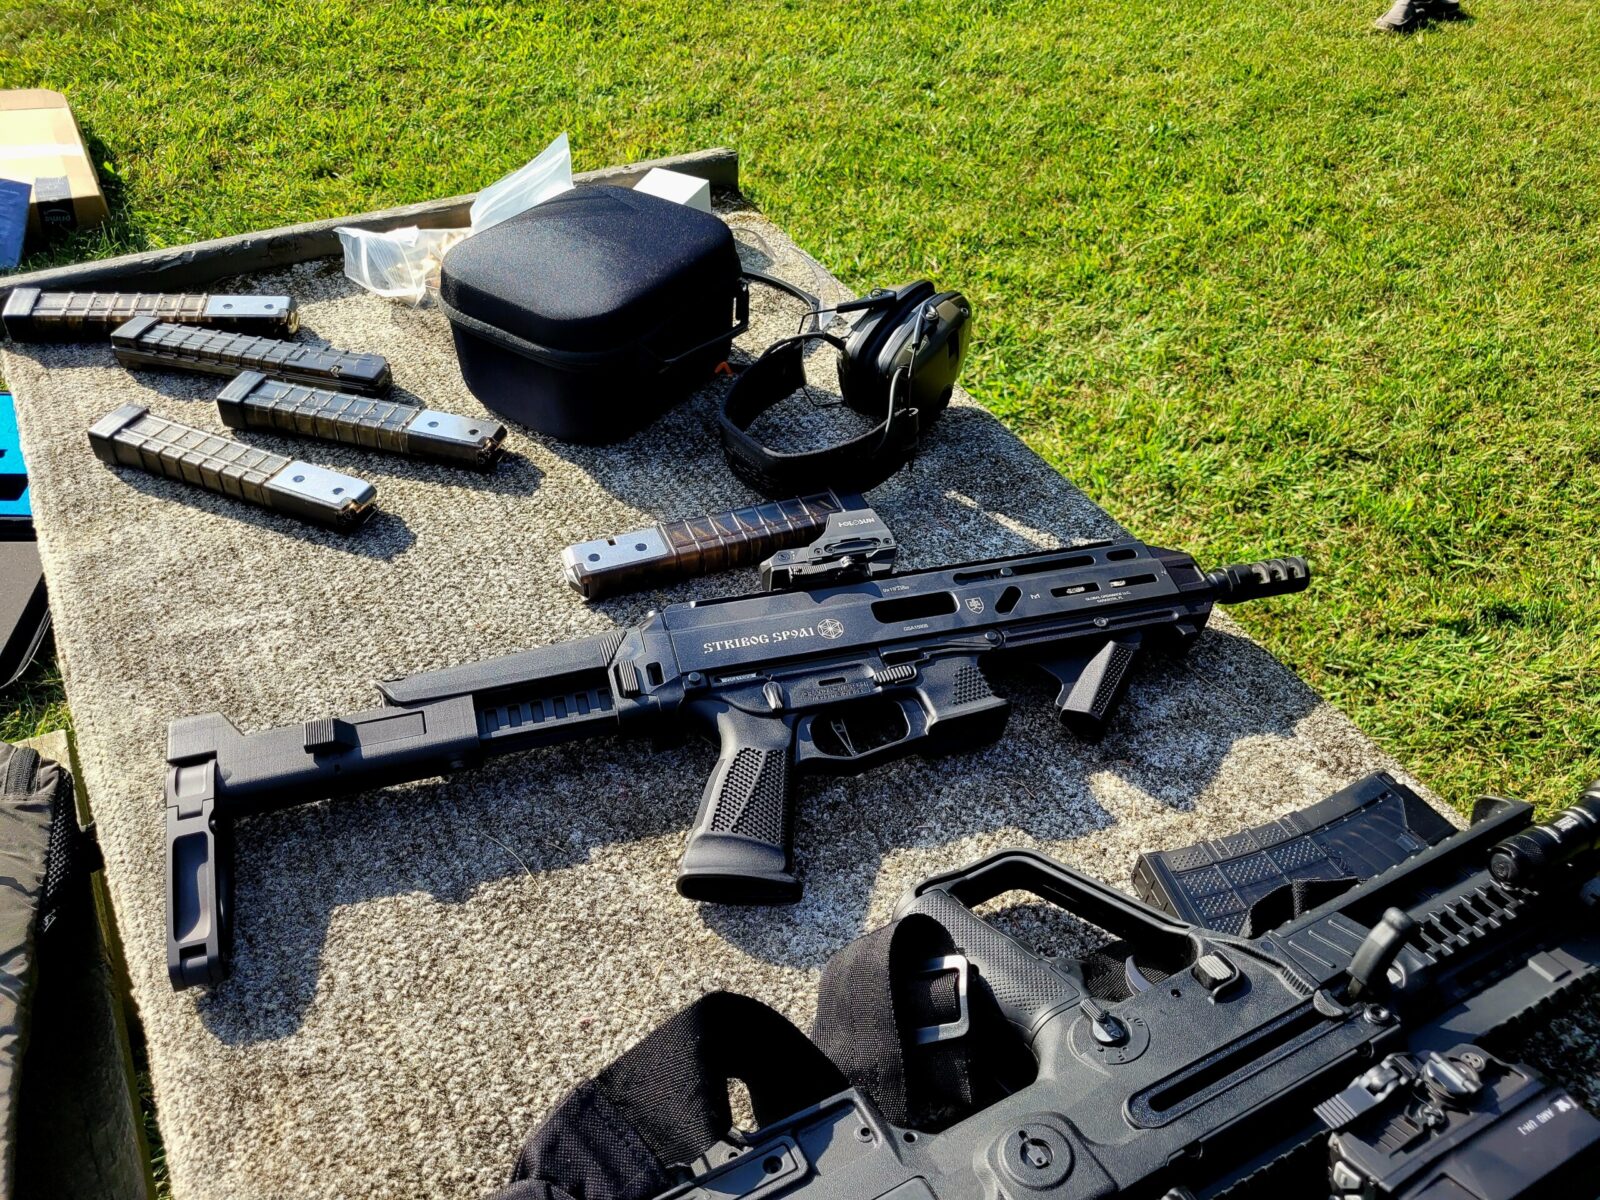
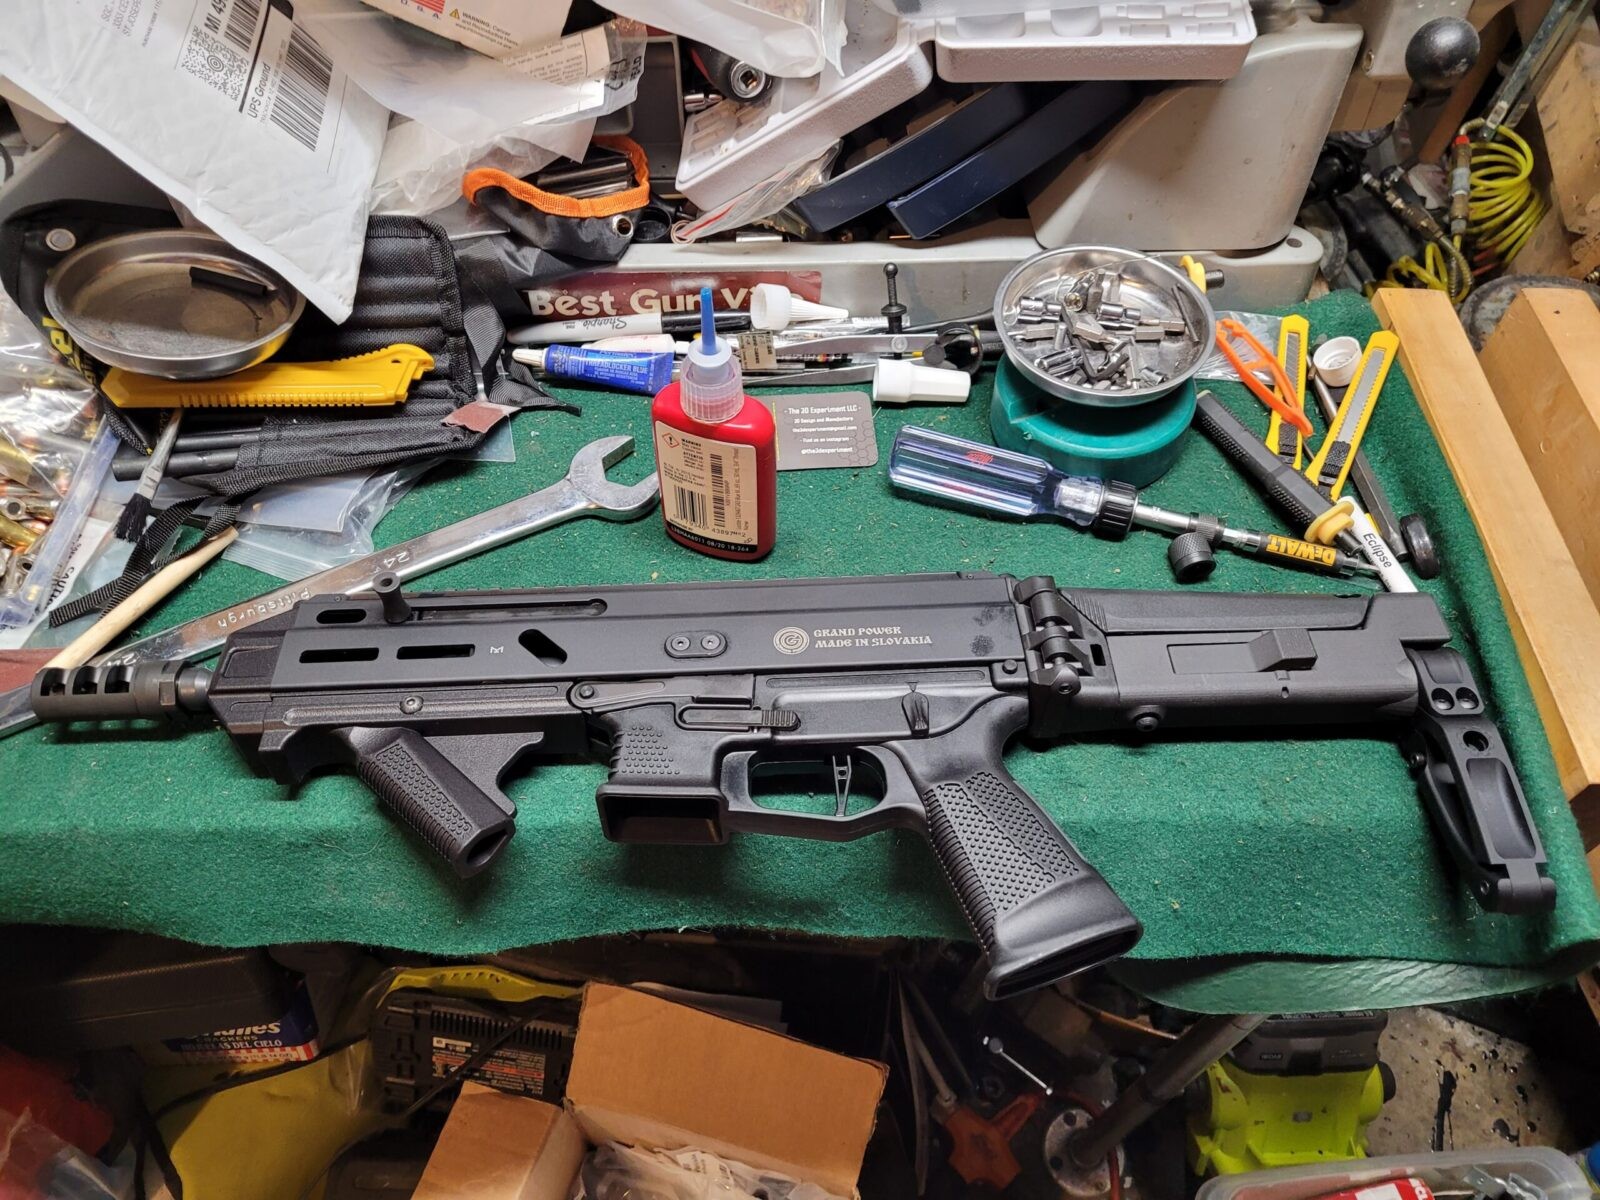
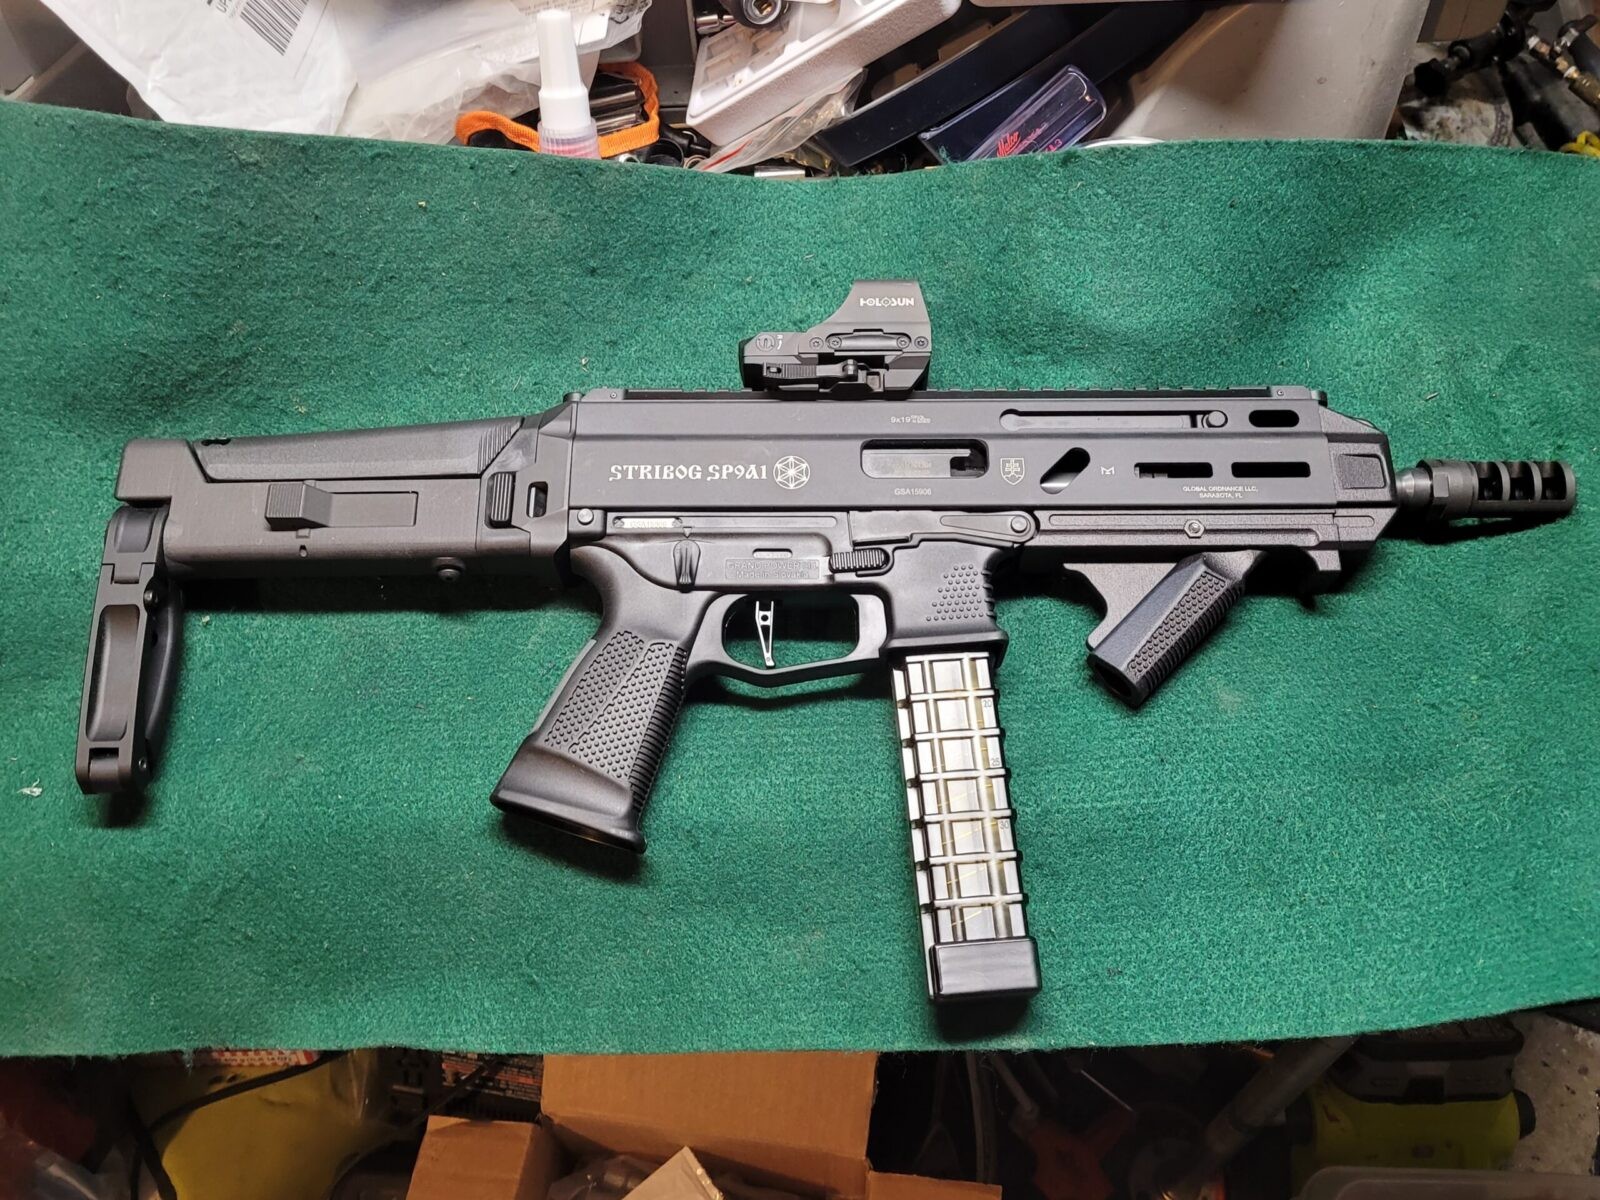
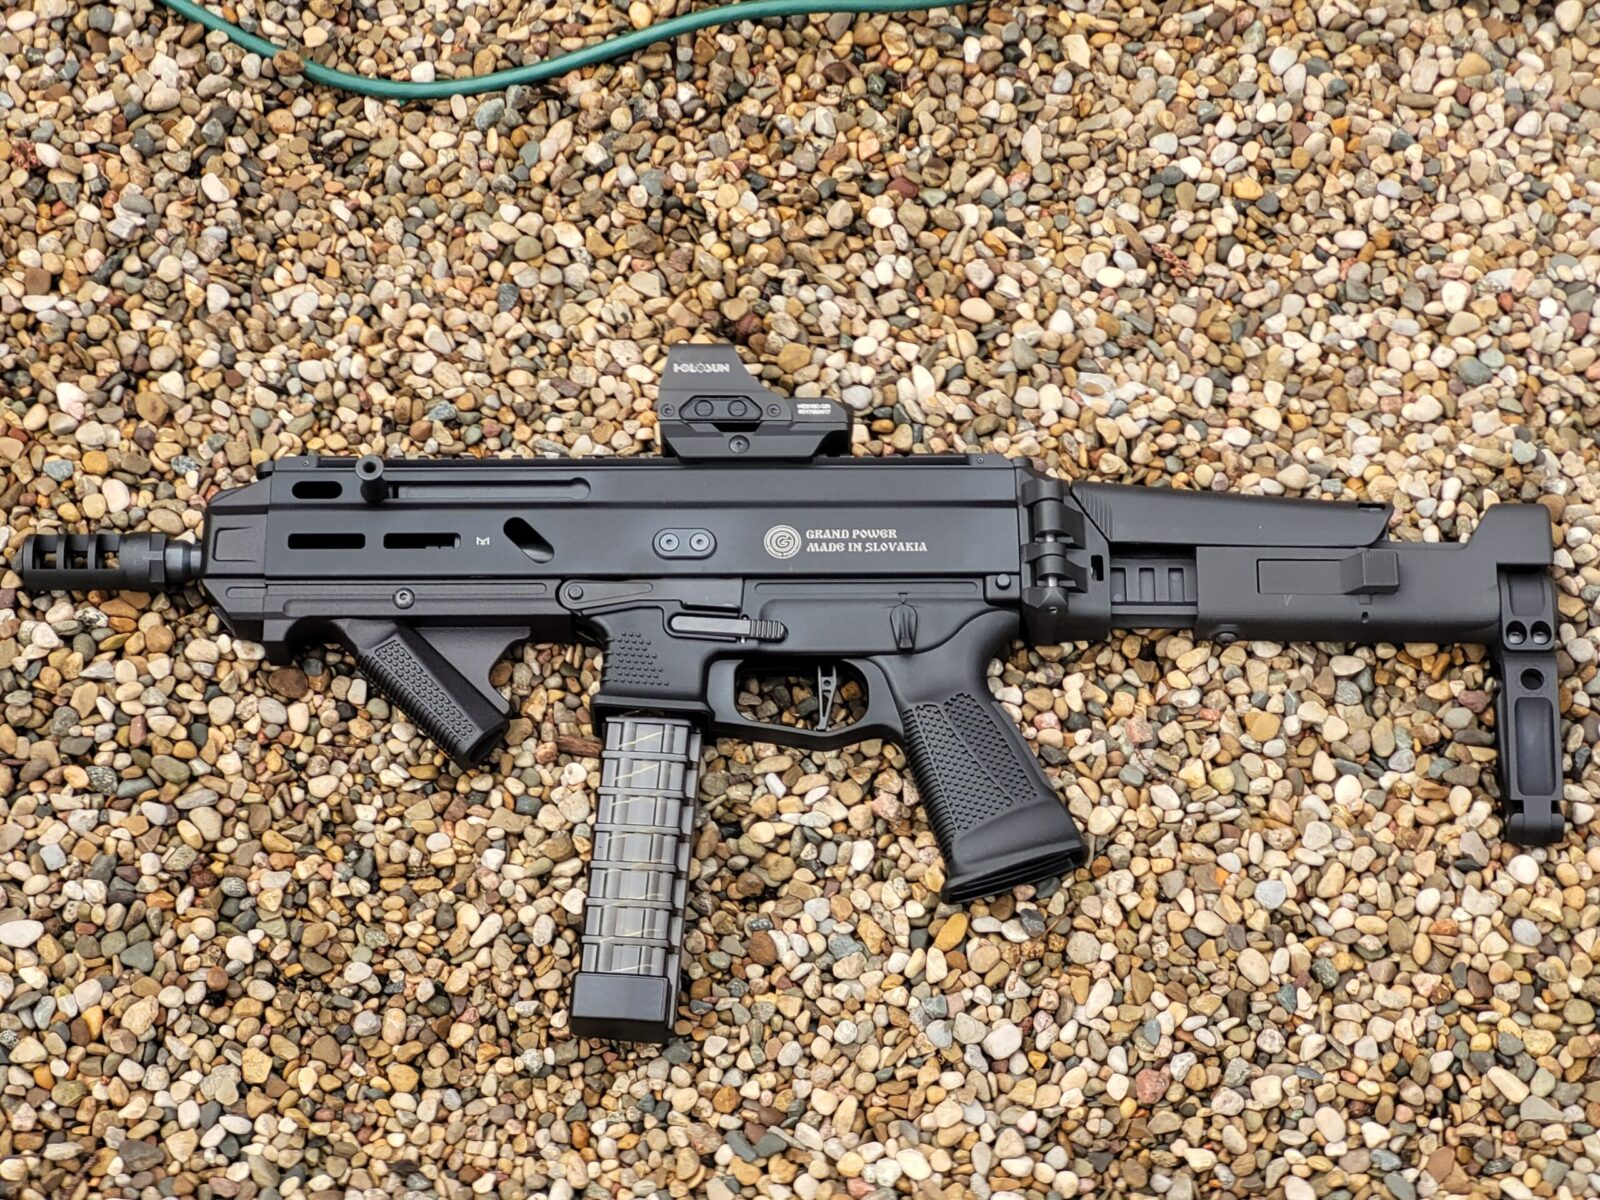
Here’s the finished unit – A Stribog SP9A1 with the F5 modular brace, Dragon Snout forearm, S9 brake and a Holosun HE510C-GR optic on top. That is one of the straight 30 round magazines,
Quick Comment on Magazines
The magazine design is unique. While there are now options for the lowers that let you use Glock mags, the native magazine is a proprietary double stack design.
You have a number of options for magazines – 20 and 30 round plus there are ones that are straight, with and without metal reinforced tops and a curved model. Right now, I have a combination of straight 30 round magazines both with and without the reinforced metal feed lips.
I’d recommend you have 4-8 magazines at least for your Stribog. Why? It’s so much fun to shoot you will go through 30 rounds fast. A number of places sell Stribog magazines and I bought a few of my spares from GunMag Warehouse. I bought a couple of the steel reinforced lipped models from Global Ordnance but everyone seems to be sold out of them at the moment. I haven’t had any problems with the all polymer units but if we make a broad generalization, steel reinforced mag lips of any design tend to last longer.
Summary
Ok, the Stribog was assembled and ready for the range! For a change, I am writing this after taking it to the range twice, having a blast and will talk about my experiences with the weapon in my next post.
Here’s one view of the completed Stribog.
And another.
I hope this post gives you some ideas and I definitely like the Stribog.
Note, I have to buy all of my parts – nothing here was paid for by sponsors, etc. I do make a small amount if you click on an ad and buy something but that is it. You’re getting my real opinion on stuff.