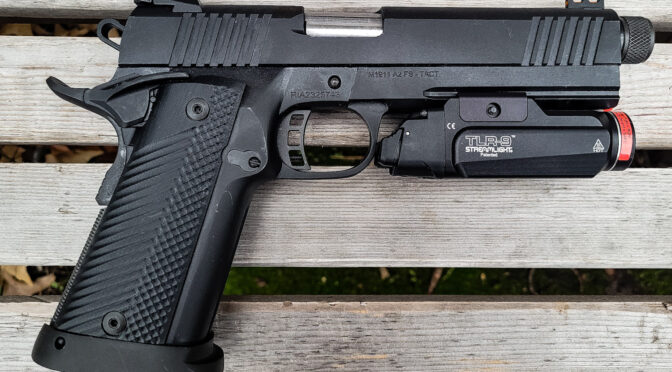
As you may know, we offer a third generation staggered 16 round magazine for Rock Island Armory (RIA) pistols chambered in either 10mm for .40 S&W. Having the correct front feed lip gap is critical for reliable feeding and I want to update you on some changes.
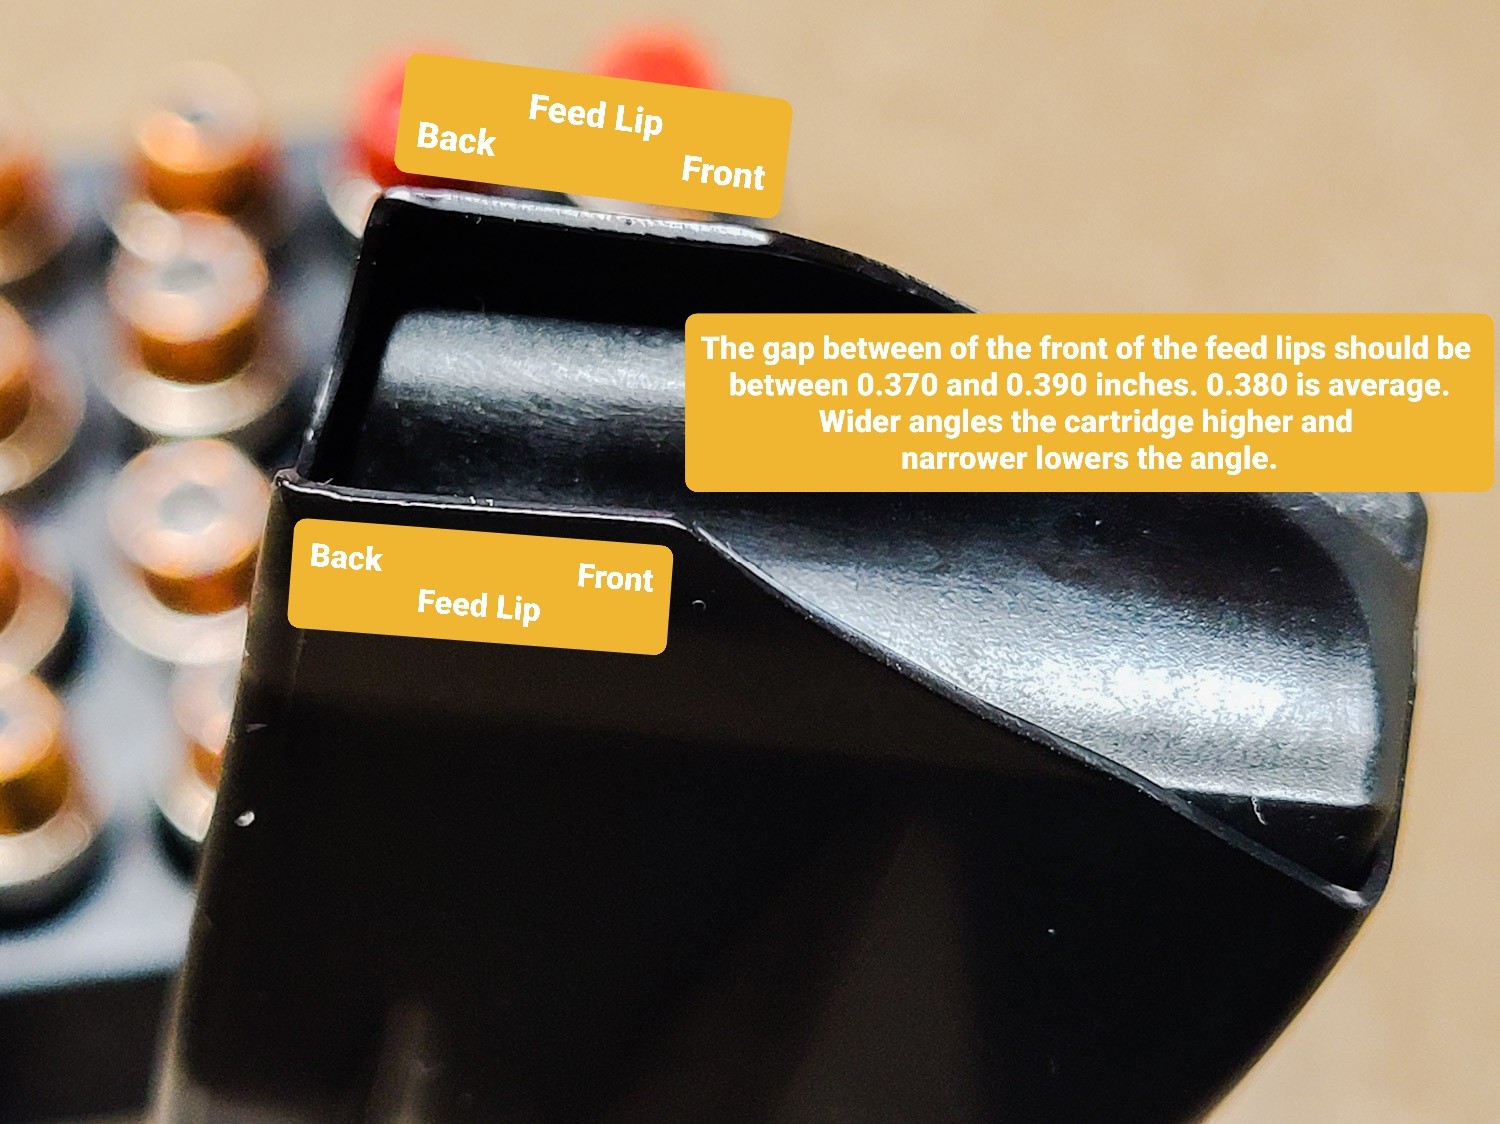
When I first started the magazines, I was setting the front edge of the feed lips between 0.36 and 0.375. In talking with customers who have bought the mags and were having feeding problems (notably stovepiping) , when the magazine lips were down at the lower end of 0.360″. I’d walk them through setting the gap for their pistol and at the end, I would have them measure the final front lip gap that worked. It was usually between 0.370 and 0.390″ and averaged 0.380″.
| June 2024: The nominal front feed lip gap is 0.375 +/- 0.002. 0.380 seems to be the average maximum but the best average gap is that 0.373-0.377 range. Your pistol might vary so look at how the bullet points towards the chamber – either straight in or just slightly below. Some tinkering will help you figure out what is best for your pistol and the types of ammo you are shooting. |
Adjusting the Feed Lips Isn’t Hard
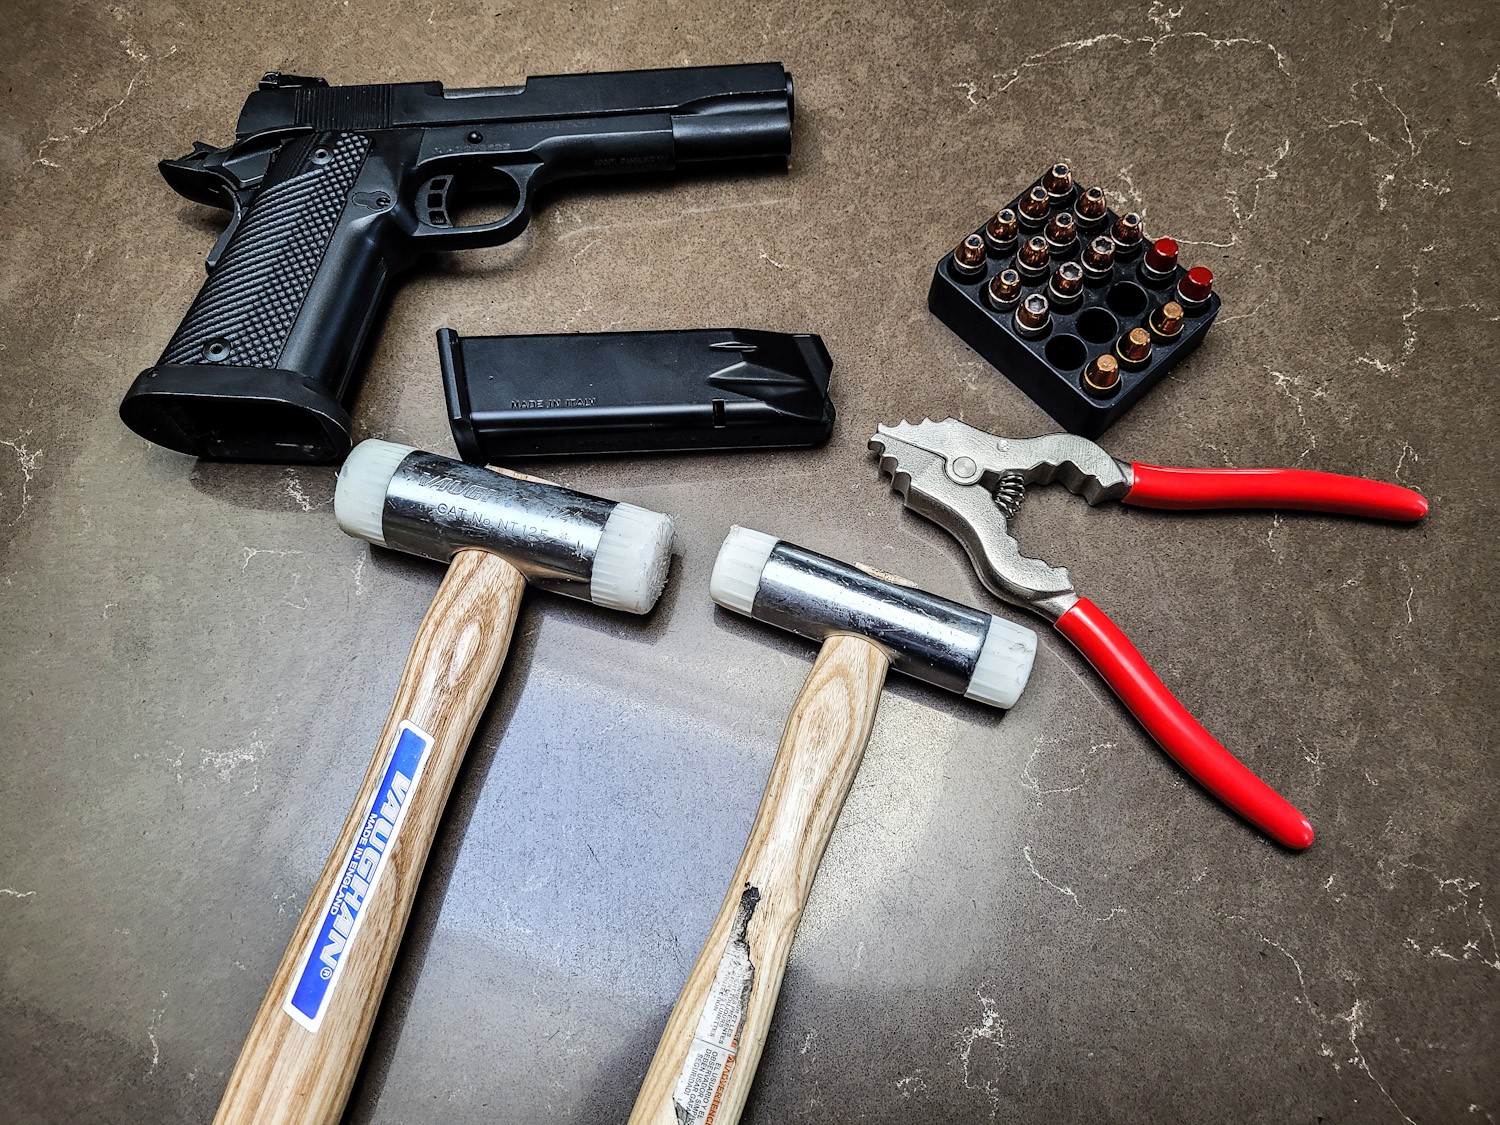
I’d recommend the following tools for the adjustments:
- 1/2-3/4 pound non-marring mallet – or even both. A lighter one for fine adjustments and a heavier one for coarse adjustments. It doesn’t take much to bend the lips. (May 2024 Update: I started using sheet metal hammers maybe a year and a half ago and find that they work great. The force of the strike bends the metal very nicely and doesn’t hurt the finish so while the photos all say use a non marring mallet – I would tell you to get some basic light sheet metal / body work hammers. Cheap ones break down quickly as the face of the hammer is weak so read reviews and get a good one. You just need a decent flat face and not a lot of weight – look at Martin, Fairmount, Performance Tool, etc.)
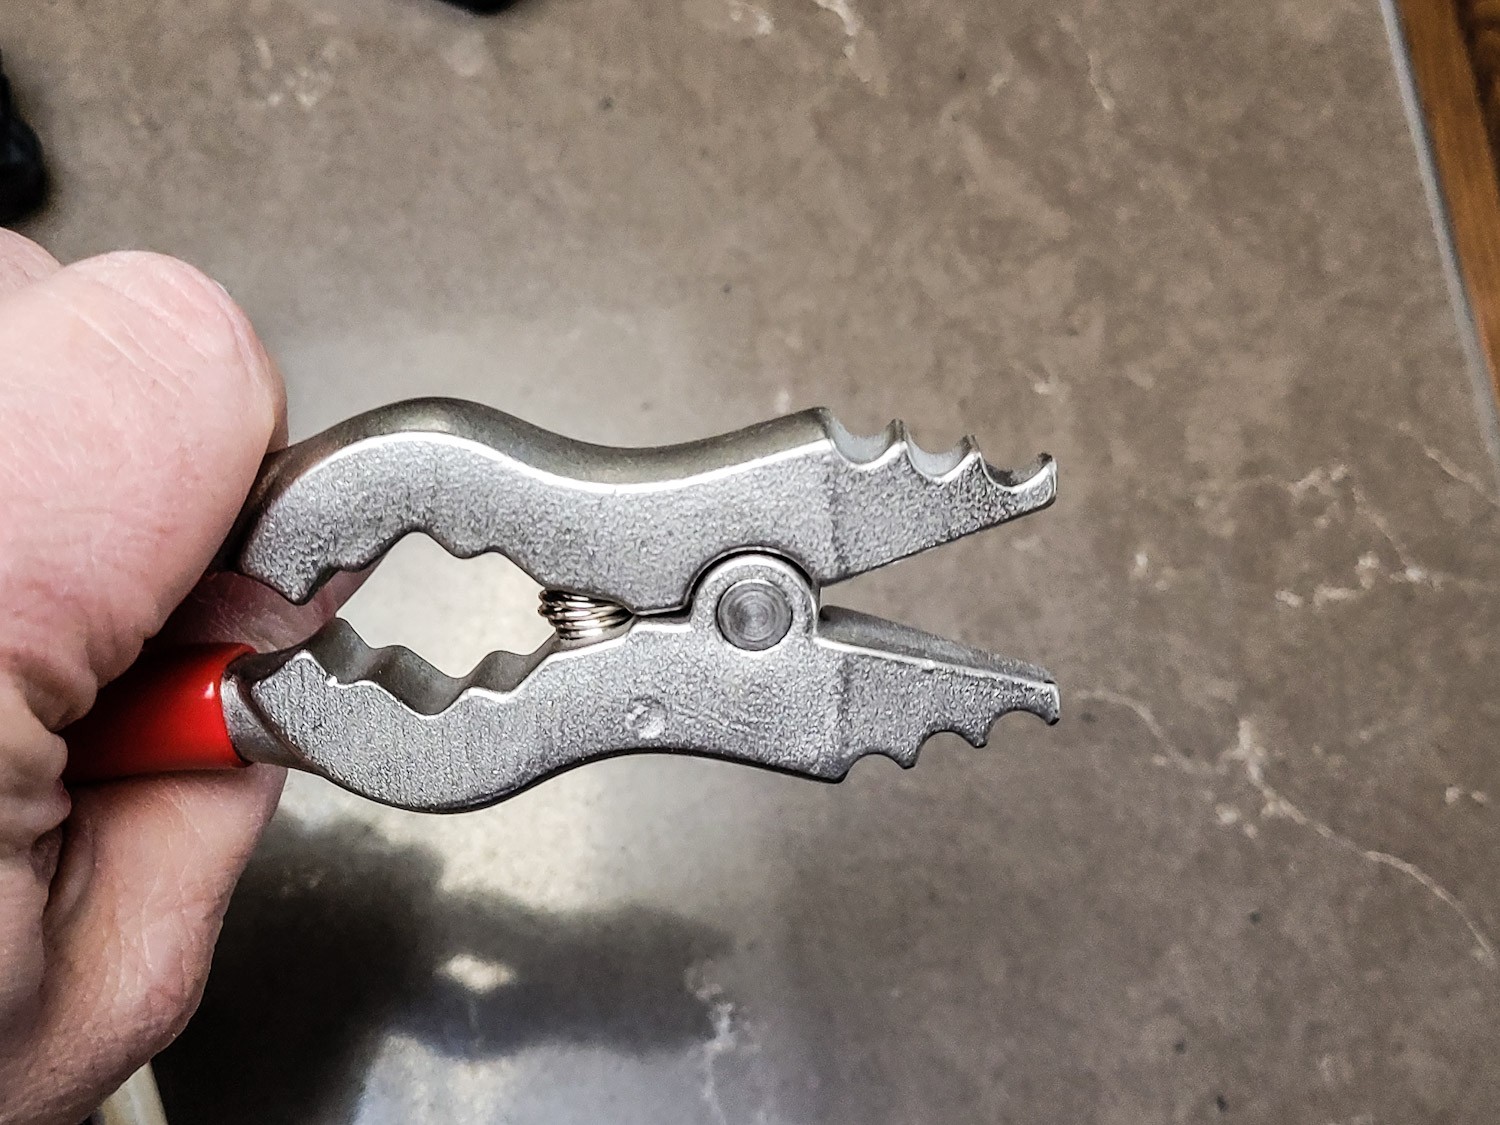
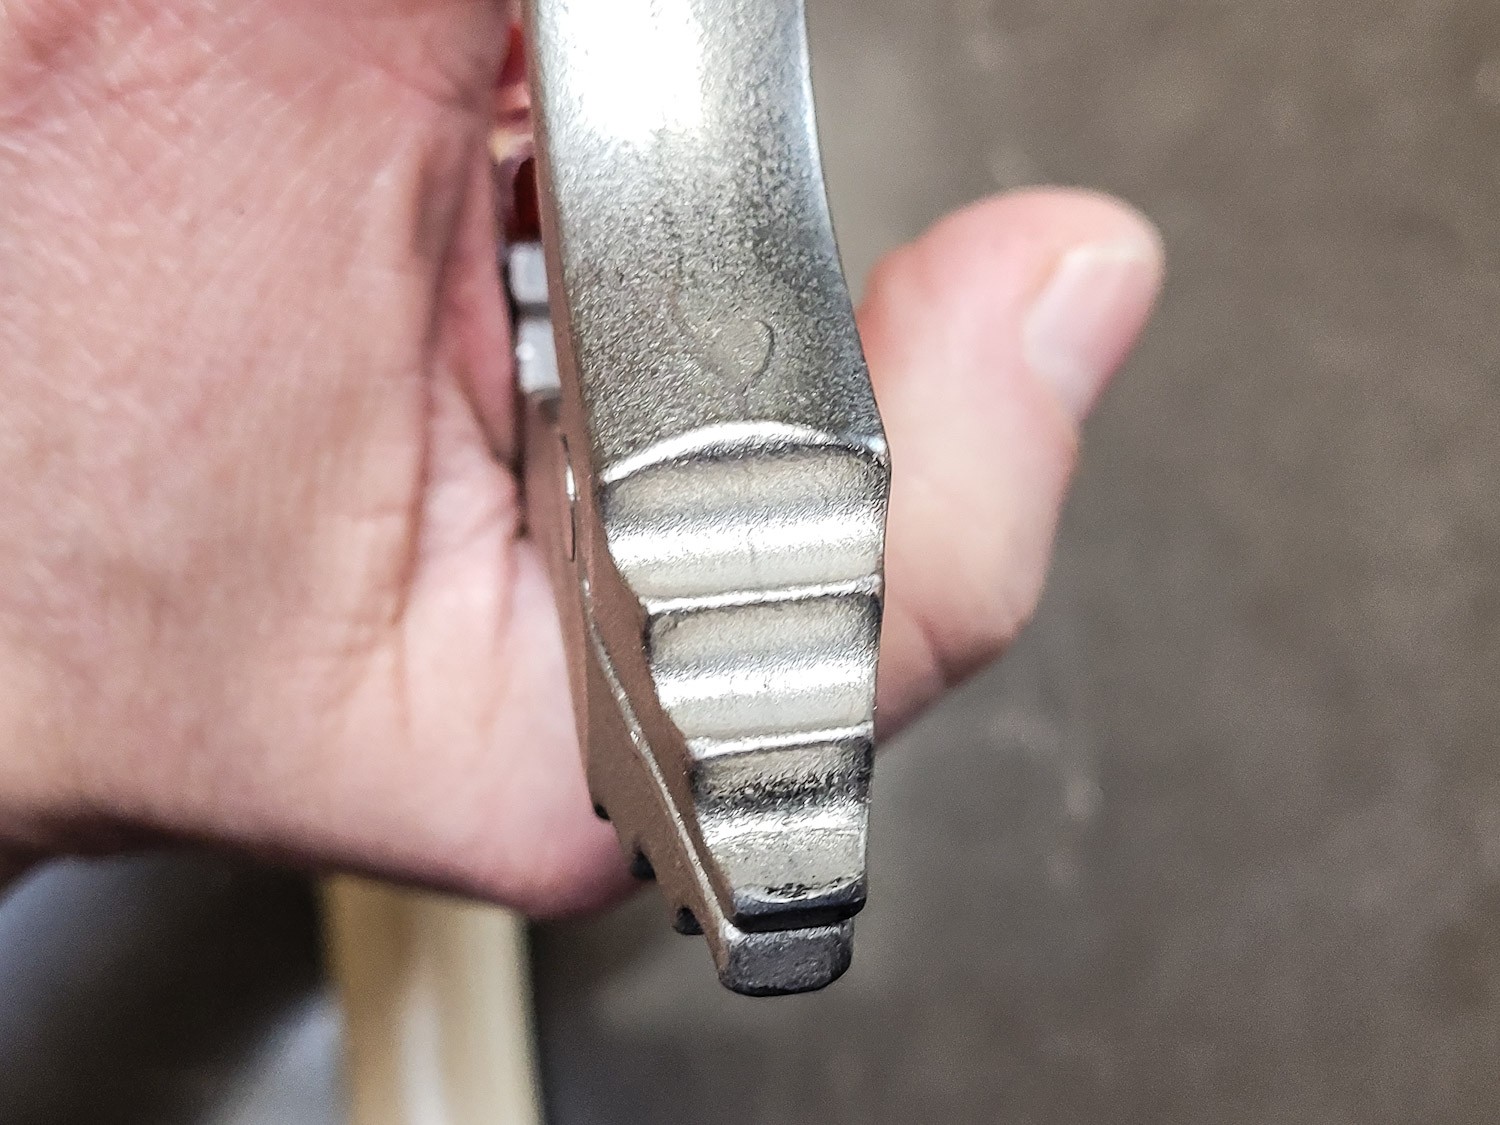
- A pair of snap ring or malleable chandalier pliers that can spread the lips open. I highly recommend the Westinghouse 70099 pliers specifically because they have nice wide jaws that really help you make solid contact with the lips. Other brands have narrower jaws, probably to lower costs, that work but want to roll over on you while you are adjusting.
- A pair of straight plastic jawed pliers come in hand if you need to tweak the lips left or right. I like the Beadsmith Parallel Pliers with nylon jaws for this work.
- A vise with non-marring jaws or some means to hold the mag without crushing or excessive scratching
- Digital calipers will help you with consistency and recording what gap your pistol works the best with give a particular type of ammo. Amazon has a ton of 6″ calipers so look at the reviews and decide. I use Mitutoyo 500-196-30 calipers but I need that level of precision and robustness due to constant use.
- Use Zoom Snap Caps to test cycling vs live ammo. In general, snap caps or action proving rounds are a good idea to avoid misfires. There’s also a second reason – the recoil springs in the RIA pistols are robust and if the bullet from a live round or dummy round (a bullet loaded into a case that does not have powder or a primer) smacks hard into something, it will get pushed back further and further into the case plus they deform easily. All of my testing is done with solid aluminum snap caps now. I use A-Zoom 10mm Snap Caps for both my 10mm and .40 S&W mags. I’ve had positive feedback from owners of .40 S&W pistols so I know they work for both. Note I do NOT use A-Zoom snap caps for 9mm as the bullet shape does not remotely reflect common 115gr FMJ ammo at all.
Procedure to follow
| Ensure your pistol is unloaded and no ammo is immediately nearby that might get accidentally loaded during testing. |
Okay, let’s walk through the steps:
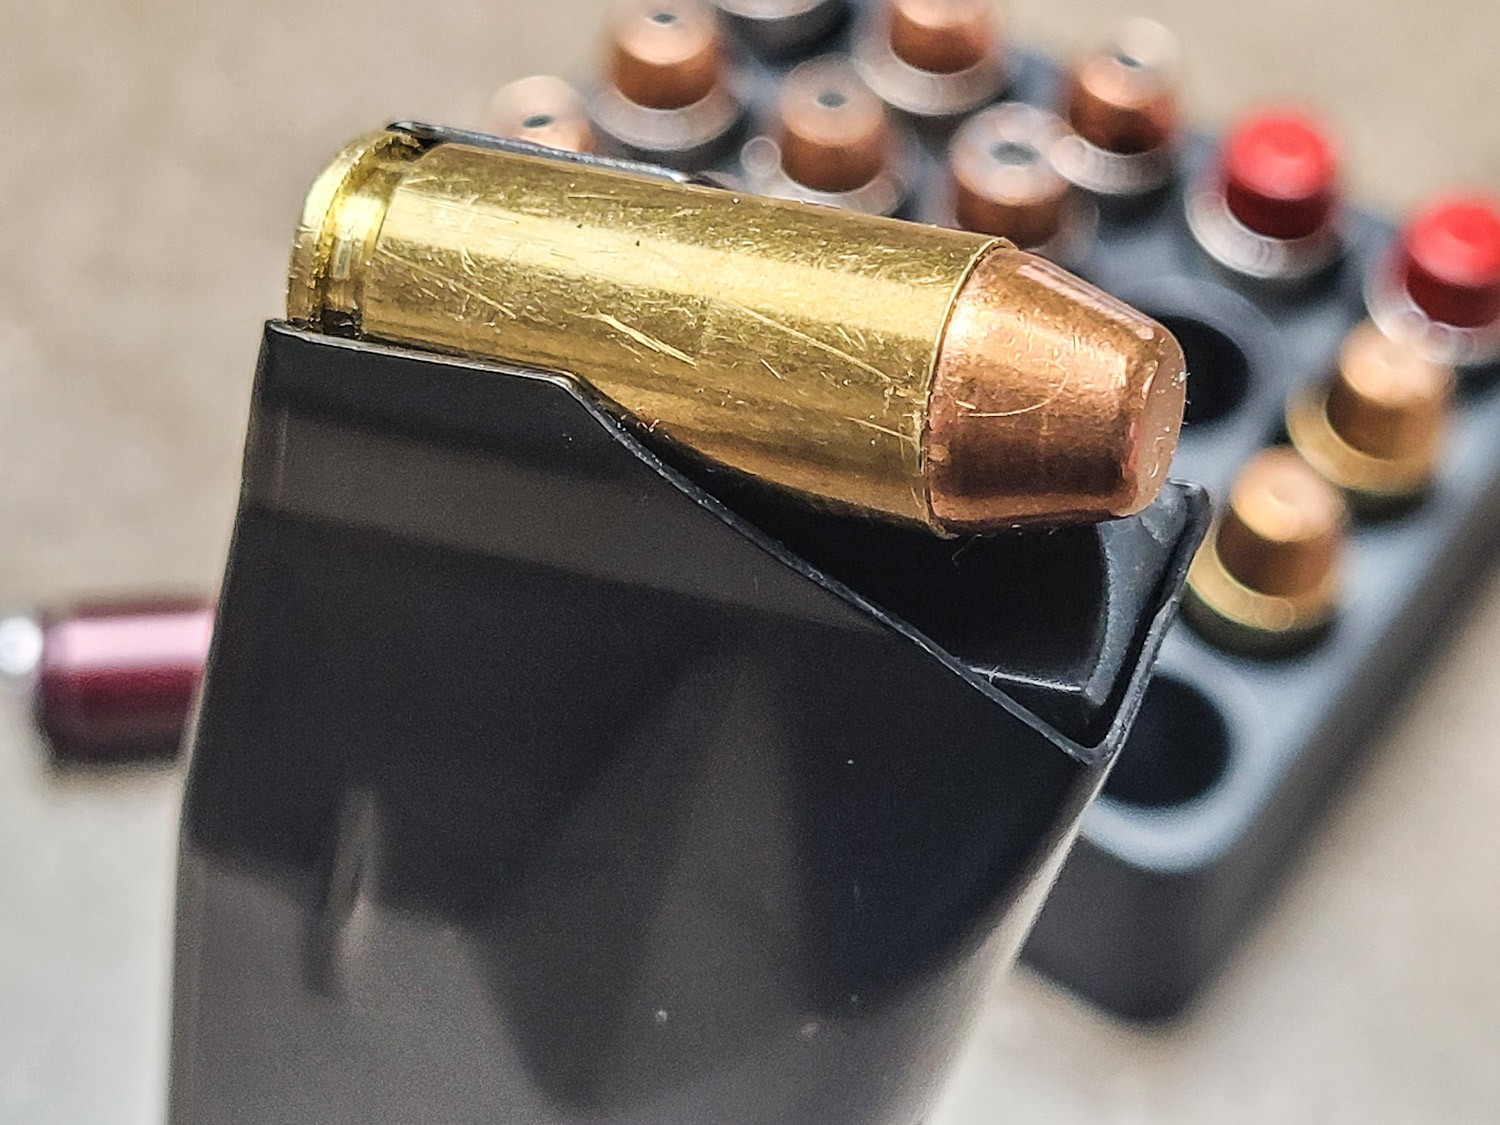
Checking Cartridge Alignment
- Lock the slide open
- Put a snap cap in the magazine
- Insert the magazine into the pistol
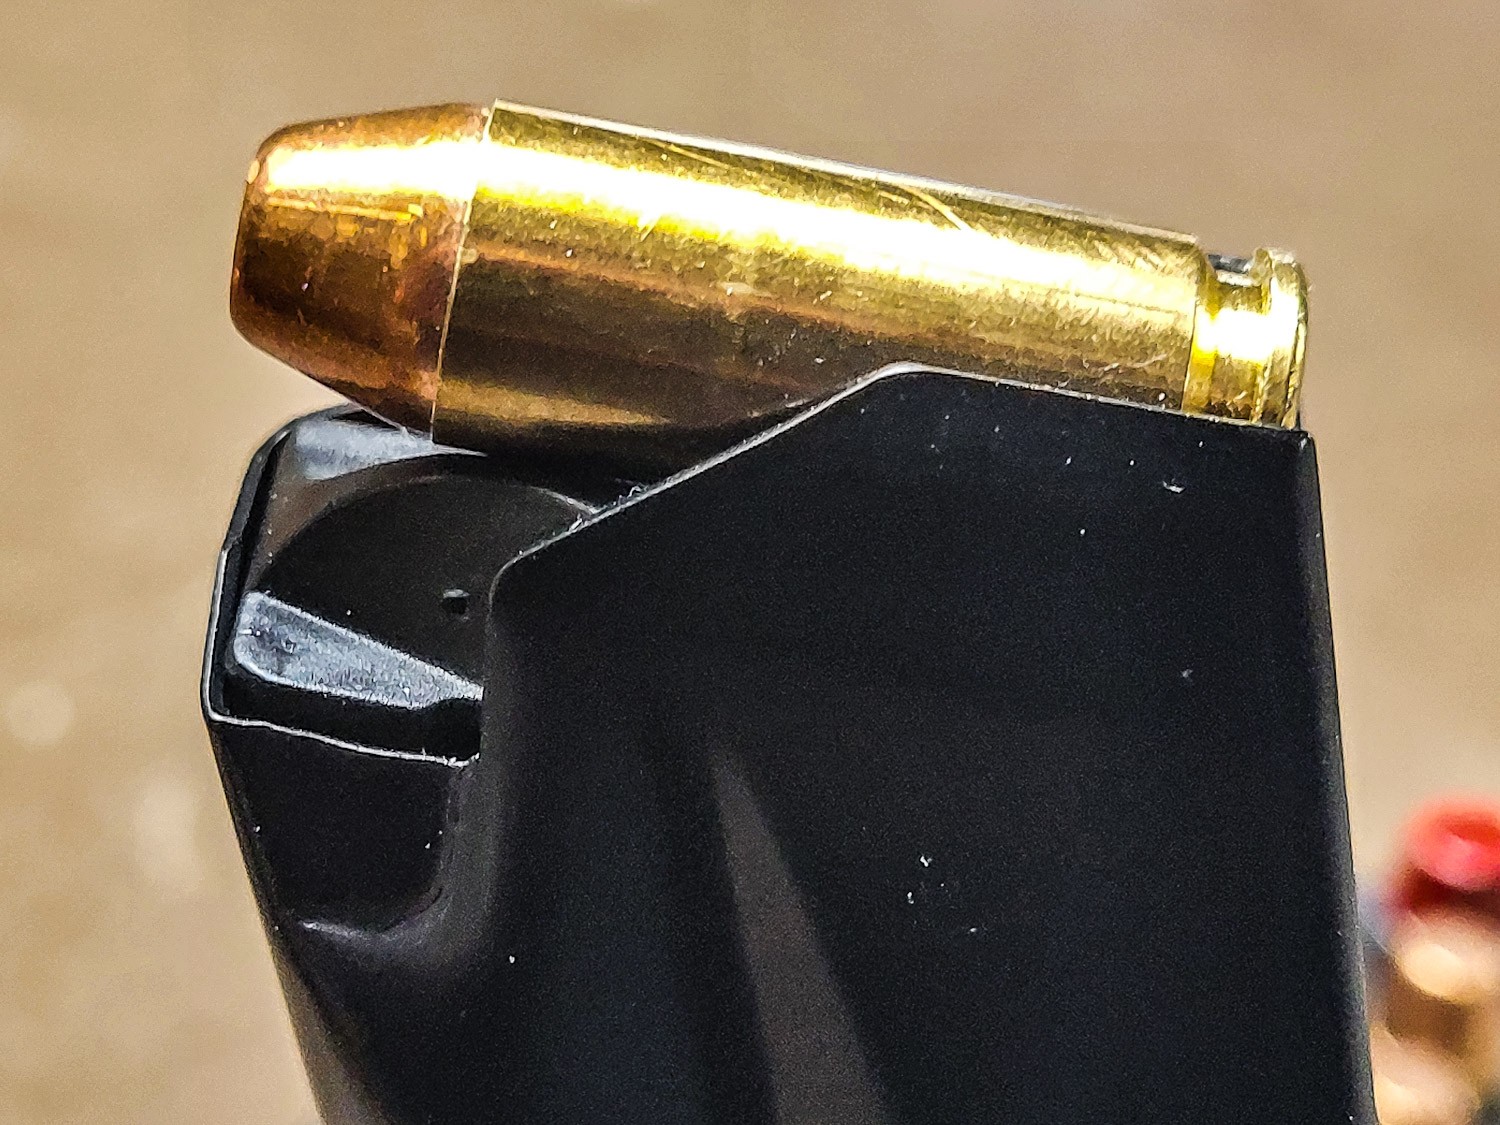
- From different angles, look at where the catridge is pointing in the chamber. Imagine a line from the center of the bullet going straight forward – where is it hitting? You will want to make small adjustments and test over and over until you get that bullet pointing into the center of the chamber (no, it does not need to be perfect).
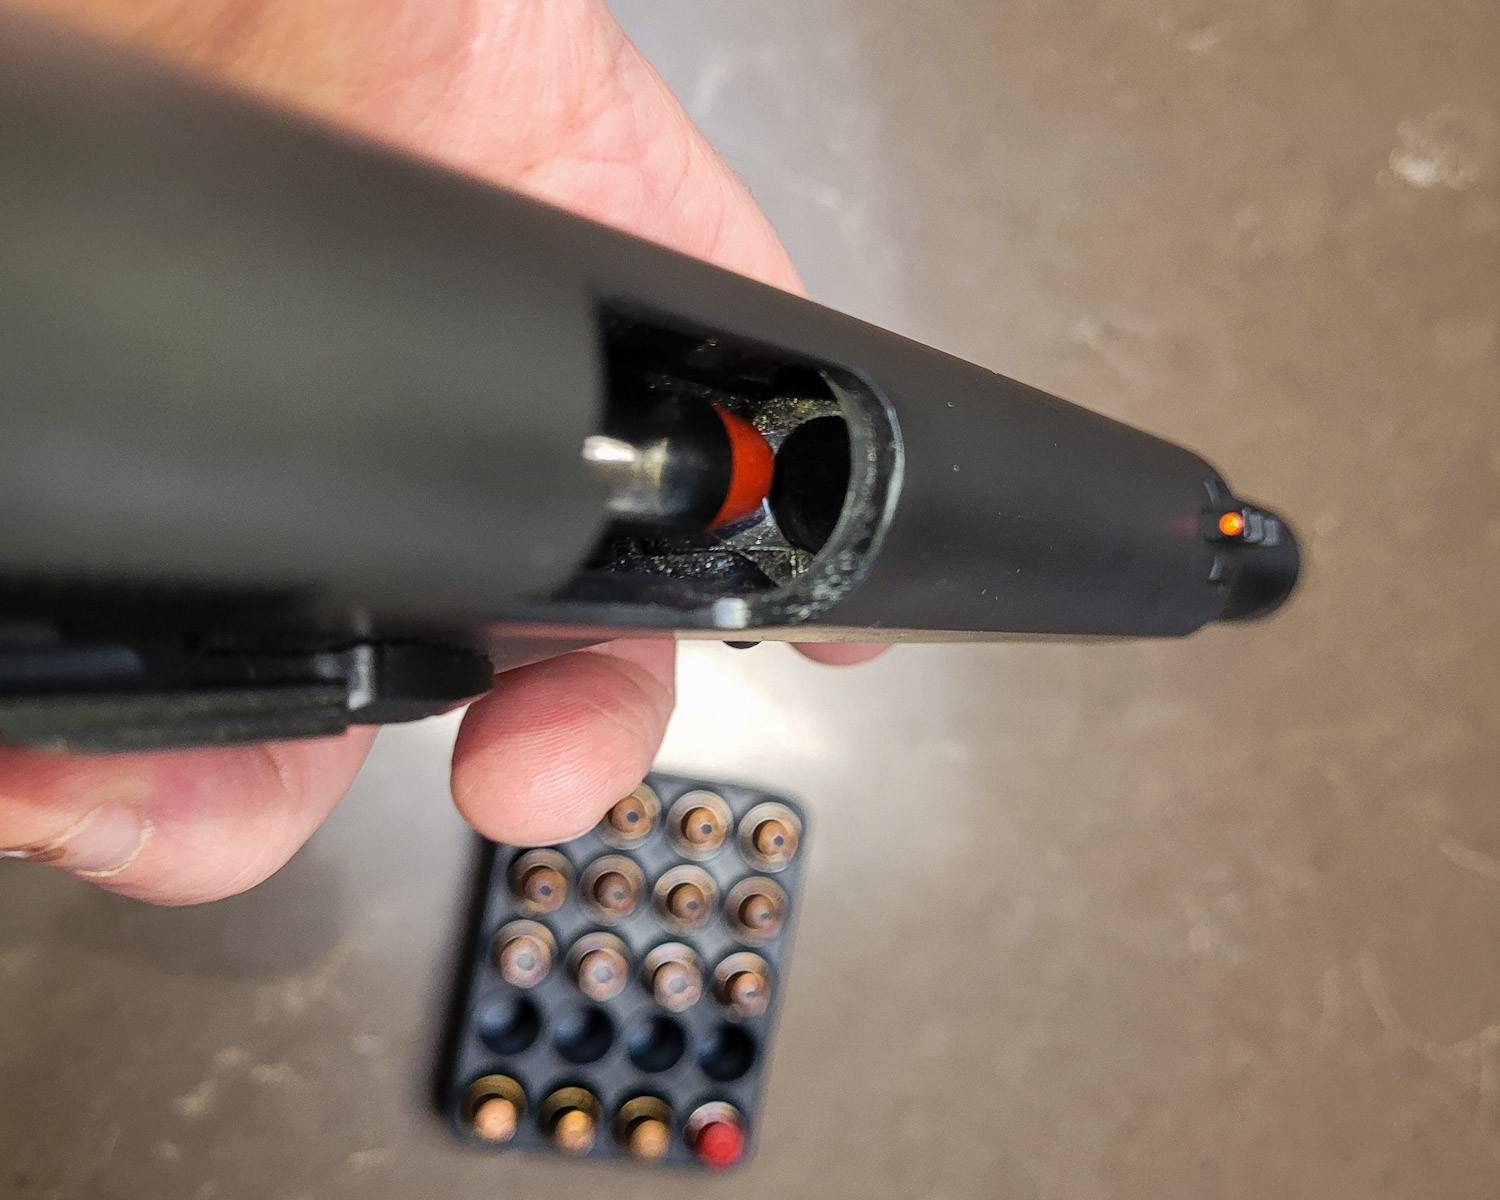
Adjusting The Vertical Angle
On most mags, including our’s, the angle the bullet sits at is adjusted by changing the gap of the front mag lips. The back can’t be adjusted because it will buckle or crack given the right angle bend to the back. What happens is that by opening the front of the mag lips, the front of cartridge sits higher (meaning it is a steeper angle). Correspondingly, by narrowing the front of the mag lips, the cartridge can’t rise up as far and the bullet sits lower.
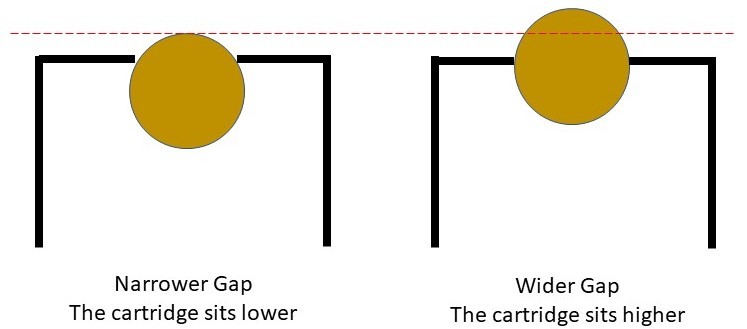
The angle is often the biggest problem. If the bullet isn’t angled enough, it gets stripped from the magazine by the slide and will either slam straight into the feed ramp and stop or it will hit, shoot up at a 45 degree angle jamming the pistol open – this is known as “stovepiping”. In both of these cases, you would want to open the lips up until there is proper feeding.
There is such a thing as the lips being too wide and hitting the top of the chamber or literally falling out. The feed lips need to be narrower than the case diameter of 0.421″ for sure otherwise the case will literally fall right through the lips.
I set the lips at 0.375 +/- 0.002 and you will need to see what works best for your pistol and the type(s) of ammo you are shooting. You may find you need a couple of mags at one gap for the type of HP ammo you are shooting and a couple of mags for FMJ. Personally, my pistols run all of my S&B, Buffalo Bore and Underwood ammo with that 0.373-0.377 range.
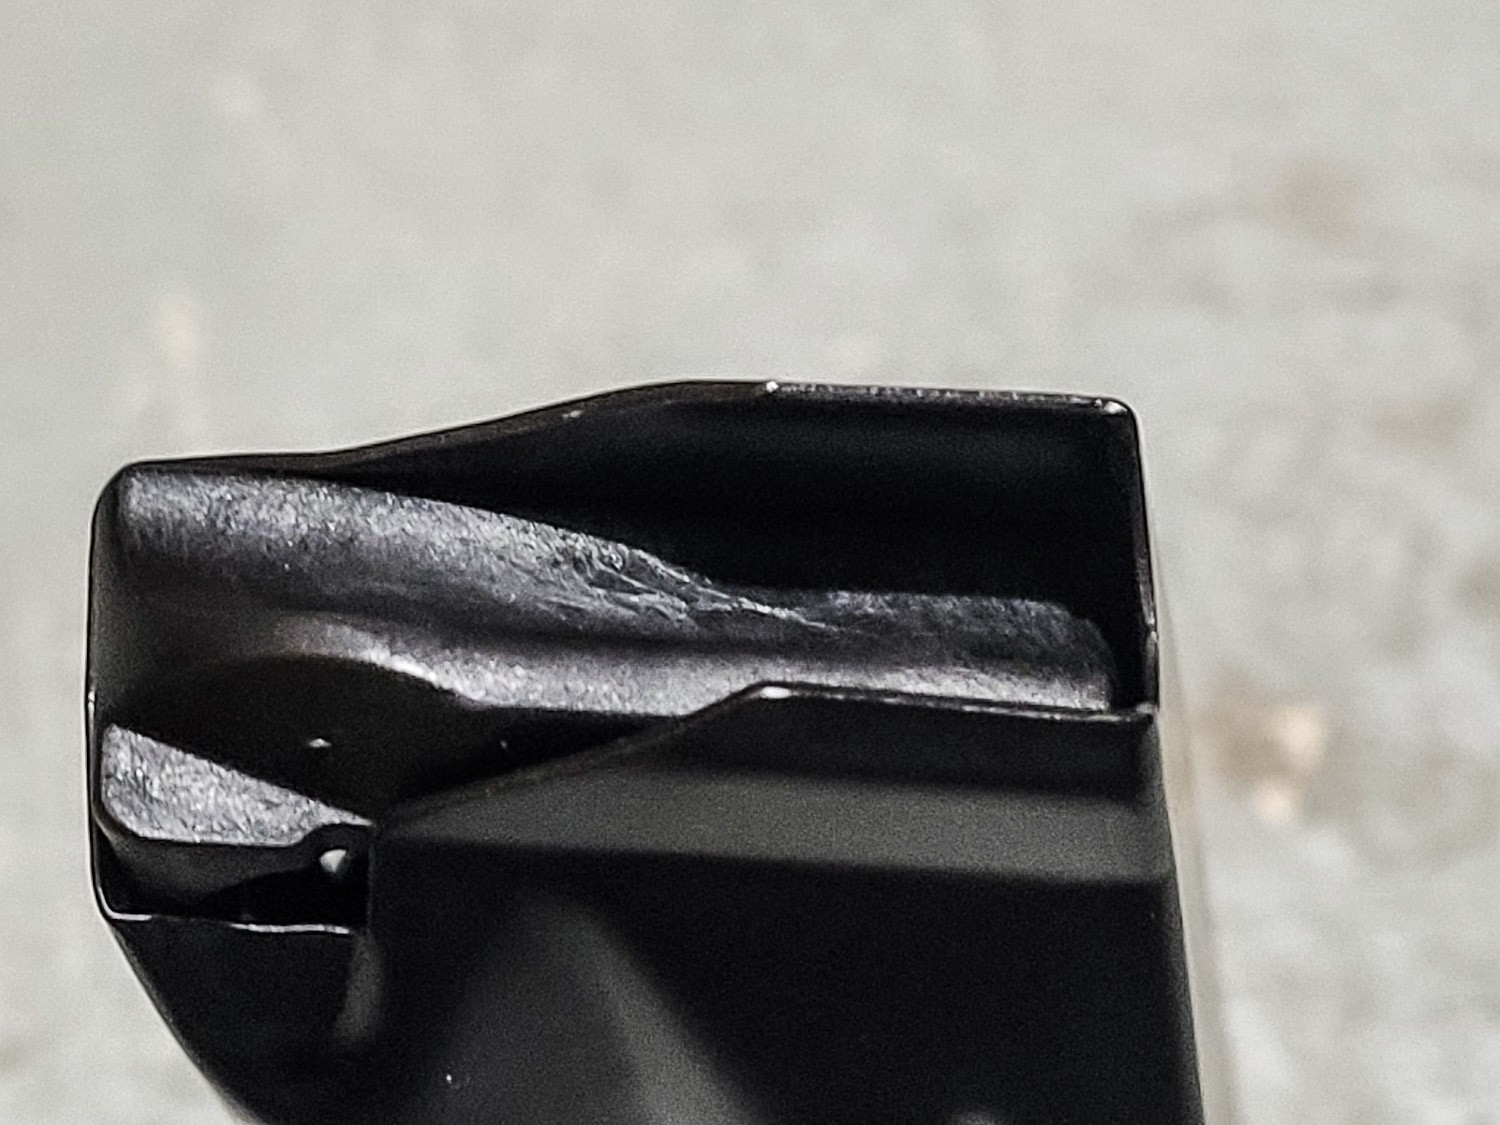
To open the front of the lips, use the chain pliers shown above on the front of the feed lips. It doesn’t take much pressure to open (or close) the feed lips so you will need to get the “feel” for how much to squeeze.
To close the front of the lips, tap the left feed lip in and then the right feed lip in equal amounts using the mallet. If you aren’t careful then you are liable to have the bullet pointing too far left or right even though the gap is the same.
| Note, it doesn’t take much force with the mallet to move the lips. If you go crazy and crush the lips such that the gap dips below 0.33″, you may find that the throat of the magazine bent and the follower will not longer be able to pass. You don’t want this to happen so make small adjustments, measure and test over and over. |
Adjusting the Horizontal Angle
You have a few ways to adjust the left to right horizontal angle. The first is to tap the lips in the direction you need. You can hit in the outside edge of the lip to close it or the right side to open it. I don’t use this because I find it takes too long.
I like to use parallel plastic jawed pliers that fit right inside the lip and let me easily adjust the angle with a good deal of control.
It really helps to number your magazines so you can keep track of feed lip gaps, which ones are having problems, etc.
Summary
Each pistol can vary slightly so each magazine may need different feed lip gaps. Going forward, the feed lip gap on our 10mm and .40 S&W magazines will vary between 0.370 and 0.380″. This gives you a starting point but you may find a bit of final tweaking of the feed lips beneficial.
If you are reading this and are not using our magazines, your feed lip gap may differ.
I hope this helps you out.
3/24/2024 Update: We make 10, 15 and 16 round magazines for Rock Island A2 HC 10mm & .40 S&W. Please click here for the product listings. |
Note, I have to buy all of my parts – nothing here was paid for by sponsors, etc. I do make a small amount if you click on an ad and buy something but that is it. You’re getting my real opinion on stuff.
Please share the link on Facebook, Forums, with colleagues, etc. Your support is much appreciated and if you have any feedback, please email us in**@*********ps.com. If you’d like to request a report or order a reprint, please click here for the corresponding page to open in new tab.