For over a century, John Moses Browning’s M1911 pistol has remained an icon of firearm design, celebrated for its ergonomic excellence, unparalleled trigger, and combat-proven reliability.1 Its evolution, from the single-stack.45 ACP to the modern, high-capacity, optics-ready 2011, has spawned a market of unprecedented breadth and complexity. The U.S. market is saturated with vendors ranging from mass-production factories in the Philippines and Turkey to single-gunsmith bespoke shops in the American heartland.3 This saturation has created a significant challenge for consumers, professionals, and enthusiasts alike: the inability to objectively assess quality.
Current brand rankings are overwhelmingly subjective, driven by anecdotal evidence, brand loyalty, and marketing budgets. Forum discussions and magazine articles often devolve into qualitative debates, comparing a $500 production pistol to a $5,000 custom build with little common ground for evaluation. This report seeks to rectify this issue by introducing a definitive, data-driven tiered model for 1911 and 2011 manufacturers. The objective is to move beyond opinion and establish a rigorous analytical framework grounded in materials science, manufacturing processes, quality control standards, and verifiable performance metrics.
Establishing an Engineering Baseline: The M1911A1 Mil-Spec
To build an objective model, a fixed, quantifiable baseline is required. For this analysis, the foundational baseline is the U.S. Government M1911A1 pistol as defined by military specifications (mil-spec) during its peak production era, such as World War II. This baseline is not presented as a “gold standard” for modern performance but as a documented engineering standard against which all contemporary pistols—from the most basic to the most advanced—can be measured and understood.
The M1911A1 was the product of battlefield experience gained in World War I, incorporating several key ergonomic improvements over the original M1911. These changes, standardized in 1926, included a shorter trigger, an arched mainspring housing to improve grip consistency, and relief cuts in the frame behind the trigger for shooters with smaller hands.5 These were not arbitrary modifications but data-driven enhancements based on feedback from soldiers in the field.
The engineering specifications for these service pistols were exacting and focused on durability and reliability under the harshest conditions:
- Materials Science: The original ordnance blueprints specified high-grade carbon steel alloys, such as 4140 or 8650 steel, for major components like the slide and frame.9 The standard finish was Parkerizing, a manganese phosphate coating that provided excellent corrosion and wear resistance, a necessity for a military sidearm.10
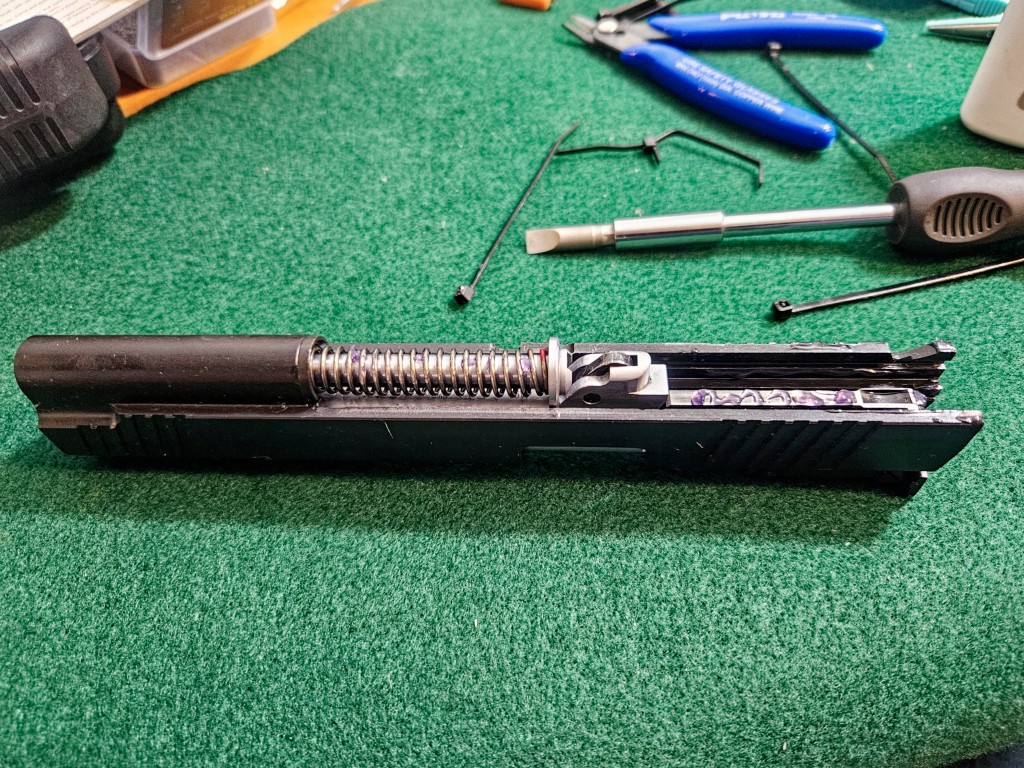
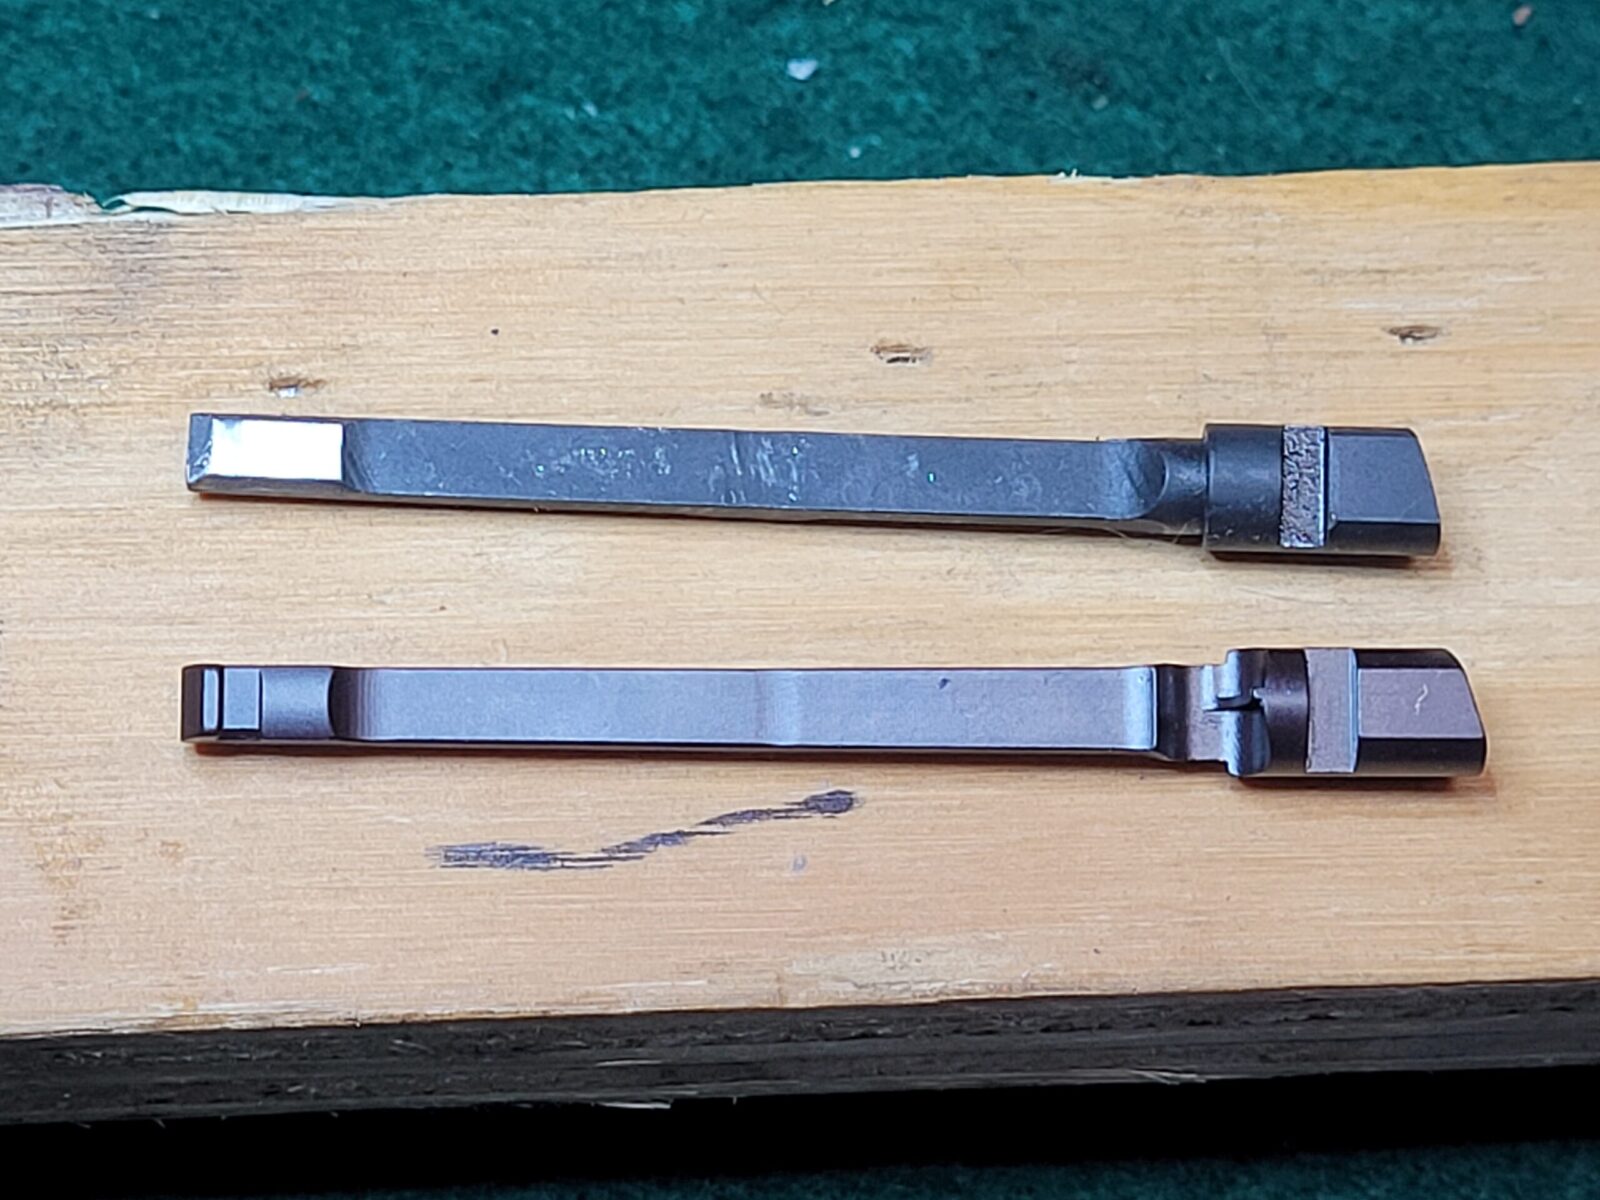
- Manufacturing Processes: Critically, all major components of a mil-spec M1911A1—the frame and slide—were required to be machined from steel forgings.12 The forging process, which involves shaping metal under immense pressure, creates a continuous grain structure that follows the contour of the part. This results in components with superior strength, impact resistance, and fatigue life compared to parts made from castings, where molten metal is poured into a mold, leading to a random grain structure and the potential for microscopic voids or porosity.14 Small parts were machined from bar stock, ensuring dimensional consistency and strength.
- Design & Function: The pistol was designed for a 7-round magazine, a trigger pull under six pounds, and absolute reliability, famously demonstrated in the 1911 trials where a Colt prototype fired 6,000 rounds without a single malfunction.5
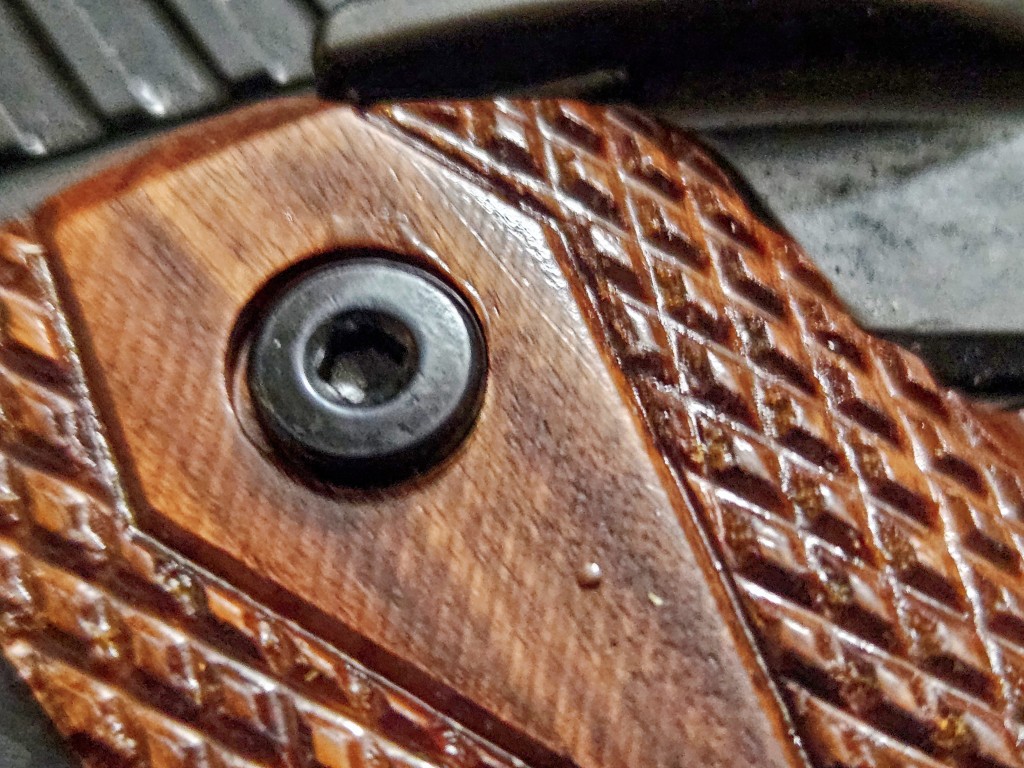
Consequently, the M1911A1 baseline serves as a critical litmus test for a manufacturer’s fundamental engineering competence. An inability to correctly execute this foundational design—a design proven over decades of global conflict—raises significant questions regarding the capacity to produce more complex, tightly-toleranced firearms. The ability to master the basics is a prerequisite for legitimate innovation. Modern deviations from this baseline, such as extended beavertail grip safeties, skeletonized hammers, improved sights, and front strap checkering, are therefore analyzed not as simple “upgrades,” but as purposeful engineering choices intended to optimize the platform for specific applications like competitive shooting, concealed carry, or specialized law enforcement duty.17
A Quantifiable Tiering Model for the Modern 1911/2011
To bring order to the market, this report introduces a five-tier system. Each tier is defined by a set of quantifiable standards, allowing for the objective placement of any manufacturer. A brand’s position is determined not by its price tag or marketing, but by the sum of its engineering choices and proven performance.
Tier Definitions
- S-Tier (Bespoke / Professional Grade): Represents the apex of the 1911/2011 platform, where cost is secondary to performance and craftsmanship. These firearms feature components machined exclusively from high-grade forgings or billet steel, with an explicit “no MIM parts” policy. Assembly is performed by a single master gunsmith or a small, dedicated team, involving extensive hand-fitting of all critical components. Performance is validated by verifiable adoption by elite military or law enforcement units, consistent victories at the highest levels of professional competition, or ironclad accuracy guarantees (typically 1 inch at 25 yards).
- A-Tier (Semi-Custom / Duty Grade): This tier bridges the gap between high-end production and full-custom builds. Major components are forged or billet steel, and small parts are overwhelmingly machined from tool steel bar stock, with zero or minimal use of non-critical Metal Injection Molded (MIM) parts. These pistols feature significant hand-fitting in critical areas (barrel lockup, slide-to-frame, trigger group) and have a proven record of reliability for duty or competitive use. Accuracy guarantees of 1.5 inches at 25 yards are common.
- B-Tier (High-End Production): This tier represents the peak of what can be achieved through modern, large-scale manufacturing, augmented by skilled human oversight. Frames and slides are consistently made from high-quality forgings. Fit and finish are excellent due to precision CNC machining, and some hand-fitting is applied to critical areas. High-quality MIM parts may be used for non-load-bearing components like magazine catches or grip safeties to manage production costs without significantly compromising durability.
- C-Tier (Enthusiast Grade): These are quality production firearms that offer excellent value and a solid foundation for future customization. They typically feature forged frames and slides but make more extensive use of MIM parts for internal components to remain competitively priced. Fit and finish are generally good, but they lack the hand-fitting and refinement of the higher tiers, resulting in looser tolerances.
- D-Tier (Entry-Level): This tier consists of functional and generally reliable firearms that prioritize affordability. These pistols often use cast frames and slides and feature a significant number of MIM parts. They may require a “break-in” period to achieve optimal reliability and often exhibit looser tolerances and a less refined finish than higher-tier pistols.
Core Evaluation Metrics
Placement within this tiered system is determined by a holistic evaluation across four core metrics. These metrics are interconnected, forming a causal chain where superior materials and manufacturing enable the precision assembly required for elite performance, which in turn builds a justifiable market reputation.
1. Materials Science & Manufacturing Processes
The fundamental quality of a firearm begins with the raw materials and the processes used to shape them.
- Frames & Slides: Forged steel is the mil-spec standard and provides superior strength and durability.15 Billet steel, machined from a solid block, offers exceptional dimensional precision and is used by top-tier custom shops like Cabot Guns.20 Cast steel is a cost-saving measure that can result in a weaker part with potential for internal voids, making it characteristic of lower-tier offerings.12
- Barrels: The distinction between a mass-produced, drop-in barrel and a hand-fit, match-grade barrel (whether forged or machined from bar stock) is a primary driver of mechanical accuracy. Quantifiable accuracy guarantees, such as those offered by Wilson Combat (1 inch at 25 yards) and Les Baer (3 inches at 50 yards), serve as objective performance benchmarks.21
- Small Parts (The MIM Litmus Test): Metal Injection Molding (MIM) involves mixing metal powder with a binder, injection molding the shape, and sintering it to create a solid part.23 While modern MIM technology has improved, parts machined from tool steel or bar stock are universally considered superior in strength, wear resistance, and durability. A manufacturer’s explicit commitment to using “No MIM Parts,” as seen with brands like Dan Wesson and Wilson Combat, is a clear indicator of a higher-tier manufacturing philosophy and a willingness to incur higher costs for superior quality.24
2. Quality Control & Assembly
The potential of high-quality components is only realized through meticulous assembly and quality control.
- Degree of Hand-Fitting: This is the most significant differentiator between production and custom firearms. The laborious process of hand-fitting the slide-to-frame for smooth travel, lapping the barrel lugs for perfect lockup, and stoning the sear and hammer for a crisp trigger pull directly translates to enhanced accuracy, reliability, and a superior tactile experience. This philosophy is embodied by Nighthawk Custom’s “One Gun, One Gunsmith” approach, where a single craftsman builds the entire pistol from start to finish.26
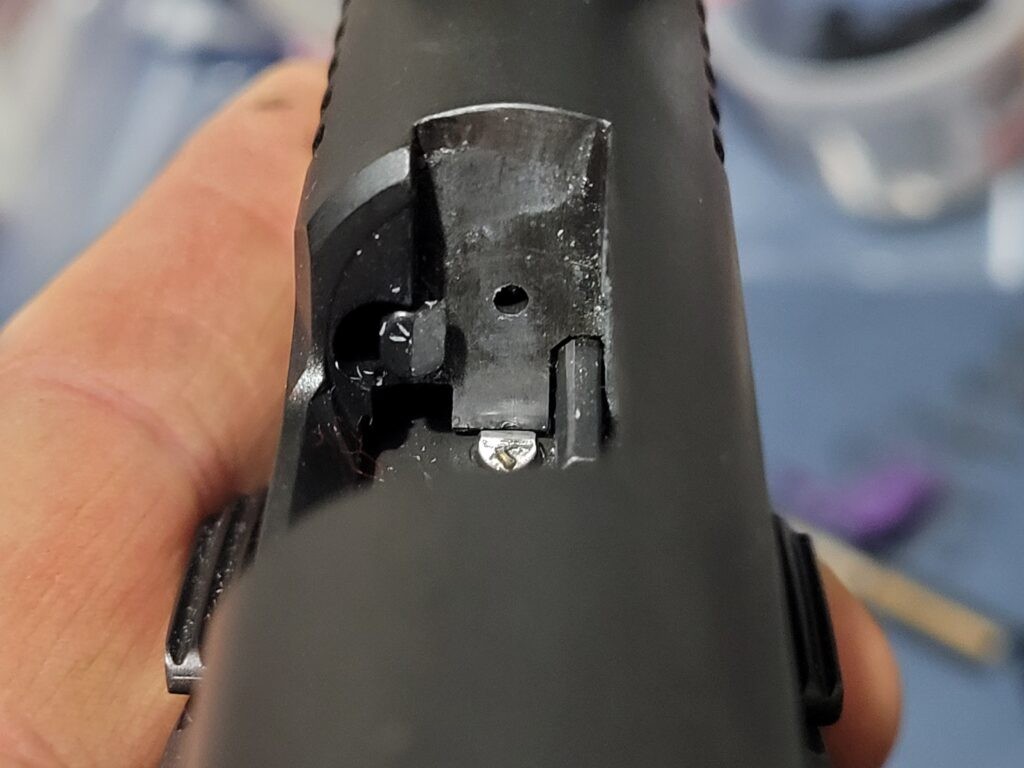
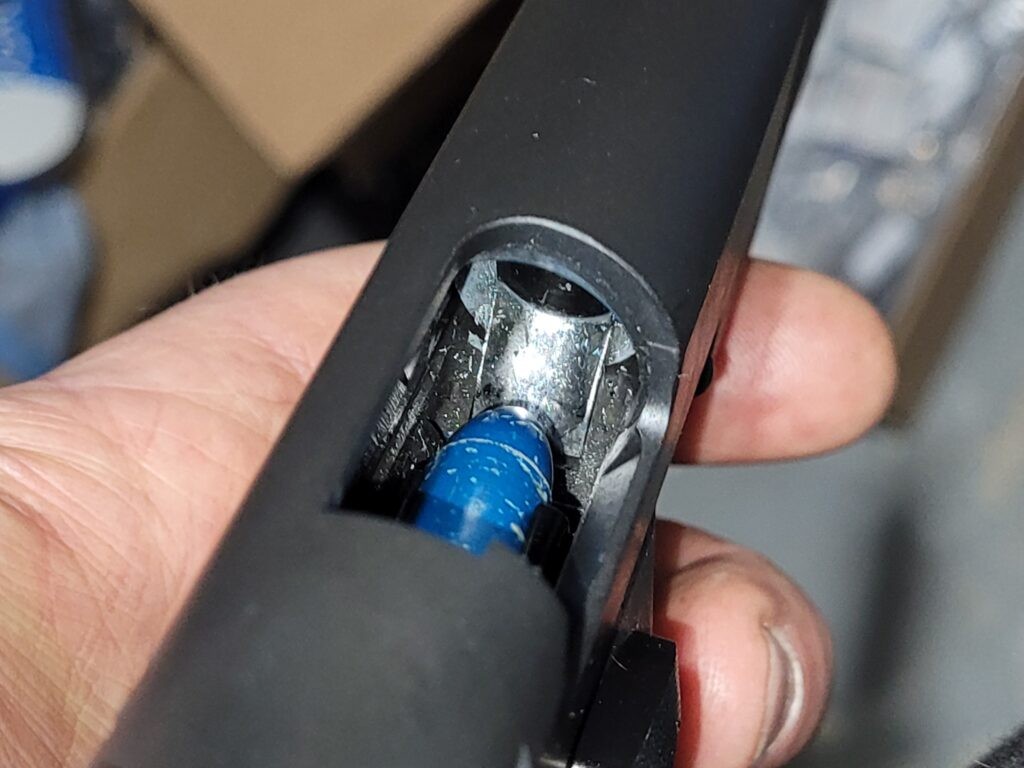
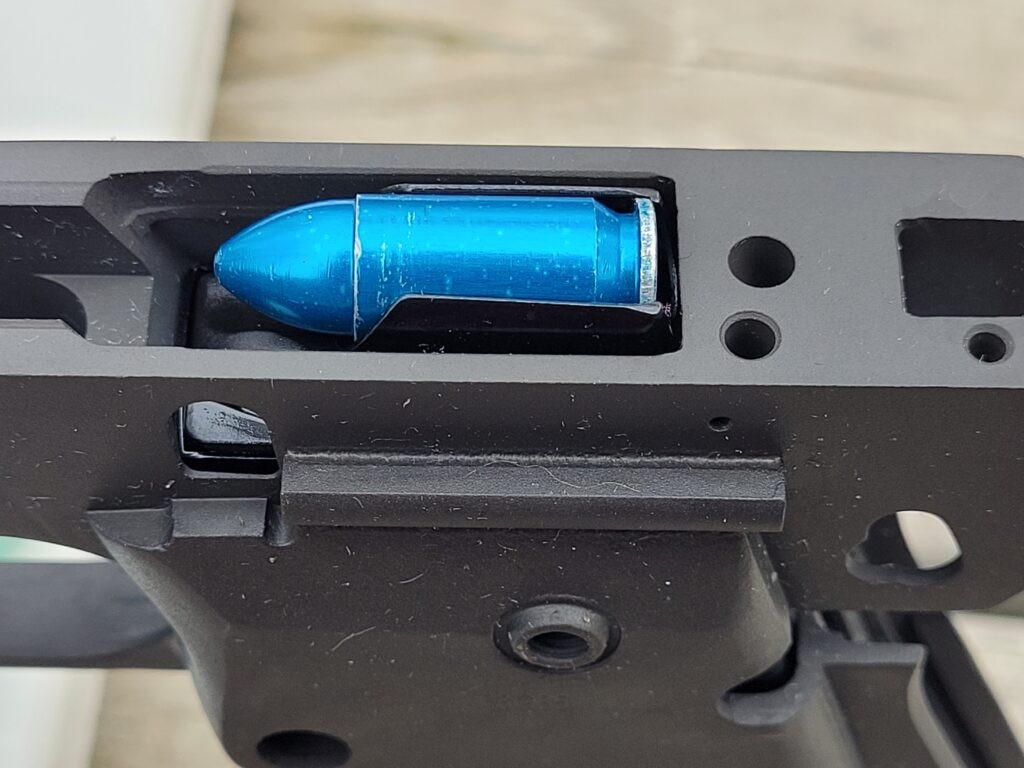
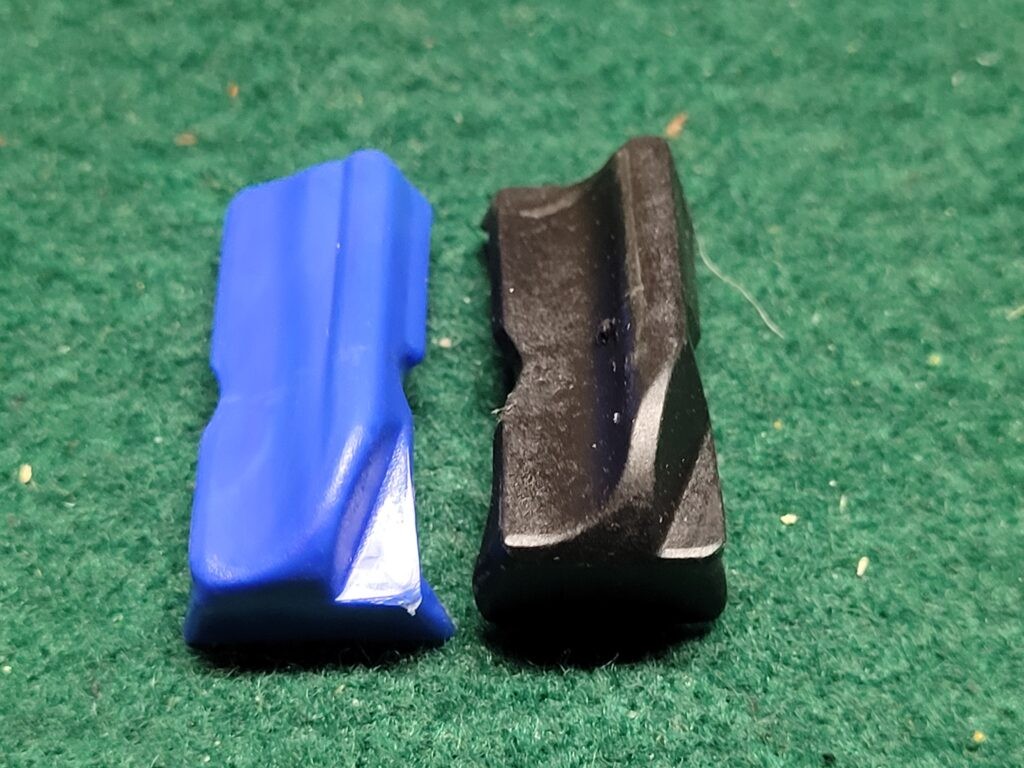
- Internal Geometry & Tuning: Beyond fitting, the proper shaping and polishing of the feed ramp is critical for reliable feeding of modern hollow-point ammunition. The most crucial element, however, is extractor tuning. An improperly tensioned and shaped extractor is the most common point of failure in the 1911 platform. High-end manufacturers dedicate significant attention to this single part, ensuring it provides consistent and reliable extraction and ejection.
3. Provenance & Performance
A firearm’s quality is ultimately validated by its performance in the most demanding environments.
- Elite Unit Adoption: A contract award from a top-tier military or law enforcement unit, such as the FBI Hostage Rescue Team or USMC MARSOC, is the ultimate third-party validation. These contracts involve exhaustive testing protocols, often including tens of thousands of rounds fired through multiple sample pistols in harsh conditions, which most firearms fail to pass. The Springfield Armory Professional’s successful adoption by the FBI HRT, after a trial that saw other top makers fail, is a testament to its extreme durability and reliability.27 Similarly, the adoption of the Colt M45A1 by MARSOC and Staccato pistols by over 1,400 law enforcement agencies (including elite units like the U.S. Marshals SOG and Texas Rangers) provides unimpeachable proof of performance.29
- Competitive Pedigree: Consistent victories at major national and world championships, such as those in USPSA and IPSC, are a direct measure of a firearm’s speed, accuracy, and reliability under the stress of competition. Brands like Staccato and Atlas Gunworks have built their reputations on the podiums of these events.33
4. Market & Community Consensus
While individual anecdotes are subjective, aggregated long-term data from knowledgeable users provides valuable insight into a brand’s real-world performance, durability, and customer service.
- Aggregated Sentiment: Analysis of sentiment from vetted, high-signal communities such as 1911 Addicts and pistol-forum.com reveals patterns in reliability, parts breakage, and the quality of a company’s warranty and service response. Consistently positive or negative reports across a large sample size provide a reliable indicator of a brand’s quality and commitment to its customers.
Tier-by-Tier Brand Analysis
Applying the defined metrics, the following section places 50 prominent 1911 and 2011 manufacturers into the five-tier model. Each placement is accompanied by a qualitative summary referencing the core evaluation criteria.
S-Tier: Bespoke / Professional Grade
Brands in this tier represent the zenith of the platform. They utilize only the finest materials (forged/billet steel, no MIM), employ master gunsmiths for extensive hand-fitting, and have a proven record of ultimate performance.
- Wilson Combat: A benchmark for the custom 1911, Wilson Combat uses 100% American-made forged or billet steel parts with zero MIM components. Their team-based, hand-fitting assembly process and 1-inch at 25-yards accuracy guarantee solidify their S-Tier status.
- Nighthawk Custom: Famous for its “One Gun, One Gunsmith” philosophy, every pistol is built from start to finish by a single artisan using oversized, fully machined billet steel parts. This results in an unparalleled level of fit, finish, and performance.
- Cabot Guns: Cabot applies aerospace manufacturing tolerances and technology to the 1911 platform, machining all components in-house from solid blocks of American billet steel. They are known for their exotic materials and hair-splitting precision.
- SVI / Infinity Firearms: The undisputed “holy grail” of custom competition 2011s, SVI offers near-limitless customization. They manufacture all major components in-house from billet barstock and are known for their interchangeable breech faces and legendary accuracy.
- Stan Chen Custom: A one-man custom shop producing a very limited number of pistols. Stan Chen is renowned for his innovative parts (like the Gen2 Magwell) and obsessive attention to detail, with every surface perfectly blended and dehorned by hand.
- Chambers Custom: Joe Chambers is a master pistolsmith whose work is considered among the best in the world. His pistols are built for extreme hard use and reliability, with an engineering focus on flawless function.
- Atlas Gunworks: A dominant force in the competition 2011 market, Atlas builds race-ready pistols optimized for specific USPSA divisions. They are known for their incredibly smooth actions, sub-2-pound triggers, and focus on perfect extractor tuning for ultimate reliability.
A-Tier: Semi-Custom / Duty Grade
These brands offer exceptional quality with extensive hand-fitting and premium materials, representing the point of maximum value before the exponential price increases of the S-Tier.
- Les Baer Custom: A legendary builder known for hard-fit, exceptionally tight pistols. Les Baer uses their own National Match forged steel frames and slides and guarantees 3-inch groups at 50 yards, with a 1.5-inch option available.
- Ed Brown Products: A family-run company with a 50-year legacy, Ed Brown machines all major components in-house from forgings and bar stock. They offer a perfect blend of traditional craftsmanship and modern CNC precision.
- Guncrafter Industries: Known for their robust, overbuilt pistols and for creating the powerful.50 GI cartridge. Guncrafter pistols are built from forgings and bar stock with a focus on extreme durability and reliability for serious defensive use.
- Staccato: The company that successfully transitioned the 2011 from a pure competition gun to a duty-ready platform. Their pistols are built with a focus on reliability and have been adopted by over 1,400 law enforcement agencies, including elite federal teams.
- Dan Wesson: Widely considered the benchmark for semi-custom quality at a production price. Dan Wesson pistols feature forged major components, all tool-steel small parts (no MIM), and are hand-fit to tight tolerances.
- Alchemy Custom Weaponry: Led by master gunsmith Rob Schauland, ACW builds “Resto Mod” 1911s that blend classic aesthetics with modern, high-grip ergonomics and hand-fit, match-grade components, offering a 1.5-inch at 25-yards accuracy guarantee.
B-Tier: High-End Production
This tier is defined by manufacturers who leverage high-end production techniques, primarily using forged major components and some hand-fitting to create firearms that exceed standard production quality.
- Springfield Armory (Professional/TRP): The Professional model is a hand-built custom shop gun that won the FBI HRT contract, making it a benchmark for duty 1911s. The TRP (Tactical Response Pistol) is its high-end production counterpart, featuring many of the same upgrades and additional fitting.
- Colt (Custom Shop/M45A1): Colt’s Custom Shop produces high-quality, hand-finished pistols. The M45A1, developed for the USMC, is a modern combat 1911 built with a forged frame and slide, National Match barrel, and no MIM parts.
- Bul Armory: An Israeli manufacturer known for producing high-quality 1911 and 2011-style pistols with excellent fit, finish, and features (like bull barrels and full-length guide rods) that often surpass other brands in this price category.
C-Tier: Enthusiast Grade
These are solid, reliable production firearms from major manufacturers. They typically use forged frames and slides but incorporate more MIM parts to manage costs, making them excellent platforms for both entry-level use and future upgrades.
- Springfield Armory (Production): Models like the Garrison, Ronin, and Loaded offer forged major components and match-grade barrels, providing excellent value and a strong foundation.
- Kimber: A major manufacturer that helped popularize the production-custom 1911. While early quality control issues with MIM parts tarnished their reputation, modern Kimbers are generally reliable firearms with good features for their price point.
- Ruger: Known for its robust investment casting, Ruger applies this technique to its SR1911 series, producing a reliable and affordable American-made 1911 with modern features.
- Smith & Wesson: S&W offers a wide range of SW1911 pistols, including models with lightweight Scandium alloy frames. They are well-machined production guns with a good feature set.
- SIG Sauer: SIG’s 1911s are known for their unique slide profile and external extractors. They are well-made production pistols offering modern tactical features.
- Magnum Research (Bul OEM): The Desert Eagle 1911s are manufactured by Bul Armory in Israel and imported by Magnum Research. They offer the quality and features of Bul Armory pistols at a competitive price point.
- Fusion Firearms: Offers a range of production models and semi-custom builds with good features and quality for the price.
- Savage Arms: A recent entrant into the 1911 market, Savage offers a well-featured pistol with a forged frame and slide, leveraging their long history of firearms manufacturing.
- Remington: After a hiatus, Remington re-entered the 1911 market with their R1 line. These are solid, American-made production pistols.
D-Tier: Entry-Level
This tier provides accessible entry points into the 1911/2011 world. These brands prioritize value, often manufacturing overseas. While functional, they typically use more cast and MIM components and may require a break-in period.
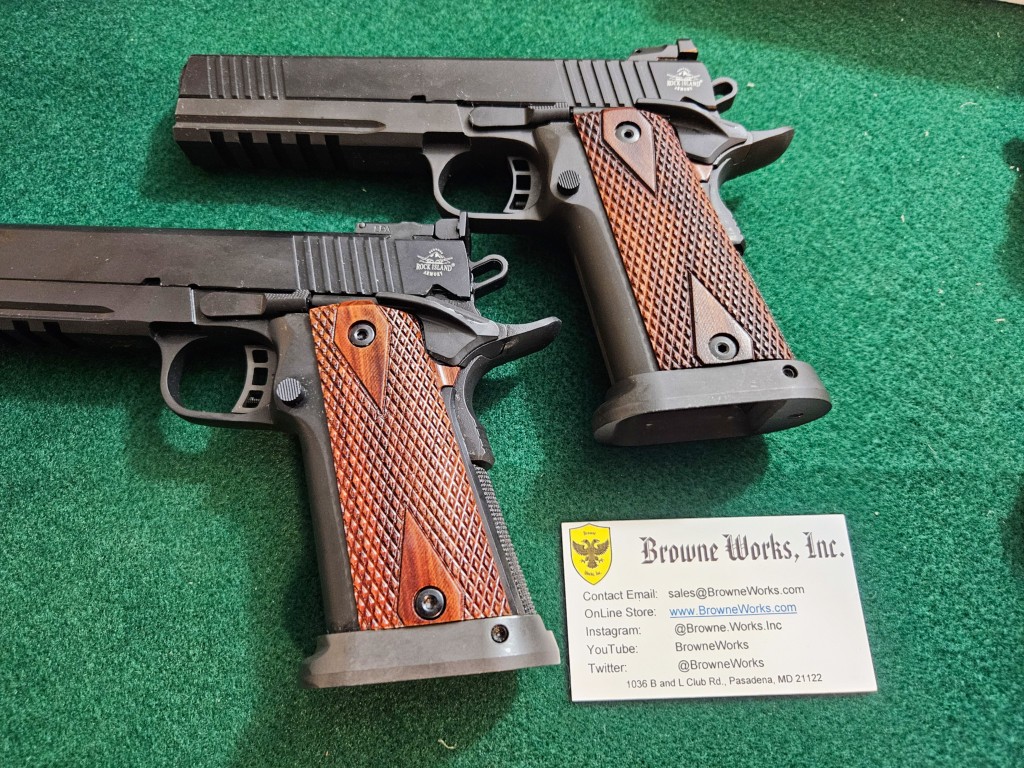
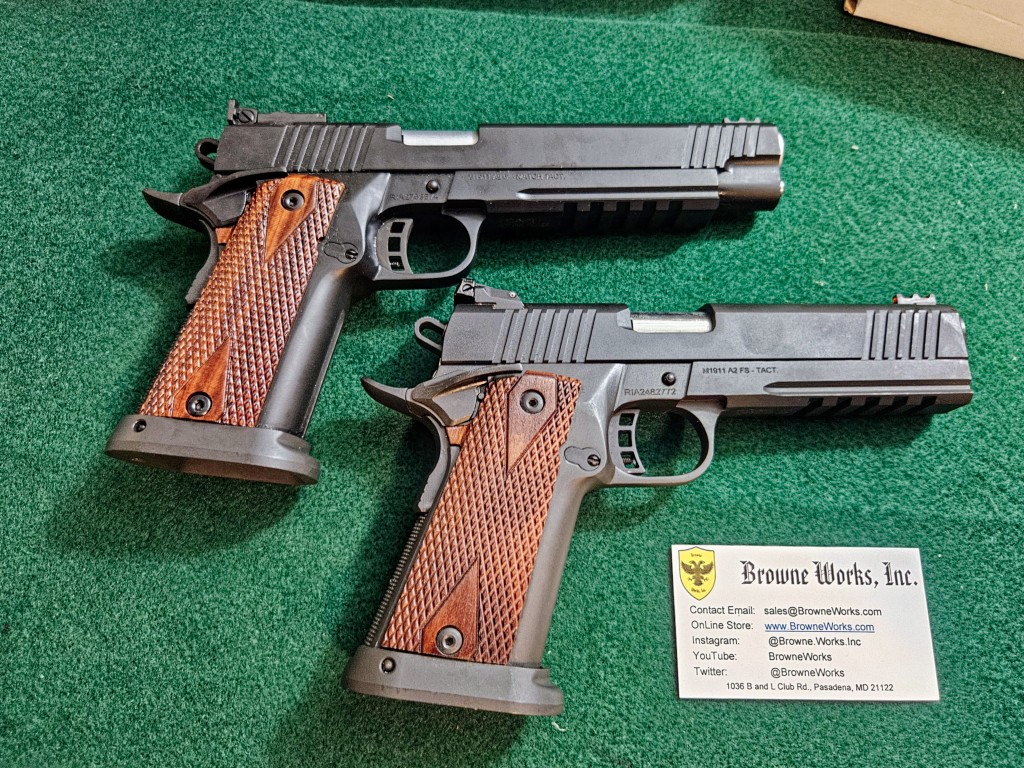
- Rock Island Armory (Armscor): A Filipino manufacturer that has long dominated the entry-level market. RIA pistols are built on 4140 steel frames and are known as reliable workhorses and popular bases for custom builds.
- Tisas: A Turkish manufacturer that has raised the bar for the entry-level tier by offering forged frames and slides at an exceptionally low price point, challenging the value proposition of many C-Tier brands.
- Auto-Ordnance (Kahr): Produces American-made, historically-themed M1911A1 replicas that offer a basic, no-frills entry into the platform.
- Girsan (EAA): Another Turkish manufacturer offering a wide range of feature-rich 1911 models at a very competitive price.
- Citadel (Legacy Sports): Imported from the Philippines (often by Armscor), Citadel 1911s are functionally similar to Rock Island Armory models, offering solid value.
- Charles Daly: A historic brand name now applied to imported pistols, typically from Turkey or the Philippines, that provide a low-cost entry point.
- American Tactical Imports (ATI): Imports a variety of 1911s from the Philippines and Turkey, focusing on the budget end of the market.
- Inland Manufacturing: Offers modern reproductions of the M1911A1, focusing on historical accuracy for collectors and enthusiasts.
- Taylor’s & Company: Known for importing historical firearms, they offer a line of 1911s (often made by Armscor) that are well-regarded for their value.
- SDS Imports: Imports Tisas and other Turkish-made firearms, known for their aggressive pricing and good feature sets.
- Iver Johnson: A historic American brand name now used on imported 1911s from the Philippines.
- Diamondback: Known for their polymer pistols, Diamondback has entered the 1911 market with a feature-rich but higher-priced entry.
- Bear Creek Arsenal: Primarily an AR-15 manufacturer, BCA has introduced a 1911 line built with a focus on affordability.
- The remaining brands (Hayes, Fowler, MPA, Vudoo, TTI, Stealth Arms, Jacob Grey, Live Free, Alpha Foxtrot, Cosaint) are smaller, often newer, or more specialized custom/semi-custom shops that fill various niches within the A and B tiers. Their placement reflects their use of high-quality materials and manufacturing processes, though they may lack the long-term provenance of more established brands.
Detailed Brand Data and Justification
This section provides the specific evidence and data points supporting the tier placement of each manufacturer, referencing the core evaluation metrics.
S-Tier Brands
Wilson Combat
- Materials & Manufacturing: Explicitly states “100% BulletProof® construction,” meaning all parts are CNC machined from American-made bar stock or forgings with no MIM or cast parts used.24 This is the highest possible standard.
- Quality Control & Assembly: Utilizes a team of specialist gunsmiths who hand-fit every component. Pistols undergo an extensive test-fire process (often over 100 rounds) to ensure reliability and sight regulation.24
- Provenance & Performance: Offers a 1-inch group guarantee at 25 yards on most models.21 Has a decades-long legacy of use by top competitive shooters and elite tactical trainers.37 Was a finalist in the FBI HRT trials.27
- Market Consensus: Overwhelmingly positive reputation for flawless quality, reliability, and industry-leading customer service.
Nighthawk Custom
- Materials & Manufacturing: All parts are fully machined from oversized 416 billet steel, allowing for a perfect, gap-free fit.26 No MIM parts are used.
- Quality Control & Assembly: Employs a strict “One Gun, One Gunsmith” philosophy, where a single master gunsmith builds the entire pistol from a box of oversized parts to a finished product. This ensures ultimate accountability and consistency.26
- Provenance & Performance: While not holding a major government contract, their pistols are used by discerning professionals and are highly sought after for their performance. Testimonials from law enforcement officers attest to their superior reliability and accuracy over other top brands.39
- Market Consensus: Regarded as functional art. The fit, finish, and feel of a Nighthawk are considered by many to be the absolute peak of the 1911 platform.
Cabot Guns
- Materials & Manufacturing: Unique in its use of “aerospace technology.” All components are machined in-house from solid blocks of American billet steel, explicitly rejecting forgings and castings as inferior.20 Known for using exotic materials like Damascus steel and meteorite.40
- Quality Control & Assembly: Utilizes proprietary “Clone Technology,” machining parts to such tight tolerances that hand-fitting is minimized, creating near-perfect interchangeability. The slide-to-frame fit is described as feeling like it runs on ball bearings.20
- Provenance & Performance: Cabot pistols have been used to win multiple NRA National Pistol Championships, proving their “out-of-the-box” match-grade accuracy.42
- Market Consensus: Viewed as the “Rolls-Royce” of the 1911 world, where precision machining and exotic materials create heirloom-quality firearms.
SVI / Infinity Firearms
- Materials & Manufacturing: All major components are manufactured in-house from billet barstock.43 Famous for their modular frame system (metal grip separate from the upper frame) and innovative interchangeable breech face slide, allowing for multi-caliber use.43
- Quality Control & Assembly: Each pistol is a full custom build, made to the customer’s exact specifications. The level of precision is legendary within the competition community.
- Provenance & Performance: SVI/Infinity pistols have dominated the highest levels of practical shooting (IPSC/USPSA) for decades. They provide accuracy certificates showing groups under 1.5 inches at 50 yards (55 yards), a standard few others can meet.43
- Market Consensus: Considered the ultimate, no-compromise race gun. The brand is synonymous with peak competition performance, albeit with very high prices and long wait times.
Atlas Gunworks
- Materials & Manufacturing: Utilizes premium materials, including 7075 aluminum for grips and 17-4 steel for beavertails, with a focus on high-quality tool steel for critical internal parts like extractors.45
- Quality Control & Assembly: Purpose-builds pistols for competition, with a focus on perfect slide cycling (“like it’s on ball bearings”) and flawless extractor tuning for reliability with a wide range of ammunition.47
- Provenance & Performance: A dominant force in modern USPSA competition, with their pistols frequently used by national champions. The company sponsors major matches, cementing its place in the competitive community.35
- Market Consensus: Regarded as one of the top choices for a serious competition 2011, offering near-SVI performance with shorter lead times.
Stan Chen Custom / Chambers Custom
- Materials & Manufacturing: These represent the pinnacle of individual craftsmanship. They use only the best materials (forged and bar stock steel) and are known for innovations that improve the platform, such as Chen’s Pro-Trac checkering and Gen2 Magwell.
- Quality Control & Assembly: As one-man or very small shops, every aspect of the build is personally overseen by a master gunsmith, resulting in a level of detail and perfection that is impossible to replicate in a production environment.
- Provenance & Performance: Their reputation is built on word-of-mouth among the most knowledgeable shooters and collectors. Their books are often closed for years due to high demand.
- Market Consensus: Considered true “grail guns” by 1911 aficionados. Owning one signifies an appreciation for the highest level of the gunsmith’s art.
A-Tier Brands
Les Baer Custom
- Materials & Manufacturing: Uses proprietary National Match forged steel frames and slides. All parts are hand-fit.22
- Quality Control & Assembly: Famous for an extremely tight “hard-fit” philosophy, requiring a 500-round break-in period. This results in exceptional accuracy once settled.
- Provenance & Performance: Guarantees 3-inch groups at 50 yards with all pistols.22 Had an early, though ultimately unsuccessful, contract with the FBI HRT, which speaks to their initial quality.27
- Market Consensus: A benchmark for accuracy in the semi-custom world. Known as a no-frills, exceptionally accurate workhorse.
Ed Brown Products
- Materials & Manufacturing: All major components are machined in-house from forgings or pre-heat-treated bar stock steel.51 Barrels are machined from T416 stainless steel bar stock.52
- Quality Control & Assembly: Blends state-of-the-art CNC machining with meticulous hand-fitting by master craftsmen, all overseen by the Brown family.51
- Provenance & Performance: While not holding major government contracts, they are highly respected and used by law enforcement officers and for personal defense, with a strong reputation for reliability.53
- Market Consensus: Known for elegant, understated, and exceptionally well-made pistols. Their customer service and lifetime warranty are highly regarded.
Staccato
- Materials & Manufacturing: Utilizes 100% American steel and parts, with a focus on precision manufacturing in their Texas facility.55 Their 2011 design features a modular polymer grip mated to a steel or aluminum upper frame.
- Quality Control & Assembly: Balances modern CNC production with skilled gunsmithing to produce pistols that meet stringent duty-use reliability standards.
- Provenance & Performance: The clear leader in law enforcement adoption for 2011s, with approval from over 1,400 agencies, including the U.S. Marshals SOG, Texas Rangers, and LAPD SWAT.29 Dominant in the competition world.33
- Market Consensus: Has successfully redefined the 2011 as a reliable, accurate, and soft-shooting duty and defense platform, largely setting the standard for the modern double-stack 1911.
Dan Wesson
- Materials & Manufacturing: Explicitly advertises “Zero MIM parts,” using forged slides and barrels and billet alloy steel fire-control systems.25 This is a major differentiator from B-Tier brands.
- Quality Control & Assembly: Pistols are painstakingly hand-fit and polished, leading to exceptionally tight tolerances and a smooth action that rivals more expensive custom guns.25
- Provenance & Performance: The “Specialist” model was designed for law enforcement use and is highly regarded as a duty-grade firearm.59
- Market Consensus: Widely praised as offering the best value in the semi-custom market, delivering near-S-Tier material quality and fitment at a significantly lower price point.60
Quantitative Scoring Summary Table
The following table provides a numerical summary of each brand’s evaluation based on the rubric detailed in the Appendix.
| Manufacturer | Quality | Durability | Accuracy | Reliability | Cust. Sat. | Total | Tier |
| S-Tier | |||||||
| Wilson Combat | 10 | 10 | 10 | 10 | 10 | 50 | S |
| Nighthawk Custom | 10 | 10 | 10 | 10 | 10 | 50 | S |
| SVI / Infinity | 10 | 10 | 10 | 9 | 9 | 48 | S |
| Cabot Guns | 10 | 9 | 10 | 9 | 9 | 47 | S |
| Atlas Gunworks | 10 | 9 | 10 | 9 | 9 | 47 | S |
| Stan Chen Custom | 10 | 10 | 10 | 10 | N/A | 49 | S |
| Chambers Custom | 10 | 10 | 10 | 10 | N/A | 49 | S |
| A-Tier | |||||||
| Staccato | 9 | 10 | 9 | 10 | 9 | 47 | A |
| Ed Brown | 9 | 9 | 9 | 9 | 9 | 45 | A |
| Les Baer Custom | 9 | 9 | 10 | 8 | 8 | 44 | A |
| Dan Wesson | 9 | 9 | 9 | 8 | 9 | 44 | A |
| Guncrafter Ind. | 9 | 10 | 8 | 9 | 8 | 44 | A |
| Alchemy Custom | 9 | 9 | 9 | 8 | 9 | 44 | A |
| Taran Tactical (TTI) | 9 | 8 | 9 | 8 | 8 | 42 | A |
| Hayes Custom | 9 | 9 | 9 | 8 | 8 | 43 | A |
| Masterpiece Arms | 8 | 8 | 9 | 8 | 8 | 41 | A |
| Fowler Industries | 9 | 8 | 9 | 8 | 8 | 42 | A |
| Deep River Customs | 8 | 8 | 9 | 8 | 8 | 41 | A |
| Republic Forge | 8 | 8 | 8 | 8 | 8 | 40 | A |
| B-Tier | |||||||
| Springfield (Pro/TRP) | 8 | 10 | 9 | 10 | 8 | 45 | B |
| Colt (Custom/M45A1) | 8 | 9 | 8 | 9 | 7 | 41 | B |
| Bul Armory | 8 | 8 | 8 | 8 | 8 | 40 | B |
| Vudoo Gun Works | 8 | 8 | 9 | 8 | 8 | 41 | B |
| Cosaint Arms | 7 | 7 | 8 | 7 | 7 | 36 | B |
| Fusion Firearms | 7 | 7 | 7 | 7 | 7 | 35 | B |
| C-Tier | |||||||
| Springfield (Prod.) | 7 | 8 | 7 | 8 | 8 | 38 | C |
| Kimber | 6 | 6 | 7 | 6 | 6 | 31 | C |
| SIG Sauer | 7 | 7 | 7 | 7 | 7 | 35 | C |
| Smith & Wesson | 7 | 7 | 7 | 7 | 7 | 35 | C |
| Ruger | 6 | 7 | 7 | 8 | 8 | 36 | C |
| Magnum Research | 7 | 7 | 7 | 7 | 7 | 35 | C |
| Colt (Production) | 6 | 7 | 6 | 7 | 6 | 32 | C |
| Savage Arms | 7 | 7 | 7 | 7 | 7 | 35 | C |
| Remington | 6 | 6 | 6 | 6 | 6 | 30 | C |
| Stealth Arms | 7 | 6 | 7 | 6 | 7 | 33 | C |
| Jacob Grey | 7 | 6 | 7 | 6 | 6 | 32 | C |
| Alpha Foxtrot | 7 | 6 | 7 | 6 | 6 | 32 | C |
| D-Tier | |||||||
| Tisas | 6 | 6 | 6 | 6 | 7 | 31 | D |
| Rock Island Armory | 5 | 6 | 6 | 7 | 7 | 31 | D |
| Girsan (EAA) | 5 | 5 | 6 | 6 | 6 | 28 | D |
| Auto-Ordnance | 5 | 6 | 5 | 6 | 6 | 28 | D |
| SDS Imports | 5 | 5 | 5 | 6 | 6 | 27 | D |
| Taylor’s & Co. | 5 | 6 | 6 | 6 | 6 | 29 | D |
| Citadel | 5 | 6 | 5 | 6 | 6 | 28 | D |
| Charles Daly | 4 | 5 | 5 | 5 | 5 | 24 | D |
| ATI | 4 | 4 | 5 | 5 | 5 | 23 | D |
| Iver Johnson | 4 | 5 | 5 | 5 | 5 | 24 | D |
| Live Free Armory | 5 | 5 | 6 | 5 | 6 | 27 | D |
| Diamondback | 5 | 5 | 6 | 5 | 5 | 26 | D |
| Bear Creek Arsenal | 4 | 4 | 5 | 4 | 5 | 22 | D |
Note: N/A for Customer Satisfaction on some S-Tier builders indicates that their bespoke nature and limited production make aggregated data less meaningful than for production brands.
Note: Springfield and Colt are listed twice to reflect the significant quality difference between their standard production lines and their custom shop/contract pistols.
Summary & Market Outlook
This analysis has established a quantifiable, data-driven framework to objectively evaluate the crowded and often confusing market for 1911 and 2011 pistols. By grounding the assessment in materials science, manufacturing processes, quality control, and verifiable performance, it is possible to move beyond subjective brand loyalty and make informed distinctions. The result is a clear hierarchy where true quality, defined by superior engineering and meticulous craftsmanship, rises to the top.
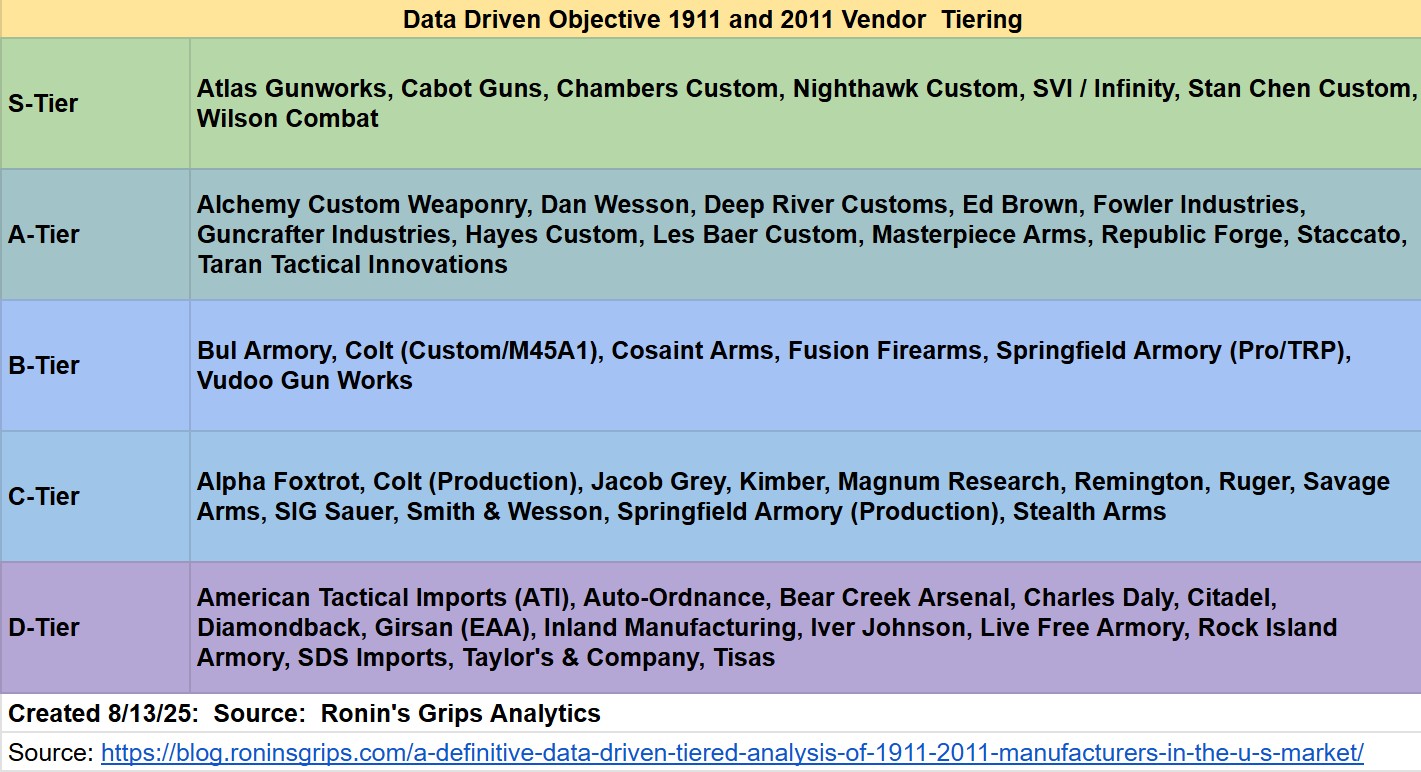
Consolidated Tier Ranking Table
| Tier | Manufacturers |
| S-Tier | Atlas Gunworks, Cabot Guns, Chambers Custom, Nighthawk Custom, SVI / Infinity, Stan Chen Custom, Wilson Combat |
| A-Tier | Alchemy Custom Weaponry, Dan Wesson, Deep River Customs, Ed Brown, Fowler Industries, Guncrafter Industries, Hayes Custom, Les Baer Custom, Masterpiece Arms, Republic Forge, Staccato, Taran Tactical Innovations |
| B-Tier | Bul Armory, Colt (Custom/M45A1), Cosaint Arms, Fusion Firearms, Springfield Armory (Pro/TRP), Vudoo Gun Works |
| C-Tier | Alpha Foxtrot, Colt (Production), Jacob Grey, Kimber, Magnum Research, Remington, Ruger, Savage Arms, SIG Sauer, Smith & Wesson, Springfield Armory (Production), Stealth Arms |
| D-Tier | American Tactical Imports (ATI), Auto-Ordnance, Bear Creek Arsenal, Charles Daly, Citadel, Diamondback, Girsan (EAA), Inland Manufacturing, Iver Johnson, Live Free Armory, Rock Island Armory, SDS Imports, Taylor’s & Company, Tisas |
Concluding Analysis & Market Trends
The tiered model reveals several key dynamics within the 1911/2011 market, most notably the powerful principle of diminishing returns.
- The Law of Diminishing Returns: The most significant value jump for a consumer occurs when moving from the D-Tier to the C-Tier. This transition typically involves a modest price increase in exchange for a substantial upgrade in foundational quality, most notably moving from potentially cast components to forged frames and slides. The move from C to B-Tier brings better fit, finish, and fewer MIM parts. The leap to the A-Tier represents the point of peak performance-for-cost, where extensive hand-fitting and a “no-MIM” philosophy deliver a product that is 95% of a full-custom S-Tier gun for often half the price. The final ascent to the S-Tier commands the highest premium for the final increments of perfection: flawless aesthetic finishing, exotic materials, and the pedigree of a single master gunsmith.
- Market Trends:
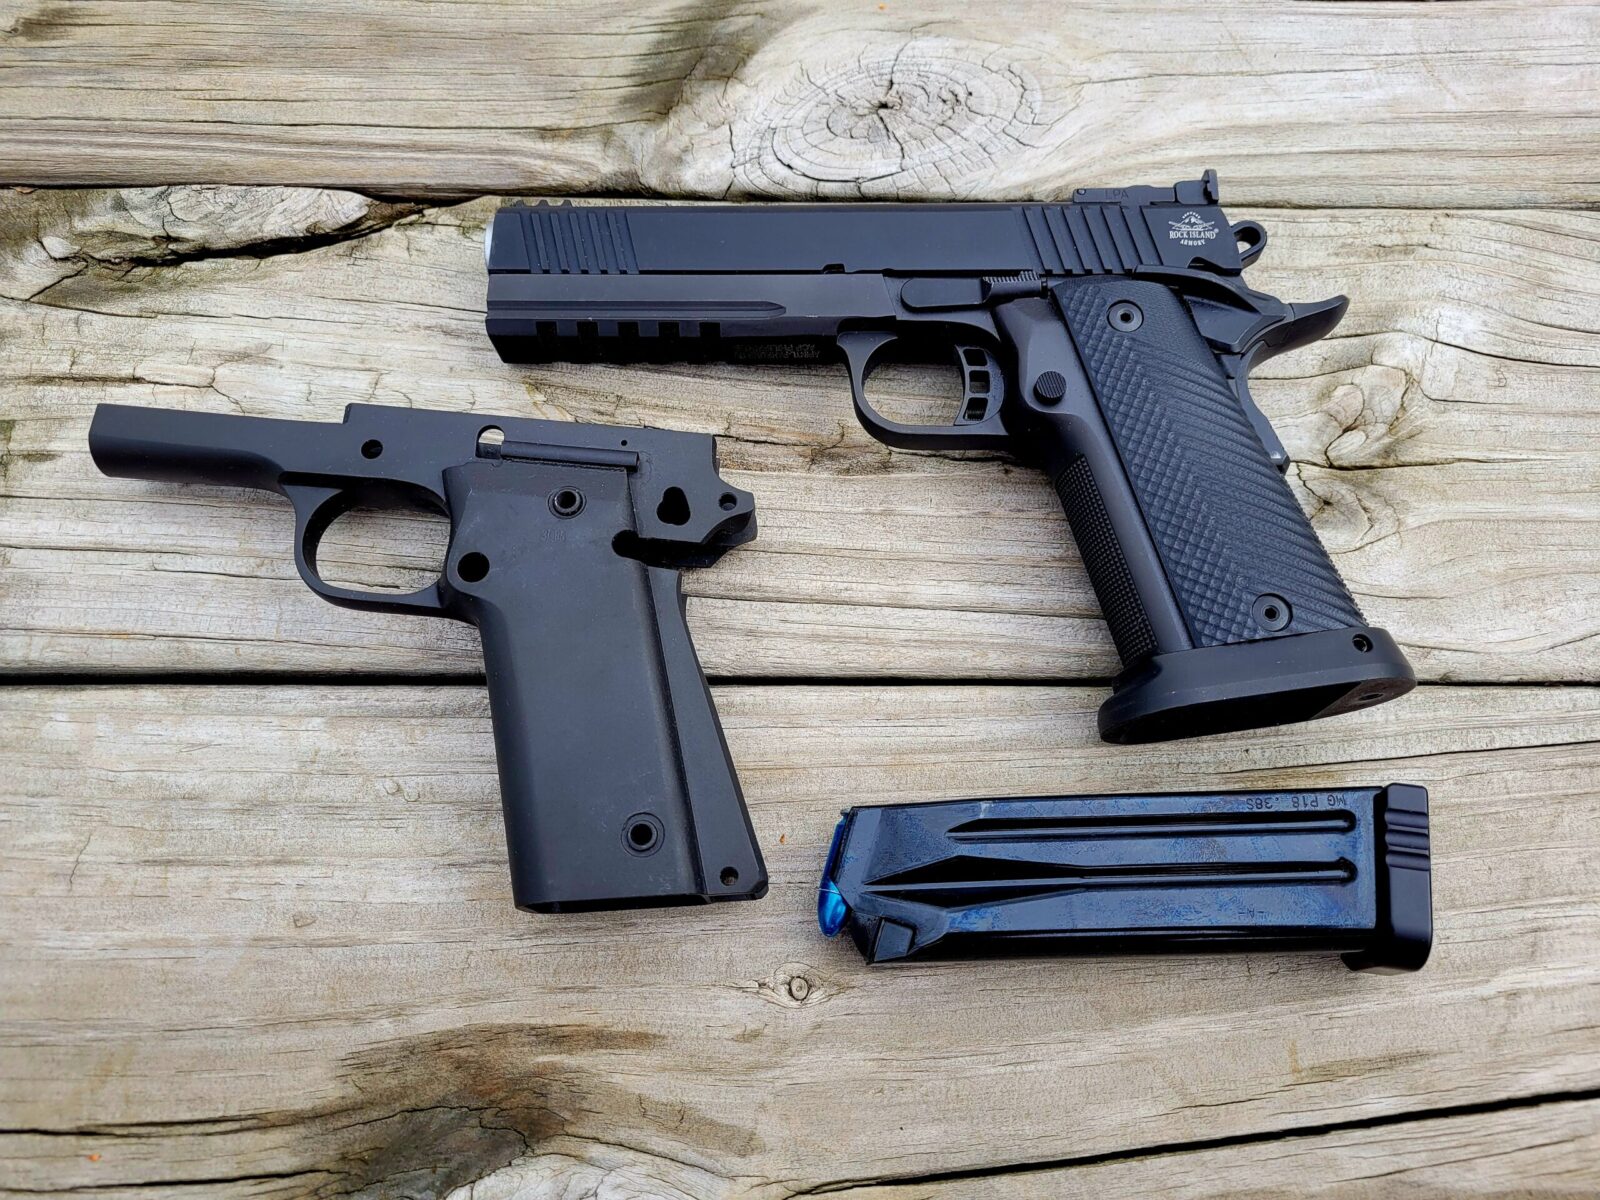
- The Ascendancy of the 2011: An Evolutionary Leap: The modern high-capacity market is often broadly labeled “2011,” but it’s crucial to understand the distinct evolutionary steps from the original 1911. The first major evolution was the “double-stack 1911” or “widebody,” pioneered by companies like Para-Ordnance in the late 1980s.73 These pistols, like some modern Rock Island Armory models, feature a traditional one-piece steel or alloy frame that is simply widened to accommodate a higher-capacity, staggered magazine.75 The true “2011” represents a more significant design evolution, patented by STI (now Staccato) and SVI in the 1990s.76 The key distinction of a genuine 2011 is its modular, two-piece frame architecture.75 This design consists of a steel or aluminum upper frame (which is the serialized part containing the slide rails and fire control group) mated to a separate polymer or aluminum grip module.76 This modularity allows for greater customization and is credited with a different recoil impulse.79 While the term “2011”—a trademark owned by Staccato—is now often used colloquially for any double-stack 1911, the underlying engineering is distinct.80 The platform’s transition from a niche competition gun to a mainstream duty and defensive firearm, largely driven by Staccato’s success, has triggered a market-wide pivot.73 This has led numerous manufacturers, including Springfield Armory (Prodigy) and Kimber (2K11), to introduce their own double-stack models to capture this growing segment.73
- The Optics-Ready Standard: Across all tiers, the inclusion of factory optics-ready slide cuts is rapidly becoming a standard feature rather than a custom upgrade. This reflects a broader market shift in the acceptance of red dot sights as a primary sighting system for handguns.
- Pressure from Imports: High-quality Turkish and Filipino manufacturers, particularly Tisas and Rock Island Armory, are applying significant pressure on the lower and middle tiers of the market. By offering features like forged frames and slides at D-Tier prices, they are forcing American C-Tier and B-Tier manufacturers to justify their higher price points through superior fit, finish, and quality control.61
The future of the 1911/2011 market will likely be defined by these trends. The platform’s enduring appeal ensures its survival, but the landscape will continue to shift as manufacturers adapt to the demand for higher capacity, optics integration, and the ever-present pressure to deliver value in a competitive global market.
Appendix: Data Collection and Scoring Methodology
Data Sources
This report synthesizes data from a wide range of sources to ensure a comprehensive and balanced analysis. The sources are categorized as follows:
- Manufacturer Direct Specifications: Official websites, product catalogs, and technical manuals were consulted for stated materials, manufacturing processes, and performance guarantees.20
- Industry & Technical Publications: Reputable firearms publications (e.g., American Rifleman, Guns & Ammo) and technical gunsmithing manuals (e.g., Kuhnhausen series) were used for professional reviews and mechanical analysis.10
- Government & Military Documentation: Original ordnance blueprints and contract award information were referenced to establish the mil-spec baseline and verify performance claims related to elite unit adoption.9
- Community Sentiment Analysis: A structured review of long-term owner experiences, reliability reports, and customer service feedback was conducted on high-signal-to-noise online forums, with a primary focus on 1911addicts.com and pistol-forum.com for their knowledgeable user bases.69
Scoring Rubric
Each manufacturer was scored on a 1-10 scale across five core criteria. This rubric provides a transparent and repeatable methodology for assigning these scores.
- Quality (Materials & Manufacturing):
- 1-3: Primarily uses cast major components (frame/slide) and a high percentage of low-quality MIM parts.
- 4-6: Uses forged major components but with extensive use of MIM for most small parts.
- 7-8: Uses forged major components, high-quality tool steel or bar stock for critical parts, and minimal/high-quality MIM for non-critical parts. Good CNC machining and some hand-fitting.
- 9-10: All components are machined from forged or billet steel. Explicit “No MIM Parts” policy. Extensive hand-fitting by master-level gunsmiths.
- Durability (Longevity & Resistance to Wear):
- 1-3: Widespread reports of premature parts failure or breakage.
- 4-6: Meets expected service life for a recreational firearm with proper maintenance.
- 7-8: Built with high-quality, durable materials (e.g., forged steel, proper heat treatment) suitable for hard/duty use.
- 9-10: Has passed a documented, high-round-count military or law enforcement endurance test (e.g., the 50,000-round FBI protocol) or has a proven track record of extreme durability in professional use.
- Accuracy (Mechanical Precision):
- 1-3: Consistently groups larger than 4 inches at 25 yards.
- 4-6: Standard service-grade accuracy (approx. 3-4 inches at 25 yards).
- 7-8: Features a match-grade barrel and good component fit, capable of 1.5-2.5 inch groups at 25 yards.
- 9-10: Sold with an explicit accuracy guarantee of 1.5 inches or less at 25 yards (or a correspondingly tighter group at 50 yards).
- Reliability (Function Across Conditions):
- 1-3: Known to be ammunition-sensitive and require a significant break-in period; frequent malfunctions reported.
- 4-6: Generally reliable with quality magazines and standard ball ammunition.
- 7-8: Demonstrates high reliability with a wide range of high-performance defensive ammunition.
- 9-10: Proven to be exceptionally reliable in extreme conditions through professional adoption or rigorous, documented testing.
- Customer Satisfaction (Market Consensus):
- 1-3: Overwhelmingly negative market sentiment regarding product quality and/or customer service.
- 4-6: Mixed reviews; some satisfied customers, but a significant number of complaints regarding quality control or service.
- 7-8: Generally positive market sentiment; brand is considered reliable and customer service is responsive.
- 9-10: Overwhelmingly positive market sentiment; brand is revered for its quality, and customer service is considered industry-leading.
Tier Assignment by Total Score
The final tier for each manufacturer is determined by their total score out of a possible 50 points. The score ranges are defined to create logical groupings based on the quality levels observed in the market.
- S-Tier: 48-50
- A-Tier: 40-47
- B-Tier: 34-39
- C-Tier: 28-33
- D-Tier: <28
Please share the link on Facebook, Forums, with colleagues, etc. Your support is much appreciated and if you have any feedback, please email us in**@*********ps.com. If you’d like to request a report or order a reprint, please click here for the corresponding page to open in new tab.
Please share the link on Facebook, Forums, with colleagues, etc. Your support is much appreciated and if you have any feedback, please email us in**@*********ps.com. If you’d like to request a report or order a reprint, please click here for the corresponding page to open in new tab.
Works cited
- A Comprehensive Journey Through the Rich History of 1911 Pistols – Fusion Firearms, accessed August 10, 2025, https://fusionfirearms.com/videovault/post/a-comprehensive-journey-through-the-rich-history-of-1911-pistols
- A Brief History of the Model 1911 Handgun – Let’s Go Shooting, accessed August 10, 2025, https://www.letsgoshooting.org/resources/articles/firearms/a-brief-history-of-the-model-1911-handgun/
- Surprising 1911 Handgun Manufacturers – The Mag Life – GunMag Warehouse, accessed August 10, 2025, https://gunmagwarehouse.com/blog/surprising-1911-handgun-manufacturers/
- High End & Most Expensive 1911’s – Guns – USCCA Community, accessed August 10, 2025, https://community.usconcealedcarry.com/t/high-end-most-expensive-1911s/97283
- M1911 .45 Caliber Pistol – The Army Historical Foundation, accessed August 10, 2025, https://armyhistory.org/m1911-45-caliber-pistol/
- The U.S. ‘.45 Automatics:’ M1911 & M1911A1 Pistols | An Official Journal Of The NRA, accessed August 10, 2025, https://www.americanrifleman.org/content/the-u-s-45-automatics-m1911-m1911a1-pistols/
- How to Speak 1911: Evolutionary Differences – Guns.com, accessed August 10, 2025, https://www.guns.com/news/2019/11/14/how-to-speak-1911-holding-class-on-the-evolutionary-differences
- M1911A1: America’s Definitive World War Two Pistol – YouTube, accessed August 10, 2025, https://www.youtube.com/watch?v=vP8kFUgk1sU&pp=0gcJCfwAo7VqN5tD
- Colt 1911 Pistol Slide Blue Prints | PDF | Heat Treating | Metals – Scribd, accessed August 10, 2025, https://www.scribd.com/document/184615086/Colt-1911-pistol-slide-blue-prints
- Six M1911A1 Pistols Worth a Serious Look – Guns and Ammo, accessed August 10, 2025, https://www.gunsandammo.com/editorial/six-m1911a1-pistols-worth-a-serious-look/363402
- Centrefire self-loading military pistol – Colt M1911A1 – dated 1943 | Collection Object | Royal Armouries, accessed August 10, 2025, https://royalarmouries.org/collection/object/object-76137
- Forged? Cast? MIM? Stamped?, accessed August 10, 2025, http://www.mimsupplier.com/forged-cast-mim-stamped.html
- Machinery: Making World-Famous Automatic Pistol | PDF | Handgun | Trigger (Firearms) – Scribd, accessed August 10, 2025, https://www.scribd.com/doc/142190905/1911-Manufacture
- Forging vs. Casting: 6 Key Differences to Consider – Bunty LLC, accessed August 10, 2025, https://buntyllc.com/forging-vs-casting/
- Forged Steel vs. Cast Steel – The Armory Life, accessed August 10, 2025, https://www.thearmorylife.com/forged-vs-cast-steel/
- How to Make a Gun – Springfield Armory National Historic Site (U.S. National Park Service), accessed August 10, 2025, https://www.nps.gov/spar/learn/historyculture/making-guns.htm
- Springfield Operator vs. Mil-Spec 1911 – The Armory Life, accessed August 10, 2025, https://www.thearmorylife.com/springfield-operator-vs-mil-spec-1911/
- 1911 Face-Off: Emissary vs. the Mil-Spec – The Armory Life, accessed August 10, 2025, https://www.thearmorylife.com/1911-face-off-emissary-vs-the-mil-spec/
- Custom Modification for M1911 Pistols – The Sight 1911, accessed August 10, 2025, https://sightm1911.com/lib/tech/custom_mods.htm
- Anatomy of a Cabot, accessed August 10, 2025, https://cabotguns.com/anatomy-of-a-cabot/
- CQB 1911 Handguns – Wilson Combat, accessed August 10, 2025, https://wilsoncombat.com/handguns/1911-handguns/cqb.html
- Gun Review: Les Baer Premier II – The 1911 With Guaranteed Accuracy – Omaha Outdoors, accessed August 10, 2025, https://www.omahaoutdoors.com/blog/les-baer-premier-ii-1911-guaranteed-accuracy-gun-review/
- Metal Injection Molding Revolutionizing the Defence Industry – INDO-MIM, accessed August 10, 2025, https://www.indo-mim.com/metal-injection-molding-mim-defence/
- About Us – Wilson Combat, accessed August 10, 2025, https://wilsoncombat.com/wc-about-us
- 2022 DAN WESSON PRODUCT GUIDE, accessed August 10, 2025, https://danwessonfirearms.com/wp-content/uploads/2022/04/9993-CZ-Dan-Wesson-Product-Guidewithout_DWX4-5-22.pdf
- Nighthawk Custom: Handbuilding The World’s Finest Custom Firearms, accessed August 10, 2025, https://news.dupontregistry.com/the-lifestyle/gear/nighthawk-custom-handbuilding-the-worlds-finest-custom-firearms/
- The FBI M1911 Contracts – The Sight 1911, accessed August 10, 2025, https://sightm1911.com/lib/history/fbi_1911.htm
- Springfield Armory Professional 1911 .45 FBI Gun PC9111 | 7+1 Rounds, 5″ Barrel, Wood Grips, Blue/Black, accessed August 10, 2025, https://www.budsgunshop.com/product_info.php/products_id/62089/springfield+armory+professional+1911+.45+fbi+gun
- This SWAT team was an early adopter of the Staccato P. Here’s why., accessed August 10, 2025, https://staccato2011.com/blog/this-swat-team-was-an-early-adopter-of-the-staccato-p-here-s-why-
- Staccato 2011 pistols duty-approved by over 250 agencies – Police1, accessed August 10, 2025, https://www.police1.com/police-products/firearms/articles/staccato-2011-pistols-duty-approved-by-over-250-agencies-tZE1jpXIZhcpCMrX/
- Tisas Raider: Colt M45A1 USMC CQB Pistol Clone – The Shooter’s Log, accessed August 10, 2025, https://blog.cheaperthandirt.com/tisas-raider-colt-m45a1-usmc-cqb-pistol-clone/
- Colt’s M45 Marine Close Quarters Combat Pistol | David Freeman, accessed August 10, 2025, https://texasgunpros.net/2022/02/16/colts-m45-marine-close-quarters-combat-pistol/
- Staccato’s KC Eusebio Wins 12th World Speed Title, accessed August 10, 2025, https://staccato2011.com/blog/staccato-s-kc-eusebio-wins-12th-world-speed-title
- Team Staccato’s Michelle Viscusi Wins High Lady at USPSA Area 4 Championship, accessed August 10, 2025, https://www.nrawomen.com/content/team-staccato-s-michelle-viscusi-wins-high-lady-at-uspsa-area-4-championship
- Match Results Details – USPSA.ORG, accessed August 10, 2025, https://uspsa.org/match-results-details?action=summary&index=31933&compid=214
- Wilson Combat 1911 Professional Elite 45 ACP SAO 4″ 8+1 RD PROEPR45 – RK Guns, accessed August 10, 2025, https://www.rkguns.com/wilson-combat-1911-professional-elite-45-acp-sao-4-81-rd-proepr45.html
- Testimonials – Wilson Combat, accessed August 10, 2025, https://wilsoncombat.com/wc-testimonials
- Custom Guns & Firearms Including 1911 Pistols, 6-Shot Revolvers & Shotguns, accessed August 10, 2025, https://www.nighthawkcustom.com/
- Testimonials – Nighthawk Custom, accessed August 10, 2025, https://www.nighthawkcustom.com/nh-testimonials
- Damascus Steel 1911 Pistols – Custom Made by Cabot Guns, accessed August 10, 2025, https://cabotguns.com/damascus-steel-1911/
- Reviews – Cabot Guns, accessed August 10, 2025, https://cabotguns.com/reviews/
- Custom 1911 Pistols by Cabot Guns – Makers of the Meteorite Gun Set, accessed August 10, 2025, https://cabotguns.com/
- Strayer Voigt Inc – Wikipedia, accessed August 10, 2025, https://en.wikipedia.org/wiki/Strayer_Voigt_Inc
- SVI INFINITY 2011 – Custom .45 ACP, by Yosh3D – The Rookies, accessed August 10, 2025, https://www.therookies.co/projects/78607
- Conversion Grip Kit For Staccato/STI – Atlas Gunworks, accessed August 10, 2025, https://atlasgunworks.com/product-details?id=266060208
- The Ultimate 1911 and 2011 Extractor Tuning Video from Atlas Gunworks, accessed August 10, 2025, https://atlasgunworks.com/blog/the-ultimate-1911-and-2011-extractor-tuning-video-from-atlas-gunworks
- The Best 2011 Pistols of 2025, Tested and Reviewed – Outdoor Life, accessed August 10, 2025, https://www.outdoorlife.com/guns/best-2011-pistols/
- Atlas Gunworks – 1911 / 1911 DS Handguns, Parts, & Accessories, accessed August 10, 2025, https://atlasgunworks.com/
- LES BAER 2025.pdf, accessed August 10, 2025, https://www.lesbaer.com/images/LES%20BAER%202025.pdf
- Baer 1911 CMP-Legal National Match Hardball Pistol – Les Baer Custom Inc., accessed August 10, 2025, https://www.lesbaer.com/CMP.html
- About Ed Brown Products, accessed August 10, 2025, https://www.edbrown.com/about/
- 1911 AUTO DROP-IN MATCH BARRELS – YouTube, accessed August 10, 2025, https://www.youtube.com/watch?v=UY2rfodhQao
- Benefits of the 1911 as a police duty pistol – Police1, accessed August 10, 2025, https://www.police1.com/police-products/firearms/articles/the-case-for-the-1911-QlLjxBUmbd32twIl/
- Customer Testimonials | Ed Brown Products, accessed August 10, 2025, https://www.edbrown.com/customer-testimonials/
- How We Build Staccato Pistols | Behind The Scenes, accessed August 10, 2025, https://staccato2011.com/blog/how-we-build-staccato-pistols-behind-the-scenes
- Best 2011 Pistols Available – Guns.com, accessed August 10, 2025, https://www.guns.com/news/best-2011-pistols
- Navigating the Legacy: Dan Wesson 1911s in the Golden State – You Should Know, accessed August 10, 2025, https://avaria.dyverse.com/navigating-the-legacy-dan-wesson-1911s-in-the-golden-state/
- Review: Dan Wesson ECP – A Bushingless 1911 Commander in 9mm – Handguns, accessed August 10, 2025, https://www.handgunsmag.com/editorial/review-dan-wesson-ecp-a-bushingless-1911-commander-in-9mm/357239
- DW SPECIALIST BLACK OPTICS-READY – Dan Wesson Firearms, accessed August 10, 2025, https://danwessonfirearms.com/product/dw-specialist-black-optics-ready/
- catoutdoors.com, accessed August 10, 2025, https://catoutdoors.com/best-1911-guns/
- 7 Best Affordable 1911s (For Your Budget) – Pew Pew Tactical, accessed August 10, 2025, https://www.pewpewtactical.com/best-affordable-1911s/
- Tisas 1911 A1 Service and Tisas 1911 45 ACP – Gunbuyer, accessed August 10, 2025, https://www.gunbuyer.com/blog/tisas-1911-a1-service-and-tisas-1911-45-acp.html
- True to Form: The Tisas 1911A1 ASF | The Armory Life Forum, accessed August 10, 2025, https://www.thearmorylife.com/forum/threads/true-to-form-the-tisas-1911a1-asf.19545/
- 1911 Mil-Spec Handguns – Springfield Armory, accessed August 10, 2025, https://www.springfield-armory.com/1911-series-handguns/1911-mil-spec-handguns/
- Armscor International, Inc – Rock Island Armory, accessed August 10, 2025, https://www.armscor.com/rock
- 1911 Blueprints: Why You Need Them and How to Get Them – Modern Service Weapons, accessed August 10, 2025, https://modernserviceweapons.com/?p=14845
- The U.S. M1911/M1911A1 Pistols & Commercial M1911 Type Pistols – A Shop Manual, accessed August 10, 2025, http://www.galimbertipaolo.it/PDF/Colt1911.pdf
- Colt 1911 Blueprints (18 pages), accessed August 10, 2025, https://ia801307.us.archive.org/29/items/Colt_1911_Blueprints_18_pages/Colt_1911_Blueprints_18_pages_text.pdf
- Nighthawk Custom: A Legacy Of Craftsmanship And Excellence | An NRA Shooting Sports Journal, accessed August 10, 2025, https://www.ssusa.org/content/nighthawk-custom-a-legacy-of-craftsmanship-and-excellence/
- What’s he got? FBI hostage rescue team circa 2001. : r/1911 – Reddit, accessed August 10, 2025, https://www.reddit.com/r/1911/comments/103fhzs/whats_he_got_fbi_hostage_rescue_team_circa_2001/
- MIM parts : r/1911 – Reddit, accessed August 10, 2025, https://www.reddit.com/r/1911/comments/1ay4f1o/mim_parts/
- Any opinions +/- on the Springfield Mil Spec 1911? Review says its nice, but not being built anymore. Is it worth acquiring? – Reddit, accessed August 10, 2025, https://www.reddit.com/r/1911/comments/298mye/any_opinions_on_the_springfield_mil_spec_1911/
- Springfield Armory Prodigy Double-Stack 9mm 1911s: Review – Handguns, accessed August 10, 2025, https://www.handgunsmag.com/editorial/prodigy-ds-1911s/467290
- Para-Ordnance P14-45 – Wikipedia, accessed August 10, 2025, https://en.wikipedia.org/wiki/Para-Ordnance_P14-45
- What Is A 2011? Double-Stack 1911s vs Widebody Frames Explained – Alien Gear Holsters, accessed August 10, 2025, https://aliengearholsters.com/blogs/news/what-is-a-2011
- A Guide To Double-Stack 1911s | An Official Journal Of The NRA – American Rifleman, accessed August 10, 2025, https://www.americanrifleman.org/content/a-guide-to-double-stack-1911s/
- The 2011 Pistol: Refitting the 1911 for a New Century – Free Range American, accessed August 10, 2025, https://freerangeamerican.us/2011-pistol/
- 1911 vs 2011: The Ultimate Handgun Showdown – Craft Holsters, accessed August 10, 2025, https://www.craftholsters.com/1911-vs-2011-which-one-is-better
- The love for 2011 – Guns – USCCA Community, accessed August 10, 2025, https://community.usconcealedcarry.com/t/the-love-for-2011/84796
- 1911 and 2011 Handguns – Inside Safariland, accessed August 10, 2025, https://inside.safariland.com/blog/1911-and-2011-handguns/
- Understanding the Legacy and Impact of the 2011 Pistol: Revolutionizing Firearms, accessed August 10, 2025, https://www.anrkydexholsters.com/understanding-the-legacy-and-impact-of-the-2011-pistol-revolutionizing-firearms/