Category Archives: AK & Related Rifles

Used to discuss AK-47, AK-74, and related rifles

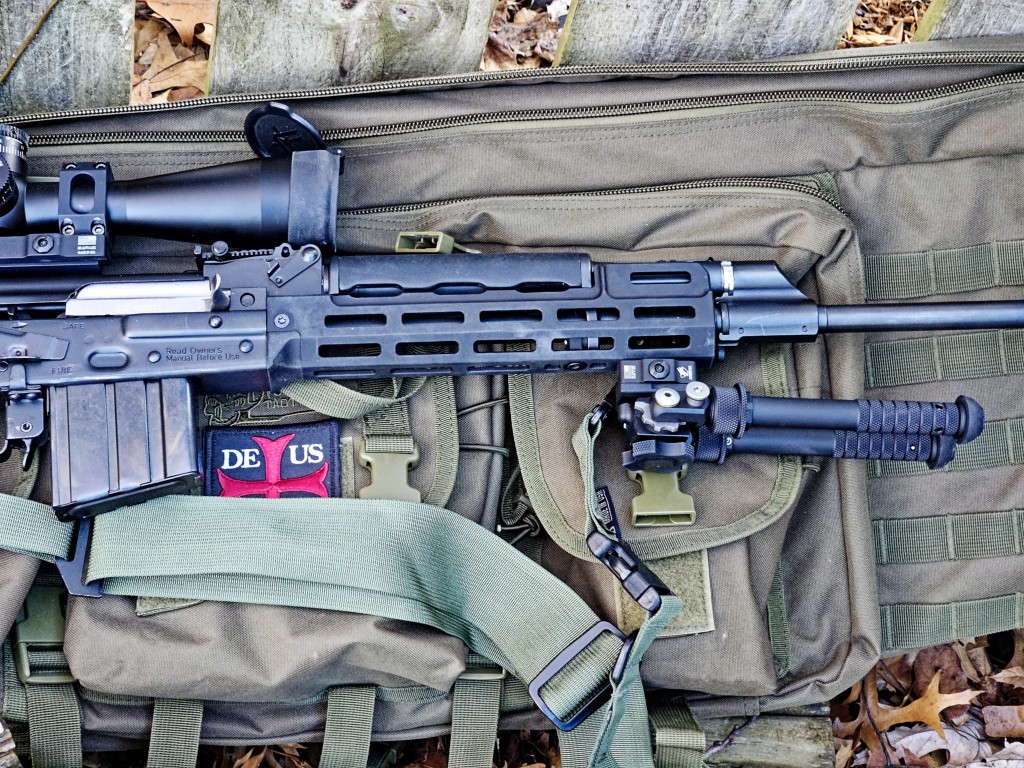
Adding a RS Regulate GKR-9DY Handguard To A Zastava M77

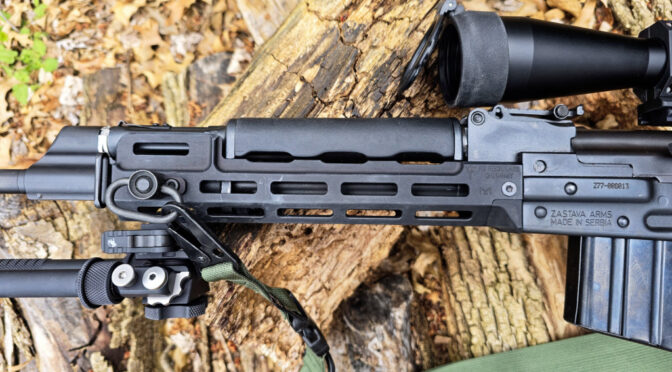
Ok, so I planned to completely redo the M77 and keep the Battleworn wood for the future just in case. The first step was to swap out the wood handguards for a RS Regulate GKR-9DY. It’s a 9″ MLOK rail for Zastava AK-type rifles – this matters because a Zastava handguard is longer and a different shape than an AKM handguard.

Scot Hoskinson owns RS Regulate and is a meticulous engineer. His products are top notch and one thing I would tell you is to always read the instructions. He puts a lot of effort into documenting what you need to do so find the instructions and follow them.
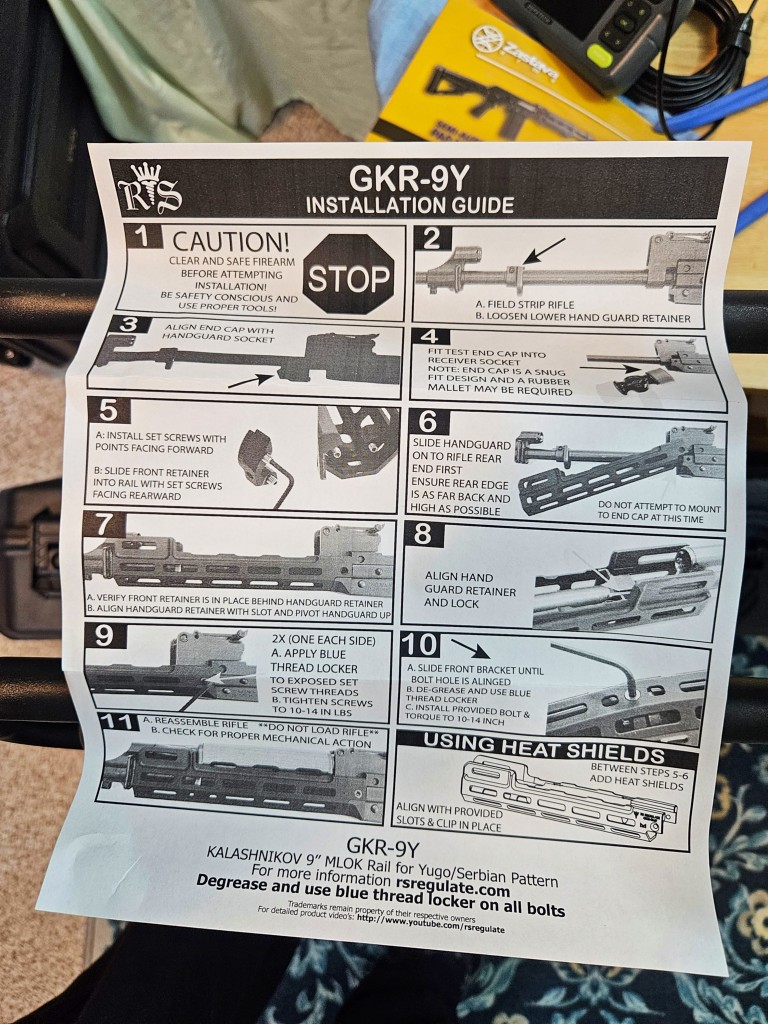
RS Regulate GKR-9Y handguard installation guide for Kalashnikov Yugo/Serbian pattern rifles.
Trust me – read and follow the instructions to install a RS Regulate handguard. Note the instruction sheet is for the old part number GKR-9Y. Scot revised the part number and it is now the GKR-9DY — same handguard but different part number.
Installing RS Regulate GKR-9DY handguard on a Zastava M77 rifle.
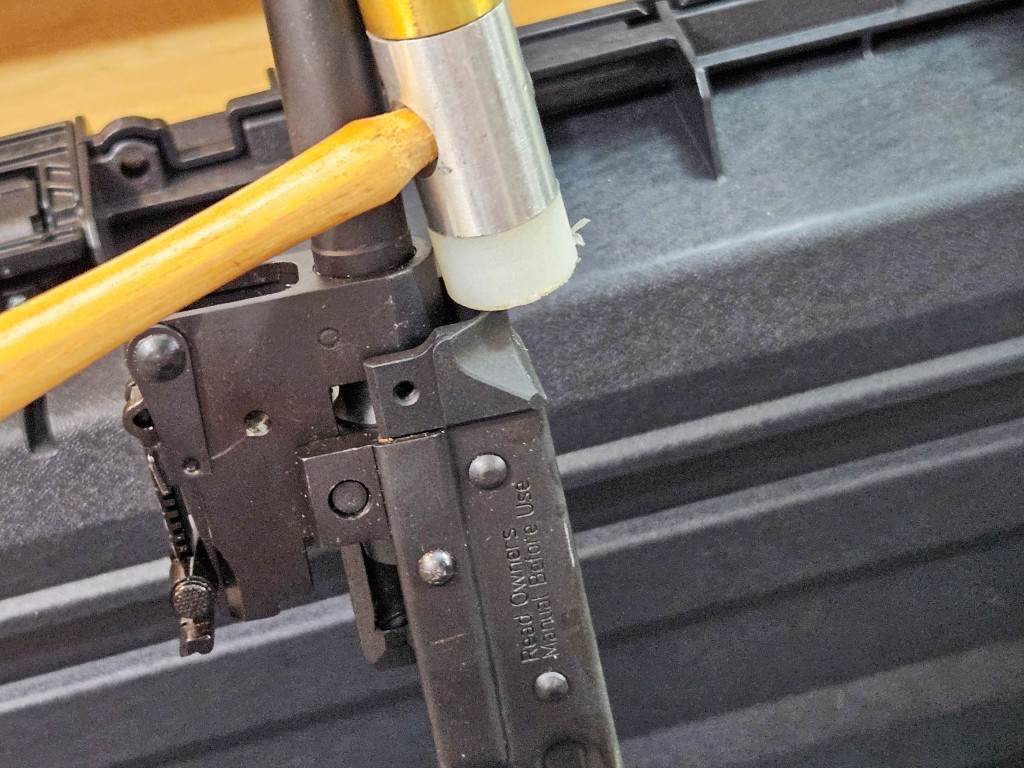
Per the instructions in steps 3 and 4, I tapped the end cap into place. Note, you do need to test fit and make sure it will fit. You aren’t beating it into place with a ton of force. Mine went in without any filing needed but I did need to tap it to get it fully seated. You want the end cap to sit in the receiver firmly – not loose.

I don’t have photos of every step Scot lists, but I do want to mention step 5 – the front retainer set screws are backed out towards the receiver with the allen heads facing the rear. Once you have the front retainer in place and screwed to the handguard in step 10, you then tighten down the set screws to make everything nice and tight.

In all of his steps, be sure to follow the torque specifications and use blue loc-tite or your favorite medium strength thread locker. If you don’t, then the screws will risk coming loose and potentially falling out.
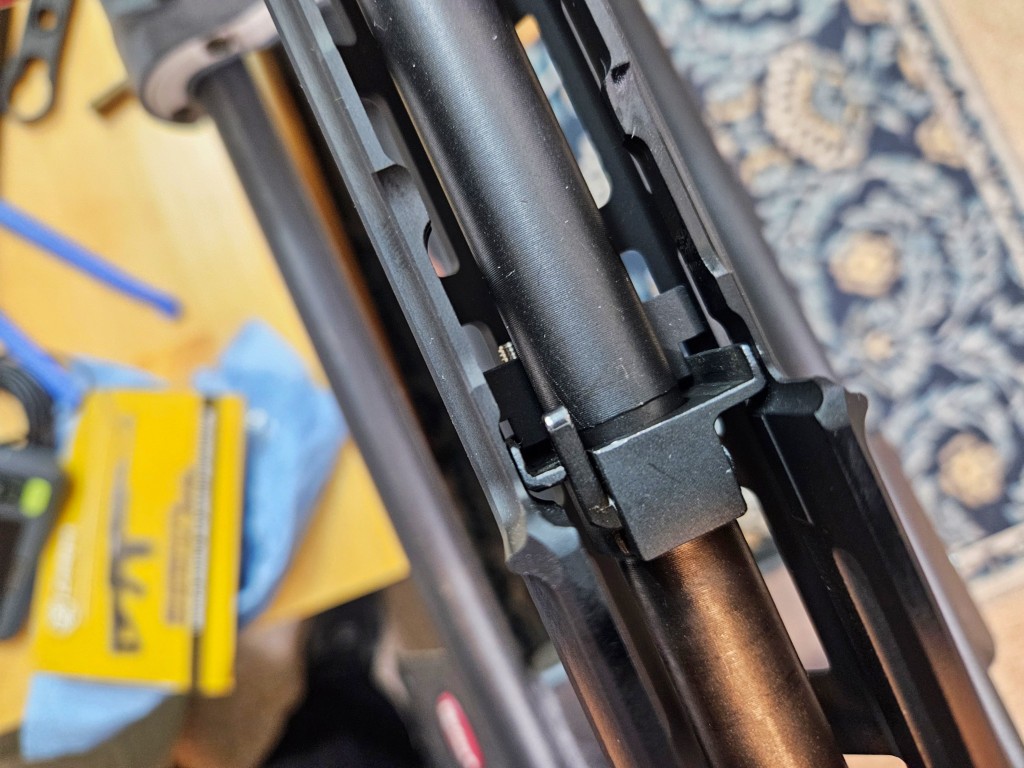
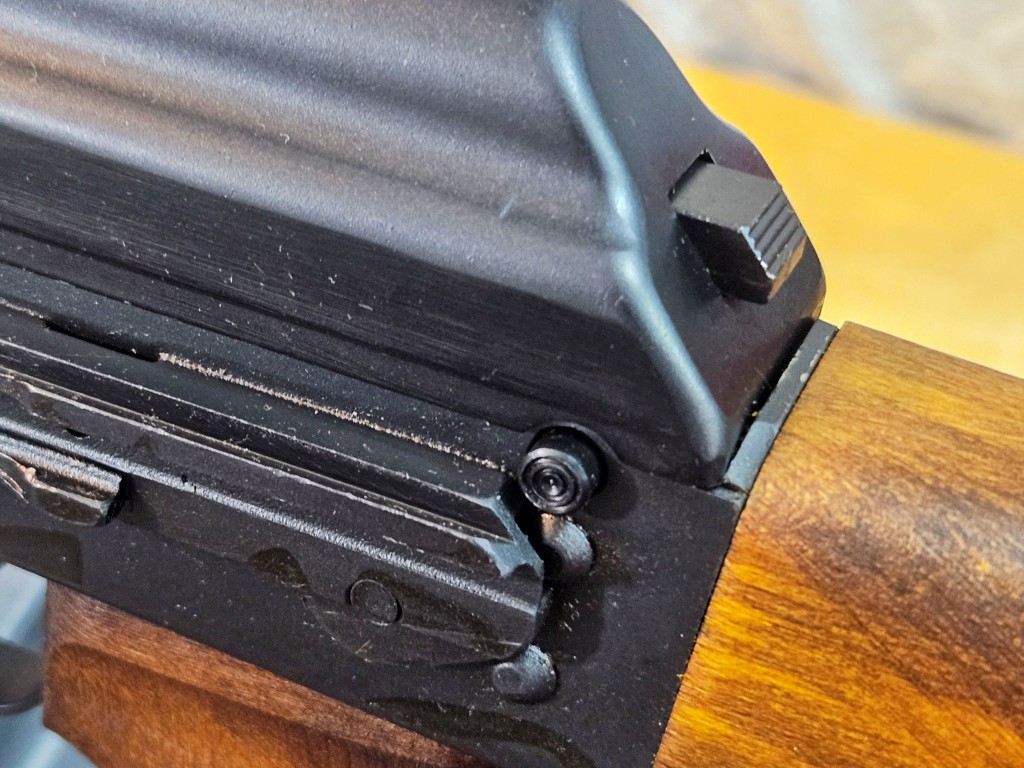
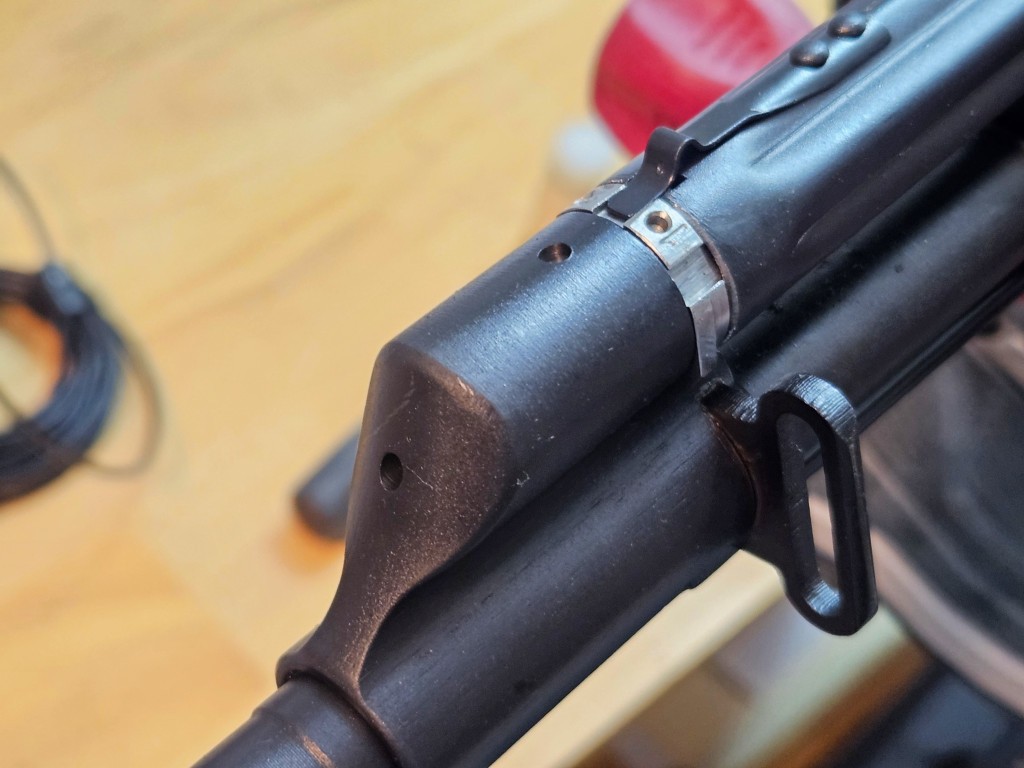
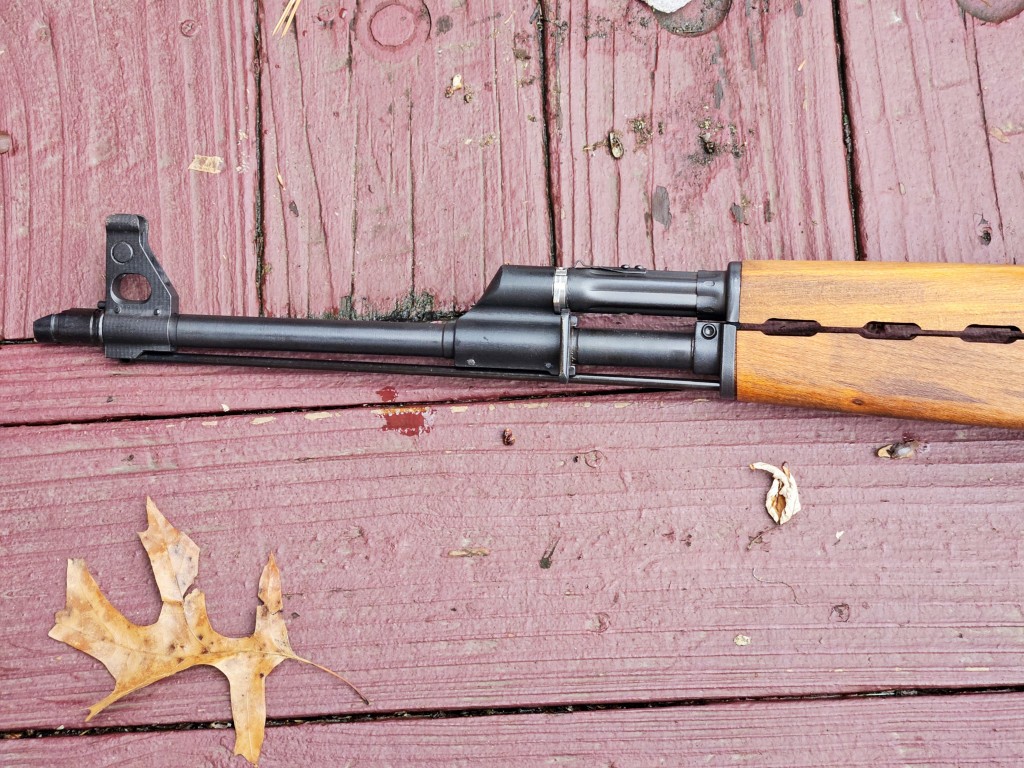
Close-up of the Zastava M77 receiver with RS Regulate GKR-9DY handguard being installed.
You can see the rifle’s handguard retainer is locked in place because the cam lever is rotated backwards. Looking down past the barrel you can see one of the two front retainer set screws waiting to be snugged down.
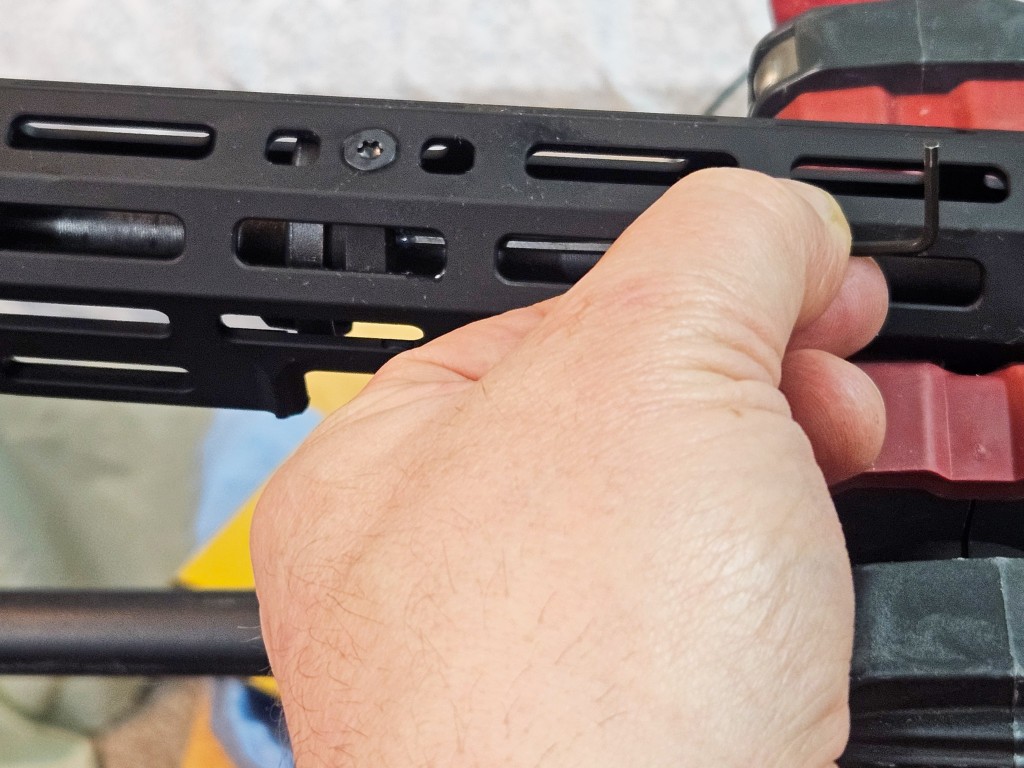
Installing an RS Regulate GKR-9DY handguard on a Zastava M77 rifle.
I used a long Bondhaus ball head allen key to reach in and tighten the set screws. Let me spare you some future grief – buy quality sets of allen wrenches that properly engage your fasteners. The cheap import keys are prone to poor fitment and/or rounding over the edges and both will mess up your fasteners.
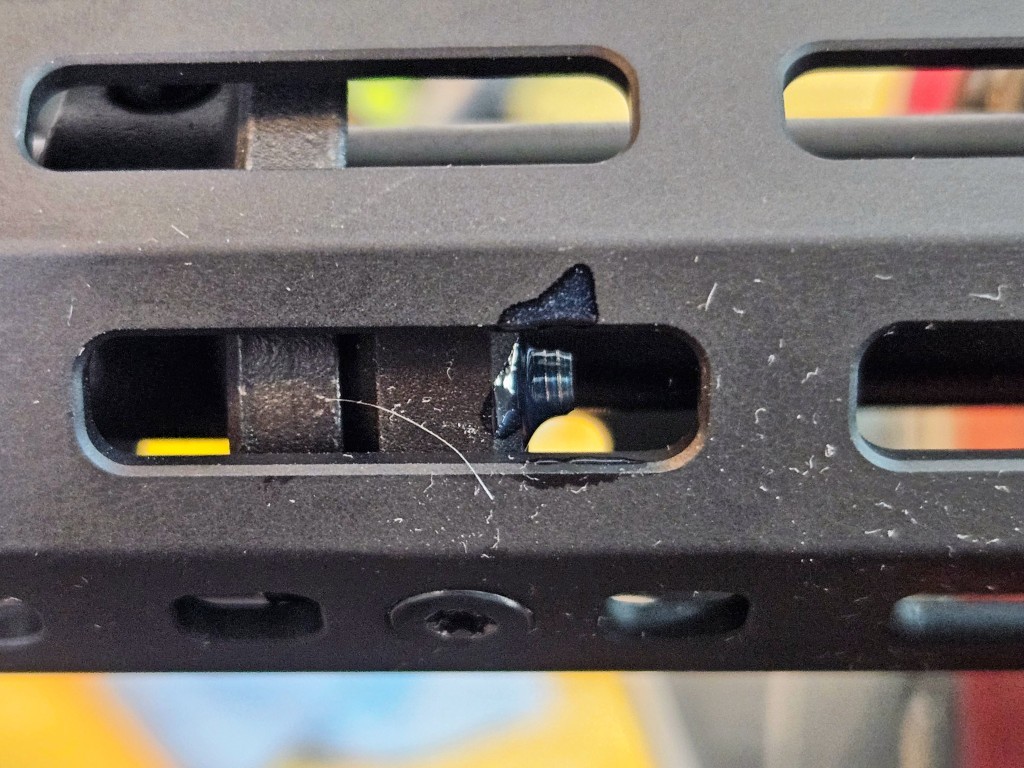
Close-up of an RS Regulate GKR-9DY handguard mounted on a Zastava M77.
I applied Blue Loc-Tite before I snugged down the set screws. I removed the residue with a shop towel.

The Gas Tube Cover

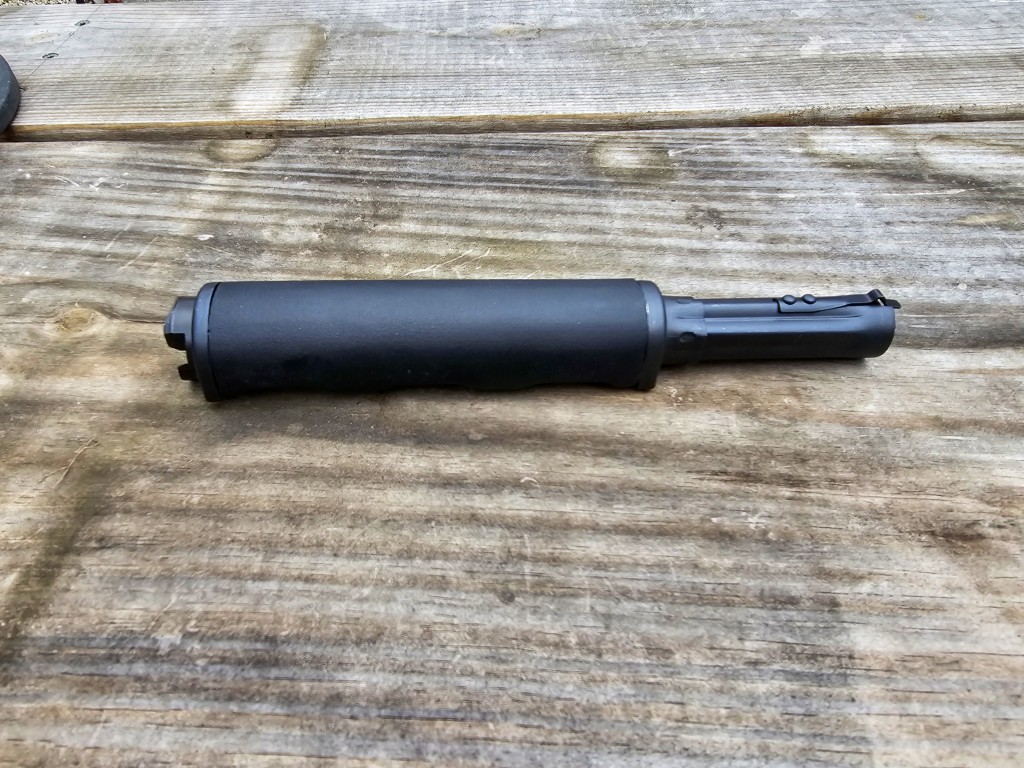
The RS Regulate handguards are the lower-half only. It’s up to you to decide if you want to run the wood or just what. In my case, I am using one of our Yugo/Zastava gas tube covers that is made from glass-fiber reinforced high-temp urethane. A Yugo gas tube cover is significantly longer than that of an AKM and are not interchangeable.

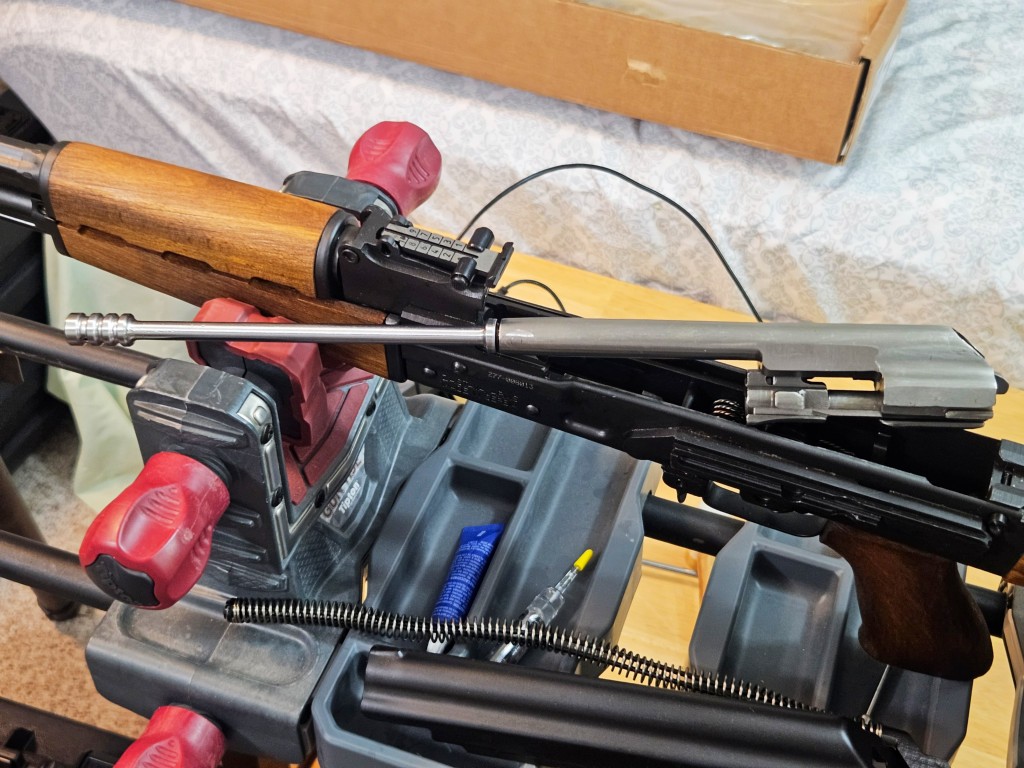
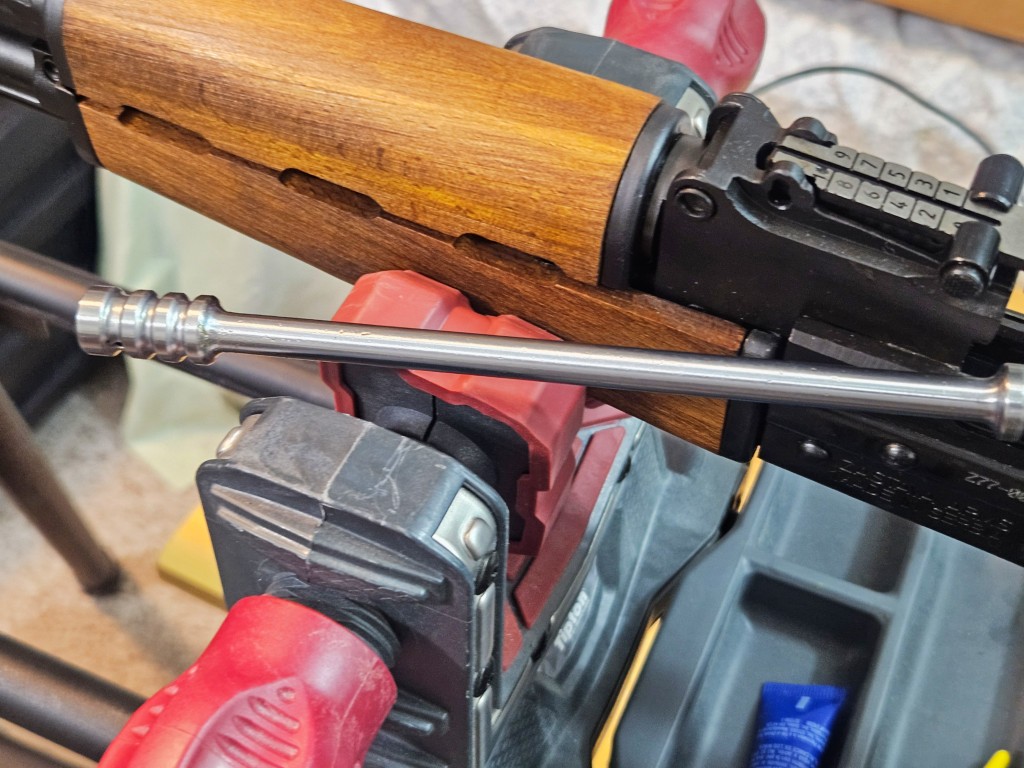
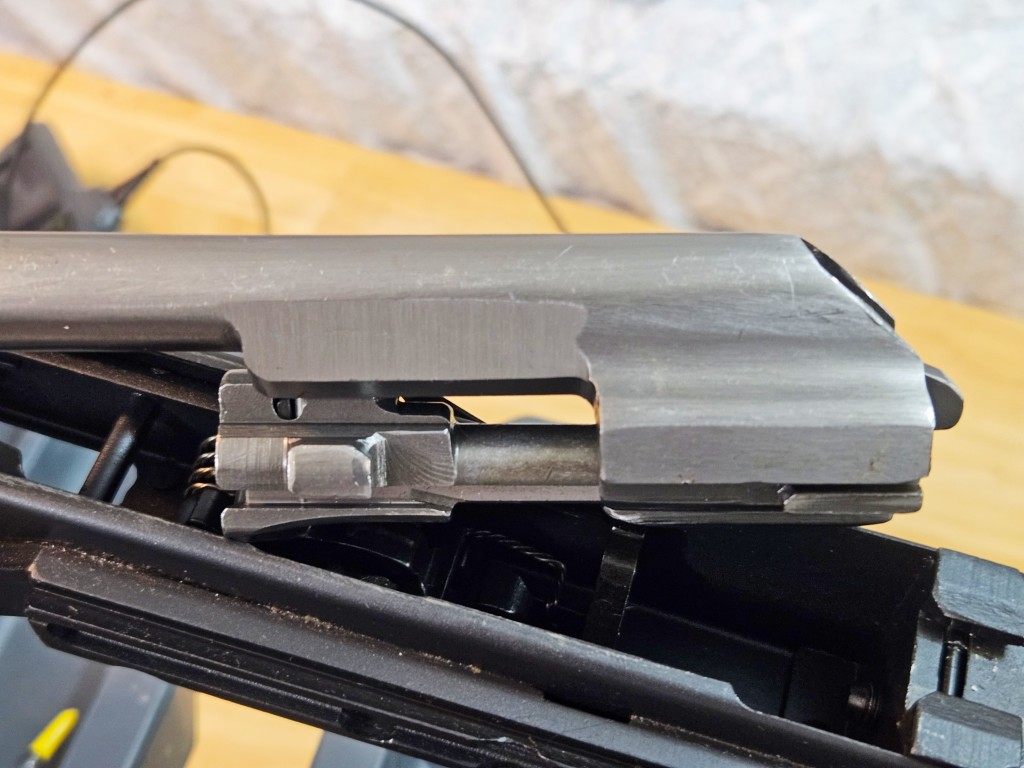
To remove it, rotate the locking lever on the rear sight base. Zastava is one of the makers that make that lever really tight. I use a large adjustable wrench’s jaws to hold the lever while I rotate it up. You can also use a hammer with plastic heads to tap the lever up. Once it is rotated, the rear of the tube closer to the receiver can be lifted up and the unit brought back just a tad to clear the front gas block. By the way, the bolt carrier must be removed or the long gas piston will be in the tube and block removal.
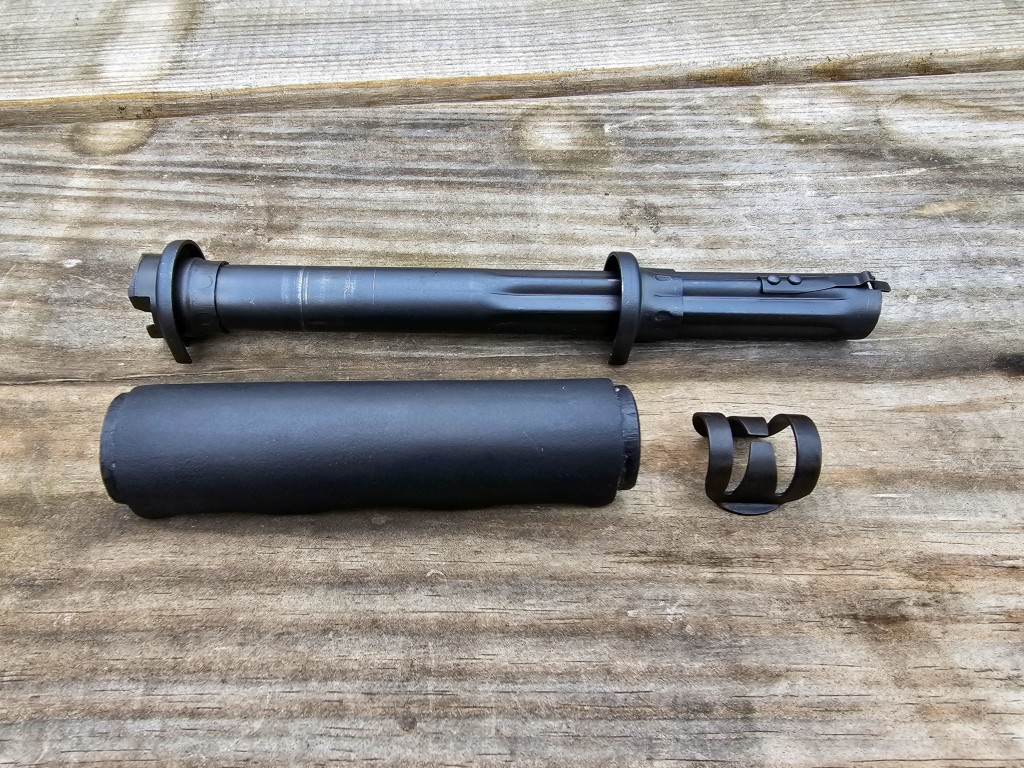
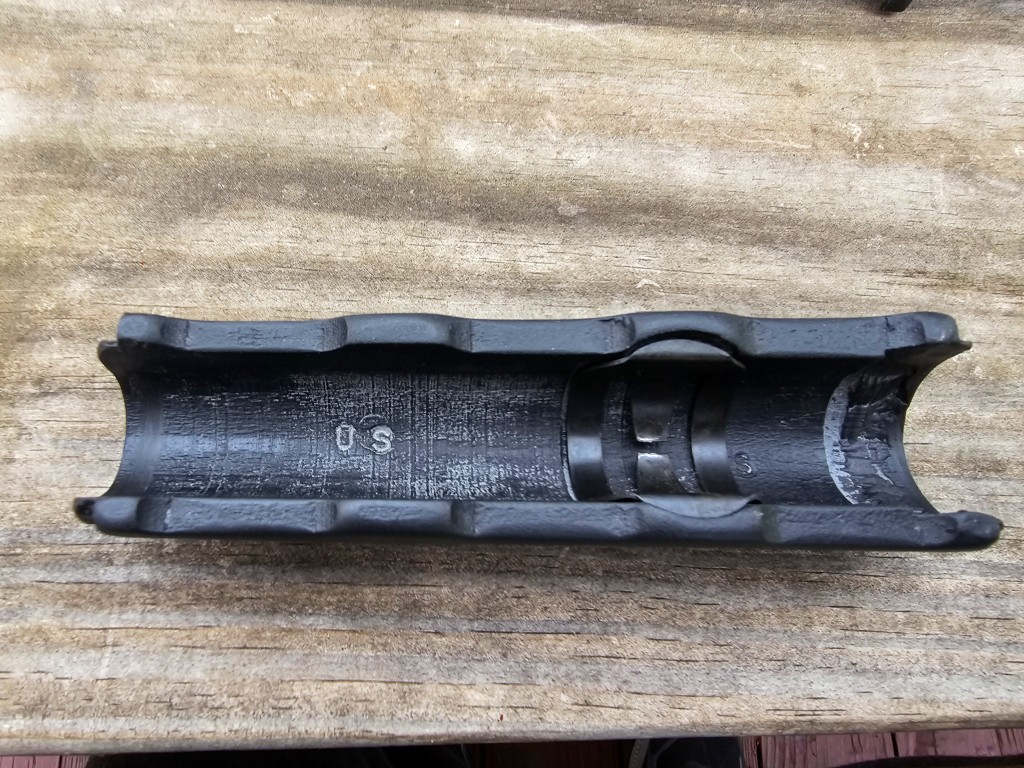
Zastava M77 gas tube, handguard, and retaining clip for adding an RS Regulate GKR-9DY handguard.
I didn’t get a picture of the gas tube with the wood before I removed it so we’ll just pick up here. This is one of our high-temp Yugo/Zastava gas tube covers. The spring clip is from the wood set and pops into the our cover to help provide tension and support. If you don’t have the clip, I would recommend buying one vs. skipping it. Check Apex Gun Parts, Robert RTG, Numrich, Centerfire, etc.
RS Regulate GKR-9DY handguard detail, showing the OS markings.
The spring clip just presses into the pocket molded foir it in the cover.
Uzi stock attachment tool kit with various bits and hammer
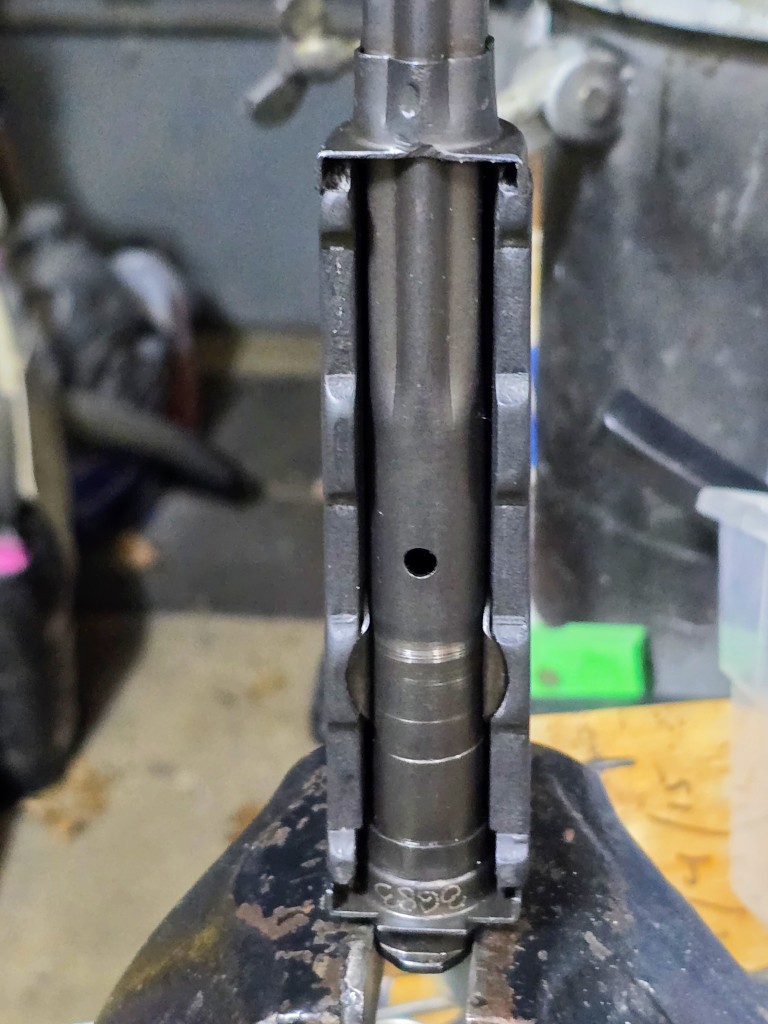
I like to use a vise to hold the forged end of the gas tube. DO NOT try and clamp the thing circular end or you will crush it. The vise you see has smooth jaws and will not hurt the forging – if your vise has aggressive jaws to hold material, use something to protect the gas tube like jaw covers, pieces of wood, etc. In this photo, the cover is fully rotated into position. You may find it easier to rotate your cover to the left or to the right when it comes to installation or removal. If it will not turn, carefully inspect why and remove a bit of material as needed with a file, Don’t rush – you want a firm fit and for it to look good.
Uzi stock attachment tool kit with various bits and hammer
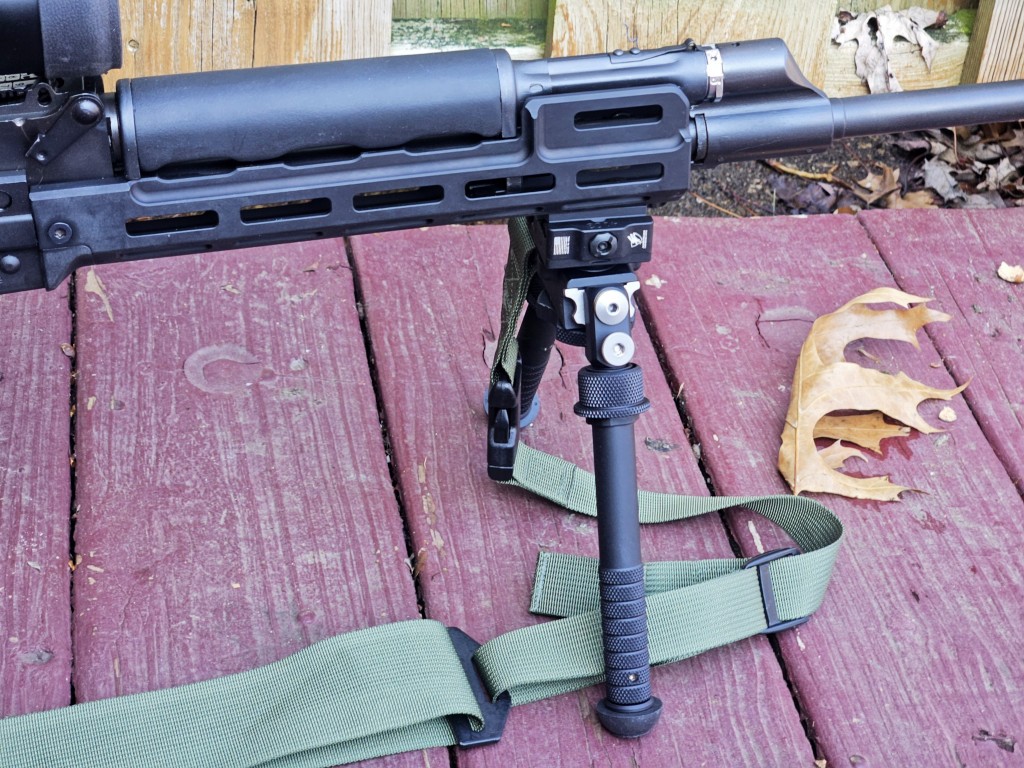
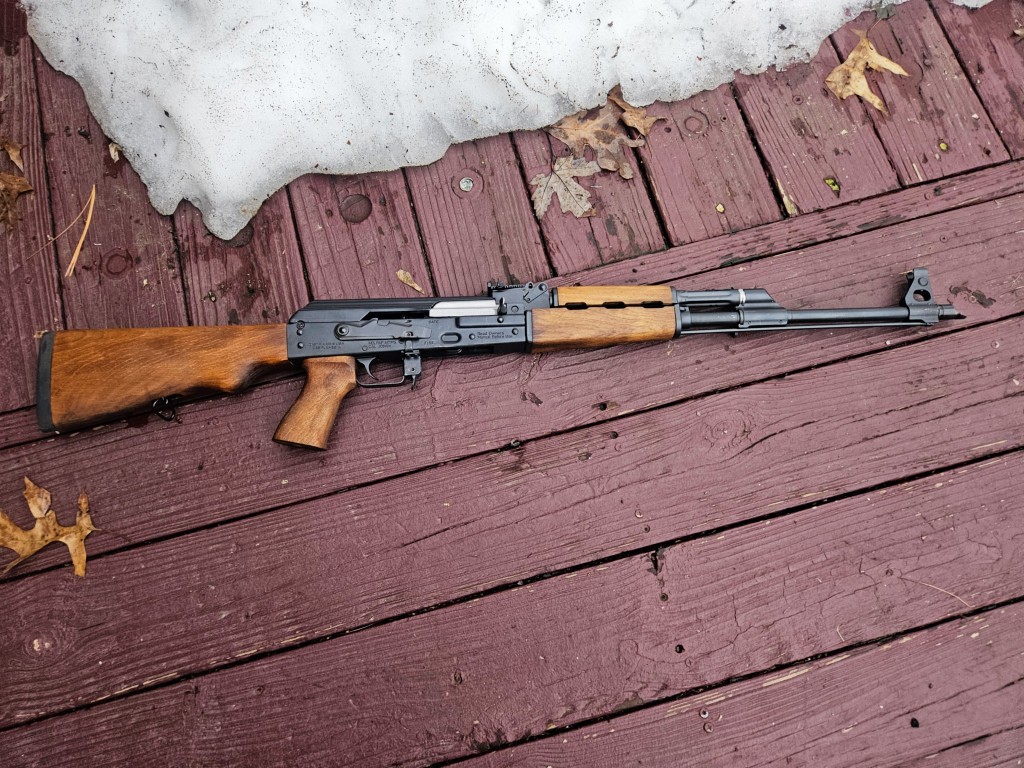
What it looks like when done.

Years ago, I did do a blog post with more instructions and links to videos. Please click here if you want to read it.

End Result
Uzi stock attachment tool kit with various bits and hammer

Summary

RS Regulate makes some great lower handguards for a variety of AKs including for the Yugo/Zastava M70 and M77s. It takes a little bit of effort to install and is very much worth it. You can optionally use your wood gas tube cover or buy one of our polymer units.


Note, I have to buy all of my parts – nothing here was paid for by sponsors, etc. I do make a small amount if you click on an ad and buy something but that is it. You’re getting my real opinion on stuff.


Please share the link on Facebook, Forums, with colleagues, etc. Your support is much appreciated and if you have any feedback, please email us in**@*********ps.com. If you’d like to request a report or order a reprint, please click here for the corresponding page to open in new tab.
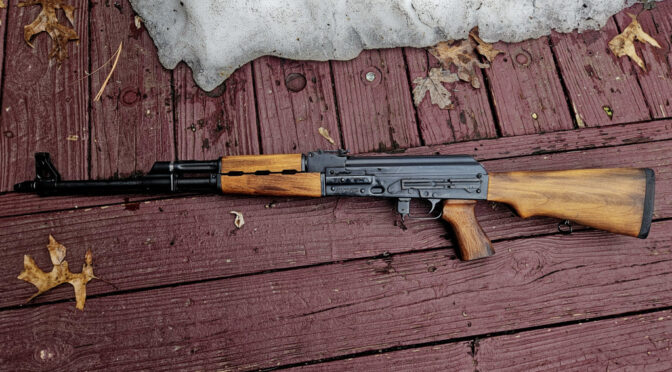
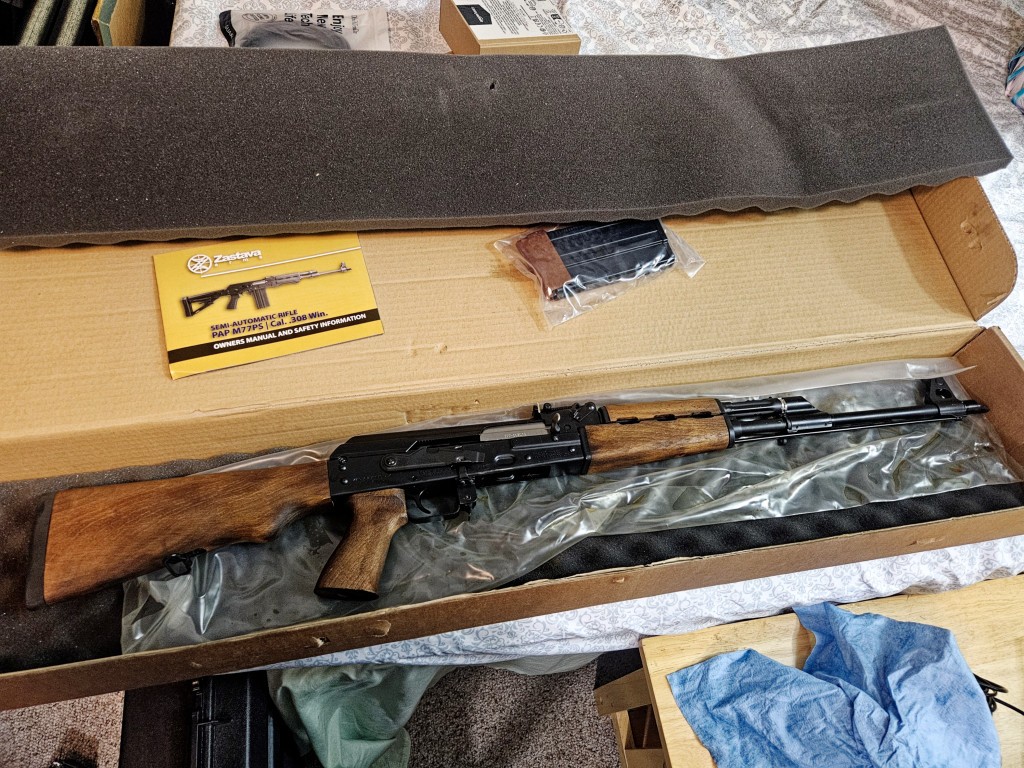
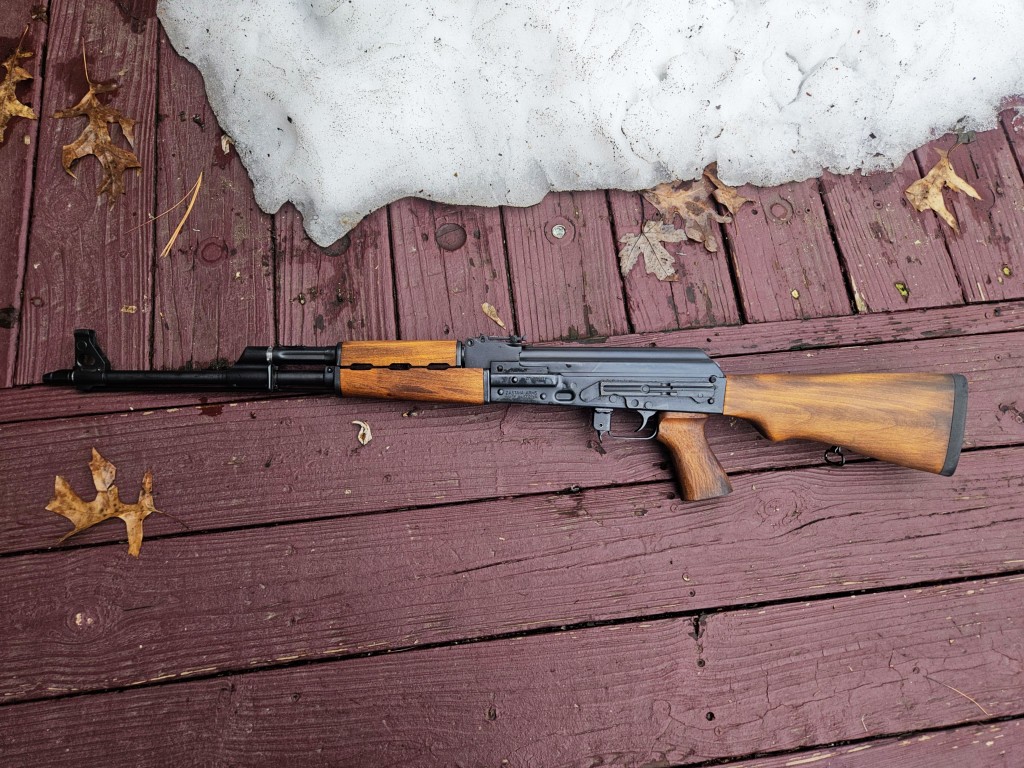
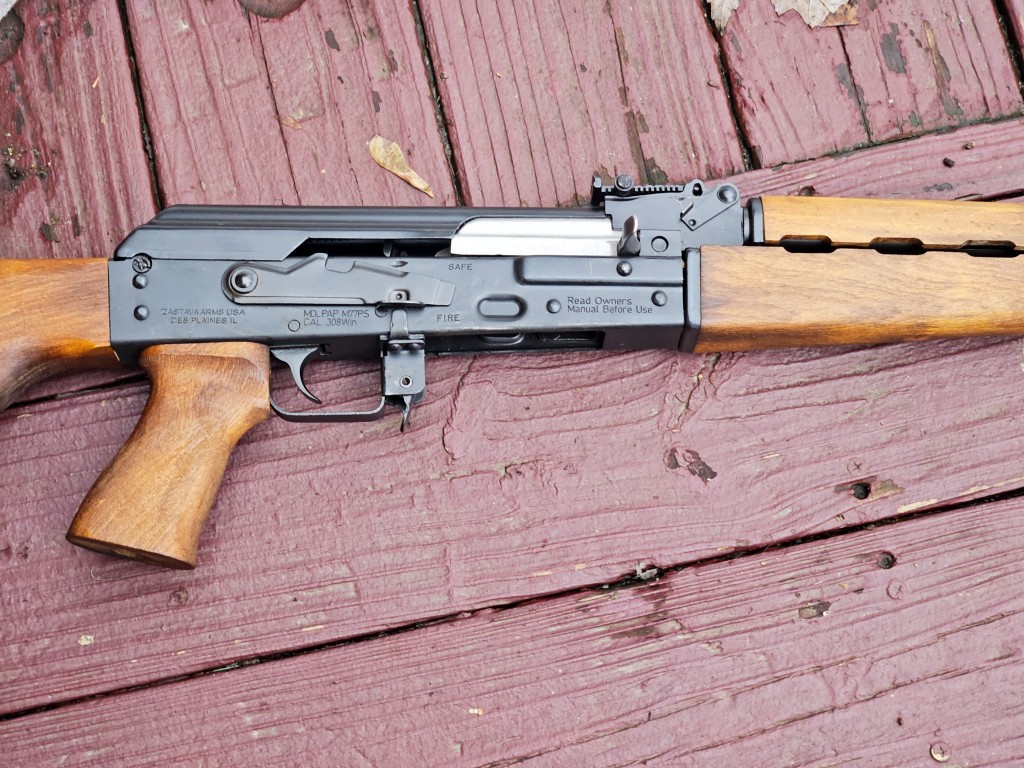
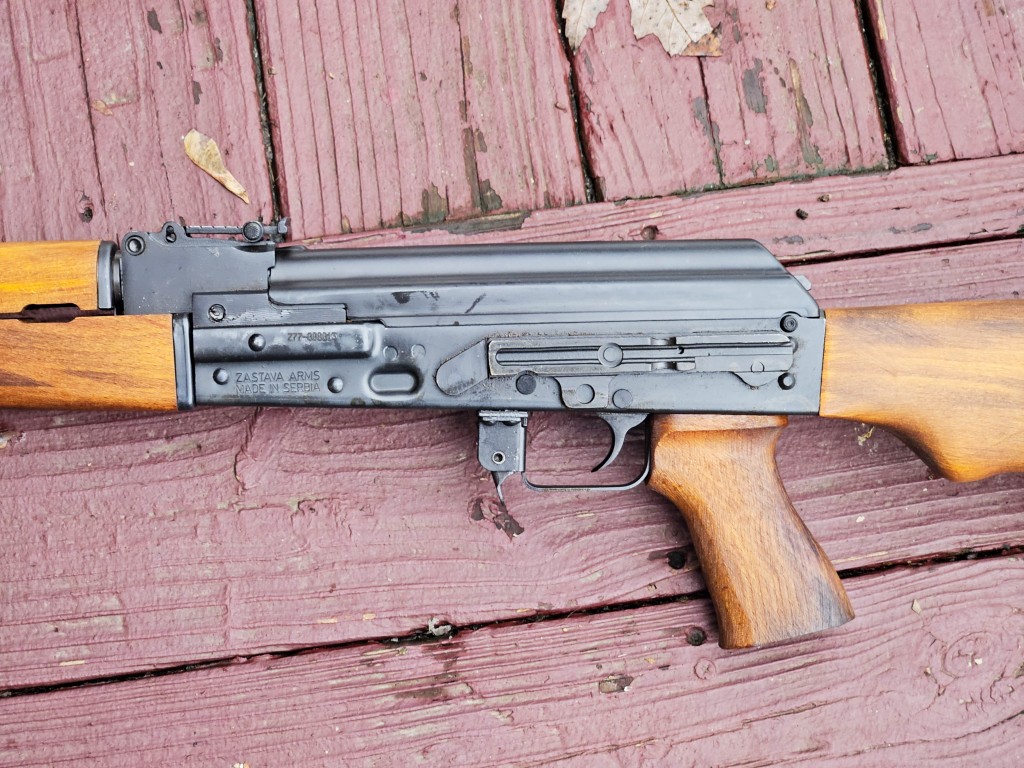
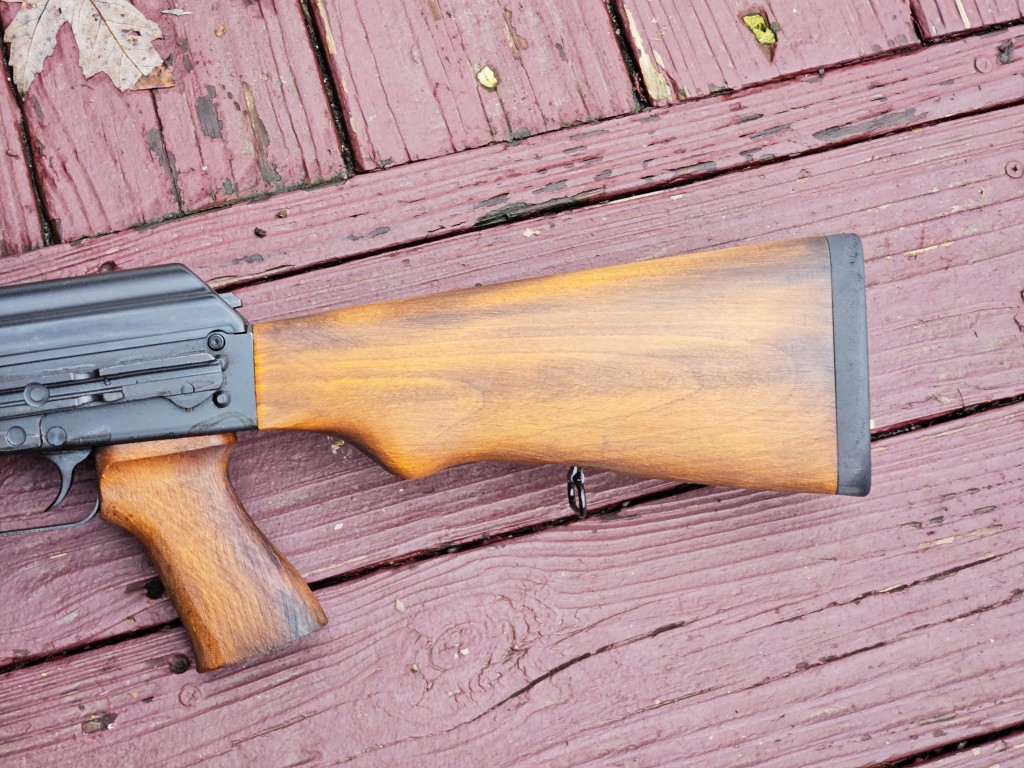
The Century Zastava PAP M77 in .308 – With Battleworn Furniture

Years ago, I had a Zastava M77 and regretfully sold it back in 2014. It was one of those situations where I had to sell it to fund other projects but I didn’t even get a chance to shoot it. I also had a custom M76 (the 8mm version) for a while but I did sell that one – mainly because it was a primer popper. That is a known issue because the firing pin hole opened up out of spec due to corrosive ammo use and didn’t adequately support the primer as a result but I digress.

I had resisted buying another one until Zastava decided to release what they called the “Battleworn” model (ZR77308W) and I caved. On one hand, it comes with some really nice retro looking Europen beech wood furniture. What really got me was that it was way cheaper than their other models that had optics and/or polymer furniture at that time.

Why the M77?

So, I had wanted to get back into the Zastava designated marksman’s rifle (DMR) game for a while and was just biding my time. The reason I wanted the M77 was due to all of the quality match 7.62×51 and match .308 match ammo that is out there. In comparison, try finding affordable true match grade 8mm ammo for the M76 or match 7.62x54r for the M91. You can find it once in a while but it’s not cheap and choices are limited here in the US. On the other hand, match 7.62×51 and .308 plentiful and affordable.

So, the main reasons were the ammo and the second was the M77 Battleworn model being very affordable in the Late Summer of 2023. As I am writing this, a quick search on GunBroker shows the Battleworn model selling fro $1369 with one 20-rd magazine up to $1,499 with five 20 round mags plus the various models are a lot closer in price. I paid less last summer but you get the idea. (In 2014 I bought a M77 with a thumbhole polymer stock and polymer handguard set for $600 or 700 from Centerfire Systems but that’s the way pricing goes – any vendor will raise prices to what they think the market will bear to try and maximize profits.)

Taking a Closer Look

Uzi parts kit disassembled: receiver, barrel, and wooden stock
It’s well packed in an egg foam box. Note the CSSpecs 25 round magazine on the box cover.
Uzi parts kit disassembled: receiver, barrel, and wooden stock
Honestly, the wood is really nice. It’s very reminiscent pf the M76 wood with a few minor exceptions – the grip does not have a ferrule, the recoil pad uses allen head screws and the stock bolt is one of their modern commerical shorter ones vs. the long Yugo military 8x1x260mm (about 10.23″ long).
Uzi parts kit disassembled: receiver, barrel, and wooden stock
Like many aspects of the original designs, the Yugoslavs modfield their scope rails and how they mount The result is more to the rear and is often refered to as “rear-biased” so they need a scope mount vs. an AKM pattern rail.
Uzi parts kit disassembled: receiver, barrel, and wooden stock
Honestly, the wood is cool. It has almost rough hewn look but better finished if that makes sense. The grip reminds me of one that Matt Shuster of Ironwood Designs came up with many years ago before he passed. I think he called it the “mini fat cap” – if someone remembers, please tell me. He made the M76 Fat cap patterned after the original wierd awkward really fat but oddly short M76 grip but without a ferrule. Then he came up with a far more elegant smaller one and this Zastava design reminds me of it. Folks, Matt helped me get started years ago and was a genius with wood. God rest his soul and take care of his family.
Uzi parts kit disassembled: receiver, barrel, and wooden stock
It has the mile long 19.7″ cold hammer forged barrel. The silver disc on the gas tube is the three position gas regulator. It has a slant brake on it and 14x1mm left hand threads under it just like any other AK. A M76’s long flash hider is actually part of the front sight assembly but that is not the case with the M77 – you can install whatever you want. Also, note the cleaning rod.
Uzi parts kit disassembled: receiver, barrel, and wooden stock
Here’s a view of the rifle looking at the operating side. The chromed bolt jumps right out in contrast.
Uzi parts kit disassembled: receiver, barrel, and wooden stock
The M77 uses a bulged trunnion and the oversized AK receiver needs to accomadte it. These bigger 1.5mm thick receivers are beefy. They both hold the various component assemblies in position and the thicker receiver means more steel to compensate for any metalurgical or hardening shortcomings.
Uzi parts kit disassembled: receiver, barrel, and wooden stock
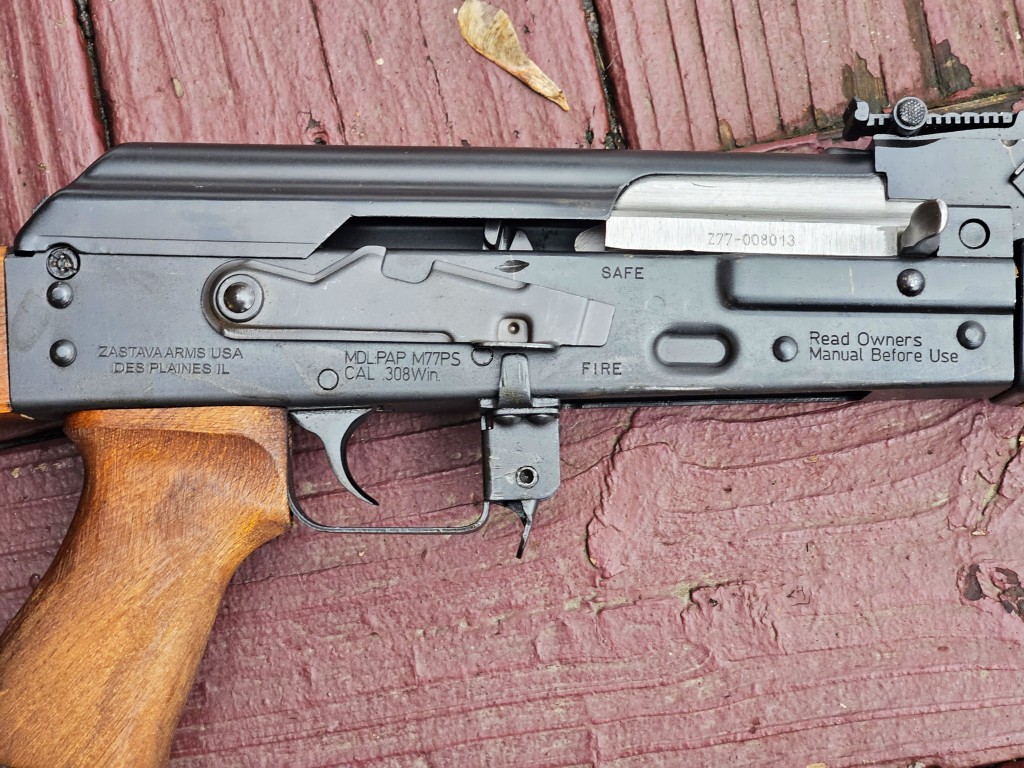
Zooming in on just the receiver. Note the notched selector/safety lever and the relatively tall selector stop. In the top right you can see the other side of the operating rod lock.

Opening it up

Uzi parts kit disassembled: receiver, barrel, and wooden stock
The locking dust cover was introduced in the M70 Yugo rifles because their doctrine made extensive use of rifle grenades. They didn’t want the cover top pop off so they added a sliding lock that holds the rear recoild spring assembly in place and, thus, the top cover in place. By the way, one of the really nice side benefits is that when you reassemble a rifle with one of these locks, you put the recol spring in front, install the dust cover without fighting the spring, push the button and the recoil rod pops out the back.
Uzi parts kit disassembled: receiver, stock, barrel, and sights
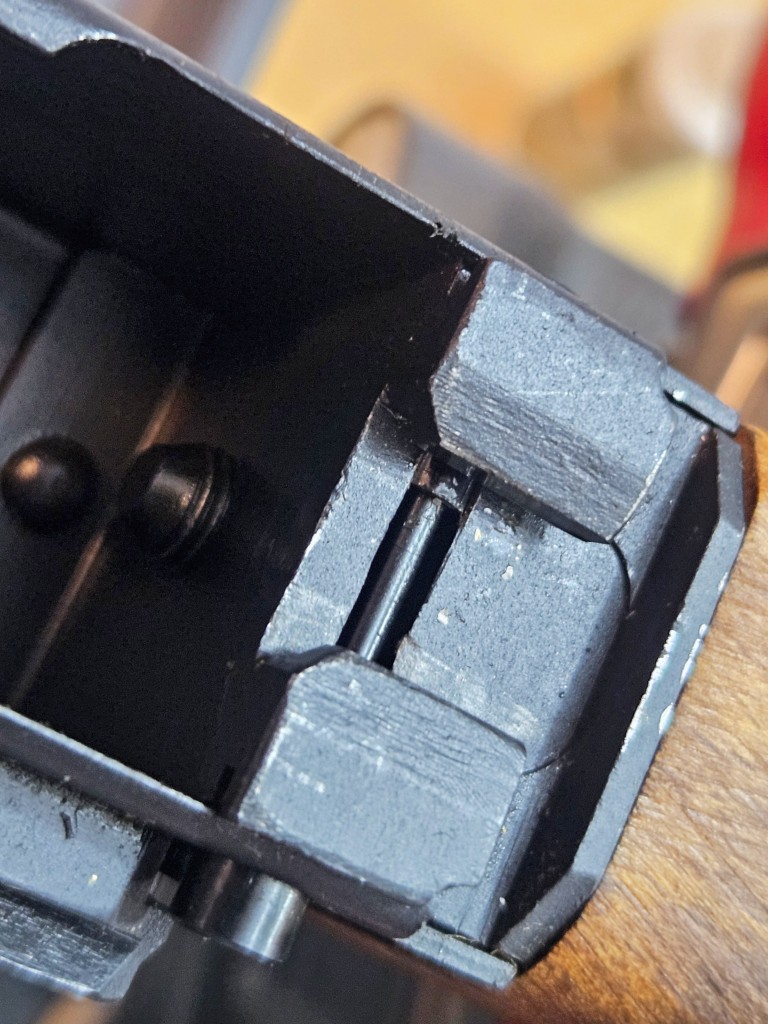
Looking at the locking assembl, the plunger button the operator pushes is at the bottom of the photo. The slightly elevated portion under the top lip of the trunnion (top in this photo – right side in real life looking down – is what slides out of the way wehn pressed so the recoil spring assembly can come forward for removal. What you don’t see is the hidden compression spring. If you ever need these parts, CNC Warrior make and sells both the whole assembly.
Uzi parts kit disassembled: receiver, stock, barrel, and sights
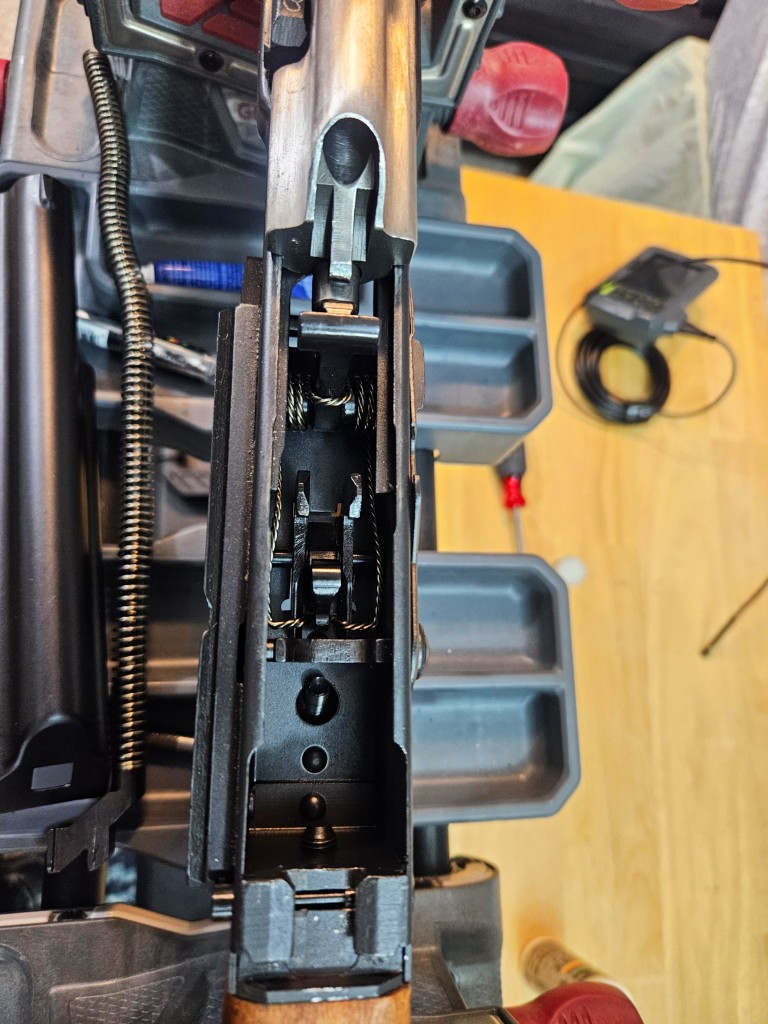
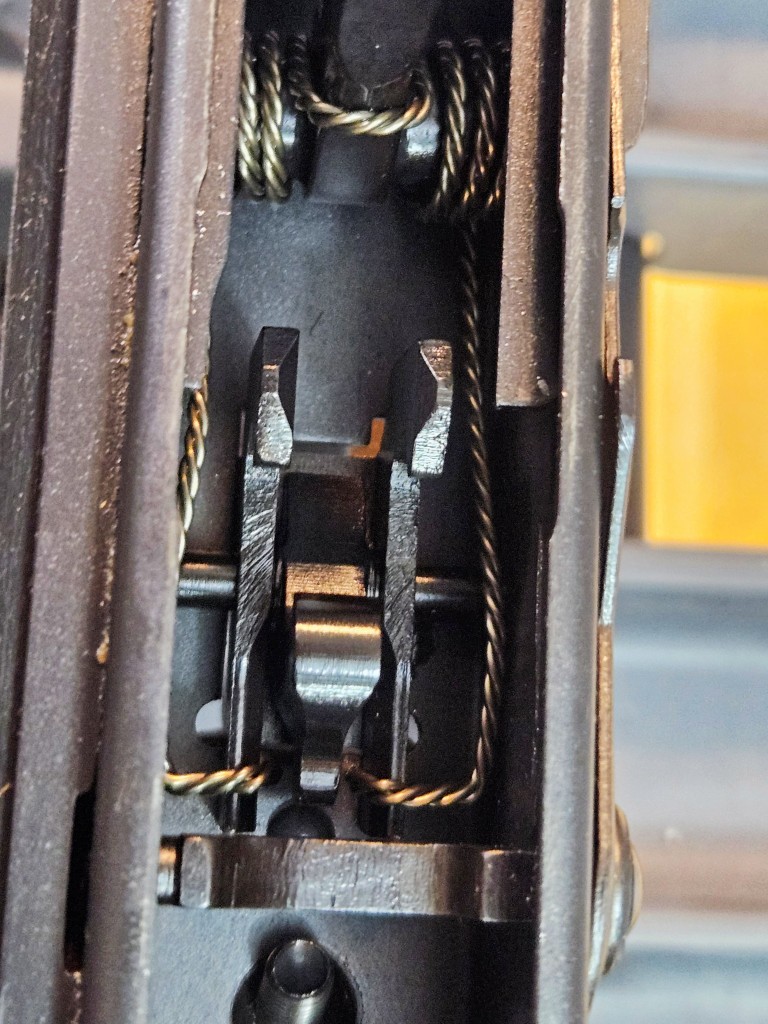
Looking down at the classic double hook AK trigger and double wound spring. I’ve had guys ask me why did they double these? The answer is fault tolerance. The second hook is there if the first should fail and the second spring winding is there should one of the two fail. In all of my years working on civilian AKs, I’ve never seen a hook fail but I have seen springs fail although very, very rare and usually from a surplus kit build.
Uzi parts kit disassembled: receiver, stock, barrel, and sights
Look at those hooks! They are forged and not stamped. The bevels in the front and the back help the bolt carrier pass by.
Uzi parts kit disassembled: receiver, stock, barrel, and sights
Here’s a better view of the three position gas regulator disc. Note the vent holes in the gas block itself.
Uzi parts kit disassembled: receiver, stock, barrel, and sights
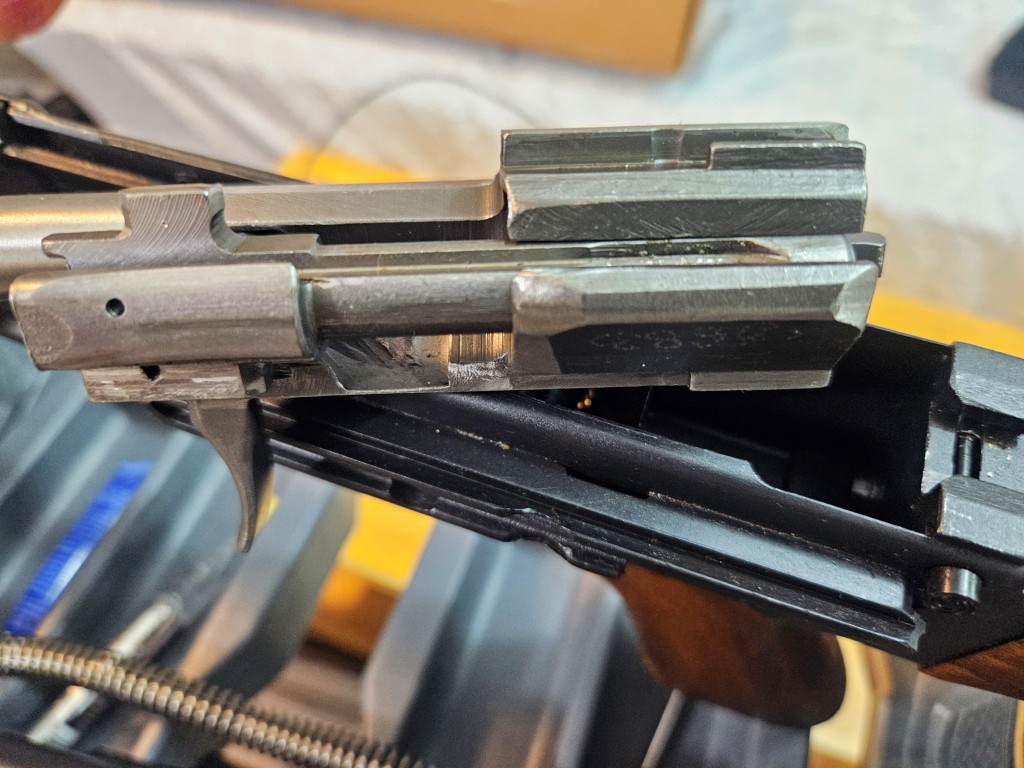
One oversized bolt assembly. Despite what some may tell you, the PSLs and these M76/M77/M91 families of rifles are oversized AKs. The SVD Dragunovs use very different bolt carrier assemblies.
Uzi parts kit disassembled: receiver, stock, barrel, and sights
Longer than a normal AK gas pistol and chrome plated to improve corrosion resistance.
Uzi parts kit disassembled: receiver, stock, barrel, and sights
View from the side. Some of the machining is crude but effective in places.
Uzi parts kit disassembled: receiver, stock, barrel, and sights
Bolt extended in the carrier.
Uzi parts kit disassembled: receiver, stock, barrel, and sights
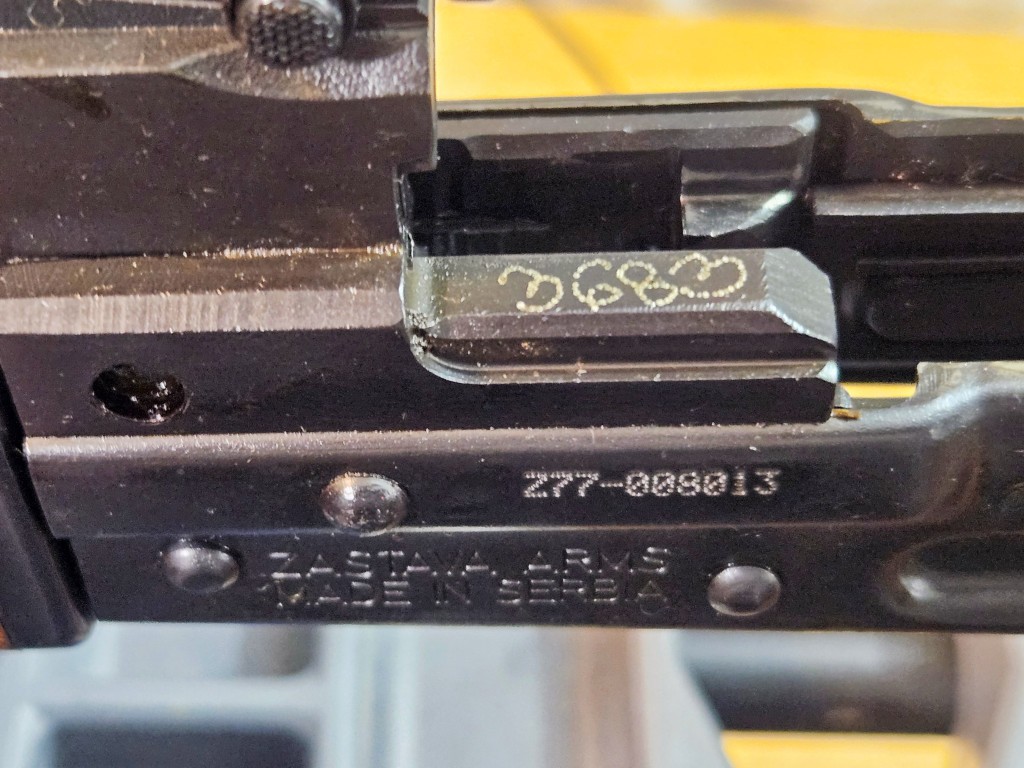
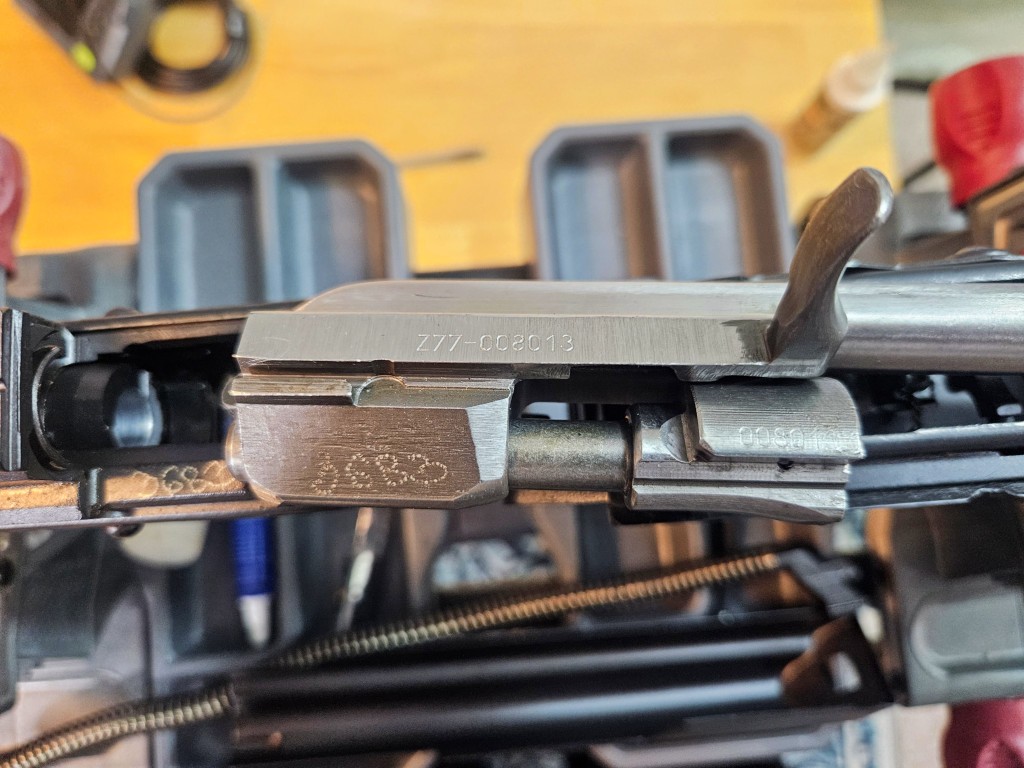
I chuckled when I saw this. There are two numbering systems on some of the parts – crisp machined ones and ones done by hand with an electropencil like you would see on some kits.
Uzi parts kit disassembled: receiver, stock, barrel, and sights
You an see the numbers of the key parts and they should all match.
Century Zastava PAP M77 .308 rifle with battleworn furniture undergoing maintenance.
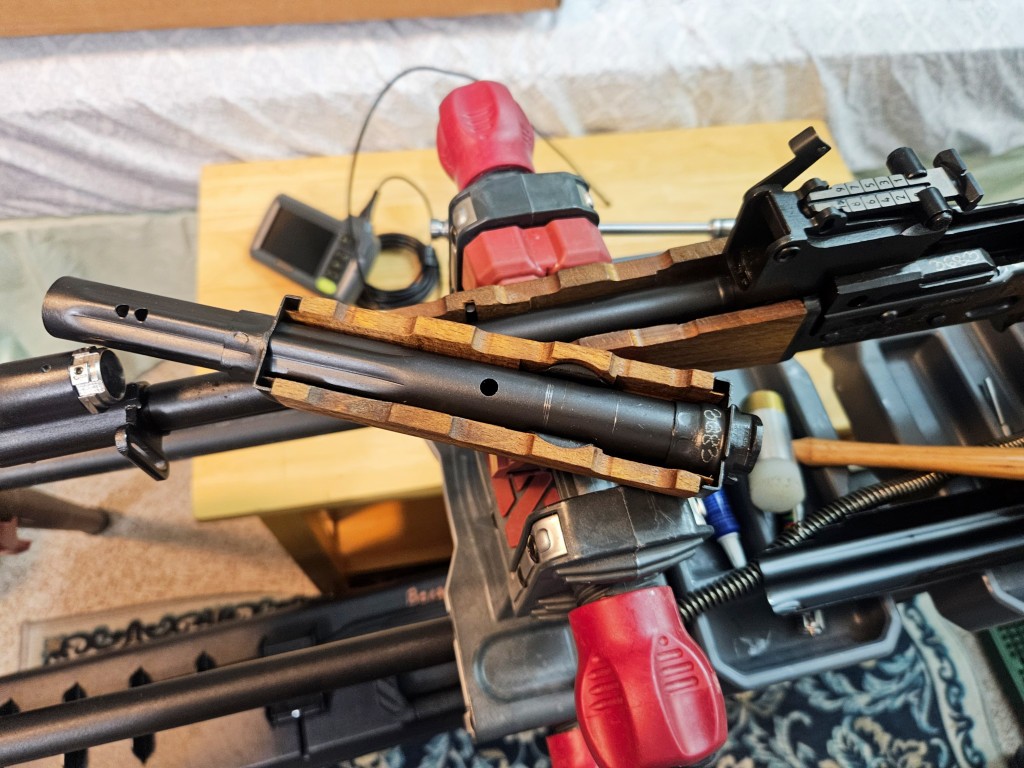
Interesting – more holes to vent propellant gasses.
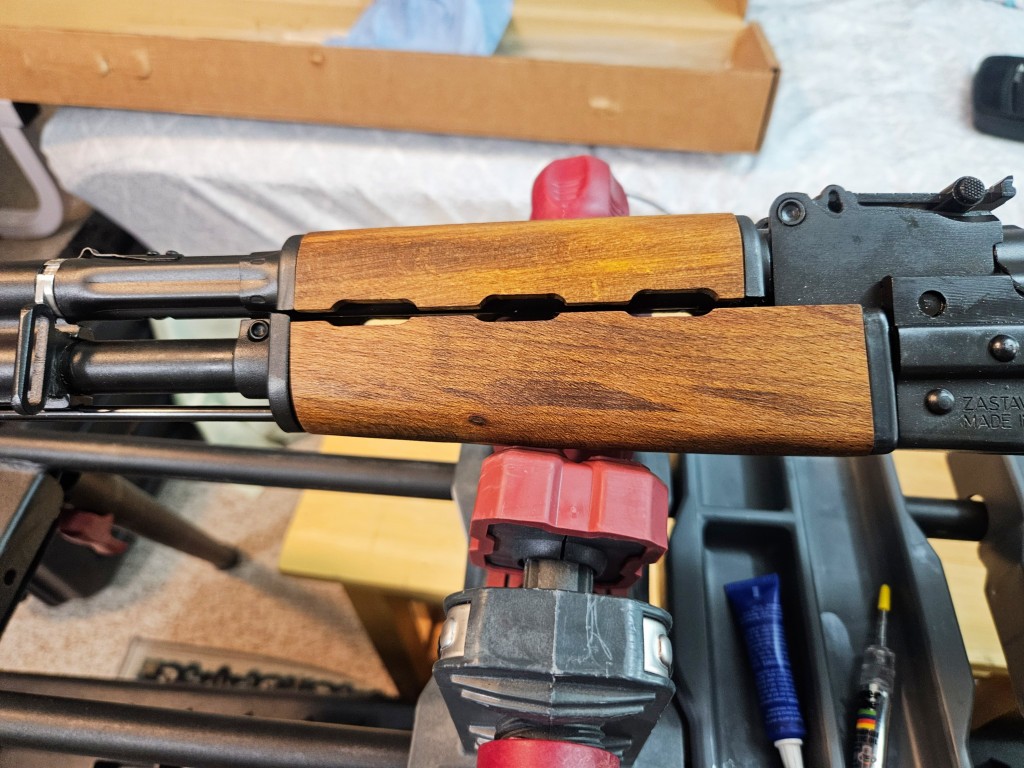
Zastava PAP M77 battleworn furniture close-up.
A better view of the upper and lower handguard assembly,
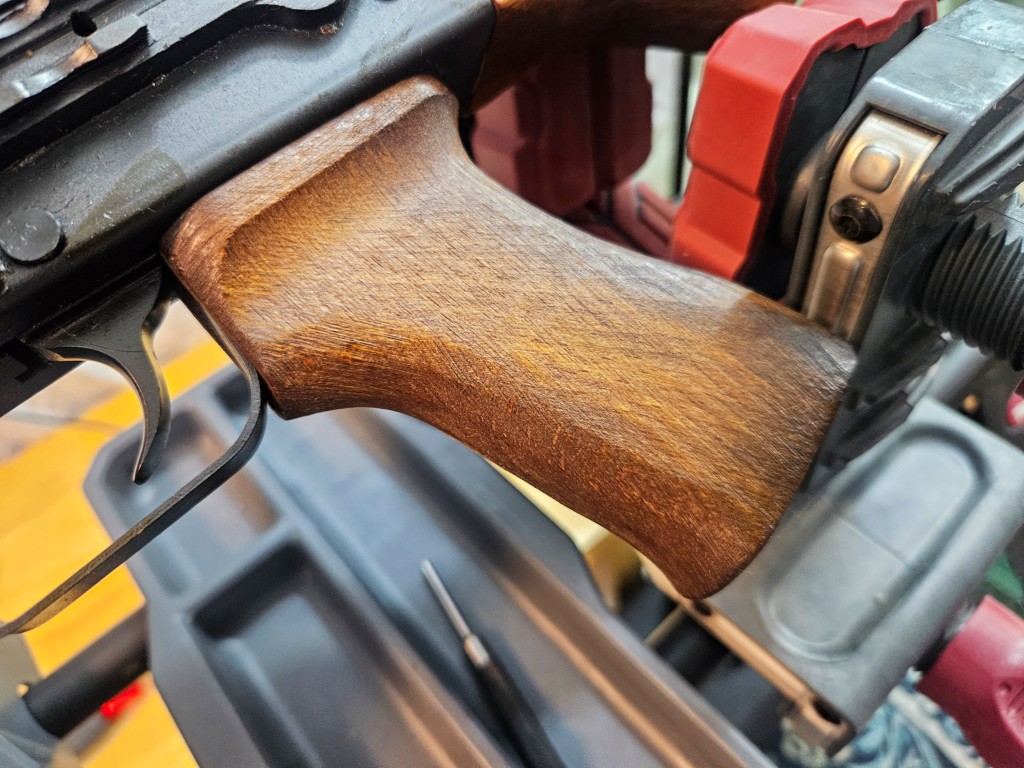
Zastava PAP M77 .308 pistol grip with battleworn furniture.
A view of the grip.
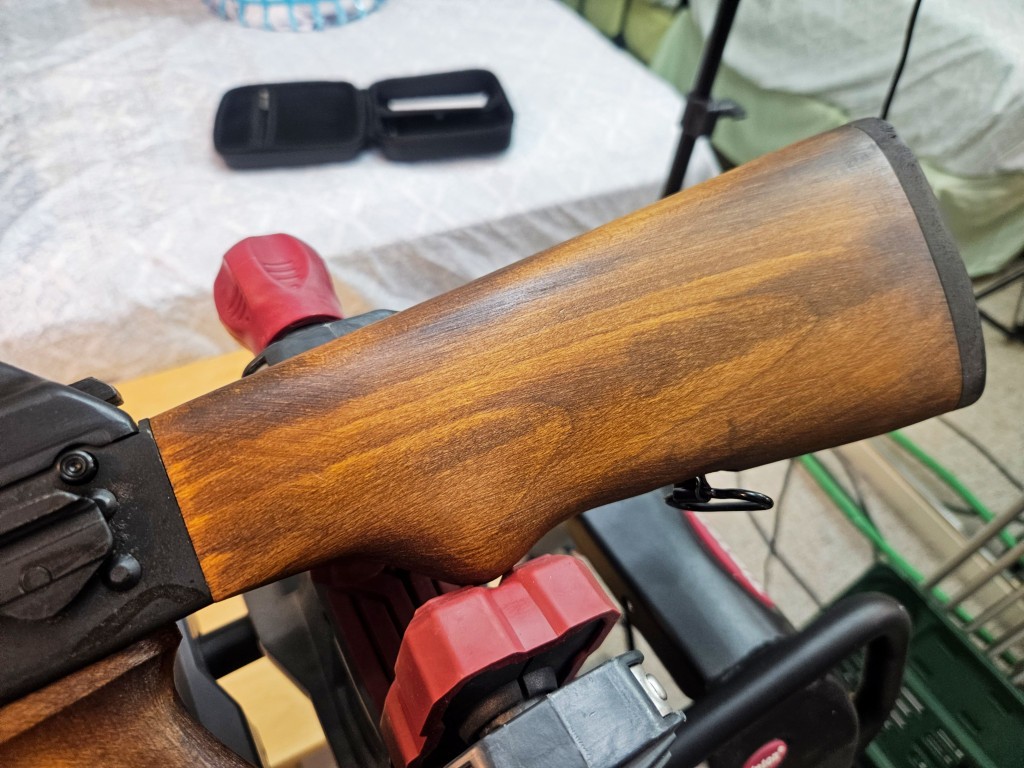
Close-up of the wooden stock on a Century Zastava PAP M77 rifle in .308 with battleworn furniture.
The buttstock has the distinctive grip area like you would see on the M76 military stocks. I have never had the purpose of that grip area explained to me.
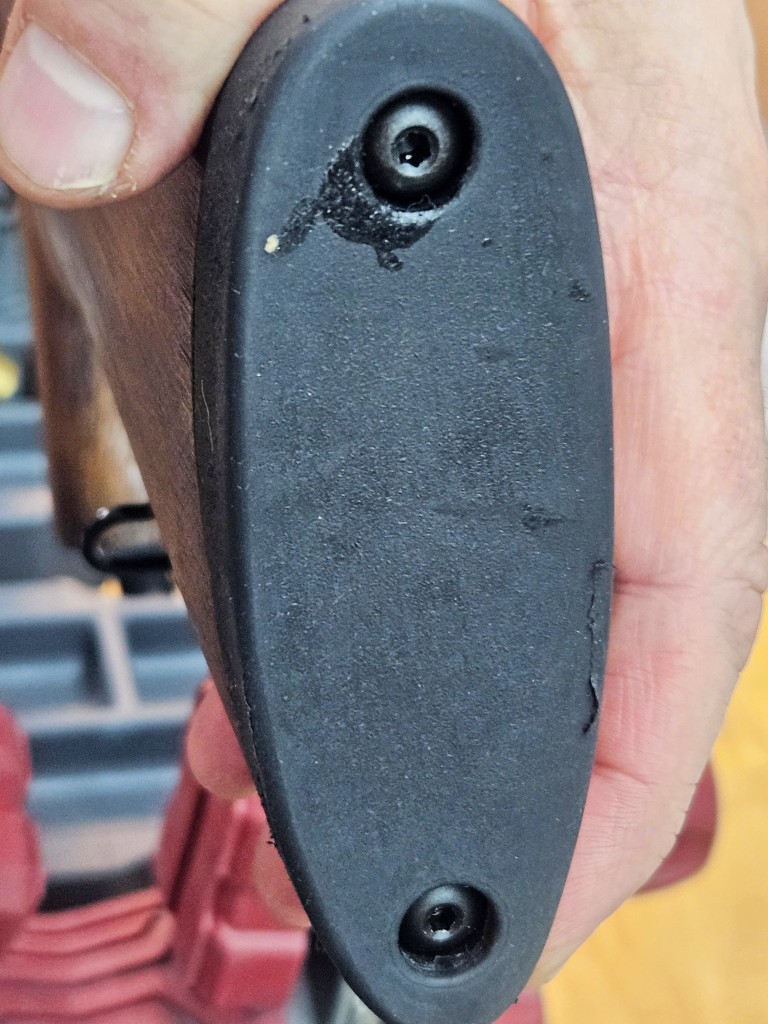
Close-up of the Zastava PAP M77 battleworn furniture, showing the buttstock and its two screws.
It uses a classic Yugo military sized recoil pad. What’s noteworthy is that they have ditched the old slotted screws for allen/head-head screws.

Summary

This gives you an overview of the M77 battleworn model right out of the box. Nothing really surprised me and the quality looked good. Sometimes I buy stuff and regret it but not this time.

If you know me, you also know I could not going to leave it alone and the customizations will be in future posts.

Note, I have to buy all of my parts – nothing here was paid for by sponsors, etc. I do make a small amount if you click on an ad and buy something but that is it. You’re getting my real opinion on stuff.


Please share the link on Facebook, Forums, with colleagues, etc. Your support is much appreciated and if you have any feedback, please email us in**@*********ps.com. If you’d like to request a report or order a reprint, please click here for the corresponding page to open in new tab.


Hungarian Blue Stocks Do Not Have A Standard Color

Have you ever heard someone refer to a stock color on an AMD-63 other Hungarian AK variant and they called it “Hungarian blue”? Well, I’ve had a lot of guys ask me to make AMD grips in that color but I could never get my hands on the original and the demand was never really solid.

Fast forward to 2023 and Sean from Wolff Gunsprings convinced me there was enough demand and loaned me a grey-blue Hungarian butt stock for color matching.  Over the years, guys always told me these things were light blue or Robin’s egg blue.  Holding a real buttstock in my hand I would describe it as light to medium grey with a hint of blue.  Big difference. 

Wolff Gunsprings loaned me a grey-blue Hungarian butt stock for color matching.  Over the years, guys always told me these things were light blue or Robin’s egg blue.  Holding a real buttstock in my hand I would describe it as light to medium grey with a hint of blue.  Big difference. 

After a ton of trial and error, I worked up the color formula. Part of the trick is that how a piece of plastic is finished – gloss, satin, or matte – will affect the reflected light too so it wasn’t until I was hovering around the color of the stock that I actually polished a pair of grips to the point that they shined like the originals that I “hit” the color I was looking for.

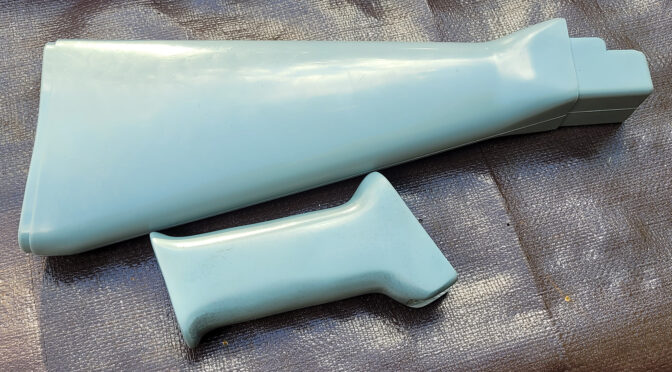
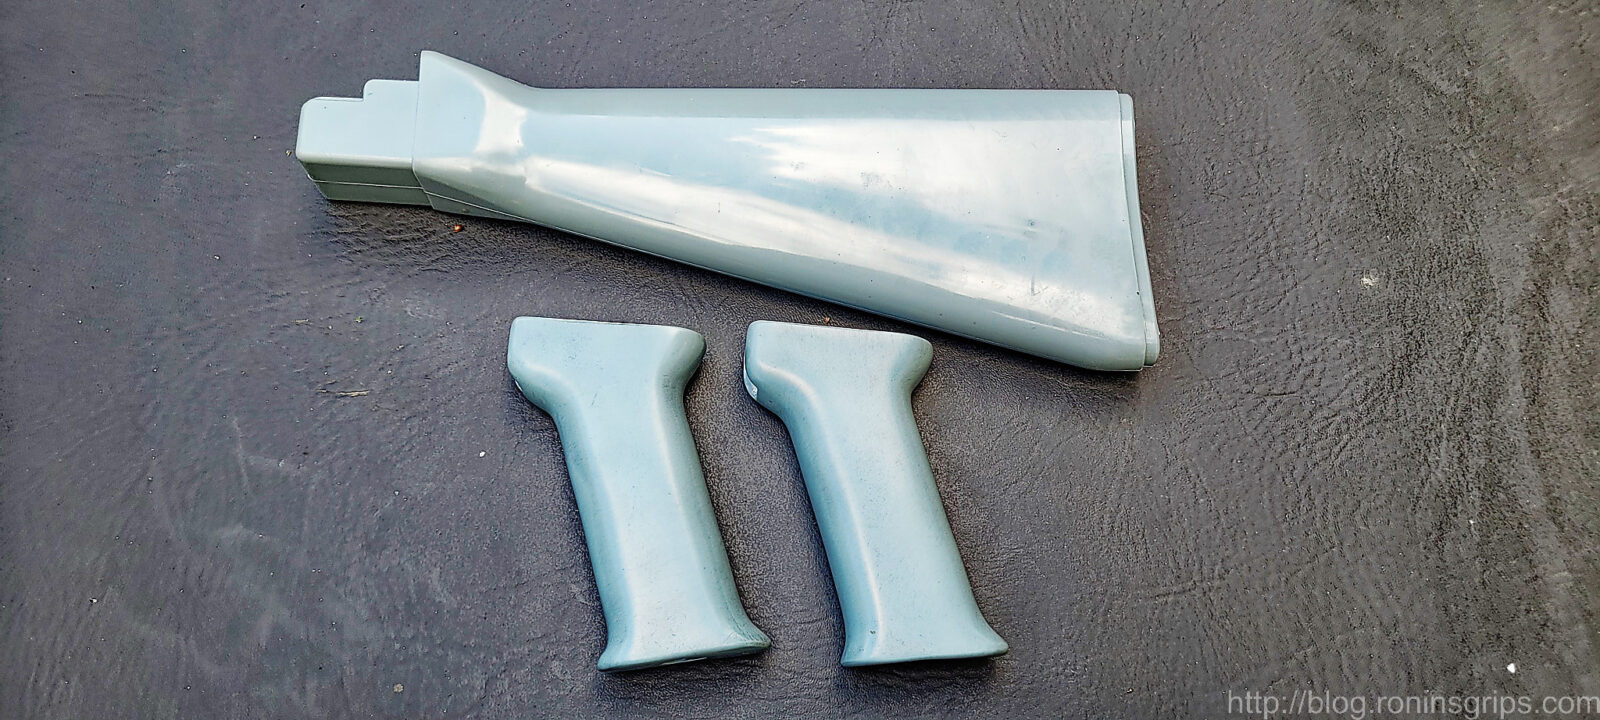
Hungarian blue AK stock set: buttstock and pistol grips
Here’s a photo I snapped when I was done. This is the approximate color I produce but it will vary and the color you likely see on your monitor may be different as well.

Now, here’s the big question I get asked – is the Hungarian Blue color a standard and the answer is a resounding “no” and I have evidence to back that up.

As I worked on Sean’s grips and pre-orders for the new color were coming in, I knew I better get a few stocks of my own for reference. Why? Very, very little in the Communist-era AK world is consistent, especially plastic colors, and I was betting these were no different.

Now this is where my memory gets fuzzy. I ordered three of GunBroker and then Arms of America got another batch in and I bought three more. Arms of America is great to work with my the way – I’ve bought from them quite a few times over the years. The stocks I got from them still had their factory wrapping paper on them and metal hardware – all unused.

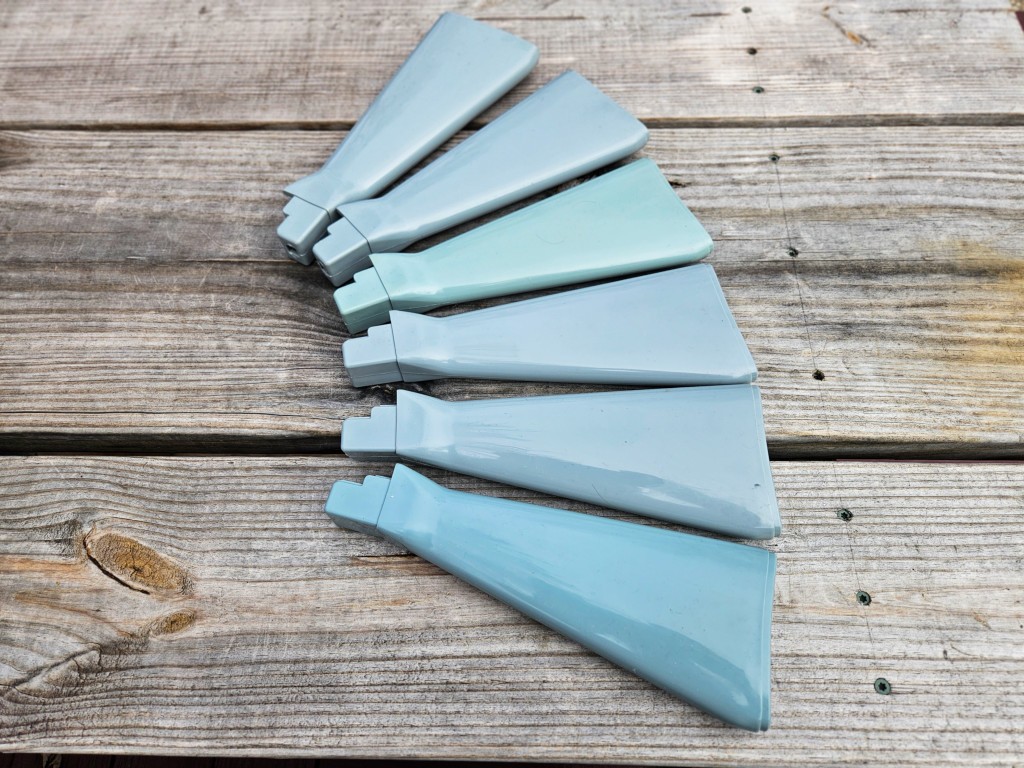
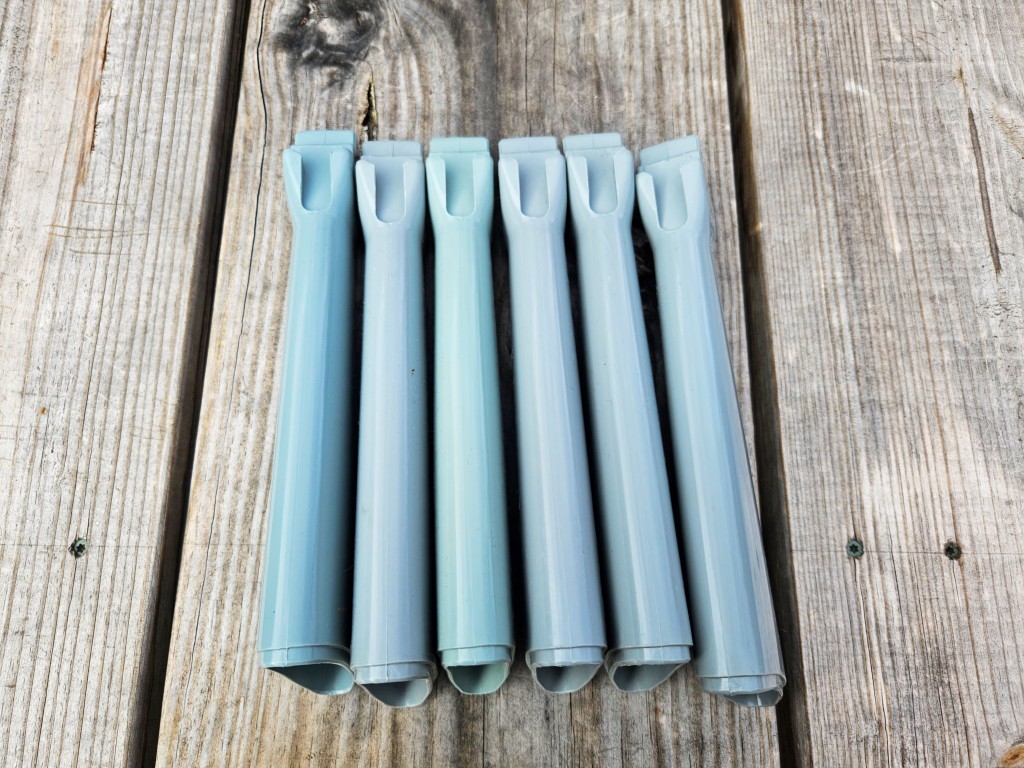
Regardless, here are photos I tool today of the six and you can see the color variations:

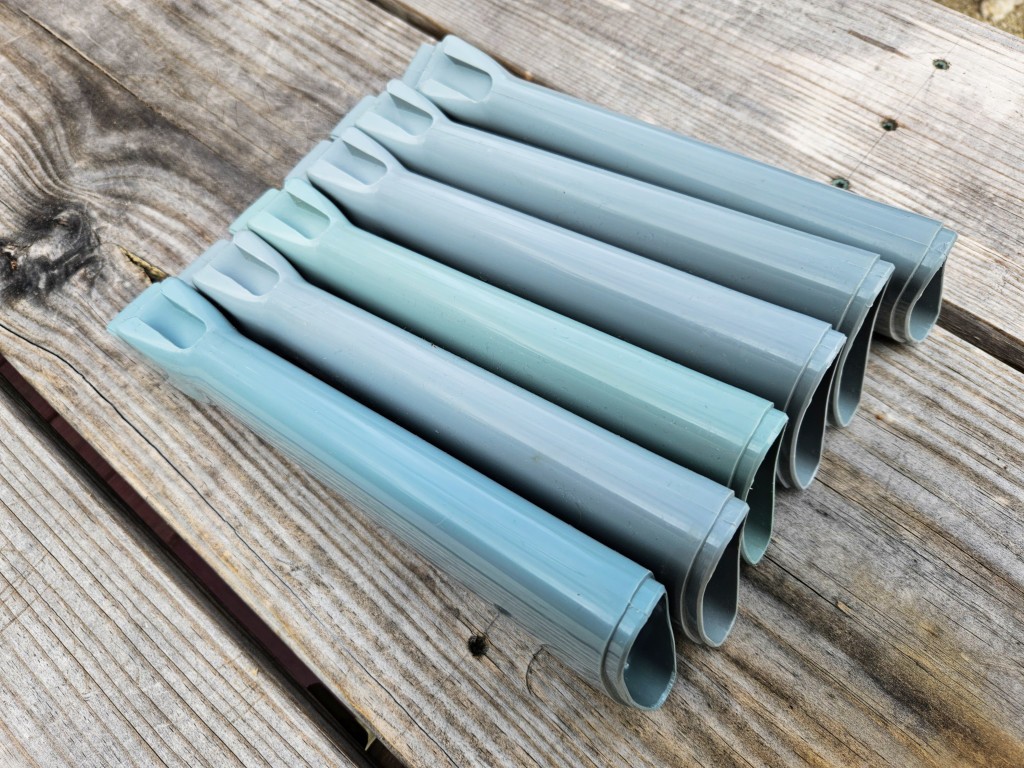
Hungarian Blue Stocks: Several blue-painted stocks arranged on a weathered wood surface.

My color is more like the top two.

Six blue plastic bag sealing sticks on a weathered wooden surface.
My color is more like the 4th and 5th stocks from the left.
Hungarian blue stocks in various shades of blue arranged on a weathered wooden surface.

My color is more like the 4th and 5th stocks from the left.

Summary

So, the Hungarian blue can look more grey, more blue and all points in between. My color formula will produce something close to what I did for Sean but because I count droplets of dye and a ton of factors can influence the size & shape of each droplet and thus the actual volume, my grips will vary as well. Sorry but I can’t custom match as a result.

I hope this helps you out. Here is the link to our AMD grips if you are interested.


Please share the link on Facebook, Forums, with colleagues, etc. Your support is much appreciated and if you have any feedback, please email us in**@*********ps.com. If you’d like to request a report or order a reprint, please click here for the corresponding page to open in new tab.


How to level a scope reticle

First off, I better explain that a recticle is the formal name for the cross-hairs or series of fine lines that are inside a scope that you use to aim with. There are a ton of different ones out there and one thing you want to do is to get them level with the rifle.

Let’s start with why this matters

The reason for this doesn’t affect the old traditional cross-hair designs but it does the ones that have additional marks to help you better determine the range and the necessary hold based on Mil-Radians (Mils) or Minutes of Angle (MOA).

Bullet drop test: Cartridge inserted into barrel mechanism
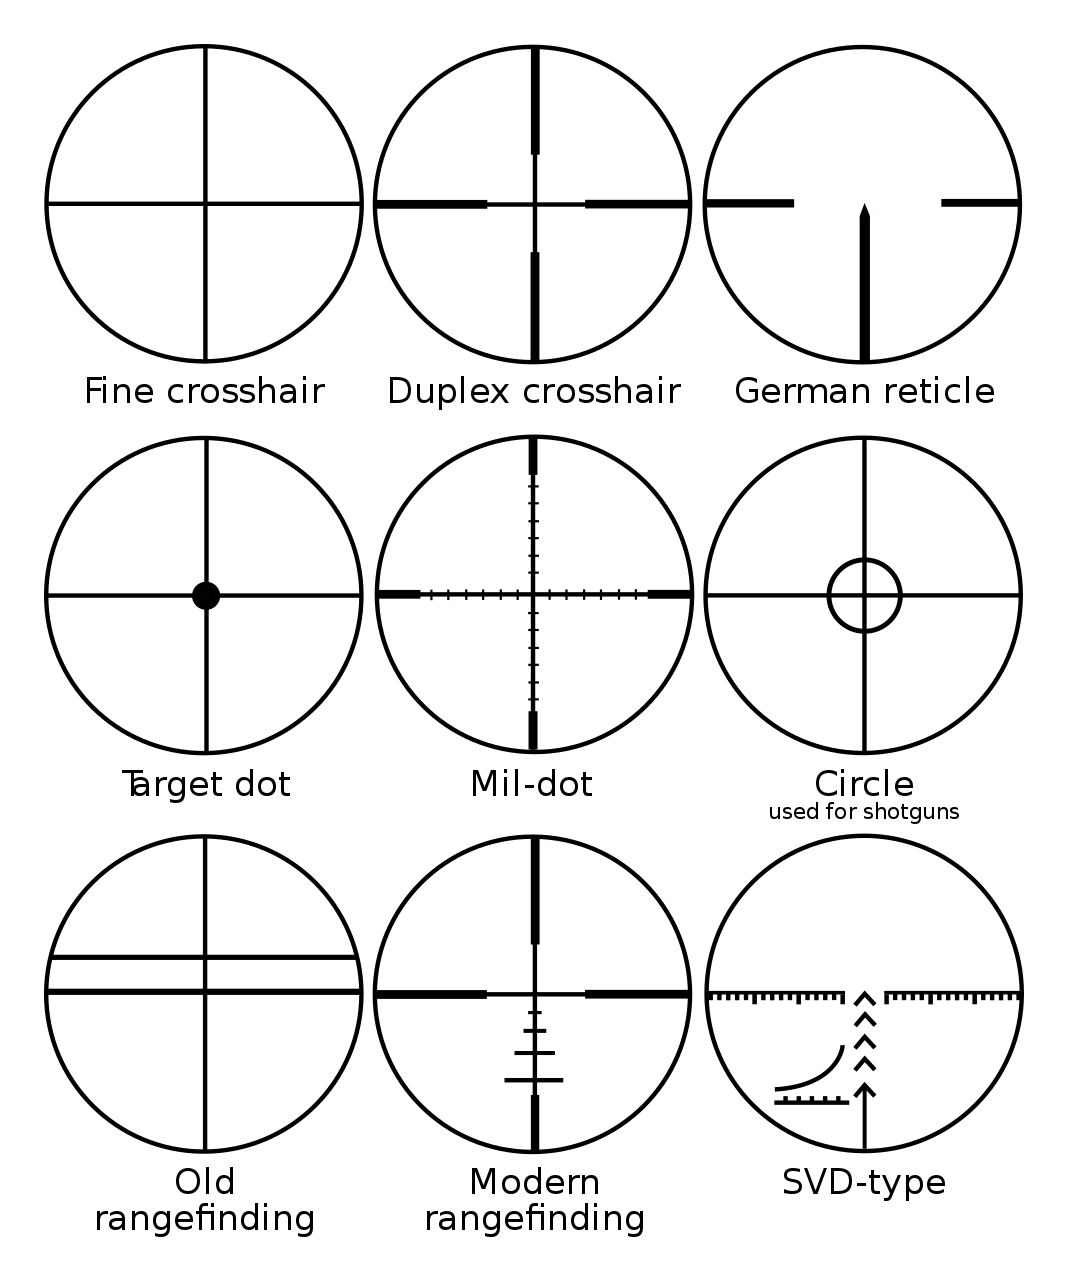
These are examples of reticles found in a very interesting post about the topic on Wikipedia.

If you search, there are tons and tons of posts about different types of reticles and how to use them. The important point I want to make is that for any of these more modern reticles with additional lines to help you accurately, the horizontal lines must be parallel with the rifle.

How do you level a reticle?

The first way is the old fashioned “eyeball” method. Hold the rifle and make sure the top of the receiver is as level as possible (meaning the rifle is not tilted left or right), look through the scope and adjust it in the rings until it is true to the top of the receiver and then start tightening down the rings while confirming nothing shifts. It’s not the most precise method but it does work, I’ve done a ton of rifles that way, but there is another approach using levels.

In it’s most form, you put a small level on the top rail or flat spot of your recever, tilt it until it is level and then put the level on the top turret and adjust the scope until it matches. Having something to hold the rifle in place while you work really helps as does having a second level so you can both confirm the receiver and scope are level as you work. You can often find single vial levels at hardware stores or through industrial supply houses. The one negative to this approach is that the levels can slide off if you don’t have things secure. I like to use a Tipton Pro Rifle Vise to hold the rifle in place while working.

Wheeler Engineering does offer a basic level set that works. I don’t use it though because it’s rear receiver piece has a magnet to secure it and that will not work in an AR or other weapon that is made from aluminum and not steel. For this reason, it wasn’t something I could use.

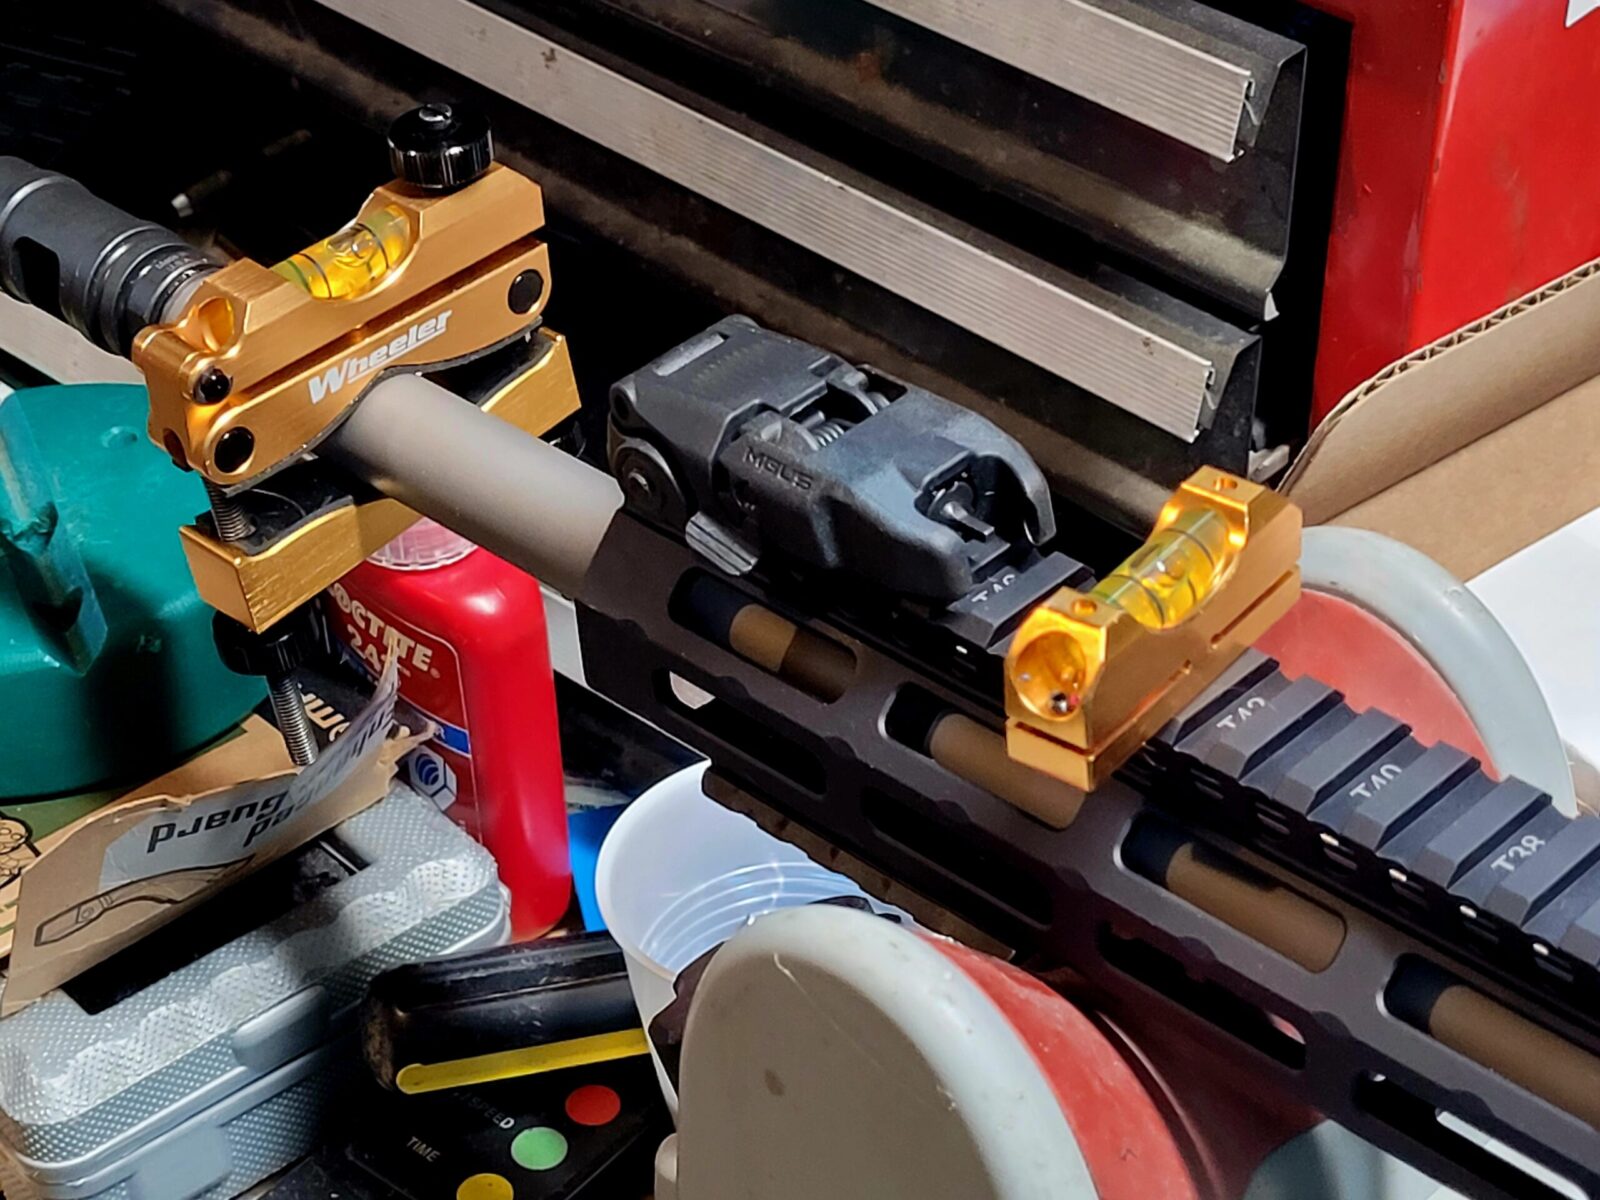
These days, when I have time and I want to try and get the scope as accurately positioned as I can on the first try, I use a Wheeler Engineering Profession Reticle Leveling System. It’s easy and fast.

First, you put the level on your receiver/rail and level the receiver. Then you put the clamp on the barrel and level it – I compare both the receiver and the barrel bubble levels before I move the receiver level to the top scope turret. Once the level is on the top turret, I adjust the scope until the bubbles match and it’s done. I’ve used this for a number of years now and am very happy with it.

Bullet drop test: Cartridge inserted into barrel mechanism
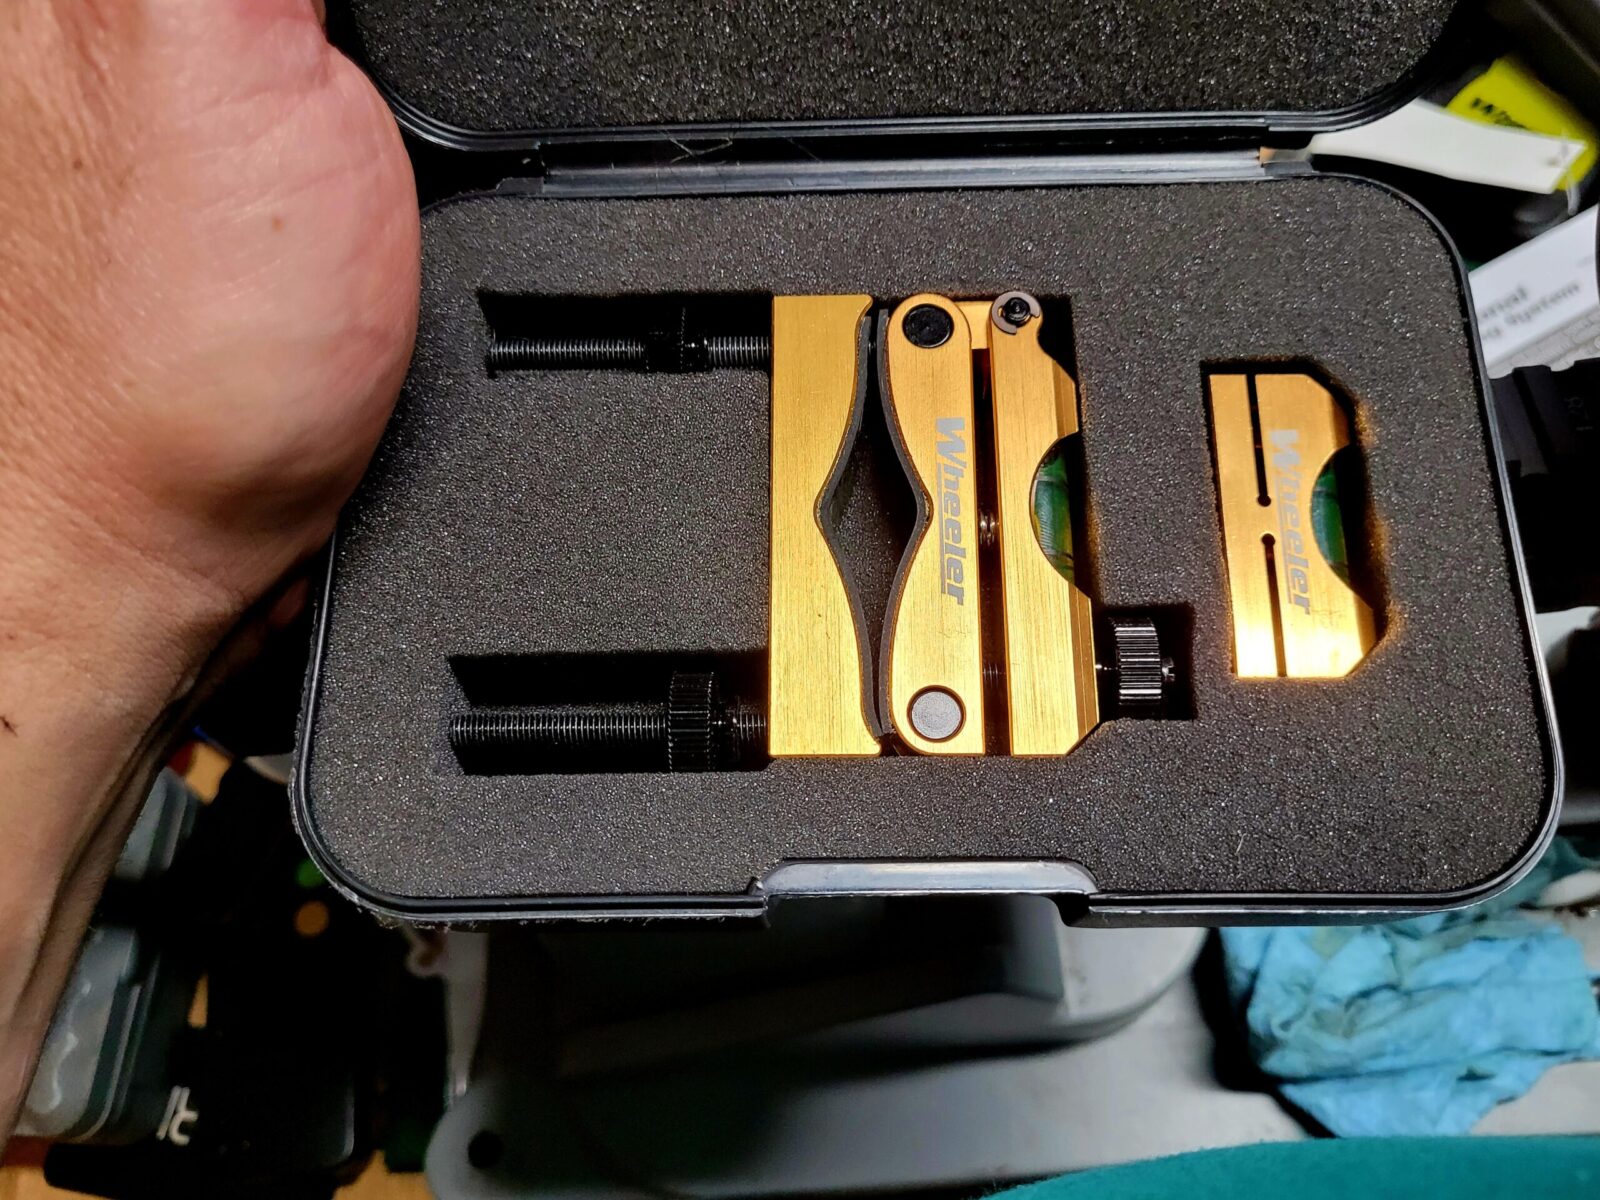
The professional leveling system has two parts – the barrel clamp and the separate level you use on the receiver and then the scope turret. The two parts are made from aluminum and come in a nice protective case. If it weren’t for the case, mine would look much more beat up. Protecting the parts makes sense for another reason – you don’t want things to get bent, gouged, dented or whatever and then throw off the readings or mar the finish of your weapon.
Bullet drop test: Cartridge inserted into barrel mechanism
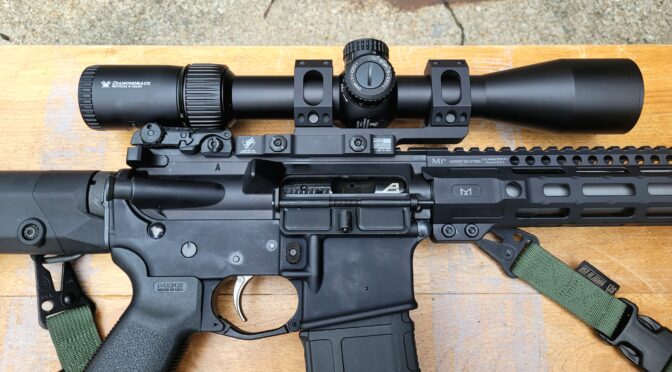
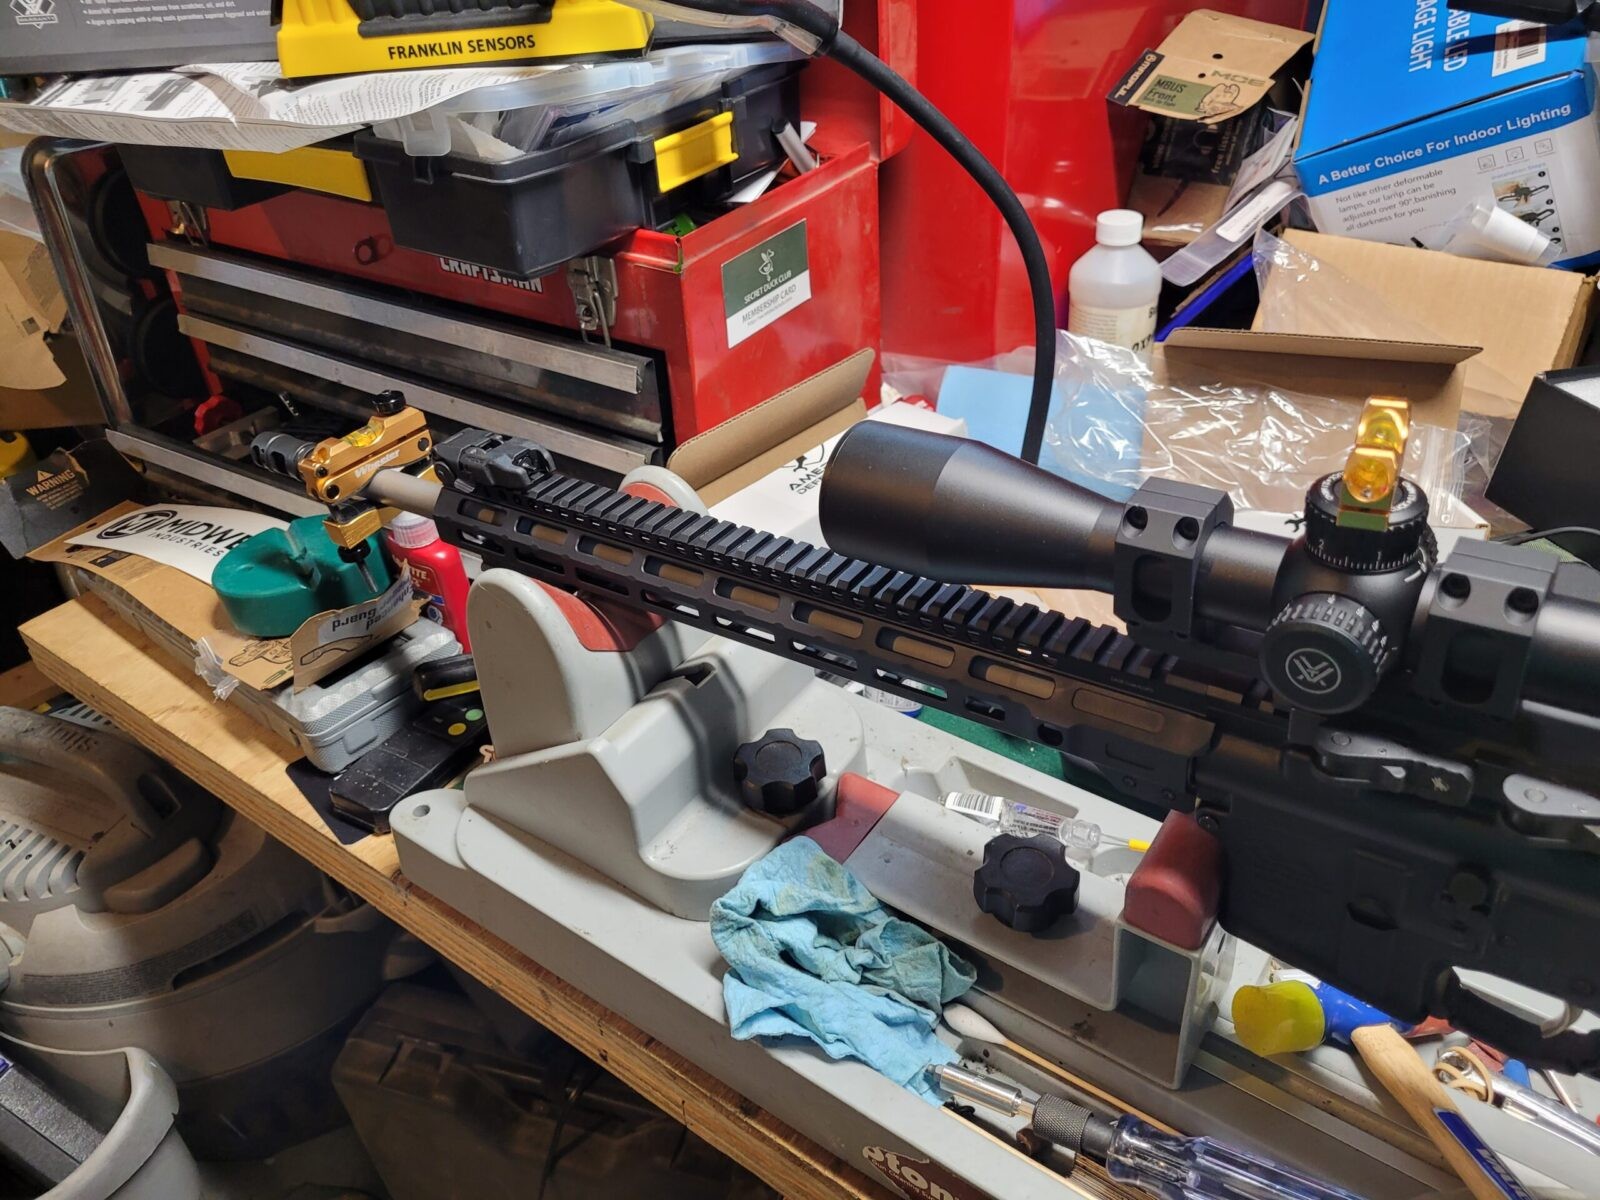
The first thing you do is to use the small level (shown behind the backuop sight) to true the receiver. Then you adjust the barrel clamp until it is level also. Just visible under the handguard is the front of my Tipton vise.
Bullet drop test: Cartridge inserted into barrel mechanism
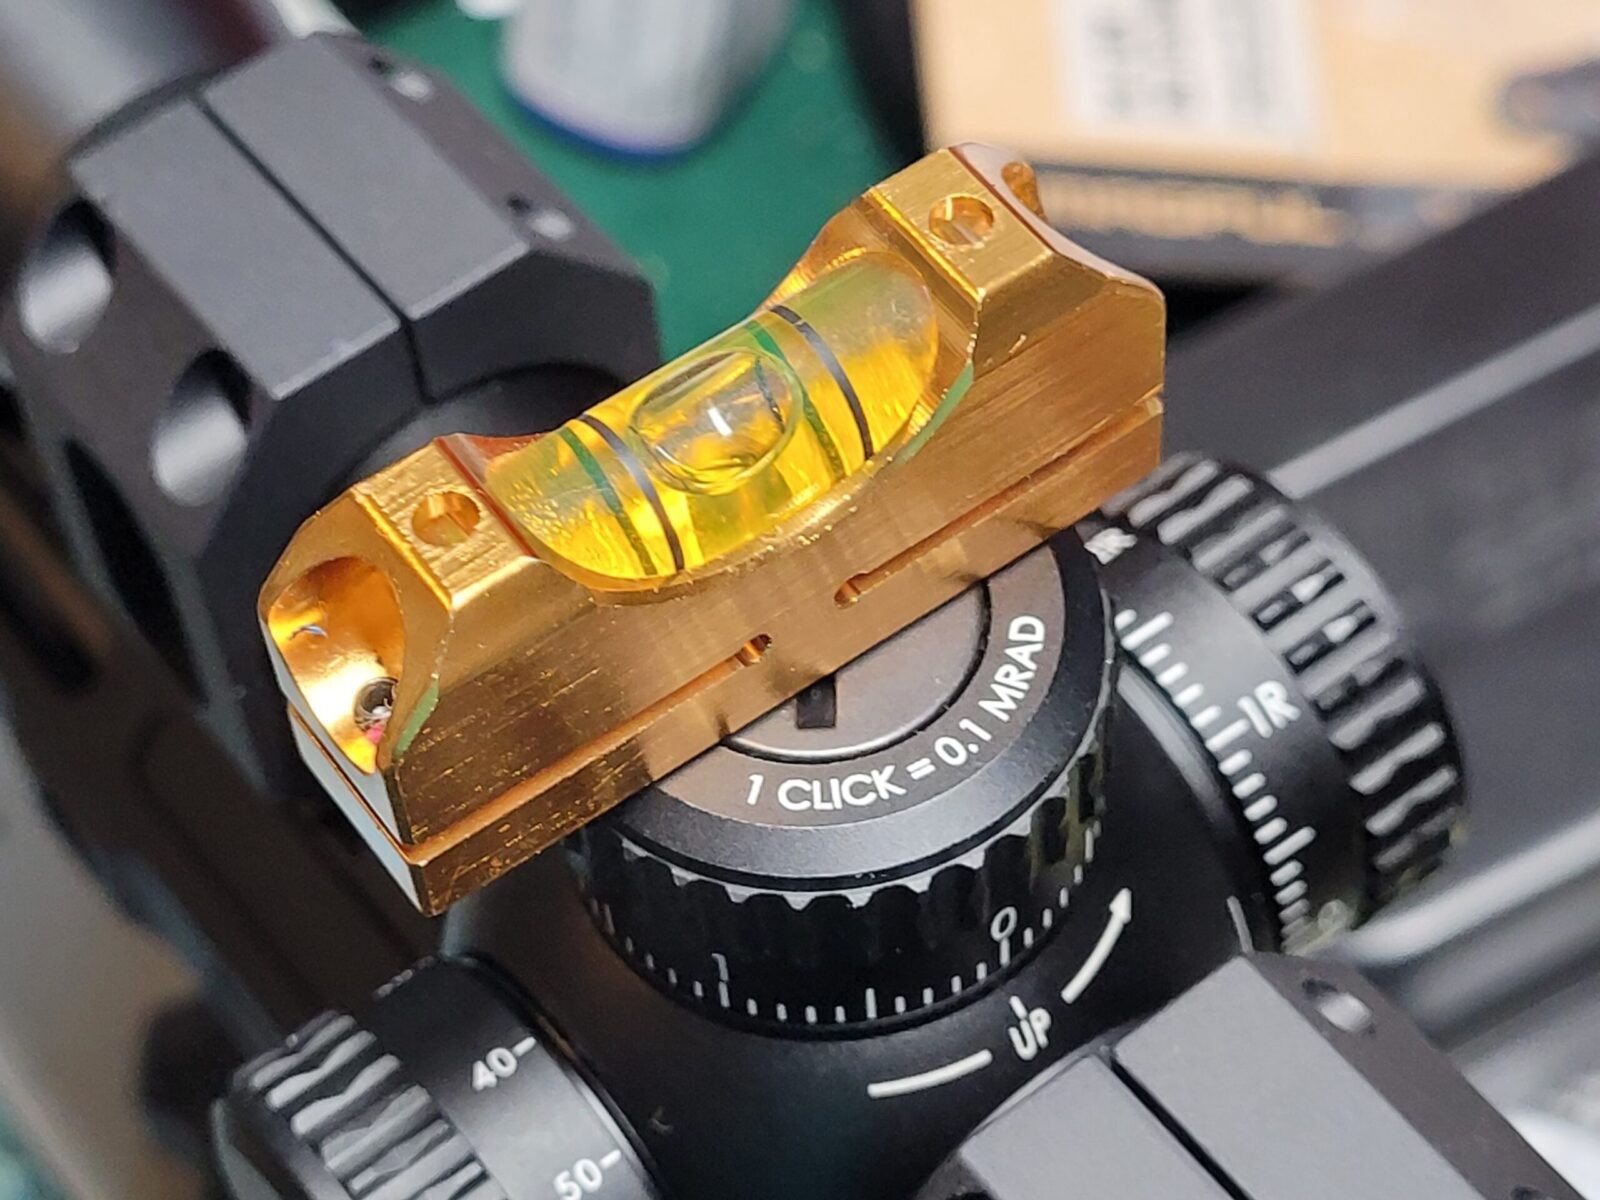
After the barrel clamp has been levelled, you move the small level to the flat top turret and then rotate the scope however you need to get it flat also. Compare this level to the barrel clamp level to make sure they agree. The more care you take to get the bubbles centered and matching, the better.

I do use a Vortex torquing screw driver to tighten the scope ring screws and am careful to confirm the scopes levelling does not shift in the process. Vortex scopes say not to torque them past 18 inch/pounds (please note that is inch pounds and not foot pounds just to be very clear – you don’t want to damage your scope but at the same time, you do want it secure).

Again, with any of these methods, it really helps to secure the rifle in a vise where you can adjust and then secure the rifle so the top is horizontally true.

Bullet drop test: Cartridge inserted into barrel mechanism
Yeah, this is my real work bench. It was worse than normal as I still had all of the packing from the scope,rings and upper on the bench. The Tipton gun vise has served me very well over the years. By the way, notice the level on the turret – you reall want that perpendicular to the rifle. In this photo it is slightly crooked and no longer perpendicular and risk the scope not bein accurately levelled to the rifle.

Conclusion

The Wheeler Engineering Professional Leveling System has served me well and I have used it on a number of projects over the years. I have no hesitations in recommending it to you as well.

Bullet drop test: Cartridge inserted into barrel mechanism
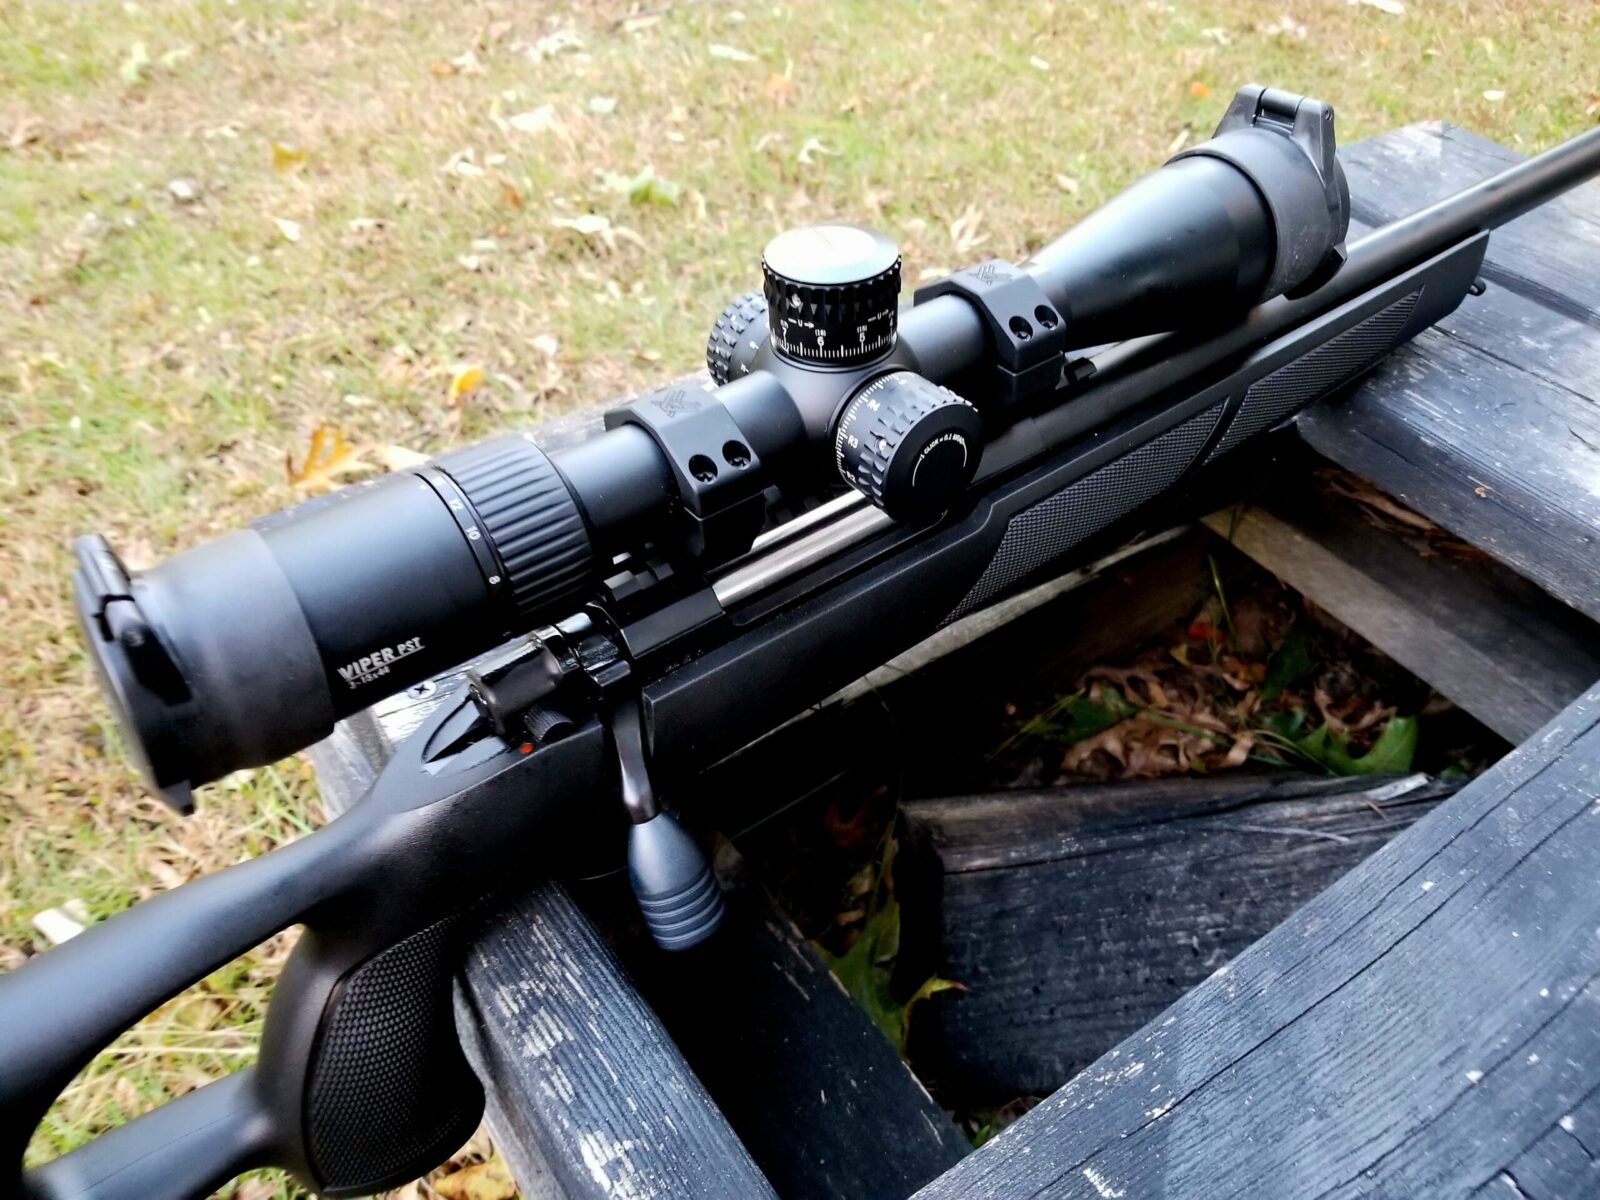
Sabatti Urban Sniper with a Vortex PST scope.
Bullet drop test: Cartridge inserted into barrel mechanism
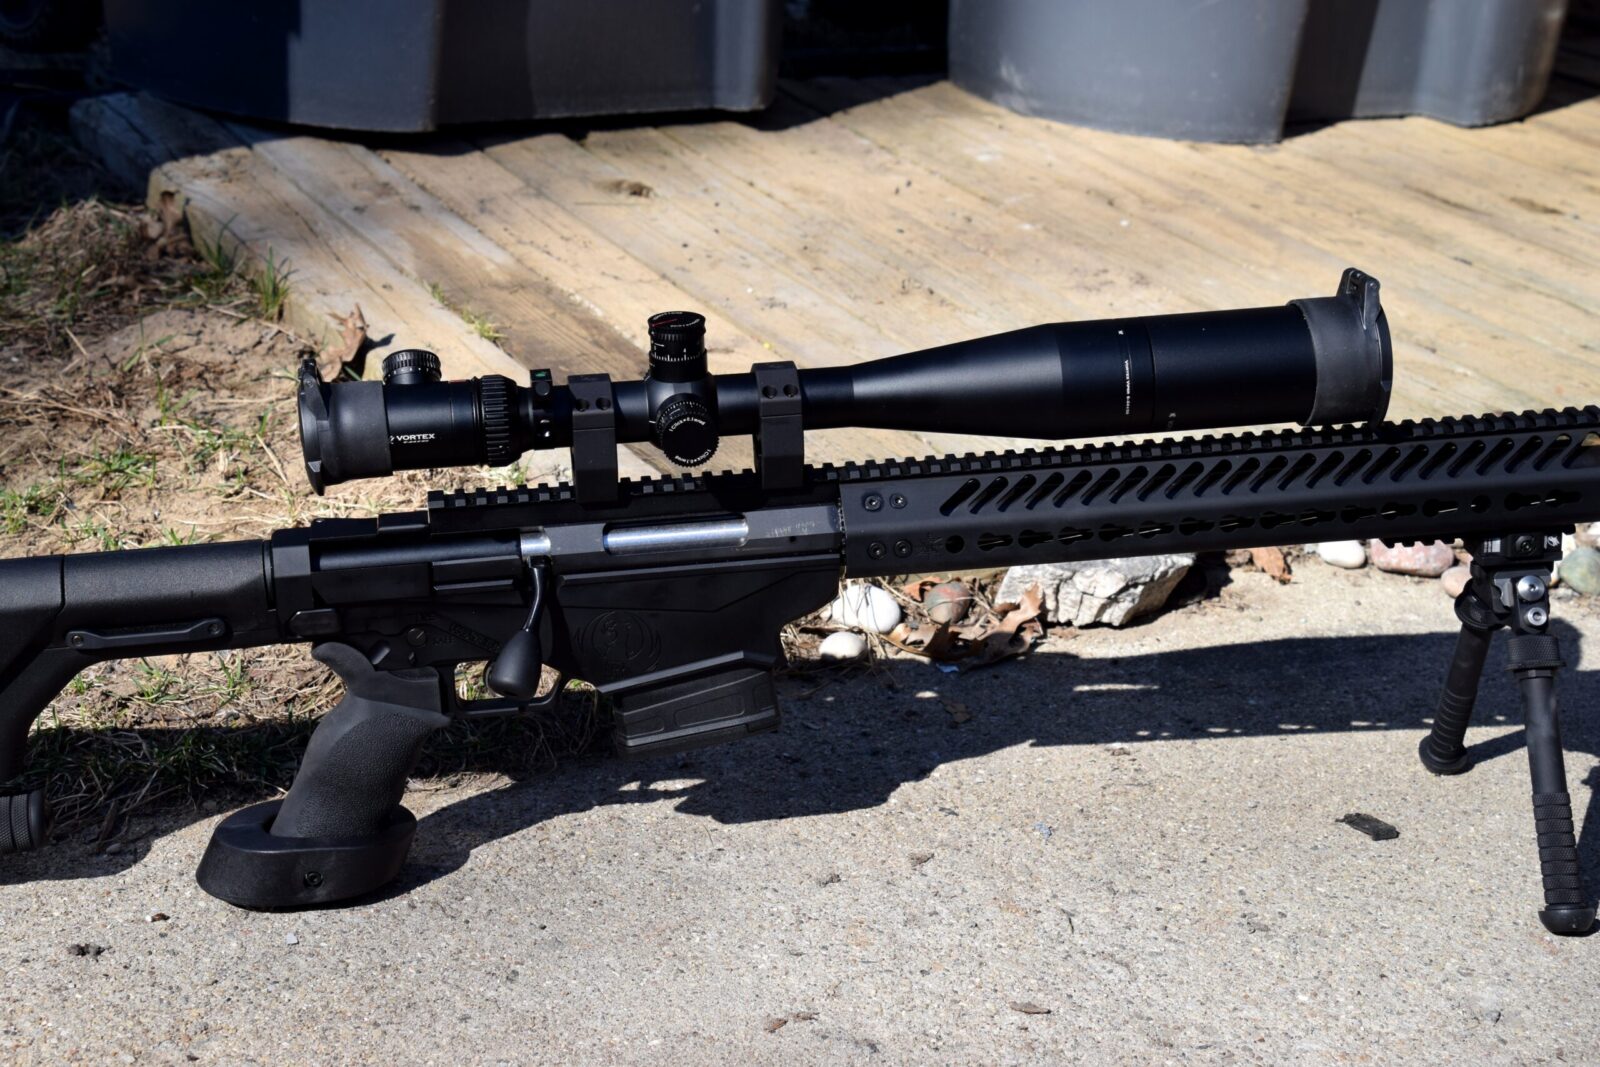
Ruger RPR with Vortex PST optic sporting its sun shade.
Bullet drop test: Cartridge inserted into barrel mechanism
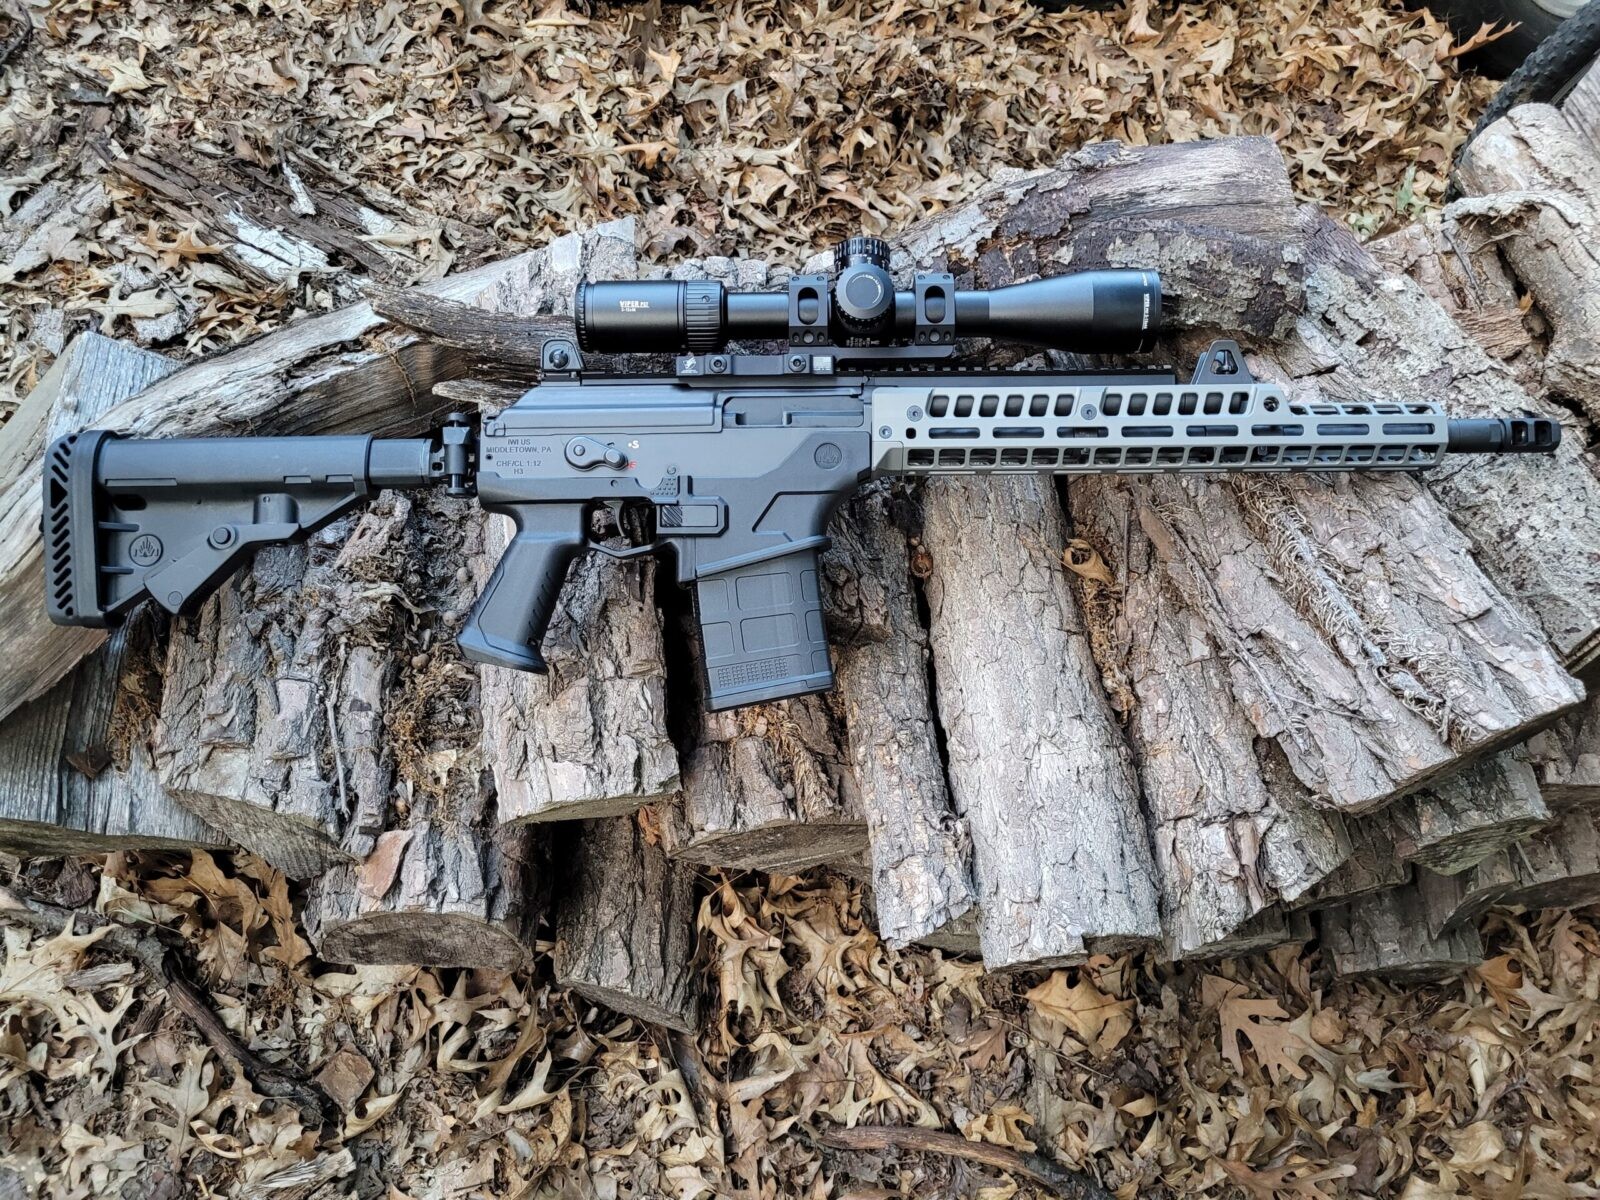
IWI .308 Galil with a Vortex PST Gen 2 Scope.

I hope this post helps you out.


Note, I have to buy all of my parts – nothing here was paid for by sponsors, etc. I do make a small amount if you click on an ad and buy something but that is it. You’re getting my real opinion on stuff.


Please share the link on Facebook, Forums, with colleagues, etc. Your support is much appreciated and if you have any feedback, please email us in**@*********ps.com. If you’d like to request a report or order a reprint, please click here for the corresponding page to open in new tab.


Are You Looking For A Great Deal on The ALG Enhanced AK Fire Control Groups – the AKT-EL Model?

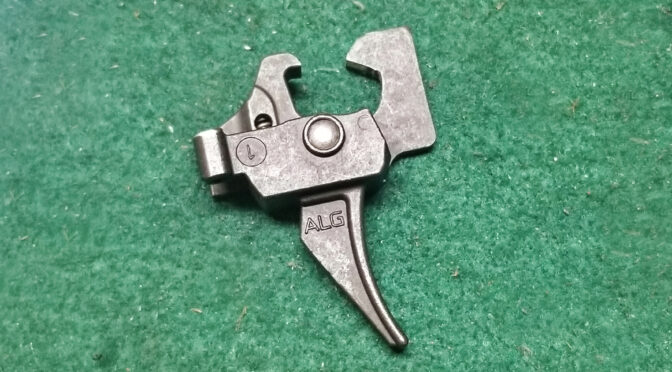
I wrote about this recently that my go-to fire control groups, meaning the trigger, disconnector and hammer, are now the ALG Enhanced Triggers – model AKT-EL. There are two challenges that interested buyers have – #1 they can’t even find them in stock at most websites and #2 even if they do, they are expensive. Let me tell you a secret.

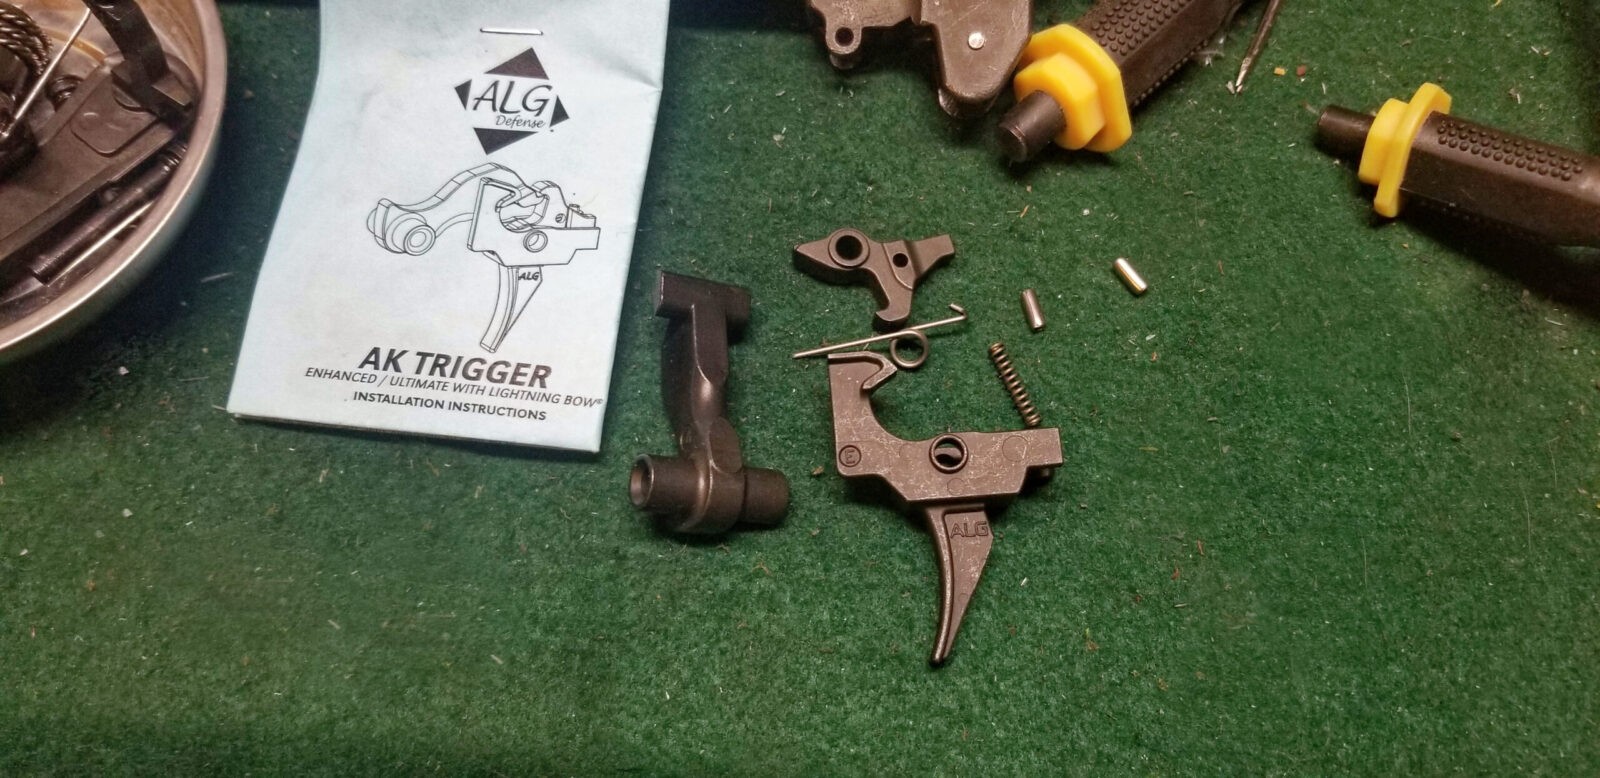
Palmetto State Armory has made a big push into AK-series rifles and pistols over the past few years and some of their models have a unique layout inside that requires a slight change to the traditional AK trigger design. They talked to ALG, a sister company owned by the wife of Bill Geiselle of Geiselle trigger fame – and they produced a bunch of the AKT-EL triggers for PSA with the slight modification. Guess what? Any AK can use them.

For a couple of years now, I have been using AKT-EL in regular AK builds and even my IMI Galils that needed their fire control groups swapped out for 922r reasons.

So this post is short and sweet – if you are looking for a great American made AK trigger, then get an ALG AKT-EL and if you want one that is in stock at a great price, go to PSA [click here].

I hope this helps you out.


Note, I have to buy all of my parts – nothing here was paid for by sponsors, etc. I do make a small amount if you click on an ad and buy something but that is it. You’re getting my real opinion on stuff.


Please share the link on Facebook, Forums, with colleagues, etc. Your support is much appreciated and if you have any feedback, please email us in**@*********ps.com. If you’d like to request a report or order a reprint, please click here for the corresponding page to open in new tab.


ATF Letter June 2019: How to Measure The Overall Length Of A Pistol With A Brace

In June 2019, someone as the the Bureau of Alcohol, Tobacco, Firearms and Explosives (ATF), Firearms Technology Industry Services Branch (FTISB), what was the correct way to measure a pistol equipped with a stabilizing brace that has a folding adapter (like my Galil Ace in the photo above).

They said that the overall length is measured with the brace in the folded position. So you can confirm this for yourself plus see their reasoning, click here to read the scanned PDF copy that has the names redacted for privacy’s sake.

Please note that I am not an attorney and this is not legal advice. I’m just passing along the ATF letter for people to read and interpret themselves.

I hope this helps you out.


Please share the link on Facebook, Forums, with colleagues, etc. Your support is much appreciated and if you have any feedback, please email us in**@*********ps.com. If you’d like to request a report or order a reprint, please click here for the corresponding page to open in new tab.


PSA AK-E: First Range Trip

Well folks, we finally had a chance to go to the range for the first time this year. It was a beautiful day and the only shortcoming was that we had a number of rifles and pistols to test and not enough time to shoot a ton of rounds through each. To be honest, we had a blast 🙂

One of the rifles that went was my PSA AK-E. It was the smoothest cycling AK out of the box that I have encountered and I think it’s due to a combination of pretty good fitment and their nickel-boron coating of the bolt and bolt carrier. I’ve written a number of posts about my journey with the AK-E so click here to open a tab/window and see those posts.

Palmetto State Armory (PSA) has a stunning array of Kalashnikov firearms now. AK-47s, AK74s, 100 series, rifles, pistols … it’s impressive. Click here to go to their main AK menu.

We were shooting 124 grain 7.62×39 FMJ ammo by Golden Tiger. This is great ammo and my favorite to use. For AK bulk ammo, it’s relatively accurate, reliable and consistent — notice that I say relatively. It will hold its own with any of the bulk steel case ammo or even do better. I’m not comparing it to hand loads or specialty ammo.

ATF letter answering if AR pistol can be built from unassembled receiver
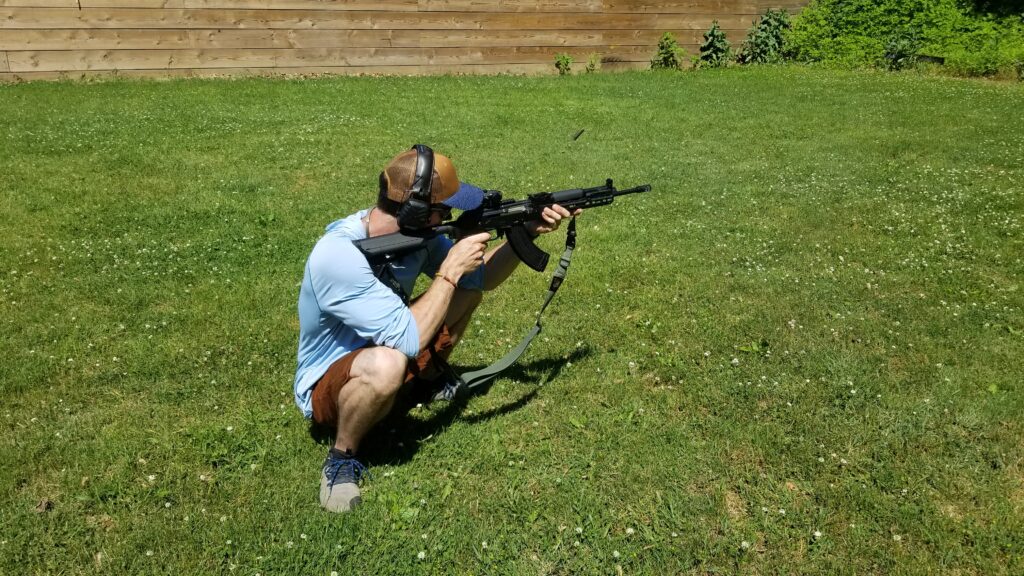
Niko is a heck of a shot and is familiar with AKs as well. He had to do Slavic Squat shot 🙂

I wish I could tell you that we shot hundreds of rounds but there just wasn’t time. We shot three mags through it – 90 rounds and did not have one problem. Yeah, it’s not many rounds but I figured some of you would like an update and I’ll post again after the next range trip.

Observations:

  • The little Vortex Crossfire did a great job and we had fun punching paper. The scope and the RS!Regulate optic mount worked out just fine. I’ve used the combo before and expected such.
  • The rifle functioned just fine with no feed or ejection problems
  • The rounds were grouping pretty well – we were not shooting for accuracy – more for function testing
  • The trigger was very nice – ALGs are great in general and what I like to use these days.
  • The brake did a decent job. I think a JMAC RRD-4C brake would have reduced recoil further but out of the box the recoil was not bad at all. When you think about it, even an AK with no brake is surprisingly pleasant to shoot during semi-auto fire
  • I definitely liked the feel – the weight and balance – of the rifle – the RS!Regulate handguard, our AK-12 grip and a Magpul ACS stock worked very well together
ATF letter answering if AR pistol can be built from unassembled receiver
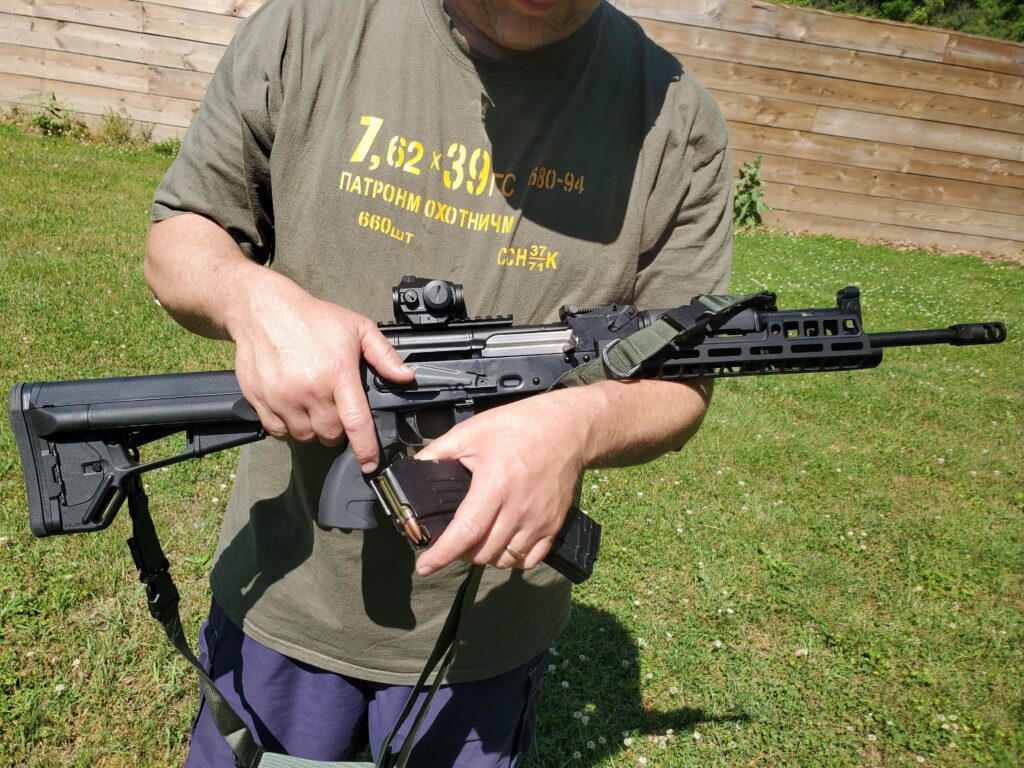
Me with my favorite AK shooting shirt 🙂

When we were done, I did take the rifle apart and did not see anything concerning. So, I definitely want to shoot it more and the rifle is off to a good start.


Please share the link on Facebook, Forums, with colleagues, etc. Your support is much appreciated and if you have any feedback, please email us in**@*********ps.com. If you’d like to request a report or order a reprint, please click here for the corresponding page to open in new tab.


Video: Russian Gunbusters Fires 1,400 Rounds Through A 7.62×39 AK-103 Trying to Get It To Fail

In this episode, Georgiy Gubich operates a 7.62×39 AK-103 built in 2019 on full auto trying to get it to fail. The AK-103 is a remarkable rifle as you will see in the video

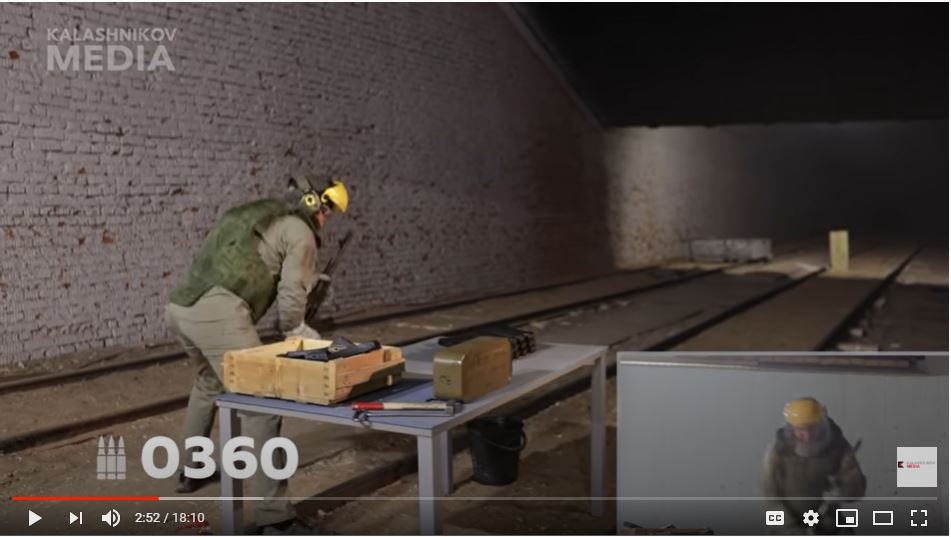
Man in protective gear fires AK-103, with text "0210 - Smells like plastic.
He’s smelling hot plastic
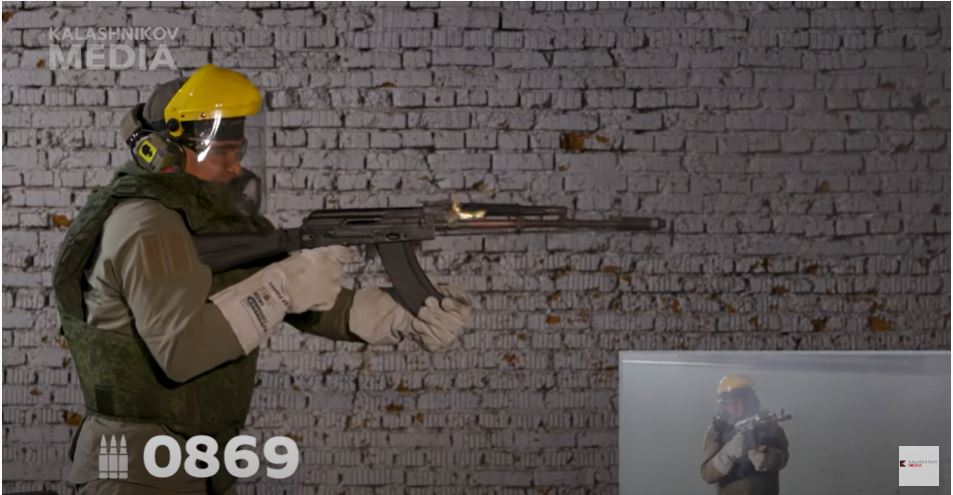
Man in protective gear fires AK-103 in Kalashnikov Media test
Starting here forward he really needs to struggle to get the bolt to exit the chamber. It seems to return and cycle just fine when firing.
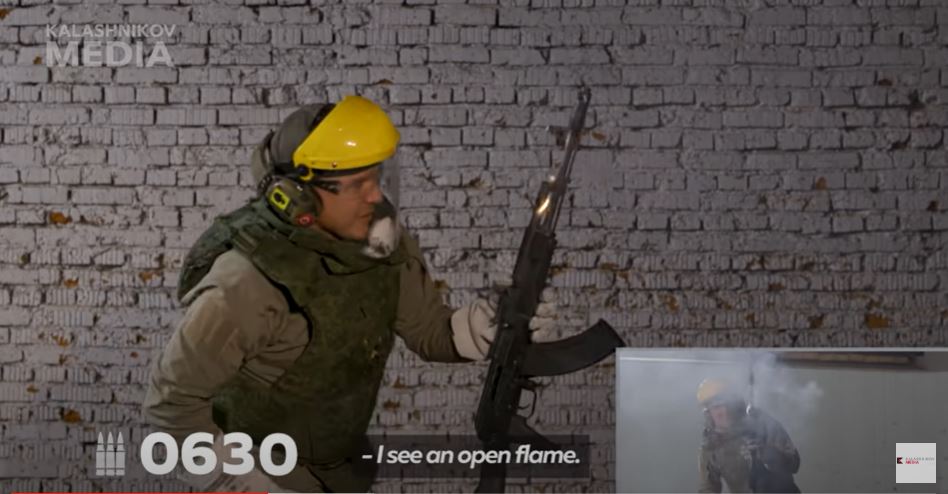
Man in protective gear fires AK-103, with text "I see an open flame.
He’s seeing flame from the handguards
AK-103 firing 7.62x39 rounds, tested for 1,400 rounds
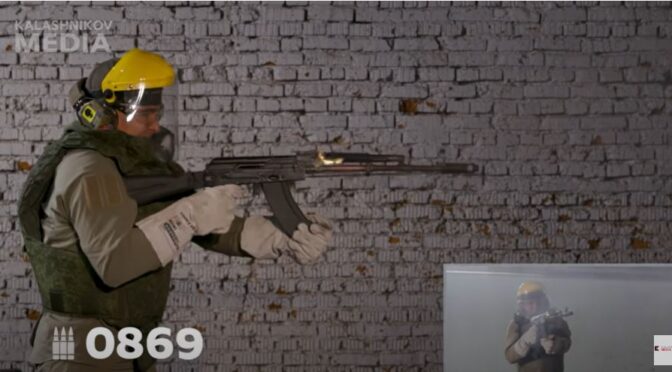
The lower handguard had already fallen off during a previous reload but look at the barrel glowing red.
Man in protective gear holds AK-103 after firing 1,400 rounds.
The rifle survived through two spam cans, 1,400 rounds, of ammo!
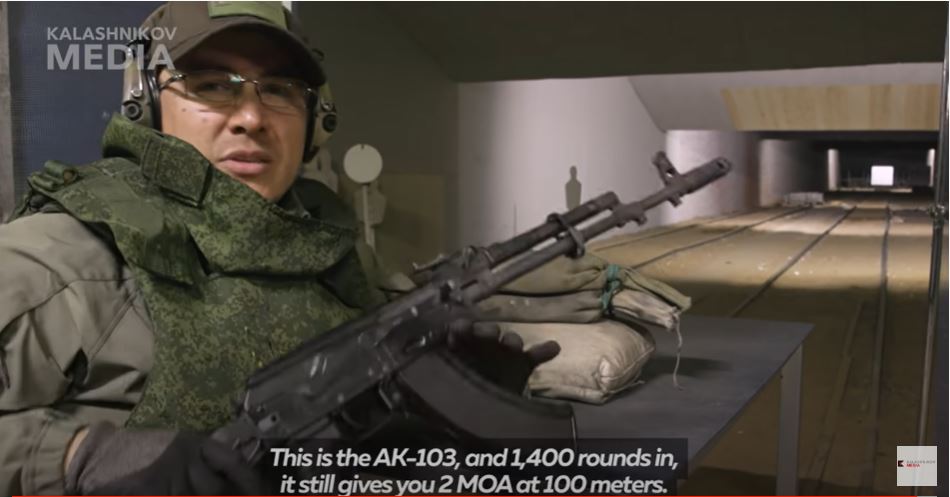
AK-103 with 1,400 rounds fired, 2 MOA at 100 meters
After all that, it could still shoot 2 MOA at 100 meters. Definitely a remarkable rifle.

Watch the Video!

Summary

I’m a fan of both the 7.62×39 round and the AKs that shoot it so I was rooting for the rifle the whole time. It’s pretty amazing that it still ran after 1,400 rounds.

I hope you enjoyed this!


Please note that all images were extracted from the video and are the property of their respective owner.


Please share the link on Facebook, Forums, with colleagues, etc. Your support is much appreciated and if you have any feedback, please email us in**@*********ps.com. If you’d like to request a report or order a reprint, please click here for the corresponding page to open in new tab.


PSA AK Webstore Links

Interested in an American made AK? Consider Palmetto State Armory (PSA) as a source. Click on the following links for the associated webstore categories for AK-related rifles, pistols and parts at PSA: