With a name like “GrabAGun”, you have to wonder if they are legit or not. Well, to cut to the chase, they definitely are but I did wonder. I started
using them in 2021 and they have great pricing and are quick to ship. I figured everyone else must be looking for deals so add them to the list of other sites such as Palmetto State Armory and Primary Arms.
They have some great deals on firearms and ammunition so add them to your list of online firearm websites that are good to go. I wouldn’t recommend them unless I had first hand experience.
I hope this helps you out!
Note, I have to buy all of my parts – nothing here was paid for by sponsors, etc. I do make a small amount if you click on an ad and buy something but that is it. You’re getting my real opinion on stuff.
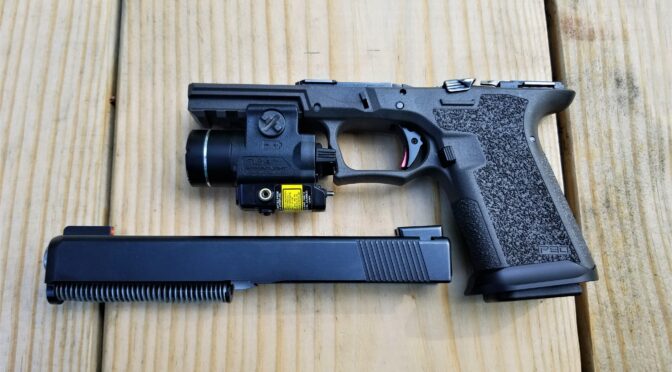
I bought a basic Swenson slide almost two years ago and it’s been solid. Part of what attracted me to it was the beveled nose that allows for easier insertion into a holster. At any rate, I’ve had guys ask me if Swenson slides are any good and my experience has been positive plus from what I have read, most guys find them good. Let me put it this way, if I found a good deal on one to host a RMR optic today, I’d buy it.
The Slide You See
When I first installed it on my first Polymer80 PF940V2 G17, no fitting was needed. However, when I built the PF940CL that it is on now, I did need to use Goodson 400 and then 800 grit lapping compound to get a good fit. Initially there as some binding and now it is just nice and smooth. [Click here if you want to read more tips]
That is the only tuning I’ve need to do. The channel spring liner and all slide parts went in easily and I’ve not had any problems. It’s hosted both it’s current Storm Lake barrel as well as a threaded barrel that I bought from 80P builder with no problem. All in all, it’s worked just fine.
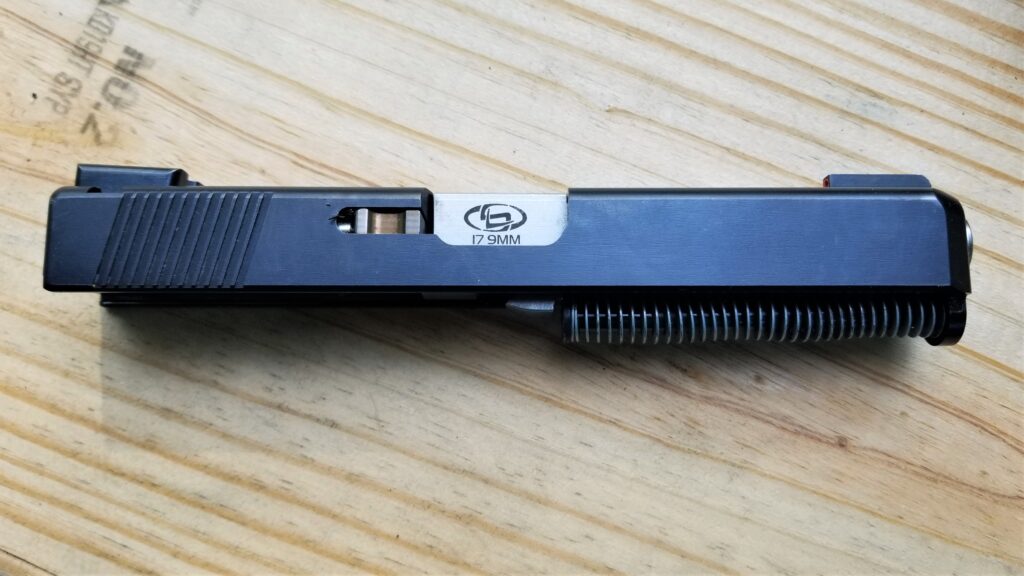
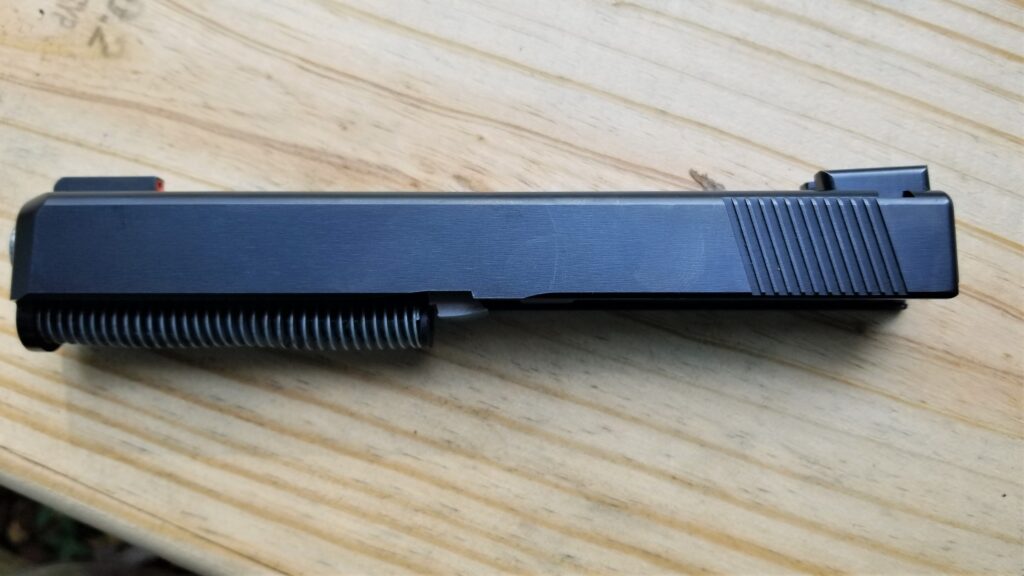
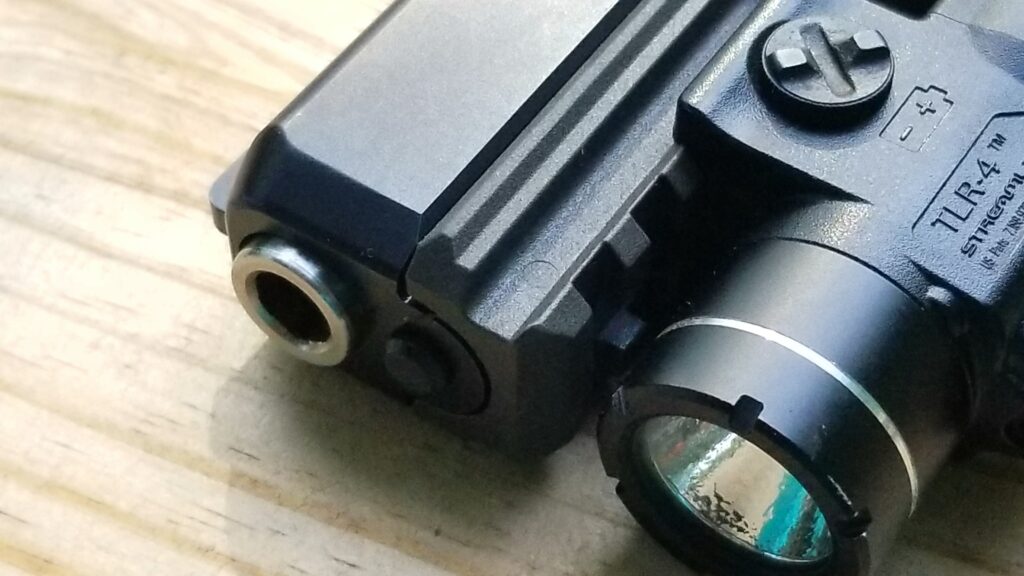
View of the ejection port side. Just a solid basic slide. Here’s the other side.Here’s the bottom. Other than the Storm Lake barrel, I think all of the other parts are OEM Glock.I really like the beveled nose and prefer it for carry pistols. Also, Streamlights are my go to brand for light and laser combos. The TLR-4 works great here and any of the TLR series would since this is a full size pistol. The CL just has the shorter G19 grip to aid with concealment.
So, if you are hunting for a slide for your Glock or Polymer80 build, take a look at Swenson models. They have quite a few designs to select from now including fancy windows and various optics cuts. Just remember, if you are doing a Polymer80 build, look at slides meant for Glock Gen3 models.
The problem these days is finding them. The whole market is in pandemic shock – either hit with supply chain problems or unprecedented demand for guns, ammp and parts. With that said, I did some searching and see Swenson slides either at Midway USA or on eBay and the following is a real time search of eBay for themL
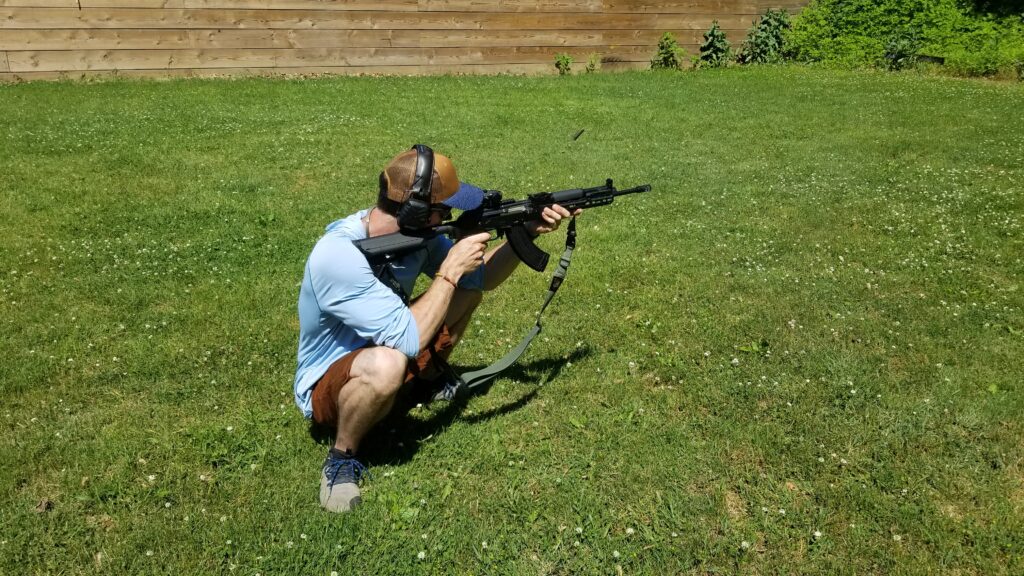
Well folks, we finally had a chance to go to the range for the first time this year. It was a beautiful day and the only shortcoming was that we had a number of rifles and pistols to test and not enough time to shoot a ton of rounds through each. To be honest, we had a blast 🙂
Palmetto State Armory (PSA) has a stunning array of Kalashnikov firearms now. AK-47s, AK74s, 100 series, rifles, pistols … it’s impressive. Click here to go to their main AK menu.
We were shooting 124 grain 7.62×39 FMJ ammo by Golden Tiger. This is great ammo and my favorite to use. For AK bulk ammo, it’s relatively accurate, reliable and consistent — notice that I say relatively. It will hold its own with any of the bulk steel case ammo or even do better. I’m not comparing it to hand loads or specialty ammo.
Niko is a heck of a shot and is familiar with AKs as well. He had to do Slavic Squat shot 🙂
I wish I could tell you that we shot hundreds of rounds but there just wasn’t time. We shot three mags through it – 90 rounds and did not have one problem. Yeah, it’s not many rounds but I figured some of you would like an update and I’ll post again after the next range trip.
Observations:
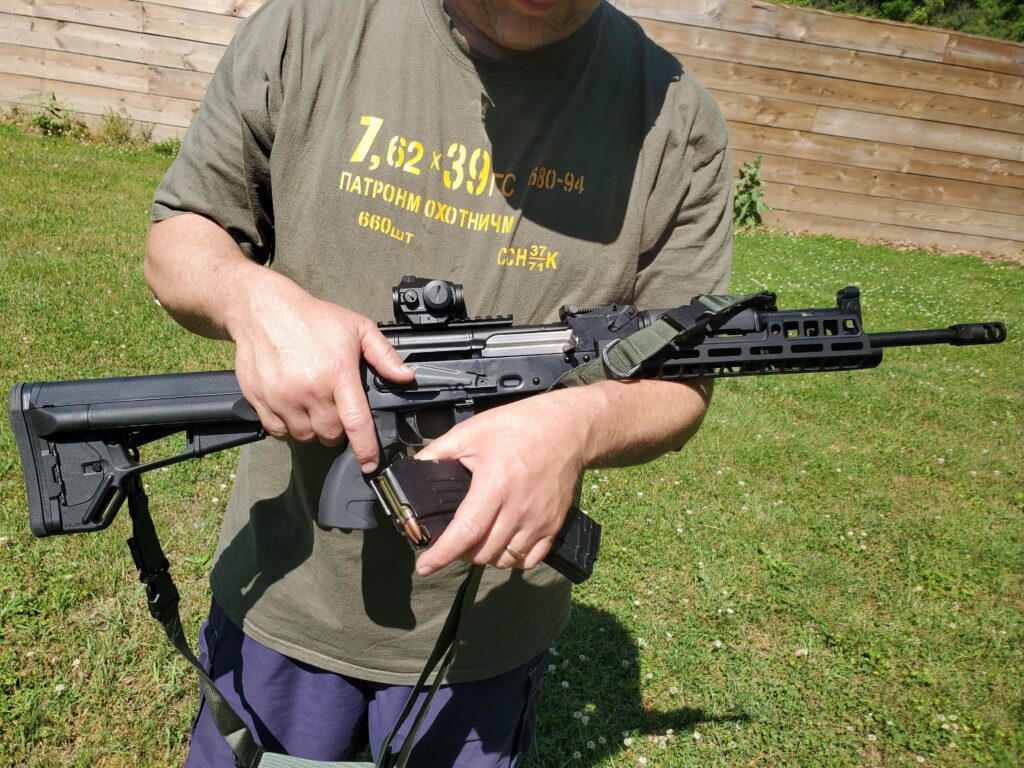
The little Vortex Crossfire did a great job and we had fun punching paper. The scope and the RS!Regulate optic mount worked out just fine. I’ve used the combo before and expected such.
The rifle functioned just fine with no feed or ejection problems
The rounds were grouping pretty well – we were not shooting for accuracy – more for function testing
The trigger was very nice – ALGs are great in general and what I like to use these days.
The brake did a decent job. I think a JMAC RRD-4C brake would have reduced recoil further but out of the box the recoil was not bad at all. When you think about it, even an AK with no brake is surprisingly pleasant to shoot during semi-auto fire
I definitely liked the feel – the weight and balance – of the rifle – the RS!Regulate handguard, our AK-12 grip and a Magpul ACS stock worked very well together
Me with my favorite AK shooting shirt 🙂
When we were done, I did take the rifle apart and did not see anything concerning. So, I definitely want to shoot it more and the rifle is off to a good start.
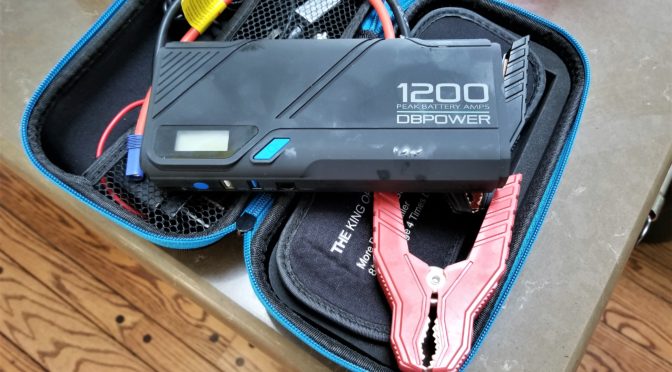
In August 2016 I bought a DBPower 400A DJS10 Peak jump starter amd found it handy. At the end of August 2018, I bought two of the bigger 1200A portable jump starters. I was busy and the units sat until some time in November when I tried to charge them. One was dead on arrival and would not charge no matter what method I tried (USB or their supplied charger). I contacted the seller and they were cool about immediately shipping a replacement. I charged it no problem and put both in our cars as a “just in case” measure.4
So, fast forward to February 1, 2019. Michigan was in the grips of an arctic freeze with ambient temperatures ranging from -8 to -12F and windchills under -20F. It was this way for two days. On the first, I went to start my wife’s Camry for the first time in several weeks and the starter could barely turn a few times before the solenoid clicked. The battery read 11.17 volts.
I thought myself lucky that I had the foresight to buy the batteries as I would not have to move my truck around to jump start it or run an extension cord out to use one of my Noco Genius chargers. The DBPower unit had been in the car and it was about +9F at the time. The whole point of these things is to store them in the car, right? It was fully charged when I put it in there.
Guess what? The DBPower read “Lo” voltage on the LED display when I turned it on and tried to charge the battery. It didn’t help the cart start at all. I was pissed. These things were $72.99/each. I felt like I had wasted a ton of money on junk. That is not a good feeling.
So, I decided to run an extension cord from my shop and hooked up my big Noco Genius G2600 charger to the battery and set it to the 30 amp quick charge setting that runs for five minutes.
This time around, the story ends a lot better – the car started right up. My wife used her car to run errands and I let it charge all last night with the normal charging cycle on the Noco.
4/16/19 Now, DBPower did make things right and replace both units and told me I have to charge the units every two months to have reliable power. If you open a unit up, you will find out they have Lithium Polymer (LiPo) power cells. These can hold a big charge and discharge quickly but they lose the charge as they sit – typically in about two months.
12/6/19 update- still working just fine as long as I keep them charged.
12/21/19 – pulled one out of our van. It’s been there since probably Labor day and the battery is at zero. I’m charging it now. What I am finding with these things is the you need to top them off every 2-3 months. The Noco charger holds a charge far longer than the DBPower unit. I charged the Noco early on the summer and it’s between 50 and 75% right now according to its status LEDs.
7/14/20 – Have now thrown away two units because they don’t buy a charge. Seriously, do not buy a DB Power unit and buy a Noco jumpstarter instead. My Noco holds a charge and has had zero problems.
11/5/20 – Throwing out my last two DBPower units that no longer hold charges. The Noco is still doing just fine and I plan on buying a second one.
Folks, I saw the Cold Dead Hands (CDH) ambidextrous charging handle ad on Facebook and figured for $34.94 delivered I might as well give it a try so I ordered it on 6/22/17. The first thing I noticed after I placed my order was that it was shipping from China but was hopeful that wasn’t a bad thing. Well, it arrived today (6/28/17) in a brown cushion mailer and I immediately noticed the bare bones generic packaging it was in and was still hopeful because it looked pretty good.
Here it is next to my favorite model of charging handle, the BCM Gunfighter Mod 3 Large Latch.
It fit just fine in terms of installation and locking in place.
The problem is the unlocking. It is a tad rough from the left side (the non op side looking down from the top where the normal handle release is) but it works.
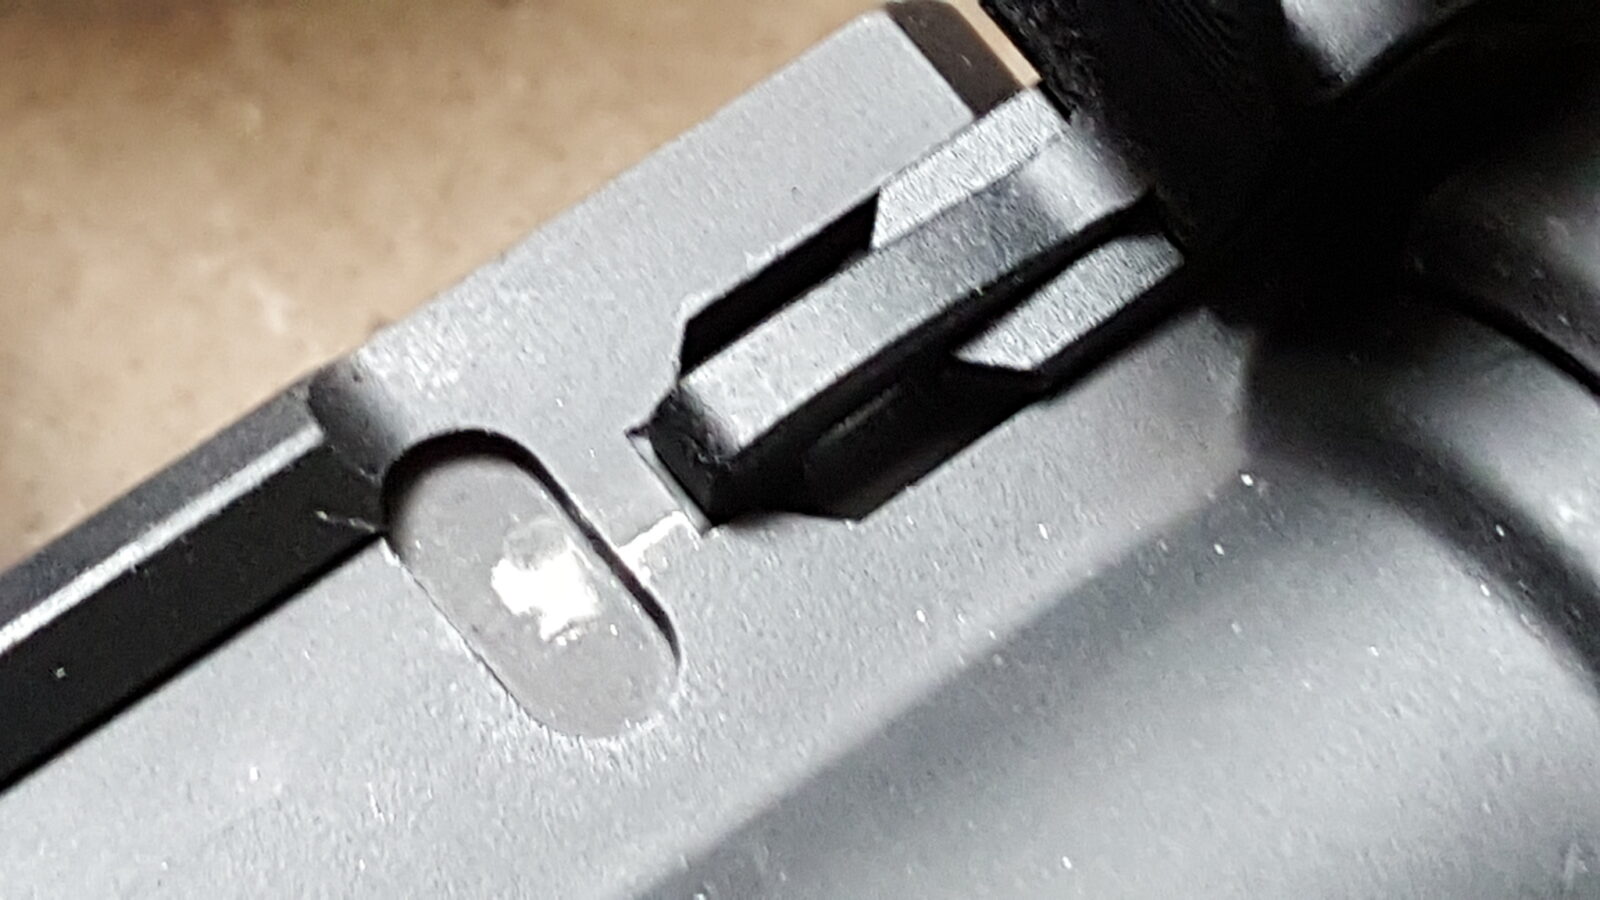
From the right side (where the ejection port is), if you pull back slow using the right tab the handle’s catch hook pretty much digs in and locks the handle in place. If I yanked hard and fast from the right, it would release. If I went slow, it would not release. This pretty well defeats the ambidextrous function claim.
There’s nothing odd about the upper – just a normal Palmetto State Armory upper. In the next photo, I stopped the handle short on purpose to take the photo of the locking area on the upper.
So, the CDH handle was gritty on the left and unpredictable on the right. Out it went and the BCM Mod 3 went in. By the way, a Mil-Spec charging handle worked just fine as does the BCM. I had a Mil-Spec handle in there before trying the CDH unit.
Bottom line, based on my experience, I would recommend against buying the Cold Dead Hands model. Stick with Mil-Spec or a name brand charging handle.
One of my favorite things is to do research. Before I bought my Hatsan Gladius Long Bullpup in .22, I did a lot of reading and also watching of videos. Youtube is a goldmine of reviews and insights that one should tap in to. Here are three videos that helped me learn more about the Gladius and especially get a better look at its features and how loud it was.
The first video is my favorite as the two guys set up the rifle and then go through each power setting and record three shots along with their velocity and calculated foot pounds of energy (FPE) for the pellet they were using. For some reason they did levels one through five but not six. Regardless, I was pretty much sold by the end of these three videos.
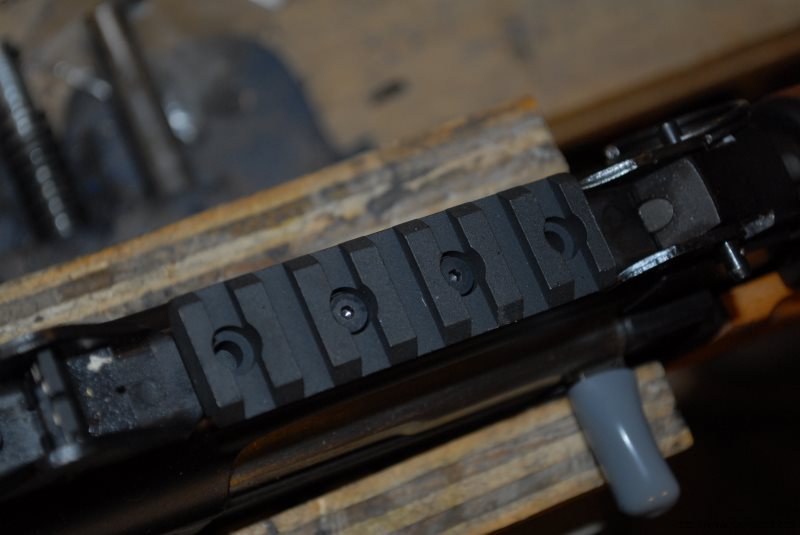
Another great accessory for the Yugo M92 or M85 PAP is the slick picatinny rail kit that CNC Warrior sells. This thing is a breeze to install and is the best means I have seen for adding an optic to the M92. Because the screws are inserted from the rail side, it is superior to other products that require the screws to come in from underneath the dust cover and risk being hit by the bolt carrier.
All you need is the pistol, a drill and some cutting oil to do the installation.
SAFETY STEP – MAKE SURE THE WEAPON IS UNLOADED. NEVER ASSUME THAT IT IS – VERIFY IT IS UNLOADED BEFORE YOU BEGIN WORK.
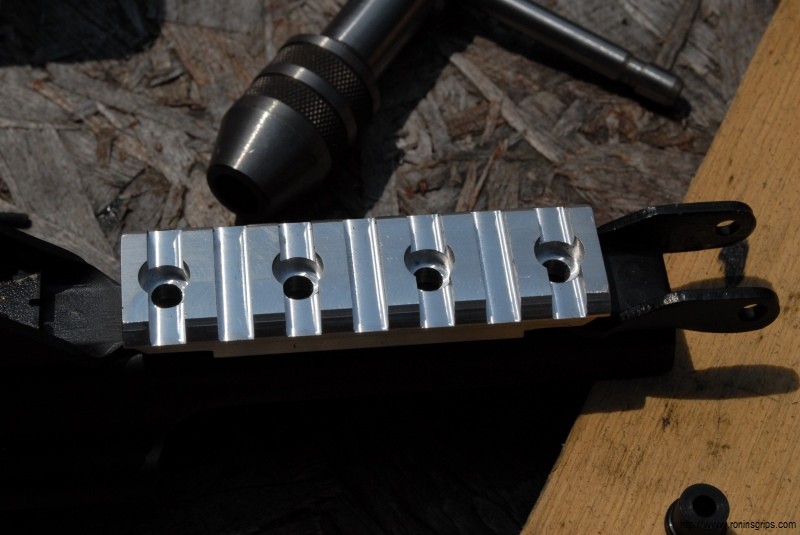
1. This is the top thick hinge of the M85/M92 dust cover. See the faint circles? Those are the spot welds and they are very hard! Do not drill into them! The new CNC Warrior mount has four holes and you only need to use two of them. The reason there is four is so you can pick the best two that get you around/away from the spot welds. Please note that my rail is only silver because it was a brand new design and they hadn’t applied a finish yet. If you order one, you will get a black rail!
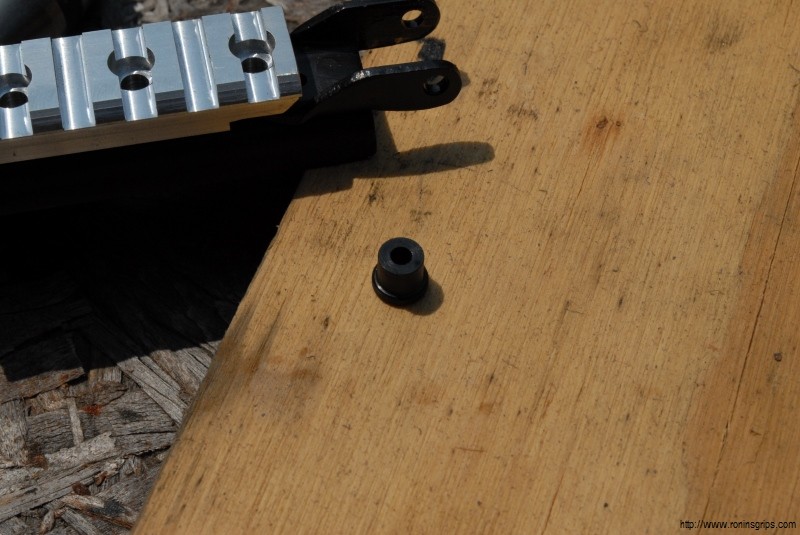
2. Here you can see my fancy high tech tools. My Ryobi drill, Tap Magic cutting oil to lubricate the drills and the taps. Note, you will need to buy a tap handle if you do not have one. Do not take the short cut of trying to start the tap with a regular socket or open end wrench. You really want the tap to be firmly held so you can tap the threads at a right angle to the surface of the hinge. Also, see that little black cylinder? That is a drill guide that you put into the hole you select to guide the drill bit to the right place on the hinge. Be sure to use the cutting oil!
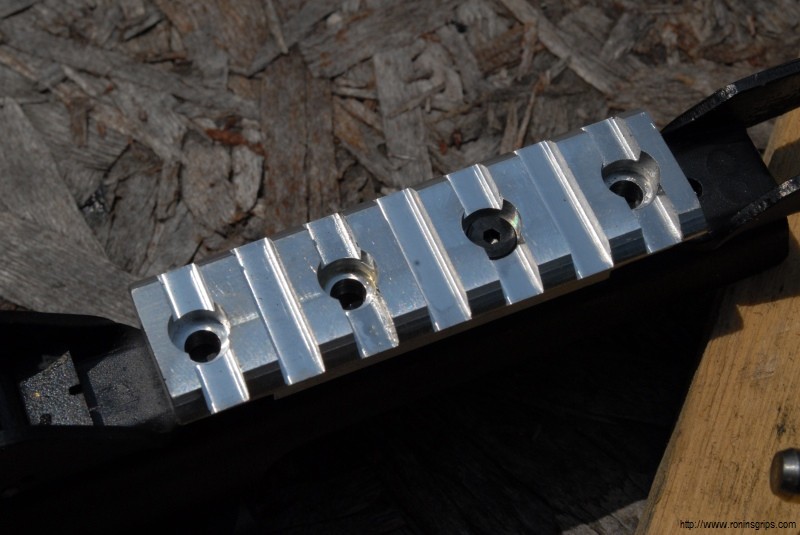
3. As an aside, I blasted the mount and then sprayed on flat black Molyresin and baked it. You’d never know it came to me unfinished.
4. After you clean up the chips and are ready to do the final screwing of the mount, be sure to apply Blue Loctite so it does not come loose.
That’s it! The mount is solid and it holds my Vortex Sparc red dot just great. Note our quick takedown pin to make it easy to remove the cover and get the optic out of the way.
10/27/18 Note: Vortex discontinued the Sparc red dot. They sell a great 2 MOA red dot called the Crossfire that I really like.
I use a lot of flashlights and the problem is that I tend to lose them. Thus, while I like and appreciate high-end lights, they can be expensive to lose, crush, etc. As a result, I tend to try and find decent lights at a low price. In my recent trolling of Amazon I was intrigued by the LiteXpress LXL439001. You might think I was trolling for lumens but I am way over that – I want something in the 40-100 lumen range with good battery life, is LED, and rugged yet affordable. If I lose it, I don’t want to have an awful sense of loss.
I also prefer AA or CR123A batteries, which I buy in bulk. You guys may know this already, but shop for CR123A batteries on Amazon plus Walgreen’s Alkaline batteries are great and very affordable. When it comes to the CR123As, buy brand name and check reviews – all the major light manufacturers warn against the no-name cheap import batteries due to the risk of fire. I check brands such as Surefire, Energizer and Streamlight for volume deals on Amazon. The price savings are huge compared to local stores.
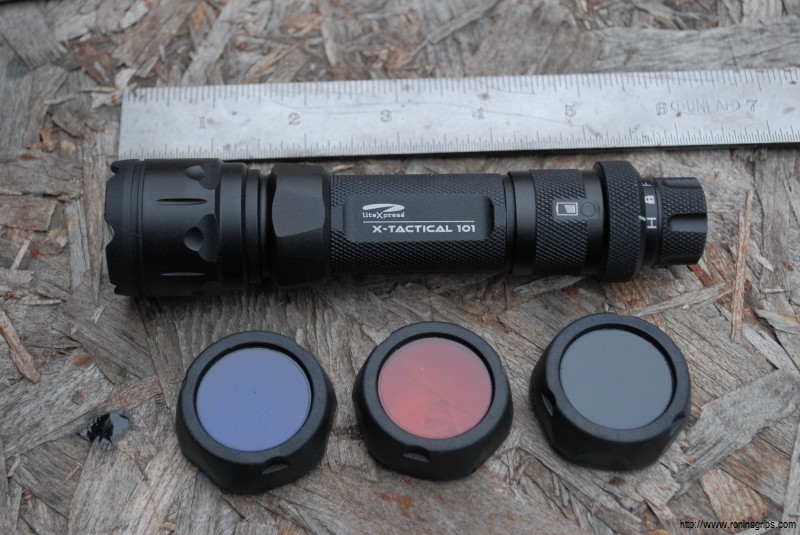
At any rate, what attracted me wasn’t lumens or some tacticool styling feature – it was the little rotary switch on the tail end and it stopped me dead. I loathe the “click and try to get it right” 3-5 mode lights. Seriously, they drive me crazy. I want something simple and predictable. I’m not even a huge fan of low-high-off but can deal with it. I’m sure you’ve seen the lights where they have all kinds of features – typically low, high, strobe, SOS, etc. You know what I really want – on and off. The LiteXpress has an on/off switch and the genius in in moving all the features to the rotary with symbols – I can go straight to whatever mode I want and if I hold the on/off button down, then the intensity can drop down from 122 by 10% increments.
You see, the LiteXpress is designed in Germany but built in China. There is an attention to design in this light that frankly surprised me so much that I bought it and decided to write about it. When the Amazon box arrived, I opened it up and found the light secured in a plastic blisterpack shell. Of course, I had to snap a few photos to share with all of you:
Features:
122 lumens max but can decrease to 10 lumens
Push-button on/off on the barrel
Rotary selector switch on the tail end. The modes are lock, high, flash (strobe or SOS can be selected), and temporary on/off. Pretty cool.
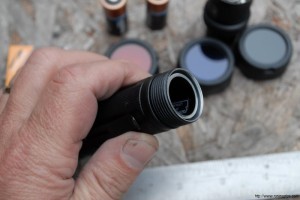
Three color filters that firm slide over the output end of the light
LED battery indicator: green = 100%, Yellow=approx 50% and Red=approx 10% remaining
It came with 2 Duracell CR123A batteries
Aluminum case
I have been using it a few days now and really like it. It’s higher quality than I expected and you’ll find it hard to beat for $23. If you are looking for a decent flashlight, you might want to check it out.
Update on 7/1/14: We lost power last night and this flashlight was fantastic. I used it last night and this morning after the powerful storm went through. It worked great the whole time and even after at least 45-60 minutes of ontime the batteries are reported as “green” by the power indicator. We may well not have power tonight either and I will be using this more again if that happens.