Tag Archives: red dot

American Defense Red Dot Optic Mounts Rock!

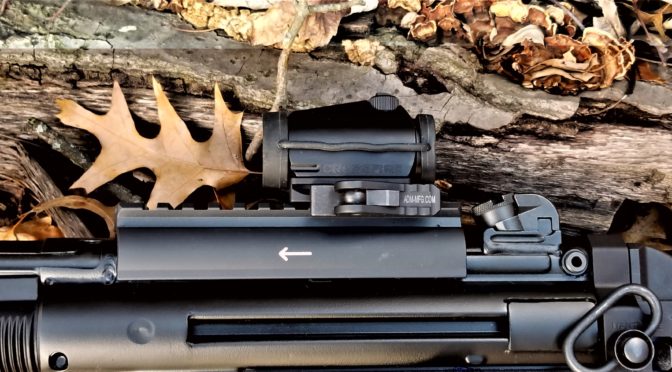
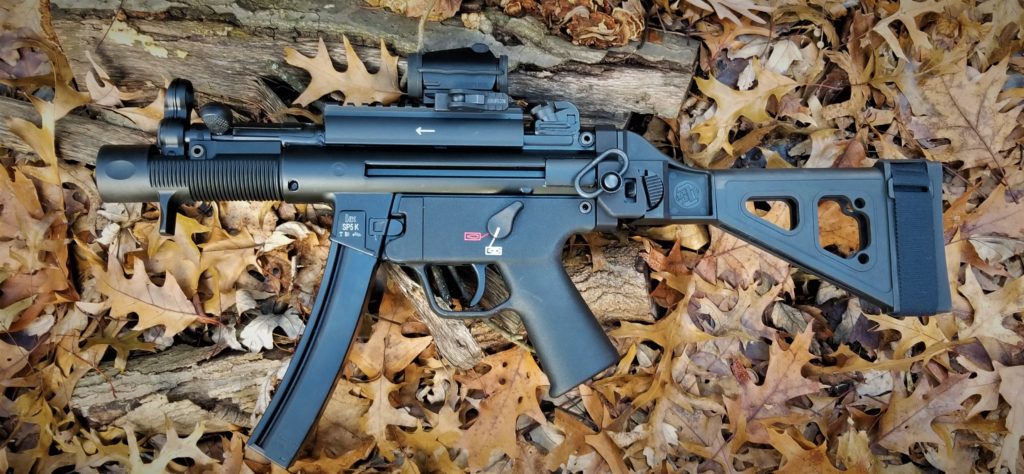
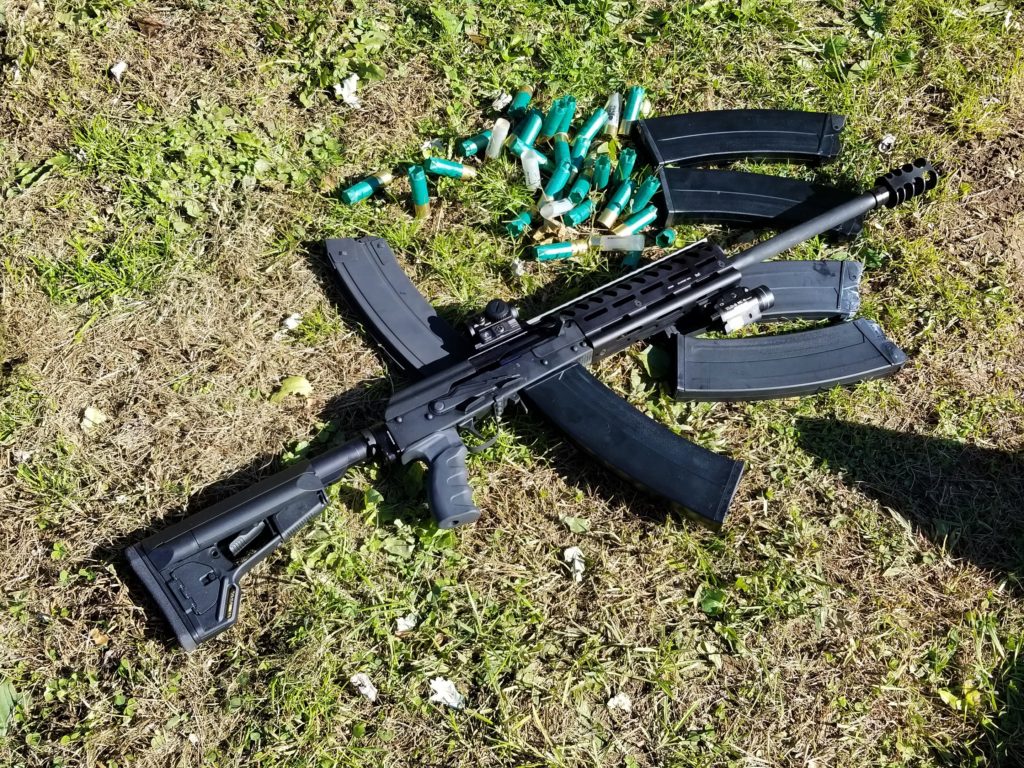
I really like Vortex Crossfire Red Dots and have been using them extensively for a while now.  They’ve survived 9mm POF-5. 12 gauge shotguns, 5.56 ARs and 7.62×39 AKs with no problem.  The only modification they need is a good quick release mechanism in my opinion.

HK SP5 with a Vortex Crossfire and an American Defense AD-T1-L STD low mount.
Lynx 12 gauge with a Crossfire and also the AD-T1-L STD low base.

The designers at Vortex are pretty shrewd.  They designed the Crossfire to share the same base as the Aimport T-1/H-1.  Because of that smart design consideration, it opens up a ton of options for you.  

My preference these days are quick release mounts made by American Defense right here in the US.   The units are made from 6061 T6 aluminum and finished with a T3 anodized unit.  They are rock solid.  I have had problems in the past with cheap import models and these are rugged and reliable.

They have a low profile unit that I like for AKs and my POF-5 where I don’t care about co-witnessing with the iron sights.  It’s their AD-T1-L STD model.

They also make a taller unit that is an absolute co-witness height for ARs.  

This is one of my Vortex Crossfires.  It has the low-profile American Defense mount on it and the co-witness model is the taller unit on the right.   The small lever you see sticking out from the main lever is the lock to prevent an accidental release.
The bases are held in place by four small screws.  Here’s the “-L” low model next to the co-witness “-10” model.
To change bases is just a matter of removing four screws.  To avoid the screws loosening, use a blue medium Loc-tite or Vibratite.  Do not use a permanent formula.
To adjust the fit, you push with one finger from the lever side and the nut is pushed out of its housing straight across.  Turn it one hex side at a time.  Turn it clockwise to make the clamp tighter or counter-clockwise to loosen it.  (righty-tighty and lefty-loosy

These American Defense mounts work like a charm and the quality is evident.  I can easily remove the red dots when I am working on a weapon or even swap optics if I so choose.  They do have a repetitive zero but I would recommend always putting it in the same rail slot for consistency.

I hope this helps you out.


If you find this post useful, please share the link on Facebook, with your friends, etc. Your support is much appreciated and if you have any feedback, please email me at in**@ro*********.com. Please note that for links to other websites, I may be paid via an affiliate program such as Avantlink, Impact, Amazon and eBay.


Installing the CNC Warrior Picatinny Rail Scope Mount for the M92 PAP Pistol

Another great accessory for the Yugo M92 or M85 PAP is the slick picatinny rail kit that CNC Warrior sells.  This thing is a breeze to install and is the best means I have seen for adding an optic to the M92. Because the screws are inserted from the rail side, it is superior to other products that require the screws to come in from underneath the dust cover and risk being hit by the bolt carrier.

All you need is the pistol, a drill and some cutting oil to do the installation.

SAFETY STEP – MAKE SURE THE WEAPON IS UNLOADED.  NEVER ASSUME THAT IT IS – VERIFY IT IS UNLOADED BEFORE YOU BEGIN WORK.

1.  This is the top thick hinge of the M85/M92 dust cover.  See the faint circles?  Those are the spot welds and they are very hard!  Do not drill into them!  The new CNC Warrior mount has four holes and you only need to use two of them.  The reason there is four is so you can pick the best two that get you around/away from the spot welds.  Please note that my rail is only silver because it was a brand new design and they hadn’t applied a finish yet.  If you order one, you will get a black rail!

DSC_0241

DSC_0243

2.  Here you can see my fancy high tech tools.  My Ryobi drill, Tap Magic cutting oil to lubricate the drills and the taps.  Note, you will need to buy a tap handle if you do not have one.  Do not take the short cut of trying to start the tap with a regular socket or open end wrench.  You really want the tap to be firmly held so you can tap the threads at a right angle to the surface of the hinge.  Also, see that little black cylinder?  That is a drill guide that you put into the hole you select to guide the drill bit to the right place on the hinge.  Be sure to use the cutting oil!

DSC_0244

DSC_0245

DSC_0246

DSC_0247

DSC_0248

DSC_0249

DSC_0250

DSC_0255

DSC_0257

3.  As an aside, I blasted the mount and then sprayed on flat black Molyresin and baked it.  You’d never know it came to me unfinished.

DSC_0268

DSC_0269

DSC_0275

By the way, pictured above is a cheap Harbor Freight air brush.  I used to buy a bunch of them at a time and then throw them away when they hard problems.  I now use a Paasche H series air brush and am much happier with it.

4.  After you clean up the chips and are ready to do the final screwing of the mount, be sure to apply Blue Loctite so it does not come loose.

DSC_0276

DSC_0278

That’s it!  The mount is solid and it holds my Vortex Sparc red dot just great.  Note our quick takedown pin to make it easy to remove the cover and get the optic out of the way.

DSC_0332

10/27/18 Note:  Vortex discontinued the Sparc red dot.  They sell a great 2 MOA red dot called the Crossfire that I really like.


If you find this post useful, please share the link on Facebook, with your friends, etc. Your support is much appreciated and if you have any feedback, please email me at in**@ro*********.com. Please note that for links to other websites, I may be paid via an affiliate program such as Avantlink, Impact, Amazon and eBay.