Tag Archives: airgun

Looking for a Wicked Russian Designed Semi-Auto Airgun? Check Out The Edgun Leshiy 2

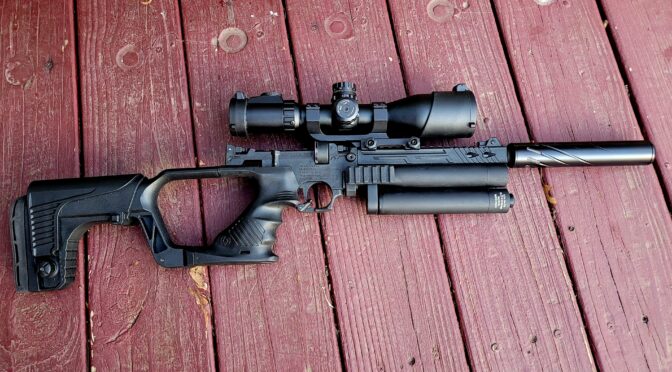
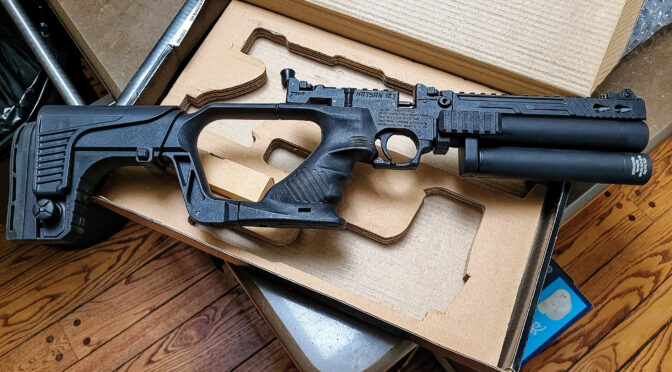
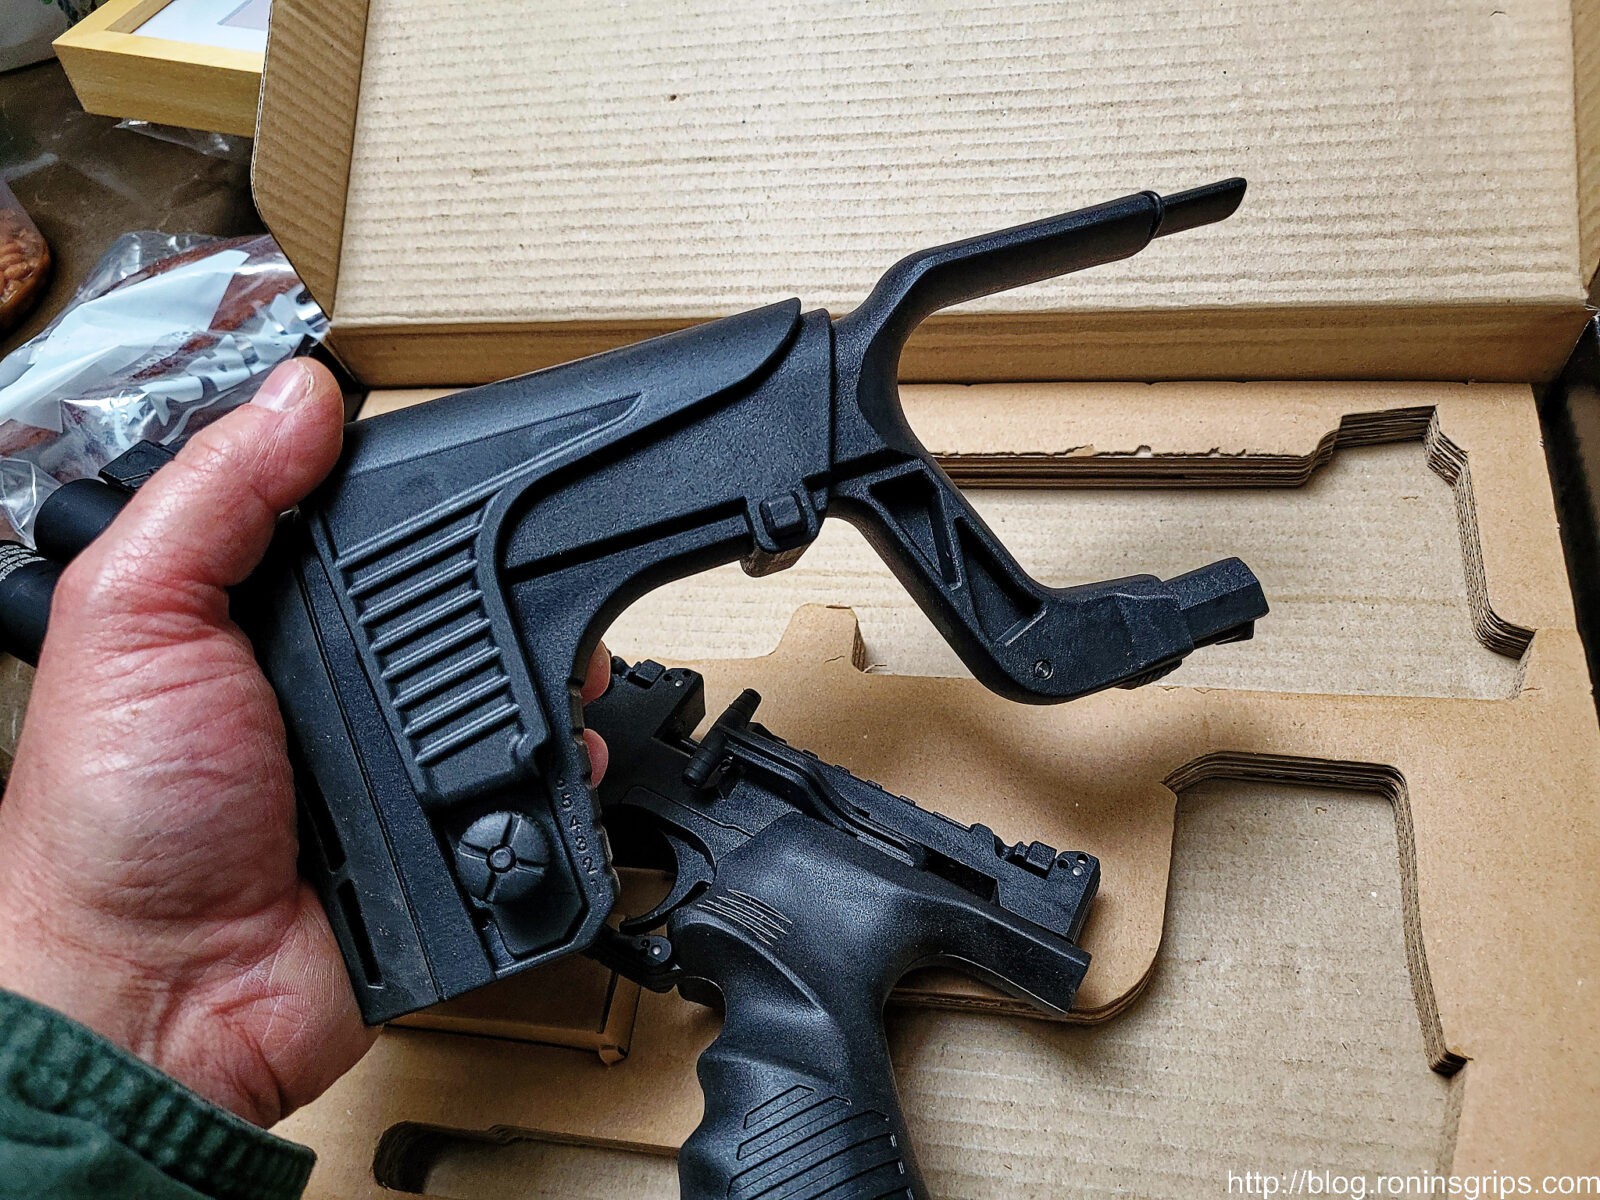
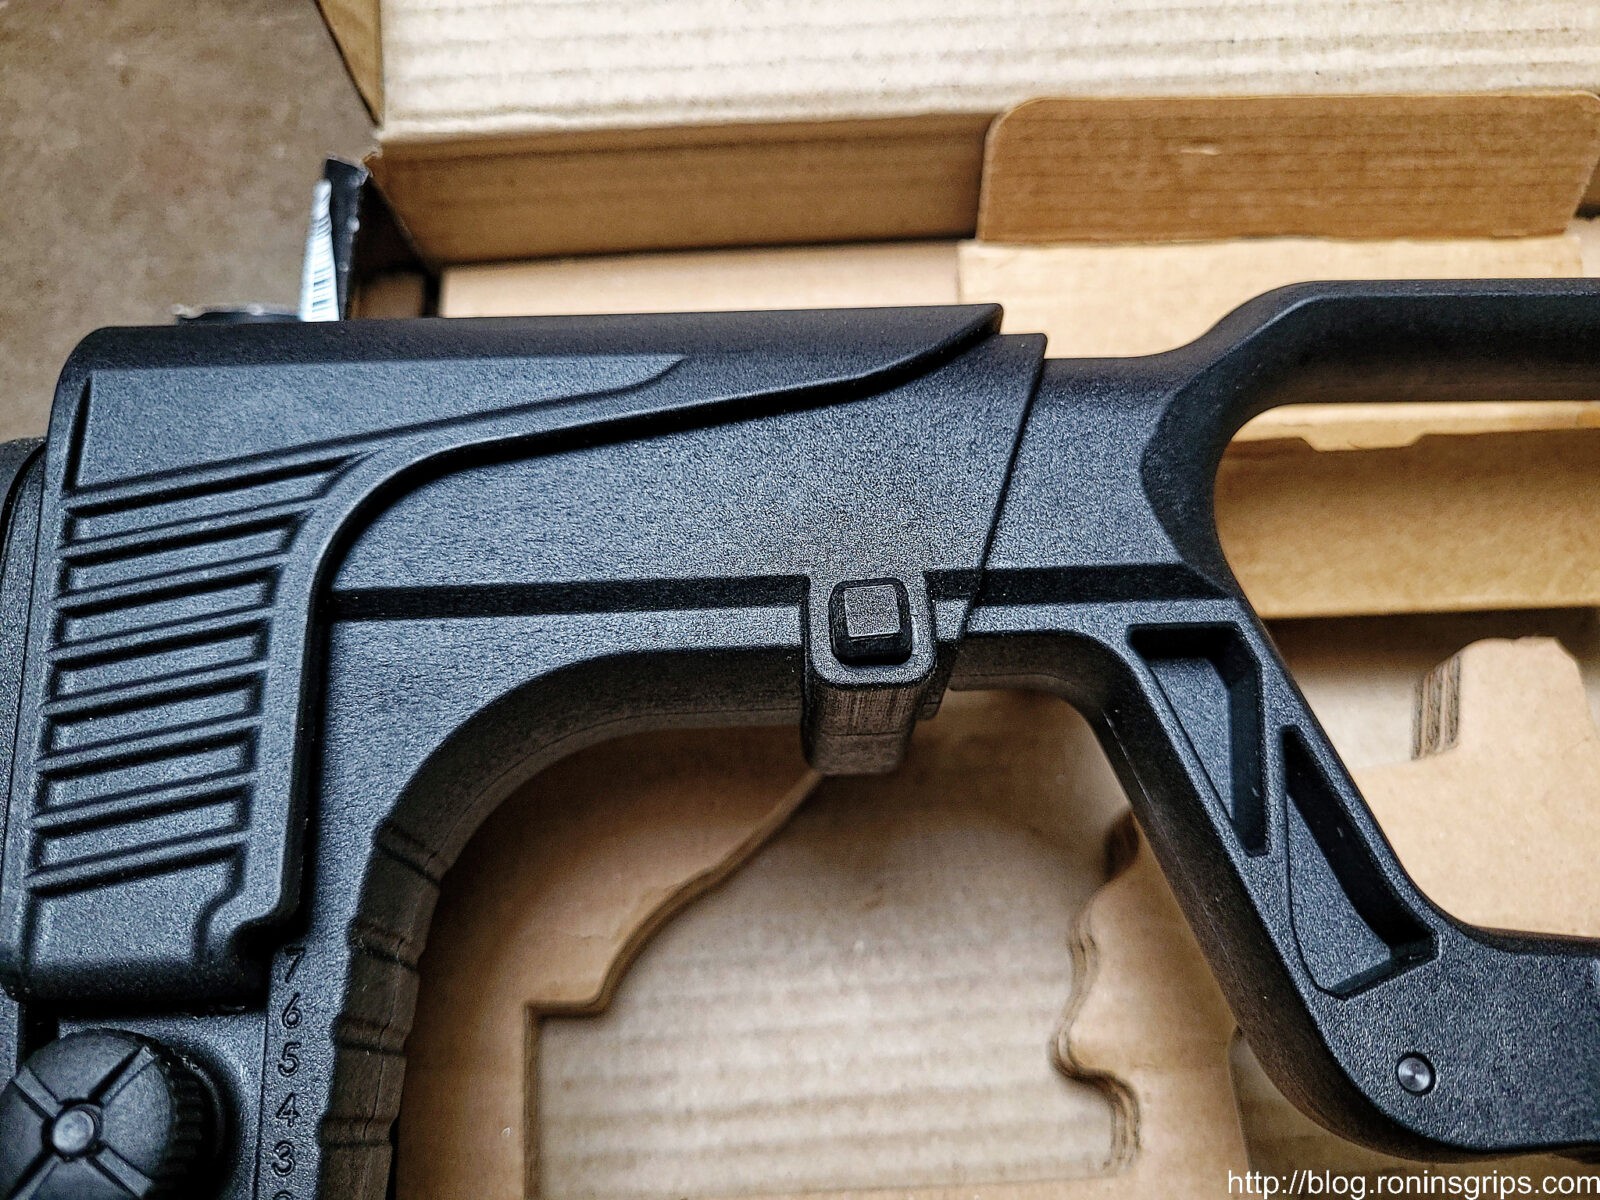
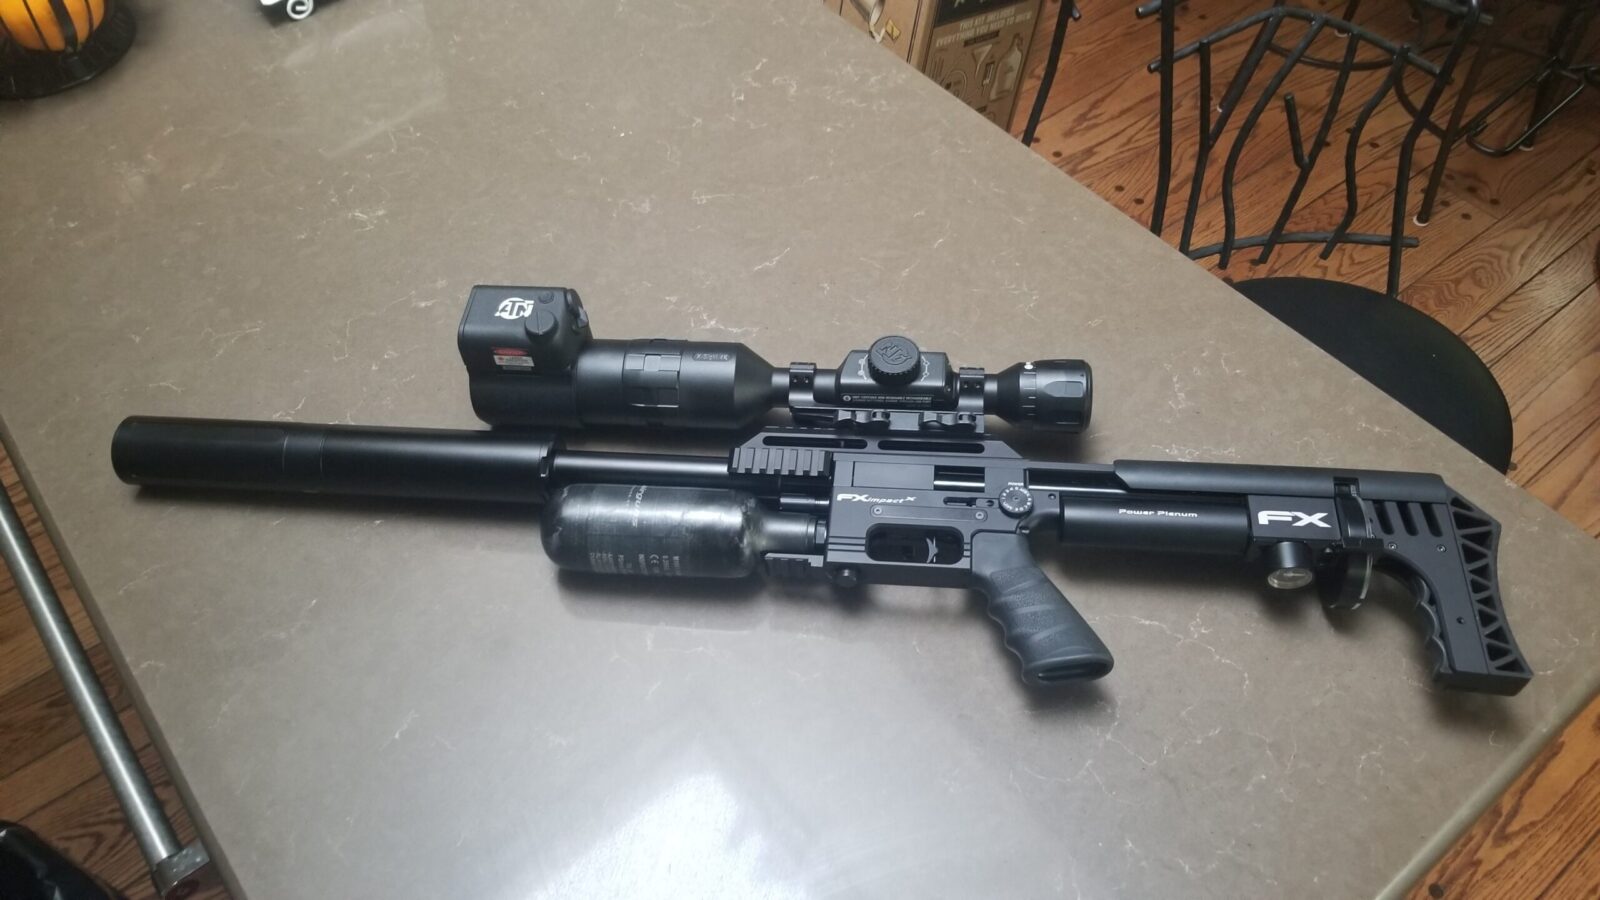
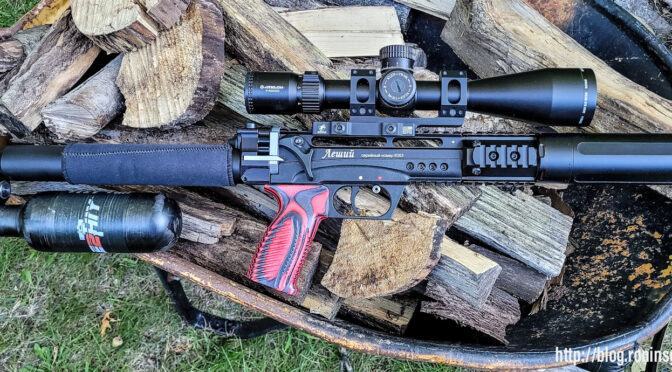
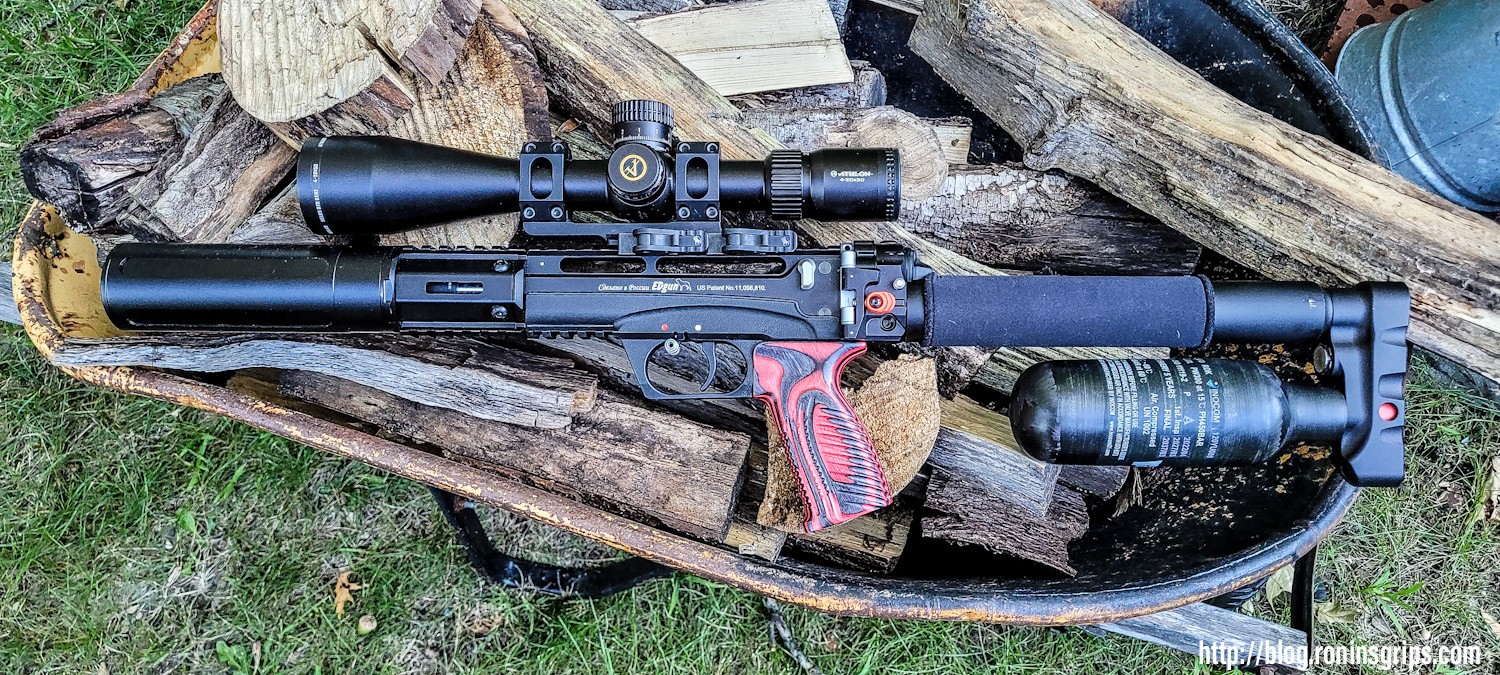
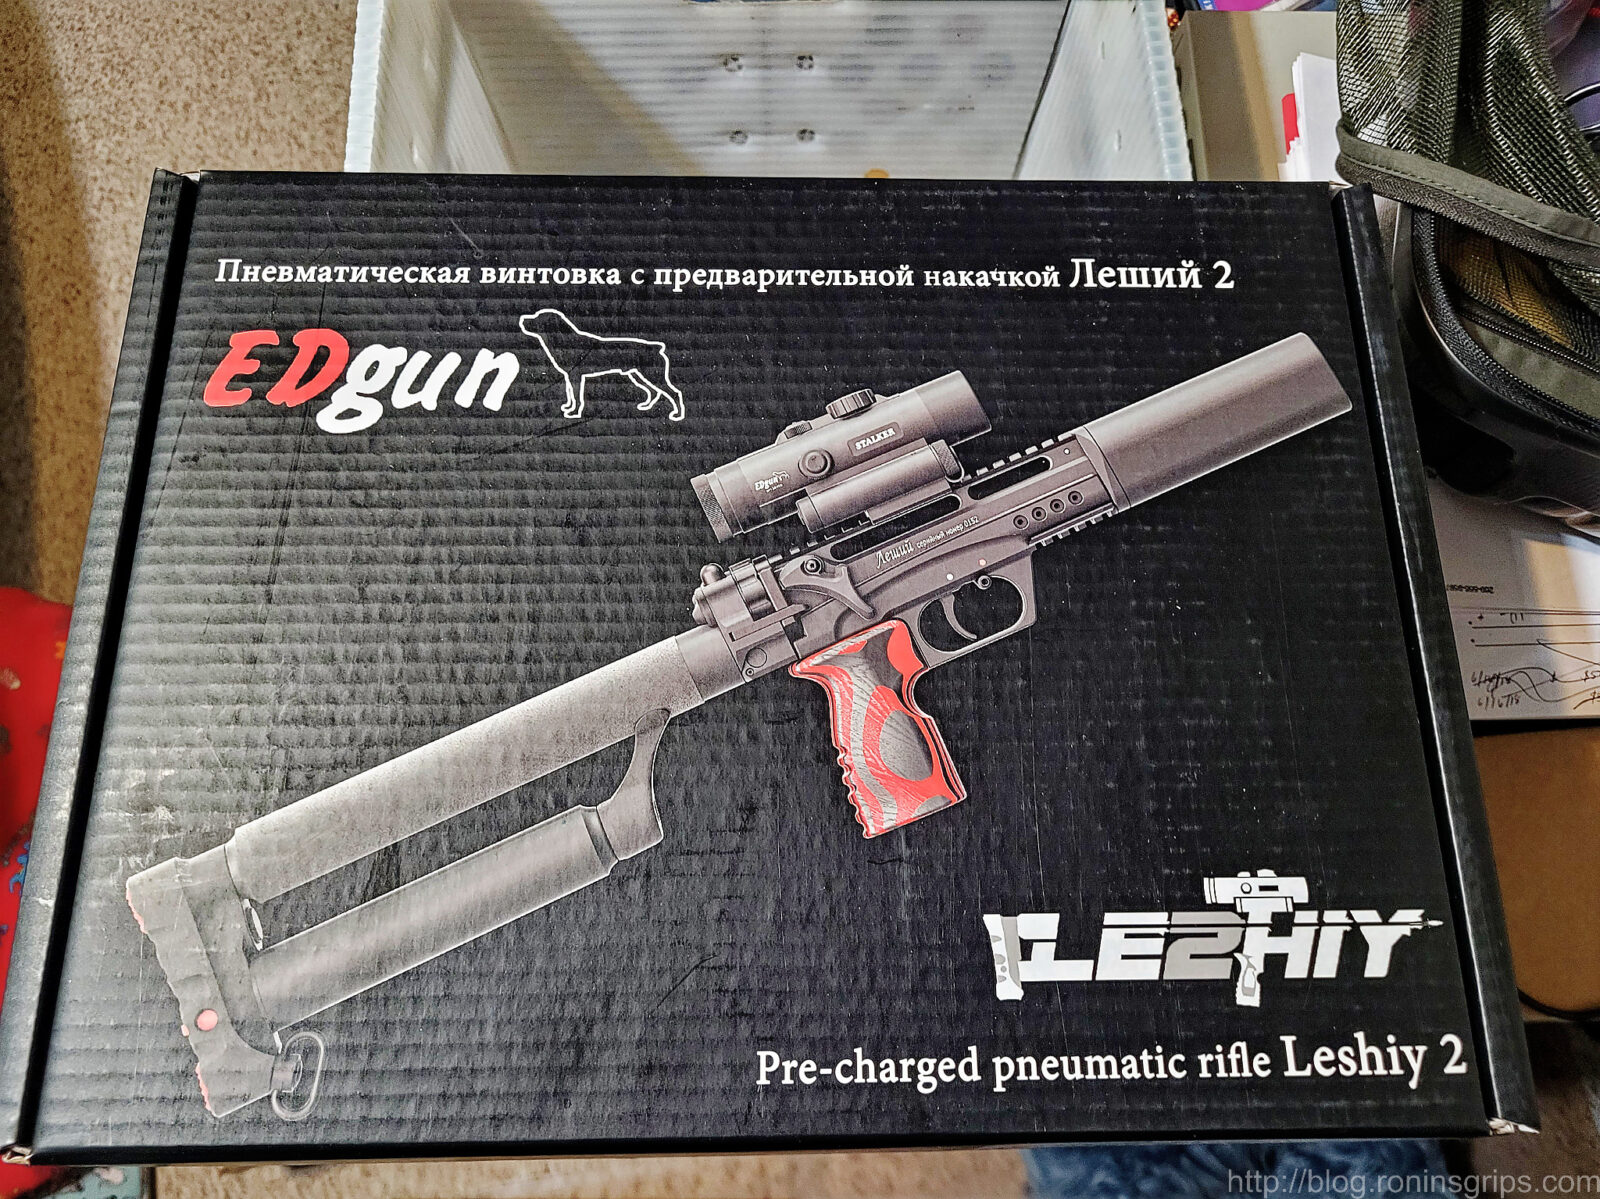
Folks, in February 2023, I bought an EdGun Leshiy 2 Short Wolverine (REPR) from EdGun West. For those of you not familiar with it, the Leshiy 2 is a semi-automatic precharged pneumatic (PCP) airgun. I can sum up my feelings about it having used it for six months now in one word – “wow!” Now bear in mind, I had to buy this so you are going to get an honest review here.

I bought it for pest control with fast follow up shots in mind. When I went from single-shot pellet guns to bult-action with a magazine, that was an amazing improvement. Semi-auto thought, that’s a whole new game – your eye doesn’t even have to leave the scope and the follow-up shot is just a matter of pulling the trigger.

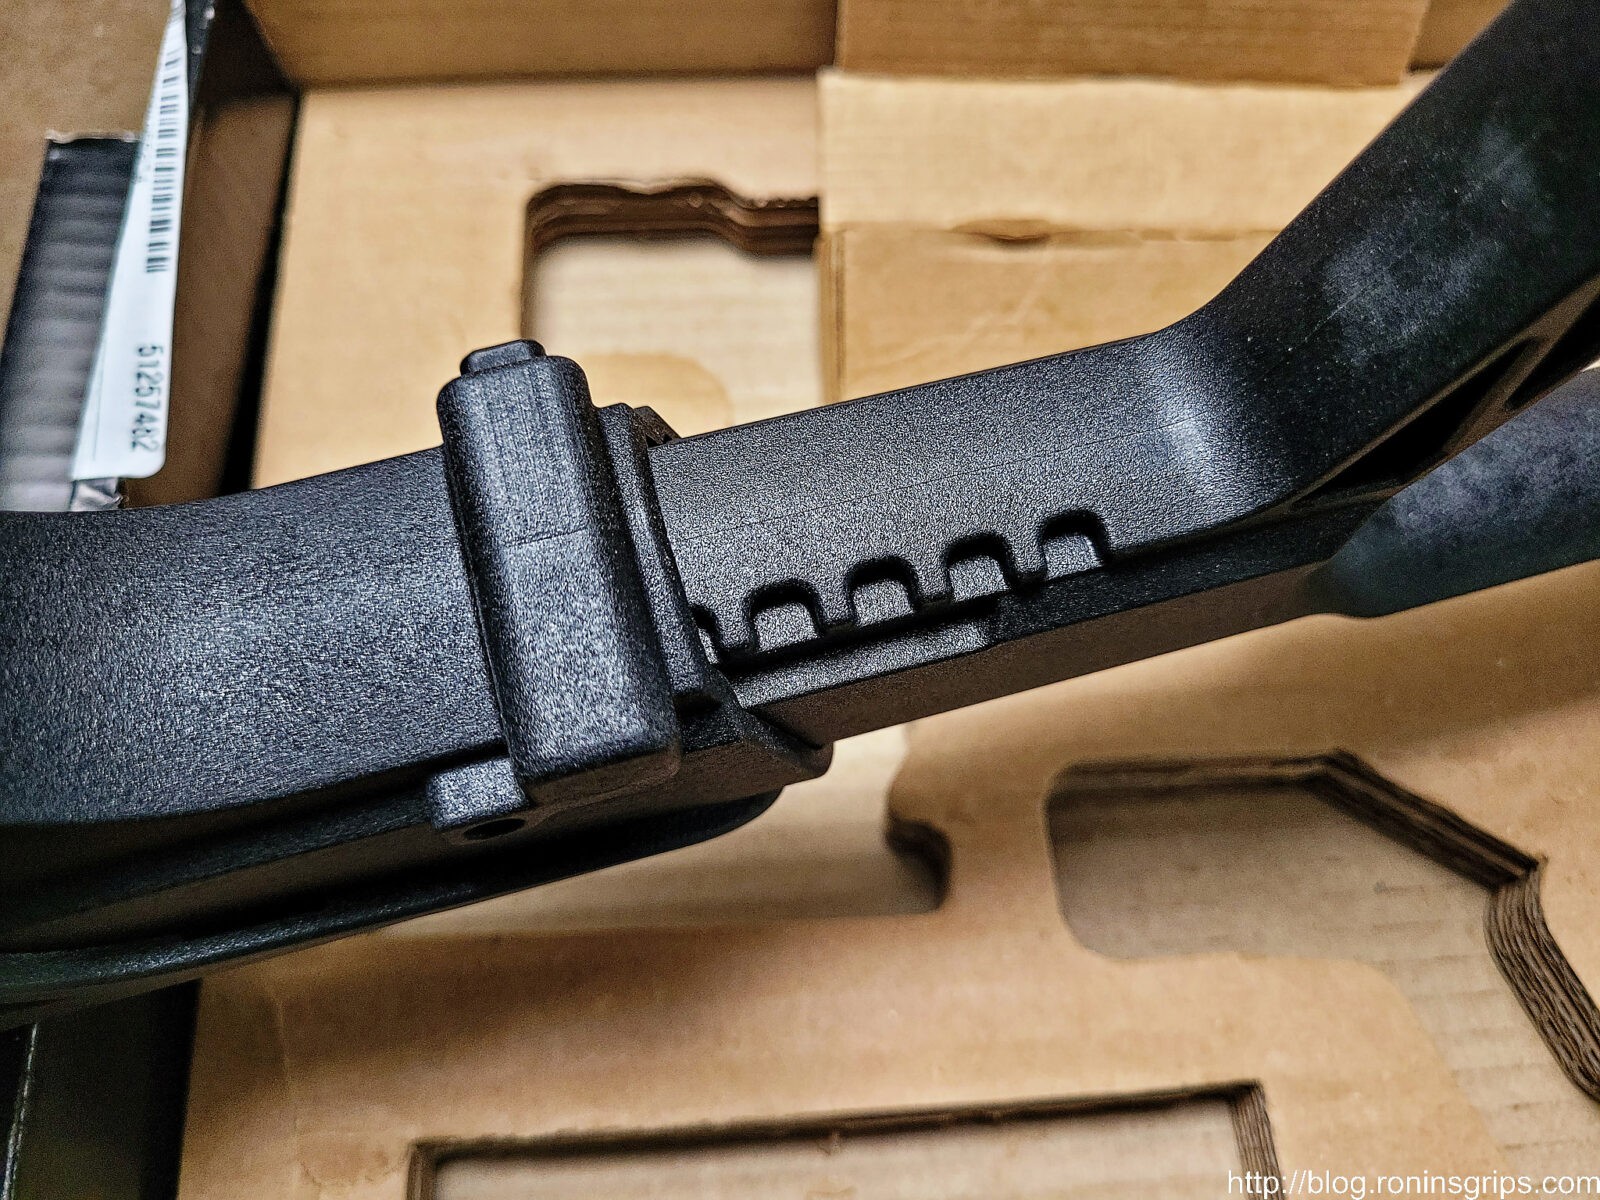
The Leshiy 2 is pricey but it has some amazing engineering in it and is built very nicely. Is it worth it – I’m going to say “Yes” at this point butt we need to view it as a tool and as such it excels at certain use cases but not others. So, what I want to do is to share my experiences for the last six months.

What you are looking at is an Edgun Leshiy 2 Wolverine Short with a REPR valvle. That means it has a 250mm (9.3 inch) barrel, an upgraded Edgun Carbon Fiber air tank, DonnyFL Ronin airgun moderator, ADM scope mount and an Athlon Helos BTR Gen2 4-20×50 Mil-Dot scope. How I arrived at this current configuration has a story that I will share over the next few posts.

Some Background On The Leshiy 2

The airgun company “Edgun” was founded by Eduard Gafarov in Russia in 2005. His designs are unconventional and very interesting to say the least. I’ll let you Google some of his other airguns – I want to focus this article on the Leshiy 2.

The word “Leshiy” refers to a male forest spirit from pagan Russian mythology. Literally “He from the forest”. Wikipedia has more if you want to open tab to read more.

This is actually the second generation of the Leshiy. The first, which is still availble as the Leshiy Classic, is a single shot model. I first heard about the Leshiy 2 in 2021 when I was searching for a new pest control airgun and bought a FX Impact Mk. II Compact. At the time, I went with the FX because it was more affordable and I was a little bit leery of the relatively new Leshiy 2 design.

What Was My Use Case?

No tool, no firearm, no knife, no airgun does everything. You must think about your intended use – what engineers call the “use case”. You want to thing this through to aid you in your selection. If you don’t you risk buying something that doesn’t meet your needs.

For me and pest control, I needed the airgun to be:

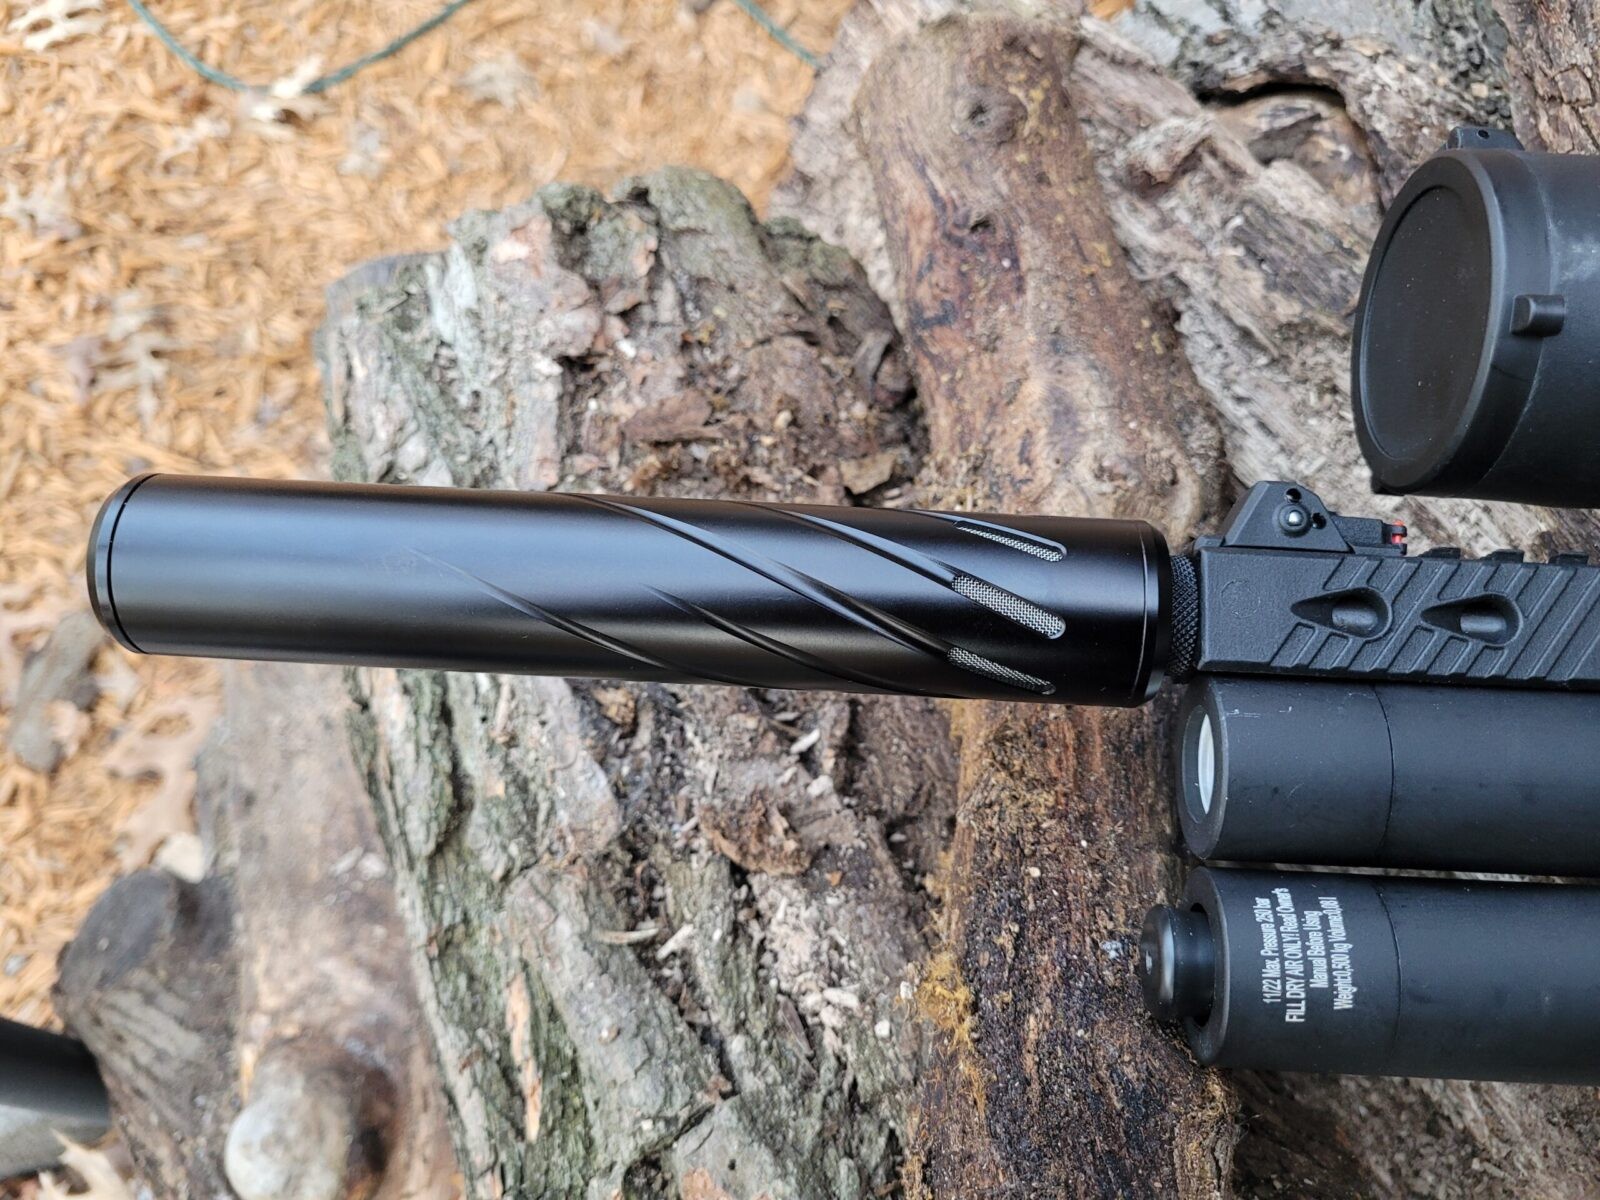
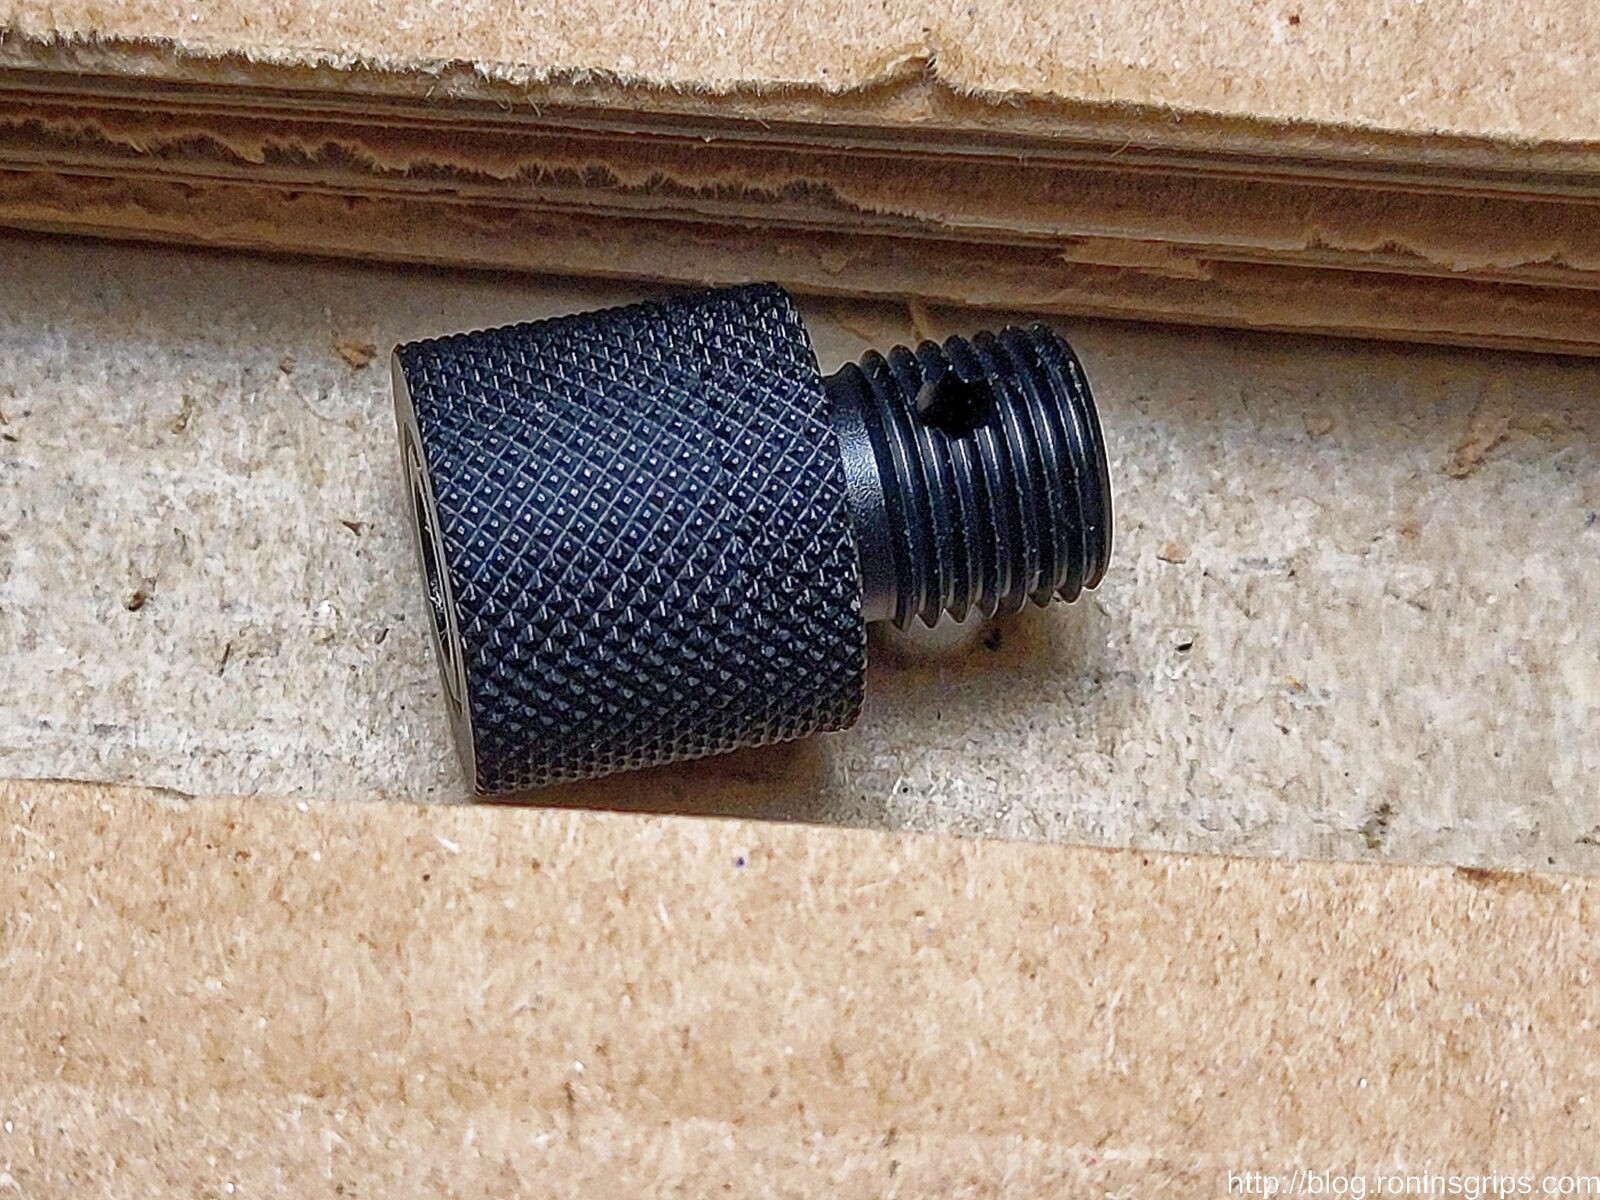
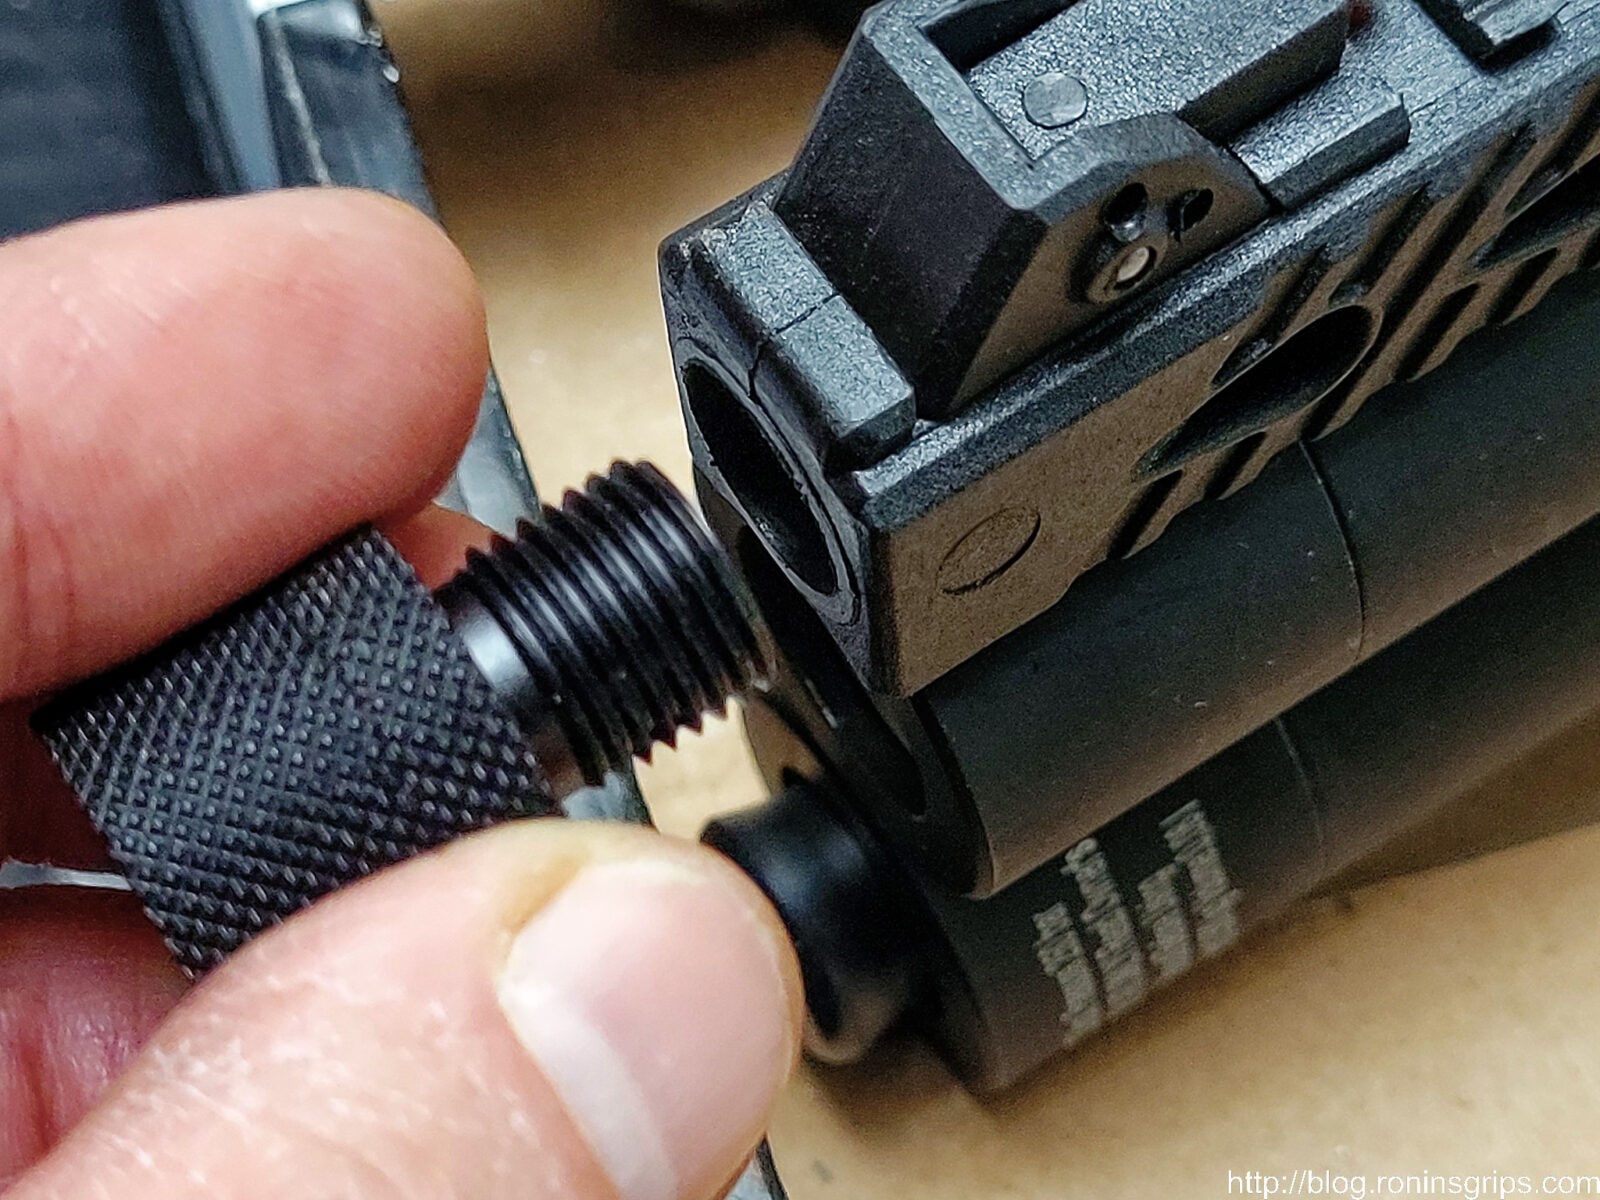
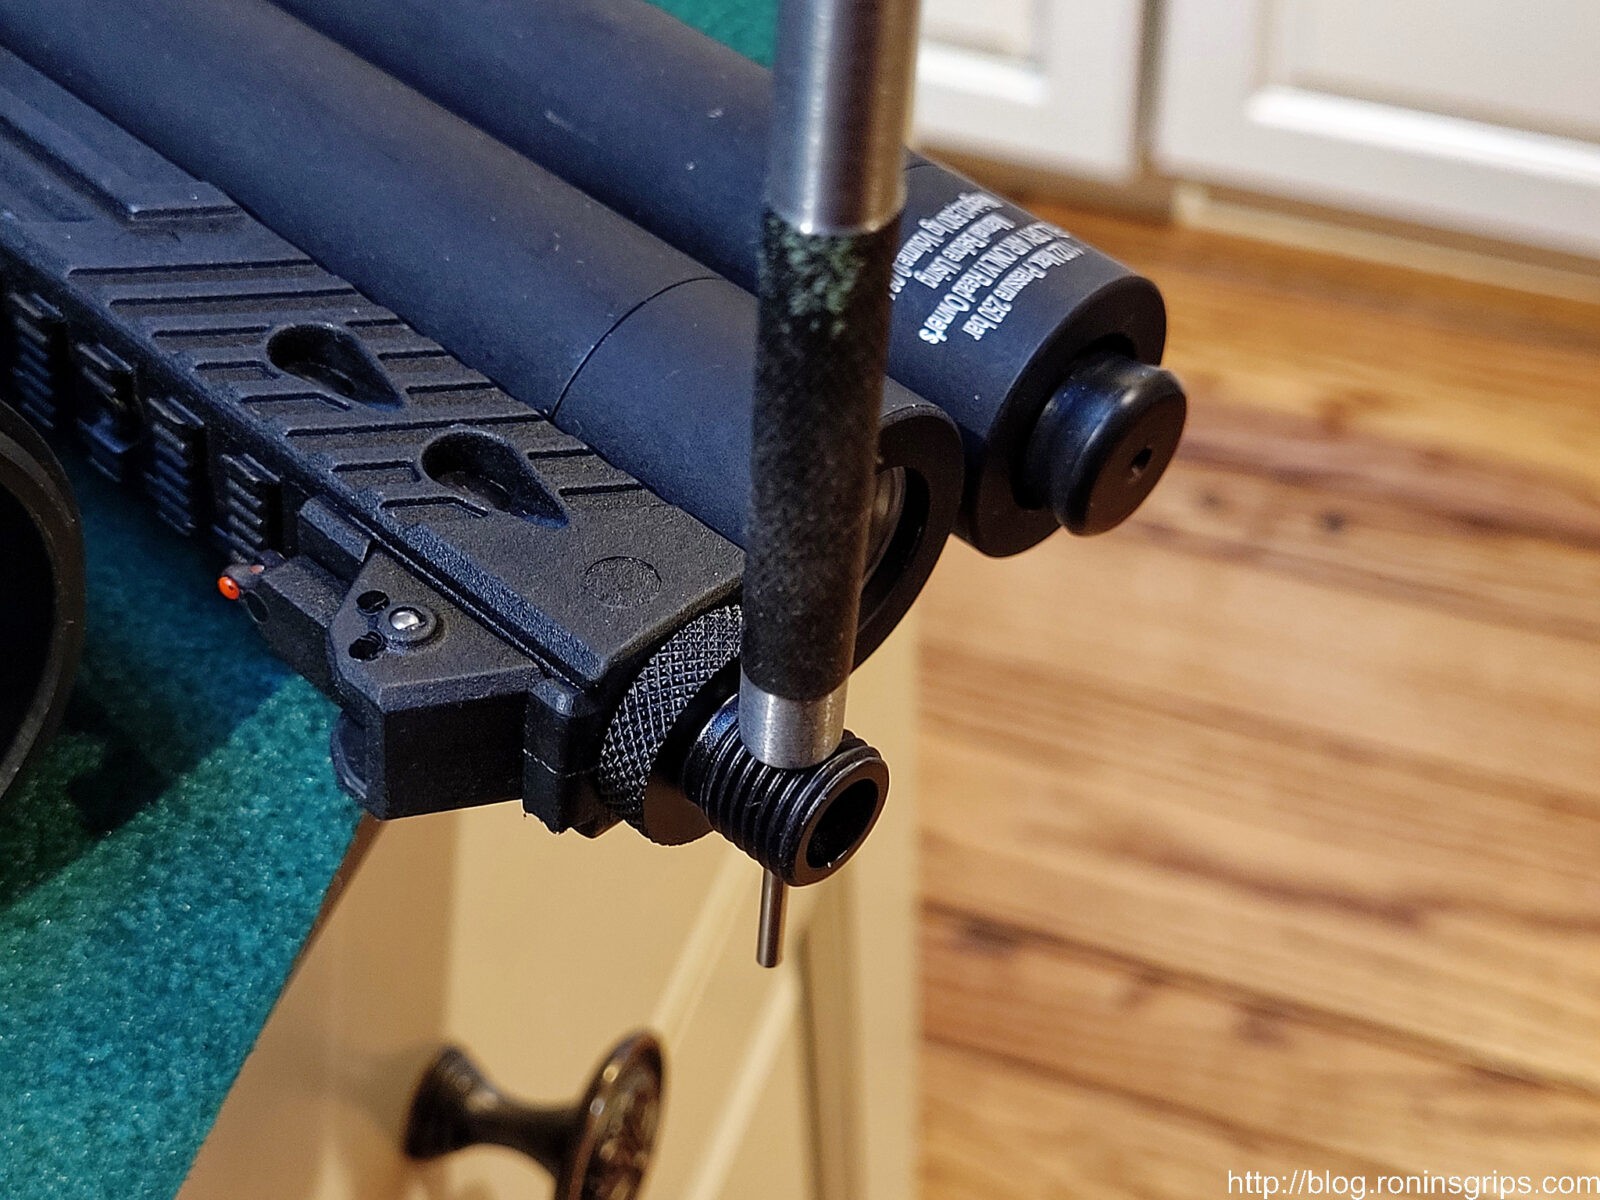
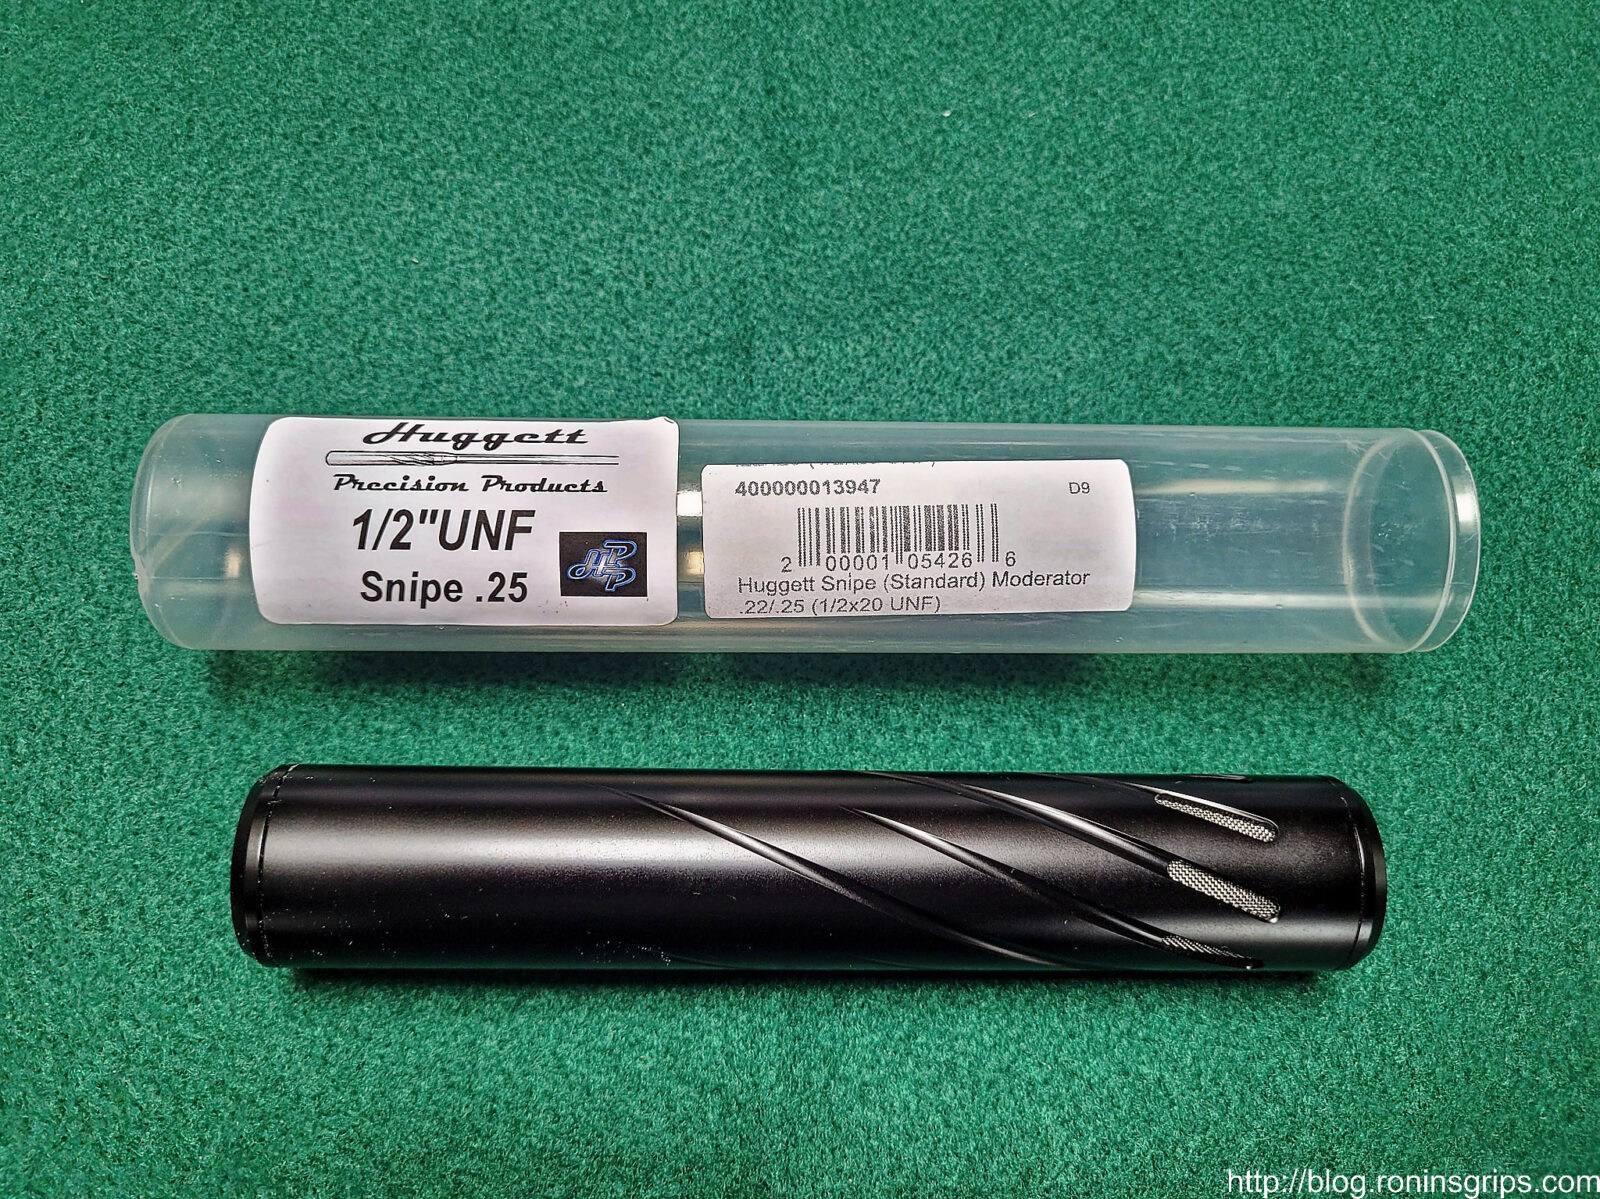
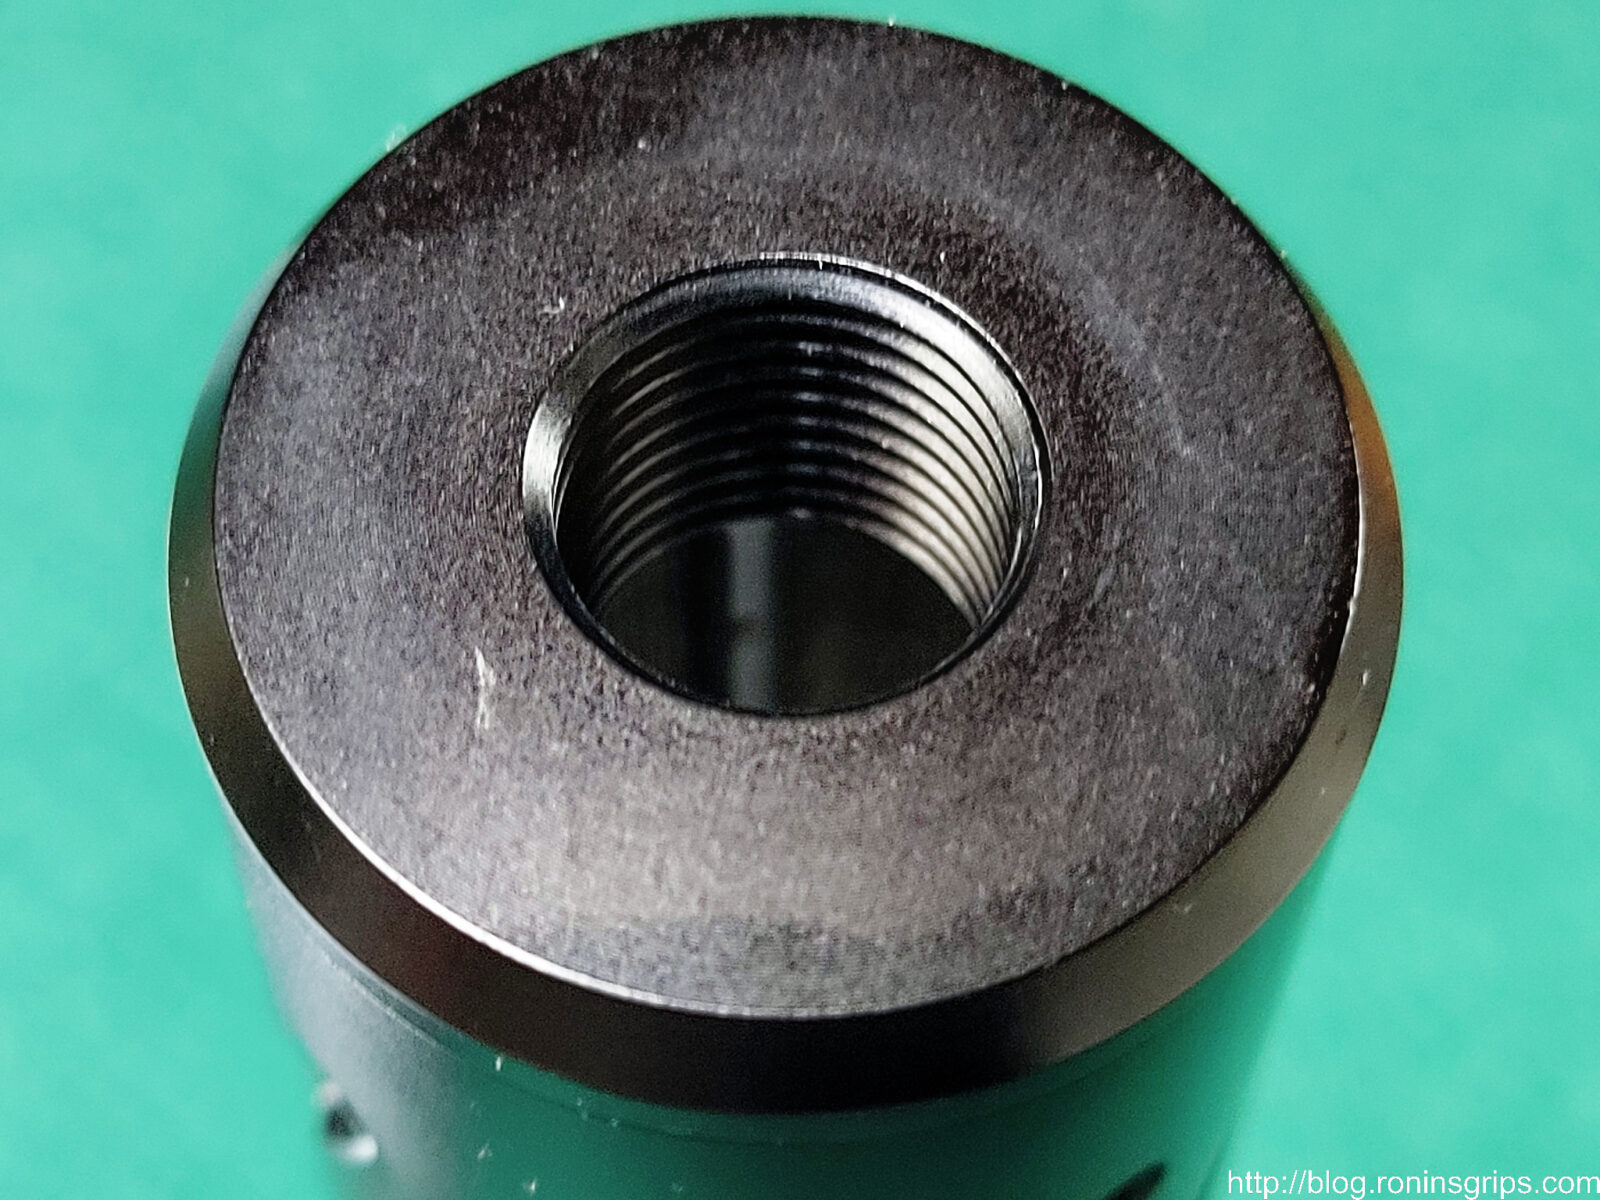
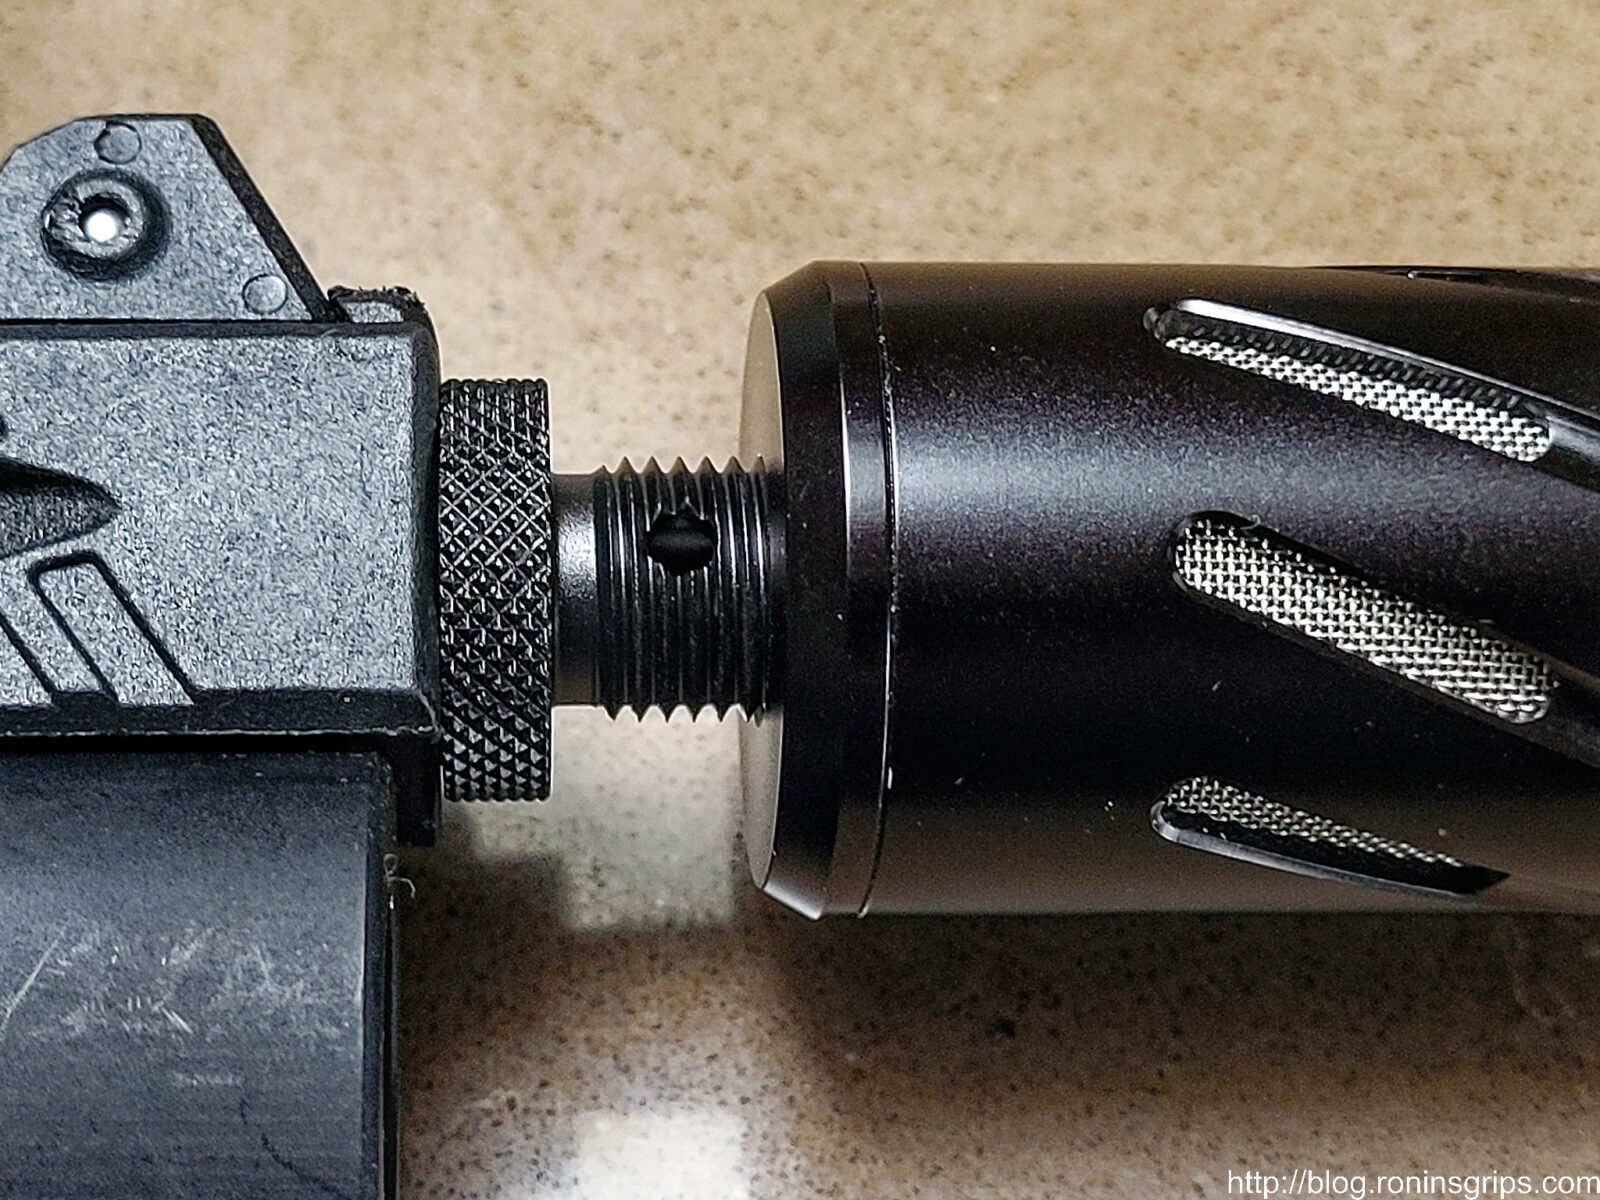
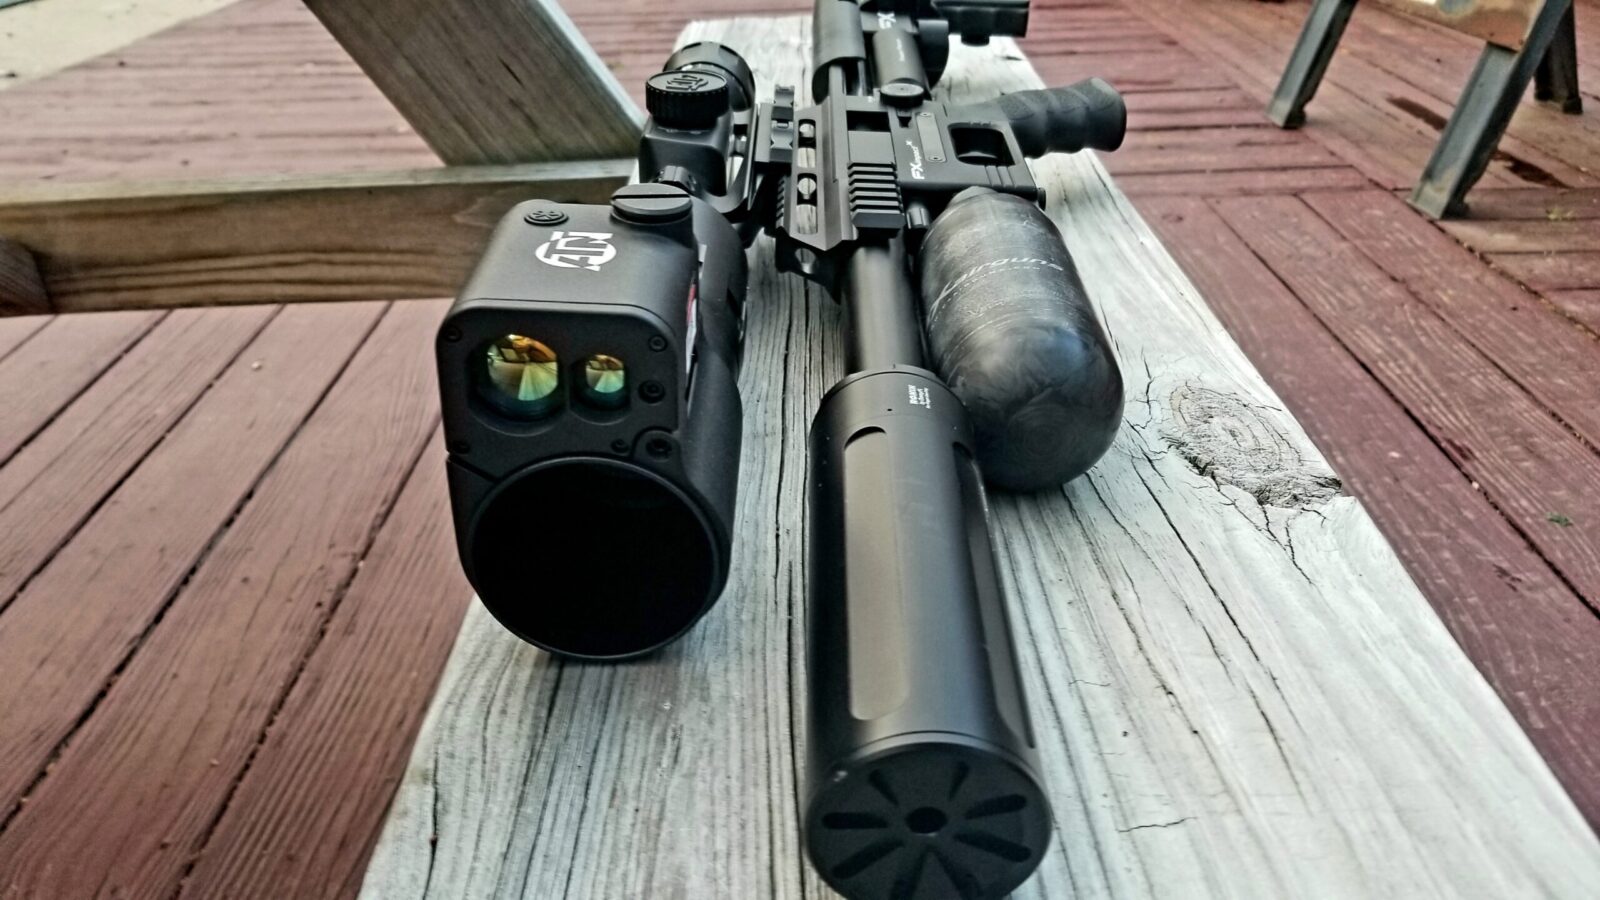
  • Quiet – this was for residential pest control and I needed the sound signature to be as low as possible so the muzzle needed to be threaded and the bore reputed to be true to the threads and vice versa. Barrels that do not have their bores centered in their barrels will risk shooting their moderator resulting in poor accuracy and damage.
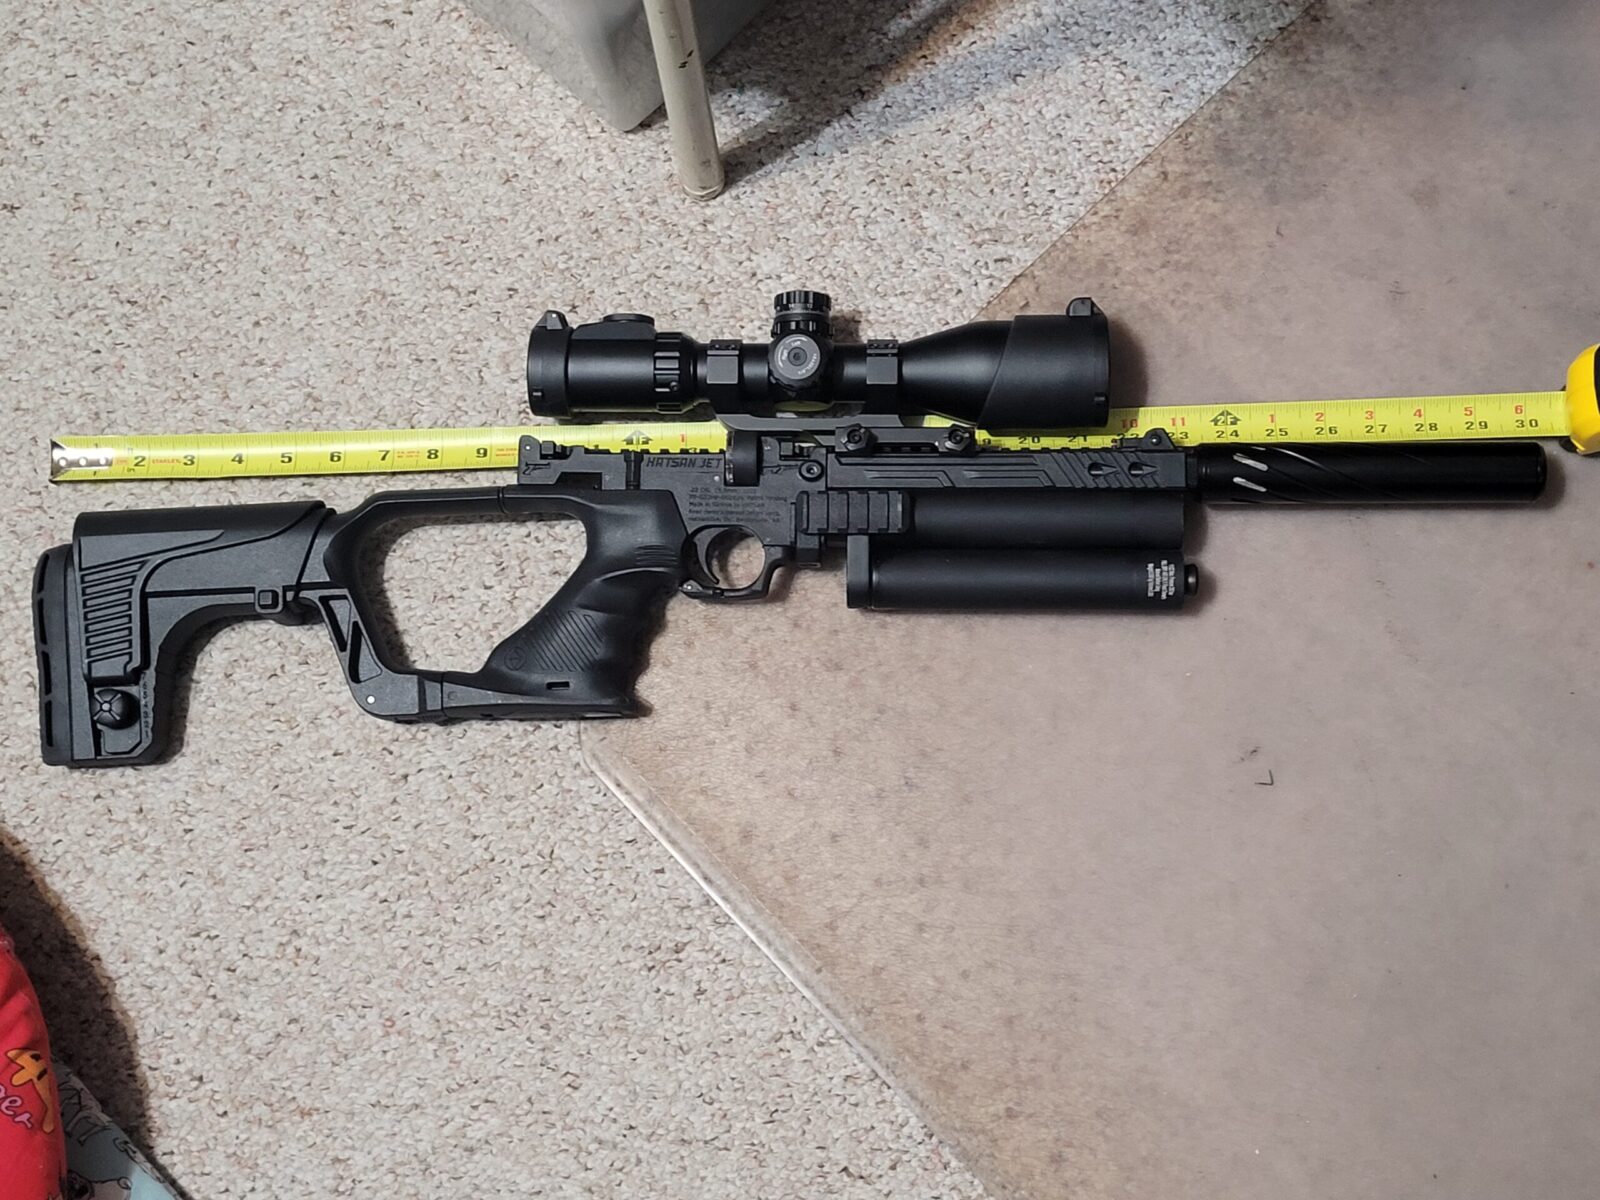
  • Compact – small enough to not attract attention and be maneuverable
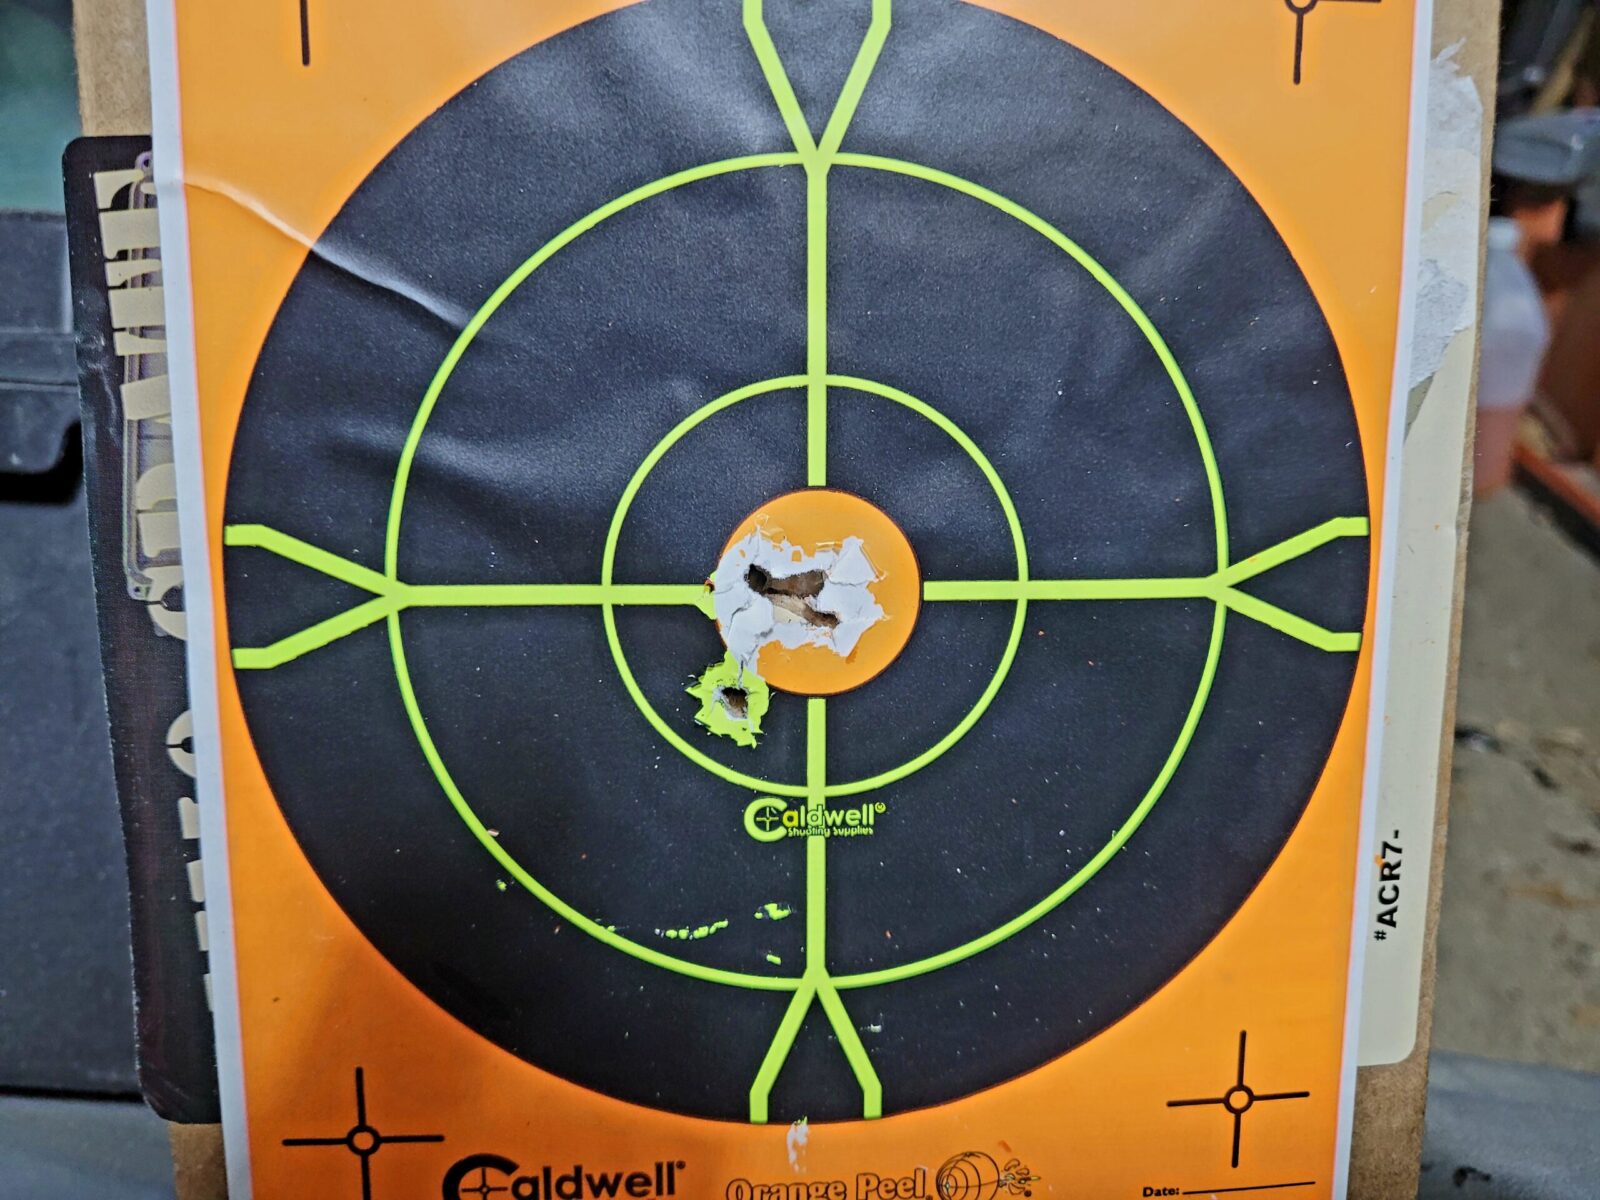
  • Accurate within 100 feet almost always – it’s very rare that I shoot further and the bulk are between 30-60 feet. I needed dime sized groups or less within 25 feet.
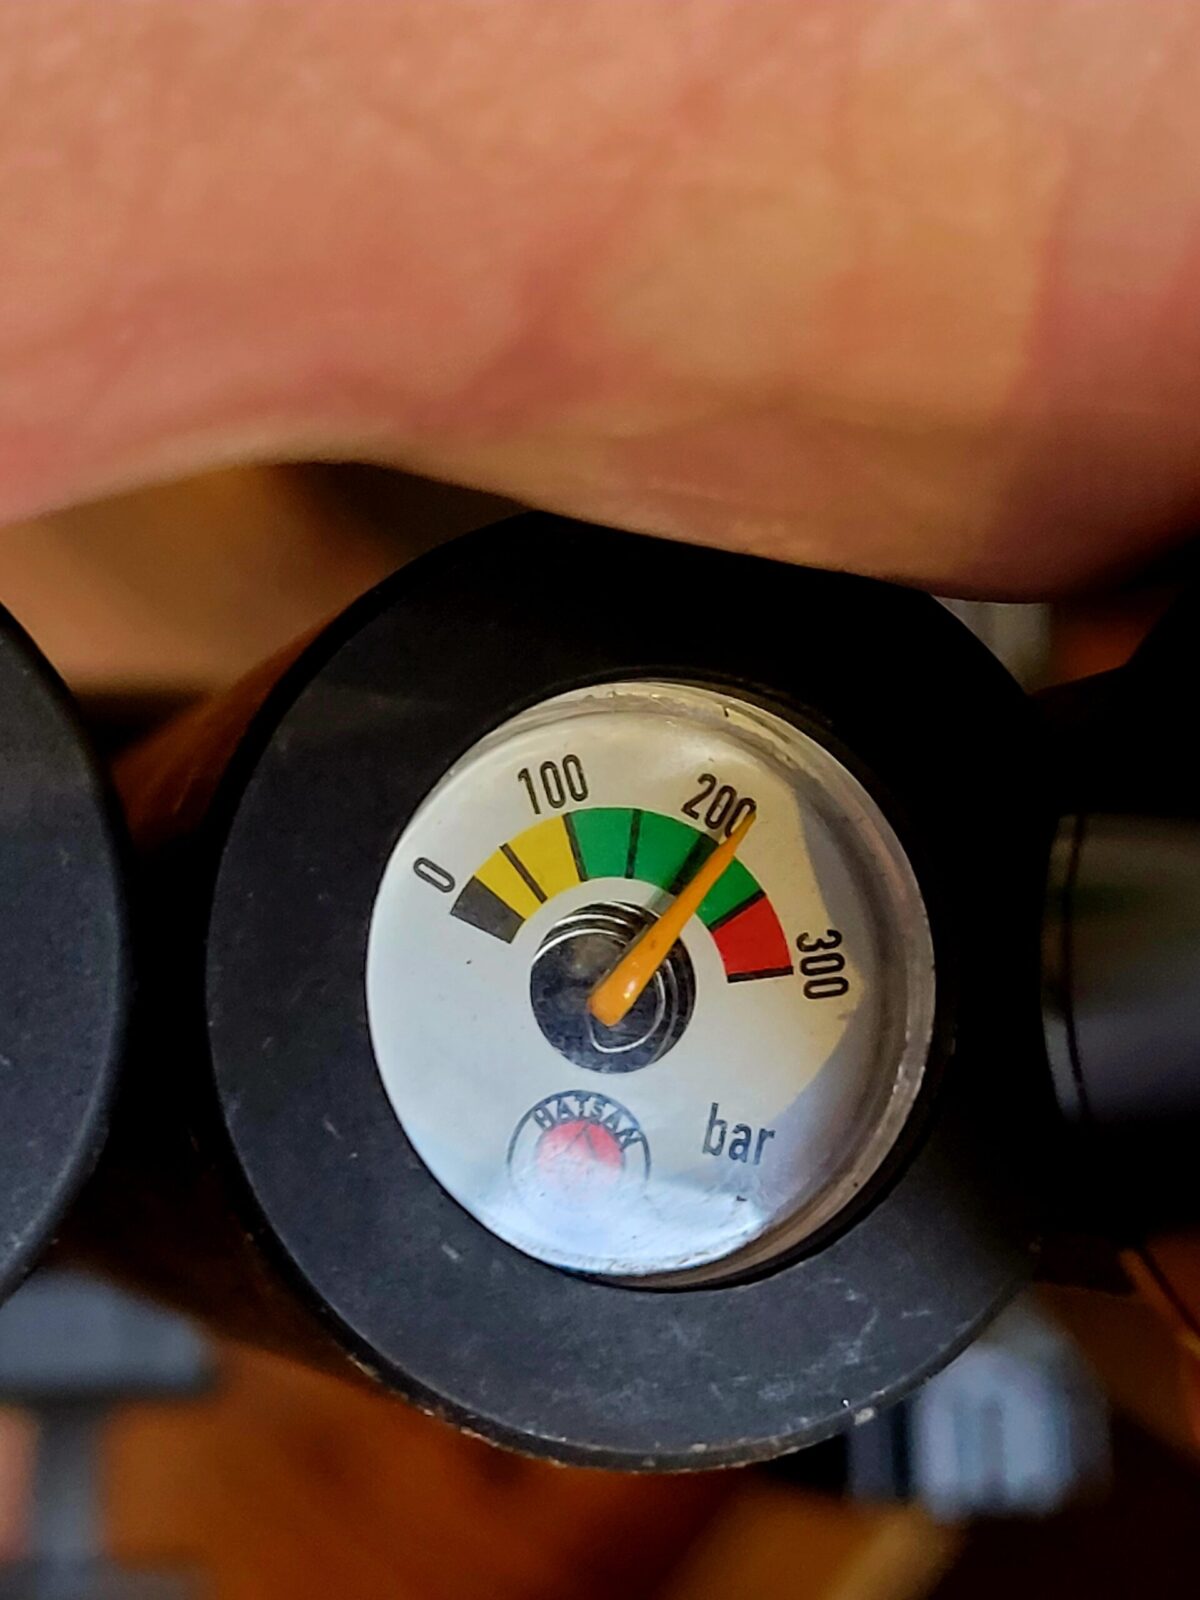
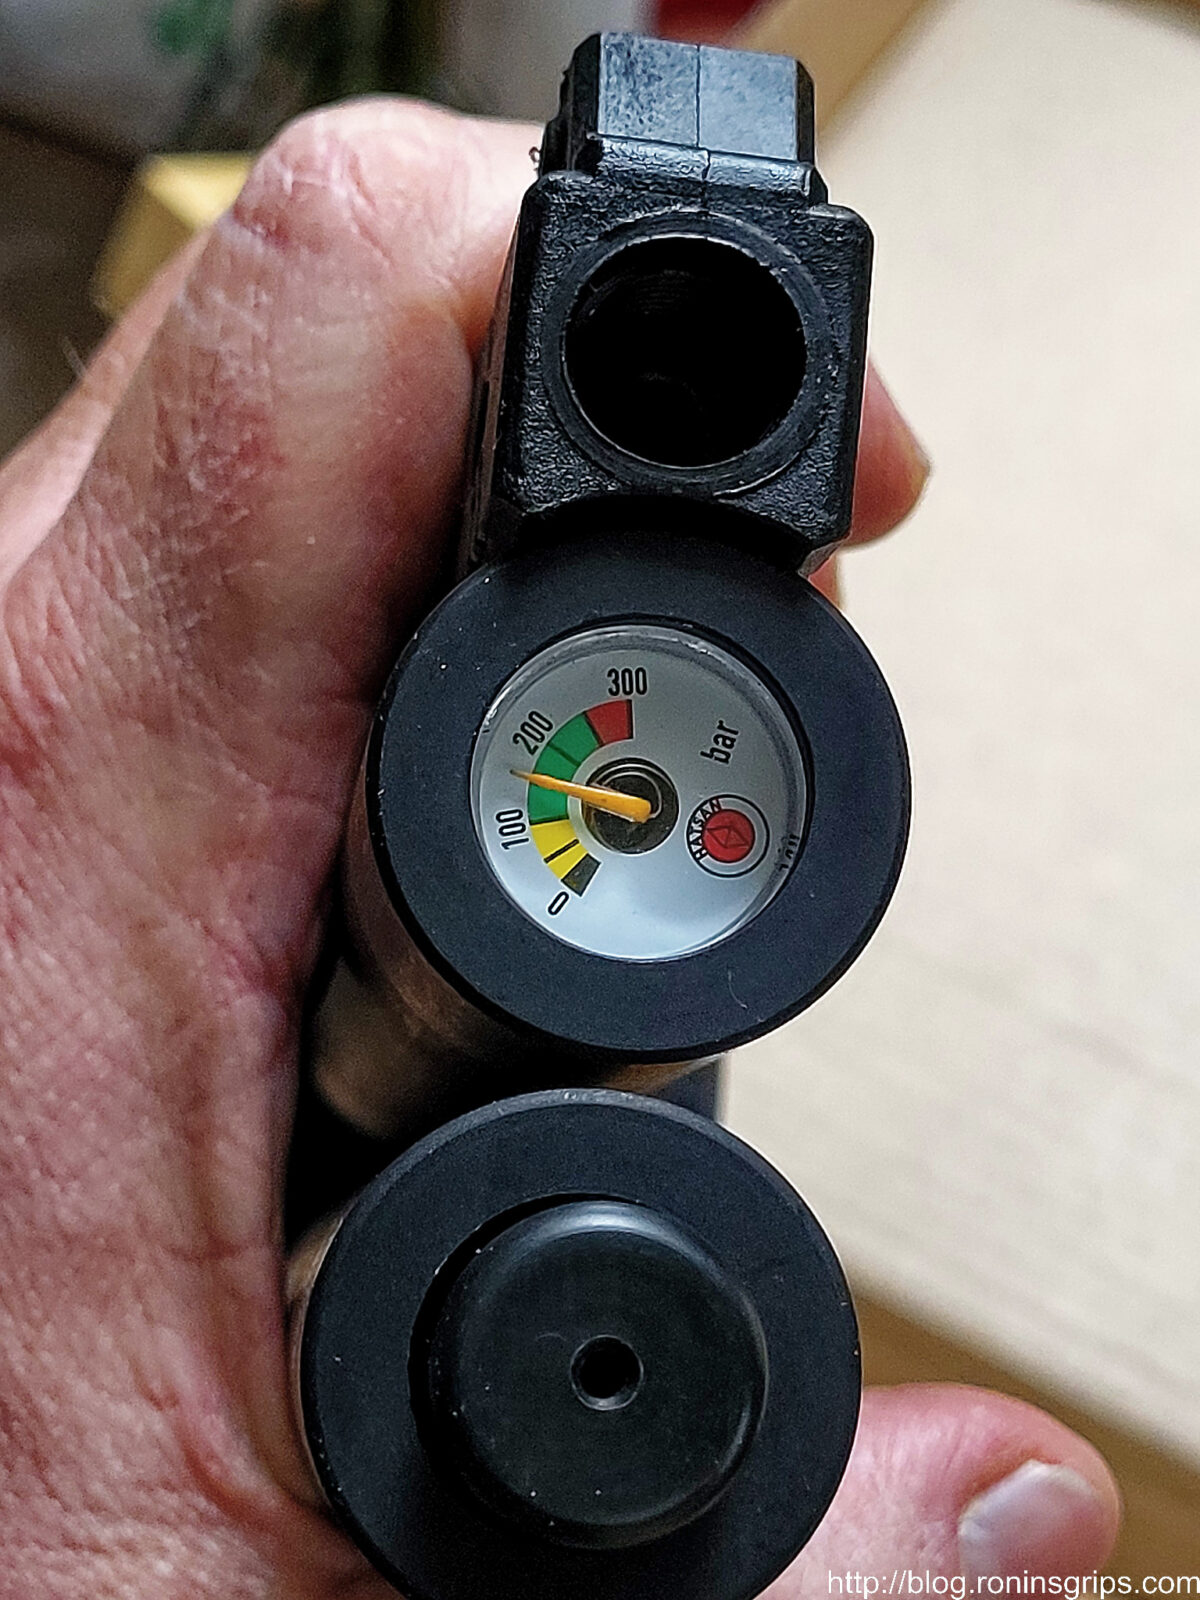
  • Regulated – I’ve owned airguns both with and without regulators. If you want accuracy and consistency, then you really need a regulator that keeps the pressure relatively constant until the pressure in the onboard tank dips below the relator’s set limit.
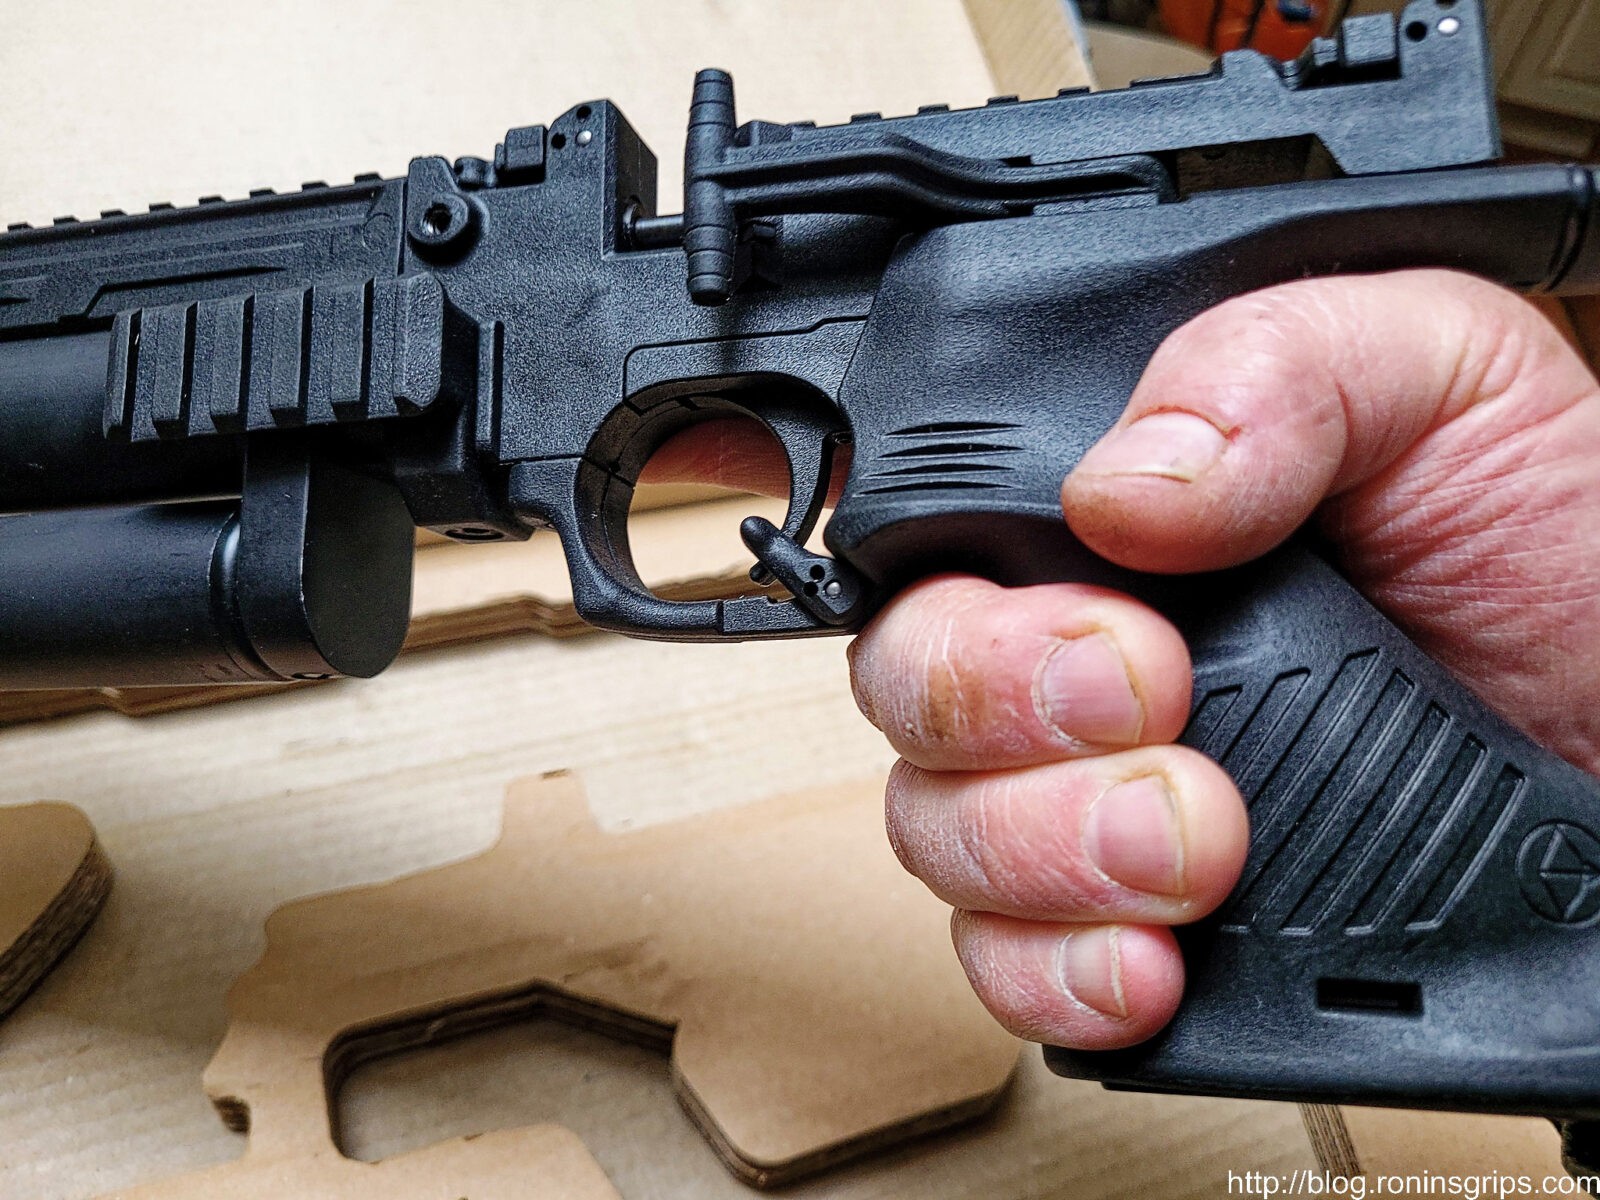
  • Semi-Auto – I wanted a fast follow up shot but didn’t want to worry about batteries. I just didn’t see the point of full-auto unless playing around and this was for work.
  • Magazine Fed – I wanted an airgun where the magazines could be replaced when empty. Not all airgun designs support this.
  • Reliable – I needed an airgun I could count on that wouldn’t be jamming constantly.
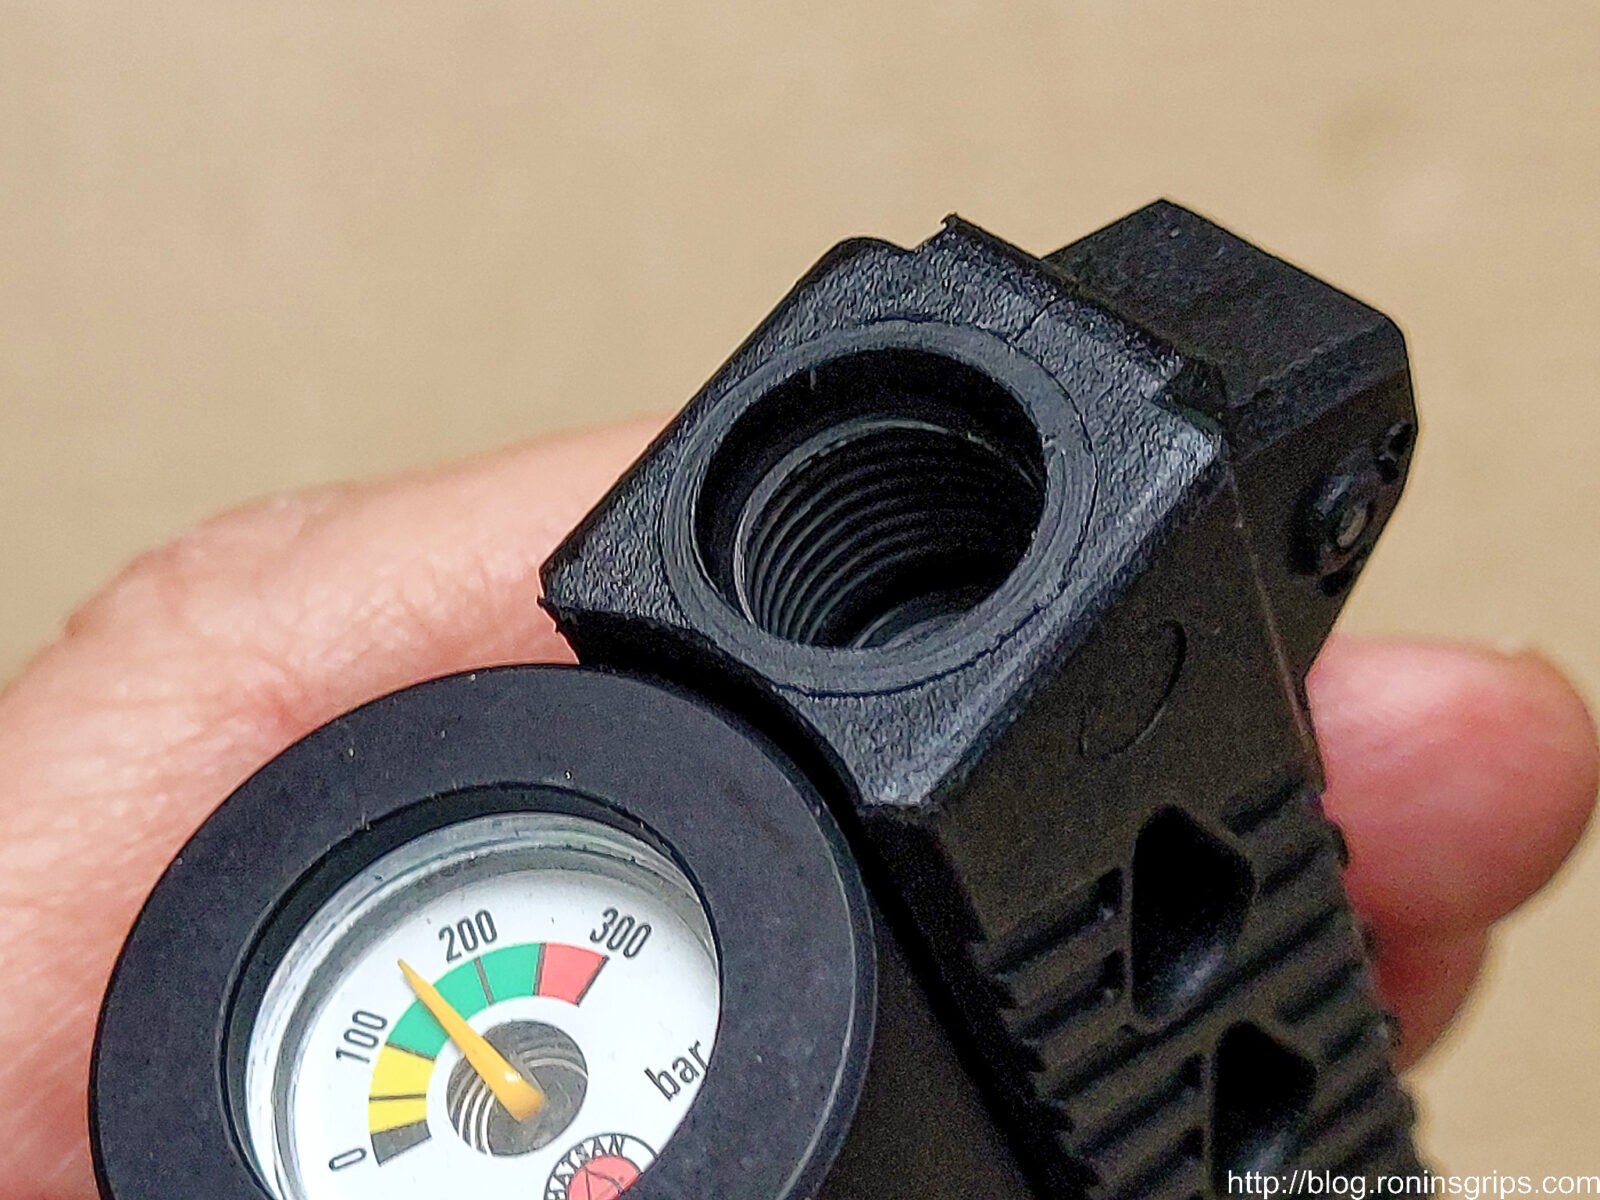
  • Air Capacity – I am busy so filling up an onboard tank or reservoir isn’t in the top 500 task list of things I need to do so I wanted it to go at least 30-40 rounds before I needed to refill it.
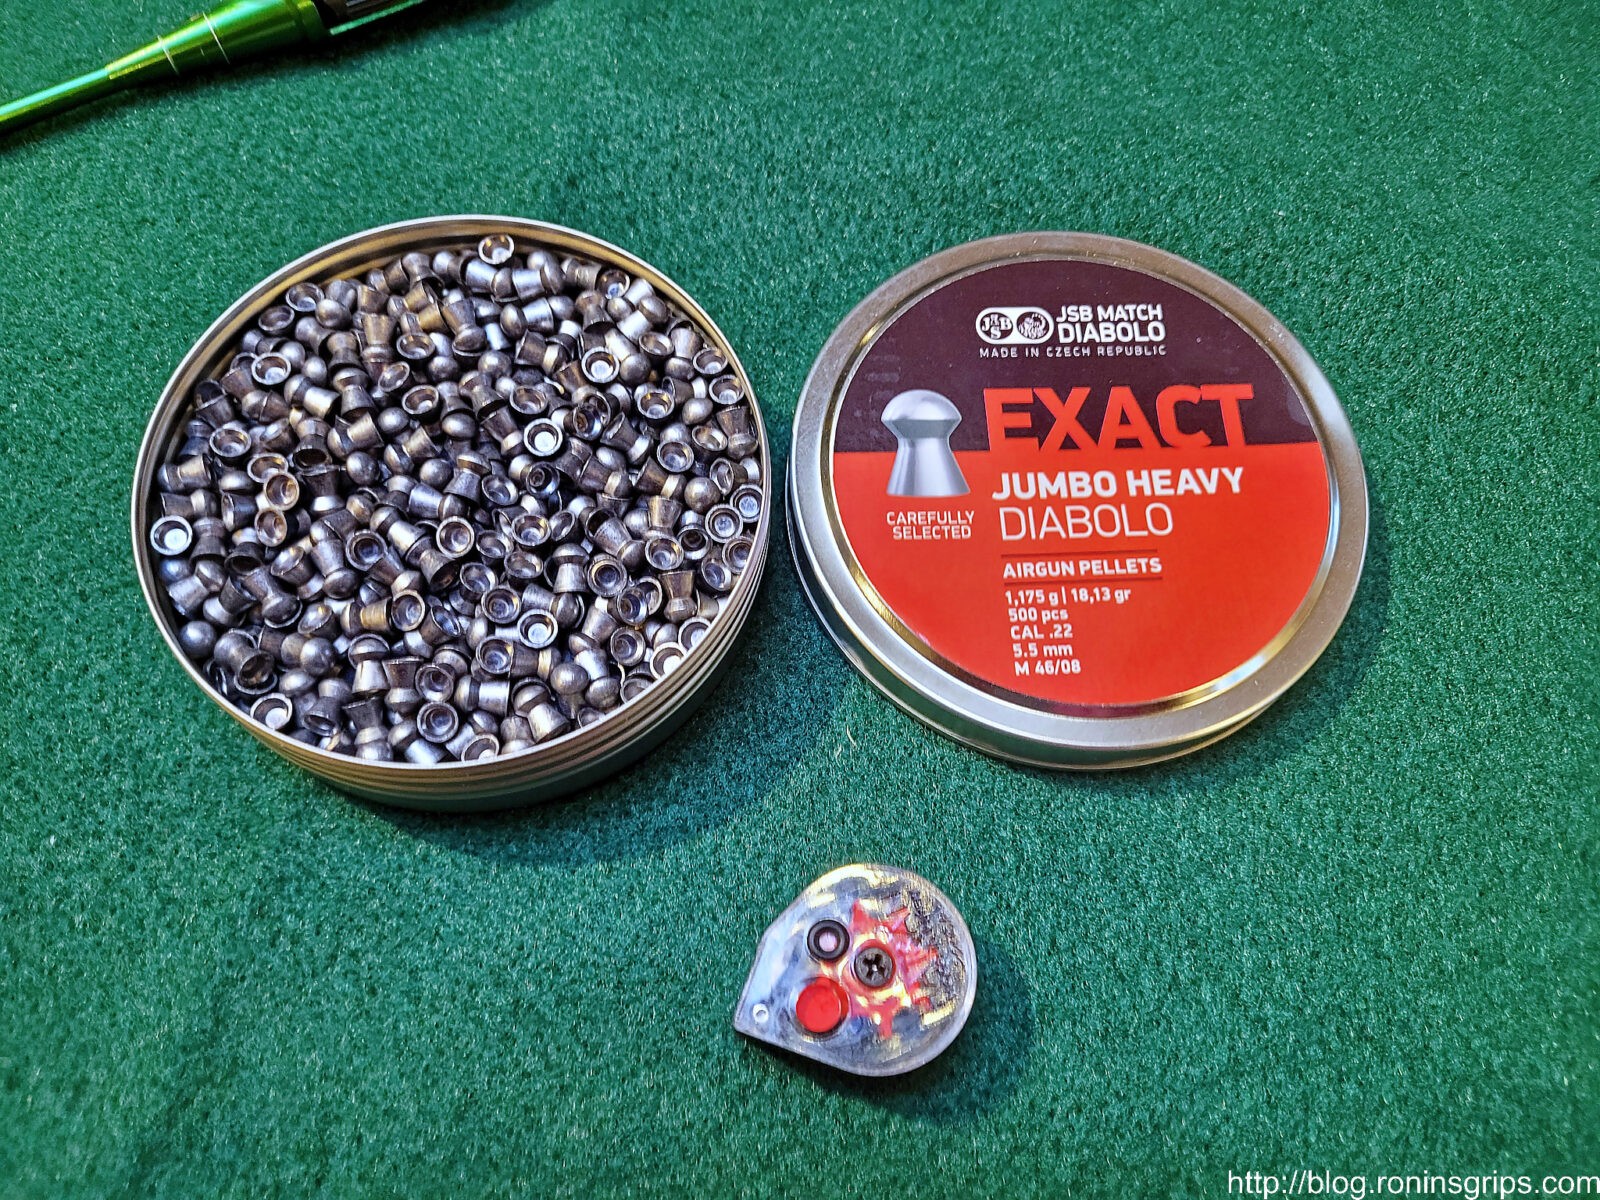
  • Stopping Power – the targeted pests were mainly tree squirrels and ground squirrels. Anything bigger and I will get out my .25 FX Impact. This was a big deal for me. I didn’t want the constant over penetration I encountered with my .25 but I was also fearful that .177 might not hit hard enough so I went back to .22 caliber for this one.

For me the first three are critical and I call them my QCA criteria – Quiet, Compact and Accurate. Unless I have have a use case that requires a 100 yard airgun, I will view QCA as mandatory table stakes. If an airgun doesn’t have those three then they are not in the running.

In reading and watching reviews, it appeared that the Leshiy 2 more than met my needs. Given the Leshiy 2’s modularity, I could change it as my needs change. If I decided I wanted a different length of barrel or caliber, I could change the set up.

I Decided To Buy One

At the time, there weren’t many vendors carrying the Leshiy 2 and I had a bunch of questions so I talked to Brian Meckler at Edgun West. He talked me through the options.

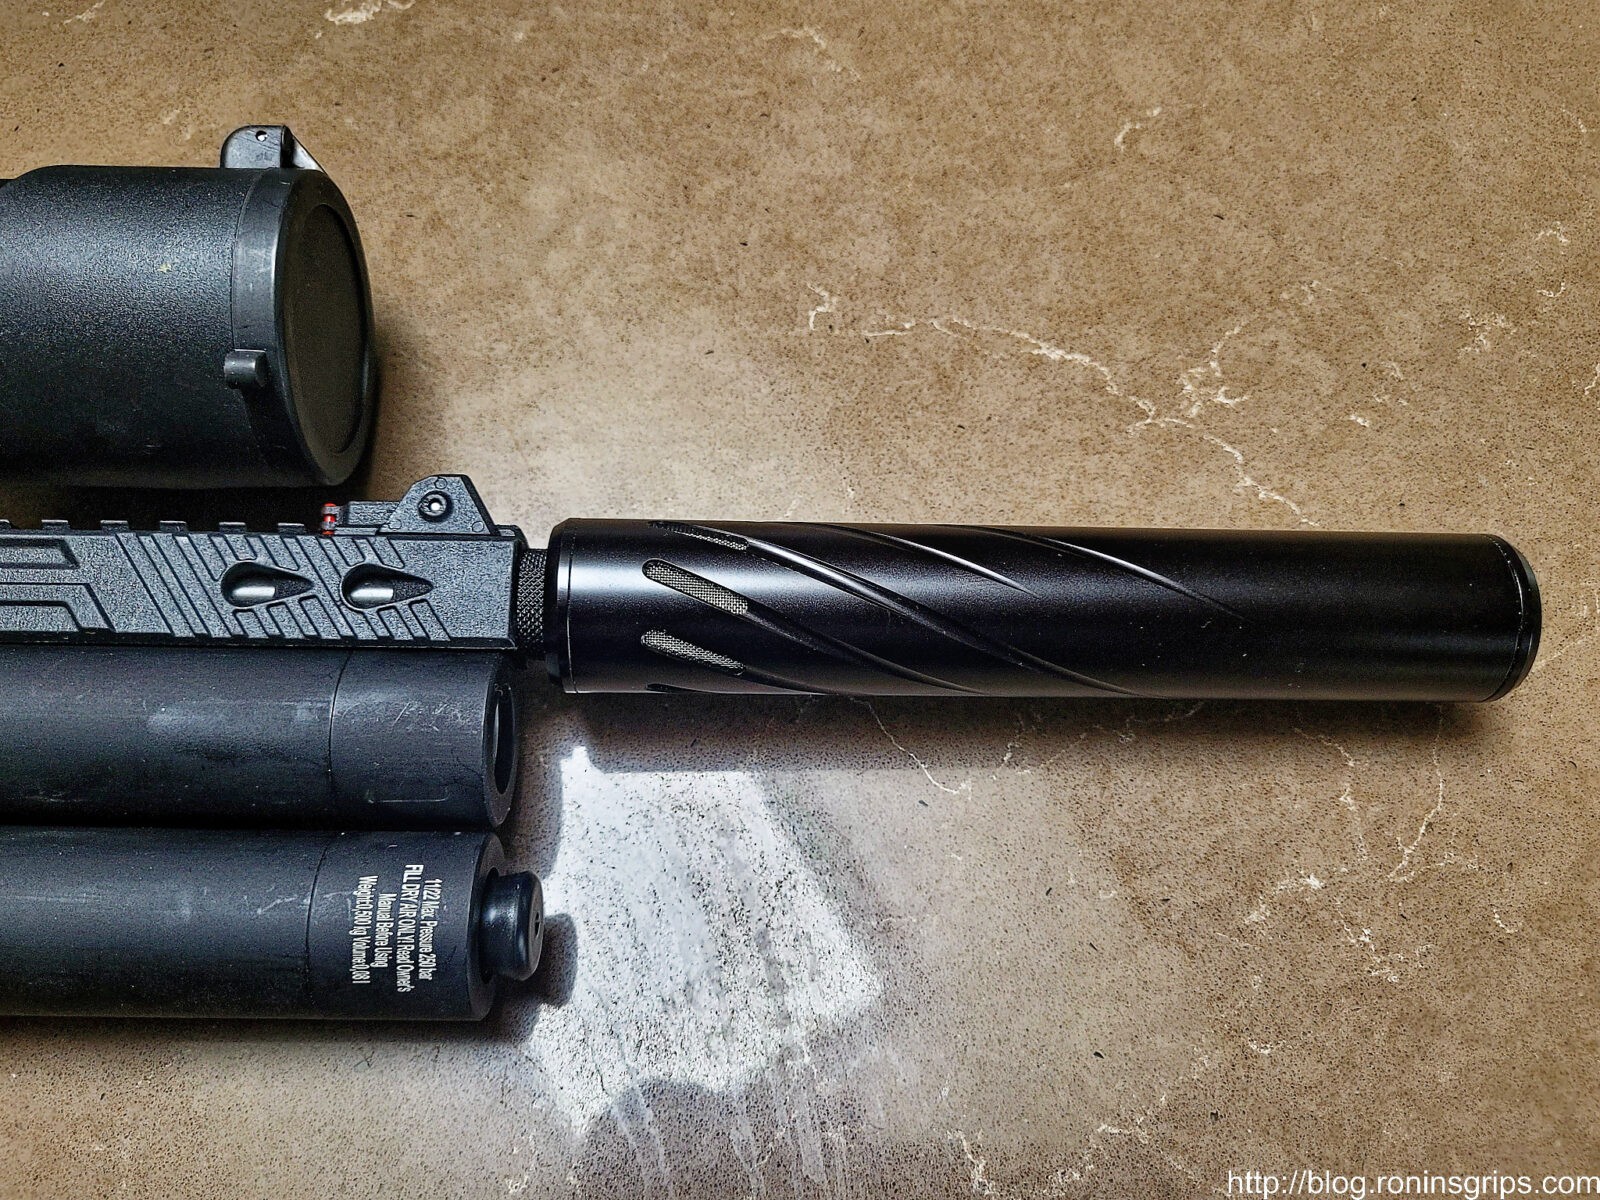
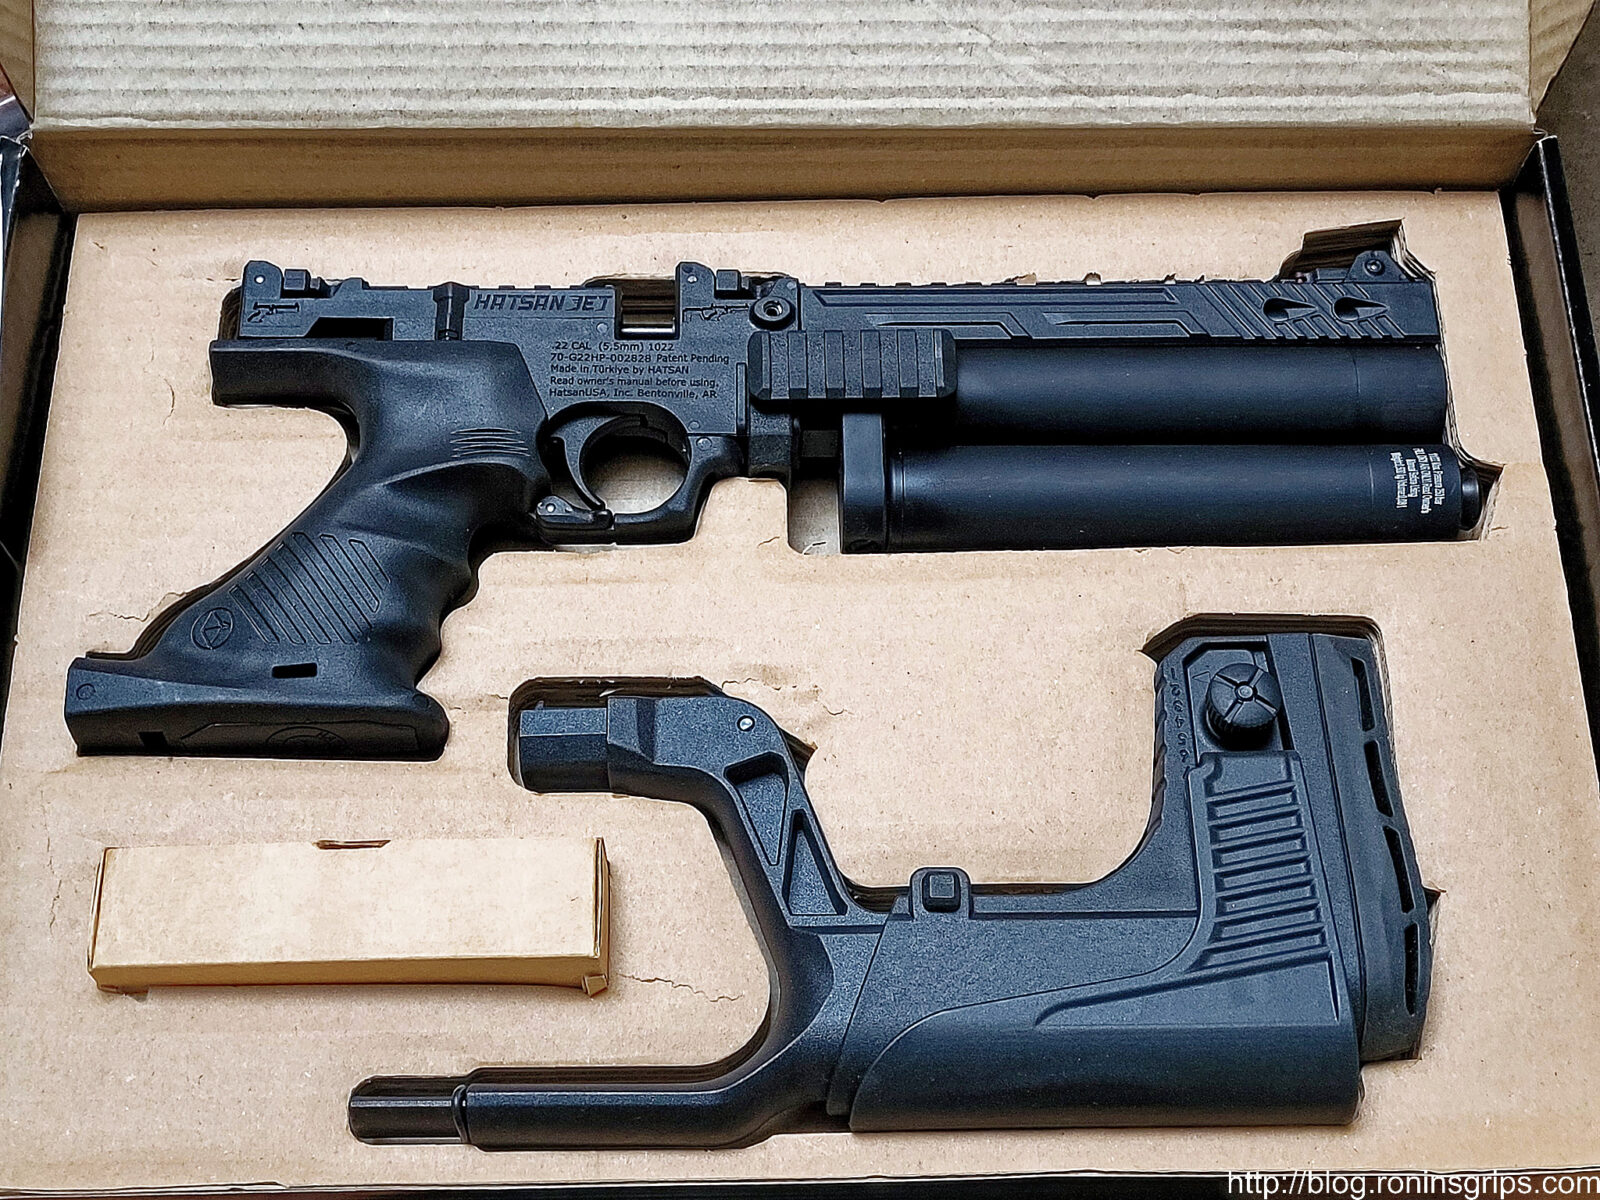
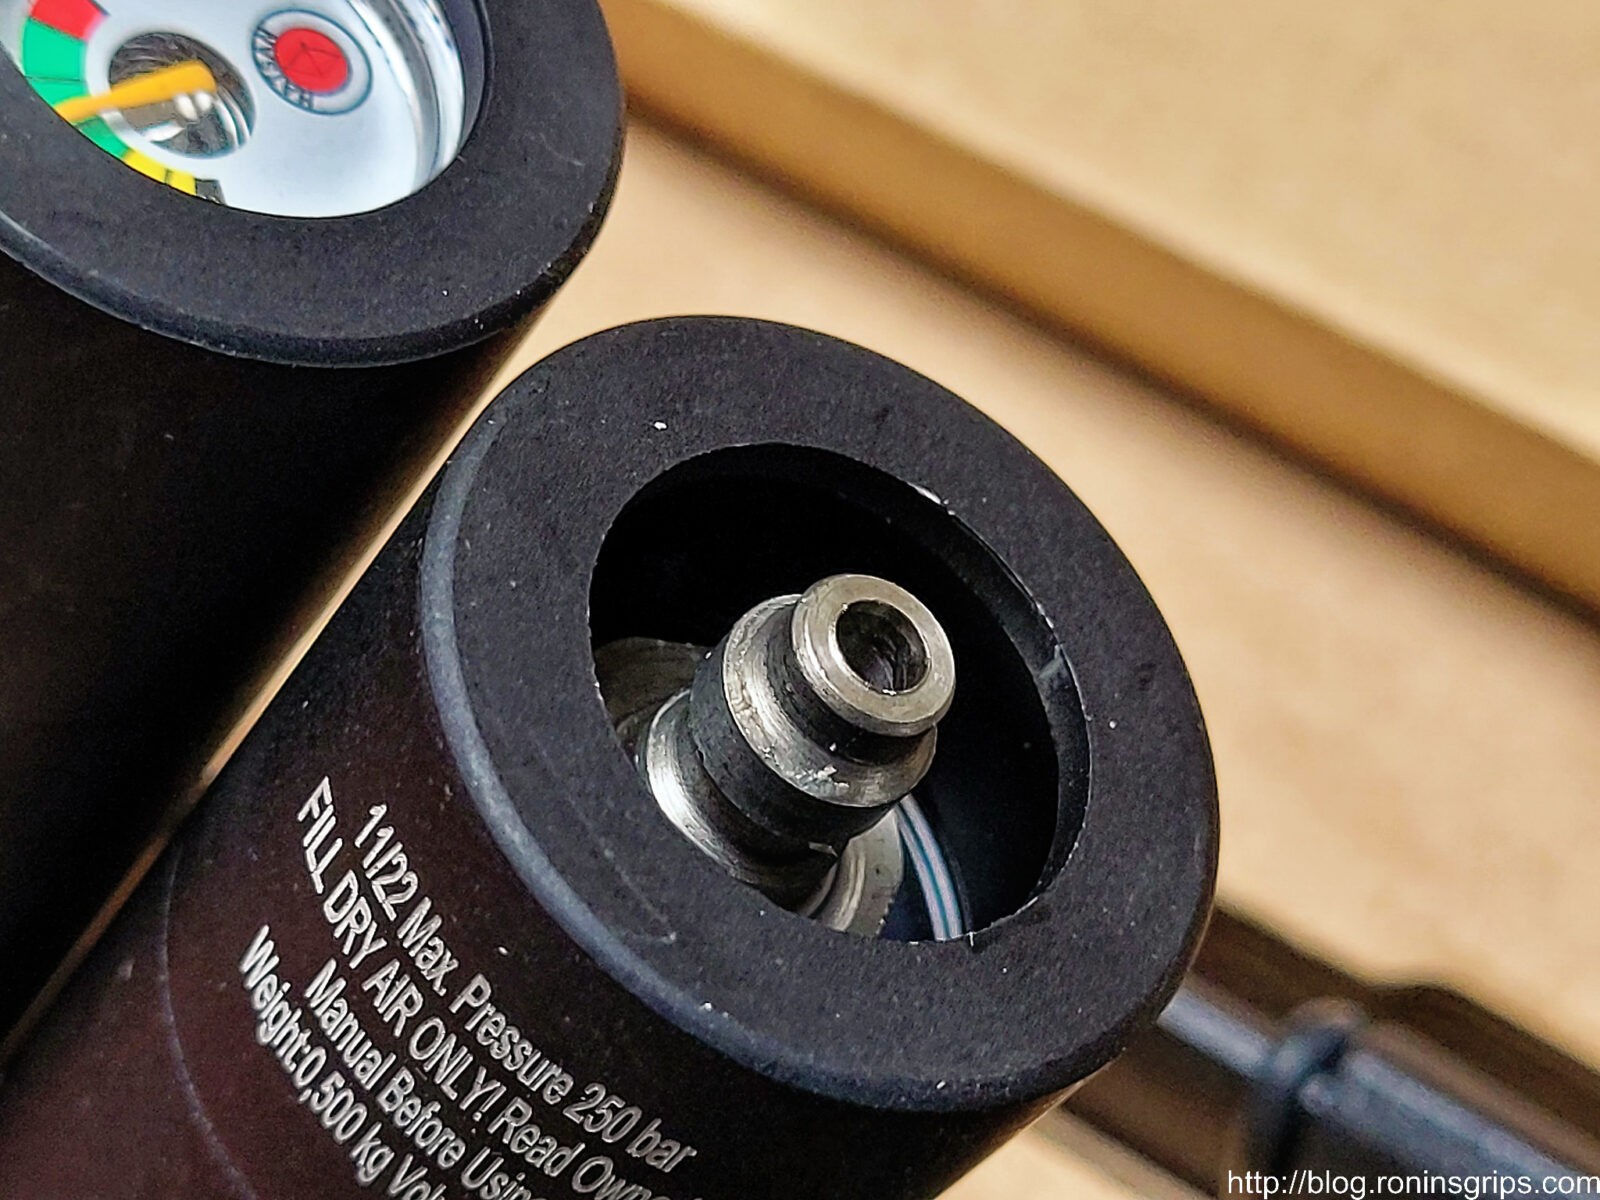
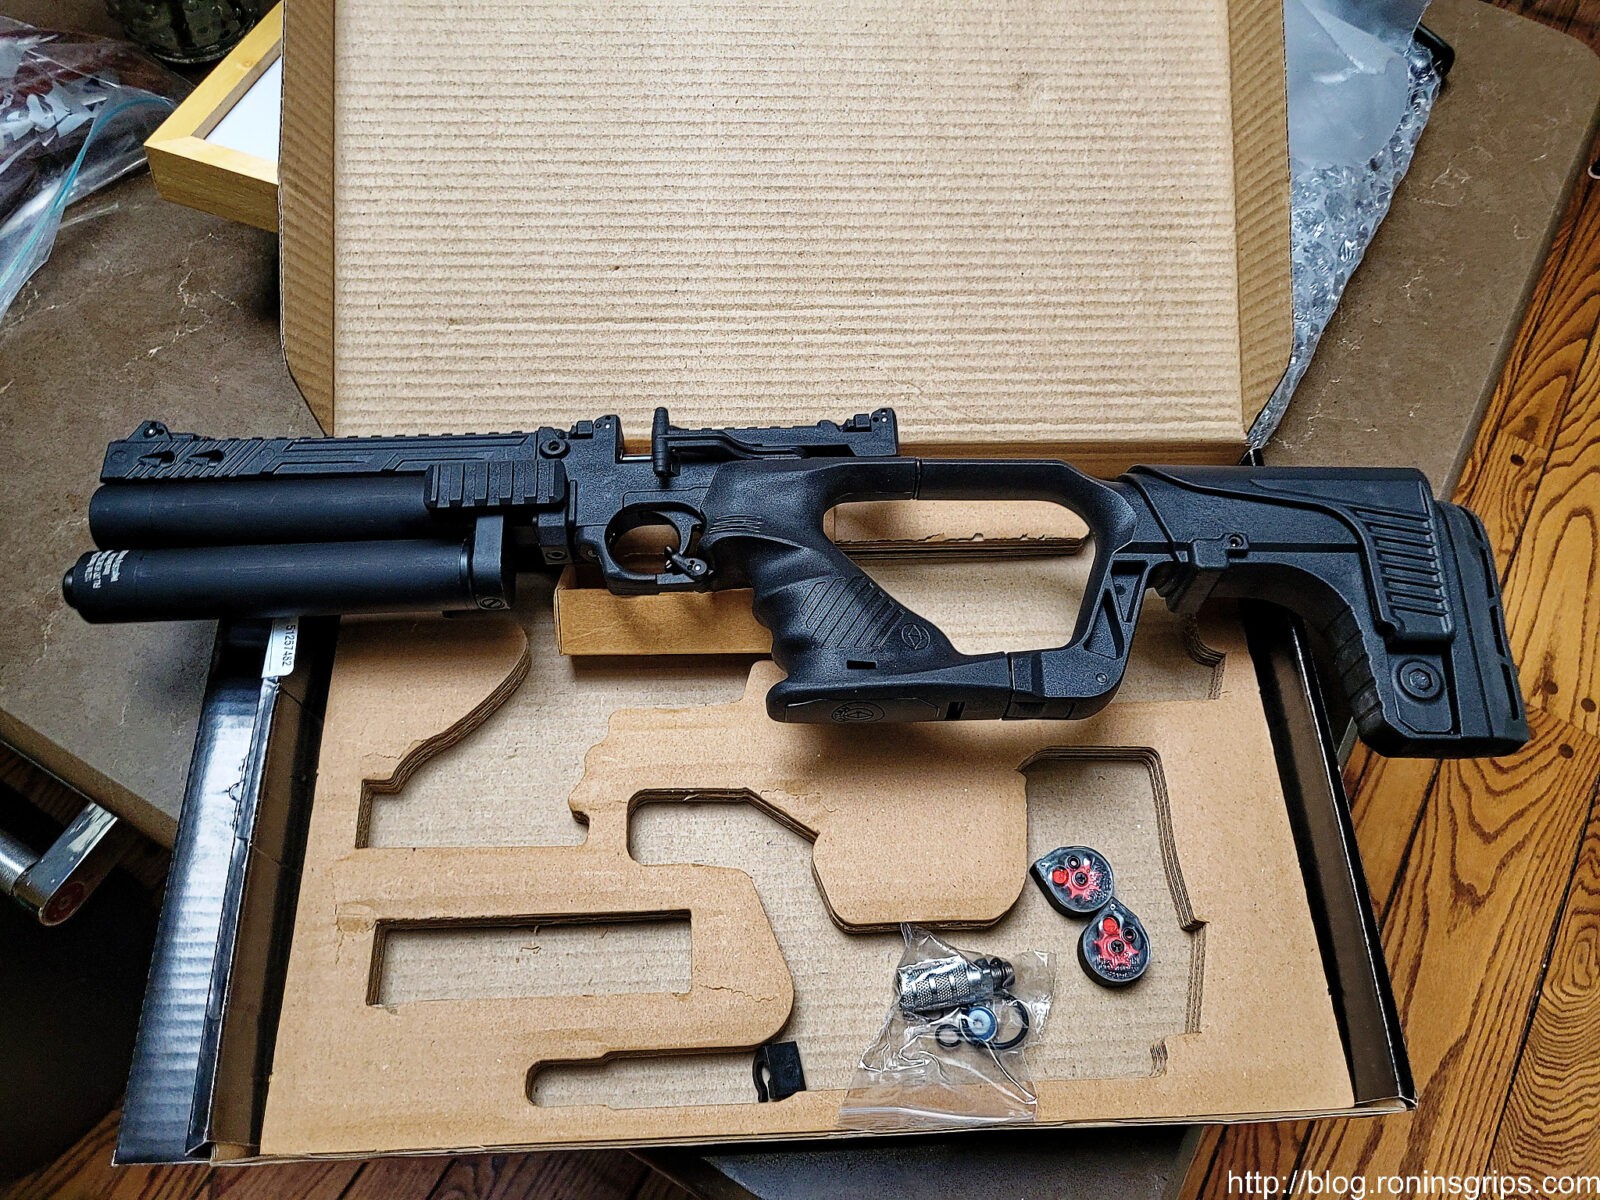
One thing though – I already had one of the Behemoth moderators so they had basically assembled one of their Leshiy 2 Short Wolverine models with the REPR valve but without the Behemoth. I made it almost 9 whole days until I decided I needed the larger carbon fiber air cylinder and a spare parts kit called “The Drivetrain”.

It comes in a surprising small compact box.

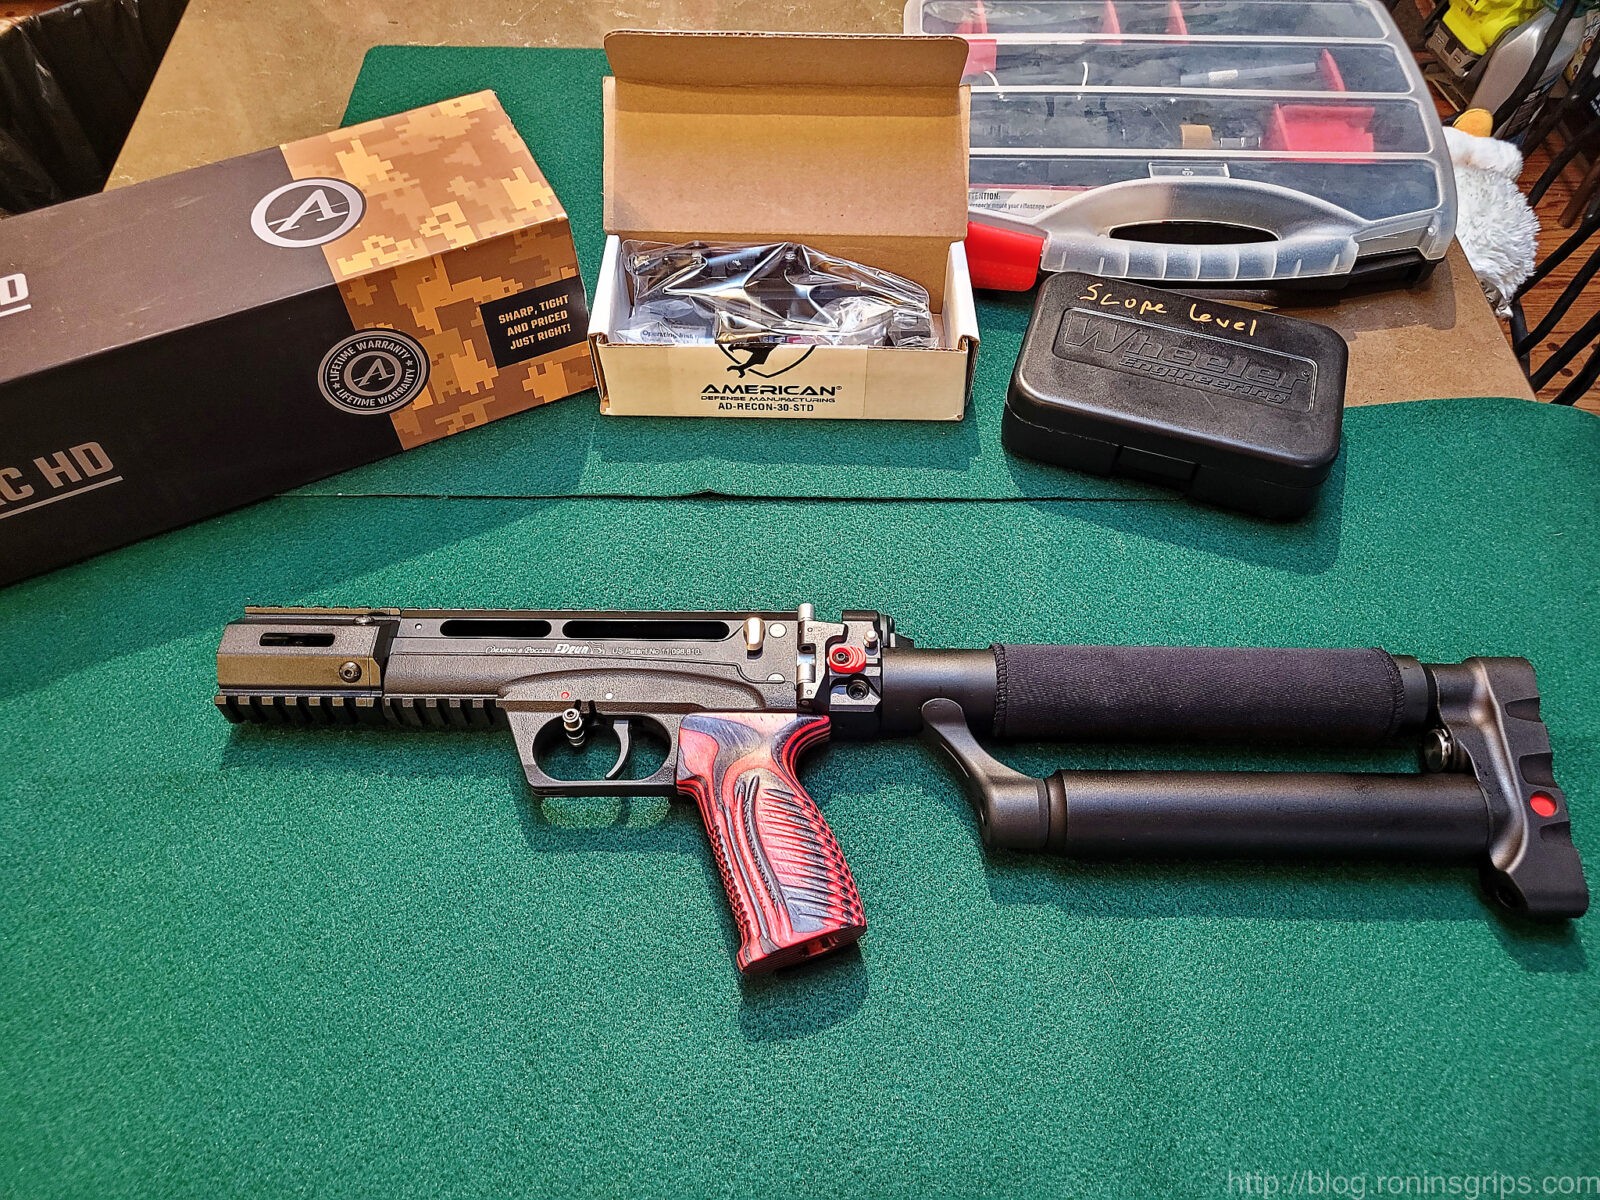
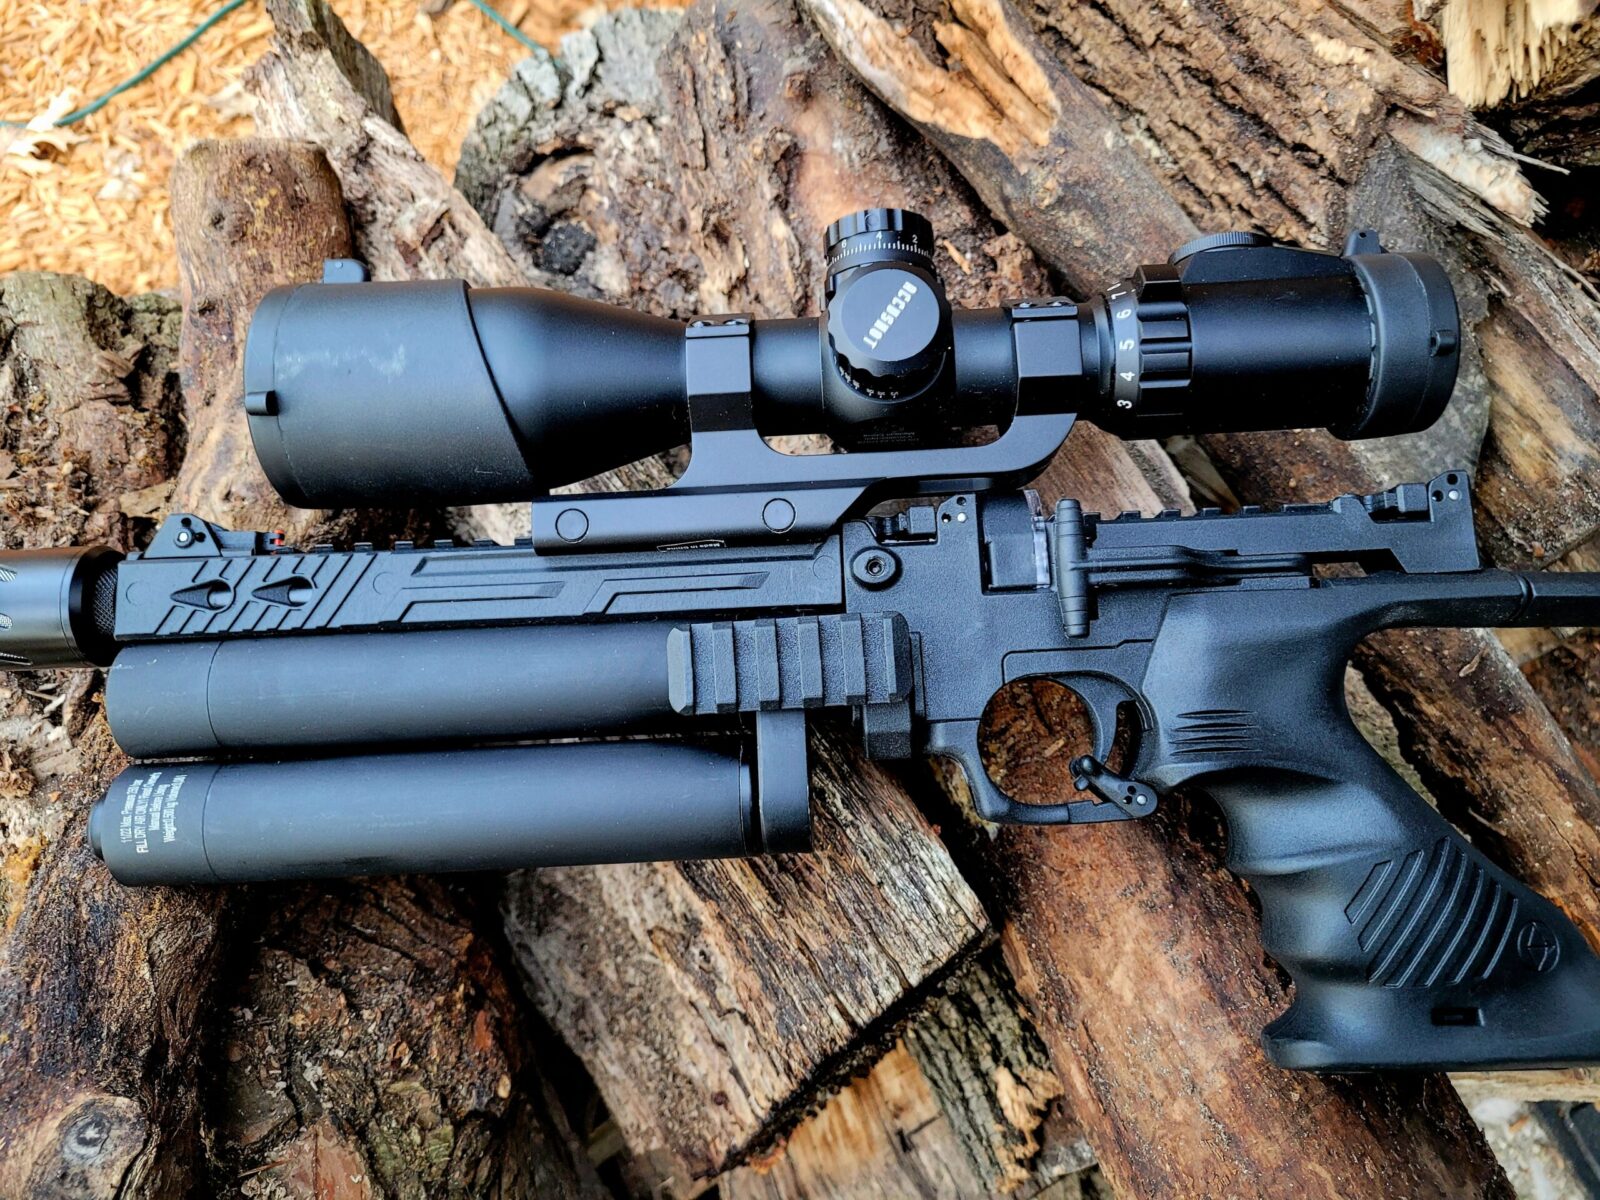
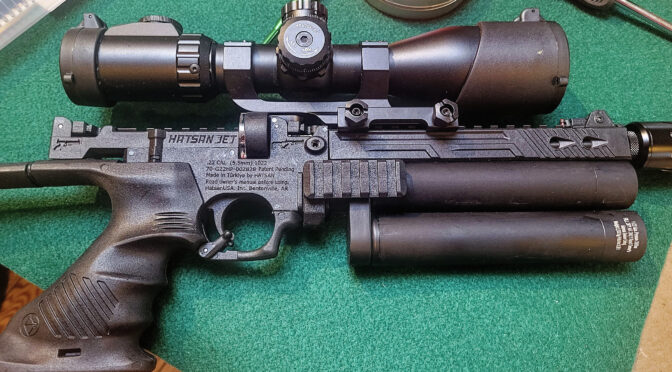
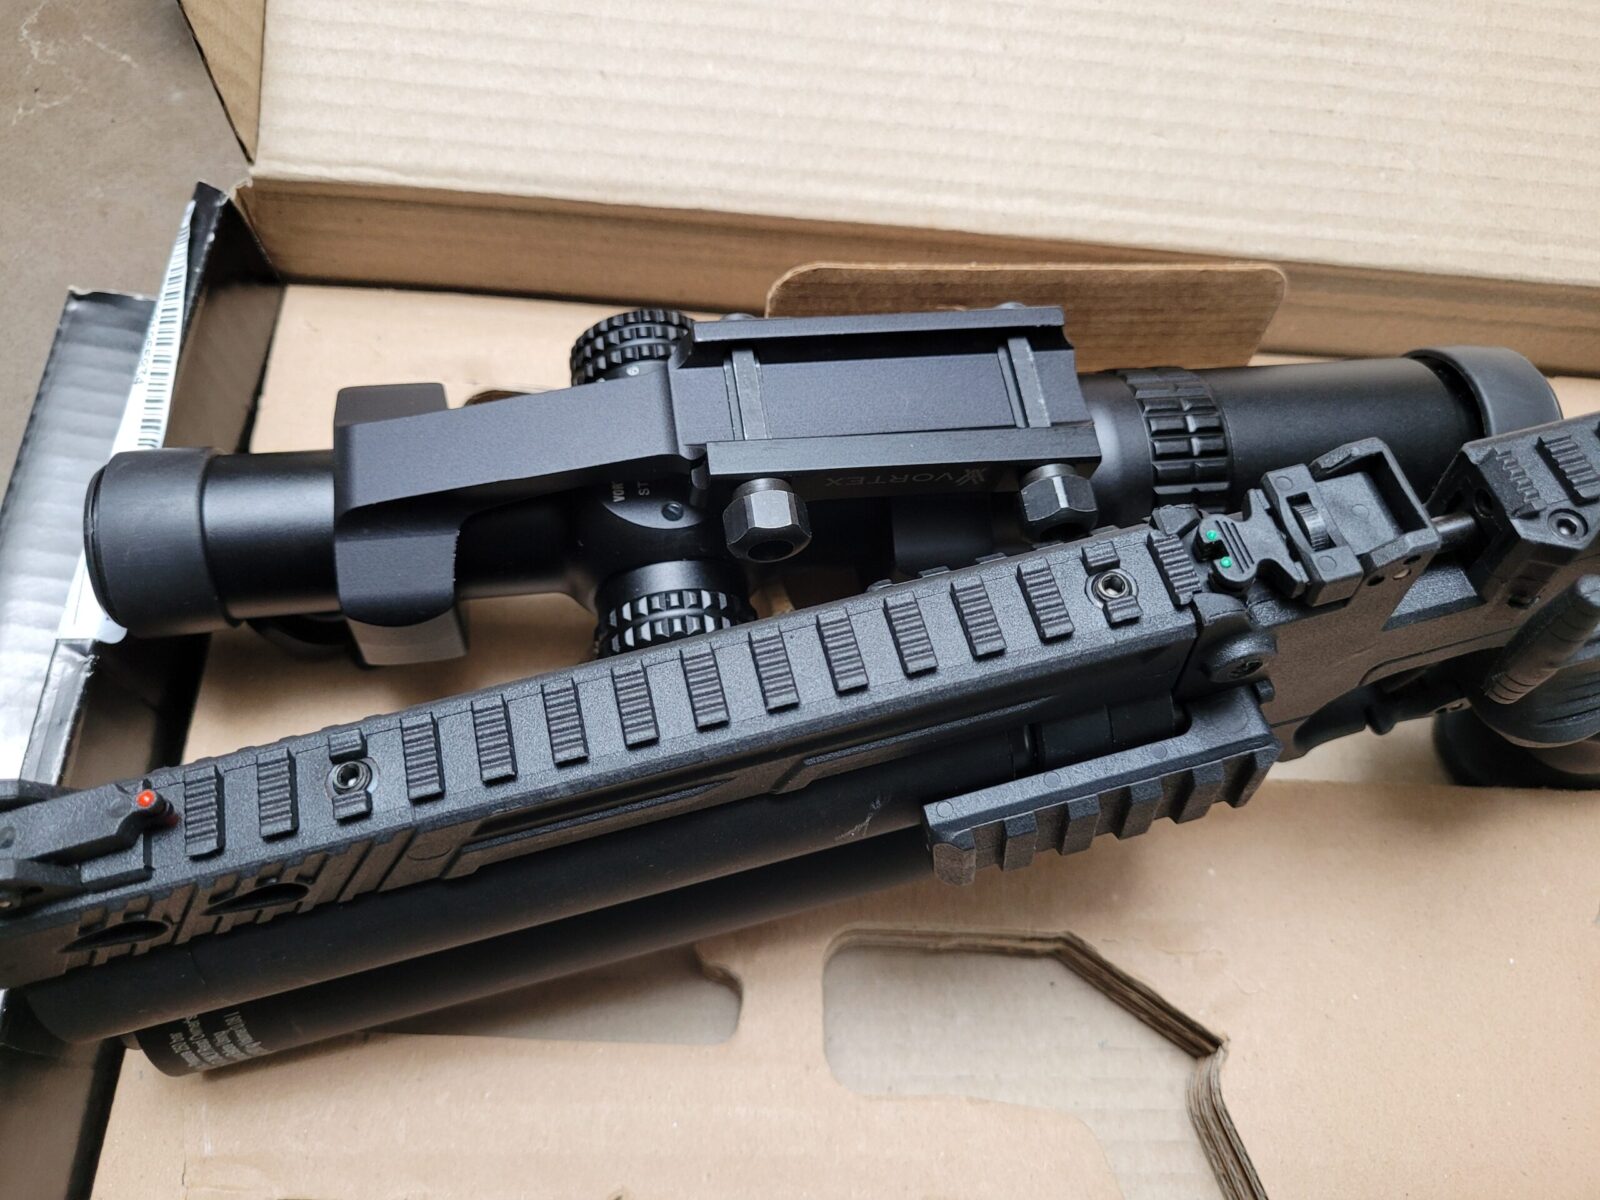
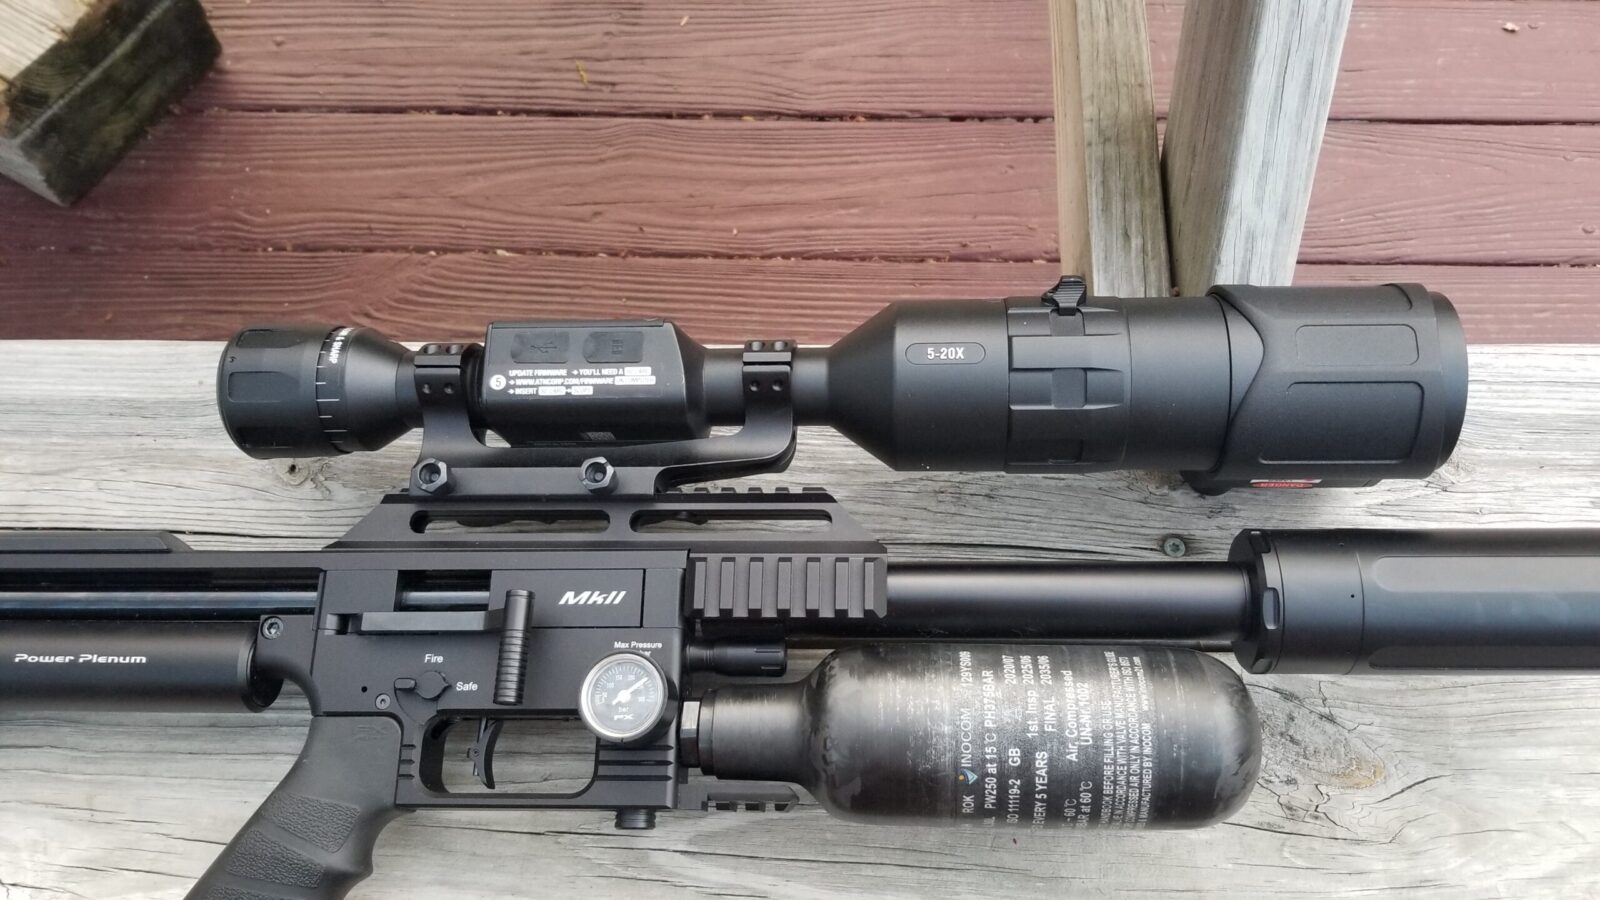
I’d also ordered in an American Defense AD-Recon-30-STD scope mount. Folks, I pretty much swear by American Defense now. Their mounts are solid as a rock, repeatable zero and the quick release levers are superb. Take an AD mount and put it side by side with a cheap one – you’ll see what I mean real quick.

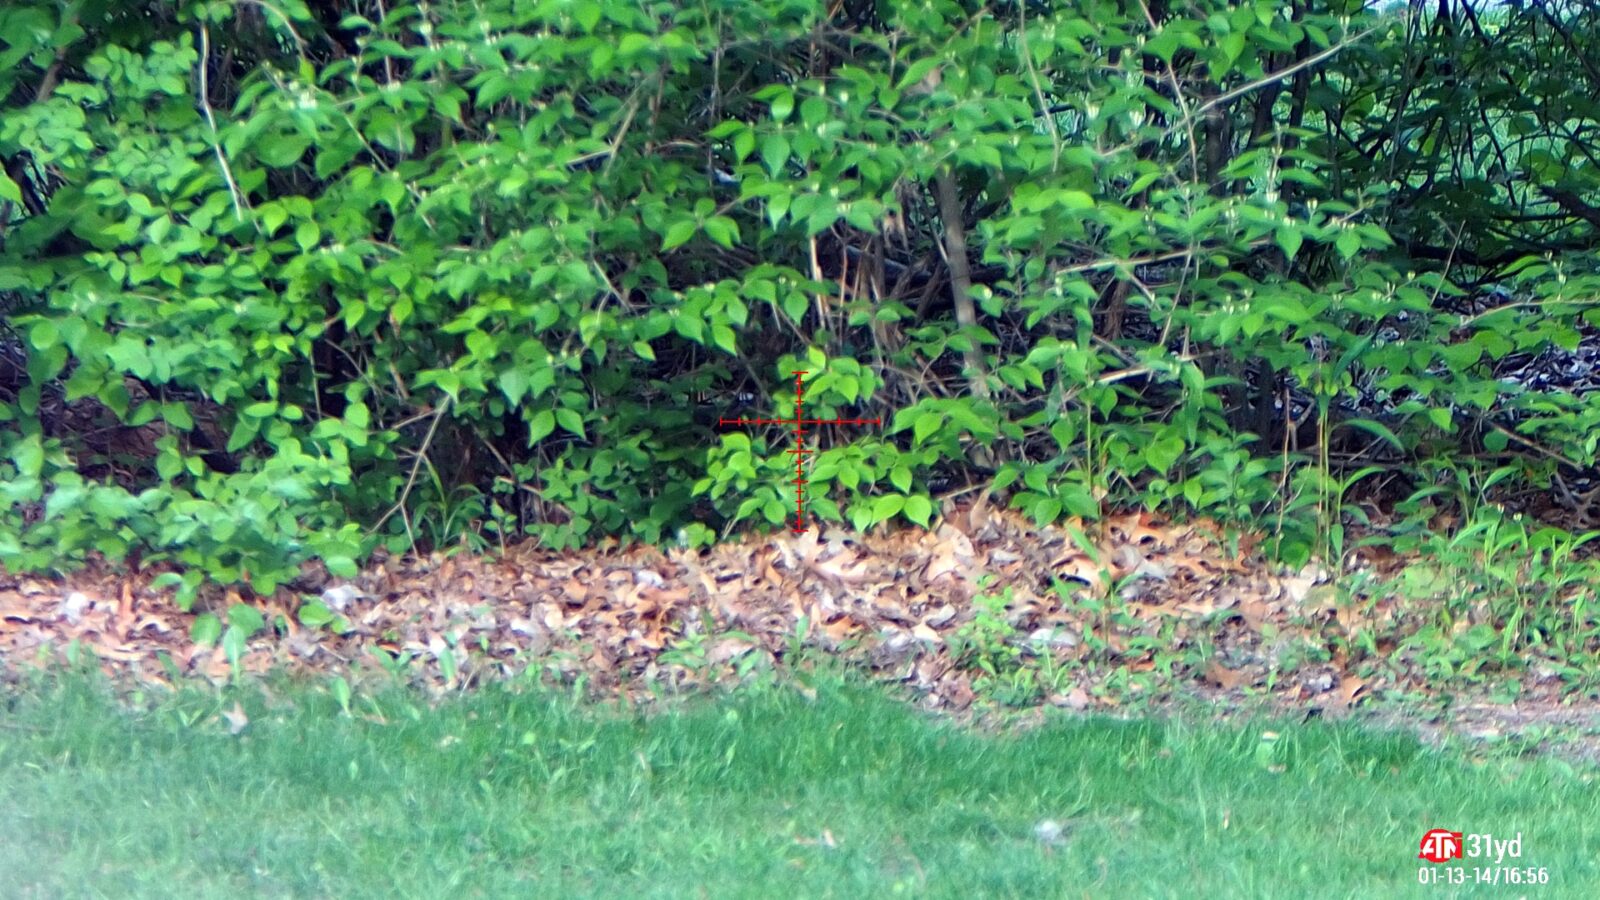
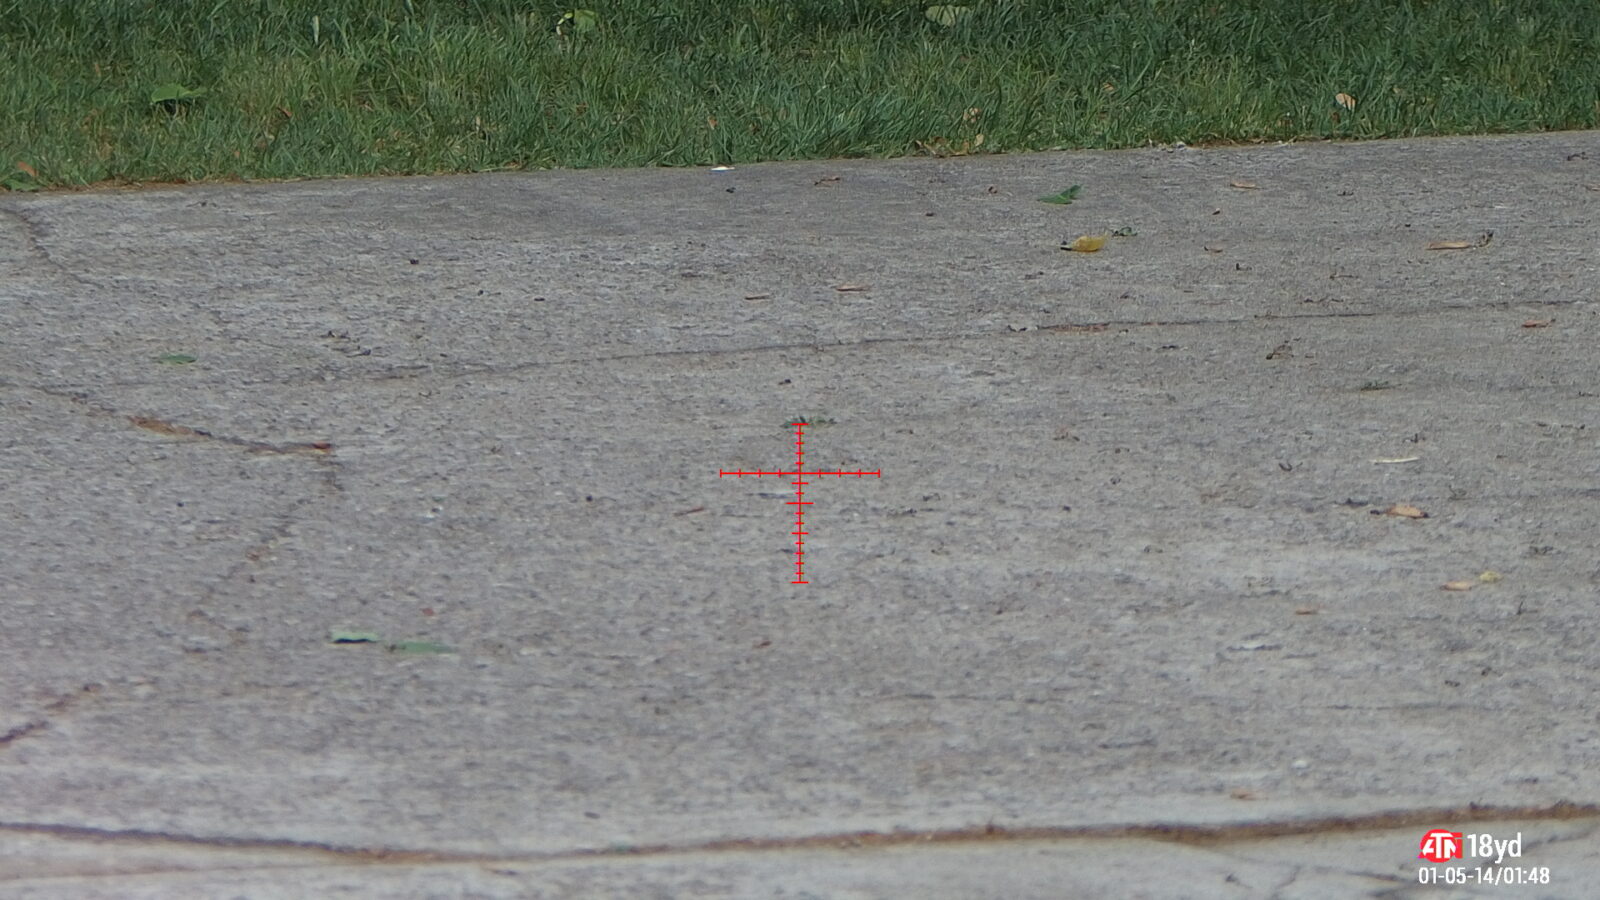
As time has past, the best way I can describe it is that airgun scopes are kind of odd ducks. Guys using them are way, way closer to their targets than a firearm shooter, need an adjustable objective that goes down to 10 yard/10 meters, and has quite a bit of elevation adjustment. I also like having an illuminated reticle for shooting pests in low light. Lastly, we want a lot of magnification with clear glass to shoot at relatively small targets.

For an optic, I went out on a limb and tried a new brand – Athlon. I spent some time reading on the airgun forums and their Midas Tac HD 6-24×50 scope seemed to have the features that I wanted at a price I could afford – I bought it for $650 off Amazon.

Here are the partsa – front row – the Leshiy 2 receiver group, the Behemoth moderator under it and the rear stock and air reservoir assembly to the right. At the top, we have the Athlon Modas scope on the left and the American Defense rings on the right.

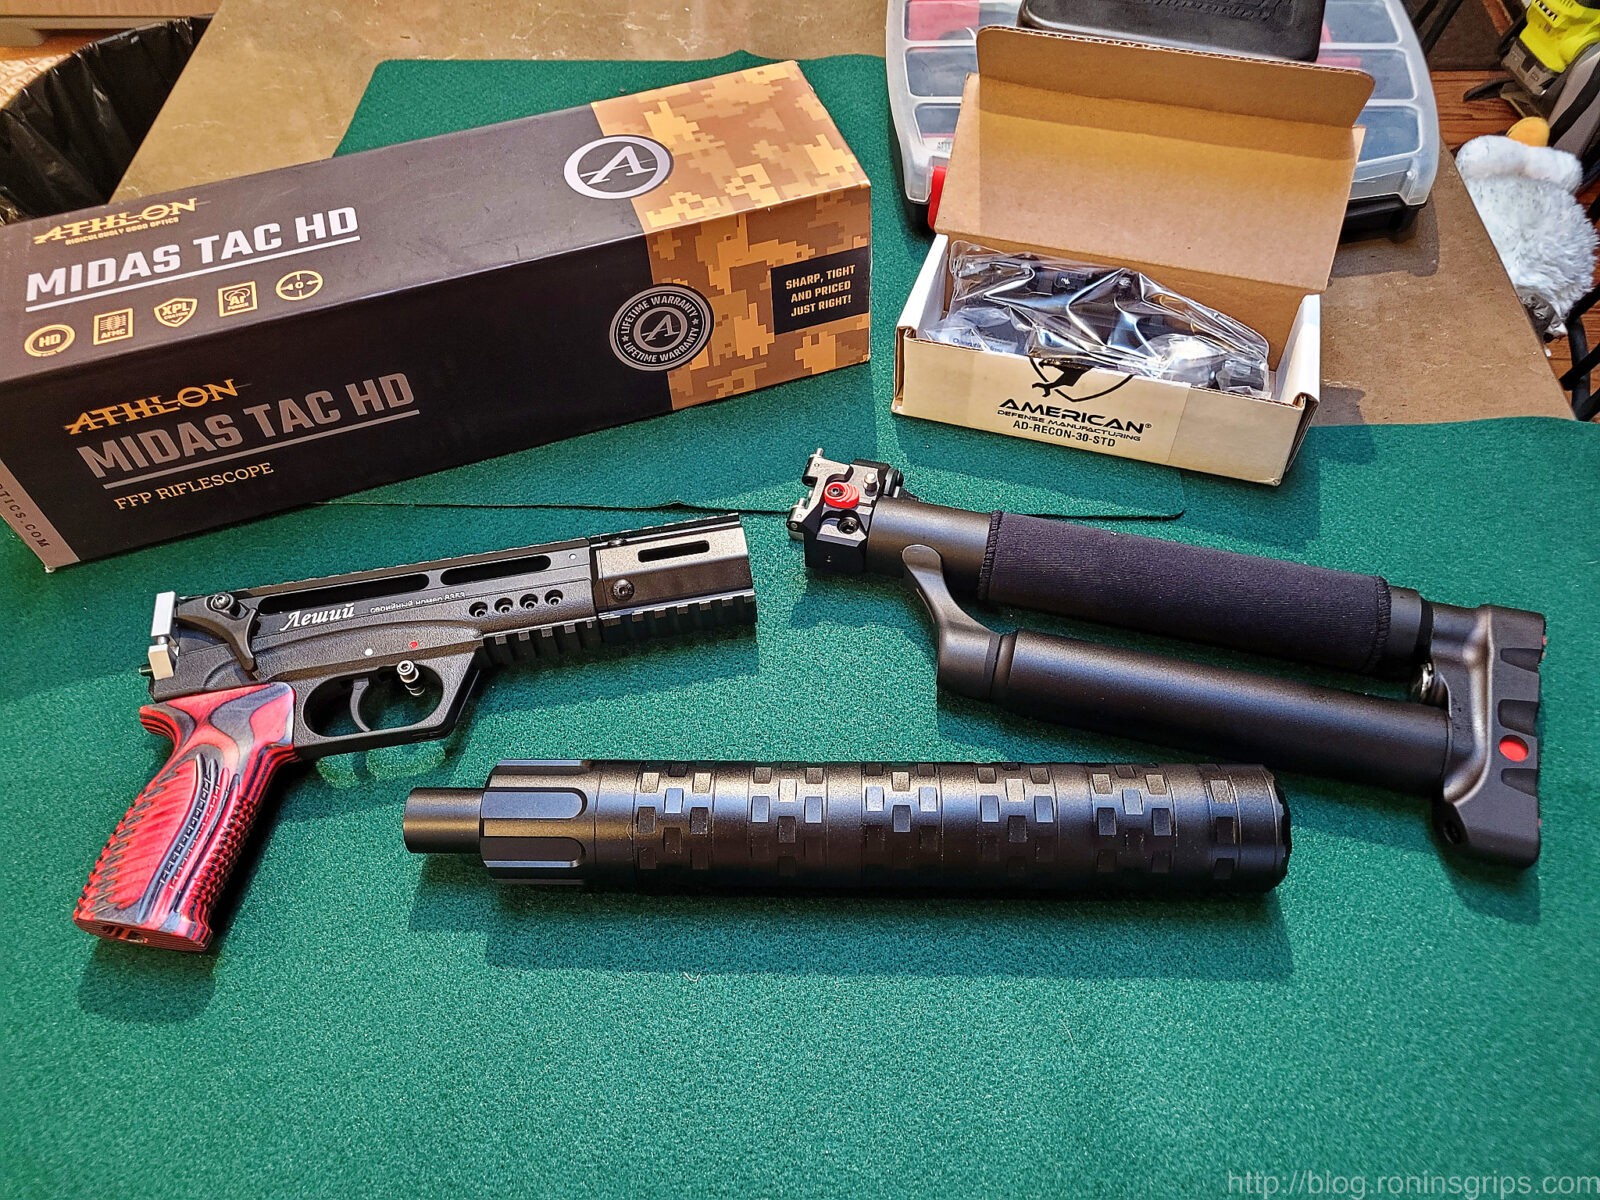
So, the big day arrived and I had all of the parts – the next post will get into assembly. Everything was going well up to this point and the next post will get into assembly.

I do want to share something a bit out of sequence with the story – the Midas Tac was dead on arrival butI didn’t find this out until testing. I’m mentioning this early because I don’t want somebody rushing out and buying a Midas after just reading the above. In digging deeper on the Athlon line, I read comparisons of the Midas vs the Helos BTR Gen 2. Thanks to Amazon customer service, I returned the Midas Tac and changed to an Athlon Helos BTR Gen 2 4-20×50 that I am happy with and am still running just over six months later.

Summary

Without a doubt, the Edgun Leshiy 2 is a novel airgun and one I like – I’ll tell you that right up front. I did learn a few things along the journey that I will share over the course of a few blog posts and the next one will be about assembling carbine.


Note, I have to buy all of my parts – nothing here was paid for by sponsors, etc. I do make a small amount if you click on an ad and buy something but that is it. You’re getting my real opinion on stuff.

If you find this post useful, please share the link on Facebook, with your friends, etc. Your support is much appreciated and if you have any feedback, please email me at in**@ro*********.com. Please note that for links to other websites, I may be paid via an affiliate program such as Avantlink, Impact, Amazon and eBay.


Update on the Hatsan Jet II – It’s Pretty Wicked!

I wrote a series of posts about purchasing a .22 Hatsan Jet II right after I bought it in early January 2022. After shooting it for a month I have some feedback to share.

I’d guesstimate I have just over a 100 rounds through it. I’ve changed quite a few 7 round mags – that much I know for sure. The first thing I want to tell you is that the performance and reliability are surprising. It reinforces to me that Hatsan can turn out some great airguns.

The Shroud Is True

I was a little worried about how true the shroud would be relative to the center of the barrel’s bore. In my Gladius, it was not. With the Jet II, it is. The way you can tell is that pellets are landing all over the place because they hit the adapter or somewhere in the moderator and spin out of control. In other words, accuracy is horrible until you remove the moderator and/or the adapter. The DonnyFL 1/2-20 male to male adapter screwed right and then the Hugget Sniper to it and accuracy was great.

Accuracy

Speaking of accuracy – I was very happy. Once I dialed in the scope I had no problem shooting 1/2″ 7 round groups using 18.13 JSB Exact Jumbo Diabolo pellets at 12 yards from a bench. To be clear – just me resting my arm on the bench. I didn’t have a true rifle stand.

That is 7 rounds of .22 18.13gr JSB Exact Jumbo Heavy Diabolo pellets at s12 yards. Ignore the blatant flier – that was my fault, not the gun’s or the pellets. I was firing supported from a bench but the Jet II was not in a bench rest. I’ll do some accuracy testing one of these days.

Now, another form of accuracy is to tell you about squirrells. I have cleanly dispatched 8 over the last three weeks. Distances vary from 12-16 yards.

The Jet II really likes these pellets. I really like JSB in general for all of my pellet guns.

The Charging Handle

In my first review I voiced a concern about the polymer charging/cocking lever. So far, it has worked just fine – no signs of any loosening or bending.

The cocking handle is doing just fine.

Air Use

I purposefully bought the Jet II due to the larger air reservoir than the Jet I. I could shoot two mags with no noticeable change in trajectory in my 12 yard test range shooting 18.13 JSB Exact pellets.

My usual approach is to shoot a mag and then top of the Jet II from my air tank at the same time I reload the pellets in the magazine. I have a spare magazine ready to go so if I was in a rush for some reason I know I have a little bit of buffer just in case I need it – I’m using the gun for pests and not target shooting.

I had it filled pretty close to the 250 bar max. What you see is the amount of air left after 14 shots (two magazines). I have not tried shooting more than two mags after refilling.

Snipe Moderator

I’m using the Hugget Snipe moderator and it almost makes the Jet II backyard friendly. It’s far quieter with it of course – I just wish it was quieter yet and will experiment some more with different cans.

The Hugget Snipe does a very good job. I wish it was even more quiet but that’s not really a negative reflection on the Snipe.
With the Snipe, the overall length is approximately 30″. From an overall length perspective, it’s a great combination.

Summary

At this point I am still very happy with the Jet II for it’s intended pest control purposes. It’s definitely effective and amazing for the price when you stop and think about it.

Here’s the listing at Pyramyd Air and I always recommend you use their 10 for $10 test service:

Hatsan Jet II 0.22

Hatsan Jet II 0.22

Hatsan Jet II Convertible PCP Pistol

Convertible pistol or rifle Includes removable synthetic stock PCP Two 40cc air cylinders fill to 3,625 PSI/250 BAR Shots at optimal velocity*: 48 (.177), 42 (.22), 30 (.25) Magazine capacity: 8 rounds (.177), 7 rounds (.22), 6 rounds (.25) Integrated manometer Max. velocity (lead-free): 810 FPS (.177), 700 FPS (.22), 611 FPS (.25) Max. velocity (lead): 788 FPS (.177), 700 FPS (.22), 608 FPS (.25) Max. energy: 9.7 FPE (.177), 15.6 FPE (.22), 16.5 FPE (.25) Length-adjustable buttstock Elevation-adjustable cheek rest Ridged rubber buttpad Flip-up fiber optic front sight Flip-up adjustable fiber optic rear sight 11mm Dovetail optics rail Picatinny accessory rail Barrel length: 7.9" Overall length (pistol): 15" Overall length (rifle): 22.8"-24.6" Overall weight (pistol): 2.4 lbs. Overall weight (rifle): 3.4 lbs.

* – within 85% of peak velocity.


Note, I have to buy all of my parts – nothing here was paid for by sponsors, etc. I do make a small amount if you click on an ad and buy something but that is it. You’re getting my real opinion on stuff.

If you find this post useful, please share the link on Facebook, with your friends, etc. Your support is much appreciated and if you have any feedback, please email me at in**@ro*********.com. Please note that for links to other websites, I may be paid via an affiliate program such as Avantlink, Impact, Amazon and eBay.


Introducing the New Unique Hatsan Jet II: Post 3 – Mounting a Scope

In first post, I told you a little about the Jet I and II pistols and how I ordered a Jet II in .22 plus I shared some specifications and photos. In the last post I went over adding a moderator and in this post, I am going to show you how to add a scope. Because the Jet I and II are almost identical other than the twin air cylinders in the II, this post should help anyone wanting to add sound suppression to their Hatsan Jet pistol/carbine.

Okay, so you have two rail sections – one runs the length of the barrel and the second section is just behind the breach. Despite what you may read that the pistol is set for an 11mm dovetail, which is partly true, it is also set up for Picatinny rails. I noticed in my Hatsan Gladius that they did this interesting hybrid optics rail that supported both and they did it again with the Jet.

This means you have tons and tons of options. Now, I went with an inexpensive UTG 3-12×44 compact scope with a 30mm tube, adjustable objective, illuminated M-il-Dot reticle and rings. (This is their SCP3-UM312AOIEW scope). I don’t use UTG on firearms but I have no problem running them on airguns and have used a number of different models over the years. Honestly, you can run whatever you want as long as you can figure out how to mount it and clear the mag and the breach area. Click here to go to Amazon to see a number of different UTG scopes.

Now this next part is a bit of a work in process. Right now I am running a medium height 2″ offset scope mount like you would find on an AR. I think it is from Primary Arms but am not 100% sure. What I wanted to do was to keep the mount purely on the barrel to avoid any alignment issues between that section and the rear section. Even as far back as I can move the scope, I still have to choke up on the gun a bit to get the proper eye relief on the scope. I may either move to a 3″ offset mount or just go ahead and try seeing what I can do with two separate rings and see how the alignment goes. Another option might be a scope with longer eye relief … we’ll see how things go.

Let’s take a look…

You have all of the rail space on the barrel.
Plus a little bit more on the rear. I was worried about alignment over time and opted to just mount on the barrel but I am rethinking that and may try a pair of rings in the future,
My first test optic was a 1-6×24 Vortex Strike Eagle. For airgun work there is just not enough magnification bit it did confirm the rail was configured to properly hold a Picatinny rail mount.
The top dovetail is the small 11mm style. I don’t know if you can see the contour of the top and how it is beveled – that is for the larger Picatinny mounts. It’s unorthodox but if works. The end of the day this is a PCP (pre-charged pneumatic – meaning it has cylinders of compressed air) airgun and will have little to no recoil to deal with.
This is a one piece 30mm mount with a 2″ offset. My best guess is that I bought it from Primary Arms but I really am not sure because it was sitting lose on a shelf with no packaging. It’s about a medium height.
The mount just barely clears the magazine. The magazine sticks up about 0.392″ from the bottom of the rail just so you know and it is the highest thing you need to clear. The magazine slides in straight from the side and is held in place by friction fit so you don’t need to worry about lifting the mag out – it just needs to be able to slide in under the mount or the scope tube itself.

Boresighting the scope

Now this was a bit of an adventure. I like to use a laser boresighter but I couldn’t find any of the collets for stabilizing the stem so I wound up inserting and stabilizing it with one hand while adjusting the scope knobs. In the end, I was about 6″ down and 3″ right of the bullseye at 10 yards but it did get me close enough to actually shoot and dial in the scope.

So let’s wrap up this post

Instead of dealing with the 11mm dovetail, I am happily using the Picatinny rail. The combination of one piece 2″ offset mount and UTG compact scope are working for now. I just wish I could get the scope a tad further back or get a scope with longer eye relief. I may get a 3″ offset mount and give it a try as I really would like to mount the scope to the barrel’s rail.

So far so good. I hope this gives you some ideas.


Note, I have to buy all of my parts – nothing here was paid for by sponsors, etc. I do make a small amount if you click on an ad and buy something but that is it. You’re getting my real opinion on stuff.

If you find this post useful, please share the link on Facebook, with your friends, etc. Your support is much appreciated and if you have any feedback, please email me at in**@ro*********.com. Please note that for links to other websites, I may be paid via an affiliate program such as Avantlink, Impact, Amazon and eBay.


Introducing the New Unique Hatsan Jet II: Post 2 – Adding A Moderator

In the last post, I told you a little about the Jet I and II pistols and how I ordered a Jet II in .22 plus I shared some specifications and photos. In this post, I am going to show you how to add a moderator. Because the Jet I and II are almost identical other than the twin air cylinders in the II, this post should help anyone wanting to add sound suppression to their Hatsan Jet pistol/carbine.

It comes with a threaded shroud that stabilizes and protects the barrel plus provides a 1/2″-20 threaded end. It does not come with any sound suppression out of the box. For those of you are familiar with sound suppression in airguns, they go by a number of names – moderators, air strippers, suppressors and sometimes silencers. Personally, I use the term moderator to make it very different from firearms and avoid confusion.

Next, airgun moderators are not regulated like firearm suppressors are plus the designers take great care for them to not work on firearms – the threading is different and the internals are made from plastics or fibers that will melt or blow apart if put on a firearm. The moderator market is competitive and different vendors have different designs with varying degrees of effectiveness,

In short, airgun suppressors are made for use only on airguns and they do serve real purposes – they make the gun backyard friendly to avoid worrying neighbors, they reduce the sound signature to not scare away whatever pest or game you are trying to shoot plus if you have a big bore airgun the reduced sound levels protect your ears.

Now, when t comes to a .22, there isn’t a very loud retort when the airgun fires but you definitely can hear it. By using a moderator, the airgun becomes very quiet. It’s not perfectly silent – that’s largely a myth just like firearms – but it sure does quiet them down.

Last comment – many airguns come with moderators built in such as the Hatsan Quiet Energy line plus many of the more expensive PCP airguns either come with a moderator built into the shroud or have a threaded barrel to allow one to be screwed on.

There are three moderator companies that I have had very good luck with and have no hesitation recommending – DonnyFL, Huggett Precision Products and EdGun. In today’s post, I’ll use a Huggett Snipe that I bought from Utah Airguns (who has quite a selection of brands and models) and a DonnyFL A21 adapter to mount it.

Let’s Get To It!

These holes that look like ports in the shroud are just for looks – the same way that having the serrations in a shroud are for looks. The shroud stabilizes and protects the barrel plus has threading for adding a moderator but that’s it. There is no integral moderator. You’ll need to add that but that’s ok and I’ll tell you why and how in another post.
Inside the muzzle end of the shroud are 1/2-20 threads for adding a moderator. So, if you get a 1/2-20 male to male fitting, you can add your favorite brand of moderator. I’ll cover more about this later.
This is the DonnyFL A21 adapter with the tread protector screwed on. Note, there are other male-to-male 1/2-20 adapters out there. I went with DonnyFL as they are a good business work with and their machining is always top notch.
This is the DonnyFL A21 adapter and it simply screws into the end of the shroud. I am happy to report that the barrel does appear to be properly centered. I was not so luck with my Gladius and could not mount an external adapter. For my Jet II though, it lines up great. Note, it comes with a threaded muzzle protector / thread protector that screws off. It’s very nicely made and finished by the way.
One nice feature is that both ends of the adapter have holes in them so you can insert something round, like my punch here, and snug down the adapter. Bear in mind that the threaded adapter is screwing into polymer. You just want to snug it down or else you are liable to strip out the shroud’s polymer threads. You do want to do this because when you screw the moderator on or off, you want the adapter to stay put and it will. Just don’t go crazy with the torque is my warning.
This is a Snipe made by Huggett Precision Products in the UK. It is threaded for 1/2 UNF which means Unified Fine which is also is written as 1/2-20 meaning 20 threads per inch.
The business end
This is the 1/2-20 threaded base.
The moderator is lightly screwed onto the DonnyFL adapter.
Again, it all lines up and shoots great.

So let’s wrap up this post

Okay – the combination of Hatsan Jet II, DonnyFL A21 adapter and Huggett Snipe moderator work really well. I bet you’re wondering about the scope and that will be the next post.


Note, I have to buy all of my parts – nothing here was paid for by sponsors, etc. I do make a small amount if you click on an ad and buy something but that is it. You’re getting my real opinion on stuff.

If you find this post useful, please share the link on Facebook, with your friends, etc. Your support is much appreciated and if you have any feedback, please email me at in**@ro*********.com. Please note that for links to other websites, I may be paid via an affiliate program such as Avantlink, Impact, Amazon and eBay.


Introducing the New Unique Hatsan Jet II – A Versatile Compact PCP Airgun: Post 1 – Out of the Box

I first saw a photo of the forthcoming Hatsan Jet I and II airguns in November of 2022 and was very interested in them. As more info started coming out, I really focused on the Jet II as it has twin air tanks. You see, I like short airguns for handling pests so I needed something to authoritatively deal with ground squirrels, tree squirrels and the occasional rabbit.

I have an amazing FX Impact Compact Mk II in .25 but wanted something even smaller but with less over penetration. I used to include having less of a report but switched from a DonnyFL Emperor to one of the new EdGun Behemoth moderators with an additional module and wow is that thing quiet now but that is a story for another day.

So, back to the point – I wanted something even smaller than the Impact Compact with less energy but didn’t want to spend a fortune either – sure, I’d love a Leishy II, Layla or something similar but don’t have that kind of money. As the just-before-Christmas release date drew near, the pricing came out and the suggested pricing was very affordable at $289.99 for the Jet I and $339.99 for the Jet II plus vendors were planning to come in lower. Ok, I had some thinking to do and very quickly decided to order the Jet II in .22 from Pyramyd Air and added their 10 for 10 test to try and guard against getting a defective unit.,

Specifications

  • It’s a side lever operated repeater
  • Available in .177, .22 and .25 – I opted for the .22 model
  • Magazine capacity: .177 is 8 rounds, .22 is 7 rounds and .25 is 6 rounds – these are small magazines for a small airgun
  • Barrel length: 7.9″
  • Each air cylinder holds 40cc so the Jet II holds 80cc of air
  • Pressure is 250 bar (3,626 psi)
  • There is a built in pressure gauge
  • Power is not regulated (the more expensive airguns tend to have regulators that step the pressure down from the tank to a lower more o consistent level that is then sent to the pellet upon firing. Higher end air guns may even have two regulators. For the price point, the Jets do not have a regulator and you’ll be just fine though I will tell you this is why I bought the Jet II – I wanted a larger air volume and a slower corresponding drop in pressure compared to the Jet I.
  • The barrel has a shroud to protect and stabilize it but nothing more. There is no integral moderator/suppression in the shroud.
  • Hatsan reports the barrel is rifle and made in Germany but they don’t mention the manufacturer – not sure if it is made Walthar or just who and will update this if I find out
  • Split length 11mm dovetail and Picatinny rail – it runs over the entire barrel and for a short amount behind the breach. Note: This combination rail design was also on my Gladius and hasn’t been reported in the press for some reason. You do not need to be limited to just 11mm.
  • Has three flip up sights – one front and then two at the rear depending on whether you are shooting it as a pistol or a carbine
  • The stock can be easily installed or removed with a push button
  • It is adjustable for length with a rubber recoil pad and a vertically adjustable cheek piece
  • Overall length of just the pistol: 15″
  • Overall length with the stock collapsed is about 23-3/16″ and fully extended it is just over 24-3/4″.
  • If I use the back of the rear sight as a starting point, length of pull collapsed is about 9-5/8″ and fully extended it is about 11-9/16″.
  • 1.4 pounds without the stock and 3.4 pounds with the stock
  • Now the next stats are reported by Hatsan and I want to take a moment and recognize them for conservative reporting. Whereas some vendors inflate their numbers (meaning they exaggerate), Hatsan tends to be truthful and if anything their airguns perform better than they report:
  • Max Velocity – Lead Free Pellets – 810 FPS – .177; 700 FPS – .22; 600 FPS – .25 (depends on the type of pellet and other factors)
  • Max Velocity – Lead Pellets – 788 FPS – .177; 700 FPS – .22; 600 FPS – .25(depends on the type of pellet and other factors)
  • Max Muzzle Energy – 9.7 FPE – .177; 15.6 FPE – .22; 16.5 FPE – .25 (depends on the type of pellet and other factors)
  • Shots at Optimal Velocity – 48 – .177; 42 – .22; 30 – .25

Notice the muzzle energy reported in Foot Pounds of Energy (FPE). I want to use this to eliminate squirrels and the .177 with 9.7 FPE is on the lighter side. There are guys who hunt squirrels with .177 but I tend to think they are pushing heavy pellets faster and delivering more FPE. My first choice would have been .177 but given the numbers I decided to go with a .22 and the 15.6 FPE.

How much is enough FPE for squirrels starts arguments and chest thumping online one post cites 9 FPE for minimum energy and then you have folks swearing clean kills at 5 FPE with headshots. My point is that there are tons of claims out there. I know 15.6 FPE will do the job if I do mine in terms of accurate shot placement so that’s my rationale.

Opening The Box

On December 28th, the carbine arrived from Pyramyd Air and it did not disappoint.

The Jet II arrived in a flat box and inside was the pistol, the stock and in the box are two mags, a female quick connect fitting and some o-rings. Is this a pistol or a carbine? The answer is yes. I have found Hatsan’s designs to be novel and forward looking – this is no exception.
This is looking straight on at manometer (the pressure gauge). It looks like Pyramyd Arms did their 10 for $10 test but didn’t bother refilling the tank. So the gauge is in the top cylinder. The bottom cylinder has a cap on and under it is the male quick connect fitting for filling the airgun.
Inside the muzzle end of the shroud are 1/2-20 threads for adding a moderator. So, if you get a 1/2-20 male to male fitting, you can add your favorite brand of moderator. I’ll cover more about this later.
The quick connect foster fitting is protected by a black plastic cover. Note the 250 bar limit printed on the cylinder.
The cocking lever is polymer. I’d rather it were aluminum but let’s see how it holds up, Injection molded composites these days are amazing so this may do ok. Time will tell. Also, that optic rail also runs forward of the breach the whole length of the barrel and supports both 11mm and Picatinny. Most reviewers and listings have overlooked that. I will do a blog post showing a scope mounted with Picatinny rings directly.
These holes that look like ports in the shroud are just for looks – the same way that having the serrations in a shroud are for looks. The shroud stabilizes and protects the barrel plus has threading for adding a moderator but that’s it. There is no integral moderator. You’ll need to add that but that’s ok and I’ll tell you why and how in another post.

Now, let’s look at the stock

Let’s next turn our attention to the attachable stock that is very slick and can be easily attached or removed.

The stock is really interesting. The male plugs go into the female receptacles in the pistol. The knob on the lower left adjusts the height of the cheekpiece and the the square button just forward of the middle lower part of the stock moves a detent and allows you to make the stock longer or shorter.
The lower plug has a locking mechanism to keep it secured in the pistol.
The top plug has an O-ring installed. What this does is provide resistance/springiness for a firm lock-up. When you push the stock into the pistol the O-ring compresses to create a solid feeling connection.
This is looking at the female receptacles on the pistol that the stock’s plugs will go into.
That square button allows enables the stock to telescope in or out.
There are a total of six adjustments in the stock. Overall length with the stock collapsed is about 23-3/16″ and fully extended it is just over 24-3/4″. If I use the back of the rear sight as a starting point, length of pull collapsed is about 9-5/8″ and fully extended it is about 11-9/16″. There is a slight amount of play, or wiggle, in the lock up of the stock but it’s really not much and thus acceptable
It looks slick and goes to the shoulder very easily. The balance is good too. You can see the two magazines and bag of goodies that were in the accessory box.
I wear XL-sized gloves and my hand fits the grip but just barely. Oddly it’s my middle finger’s middle knuckle that feels the tight fit. I wish there was just a tad more room before the start of the trigger guard but I can live with it. I do want to point out one thing I really like – the safety flips up from the bottom of the trigger guard. I really like designs that put the safety where it can be readily turned off without moving your head or your hand to find the safety leverl. Big kudos to Hatsan for that. My Gladius had one at the front of the trigger guard and I could very easily feel it’s status or turn it off without moving my head.

So let’s wrap this first blog post

I will do more posts about adding a moderator and the optic. I’ve already done some test firing at targets and really like the little “carbine” – I think that’s what I’ll call it. So, if you are looking for something new and compact, check out the Jet I or Jet II in the caliber of your choice.


Note, I have to buy all of my parts – nothing here was paid for by sponsors, etc. I do make a small amount if you click on an ad and buy something but that is it. You’re getting my real opinion on stuff.

If you find this post useful, please share the link on Facebook, with your friends, etc. Your support is much appreciated and if you have any feedback, please email me at in**@ro*********.com. Please note that for links to other websites, I may be paid via an affiliate program such as Avantlink, Impact, Amazon and eBay.


JSB Airgun Pellets Are My Favorites – Two Cool Factory Tour Videos

In addition to firearms, I like pellet guns and use them quite a bit for pest control. Along the way, I’ve had a chance to try quite a few different varieties of pellets and do have a favorite maker – JSB, For my needs, they have worked great in both break barrel springs as well as precharged pneumatic (PCP) which is pretty much all I use now.

Like with firearms, you need to find the brand, style and weight of pellet that works best for your needs be it plinking, punching paper or hunting. For example, the main PCP airgun I use is a FX Impact Compact Mk.II in .25 caliber. I’ve found the JSB Exact King .25 Diabolo 25.39 grain pellets work exceptionally well for that rifle both in terms of accurace and the ability to deal with squirrels, rabbits and the occasional raccoon.

I’ve looked at these 25.39 grain JSB pellets and often wondered how they are made

Who Makes Them?

I knew they are made in the Czech Republic – I got that much right but I thought JSB was the company and that is only partly right. The company was founded in 1991 by Josef Schultz (the “JS” part of the name), who was a competive shooter and coach, with the express intent to make airgun ammunition. The “B” is from the town he lived in – Bohumin.

The current company’s name is “JSB Match Diabolo Bohumin” and was a merger of Josef’s pellet making activities as well as others – if I understand some of what I read, he design some of the machines and they are all under that “JSB Match Diabolo A.S.” corporate name, which was established in 2007 in the town of Bohumin.

On a sad note, Josef passed away due to complications following a surgery in 2020 at the age of 76. He definitely left a legacy behind.

Videos

Lately I’ve been watching a lot of airgun videos on Youtube and encountered two different videos that have factory tours of JSB that are fascinating.

This first one is three years old and has the most detail including explanations by a tour guide in English:

This second one is shorter, set to music, has some really great details and is from early 2022:

Summary

Thought I would share these neat videos with you and hope you enjoy them. Kudos to the folks who took the time to put them together for us.


Note, I have to buy all of my parts – nothing here was paid for by sponsors, etc. I do make a small amount if you click on an ad and buy something but that is it. You’re getting my real opinion on stuff.

If you find this post useful, please share the link on Facebook, with your friends, etc. Your support is much appreciated and if you have any feedback, please email me at in**@ro*********.com. Please note that for links to other websites, I may be paid via an affiliate program such as Avantlink, Impact, Amazon and eBay.


The ATN X-Sight 4K 5-20x Scope Is Surprisingly Effective But Expect A Learning Curve

I never was that interested in ATN scopes until maybe a two years ago. I was at the range fiddling with something and a fellow pulled in and set up a varmint AR with a big blocky optic on a Bog Deathgrip tripod. I could not help myself – I had to go over and ask what the optic was.

Thankfully, he was a good old boy and liked shooting and talking. He was having a coyote problem and wanted to get the rig sighted in. He told me it was an ATN night vision optic and the tripod was to help him keep it all steady. I looked it all over and headed back to my area. The ATN looked better in person than it did in the ads that I had seen in catalogs that made it look “gimicky”. Between my assumption about the quality and the price, I was never interested but after seeing it in person it was filed under “who knows – maybe someday” category in my head for future projects.

Fast Forward to 2021

I was researching high end airguns and some of the of guys were running various ATN scopes. I wanted to up my game on the computational ballistics front – yeah the calculation of trajectories – and I wanted a computer to do it for me. I really wanted to get surgical and modern with my new .25 caliber FX Impact Compact pre-charged pneumatic (PCP) air rifle. This desire brought me to ATN and their latest generation of digital X-Sight 4K optics because they have an internal computer that can crank the numbers.

An Auxiliary Ballistic Laser (ABL) good from 5 to to 1000 yards could be added that interfaced with the scope to provide range to target data to the computer. The computer can take the muzzle velocity of your round, the ballistic coefficient of your bullet (in my case pellet), distance of the optic from the center of the bore, angle and the distance to the target and automatically adjust the recticle. Whoa…. that’s pretty amazing.

Just a quick note on the ABL – based on my experience with laser rangefinders, usually maximum range comments by vendor are a bit of hype because it depends on how reflective the target is. In my case, virtually all of my shooting will be within 50 yards with a possible stretch to 100 but I doubt I will ever shoot beyond that.

Another feature that attracted me was the night vision capability. I’ve not had the capability to eliminate pests at night or at very low light levels.

The X-Sight scopes have a host of other features like taking photos and movies, recording just before and after sensing recoil, etc. Those are nice but not really features I cared about.

I shopped around and ordered an ATN X-SIght 4k 5-20x optic, Auxiliary Ballistic Laser (ABL) 1000 rangefinder, and a quick release mount. It came to just over a $1,000 plus I bought a SD memory card. The optic and rangefinder were from Brownells and I sourced the quick detach mount direct from ATN. A lot of vendors carry ATN products so you can shop around.

In case you are wondering why I would go to such expense for accuracy in a PCP airgun that will mostly be used within 100 yards, I can sum it up with the saying “aim small – miss small.” It’s one of my favorite lines from American Sniper but it is true. If you focus your aim on a very small part of the target then you will either hit it or miss by a small amount. This requires discipline and knowledge on your part combined with a capable weapons system to deliver the bullet or pellet.

The Scope, ABL and Mount Arrived

When the boxes came and I started reading the manuals, I had the same feeling when I read something that says “some assembly required”. I really hadn’t put much thought into how different a digital optic is from a traditional scope. Wow. This thing has a series of setup menus and then you need to learn your away around the scope. So right out of the box there was a lot of fumbling, swearing and my changing things.

So here’s my first recommendation – be sure to watch ATN’s videos about setting up the optic and using it. The manuals help but I found the combination of videos for the overview and the documentation to refer to as a very handy combination. Click here to go to the ATN page with all of their videos and/or click here for the manuals – it actually has links to PDFs videos and guidance on the page itself.

The X-Sight is mounted just like any other scope. Square the weapon then the optic to the weapon to ensure the recticle is level. I use a Wheeler scope mounting kit’s leves to do this. Note that the Impact Compact is being held in a Tipton Standing Ultra GunVise. Man, those are nice.

Here’s an example of needing to read the instructions. The threaded portion is part of a tube that is separate from the body of the ABL. You back off the two screws you see, remove the tube and screw it into the front of the X-Sight scope. You then clamp the ABL onto the tube and position it horizontal to the scope and bore.

Here is everything mounted.
Here’s another angle.

Now let me give you hope – once you start using the scope, it gets easier and faster each time. I turn on the scope so it has time to boot up as I am setting up – not at the last minute when I need to take a shot. Most of the time I am shooting at 14 yards so I dont need to range the target and the scope remembers the last range used. Instead,I zoom as needed, acquire the target and take the shot. That’s it – not a billion menus. So, stick with it – you will probably find it frustrating too at first and then it will get better with time.

Setup and Zeroing In Tips

When you are entering the info for the ballistic coefficient (BC) and the muzzle velocity, try and be as exact as possible, I obtained the BC from the manufacturer of my .25 pellets and the muzzle velocity was the average of 10 rounds fired through a chronograph.

I carefully measured out the range from the muzzle to the target. When I entered the range into the optic, I was precise and not guessing. I was being very careful due to the desire for accuracy.

Set your rifle up in a firm stand and fire a group then adjust the recticle. Their marketing comment of one shot zeroes is something they even mention is “in theory”. Repeat this until you have your zero consistently. This will all go faster and be easier if you have a solid stand – notice I mentioned this twice now 🙂 I used a Bog Deathgrip Carbon Fiber model to help me get the job done.

My Opinion

I’ve been using the X-Sight since late-April 2021 and like it. If I have a new distance to shoot, I range it, take the shot and then reset to my most common distance. I have made a few 35-50 yard shots that would have required some calculation, or at least experience, and hit less than quarter sized targets (squirrel head and heart shots) accurately.

Here’s another angle that gives you a good view of the mounted ABL. It connects to the scope via Bluetooth and you need to follow a zeroing process outlined in the manual. It’s straight forward but don’t skip it.

One thing I had to get used to was looking at a small monitor vs. glass. I’ve been shooting nice glass scopes for a number of years now – notably Vortex scopes – and looking at a monitor with a resolution lower than reality is different. I must admit that I prefer the clarity of good glass but it dawned on me that it was not fair to compare them at this point. I bought the ATN for the ballistics calculation capabilities and the potential for low-light/night-use — I did not buy it to be just another scope, That set my mind more at ease about the image difference – it is what it is with the current level of technology in these scopes.

This is an actual screen capture. The optic allows you to select from a number of recticle choices. Note the range information from the ABL down in the ower right corner. What you see in the scope actually has much more information but the screen capture does not include it.
This is an exciting shot of concrete but it lets you see the recticle better.

The combination of scope and ABL is a bit bulky and the ABL’s head is asymmetrical for the laser transmitter and receiver units. I set the Impact Compact on our tall kitchen table and it fell off onto the hardwood floor about three feet. It definitely made my stomach drop to hear all that money hit the floor. I’m actually happy to report that the rifle and optics system survived without any problems at all.

I was wondering how long the battery would live but that has not proved to be a problem. I fully charged it when I first got it and then again a few weeks ago. Now I don’t leave it turned on all the time. I’d say it runs maybe 5-10 minutes every 2-3 days and it’s not been a problem. I think I will just always charge it when it gets half way down or so plus I could always charge it from a powerbank/portable battery if needed. ATN even sells an extended battery if you need it.

The ABL is still on its first battery so I can’t tell you much there – I only use it as needed for longer shots so its had minimal use. I do have a spare battery just in case.

I wish the menus were a bit easier to navigate with very clear “back” or “cancel” options immediately available on every screen. For example, if you get into the manual ranging section or the part of zeroing the recticle by accident. For the most part they are pretty straight forward but I am not wowed by them from a user design perspective.

I opted for the ATN quick connect scope mount and it is okay but does not have locks on the throw levers. In hindsight, I could have used any 30mm rings I wanted including my preferred American Defense mounts. You have plenty of flexibility because one of the menu options lets you specify how high the scope is mounted.

Here’s a view of the ATN quick dtach mount’s levers. They don’t lock closed but have held no problem so far.

Last comment – I had the scope freeze on me twice. I found that turning the ABL off first, if I turned it on, seemed to cause the problem. Now, when I do use the ABL, I turn the scope off first and then the ABL. I’ve not had it freeze since powering down in this order. By the way, if your scope does freeze, hold down the power button for 10-15 seconds and it will shut off – kind of like notebooks where one push does a controlled power down of the laptop but holding it down does a forced immediate shut down.

ATN definitely tries to label everything outside of the scope to try and help folks learn the controls.

In Summary

I’ve been using the X-Sight 4K 5-20 and ABL 1000 laser for about three months and several times per week – sometimes several times per day depending on what is going on. I really feel like the combination has improved my actual accurage in terms of precisely hitting the target so I am happy with the purchase.

I’d recommend the setup for anyone looking for this type of optics system with similar intentions as I outlined at the start. It’s different from traditional glass lense optics but it brings a different set of capabilities to the table also. Let me put it this way,I would buy it again for my intended use.

I hope this helps you.


Note, I have to buy all of my parts – nothing here was paid for by sponsors, etc. I do make a small amount if you click on an ad and buy something but that is it. You’re getting my real opinion on stuff.

If you find this post useful, please share the link on Facebook, with your friends, etc. Your support is much appreciated and if you have any feedback, please email me at in**@ro*********.com. Please note that for links to other websites, I may be paid via an affiliate program such as Avantlink, Impact, Amazon and eBay.


A Video Tour of the Hatsan Factory in KemalpaÅŸa, Turkey

Hatsan Arms Company is an innovative builder of air guns and shotguns that was founded in 1976 and produce over 300,000 units per year.  Hatsan is located in KemalpaÅŸa, which is a large town located in the Izmir Province of Turkey.  There they product Hatsan airguns, Escort shotguns and Optima shotguns.


One interesting facet of Hatsan is that they handle all facets of production – machining of wood, machining of metal parts, heat treatment, finishing of work such as honing, different types of chemical plating & bluing, injection molding, metal injection, mold making, welding, barrel manufacturing, laser marking, laser engraving on wood & metal parts, camouflage coating, assembly, quality assurance testing, and test shooting.

Hatsan has over 650 workers, 599 machines in 35,000 square meter production area.  To produce products to high standards, Hatsan uses total quality management (TQM) and are ISO 9001 certified.

You’ll note factory looks well used, is relatively organized and bright.

Work centers are organized and appear well equipped.

Substantial automation including a variety of CNC systems.

This is an interesting 5:28 video that showcased their facility in 2015:


If you find this post useful, please share the link on Facebook, with your friends, etc. Your support is much appreciated and if you have any feedback, please email me at in**@ro*********.com. Please note that for links to other websites, I may be paid via an affiliate program such as Avantlink, Impact, Amazon and eBay.