In first post, I told you a little about the Jet I and II pistols and how I ordered a Jet II in .22 plus I shared some specifications and photos. In the last post I went over adding a moderator and in this post, I am going to show you how to add a scope. Because the Jet I and II are almost identical other than the twin air cylinders in the II, this post should help anyone wanting to add sound suppression to their Hatsan Jet pistol/carbine.
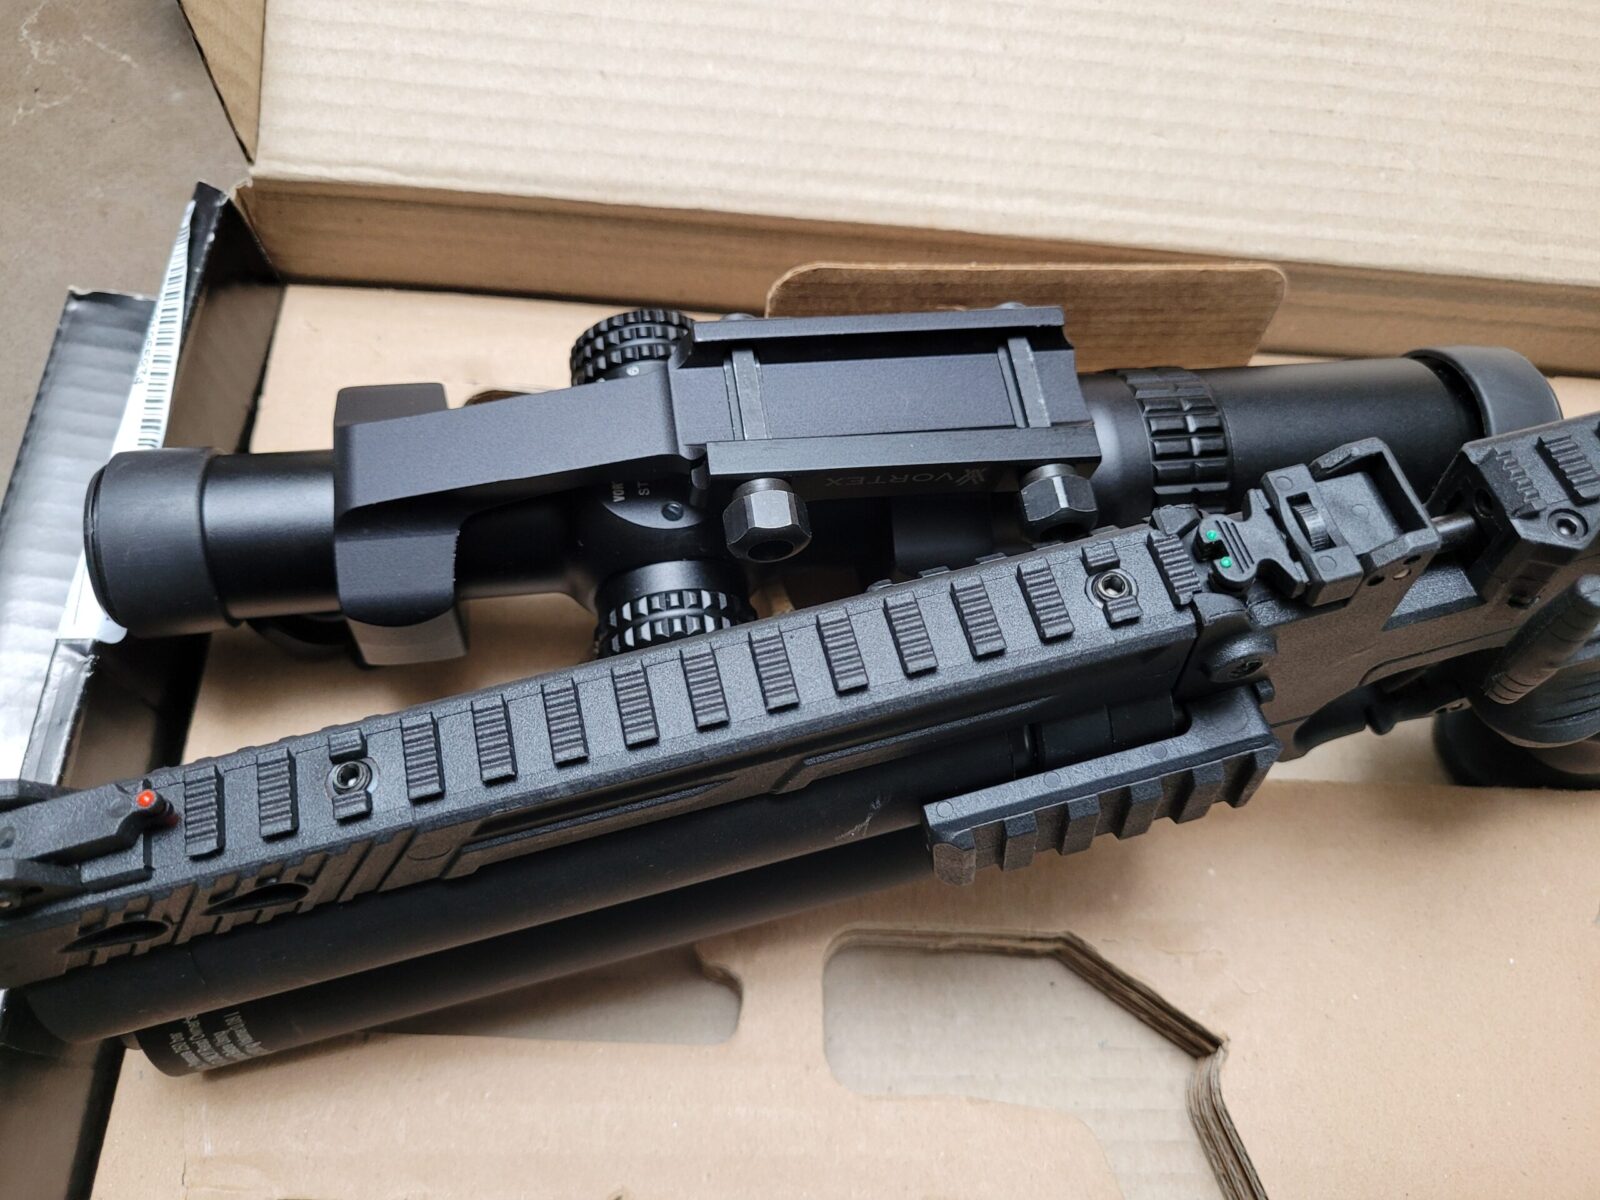
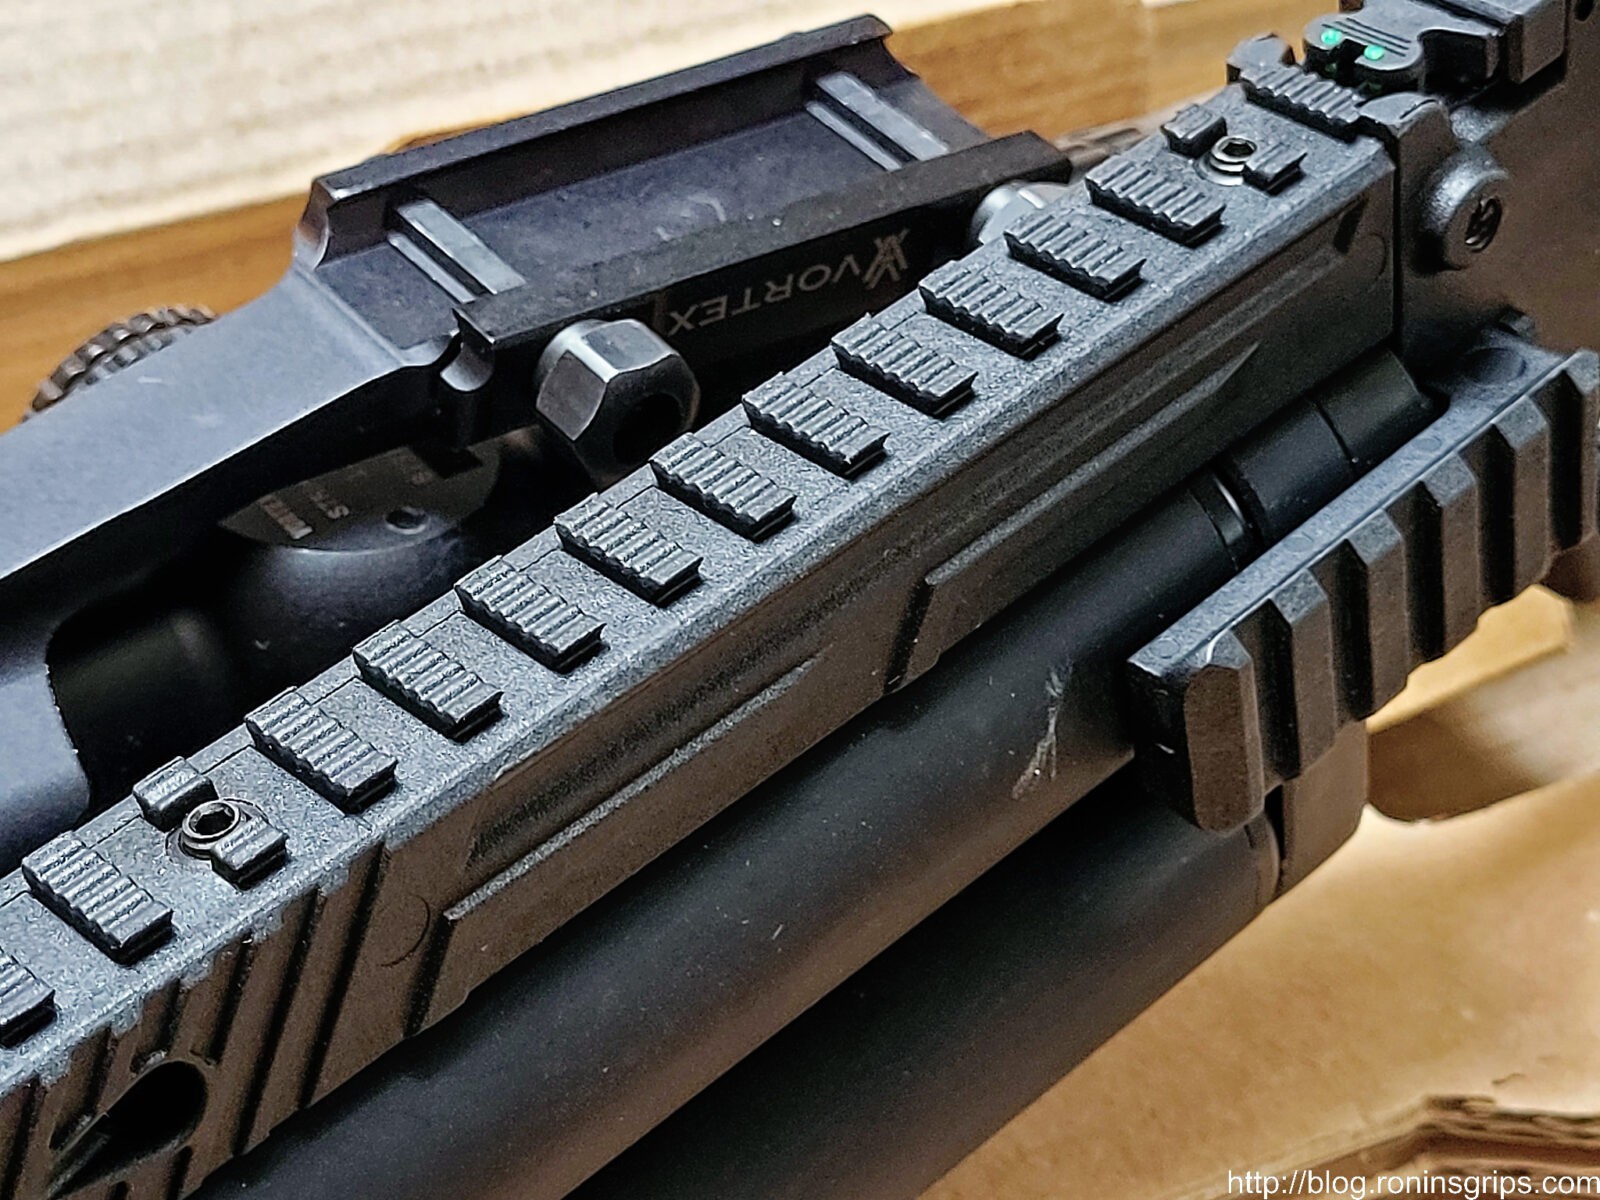
Okay, so you have two rail sections – one runs the length of the barrel and the second section is just behind the breach. Despite what you may read that the pistol is set for an 11mm dovetail, which is partly true, it is also set up for Picatinny rails. I noticed in my Hatsan Gladius that they did this interesting hybrid optics rail that supported both and they did it again with the Jet.
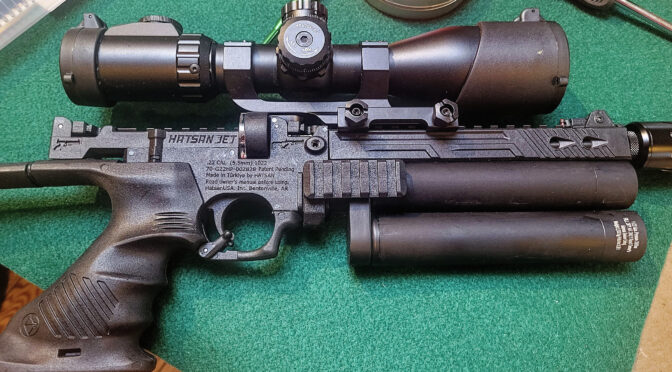
This means you have tons and tons of options. Now, I went with an inexpensive UTG 3-12×44 compact scope with a 30mm tube, adjustable objective, illuminated M-il-Dot reticle and rings. (This is their SCP3-UM312AOIEW scope). I don’t use UTG on firearms but I have no problem running them on airguns and have used a number of different models over the years. Honestly, you can run whatever you want as long as you can figure out how to mount it and clear the mag and the breach area. Click here to go to Amazon to see a number of different UTG scopes.
Now this next part is a bit of a work in process. Right now I am running a medium height 2″ offset scope mount like you would find on an AR. I think it is from Primary Arms but am not 100% sure. What I wanted to do was to keep the mount purely on the barrel to avoid any alignment issues between that section and the rear section. Even as far back as I can move the scope, I still have to choke up on the gun a bit to get the proper eye relief on the scope. I may either move to a 3″ offset mount or just go ahead and try seeing what I can do with two separate rings and see how the alignment goes. Another option might be a scope with longer eye relief … we’ll see how things go.
Let’s take a look…
You have all of the rail space on the barrel.Plus a little bit more on the rear. I was worried about alignment over time and opted to just mount on the barrel but I am rethinking that and may try a pair of rings in the future,My first test optic was a 1-6×24 Vortex Strike Eagle. For airgun work there is just not enough magnification bit it did confirm the rail was configured to properly hold a Picatinny rail mount.The top dovetail is the small 11mm style. I don’t know if you can see the contour of the top and how it is beveled – that is for the larger Picatinny mounts. It’s unorthodox but if works. The end of the day this is a PCP (pre-charged pneumatic – meaning it has cylinders of compressed air) airgun and will have little to no recoil to deal with.This is a one piece 30mm mount with a 2″ offset. My best guess is that I bought it from Primary Arms but I really am not sure because it was sitting lose on a shelf with no packaging. It’s about a medium height.The mount just barely clears the magazine. The magazine sticks up about 0.392″ from the bottom of the rail just so you know and it is the highest thing you need to clear. The magazine slides in straight from the side and is held in place by friction fit so you don’t need to worry about lifting the mag out – it just needs to be able to slide in under the mount or the scope tube itself.
Boresighting the scope
Now this was a bit of an adventure. I like to use a laser boresighter but I couldn’t find any of the collets for stabilizing the stem so I wound up inserting and stabilizing it with one hand while adjusting the scope knobs. In the end, I was about 6″ down and 3″ right of the bullseye at 10 yards but it did get me close enough to actually shoot and dial in the scope.
So let’s wrap up this post
Instead of dealing with the 11mm dovetail, I am happily using the Picatinny rail. The combination of one piece 2″ offset mount and UTG compact scope are working for now. I just wish I could get the scope a tad further back or get a scope with longer eye relief. I may get a 3″ offset mount and give it a try as I really would like to mount the scope to the barrel’s rail.
So far so good. I hope this gives you some ideas.
Note, I have to buy all of my parts – nothing here was paid for by sponsors, etc. I do make a small amount if you click on an ad and buy something but that is it. You’re getting my real opinion on stuff.
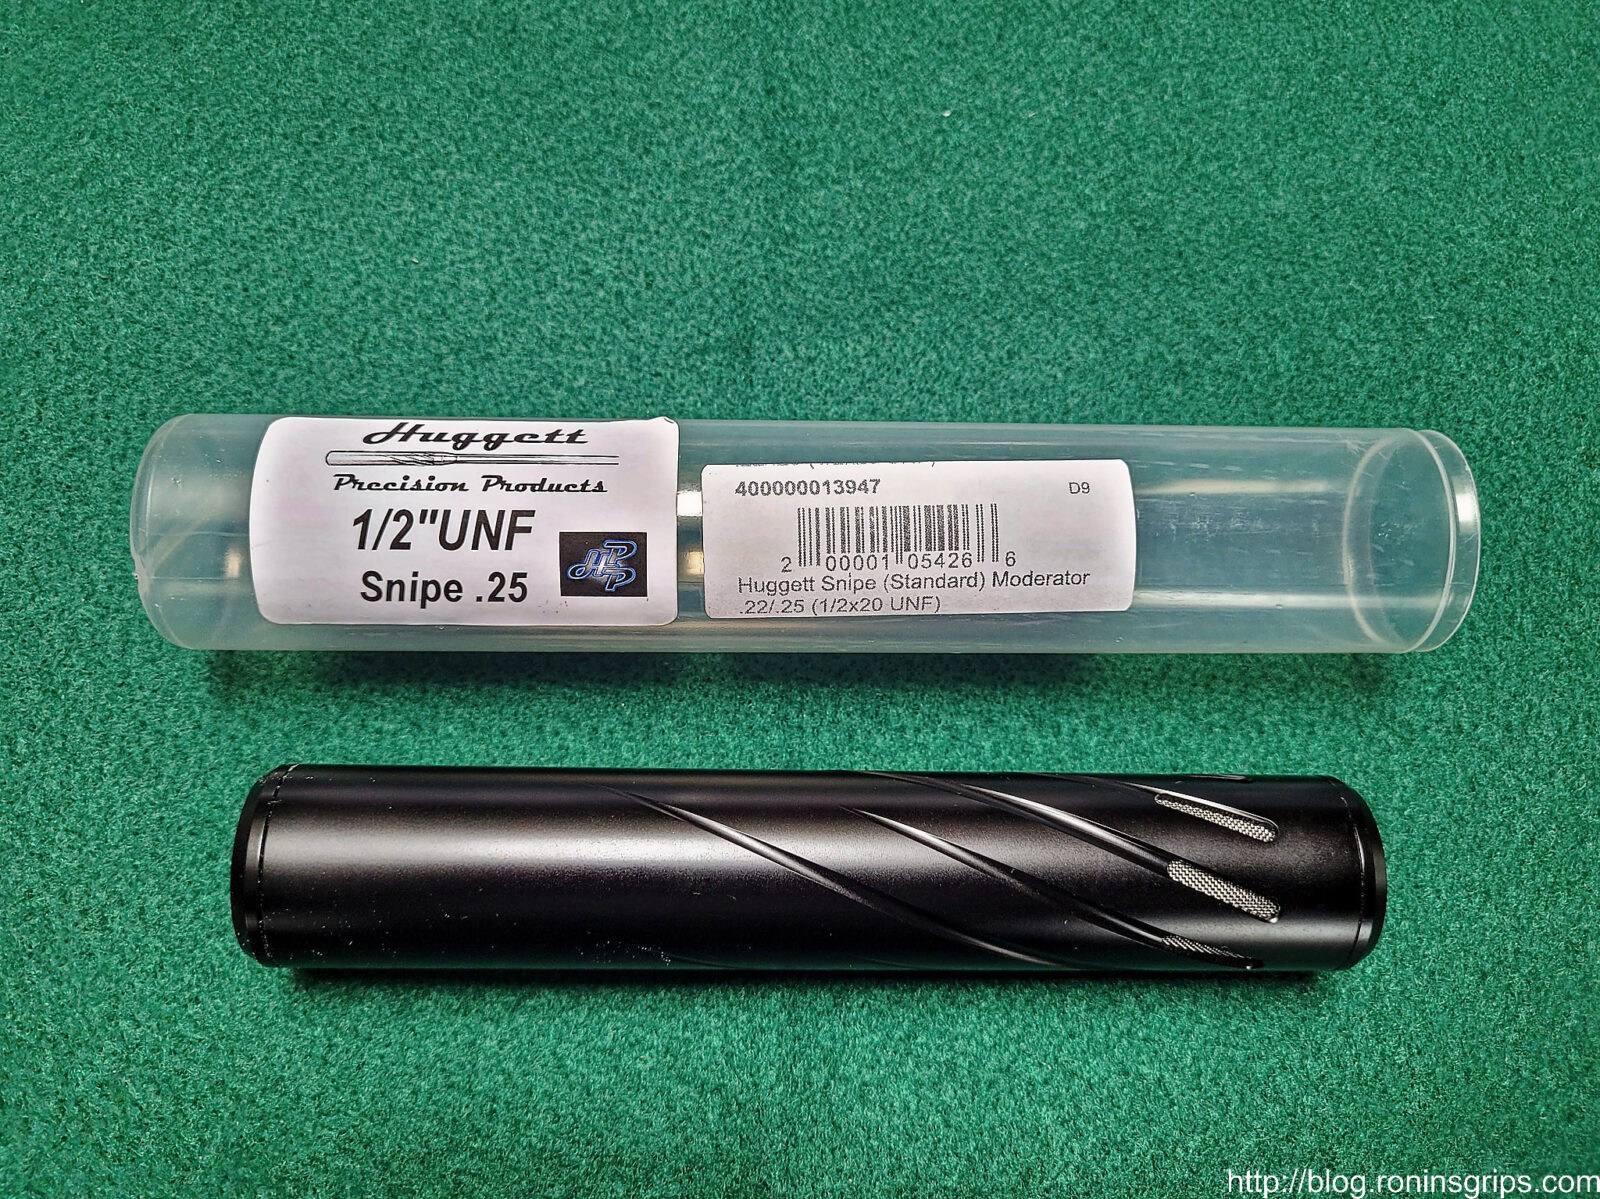
It comes with a threaded shroud that stabilizes and protects the barrel plus provides a 1/2″-20 threaded end. It does not come with any sound suppression out of the box. For those of you are familiar with sound suppression in airguns, they go by a number of names – moderators, air strippers, suppressors and sometimes silencers. Personally, I use the term moderator to make it very different from firearms and avoid confusion.
Next, airgun moderators are not regulated like firearm suppressors are plus the designers take great care for them to not work on firearms – the threading is different and the internals are made from plastics or fibers that will melt or blow apart if put on a firearm. The moderator market is competitive and different vendors have different designs with varying degrees of effectiveness,
In short, airgun suppressors are made for use only on airguns and they do serve real purposes – they make the gun backyard friendly to avoid worrying neighbors, they reduce the sound signature to not scare away whatever pest or game you are trying to shoot plus if you have a big bore airgun the reduced sound levels protect your ears.
Now, when t comes to a .22, there isn’t a very loud retort when the airgun fires but you definitely can hear it. By using a moderator, the airgun becomes very quiet. It’s not perfectly silent – that’s largely a myth just like firearms – but it sure does quiet them down.
Last comment – many airguns come with moderators built in such as the Hatsan Quiet Energy line plus many of the more expensive PCP airguns either come with a moderator built into the shroud or have a threaded barrel to allow one to be screwed on.
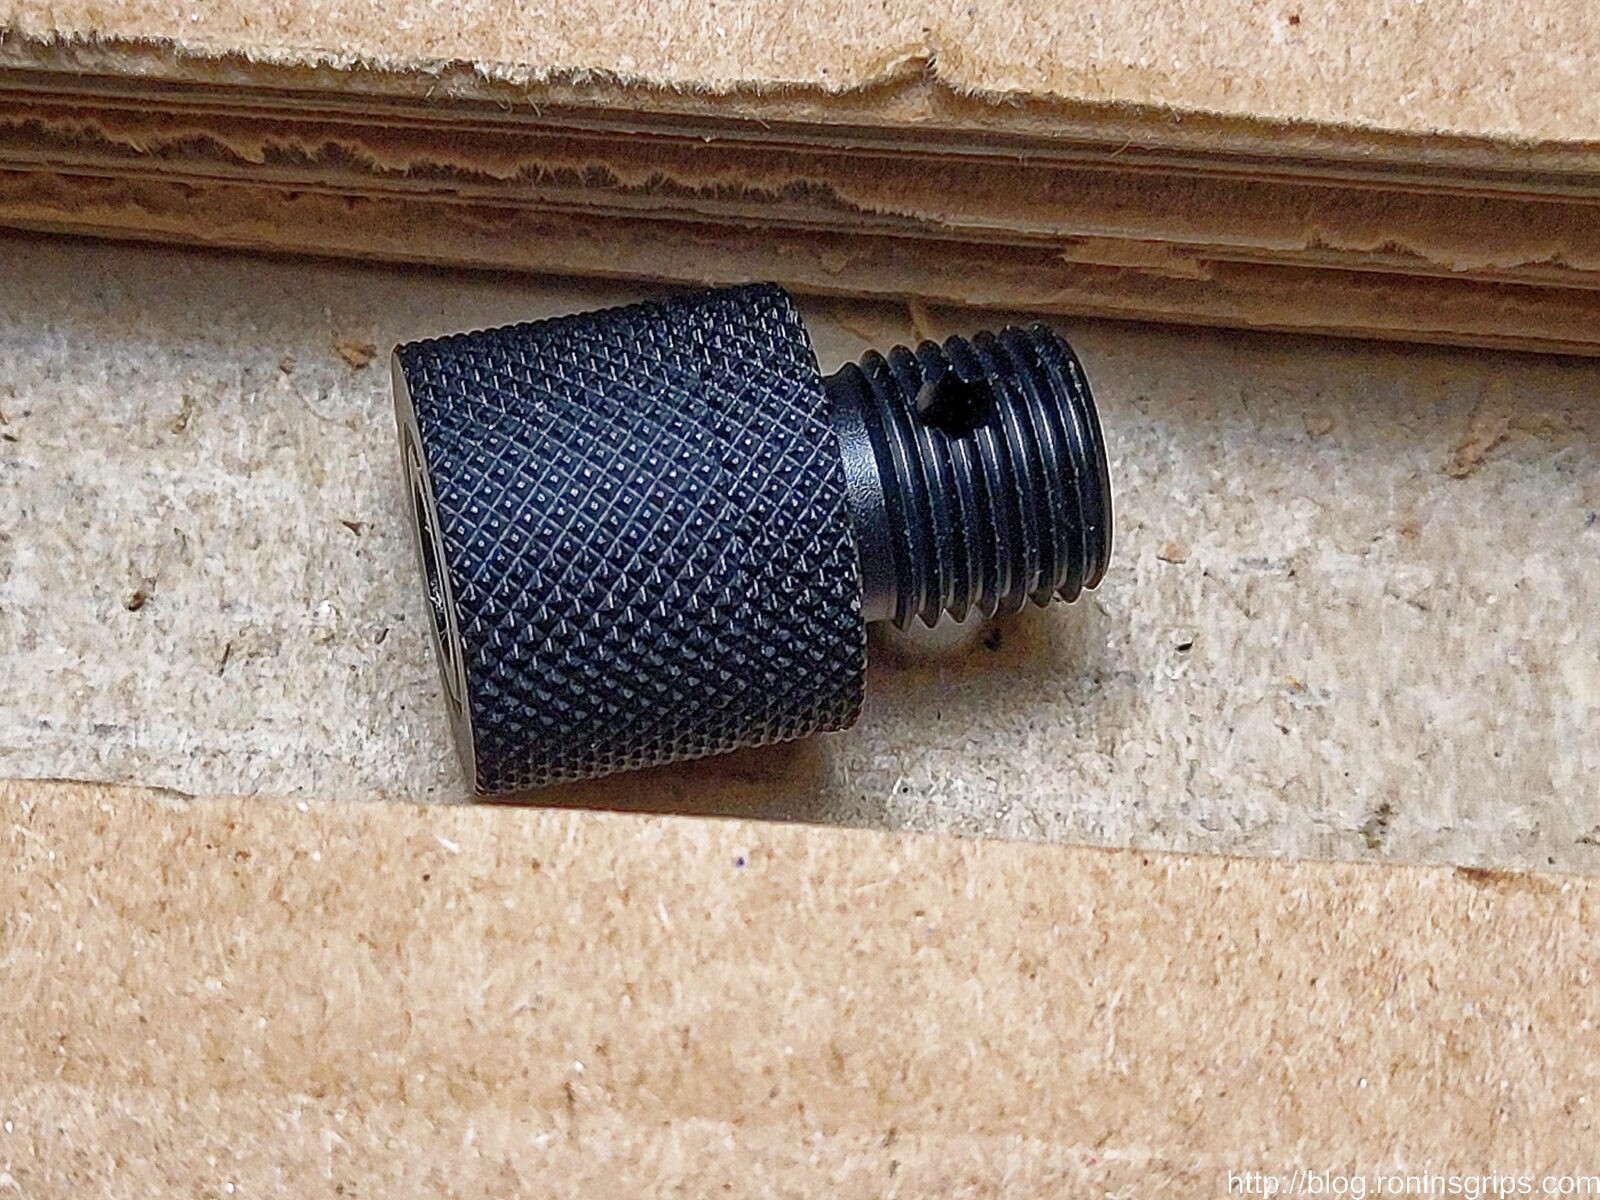
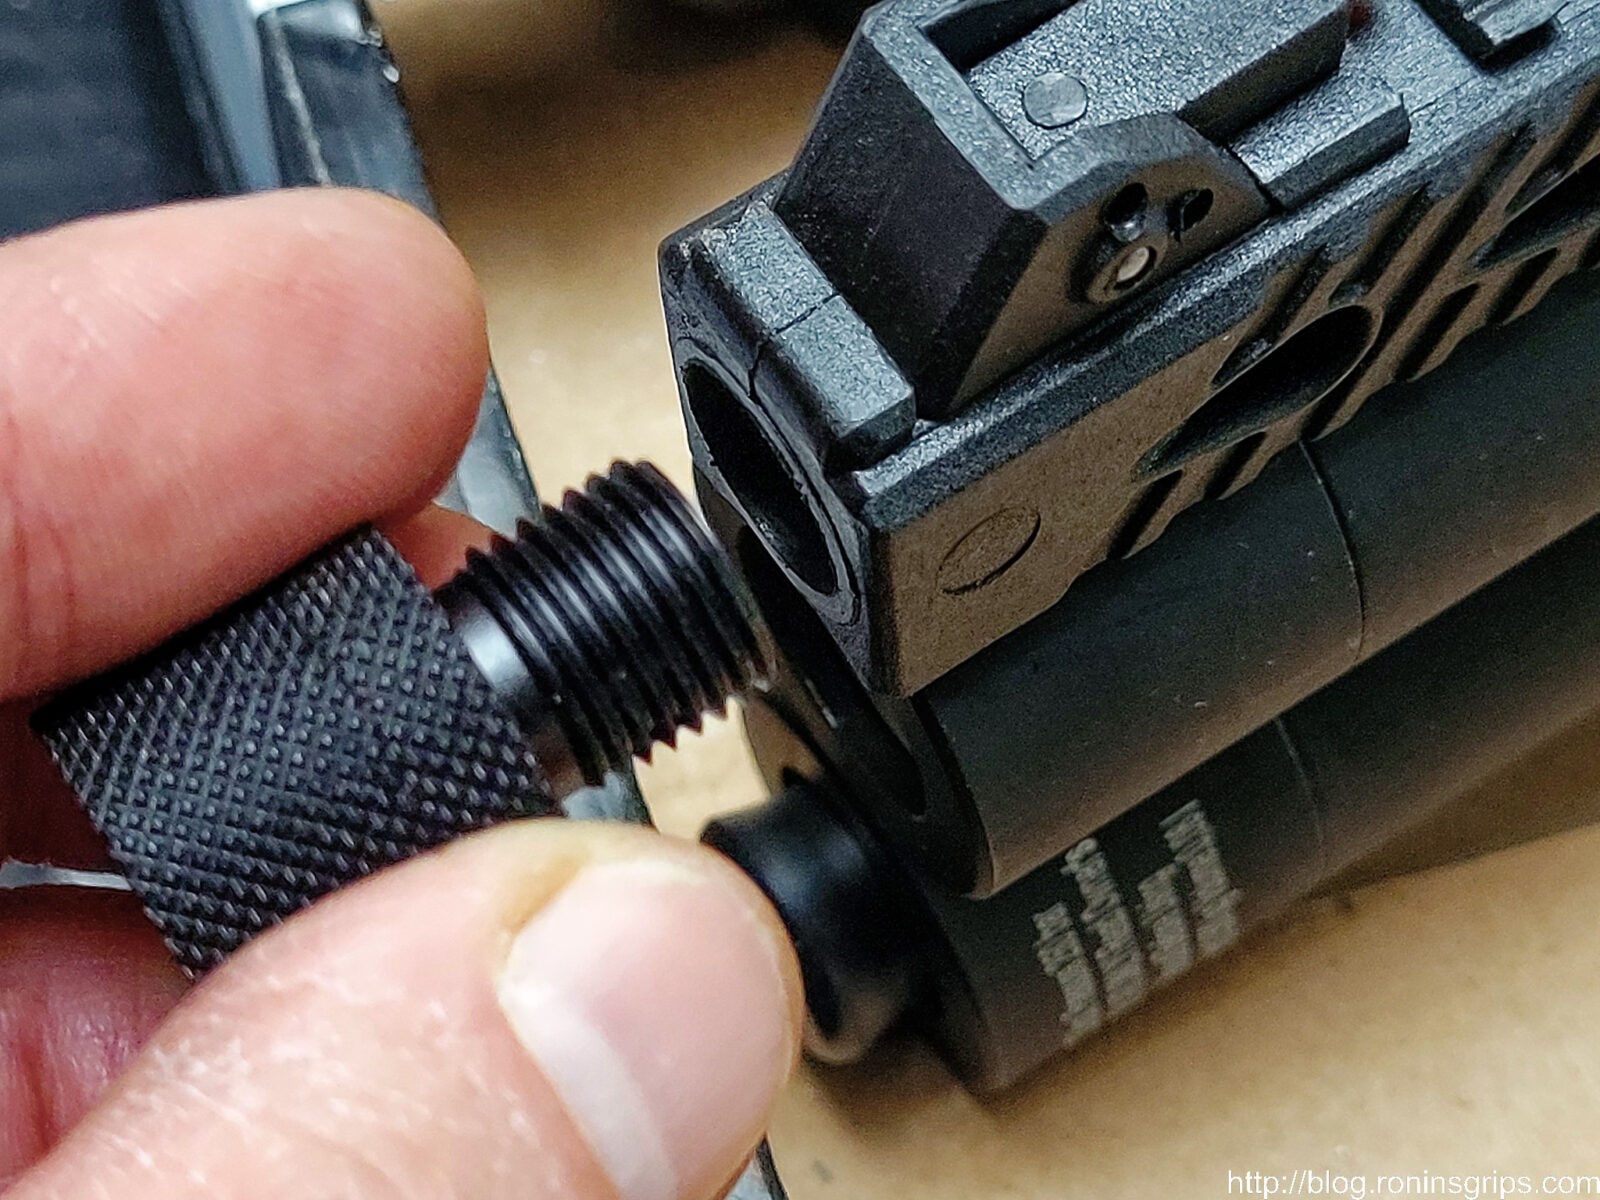
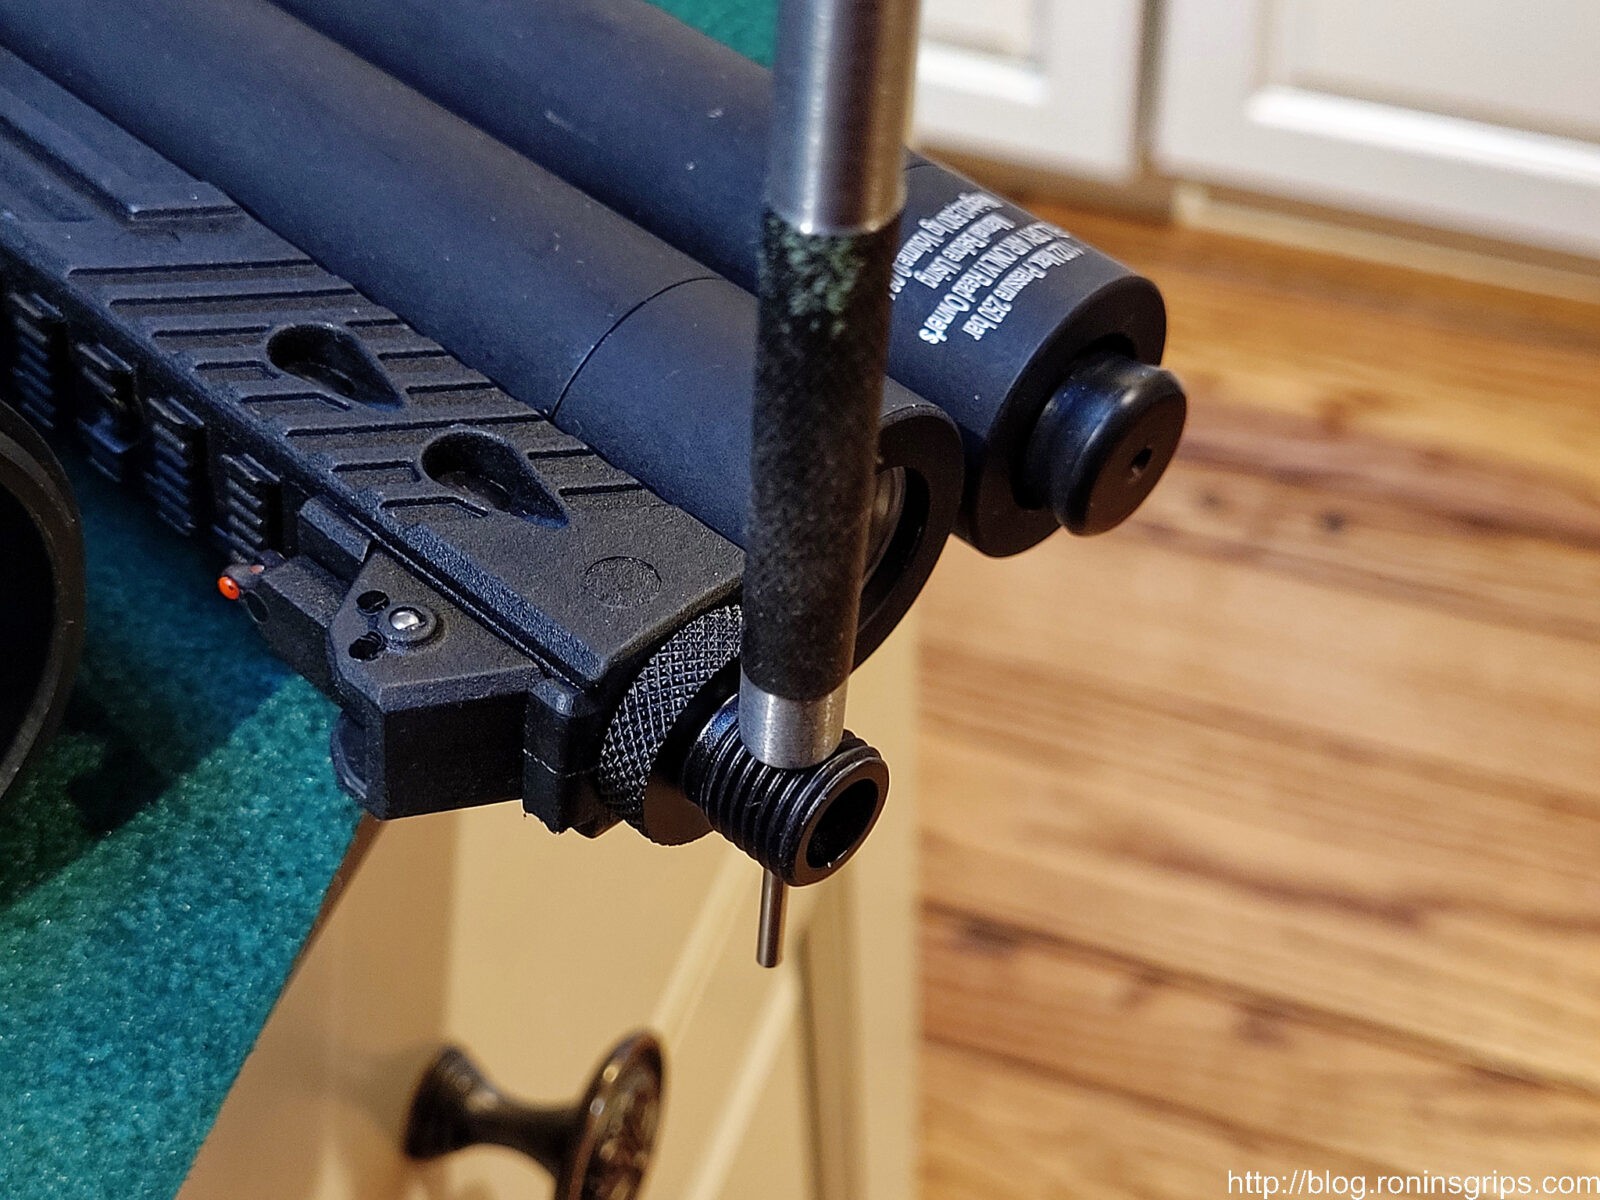
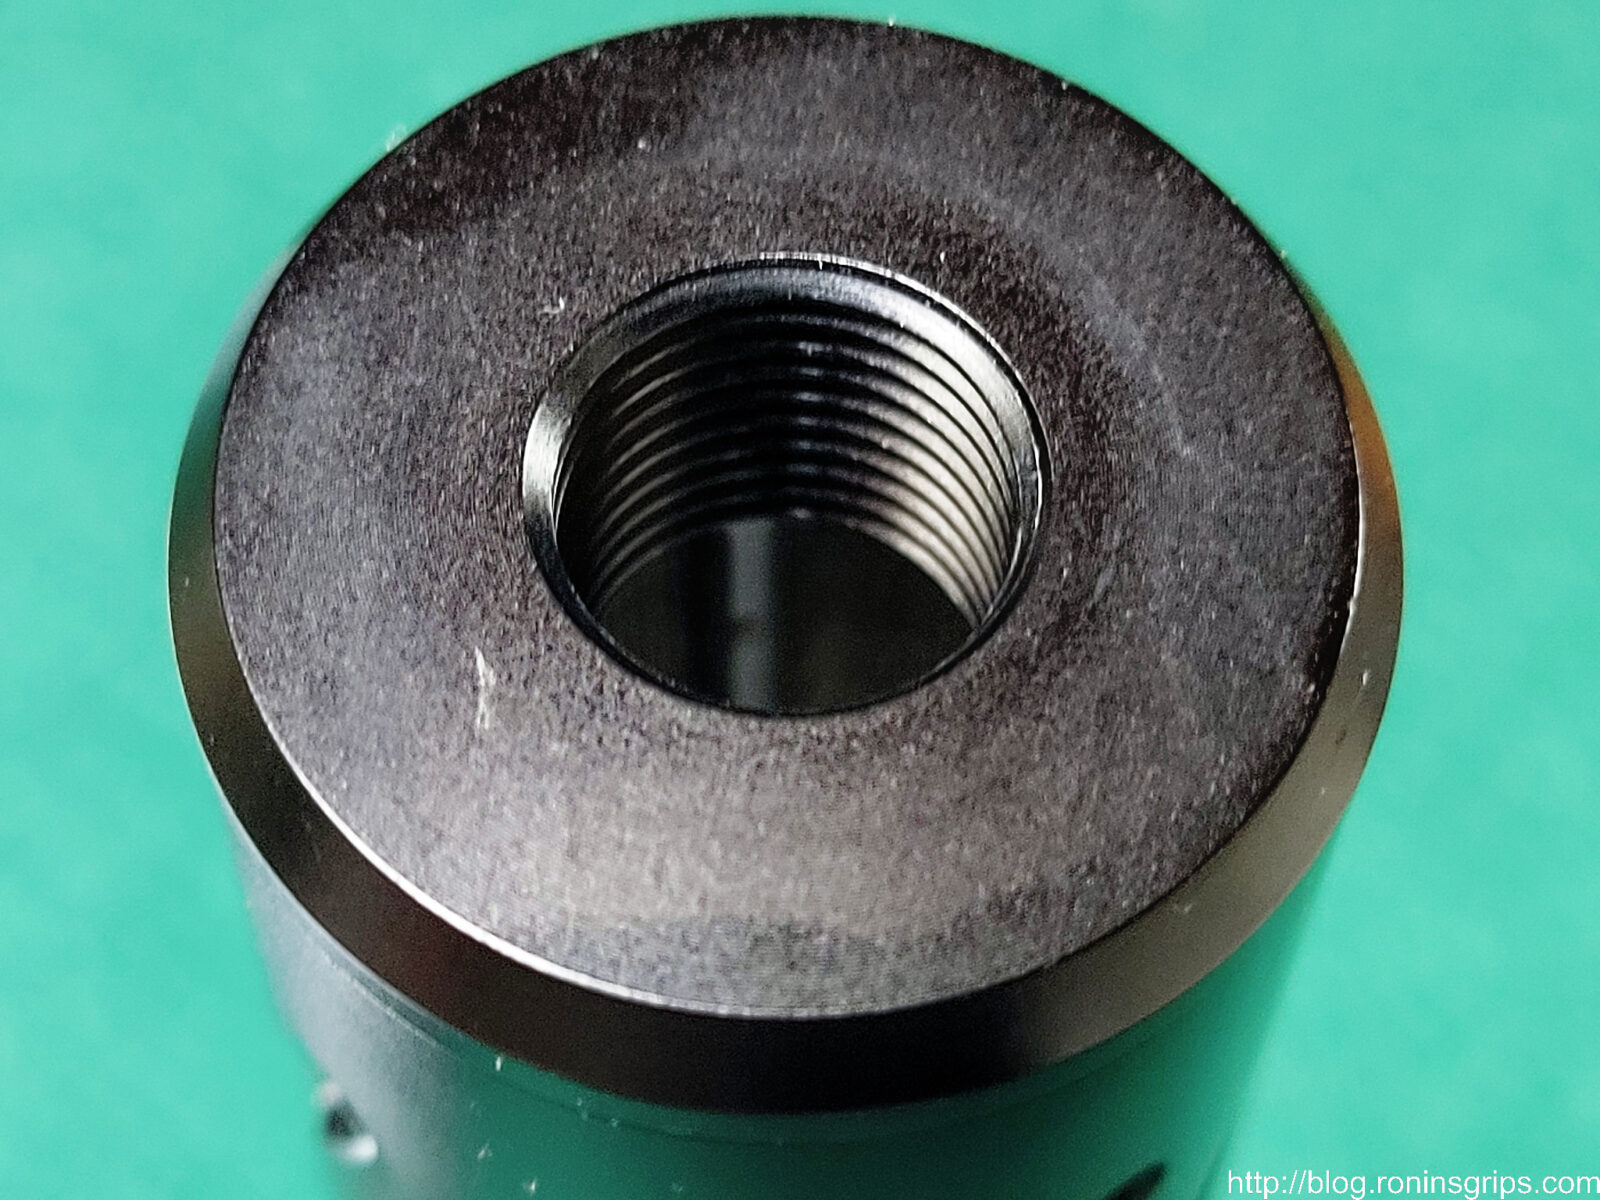
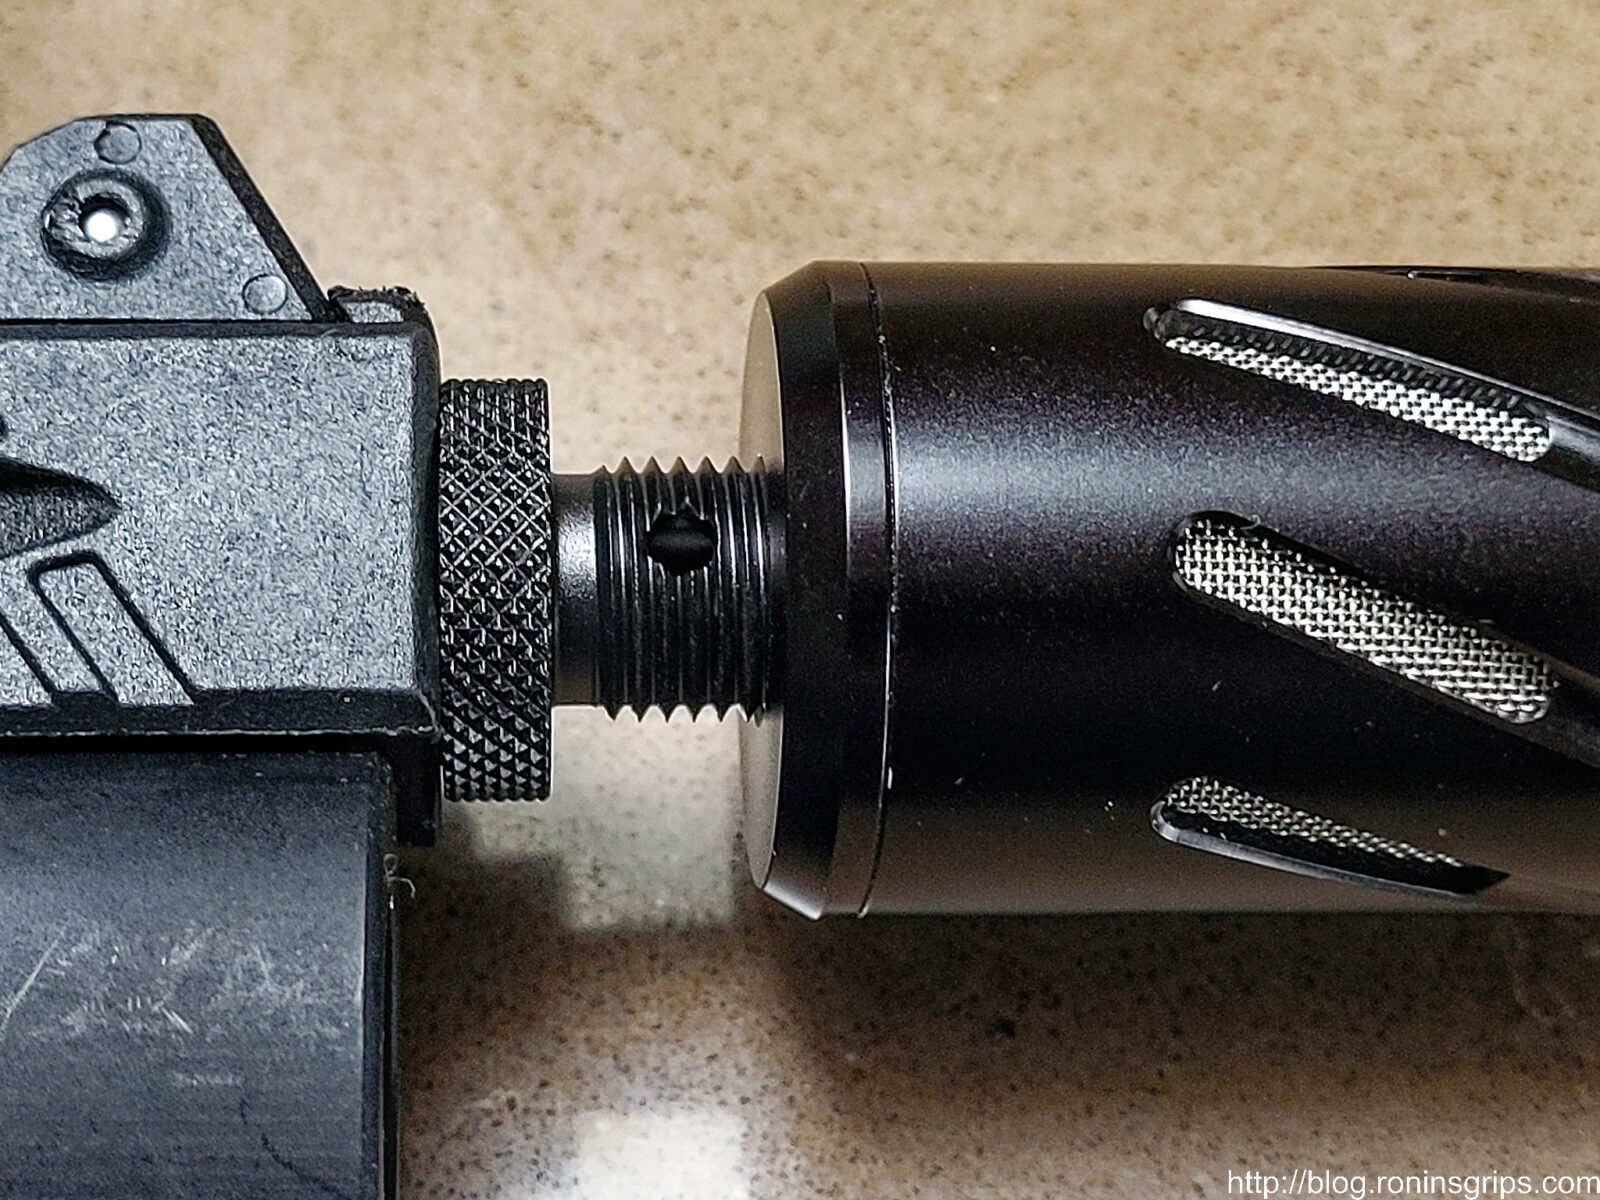
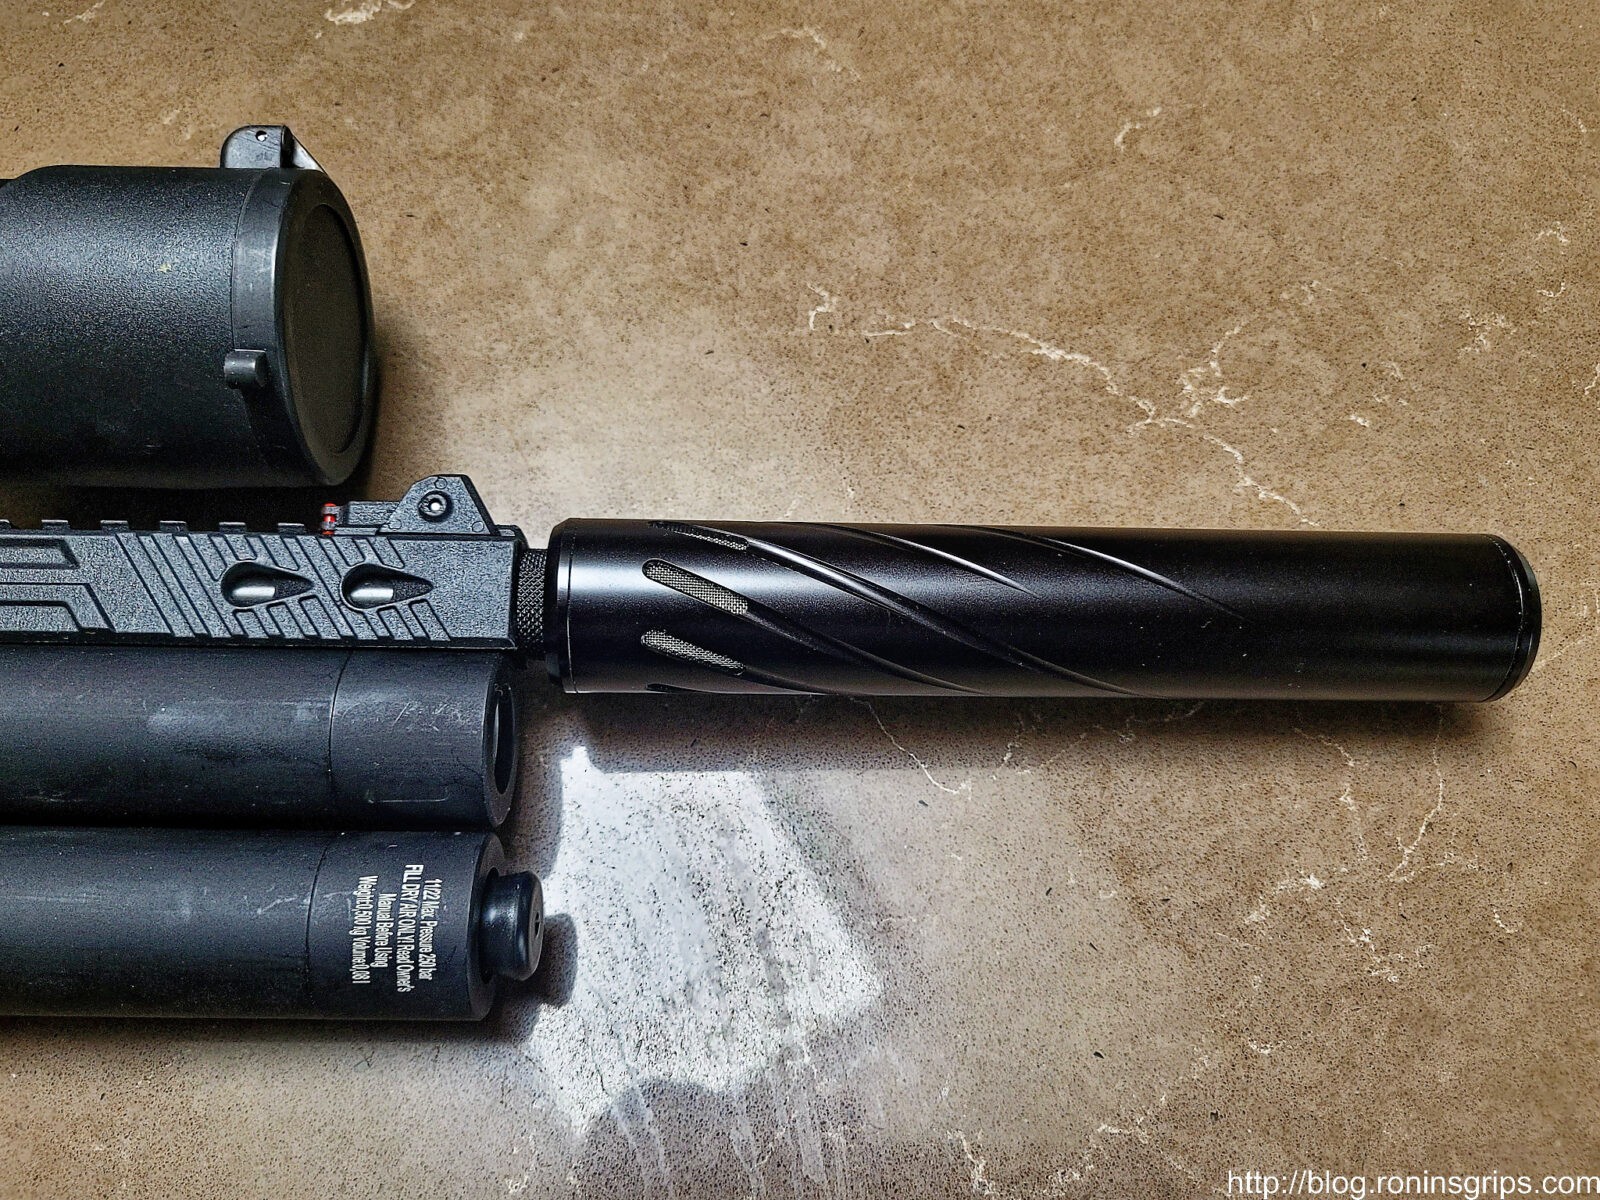
These holes that look like ports in the shroud are just for looks – the same way that having the serrations in a shroud are for looks. The shroud stabilizes and protects the barrel plus has threading for adding a moderator but that’s it. There is no integral moderator. You’ll need to add that but that’s ok and I’ll tell you why and how in another post.Inside the muzzle end of the shroud are 1/2-20 threads for adding a moderator. So, if you get a 1/2-20 male to male fitting, you can add your favorite brand of moderator. I’ll cover more about this later.This is the DonnyFL A21 adapter with the tread protector screwed on. Note, there are other male-to-male 1/2-20 adapters out there. I went with DonnyFL as they are a good business work with and their machining is always top notch.This is the DonnyFL A21 adapter and it simply screws into the end of the shroud. I am happy to report that the barrel does appear to be properly centered. I was not so luck with my Gladius and could not mount an external adapter. For my Jet II though, it lines up great. Note, it comes with a threaded muzzle protector / thread protector that screws off. It’s very nicely made and finished by the way.One nice feature is that both ends of the adapter have holes in them so you can insert something round, like my punch here, and snug down the adapter. Bear in mind that the threaded adapter is screwing into polymer. You just want to snug it down or else you are liable to strip out the shroud’s polymer threads. You do want to do this because when you screw the moderator on or off, you want the adapter to stay put and it will. Just don’t go crazy with the torque is my warning.This is a Snipe made by Huggett Precision Products in the UK. It is threaded for 1/2 UNF which means Unified Fine which is also is written as 1/2-20 meaning 20 threads per inch. The business end This is the 1/2-20 threaded base. The moderator is lightly screwed onto the DonnyFL adapter. Again, it all lines up and shoots great.
So let’s wrap up this post
Okay – the combination of Hatsan Jet II, DonnyFL A21 adapter and Huggett Snipe moderator work really well. I bet you’re wondering about the scope and that will be the next post.
Note, I have to buy all of my parts – nothing here was paid for by sponsors, etc. I do make a small amount if you click on an ad and buy something but that is it. You’re getting my real opinion on stuff.
I first saw a photo of the forthcoming Hatsan Jet I and II airguns in November of 2022 and was very interested in them. As more info started coming out, I really focused on the Jet II as it has twin air tanks. You see, I like short airguns for handling pests so I needed something to authoritatively deal with ground squirrels, tree squirrels and the occasional rabbit.
I have an amazing FX Impact Compact Mk II in .25 but wanted something even smaller but with less over penetration. I used to include having less of a report but switched from a DonnyFL Emperor to one of the new EdGun Behemoth moderators with an additional module and wow is that thing quiet now but that is a story for another day.
So, back to the point – I wanted something even smaller than the Impact Compact with less energy but didn’t want to spend a fortune either – sure, I’d love a Leishy II, Layla or something similar but don’t have that kind of money. As the just-before-Christmas release date drew near, the pricing came out and the suggested pricing was very affordable at $289.99 for the Jet I and $339.99 for the Jet II plus vendors were planning to come in lower. Ok, I had some thinking to do and very quickly decided to order the Jet II in .22 from Pyramyd Air and added their 10 for 10 test to try and guard against getting a defective unit.,
Specifications
It’s a side lever operated repeater
Available in .177, .22 and .25 – I opted for the .22 model
Magazine capacity: .177 is 8 rounds, .22 is 7 rounds and .25 is 6 rounds – these are small magazines for a small airgun
Barrel length: 7.9″
Each air cylinder holds 40cc so the Jet II holds 80cc of air
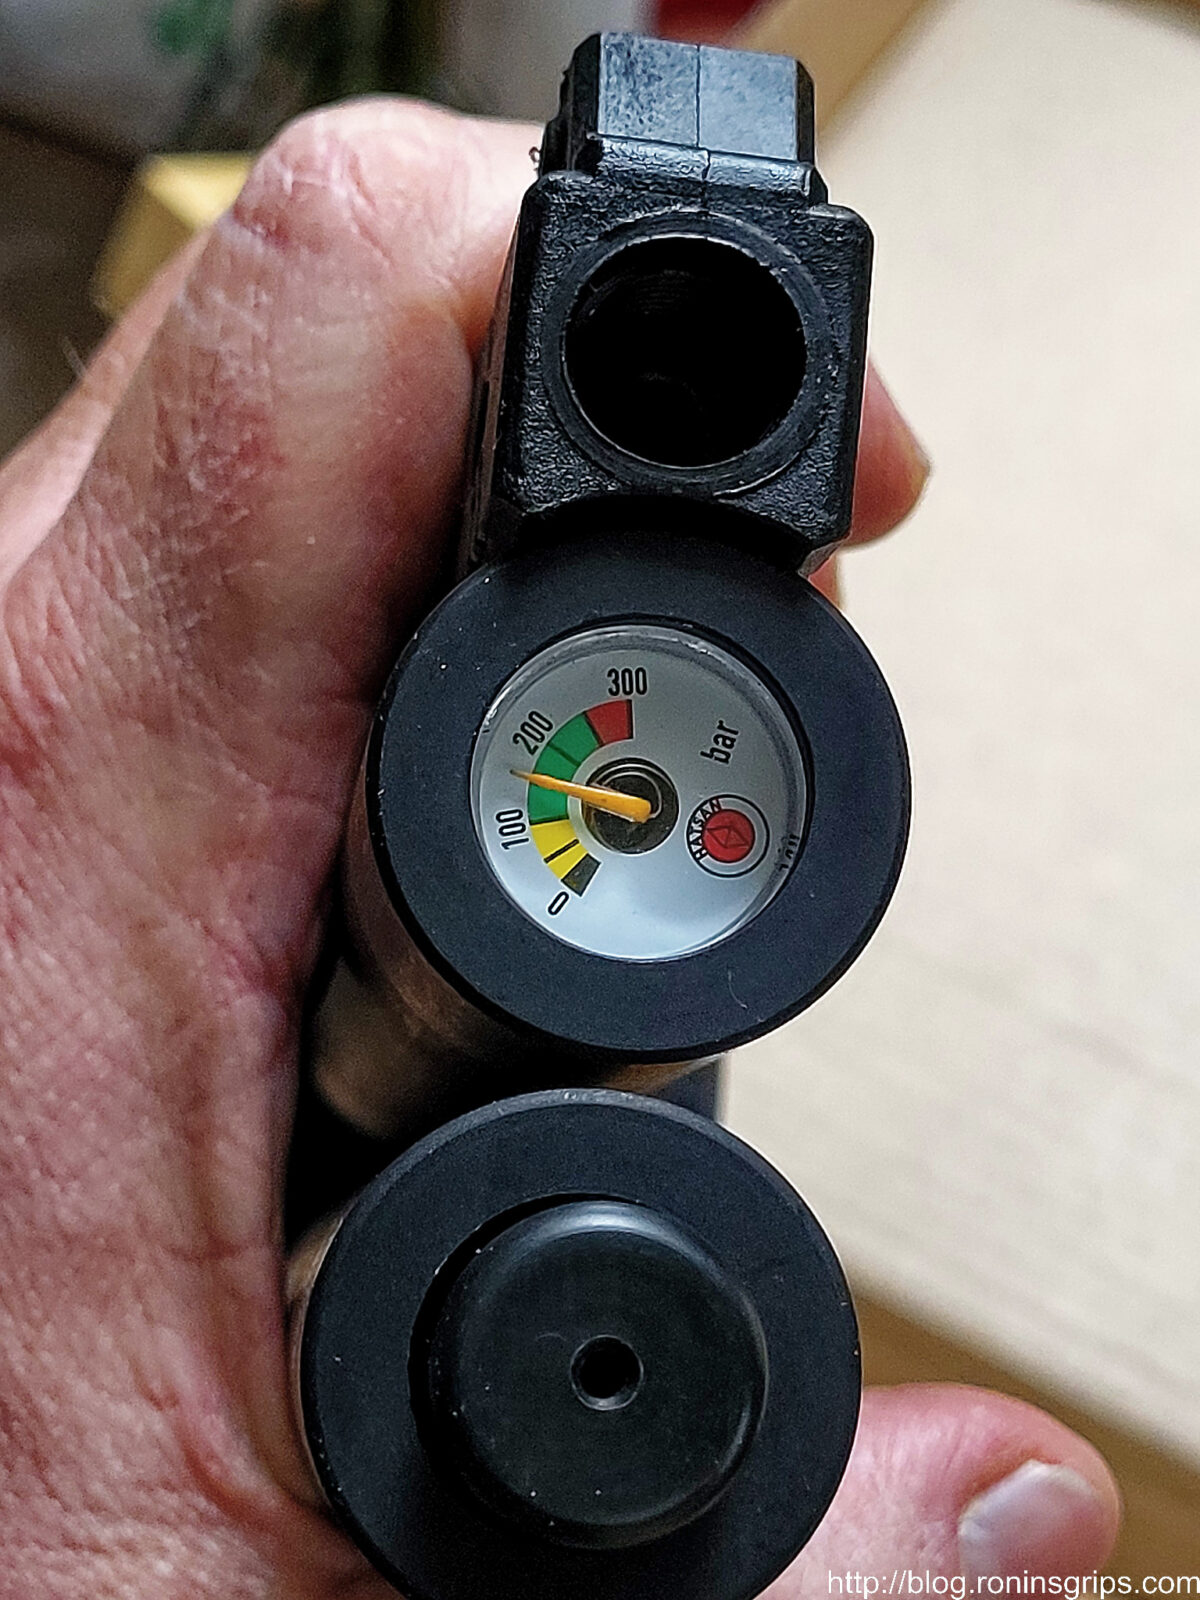
Pressure is 250 bar (3,626 psi)
There is a built in pressure gauge
Power is not regulated (the more expensive airguns tend to have regulators that step the pressure down from the tank to a lower more o consistent level that is then sent to the pellet upon firing. Higher end air guns may even have two regulators. For the price point, the Jets do not have a regulator and you’ll be just fine though I will tell you this is why I bought the Jet II – I wanted a larger air volume and a slower corresponding drop in pressure compared to the Jet I.
The barrel has a shroud to protect and stabilize it but nothing more. There is no integral moderator/suppression in the shroud.
Hatsan reports the barrel is rifle and made in Germany but they don’t mention the manufacturer – not sure if it is made Walthar or just who and will update this if I find out
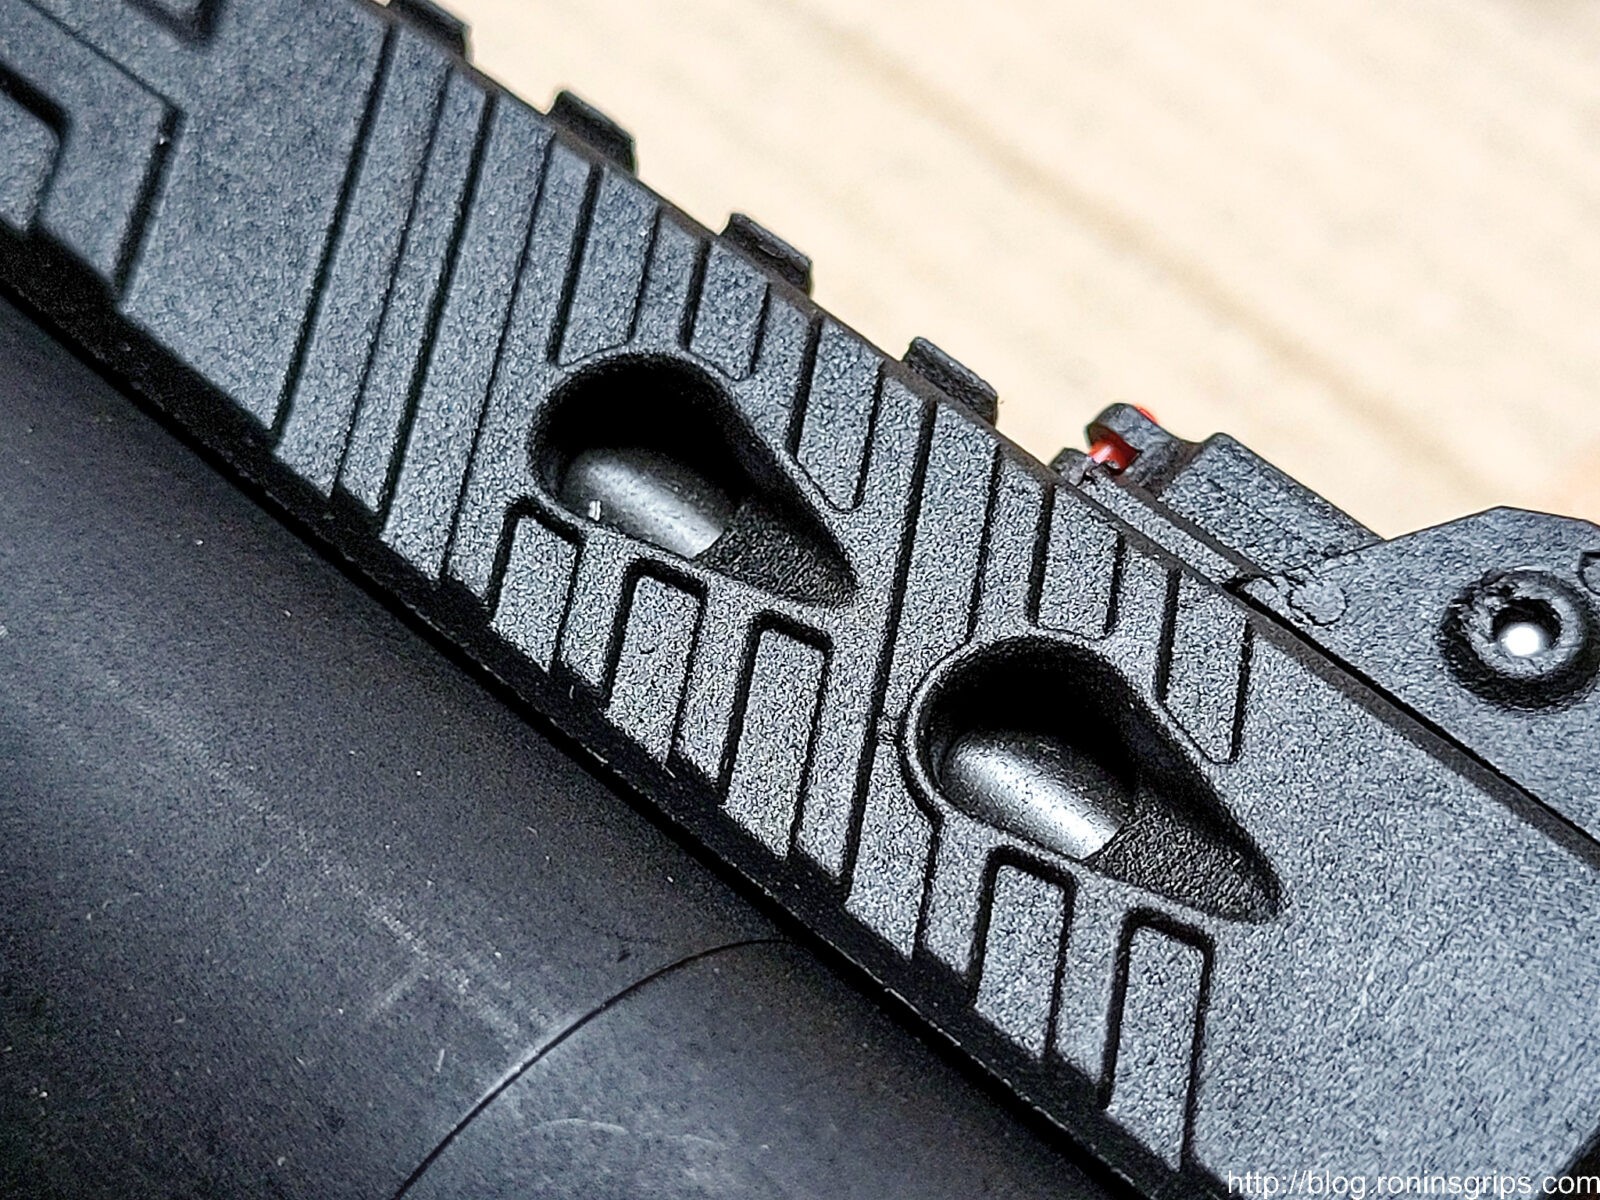
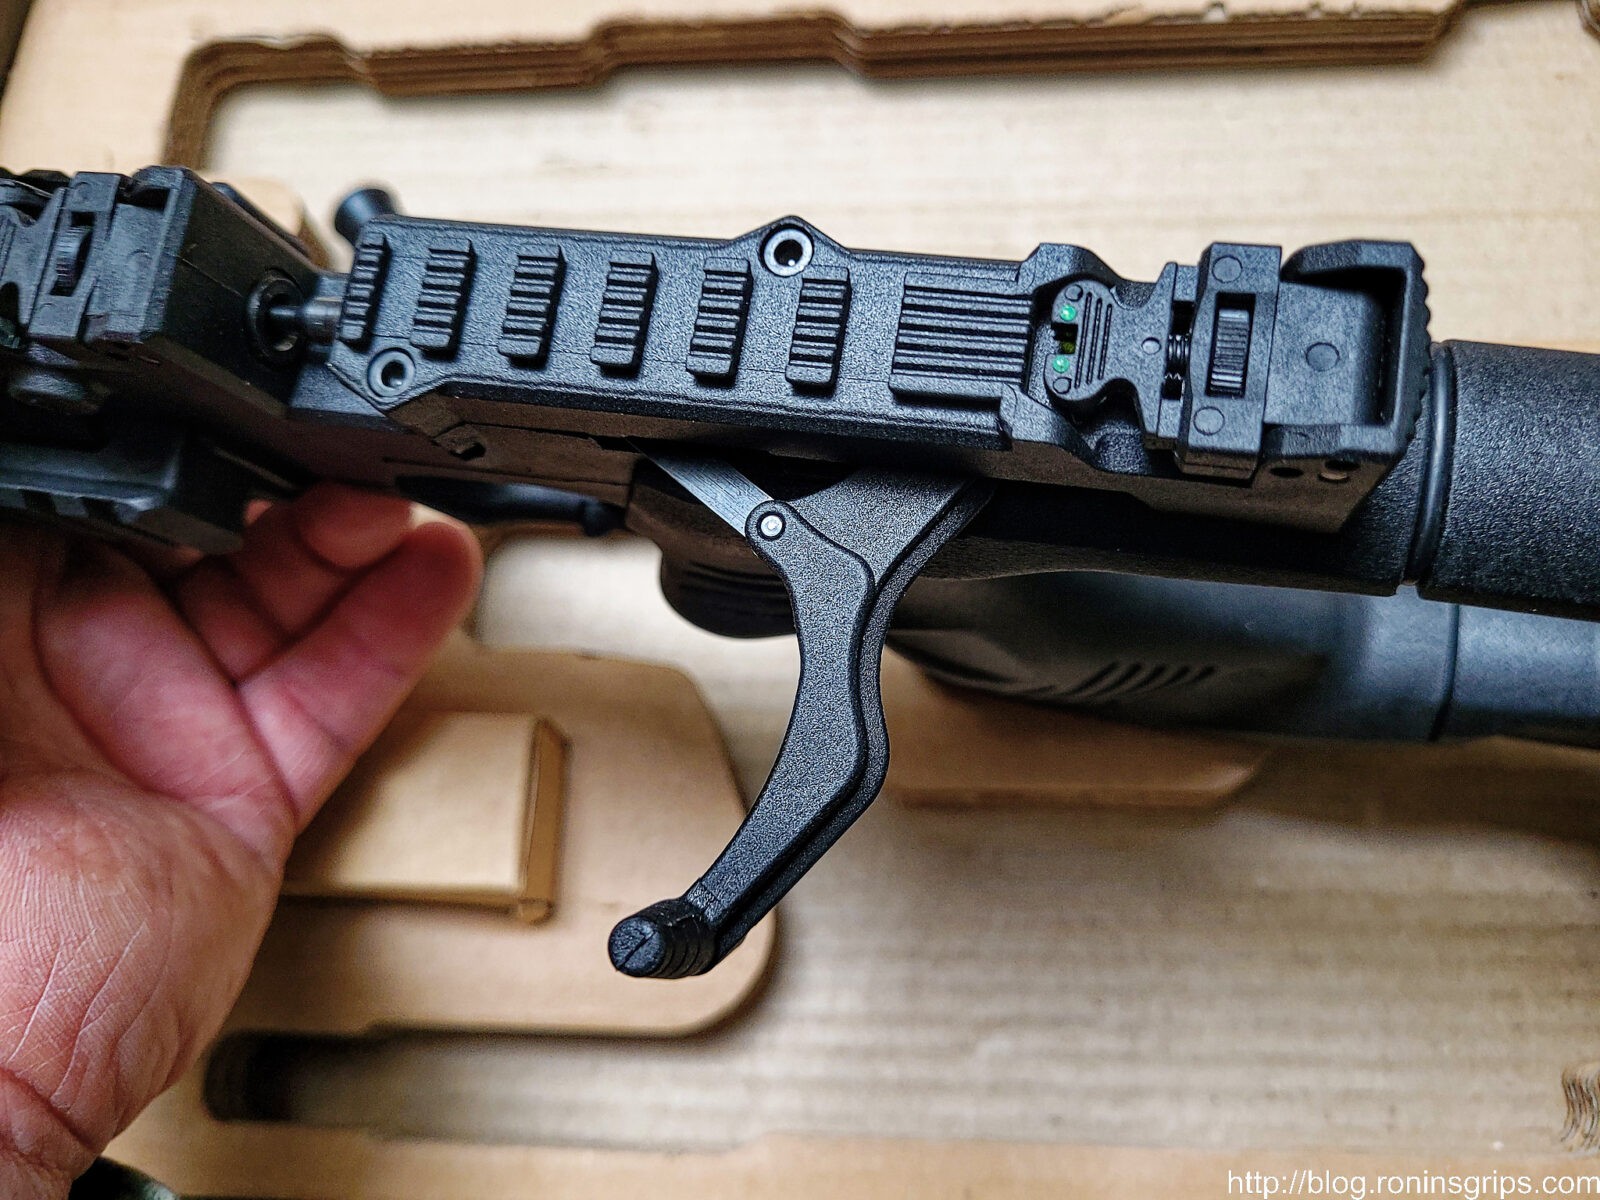
Split length 11mm dovetail and Picatinny rail – it runs over the entire barrel and for a short amount behind the breach. Note: This combination rail design was also on my Gladius and hasn’t been reported in the press for some reason. You do not need to be limited to just 11mm.
Has three flip up sights – one front and then two at the rear depending on whether you are shooting it as a pistol or a carbine
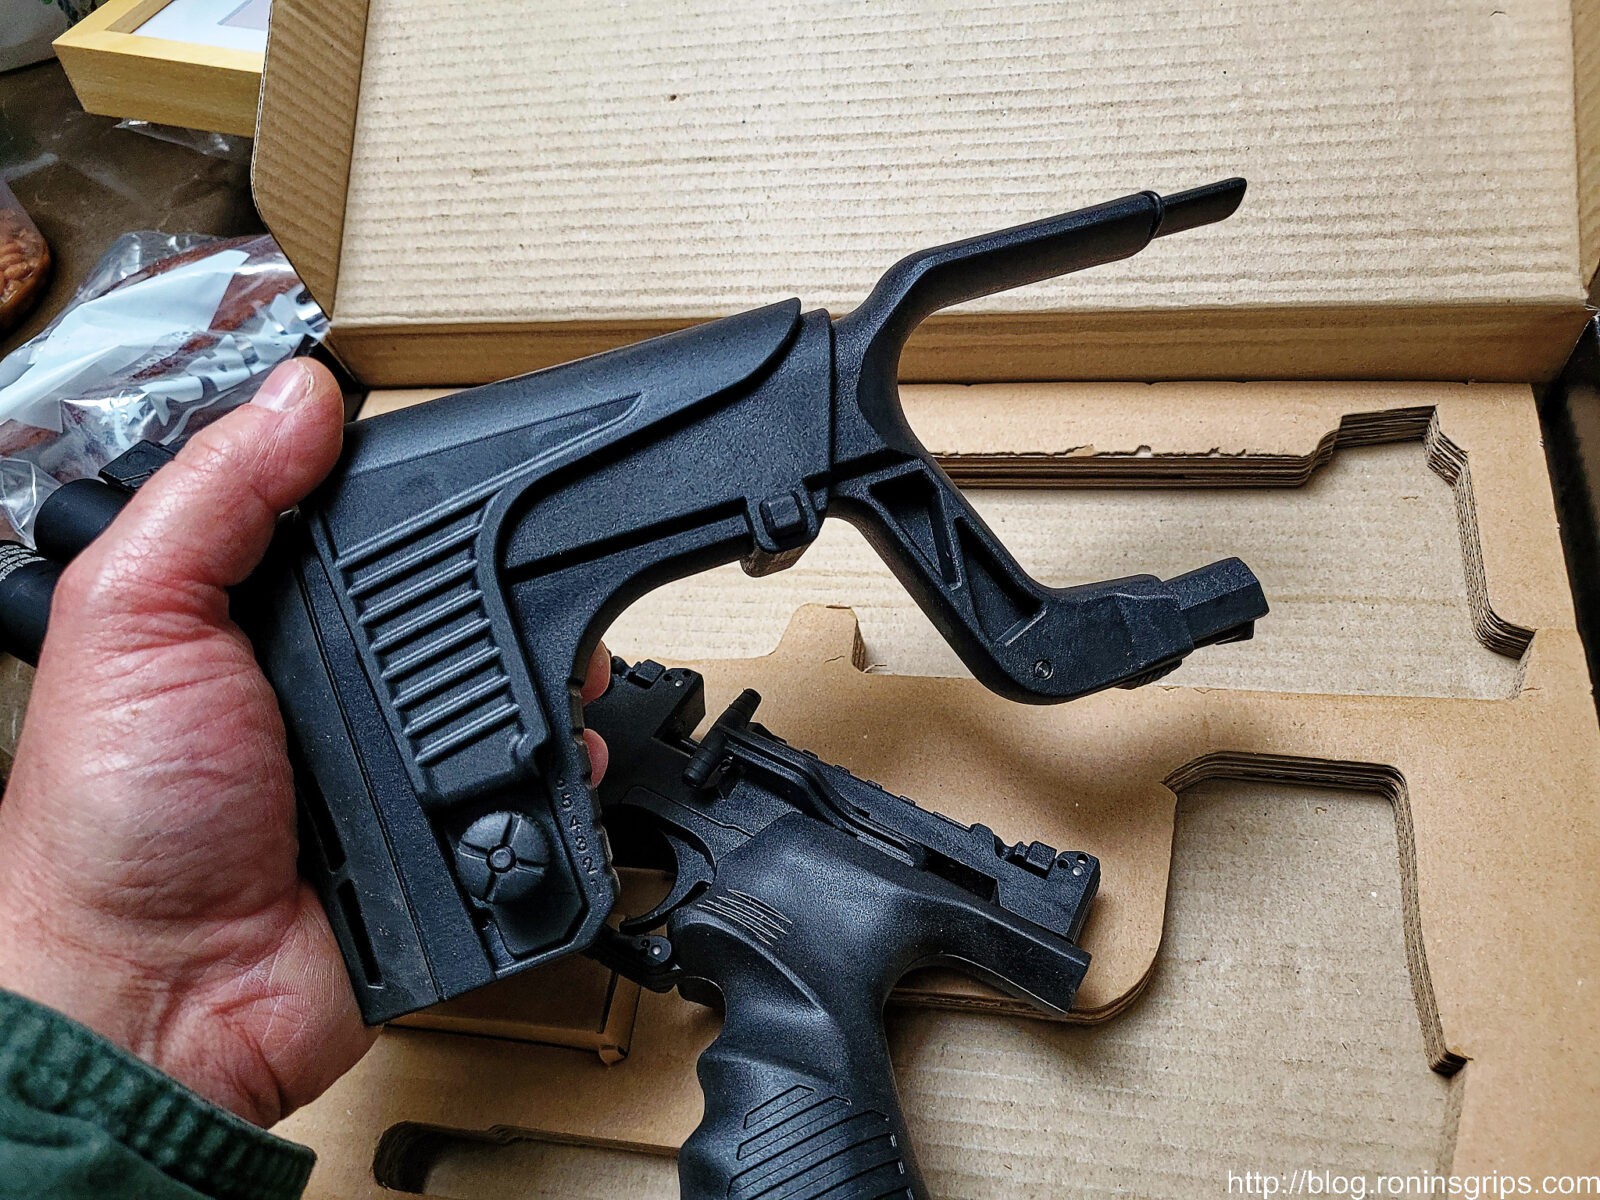
The stock can be easily installed or removed with a push button
It is adjustable for length with a rubber recoil pad and a vertically adjustable cheek piece
Overall length of just the pistol: 15″
Overall length with the stock collapsed is about 23-3/16″ and fully extended it is just over 24-3/4″.
If I use the back of the rear sight as a starting point, length of pull collapsed is about 9-5/8″ and fully extended it is about 11-9/16″.
1.4 pounds without the stock and 3.4 pounds with the stock
Now the next stats are reported by Hatsan and I want to take a moment and recognize them for conservative reporting. Whereas some vendors inflate their numbers (meaning they exaggerate), Hatsan tends to be truthful and if anything their airguns perform better than they report:
Max Velocity – Lead Free Pellets – 810 FPS – .177; 700 FPS – .22; 600 FPS – .25 (depends on the type of pellet and other factors)
Max Velocity – Lead Pellets – 788 FPS – .177; 700 FPS – .22; 600 FPS – .25(depends on the type of pellet and other factors)
Max Muzzle Energy – 9.7 FPE – .177; 15.6 FPE – .22; 16.5 FPE – .25 (depends on the type of pellet and other factors)
Notice the muzzle energy reported in Foot Pounds of Energy (FPE). I want to use this to eliminate squirrels and the .177 with 9.7 FPE is on the lighter side. There are guys who hunt squirrels with .177 but I tend to think they are pushing heavy pellets faster and delivering more FPE. My first choice would have been .177 but given the numbers I decided to go with a .22 and the 15.6 FPE.
On December 28th, the carbine arrived from Pyramyd Air and it did not disappoint.
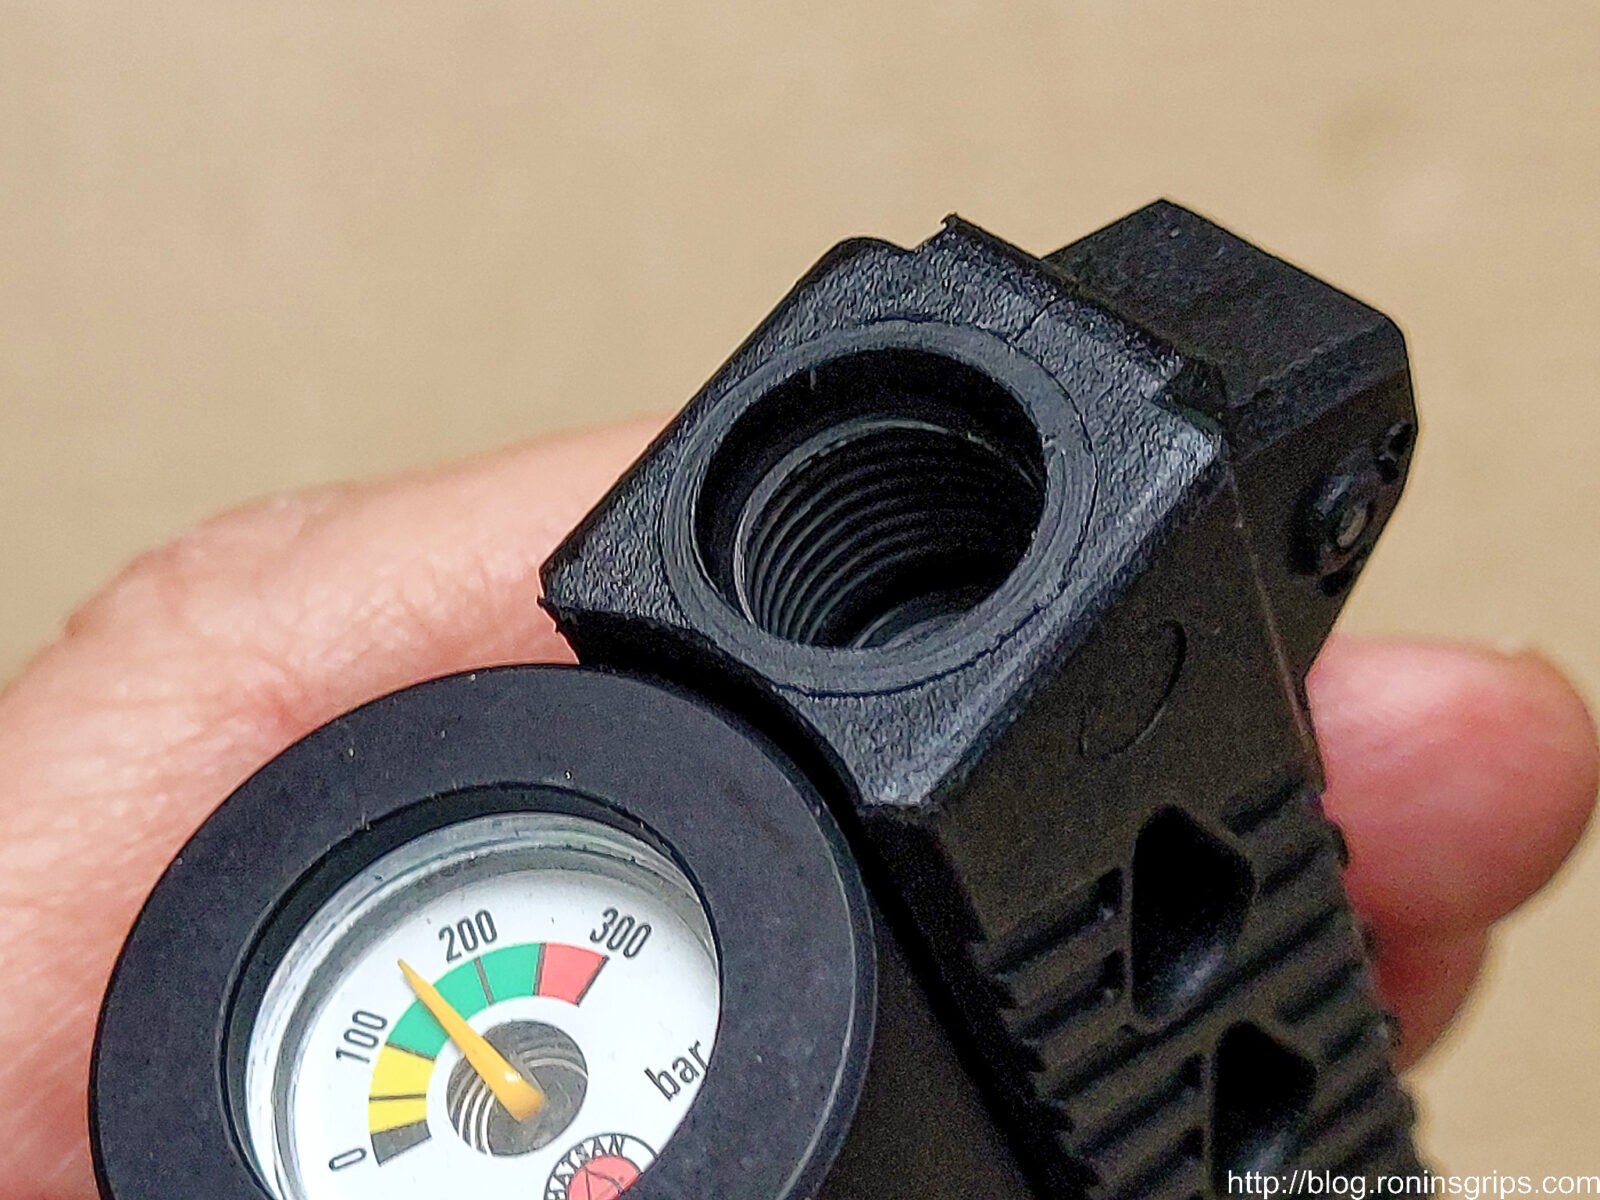
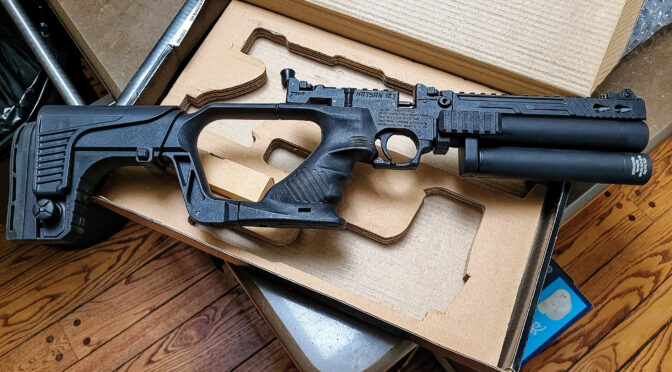
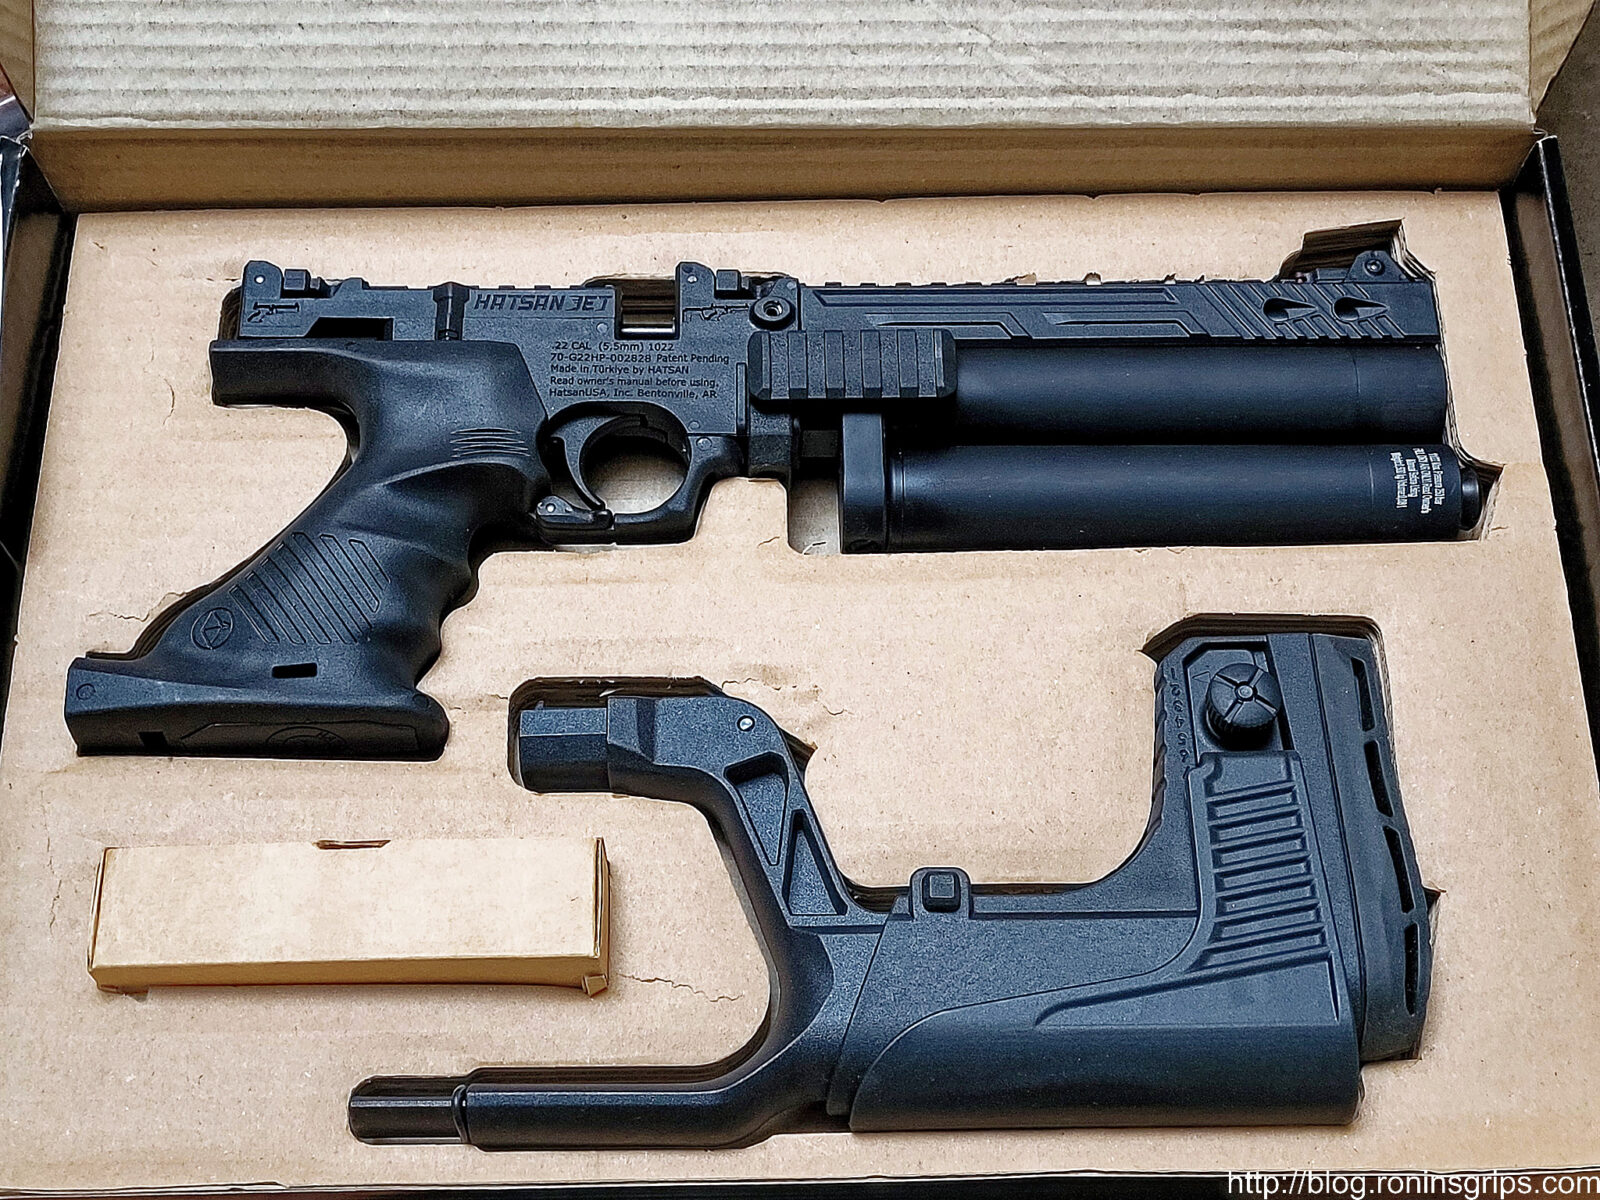
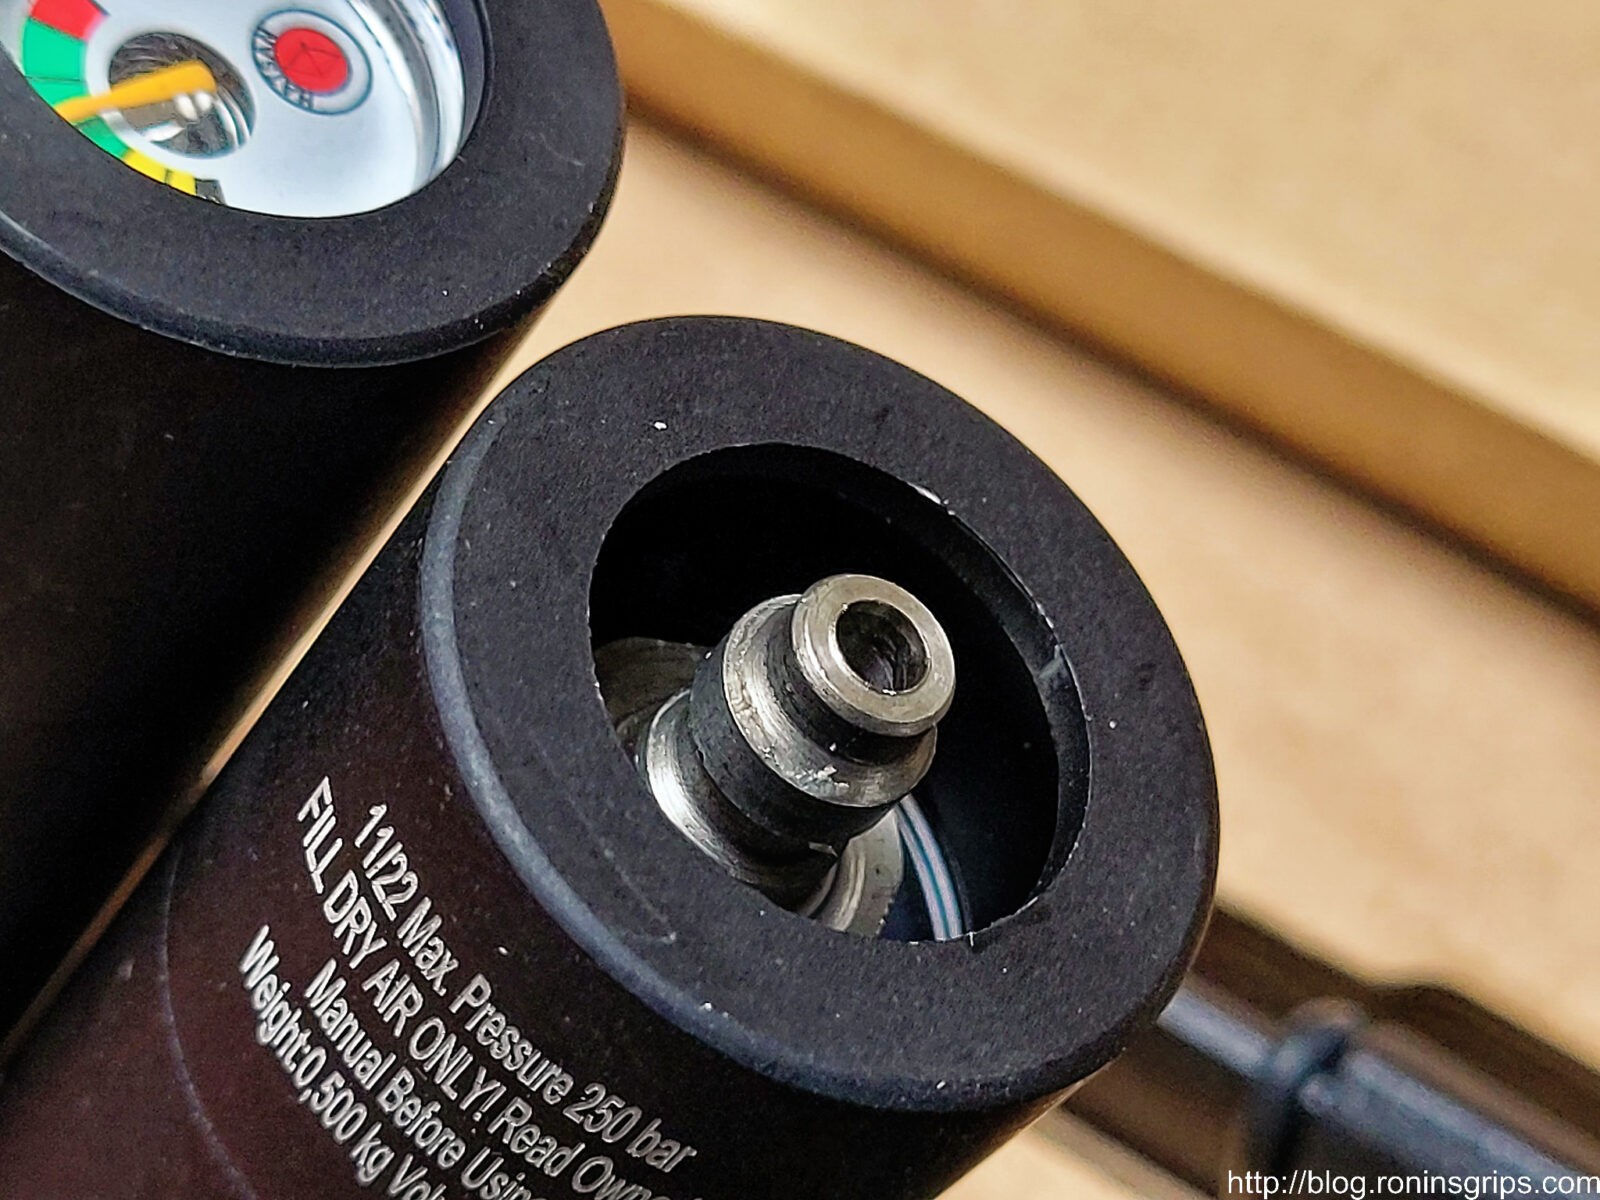
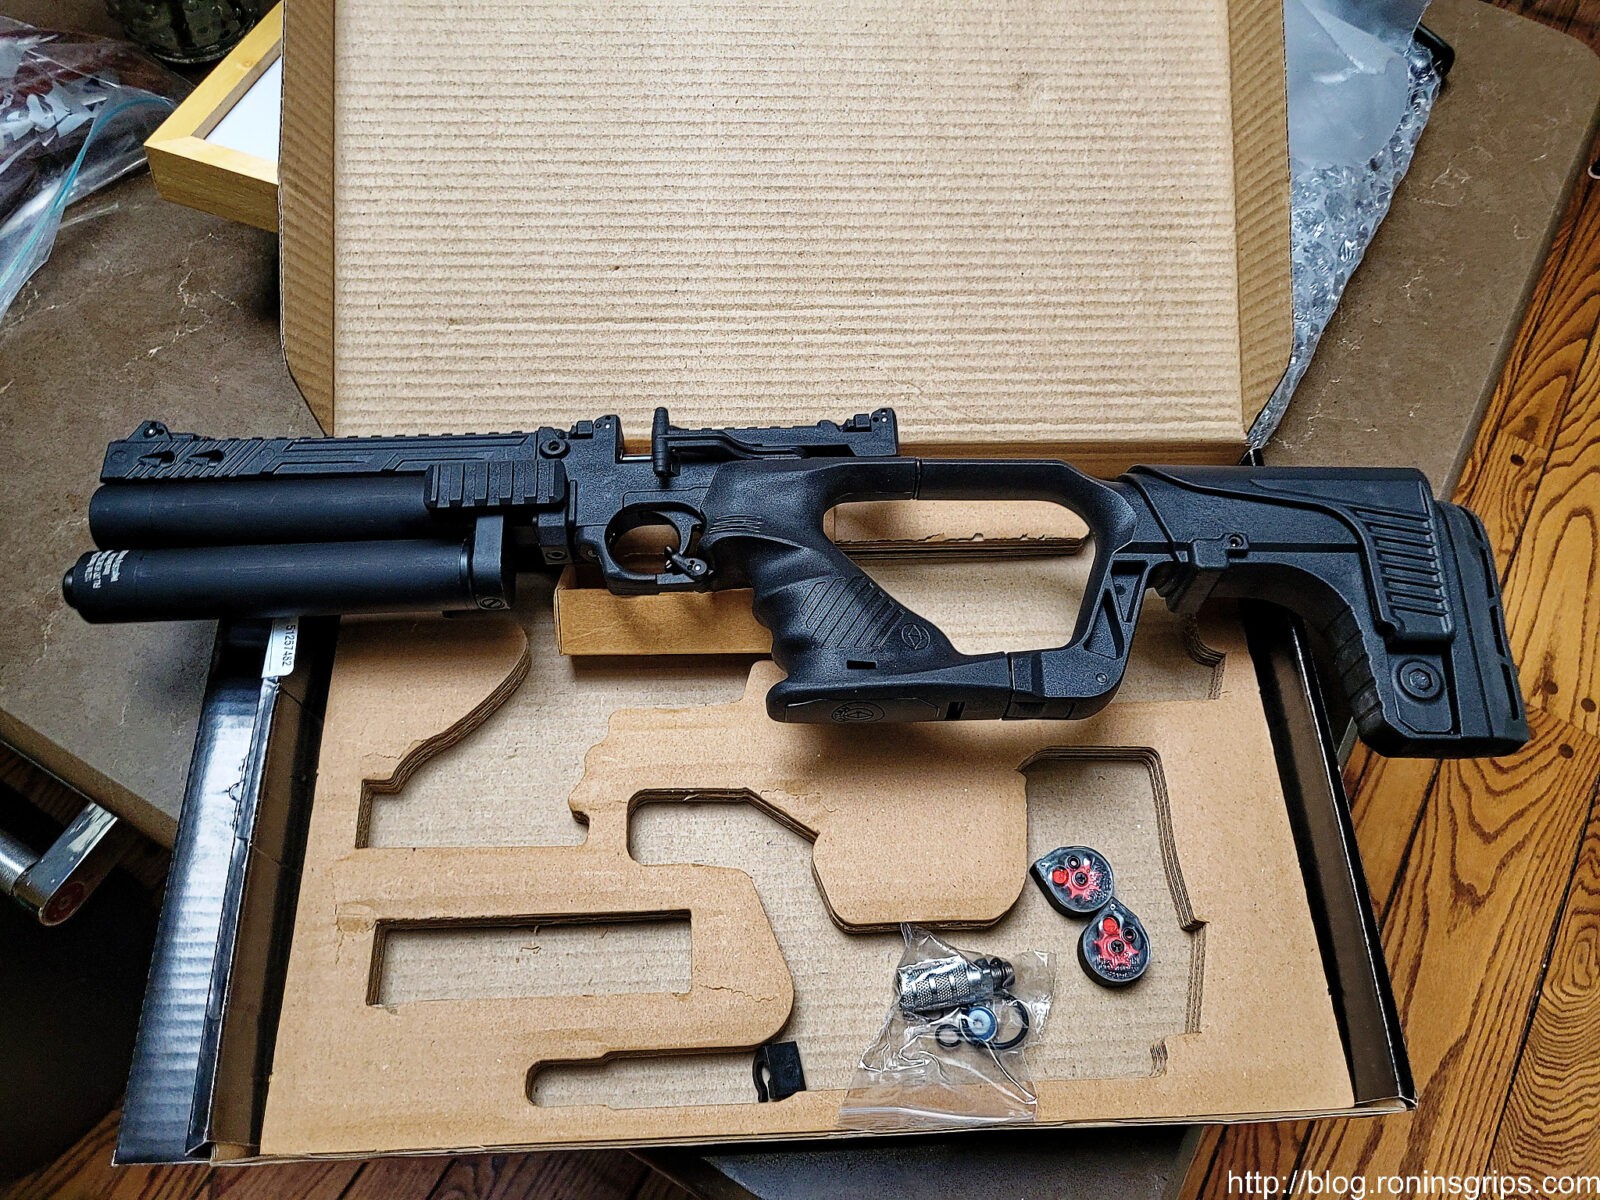
The Jet II arrived in a flat box and inside was the pistol, the stock and in the box are two mags, a female quick connect fitting and some o-rings. Is this a pistol or a carbine? The answer is yes. I have found Hatsan’s designs to be novel and forward looking – this is no exception.This is looking straight on at manometer (the pressure gauge). It looks like Pyramyd Arms did their 10 for $10 test but didn’t bother refilling the tank. So the gauge is in the top cylinder. The bottom cylinder has a cap on and under it is the male quick connect fitting for filling the airgun.Inside the muzzle end of the shroud are 1/2-20 threads for adding a moderator. So, if you get a 1/2-20 male to male fitting, you can add your favorite brand of moderator. I’ll cover more about this later.The quick connect foster fitting is protected by a black plastic cover. Note the 250 bar limit printed on the cylinder.The cocking lever is polymer. I’d rather it were aluminum but let’s see how it holds up, Injection molded composites these days are amazing so this may do ok. Time will tell. Also, that optic rail also runs forward of the breach the whole length of the barrel and supports both 11mm and Picatinny. Most reviewers and listings have overlooked that. I will do a blog post showing a scope mounted with Picatinny rings directly.These holes that look like ports in the shroud are just for looks – the same way that having the serrations in a shroud are for looks. The shroud stabilizes and protects the barrel plus has threading for adding a moderator but that’s it. There is no integral moderator. You’ll need to add that but that’s ok and I’ll tell you why and how in another post.
Now, let’s look at the stock
Let’s next turn our attention to the attachable stock that is very slick and can be easily attached or removed.
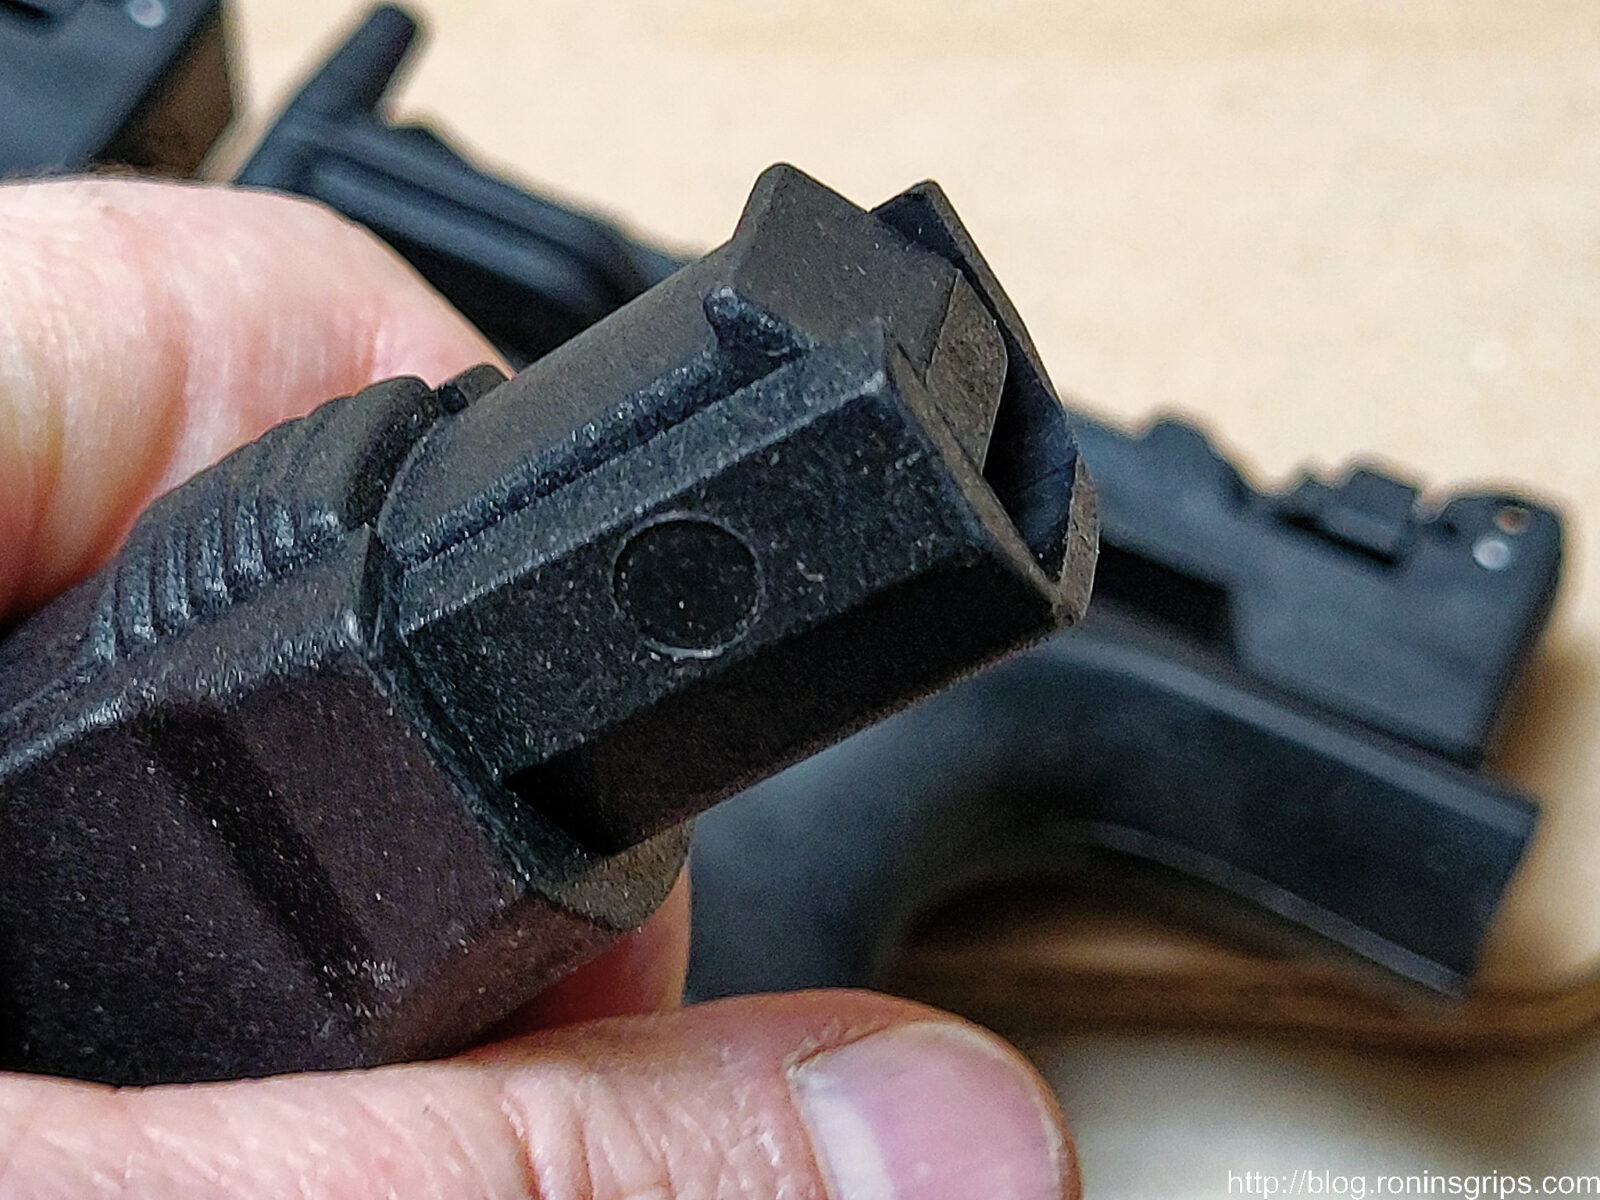
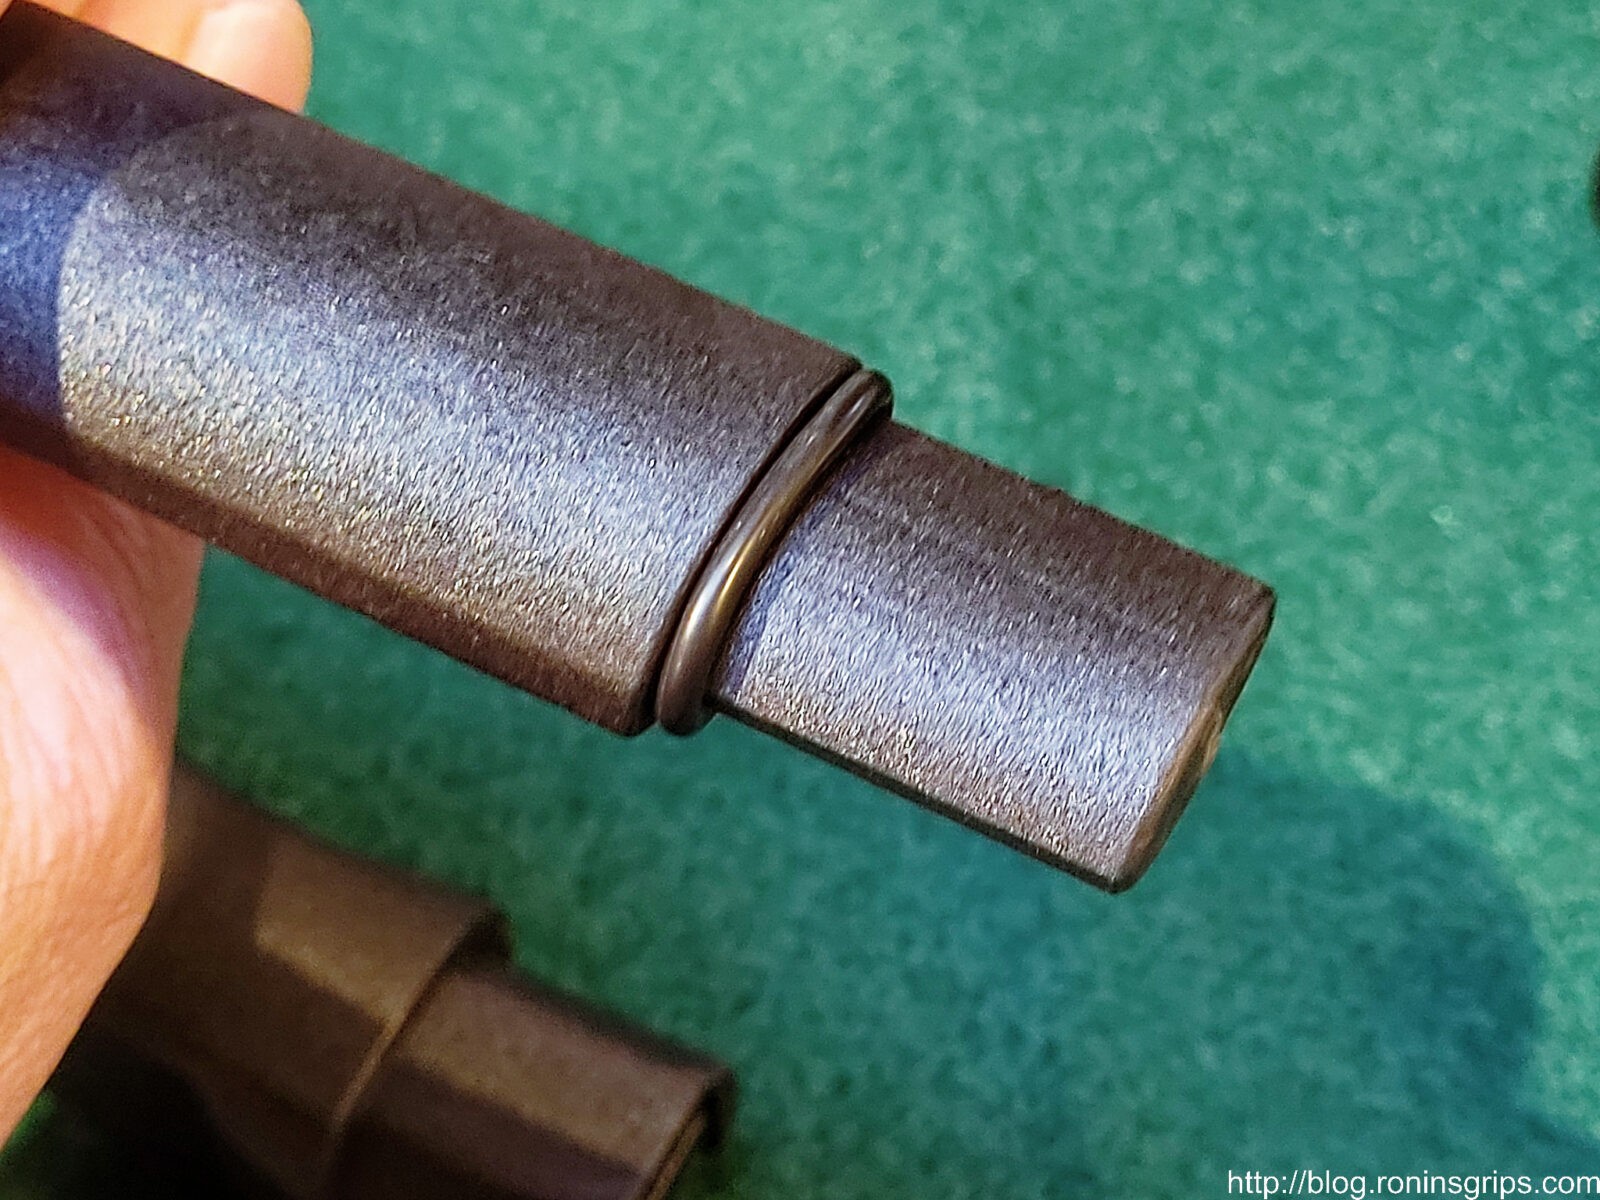
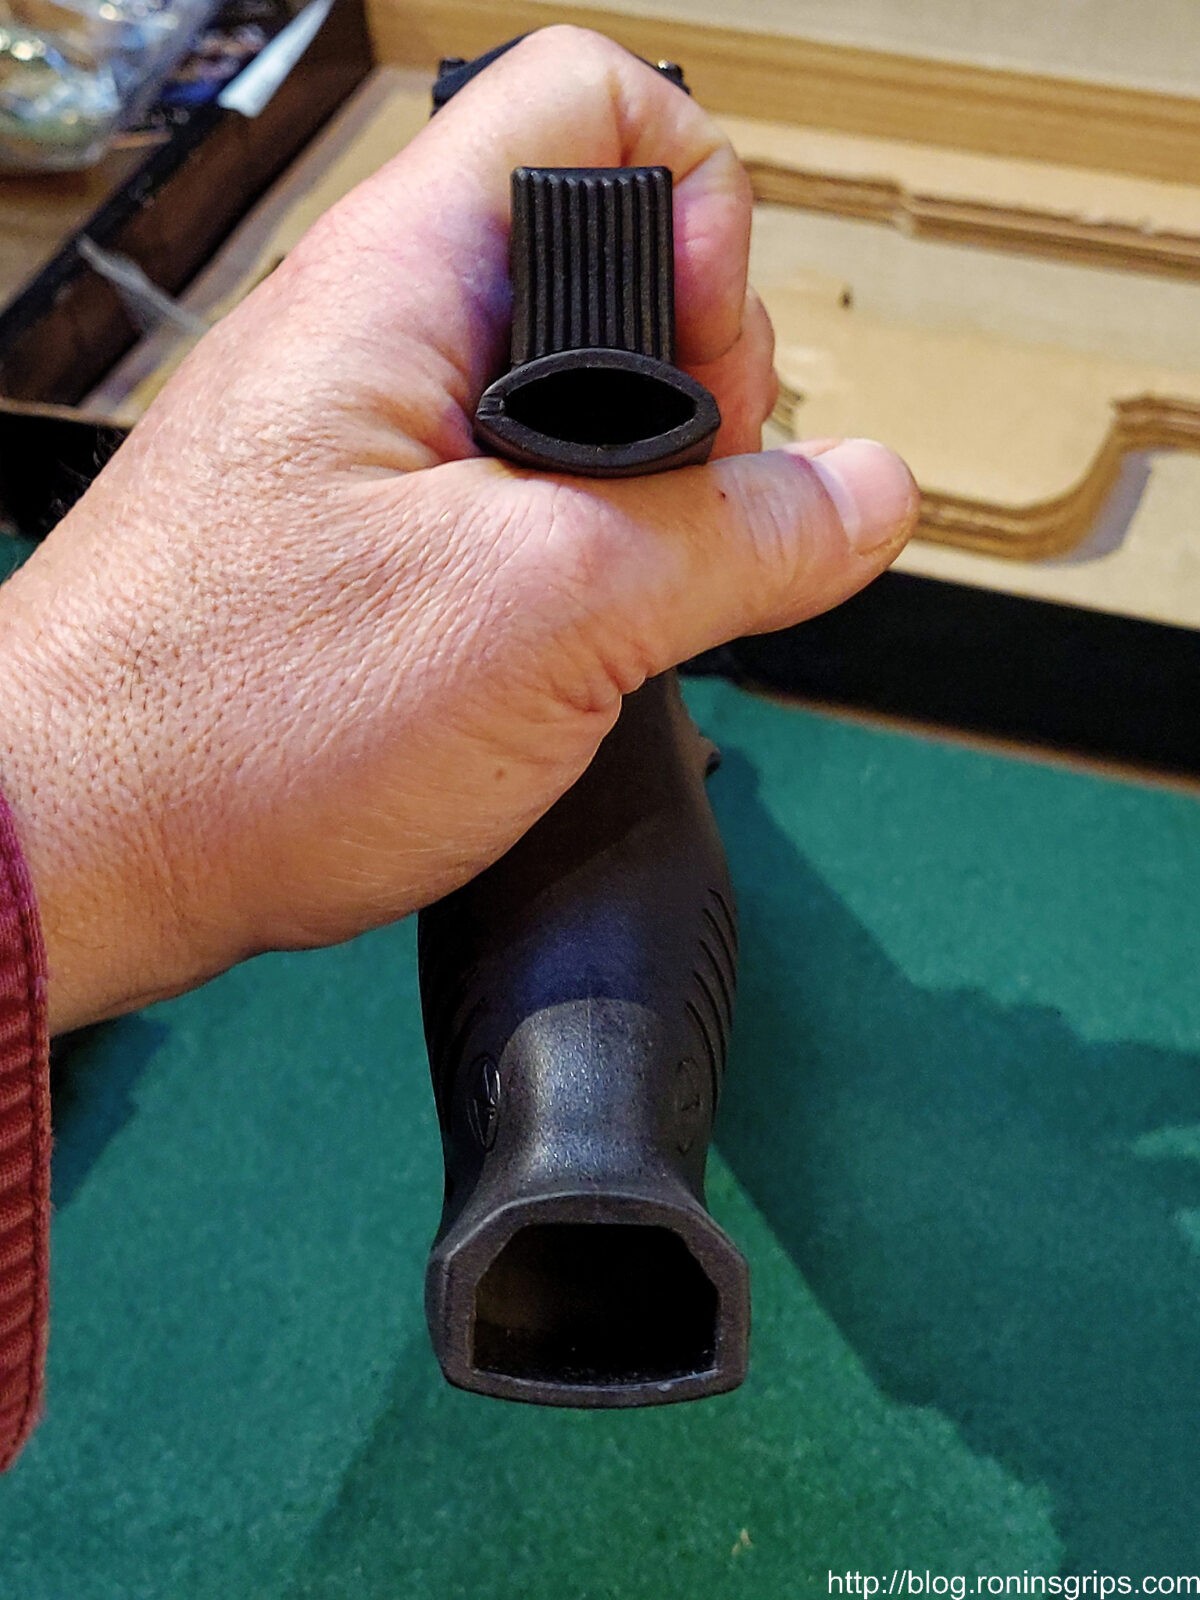
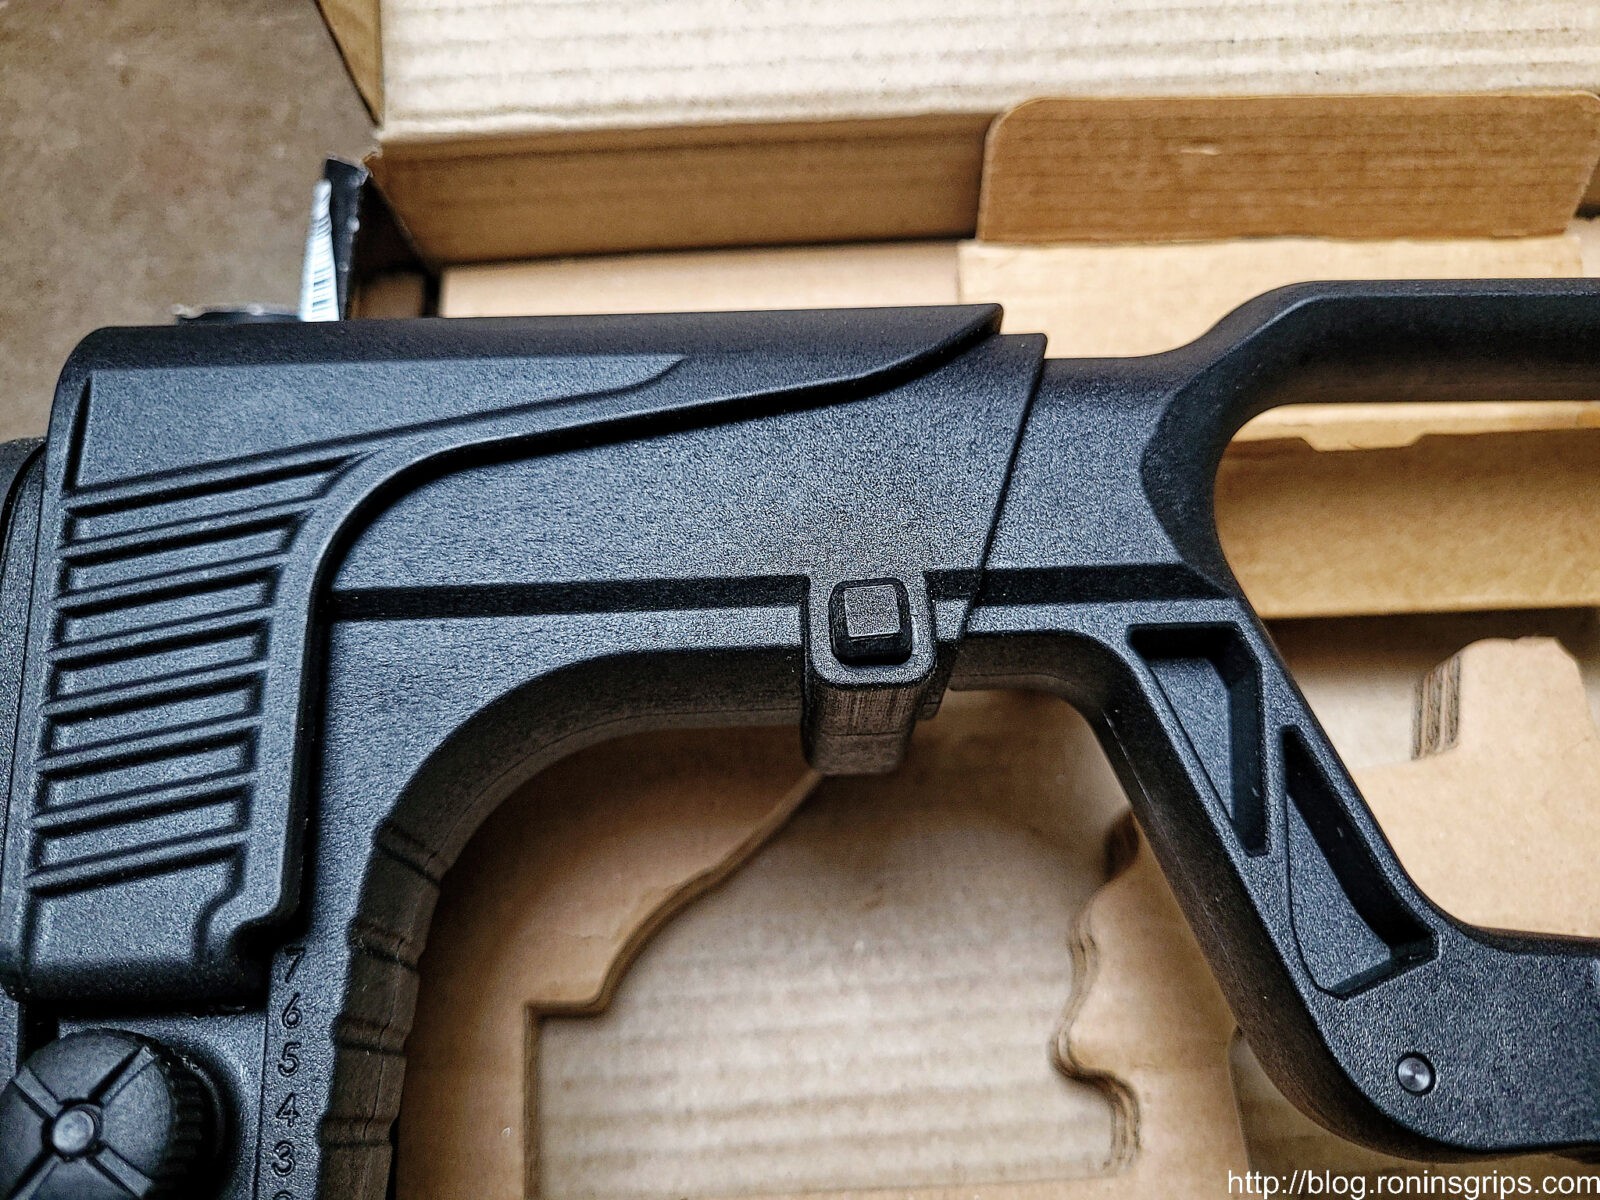
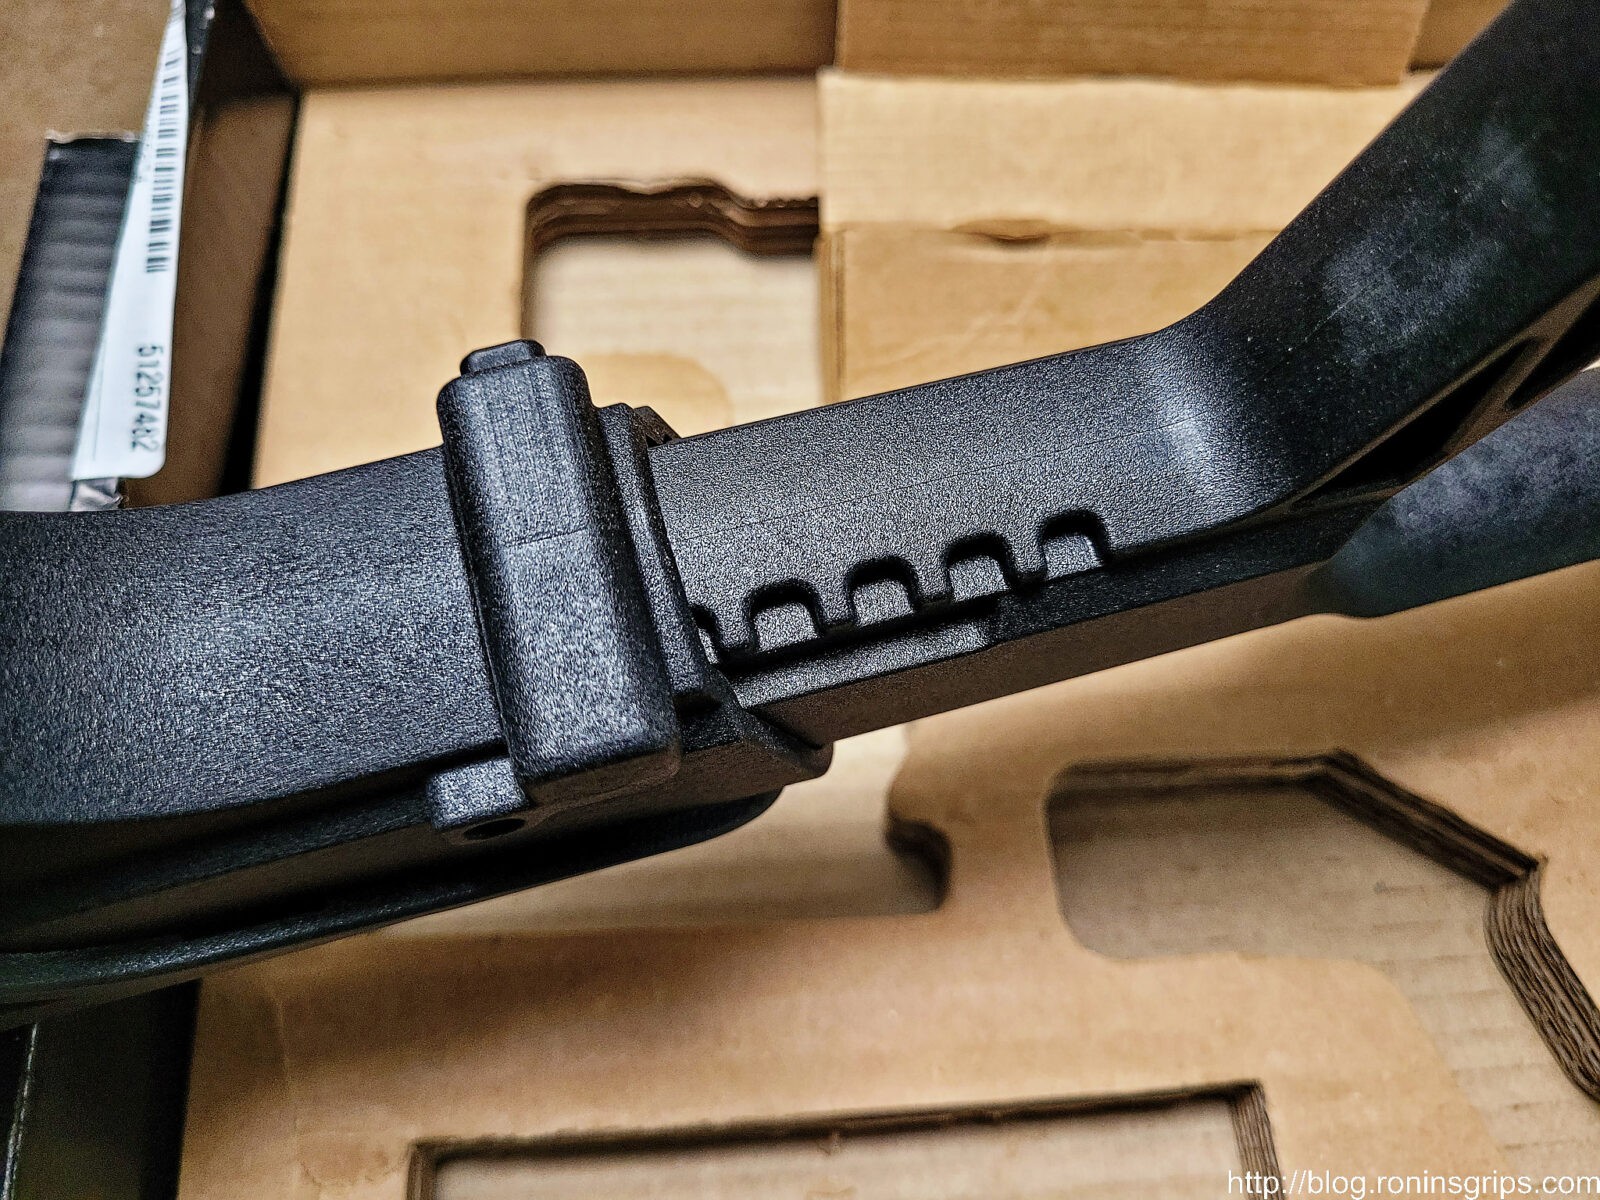
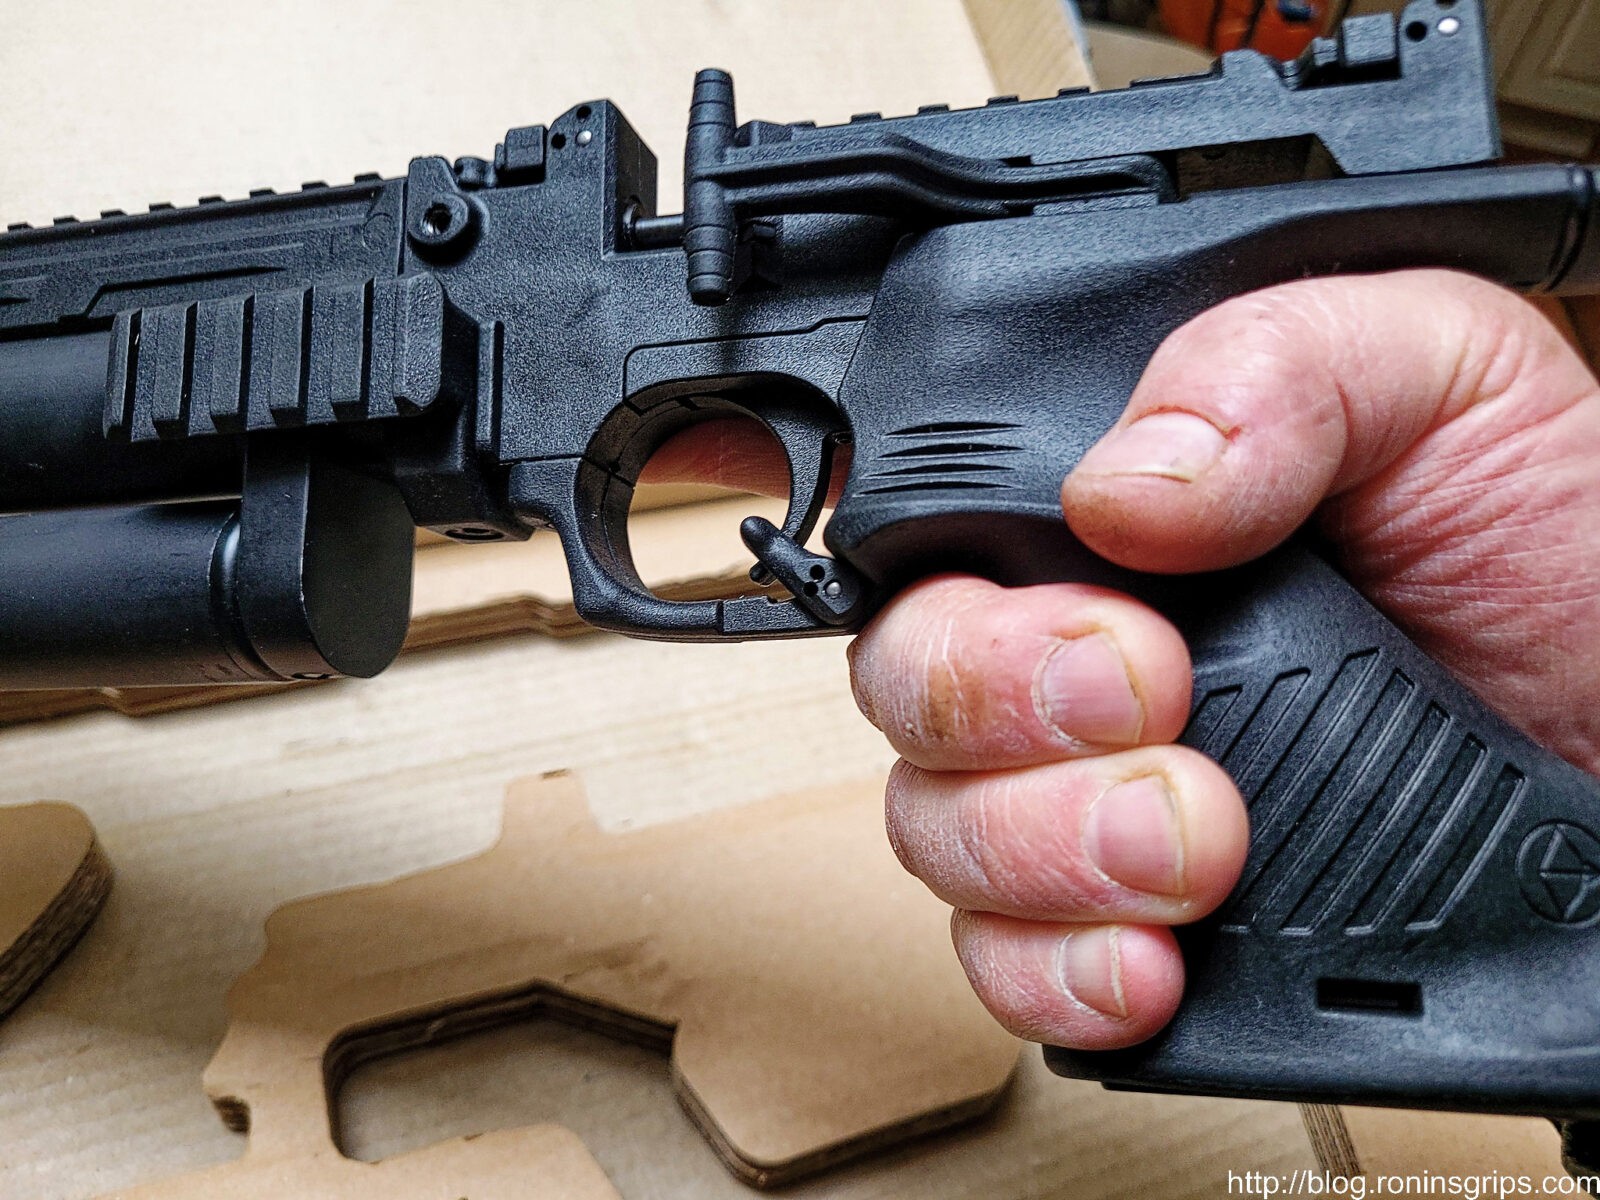
The stock is really interesting. The male plugs go into the female receptacles in the pistol. The knob on the lower left adjusts the height of the cheekpiece and the the square button just forward of the middle lower part of the stock moves a detent and allows you to make the stock longer or shorter.The lower plug has a locking mechanism to keep it secured in the pistol.The top plug has an O-ring installed. What this does is provide resistance/springiness for a firm lock-up. When you push the stock into the pistol the O-ring compresses to create a solid feeling connection.This is looking at the female receptacles on the pistol that the stock’s plugs will go into.That square button allows enables the stock to telescope in or out.There are a total of six adjustments in the stock. Overall length with the stock collapsed is about 23-3/16″ and fully extended it is just over 24-3/4″. If I use the back of the rear sight as a starting point, length of pull collapsed is about 9-5/8″ and fully extended it is about 11-9/16″. There is a slight amount of play, or wiggle, in the lock up of the stock but it’s really not much and thus acceptableIt looks slick and goes to the shoulder very easily. The balance is good too. You can see the two magazines and bag of goodies that were in the accessory box.I wear XL-sized gloves and my hand fits the grip but just barely. Oddly it’s my middle finger’s middle knuckle that feels the tight fit. I wish there was just a tad more room before the start of the trigger guard but I can live with it. I do want to point out one thing I really like – the safety flips up from the bottom of the trigger guard. I really like designs that put the safety where it can be readily turned off without moving your head or your hand to find the safety leverl. Big kudos to Hatsan for that. My Gladius had one at the front of the trigger guard and I could very easily feel it’s status or turn it off without moving my head.
So let’s wrap this first blog post
I will do more posts about adding a moderator and the optic. I’ve already done some test firing at targets and really like the little “carbine” – I think that’s what I’ll call it. So, if you are looking for something new and compact, check out the Jet I or Jet II in the caliber of your choice.
Note, I have to buy all of my parts – nothing here was paid for by sponsors, etc. I do make a small amount if you click on an ad and buy something but that is it. You’re getting my real opinion on stuff.