1.0 Executive Summary
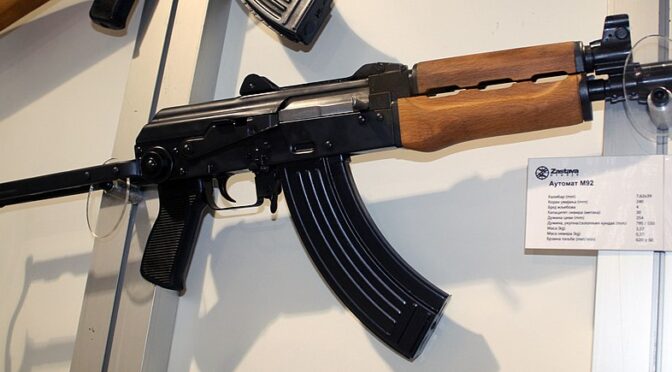
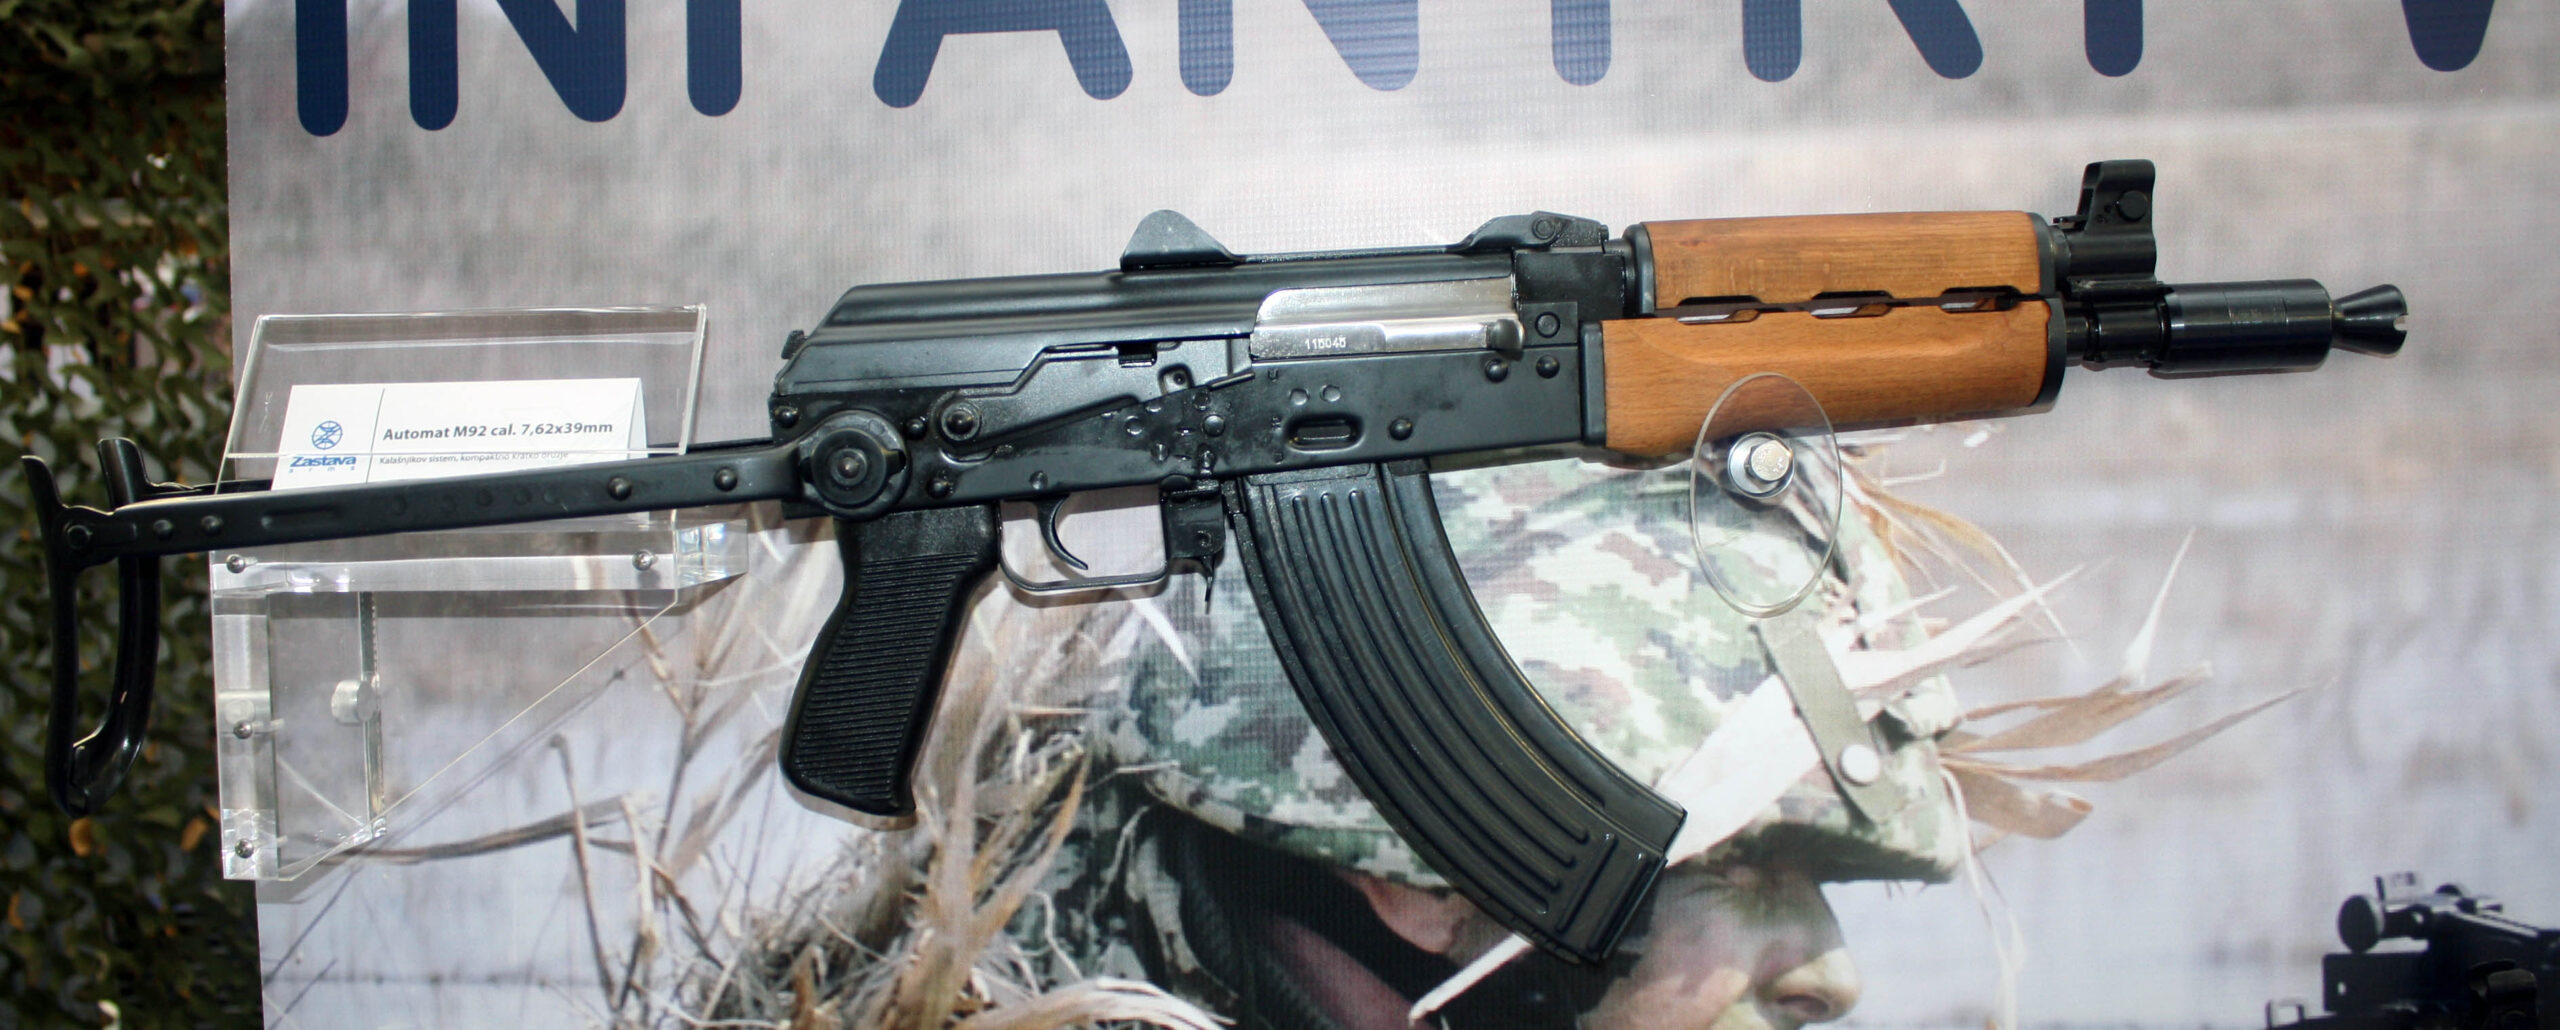
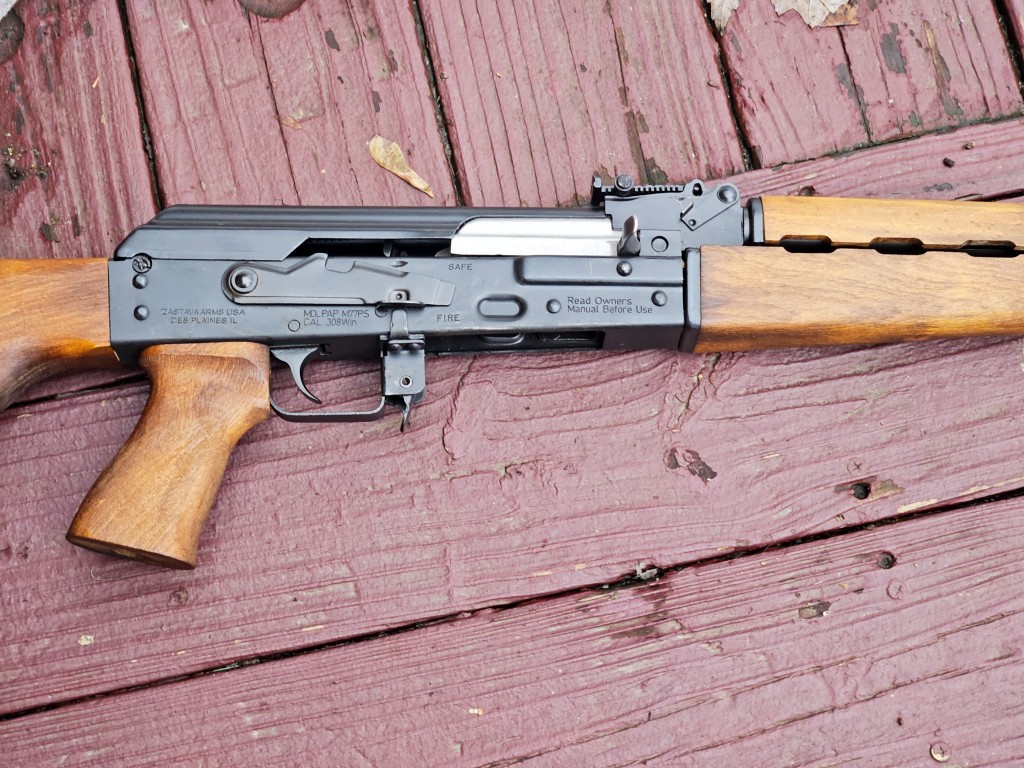
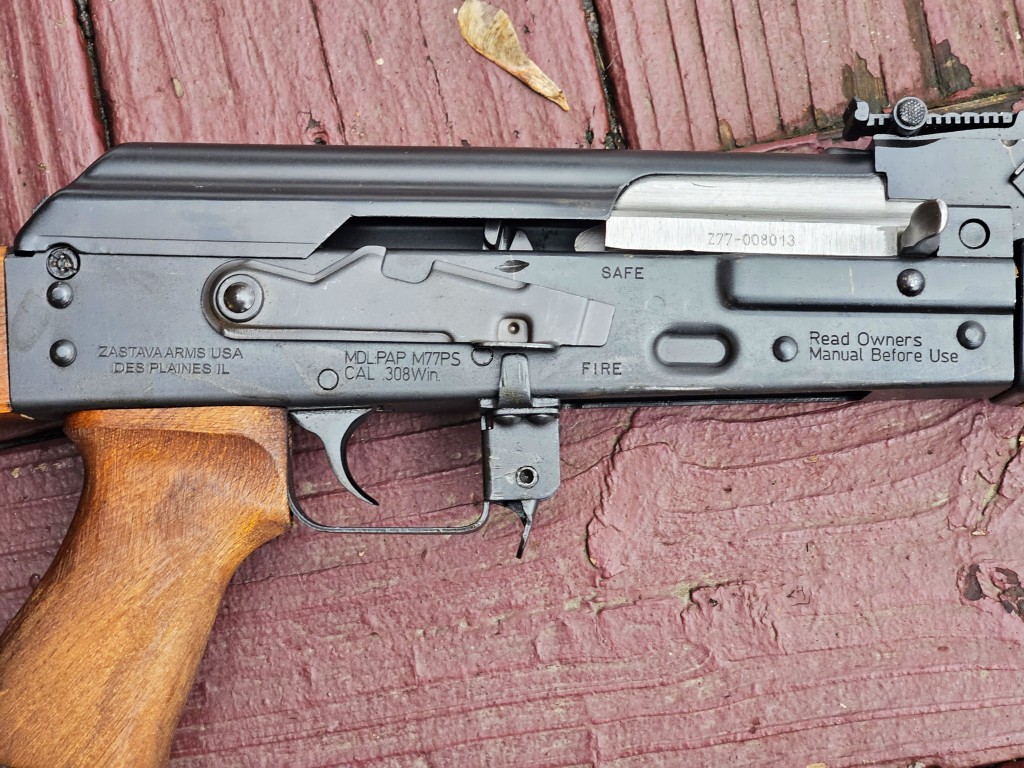
The Zastava ZPAPM92 series represents a specialized, compact firearm platform engineered around the Kalashnikov architecture and chambered in the intermediate 7.62x39mm cartridge.1 Manufactured by Zastava Arms at their primary production facility in Kragujevac, Serbia, the platform is subsequently imported into the United States by Zastava Arms USA, an operational hub located in Des Plaines, Illinois.3 Within the United States commercial market, the ZPAPM92 is legally classified and distributed as a pistol, owing to its ten inch barrel and the intentional omission of a traditional shoulder stock from the factory configuration.1 The platform is specifically designed for applications requiring high maneuverability in confined spatial environments, serving primarily in vehicle transport roles, close quarters tactical applications, and as a foundation for legally registered short barreled rifle conversions.1
The current ZPAP series represents a significant structural evolution over previous generational imports. Historical iterations of the M92 platform imported into the United States often featured standard stamped receivers and untreated barrels.5 The contemporary ZPAPM92 introduces critical metallurgical enhancements, most notably a 1.5 millimeter stamped steel receiver combined with a bulged front trunnion.2 This specific receiver geometry is directly inherited from the RPK light machine gun lineage, providing a level of structural rigidity that far exceeds the traditional 1.0 millimeter standard established by the AKM platform.2 Furthermore, the platform utilizes a cold hammer forged and chrome lined barrel, enhancing the overall lifespan of the bore while providing high resistance to thermal degradation and chemical fouling.2
Aggregated consumer data and forensic field reports indicate an exceptionally high level of baseline satisfaction regarding the mechanical longevity and physical durability of the ZPAPM92.2 The firearm is widely praised for its ability to operate reliably in adverse conditions and its tolerance for heavy carbon accumulation.9 However, consumer satisfaction is frequently mediated by several inherent operational quirks specific to the short barreled Kalashnikov design. Consumers consistently document a high degree of sensitivity regarding magazine selection, with specific polymer magazines inducing frequent feeding malfunctions.10 Additionally, the platform exhibits severe overgassing when paired with aftermarket sound suppressors, necessitating immediate consumer intervention to regulate internal system pressures.10
The overarching consensus derived from social media aggregations, dedicated enthusiast forums, and long term video reviews frames the ZPAPM92 as a highly capable and robust firearm that demands a baseline level of technical understanding from the end user. While the physical hardware is overbuilt and highly durable, prospective buyers must anticipate navigating proprietary Yugoslavian component dimensions and investing in specific aftermarket modifications to optimize the platform for modernized, accessory heavy applications.8
2.0 Reliability and Accuracy
The mechanical reliability of the ZPAPM92 is deeply intertwined with the physics of its long stroke gas piston operating system and the unique fluid dynamics associated with a severely shortened barrel. The following evaluation isolates the platform’s performance across extreme round counts, specific ammunition types, and varying accessory configurations.
2.1 Mechanical Accuracy and Practical Shootability
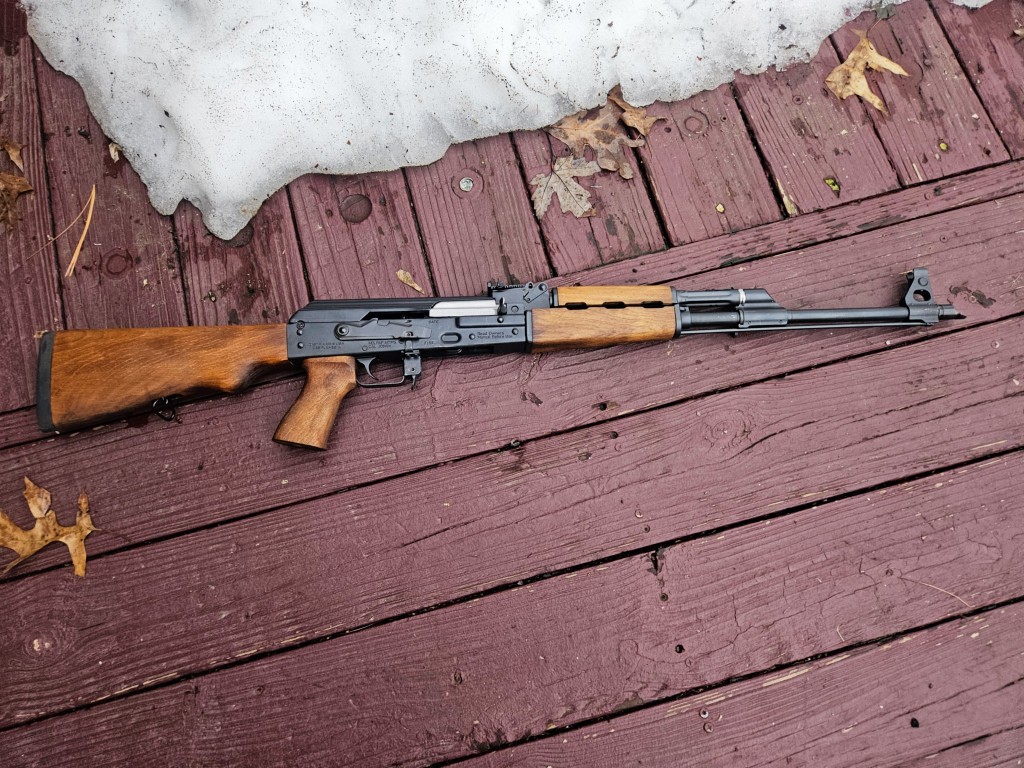
The mechanical accuracy of the ZPAPM92 is highly commendable for a platform of its size. The ten inch cold hammer forged barrel provides a rigid housing for the projectile, minimizing barrel whip during the firing sequence.2 Users operating the firearm from stable rested positions frequently report achieving sub three inch groups at a distance of 100 yards, which is well within the acceptable combat accuracy threshold for the 7.62x39mm cartridge.2 The chrome lining applied to the internal bore further aids in maintaining consistent projectile spin rates even as the barrel undergoes significant thermal expansion during rapid fire schedules.2
Despite the high mechanical accuracy potential of the barrel, practical shootability is heavily constrained by the physical design of the weapon. The ZPAPM92 features a total overall length of 19.3 inches and an unloaded weight of 6.6 pounds.2 Because the firearm is sold as a pistol without a stabilizing shoulder brace, operators must suspend the heavy 6.6 pound mass entirely with their arms.14 This extreme front heavy weight distribution induces rapid muscular fatigue, which subsequently degrades unsupported standing accuracy.2 The physical footprint of the 1.5 millimeter receiver, the bulged front trunnion, and the solid wooden handguards concentrates the bulk of the mass directly over the support hand.2
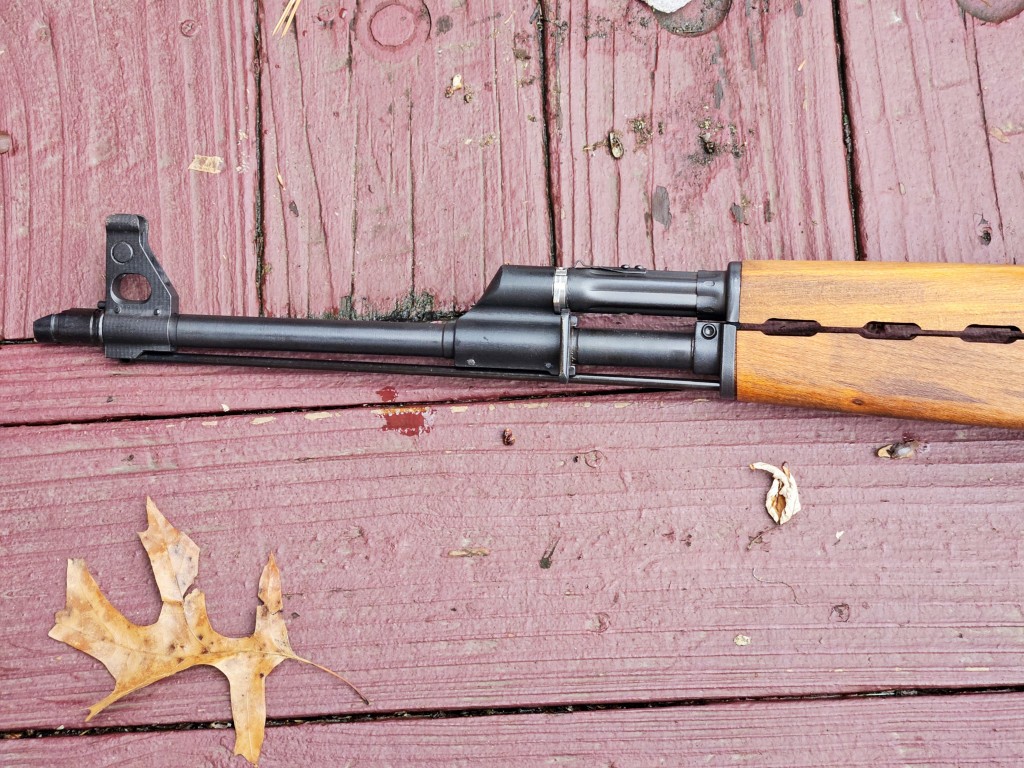
Furthermore, the shortened ten inch barrel severely truncates the maximum sight radius available to the user. The factory Krinkov style iron sights consist of a dual aperture front post and a rear notch mounted directly to the hinged dust cover.2 The close proximity of the front and rear sights makes minute angular alignment errors highly detrimental to long range accuracy.2 The unburnt powder escaping the ten inch barrel also generates a concussive muzzle blast and significant muzzle rise, requiring the user to exert substantial physical control to reacquire the sights for rapid follow up shots.8 Zastava equips the muzzle with a conical booster device designed to direct the concussive blast forward, but the physical recoil impulse remains remarkably sharp compared to full length 16 inch rifles.2
2.2 Ammunition Sensitivity Profiles
The ZPAPM92 exhibits an exceptionally broad tolerance for varying types of ammunition. The fundamental geometry of the Kalashnikov feed ramps and the high velocity of the heavy bolt carrier group allow the firearm to strip and chamber a wide array of cartridge profiles without hesitation.
Based on aggregated user data, the platform does not display any inherent sensitivity to casing materials. The firearm cycles inexpensive steel cased ammunition imported from Eastern Europe with the exact same reliability as premium domestically manufactured brass cased ammunition.9 The robust extractor claw is specifically dimensioned to grip the rims of hard steel casings, preventing the extraction failures commonly observed in platforms originally designed exclusively for brass ammunition.6
Projectile weight and geometry also fail to disrupt the feeding cycle under normal conditions. Users report successful cycling of standard 123 grain full metal jacket projectiles, 124 grain hollow point defensive loads, and heavier 154 grain soft point hunting loads. The dual feed ramp design carved into the front trunnion smoothly guides blunt nosed hollow points directly into the chamber without snagging on the barrel face. Additionally, the platform easily consumes highly corrosive surplus military ammunition, which remains a popular and economical choice for high volume training sessions.9 The platform requires no specific grain weights or premium hollow points to maintain its factory established cyclic rate.
2.3 Malfunction Frequencies and Root Causes
While the baseline reliability of the ZPAPM92 is excellent, specific operational environments introduce highly predictable malfunction trends. Social media sentiment and forum data heavily isolate two distinct variables that compromise the system: polymer magazine incompatibility and sound suppressor utilization.10
The following table categorizes the primary malfunctions reported by owners, defining the specific mechanical failures and their identified root causes based on forensic user data.
| Malfunction Type | Frequency Rate | Mechanical Description | Identified Root Cause |
| Failure to Feed (Nose Dive) | High (with specific magazines) | The bolt rides completely over the top of the cartridge, or the cartridge nose dives into the front of the magazine body, failing to ascend the feed ramp. | Utilization of commercial polymer magazines, specifically Magpul PMAGs. The heavy bolt carrier outpaces the upward pressure of the polymer magazine spring geometry.11 |
| Stovepipe Extraction Failure | Moderate | The spent casing is extracted from the chamber but fails to clear the ejection port, becoming crushed horizontally by the returning bolt carrier. | Often related to underpowered ammunition batches failing to push the carrier rearward with sufficient velocity, or excessive friction from a lack of initial lubrication during the break in period.9 |
| Suppressor Induced Bolt Override | High (when suppressed) | The bolt carrier cycles violently to the rear and returns forward faster than the magazine can present the next cartridge, resulting in an empty chamber on a closed bolt. | Severe overgassing. Sound suppressors increase backpressure exponentially. The excess gas drives the bolt carrier backward at unsafe velocities, disrupting the cyclic timing.10 |
| Catastrophic Brass Deformation | Moderate (when suppressed) | Spent brass casings are ejected with severely crushed sidewalls and mangled case mouths. | Suppressor induced overgassing causes the bolt to unlock while residual pressure remains high in the chamber, violently ripping the casing out and striking the dust cover.10 |
The magazine compatibility issue represents the most frequent complaint among new owners. Users on platforms such as Reddit’s r/zastavaarms101 repeatedly document failures to feed when utilizing Magpul PMAGs.11 The consensus indicates that the polymer feed lips and internal spring tension of these specific magazines are incompatible with the rapid cyclic rate of the ZPAPM92.11 Conversely, users report near flawless reliability when utilizing traditional steel surplus magazines, high quality Bulgarian polymer magazines with steel reinforced feed lips, or the proprietary Zastava metal magazines.9
The introduction of aftermarket sound suppressors fundamentally destabilizes the factory gas regulation.10 Because the ten inch barrel features a gas port located extremely close to the chamber, the internal operating pressures are already highly elevated to ensure reliability.9 A sound suppressor restricts the forward flow of escaping gases, forcing a massive volume of high pressure gas backward through the gas tube.10 This secondary pressure spike drives the bolt carrier group rearward with excessive force.10 Users attempting to run the firearm suppressed without altering the gas system report continuous failures to feed, deformed ammunition casings, and heavy accumulations of carbon sludge within the receiver.10
3.0 Durability and Maintenance
The structural durability of the ZPAPM92 serves as its primary competitive advantage within the commercial firearms market. Zastava Arms incorporates military grade metallurgical techniques into the commercial production lines, resulting in a physical architecture capable of withstanding extreme physical abuse and high round count firing schedules.2
3.1 Structural Integrity and Component Wear
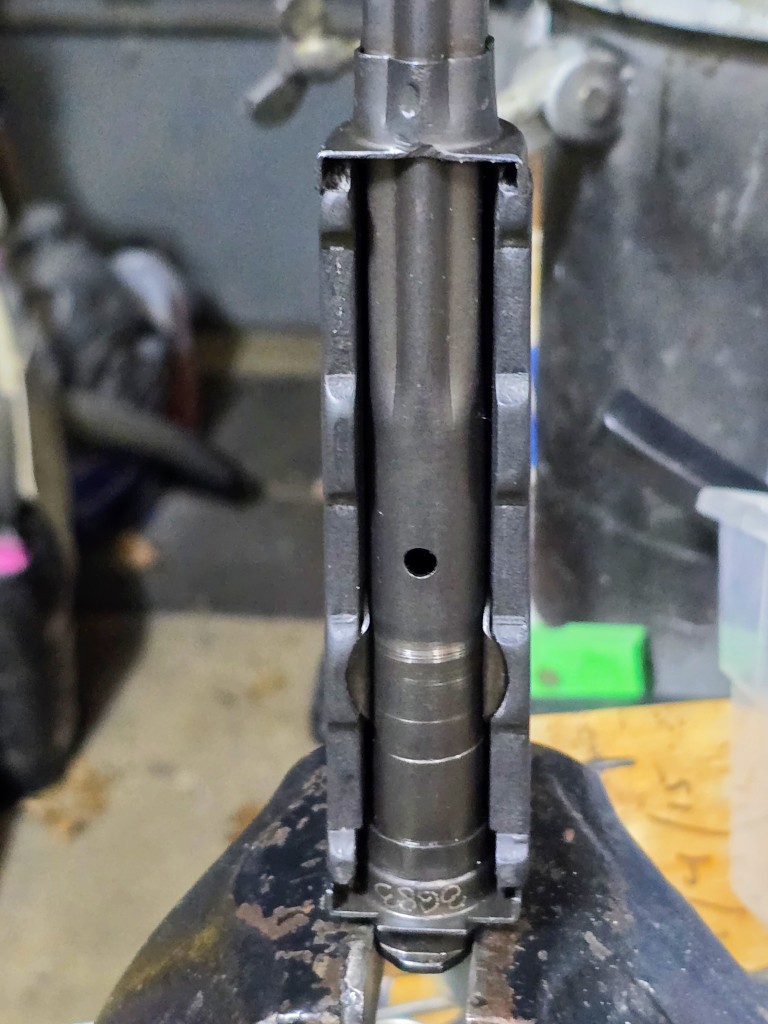
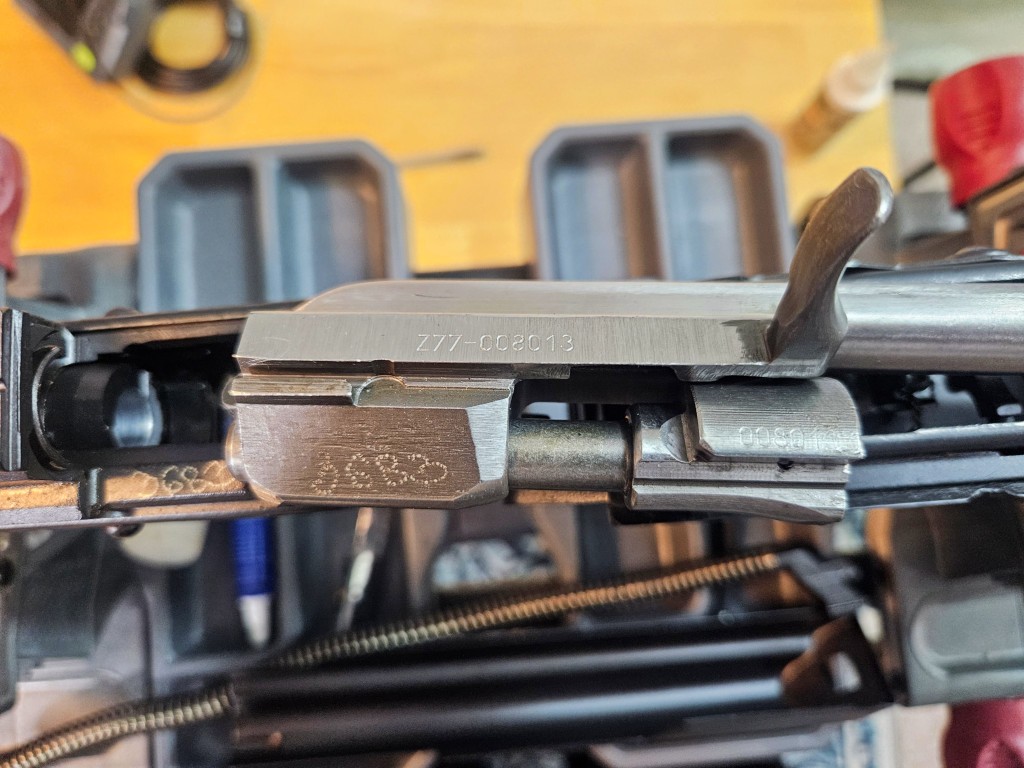
The foundational strength of the ZPAPM92 lies in its receiver construction. Traditional stamped AKM platforms utilize a 1.0 millimeter thick sheet metal receiver.2 Zastava upgrades this specification by stamping the ZPAPM92 receiver from 1.5 millimeter thick steel.2 This 50 percent increase in material thickness provides immense torsional rigidity, entirely eliminating the receiver flex commonly observed in lighter platforms during slow motion video analysis.2 To complement the thicker receiver, Zastava installs a bulged front trunnion.2 The trunnion is the critical steel block riveted to the front of the receiver that houses the barrel and absorbs the direct impact of the locking lugs during detonation.2 The bulged profile adds extra mass to the trunnion sidewalls, a feature originally engineered to manage the intense thermal expansion and continuous mechanical stress associated with squad automatic weapons.2 This overbuilt geometry ensures that the rivets securing the trunnion to the receiver will not stretch or deform over the lifespan of the firearm.2
The barrel provides another layer of extreme durability. The ten inch barrel is manufactured using a cold hammer forging process.2 A solid steel blank is struck by massive hydraulic hammers around a centralized mandrel, compressing the molecular structure of the steel and creating a highly dense, dimensionally perfect bore.2 The internal bore and chamber are subsequently lined with hard chrome.2 Chrome lining significantly increases the surface hardness of the barrel, preventing rapid throat erosion and preserving accuracy over tens of thousands of rounds.2
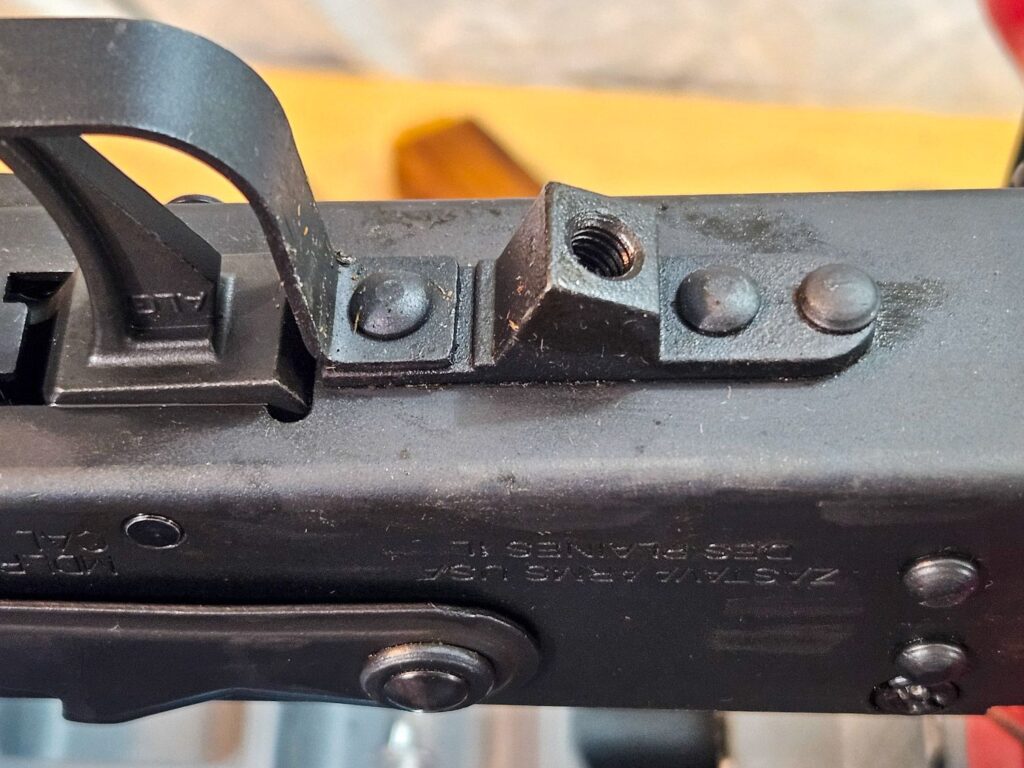
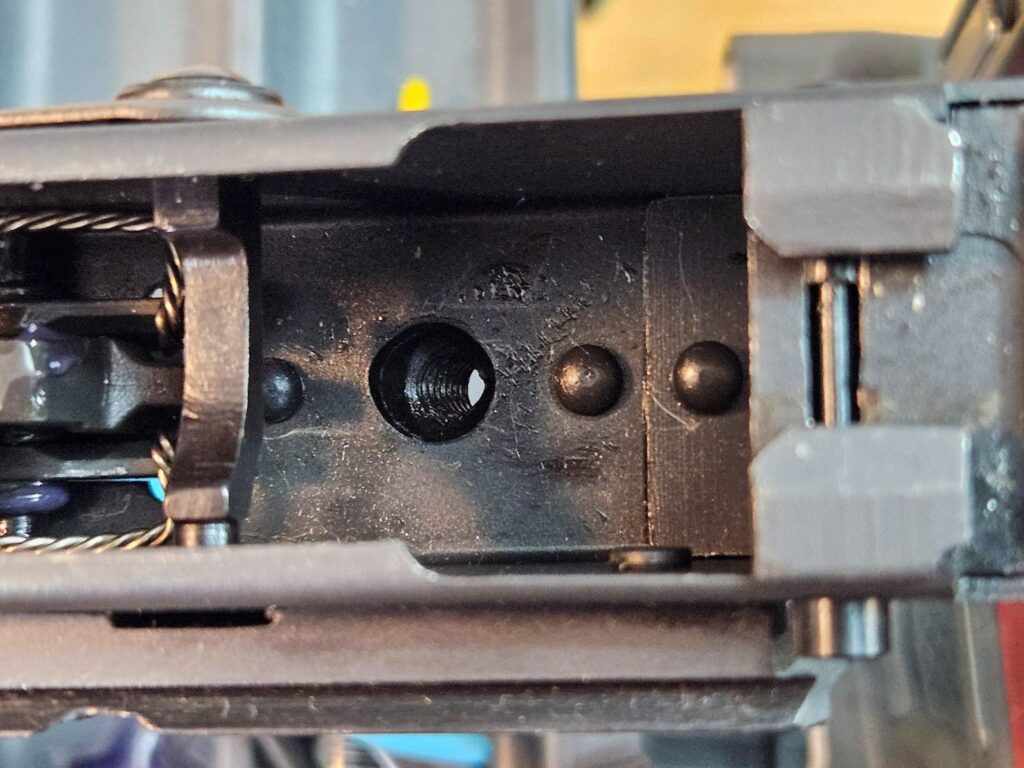
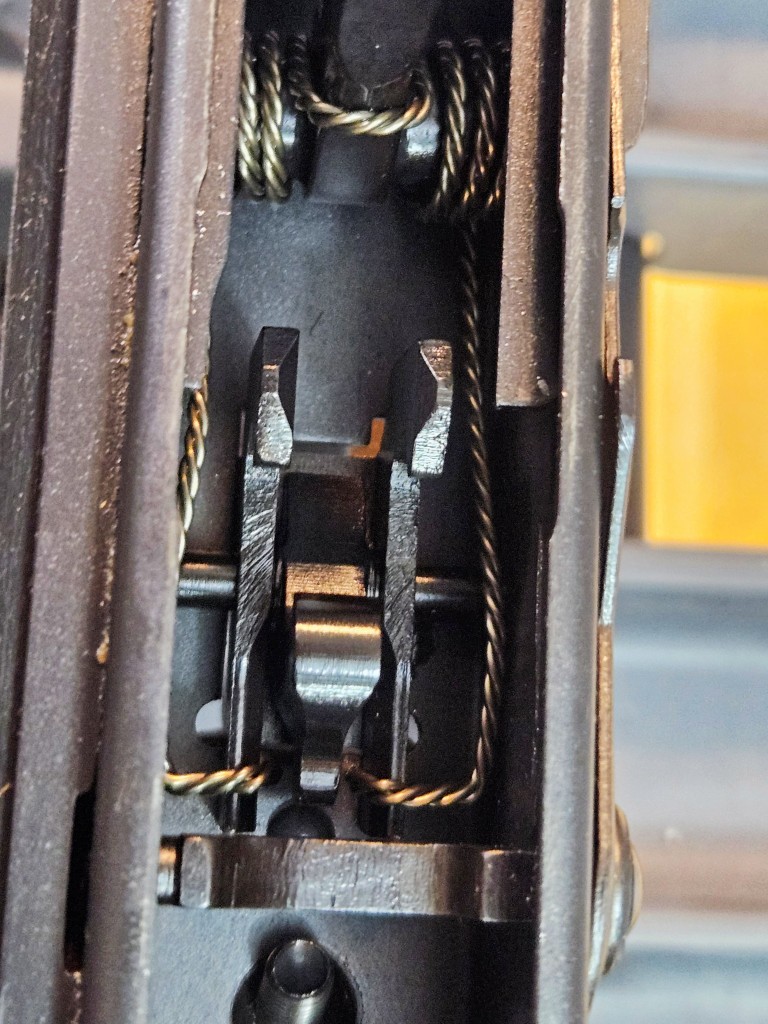
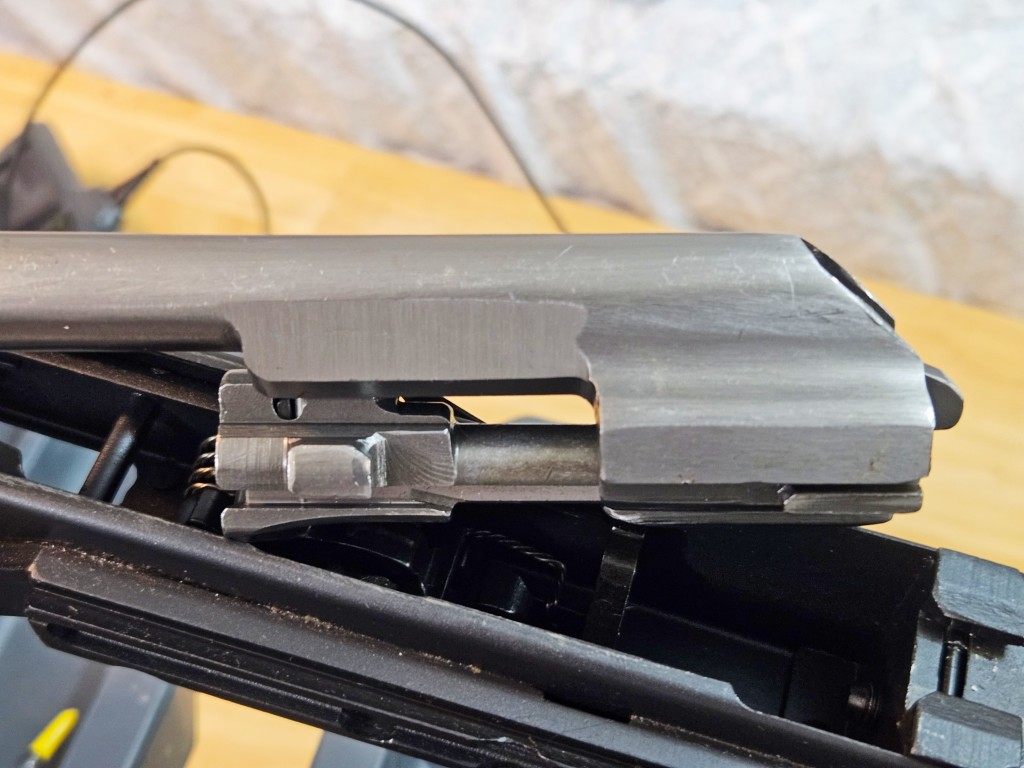
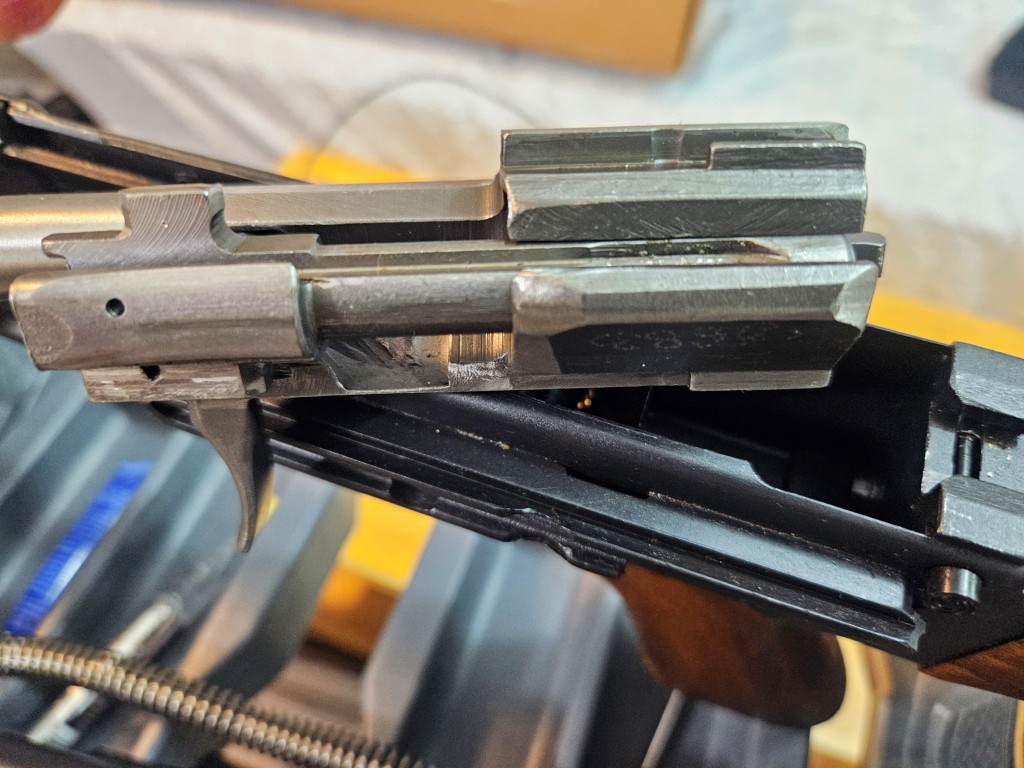
Despite the overarching strength of the platform, specific wear patterns consistently emerge within the fire control group. Users frequently document a metallurgical phenomenon known as peening occurring on the tail of the bolt carrier.17 The bolt carrier tail is the protrusion that physically depresses the hammer to reset the trigger during the rearward cycle. Users note that the tail of the ZPAPM92 carrier often begins to mushroom or deform after several hundred rounds.18 Forensic metallurgical analysis shared across enthusiast forums suggests this is the result of dissimilar metal hardnesses.17 The factory bolt carrier is cast and machined from a softer steel alloy, while the factory hammer is heavily hardened.17 When users replace the factory trigger group with aftermarket options, such as the popular ALG Defense AKT series, the harder aftermarket hammer rapidly displaces the softer metal on the carrier tail.17 Field reports confirm that this peening is largely a cosmetic and self limiting issue.18 The metal displaces outward to a certain extent and then ceases to deform further.18 The required intervention is minor, with users simply utilizing a hand file to smooth the displaced metal edges to prevent the bolt from binding during its rotation.18
Catastrophic structural failures are exceptionally rare in current production models. Social media analysis reveals isolated historical reports of front trunnion locking lugs shearing completely off the firearm.6 However, an investigation into these specific claims reveals that the failures occurred almost exclusively on older model pistols imported by Century Arms prior to the establishment of Zastava Arms USA, or they involved users firing ammunition loaded to dangerous, out of specification pressure limits.6
3.2 Routine Maintenance Realities
The routine maintenance requirements for the ZPAPM92 are exceptionally low under standard operating conditions, but they escalate dramatically depending on the specific type of ammunition utilized. The Kalashnikov gas system features massive clearances between the moving parts, allowing the firearm to push past heavy carbon fouling, environmental dust, and unburnt powder without slowing down.9 Users frequently report firing over one thousand rounds without applying any cleaning solvents or fresh lubrication, and the firearm continues to cycle reliably.10
However, the maintenance paradigm shifts completely when owners utilize surplus military ammunition. Much of the inexpensive 7.62x39mm ammunition available on the commercial market utilizes highly corrosive Berdan primers.9 When detonated, these primers leave behind potassium chloride salts within the barrel, the gas port, the gas block, and along the bolt face.9 These salts are highly hygroscopic, meaning they actively attract and absorb moisture from the surrounding atmosphere. If left untreated, the salts will induce rapid and aggressive rust formations within 24 to 48 hours.9
The required maintenance to combat this chemical reaction is simple but mandatory. Standard petroleum based gun oils will not dissolve these salts. Users must flush the barrel, gas block, and gas tube with a water based solvent to dissolve and wash away the corrosive residue before applying standard protective lubrication.9 While the chrome lined barrel offers excellent resistance to this corrosion, the unlined gas block, gas tube, and the exposed face of the bolt carrier are highly susceptible to pitting if the corrosive salts are ignored.2 Aside from managing corrosive residues, users are only required to apply high temperature grease to the bolt carrier guide rails and the locking lugs to maintain peak operational smoothness.9
4.0 Ownership Experience and Consumer Interventions
The day to day reality of owning a ZPAPM92 requires consumers to abandon assumptions regarding universal AK platform compatibility. The firearm is constructed according to proprietary Yugoslavian pattern dimensions, which introduces a distinct learning curve for new owners seeking to customize the platform.8
4.1 Navigating Proprietary Dimensions
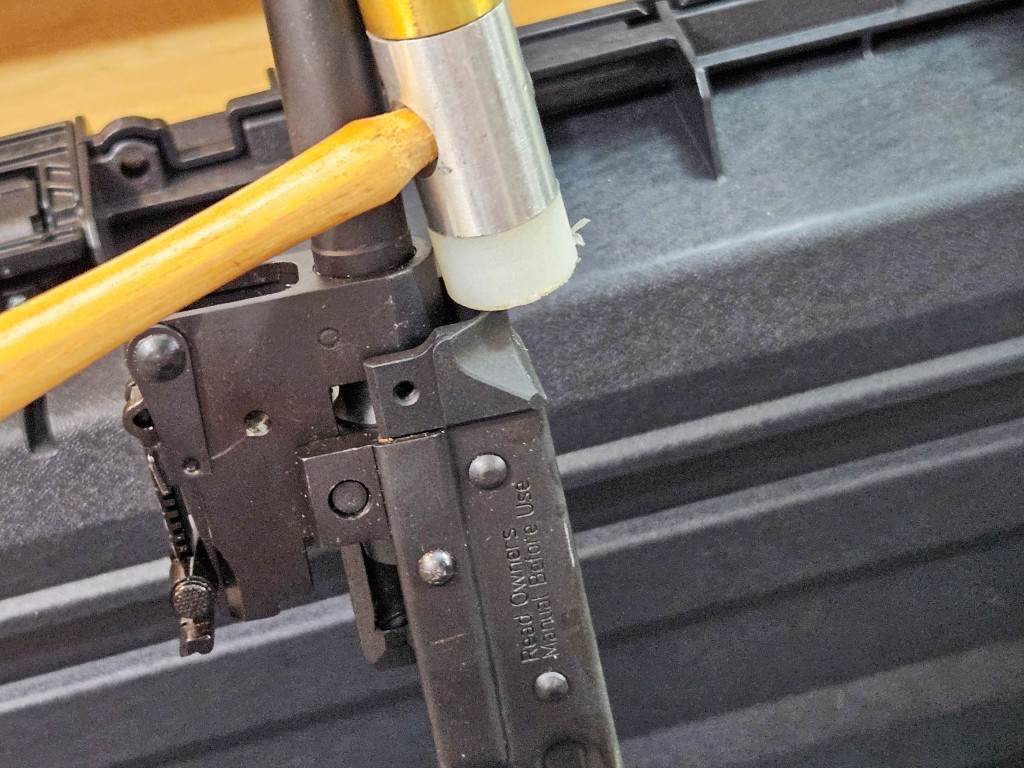
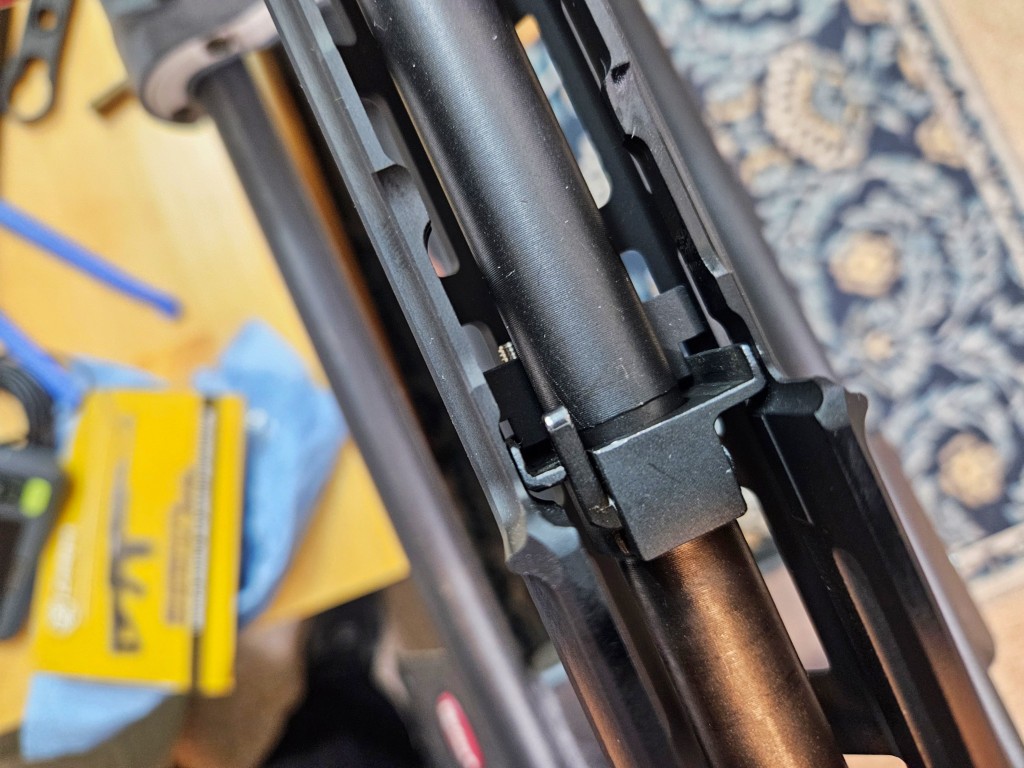
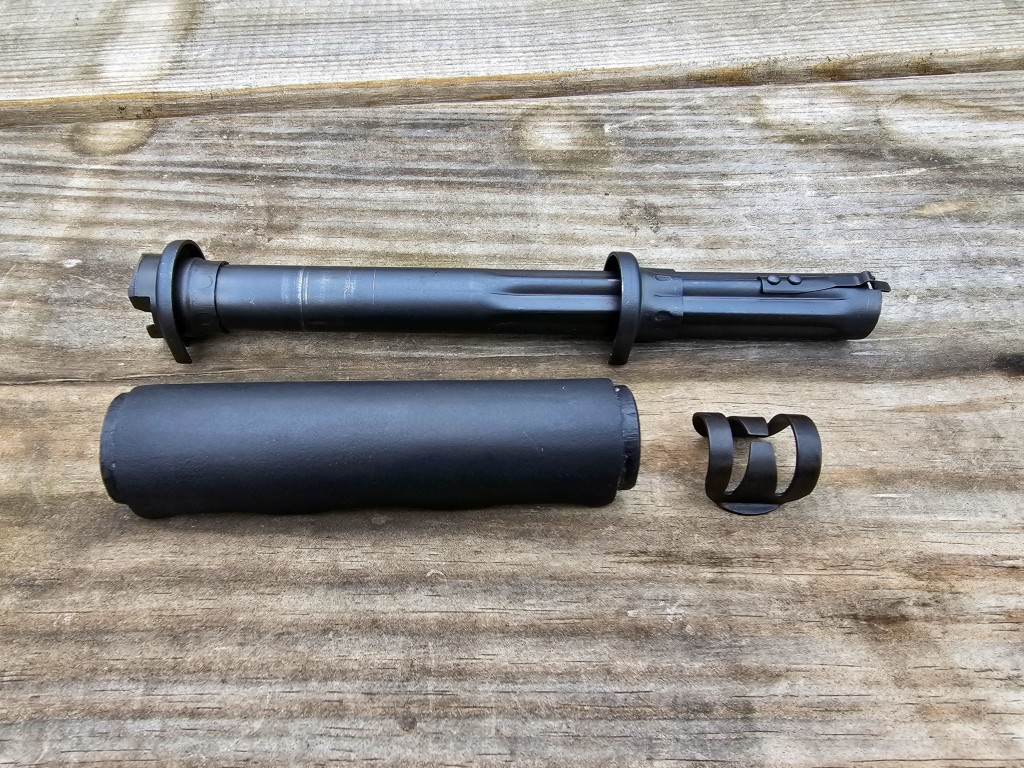
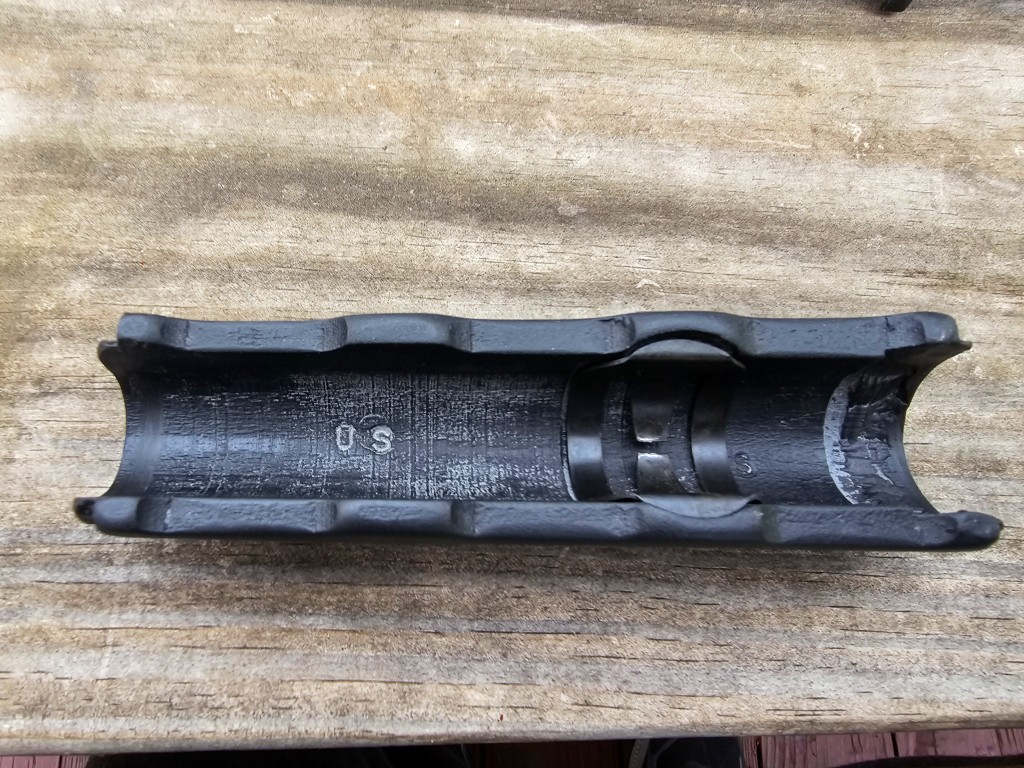
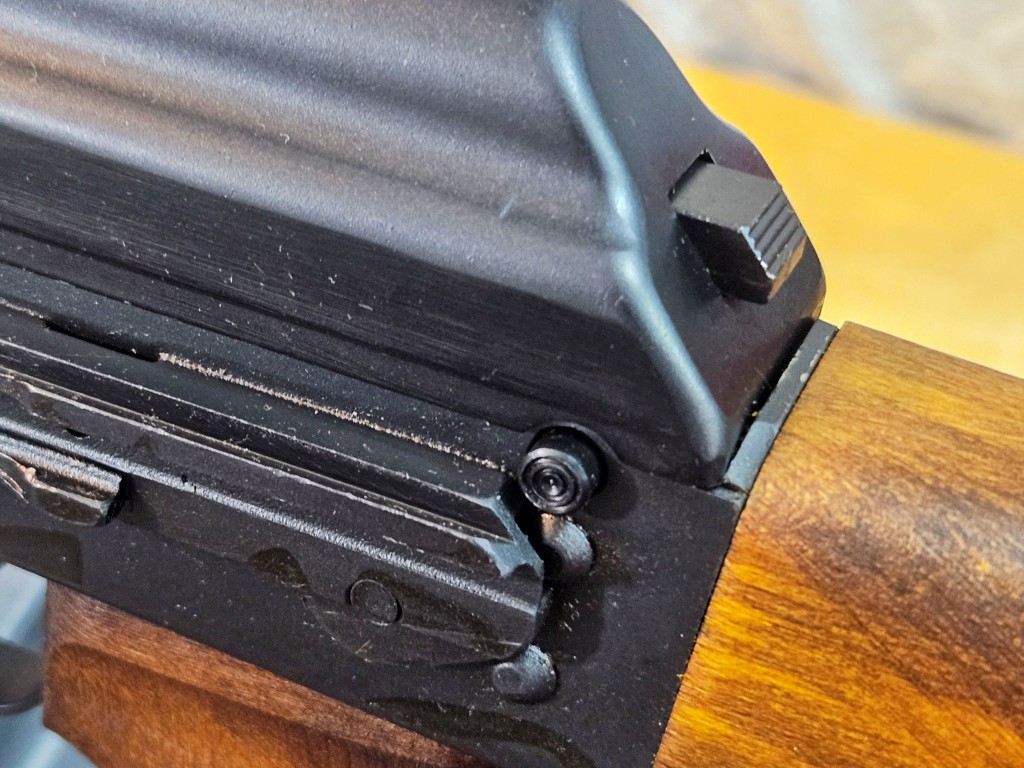
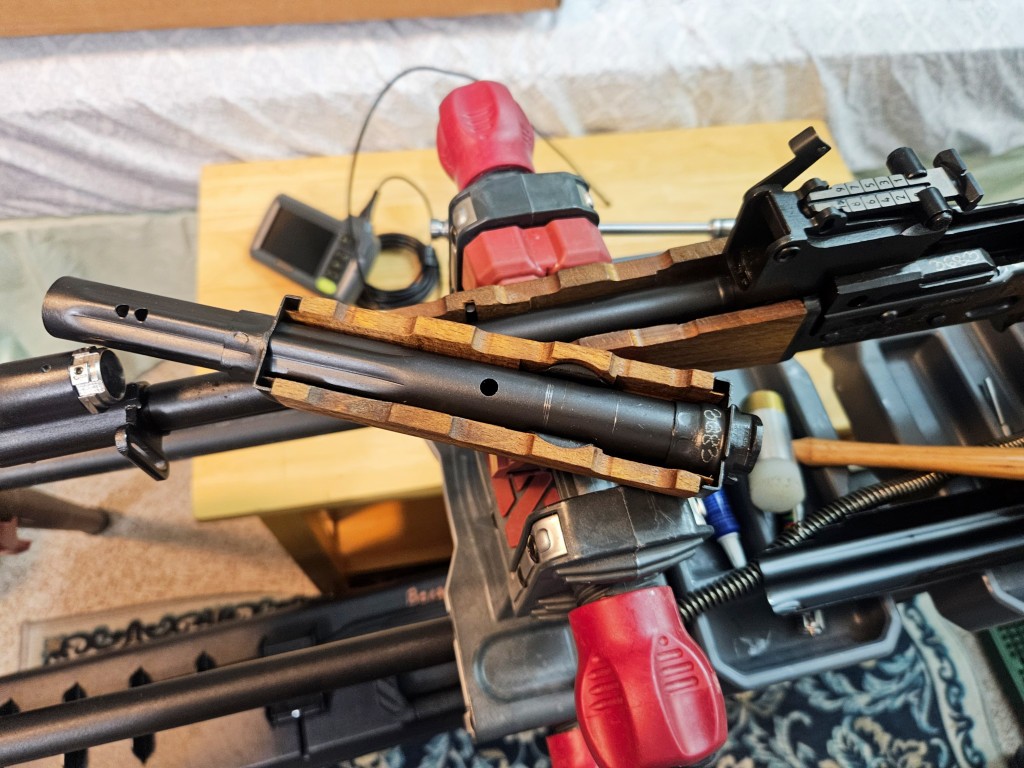
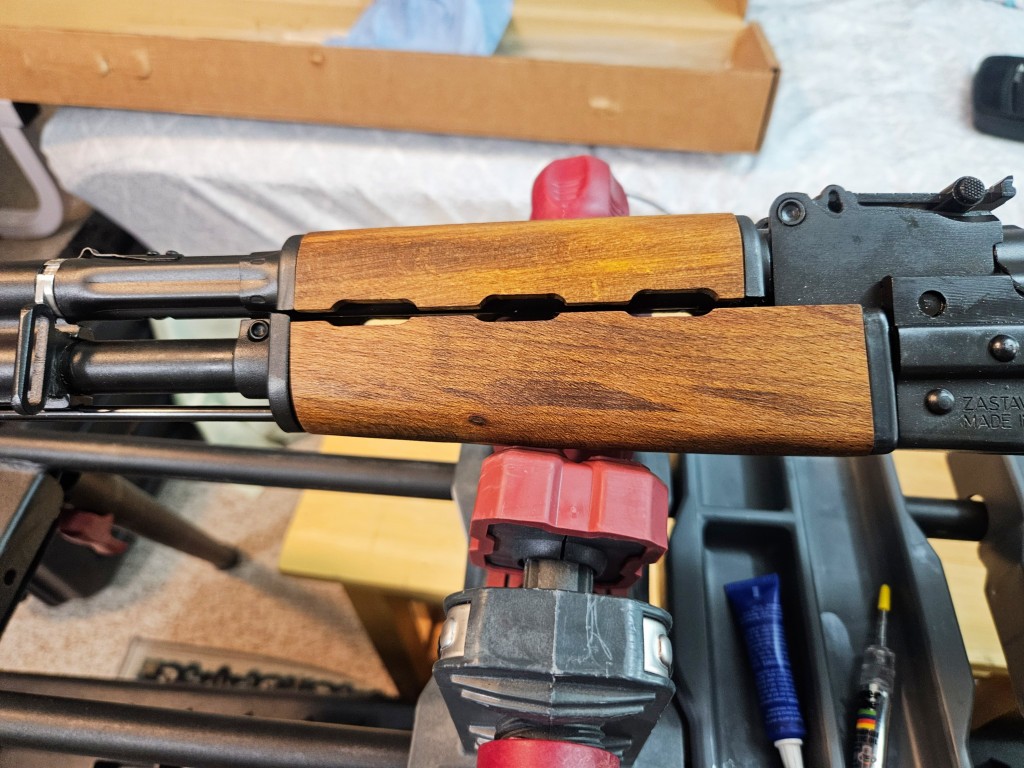
The most frequent surprise encountered by new owners is the realization that standard AKM accessories will not fit the ZPAPM92.8 The Yugoslavian pattern architecture dictates different physical lengths and mounting geometries for nearly every external component.8 The wooden handguards are uniquely shaped and utilize a specific retaining bracket.8 The gas tube is distinctly shorter than standard AKM gas tubes.13 The receiver features a proprietary trunnion angle, and the factory pistol grips utilize a different screw length.8
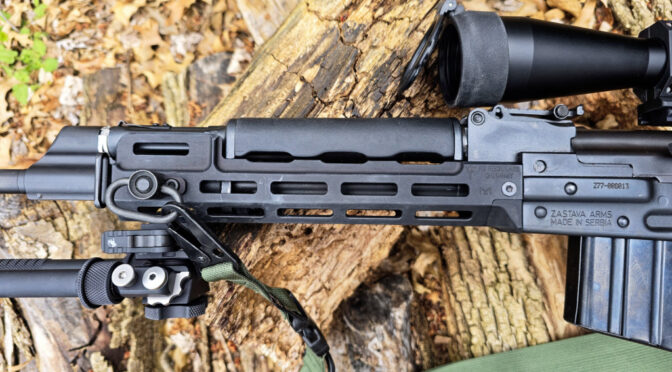
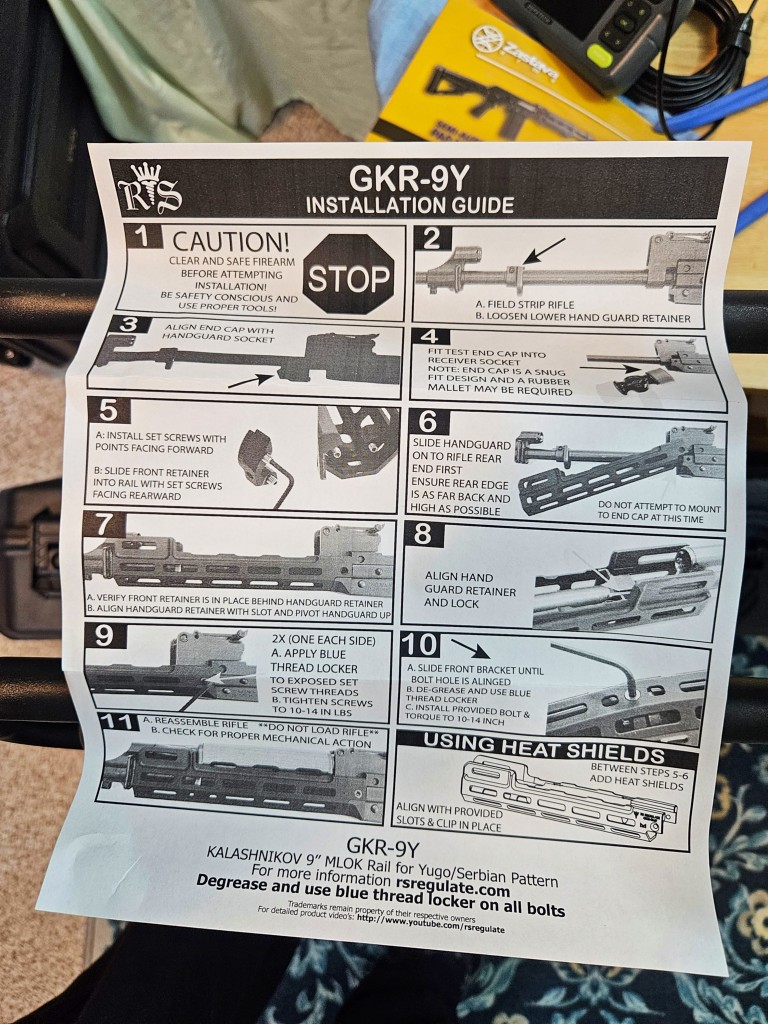
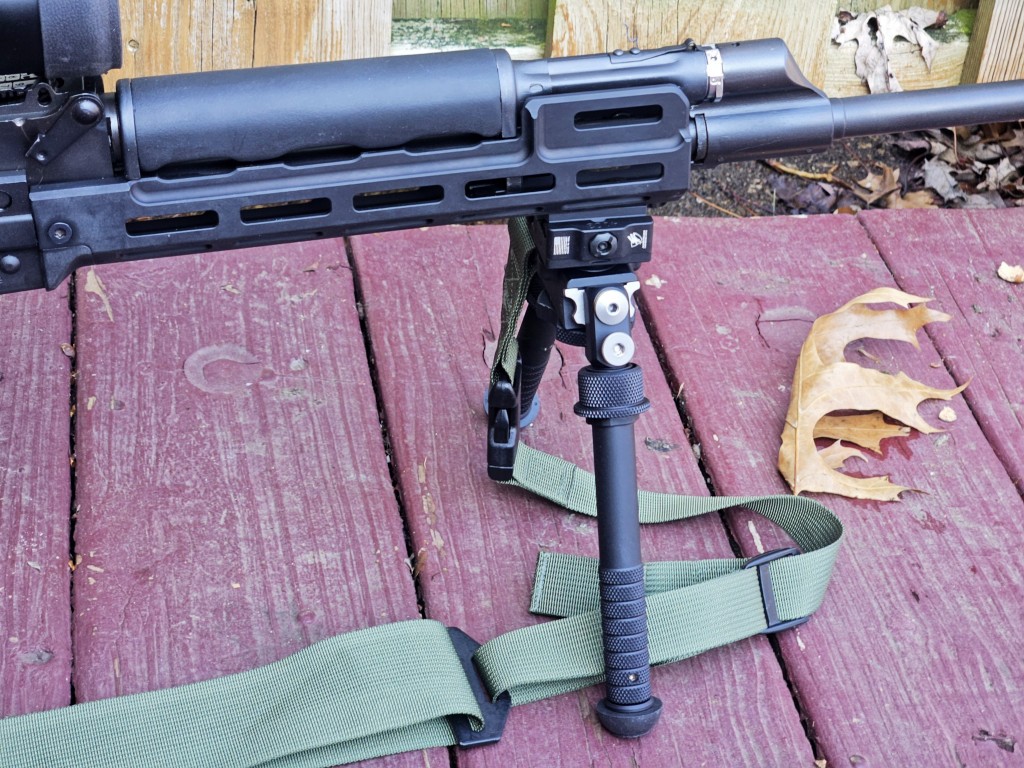
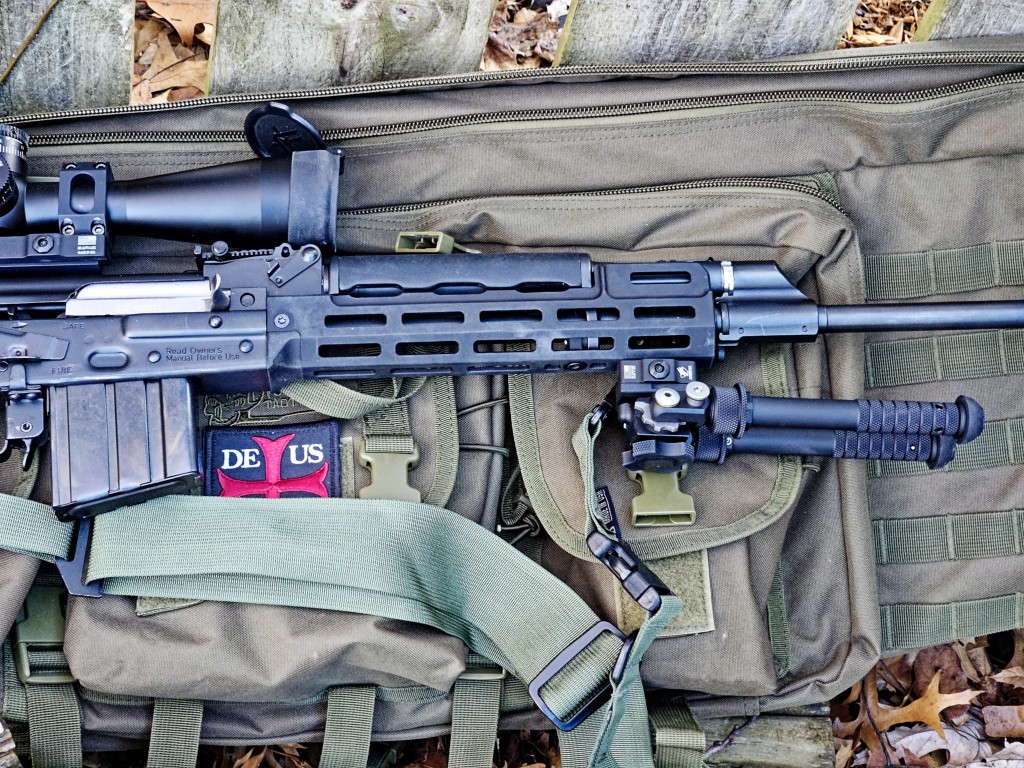
Consequently, owners cannot simply purchase surplus Russian or Romanian furniture and expect a direct fit.8 The aftermarket support for the ZPAPM92 was historically limited, but it has expanded significantly in recent years.8 Consumers must actively seek out parts explicitly labeled for “Yugo M92” or “ZPAP92” configurations.8 Companies such as Midwest Industries, SLR Rifleworks, Manticore Arms, and Texas Weapon Systems now produce dedicated aluminum quad rails, M-LOK handguards, and specialized optic mounts precisely machined to accommodate the proprietary Zastava dimensions.12
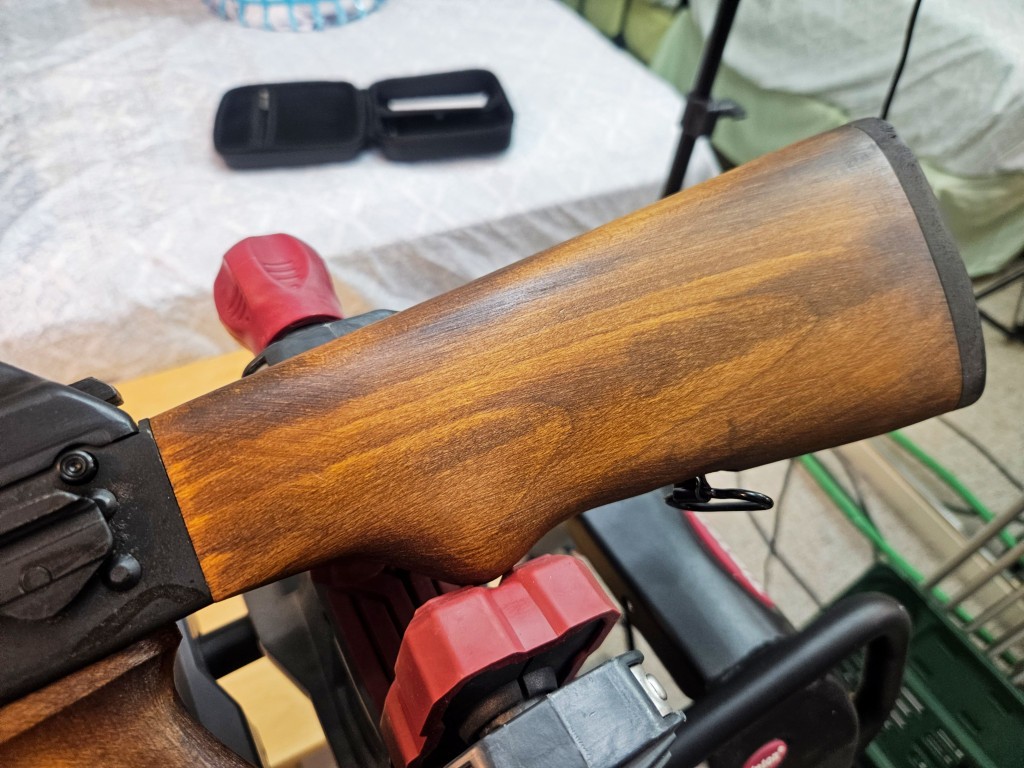
4.2 Ergonomics and Handling Limitations
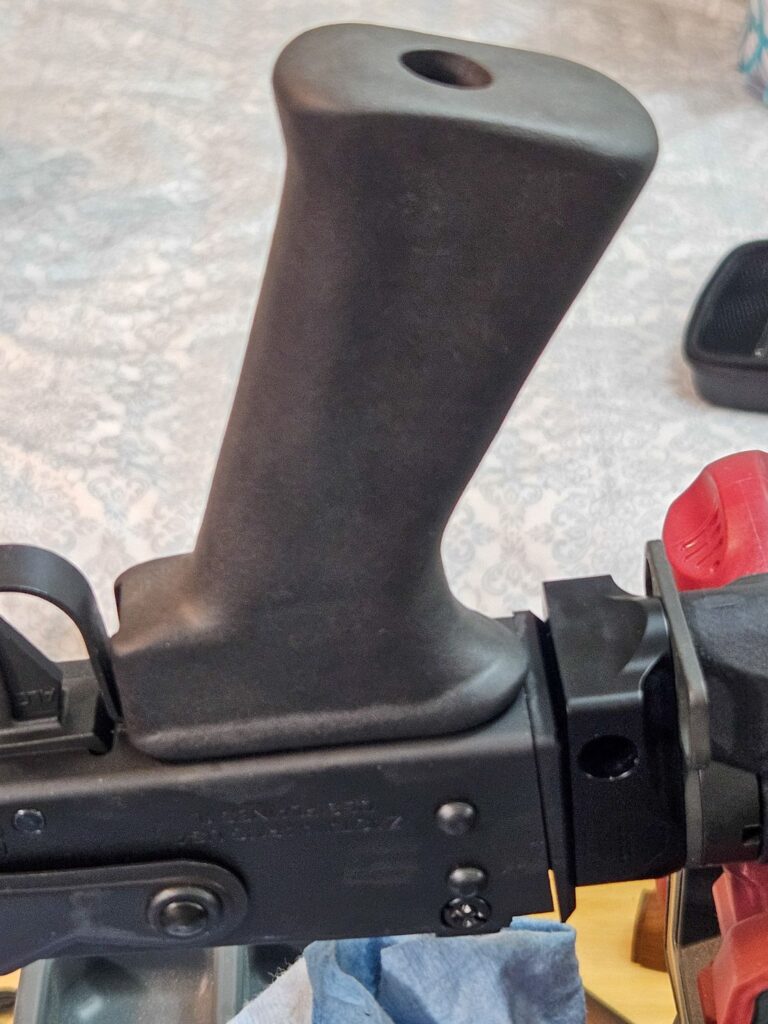
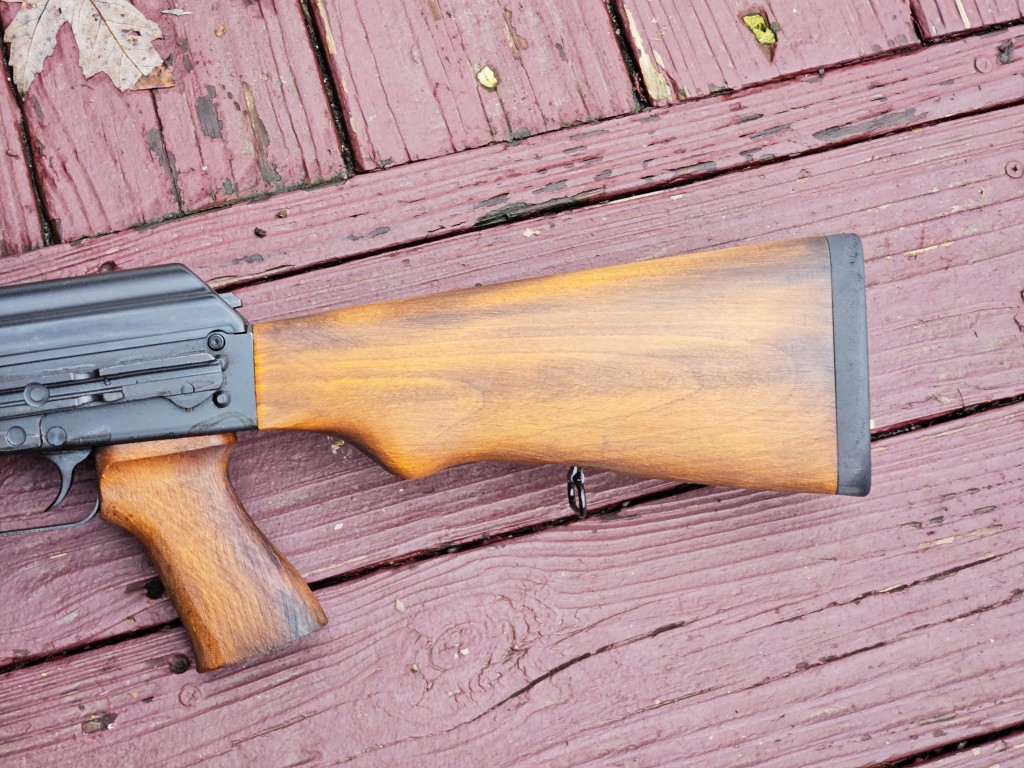
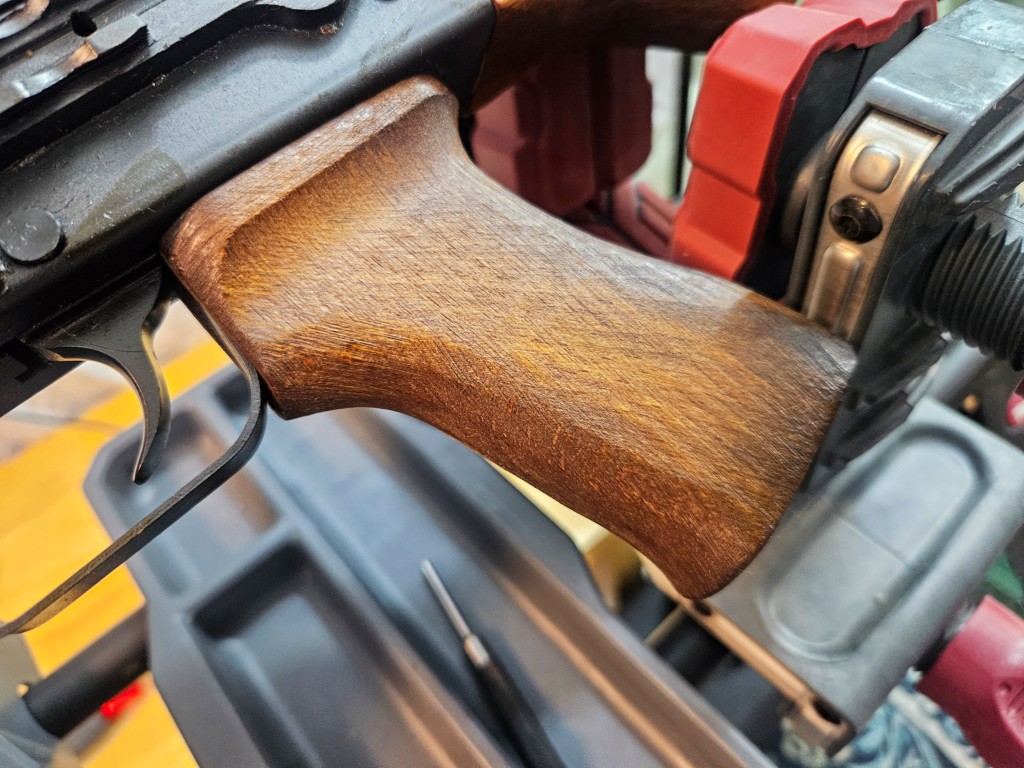
The ergonomic profile of the ZPAPM92 requires significant physical adaptation. The factory configuration provides a hard polymer pistol grip and a smooth wooden forend.14 Without the inclusion of a stabilizing brace or an underfolding stock, users must rely entirely on tension between their hands to stabilize the 6.6 pound mass during the firing sequence.2 The balance point of the firearm rests heavily forward of the magazine well due to the dense 1.5 millimeter receiver and the bulged trunnion.2
During operation, the primary ergonomic complaint involves the safety selector switch. The standard AK safety lever requires the user to break their firing grip completely to sweep the heavy steel lever downward into the firing position.2 Zastava has attempted to modernize this interface by cutting a manual bolt hold open notch into the safety selector.2 This allows the user to pull the bolt carrier fully to the rear and engage the safety upward, physically locking the bolt open for range safety compliance or easier visual chamber inspections.2
4.3 Required Interventions and DIY Modifications
To achieve a baseline standard of modern usability, owners frequently execute three specific aftermarket interventions. The following table details these required modifications, the specific problems they solve, and the complexity of the consumer installation process.
| Modification Category | Addressed Issue | Specific Aftermarket Solution | Installation Complexity |
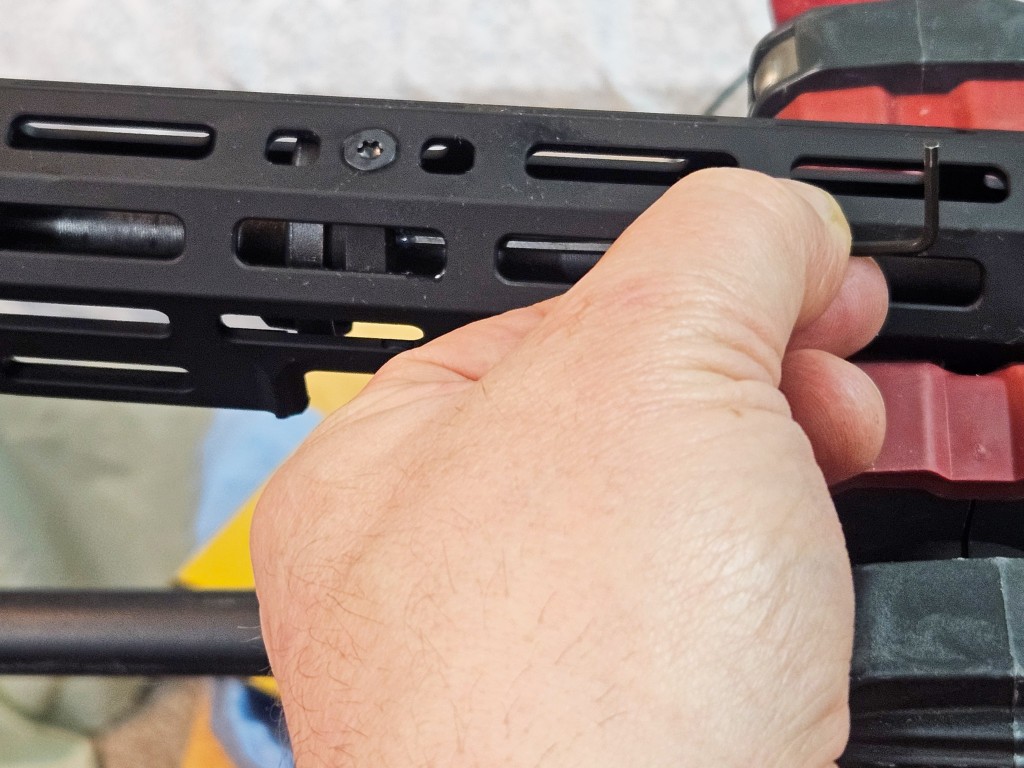
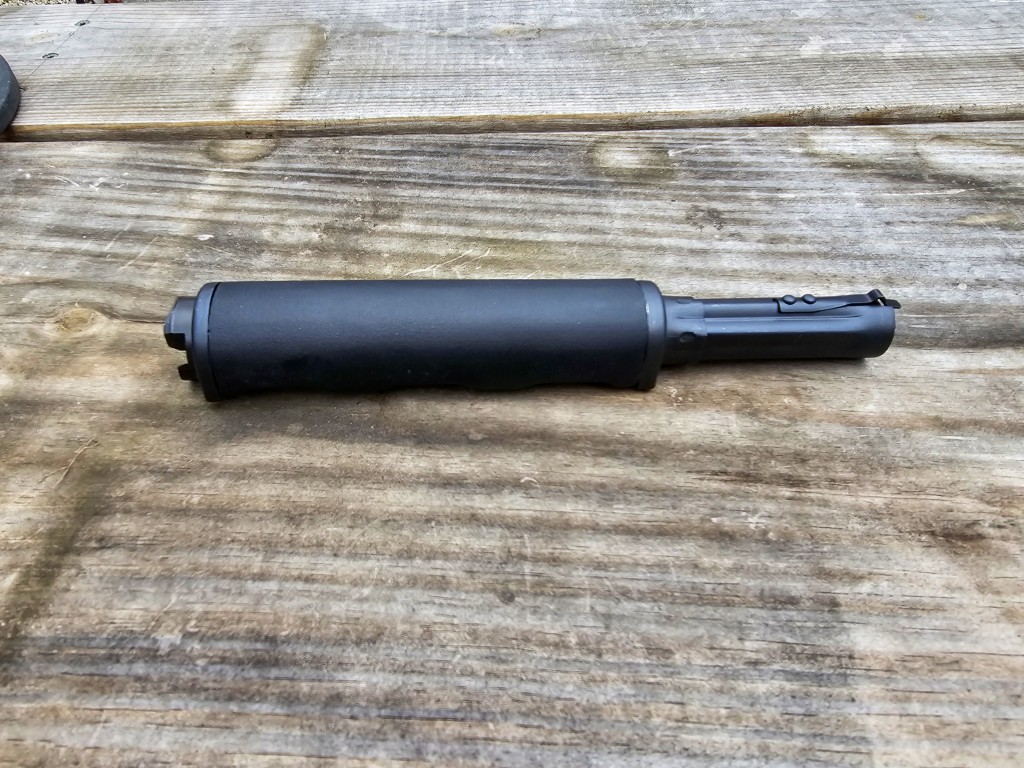
| Optic Mounting Stability | The factory hinged dust cover is inherently unstable. It shifts laterally during recoil and when opened for maintenance, causing attached red dot sights to completely lose their mechanical zero.22 | Installation of an UltiMak gas tube rail (mounts the optic forward directly to the barrel) or a Texas Weapon Systems (TWS) Dog Leg rail (replaces the factory dust cover with a highly secure locking rail).12 | Moderate. Requires removal of the factory gas tube or driving out the factory hinge pin to install the TWS rail system.23 |
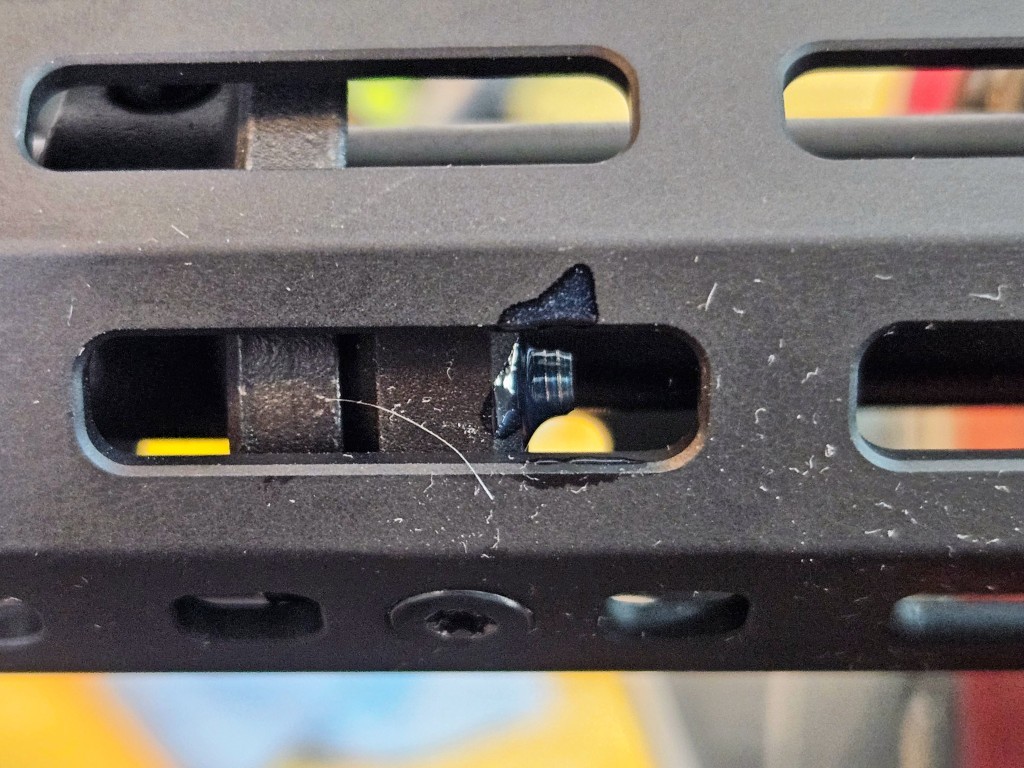
| Gas System Regulation | Severe overgassing when operating with a sound suppressor, leading to violent cyclic rates, failures to feed, and deformed ammunition casings.10 | Installation of a KNS Precision adjustable gas piston. This device replaces the solid factory piston and allows the user to manually bleed off excess backpressure by adjusting an internal collar.10 | High. The consumer must drill out the factory steel rivet securing the original piston, unscrew the piston, thread the new KNS unit into the bolt carrier, and drive a new roll pin through the assembly.10 |
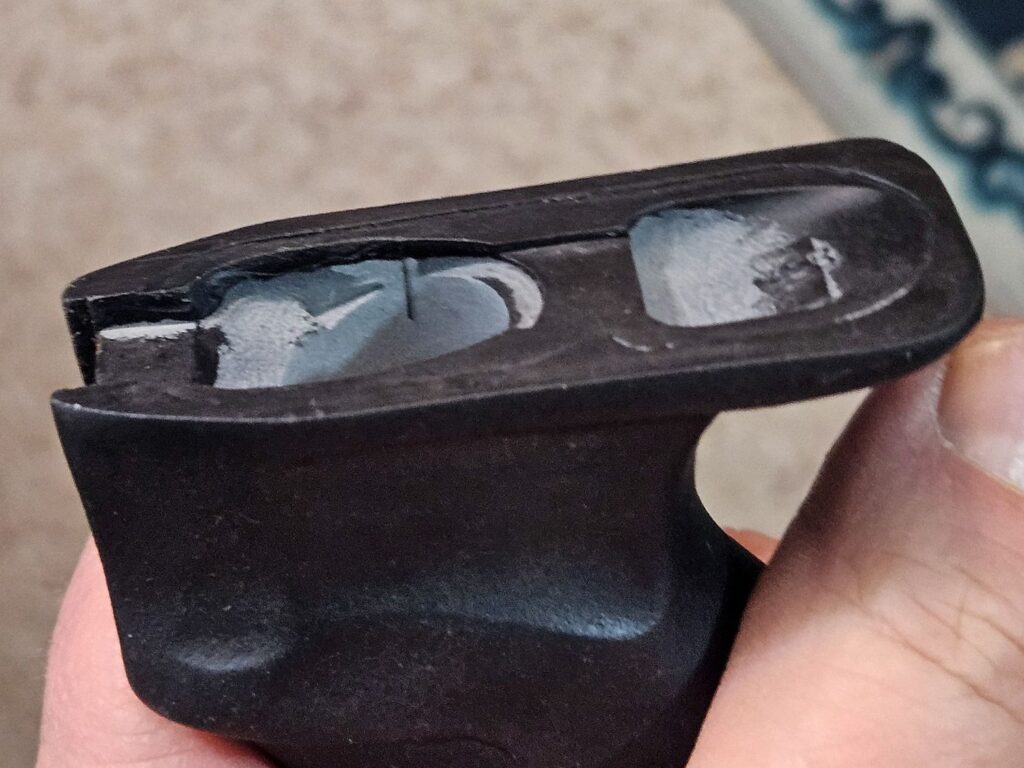
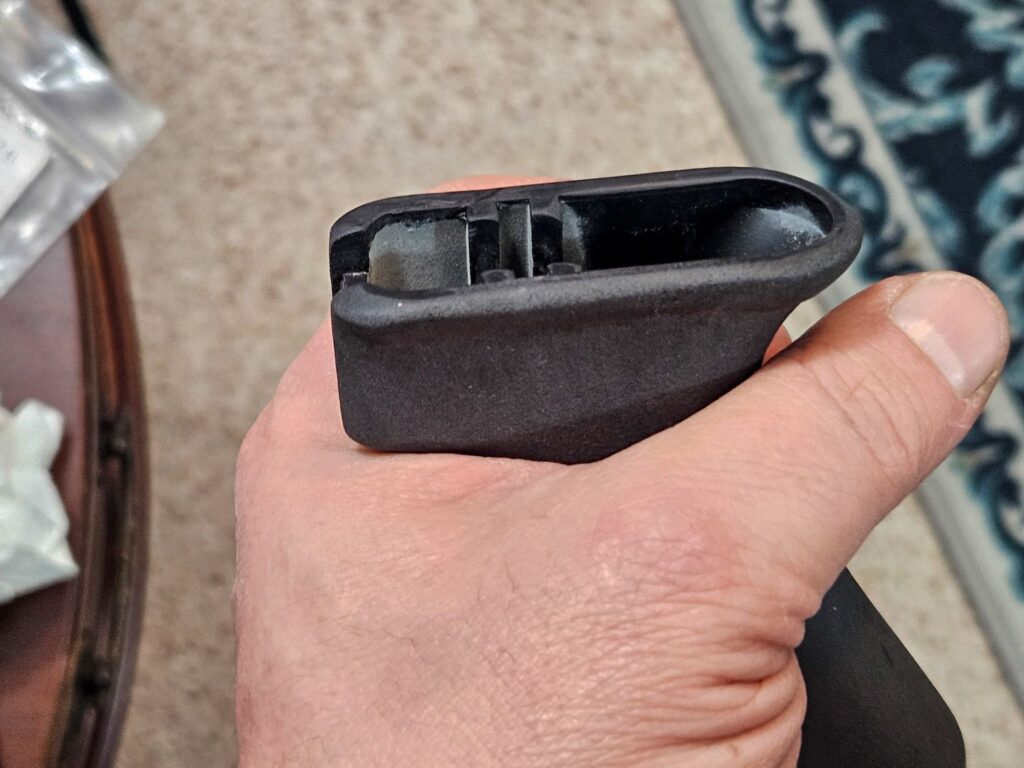
| Magazine Optimization | High frequency of nose dive malfunctions and feeding failures when utilizing Magpul PMAGs and certain commercial polymer variants.11 | Strict curation of the magazine inventory. Consumers must purchase and exclusively utilize steel surplus magazines, Bulgarian steel reinforced polymer magazines, or factory Zastava metal magazines.9 | Zero. Requires no mechanical skill, only financial investment in appropriate feeding devices.11 |
The necessity of the optic mounting intervention cannot be overstated for users demanding precision. The factory dust cover hinges on a simple pin near the rear sight block.22 While some ZPAPM92 models arrive from the factory with a segment of picatinny rail welded directly to this cover, owners universally report that the hinge mechanism lacks the tight mechanical tolerances required to hold an optic perfectly still.22 A user on Reddit accurately diagnoses the issue, stating that while the cover feels tight, the vibration of the 7.62x39mm cartridge will inevitably rattle the zero loose.22 DIY part replacements like the TWS Dog Leg rail completely resolve this by anchoring the rail securely to the rear trunnion release button, ensuring a rock solid return to zero after field stripping.23
5.0 Warranty, Safety Recalls, and Defect Trends
The execution of warranty services and the management of manufacturing defects have evolved drastically since Zastava took direct control of their United States imports. The establishment of Zastava Arms USA in 2019 represents a clear demarcation line in the quality of customer support.25
5.1 Real World Warranty Execution
Prior to 2019, Zastava firearms were imported by third party entities, most notably Century Arms.5 Consumer feedback from this era paints a bleak picture of customer service, characterized by denied warranty claims, extremely long turnaround times, and a general lack of accountability for manufacturing defects.6
The current operational reality under Zastava Arms USA is remarkably positive. Zastava Arms USA provides a limited lifetime warranty for the ZPAPM92, applicable strictly to the original purchaser of the firearm.27 The customer service hub operates locally out of Des Plaines, Illinois, allowing for rapid communication and localized repair work.4 Social media aggregations tracking warranty interactions reveal a highly responsive department. Users report that initial email inquiries regarding mechanical issues are typically answered within 24 to 48 hours.28
When a defect requires factory intervention, Zastava Arms USA routinely issues prepaid shipping labels directly to the consumer, absorbing the logistical costs of the return.28 The typical turnaround time for factory repairs ranges from one to three weeks, a timeline that is highly competitive within the firearms industry.28 In instances where a firearm cannot be easily repaired, such as severe trunnion misalignment, the company exhibits a willingness to entirely replace the defective weapon with a brand new production model and ship it directly to the user’s federal firearms licensee.28
5.2 Documented Defect Trends and Safety Recalls
There are currently no active, federally mandated safety recalls or urgent safety notices issued for the ZPAPM92 platform. The core operating system does not exhibit any widespread safety hazards resulting in catastrophic failures or operator injury.
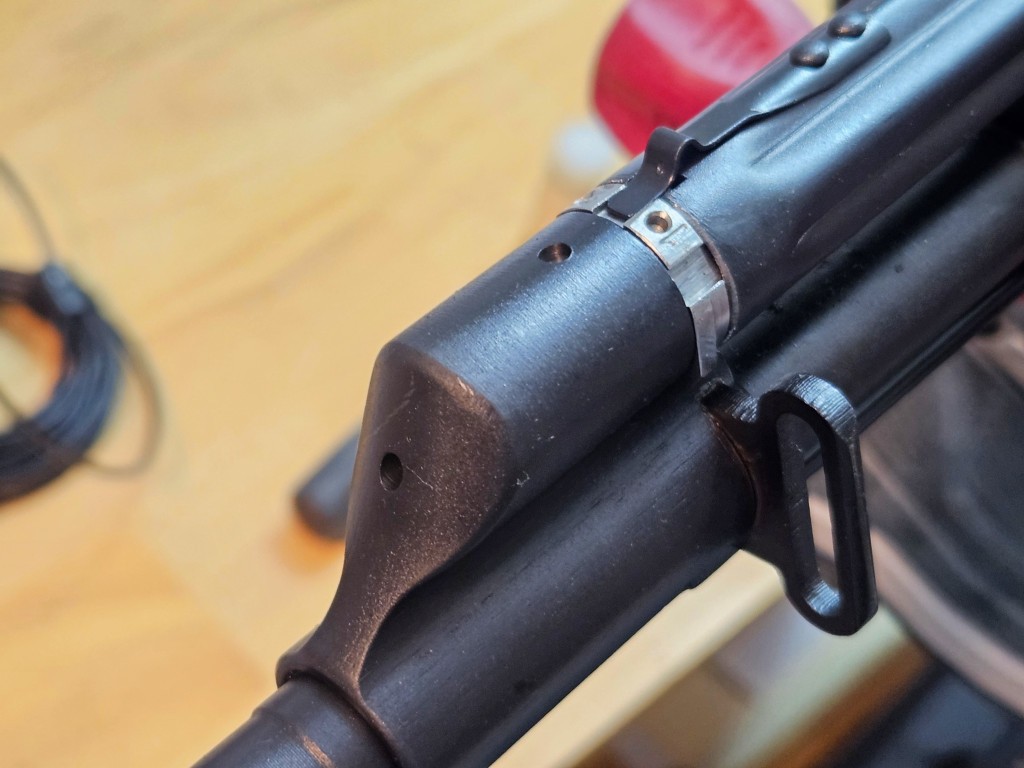
However, forensic analysis of forum data reveals a widely documented and highly visible quality control defect trend regarding component alignment. Consumers frequently report receiving brand new ZPAPM92 pistols featuring severely canted front sight blocks, crooked gas blocks, and misaligned picatinny rails welded to the hinged dust cover.29 In the most extreme documented cases, users have shared photographic evidence of front sight blocks rotated up to 20 degrees off the true top dead center axis.29
This canting phenomenon is a well known byproduct of traditional Kalashnikov manufacturing processes.29 The barrel components are pressed onto the barrel using massive hydraulic force and secured with steel pins.29 If the alignment jig is slightly off axis during the pressing stage, the component becomes permanently pinned in a crooked orientation.29 While a canted front sight is visually jarring, it rarely compromises the mechanical function of the firearm. Users are often able to successfully zero the weapon by pushing the adjustable windage drum to its extreme lateral limits.29
Zastava Arms USA acknowledges this defect trend and actively honors warranty claims for severe misalignment.29 The company’s response involves either receiving the firearm in Illinois to press the components straight using domestic tooling, or entirely replacing the firearm if the alignment cannot be rectified.28 Aside from these geometric alignment issues, metallurgical defects such as soft receivers or brittle trunnions are statistically non existent in the current ZPAP production batches, confirming the efficacy of the 1.5 millimeter stamping and bulged trunnion upgrades.18
6.0 Voice of the Customer (VoC)
The following syntheses represent median consumer sentiment extracted directly from aggregate ownership data. These statements reflect the authentic phrasing, specific concerns, and recurring mechanical themes articulated by real owners across various digital platforms, avoiding extreme outliers or isolated anecdotal anomalies.
- Regarding Magazine Compatibility and Feeding Malfunctions: A prevailing sentiment on Reddit’s dedicated r/zastavaarms101 forum highlights the platform’s strict preference for specific magazine geometries. One representative owner details, “If you are using a PMAG, that is going to happen a lot. I have two brand new and they both jam the same with that pistol. Ditch the PMAG. Try using a surplus steel mag. My M92 would cycle French fries if I loaded a Bulgarian poly mag with them.” 11
- Regarding Suppressor Overgassing and Required Interventions: Discussions on NFA focused forums frequently center on the violent internal ballistics of suppressed ownership. A typical user outlines the exact sequence of failures, noting, “Between the stock configuration and the suppressor backpressure, the bolt cycles so violently that it causes failures to feed on the return. I know I likely need a KNS piston, but I am worried about reliability when unsuppressed. The unsuppressed magazines ran flawlessly, but suppressed, I had constant issues.” 10
- Regarding Optic Mounting and Zero Retention: On dedicated AK enthusiast forums, a common grievance involves the mechanical instability of the factory hinged dust cover. An owner thoroughly explains the limitation, stating, “The hinged dust cover is alright for mounting, but if you want perfect accuracy, that may not be the way to go. Currently, my M92 is failing to hold zero with a very lightweight red dot. Your best option is to replace the entire top cover with a railed top cover like what TWS offers.” 22
- Regarding Warranty Execution and Customer Service: In direct contrast to historical complaints about previous importers, modern owners consistently validate the responsiveness of Zastava Arms USA. A representative timeline highlights, “Upon purchasing the firearm, I realized it was plagued with constant jamming. Zastava emailed me immediately with a shipping label and had the firearm for four days before emailing me that they would be replacing it. I received the replacement three days later and the firearm feels amazing.” 28
- Regarding Manufacturing Tolerances and Visual Defects: Discussions concerning initial quality control frequently focus on component alignment straight out of the factory box. One user’s experience captures the median frustration, detailing, “Had a brand new M92 come to me like this. It is a little hard to tell but the rear sight and rail are off about 20 degrees to the right. Just call Zastava, warranty will take care of it.” 29
7.0 Quantitative Ratings
The following ratings quantify the capabilities of the ZPAPM92 on a scale from 1 (poor) to 10 (excellent), derived strictly from the aggregated technical data, malfunction matrices, and overall user sentiment outlined in the preceding sections.
| Category | Score | Objective Justification |
| Reliability | 8/10 | The core long stroke gas piston system is relentlessly dependable under extreme fouling, but the score is objectively reduced by the strict requirement to avoid common polymer magazines and the severe overgassing malfunctions induced by sound suppressors.9 |
| Accuracy | 7/10 | The cold hammer forged and chrome lined barrel provides excellent mechanical precision for a ten inch platform, but practical accuracy is hampered by a short sight radius, concussive recoil, and a hinged dust cover that struggles to retain optical zero.2 |
| Durability | 9/10 | The utilization of a 1.5 millimeter stamped steel receiver combined with a bulged front trunnion provides exceptional, military grade structural longevity that entirely eliminates receiver flex and rivet deformation over massive round counts.2 |
| Maintenance | 8/10 | The firearm easily tolerates heavy carbon accumulation and environmental debris without binding, though owners must apply strict, water based cleaning protocols if utilizing widely available corrosive surplus ammunition.9 |
| Warranty and Support | 9/10 | The domestic customer service hub in Illinois provides rapid, highly responsive lifetime warranty support, routinely covering all shipping logistics and executing full firearm replacements for defective units within an impressive three week turnaround window.4 |
| Ergonomics and Customization | 7/10 | The platform is unusually front heavy and fatiguing to hold unsupported, while the proprietary Yugoslavian component dimensions force owners to navigate a restricted and highly specialized aftermarket to source compatible handguards and optic mounts.8 |
| Overall Score | 8/10 | The ZPAPM92 is an incredibly robust, overbuilt firearm that excels in adverse environments, provided the consumer is willing to curate their magazine selection, respect the corrosive ammunition cleaning protocols, and invest in aftermarket gas regulation if suppressors are utilized. |
8.0 Pricing and Availability
The pricing landscape for the ZPAPM92 fluctuates based on market demand and the specific trim level configured at the factory. Standard models featuring simple wooden handguards and no rear picatinny rail represent the lower end of the pricing spectrum, while tactical variants featuring aluminum quad rails, top optics rails, and stabilizing braces command premium prices. The following figures represent the current active pricing data aggregated from primary retail distributors.
- MSRP: $1429.99
- Minimum Observed Price: $1106.54
- Average Observed Price: $1285.00
- Maximum Observed Price: $1570.99
Manufacturer Website:
https://zastavaarmsusa.com/products/zpap92/
Vendor Links:
- https://www.midwayusa.com/product/1024764563
- https://www.sportsmans.com/shooting-gear-gun-supplies/handguns/zastava-arms-zpap-m92-762x39mm-10in-blued-modern-sporting-pistol-301-rounds/p/1791326
- Primary Arms
- https://palmettostatearmory.com/zastava-zpap92-7-62×39-ak-47-pistol-10-5-30rd-black-wood-w-pic-rail-zp92762pam.html
- Classic Firearms
9.0 Methodology
The forensic evaluation process utilized to generate this consumer research report prioritizes the deep aggregation of long term owner experiences over localized, highly curated promotional content. Data extraction focused exclusively on dedicated enthusiast spaces, including high volume subreddits (such as r/ak47, r/firearms, and r/zastavaarms101), specialized firearm discussion forums, and detailed transcripts from long term field tests.
To ensure objectivity and eliminate statistical noise, a strict filtering protocol was applied to the collected sentiment. Isolated anecdotal complaints regarding obscure part breakages, as well as hyper enthusiastic brand defense, were systematically removed from the primary dataset. Claims regarding mechanical performance were only elevated to the status of a verifiable trend if multiple, independent users documented the exact same behavior under similar conditions. This methodology successfully isolated the specific feeding geometry failures of Magpul PMAGs, the zero retention failure of the factory hinged dust cover, and the violent overgassing induced by sound suppressors, separating them from user induced errors.
Claims concerning metallurgy, such as bolt carrier peening and the necessity of the 1.5 millimeter receiver, were continuously cross referenced against historical engineering data regarding the interaction of dissimilar metal hardnesses and the original design parameters of the RPK platform. Customer service metrics were evaluated by tracking timeline data explicitly provided by users who actively engaged the Zastava Arms USA warranty return process. Pricing data was aggregated by querying the official manufacturer portal alongside primary retail distributors, calculating the average based strictly on currently active listings to provide a realistic, uninflated financial baseline for prospective buyers. This objective, multi layered verification process ensures the final report reflects authentic, repeatable mechanical realities rather than isolated manufacturing anomalies or marketing narratives.
Note: Vendor Sources listed are not an endorsement of any given vendor. It is our software reporting a product page given the direction to list products that are between the minimum and average sales price when last scanned.
Please share the link on Facebook, Forums, with colleagues, etc. Your support is much appreciated and if you have any feedback, please email us in**@*********ps.com. If you’d like to request a report or order a reprint, please click here for the corresponding page to open in new tab.
Sources Used
- ZPAP92 | Zastava Arms USA, accessed May 22, 2026, https://zastavaarmsusa.com/products/zpap92/
- ZPAP92 Review: Accuracy, Reliability, and Suppressed Performance – Zastava Arms, accessed May 22, 2026, https://zastavaarmsusa.com/zpap92-review-accuracy-reliability-and-suppressed-performance/
- What’s up with the Zpap92 : r/ak47 – Reddit, accessed May 22, 2026, https://www.reddit.com/r/ak47/comments/162hiok/whats_up_with_the_zpap92/
- Zastava in Des Plaines: How the U.S. Facility Upgrades AK Production, accessed May 22, 2026, https://zastavaarmsusa.com/zastava-in-des-plaines-how-the-u-s-facility-upgrades-ak-production/
- When was the Zastava Arms M92 PAP in 7.62×39 introduced to the civilian market in the U.S.? Mostly interested in info on the PAP but what about other AK pistol/AK rifle variants? : r/ak47 – Reddit, accessed May 22, 2026, https://www.reddit.com/r/ak47/comments/5ynoi5/when_was_the_zastava_arms_m92_pap_in_762x39/
- Zpap M92 Trunnion Failure : r/ak47 – Reddit, accessed May 22, 2026, https://www.reddit.com/r/ak47/comments/sxzvyz/zpap_m92_trunnion_failure/
- ZPAP92 ZP92762CTR Rifle – Zastava Arms USA, accessed May 22, 2026, https://zastavaarmsusa.com/product/zpap92-zp92762ctr-rifle/
- Top 5 Zastava Rifle Upgrades: From Furniture Sets to Muzzle Brakes, accessed May 22, 2026, https://zastavaarmsusa.com/top-5-zastava-rifle-upgrades-from-furniture-sets-to-muzzle-brakes/
- My Zastava zpap jam : r/ak47 – Reddit, accessed May 22, 2026, https://www.reddit.com/r/ak47/comments/192chup/my_zastava_zpap_jam/
- Suppressed ZPAP M92 issues : r/NFA – Reddit, accessed May 22, 2026, https://www.reddit.com/r/NFA/comments/1dmcfrh/suppressed_zpap_m92_issues/
- M92 looks great but jams : r/zastavaarms101 – Reddit, accessed May 22, 2026, https://www.reddit.com/r/zastavaarms101/comments/12bvg4g/m92_looks_great_but_jams/
- New ZPAP92! Just gotta get the new handguard and Burris Fastfire optic and she’ll be complete! : r/ak47 – Reddit, accessed May 22, 2026, https://www.reddit.com/r/ak47/comments/sr98uw/new_zpap92_just_gotta_get_the_new_handguard_and/
- ZPAP92. A few questions : r/ak47 – Reddit, accessed May 22, 2026, https://www.reddit.com/r/ak47/comments/o8s8p9/zpap92_a_few_questions/
- ZPAP92 ZP92762M – Zastava Arms USA, accessed May 22, 2026, https://zastavaarmsusa.com/product/zpap92/
- Which Zastava Do I Need To Get Before It’s to Late! ( using this to justify it to the wife) M90 or Zpap85 : r/ak47 – Reddit, accessed May 22, 2026, https://www.reddit.com/r/ak47/comments/14ypfxk/which_zastava_do_i_need_to_get_before_its_to_late/
- Brand new ZPAP issues : r/zastavaarms101 – Reddit, accessed May 22, 2026, https://www.reddit.com/r/zastavaarms101/comments/14oa4nf/brand_new_zpap_issues/
- Nuked M70. This isn’t my rifle, saw on FB so I thought I’d share. More metallurgy issues. : r/ak47 – Reddit, accessed May 22, 2026, https://www.reddit.com/r/ak47/comments/tyde2x/nuked_m70_this_isnt_my_rifle_saw_on_fb_so_i/
- Have between 1 – 1.5k rounds through this psa 103. Any unusual wear? Any info/ things to look out for is greatly appreciated! : r/ak47 – Reddit, accessed May 22, 2026, https://www.reddit.com/r/ak47/comments/1jxmuul/have_between_1_15k_rounds_through_this_psa_103/
- M92 catastrophic failure, lugs broken. Rifle made in zastava factory …, accessed May 22, 2026, https://www.reddit.com/r/ak47/comments/1ajpyow/m92_catastrophic_failure_lugs_broken_rifle_made/
- I’M BACK!! Zastava Zpap92 Makeover & Upgrades #zastava #zpap #trijicon – YouTube, accessed May 22, 2026, https://www.youtube.com/watch?v=OV5_n-uZ25o
- M92 Glow-Up – JMac Customs LLC, accessed May 22, 2026, https://www.jmac-customs.com/blog/-m92-glowup-/
- (M92) TWS Dog Leg loss of zero : r/zastavaarms101 – Reddit, accessed May 22, 2026, https://www.reddit.com/r/zastavaarms101/comments/12k33i8/m92_tws_dog_leg_loss_of_zero/
- What’s everyone doing for a red dot rail on your M92s? The stuff I’ve seen looks cheap and likely wouldn’t hold a zero : r/zastavaarms101 – Reddit, accessed May 22, 2026, https://www.reddit.com/r/zastavaarms101/comments/1p97xun/whats_everyone_doing_for_a_red_dot_rail_on_your/
- how much can i trust a hinged top cover? : r/zastavaarms101 – Reddit, accessed May 22, 2026, https://www.reddit.com/r/zastavaarms101/comments/tij3sn/how_much_can_i_trust_a_hinged_top_cover/
- PAPs, Toks and Mausers for the masses: Zastava launches U.S-based operation, accessed May 22, 2026, https://zastavaarmsusa.com/paps-toks-and-mausers-for-the-masses-zastava-launches-u-s-based-operation/
- I bought an Arsenal 106 and it’s a PoS : r/ak47 – Reddit, accessed May 22, 2026, https://www.reddit.com/r/ak47/comments/8pdt8s/i_bought_an_arsenal_106_and_its_a_pos/
- zpap92 warranty question : r/zastavaarms101 – Reddit, accessed May 22, 2026, https://www.reddit.com/r/zastavaarms101/comments/1e1lef5/zpap92_warranty_question/
- My experience with Zastava USA : r/ak47 – Reddit, accessed May 22, 2026, https://www.reddit.com/r/ak47/comments/1ou113t/my_experience_with_zastava_usa/
- Zastava m92 issues (brand new) : r/ak47 – Reddit, accessed May 22, 2026, https://www.reddit.com/r/ak47/comments/17w8u9i/zastava_m92_issues_brand_new/
- Greetings from Zastava Arms USA. We are happy to finally be home amongst our family, please feel free to hit us up with questions/concerns and we will respond as much as possible. : r/zastavaarms101 – Reddit, accessed May 22, 2026, https://www.reddit.com/r/zastavaarms101/comments/nmgyp5/greetings_from_zastava_arms_usa_we_are_happy_to/