
My mother-in-law is getting older and so are my wife and I. Let me tell you, It was a lot easier pushing around a wheelchair 10+ years ago compared to today. With this in mind, my wife and been watching for a good deal on one of those little electric mobility scooters. Finally, one day she saw one posted on Facebook at a local thrift store so we want and took a look.
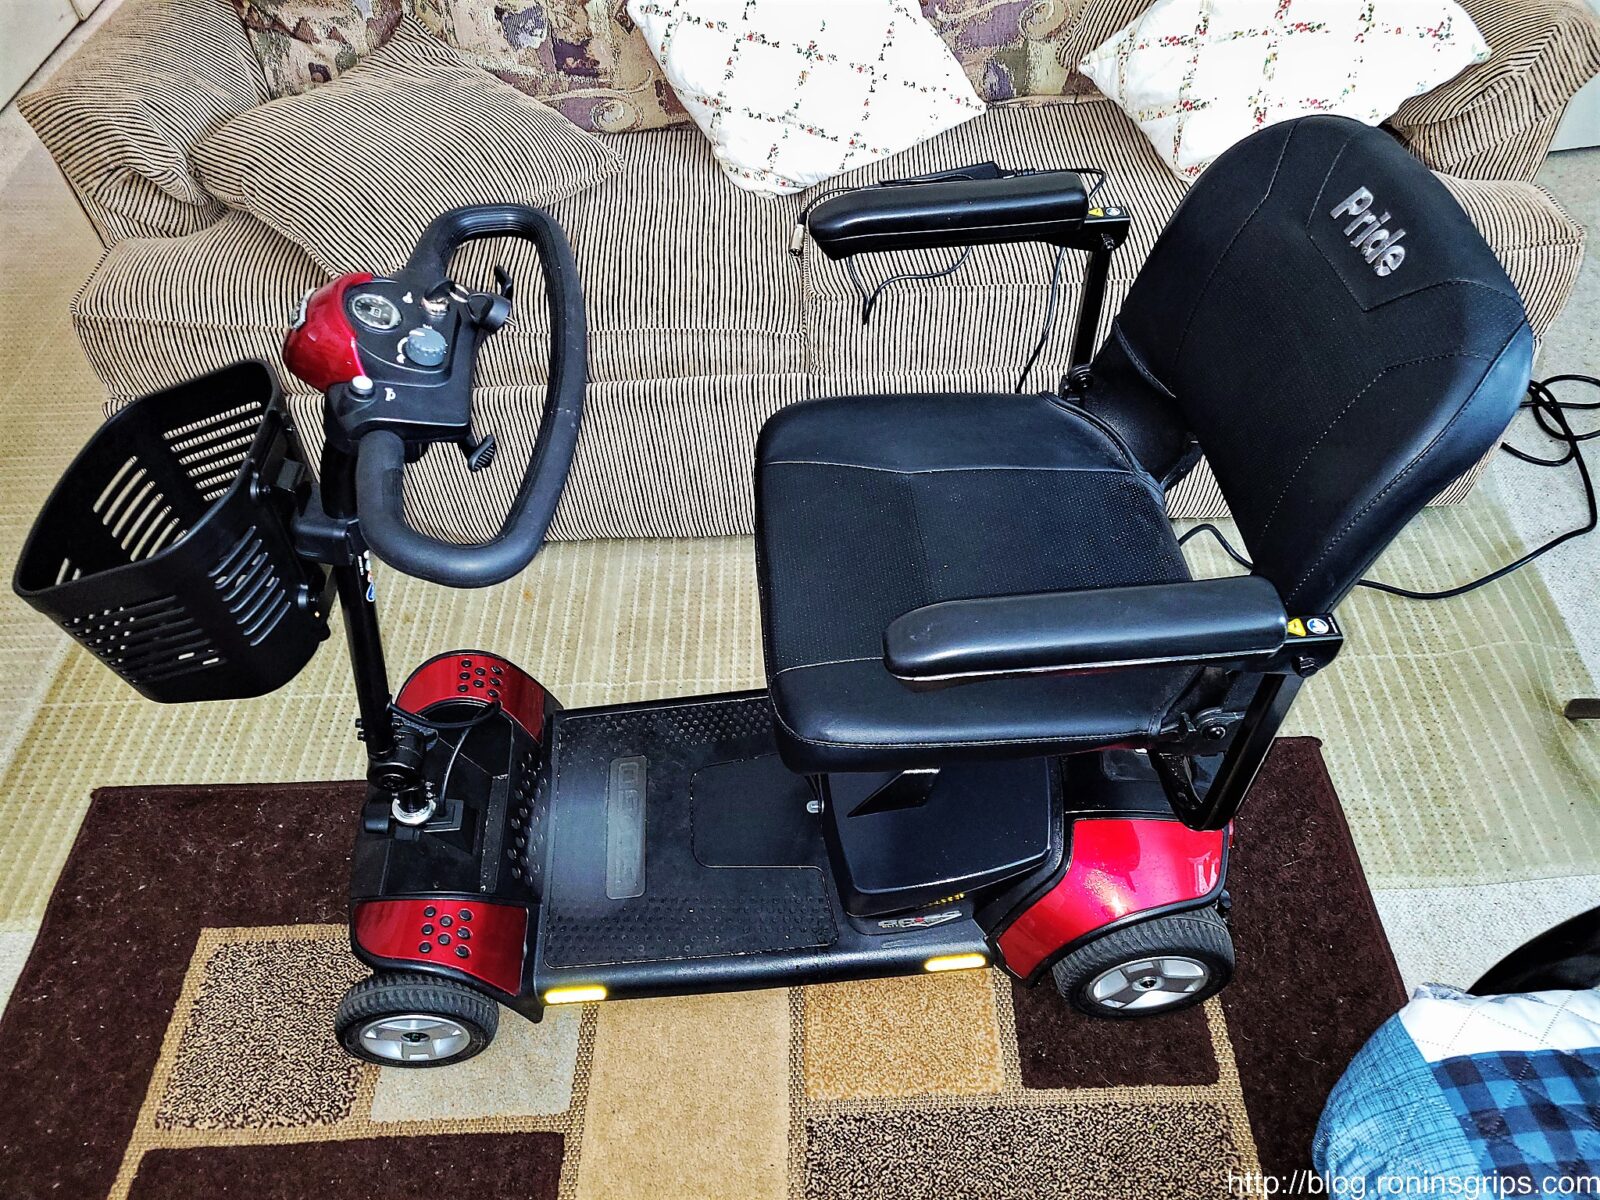
The owner of the store buys abandoned storage units and a Pride Mobility Elite Traveller scooter was in one of them. It looked to be in great shape but it wouldn’t run. He could turn the on/off switch and a light would come on the little dashboard but that was it. He said he tried charging it for an hour but nothing happened and thought it was the batteries — this is a great example of someone giving you their diagnoses and then that affects what you do.
At any rate, it came with the original Pride Mobility charger so I figured it was probably the batteries and did a quick search on them and replacements ranged in price from $51-89/pair. With this in mind, we settled on a price of $250 and brought the scooter home.
| Note: Pride Mobility puts all of their manuals online. I really appreciate it when firms do this. You can get the brochure, owner’s manual, specification sheet and more on their website – click here. Just FYI: They do not provide a repair manual or technical guide. |
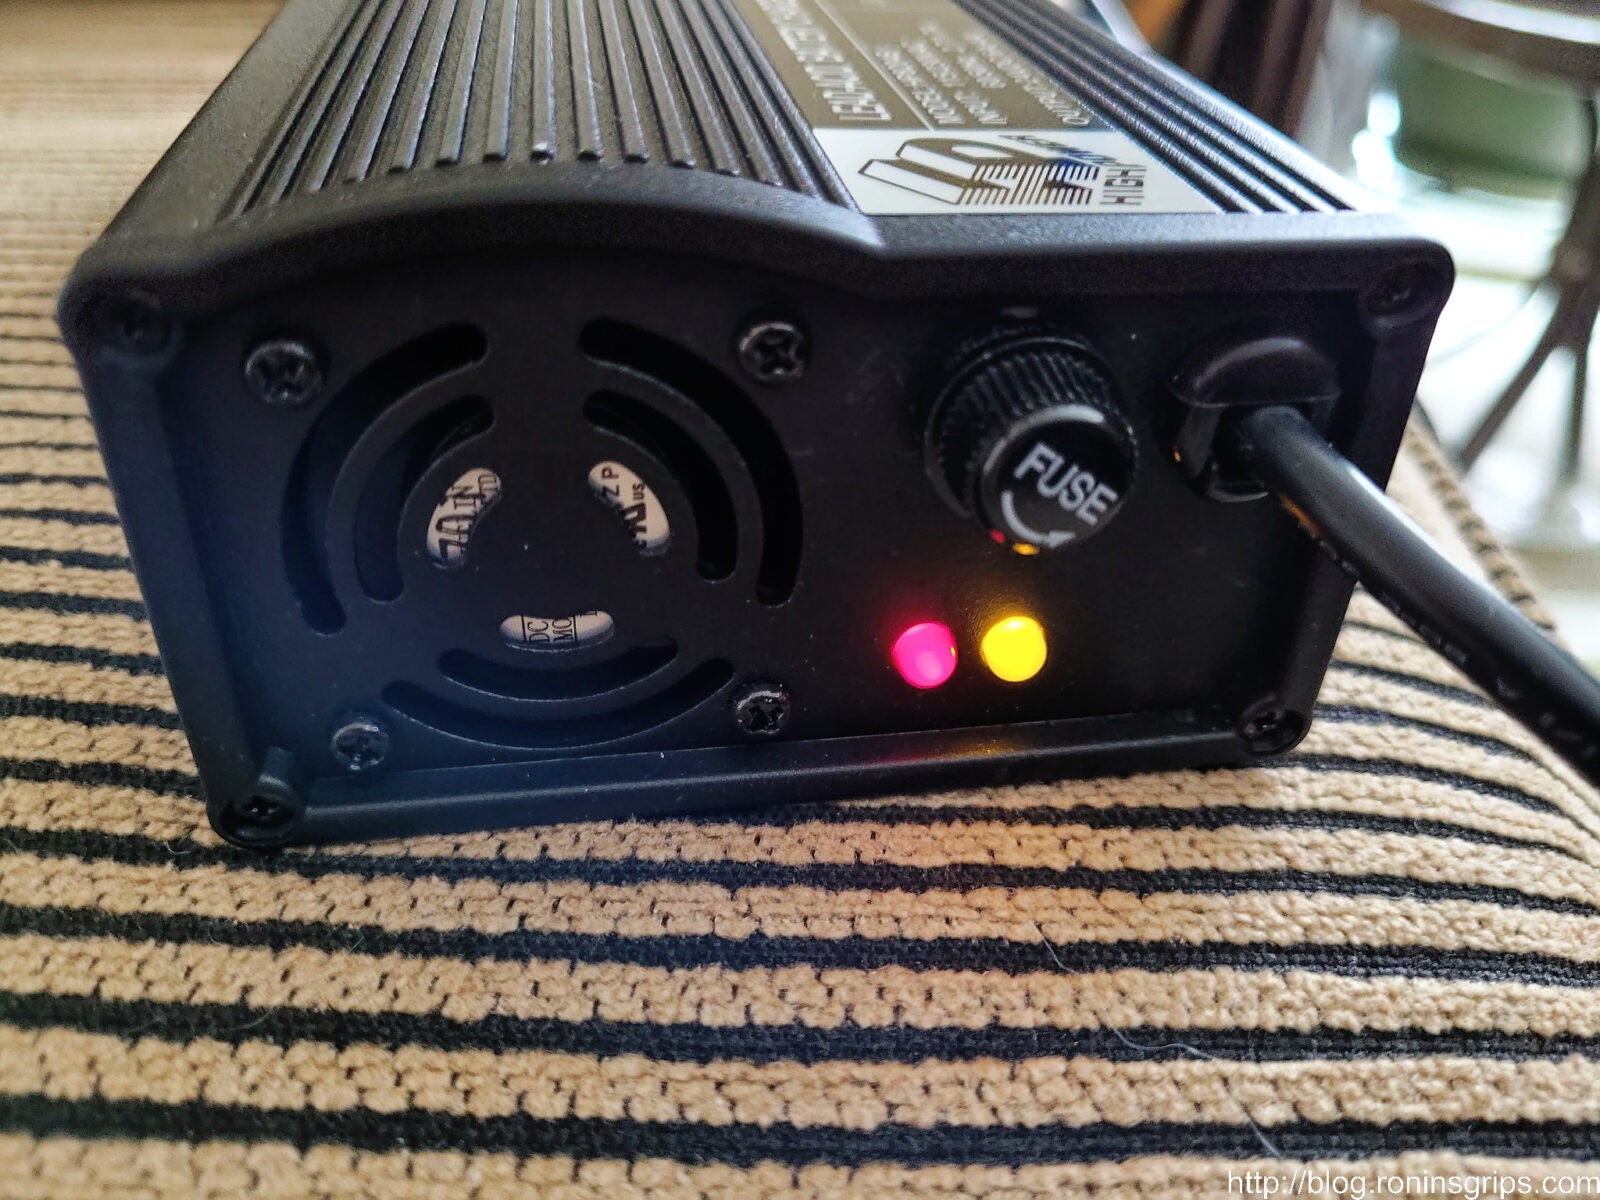
A few days went buy before I could work on it. The first thing I did was plug the charger into the wall, then the cord direct to the power pack, turned on the switch and the little red power light came on. The charger’s second indicator LED was supposed to turn yellow that it was charging. It did not – it stayed off. Also, the cooling fan never started. Hmmm…. interesting but I had run into problems before with smart chargers not starting if batteries were dead.
Now, this mistaken assumption cost me some time but I learned a lot in the process that I’ll share.
Removing And Opening The Battery Compartment
Based on what I saw, the engineering and build quality of the scooter was excellent. I’ve seen people driving them around but never had the need to look at one up close or take one apart. Everything is built heavy duty with reliability and resiliency in mind not to mention they put fuses all over the place to protect the electronics. With that overview comment done, my focus was on getting to the batteries because I thought that was the problem.
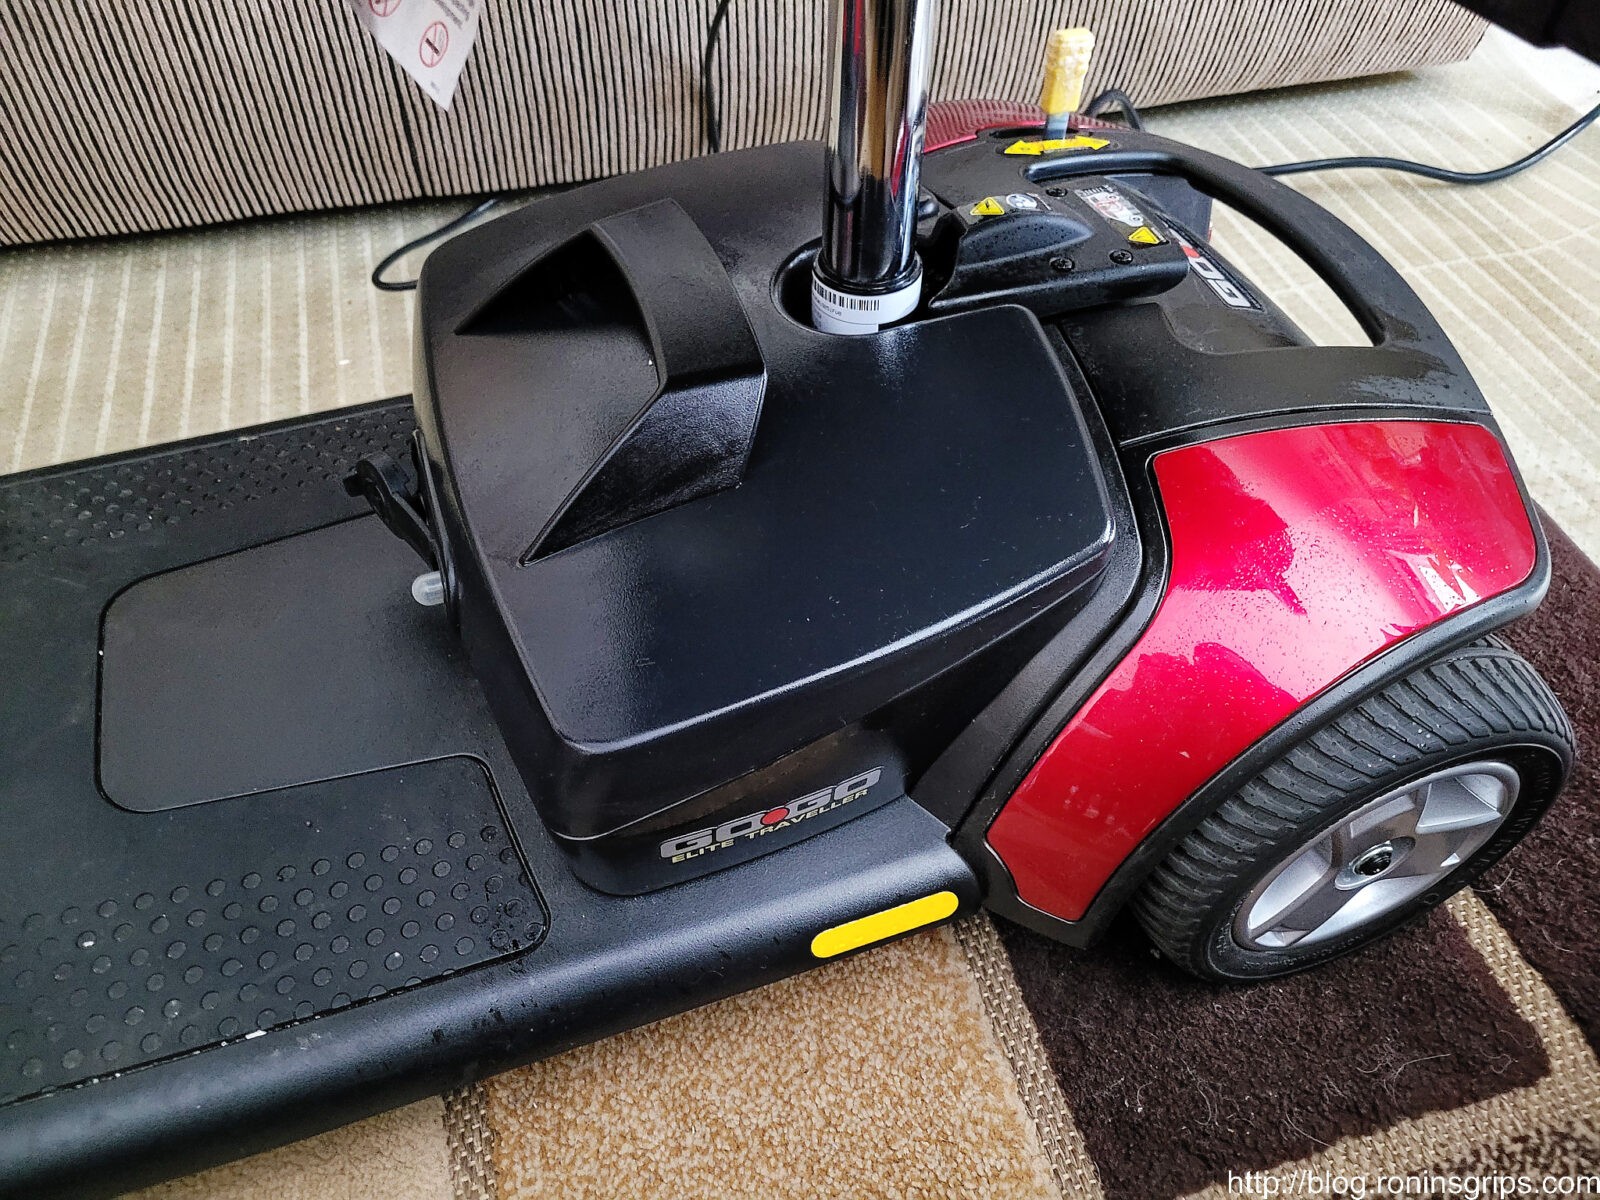
The battery pack is the black plastic “box” with a molded handle directly underneath the seat on the floorboard of the scooter and is held in place by a tab of 3M Dual-Lock fasteners on each side. Dual-Lock is a stronger than traditional velcro and it does a great job of holding the battery compartment in place both for the sake of safety as well as to prevent rattling.
To remove the battery box, lift straight up – there aren’t any bolts or clasps – just a combination of weight, the way the pieces fit together and the Dual-Loc. If you try to lift at an angle, you’ll be surprised how it will not want to budge – straight up is what you need to do.
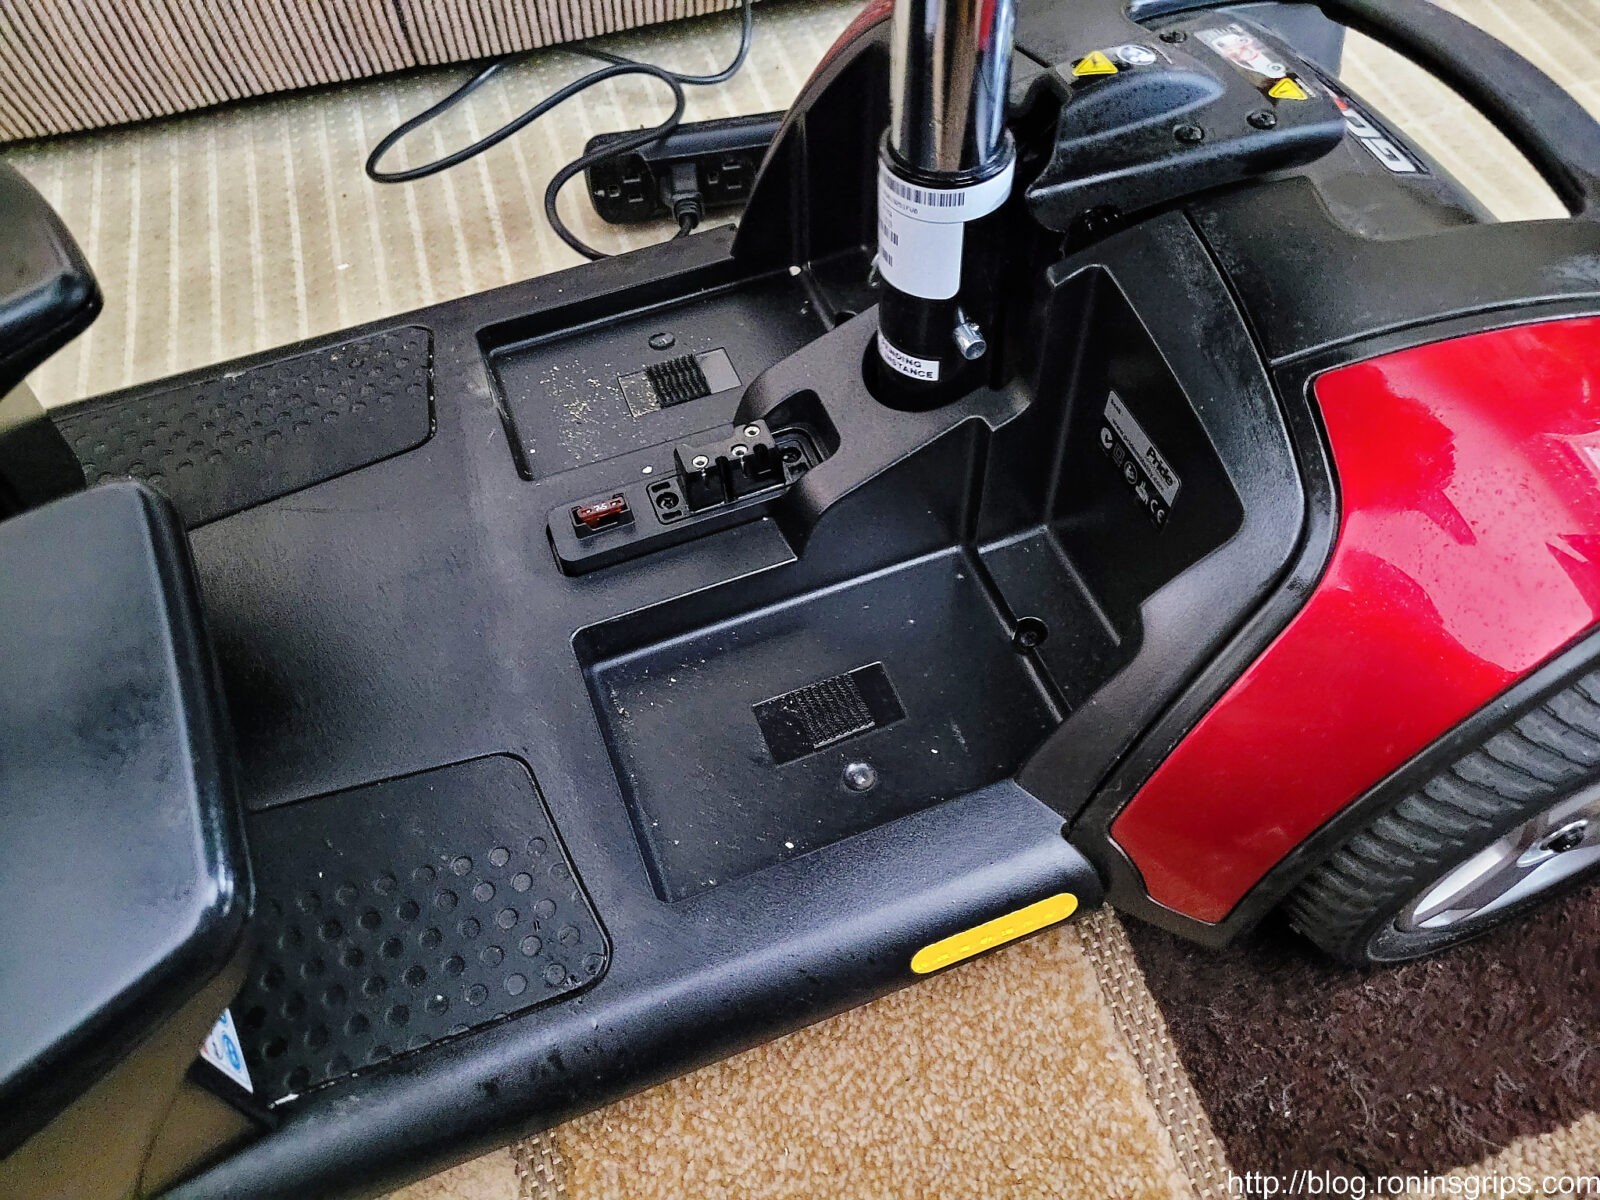
The battery compartment is very well made and to disassemble it, you need to remove six philips head machine screws. This is just an example of where I thought the design and execution was excellent – these are threaded machine screws that go into brass female inserts on the other side – they didn’t just go cheap using some self tapping screw. You flip the compartment upside down and remove the screws. The batteries are held securely in place by Dual-Lock also.
The 12 Volt Batteries Themselves
I’m going to step you through some details on the batteries but I did not change them yet. I’d recommend you read this whole post because your “problem” may or may not be the batteries.
Our scooter is powered by two 12 volt 14 amp hour batteries wired in series to provide 24 volts. In the compartment is a wiring diagram and everything is done very nicely to avoid confusion – red wires to positive tabs on the battery and black wires to the negative tabs on the battery.
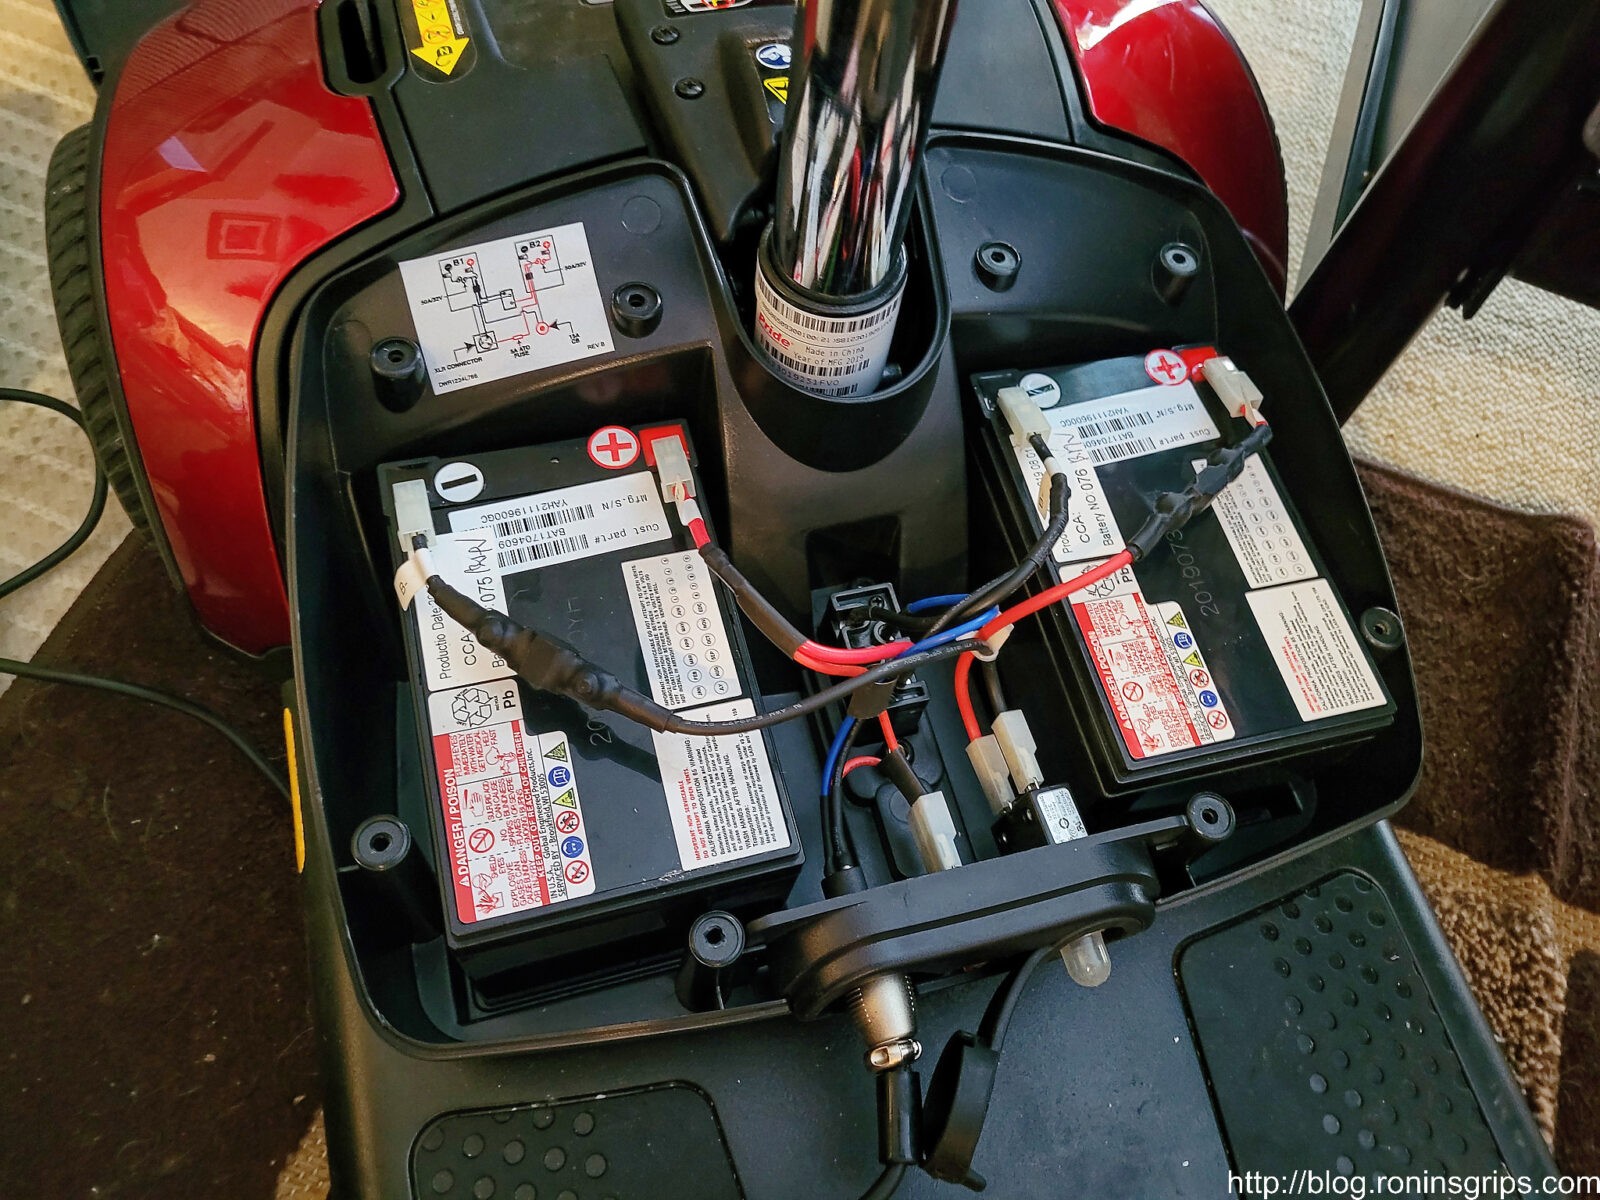
For those of you unfamiliar with direct current (DC) batteries, these two batteries are hooked up in series to produce 24 volts. This is done by connecting the negative terminal of one battery to the positive of the other and then the opposite as well. In the scooter, this is done at the wiring block in the middle. You don’t need to worry – just note the wires when you take it out (a photo helps) and do a battery at a time – black wire to negative and red wire to positive,
Note, there are at least two sizes of batteries used – their standard battery pack is rated for 6 miles and uses two 12 amp hour (Ah) batteries. There is a 9.7 mile bigger 18 amp hour (Ah) battery and it correspondingly uses a bigger cabinet so if you decide you are going to replace your batteries, confirm what is in your battery compartment first. You can change cabinets – or even buy entire battery packs ready to go. From what I have seen, the cheapest bet is to just buy the batteries and swap them out in your existing compartment. I also see batteries with other capacities like 15Ah and over 20Ah, I’d recommend you confirm that their physical sizes will fit whatever battery compartment you have.
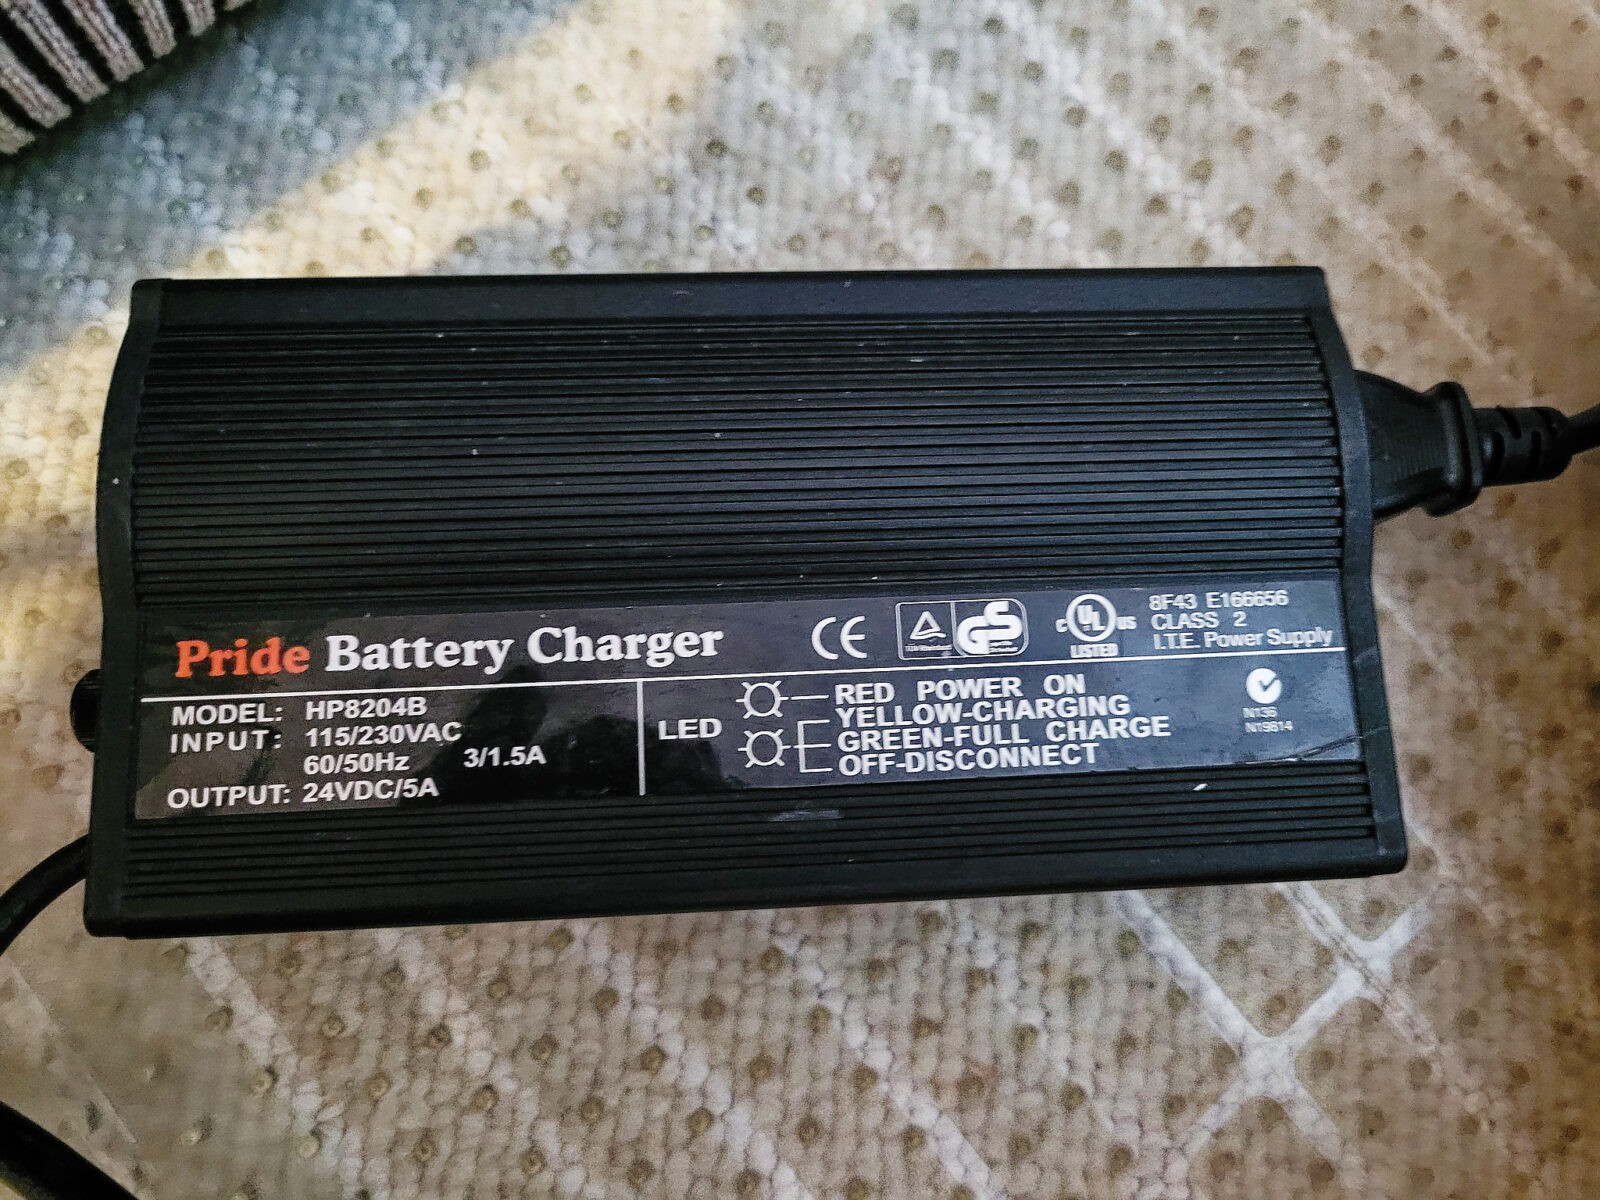
Troubleshooting the HP8204B Charger
The batteries hold the charge that runs the scooter but they must be recharged by using a battery charger. I should have checked this first but didn’t because I assumed it was the batteries but let me step you through what I did.
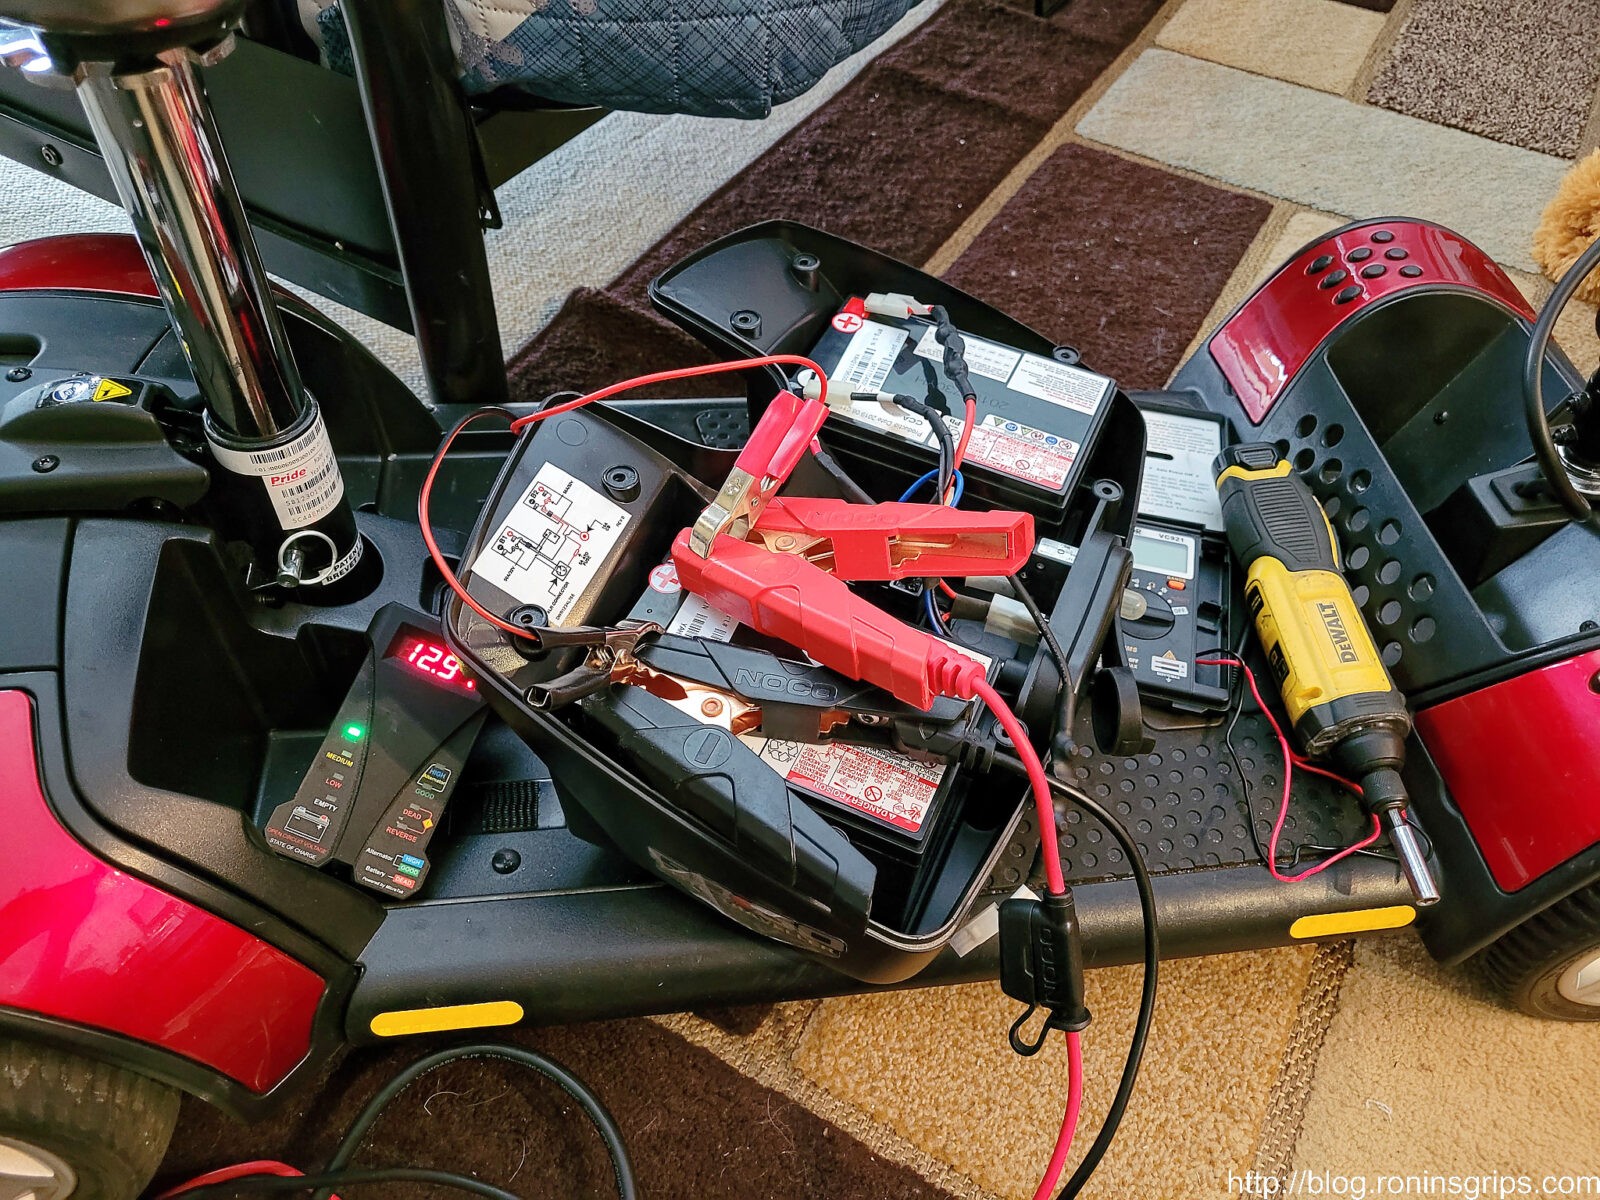
I put a voltmeter on each of the 12 volt batteries and they both read just a tad over 4 volts. So, not absolutely dead but boy were they spent. In doing automotive work, I would have expected the smart charger to sense the voltage and begin. Okay, something was fishy and it wasn’t adding up. It was time to look at the charger again.
The scooter came with a Pride Mobility HP8204B charger rated for 24 volts DC at 5 amps. That would mean that if I took my meter and put it on the pins, I should read somewhere around 28+ volts (the exact volts is an “it depends” – I would have been cautiously happy with anything over 24 and stopping somewhere around 30).
I used my multimeter on the batteries with the Pride charger connected. Only the red bulb on the charger was lit. No fan, no yellow light and no additional voltage detected on the battery terminals. I should have read 13-14 volts when doing the positive and negative tabs on each individual battery with the wires connected but I read just the 4 volts (by the way I word it like this because it was 4 and some decimal but I didn’t write down.)
The fuse you can see outside of the battery pack between the plug and a circuit breaker on the front of the battery pack looked fine and tested okay for continuity.
In looking at the battery pack, I unplugged the pin 1 should have been positive and pin 2 should have been negative. I cautiously touched my probes on the two tips because I didn’t want to unnecessarily short the system out by accidentally touching positive and negative together. Guess what? Nothing – not a thing. My auto-ranging digital meter was doing it’s usual millivolt reading garbage but there was no real voltage coming through.
The next thing I did was to turn off the original charger and remove the fuse from the end of the charger with the lights – undoing the round cap will produce a glass tube fuse. You can usually see if the wire running from one end to the other in the middle of the clear glass is intact or burned out. It looked okay and just to be sure I ran a continuity test with my meter and it was okay.
I also pulled apart the plug that goes into the battery pack just in case something was lose and it read zero volts too. In case you are wondering why there are three pins (I wondered why) – pin three provides voltage to the scooter so the little computer knows the charger is still attached and will not let the driver move the scooter – pretty good idea.
Okay, it was time to Google the scooter and the charger to learn more. The fact that only the red light was coming on but not the fan and/or the yellow charging light was making it look the the charger had failed. I did the “sniff” test to see if I could smell if anything had burned out but if it had, it must have been some time ago as I didn’t detect anything. In short, the charger was history.
There are tons of charger options on Amazon but I want to caution you against the little sealed chargers. They do work but they are going to get hot and they will probably fail at some point due to all of that heat. There’s a reason Pride went with the a fan cooled charger – they get hot converting AC (wall outlet) current to 24 volts DC (direct current).
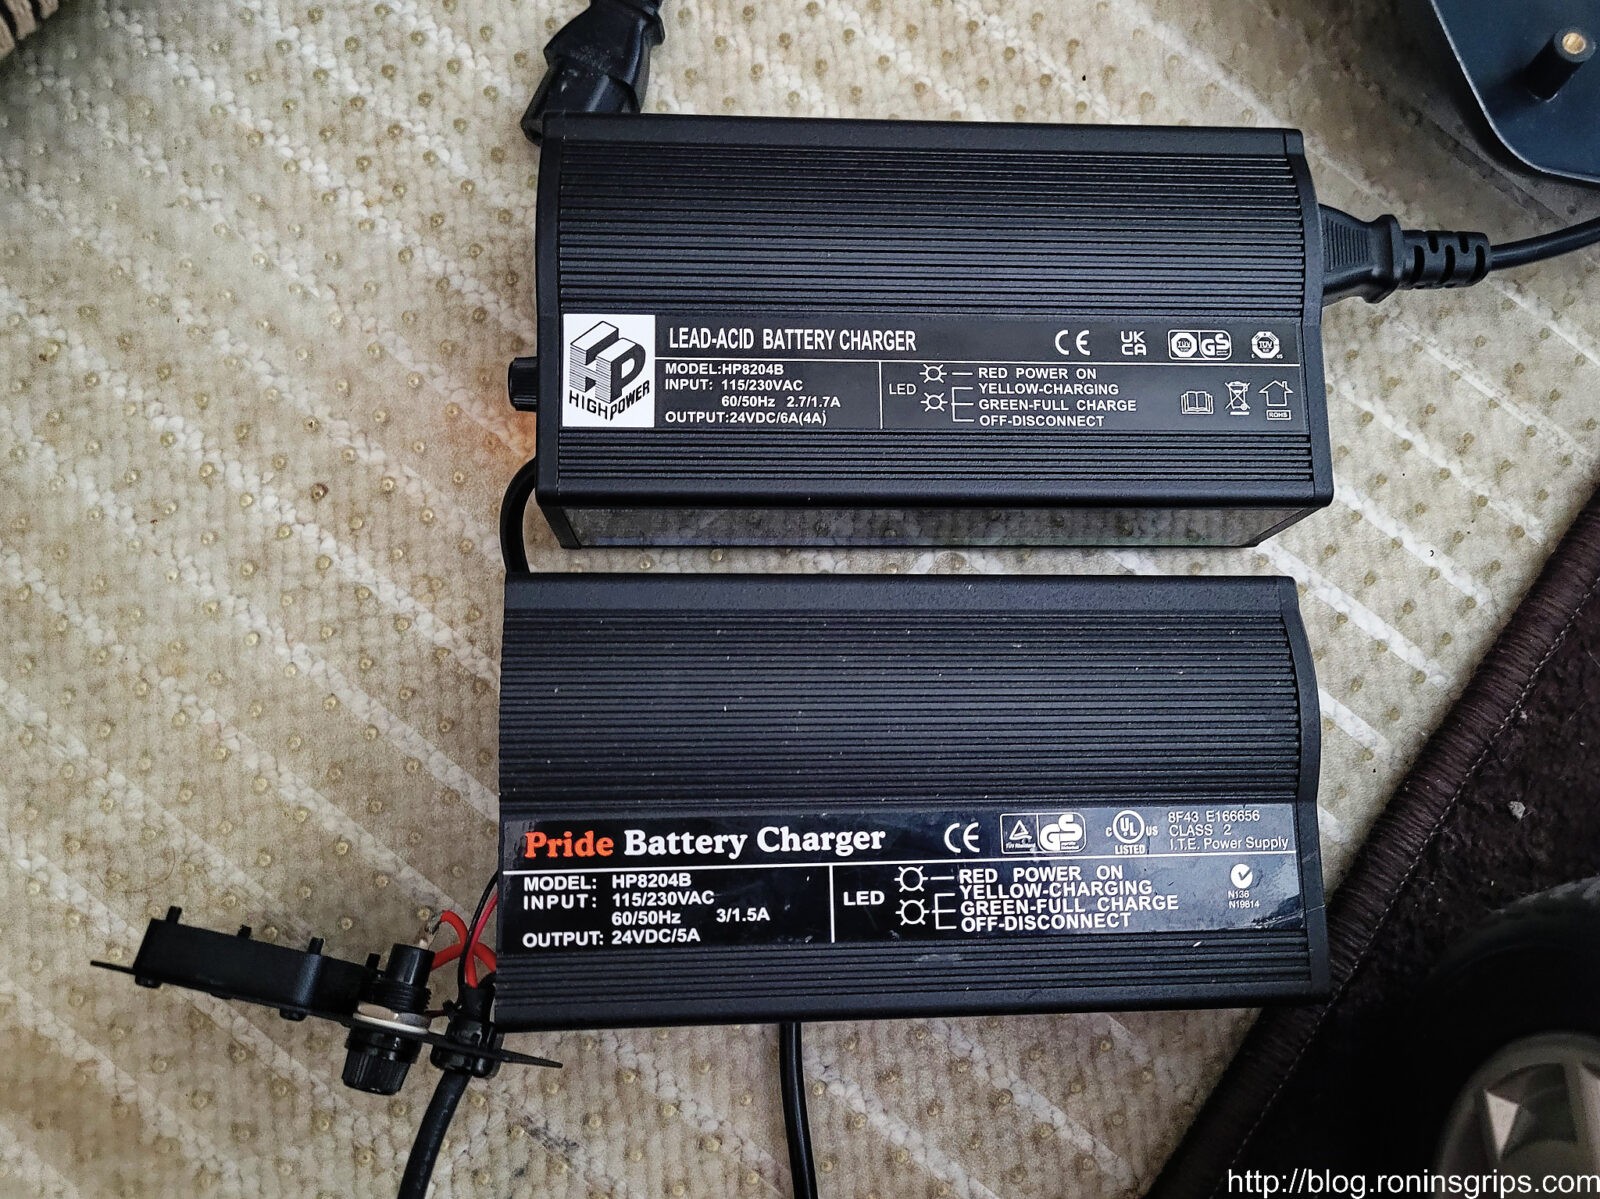
Companies like Pride rarely make their own chargers. They will either use an existing charger on the market and not bother covering up the name of the maker or they will pay for it have their brand name on the decal. Pride opted for the latter or at least that’s what I think they did. The trick to realize here is that by searching on HP8204B, you can find either the original maker or another firm who did the same thing – had their name put on the charger. Regardless, you can save a bundle off a new Pride charger.
In my case, I found a seller named “ENCAREFOR” on Amazon selling what seemed to be the exact same charger but with the label “High Power” on it. Besides the label, the rated output is at 4 amps vs. 5 which means it will just charge a tad slower. It was going for $89.99 with Prime One Day shipping but I held off as I realized I needed to test the batteries and the scooter before I spent more money. In other words, I knew the charger was bad but didn’t want to spend more money if the scooter itself was burned out – if it was just the batteries, I could still order them.
By the way, you can buy used OEM Pride chargers off of eBay. I’ve had mixed experience with used chargers in general so I tend to just buy new. If you don’t mind gambling on a used one, they are on eBay.
Used a Noco Genius Car Battery Charger For Testing
At this point I was pretty sure it was charger and also thought that the batteries might be okay. Why? First off, there is a sticker on the mast pole of the seat that said the scooter was made in 2019 – that meant it was three or just under three years old (especially given I was doing my troubleshooting in mid-February 2022). Batteries can last maybe five years give or take. If the voltage was zero, I’d bet they were junk but since I was getting just over 4 volts from each battery independently, they weren’t completely dead. I started to wonder if a good reconditioning and charge might work to bring them back to life. I had just the charger to try.
I’ve written in the past about Noco products – I think they are great and I use mine regularly. Not only are they excellent smart chargers with a number of safeguards built in but they can also recover/recondition deeply discharged batteries as well. My big Noco G26000 can do 12 or 24 volt batteries but since I was planning on a battery at a time, I just needed the 12 volt option. Indeed, I have three Noco Genius chargers of varying sizes (meaning the amps they put out) and they all could have done the job although the smaller 5 amp charger would have likely taken longer.

I undid the battery cables from the first battery only and directly connected the Noco to it. I charged for one cycle and then ran a repair cycle. During repair, the charger pulses the battery to desulfinate it.
Results
When the charging was done with both batteries, I connected the scooter’s cables back and seated the battery back into its cradle. I then turned the key on for the scooter and moved it forward and backward. It worked just fine. I checked the batteries and the voltage was holding – it wasn’t dropping down.
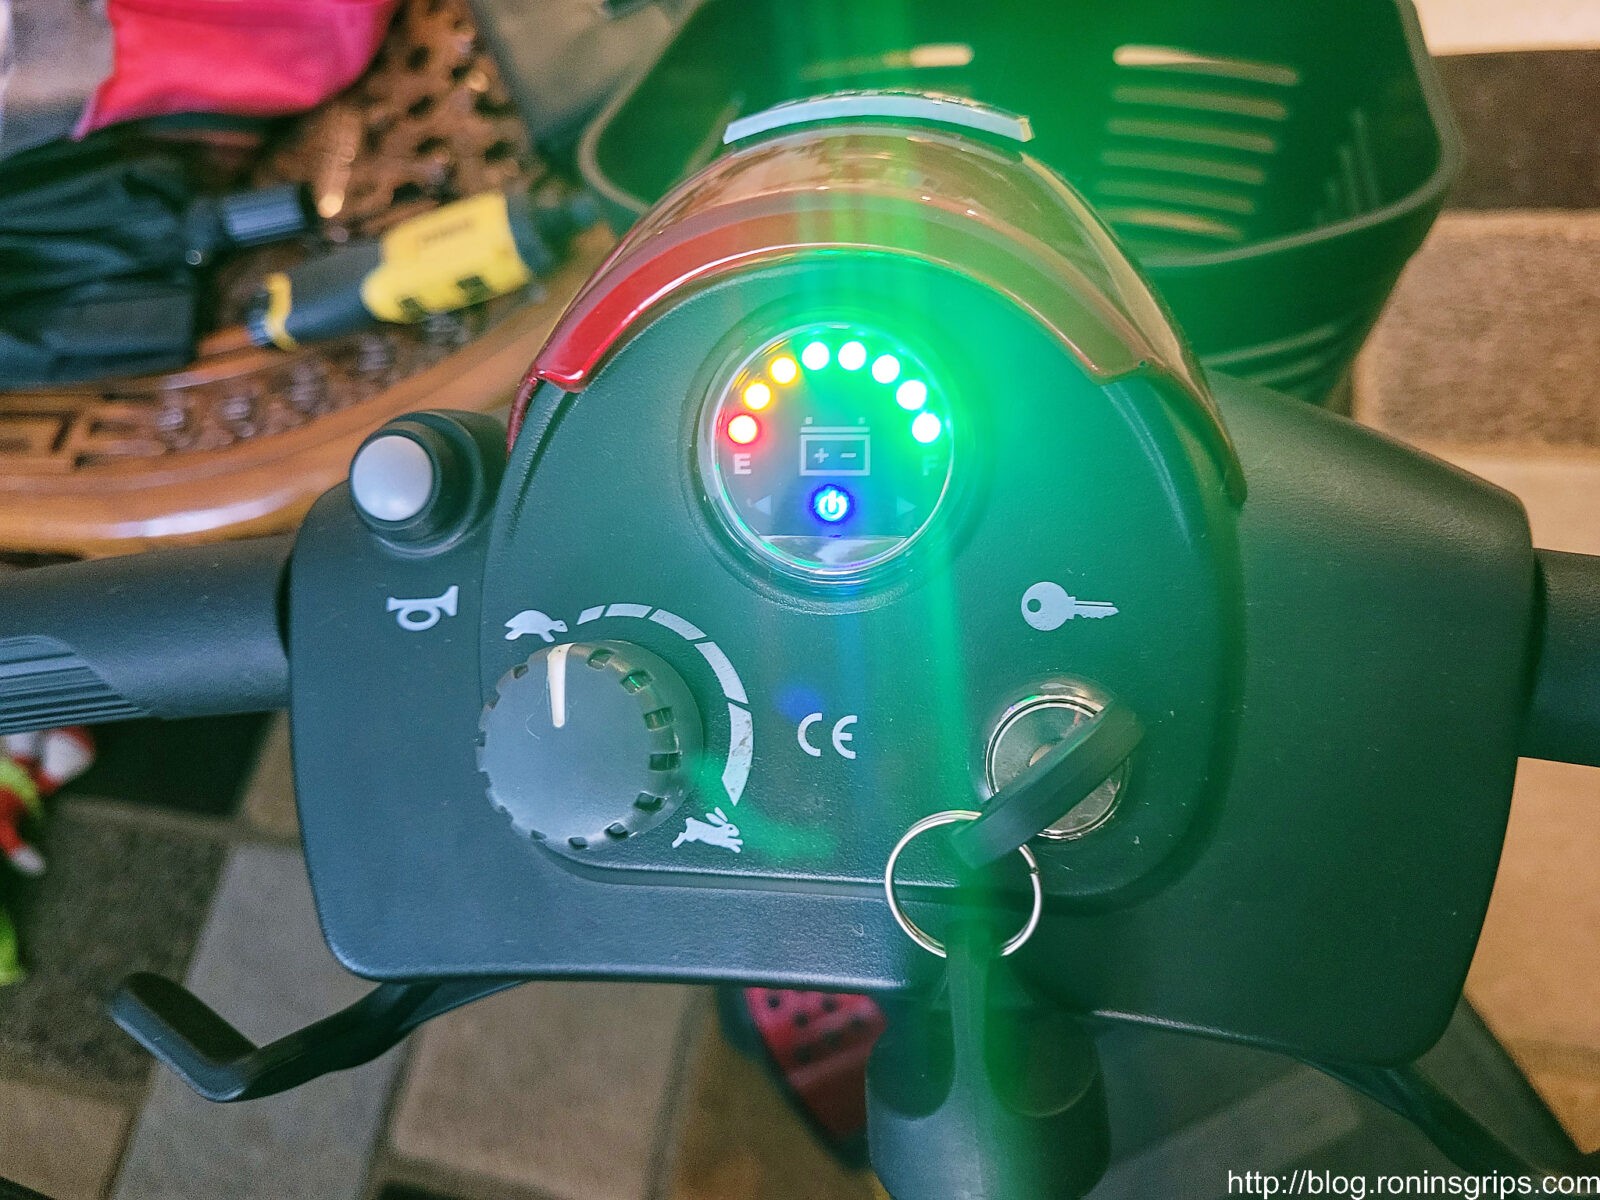
By the way, the charger’s fan will make a pulsing or surging sound as the speed changes as it nears the end of charging. This is normal and will give you an indicator that charging is almost complete.
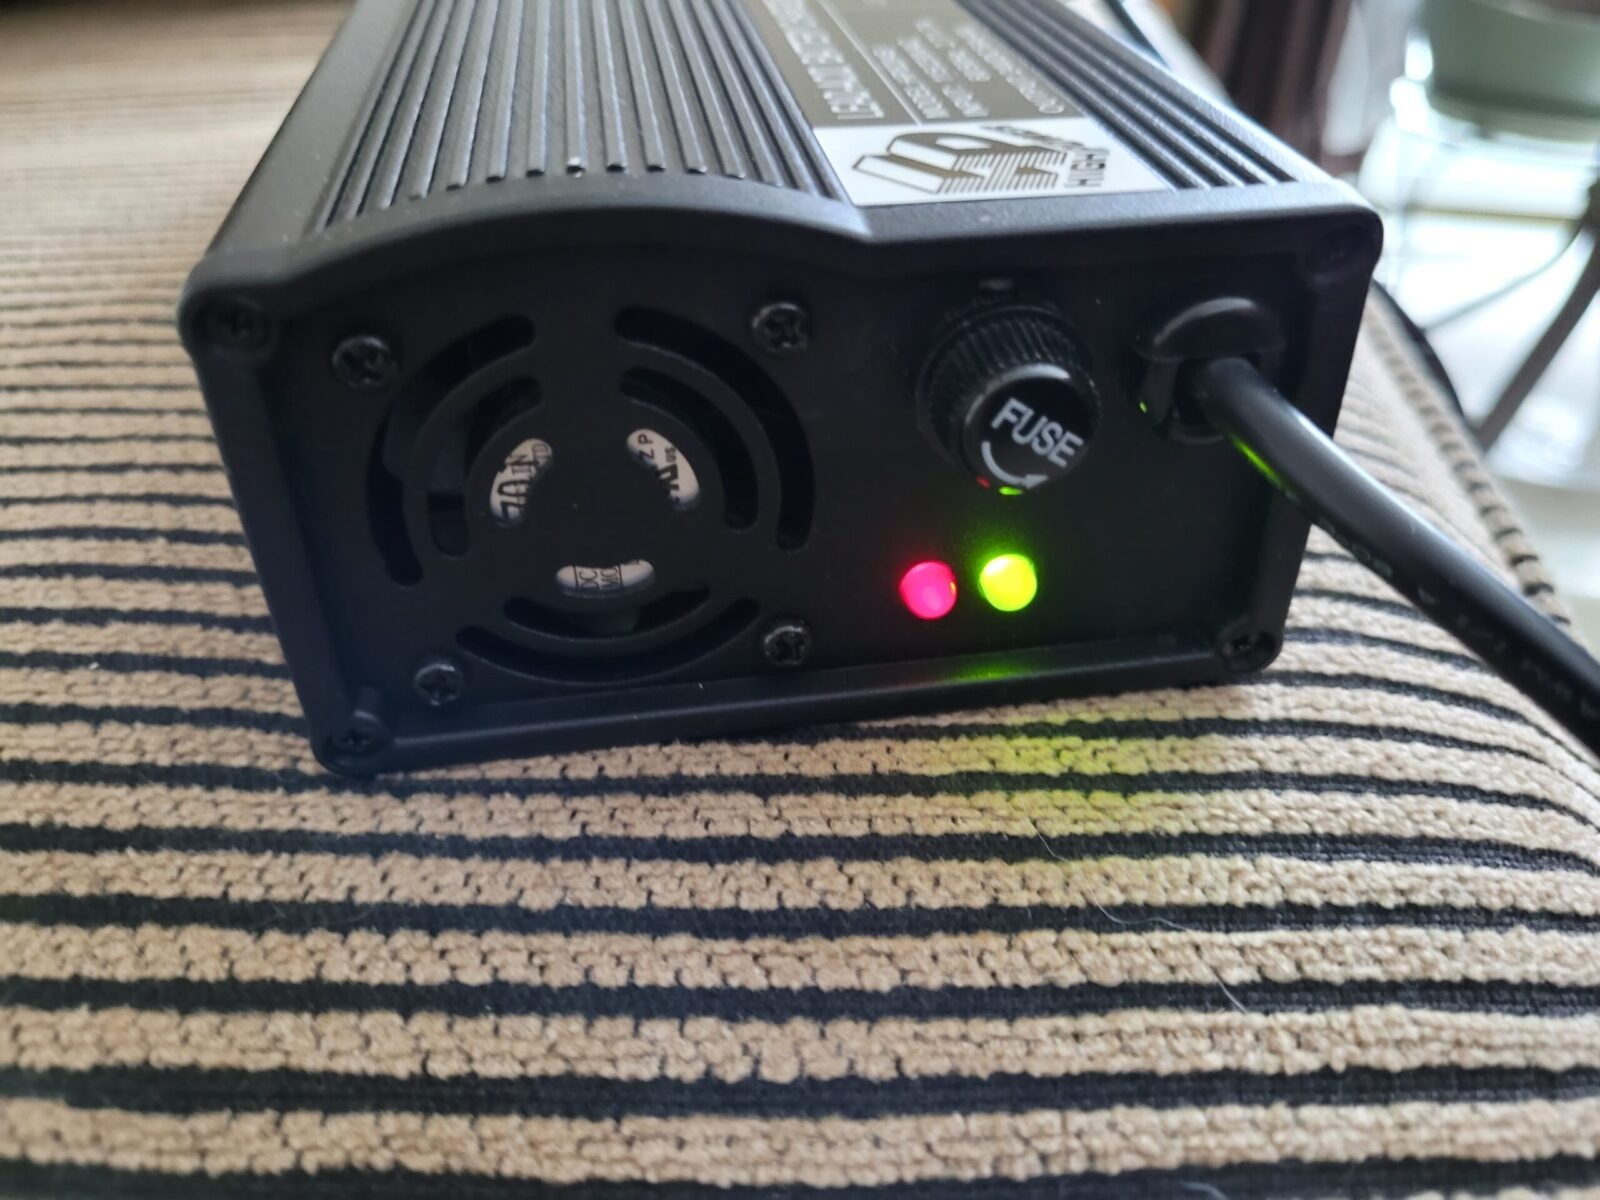
Bottom line, the batteries and scooter were fine – it was just the charger that had failed so I ordered the replacement above from Amazon and it topped off the batteries. I drove it around the house some and everything was working just fine.
In Conclusion
So I learned a few things. The scooter was exceptionally well made is my first comment. Second, I should have started from the wall and worked towards the scooter vs. focusing on the batteries to start based on what the fellow told me.
I should have confirmed power to the charger, then that there was no power from the charger to the scooter and ordered a new charger. I’d bet a new charger could have recovered the batteries – the documentation says they can recondition a battery but who knows. Even though I started with the battery, at least I could run the Noco charger through charging and repair cycles – I’ve used it to recover a number of really compromised batteries over the years.
The scooter is ready and now we need to wait for warmer weather to let my mother-in-law practice in the driveway. I hope this story helps you out.
| March 2024: I did two new blog posts – one on actually replacing the batteries and a second on tightening the ignition switch – which also shows what you would need to do to replace the ignition switch. |
3/17/24 Update: I noticed a typo while working on a post about replacing the batteries. The original text above said the OEM batteries from the factory were 12 amp-hour (AH) when they are actually 14AH batteries.
1/22/24 Update: It looks like Noco no longer sells the 26amp model charger. If you get a 12 volt charger, do each battery by itself. If you have a 24 volt charger, you can do the pair and connect where the chair’s leads normally attach to the batteries. I still like the Noco brand in general, but you may want to look at other options also – just go with a well reviewed/regarded model.
Note, I have to buy all of my parts – nothing here was paid for by sponsors, etc. I do make a small amount if you click on an ad and buy something but that is it. You’re getting my real opinion on stuff.
Please share the link on Facebook, Forums, with colleagues, etc. Your support is much appreciated and if you have any feedback, please email us in**@*********ps.com. If you’d like to request a report or order a reprint, please click here for the corresponding page to open in new tab.