It was our last outing with the Scooter that I noticed the ignition switch, if we can call it that, was floating on my mother-in-law’s Pride Mobility GoGo Eliter Traveller Scooter. I was surprised that it happened given how well it had performed up to that point. From what I could tell, the backing nut had slowly vibrated loose until it literally fell off the back of the switch. Everything worked – all the parts were there but I had to put it back together. I figured a blog post would help anyone needing to tighten the switch or even replace it.
To work on the scooter, I removed the chair, its mast and the battery pack. I also removed the forward and reverse control lever that is held in by two screws. In hindsight, I am not sure I needed to do that. By the way, removing the battery compartment also reduces the risk of sparks/shorts by disconnecting the power from the system.
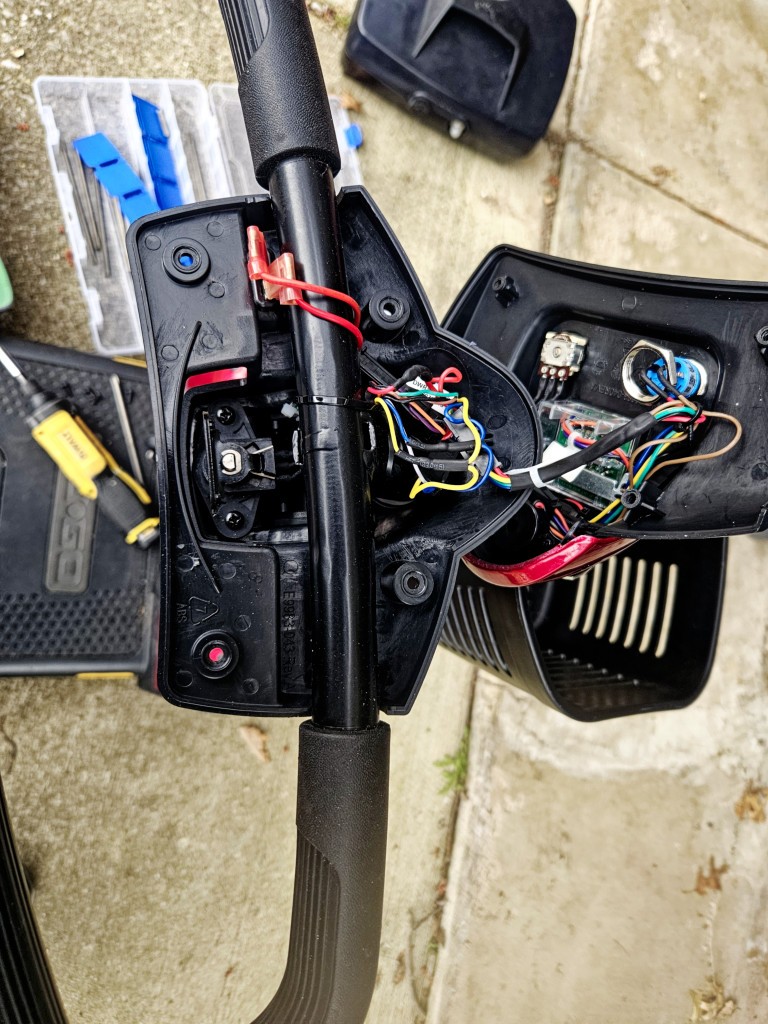
To get inside the center console, you need to remove four screws – the two closest to the operator and the two furthest forward. The ones in the middle hold the lower half to the handlebar and do not need to come out.
One small detail, I had to push the top cover slightly towards the back towards the seat to get it to lift off once the screws were gone. Reinstalling the top recover also meant I had to slide it forward slightly before reinstalling the screws.
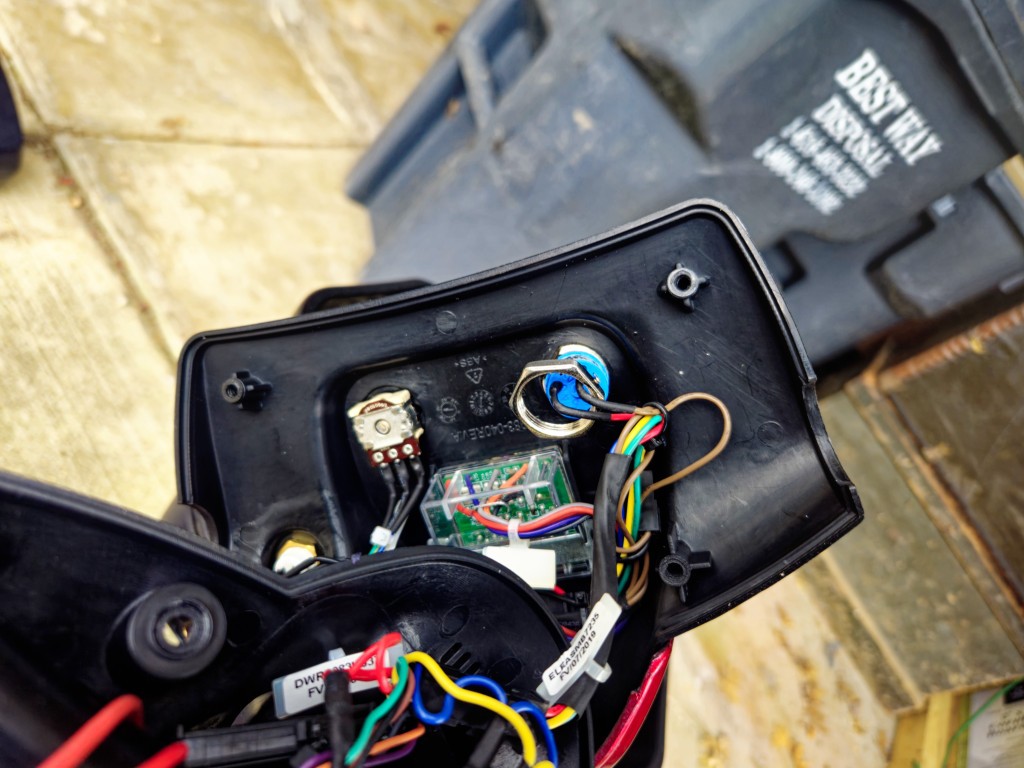
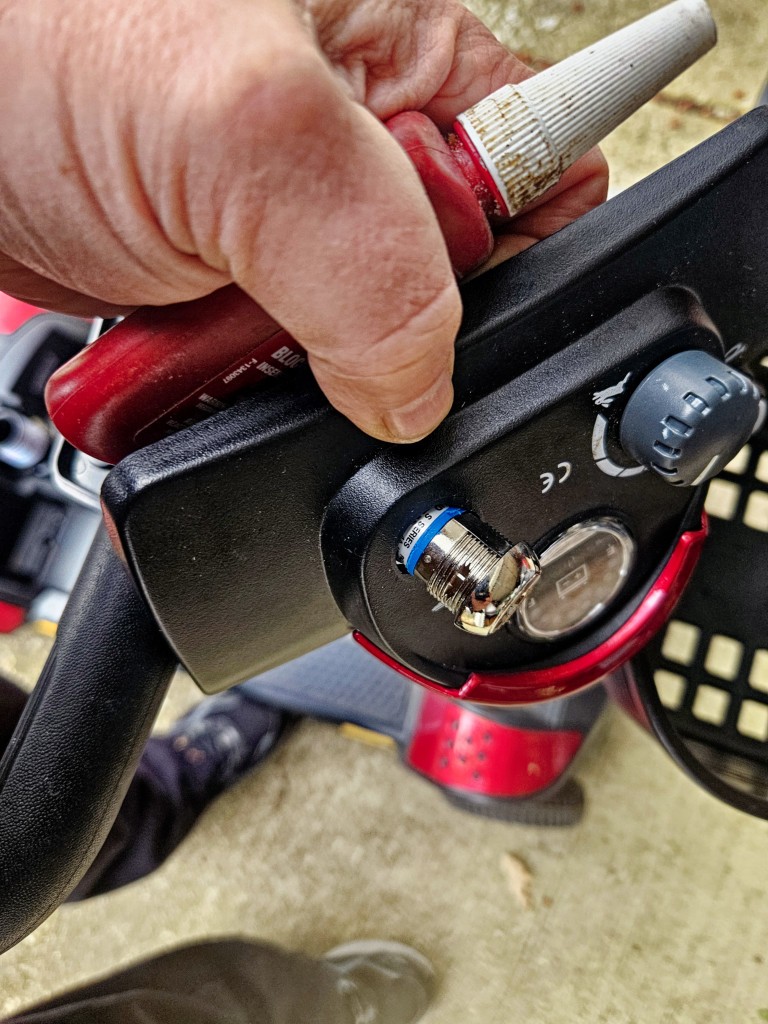
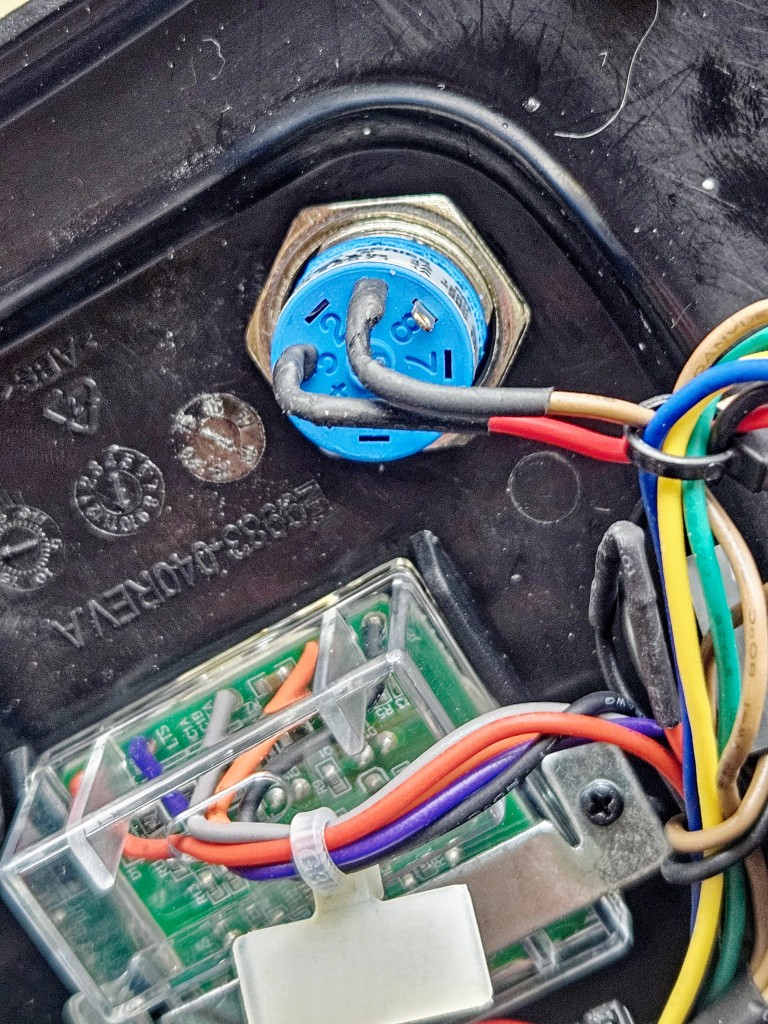
It dawned on me after starting that I had better take some pictures. The operator is to the left and the forward is to the right in this photo. You can see the four empty screw holes that need to come off. On the top cover you can see the loose locking nut.Another view of the switch and loose nut.If you were replacing the ignition switch, you’d unplug the two wires, loosen the nut and push the ignition switch assembly out through the top and insert a new one. That is Loc-tite blue medium strength thread locker. I put that on the switch with the body out so the nut will not rattle loose again.The nut is down snug. I thought a photo might help if someone needs to know what wires go to what terminal numbers. There are only two wires but three terminals on this model.
From there, I slid the top back on and reinstalled the screws and put the rest of the stuff back on.
Works great now.
Bought Spare Keys Too
One last note, mama only had one key for the scooter. Turns out they are generic and not keyed to a specific scooter. I bought a spare pair off Amazon that works great. This way she can have a key and I can have one on a trip.
Summary
Her key switch is good to go and no we have some spare keys too. I hope this helps you out.
Note, I have to buy all of my parts – nothing here was paid for by sponsors, etc. I do make a small amount if you click on an ad and buy something but that is it. You’re getting my real opinion on stuff.
Back in 2022, we bought a used Pride Mobility GoGo Elite Traveller scooter for my mother-in-law. I wrote a blog post about replacing the battery charger and the original batteries were still good though I knew that if the scooter was made in 2019, they probably only had a year or two left. Guess what? They quit charging in the Fall of 2023, pretty right on schedule. Living in Michigan, my mother-in-law wouldn’t be using it in the Winter as she doesn’t go out much so we decided to wait until the Spring of 2024 to deal with it. Well, that gives me two things to tell you about in this post.
First – Dead batteries freeze and I made an avoidable mess
Ok, the decision to put the battery replacement off made sense monetarily. Why spend the money just to have it sit. Well, we store her scooter in her attached but unheated garage, we had plenty of days well below freezing – some even in the single digits – and her batteries froze and busted their cases.
In the back of my head I knew dead batteries pretty much froze just like water at 32 degrees Farenheit but it never crossed my mind as part of the decisionmaking. If we had taken the battery compartment indoors, it would not have been an issue.
For giggles, I looked it up. Fully charged batteries with fresh electrolyte will not feeze until around -40F and websites give a ton of different answers on that with two saying that number is -76F. I saw mention that If the charge is around 40% the freezing level rises to around -16F but another website said -20F at 80% so go figure. Where they all agree is that if the battery is dead, meaning 0% charged, then it is the same as water at 32F. Why? The electrolyte is 25% sulferic acid and 75% water and the charge is what lowers the freezing point.
How did I find out? Well, we needed mama’s scooter for an upcoming trip so I lifted the housing off the scooter and brought it home. By the way, if you have never removed your battery pack below the seat on the floorboard – lift straight up firmly. There is a very strong velcro-like material on the bottom that does its job and doesn’t want to let go but will if you lift straight up. Technically, what they are using is Dual Lock or a clone of it that is stronger than traditional Velcro hook-and-loop fasteners.
I brought the compartment home, flipped it over on my bench to remove the 8 screws and what looked like water dripped on bench. Also, electrolyte has a unique smell so I knew I was in for a mess and moved it all onto the concrete floor so I could take it apart.
Safety note: You are working with a solution that has a relatively small amount of sulferic acid in it (3 parts water + 1 part acid). Wear nitrile gloves, protective eye wear and have good ventilation. I’ve found some people are very sensitive and others are not. I’m lucky and it doesn’t really bother me but I’ve worked with people that would get chemical burns real easy. So, if this is your first time and you have no idea, play it safe.
The batteries were stuck in the compartment. I suspected they used something to secure the batteries because they did NOT want to come loose. I thought they had really gone wild with Dual Lock fastener strips so I pulled hard with my fingers – nothing. I tried lifting with a little pry bar and didn’t get anywhere. Finally, I F-bombed it, got some Vise Grip pliers, got a real good hold of a terminal and lifted with all the strength I could muster — then I heard the tearing sound of velcro, saw the battery starting to rise up and kept pulling until the battery lifted out. Did not expect that!
Yes, there was a regular hook-and-loop type velcro on the end of each battery and the bottom of the compartment. What had happened was the adhesive they put on the strips on the bottom of the case and slowly oozed around and glued the batteries down as well. Sheesh. I was just glad the plastic of the compartment did not snap.
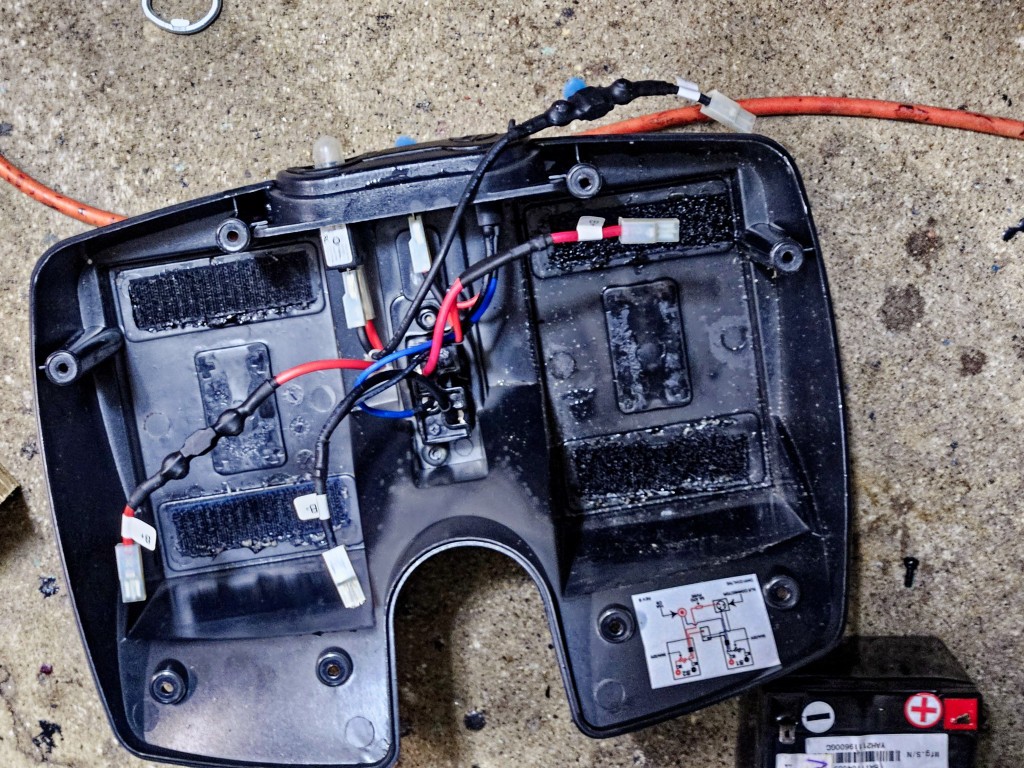
This is what the inside of the battery compartment looks like. The shiny black stuff around the velcro is the adhesive that oozed out and “glued” the batteries in place.Both sealed batteries had their cases deform and crack open when their electrolyte froze.
With the batteries removed, I poured some water with baking soda in it to neutralize the acid in the velcro, the ends of the wires that were floppng around and the compartment. I did not dunk everything because there is a circuit breaker that I did not want to get water in.
I’m amazed at how this photo I snapped in a rush turned out. The bubbles are the chemical reaction bretween acid residue and the baking soda and water solution. Stir the baking soda and water around to make sure there is plenty of it to neutralize the acid. When all of the acid has been neutralized, the bubbles will stop and you can rinse it off.
I then carefully rinsed out the water, dried it with a towel and put it front a fan overnight to completely dry out. I did this to the top and bottom of the compartment and the screws that hold the compartment together.
When everything was dry, I applied Silicode spray and wiped it off.
It looked great once we cleaned it up. Note, getting rid of acid residue is something you always want to do. Otherwise, vapors can cause parts to oxidize.
Moral of the story – take the battery compartment in for the winter and avoid the risk of it freezing. I blew an hour cleaning up an avoidable mess.
Second – Actually replacing the batteries is pretty easy!
Okay, actually replacing the batteries is straight forward – although you may have to fight the velcro’s adhesive like I did. I could not find Interceptor brank 6-DZM-12HG batteries and different firms claimed compatibility but had different sizes so I decided to confirm the details by looking at the now-very dead originals.
The scooter uses two identical batteries. This one froze and that’s why the case and label look so bad.
Volts: 12
Capacity: 14 AH
Size: 3.9 x 3.9 x 5.9 using my calipers. Including the F-type tabs, the total height was about 4 inches
By the way, the dimensions are really important because Pride Mobility sold both standard and extended range battery systems. The latter has batteries far bigger than what will fit in the standard model’s case.
With the above, I was ready to dig on Amazon for batteries. Lots of sellers claimed their batteries were compatibile with the GoGo Elite Traveller but some only had 12AH of capacity which means those batteries would not last as long / go as far.
I also pay attention to reviews and want more than 30 reviews – the newer the better – to get an idea. Actually read the reviews. Some sellers will change the product for sale so you see reviews for one product but they are selling another.
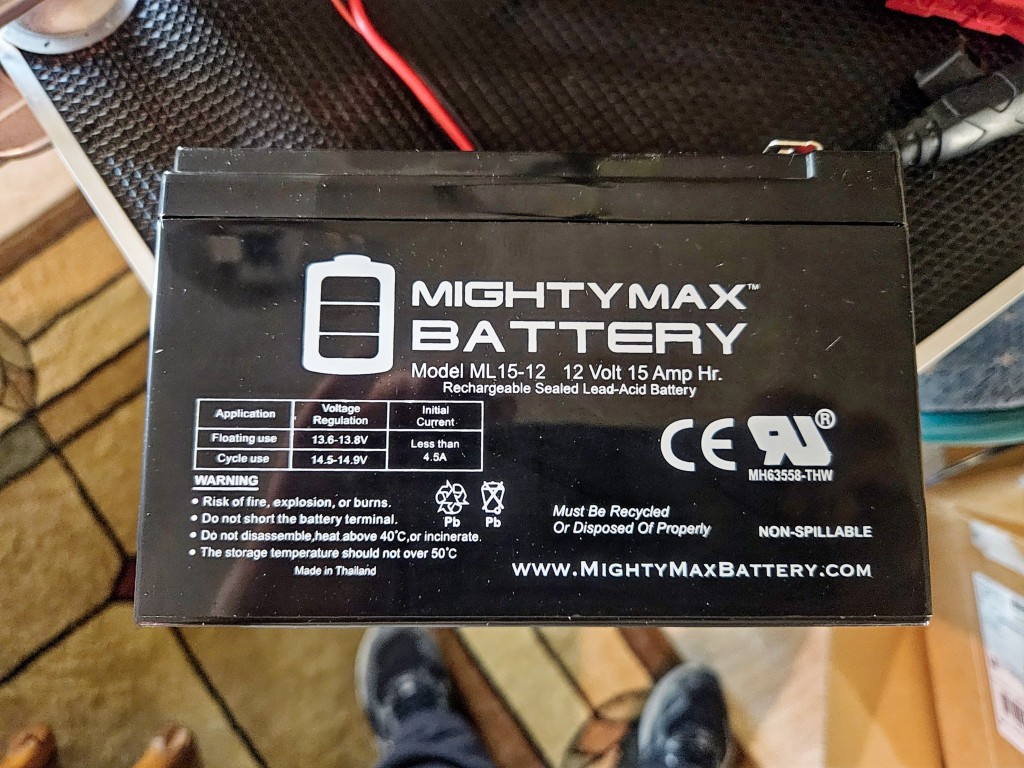
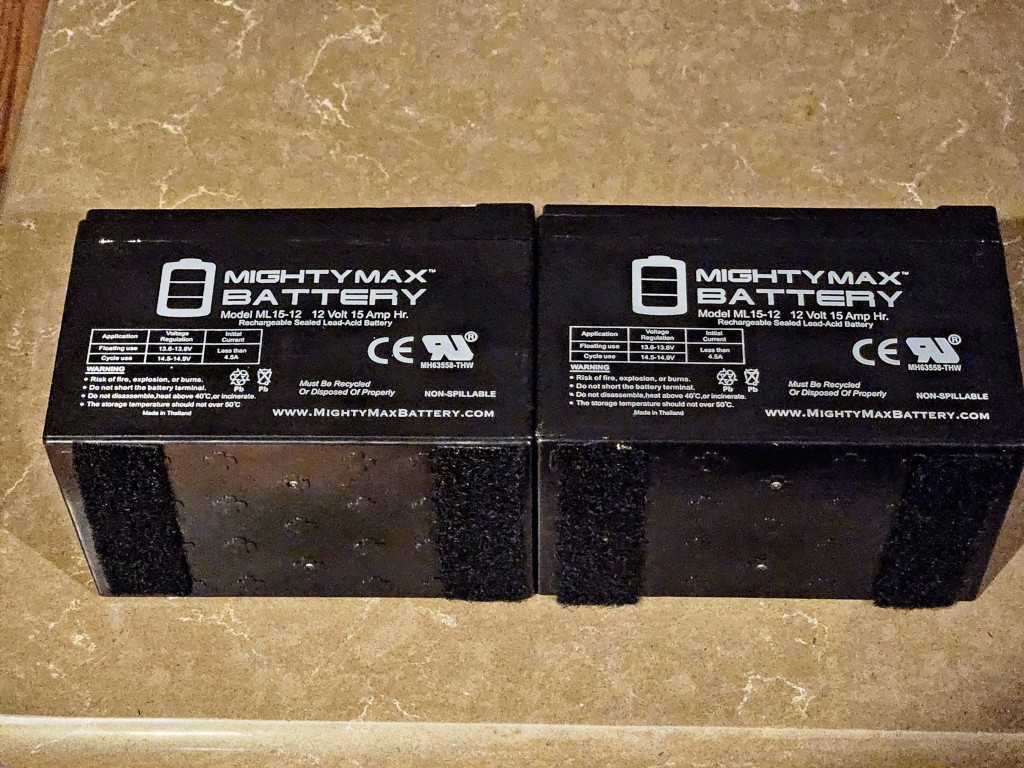
One listing really jumped out at me – Mighty Max 12V 15AH batteries with 330 reviews and a 4.6 star rating so I took a closer look. The reported 15AH capacity puts them slightly ahead of the original 14AH batteries. The reported size was 5.94×3.86×3.86 – which would work with mine – the 5th photo in the listing shows specifications including the dimensions. That’s what I went with – Mighty Max model ML15-12. They arrived a few days later direct from the seller and seemed to be everything they said they would be.
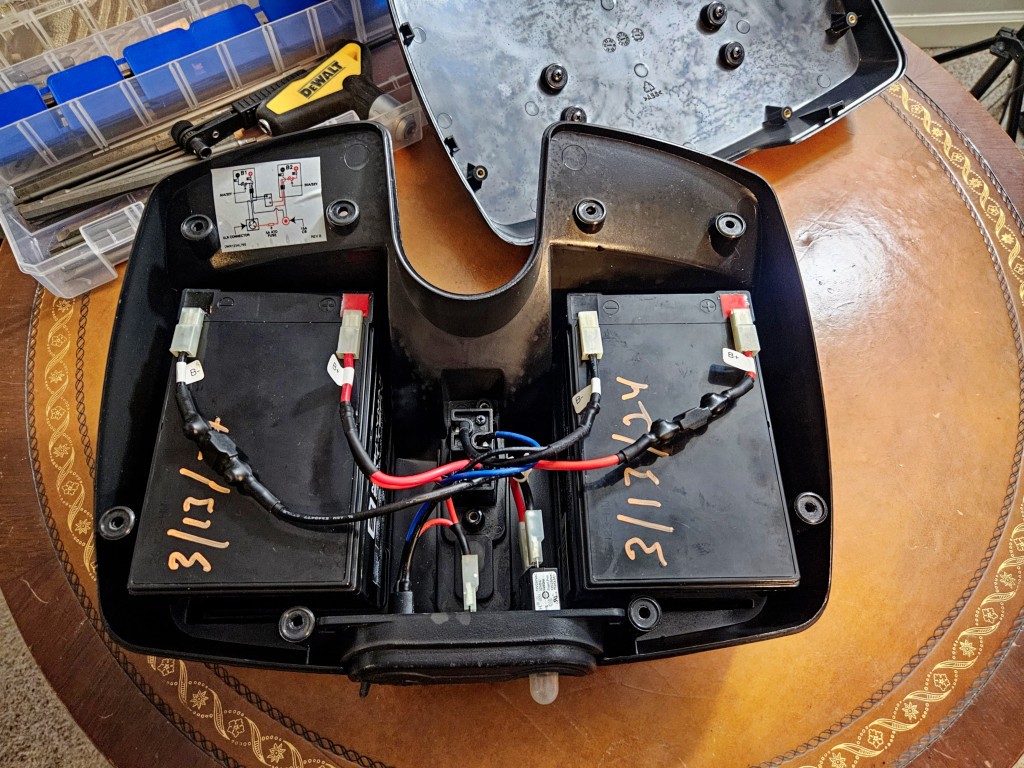
I wrote the date on the batteries with a paint pen and applied industrial velcro to the end of each battery and let them sit overnight for the adhesive to bond. I really didn’t want to deal with the batteries sticking again so I sprayed the bottom of the battery and the bottom of the compartments with mold release compound (which I have handy due to my casting business). You could get the same effect by buffing the bottom of the battery with light shoe/boot wax.
I put two strips of industrial velcro on each battery and then set them on the table with the weight of each battery pushing the velcro’s adhesive into place. In general, self-adhesive velcro needs to sit at least overnight to get a good bond otherwise it will pull right off. Also, clean the bottom of the battery with alcohol to make sure it is clean and doesn’t have any release agent left on it from when they were made.
I didn’t bother bringing mama’s 24 volt charger home and instead just topped off each 12 volt battery before I installed them. It took my Noco 12 volt 5 amp charger maybe 3-5 minutes to top off each.
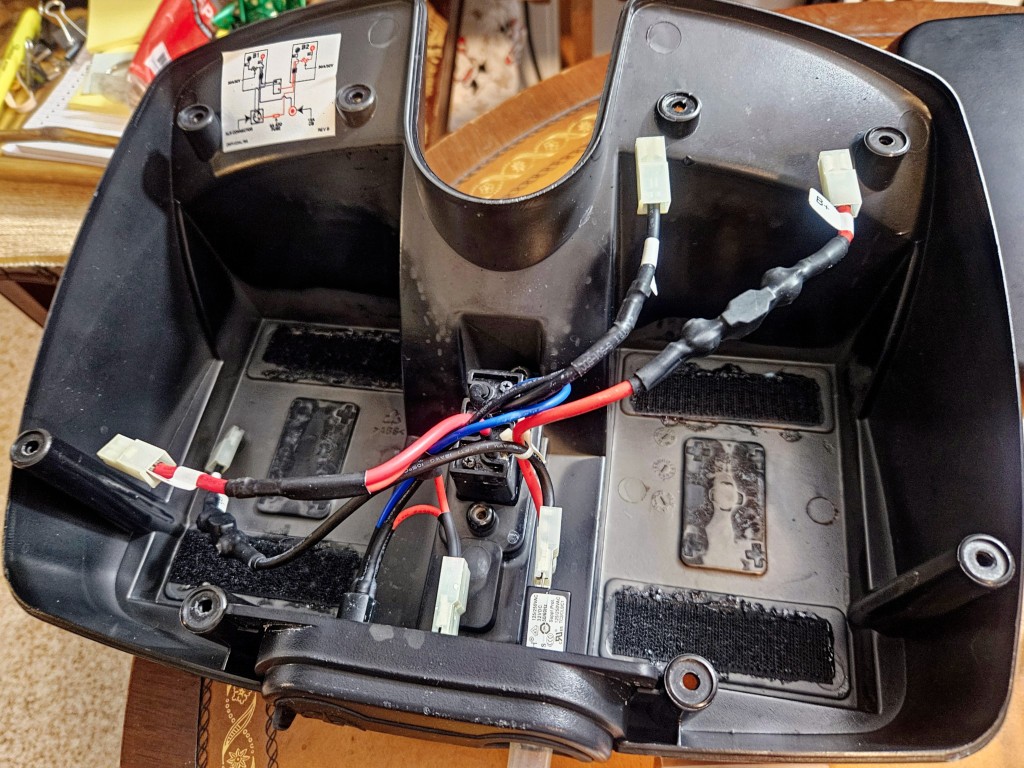
Wiring is easy red goes to postive and black goes to the negative. Then you put on the cover and reinstall the screws.
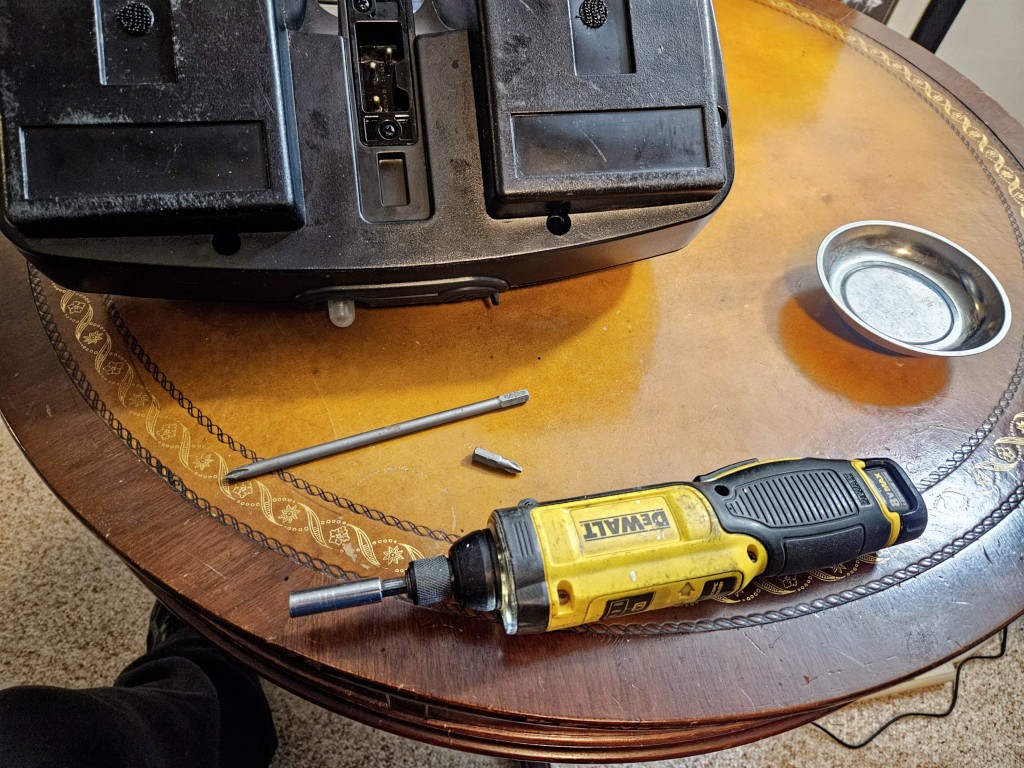
Wires are re-attached – note the color coding. Red to red and black to black. If I ever need to know, I can see the day I installed them also thanks to the orange paint pen.I use a Dewalt cordless screwdriver a great deal due to my having Carpal Tunnel problems. The regular length Philips bit and extended length are Dewalt also. I’ve used a ton of cheap import bits and find that they wear out too fast with the Philips bit edges rounding over and not getting a good bite. You can definitely use your favoite Philips screw driver as well of course.Installed and ready to go.
The batteries worked great. I weigh probably about 240 pounds with my jacket and I drove mama’s scooter about a half mile with no drop in the charge indicator and that was good enough for me. I am sure I weigh twice what she does,
The scooter was almost ready for our trip other than fixing a loose ignition switch which I will cover in another post.
I still think the Pride Mobility GoGo Elite Traveller scooter is very well made. Mama enjoys getting her freedom back and will sometimes joke and head off ahead of us during a walk.
Two big takeaways I want you to have from this blog – Don’t forget batteries can freeze . Second – you can definitely change the batteries yourself. You do not need to buy a whole new cabinet and battery assembly unless you really want to.
I hope this helps.
Note, I have to buy all of my parts – nothing here was paid for by sponsors, etc. I do make a small amount if you click on an ad and buy something but that is it. You’re getting my real opinion on stuff.
My mother-in-law is getting older and so are my wife and I. Let me tell you, It was a lot easier pushing around a wheelchair 10+ years ago compared to today. With this in mind, my wife and been watching for a good deal on one of those little electric mobility scooters. Finally, one day she saw one posted on Facebook at a local thrift store so we want and took a look.
The owner of the store buys abandoned storage units and a Pride Mobility Elite Traveller scooter was in one of them. It looked to be in great shape but it wouldn’t run. He could turn the on/off switch and a light would come on the little dashboard but that was it. He said he tried charging it for an hour but nothing happened and thought it was the batteries — this is a great example of someone giving you their diagnoses and then that affects what you do.
At any rate, it came with the original Pride Mobility charger so I figured it was probably the batteries and did a quick search on them and replacements ranged in price from $51-89/pair. With this in mind, we settled on a price of $250 and brought the scooter home.
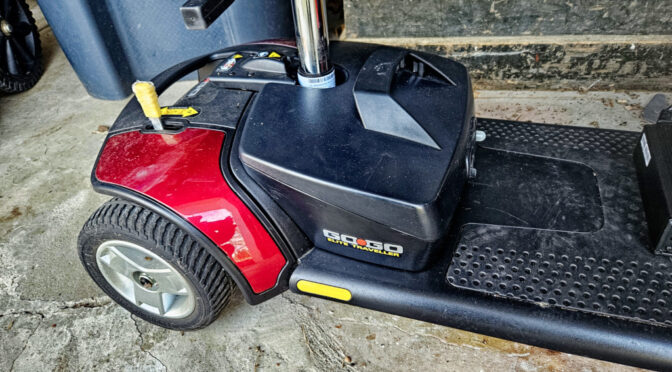
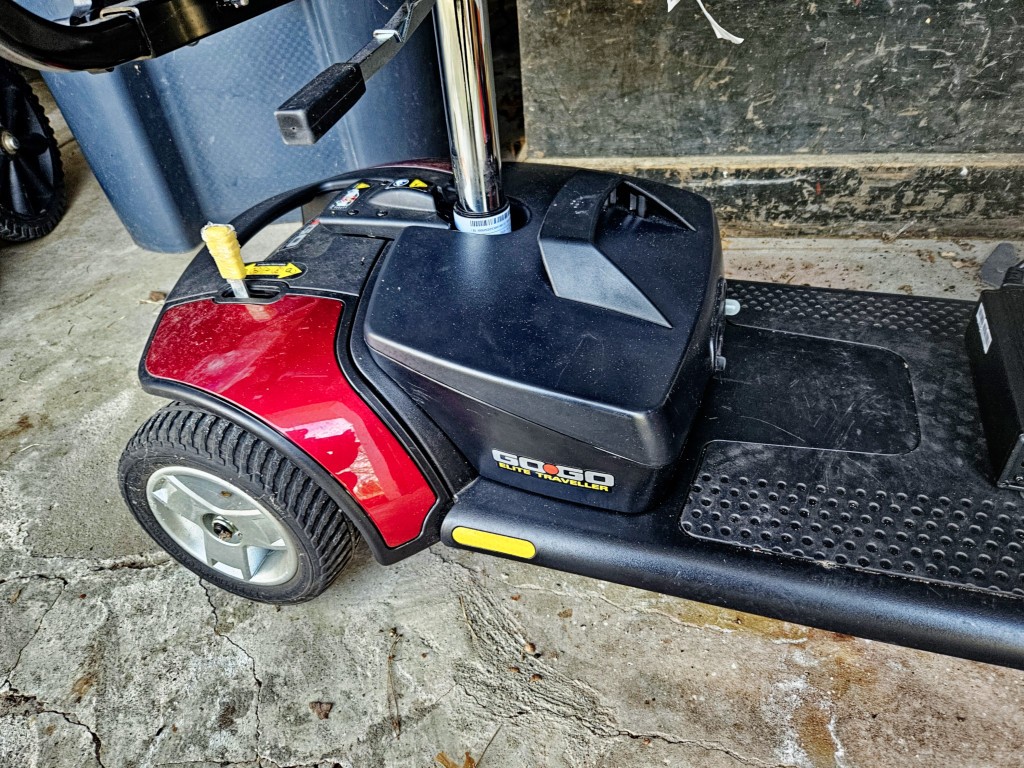
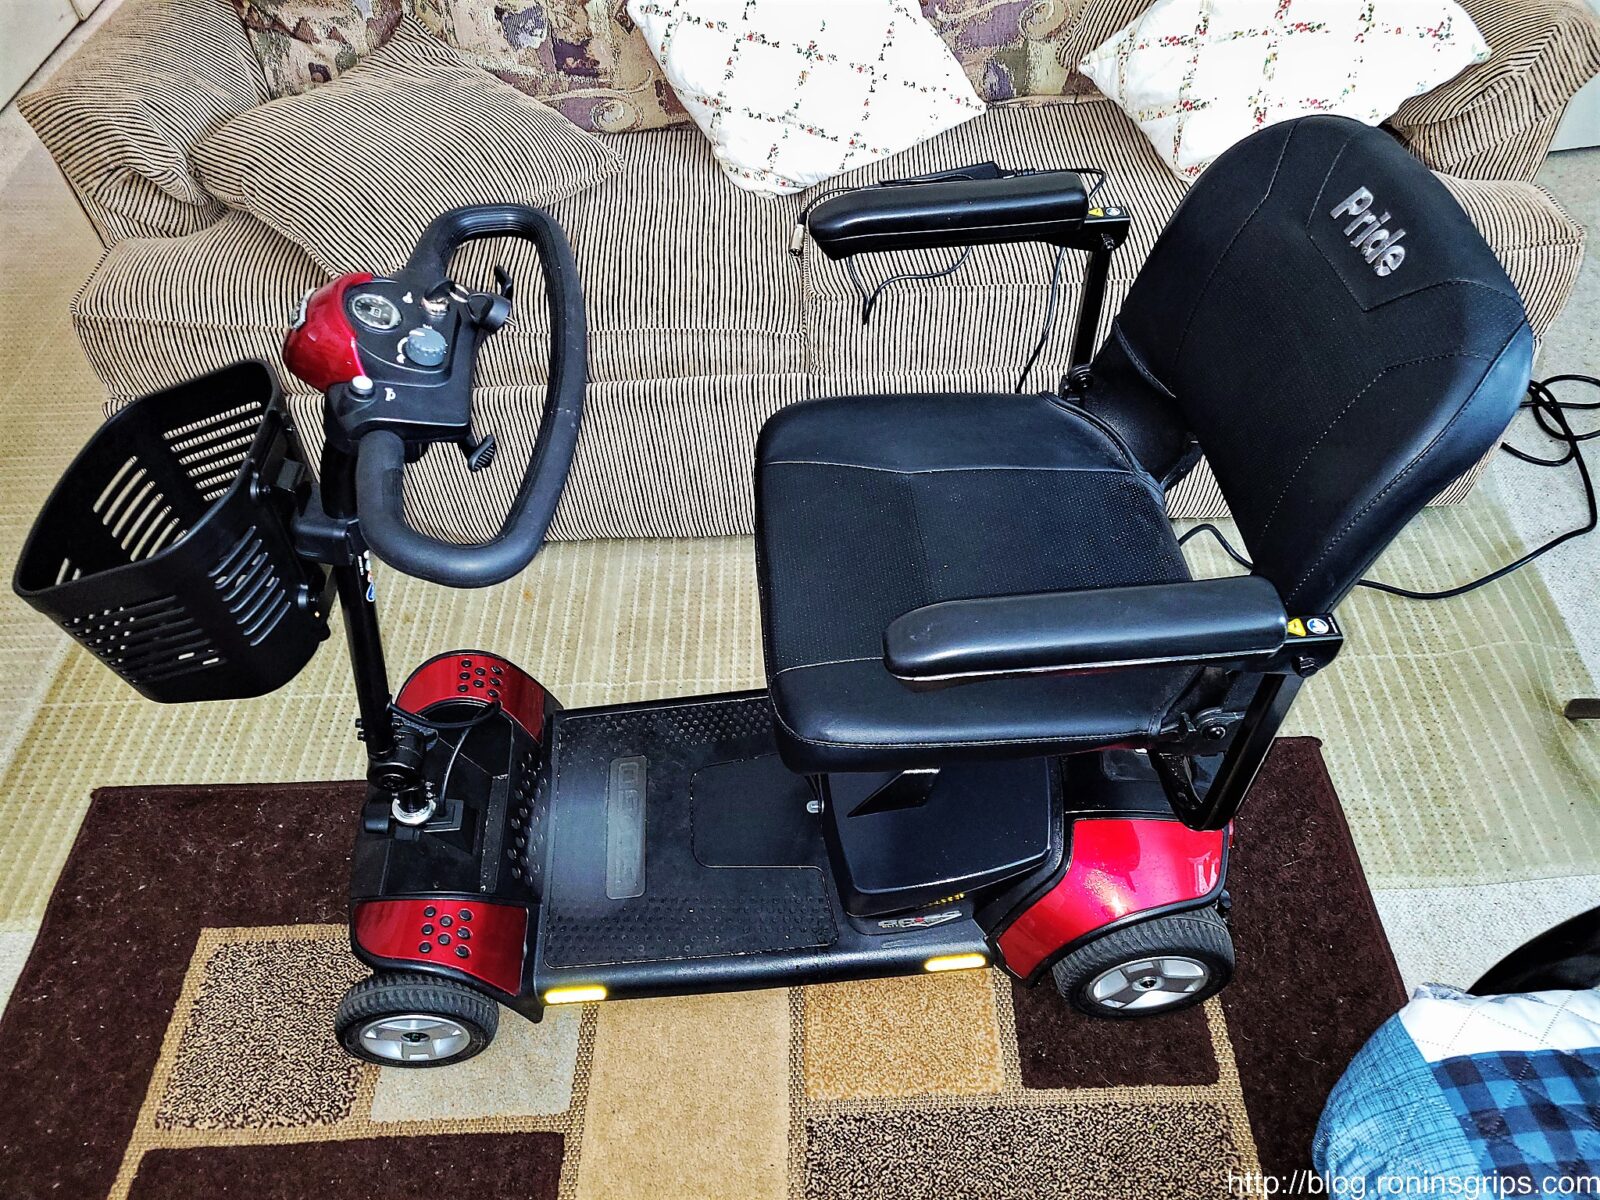
Here’s the GoGo Elite Traveller scooter. It’s remarkably well made. I was impressed the minute I started critically looking at the fit, finish and serviceability.
Note: Pride Mobility puts all of their manuals online. I really appreciate it when firms do this. You can get the brochure, owner’s manual, specification sheet and more on their website – click here. Just FYI: They do not provide a repair manual or technical guide.
A few days went buy before I could work on it. The first thing I did was plug the charger into the wall, then the cord direct to the power pack, turned on the switch and the little red power light came on. The charger’s second indicator LED was supposed to turn yellow that it was charging. It did not – it stayed off. Also, the cooling fan never started. Hmmm…. interesting but I had run into problems before with smart chargers not starting if batteries were dead.
Now, this mistaken assumption cost me some time but I learned a lot in the process that I’ll share.
Removing And Opening The Battery Compartment
Based on what I saw, the engineering and build quality of the scooter was excellent. I’ve seen people driving them around but never had the need to look at one up close or take one apart. Everything is built heavy duty with reliability and resiliency in mind not to mention they put fuses all over the place to protect the electronics. With that overview comment done, my focus was on getting to the batteries because I thought that was the problem.
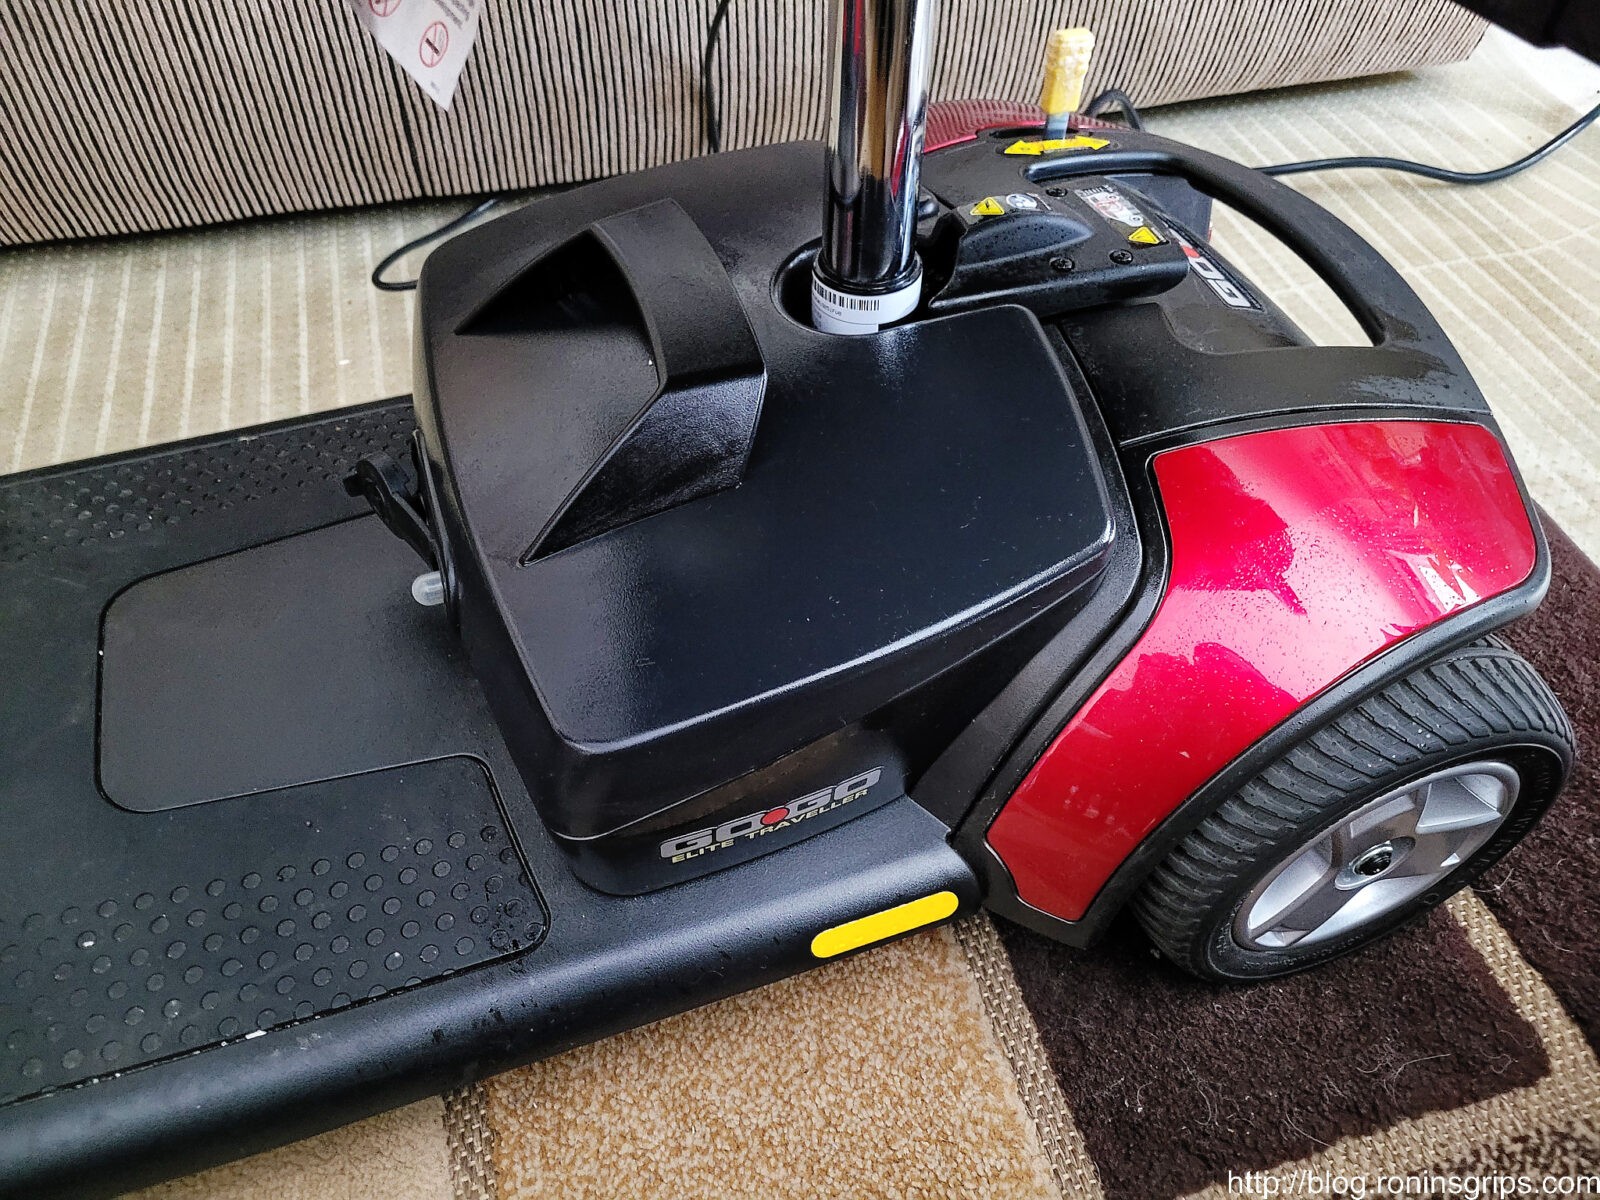
The battery pack is the black plastic “box” with a molded handle directly underneath the seat on the floorboard of the scooter and is held in place by a tab of 3M Dual-Lock fasteners on each side. Dual-Lock is a stronger than traditional velcro and it does a great job of holding the battery compartment in place both for the sake of safety as well as to prevent rattling.
To remove the battery box, lift straight up – there aren’t any bolts or clasps – just a combination of weight, the way the pieces fit together and the Dual-Loc. If you try to lift at an angle, you’ll be surprised how it will not want to budge – straight up is what you need to do.
That black molded plastic object with the handle in front of the silver set mast is the battery compartment. It comes off the scooter by lifting straight up. FYI – the white label on the seat mast has the date of manufacture.
Between the way the compartment sits into the molded floorboard and the 3M Dual-Loc tabs, the unit is very secure.
The battery compartment is very well made and to disassemble it, you need to remove six philips head machine screws. This is just an example of where I thought the design and execution was excellent – these are threaded machine screws that go into brass female inserts on the other side – they didn’t just go cheap using some self tapping screw. You flip the compartment upside down and remove the screws. The batteries are held securely in place by Dual-Lock also.
The 12 Volt Batteries Themselves
I’m going to step you through some details on the batteries but I did not change them yet. I’d recommend you read this whole post because your “problem” may or may not be the batteries.
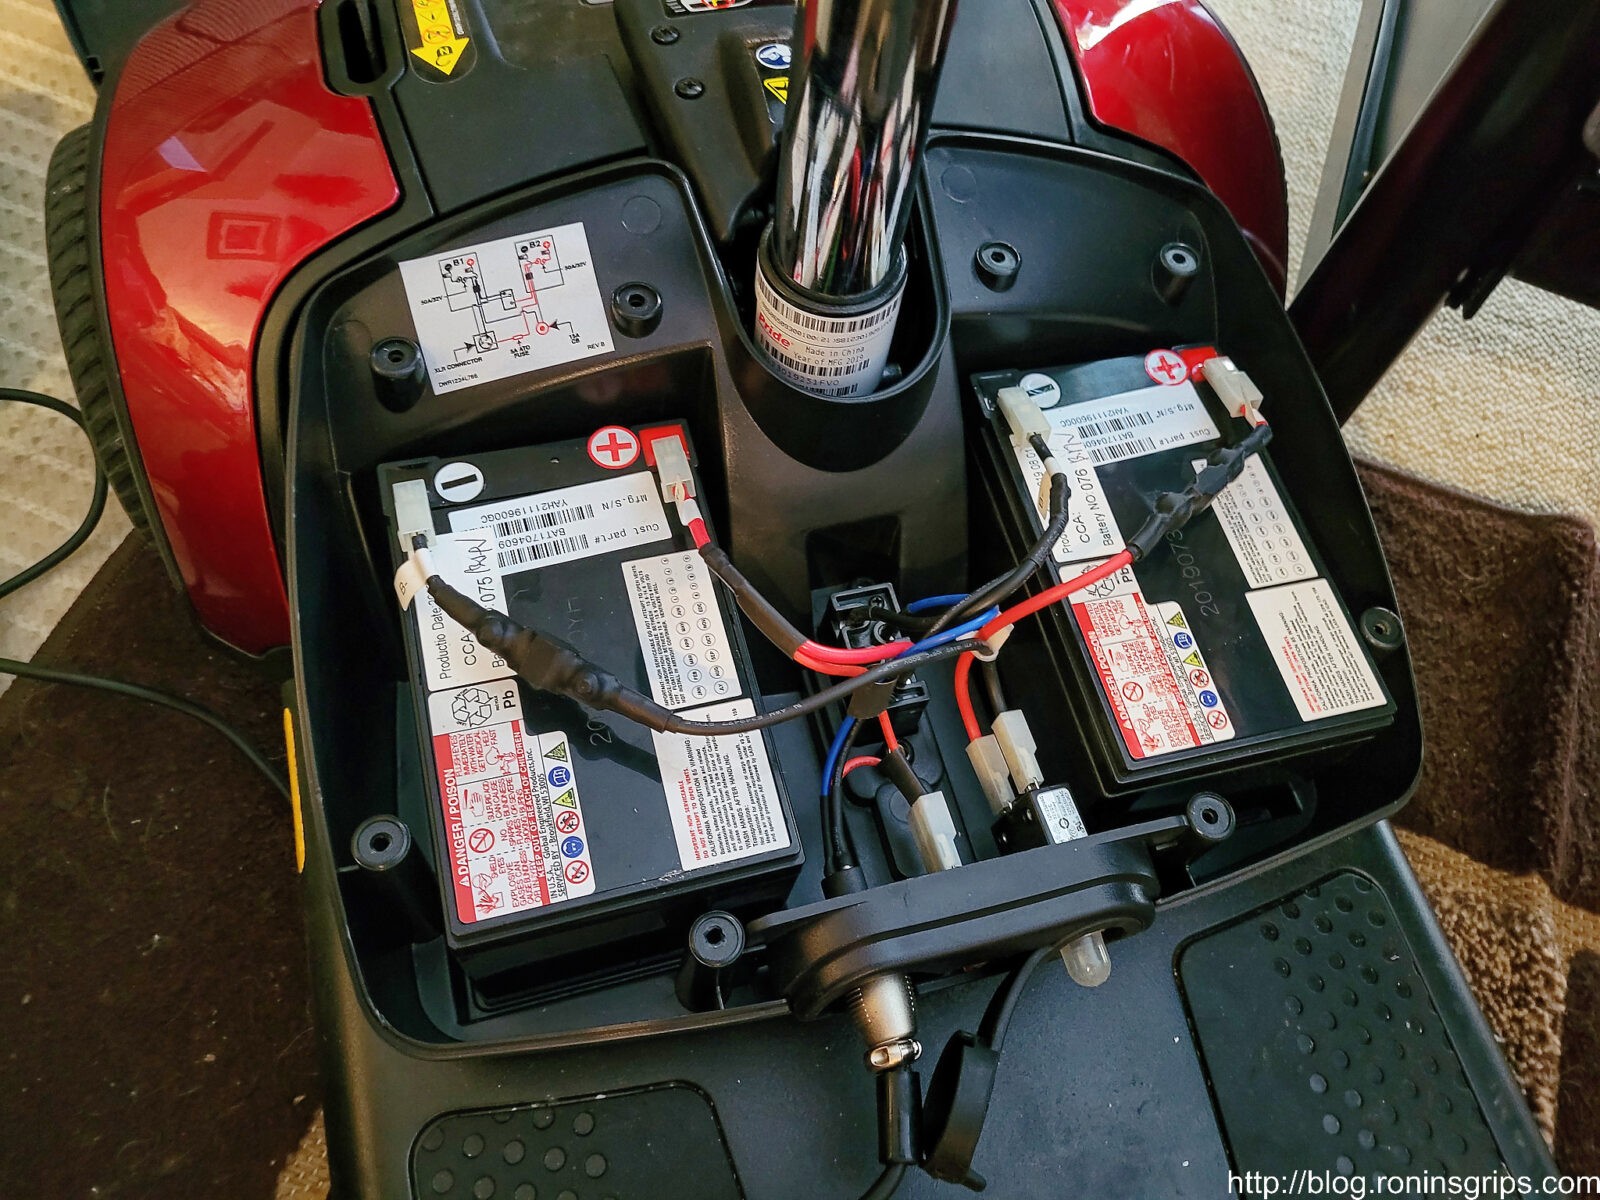
Our scooter is powered by two 12 volt 14 amp hour batteries wired in series to provide 24 volts. In the compartment is a wiring diagram and everything is done very nicely to avoid confusion – red wires to positive tabs on the battery and black wires to the negative tabs on the battery.
These are the 12 volt 12 amp hour batteries that are hooked up in series to provide 24 volts. If you look to the right of the silver plug, the two red wires white plastic connector is on a fuse assembly that protects the charger circuit that you will want to check and the far right side has a circuit breaker that is also worth checking. Pride says they can go up to 6.7 miles depending on factors such as the weight of the passenger and cargo. Note how everything is so well labeled, the wiring is very neatly done and they even provide a handy wiring diagram above the left battery. Whomever designed and then built this cared about what they were doing.
For those of you unfamiliar with direct current (DC) batteries, these two batteries are hooked up in series to produce 24 volts. This is done by connecting the negative terminal of one battery to the positive of the other and then the opposite as well. In the scooter, this is done at the wiring block in the middle. You don’t need to worry – just note the wires when you take it out (a photo helps) and do a battery at a time – black wire to negative and red wire to positive,
Note, there are at least two sizes of batteries used – their standard battery pack is rated for 6 miles and uses two 12 amp hour (Ah) batteries. There is a 9.7 mile bigger 18 amp hour (Ah) battery and it correspondingly uses a bigger cabinet so if you decide you are going to replace your batteries, confirm what is in your battery compartment first. You can change cabinets – or even buy entire battery packs ready to go. From what I have seen, the cheapest bet is to just buy the batteries and swap them out in your existing compartment. I also see batteries with other capacities like 15Ah and over 20Ah, I’d recommend you confirm that their physical sizes will fit whatever battery compartment you have.
The batteries hold the charge that runs the scooter but they must be recharged by using a battery charger. I should have checked this first but didn’t because I assumed it was the batteries but let me step you through what I did.
I put a voltmeter on each of the 12 volt batteries and they both read just a tad over 4 volts. So, not absolutely dead but boy were they spent. In doing automotive work, I would have expected the smart charger to sense the voltage and begin. Okay, something was fishy and it wasn’t adding up. It was time to look at the charger again.
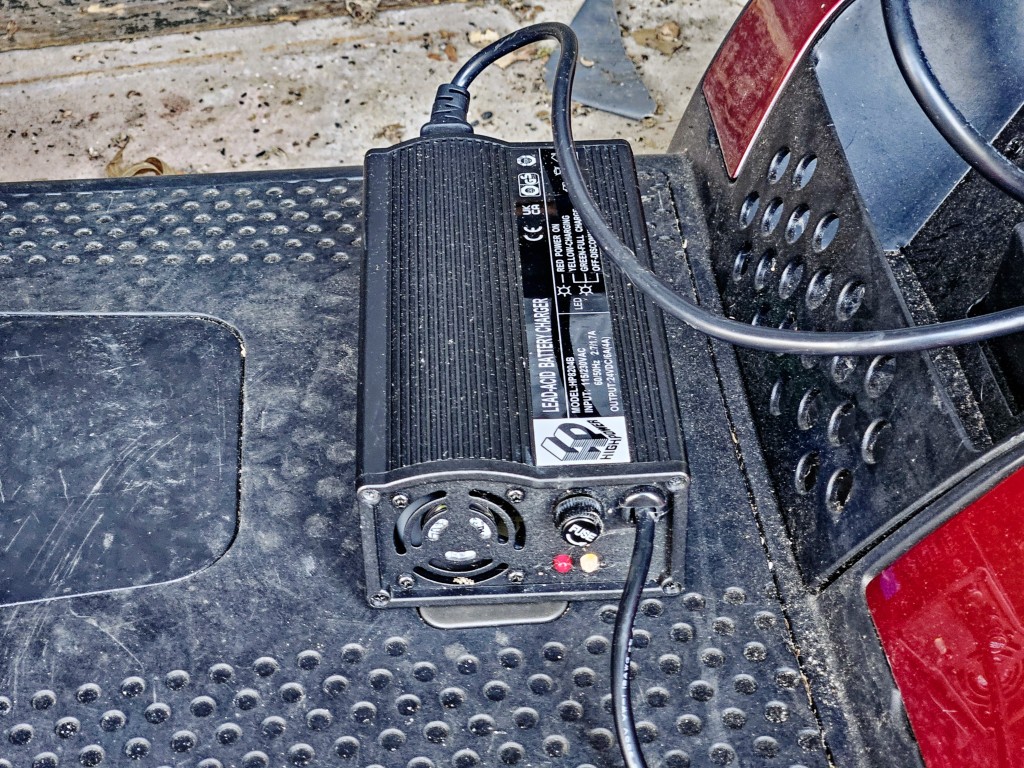
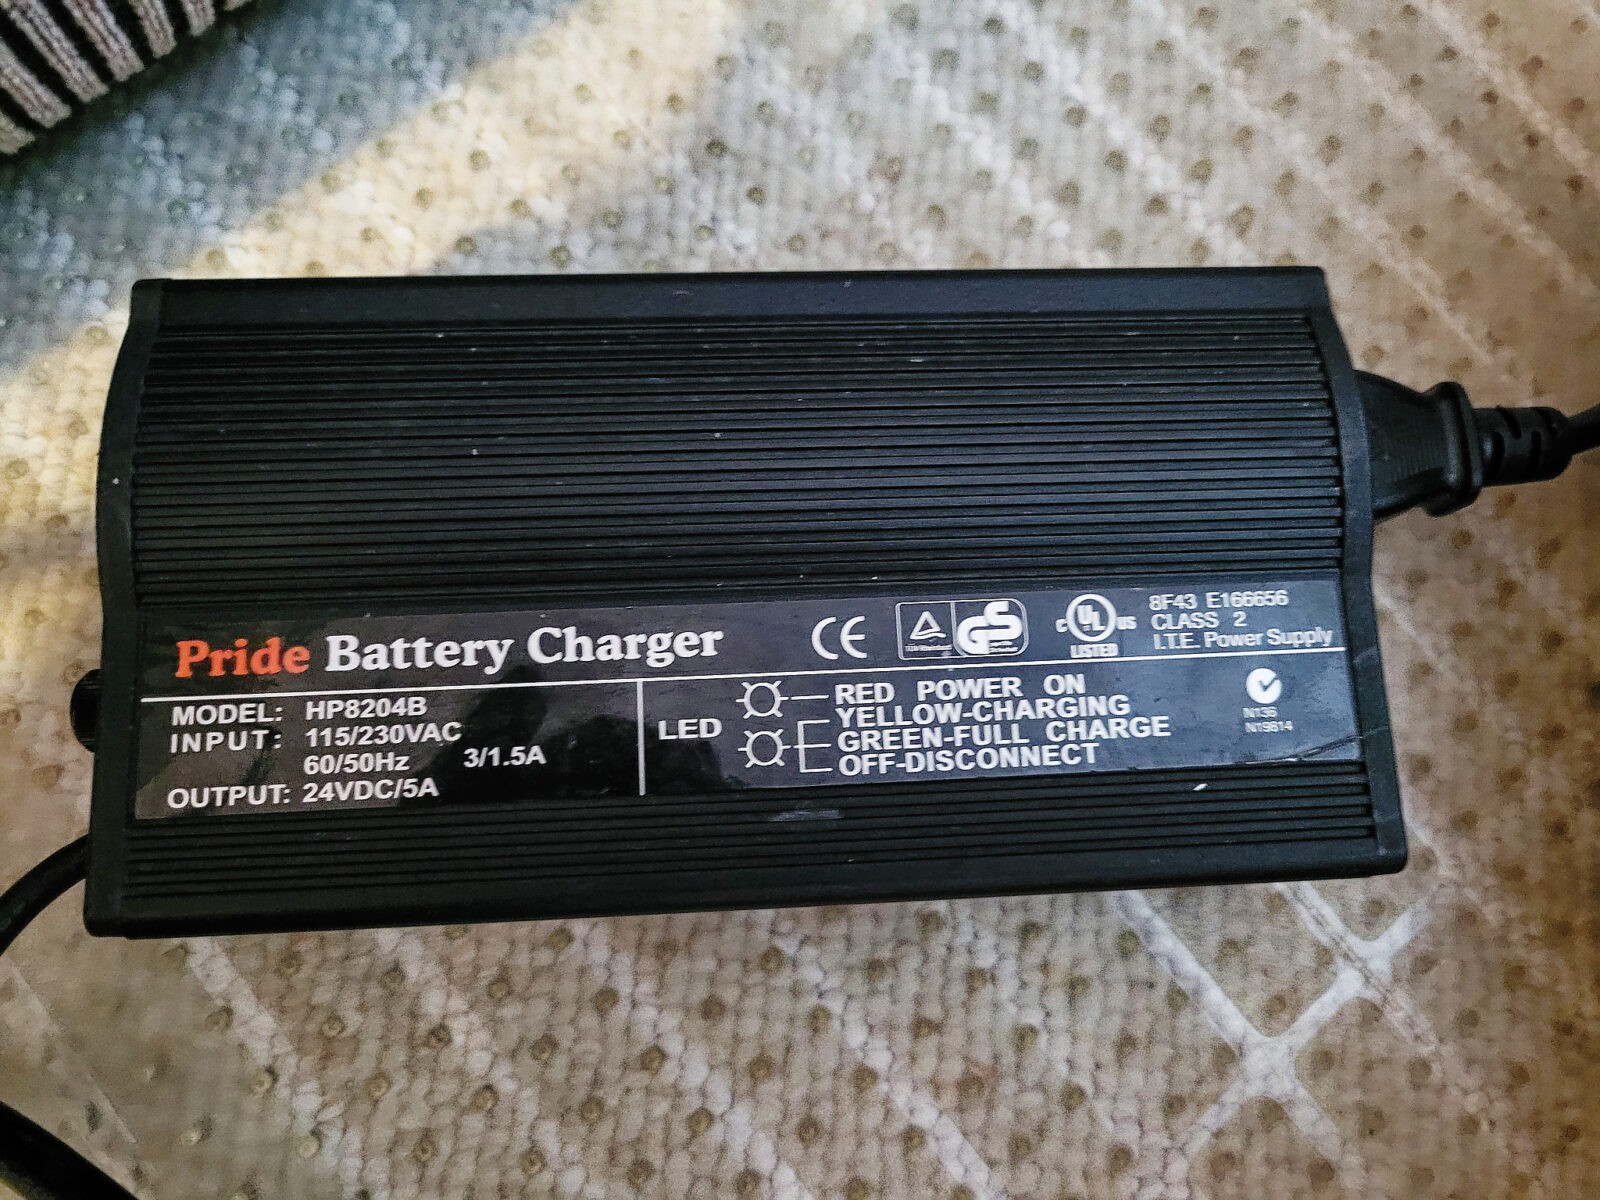
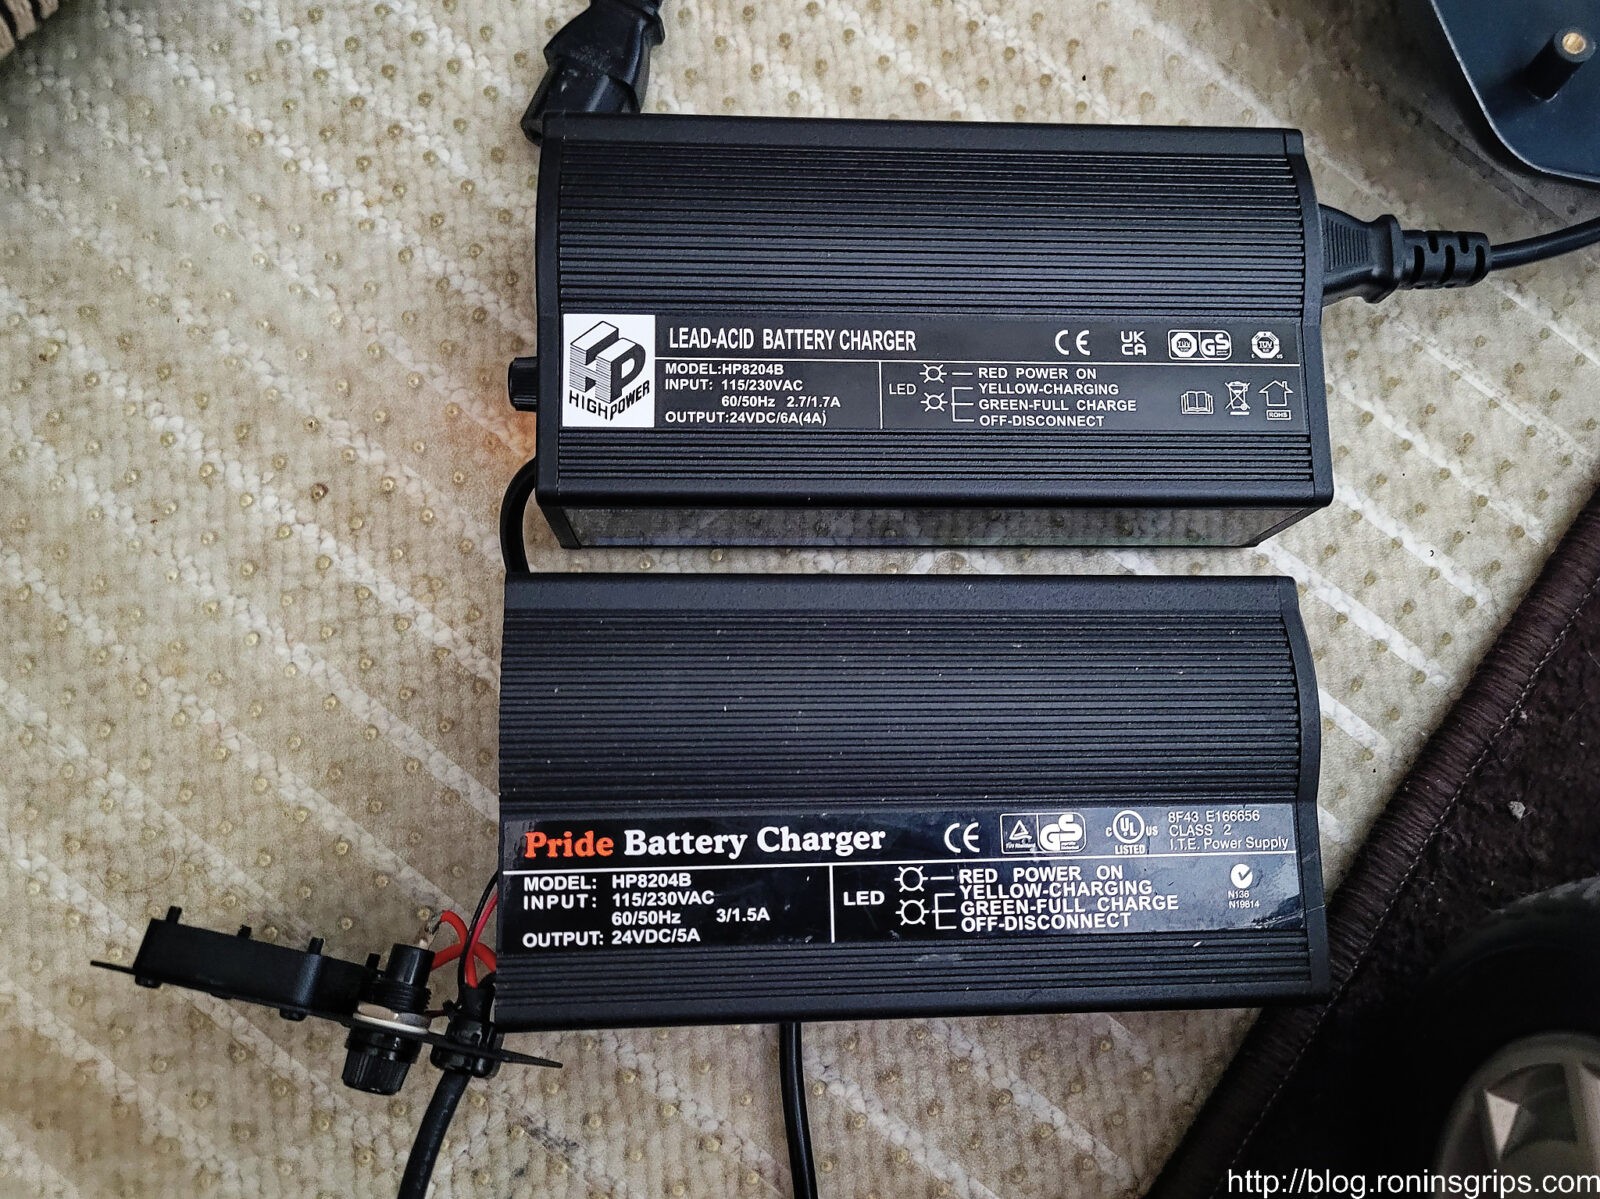
The scooter came with a Pride Mobility HP8204B charger rated for 24 volts DC at 5 amps. That would mean that if I took my meter and put it on the pins, I should read somewhere around 28+ volts (the exact volts is an “it depends” – I would have been cautiously happy with anything over 24 and stopping somewhere around 30).
This is the original charger. Only a solid red light would come on. That indicated it had power. The cooling fan never turned on and the second LED that should turn yellow for charging or green for fully charged never turned on.
I used my multimeter on the batteries with the Pride charger connected. Only the red bulb on the charger was lit. No fan, no yellow light and no additional voltage detected on the battery terminals. I should have read 13-14 volts when doing the positive and negative tabs on each individual battery with the wires connected but I read just the 4 volts (by the way I word it like this because it was 4 and some decimal but I didn’t write down.)
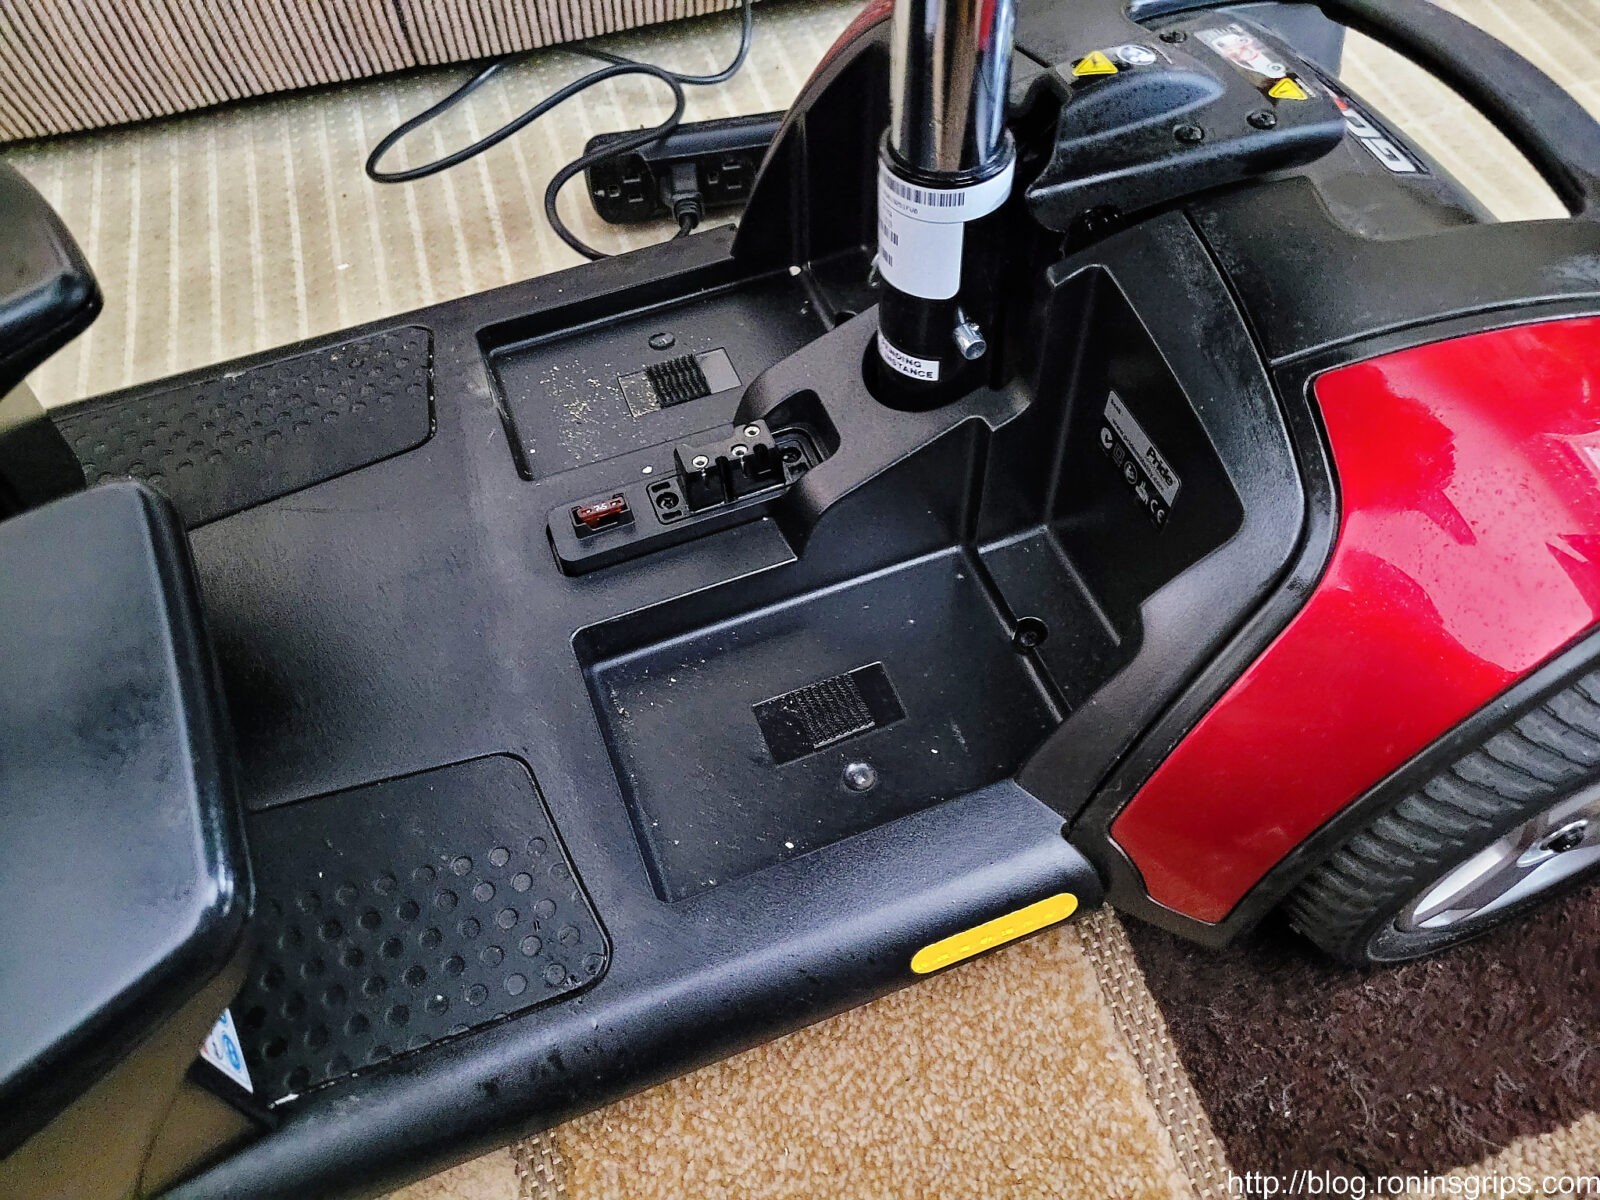
The fuse you can see outside of the battery pack between the plug and a circuit breaker on the front of the battery pack looked fine and tested okay for continuity.
In looking at the battery pack, I unplugged the pin 1 should have been positive and pin 2 should have been negative. I cautiously touched my probes on the two tips because I didn’t want to unnecessarily short the system out by accidentally touching positive and negative together. Guess what? Nothing – not a thing. My auto-ranging digital meter was doing it’s usual millivolt reading garbage but there was no real voltage coming through.
The next thing I did was to turn off the original charger and remove the fuse from the end of the charger with the lights – undoing the round cap will produce a glass tube fuse. You can usually see if the wire running from one end to the other in the middle of the clear glass is intact or burned out. It looked okay and just to be sure I ran a continuity test with my meter and it was okay.
I also pulled apart the plug that goes into the battery pack just in case something was lose and it read zero volts too. In case you are wondering why there are three pins (I wondered why) – pin three provides voltage to the scooter so the little computer knows the charger is still attached and will not let the driver move the scooter – pretty good idea.
Okay, it was time to Google the scooter and the charger to learn more. The fact that only the red light was coming on but not the fan and/or the yellow charging light was making it look the the charger had failed. I did the “sniff” test to see if I could smell if anything had burned out but if it had, it must have been some time ago as I didn’t detect anything. In short, the charger was history.
There are tons of charger options on Amazon but I want to caution you against the little sealed chargers. They do work but they are going to get hot and they will probably fail at some point due to all of that heat. There’s a reason Pride went with the a fan cooled charger – they get hot converting AC (wall outlet) current to 24 volts DC (direct current).
Companies like Pride rarely make their own chargers. They will either use an existing charger on the market and not bother covering up the name of the maker or they will pay for it have their brand name on the decal. Pride opted for the latter or at least that’s what I think they did. The trick to realize here is that by searching on HP8204B, you can find either the original maker or another firm who did the same thing – had their name put on the charger. Regardless, you can save a bundle off a new Pride charger.
In my case, I found a seller named “ENCAREFOR” on Amazon selling what seemed to be the exact same charger but with the label “High Power” on it. Besides the label, the rated output is at 4 amps vs. 5 which means it will just charge a tad slower. It was going for $89.99 with Prime One Day shipping but I held off as I realized I needed to test the batteries and the scooter before I spent more money. In other words, I knew the charger was bad but didn’t want to spend more money if the scooter itself was burned out – if it was just the batteries, I could still order them.
By the way, you can buy used OEM Pride chargers off of eBay. I’ve had mixed experience with used chargers in general so I tend to just buy new. If you don’t mind gambling on a used one, they are on eBay.
Used a Noco Genius Car Battery Charger For Testing
At this point I was pretty sure it was charger and also thought that the batteries might be okay. Why? First off, there is a sticker on the mast pole of the seat that said the scooter was made in 2019 – that meant it was three or just under three years old (especially given I was doing my troubleshooting in mid-February 2022). Batteries can last maybe five years give or take. If the voltage was zero, I’d bet they were junk but since I was getting just over 4 volts from each battery independently, they weren’t completely dead. I started to wonder if a good reconditioning and charge might work to bring them back to life. I had just the charger to try.
Any 12 bolt charger can do the job provided you charge the batteries one at a time.
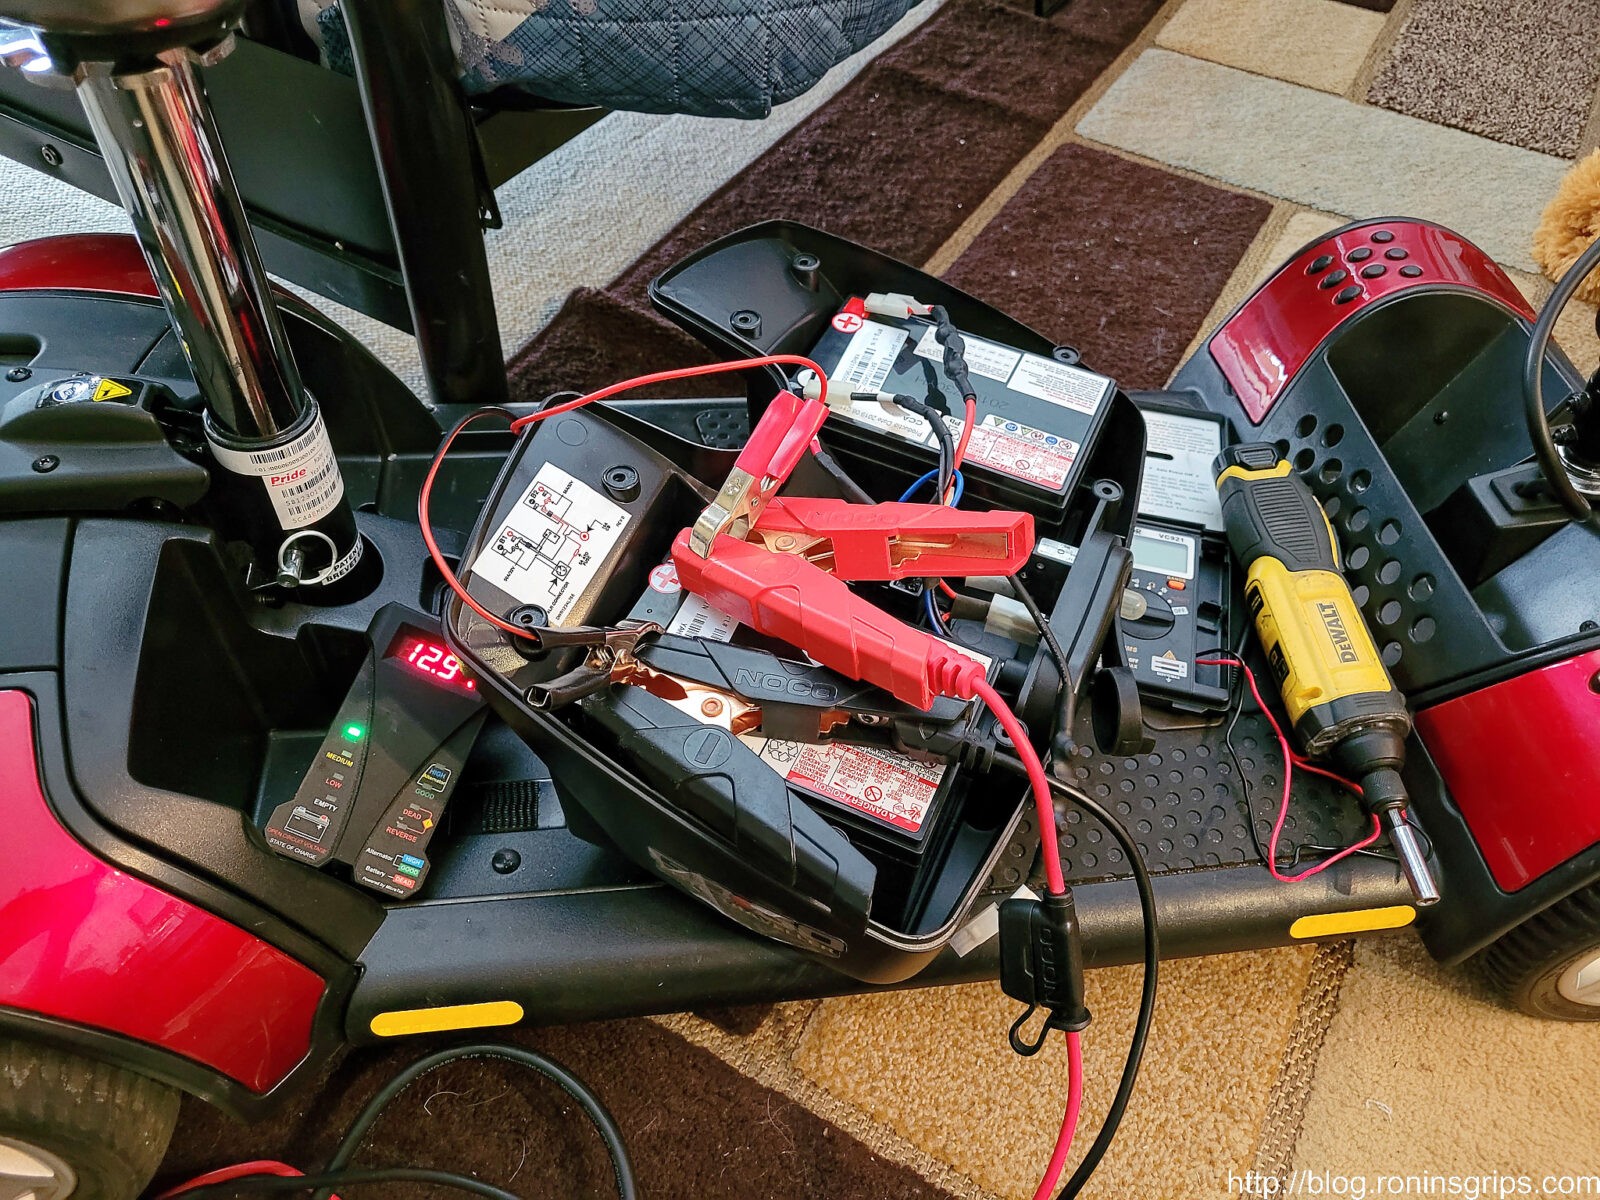
I undid the battery cables from the first battery only and directly connected the Noco to it. I charged for one cycle and then ran a repair cycle. During repair, the charger pulses the battery to desulfinate it.
Don’t let all the wires intimidate you. I hooked the plus (red) clamp of the Noco to the plus (red) terminal of the battery on the left, I then hooked the negative (black) clamp from the Noco to the black terminal of the same battery. I have a small voltmeter that clamps ,on attached also so I could monitor progress — that’s strictly optional.
Results
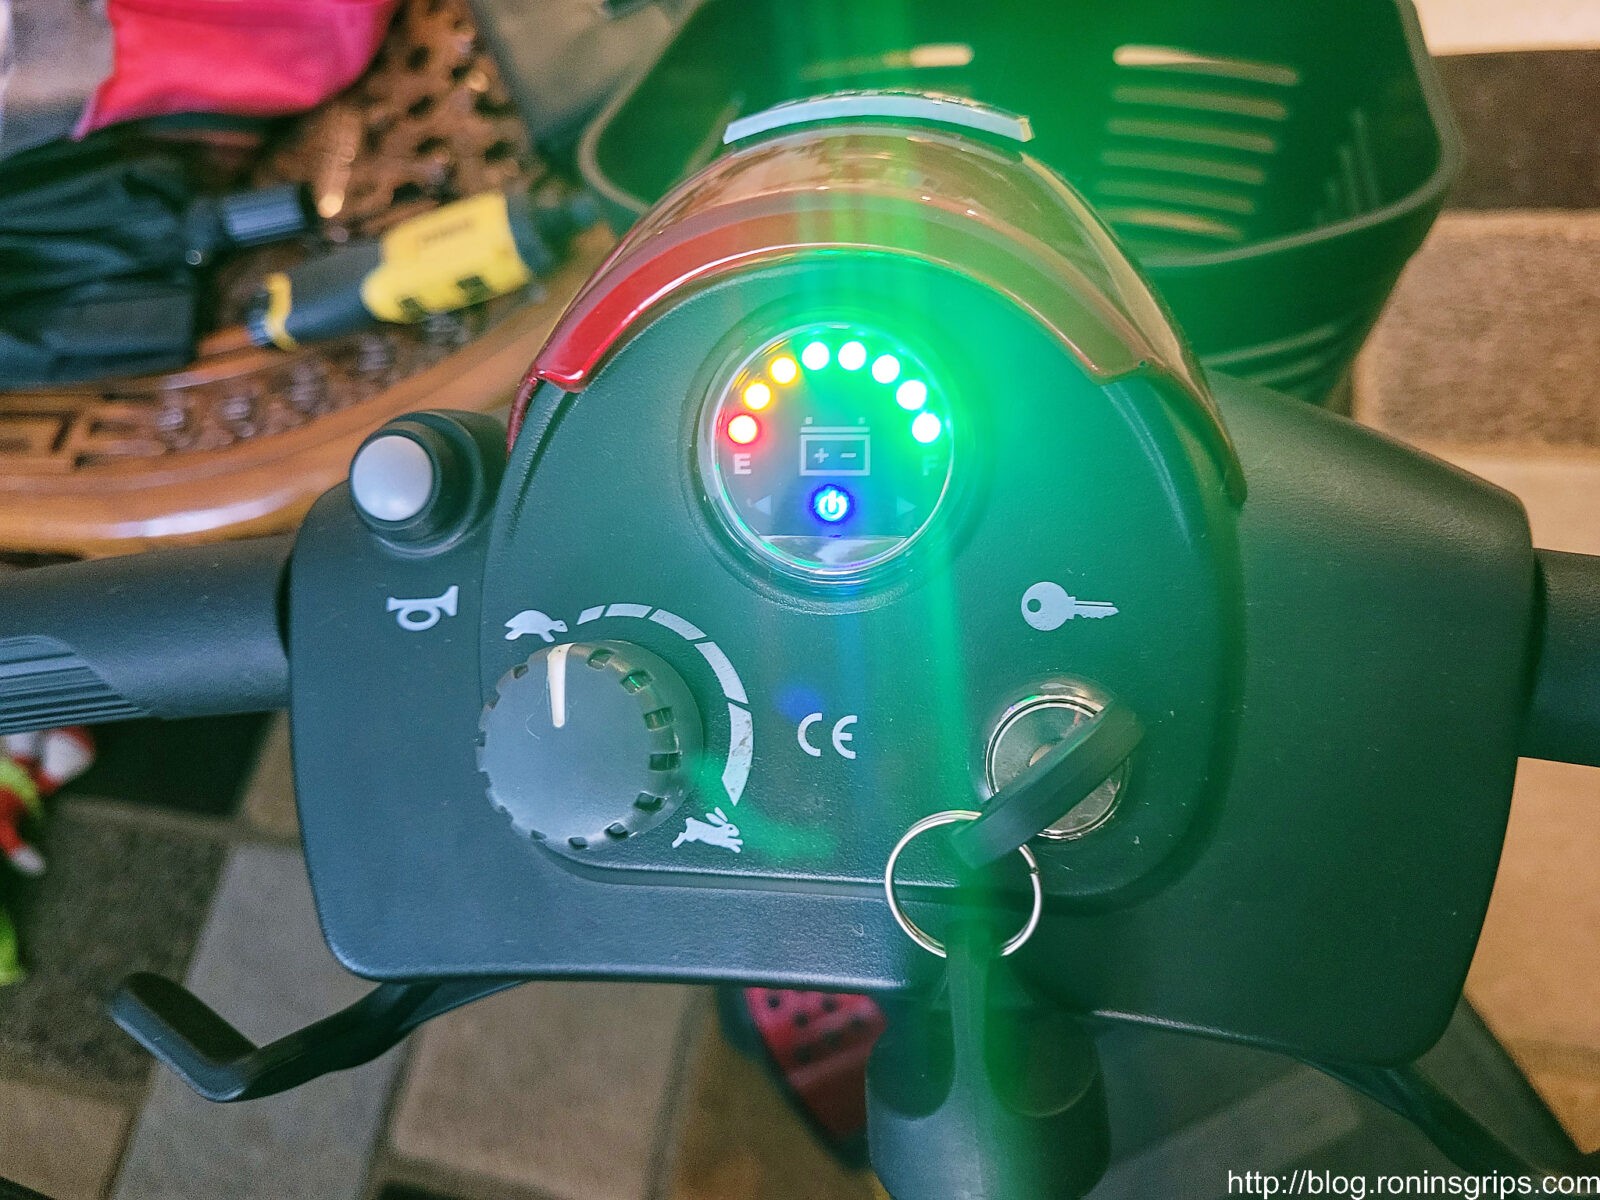
When the charging was done with both batteries, I connected the scooter’s cables back and seated the battery back into its cradle. I then turned the key on for the scooter and moved it forward and backward. It worked just fine. I checked the batteries and the voltage was holding – it wasn’t dropping down.
This is what I wanted to see — the batteries were fully charged. I drove the scooter around the house and the charge never went down. I also learned that scooters are bizarre little things to drive – their turning is like sitting upright on sensitive go cart.
Other than the decals and the lower 4 amp output, the new “High Power” charger looks identical to the Pride unit. Note, I’d opened the front of the unit up to inspect the inside — the front panel is what is dangling in the bottom left of the photo.
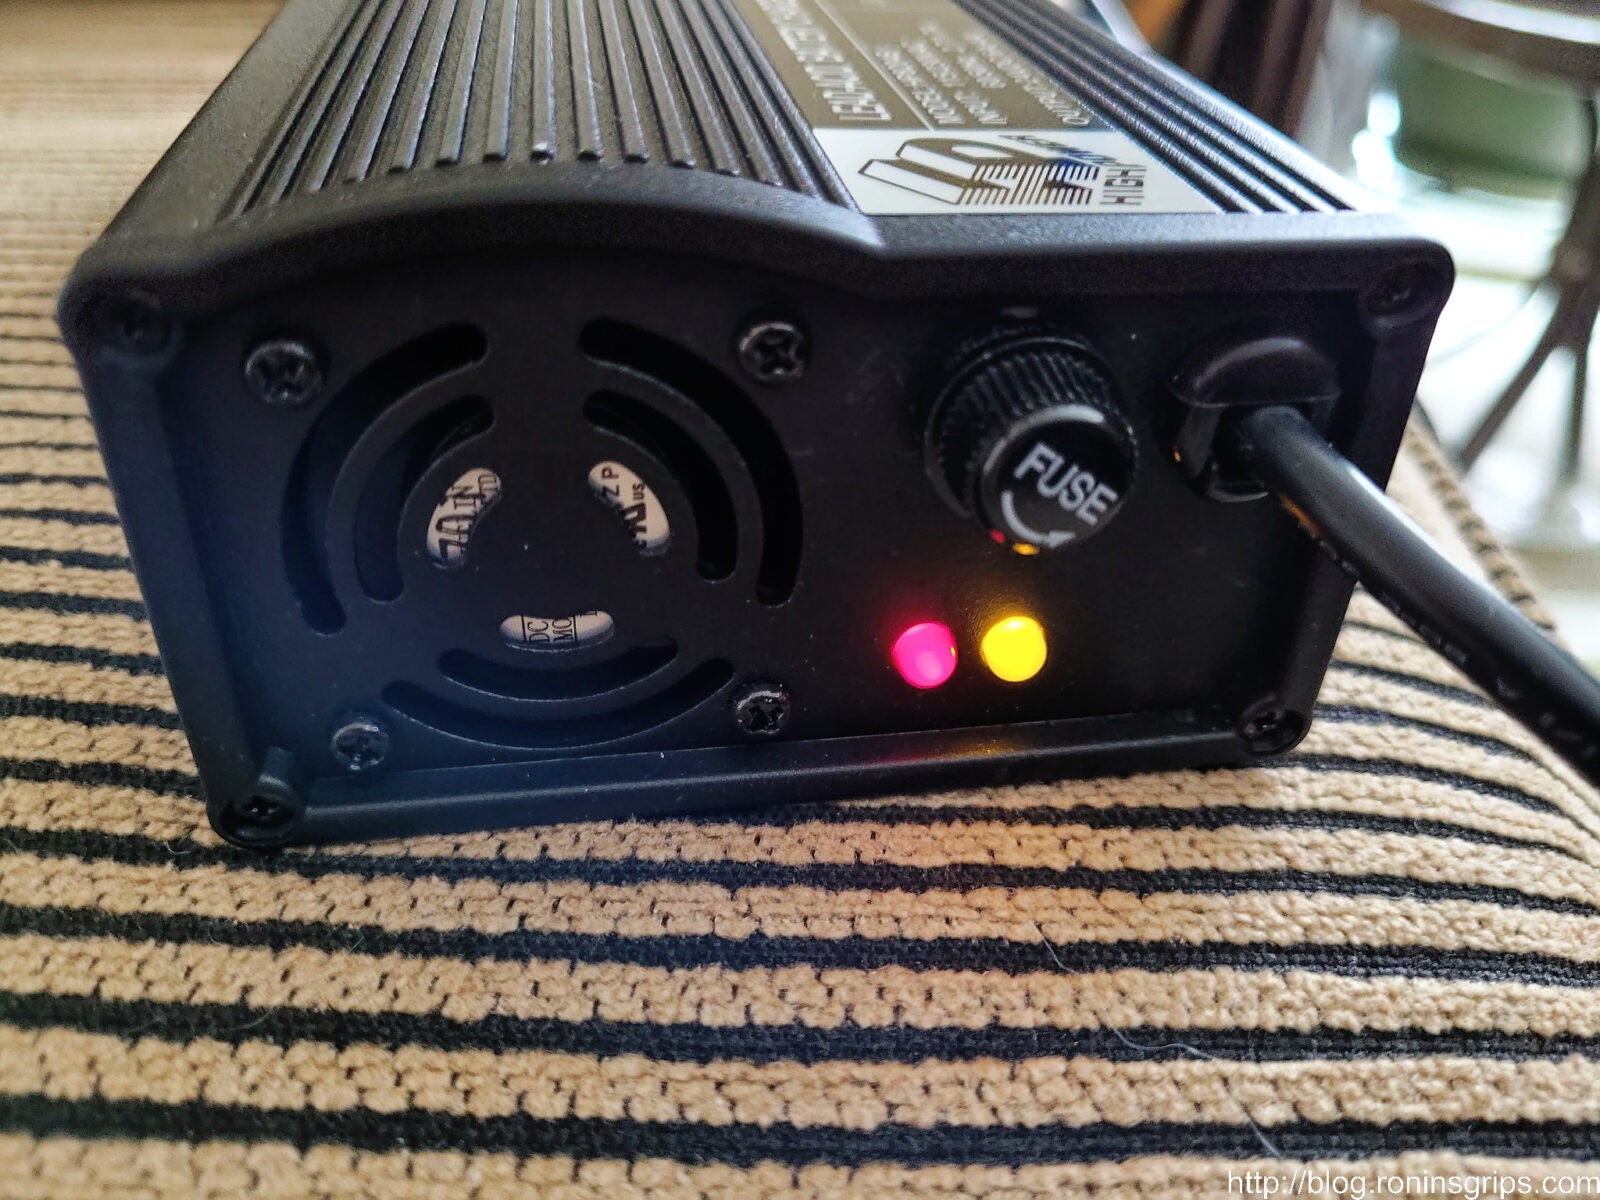
As soon as I plugged in the new charger and turned it on, the red power light and yellow charging lights came on.
By the way, the charger’s fan will make a pulsing or surging sound as the speed changes as it nears the end of charging. This is normal and will give you an indicator that charging is almost complete.
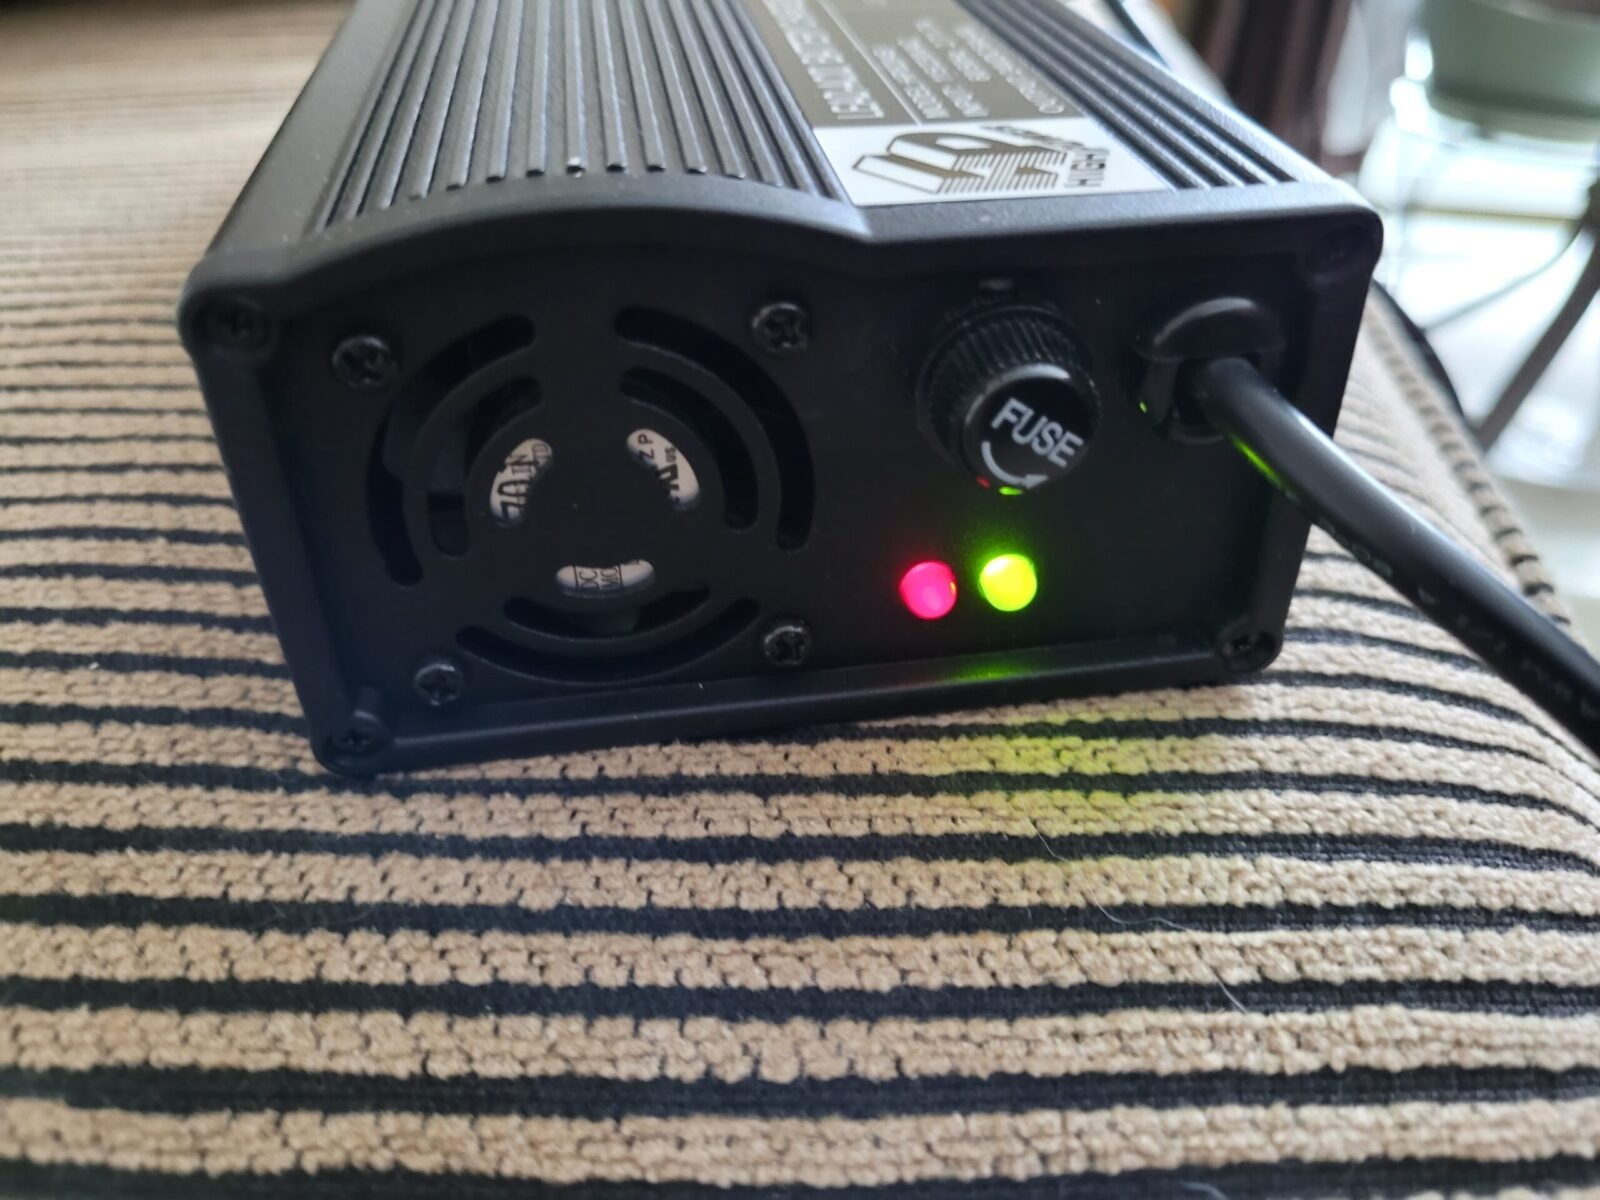
When the scooter’s batteries are fully charged, the yellow light will turn green. The fan will make a pulsing sound as the charging nears completion.
Bottom line, the batteries and scooter were fine – it was just the charger that had failed so I ordered the replacement above from Amazon and it topped off the batteries. I drove it around the house some and everything was working just fine.
In Conclusion
So I learned a few things. The scooter was exceptionally well made is my first comment. Second, I should have started from the wall and worked towards the scooter vs. focusing on the batteries to start based on what the fellow told me.
I should have confirmed power to the charger, then that there was no power from the charger to the scooter and ordered a new charger. I’d bet a new charger could have recovered the batteries – the documentation says they can recondition a battery but who knows. Even though I started with the battery, at least I could run the Noco charger through charging and repair cycles – I’ve used it to recover a number of really compromised batteries over the years.
The scooter is ready and now we need to wait for warmer weather to let my mother-in-law practice in the driveway. I hope this story helps you out.
Note, I have to buy all of my parts – nothing here was paid for by sponsors, etc. I do make a small amount if you click on an ad and buy something but that is it. You’re getting my real opinion on stuff.