Tag Archives: M76

Part 2: Two Rivers Arms Yugo M76 Rifle – Mounting the Optic

I let the cat out of the bag a bit with my first post – I don’t like the Communist offset scopes. Yes, they are traditionally correct but I prefer a scope mounted on the centerline of the rifle with better optics including variable magnification. I had a combination in mind right from the start – the RS!Regulate mounting system and a Vortex Hog Hunter scope – why? Because I actually want to use this rifle to hunt hogs.

RS!Regulate Mount

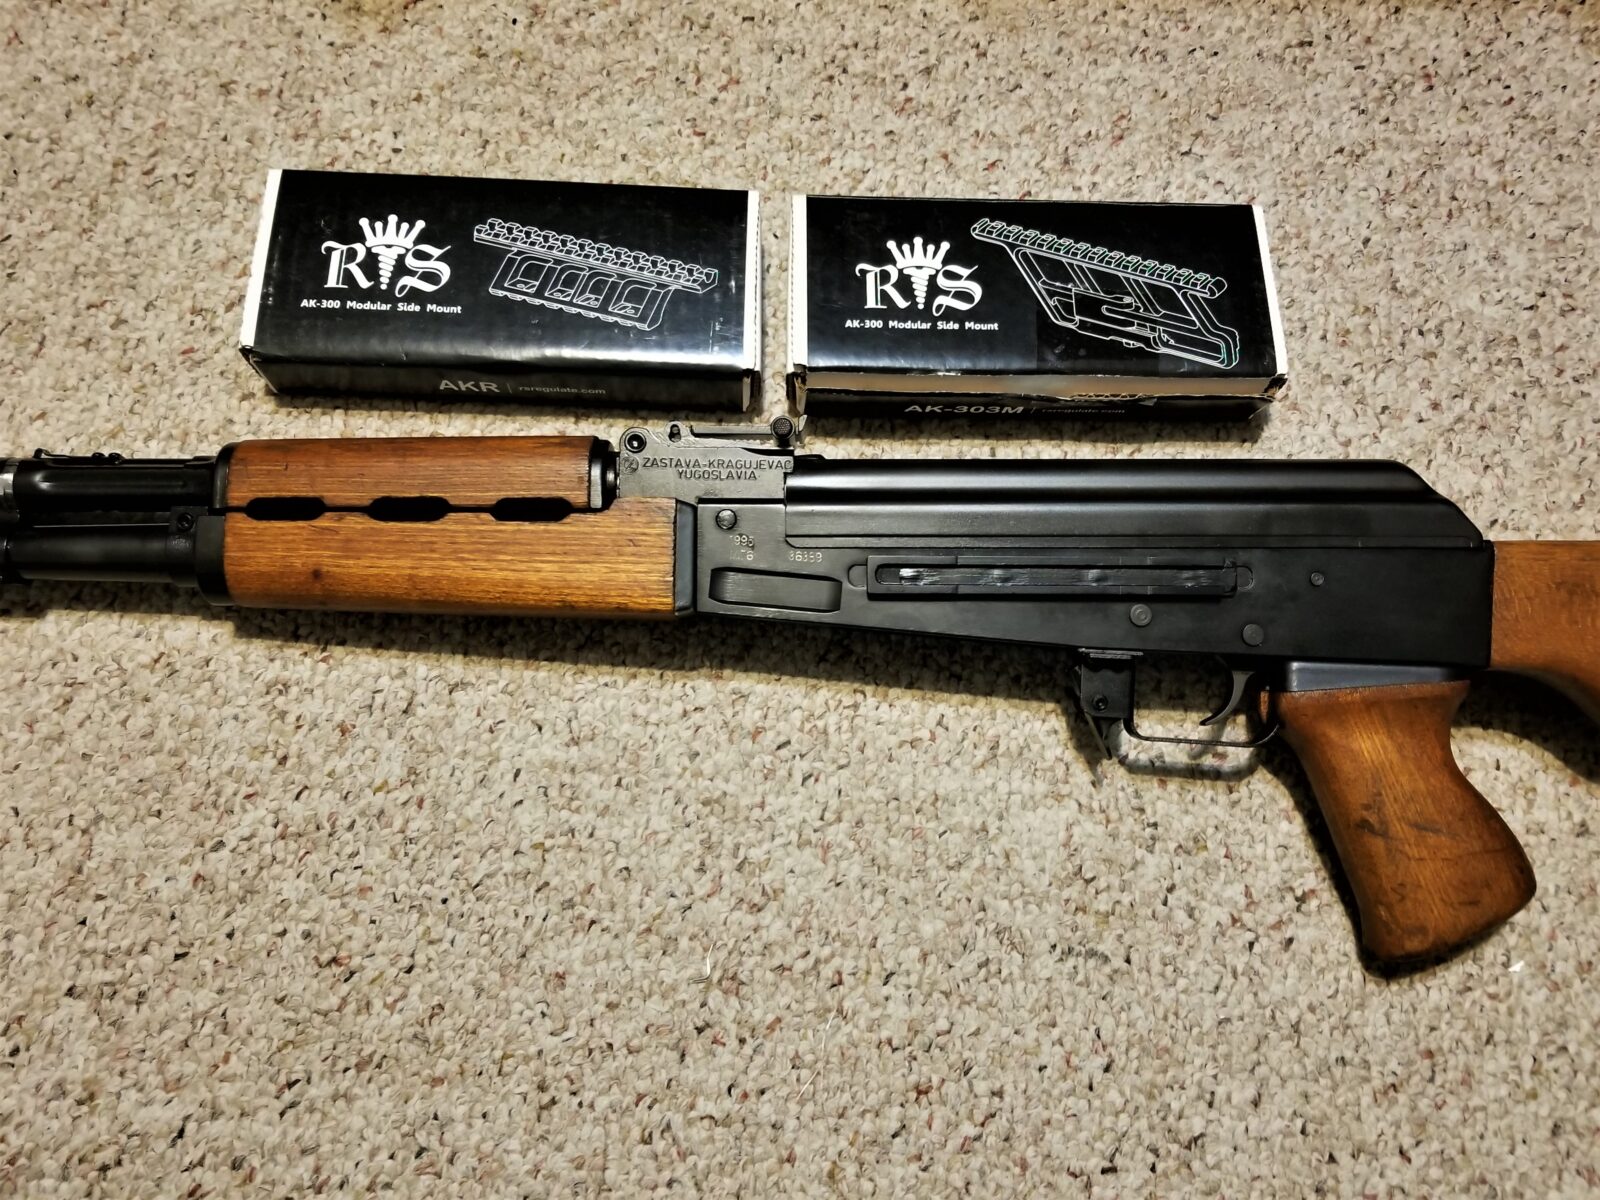
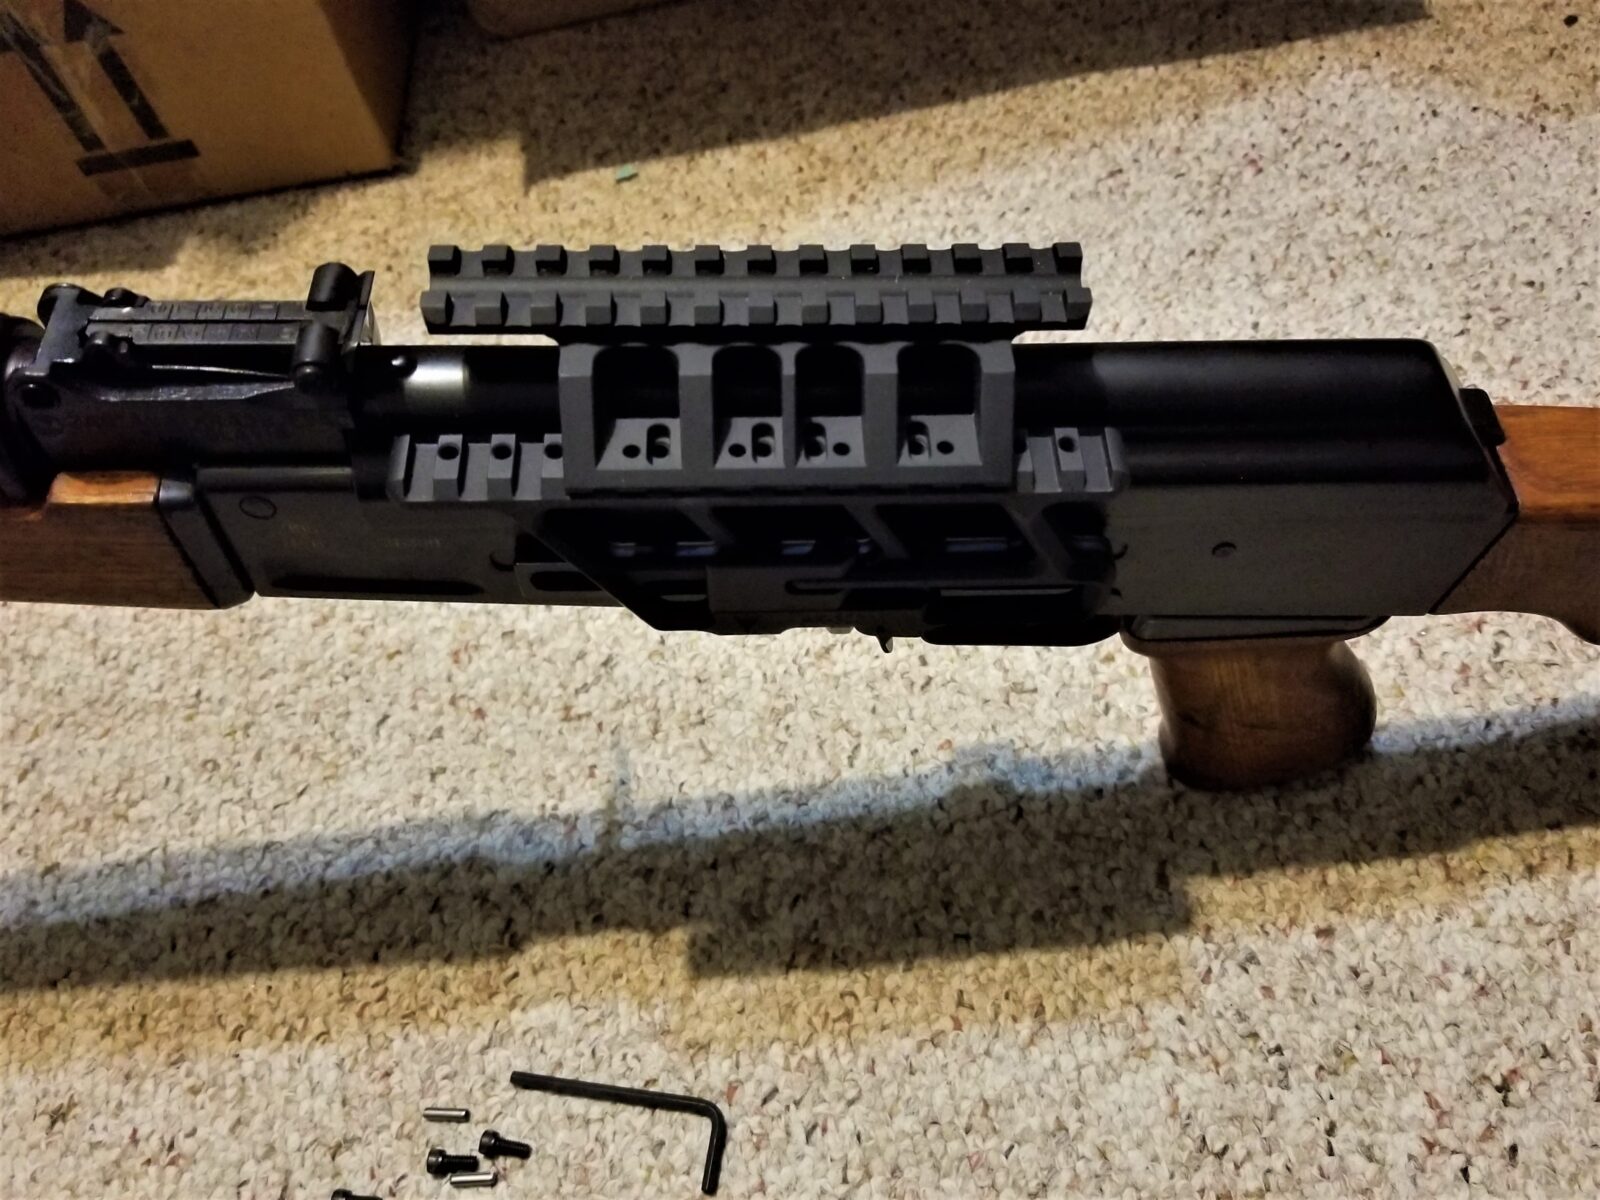
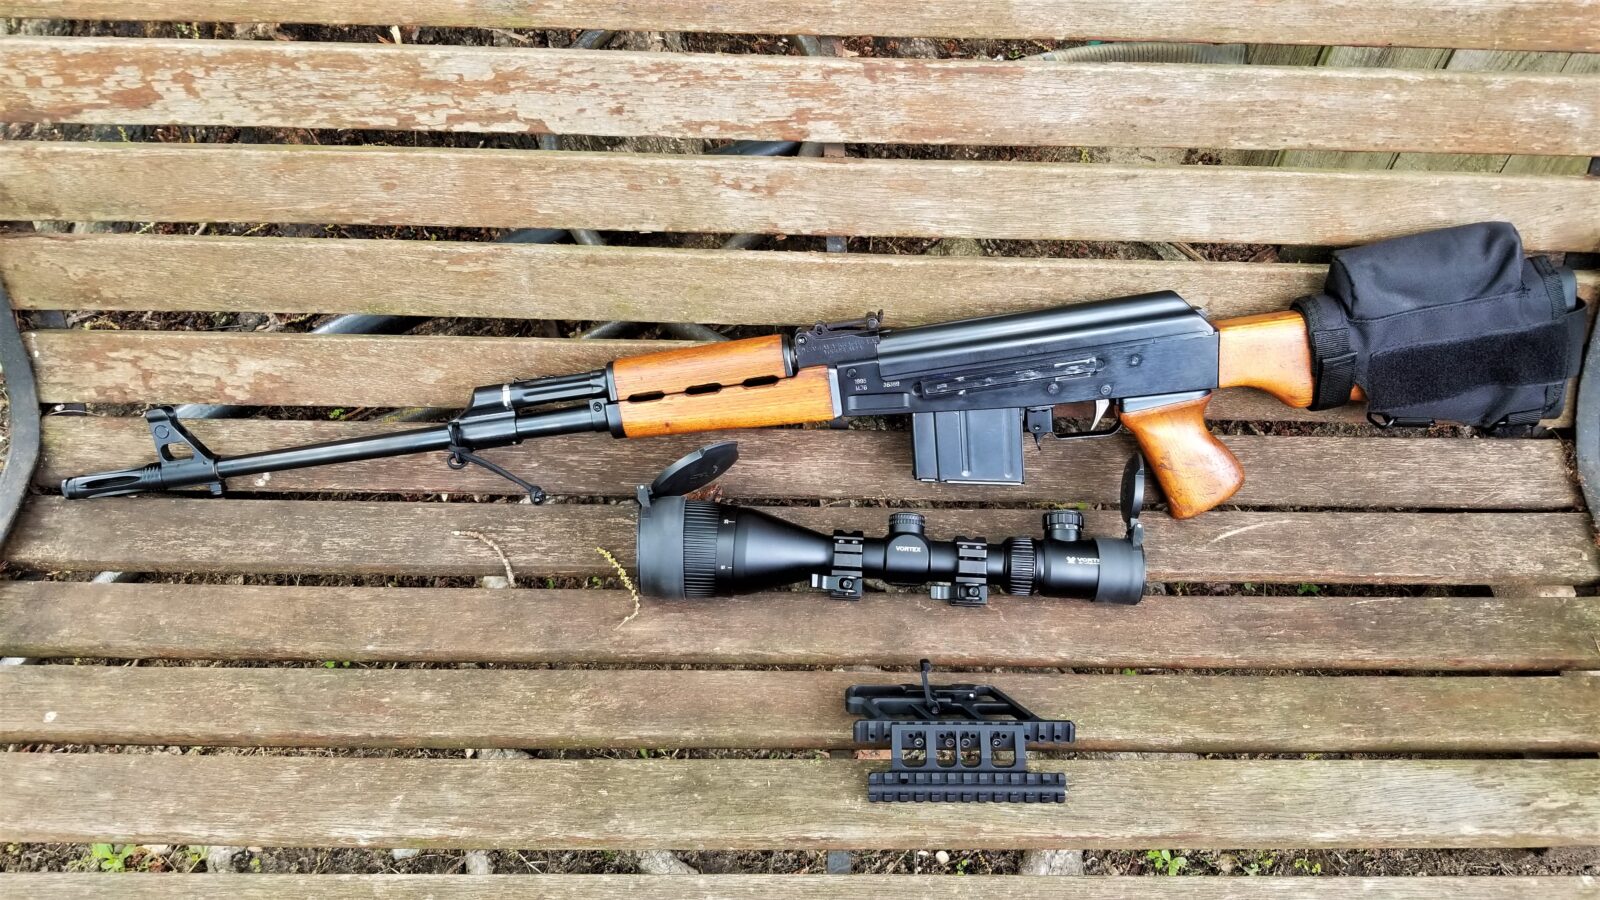
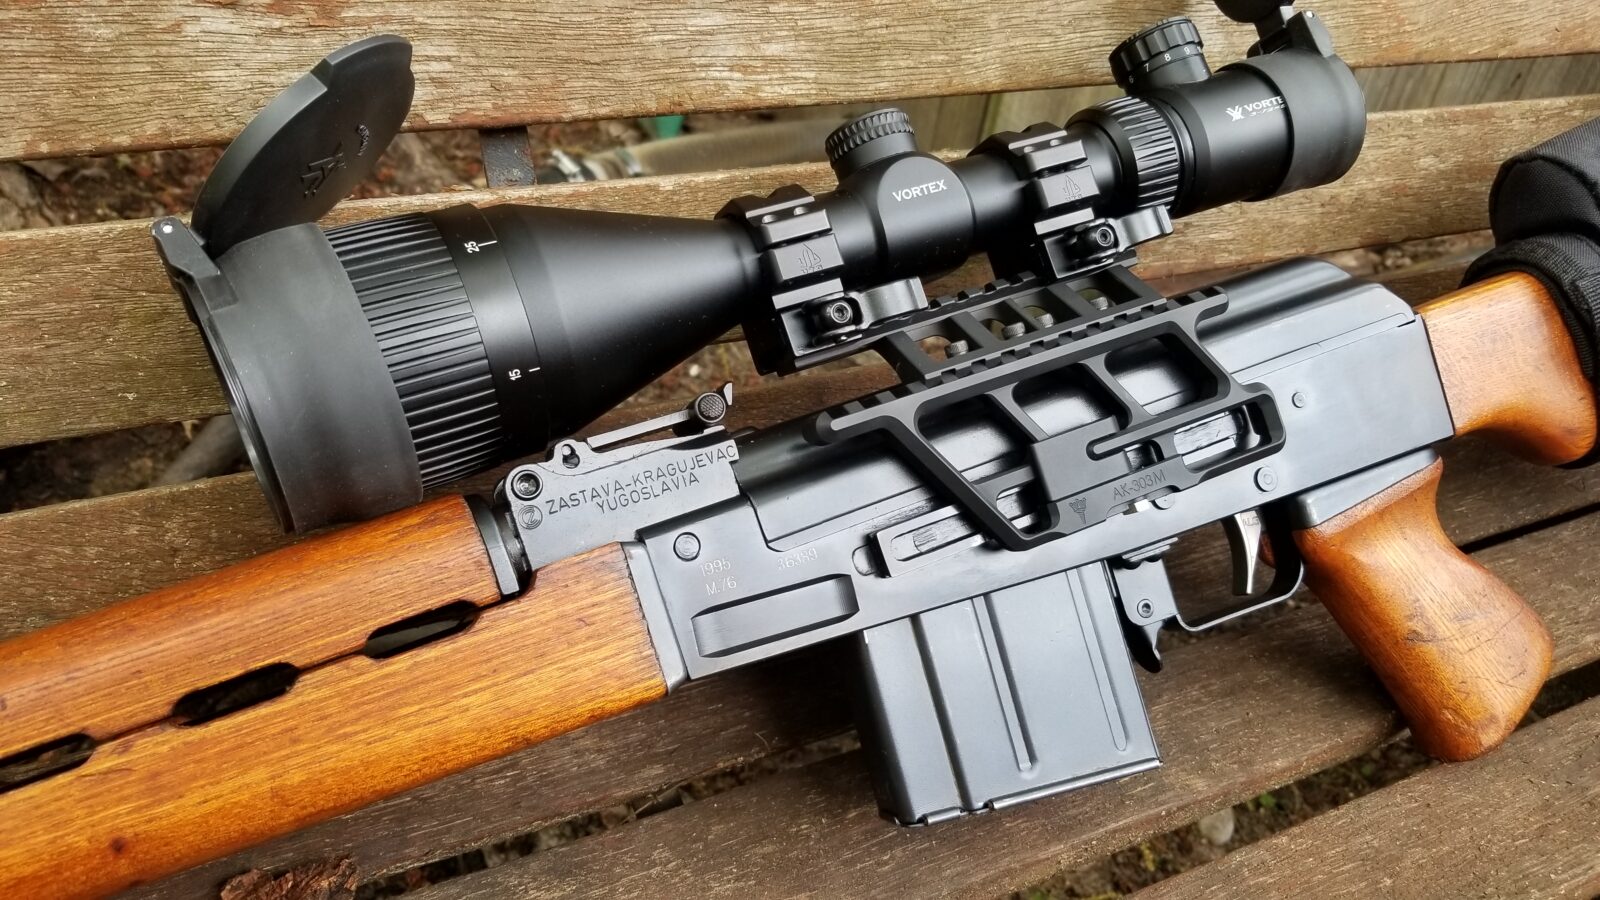
Based on past projects, I knew that the best mounting system for my project would be the RS!Regulate system. The reason I am so adamant about this is that the design allows for a ton of flexibility in terms of front to back movement as well as left to right. Specifically, I chose the AK-303M lower rail and the AKR upper.

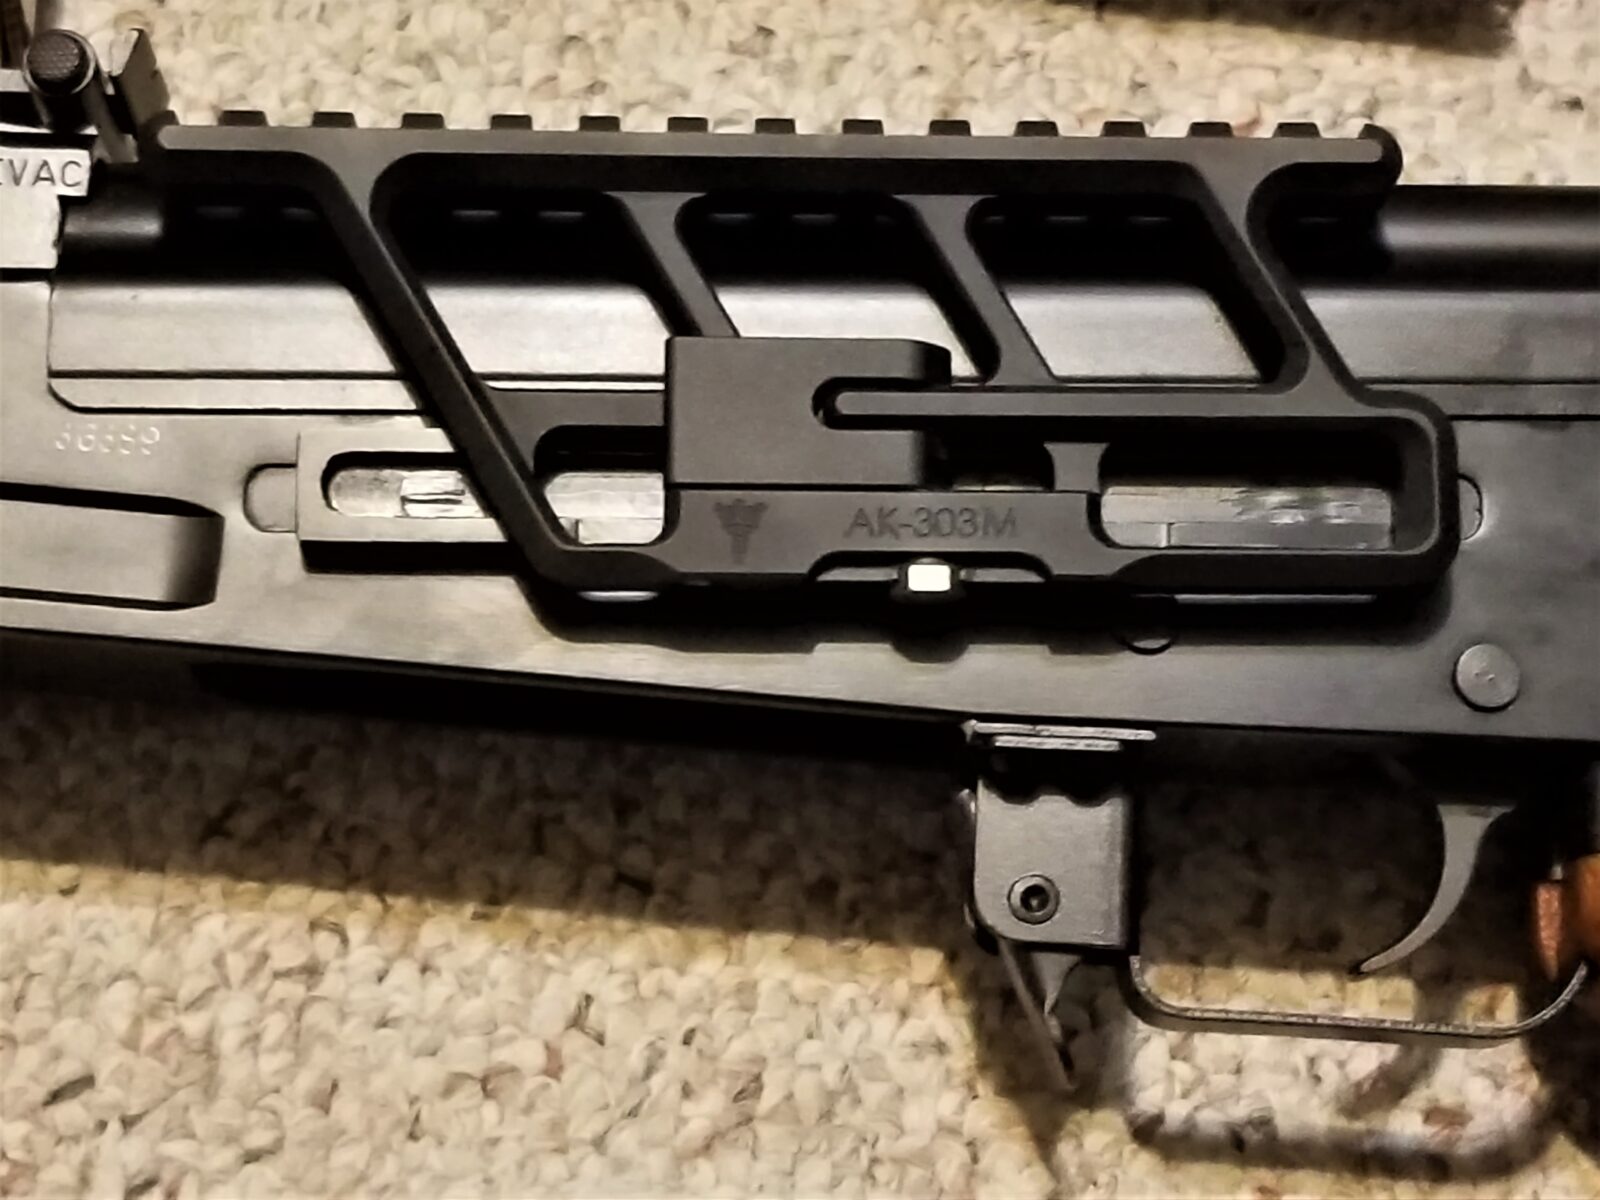
You basically install the AK-303M lower on the side rail. You can adjust the screw under the lever to adjust how much tension is applied when the lever is locked down.

My next step was to install the AKR top section and located it about three slots back as a starting point. In my case, that worked just fine. I then eyeballed the left to right location over the centerline of the rifle and installed the screws. Note, I do not drill and install the pins until test firing just in case I decide to move the rail around.

Here is my M76 with the two parts of the mount. You can get a good look at the side rail on the receiver as well. Don’t get ripped off by cheap counterfeit products that don’t hold up – only buy your RS!Regulate mounts either direct from them or a reputable dealer – not Amazon or eBay.

This is the AK-303M lower rail section. You can see the shiny adjustment screw right under the “-30” part of the AK-303M product stamp.
This gives you a good view of the AKR unit and how the ingenious design allows you to basically use an upward facing Picatinny rail on the AK-303M to mate with the downward facing rail on the 303M. The slots are where the screws go and you can see how they enable the left to right movement. The circular holes are where you can drill and install pins *after* you finalize the layout – I would recommend doing this after test firing or even several range visits.

Vortex Crossfire II Hog Hunter Scope

Part of my design criteria for the rifle was to use it for hog hunting. That would entail using a scope that is pretty versatile in daylight as well as dusk. To accomplish this, you need a scope with a big objective to gather as much light as possible (50mm or better), a 30mm tube and good glass to aid in the transmission of the image.

In terms of the reticle, I really did not see a need for something really fancy with tons of MRAD or MOA markings for calculating distance, drop and windage. However, I did know that I would need some form of illumination for low light.

Lastly, in all candor, I knew I was putting an optic on a rifle that would likely shoot 1.5-2″ at 100 yards. I did not need to put a super-high end optic on the rifle – just one that was good enough and reliable.

After doing some reading, the ideal scope with the above design criteria and a very affordable price turned out to be the Vortex Optics Hog Hunter (SKU: CF2-31049). The specs are pretty good:

  • Magnification 3-12x
  • Reticle: V-Brite Illuminated (MOA) – The center 0.5 MOA Red Dot is illuminated and the subtensions are in MOA
  • Objective Lens Diameter 56 mm
  • Eye Relief 3.5 inches
  • Field of View 36.7-9.2 ft/100 yds
  • Tube Size 30 mm
  • Turret Style Capped
  • Adjustment Graduation 1/4 MOA
  • Travel Per Rotation 15 MOA
  • Max Elevation Adjustment 60 MOA
  • Max Windage Adjustment 60 MOA
  • Parallax Setting 10 yards to infinity
  • Length 14.3 inches
  • Weight 21.1 oz (just over 1.3 pounds)
This is the Vortex Hog Hunter 3-12x56mm scope. You can see the RS!Regulate mount on the rifle and also the UTG rings that I used for prototyping. Now you may be wondering why I am using quick release rings on a removable scope mount so let’s discuss that next.

Quick note on the lens caps. They are from Vortex but I am not super excited by that front one. They seem very well made but it is definitely a stretch to get the rubber over that huge front bell. I’m going to stick with them for now.

Figuring Out The Rings

In most cases, you want to mount the scope as close to the center of the bore as you can. This reduces the angle from the center of the scope to the center of the bore.

This is overly simplistic in that it ignores ballistics but it is trying to illustrate that all things being equal, a lower mounted scope will be closer to the centerline of the bore after the zero point and require less adjustment/correction than a higher mounted scope.

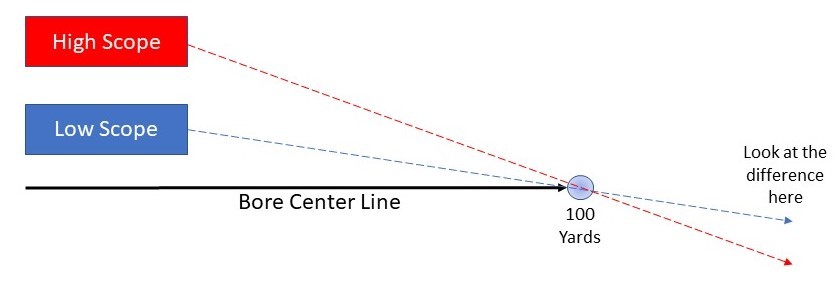
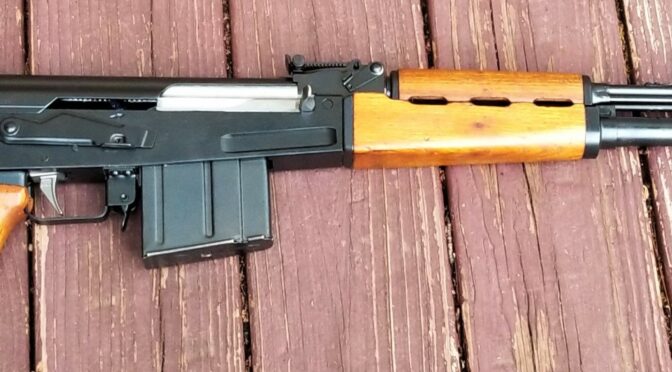
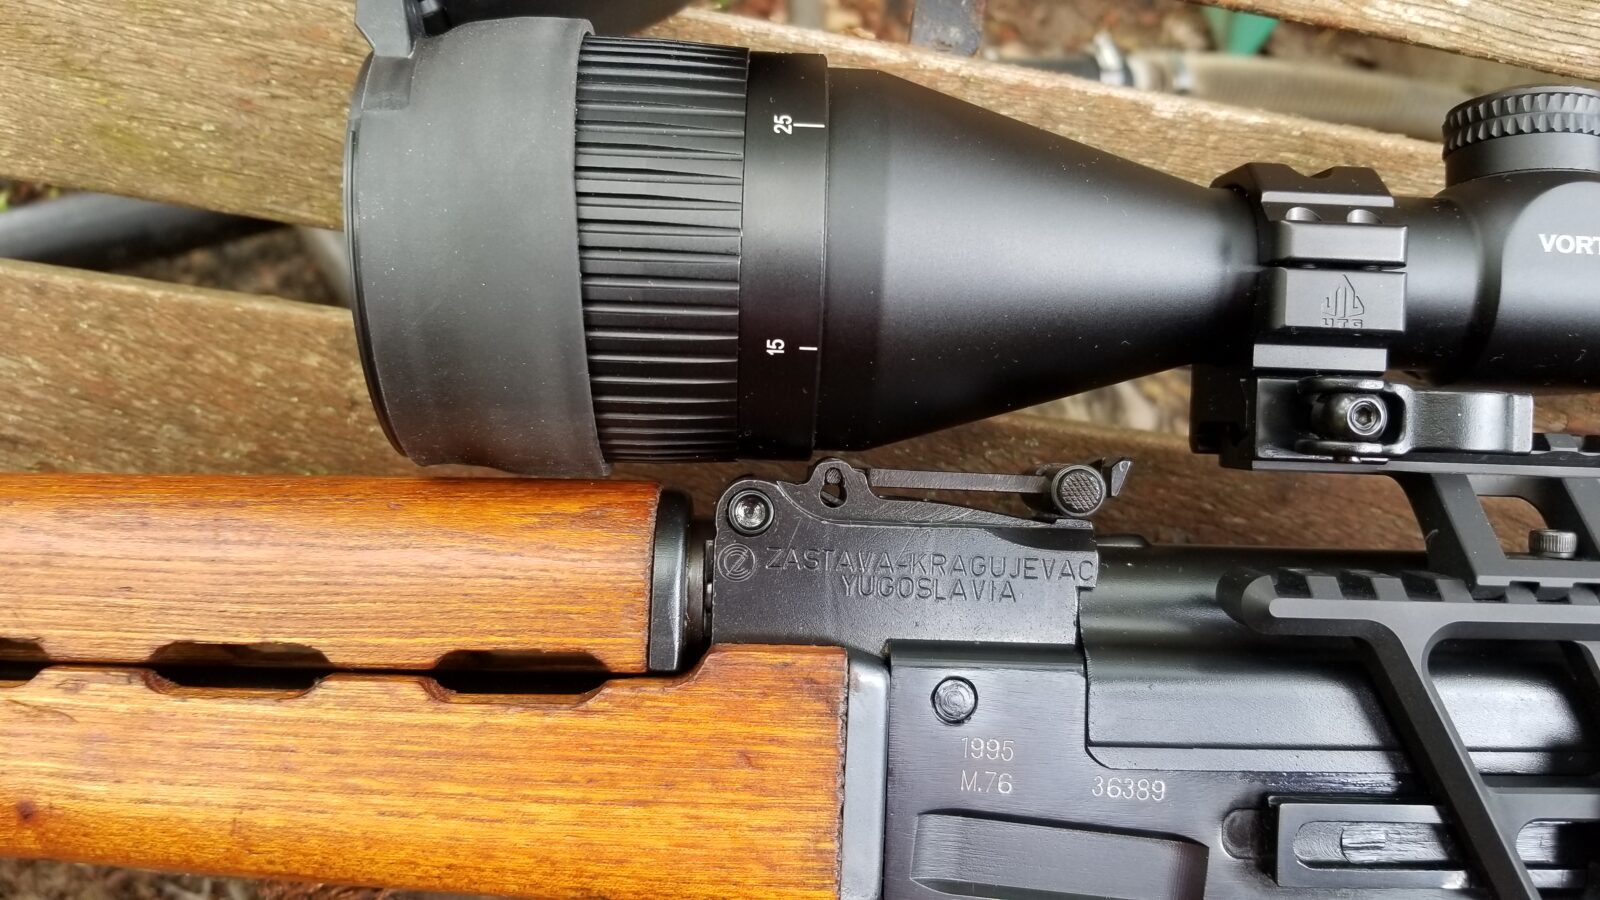
So here’s the tough part – any AK-type rifle has a big rear sight block (RSB) that is pinned to the barrel that not only holds the rear leaf sight but also holds the rear of the gas tube in position and the front of the dust cover is inserted into a slot — in short, it has to be here. Thus, any optic must clear the RSB somehow.

The RSB is pinned to the barrel and holds both the rear sight and secures the rear of the gas tube. Problematically, it extends above both the dust cover and the gas tube.

So this means we have two options – either the optic must slide into position and clear the RSB while doing so -or- we vertically lower the scope into position. To slide the scope in either means you go with tall enough rings and/or a small enough front objective that the front of the scope can clear.

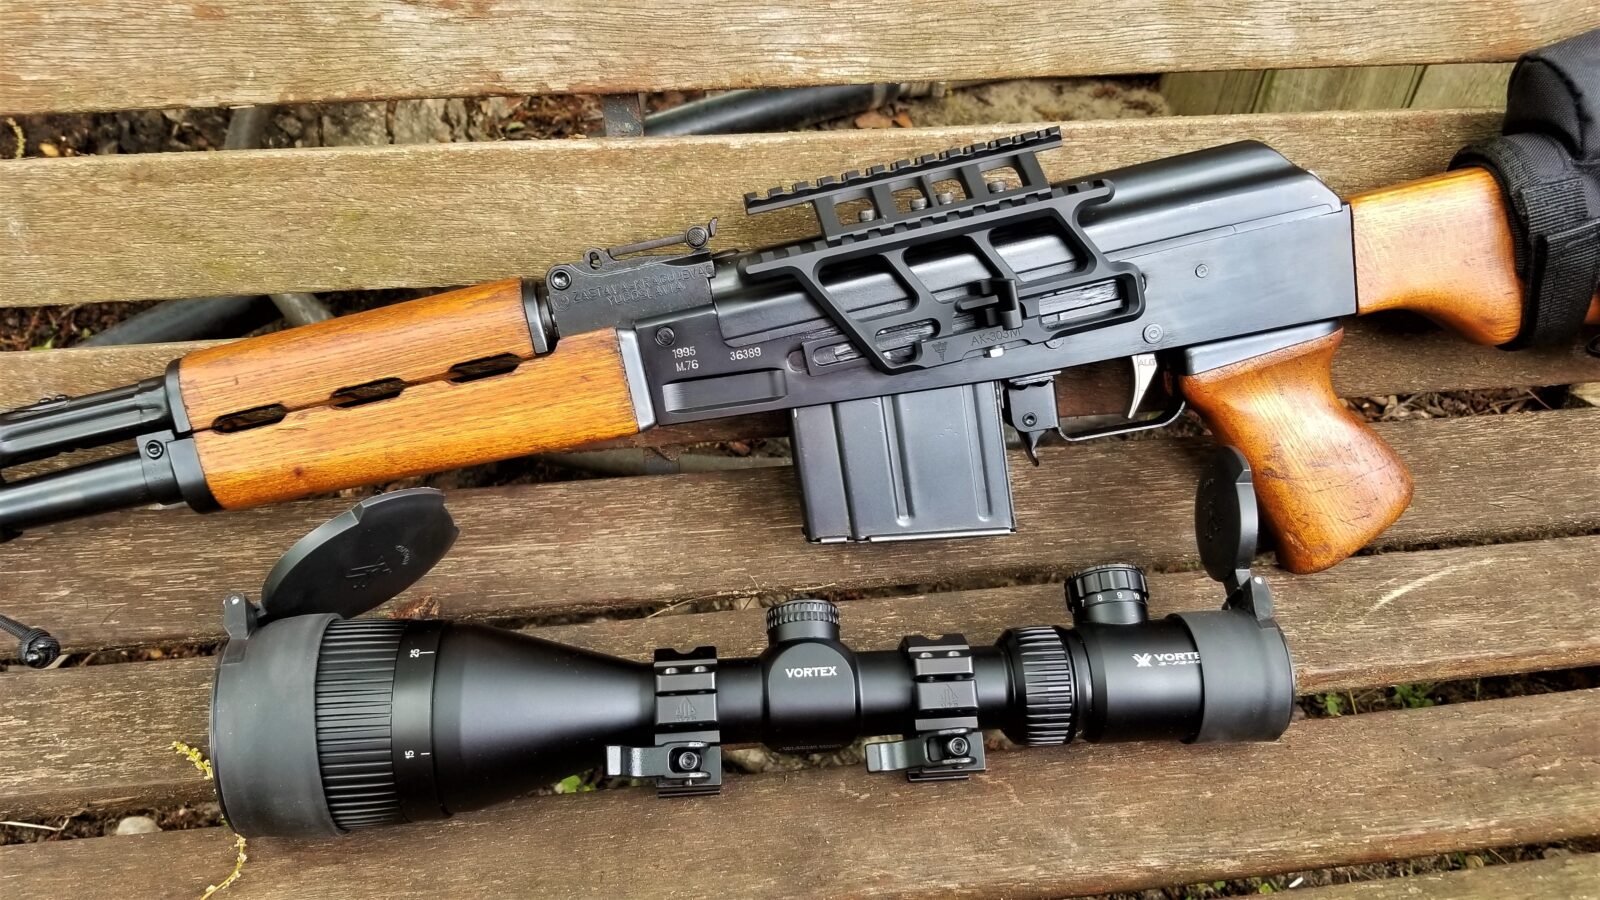
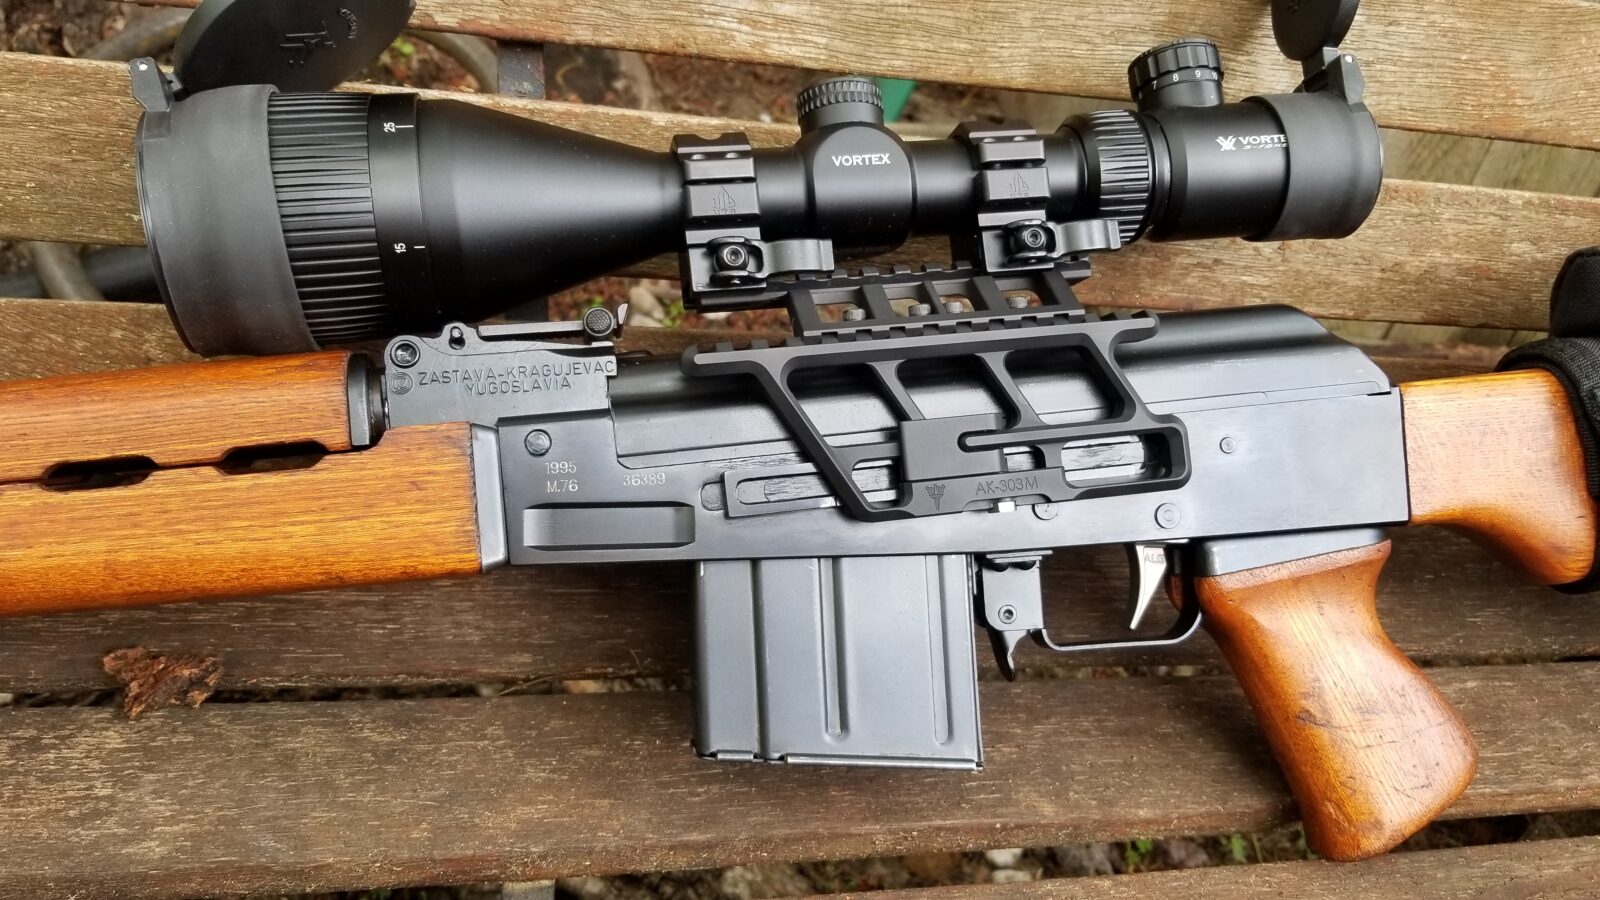
The vertical option means we can use both a bigger objective and lower rings but begs the question – what do we do if we need to open the rifle up in the field? That is why I opt for quick release rings. Now, let me point out the photos show interim UTG rings that will not be on the rifle long term. I had them in storage from way back when and used them and some other models to do some “what if” scenarios.

The problem with this model of ring from UTG is that they use a round screw that goes through the Picatinny rail channel – they should be using square stock to securely and consistently secure the ring to the rail. While I do not expect a ton of recoil from the M76, I would rather the rings sit securely in the rail and not move around or place uneven stresses on the rails.

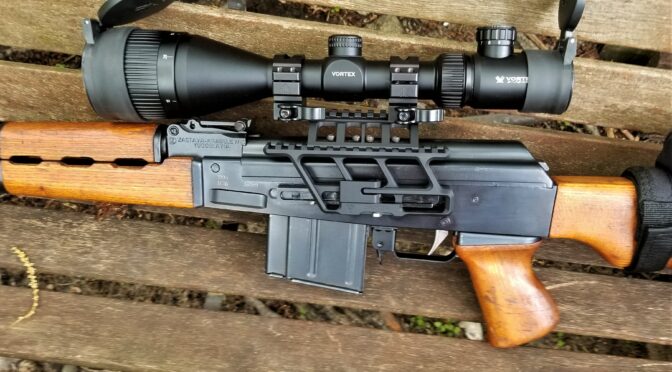
In the next few weeks, the UTG rings will be replaced by an American Defense AD-Recon-SL-30-STD one piece mount. American Defense makes top notch gear. The UTG rings definitely helped me prototype the layout and identify that I needed rings that measured from the base of the ring to the center line at least 0.915″. The AD-Recon-SL will hold to scope just a tad higher at 1.110″ and I am okay with that almost 0.195″ difference. It’s real tight right now as you can see:
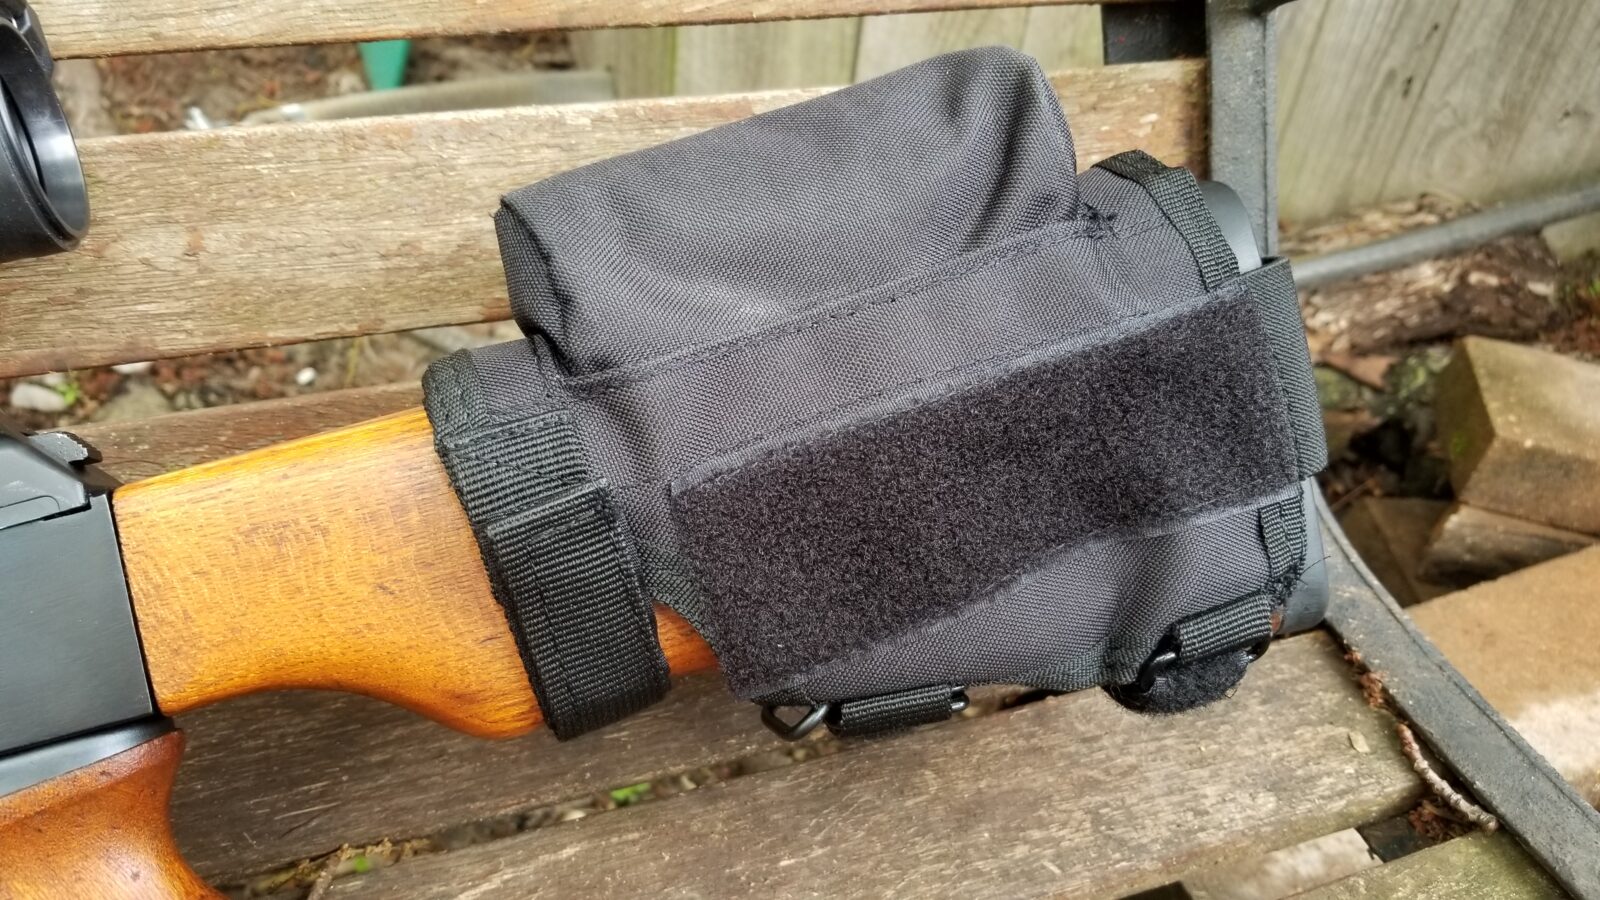
Voodoo Cheek Pad

The one thing I quickly found out was that I needed a cheek piece to give me a better weld. I have used Voodoo Tactical cheekpieces a number of times in the past so I used one hear to give me about a 1/2″ lift to better line up behind the scope.
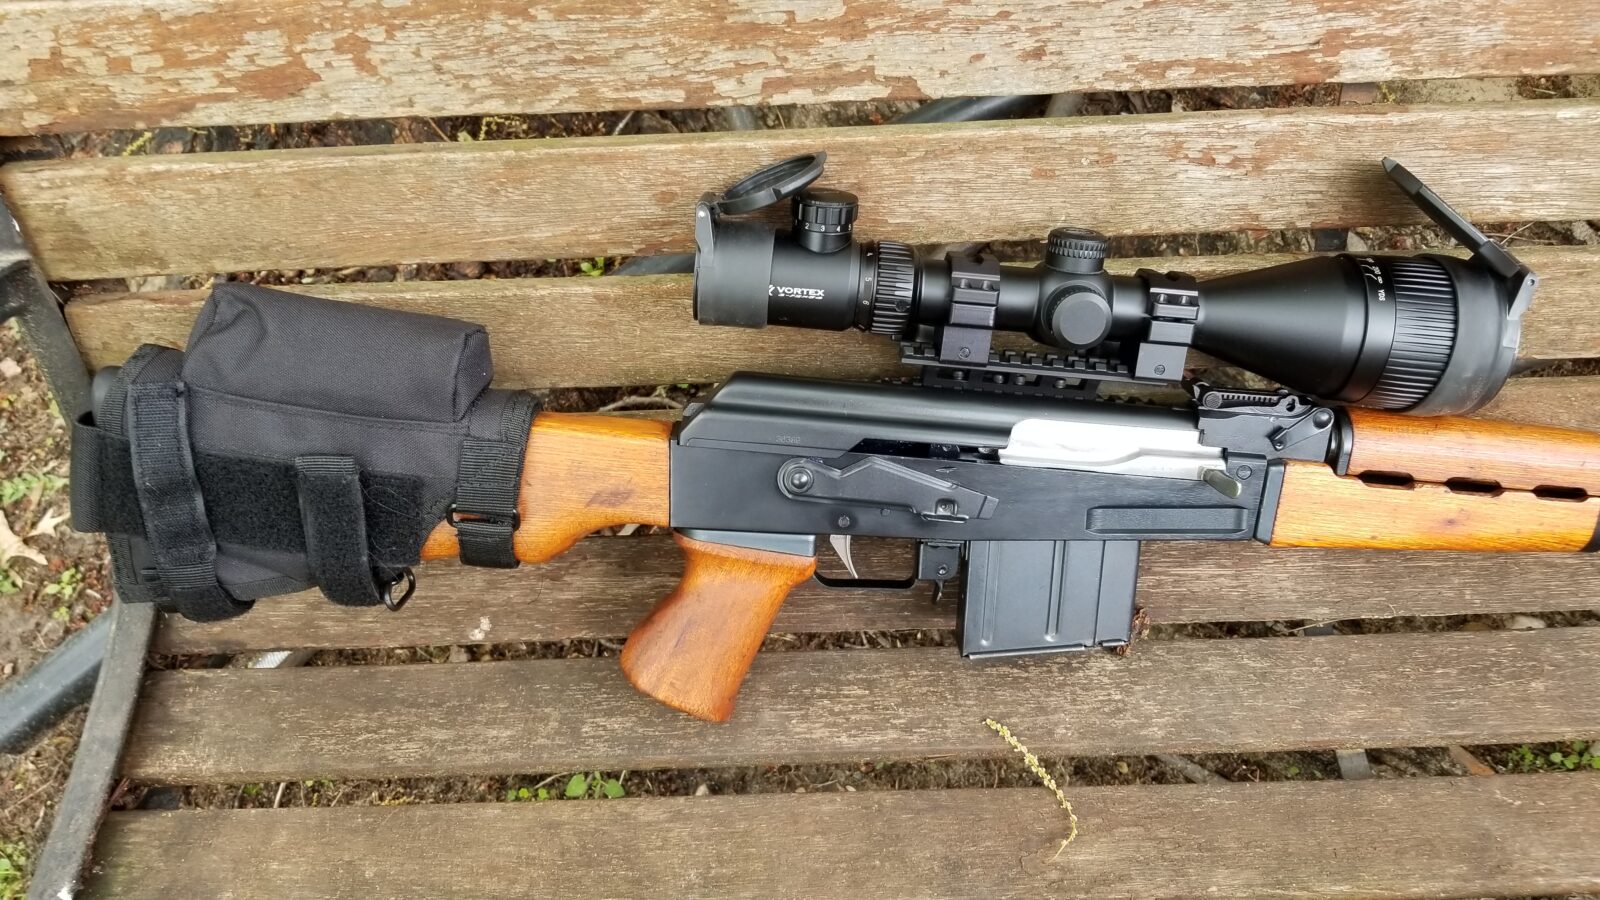
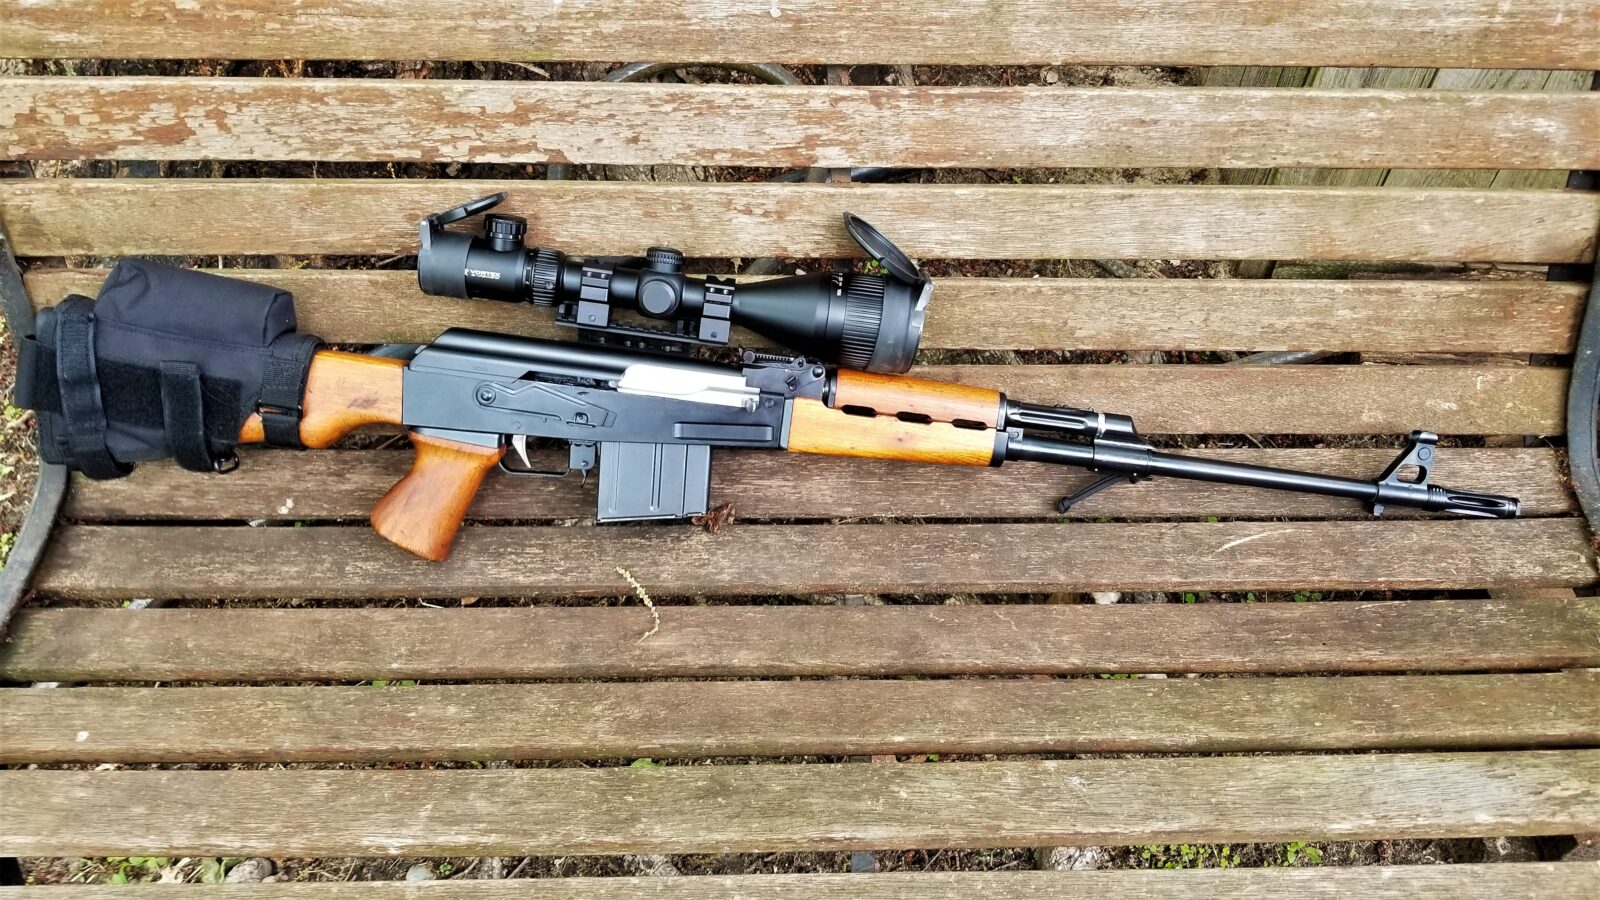
You can access that top soft cavity and add or remove material to give you whatever height and “feel” that you want.
I’m going to do some tailoring of the straps in the near future. While I am using the hook & loop (velcro) straps came with the Voodoo pad right now, I’ve been using this cool industrial hook & loop tape that is double sided with the hook on one side and the loop on the other that ought to really clean this up.

The Result

Right now, I’m happy. I need to get the ADM mount in and get to the range but everything is very promising so far.

Okay, in the next post, I’ll tell you about the ALG trigger.


If you find this post useful, please share the link on Facebook, with your friends, etc. Your support is much appreciated and if you have any feedback, please email me at in**@ro*********.com. Please note that for links to other websites, I may be paid via an affiliate program such as Avantlink, Impact, Amazon and eBay.


Part 1: Two Rivers Arms Yugo M76 Rifle – Out of the Box

In 1975, Zastava Arms was approached by the Yugoslavian military with a need for a designated marksman’s rifle (DMR) that was semi-automatic and fired a full power round. Rather than license the Dragunov design, Zastava took a similar path that the Romanians did with the PSL – they took the base Kalashnikov design and scaled it up to handle a full size rifle round that they already had. In the case of Zastava, they chambered the rifle in 7.92×57 (8mm Mauser round). This put the effective range for human sized targets out at about 800 meters (875 yards).

The M76 is an interesting beast. When you pick one up, the first things you notice are that it is both heavy and long. Zatastava opted for a stiff, albeit heavy, milled receiver and a heavy barrel profile. The published statistics for the rifle put the weight at 4.6kg (10.14 pounds) – definitely not light. The barrel is 550mm (21.65 inches) long and the overall length is 1,135mm (44.69 inches).

All Things Yugo

This is where I enter the pictured. In 2006, I saw a photo in Shotgun News of an 8mm AK and thought it was a mistake! Over the years, I both learned more about the extended family of firearms based on the Kalashnikov design, the more I came to really like the Yugoslavian branch of the AK tree. I also very much wanted to own a Yugo M76 but a combination of budget (or lack there of) and reports of quality control problems by commercial US builders held me back.

A few things all came together to get me to finally move on having an M76. First, I got to know Two Rivers Arms over the years both by selling grips to them as well as their building some M72B1s for me. I knew they would do exceptional work. Second, TortOrt released their 80% Yugo M76 receivers and Tim at Two Rivers told me he could work with one of them. Third, I was able to source a complete kit with no furniture but a Green Mountain barrel from Apex and bought a complete Yugo M76 kit from Ivan Drago on GunBroker that did not have the barrel or the optic.

I need to mention something here – I just am not a huge fan of the offset scopes that the Soviets and Communist Bloc (ComBloc) countries came up with. I prefer something low, centered and … modern (gasp). When I talked to Tim at Two Rivers about my plans to not go with the traditional ZRAK 4x optic he was surprised. I already knew I wanted to use one of RS!Regulate’s mounting systems because they are simply the best most adjustable mounts out there. My first thought was to replace the factory optic rail on the receiver with more on an AKM style but we found out that the RS!Regulate AK-303M would have enough adjustment that we could use the factory rail. So, I ordered in the AK-303M lower rail and the AKR upper – RS!Regulate mounts are two piece so you can really dial in what you want.

This is the two piece RS!Regulate mount. The lower piece starts a fourth of the way down where you see a second Picatinny rail. That lower pieces is the AK-303M section. The upper piece is the “AKR” model and can be moved front to back and left to right on the lower allowing you to really dial things in. Pins are provided to lock the position in once everything is worked out.

By the way, on the RS!Regulate parts, either buy them direct or from a reputable vendor – not eBay or Amazon. There are cheap Chinese knockoffs/counterfeits that are for sale and not only is the quality poor but you are taking money from the small business who put in the hard work and money to make these.

Eventually, all of the parts arrive, I packed them in boxes and sent them to Tim at Two Rivers. Then the waiting part happened. With top notch builders, they are backlogged with work. In my case, I asked them to put the project on hold at one point, so all said and done, it was just shy of two years before schedules aligned and the rifle was completed. When Tim called to tell me he was wrapping it up after test firing it, I was pretty excited to say the least.

Out of the Box Impressions

Tim sent the rifle to my friend and FFL, Scott Igert of Modern Antique Firearms and as soon as it arrived, I went over to get it. Scott and I pulled it out of the box. Wow , was it big and cool. The diameter of the barrel was actually surprisingly big.

When I got home, I measured it. The rifle was just under 44-3/4″ long from the tip of the compensator to the top of the recoil pad on the buttstock.

Weight of the rifle without a magazine was 9.86 pounds. It was 10.42 pounds with an empty magazine. I instantly liked the heft as I like heavy rifles and the balance was pretty good. Granted there is a mile of heavy steel in front of the receiver but it was pretty decent.

Here are some photos of the base rifle. You may notice the trigger is silver – I did install an ALG Ultimate trigger (my hands down favorite AK trigger now) before I took these shots and will write up some of the modifications in following posts.

Look at that barrel and giant ejection port!
Here’s a good view of the M76 buttstock with the unique relief in the front. Note, you can interchange Yugo M70 and M72 fixed stocks with the M76 if you are ever so inclined. Then you have that giant unique grip. I wear XL-sized gloves and it is a handful.
It uses the same recoil pad as the M70 and M72 series rifles. Because of the weight and the gas action, I am not expecting a bad recoil.
There is just under 17″ of the 21.65″ barrel sticking out from the end of the wood (not the retainer) you see in the photo. The muzzle brake is integration with the front sight block (FSB) and not removable. The barrel is 0.845″ thick immediately in front of the handguard retainer.
The M76 has a gas regulator and is the silver dial you see above. It has three settings.
Unlike AK rifles, the M76’s muzzle brake is integral with the front sight block – it is not removable. It’s also interesting to note the threading for the attachment of a suppressor. Note the bayonet lug.
Let’s look at the other side now.
The side dovetail scope rail is unique and the RS!Regulate can accommodate it.
It uses a solid recoil rod assembly like the milled AKs and some RPKs use vs. the toggle wire assembly you see in AKMs. The increased rigidity of the recoil rod probably helps handle the heavier load plus aid in consistency of the bolt returning into battery. A number of us used to build AKMs with the milled rods to try and improve accuracy.
The M76 uses a 10 round box magazine.
There is one Achille’s Heel with the M76 (meaning the one weakness) is that the followers have a tendency to jam down hard when the bolt hold open (BHO) follower is hit from behind by the bolt. — that’s pretty ironic really. What happens way too often (in my opinion), is that the bolt hits the BHO causing a cantilever motion and because of an overly large gap, the front of the follower nose dives down into the mag body and it is not easy to get it back up but there is a fix. Note the very small tab just barely visible between the rear of the bolt body and the follower – I welded that in to limit the gap that allowed the nose dive to happen. I’ll write that up in a later post.
Nice shot of the Zastava logo and serialization info above the lightening cut.

I will be writing up my journey in upcoming posts and hope to take this rifle to the range in the near future. Definitely a big shout out to the gang at Two Rivers Arms for another wicked build! Thanks guys!


If you find this post useful, please share the link on Facebook, with your friends, etc. Your support is much appreciated and if you have any feedback, please email me at in**@ro*********.com. Please note that for links to other websites, I may be paid via an affiliate program such as Avantlink, Impact, Amazon and eBay.


Ian at Forgotten Weapons Does a 2-Gun Match With a Yugo M76!!

Two Rivers Arms recently built a Yugo M76 8mm designated marksman’s rifle for me. I’ve wanted one for years and it was a long but worthwhile wait until it arrived. So, once Tim called and said it was almost ready, I started reading up in earnest and watching videos as well.

That’s where Ian McCollum of Forgotten Weapons enters in. I am a fan of Ian at Forgotten Weapons and both subscribe to his Youtube channel and support him via Patreon. Ian published a video of him using a Yugo M76, or as it is formally known, a Zastava M76, in a 2-Gun match. It’s a quick fun watch to see Ian swinging around the big rifle.


If you find this post useful, please share the link on Facebook, with your friends, etc. Your support is much appreciated and if you have any feedback, please email me at in**@ro*********.com. Please note that for links to other websites, I may be paid via an affiliate program such as Avantlink, Impact, Amazon and eBay.


Video: Troops training with the Zastava M76 and M91 Designated Marksman Rifles (DMRs)

This video from 2016 shows US, Latvian and other troops firing the Zastava M76 and M91 rifles.  Some may call them sniper rifles but they are more DMRs to me.  It’s always interesting to see rifles in practical use and hear some of the coaching going on.  Please note that these are like giant AK rifles that are over-sized to handle the larger rounds.  In contrast, the Dragunov is a different design including:  A short stroke piston that is separate from the bolt carrier, ,the bolt carrier does not have any provision for a piston so it has far less mass, the trigger is in a removable cartridge and the operating spring is mounted in a locking dust cover.

Here’s The Video


Please note that all images were extracted from the video and remain the property of their respective owner(s).


If you find this post useful, please share the link on Facebook, with your friends, etc. Your support is much appreciated and if you have any feedback, please email me at in**@ro*********.com. Please note that for links to other websites, I may be paid via an affiliate program such as Avantlink, Impact, Amazon and eBay.


Stephen’s M70 – Check Out the Wood!!

You have to love the traditional lines of a Zastava M70B1.  Stephen did something neat with his – notice the M76 buttstock and great looking wood.  I think it’s fantastic.  We’re honored he picked one of our M70 grips to go on his rifle!

7343518eac83b5c913f22058ecdf800b_zps5fd4b604

If you are interested, our grip is online at:  http://shop.roninsgrips.com/Yugoslavian-M70-M72-M85-M92-Grip-Yugo-M70-M72-M92.htm


If you find this post useful, please share the link on Facebook, with your friends, etc. Your support is much appreciated and if you have any feedback, please email me at in**@ro*********.com. Please note that for links to other websites, I may be paid via an affiliate program such as Avantlink, Impact, Amazon and eBay.


What is a Ferrule on Yugo and AK Rifles?

A ferrule is a metal end cap found on some wood grips and handguards to protect the end grain of the wood from being hammered and splitting open.  They were used on different country’s weapons and are usually not interchangeable between countries.  For example, Bulgarian and Yugo ferrules are different.

Near and dear to me are the metal ferrules on Yugoslav / Zastava wood lower handguards.  The following photo shows a M92 lower and the black metal cap is the ferrule.  This ferrule does not fit everything Yugo – just the M70, M85/92, and M77.  The M72 and M76 are unique sizes.

DSC_0312

You have three options when you need a ferrule:  1) Find a used one and this is real hard – try posting in the Marketplace of http://www.akfiles.com and see if they have one.  2) Buy a replica ferrule from us or 3) Simply pry the old ferrule off, put it on the new handguard and the squeeze the tabs shut again with a pair of pliers.

DSC_0322
DSC_0323

Note if you are putting it on one of our plastic handguards either just set it on it with the ears closed or glue it in place.  Absolutely do not try to squeeze the ears shut — the little metal divots will not dig into our plastic and you risk snapping the handguard tabs.  Again, either slide it on or glue it in place with something like rubber glue or Goop that you can later remove if you want.  Epoxy works too but it is pretty permanent.

For example, I just slid the ferrule on the M70 bulged handguard in the next photo.

We manufacture ferrules that fit the Yugo/Zastava M70, M77, M85 and M92 lower handguards. Note, they are specific to those models and will not fit other nationalities or models.

Click here to visit our store with the ferrules for sale.


If you find this post useful, please share the link on Facebook, with your friends, etc. Your support is much appreciated and if you have any feedback, please email me at in**@ro*********.com. Please note that for links to other websites, I may be paid via an affiliate program such as Avantlink, Impact, Amazon and eBay.