Tag Archives: 9mm

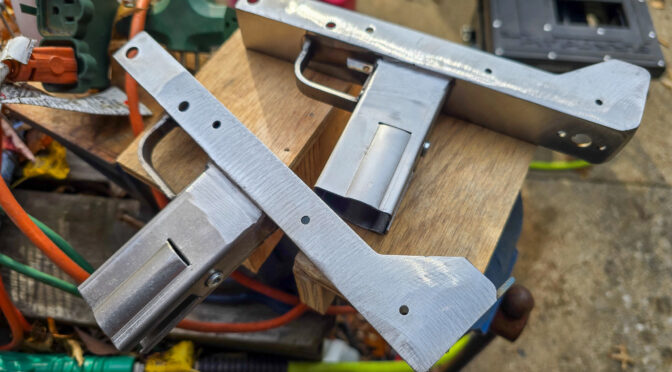
Welding a VMAC9 Lower Receiver Together – Uses MAC-11 9mm Style Uppers

Need to start this post with a reminder to be legal and safe.

When I was a kid in the 70s and 80s, the Ingram Mac-10 and 11 submachine guns (SMGs) were in tons of TV shows and movies. You could see these iconic blocky little SMGs everywhere with their equally famous two stage suppressors. So, they must have been amazing – right? Well, the truth is their reliability wasn’t that great, they had an insanely high cyclic rate that could dump a 30-32 round mag in about 1.5 seconds and a very short barrel. So, iconic was a big “yes” but effective … well, not so much.

I’m not going to cover the history of Gordon Ingram and the various businesses that inherited the Military Armaments Corporation (MAC) M10 and M11 designs. If you want that, click on the following to open a new tab: Wikipedia MAC-10, Wikipedia MAC-11, or Modern Firearms Ingram MAC-10/MAC-11 plus, IMDB has quite a list of movies that had the MAC-10 featured.

This is the first post of a series wherein your’s truly felt like building something, had a fit of nostalgia and decided to do a MAC-11 in 9mm. This was partly triggered by seeing a lot of really cool printed 3D pistol designs that utilized a MAC-11 upper. I don’t have a 3D printer because I don’t have time to learn one and my wife also told me in no uncertain terms that I was not to buy one … although she may forget this one day 🙂 If you are into 3D printing, search for “MacDaddy 3D Print” and you’ll find the many variations of it.

So, on a whim, I googled Mac-11 kits one day and found receiver options that could be bent from a flat or welded together. I didn’t feel like either buying a flat bending jig or making one but I can weld somewhat. If you know the slam “he’s a grinder, not a welder” – that’s me. I’m marginal with a welder but let me assure you, I know how to sand. Thousands of grips and handguards later, I absolutely know how to sand.

Extech IR thermometer and Ronin's polymer grips for heat testing.
This is me …

So, Velocity Firearms sells a lower receiver weld kit that has the the center section, trigger guard, mag-well/grip, front takedown pin reinforcement and rear sight plate. They also have various kits that include lower receiver weld kit, the internals and different models of uppers. What they all have in common is that they need the side plates to be completed and Velocity does not sell those.

Now you have two options on the side plates – when you buy the kit, Velocity gives you a complete set of prints so you can make your own or you can buy the plates already cut and ready to go from 2D3Dlaser.com. I thought about building them but didn’t really feel like it and the 2D3D plates had really good reviews so I went with them — and I’ll tell you right now they are nicely done.
Extech IR thermometer and Ronin's polymer grips for heat testing.
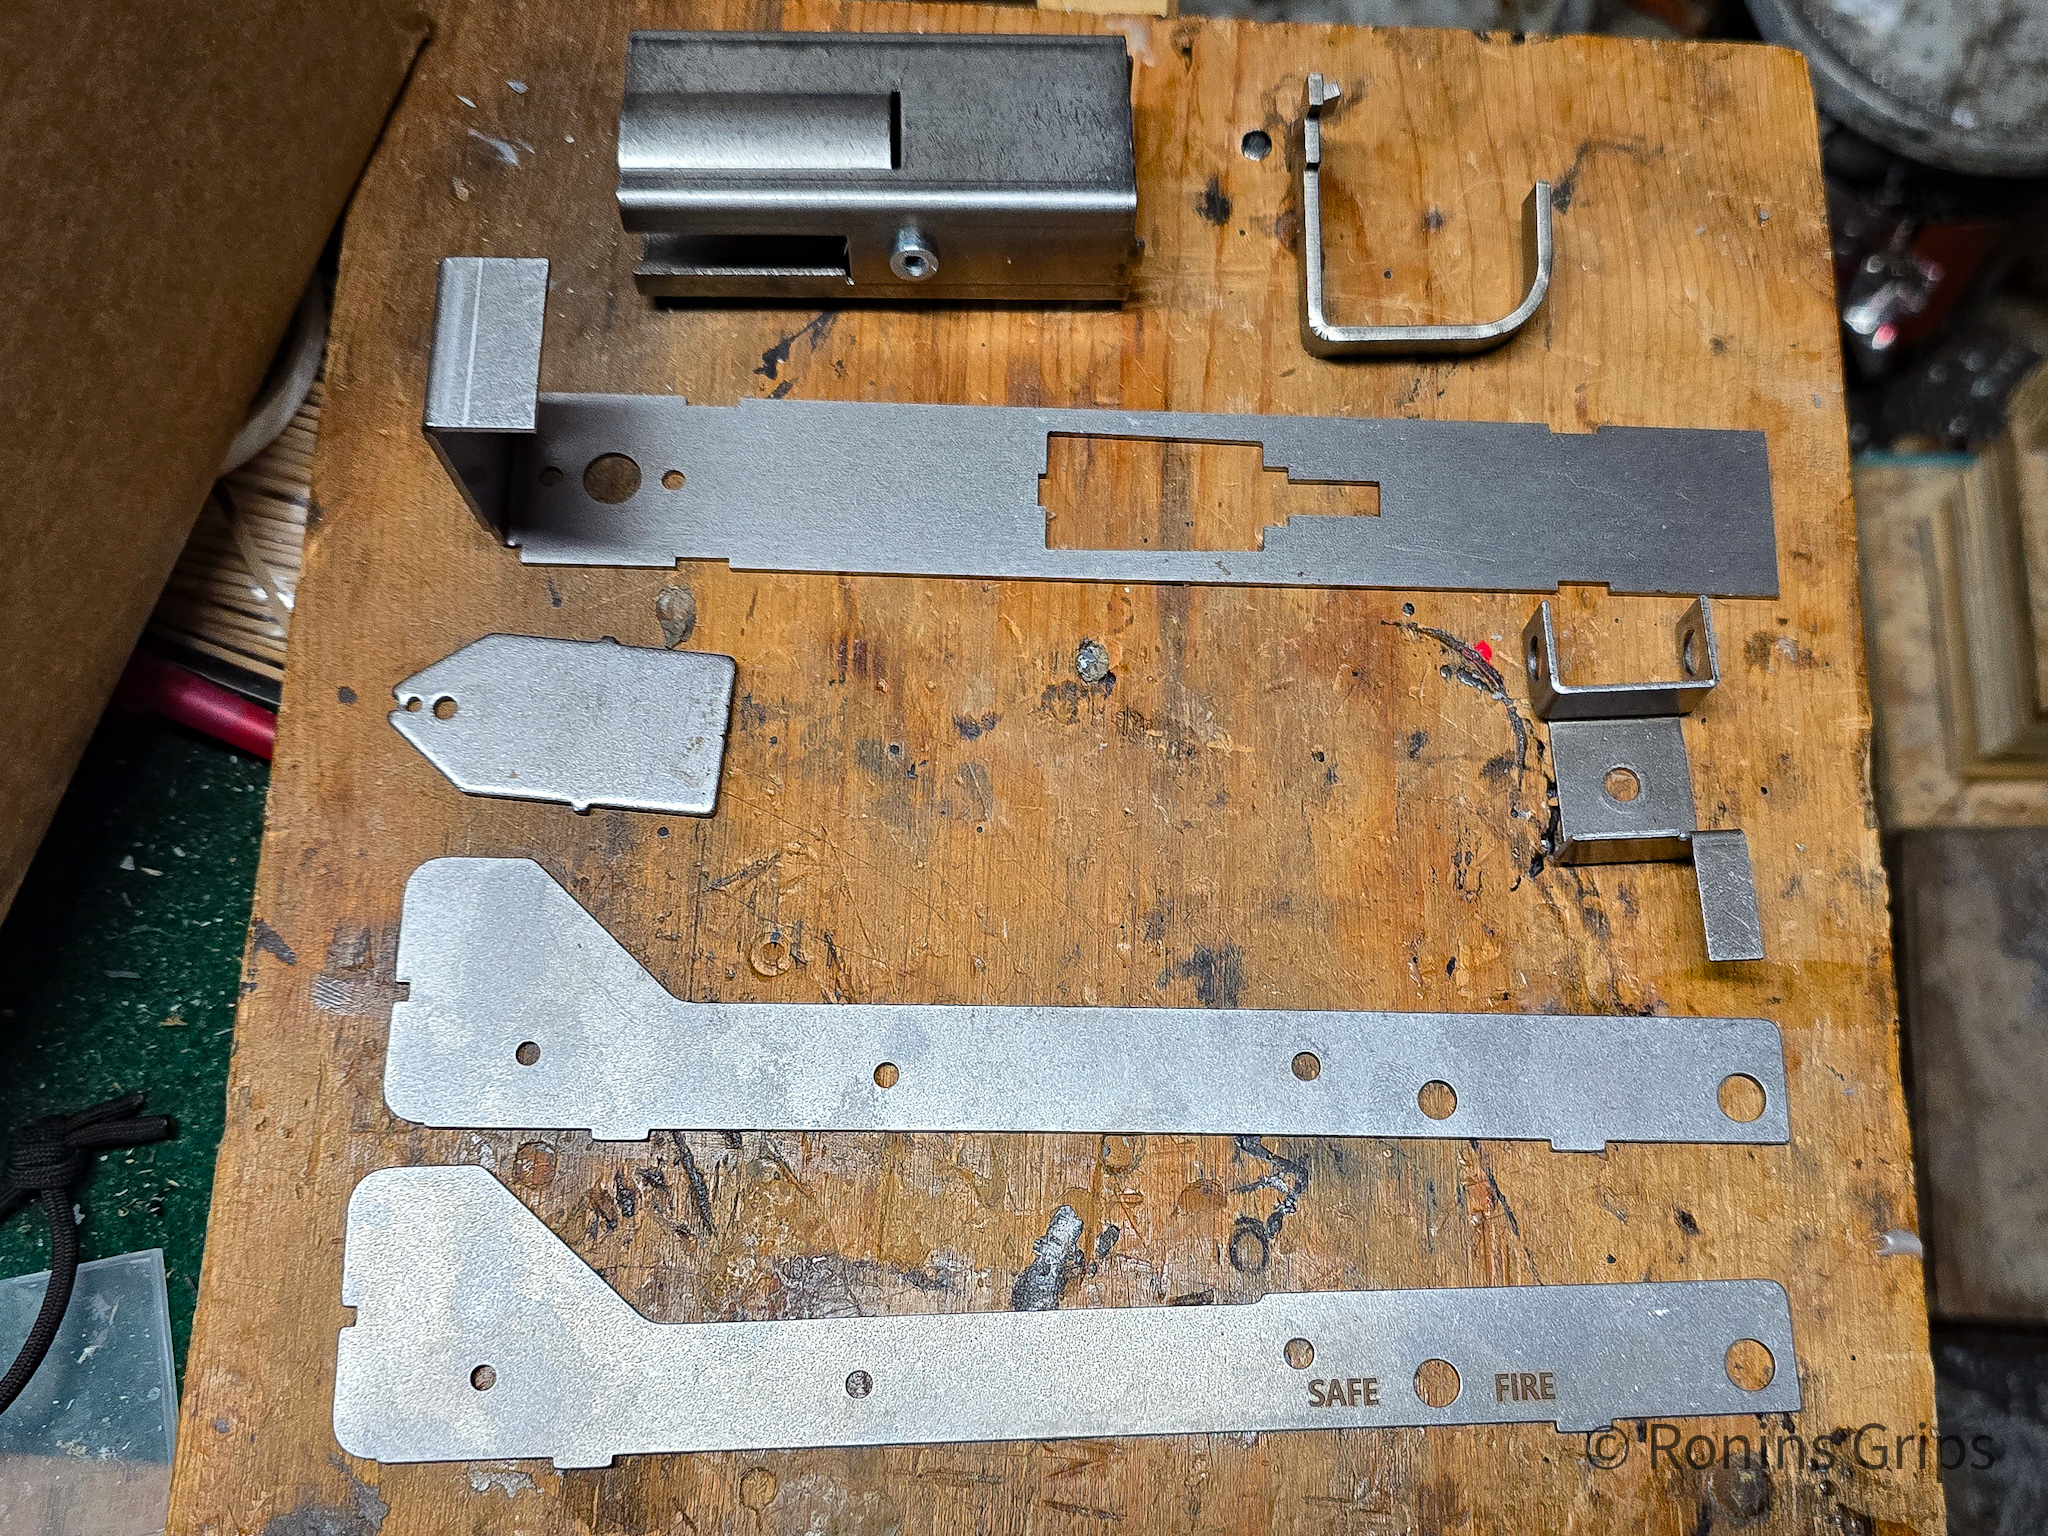
This photo has all of the parts you will weld together. Surprisingly, they are all 14 gauge cold roll steel (so were the originals). Top left is the mag well/grip assembly and to the right of it is trigger guard. The odd flare that sticks up at the back is the bullet guide. Under them is the center section. Under that to the left is the rear sight plate, and to the right of that is the front takedown pin reinforcement. It actually should be turned to the right so the holes you see on the top “U” line up with the holes in the side plates. Under those two is the left side plate – you can tell because it goes straight across the top. Finally, below that is the right plate. I paid 2D3D to print SAFE and FIRE and the selector plus you can see the small depression that aligns with the bolt carrier face and ejection port of the upper. See all of the cutouts on the center section and tabs on the other parts? Those help you align the parts.

You need a welder

First off, you need a welder that can handle 14 gauge sheet metal. I like using a MIG welder with a 75 % Argon / 25% CO2 gas – this is often referred to as “C25 gas” due to the ratio. This can generate very clean welds. The cheap flux core MIGs will work but they have a chemical known as “flux” inside the hollow steel tube that is melting to shield the weld from the atmosphere and it splatters everywhere requiring more clean up.

The best welder you can use is a TIG – those things can generate beautiful welds and there are cost effective entry level welders but they always must have a shielding gas – usually of 100% argon. I spent a bunch of money on a really nice TIG and couldn’t use it because my hands shake too much – I have what is called a “hereditary tremor” and fine motor work like dabbing a welding rod into a weld pool just isn’t something I can do no matter how well my arms and hands are supported.

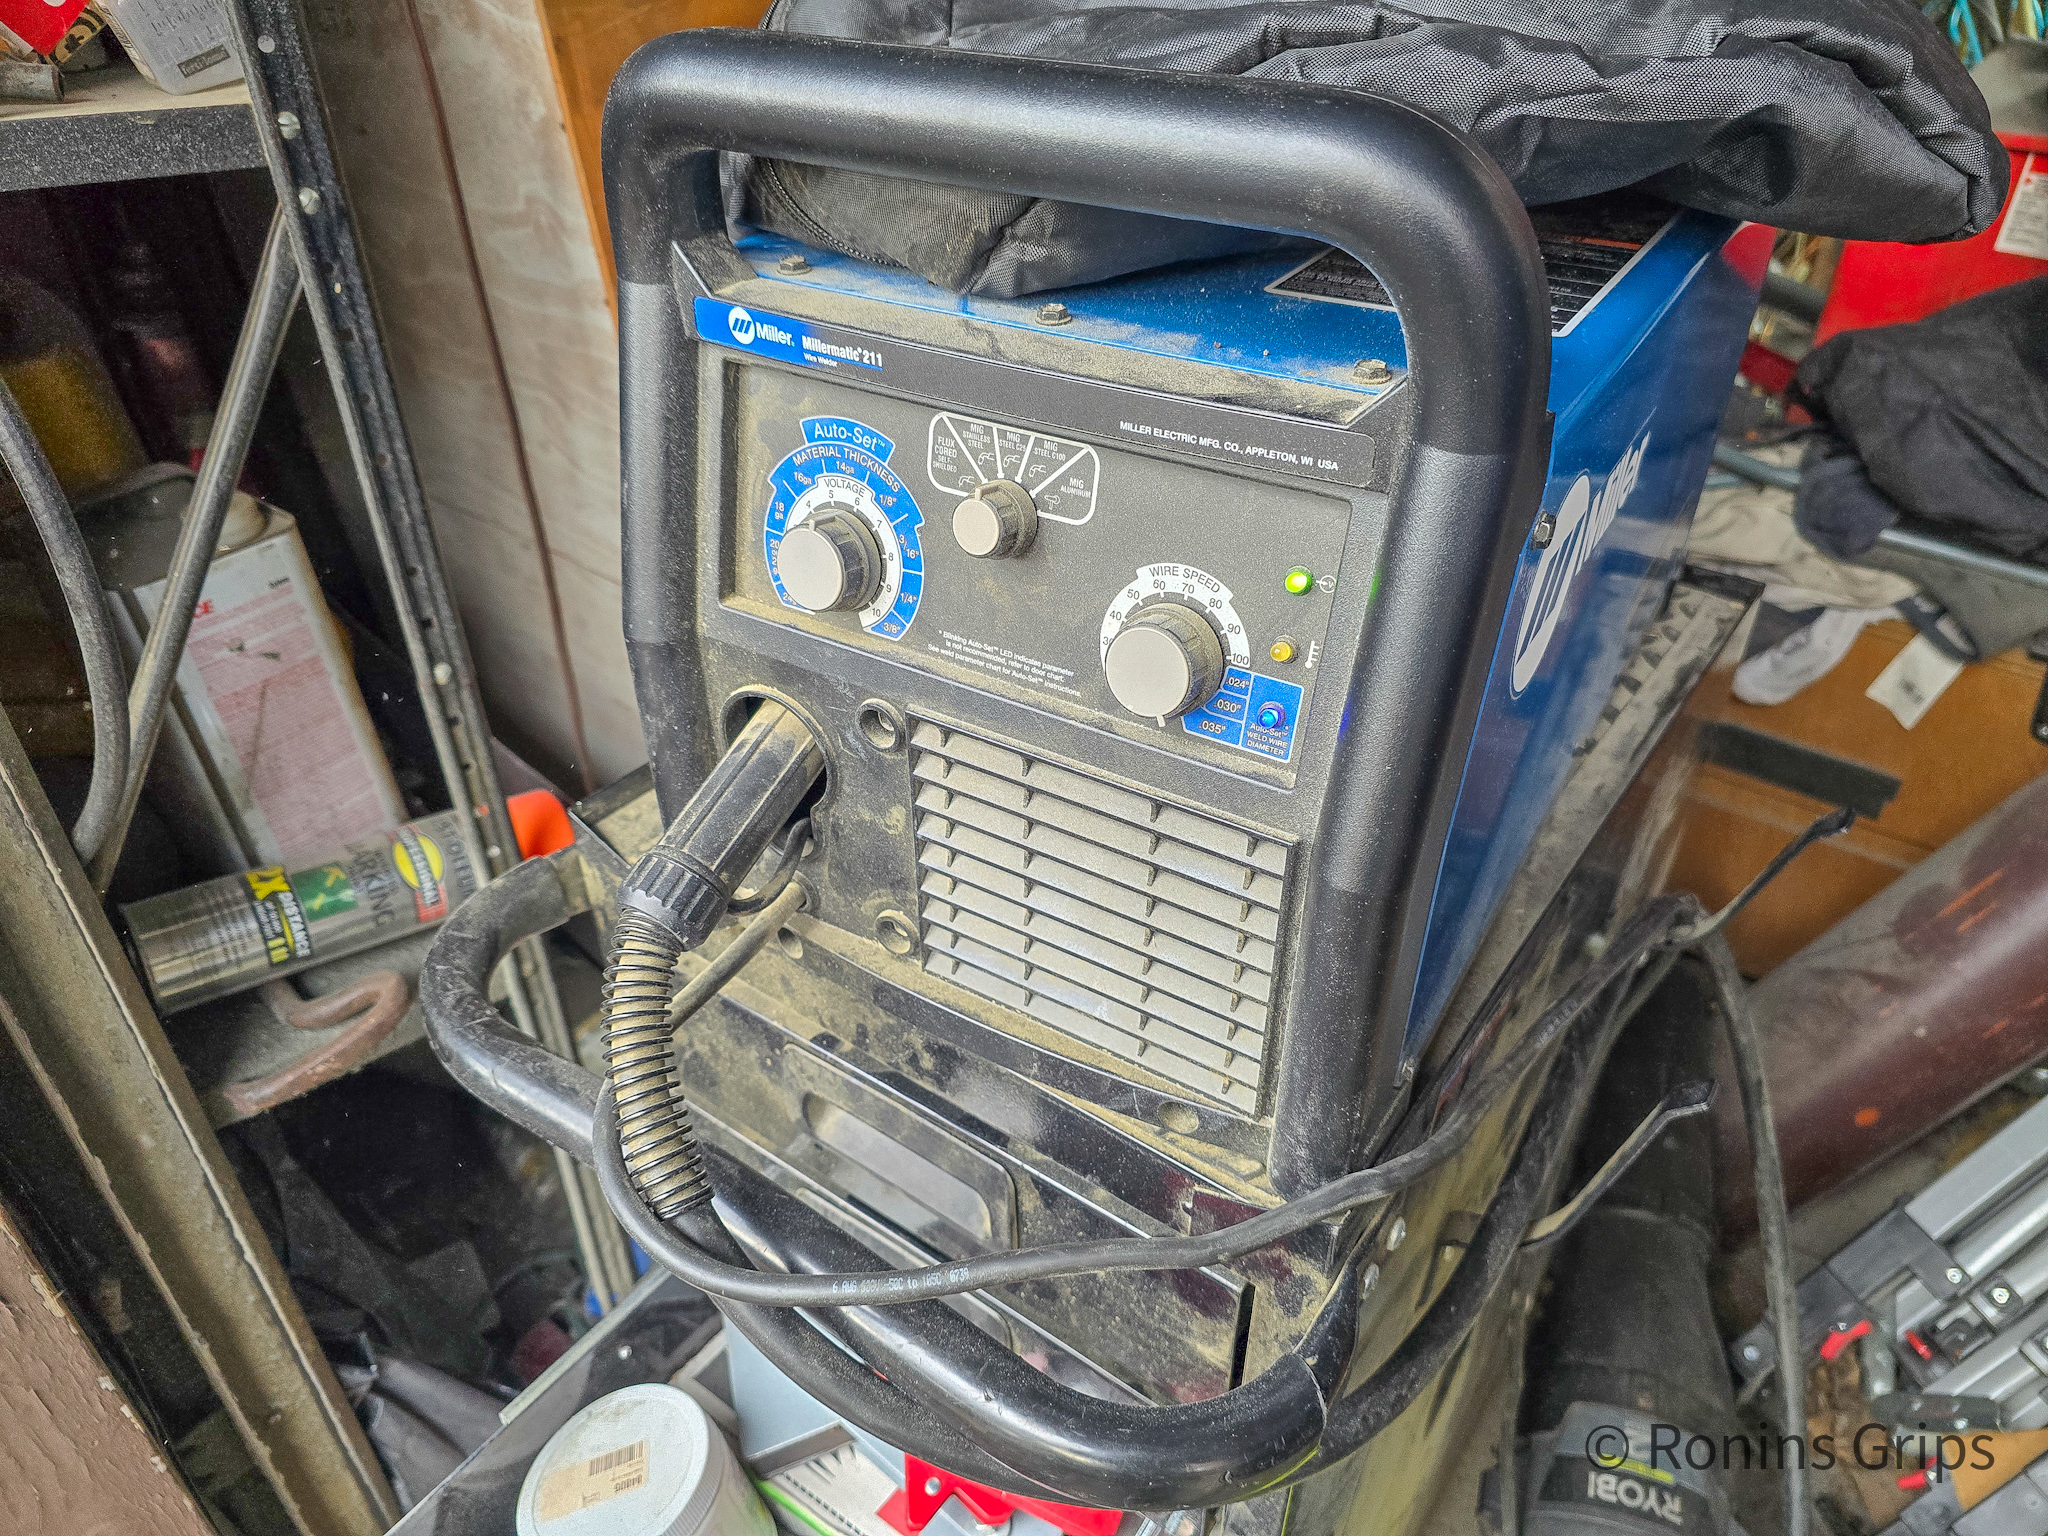
I suppose stick and Oxyacetelyne welders are also options but you need to know how to use them. On that point, no matter what machine you buy or use, practice first. You can get some cheap 14 gauge mild steel test pieces known as “coupons” off Amazon that gave you lots of edges to test on before you weld the receiver. I highly recommend this. I’ve had my Miller 211 MIG for years now and I still did some test beads first to make sure I had the machine set right and that I knew how to approach my welds.
Extech IR thermometer and Ronin's polymer grips for heat testing.
I got by with a cheap Harbor Freight welder for years. When I decided to get a better welder with more depth and a longer duty cycle, the difference was night and day. Most of the time I am fabricating/repairing pieces of steel ranging from 1/8: to 3/8″ thick. I also have found that cheap wire is messier than good wire. I’m running Lincoln 0.035″ diameter ER70S6 wire.
Extech IR thermometer and Ronin's polymer grips for heat testing.
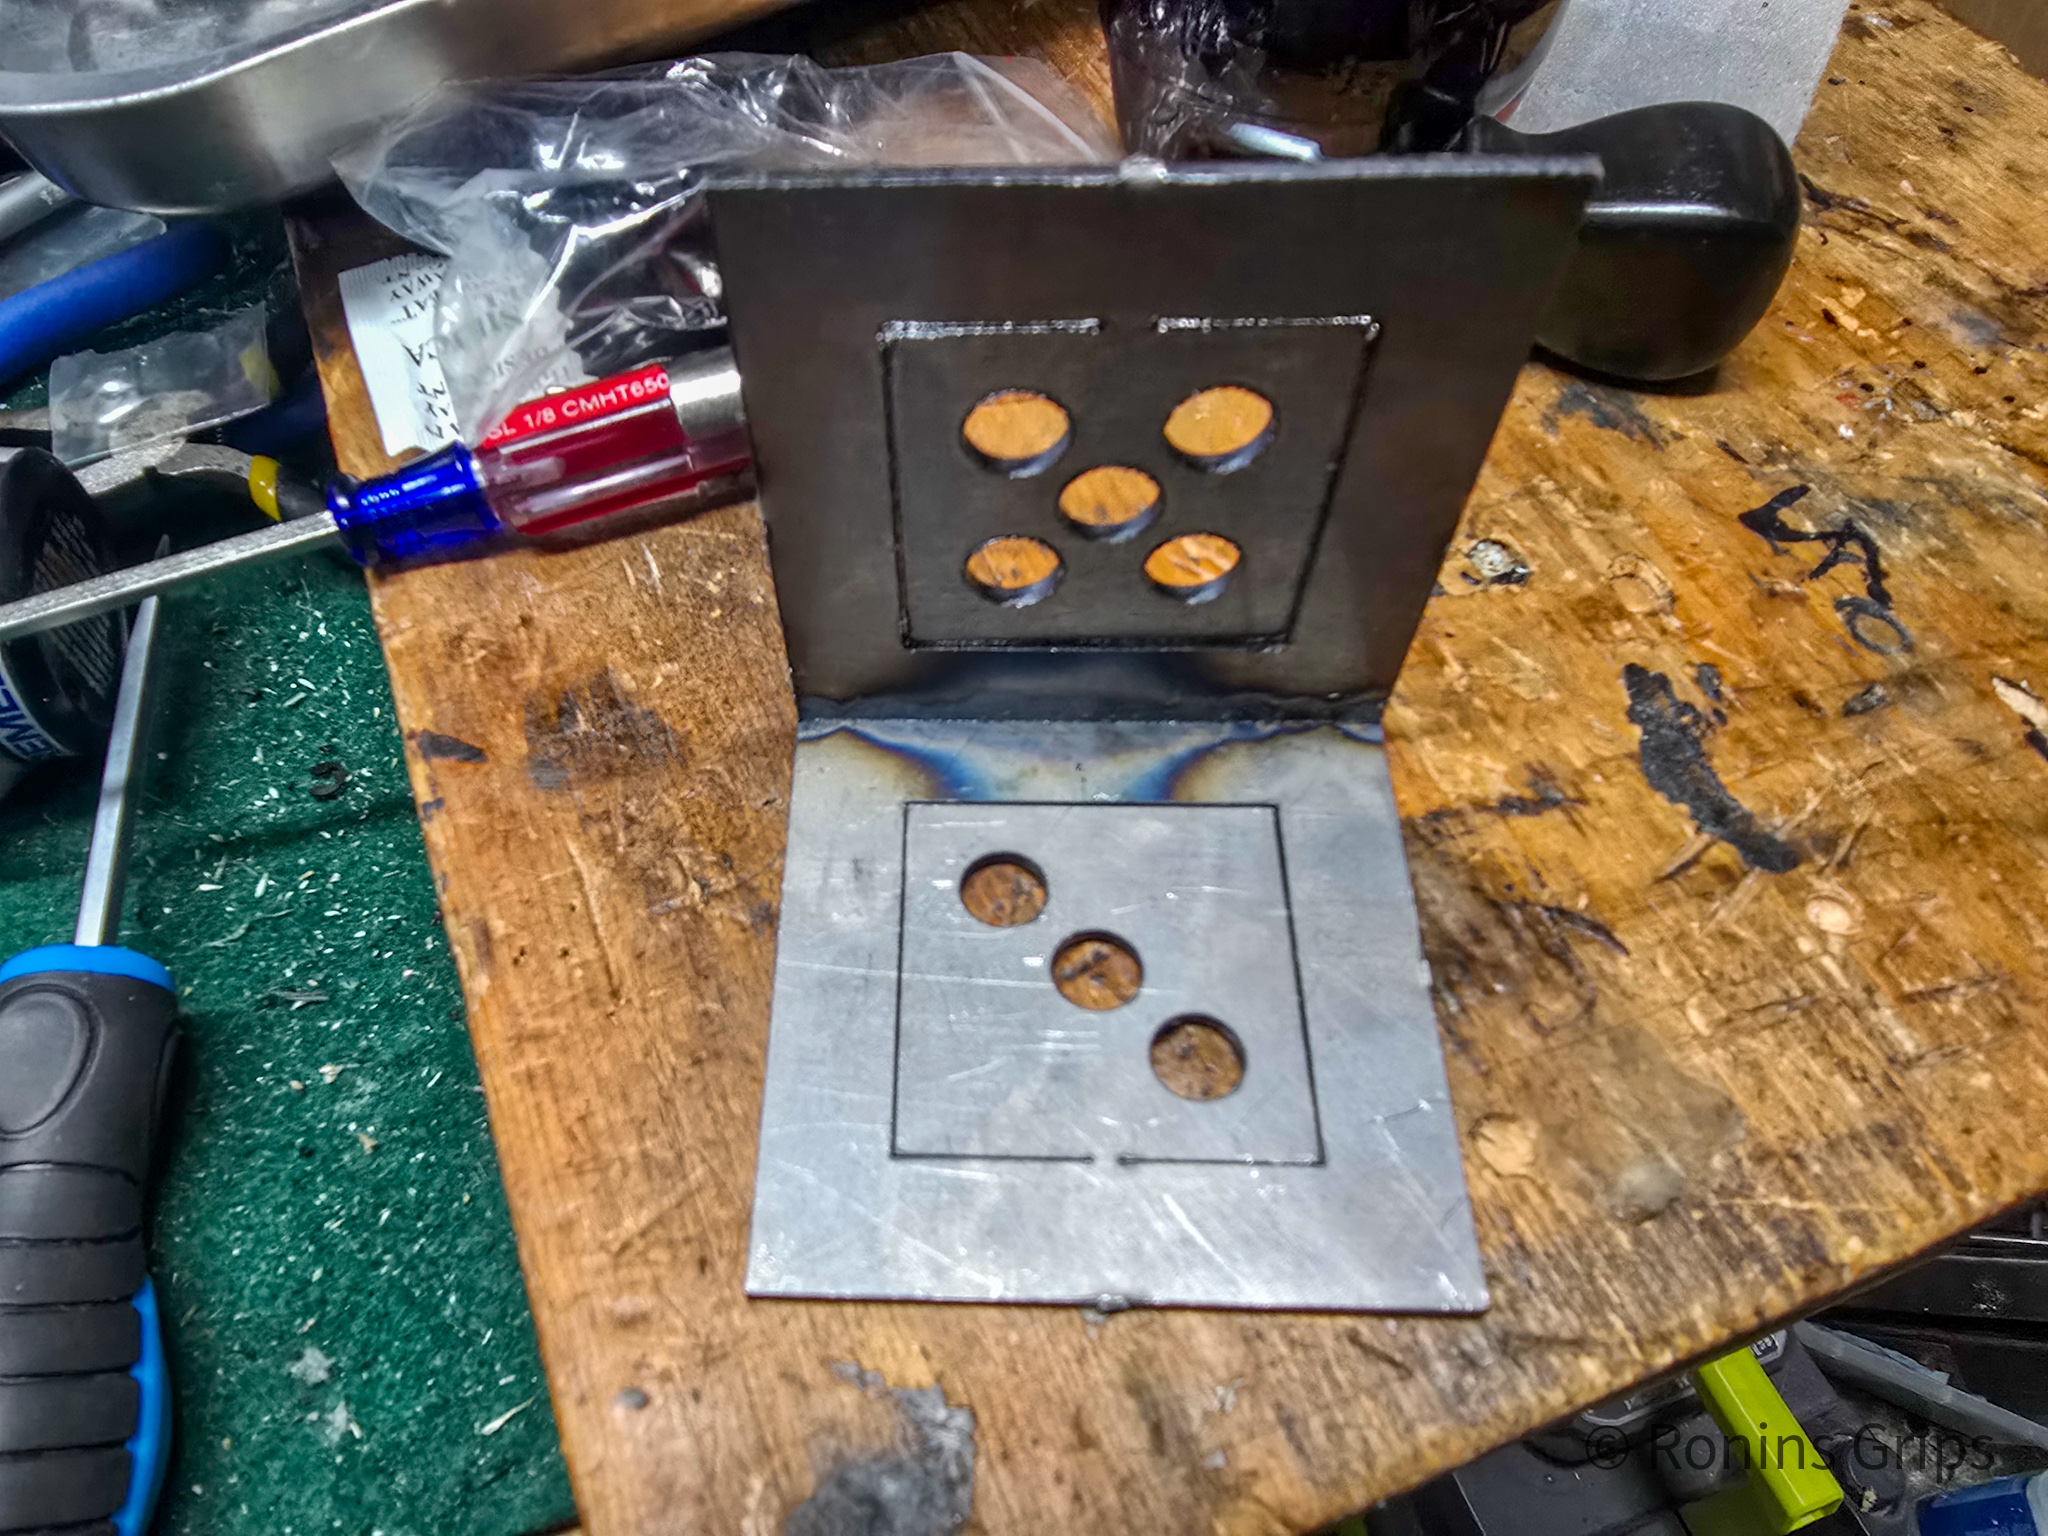
This is two parts of the test coupons I bought from Amazon. They give you a bunch of test areas with the pieces they send you and it’s worth it – unless you just happen to have scrap 14 gauge cold roll steel laying around.
Extech IR thermometer and Ronin's polymer grips for heat testing.
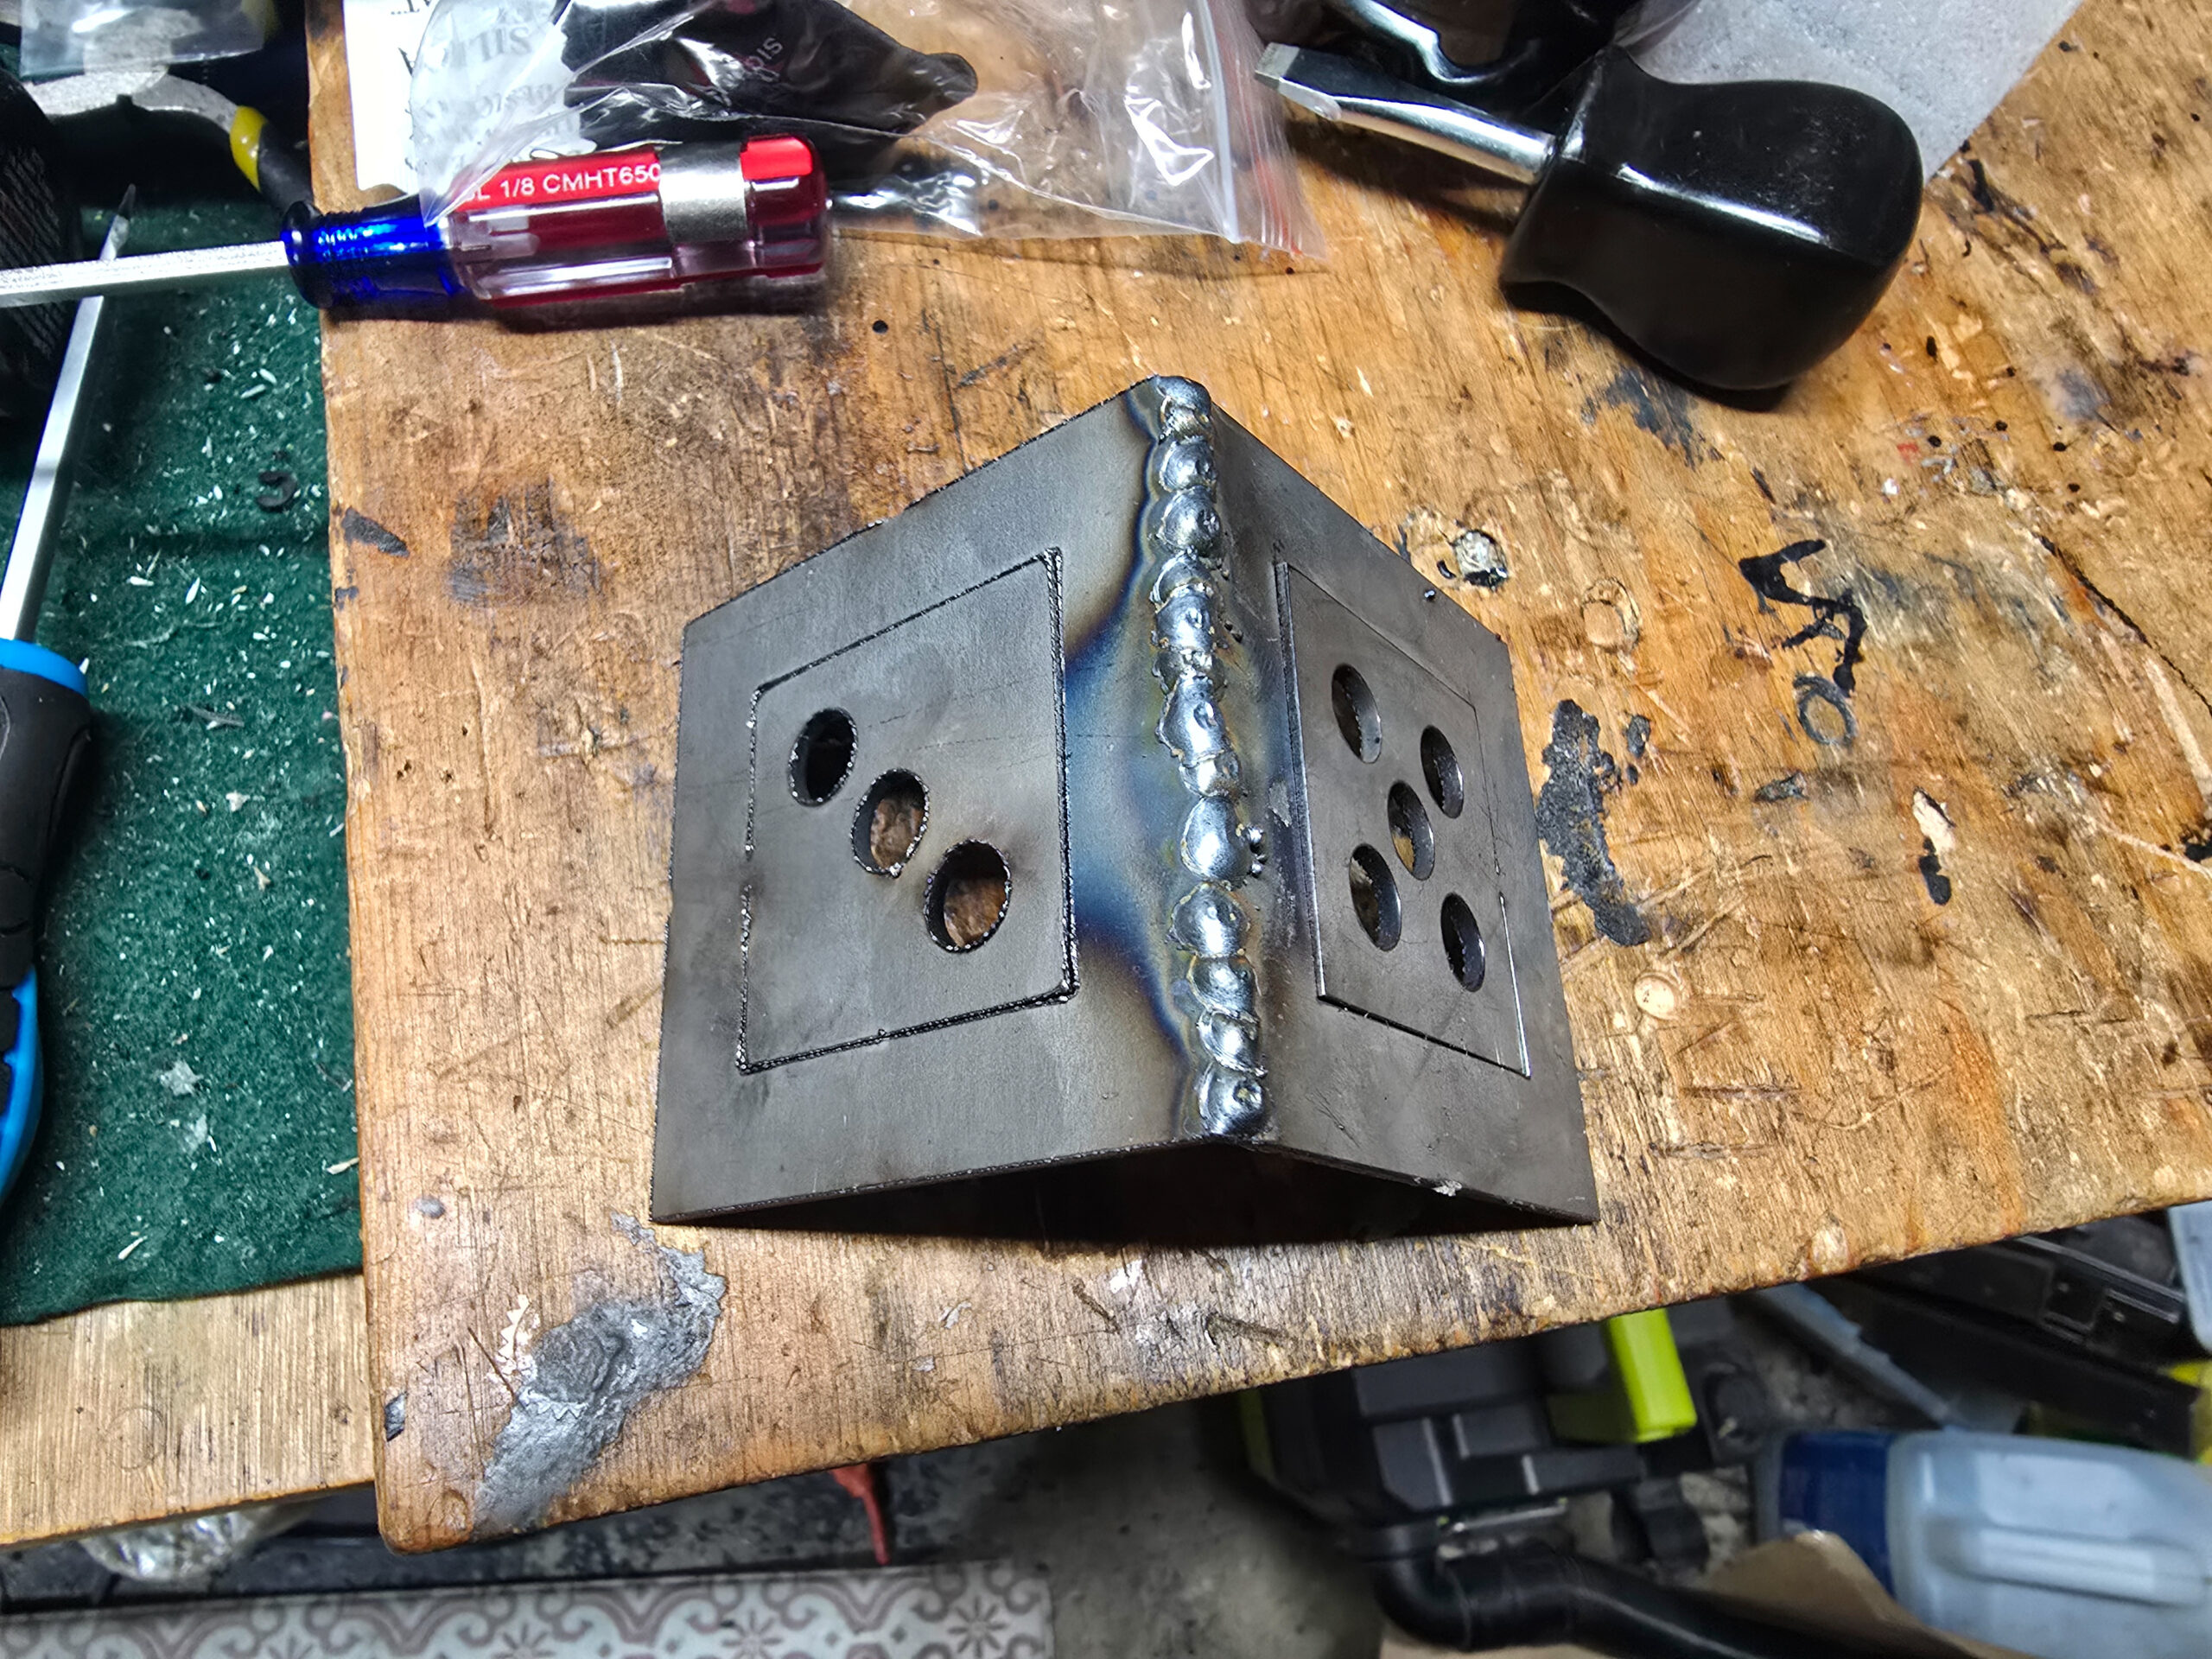
Welding is not the same as gluing. Technically you are doing fusion welding. The filler metal being introduced is molten and fuses the two metal pieces together., You don’t want the weld to be superficial or so hot that the steel is running/flowing away either. I did this test coupon and tried as hard as I could to separate it or bend it and I couldn’t. If it had pulled apart or broken easily then I would have known I needed to adjust my welder – probably by dialing up the heat. My point is that the weld fuses the pieces together and then you can sand the bead down if you want to. My beads always look like crap so I always sand them down with a grinder or flap sander.
Extech IR thermometer and Ronin's polymer grips for heat testing.
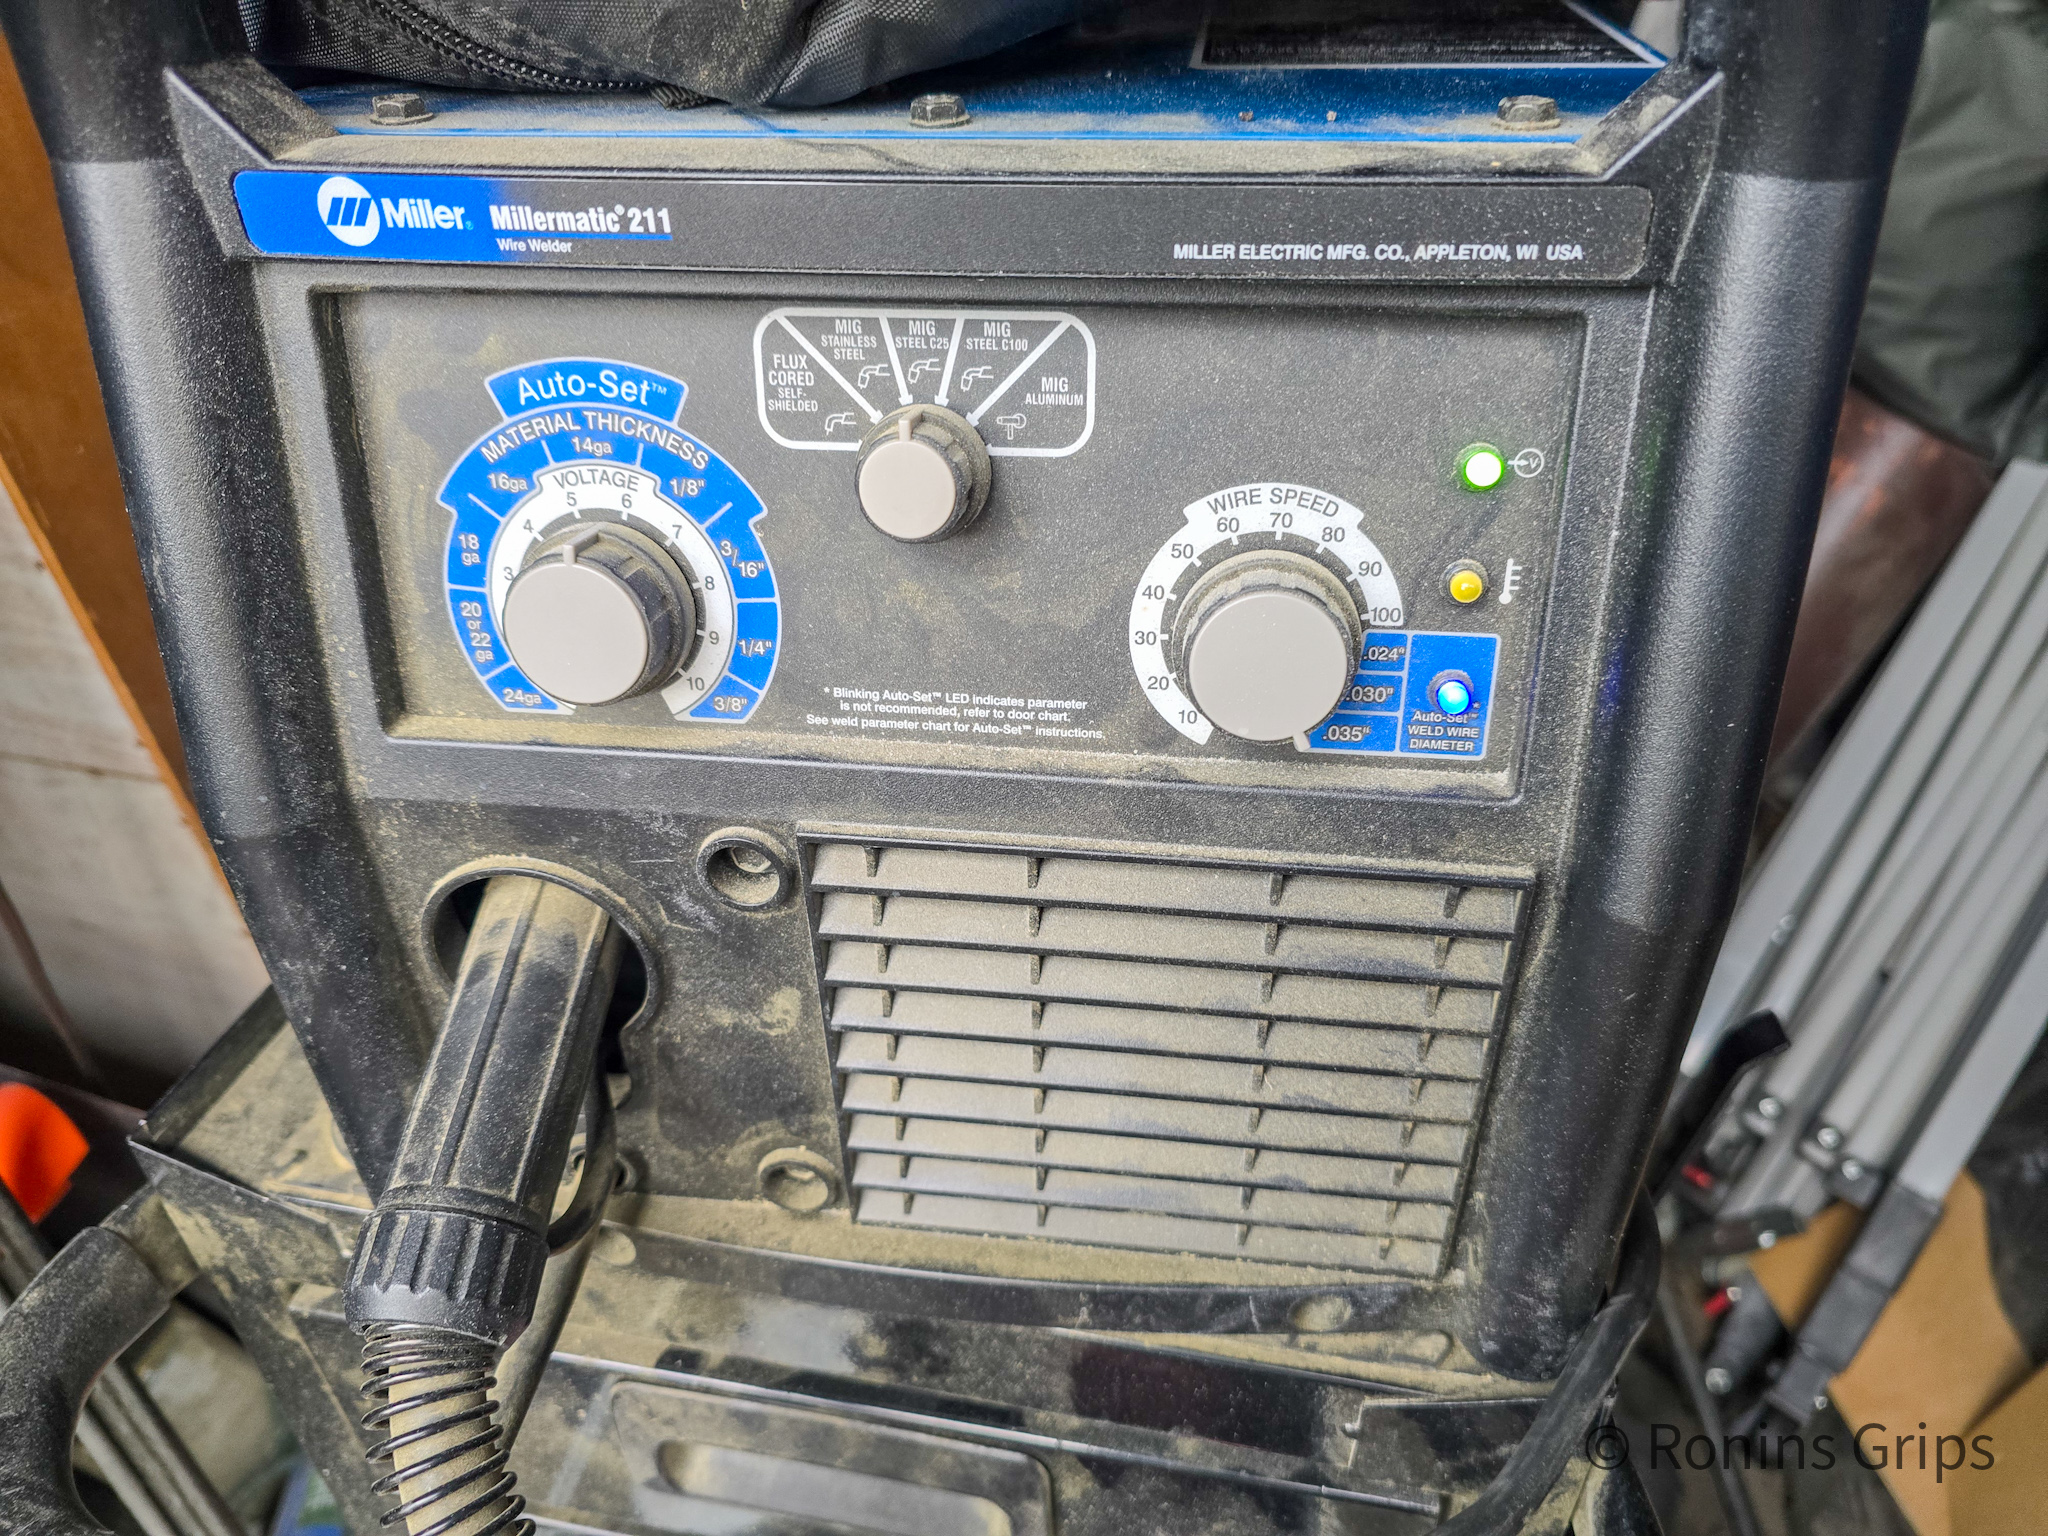
The Millermatic 211 MIG welder can automate some of the settings. In the top middle, it is set to C25 gas. Note it can use C100 and flux core plus has an aluminum setting. On the bottom right, I can manually set the wire feed speed or just specify the diameter of 0.035″, which I did here. The Autoset Thickness dial on the left lets me control the volts. If you are wondering why volts and not amps are being set, it is because the Millermatic uses an inverter and you adjust the voltage instead for a better arc and uses less power. On the test coupons, I found I got the level of penetration I wanted with the dial closer to 6. The 14 gauge recommended setting is from 5-6.

I really like Miller welders and Lincolns are good too but you are going to pony up money for either one. If you plan on using your welder a lot buy the best you can afford. Thickness, duty cycle and the quality of the weld all depend on the quality of the electronics in the welders.

If you are new to welding get either a 120 or 240 volt MIG welder. MIGs just make life easier as the welder feeds the steel wire into the weld and the wire is the electrode that is conducting electricity and melting. It’s surprisingly straight forward for a person new to welding. You can start with flux but gas is better – some welders can do either and that would give you some flexibility.

One brand of affordable welders on Amazon is “YesWelders”. They have a pretty good following. There are tons of brands of MIG welders on Amazon, read the reviews plus search the name with Google and see what you turn up in terms of reviews, recommendations, etc.

You need a welding helmet

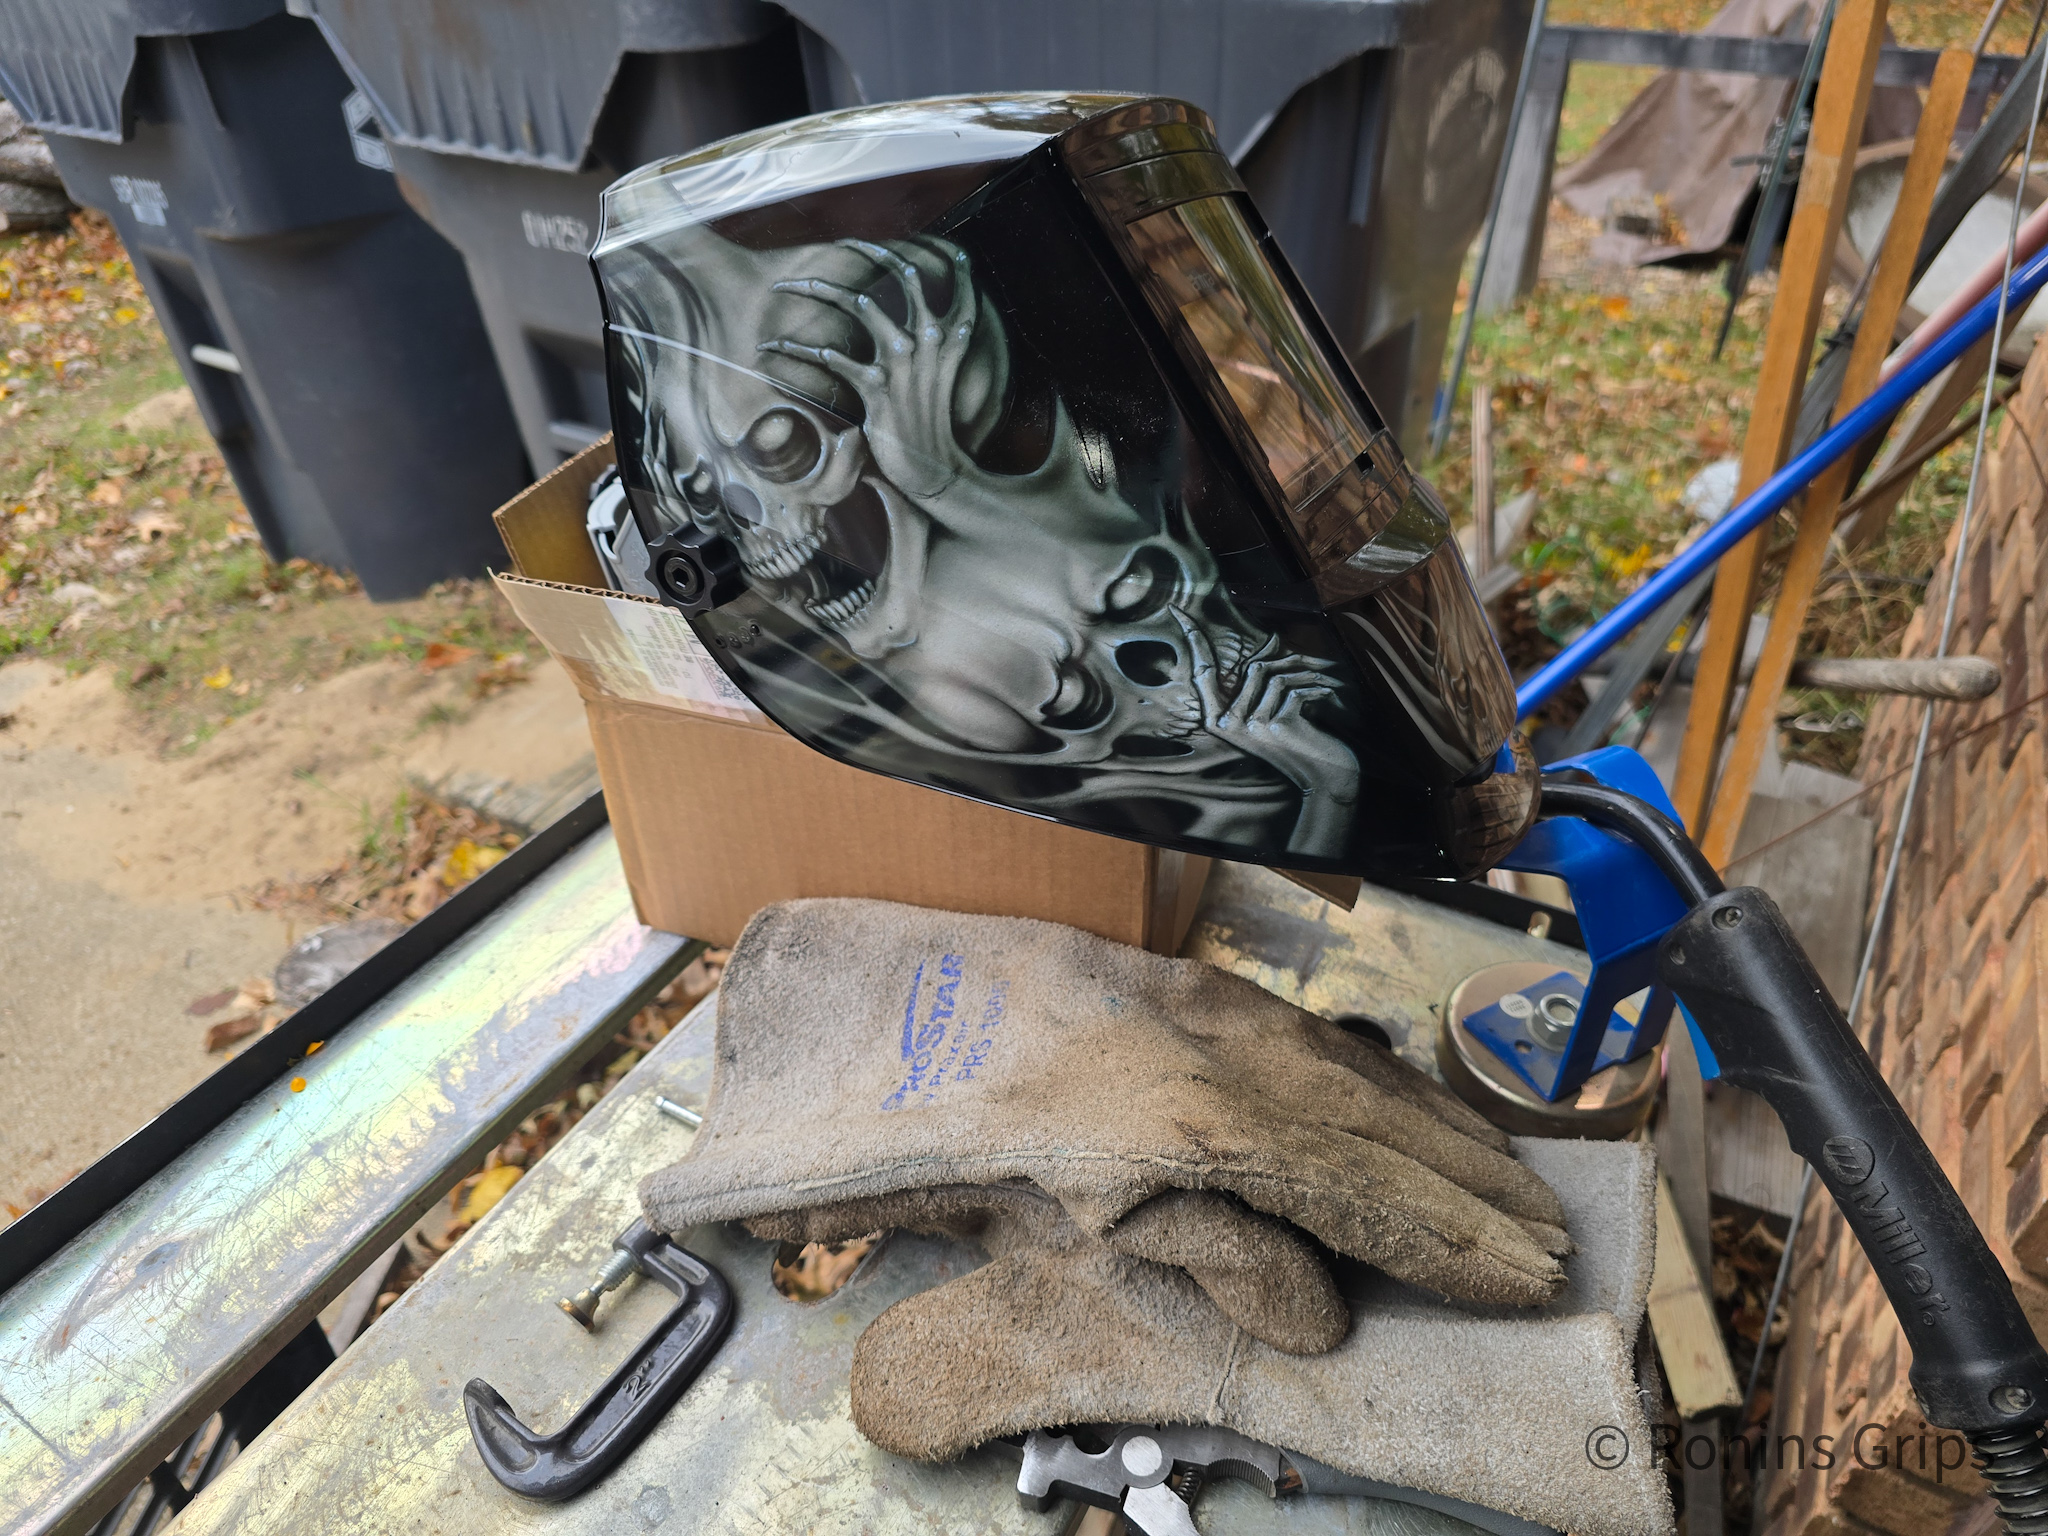
Now one thing that also is critical with a welder is a helmet. The arc from a MIG can really mess up your eyes as it generates quite a bit of UV radiation. I like auto-darkening masks because I can see good and when the arc triggers the lens jumps to the specified level of shielding. I’m currently using an Antra and really like it. A good mask will trigger fast, go darker and usually have both solar and battery backup power. I also keep it in a helmet back to protect it.

By the way, avoid cheap no-name auto darkening helmets. If they are slow to trip and go dark then more damage happens to your eyes. Some guys like permanently shaded helmets so they don’t have to worry about batteries, cumulative effects, etc. They lift their helmet up, position everything and then do a head bob motion so the visor comes down and away they weld. The choice is yours.
Extech IR thermometer and Ronin's polymer grips for heat testing.
This is my third or fourth welding helmet over the years. It is an Antra True Color Wide Shade helmet. Also on table, you can see one of my welding glove sets. The MIG gun is resting in a magnetic clamp holder and it’s all sitting on my Harbor Freight small welding table. I have a big Dewalt welding table for larger jobs.

Cover yourself up

Last welding comment – cover up. There are two reasons for this. First, the UV radiation will give you a really nasty radiation burn that is deeper than a sunburn. I wear a long sleeve shirt and pants. It’s not happened to me (honestly) but I’ve talked to guys who were wearing shorts and welding crouched down and they burned the inside of their thighs so walking absolutely sucked for them – two guys and they both said “I didn’t think I was going to weld long enough for it to matter. It wasn’t me because I own mistakes so others can learn – I sure learned from them.

The second reason to cover up is that welding generates “spatter” – little droplets of steel that can get blown off and cause small burns. Shit happens. I’ve been burned through just about everything at one time or another and being covered up just reduces the odds. Guys who weld a lot will wear a leather apron, jeans and safety boots.

Always wear welding gloves for a boat load of reasons – spatter, protection and insulation from heat as you weld. Gloves also reduce the odds of burning the crap out of yourself when you accidentally grab/catch something hot.

You’ll need a collection of clamps

In addition to the welder, you are going to need clamps. How many kind of depends on how you clamp everything together. BTW, plastic clamps can hold stuff but don’t weld anywhere near them or they will melt. There are C-clamp assortments on Amazon.
Extech IR thermometer and Ronin's polymer grips for heat testing.
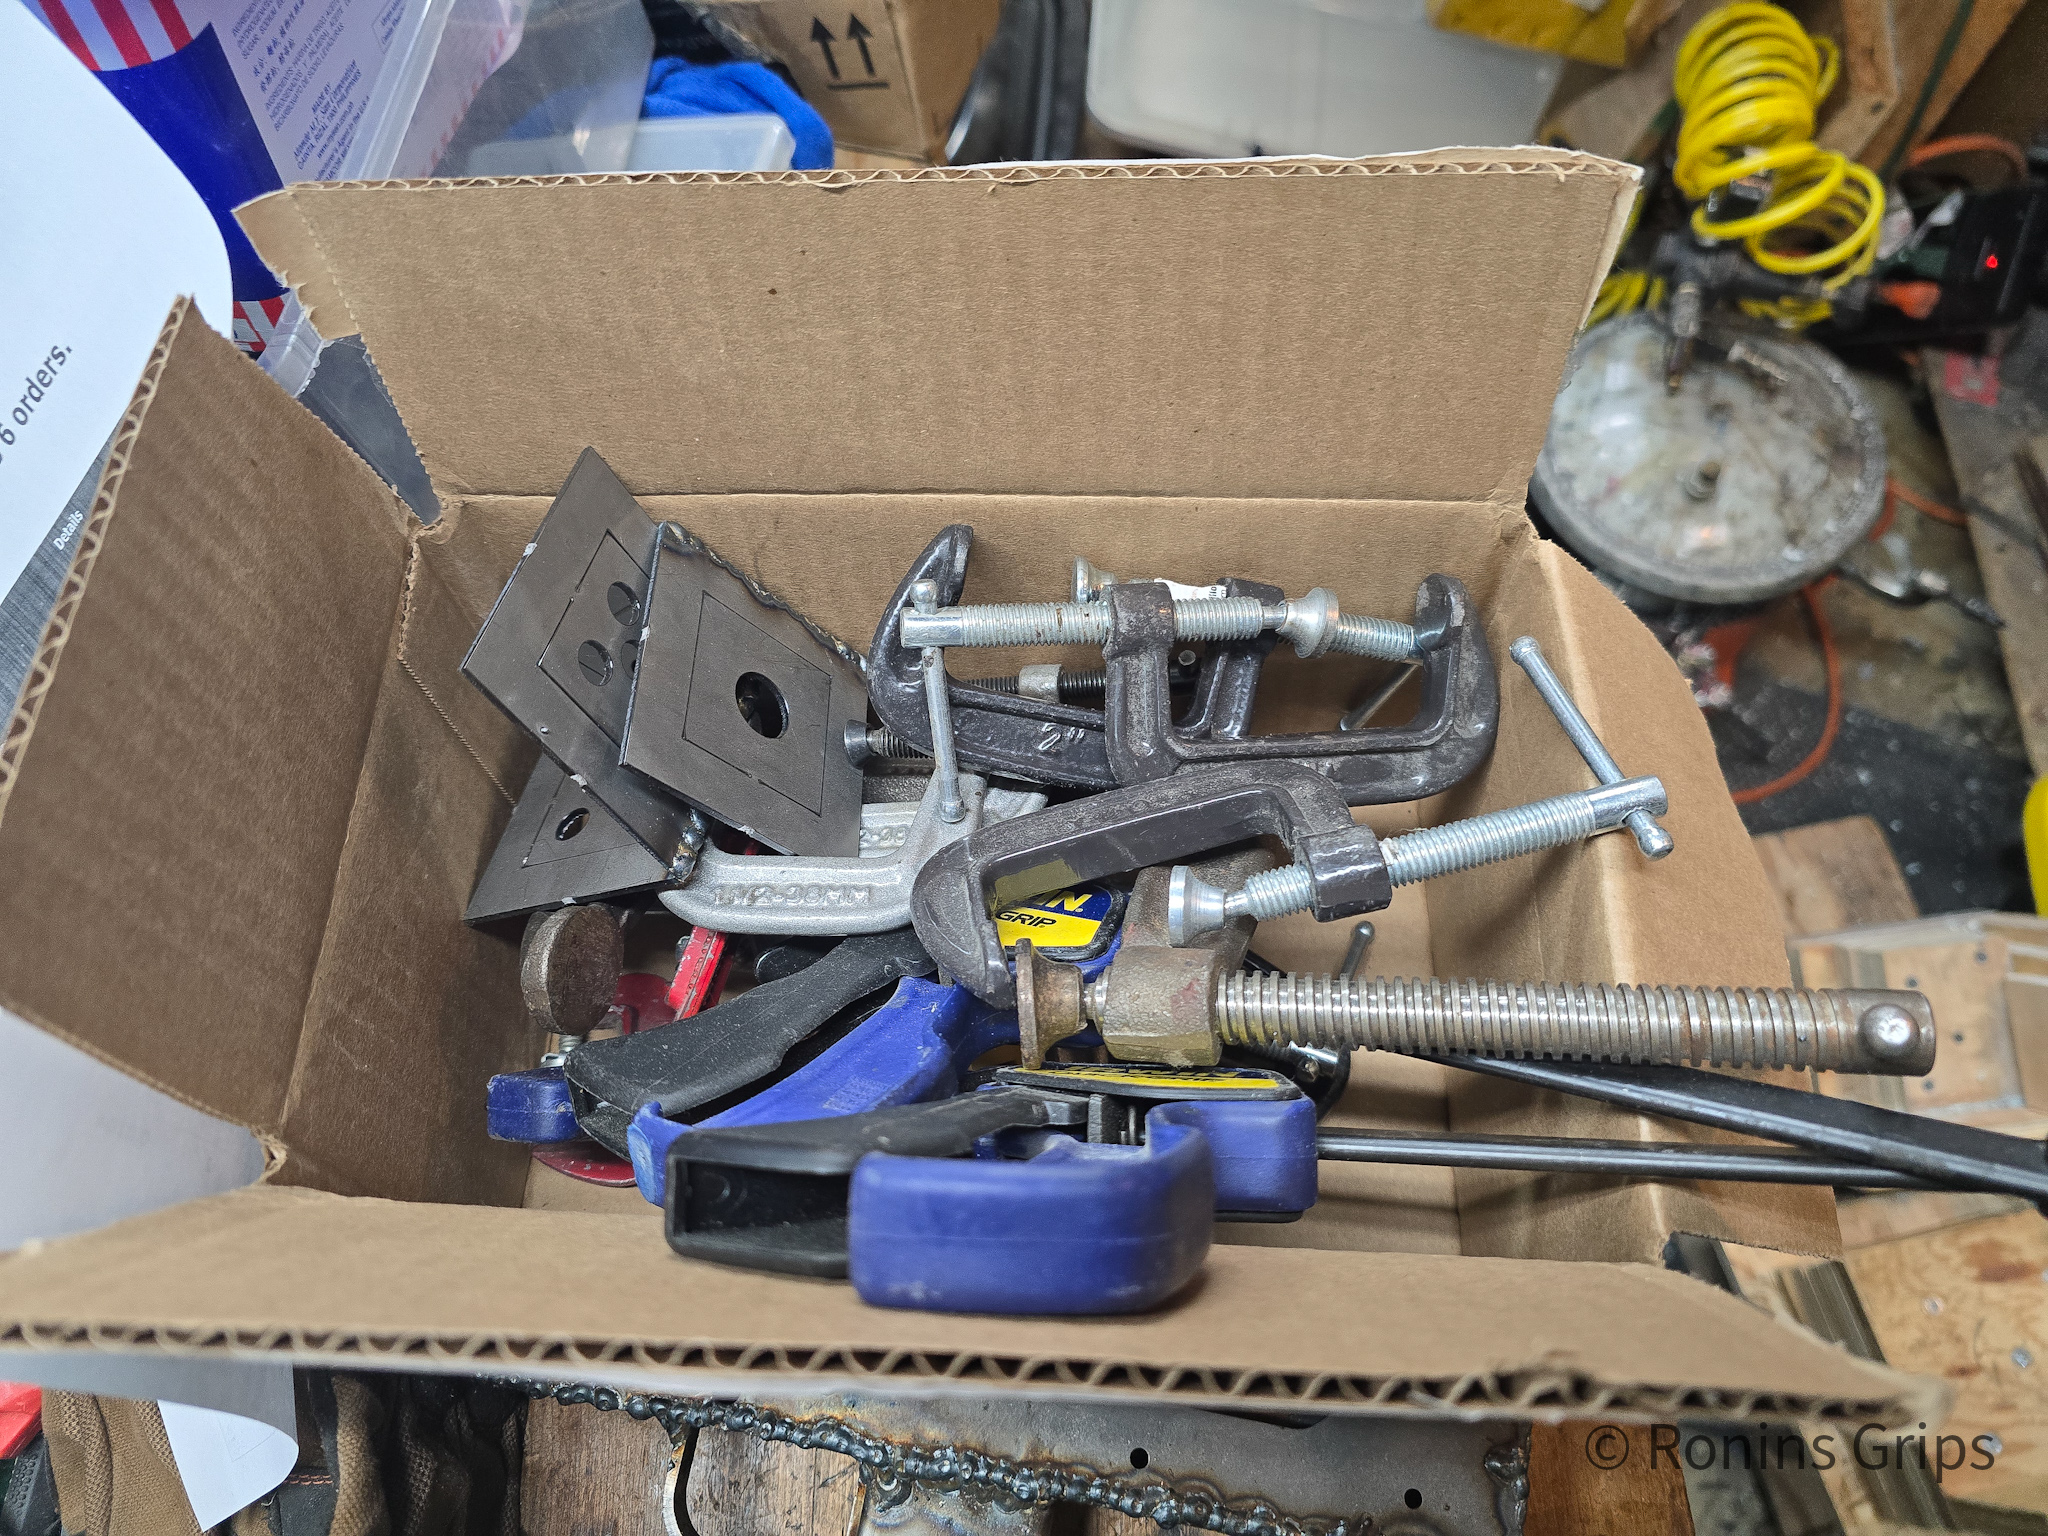
I took a quick photo of a box I had clamps sitting in for this project. I have 3-4x this many clamps.

You’ll see I have a variety of 1″, 1.5″, 2″, and 3″ clamps plus one 6″ clamp for the handle. How many you need of each depends on how you decide to do your welding. A couple of pieces of scrap metal will also help with your clamping so you can apply even pressure.

In general, you need to securely clamp what you are welding so stuff doesn’t move. The better job of clamping you do, the less rework you are going to experience from things shifting.

Various sizes of magnetic welding clamps come in handy too. I have all different sizes ranging from pretty small – maybe 1-2″ and then up to 4-5″. The come in handy for holding work in place and keeping it from sliding around. There are a lot of options on Amazon.

The actual clamping and welding

I planned to do three receivers – two pistols and one rifle. So, I tried welding three different ways:

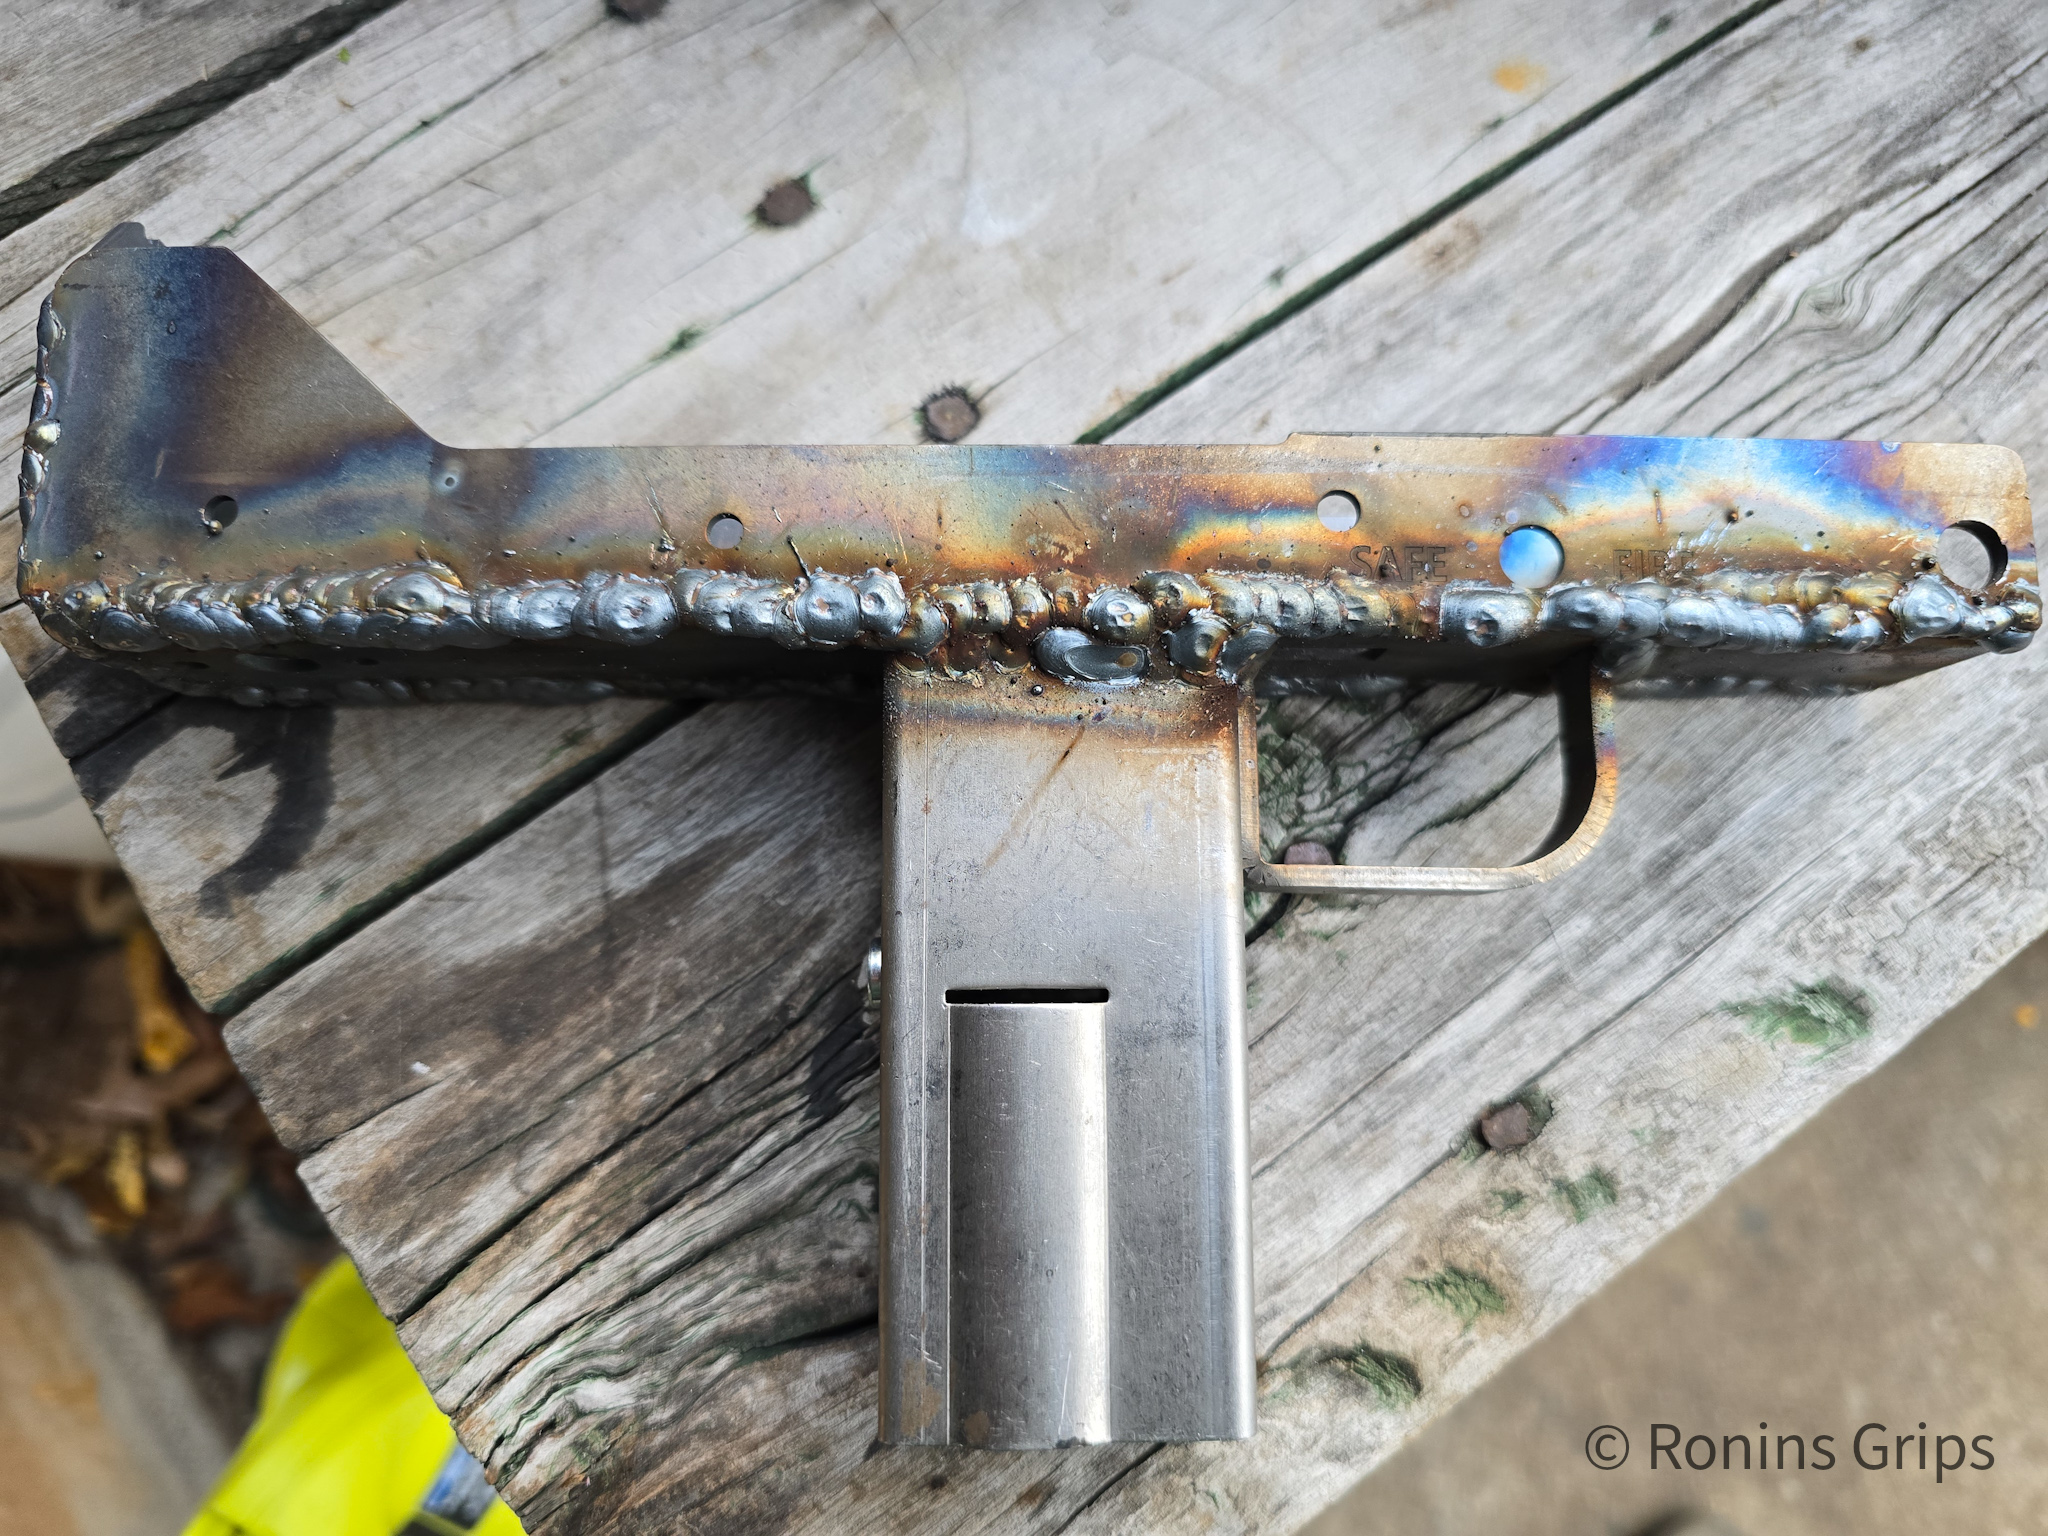
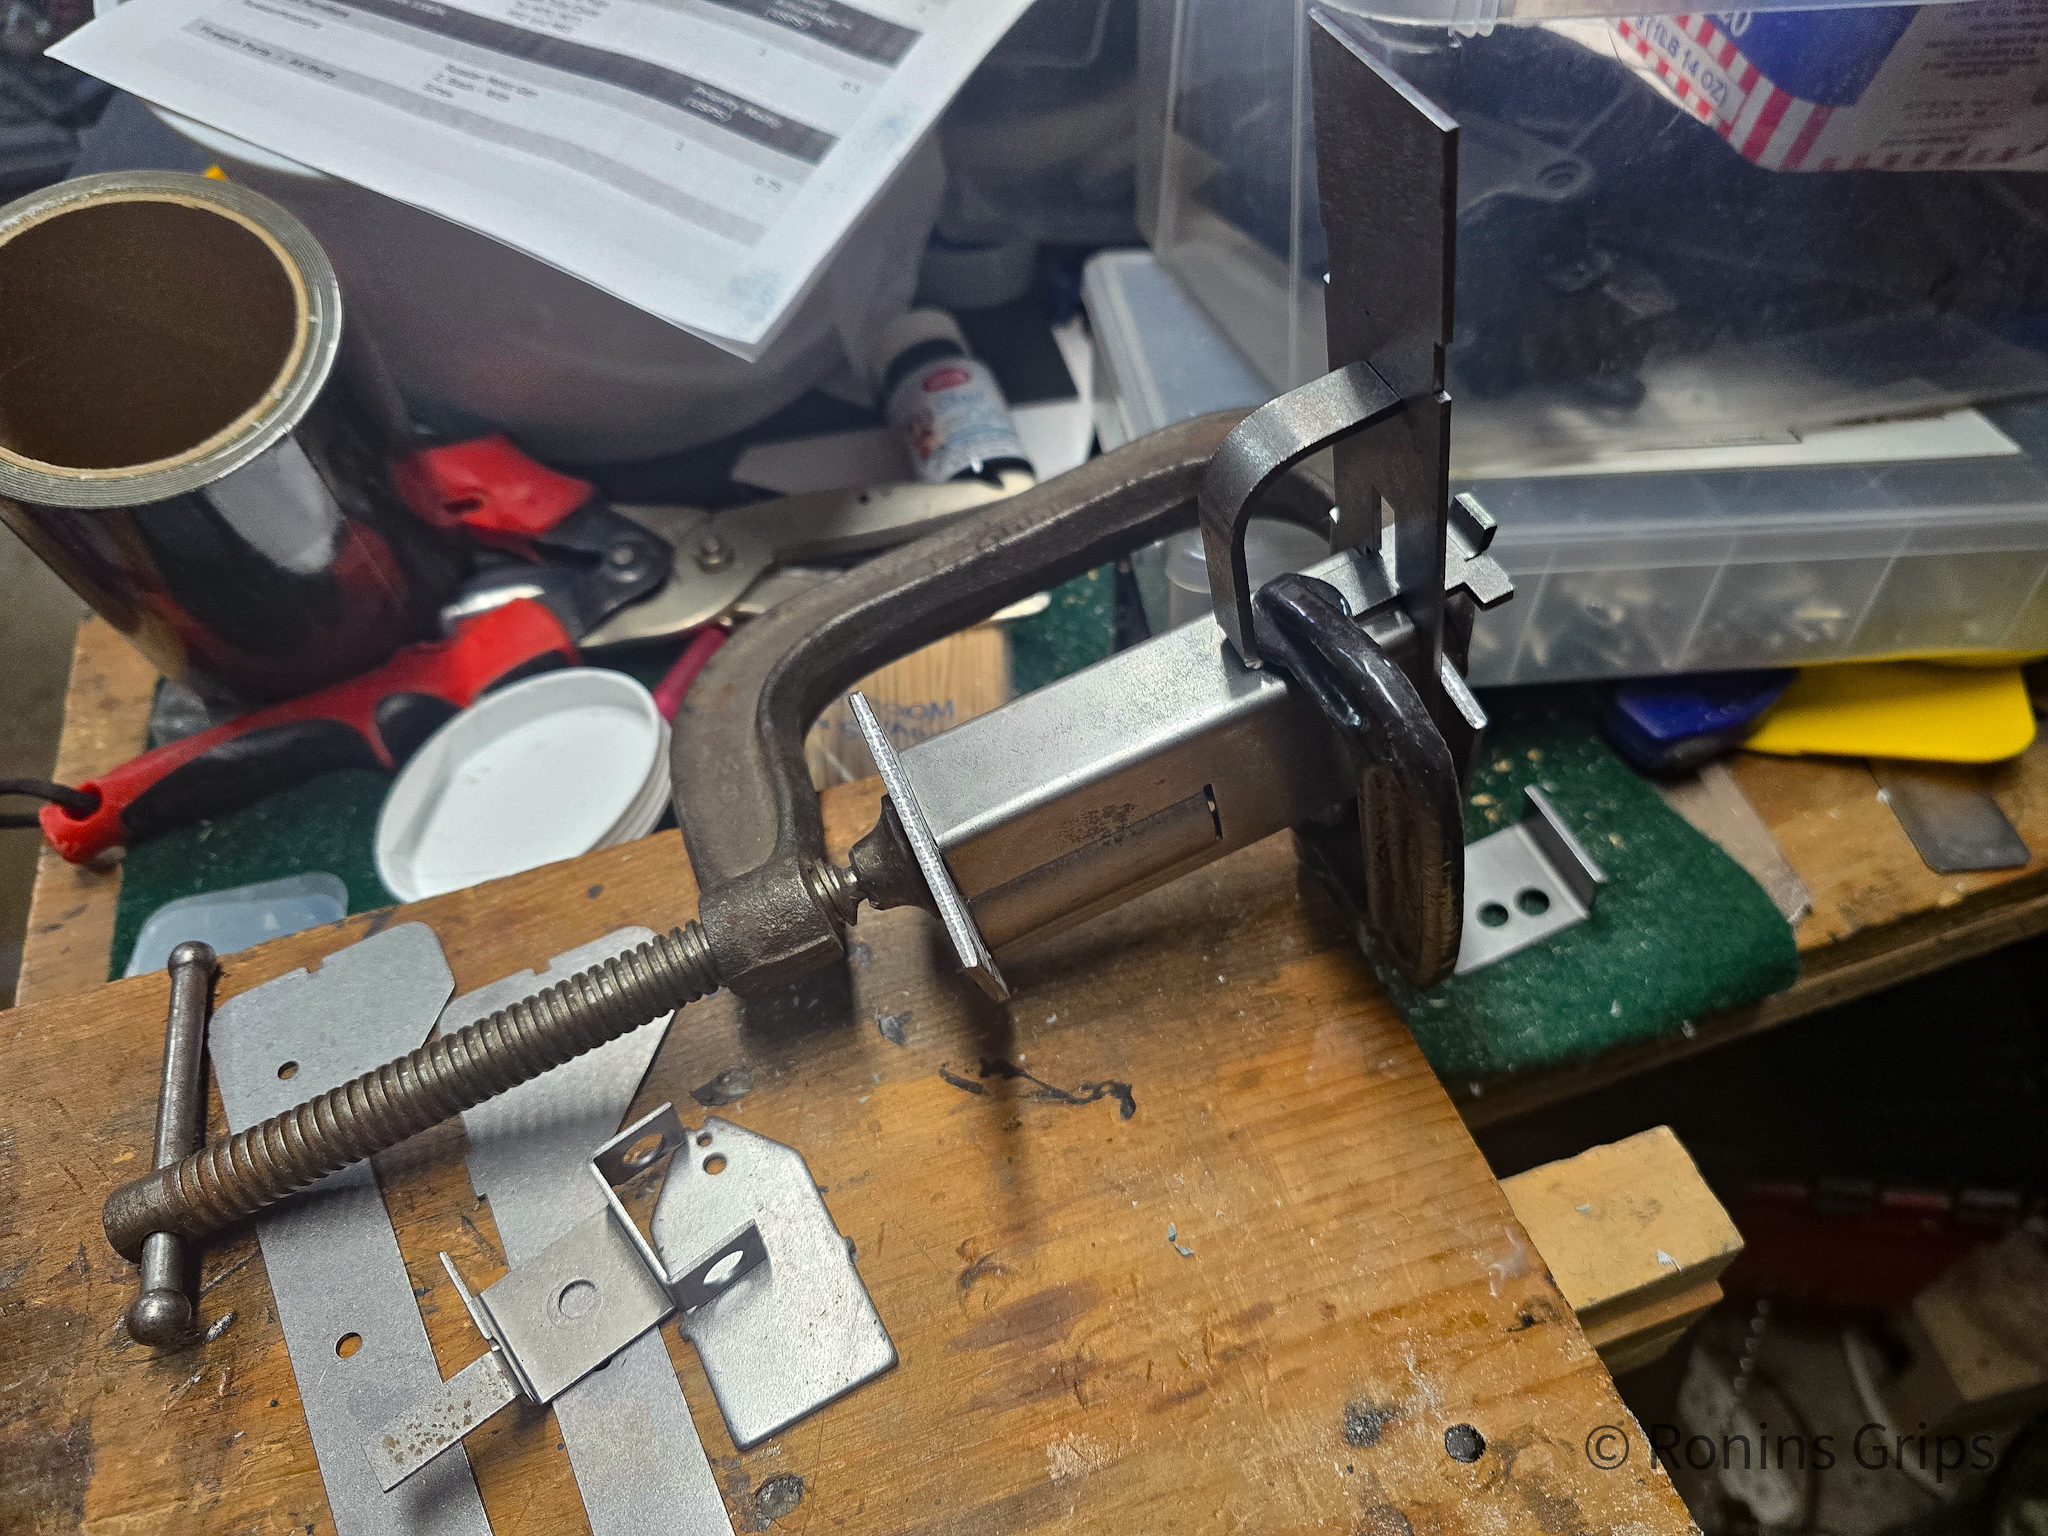
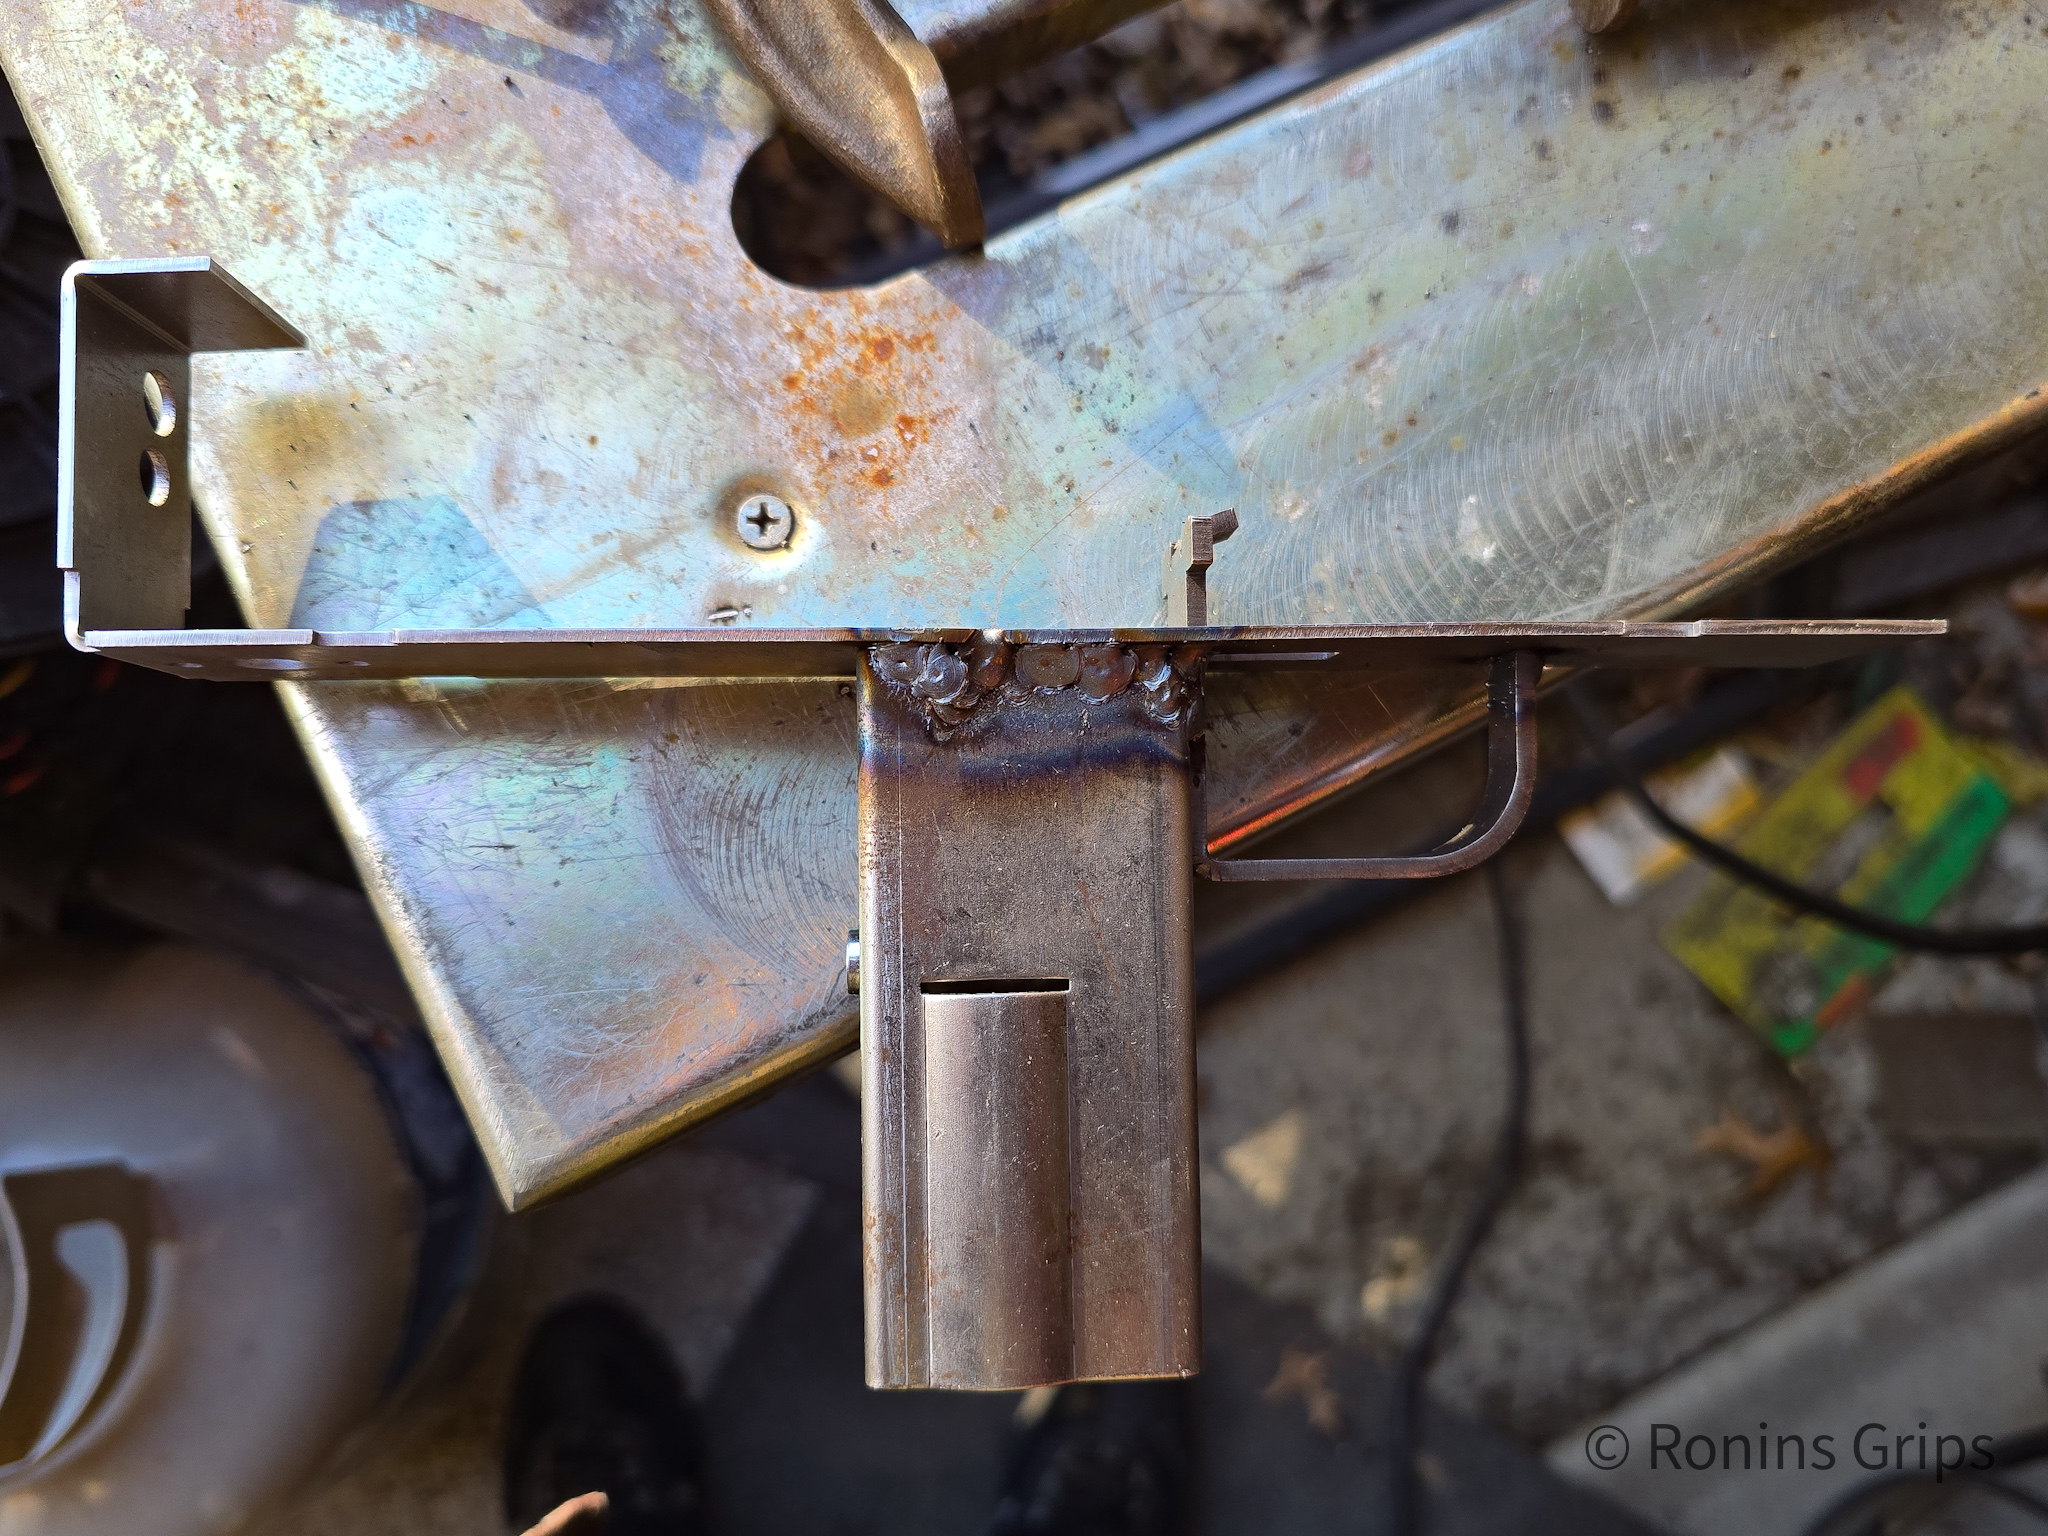
First Receiver: I clamped the grip, trigger guard and center section together, welded them and then used a right angle piece of aluminum to clamp the right side plate into position welded that, did the same for the right side plate and then the center reinforcement plate. Then I welded in the rear sight.
Extech IR thermometer and Ronin's polymer grips for heat testing.
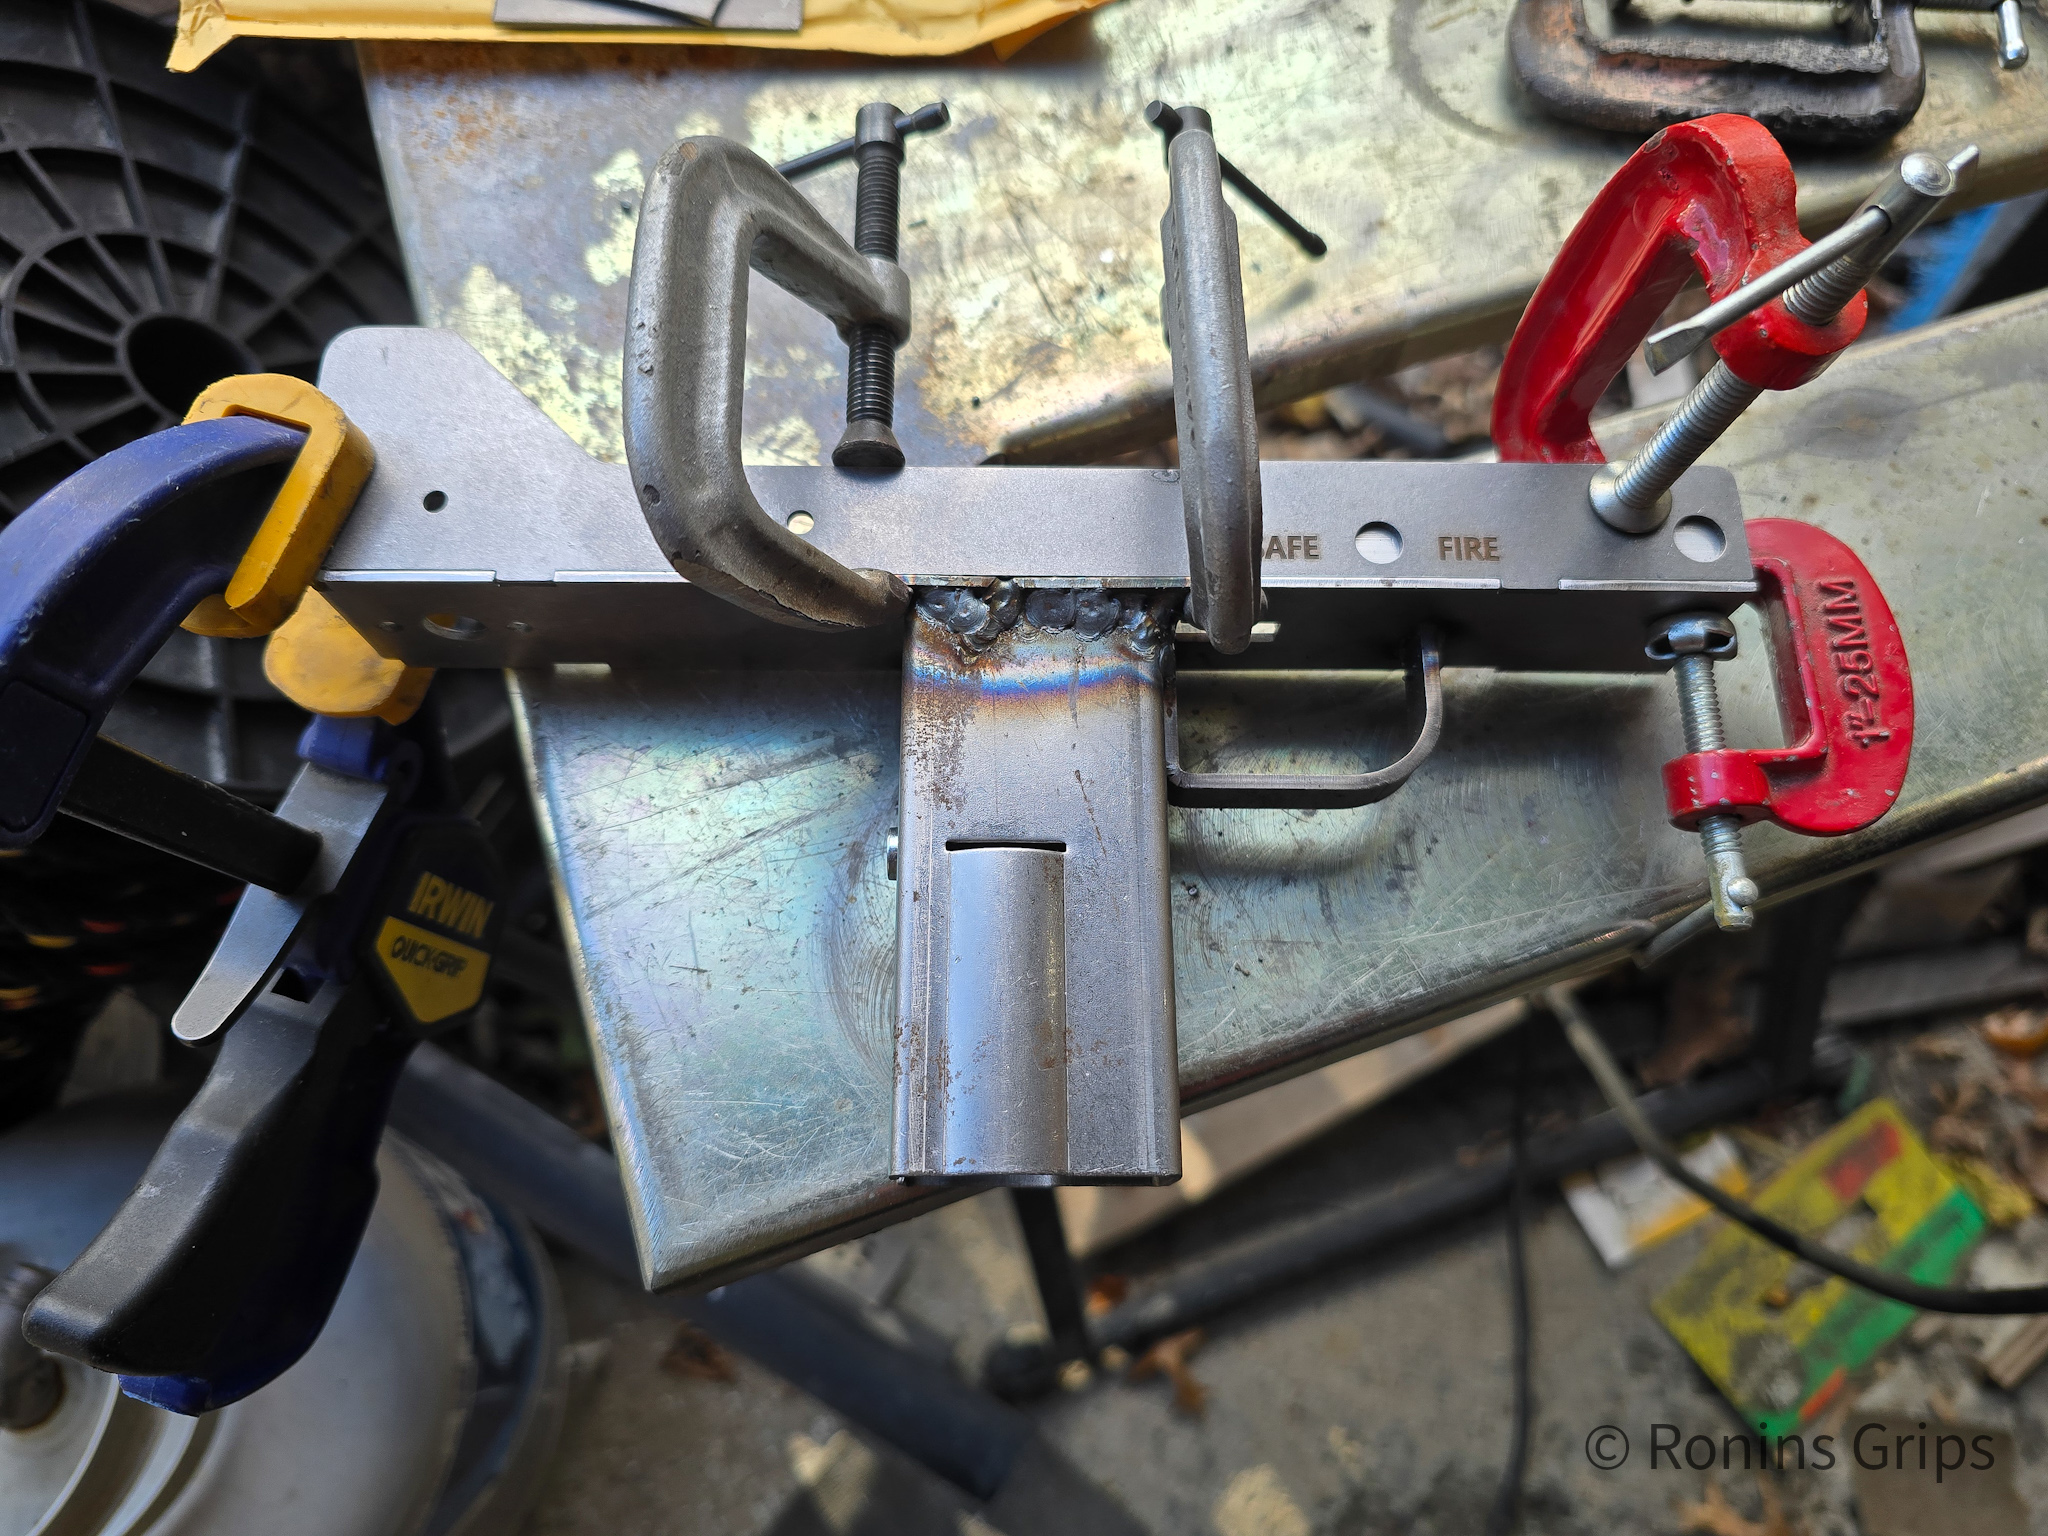
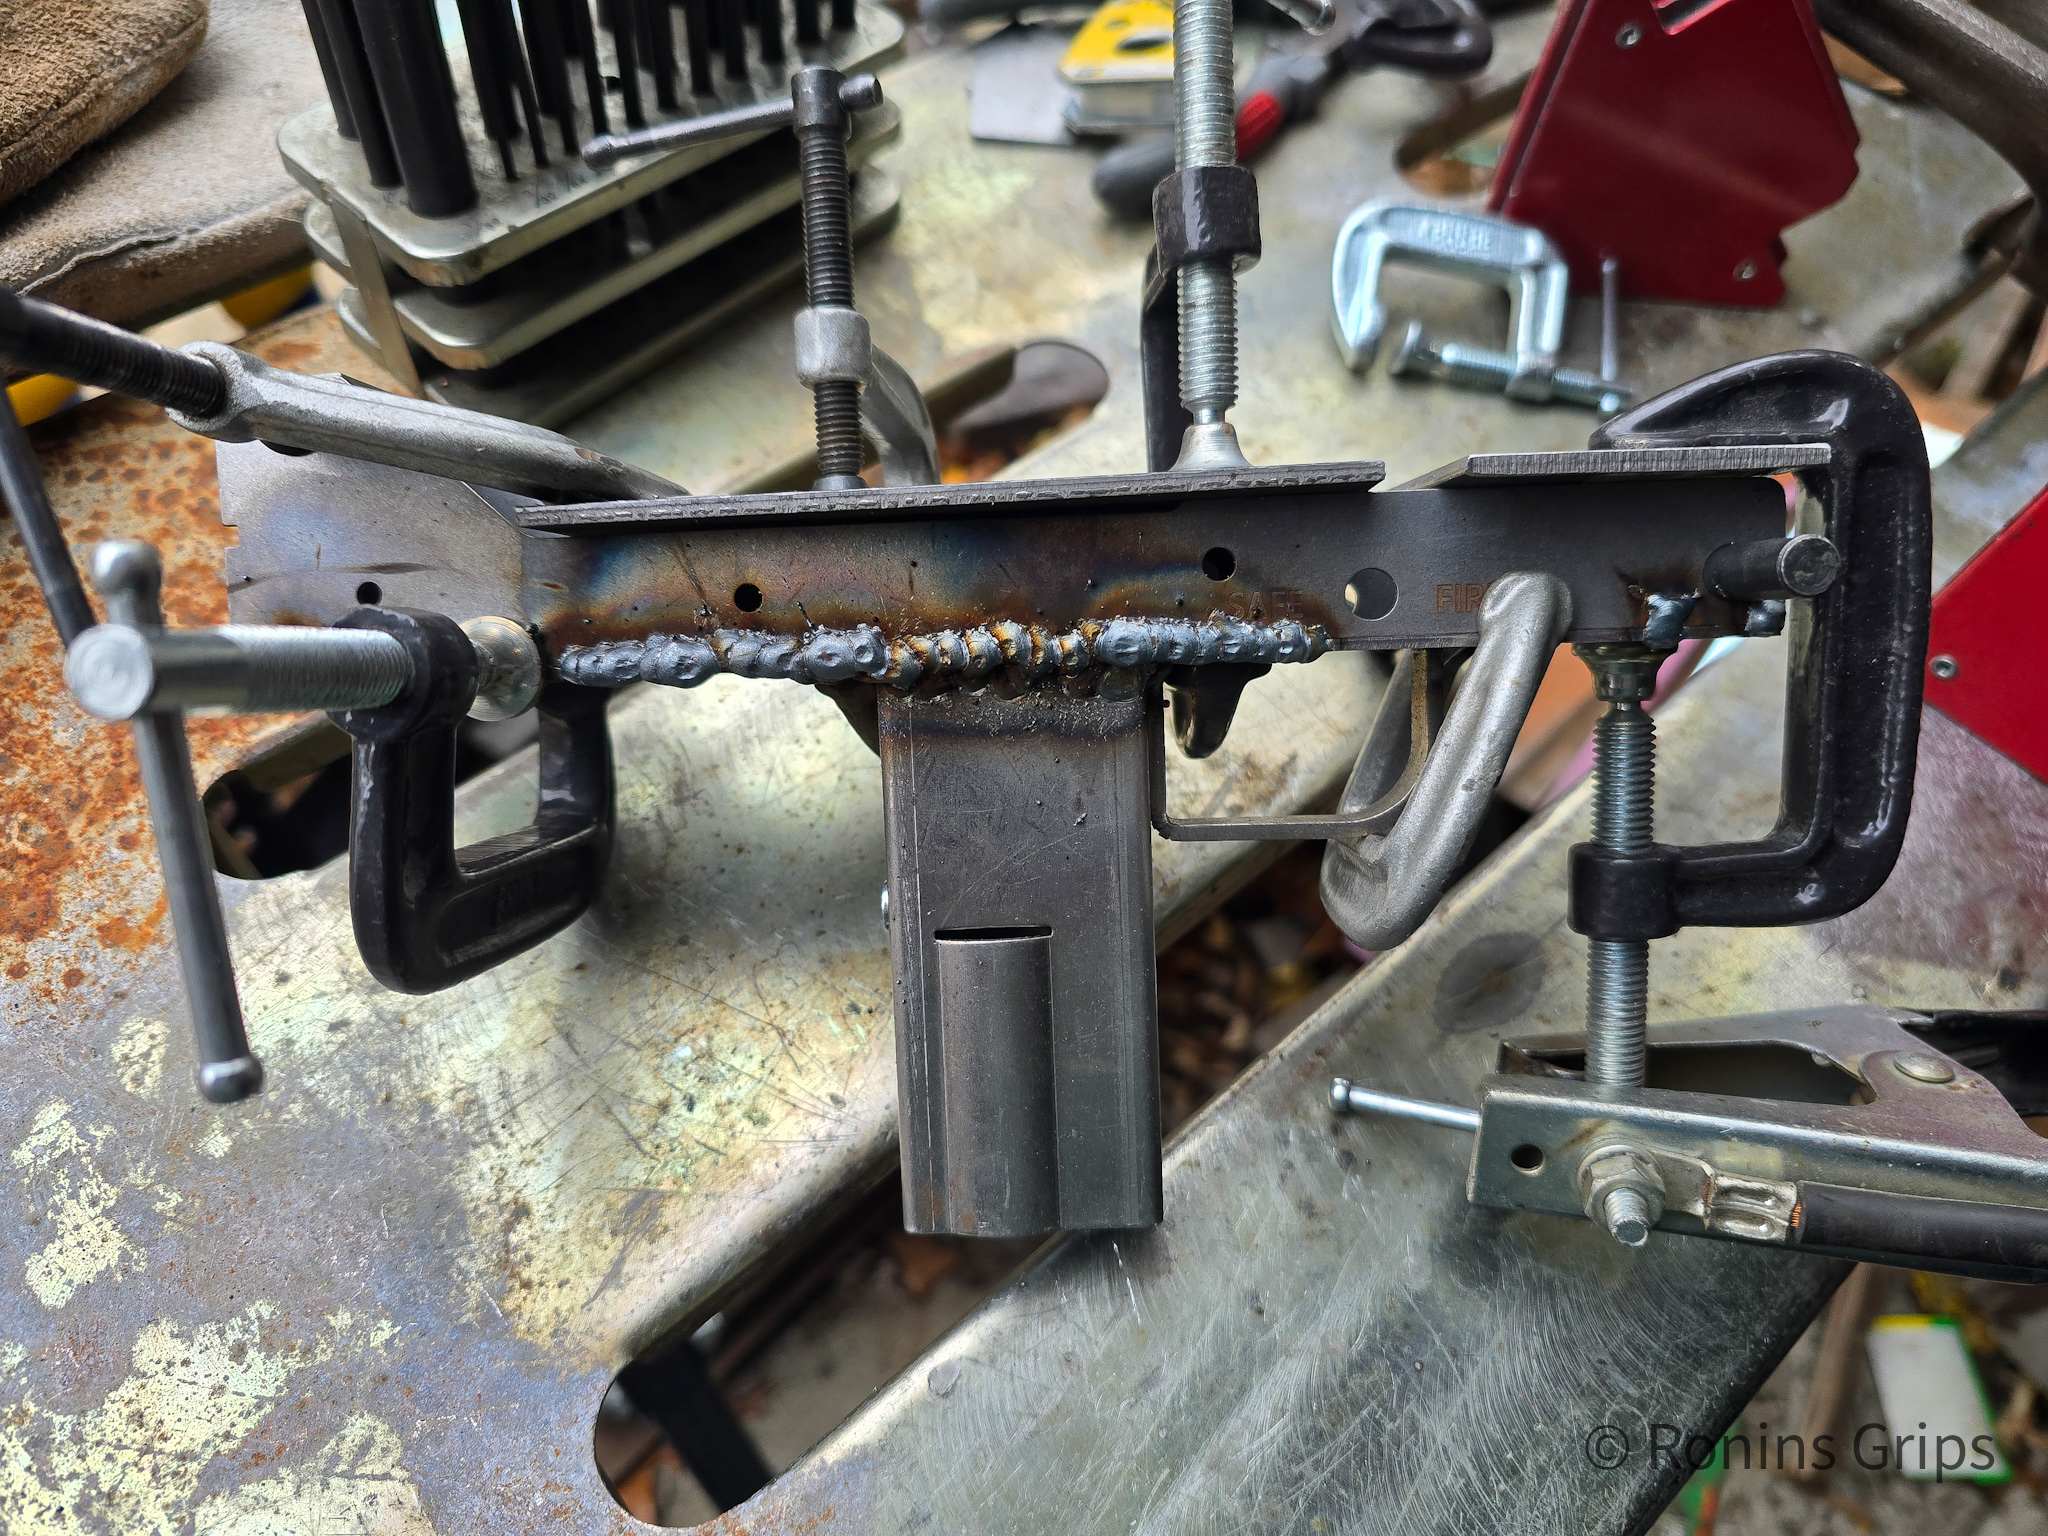
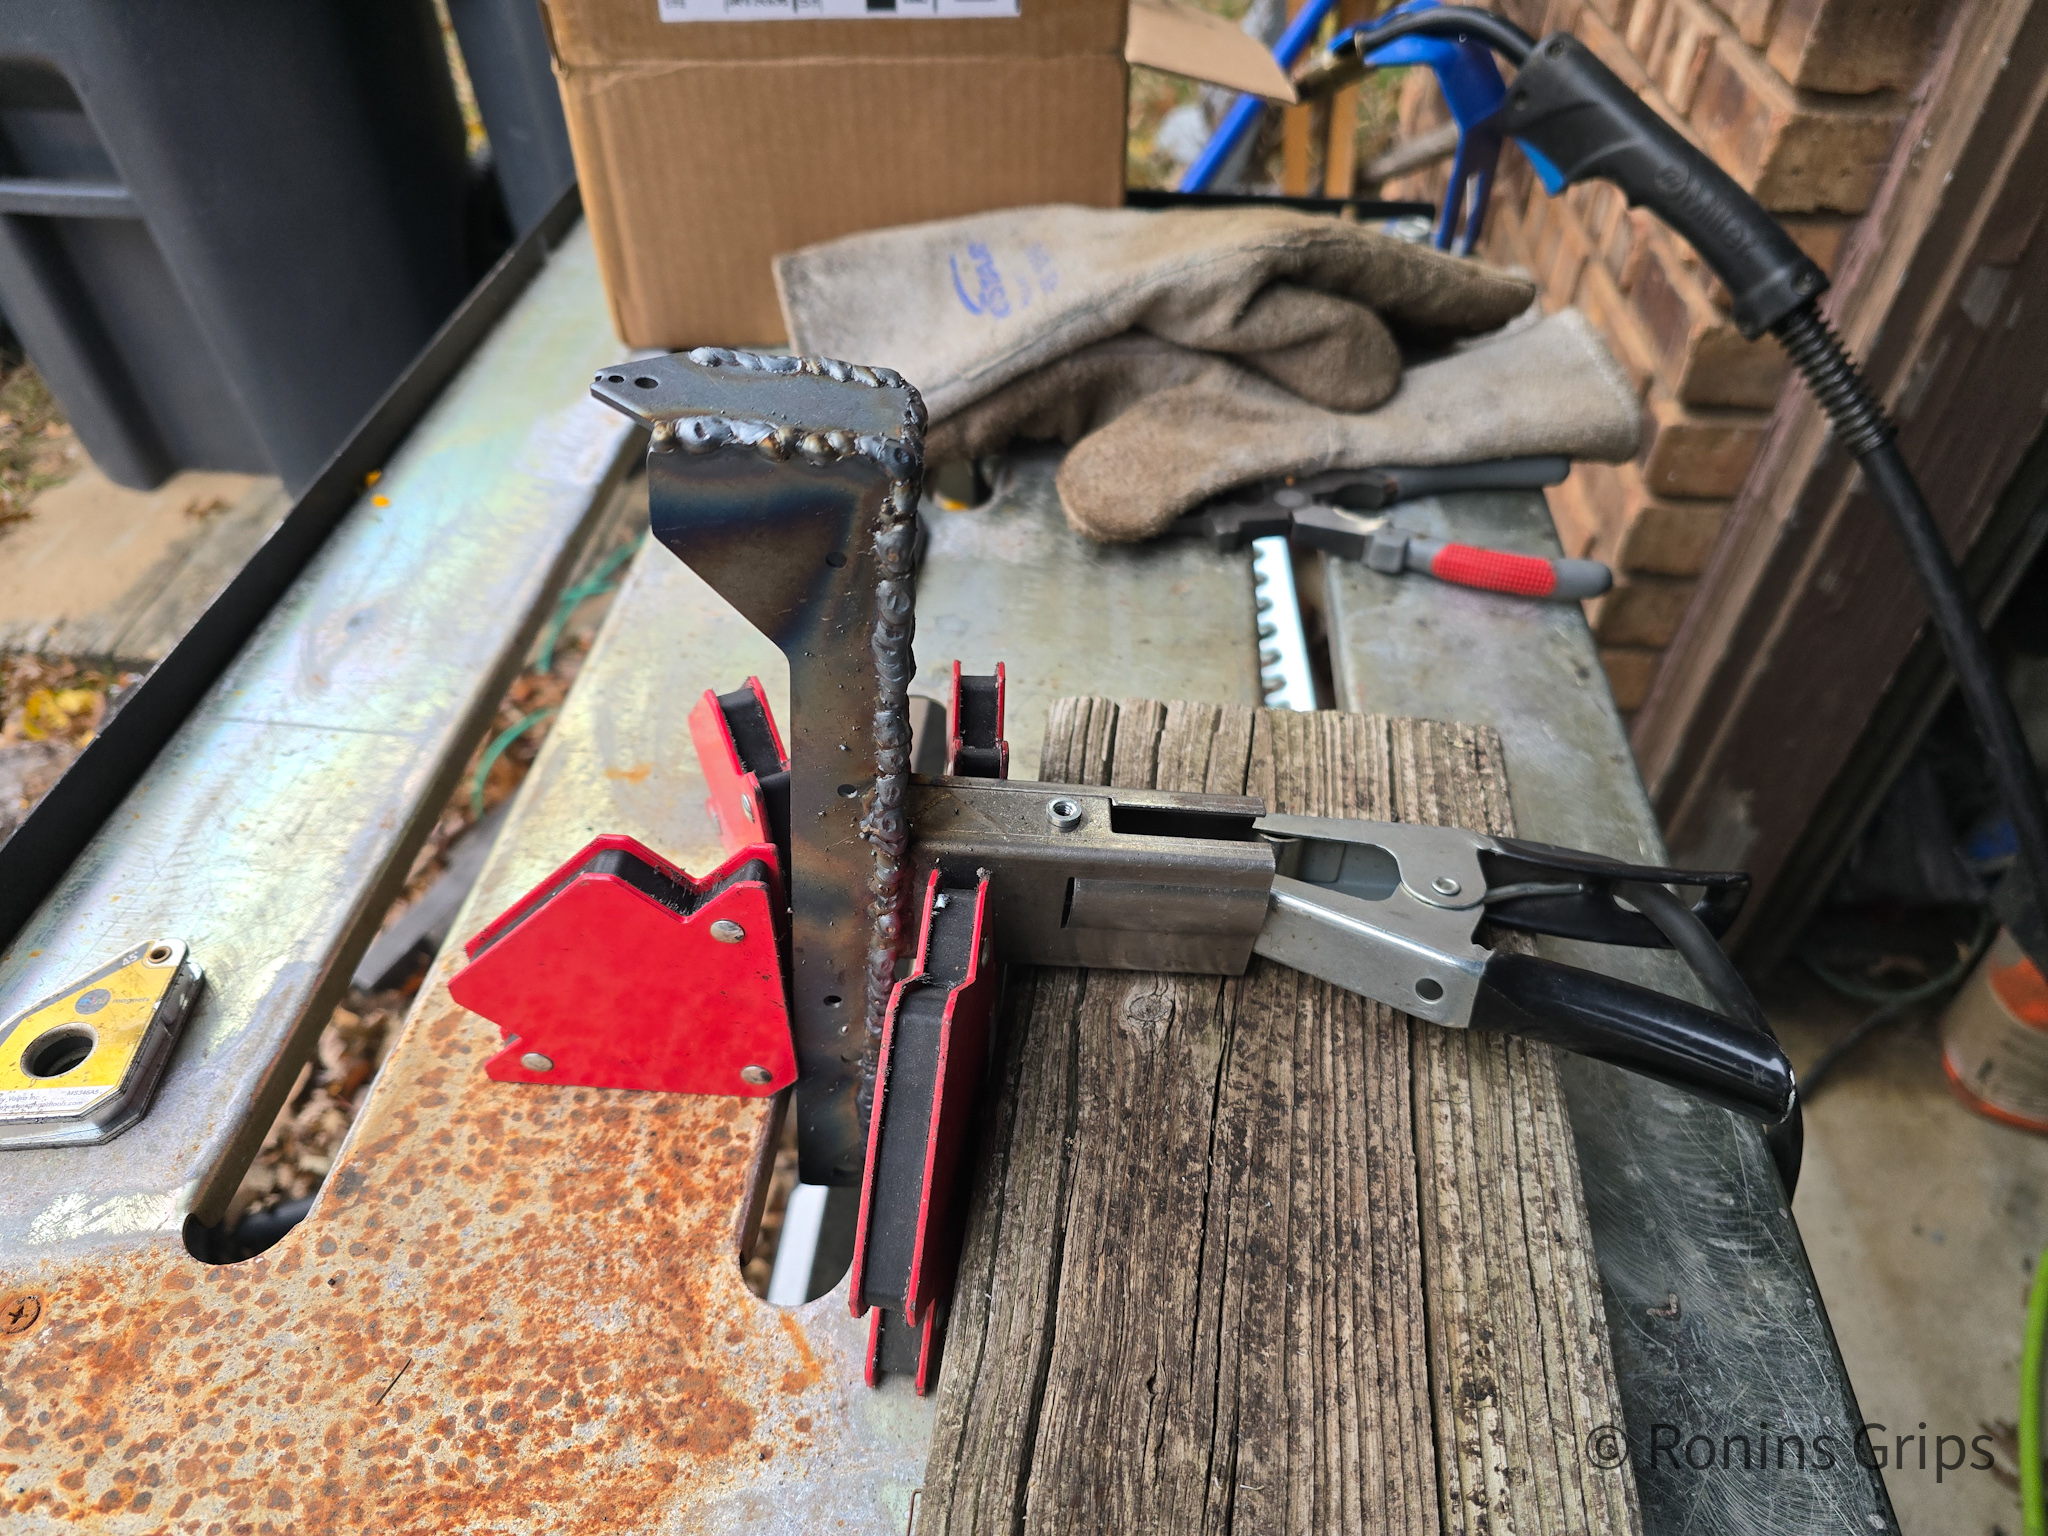
I tried to do the trigger guard, grip and center section all at once. A 6″ clamp and two pieces of 1/8″ thick scrap metal were used to evenly clamp the grip to the center support. A 2″ clamp was used to secure the trigger guard to the grip.
Extech IR thermometer and Ronin's polymer grips for heat testing.
When you weld sheet metal, do not just pour on the heat. If the sheet metal gets too hot it will sag/melt. It will also likely warp. To avoid this, tack weld the pieces together first. Tack welds are small spot welds. When everything is tacked, go back and weld small sections at a time rotating a round to keep the heat and warping low. I did not do the above all at once. Note you do not weld the back of t he grip or you will block the black plastic grip assembly.
Extech IR thermometer and Ronin's polymer grips for heat testing.
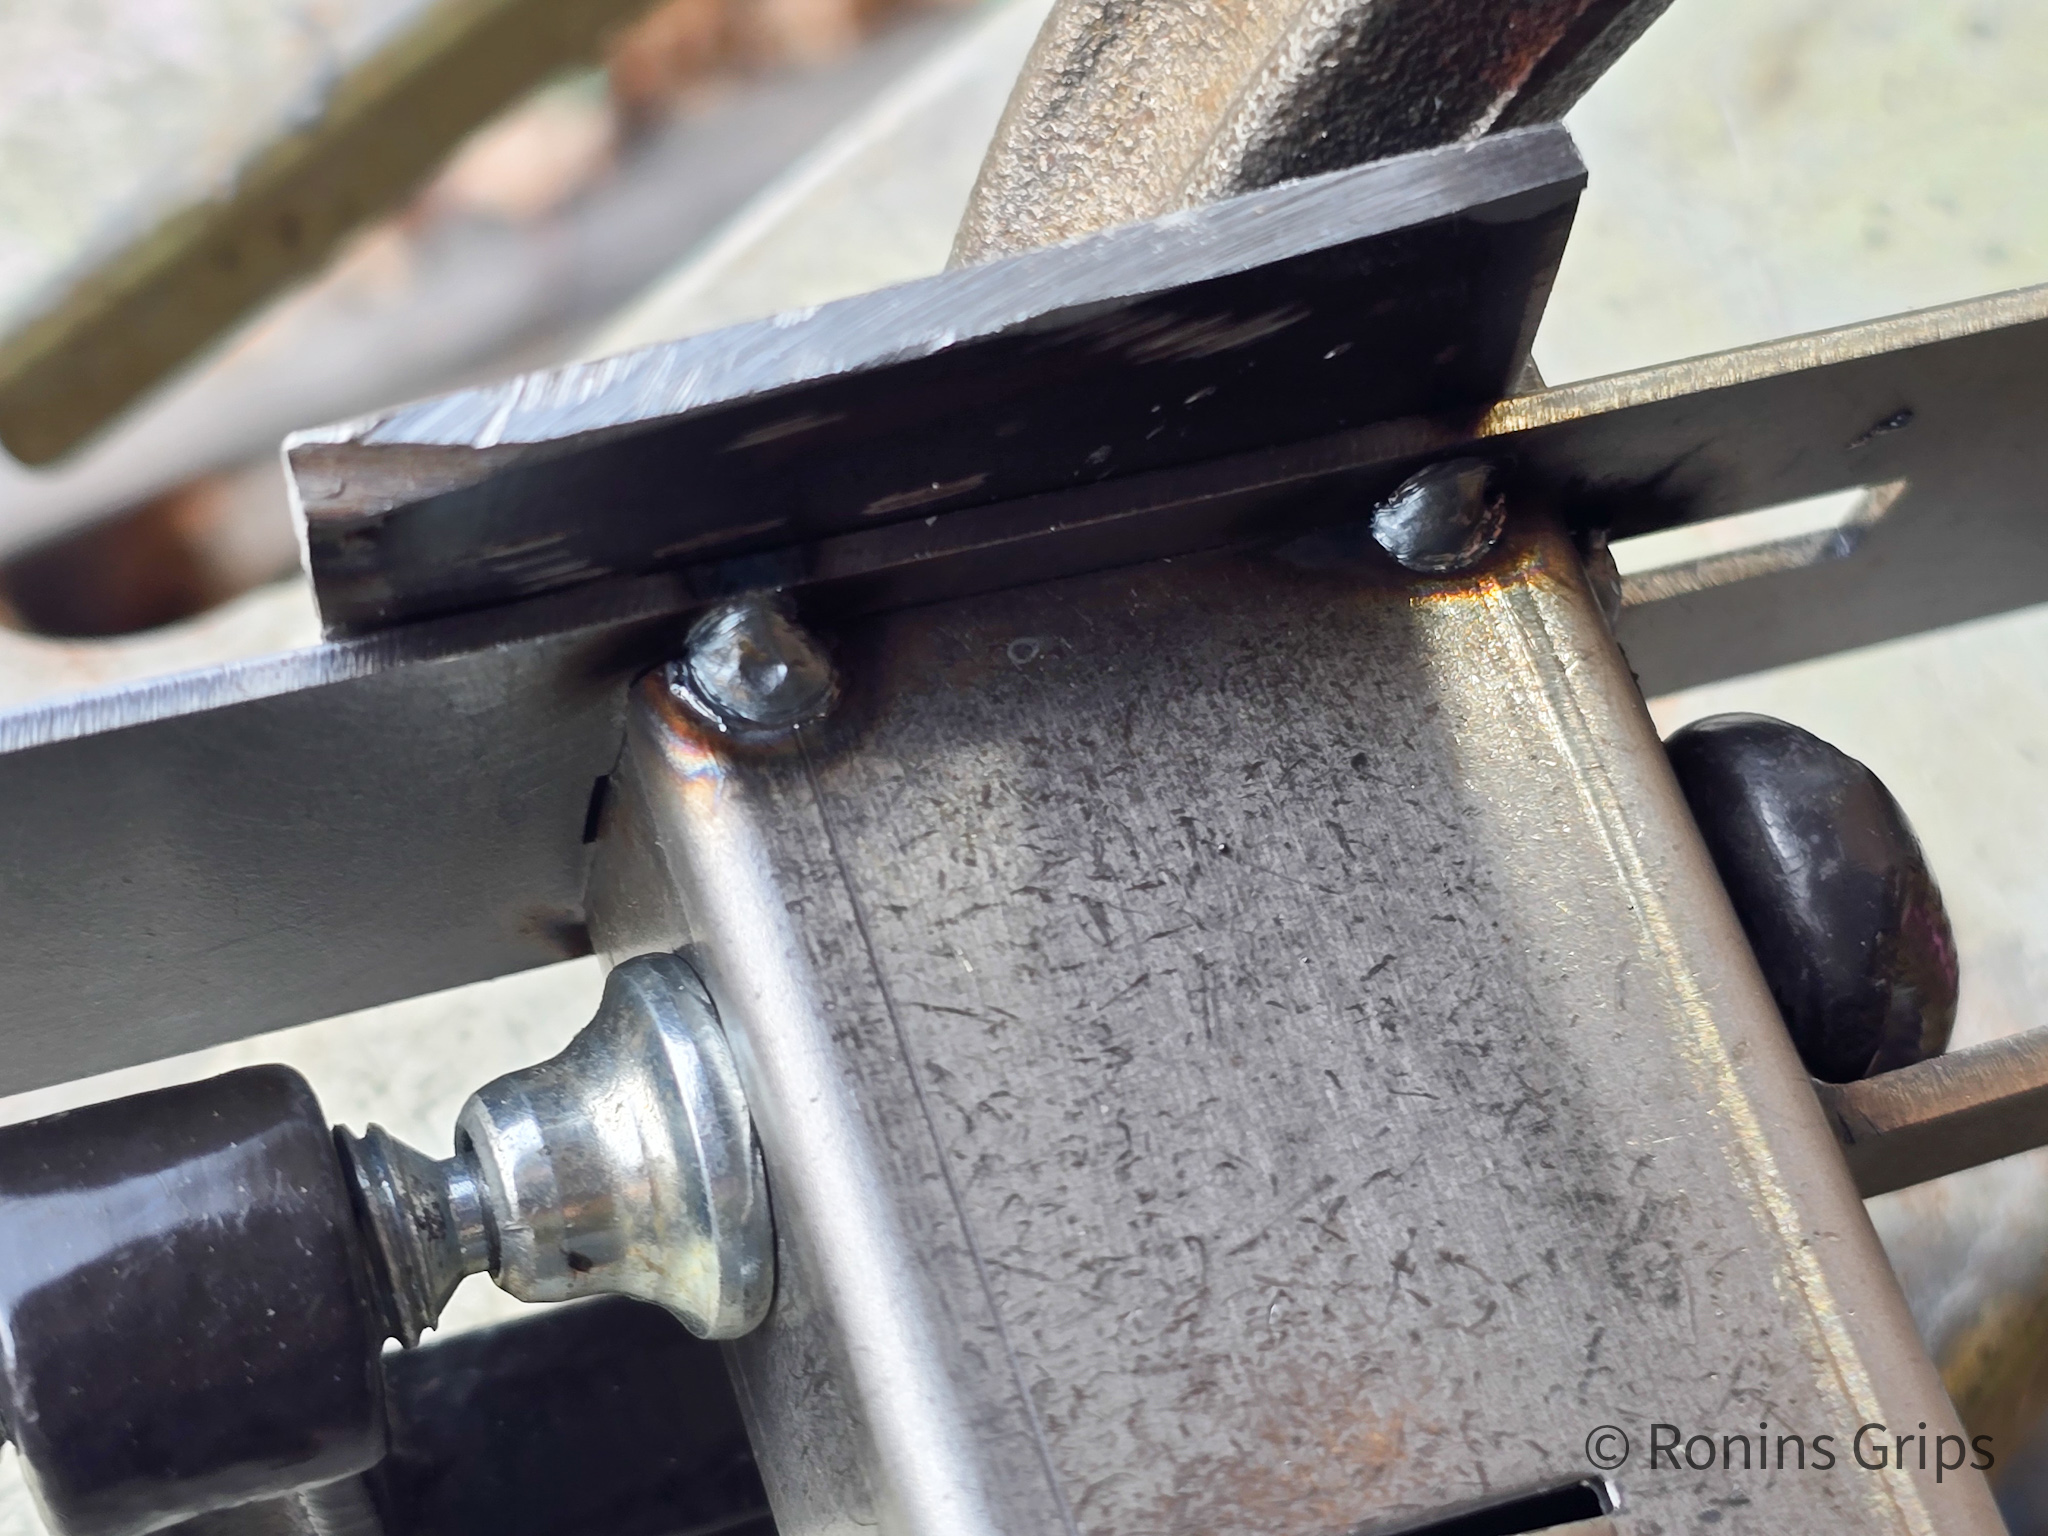
I inserted a piece of right angle aluminum in the front and clamped down the one side. You do not heed the right angle – the center reinforcement is plenty but I did not know this yet.
Extech IR thermometer and Ronin's polymer grips for heat testing.
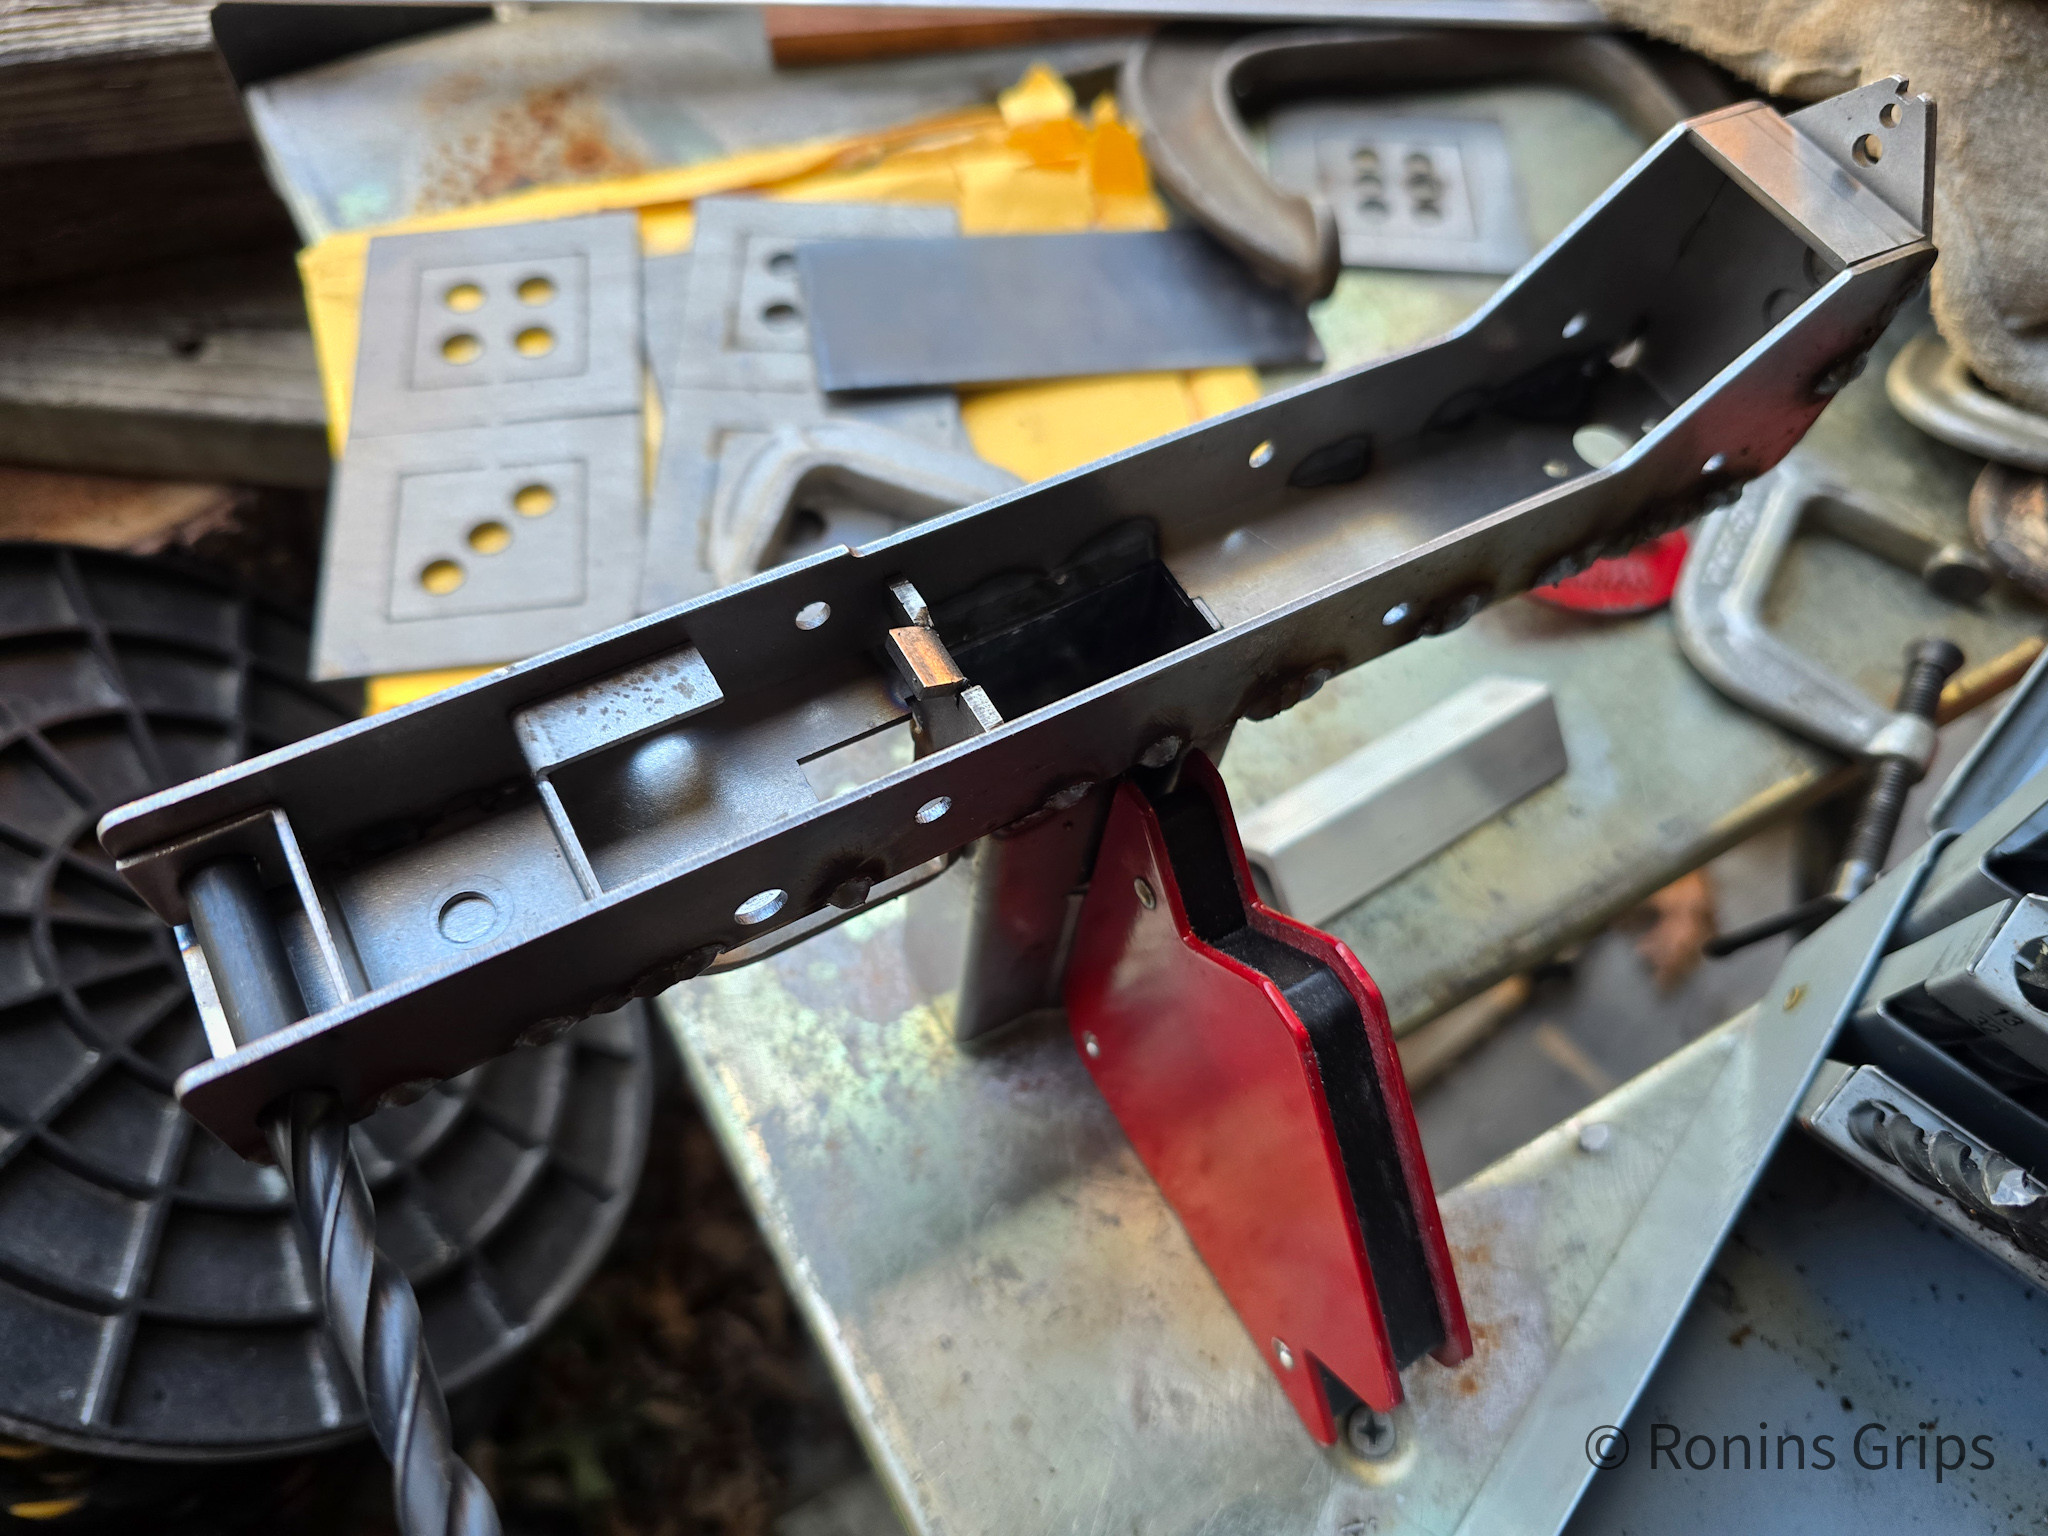
I welded the slide plates on – first with tack welds and then increasing the welds. A 21/64ths” drill bit shank holding the center reinforcement in place prior to doing a spot weld in the visible hole. I did not weld the top rear of the receiver to allow for tuning. The red objects are magnetic clamps.
Extech IR thermometer and Ronin's polymer grips for heat testing.
I did a weld in the middle and then on the sides just to make sure things don’t move later.
Extech IR thermometer and Ronin's polymer grips for heat testing.
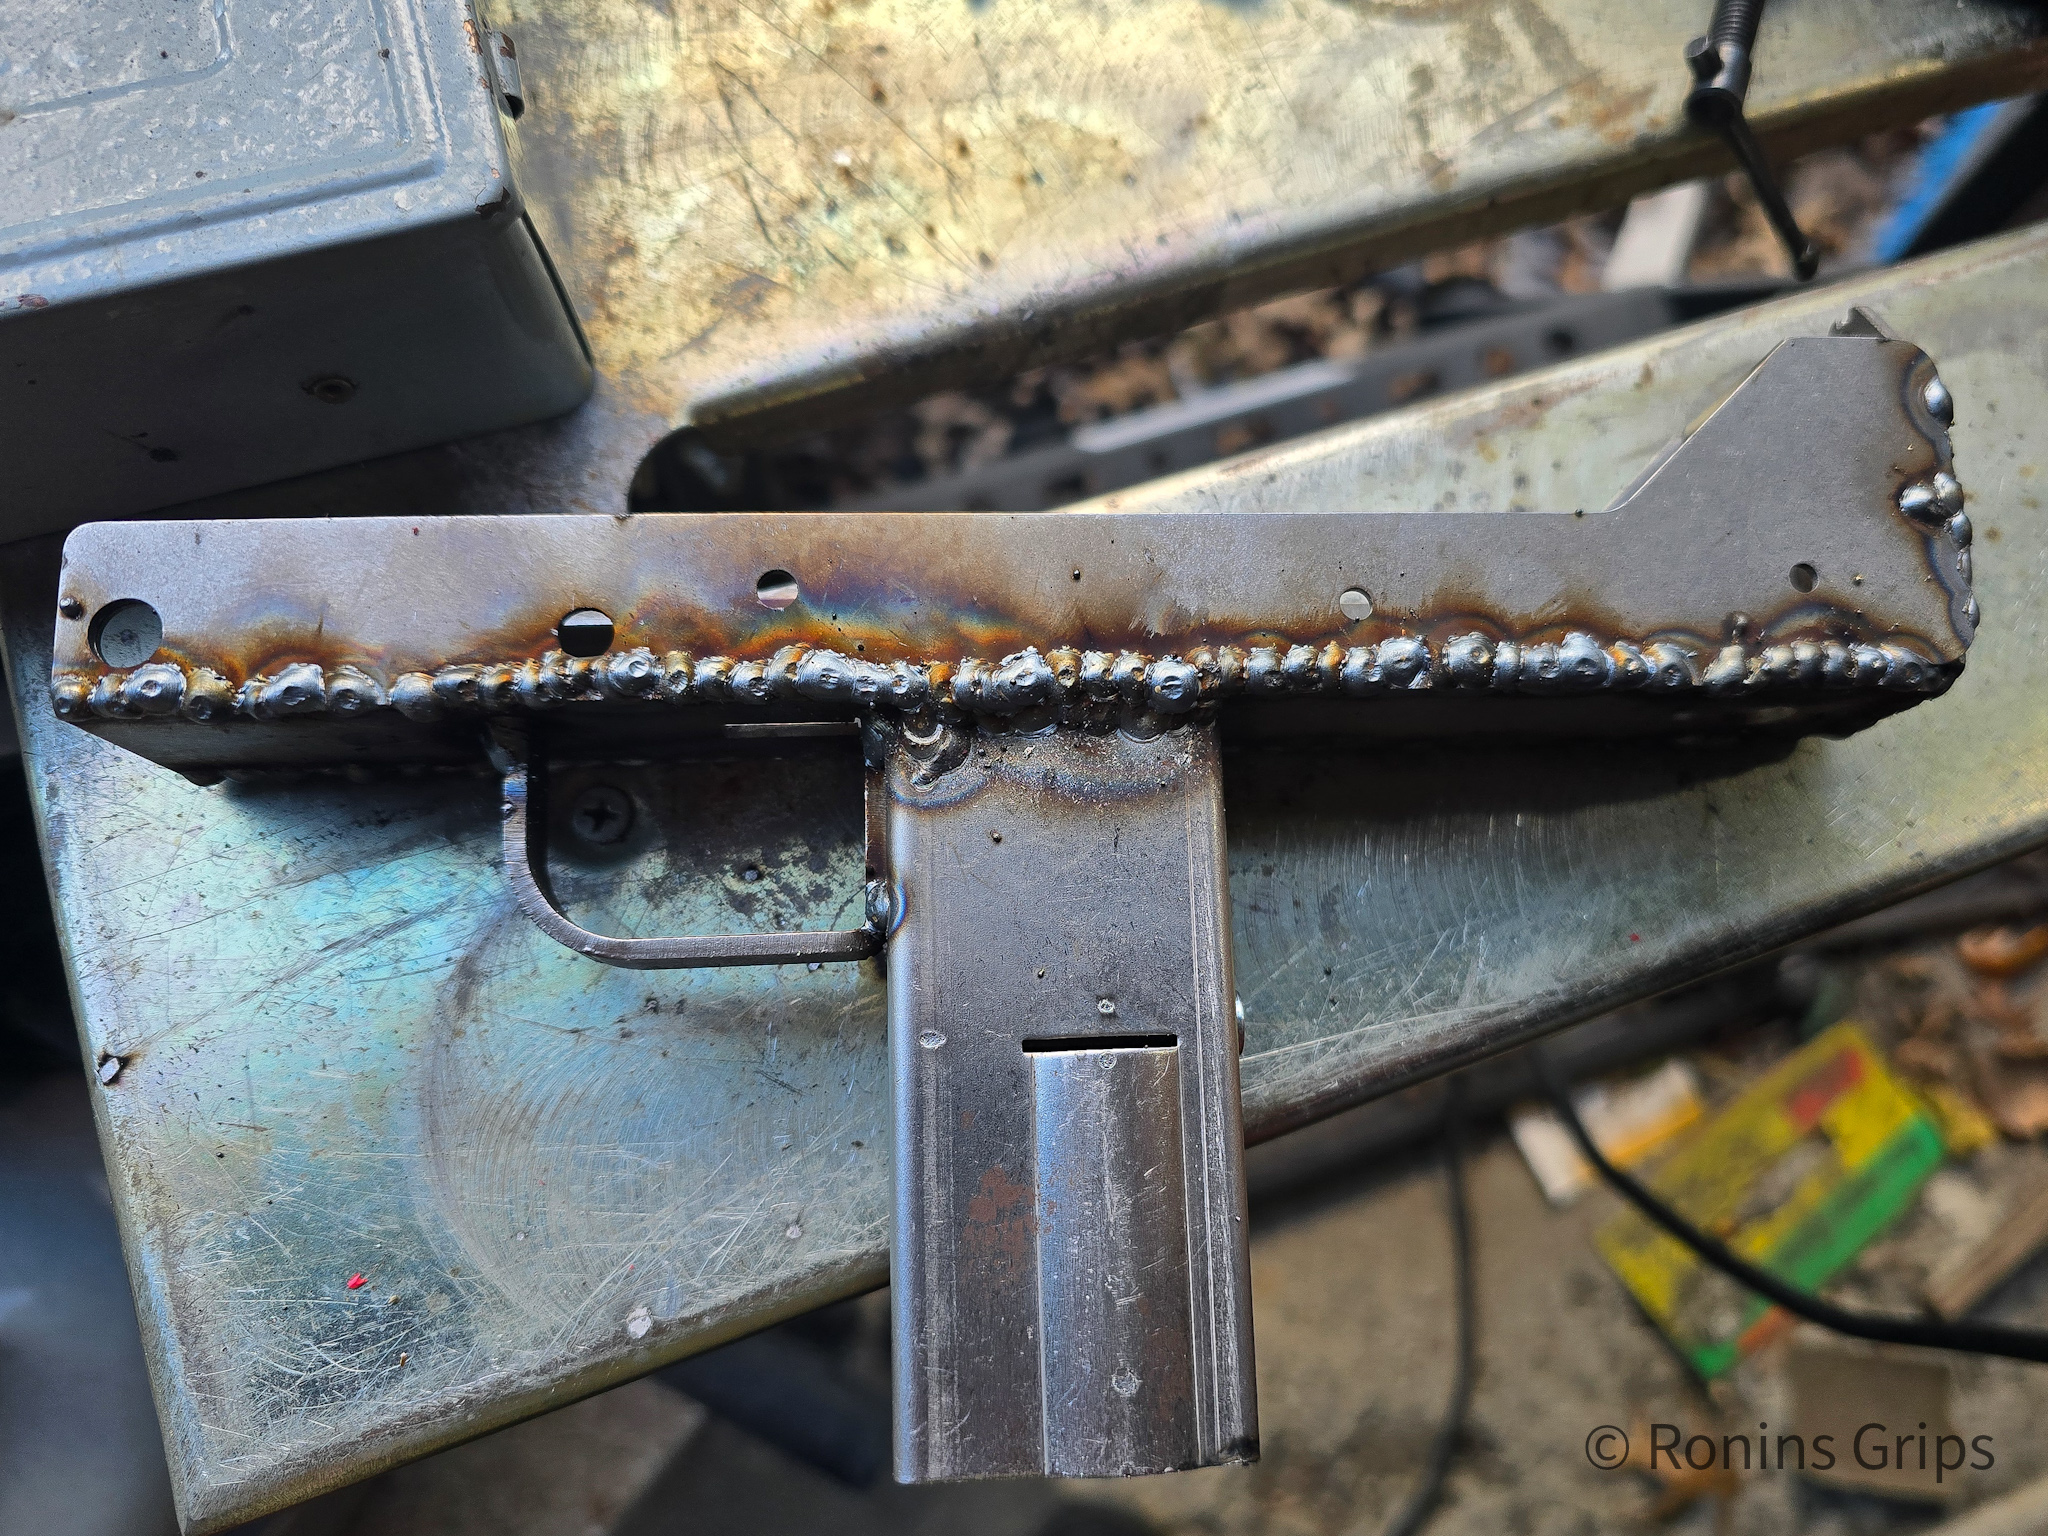
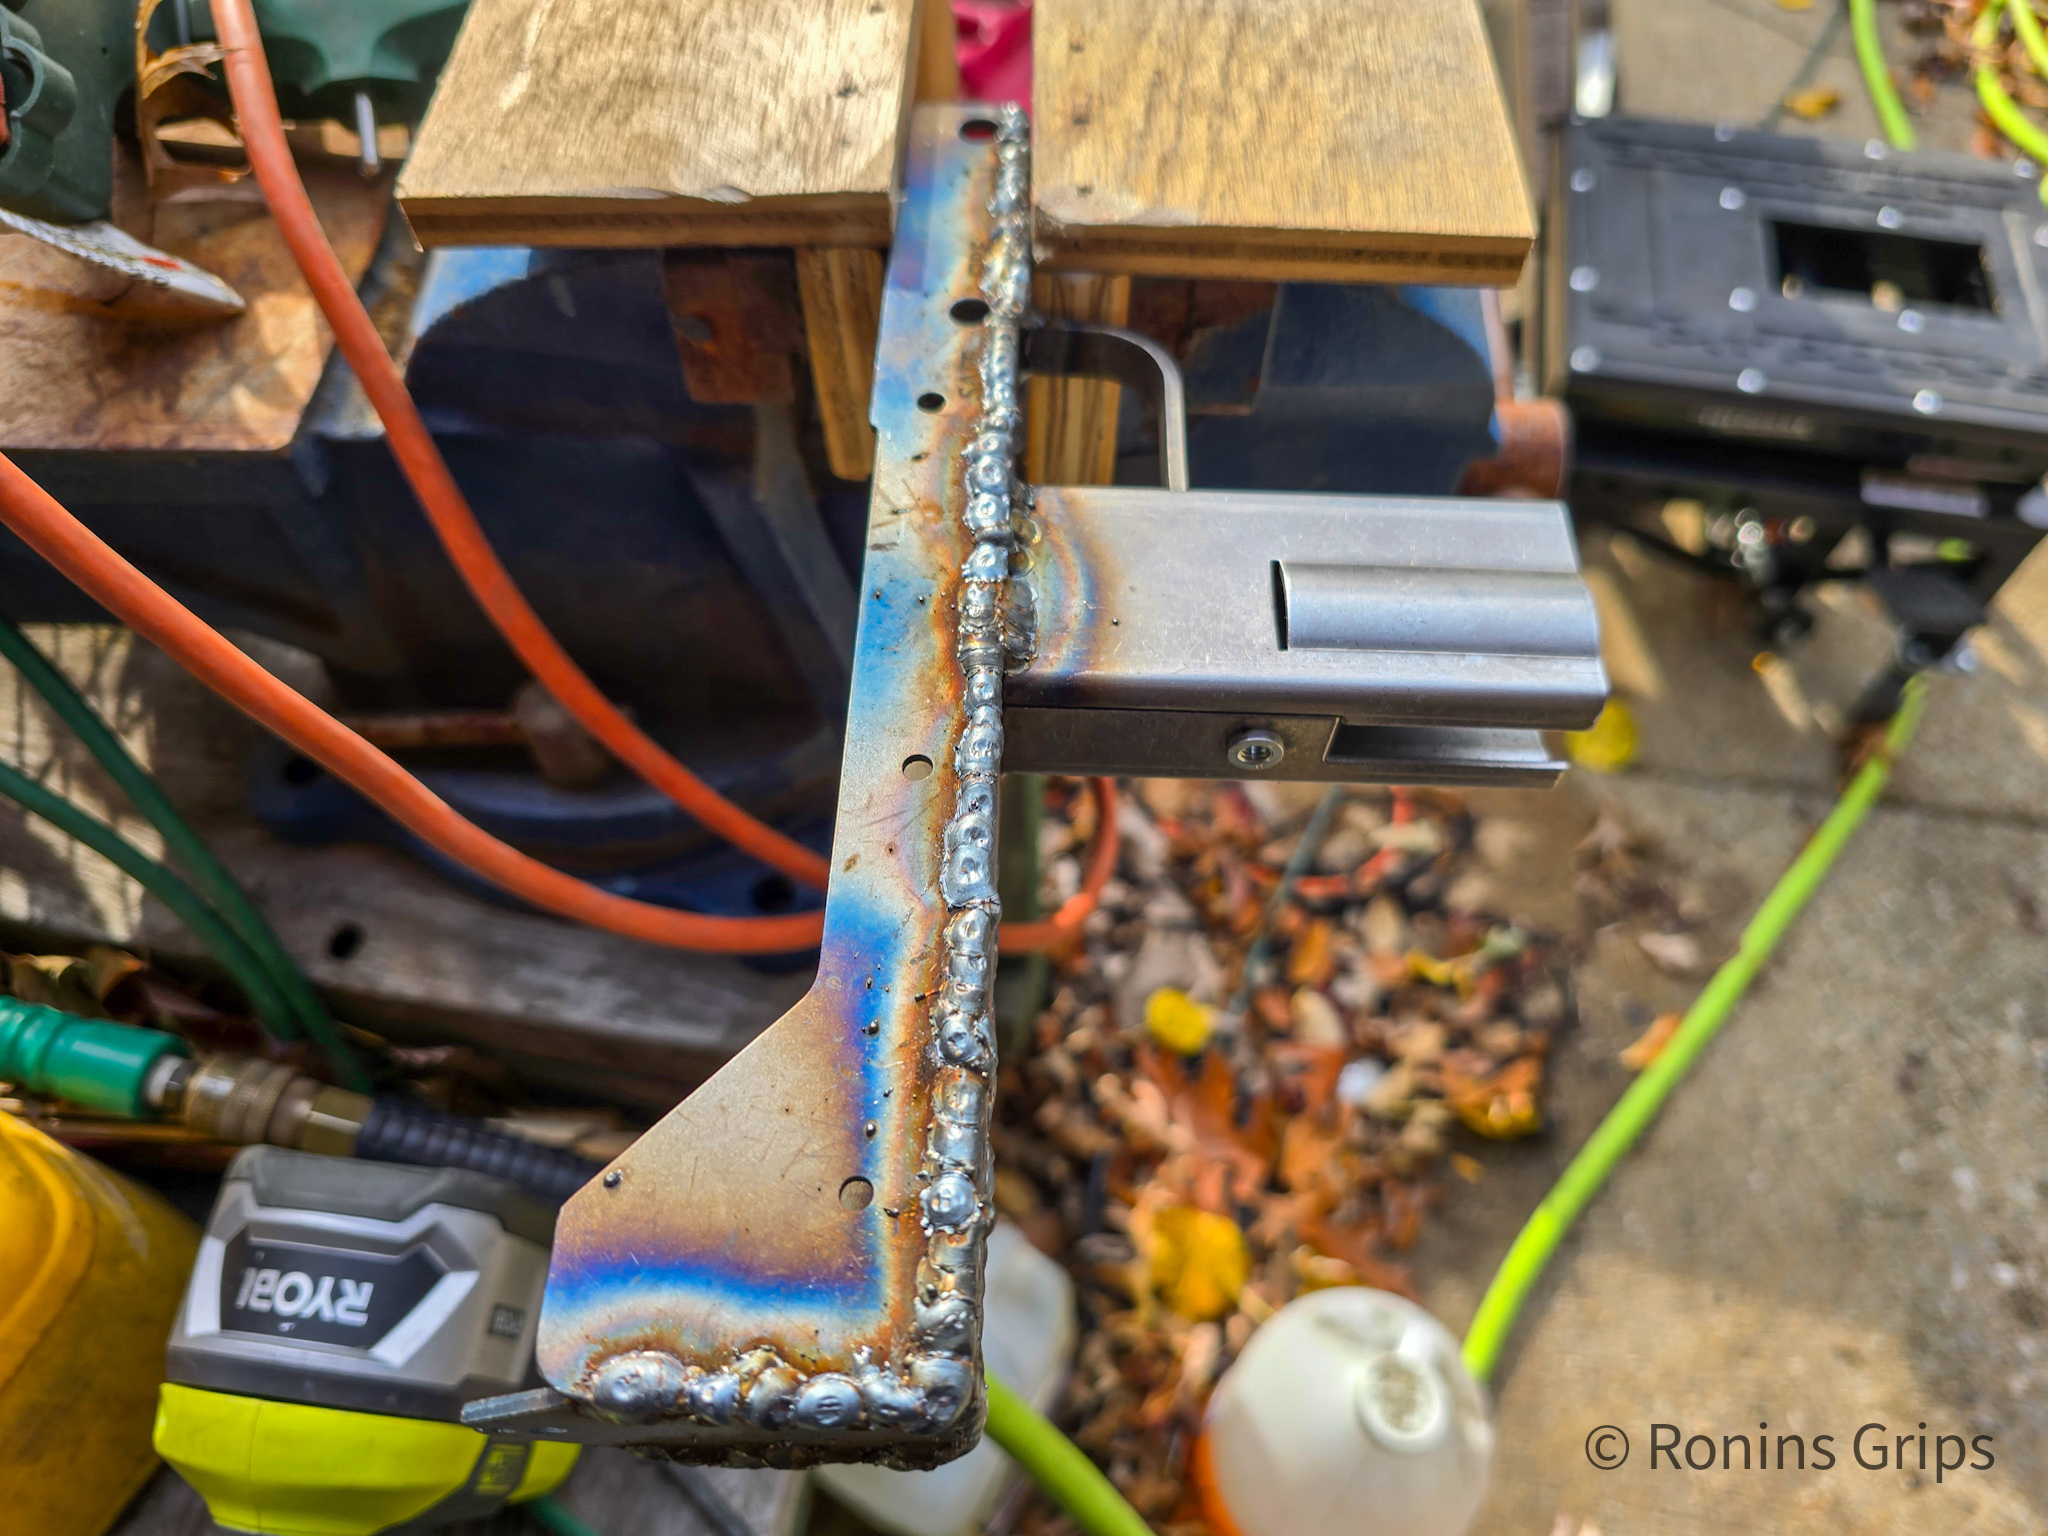
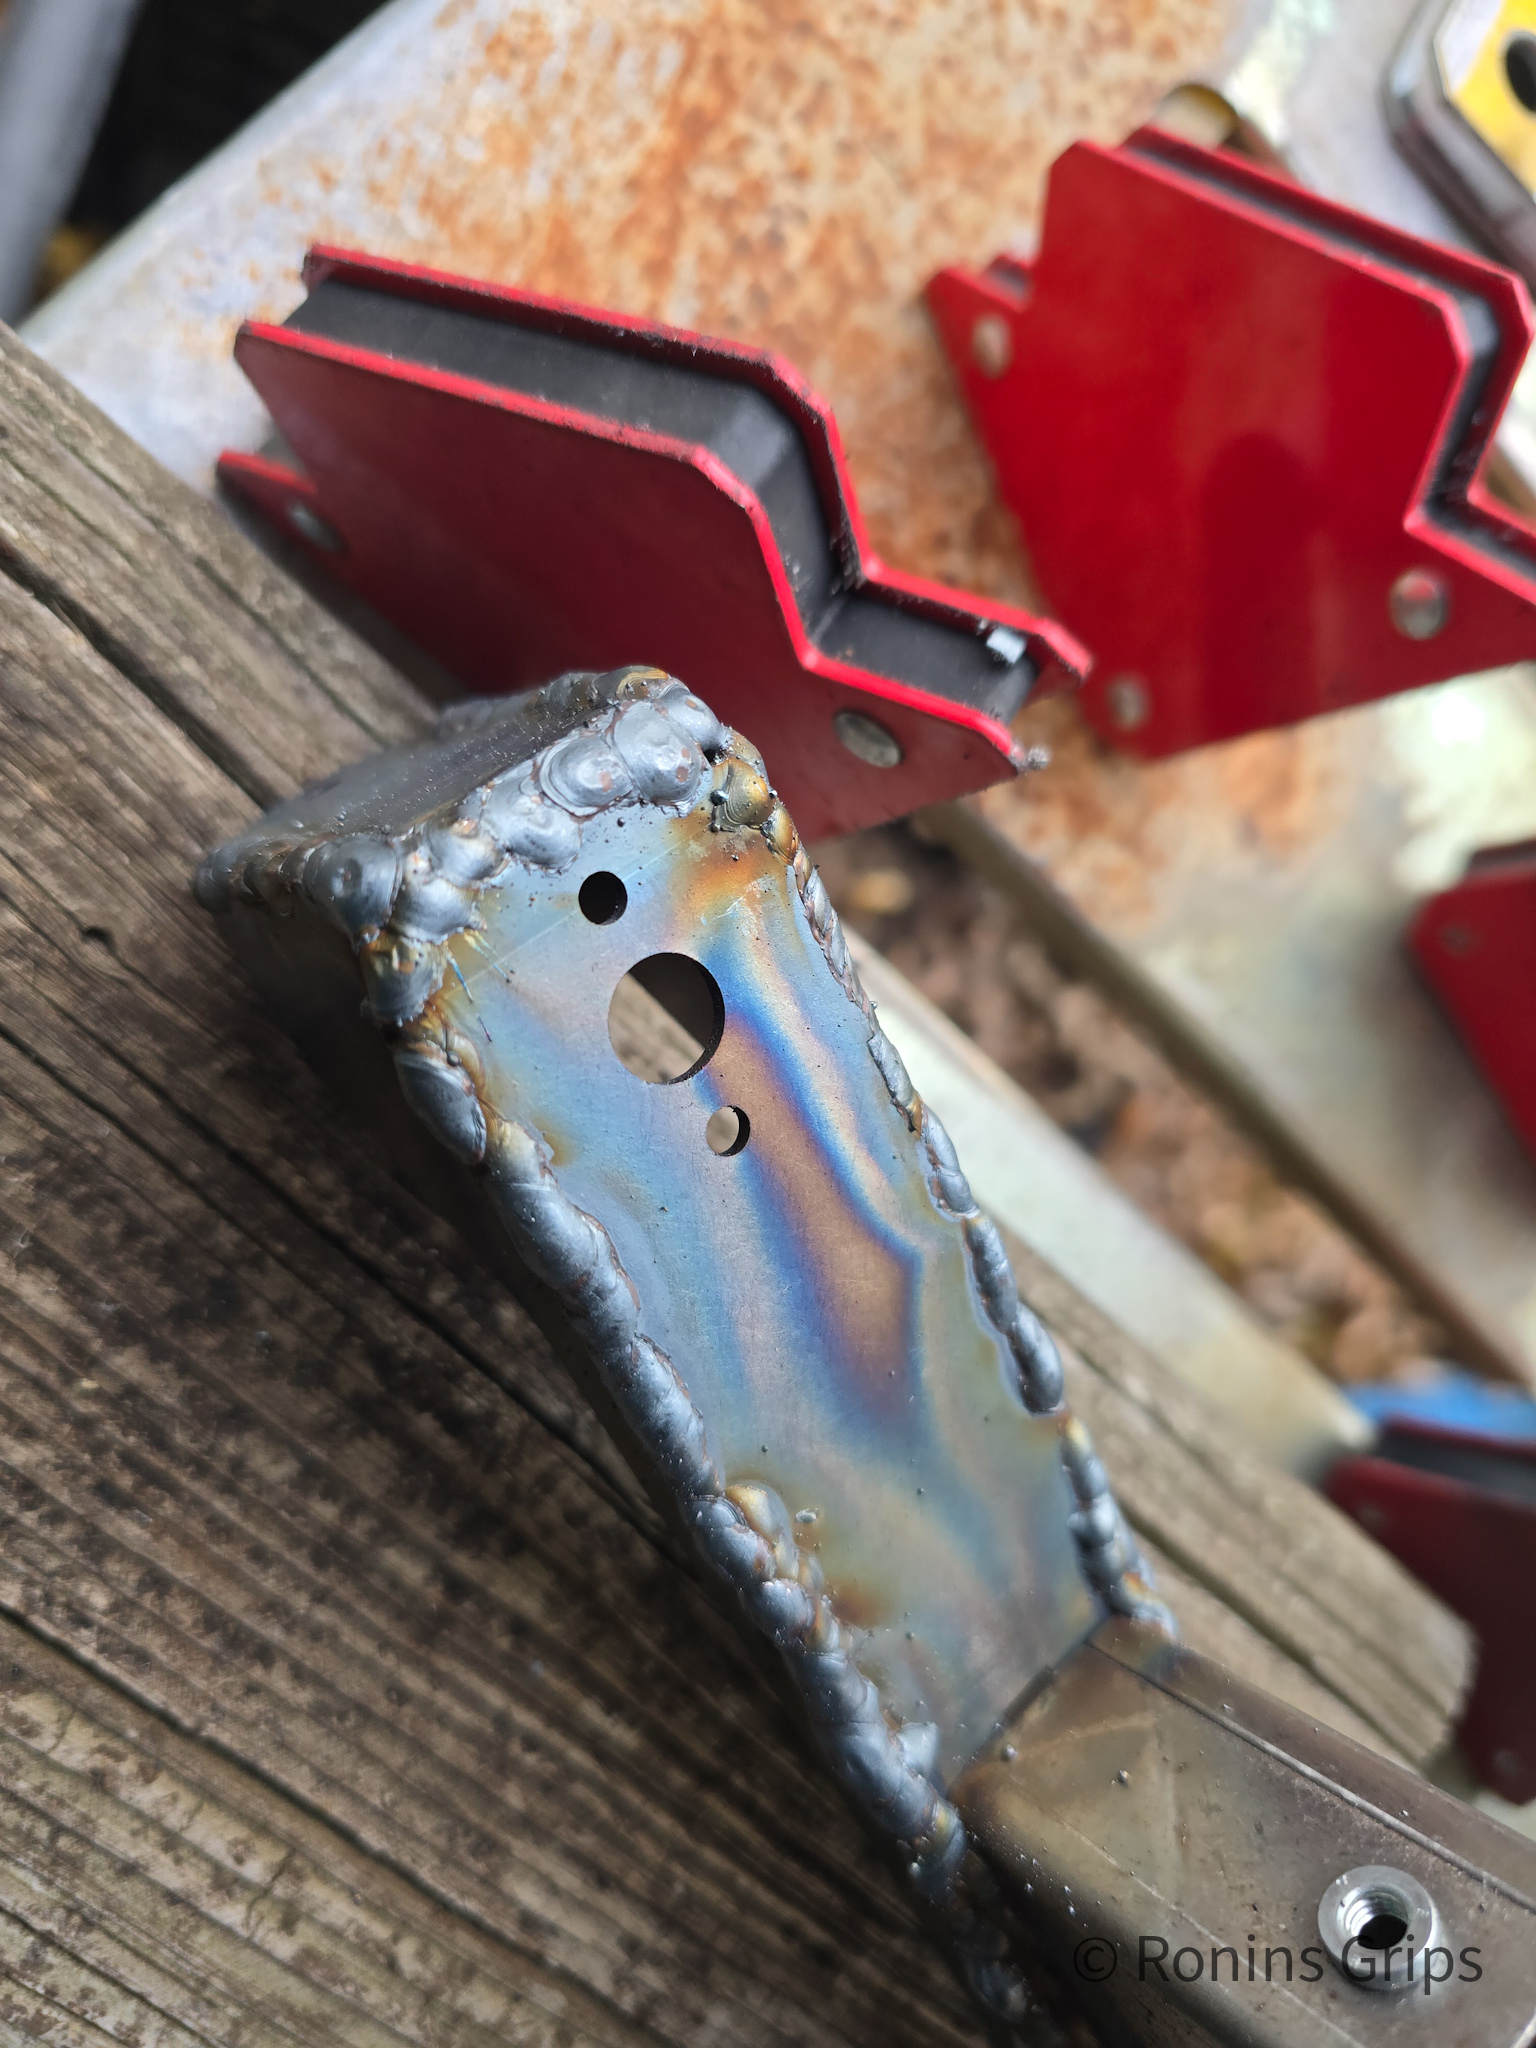
The welds look like crap you say? Yeah – but if I can pull this off so can you. I shoot single welds and aim for good penetration due to my tremor. Then I grind/sand to clean up.
Extech IR thermometer and Ronin's polymer grips for heat testing.
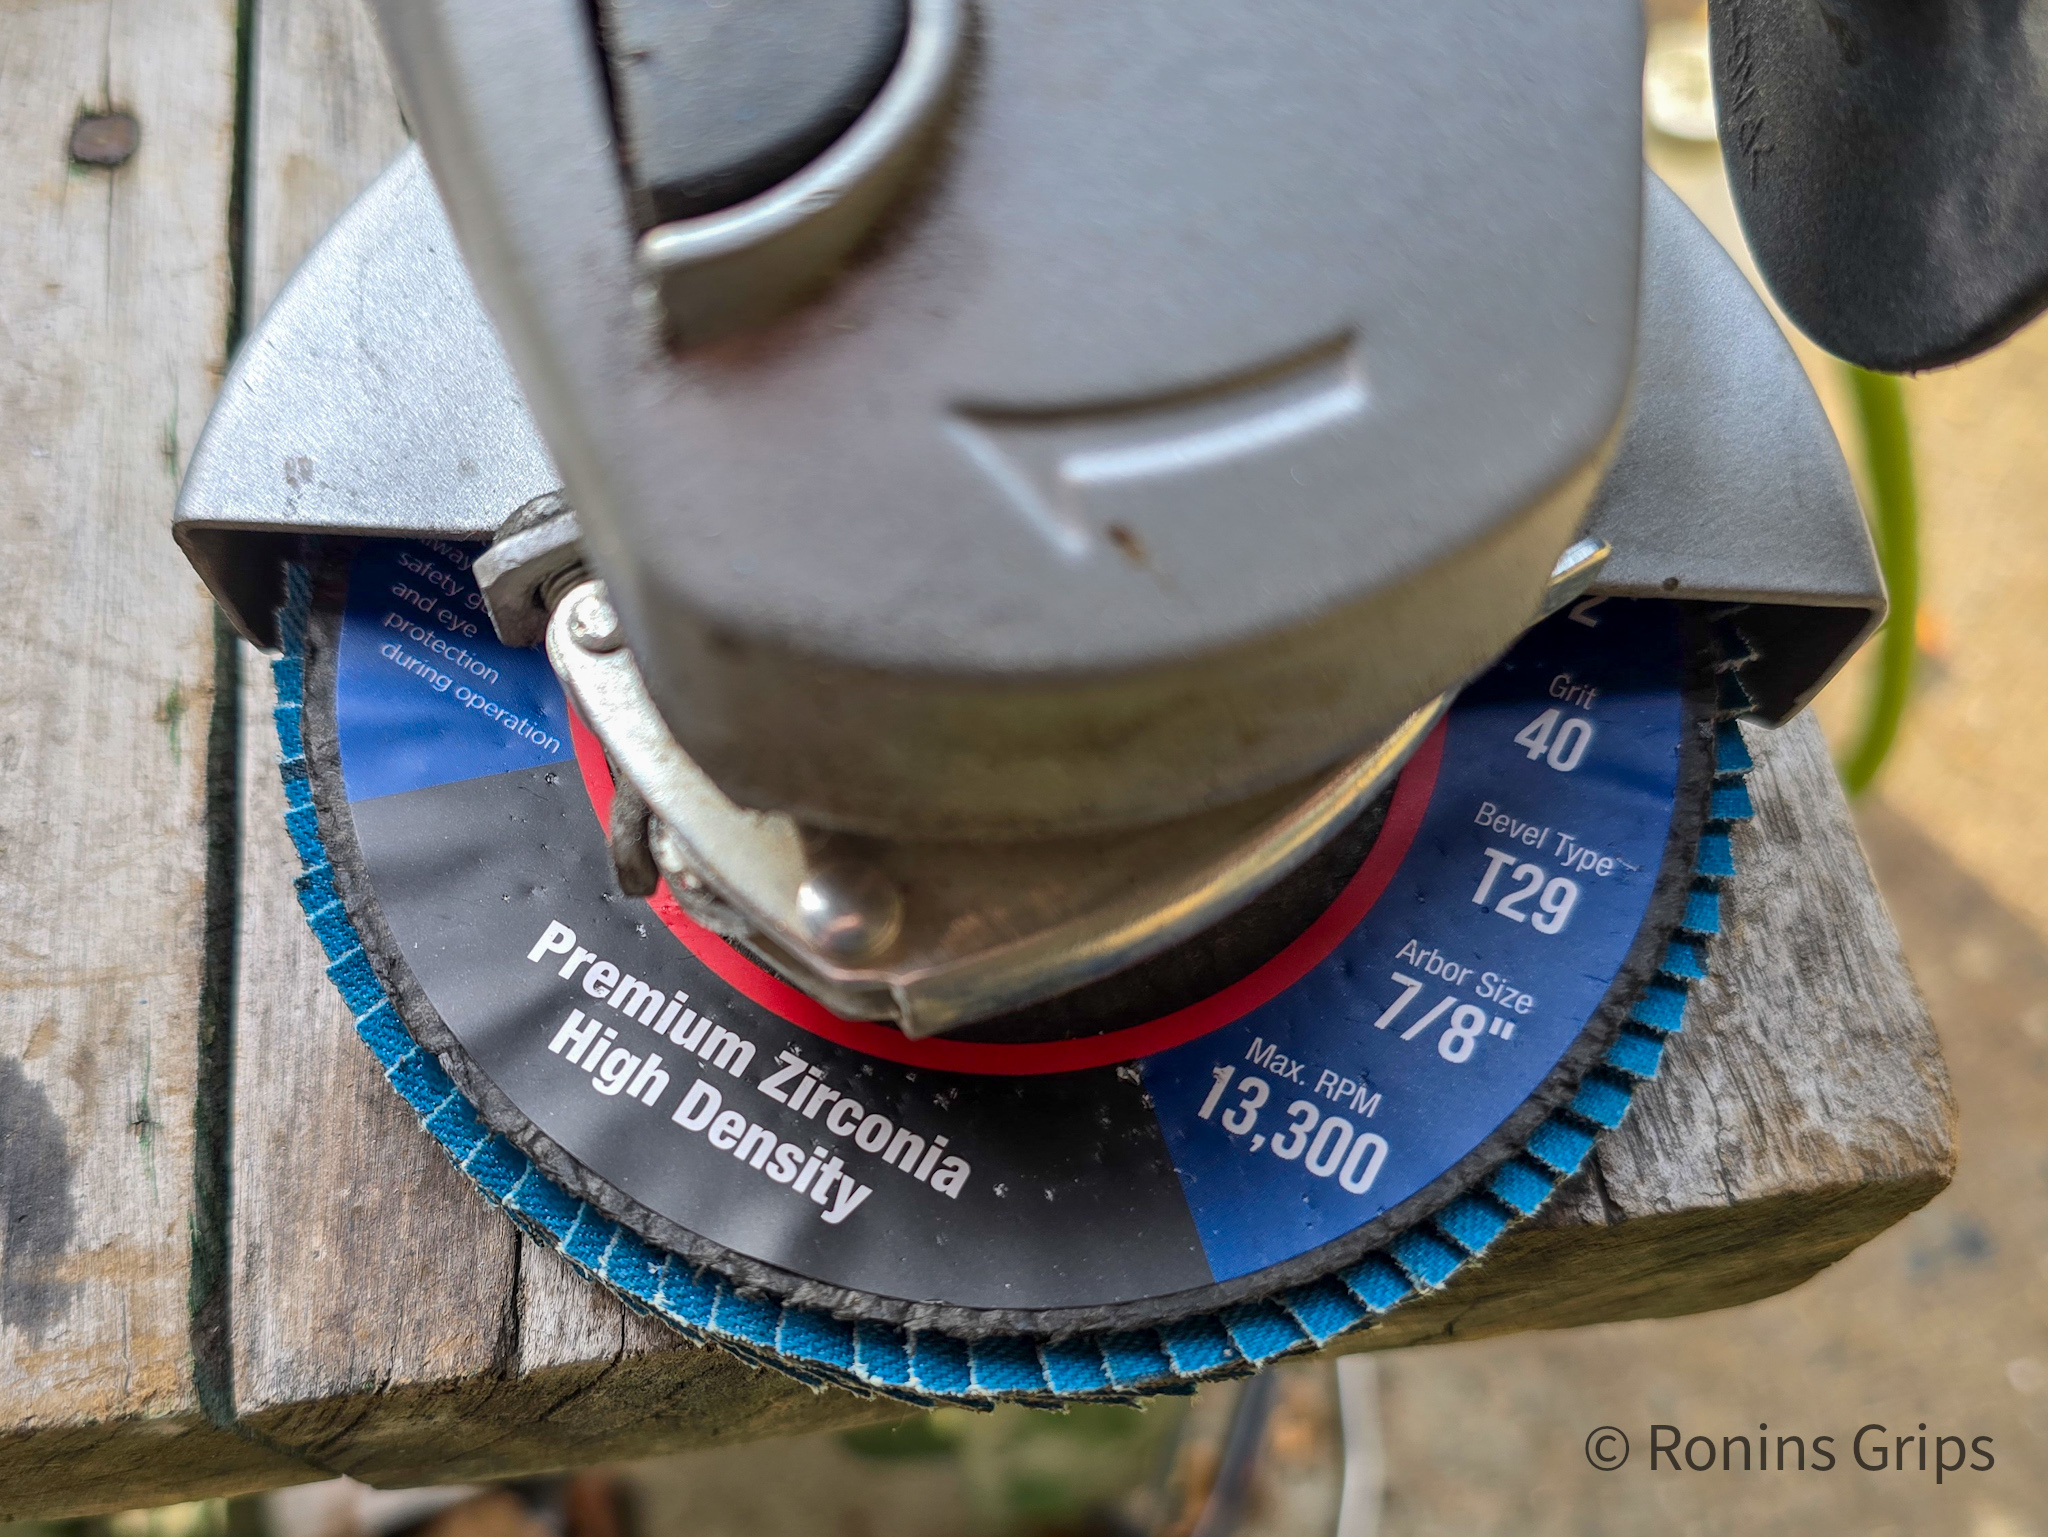
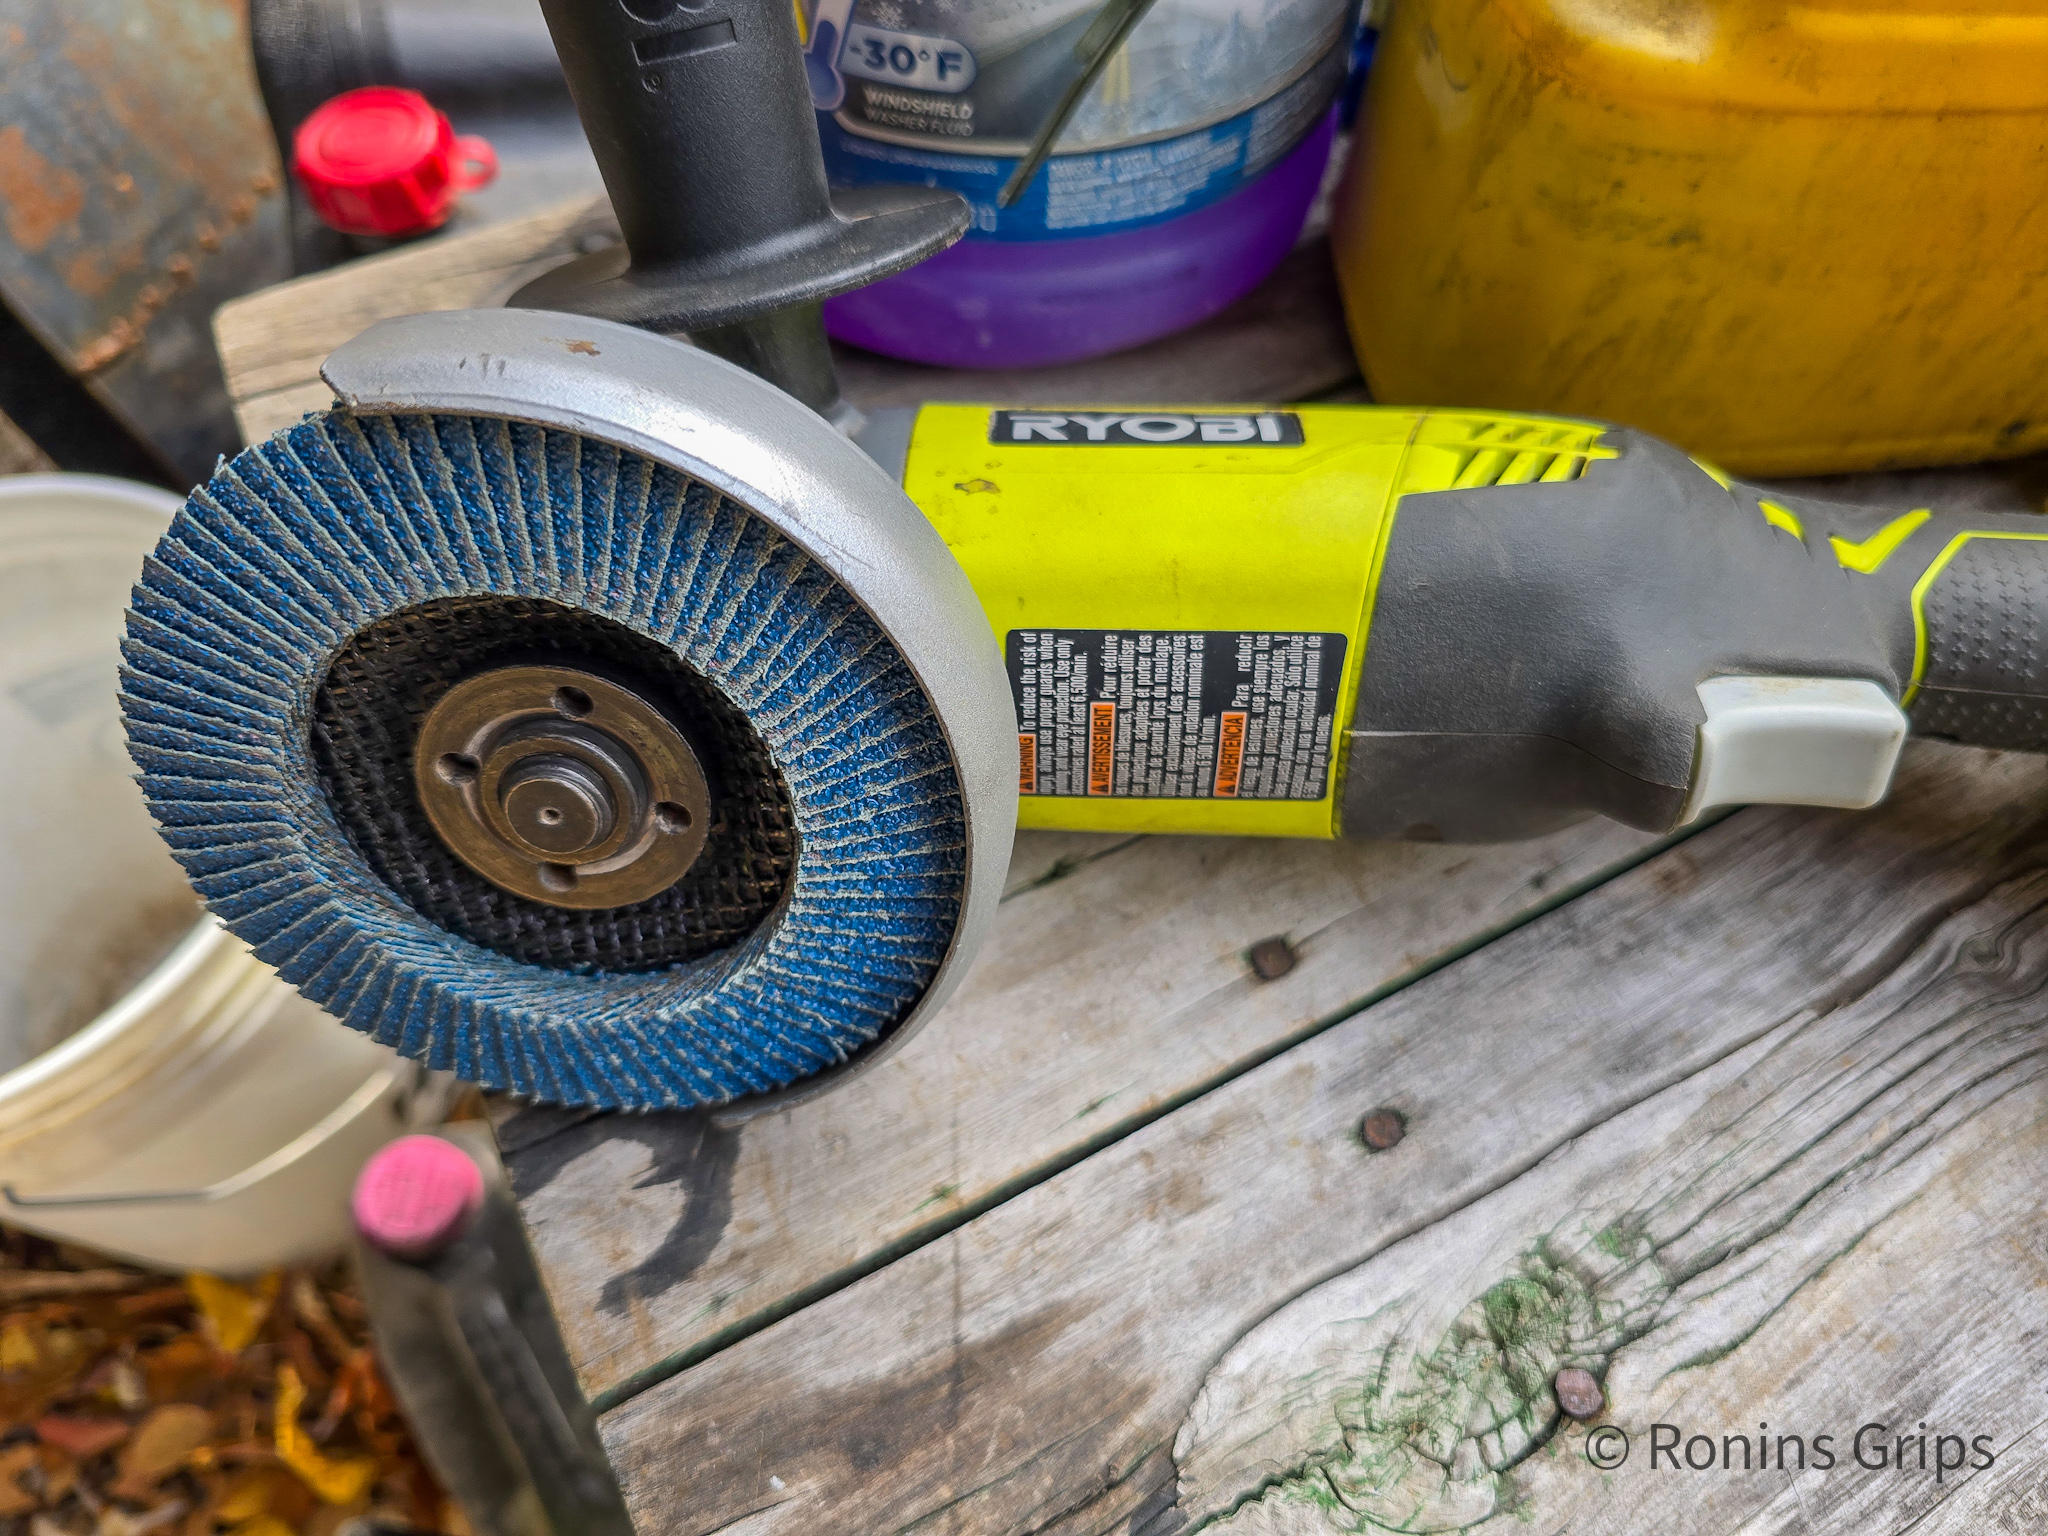
I use a Ryobi 18volt 4.5″ grinder with a 7/8″ arbor and use Neiko 40 grit flap sanding discs. I like the Neikos because they are thicker than cheaper models and the grit seems to last really well. I did not wear out one disc doing all three receivers.
Extech IR thermometer and Ronin's polymer grips for heat testing.
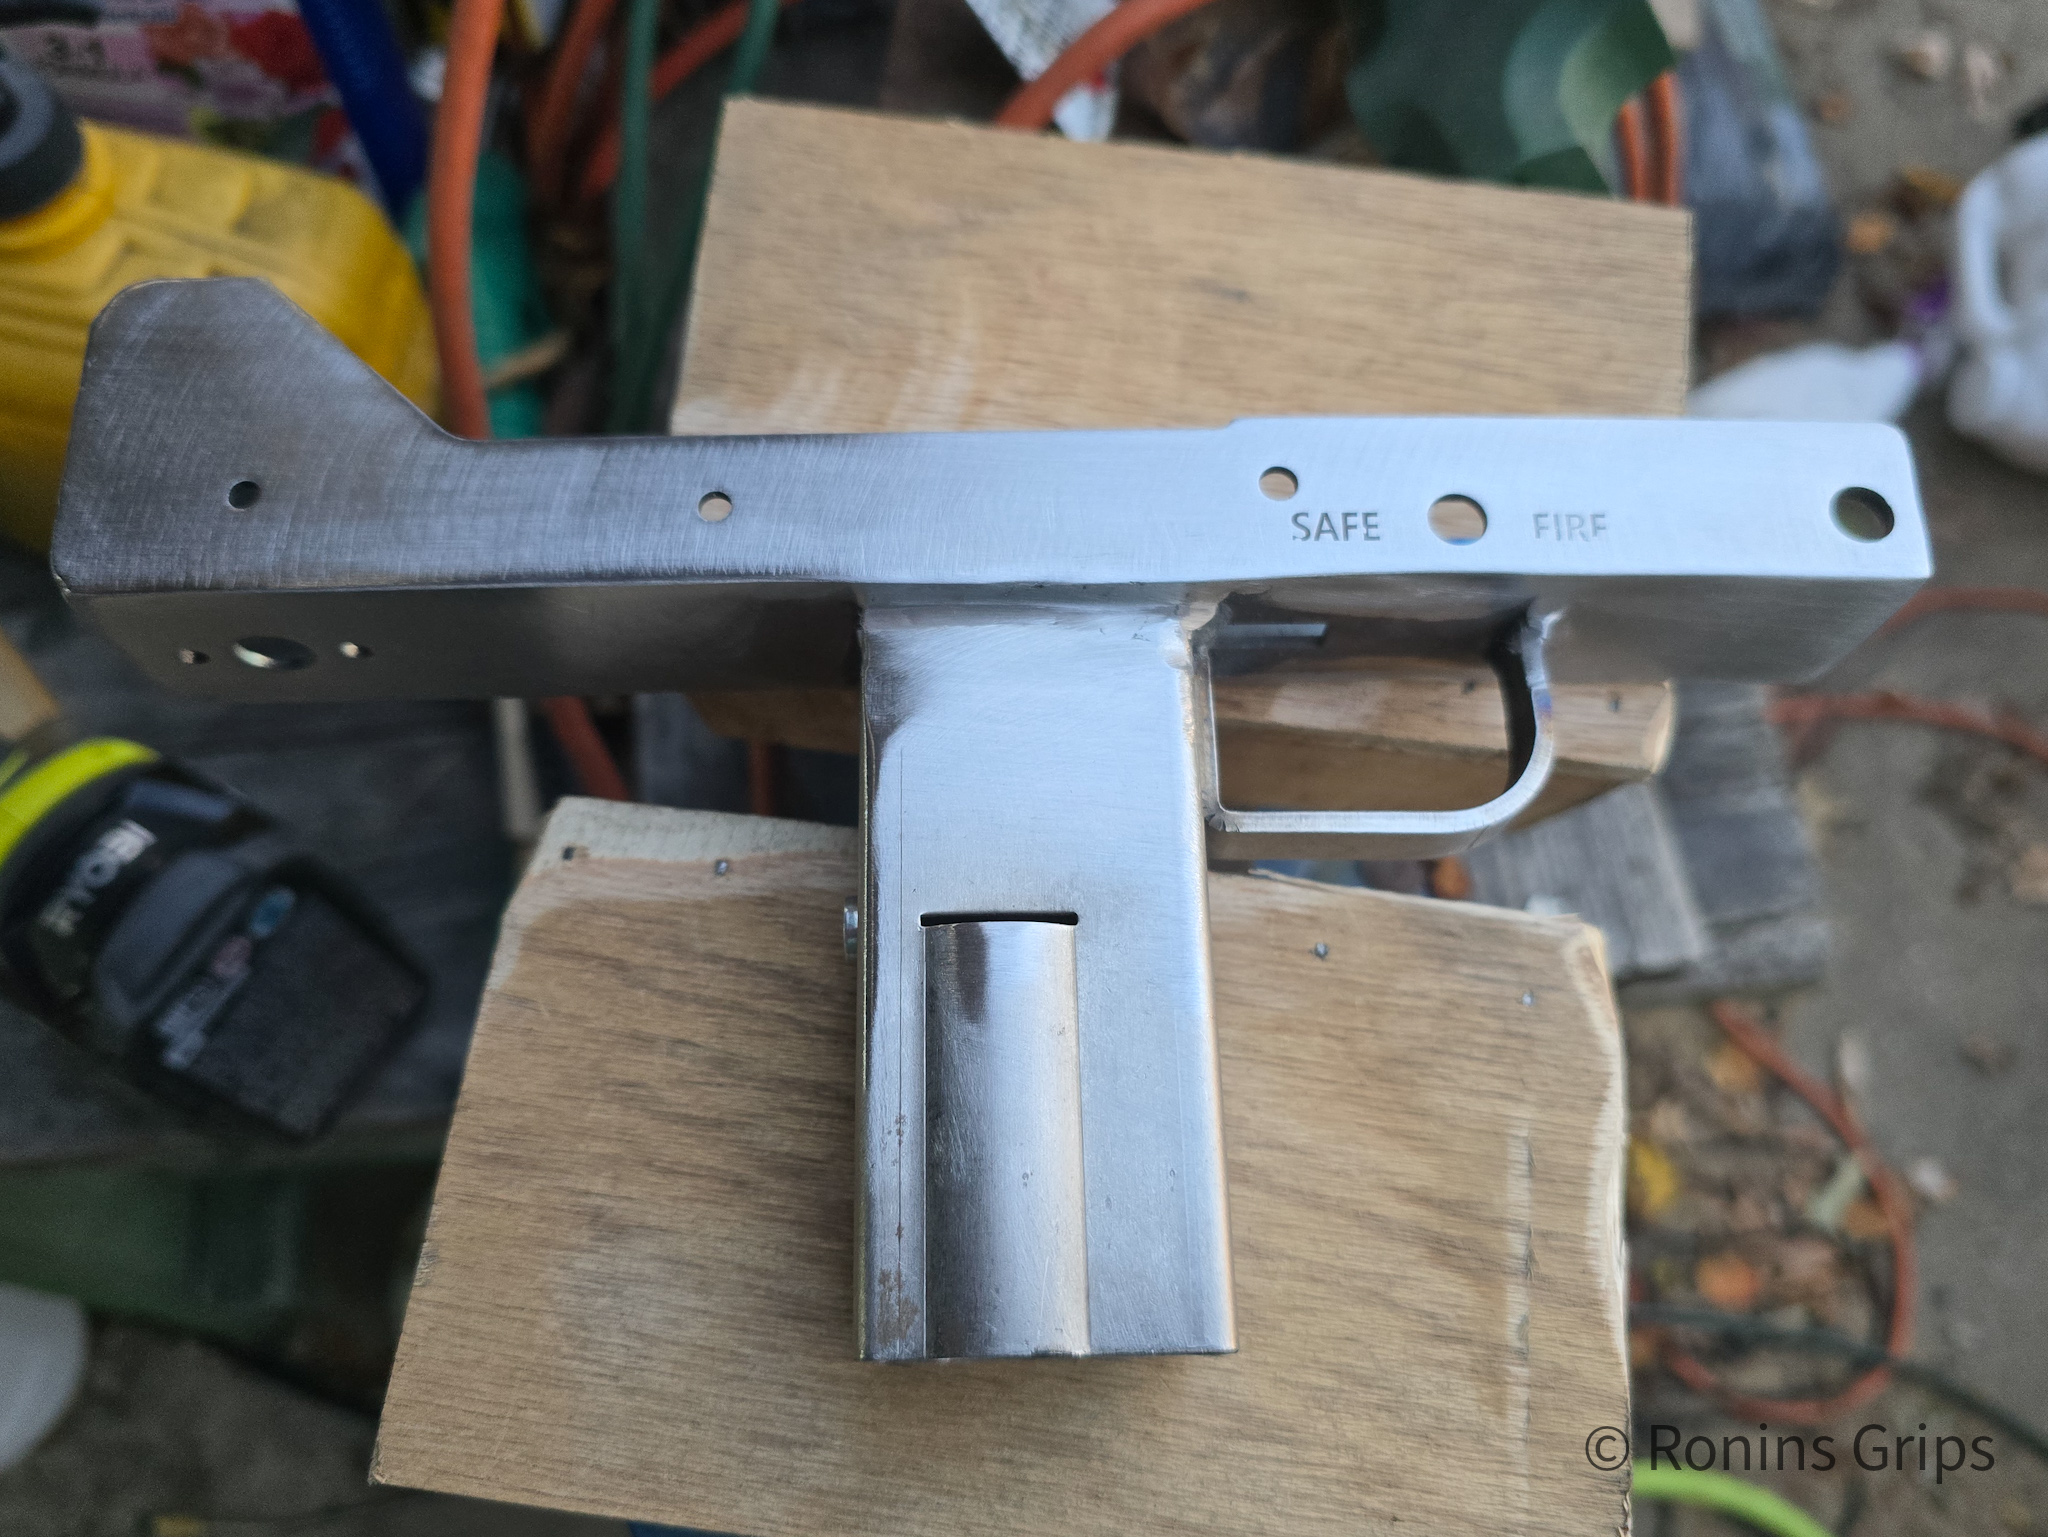
So the Neiko flap sander did the bulk of the crude work. I did use a 120 grit disc to quickly clean up the three receivers before I abrasive blasted and parkerized them.
Extech IR thermometer and Ronin's polymer grips for heat testing.
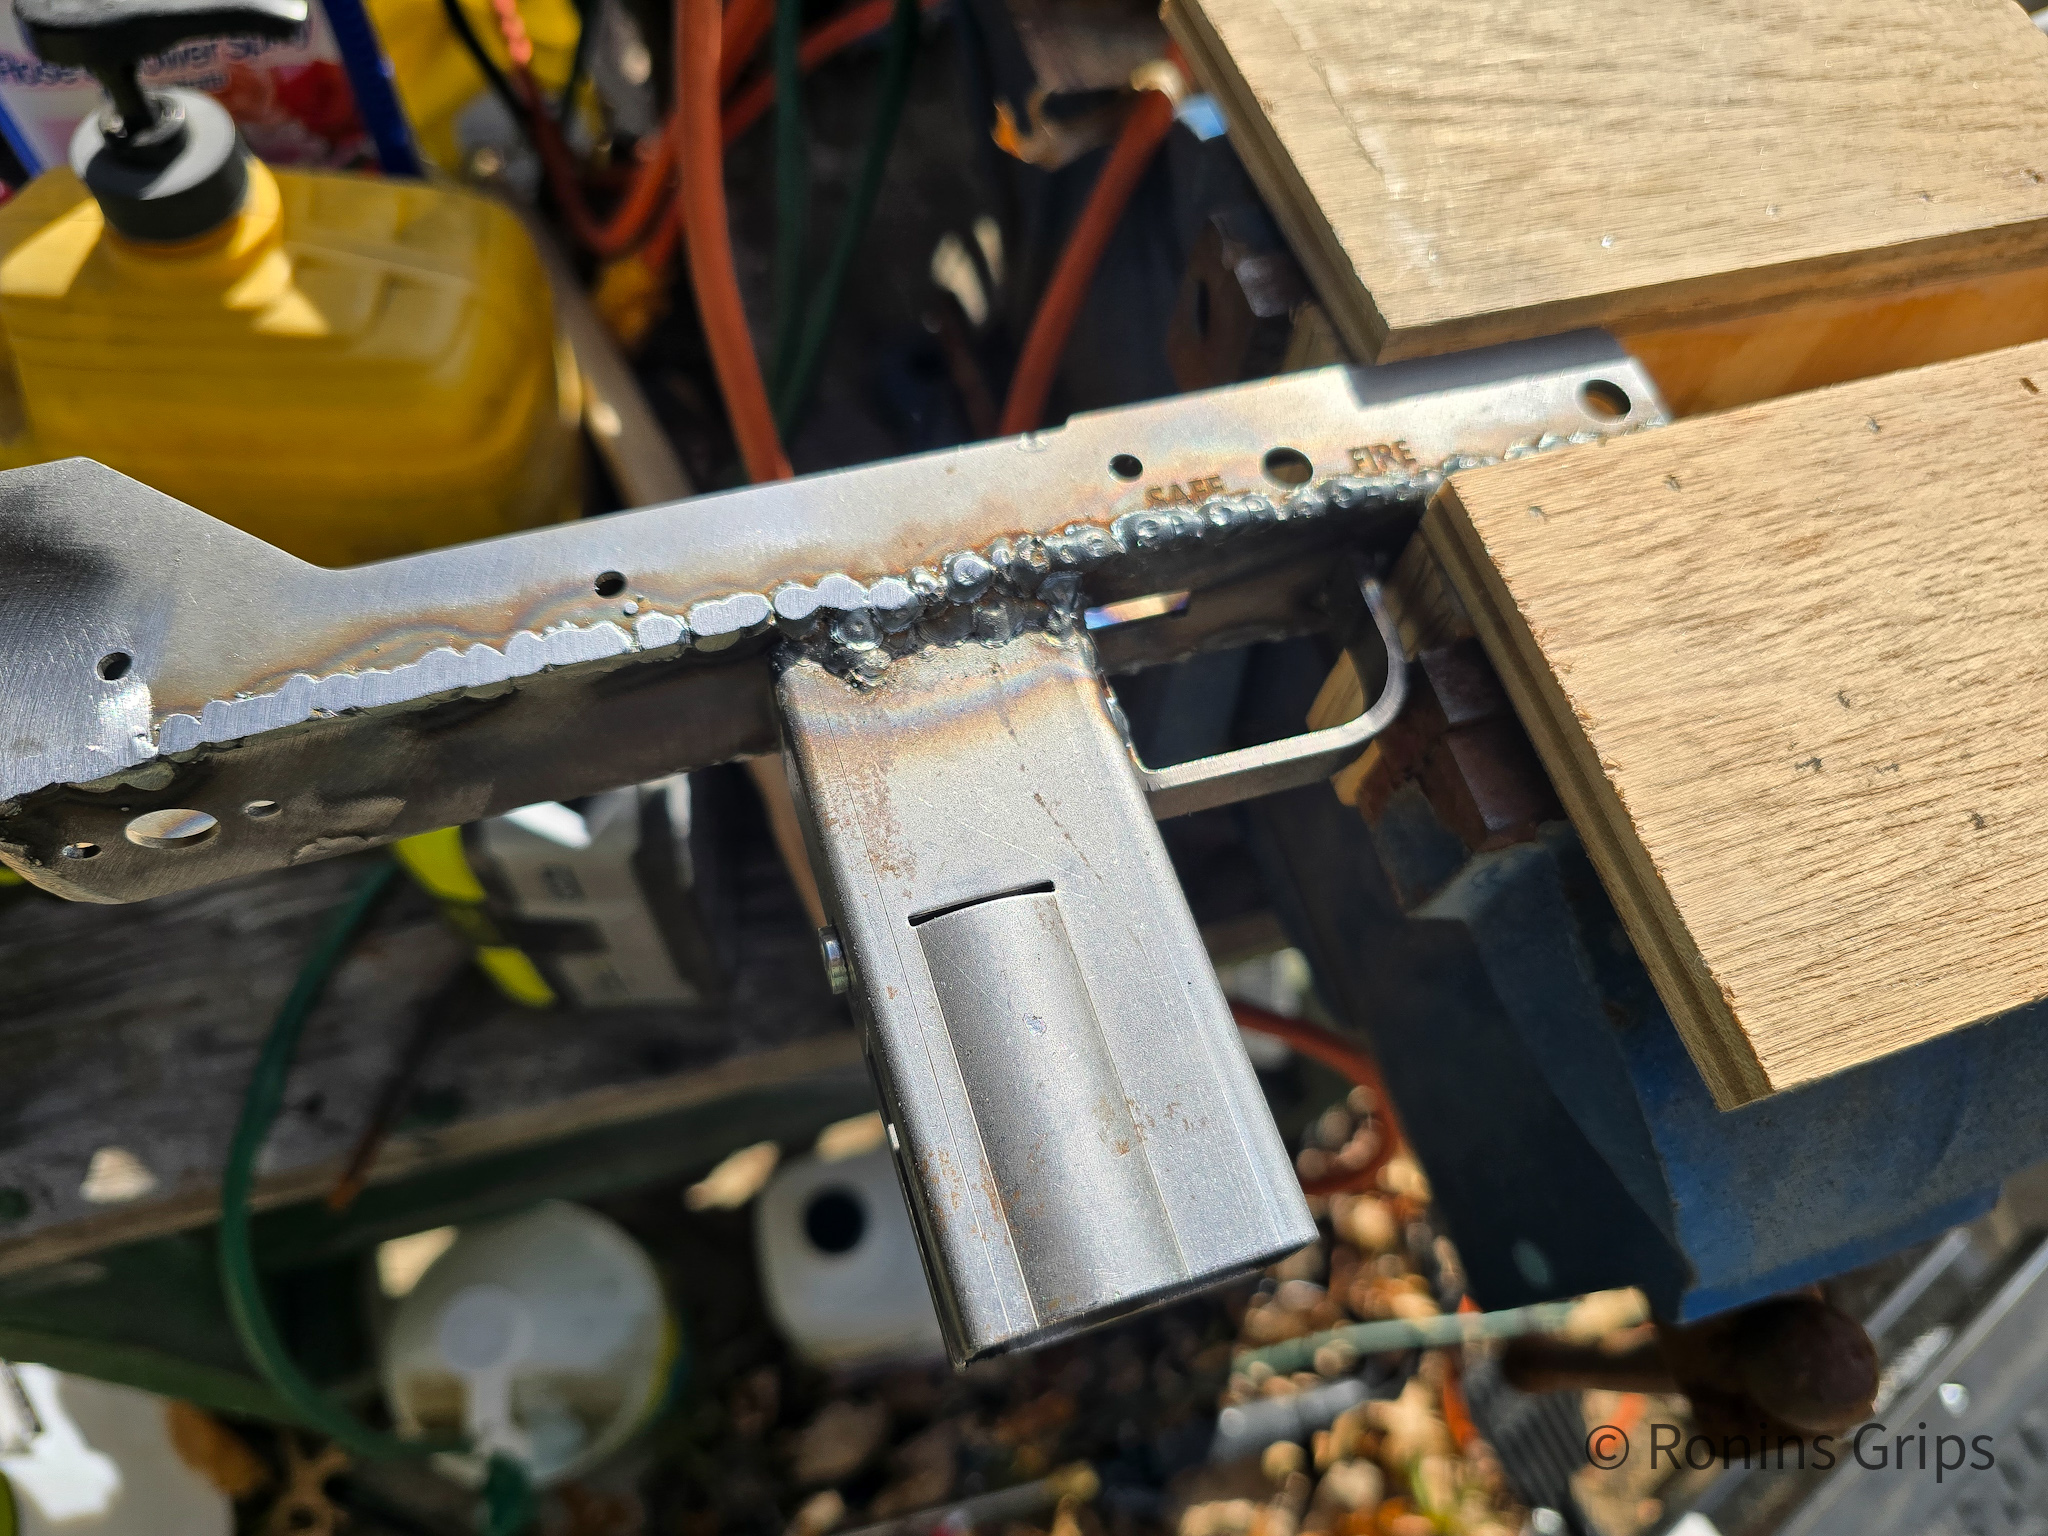
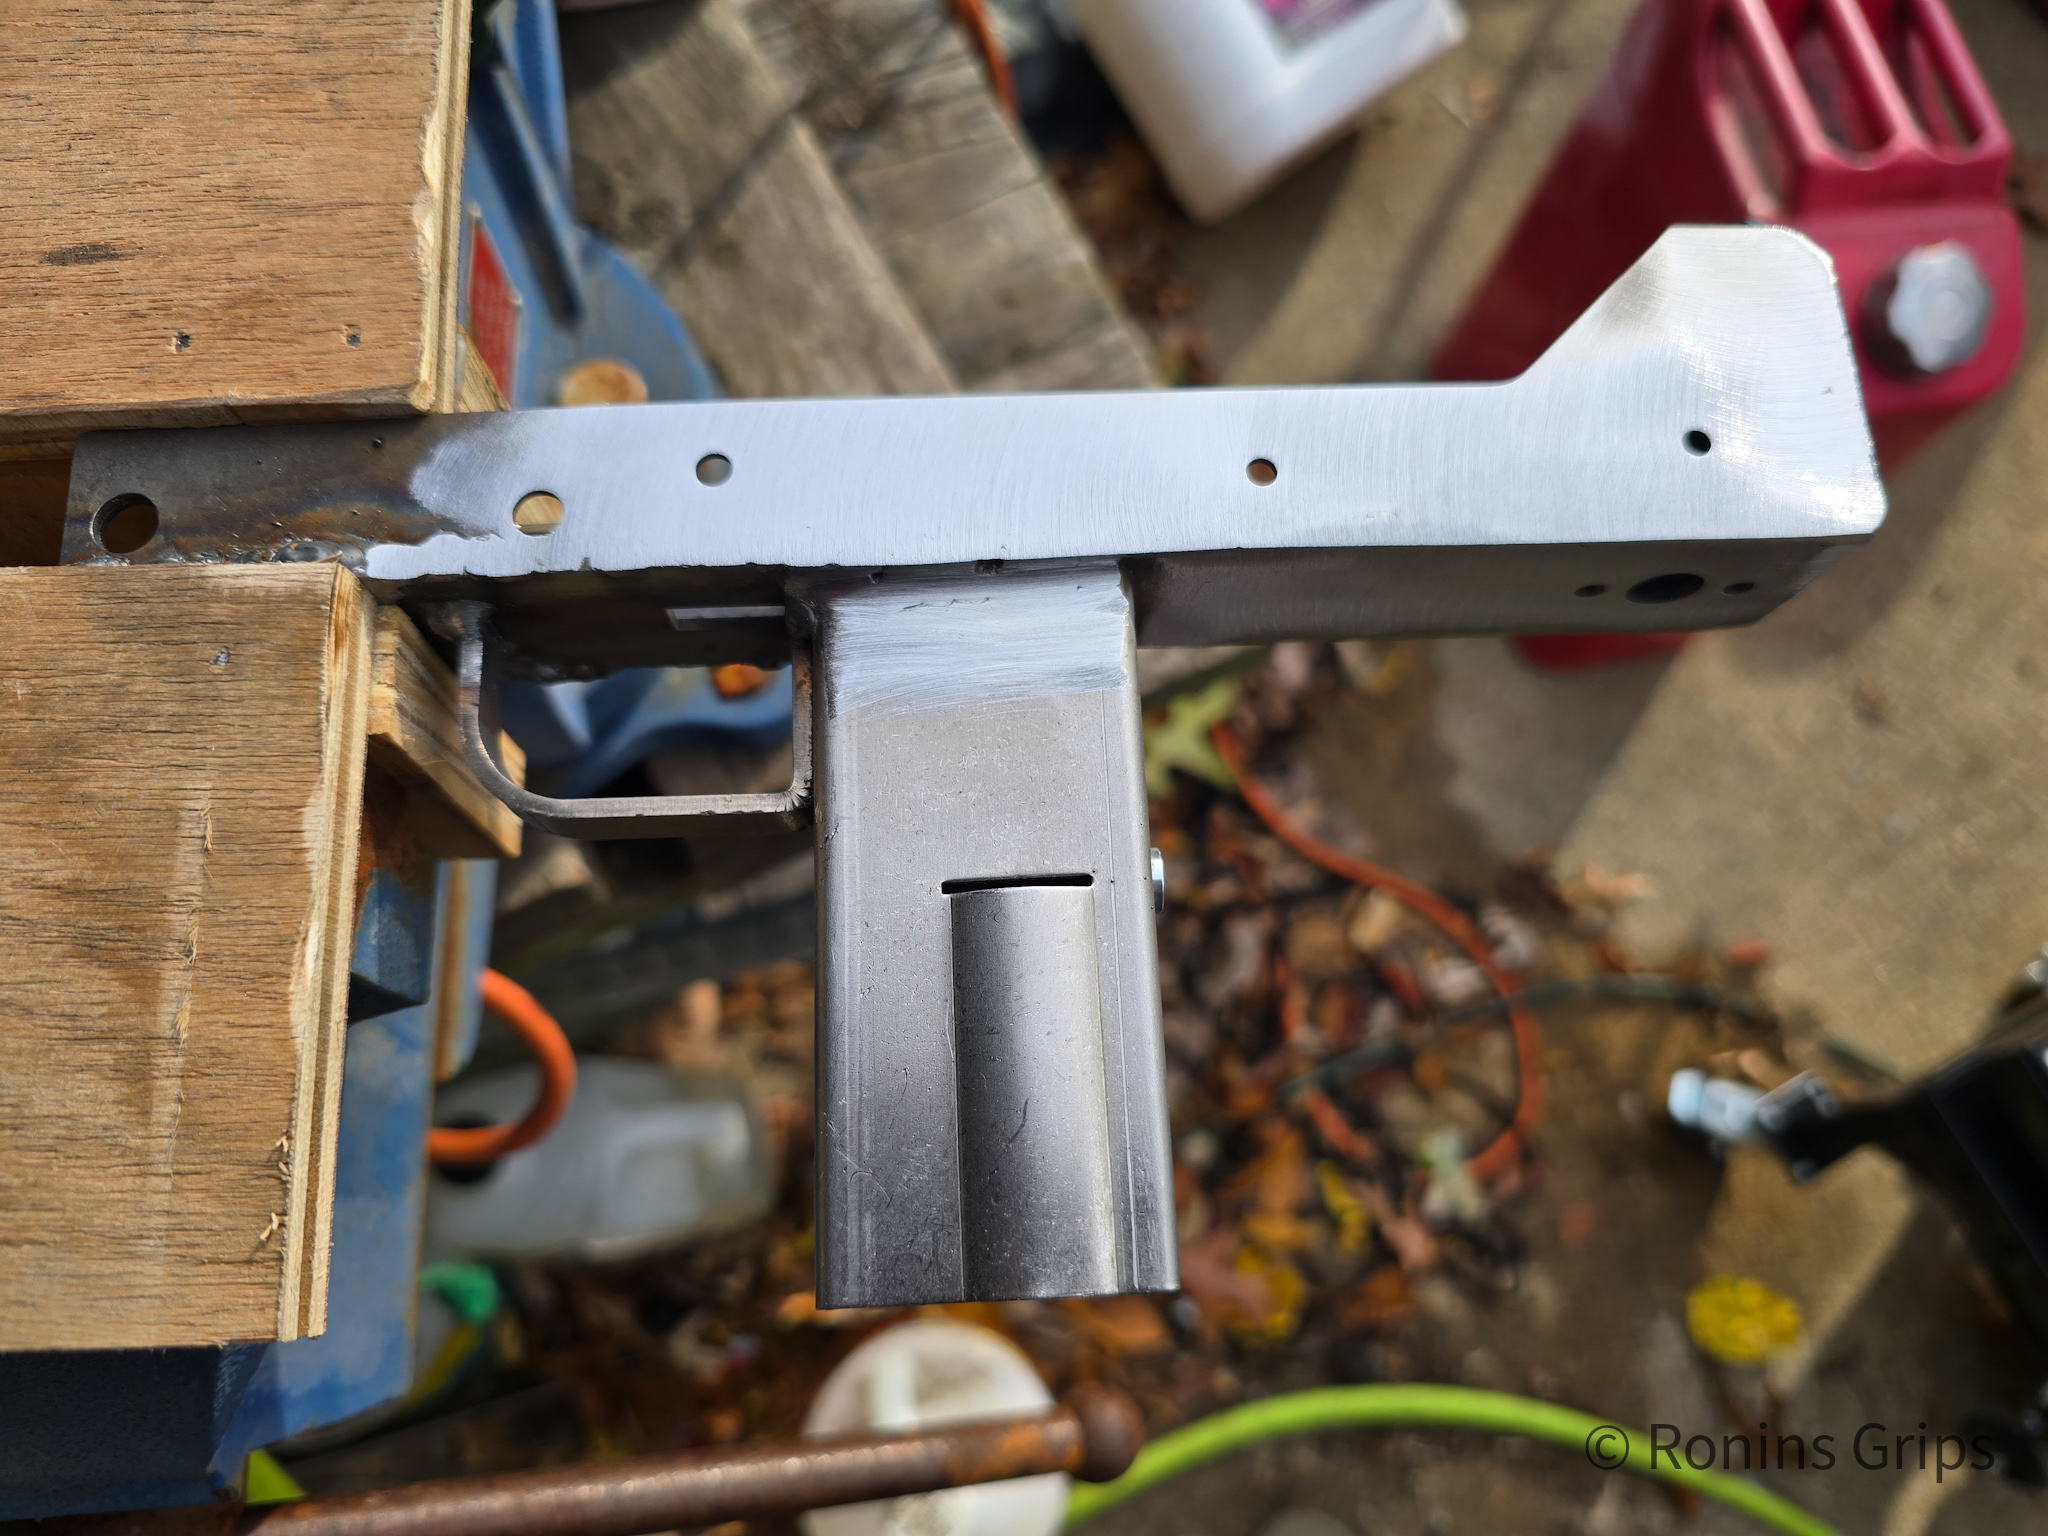
40 grit sand paper in a grinder can take off material fast – even steel. I’d recommend having the work at a comfortable height secured in a vise. The wood inserts you see are something I slapped together for my big 6″ outdoor vise to hold the receivers and not tear them up. The vise has hardened jaws and would chew up the mild steel receivers if they were holding them directly. At any rate, be conscious of the angle of your grinder and focus on knocking the beads down. Take care not to let the grinder remove/thin out the base sheet metal.
Extech IR thermometer and Ronin's polymer grips for heat testing.
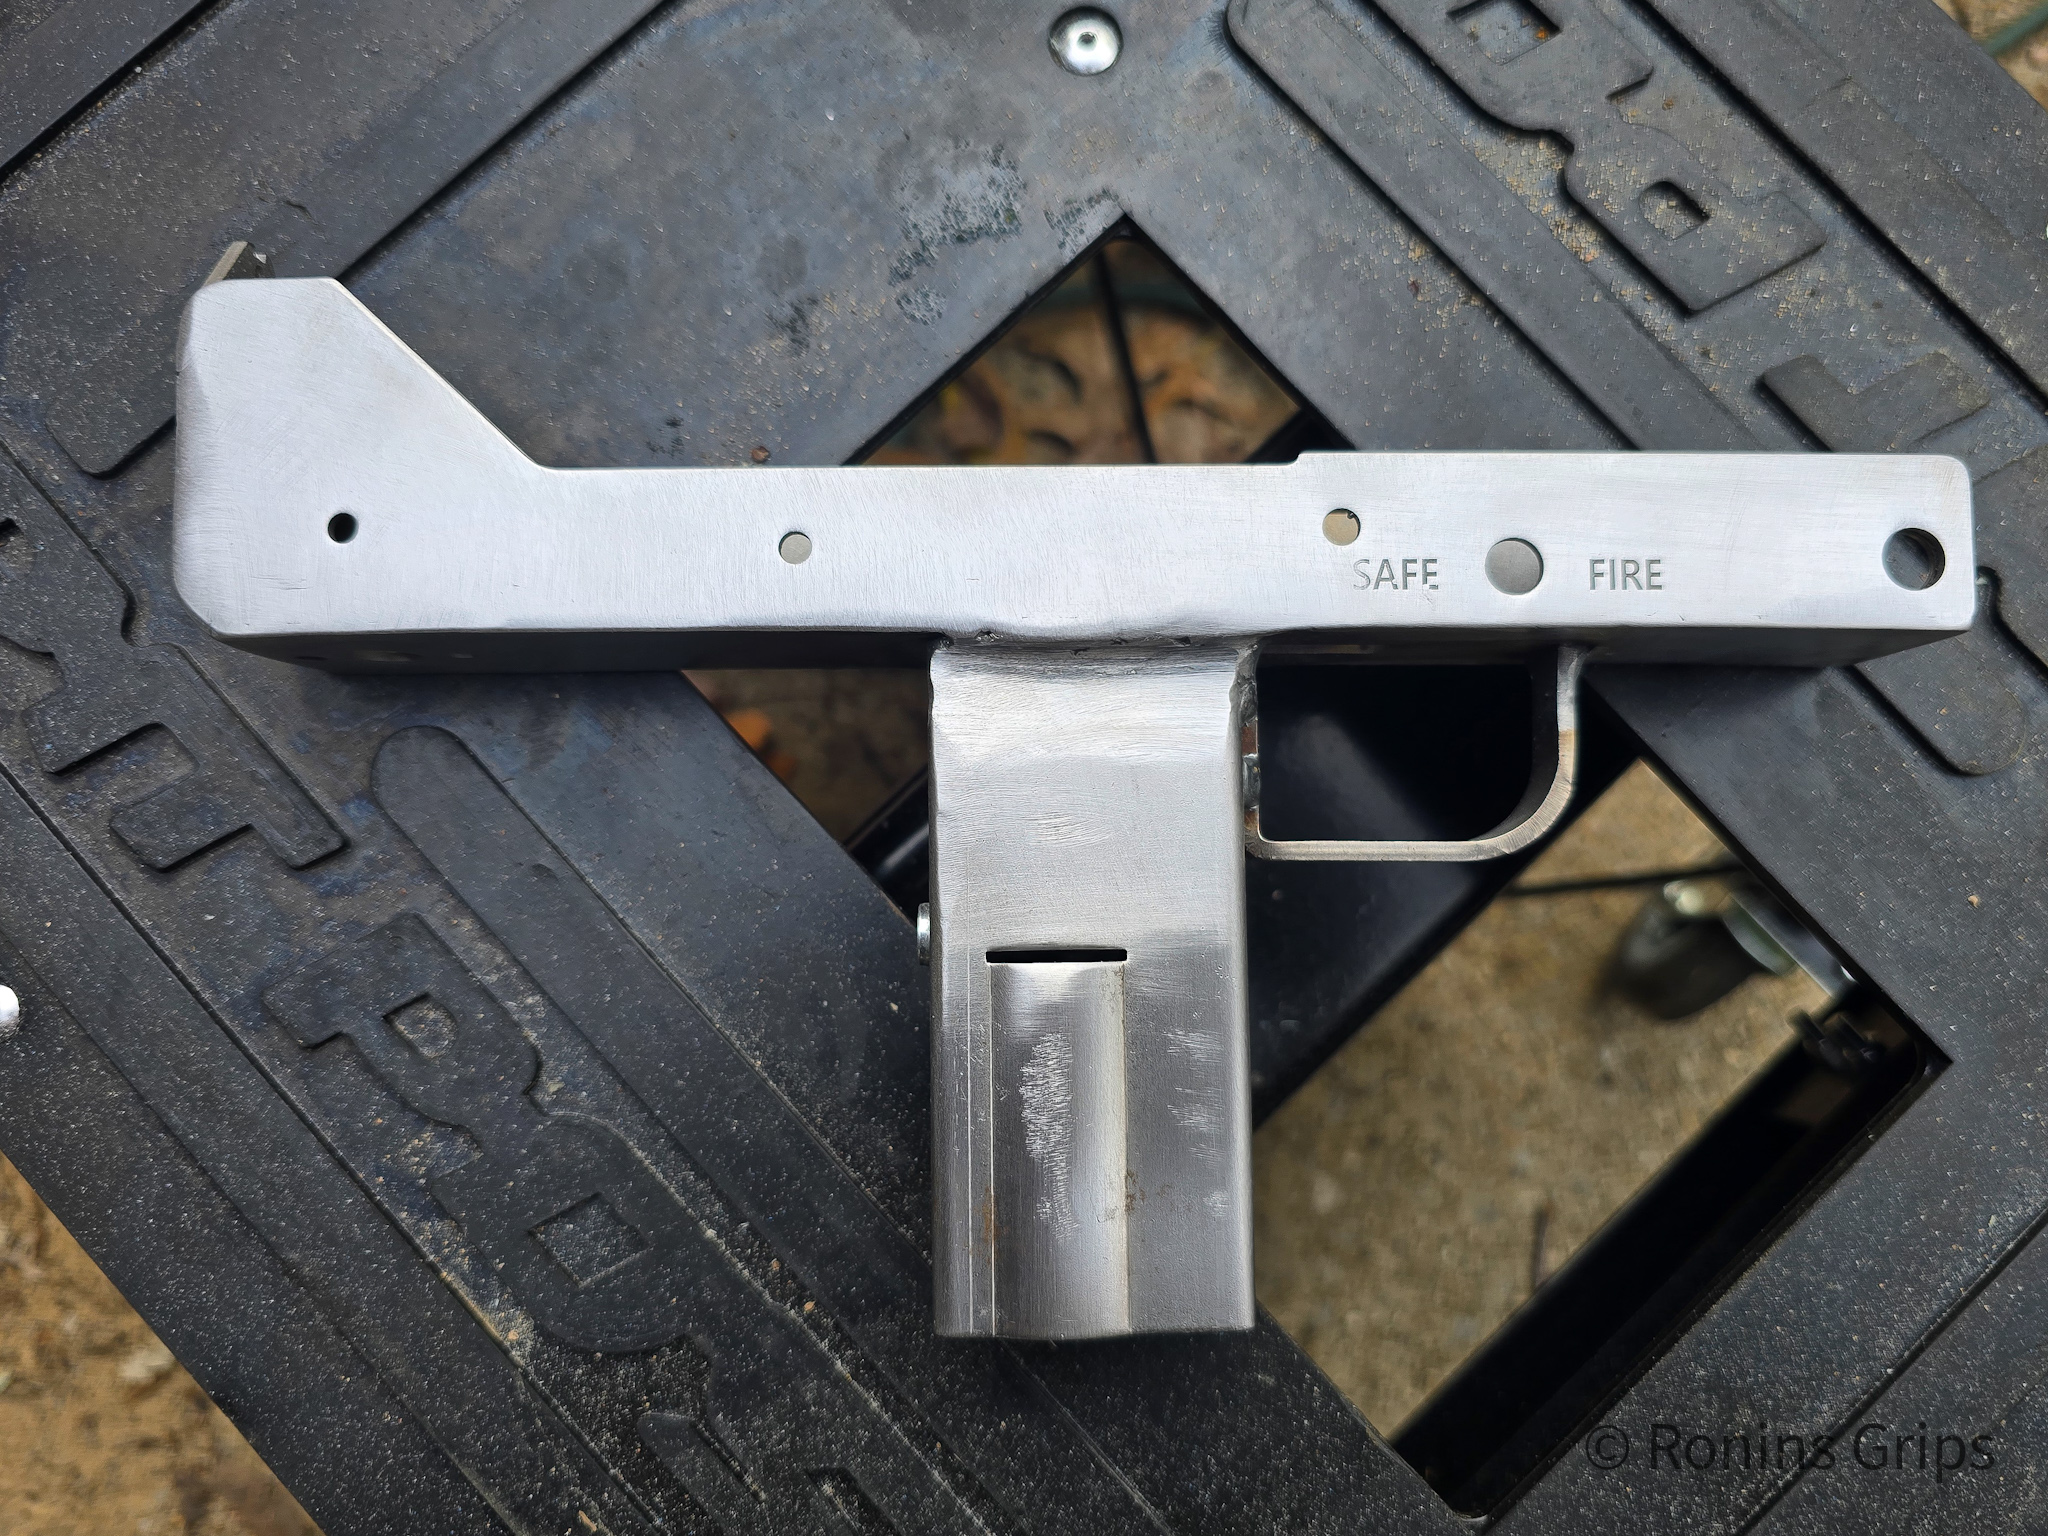
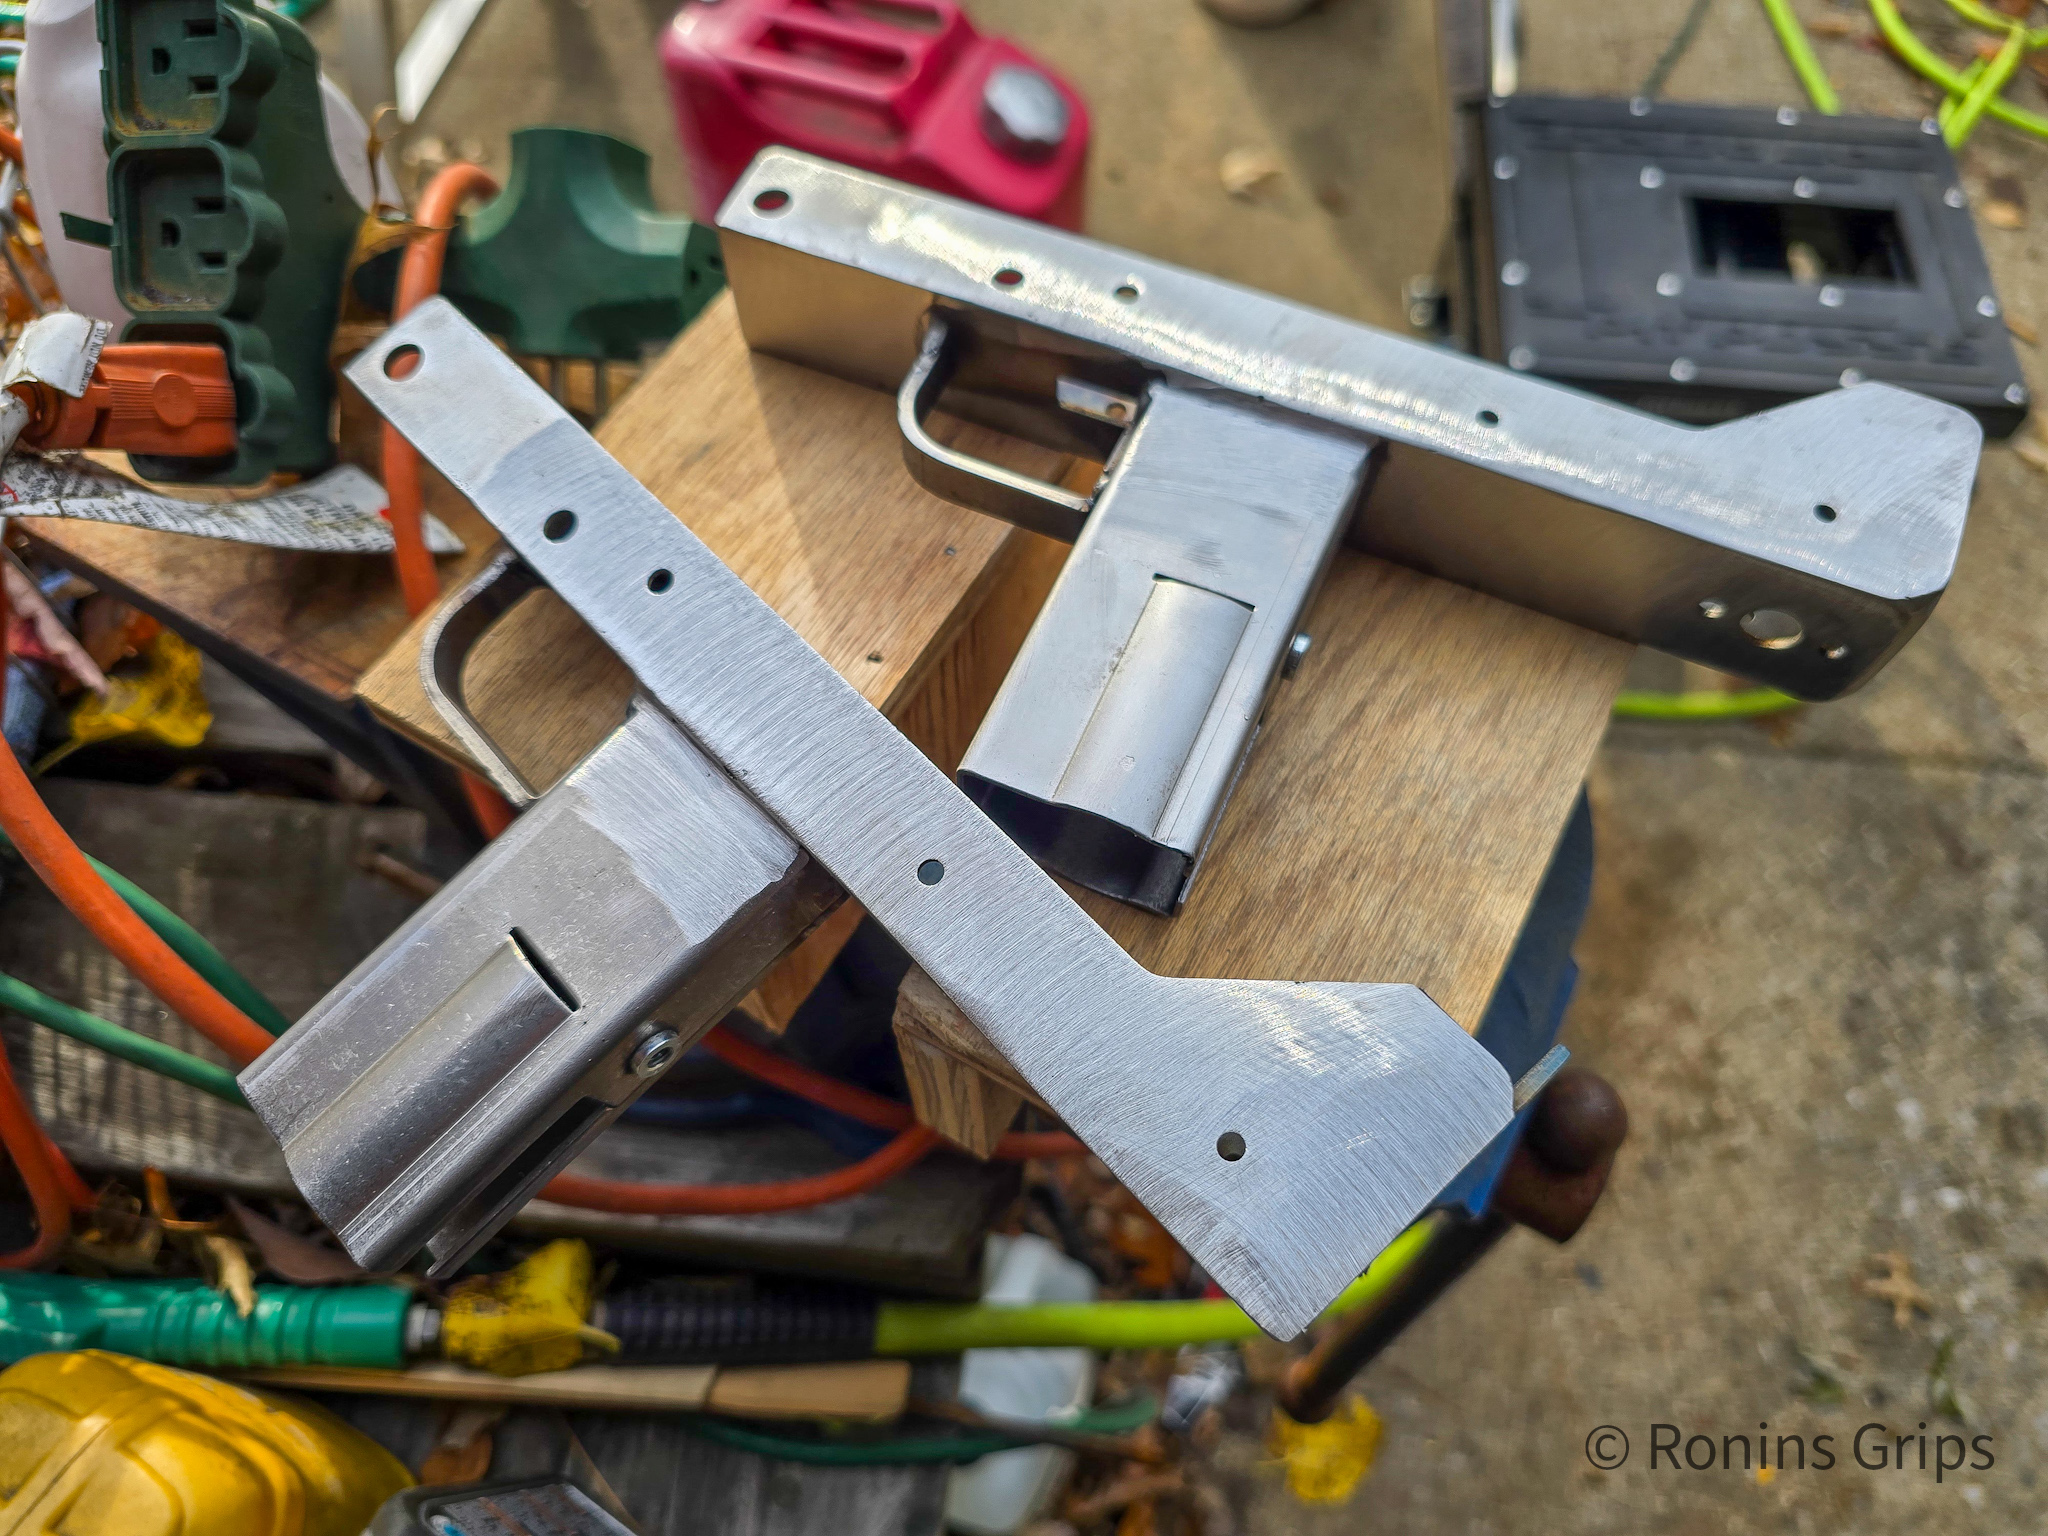
Done for now. I later levelled most of it our using a 120 grit flap sanding disc before abrasive blasting. The whole point of this is to fusion weld the pieces together and remove the extra beads. I then used a sanding mop to round over the right angles on the sides. By the way, these are for my own use. I’m not selling them so they just have to be good enough to me.

Lessons learned: 1) Don’t need the aluminum right angle to orient the side plates. The rear bend in the center section and the takedown pin reinforcement can hold it just fine. This dawned on me as I was sliding the reinforcement section into position. 2) a piece of sheet metal on top of the side plates would probably be a better way to secure them. 3) Also, I really needed to connect the ground straight to the receiver to get a better connection.

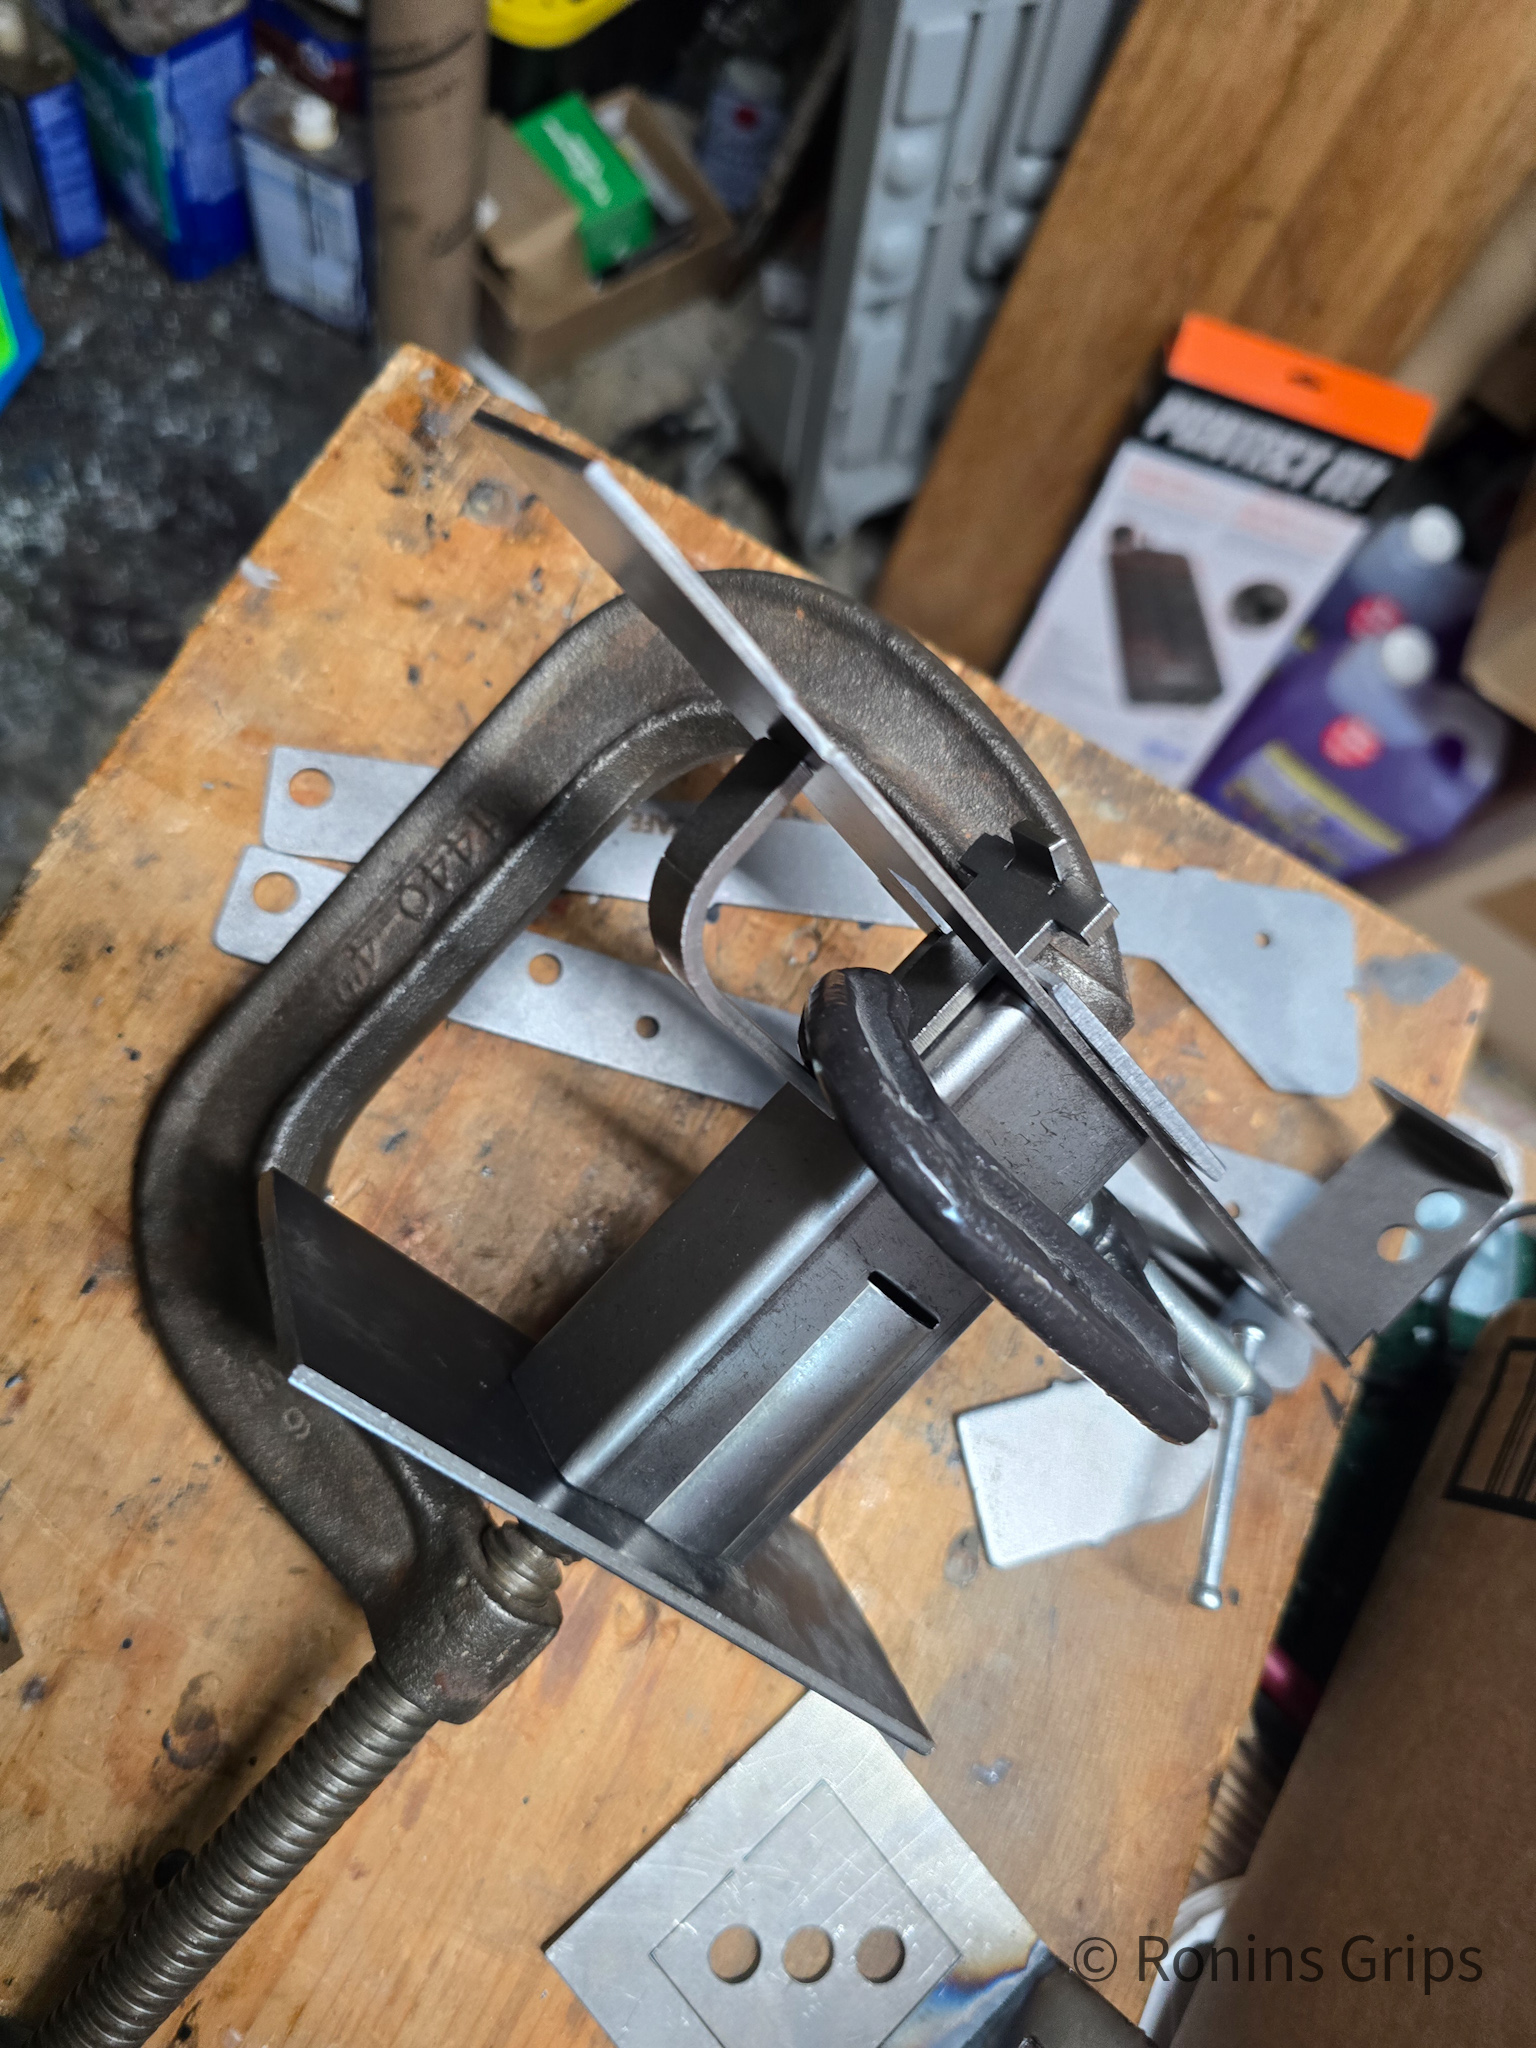
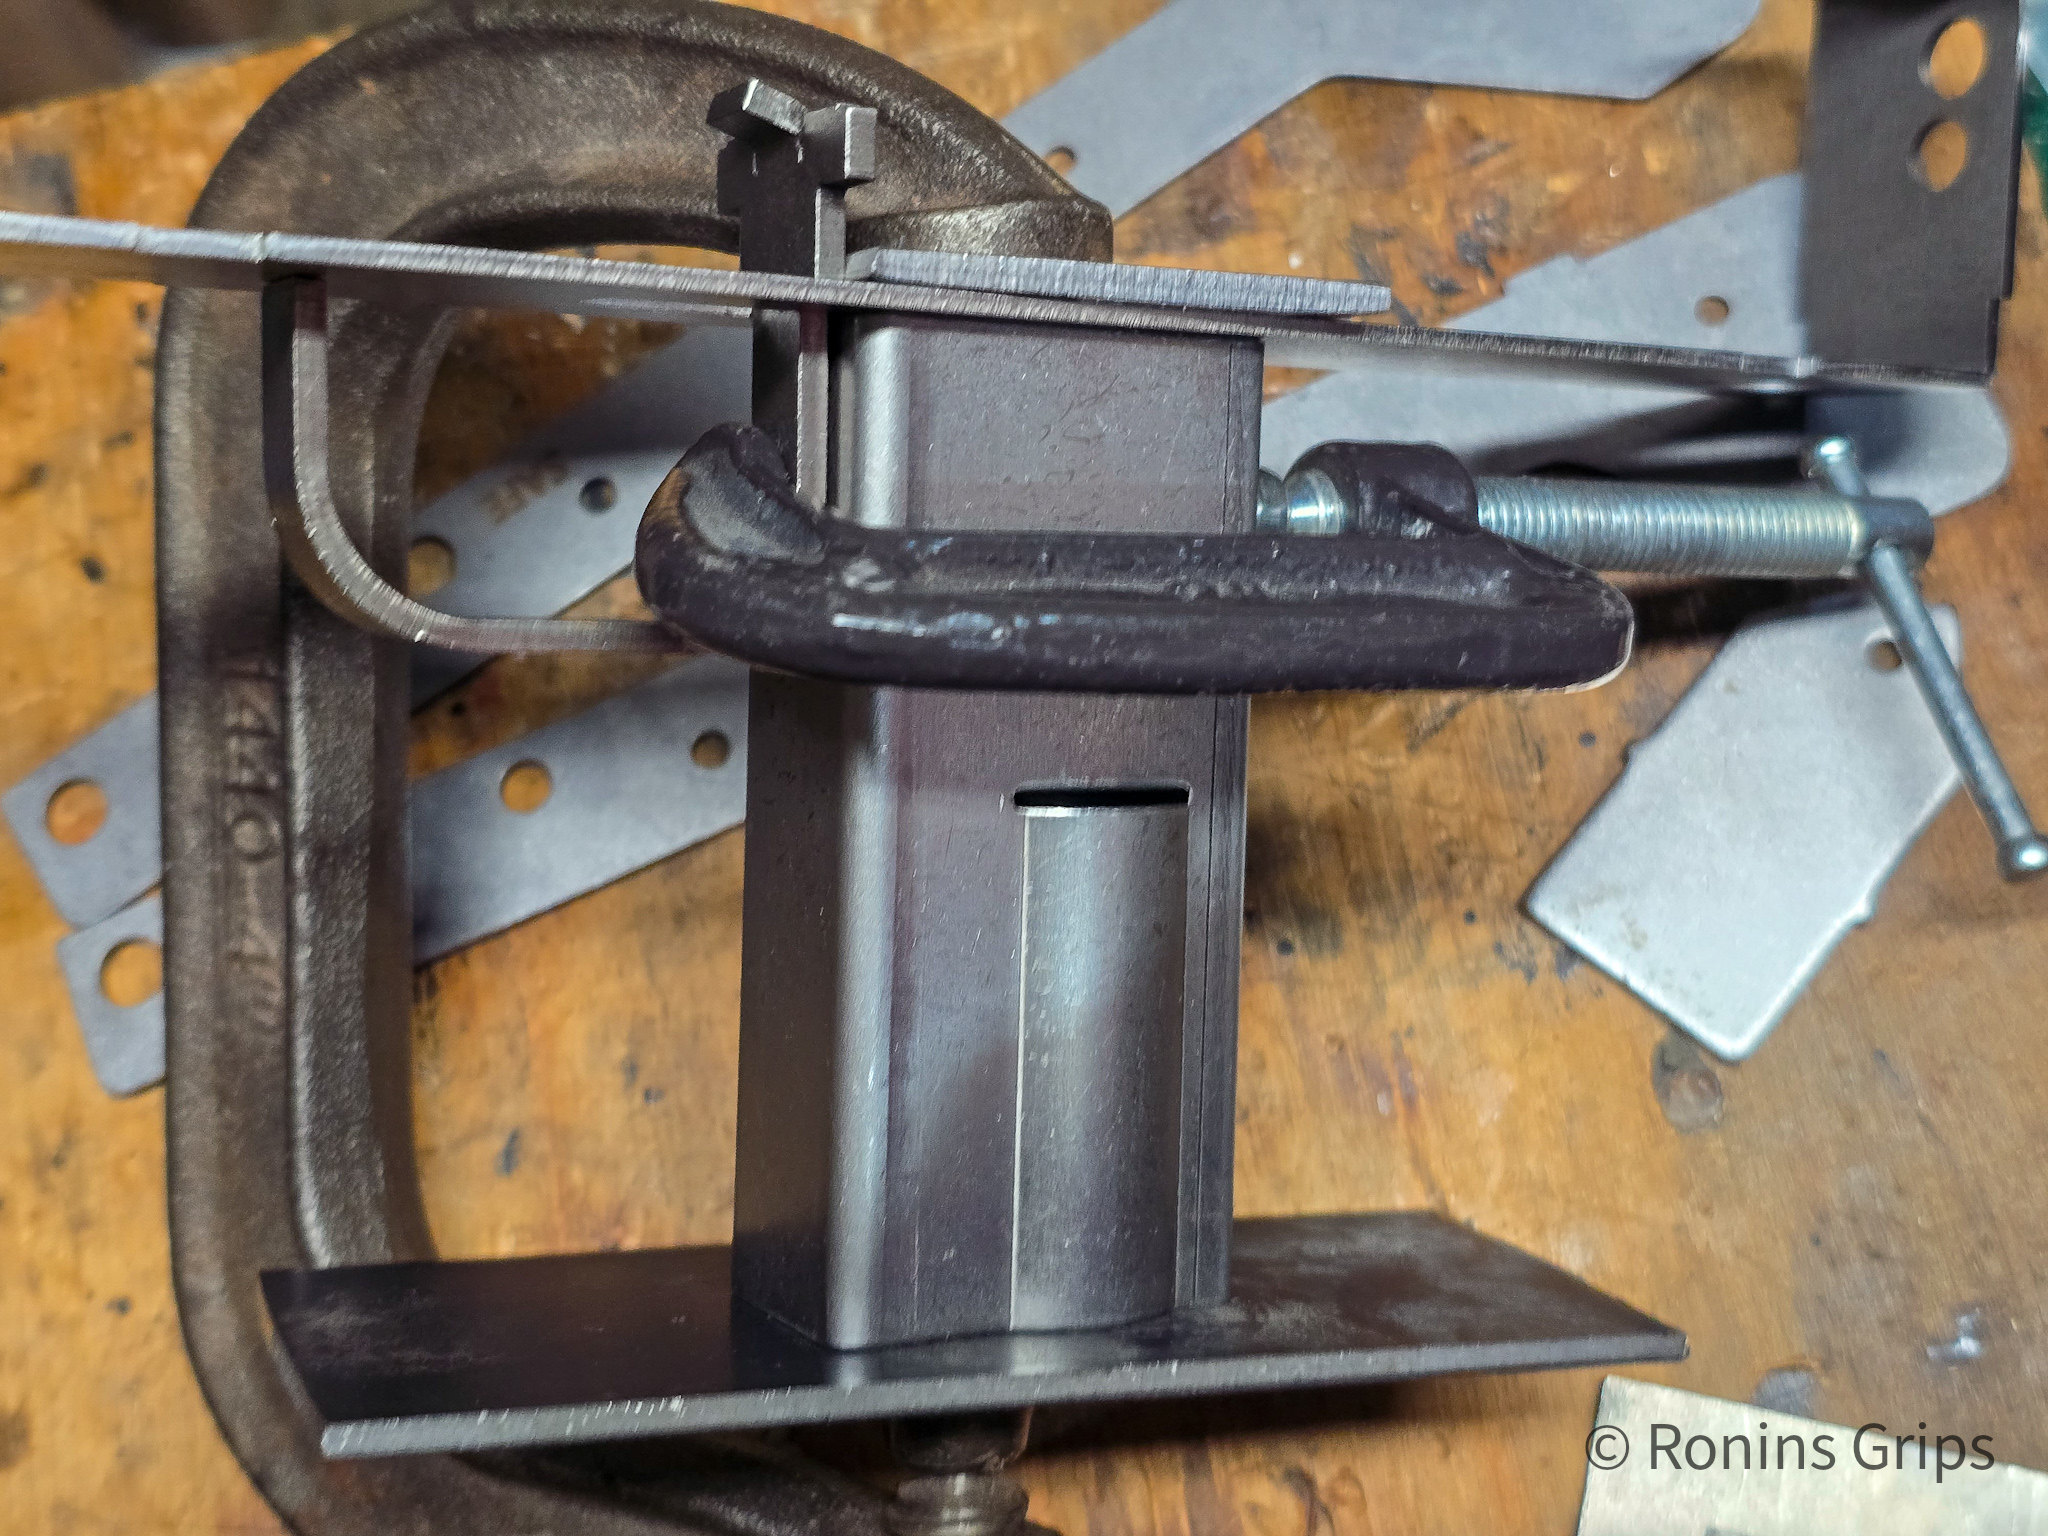
Second Receiver: I clamped the trigger guard, grip and center support together and welded them. Then I inserted the front reinforcement and clamped the side plates at the front, back, middle and welded. I then did the rear sight plate.
Extech IR thermometer and Ronin's polymer grips for heat testing.
So the second one started in a very similar manner.
Extech IR thermometer and Ronin's polymer grips for heat testing.
But this time, I took more photos and with better lighting.
Extech IR thermometer and Ronin's polymer grips for heat testing.
Tack welds are in.
Extech IR thermometer and Ronin's polymer grips for heat testing.
I was clipping right along feeling good about stuff but broke a cardinal rule – I didn’t check the clamps and the workpieces. The magwell/grip is true but trigger guard assembly cocked sideways somehow and was no longer perpendicular with the center section. Well crap!
Extech IR thermometer and Ronin's polymer grips for heat testing.
So, I used a Dremel with a cutting wheel to cut off the trigger guard and welded it square. I used pliers to true the bullet guide so it was perpendicular the way it should be with the receiver. The slot you see is where one of the side plate tabs went into the recess on the center section. I welded them closed and ground them flat later.
Extech IR thermometer and Ronin's polymer grips for heat testing.
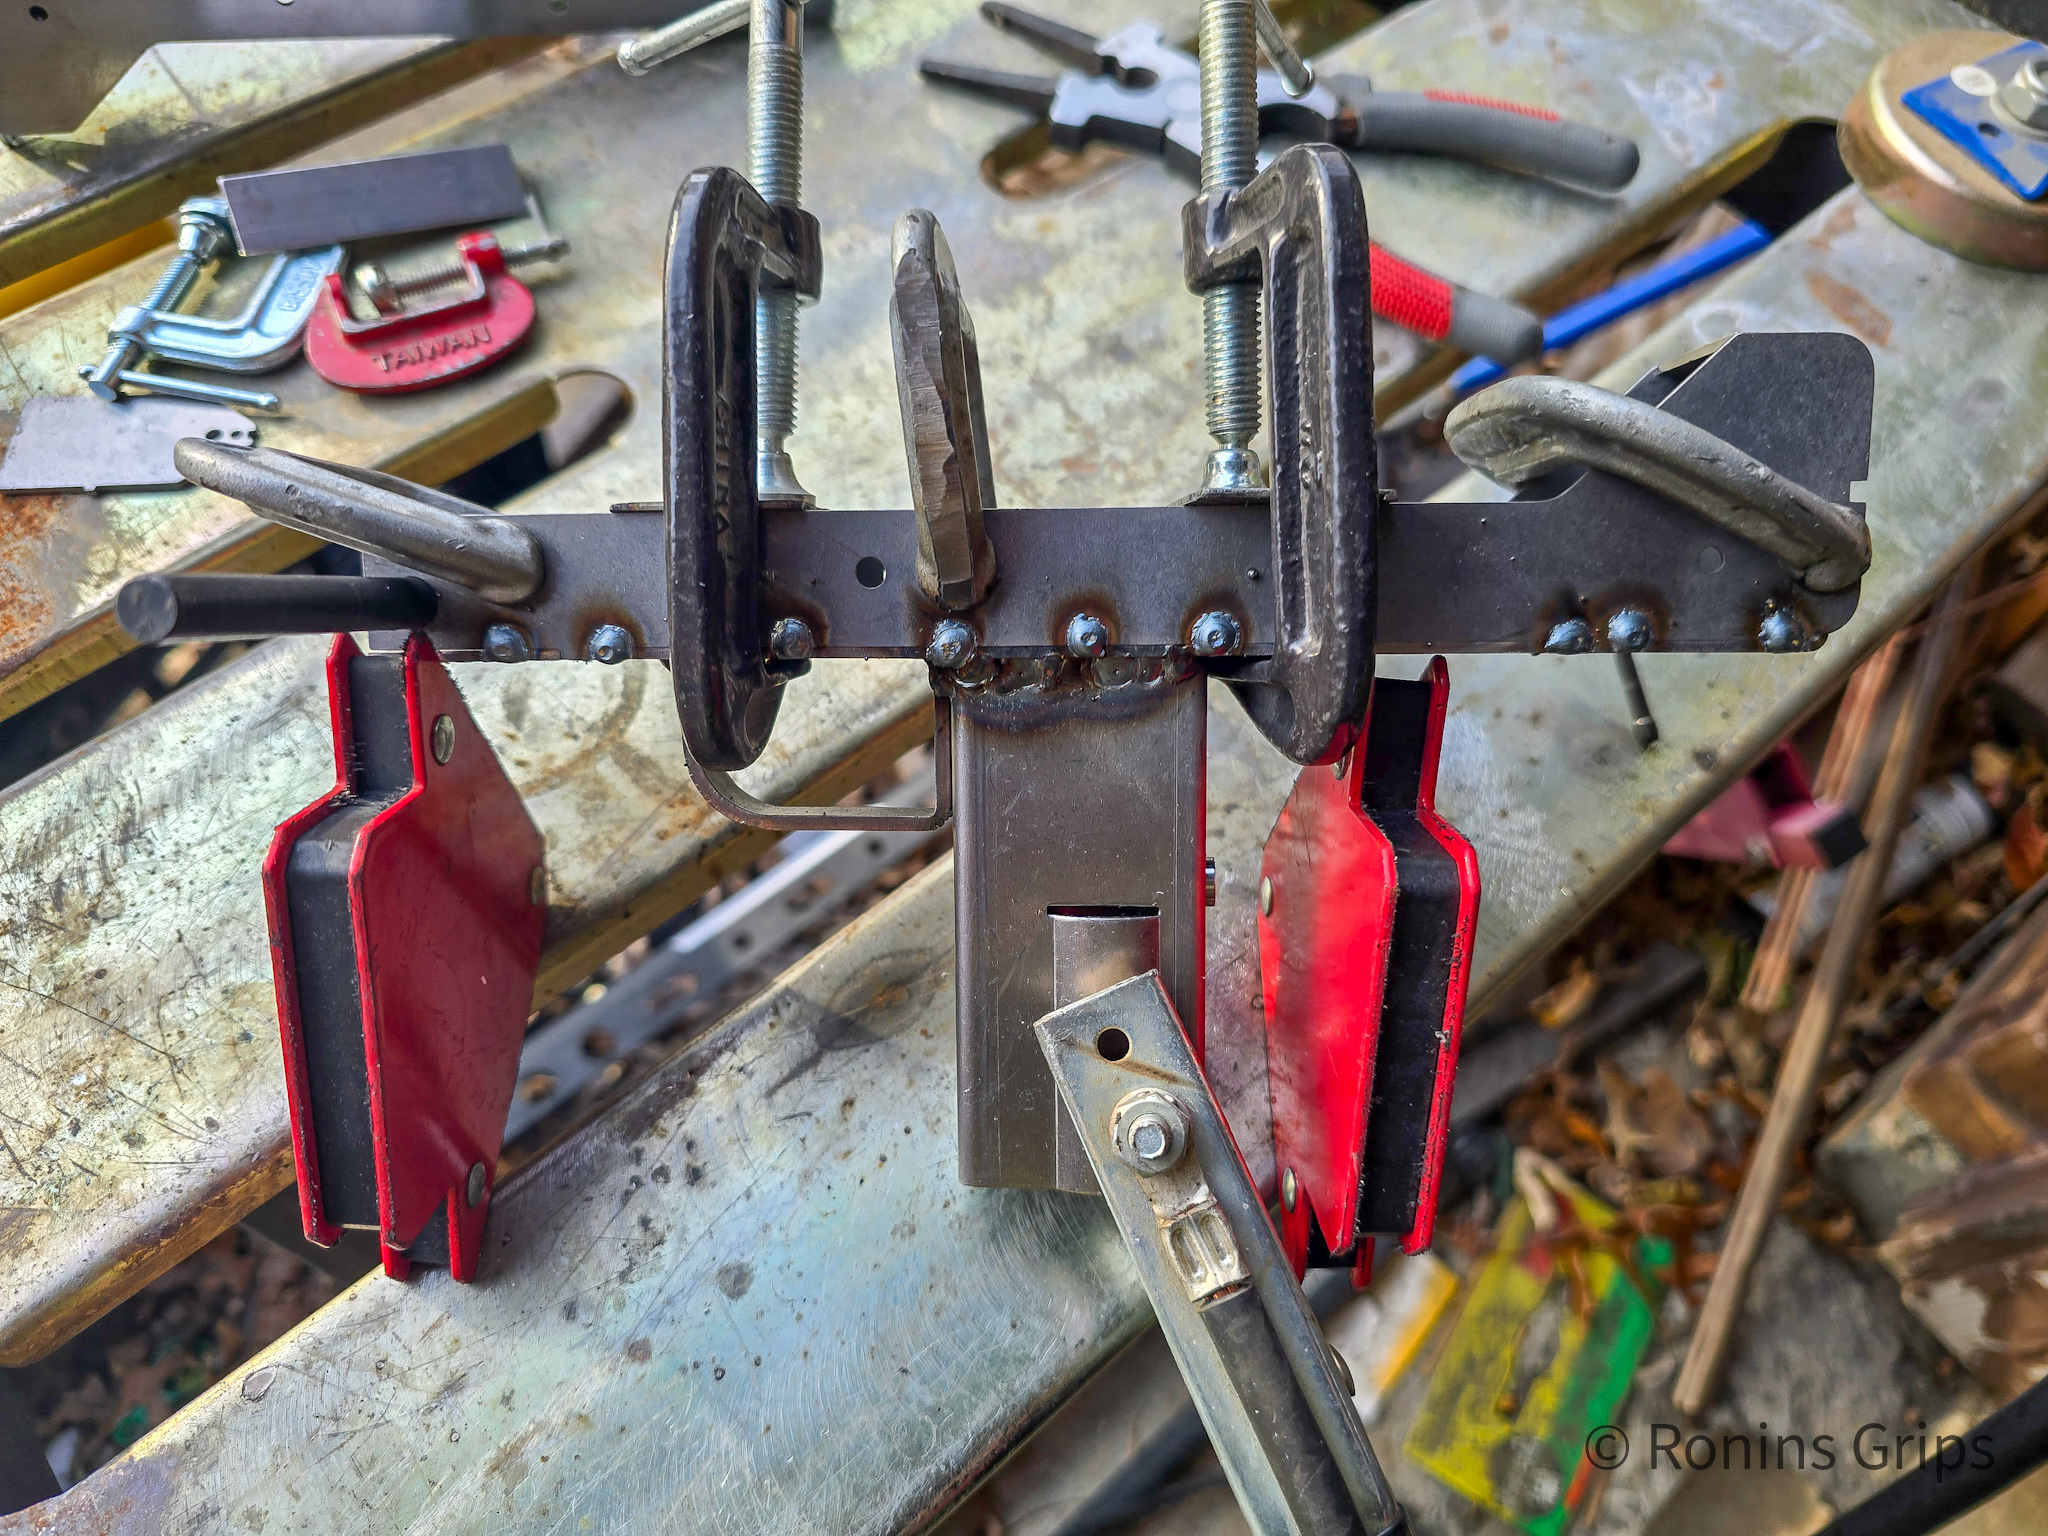
I used plenty of clamps to make sure nothing else moved and then did the spot welds. Note the ground is right on the receiver. The magnets are keeping the assembly from moving. You can see the spot welds. I would then move around welding a bit at a time to avoid warping or sagging. There is a 21/64ths transfer punch aligning the center takedown pin reinforcement.
Extech IR thermometer and Ronin's polymer grips for heat testing.
To be clear, I welded the center section after the side plates were welded in. The I pulled out the alignment pin – in this case a 21/64″ transfer punch.
Extech IR thermometer and Ronin's polymer grips for heat testing.
Clamped getting ready for the flap sander. Note, I would need to move the receiver around about 4 times to get all of the material off. It was never in one go.
Extech IR thermometer and Ronin's polymer grips for heat testing.
A good chunk of the weld bead on that side was gone at this point.
Extech IR thermometer and Ronin's polymer grips for heat testing.
Two roughed in receivers. No finish sanding yet.

Lessons learned: 1) Check your clamps and work to make sure nothing shifted. I could have kicked myself – that was such a basic mistake. 2) the center section may not be true – use some scraps of metal to pull the center section and side plates together. 3) More clamps are better than fewer clamps. 4) Maybe I should try welding the trigger guard by itself first – and I did that with the next one.

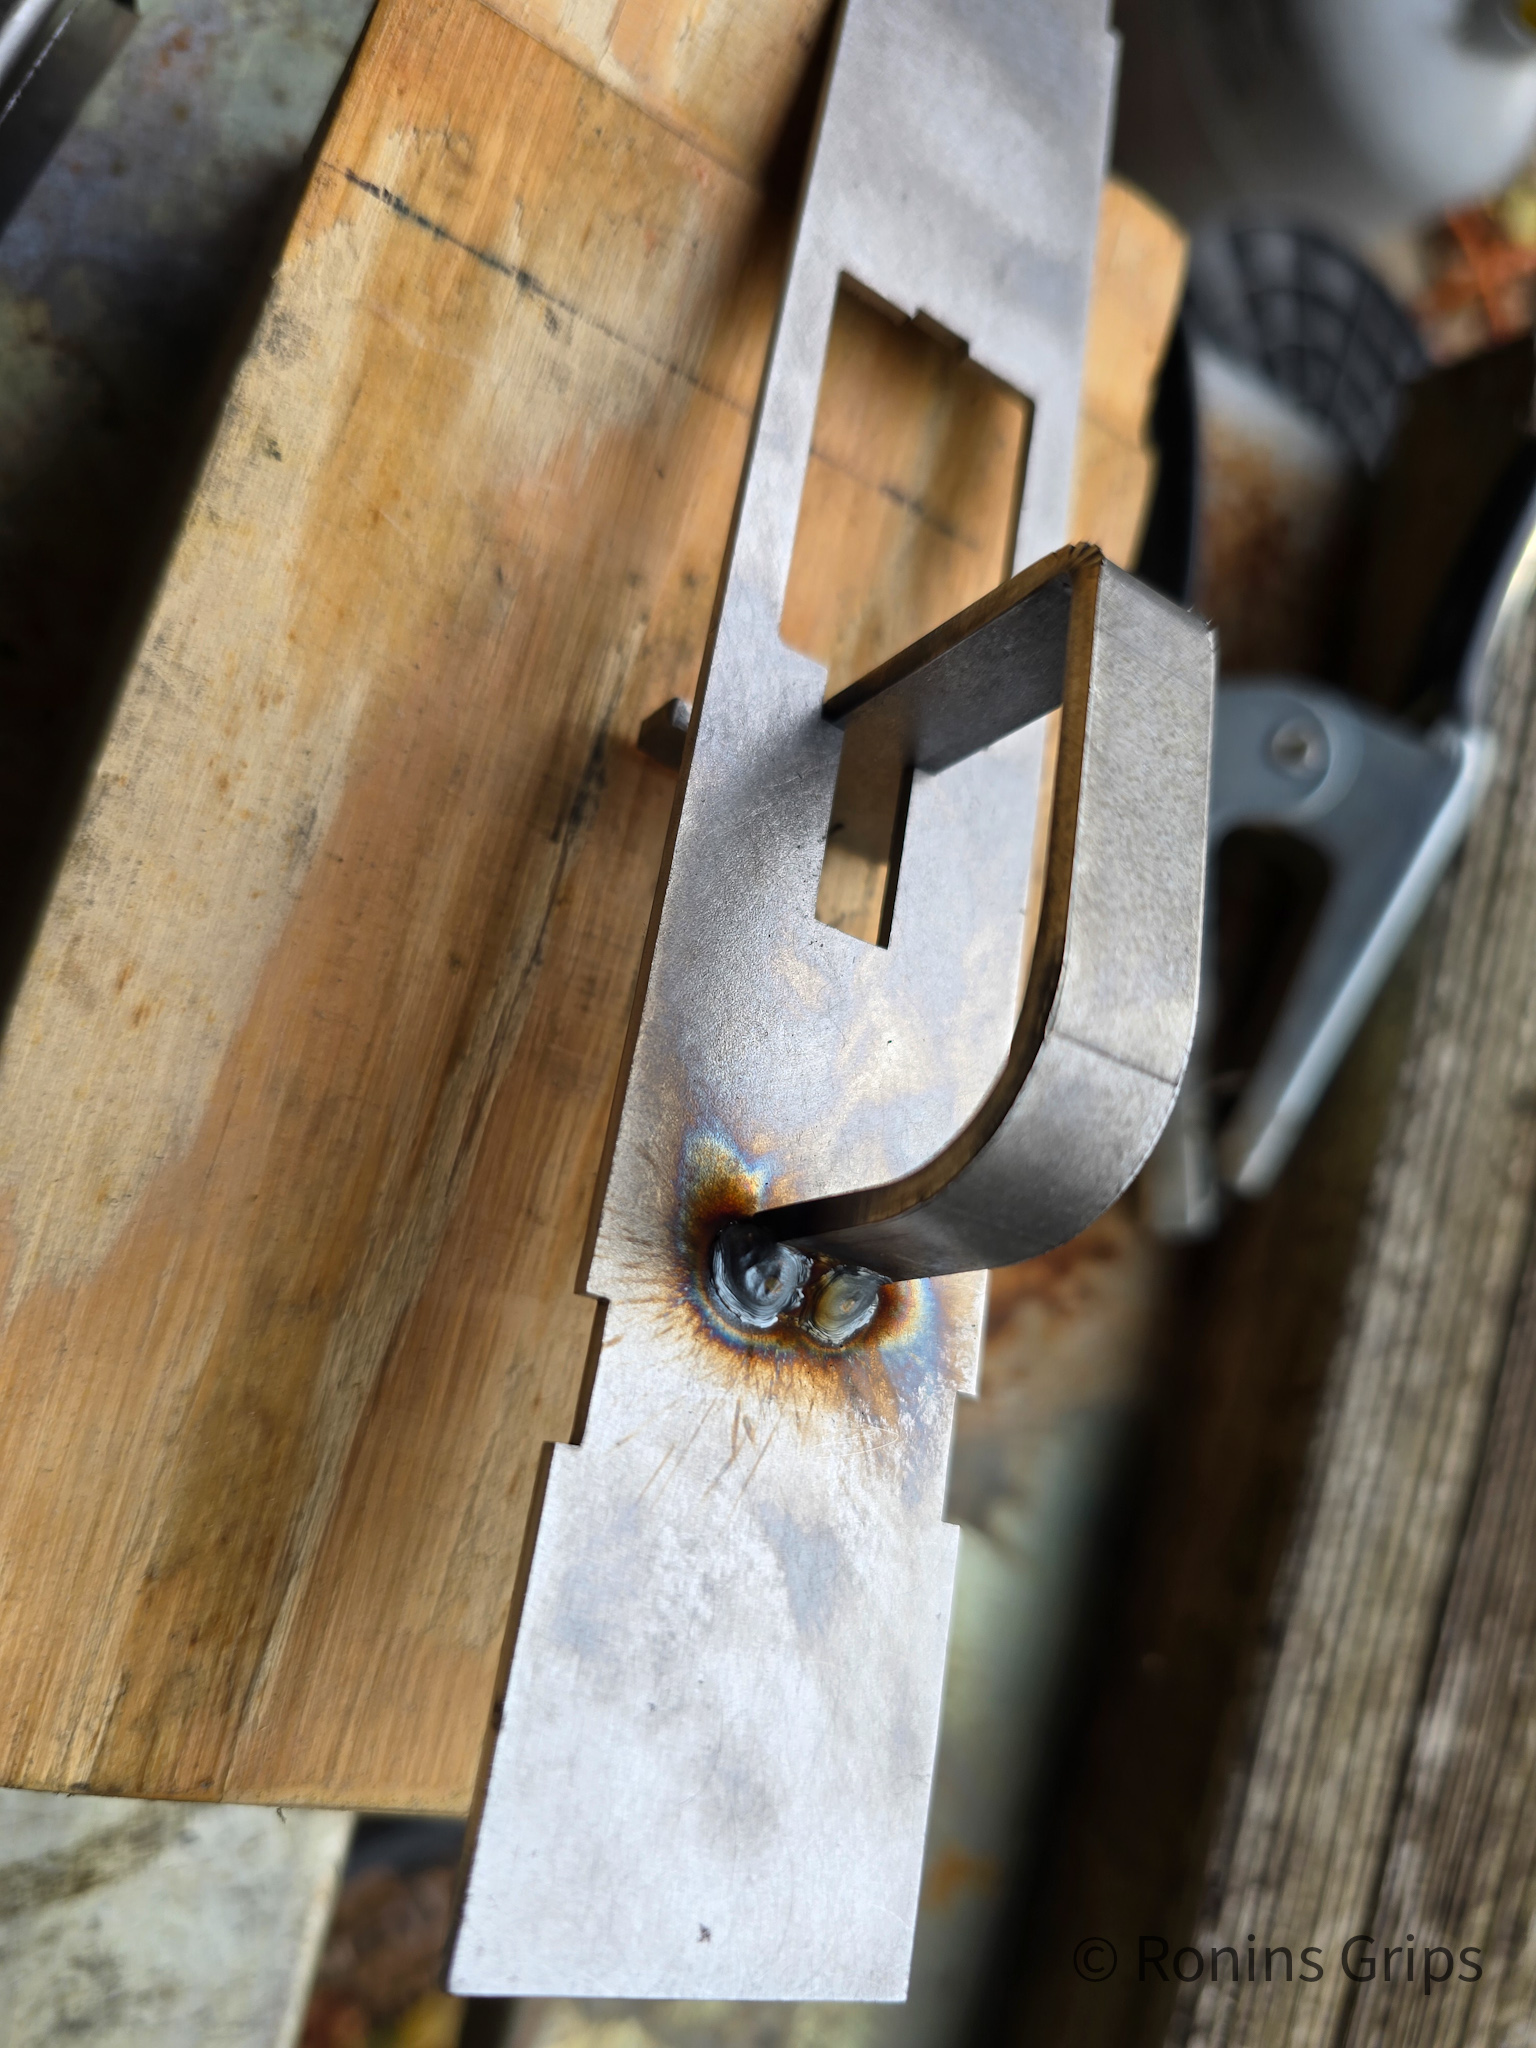
Third Receiver: Clamped the trigger guard to the center section and welded it. Positioned the magwell/grip, clamped and welded it. I then positioned the front reinforcement piece, clamped the side plates and welded.
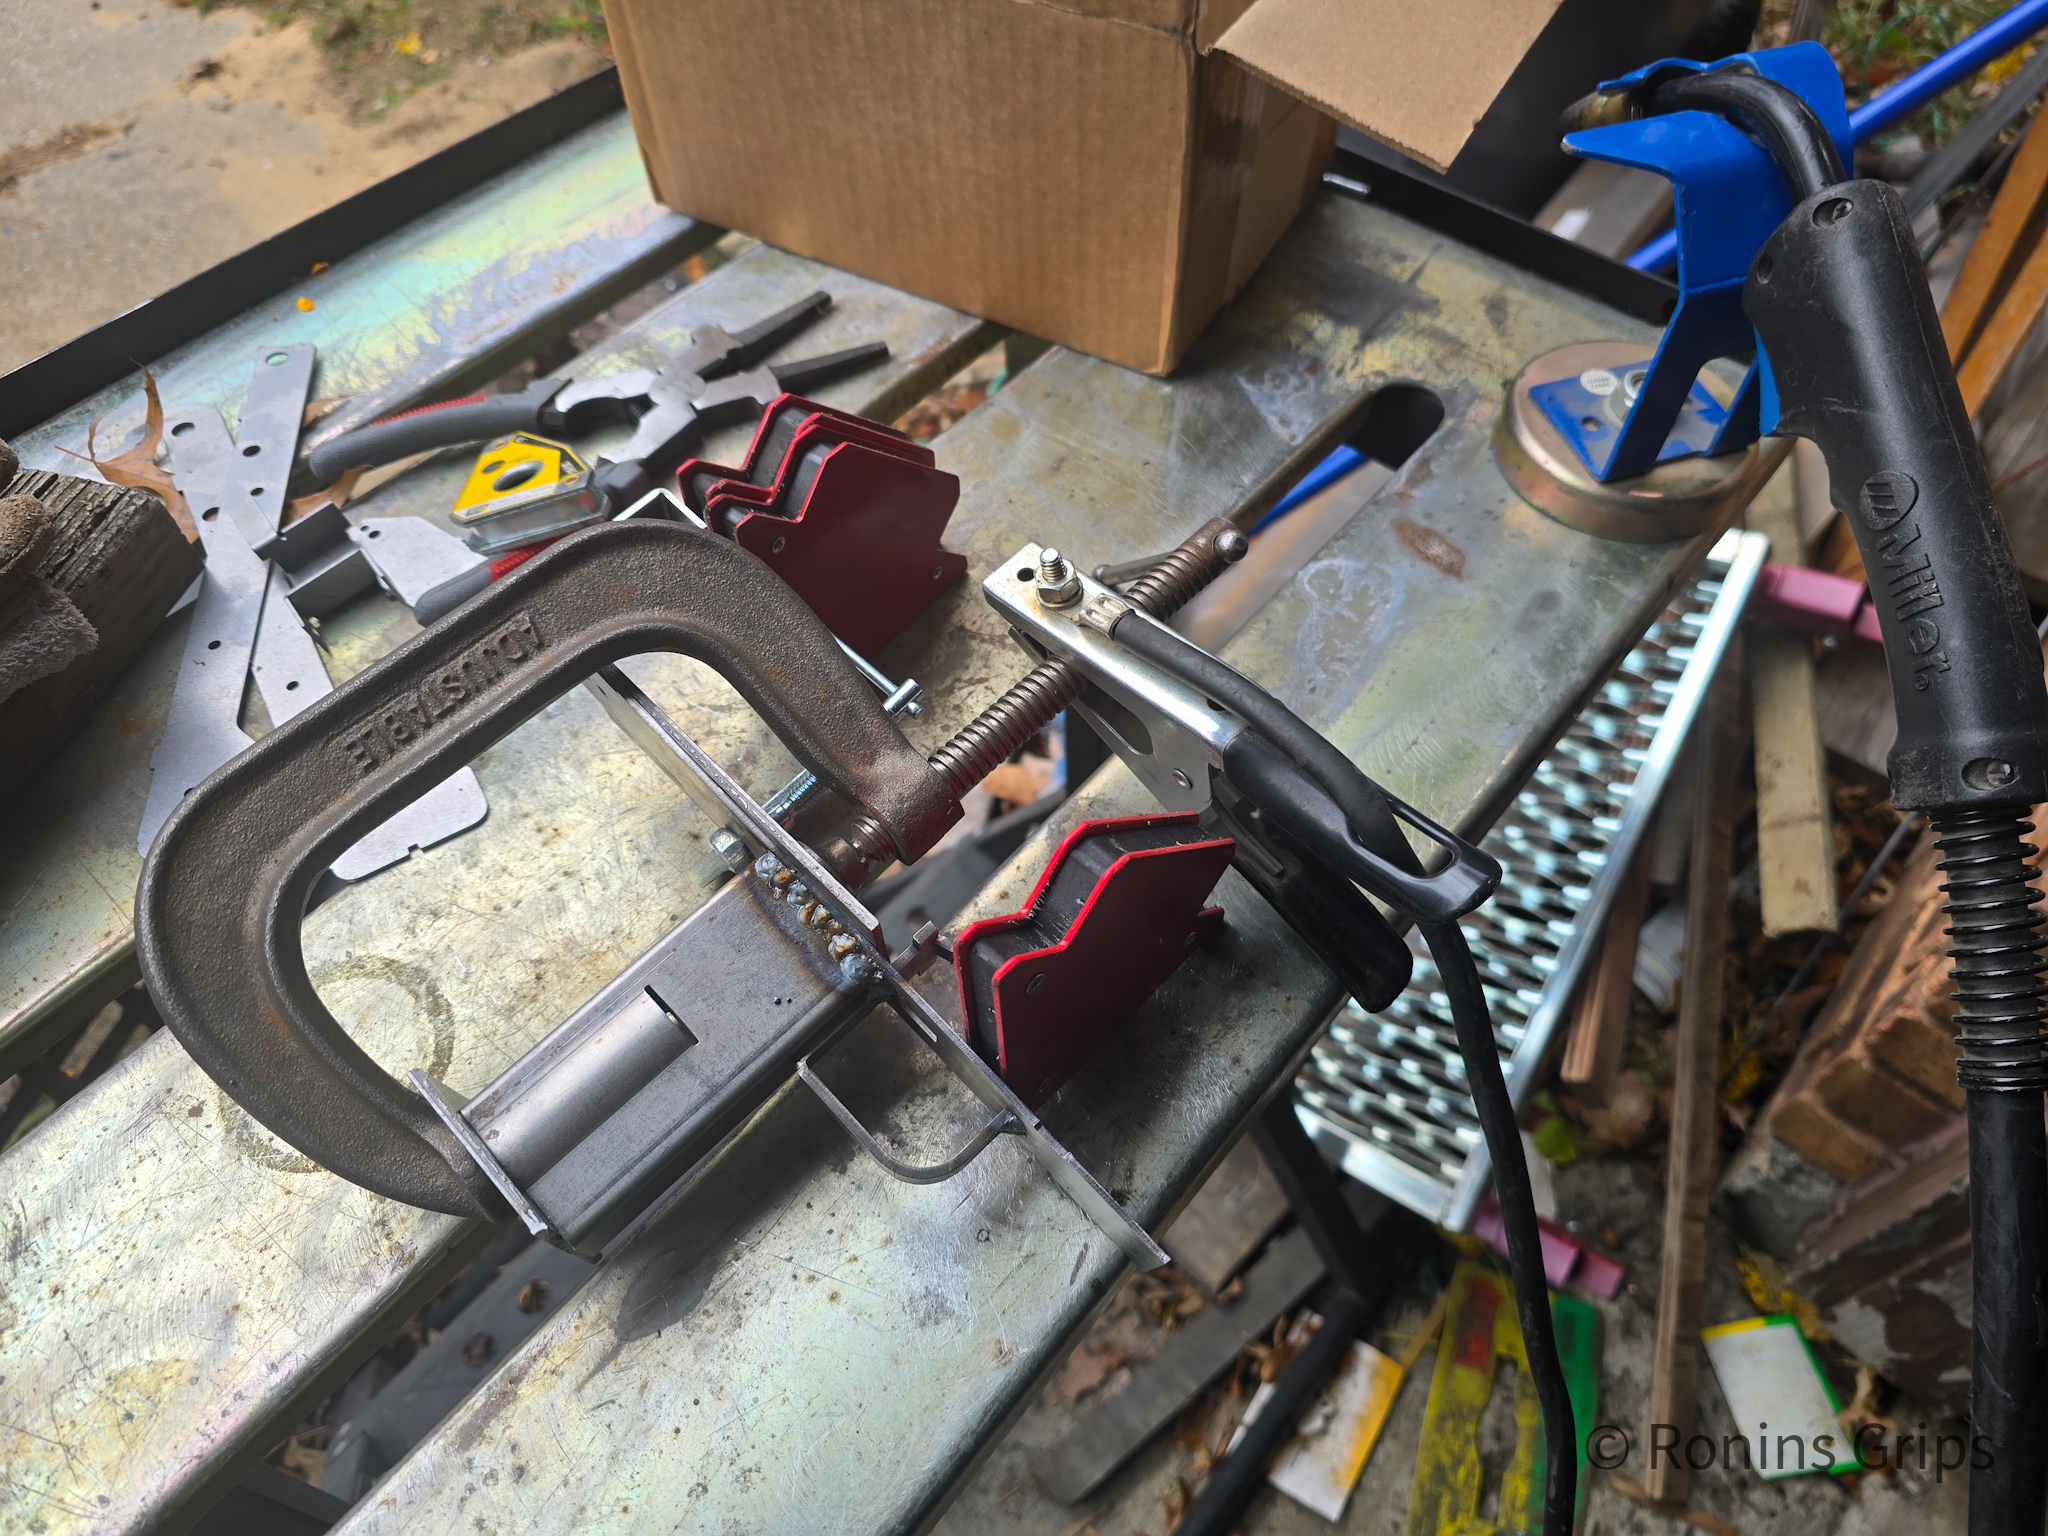
Extech IR thermometer and Ronin's polymer grips for heat testing.
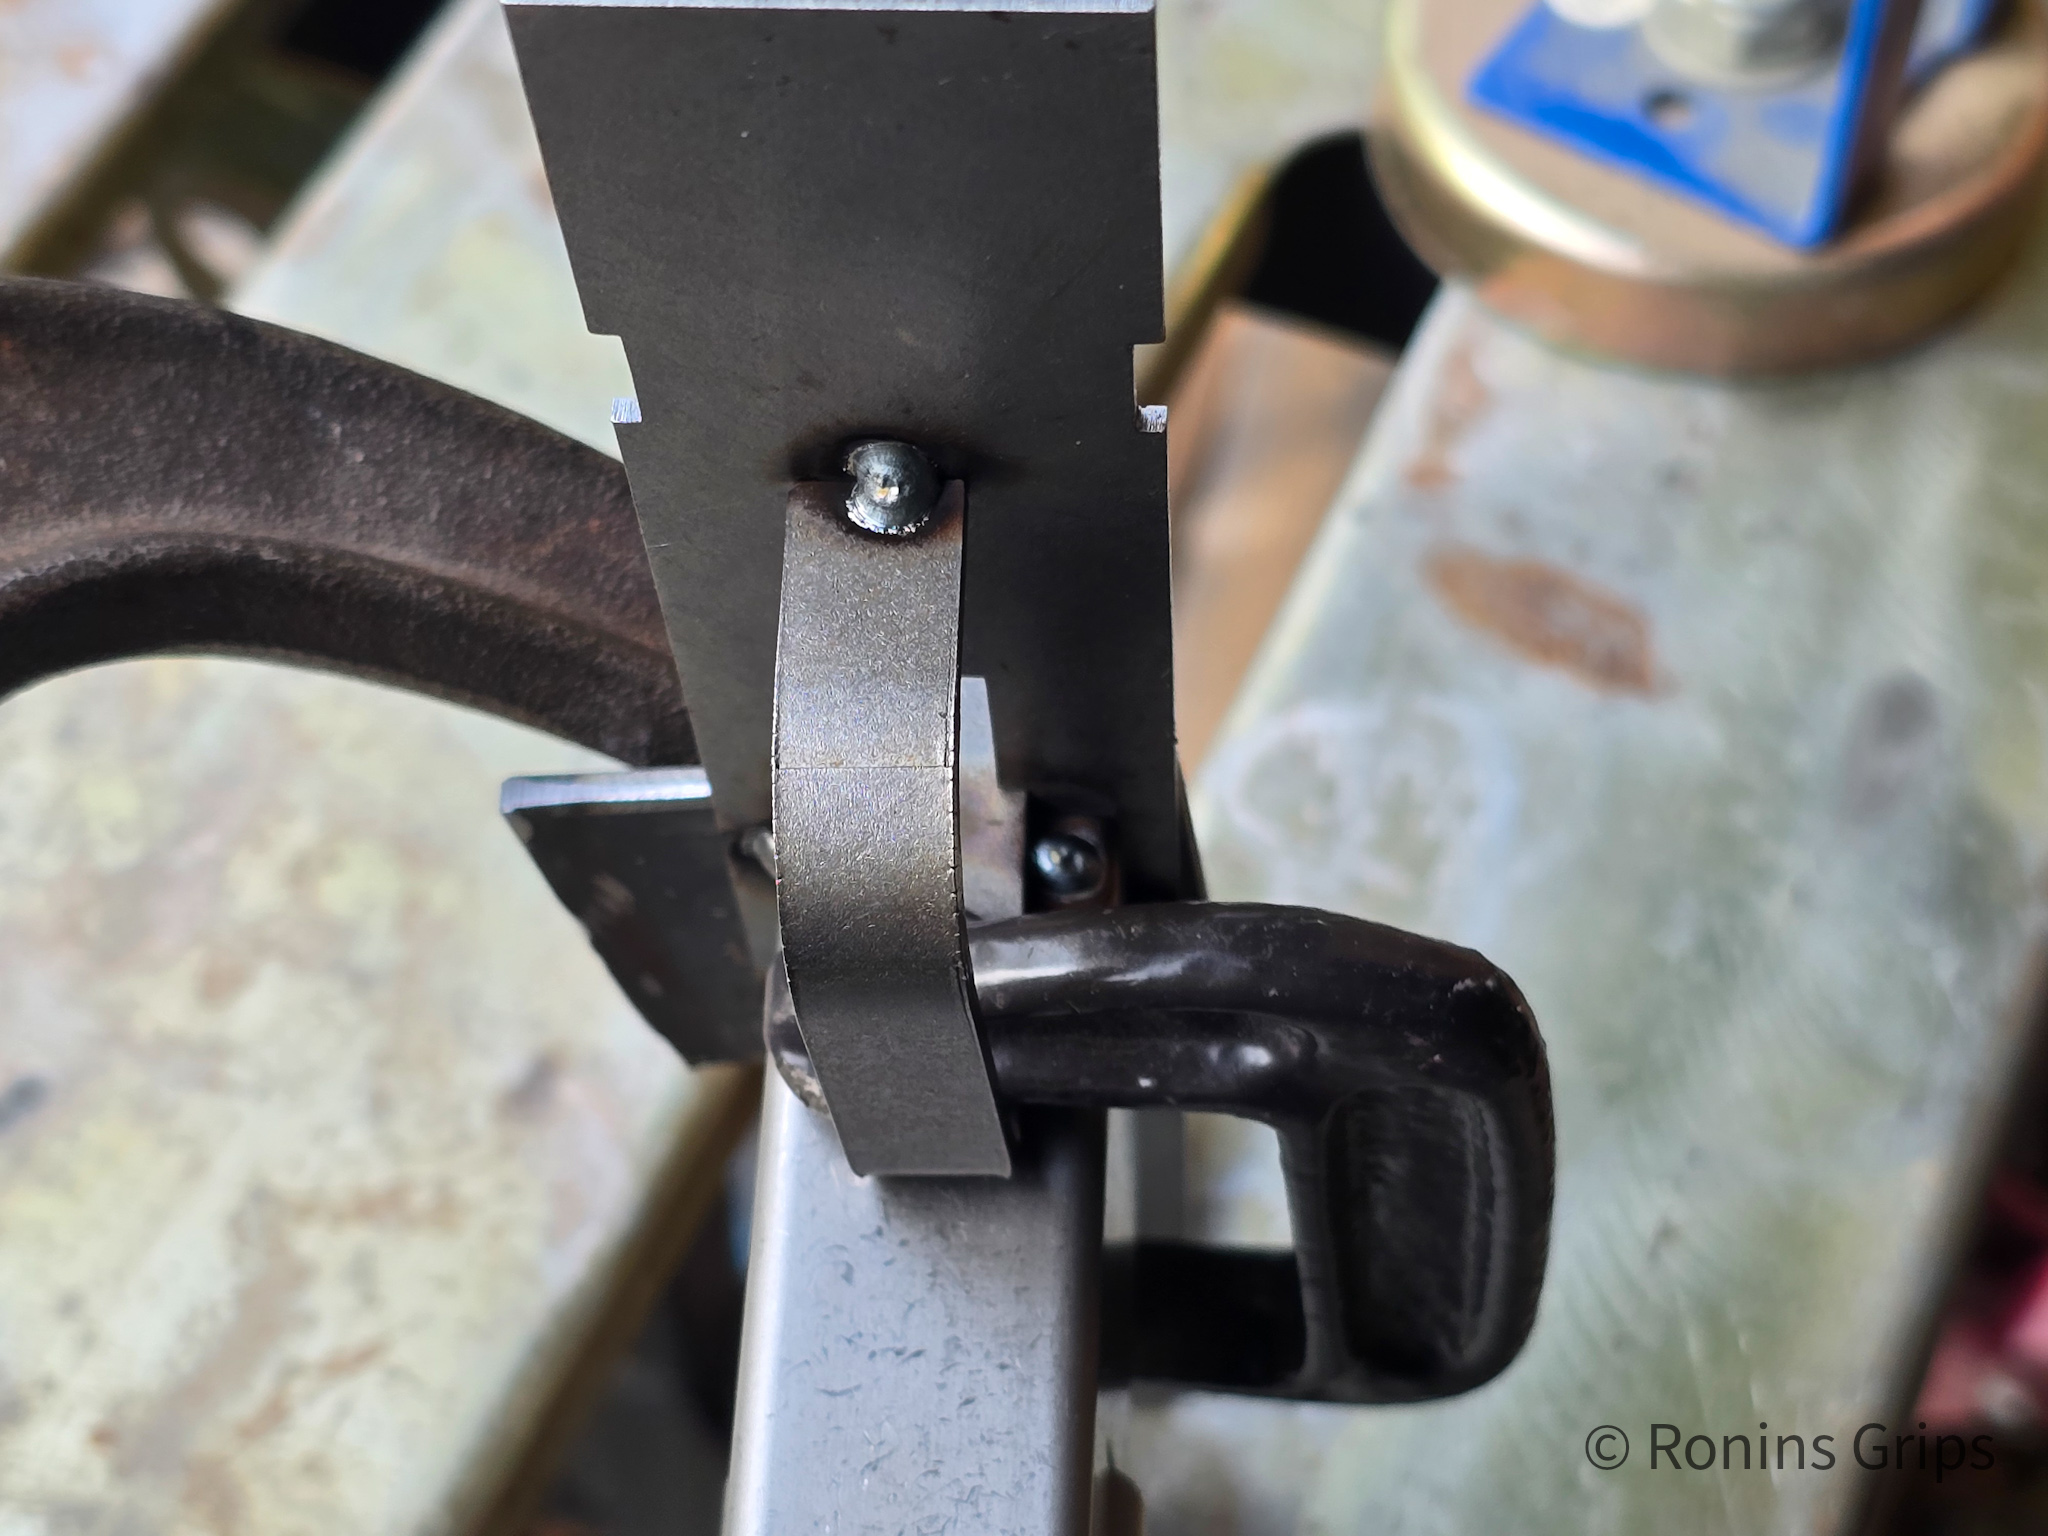
Through the use of magnetic clamps, I made sure the trigger guard was all of the way forward, true and tacked it in place. Then I moved on to the magwell/grip.
Extech IR thermometer and Ronin's polymer grips for heat testing.
So then I clamped the magwell in place, did the tack welds and then welded it all in.
Extech IR thermometer and Ronin's polymer grips for heat testing.
I’m holding it together but see how the plates are held vertically by the bullet guide and the front reinforcement? The trick is to properly locate everything and then clamp it.
Extech IR thermometer and Ronin's polymer grips for heat testing.
So I’m welding along the seam. What you can’t see is that I let it get too hot and I pushed through the other side in a few places
Extech IR thermometer and Ronin's polymer grips for heat testing.
I welded in the ceterpiece. You can see the 21/64″ hole center punch aligning everything.
Extech IR thermometer and Ronin's polymer grips for heat testing.
Finishing up the weld on the seam.
Extech IR thermometer and Ronin's polymer grips for heat testing.
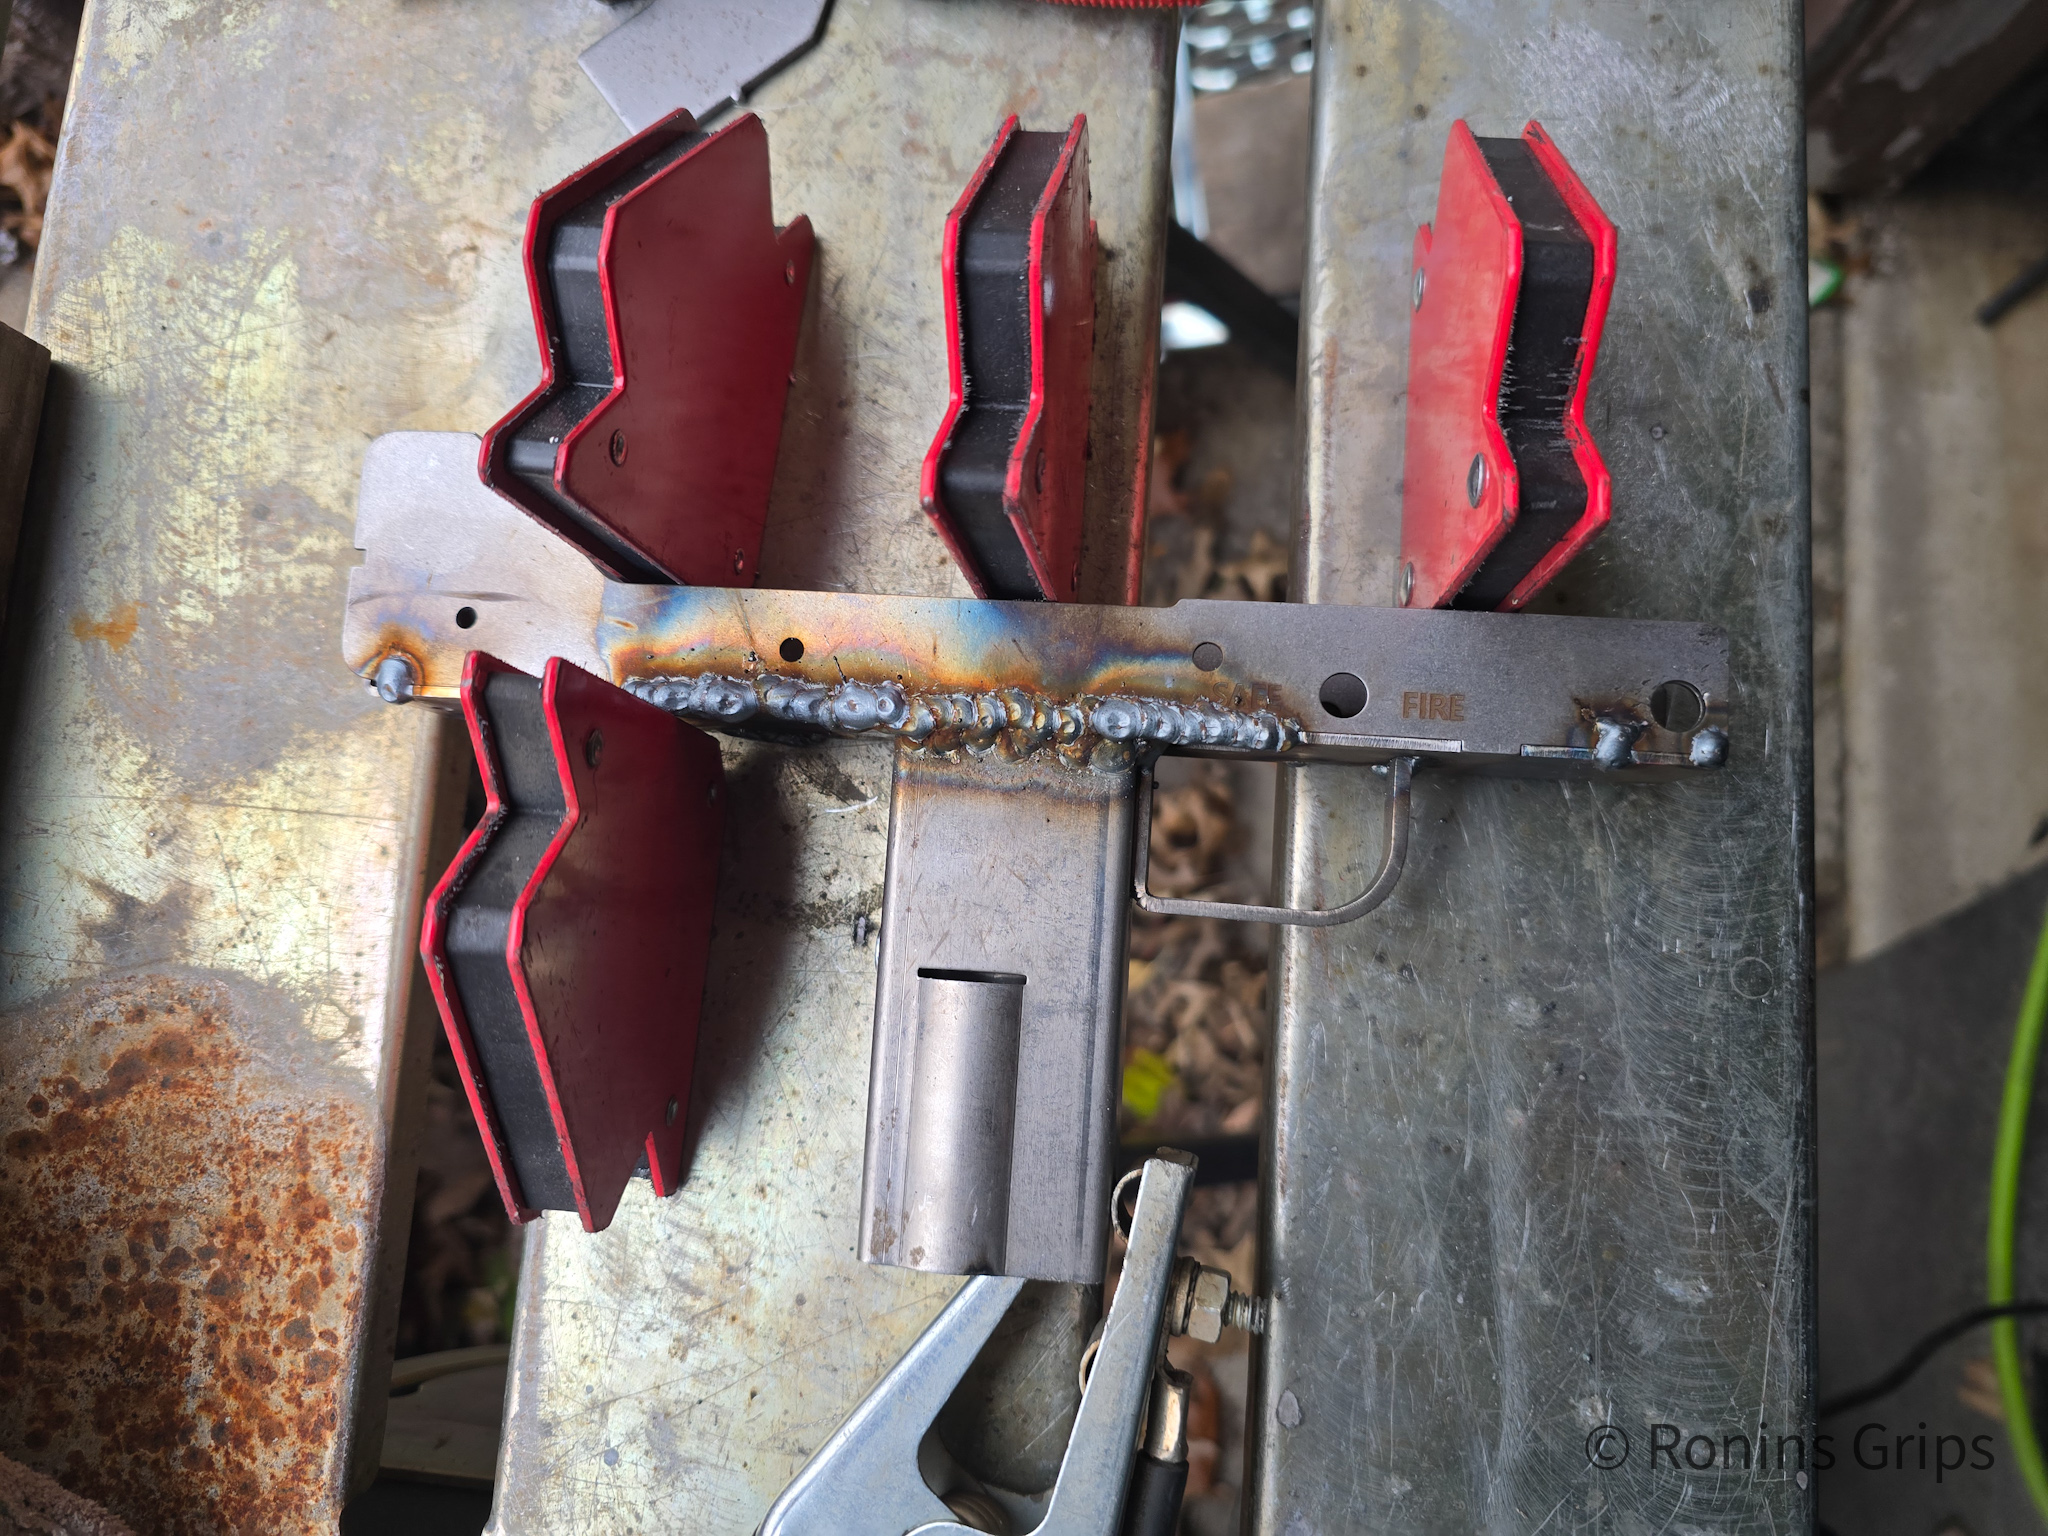
Welded in the rear sight plate. I welded the bottom edge closed so I could clean it up later – I did this on all three.
Extech IR thermometer and Ronin's polymer grips for heat testing.
I inspected the bottom of all three also. I added beads on all three receivers so I could get good penetration, fill in the slots where the tabs went and have a right angle I could then sand over. Again, note no weld on the rear of the mag well.
Extech IR thermometer and Ronin's polymer grips for heat testing.
Time to sand it down and clean it up.
Extech IR thermometer and Ronin's polymer grips for heat testing.
Again, we sand down all of the beads and clean things up.
Extech IR thermometer and Ronin's polymer grips for heat testing.
And number three was done awaiting finish sanding and parkerizing… or so I thought.,

Testing & cleaning up

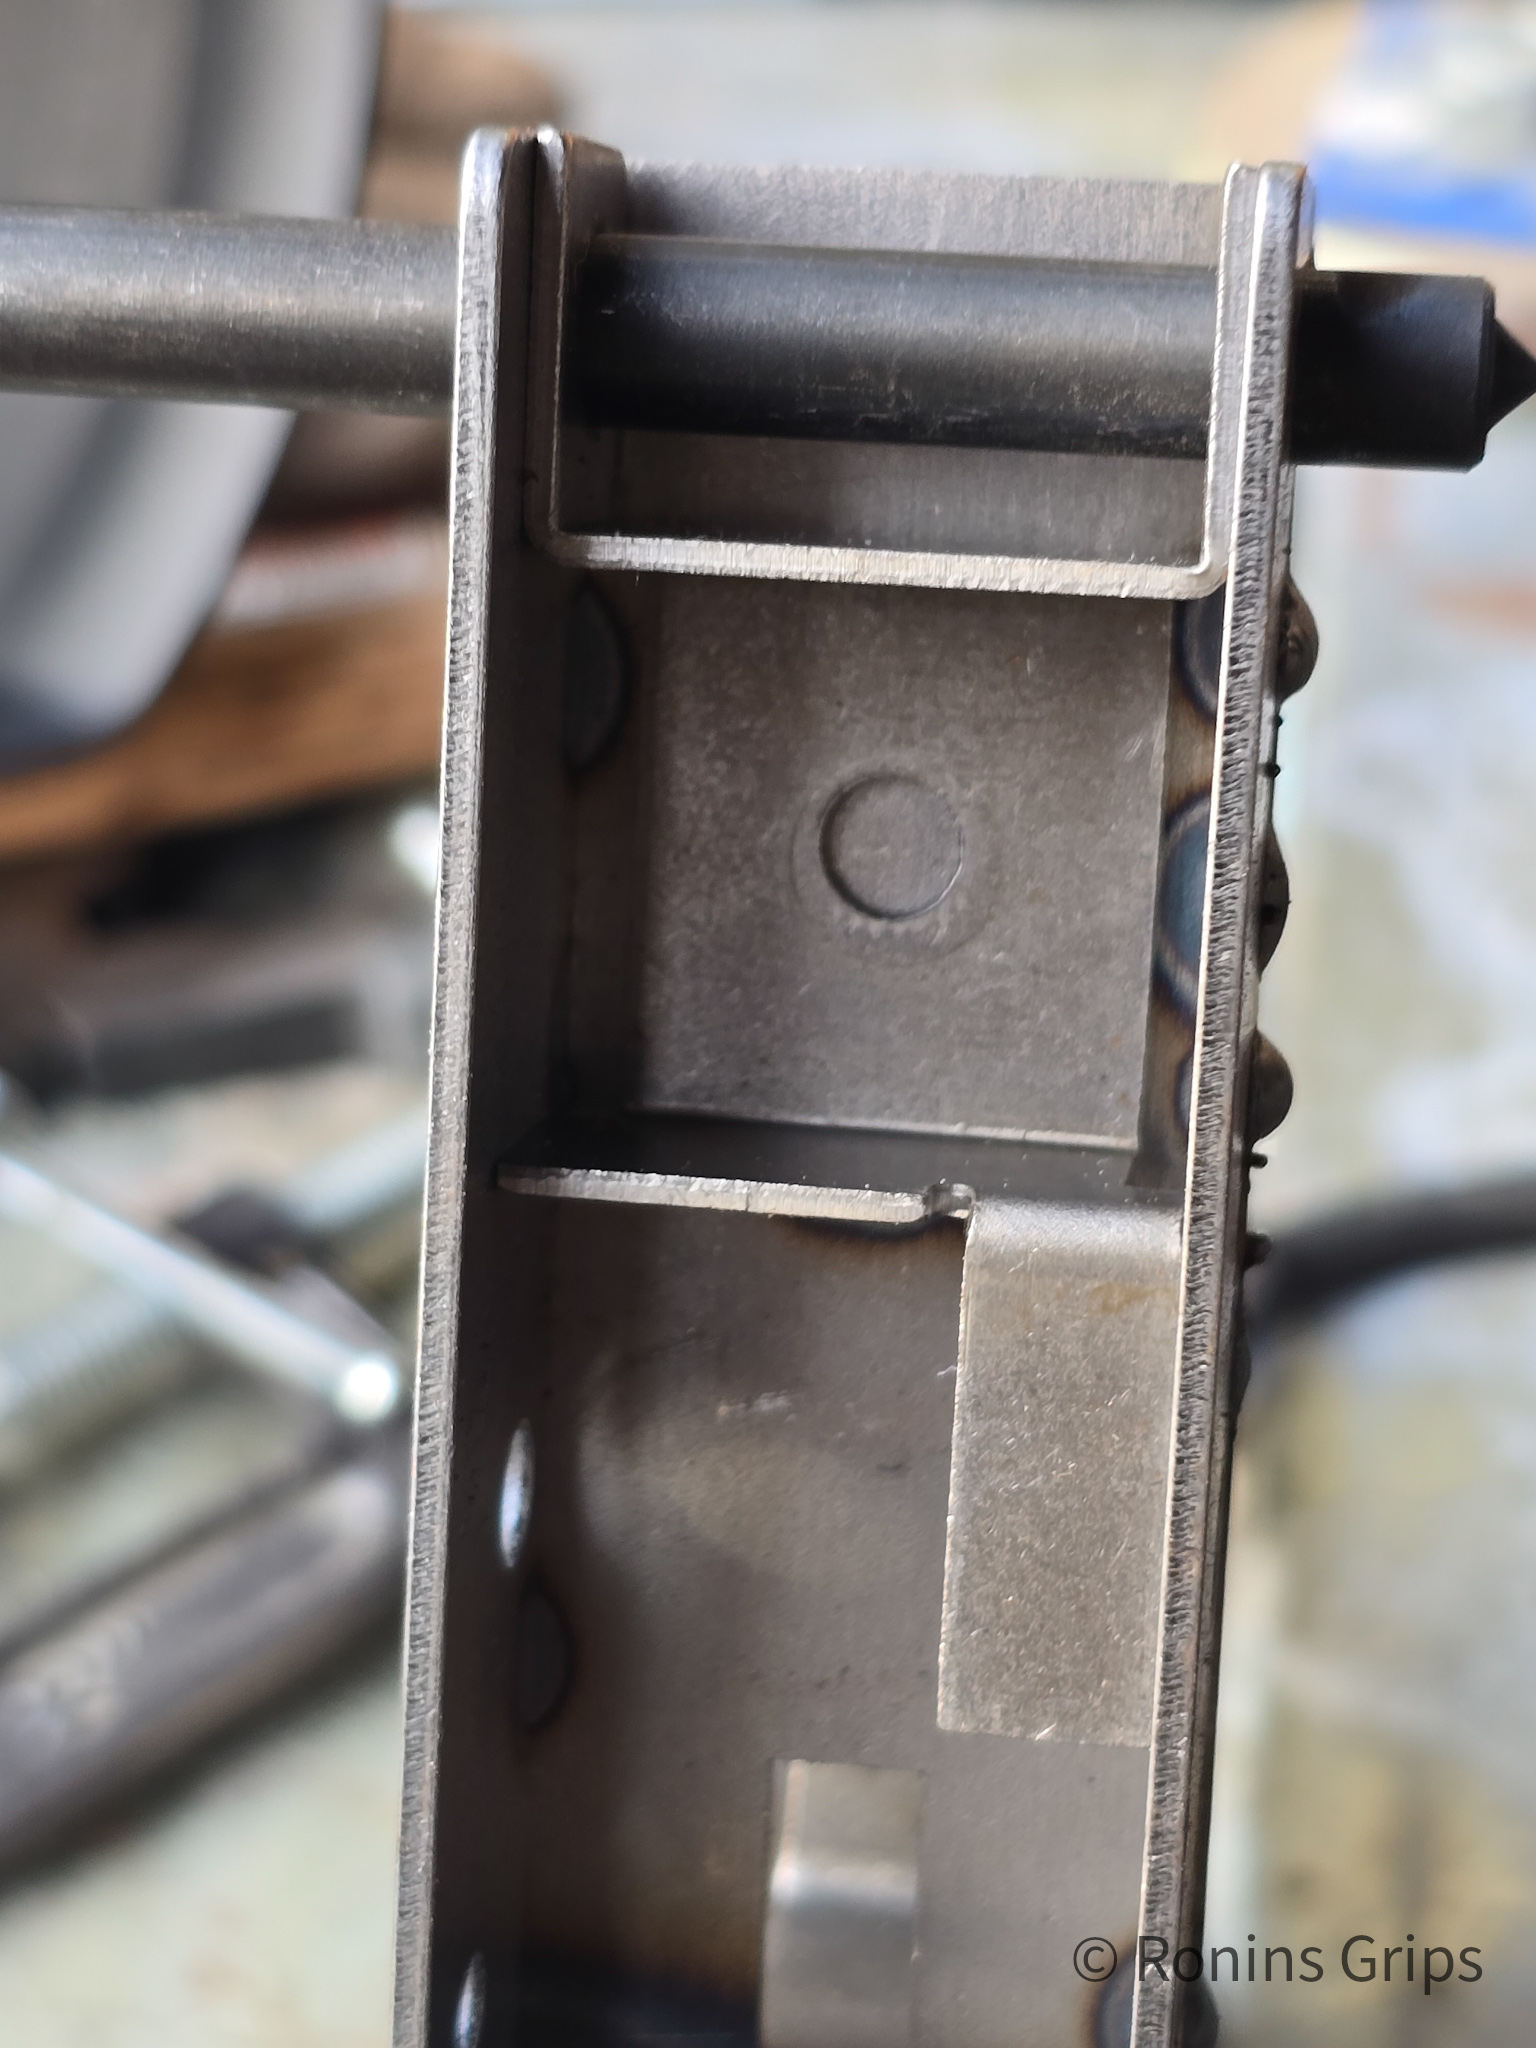
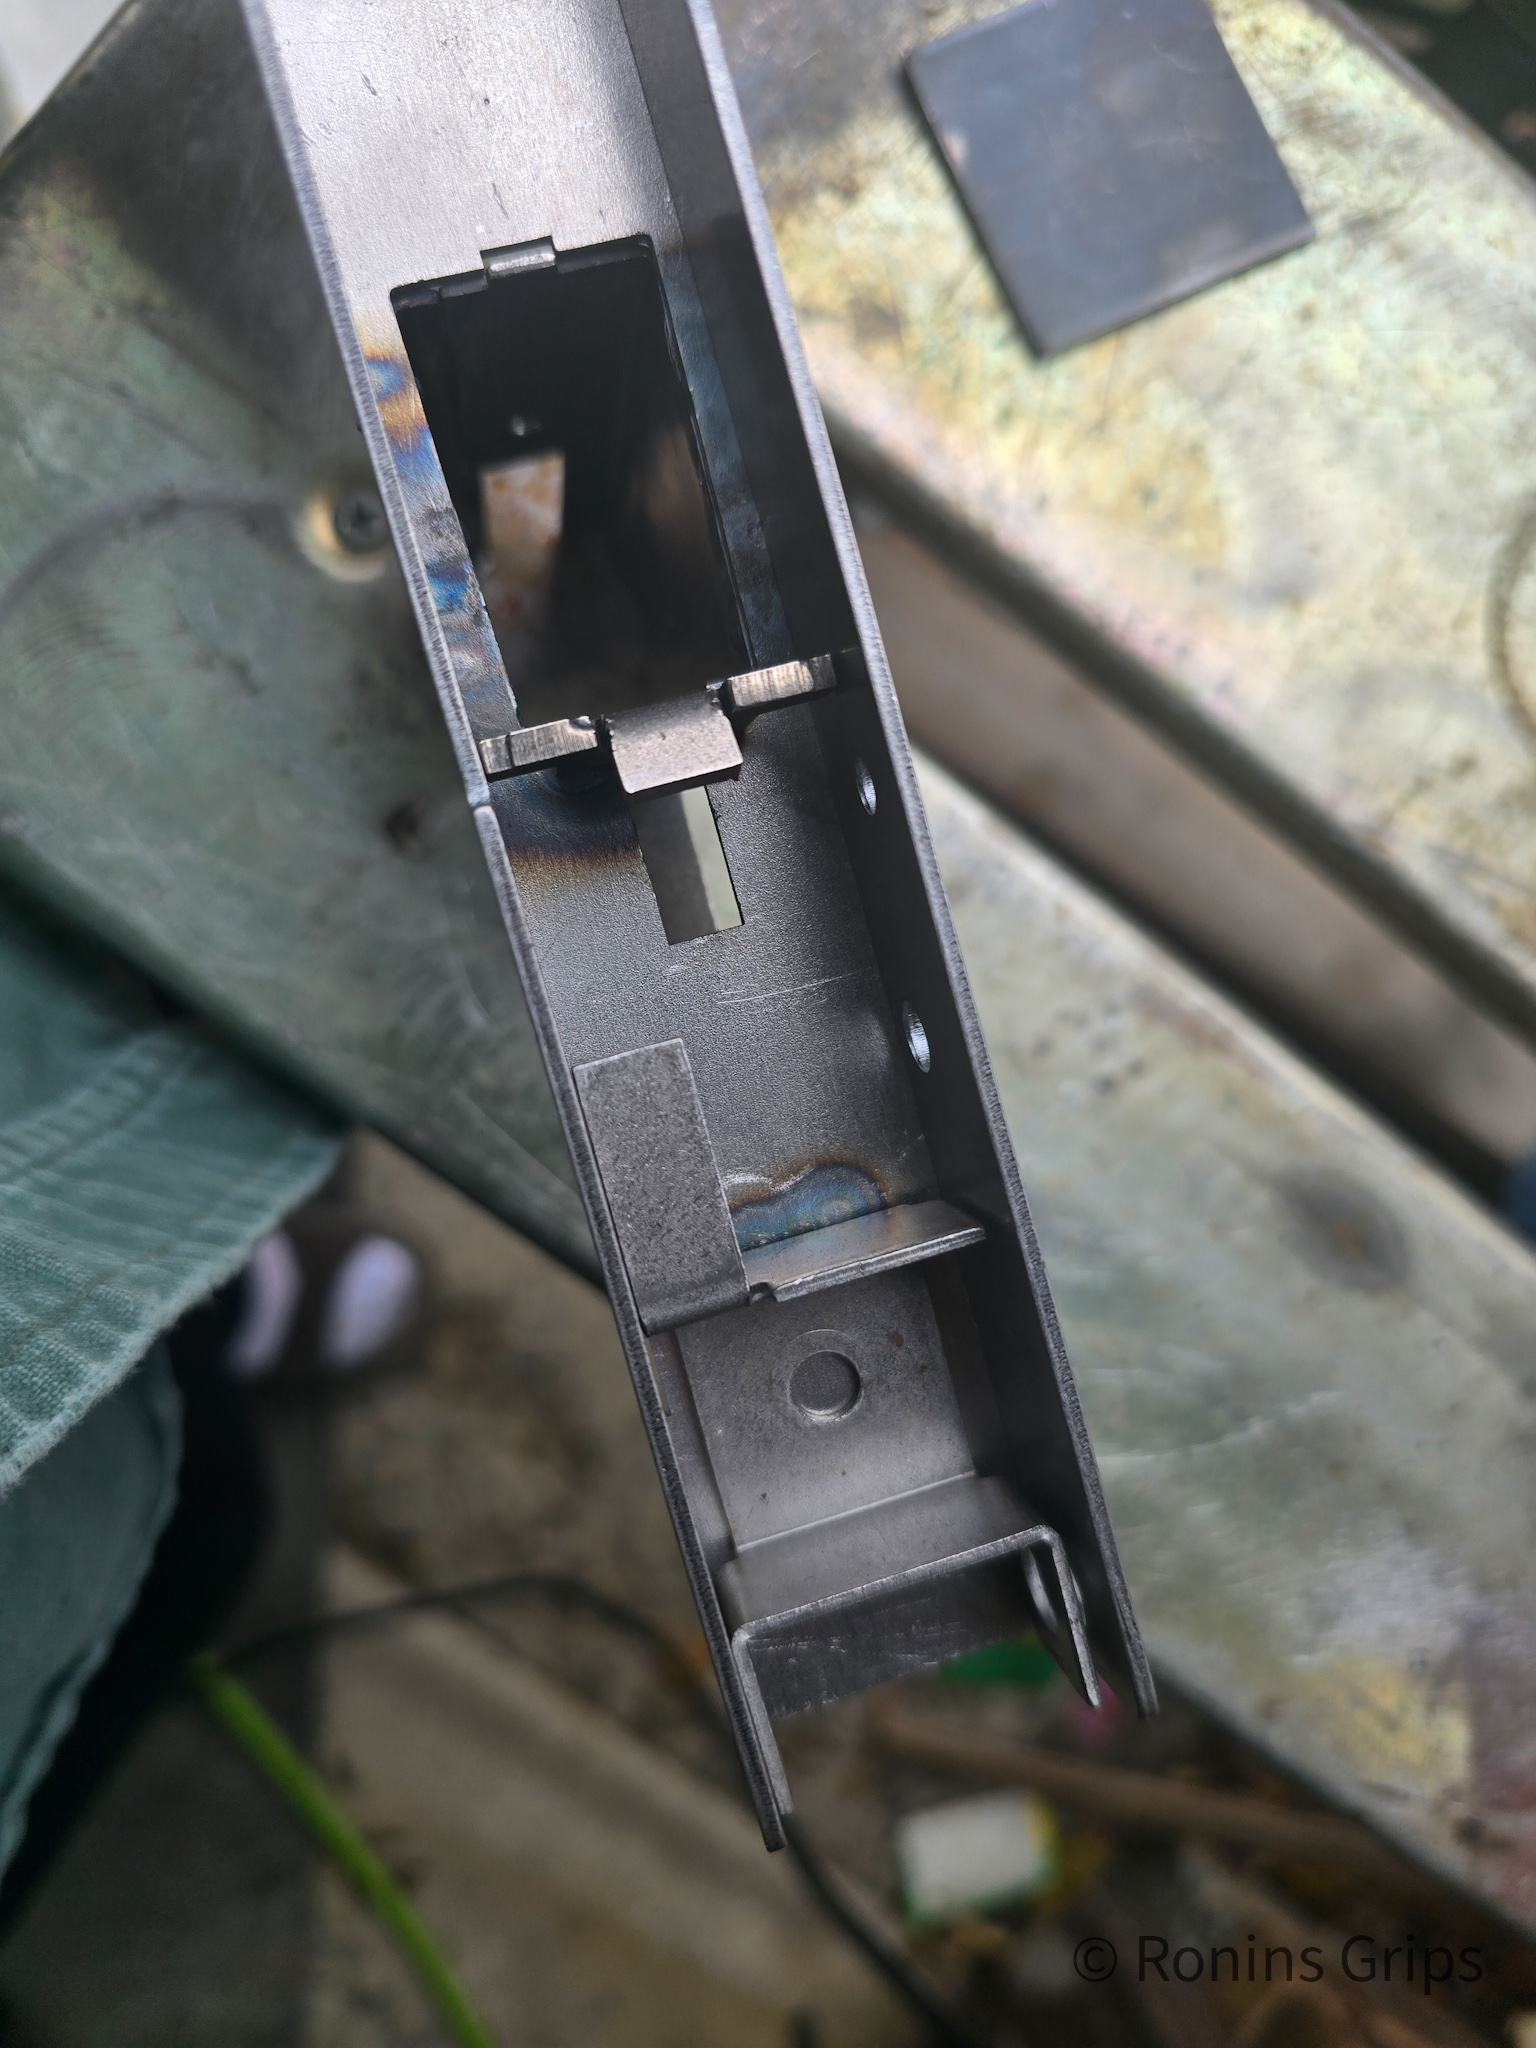
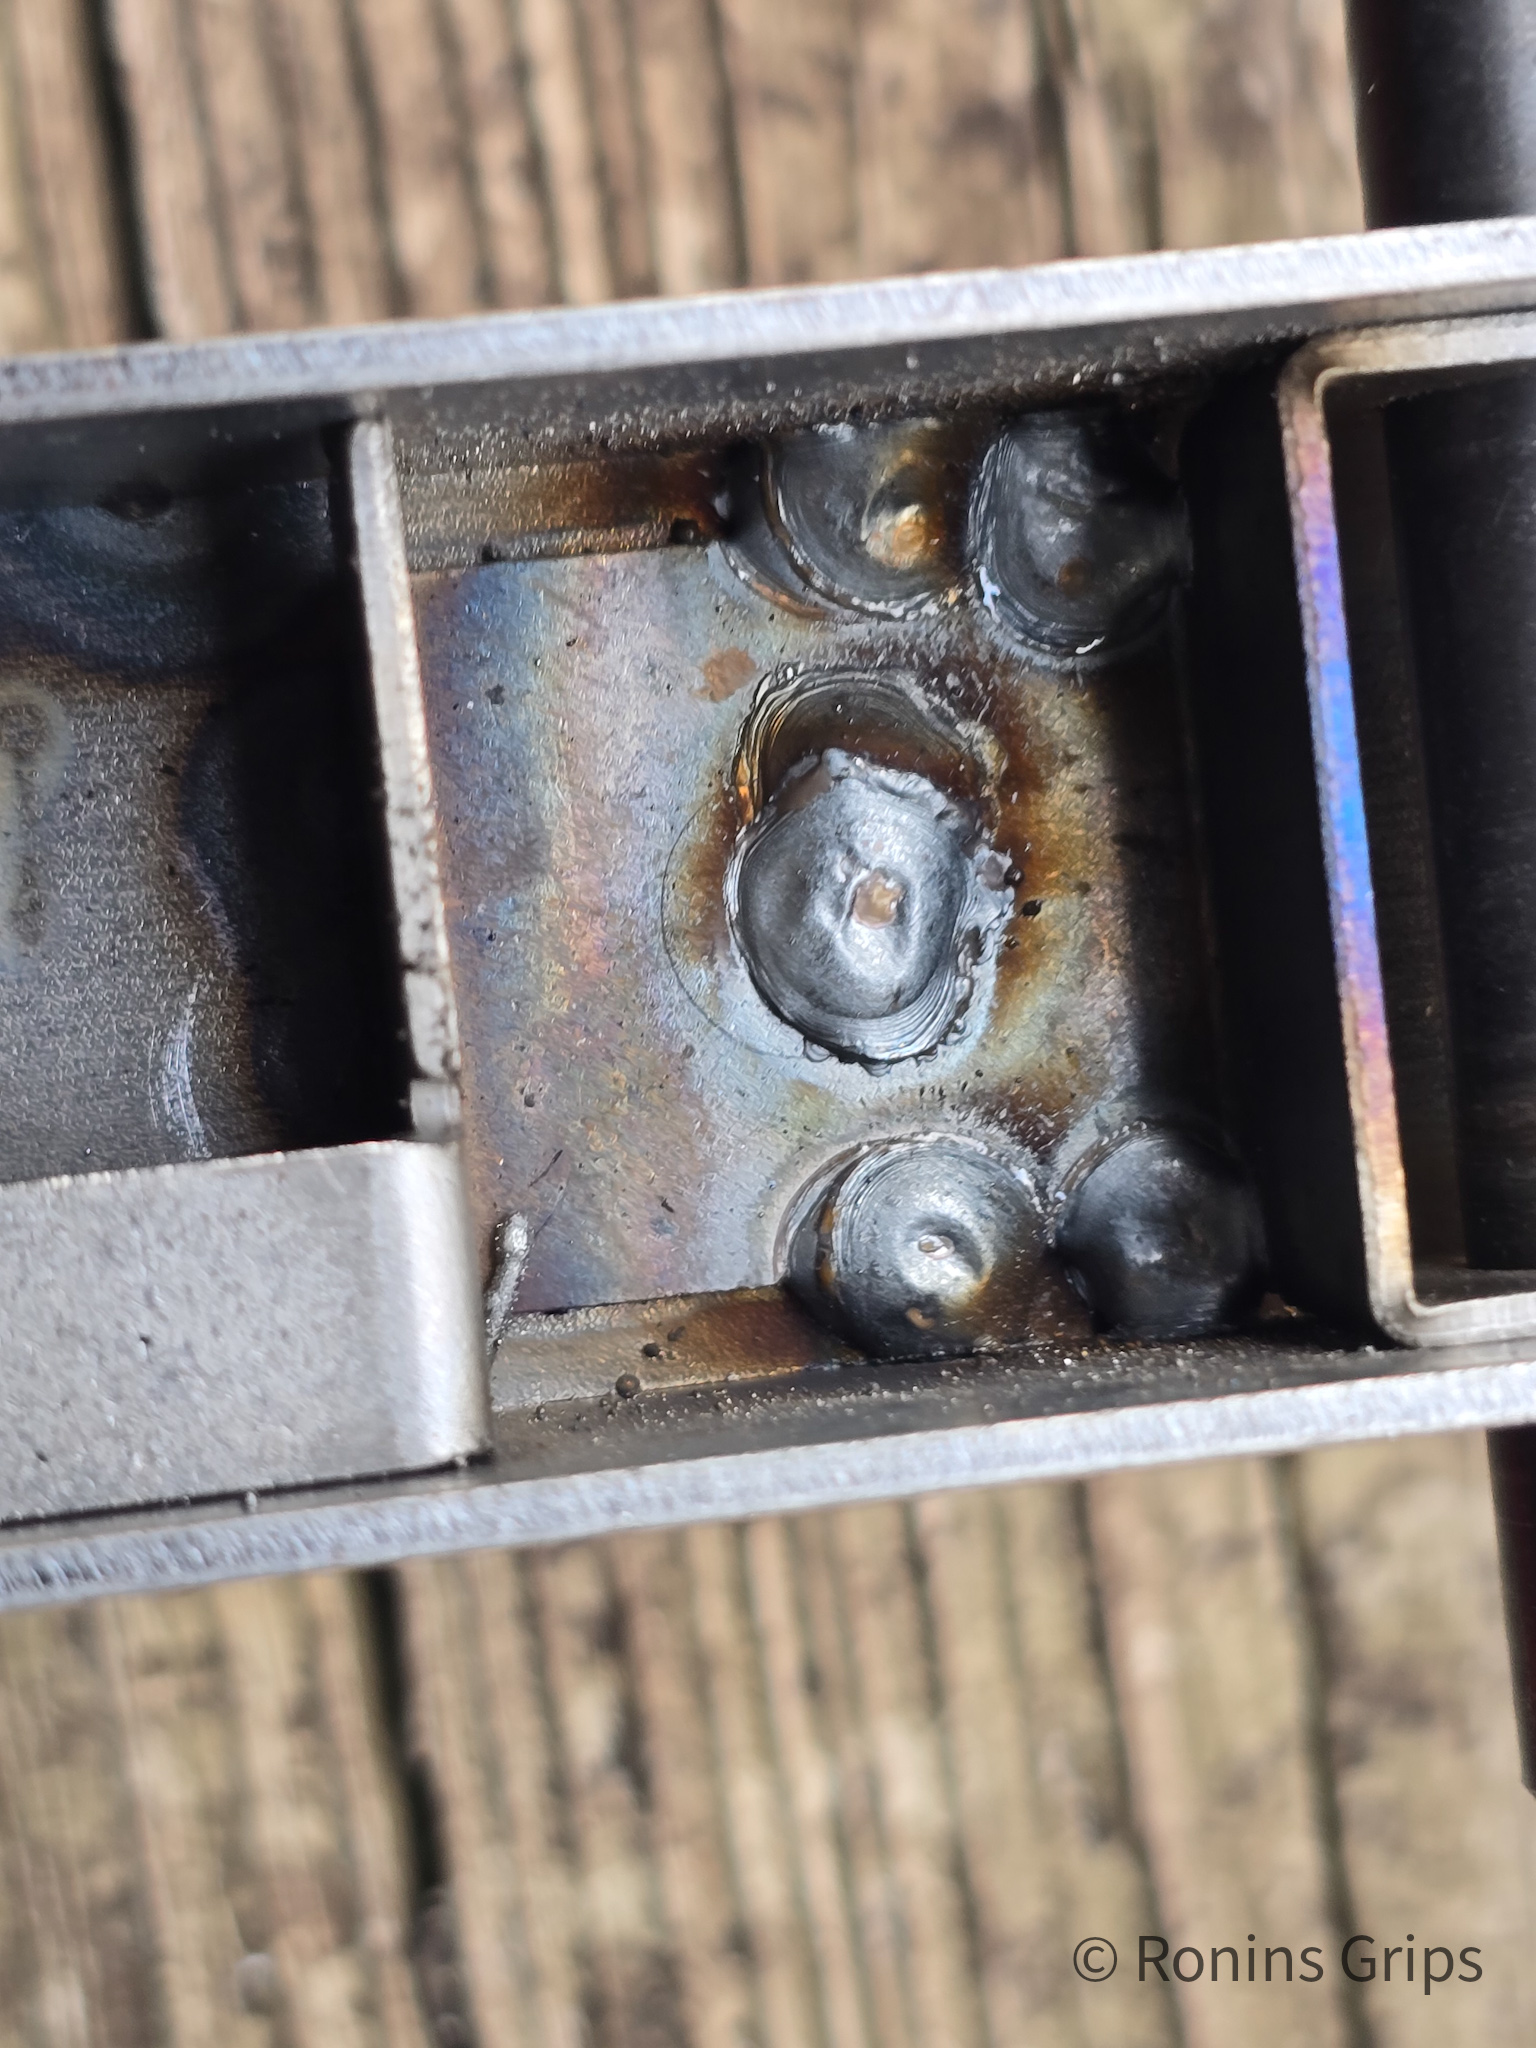
Okay, you need to make sure thee sear plate can slide from the back all the way to the forward towards the center support. The reason being is that if you have any welds interfering with it’s ability to slide forward or the trigger bar, your action is going to be messed up. If you have welds in the way, you are going to need to grind them down.
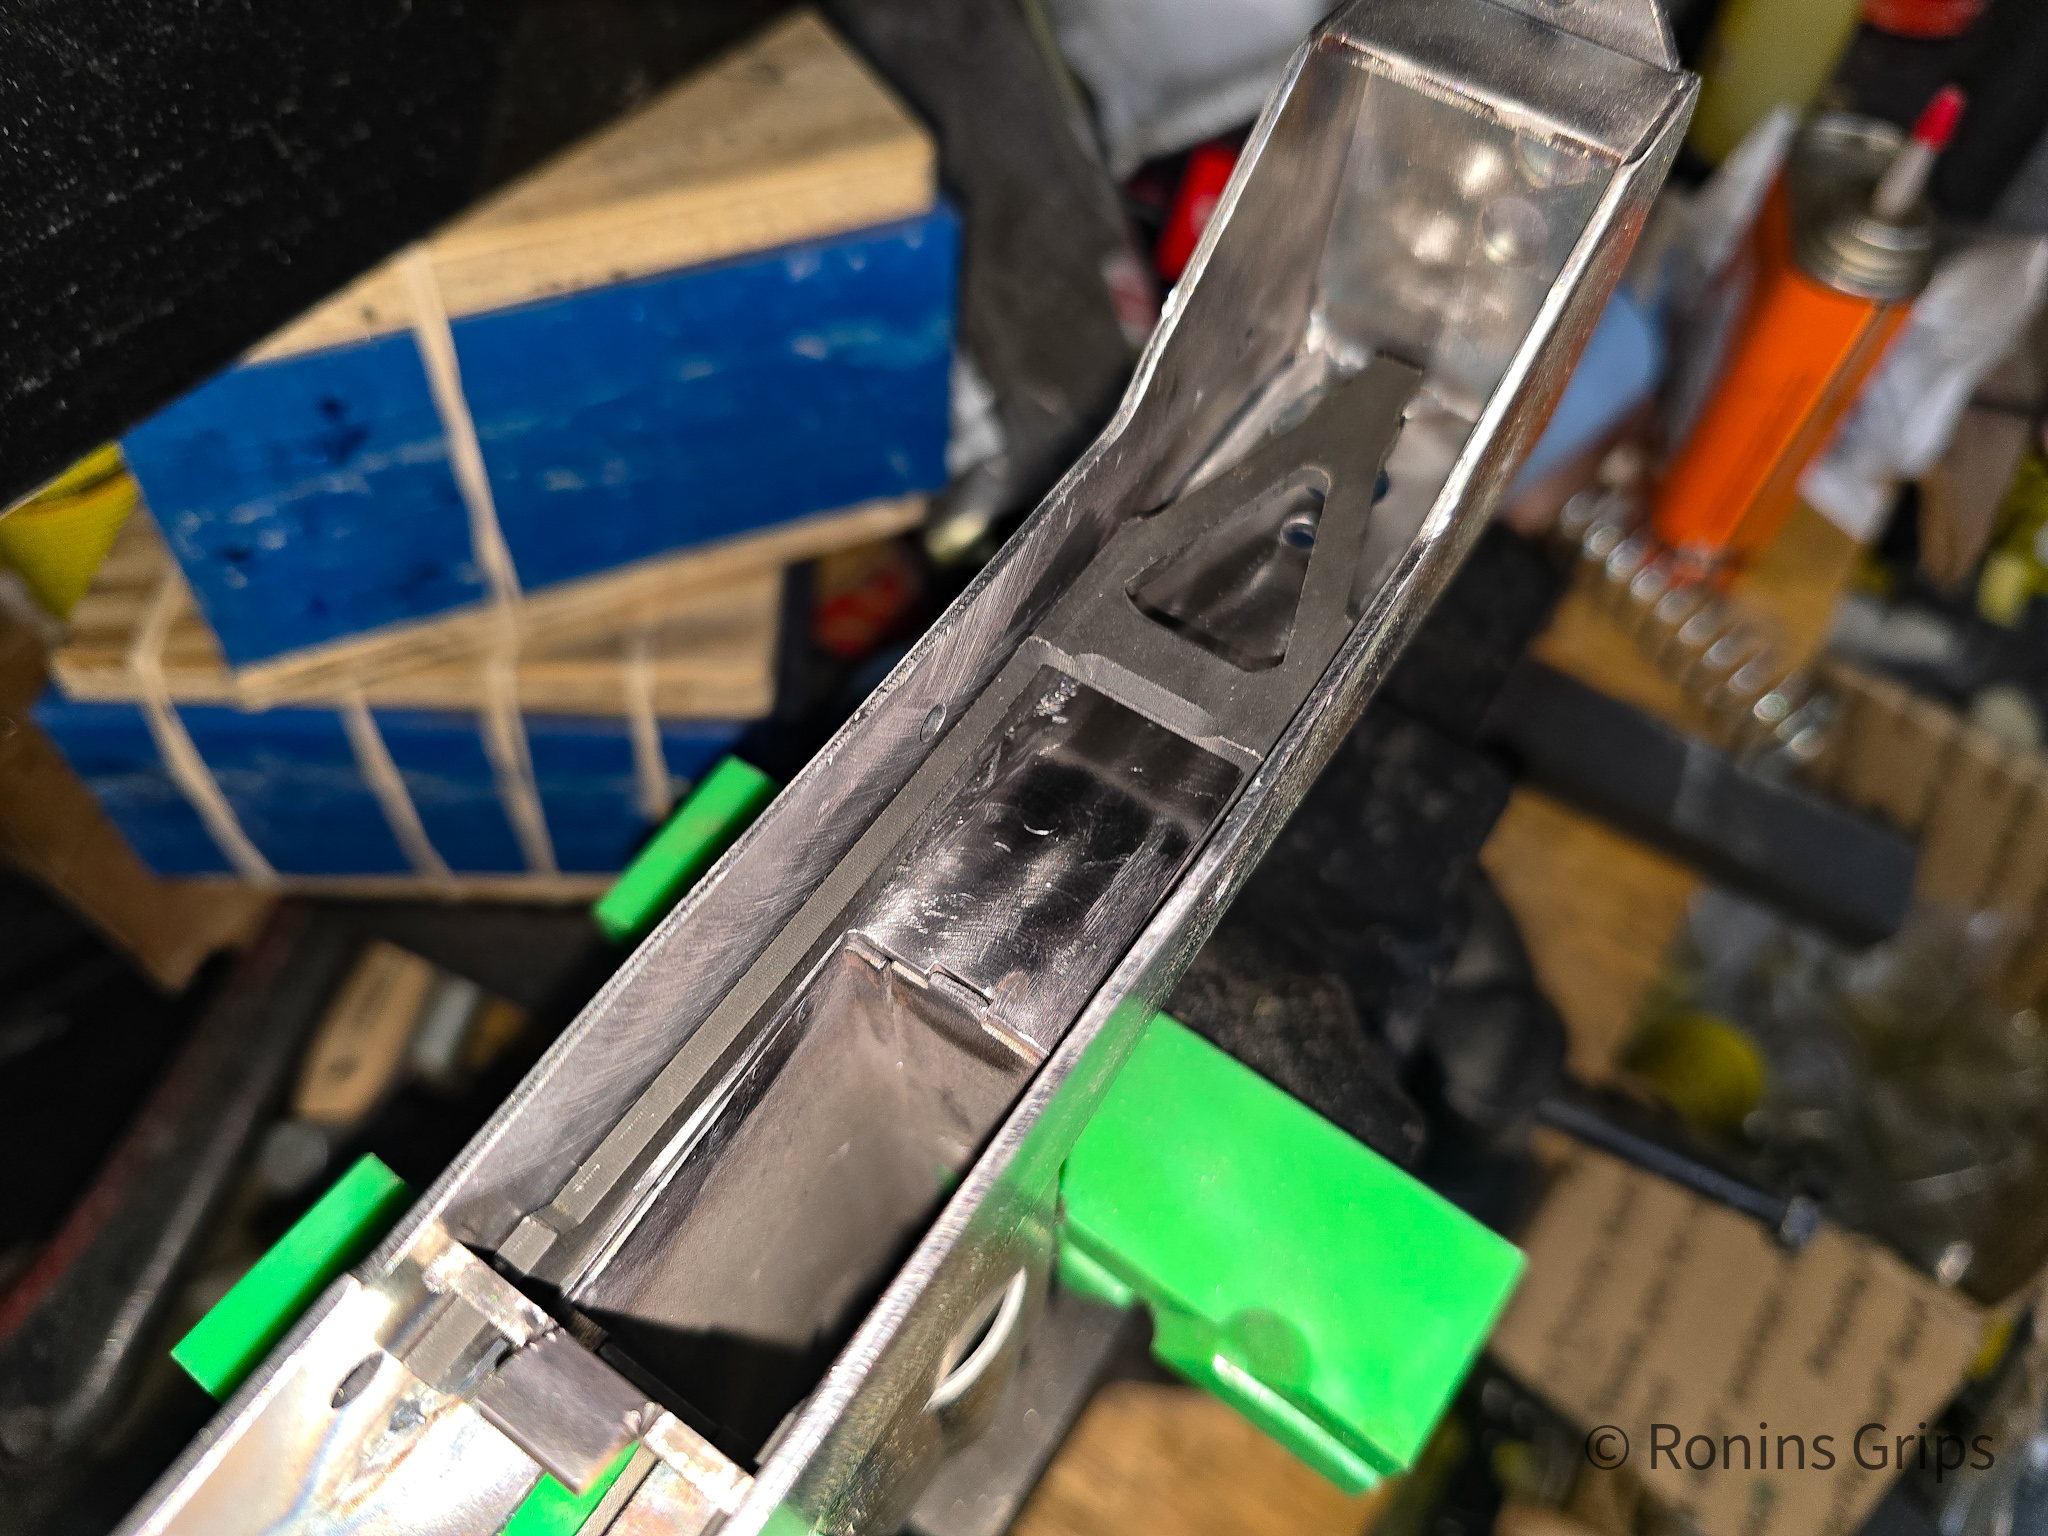
Extech IR thermometer and Ronin's polymer grips for heat testing.
The sear plate must be able to smoothly slide forward and backward and not have any welds in the way.

This is one of those things where avoiding them up front my not going crazy with the heat would have been a good idea on my part. My first two were great. My third receiver had issues and I even know when I did it.
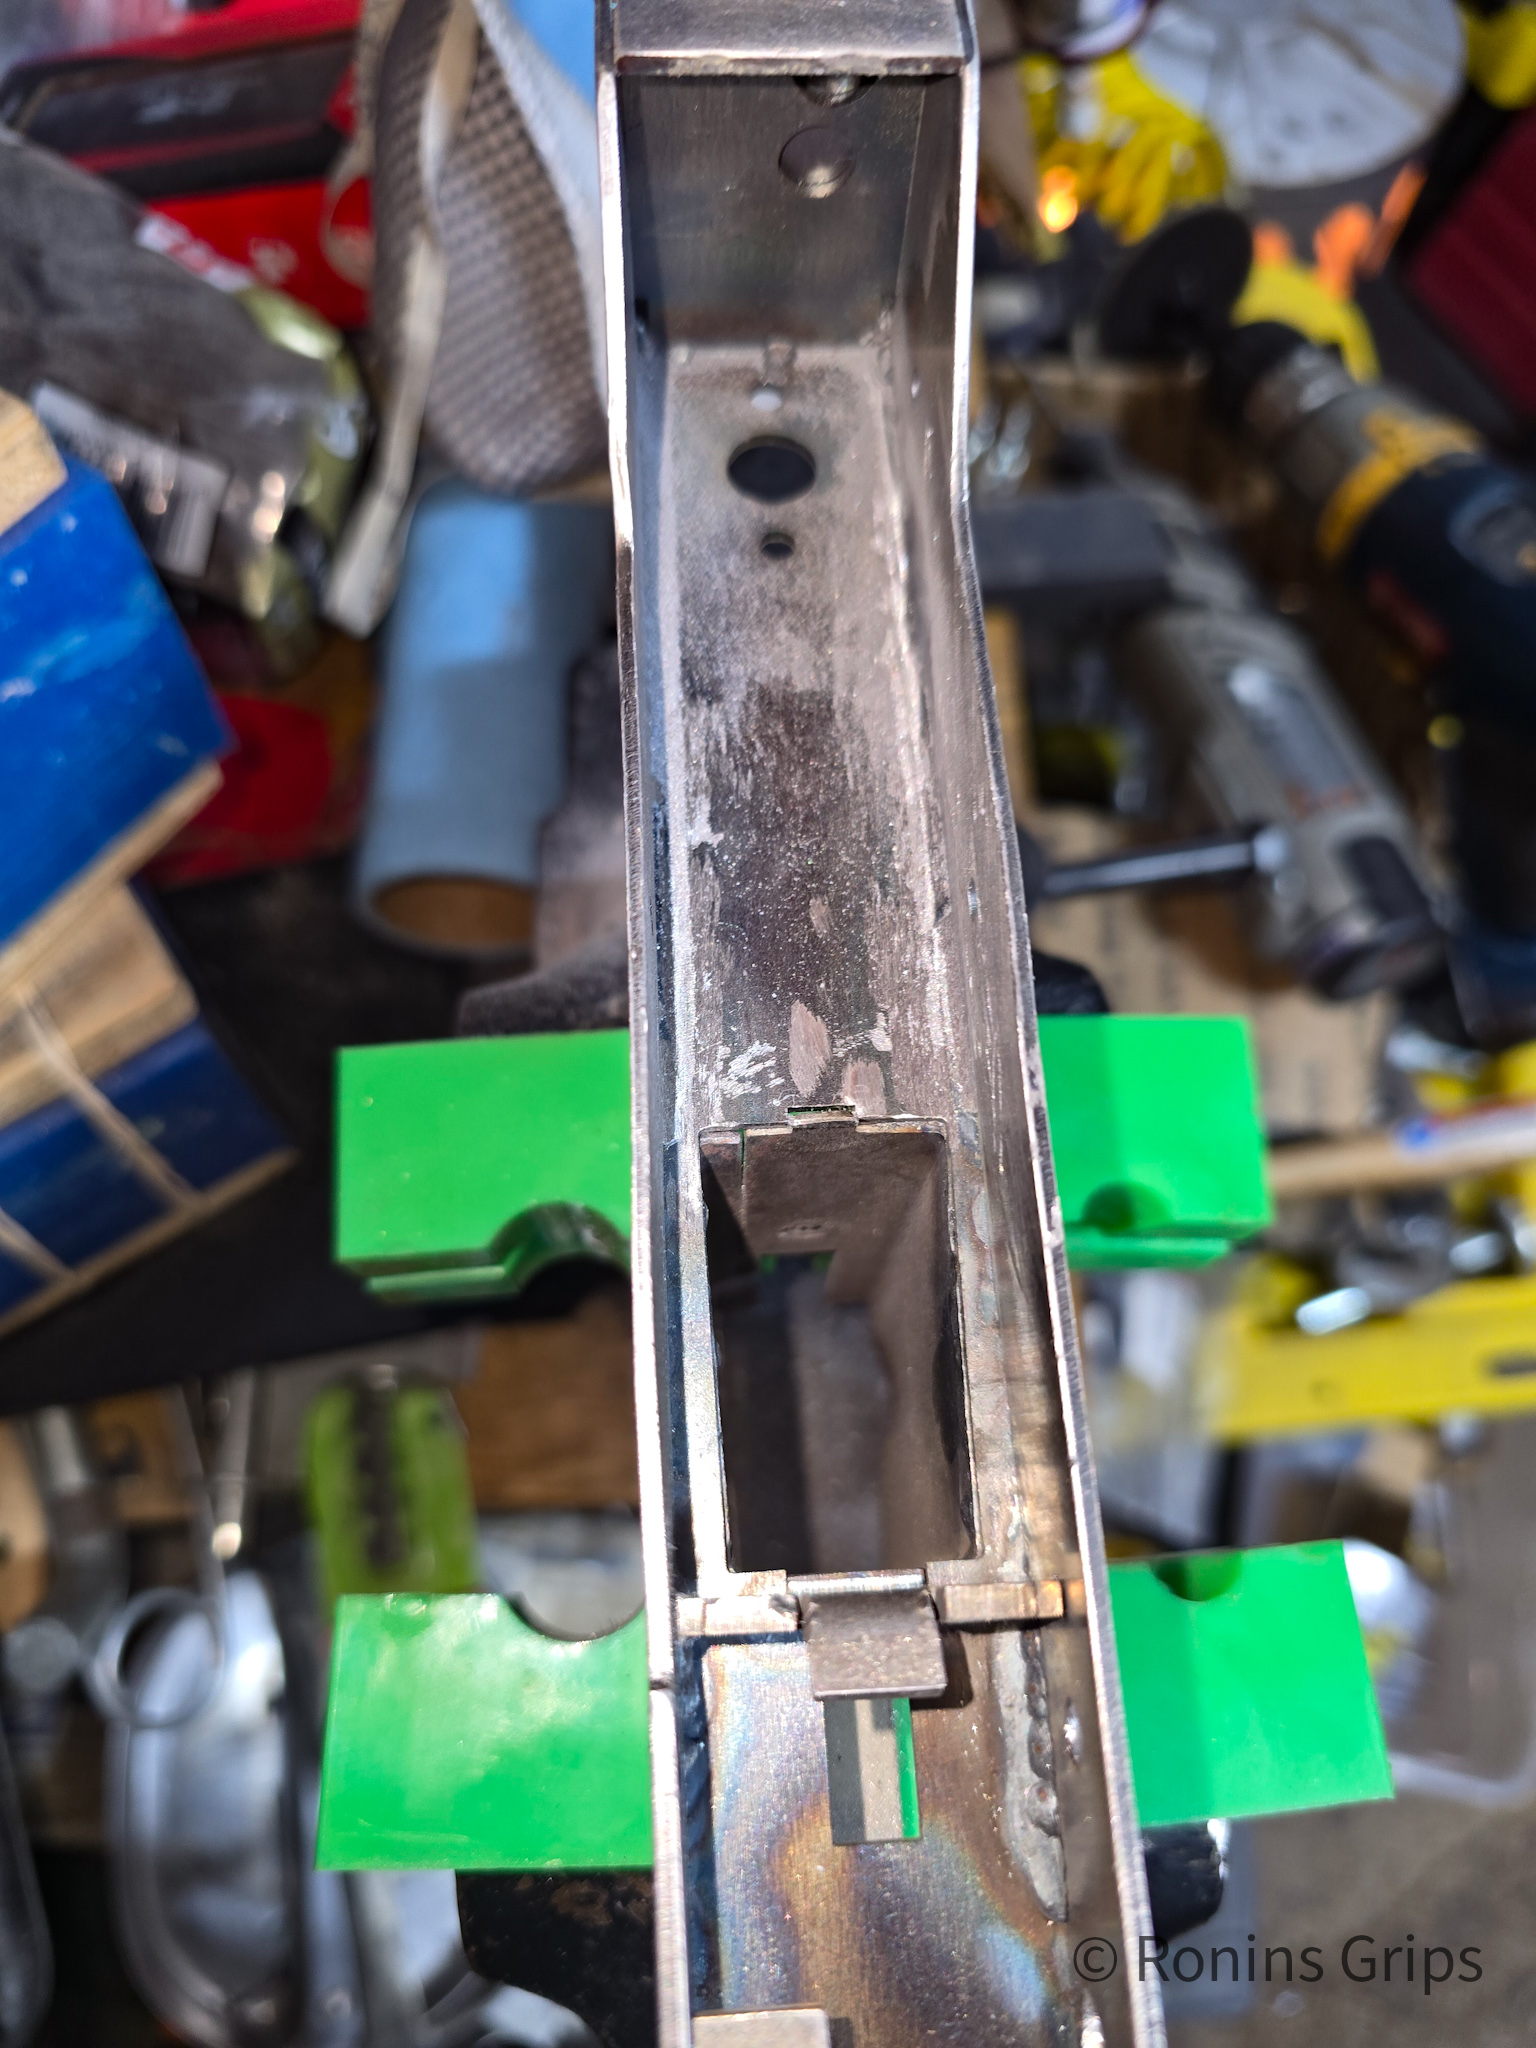
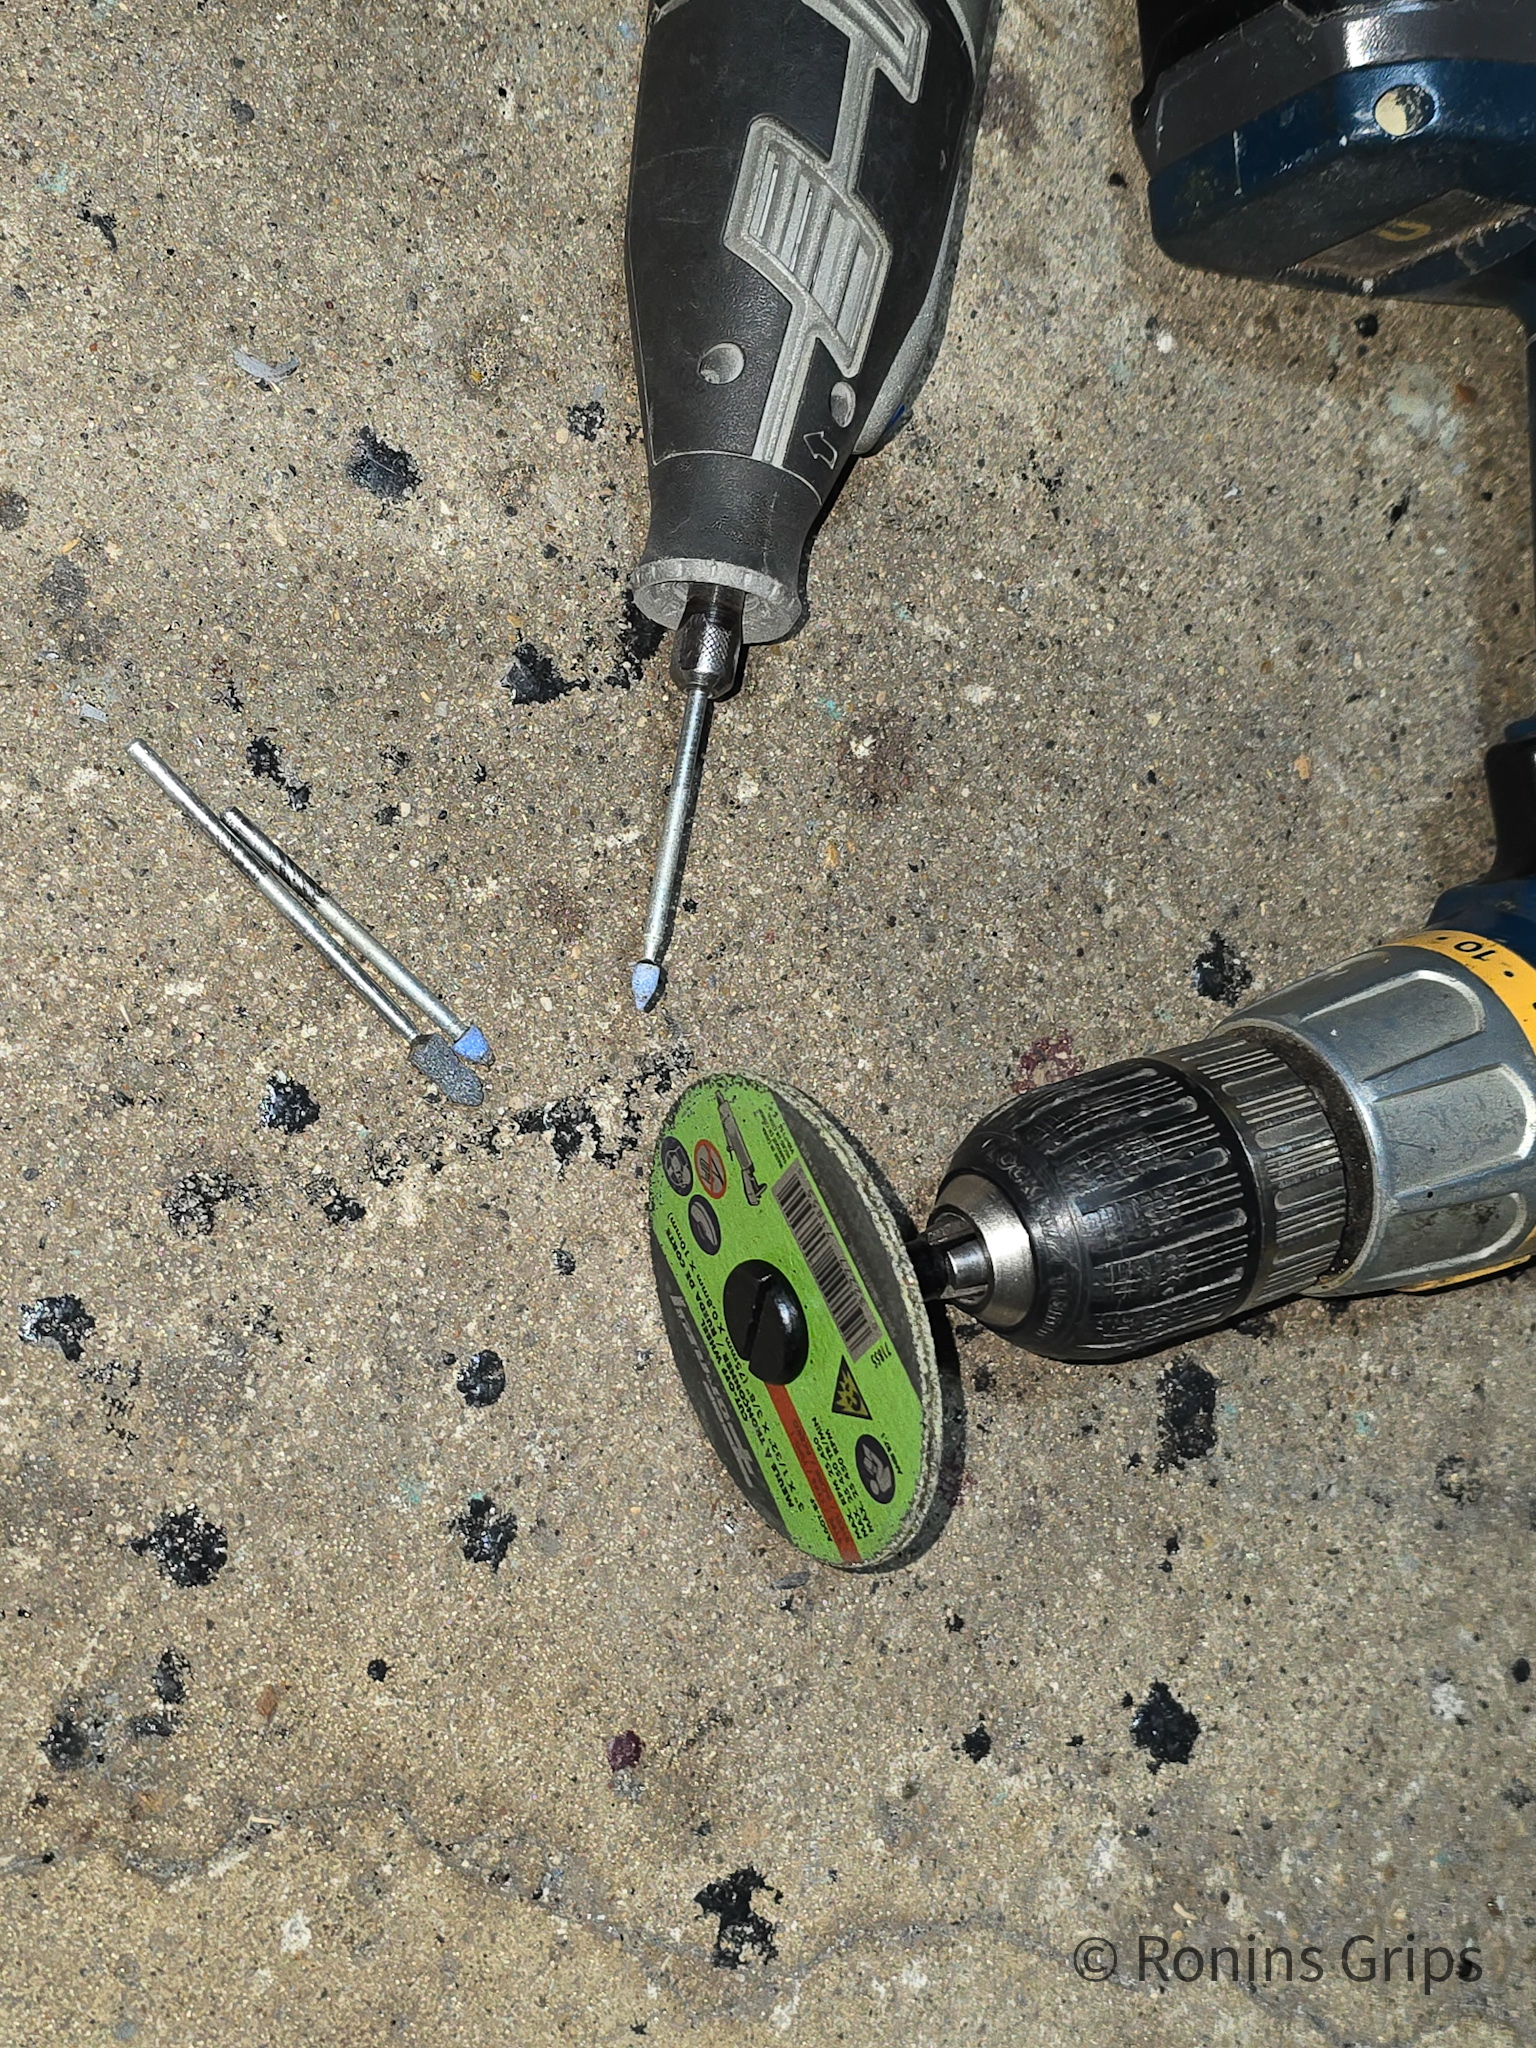
Extech IR thermometer and Ronin's polymer grips for heat testing.
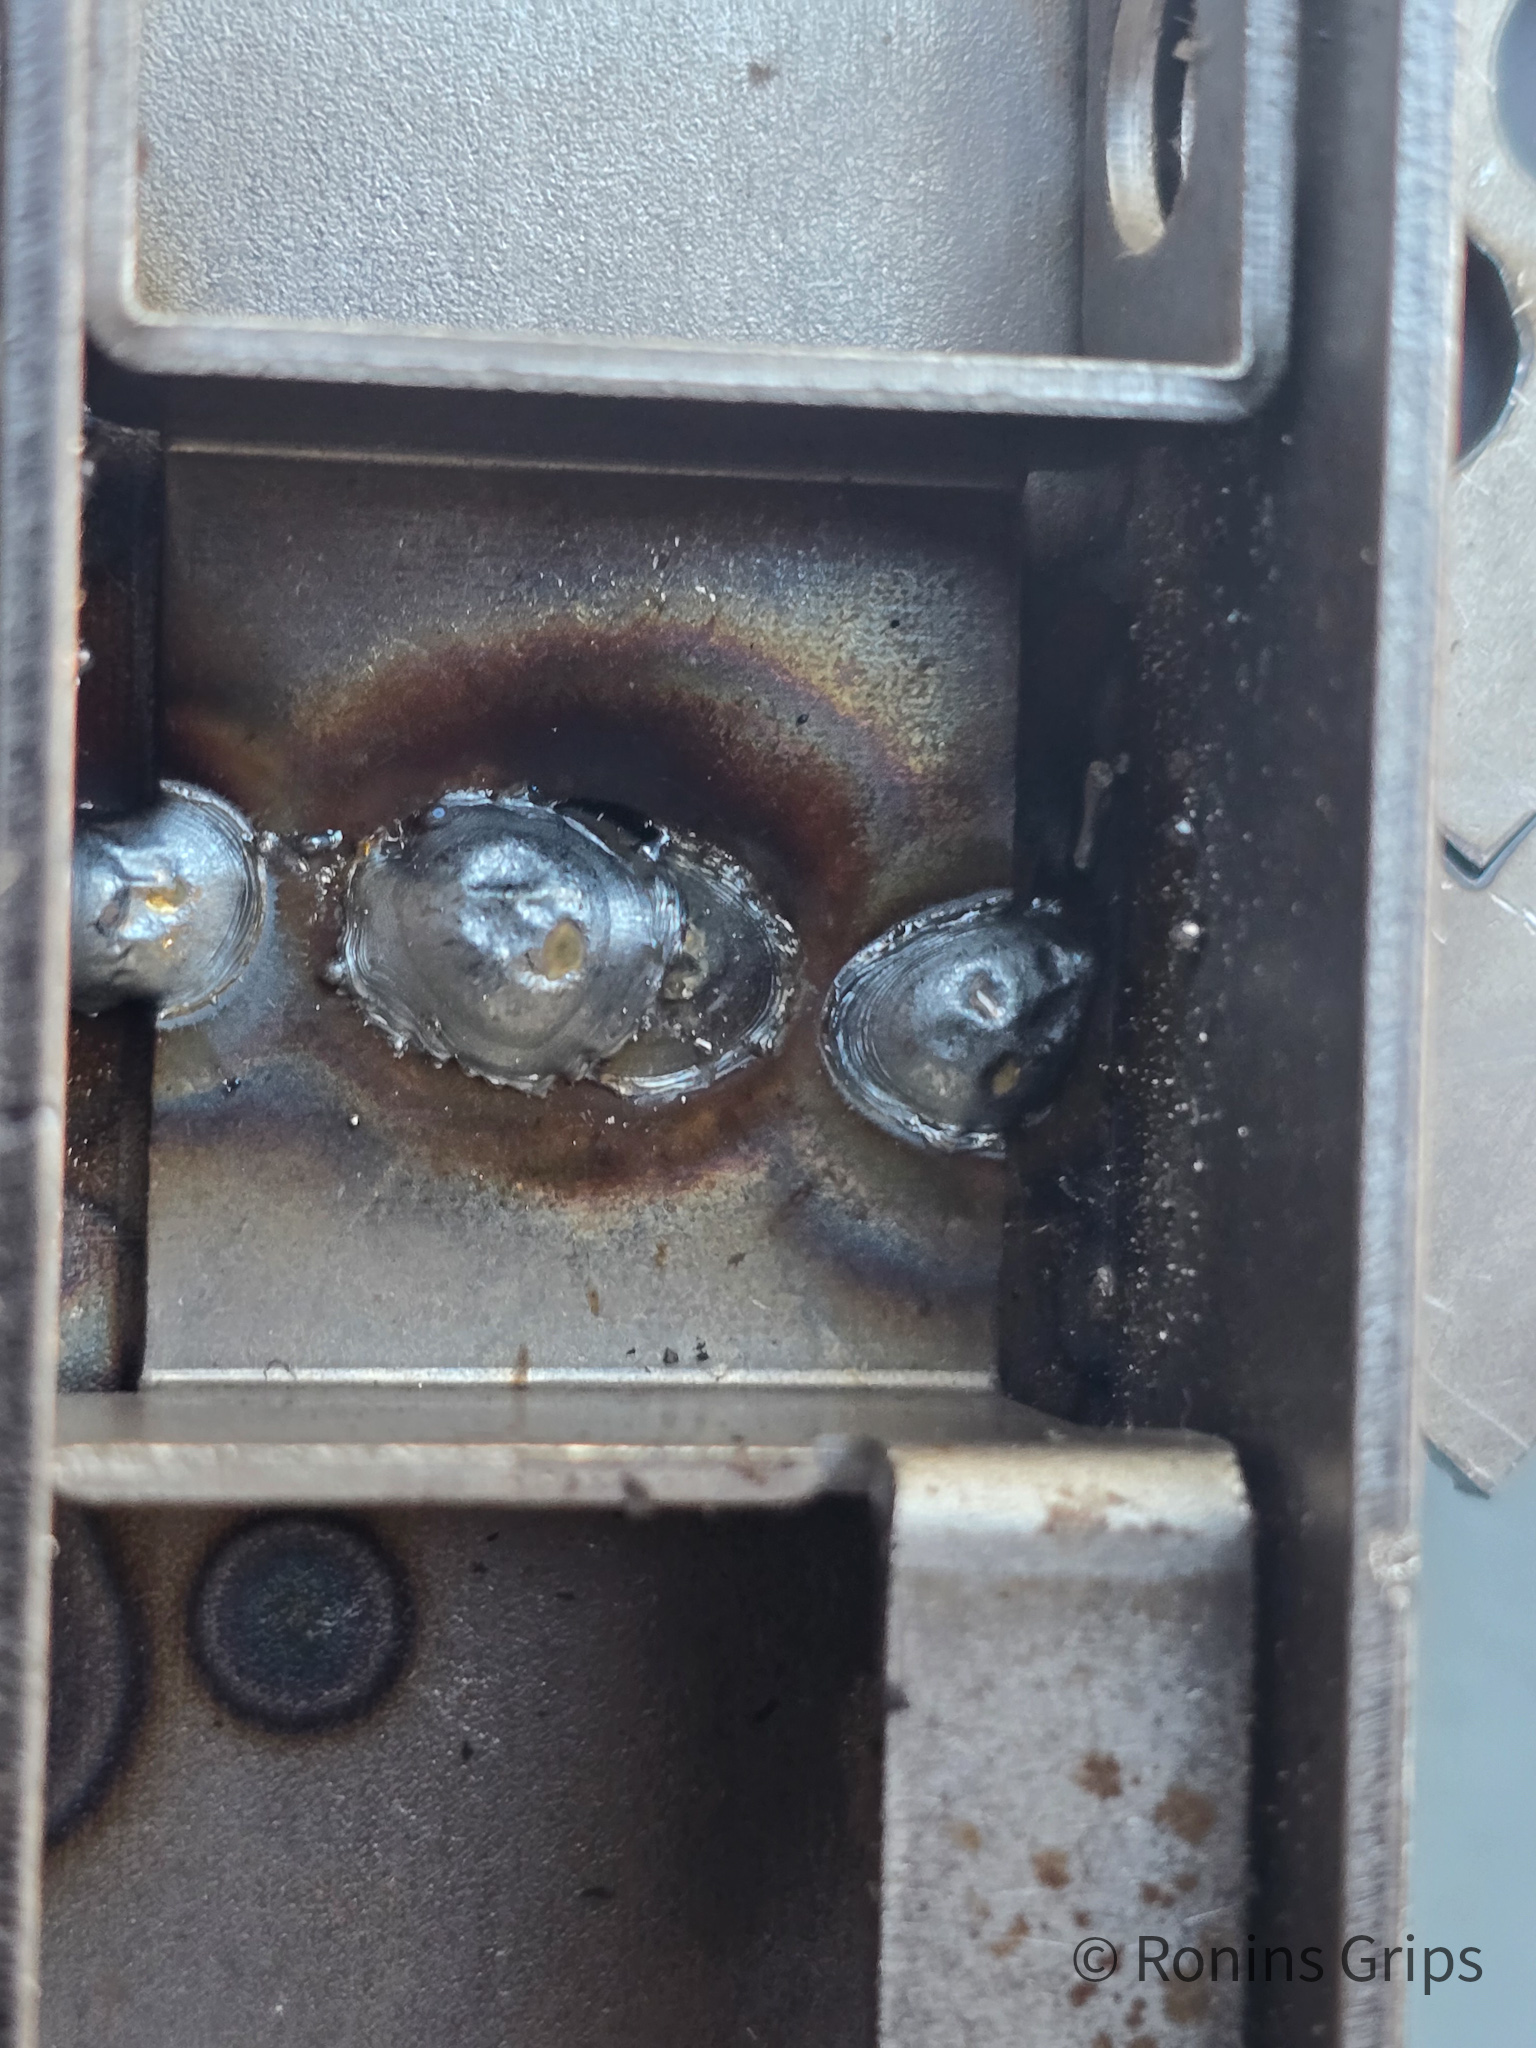
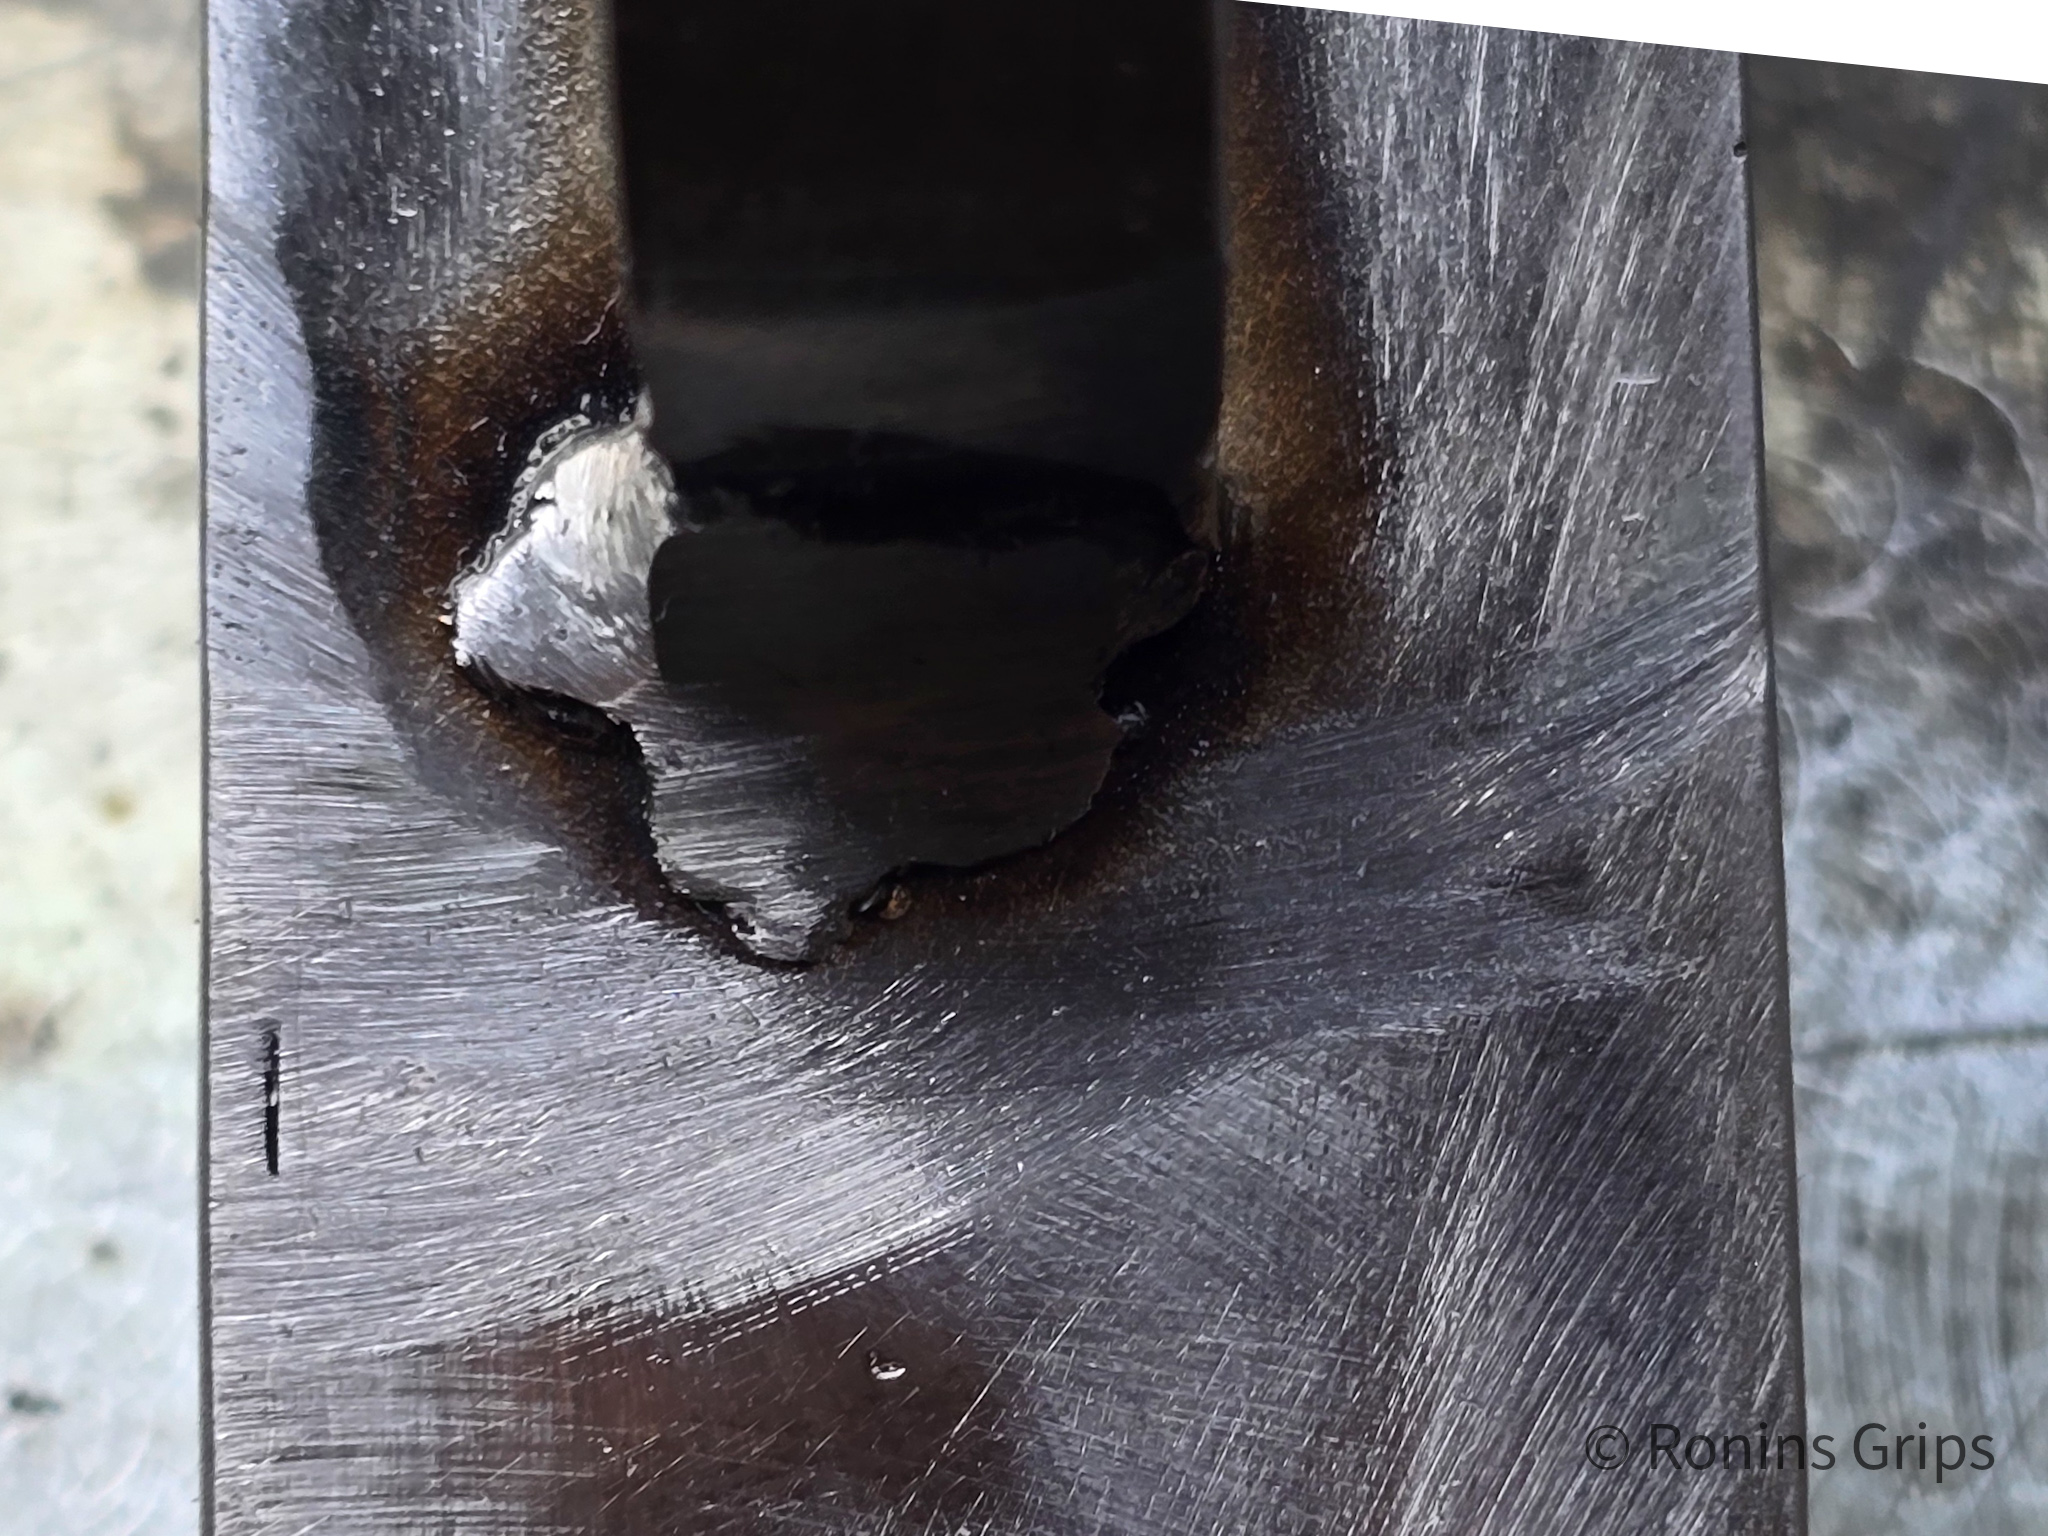
I had 4-6 places I needed to remove weld material from the inside of the receiver. I thought I had a before picture but I guess not. The weld beads closer to the bottom of the photo just under the bullet guide/trigger guard assembly need to be removed. I’d already removed the others.
Extech IR thermometer and Ronin's polymer grips for heat testing.
I double-stacked two 3″ abrasive cutting discs, put them in a drill and cleaned up the back quickly. Cleaning up the tight areas around the trigger guard took longer and I had to use abrasive Dremel bits. I can’t imagine living without a Dremel. I use a 12 volt cordless model and have 4 batteries for it. There are a lot of options on Amazon.
Extech IR thermometer and Ronin's polymer grips for heat testing.
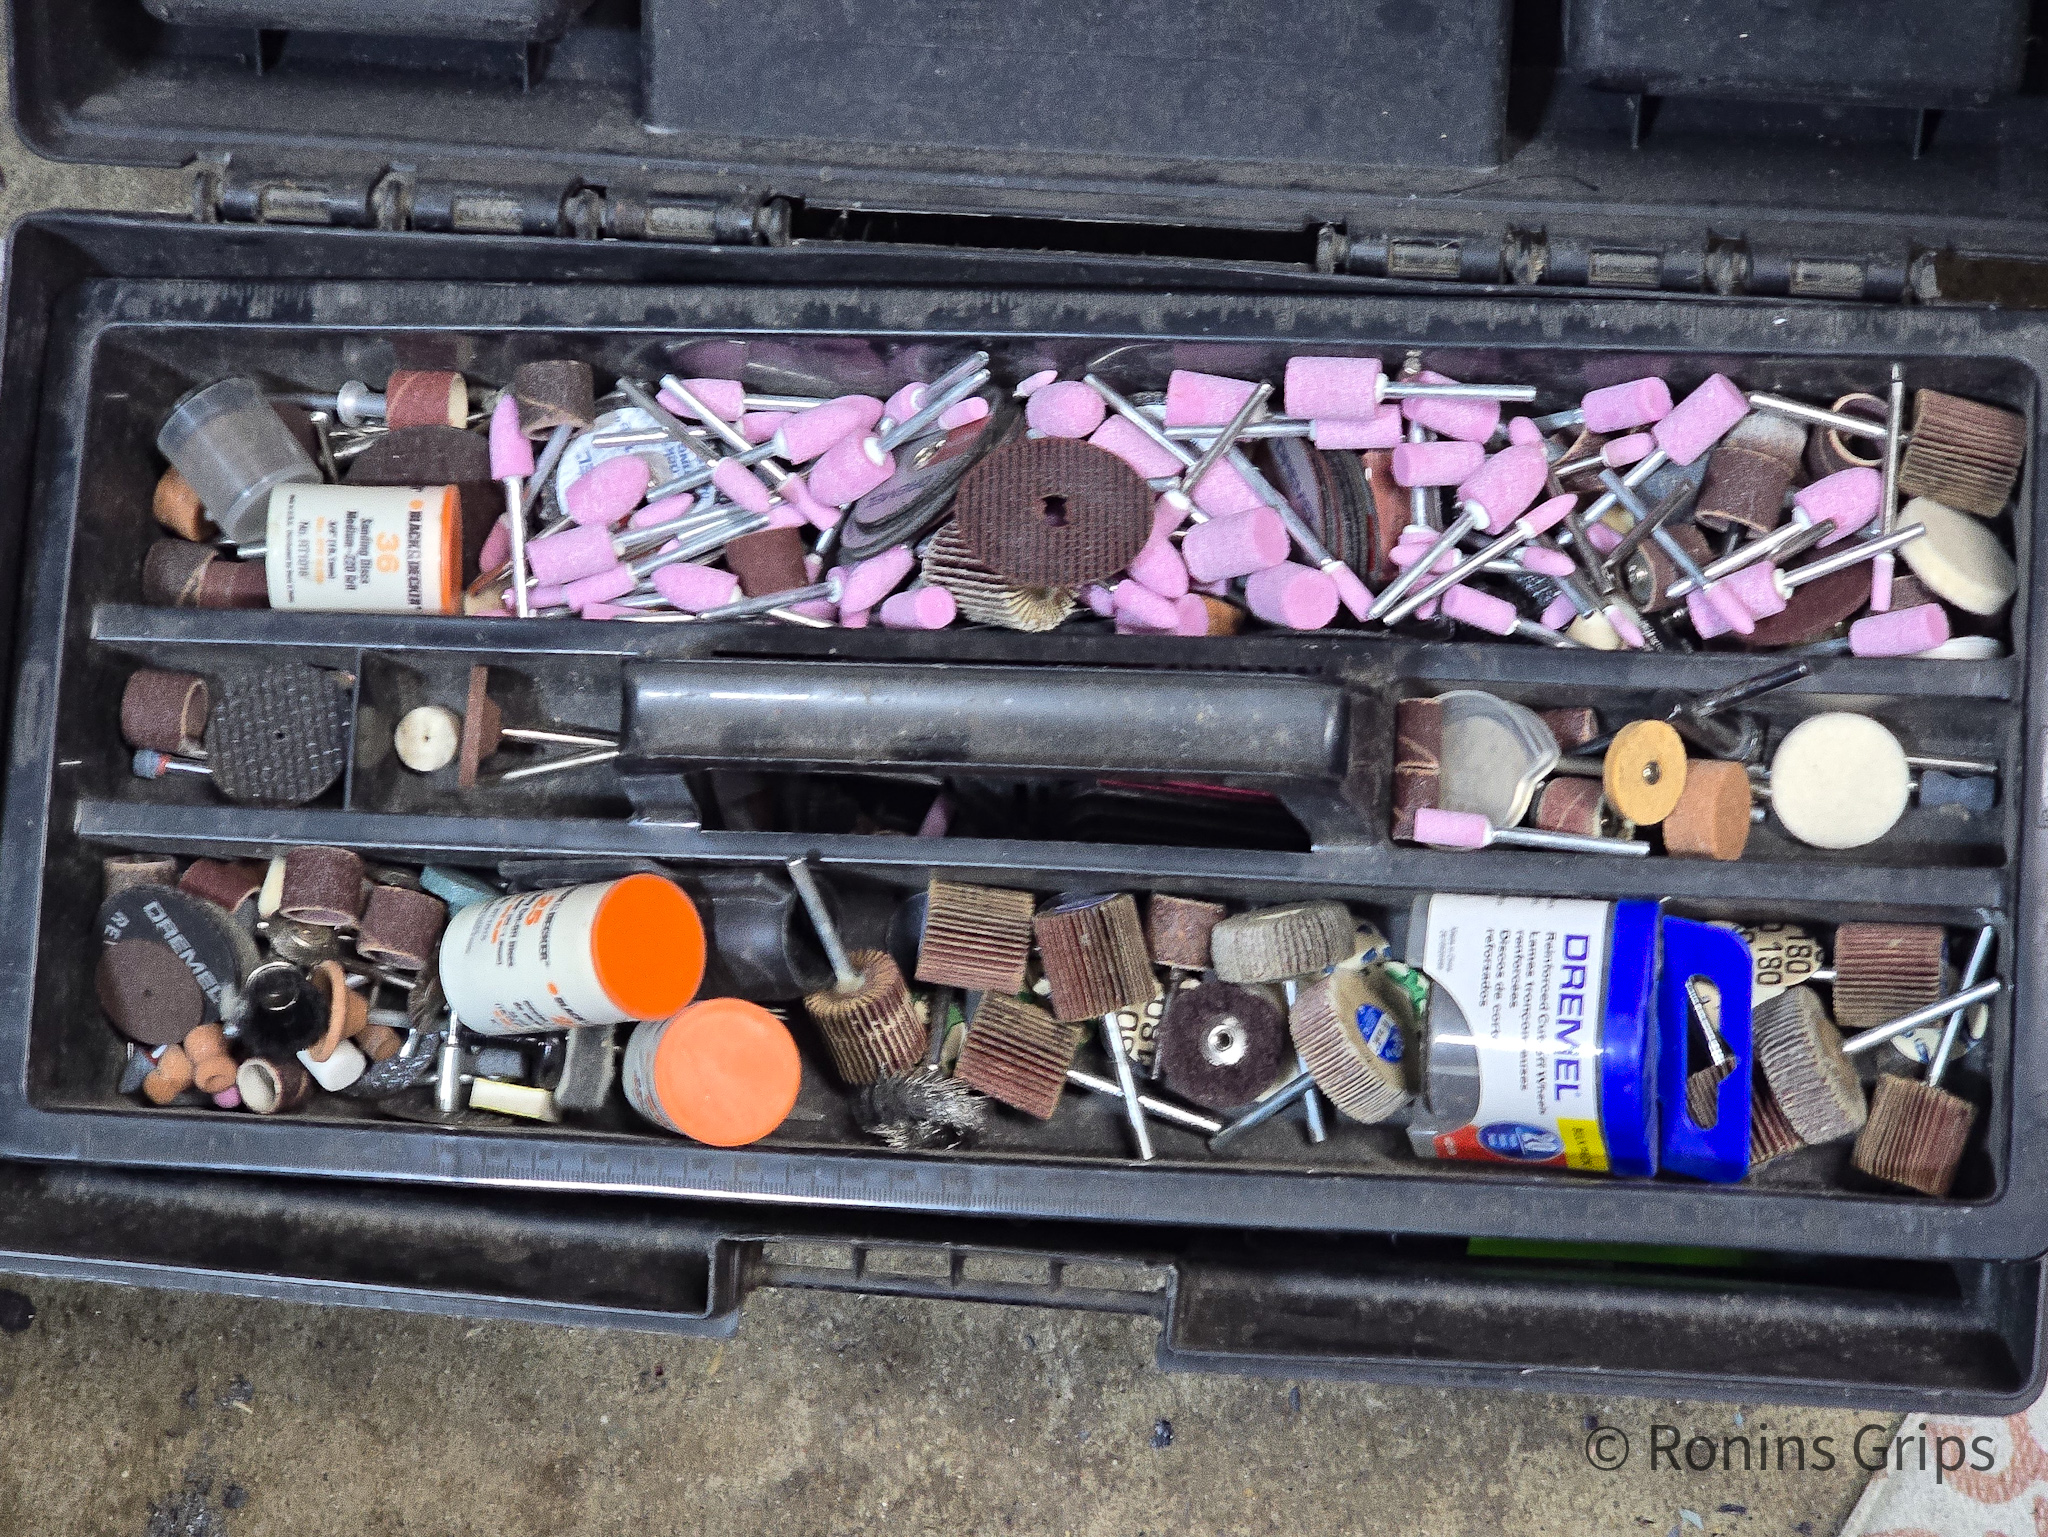
It always pays to have a large assortment of Dremel bits – abrasive, polishing, sanding, etc. You can buy a few starter kits if you want and then you will find out what you go through a lot of. For me, it’s the cut off wheels (I prefer Dremel brand EZ-Loc fiberglass reinforced wheels), abrasive buffs, pointed abrasive bits and rubber polishing bits (I’ve had very good luck with Temo brand).

Summary

So far, things were going smooth. The VMAC9 lowers were welded together awaiting next steps. In the next post, I will cover how to given them a nice black manganese parkerized finish.

I hope this helps you out.


Note, I have to buy all of my parts – nothing here was paid for by sponsors, etc. I do make a small amount if you click on an ad and buy something but that is it. You’re getting my real opinion on stuff.


Please share the link on Facebook, Forums, with colleagues, etc. Your support is much appreciated and if you have any feedback, please email us in**@*********ps.com. If you’d like to request a report or order a reprint, please click here for the corresponding page to open in new tab.
Best MP5/MP5K Upgrade Ever – The Timney MP5 2-Stage Trigger

I hate bad triggers and the worst triggers I have ever used were on HK MP5 and MP5K weapons. I have no idea of the design intent – maybe a real strong emphasis on avoiding an accidental discharge by having a long spongy pull and then a break somewhere around eight pounds. For someone who likes crisp triggers and a lighter pull, the HK triggers in general can be a rude awakening.

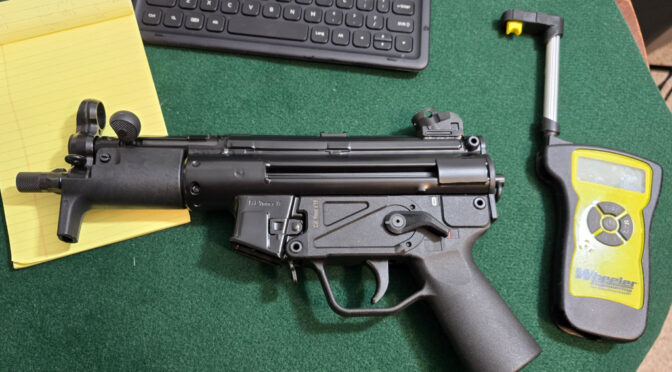
I recently picked up Zenith Firearms ZF5-P, which is a MP5K clone. Zenith Firearms is based in Afton, VA, and make their various rifles and pistols there. They used to import MKE clones from Turkey but severed ties and are actually making them here in the US.

I bought the ZF5-P for a few reasons – First, I got a good deal on it. That always helps. Second, I no longer had any form of an MP5 and kind of wanted to get back in. Third, and the subject of this story, I knew Timney made a well-regarded trigger pack for the MP5/MP5K. Fourth, I had an urge to tinker and needed a test platform.

Now Zenith makes a big deal that they machine their cartridge walls vs. bending sheet metal resulting in a better trigger. I was kind of curious to check that out as well.

For the rest of the article, I’ll just refer to the trigger as an MP5 trigger because the MP5 and MP5K share the same trigger pack. It’s the grip that differs.

The Zenith’s Original Trigger

Well, I was hoping for a good trigger out of the box because of Zenith machining the walls of their trigger pack but to be honest, it was just another MP5 trigger. I bought a new Century MKE AP5-P and its trigger was better than the Zenith’s also. It’s not that the Zenith’s trigger is bad – my point is that the unit I received was no better than any other MP5 trigger I’ve used.

I used a Wheeler “Professional Digital Trigger Pull Gauge” and did 10 pulls of the trigger after lubrication plus I had pulled the trigger maybe two dozen times since I bought it so there was a tad bit of wear in before testing. At any rate, the lightest pull was 7 pounds 5.9oz. The heaviest was 7 pounds 13.5 ounces and the average came in at 7 pounds 11.3 ounces. So, just shy of 7.75 or seven and three quarter pounds. Still long, creepy, spongy … pick the bad discriptor you like.

The Timney MP5 2-Stage Trigger

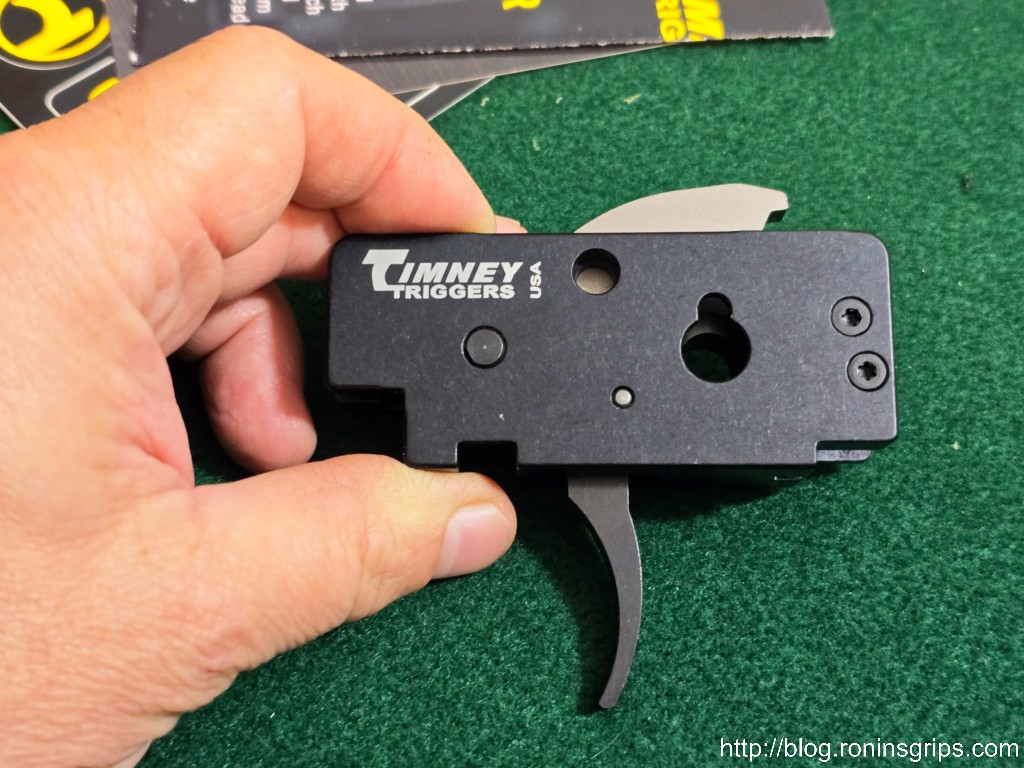
Timney MP5 2-Stage Trigger held in hand. Close-up view.
It’s nicely machined and ready to go. You just need to move the ejector, ejector axle and ejector spring from your old trigger to this one. It’s easy to do.

These triggers are compatible with SEF/ Semi-Auto trigger packs and their style of safety selector levers.

These triggers are NOT compatible with Ambi/Navy/FBI trigger packs or .22 clones, as they are different internally.

Timney provides clear installation instructions in the package plus they have the following video to help with the install.

Folks, that trigger is amazing. Here are pull test results: Minimum pull weight was 3 pounds 2.7 oz. Maximum was 4 pounds 0.1 ounce. The average was 3 pounds 10.3 oz.

I’d call it crisp and clean. Night and day better than the original Zenith trigger.

Range Time

My brother-in-law, nephew and I took the Zenith ZF5-P and a Century MKE AP5-P to the range. For an MP5, the MKE’s trigger is fairly decent but was seriously beaten by the Timney.

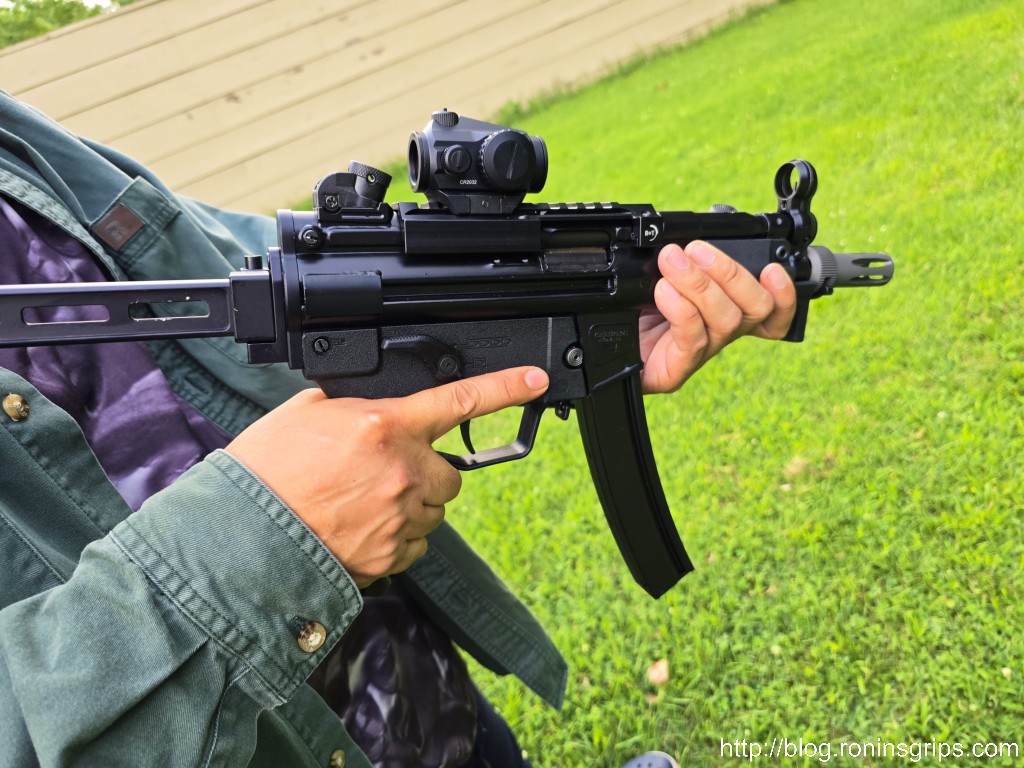
MP5 with red dot sight and Timney 2-Stage Trigger being held. Ronin's Grips logo in corner.
My nephew really liked the Timney trigger – we all did. By the way, one thing I really like is that a B&T low profile optics mount enables you to cowitness a Vortex Crossfire red dot with the iron sights.

Summary

I have never hid my dislike of MP5 triggers – I genuinely don’t like them and the only good things I can say are that they are reliable and you’ll probably never have an accidental discharge.

The Timney trigger ranks as one of the best upgrades I have done to a firearm. If you want a better trigger for your MP5/MP5K, or a clone of them, then get the Timney trigger.


Note, I have to buy all of my parts – nothing here was paid for by sponsors, etc. I do make a small amount if you click on an ad and buy something but that is it. You’re getting my real opinion on stuff.


Please share the link on Facebook, Forums, with colleagues, etc. Your support is much appreciated and if you have any feedback, please email us in**@*********ps.com. If you’d like to request a report or order a reprint, please click here for the corresponding page to open in new tab.

Improperly Adjusted Feed Lips in a Rock Island A2 HC Pistol Can Cause Failure to Eject

One of the things I enjoy about the firearm industry is meeting neat people. Dan Barnett contacted me a few weeks back. He is a certified “polymer” pistol armorer and had recently got into 1911s. As part of the journey, he purchased a used Rock Island Armory 51679 Tac Ultra FS HC 9mm and was trying to sort out why it was failing to eject way more than he cared for and he would have an empty case and a round trying to be fed in the slide at the same time. He and I hit it off because we both like the soft shooting Rocks.

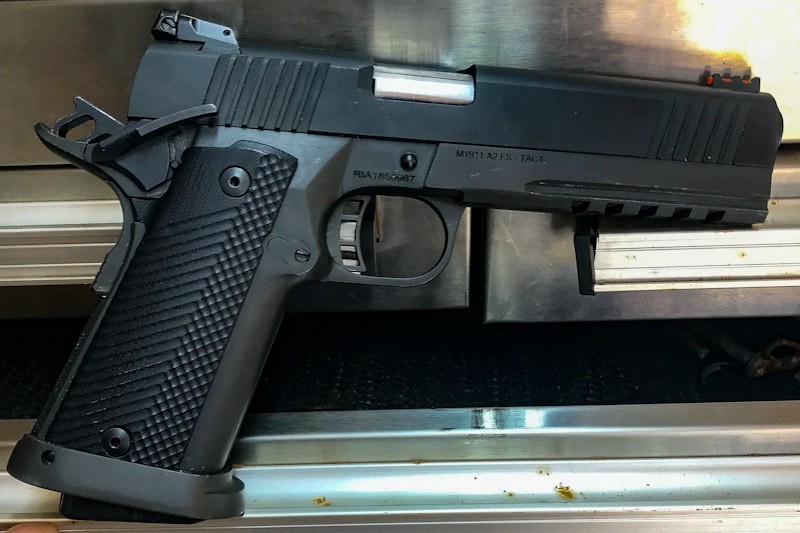
Rock Island A2 HC pistol with text "RIA1855987 M1911 A2 FS - TACT.
Dan’s 51679 Tac Ultra

Because of my past experiences with RIA Tac Ultra 9mm extractors failing, I asked him how his looked and he told me that it looked nice and sharp – no broken parts. I send him my blog post on extractors and recommended he switch his to a Wilson Combat if he ever runs into a problem or wants to make the upgrade anyways.

There was a possibility the extractor tension was too light but I figured we’d assume it was okay for the moment. Note, if you open a slide slowly and watch the cartridge or casing being extracted, the extractor should maintain control all the way to the ejector. If it doesn’t and the extractor looks ok then it is most likely the tension and there are specialty gauges out there for testing and setting them.

With the extractor tentatively ruled out, what I told him was that not many people understand how critical the magazine feed lips are to proper feeding and ejection of a 1911 and that his Tac Ultra was just that – an oversize 1911.

What can happen is that the front feed lip gap can be set too wide allowing the front of the cartridge to tilt up in the air too far. Then, as the newly extracted case comes backwards, the riding too high bullet pushes the spent case up just enough to miss the ejector. Honestly, there is a really delicate brilliant dance going on inside a 1911 and all it takes is something to be off just enough and things go wrong.

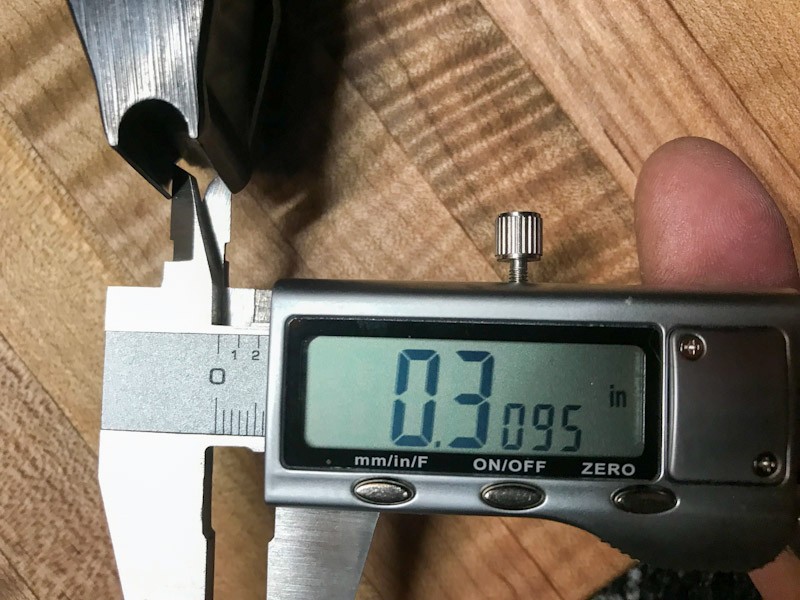
Dan took his calipers to the four mags he had and the front of the feed lips that can be adjusted were all over 0.320″ and I recommend starting somewhere between 0.308 to 0.312″. There isn’t a magic number due to all of the variables one can encounter. Too wide and it can cause a failure to eject or stove piping. You can even have rounds falling out of the mag. Too narrow and you have the cartridge moving straight ahead, smashing nose first into the feedramp and stopping / jamming right then and there.

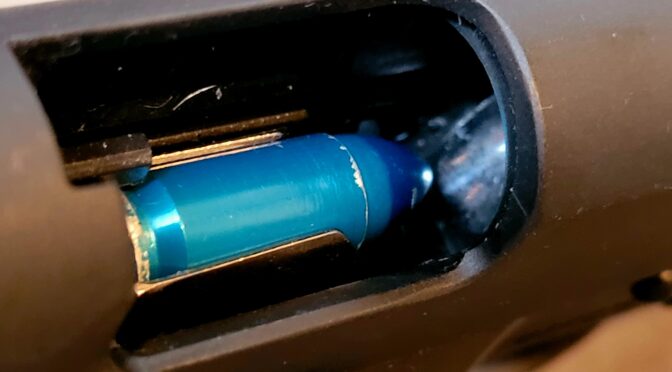
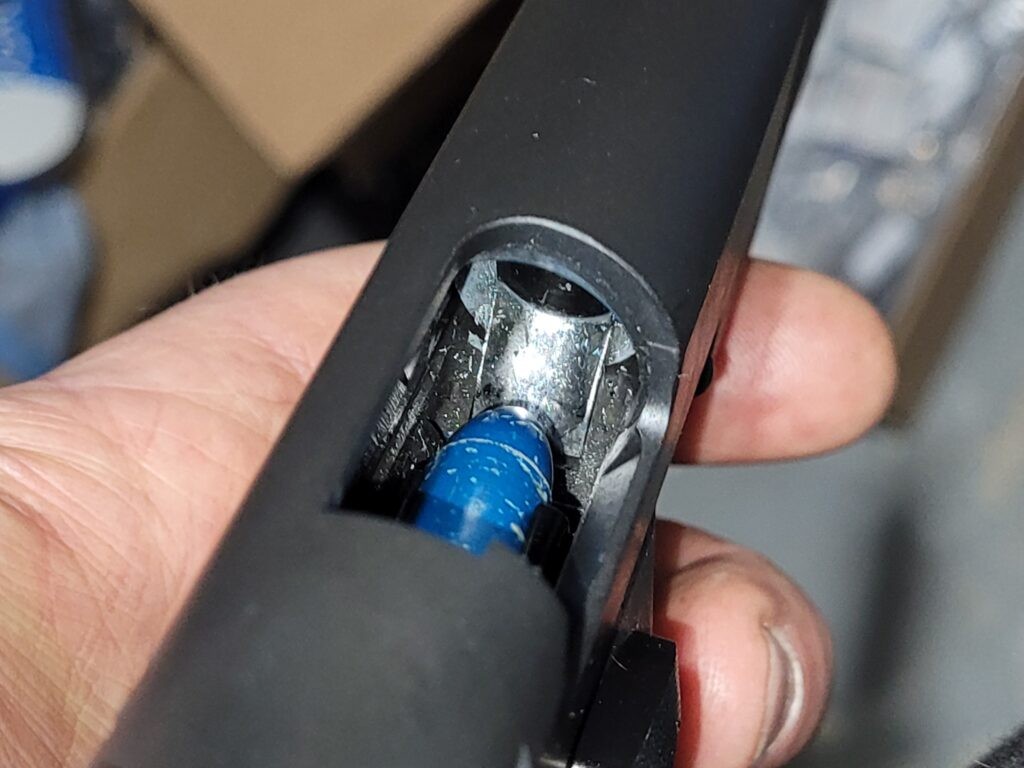
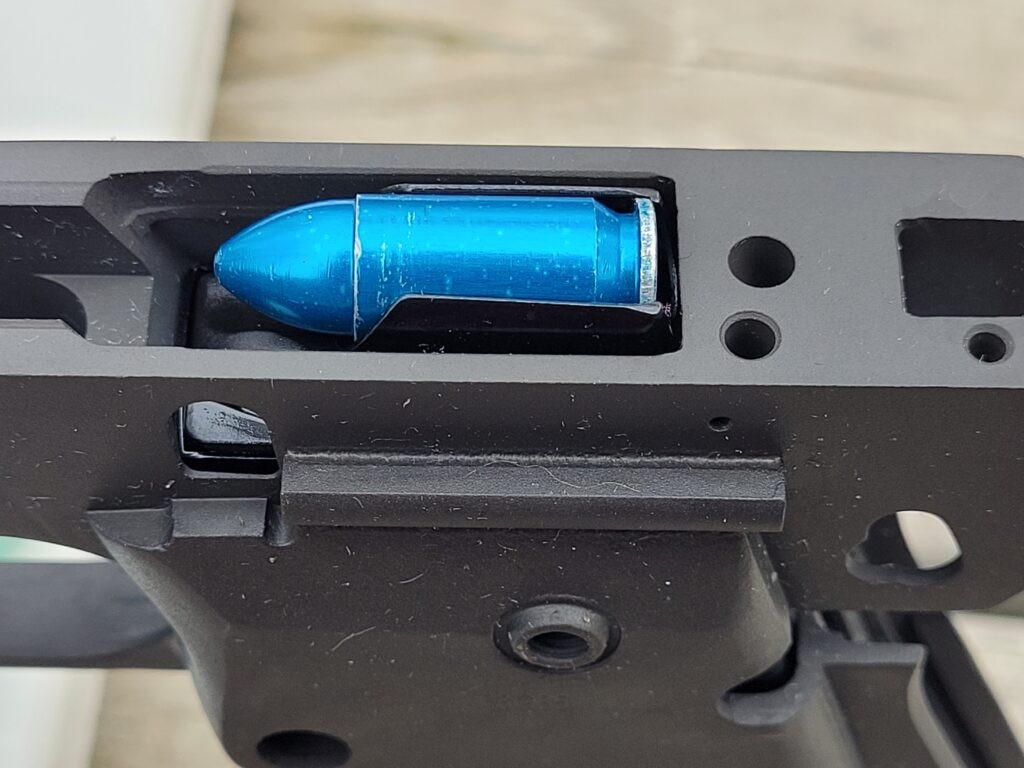
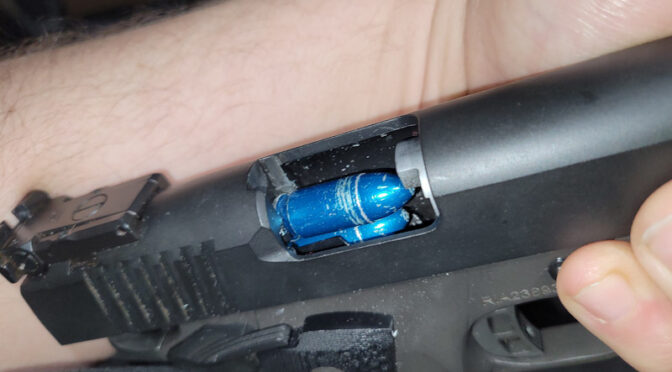
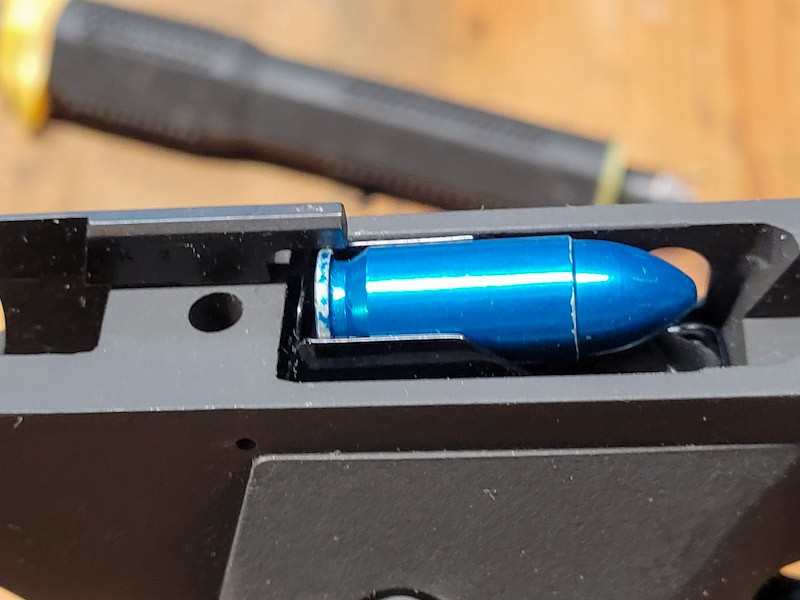
Blue cartridge stuck in Rock Island A2 HC pistol feed lips due to improper adjustment.
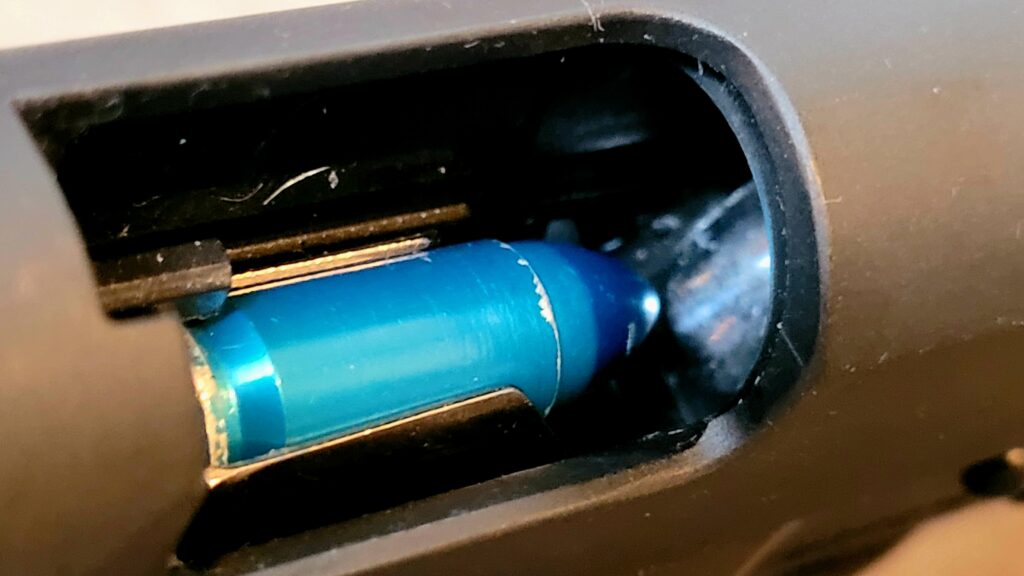
You can see the ejector is just above the rear rim of the dummy round and the round is angled up slightly. If that nose is up too much, it will nudge the extracting case high enough to miss or intermittently miss the extractor.
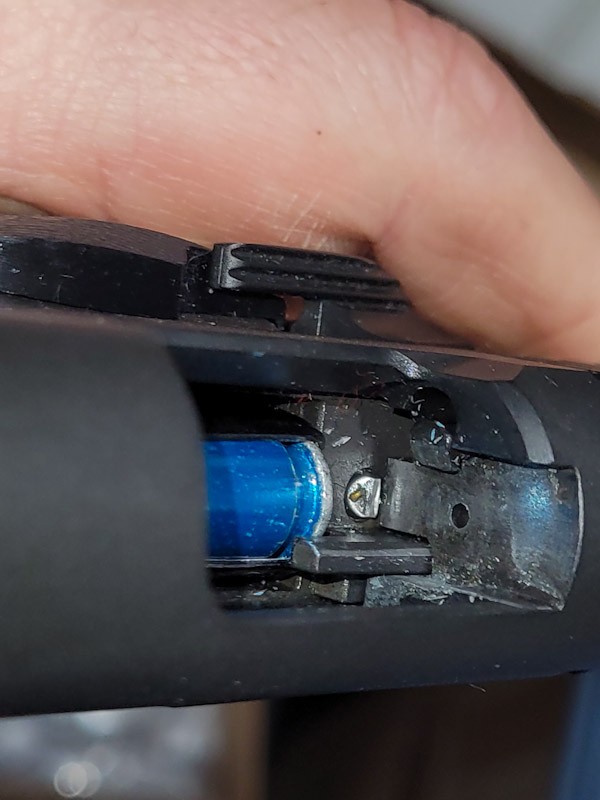
Rock Island A2 HC pistol feed lips improperly adjusted, causing failure to eject.
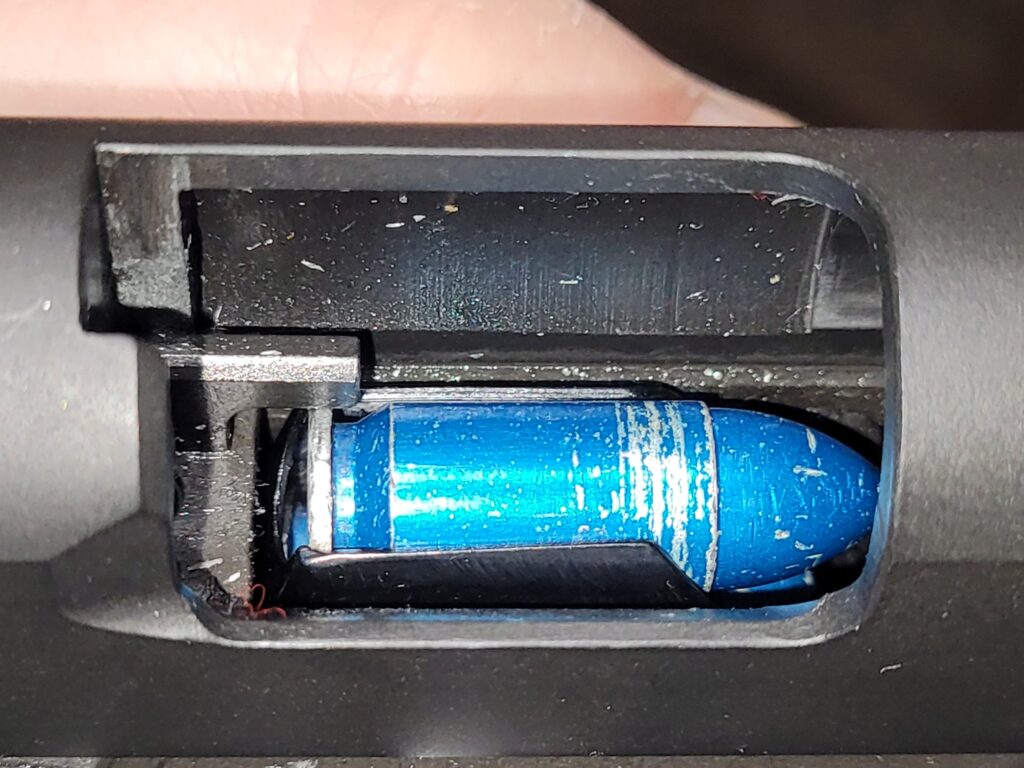
This is looking down at the face of the slide – what I want you to see is that there is nothing there to limit the round from working its way towards the top of the slide. The extractor has a firm grip on the rim of the case but that’s it.

Dan asked what he should do, I told him to disassemble the magazine and then carefully hold the magazine budy (the “tube”) on a table or better yet a piece of wood that lets the bottom lips dangle but supports the magazine all the upwards. Then lightly tap on each front side of the magazine to close the gap. Light tap left, light tap right, and measure. Repeat until it gets to the right gap – either via measurement or testing the mag with some dummy rounds.

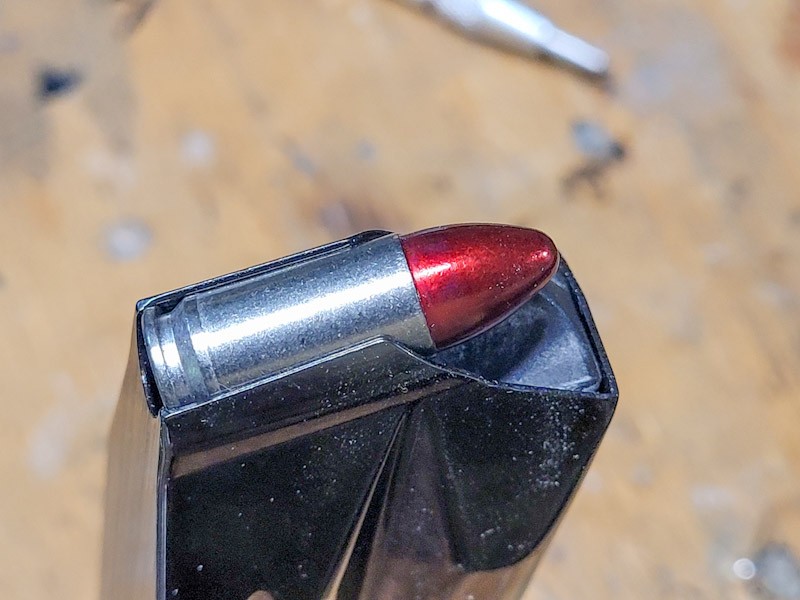
Close-up of a pistol magazine with a red-tipped bullet, showing potential feed lip issues.
This is a Steelworx machined stainless steel 9mm dummy round and what I prefer to use these days for testing. I no longer use the blue A-Zoom snap caps as they are not dimensionally identical to a true 115 9mm FMJ round. To adjust the lips, disassemble the mag and then tap on the front of the feed lips only – in the case you can see they are tapered in and are closest to the red. You do not need to hit on the other parts. By tapping on the front the steel lip will gracefully bend in the direction you are tapping it.
Digital calipers measure 0.095 inches on a pistol feed lip.
Dan adjusted his gap to be around around 0.3095 by looking at where the bullet would hit the ramp/enter the chamber and testing . Your gap could be different from his.

By the way, the back of the magazine is fixed due to the folded metal ears that form the back of the lips. You can’t adjust them much at all or they will buckle or break. I leave them alone.

This tapping doesn’t take a ton of effort so use a light hammer and light taps – this is not a “mongo smash” moment because if you crush the neck of the mag, it’s game over unless you have a mandrel to open it back up. These days I use a light body hammer to do the work.

If you go too far and need to open the lips, use malleable chain pliers also known as chandelier or lamp chain pliers to open the lips back up. External snap ring pliers can also work but are not my first choice. The chain pliers distribute the pressure along a larger area of the lips vs. the relative point pressure of the snap ring pliers’ pins.

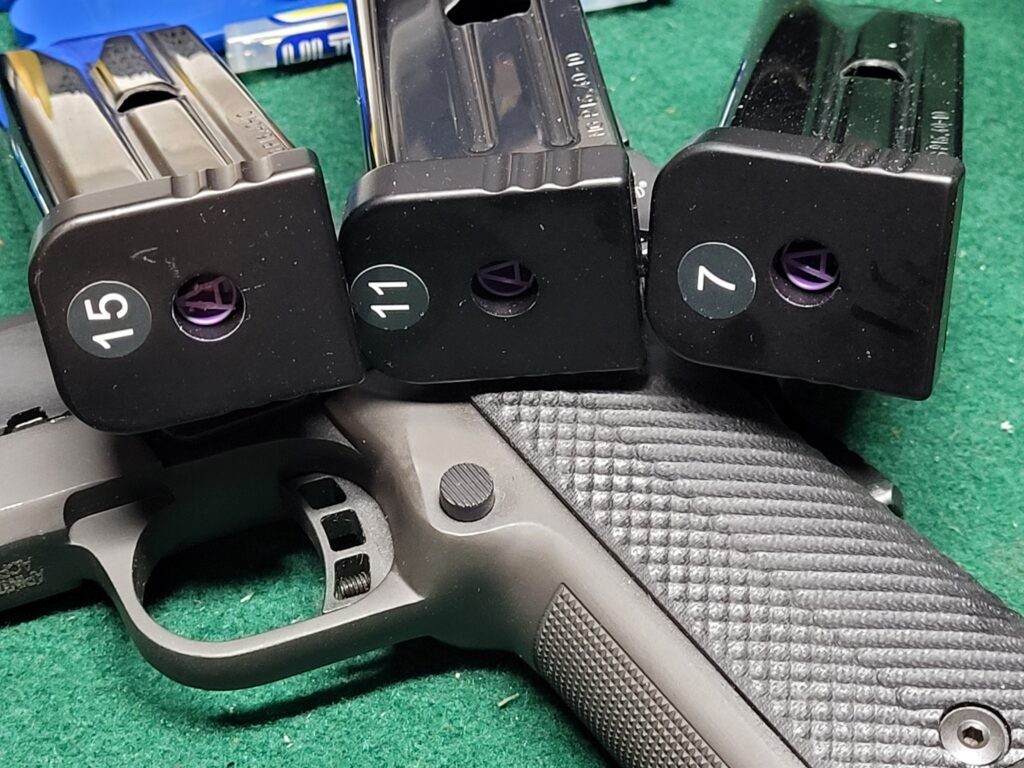
Feed lip gaps will change with use – this is not a one time exercise and why it is a good idea to number your mags. This way you can write down the setting for each magazine or know that when you get back front the range which magazine you need to take a look at.

How did the adjustments work out for Dan? He finished a 1,000 round tactical range session with zero malfunctions. I told him to have fun because there is always something to adjust or tinker with on a 1911 and I mean that in a good way.

So, I hope this post helps you out!


Please share the link on Facebook, Forums, with colleagues, etc. Your support is much appreciated and if you have any feedback, please email us in**@*********ps.com. If you’d like to request a report or order a reprint, please click here for the corresponding page to open in new tab.

How to make a Stribog’s cocking handle more comfortable? Easy – Get an HB Industries Ambi Charging Handle Kit

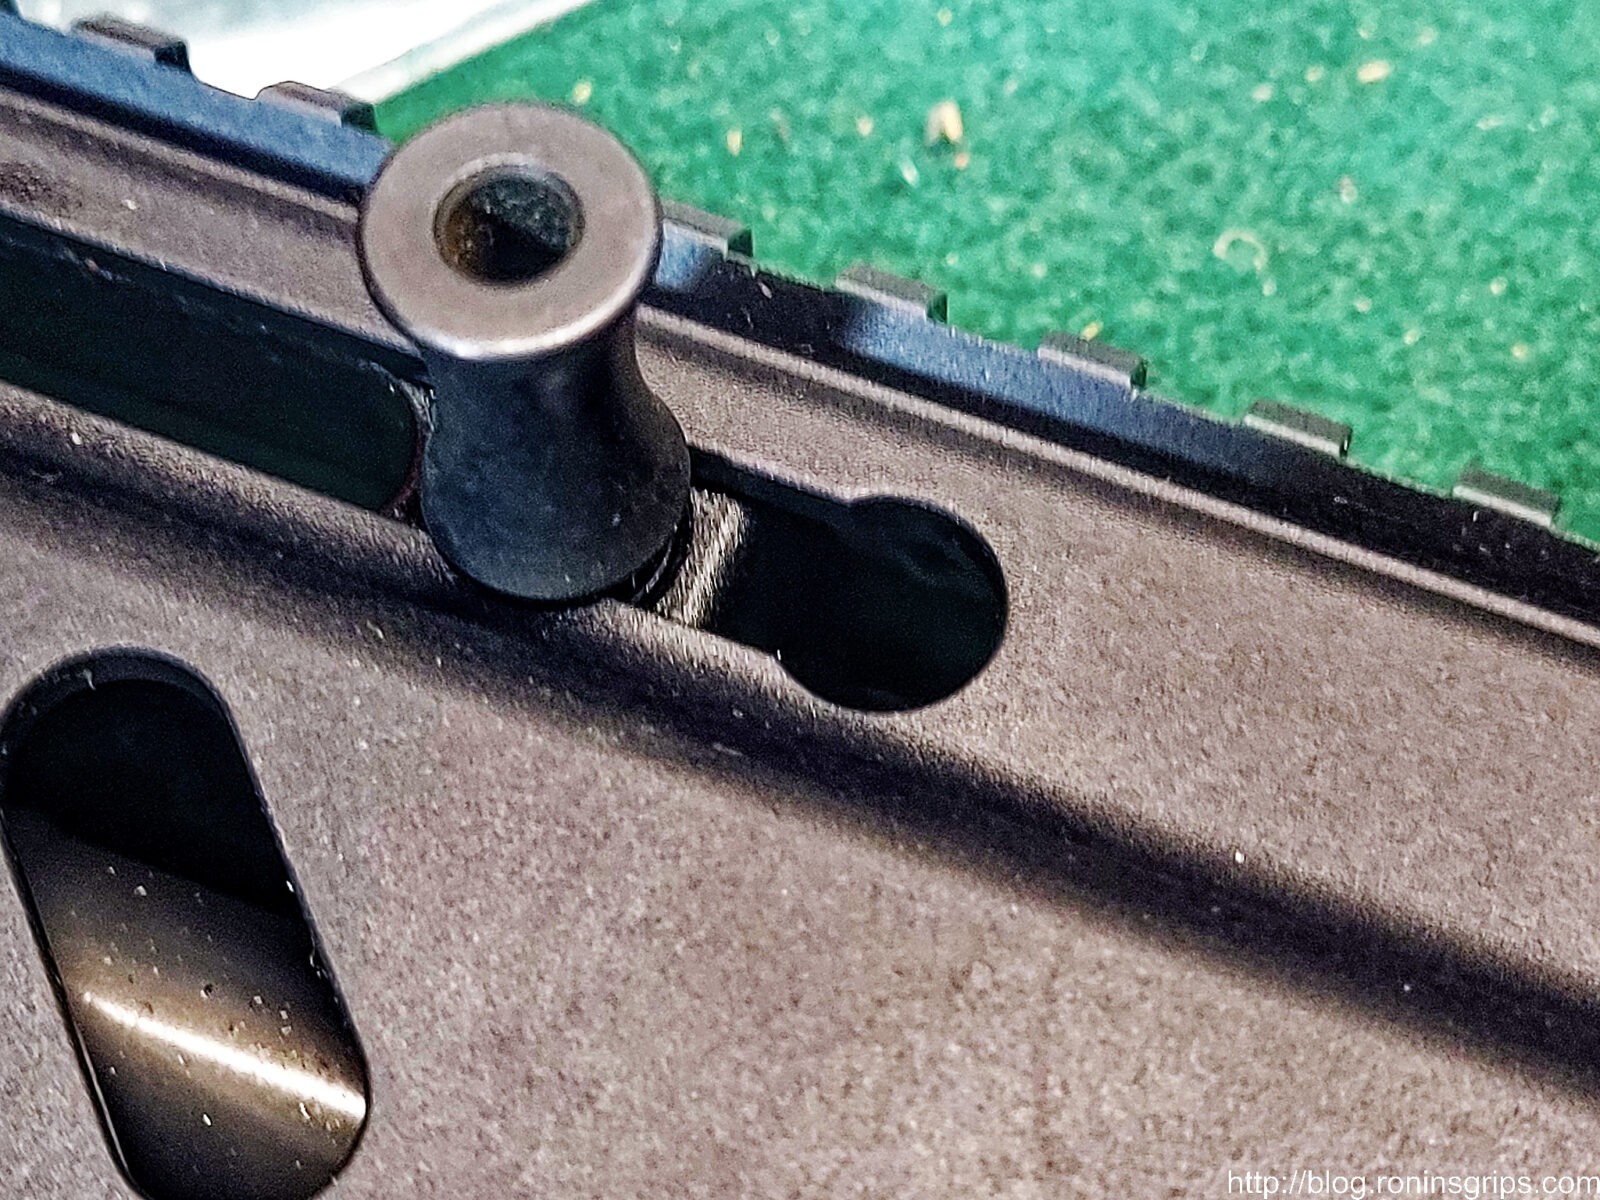
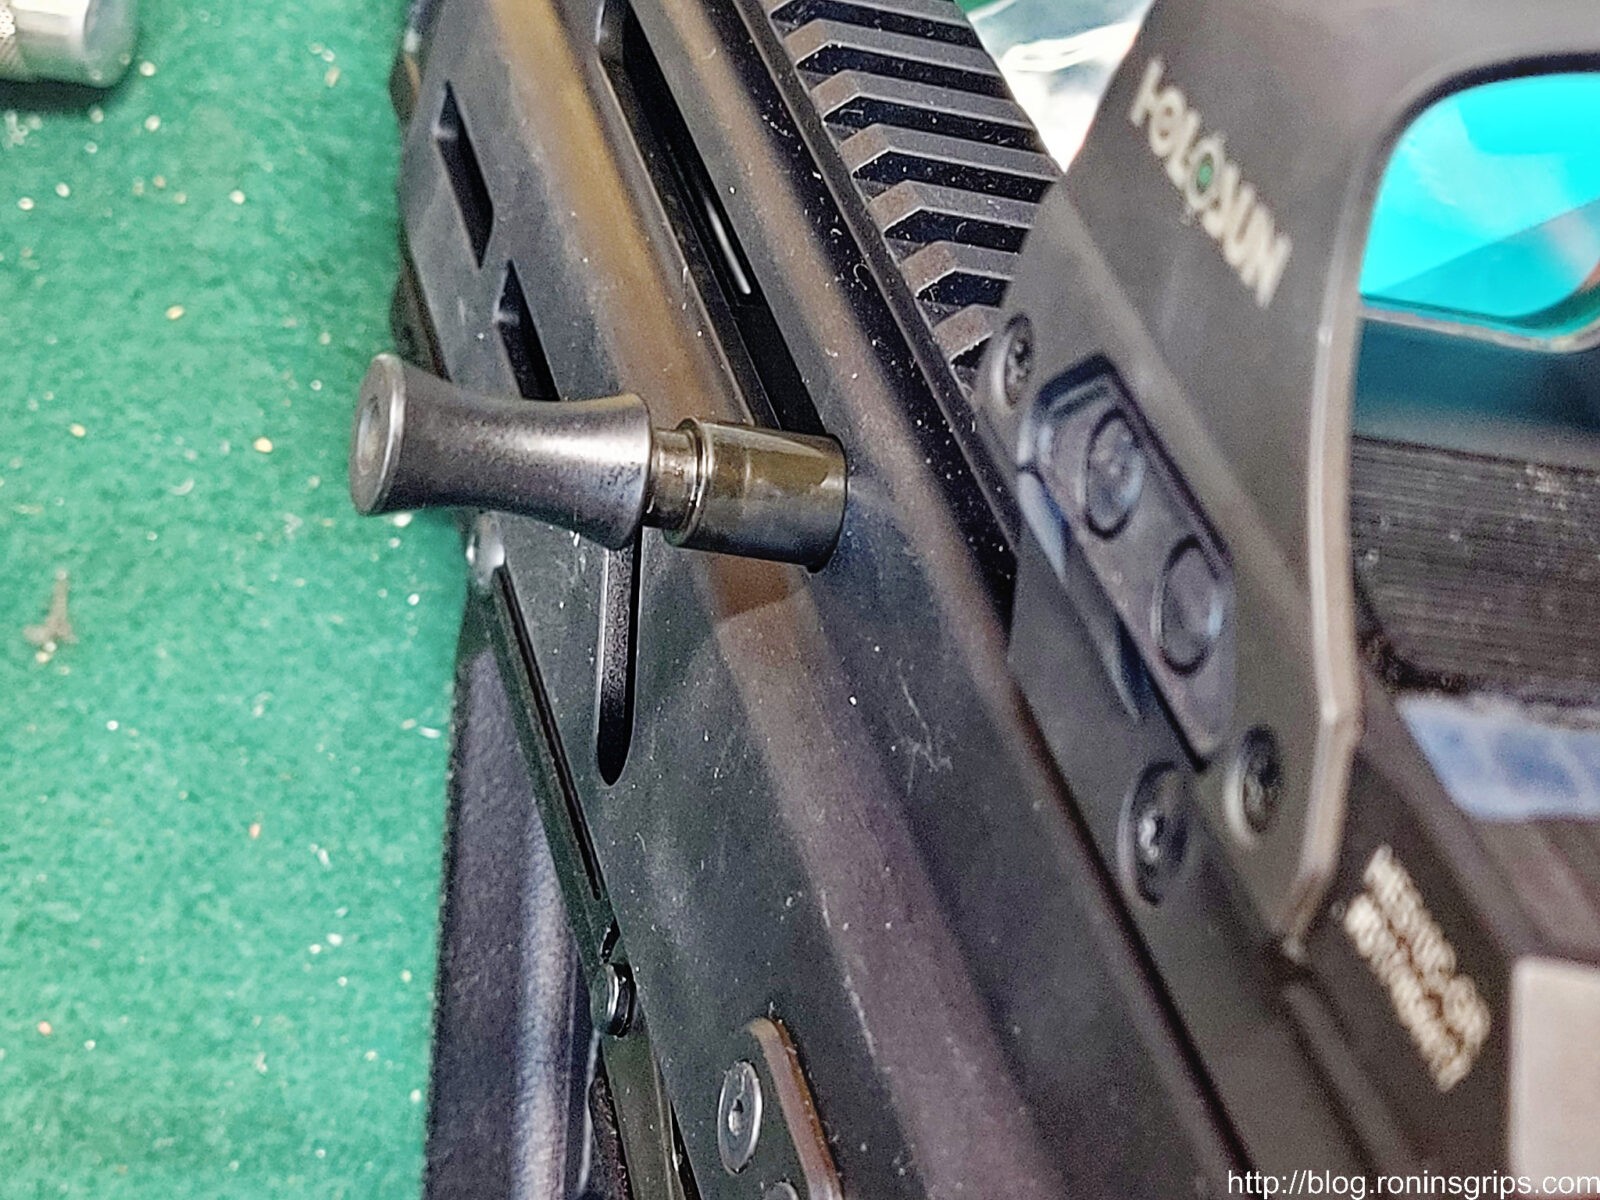
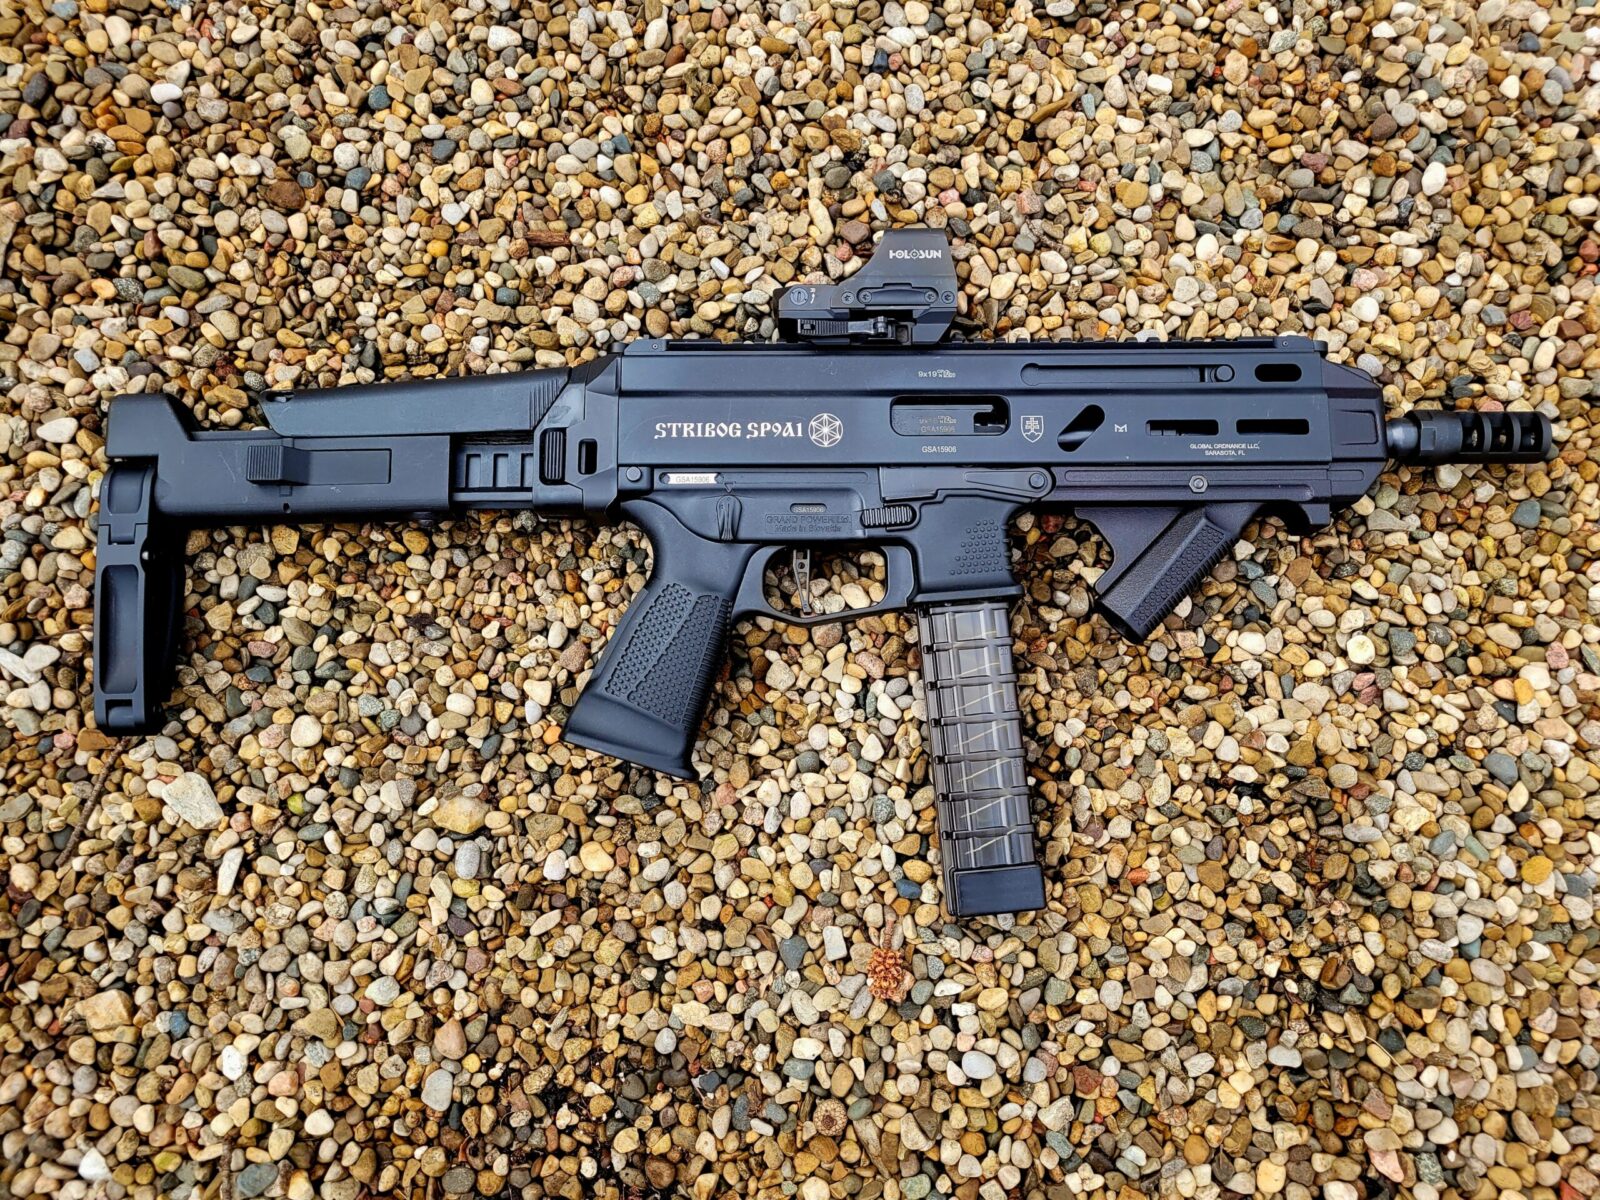
I’ve really enjoyed my Stribog SP9A1 but one of my small complaints is that the cocking handle is uncomfortable. When the Stribog was first released, it had a reciprocating charging handle – meaning it would go back and forth with the slide carrier. They listened to customer (fortunately) and introduced a non-reciprocating charging handle. Somewhere along the line, the made the charging handle it could be installed on either the left or right side depending on the shooter’s preference. Now here’s my gripe – the stock handle – it’s a knob really – has a fairly narrow diameter in the middle. It’s tapered from both ends to the middle so your finger finds the middle real fast for a positive grip but it’s just too small. I decided to look into options and fix it because I really liked the Stribog otherwise.

Close-up of the bronze frame and textured grip of a Dan Wesson Bruin 10mm pistol.
Thanks to a zoom lens, the charging handle/knob looks big in this photo but the middle narrow part is just a bit too small to be comfortable in my honest opinion – I just don’t care for the feeling.

HB Industries Ambi Charging Handle Kit

When I research parts, I tend to do some searching with Google plus I know certain websites that have products of the type I want – Global Ordnance is my first “go-to” site for Stribog accessories. Two options caught my eye – a folding charging handle that seemed a bit more than I wanted for some reason – or I could go with the HB Industries “Ambi Charging Handle Kit” and that was what I had in mind – a bigger knob to grab a hold of and it happened to come with a slightly smaller knob for the other side. All I really wanted was the bigger knob – having a backup knob on the other side was just a bit of a perk. Having started pistol caliber carbines (PCCs) with MP5s back in day, I actually prefer the left side charging handle as I am right handed and I never have to let go of the Stribog when racking the slide.

Close-up of the bronze frame and textured grip of a Dan Wesson Bruin 10mm pistol.
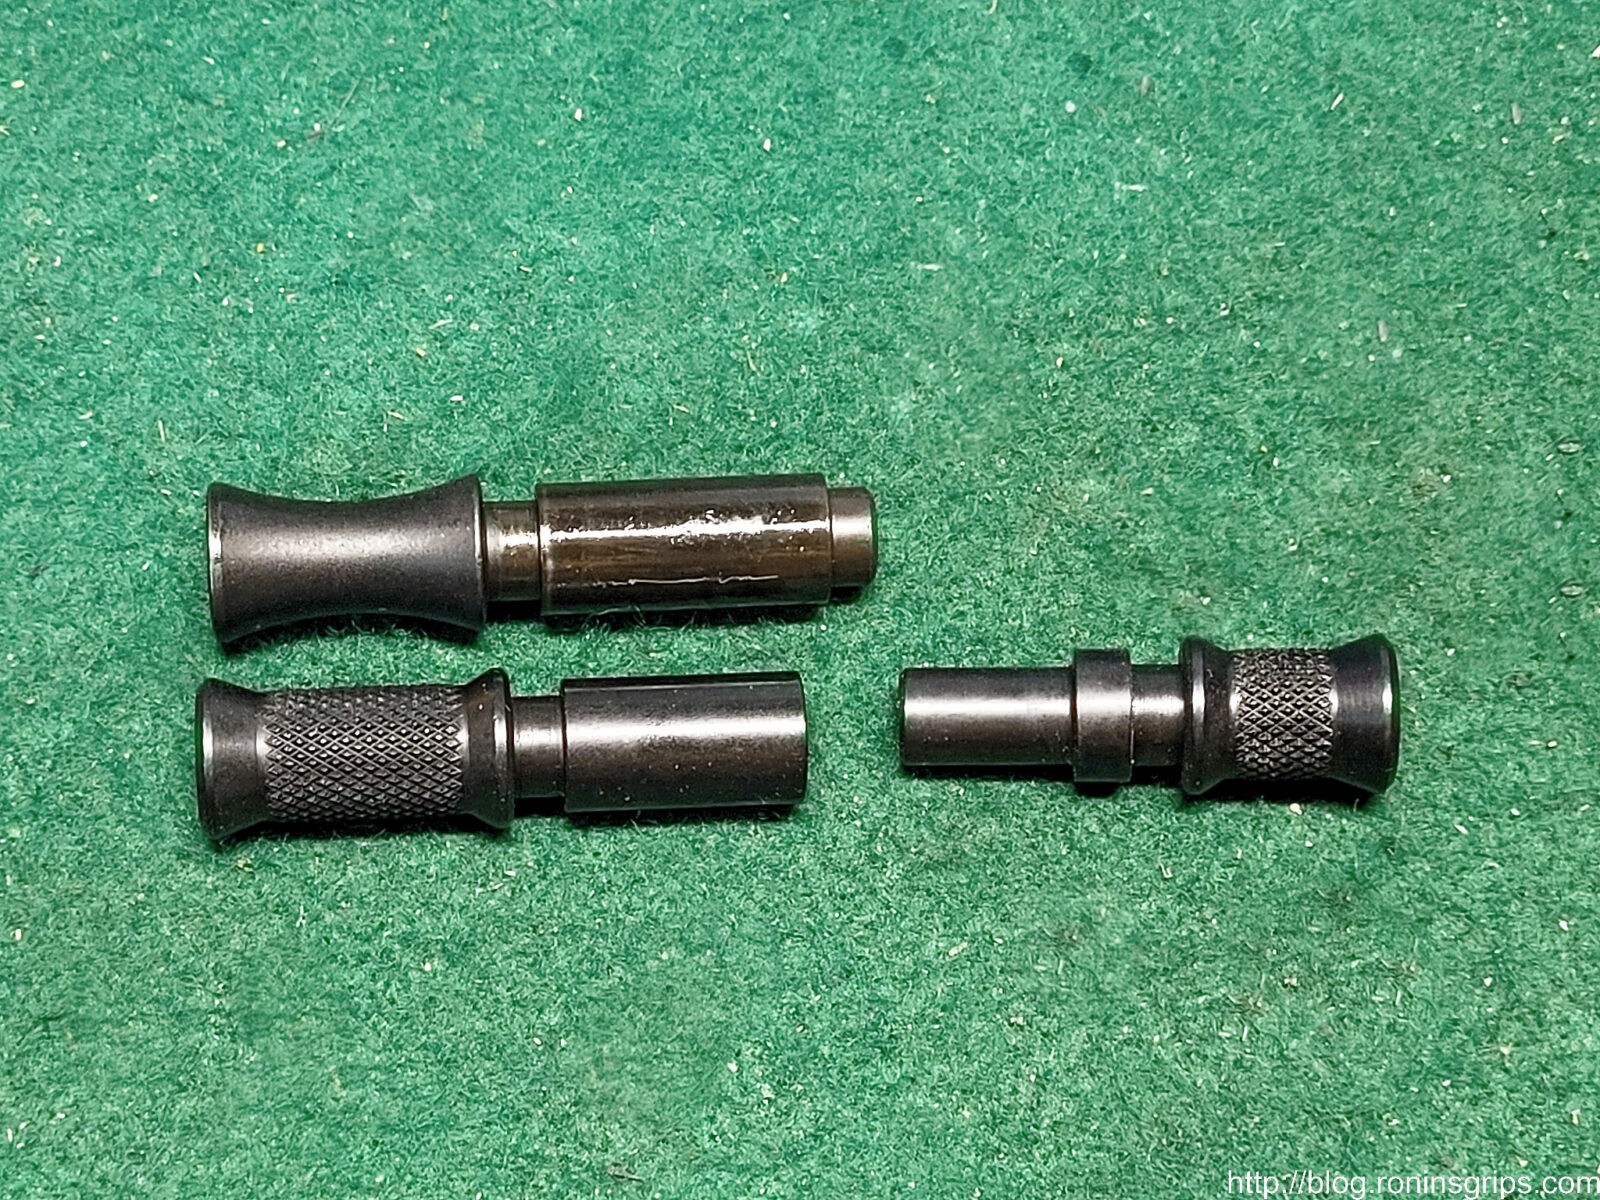
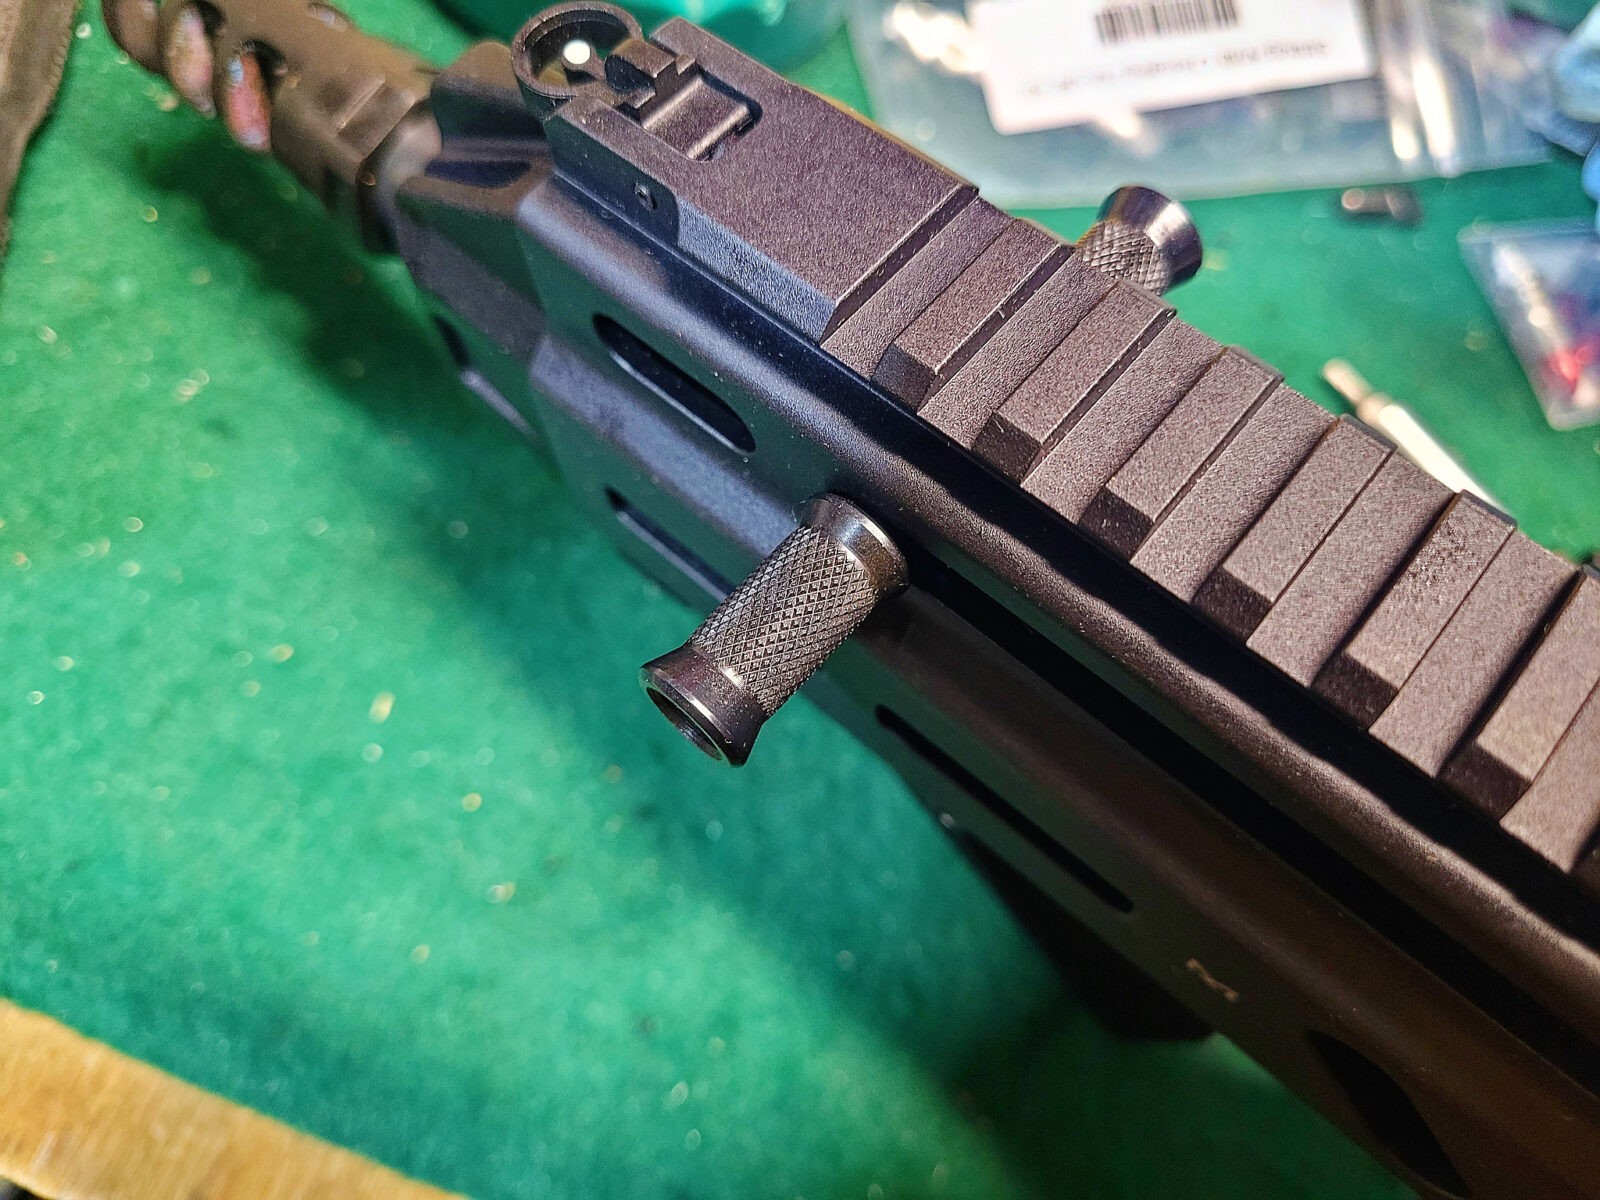
This is the HB Industries Ambi Charging Handle Kit. Notice how there is a larger 23mm knob and a smaller 16mm knob. You can decide how you want to use them. Notice the center is nice and wide and has knurling.

Installation

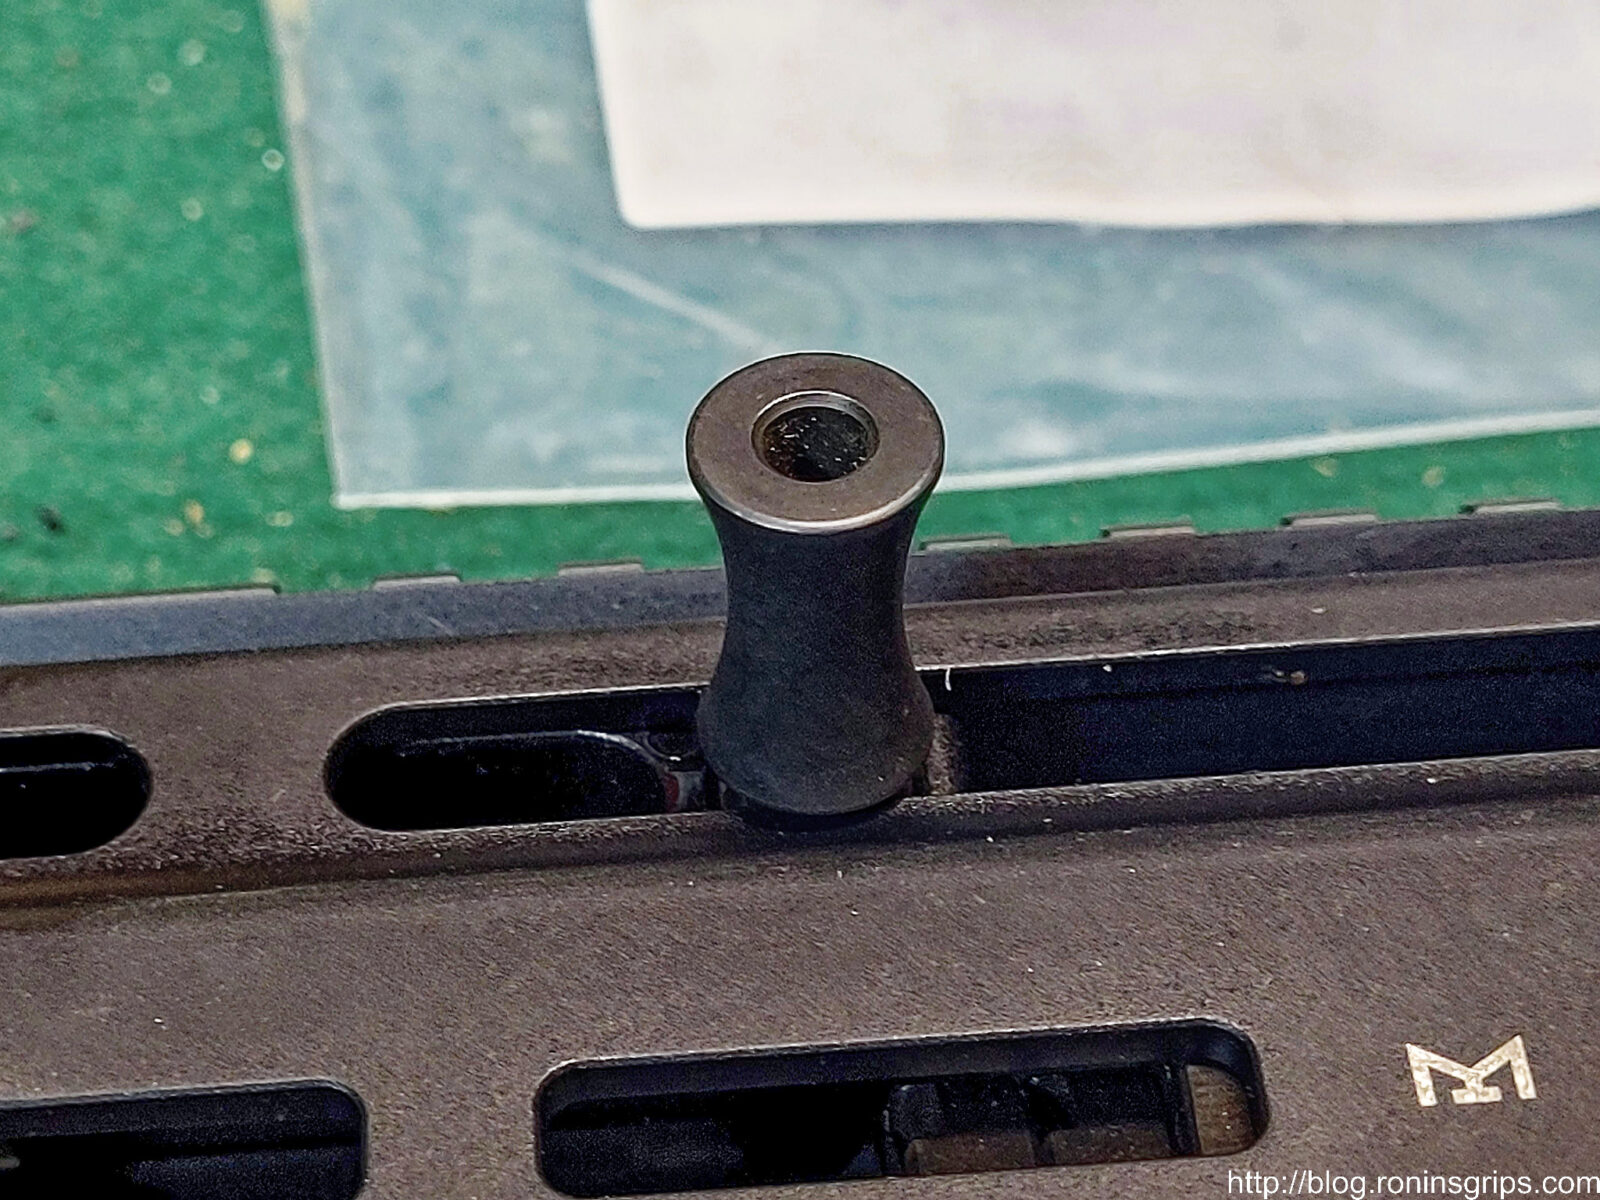
Basically, you remove the bolt group, slide the non-reciprocating charging handle block to where the big circular opening is and the pull the charging handle right out!

Close-up of the bronze frame and textured grip of a Dan Wesson Bruin 10mm pistol.
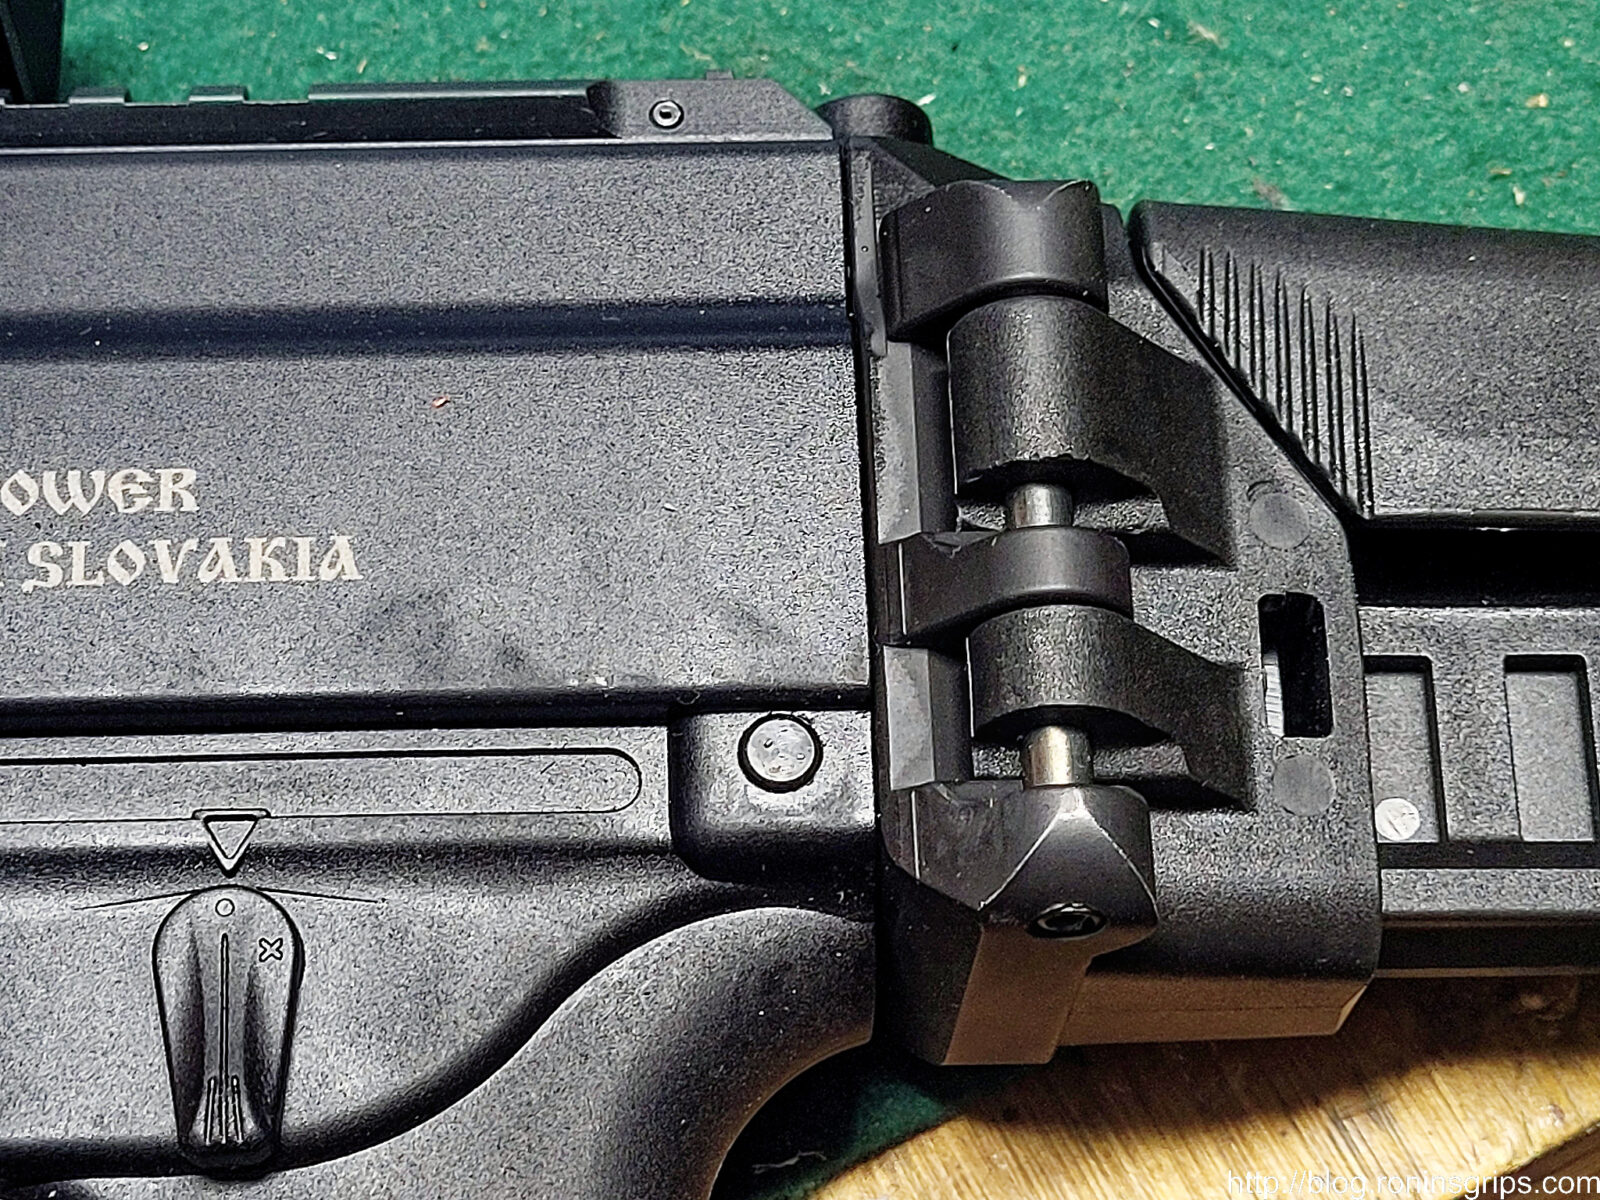
Push the lower takedown pin out of the way so you can remove the end cap, brace, stock or whatever you have back there. In my case, it’s an F5 modular brace that I think is fantastic.
Close-up of the bronze frame and textured grip of a Dan Wesson Bruin 10mm pistol.
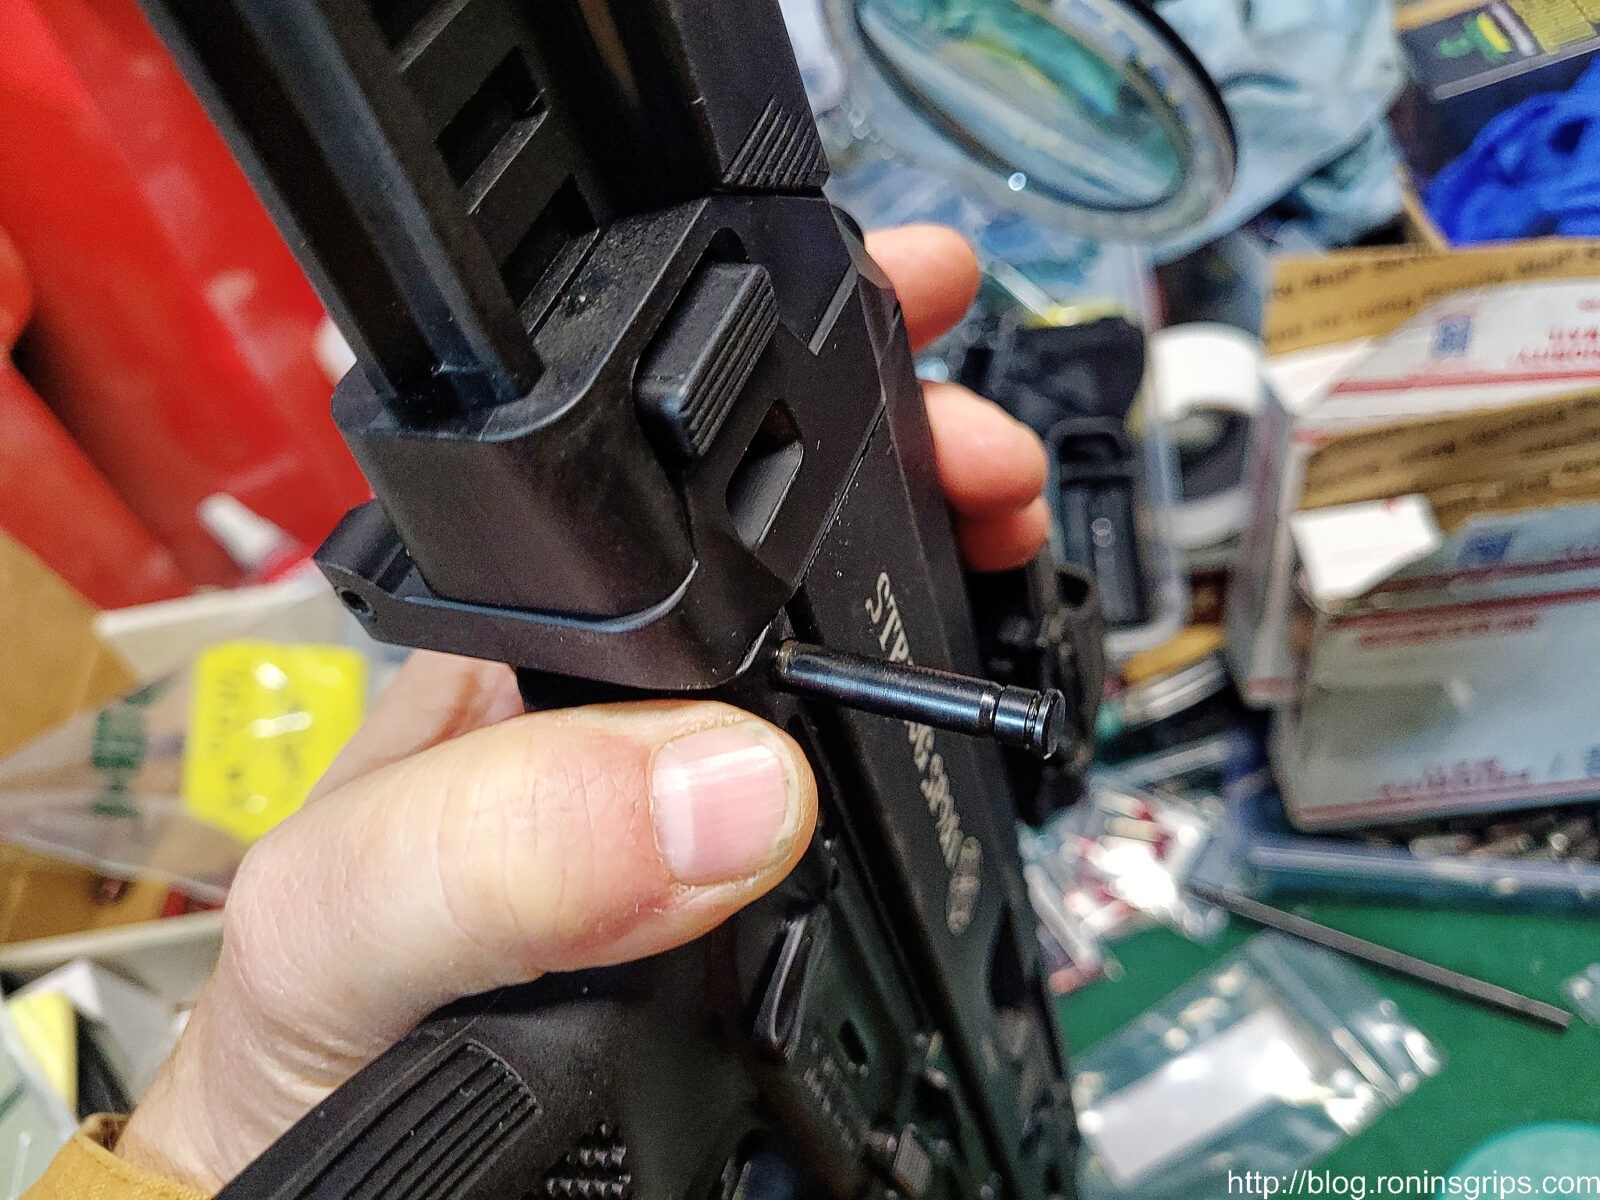
That lower pin is captured so don’t try to drive out out. You will feel it stop on the other end and you can then pivot the lower portion out of the way.
Close-up of the bronze frame and textured grip of a Dan Wesson Bruin 10mm pistol.
So you swing the lower out the way so you can remove the end cap, brace or whatever. I tend to find I need to do a light downward tap on top of the brace and then it pulls straight back and out. The bolt carrier group then is pulled straight out the rear and set out of the way.
Close-up of the bronze frame and textured grip of a Dan Wesson Bruin 10mm pistol.
With the bolt carrier out of the way, you then slide the charging handle carrier all of the way to the rear where the big “O” is at because the narrower part of the channel is what actually retains the charging handle. It’s a nice tool-less design.
Close-up of the bronze frame and textured grip of a Dan Wesson Bruin 10mm pistol.
The charging handle is pulled out. See the groove in the charging handle’s pin portion? That is what goes back and forth in the channel. The inner and outer parts of the pin are too big and it effectively keeps the charging handle right where you want it. It’s also a good reason to put just a bit of oil on the body before you install a new pin or re-install the old one for that matter.
Dan Wesson Bruin 10mm pistol with bronze frame and black slide
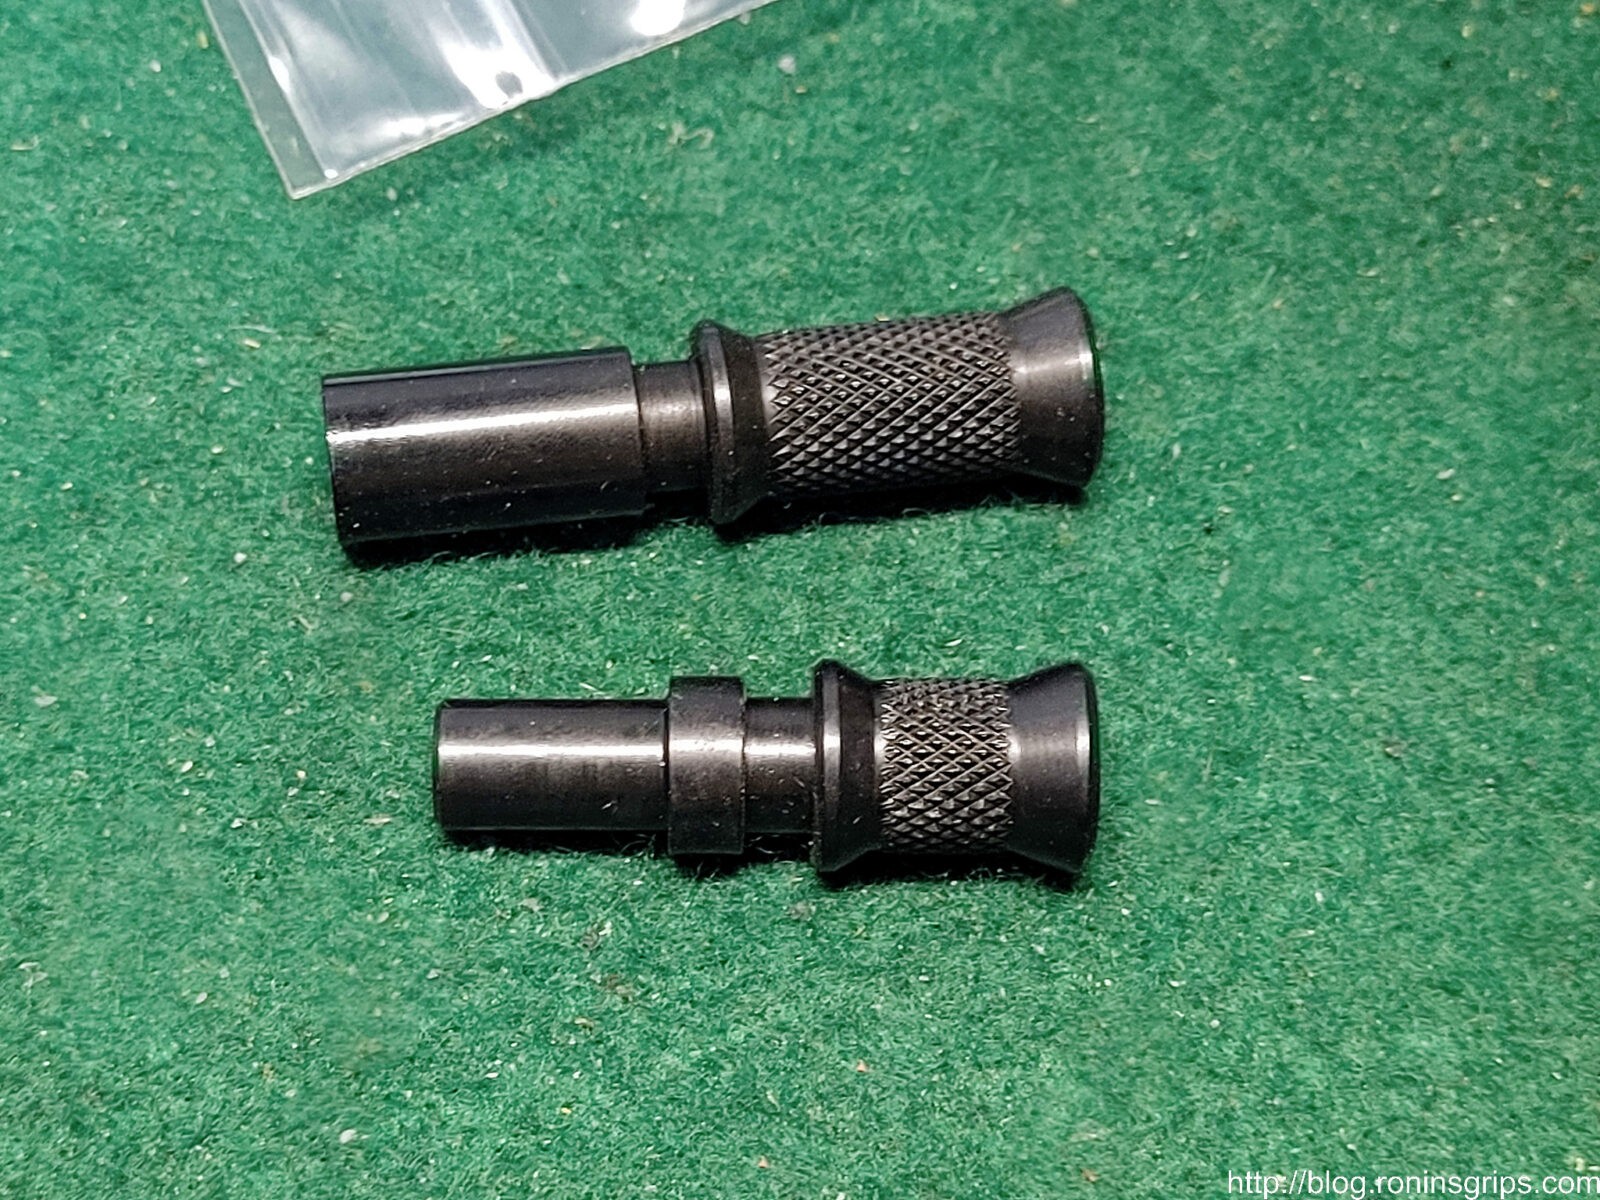
HB Industries did some elegant design work here – the original pin is at the top. Note how it is longer and needs to reach both sides of the channel but is only actually retained on the left because that is all that is needed. The HBI part has two halves – the larger one and the smaller one that sits inside the larger pin’s housing. They both have the grooves to ride in the charging handle channel and, both grooves serve to capture and hold each half in place in the channel. I love stuff like this – simple and does the job.
Dan Wesson Bruin 10mm pistol with bronze frame and black slide
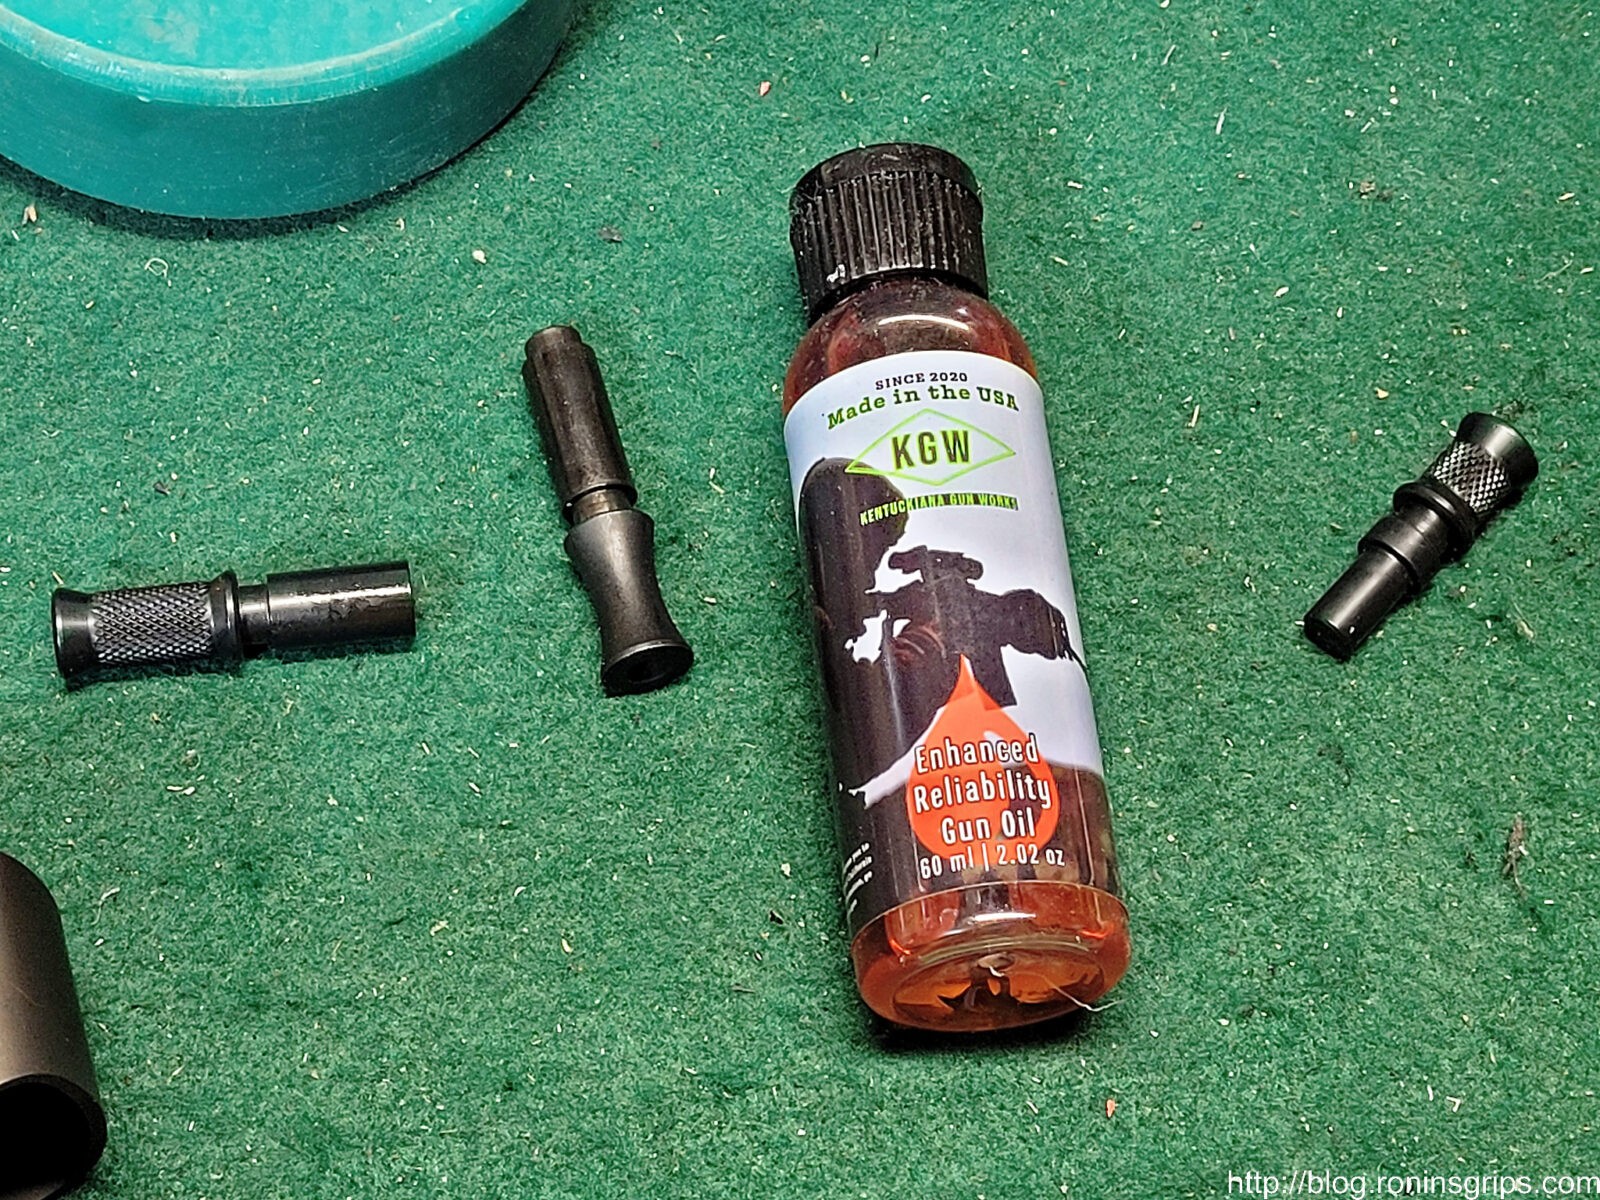
I started using Kentuckiana Gun Works Enhanced Reliability Gun Oil this year. I actually just had an issue that made me use it even more that I will do another post on. I used to use Super Lube quite a bit but when my shop was 32F and two of my RIA 9mm pistols that are in there all the time also were that cold, I went to do magazine work and the slides were sluggish. It would appear the Super Lube thickened up some at that temperature. I did not have the same problem with the KGW product — so I’m using KGW on all firearms going forward and have stopped SuperLube all together except for when I need a grease.
Dan Wesson Bruin 10mm pistol with bronze frame and black slide
Once you install the two handles and slide them forward out of the way, the rest of the installation is the reverse – install the bolt carrier group, install the brace or whatever you have, swing the lower back up, push the pin back in and then test the weapon.

Summary

I really like the feel and am glad I made the change. If you are considering changing the handle, it’s very straight forward and I hope you found this post useful.


Note, I have to buy all of my parts – nothing here was paid for by sponsors, etc. I do make a small amount if you click on an ad and buy something but that is it. You’re getting my real opinion on stuff.


Please share the link on Facebook, Forums, with colleagues, etc. Your support is much appreciated and if you have any feedback, please email us in**@*********ps.com. If you’d like to request a report or order a reprint, please click here for the corresponding page to open in new tab.

Are Rock Island Armory Double Stack 9mm 1911-Style A2 HC-series Pistols Any Good?

Rock Island Armory (RIA) is a brand name that is owned by Armscor Global Defense located in Marakina, Philippines. Armscor obtained a license from the Philippine government in 1952 to begin making firearms. In 1980 it became Arms Corporation of the Philippines (ArmsCor) and in the mid-80s they bought the US brand “Rock Island Armory” and began exporting firearms to the US. They have invested in quality improvement and automation to create their wide variety of firearms offered today. They also have opened plants in the US – one in Stevensville, MT, and the other in Pahrumo, NV.

In March 2022, a Philippine TV crew visited the Armscor factory in Marakina and produced this nice video that focuses mainly on their 1911 production area:

The reason I wanted to share this with you is that RIA pistols do have a long history and Armscor is not some fly by night company. This is my opinion – I would describe RIA 1911 pistols as being designed, built and sold to shooters who want an acceptable 1911 without spending a fortune. They are not claiming to turn out semi-custom pistols – instead, good enough pistols at an affordable price point.

In marketing, when you are trying to hit a certain price point to attract the buyers you are after, you have to figure out the features, the materials, and process combination to get you there. Now reliability and accuracy are features also so this needs to be factored in – the pistols need to be good enough but not necessarily over the top – even though we wish they were.

Ok, but are the 9mm HC 17 round pistols “good”?

So let’s go back to the question – are they good? For the price, yes. You can’t compare them to far higher end pistols such as Stacatto or Bul – it’s simply not fair. It would be like comparing a daily-driver economy model Ford or GM car to a BMW. Yes, they are all cars but the engineering and attention to detail during manufacturing in the BMW are going to be very different. They are for different markets comprised on people with different disposable income levels and tastes – and have different price points.

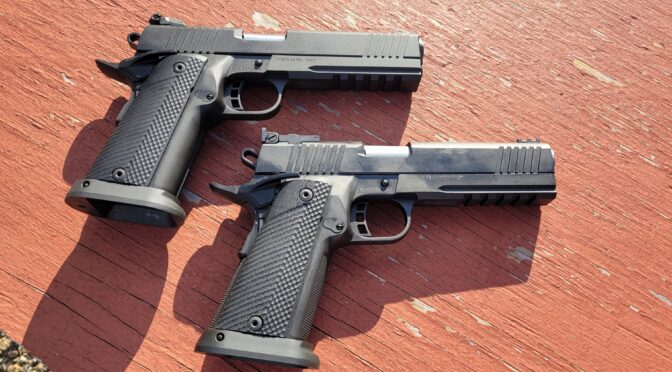
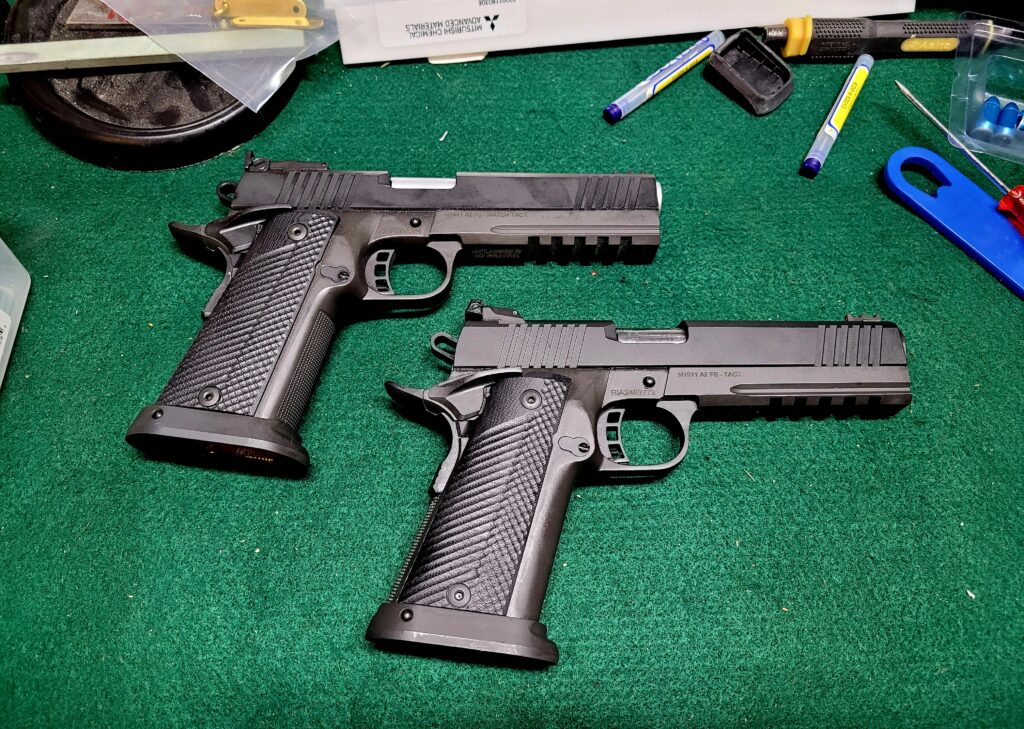
The two pistols I am discussing to be clear are the 9mm RIA A2 HC pistols – the 51679 Tac Ultra FS HC and the 56645 Pro Ultra Match HC – by the way, FS means “Full Size” and HC means “high capacity” because they hold 17 rounds in staggered magazines.

The frames and slides are made from 4140 alloy steel via CNC and they do have QA steps. The barrel seems to be pretty decent but then the price point issue begins to creap in.

Rock Island 52000 10mm pistol with Streamlight TLR-2 HL G laser
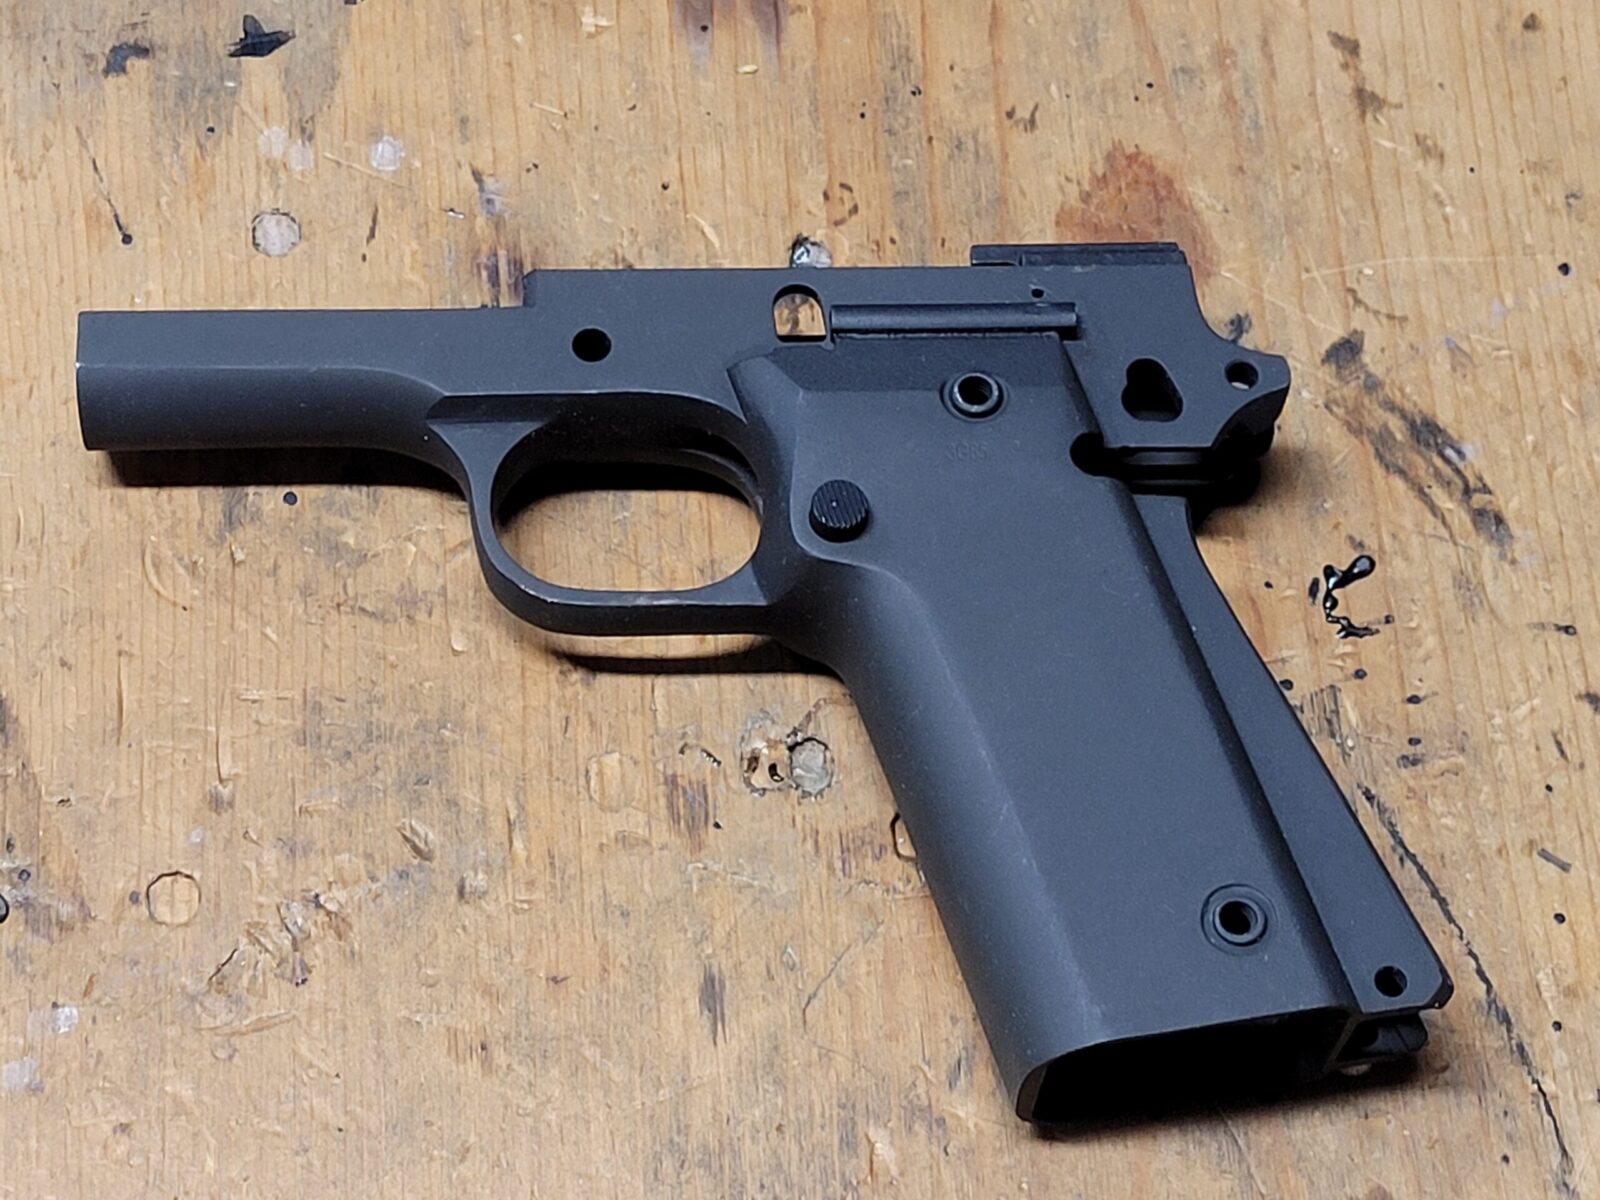
I bought four of the A2 HC 80% frames back when I was doing R&D on magazines for the 10mm/..40 S&W calibers (they use the same magazine design) and also the 9mm magazines. What not everyone knows is that these pistols also share a common frame. I installed the RIA magazine catch and ejector but they milled all of the holes and applied, as you can see, a very decent parkerized finish.
Rock Island 52000 10mm pistol with Streamlight TLR-2 HL G laser
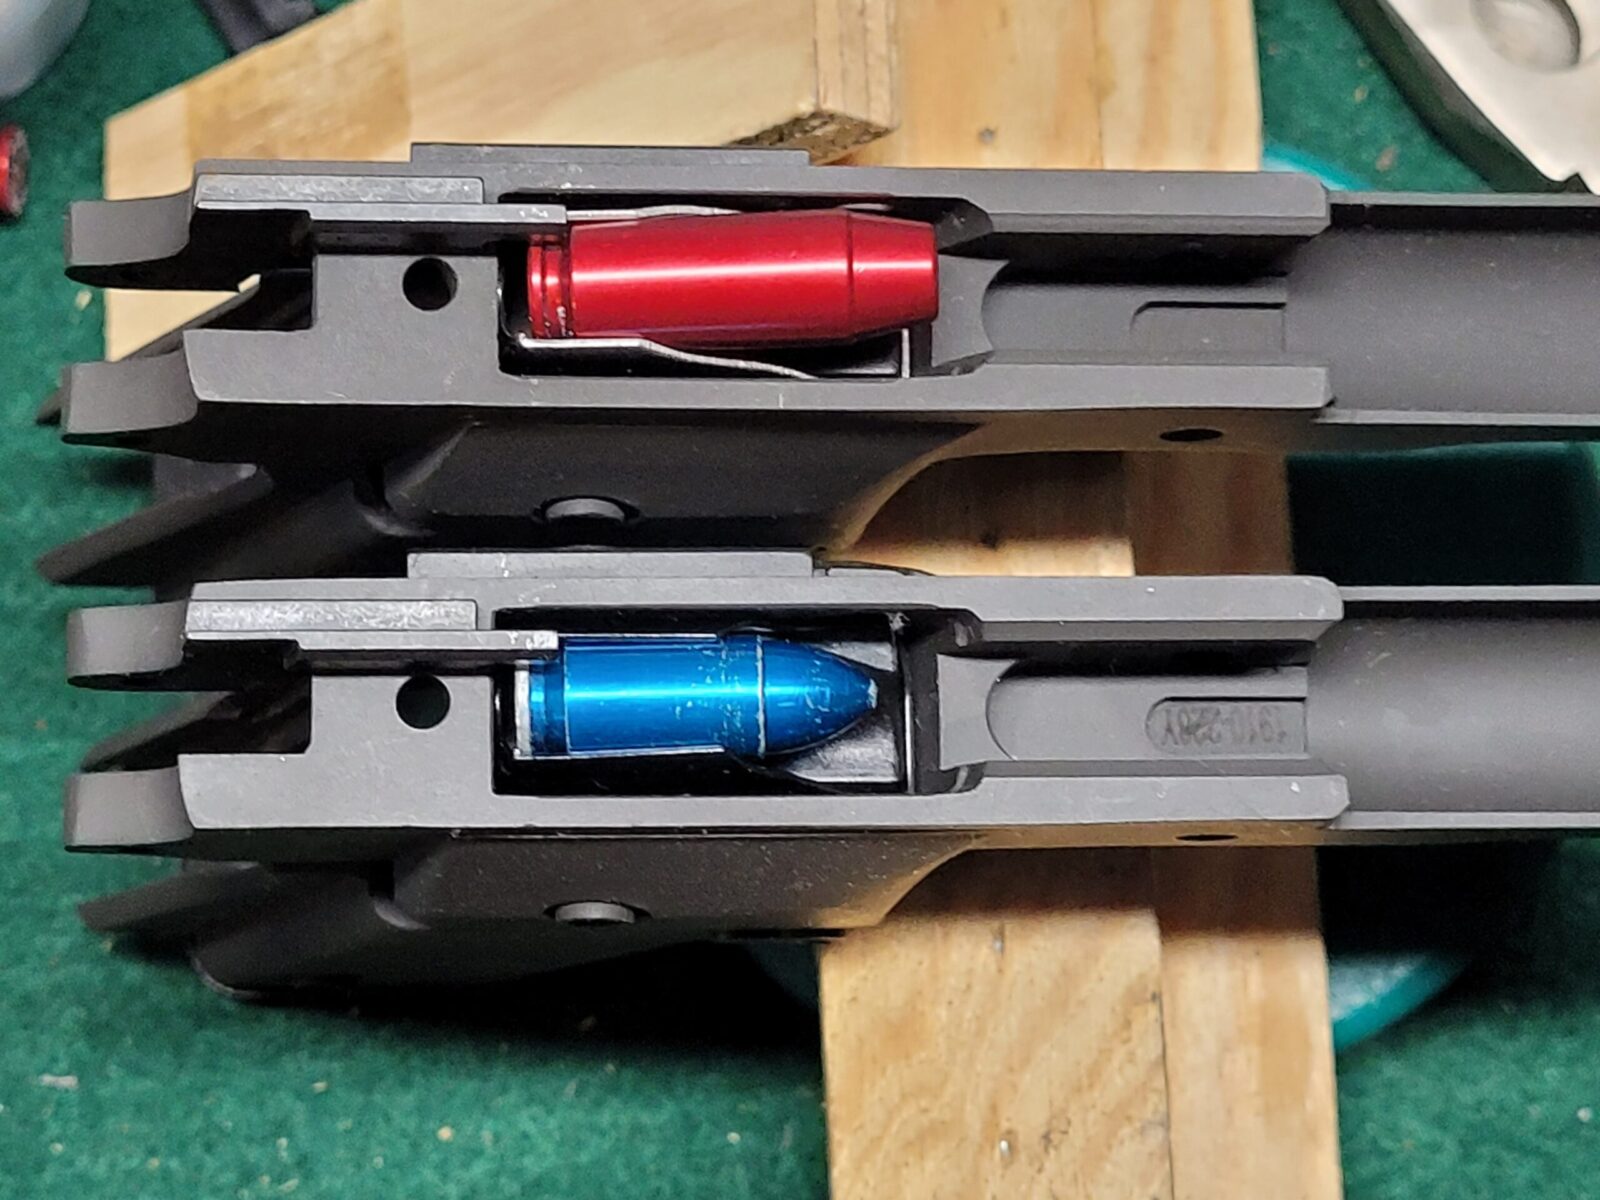
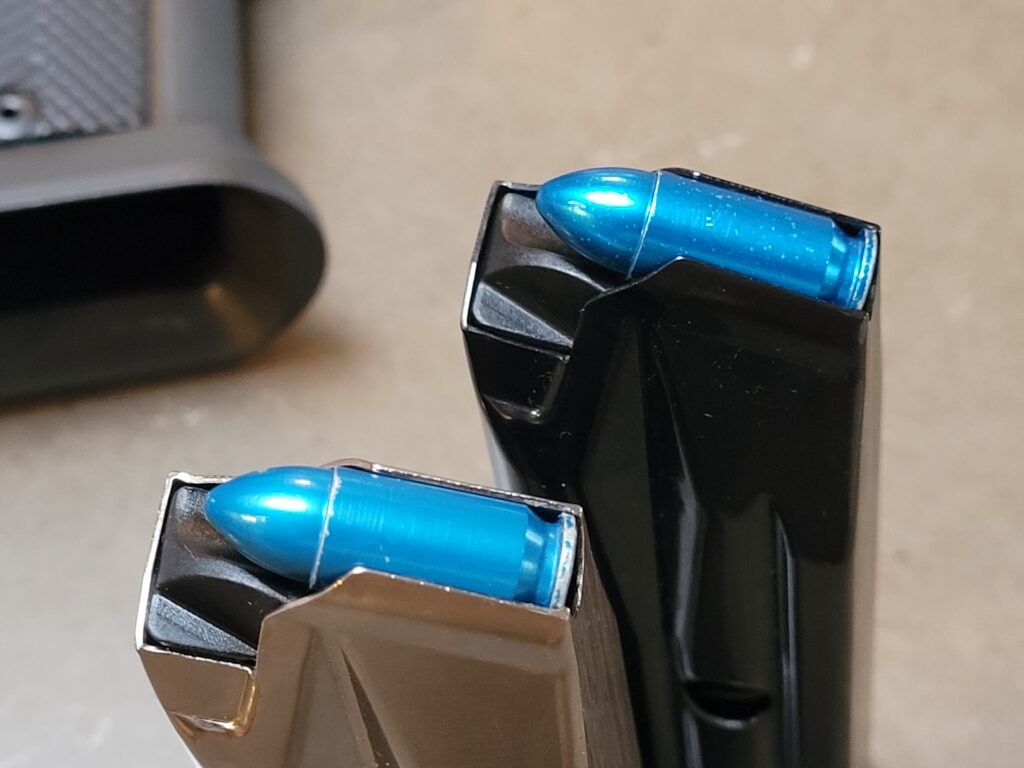
Here are two 80% frames with the top one holding a 10mm magazine and dummy red A-Zoom round. The bottom one has a 9mm magazine. The blue round is an A-zoom snap cap and I don’t use or recommend them any longer as the bullet is shaped very differently than a 115gr or 124gr FMJ round so you may think feeding will work when it doesn’t. I sure found that out the hard way.ĵ

For example, to keep costs down, Armscor uses metal injection molded (MIM) parts. I know through first hand experience, the extractors are MIM and they will not have the longevity of a forged part made from tool steel such as one from Wilson Combat *but* the extractors can be replaced if you ever have a problem so it’s not like you suddenly have a boat anchor and that’s one of the beauties of 1911-style pistols – there is a huge aftermarket parts industry and tons of websites/forums out there to help you sort out what is going on not to mention 1911 gunsmiths and that Armscor has good warranty service – I’ve had to avail on it twice – one on a 6″ 10mm Big Rock and also on a 9mm Tac Ultra that had failure to extract issues … and on that one, there was something seriously wrong because just replacing the extractor didn’t work. [Click here for a post I wrote about my extractor journeys with RIA 9mms].

Rock Island Armory A2 HC-series 1911-style pistol parts
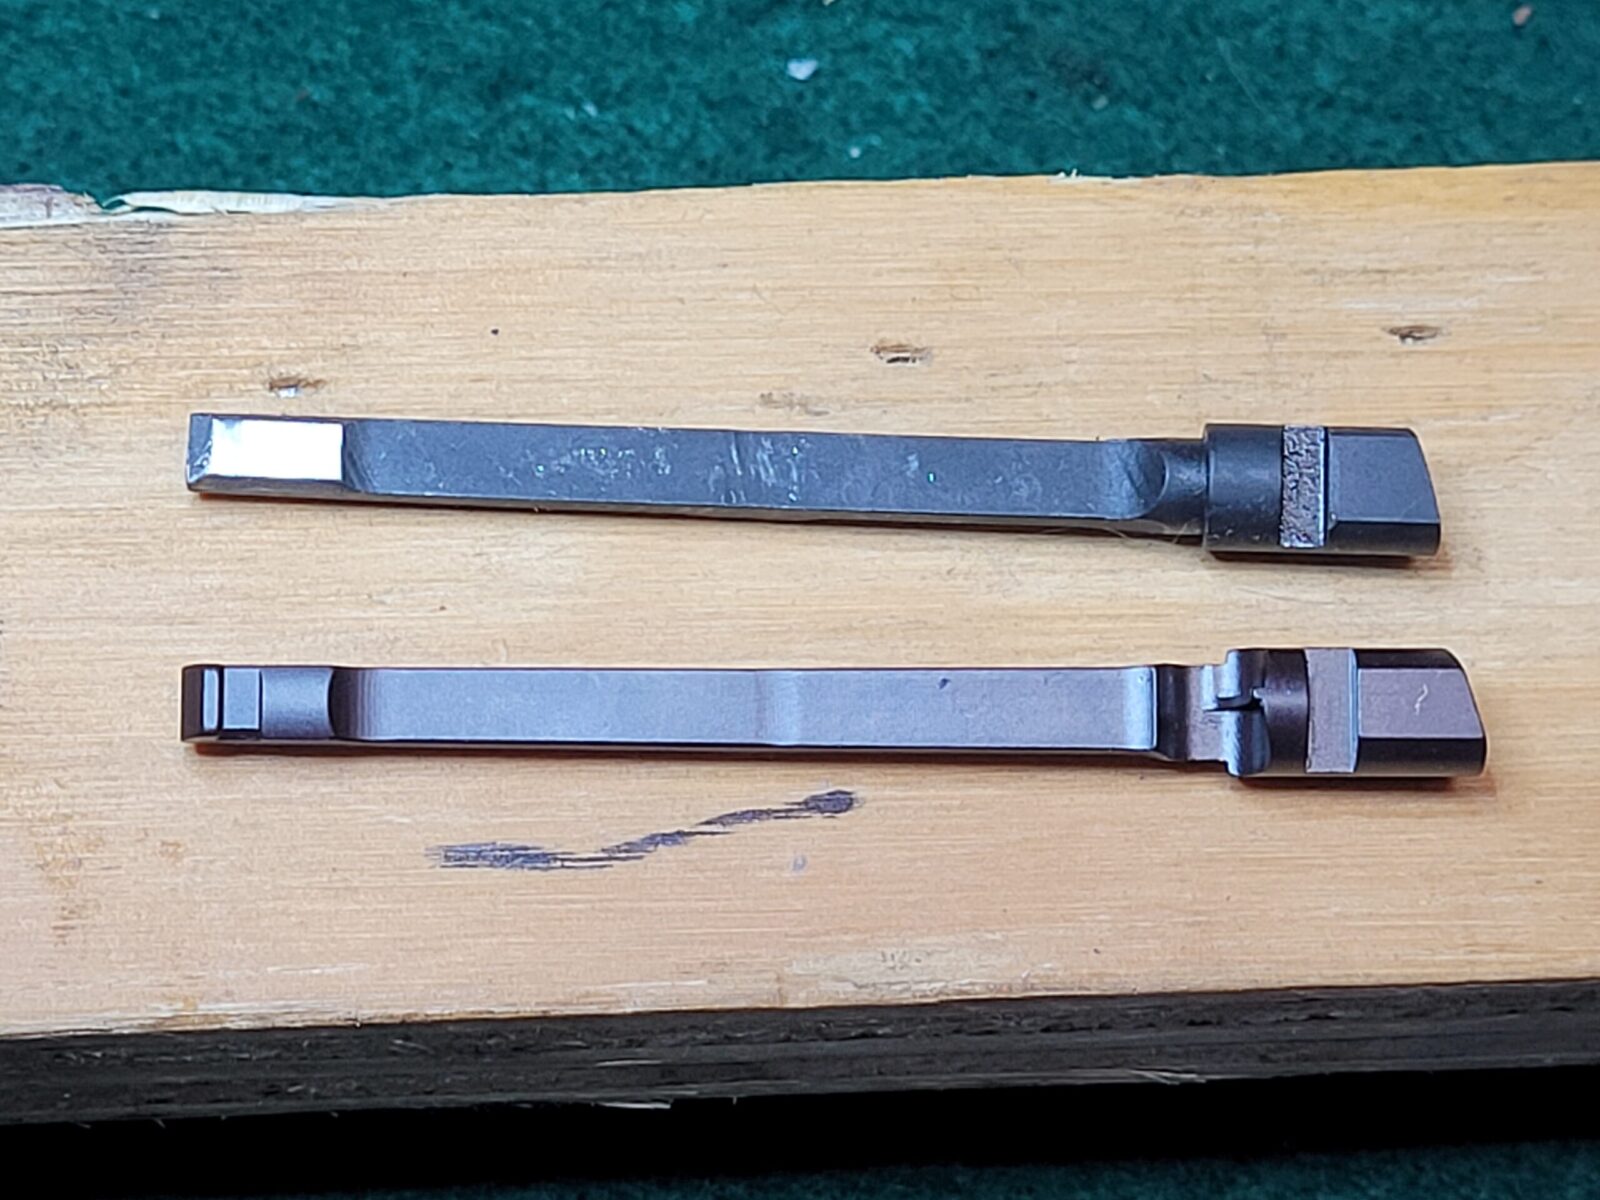
The top is the original Armscor extractor and the claw snapped off. The bottom is a forged tool steel Wilscon Combat. If you run into an issue, read the post I wrote and upgrade to a Wilson.

They also use a parkerized finish and its applied very nicely. There is a but coming – but parkerizing leaves a rough finish and means they need to wear in more compared to other brands that use a different finish and/or have careful polishing and tuning while parts are assembled.

Rock Island Armory A2 HC 9mm 1911-style pistols on a wooden surface.
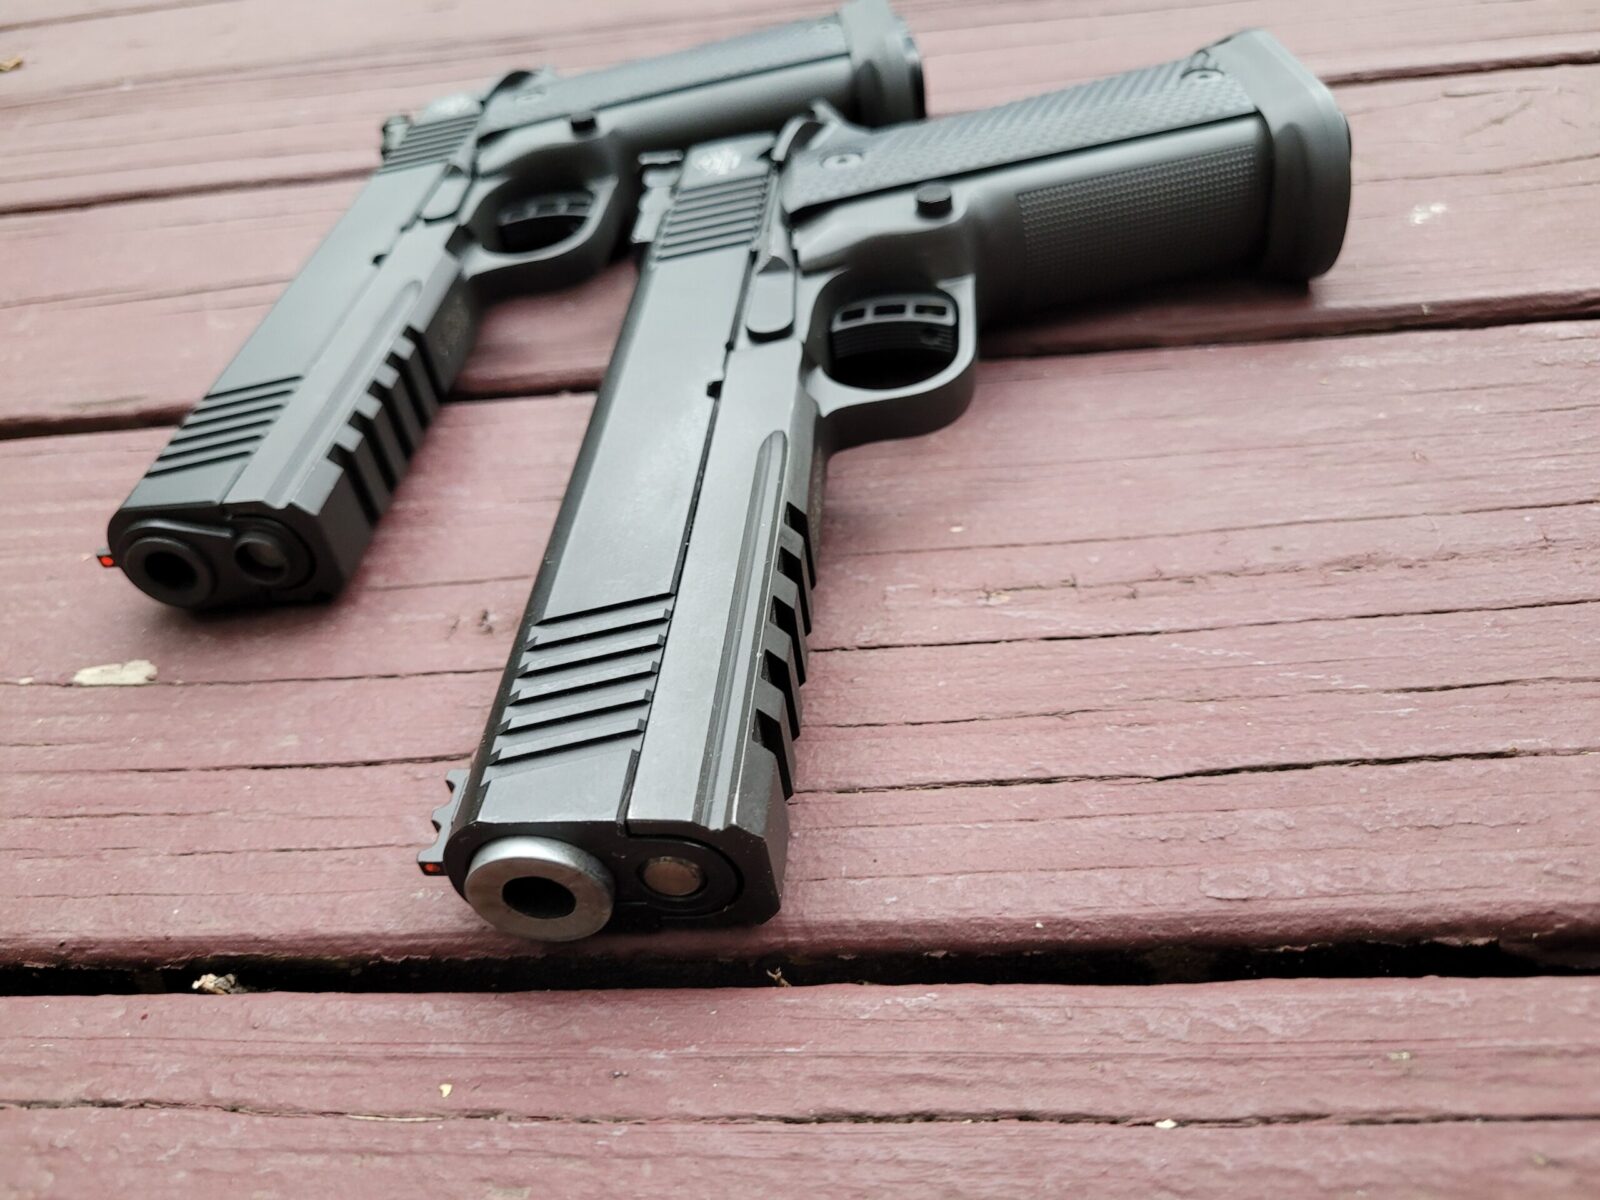
Every parkerized RIA pistol that I have seen has a very nice consistent finish on it. The left pistol is the TAC and you can tell due to the bushing, normal barrel and no checkering on the grip. The right pistol is the Match. It has a bull barrel, full length guide rod and checkering on the front of the grip. The rear sights differ but you can’t see them in this photo.
Rock Island Armory A2 HC double stack 9mm 1911 pistol disassembled with magazine
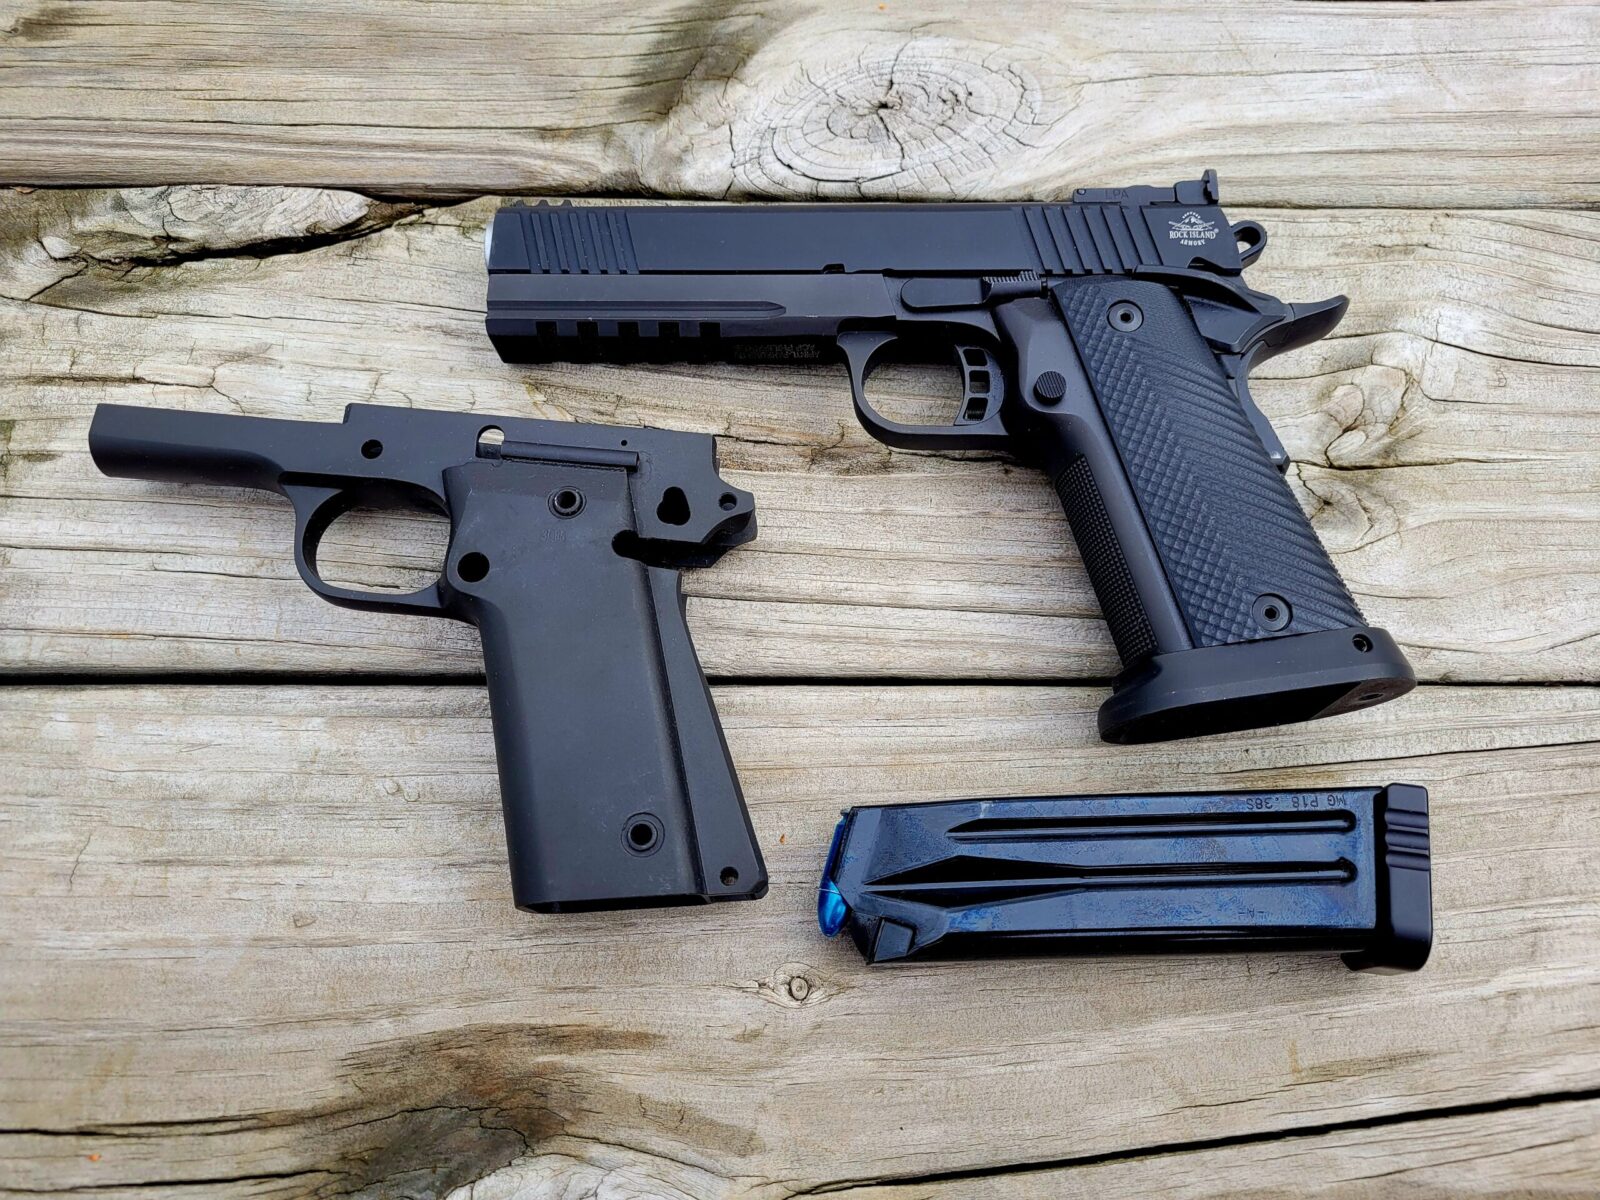
That’s an 80% frame with no modifications right next to it’s finished cousin – a 51679 Tac Ultra. Under the pistol is one of our tuned Mec-Gar P18 magazines with a Dawon +200 base plate. Click here for our 9mm RIA magazine offerings.

Conclusion

This is my way of saying they are good enough. You are buying an entry level pistol that has been on the market for many years and word would get around quickly if they were utter junk. Does the gun need wear in? Yes. Might there be issues? Yes. Do they have warranty support? Yes and they do stand behind and repair their pistols.

Would I recommend these RIA Tac Ultra FS and Pro Match Ultra HC pistols to someone looking for an entry level 17 round 9mm 1911 style pistol? You may find it odd but yes I would and I’d explain the above.

I hope this helps you out.

1/6/2023 Update: I’ve had zero problems since writing this post. Both pistols have cycled thousands of times during magazine testing (meaning rounds are cycled by hand but not actually fired) and the slides are smooth as glass. I took both to the range recently and they functioned just fine with both 115 and 124gr bulk FMJ – I think the 115gr was CCI and the 124gr was S&B if I recall right.


Note, I have to buy all of my parts – nothing here was paid for by sponsors, etc. I do make a small amount if you click on an ad and buy something but that is it. You’re getting my real opinion on stuff.


Please share the link on Facebook, Forums, with colleagues, etc. Your support is much appreciated and if you have any feedback, please email us in**@*********ps.com. If you’d like to request a report or order a reprint, please click here for the corresponding page to open in new tab.

Stribog SP9A1 Range Results And My Observations – Why I like it!

In the last post, I told you a little bit about the Stribog and the modifications I made [click here if you missed it]. I took it to the range twice over the summer and ran about 400-500 rounds through it flawlessly – really. So let’s talk about the details.

Prepping to go to the range

One thing I have learned over the years is that most semi-automatic weapons need to break in and that includes the Stribog. Never take a weapon out of the box and expect it to work. Instead, field strip the weapon, clean and oil it. After that, cycle the slide manually a few hundred times (literally) to get a jump start on the break in process.

What happens during wear-in or break-in is that surfaces that rub together – either by sliding or rotating start to have the surface smooth down. Despite what you may see, most surfaces have thousands of tiny ridges and spikes sticking up that cause friction and screw up operation. As the weapon cycles, these little edges are worn down. A decent oil or light grease can help with this as it fills in these areas and the luibricity enables the parts to slide or rotate while they are wearing in.

This is to be expected of most weapons unless you are buying a custom firearm where the builder has probably meticulously polished everything. By the way, firearms with parkerized parts need wearing in the most. On the other hand, other finishes, such as Nickel Boron, may need it less.

What’s my tip for you? If you want to have an enjoyable first range visit, clean, lube and cycle your weapon at least 200 times.

Function tested the Stribog

Just to be safe, I function tested the Stribog to make sure the fire control system was working right:

  1. Make sure the weapon is clear
  2. Try pulling the bolt back and let go. The spring should forefully return the bolt to the home position. If it doesn’t, take the weapon apart then clean, lube and try this again. If it still doesn’t then something is wrong and you should talk to who sold it to you, Grand Power or do some searching online – just be cautious because not everyone posting advice knows what they are talking about so be a healthy skeptic.
  3. Cycle the bolt, pull the trigger and you should hear a click. If not, you have a problem.
  4. Make sure the hammer is not cocked (pull the trigger if you need to – See #1). Now, pull the trigger and hold it down and cycle the bolt – you may hear or feel a light click as you release the trigger – that should be the disconnector catching the hammer so it doesn’t follow the bolt back. When you squeeze the trigger you should hear the normal click of the hammer hittin the firing pin. If the hammer isn’t getting caught, you have a problem.
  5. Cycle the bolt, turn the safety to on and try to pull the trigger – it should have little to no movement and you should not hear the hammer hit the firing pin. If you do hear the hammer hit the firing pin – make sure you did turn the safety lever the corrrect direction and all of the way to safe. If it still fires, you have an unsafe weapon that needs to be serviced / returned for warranty repair.

Range Trips

The Stribog has been to the range twice as of my writing this. The first visit was with my friend Jim and we used 124 grain S&B FMJ ammo. I like to use the 124 grain ammo during initial break in of 9mm firearms as there is a bit more recoil impulse to overcome remaining friction.

Two 10mm bullets, possibly for a Rock Island pistol.
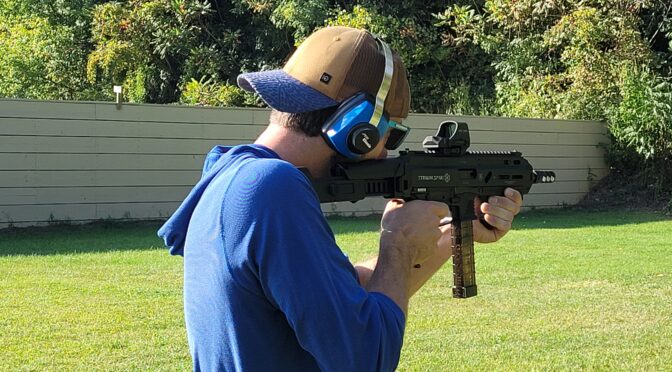
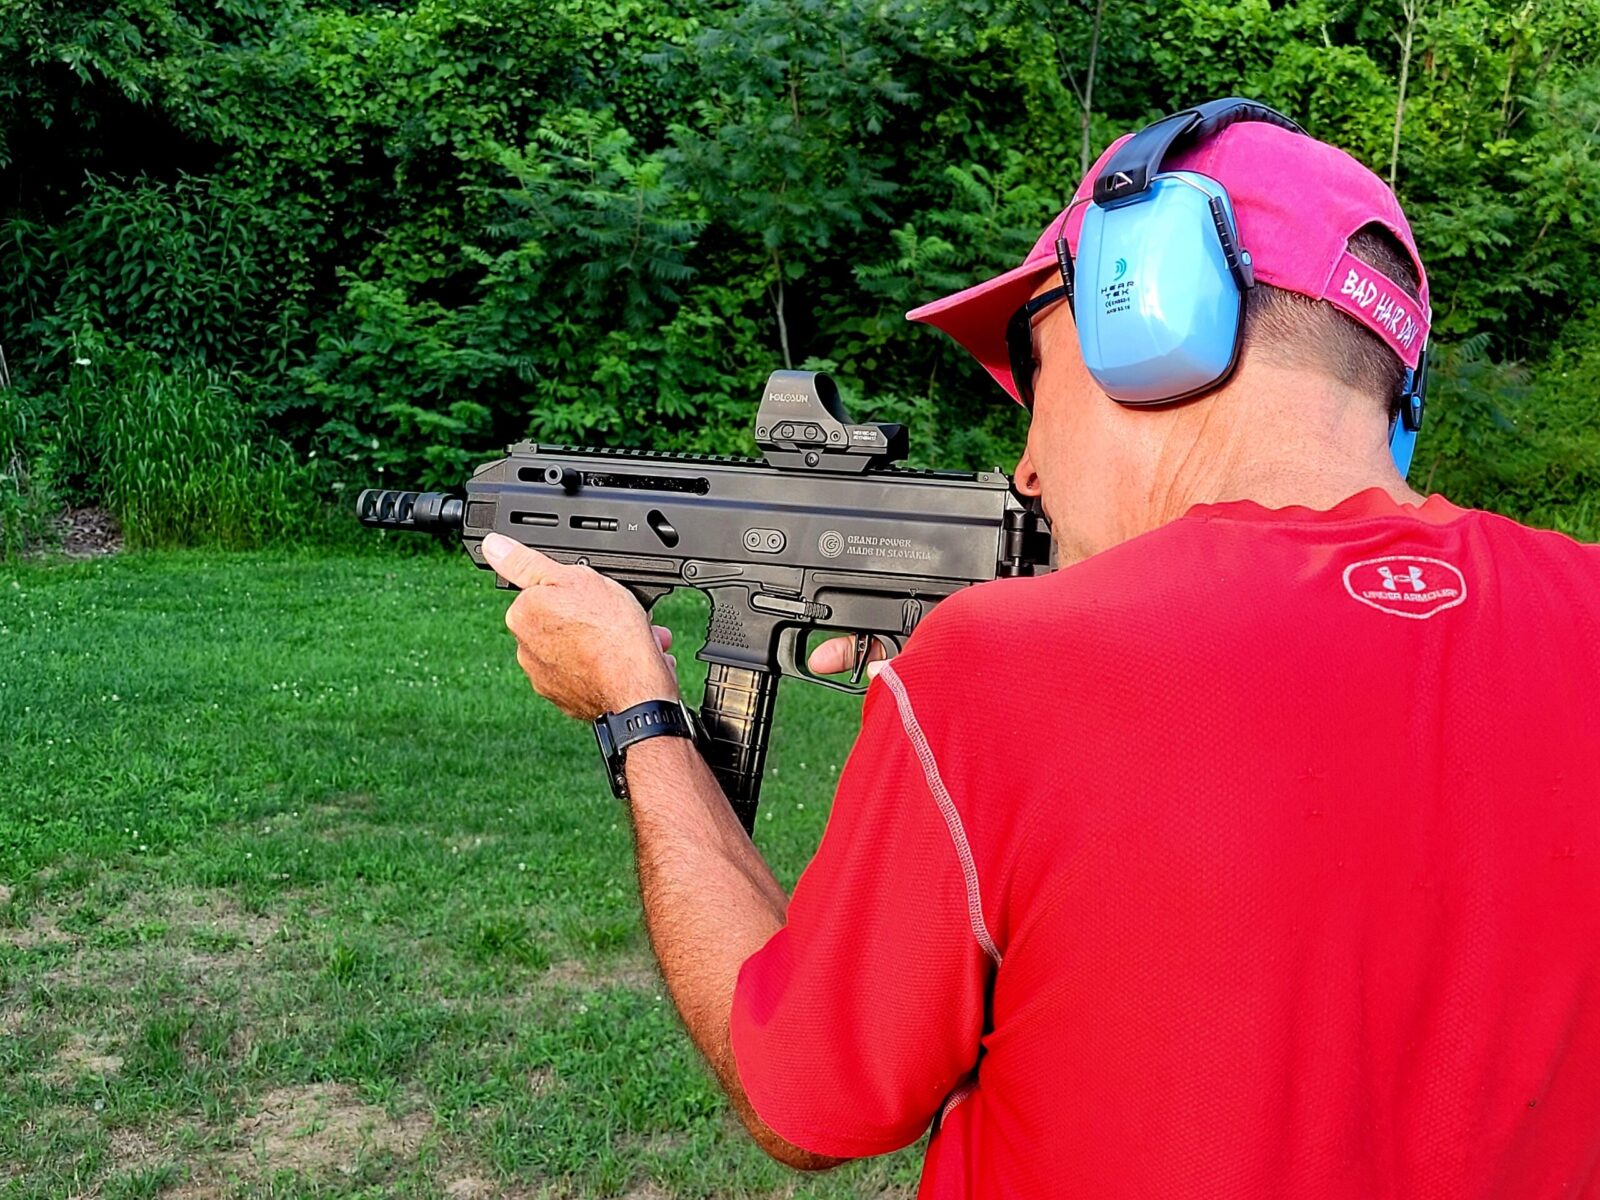
Jim putting 124gr FMJ rounds down range through the Stribog. We were both vey impressed. Ok, about the pink hat – Jim forgot his hat and it was a bright sunny day. The only spare hat in my truck was my wife’s. Sooo… Jim wore that hat and has endured good natured ribbing ever since. He’s a very good friend and a great shooter … even with a pink hat on – Hi Jim 🙂
Two 10mm bullets, possibly for a Rock Island pistol.
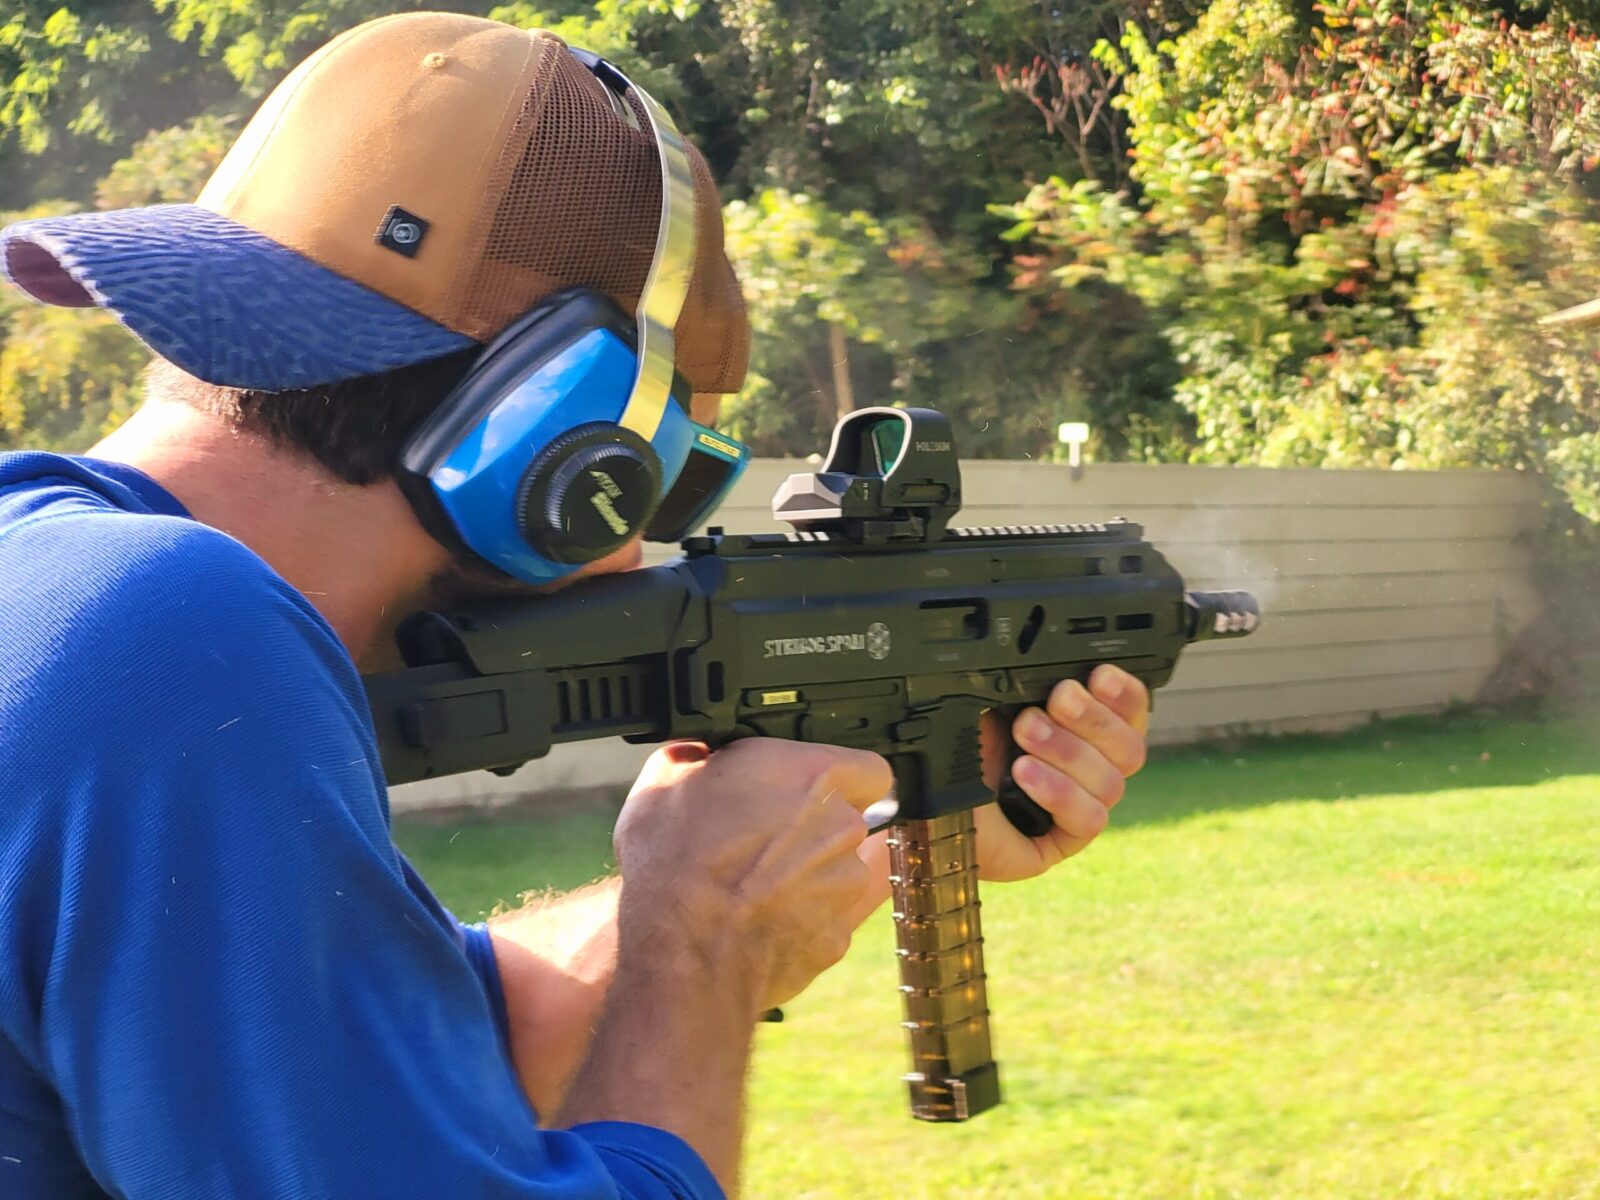
Niko is cutting loose. You can see some smoke rising from the muzzle. It was toasty from all the rounds. Niko is about 6′ 2″ tall and I’m only 5′ 8″. The adjustable brace worked really well for both of us as a result. By the way, that F5 modular brace system is incredible. I am running it on both my Stribog and CZ Scorpion Micro.

It ran great – I think we put about 90-120 rounds through it with no problems at all. In the second trip, we ran about 60 rounds of the 124 grain S&B FMJ. We then ran probably 300 rounds of 115 grain CCI Speer FMJ bulk box ammo and wrapped up with about 30 rounds of the IMI 124 grain +P black dot hollow points through it.

Two 10mm bullets, possibly for a Rock Island pistol.
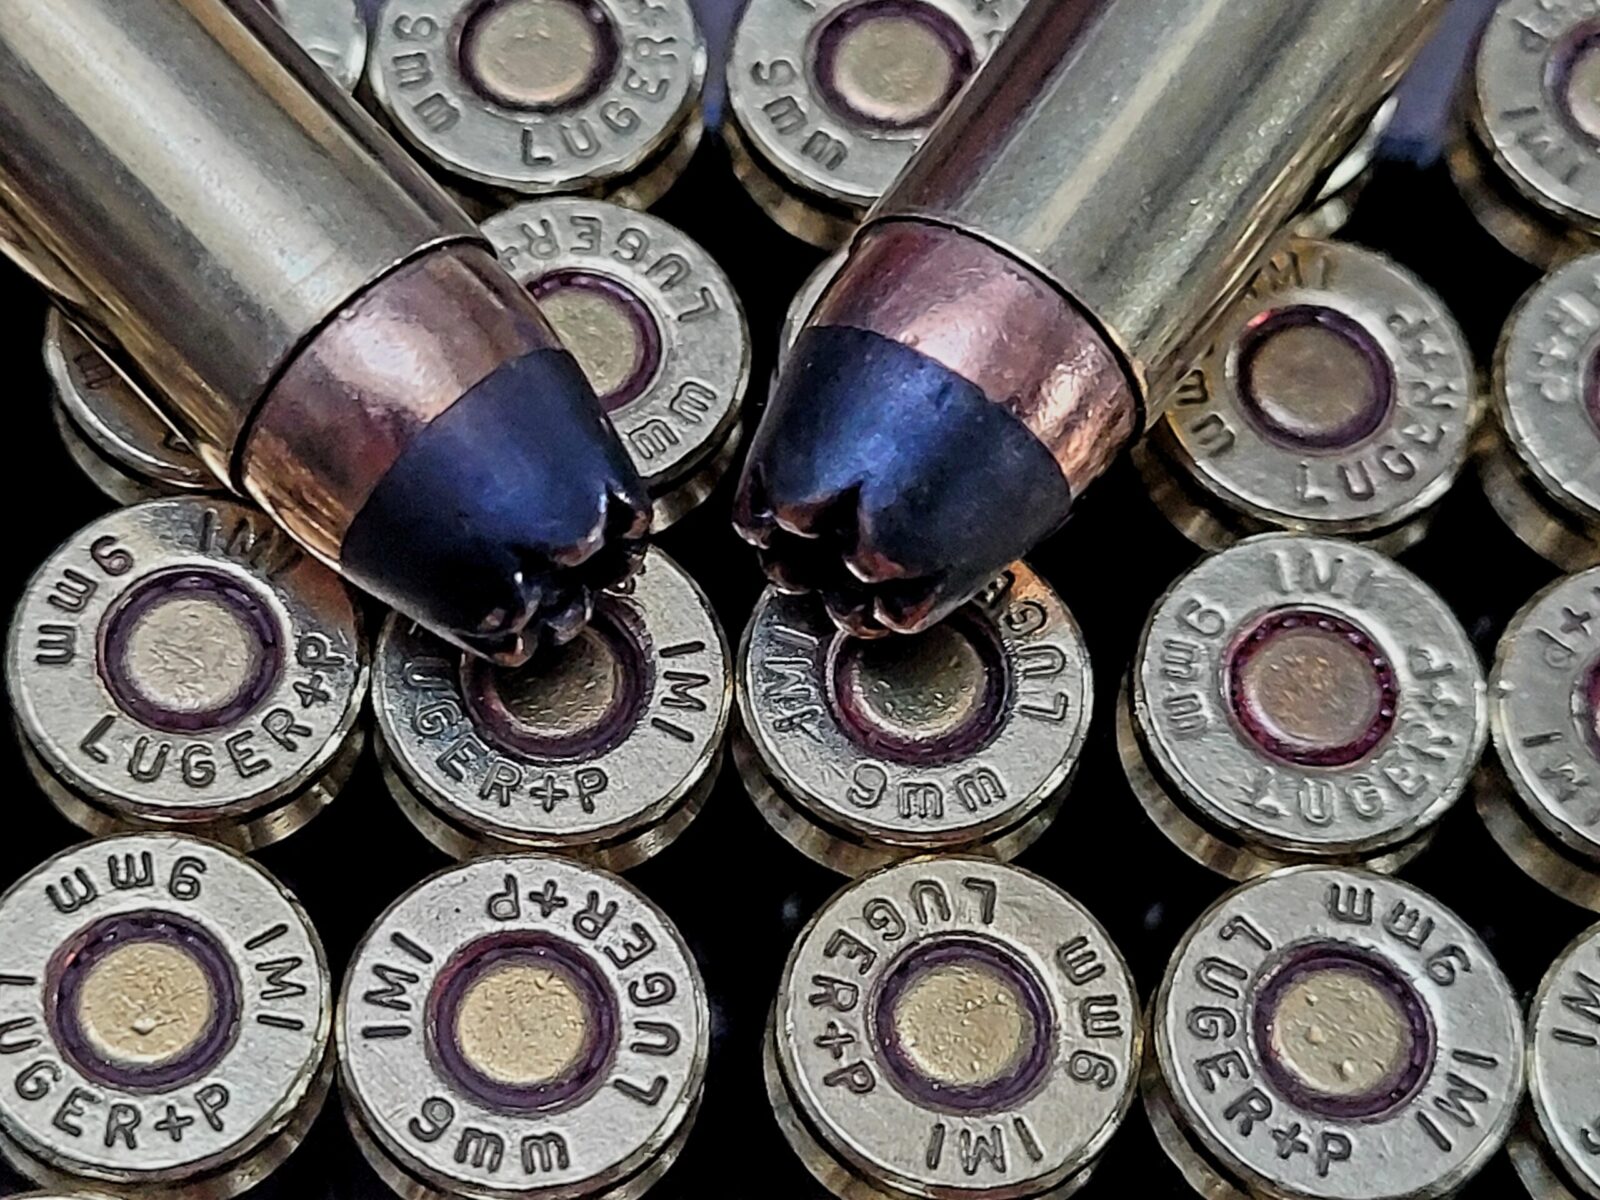
The IMI +P 124gr load is decent. The black paint is used to identify it is a +P load. It’s just a paint and not any form of special coating. If you read the reviews, it’s a decent HP load at the end of the day. I wish I’d brought some other HP loads to try as well. We didn’t have any issues but people have reported problems in the past with HP loads,

What was amazing was the we had zero, none, nada failures to feed (FTF) or failures to eject (FTE). I attribute this to how I break in all semi-autos before I go to the range the first time as mentioned above. It should also tell you that the Stribog is pretty well thought out and made.

Two 10mm bullets, possibly for a Rock Island pistol.
The Stribog really performed great during both of its range trips. Note, we only used straight 30 round mags and none of the curved ones. I had the curved mags buried in my range bag and we simply didn’t get to them. We used mags both with and without the steel reinforcing lips and did not have anyu issues with either one.

So what else did I notice?

In both cases, we were shooting paper targets and plates at about 10-15 yards from the standing position. The combination of the Stribog, Holosun Optic and F5 modular brace proved to be excellent.

Controlling the Stribog even during rapid fire was easy. The relatively small 9mm cartridge has very little recoil to begin with and fired from the Stribog with a brake, it’s very easy to keep the muzzle on target. I’m sure the brake helped some but givent he weight of the Stribog and an 8″ barrel, it probably would have been ok without it. If nothing else, the brake looks better than the threaded muzzle protector.

The trigger is perfectly decent. It’s not a match trigger but it is one of the better factory triggers I have encountered out of the box in a pistol caliber carbine. I used my Wheeler digital trigger pull gauge to collect some test data – I carefully pulled the trigger 10 times and found that the average pull was 5 pounds 10.8 ounces. The minimum was 4 pounds 10.2 ounces and the maximum pull was 6 pounds 6.8 ounces. Not bad. There is a spring set to reduce the pull that can be bought but I don’t reallly think the pull needs to be changed given close quarter use.

By the way, I always compare triggers mentally to the worst triggers I have felt out of the box. The worst trigger award goes to H&K and clone MP5s. Yuck. I’d described those triggers as pulling a truck with no wheels through the mud. With practice you get used to them – I guess with enough practice you can get used to just about anything and they do wear in a bit – but they suck out of the box.

Moving on, I do wish the charging handle was a tad bigger to spread the load a bit more. It’s jost a tad too narrow for me but that’s just me. There is a folding charging handle option I plan to try at some point.

10mm bullet for Rock Island 52000 10mm pistol
I do wish the charging handle was a tad thicker. See how it tapers in the middle? I do plan to upgrade to a folding charging handle in the future. The controls overall are well thought out and easy to use. The safety is just above the pistol grip, the magazine reease is above and to the front of the trigger and the slide release is immediately above the magazine release.

Summary

The Stribog really delivered. It was fun, accurate and reliable at the range. I wish I had brought some other hollow points to try but it didn’t cross my mind. I actually bought a case of the IMI +P 124gr HP rounds specifically for my PCCs if self defense was required – I really only shoot FMJ at the range.

To wrap up, I like the SP9A1 Stribog and have no hesitation recommending it to others given my experience. There is a growing aftermarket so you can customize the pistol to fit your needs.

I hope this helps you out!


Note, I have to buy all of my parts – nothing here was paid for by sponsors, etc. I do make a small amount if you click on an ad and buy something but that is it. You’re getting my real opinion on stuff.


Please share the link on Facebook, Forums, with colleagues, etc. Your support is much appreciated and if you have any feedback, please email us in**@*********ps.com. If you’d like to request a report or order a reprint, please click here for the corresponding page to open in new tab.

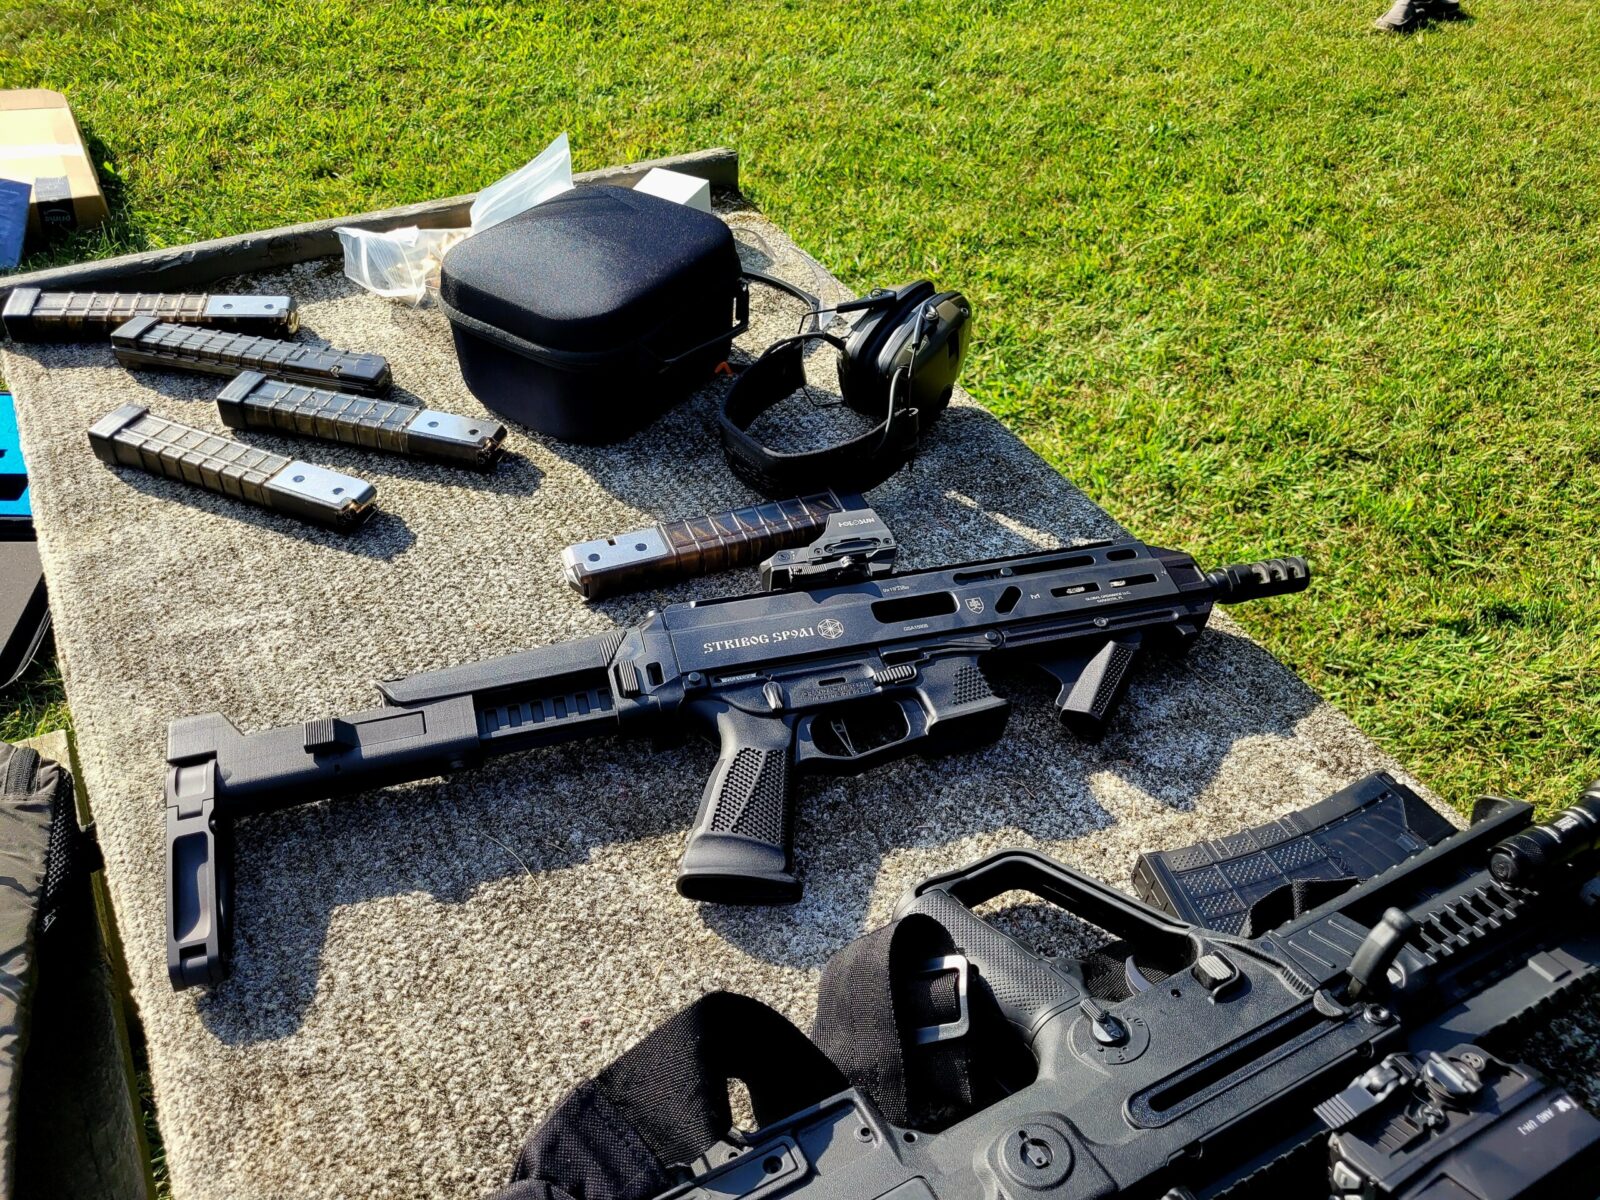
What is a Stribog? It’s currently my favorite pistol caliber carbine

I do a lot of reading and a few years ago I read about a new pistol caliber carbine (PCC) called a “Stribog” by Grand Power. It was a blocky looking thing but it was getting good reviews. The more I read, the more positive real-world reviews I encountered. Finally, in a fit of obsessive compulsive behavior, I ordered one in and now it’s my favorite PCC. Well, that would be too short of a post so let me back up a bit and give you some background.

Where did the name “Stribog” come from?

First off, “Stribog” is pronounced “Stry-Bog” and refers to an anicent Slavic diety that can be interpeted as the god of wind or, depending on the translation, the god of annihilation or war. Others say he was the gold of the cold but regardless, that’s what it was in centuries long past. [If you want to read more, click here for a cool post on Wikipedia].

Who makes it?

The Stribog is made by Grand Power, a relatively new company located in Banská Bystrica – Slovenská Ľupča (Slovakia). Mr. Jaroslav Kuracina started the company just before 2012 when he then got funding from friends and the rest is history. They now are producing 2,000 firearms per month on CNC machines based on Jaroslav’s designs.

By the way, Jaroslav’s patented design is how the barrel locks into the slide by rotating. This matters for two reasons – first, it reduces barrel rise meaning you can get back on target faster. Second, it reduces felt recoil – enabling the shooter to better stay on target also.

In 2008 they started exporting to the US and today, Global Ordnance of Sarasota, FL, is their US distributor. In a relatively short amount of time, they have not only entered the US market but created a good reputation in the process. You can now find the Stribog being sold by many different vendors including Global Ordnance directly, Palmetto State Armory, GrabAGun and many others.

Which model did I get?

I bought a SP9A1 with a folding SB Tactical brace in November 2021. It is my understanding that at some time prior to that the charging handle was of the reciprocating type – meaning it would travel forward and backward as the bolt cycled. One thing I made sure of was that it did have a non-reciprocating handle and it did. I would bet by the time you read this you will only find new firearms for sale with the non-reciprocating handle but buying one used might be a different story.

Chambered for 9×19 NATO (9mm Luger) and fire +P loads. 9mm NATO tends to be hotter than 9mm Luger so +P ammo is not a challenge for it.

8″ barrel with 1/2″x28 threads – this thread is commonly used for 9mm muzzle devices so you can readily add compensators, suppressors, etc.

Close-up of the textured grip of a Rock Island 10mm pistol.
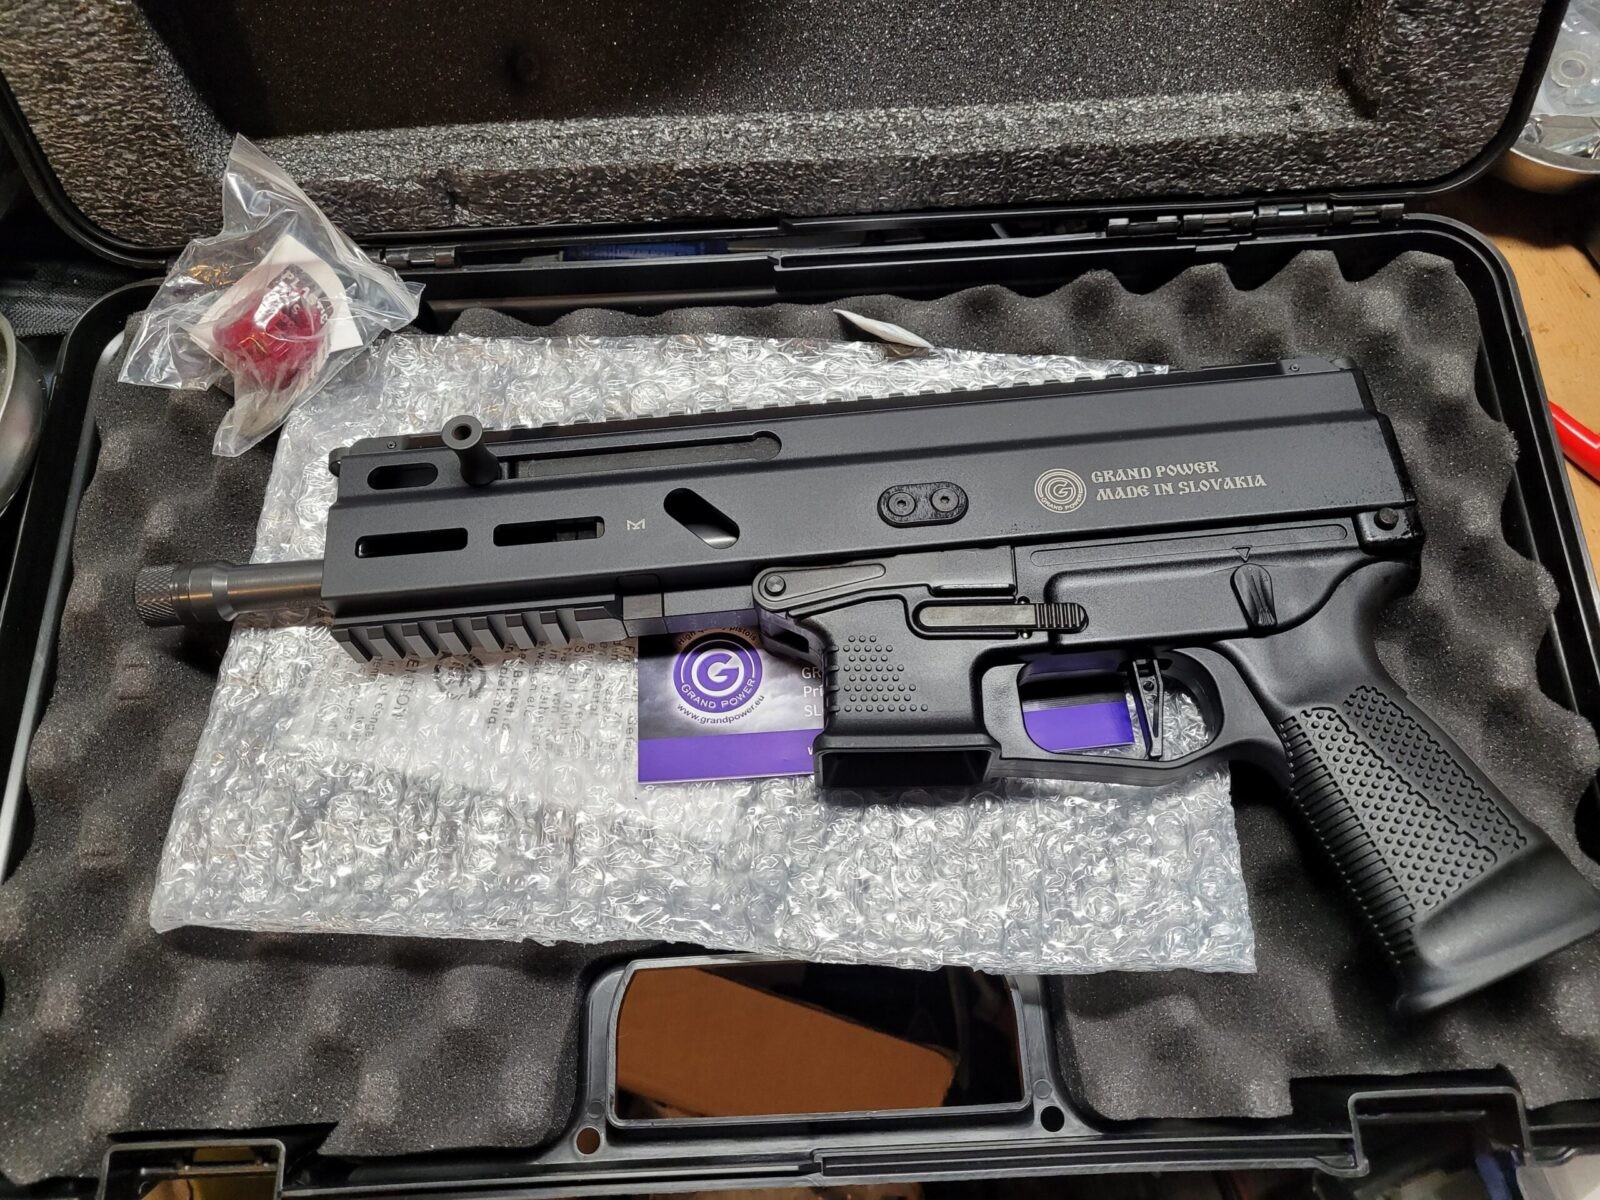
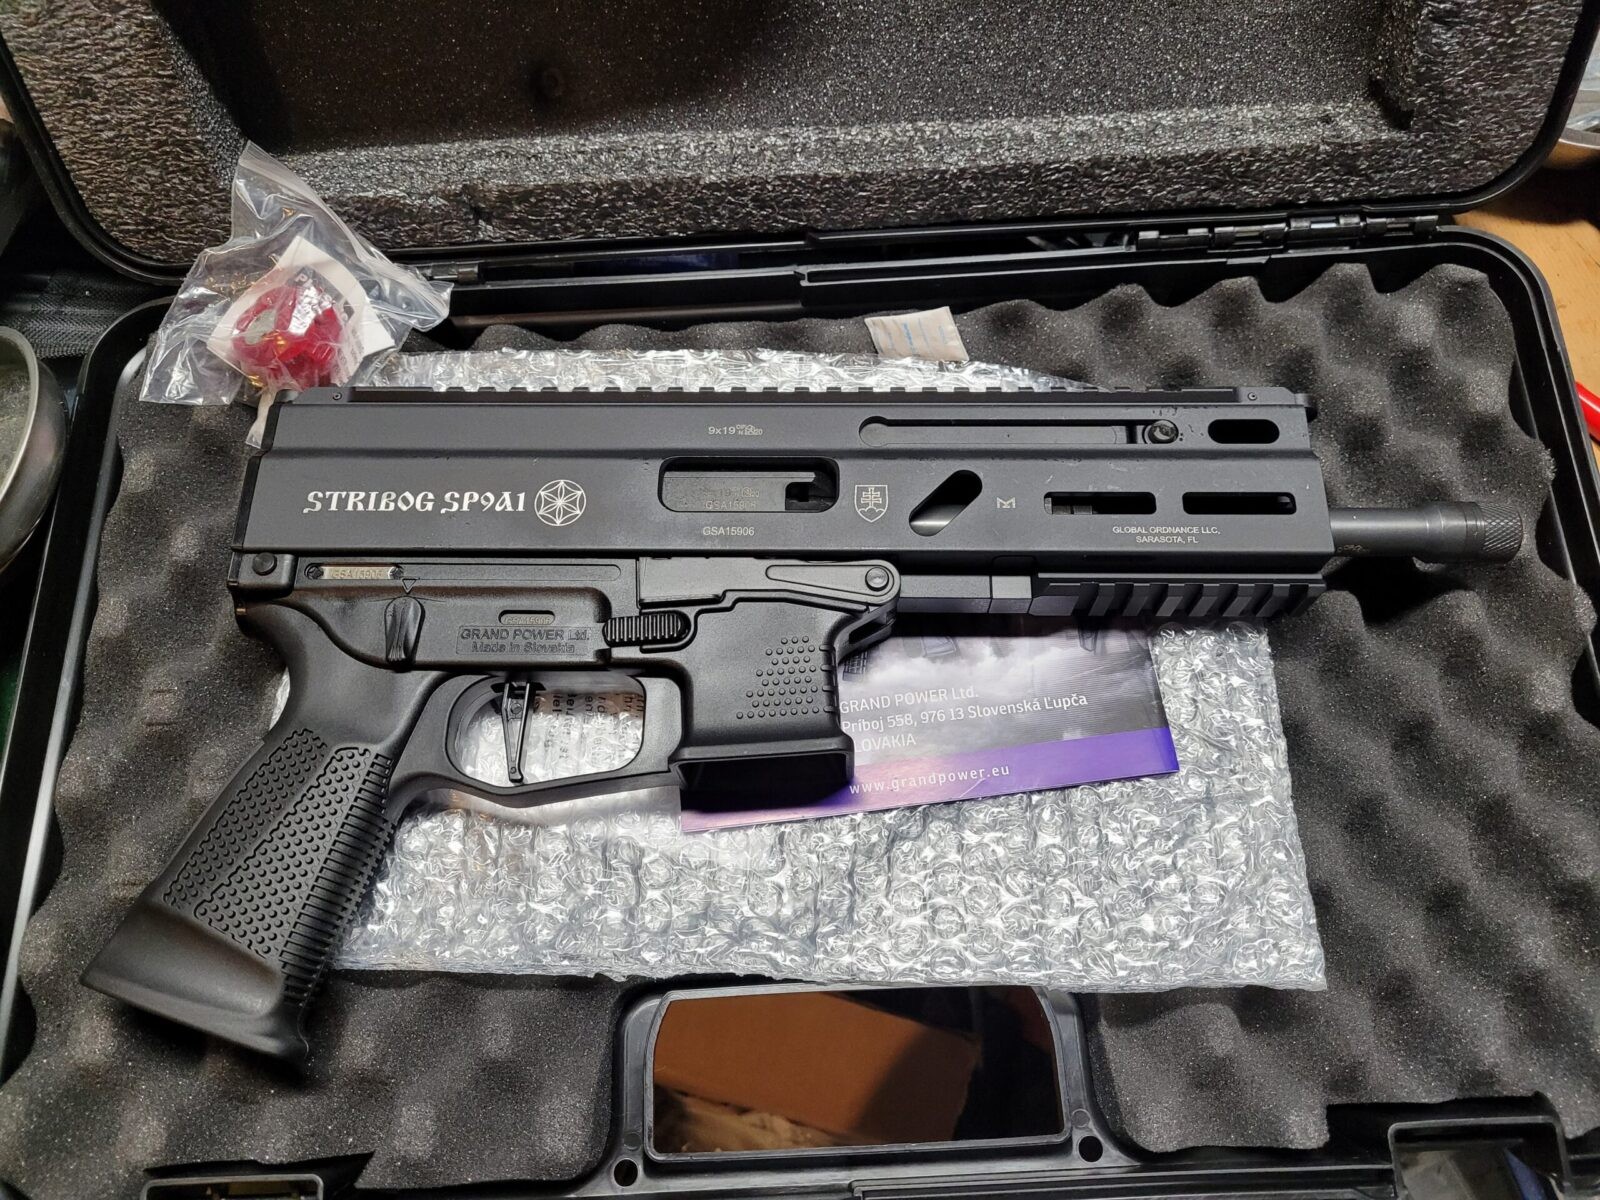
The Stribog arrived nicely packed in a hard case.
Close-up of the textured grip of a Rock Island 10mm pistol.
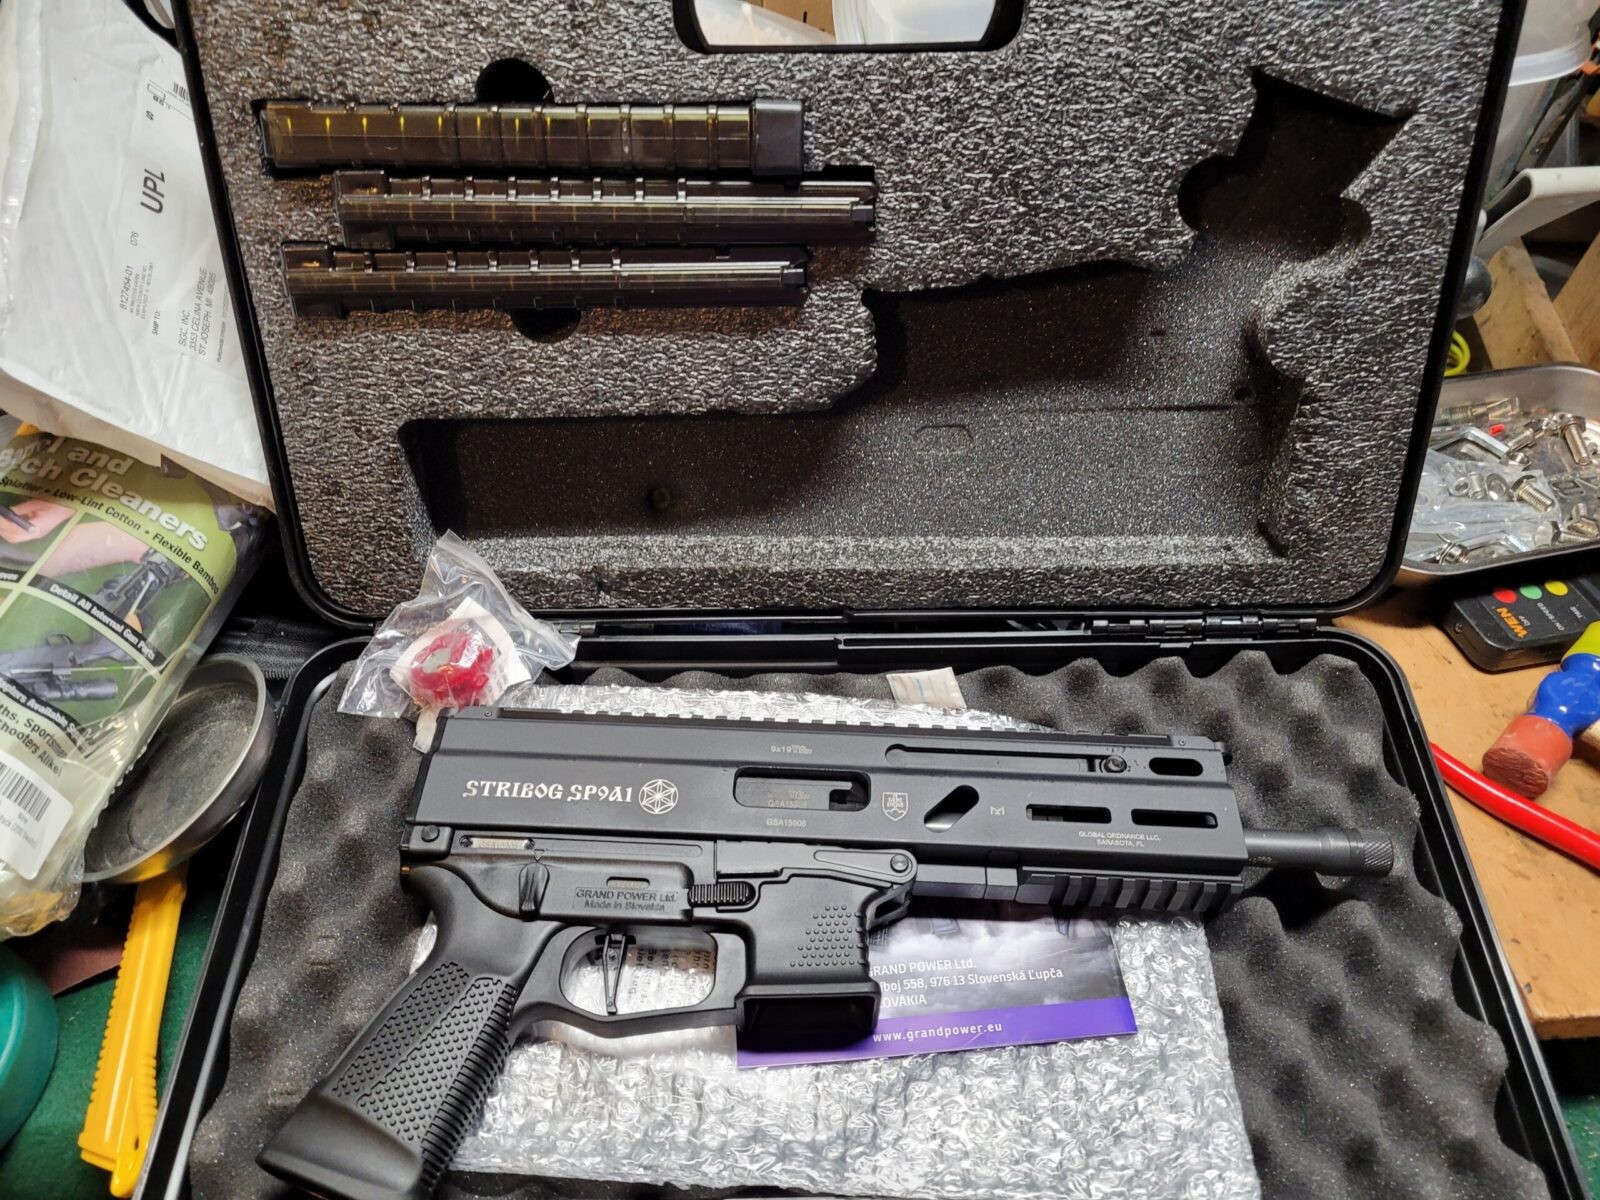
Here;s looking at it from another angle. Honestly, I can do without the screen printed white text and graphics.
Close-up of the textured grip of a Rock Island 10mm pistol.
It took me a minute before I looked at the lid and noticed the three magazines tucked in there.

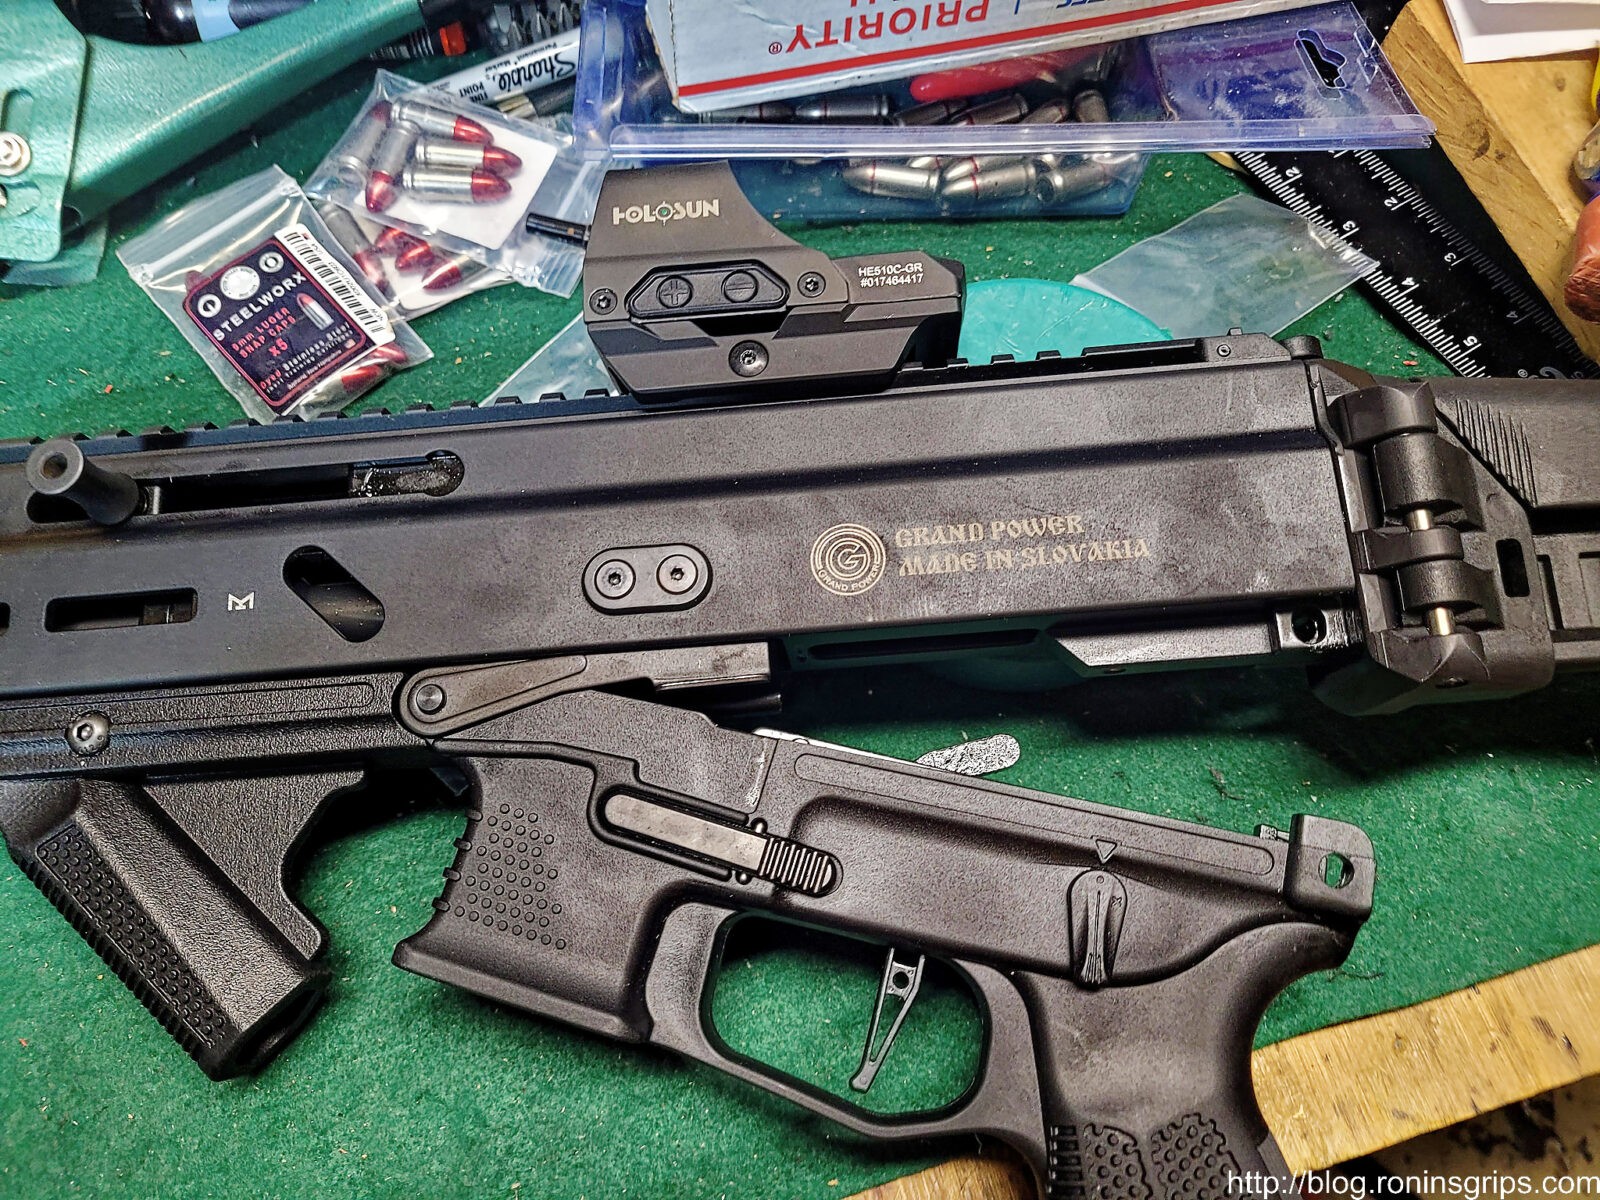
In looking the pistol over, there were a few areas for improvement. First, I do not like the trangular SB Tactical brace. It works but doesn’t suit my taste. I also wanted to do something with that 8″ barrel poking out the front of the handguard, install a muzzle brake and a reflect optic.

Installing the F5 Manufacturing Modular Brace

Folks, I’ll tell you up front that F5 Modular Brace System is my favorite brace. It really is well done plus they make a number of Stribog related products if you are interested.

Close-up of the textured grip of a Rock Island 10mm pistol.
Pop out the back lower pin and you can then change the rear plate in the top half. The pin is captive meaning it will push through but will not exit the other side so don’t force it.
10mm bullet for Rock Island 52000 10mm pistol
This is as far as the pin will push out. You do need to push it until it stops so you can remove the back plate but don’t force it out.
Close-up of the textured grip of a Rock Island 10mm pistol.
Push the plate down slightly and then it will pull out.
Close-up of the textured grip of a Rock Island 10mm pistol.
The F5 literally slides right back in place of the plate. It’s very nicely done – my unit did not require any fitting.
Close-up of the textured grip of a Rock Island 10mm pistol.
For the brace, I switched over to the cool F5 Manufacturing’s modular brace system that then holds a Tailhook brace. I like the modular system because it is adjustable and reminds me of a SCAR.
Close-up of the textured grip of a Rock Island 10mm pistol.
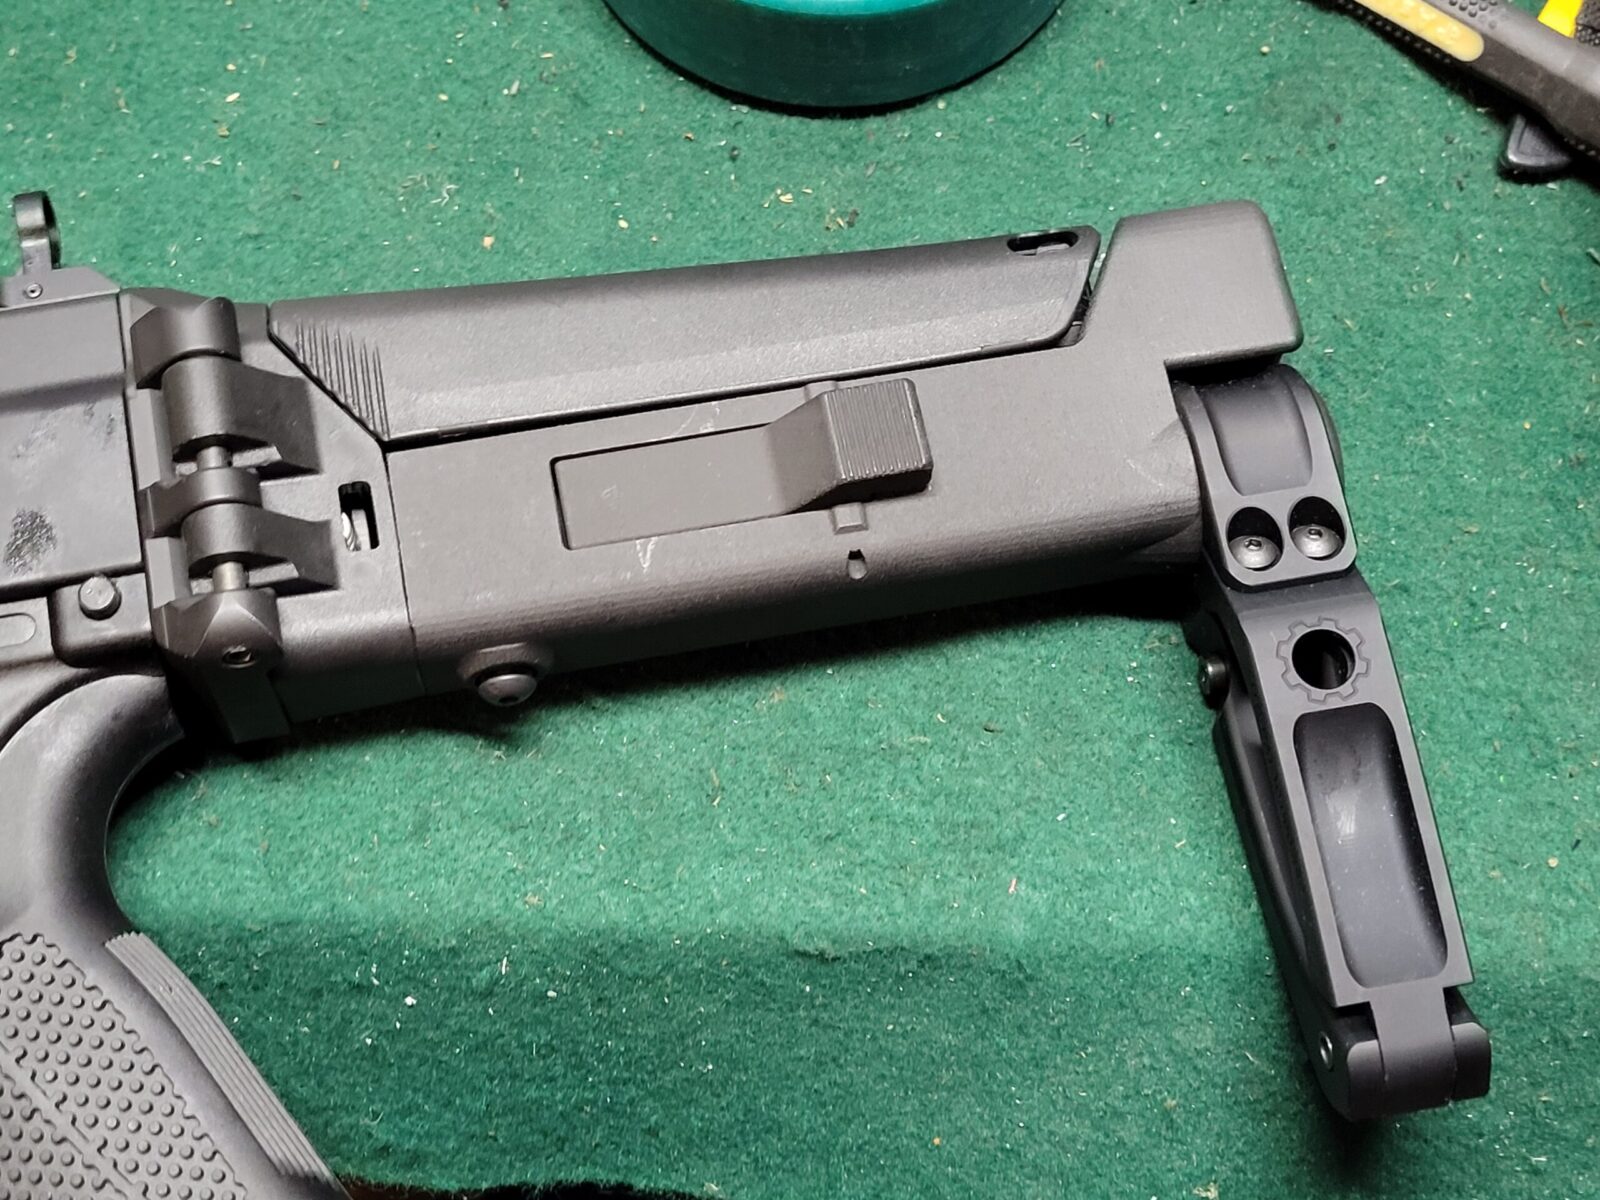
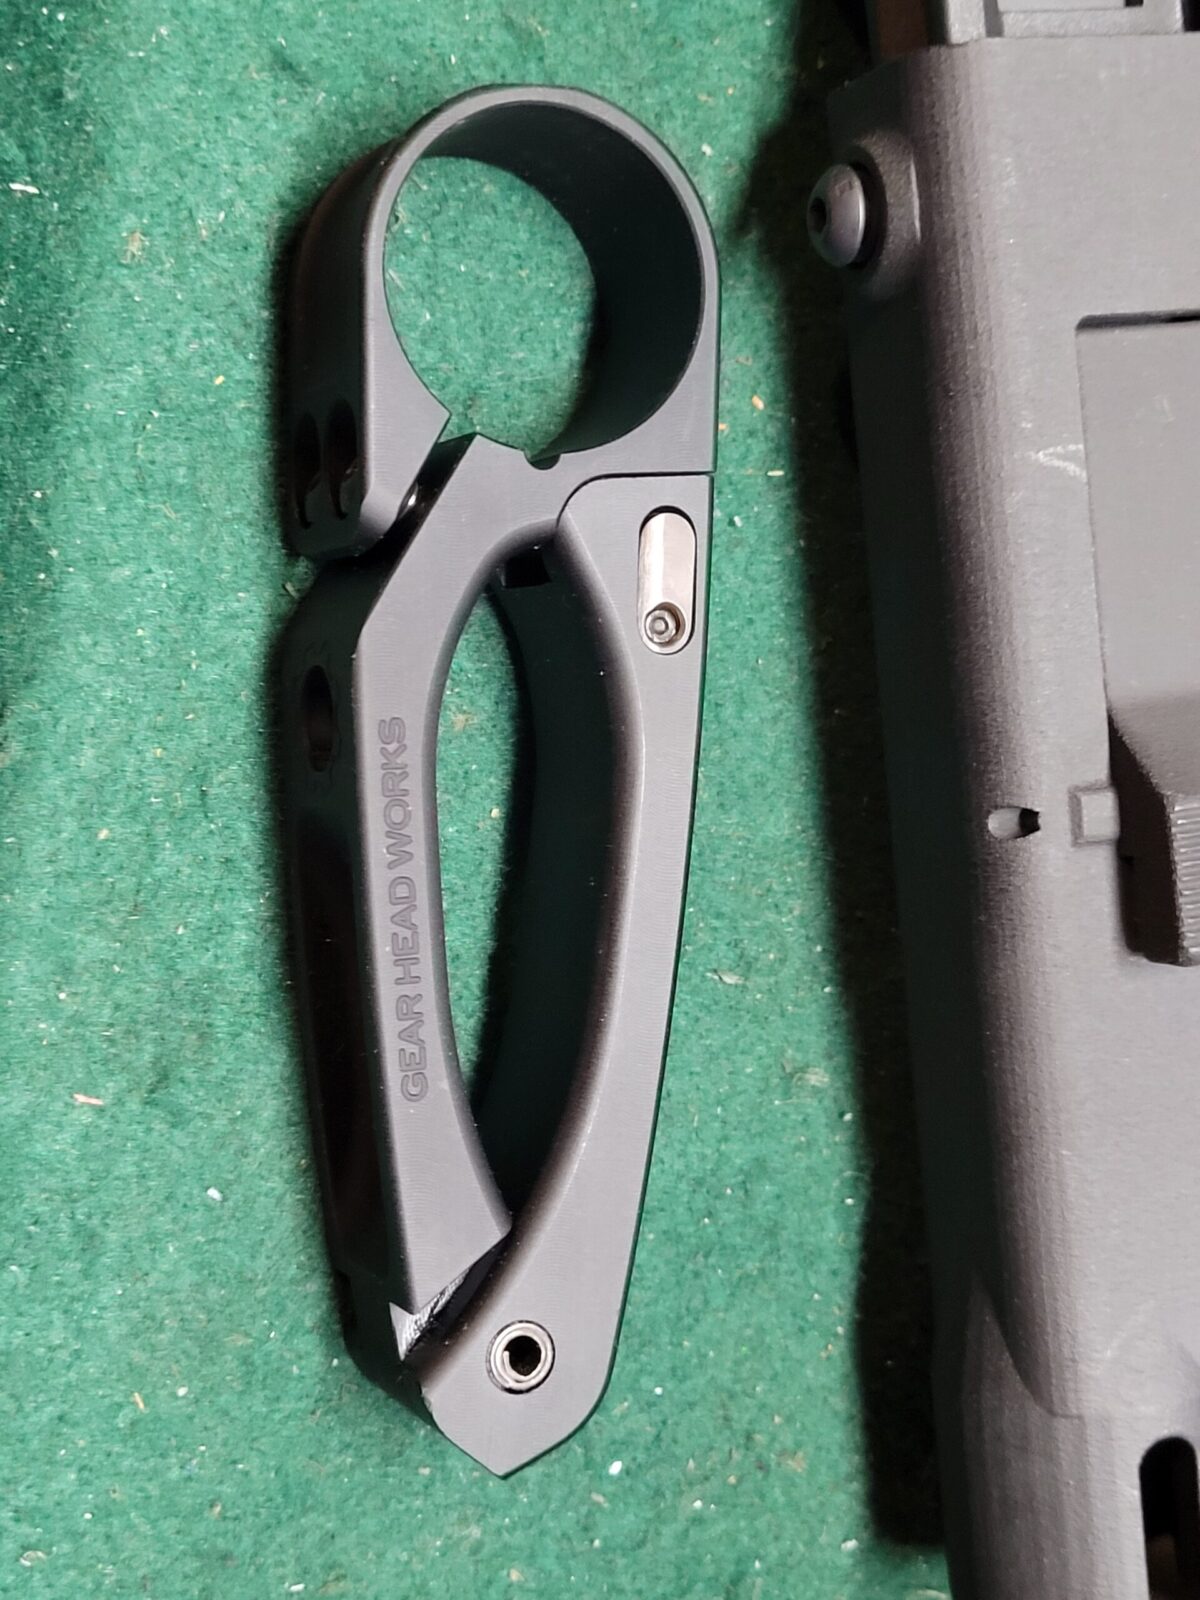
The GearHeadWorks Tailhook is one of the slickest braces in my opinion. It’s made from aluminum and the hook is deployed by pushing a button and folding the it outwards.

The Dragon Snout

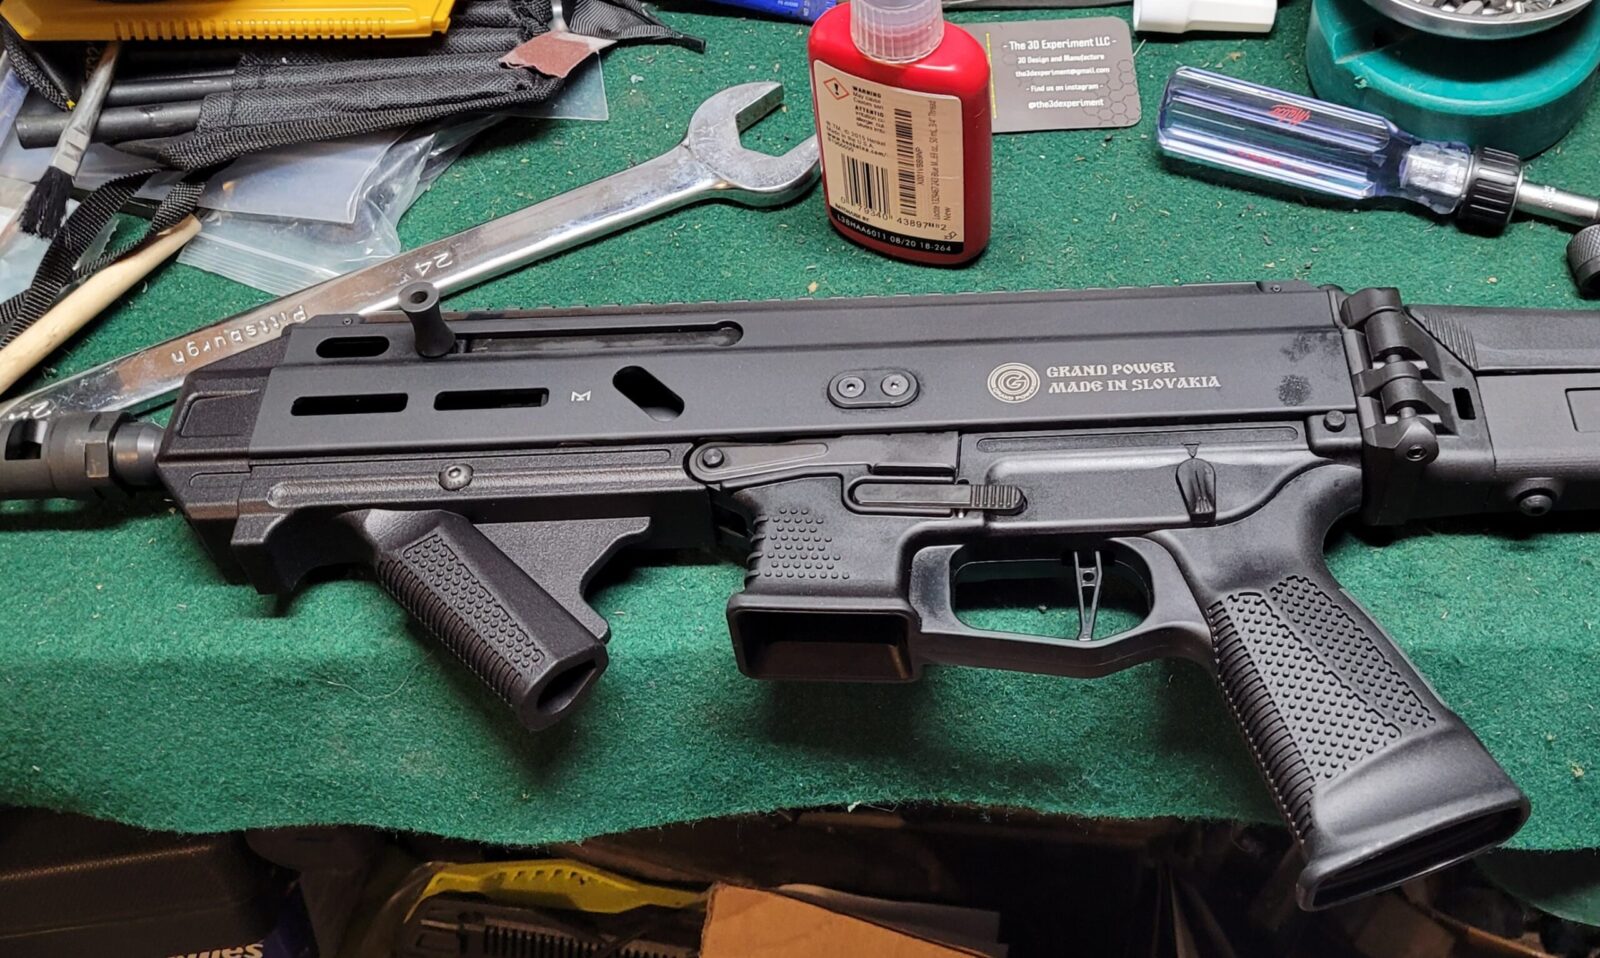
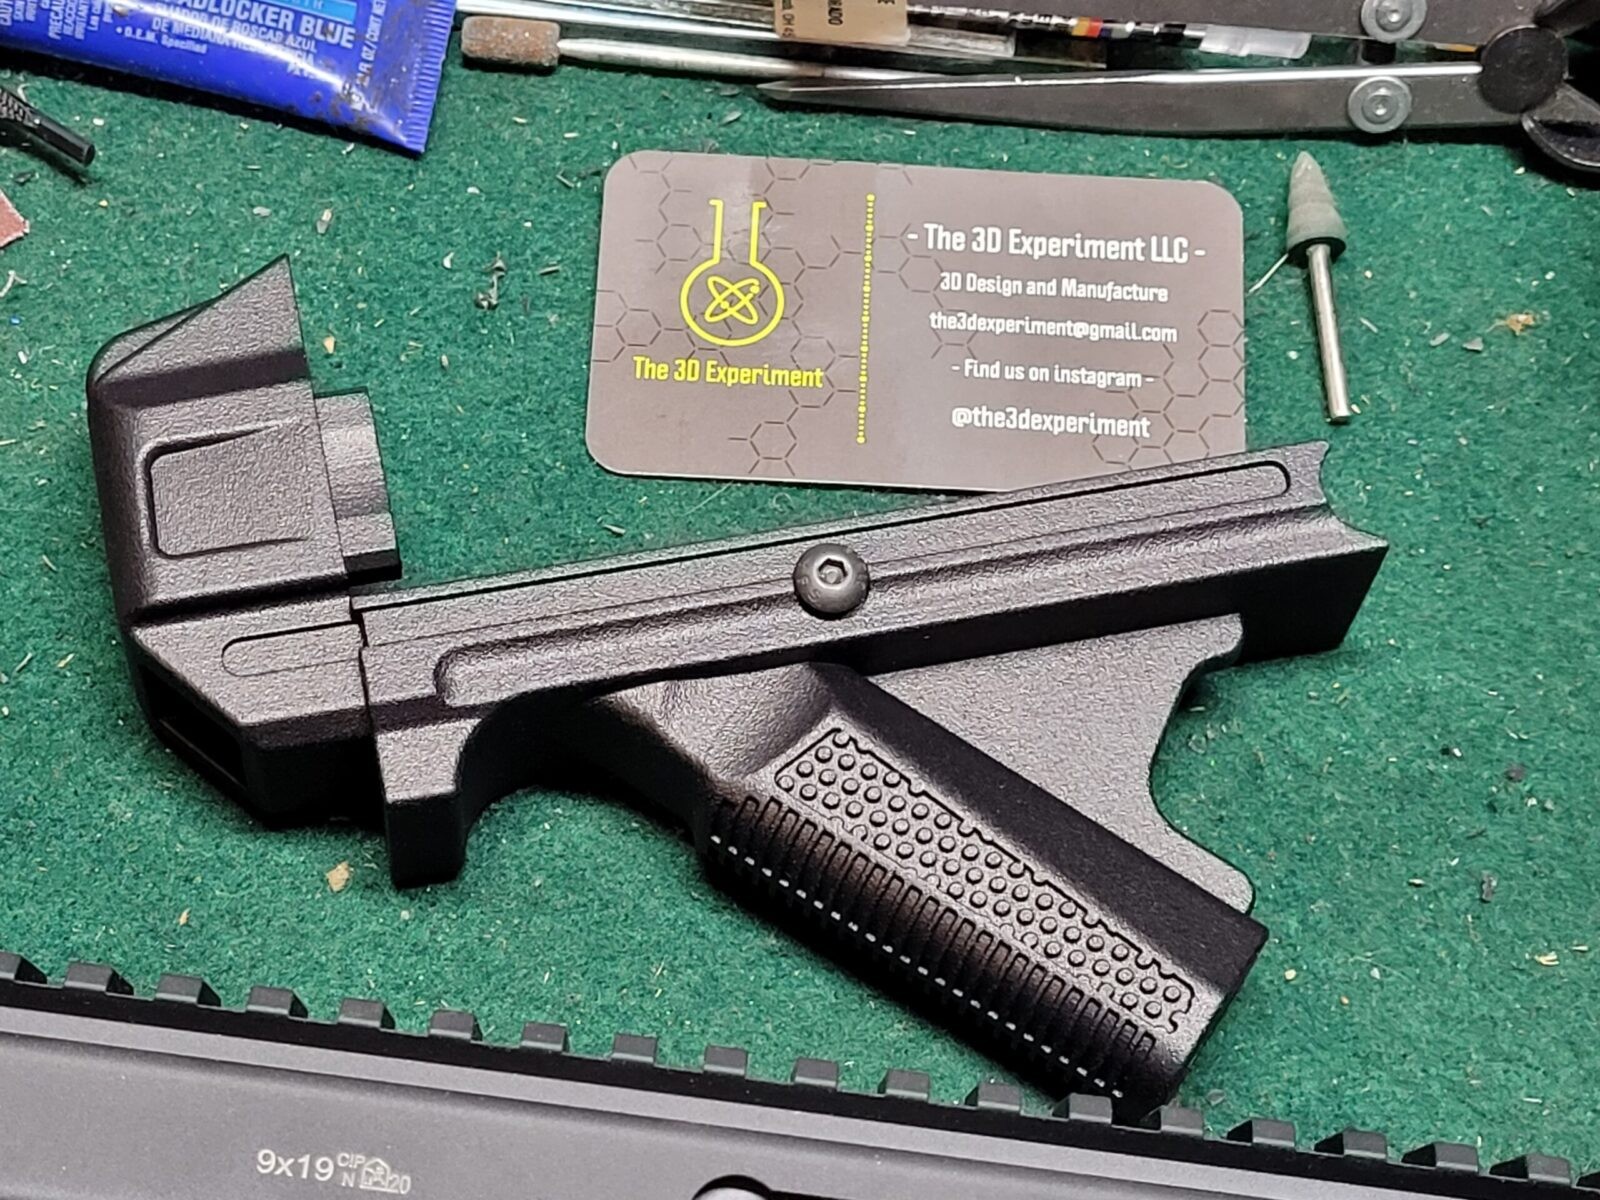
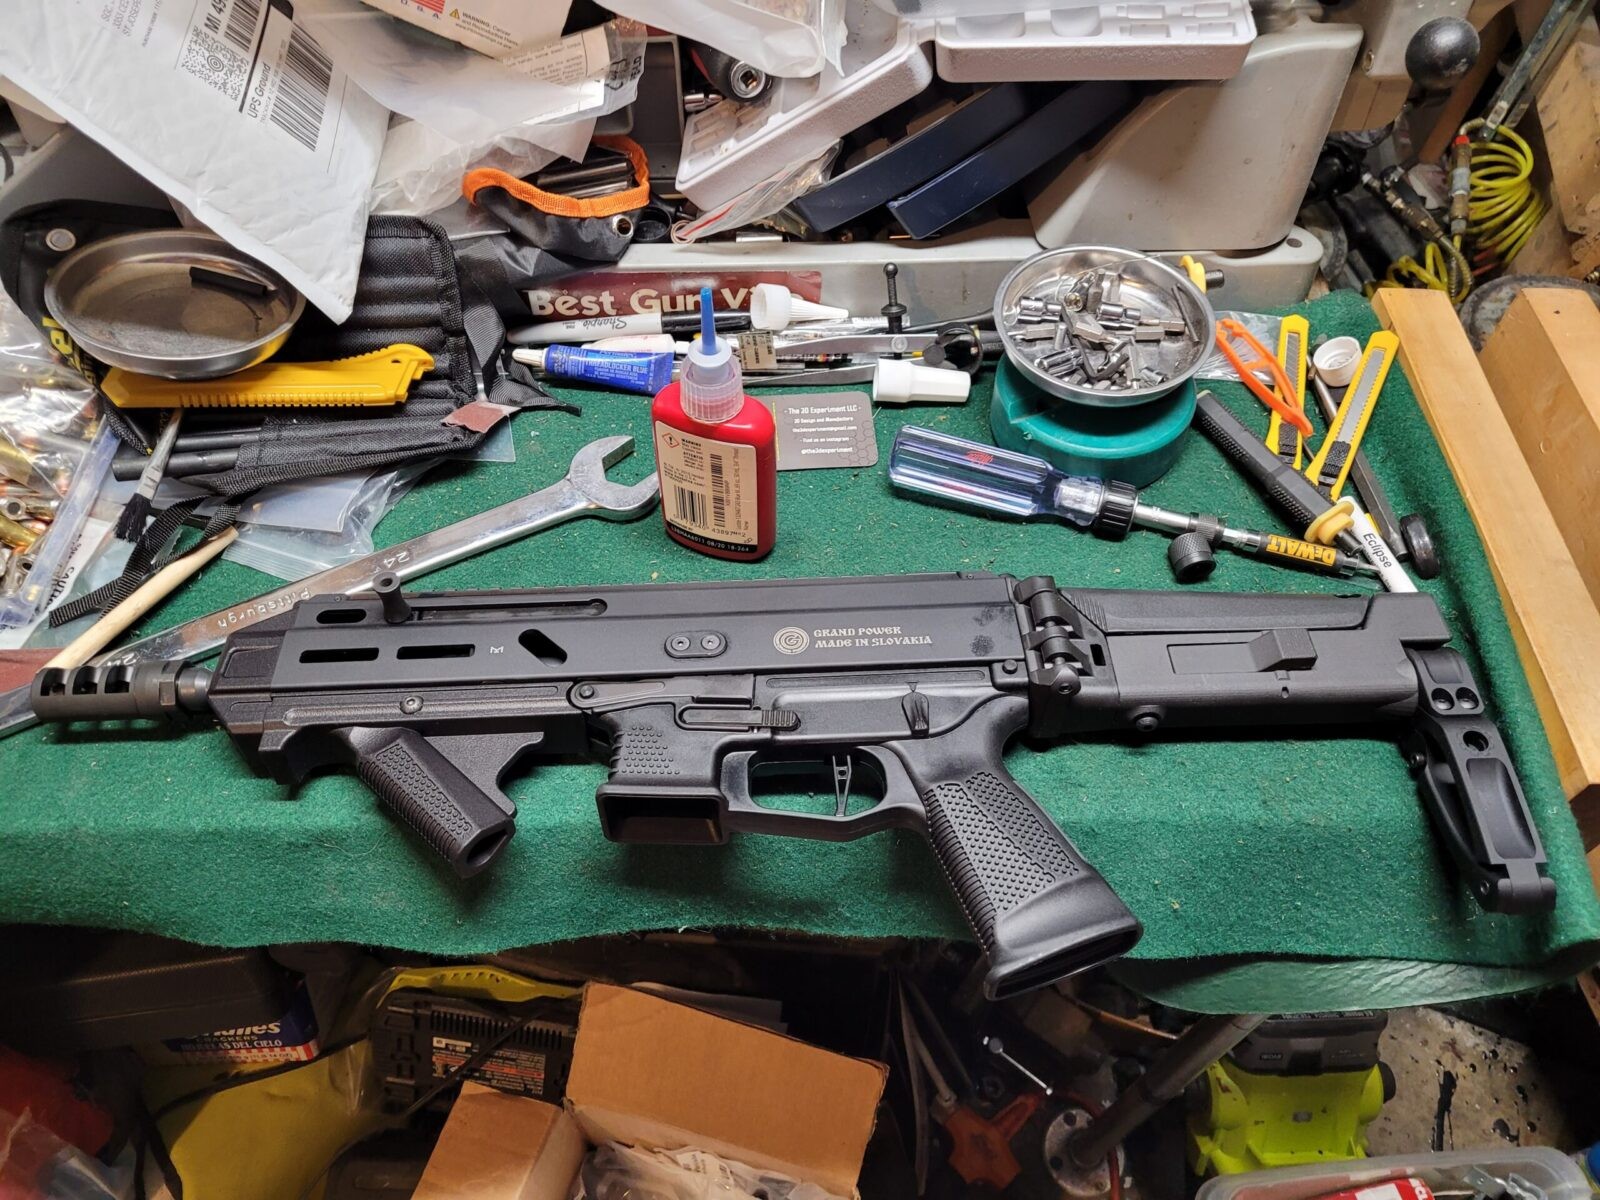
There is actually a neat 3D printed angled forearm extension made for the Stribog known as “the Dragon Snout”. It’s made by 3D Experiment and is sold by Global Ordnance.. It fits and feels great plus aesthetically I like covering up the approximate 3″ of barrel that stick out of the factory handguard.

Rock Island 52000 10mm pistol rear sight and slide with optic mount
First off, it’s a great name! It’s also very well done.
Rock Island 52000 10mm pistol rear sight and slide with optic mount
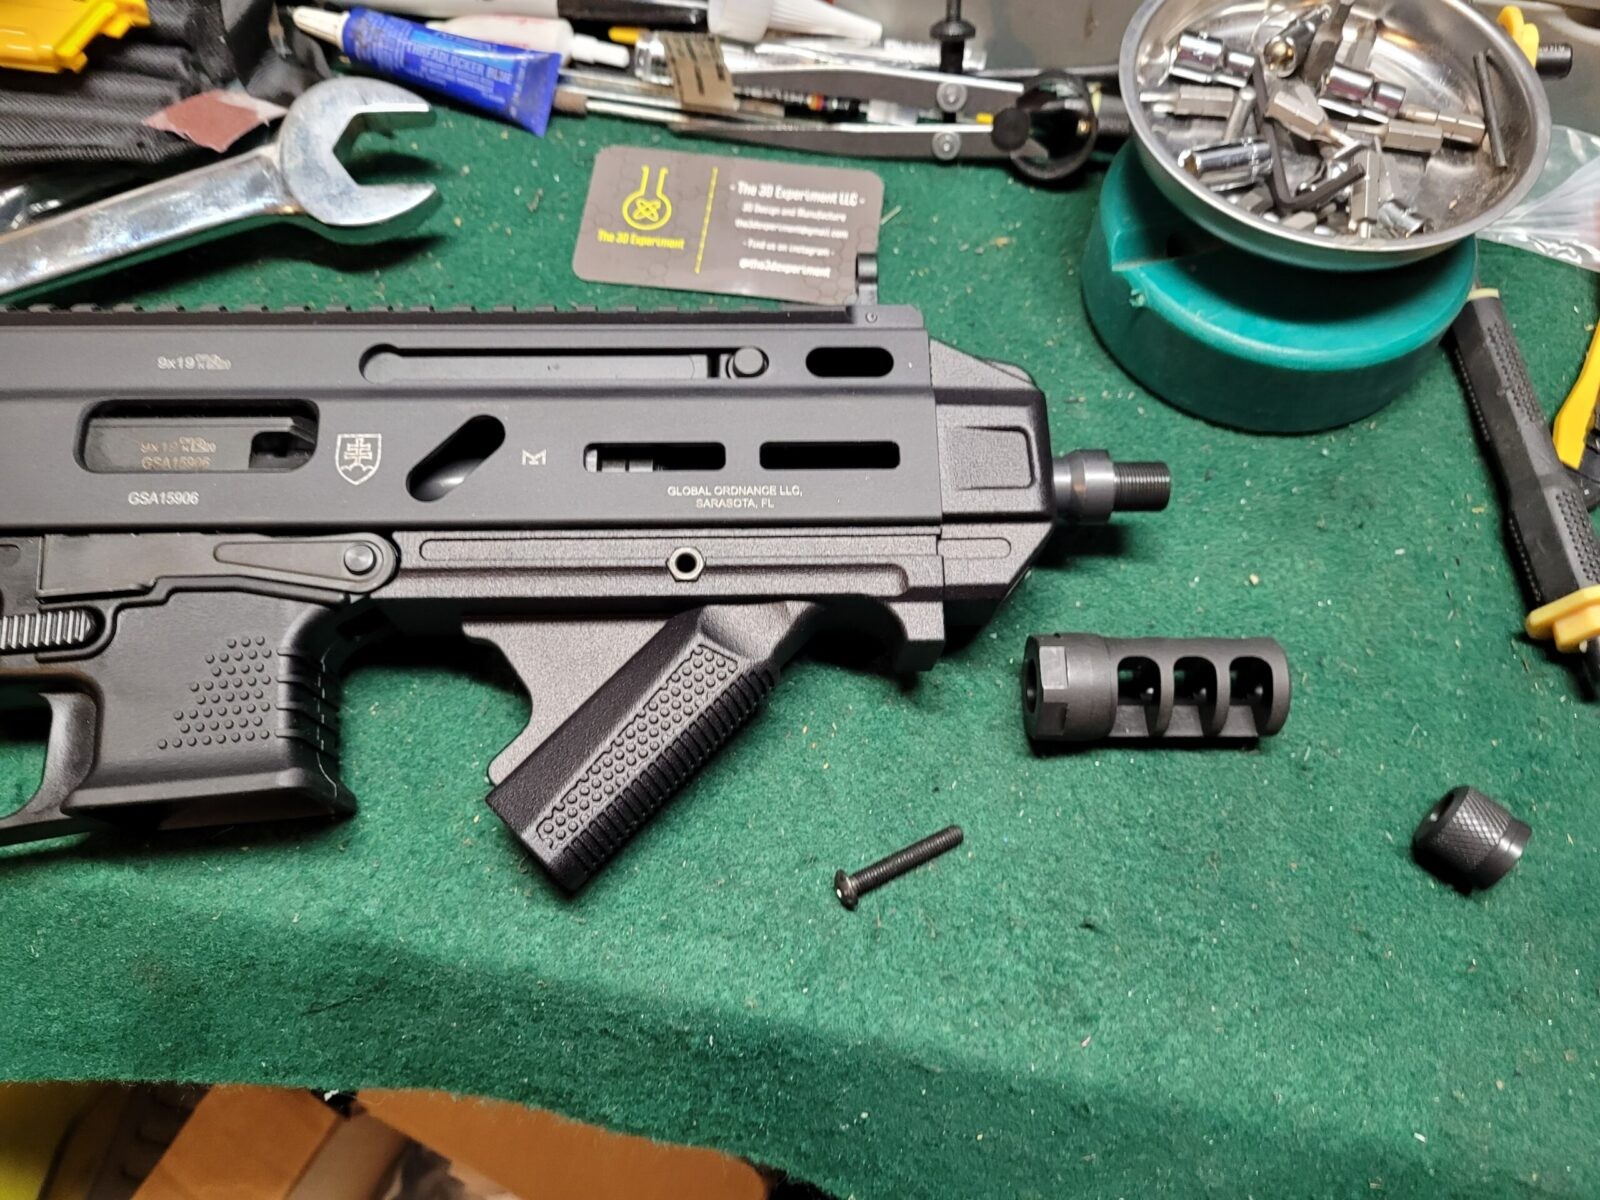
The Dragon Snout mounts by sliding it onto the existing 1913 Picatinny Rail on the bottom of the pistol’s handguard. One minor detqail – the Dragon Snout will likely need to go on before your muzzle device. For the Grand Power S9 shown, it did need to be mounted after the Dragon Snout.

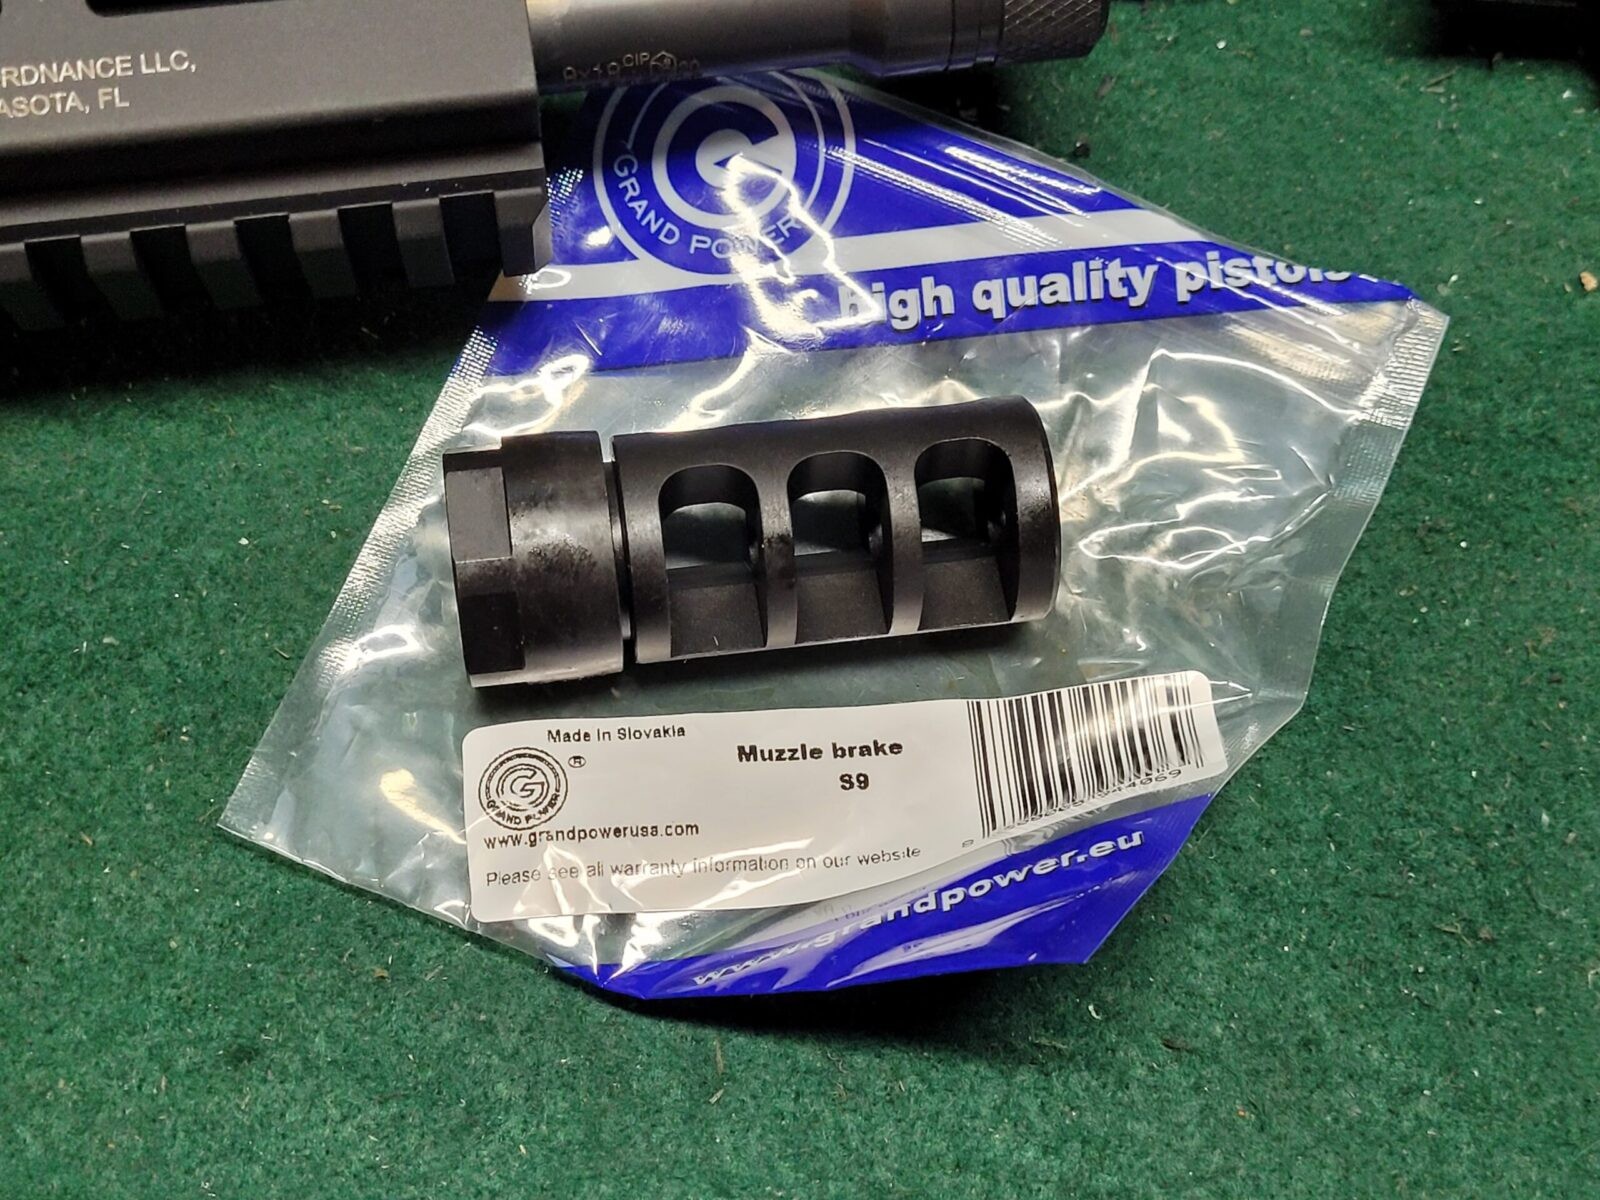
Grand Power S9 Muzzle Brake

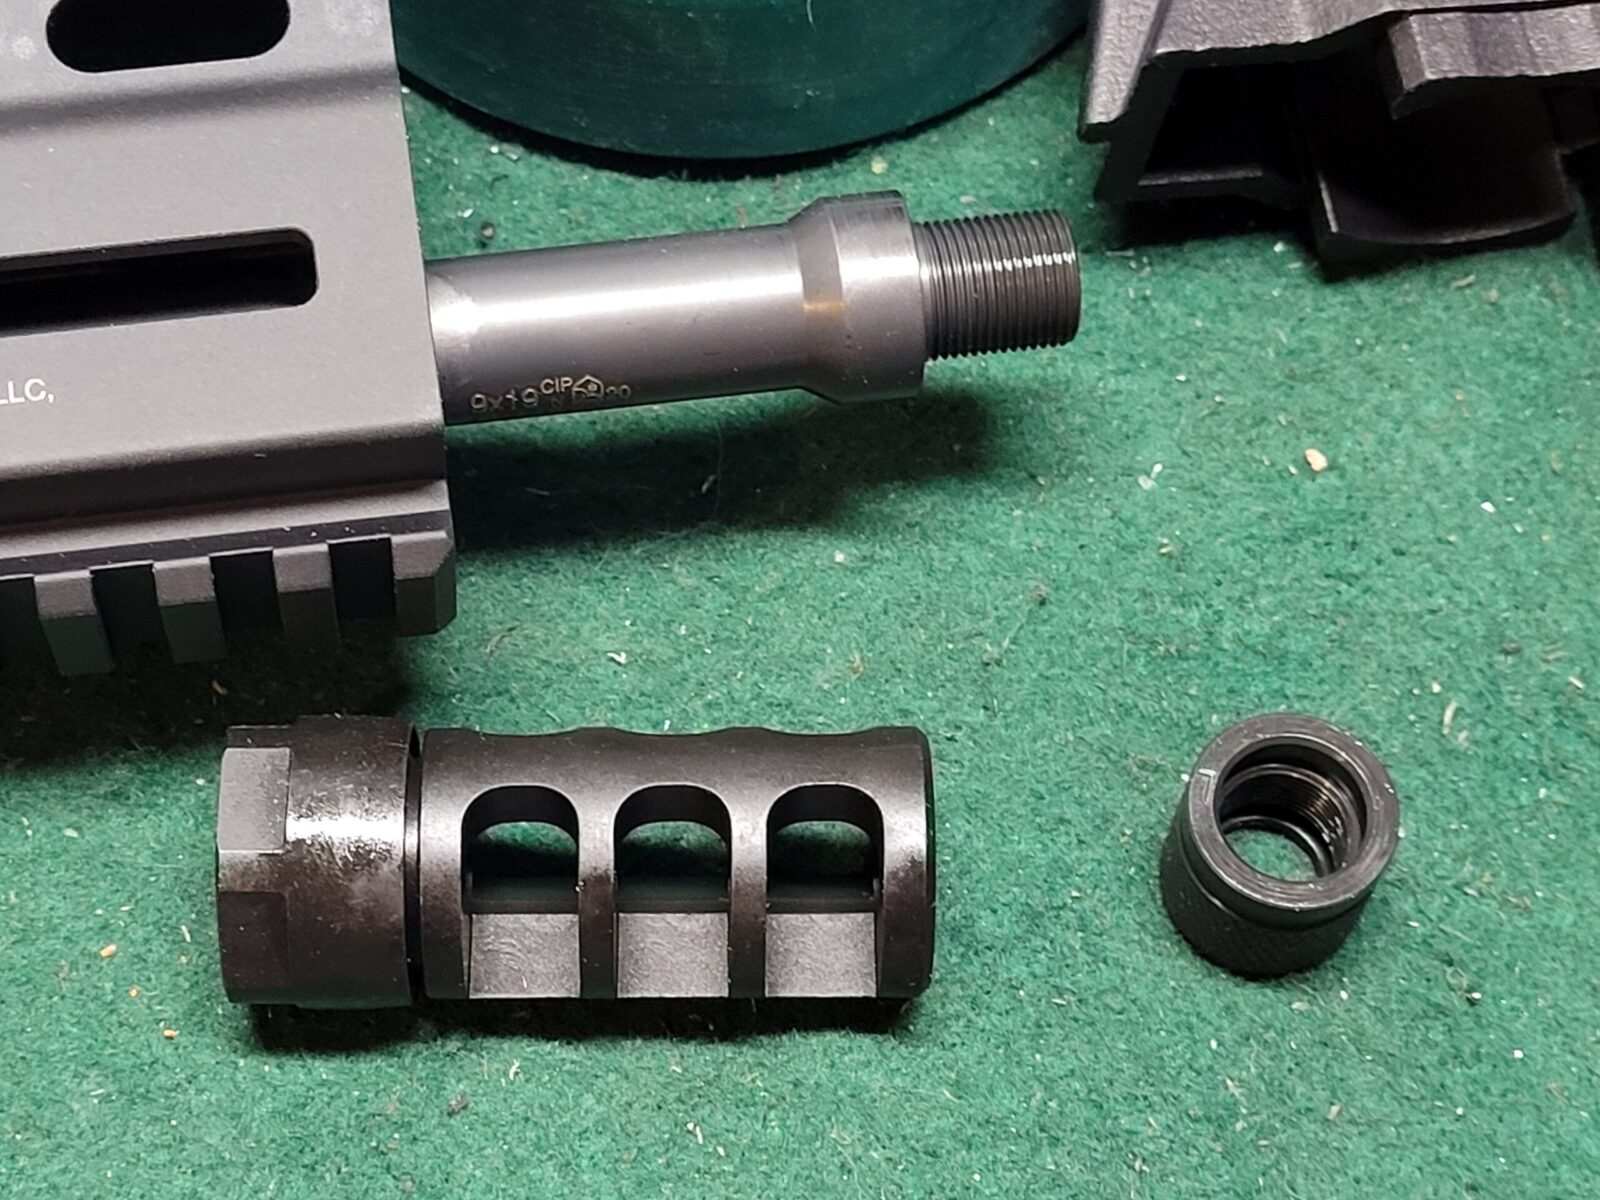
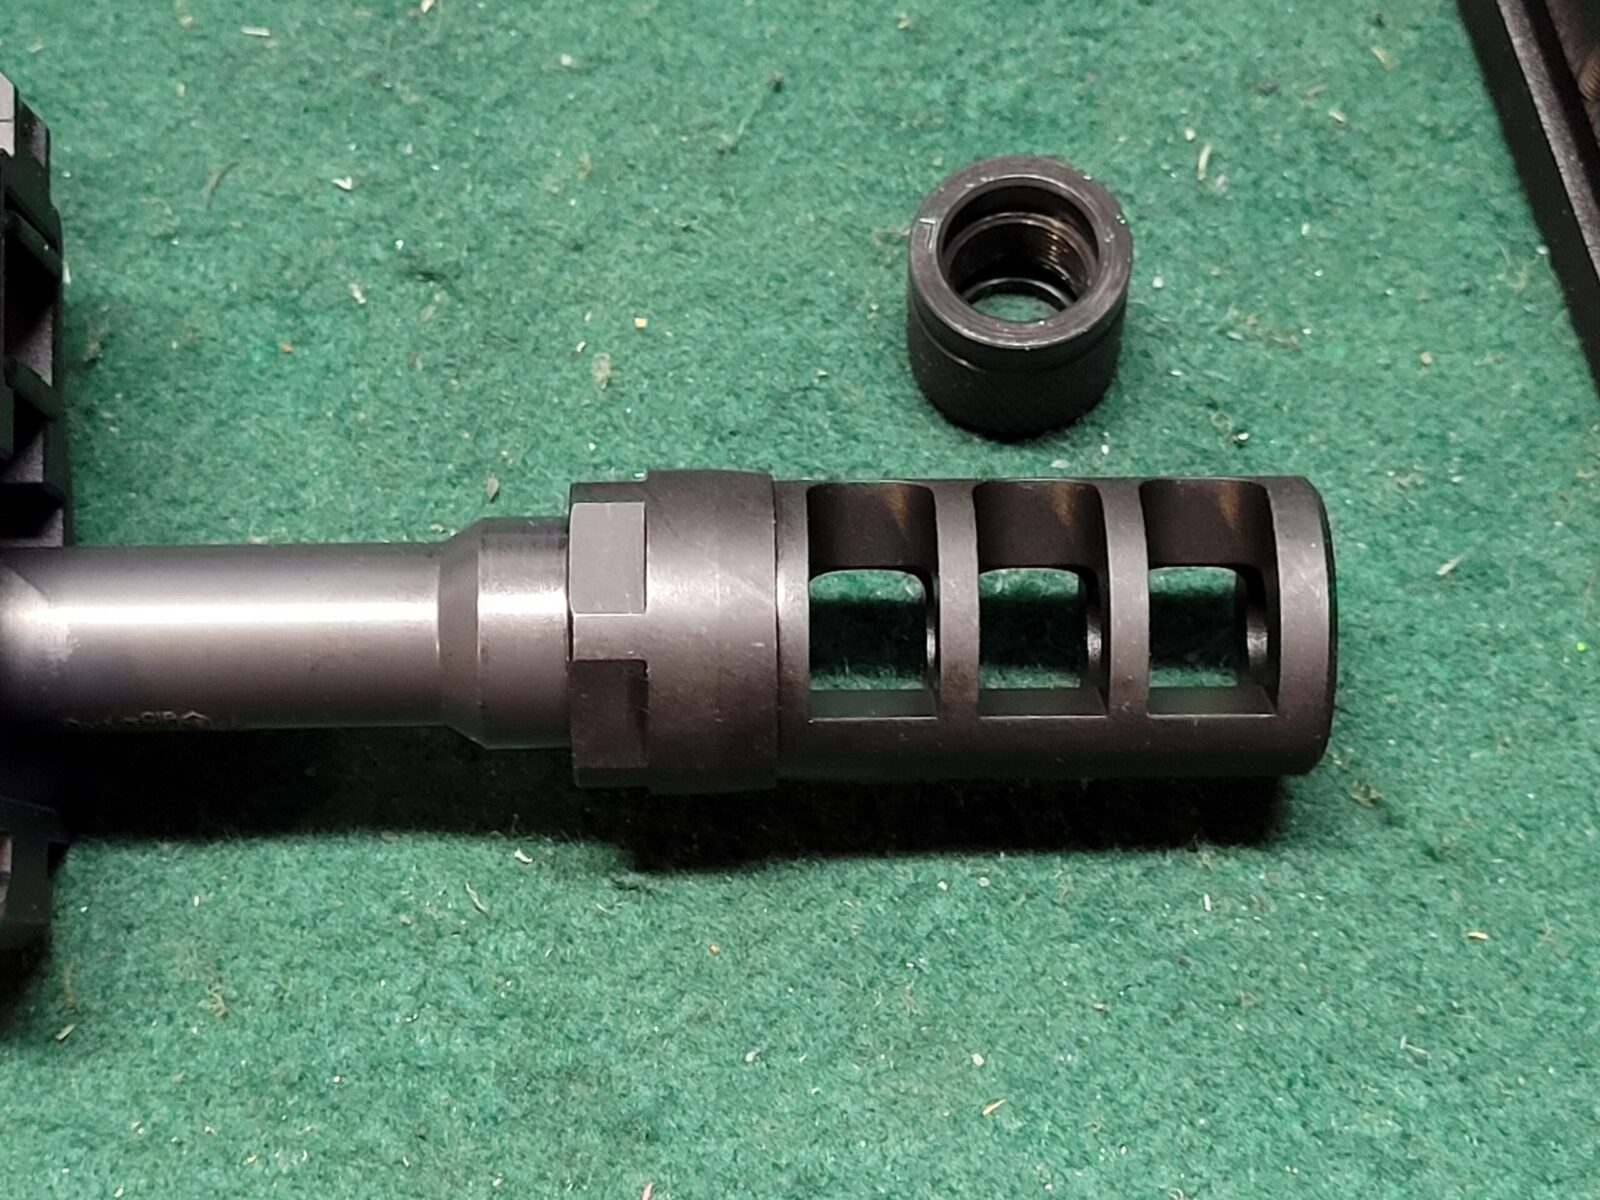
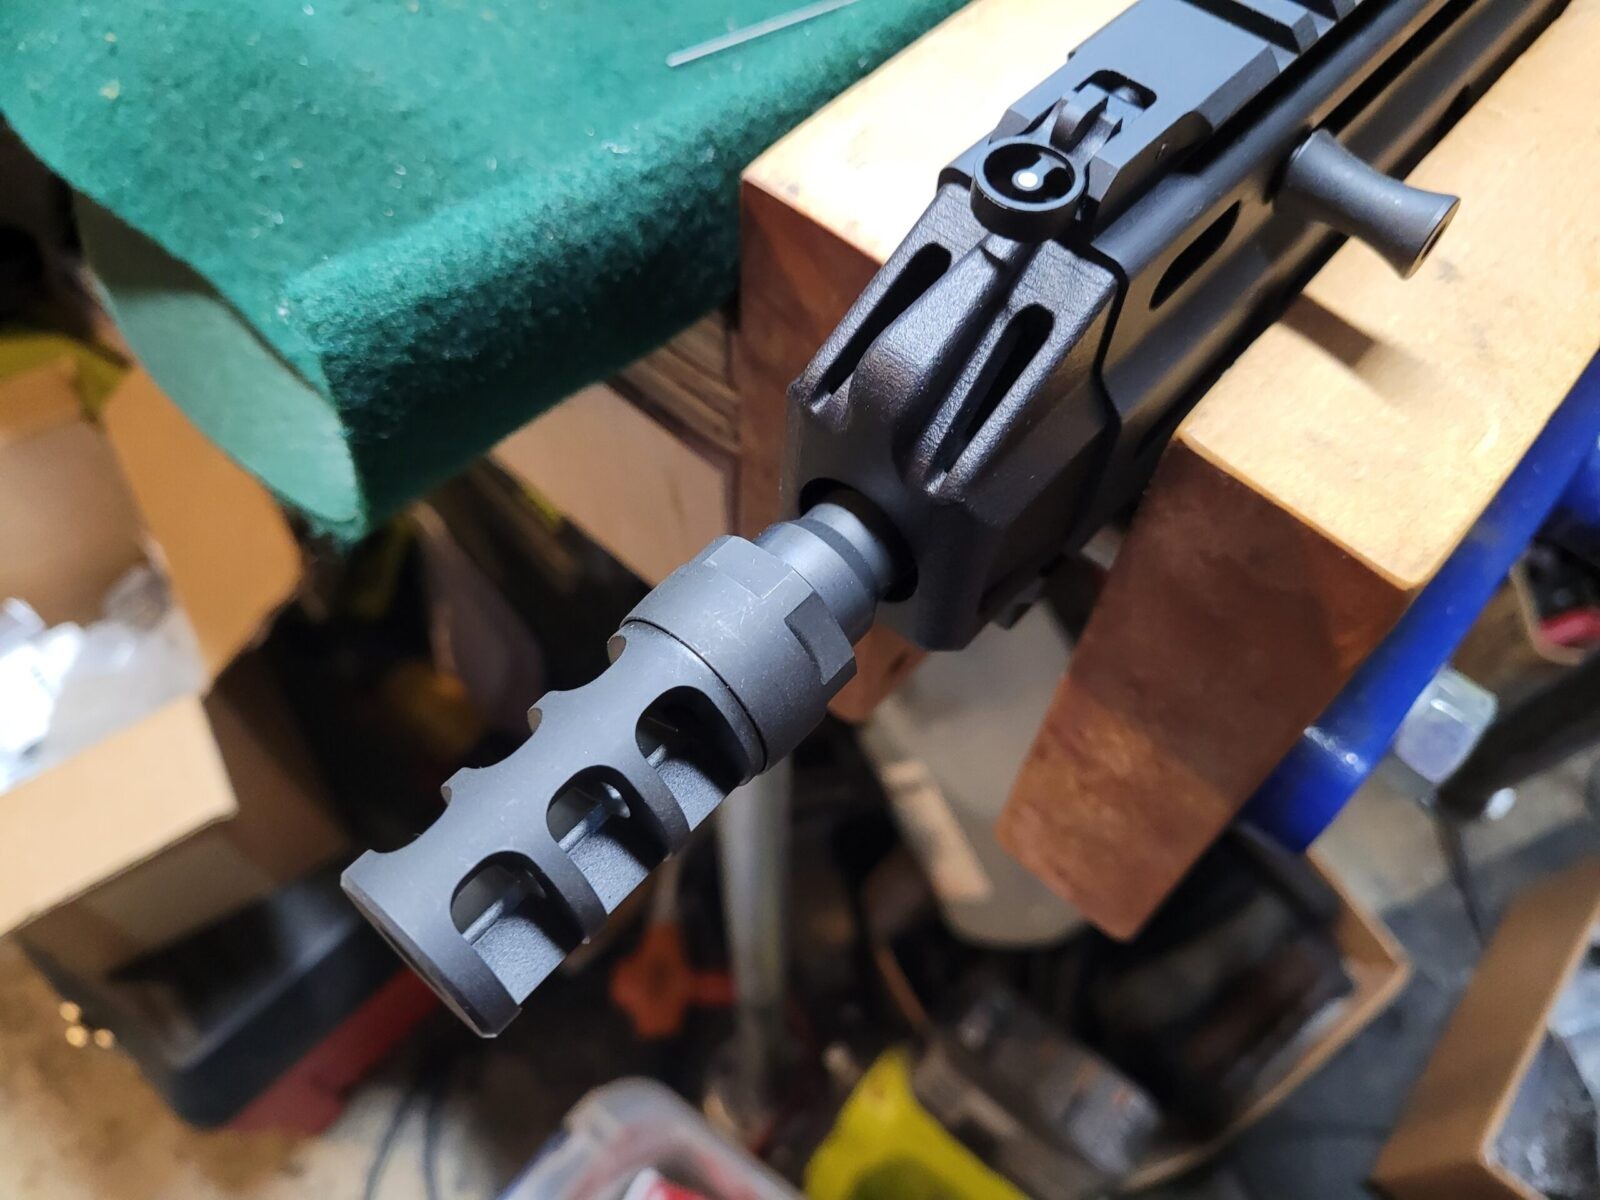
I went with a Grand Power 9mm brake that has an integral locking nut. Unfortunately, I do not see it for sale right now anywhere so I can’t link to it. Here are some photos of it.

Rock Island 52000 10mm pistol rear sight and slide with optic mount
The S9 brake is seems to work quite well and it was easy to install.
Rock Island 52000 10mm pistol rear sight and slide with optic mount
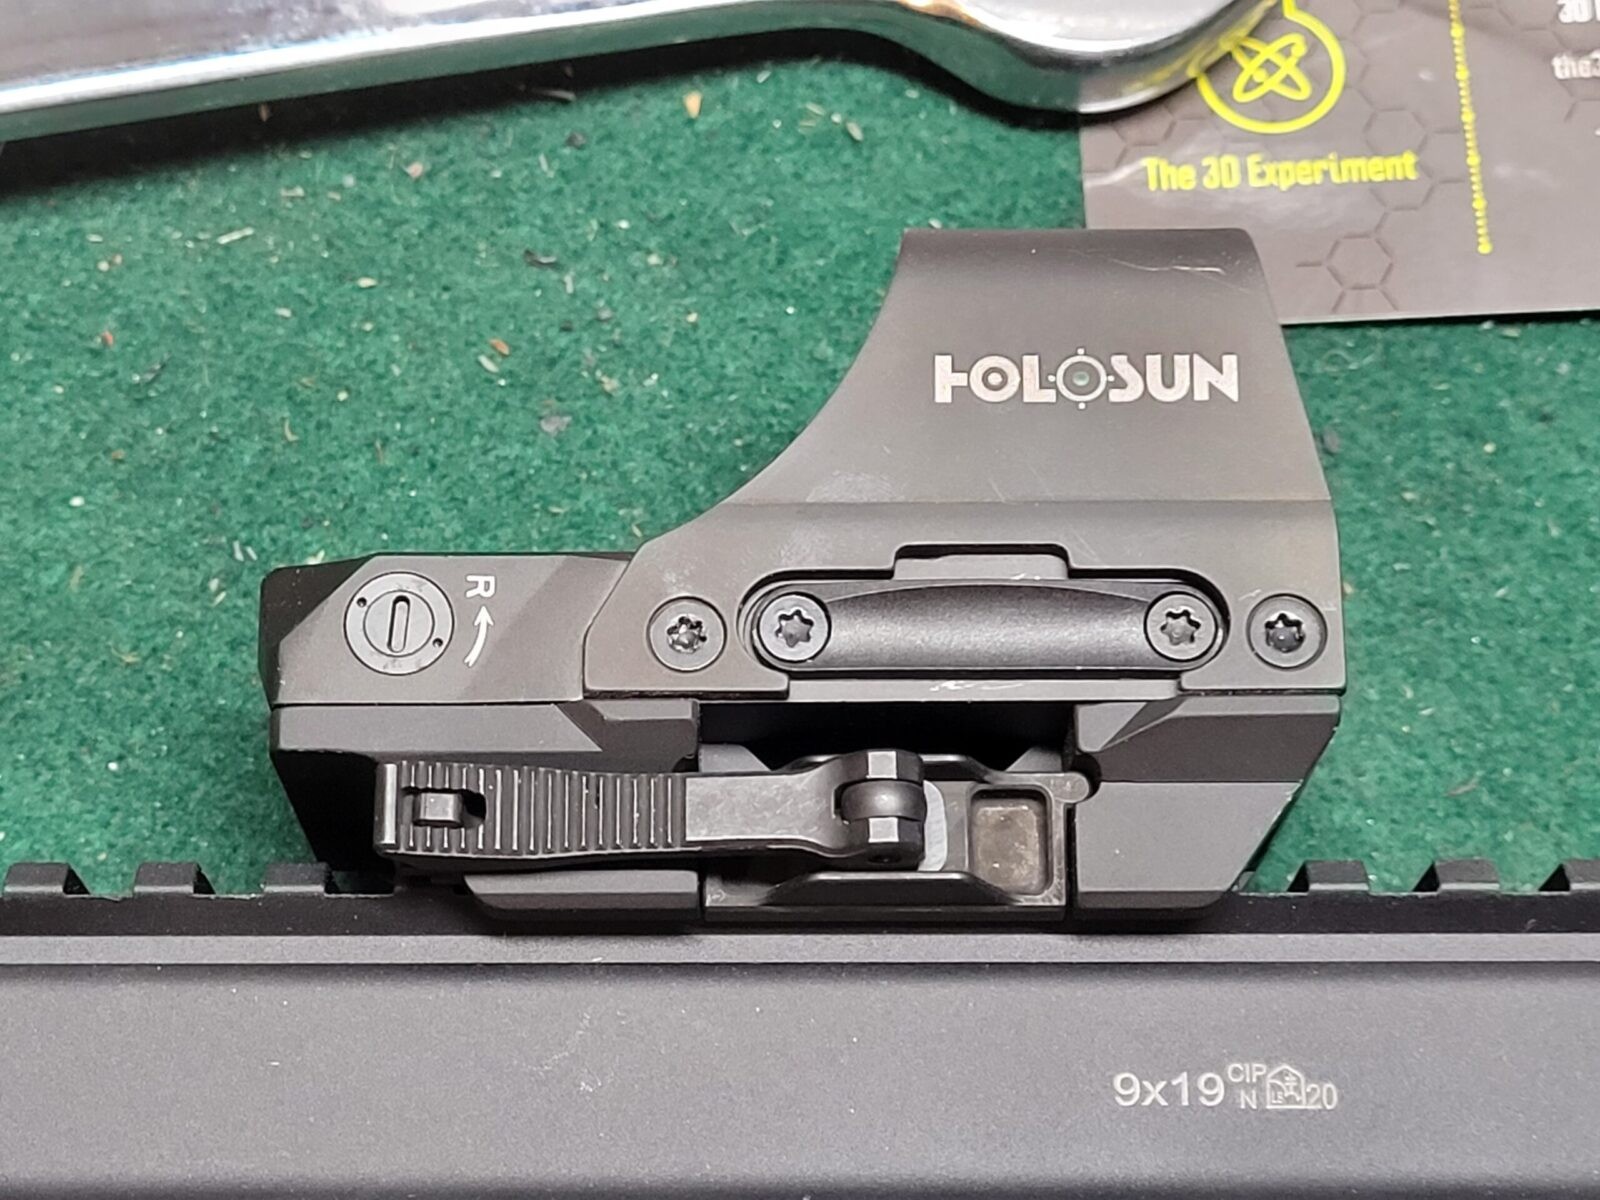
The threads are protected by a barrel nut so you remove it and thread on the new brake. It’s interesting to note the proof mark on the barrel 9×19 CIP – CIP is a European standards group that does the work of SAAMI there. CIP and SAAMI standards are often close but not exactly the same due to differences in where they collect pressure data. SAAMI also has +P and +P+ whereas CIP does not.
Rock Island 52000 10mm pistol rear sight and slide with optic mount
When installing a brake, thread it on as far as you can and then back it off only as much as you need to “clock” it (align it) and then tighted the locking nut.
Rock Island 52000 10mm pistol front sight with orange fiber optic insert
Here’s a good photo of the brake and how it is larger than the Dragon Snout’s front hole. You can also see the integral iron front sight and charging handle.
Rock Island 52000 10mm pistol front sight with orange fiber optic insert
The Stribog was really shaping up and I liked both the balance and the way it felt when I brought it up.

Adding a Holosun HE510C-GR Green Reflex Sight

My opinion of Holosun optics has improved quite a bit over the last two years – mainly because I started using the versus just reading about them. My go-to holographic sight is the Vortex UH-1 when I can afford it. When I can’t, I have found the Holosun optics to be very decent affordable choices. I especially like the HE510C-GR.

In general, I like Holosun’s use of two power sources – battery and solar plus you can either manually shut off the optic or use the shake awake feature that turns the unit and then off after a period of inactivity.

I find the green colored reticle super easy to find. Bringing the Stribog up and acquiring the target is both very straight forward and fast.

Rock Island 52000 10mm pistol front sight with orange fiber optic insert
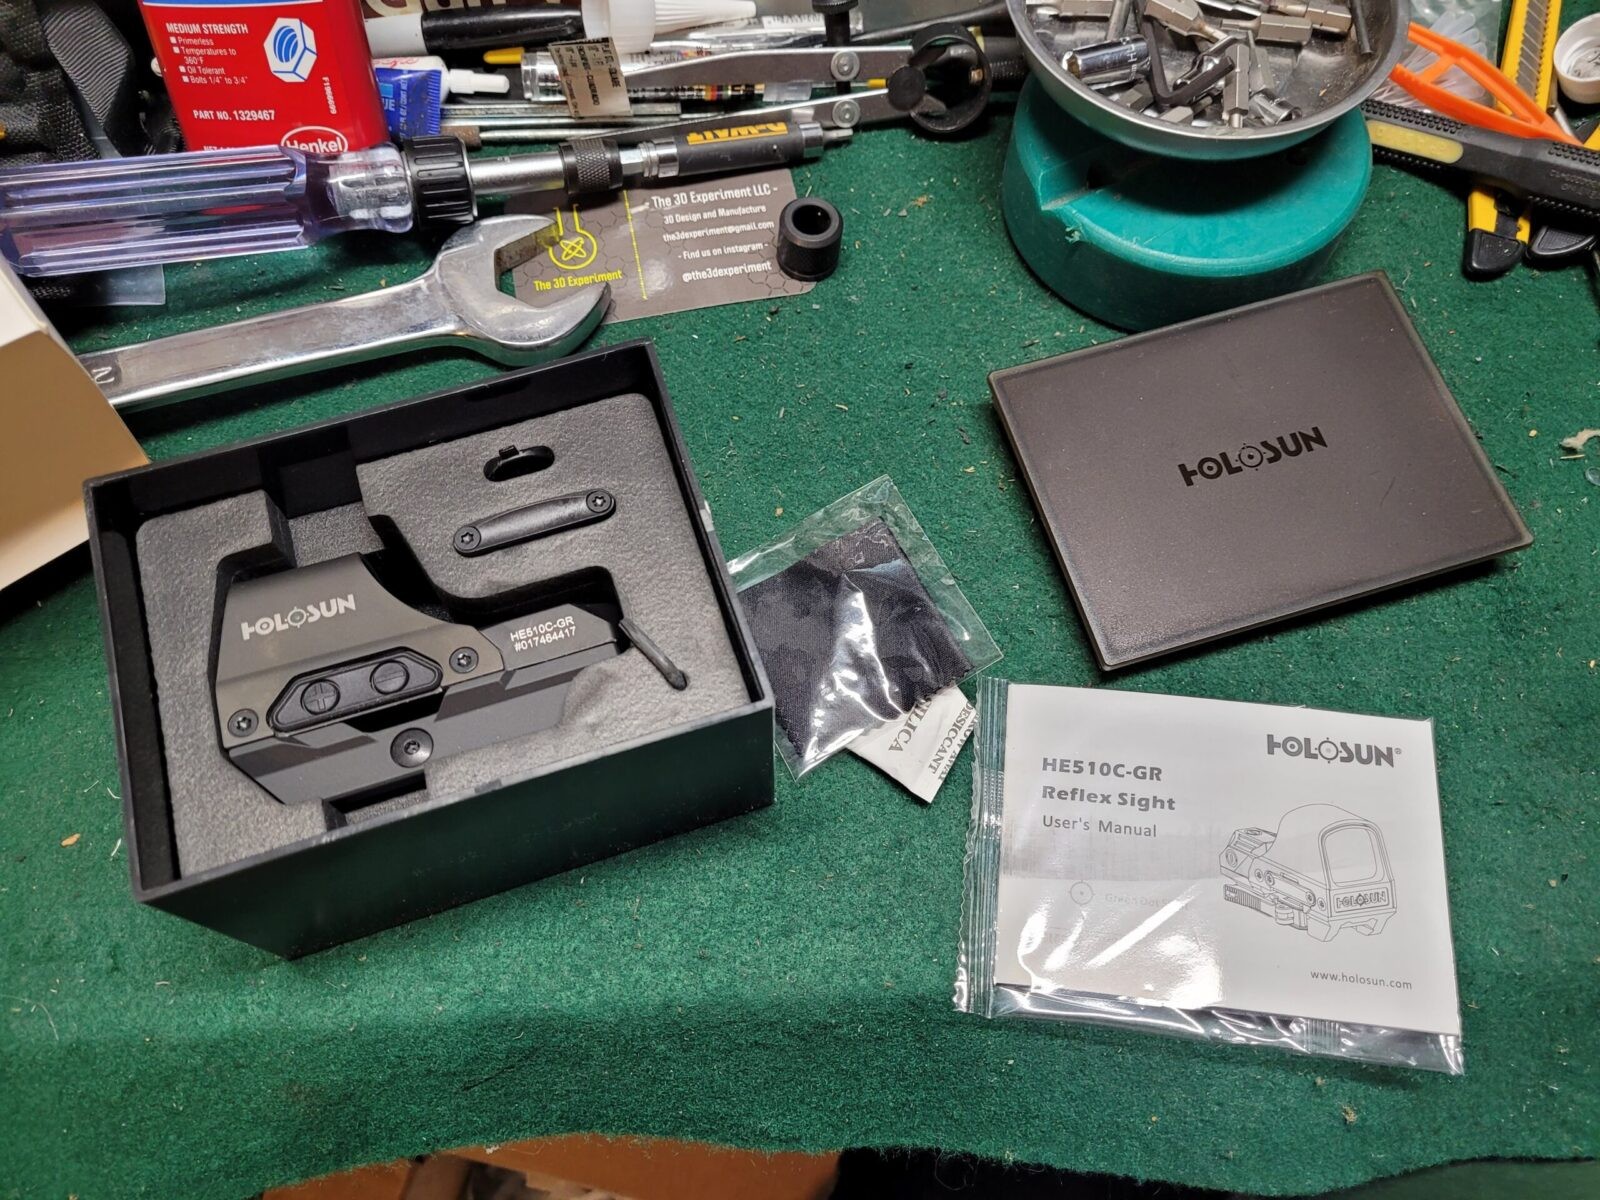
The HE510C-GR arrives well protected in its box ready for you to install the battery and mount it.
Rock Island 52000 10mm pistol front sight with orange fiber optic insert
The unit has a quick release lever so you can remove the optic quickly either for cleaning or if you need to get it out of the way. I really prefer optics with quick release levers because there are any number of reasons why you may need to get it out of the way in a hurry. For example, if this Holosun were to fail, I’d remove it and quickly fail over to using the integral backup iron sights that are built into the Stribog’s top rail. Those sights flip up but are too short to use with the Holosun so I just leave them folded down.

The Final Result

I was very happy with the weapon – it all came together in a nice package:

Rock Island 52000 10mm pistol front sight with orange fiber optic insert
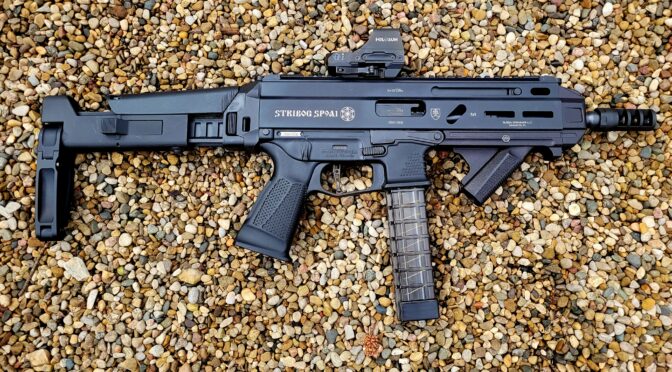
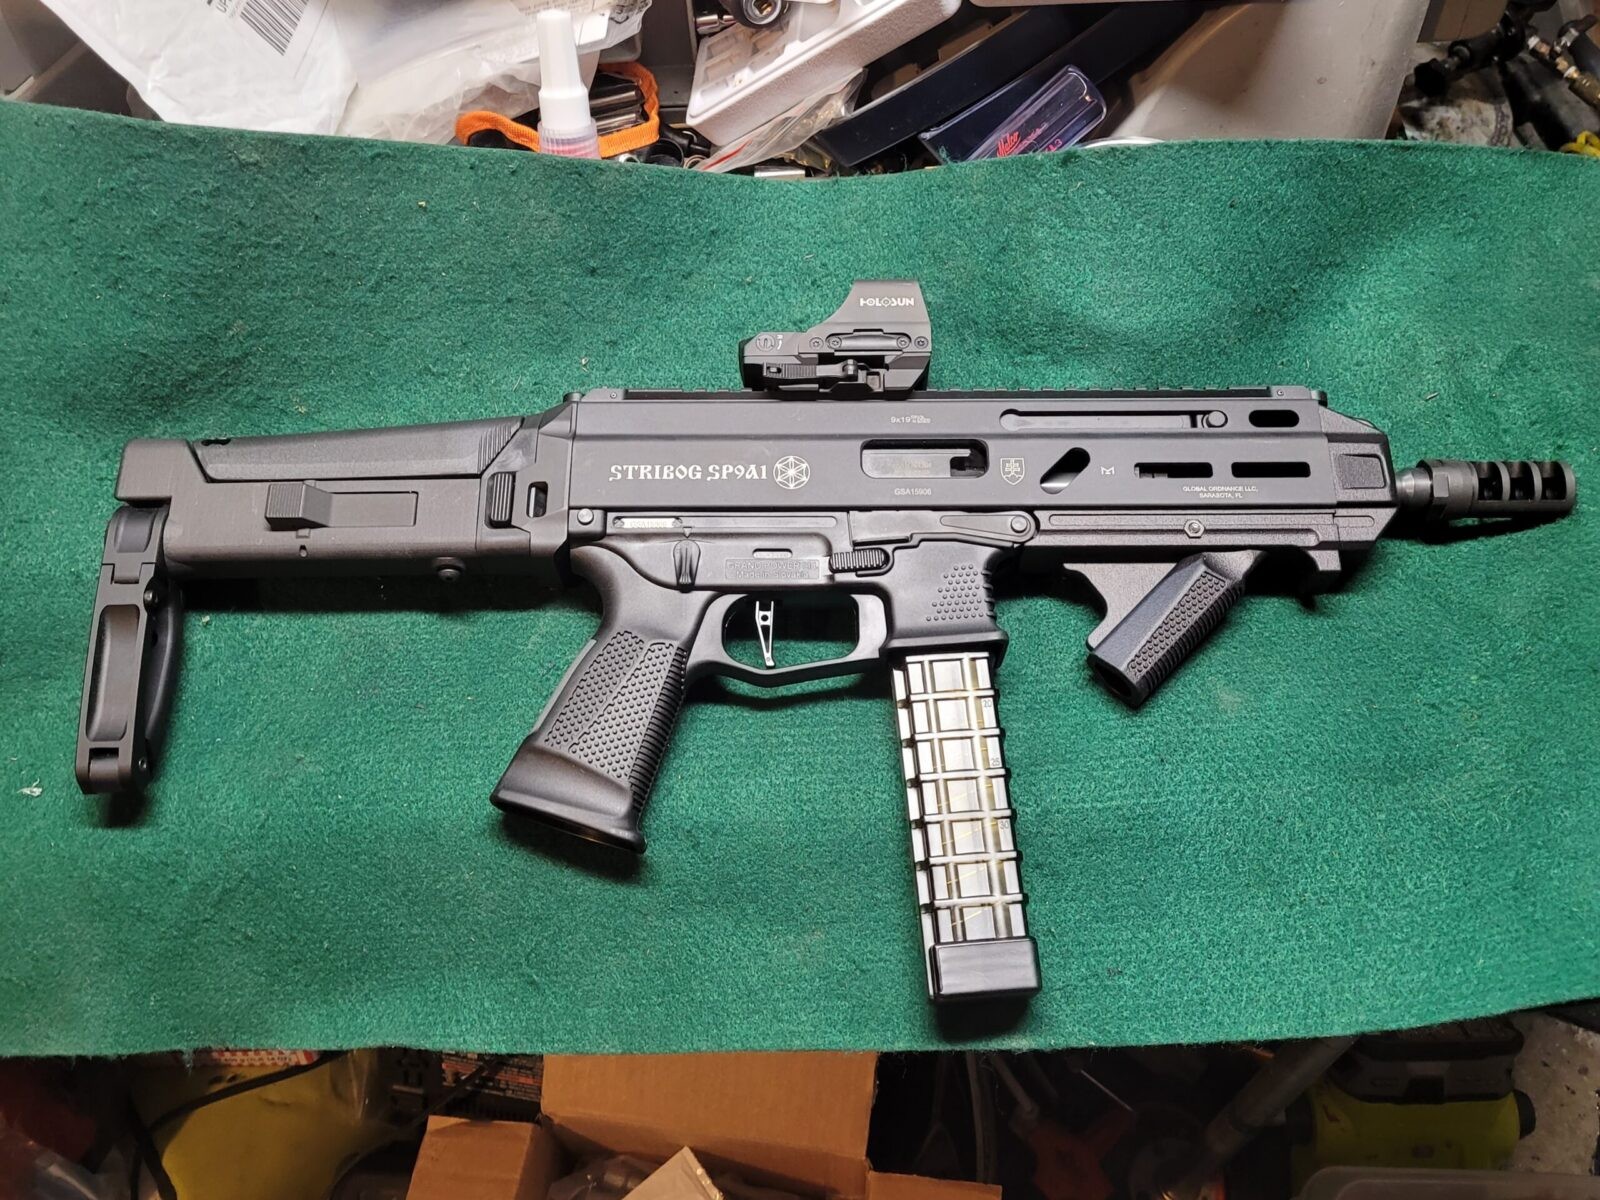
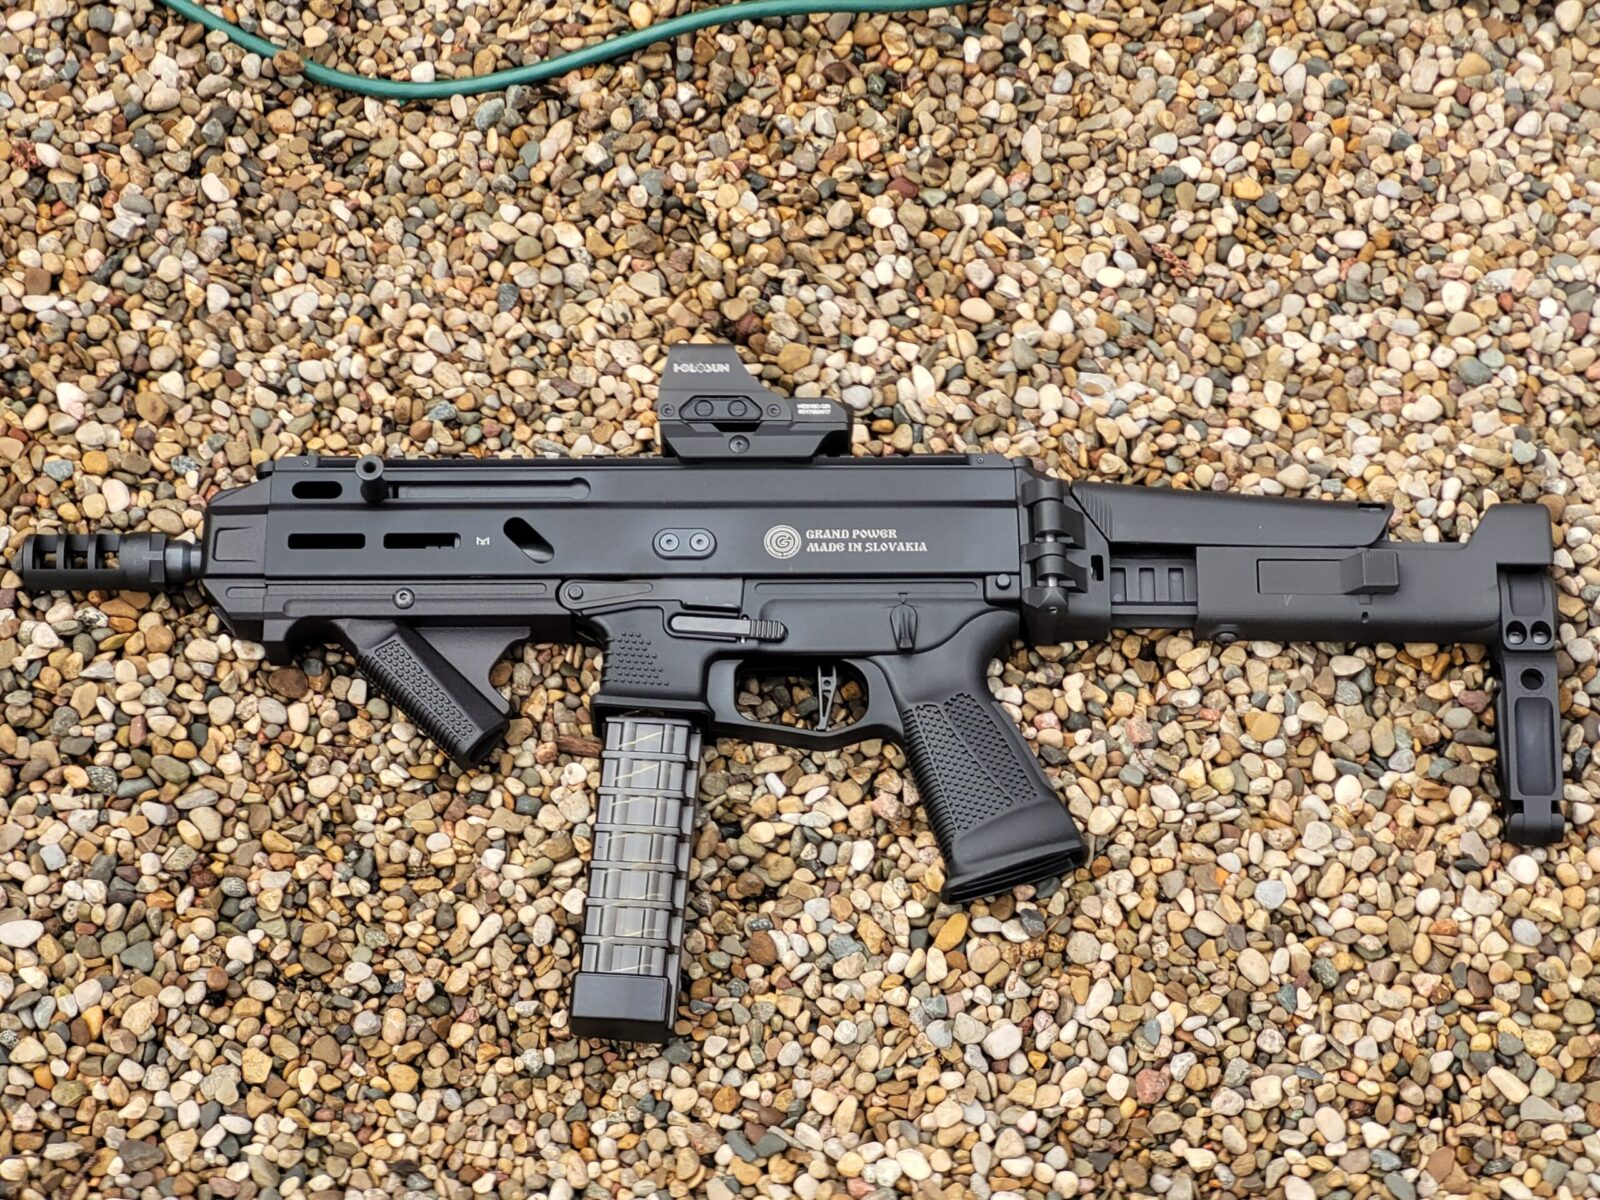
Here’s the finished unit – A Stribog SP9A1 with the F5 modular brace, Dragon Snout forearm, S9 brake and a Holosun HE510C-GR optic on top. That is one of the straight 30 round magazines,

Quick Comment on Magazines

The magazine design is unique. While there are now options for the lowers that let you use Glock mags, the native magazine is a proprietary double stack design.

You have a number of options for magazines – 20 and 30 round plus there are ones that are straight, with and without metal reinforced tops and a curved model. Right now, I have a combination of straight 30 round magazines both with and without the reinforced metal feed lips.

I’d recommend you have 4-8 magazines at least for your Stribog. Why? It’s so much fun to shoot you will go through 30 rounds fast. A number of places sell Stribog magazines and I bought a few of my spares from GunMag Warehouse. I bought a couple of the steel reinforced lipped models from Global Ordnance but everyone seems to be sold out of them at the moment. I haven’t had any problems with the all polymer units but if we make a broad generalization, steel reinforced mag lips of any design tend to last longer.

Summary

Ok, the Stribog was assembled and ready for the range! For a change, I am writing this after taking it to the range twice, having a blast and will talk about my experiences with the weapon in my next post.

Rock Island 52000 10mm pistol front sight with orange fiber optic insert
Here’s one view of the completed Stribog.
Rock Island 52000 10mm pistol front sight with orange fiber optic insert
And another.

I hope this post gives you some ideas and I definitely like the Stribog.


Note, I have to buy all of my parts – nothing here was paid for by sponsors, etc. I do make a small amount if you click on an ad and buy something but that is it. You’re getting my real opinion on stuff.


Please share the link on Facebook, Forums, with colleagues, etc. Your support is much appreciated and if you have any feedback, please email us in**@*********ps.com. If you’d like to request a report or order a reprint, please click here for the corresponding page to open in new tab.

How Magazines Affect Reliability in Rock Island FS A2 9mm Pistols

This post reflects a journey I’ve been on regarding making and selling magazines for the 9mm Rock Island Armory (RIA) FS A2 pistols. These pistols are based on Para Ordnance designs that use a staggered magazine that can accomodate 15+ rounds in a fattened 1911 grip. Think of them as 1911 pistols on steroids with a fat grip the holds more rounds they hold more rounds so sometimes RIA calls them “HC” for high capacity.

AK rifle with MI rails and custom Galil grip
These are my two 9mm test platforms. The top pistol is the 56645 Pro Ultra Match HC (you can see the checkering on the front strap of the grip) and the bottom is 51679 Tac Ultra FS HC.

For over a year now, I’ve been making magazines for the FS A2 pistols chambered in 10mm and .40 S&W. The interesting thing is that 9mm, .38 Super, .40 S&W and 10mm all use the same frame. You’d think making the 9mm mags would be an easy jump – I did at least — maybe it was just me.

The 10mm round is bigger than 9mm – it is fatter and longer. You don’t think about that a lot until you are trying to get the ejecting case to hit the ejector – the 10mm round is a hell of a lot easier to make hit the ejector than the 9mm. Also, the relatively short 9mm round has a long way to travel before it goes into the chamber. I found myself having to kick out some assumptions I had for magazines in order to get the 9mm round to reliably work.

In general, I now understand why the 1911 community is so fast to cast suspicion on the magazines when feed and ejection problems are happening. John Browning was an absolute genius and the 1911 design shows it but it does need all of the parts to be working together correctly to deliver a reliabile pistol.

Oh yeah, the magazines can make or break reliability. Let me share with you some observations I’ve made so far about the magazine after making a few hundred of the 9mm models either modifying P18 magazines (.38/9mm) or P16 mags (10/.40).

What about feed lip length?

The feed lips are the part of the magazine that hold the top round down and at the right angle. If they are too short, the round tends to be presented at too high of an angle and if they are too long, the front gap may not be adjustable enough to support the feed angle needed.

AK rifle with MI rails and custom Galil grip
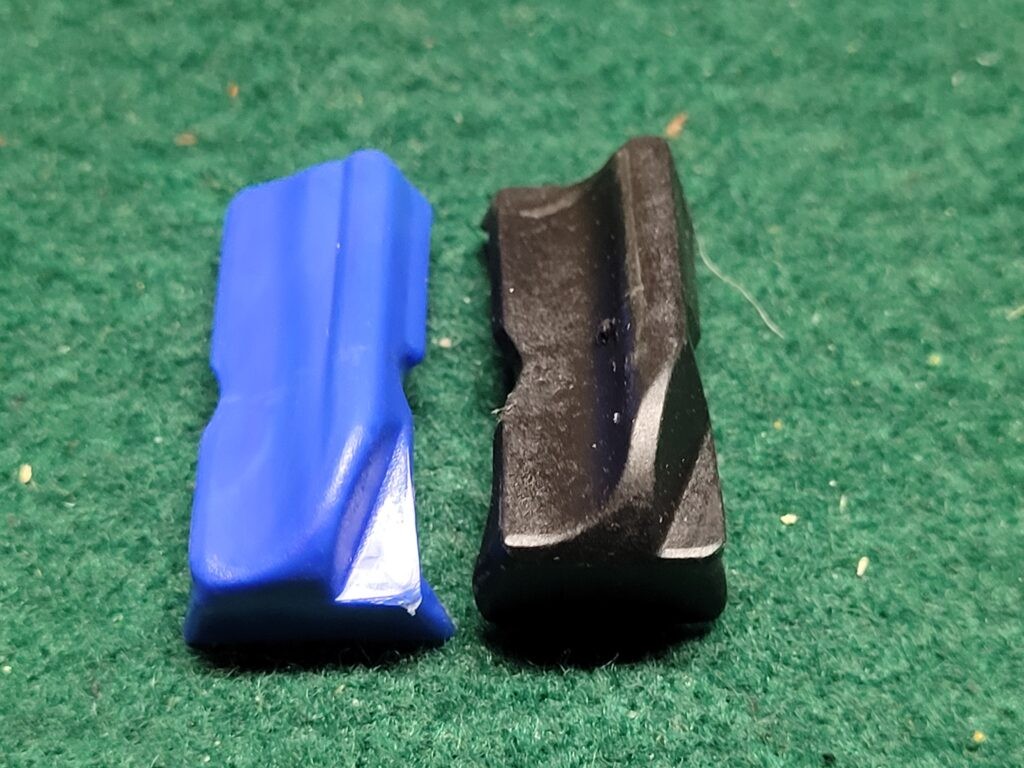
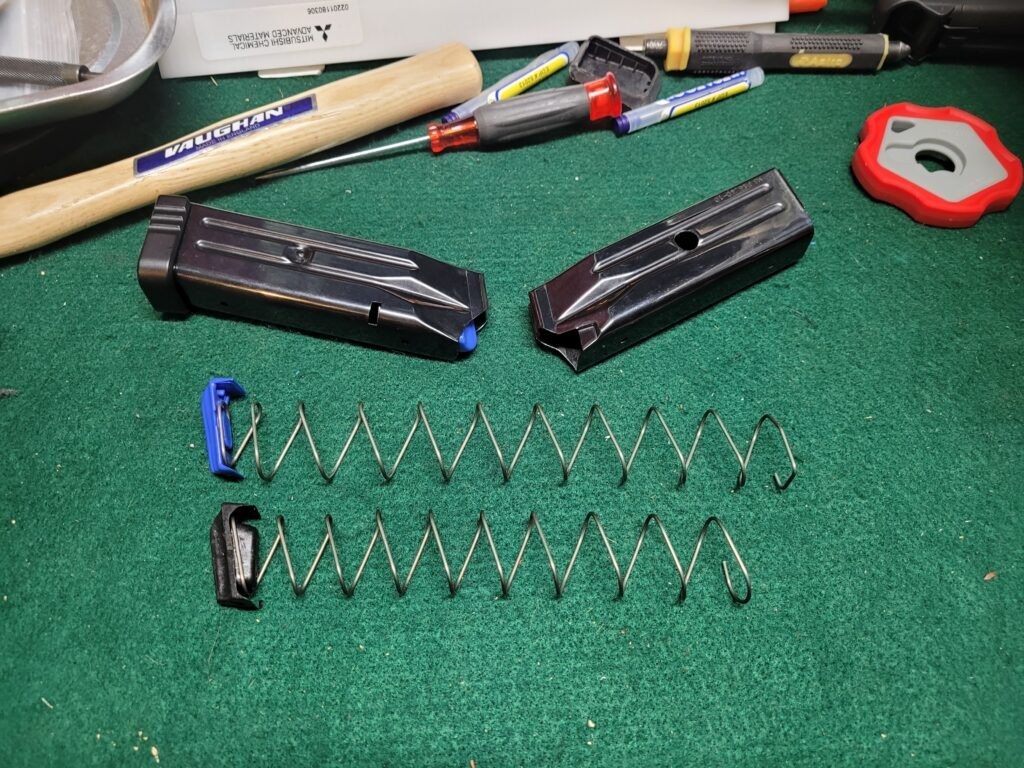
The blue rounds are A-Zoom Snap Caps. I use them during magazine prototyping and testing rather than live ammo The magazine lips are long pieces of rounded sheet metal that are going up the sides of the cartridge and are both positioning and retaining the round. Note the plastic “shelf” of the follower that is on the left bottom edge of each magazine that is level with the metal body. When the last round is fed from the magazine, the follower rises and that shelf is what engages the slide lock lever to put upwards pressure on it. When the slides travels rearword with the extraction and ejection of the last round, the slide lock level pushes up and locks the slide open ready for the next magazine to be fired.

The original 1911 was designed for .45 ACP but we are feeding a little short round from the back of the magazine towards the chamber a mile away. How can we maintain control? The short answer is have longer feed lips on the magazine. These longer lips are what get the relatively small 9mm round from the back of the magazine all the way into the chamber.

AK rifle with MI rails and custom Galil grip
“We’ve got a long way to go and a short time to get there” were the famous words in “East Bound and Down” by Jerry Reed in the movie classic Smokey and the Bandit. The feed lips need to control the feeding of the cartridge all the way from the back of the magazine to the point the bullet engages the feed ramp and then starts to go into chamber. A 9mm Luger cartrdge is 1.169″ long. In comparison, 10mm Auto is 1.260″ overall. and .45 ACP is 1.275″. You might thing those differences are small but they definitely impact the design and operation of the pistol – they need to be planned for if you want reliability.

The reason I listed this section is that the length of the feed lips can vary depending on the model of pistol so if you are trying to use a magazine from another type of pistol you may find you need to trim the feed lips back. I didn’t have to change the P16 or P18 mags for the 9mm but I did need to modify the P16 Para mags to feed reliability in RIA 10mm and .40 S&W pistols.

What happens if the front feed lip gap is too wide? You tend to get a Failure to Eject (FTE) or the Slide locks open prematurely

The feed lip gap at the front of the magazine controls where the cartridge is going vertically – the angle towards the chamber. Increase the gap and the front of cartridge rises and decrease it and the angle goes down. But wait, there’s more.

AK rifle with MI rails and custom Galil grip
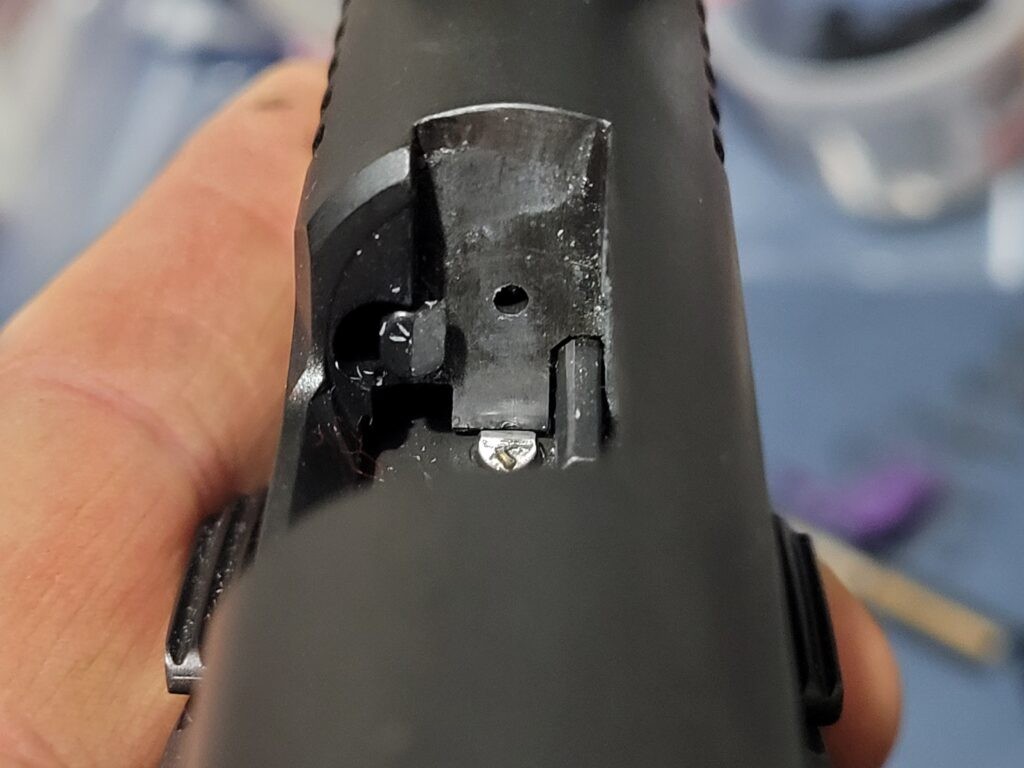
If the front of the round pushes up too much, it will cause the extracting case to slide up the breech face and out of position thus missing the ejector bar you can see just above the rear of the cartidge. The tell tale is that you have the new round and the old case in the back of the slide at the same time.

Now here’s the first gotcha: The feed lip gap still controls the rise of the bullet in the front but if it goes too far, the bullet is going to interfere with extraction, pushing the extracted case upwards on the breach face of the slide and out of position to correctly engage the ejector and all of a sudden you have the old case in the slide, a new round trying to feed and you have a jam. If you go for a front feed lips gap of .305-.308″ you will be fine. Depending on your pistol once you get somewhere around .320″, you are going to cause the ejection problem I just mentioned

AK rifle with MI rails and custom Galil grip
There’s an interesting design issue with all 1911 breech faces – they are flat. The extractor pushes the case to the right in this photo. The ejector bar is exiting its cut out from the breech face in the lower right but there is nothing to truly limit upwards travel.

I’ve spent a lot of time chasing this dimension because you tend to get better feeding the more the bullet is oriented towards the chamber but with the 9mm you have to be mindful of the impacts on the the ejecting cartridge.

By the way, in addition to interfering with ejection, a feed lip gap that is too wide can allow the follower to travel too far upwards and prematurely lock the slide open with one cartridge remaining in the magazine.

I should point out that the most likely cause of a failure to eject (FTE) is a faulty magazine. The second most likely is a worn or failing extractor. It probably is not the ejector bar.

What happens if the front feed lip gap is too narrow? You tend to get a failure to feed (FTF)

If you move the feed lips to close together, the new round that needs to be fed into the chamber comes in at too flat of an angle and smashes straight into the feed ramp. On one hand the 9mm bullet is rounded abruptly but the feed ramp is quite abrupt. I tend to find that somewhere under .302″ this happens but I haven’t done a lot of testing on this dimension because I have been more focused on wanting the cartridge angled up vs. down.

AK rifle with MI rails and custom Galil grip
The round travels up the feed ramp but it needs have enough of an upward angle to ride the ramp up. If it is too shallow it will slam the bullet into the ramp and stop. Note that RIA did polish the ramp – that was an unexpected nice touch. In general, I’d recommend polishing the ramp smooth to aid in feeding. Also, look at the shape of the snap cap – it mimics a classic full metal jacket 115gr bullet. The curvature of the bullet will aid in feeding. Different bullet shapes can affect feeding in some pistols and you may need to tweak certain mags for certain rounds – it’s next to impossible to guess so test your pistol with certain combinations of cartrdiges and magazines to ensure they are reliable. You may find your pistol likes some and hates others. I’d probably just move to another cartridge if it were me and my pistol had issues with a given round.

Yeah, the lips have a memory

So the magazines are made of high carbon steel that is heat treated. The feed lip gap falls within a certain tolerance. If it changed either wider or narrower, the lips are going to move back towards their original positing anywhere from .002-.004″ so plan accordingly.

This is where experience matters with the mags you are working with. Once you have your dimensions figured out, you may find you need to bend further than the nominal dimension so when the sheet metal starts to relax it will stop in the range you want.

You may also find that the metal does most of its movement in some number of minutes after you do the initial tune and need to do it one more time. Some guys will wait overnight to do the final tuning. I wait at least 30 minutes.

What about left and right bends to the feed lips?

The more you bend the feed lips in one direction too much, the round will point that way and either glance the chamber wall or actually slam into the chamber and stop depending on how off you are. Try and get the cartridge to point into the center of the chamber in terms of left to right.

AK rifle with MI rails and custom Galil grip
This is an 80% RIA frame that I used during prototyping. I’m not enough of a machinist to actually complete it but it really helps you see what is going on. If the right feed lip is bent too much to the right then the round will go in that directton – same for the left lip. You want to point the round into the center of chamber.

What about the follower?

It’s really interesting how important the follower is. On one hand it is pushing the rounds up againt the feed lips properly and on the other, there is a small “shelf” on the front left edge that pushes the slide stop lever up and locks the slide open on empty (unless you are using competition followers such as the Arredondos that purposefully do not lock the slide open).

The walls at the top of the 9mm mag really need to taper inward to properly channel the staggered round into the single exit position at the top. The follower’s sides need to be appropriately tapered and rounded as well less they drag on the walls. The original Mec-Gar followers have significant drag that you can feel when loading the mgazine so revising them made the most sense.

AK rifle with MI rails and custom Galil grip
The Arredondo follower is on the left. It is more angled and rounded on the right side in this photo than the Mec-Gar on the right. The Arredondo was desined for competition is when you look at the bottom right edge of each you will see the Arredondo slopes down fast so it will not raise the slide stop lever. The Mec-Gar has a more elevated edge that will lock the slide open. Our modified Mec-Gar followers improve reliability by having more rounded edges but still can lock the slide open.

By the way, to make life more colorful, when you install the follower the spring tension will spread the feed lips wider by about 0.002-0.004″.

How about the spring?

The Mec-Gar springs are okay. How much spring is enough or to little really depends on how well it can keep constant upwards pressure on the follower to move the rounds up fast enough and keep them in position. With the drag on the follower reduced, the spring can do its job.
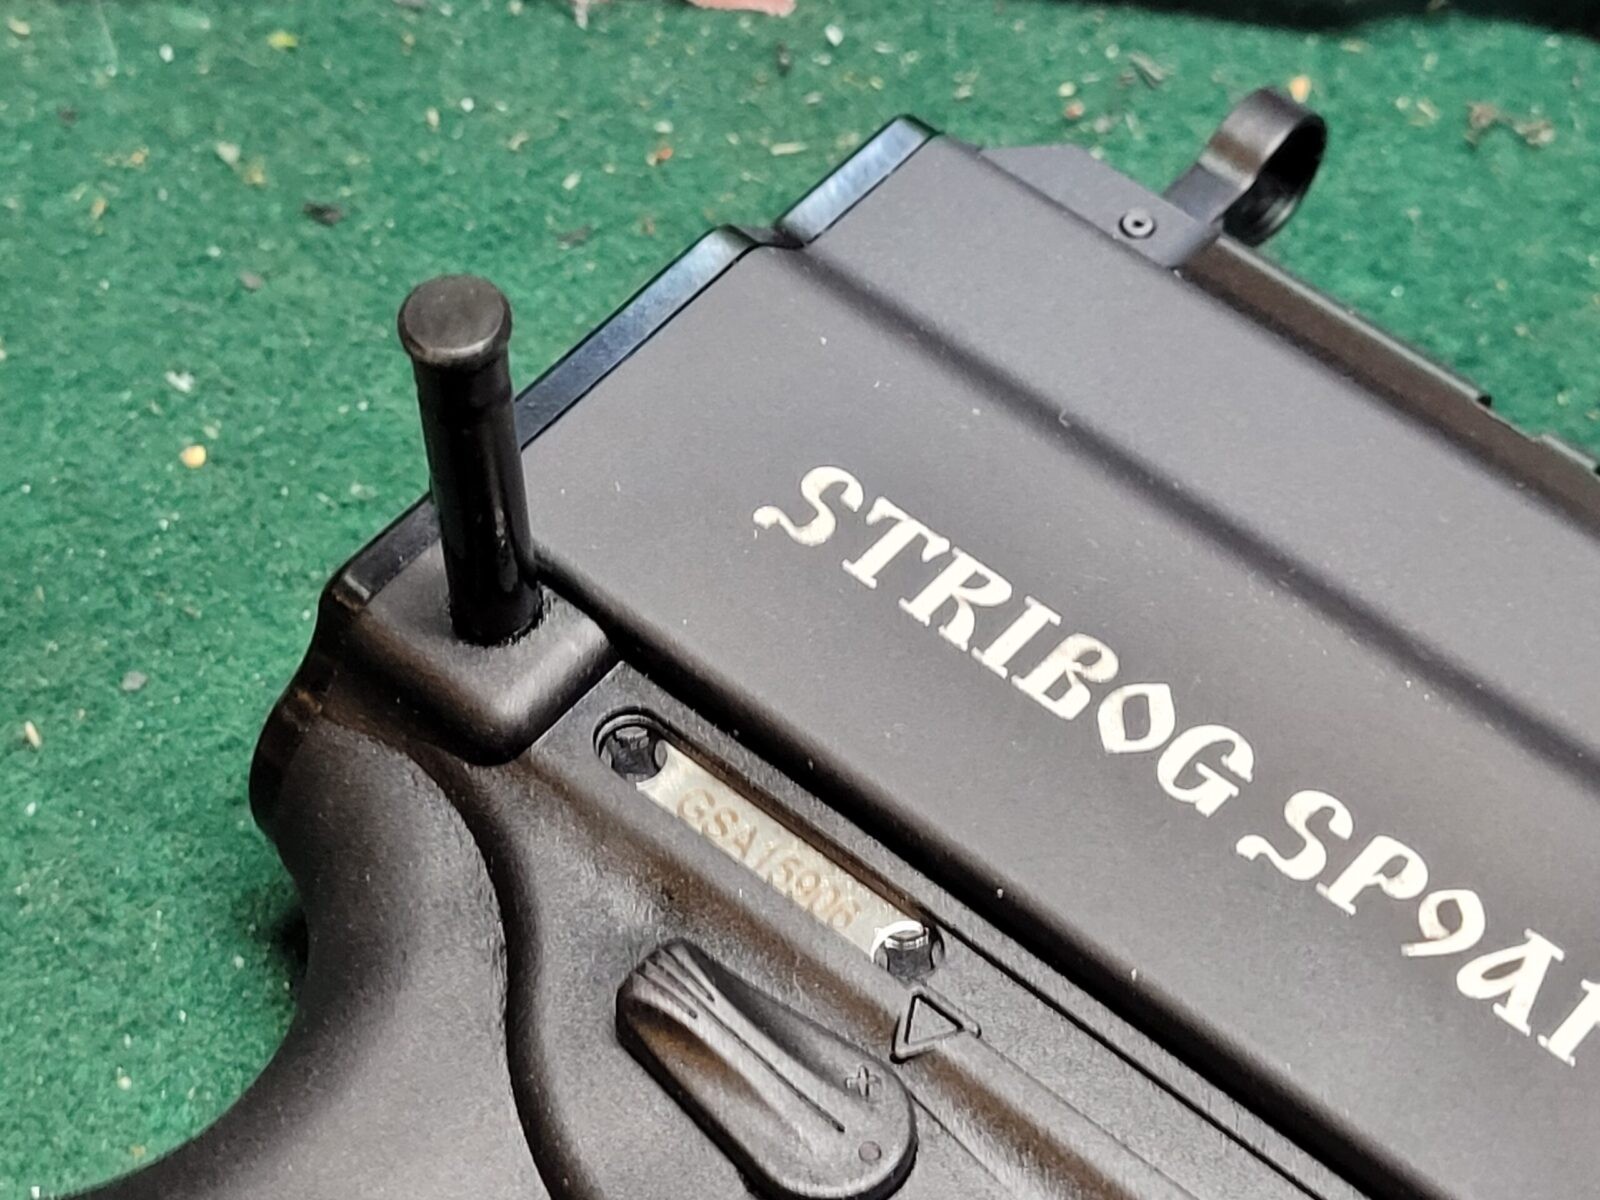
There is an exception though – if you add a magazine extension or base plate that adds capacity, the spring really ought to be longer so get a Wolff or Arredondo spring that can supply the pressure over a longer distance.
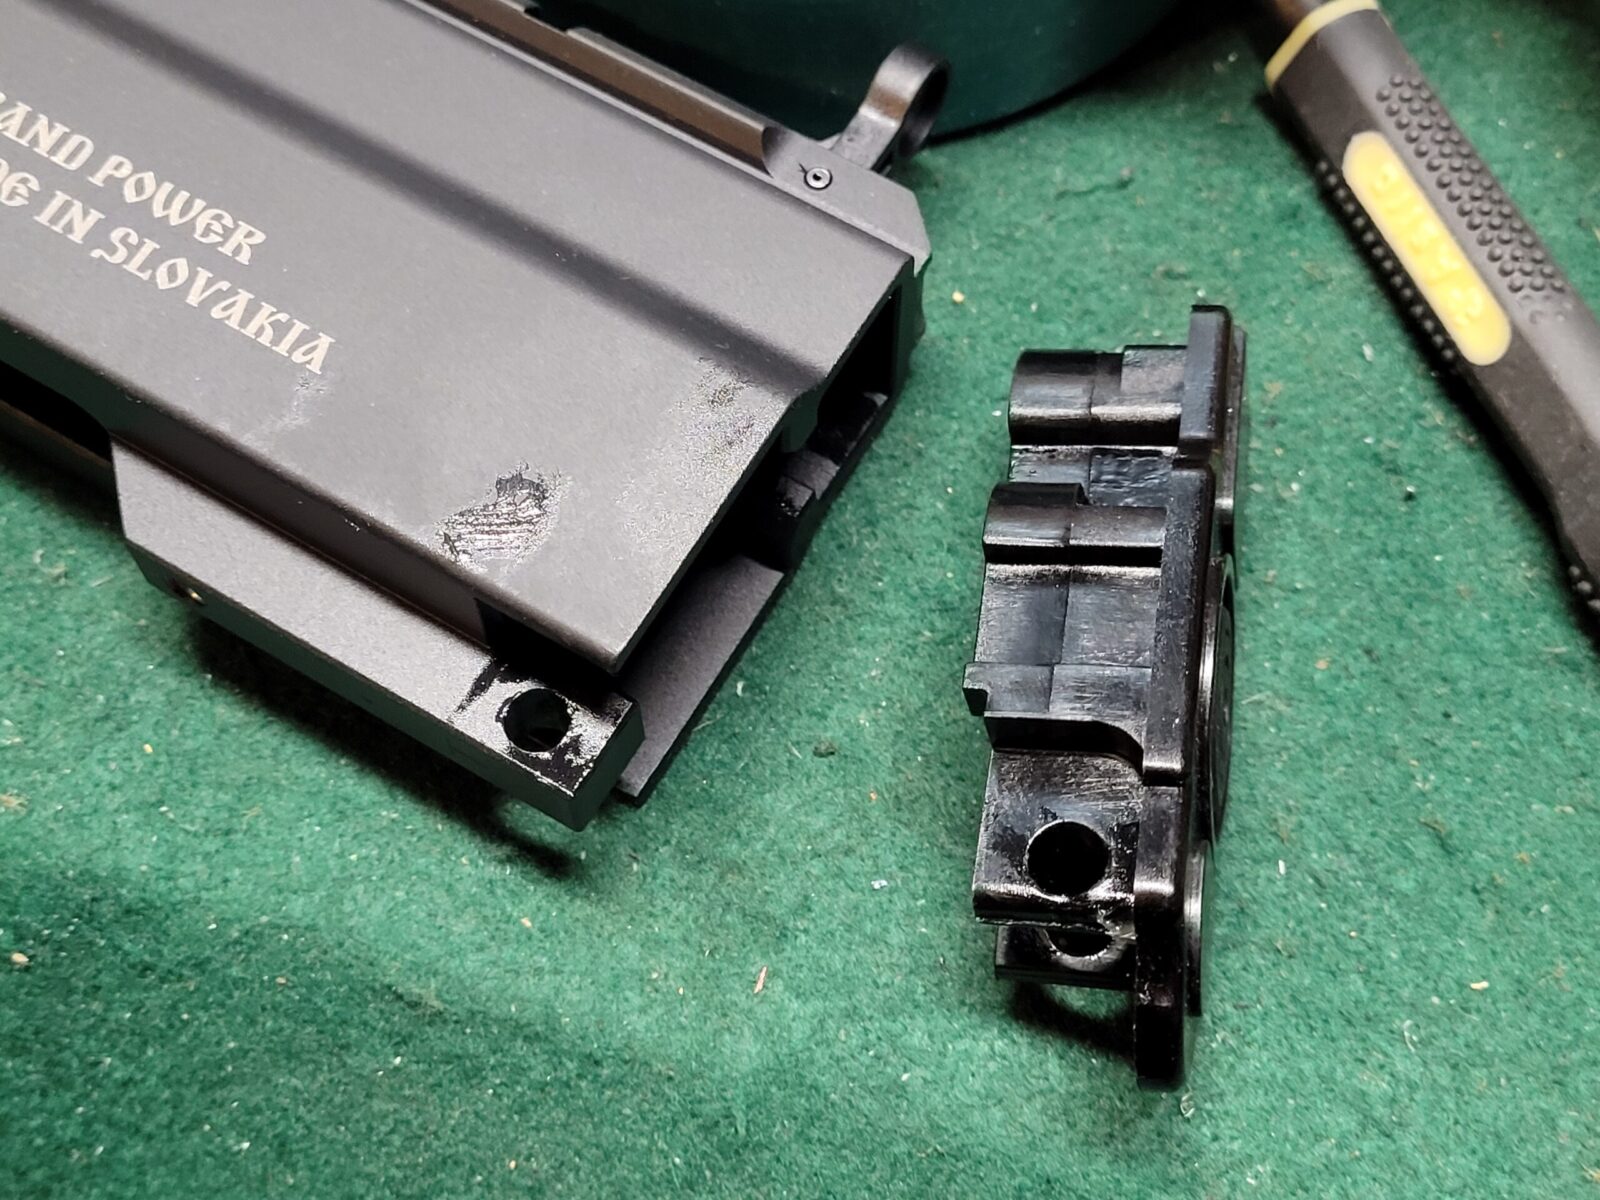
AK rifle with MI rails and custom Galil grip
The top assembly has the a easy to identify blue Arredondo follower and longer spring. The spring is made by Wolff but is bent to properly hold the Arredondo follower. The black follower and shorter spring are the original Mec-Gar units.

Yes, springs can and do wear our so if you feel the follower is being pushed up sufficiently or is sluggish *and* the walls do not appear bent then you probably need a new spring.

What about lubricant?

Mec-Gar mags come with some lubricant all over the insides of the mags, follower, spring, floor plate and base plate. On one hand it protects against corrosion but on the other it can attract dirt.

I would recommend that you use a good dry lubricant film. I used to use Dupont’s Teflon dry lubricant film spray but they discontinued it over environmental and health concerns about Teflon. The company is now producing a dry film using a ceramic technology that I really like and find it does a remarkable job at lubricating magazines.

If you are in a marine environment and you need the corrosion protection the use the oil of your choice – you need to worry about rust, I get it. For me, the Dupont Dry Film Lube aerosol spray does a great job. The new followers and the inside of the magazine tubes coated with this enables remarkably smooth movement of the follower.

Number your magazines

A tip you really ought to consider is to number your magazines so you can keep track of them. I like stickers because you can readily remove them if you put a baseplate on a different magazine tube but there are plenty of guys who use a permanent marker or etcher to uniquely identify each magazine.

The benefit of doing this is that when you are at the range if you find that some magazine is having problems, you can write down or take a photo of the number and know what you need to work on. Face it, if you have a bunch of mags and they all look pretty similar it can be hard to keep track of them otherwise.

AK rifle with MI rails and custom Galil grip
By numbering the magazines, I can track dimensions and performance over time.

We do sell the stickers if you are interested – click here.

I’m still learning

I don’t claim to know everything – let me right up front about that. I now know what people mean whey they say “The more I learn, the less I know”. In other words, as I learn more I am increasingly aware that there is a ton of stuff I don’t know.

Hopefully this gives you some insight about why one magazine will work great but then another one doesn’t. The above are things to consider.

My reason for writing this is to give you some idea of what we’ve learned and are building into each 9mm magazine that you buy from us – we aren’t just relabeling mags and selling them at a heck of a mark up.

What are are doing is ensuring the dimesions, doing the necessary modifications and testing teach magazine in one of our 9mm RIA pistols to ensure you get a reliable mag. If you have problems with a magazine from us, we will definitely make it right.

If you’d like to see our magazines, click here to go to our store.

We do have a new post about how to load our v2 9mm magazines to get reliable feeding. Click here for it.

Note, I have to buy all of my parts – nothing here was paid for by sponsors, etc. I do make a small amount if you click on an ad and buy something but that is it. You’re getting my real opinion on stuff.


Please share the link on Facebook, Forums, with colleagues, etc. Your support is much appreciated and if you have any feedback, please email us in**@*********ps.com. If you’d like to request a report or order a reprint, please click here for the corresponding page to open in new tab.