Tag Archives: 9mm

My Adventures With Rock Island Armory 9mm Extractors

Starting in 2021, I started to offer 10mm magazines for the Rock Island Armory A2 HC pistols – “A2” being a marketing opportunity to refer to the next generation 1911A1 pistol prototyping the US Army did starting in 2004 that experimented with different sights, extractors, mainsprings, etc. The “HC” stands for high capacity and reflects the RIA pistols are using a staggered magazine design to hold far more rounds than a single stack could.

At any rate, I had a number of customers ask me to produce mags for the 9mm RIA A2 HC pistols – the 51679 Tac Ultra and the 56645 Pro Ultra Match HC. Our 10mm mags had proven to be very successful and after enough requests, I decided to enter the 9mm magazine market.

One thing I learned with making AK grips is that you really need to have the weapon to make a part for it. This allows you to check fitment, reinforce potentially weak areas, etc. So, when I started with the 10mm mags, I bought a 52009 Rock Ultra HC and later a 56862 Tac Ultra Match HC. Why? Because you also find that a given firearm may differ enough that if you build and test only with it, you may not be making something others can use.

There’s an engineering problem called “stacked tolerance”. Every part has a specification that says, for example “9.0mm” and then there is a tolerance specified – for example “+/- .01”. That means the part produced can range from 8.99 to 9.01 in size. Make an assembly and all of those tolerances may combine, or “stack” in such a way that if you build a part to work for that particular unit then another assembly that happens to stack in the other direction may not be able to use that part. Testing on multiple pistols helps with a testing – at least a bit because you are reducing the odds of one pistol having a problem or working and others not.

So, by having both the 52009 and 56862 10mm pistols, I could test magazines to make sure they fed right, dropped free, etc. With the 9mm pistols, I had limited funds and just started with the 51679 – the Tac Ultra. That decision bit me hard.

The Initial Magazine Prototyping Didn’t Make Sense

When I prototype, I buy a bunch of original magazines and then start looking for what is close enough to modify and start tinkering with the feed lips, feed angles, the spring and the follower. To keep track of things, I applied numbered stickers to every magazine and kept track of the dimensions plus performance.

What I also learned with the 10mm mags is that the best dummy rounds are the machined aluminum A-Zoom Snap-Caps. Dummy rounds that are made from a case and a bullet will see the bullet pushed back into the case and/or get deformed after some fairly low number of cycles. The machined aluminum A-Zoom Snap-Caps are dimensionally accurate and can cycle hundreds of times before needing to be replaced. By the way, don’t do this type of work with live rounds – it’s an accident waiting to happen.

Back to the 9mm world, I was working on the mags and things just didn’t make sense. A magazine would work and then it wouldn’t. One set of dimensions would work and then they wouldn’t. Something just wasn’t adding up. The pistol would fail to eject randomly, I’d then have the old round and the new round in the slide at the same time and of course it jammed.

It had to be the mags right? I blew through a bunch of mags and time before it dawned on me that the pistol itself must have issues. I hadn’t questioned it before because the pistol was brand new out of the box. Sure, I had cleaned and lubed it first before cycling hundreds of snap caps through it. The problem was that I assumed it was good to go and the initial testing seemed to show a reliable pistol … but I only tested a few mags worth of snap caps – maybe 34-52 cycles max.

Testing The First Pistol

I loaded a magazine up, racked the slide and loaded a snap cap. I then pulled the slide back slowly and the extractor lost control of the extracted round as I pulled the slide to the rear. That wasn’t supposed to happen. If I went slow, it would either fail to extract completely or lose control of the round.

I’m not a 1911 gunsmithing guru but I had to learn some stuff really fast. I knew if I sent the pistol back to Rock Island/Armscor, it would be at least a month before I would get it back. So I read posts and watched videos that explained the pistol had an extractor problem and how to correct it. I bought a few different brands of 9mm extractors, the Brownells extractor tool, the Jack Weigand extractor gauge and tensioning tool.

Boy, I could not get that thing to work even after trying a few different brand extractors and a Wilson. At this point I was pretty ticked off. My last best guess was that the extractor looked like it was clocked slightly. When I inserted the Weigand 9mm gauge, I could feel initial tension as I inserted it and then it would drop off rapidly as I inserted the gauge the rest of the way (it centers over the firing pin hole). Rather than do a new firing pin stop plate, I decided to stop chasing best guesses mainly because I was blowing time I did not have to spend. The pistol was under warranty so feeling both stupid and defeated, I finally got an RMA to send the pistol back.

No, I’m Not Incredibly Patient

In the meantime, I bought a 56645 Pro Ultra Match HC and it has worked great – no problems at all. I was able to work out the details on the mags. Now, I am not patient so I actually ordered a second 51679 Tac Ultra that I looked at, cycled a few rounds through but really didn’t use a great deal – my primary go-to test platform was the 56862 … until I decided to take some photos about the RIA 9mm A2 HC pistols and looked at the 51679’s extractor.
Close-up of a black AK Galil grip on a Romy G rifle with MI rails.
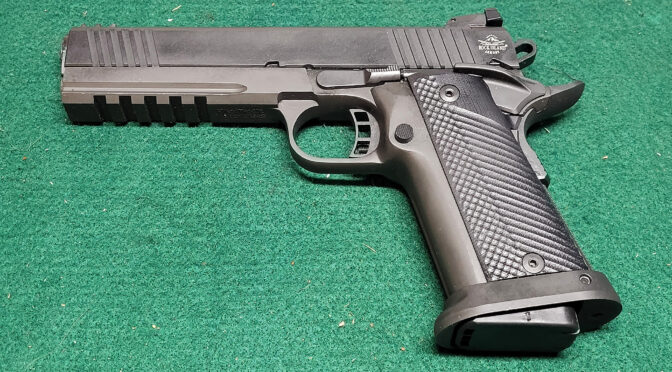
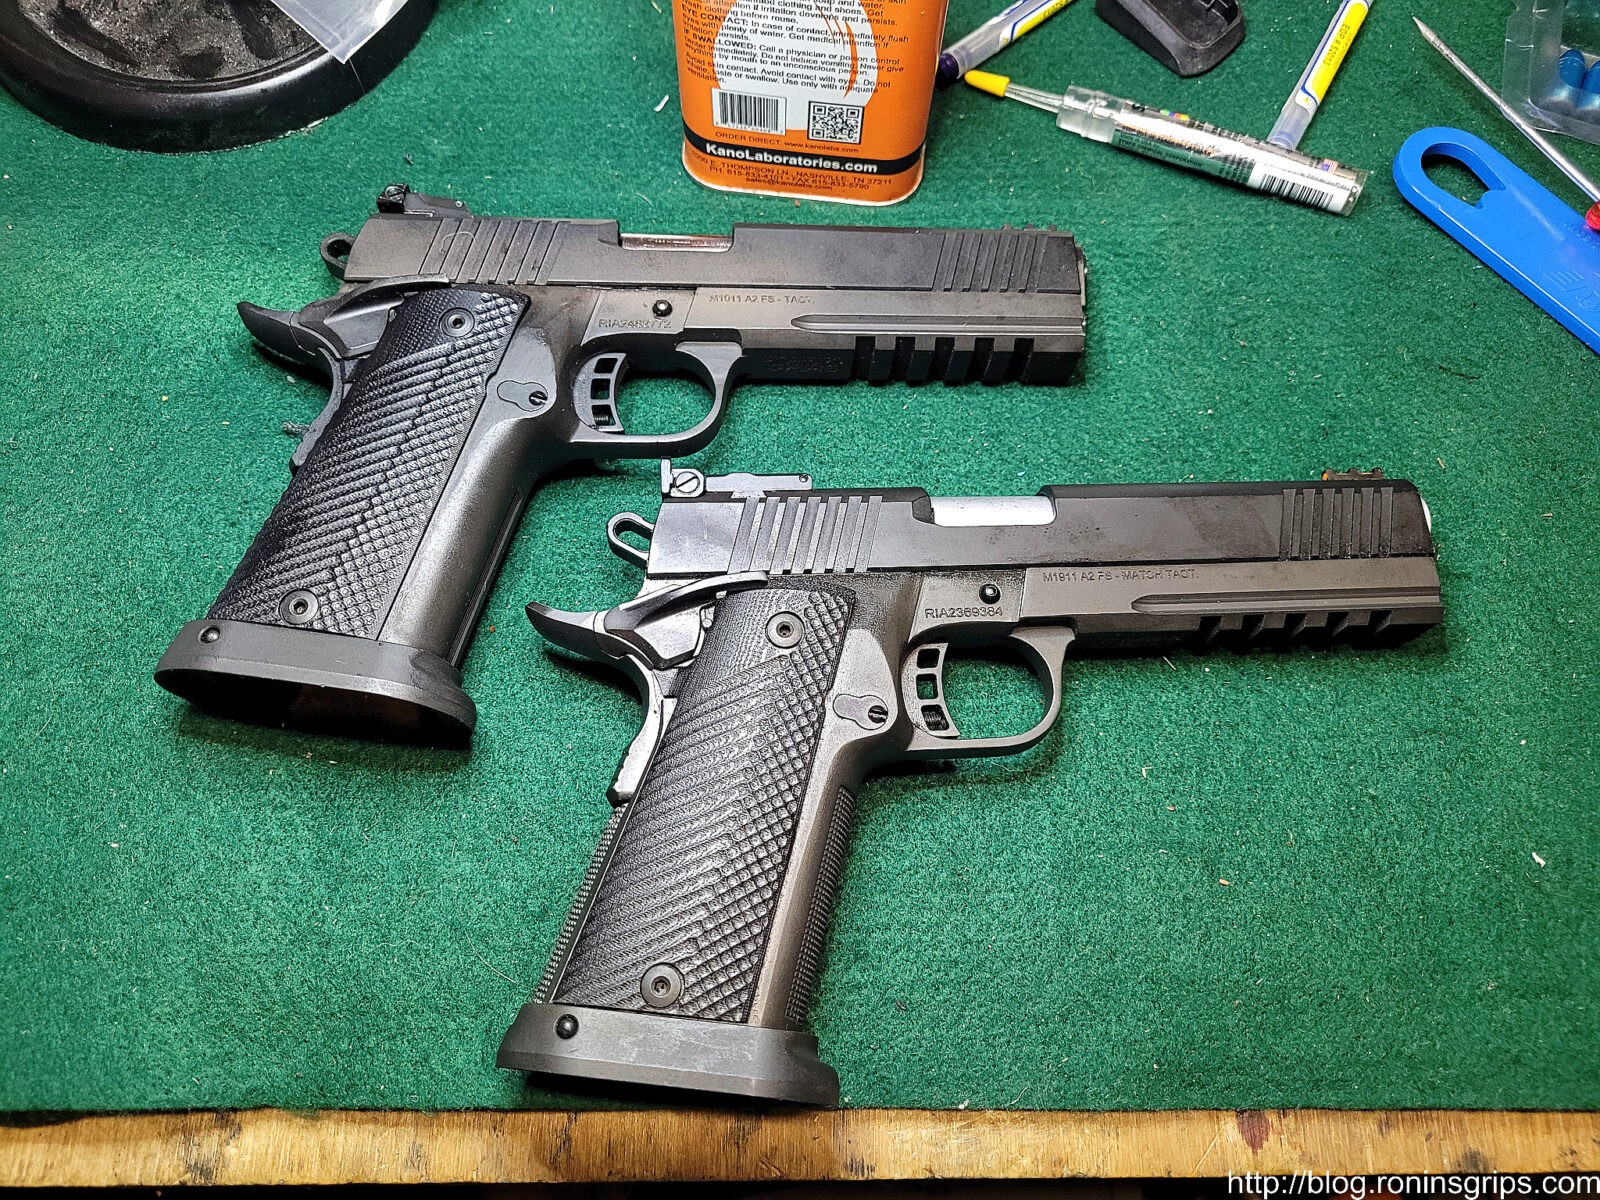
The second 51679 is at the top and the 56862 Tac Ultra Match is at the bottom. The Match pistol has nice checkering on the front of the grip, the top of the exposed barrel is a grey matte finish and has a target rear sight.

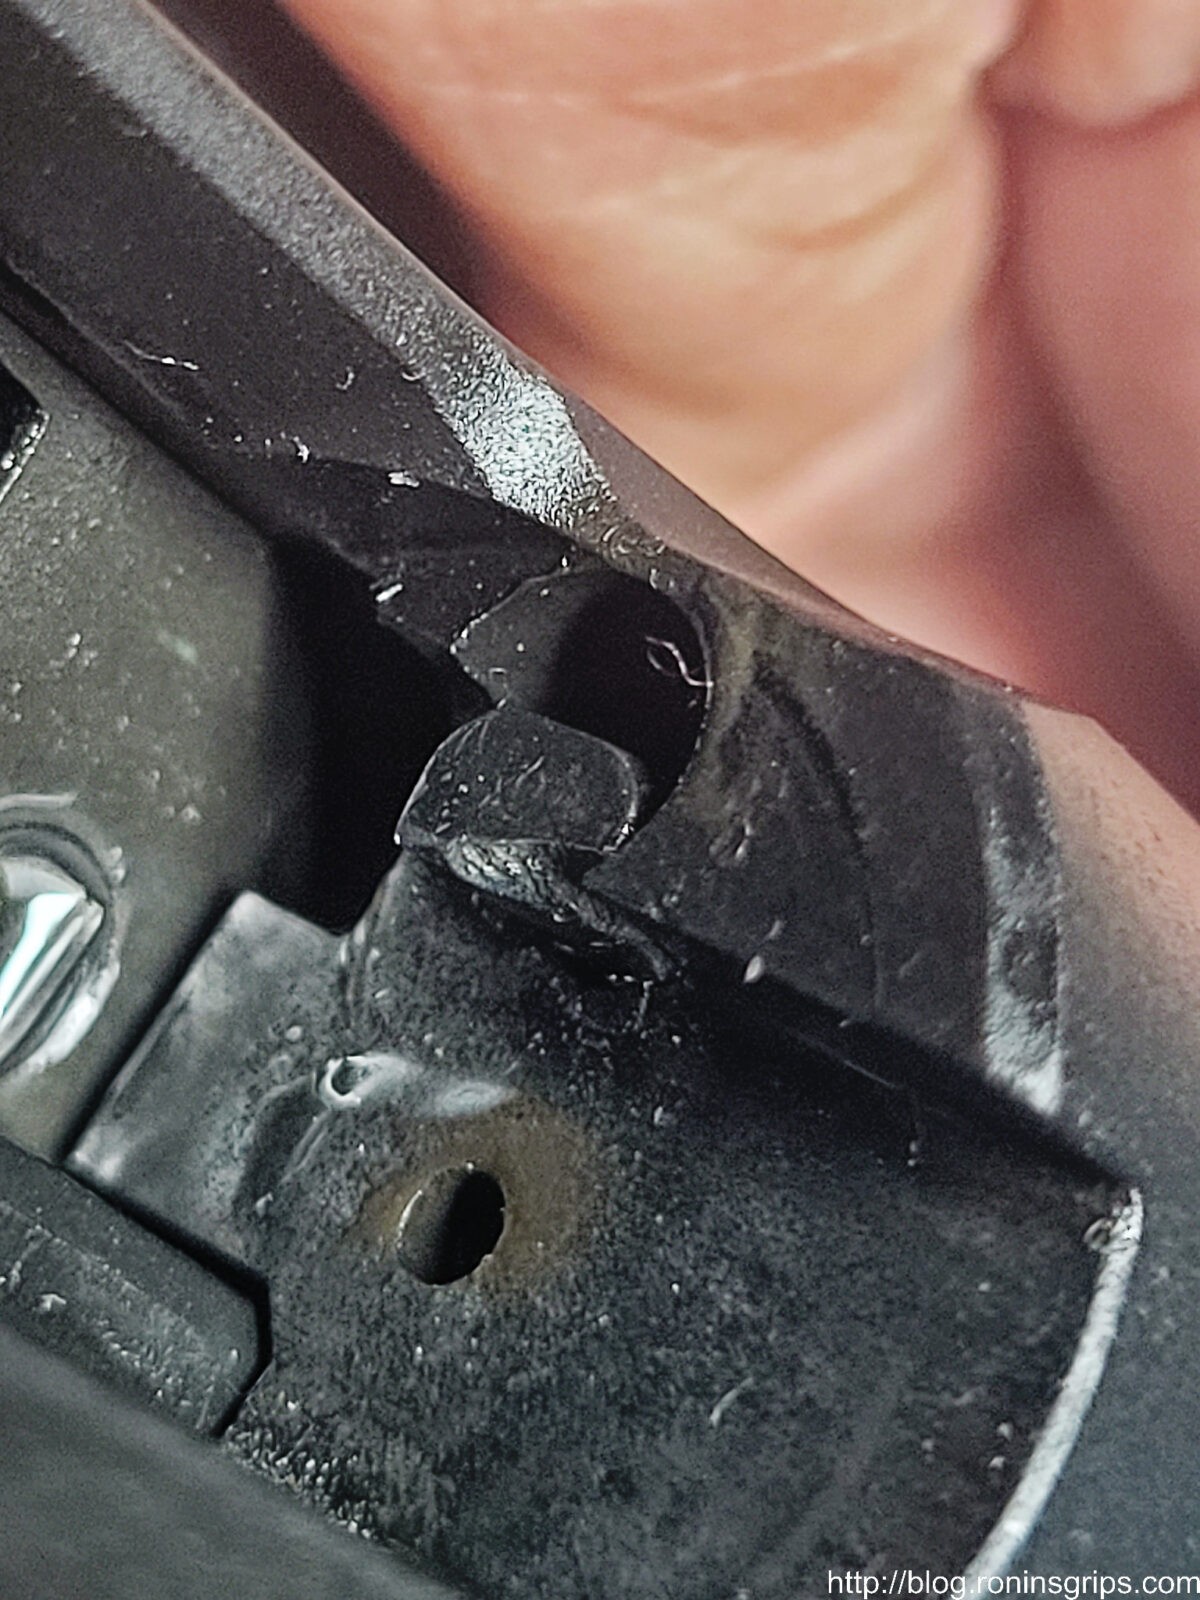
“You’ve got to be kidding me” – I thought to myself. Inserting a choice F bomb of course. The extractor in the brand new 51679 that probably has less than 100 hand cycled Zoom snap caps through it was almost completely broken off other than a little tiny nub on one end. WTF?!?!
Close-up of a black AK Galil grip on a Romy G rifle with MI rails.
I was happily taking photos for a blog post when I saw the silver grain of the busted extractor. Yeah, I was swearing up a storm. Really?

Okay, two 51679s bought from different vendors off Gunbroker about a month apart both having extraction problems …. wow. I’ll be honest – I’m disappointed. RIA 1911s are econobox models but they usually work – so, no, I’m not remotely happy not to mention jumping through hoops waiting for ever for their customer service to respond. I did learn a bunch though and will share with you what I did and what you can do if you want to.

Metal Injection Molding For Extractors Isn’t The Best Choice

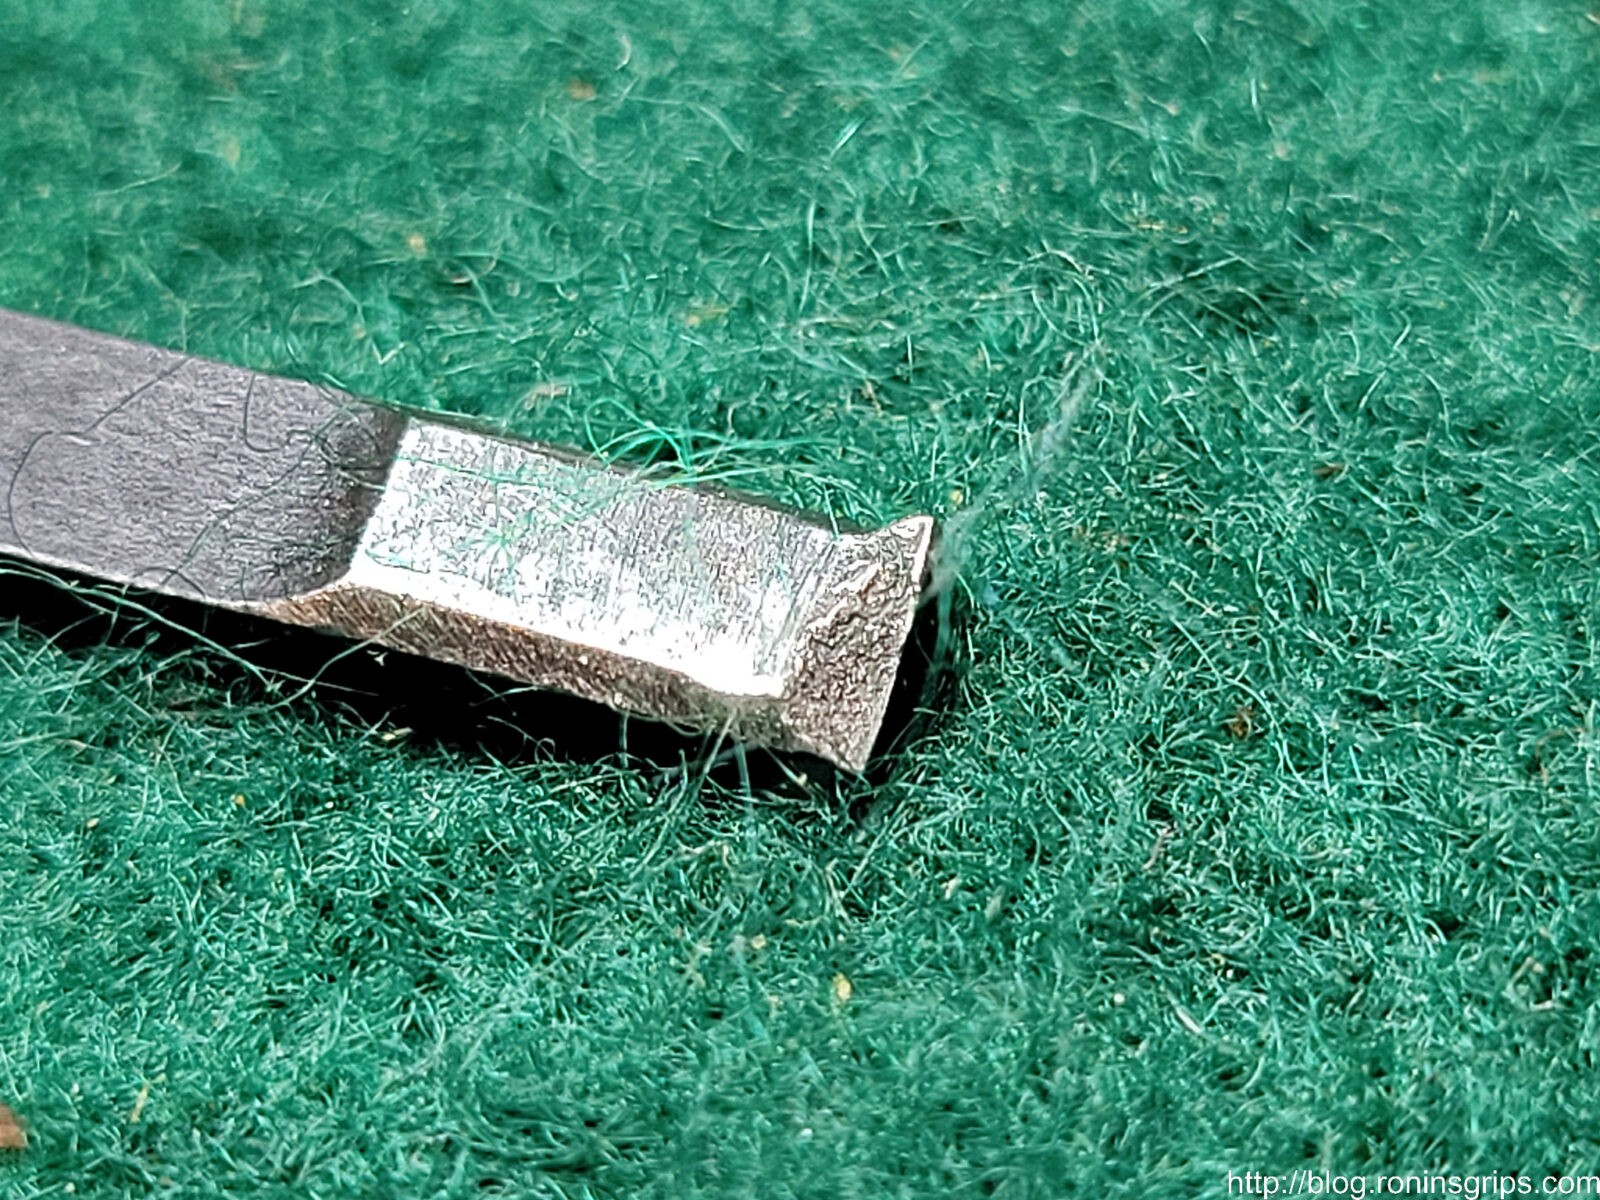
The problem is that to keep costs down, Armscor, who owns the Rock Island brand, make the ejector using Metal Injection Molding (MIM). If you search on the web, you will see a ton of guys arguing against the use of MIM in high stress parts. As I just learned with extractors, it’s not the strongest manufacturing approach – making them from forged high-quality steel is a far better idea.
Close-up of a black AK Galil grip on a Romy G rifle with MI rails.
I removed the extractor from the pistol and zoomed in as best I could to get you this photo. You can see the grainy structure that is a signature of metal injection molding. That nub at the top right edge in the photo was just enough to yank the case out of the chamber … sometimes.

Okay, if you get a new RIA 9mm pistol, check the extractor out of the box. Clean and lube it, go to the range and keep your eye on the extractor. If it breaks you have two options – send it back to Rock Island/Armscor for a RMA repair or do it yourself. Heck, you could even just replace the extractor yourself before you have a problem if you want to.

I Decided To Replace the Extractor Myself

I learned a ton on that first pistol plus I had all of the tools and spare Wilson Combat extractors. I just needed to trust in my abilities a bit more and try it again. If there’s one thing I know about myself, it’s that I am persistent and don’t give up easy. With this in mind, I dove back in again with far better results.
Close-up of a black AK Galil grip on a Romy G rifle with MI rails.
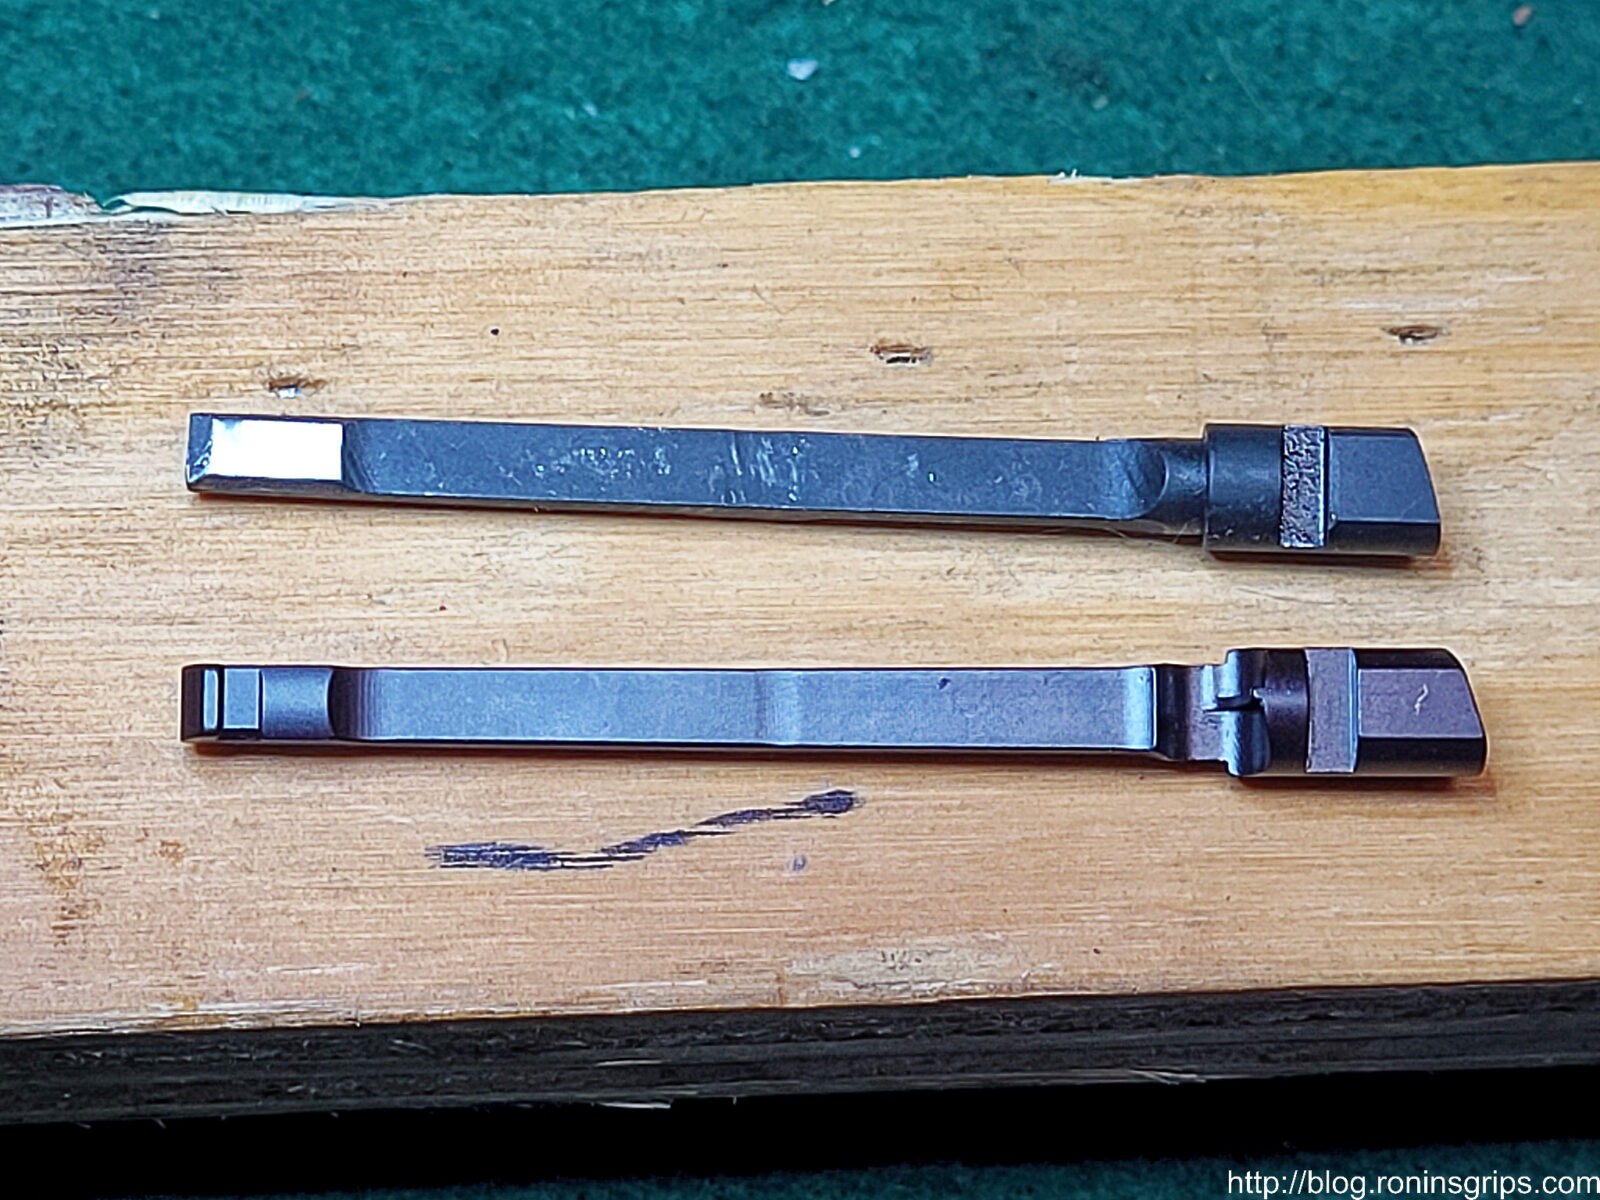
The top is the failed Rock Island 9mm ejector and it is a series 70 design. The lower extractor is a state of the art forged 9mm extractor from Wilson Combat. It is a series 80 design but will work just fine in a series 70 pistol.

First, let me explain why I went with a Wilson “Bullet Proof” .38/9mm extractor. They have an excellent reputation a number of guys posted about throwing away their RIA ejector and installing a Wilson. Instead of being MIM, here’s what Wilson says about their extractors:

  • Fully Machined from S7 shockproof tool steel with a tensile strength of 275,000 PSI
  • Optimized hook design for maximum strength and case rim contact
  • Hook location tolerances held to +/- .001″
  • Radiused corners for extended life and smooth feeding
  • Enhanced design holds tension longer over factory part many times over
  • Heat treated to optimum hardness and cryogenically treated
  • Guaranteed for life against breakage or we will replace at no cost to you

Note: I went with a series 80 extractor because they were in stock even though the RIA pistols are based on a series 70 design. You can use a series 80 extractor in a series 70 pistol but not vice versa. You can get them from Brownells, Wilson directly and other places.

You don’t need specialized tools but if you can afford them, I would highly recommend the following:

Close-up of a black AK Galil grip on a Romy G rifle with MI rails.
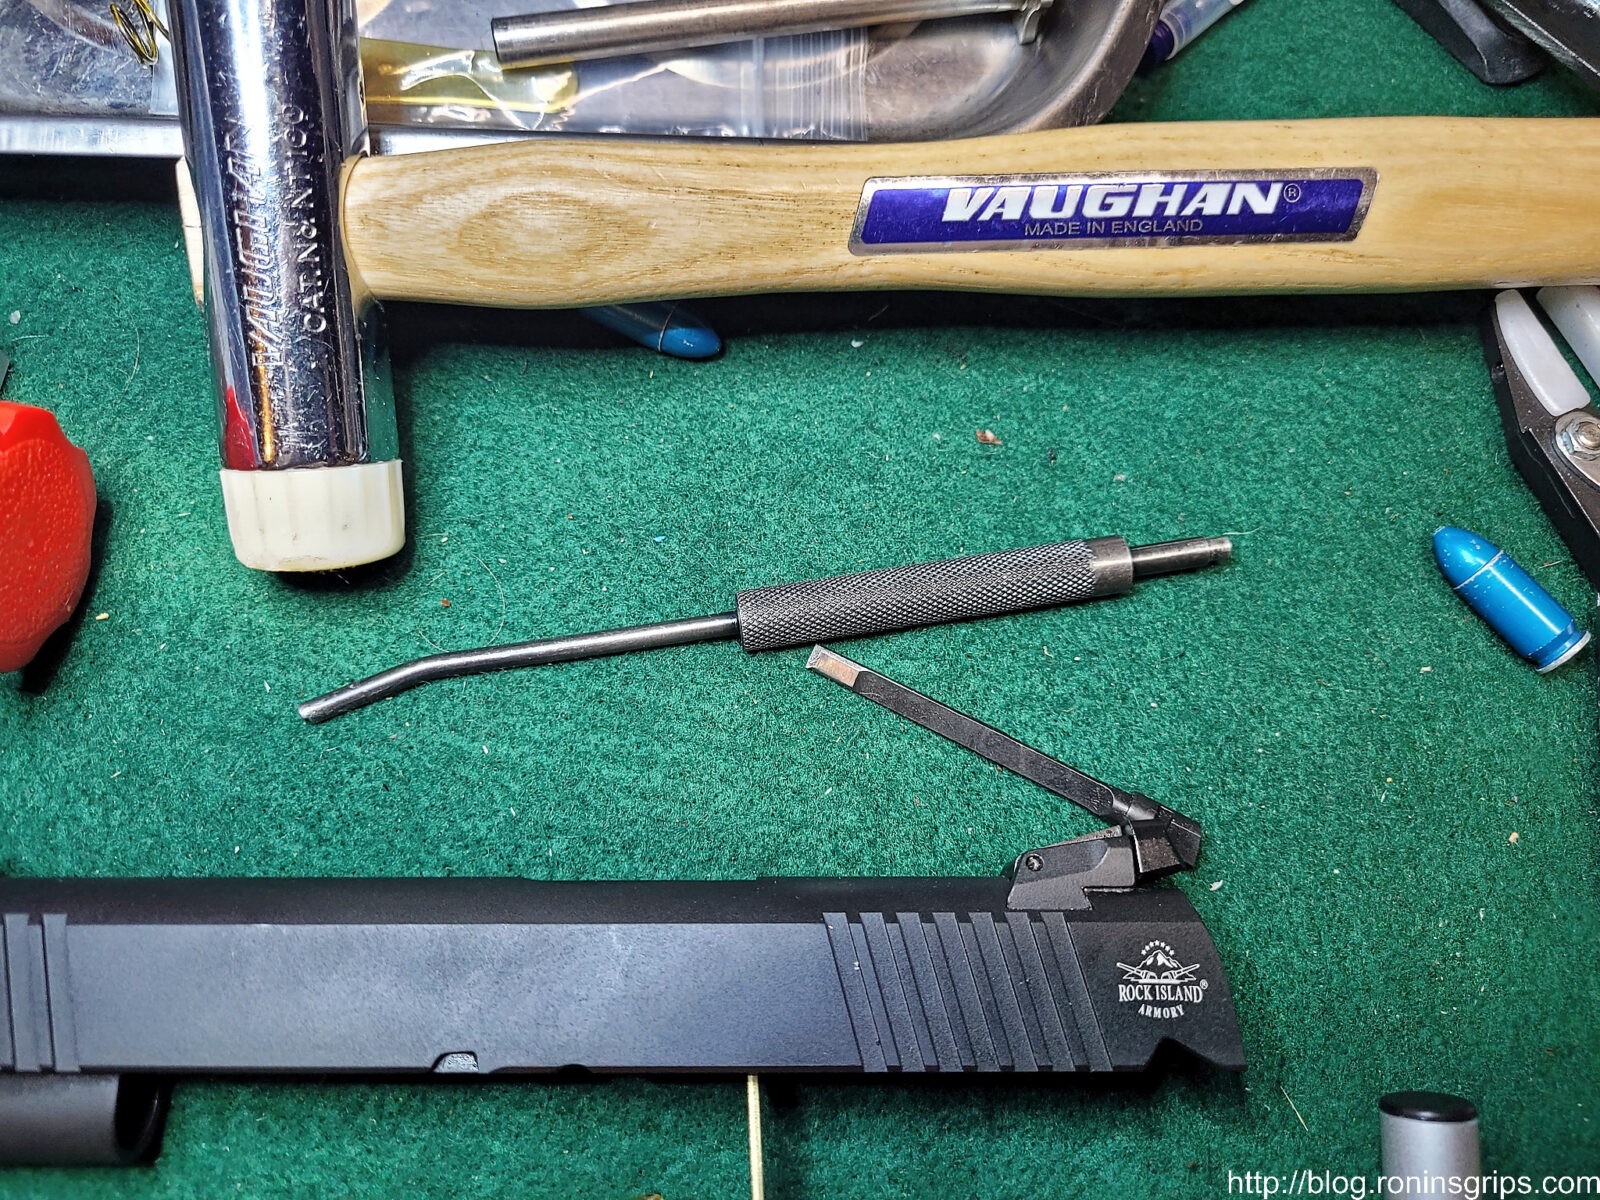
The long angled tool is the 1911 Extractor Tool from Brownells and totally worth it in my opinion. The long angled end lets you reach into the slide and push extractor back and then down into the hole for removal. The other end is perfect sized for pushing down the firing pin to aid with the removal and installation of the firing pin stop. Note the blue A-Zoom snap cap – that is the color of their volume packs of rounds. Exact same material and tolerances – just a different color.
Close-up of a black AK Galil grip on a Romy G rifle with MI rails.
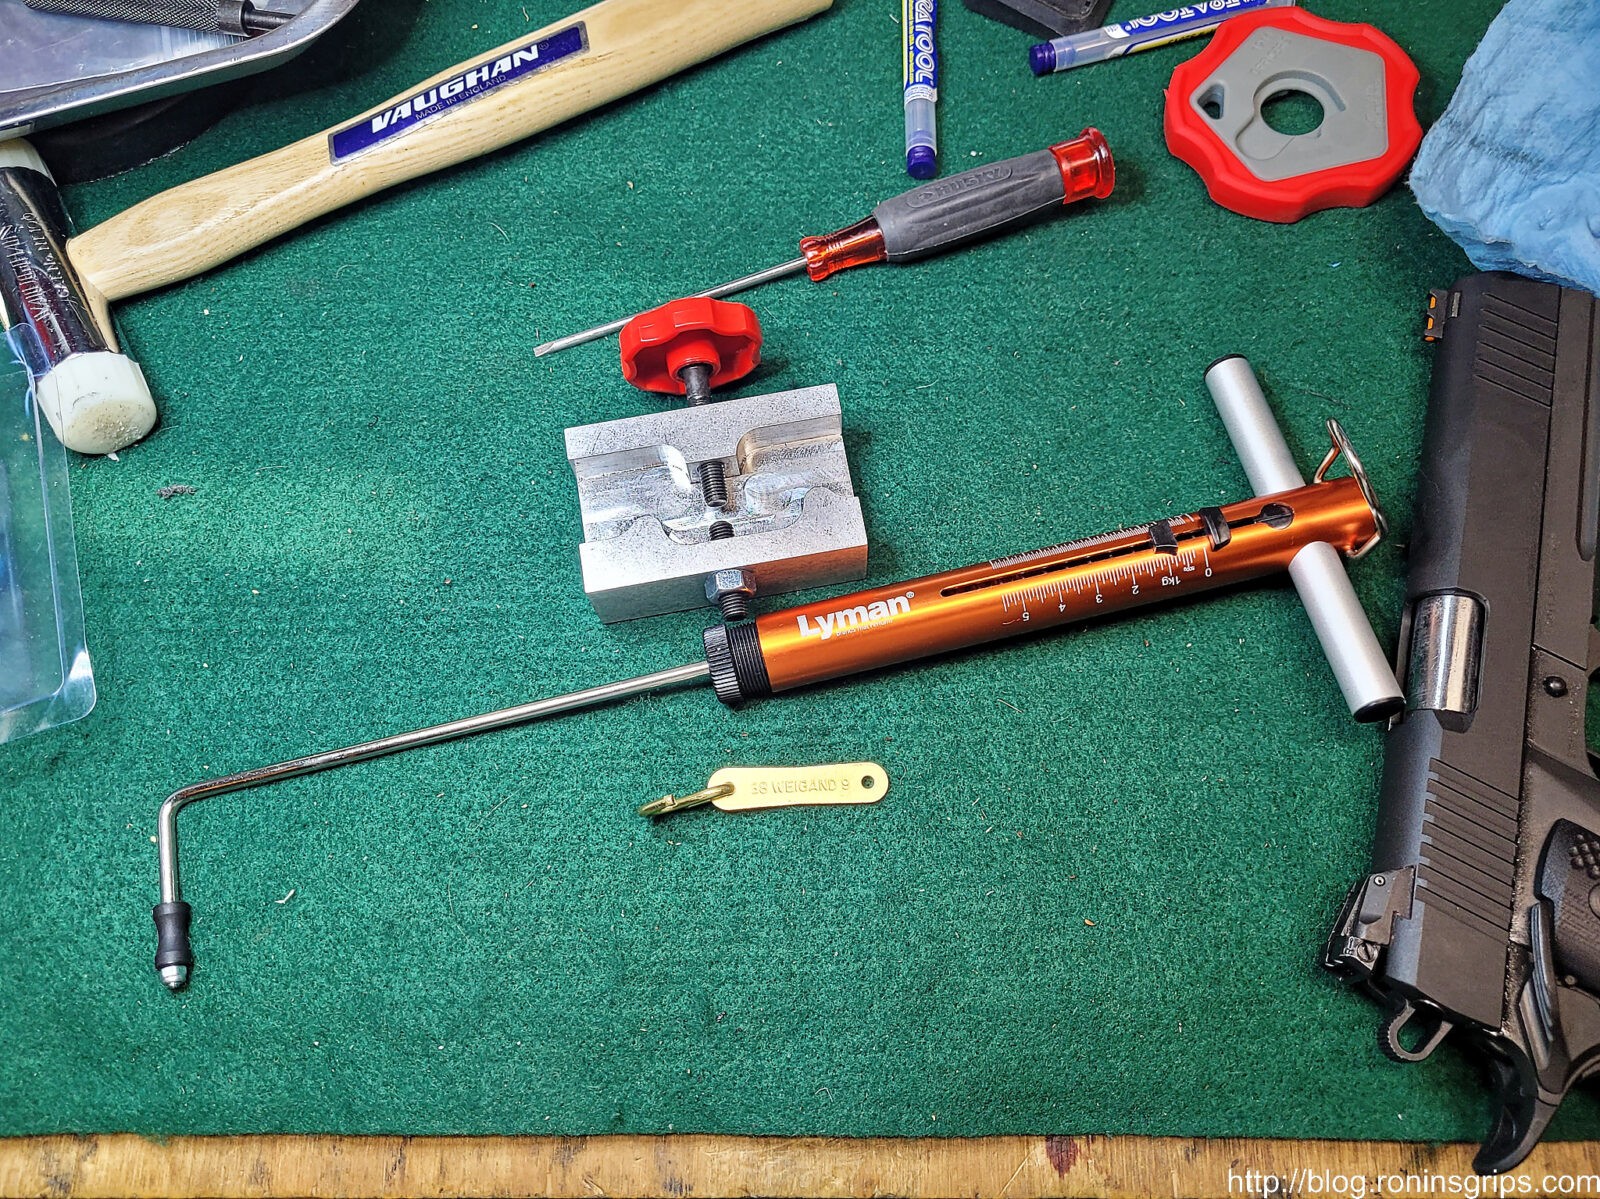
The silver block with the red handle is Weigand’s tool for adjusting extractor tension. The big orange thing is the Lyman mechanical trigger pull gauge. The brass plate is the gauge with a brass S-hook that I added. The gauge is sold as a set and each end is for a different caliber. The hole you see is actually for lining up on the firing pin hole – I just added the S-hook on the .38 end because I don’t have any plans to shoot .38 Super. Note, the small blade screw driver makes it real easy to nudge the firing pin up or down so the firing pin stop plate can be pushed into position.

Polish the Extractor

From what I read and saw, the Wilson extractor is practically ready out of the box other than setting the tension. Some guys recommended polishing the surfaces where the cartridge will come in contact and I did that with one of the small rubberized abrasive polishing bits in my Dremel.

How to Install

Make sure your pistol is unloaded – that the chamber is empty and a loaded magazine is not inserted. In short, work safe. Also, do not use live ammo for testing – use snap caps.

Let me give you an overview and then a couple of videos to watch:

  1. Remove the slide
  2. Remove the firing pin stop plate by pushing down with the straight short end of the extractor tool and then slide the plate off. Be CAREFUL that the firing pin and/or spring don’t come flying out as you remove the plate.
  3. Push the extractor backwards by pushing the head of extractor backwards down the hole out the rear of the slide
  4. Insert the new extractor and line it up so the stop plate can be re-inserted. It needs to line up with the top and bottom of the stop plate groove and it needs to be straight up and down parallel to the sides. You don’t need to install the firing pin and spring until you are done.
  5. Insert the Weigand gauge and pull it out using the trigger pull gauge to find out how many ounces it takes.
  6. Use the Weigand tensioning tool to increase or decrease the tension. I dialed mine in to 28 ounces (1.75 pounds).
  7. You can try testing feeding and extracting dummy rounds to see how it performs. The extractor should maintain control until the extracted dummy round hits the ejector.
  8. Once it is dialed in, you can then re-install the firing pin return spring, lube the firing pin and reinstall it also.
  9. There’s a trick to the plate – wiggle it in and push down the firing pin enough to get the plate to sit on the “shelf” at the rear. You can then maintain pressure on the plate and use the other hand to use the extractor tool to push the firing pin down far enough and hold it there while you push the plate back into place.

More Details

Wilson has a video on how to change to their extractor and a bit about setting the tension:

Now, I also read the Brownell’s blog post about extractors plus a more detailed Wilson Combat instructional PDF file.

The following is a video of Jack Weigand explaining how to use his extractor gauges and tensioning tool:

Adjusting The Extractor Landing Pad

The most detailed post and guidance in general about extractors that I read is here – and if you read down, you will get to sections/replies about 9mm extractors. One thing you will notice discussed is reprofiling the “fitting pad” to better fit the radius of the extractor hole. I stoned and polished the fitting pad to be more rounded but that was it. I put more emphasis on getting a weight in the 25-28oz range and did do that after may 3-4 tries.
Close-up of a black AK Galil grip on a Romy G rifle with MI rails.
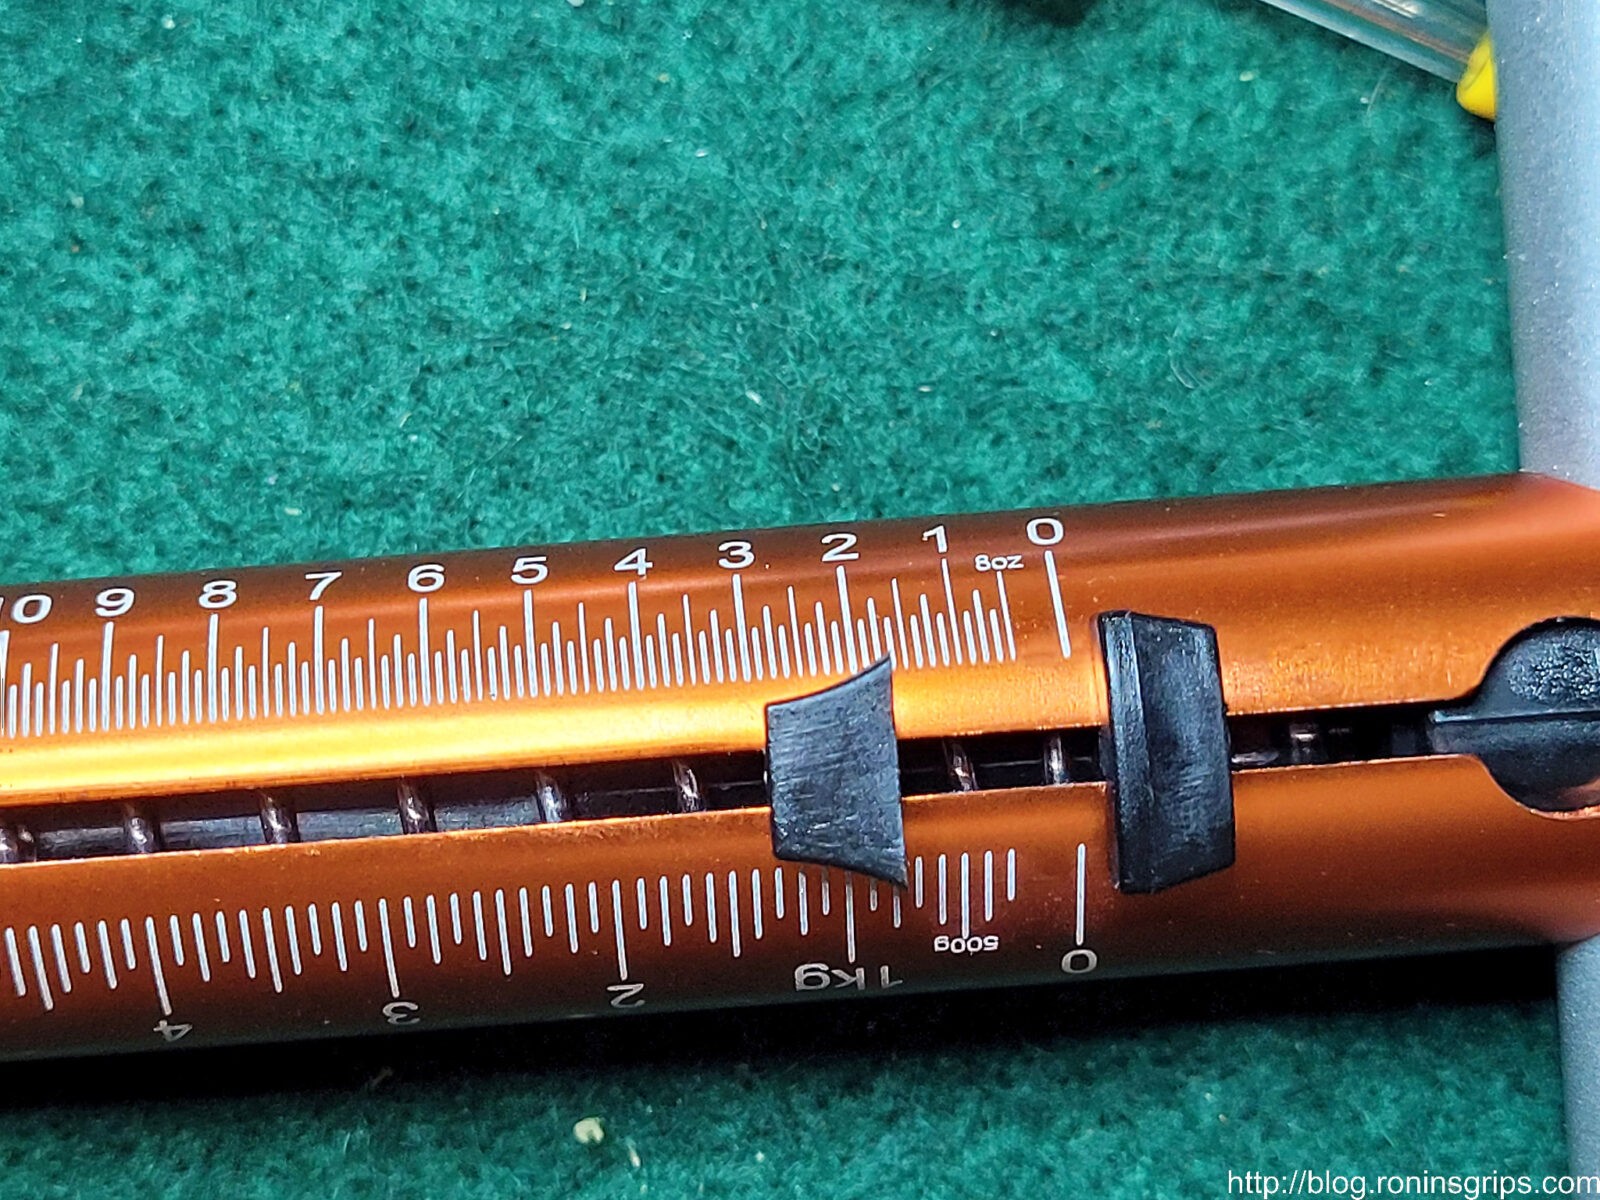
Pulling the gauge out the final time was about 1-3/4 pounds which is 28 oz. In testing the pistol, extraction was just fine.

Was The Match Pistol Higher End?

I wondered if maybe more care was put into the match pistol. There are some nice perks in terms of features but the trigger feels about the same between the two pistols. I’ll write up something more detailed down the road – for now let me just say they pistols are not night and day different in terms of how they feel with cycling the slide or pulling the trigger.

In terms of pricing, there’s not a huge difference on Gunbroker. The first 51679 was bought on 3/5/22 for $819.99, the Match pistol was $899.00 on 3/25/22 and the second 51679 was bought on 4/3/22 for $899.00 also. In writing this, it’s surprising that the Match wasn’t $100-200 more on the street but it wasn’t. If you look at the manufacturer’s suggested retail price (MSRP) – Armscor did set the 51679 at $899 and the Match 56645 at $1099. In other words, Armscor was hoping the Match would command a premium.

You can find the 51679 pistols right now with a bit of hunting. The 56645 match pistol is challenging to find as it seems to be a bit more rare now but it is out there too. I’d tell you to get the 56645 Pro Ultra Match HC if you can find it. As you can imagine, I’m not too thrilled with my 51679 experience right now and there is little to no price difference *if* you can find one.

Conclusion

I’m not sure what to tell you about what happened – I only have data from two 51679 pistols and one 56645 pistol. It could just be really bad luck – neither of my current 10mm pistols have given me any trouble and the 56645 Pro Ultra Match has been fine so far as well although I have only cycled maybe 500-600 snap caps through it so far.

The first 51679 had something going on that I can’t explain and am waiting on Armscor to fix it under warranty. It certainly was not a broken extractor. For the second one to have a snapped extractor claw with so very few rounds – I guess that highlights the limitation of MIM and that forged extractors are better – there’s a reason why Wilson’s Bullet Proof extractors have such a good reputation.

6/22/22 Update: RIA did a warranty repair after about 4-5 weeks. All they told me was that they confirmed the extraction problem, fixed it and the pistol was fully operational now. So, I still don’t know exactly what happened but at least Armscor/RIA stood behind it and made things right.

We’ll see what Armscor comes back with regarding the first pistol and I’ll report it here. I guess the big thing I want folks to know is that changing an extractor is not an arcane black magic endeavor. There are tons and tons of videos and posts that you can read. At some point you just need to wade in, give it a go and learn.

My other lesson learned is that don’t replace a busted Armscor extractor (MIM) with the same thing. Upgrade. I decided to go with Wilson Combat due to all the good reviews I read and would recommend that.

I still have a lot to learn about 1911s and don’t claim to know much. I’m really focused just on the mags but I hope this helps out anyone who reads it.

A Stunningly Good 1911 Reference Book Recommendation

By the way, If you want a really good book with tons of dimensions, drawings and photos, then get Jerry Kuhnhausen’s “The Colt .45 Automatic – A Shop Manual”. What I bought off Amazon is the “New Expanded 10th Edition” published in 2015. It gave me a better understanding about the extractor and the firing pin stop.

I hope this post helps you out!

6/29/23 Update: The match 9mm MIM extractor is still doing just fine and I have no idea how many thousands of times it has been cycled. The Wilson is doing great on the other pistol also.

12/17/22 Update: I’m somewhat surprised – the original MIM extractor in the Match 9mm is still doing just fine thousands of rounds later. So is the Wilson but I am not surprised about the Wilson holding up.


Note, I have to buy all of my parts – nothing here was paid for by sponsors, etc. I do make a small amount if you click on an ad and buy something but that is it. You’re getting my real opinion on stuff.


Please share the link on Facebook, Forums, with colleagues, etc. Your support is much appreciated and if you have any feedback, please email us in**@*********ps.com. If you’d like to request a report or order a reprint, please click here for the corresponding page to open in new tab.
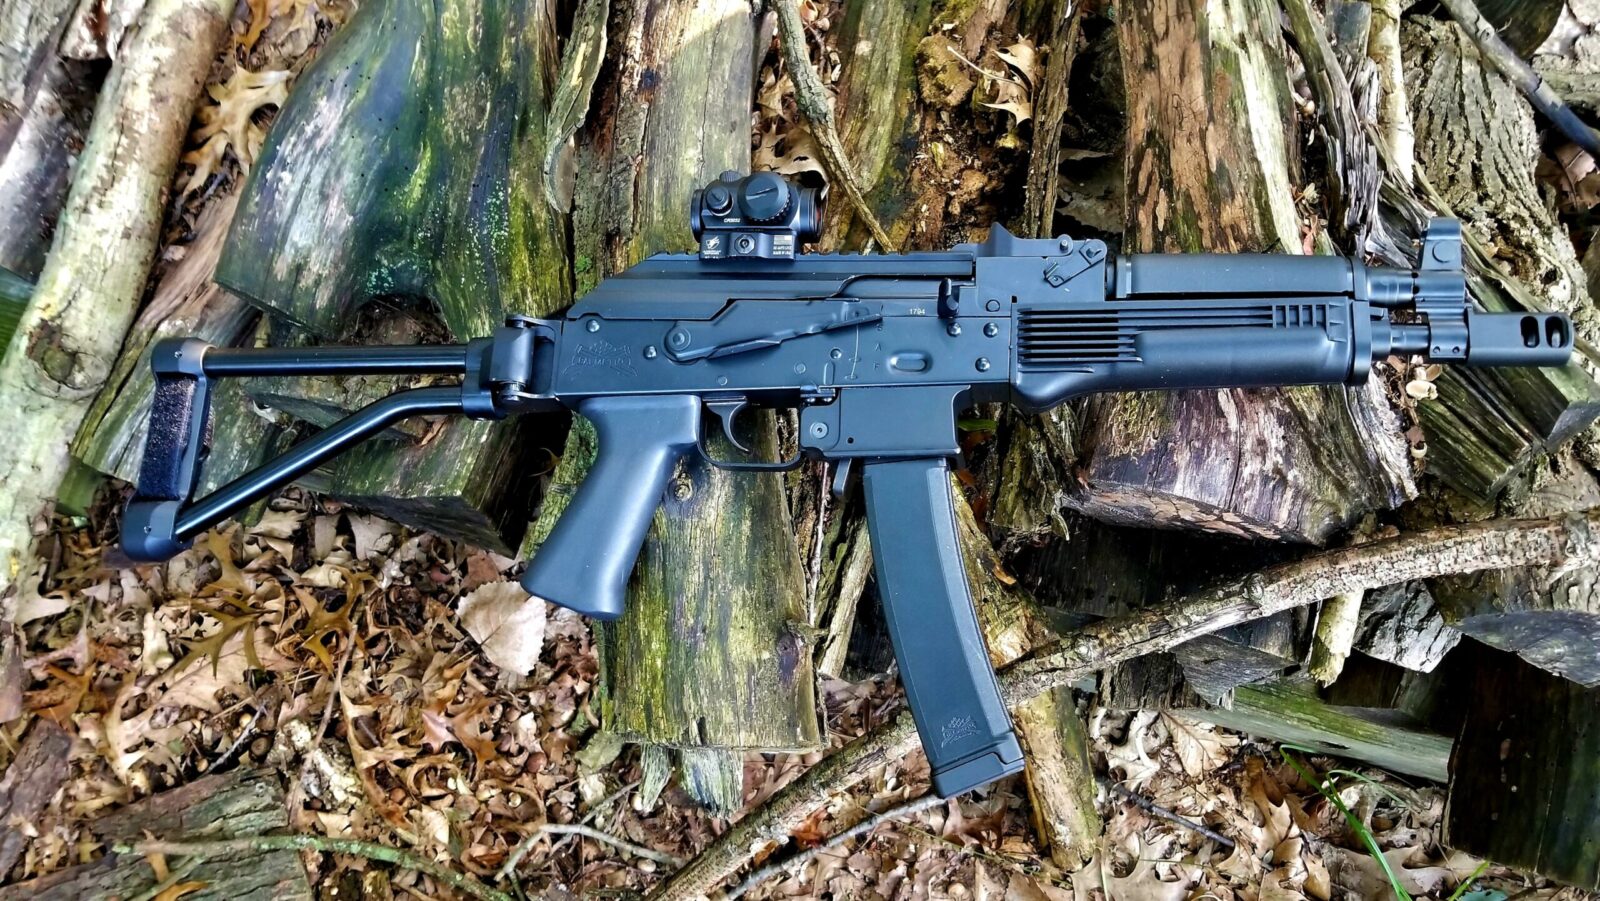
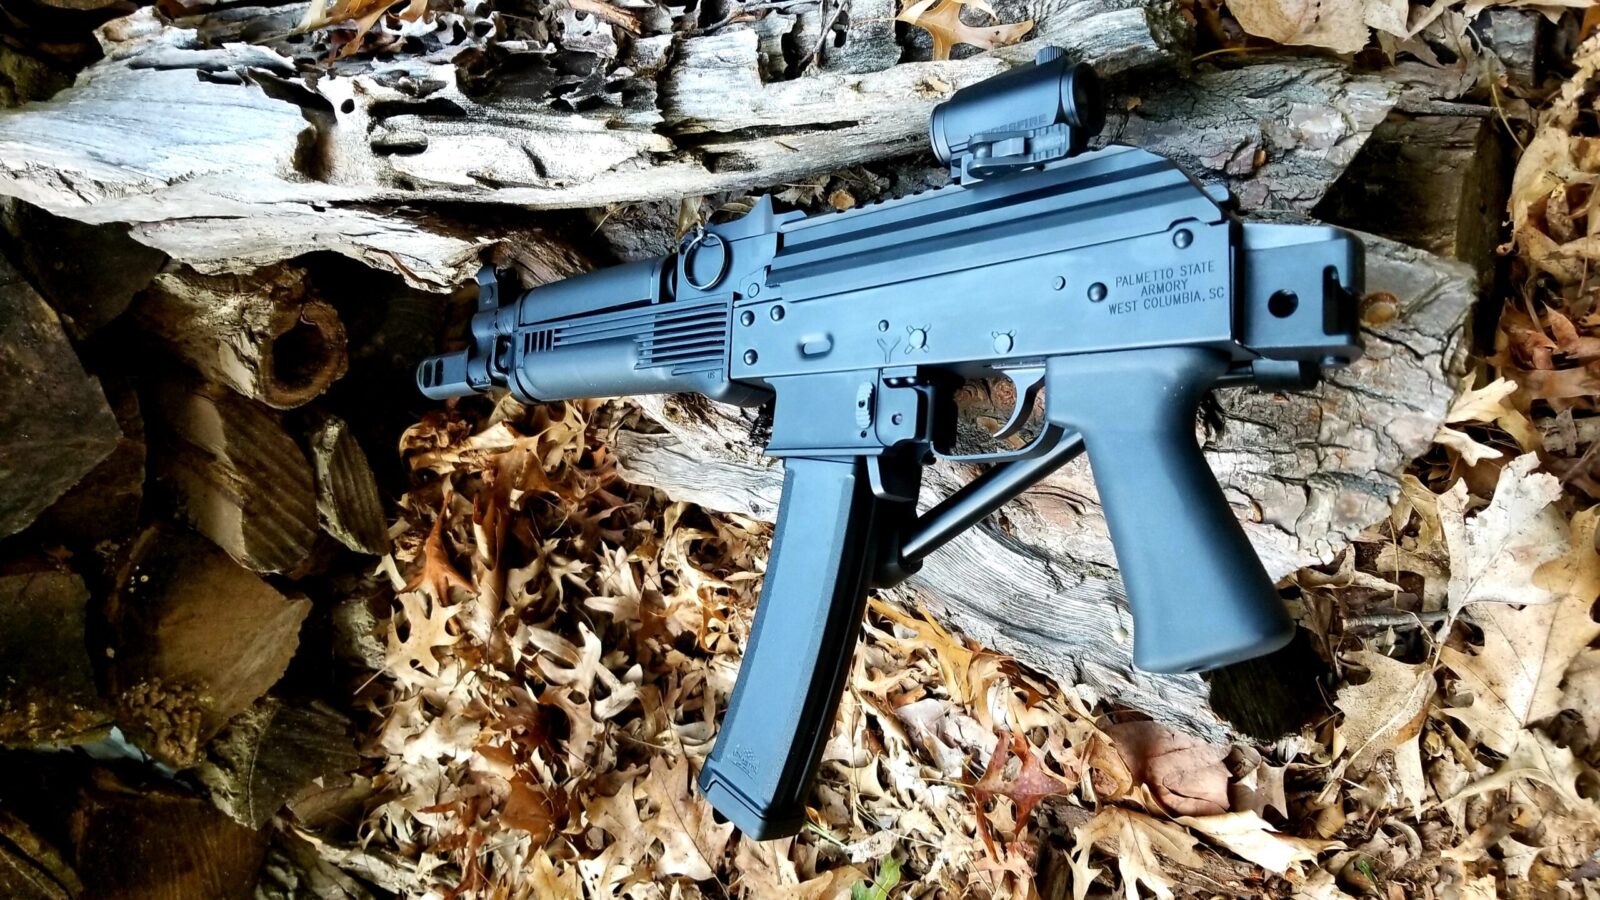
The PSA AK-V Pistols and Carbines Are Good To Go

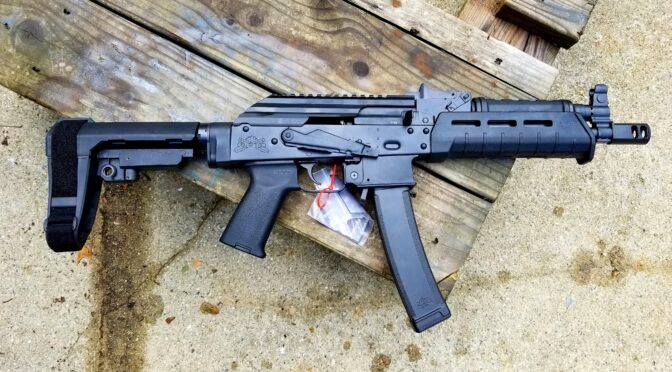
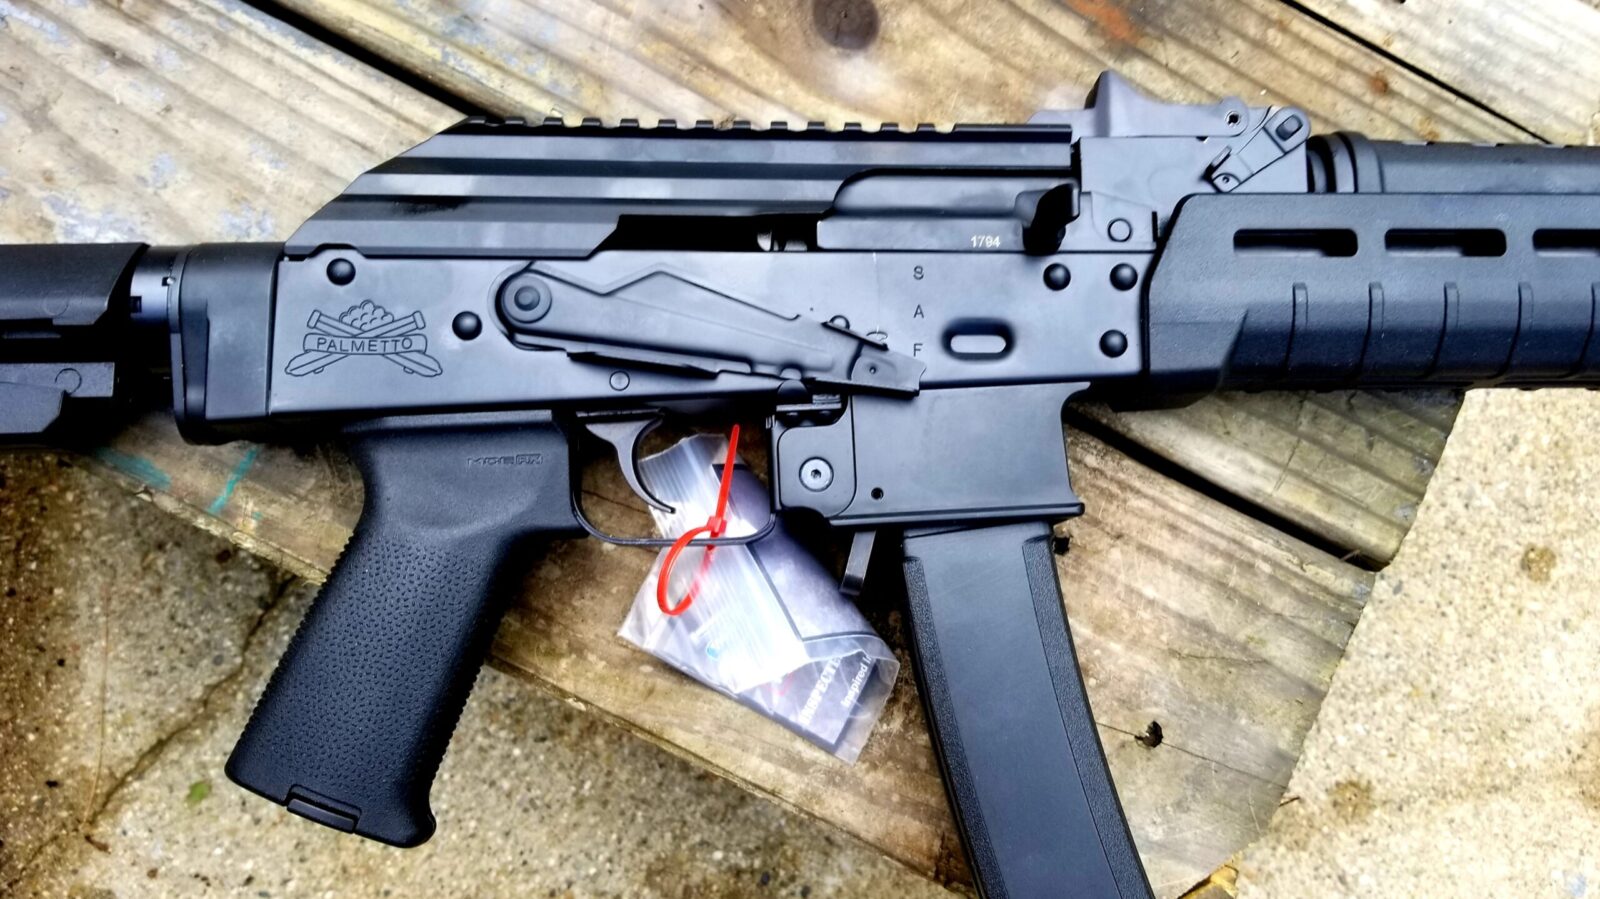
I’ve had a few guys ask me about my experience with the Palmetto State Armory AK-V and if I thought it was worth it. Well, I bought mine on July 20, 2019 and it was solid right out of the box. Although I did do a bunch of customizations, none of those changes were to improve reliability – they were all cosmetic.

An AK-V is basically an AK that has a blow back operating system to handle the little 9×19 (or 9mm Luger) cartridge. They did have some initial problems with the design such as cartridges getting stuck under the dust cover, they had fixed them by the time I bought mine.

Tricked out Romy G AK rifle with MI rails and Galil grip
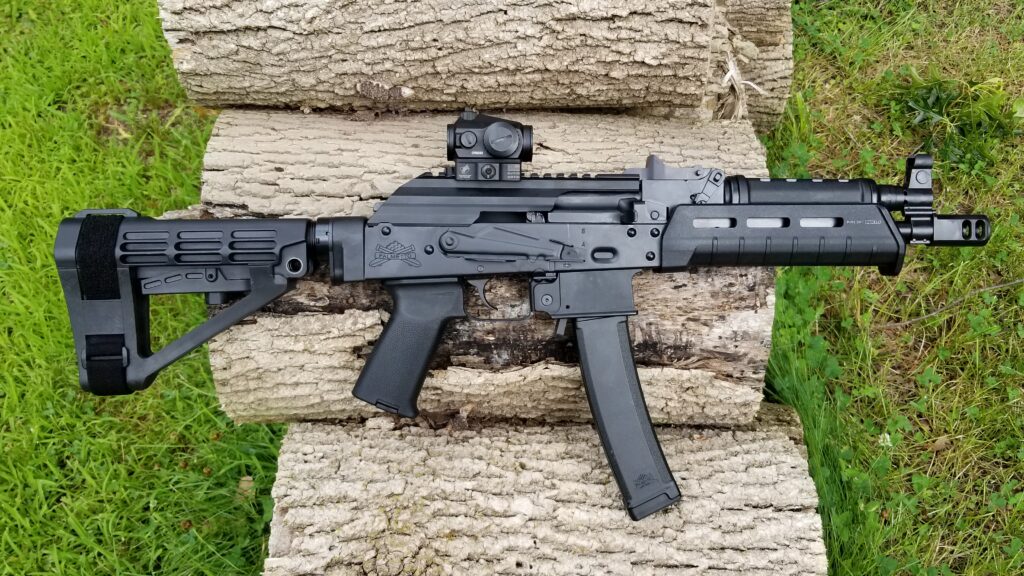
This is my AK-V right out of the box still sporting the Magpul MOE grip, handguard and SBA-3 brace.
Palmetto State Armory (PSA) has a stunning array of Kalashnikov firearms now. AK-47s, AK74s, 100 series, rifles, pistols … it’s impressive. Click here to go to their main AK menu.

The biggest problem I had was finding one. There were a bunch of us watching the PSA website trying to snag any model we could. Finally, on July 1, 2019, I snagged one of their MOE SBA3 models and proceeded to change it to my liking – first with an SBA4 brace and then to look more like a Vintorez. [Click here for a listing of all of my posts on the AK-V].

Tricked out Romy G AK rifle with MI rails and Galil grip
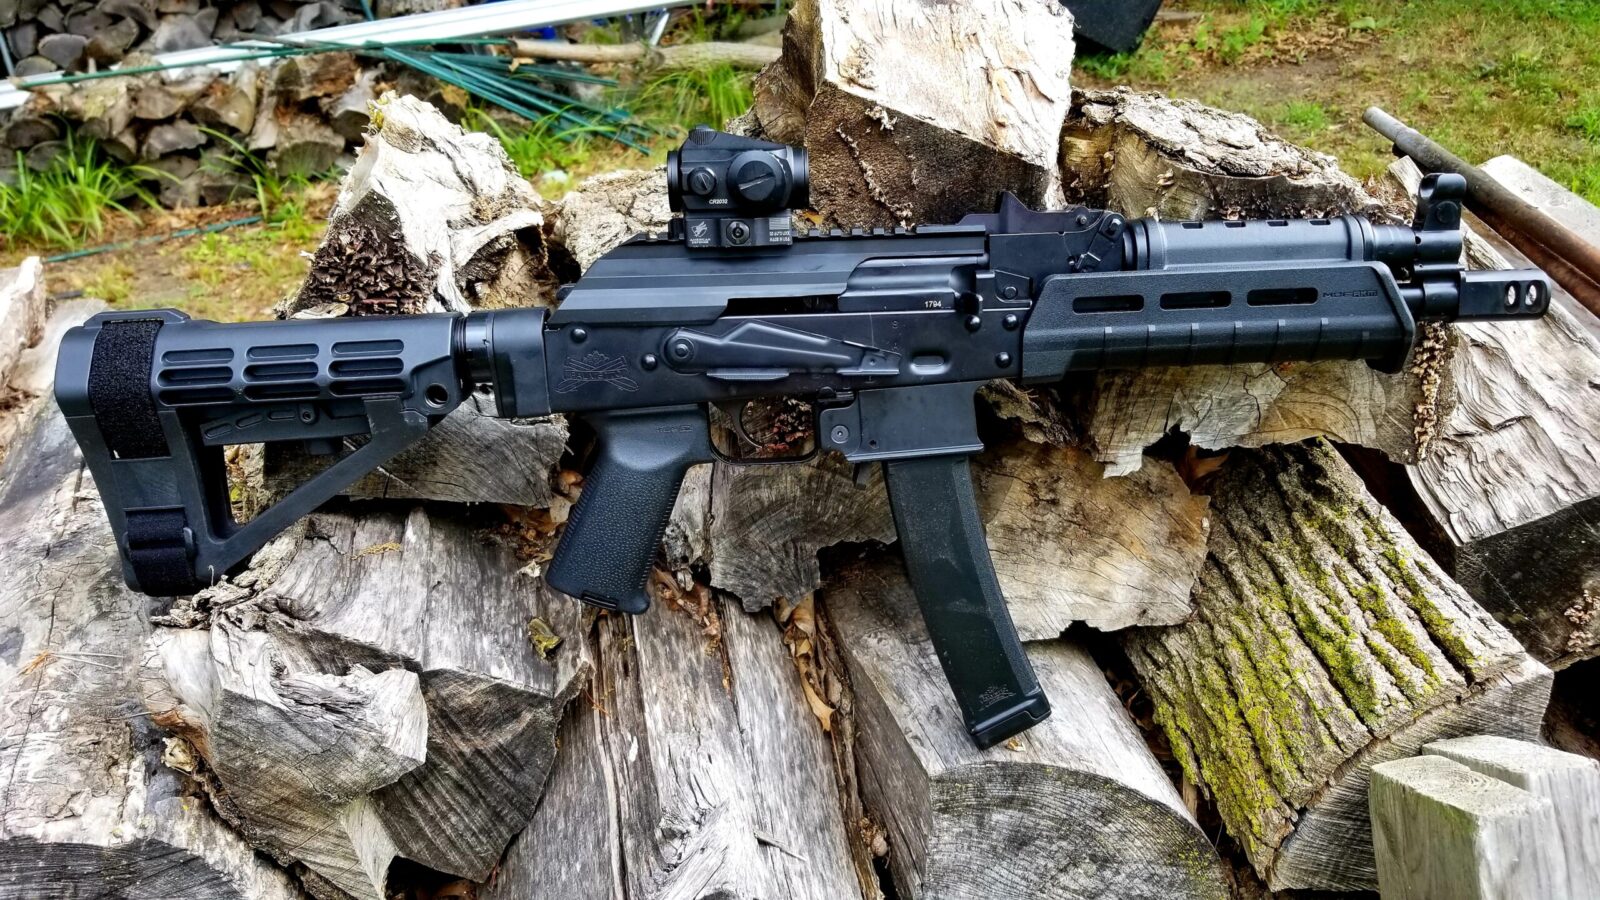
This was my AK-V after my first round of modifications – I move to the stiffer SBA-4 brace, added one of our quick takedown rings so I could get the dust cover out of the way when cleaning the pistol and one of the Vortex Crossfire red dots.
Tricked out Romy G AK rifle with MI rails and Galil grip
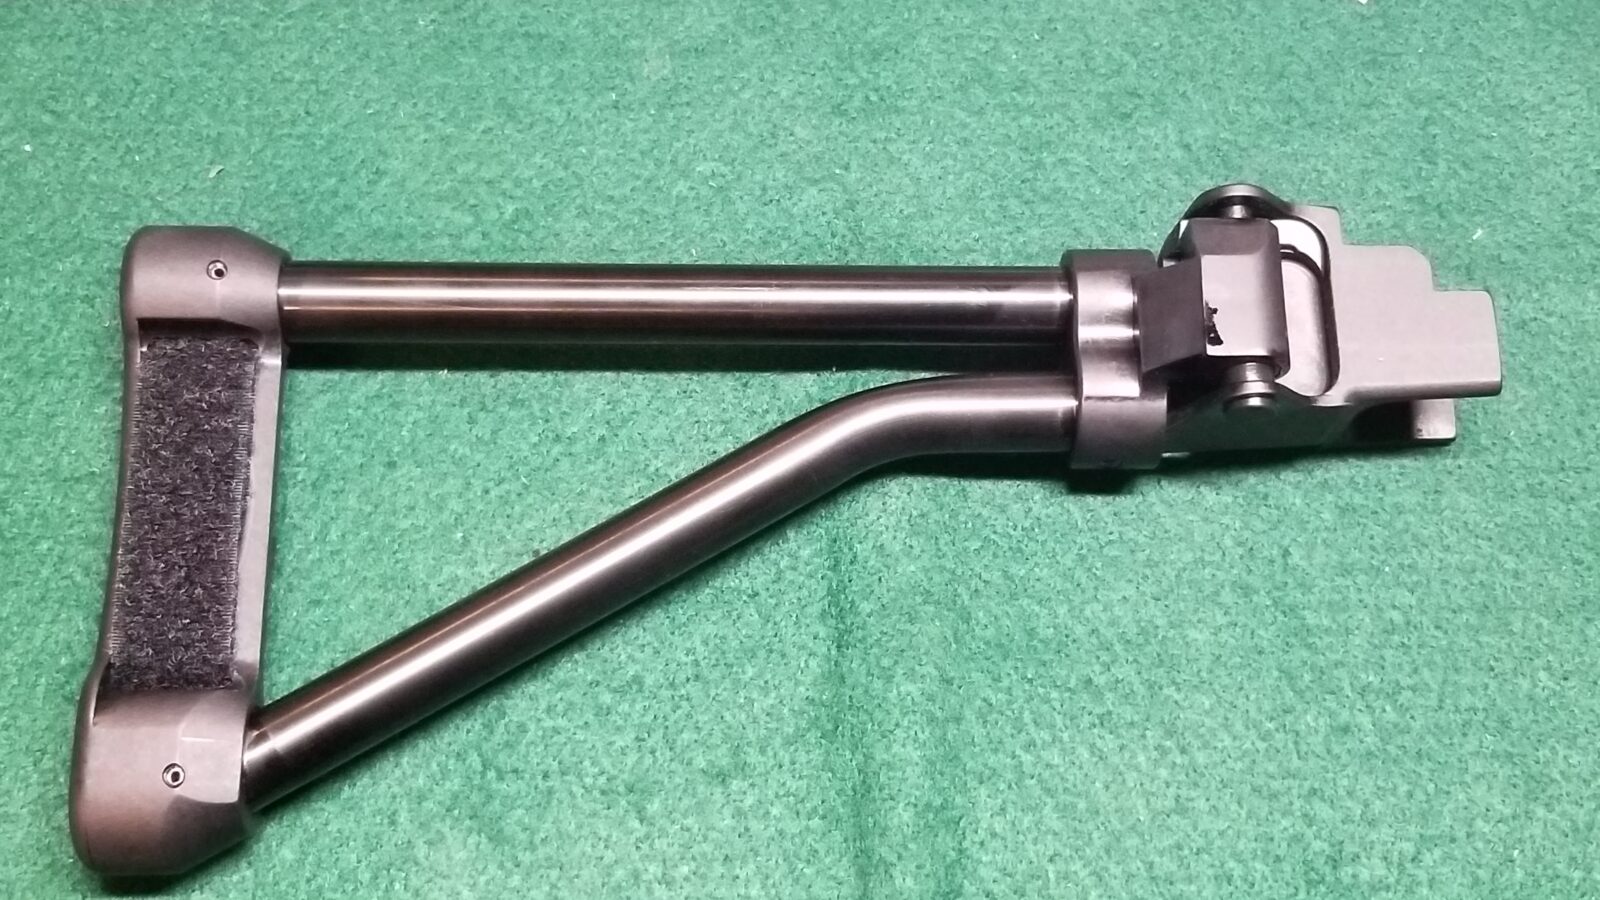
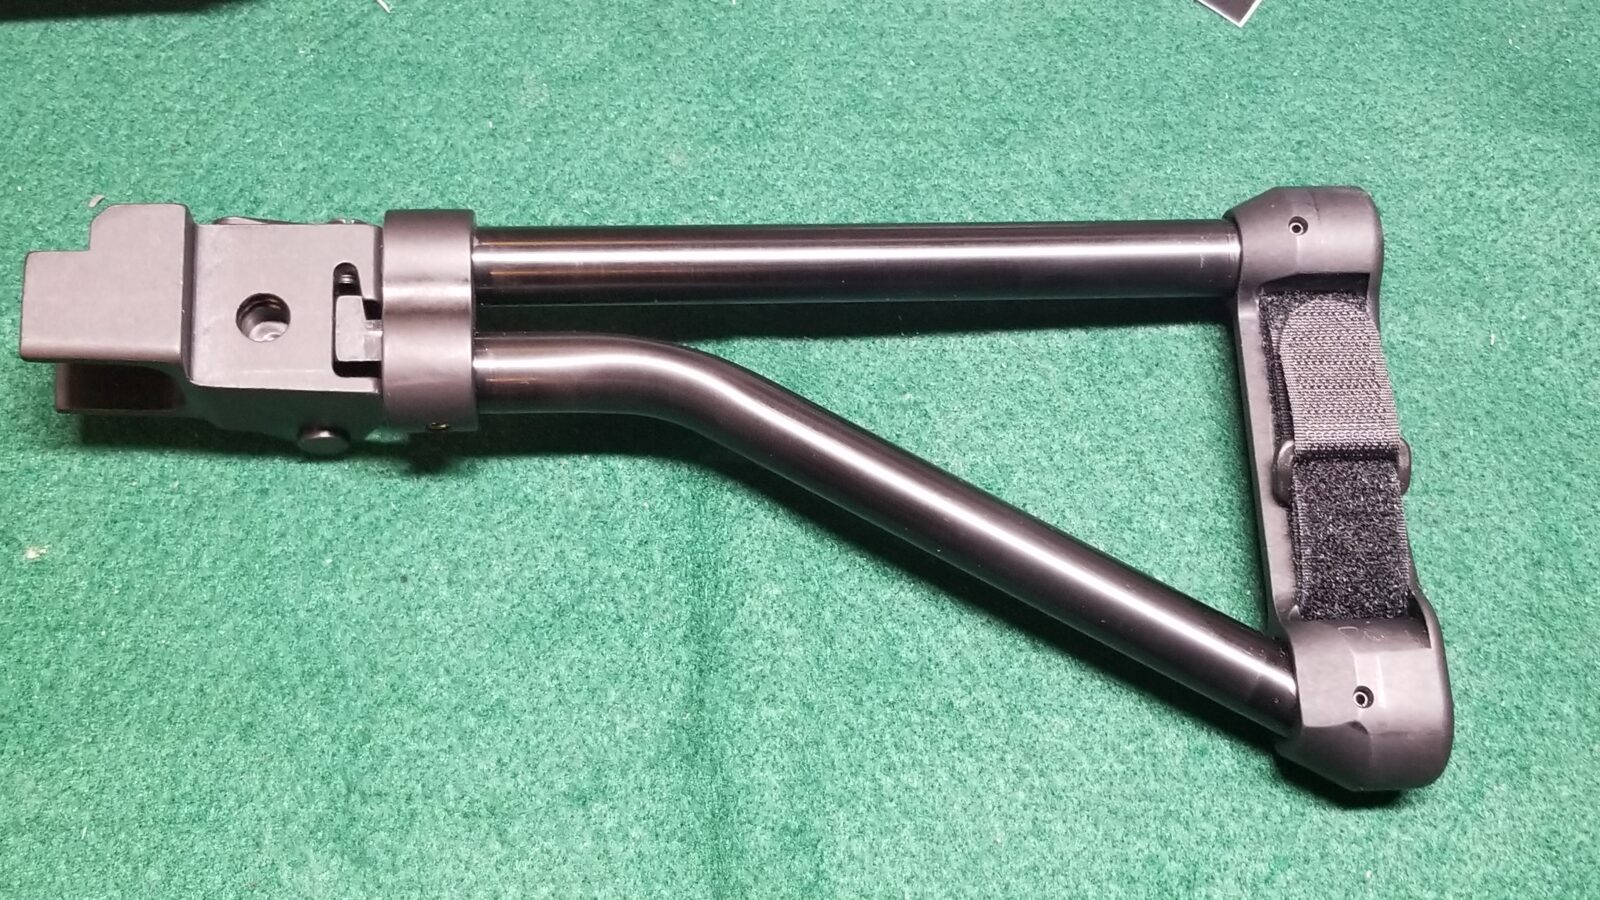
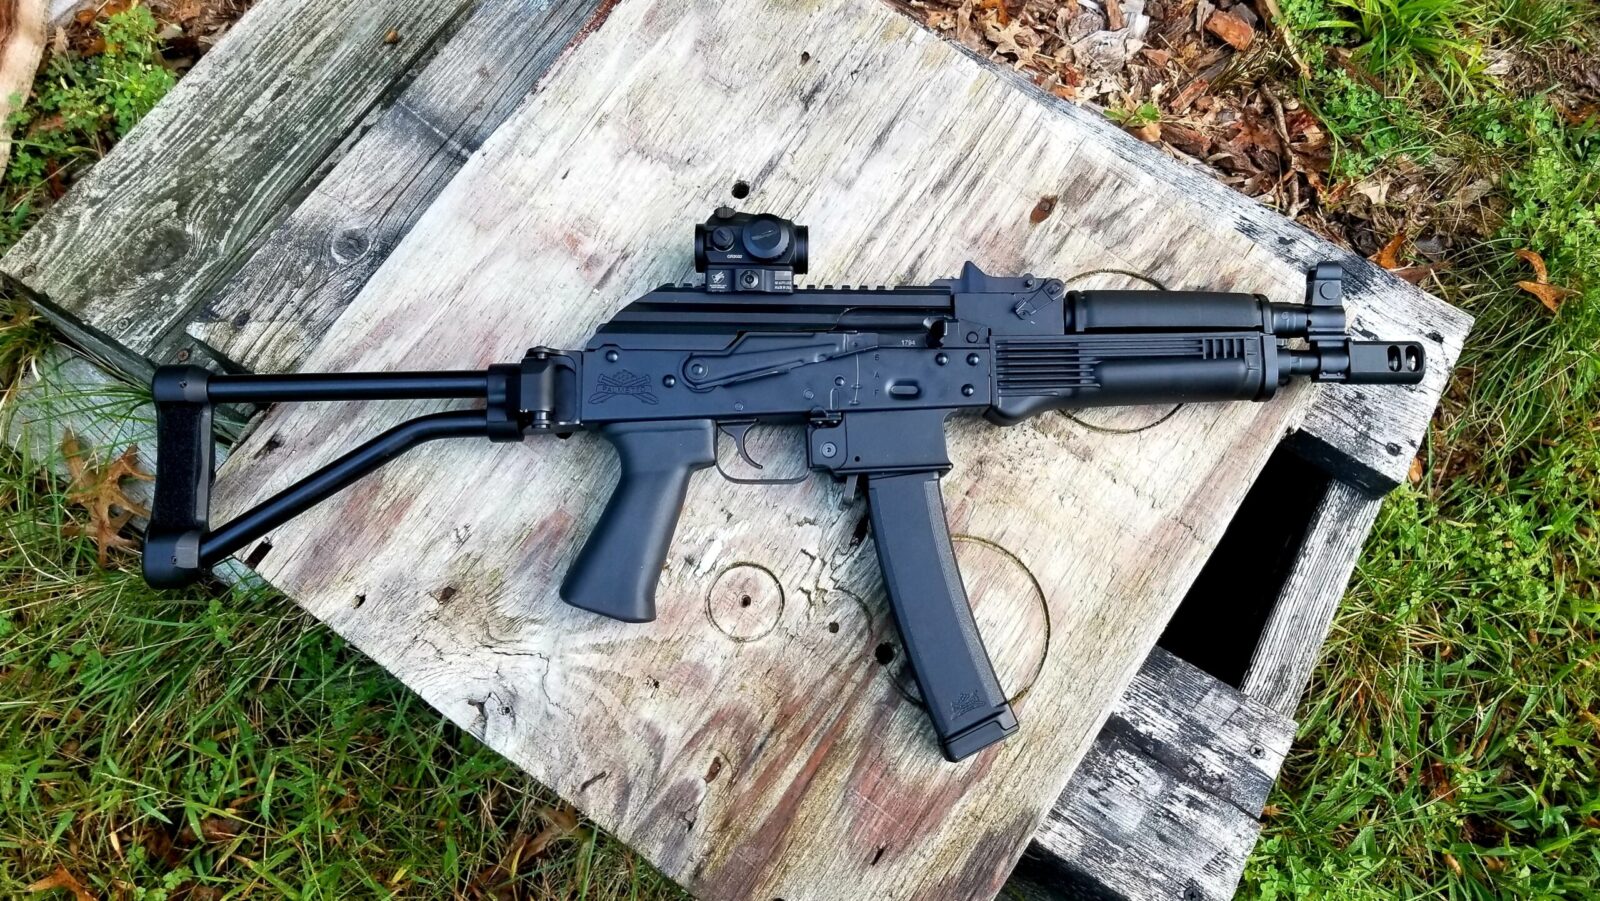
This is my current confiruation – a CNC Warrior/Bonesteel Arms side folding brace (they are way beefier than the side folding triangles PSA sells), K-Var handguards and one of our Molot Gen 2 grips.

To be very clear, I bought it so I can saw whatever I want about my experience.

I really had fun with the little braced pistol and found it reliable, accurate and just an all around fun little gun to shoot. The good news is that for people looking for AK-Vs now, PSA production has finally caught up and you can hop right over to their website and buy one.

I do want to give you a tip for breaking in the AK-V before your first range trip:

  1. Field strip the rifle
  2. Clean the bore and make sure the action doesn’t have any junk in it.
  3. Oil the fire control group
  4. Use a light grease on the frame rails, where the bolt goes into the bolt carrier and on the bottom. You can switch to oil but the grease really helps lubricate things druing the wear in period — If you are in cold weather, say below 30F, then use oil as the grease will be too thick.
  5. Reassemble the AK-V
  6. Without a magazine in the AK-V, rack the slide (meaning move it back and forth) a couple hundred times to help the wear in process get started. You do not need to use anything abrasive to wear things in – I’ve heard of folks using valve compound to accelerate wear in but it’s just not needed 99.9% of the time.
  7. I would also recommend using a stout/strong/stiff load initially. Rather than 115gr FMJ ball ammo, I will use 124gr FMJ as it generates more of a recoil impulse. I use 124gr Sellier & Bellot (S&B) FMJ 9mm a lot for this.
  8. After a few hundred rounds you can shoot anything you want and it will cycle.

I kid, you not, this can make a world of difference when you go to the range the first time. What I find frequently happens is that a new gun owner gets excited and takes his/her brand new purchase right out of the box at the range, loads it and then gets upset at the weapon and labels it as an unreliable POS, which isn’t fair. I always tell new owners to do the above for any semi-automatic firearm.

Tricked out Romy G AK rifle with MI rails and Galil grip
Another view
Tricked out Romy G AK rifle with MI rails and Galil grip
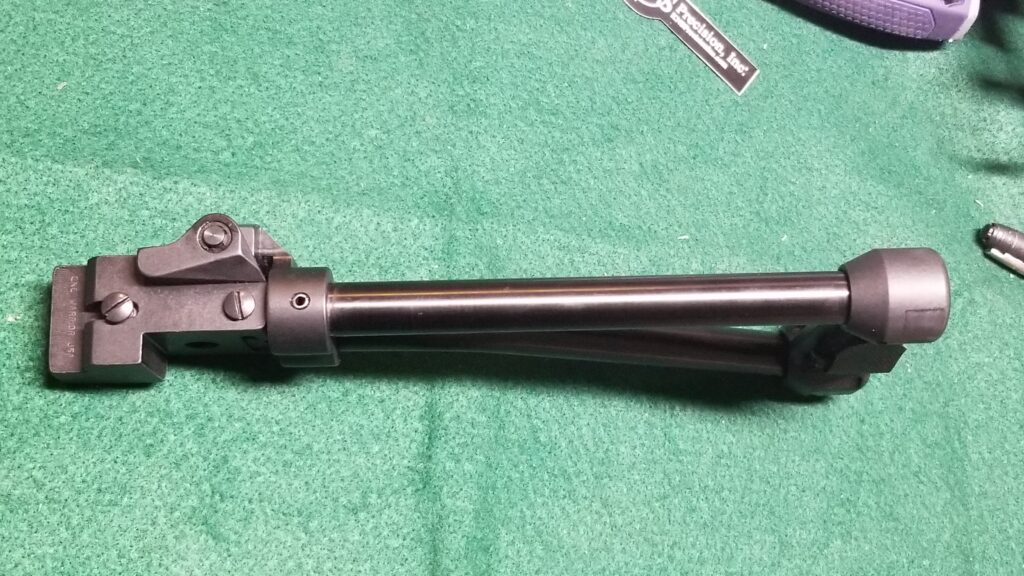
Here it is with the brace folded. I would have preferred a left-folding brace but CNC Warrior was sold ouut so I opted for the rifle-folding model. Regardless of the model, this is the best in class folding triangle brace and I highly recommend it.

So, with that said, get an AK-V, do the above to break it in and have fun. There is a huge parts aftermarket for the AK rifles and pistol and I am sure you’ll enjoy it.


Note, I have to buy all of my parts – nothing here was paid for by sponsors, etc. I do make a small amount if you click on an ad and buy something but that is it. You’re getting my real opinion on stuff.


Please share the link on Facebook, Forums, with colleagues, etc. Your support is much appreciated and if you have any feedback, please email us in**@*********ps.com. If you’d like to request a report or order a reprint, please click here for the corresponding page to open in new tab.


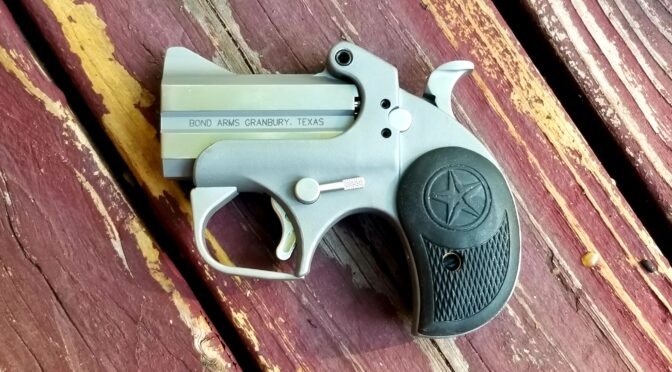
The Bond Roughneck Derringer – Far Bigger Than I Assumed

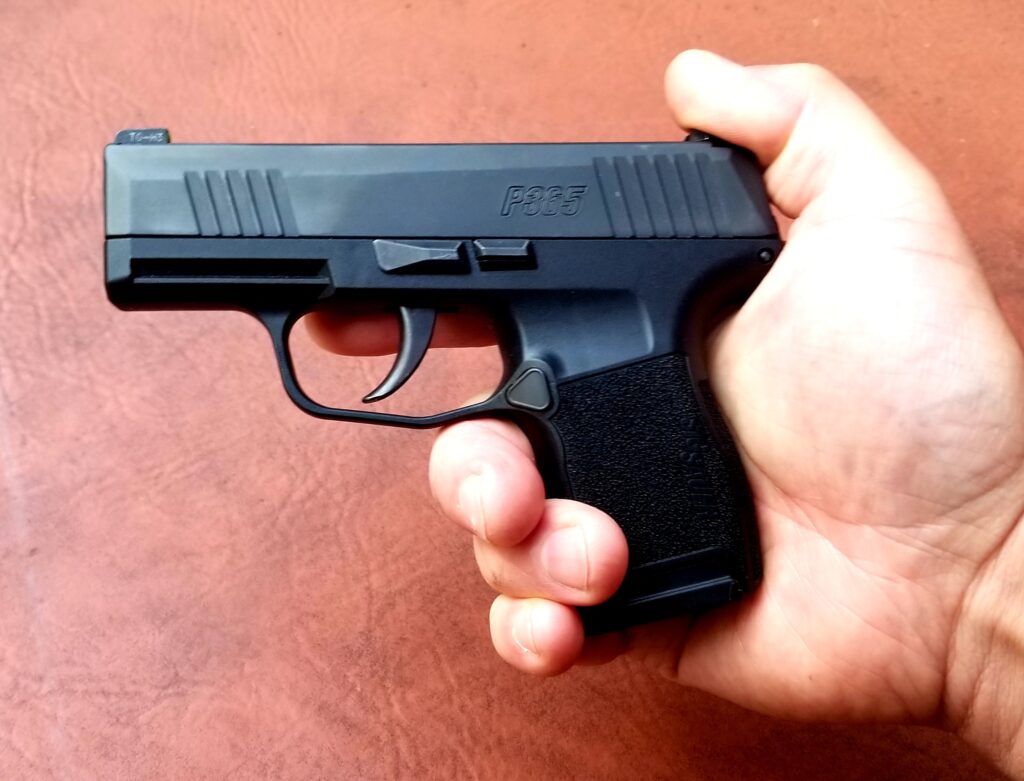
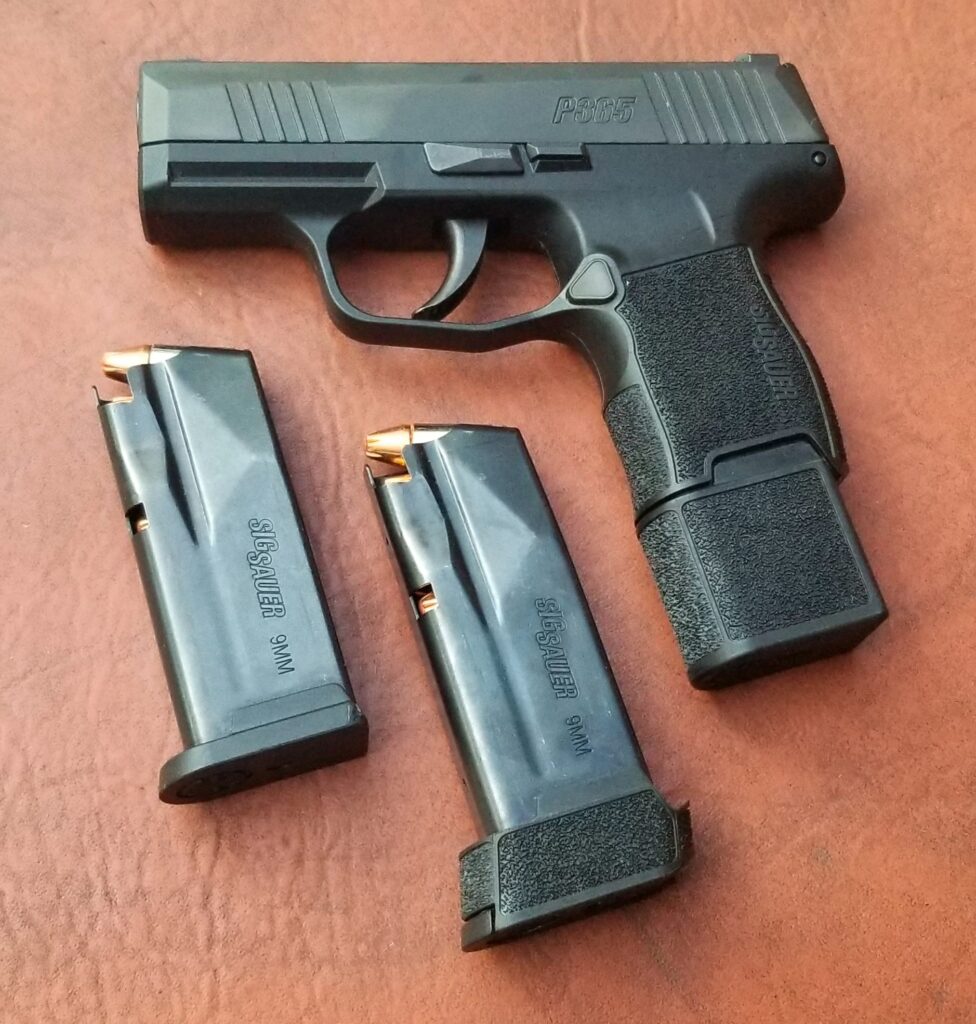
Folks, I have a legal concealed carry permit . My normal carry pistol is a SIG P365. It is quite a bit of firepower in a compact package with magazines that can carry 10, 12 or even 15 rounds. The challenges are two fold – it is still relatively large and heavy. Sure, compared to a full size 1911 or Glock 17/1 9 it is smaller but I have been wanting an even smaller pistol that could slide in my pant pocket and not weigh as much. So, when Palmettos State Armory had the 9mm 2.5″ Bond Arms Roughneck on sale, I jumped and bought one.

Bond Arms makes some beautiful derringers and their high end models are over $1,000 and well regarded. The Roughneck is not as polished and finished as the higher end models and they will tell you they can make four Roughnecks in the time it takes to make one of their other models.

Bond Arms is known for their quality, they have a rebounding hammer to improve safety and have a ton of interchangeable barrels with different calibers and lengths supported. Please note that I am very complimentary of the design and the construction. It’s a beautifully made derringer and I could readily see why they have such a good reputation.

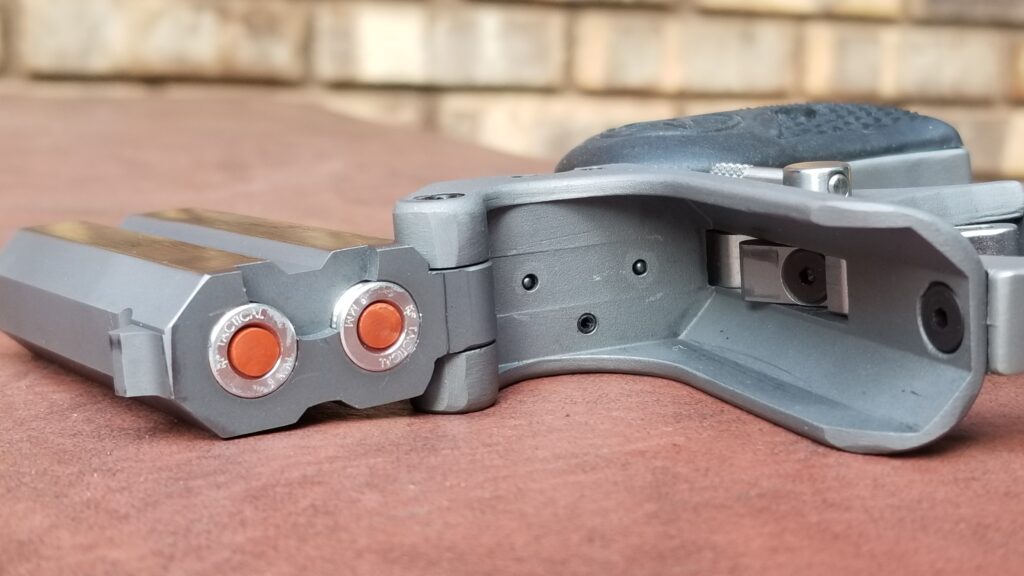
Bond Roughneck derringer with two .357/.38 Special rounds loaded.
One safety feature of the Bond derringers is the use of a rebounding hammer. Traditional derringers had the hammer/pin right against the primer. Dropping the derringer or hitting the hammer often resulted in an accidental discharge. To guard against unnecessary wear on the cross-bar, I kept snap caps in the pistol for dry firing. Don’t dry fire a Bond is the important message.

The Problem Was Me

Okay, so in my rush to get the Roughneck I assumed some things. Ever heard that old saying “When you assume you make and ASS out of U and ME?” Well, that was me. I assumed it was going to be small and light and never checked the dimensions. Bond Arms builds these things like tanks out of steel. Seriously folks, we are talking about an incredibly beefy derringer that will last and last and last.

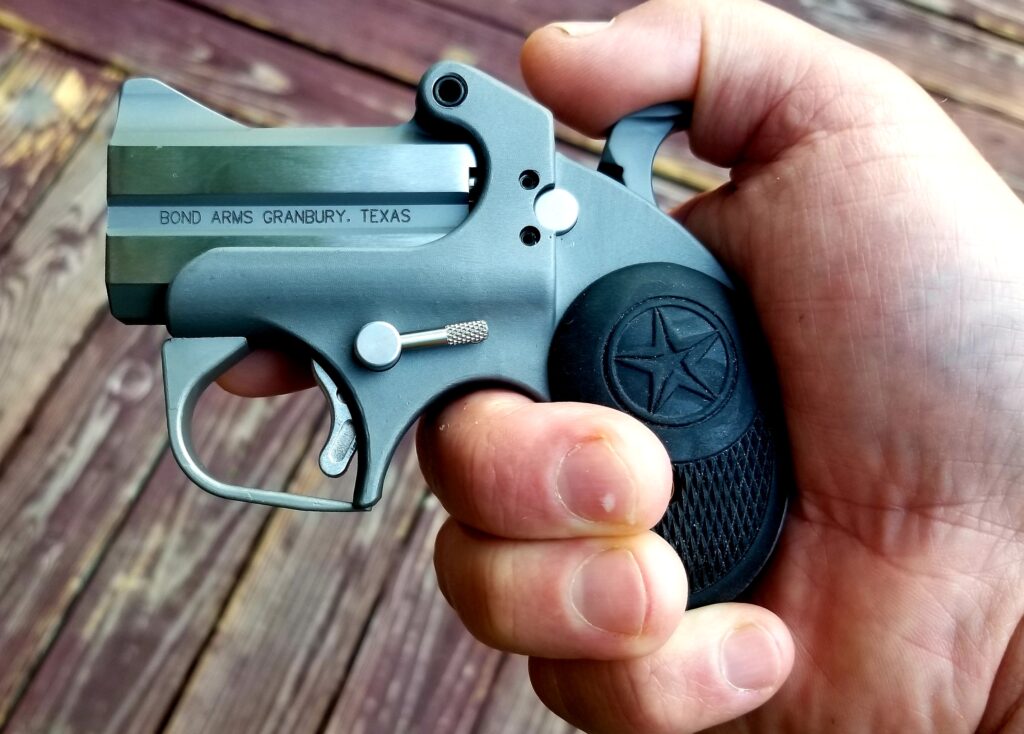
When I picked it up at Michigan Gun Exchange, my FFL, I immediately noticed my oversight regarding the weight and dimensions. Boy, it filled my hand and weighed 19oz (1.18 pounds) empty and 4.5″ overall. Not what I had in mind at all.

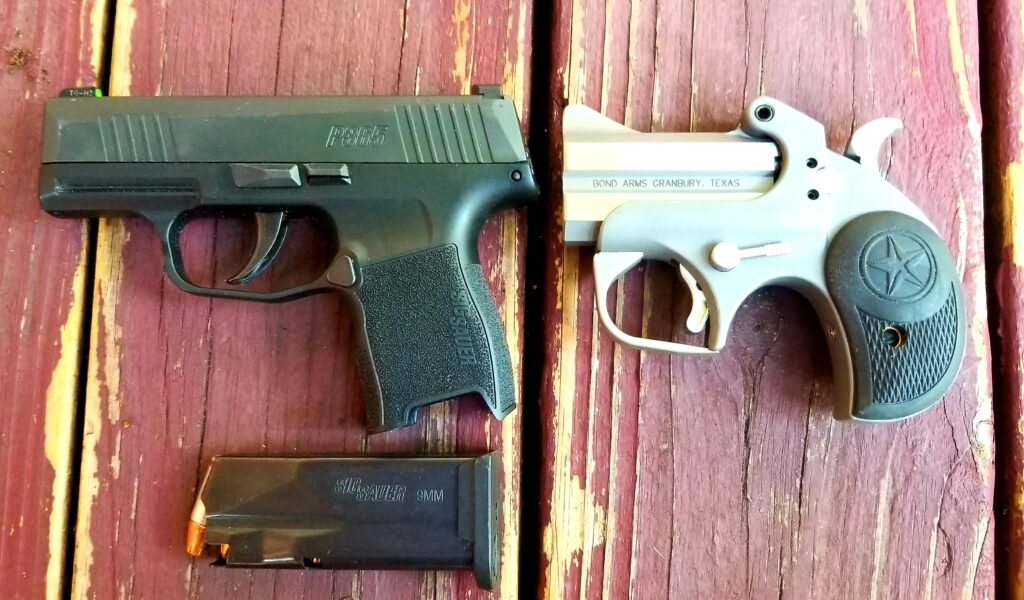
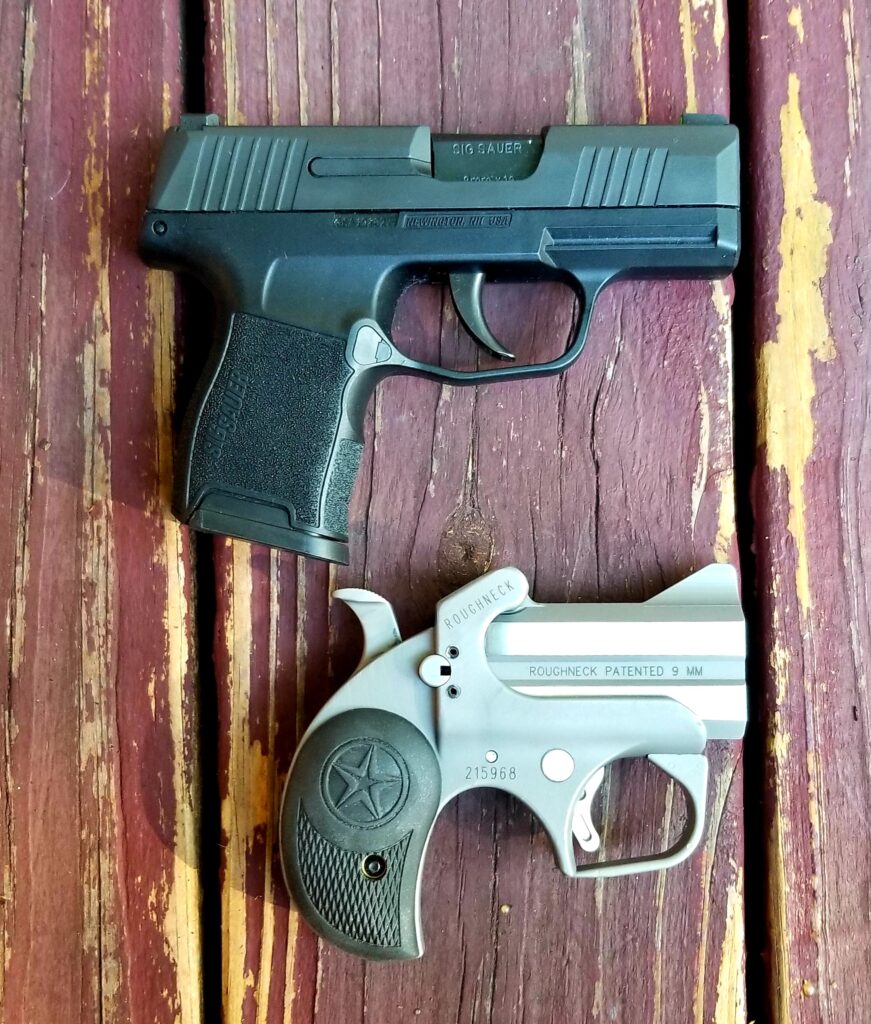
Okay, to be honest, I thought about it overnight and decided to sell it the next day. The reason is simple, my SIG P365 weighs 17.8 oz (1.11 pounds) empty. and is about 4.9″ long. Yeah….. sticking with the SIG made way more sense because of the increased firepower – the 10 round magazine is flush fitting. Of course the SIG will weigh more than the Roughneck when loaded but that’s life.

So here are some pictures so you can decide for yourself:

Sig Sauer P365 and Bond Arms Roughneck derringer 9mm pistols
Here’s the SIG P365 on Top and the Roughneck Below. To get an idea of scale, they are sitting on a 2×4 board.
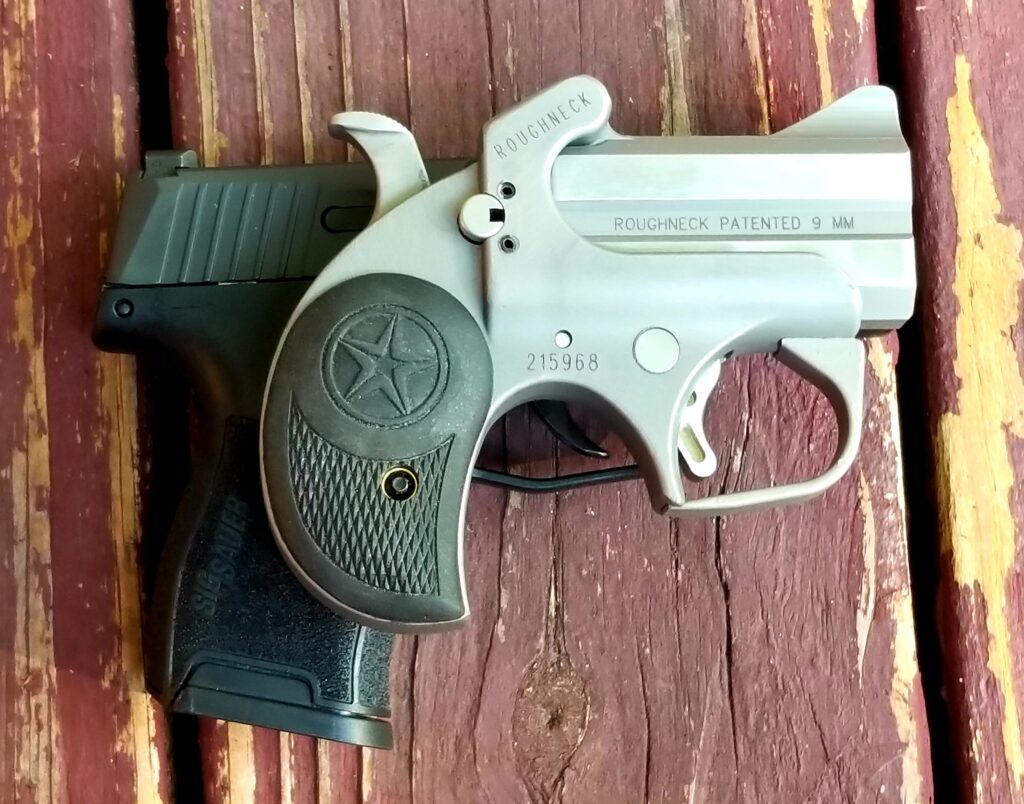
Roughneck Derringer 9mm handgun with star grip on wooden surface
The Roughneck is decidedly shorter.
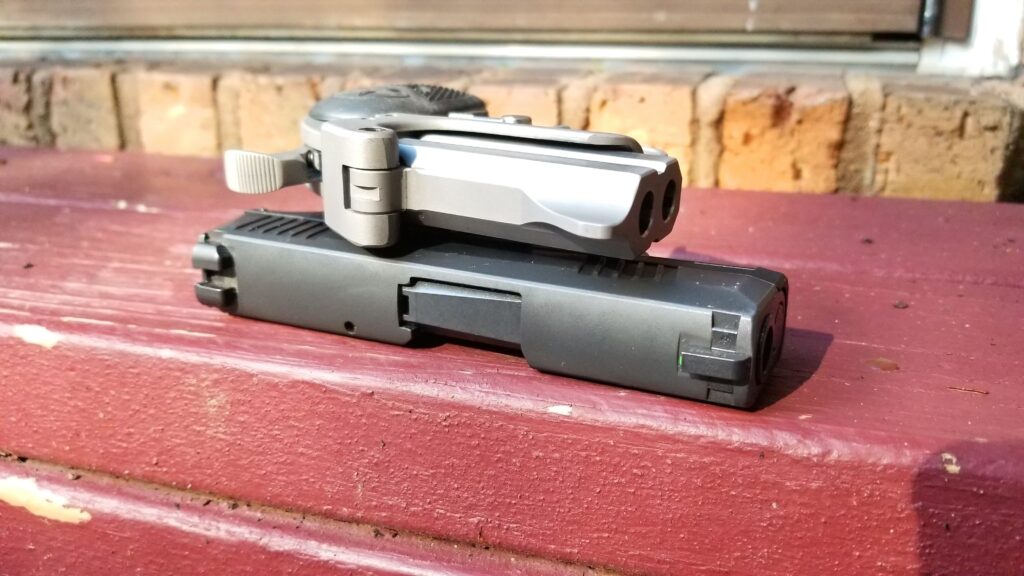
Bond Roughneck Derringer pistol atop a black handgun
They are about the same thickness.
Bond Arms Roughneck Derringer and Sig Sauer P365 pistol with magazine
This photo really sums up why I am keeping the SIG and selling the Roughneck. The size is similar but the SIG has that amazing 10 round flush fitting magazine.
Bond Arms Roughneck derringer in hand, showing "BOND ARMS GRANBURY, TEXAS" text.
Here’s the Roughneck in my hand. I have stubby fingers but wear and XL-size glove.
Sig Sauer P365 pistol held in a hand
Here’s me holding the SIG P365.
Sig Sauer P365 9mm pistol with two magazines
SIG makes 10-, 12- and even 15-round magazines for the P365 and I’ve found them all to be reliable.

Conclusion

Buyers should select pistols based on how they feel and their intended use. My jumping the gun and buying the Roughneck without reading about the size and weight was totally my fault. My decision to sell the Roughneck is not a negative against the design – it’s just not what I am looking for in terms of a really small last-ditch self-defense pistol. For now, I’ll keep my SIG but also keep an eye out for something smaller that still chambers 9mm.

10/25/22 Update: For times when I need something small and light, I am carrying a Ruger LCP Max. Click here to read more.

I hope this post helps you out!


Please share the link on Facebook, Forums, with colleagues, etc. Your support is much appreciated and if you have any feedback, please email us in**@*********ps.com. If you’d like to request a report or order a reprint, please click here for the corresponding page to open in new tab.


Yes, Sellier & Bellot (S&B) Makes Good Ammo

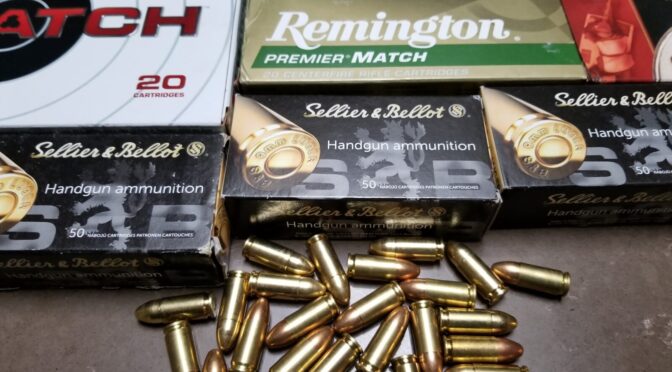
Many folks are new to firearms these days or they are experienced and scrambling to find ammo. This means they are encountering brands they may never of heard of and Sellier & Bellot (S&B) is one such example. I get asked regularly if they make good ammo and if I would recommend their pistol or rifle and the answer is a definite YES.

First off, S&B is a Czech company that was founded in 1825. The Czechs produce some excellent small arms, such as the cz.75 pistol, and S&B turns out some great ammo. My point is that they know their stuff.

I have been using S&B ammo for years including 12ga shot shells, 8mm Mauser, .308, 9mm 115 grain and 124 grain full metal jacket (FMJ) plus 10mm 180 grain FMJ rounds. I use it for firearm testing and shooting at the range and have shot thousands of rounds with not one failure that I could attribute to the ammo – bear in mind I am using it often to test and break in guns. For example, the recoil impulse of the 9mm 124 grain ammo is great for breaking in pistol caliber carbines (PCCs) as well as newly built Polymer80 pistols.

I’ll keep this post short, S&B ammo is good to go. Below are some vendors with S&B offerings:


Please share the link on Facebook, Forums, with colleagues, etc. Your support is much appreciated and if you have any feedback, please email us in**@*********ps.com. If you’d like to request a report or order a reprint, please click here for the corresponding page to open in new tab.


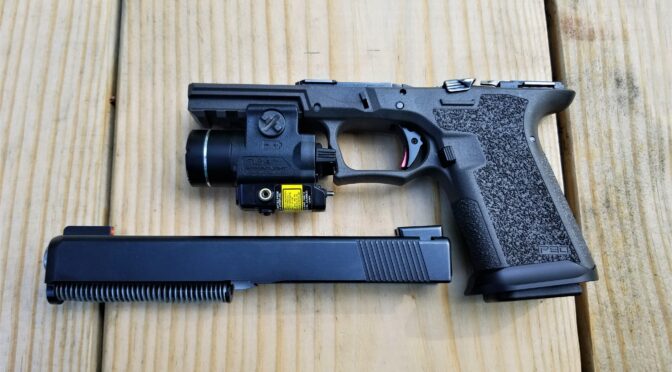
A review Of my Swenson Glock 17 Slide – It’s Solid

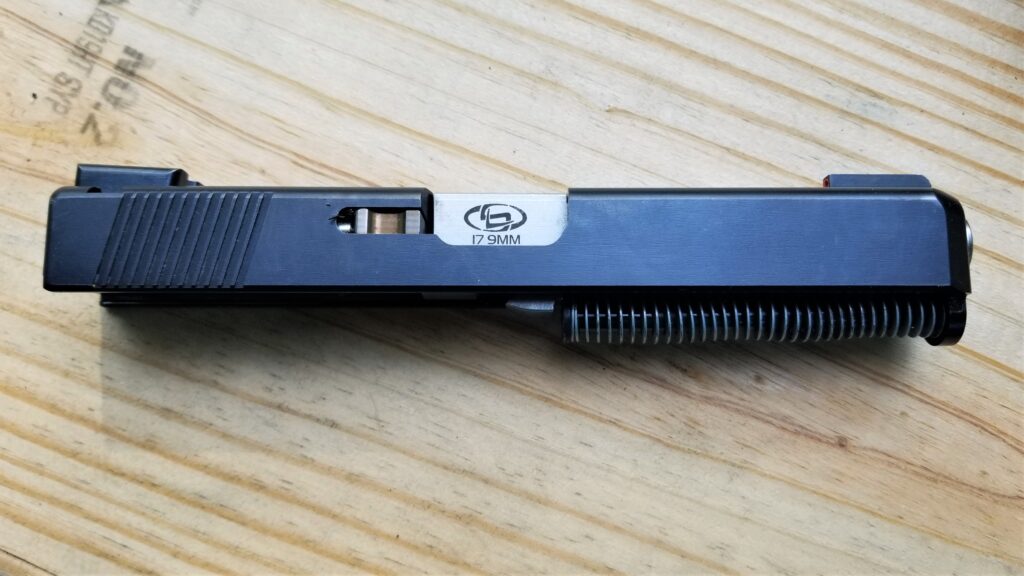
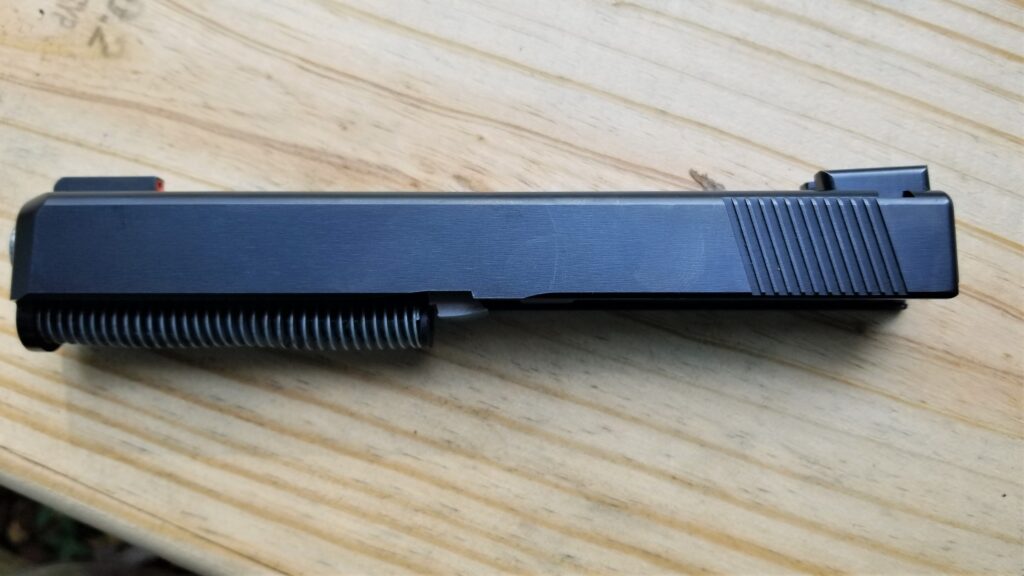
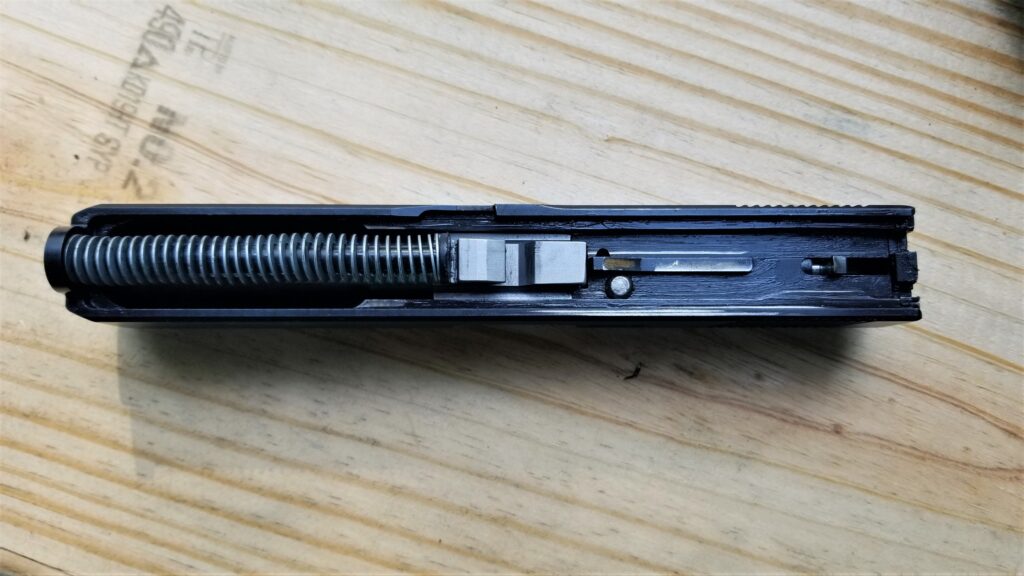
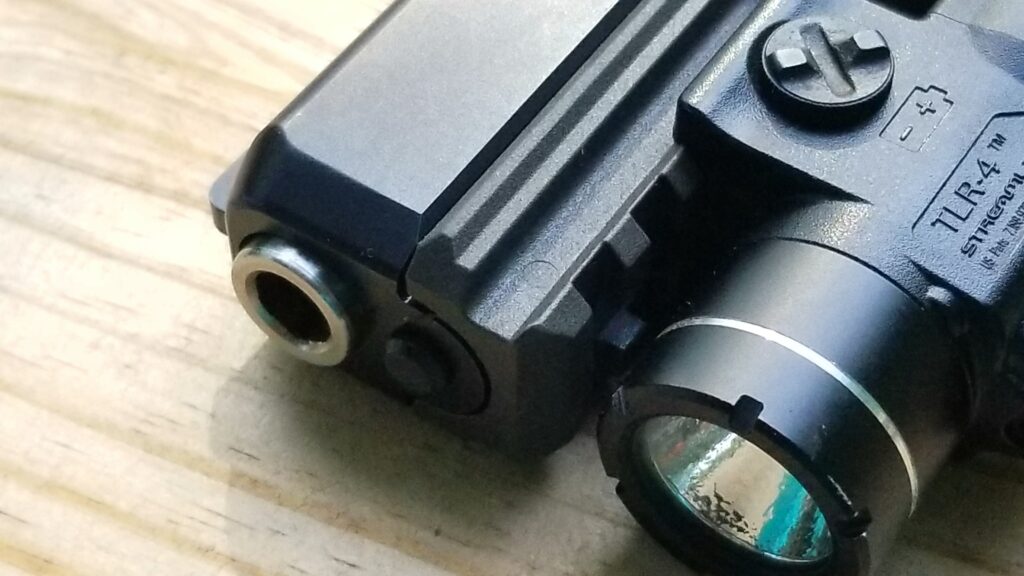
I bought a basic Swenson slide almost two years ago and it’s been solid. Part of what attracted me to it was the beveled nose that allows for easier insertion into a holster. At any rate, I’ve had guys ask me if Swenson slides are any good and my experience has been positive plus from what I have read, most guys find them good. Let me put it this way, if I found a good deal on one to host a RMR optic today, I’d buy it.

The Slide You See

When I first installed it on my first Polymer80 PF940V2 G17, no fitting was needed. However, when I built the PF940CL that it is on now, I did need to use Goodson 400 and then 800 grit lapping compound to get a good fit. Initially there as some binding and now it is just nice and smooth. [Click here if you want to read more tips]

That is the only tuning I’ve need to do. The channel spring liner and all slide parts went in easily and I’ve not had any problems. It’s hosted both it’s current Storm Lake barrel as well as a threaded barrel that I bought from 80P builder with no problem. All in all, it’s worked just fine.

Man at shooting range with M70B1 rifle and dark Russian plum handguard
View of the ejection port side. Just a solid basic slide.
Man at shooting range with M70B1 rifle and dark Russian plum handguard
Here’s the other side.
Man at shooting range with M70B1 rifle and dark Russian plum handguard
Here’s the bottom. Other than the Storm Lake barrel, I think all of the other parts are OEM Glock.
Man at shooting range with M70B1 rifle and dark Russian plum handguard
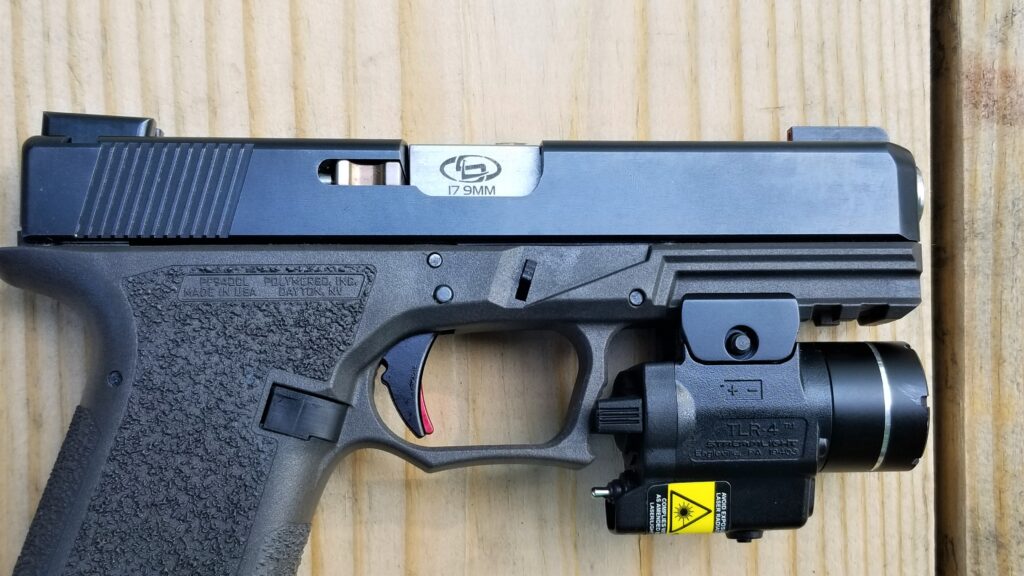
I really like the beveled nose and prefer it for carry pistols. Also, Streamlights are my go to brand for light and laser combos. The TLR-4 works great here and any of the TLR series would since this is a full size pistol. The CL just has the shorter G19 grip to aid with concealment.


So, if you are hunting for a slide for your Glock or Polymer80 build, take a look at Swenson models. They have quite a few designs to select from now including fancy windows and various optics cuts. Just remember, if you are doing a Polymer80 build, look at slides meant for Glock Gen3 models.

The problem these days is finding them. The whole market is in pandemic shock – either hit with supply chain problems or unprecedented demand for guns, ammp and parts. With that said, I did some searching and see Swenson slides either at Midway USA or on eBay and the following is a real time search of eBay for themL


I hope this helps you out!


Please share the link on Facebook, Forums, with colleagues, etc. Your support is much appreciated and if you have any feedback, please email us in**@*********ps.com. If you’d like to request a report or order a reprint, please click here for the corresponding page to open in new tab.


Storm lake Glock Barrels Are Good To Go – I sure Like Mine

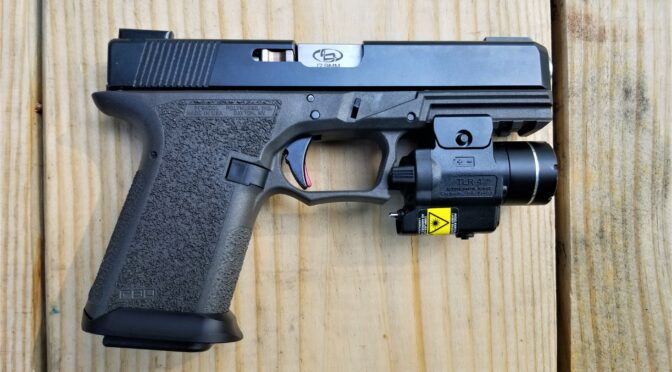
I recently built a Polymer80 PF940CL – their compact long model. This is an interesting variant because it is a their Glock 19 grip but built to use the longer Glock 17 barrel. I had a threaded barrel I could have used but opted to get one of the Storm Lake model 34000 barrels after doing some digging around on their quality. I’m impressed and figured it made since to share a quick review with you.

Storm Lake barrels are made in Tennessee. While not everyone may know their name, they’ve been around since 1983 and sell barrels for 1911s, Glock, Springfield XLs and S&W M&Ps.

Their barrels are made from 416 stainless steel, are hardened to 40-42 HRC and rifling is 1:16LH. The rifling is broach cut to support both jacketed and lead bullets.

My Glock 17 Barrel

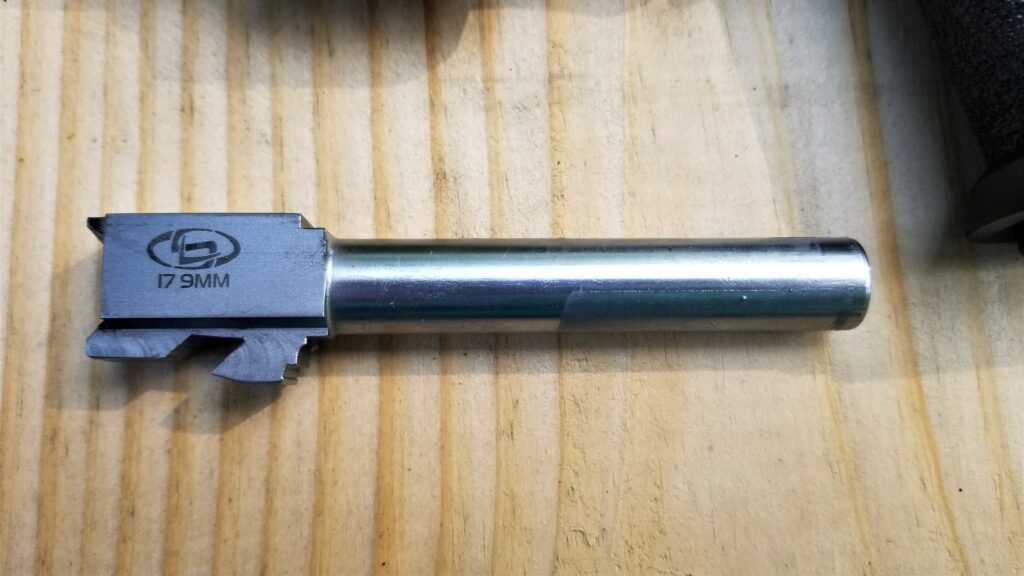
The 34000 is a 9mm 4.49″ long barrel with no ports that weights 0.30 pounds. I don’t plan on running a suppressor or a compensator so there was no real reason to have threading especially if I ever carry it.

Man at shooting range with M70B1 rifle and dark Russian plum handguard
Here’s my 4.49″ 9mm barrel.
Man at shooting range with M70B1 rifle and dark Russian plum handguard
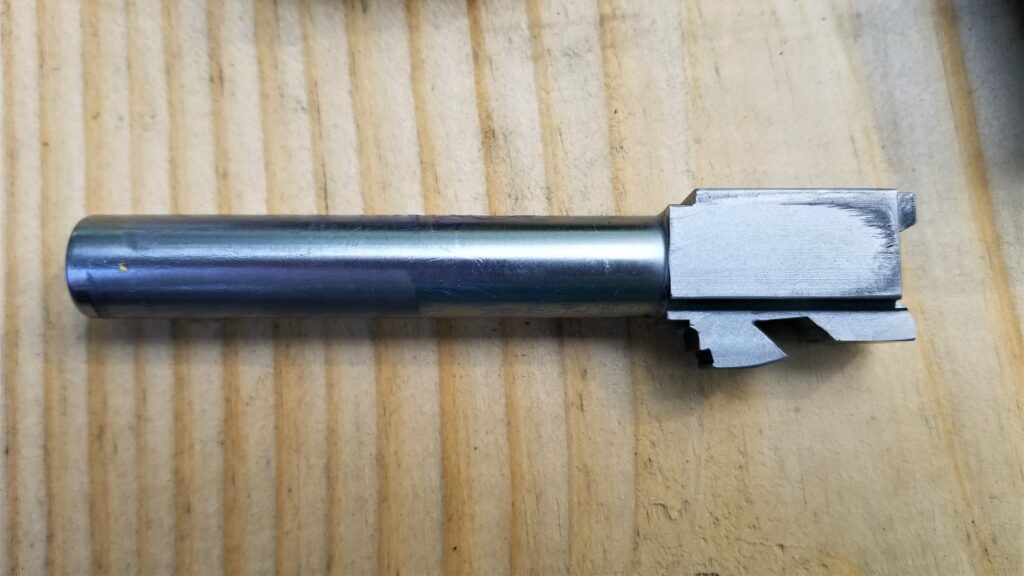
The black stuff is carbon from shooting. It’s an accurate and reliable barrel.
Man at shooting range with M70B1 rifle and dark Russian plum handguard
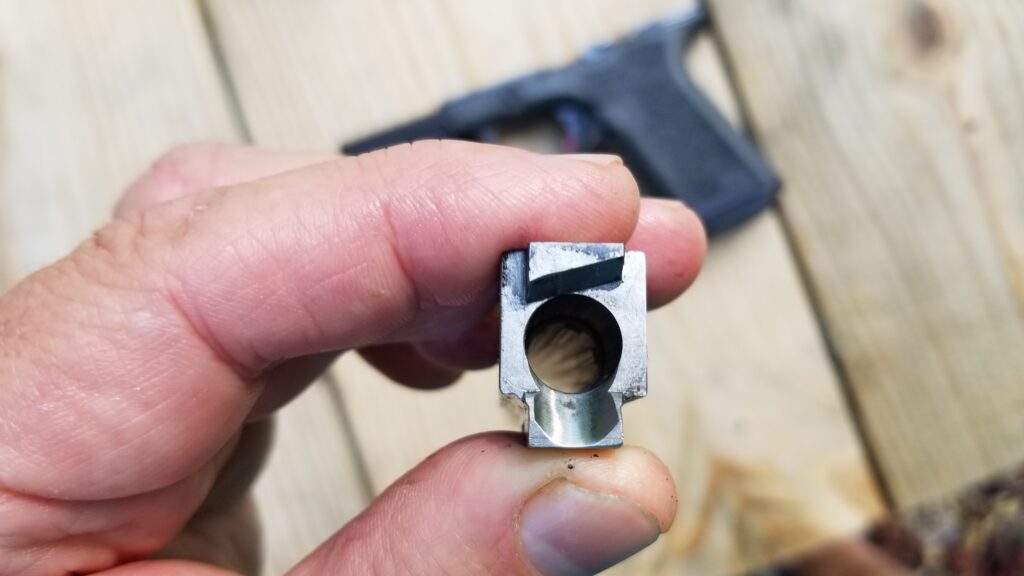
The feed ramp is nicely done. I don’t shoot unjacketed bullets but it worked great with S&B 124gr FMJ , 115 grain FMJ – not sure of the maker – and 124gr Hornady Critical Defense HP rounds.
Man at shooting range with M70B1 rifle and dark Russian plum handguard
There is a slight crown to protect the muzzle and rifling.
Man at shooting range with M70B1 rifle and dark Russian plum handguard
Here it is in the PF940CL

All in all, I have nothing negative to say. I am not some super duper target shooter. It’s accurate enough for me under 25 yards and I’ve not had any problems. Now part of that is the build and the magazines too but again, no problems!

I have no hesitation recommending Stormlake barrels. Best of all, I think they are very affordable and show that you don’t always have to spend a fortune to get good quality.

The best selection and prices are actually on eBay. The following are items live on eBay for the G17, 19 and 34 plus other models so just scroll down:


Conclusion

I hope this helps you out!


Please share the link on Facebook, Forums, with colleagues, etc. Your support is much appreciated and if you have any feedback, please email us in**@*********ps.com. If you’d like to request a report or order a reprint, please click here for the corresponding page to open in new tab.


Are you having challenges Finding 9x19mm / 9mm Luger ammo?

I’ve read a few guys asking about where to buy ammo so I did a quick dig on availability and assembled the below ammunition listings from my sponsors.

Also, so you are aware of what’s moving, I get a feed from Brownells of their current Top Sellers:

I hope this helps you out some.


Please share the link on Facebook, Forums, with colleagues, etc. Your support is much appreciated and if you have any feedback, please email us in**@*********ps.com. If you’d like to request a report or order a reprint, please click here for the corresponding page to open in new tab.


Converting the PSA AK-V To Look Like A Russian Vityaz-SN PP-19-01

Thanks to the US government restricting the imports of firearms from the Kalashnikov Concern in Russia, I pretty much gave up on my hopes of owning a Civilian Vityaz clone – or at least one from Russia.
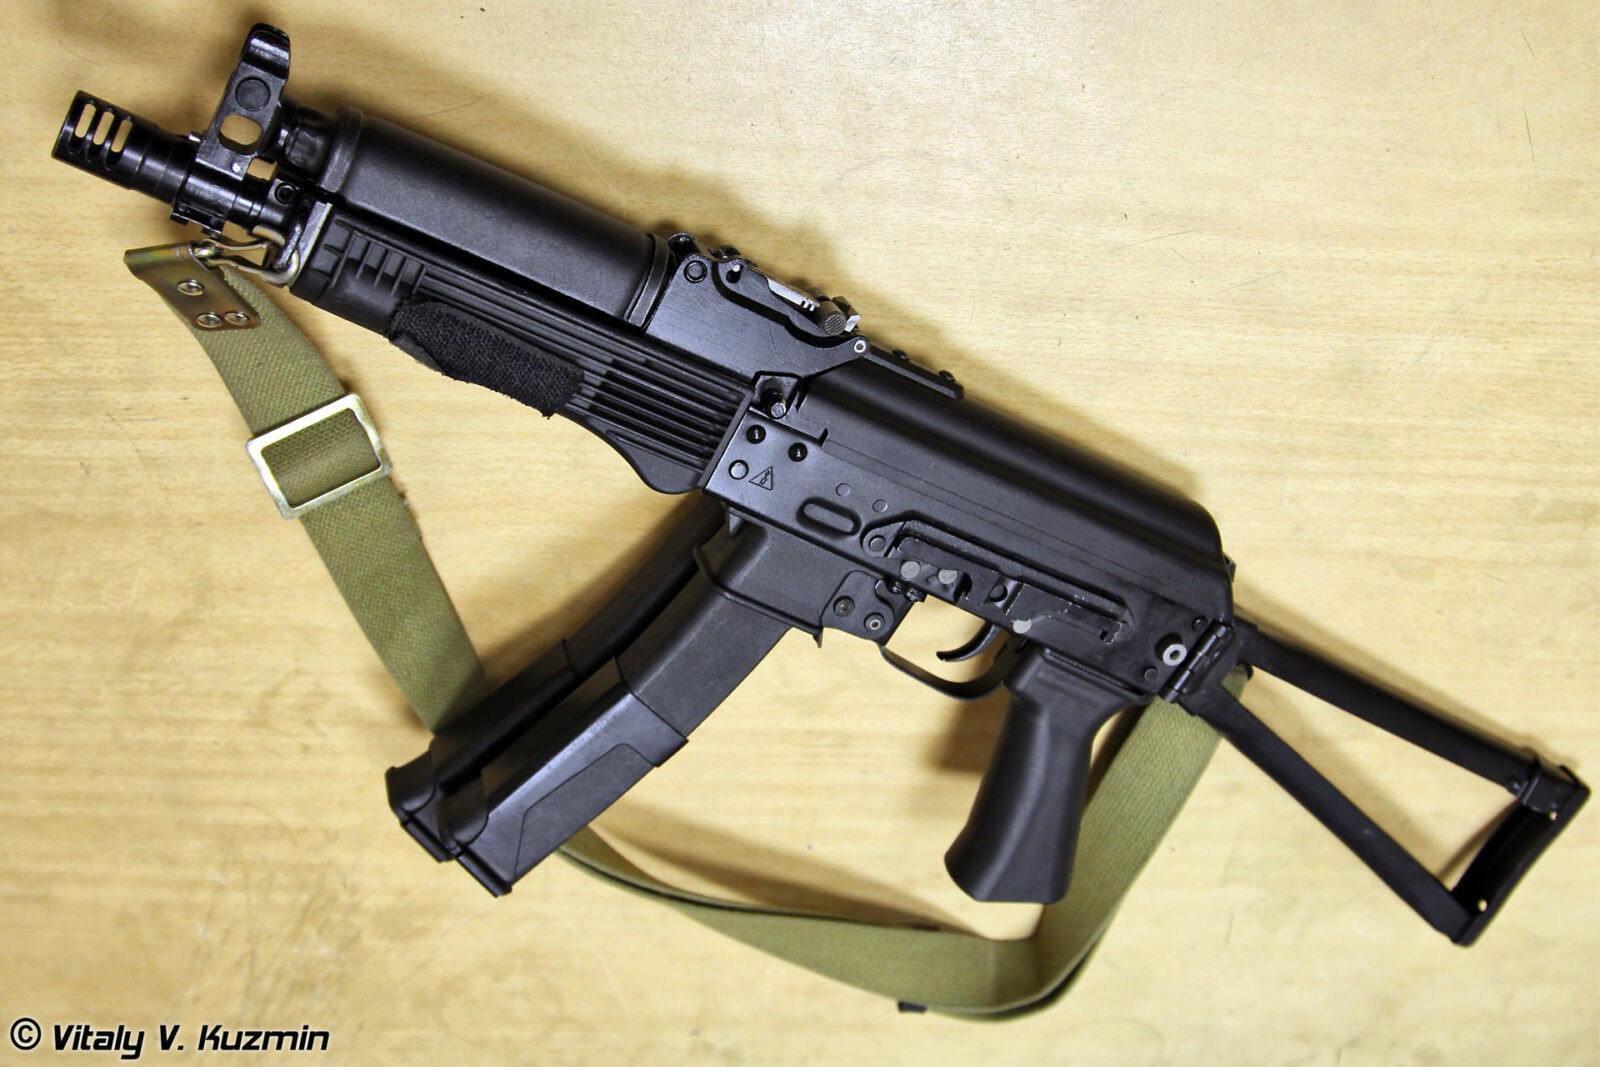
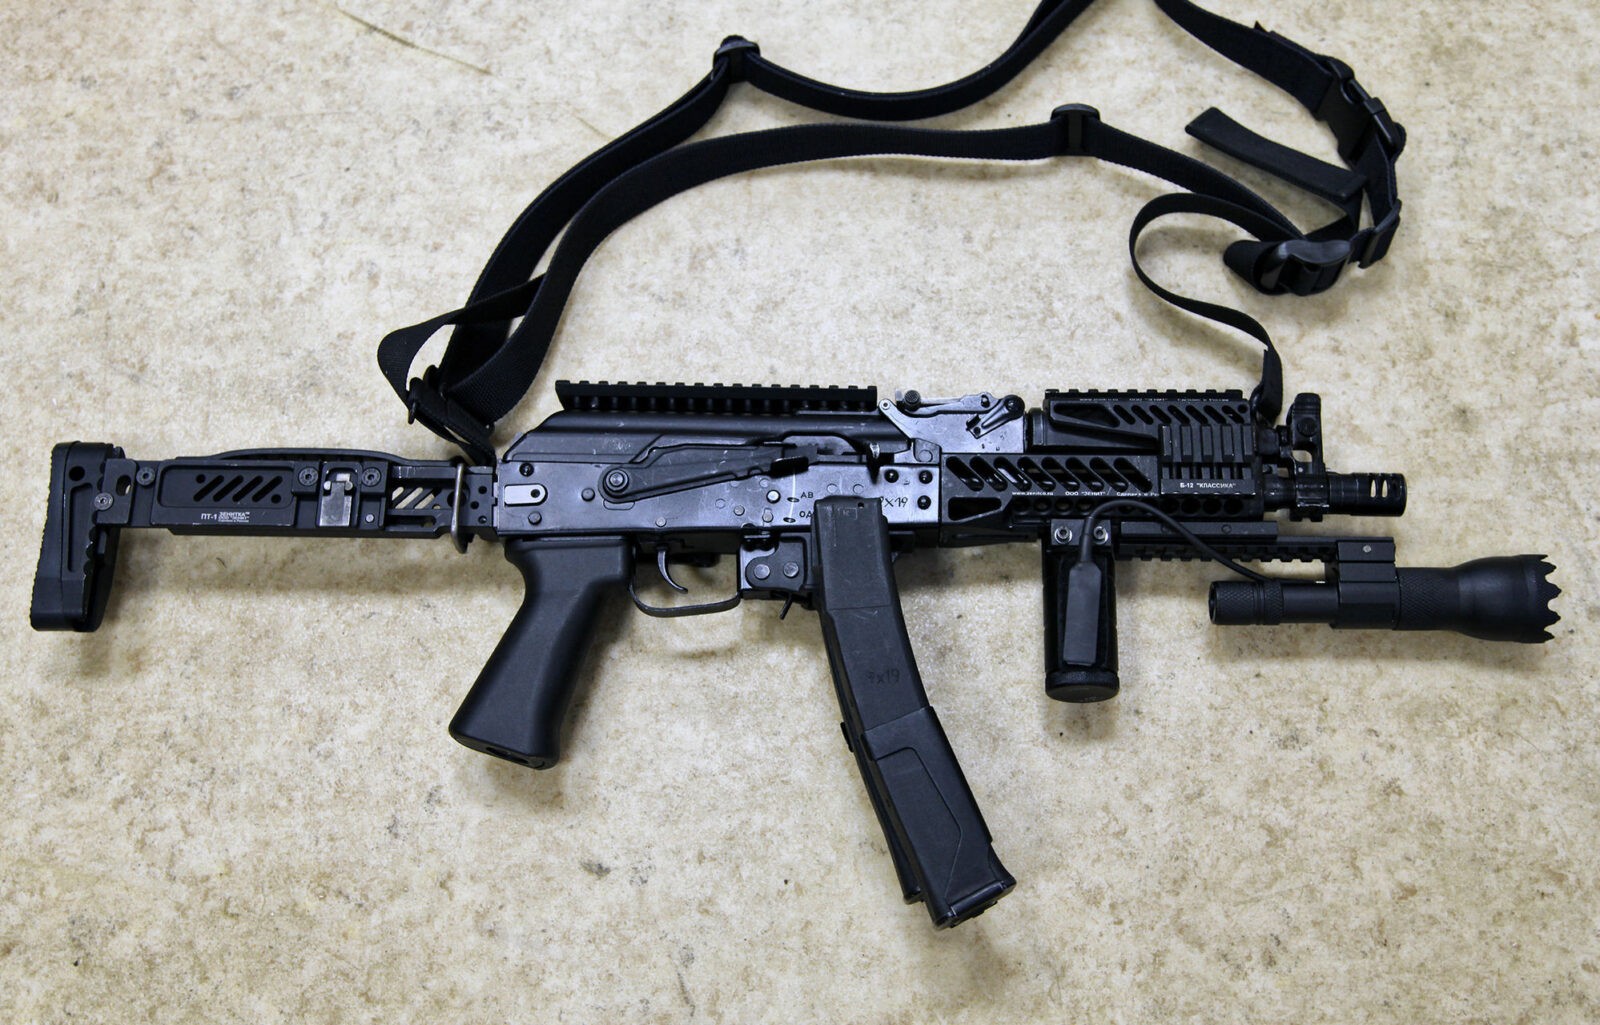
In case you don’t know the submachine gun I am referring to, the Vityaz-SN PP-19-01 is a 9x19mm submachine gun that is basically a scaled back AK-74M that uses a blowback operating method vs. gas, It was designed in 2004 and in production from 2008 to the present day.

Lyman digital scale showing 5.50 lbs on a marble surface
Vityaz SN submachine gun.
Photo obtained from Wikipedia and used under Creative Commons license.
Lyman digital scale showing 5.50 lbs on a marble surface
Vityaz-SN wiith Zenit stock and rails.
Photo obtained from Wikipedia and used under Creative Commons license.

At any rate, I got excited when PSA released their AK-V and then fixed the initial bugs that surfaced – I respect a firm that listens to customers, acknowledges the problems and fixes them. I purposefully held off buying the AK-V initially but once word started spreading of the improved model, I bought one and wrote series of blog posts:

PSA AK-V firearm with red dot sight and extended magazine on logs
Here’s my AK-V with the first set of changes – the more rigid SBA4 brace, one of my quick takedown pins and a Vorte Crossfire Red Dot on top of an American Defense quick release mount.

Click here to go to the Palmetto State Armory AK-V homepage. This is a great place to see all the models and accessories that they are now offering.

Well, I thought I was done – the AK-V didn’t look like a Vityaz-SN with the Magpul grip and handguard plus the SBA4 brace but it was very comfortable to shoot and the furniture was solid. I was fine until Paul Popov posted photos of his converted AK-V in the Facebook AK-47 Group using the new CNC Warrior side folding brace and it look far more like a Vityaz – yeah, I had to change.

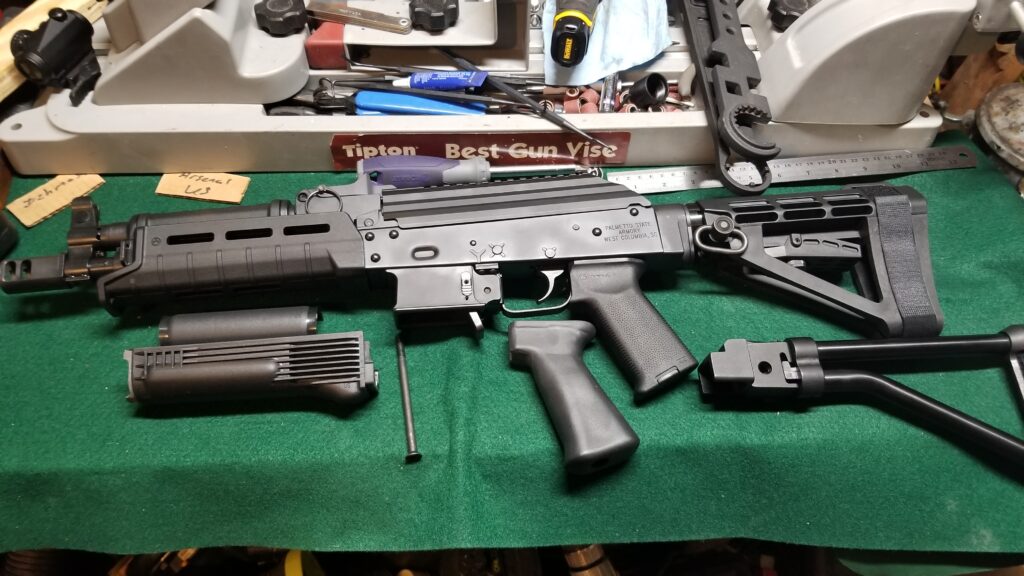
PSA AK-V parts laid out for conversion to Vityaz-SN PP-19-01 look.
Getting ready to swap out parts. Note, the is an Izhmash handguard and I wound up using a K-VAR US handguard set that I will explain more below.

The conversion is really straight forward – change the the brace, the handguard and the grip. While I do plan on changing out the muzzle device at some point, I’ve not done so yet – just FYI,

Always make sure your firearm is unloaded and safe before you work on it. Check that chamber one more time.

The CNC Warrior Brace

Chris Bonesteel, of Bonesteel Arms, and CNC Warrior have been working together for years turning out high quality Galil-style folding stocks. I did not know they had created a brace design until Paul posted his photos and I immediately ordered one. Why would I jump? Simply put, the team turns out excellently executed designs and no, they did not pay me to say that. It just happens that I’ve known both groups for a long time – the US AK parts maker community started out small way back when.

Here’s the link so you can take a look. The AK-V uses a stamped AK style trunnion and then you can choose either a left or right side folding model. They were out of stock of a left folder so I bought a ride-side folding model. It looks like the AK-V will still operate folded but I haven’t tried it yet.

Lyman Trigger Pull Gauge in its case
You can see it is very well designed and made. The rear is rigid and contoured to conform with the side of the arm when strapped on. That is the Velcro strap on the rear.
Lyman Trigger Pull Gauge in its case
This shows the lock up side of the mechanism. The whole folder assembly is an aircraft aluminum alloy. Note the quick release swivel socket just forward of the lock area.
Lyman Trigger Pull Gauge in its case
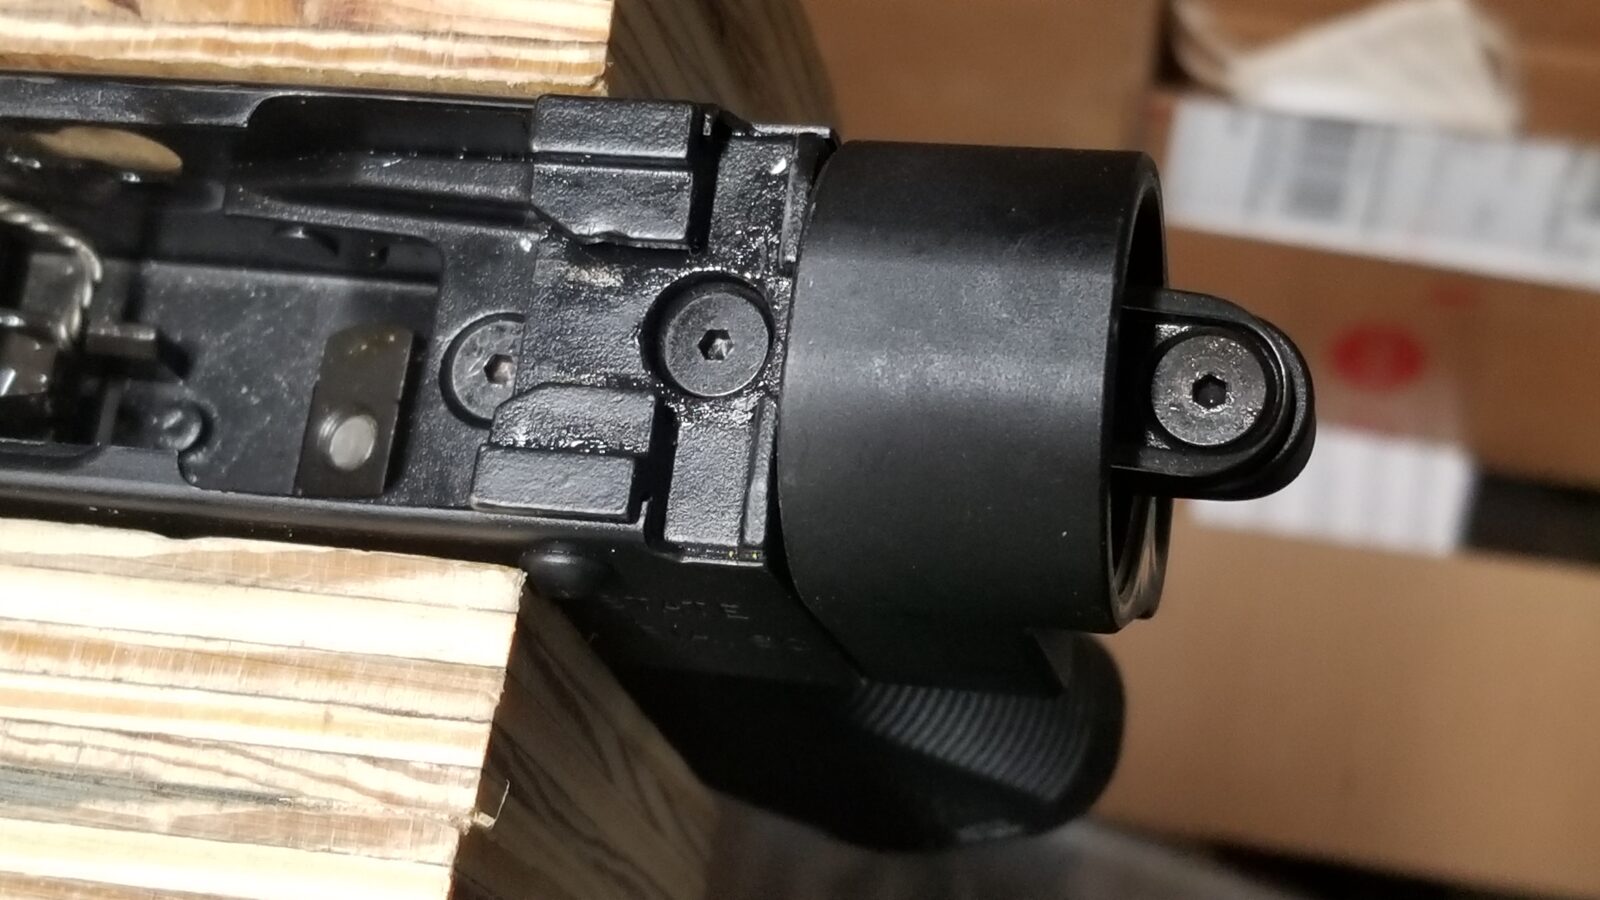
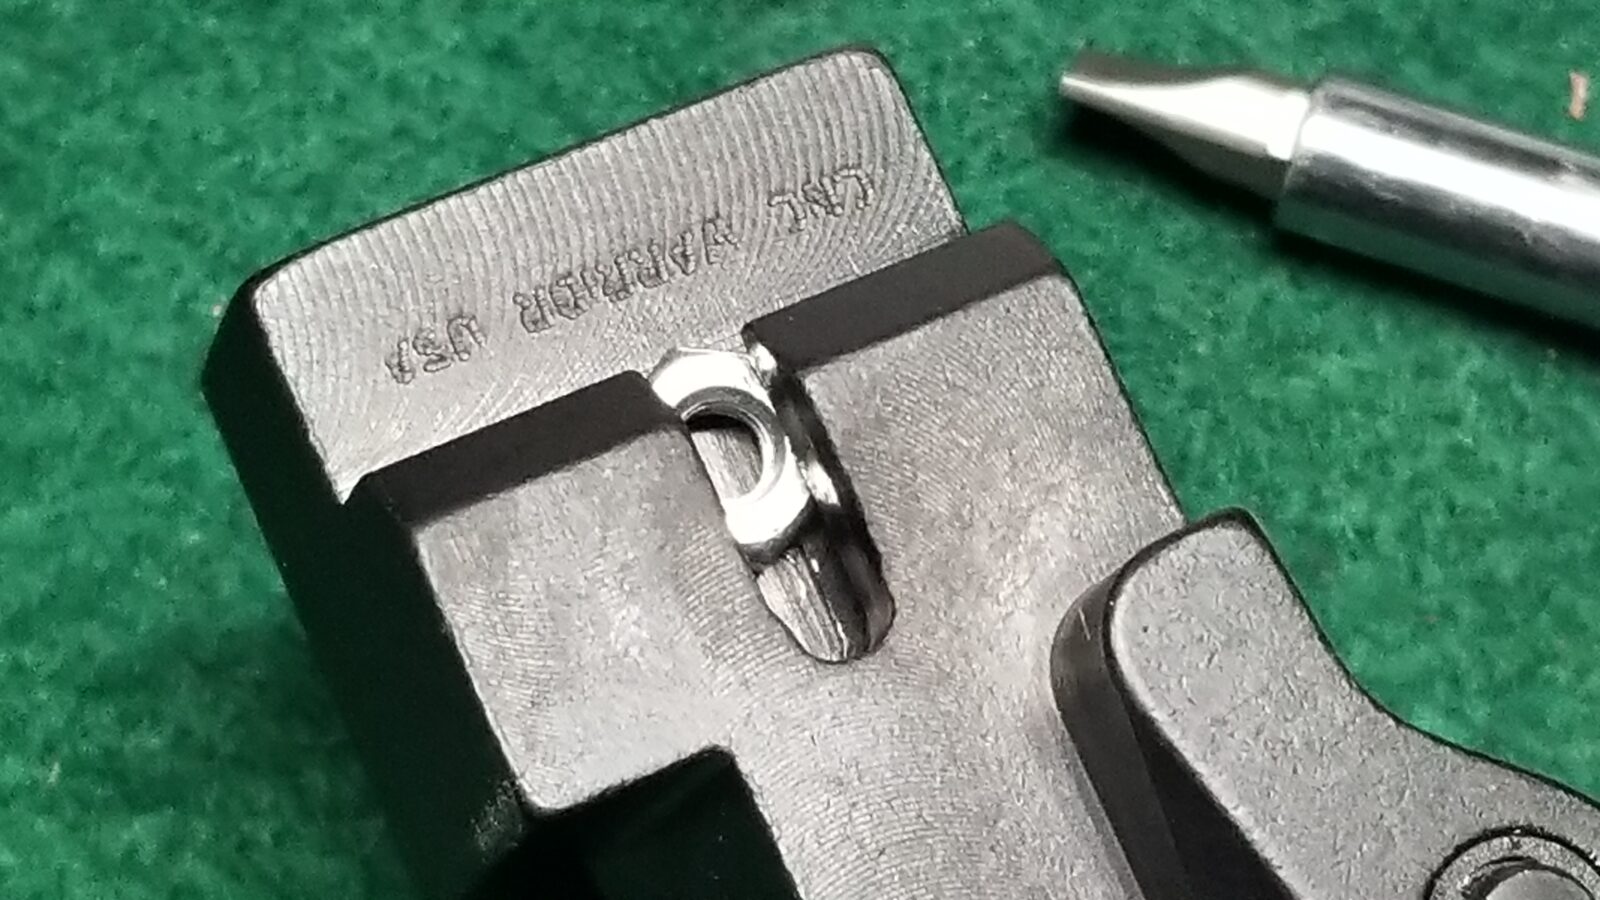
The screws that go into the trunnion are 10-32×3/8″ and there is a small nut in a slot for the front srew to give some adjustment. Keep an eye on that during installation or it may slide out.
BNM Custom Airguns CP1002 pistol with scope, trigger, and match grips
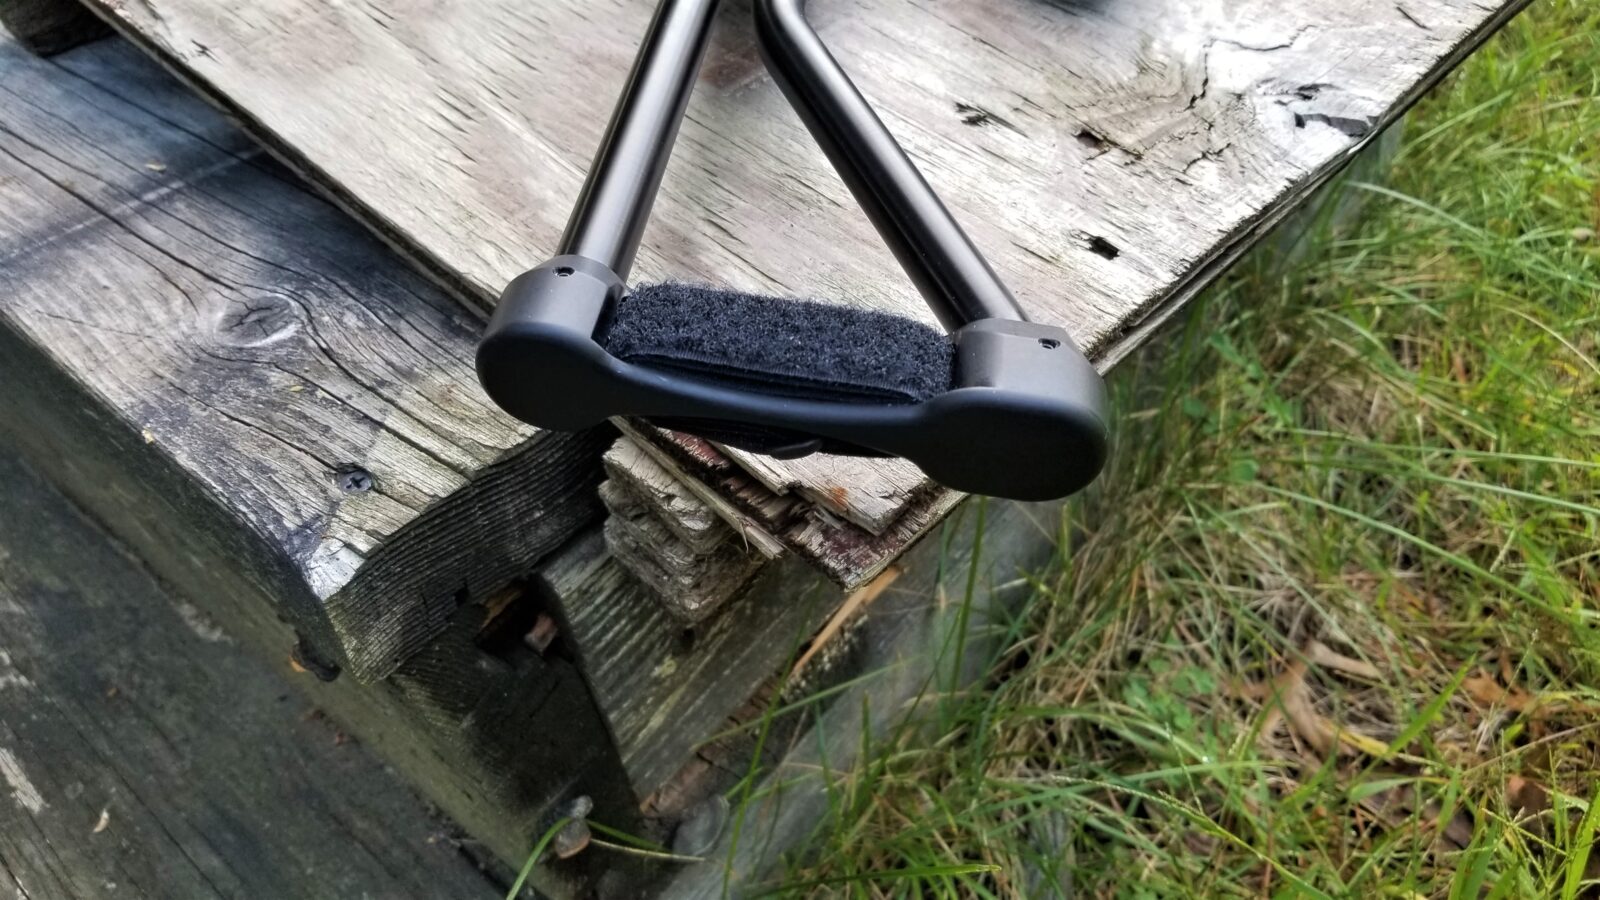
The rear of the brace is solid. It secures to the side of the arm vs. over the top. It’s a great example of thinking outside the box.

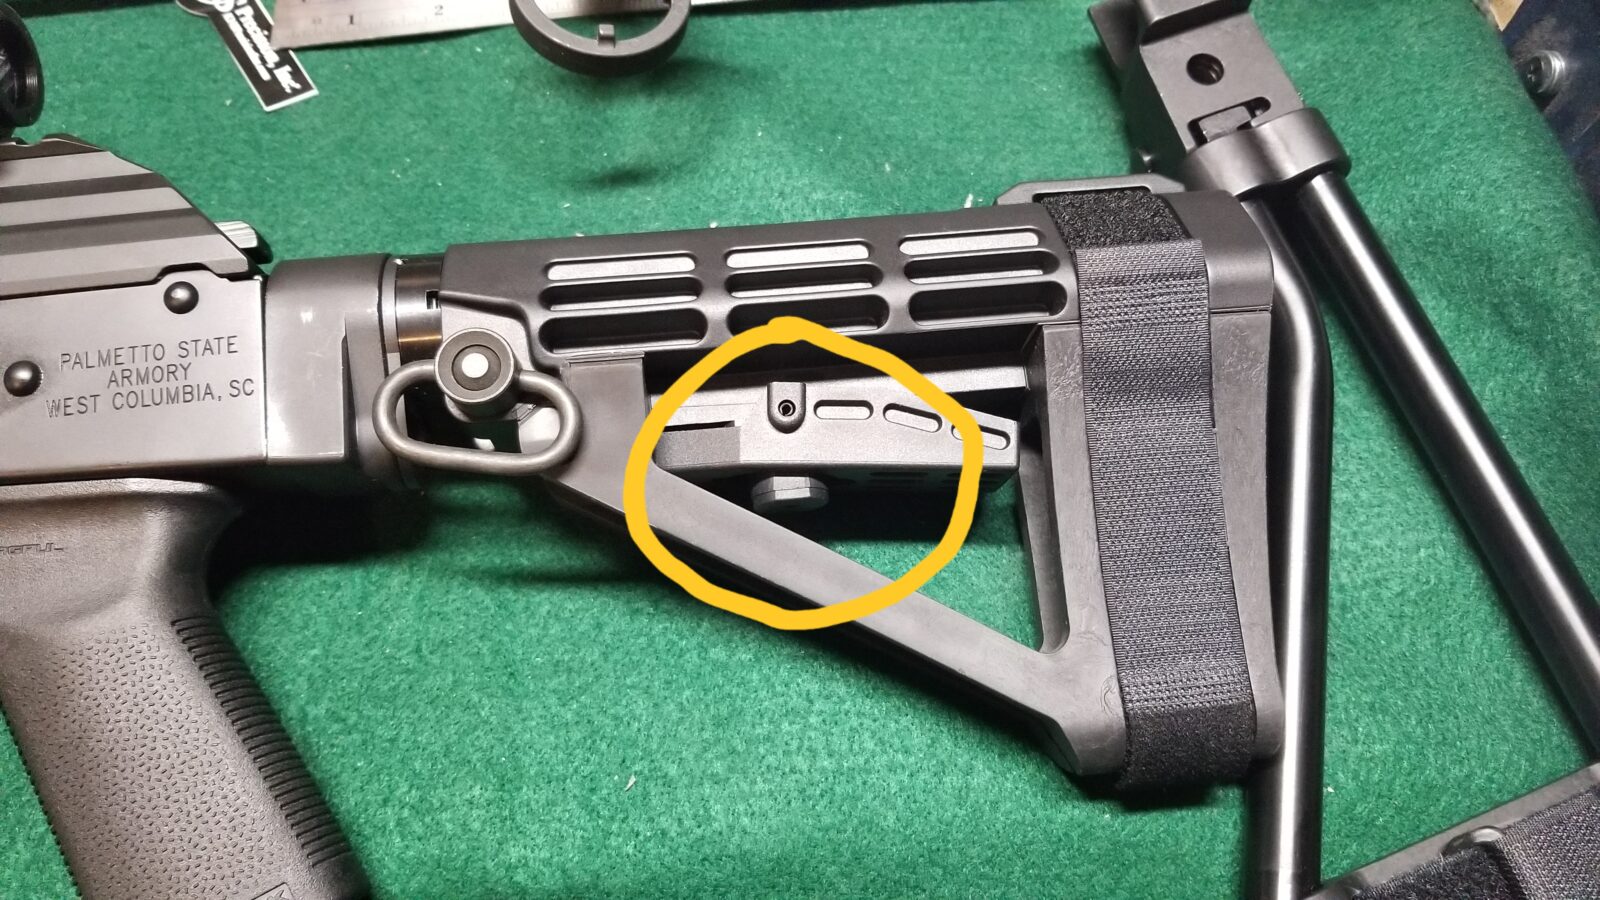
Now, to change out the existing SBA3 brace or, in my case, an SBA-4 brace, you will need to first remove the stock by pulling up on the adjustment latch and sliding the stock to the rear. You need to pull the latch so it can clear the groove’s walls it is captured in.

BNM Custom Airguns CP1002 pistol in black case with probe and display
Depending on how you are viewing the adjustment latch, you need to pull it out of the way for the brace to slide off the buffer tube / receiver extension. Given the viewing angle of this photo, I would pull the latch (in the yelow circle) down.
PSA AK-V muzzle brake with QD sling mount holes
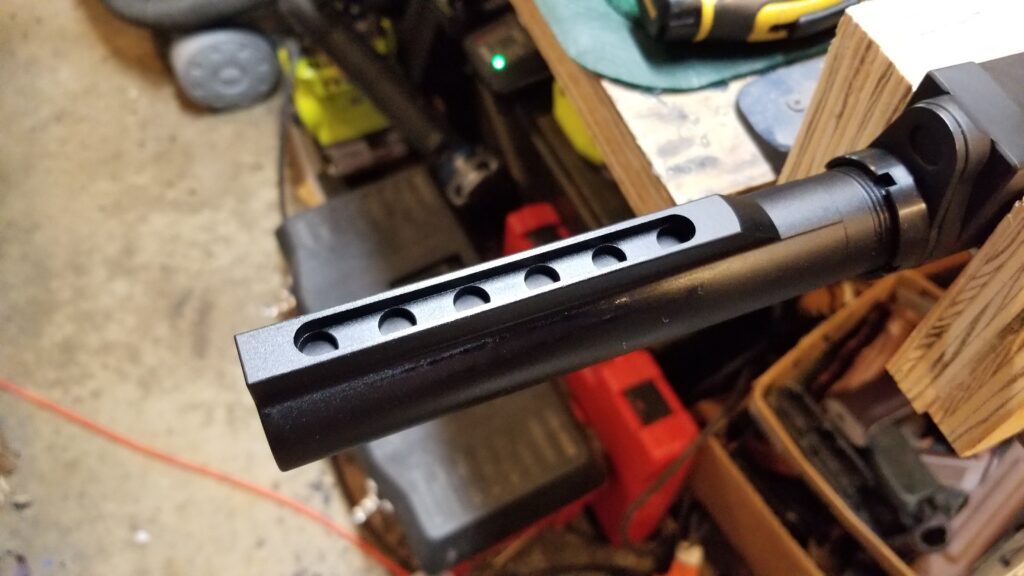
You are pulling that latch pin out of it’s normal position so it can clear the rear of the retention pin groove you see here that runs the length of the tube.
BNM Custom Airguns CP1002 pistol in black case with probe and display
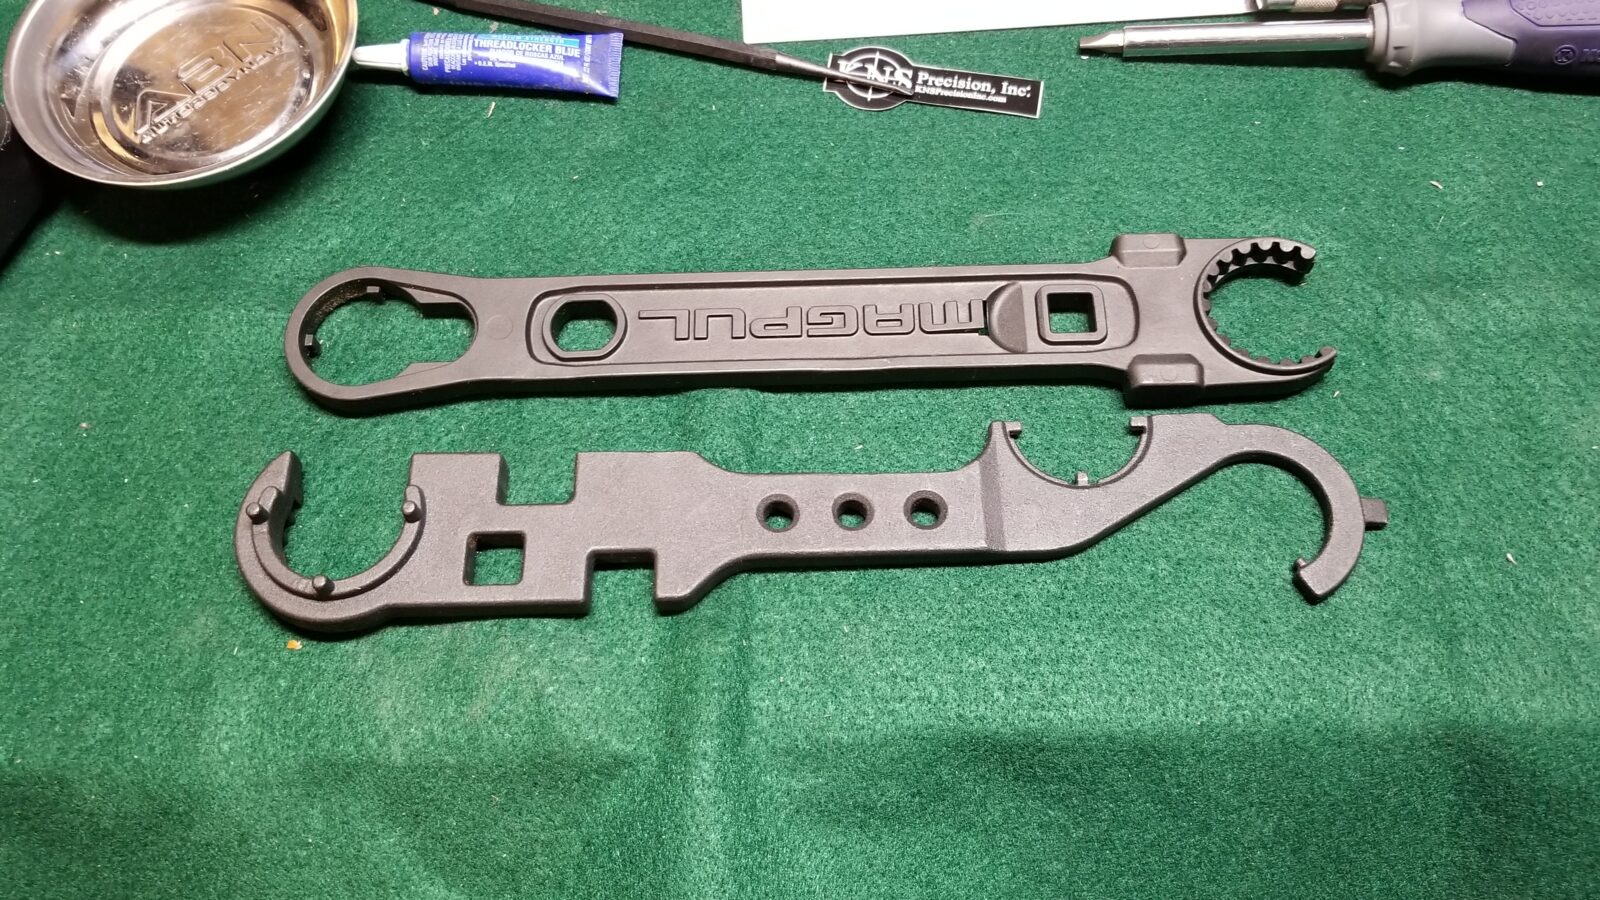
You are going to need a tool to get a firm grip on the castle nut to turn it off the staking that PSA does. You could use a combo wrench with the three contact points or a Magpul wrench. The Magpul wrench rocks, You can get a solid hold and remove staked nuts easily – even heavily staked nuts. I do NOT recommend the single point spanners like you see at the left end of the top combo wrench.
BNM Custom Airguns CP1002 pistol in black case with probe and display
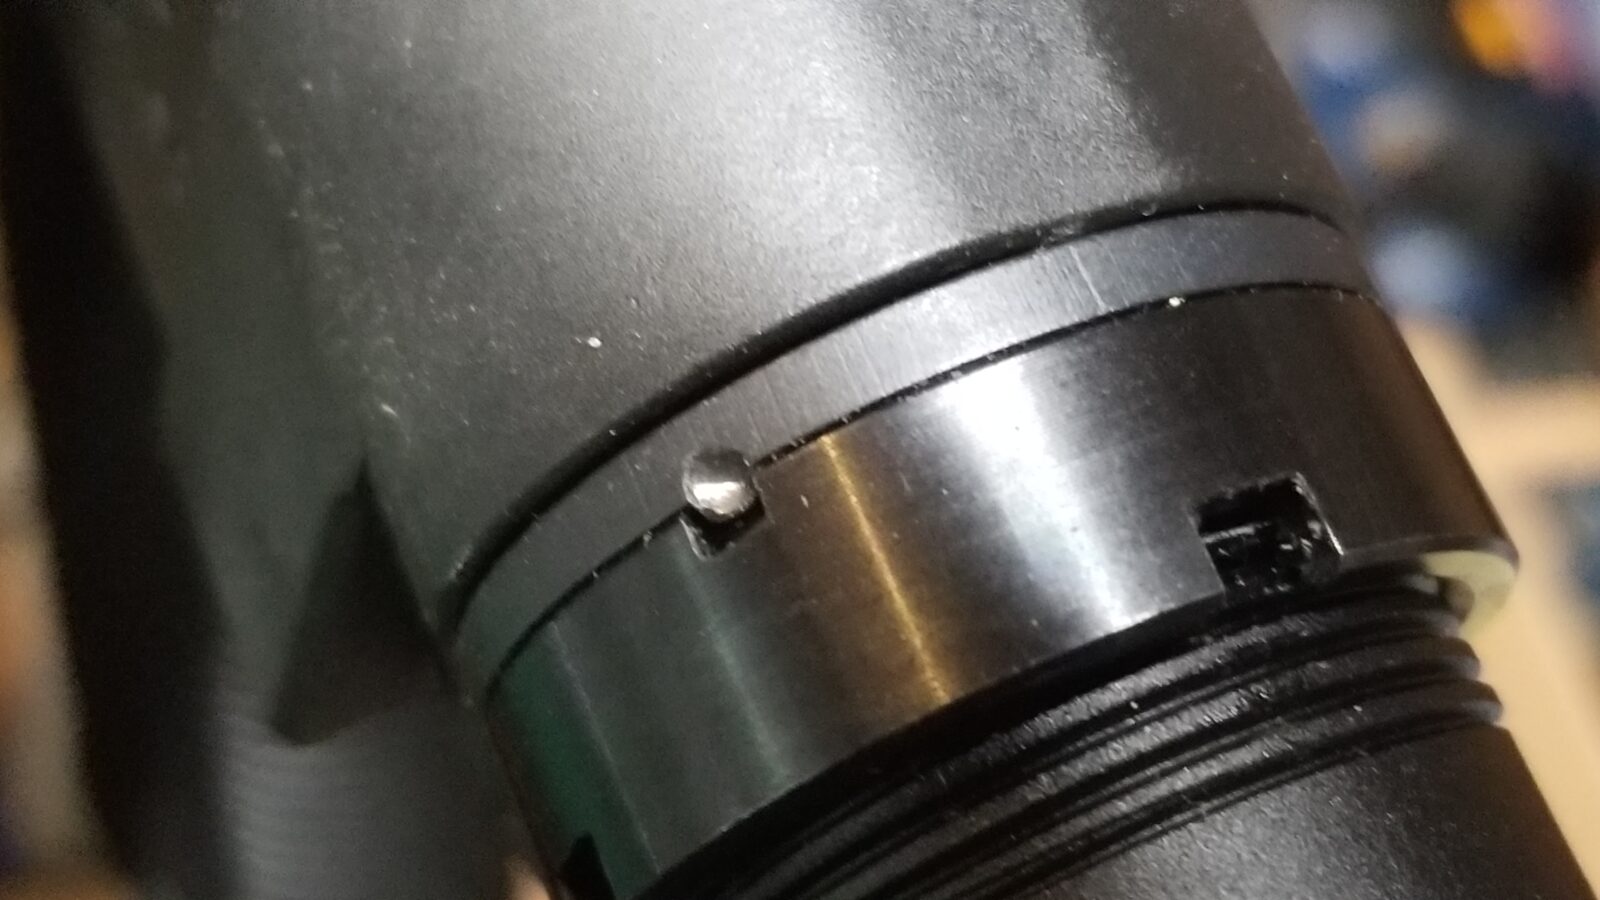
PSA does not mess around – that is a solid stake and mine had two of them. In case you are wondering why, AR rifles use stakes to prevent the castle nut from shooting loose due to recoil and vibrations.
BNM Custom Airguns CP1002 pistol in black case with probe and display
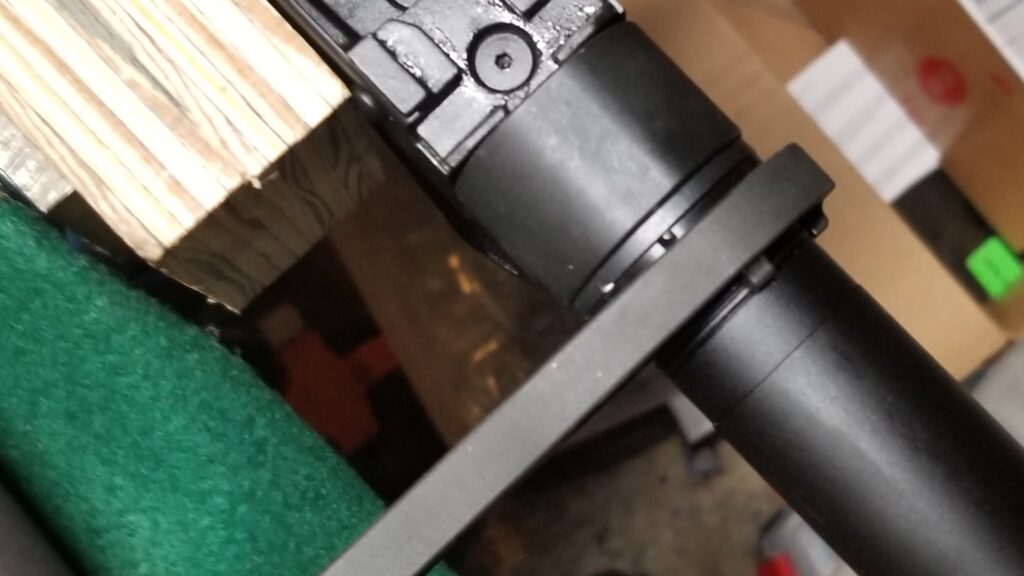
You don’t exactly remove the stake – you turn the castle nut by pushing the staked material out of the way. This is why I like the Magpul wrench – it supports the nut all the way around and sits squarely in the grooves of the nut. It will overcome stakes all day long – lefty loosey and righty tighty 🙂 So back off the nut and then unscrew the extension tube and remove it.
BNM Custom Airguns CP1002 pistol in black case with probe and display
All three of these allen head screws need to be removed. All three have thread locker on them so heat the screw up with a small torch to soften the thread locker. If you do not you risk stripping the allen socket and that happened to me regardless on the rear. If you strip one, an old trick is to use a light hammer and tap in a Torx bit into the hole and then it will usually get enough of a hold that you can remove the screw. Now, if you do strip the rear one, there is an important additional step – hold a big hammer, in my case a forging hammer – against the bottom of the tang when you tap the Torx bit in. The bigger hammer and its inertia will support the rear tang and lessen the odds of you bending or breaking the rear tang. You will not re-use any of these screws.

I didn’t get a photo of the next two steps but to remove the M4 adapter, I used a wood dowl and hammer to give the unit a few taps from the inside and it came right out. I was surprised by PSA’s use of a two-piece rear trunnion. It’s innovative and makes sense. If you ever built an AKM and then used the Ace universal modular stock adapter that did not require cutting the rear tang, you may recall that block is huge as a result. I used it because I didn’t want to permanently cut the rear tang off.

By creating this two piece unit, PSA can effectively have rear trunnion that can either accomodate a folder or modular block without the tang in the way or simply insert the tang and then use a fixed-stock style screw arrangement.

To install the CNC Warrior brace, I simply tapped it into the receiver. I did make sure the front retaining nut did not slide out of its slot during the process. Once the stock was fully seated, I checked the install of the supplied screws and I could not reach the captured nut. So, I ran down to Ace Hardware and bought a few different lengths of #10-32 allen head screws. I used 3/8″ long for rear screw and 9/16ths” for the front. I’ve not seen others mention they needed a longer screw in front but that is what worked for me. It seemed to tighten down fully – if it had not,I would either have tried a shorter screw or ground down the tip just a tad.

After I published this post, Paul Popov pointed out to me that he examined the two screws that came with the brace and noticed the heads had different tapers. The one for the front has more of a taper/slightly smaller head that allows it to indeed get down far enough for front screw. So, take a look at your screws and see if this helps.

Note: I coated the screws with Blue Medium Loc-Tite just to be sure and then tightened them down. It’s very important you use your favorite thread locker here – Vibratite, Loc-Tite, etc. Because the block is aluminum, I would not use anything stronger than a medium-strength locker.

Close-up of PSA AK-V receiver with "CNC BARREL USA" marking and a tool
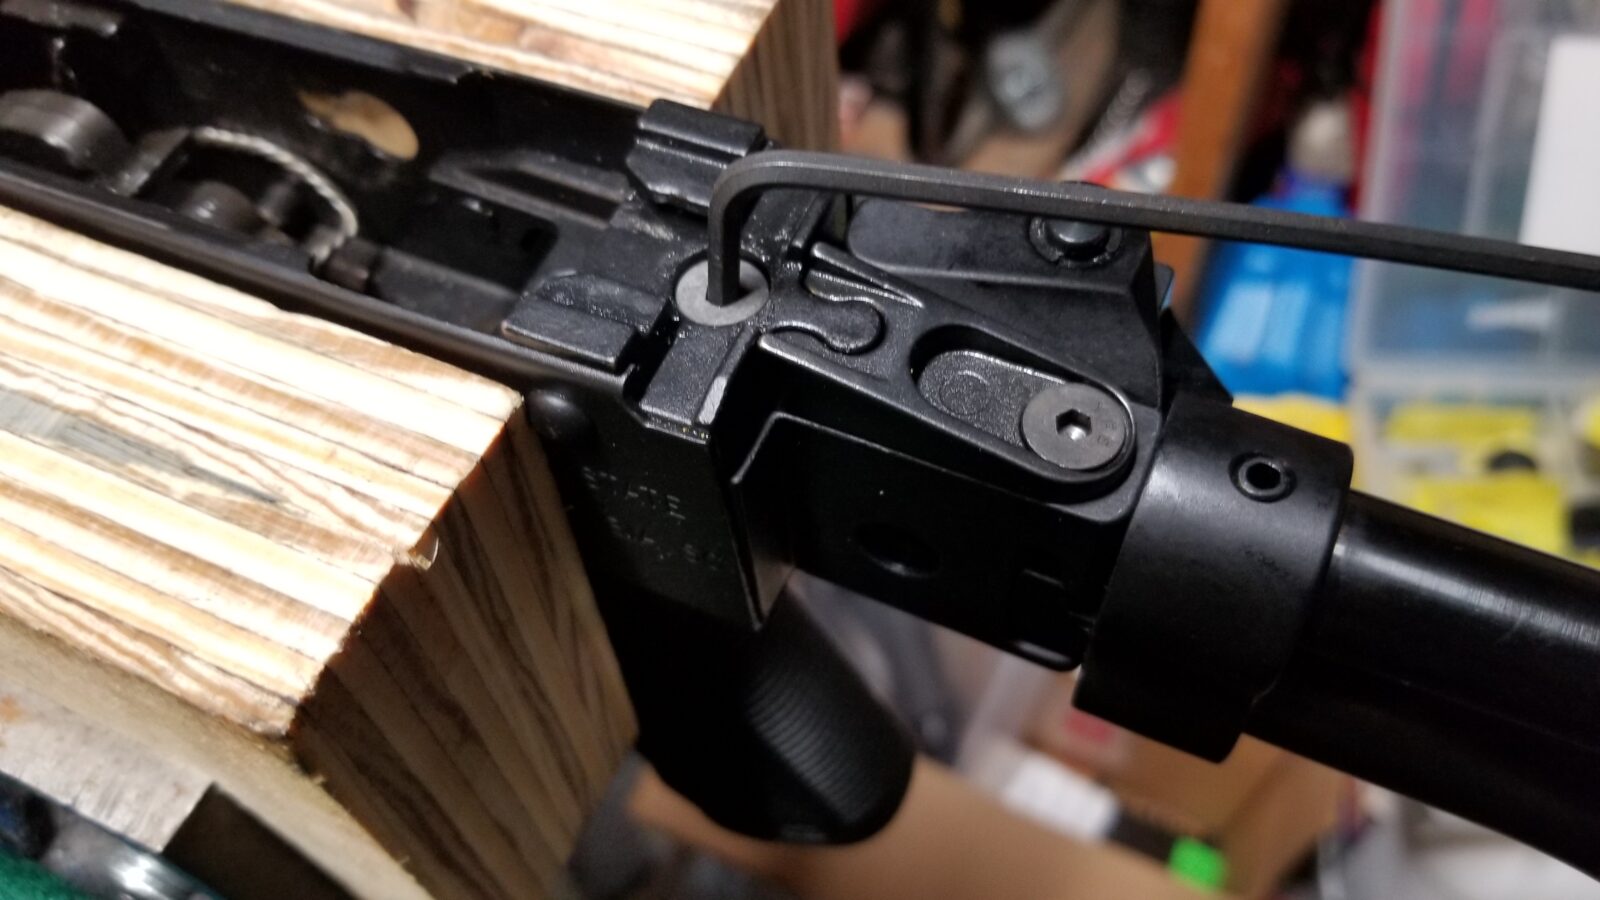
Keep an eye on that nut when installing your brace. It can easily slide right out of the slot. If you lose it, it’s simply a #10-32 nut. After installing the brace, I wiggled the weapon around to move the nut where I could see it and used a small allen wrench to slide the nut into position before inserting the screw.
AK-V Vityaz conversion: Allen wrench adjusting rear sight block on PSA AK-V.
You can see the innovative two-part rear trunnion and the new allen screws.

That’s it for the brace. It was actually really easy and trying to take the photos took longer than the actual work.

Ronin’s Grips Izhmash Molot Grip

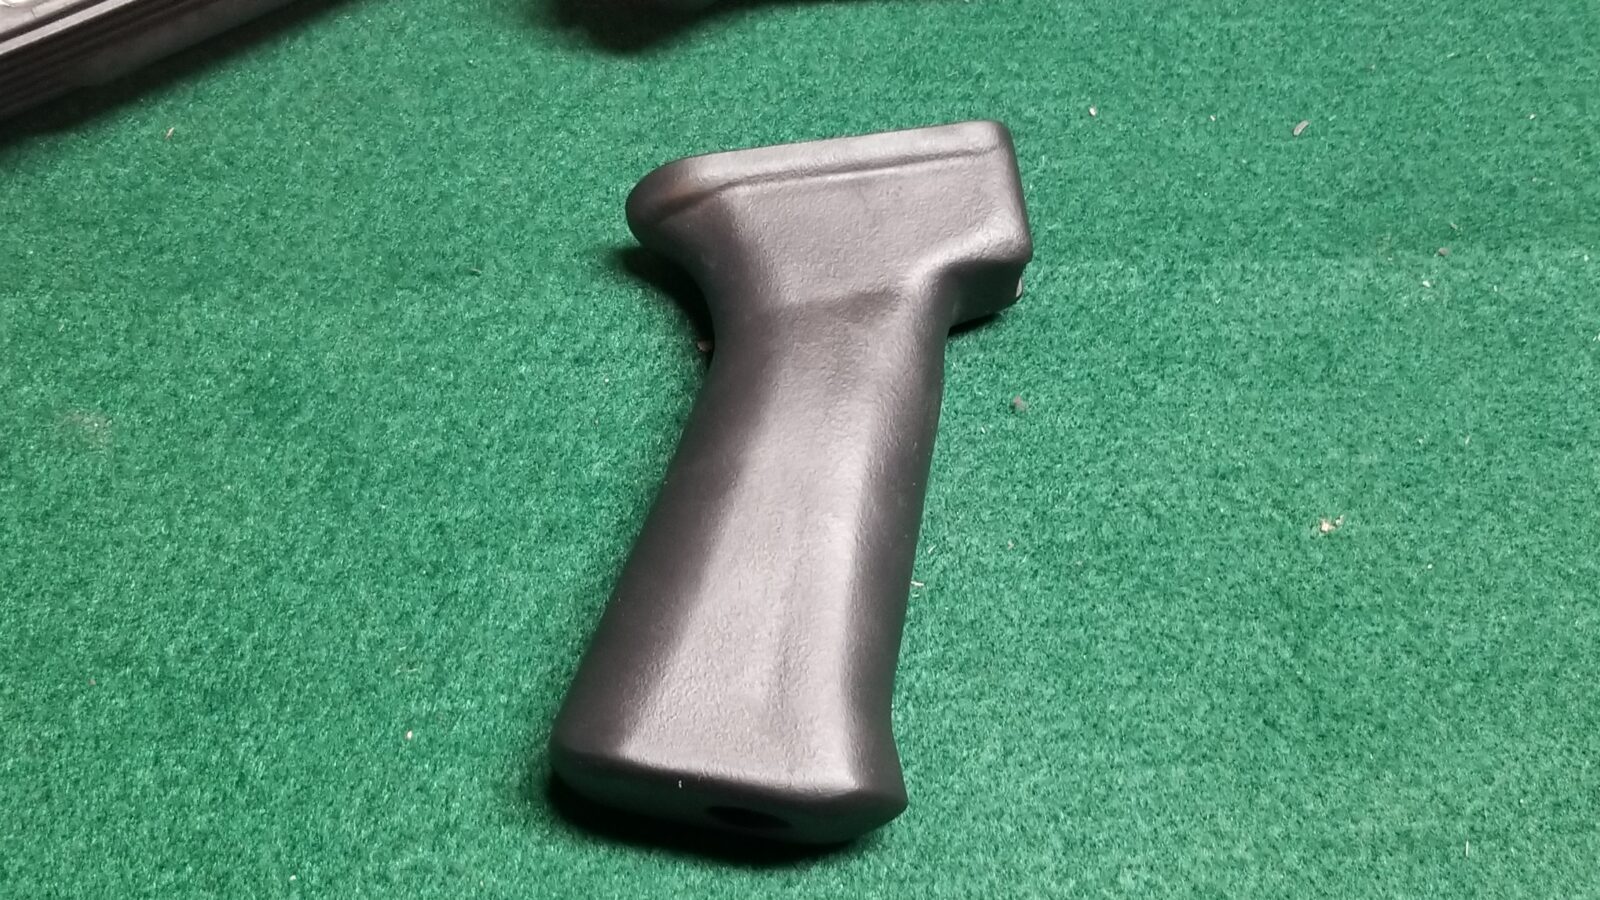
The Vityaz-SN uses Izhmash’s copy of the Molot grip – what I like to call the Molot Gen 2. In my honest opinion, the Izhmash copy is a better design, The original had a weaker nose, was slightly smaller and did not have as big of a tail between the web of the thumb and the receiver. For all these reasons, I’ve always liked the Izhmash grip more and made myself one for this build. [Click here to to go our product page from the Molot Gen 2]

AK-V pistol grip for Russian Vityaz-SN PP-19-01 conversion
We make all of our grips by hand for each order. This is our “Molot Gen 2” that I made for my AK-V to Vityaz-SN clone project. Click here for the product page.

Installing the grip is the same as every other AK. I didn’t take photos but you can google and find a ton of videos and instructions with photos.

  1. Remove the dust cover, recoil spring assembly and bolt carrier [that last one is optional] to get easy access to the back of the receiver where the grip nut is located.
  2. Remove the existing Magpul grip. Squeeze the tab to remove the bottom and expose the screw. Use either a large blade screw driver or an Allen wrench to remove the screw.
  3. Make sure the grip nut is in the receiver and angled backwards.
  4. I use one hand to reach in and hold the grip nut in place. I then flip the gun upside down, put the grip on, insert the screw and wiggle it around until it catches the thread.
  5. The grip should sit square all the way around. If it does not, then use a file or sandpaper to make it flat. Go slow, take your time and test over and over – don’t try and do everything at once or you may take off too much.
  6. I tighten the screw down firmly but I don’t use a thread locker and I also do not go crazy torquing it down either.
  7. Re-assemble the weapon and function test it.

K-VAR US Handguard Set

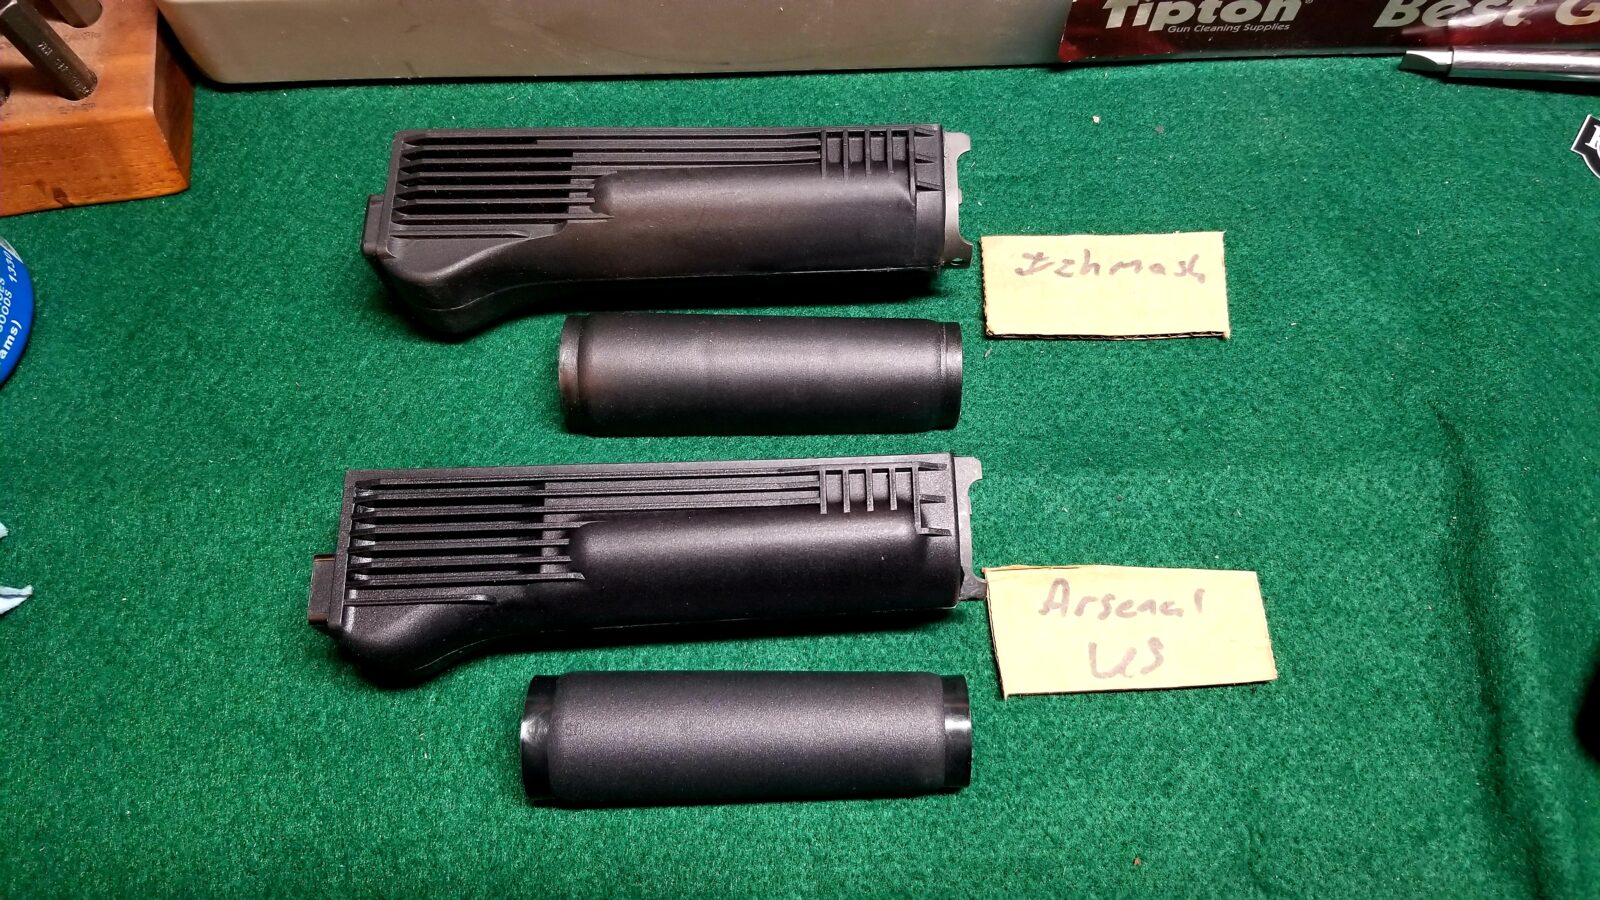
The Vityaz-SN uses the same handguards as the AK-74M and they will also fit AKM-pattern handguards as well. I’ve used K-VAR’s US-made furniture many times so I went to their website and they had both their US handguards and original Izhmash furniture. I thought it was a neat opportunity to see the differences first hand so I did a blog post with tons of photos showing the small differences between the two – click here to read it.

Crosman CP1002 pistol trigger mechanism and grip, with warning text
The top set is a real Russian Izhmash set and the bottom is a K-VAR US-made set.

My first thought was to use the Izhmash set but I found I needed to remove just a tad bit of material off the metal nose for it to lock up fully into the retainer. I didn’t want to modify the real Russian lower so I opted to use the K-Var US lower and modify it as needed.

When it comes to fitting a new handguard to a rifle, you want the lower to lock in firmly and not be loose but you don’t want to impossibly tight where you break the cam arm lever off trying to tap it down.

If I were to make a broad generalization, I find that if I need to trim a brand new lower to fit a rifle, I usually need to shorten the handguard. Maybe it’s just my luck but usually that is what I would find with new lowers. If it was a surplus lower from another rifle then all bets were off because there was no telling how it was trimmed to fit.

Again, tons of photos and videos on the Internet but here are the basic installation steps:

  1. Remove the dust cover
  2. Remove the recoil spring assembly
  3. Remove the bolt carrier assembly
  4. Swing the gas tube locking lever up and remove the gas tube assembly
  5. Flip the cam lever on the lower handguard retainer to unlock the lower.
  6. Slide the lower forward and down to remove it.
  7. Reverse this to install the new one. Fit the lower if needed. It took 2-3 test fittings before my lower would go on because I removed such a small amount each time.
  8. To remove the gas tube cover, I like to secure the forged part of the gas tube in a vise so you can twist the gas tube cover 180 degrees and remove it. Never, never clamp the circular end of the tube – it is so then that it will probably bend/crush.
  9. Installing the gas tube cover is the reverse. Note, I did not need to trim my gas tube cover – it went on. If you need to, take off a little with sand paper or a file and test – repeat until it fits.
  10. Reassemble the weapon and function test it.
Crosman CP1002 pistol trigger mechanism and grip, with warning text
That is the lower handguard locking lever. It is attached to a cam that pushes the handguard backwards and locks everything into place. It rotates 180 degrees opposite from what is shown to unlock the handguard. This photo shows it locked. I like it to be snug enough that I need to use a small hammer to tap it into place. There is such a thing as the handguard being so long that the lever can’t go back into position so be careful and take the time to fit the handguard. In rare cases, the handguard can be shorter and the cam is on the wrong side of the groove so know what you are dealing with before you go modifying parts.

The Results

I really like how the converted AK-V looks and how it feels. I really think PSA did a great job with the design and build and heartily recommend the AK-V.

Click on any of the thumbnails below to open the full size photo and enter the slide show:

PSA AK Webstore Links

Interested in an American made AK? Consider Palmetto State Armory (PSA) as a source. Click on the following links for the associated webstore categories for AK-related rifles, pistols and parts at PSA:


Note, I have to buy all of my parts – nothing here was paid for by sponsors, etc. I do make a small amount if you click on an ad and buy something but that is it. You’re getting my real opinion on stuff.


Please share the link on Facebook, Forums, with colleagues, etc. Your support is much appreciated and if you have any feedback, please email us in**@*********ps.com. If you’d like to request a report or order a reprint, please click here for the corresponding page to open in new tab.