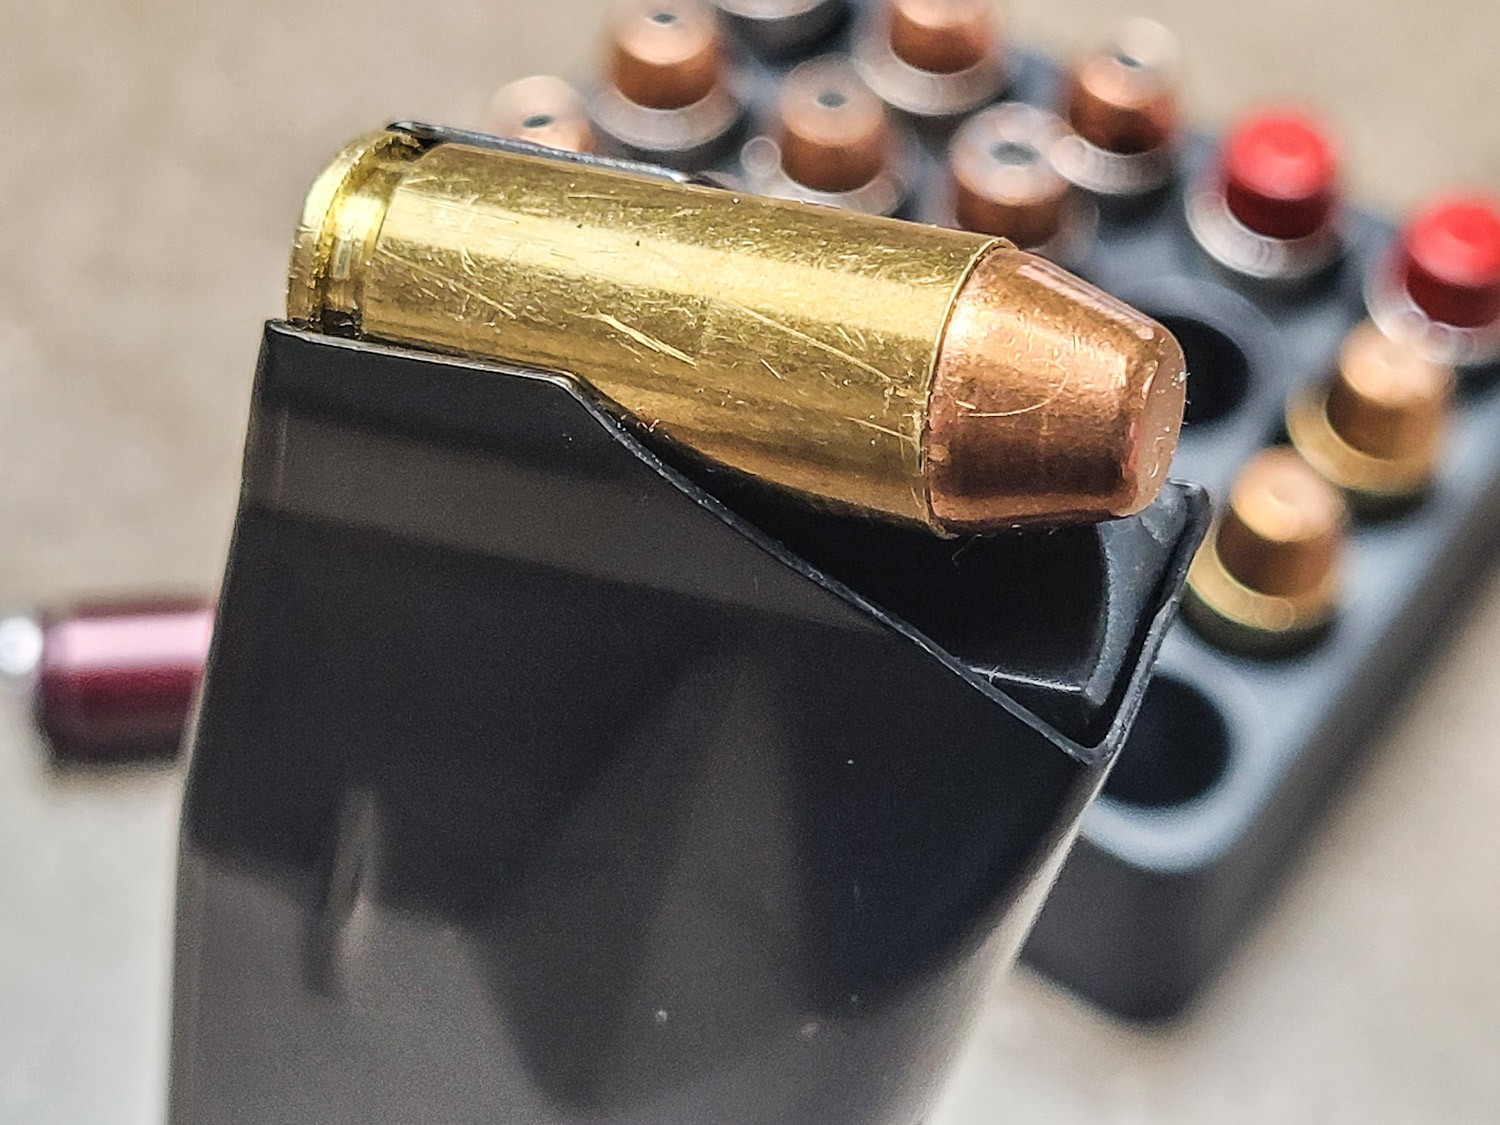
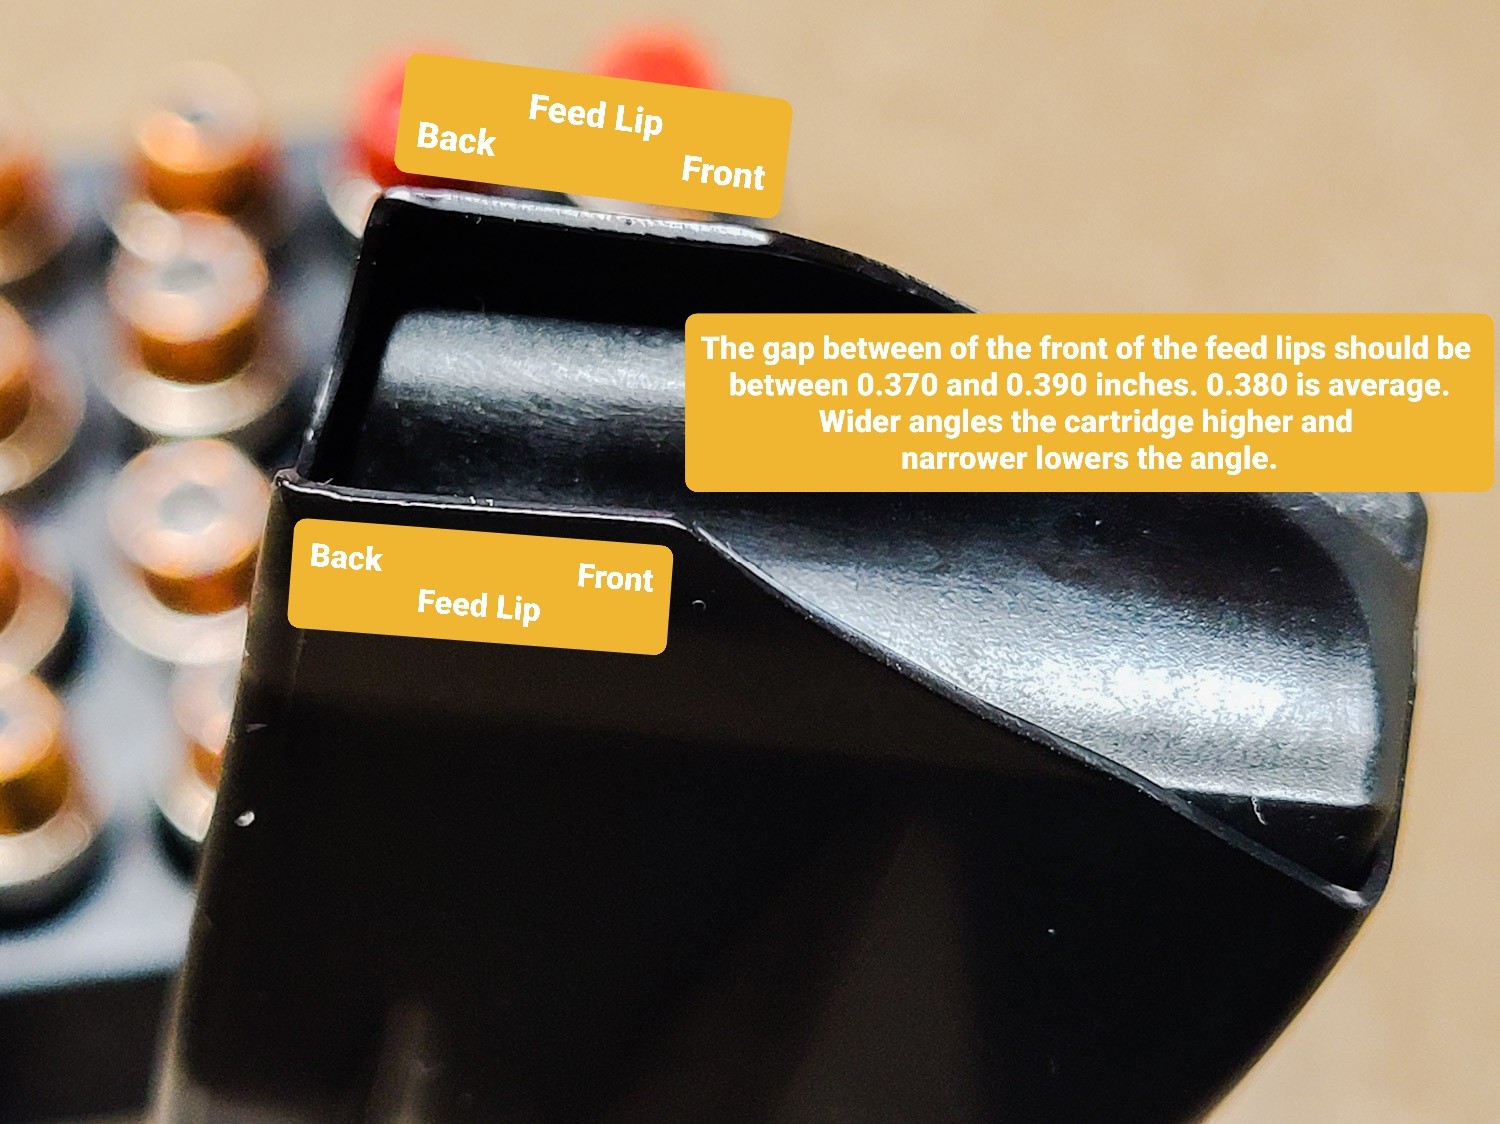
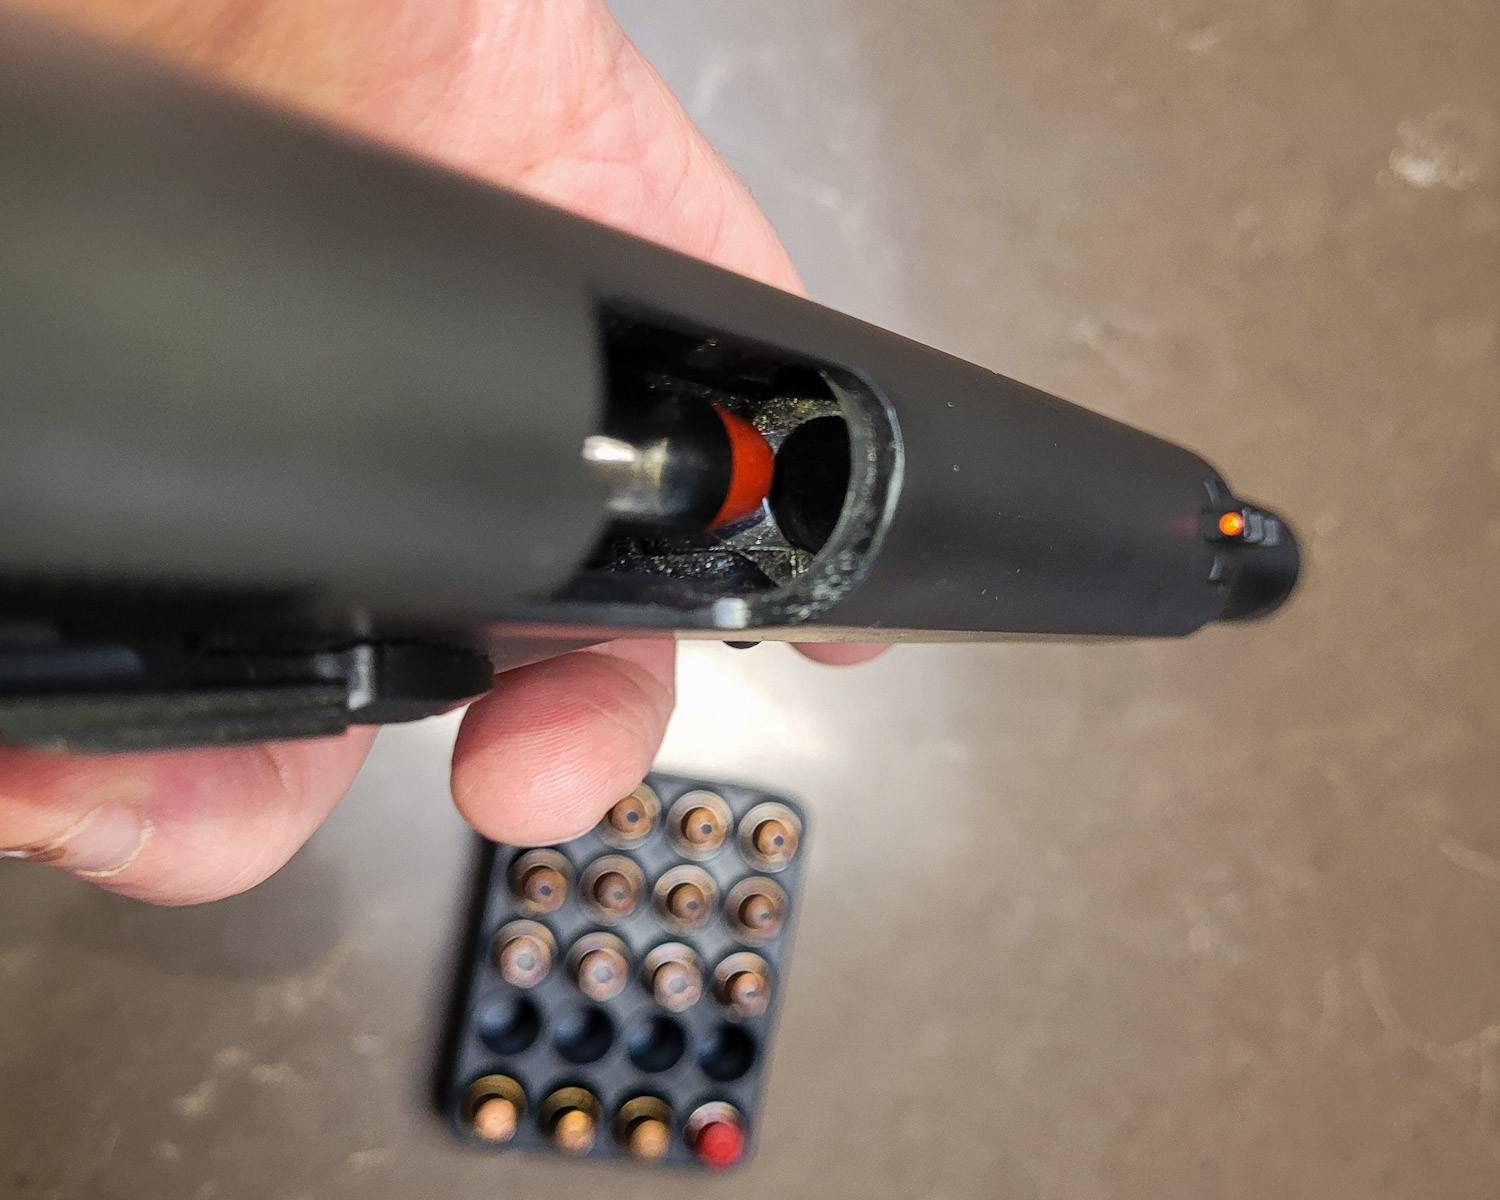
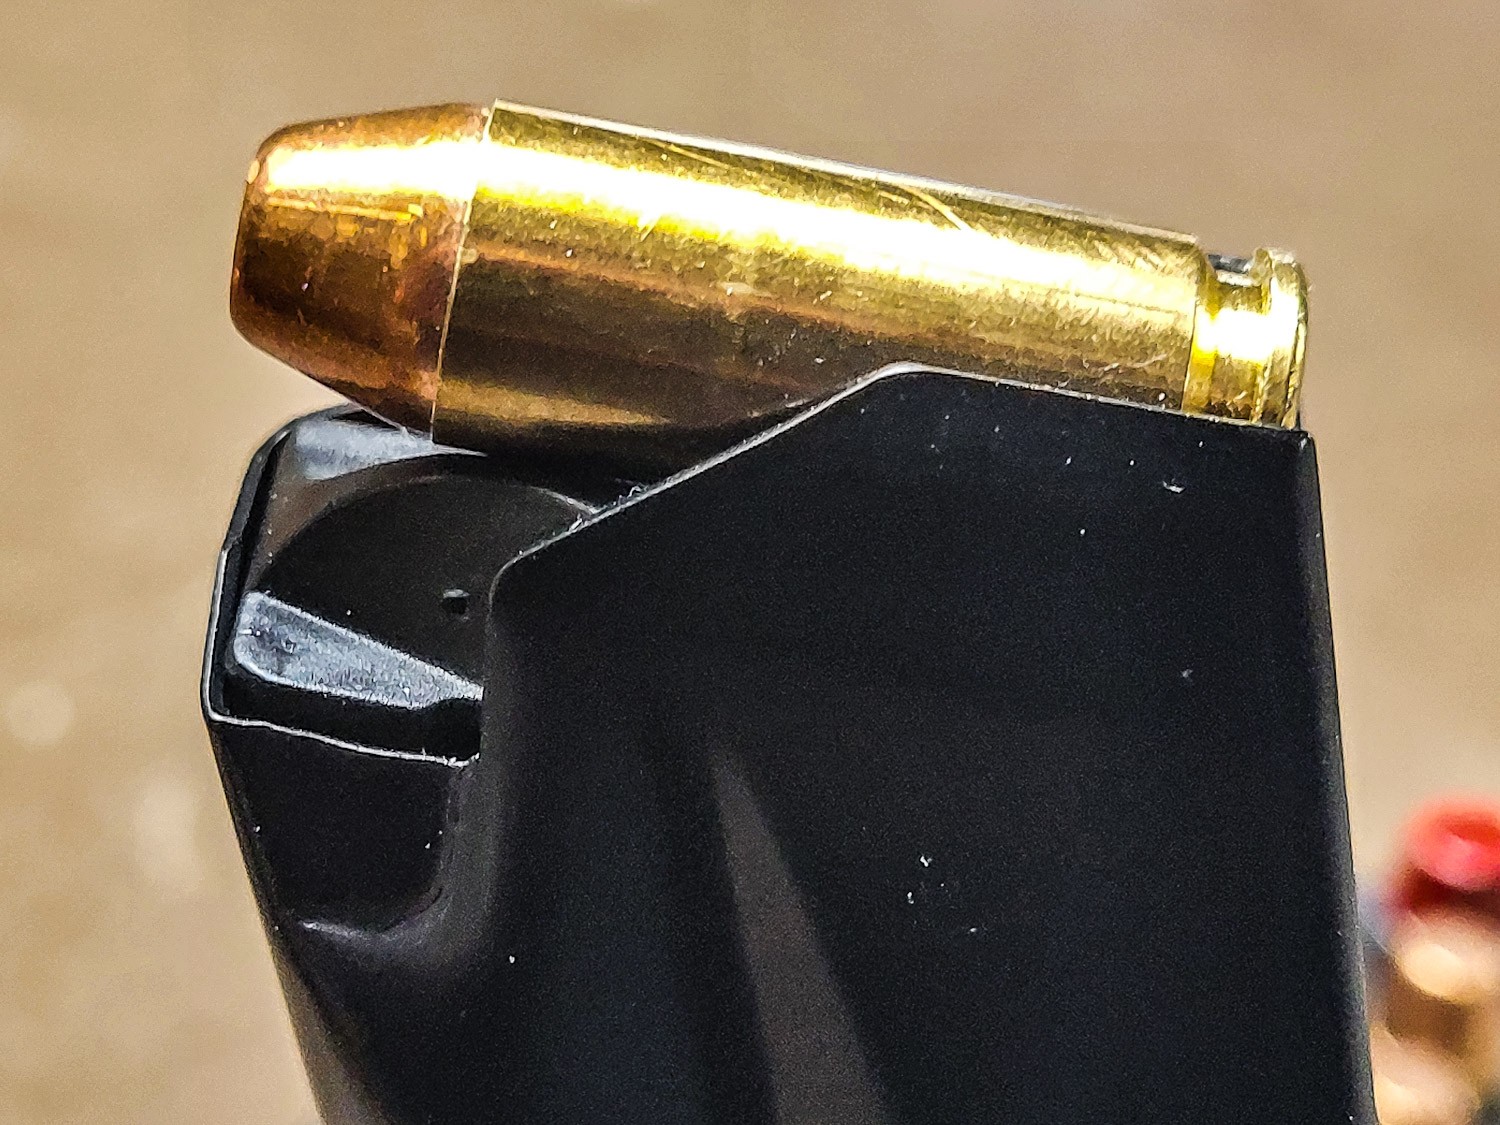
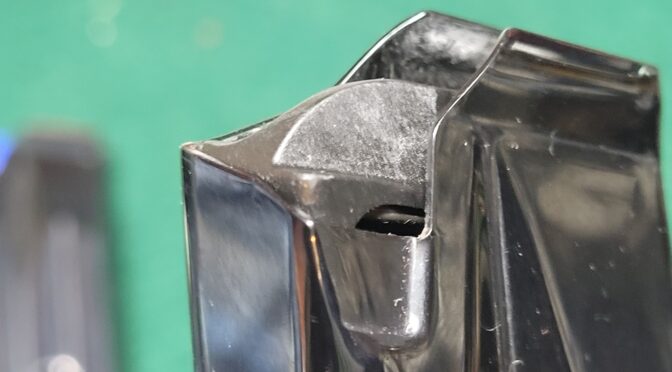
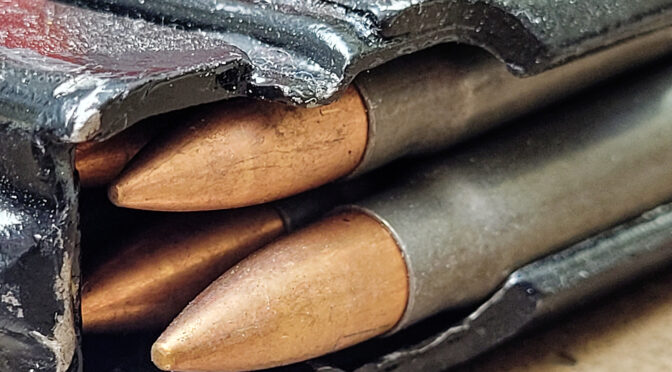
S&B 180gr FMJ round. The black “flaps” over the back of the cartride are known as the “feed lips”. They serve to limit how far the cartridge sticks up, the vertical angle as well as the left-to-right angle. On our magazines, it is the front of the lips, or right right edge of the lips in this photo, that are key for proper positioning of the round.
When I first started the magazines, I was setting the front edge of the feed lips between 0.36 and 0.375. In talking with customers who have bought the mags and were having feeding problems (notably stovepiping) , when the magazine lips were down at the lower end of 0.360″. I’d walk them through setting the gap for their pistol and at the end, I would have them measure the final front lip gap that worked. It was usually between 0.370 and 0.390″ and averaged 0.380″.
June 2024: The nominal front feed lip gap is 0.375 +/- 0.002. 0.380 seems to be the average maximum but the best average gap is that 0.373-0.377 range. Your pistol might vary so look at how the bullet points towards the chamber – either straight in or just slightly below. Some tinkering will help you figure out what is best for your pistol and the types of ammo you are shooting.
Here is a photo with labels.
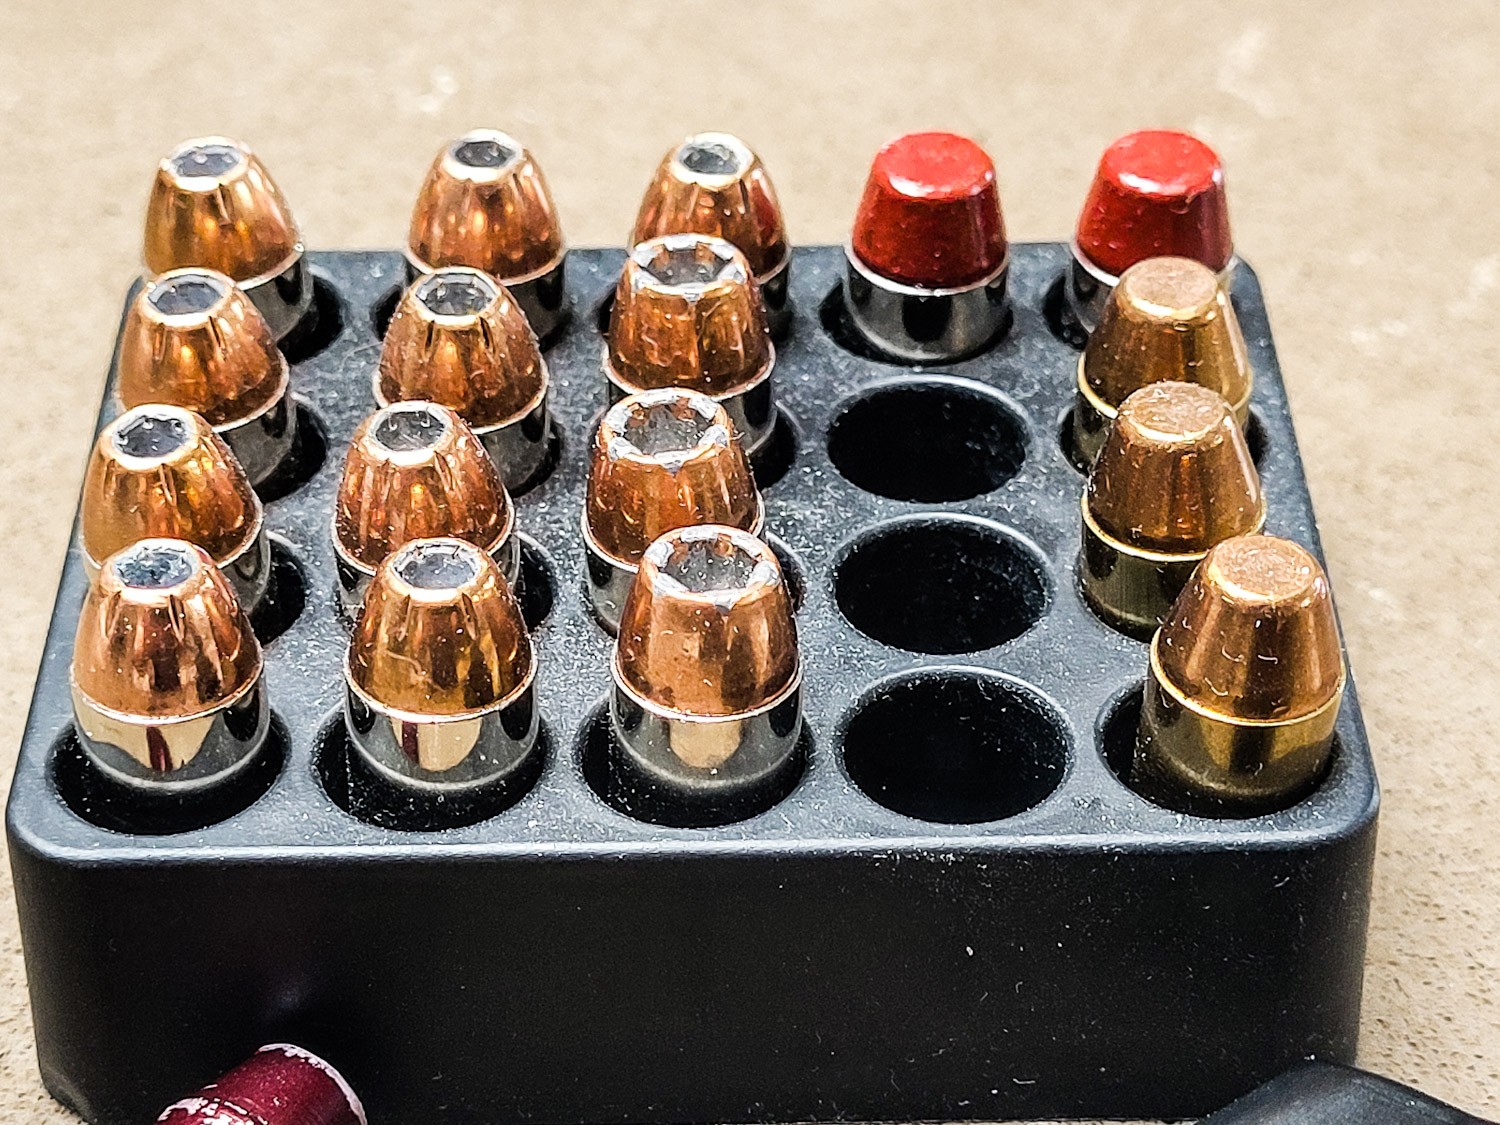
There are a lot of different 10mm cartrdiges on the market. Look at the different bullet shapes – the different angles can all affect reliable feeding which is one of many reasons why you may find one pistol likes one ammo and can cycle it all day long but not another.
Adjusting the Feed Lips Isn’t Hard
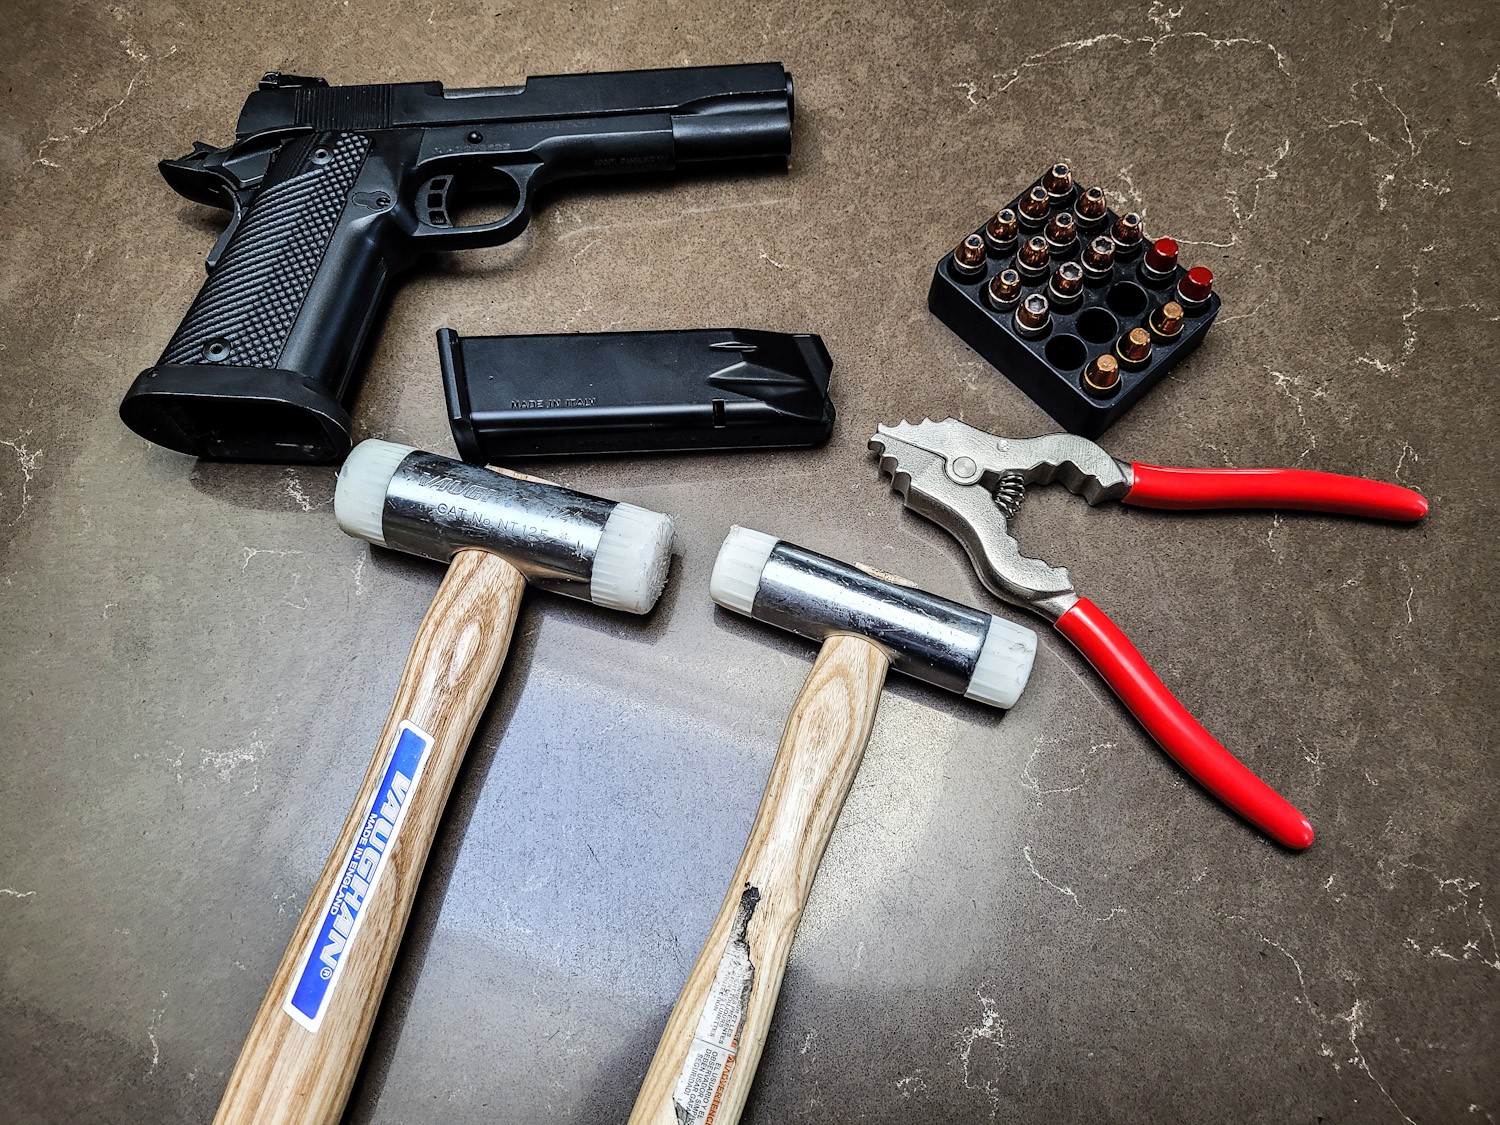
I’d recommend the following tools for the adjustments:
1/2-3/4 pound non-marring mallet – or even both. A lighter one for fine adjustments and a heavier one for coarse adjustments. It doesn’t take much to bend the lips. (May 2024 Update: I started using sheet metal hammers maybe a year and a half ago and find that they work great. The force of the strike bends the metal very nicely and doesn’t hurt the finish so while the photos all say use a non marring mallet – I would tell you to get some basic light sheet metal / body work hammers. Cheap ones break down quickly as the face of the hammer is weak so read reviews and get a good one. You just need a decent flat face and not a lot of weight – look at Martin, Fairmount, Performance Tool, etc.)
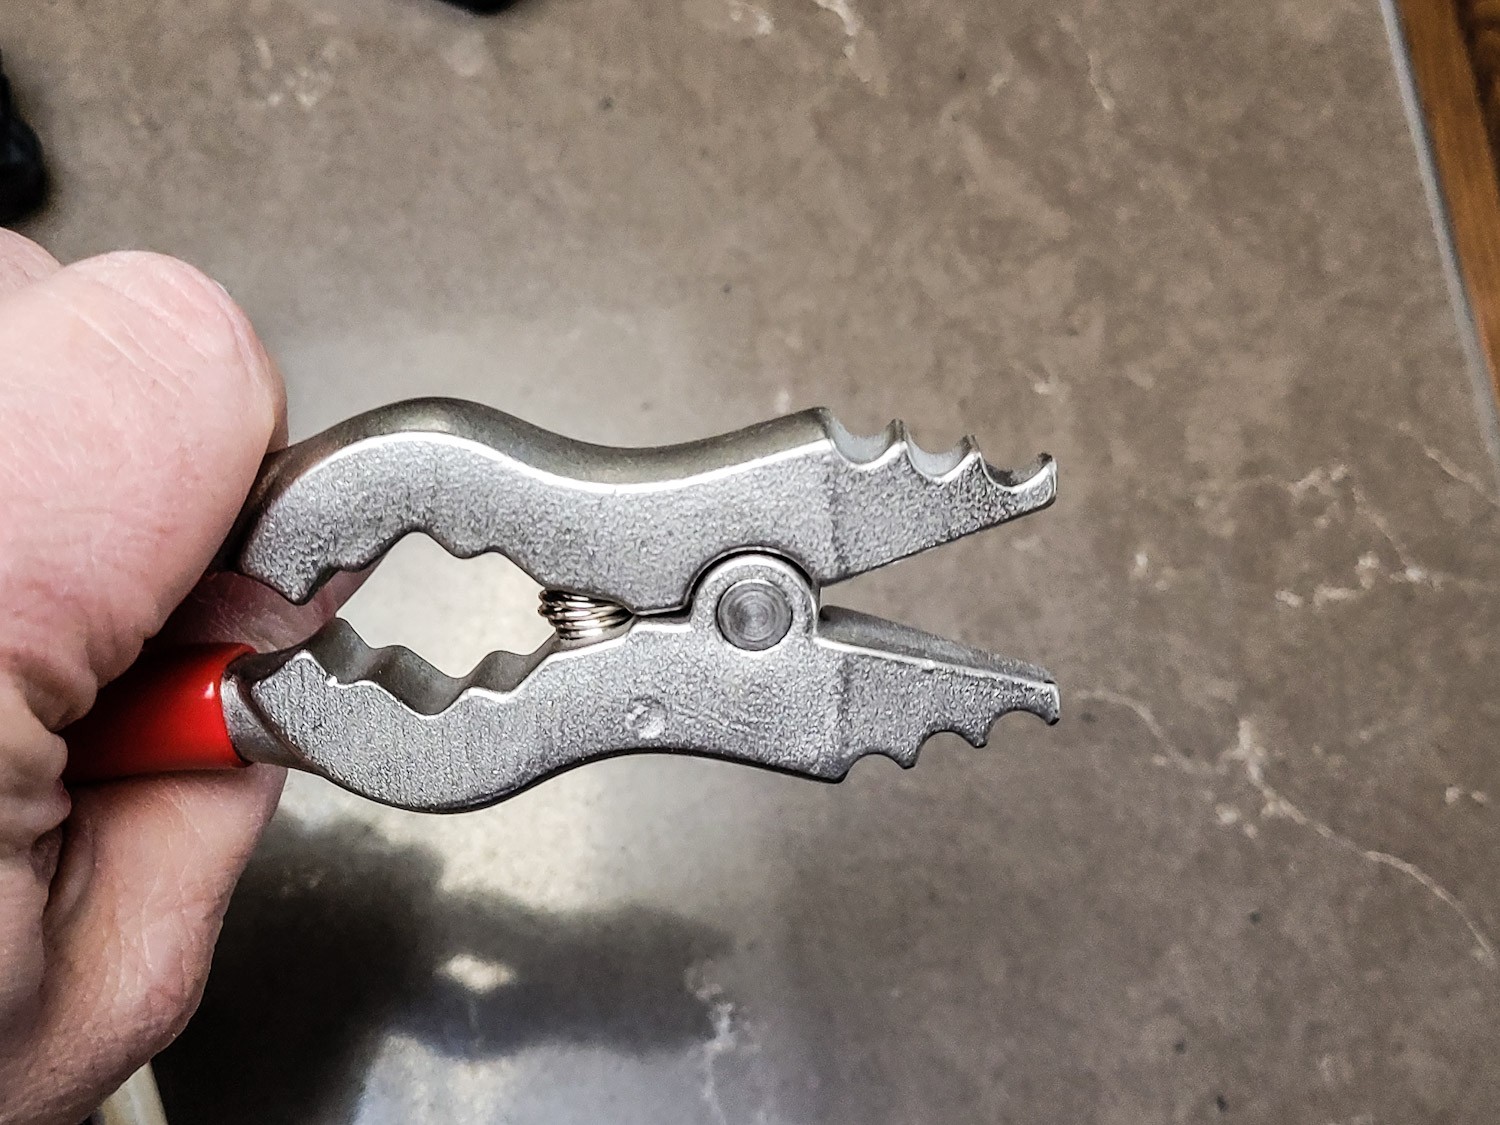
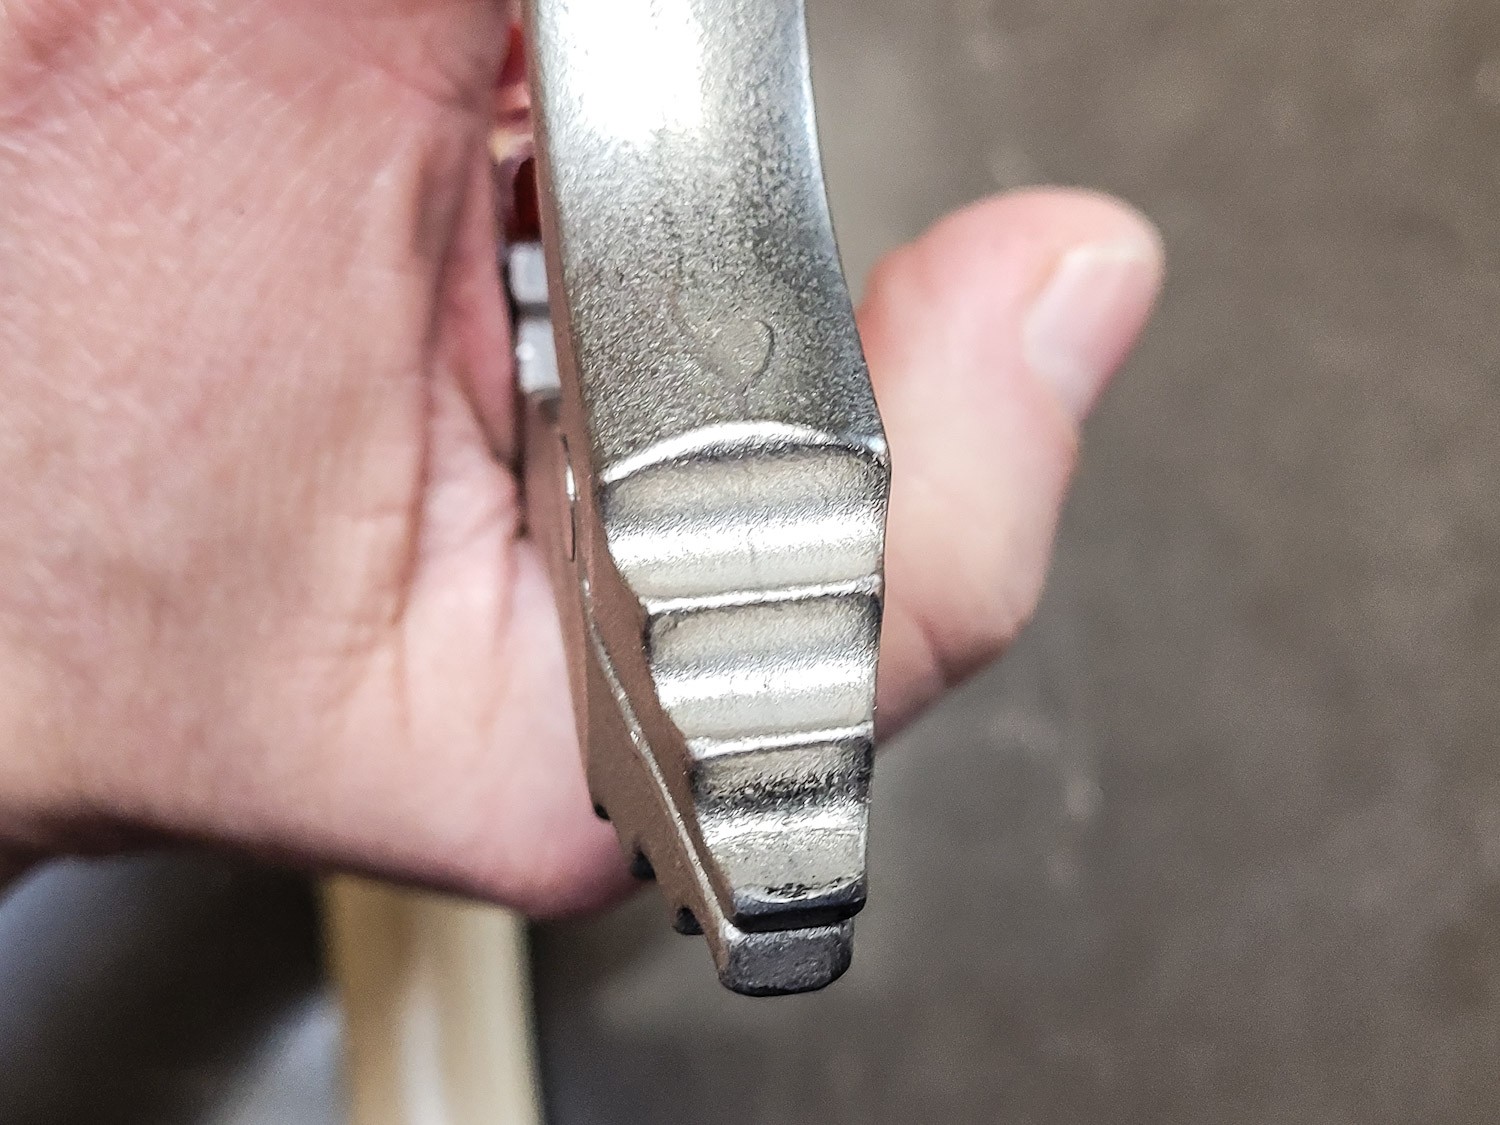
A pair of snap ring or malleable chandalier pliers that can spread the lips open. I highly recommend the Westinghouse 70099 pliers specifically because they have nice wide jaws that really help you make solid contact with the lips. Other brands have narrower jaws, probably to lower costs, that work but want to roll over on you while you are adjusting.
A pair of straight plastic jawed pliers come in hand if you need to tweak the lips left or right. I like the Beadsmith Parallel Pliers with nylon jaws for this work.
A vise with non-marring jaws or some means to hold the mag without crushing or excessive scratching
Use Zoom Snap Caps to test cycling vs live ammo. In general, snap caps or action proving rounds are a good idea to avoid misfires. There’s also a second reason – the recoil springs in the RIA pistols are robust and if the bullet from a live round or dummy round (a bullet loaded into a case that does not have powder or a primer) smacks hard into something, it will get pushed back further and further into the case plus they deform easily. All of my testing is done with solid aluminum snap caps now. I use A-Zoom 10mm Snap Caps for both my 10mm and .40 S&W mags. I’ve had positive feedback from owners of .40 S&W pistols so I know they work for both. Note I do NOT use A-Zoom snap caps for 9mm as the bullet shape does not remotely reflect common 115gr FMJ ammo at all.
From left to right bottom row: Vaughan 3/4 pound NT-125 mallet, Vaughan 1/2 pound NT-100 mallet and Westinghouse 7009900 lighting fixture chain pliers. The Vaughan mallets hold up great – the plastic is both pretty solid and robust so tapping in the feed lips goes very smoothly.
The Westinghouse pliers make opening the feed lips wider a very easy job. You could also use snap ring pliers but they will not distribute the pressure the same or be as easy to use.
The Westinghouse pliers have wide jaws – meaning left to right in the photo above. I’ve bought a number of chain pliers and the cheaper ones do not have as wide of jaws and have a tendency to want to roll when you are applying pressure. They work – but take a bit more control on your part.
Procedure to follow
Ensure your pistol is unloaded and no ammo is immediately nearby that might get accidentally loaded during testing.
Okay, let’s walk through the steps:
Checking Cartridge Alignment
Lock the slide open
Put a snap cap in the magazine
Insert the magazine into the pistol
From different angles, look at where the catridge is pointing in the chamber. Imagine a line from the center of the bullet going straight forward – where is it hitting? You will want to make small adjustments and test over and over until you get that bullet pointing into the center of the chamber (no, it does not need to be perfect).
The front edge of the feed lips are adjusted such that the cartridge is aiming into the middle of the chamber vertically and horiztontally.
Adjusting The Vertical Angle
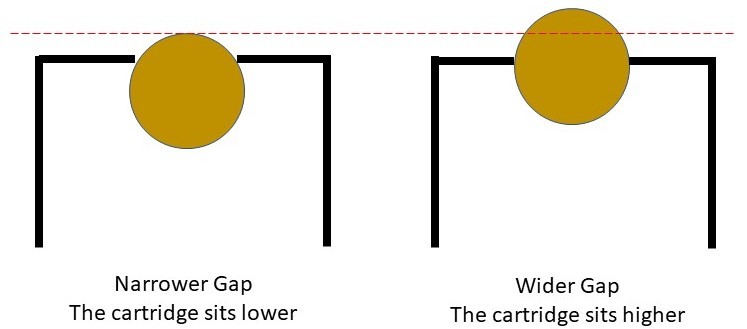
On most mags, including our’s, the angle the bullet sits at is adjusted by changing the gap of the front mag lips. The back can’t be adjusted because it will buckle or crack given the right angle bend to the back. What happens is that by opening the front of the mag lips, the front of cartridge sits higher (meaning it is a steeper angle). Correspondingly, by narrowing the front of the mag lips, the cartridge can’t rise up as far and the bullet sits lower.
The circle representing a cartridge is the same size in both figures. By making the gap wider on the right, the circle rises up higher before it contacts the black feed lips.
The angle is often the biggest problem. If the bullet isn’t angled enough, it gets stripped from the magazine by the slide and will either slam straight into the feed ramp and stop or it will hit, shoot up at a 45 degree angle jamming the pistol open – this is known as “stovepiping”. In both of these cases, you would want to open the lips up until there is proper feeding.
There is such a thing as the lips being too wide and hitting the top of the chamber or literally falling out. The feed lips need to be narrower than the case diameter of 0.421″ for sure otherwise the case will literally fall right through the lips.
I set the lips at 0.375 +/- 0.002 and you will need to see what works best for your pistol and the type(s) of ammo you are shooting. You may find you need a couple of mags at one gap for the type of HP ammo you are shooting and a couple of mags for FMJ. Personally, my pistols run all of my S&B, Buffalo Bore and Underwood ammo with that 0.373-0.377 range.
To open the front of the lips, use the chain pliers shown above on the front of the feed lips. It doesn’t take much pressure to open (or close) the feed lips so you will need to get the “feel” for how much to squeeze.
To close the front of the lips, tap the left feed lip in and then the right feed lip in equal amounts using the mallet. If you aren’t careful then you are liable to have the bullet pointing too far left or right even though the gap is the same.
Note, it doesn’t take much force with the mallet to move the lips. If you go crazy and crush the lips such that the gap dips below 0.33″, you may find that the throat of the magazine bent and the follower will not longer be able to pass. You don’t want this to happen so make small adjustments, measure and test over and over.
Adjusting the Horizontal Angle
You have a few ways to adjust the left to right horizontal angle. The first is to tap the lips in the direction you need. You can hit in the outside edge of the lip to close it or the right side to open it. I don’t use this because I find it takes too long.
I like to use parallel plastic jawed pliers that fit right inside the lip and let me easily adjust the angle with a good deal of control.
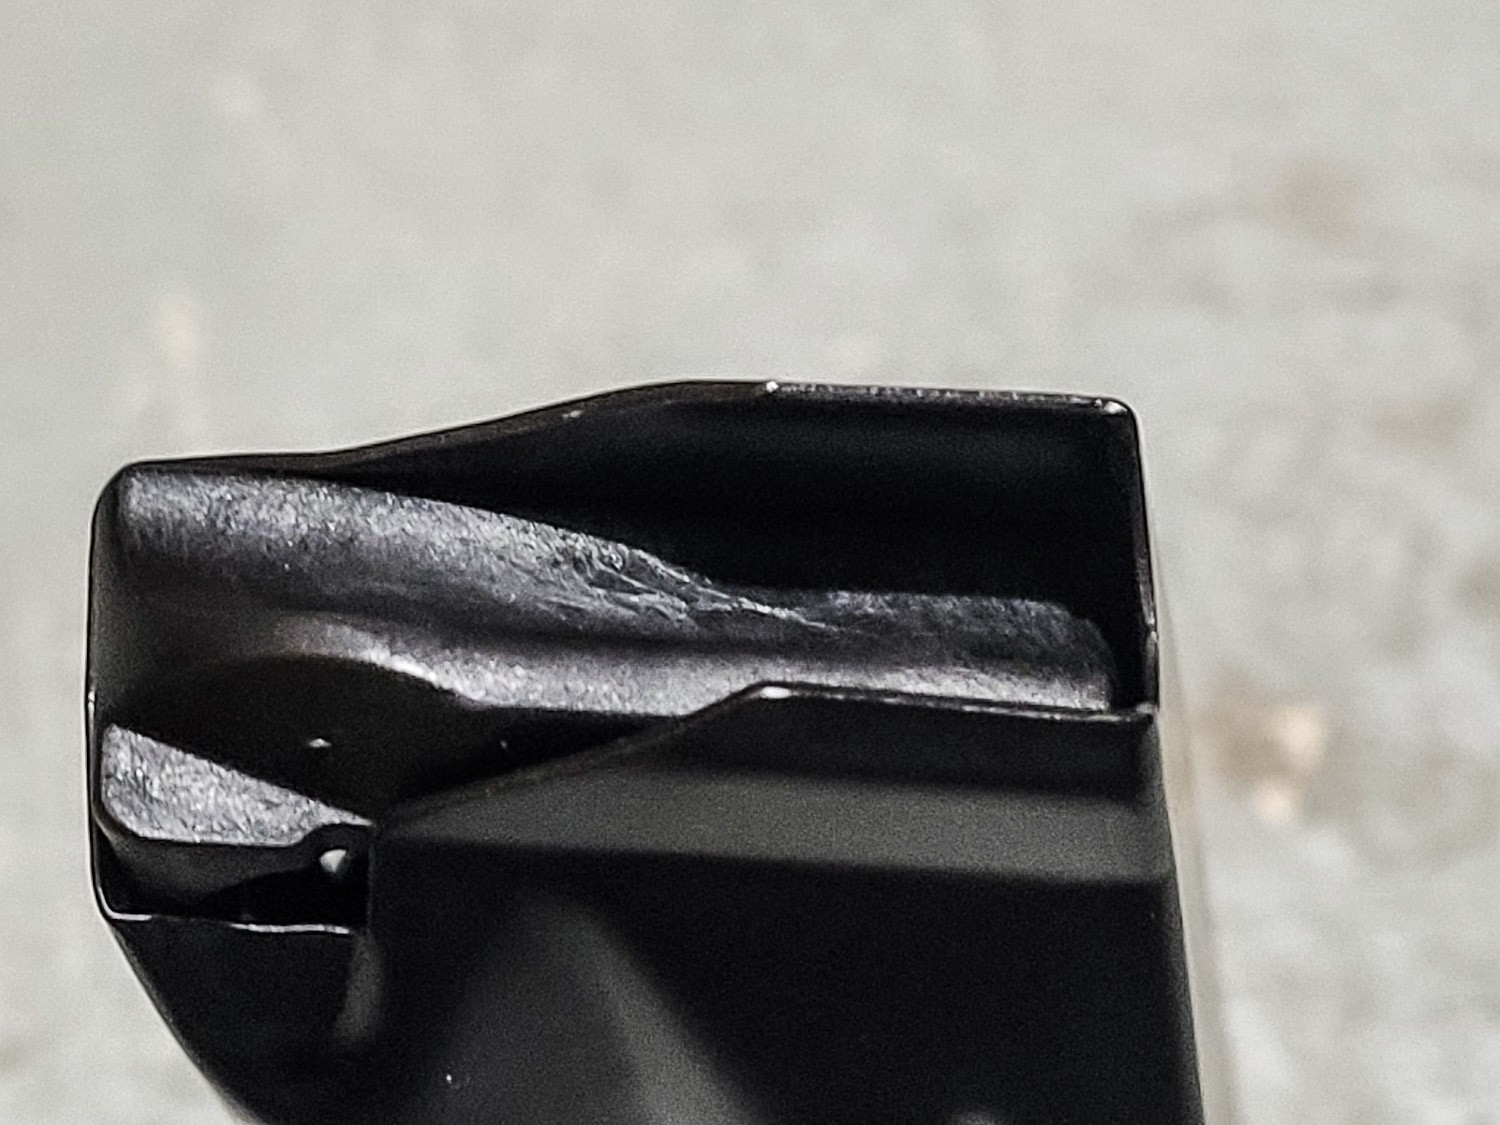
Here’s another look at the lips without a cartridge present.
Here’s a magazine with a 180 grain FMJ round by S&B loaded.
It really helps to number your magazines so you can keep track of feed lip gaps, which ones are having problems, etc.
Summary
Each pistol can vary slightly so each magazine may need different feed lip gaps. Going forward, the feed lip gap on our 10mm and .40 S&W magazines will vary between 0.370 and 0.380″. This gives you a starting point but you may find a bit of final tweaking of the feed lips beneficial.
If you are reading this and are not using our magazines, your feed lip gap may differ.
Note, I have to buy all of my parts – nothing here was paid for by sponsors, etc. I do make a small amount if you click on an ad and buy something but that is it. You’re getting my real opinion on stuff.
Firearms box magazines all work the same – a spring is pushing against a follower that is then pushing the ammunition on the direction needed. The follower is often pushing against at least one wall of the box magazine and dragging. This can be especially bad with steel and aluminum magazines making loading the magazines more tedious and even cause problems with feeding. It begs the question – how can I lubricate the inside of the magazine?
The knee jerk reaction is to put oil in the magazine to lubricate things. I’d recommend against this course of action because the oil will trap dirt and eventually can start causing sticking and jamming.
I’d recommend that you use a dry film lubricant aerosol instead. These sprays on and then the liquid evaporates off and what is left in place are thousands of particles that are slippery. I do not recommend any of the dry films that include a wax – like chain lubes. The wax may trap dirt as well over time.
Don’t spray anything in, or on, a plastic magazine without first checking with the manufacturer. Some plastic magazines are self-lubricating and don’t need any additional lubrication. Also, when spraying any solvent (which is basically what the dry film particles are floating in) on plastic, you risk the plastic getting gummy due to a chemical reaction – this depends on what plastic they useed. My recommendation is really for steel and aluminum magazines.
A Quick Side Note About Teflon
Up until a few years ago, I used to like Teflon, which is what Dupont, the owners of the trademark call it. Teflon was discovered by Chemours, which was a spin off from Dupont, in 1938. If you see someone selling “PTFE” – that is the generic name for Teflon. By saying their product contains “PTFE” then they don’t have to pay royalties to Dupont or risk having Dupont sue them.
So, Teflon and PTFE were selling great and then people started worrying about the safety of people eating Teflon, Teflon in the environment and so on. I’m not hear to weigh in on this but whether it was concerns over marketing, lawsuits or just the pandemic, the Dupont Teflon Aerosol Spray went on hiatus for the longest time.
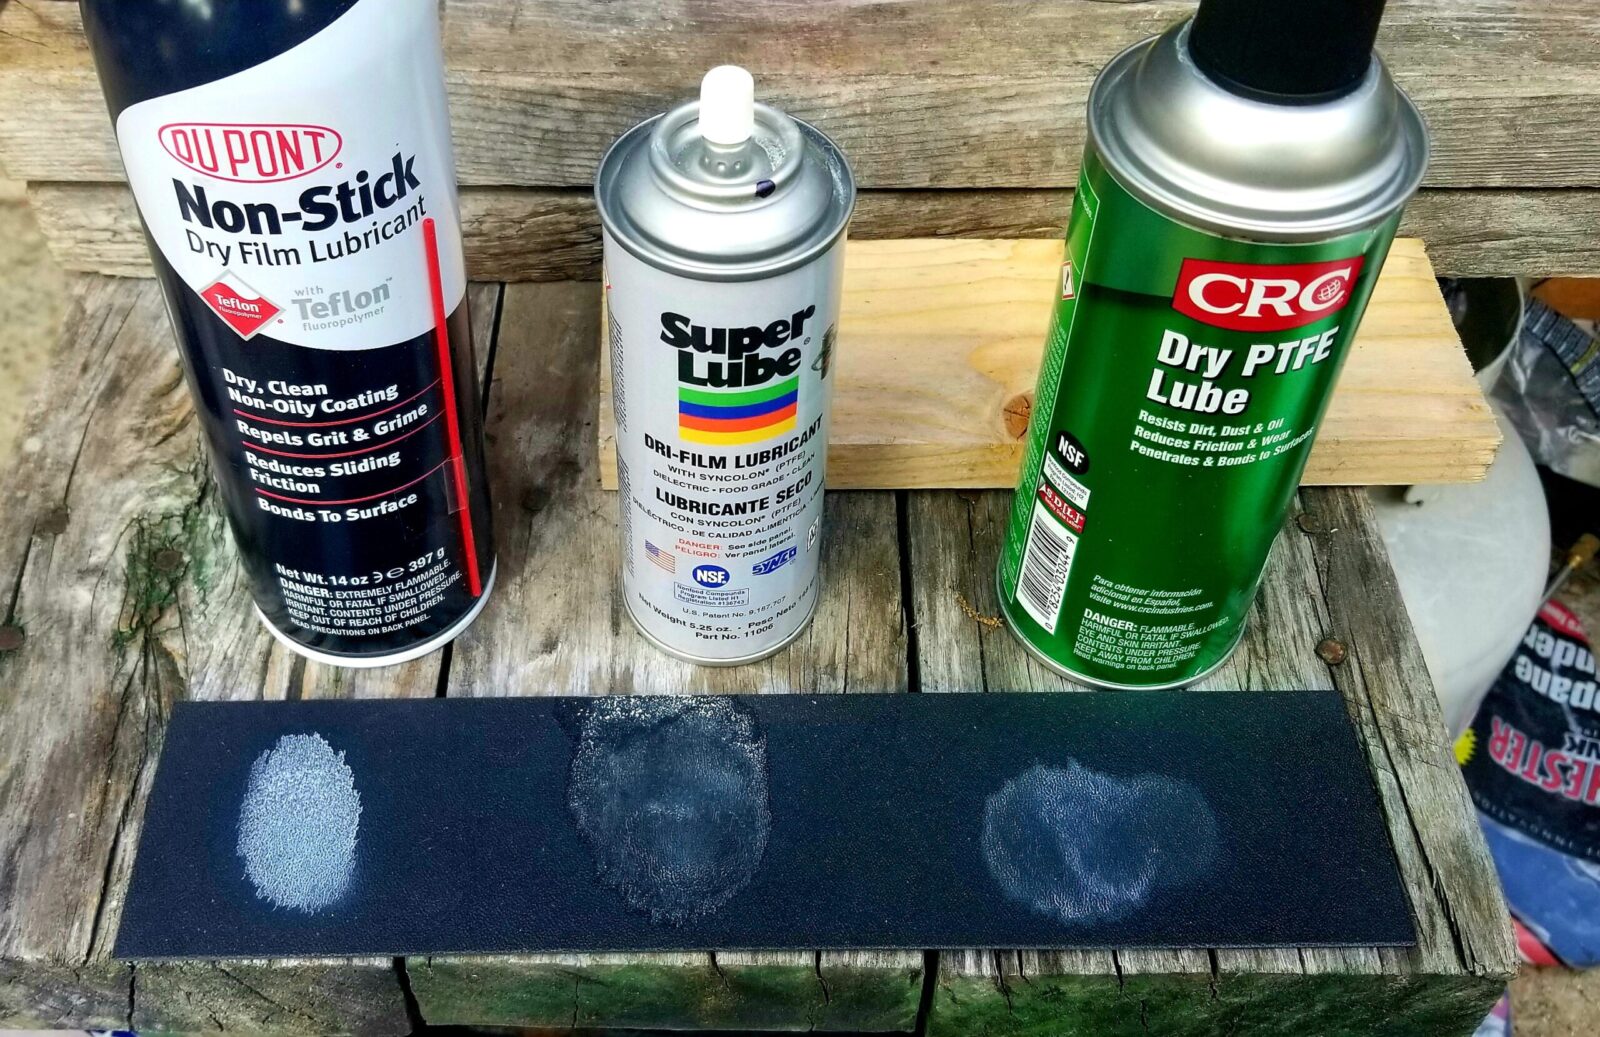
In late 2021, it re-appeared but with a different formulation. The new spray uses a ceramic now and not Teflon. I corresponded with Hank Krause the president and CEO of Finish Line Technologies – the group that actually markets the spray. I was concerned about the change in formulation because the Dupont spray had been excellent before. Want a quick way to test this? First, spray some competing dry films on a black plastic surface and see how some of them actually leave very little residue. Also look at how evenly the distribution is. Not all are the same.
I think this photo says a lot. On the left is the original Dupont spray with Teflon. In the middle is Super Lube’s Dry Film and on the right is CRC’s. This is why I swore by the Dupont dry film for years. The CRC was dry film was going to be my fall back once I ran out of the Dupont Teflon.
Nano-Ceramic Boron
At any rate, Hank told me that they have moved away from Teflon to Nano-ceramic boron nitride particles and I told him my concern that I didn’t know whether to change to a new dry film technology I knew nothing about. Hank told me the new formulation used thier same propretary technology for binding the particles to the surface and the following are benefits of the new ceramic technology over Teflon (I will copy and paste his list verbatim):
Helps extend life of the lubricant, thus delivering longer relubrication intervals
Provides enhanced lubricity
Provides better extreme pressure capabilities
Increases the high temperature operating range of the lubricant
Provides better resistance against chemicals
Helps repel water and moisture more effectively
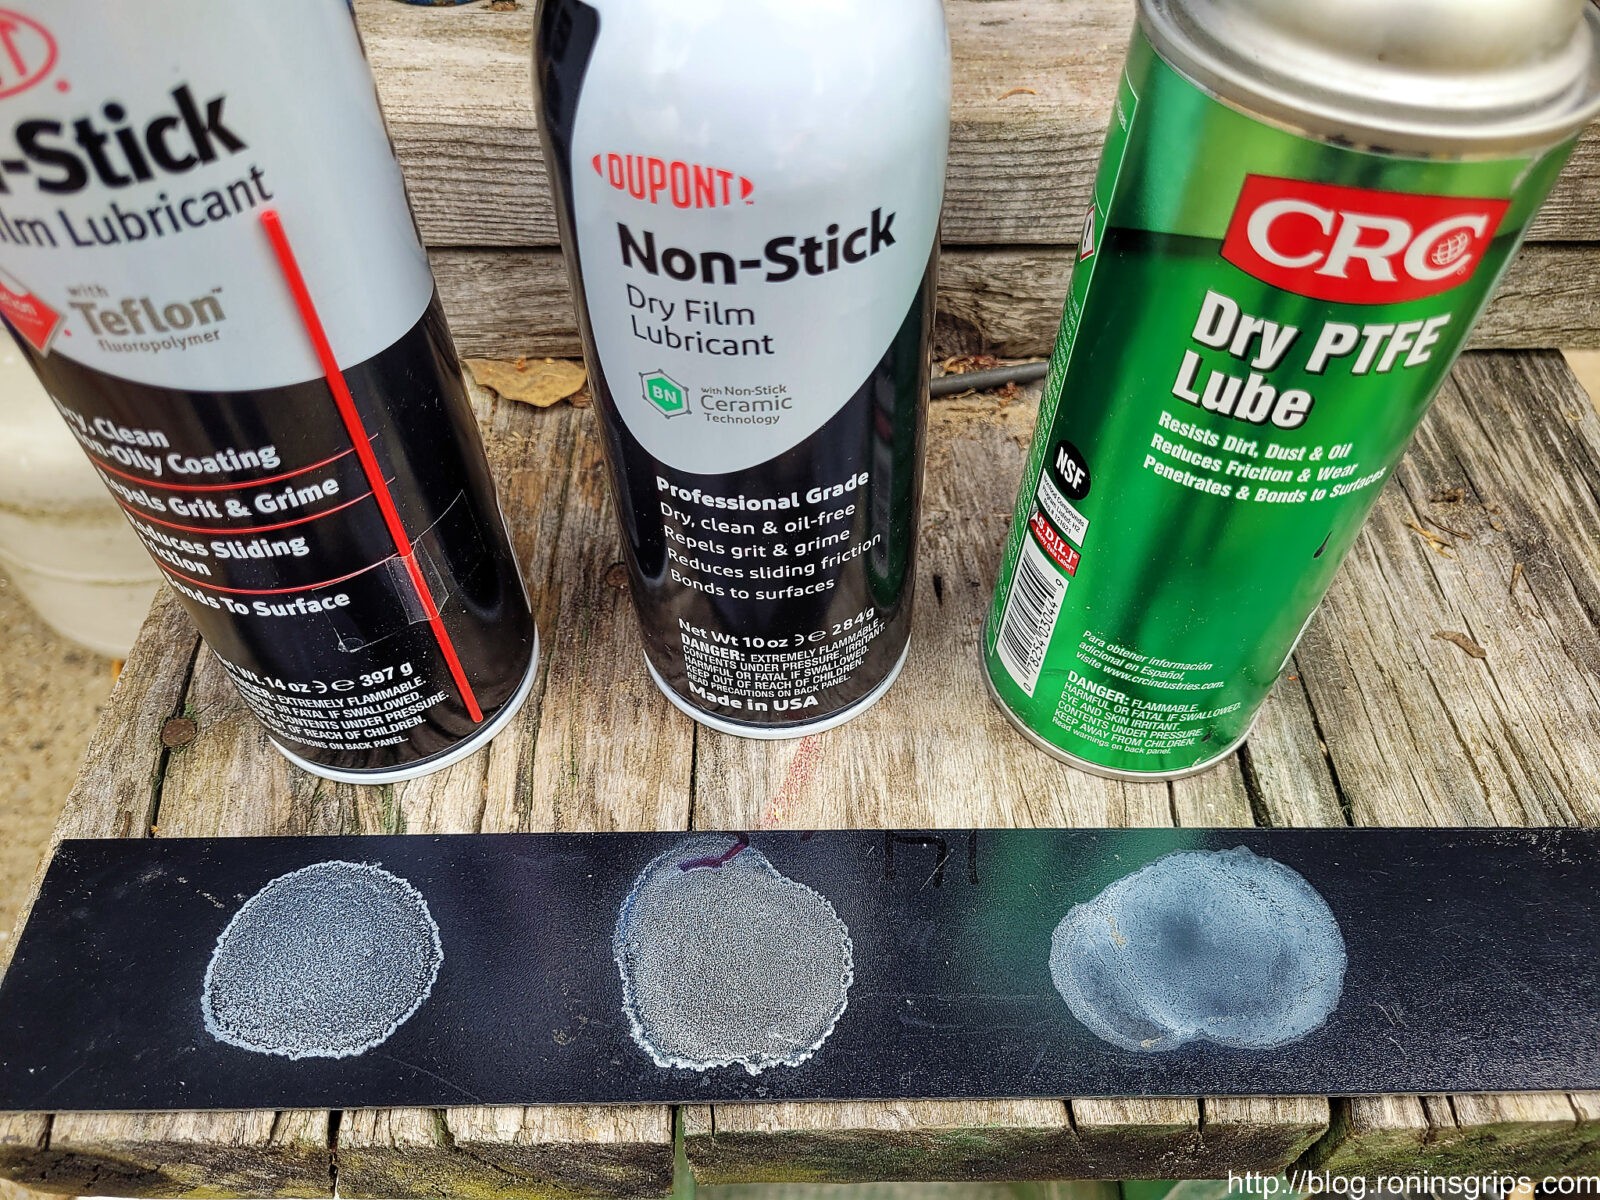
So, based on Hank’s assurances, I ordered in some cans of the spray and started testing them. The residue looked very similar to the Teflon test above – the ceramic dry film residue is also white.
The black strip is the shiny side of a piece of Kydex. I included the cans in the photo. The Dupont sprays put down the thickest coat. Interestingly enough, the CRC left a very fine film. I couldn’t find the SuperLube product – I may have tossed it – I’m not sure.
In terms of lubricity, it does the job just as well and maybe even better than the Teflon. While this may seem subjective, the lubrication seems very good with one solid spray of the ceramic both in the tube of the magazine and on the follower. Any over spray wipes right off with a rag.
With the ceramic spray, feeding rounds by hand into the magazines and unloading all feel very smooth. Bear in mind that this comment is after hundreds of loaind and unloading cycles by your’s truly.
Our new second generation followers for our RIA 9mm magazines are converted from OEM followers with the final step being fine sanding paper. It’s my speculation that the ceramic particles are getting into the tiny grooves of the follower and providing excellent lubrication.
At any rate, I am very happy with the new Dupont Ceramic Dry Film aerosol for use inside firearm magazines and wanted to pass along the word. Going forward, we are using the Dupont product in all of our steel magazines that do not already have an anti-friction coating (AFC).
By the way, I cleaned out a bunch of IMI Galil magazines that I bought and you could tell there was a bunch of friction going on in the mags between the parkerized tubes and followers – the parts hadn’t worn in yet by any means. With the mags disassembled, I sprayed in a heavy coat of the Dupont Ceramic Dry Film in the tubes and sprayed both the followers and springs, let them dry and re-assembled the mags — wow! What an amazing improvement. Click here for the Amazon Listing.
I hope this helps you out.
We make a variety of magazines for the 10mm, .40 S&W and 9mm Rock Island Armory (RIA) FS A2 pistols. Click here to see them.
Note, I have to buy all of my parts – nothing here was paid for by sponsors, etc. I do make a small amount if you click on an ad and buy something but that is it. You’re getting my real opinion on stuff.
Okay, let’s dive into the world of arcane ammunition industry acronyms. If you are into pistols at all, I bet you have seem ammo rated, or claimed to be, “+P” or even “+P+” and maybe you’ve encountered pistols that claim to handle the same. What does that really mean? That’s a good question and let’s review the two in the world of pistol calibers.
In the US, there is a standards group for ammunition loads called the Sporting Arms and Ammunition Manufacturers’ Institute (SAMMI). This group was formed in 1926 with the goal of safety and compatibility. Having standards allows gun manufacturers and ammo producers to have a “meeting of the minds” about what is required for a given caliber such as 9x19mm (9mm Luger or “Parabellum” — I’ll just write “9mm going forward). Without a standard, there could be safety issues as a given firearm may be not be able to handle the pressure of a given load and fail (explode). In short, standards allow us to switch between brands of ammo with a degree of safety and consistency.
Notice how I said a degree of consistency – it’s far from perfect and many factors affect whether a given firearm will function reliably and accurately with a given round from a specific manufacturer. For example, I had a .44 Magnum Desert Eagle Mark V way back when. It could shoot just about any ammo but there was this one brand, I don’t recall who, that had an odd looking crimp in the middle of the case. My Desert Eagle absolutely could not extract that stuff. It was a brand name ammo and I am sure it worked fine in revolvers but definitely not for me in my specific pistol. In short, you always want to confirm what ammunition your firearm “likes” and include your various magazines in that testing as well.
+P Means Higher Pressure
What “+P” refers to are standard over-pressure loads and there are actually very few of them. By over-pressure, I mean over standard pressure — +P rounds are loaded to what is called “peak pressure” and since there are a number of factors that affect peak, you can see variations in +P loads.
One consideration take into account is a degree of safety. If we make a broad generalization, if a firearm in reasonably good condition fires one, it should be okay. For example, a 9mm pistol in good shape should be able to handle 9mm+P. With that said, I need to make a safety comment:
+P Safety Considerations 1. Only use +P ammo in a firearm that the manufacturer states can handle it either in the manual or on their website. 2. If a firearm manufacturer tells you not to then don’t. 3. Never run +P ammo in an older firearm 4. Due to the higher operating pressure, bear in mind that you will likely accelerate the wear and tear on your firearm by using this ammo. 5. It’s going to recoil more and may adversely affect recoil-sensitive people or take you longer to get back on target after firing.
Why have +P?
The standardized +P rounds are all common defensive rounds – 9mm Luger, .38 Special, .38 Super Auto, and .45 ACP. The intent was to produce higher velocities and energy levels as a result of boosting the pressure. The following table was generated from the 2015 specification for pistol calibers Z299.3:
All things being equal, by boosting the pressure, then the velocity and energy of the round go up. In short, a +P pressure load hits harder with the same bullet. That’s something that you often want in a defensive caliber but there are limits lest you have over penetration, etc. It’s also important to always point out that energy levels are not a substitute for accurate shot placement.
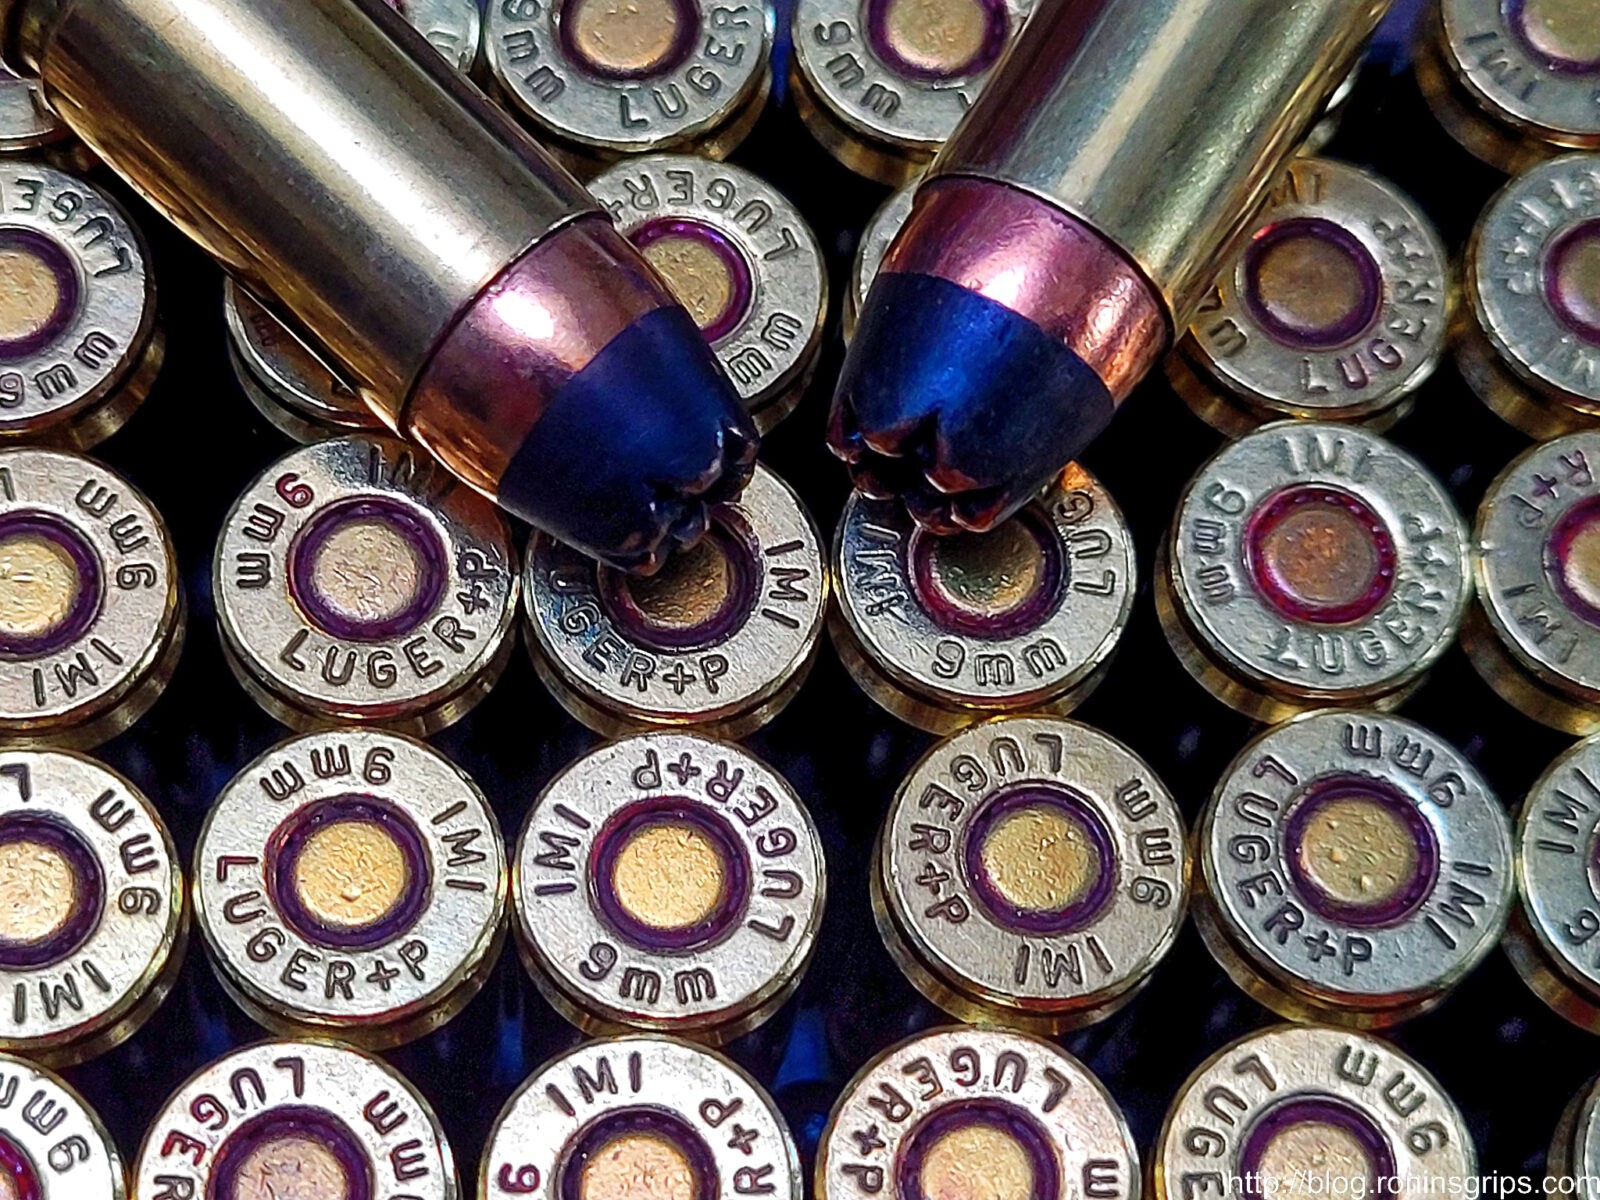
These are IMI 124 grain die cut 9mm +P hollow points. IMI dipped the tips in black paint so they are easy to identify as +P – not all firms do that. What ammo makers should do, and IMI did, was to ensure the headstamp on the case clearly identifies the load as +P.
What if a caliber is not on the list?
If a caliber is not listed above, then you have entered the world of marketing where “+P” sells more ammo. If a manufacturer decides to use some internal rule of thumb to increase the base pressure then that is totally of their own accord. You have no idea what it is and neither do the folks who build pistols chambered for that round. For example, consider .380 ACP +P rounds you sometimes see for sale. My Ruger LCP Max points out in a number of places in the manual not to run +P ammo in their pistol because they can’t guarantee performance or safety since there isn’t a standard for Ruger to build and test against.
Note that groups who make non-standard +P ammo are quick to point out that they stay under what the “proof” loads are that are standards based and are intended to test the safety of a firearm design. Well folks, cumulative stress is cumulative stress – it builds up over time. You go running a real hot round in a real world pistol or pistol caliber carbine with a lot of real world use and it’s impossible to predict the results.
This is why I do load my defensive weapon magazines with 9mm+P but practice at the range with regular range loads. I always verify a combination of firearm, magazine and ammo load before I count on it but then I shoot the lighter stuff for practicing to reduce the wear on my pistols.
By the way, this is also why my Ruger LCP Max only had standard .380 ACP loads in it and no hotrodded ammo.
What about +P+?
Ok, now when we talk about “+P+” rounds we have completely left the SAMMI standard. You only run this ammo if you know it was made for your firearm. You should not run it on a whim without first investigating your firearm and the ammo.
When it comes to +P+ and safety you do need to be careful. When used appropriately, it’s just fine. However, if you are thinking “oh, it’s just a few thousand PSI more – that’s not much”, I want you to remember something – a little bit doesn’t matter until it does.
Am I anti +P+? Actually, no, I’m not. I used to encounter +P+ for 9mm sub guns with heavier mechanisms that could handle the higher pressures and heavier recoil. If you run it in a regular 9mm pistol, well, it’s hard to say what it will do – at the very least it is going to prematurely wear the pistol’s components even more than +P will.
In short, only use +P+ ammo if you know what you are doing and have done your research about using it in your particular weapon. Certainly don’t just pick it because your think it will hit harder.
Conclusion
+P and +P+ ammo have their uses and you need to make sure you read up on what your firearm, be it a pistol or pistol caliber carbine, can handle a given load before you use it. Also, one last comment – be sure to thoroughly test a combination of firearm, magazine and round before you rely on it.
Note, I have to buy all of my parts – nothing here was paid for by sponsors, etc. I do make a small amount if you click on an ad and buy something but that is it. You’re getting my real opinion on stuff.
The short answer is “no, not across the board” but the longer answer bears some explaining. First off the main small arms ammunition used will be former Warsaw Pact calibers such as 7.62×39, 5.45×39, 7.62×25 Tokarev and so forth. The point is that the calibers in the scope of concern is already small – certainly not across all small arm calibers found in the US.
Russia has a large stockpile of Russian made ammunition and plenty of production facilities to make more. Given that the US government decided not to allow new imports of Russian ammunition some time ago and importers finding other sources, this should not be a big factor in ammunition supplies.
Ukraine’s only small arms ammunition manufacturer is the Luhansk cartridge plant. Luhansk did make ammunition for the export and Century Arms sold it under the “Red Army Standard” brand but Century sources from Romania, Bosnia & Herzegovina and Poland also.
It is possible that there will be more demand for calibers the Ukrainian military uses and both the government of Ukraine and their supports will turn to the International arms market for supplies should this become a protracted conflict. That might impact supplies and prices if demand increases but supply does not.
In the US, there already is some panic buying as people who are scared/nervous decide to buy more ammo but this is on the tail end of several years of significantly high volumes of firearm and ammunition purchases already – any surge in demand will likely be short lived. Same goes with any temporary price hikes.
In closing, I really doubt there will shortages of small arms ammunition in the United States with the only caveat being that if the conflict drags on and demand in the arms market increases, there might be some price increases but only time will tell.
Note, I have to buy all of my parts – nothing here was paid for by sponsors, etc. I do make a small amount if you click on an ad and buy something but that is it. You’re getting my real opinion on stuff.
Note, if you haven’t checked lately, ammunition is returning to the online vendors and prices have come down dramatically from their pandemic high. For example, a 1000 rounds of bulk packed CCI 9mm Luger was over $1,000 at one point and now it is available from $299-339 sometimes with free shipping.
My mother-in-law is getting older and so are my wife and I. Let me tell you, It was a lot easier pushing around a wheelchair 10+ years ago compared to today. With this in mind, my wife and been watching for a good deal on one of those little electric mobility scooters. Finally, one day she saw one posted on Facebook at a local thrift store so we want and took a look.
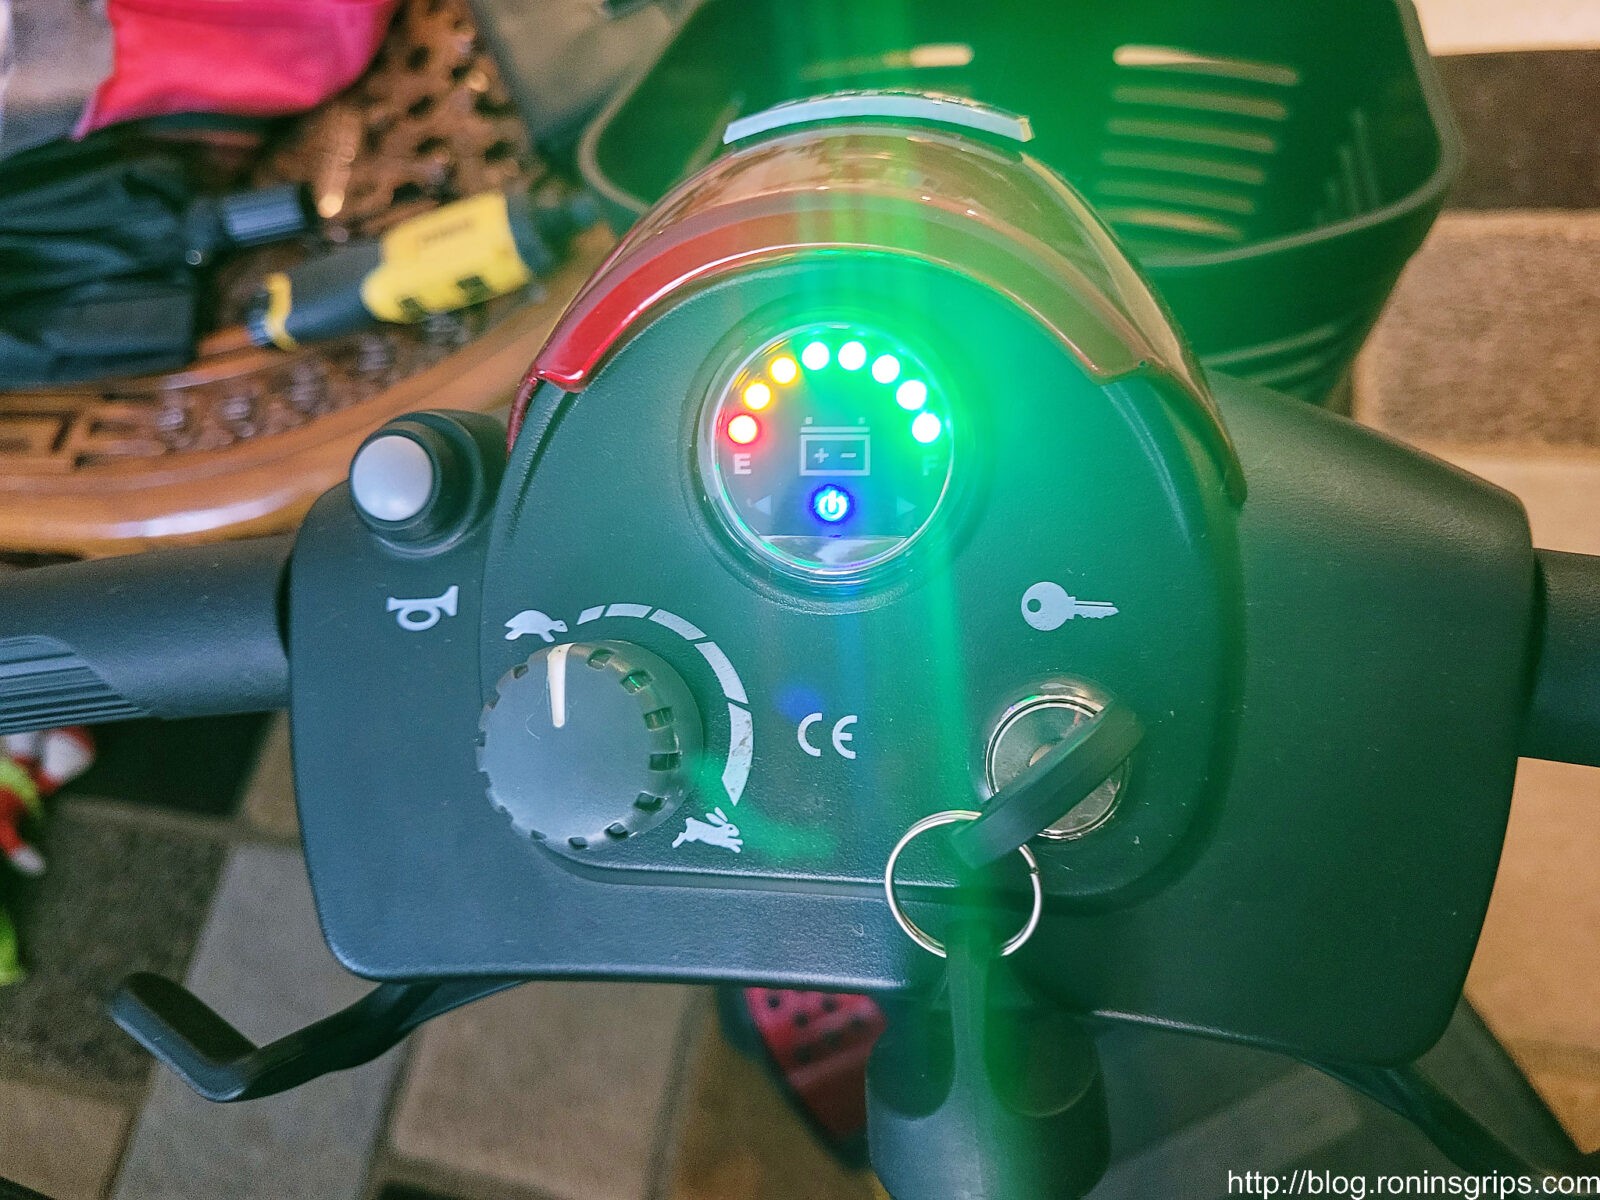
The owner of the store buys abandoned storage units and a Pride Mobility Elite Traveller scooter was in one of them. It looked to be in great shape but it wouldn’t run. He could turn the on/off switch and a light would come on the little dashboard but that was it. He said he tried charging it for an hour but nothing happened and thought it was the batteries — this is a great example of someone giving you their diagnoses and then that affects what you do.
At any rate, it came with the original Pride Mobility charger so I figured it was probably the batteries and did a quick search on them and replacements ranged in price from $51-89/pair. With this in mind, we settled on a price of $250 and brought the scooter home.
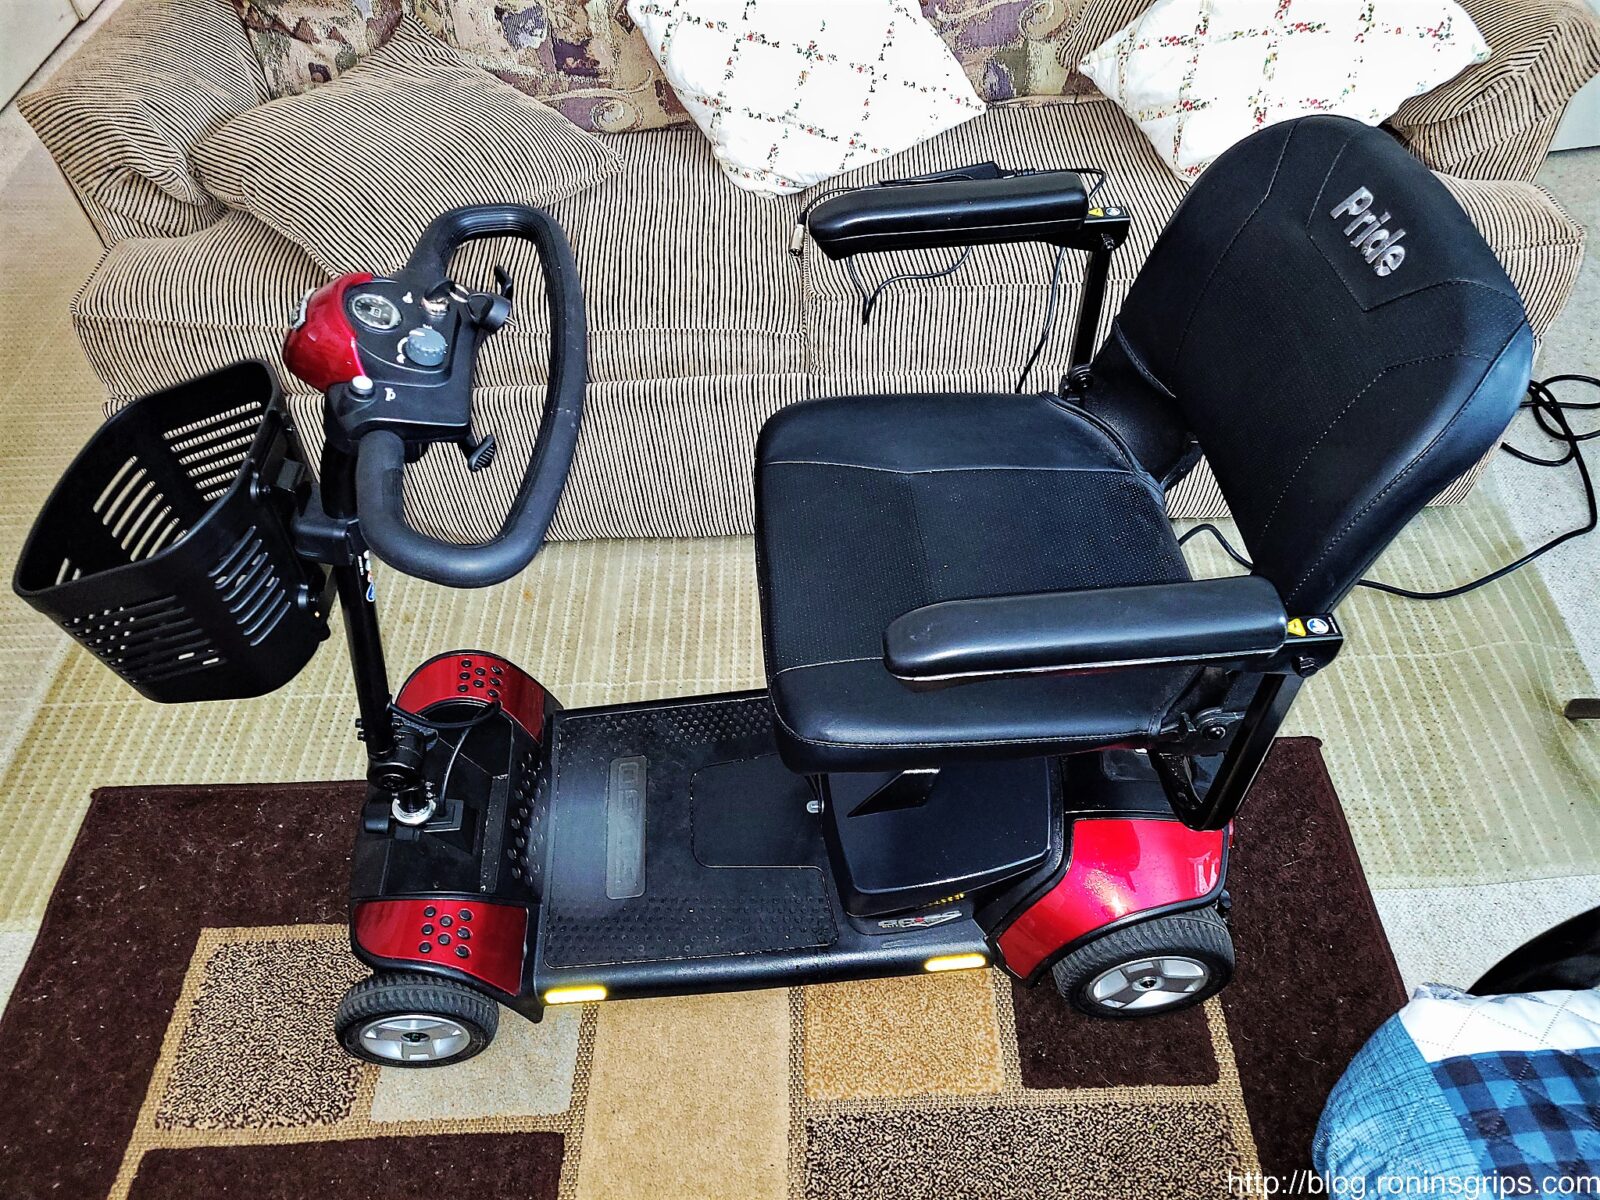
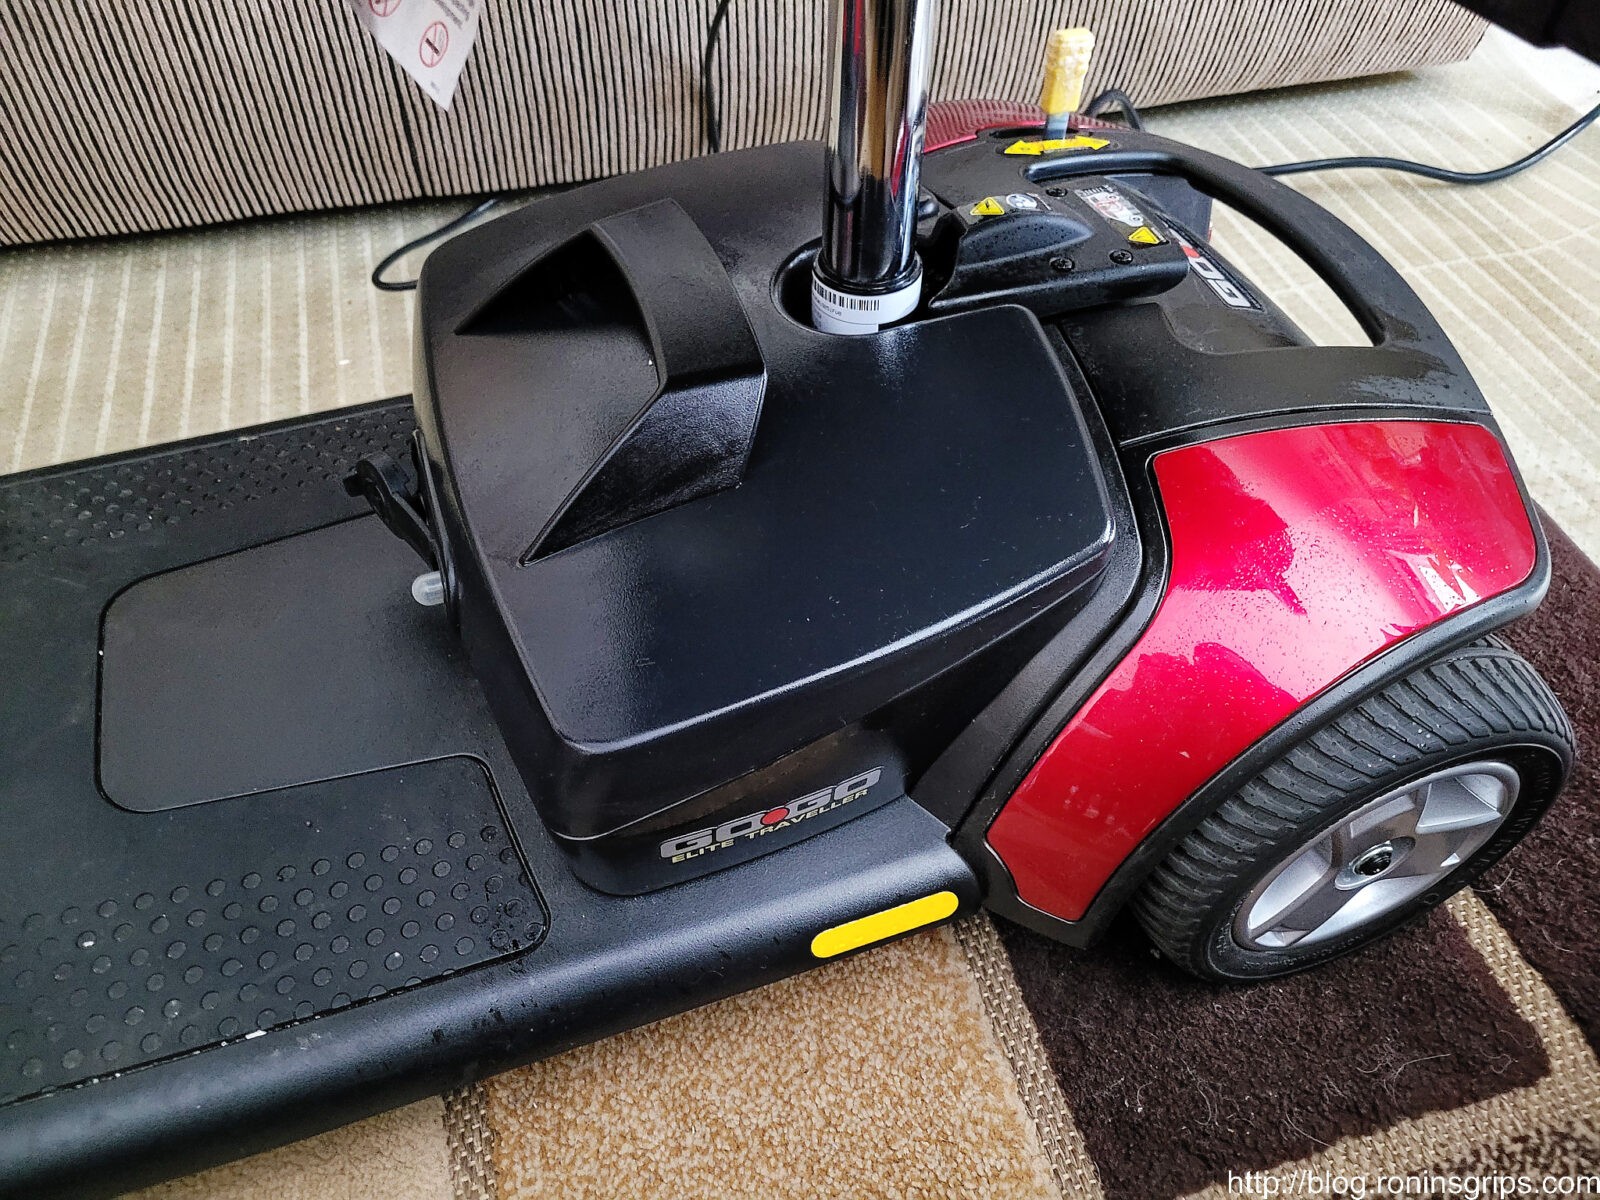
Here’s the GoGo Elite Traveller scooter. It’s remarkably well made. I was impressed the minute I started critically looking at the fit, finish and serviceability.
Note: Pride Mobility puts all of their manuals online. I really appreciate it when firms do this. You can get the brochure, owner’s manual, specification sheet and more on their website – click here. Just FYI: They do not provide a repair manual or technical guide.
A few days went buy before I could work on it. The first thing I did was plug the charger into the wall, then the cord direct to the power pack, turned on the switch and the little red power light came on. The charger’s second indicator LED was supposed to turn yellow that it was charging. It did not – it stayed off. Also, the cooling fan never started. Hmmm…. interesting but I had run into problems before with smart chargers not starting if batteries were dead.
Now, this mistaken assumption cost me some time but I learned a lot in the process that I’ll share.
Removing And Opening The Battery Compartment
Based on what I saw, the engineering and build quality of the scooter was excellent. I’ve seen people driving them around but never had the need to look at one up close or take one apart. Everything is built heavy duty with reliability and resiliency in mind not to mention they put fuses all over the place to protect the electronics. With that overview comment done, my focus was on getting to the batteries because I thought that was the problem.
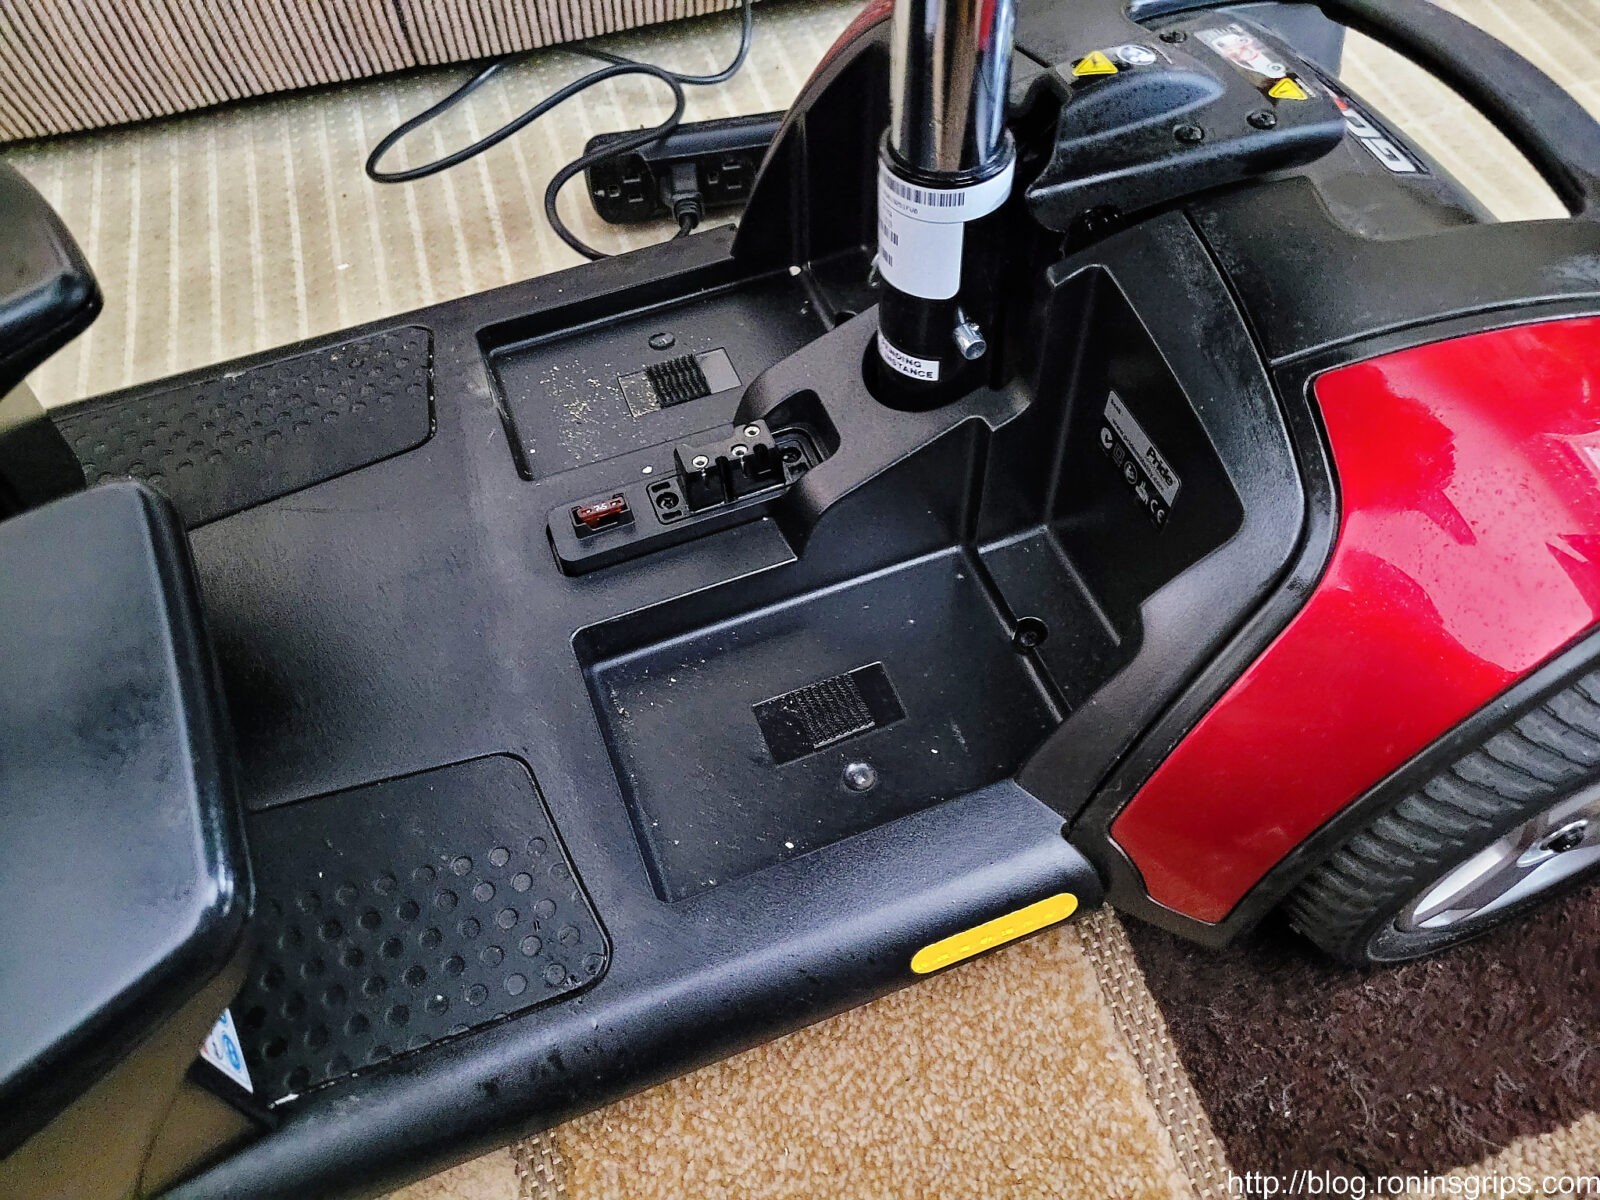
The battery pack is the black plastic “box” with a molded handle directly underneath the seat on the floorboard of the scooter and is held in place by a tab of 3M Dual-Lock fasteners on each side. Dual-Lock is a stronger than traditional velcro and it does a great job of holding the battery compartment in place both for the sake of safety as well as to prevent rattling.
To remove the battery box, lift straight up – there aren’t any bolts or clasps – just a combination of weight, the way the pieces fit together and the Dual-Loc. If you try to lift at an angle, you’ll be surprised how it will not want to budge – straight up is what you need to do.
That black molded plastic object with the handle in front of the silver set mast is the battery compartment. It comes off the scooter by lifting straight up. FYI – the white label on the seat mast has the date of manufacture.
Between the way the compartment sits into the molded floorboard and the 3M Dual-Loc tabs, the unit is very secure.
The battery compartment is very well made and to disassemble it, you need to remove six philips head machine screws. This is just an example of where I thought the design and execution was excellent – these are threaded machine screws that go into brass female inserts on the other side – they didn’t just go cheap using some self tapping screw. You flip the compartment upside down and remove the screws. The batteries are held securely in place by Dual-Lock also.
The 12 Volt Batteries Themselves
I’m going to step you through some details on the batteries but I did not change them yet. I’d recommend you read this whole post because your “problem” may or may not be the batteries.
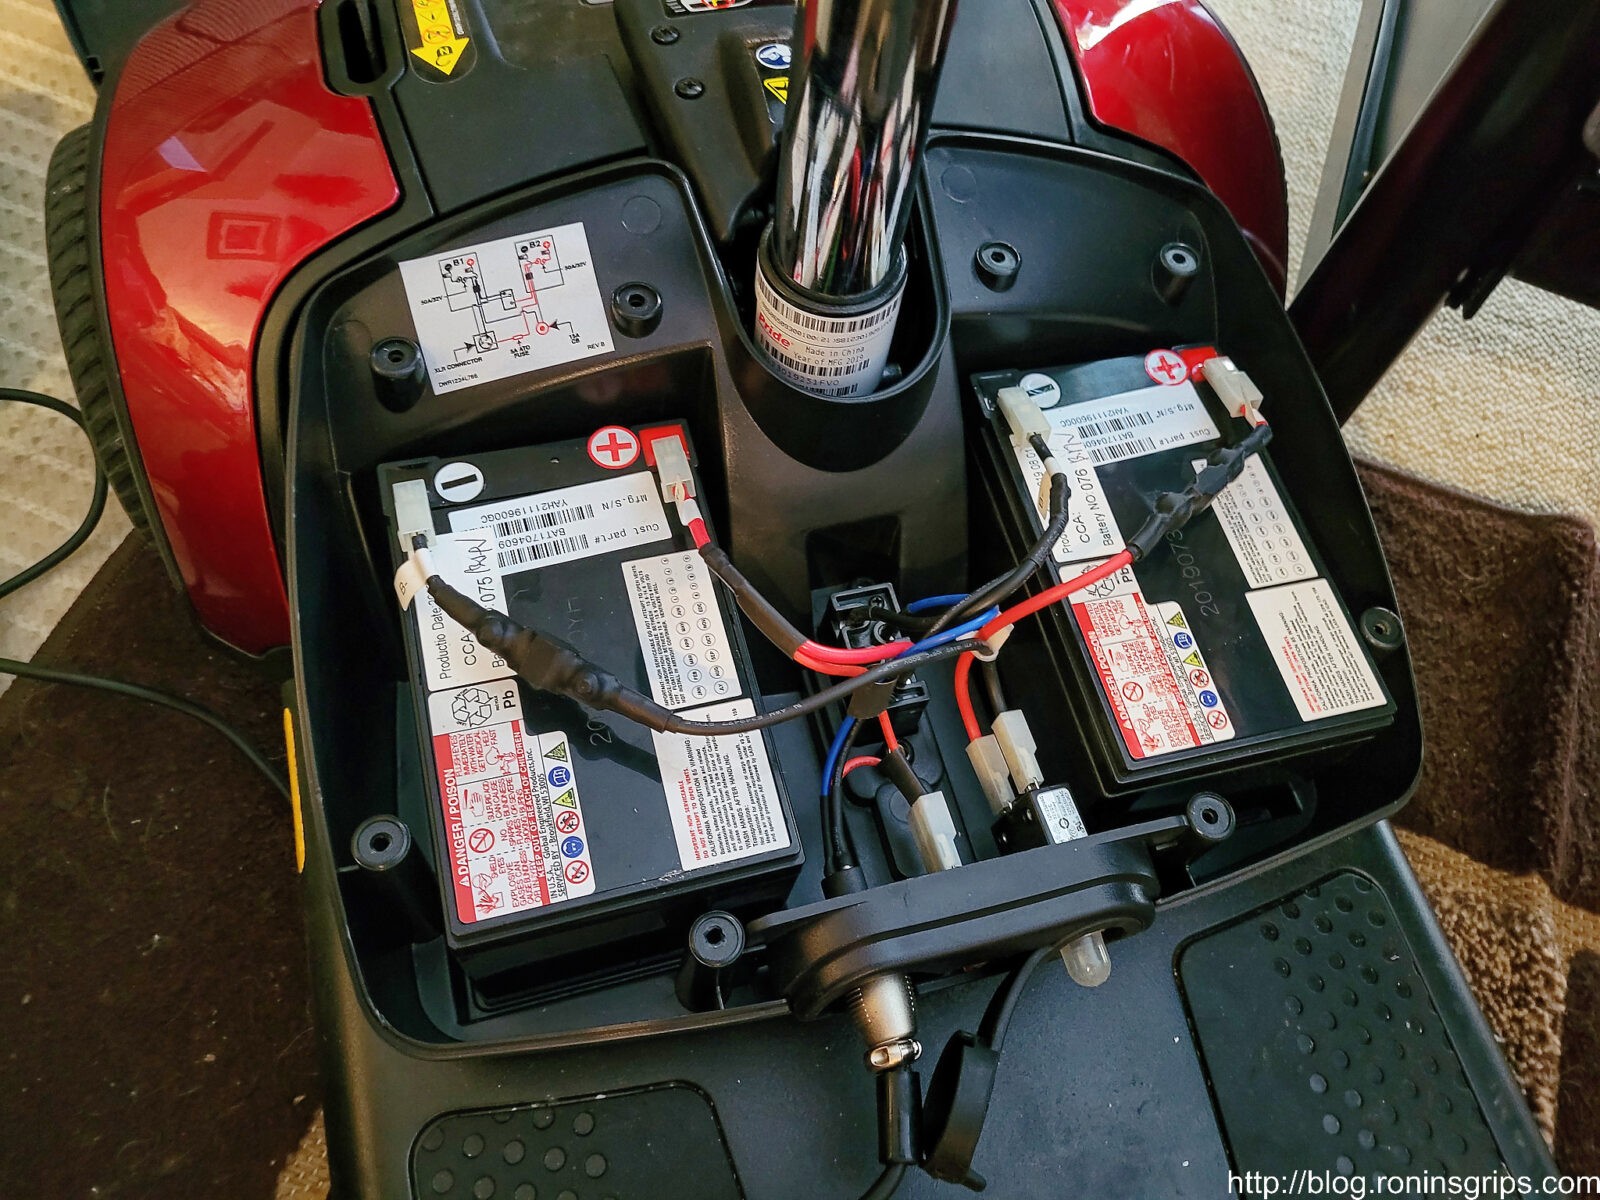
Our scooter is powered by two 12 volt 14 amp hour batteries wired in series to provide 24 volts. In the compartment is a wiring diagram and everything is done very nicely to avoid confusion – red wires to positive tabs on the battery and black wires to the negative tabs on the battery.
These are the 12 volt 12 amp hour batteries that are hooked up in series to provide 24 volts. If you look to the right of the silver plug, the two red wires white plastic connector is on a fuse assembly that protects the charger circuit that you will want to check and the far right side has a circuit breaker that is also worth checking. Pride says they can go up to 6.7 miles depending on factors such as the weight of the passenger and cargo. Note how everything is so well labeled, the wiring is very neatly done and they even provide a handy wiring diagram above the left battery. Whomever designed and then built this cared about what they were doing.
For those of you unfamiliar with direct current (DC) batteries, these two batteries are hooked up in series to produce 24 volts. This is done by connecting the negative terminal of one battery to the positive of the other and then the opposite as well. In the scooter, this is done at the wiring block in the middle. You don’t need to worry – just note the wires when you take it out (a photo helps) and do a battery at a time – black wire to negative and red wire to positive,
Note, there are at least two sizes of batteries used – their standard battery pack is rated for 6 miles and uses two 12 amp hour (Ah) batteries. There is a 9.7 mile bigger 18 amp hour (Ah) battery and it correspondingly uses a bigger cabinet so if you decide you are going to replace your batteries, confirm what is in your battery compartment first. You can change cabinets – or even buy entire battery packs ready to go. From what I have seen, the cheapest bet is to just buy the batteries and swap them out in your existing compartment. I also see batteries with other capacities like 15Ah and over 20Ah, I’d recommend you confirm that their physical sizes will fit whatever battery compartment you have.
The batteries hold the charge that runs the scooter but they must be recharged by using a battery charger. I should have checked this first but didn’t because I assumed it was the batteries but let me step you through what I did.
I put a voltmeter on each of the 12 volt batteries and they both read just a tad over 4 volts. So, not absolutely dead but boy were they spent. In doing automotive work, I would have expected the smart charger to sense the voltage and begin. Okay, something was fishy and it wasn’t adding up. It was time to look at the charger again.
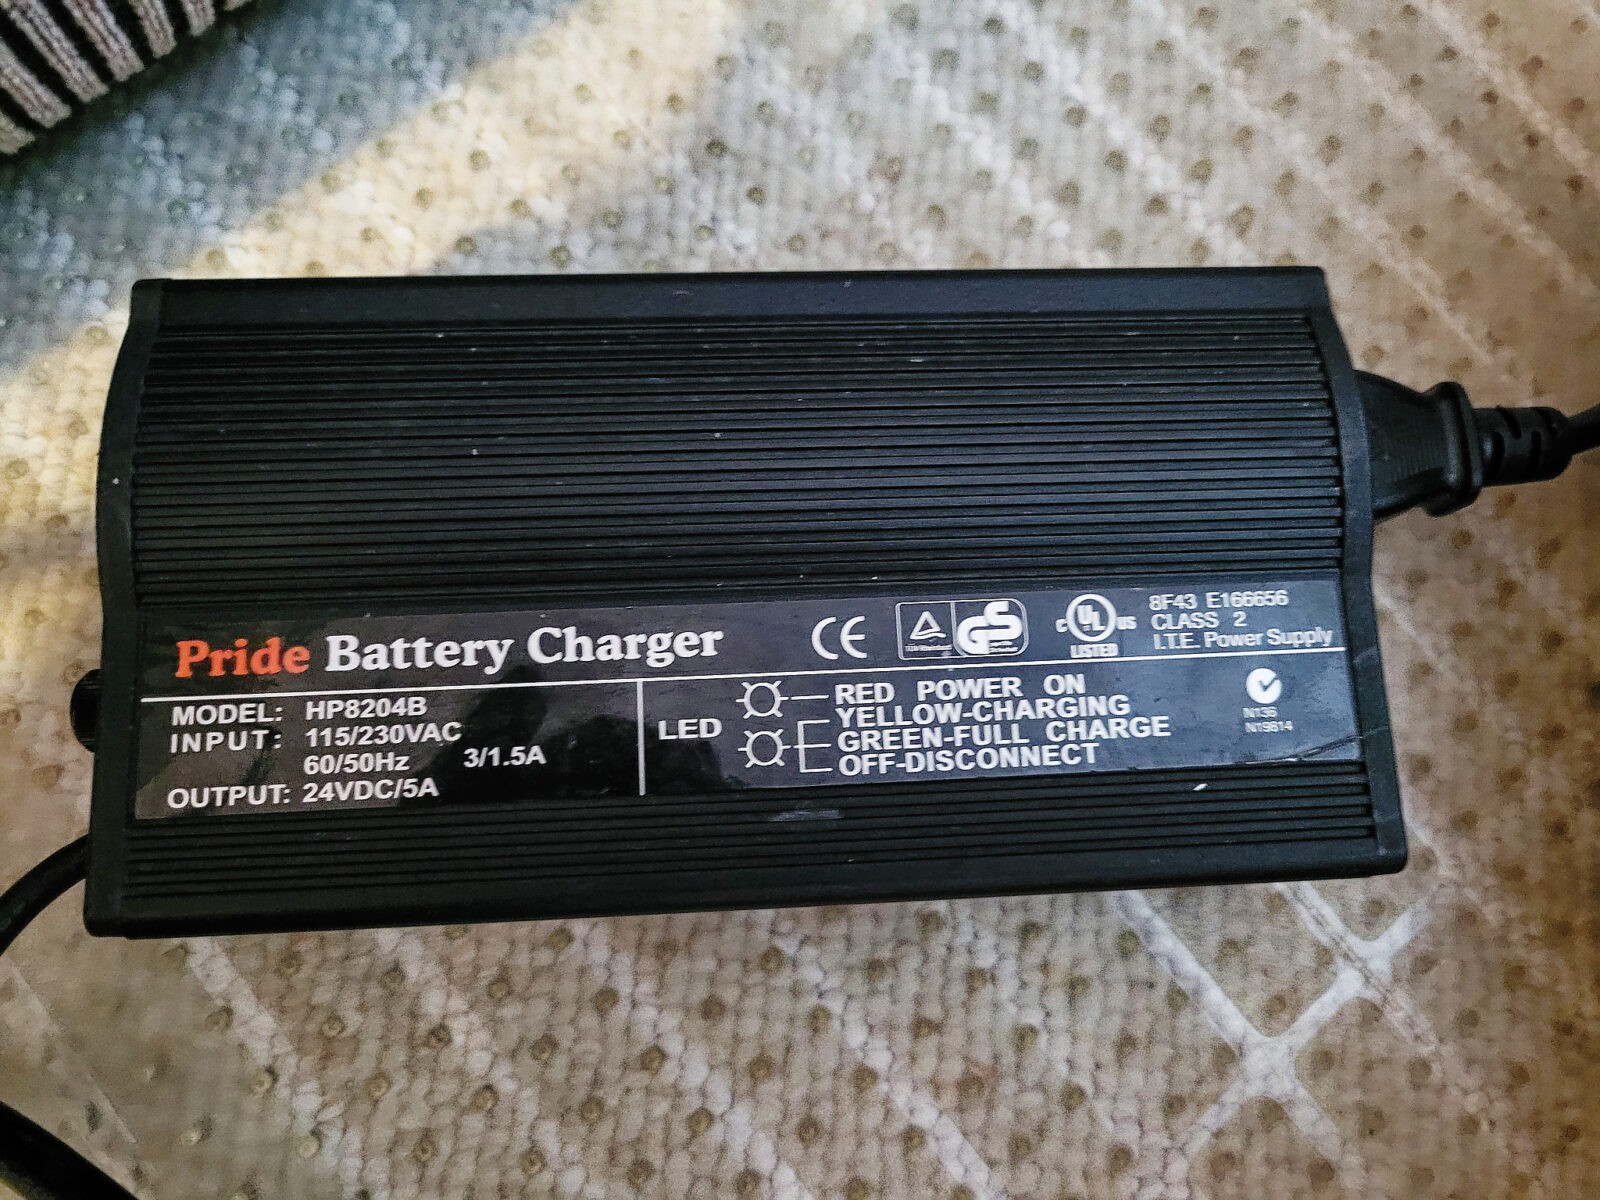
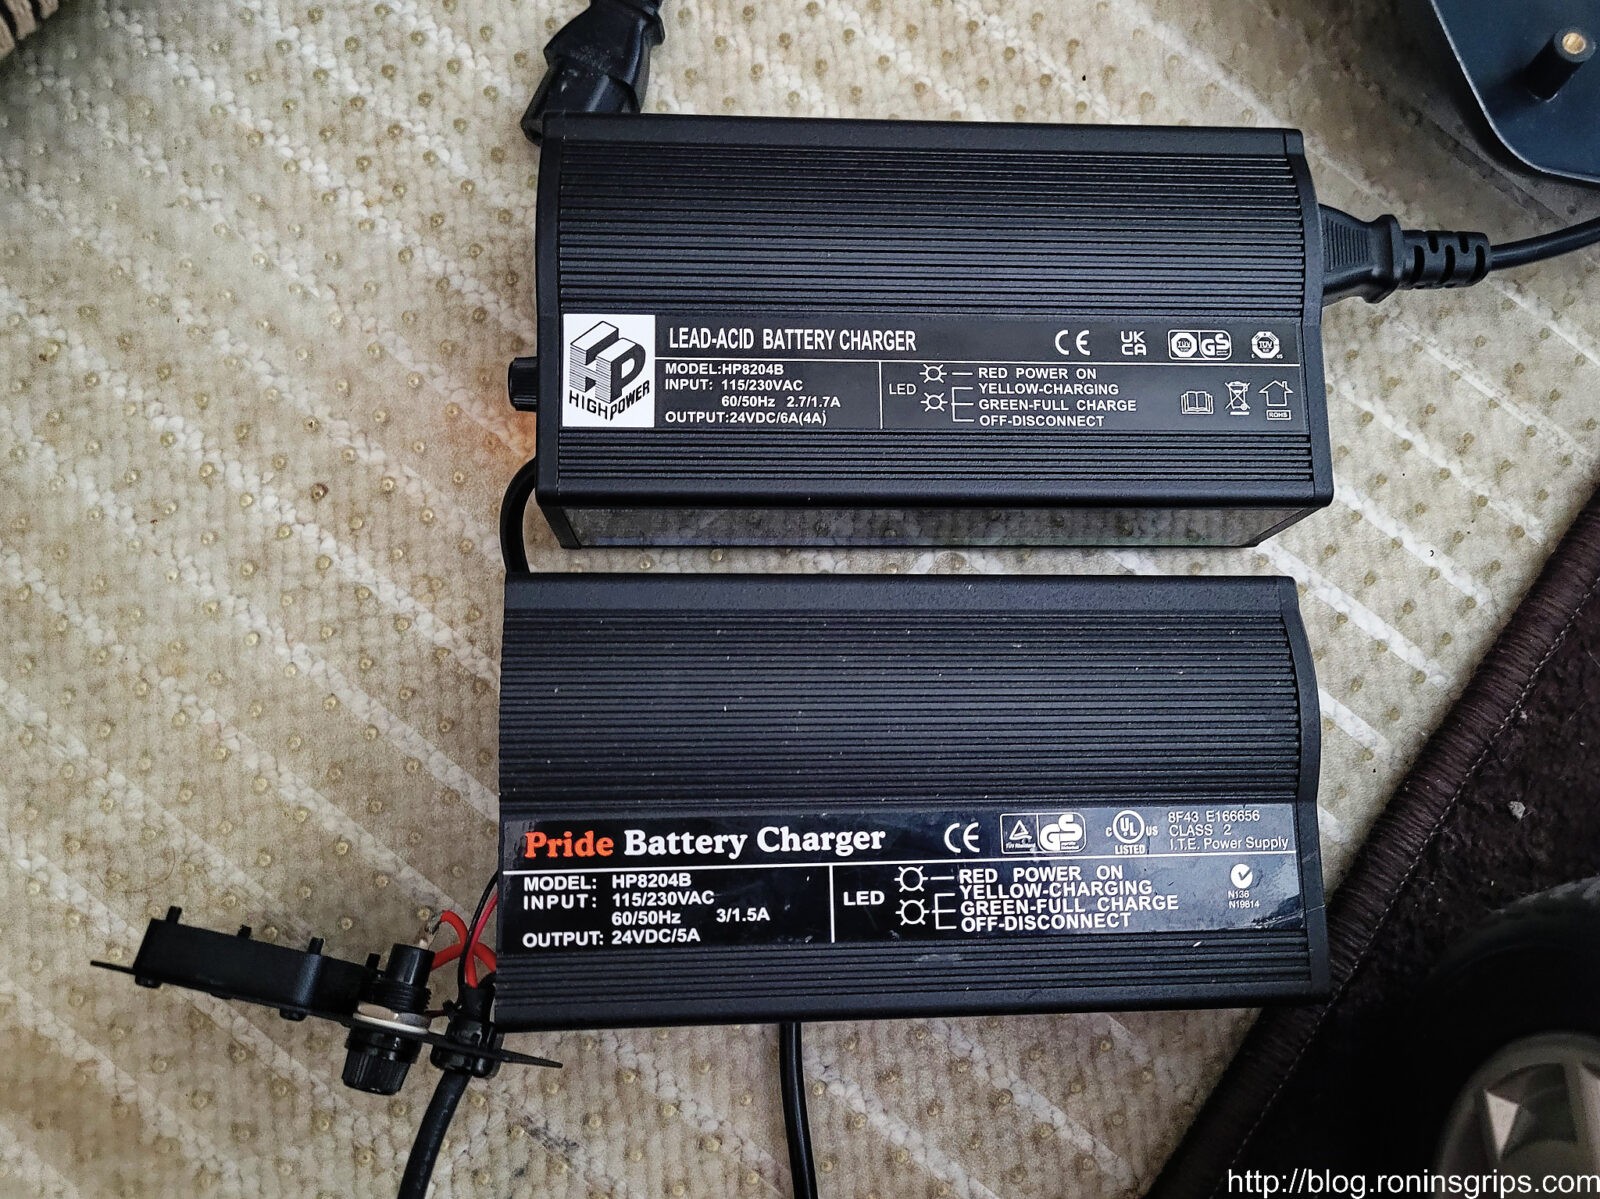
The scooter came with a Pride Mobility HP8204B charger rated for 24 volts DC at 5 amps. That would mean that if I took my meter and put it on the pins, I should read somewhere around 28+ volts (the exact volts is an “it depends” – I would have been cautiously happy with anything over 24 and stopping somewhere around 30).
This is the original charger. Only a solid red light would come on. That indicated it had power. The cooling fan never turned on and the second LED that should turn yellow for charging or green for fully charged never turned on.
I used my multimeter on the batteries with the Pride charger connected. Only the red bulb on the charger was lit. No fan, no yellow light and no additional voltage detected on the battery terminals. I should have read 13-14 volts when doing the positive and negative tabs on each individual battery with the wires connected but I read just the 4 volts (by the way I word it like this because it was 4 and some decimal but I didn’t write down.)
The fuse you can see outside of the battery pack between the plug and a circuit breaker on the front of the battery pack looked fine and tested okay for continuity.
In looking at the battery pack, I unplugged the pin 1 should have been positive and pin 2 should have been negative. I cautiously touched my probes on the two tips because I didn’t want to unnecessarily short the system out by accidentally touching positive and negative together. Guess what? Nothing – not a thing. My auto-ranging digital meter was doing it’s usual millivolt reading garbage but there was no real voltage coming through.
The next thing I did was to turn off the original charger and remove the fuse from the end of the charger with the lights – undoing the round cap will produce a glass tube fuse. You can usually see if the wire running from one end to the other in the middle of the clear glass is intact or burned out. It looked okay and just to be sure I ran a continuity test with my meter and it was okay.
I also pulled apart the plug that goes into the battery pack just in case something was lose and it read zero volts too. In case you are wondering why there are three pins (I wondered why) – pin three provides voltage to the scooter so the little computer knows the charger is still attached and will not let the driver move the scooter – pretty good idea.
Okay, it was time to Google the scooter and the charger to learn more. The fact that only the red light was coming on but not the fan and/or the yellow charging light was making it look the the charger had failed. I did the “sniff” test to see if I could smell if anything had burned out but if it had, it must have been some time ago as I didn’t detect anything. In short, the charger was history.
There are tons of charger options on Amazon but I want to caution you against the little sealed chargers. They do work but they are going to get hot and they will probably fail at some point due to all of that heat. There’s a reason Pride went with the a fan cooled charger – they get hot converting AC (wall outlet) current to 24 volts DC (direct current).
Companies like Pride rarely make their own chargers. They will either use an existing charger on the market and not bother covering up the name of the maker or they will pay for it have their brand name on the decal. Pride opted for the latter or at least that’s what I think they did. The trick to realize here is that by searching on HP8204B, you can find either the original maker or another firm who did the same thing – had their name put on the charger. Regardless, you can save a bundle off a new Pride charger.
In my case, I found a seller named “ENCAREFOR” on Amazon selling what seemed to be the exact same charger but with the label “High Power” on it. Besides the label, the rated output is at 4 amps vs. 5 which means it will just charge a tad slower. It was going for $89.99 with Prime One Day shipping but I held off as I realized I needed to test the batteries and the scooter before I spent more money. In other words, I knew the charger was bad but didn’t want to spend more money if the scooter itself was burned out – if it was just the batteries, I could still order them.
By the way, you can buy used OEM Pride chargers off of eBay. I’ve had mixed experience with used chargers in general so I tend to just buy new. If you don’t mind gambling on a used one, they are on eBay.
Used a Noco Genius Car Battery Charger For Testing
At this point I was pretty sure it was charger and also thought that the batteries might be okay. Why? First off, there is a sticker on the mast pole of the seat that said the scooter was made in 2019 – that meant it was three or just under three years old (especially given I was doing my troubleshooting in mid-February 2022). Batteries can last maybe five years give or take. If the voltage was zero, I’d bet they were junk but since I was getting just over 4 volts from each battery independently, they weren’t completely dead. I started to wonder if a good reconditioning and charge might work to bring them back to life. I had just the charger to try.
Any 12 bolt charger can do the job provided you charge the batteries one at a time.
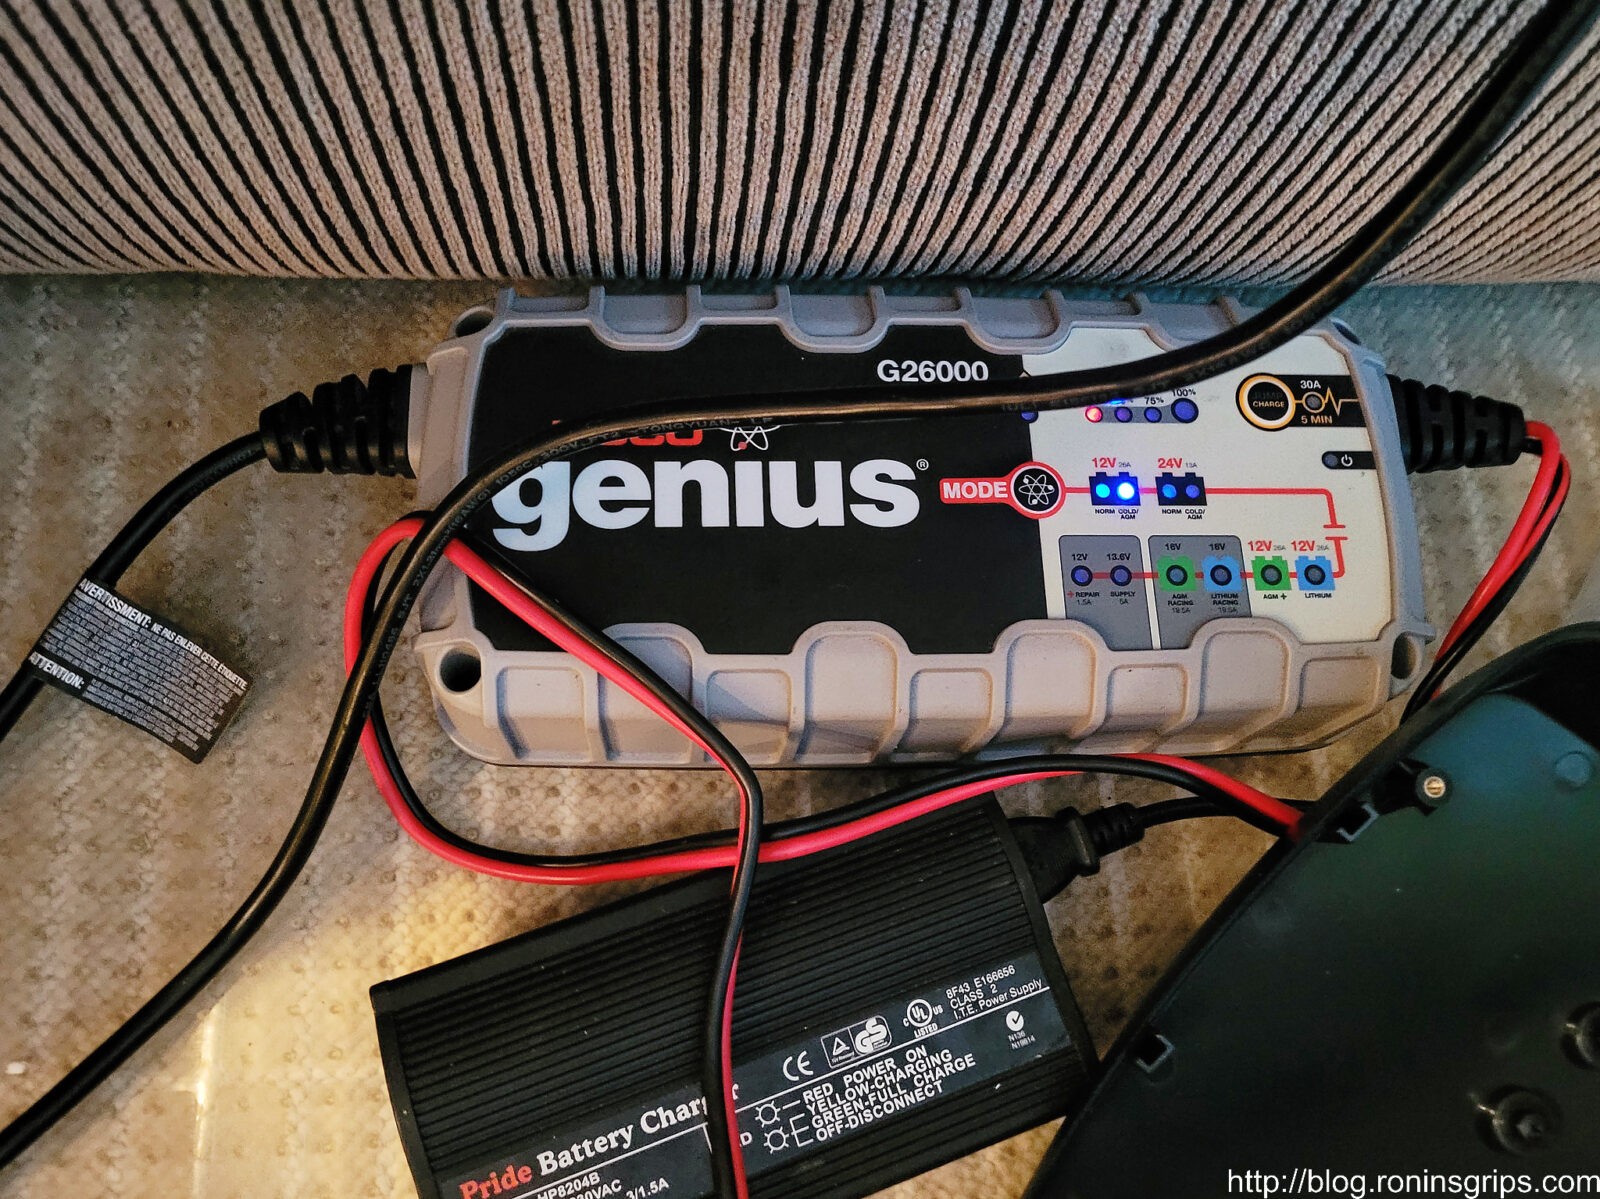
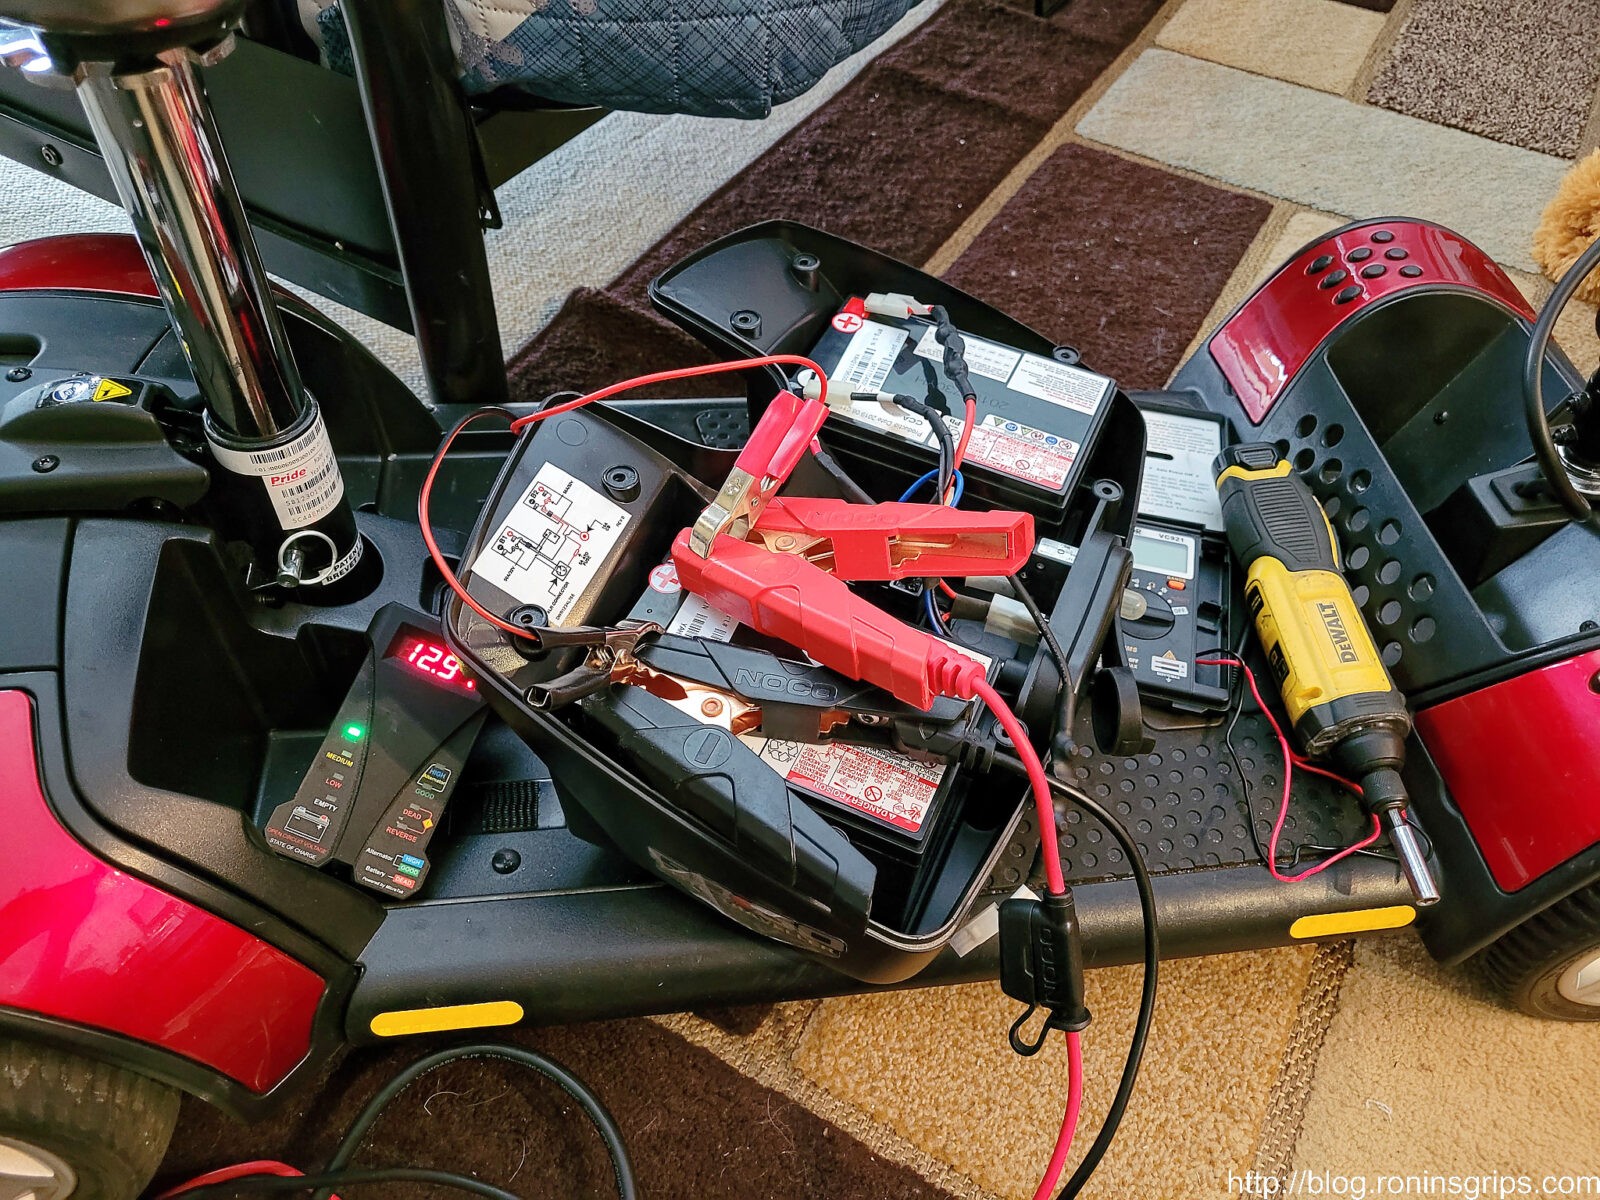
I undid the battery cables from the first battery only and directly connected the Noco to it. I charged for one cycle and then ran a repair cycle. During repair, the charger pulses the battery to desulfinate it.
Don’t let all the wires intimidate you. I hooked the plus (red) clamp of the Noco to the plus (red) terminal of the battery on the left, I then hooked the negative (black) clamp from the Noco to the black terminal of the same battery. I have a small voltmeter that clamps ,on attached also so I could monitor progress — that’s strictly optional.
Results
When the charging was done with both batteries, I connected the scooter’s cables back and seated the battery back into its cradle. I then turned the key on for the scooter and moved it forward and backward. It worked just fine. I checked the batteries and the voltage was holding – it wasn’t dropping down.
This is what I wanted to see — the batteries were fully charged. I drove the scooter around the house and the charge never went down. I also learned that scooters are bizarre little things to drive – their turning is like sitting upright on sensitive go cart.
Other than the decals and the lower 4 amp output, the new “High Power” charger looks identical to the Pride unit. Note, I’d opened the front of the unit up to inspect the inside — the front panel is what is dangling in the bottom left of the photo.
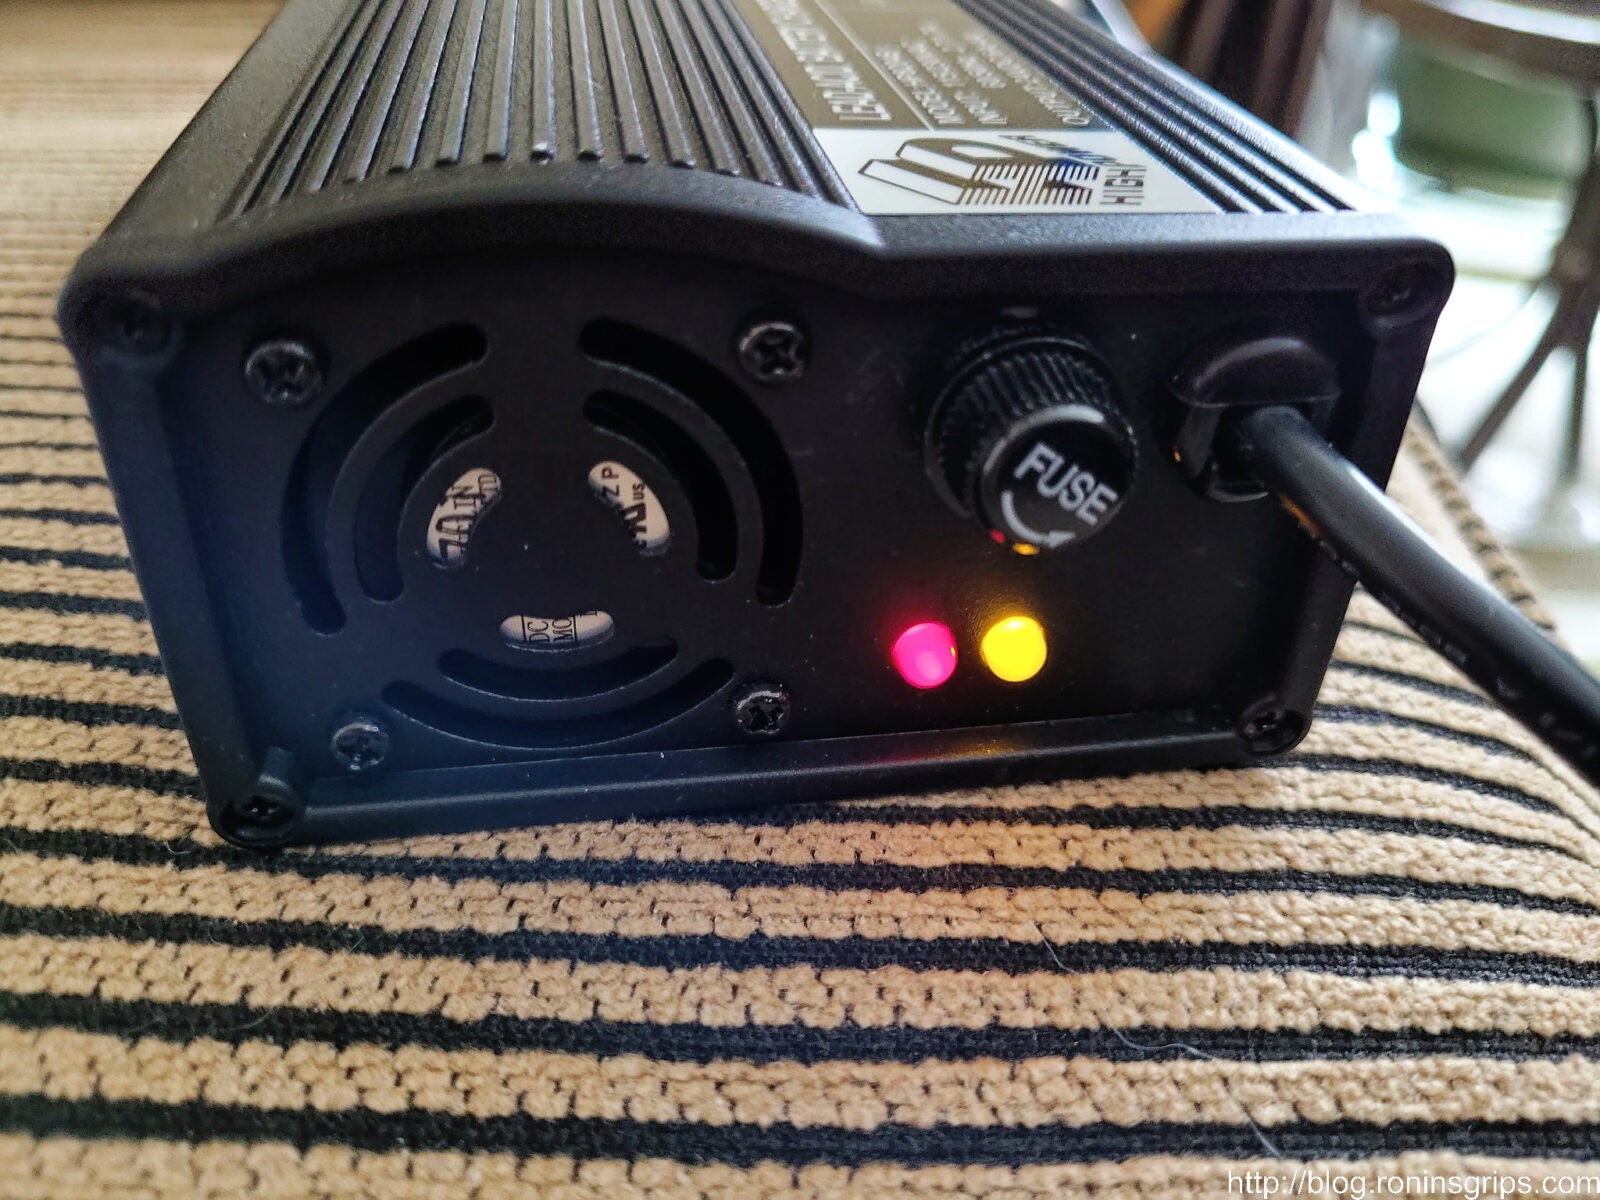
As soon as I plugged in the new charger and turned it on, the red power light and yellow charging lights came on.
By the way, the charger’s fan will make a pulsing or surging sound as the speed changes as it nears the end of charging. This is normal and will give you an indicator that charging is almost complete.
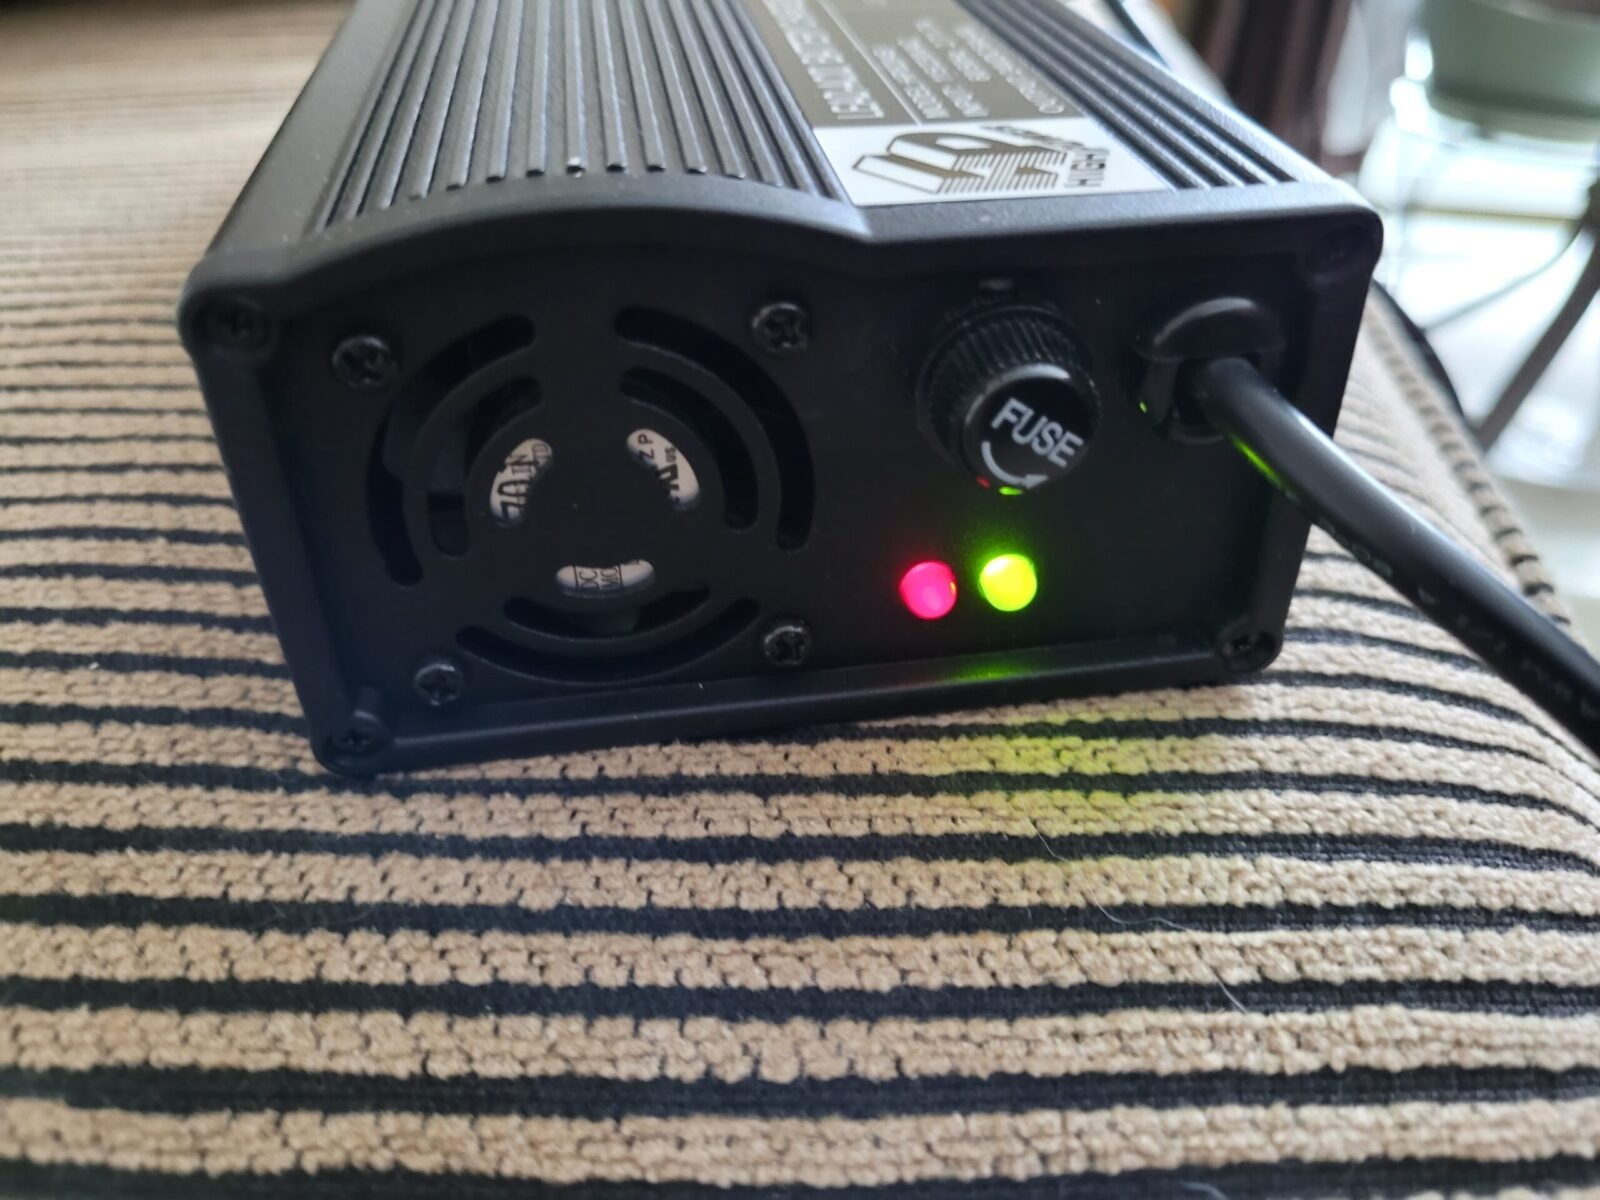
When the scooter’s batteries are fully charged, the yellow light will turn green. The fan will make a pulsing sound as the charging nears completion.
Bottom line, the batteries and scooter were fine – it was just the charger that had failed so I ordered the replacement above from Amazon and it topped off the batteries. I drove it around the house some and everything was working just fine.
In Conclusion
So I learned a few things. The scooter was exceptionally well made is my first comment. Second, I should have started from the wall and worked towards the scooter vs. focusing on the batteries to start based on what the fellow told me.
I should have confirmed power to the charger, then that there was no power from the charger to the scooter and ordered a new charger. I’d bet a new charger could have recovered the batteries – the documentation says they can recondition a battery but who knows. Even though I started with the battery, at least I could run the Noco charger through charging and repair cycles – I’ve used it to recover a number of really compromised batteries over the years.
The scooter is ready and now we need to wait for warmer weather to let my mother-in-law practice in the driveway. I hope this story helps you out.
Note, I have to buy all of my parts – nothing here was paid for by sponsors, etc. I do make a small amount if you click on an ad and buy something but that is it. You’re getting my real opinion on stuff.
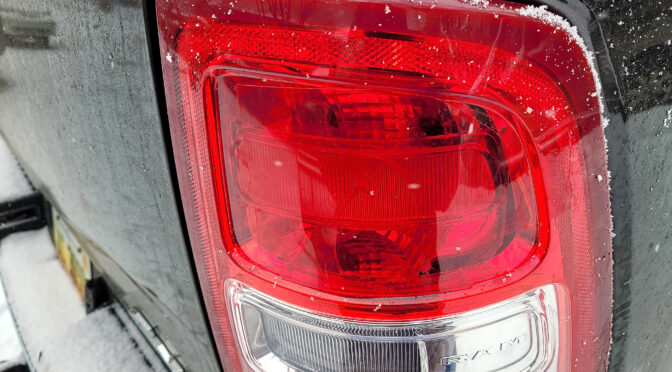
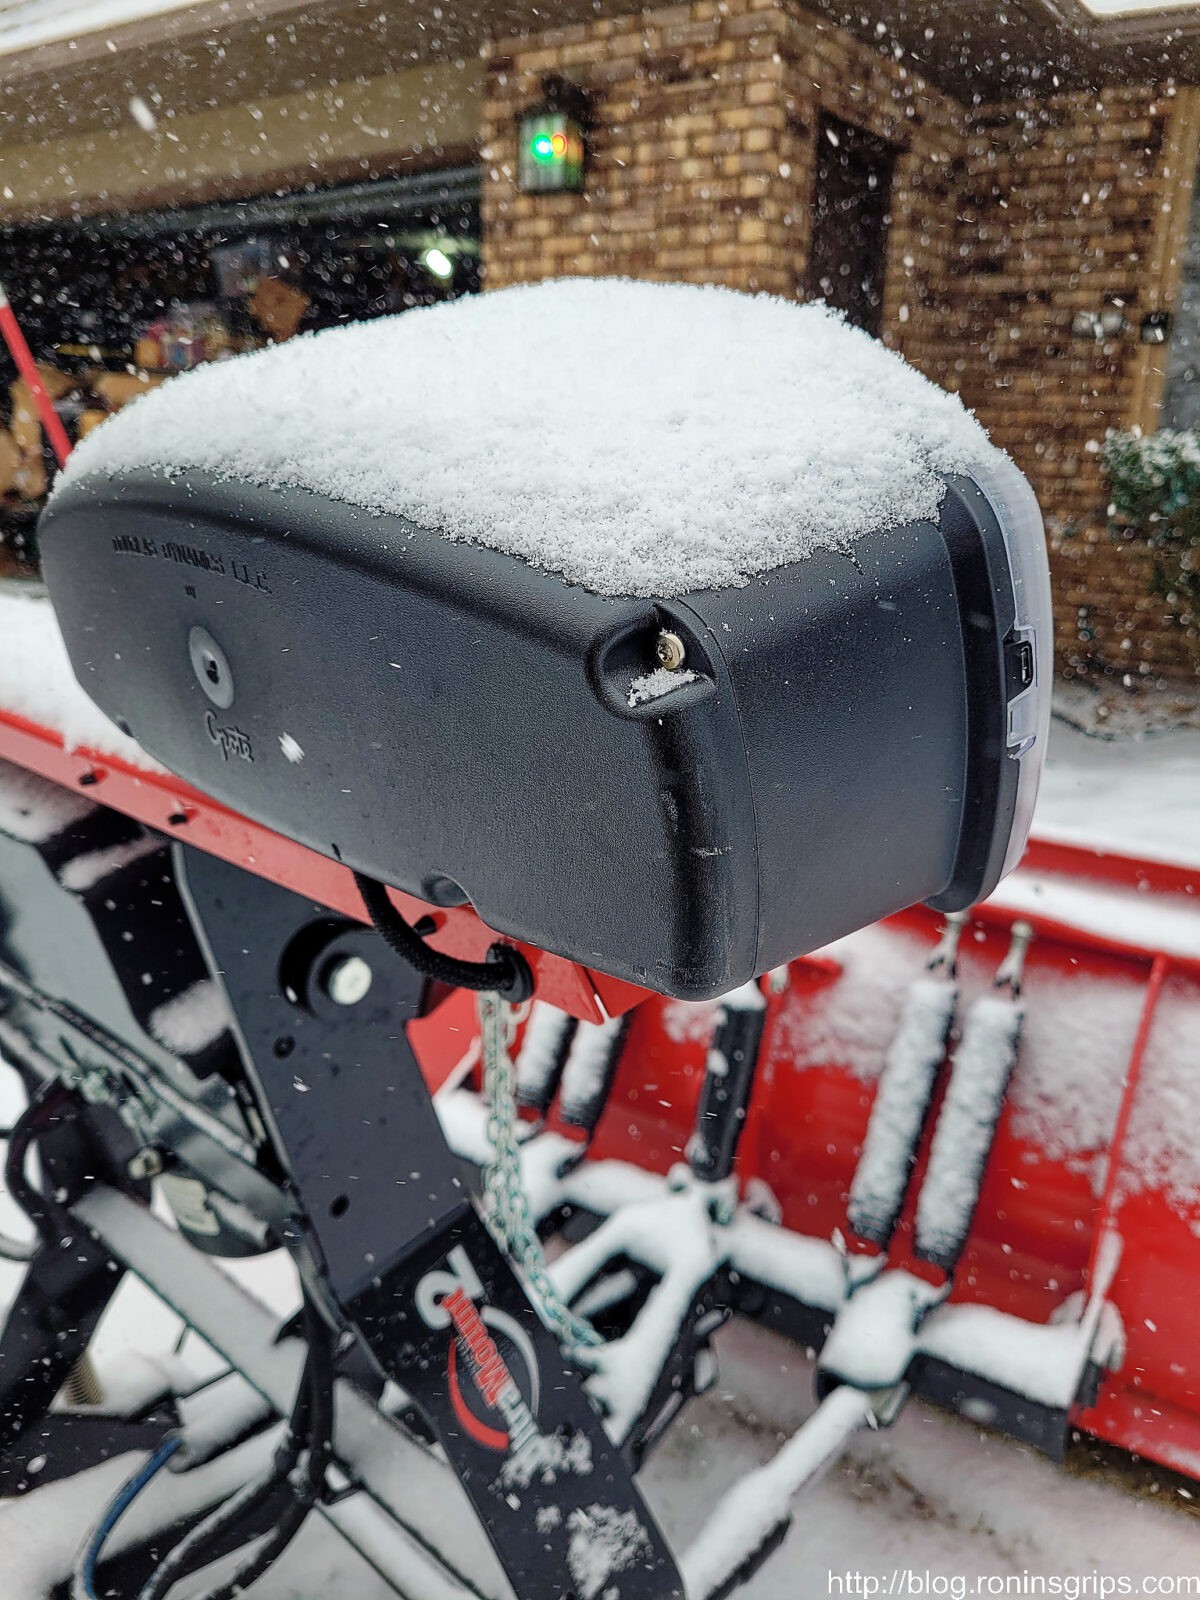
Okay, it was late the other night and I was tired. I backed up my 2021 Ram 2500 and heard the truck hit something. “Crap” I thought as I remembered my Western plow was disconnected and sitting on the ground in the area where I was backing up. Well, I hoped I had just nudged the plow frame with my rear bumper but when I got out, it turned out that one of the lights on the plow frame had busted out a golf ball sized part of the passenger side red brake light lens – it was a good thing I was going slow at least but what to do?
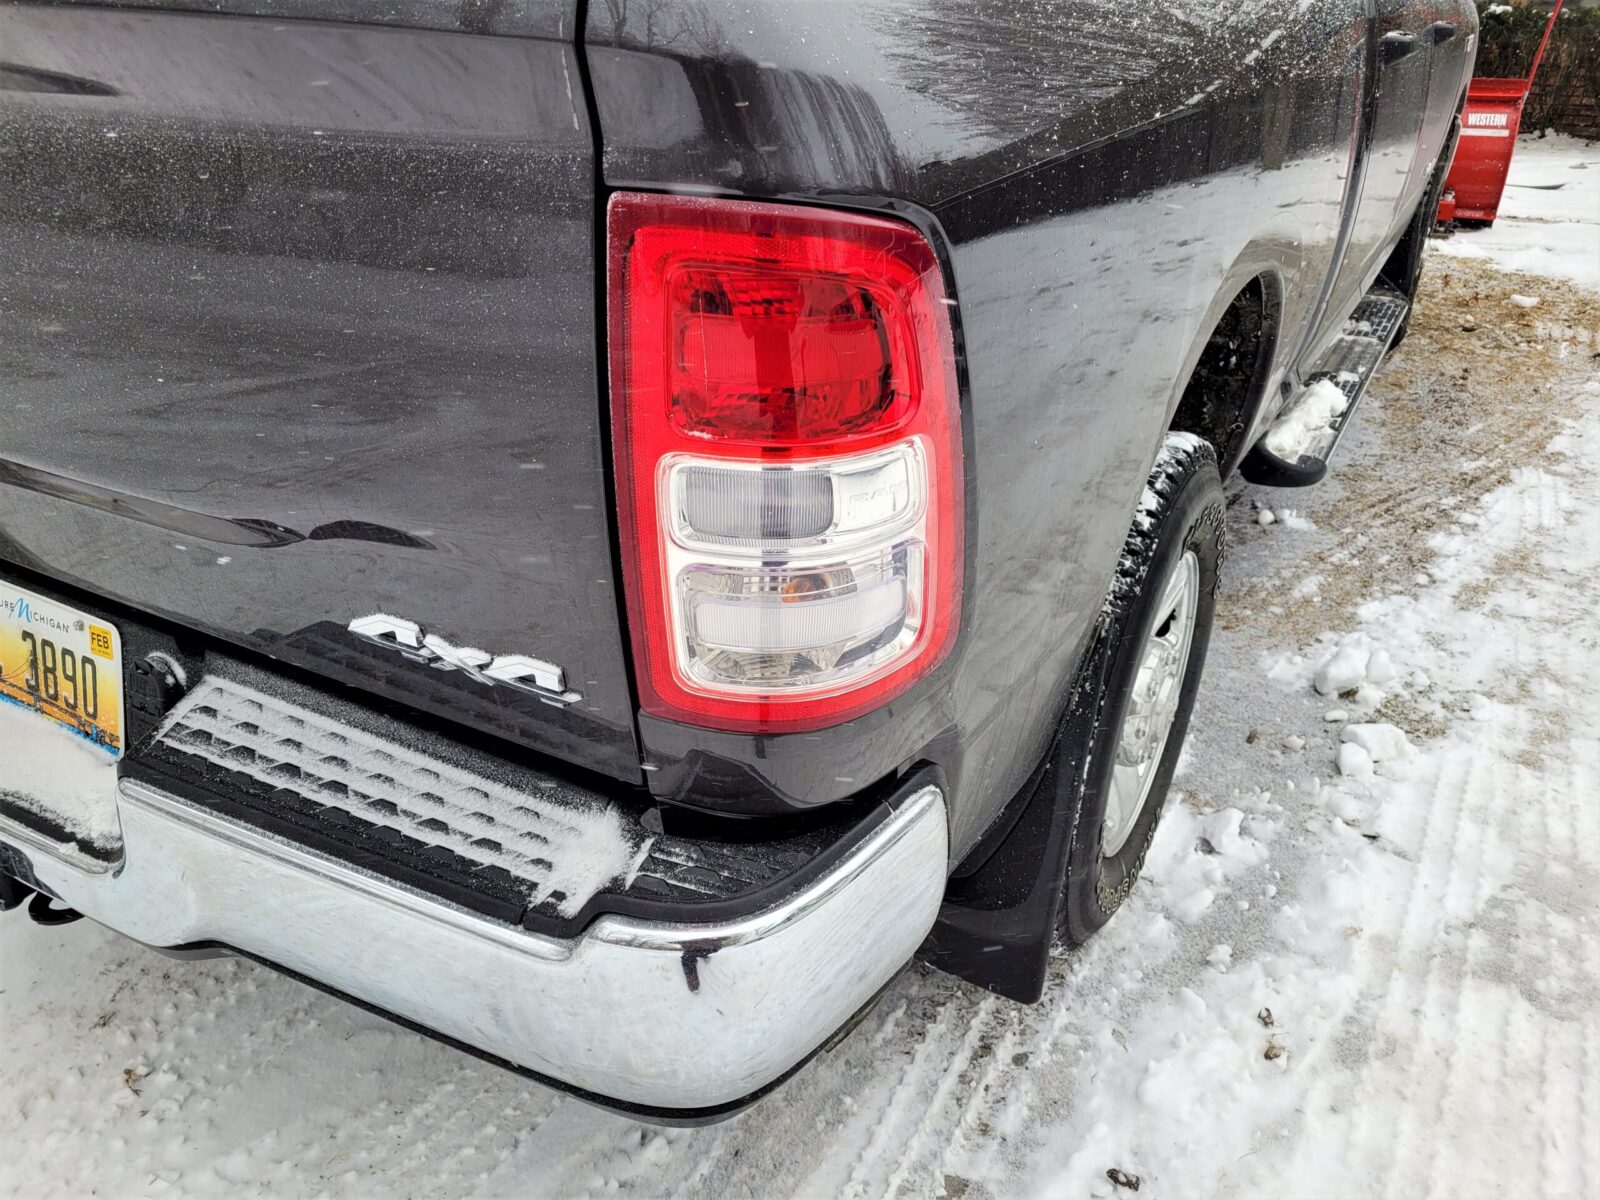
If you notice the scuff mark on the back edge of the light, that’s what hit the passenger side tail light and busted the lens. I’m definitely glad I wasn’t going fast.
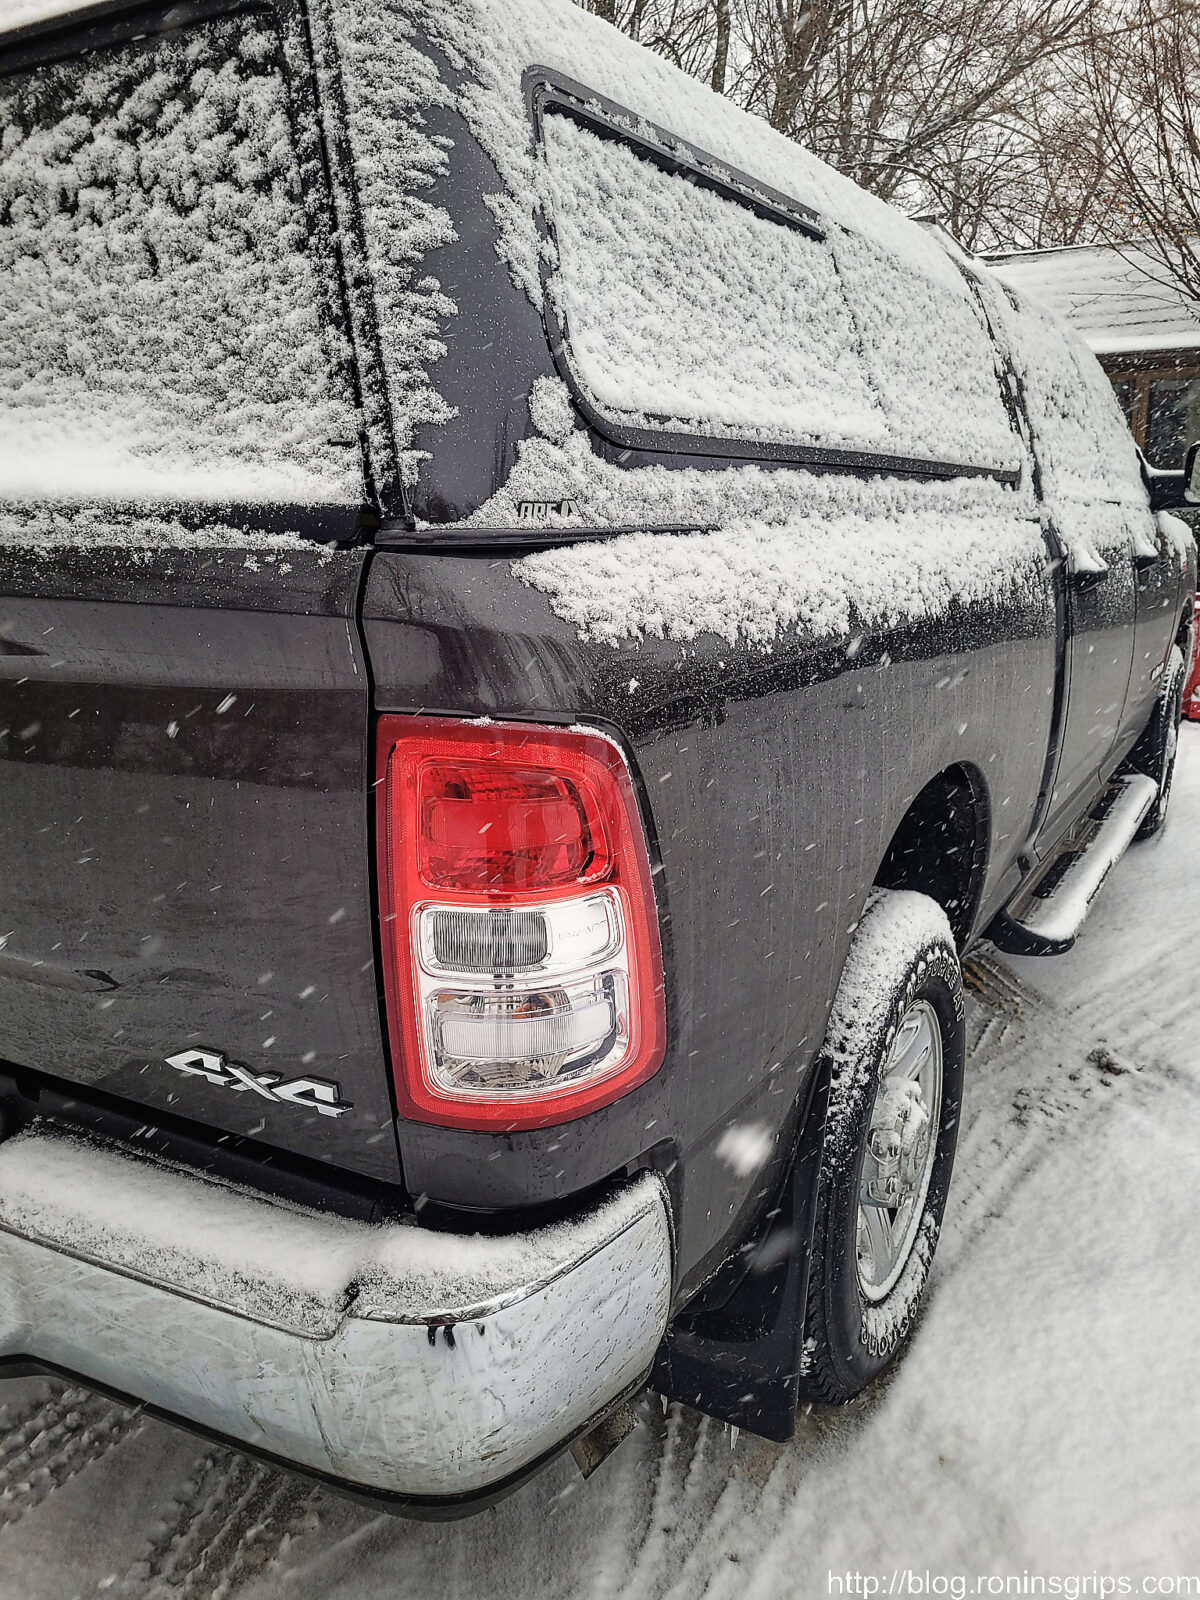
Well, first I have to tell you I felt pretty stupid. I literally forgot the plow was back there but then my next thought was “how do I fix this?” It was about 11:15 at night, 9 degrees out and snowing. If there’s one thing I have learned about myself, it’s that my patience is gone when I am tired and that was the not the time to try and fix something. I didn’t want the light assembly to get a ton of snow in it so I just lightly stuck some duct tape on it and work on it the next day.
Looking For A Quick and Easy Fix
First thing I did was to get online and order a new right side tail light assembly (68361714AD for my Tradesman) and that will take some time to come arrive – I literally ordered it yesterday morning and am waiting as I write this. At any rate, I needed to apply a temporary fix to the busted lens. In college, I’d used a red self-adhesive tape to “patch” a busted brake light. I figured I would do something similar because I wanted the lens closed and also you can get a ticket for having either a white light showing from a brake light or an inoperable light. The other thing was given the weather and supply chain problems these days, I wasn’t sure how long I would be waiting for the replacement light assembly so off to Autozone I went.
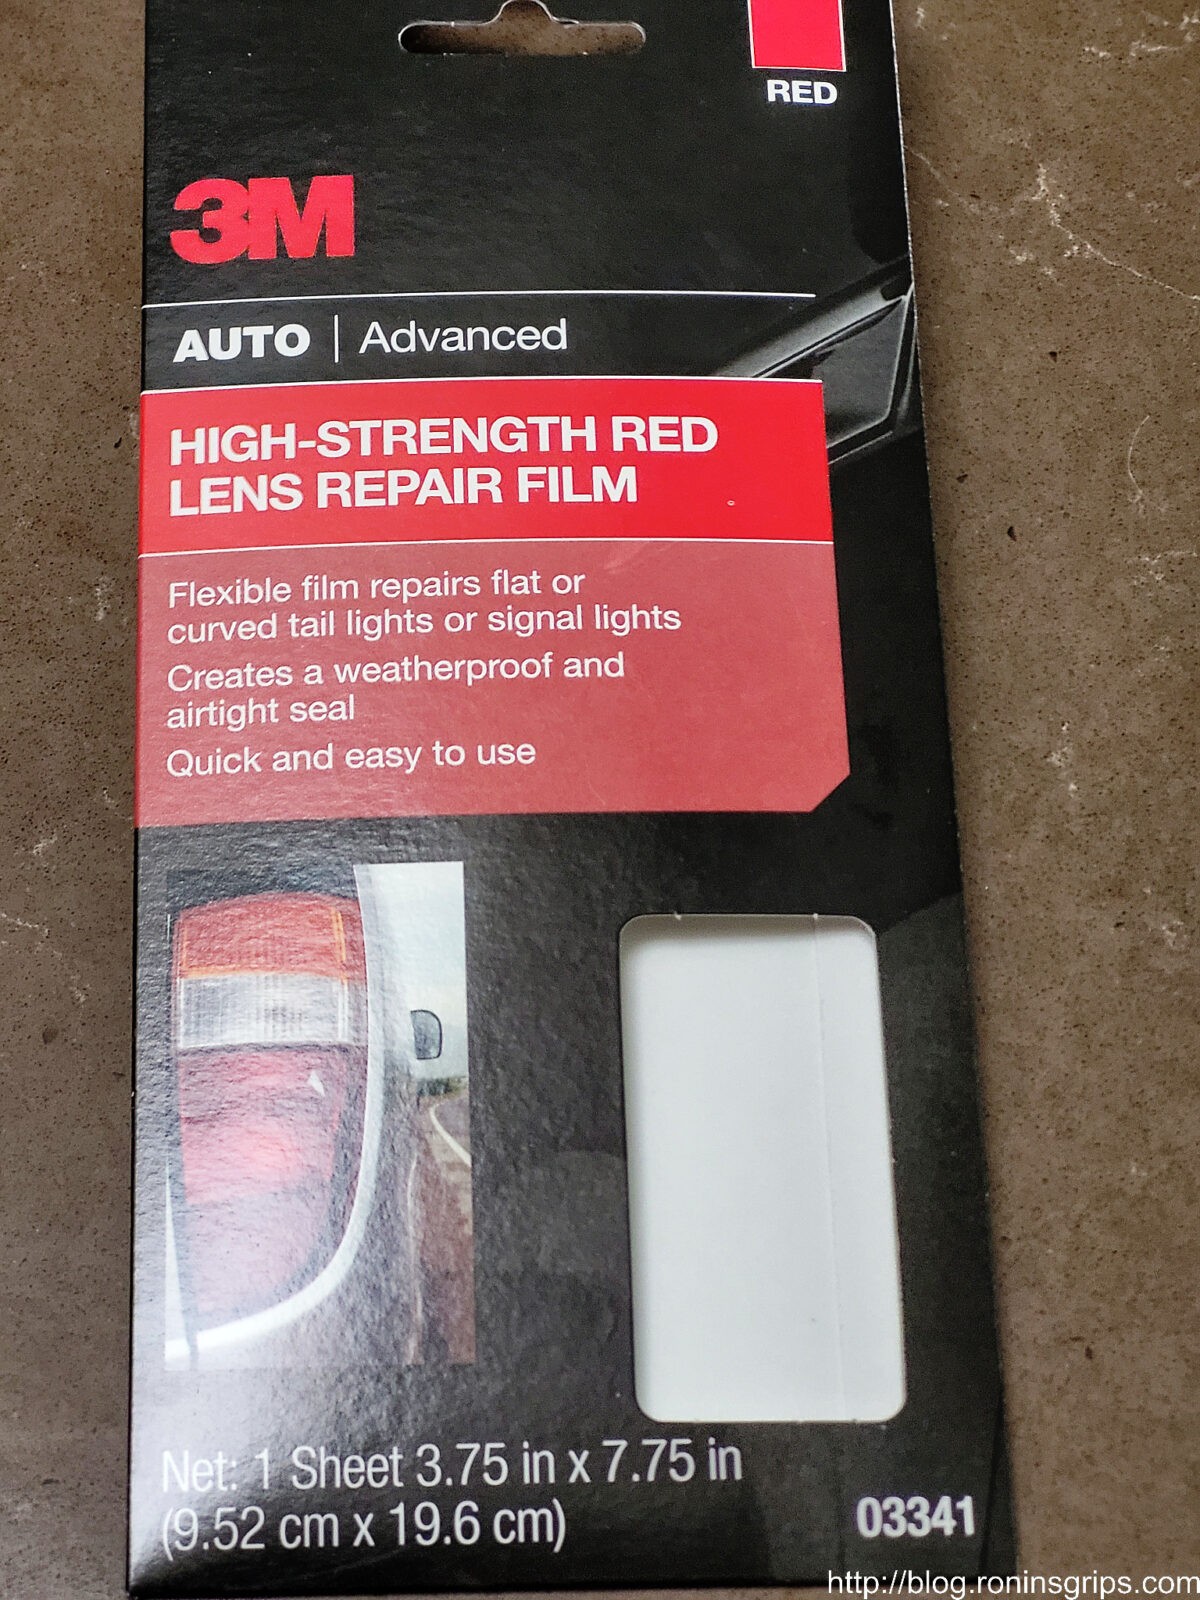
Autozone carries two type of repair kits both from 3M – one was a roll of red colored translucent tape ($4.99) and the other was a semi-rigid red translucent film ($8.99). I opted for the latter because I could cover the hole without seams and figured it would blend in a lot better. Now I have not used the 3M tape but the one I used in college 30+ years ago faded in the sun and didn’t stick to red hot so I just wasn’t that gung ho on it but I will tell you that my general experience with 3M is that they turn out top notch stuff so I am sure it would have been better but I went with the film and not the tape.
This is the front of the package in case you are hunting for it.
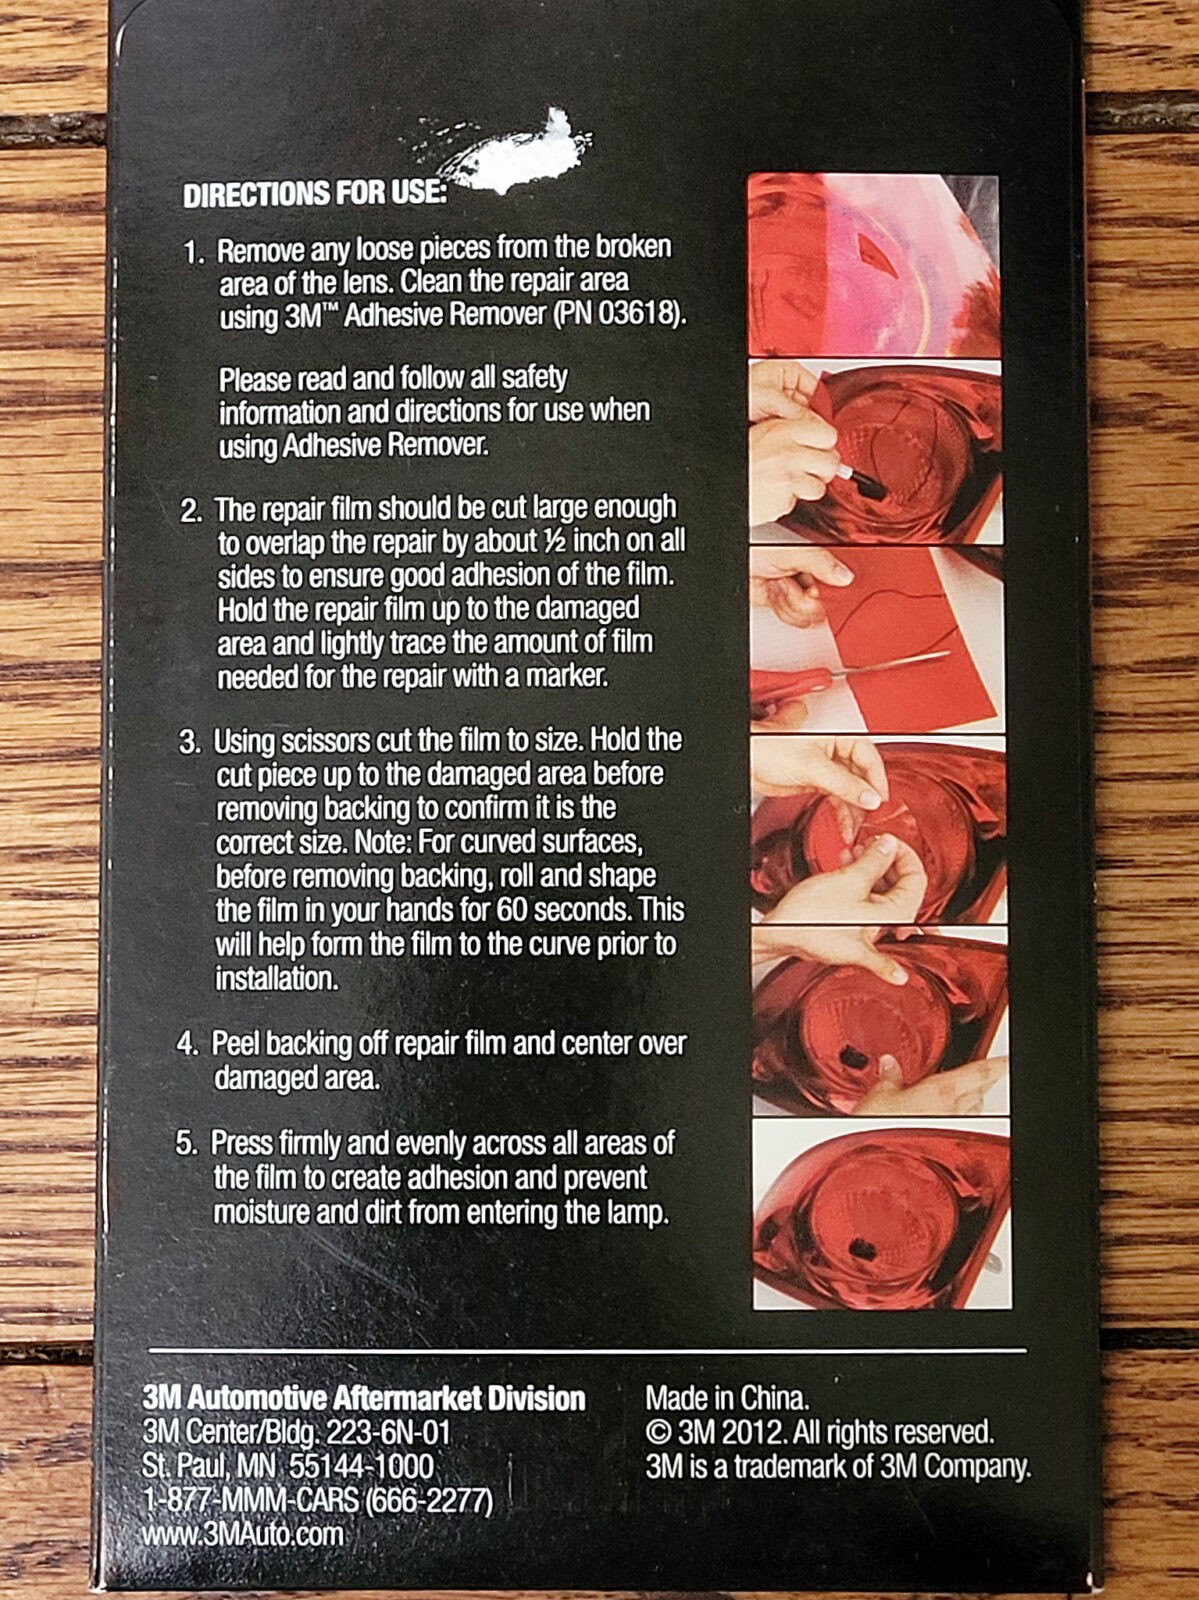
I read and followed the instructions.
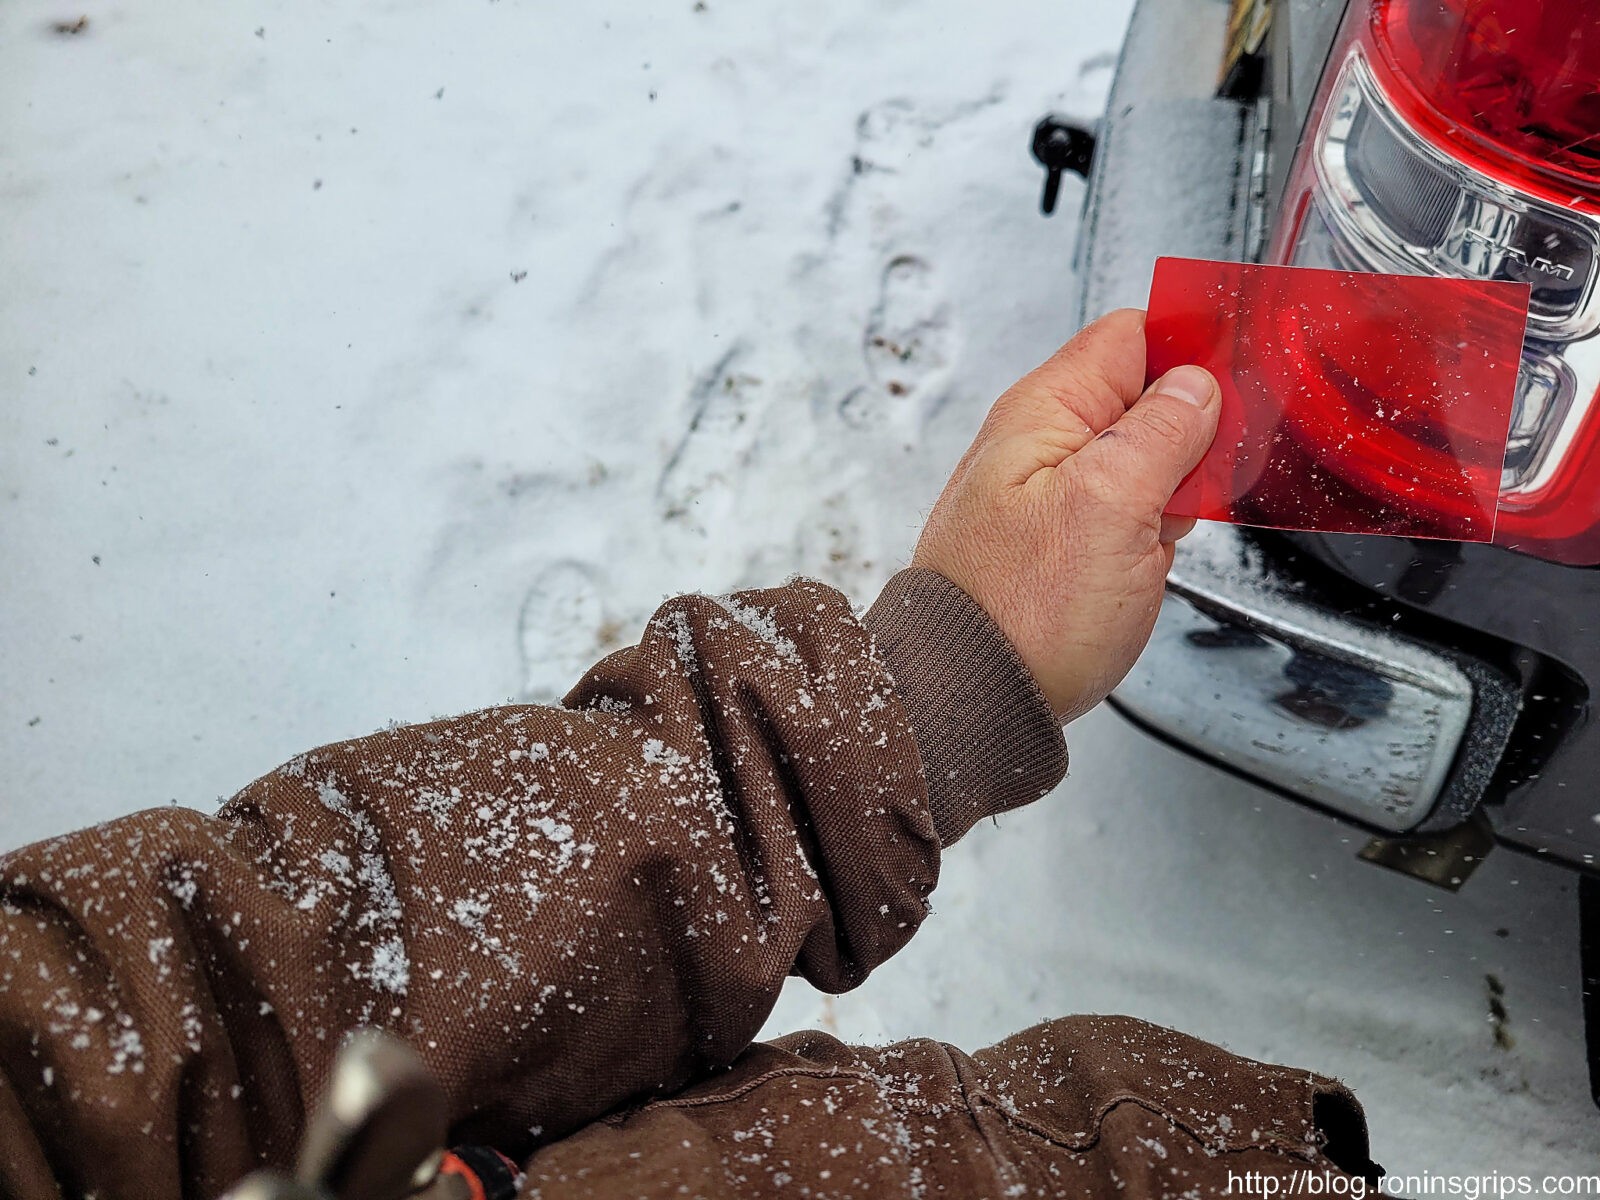
As you can see in the photos, it was snowing and 16 degrees out when I did the repair. I cleaned the lens real quick with 409 – a general purpose cleaner. I then wiped it dry and brought over the film and a pair of scissors.
The break in the lens had a slight curve so I worked the material around in my hands to get the basic curve I needed and trimmed the material so it could sit flat on the surface. I then removed the rear backing materials and kept pressure on it while working out air bubbles. I figured it might need the heat of my hands to both stay bent and to bond so I did this for 1-2 minutes. For some reason, after I applied the patch was when it dawned on me that I did not take a photo of the hole – why? I have no idea.
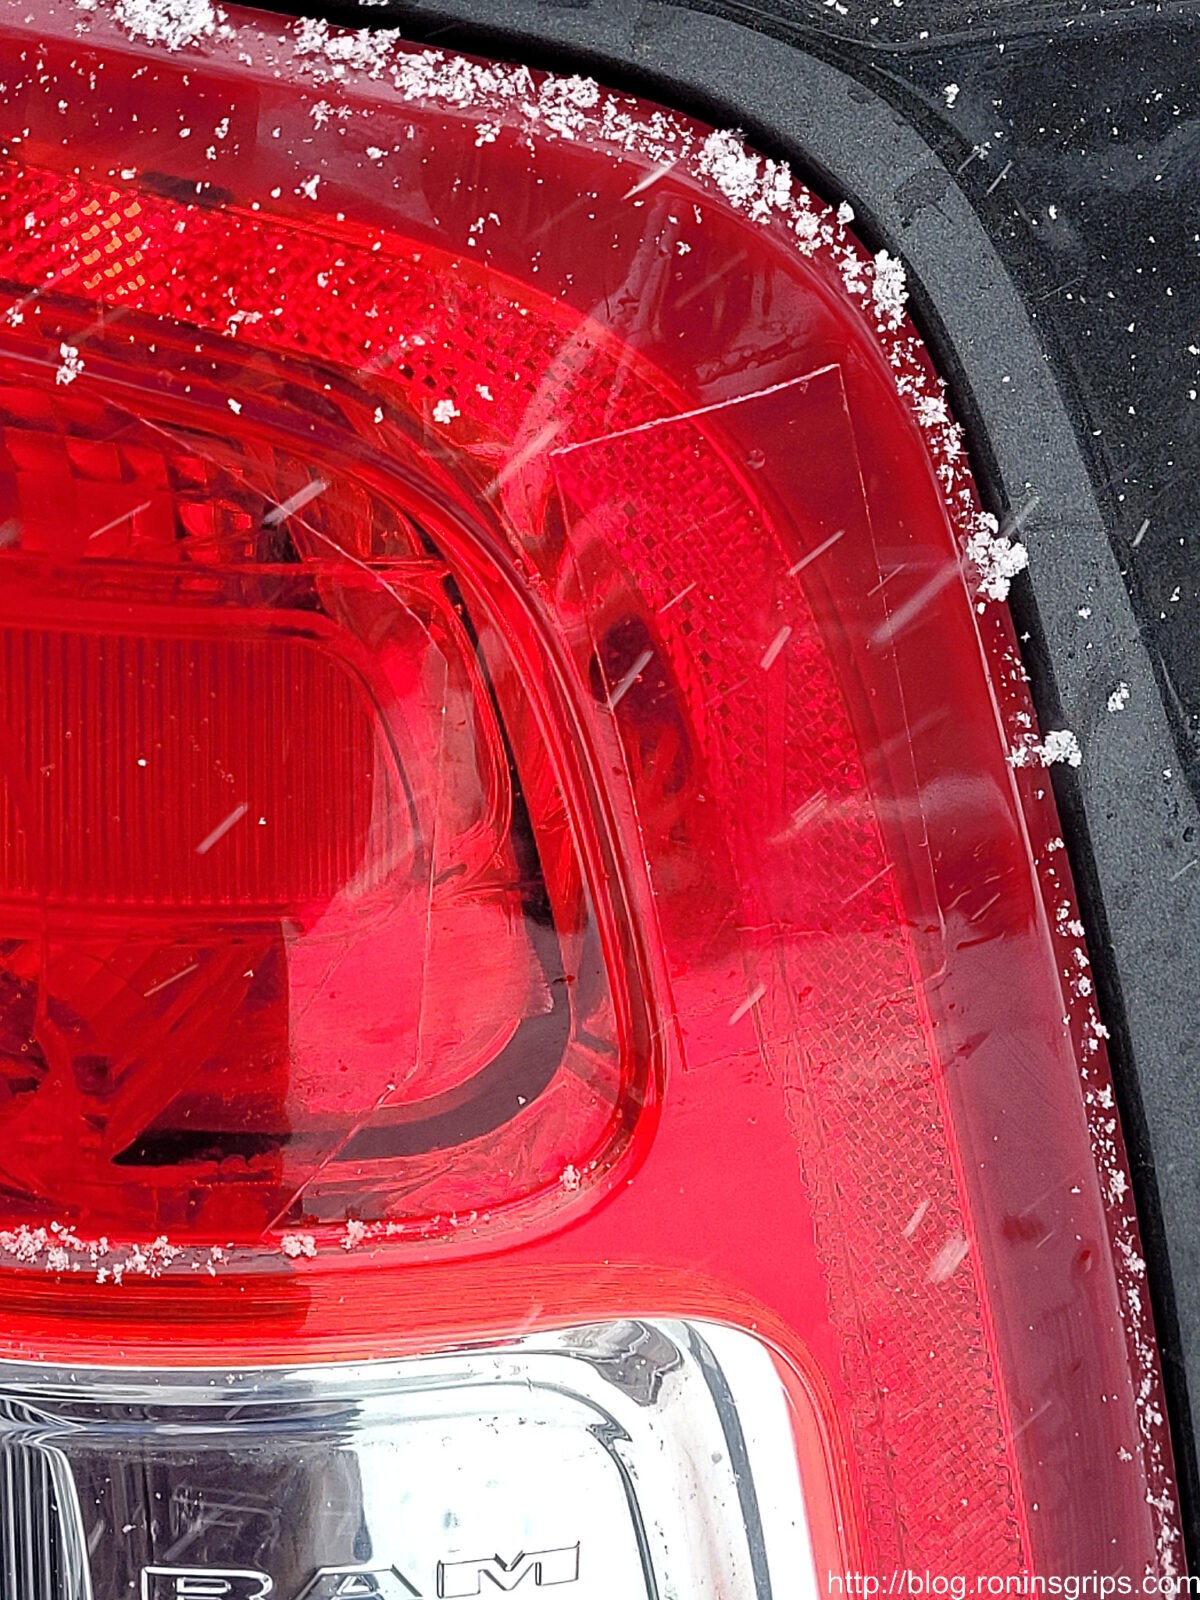
Here you can see the hole covered with the film. I have a pretty good seal except for at the bottom where all the cracks are. There’s a raised ridge there that the film cant conform to so I called it good enough and stopped there. I figure this only needs to last maybe 2-4 weeks but wanted it good enough that it can go longer if need be.
It was definitely snowing and cold. This is a piece of film left over after the patching so you can see it.
The lens cracked but did not come apart of the top right side. If you look close you can see a rectangular piece of film I stuck there just to make sure the track doesn’t get worse.
You step back a few feet and you can’t even see the film. I checked the bond the following day and it feels like the film has really bonded to the lens. I’m genuinely impressed.
The Results
I’m surprisingly happy. I didn’t know for sure if it would work but it’s holding up just fine and from a distance you wouldn’t even know it is there.
If things change, I’ll be sure to post an update but so far, so good.
3/17/24 Update – still working. This appears to be a long-lasting fix. I’ve done nothing to it and it still looks just as good as the day I applied it. No color fading or coming loose. I’m even more impressed.
2/19/22: Still holding up just fine. Nothing has changed at all – adhesion and color are just fine. I’m still waiting on the Mopar parts dealer to send me the tail light assembly. Thanks to the film I’m not in a rush and it looks just fine from a few feet away – you wouldn’t even know it is there.
2/19/2022 – still holding up just fine a week later. No sign of the plastic film letting go from the base tail light lens. It’s solid. We’ve had weather ranging from snow and 12 degrees to rain and 15 degrees. It seems to be a solid repair.
Note, I have to buy all of my parts – nothing here was paid for by sponsors, etc. I do make a small amount if you click on an ad and buy something but that is it. You’re getting my real opinion on stuff.
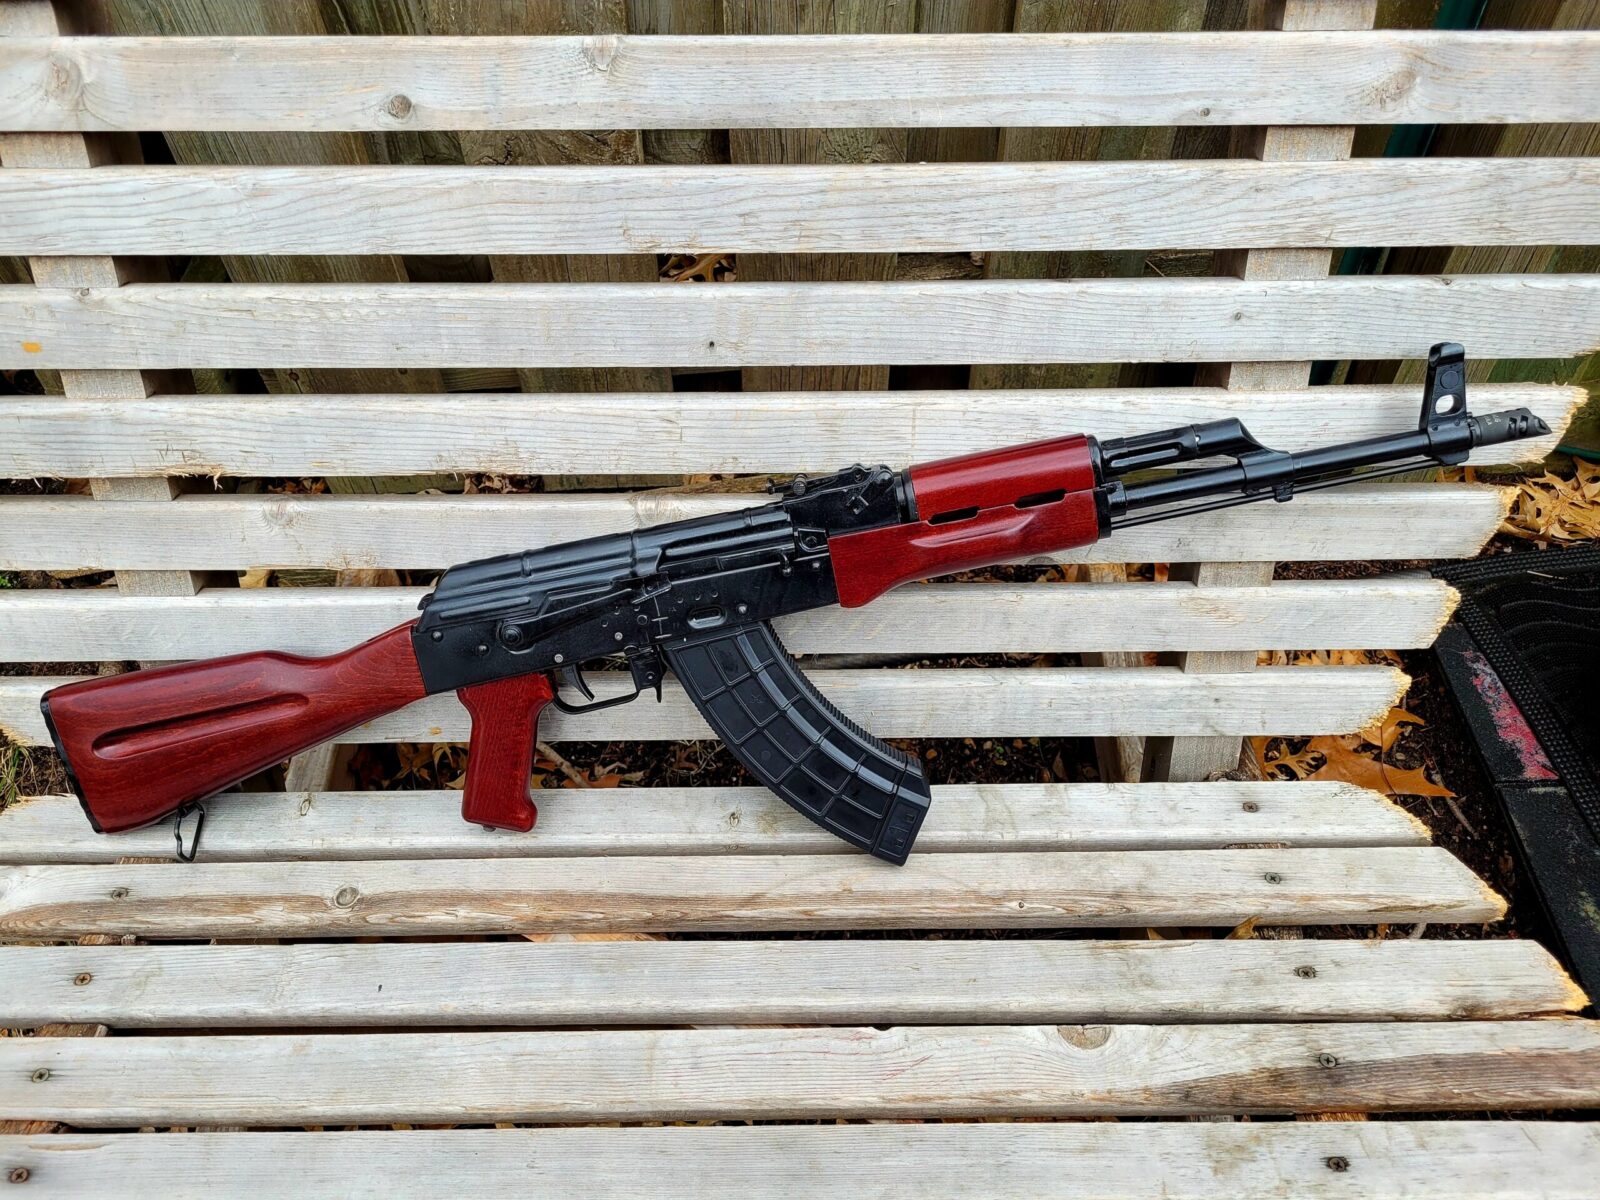
Ok, now that I have your attention with that title, I often get asked how to fit the various furniture parts of an AK to a given rifle – the gas tube cover / upper hand guard cover, the lower handguard and the buttstock. Most of the work can be done with a secret tool – a slightly modified single cut file and patience.
Most of the time with new furniture, you need to remove material and a single cut file works great for that. With the pictured PSA Redwood furniture set, I needed to think the half circle ends of the gas tube cover and I also had to fit the lower hand guard just a tad.
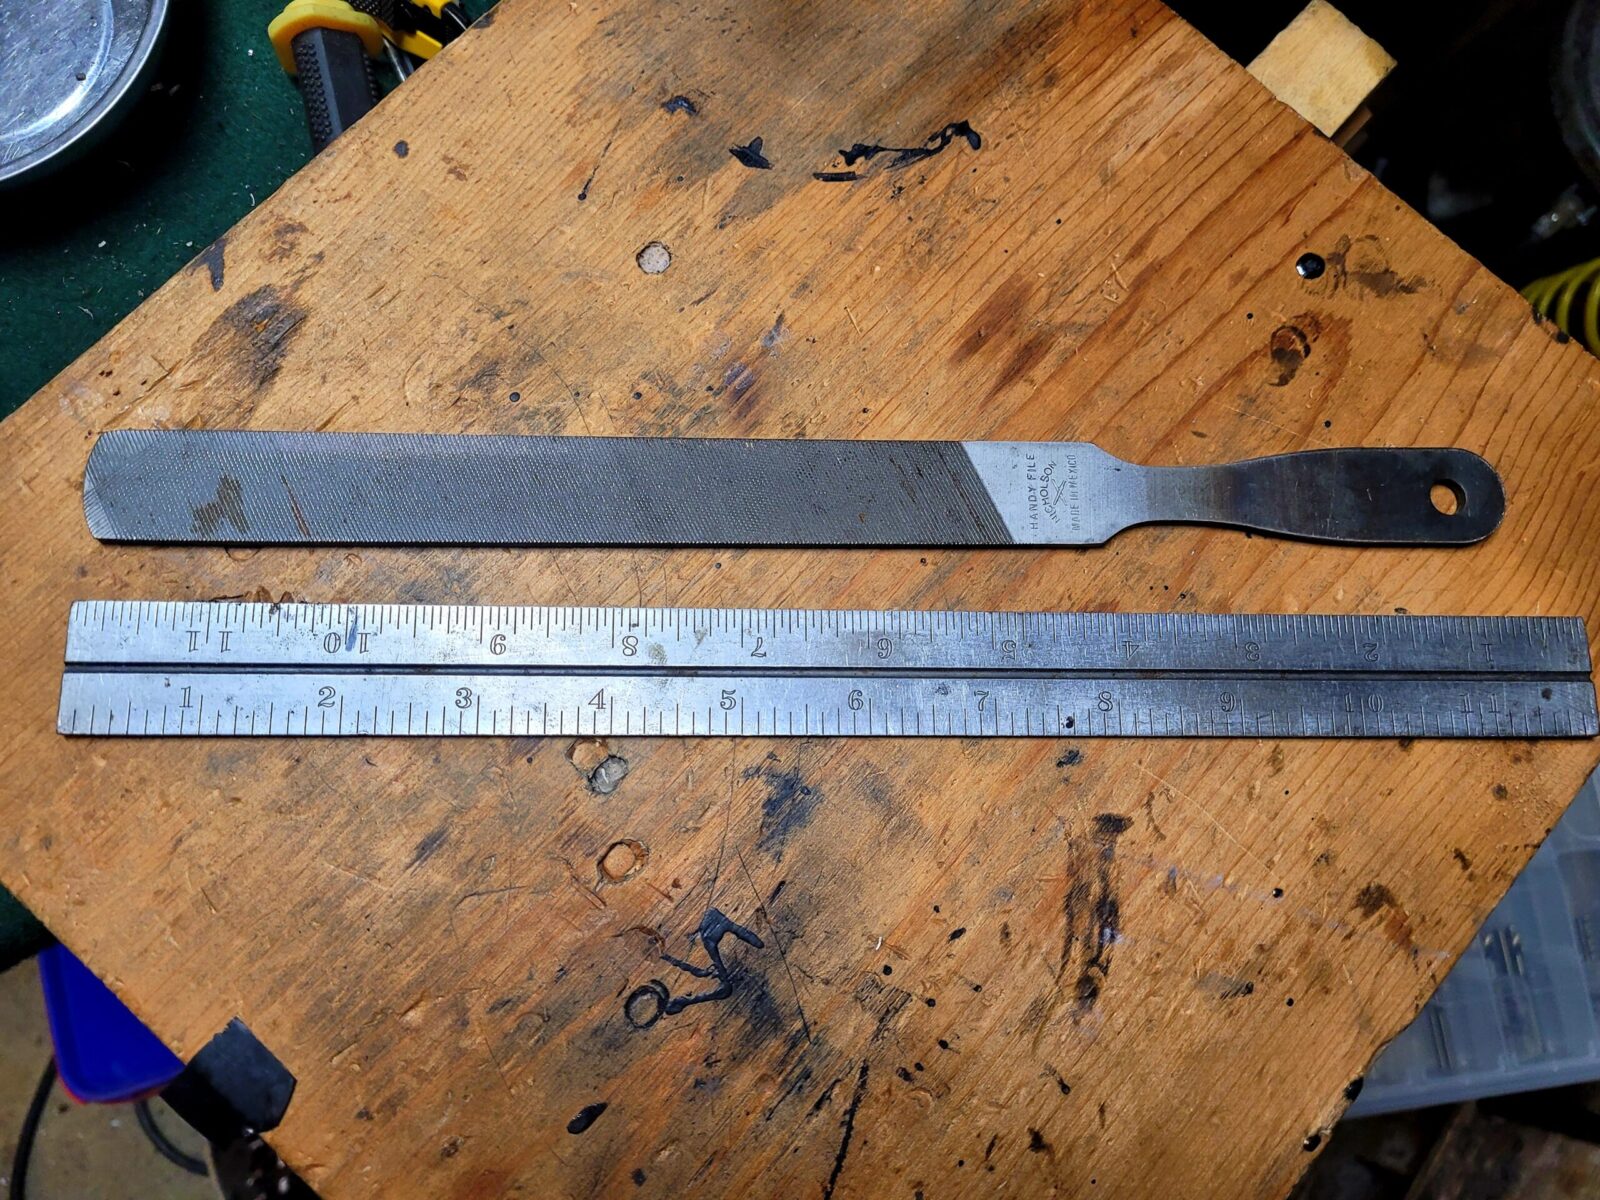
This is an 8″ single cut Nicholson Handy File that I bought many years ago and modified. I prefer a single cut file so I can go slow and not remove material too fast. Just remember an old saying – “it’s easier to take more material off than it is to put it back on.”
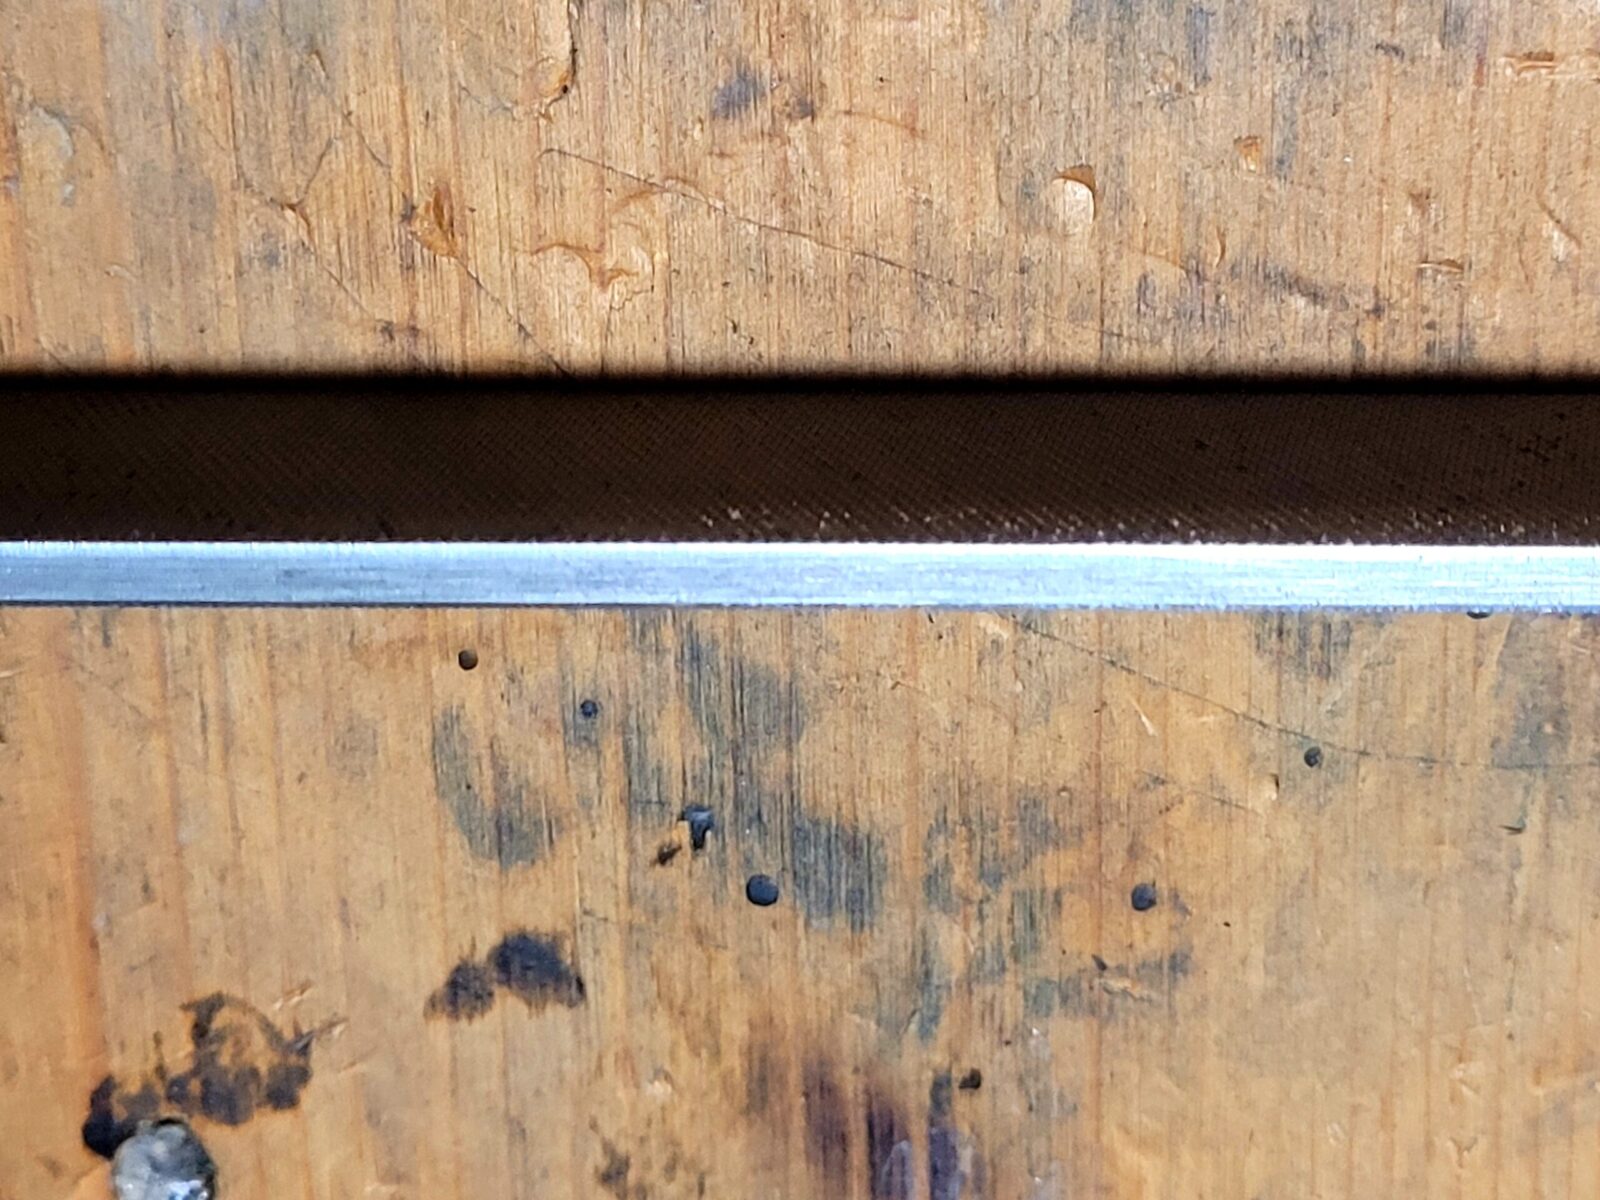
Now here’s the trick to really make this tool work for fitting furniture – grind one thin side smooth – literally get rid of the file’s teeth. This will allow you to quickly and easy run the file right against a raised edge, such as the lips of the gas tube cover, and remove material that you want while leaving the raised edge untouched.
Any brand of file ought to work. Some come with a “safe” edge meaning no teeth. Just test it first to see if any of the teeth from the perpendicular surfaces protrude enough to cut – if they do then knock them down so the smooth surface can ride on the material you are working on with zero cutting happening from that side.
I used my big belt sander and removed all the teeth from this one edge and ensure it was smooth. I purposefully left the teeth on the other thin edge.
Just be patient – look at where the furniture is binding, remove a small amount and test the fit. In general, you want AK furniture to fit snug vs. rattling around. Patience is the key though – don’t rush things. Just keep inspecting, filing off a bit and testing over and over.
So everything is installed, nothing broke because I rushed and the end result is nice snug fitting furniture.
Summary
A single cut file with one thin edge ground is the secret tool but you need to be patient when using it. I can’t even begin to guess how many lower and upper handguards I have adjusted with this file over the years plus I have learned a bit more patience as well.
Have you ever noticed that when you look in your side rear view mirrors of your car or truck that there is a “blind spot” that vehicles can disappear into? I can’t tell you how many times I’ve had a surprised motorist beep their horn because I didn’t see them when changing lanes or turning. There is definitely a way to fix that with what are known as “blind spot mirrors”.
Blind spot mirrors have been around for many years and basically are a 2″ convex (meaning bugled outward) mirror that sticks onto your OEM side view mirror with a piece of double sided tape. They worked but many had a weakness – because they were made from cheap plastic, the mirror finish sound start to fade/oxidize over time and instead of a perfect little mirror, you had black spots obscuring your view and defeating the whole reason you bought the little things.
A few years ago I ran across a vendor on Amazon of glass (not plastic) blind spot mirrors known as “Ampper”. These glass mirrors don’t break down like the plastic ones — at least they haven’t yet on our vehicles. I bought our first set in June of 2019 and have slowly replaced the plastic old plastic blindspot mirrors as they failed. In the case of my new 2021 Dodge Ram 2500, I bought the mirrors and installed them right after I got the truck.
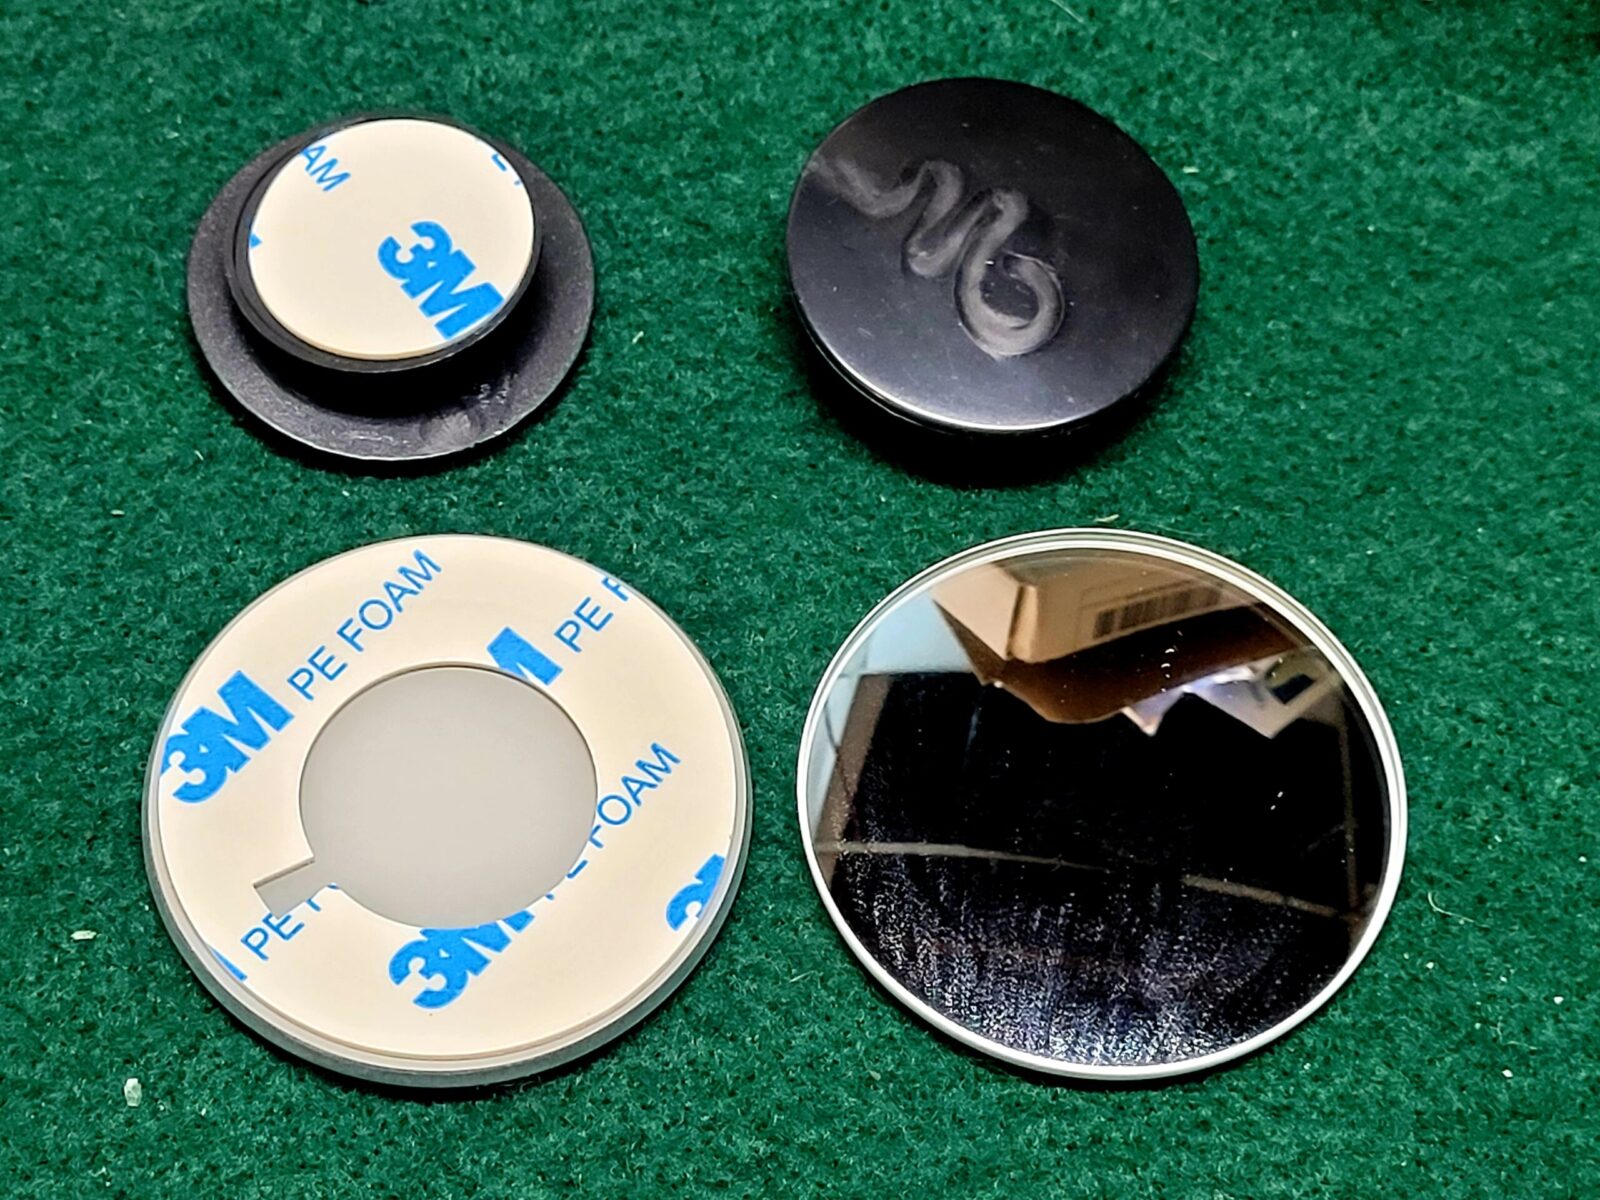
Note, they come with some little plastic swivel mounts that you can optionally use. I find them too light for my liking and instead just clean the vehicle’s mirror and stick the blind spot mirror directly on the OEM mirror.
The Ampper mirrors come in two packs – two mirrors and two swivels mounts – enough to do one vehicle. Note, I don’t use the swivels. Click here for the Amazon listing.
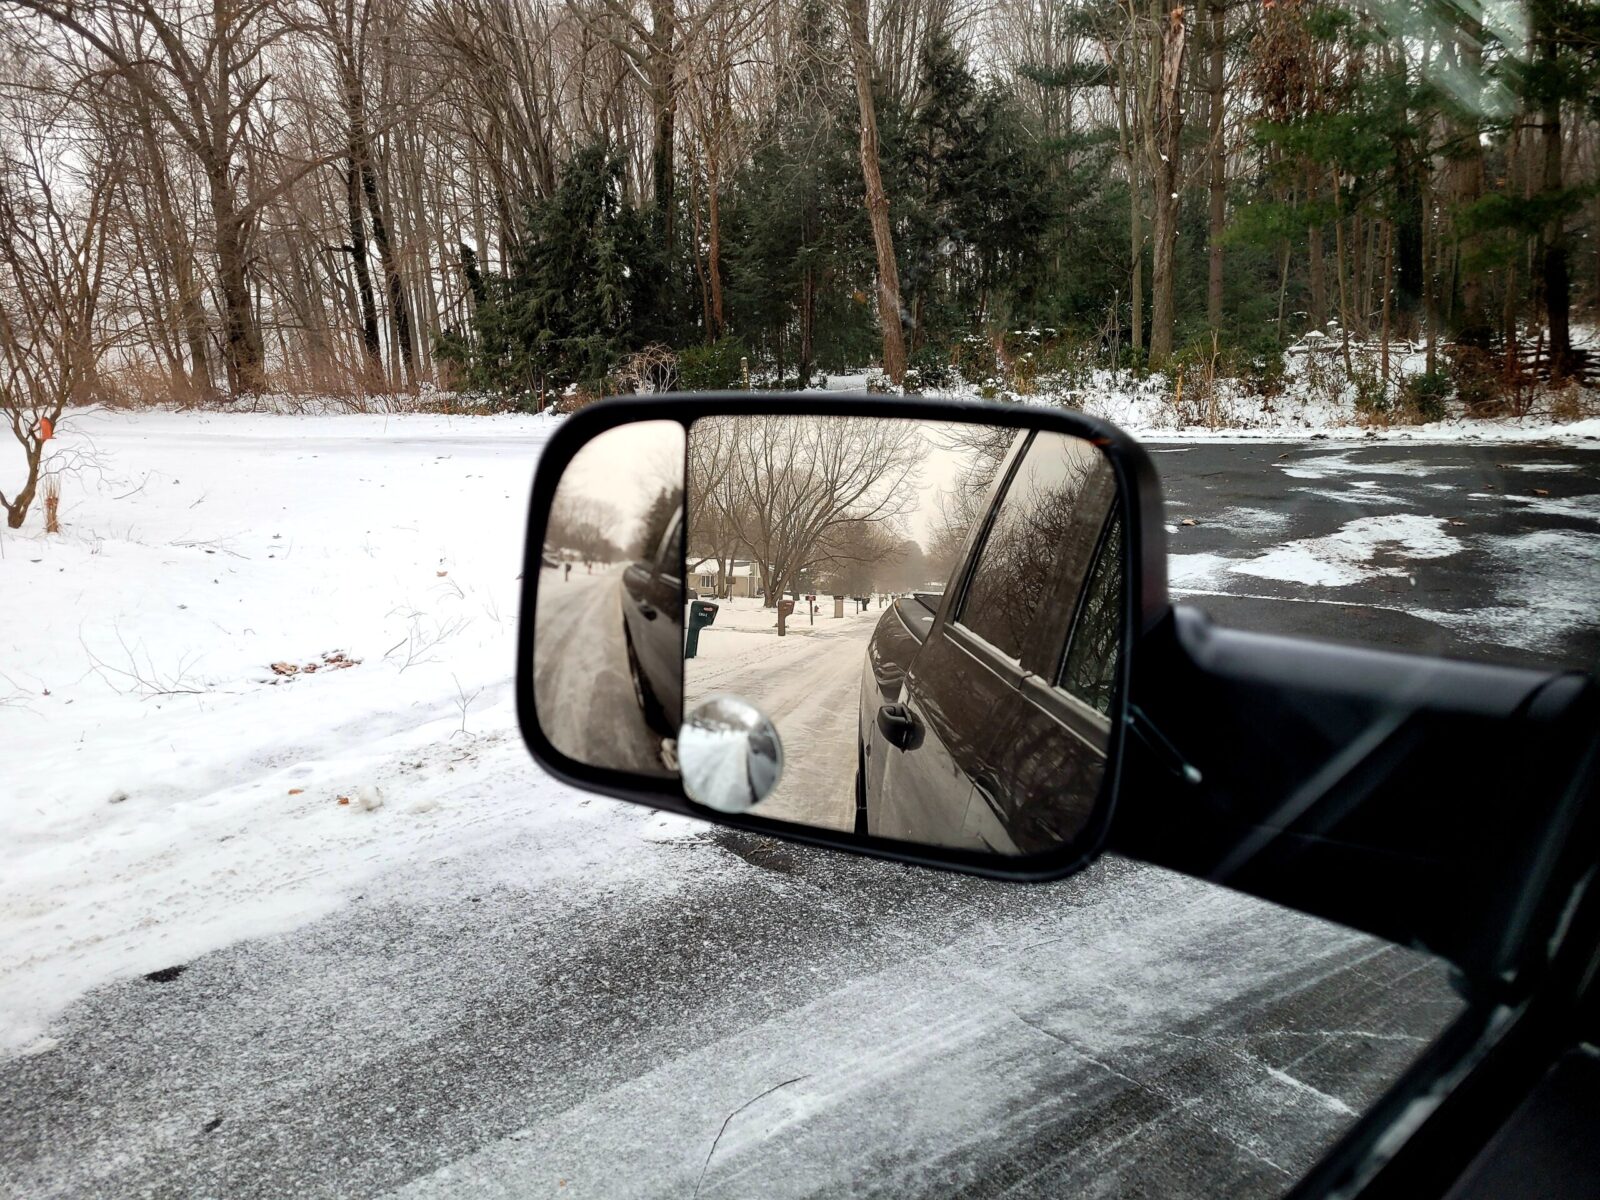
Even though my new 2500 has giant mirrors, I felt like I was more likely to catch a vehicle by the side of my truck by adding the blind spot mirror.
You can see the blind spot mirror provides a different perspective of what is going on next to the truck. I have them on both the driver and passenger.
Summary
I’d honestly recommend these for any car or truck to help reduce or eliminate the blind spot but ultimately you need to figure out how best to make sure there aren’t obstacles/vehicles in your way. You can get them off Amazon [click here] and they are cheap insurance.
I hope you find this helpful.
Note, I have to buy all of my parts – nothing here was paid for by sponsors, etc. I do make a small amount if you click on an ad and buy something but that is it. You’re getting my real opinion on stuff.