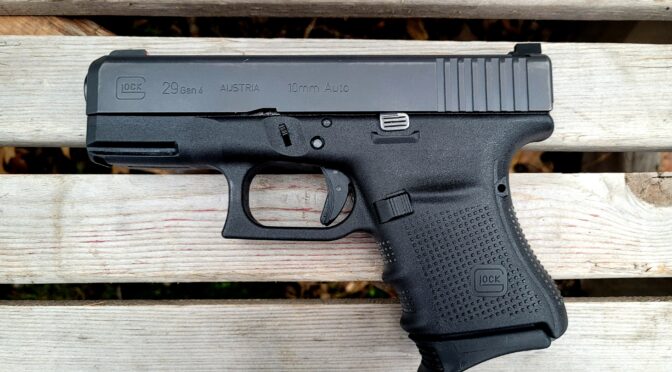
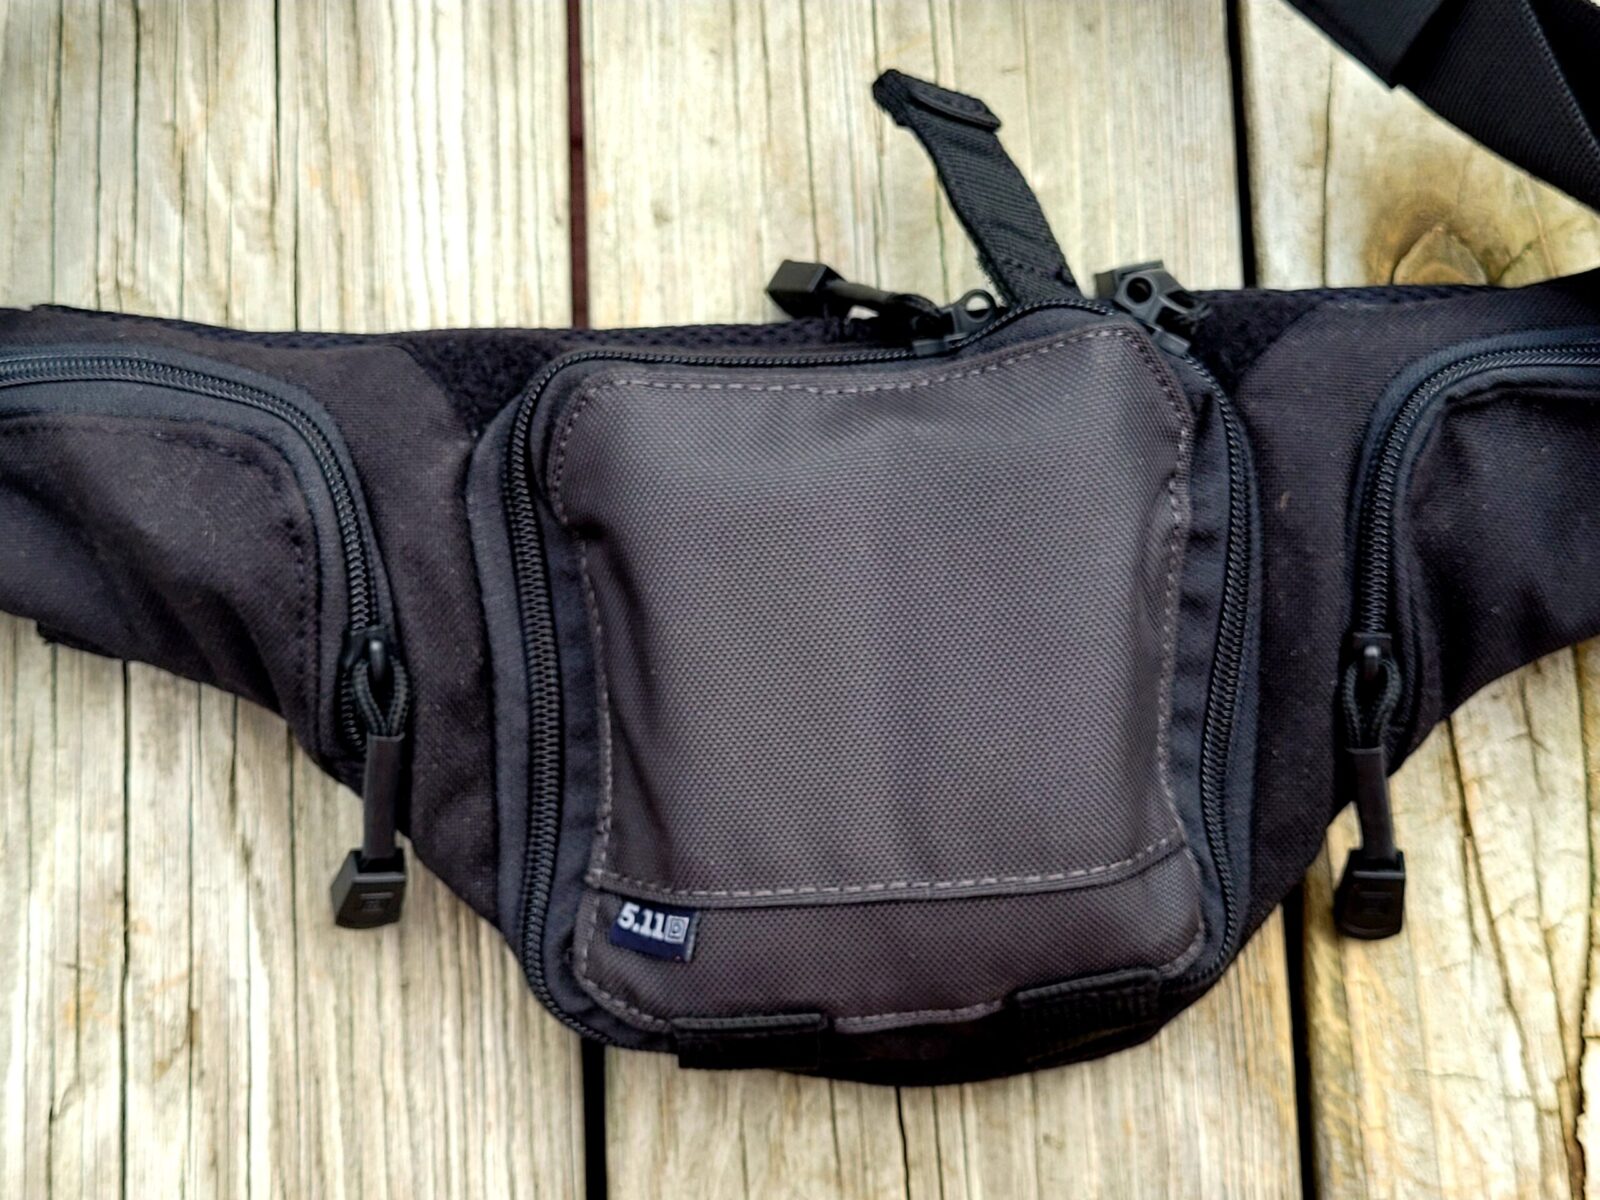
I recently wrote about my Glock 29 Gen 4 and carrying it while hiking. A fellow asked me for more details on what I was using to carry it ands I told him I was using a 5.11 Select Carry Pouch – which is a fancier product name than “tactical fanny pack”. Joking aside, it really does a great job.
Ok, why the fanny pack? I’m on the heavy side and when I go hiking I am usually wearing shorts or sweatpants depending on the weather. Jeans are a “maybe” but I’m at the point in life where I go for comfort. I’m sure not dressing to impress anyone.
If I am wearing jeans and can use a pistol belt then I might use a holster but it depends on the weather. I’d rather conceal the firearm vs. dealing with people staring at my pistol as we are walking along. If I am wearing a coat or open long sleeve shirt then I might wear a belt holster. My preferred option is a Galco shoulder holster.
What I find is that I am often hiking or fishing and it’s too hot for a coat or loose shirt so I had to figure out what to do. I knew a fanny pack might look goofy but would work great if I could find the right one given how it could distribute the weight while concealling the pistol.
The Glock 29 gen 4 is relatively compact but it is not tiny by any means and once you load it down with 10 rounds of 10mm and have a couple of back up mags of 10mm, you’ve got a lot of weight to deal with.
A couple of years ago I ordered in some different models of the no-name import fanny packs that claim to support concealed carry and the quality was very disappointing – light fabrics, lousy sewing and poor zippers across the board. They weren’t an option for the Glock 29 gen 4 because they would never hold up to real world use.
There are a lot of carry options out there but I think I can make the blanket generalization that you get what you pay for – you need a well thought out design, rugged materials, a rock solid zipper and these aren’t cheap.
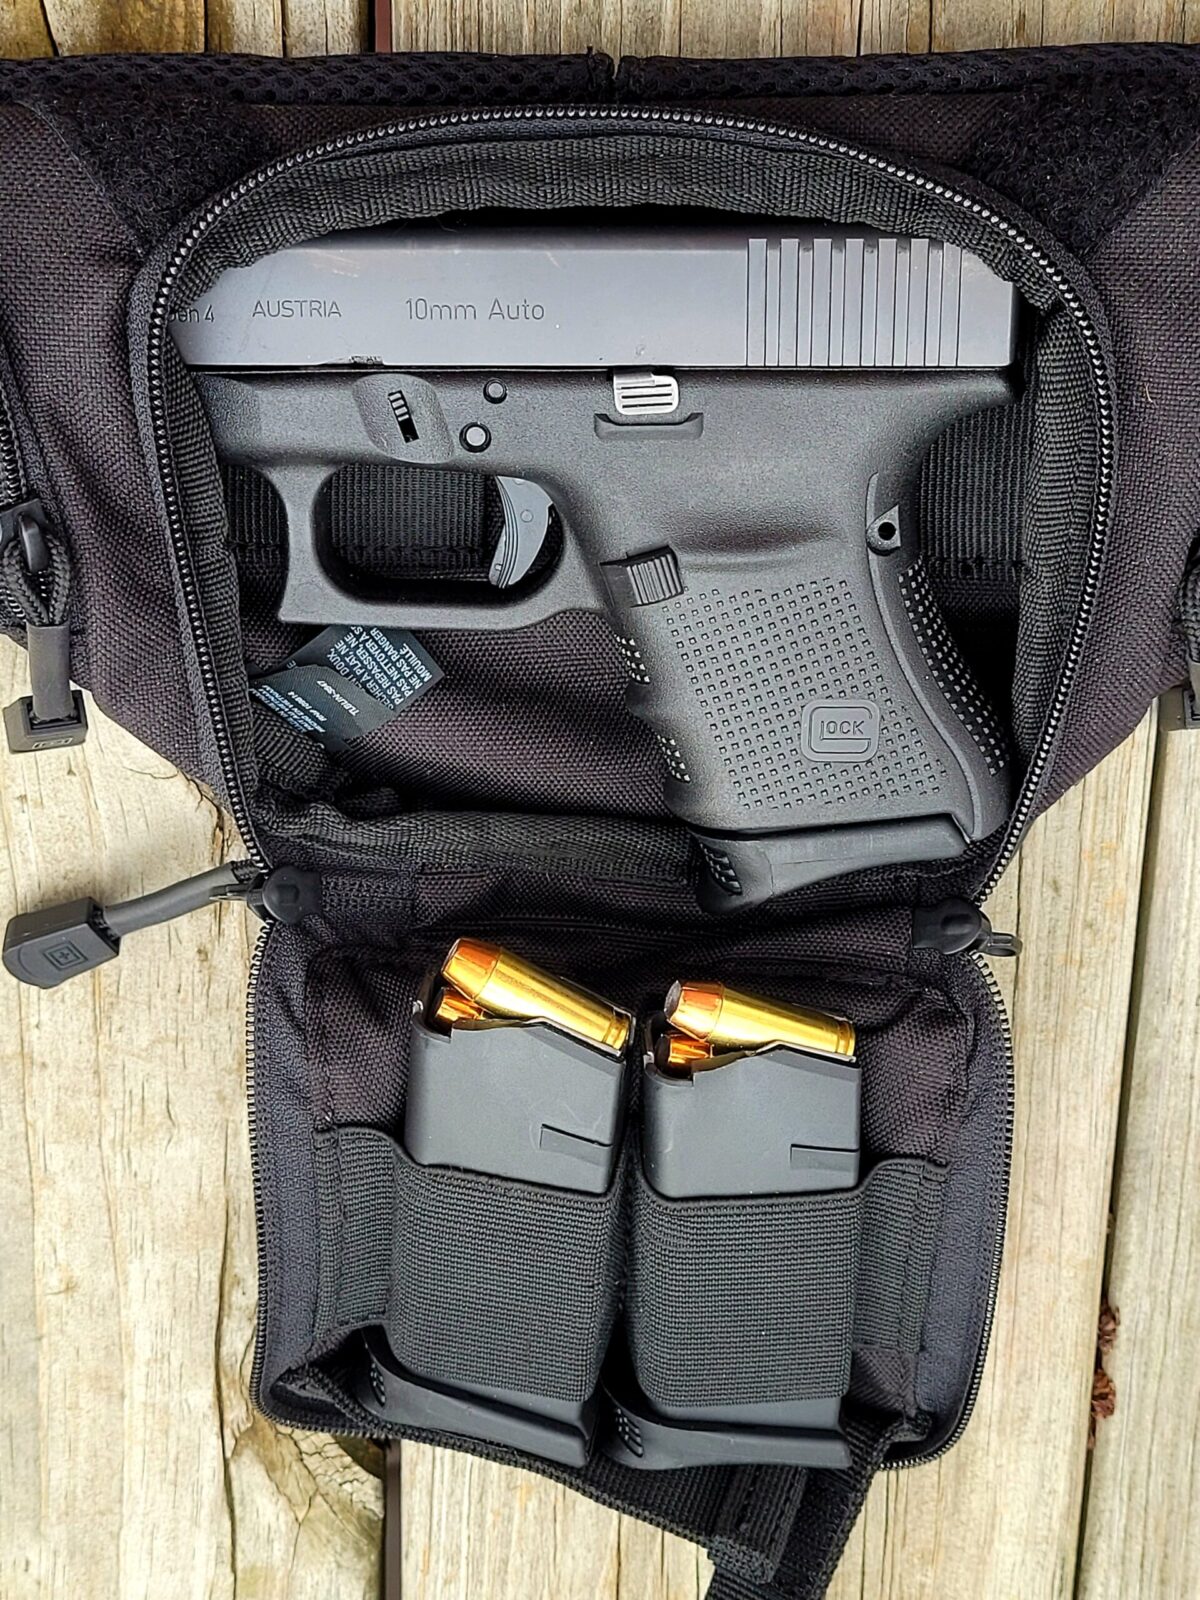
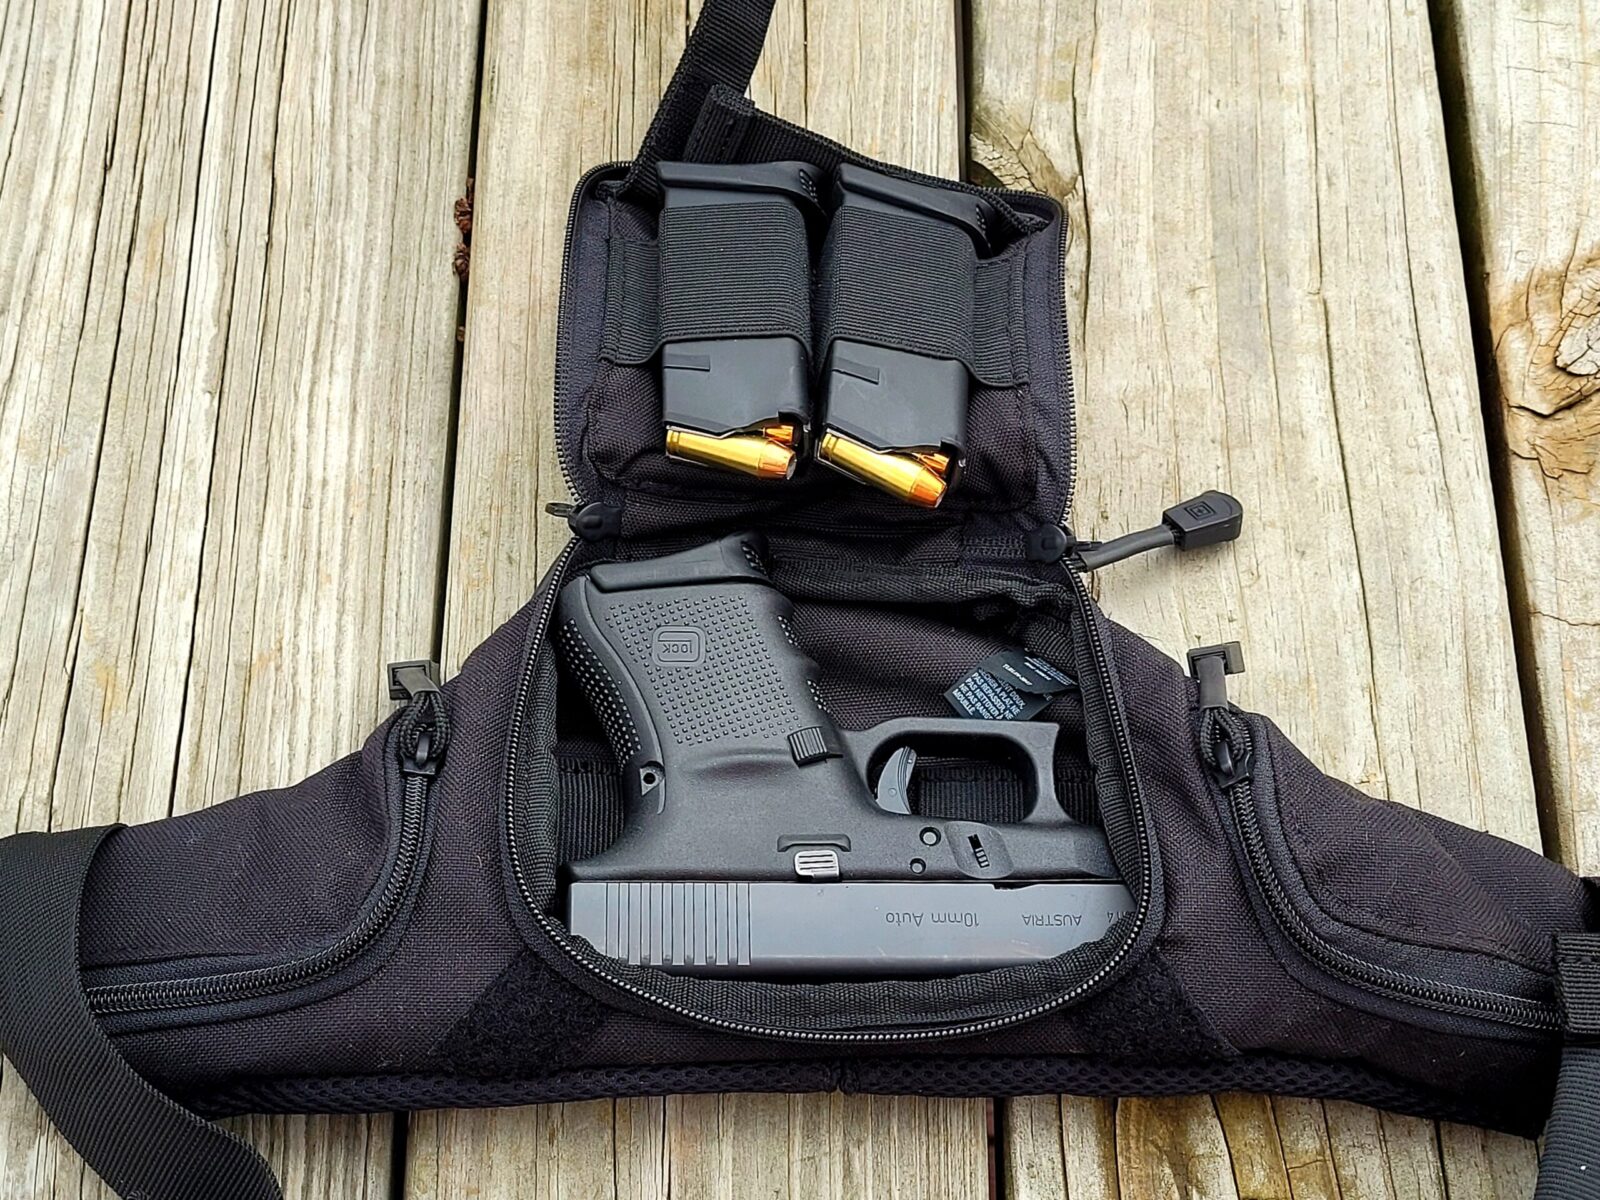
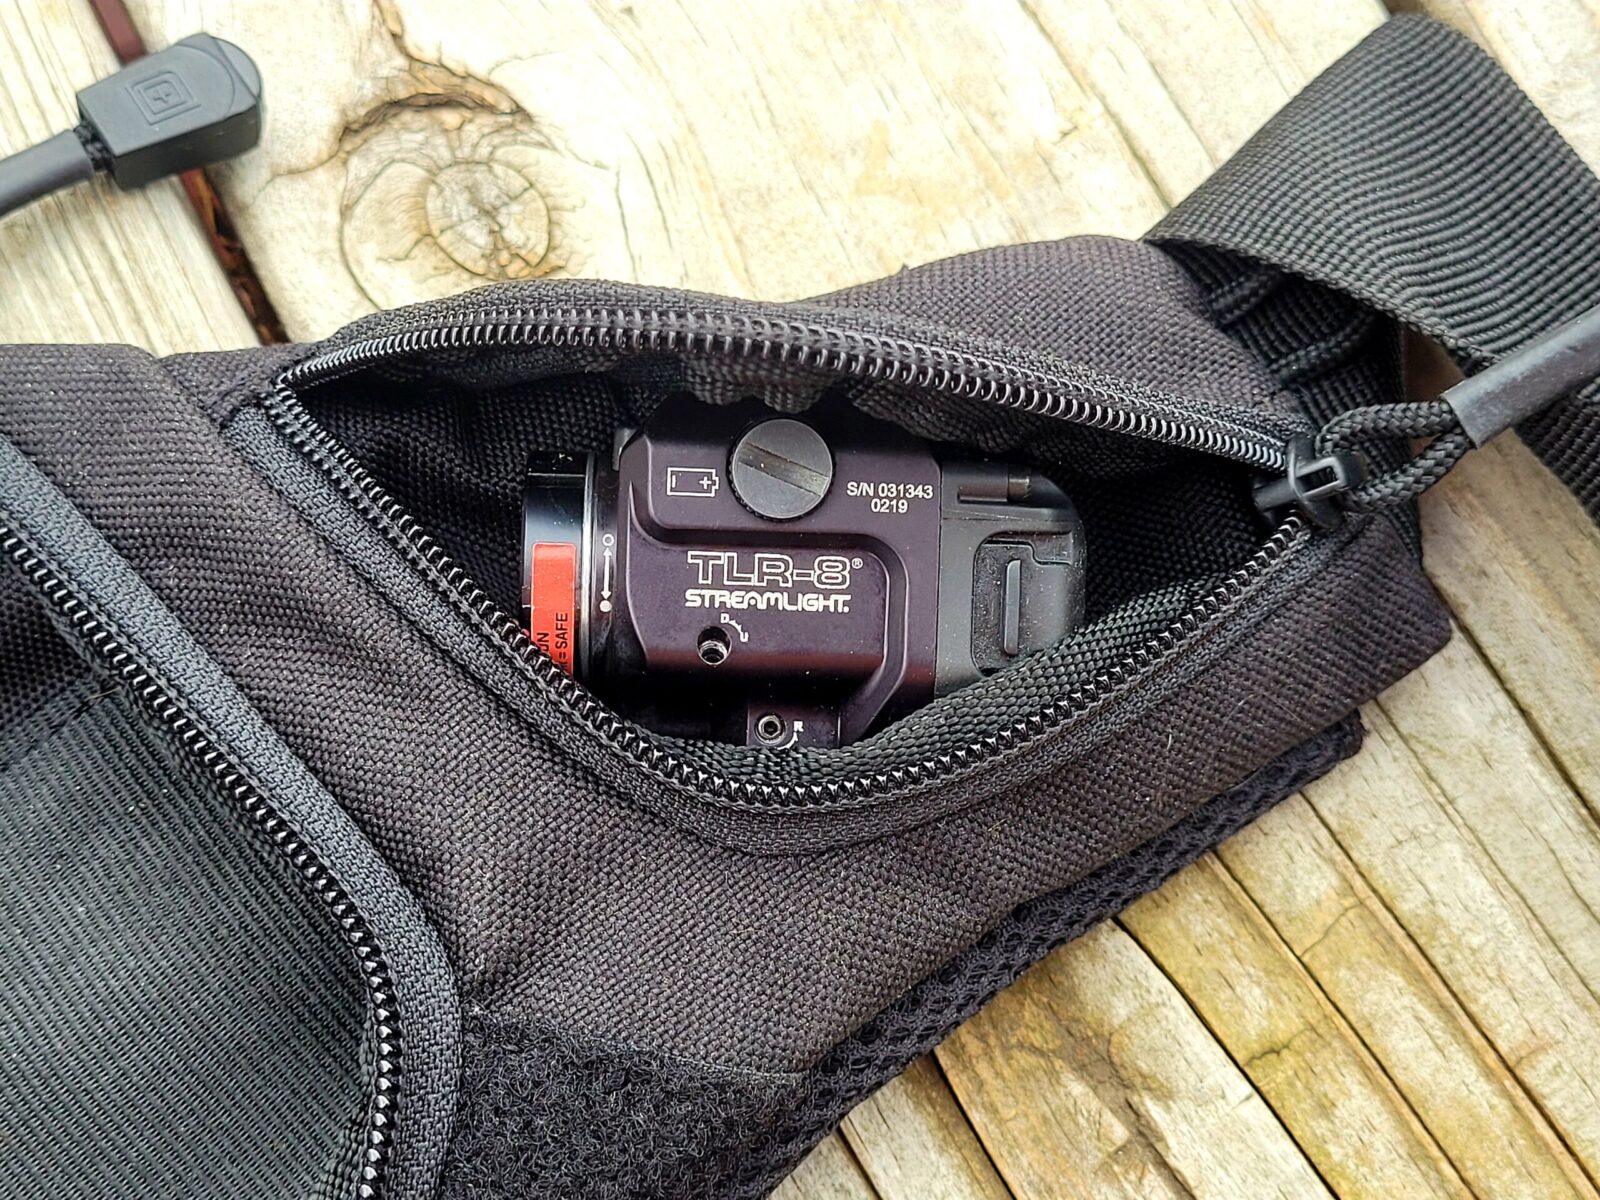
One company I like is 5.11. Their gear is reasonably priced and has never let me down. Yes, I am getting to my point – their 51804 Tactical Select Carry Pouch is very well made, looks good and doesn’t attract attention. It’s a tight fit but I can squeeze in my G29 with the Pearce magazine base plate so I have a place to rest my pinky finger, two more 10 round mags and a Streamlight TLR-8 that I keep in a side pouch.
The main pouch is a tight fit but I can squeeze in what I need. It’s symmetrical so you can insert the pistol facing either left or right. I have mine set up to rip open with the left and pull the pistol out with my right hand.
Here’s another angle. When you have the load shown, there is very little extra space.
I keep a TLR-8 stored in the right side pouch. It’s a snug fit also.
They call that thing sticking up a “hot pull strap” that you can use to yank the compartment open in a rush. Now that folks is one heck of a good idea. If you are in a hurry and the adrenaline is kicking in, fumbling with a zipper is going to suck. Grabbing that pull strap and yanking open the pouch is very do-able.
To give you an idea of real world sizing, a G29 Gen 4 is about 7″ long andjust over 4.5″ with a regular mag. Let’s just round that to 5″ in my case with the Pearce base plates. You can see in the photos that it is a snug fit. My Sig P365 fits no problem.
Note, I have to buy all of my parts – nothing here was paid for by sponsors, etc. I do make a small amount if you click on an ad and buy something but that is it. You’re getting my real opinion on stuff.
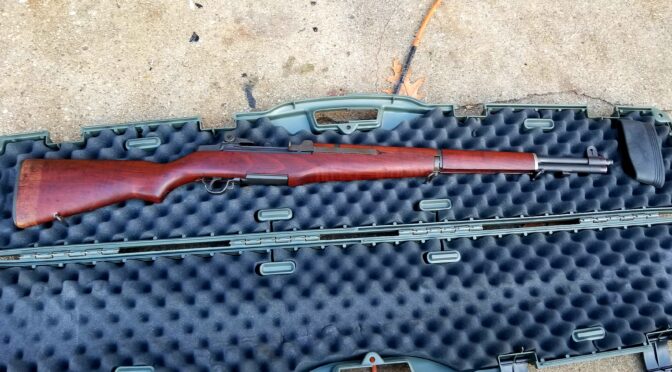
Some of you who know me as “ronin” back on the AKFiles way back when may recall that I bought my dad a M1 Garand, his bucket list rifle, back in 2011 after he was diagnosed with cancer. Just in case something ever happened to the AKFiles post, I had saved the text and photos and put them into a blog post on my site [click here].
My dad passed away in 2014 and I couldn’t even look at the rifle – it just hurt too much. I talked to one of my best friends, Scott, about it because he’d lost his dad too and he told me to just tuck it away and look at it some day in the future. He knew the rifle meant a lot to me and I took his advice.
So fast forward to the present time. I finally decided it was time to look at the Garand and make sure it wasn’t rusting. I recalled oiling it before putting it away the last time but that was six years previous. At any rate, I opened the CMP case up and everything looked good.
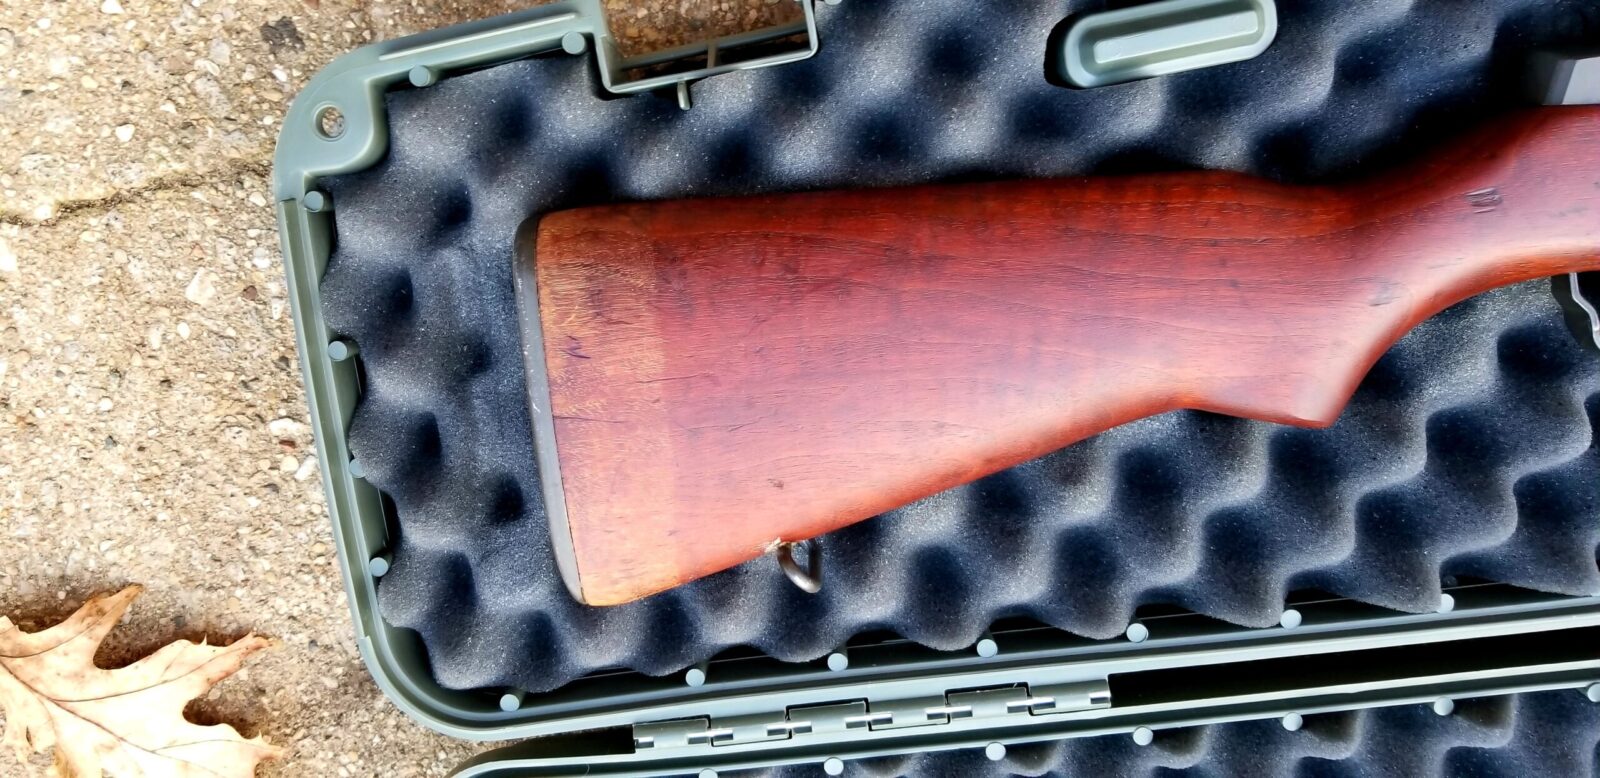
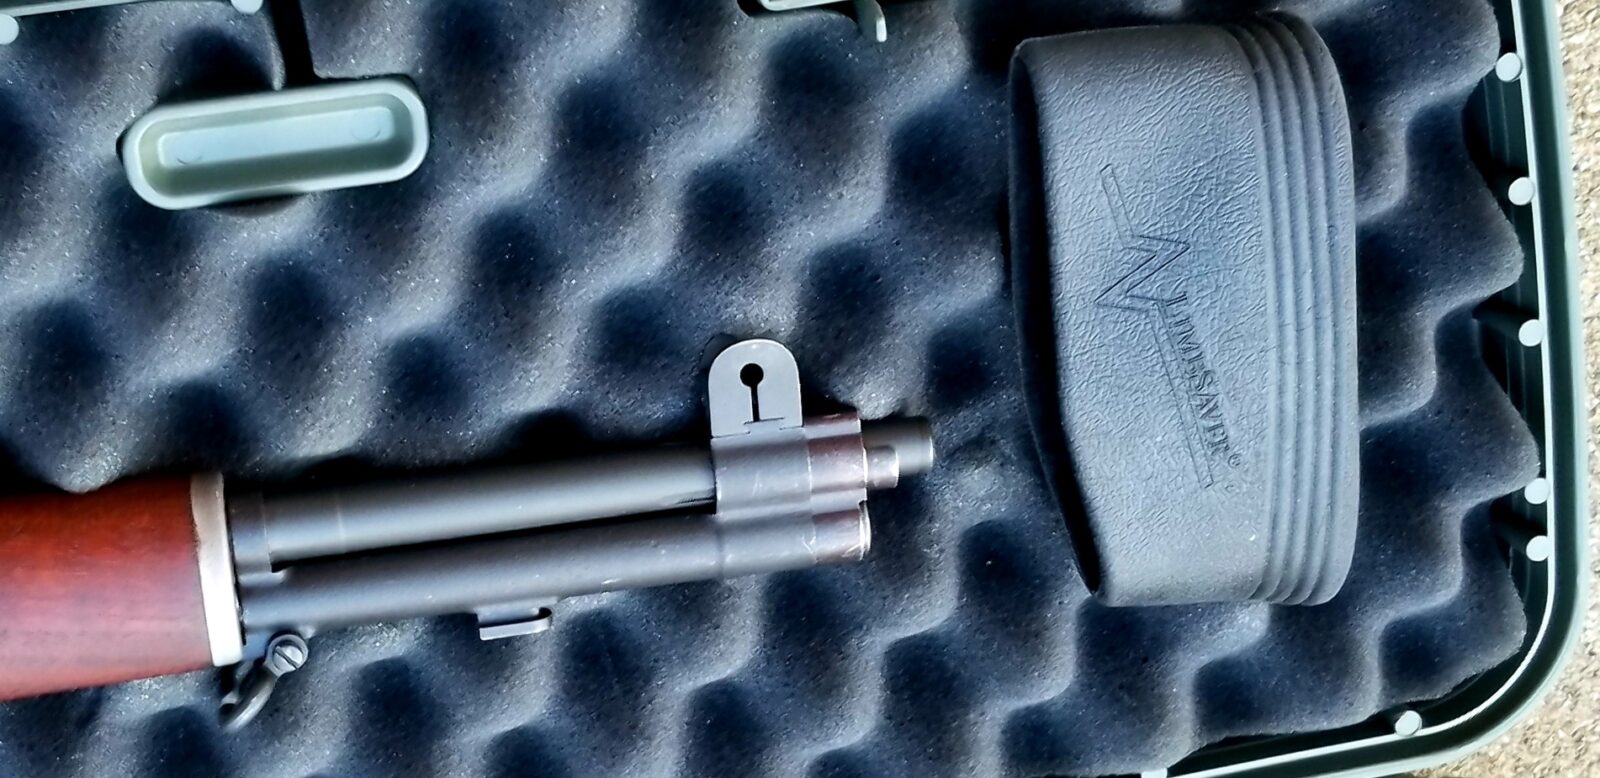
I then rolled back the Limbsaver pad off the butt of the stock – I’d put it there so the rifle wouldn’t kick my dad too hard – and the wood had visibly dried out under the Limbsaver. I really don’t know why – it must have been something to do with the polymer in the Limbsaver slip-on pad and the linseed oil on the stock.
I saw the dry wood and literally thought “Oh no”. Then I got a grip, realized it was just dry and tracked down what type of linseed oil to get.
It was a shock and really started me. My dad was the one who taught me how to shoot and clean firearms. That I might have let him down and hurt his rifle did not sit well at all.
The Limbsaver pad worked great with my dad. I guess I shouldn’t have left it installed for six years. By the way, I am not blaming the recoil pad – Limbsaver pads are my favorites to help tame recoil.
It turns out that the original buttstocks were finished with linseed oil and the dark reddish color they take on over time is from the linseed oil oxidizing. This was real linseed oil that is sometimes called raw or pure linseed oil and not boiled linseed oil that will have chemicals added to it to speed up the drying time.
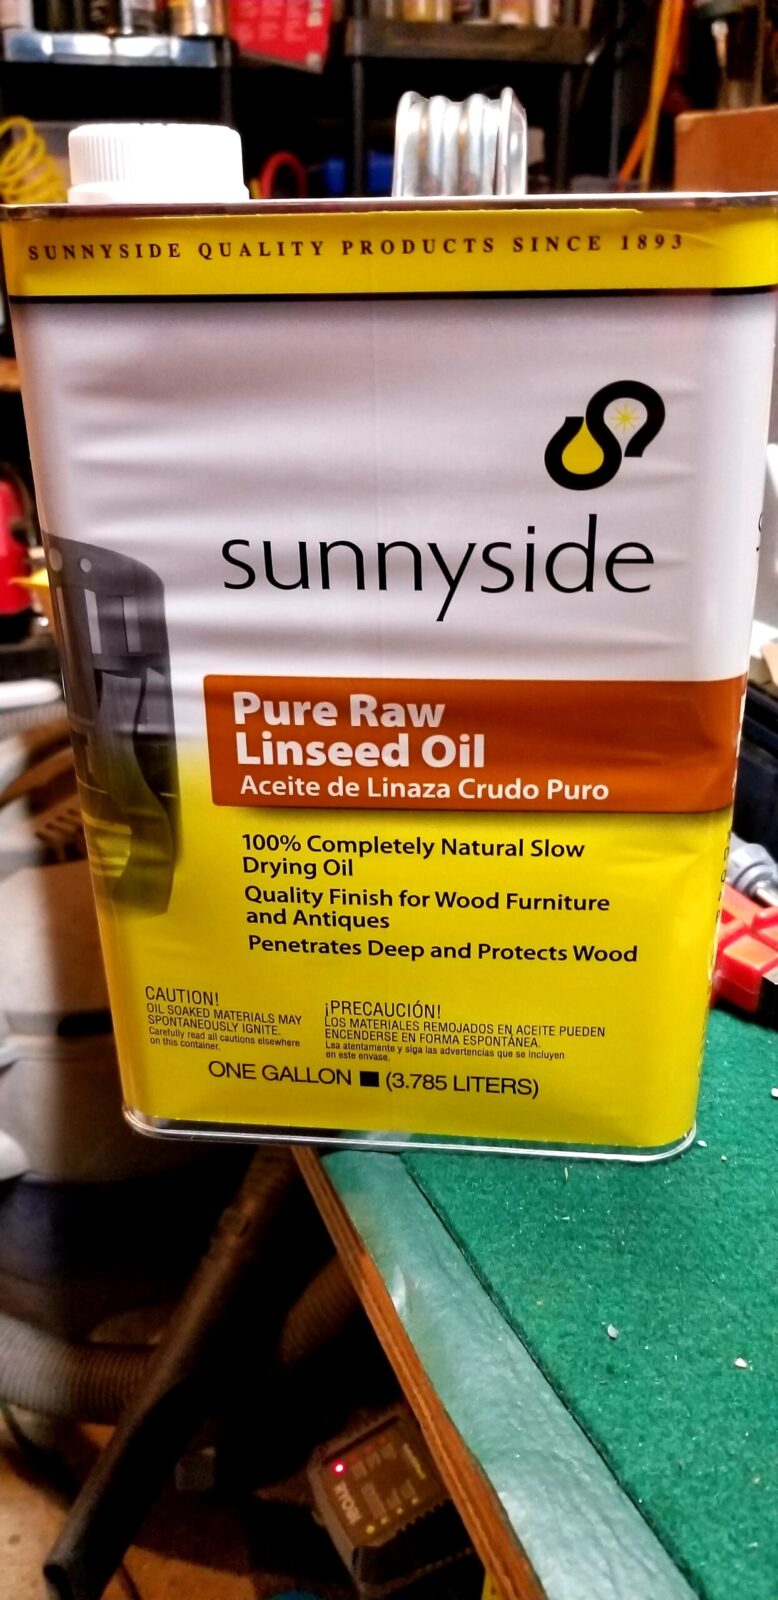
I did some digging and found SunnySide Raw Linseed oil on Amazon.com in both pint and gallon containers. If you are touching up wood, a pint is plenty. I bought a gallon to have for other uses and I may have it a long time given my current rate of usage.
All of the local hardware stores had boiled linseed oil and I was able to find this on Amazon.
With raw linseed oil, be very sure to lightly applied it to the wood and let it soak in and dry before applying the next. I did two very light coats over several days. Never put it on thick or it will get gummy and may never dry.
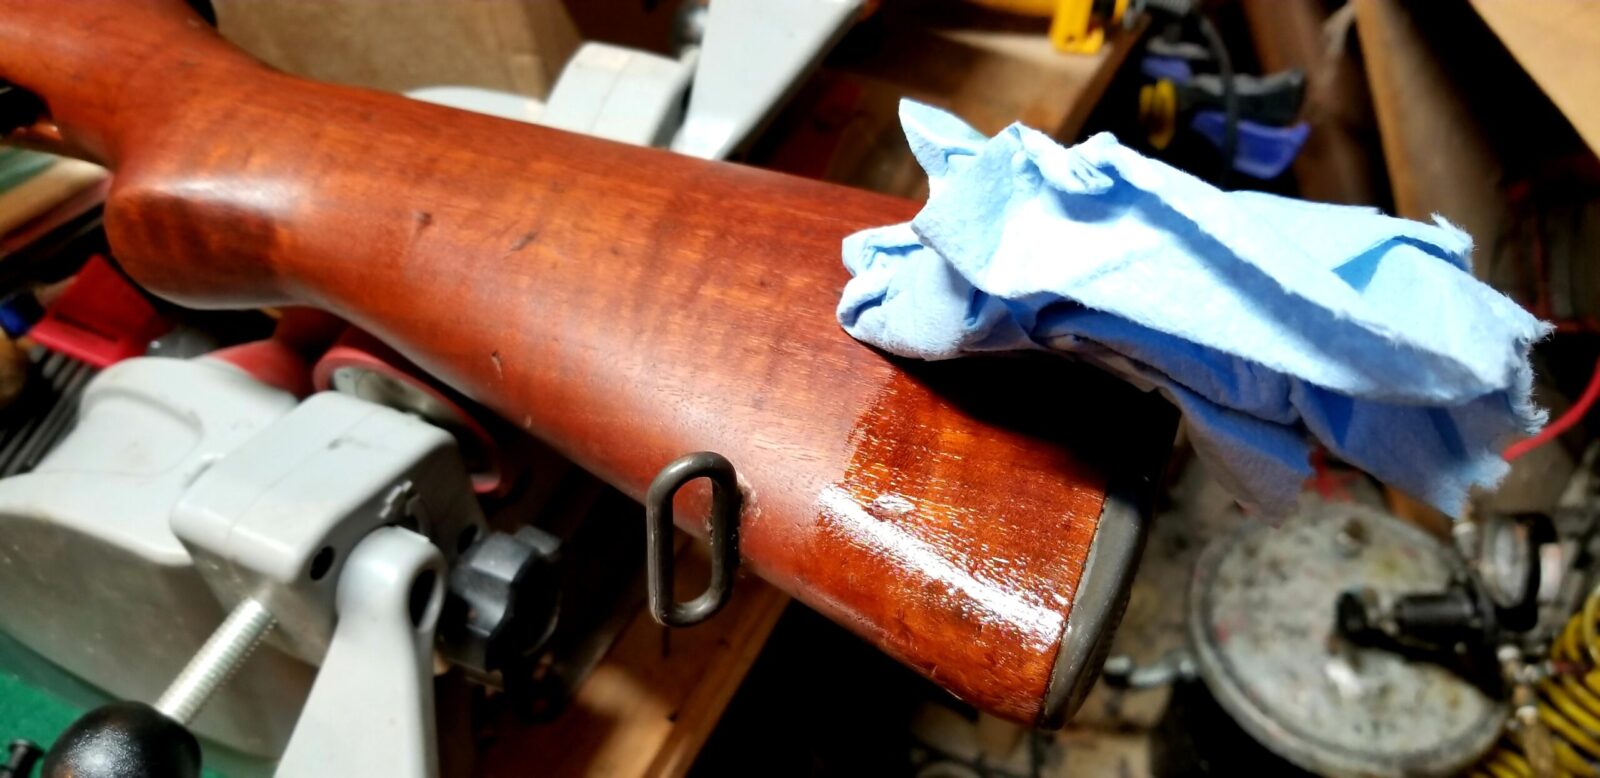
As I was applying the first coat I could already tell it was going to look amazing.
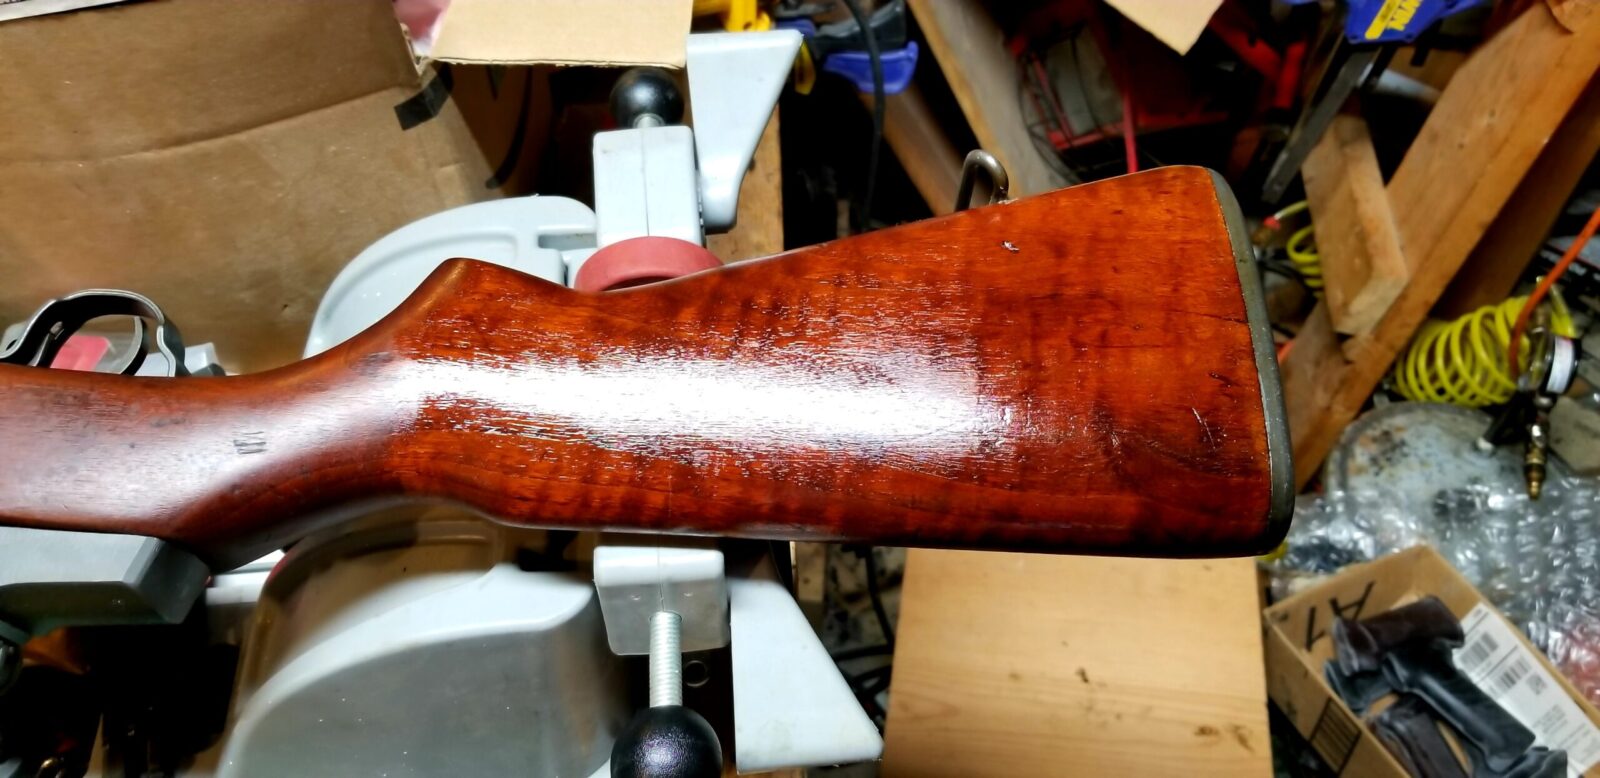
I was still appling the linseed oil at this point but notiice the dry area is gone. Even after the linseed oil cured it was gone.
Also, there is a real important fire hazard you need to know. When linseed oil dries it gets hot and can spontaneously combust. You do not want to crumple up towels that have linseed oil on them and toss them in your trash – they just might ignite.
I take my old towels and burn them in my burn barrel. Some guys who can’t do that will lay the towels out flat on bricks or concrete that can’t burn and let them dry before throwing them out. When laid flat they do not get hot enough to catch fire and are safe once dry.
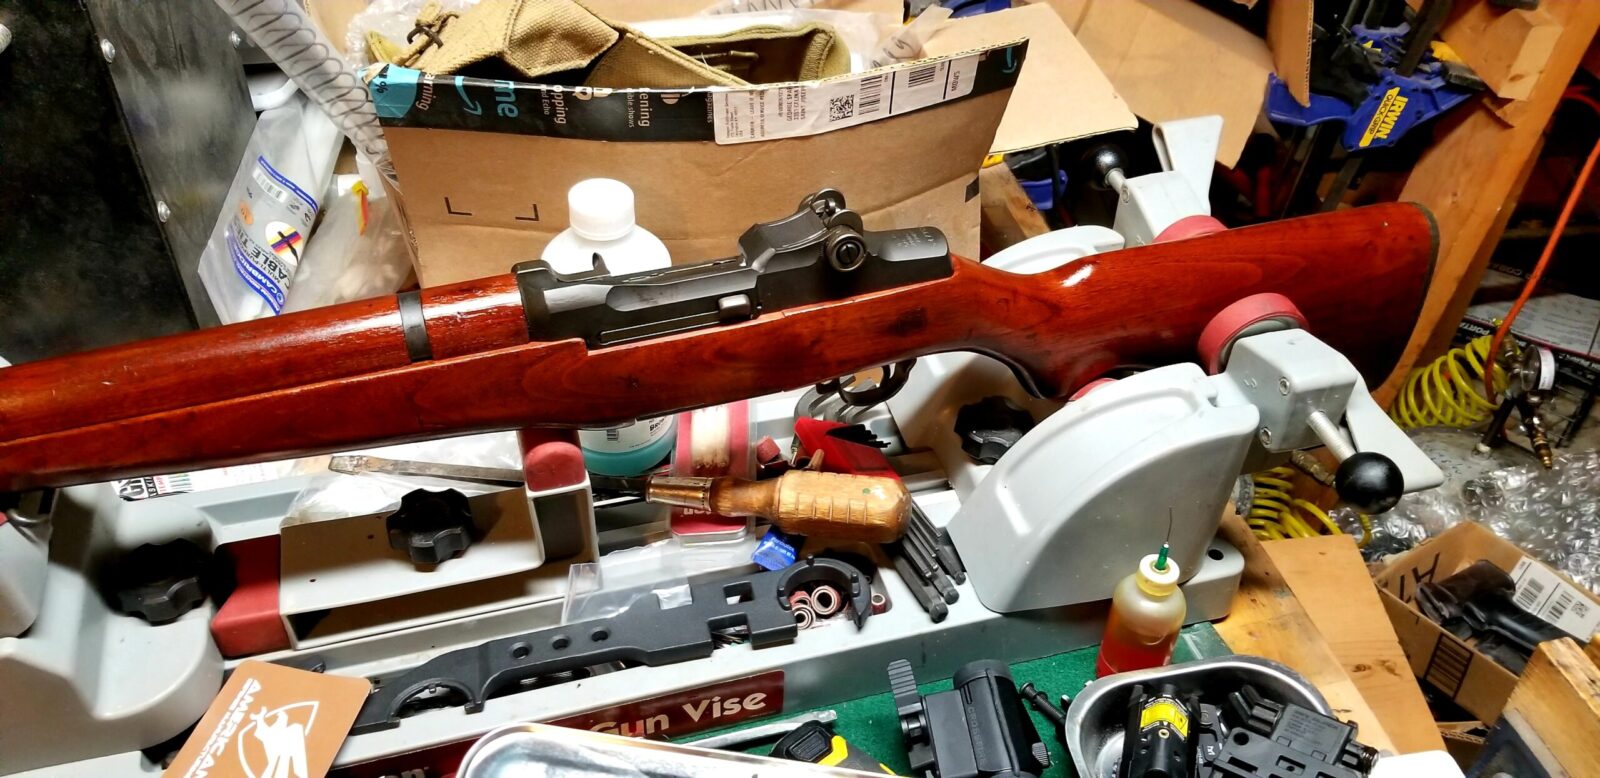
Ignore the mess and look at the wood.
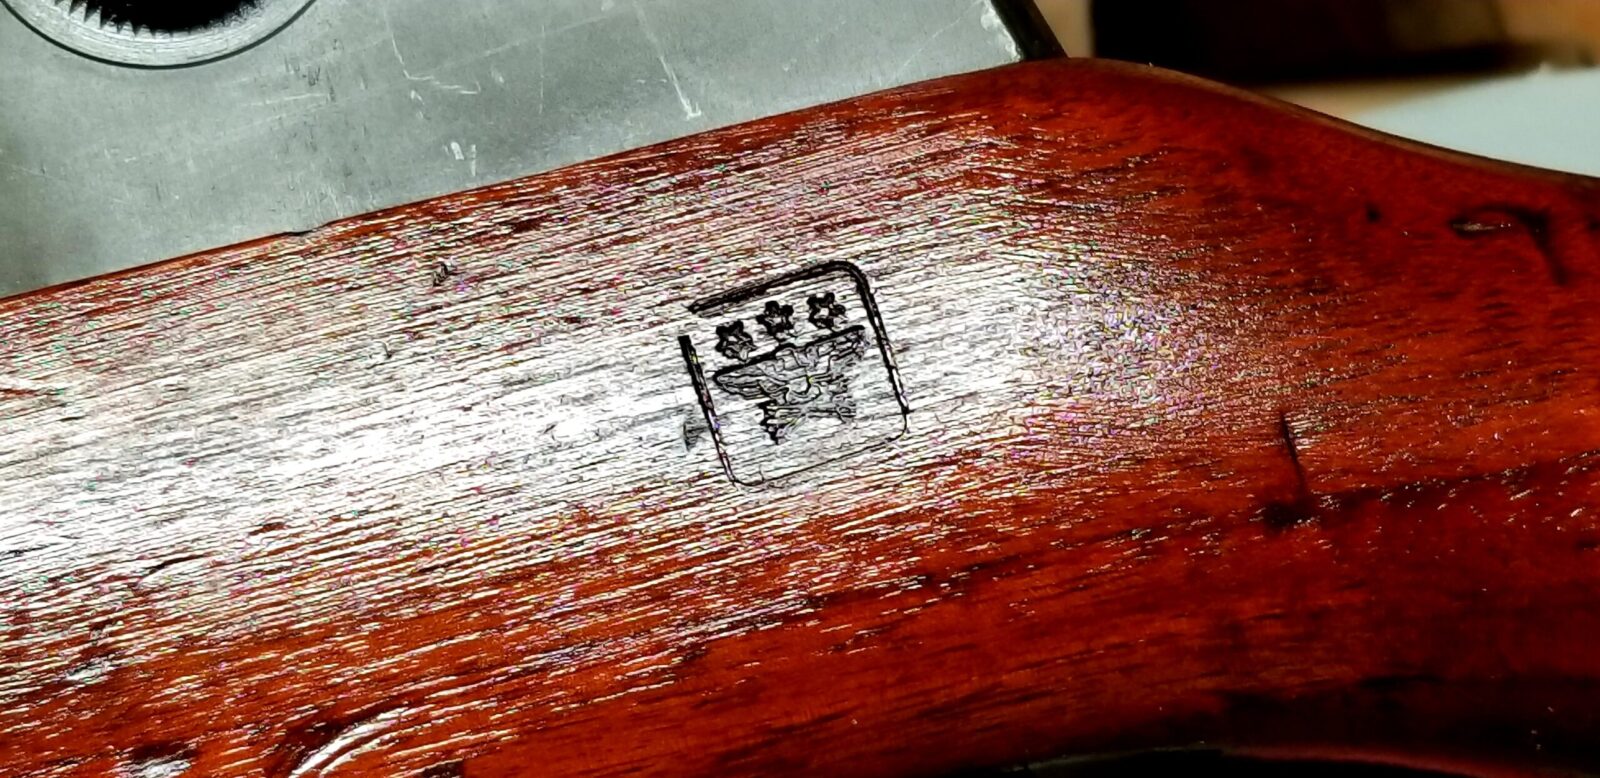
Here’s a close up of a cartouche after two coats.
Let me reinforce an earlier comment – this stuff dries slow. Apply it thin, let it dry all the way before you install the next coat. I would definitely recommend making sure it is fully dried before putting the rifle back into a case or the padding in the case may stick to the finish. I guess a hard lesson learned for me from years ago is that when it comes to finishes, you need to do your homework about how to apply each type and be patient. When I was younger I was very impatient and ran into different problems many times. With my dad’s Garand, I knew to be very patient.
Summary
If you have a Garand with a dry stock, try appling one or more light coats of raw linseed oil and let it dry all the way. The results were amazing. So, I checked the Garand over all the way, oiled it again, left the slip on recoil pad off the stock and put it back in storage. Maybe I will take it to the range this summer and remember my dad.
I hope this helps you out.
Note, I have to buy all of my parts – nothing here was paid for by sponsors, etc. I do make a small amount if you click on an ad and buy something but that is it. You’re getting my real opinion on stuff.
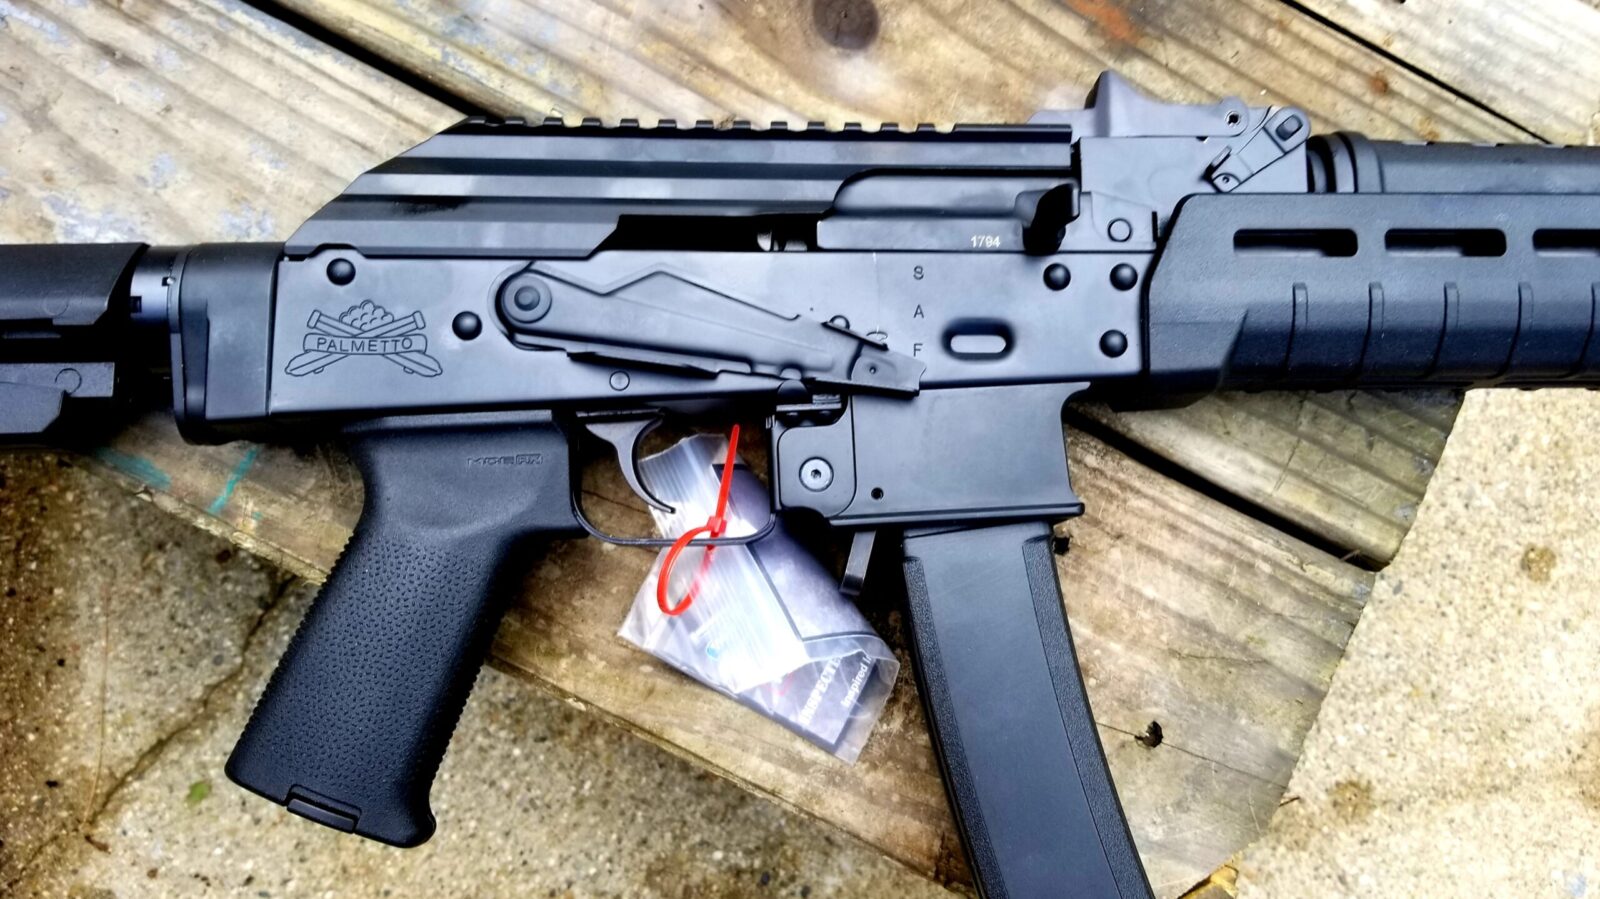
I’ve had a few guys ask me about my experience with the Palmetto State Armory AK-V and if I thought it was worth it. Well, I bought mine on July 20, 2019 and it was solid right out of the box. Although I did do a bunch of customizations, none of those changes were to improve reliability – they were all cosmetic.
An AK-V is basically an AK that has a blow back operating system to handle the little 9×19 (or 9mm Luger) cartridge. They did have some initial problems with the design such as cartridges getting stuck under the dust cover, they had fixed them by the time I bought mine.
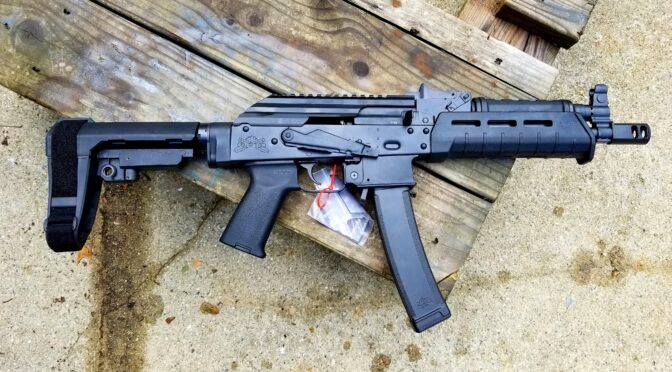
This is my AK-V right out of the box still sporting the Magpul MOE grip, handguard and SBA-3 brace.
Palmetto State Armory (PSA) has a stunning array of Kalashnikov firearms now. AK-47s, AK74s, 100 series, rifles, pistols … it’s impressive. Click here to go to their main AK menu.
The biggest problem I had was finding one. There were a bunch of us watching the PSA website trying to snag any model we could. Finally, on July 1, 2019, I snagged one of their MOE SBA3 models and proceeded to change it to my liking – first with an SBA4 brace and then to look more like a Vintorez. [Click here for a listing of all of my posts on the AK-V].
This was my AK-V after my first round of modifications – I move to the stiffer SBA-4 brace, added one of our quick takedown rings so I could get the dust cover out of the way when cleaning the pistol and one of the Vortex Crossfire red dots.
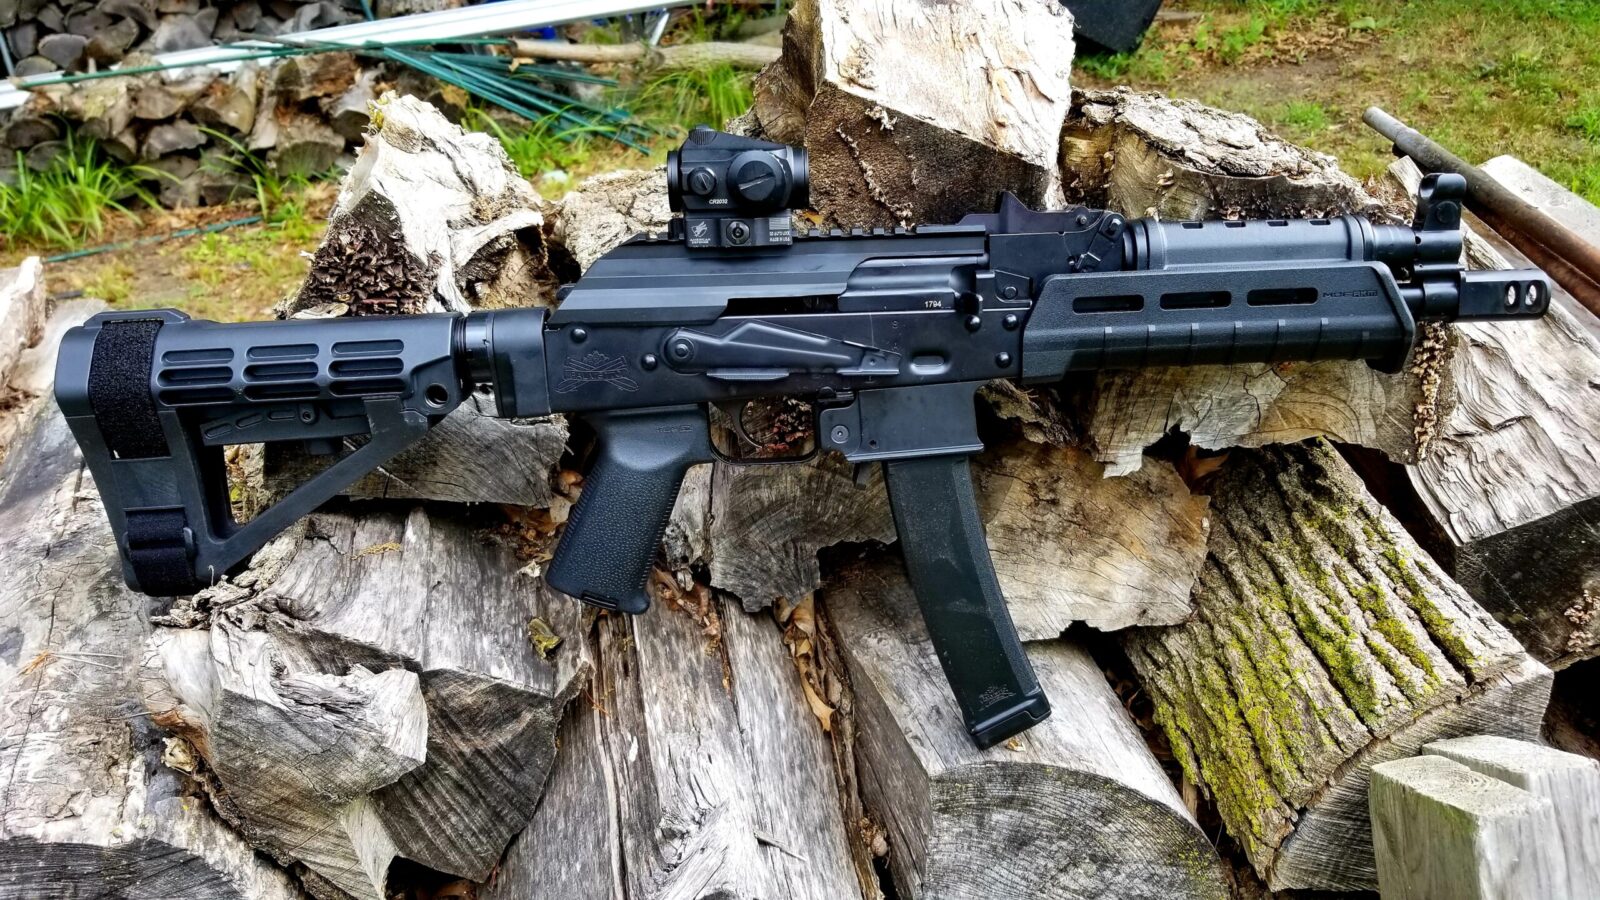
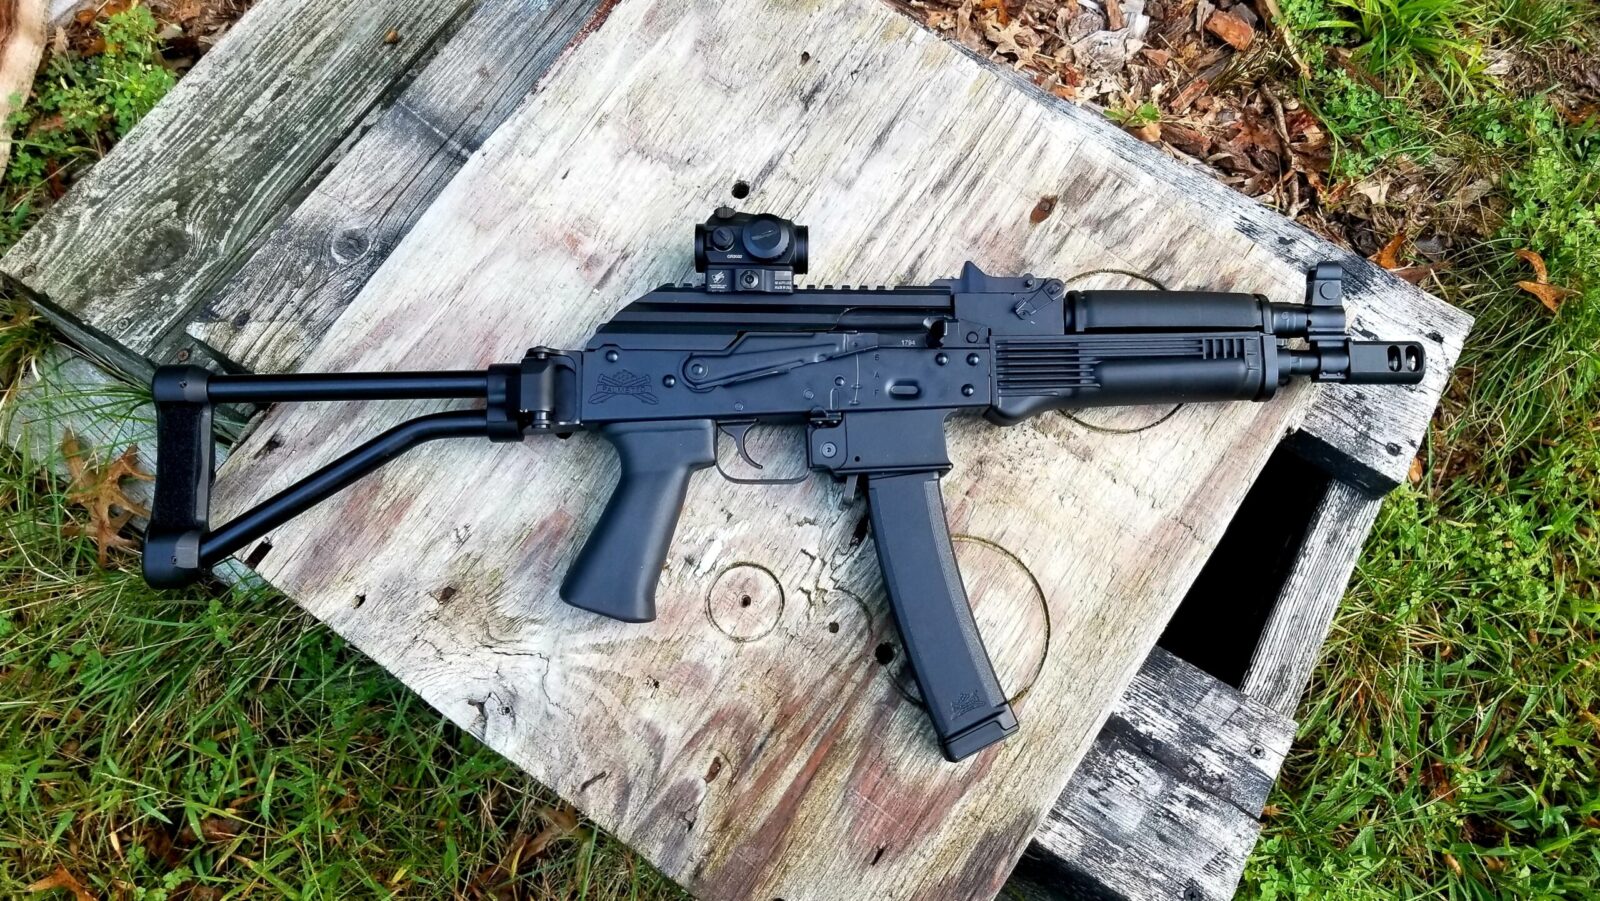
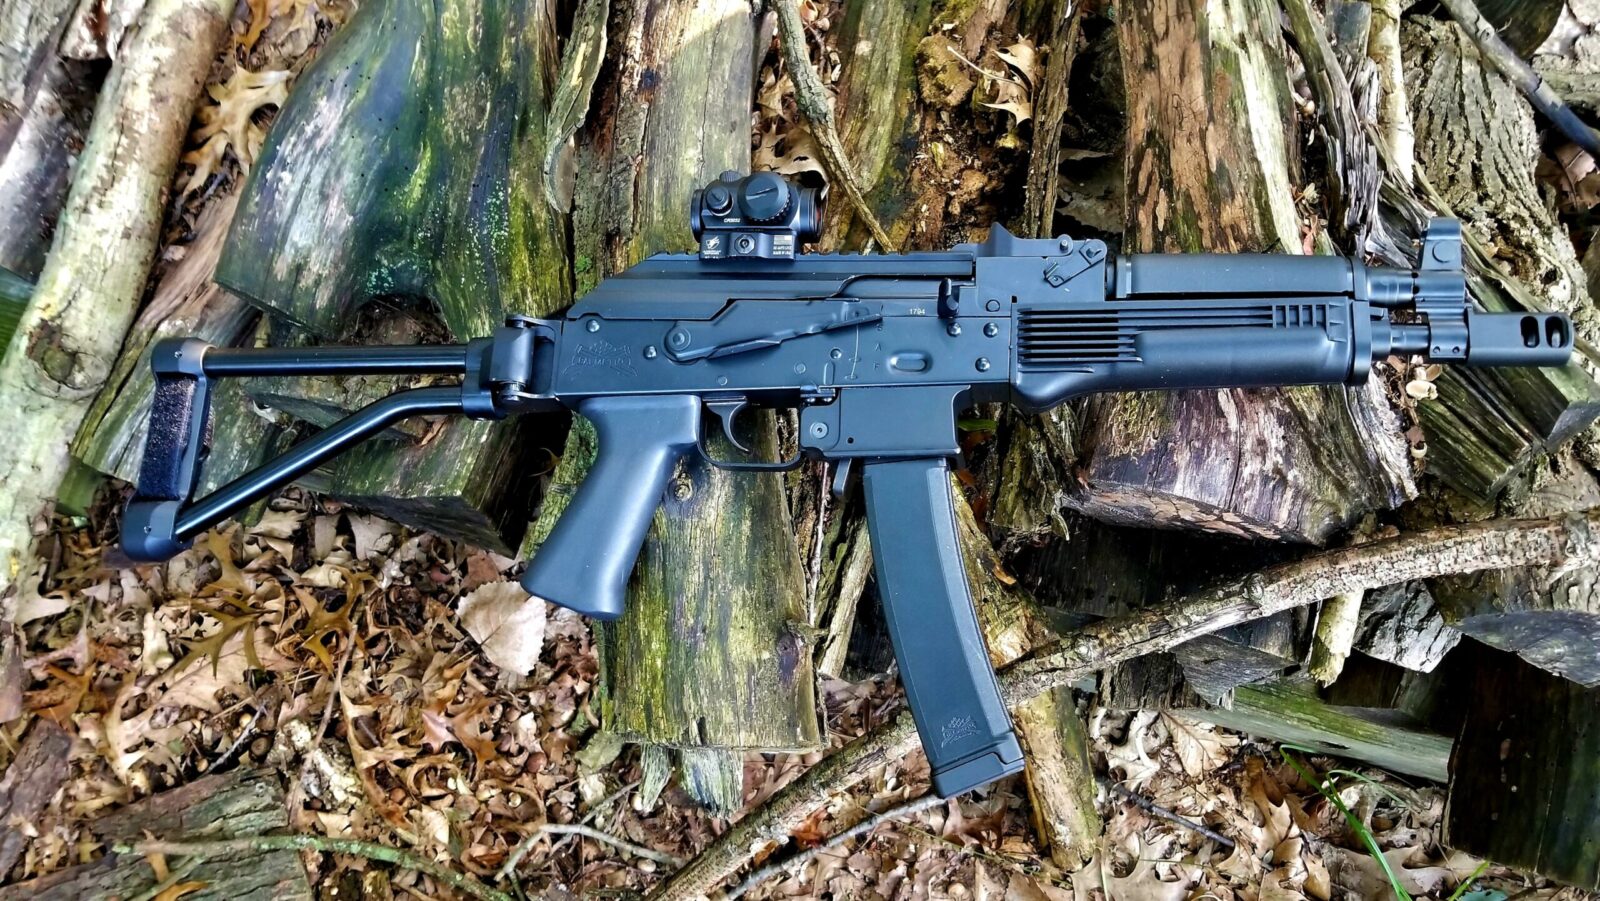
This is my current confiruation – a CNC Warrior/Bonesteel Arms side folding brace (they are way beefier than the side folding triangles PSA sells), K-Var handguards and one of our Molot Gen 2 grips.
To be very clear, I bought it so I can saw whatever I want about my experience.
I really had fun with the little braced pistol and found it reliable, accurate and just an all around fun little gun to shoot. The good news is that for people looking for AK-Vs now, PSA production has finally caught up and you can hop right over to their website and buy one.
I do want to give you a tip for breaking in the AK-V before your first range trip:
Field strip the rifle
Clean the bore and make sure the action doesn’t have any junk in it.
Use a light grease on the frame rails, where the bolt goes into the bolt carrier and on the bottom. You can switch to oil but the grease really helps lubricate things druing the wear in period — If you are in cold weather, say below 30F, then use oil as the grease will be too thick.
Reassemble the AK-V
Without a magazine in the AK-V, rack the slide (meaning move it back and forth) a couple hundred times to help the wear in process get started. You do not need to use anything abrasive to wear things in – I’ve heard of folks using valve compound to accelerate wear in but it’s just not needed 99.9% of the time.
I would also recommend using a stout/strong/stiff load initially. Rather than 115gr FMJ ball ammo, I will use 124gr FMJ as it generates more of a recoil impulse. I use 124gr Sellier & Bellot (S&B) FMJ 9mm a lot for this.
After a few hundred rounds you can shoot anything you want and it will cycle.
I kid, you not, this can make a world of difference when you go to the range the first time. What I find frequently happens is that a new gun owner gets excited and takes his/her brand new purchase right out of the box at the range, loads it and then gets upset at the weapon and labels it as an unreliable POS, which isn’t fair. I always tell new owners to do the above for any semi-automatic firearm.
Another view
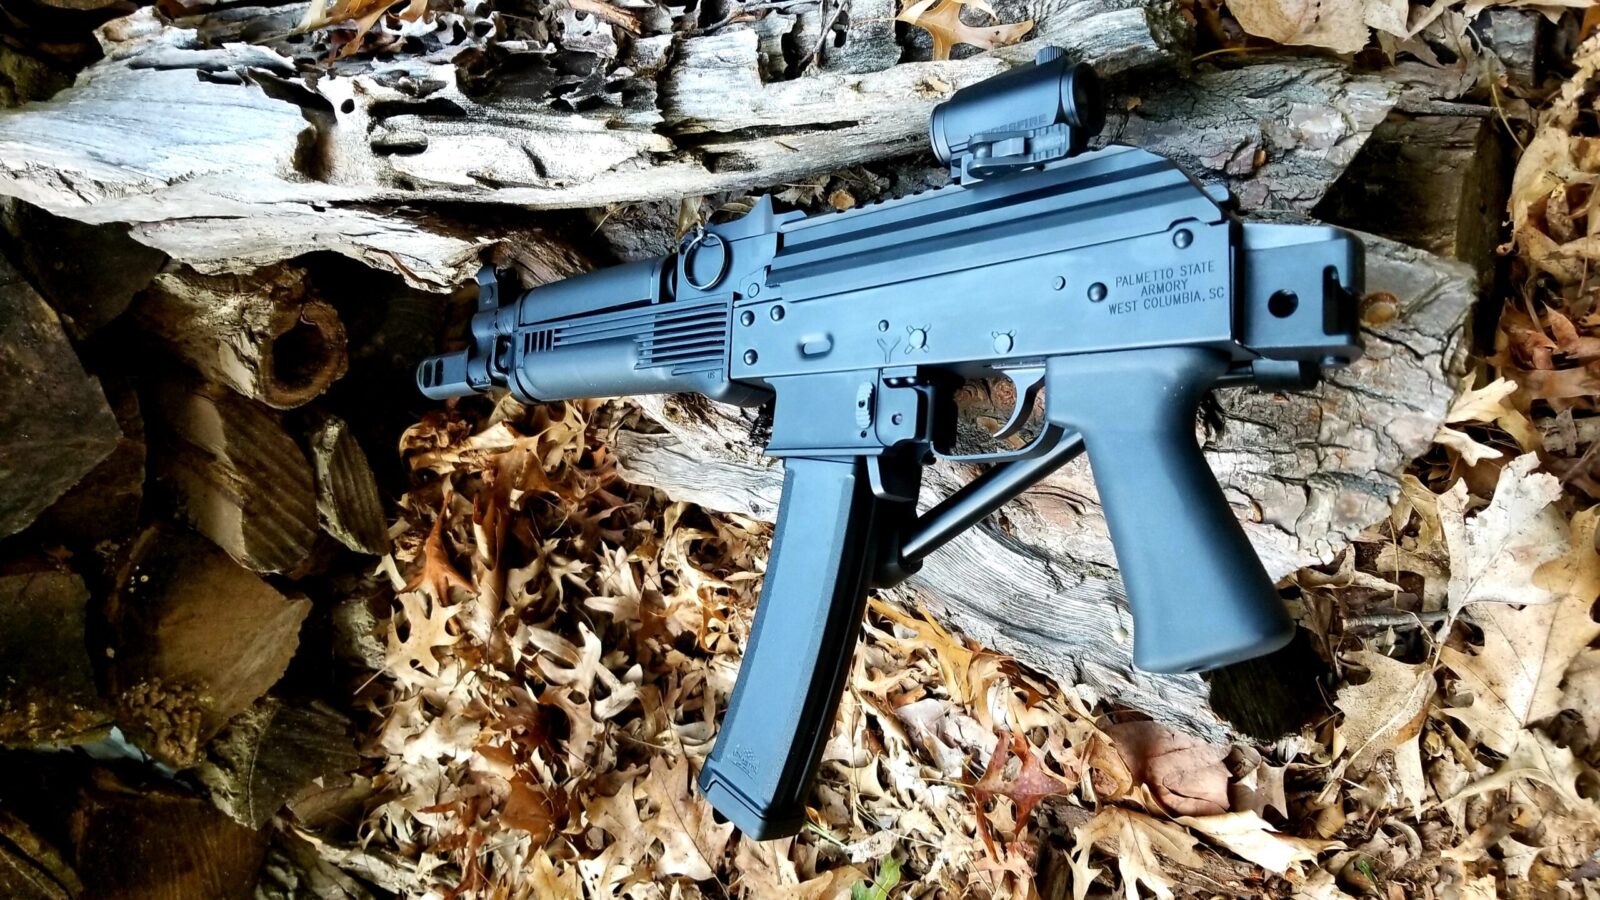
Here it is with the brace folded. I would have preferred a left-folding brace but CNC Warrior was sold ouut so I opted for the rifle-folding model. Regardless of the model, this is the best in class folding triangle brace and I highly recommend it.
So, with that said, get an AK-V, do the above to break it in and have fun. There is a huge parts aftermarket for the AK rifles and pistol and I am sure you’ll enjoy it.
Note, I have to buy all of my parts – nothing here was paid for by sponsors, etc. I do make a small amount if you click on an ad and buy something but that is it. You’re getting my real opinion on stuff.
I’ll put it right out there – I am a pistol cartridge snob. My favorite is 10mm Auto and my second is 9mm Luger. I held .380 in about the same regard as .22 LR for self-defense but then I ran into a weight problem. Yeah, I am overweight but I also wasn’t liking the weight and size of my Every Day Carry (EDC) pistol in all situtations – the SIG P365, which I think is an amazing pistol – but I wanted something smaller and lighter.
I looked at derringers and .22 pistols and just none of them really struck me as something I wanted to carry – I normally had Hornady Critical Duty 9mm +P in my P365 but it just weighed too much. Some derringers weigh a ton, some weigh less but you still have just two rounds. I read a stat once that most gun fights conclue in 5 rounds or less … just having two rounds didn’t sound appealing not to mention my big hands trying to hold a way too small pistol. Everything kept pushing me back to the P365 despite its weight. It was reliable and packed a heck of a punch.
Then my friend and FFL dealer, Scott Igert, of Michigan Gun Exchange, recommended I take a look at a Ruger LCP Max. It was light, compact, got great reviews … and was chambered in .380. Uh…. what?
The words “.380” and “amazing stopping power” will never be next to each other in the same sentence – at least not in a serious discussion. Let’s think about this for a minute. Depending on the load, a .22 long rifle cartridge will generate 120-160 foot pounds of energy. A .380 is maybe 190-294 foot pounds. The Critical Duty +P 9mm generates 369 foot pounds and 10mm Underwood 180gr is 676 foot pounds — all at the muzzle.
So, .380 has more energy than a .22 but pales in comparison to modern 9mm and 10mm loads. As I was feeling snobbish, I actually recalled a story the Kyle Lamb told about meeting a guy in a pistol shop and talking about the best pistol. Kyle told the fellow he had a Bersa .380 in his pocket and the other fellow started putting it down. Kyle then asked him where his pistol was and the guy stopped dead in his tracks – it was in his truck. The whole point is that carrying a pistol beats not carrying a pistol.
With that memory it dawned on me that having a .380 with me that was light and small beat not having anything with me due to complaints about weight, size, etc. So, I shut up and had Scott order me one while I started digging into ammo choices.
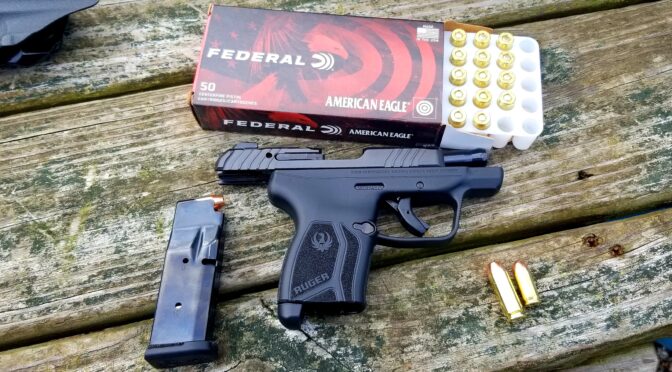
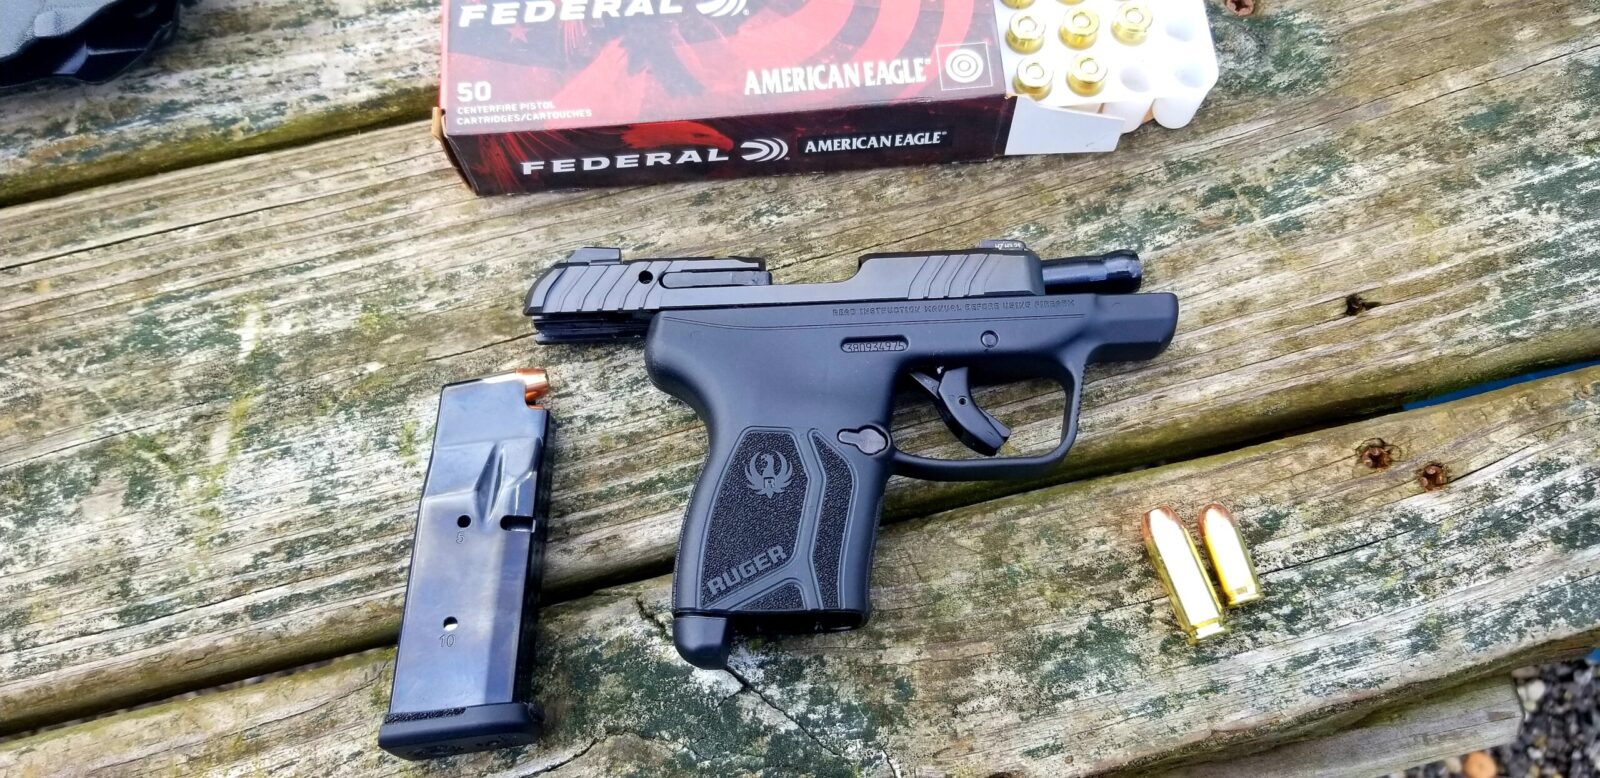
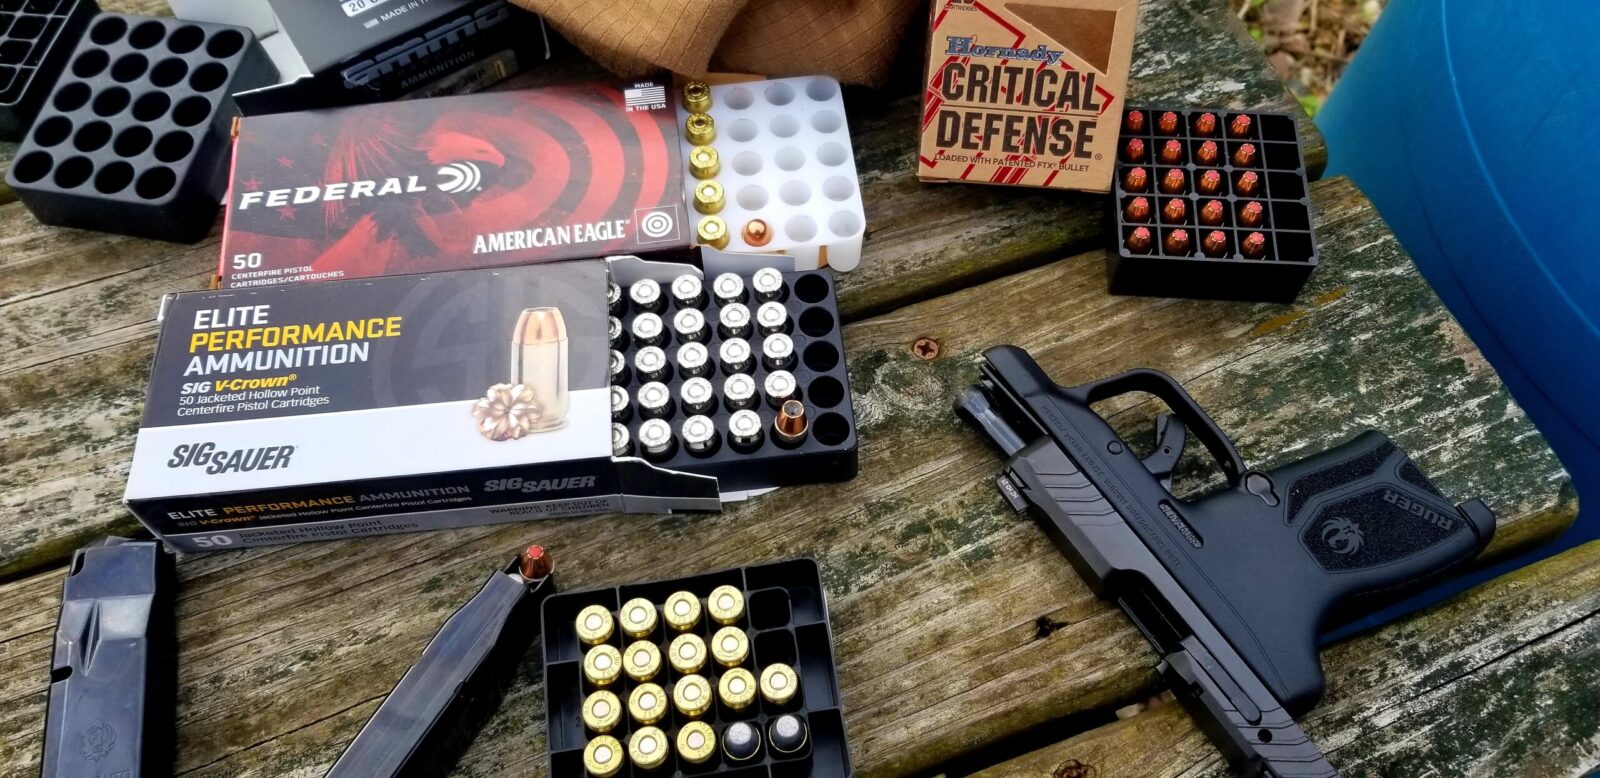
After doing some reading, I ordered in SIG, Federal, and Buffalo Bore ammo to give it a try. Then whent he pistol arrived, I field stripped, cleaned and lubricated it before heading to the range.
Time for me to do the safety briefing thing. First off, always clean and lubricate a new firearm. They are not good to go right out of the box. Second, not all pistols like all magazines or forms of ammunition. Be sure to thest your pistol with your different magazines and ammo before you rely on them. For most pistols you will find one or more combination that you need to steer clear of. Reliability doesn’t magically happen – you need to help it happen.
The Ruger LCP Max is a little pistol. Note on the lower right side of the photo the relatively big 10mm round on the left next to the small .380 round on the right,
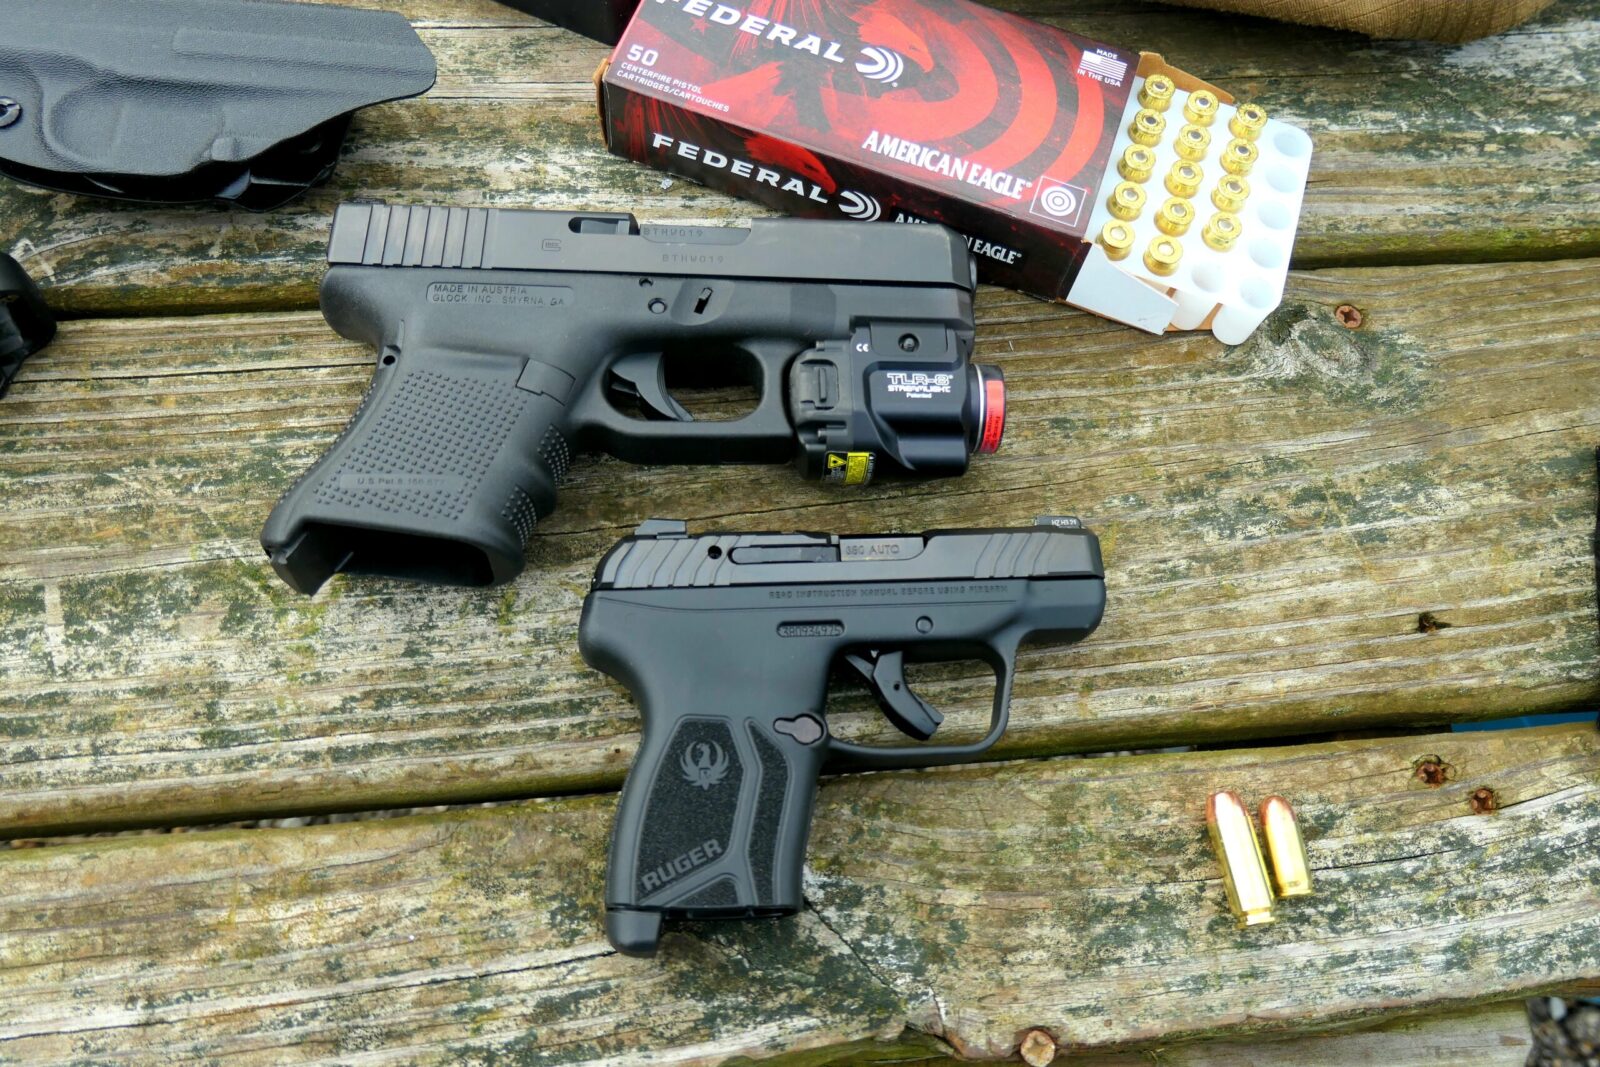
This is my Glock 29 Gen 4 10mm on top and the LCP Max .380 under it for size comparison.
At the range, I put a few hundred rounds of 10mm through the Glock 29 and my RIA 56862 Tac Ultra HC. After shooting them, just picking up the little LCP Max made me realize it was a mouse gun. Then I loaded the little bullets into the little magazines and made little pew pews.
Okay, joking aside, I did not have one failure to feed, fire or eject. The litttle pistol did its job. After shooting the 10mms, the .380 recoil was very light to non-existent. I was shooting plates and bowling pins at about 30 feet. It knocked over the plates but the bowling pins would often just jiggle a bit and not fall over.
Tip: Want to have a fun first range session? Read your instruction manual, clean and lubricate your pistol and then cycle the slide back and forth a few hundred times to help things break in. It may sound goofy but it will make a world of difference for most firearms.
The LCP Max shot every type of ammo I brought with no problems at all.
A Compensating Ammo Load Out
`As I jokingly stated earlier, the .380 round is not a power house and there is not a SAAMI specification for .380 +P. Now maybe you have seen vendors say they load .380 +P but bear in mind it is their own recipe that will generate pressures only they know. How did I find this you? The Ruger LCP Max manual states in big bold letters not to run +P and I couldn’t figure out why so I started digging.
There are only four cartridges where SAAMI created a specifications for the higher pressure +P loads: .38, .38 Super, 9mm Luger and .45 ACP. That’s it. The shooting industry loves marketing and appealing to the guys that want the hot rod ammo so there are groups out there – both who sell ammunition and make firearms – who will stamp +P on everything but the end of the day, outside of the four rounds previously listed, there are no standard +P loads so watch out.
Personally, I will stick with name brand ammo and not push the envelope. Ti m Sundle, who owns Buffalo Bore ammunition, posted the observation that your typical .380 hollow points aren’t going to penetrate very far so consider using hard cast bullets for greater penetration. I always find his write ups about his ammo very interesting and click here for this standard pressure .380 ammo listing and his thoughts. Note, his real word testing with a Colt Mustang with a 2.75″ barrel ought to be close to the LCP Max because the LCP Max has a 2.8″ barrel – close enough to get an idea of the muzzle velocity of 910 FPS and about 193 foot pounds of energy.
Okay, rather than enter the world of ballistics calculators, let me put it this way – the relatively short 2.8″ barrel of the LCP Max will mean most ammo will not generate the velocities and energies they post. For example, Hornady lists a 1,000 feet per second and 200 foot pounds of energy but that is with a 4″ barrel and depending on other factors such as how long the slide will remain closed before beginning its rearword travel and releasing pressure will all affect the velocity and energy you actually realize.
If a person enters into a self-defense situtation with a .380, I doubt one round will end the fight – maybe it will but probably not. This is where the doctrine of shooting until the threat is ended enters in. I also run an alternating loadout in my mag. The first round is a good hollow point (such as Hornady’s Critical Defense or Sig’s VCrown) followed by a Buffalo Bore hard cast load, which is then followed by another hollow point, another hard cast and so forth.
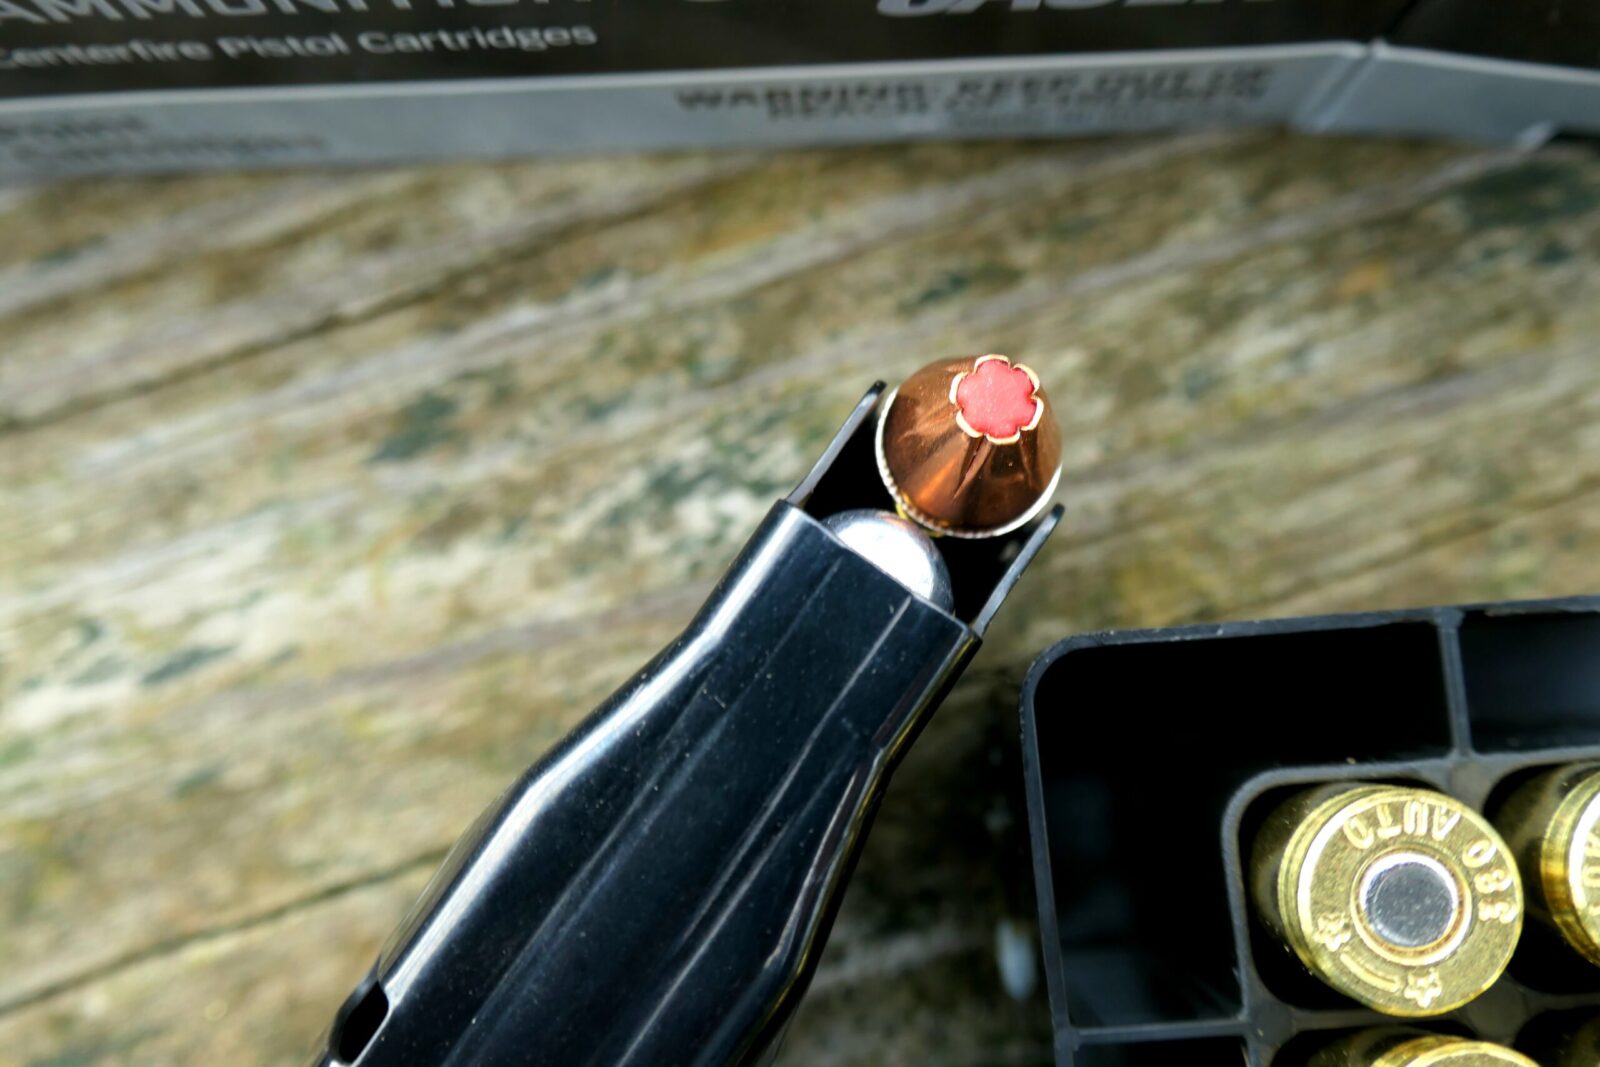
Consider loading your mags alternating with hollow points and hard cast bullets. That is a Critical Duty load that will go in first and the a Buffalo Bore hard cast solid underneath it for penetration.
Carrying The Pistol
In terms of the ability to carry the LCP Max in a concealed manner, this is where the LCP Max shines. It is less than an inch thick (0.81″ actually), has a an overall length of just 5.17″ and weighs 10.6 ounces empty.
You can carry it in your pocket – mine came with a pocket holster – or wear and inside or outside the waist band holser. Because it is small you have a ton of options not to mention it doesn’t feel like you are carrying a boat anchor.
Hickok45’s Video Review
In this day and age, I realize a lot of folks like watching videos. I’m a writer and not really not into making videos but I do watch them when I am researching firearms. Here’s a good one from Hickok45 (his videos are always worth watching on YouTube – I subscribe to his channel):
Summary
There is no magical pistol or round that is perfect for every situation is what you should always bear in mind. You need to think and the pros and cons and select accordingly. The LCP Max is a reliable pistol and can serve defensively in urban situations where weight and/or size concerns limit what a person can carry. My preference is still the Sig P365 for normal self-defense duties and I do carry a Glock 29 10mm when trail hiking in bear country. The LCP Max has filled a niche for me when I need something small and light.
I hope this post helps you out!
3/17/24 Update: Because of its size, weight and reliability, this is still the pistol I carry most for self-defense. It’s reliability has been exceptional by the way.
9/18/23 Update: Still the pistol I carry the most when I need something very light and/or discrete.
Note, I have to buy all of my parts – nothing here was paid for by sponsors, etc. I do make a small amount if you click on an ad and buy something but that is it. You’re getting my real opinion on stuff.
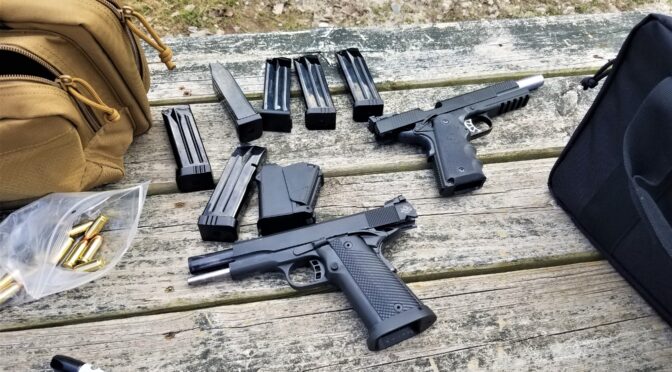
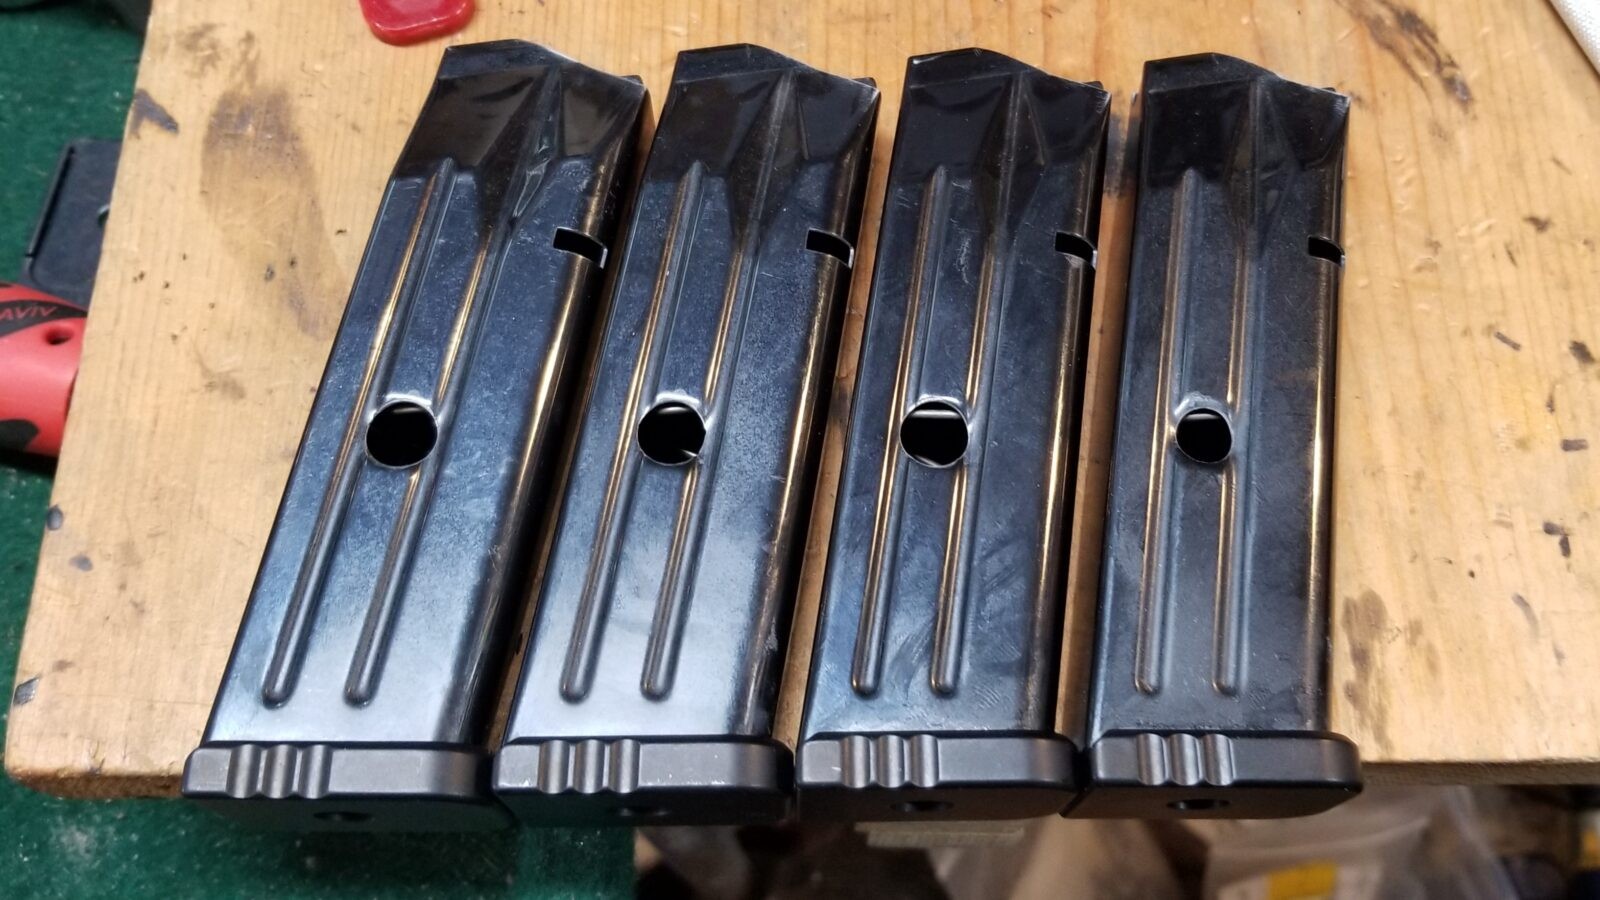
I genuinely like the Rock Island Armory (RIA) double stack 10mm pistols. I jumped into the deep end of the pool and started converting some really cool Mec-Gar Para P16 mags for use in the 10mm and .40 S&W pistols for folks who need either 10 or 15 round limited pistols due to unfortunate magazine limit laws where they live. The feed lips must be shortened and reprofiled to work reliably in RIA double stack pistols.
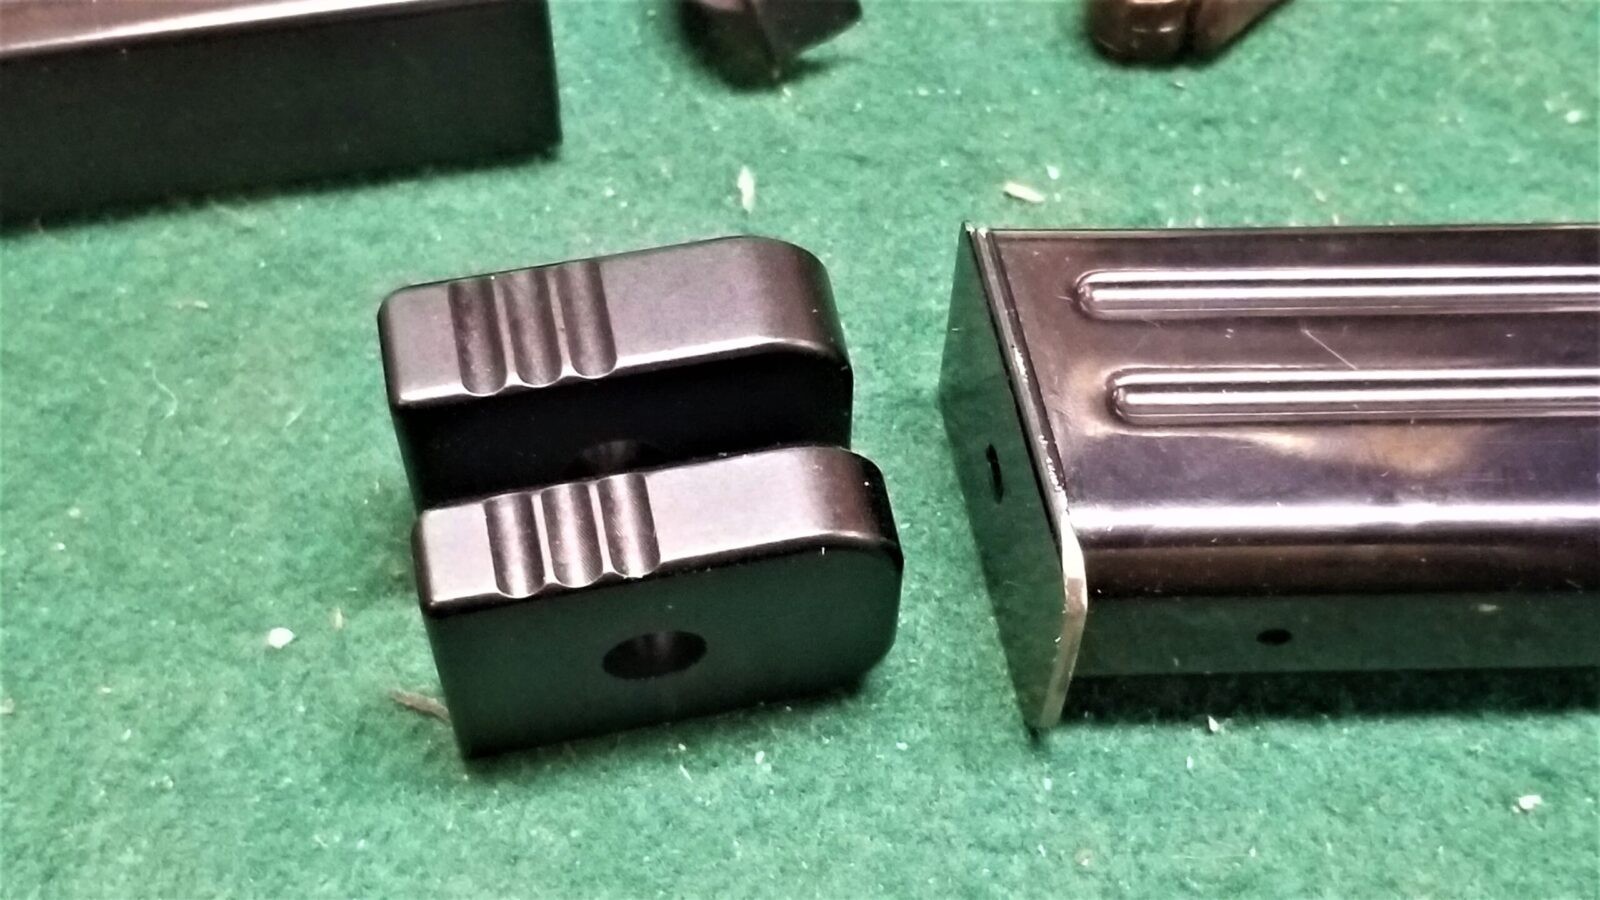
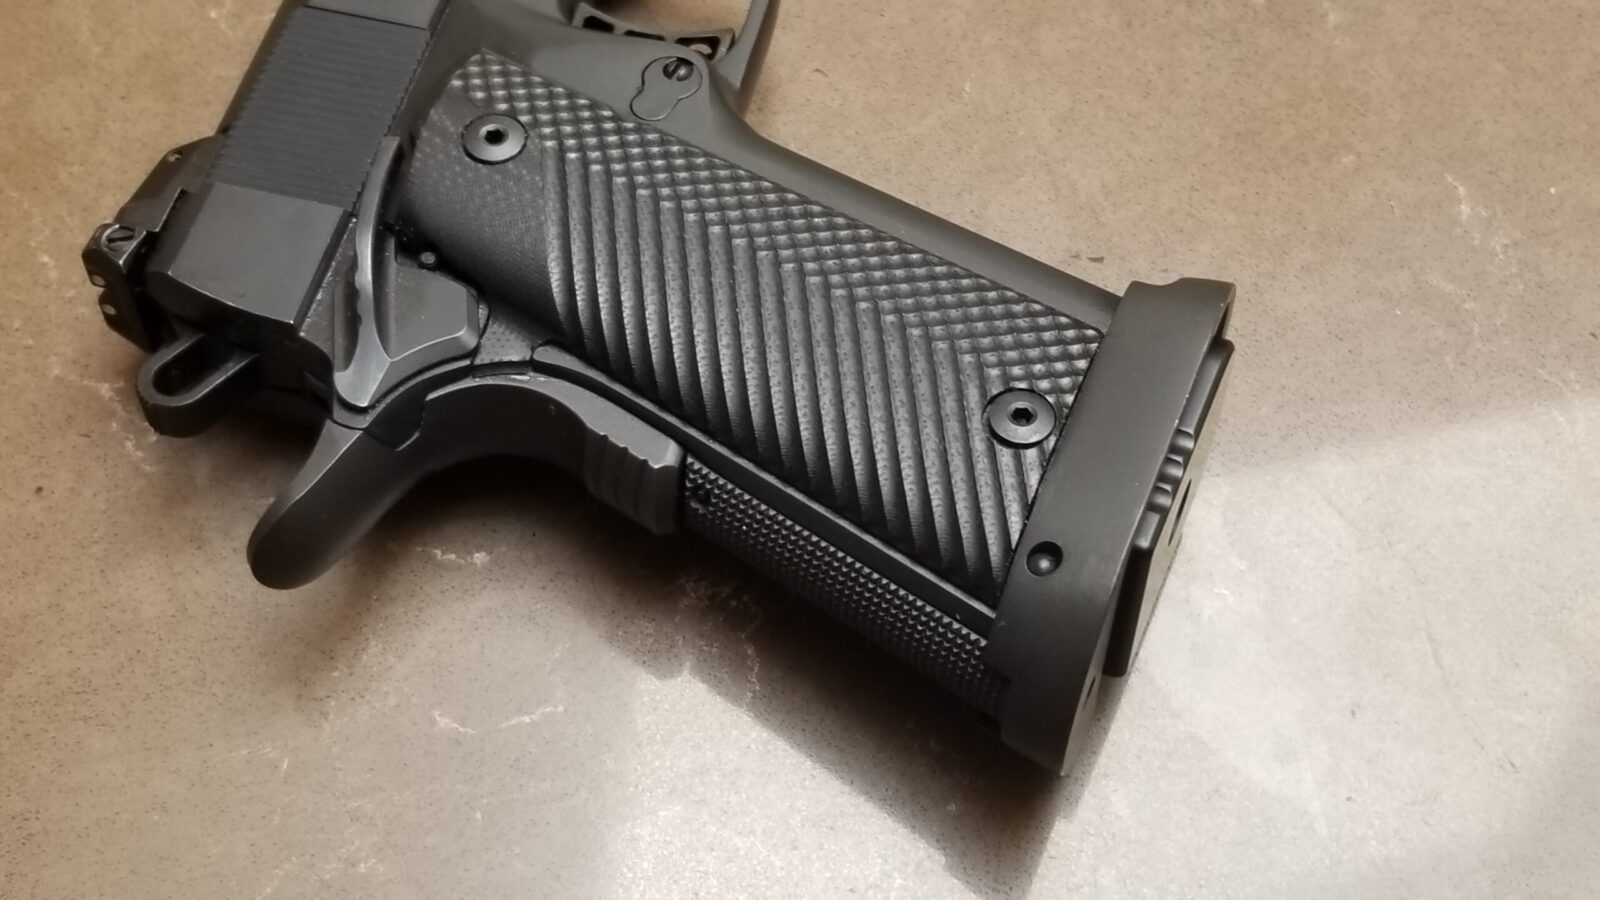
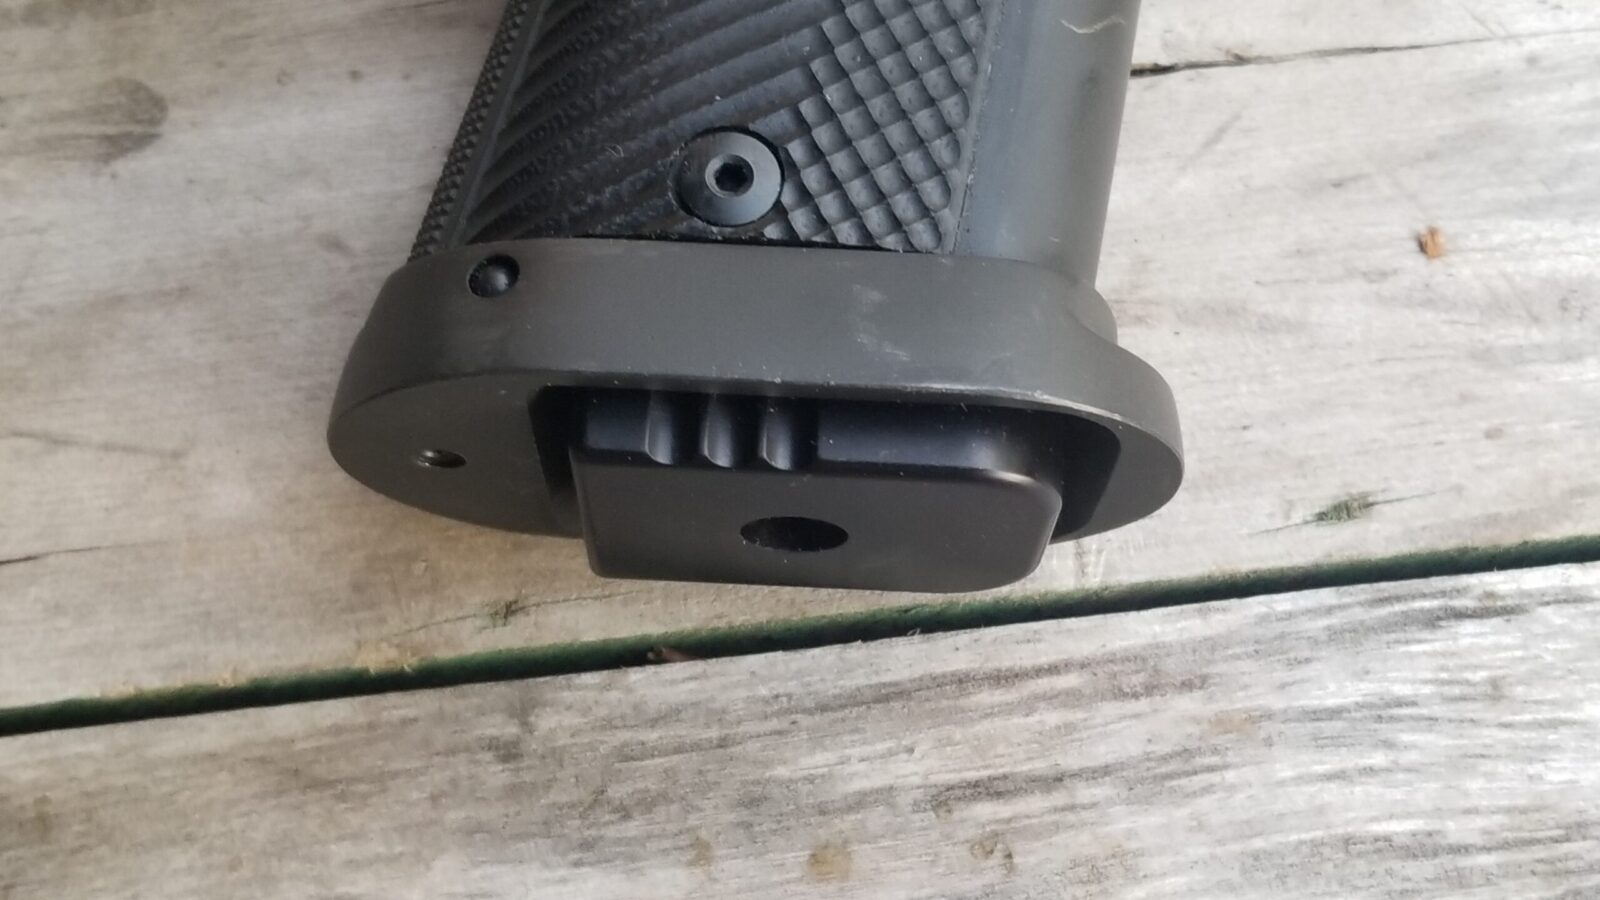
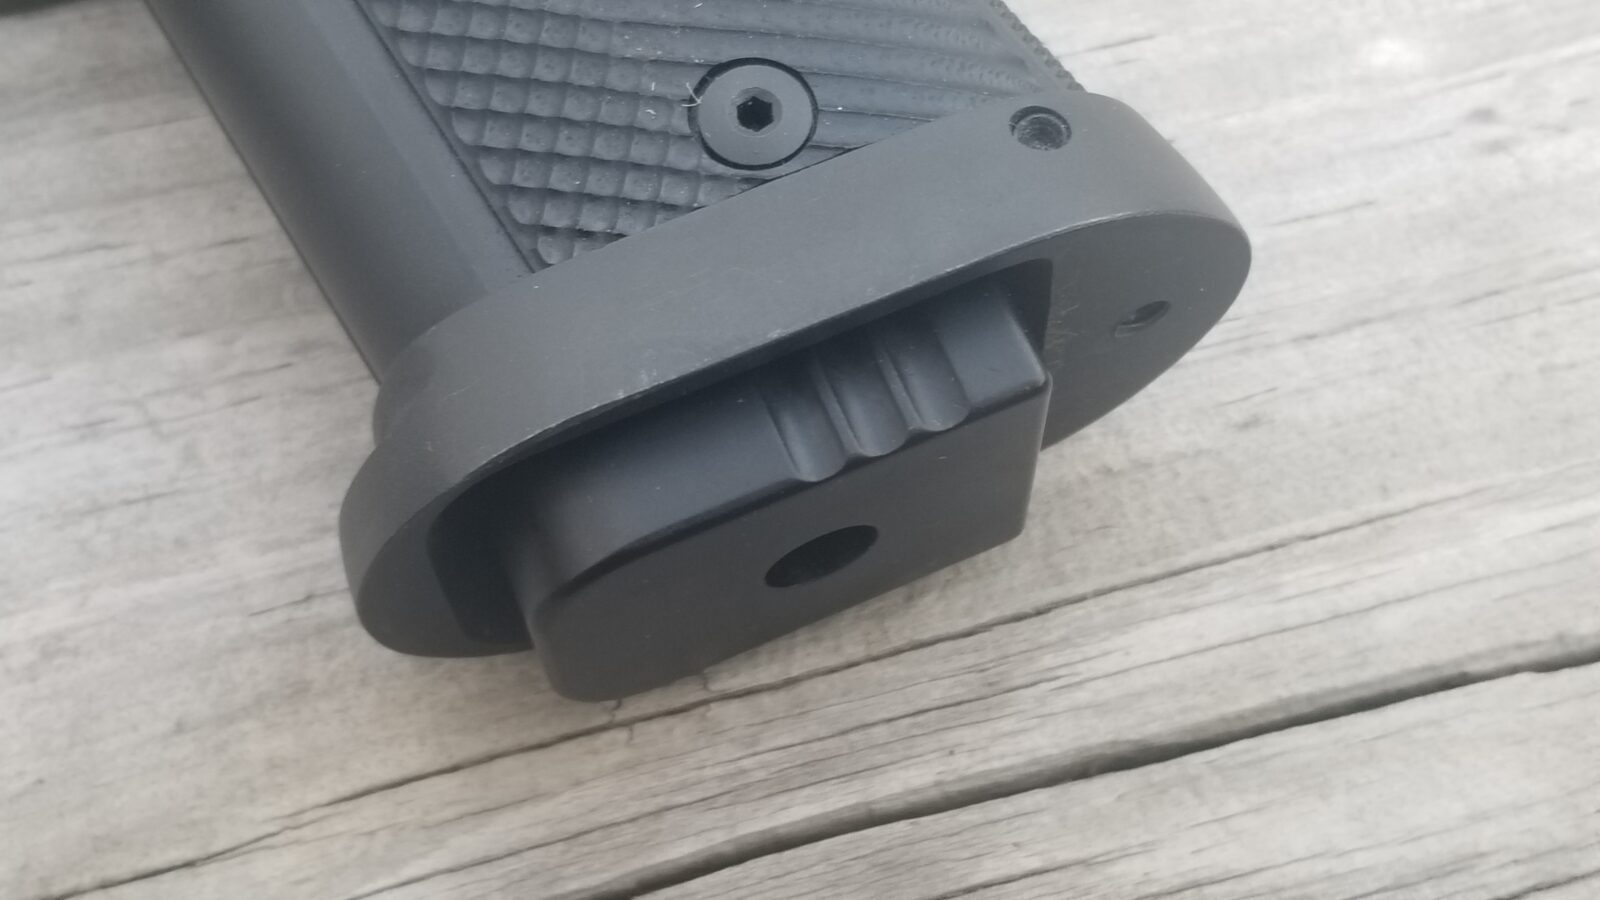
I’ve written about the conversion and you can click here to learn more but I didn’t really show a lot of photos of the different Dawson Precision base plate options. In addition to changing the feed lips, you have to replace the plate because it literally will not fit in the funnel – it’s a show stopper plus it really does need to be longer to allow for positive seating of the mag in the pistol. You could grind the OEM plate down but then you would need to glue/add material so you can fully set it – note, if you do that, leave a hole so you can unlock the plate in the future.
This post also applies to folks who own the RIA A2 HC double stack 9mm pistols. The same base plates are used on the magazines for your pistols as well and the magazine capacity is limited to 15 rounds as a result.
At any rate, here are a number of photos showing the Dawson Precision base plates and get a better idea of their different thicknesses relative to each other as well as when fully seated in the pistol:
The Dawson plates are machined from aluminum and their sizes are how much thicker they are than the original Para P16 base plate shown on the right. The bottom left Dawson plate is their +200 model and the one above it is the +300.
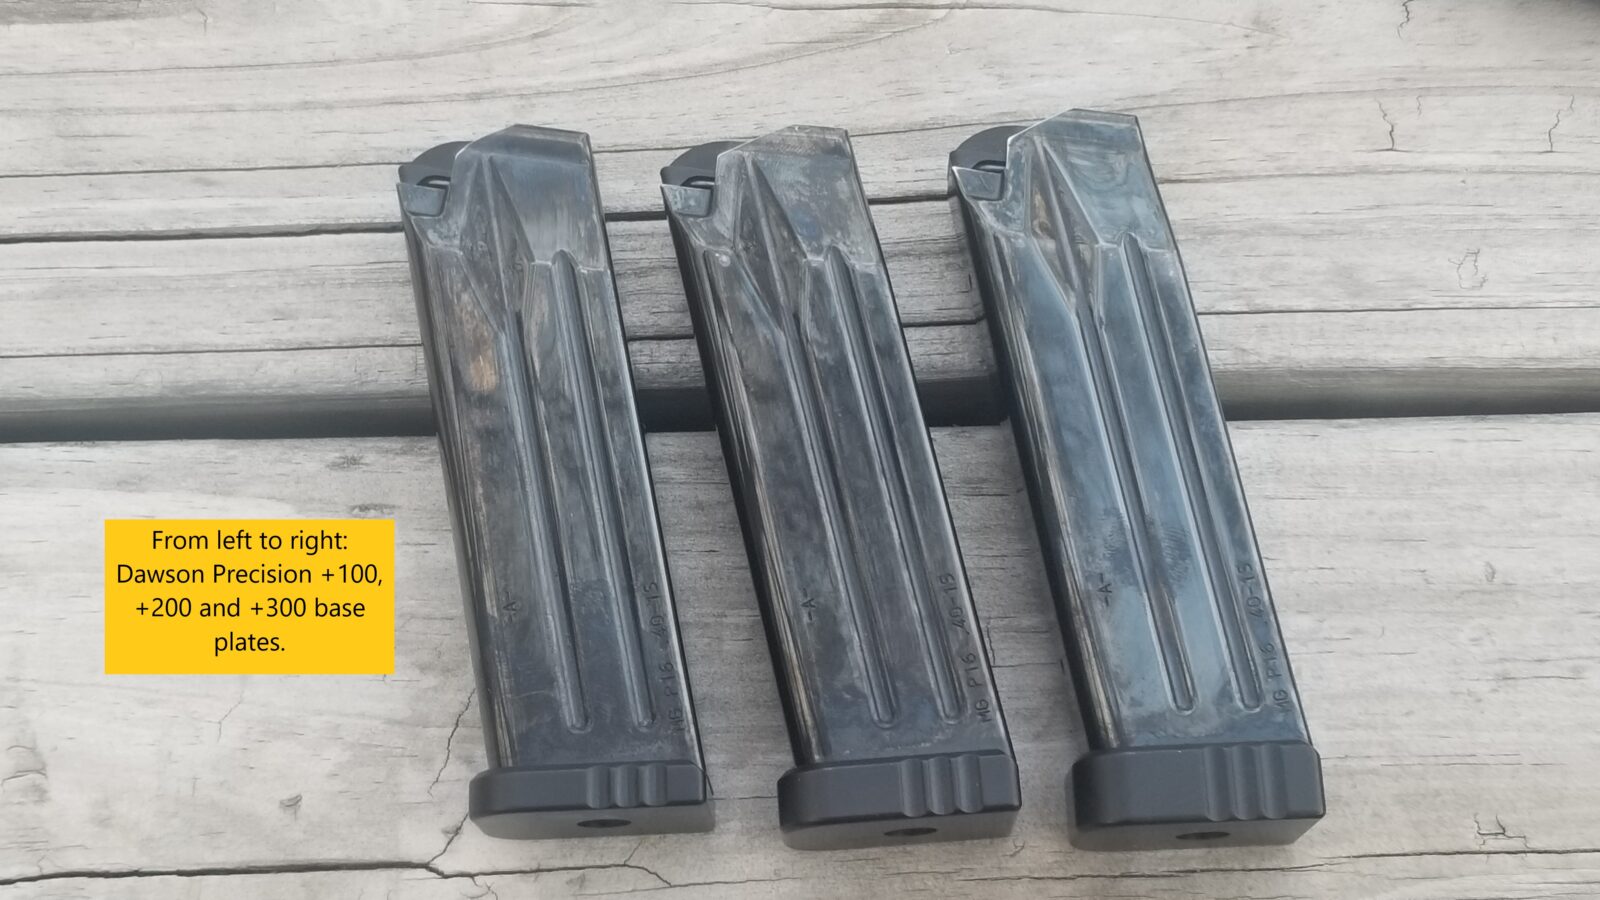
Here are the three Dawson plates next to each other on our converted P16 magazines. The +100 is on the left, +200 in the middle and +300 on the right. They increase the height and weight of the mag but do not increase the capacity.
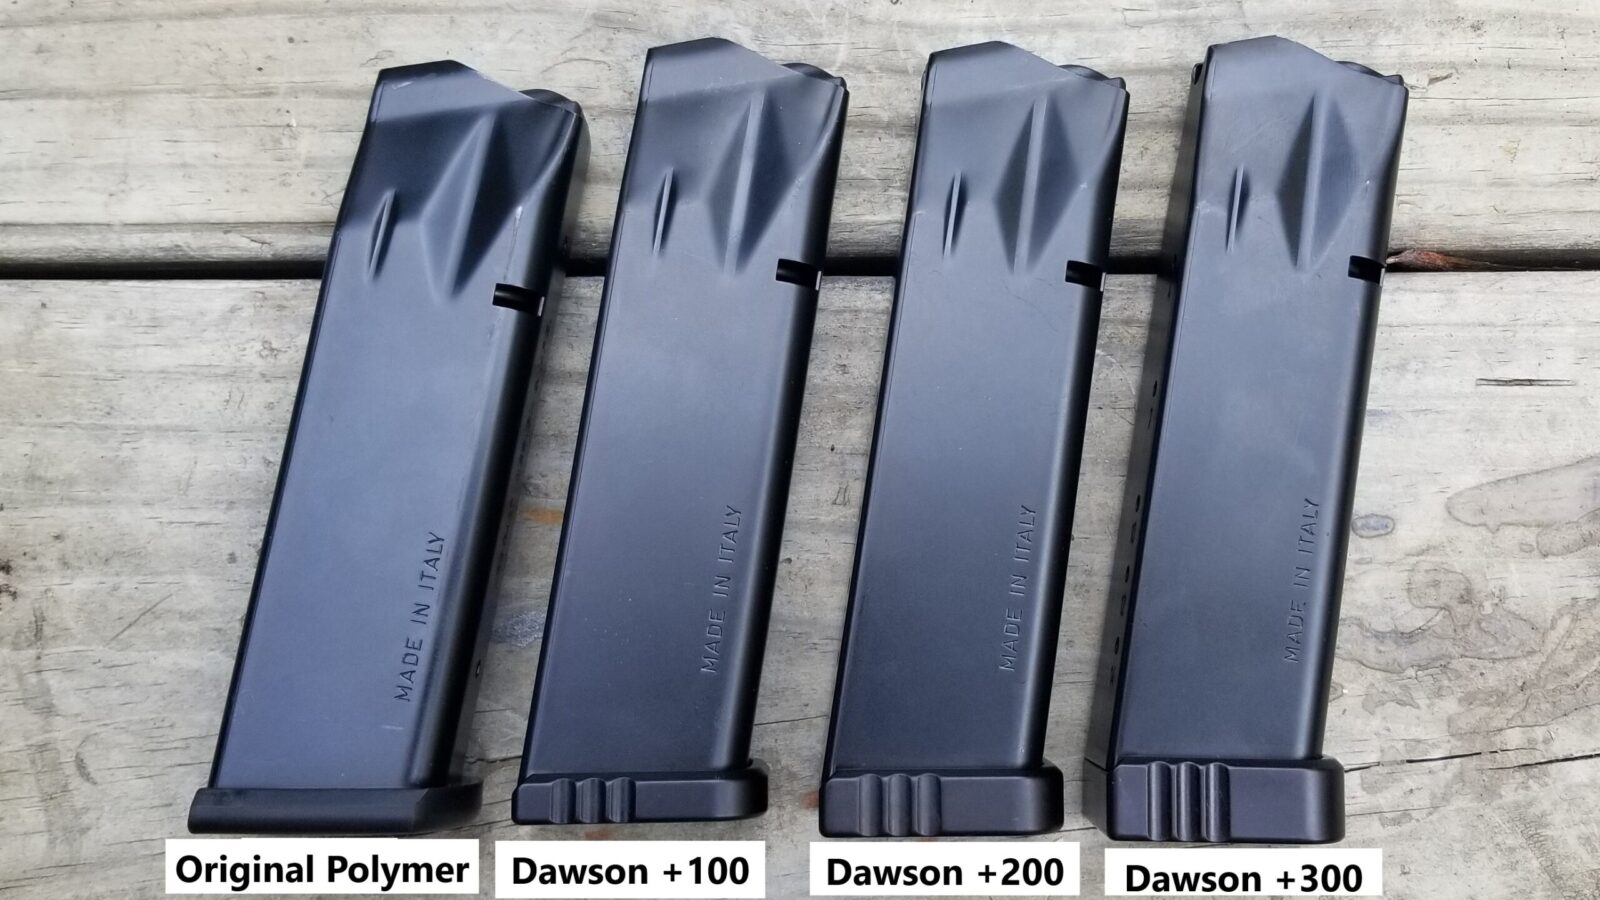
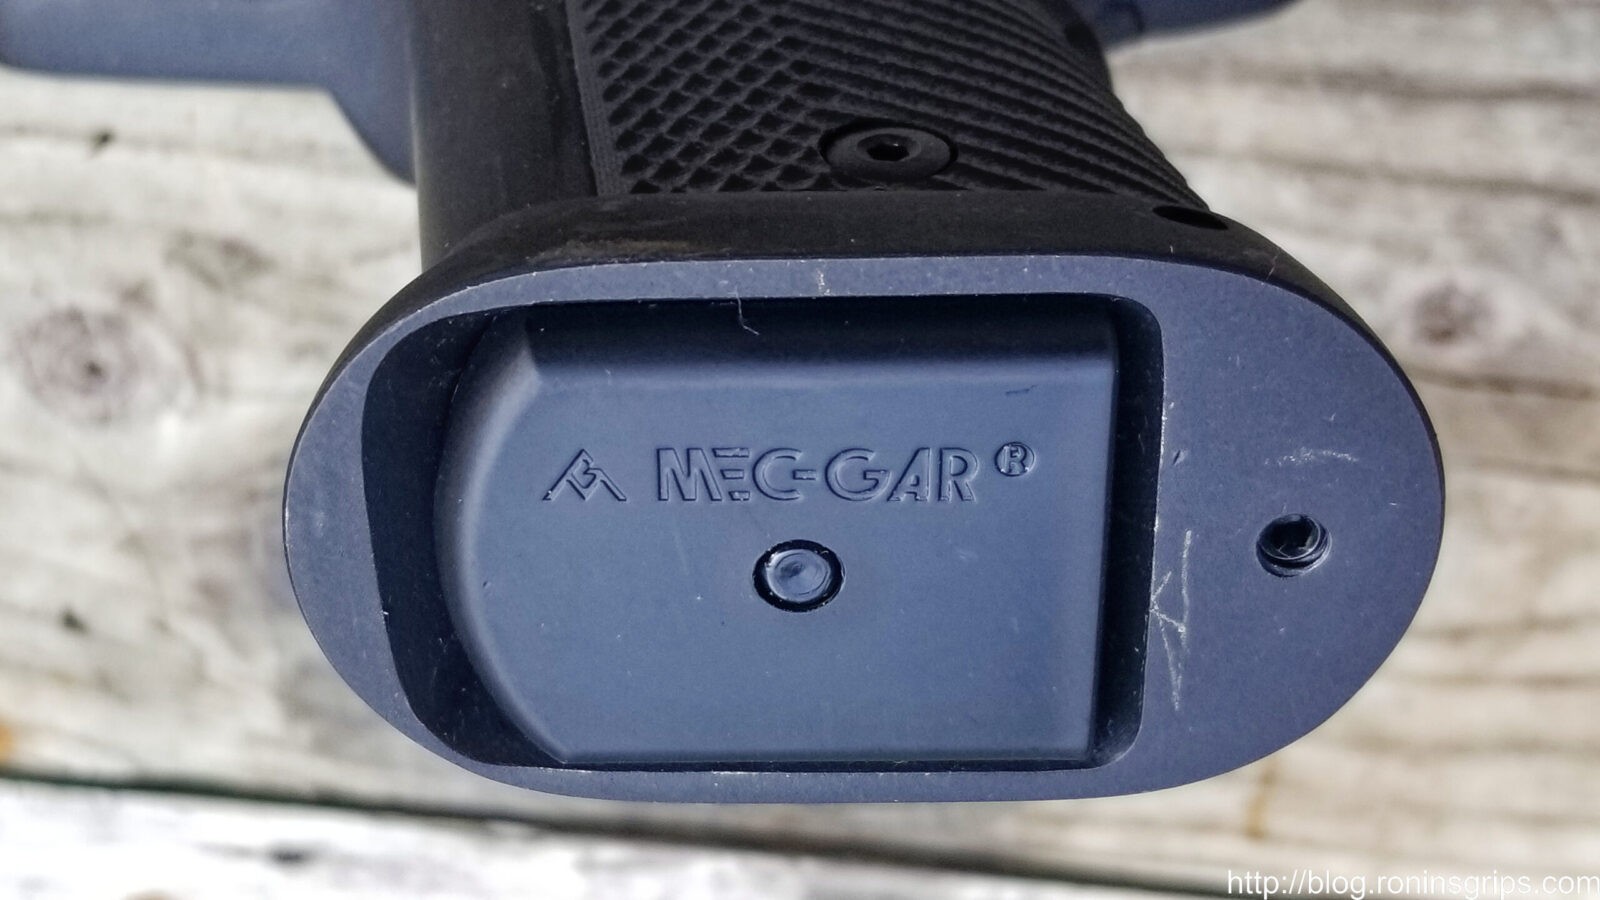
With our 3rd Gen mags, Mec-Gar started using the left polymer plate and it works great in the RIA pistols. Both it and the +100 Dawson plate sit flush in the RIA mag funnel.
These 15 round windowed mags all have +100 Dawson plates.
This is a +100 Dawson plate in my RIA 52009 Ultra HC 10mm pistol.
This is the +200 base plate.
This is a +300.
This is the 3rd gen polymer Mec-Gar plate that comes on the 10mm/.40 S&W mags for reference. It fits the RIA funnel just fine.
I do need to note something – out of the two to three hundred converted P16 mags I sold, two buyers had pistols where the distance from the mag catch to the bottom of the funnel would not allow the mags with the Dawson plates to fully seat. I gave them full refunds and don’t know if the issue was the mag catch or the fitment of the funnel to the pistol. Again, only two gentlemen out of hundreds. I really do not think it was an issue with the base plates just to be clear – just stacked tolerances going in the wrong direction.
Summary
Dawson Precision makes great base plates for Para P16 and P18 magazines that enable them to fit in the funnel of most RIA high cap 9mm, 10mm and .40 S&W pistols. They come in three sizes and you can choose based on your preference.
Note, I have to buy all of my parts – nothing here was paid for by sponsors, etc. I do make a small amount if you click on an ad and buy something but that is it. You’re getting my real opinion on stuff.
No, this is not a scam post or me trying to sell you something – I don’t make any money at all from what I am going to tell you in this post. I normally write about firearms, DIY or tools and am not going to do some huge post about this. My goal is to try and help folks.
The cost of prescription medicine, especially to the uninsured or people with poor prescription drug coverage, has been unholy for years. It has forced people and families to forego medicine because they couldn’t afford it. Finally, I can tell you to check something out that might help – GoodRX.
I first heard about GoodRX from my daughter who works in a clinic where they tell their patients about it all the time. My daughter has seen prescription drug prices drop dramatically through the use of GoodRX – some of the examples she told me were huge — from $500 to $50. $90 to $17. In my personal case, from $42 to $23 at our local CVS.
GoodRX basically does this by acting like a coupon service – you still use the stores you know and trust.
I did some searching before I used them the first time and they are legit and one reason you may never of heard of them is that some pharmacies and groups tell their employees that they can not tell patients/customers about GoodRX.
You can go to http://www.goodrx.com or you can go to your Apple App Store or Android Play Store and download the app for your phone. I have a Samsung smart phone running Android and their app works great. Your doctor may even have GoodRX business cards they can give you if you want to go that route.
With the app you can search on the medicine and it will show you all of the local pharmarcies and their prices so you can then select who to go to. If your pharmacy isn’t listed, call your pharmacy and see if they participate in GoodRX. If they don’t, you may want to change once you see how much you can save.
When you go to check out, tell them you have GoodRX and they will look at your phone or printed page to get the BIN, PCN and Group info to get you the discount.
I hope this helps. If you have questions, they have more information on their website or call them at 1-855-442-9965. This is not an area I know about and just want to try and help folks save some money given my experience.
Building an AK takes a fair amount of drilling, fitting and riveting that can intimidate someone thinking about building their first rifle. Lucky for them, the industry has evolved a lot of really cool tools exist to enable faster higher quality results. A good example of evolution is the location and drilling of the the rivet holes in the receiver for the front and rear trunnions.
Back around 2006 or so when I got started, you either measured the location of the trunnion holes and marked them or you could take a post it note, push it on the trunnion to get an outline of the holes and then transfer it to the receiver, again marking where to drill. You learned quick to start with a small drill bit so you could adjust a bit if you were off with either method – I got pretty good with the post it note method actually.
One of the AK-parts and tool vendors that has been around the longest is AK-Builder and he was always bringing new offerings to the market, I slowly added one of all of his tools as funds permitted. I had his rivet jig, flat bending jig, the top rail layout jig (if you remember those) and so forth. At some point he added a really, really cool jig for locating and drilling the holes for the trunnions. I bought it and swear by it to this day.
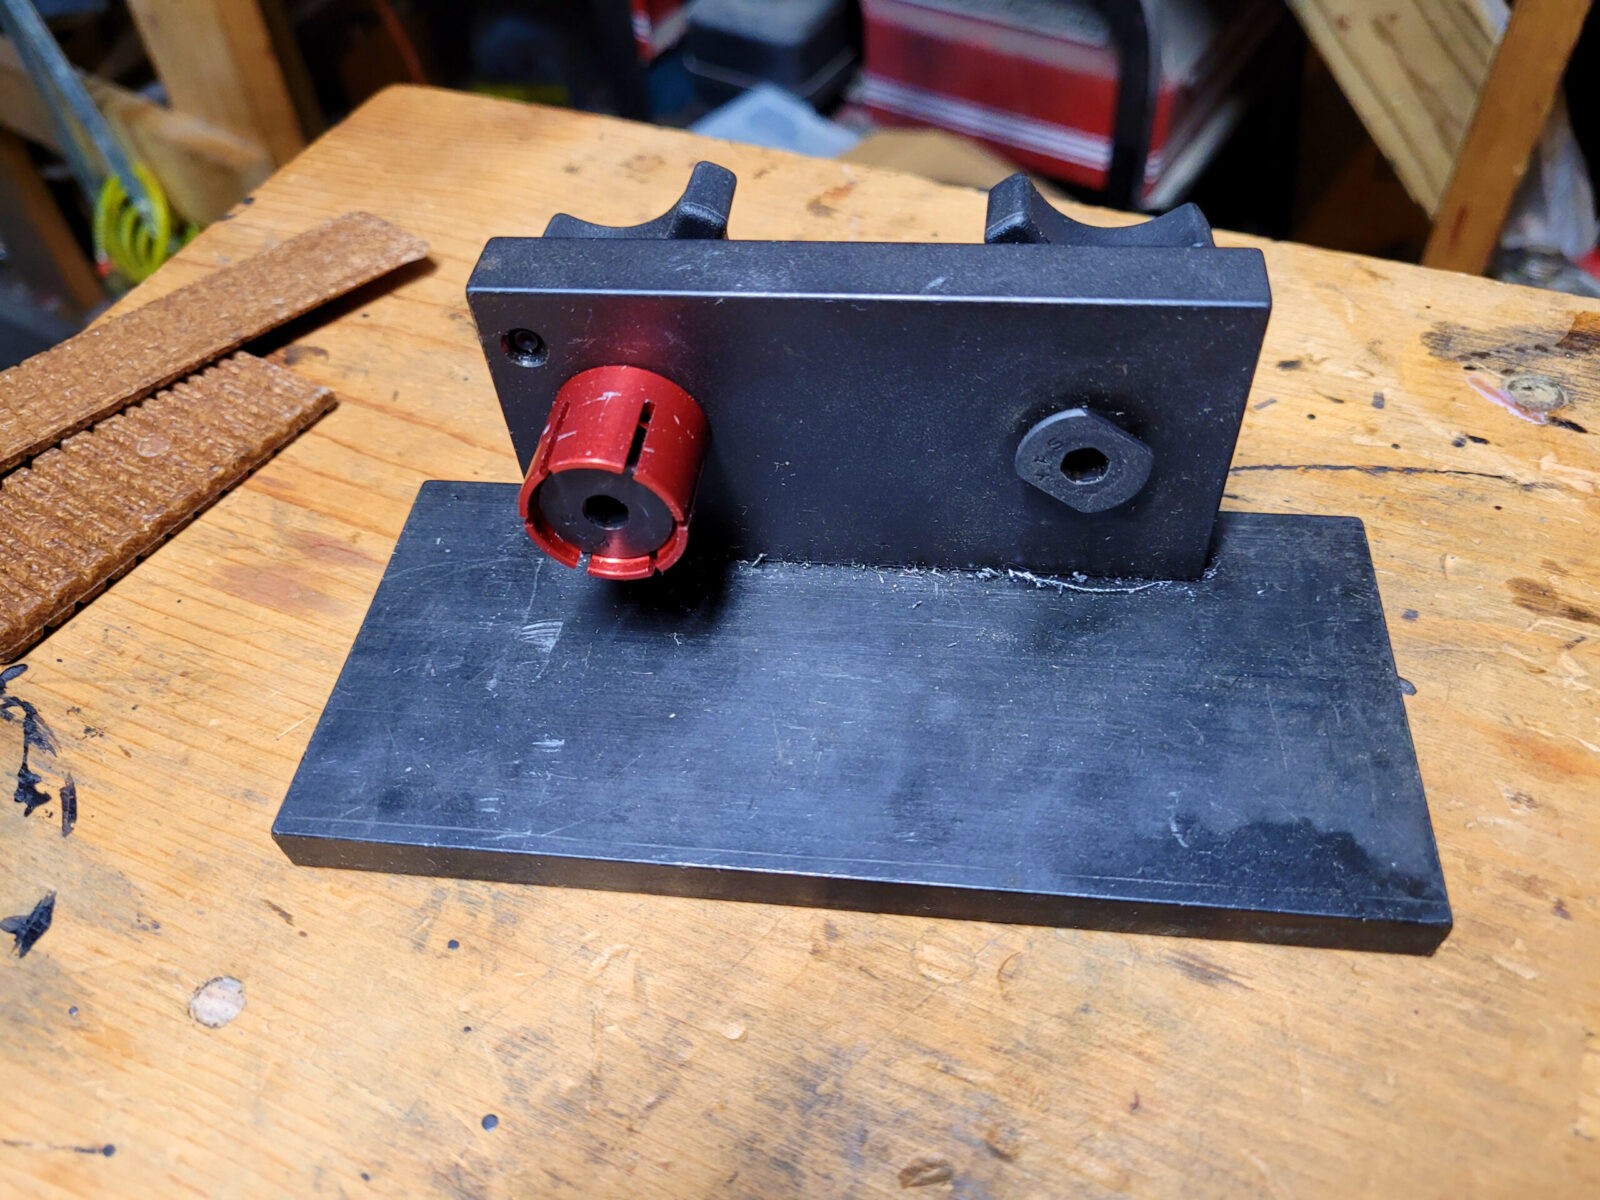
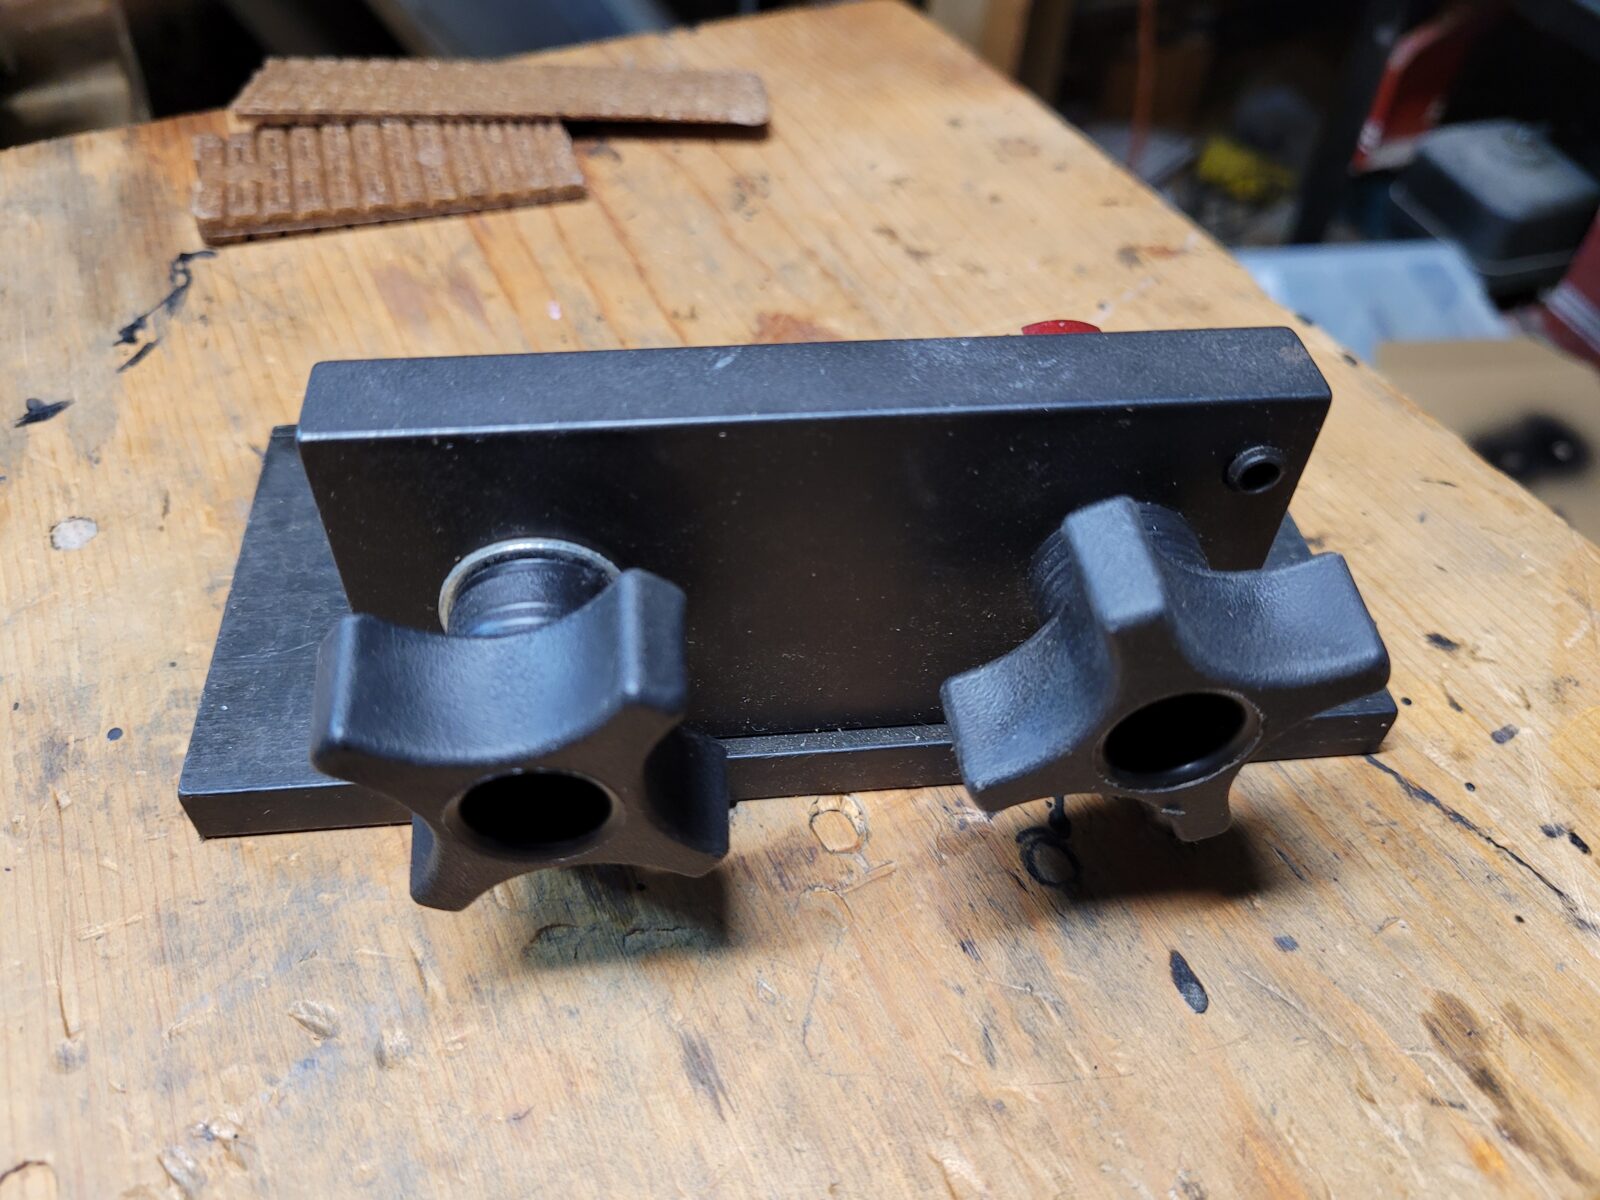
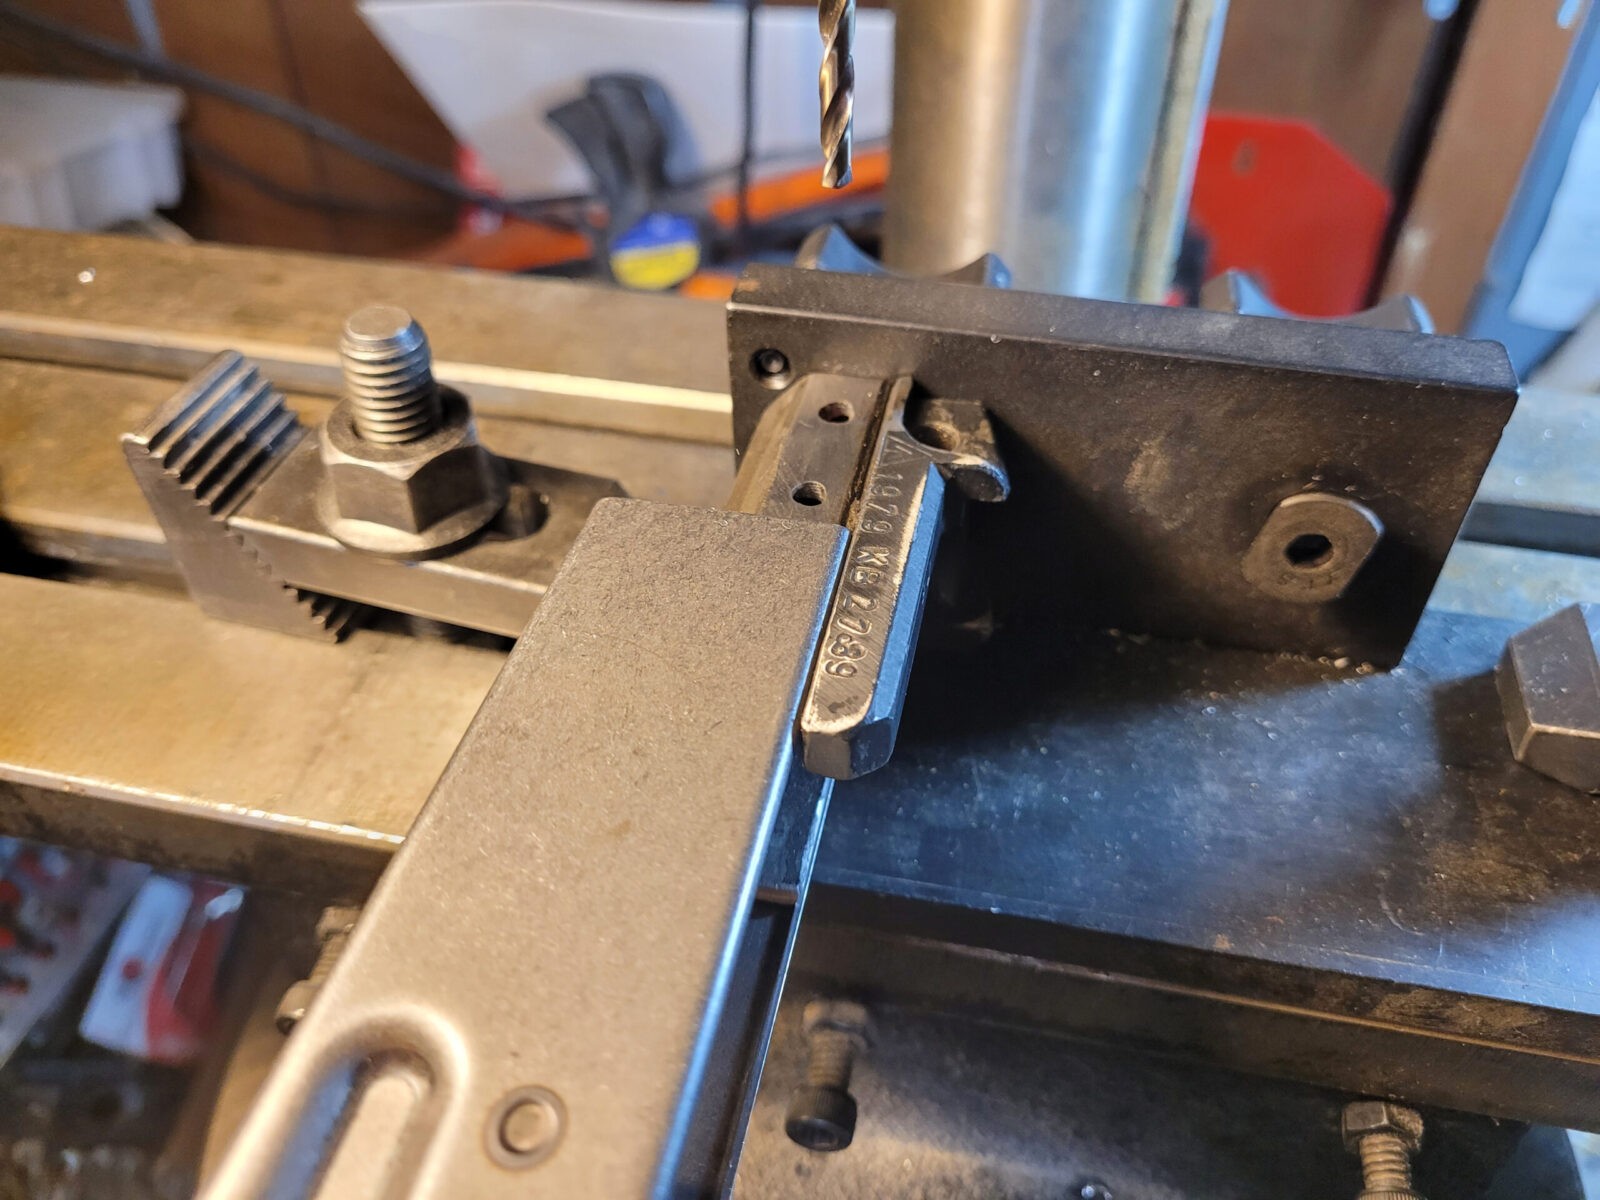
The jig is extremely well made and durable. When you buy it, you have options for the sizes of mandrels to fit different barrel channel holes. The red one you see works on 7.62 AKs and they also have one for 5.45 and the unique MAK90. The rounded rectangle on the right holds the rear trunnion.
Using It For The Front Trunnion Holes
Using this fixture is about as easy as it gets but you must have a drill press. I’d recommend an X-Y table on your drill if you plan to do this much but at least have a drill press.
Securely mount the fixture to your drill press.
Insert the trunnion and tighten the knob so it can’t move.
Move your drill table around to line the drill bit up with the hole in the trunnion.
Slide the receiver over the trunnion.
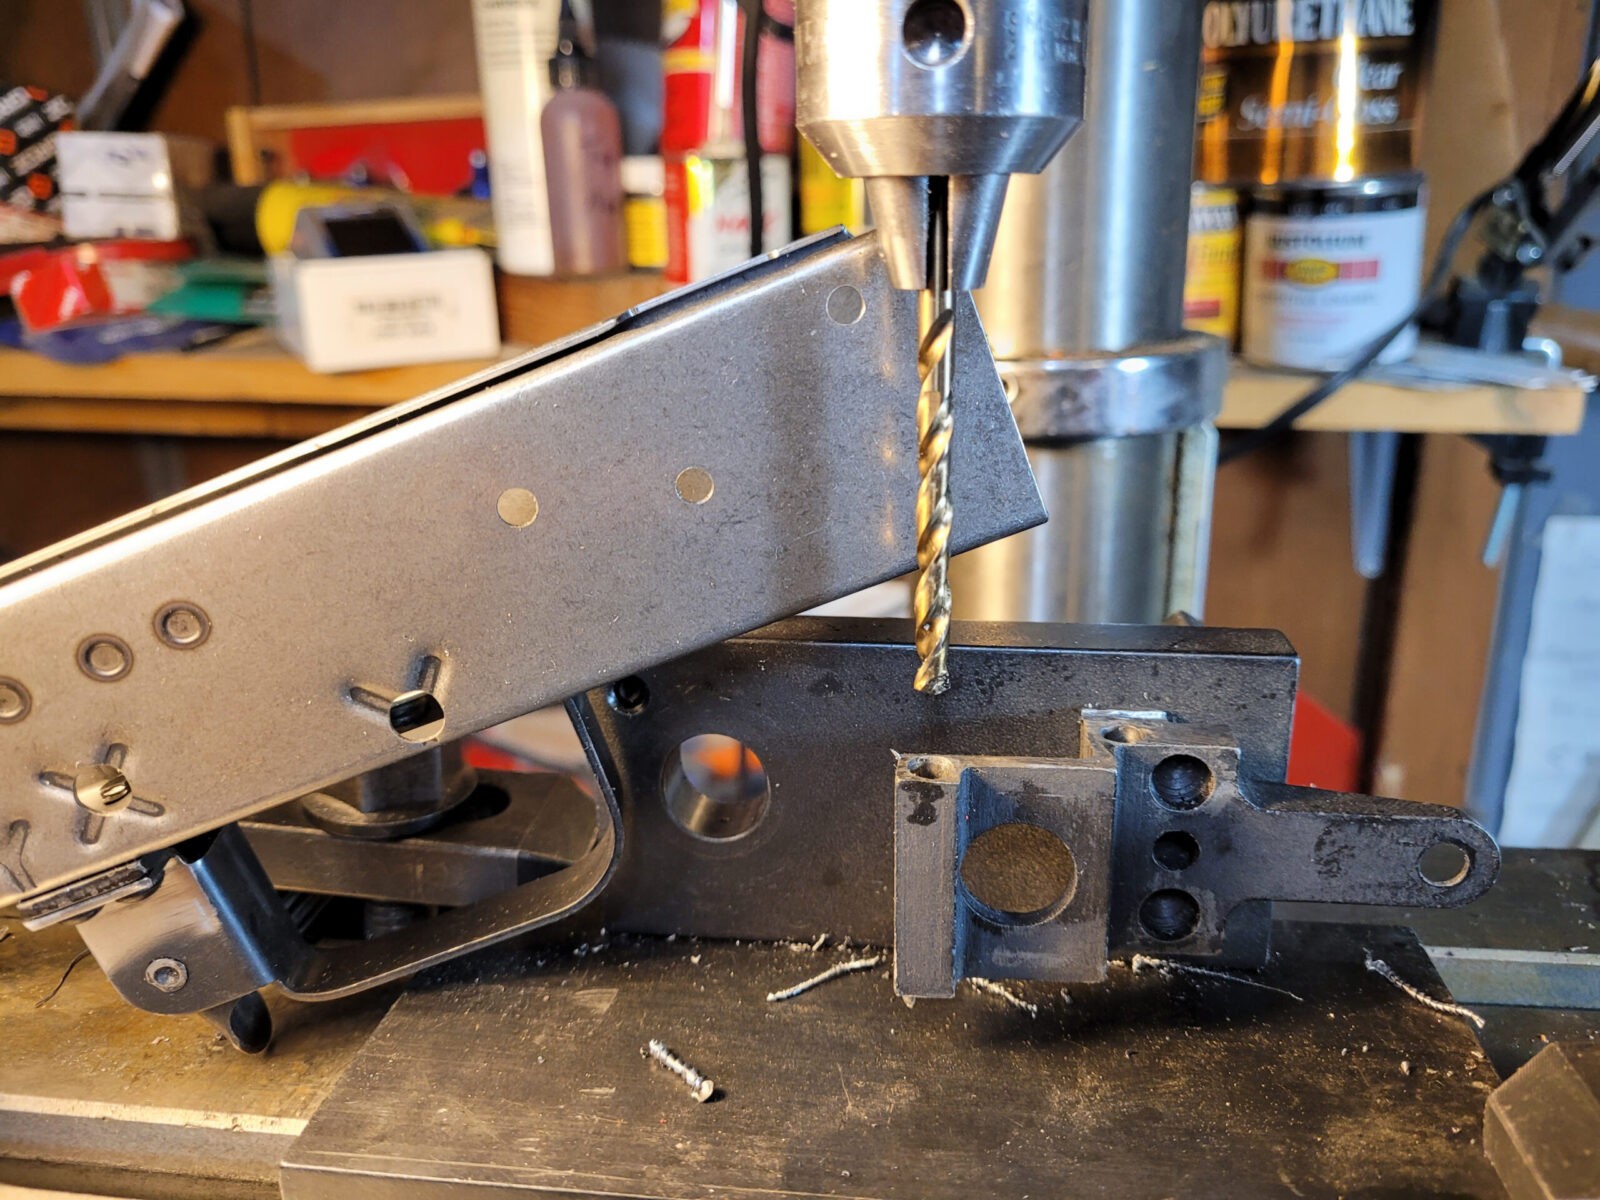
Lower the drill and it will go in the exact same location as the trunnion hole you lined up on.
The front trunnion is being held securely by the fixture. I am sliding the receiver forward and when I bring the drill down, it will make the hole in the exact same spot as what was in the trunnion.
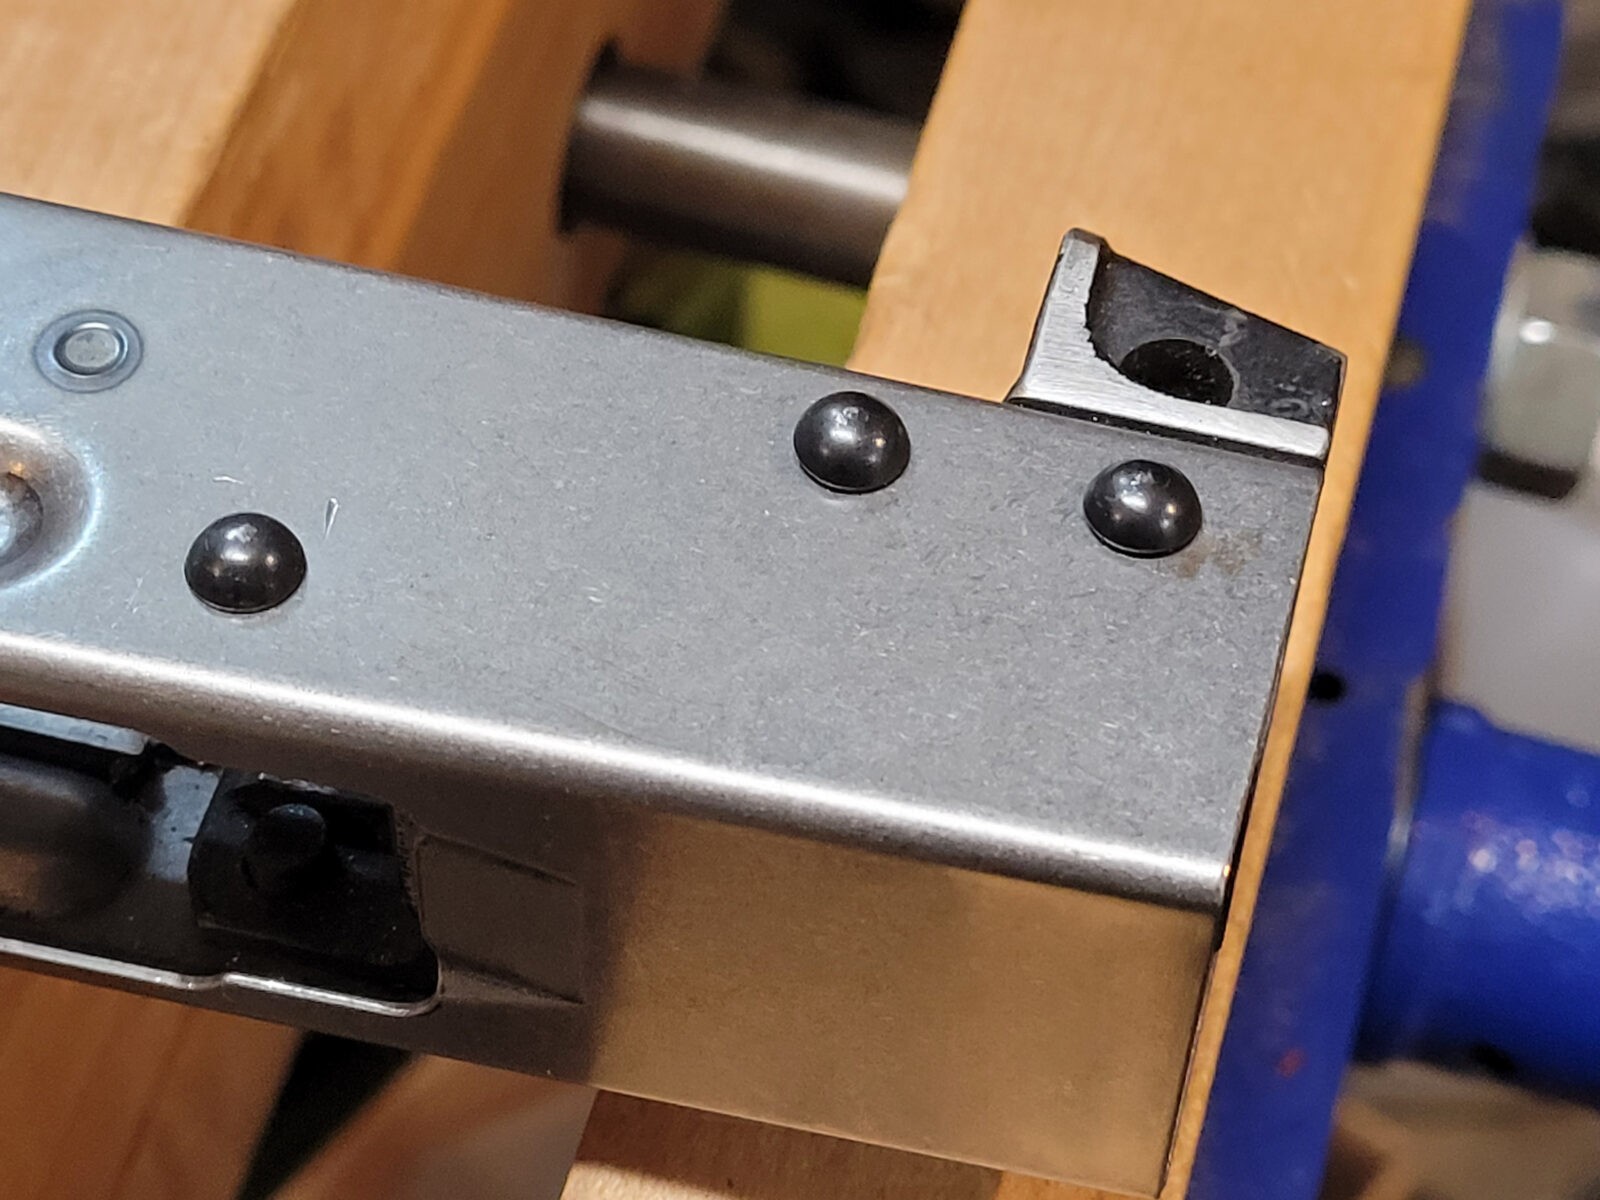
This fixture is the best means I have found to quickly and accurately locate and drill the trunnion holes in the receiver. I prefer undrilled receivers because with this jig I can put the holes exactly where I want them. By the way, these are AK-Builder rivets also.
Tips For The Front Trunnion Holes
Confirm the drill bit sizes you need before you start. For most AKMs, the front rivet holes are 4mm so you can use either a 4mm or 5/32″ (3.868mm) bit. Note, that dimension can be different so just confirm is my point. Also, I’d recommend good cobalt bits personally.
You will drill a hole at a time – do not try to go all the way through. Small alignment errors become big problems when you do that. Avoid the grief – do a hole per rivet.
Make sure the table can’t move, that the fixture is secure and that the trunnion is being held firmly. If anything moves, you are hosed.
Line up on the hole, slide the receiver all the way on, pull it back just enough to verify nothing moved one last time.
After I drill the first rivet hole I carefully inspect everything is lined up. I then move to the second rivet hole and repeat the above but before I drill, I insert temporary rivets in the holes to make sure nothing moves. DO NOT SQUISH THEM – I literally am just using their bodies to keep everything lined up. It really helps avoid small movement errors.
If you mess up real bad for some reason, weld the hole shut and start over.
Doing the rear rivet holes uses the other side of the drilling jig. The little rectangular tab goes into the top of the rear trunnion where the recoil spring rod normally sits and you can then crank it down tight to hold it in place while drilling.
Notice the receiver will be parallel to the jig during these operations. Again, make sure everything is secure and you need to make sure the back of the receiver is true to the rear of the trunnion.
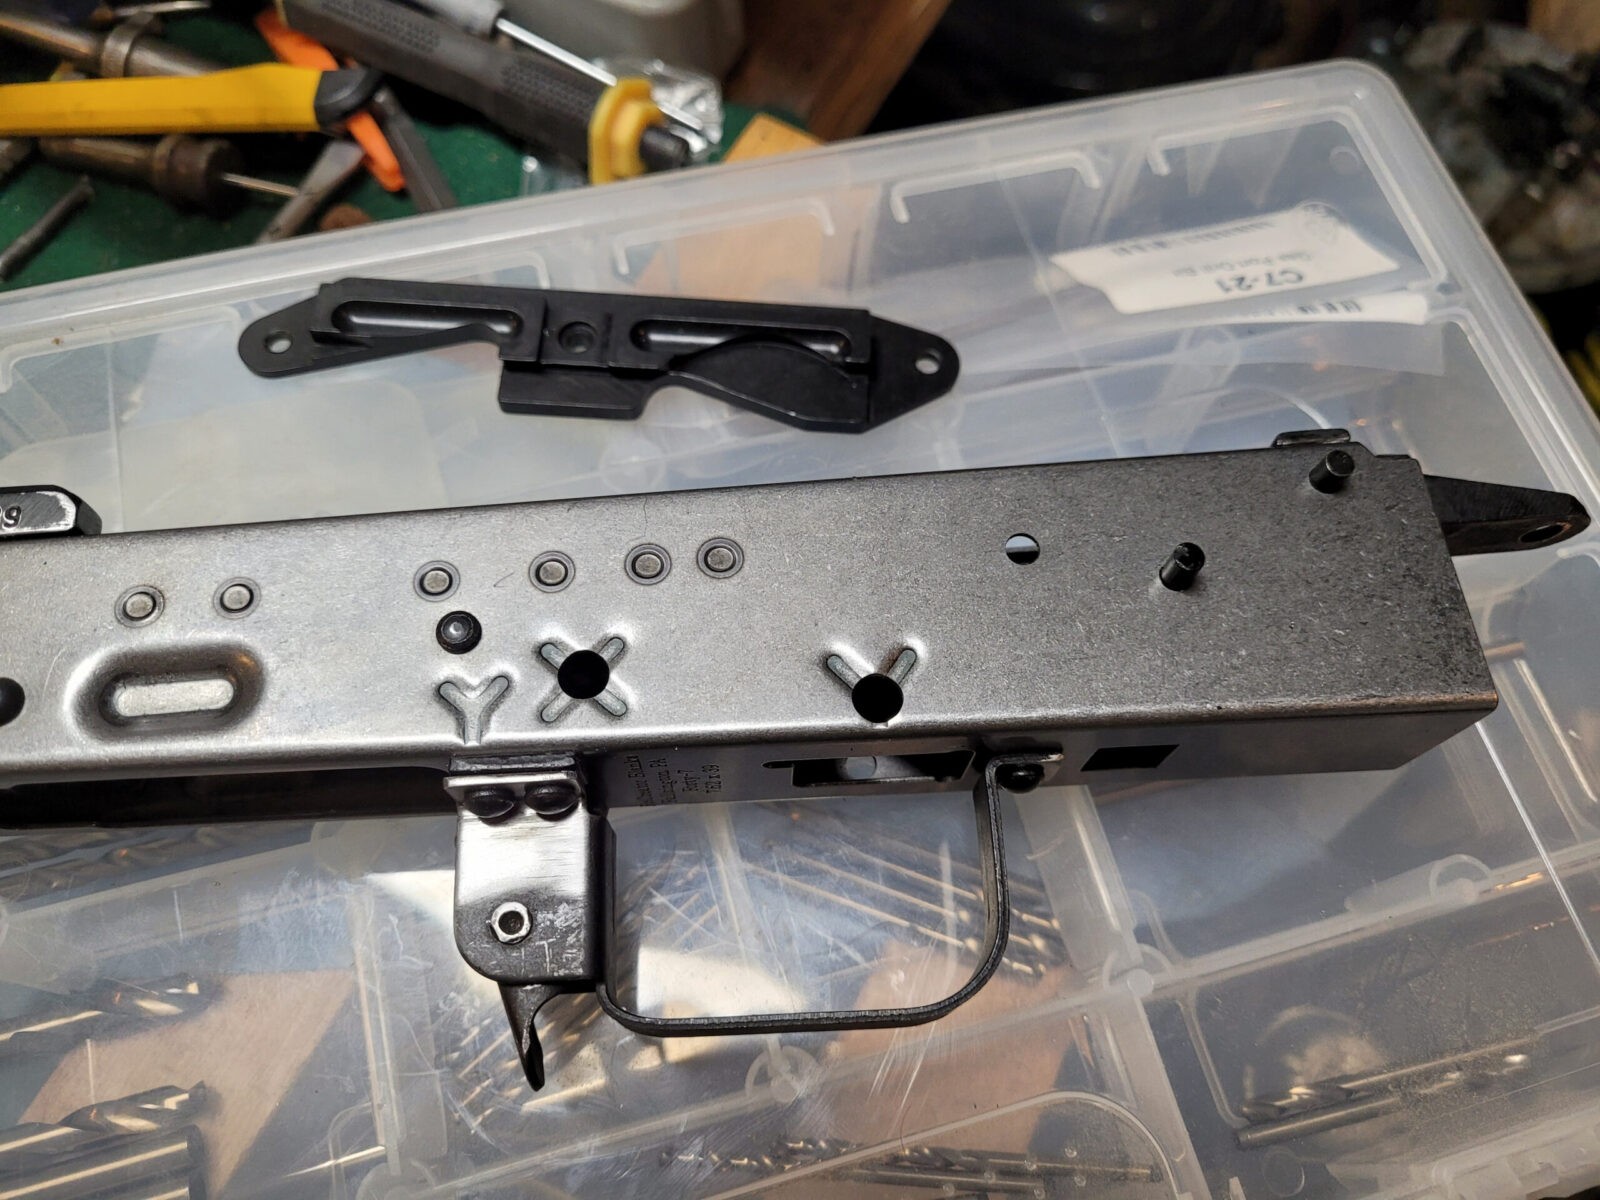
The end result will be accurately located holes. Before you set the rivets, this is when you should be thinking about a side rail for optics if you want one. I like the AKM side rail mount from AK-Builder. Those holes you will need to manually locate and drill. Use a caliper and true the top of the rail to the top of the receiver if you do install one.
Tips For the Rear
First, read all the tips I wrote for the front trunnion if you skipped them.
The key to all of this is a solid setup and nothing moving.
Confirm the size drill bit you need. It will probably be 4.5mm which you can do with that size drill or be close with 11/64″ (4.365mm).
DO NOT DRILL STRAIGHT THROUGH. I’d recommend you take your time and do a hole at a time.
Once you get a hole drilled and are ready to do the next, stick a rivet in it to prevent movement.
Summary
The AK-Builder drilling jig is the best tool I know to help you quickly and accurately locate and drill the front and rear trunnion holes in your receiver. I definitely recommend it.
Note, I have to buy all of my parts – nothing here was paid for by sponsors, etc. I do make a small amount if you click on an ad and buy something but that is it. You’re getting my real opinion on stuff.
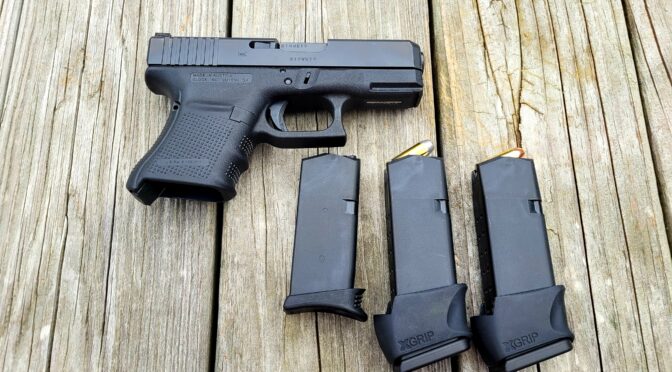
The Glock 29 Gen 4 offers a solid platform out of the box and for many, that is all they want. For me, after building a few Polymer80s and having a better idea of what I liked, I knew I wanted to upgrade some of the parts to personalize it plus run heavier loads.
Wait – Not The Trigger You Ask?
You may look at that list and be surprised that I left the trigger alone – yes, I did. I’ve used Zev, Overwatch and other aftermarket triggers along with other aftermarket parts like connectors, springs, etc. My personal choice, and this is just me, was to go with the tried and proven OEM Glock parts and let them wear in. I’m not shooting matches or precision targets – this was to be a defensive pistol so I wanted reliability and a trigger with enough pull that I wouldn’t have an accidental discharge. There are guys that will agree with me and ones that will strongly disagree – the trigger decision is totally up to you. Mine was to go with the original Glock trigger parts.
New Sights
The original Glock sights are better than nothing but I really do not care for them. Others must feel the same way because there are a ton of aftermarket sight vendors. By the way, go for a brand name – some are just total junk and not sufficiently rugged.
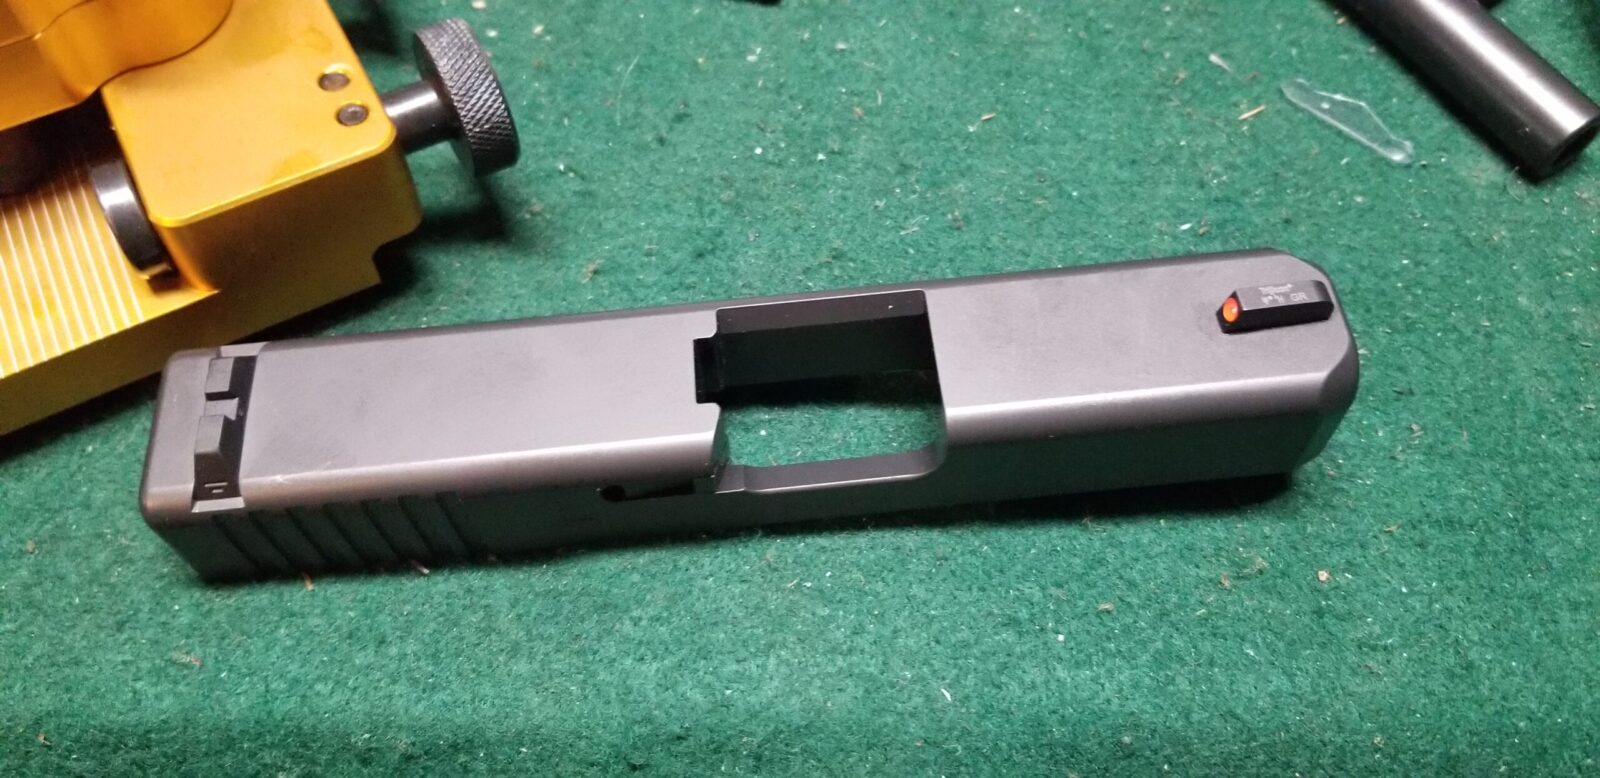
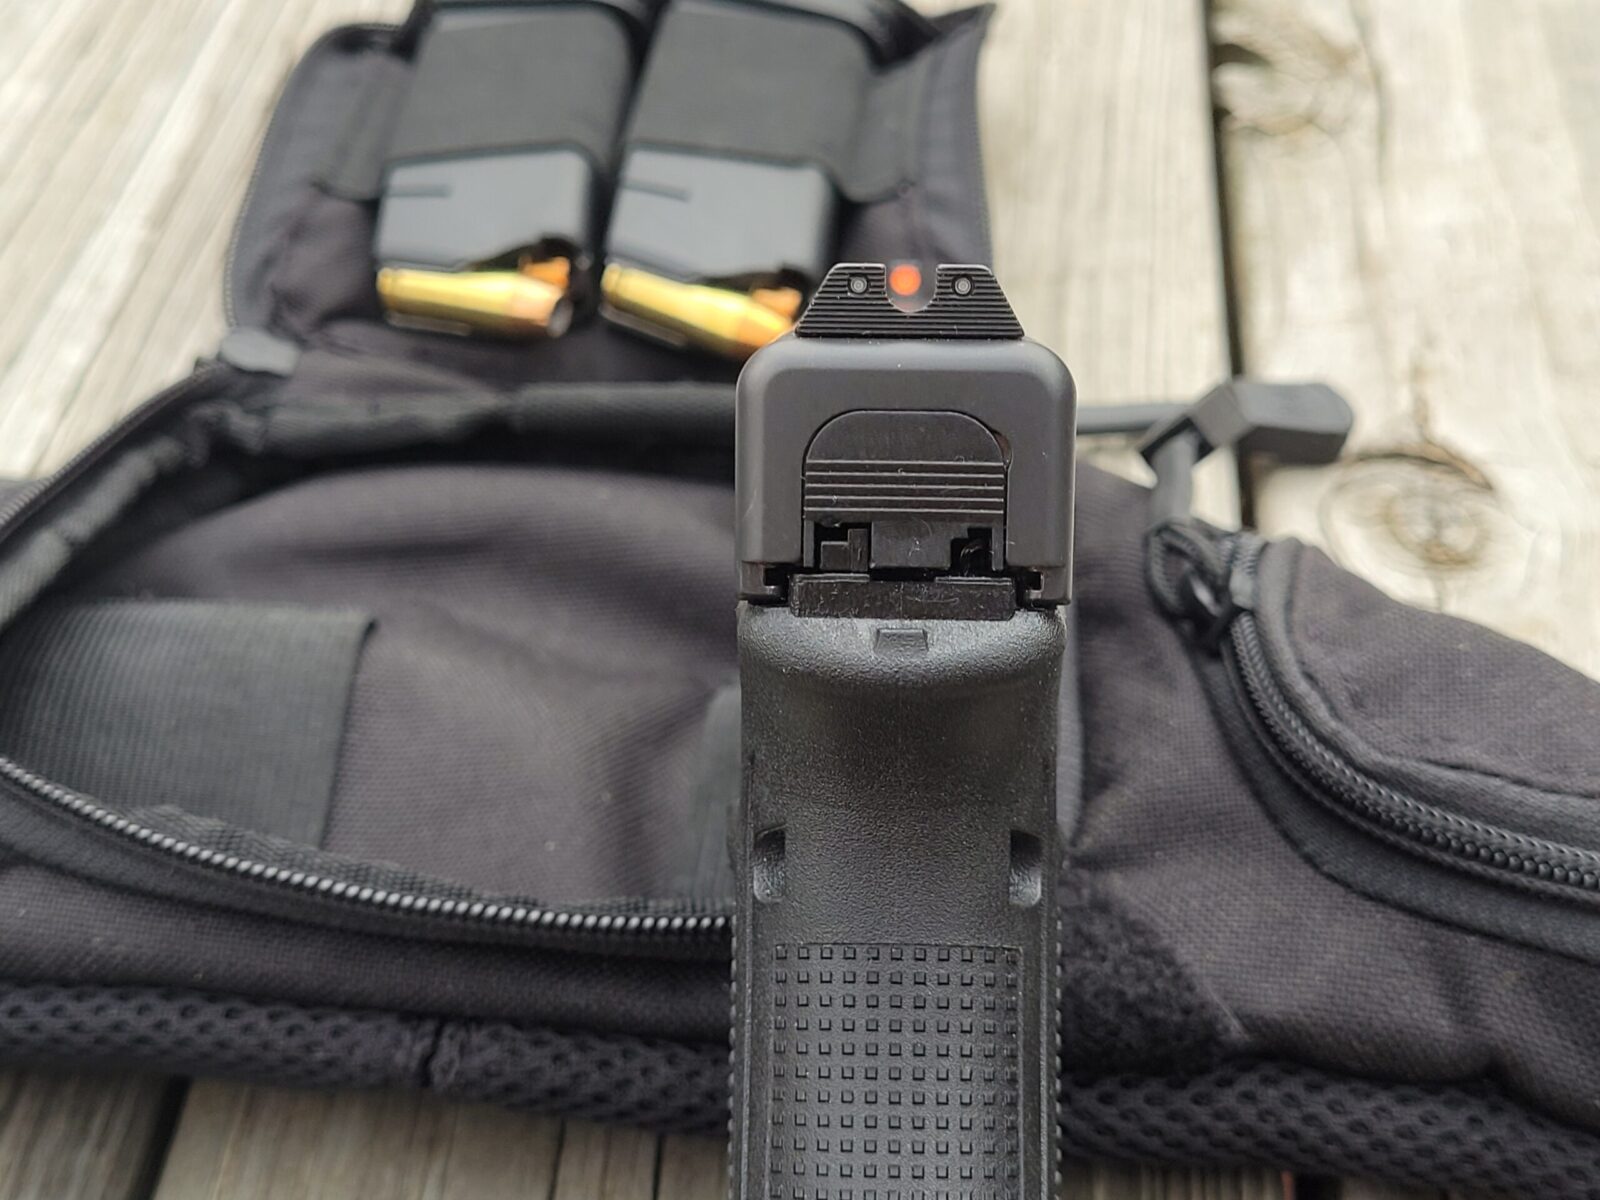
I’ve had very good luck with TruGlo and Trijicon and I tend to favor the latter more. Trijicon sights are very well designed, make aiming super easy and are incredibly rugged. I opted for the Trijicon HD Night Sights (GL1040) for large frame night sights that have an orange ball in the front and tritium illumination. I intentionally wanted a low-light sight but not to add an optic.
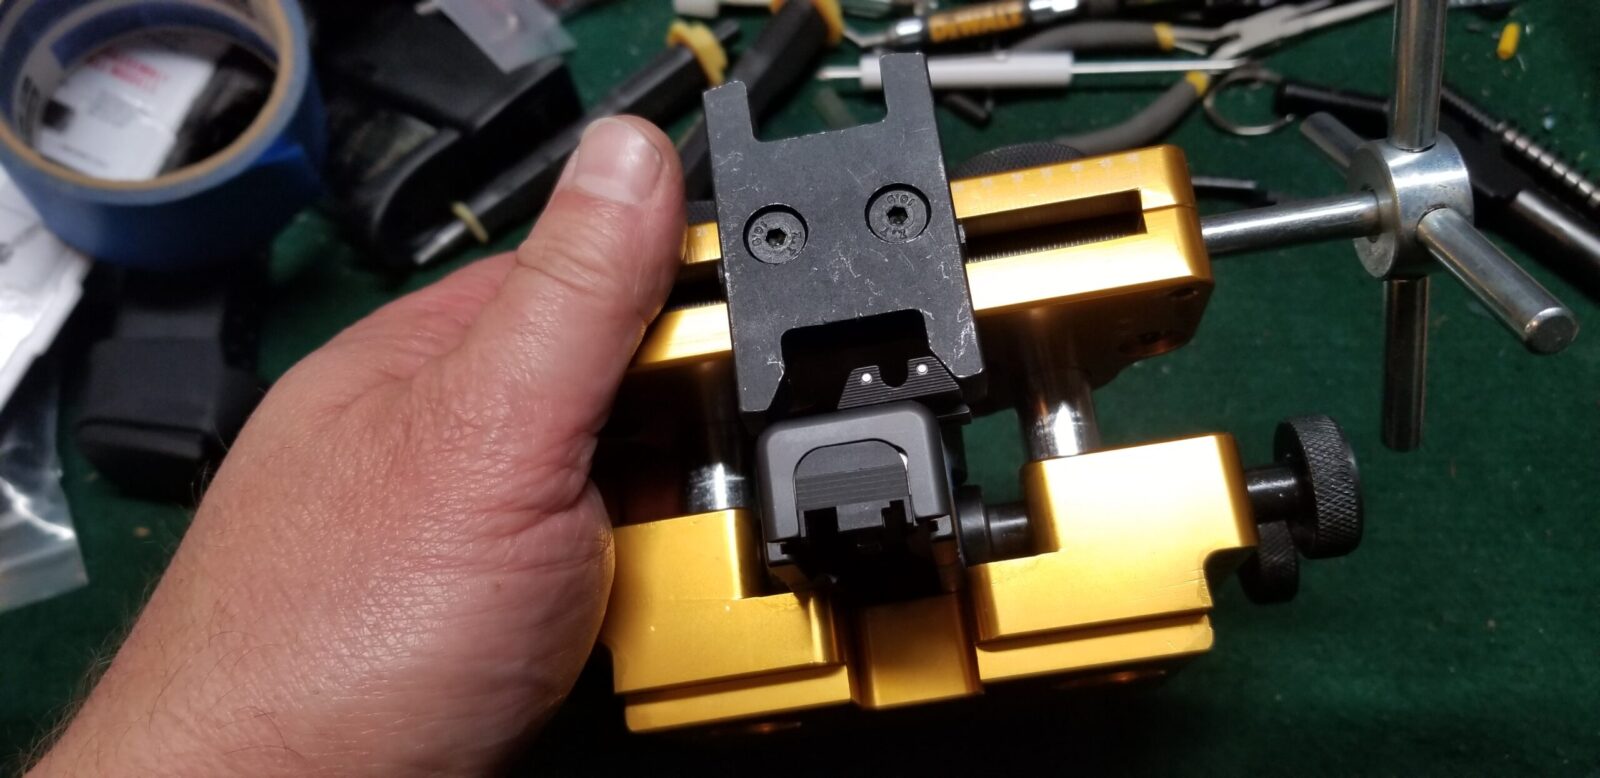
I used a Wheeler Sight Tool for pistol sights and really like it. Installing and removing Glock sights is a breeze with this tool. You can’t see it from this angle but I do have blue painter’s tape on the slide to protect the finish just in case.
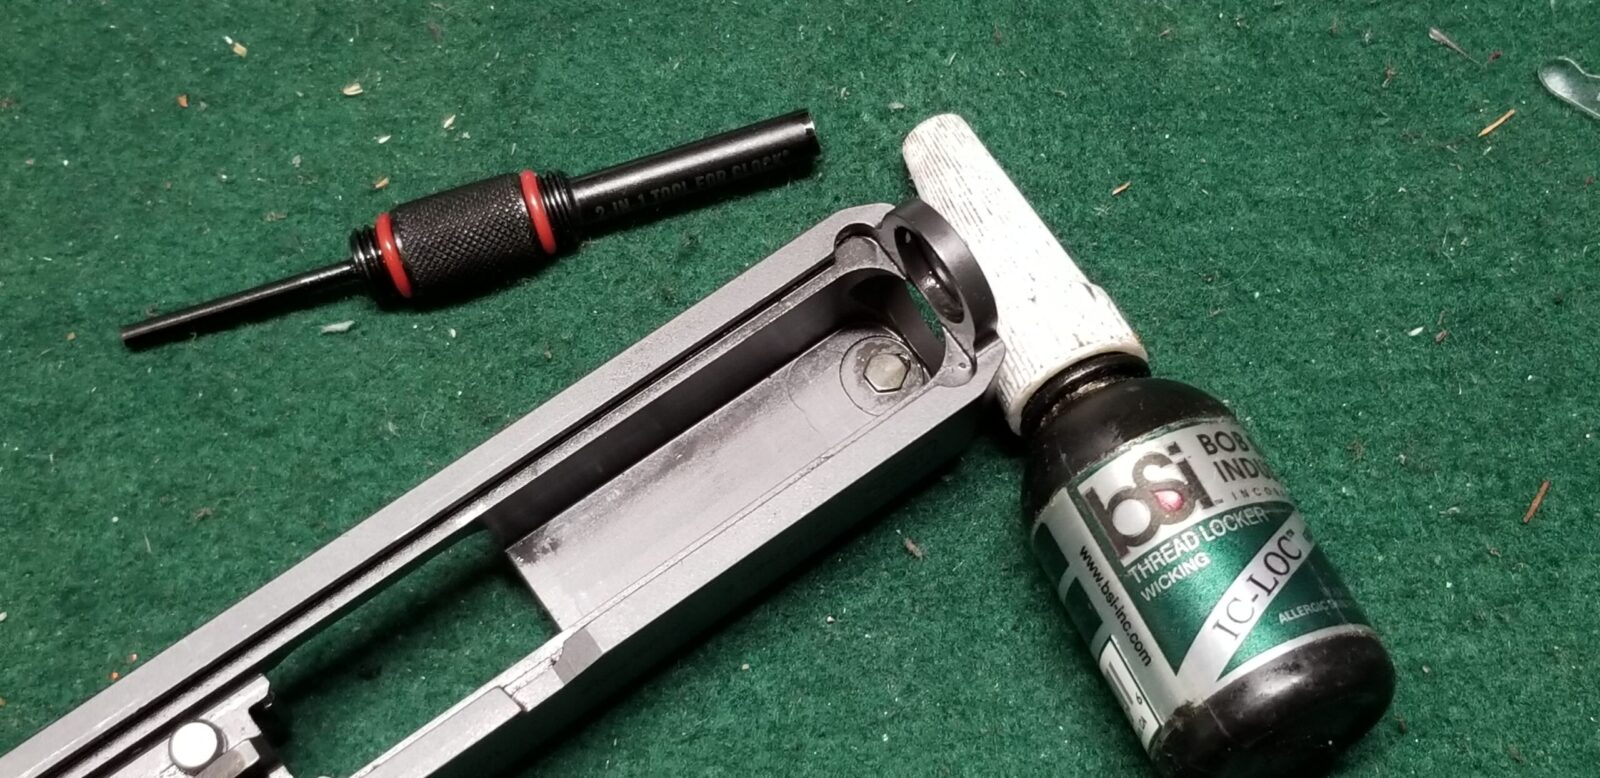
My current tool for removing and installing Glock sights is this 2-in-1 Real Avid tool that has a pin pusher on one end and a pin pusher on the other. What makes a good tool? The little bolt you see requires a 3/16″ thin wall socket. Having a rare earth magnet at the right depth makes all the difference in the world to properly hold the bolt while you are trying to get it threaded into the sight. Cheap tools do not have the socket properly formed, don’t have a magnet, etc. The Real Avid tool gets it right. Cheap imports are just that – I’ve seen them useless right out of the box.
Done. It took me maybe 10-15 minutes including taking these photos. The right tools make it very easy.
The dots glow green in low light due to tritium inserts.
Changing The Controls
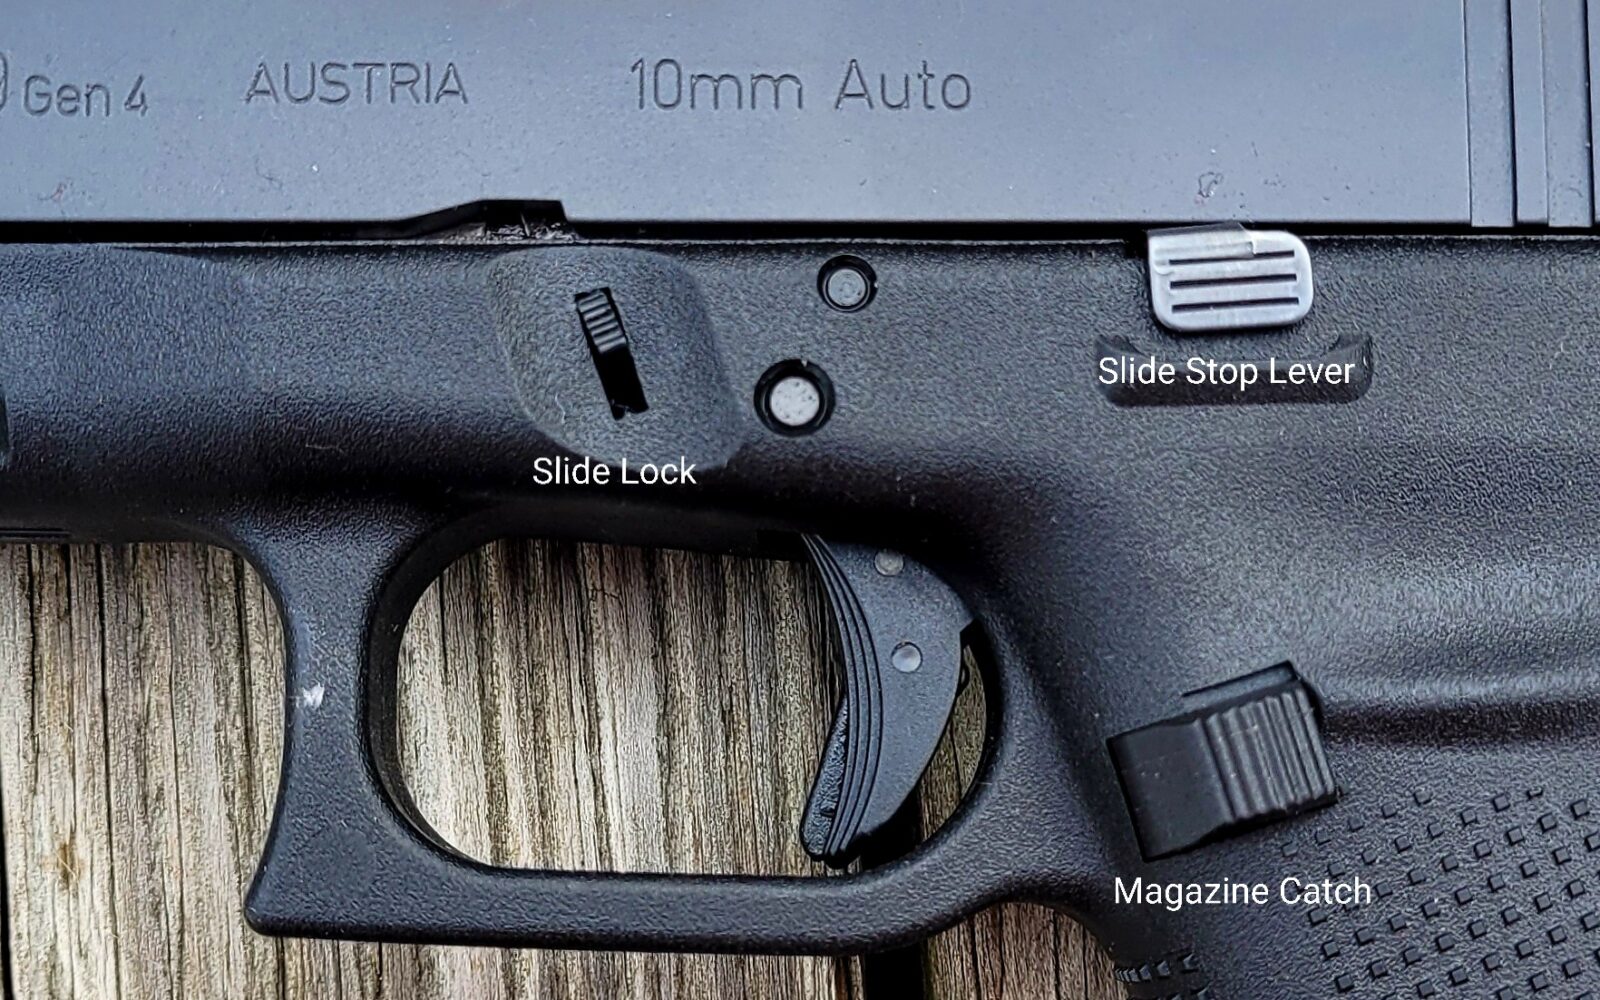
That is a Rival Arms Extended Slide Lock. An OEM Glock Slide Stop Lever and a Tango Down Vickers Tactical Magazine Catch.
I like to replace the slide lock, slide release and mag catch normally. The slide stop is actually a big problem for me as I have a hard time grabbing, even feeling, the two sides to pull it down to remove the slide. This really drives me nuts and is one thing I always replace. I installed a Rival Arms extended slide release that sticks out just enough for me to get a much better grip on it. I wish I could find the packaged but I installed a no-name unit online and it had problems from the start – the Rival Arms unit is what I went to next and am still using. Point of the story – beware of cheap parts and test your stuff.
For the Slide Stop Lever, I actually am still using the Glock unit. Normally I would replace it but had a hard time finding one that would fit a Glock Gen 4 model 29. I can use the Glock lever, it’s just not my first choice.
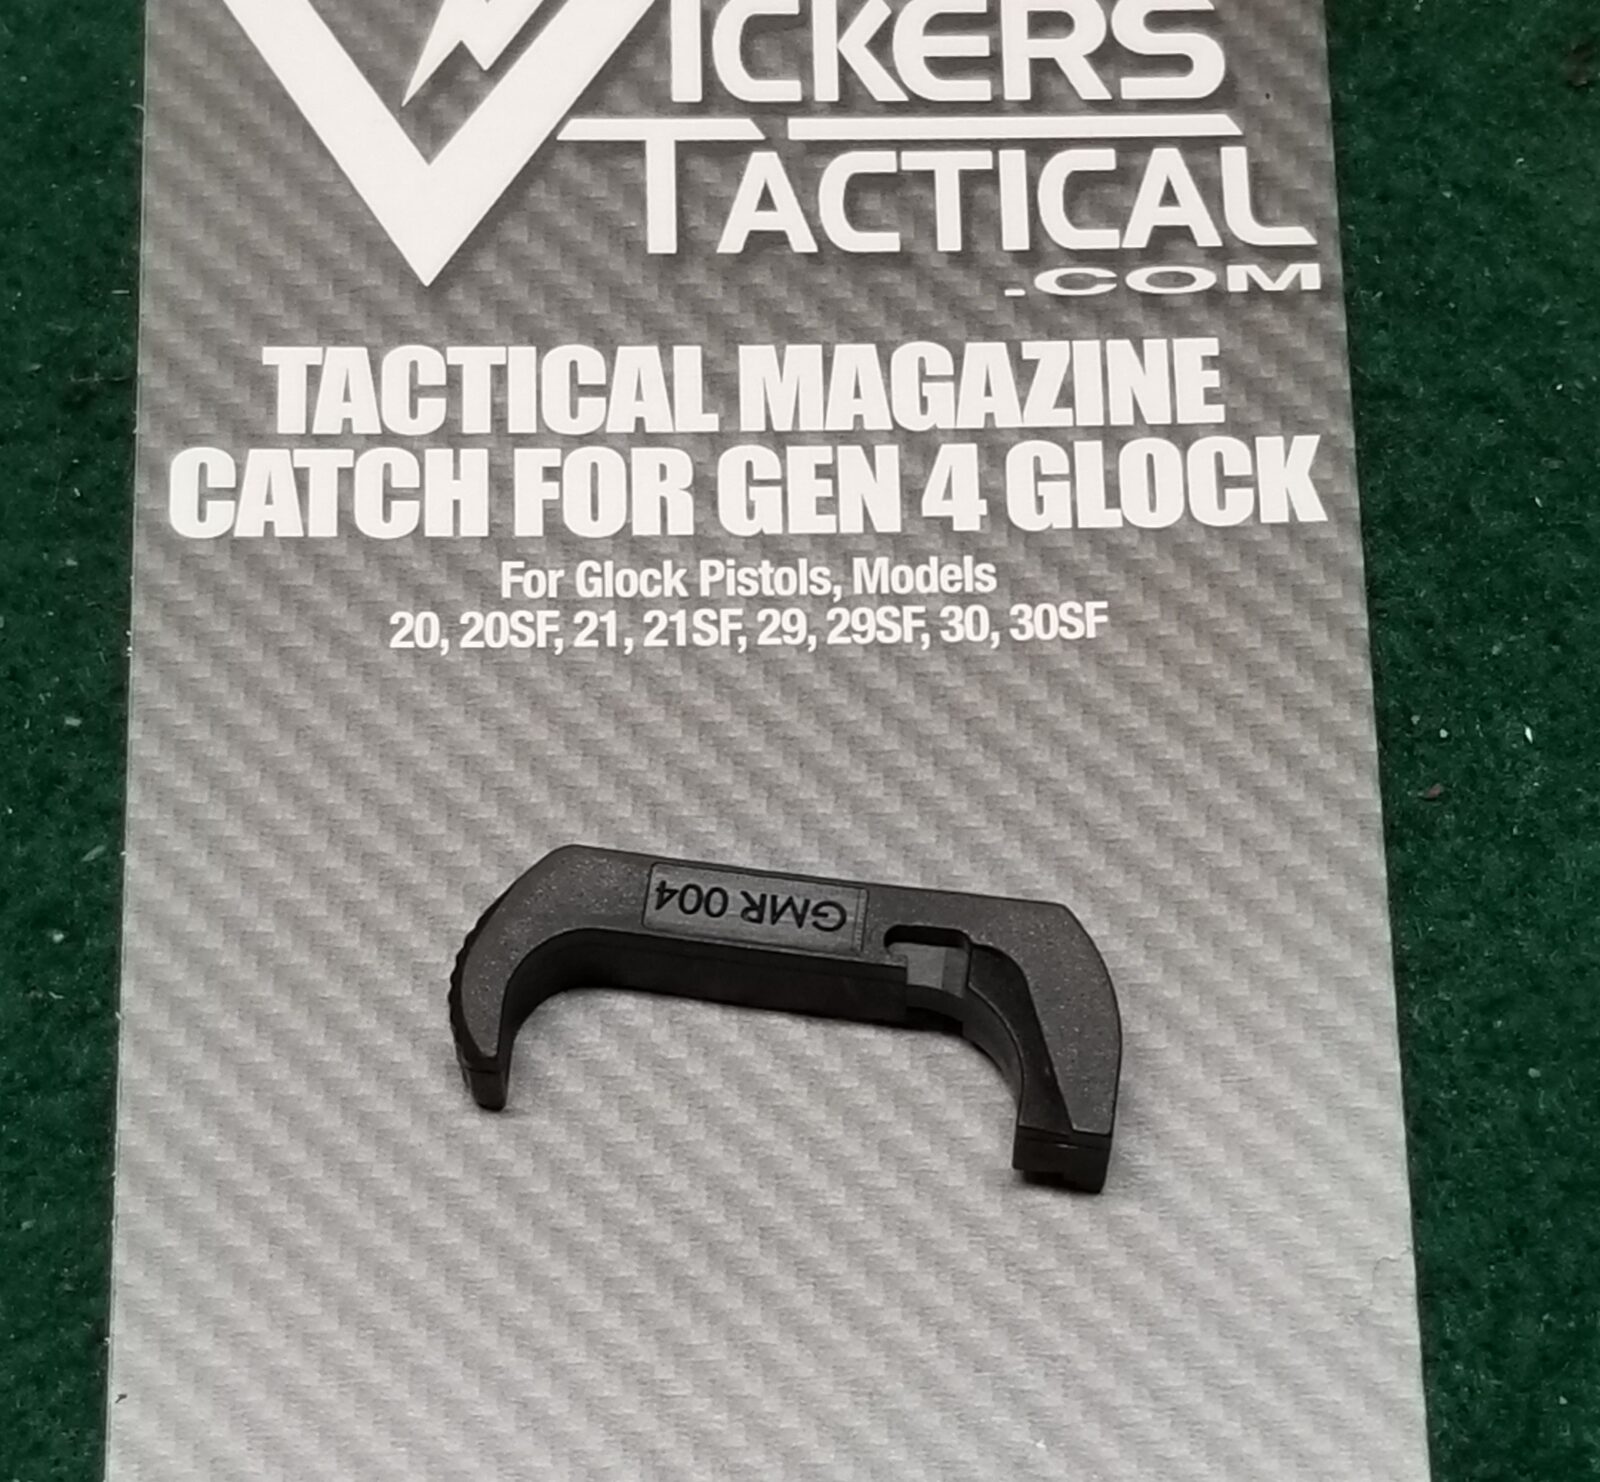
For the Magazine Catch, I went with a Tango Down Vickers Tactical model. I’ve used these a number of time of times now because I like how it sticks out just a bit more than the original but not too much. I’ve tried ones that stick out so far that if you even lay the pistol on its side, the catch is depressed enough to release the magazine and then the next round fails to feed because the mag isn’t properly seated.
The Vickers Tactical Magazine Catches are really my preferred unit these days for Glocks and Polymer80s.
Recoil Spring Upgrade
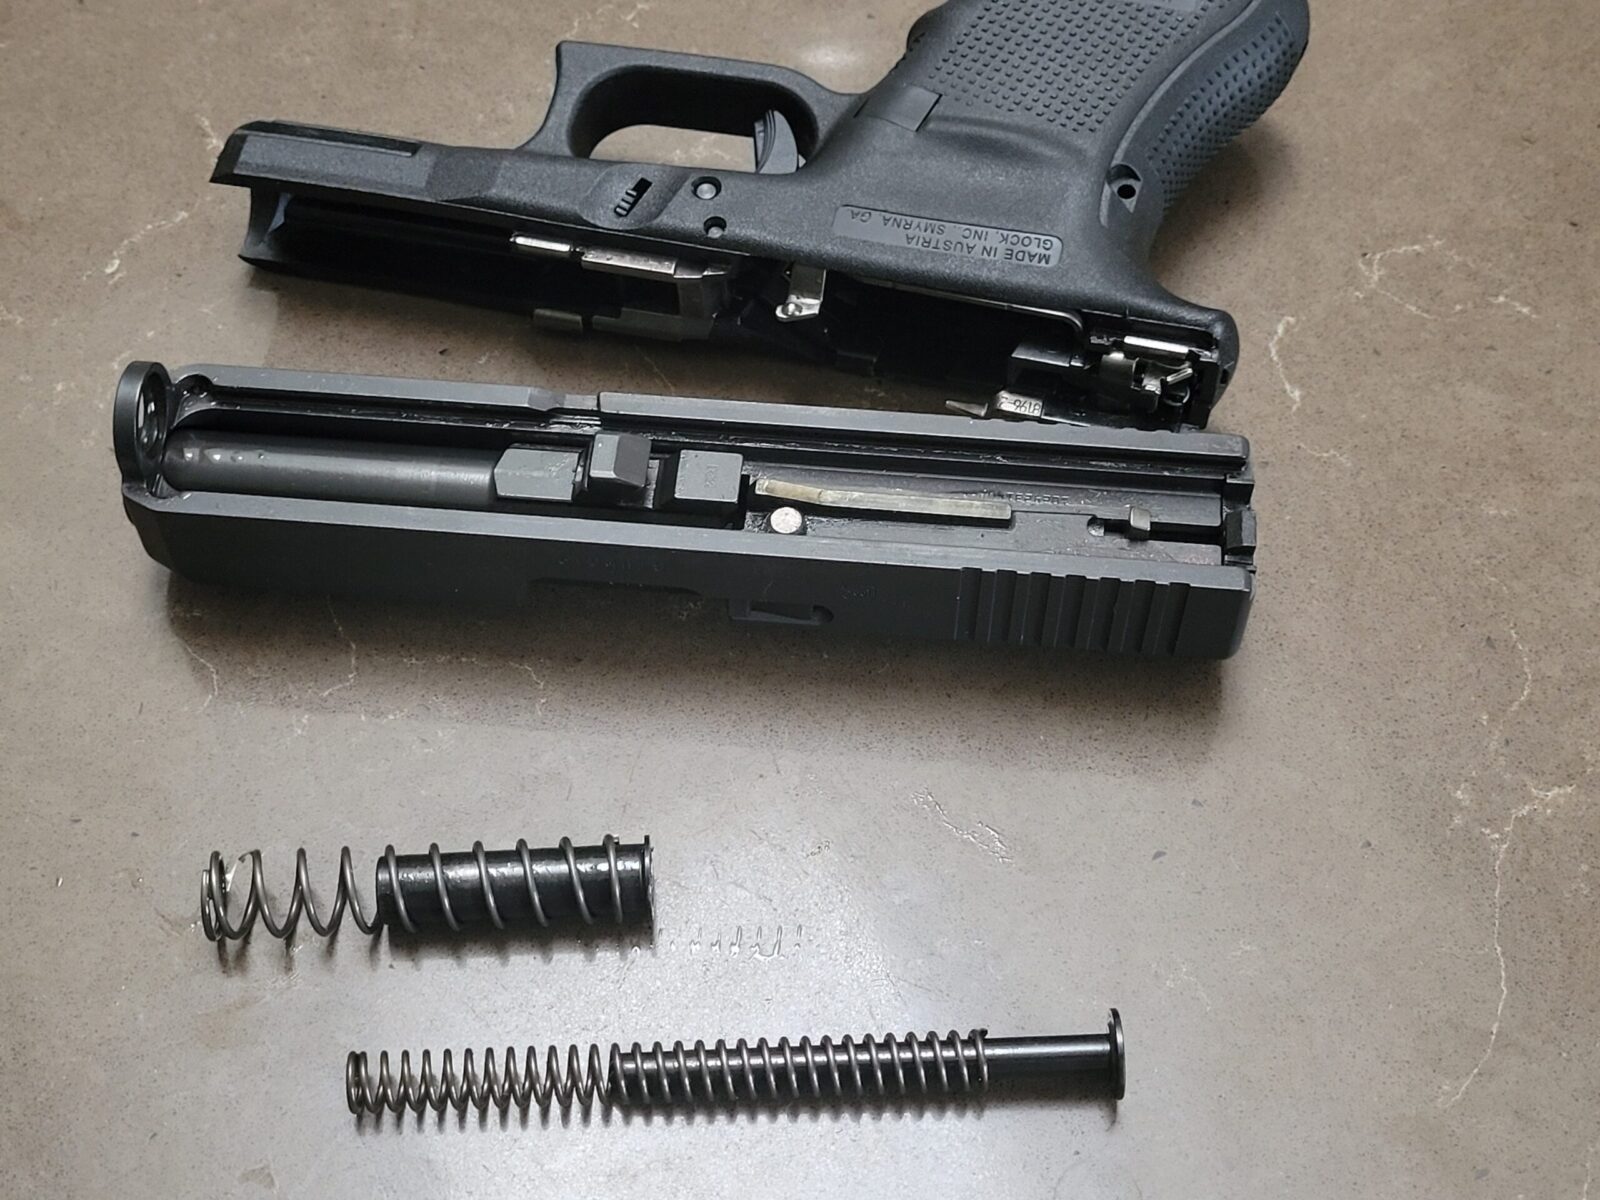
The stock Glock 29 spring is rated for 17 pounds as I understand it. To better run the hotter loads from Buffalo Bore and Underwood, I wanted to put in a stiffer spring but I wasn’t exactly sure what to go with. This helps with obtaining both higher and more consistent velocities with these loads. Yes, the OEM recoil spring will still work – this is an improvement is all. However, if you run too stiff of a spring, your pistol may not cycle reliably with other loads you want to run.
Wolff Gun Springs makes this decision super easy for you. They sell what they call a “Recoil Calibration Pak” with springs at 17, 19 and 21 pounds. They have a variety of these assortments for different Glock models as well.
To install the spring, you need to get a two piece guide rod assembly and Wolff sells them as well. The native Glock springs are in a captured assembly that really isn’t designed to come apart. The Wolff guide rods make it super easy for you to try different springs and do not affect accuracy or reliability in terms of the rods themselves.
That is the Wolff two piece guide rod and springs. It’s worked great so far.
I installed a 19 pound spring and found it functioned just fine with all of my Buffalo Bore, Ammo Inc, S&B, and Underwood loads. That’s what I am running at this point and haven’t had any reliability issues so far.
In Conclusion
The pistol is configured the way I want it and as reliable as ever. The end of the day, what you do is your choice but just be sure to test your combinations (the new parts, magazine and ammo) before you rely on them.
Note, I have to buy all of my parts – nothing here was paid for by sponsors, etc. I do make a small amount if you click on an ad and buy something but that is it. You’re getting my real opinion on stuff.