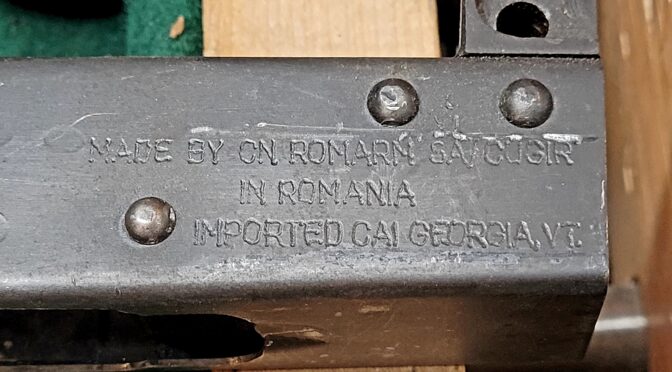
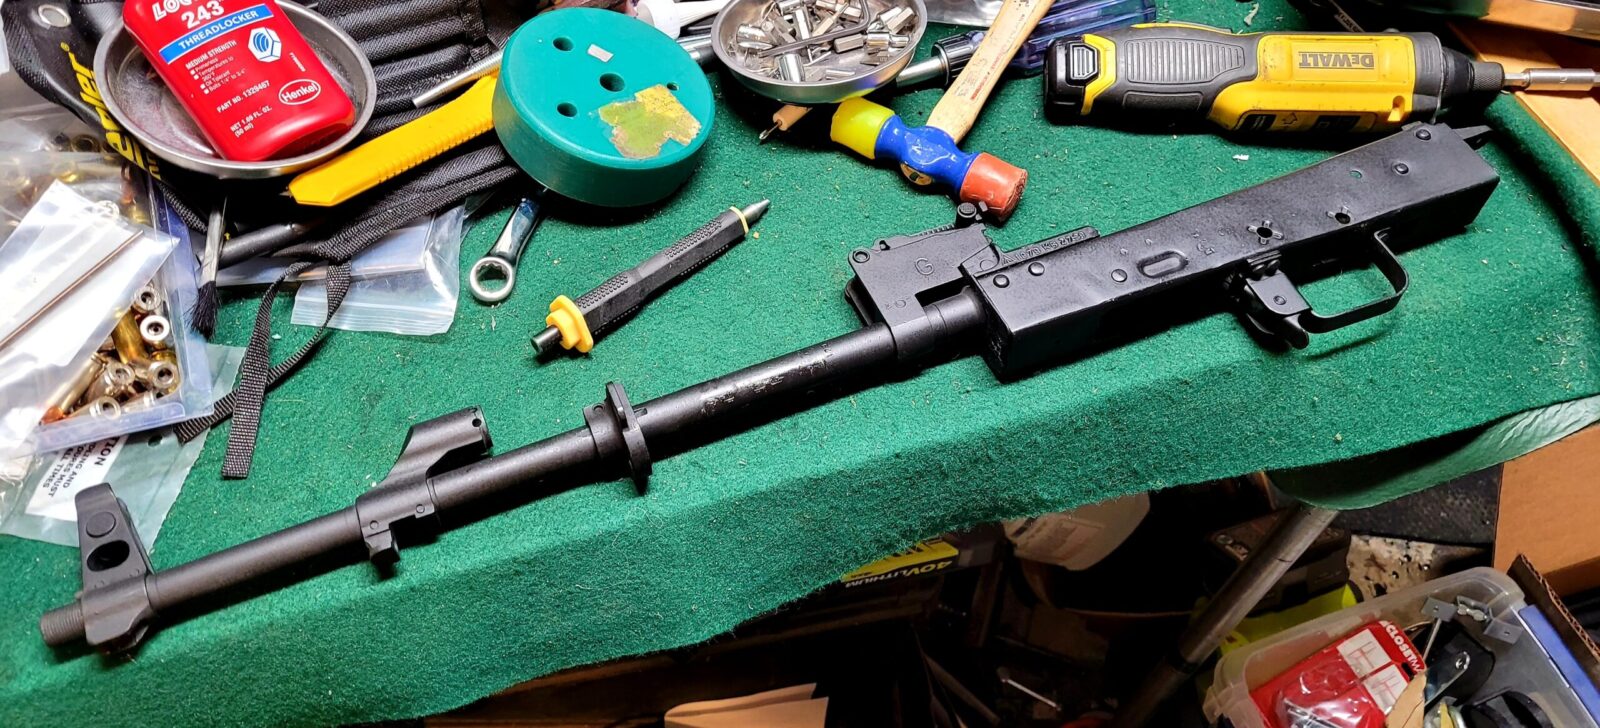
Okay, there are a ton of ways to remove rivets and I’ve posted some details both about removing the trigger guard and side rail rivets (if your AK has a side rail). This post is going to get straight to the point.
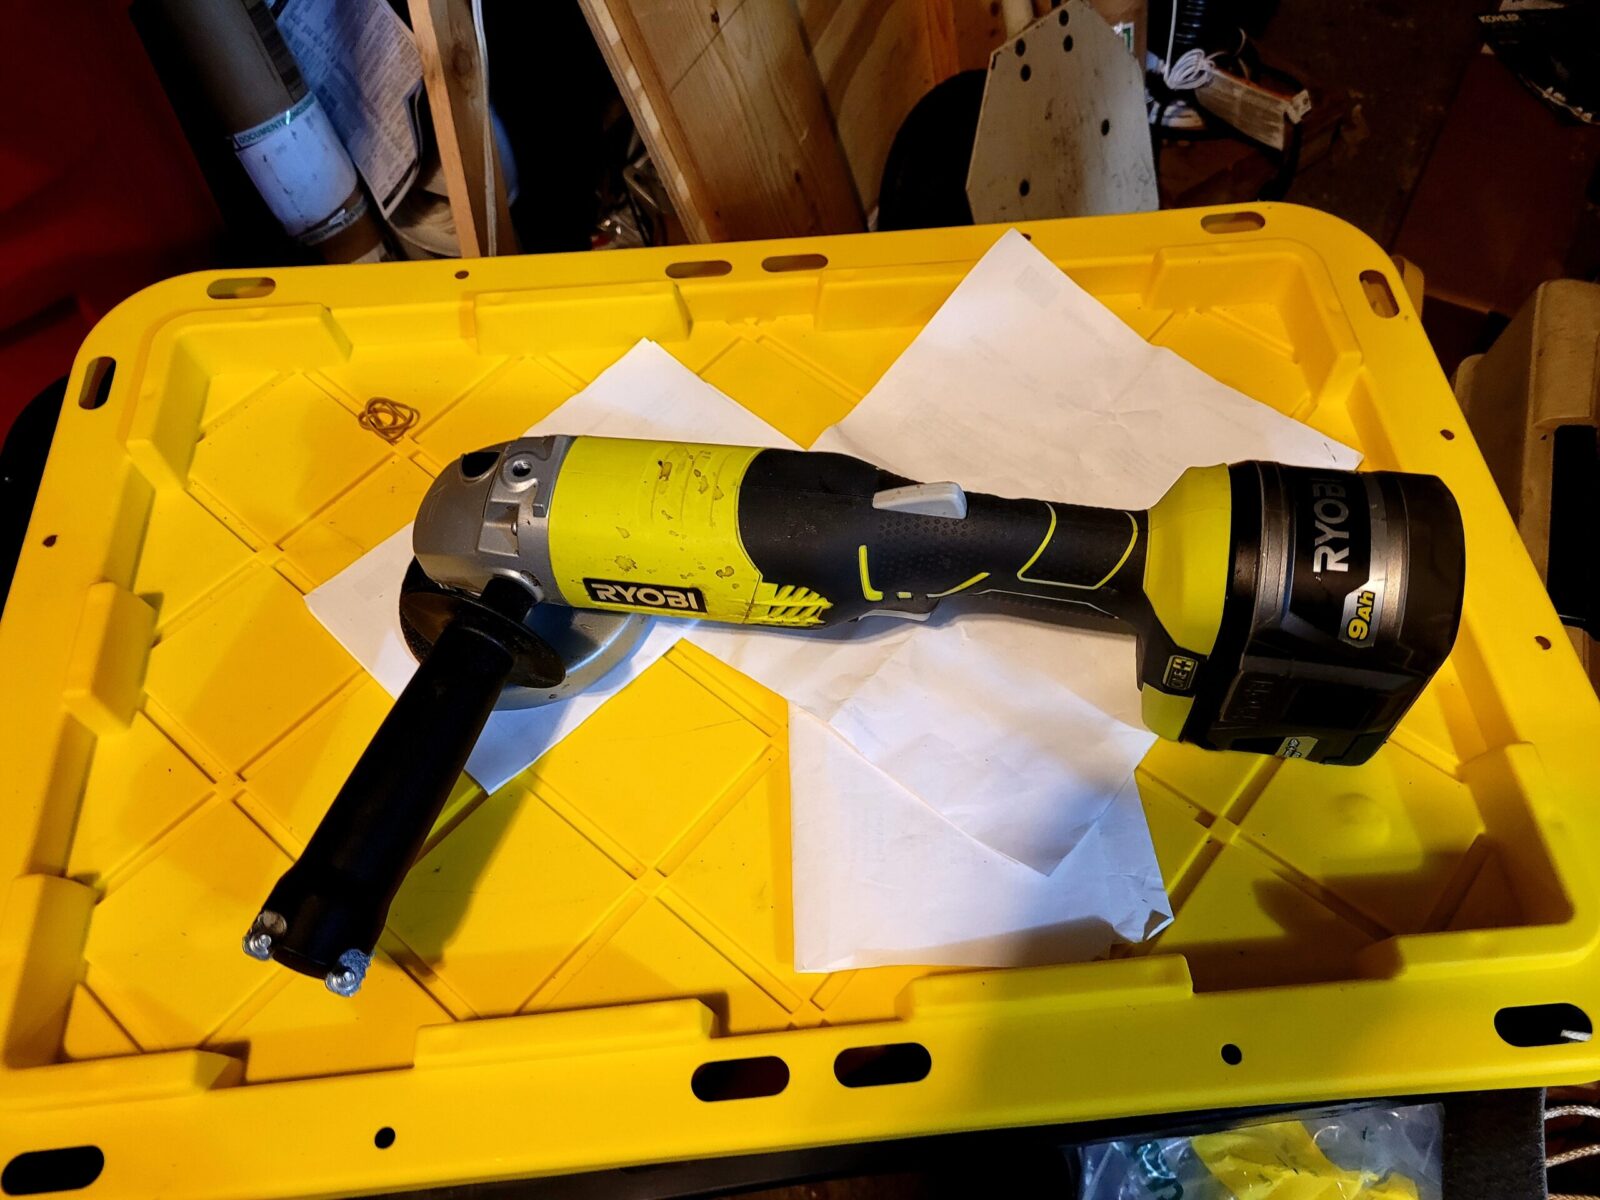
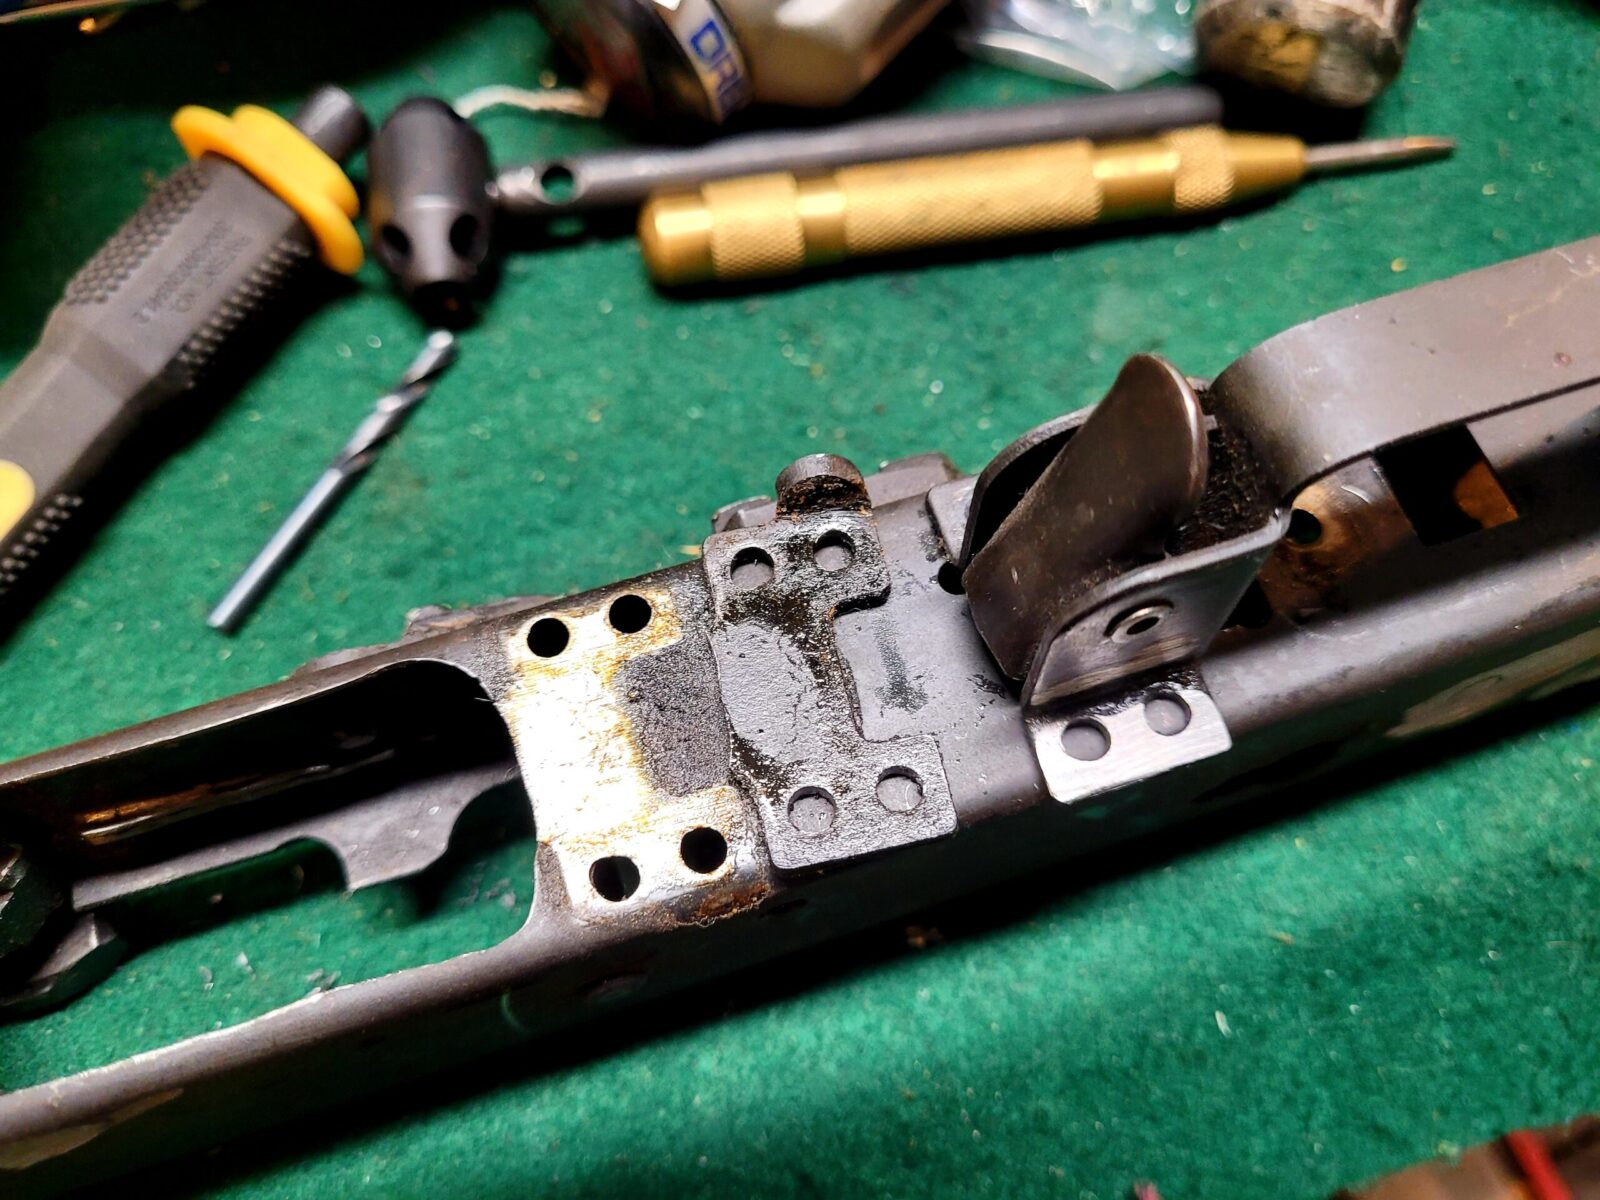
I use a 4.5″ cordless Ryobi angle grinder and take all the rivet heads down flush. Unless I plan to reuse the receiver, I don’t care how the receiver looks when I’m done. If I do care, then I will be much more careful and stop just before I get to the surface.
I then center punch all of the holes to make drilling easier. I like to use an automatic center punch so I can focus on where I want to make the divot for drilling vs. trying to keep everything aligned. If you’ve never used one, they are worth their weight in gold.
I drill an 1/8″ hold in each one use quality cobalt drill bits and cutting oil. I like to buy Tap Magic in bigger containers and then transfer the fluid as needed into smaller squeeze bottles with long metal tubular “needle” tips so I can precisely put it right where I need it.
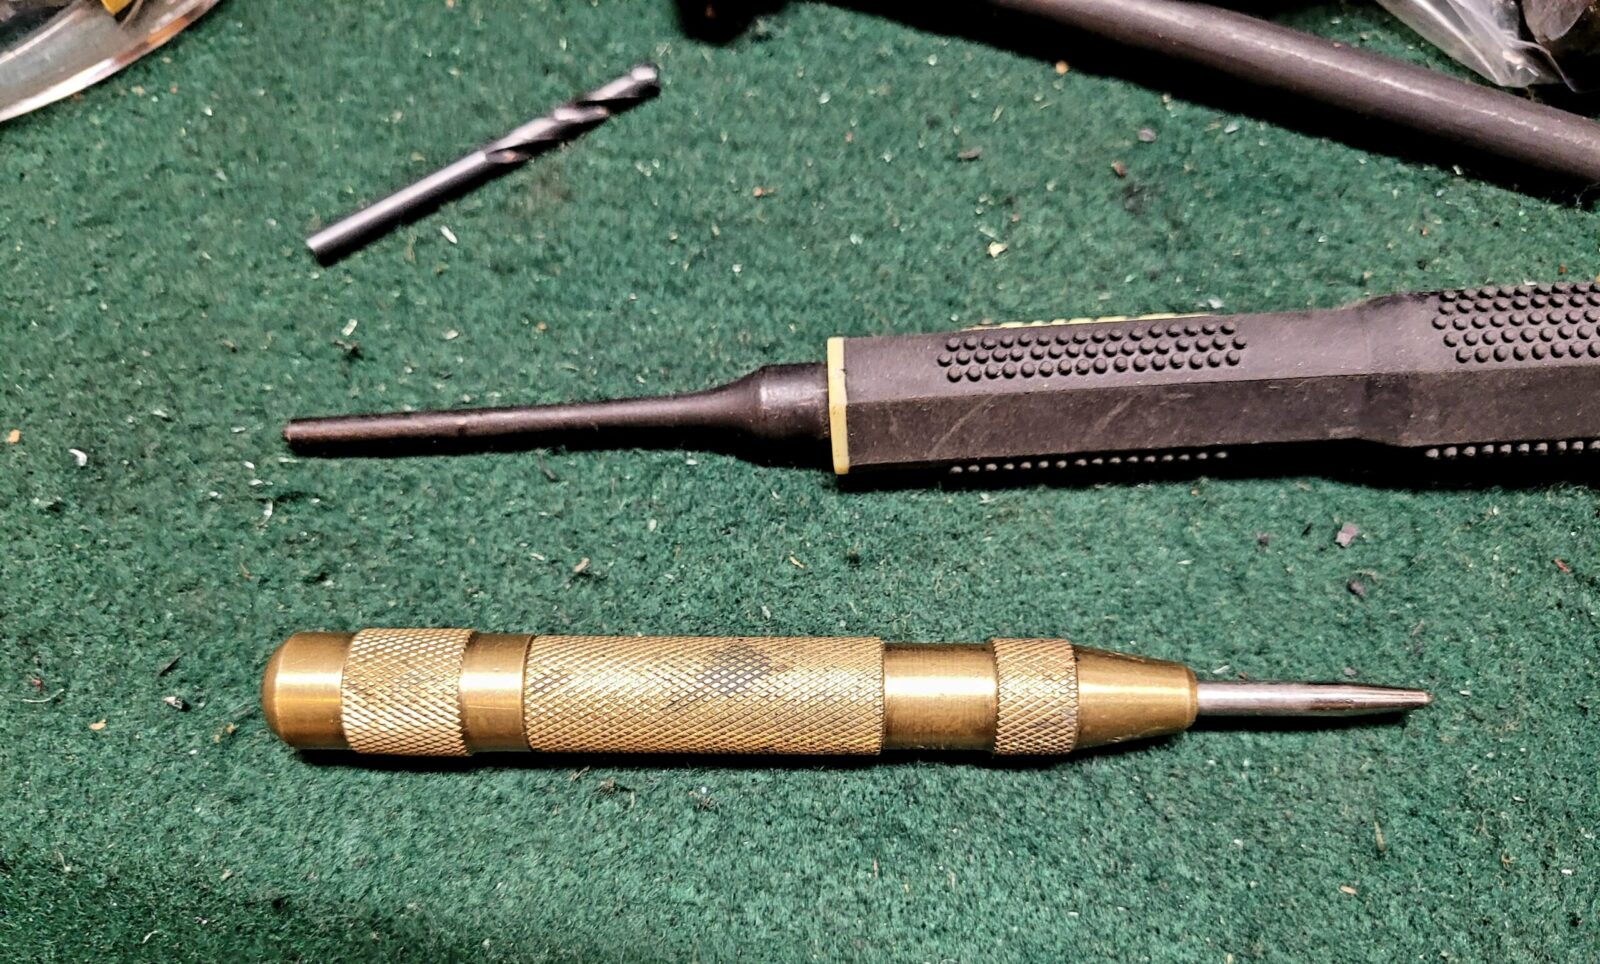
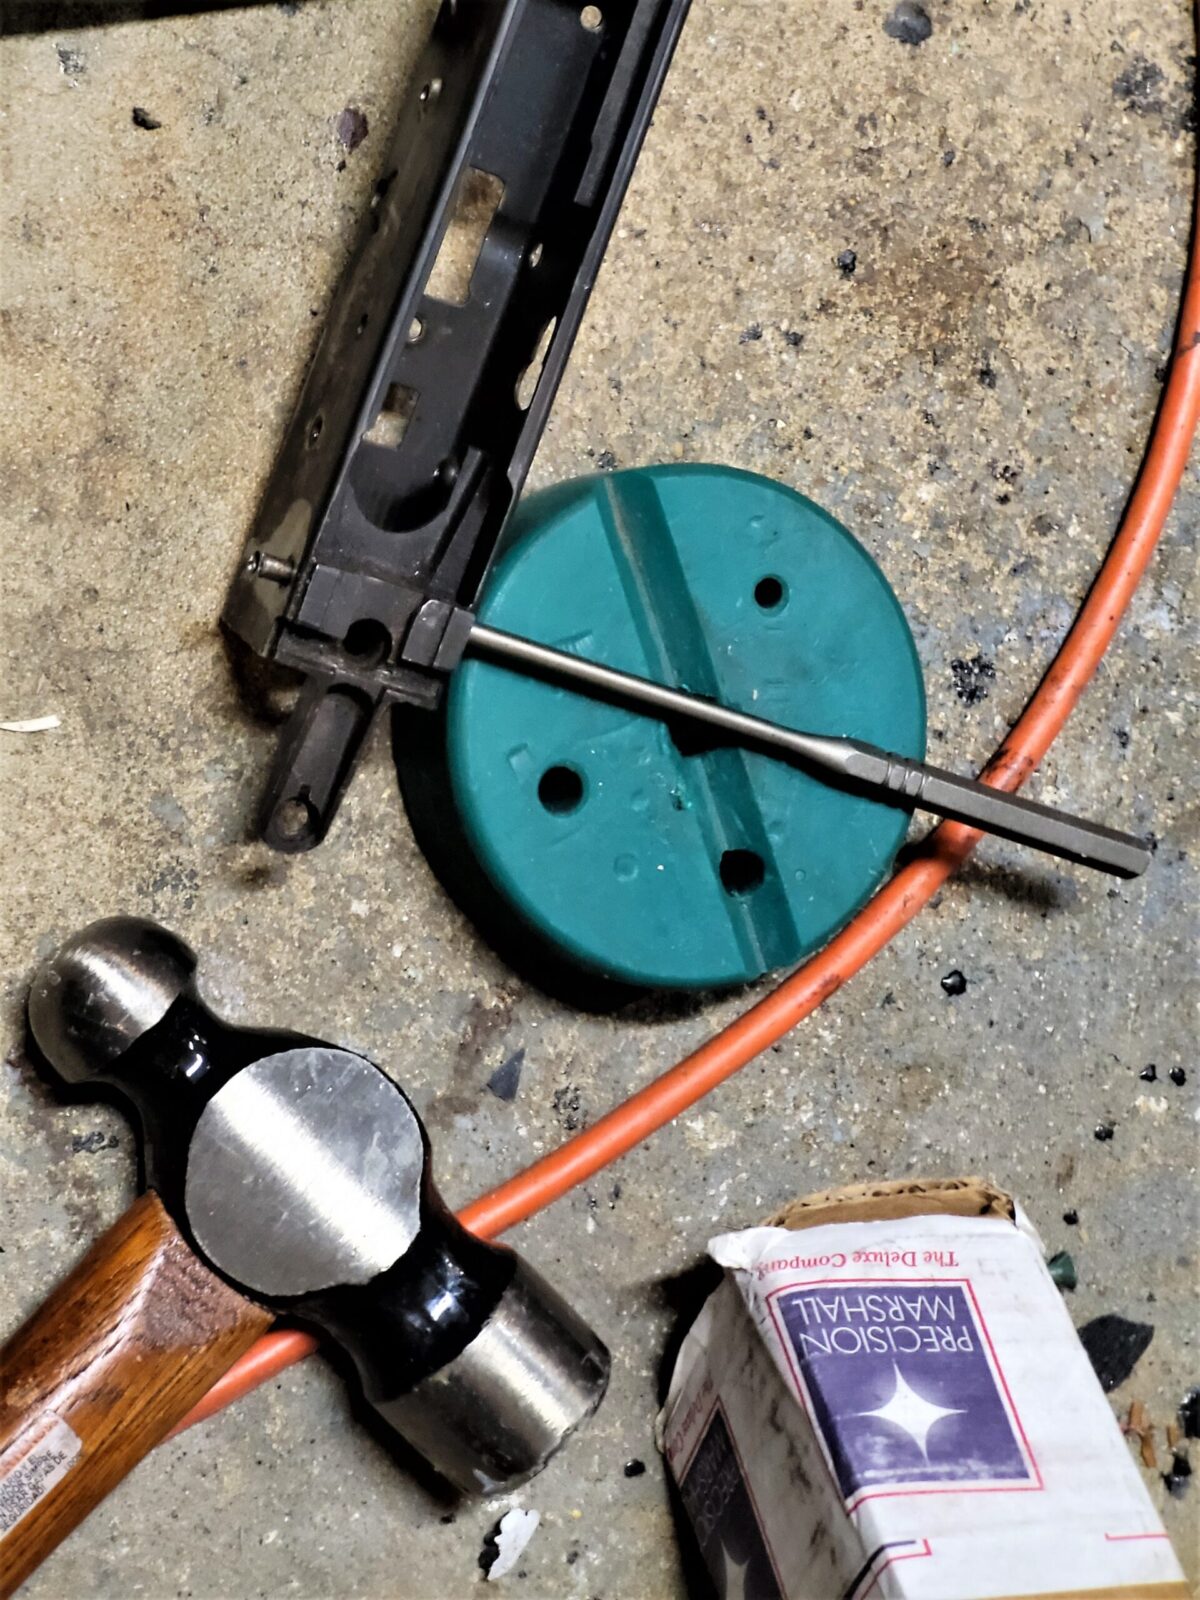
From the top – 1/8″ drill bit, roll pin punch and an automatic center punch on the bottom.
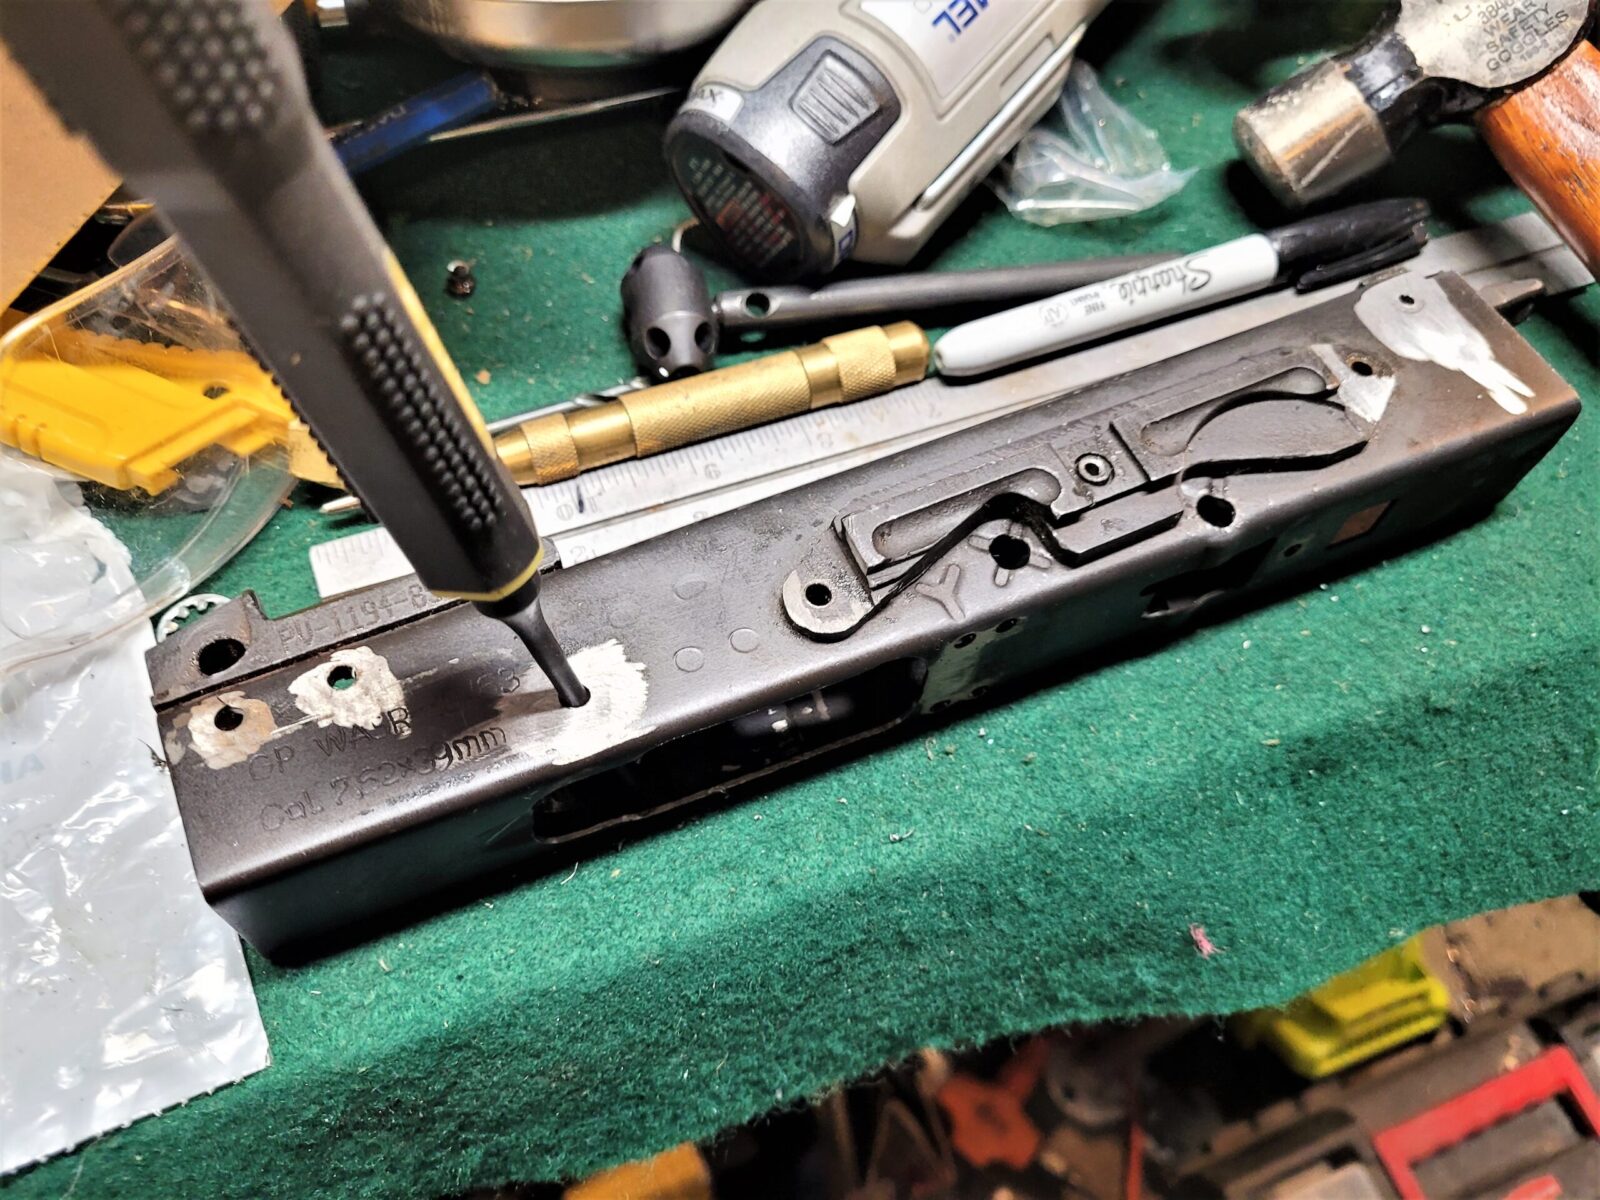
I then use a roll pin punch where the rounded tip can fit in the 1/8″ hole and the shoulder properly engage the remaining rivet. Folks, this makes removing the remaining rivets super easy except for the long trunnion rivets.
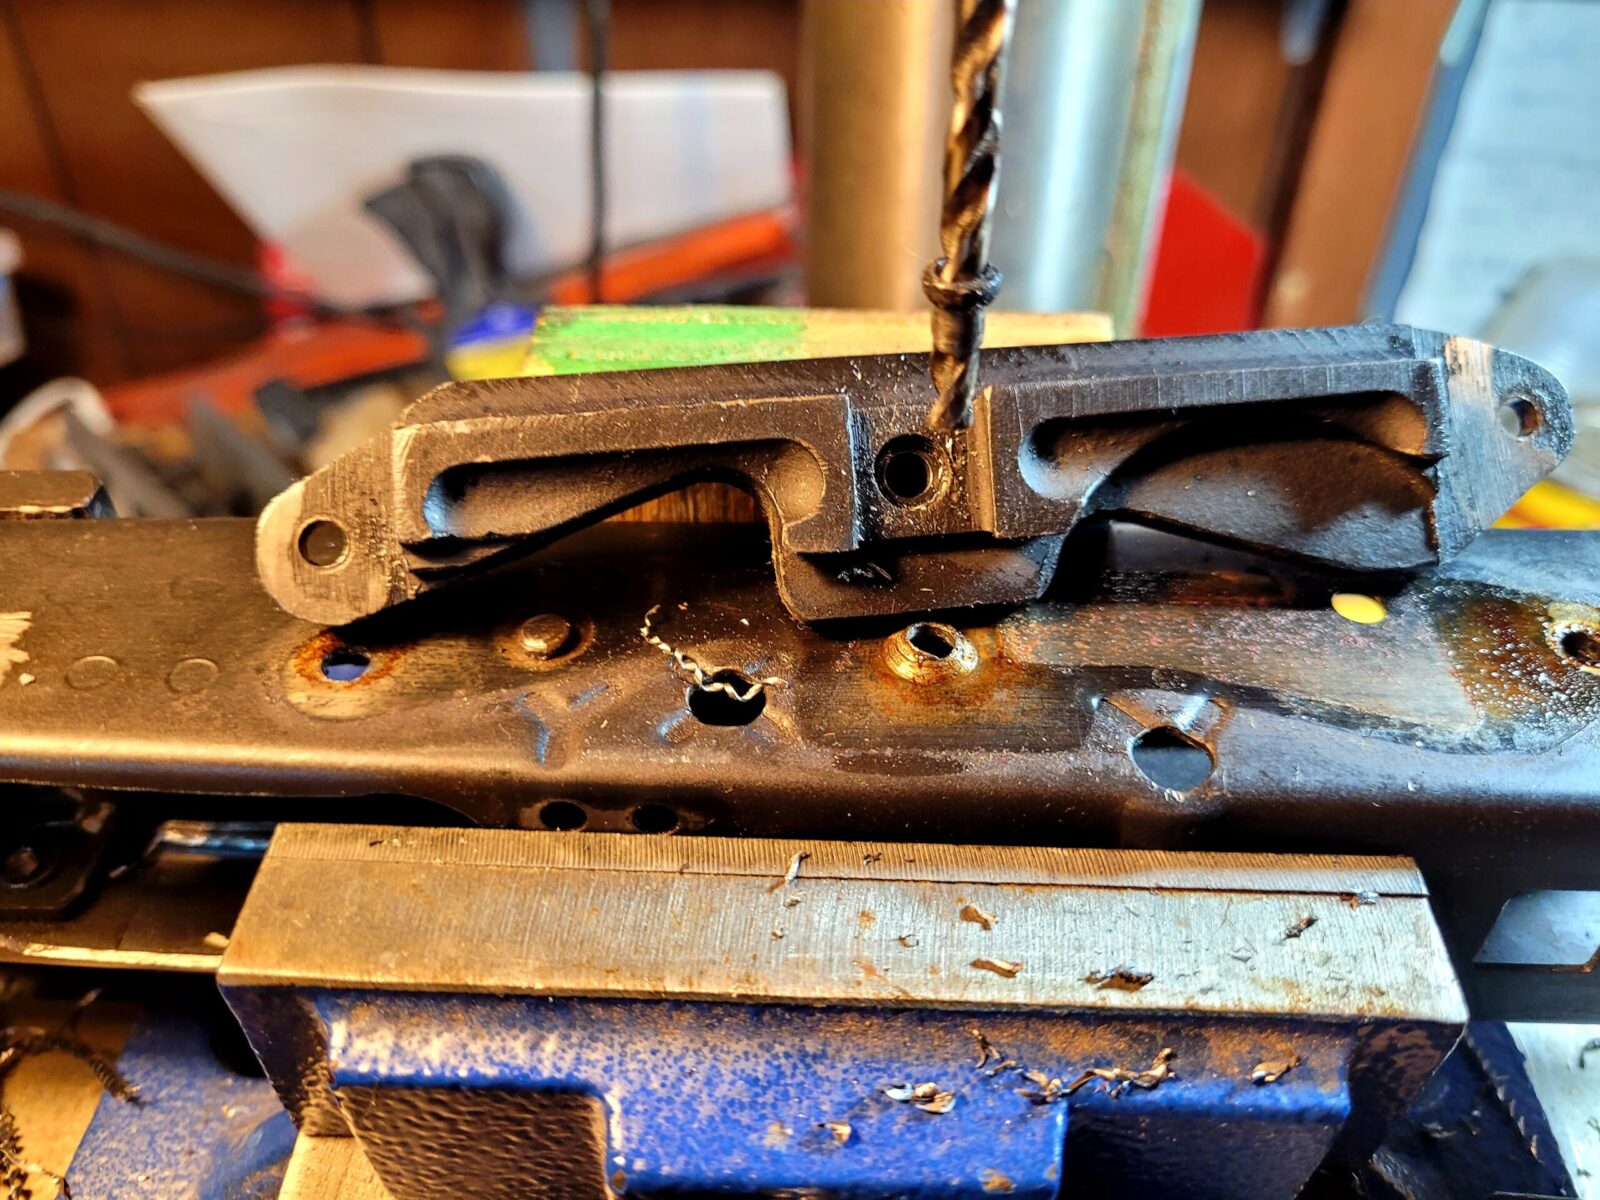
For the short rivets, I like to drill them out with an 1/8″ bit to both create a hole and relieve stress. I then use a roll pin punch to easily knock them out because the ball end of the punch keeps it centered on the rivet. If you’ve ever fought with keeping a normal punch centered while hammering, a roll pin punch centered in a hole makes a night and day difference.
Long Rear Trunnion Rivets
Okay, these take more work so we’ll make a section just for these little headaches. They’re not horrible – they just take additional time to remove but I will tell you a HUGE time saver in a moment.
In general, it’s easier to remove the rivets with the trunnion out of the receiver. If you need to save the receiver, be gentle and use successively larger drill bits to remove the rivet heads so you can then pry the sheet metal receiver open and pull it out. The balancing act is that if you make the receiver holes too big then you will need to weld them shut and drill new ones. It’s not the end of the world. I prefer welding and redrilling compared to using even bigger rivets with heads that cover the holes but are mismatched to everything else.
If you don’t care about the receiver or are removing stubs, grind those heads down and use an air hammer chisel to easily bend the receiver sheet metal away from the receiver.
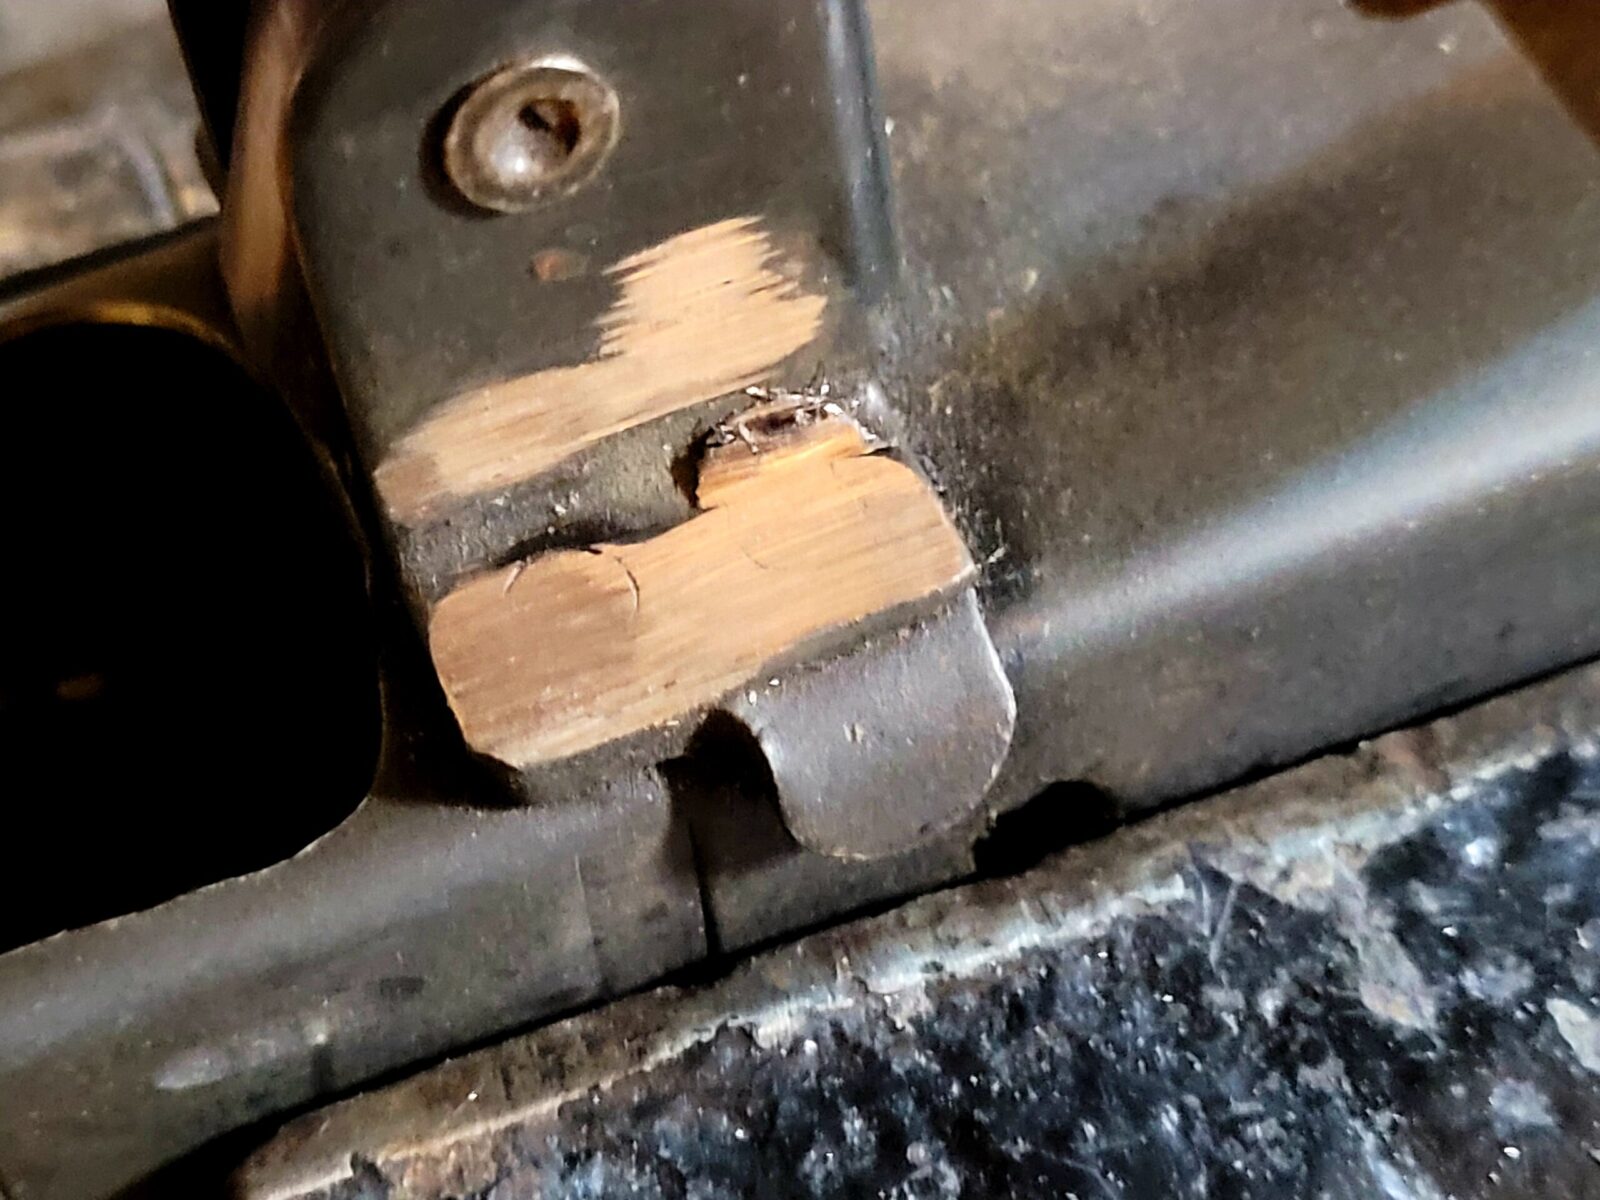
With the rivet heads ground off you can clearly see the rivet body outline and thus you can mark the center.
Traditional Method – drill in from each side about 1/2 way and then punch the rivet out. Guys will use 5/32″ (3.969mm) or even 11/64″ (4.366mm) drill bits. If you are spot on the center and you have access to quality cobalt metric bits, this is usually a 4.5mm rivet so you could use that. You will read about guys suggesting 3/16″ drills but this route is problematic because 3/16″ is 4.762mm and thus too large. You’d need to use a 3/16″ rivet to properly secure the trunnion and the heads will look noticeably different from the others.
Old school – drill the rivet out most of the way and then punch it out the rest. You can see the pin exiting to the left. Note, do this on a hard surface that isn’t going to flex and absorb some of your blows. Here I am literally beating the crap out of the punch on the concrete floor. I’ve since moved on to a method using an air hammer that I will describe next.
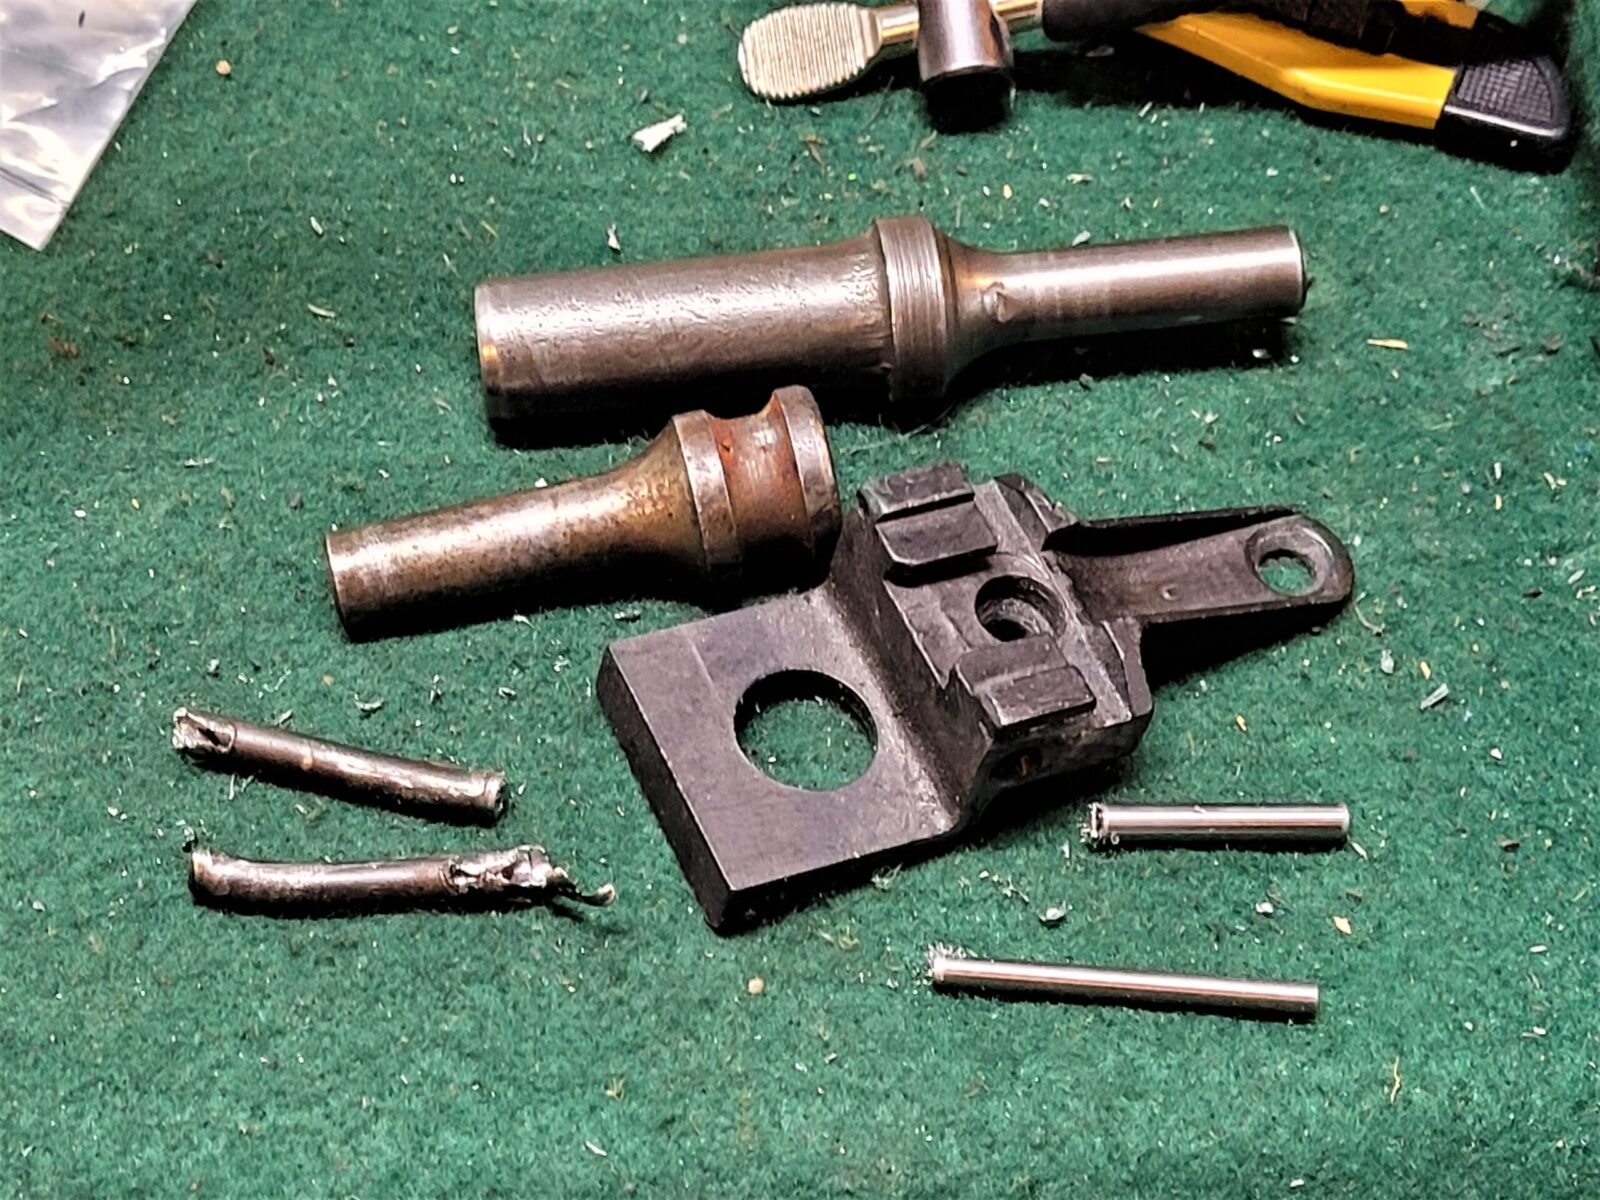
The impatient Ronin method – drill 1/8″ centered holes in one side of the rivets left in the trunnion. Make or buy an 1/8″ air hammer drift pin and chase each long rivet out in a matter of seconds. It’s amazingly fast. I don’t know who invented the air hammer but it is seriously magical when it comes to tasks like this.
I can pop out a rivet in seconds using an air hammer and my rivet fixture. I took two old .401 shank air tools and drilled center holes. One is 1/8″ and the other is 5/32″. I then have a variety of lengths of 1/8″ and 5/32 dowel pins to do the job. I built both diameters but really I just use the 1/8″ punch now. I put the trunnion in a heavy metal working vise and start with a short pin to start the push and then a longer pin to chase it all of the way out. It works like a dream. If you do this, please, please, please wear safety glasses. A hardened dowel pin can brake in these situations. For an air hammer, I am using an IR 116 – a 4x air riveter ought to work also, I have a 3x ATS but have never tried it for this.
Summary
Use an angle grinder to knock off the rivet heads, drill and punch out the short rivets. For the longer rivet, decide which of the two methods you want to use. I hope this helps you out!
Note, I have to buy all of my parts – nothing here was paid for by sponsors, etc. I do make a small amount if you click on an ad and buy something but that is it. You’re getting my real opinion on stuff.
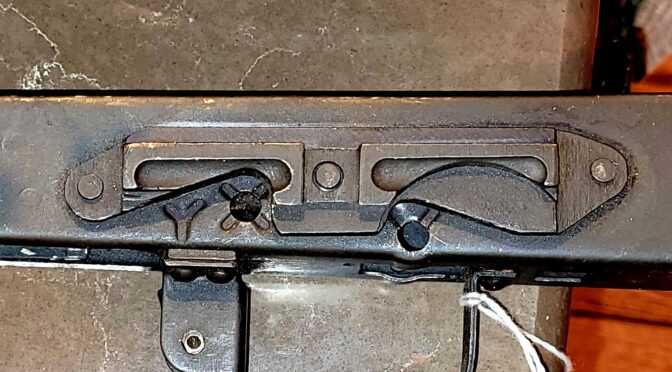
The Kalashnikov design team took an interesting approach to mounting scopes on AK-Rifles. Rather than centering the optic over the bore they placed a mounting rail on the side of the receiver. There are different types depending on the model of rifle in question but one thing that pops up from time to time is whether one can be removed.
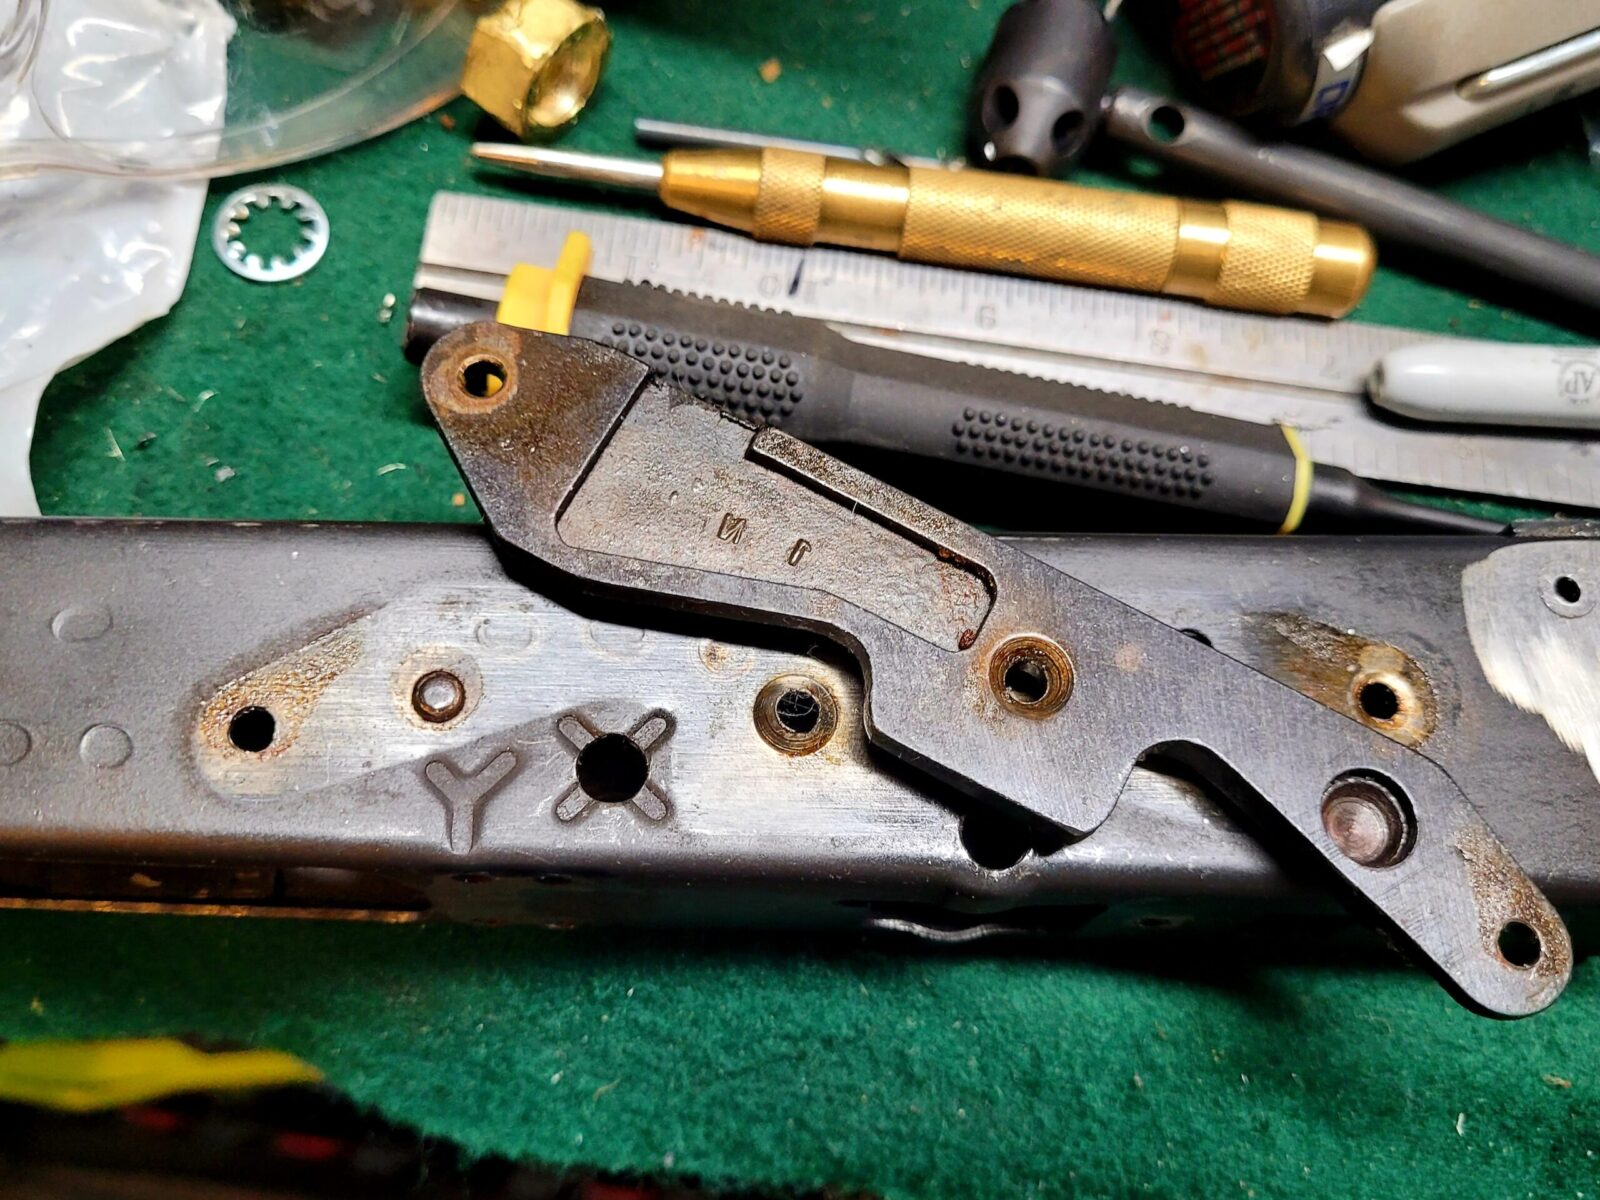
The short answer is yes. Now I add in the “but” – it is going to leave you with a receiver that not only has holes in it but receiver material that was forced into a countersink so you will have at least the center rivet area on the sheet metal receiver that will probably stick out like a little volcano taunting you.
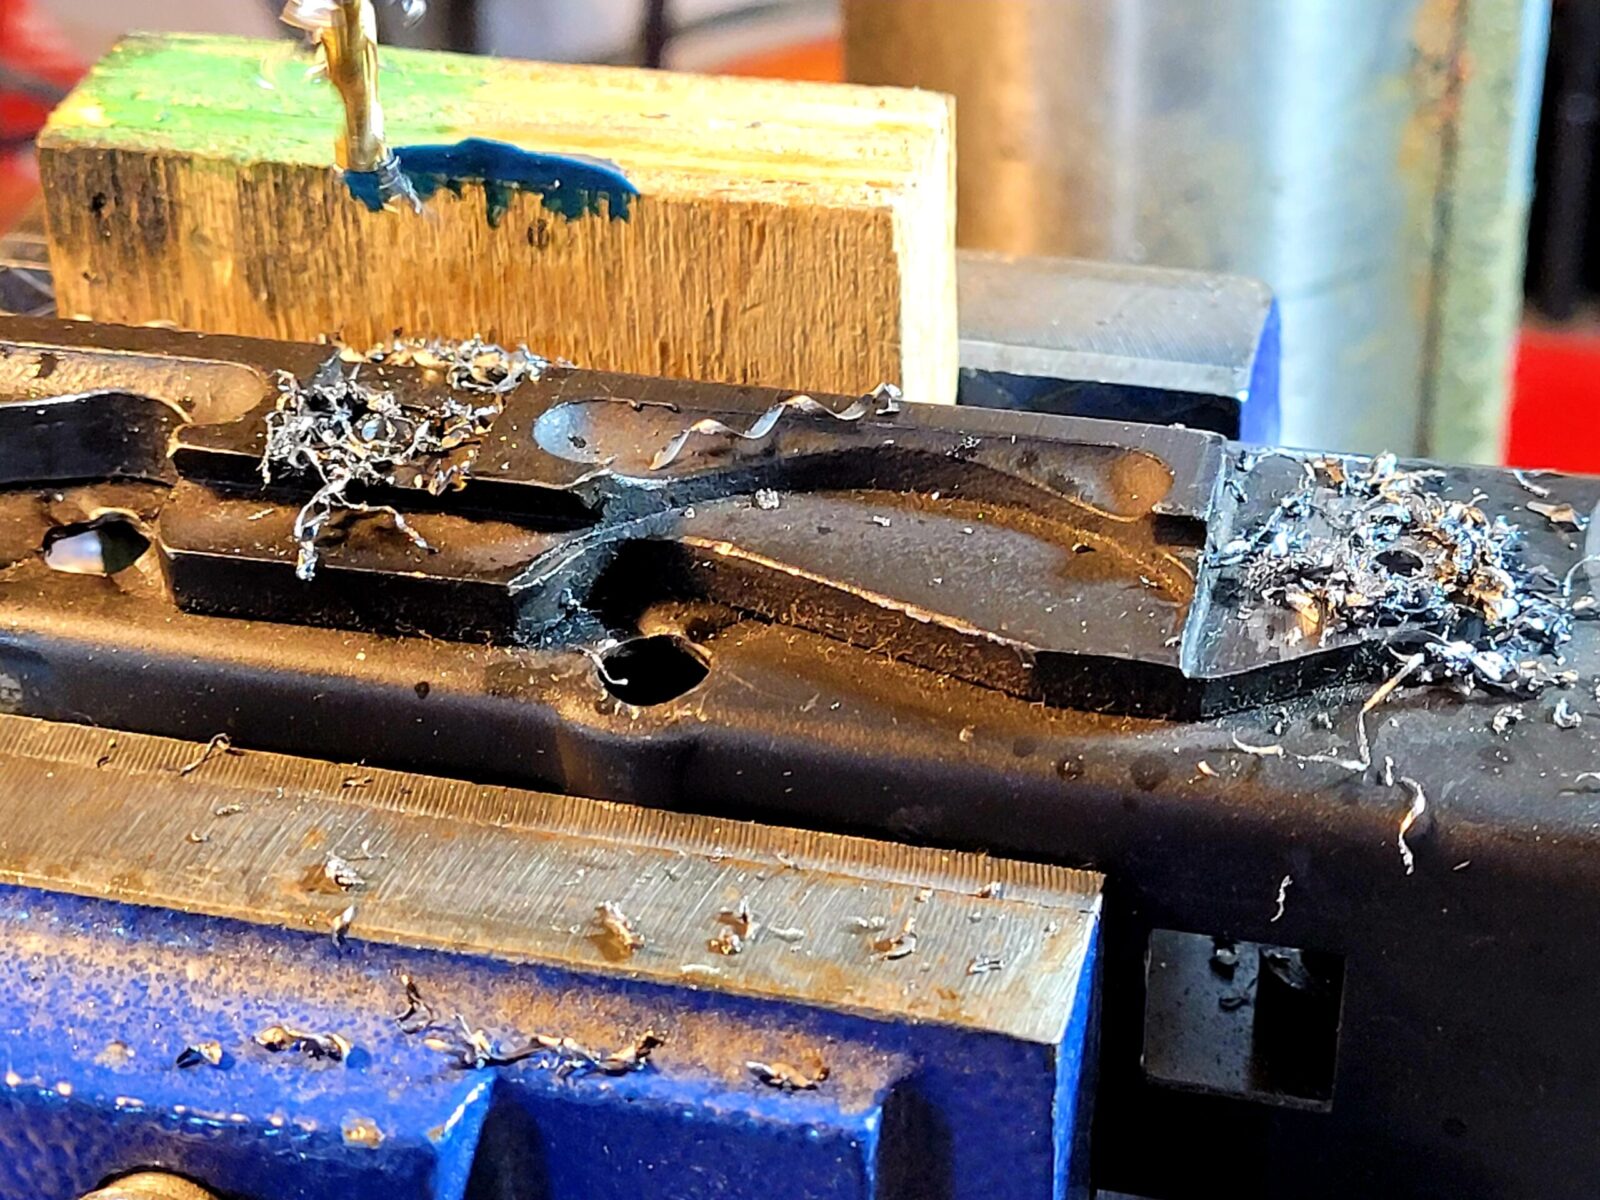
Center punch and drill out the rivets. The rear rivet is an it depends – it may either be short like you see with the AK-74 or attached via the long rear trunnion rivet. You may want to start with an 1/8″ drill and go up to 5/32″. The rear trunnion if it has a large rear trunnion rivet in it will be 4.5mm and I actually use a 4.5mm cobalt bit on that one to free up the side rail. Some guys who don’t have a 4.5mm bit will use an 11/64″ drill bit instead – it’s 4.366mm. I’ll do another post about trunnions but unless you are running a drill or mill that you know is true to the table and work piece, do not try and drill the rivet out entirely from one side, I go about half way in from each side and punch out the remainder or use an air hammer to chase out the rivet with an 1/8″ drift pin but that’s a topic for another day.
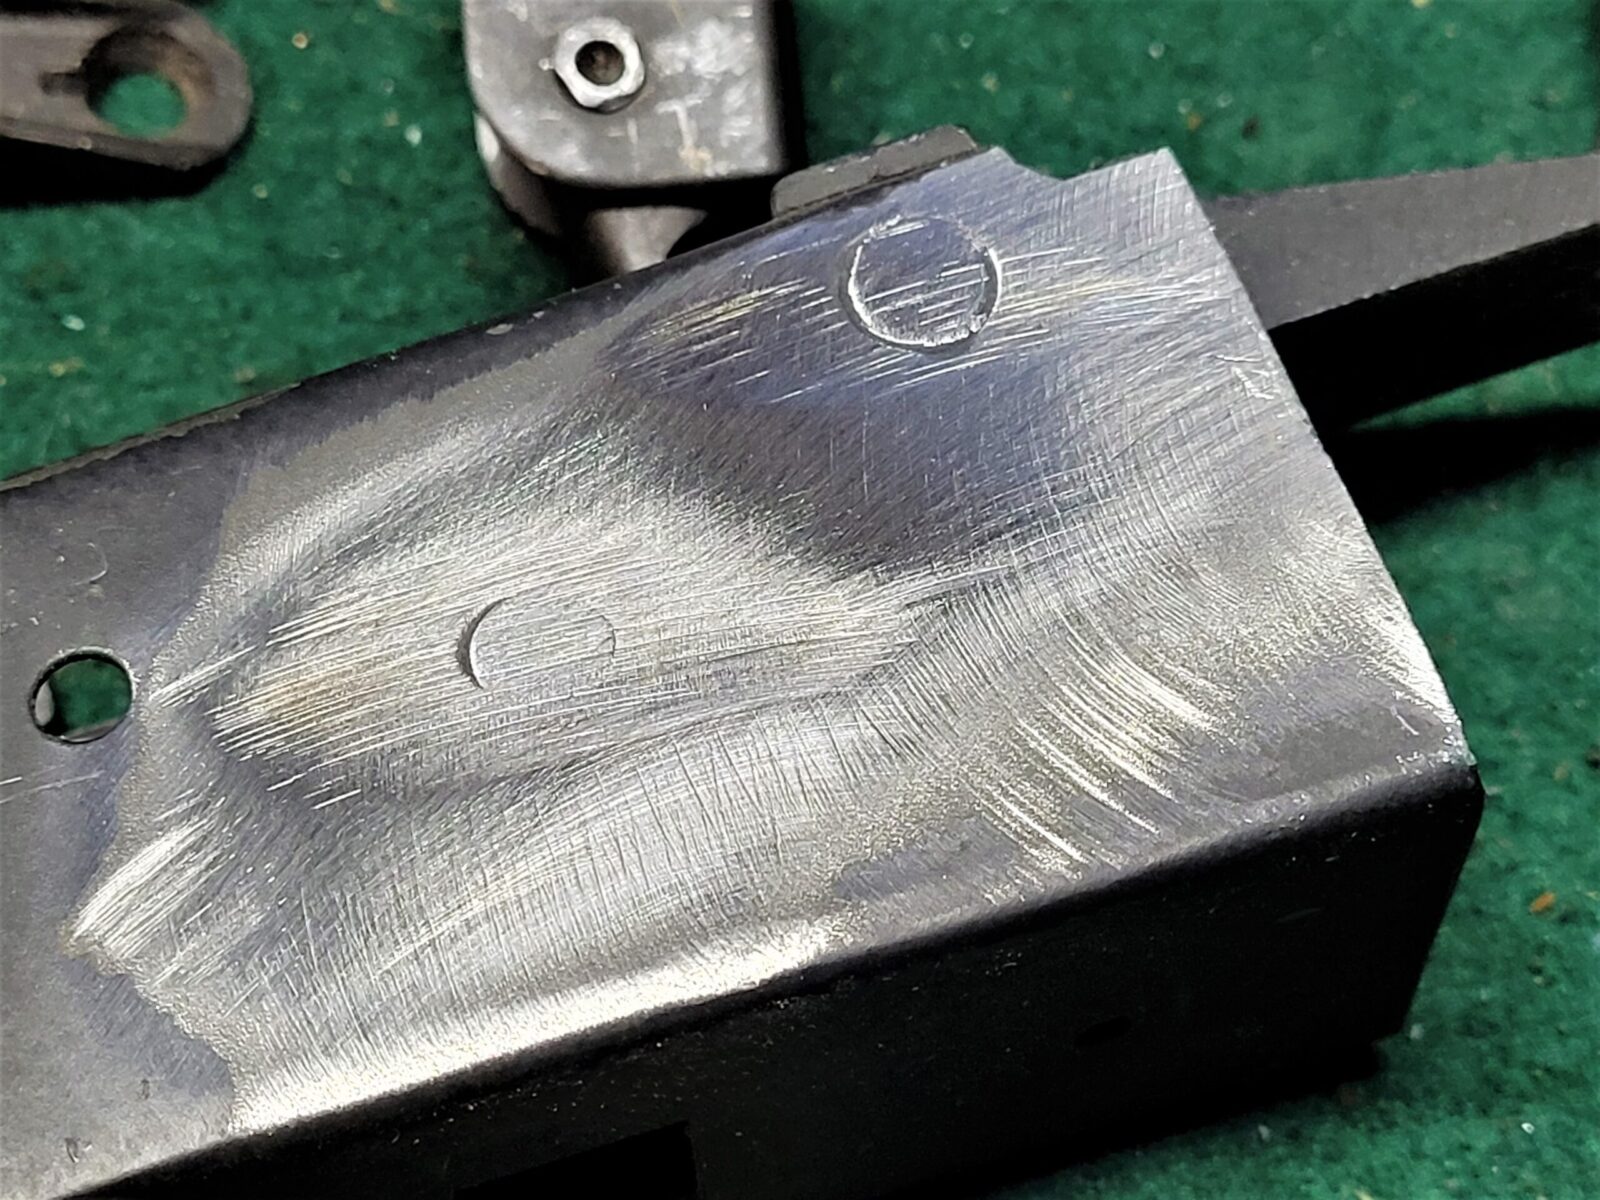
You can see the receiver material that was forced into the center hole. It really shows how secure riveting can be with countersunk rivets and holes.
So, yes, you can drill out the rivets and use the scope mount on other rifles. The question becomes what to do with the source receiver. If it is getting destroyed then this is a non issue – follow whatever your procedures are to file a destroyed receiver/firearm record with the ATF provided it was serialized and registered to begin with unlike rifles built from a blank, etc.
Now if you want to keep the receiver, the recommeendation would give is to put a thick copper backing plate behind the holes, weld them shut and then sand the result flush. For the holes with the cones, if you have any, grind/mill them down flush first and then do the same – copper backing plate, weld the holes shut and then sand flush.
You’ll need to refinish at least the receiver and the bluing on the steel welds typically doesn’t blend with bluing on the receiver so you may want to just refinish the whole thing if you care about it looking good.
Looking at the back of the side rail is fascinating. The whole indexing of the scope rail starts with the front rivet of the rear trunnion. and then having an equal distance from the top of the receiver to the top of the side rail. Now this one is flopped 180 degrees compared to the receiver under it but look at the accomodations they have for thee selector lever and center support pin of the receiver. This is off a WASR-10 and is an AKM style plate but interestingly the rear trunnion was a split AK-74 style with two small short rivets in front on the two legs of the trunnion and a long rear trunnion vs. the ccommon AKM approach of two long rivets securing the rear trunnion. The machining is crude but it did the job. The AK-Builder plates are virtually identical but far better machined and finished. If I needed to use an AKM side rail, that’s what I would get.
Summary
Yeah, you can remove the side rail but if you plan to continue to use the receiver, you’ll need to weld the holes closed, sand, and refinish the weapon. I’m very impressed by the design they came up with – it spreads forces across the sheet metal receiver and allows ready access to the dust cover and internals if required.
Note, I have to buy all of my parts – nothing here was paid for by sponsors, etc. I do make a small amount if you click on an ad and buy something but that is it. You’re getting my real opinion on stuff.
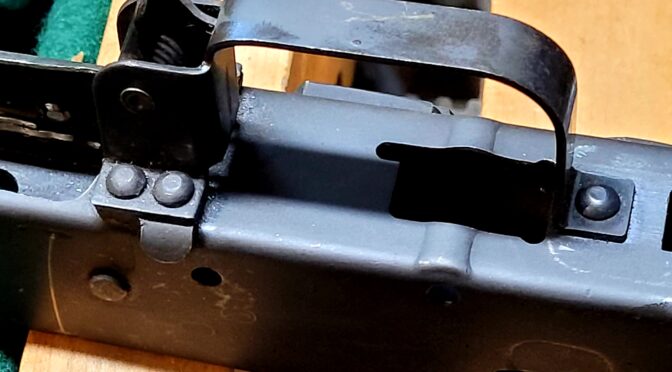
So, let’s review how to remove a riveted AK trigger guard assembly. For those of you building from virgin kits or complete demilled (“demilitarized”) kits, you don’t need to do this but for many folks they do. In my case, I needed to remove the trigger guard from a beat to heck donor rifle that someone had butchered.
You have three options to remove the trigger guard rivets:
Drill them out by center punching each rivet or using a rivet drill jig and remove them.
Mill the heads off, drill a hole and punch out the remainer of the bodies.
Grind the heads off, drill a hole and punch out the remainder
All of the above methods work. It really comes down to what you are most comfortable with. As for myself, I use option three. The reason I just don’t drill them out is that rivet head shapes can vary considerably. The AK-Builder drilling jig is fantastic but it can’t guarantee you are centered on every rivet.
With this in mind, I simply take a 4″ grinder and take off the rivet heads flush to the surface of the trigger guard itself. This lets me see the outline of the rivet bodies so I can then drill and 1/8″ hole and I’ll explain why after a couple of photos.
This is my 4.5″ Ryobi 18 volt grinder. To be honest, the tool pleasantly surprised me. I really wondered how much torque and battery life it would have. Over the last six months I have ground down quite a few bolts and metal parts with this tool. Before I had it, I had a 4″ Makita corded grinder that I still have — it’s just that cordless is so convenient. The Ryobi made short work of the five rivets that hold on the trigger guard.
Definitely practice with your angle grinder until you are able to control it. What you want to do is to remove the rivet head with out doing major damage to the trigger guard. Can you see the outline of the rivet bodies? That is what we want to get all of the way around.
The next steps you will do are to center punch each rivet, drill an 1/8″ hole through the rivet and then use a roll pin punch to knock the rivet out. This was a bit of an epiphany for me one day – I was trying to keep the punch on the rivet and I thought to myself – “Man, what if I drill a hole and use the right sized roll pin punch? The little ball on the end of the roll pin punch ought to keep it centered.” I tried it and it worked great. No more punches slipping around.
At the bottom is an automatic center punch. I love these things. You push down on the handle until the action cycles inside and the hardened tip makes a dimple in the surface without a hammer. Above it is my roll pin punch. Tons of companies make these and you can barely see the little ball at the end that will center the punch on the drill hole. Above it is an 1/8″ drill bit. I’d recommend you go with good cobalt bits when demilling. They last longer and will go through just about anything. Note, if you buy a cheap cobalt drill bit it can be worse than plain high speed steel from a quality manufacturer. Go with a brand name – Norseman is my favorite but you can go with stuff from big box stores too like Bosch, Dewalt, etc. If you are getting a set off Amazon, be sure to check reviews.
Here’s the finished result – a nicely separated receiver, selector stop plate and trigger guard. Be careful not to lose that stop plate – you will need to and the trigger guard for your next build.
One perk of only using an 1/8″ drill bit is that you have some margin for not being exactly centered on the rivet. 1/8″ is 3.127mm and a 5/32″ drill bit comes in at 3.969mm so real close to the actual 4mm holes drilled in the parts and if you are off a tad then you wind up with an “egged” or misshapen holes. Of course you can use other size drill bits – just figure out what you like.
Even though rivets are relatively soft steel, I still recommend you use cutting fluid. I keep some Tap Magic in a little squeeze bottle with a needle tip and it makes it super easy to add it when working.
Summary
Removing the trigger guard is all about getting rid of the five rivets that hold it in place. Whether you drill, sand, mill, grind or otherwise cut off the tops, then drill out the remainder – using a roll pin punch really makes it easy to punch them out the rest of the way.
Note, I have to buy all of my parts – nothing here was paid for by sponsors, etc. I do make a small amount if you click on an ad and buy something but that is it. You’re getting my real opinion on stuff.
I have a long history with building AK-47 rifles and a number of variants including: Hungarian, Romanians, Russian, and Yugoslavian. The problem I have these days is a total lack of time so I rarely get to indulge in building any more. In fact, this past year, I only got to build one AK and I had a lot of fun doing it. Rather than do a few giant posts, I am going to do a bunch of posts for each step I do.
The first thing I like to do is to remove the barrel and get it out of the way. Back in the golden age of AK Kit building you could get completed barreled AK kits for $89/ea and sometimes even less. Then the ATF decided to re-interpret the law and in July 2005 they told importers they would no longer approve the importation of kits with the original barrels. Now importers did have a lot of orders in the pipeline so the prices slowly went up and the supply dried up.
Today, you are only going to find kits with barrels that someone is selling from their collection usually at an astronomical price (I’ve seen them range from $600-1,200 literally for kits that used to be $99) or one of the vendors has decided to offer a service to assemble headspaced kits such as Arms of America. The other reason you may need to do this is that you have a donor rifle that you are getting parts from, which is what I was doing.
When I started, everything was done with hydraulic presses or the caveman approach of using big hammers that I never cared for. Today, you can remove a hammer super fast 99% of the time with an air hammer and that is my preferred method. I want to give you a few options to consider and some tips along the way.
What did I Just Work On?
I had an old Romanian Garda kit that I had built on an AK-Builder flat many years ago. I actually dug through my photos and it dates back to June 2007 when I built it originally. When I built it, I was tinkering with how to form the rivet heads and while it was a rock solid AK function-wise, the rivet heads always bugged me so I decided to rebuild it.
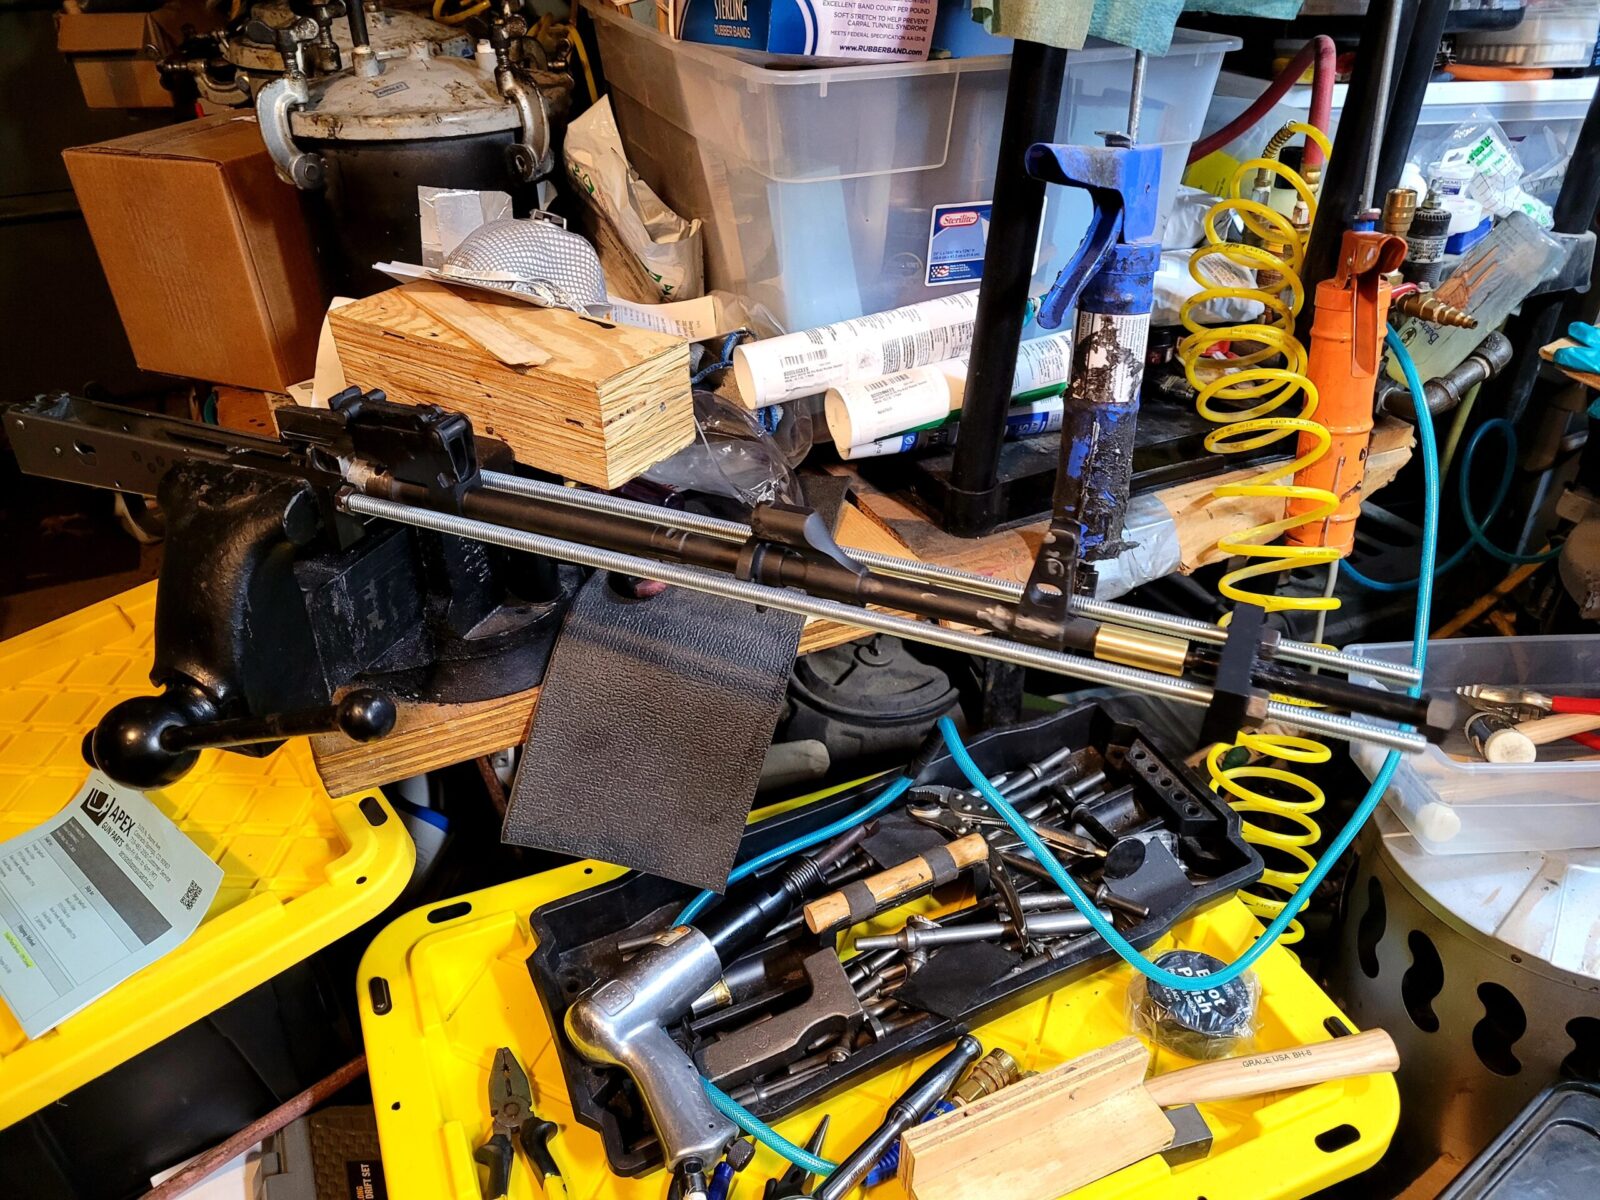
This was my last Romy G (meaning a Romanian Garda rifle) rifle. I’d built it on an AK-Builder flat and had experimented with forming the rivets and the heads always looked awful so it was going to be my source or donor rifle for my new one. Yes, my workbench almost always looks like that.
Options To Remove the Barrel Pin
There are three common ways that I can think of:
Use a press to push out the pin – works great but it takes space and you need a jig to properly support the trunnion so nothing bends under the pressure. It also takes time to set up everything. Huge hint to the new folks who use a press – whack the side of the press that the bottle jack is pushing down – sometimes called the jack bracket – or the side of the frame supporting the bottle jack. The vibration will loosen stubborn pins and lower the risk of something breaking / bending or even shattering under extreme pressure. In short, use the hammer to introduce shock and vibration to the pin while under load – pump the jack handle to increase the load and whack, pump, whack, and so forth. I guess I should do a blog post on this some day but I hope you get the general idea – don’t just increase the pressure alone. Some pins come out super easy and some will fight you the while way out.
Use a big hammer and beat the pin out – I have never had luck with this and only tried it a couple of times before deciding it wasn’t for me. I have a hereditary tremor in my hands and trying to hit a punch with a heavy hammer/small sledge with sufficient force just isn’t in the cards for me. Tons of guys have used the “BFH” (Big F’ing Hammer) method and driven the pin out.
Use an air riveter or air hammer to drive the pin out. Folks, I started using this method some years back and it’s all I use now. It’s fast, easy and you don’t need to worry about things breaking/bending like you do with a press.
So option 3 is what I do. I use a Ingersoll Rand model 117 air hammer that I bought many years ago. The stroke length is 3.5″ and the hammer is .69″ diameter, or at least the bore for it is this helps the hammer hit hard at 2,000 blows per minute.
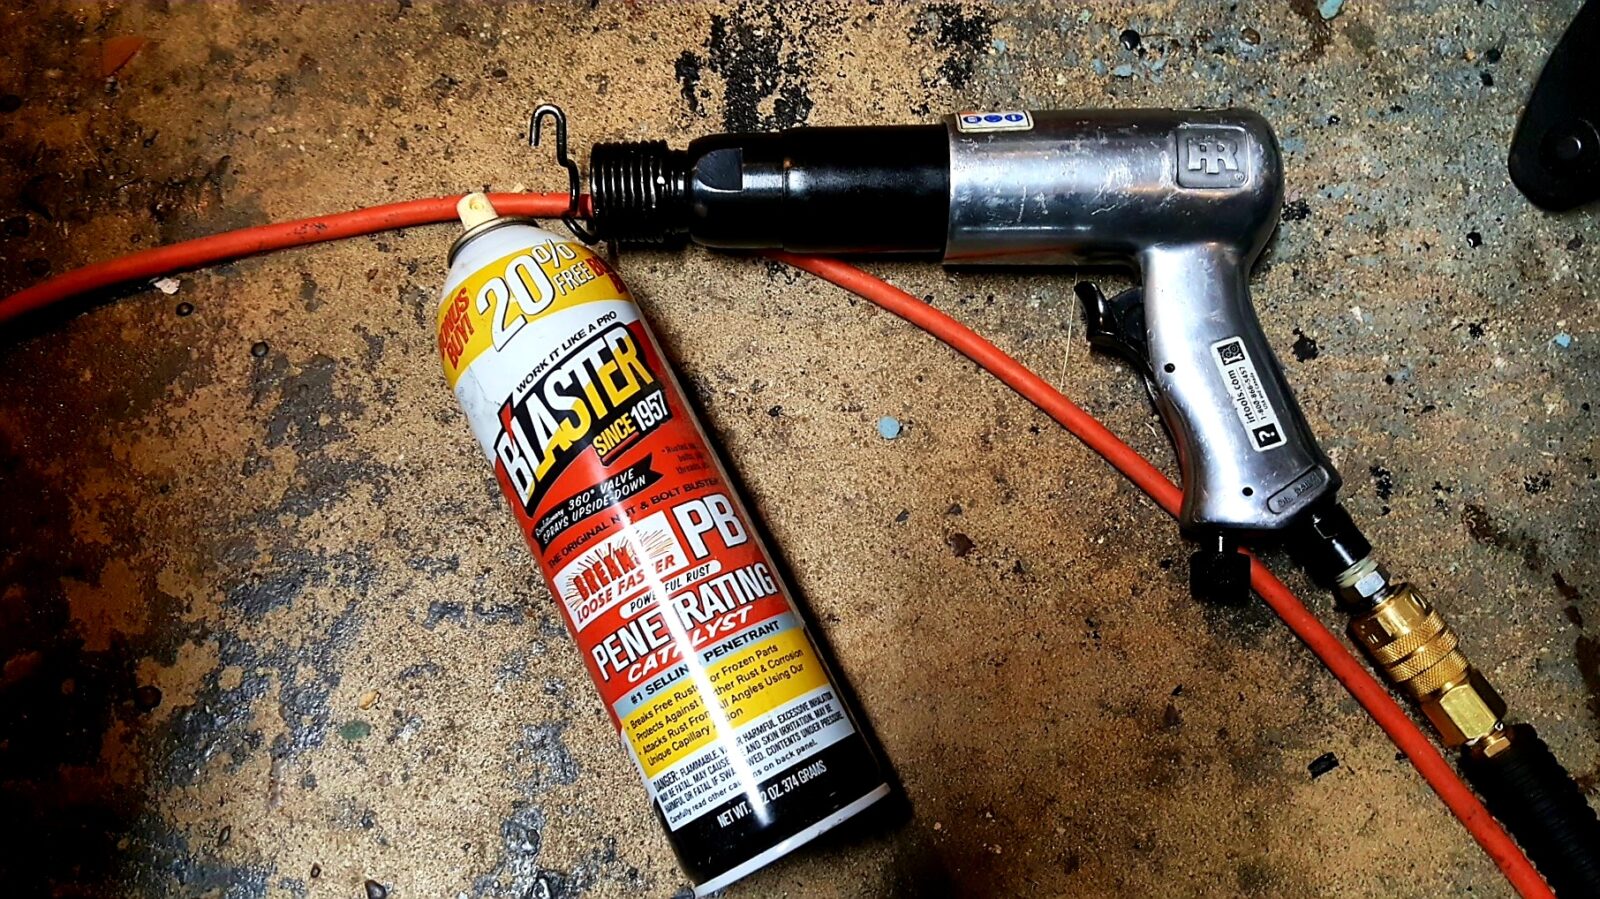
This is a photo of my IR 117. The air tool oil I used had gummed up and I used PB Blaster to free things up. That was some years back. I tossed whatever brand oil I was using but that IR is solid.
Note, I bought the 117 many years ago and may actually upgrade to one of the new 119Max air hammers. They have a .75″ bore (8% larger), still a 3.5″ stroke and is moving at 2,530 blows per minute. So it hits harder and it has an anti-vibration design as well. This makes it easier to control and less fatigue on the hands.
Regardless, the point is to get a big air hammer. I’m not sure if one of the super cheap Harbor Freight units will do the job or not. If you look to other brands on Amazon or where ever, look for units they describe as “long” – referring to the length of the hammer bore – or if they use a number, go for 4X or higher. I’ve typically seen that designation to refer to riveters and the 117 is a fine riveter for 1/4″ because of the nice variable trigger it has. The 2x, 3x, 4x, etc. all are referring to the number of times longer the barrel is compared to some original model as I understand it. The size of the rivet gun is based on the size of the rivet that needs to be set so guys may have a number of rivet guns in their tool box if they do a lot of riveting for planes, sheet metal, etc.
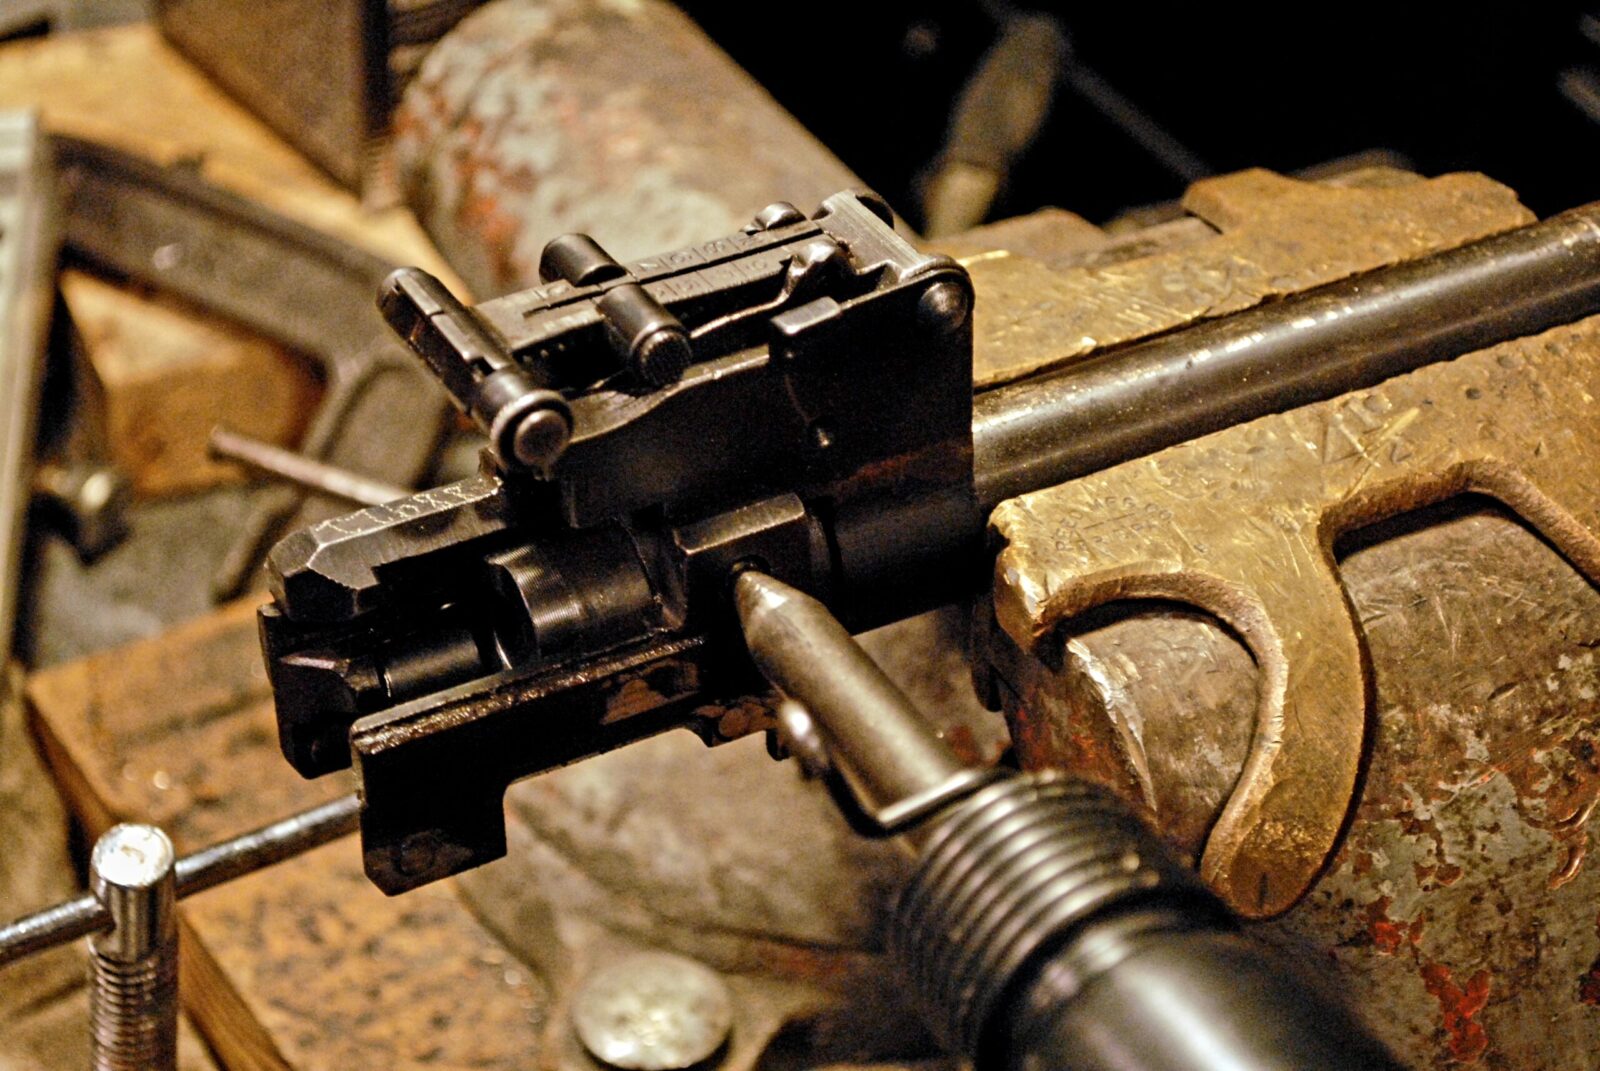
To push the pin out, you can use long air hammer drift pins or even start with the conical chisel and finish up with a hammer and punch.
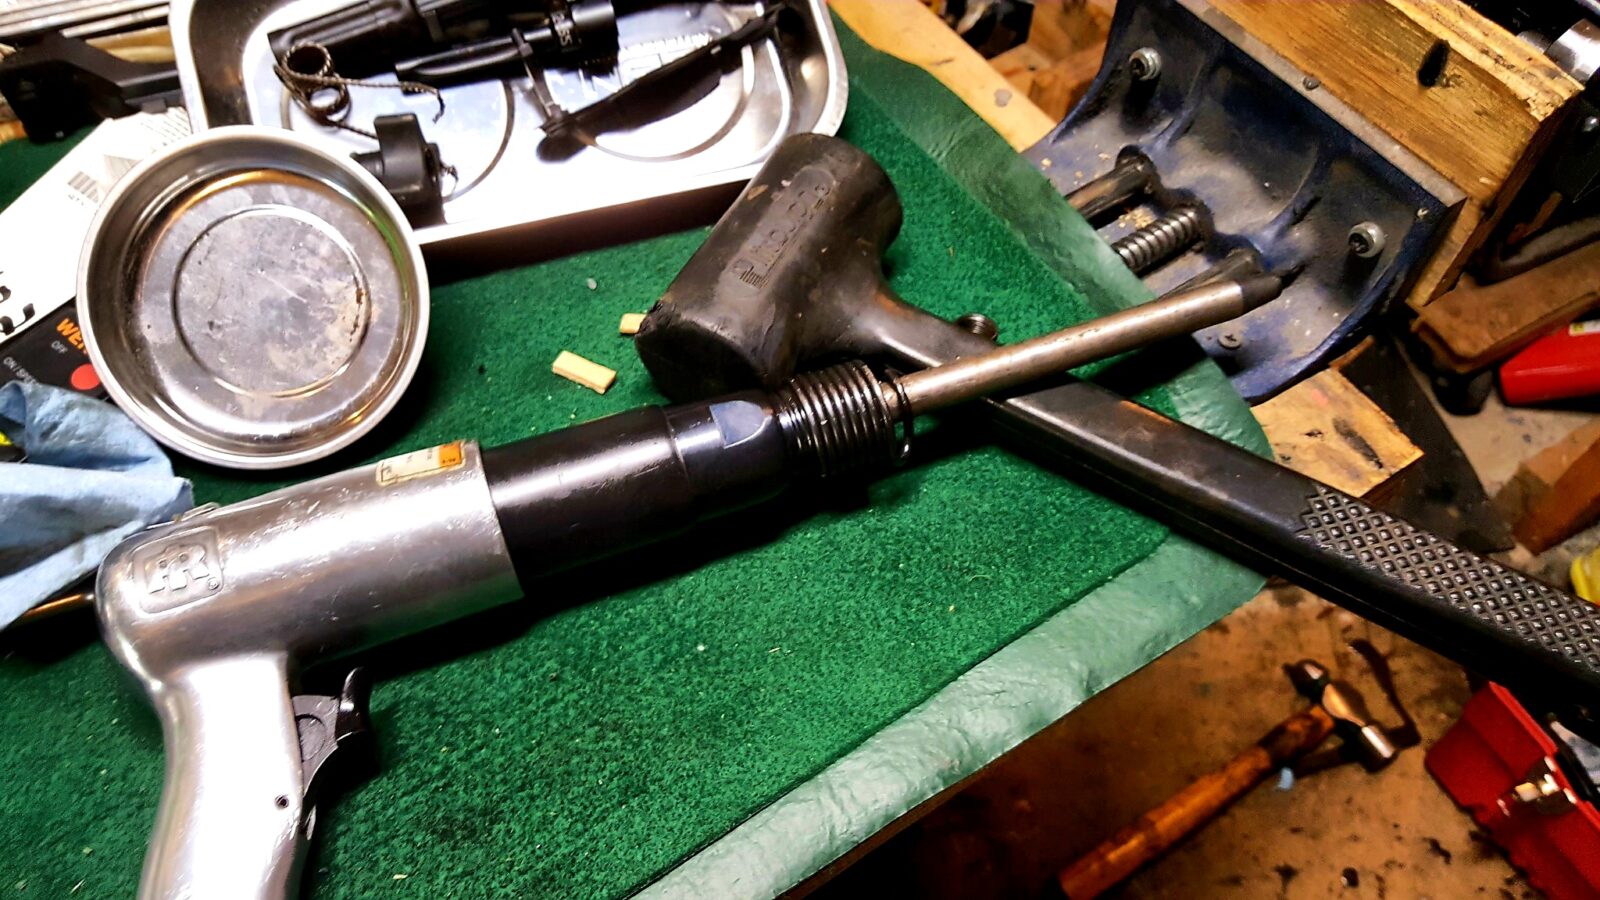
You can get the barrel pin started with the conical chisel that comes with many air hammer kits and finish it with a big hammer and punch or you can use air hammer drift punches and hammer it all of the way out. Ignore the dead blow hammer – it was just sitting there at the time – I probably was adjusting my drill press table at the time.
This is an M72B1 trunnion where I used the air hammer to start the pin being pushed out and then finished with a hammer and punch. I now put a long drift pin in the air hammer to push it the rest of the way out vs. using a hammer to finish it.
Note – If the trunnion is not secure then not only will it want to move on you but you will also lose a ton of force due to vibrations/movement that would otherwise be directed at the pin.
Slow down as you drive the pin out or it will fly across the room. I’m speaking with first hand experience on that. You will want to save the pin so you can re-use it.
Once you have the pin out, don’t lose it! I used to use a fishing tackle organizer and now I just use a magnetic tray. It is real easy to lose track of that pin and it’s happened to me.
Options To Remove the Barrel
There are four common ways to remove a barrel – I say “common” because I bet guys have figured out tons of other ways but let’s hit the trop four.
Option 1: Use A Hydraulic Shop Press
This is definitely a proven method. 12-20 ton shop presses were traditionally the go-to tools for a lot of AK work relating to barrels and rivets. For barrel work, guys use jigs from AK-Builder and others plus can make their own. The basic idea is to support the front of the trunnion and press the barrel out. Here’s a link to a post I did some years back for making your own barrel back out tool – I will tell you to make several – a long one if you need to reach through a receiver and a much shorter one if you are just pressing a barrel out of a trunnion or milled receiver stub.
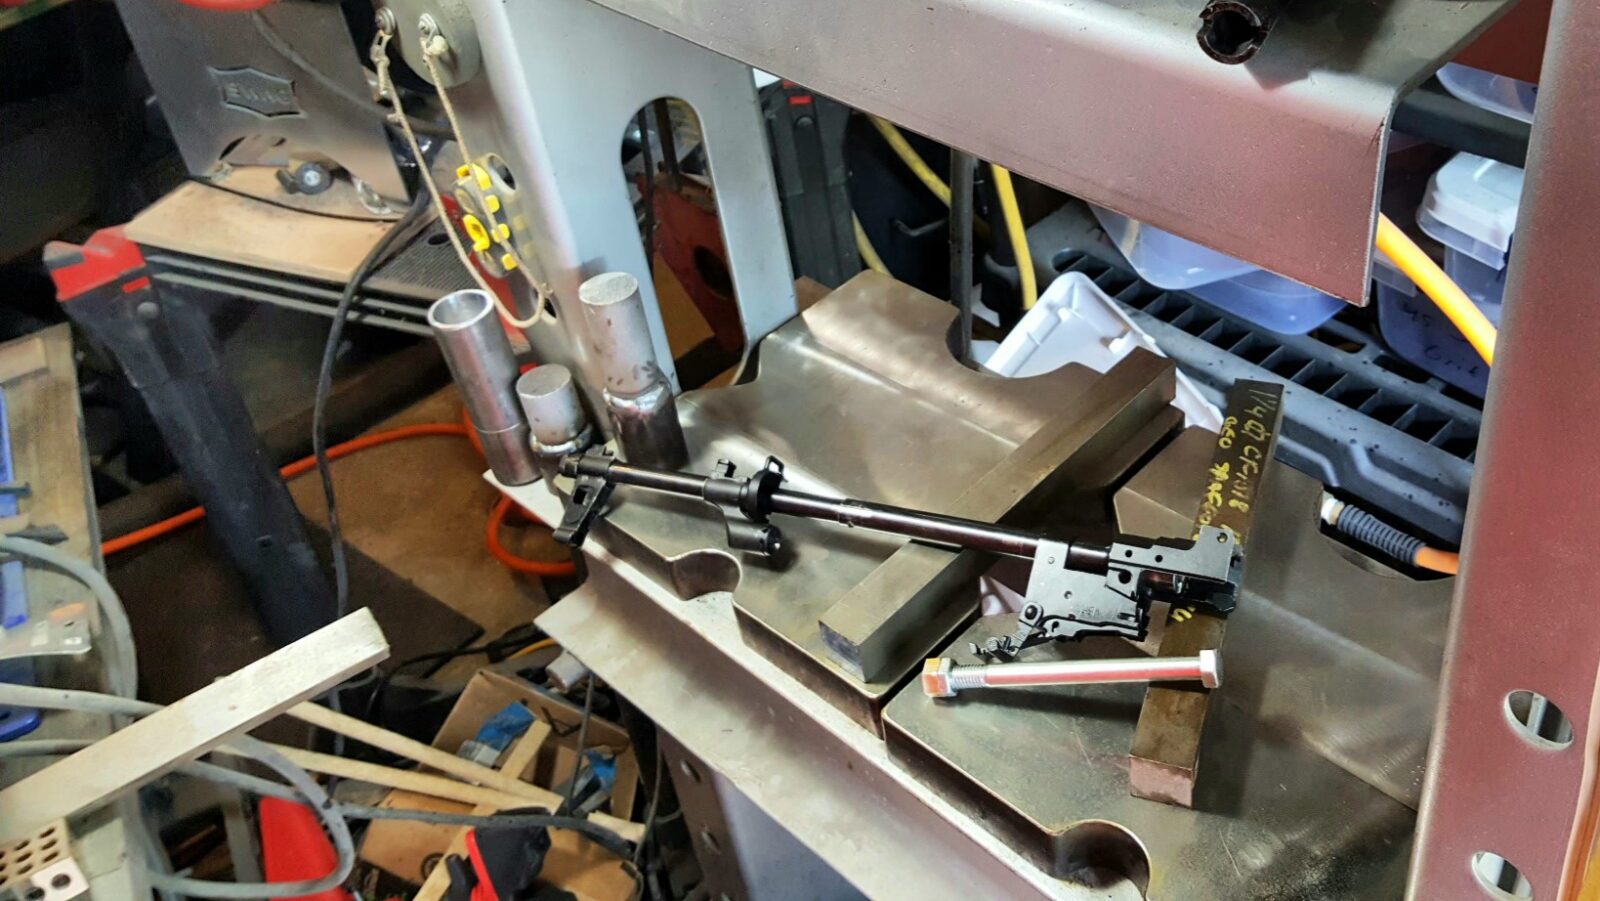
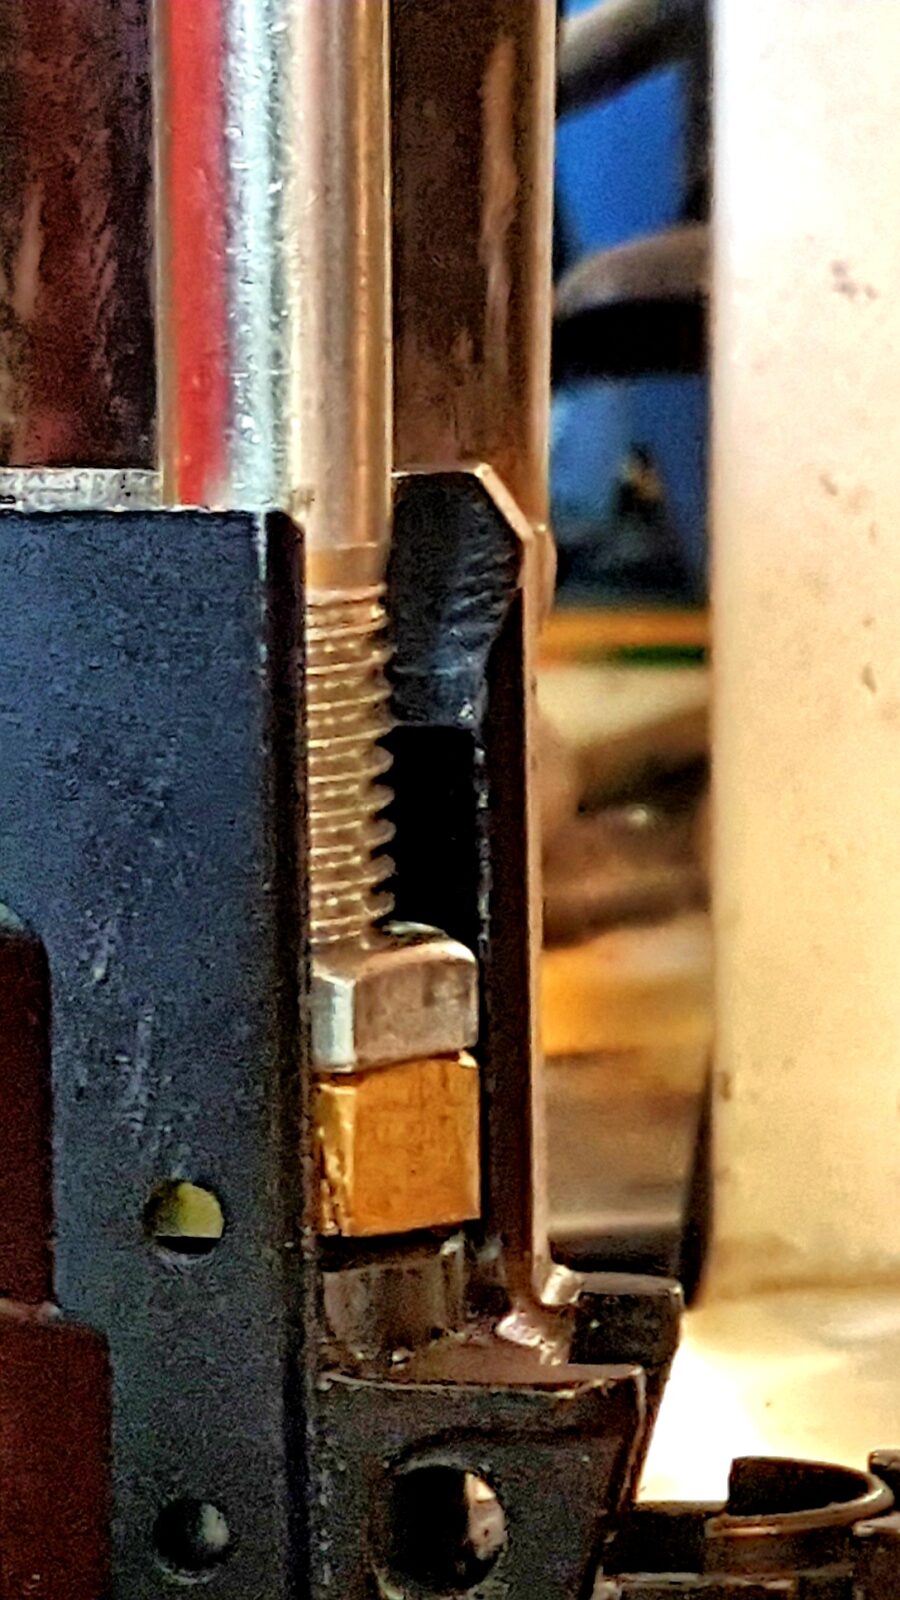
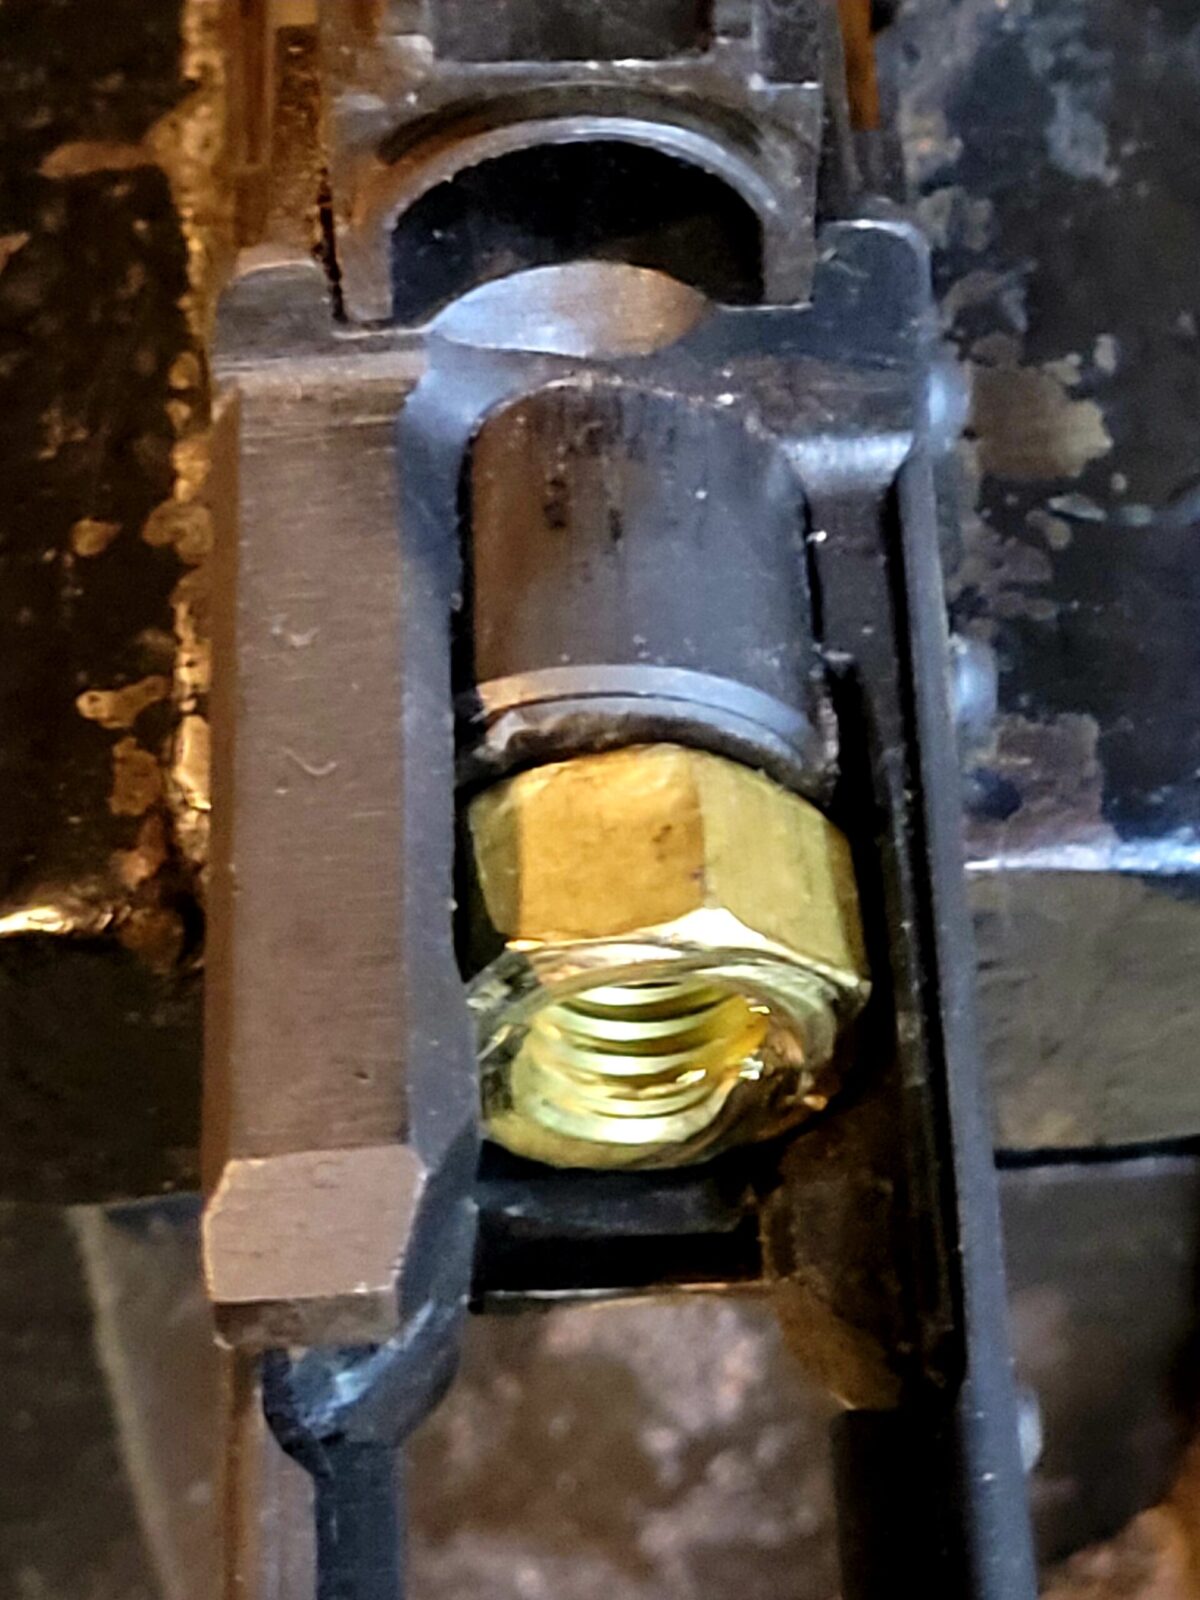
This is 30 ton H-Frame hydraulic press. The super thick press plates are from SWAG OffRoad and they are rock solid. I’ve bent thinner press plates while working on stubborn parts. The SWAG plates simple do not budge. With the barrel pointed downward, I support the front edge of the trunnion and use the small 1/2″ bolt with a brass nut and steel backing nut to press down on the breach end of the barrel. The barrel assembly is from a WBP kit that is still one of my favorite rifles – click here to read that story.
The brass is soft and will not hurt the end of the barrel – don’t use steel for that part. The steel jam nut in the rear is what provides the strength so the brass doesn’t just push right off the threads – it will do that if it’s brass alone. You bring the press down, make sure the little barrel ram is square on the barrel and not something else and the barrel will push right out.
If you want to get a press, the Harbor Freight 12-20 ton models do the job. You can certainly spend more money and you are paying for how true the various parts are to one another and the amount of pressure they can apply. I have a knock off import 30 ton press and it does the job but is nothing to jump up and down about. I do like the large wide H-frame presses that have a nice big work area vs. the small skinny A-frames but it is up to you. Note, a bench top press will really limit your options and probably be disappointing. Also, a 12 ton press is the smallest you should consider. I’d recommend a 20 ton unit if you can afford it. I bought mine just to do AKs but have used it for all kinds of stuff since like pressing in barrels, etc.
To be clear, I have all the tools I need to use my press and it is my fall back method for stubborn barrels but it takes me longer to do the set up than I care for because of how my shop is set up. If you go the press route and it is easy to get to your press, rock on. I can have the pin and barrel out before I even get done setting up my press to do barrel work is all I am saying.
Option 2: Use a BFH
Some guys will just take a big f’ing hammer and a punch to drive the barrel out. I have honestly never tried this approach because of the tremor in my hands but there are a few guys out there who claimed to have used this approach. If you do this, make sure the trunnion is very well supported and can’t move. Get a big heavy hammer (say 1-5 pounds) and use a barrel back out tool like I described above. Be very careful to strike just on the pin or you will beat up your trunnion. I cringe while writing this just so you know. Guys have done it so I feel I need to mention it but I can’t personally recommend it. I think the risk of the punch moving accidentally and then beating the crap out of your trunnion is just way too high to be acceptable.
Option 3: All Thread Method
This method got it’s name from the use of threaded rods that can be used to create a tool to either push out or insert a barrel. Toth Tool makes one this is very nice but I have only used it one time to insert a barrel and it did a great job. They say it will work on pushing out a barrel and I tend to believe them unless you get a kit that has an insanely tight fit. Over the years, I’ve only had a maybe 3-4 barrels out of dozens that I wonder if it could have done the job. With many people building from scratch and not demilling or they are getting headspaced kits that they don’t have to fight as bad with, I think this would be a very strong option. I literally just bought my Toth tool and will give it a try at some point.
This is me using the Toth barrel tool to install a barrel. It’s very well made and I plan to use it a lot more.
Option 4: Use An Air Hammer (My Preference)
Do you notice a recurring theme? I’m not very patient so I look for quick methods. I used my big IR air hammer and drove the barrel out. I put the assembly in a solid vise, inserted a brass 1/2″ nut in to protect the barrel, an angled rivet set so I could reach in at an angle and hammer the barrel out. All said and done it took a couple of minutes.
I inserted a 1/2″ brass nut to protect the barrel from the angled steel rivet set. You always want to put a soft metal in to serve as a buffer to protect the breach. If you don’t do this, the hardened metal rivet set will beat the snot out of the barrel.
The air hammer works almost all of the time and is my go to method but note that I do have a big press in the event I run into something really stubborn that can’t be air hammered out.
Avoiding Galling
There is an ugly cosmetic issue that can happen when pushing out an extremely tight fitting AK barrel or one where the originating country maybe didn’t have the best metallurgy and that is a problem known as “galling”.
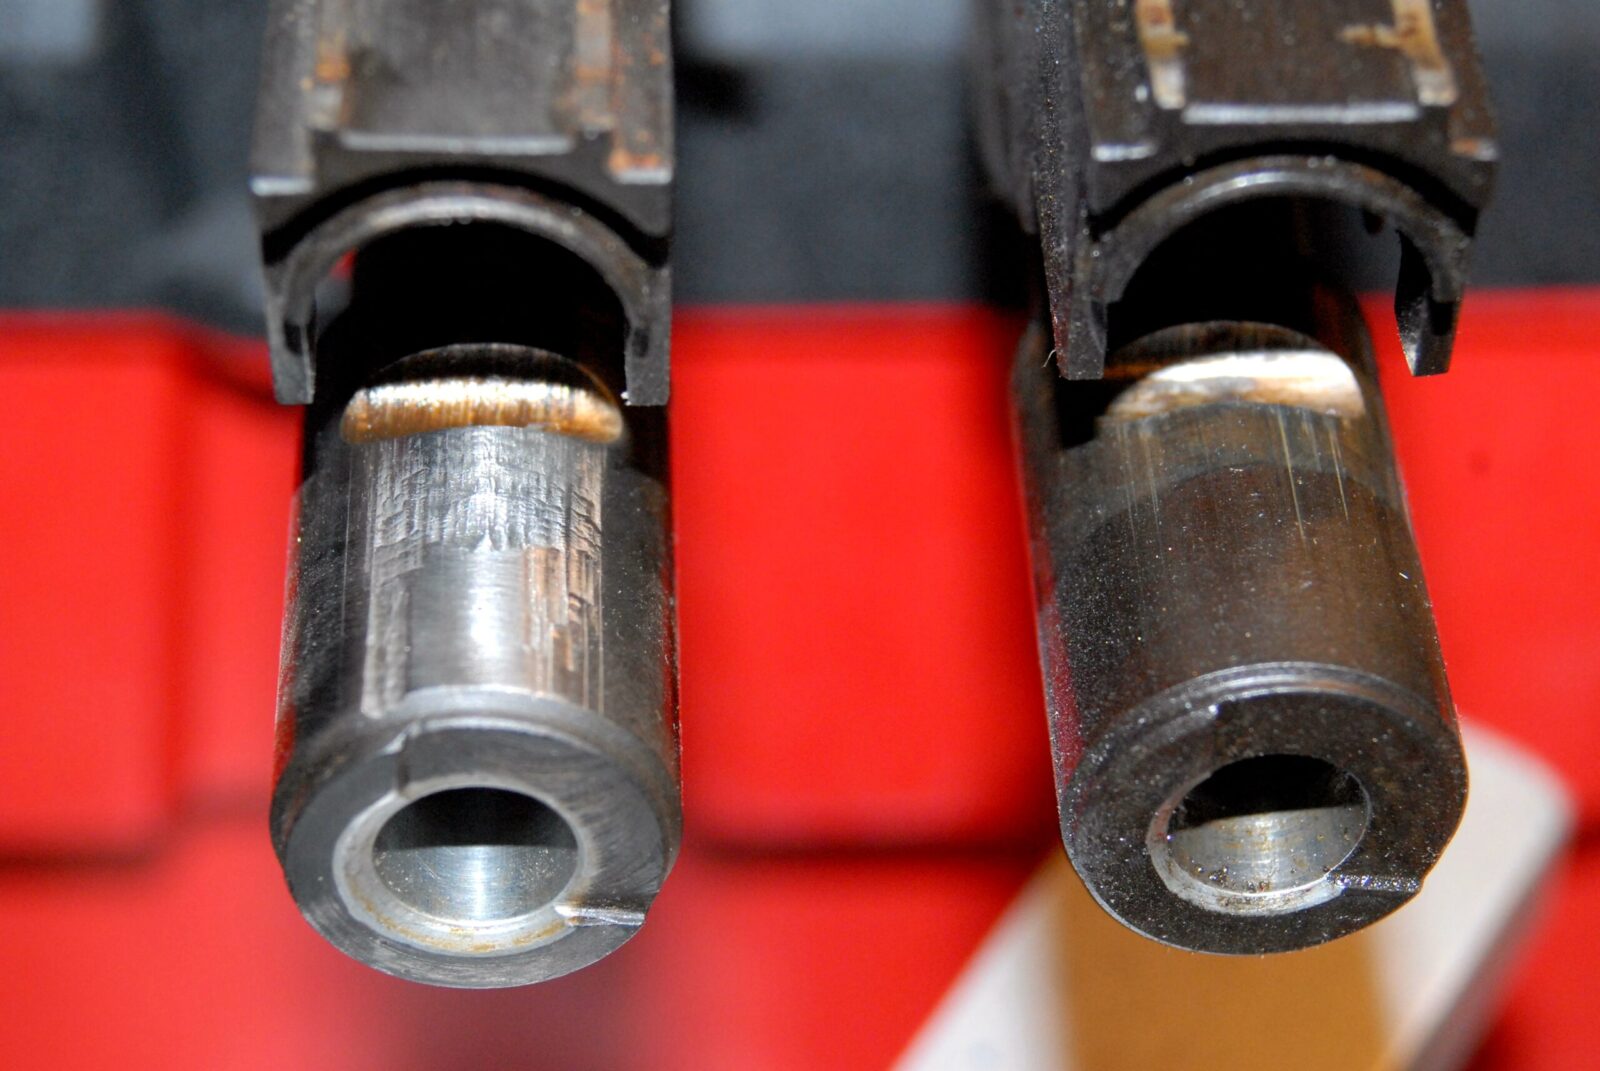
When an AK is assembled at the factory, the barrel is inserted into the trunnion, the hole for the barrel pin is drilled and then the pin is inserted. When the hole is drilled, a potentially sharp surface is created at the top front portion of the hole in the trunnion. If the barrel is pressed very tightly or the metallurgy is off, when pushing the barrel back out, this surface shaves the metal off the barrel creating an unsightly blemish on the shank of the barrel. It’s just cosmetic and does not hurt the functioning of the barrel but it sure is ugly.
The barrel on the left had galling when it was removed. The barrel on the right, by luck, had minimal galling.
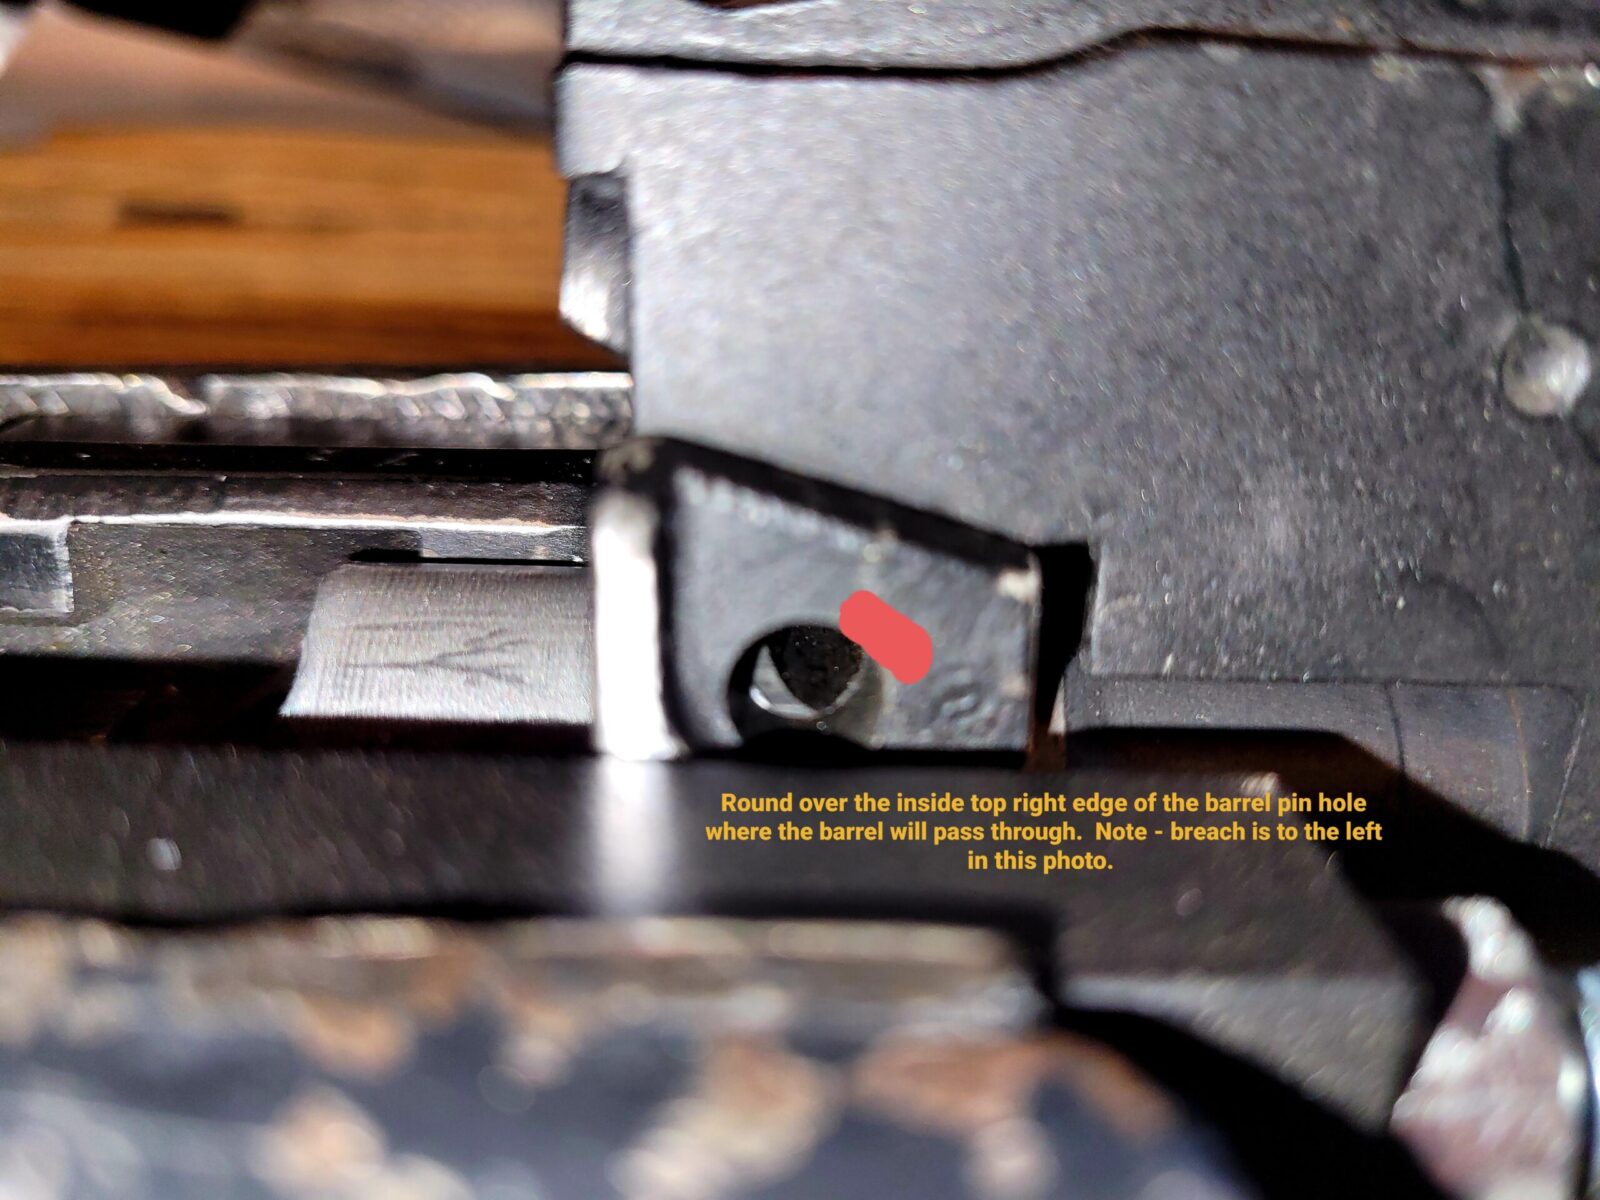
There is a trick that can help reduce the chance of galling. You push the barrel pin out as normal and just start to press the barrel out so you expose part of the front top edge of barrel channel inside the trunnion in the pin hole and dress it, meanin slightly dull or bevel it so it does not dig into the part of the barrel shank (the breach end) that will still need to push past that sharp surface.
Here, the barrel has moved ahead slightly. By reaching in with a small circular file to the inside front edge of the barrel channel, the sharp edge of the trunnion can be knocked down and reduce the chances of galling. Note the red shows the location but you need to file in the barrel channel, not the outside of the trunnion.
Small circular files, like chainsaw sharpening files make quick work of this. I have a few circular files and just grab whatever one gives me enough room to maneuver inside the 7mm (0.276″) barrel pin hole.
You can then press a bit more and see if there is galling taking place. If so, push the barrel back out a bit, get rid of the steel that is shearing off and try breaking the edge of the front barrel channel lip a bit more.
Again, this is purely cosmetic and not something that will reduce the safety or reliability of the weapon. Do I always do this? No, just on expensive kits where I don’t want the barrel to look bad.
Some Quick Tips
Let me briefly summarize some lessons I’ve learned over the years:
If there’s any sign of rust around the barrel, trunnion or pin then either soak the assembly in Ed’s Red or spray it down with PB Blaster and let it sit at least overnight. I have a 5 gallon bucket about half full of Ed’s Red and I will literally put the whole trunnion assembly right in the bucket with the barrel sticking out and leave it there.
If you are not familiar with your air hammer, practice with it and get a feel for the trigger and how to control it. Otherwise you might beat some parts up that you did not want to.
If you use a press to push out the barrel pin, remember that tons (literally) of additional pressure is not always the best bet. Press pins can shatter, trunnions can tear and so forth. Whack the press with a metal hammer to introduce vibrations to the part. It can make things way easier.
Keep track of your barrel pin both when it comes out of the hole as well as later.
Make sure everything is properly supported and you have clearances all the way around your part. I bent a barrel once years ago because I didn’t notice it was resting on something that shouldn’t have been there.
If you are going to clamp a barreled receiver in a vise, clamp on the trunnion and not on the far softer sheet metal.
When pressing out the barrel, protect the steel on the chamber end and do not press or beat on it directly. Insert a brass or copper buffer in there to avoid steel to steel contact.
When pressing or hammering out the barrel, make sure your tool is pushing directly on the barrel and hasn’t somehow lodged against the trunnion.
When the barrel comes out of the trunnion have something soft for it to land on or hold on to it so the barrel isn’t damaged during the fall.
Conclusion
You can absolutely get a barrel pin and barrel out of an AK with a press fit barrel in 10-15 minutes with an air hammer. The only catch is if you are stuck with one of those kits with unholy tight interference fit and then you’ll need a press.
Note, I have to buy all of my parts – nothing here was paid for by sponsors, etc. I do make a small amount if you click on an ad and buy something but that is it. You’re getting my real opinion on stuff.
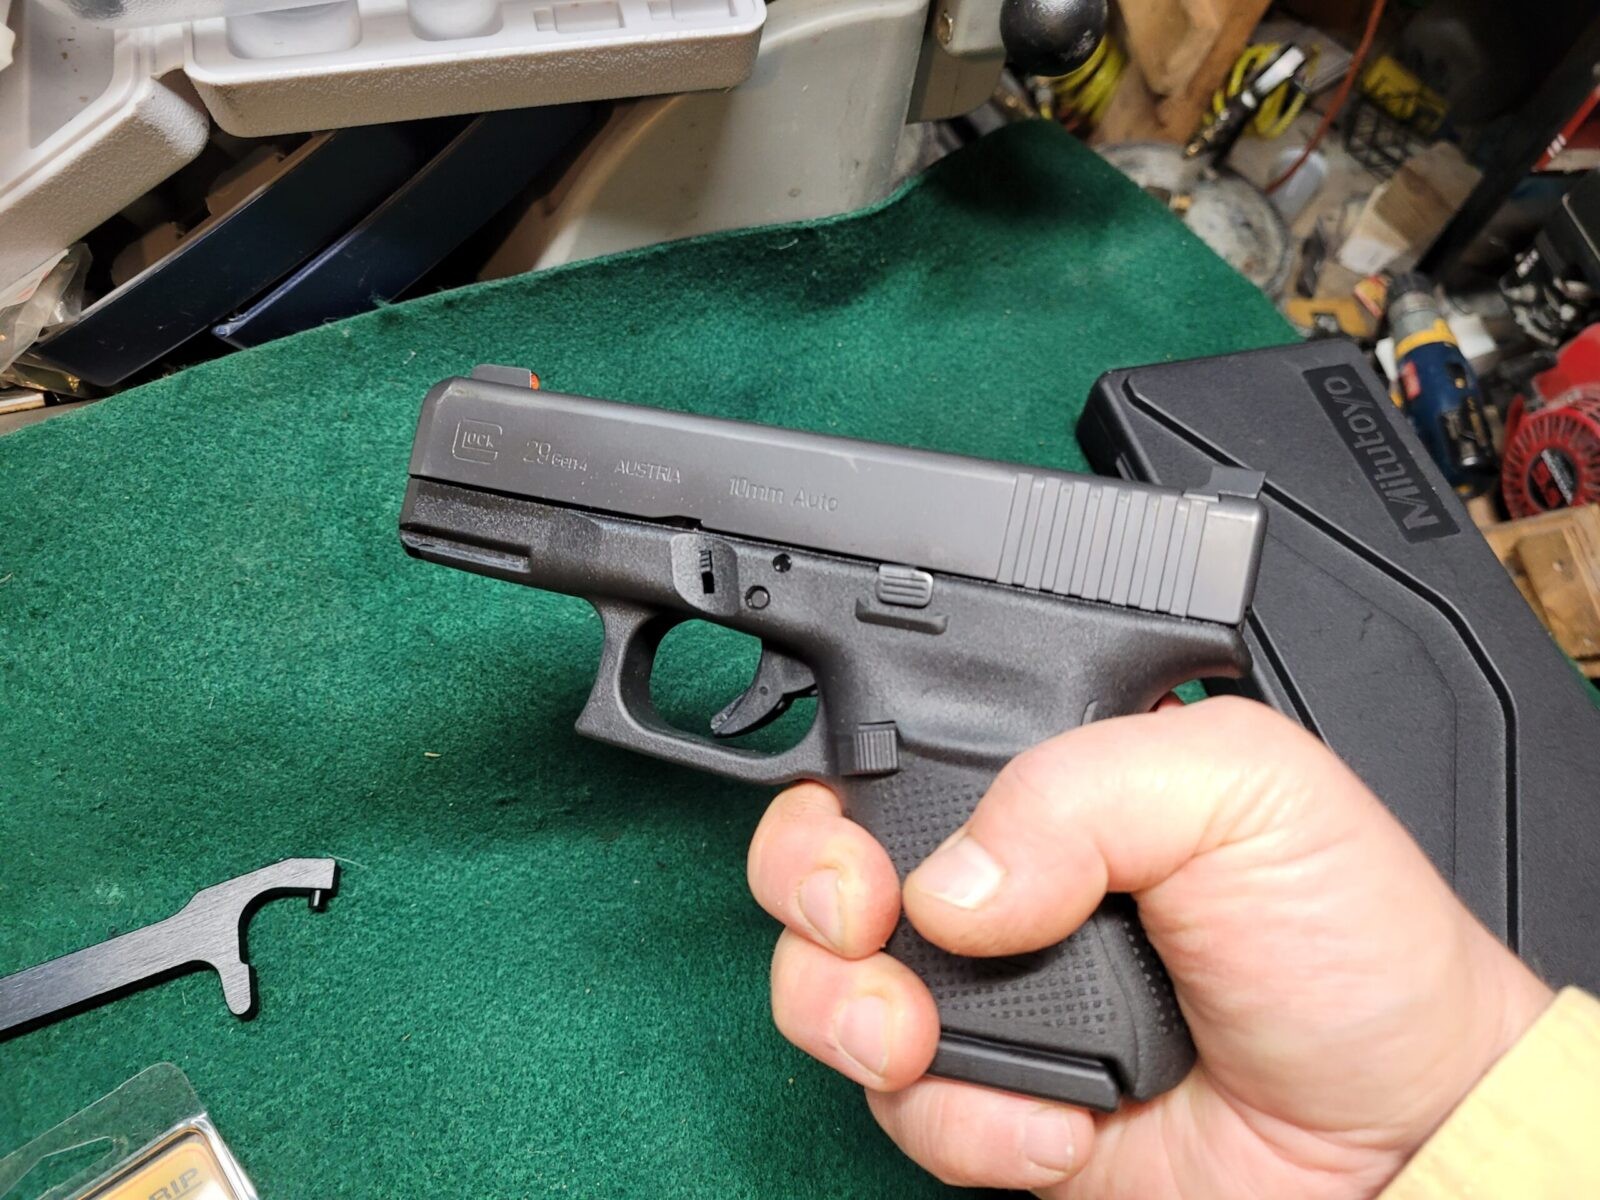
The first thing I noticed with the Glock 29 with its stock 10 round magazine was that the grip was way too small for my hands. Granted I wear XL sized gloves and have big palms courtesy of my dad and grandpa but literally, my pinky finger had nothing to grab on to and I really didn’t want to control a 10mm pistol running hot loads with just two fingers – excluding my trigger finger that is. I had a trick up my sleeve though – I knew I could get grip extensions that would make holding the pistol way more comfortable.
Yeah, sorry, I can’t stand this kind of grip.
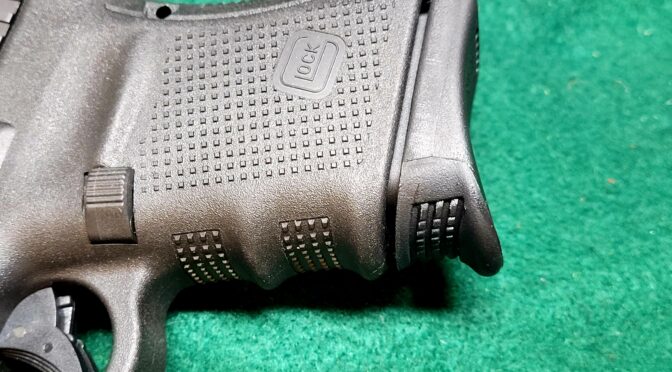
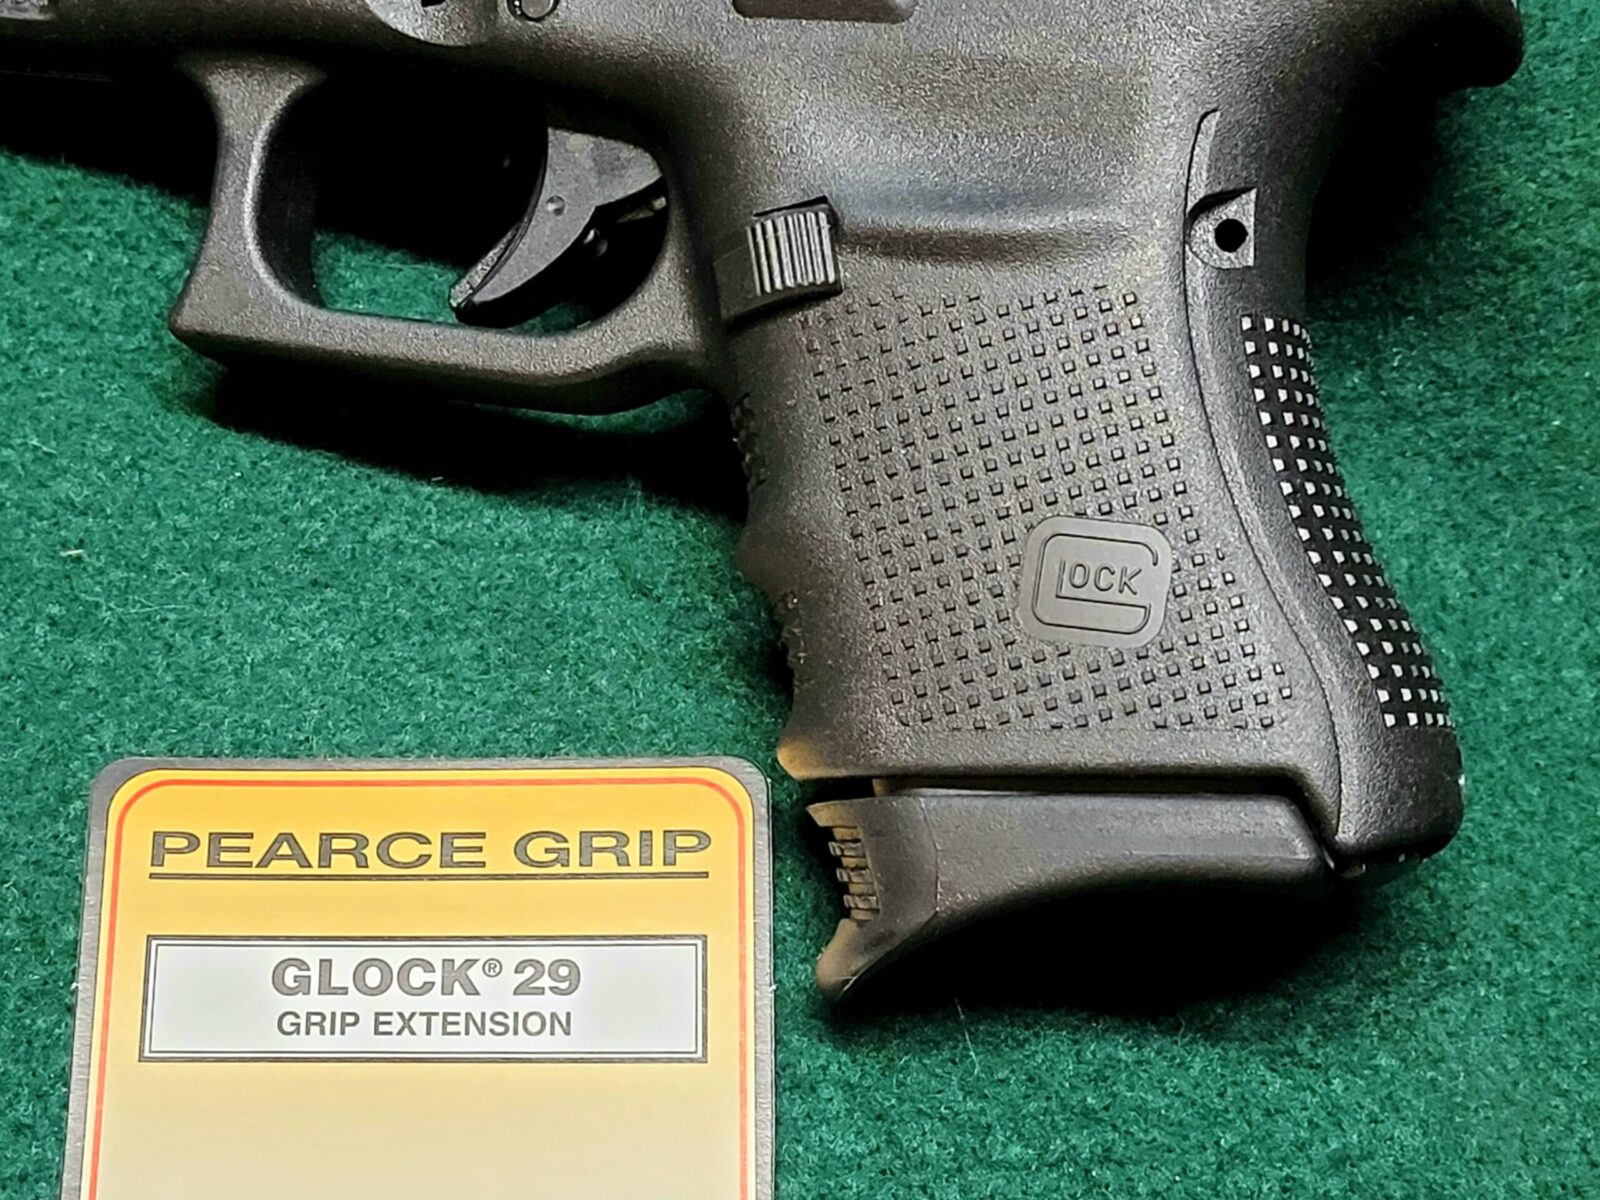
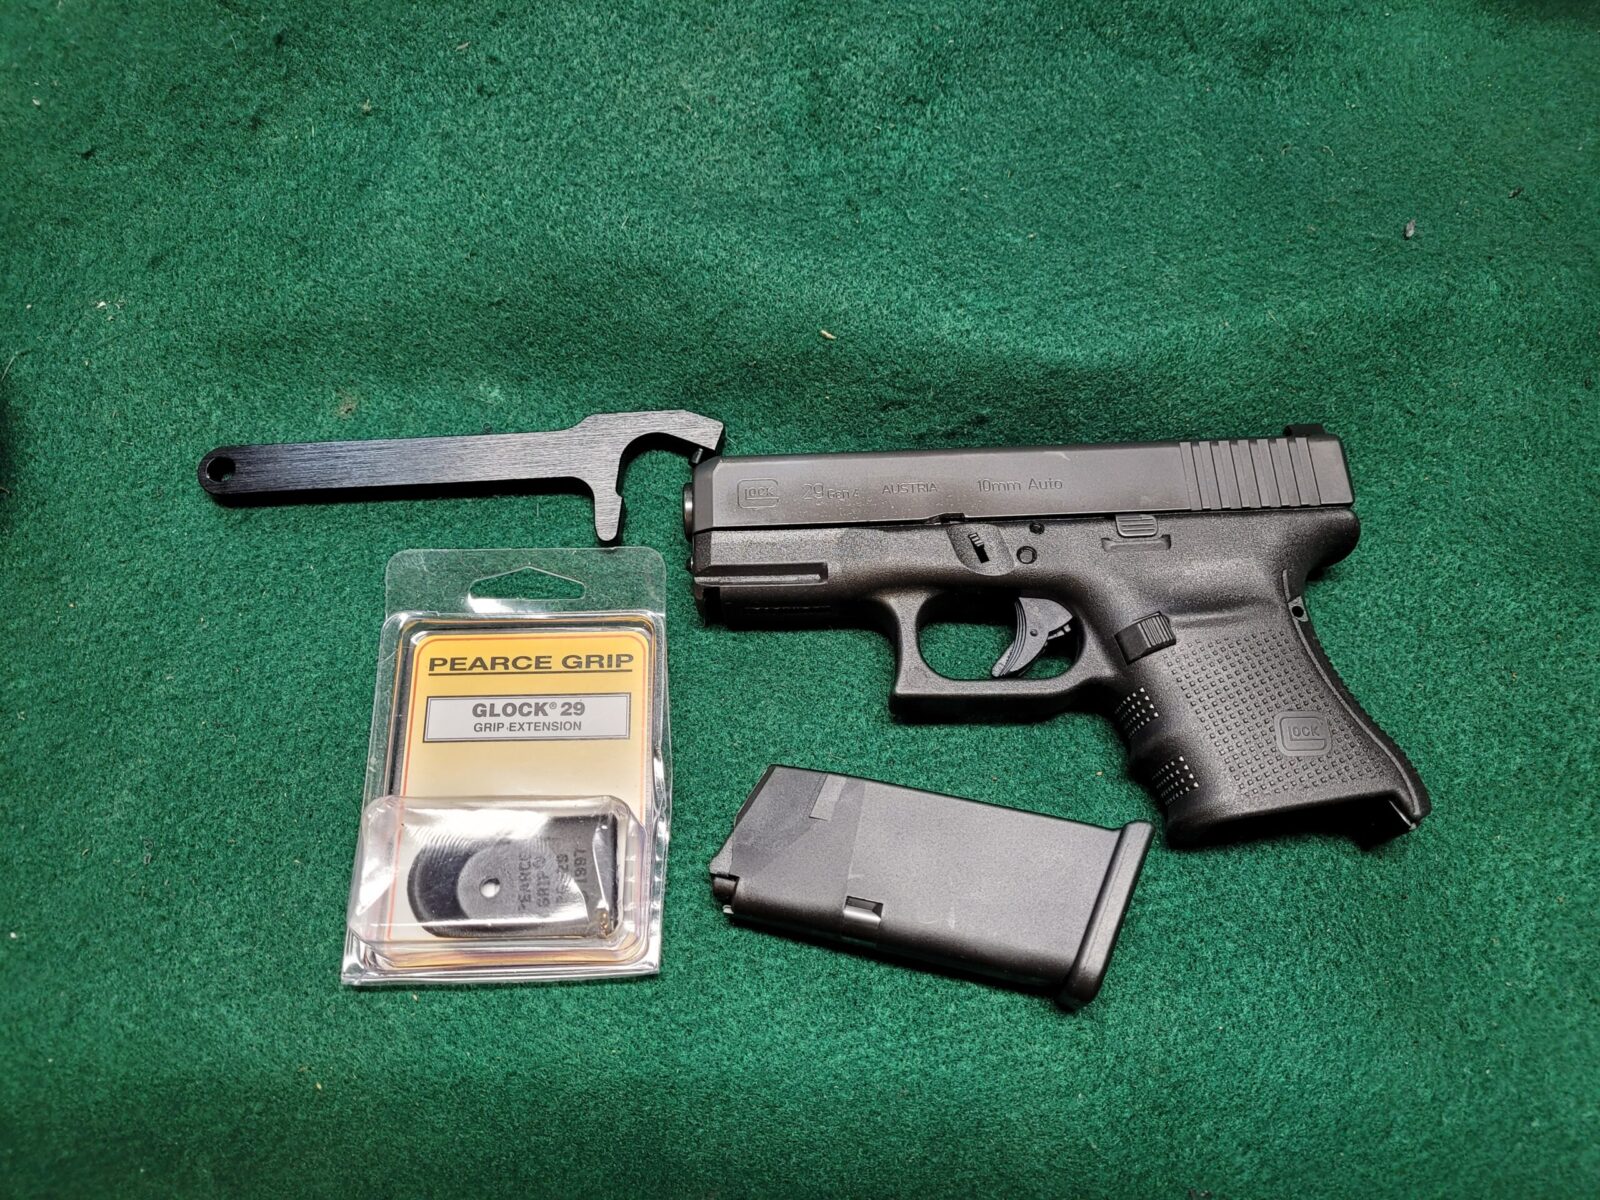
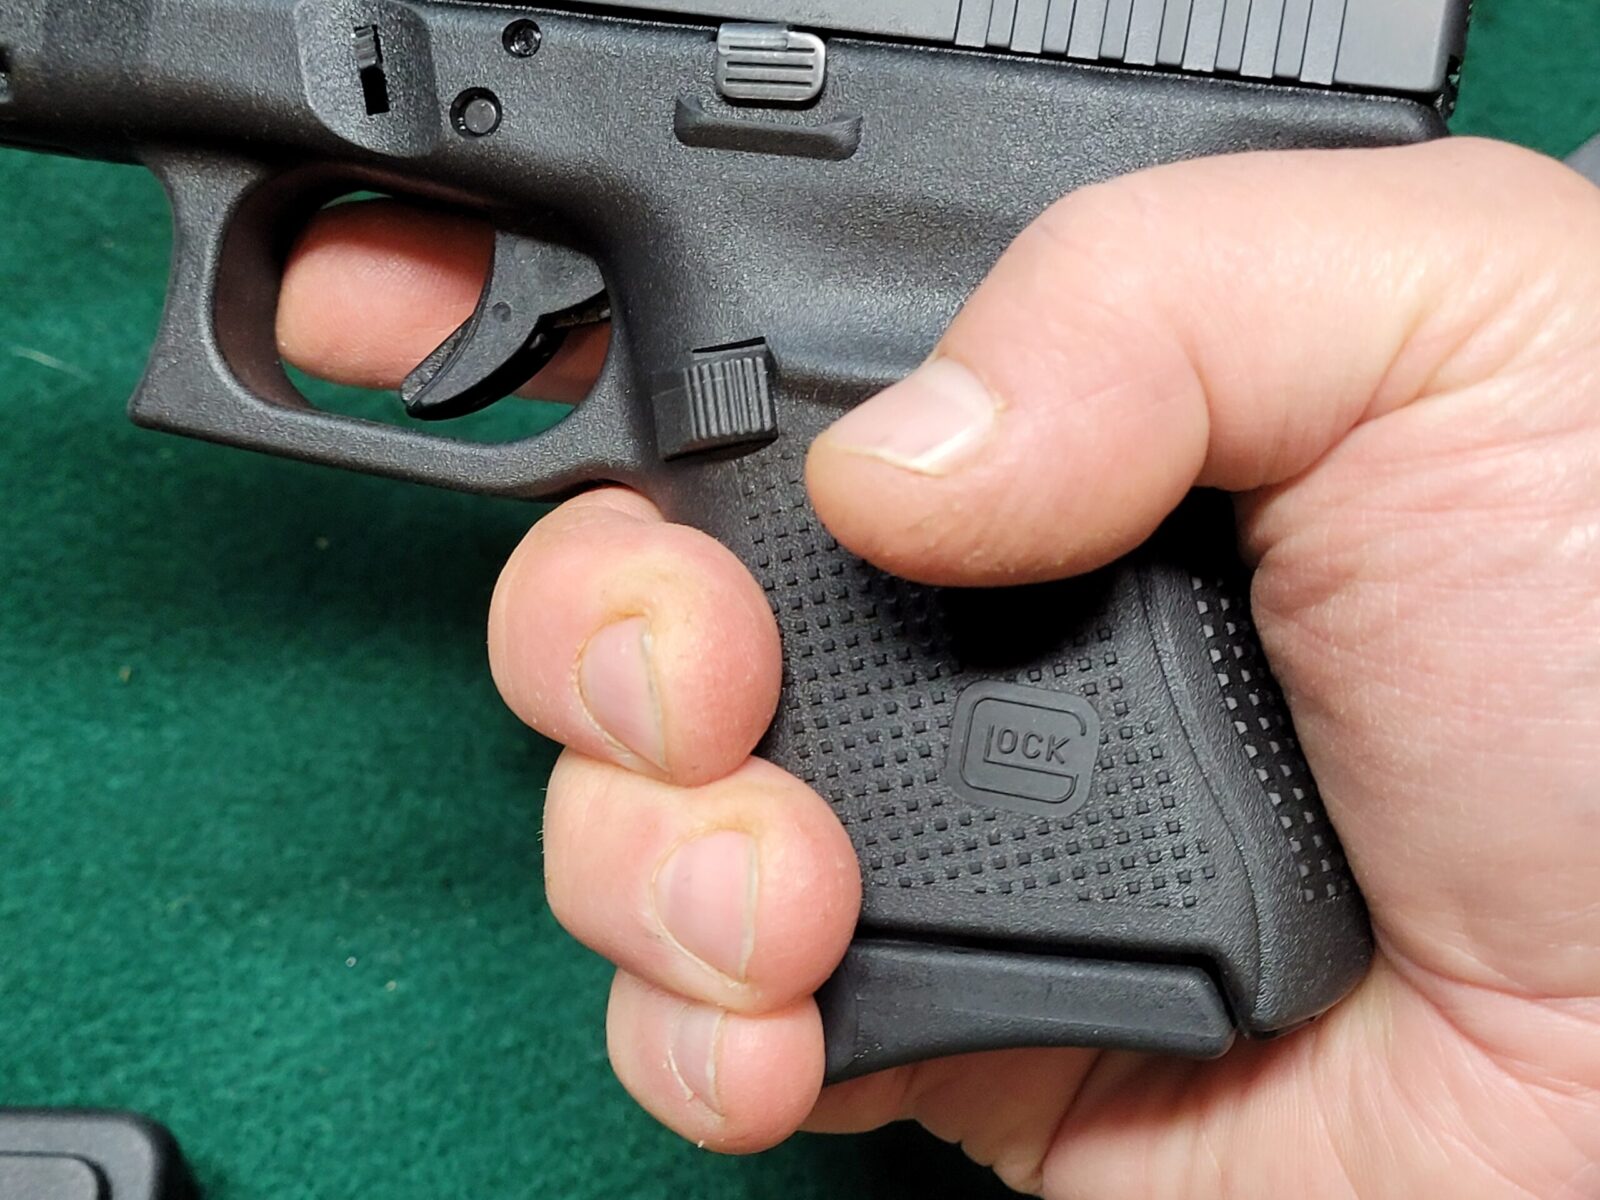
The solution comes from Pearce – they make a really nice injection molded base plate replacement that gives us just enough of an extension to comfortably hold the pistol. Since Pearce released their’s some knock offs have come out that look identical but I stick with Pearce.
That little lip makes all the difference in the world.
How To Install Them
There’s two reasons for this post – first is to tell you that there is a grip extension for the 10 round magazines and the second is to give you a tip on installing them that will save you some real grief and this pertains to Glock mags in general.
On most magazines, you push the locking button down that holds the baseplate in position and while you are doing that, you then push the baseplate off while capturing the floor plate and spring so they don’t come flying out. Trust me, those suckers can come out like a rocket.
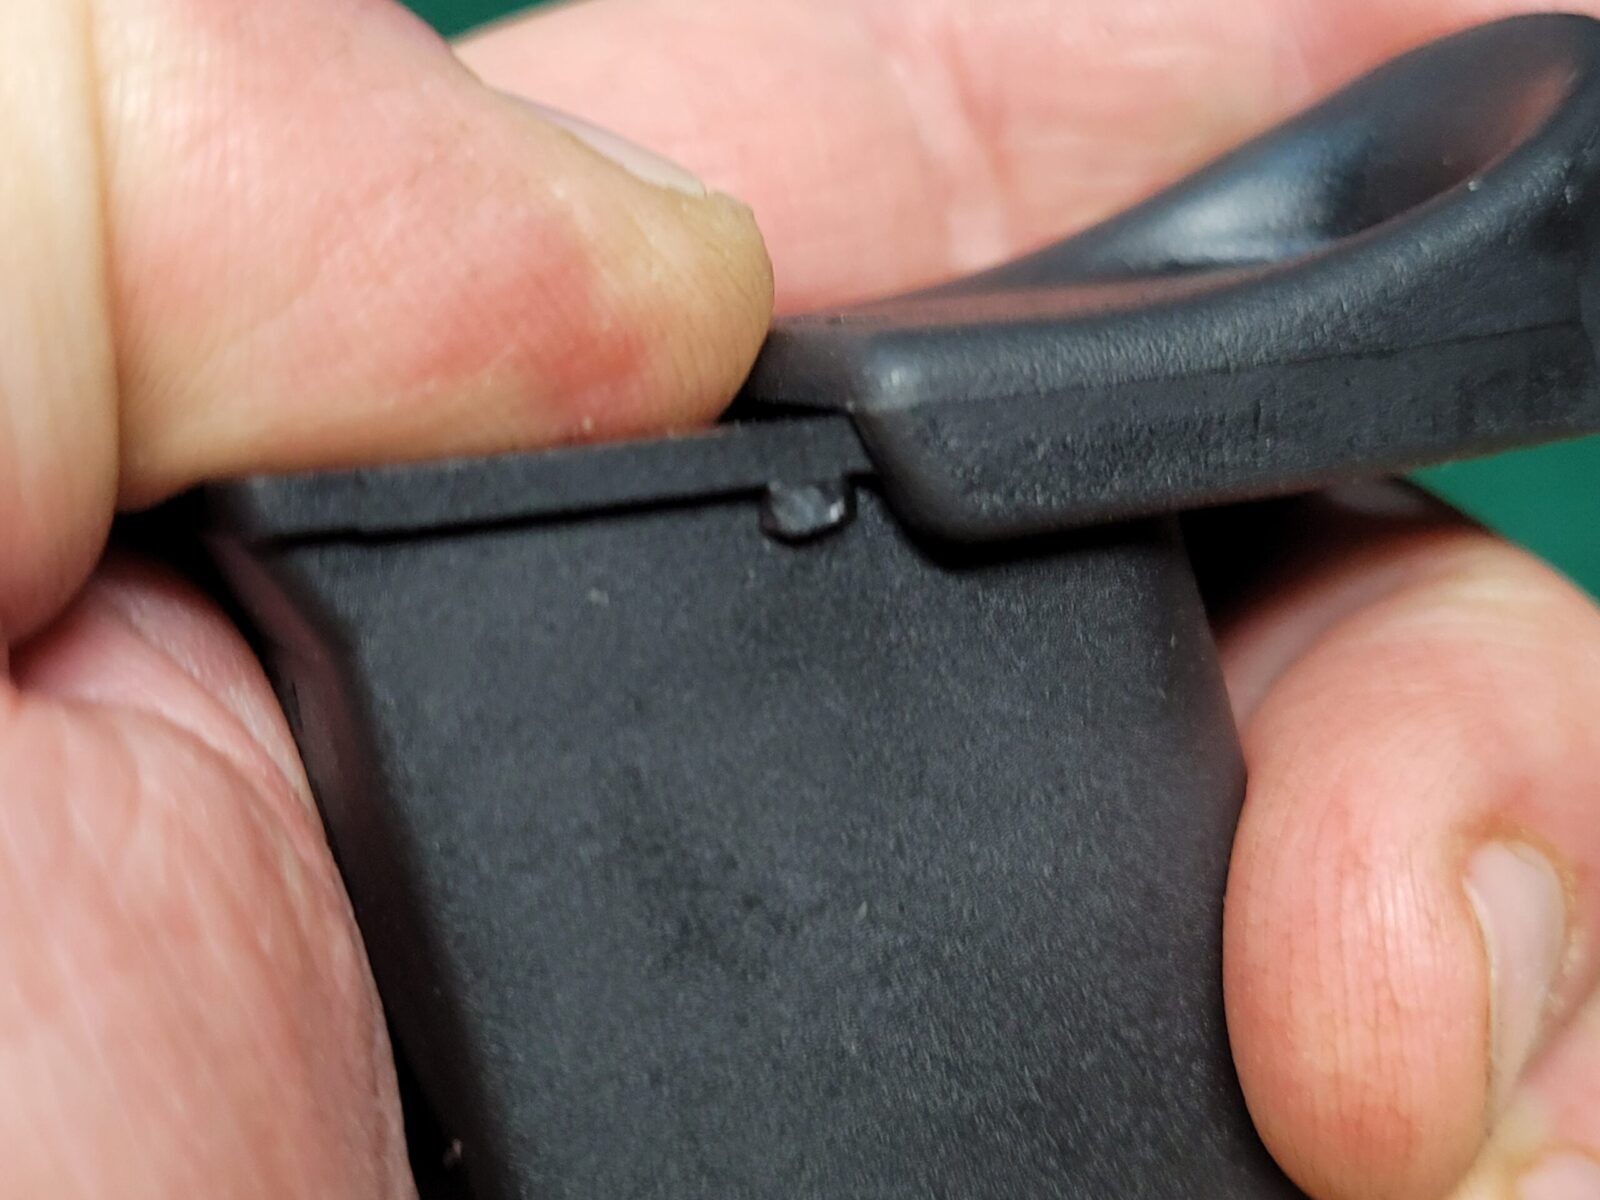
A Glock is close but not quite. Everything I said above is true but there is also a ridge case in the middle of the magazine’s rails that the base place slides on that makes it an absolute bear to do without a Glock magazine tool. Honestly, the first time I went to disassemble a Glock magazine I could not get it off and then started searching – people said to get the tool. I thought the tools were a scam because I never needed one before other than something to push a recessed dimple down or pry off a base plate with 30-50 years of junk on it. Well, with a Glock magazine, you really need the tool and everybody and there brother makes them or imports cheap knock offs that work as well.
Here’s what you need- A G29 otherwise I don’t know why you are reading this :-), however many Pearce grip extensions and 10 round Glock magazines you need and you can see the magazine tool I use in the top left. Note, I can’t speak to whether these extensions will fit on any other brand magazine – all of my 10 round mags are Glock models.
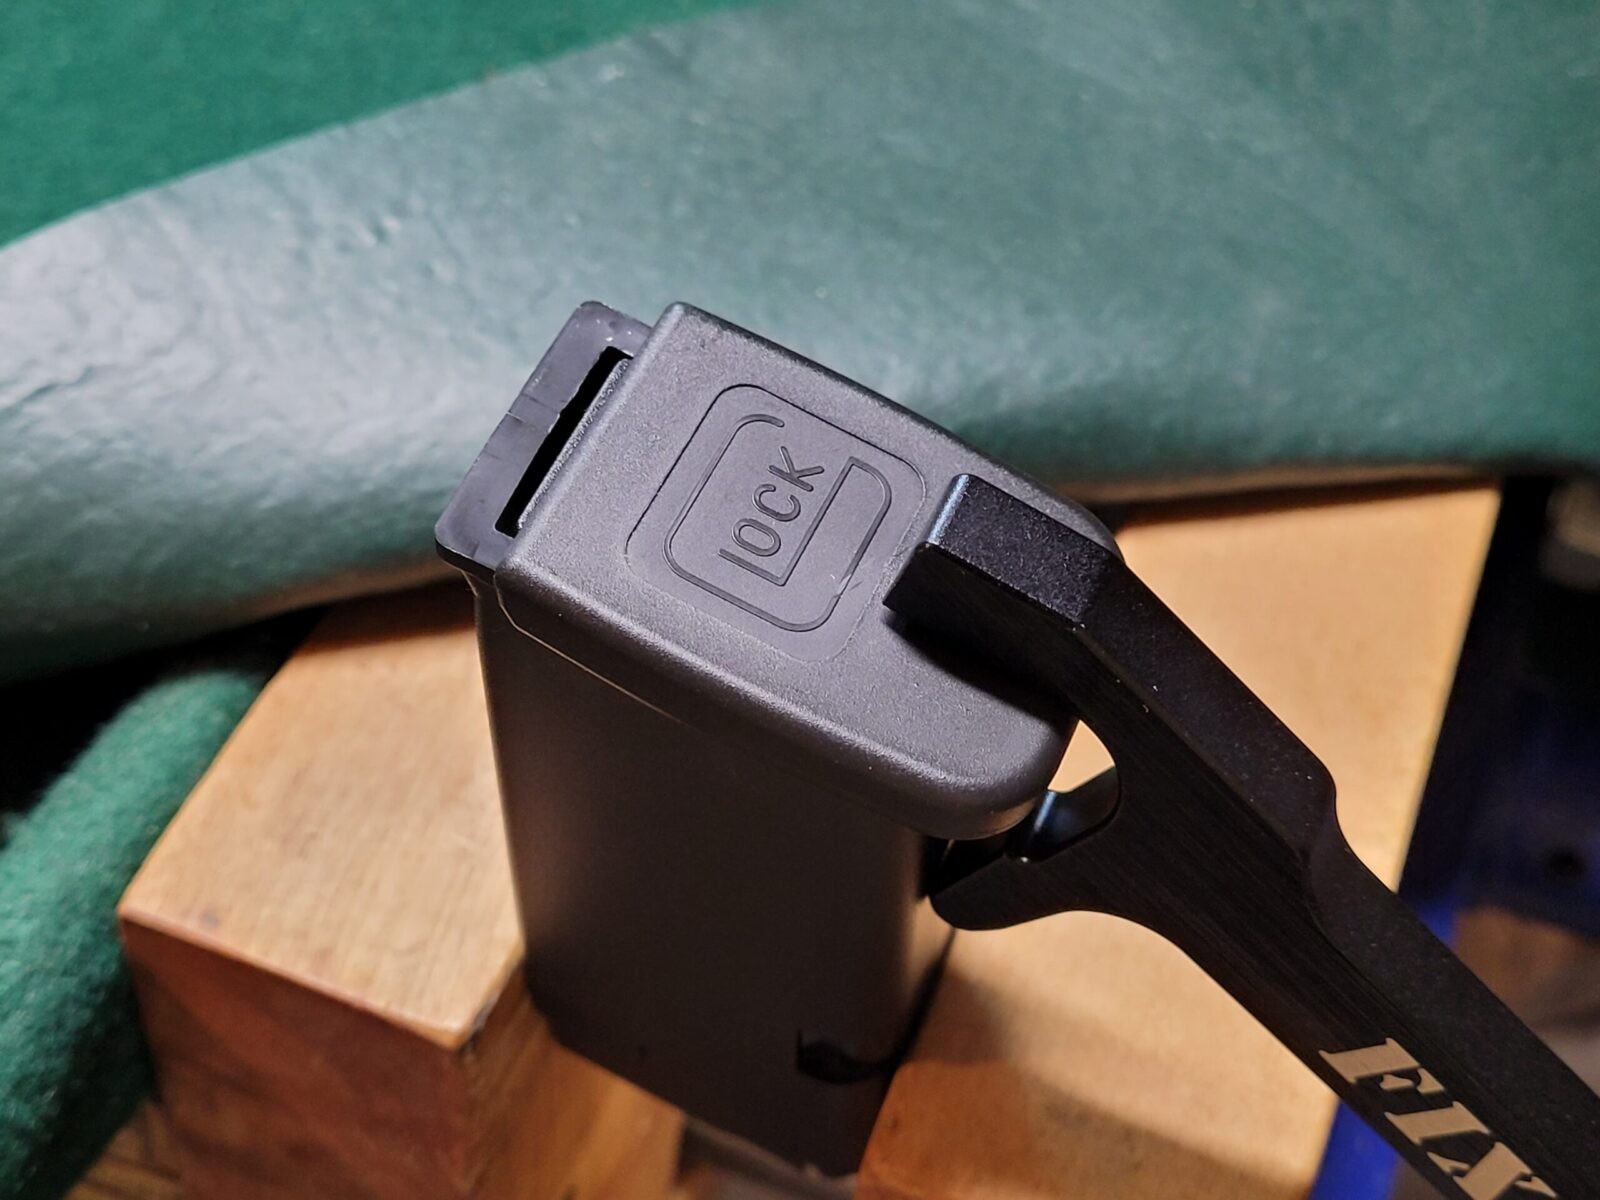
When you look at the tool. it has a nose that pushes the dimple down on the floor plate while also allowing you to have enough leverage to then pry the base plate off thanks to the mechanical leverage it gives you.
I secure the magazine in a vise to hold it while I use the magazine tool to remove the base plate. By pushing down on the handle of the tool. you have enough leverage to remove the base plate. Go slow and capture the internals – notice how I am saying this over and over.
Again, be prepared to grab/capture the floor plate and spring assembly or they will rocket out. Yeah, I’m making light of this but a lot of people have suffered eye injuries from not being prepare and getting hit by the parts as they fly out.
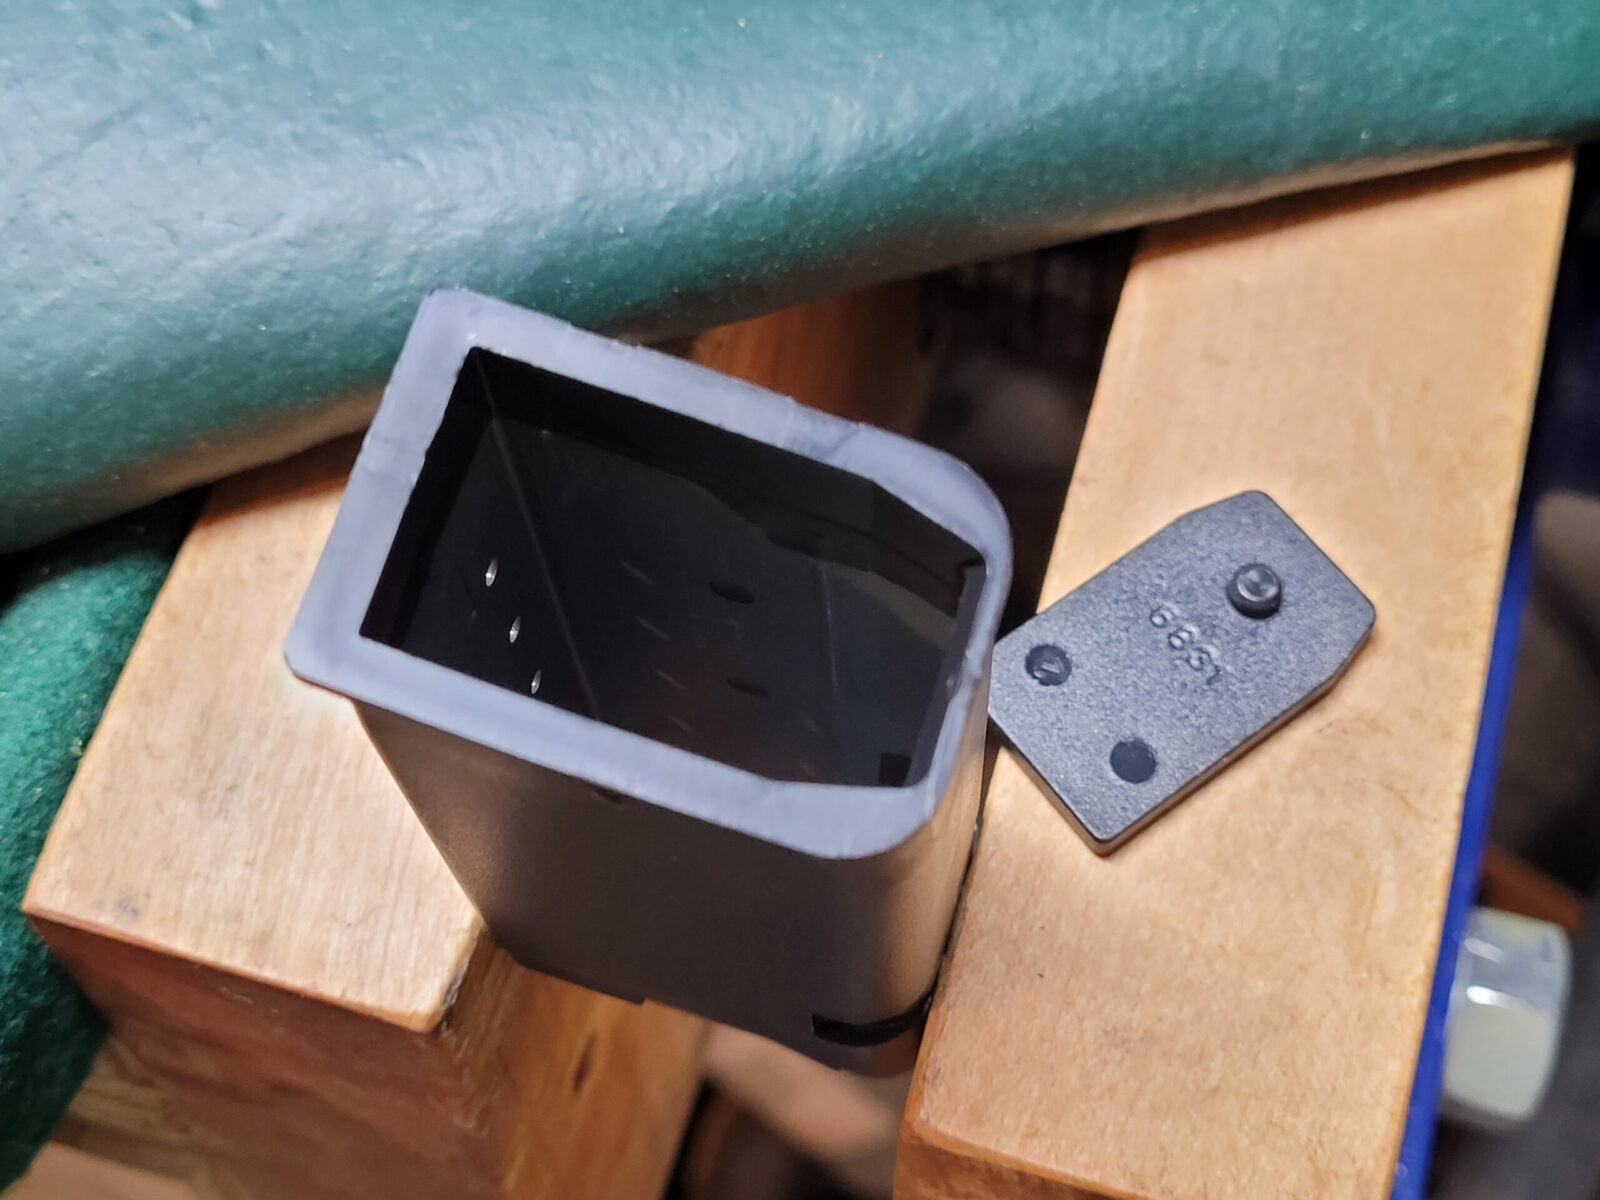
The floor plate (the little grave stone looking plastic tab with the dimple on it resting on the wood vise jaw) that pushes the magazine spring down and also locks the floor plate in place is shaped to go in the magazine one way. You just need to make sure that little dimple is face up to lock the grip extension in place. If the grip extension doesn’t want to snap in place then you probably installed that floor plate upside down.
Reinstall the spring assembly and make sure the follower (the plastic thing that pushes the bullets up) is oriented properly. Note that the dimple is face up in the photo in order to lock the base plate in place. What I do is to hold the floor plate and spring with my thumb as I slide the base plate, or in this case the Pearce Grip Extension, on to the magazine tube. You will probably hear the dimple click ino the hole of the base plate or at least feel that the extension can’t move / that it is secure.
This is a good photo of the ridge, or tab, that is cast in the magazine’s body that really holds the base plate on and makes removal so hard.
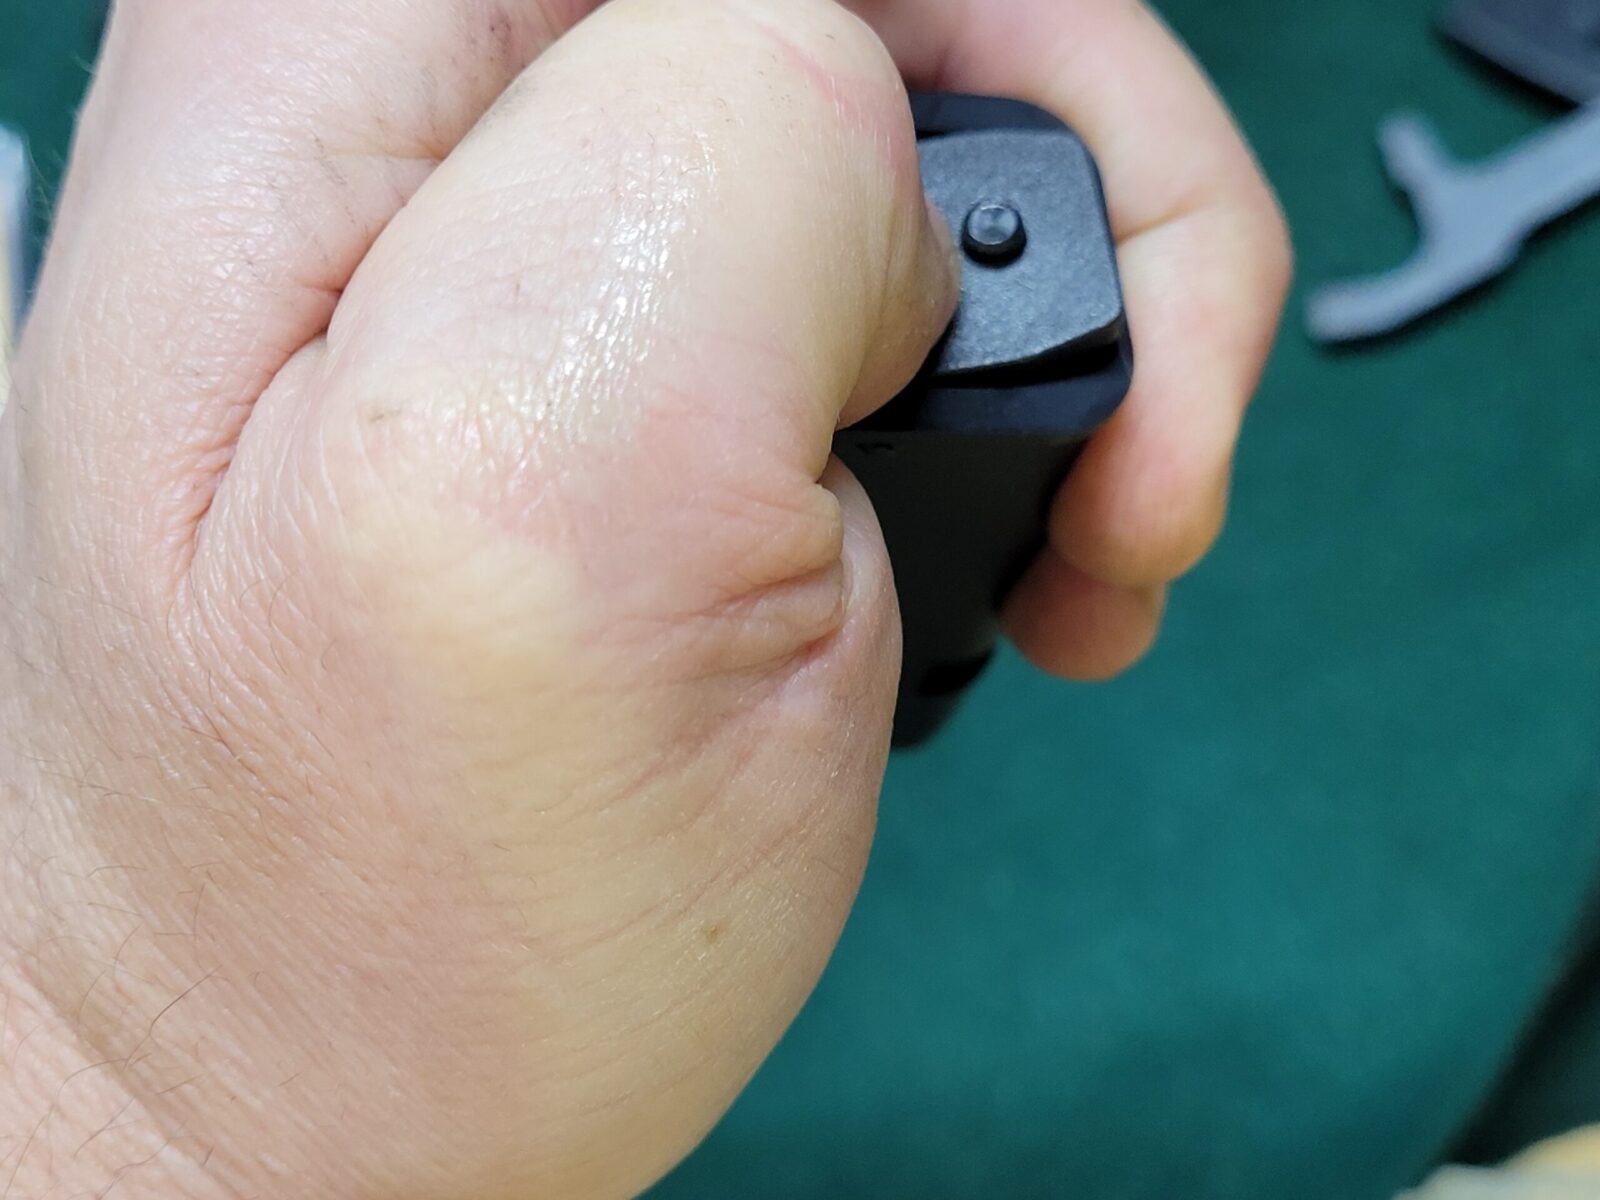
This is the end result. Notice how my little finger can now firmly grip the pistol.
If you have big hands or just want to make the grip a tad taller for whatever reason, I absolutely recommend the Pearce Grip Extensions and have four of them on my OEM Glock 10 round magazines. I have shot a ton of hot Underwood and Buffalo Bore ammo and had no problem controlling the pistol. So far, they have held up just fine.
Note, I have to buy all of my parts – nothing here was paid for by sponsors, etc. I do make a small amount if you click on an ad and buy something but that is it. You’re getting my real opinion on stuff.
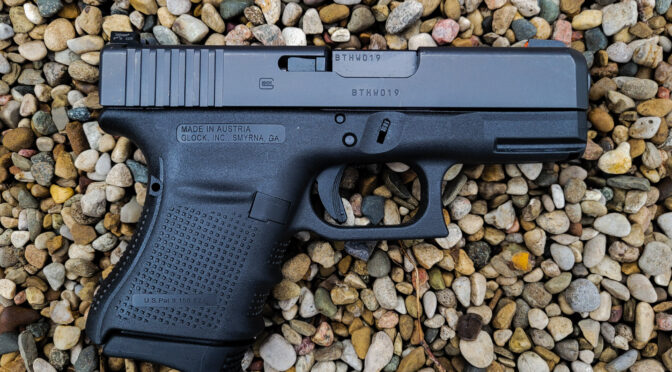
I’ve never been a huge Glock fan preferring 1911 & 2011 pistols. A few years ago I built a few Polymer80 pistols and that chipped away at my dislike because the engineering was really very cool. In terms of calibers, I mainly focus on 9mm and 10mm these days – the former for general self -defense and shooting at the range and the latter for defense including potentially black bears. The problem I’ve had for the past year is that my 1911 and 2011 10mm pistols weigh quite a bit and are large. With this in mind, I started hunting around for a smaller 10mm that would also given me at least 10 rounds of ammo in the magazine. This brought me to Glock and either the full size model 20 or compact 29. I opted for the latter because I wanted something smaller and easier to carry concealed.
First, Why 10mm?
I suppose the first thing that made me even consider a G29 is that it uses 10mm and I am a big fan of the 10mm cartridge. Folks, it hits hard. It’s not a magnum but it does pack a wallop substantially beyond what a 9mm can do while feeding from a semi-auto.
My plan was to use this pistol when hiking in the back country for self-defense from someone with malicious intents or a black bear. This was not to be my every day concealed carry pistol and while I do have quite a selection of hollow points (HPs), my plan was to load the pistol up with ammo designed to penetrate, not to mushroom like a HP bullet does.
While I have carried my Sig P365 on many hikes mainly because it’s small and lightt, let’s compare some rounds between 9mm +P and 10mm so you can get an idea:
9mm +P Penetrating Rounds
Muzzle Velocity (FPS)
Muzzle Energy (Ft/Lbs)
Hornady 9mm Critical Duty 135gr +P
1,110
369
Hornady 9mm Critical Duty 124gr +P
1,175
380
Buffalo Bore 9mm Outdoorsman 147gr Hard Cast +P
1,100
394
Underwood 9mm 147gr Hard Cast +P
1,100
395
Underwood 9mm 115gr Xtreme Penetrator +P
1,250
399
10mm Penetrating Rounds
Muzzle Velocity (FPS)
Muzzle Energy (Ft/Lbs)
Buffalo Bore 10mm Dangerous Game 190gr Mono Metal
1,100
510
Hornady 10mm Critical Duty 175gr
1,160
523
Buffalo Bore 10mm Outdoorsman 220gr Hard Cast
1,100
591
Underwood 10mm Hard Cast 200gr
1,250
694
Underwood 10mm Hard Cast 220gr
1,200
704
So if you want to read more on the ballistics of 9mm, 10mm or comparisons, there are tons out there by people who know far more than I do. You may also argue that Critical Duty was never designed for dangerous game and you are right but I wanted to give some comparisons mainly about the energy levels. Bottom line for me is that 10mm hits a lot harder and penetrates further based on lots of examples I have seen of 10mm rounds being fired into ballistic gelatin, phone books and real world self-defense stories against bears that you can search and read about.
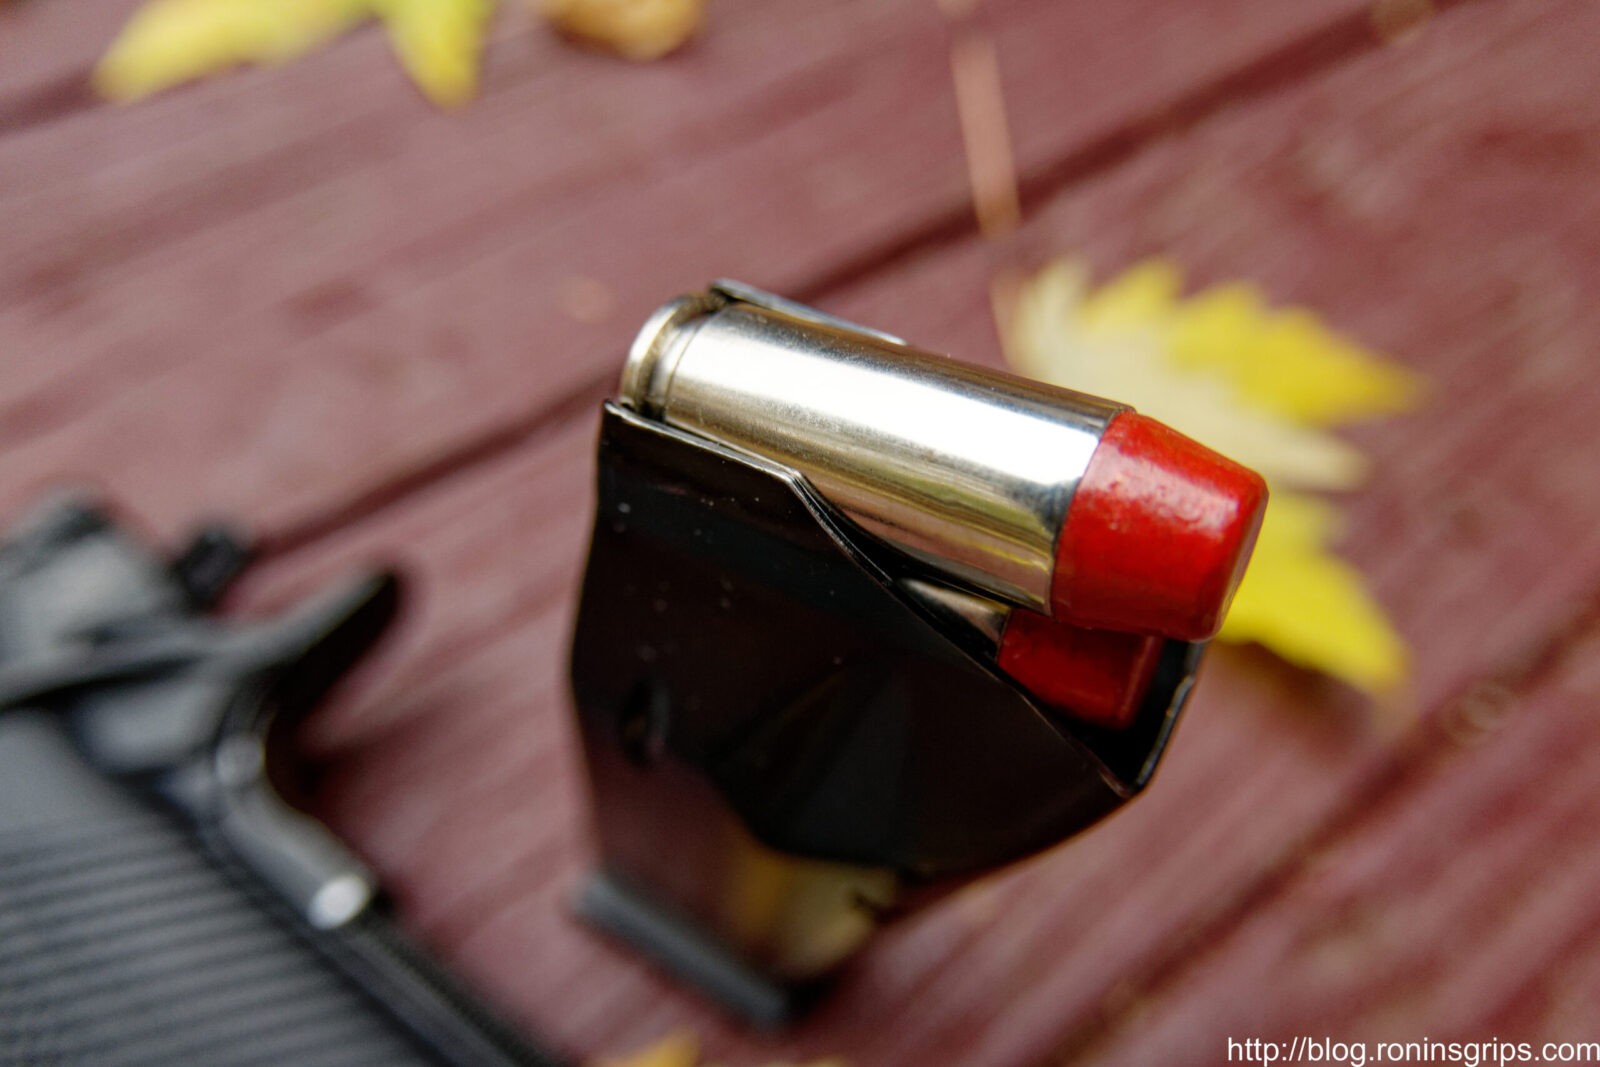
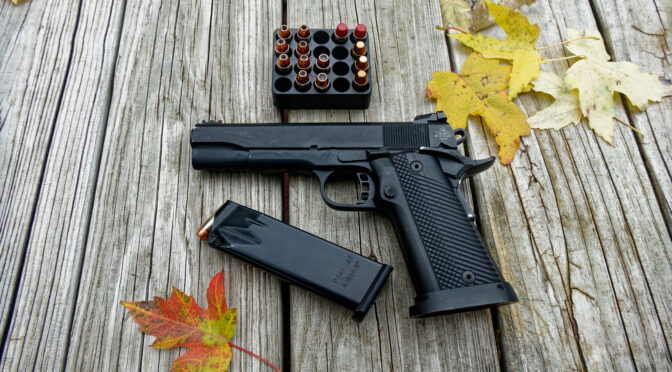
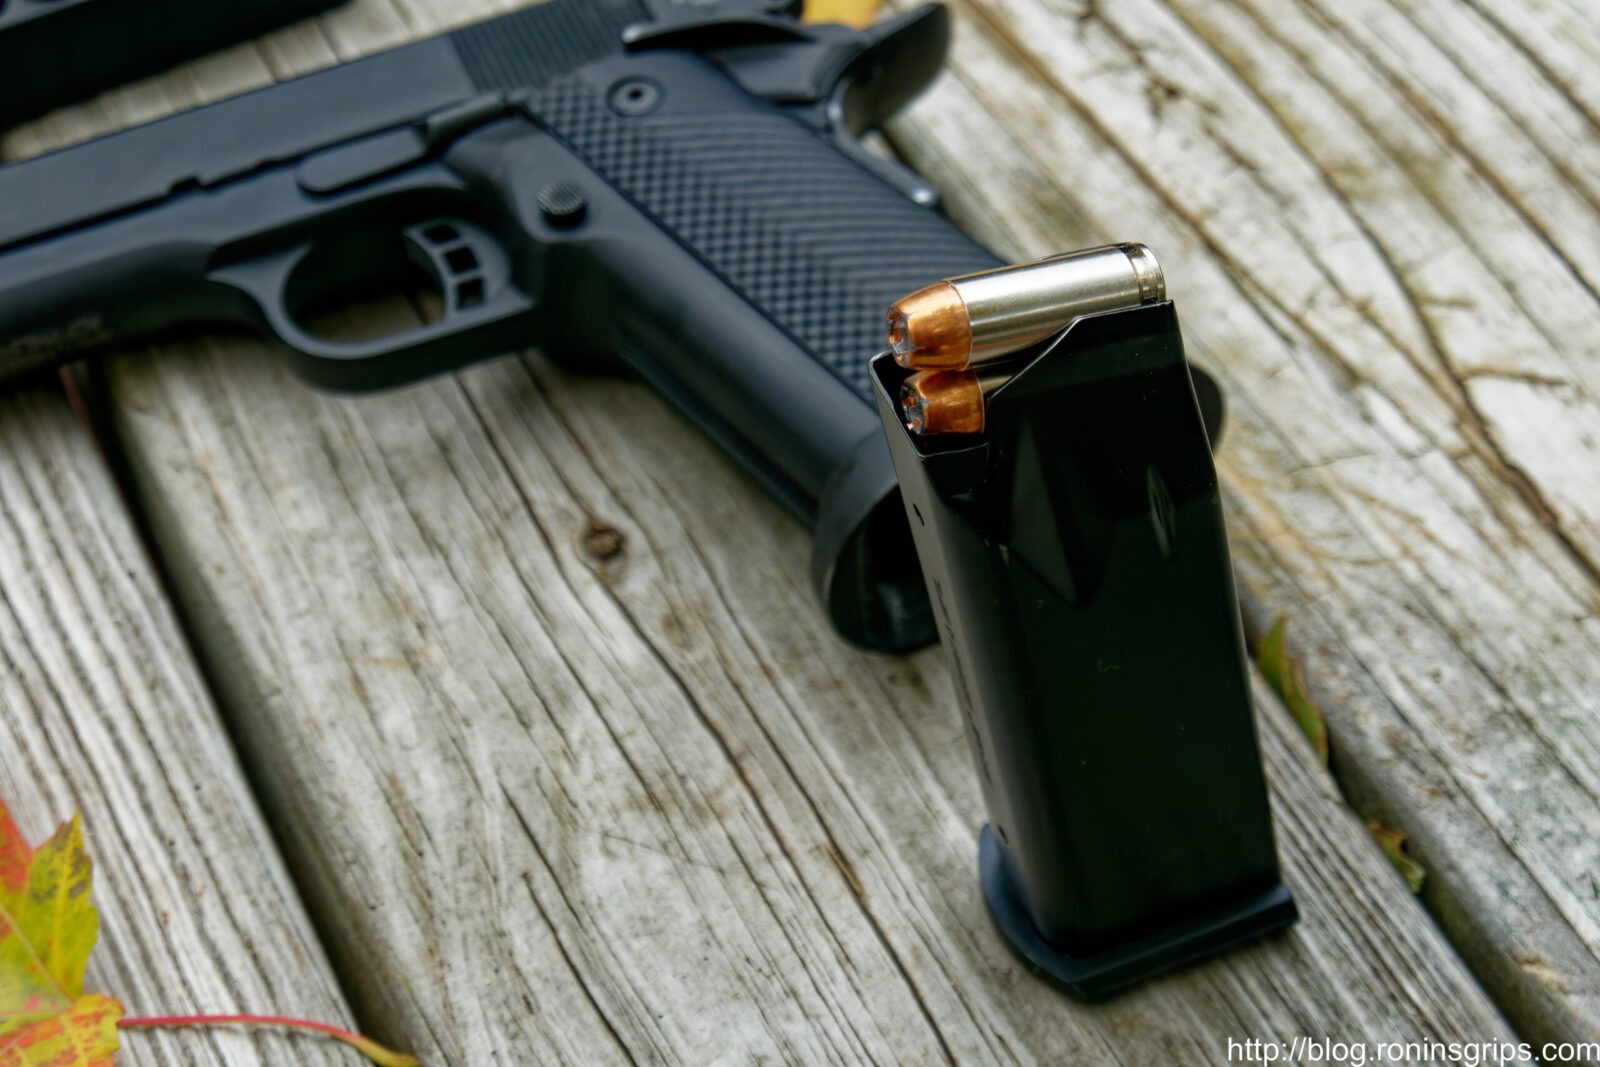
This is one of Underwood’s Hard Cast 220 grain 10mm rounds loaded in one of our custom double stack mags for RIA 10mm and .40 S&W pistols [Click here to learn more about our magazines]
But Why Glock?
I’ve not been a Glock fan to be perfectly honest. I preferred 1911/2011 pistols and CZ-75s to the Glocks mainly because of the grip angle and a bit of a bias against the blocky boring lines of the factory Glock pistol.
What is cool about Glock? First and foremost, the Glocks are amazingly reliable pistols. They are going to work when you need them to work. Note, you still need to clean, lube and thoroughly test them before relying on them but this is true of any firearm. A pet peeve of mine, maybe it’s even a fear for the safety of others, are the people who are new to any type of firearm, buying one and ammo from the store, loading it straight out of the box and then thinking they are safe – Please, don’t do this.
Second, Glocks do not weigh a bunch because of their polymer frames. My Desert Eagle 1911 in 10mm is an amazing pistol – easily the best factory-built 1911 pistol I have ever bought but it is not light. Unloaded it comes in at 36.2 ounces – folks, that is just over two and a quarter pounds!! In comparison, an empty Glock 29 weighs 24.34 ounces or just over a pound and a half – That is almost a third less weight.
Third, a Glock 29 Gen 4 pistol holds 10 rounds with the little magazines made for it but it can also use the 15 round magazines made for the Glock 20. For me to carry 15 rounds in a 1911-ish pistol means I need to move up to a wide grip 2011-style pistol such as the offerings from Rock Island Armory (RIA). Again, it’s big and heavy – 2.5 pounds empty – even heavier than the Desert Eagle.
Fourth, there is an absolutely stunningly large aftermarket parts industry supporting Glock pistols. Now you will have fewer options than the wildly popular model 17 and 19 Glocks but still, you have a ton of sights, triggers, magazine releases, slide stops and what have you to select from,
I originally was going to stop with four but I do need to add in one more – The G29 is small relatively small and far easier to conceal or even stow away than any of my big 1911/2011 pistols. The length of the G29 Gen 4 is just under 7″ with the slide being just over 6.75″. Height with the stock 10 round magazine is just over 4.5″.
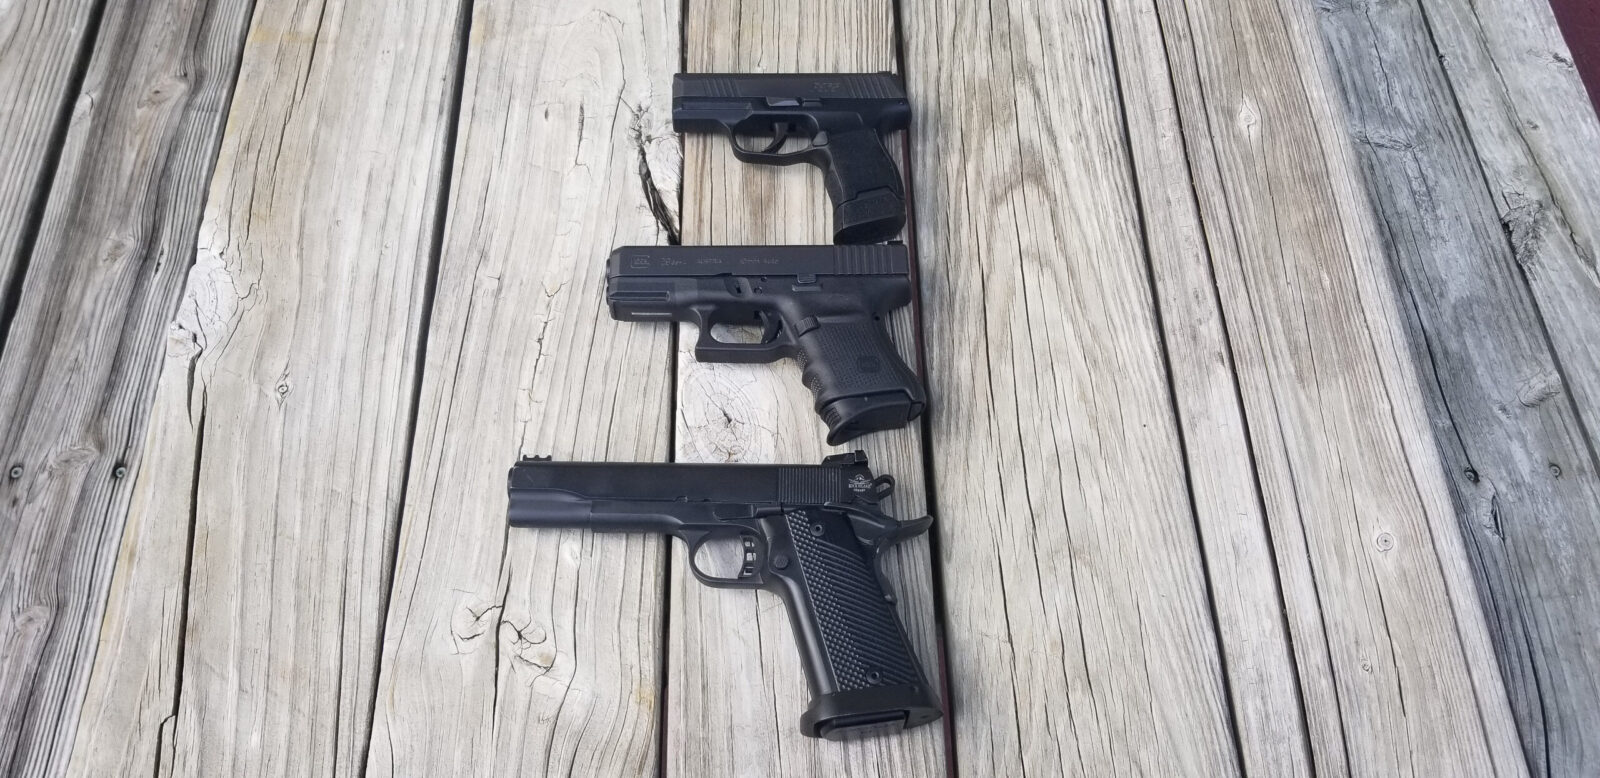
The top pistol is my SIG P365 with a 12 round magazine, The middle is the Glock 29 Gen 4 with a Pearce magazine base plate. The bottom is a RIA 52009 Rock Ultra FS HC with its 16 round magazine sitting flush under the big mag well funnel. They are all great pistols but each has a time and a place in terms of use.
All of these points finally pushed me to buy my model 29 gen 4 pistol. I’ll do some more posts about the mods I have done to make it more to my liking – namely the controls, sights and changing magazine base plates so I can more comfortably hold the pistol.
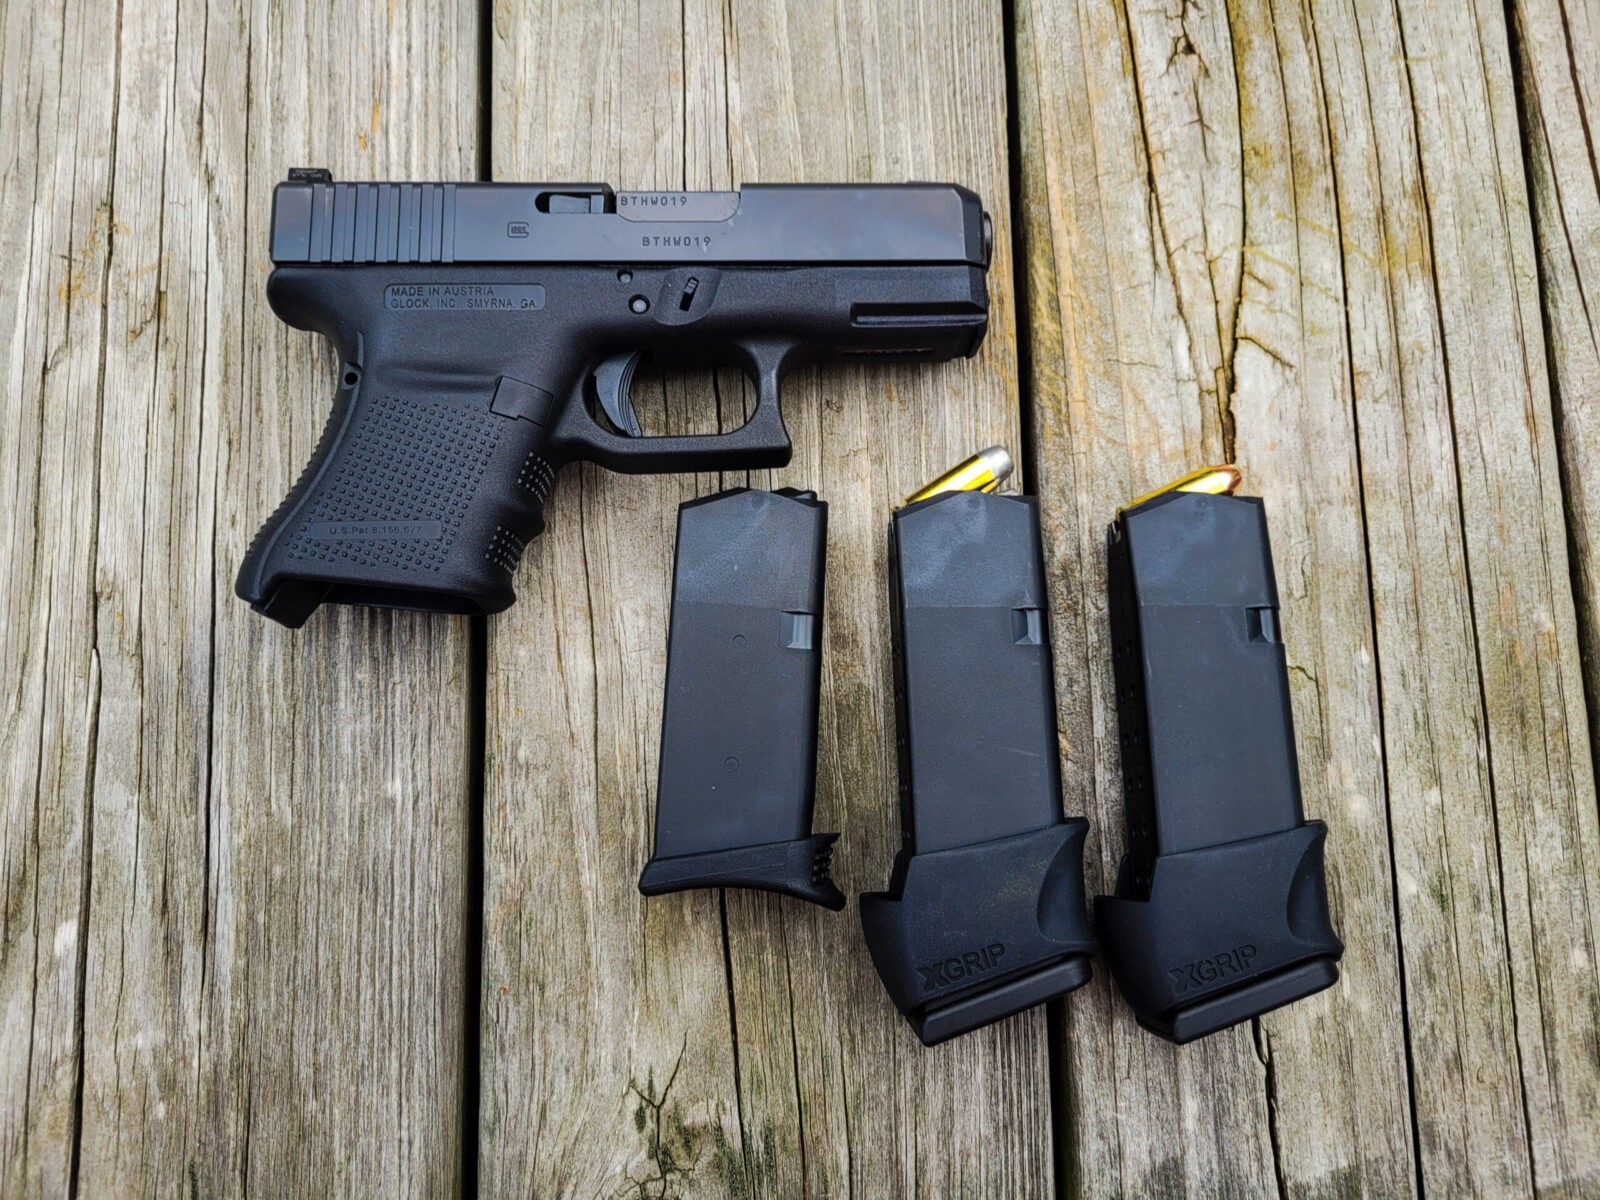
Here’s the G29 with three magazines – on the left is a 10 round magazine with a Pearce replacement base plate that makes the pistol way more comfortable to hold. The middle is a full size G20 15 round magazine with an X-Grip adapter that makes it very nice to hold. Note that one is loaded with Buffalo Bore 220 grain hard cast rounds. The right magazine is the same as the middle but is loaded with 180gr Underwood HPs.
One quick comment – I’ll tell you that I am still training myself on aiming with it. I’ll bring it up and a conciously have to align the sights because my natural point of aim happens with the 1911 grip angle, not the Glock’s. I do plan on trying the new M&P that is out and will see how that goes but for now, my backwoods carry pistol is my G29.
So, I definitely like it but will stop short of saying I love it just due to the grip angle. Now some guys absolutely love their Glocks. My recommendation would be for you to go to the gun store or try a friend’s pistol and see how your natural aim is relative to the sights and decide for yourself. Personally, I can live with it and will train more because the quality of the pistol justifies the extra work on my part.
Note, I have to buy all of my parts – nothing here was paid for by sponsors, etc. I do make a small amount if you click on an ad and buy something but that is it. You’re getting my real opinion on stuff.
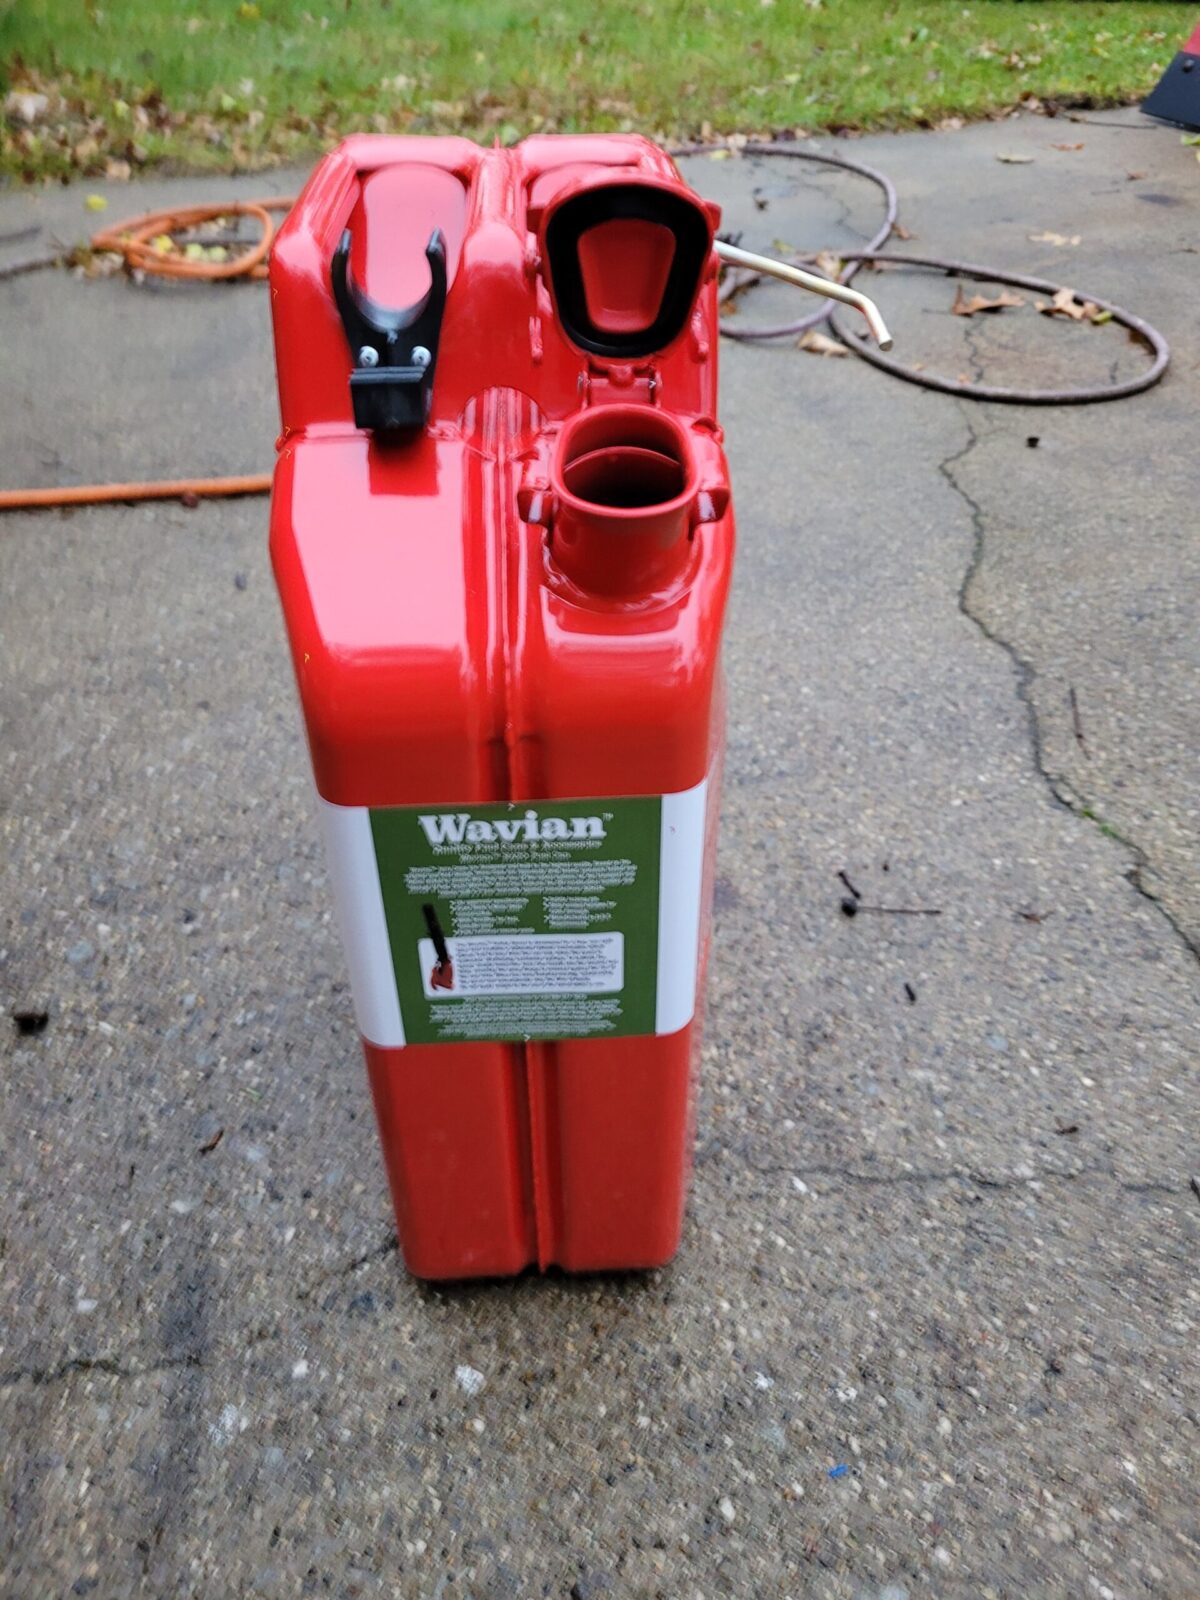
I’ll keep this post short and sweet. A couple of my many-year old plastic gas cans are getting brittle and I needed to replace them. Some years back I bought some steel Chinese ones off Amazon that are doing relatively okay other than starting to rust a bit inside – I looked it up and I bought them in 2014 for $54.50 each so that’s not too bad. I wondered what some higher quality options might be so I did some digging and came across Wavian.
Honestly, when I saw their name I assumed it was some cheap import but then started reading more. Wavian cans are made in Latvia and they are a NATO supplier. After getting mine, I can tell you they are the highest quality cans I have seen since my dad’s old surplus cans from WWII or Korea.
A Bit of History
The “Jerry Can” design dates back to 1937 created the Vinzenz Grügenvogel, the chief engineer of Müeller engineering in Schwelm, Germany. An interesting design requirement of the Wehrmacht-Einheitskanister was that a German soldier needed to be able to carry two full cans or four empty ones hence the size and triple top handle design.
There’s a far more complete historical narrative on Wikipedia including what America did if you are interested – click here.
Fast Forward To Today
Folks, these are really nice cans. At any rate, they have some cool features and I just want to highlight the ones I noticed and want to share:
They are rated for 20 liters which is actually 5.28 gallons of gas
The color you choose, I picked red, is powder coated on and a nice deep color and is gas resistant
The welding and assembly is excellent – cheap cans use tack welds that do let go.
The steel body is 0.9mm (which is 0.0354″ and puts it a tad thicker than 21 gauge (.034375″ 0.873mm)). Cheaper cans use thinner metal.
There is an internal coating to protect the steel – I doubt you will see this in a cheap can – it’s not present in my Chinese cans.
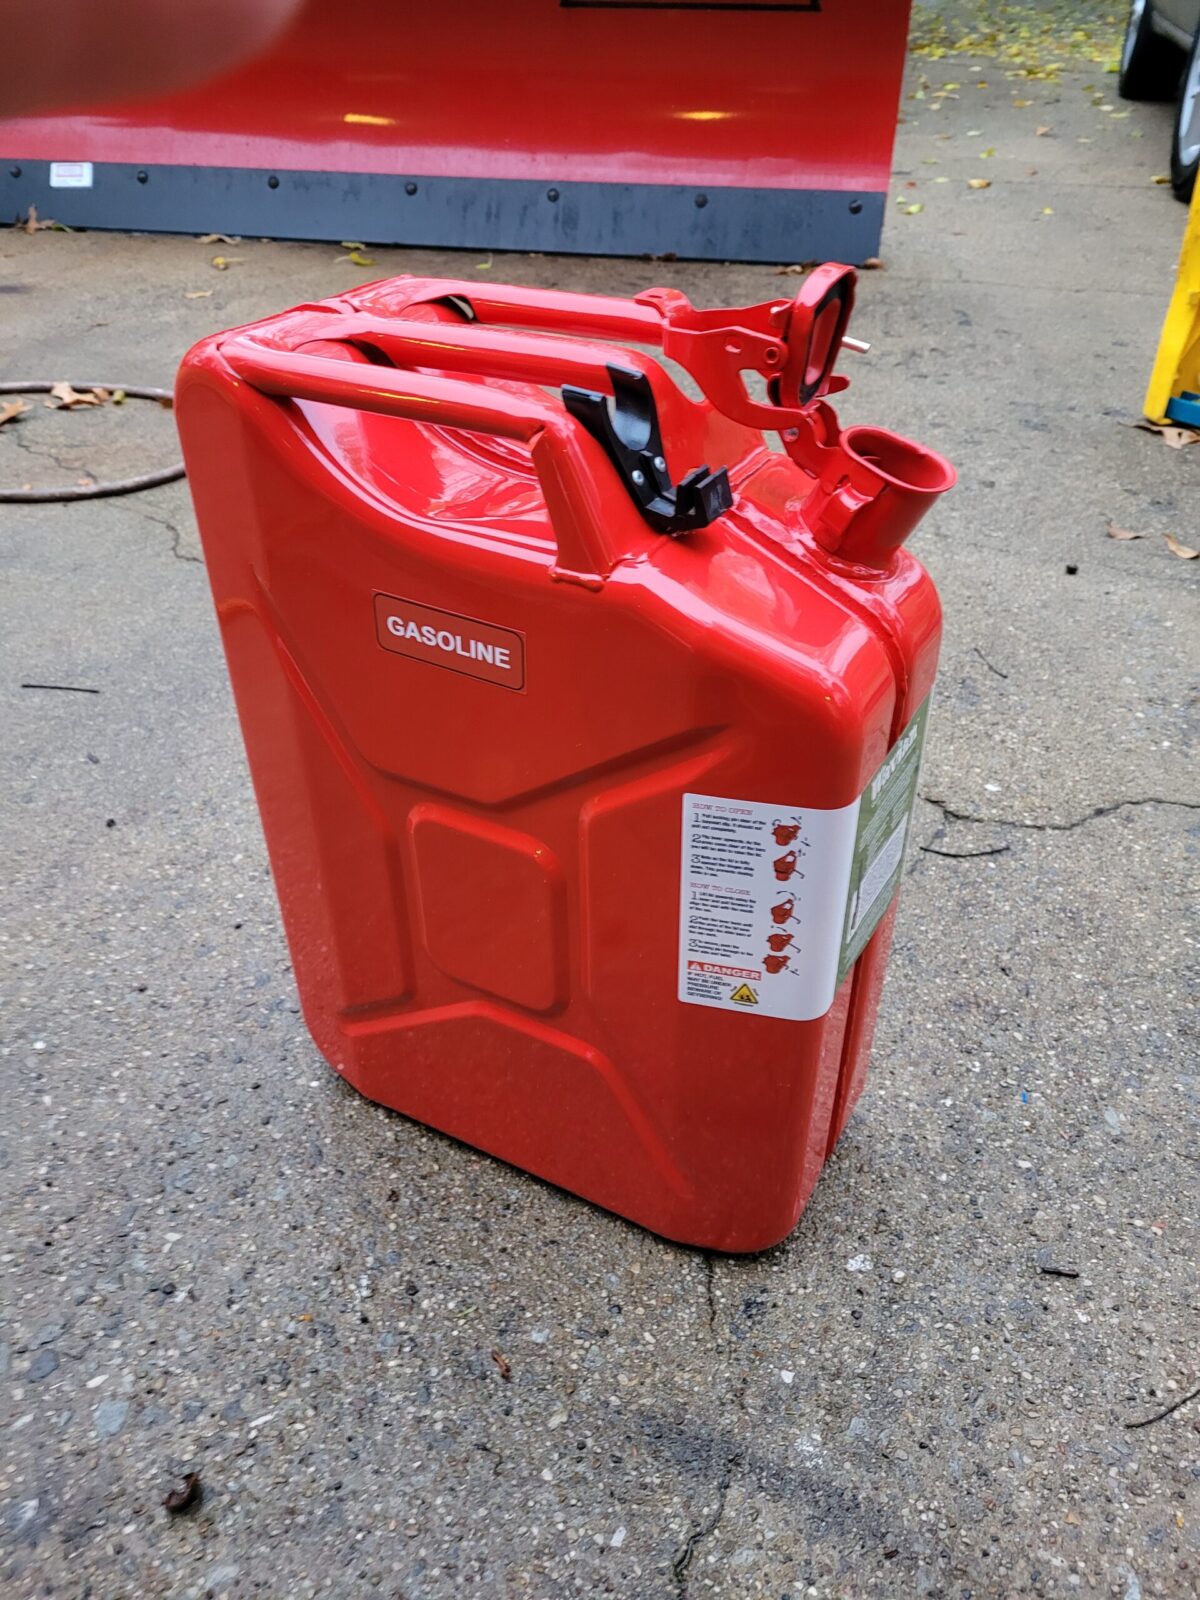
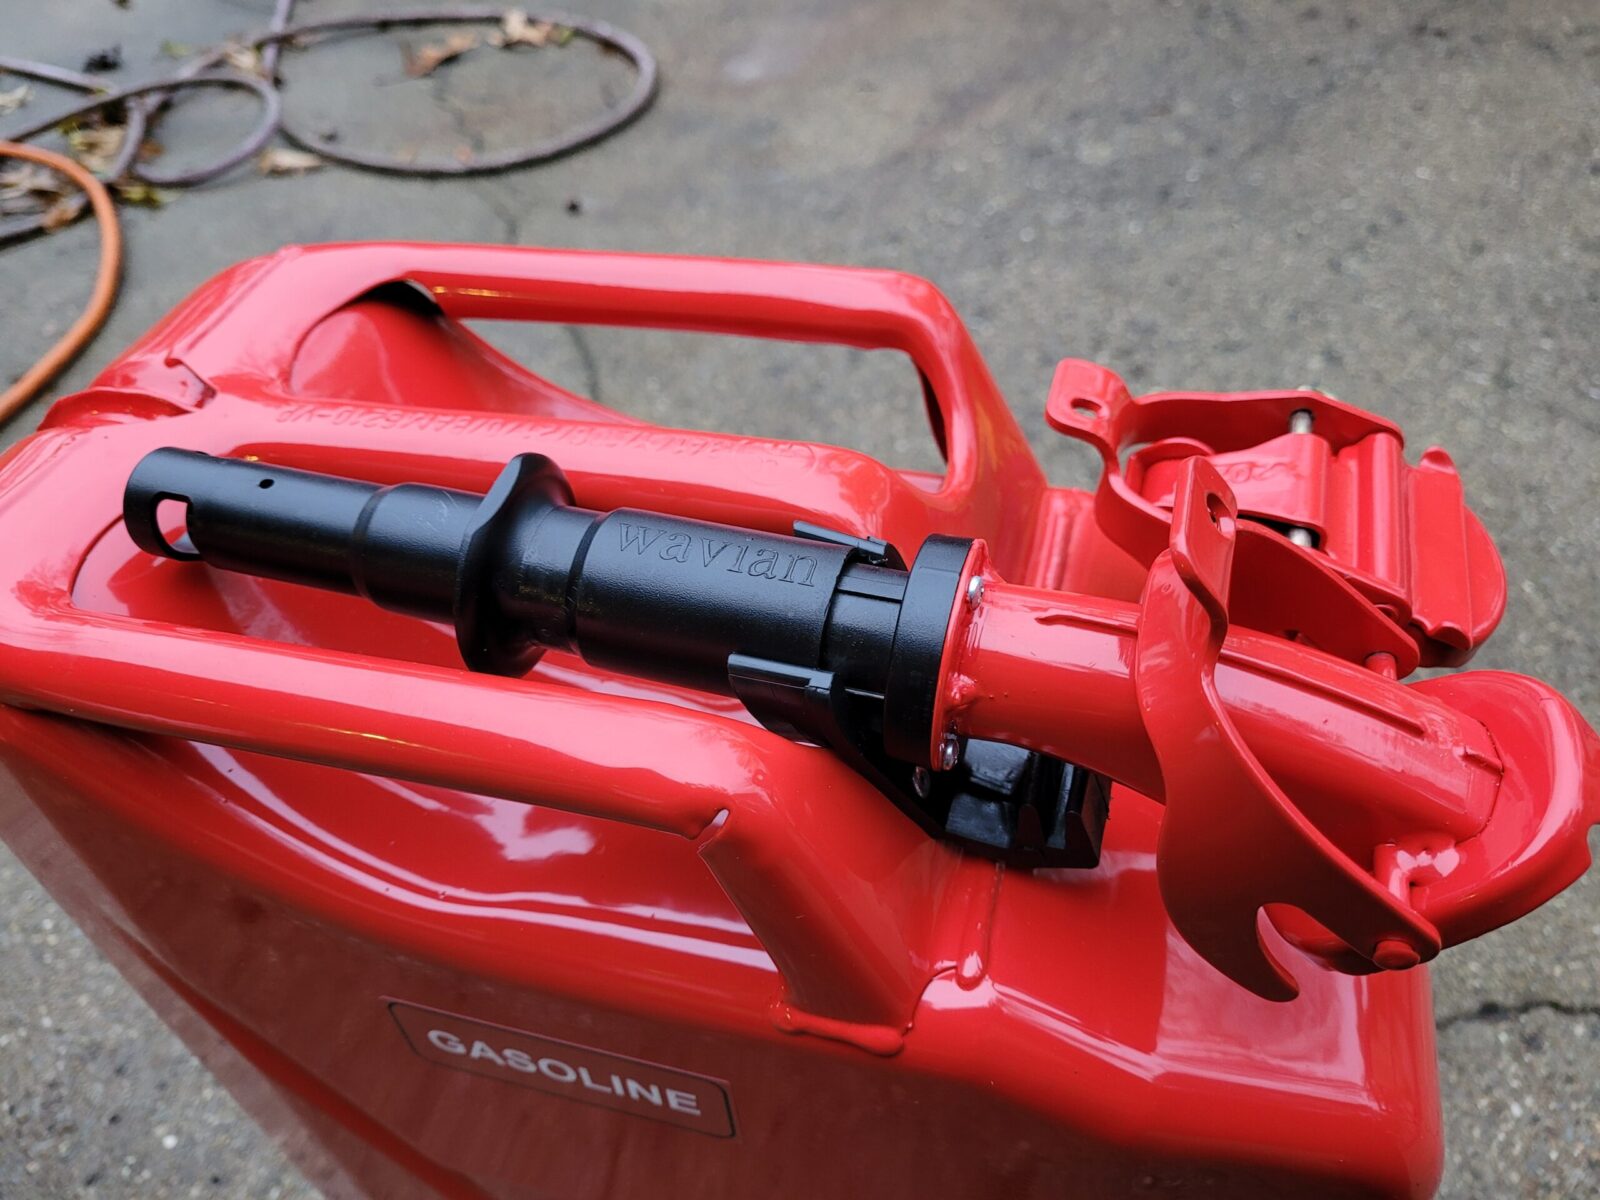
Leave it to the EPA to screw up easy to use gas can spouts. At least Wavian tried to do what they could with the mandate.
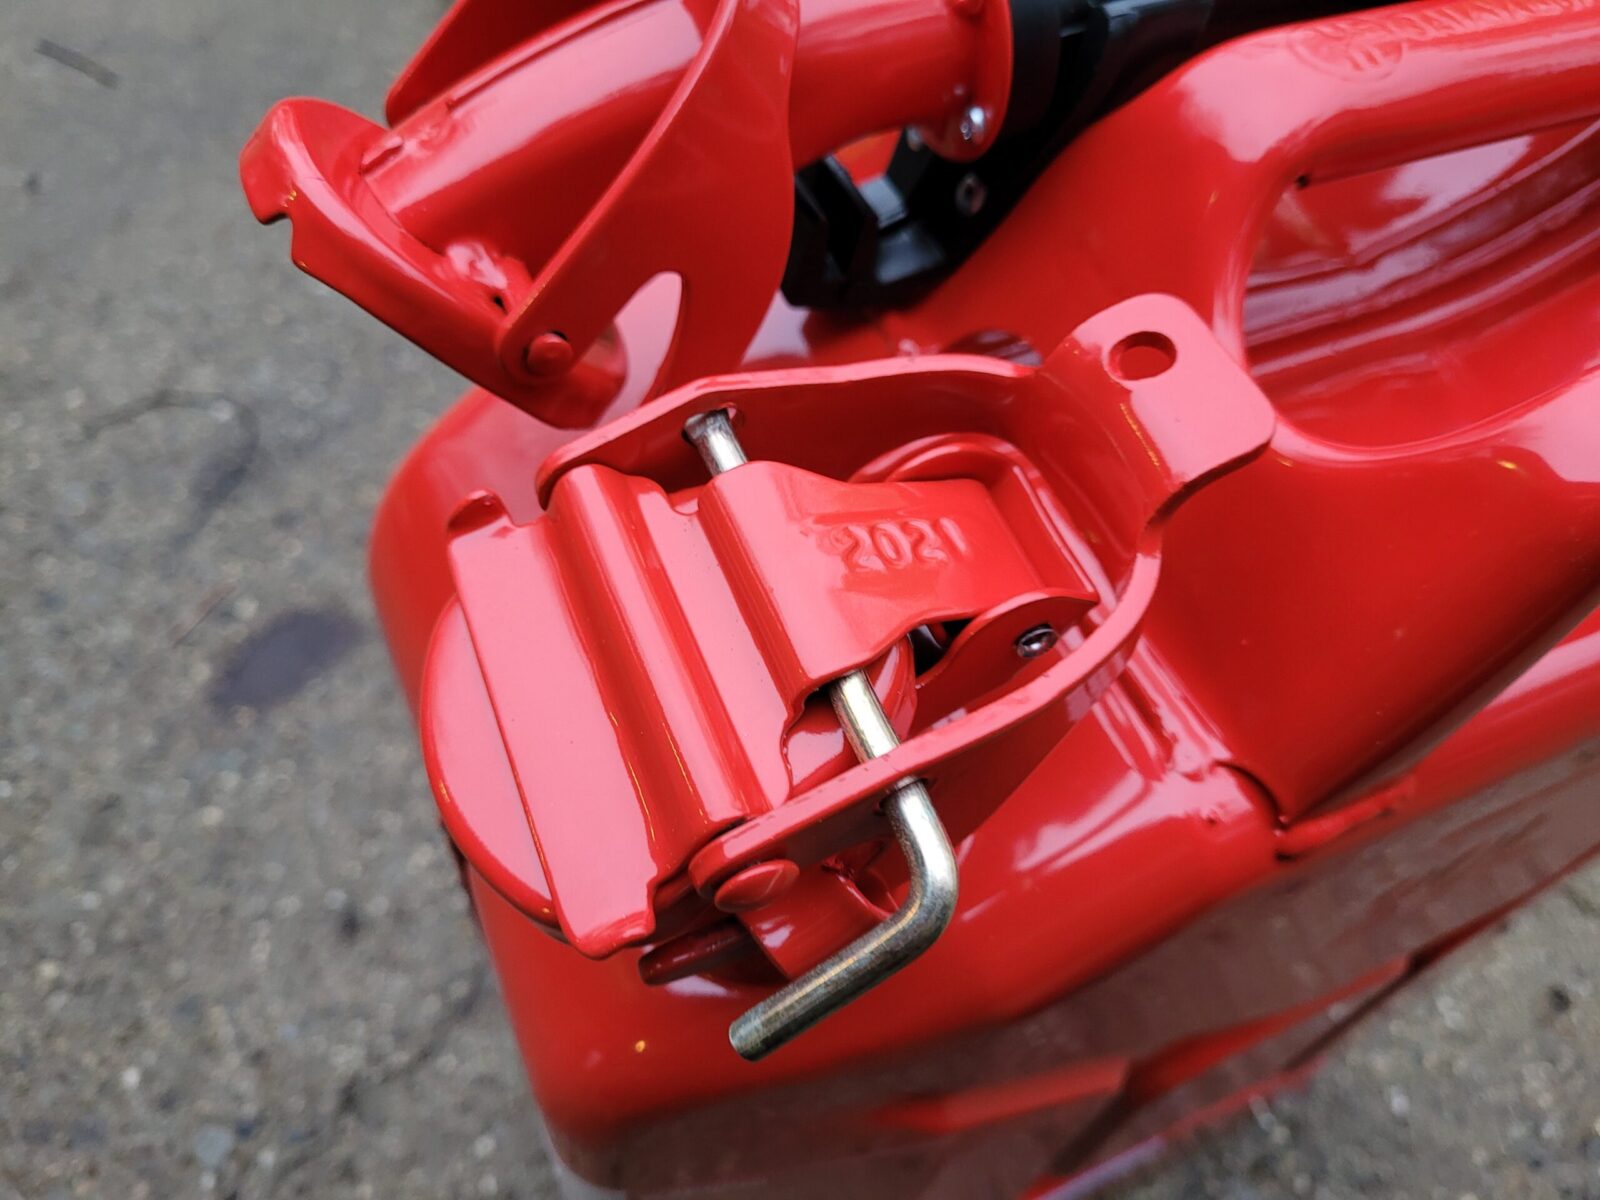
The cap closes very securely and the cadmium colored pin you see locks it in place. The pin itself is flared on the far end on purpose so it can’t be accidentally removed all the way and lose – that’s a nice design detail I think.
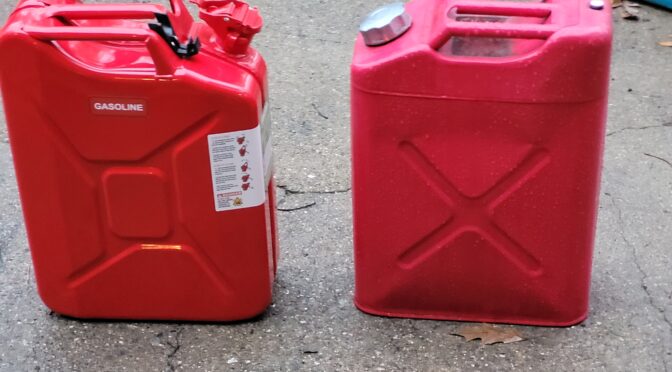
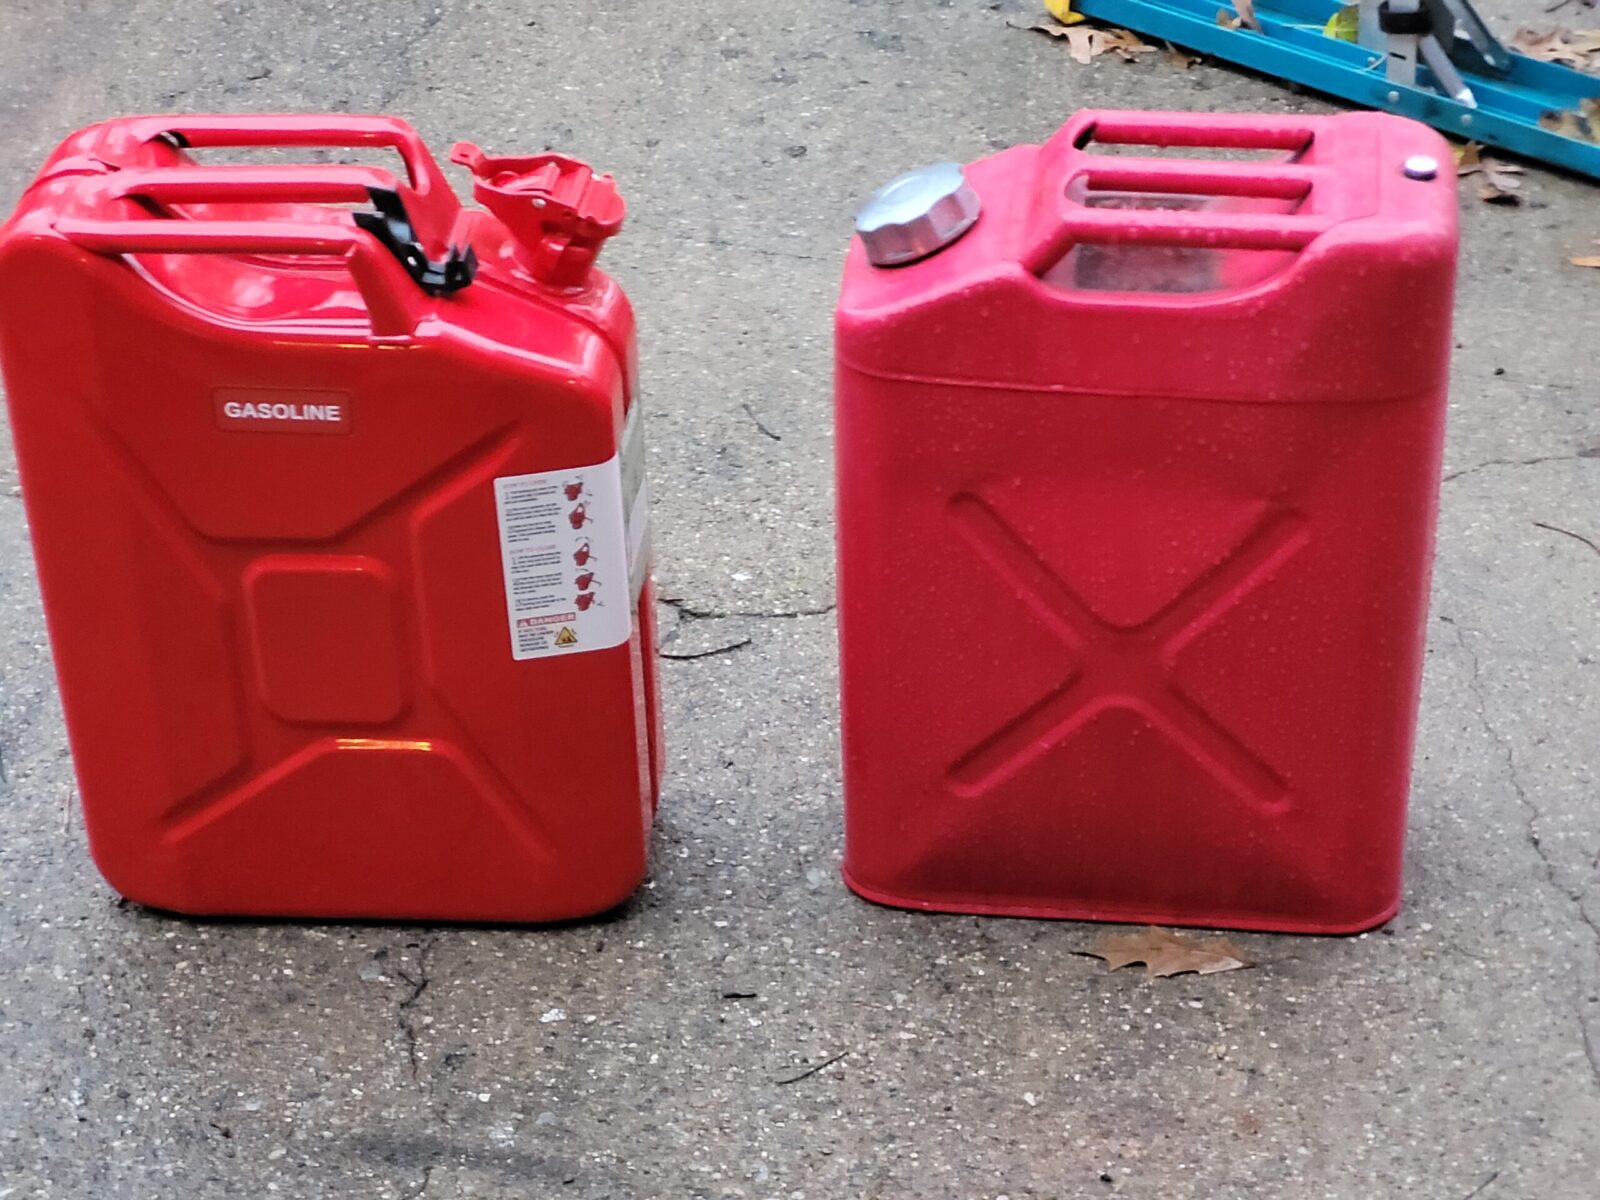
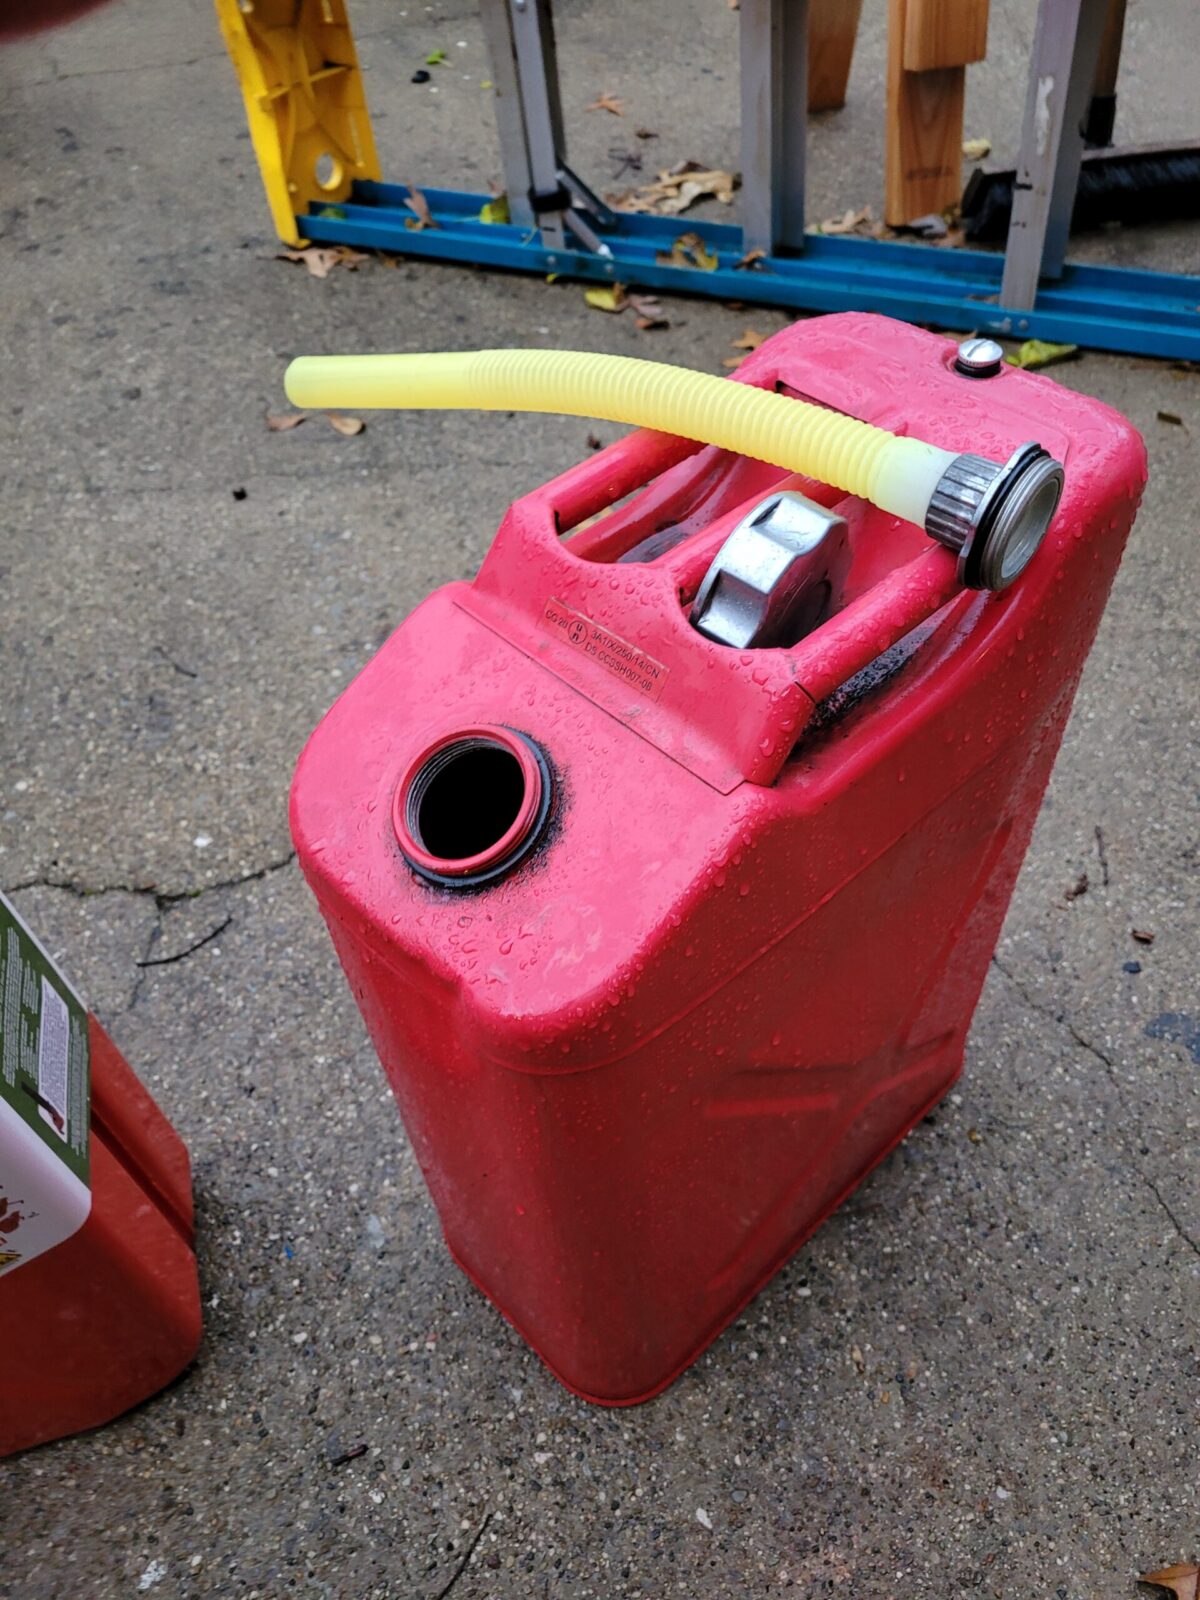
Brand new Wavian on the left – cheap 8 year old Chinese can is on the right. In all fairness, it’s held up for holding gas but I don’t really transport gas in it. The Wavian is built like a tank.
Here’s a close up of the Chinese can’s filler tube, It’s discolored with age but it works. The con is the it does flip-flop around when you are trying to start pouring. Again, it’s held up being outside all year long so I can’t knock it too hard.
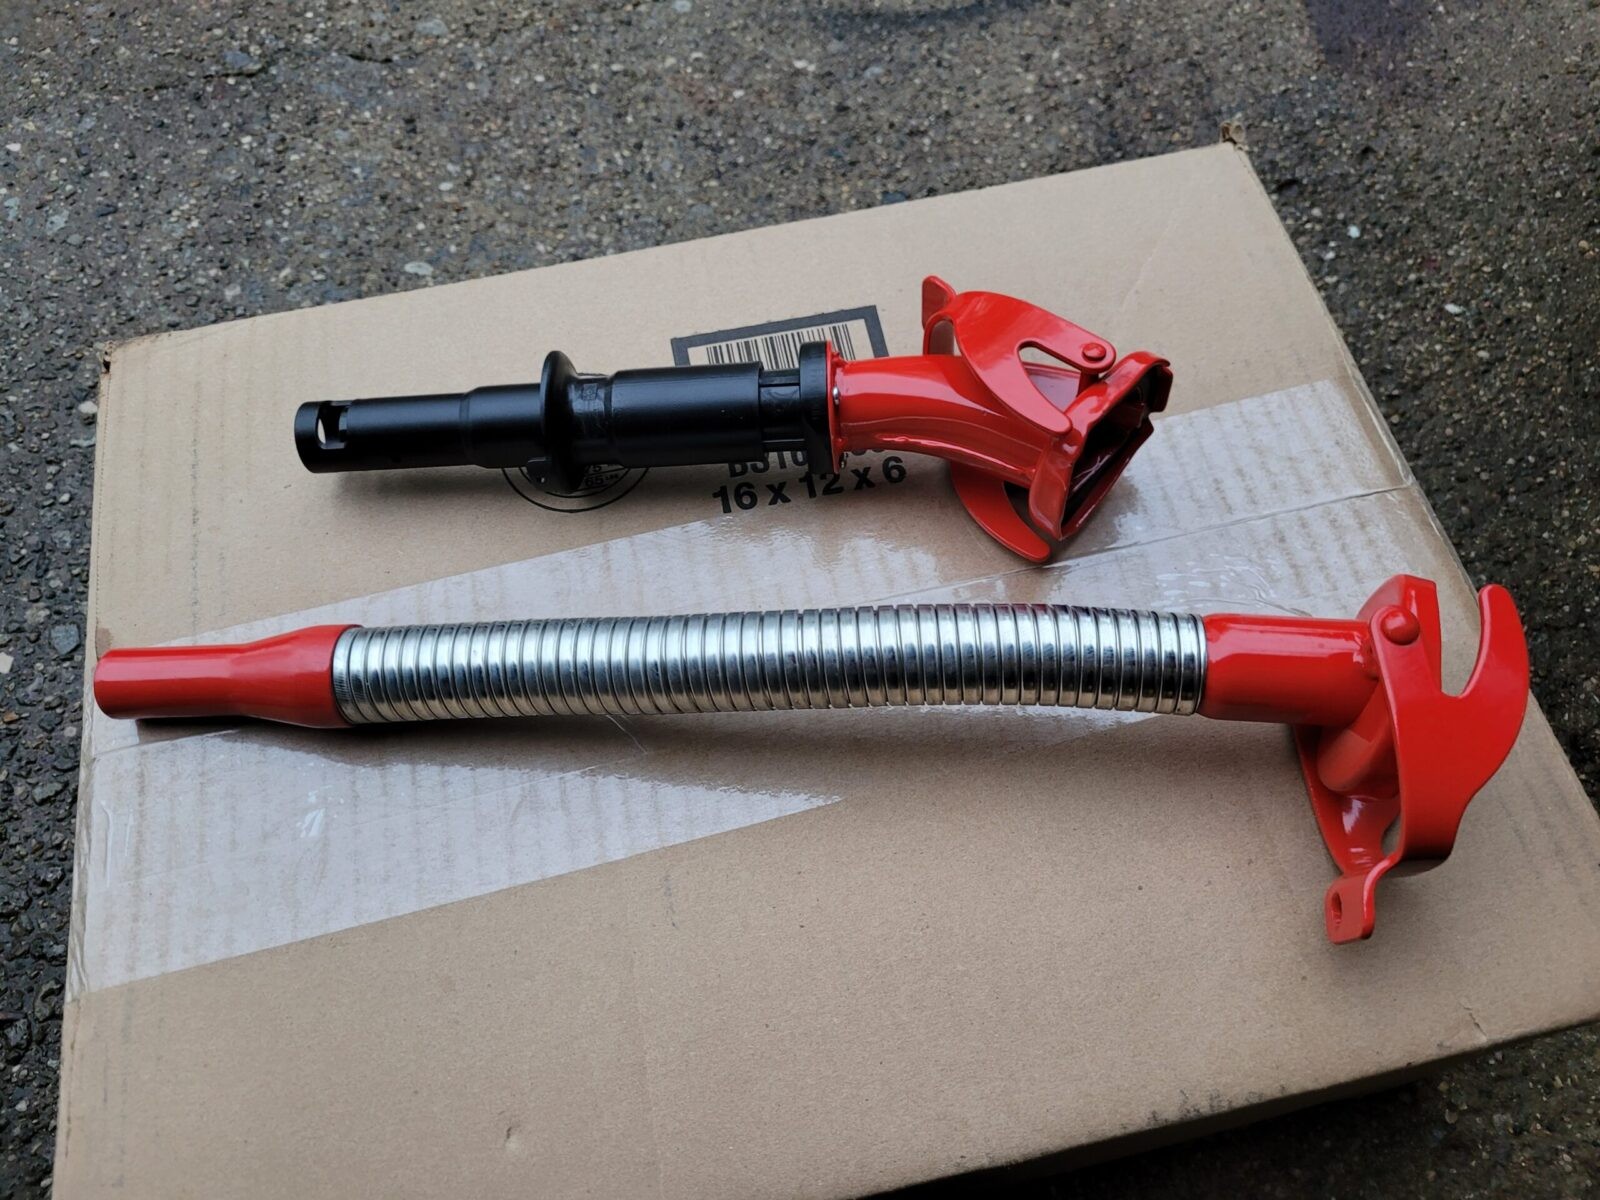
The negative is that they come with a God-awful EPA compliant nozzle. I absolutely hate any nozzle where I have to pull something back and hold it back while trying to hold a can with up to 33.8-37.7 pounds of gasoline in it. Folks, I am 54 and it’s not that easy any longer. At least Wavian tried to do what they could with the mandate. In many cases, if you can push the spout into a filler port on a vehicle, the pressure would keep the spout open but not all gas tank filler ports are shaped that way – for example it will not work on my lawn tractor or generator that both have horizontal gas tank filler ports.
So, I did spend the extra money for a more traditional steel goose neck nozzle that does not have all that EPA stuff on it so I can manage holding and positioning the can with both hands and let the nozzle do it’s thing. By the way, it’s not like Wavian really has a choice – they are mandated to supply a self-closing nozzle but at least they can still sell the aftermarket nozzle.
The EPA-compliant spout is on top. The optional spout that you can buy separately is on the bottom and far easier to use. I will install the longer spout when and where I need it vs. leaving it on the can.
Note, growing up my dad had the old style Jerry cans and kept his nozzles separate from the tanks. I’m going to do the same thing. I’ll grab the nozzle and the gas can I need when it’s time to pour gas.
So, do I like the Wavian can? Absolutely – I just bought a second. If you are looking for just about the best can out there. Get a Wavian. I’ve not seen a modern can even remotely close to this level of quality. I bought both of mine and the fill spout from Amazon:
Note, I have to buy all of my parts – nothing here was paid for by sponsors, etc. I do make a small amount if you click on an ad and buy something but that is it. You’re getting my real opinion on stuff.
If you’re reading this, I’m going to assume you are either the owner of a Rock Island Armory (RIA) high capacity 10mm or .40 S&W 1911 pistol – sometimes called a 2011 – or you are thinking about buying one. The RIA pistols are workhorses and I honestly have no reservation recommending them. What I really want to cover in this is post is to tell you about our magazines for these pistols and why I think they are the best.
Yes, I Really Own And Shoot Them
I currently own two of the high cap 2011s, a 52009 Rock Ultra FS HC in 10mm and a 51679 Tac Ultra FS HC also in 10mm. My point is that I actually own and shoot the pistols – I’m not just some guy designing to specification who doesn’t actually shoot — I actually do shoot them and I’ve developed some insights as to what makes a good reliable magazine for the RIA FS A2 series of pistols.
What Got Me Started?
What got me into the mags originally was that I bought my current 52009 during the pandemic panic and there weren’t magazines to be found anywhere. Tons of websites said they were out of stock and then ones that did claim to have them turned out to be scams or backordered them. This drove me to do some research, that I’ve documented in the past, and resulted in a series of generations of magazines starting with base Para P16 magazines and evolving to our current third generation.
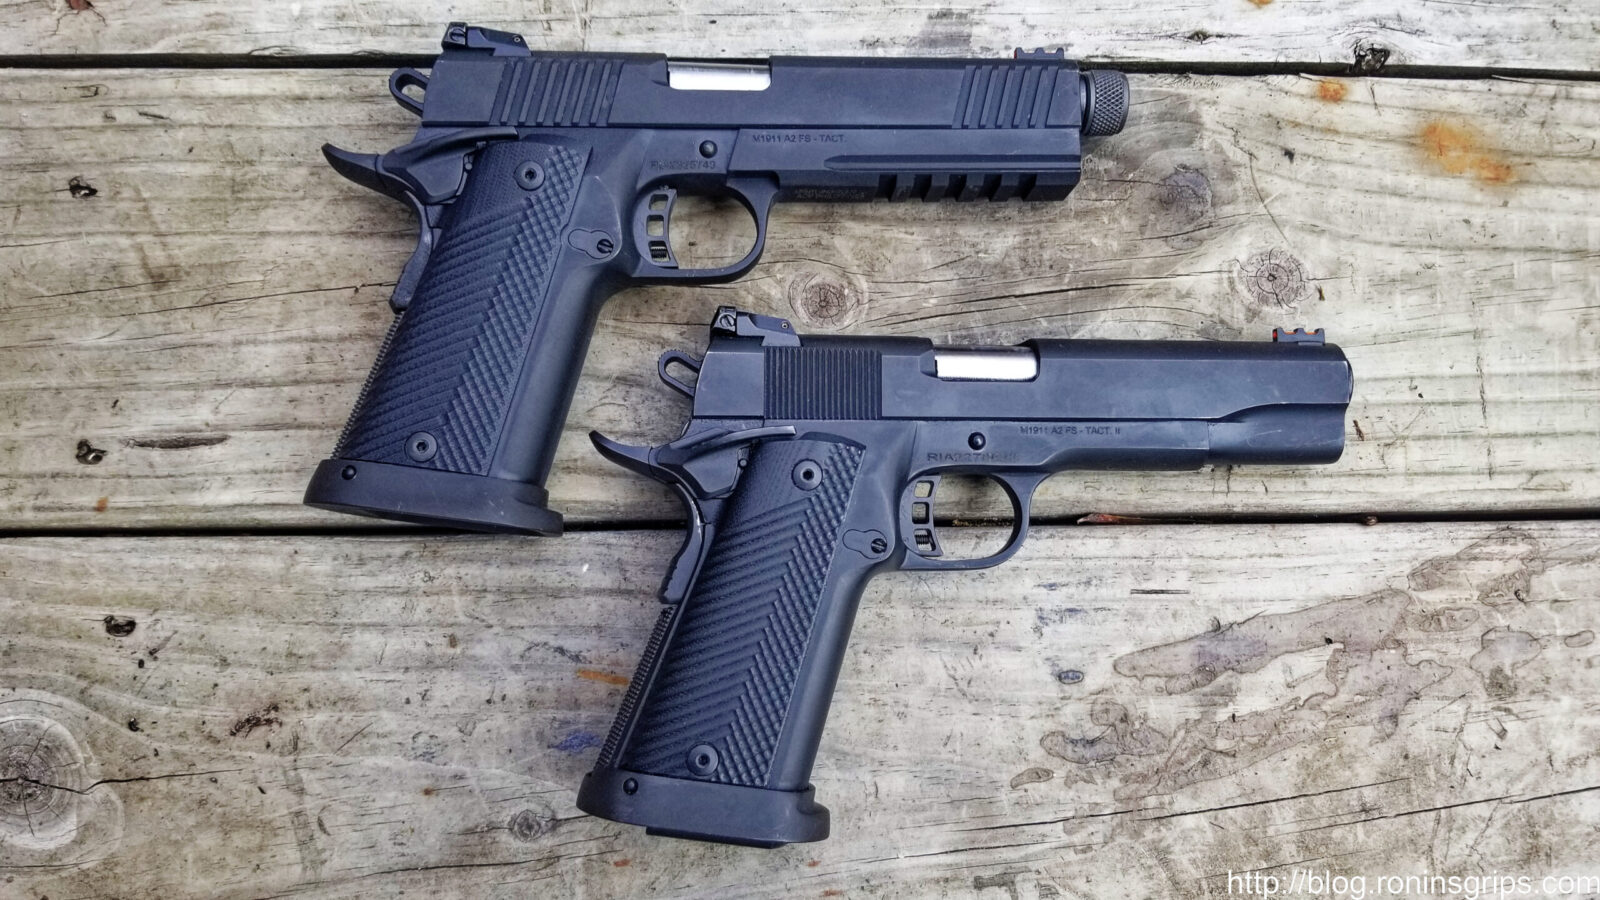
Here’s a sibling photo: The 51679 Tac Ultra FS HC is on the top and the 52009 Rock Ultra FS HC is on the bottom. The only two differences I have noticed is that the 51679 has a threaded barrel, serrated slide and a Picatinny rail on the bottom of the frame. Otherwise, they seem to be the same pistol.
Two Questions I Get Over And Over In Email
There are two things I constantly have to answer in emails – are we a real business or another scam? Yes, we are a real business and got our start making AK grips and handguards back around 2006-ish. We’ve since slowly grown our small family owned business since. Yes, if the website says we have them in stock then we have them in stock.
Second, people ask why they should buy our magazines and not the ACT-Mags sold by RIA (they are the OEM supplier to RIA by the way) and other resellers? For months we were the only supplier actually shipping magazines and people bought about 500-600 mags without ever asking “why you folks?” Well, now that there are options again between us and the ACT-Mag and tons of sellers selling them, that’s an honest question that I need to try and answer because I really do think we offer the best magazine for these specific pistols.
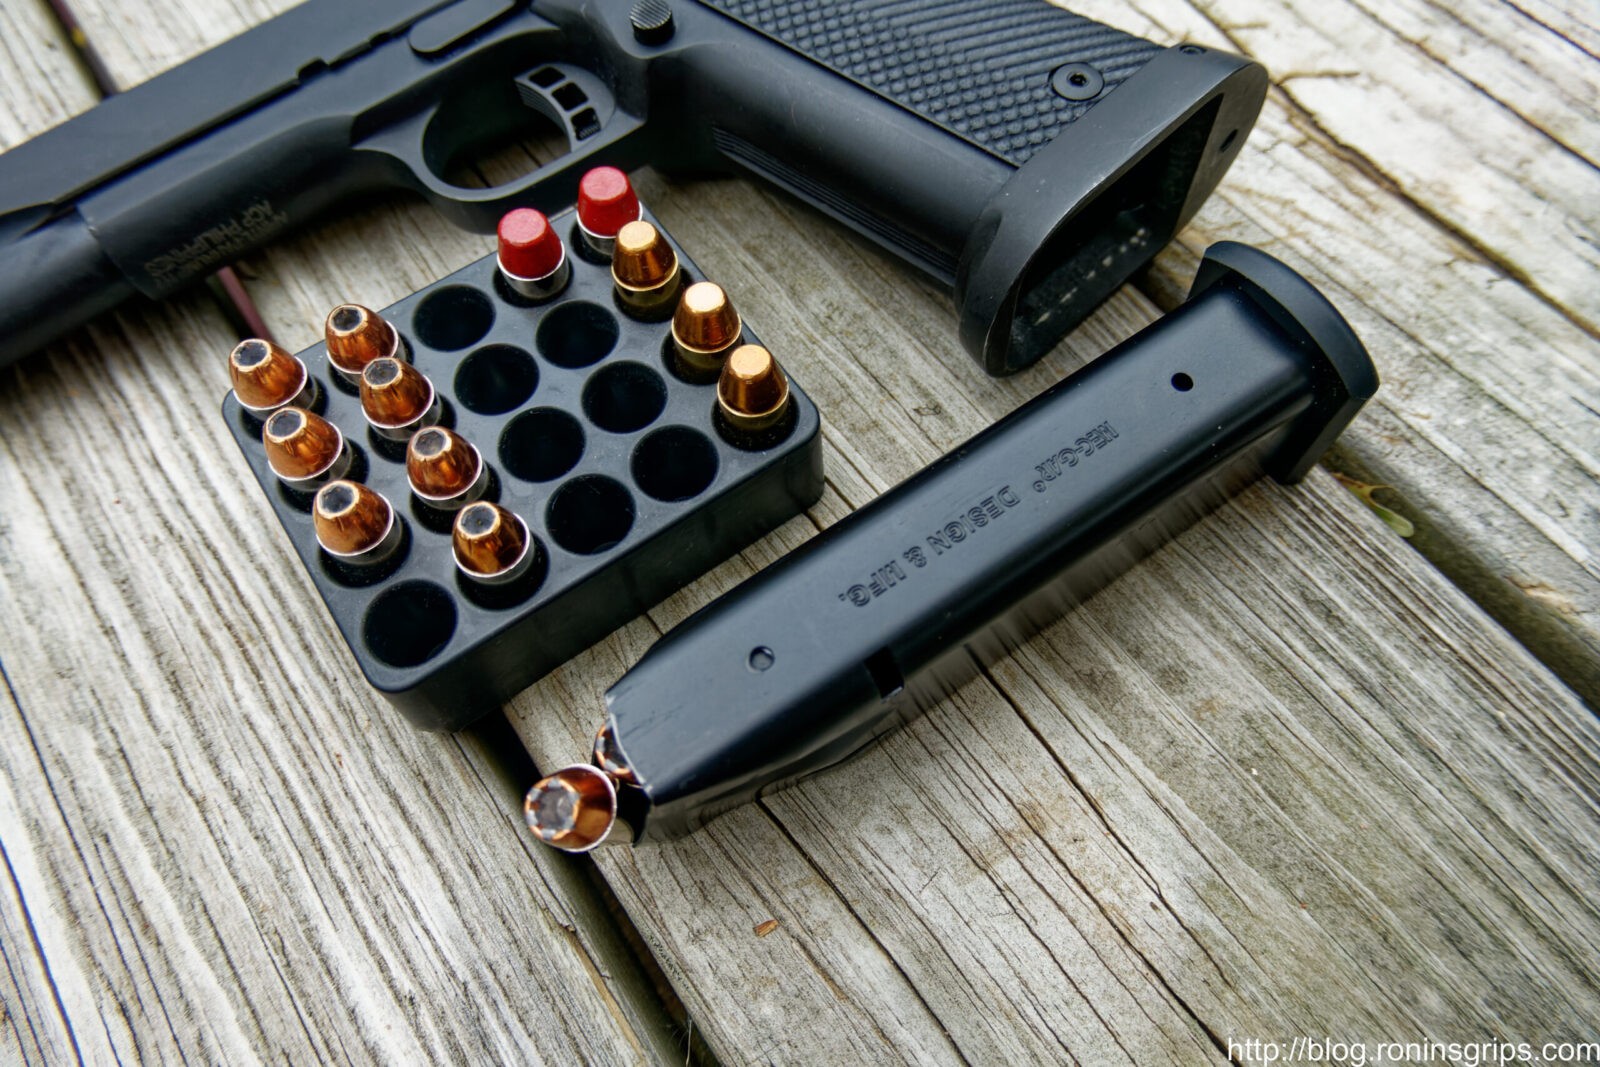
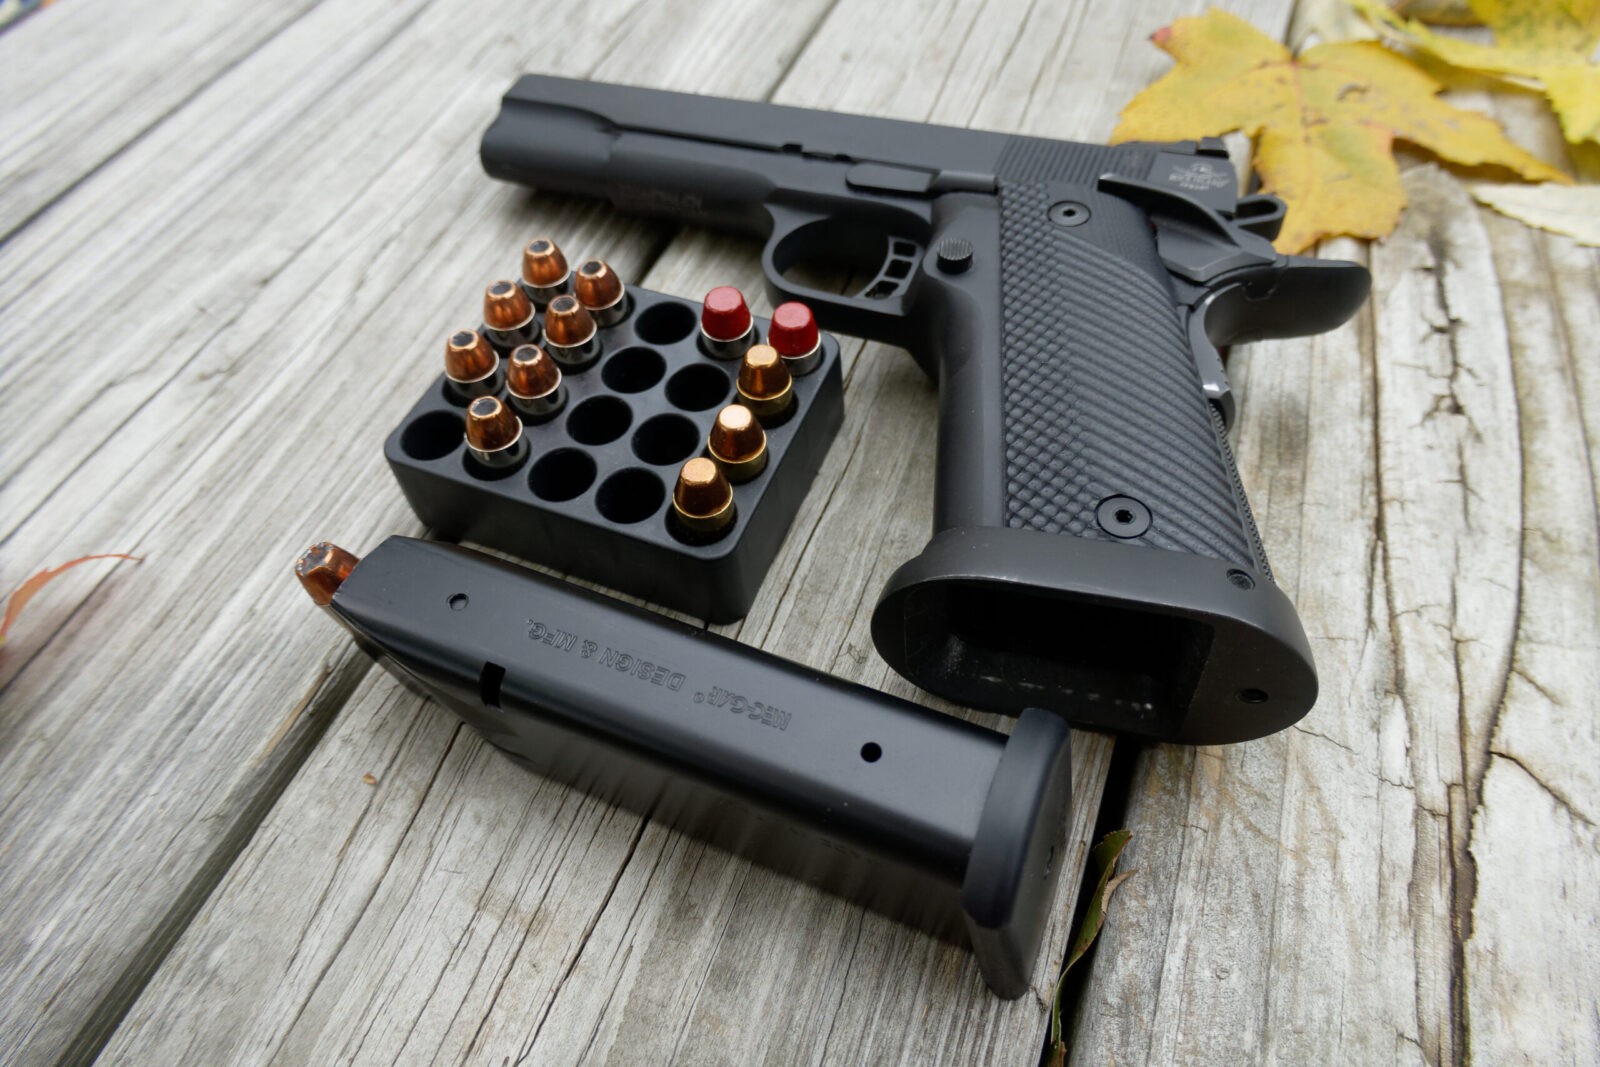
Here’s one of my personal magazines loaded with Underwood 200gr bonded hollow points. They function great in the pistol. I actually have not found a round yet that the 52009 pistol in the background can’t feed or eject properly.
Why Our Magazine’s Are The Best
First, we start with an Italian Mec-Gar P14-45 magazine. Mec-Gar makes tons of magazines and they know their stuff. In fact, they are a family owned business founded by Mr. Edoardo Racheli in 1965 in Italy for the sole purpose of making firearms magazines.
Rather than reinvent the wheel and learning from scratch, the base magazine I start with is Mec-Gar’s P14-45. That magazine reflects a ton of lessons learned that Mec-Gar has incorporated over the years and let me give you the big ones:
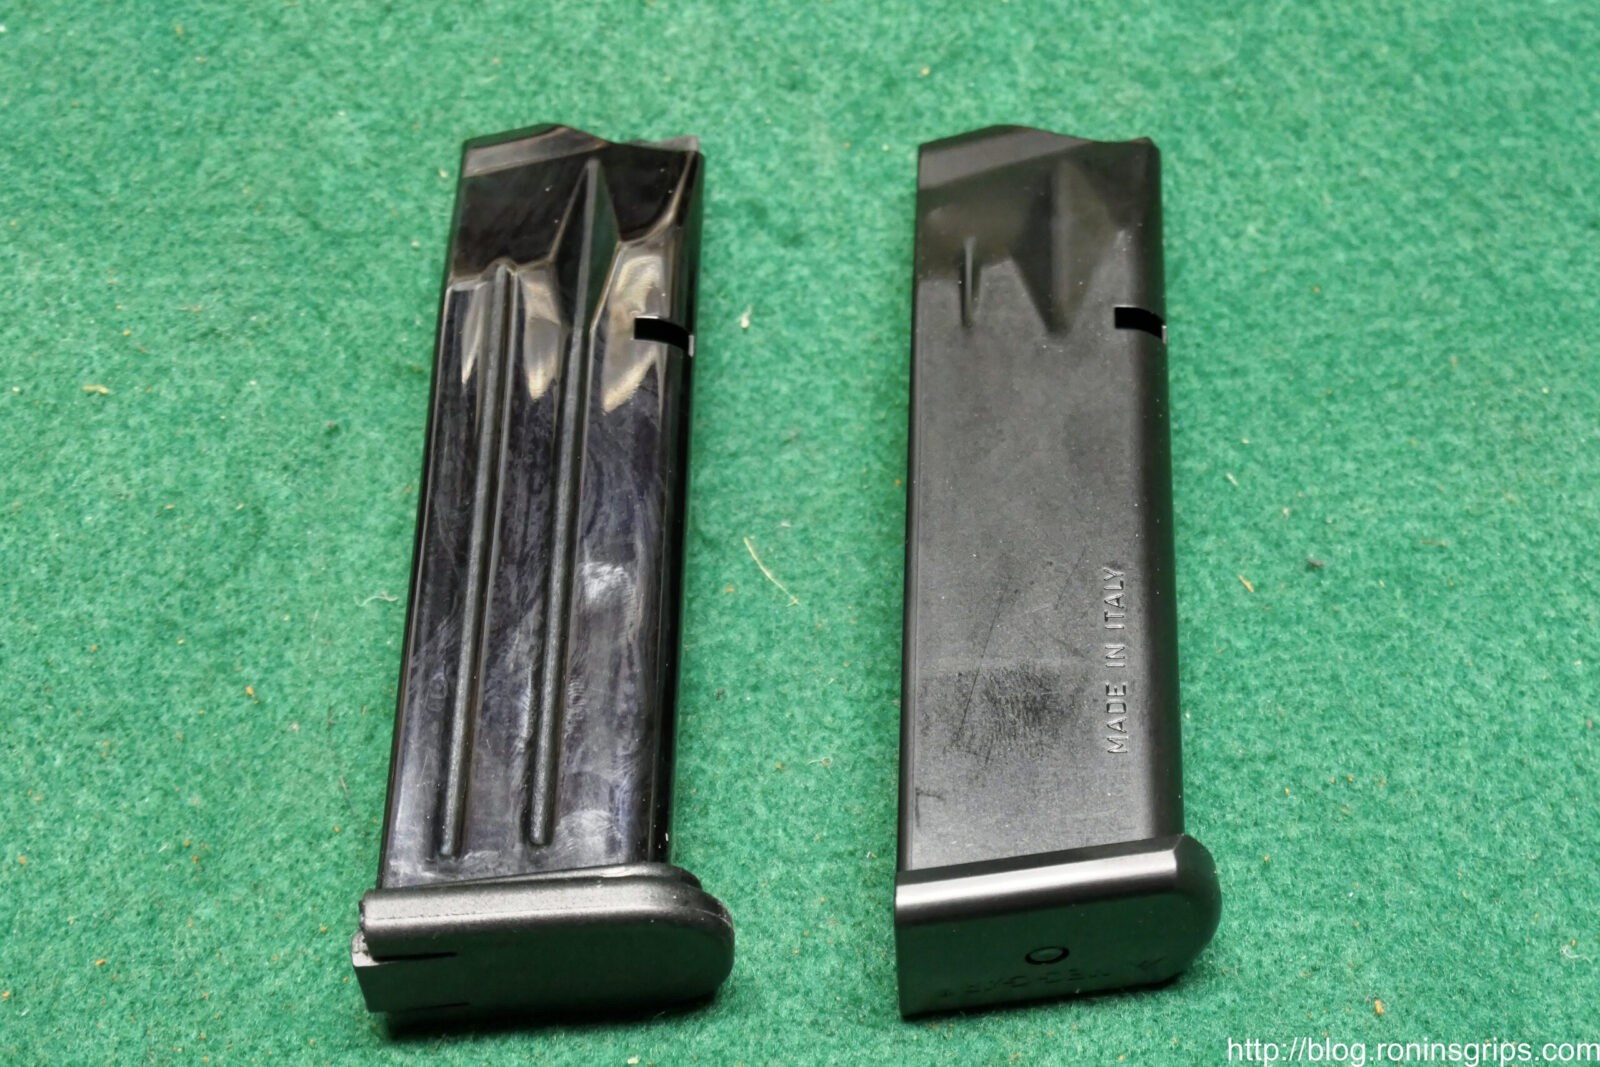
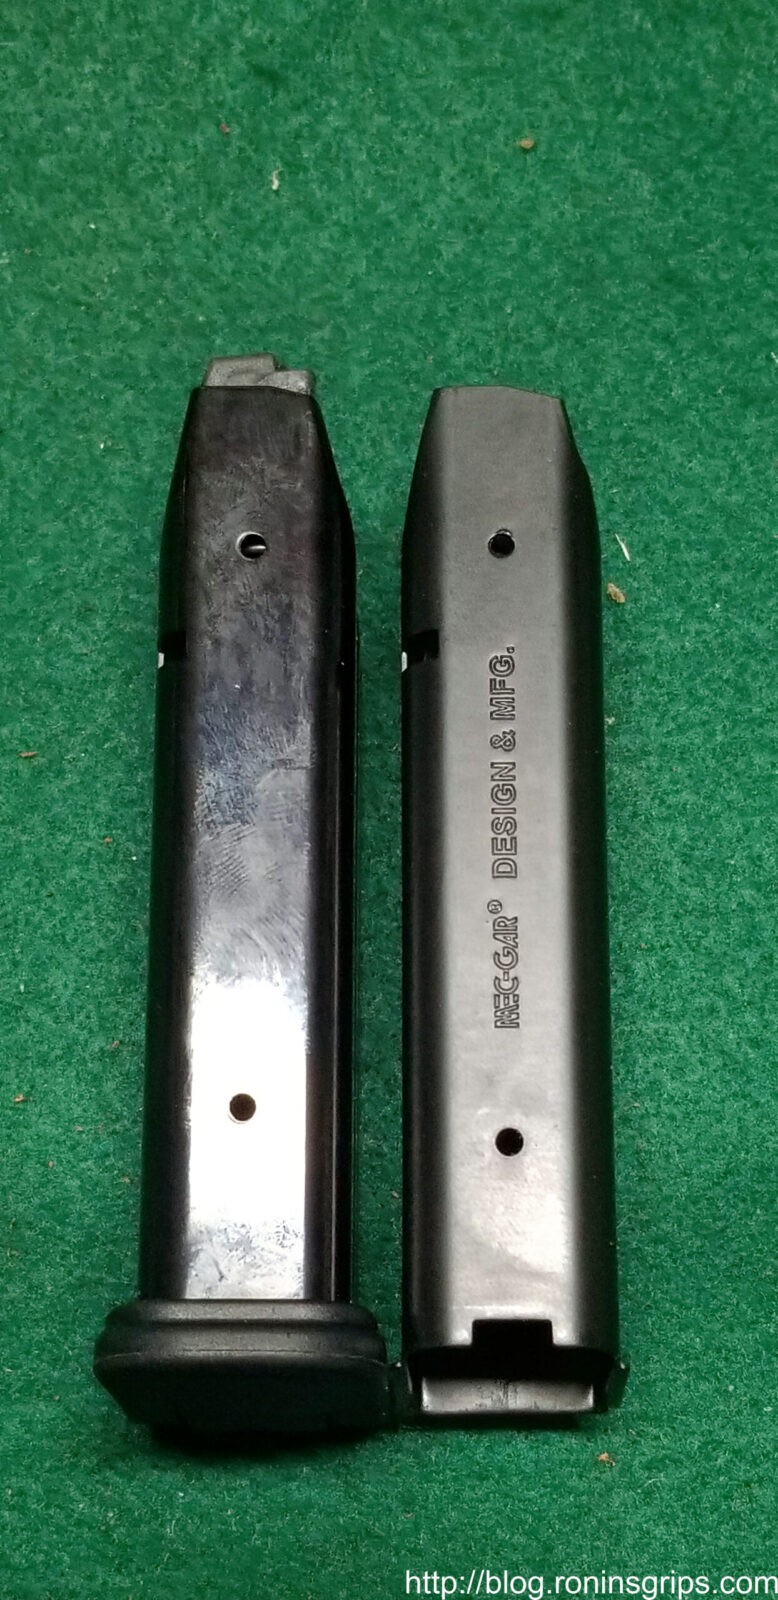
Second, unlike some mags that just have a blued finish on the steel, our Mec-Gar mags have a very cool advanced anti-friction coating that makes loading easier and far smoother feeding. The coating also reduces the risk of corrosion and does not require a lubricant – some magazines use a liquid lubricant that can attract dirt and lead to feeding problems.
The left magazine is made by ACT-Mag and it is what comes with RIA pistols. The right magazine is one of our’s – note the anti-friction coating on it vs. regular bluing on the OEM mag.
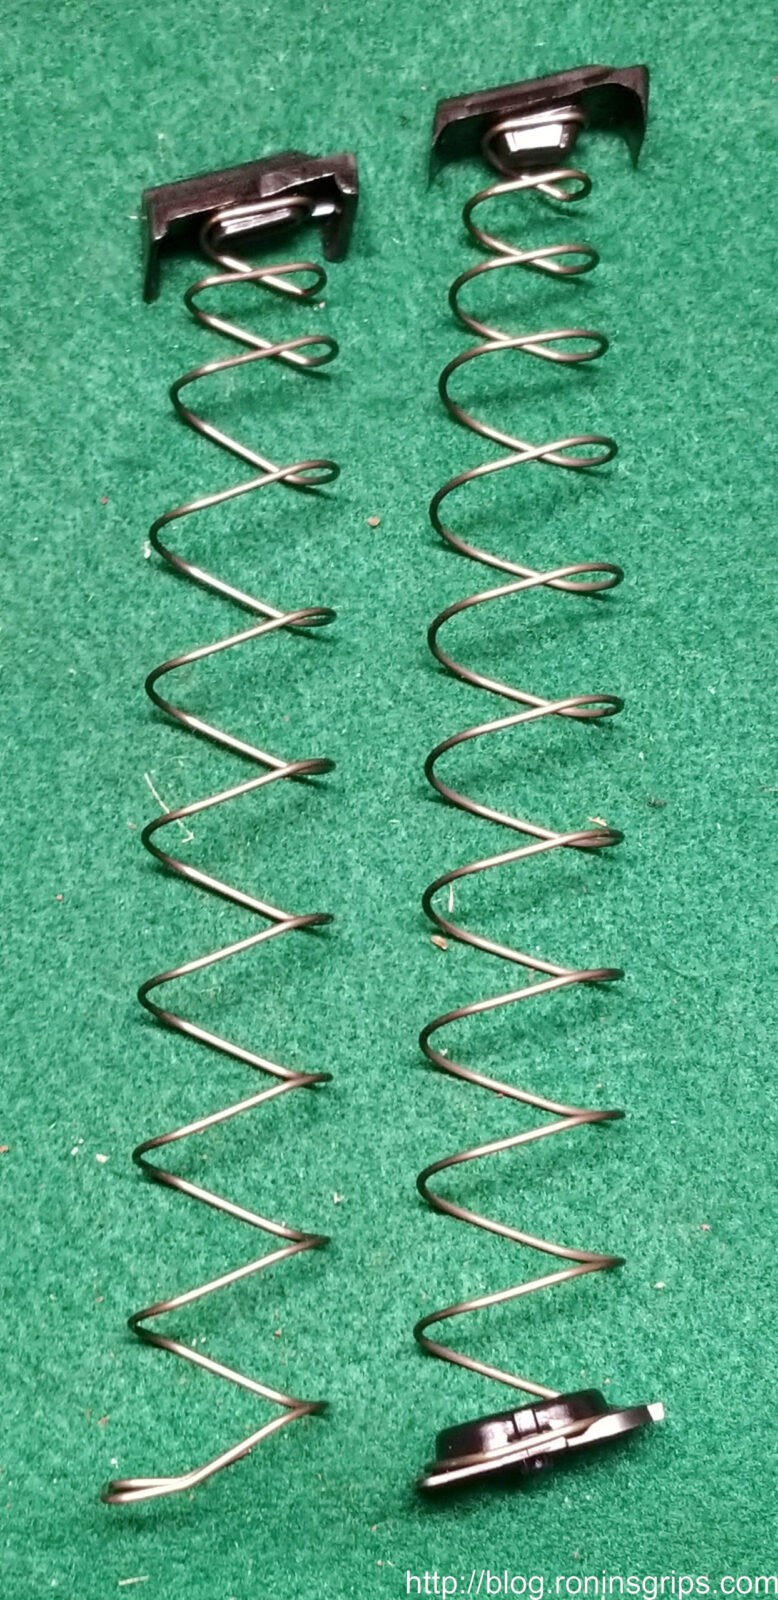
Third, we use a variable geometry spring that enables easier loading and reliable feeding regardless of the number of rounds in the magazine plus they can be stored loaded. The whole design of the follower, spring, floor and baseplates is very well thought out.
The ACT-Mag spring is on the left and does not use a floor plate. The Mec-Gar’s variable geometry spring and floor plate retainer are on the right. The tab on the right side of the floor plate rests in a notch in the magazine body to orient the plate and spring accordingly.
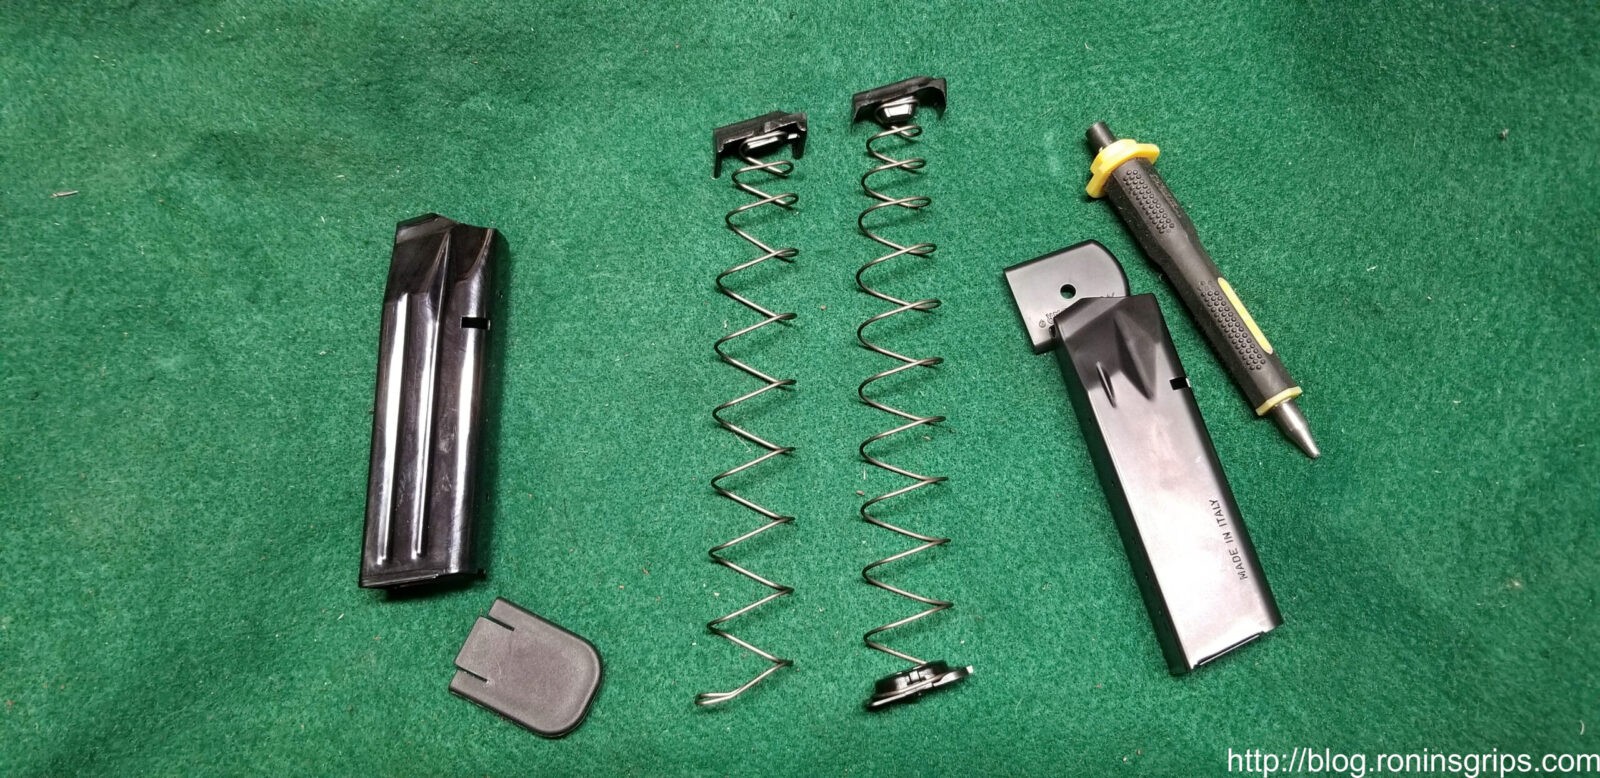
Fourth, our magazine’s spring, floor plate and base plate are all captured / locked in place and aid with easy disassembly and re-assembly for cleaning. The ACT-Mag use a tool-less design and while that makes closing the base plate a bit of a challenge because the bottom of the spring wants to escape plus the base plate can be shoved off the magazine accidentally as well.
The ACT-Mag tube, tool-less base plate and magazine spring assembly are to the left. To the right of the middle are the Mec-Gar variable geometry spring, locking base plate and tube — all based on years and years of experience and innovation at Mec-Gar. The tool in the photo is something I made to speed up the disassembly of the magazines in bulk.
An OEM ACT-Mag is to the left and one of our Mec-Gars is to the right. The notch in the front of the magazine body’s base is where a tab from the base plate on the spring sits. Everything is nicely locked in place by this elegant design.
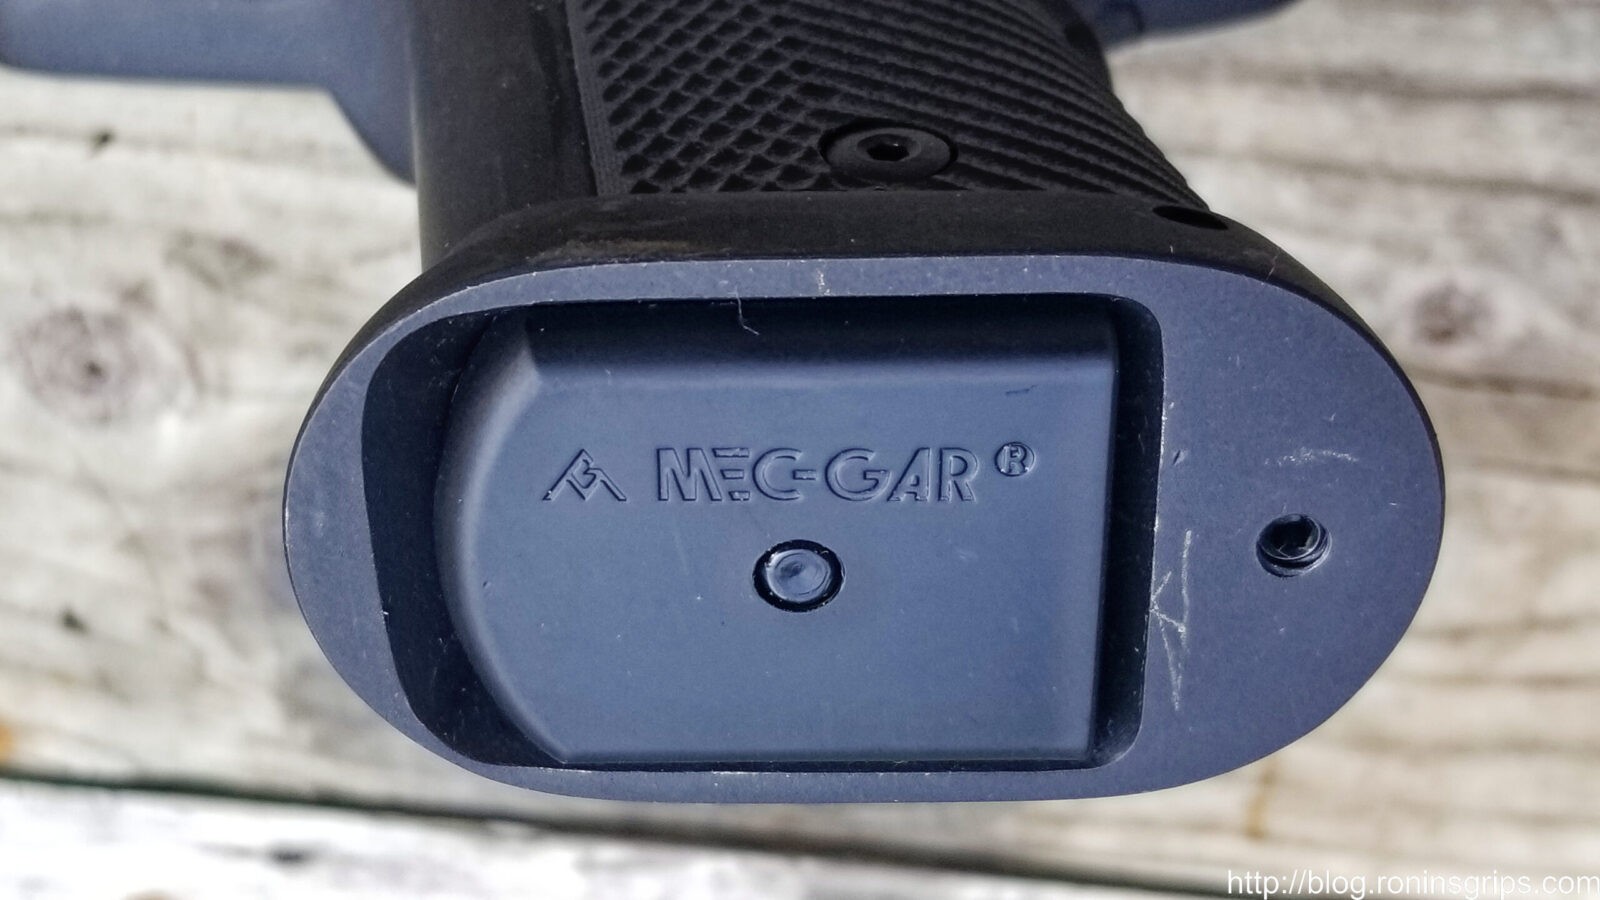
Here’s a view of one of the magazines fully seated in the pistol. You have the big flared mag well around it and the button in the middle locks the base plate to the floor plate. It needs to be depressed for the base plate to come off.
Fifth and most important – every single magazine we sell has the feed lips adjusted specifically for the RIA pistols. I use tooling that I developed to change the feed lips for optimal feeding and retetion.
For testing, I use dummy 10mm rounds and insert them by hand to feel if anything is wrong during loading. I also cycle them by hand through either my 52009 or 51679 to ensure proper feeding, retention and slide lock on empty. I’ve found tons of things that can go wrong and have refined my tooling, processes and testing to produce a magazine you can count on. This RIA-specific tuning is where we add the value and I will stand behind them if you run into a problem and need help.
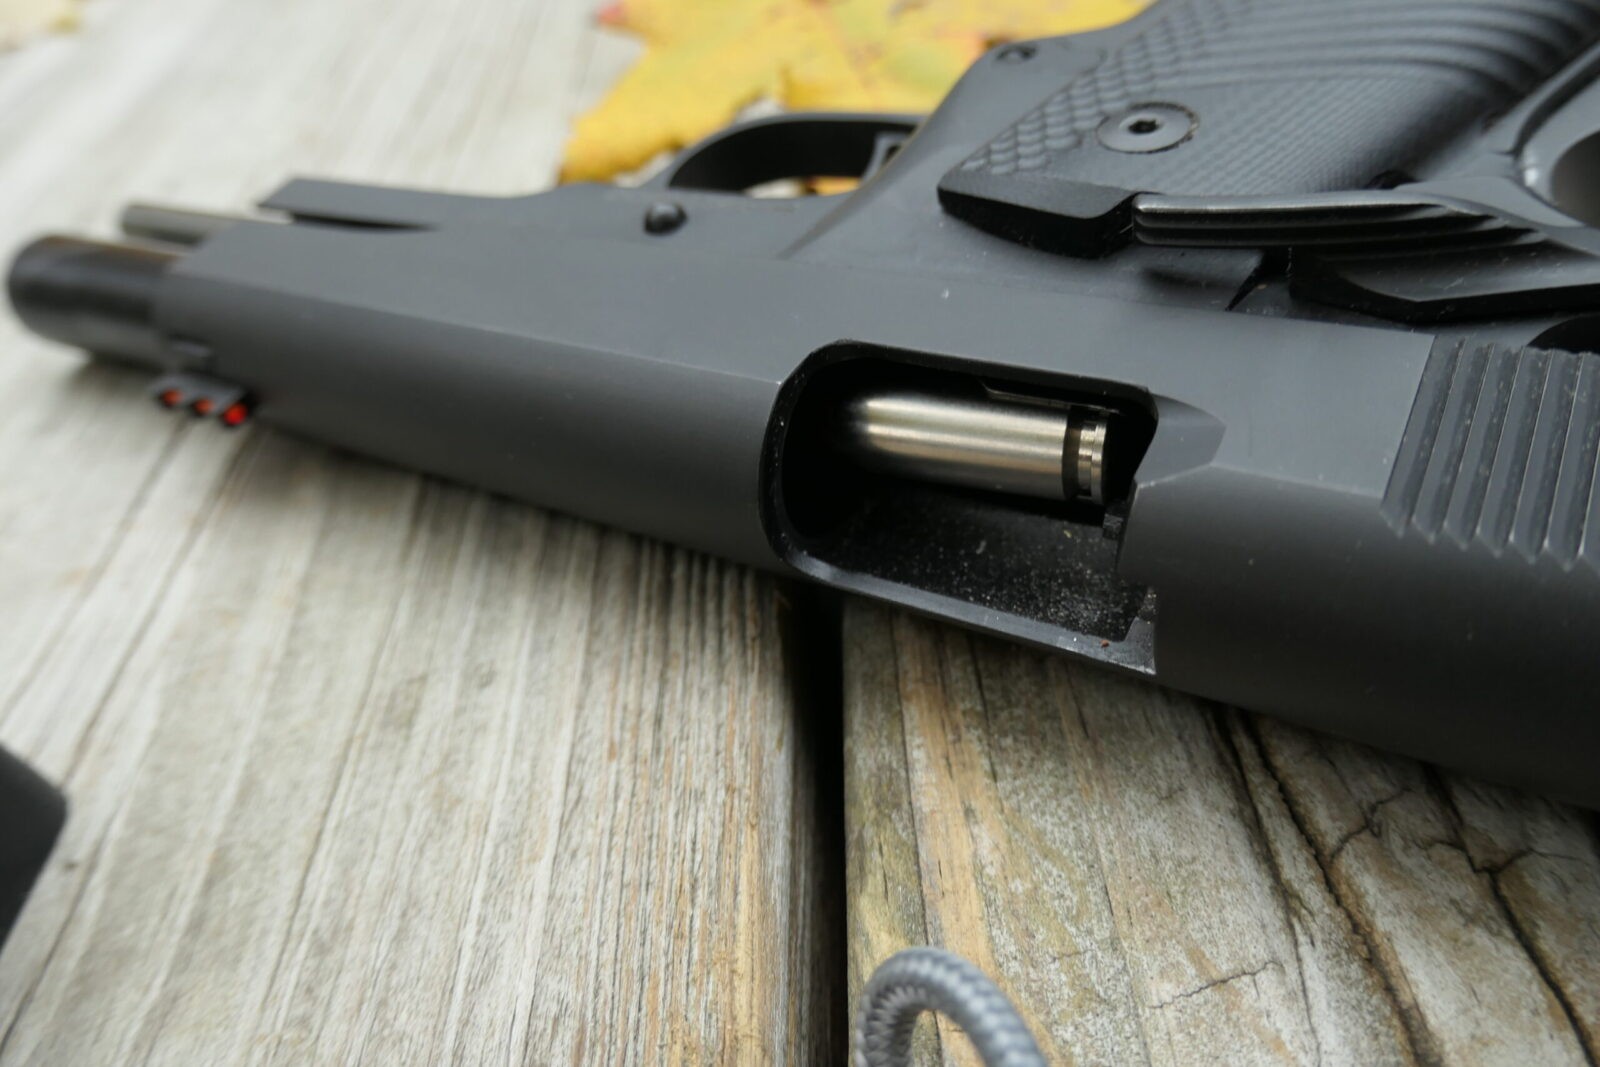
Every magazine is tuned and tested to confirm it will load a 10mm round directly in the chamber. Testing is done with dummy rounds but for the sake of the photo, this is an Underwood 155 grain HP round.
Underwood 220 grain hard cast – One of my bear defense loads. I carry Buffalo Bore also. Note how the front of the feed lips are securely holding the round in place. The lips are not just about feeding but retention also or the rounds would be popping out from under them at the wrong time.
One last photo 🙂
Summary
We pride ourselves on our customer service and small town family owned business values. We only sell stuff that we actually use as well. I really do think our magazines are solid and reliable and are worth it. I wouldn’t be using or selling them if I thought otherwise.
Note, I have to buy all of my parts – nothing here was paid for by sponsors, etc. I do make a small amount if you click on an ad and buy something but that is it. You’re getting my real opinion on stuff.