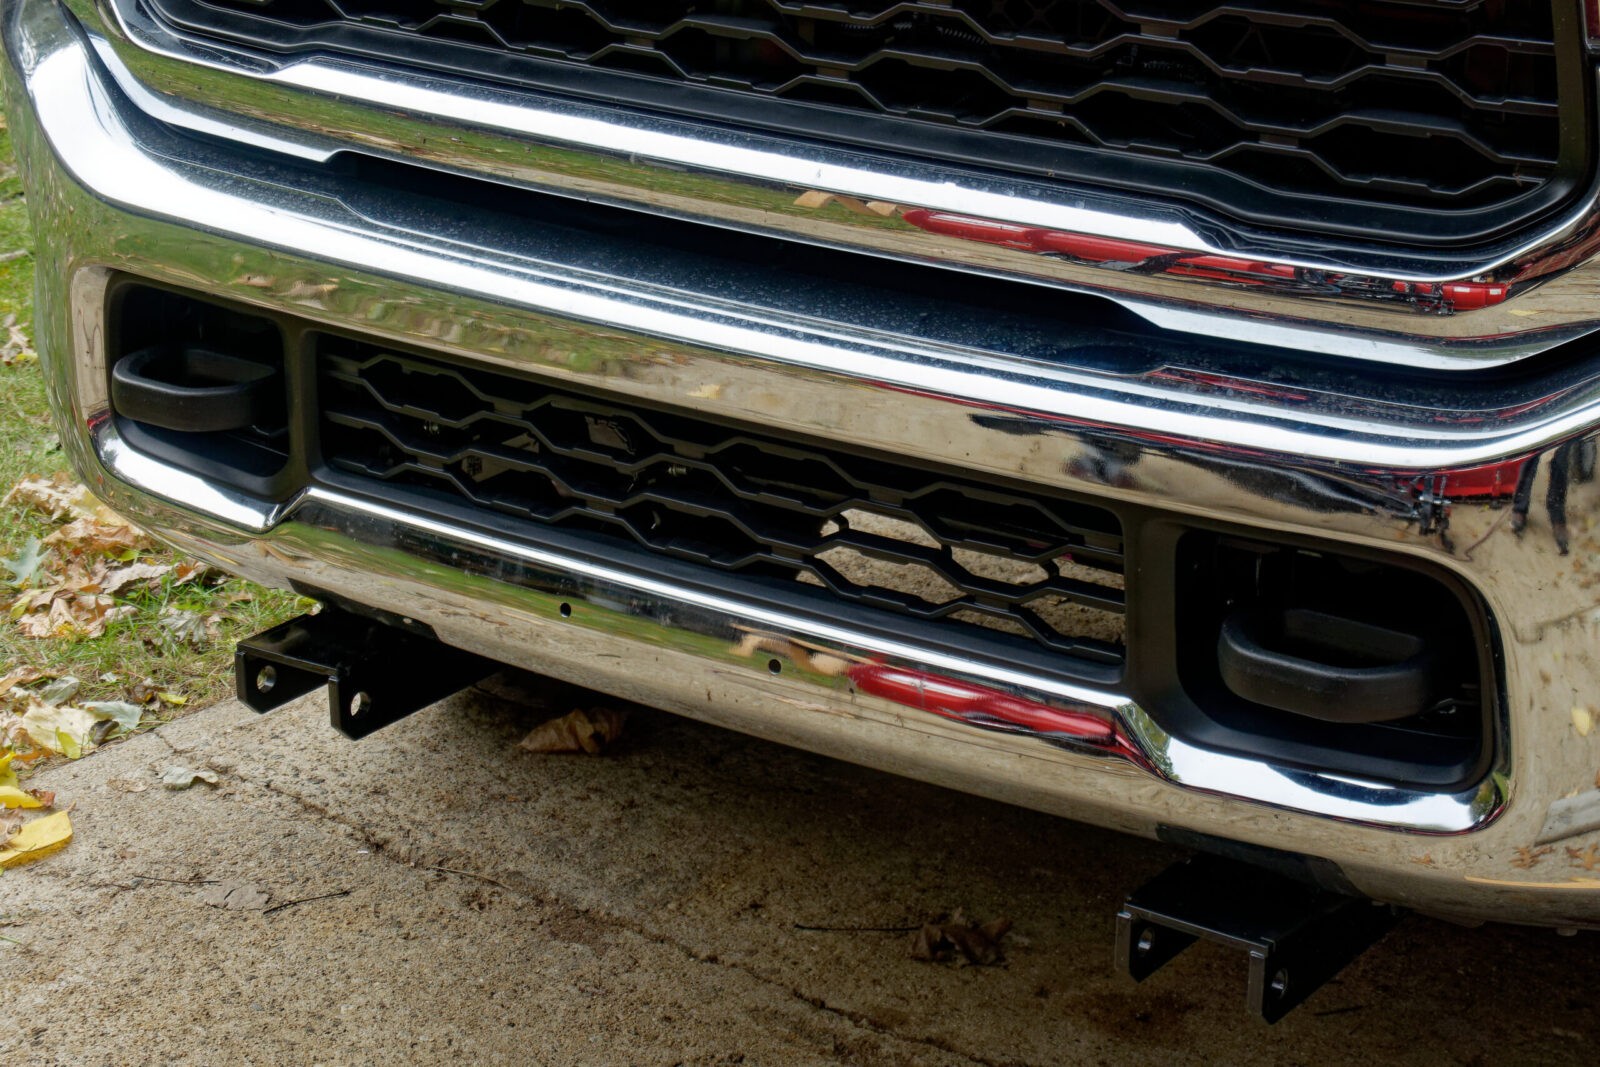
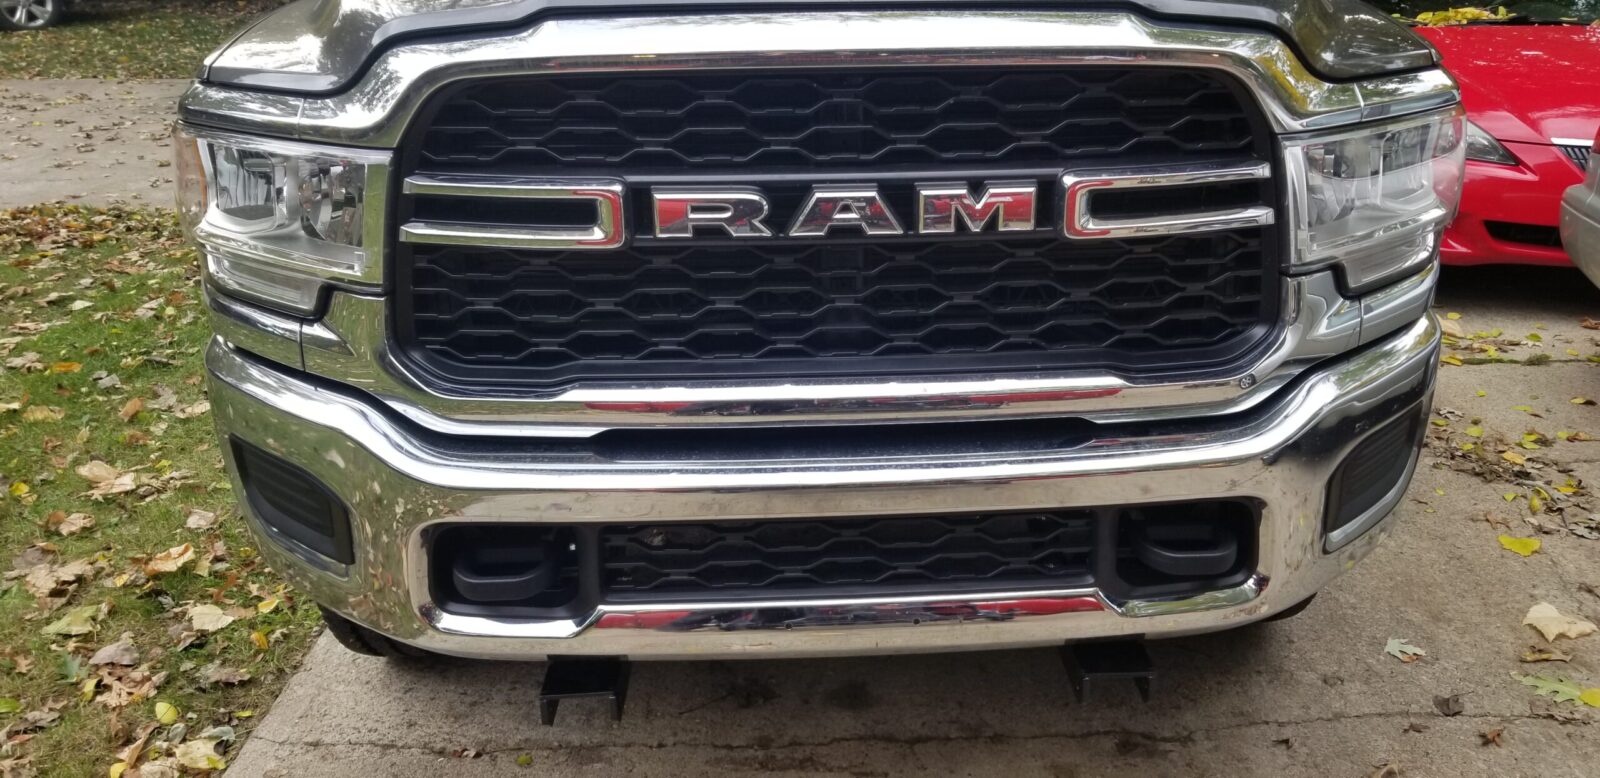
In September I bought my first new truck from a dealership – a 2021 RAM 2500 with the 6.4L Hemi engine. It was a Tradesman with a crew cab and the 2GA customer package group – meaning it had the Snow Chief, Chrome Appearance, Tradesman Level 2, Shift on the Fly transfer case, Power Black Trailer Mirrors, LED bed lighting, and Trailer controller. What it didn’t have was front tow hooks — seriously. I was actually surprised by this. I’ve used front hooks so many times over the years that to not have them wasn’t an option but I figured I could add them later and bought the truck.
Wow – Have You Seen The Price To Add Hooks?
Well, this surprised me. I shouldn’t have assumed the cost wouldn’t be bad. Let me itemize this for you real quick:
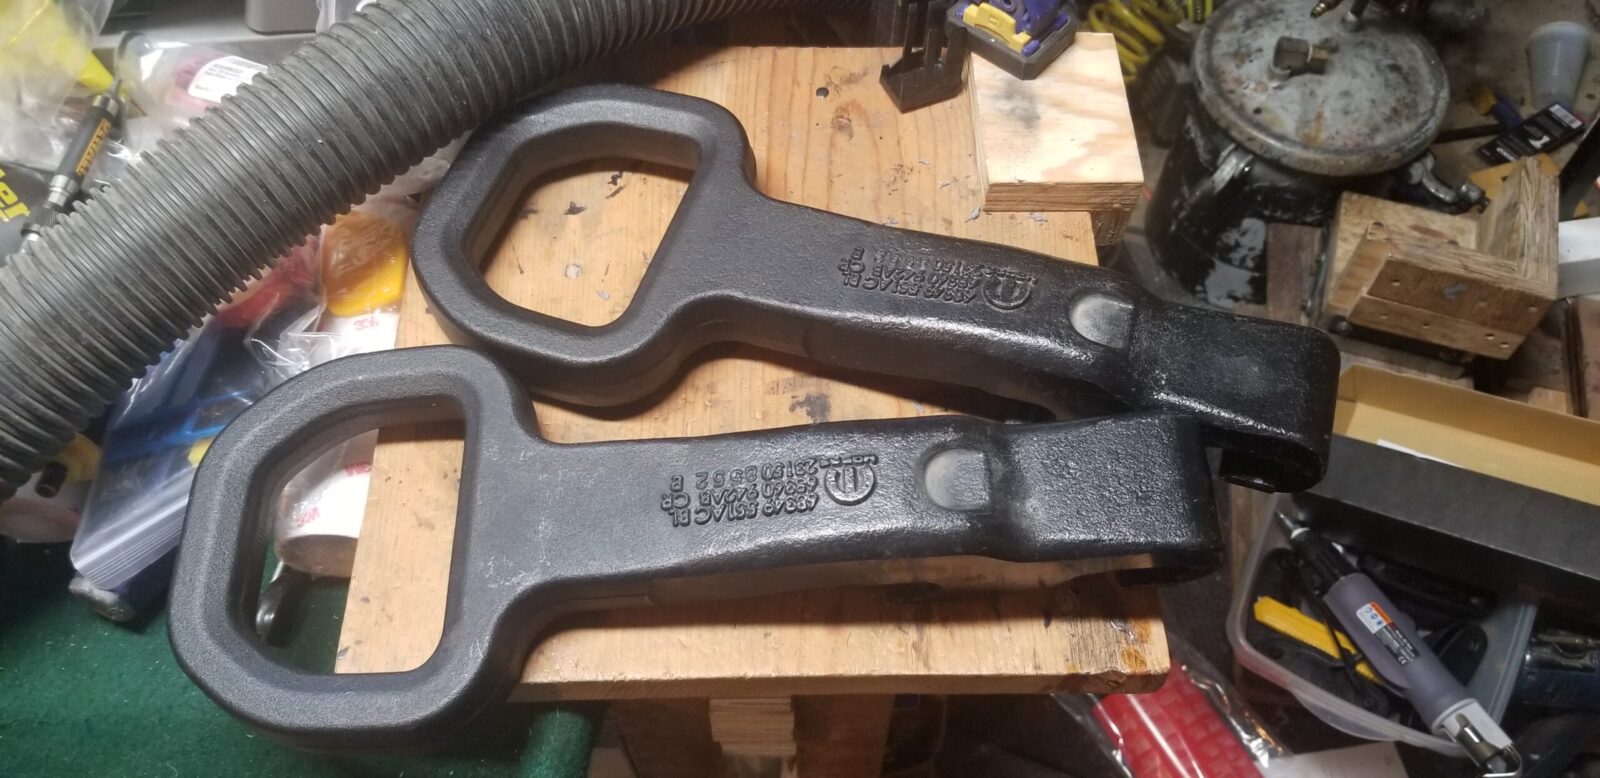
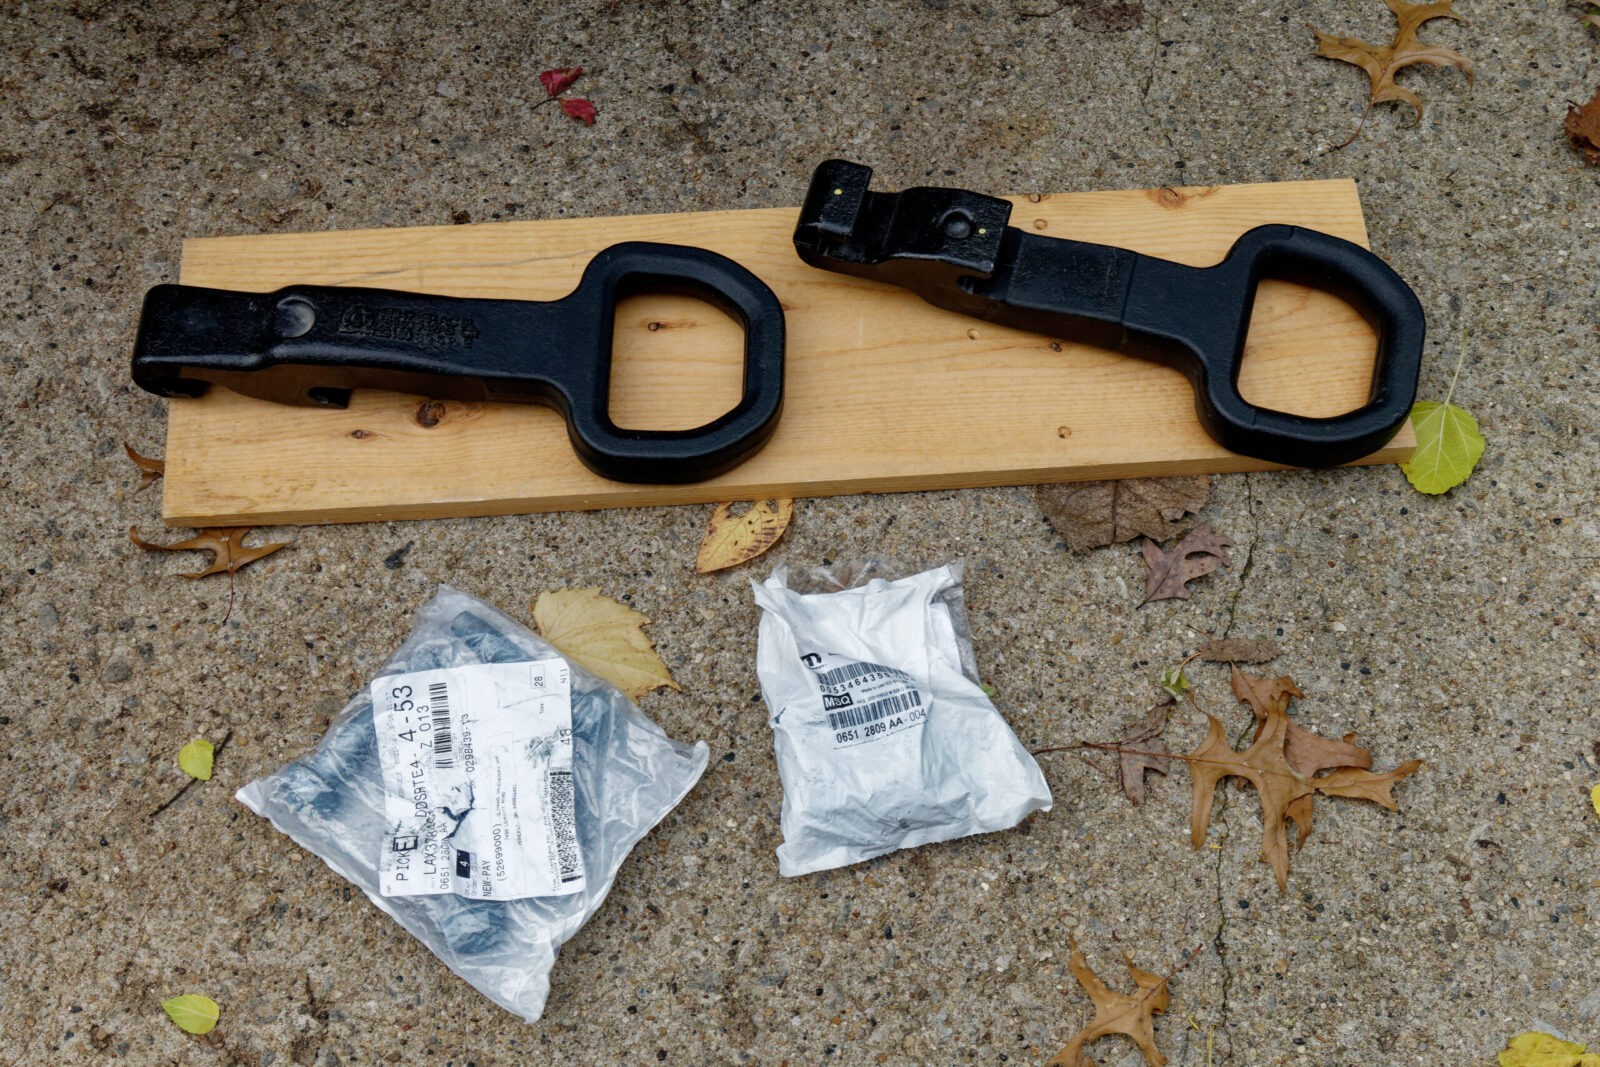
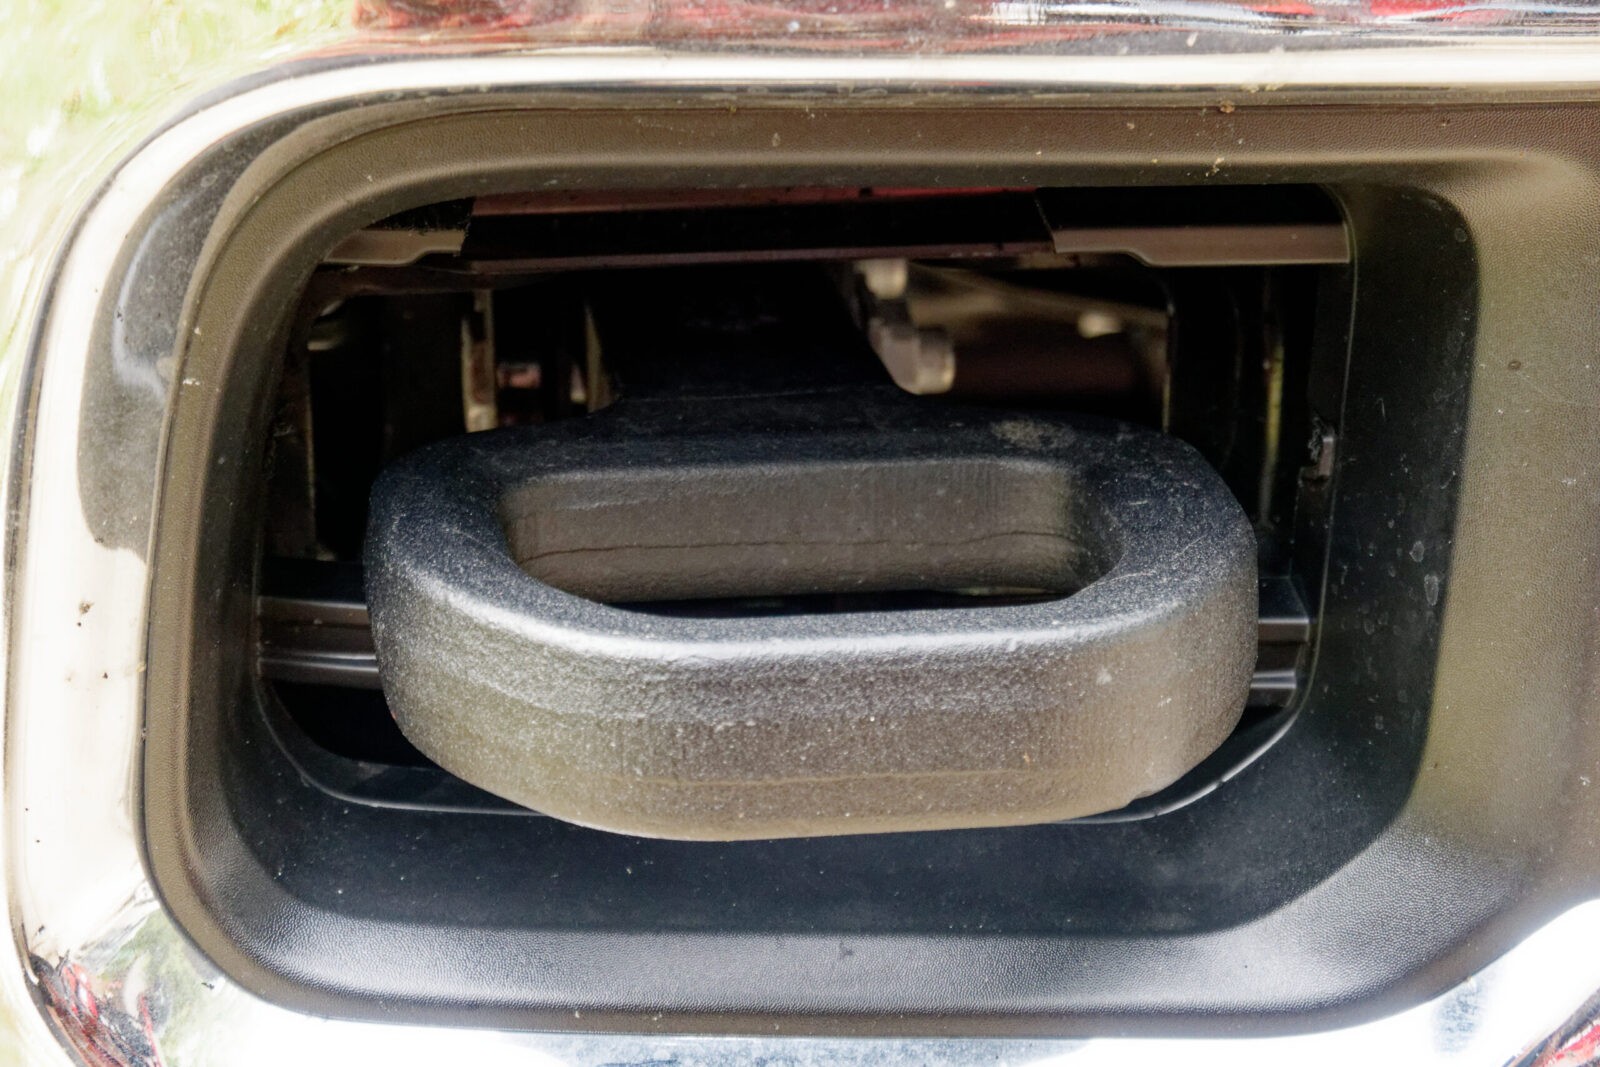
Tow Hook – Mopar 68349551AD List $132 Online around $93.36 each – you need two
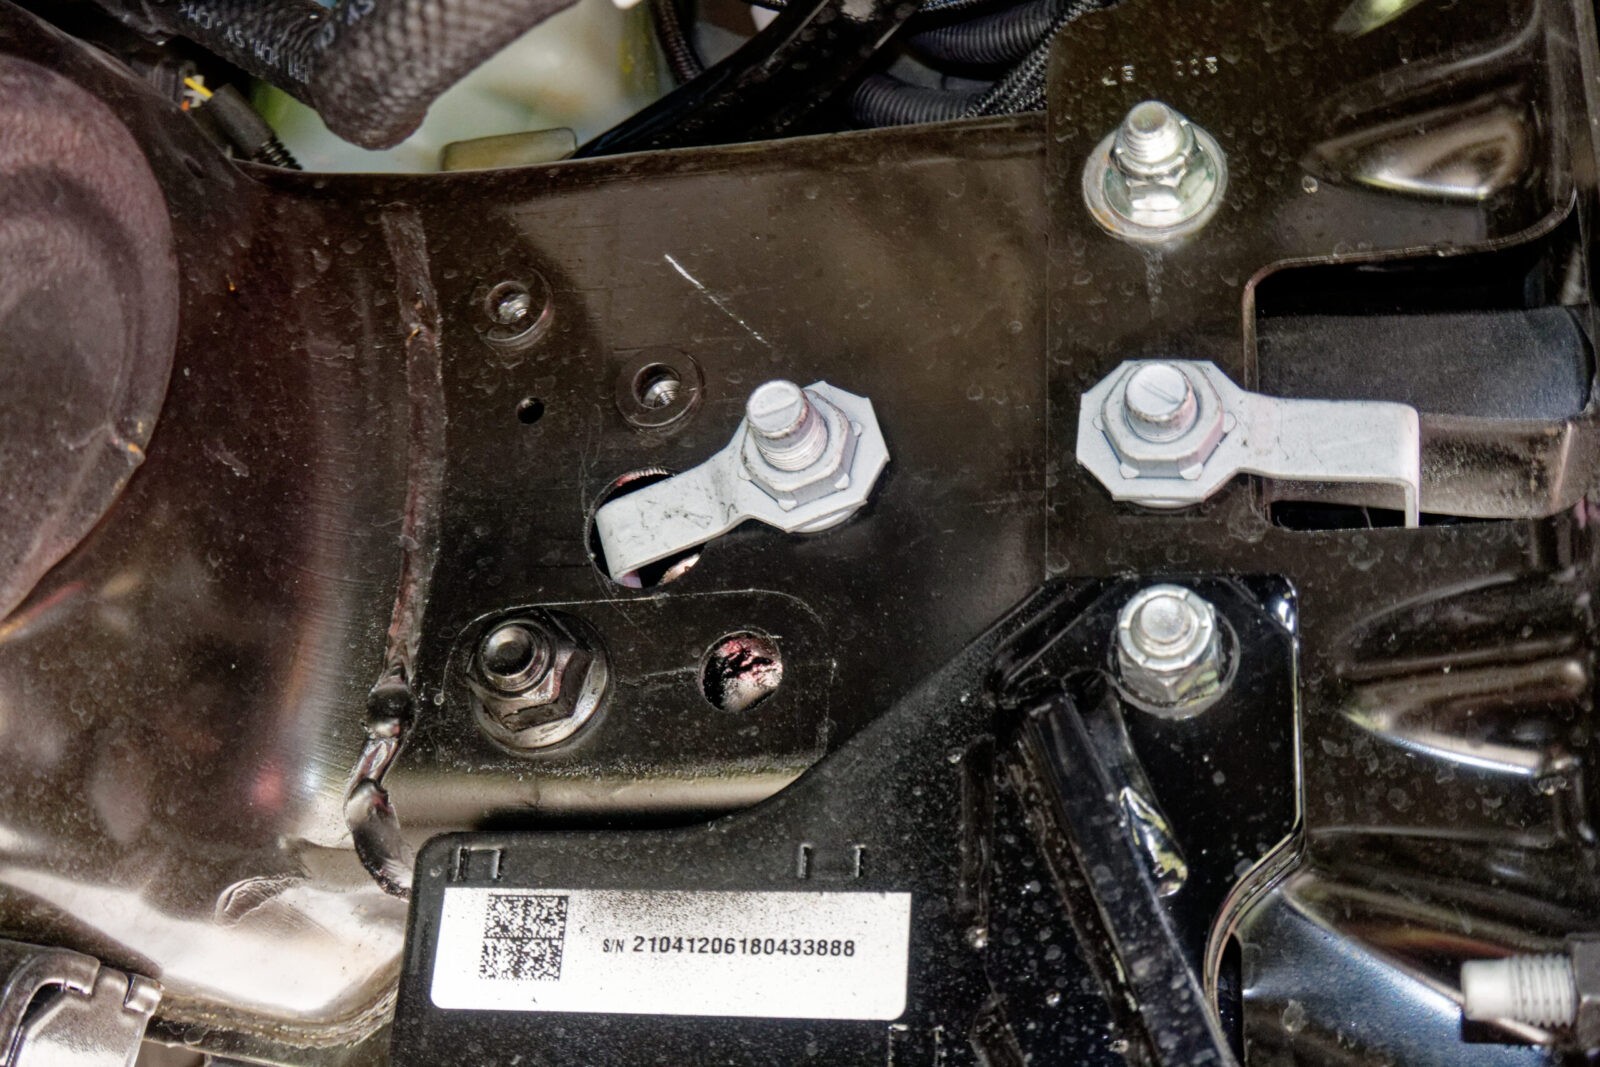
4 hex flange mounting screws / bolts – Mopar 6512808AA. List $5.10/ea and online they are around $3.84/ea. Again, you need four of them – two for each hook
4 hex flange lock nuts – Mopar 6512809AA. List is $5.10 each and online is about $3.84/ea. Thread is M16x1.50mm. Again, you need four of them – two for each tow hook.
That adds up fast. The list total is $304.80 and online is $217.44 – a savings of $87.36 but that does not include shipping or taxes
This does not include the bezels / changes to the bumper if you do it by the book
This does not reflect labor of maybe 2-3 hours or the shop supply charge either.
Also, confirm with the supplier if they have something before you buy it. When I was looking, hooks were hard to find in stock at any kind of discount plus some dealers say they have things but they do not.
So, this definitely wasn’t looking cheap either in terms of parts or labor if I had a dealer do it or even if I went will all new Mopar parts.
How to save money and not sacrifice quality?
What is quality? Quality means meeting my requirements and what did I require? I cared about brute strength. I talked to some guys and they all told me to go with the Ram hooks but to get them off eBay because salvage yards put them up for sale at a huge savings. Wow, they were right. You can get both hooks off eBay that look like new for less than half the price but usually with no fasteners included.
Search on eBay for 68349551ac or 68349551ad tow hooks. The letter designators (aa, ab, ac, and ad) tells us there have been minor changes and the most current version as of my writing this is the “ad” release. I can’t speak to all of the versions but I can tell you I am using the “ac” hooks, no problem. You could search for an earlier release such as “aa” or “ab” if you wanted – I’m just telling you what I did. If you can get a great deal on the newest version, go for it.
When I looked at the Mopar site, it seems to be the hook for all of the trim styles (Tradesman, Big Horn, Laramie, Limited, Limited Longhorn, Lone Star and Power Wagon) of both the 2500 and 3500 series trucks for 2019-2021.
Note: some eBay sellers list two hooks (meaning the pair) in an eBay listing and some just list one so pay attention.
I also always look at how many sales they have done and their rating as well. I’ll pay more for an established seller vs. gambling on a seeming deal from a relatively unknown seller.
I also noticed some sellers put all of the part numbers in their description so searches pull them up so read the listing carefully.
Click on the following to search for:
The 68349551ac hooks (this is what I bought and installed on my 2021 Ram 2500 Tradesman)
By the way, the RAM 1500 hook is not the same so make sure you get a 2500 hook for your model year truck.
Okay, for the bolts and nuts, I did actually go with Mopar and bought them online. I have read posts of fellows going to the hardware store and buying Grade 8 – 5/8″ x 4-1/2″ long bolts, washers, lock washers and nuts. It’s an option but I didn’t want to gamble with the metallurgy so I bought the bolts and washers from https://store.mopar.com/ and there are other online sellers you could go to as well.
As far as the bezels and stuff go, honestly, just cut the fake plastic grill out of the way. Yeah, you could spend the time and money to make it look factory but this is a work truck and the tow hooks are near the bottom of the bumper so nobody is going to be looking for the bezel behind realistically.
As for labor, you can totally do this yourself in less than an hour. I think it took me about 30 minutes.
These arrived via USPS Priority Mail maybe 2-3 days after I ordered them. They are like new – I doubt they were ever used. Yes, they do weigh a ton. I guess I could have weighed them but that didn’t occur to me as I really didn’t care. The point is that they sure are beefy. These are the 68349551AC series hooks by the way.
Installing The Hooks
You can totally do this if you are comfortable with cutting on your truck (some guys aren’t and that is okay – find a buddy who is and bribe him/her with beer, BBQ or whatever) and can turn a wrench. I kid you not, you only need a 15/16″ socket, 2-4″ extension and a big ratchet wrench to do this after your cut the little grills out of the way. A torque wrench capable of 80-90 foot pounds is handy but not essential.
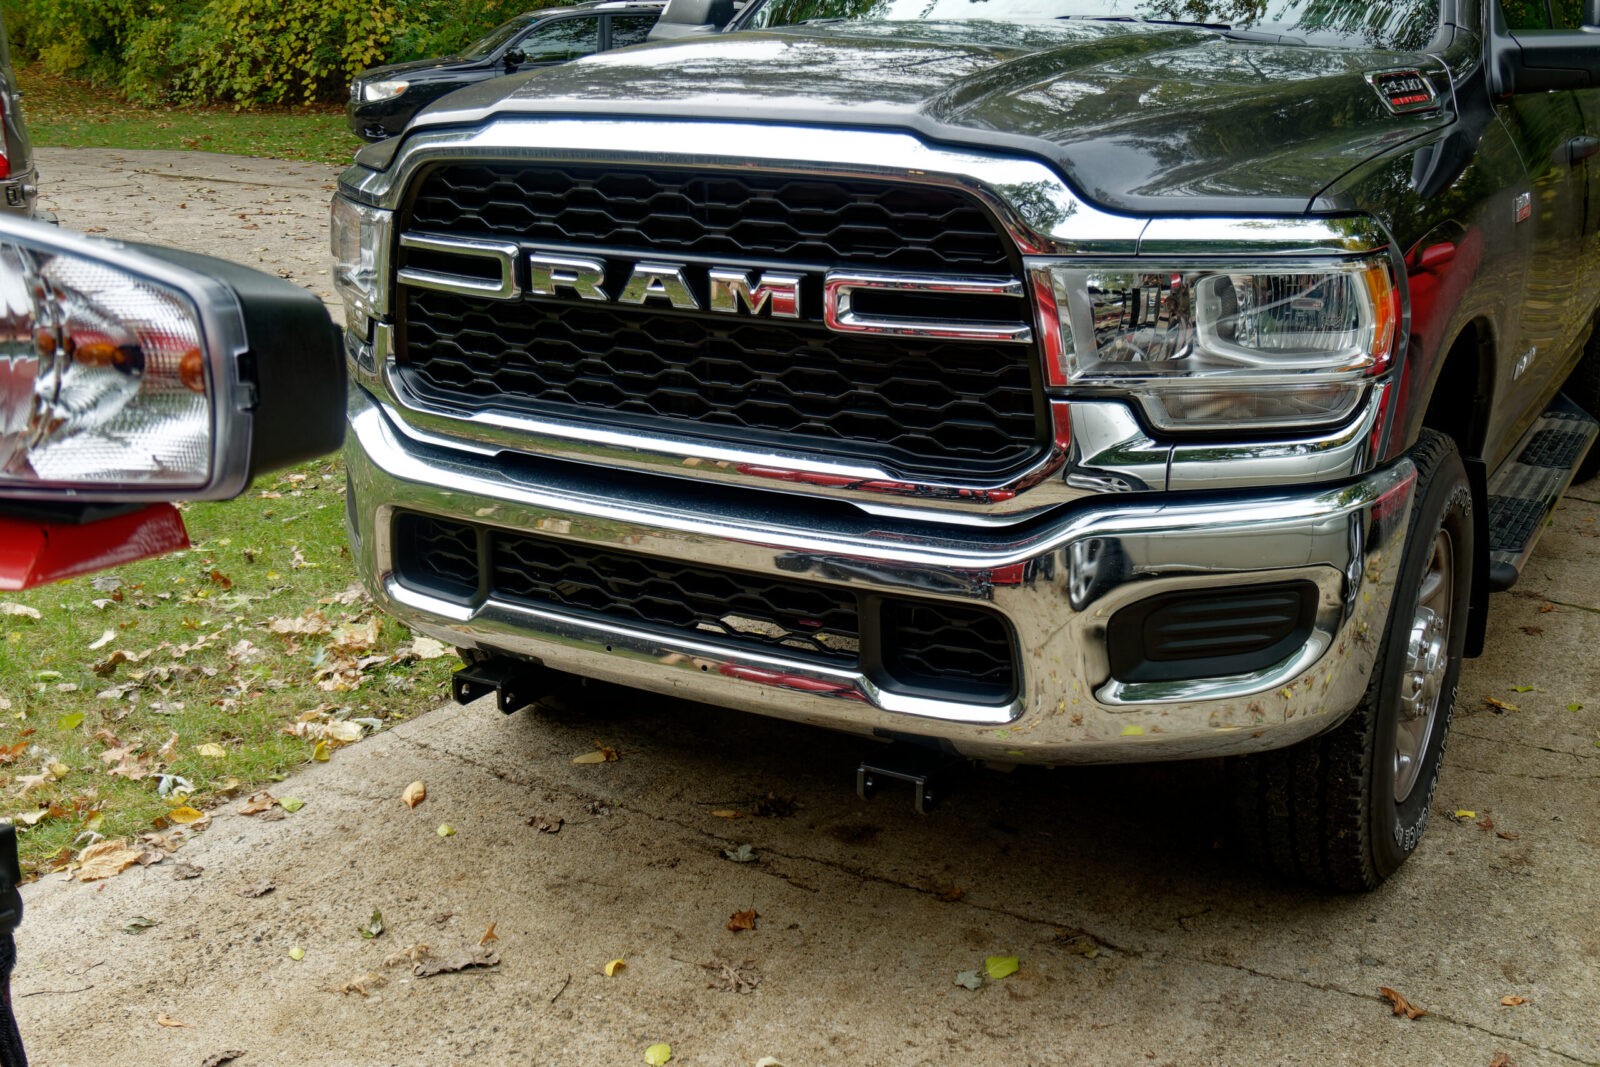
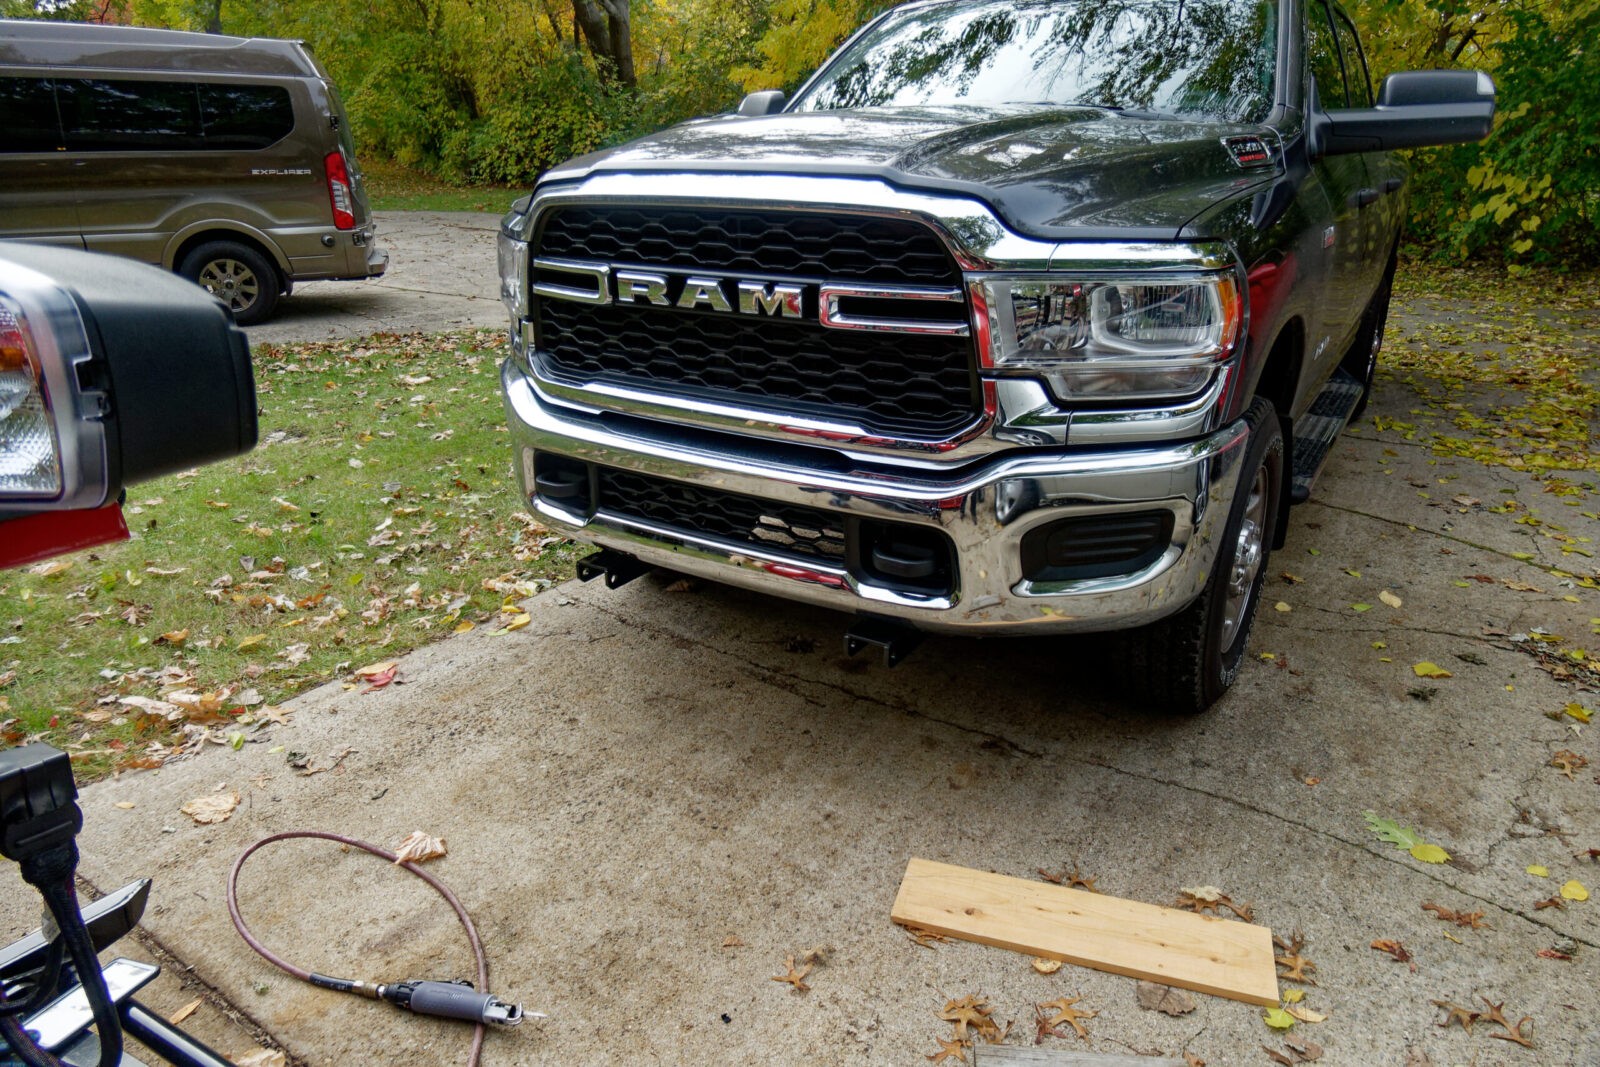
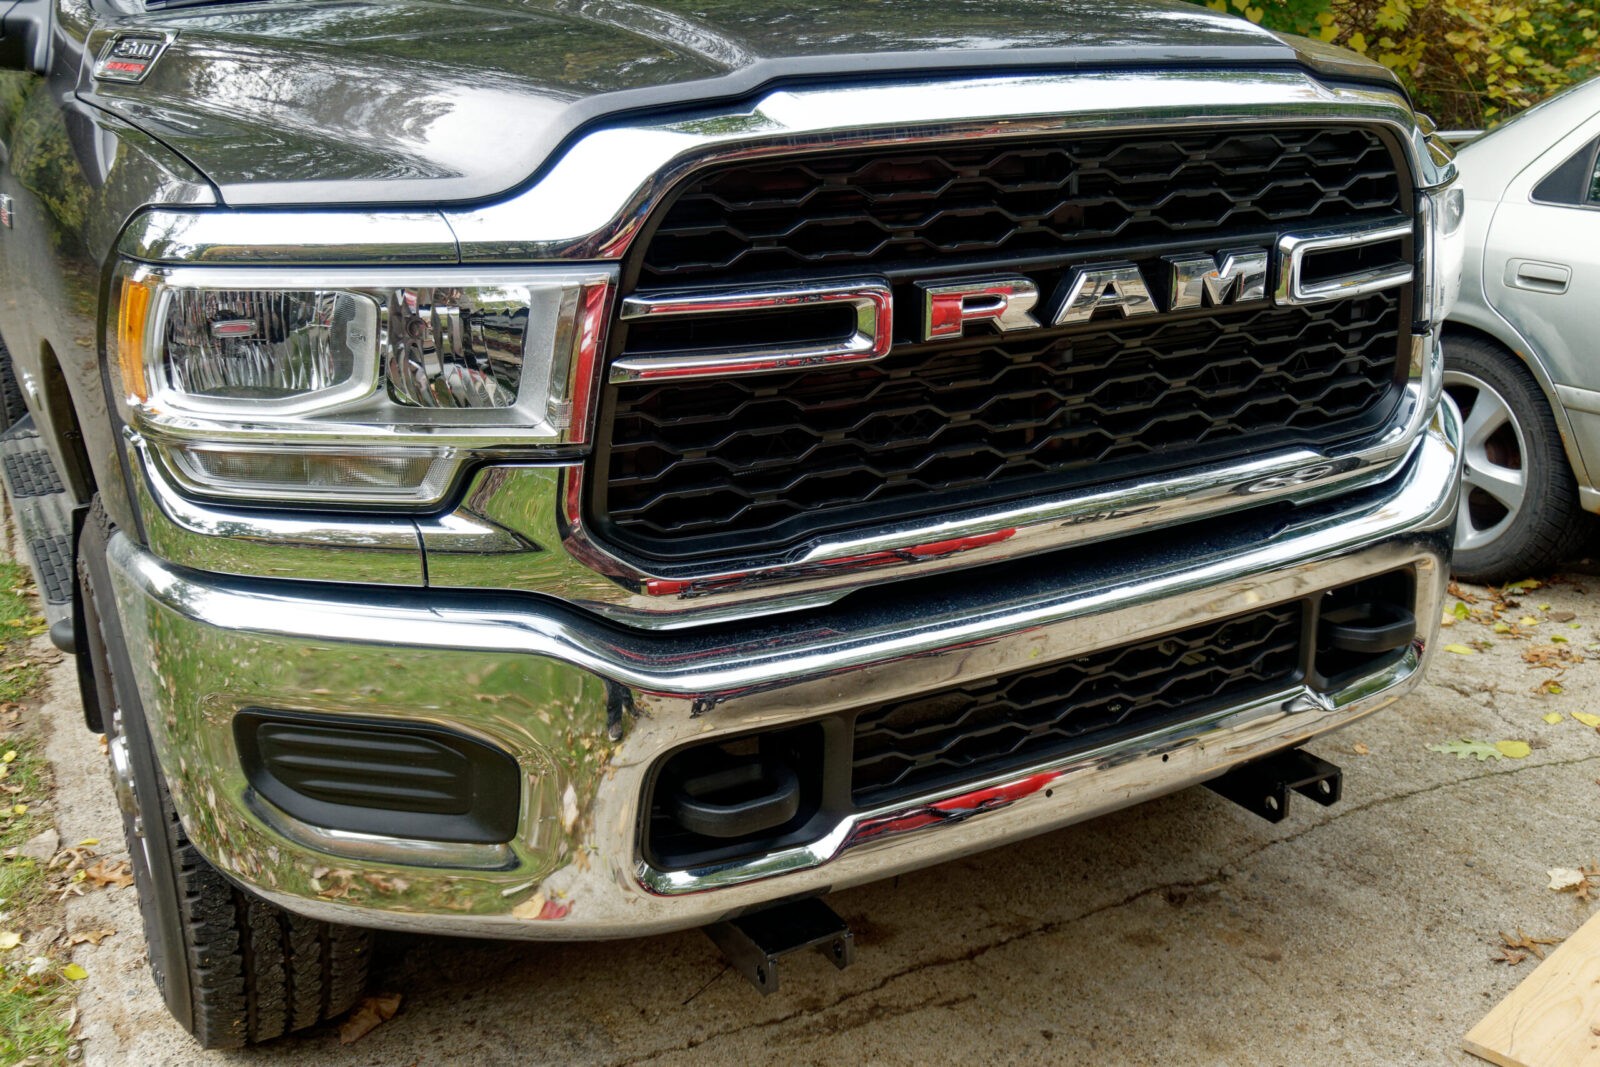
This is my 2021 Ram 2500 Tradesman. The hooks go in the openings located right under the left and right sides of the main grill or the next opening over from where the fog light covers are.
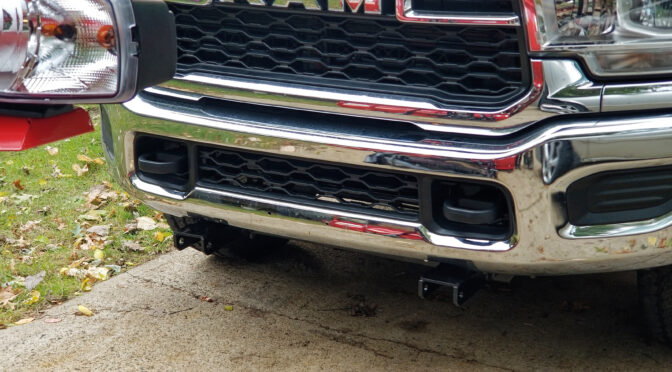
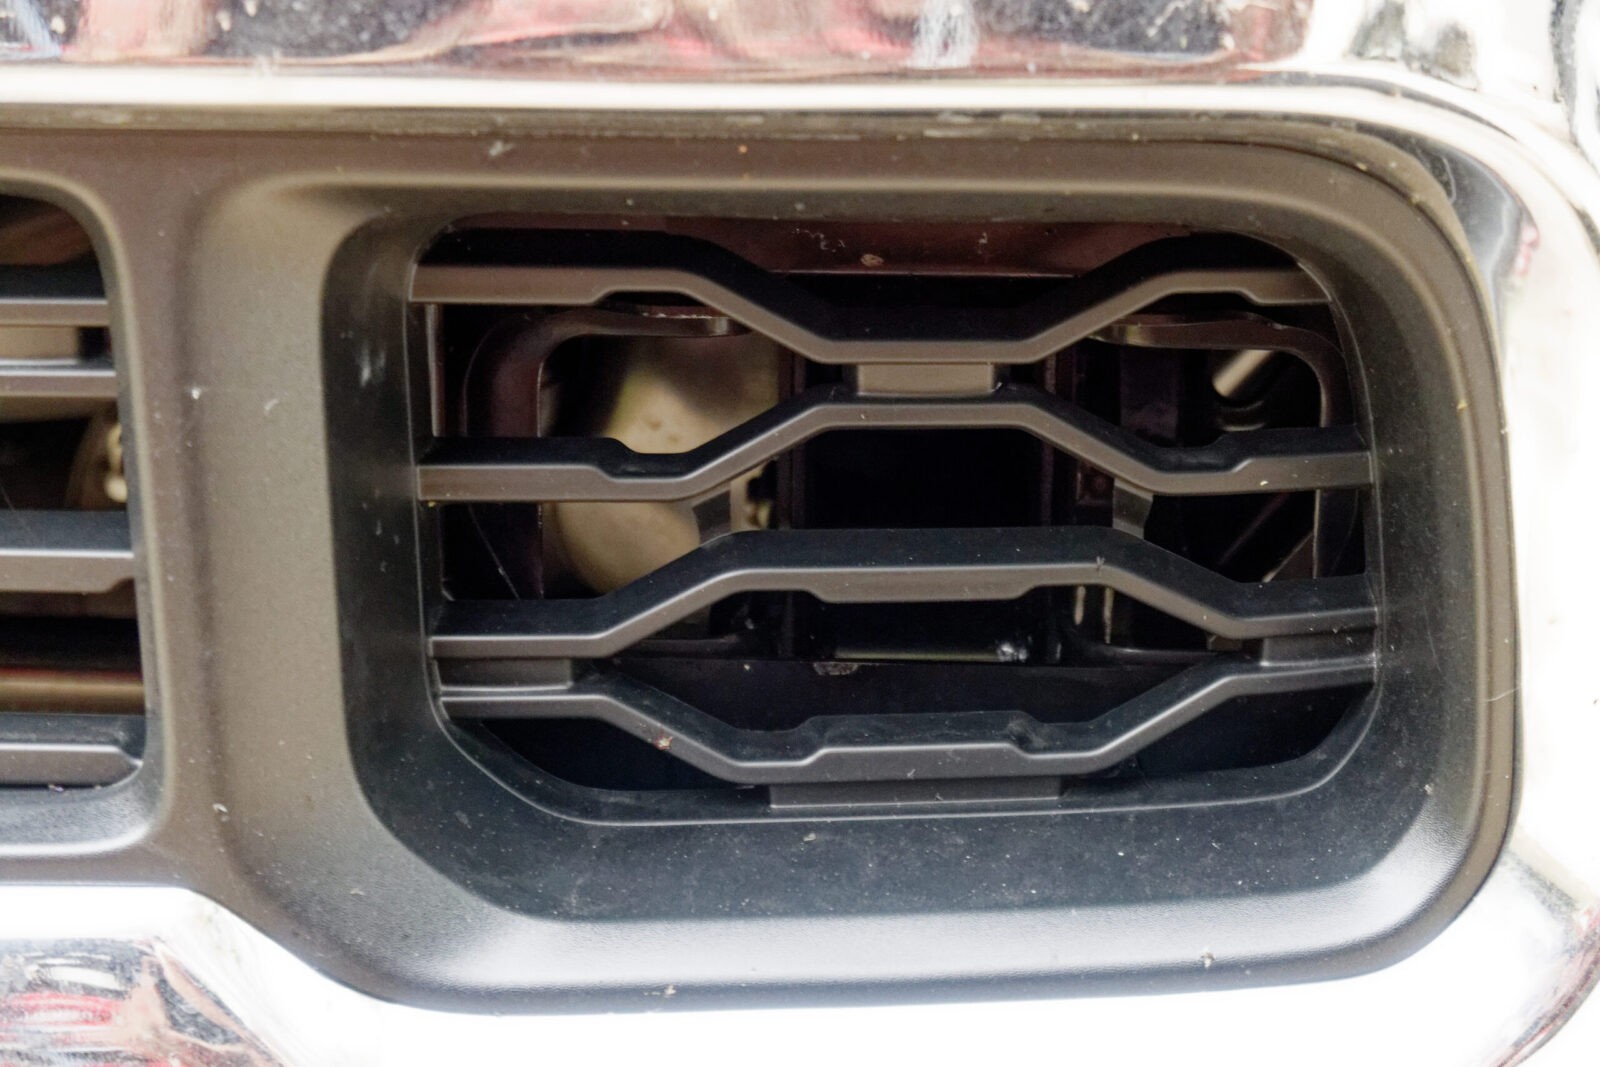
That is the driver’s side tow hook opening with the soon to be cut out plastic grill in the way.
The part of the frame rail where the town gook goes is that square opening straight back from the center so I planned to cut the top three horizontal pieces out of the way.
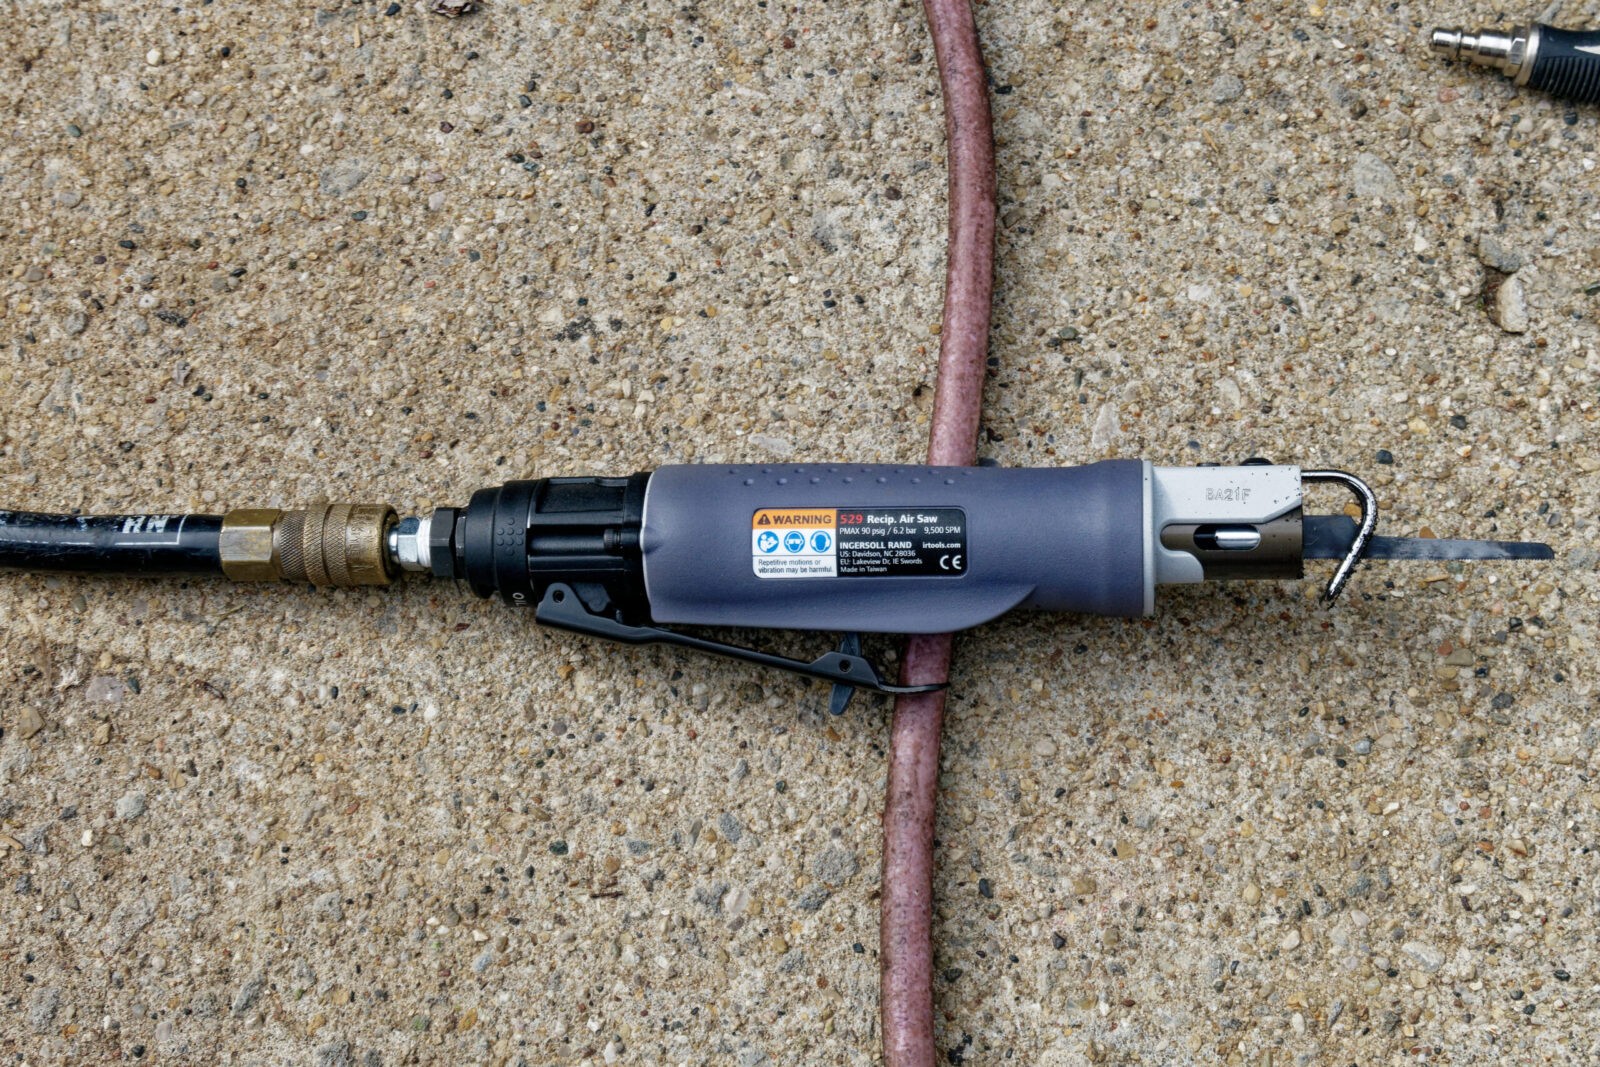
This is an Ingersoll Rand model 529 reciprocating saw used for body work and what not. This thing is amazing. Cheap reciprocating saws have a ton of vibration when they run but not this one. It makes cutting sheet metal as easy as soft grill plastic 🙂 This is a fine 24 tooth blade. Use a fine blade on plastic to avoid any snags and tears. Your other option is to look for one of the small hack saw blade holders or other small saw where you can reach in. The more teeth per inch, the better.
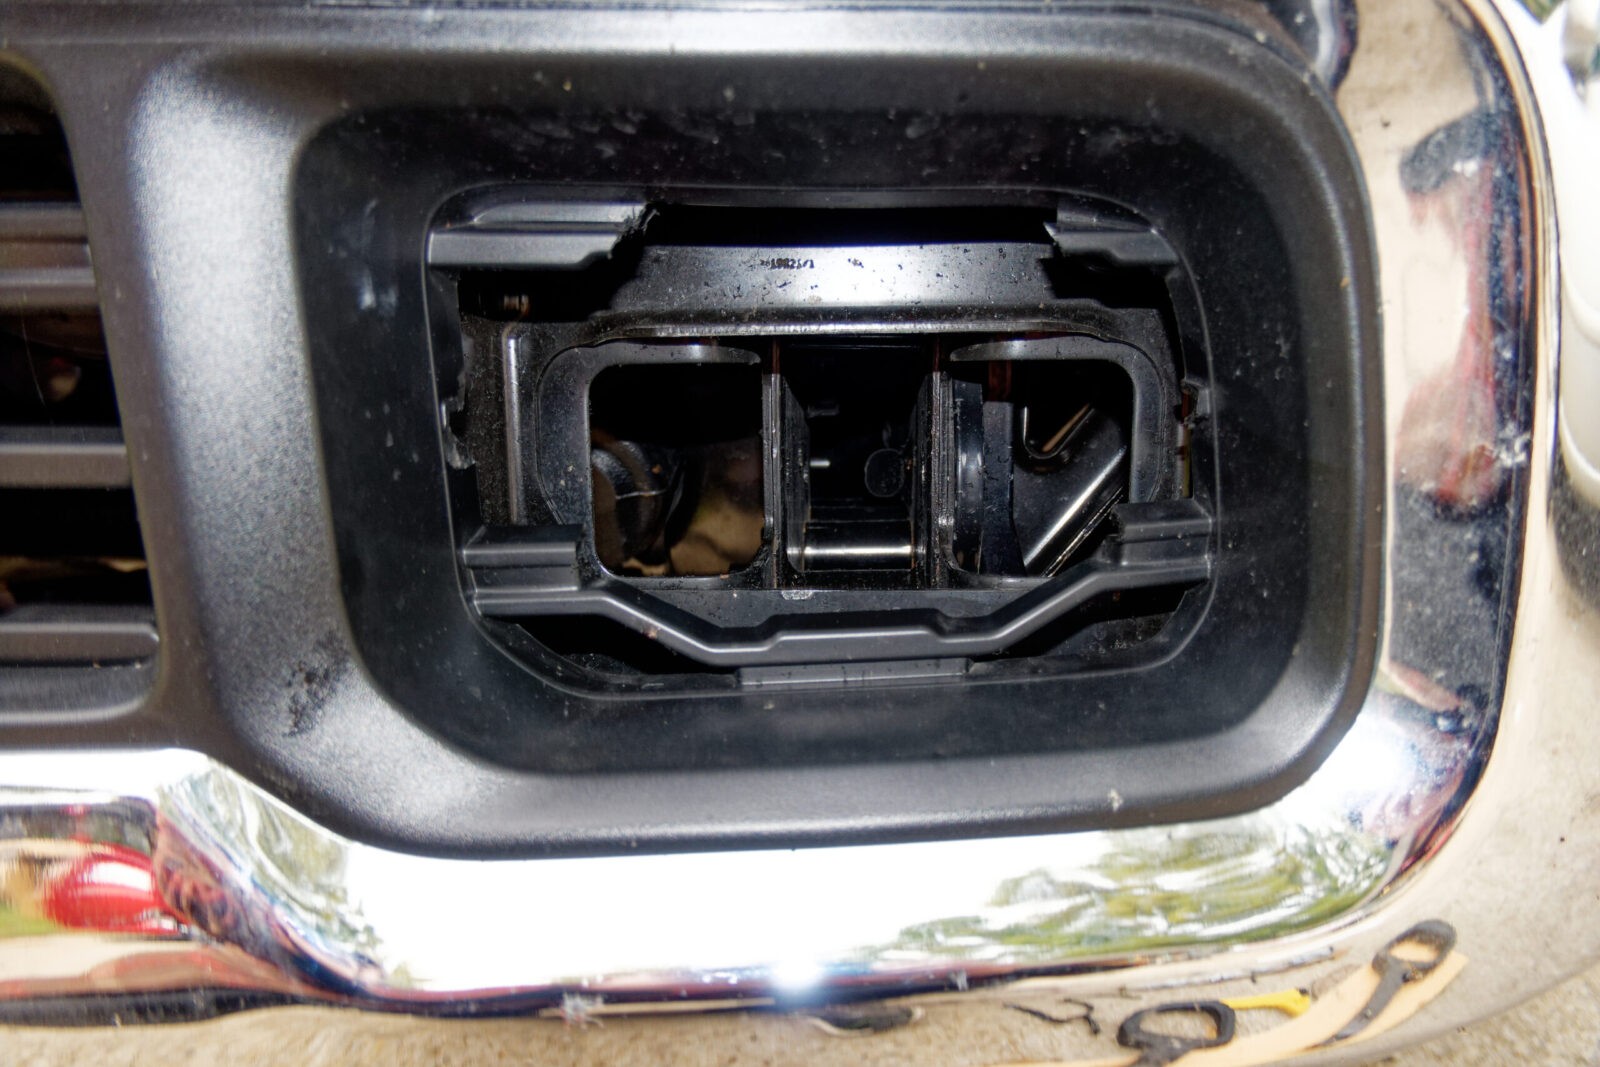
This is right after cutting. I haven’t cleaned up the cuts or blown out the plastic cuttings yet. The tow hook will go straight into that center opening and you will need to jiggle the hook around to get the two bolts through.
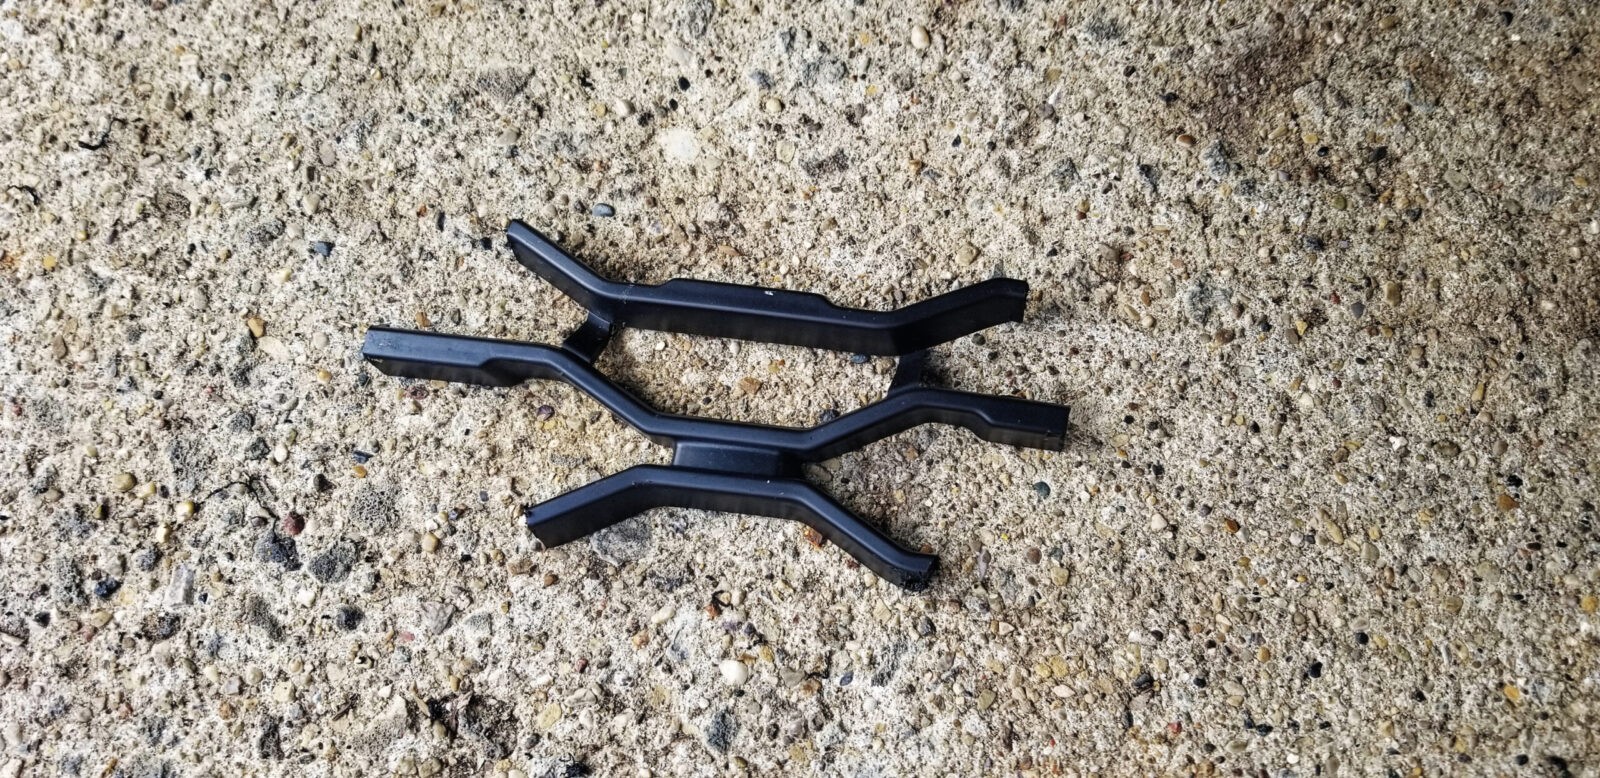
This is what I cut out. A fine tooth saw really does a nice job – fast and clean.
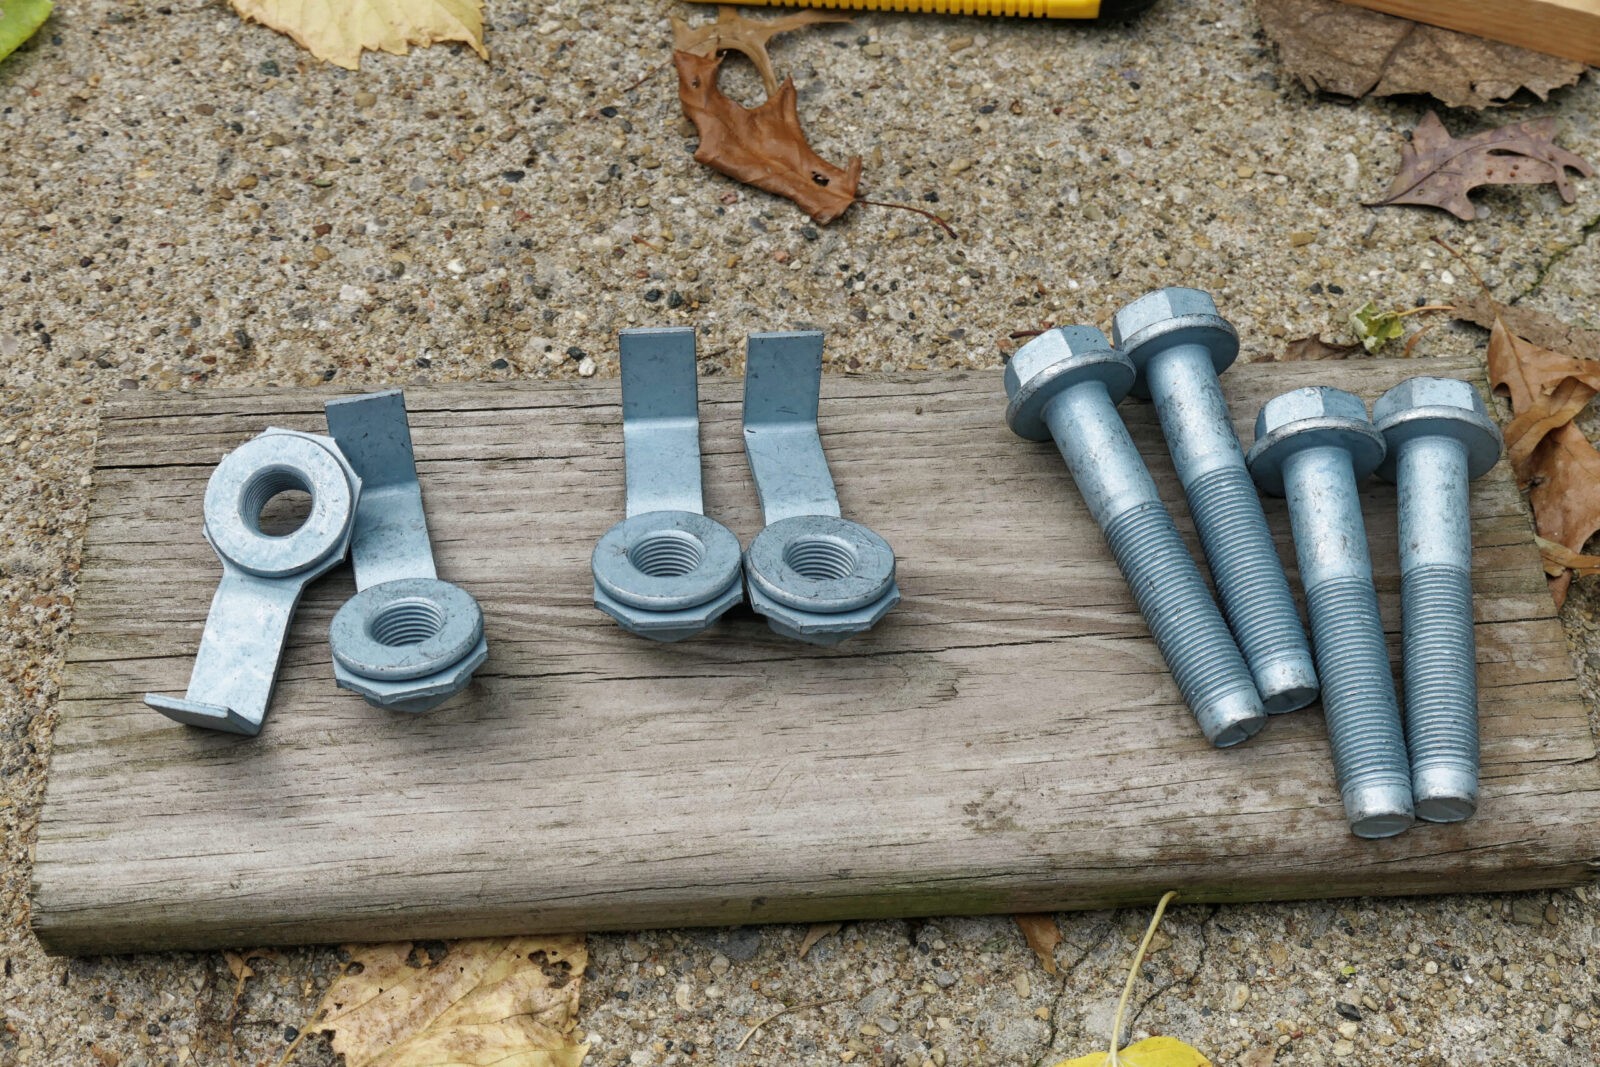
Here are the hooks, bolts and buts.
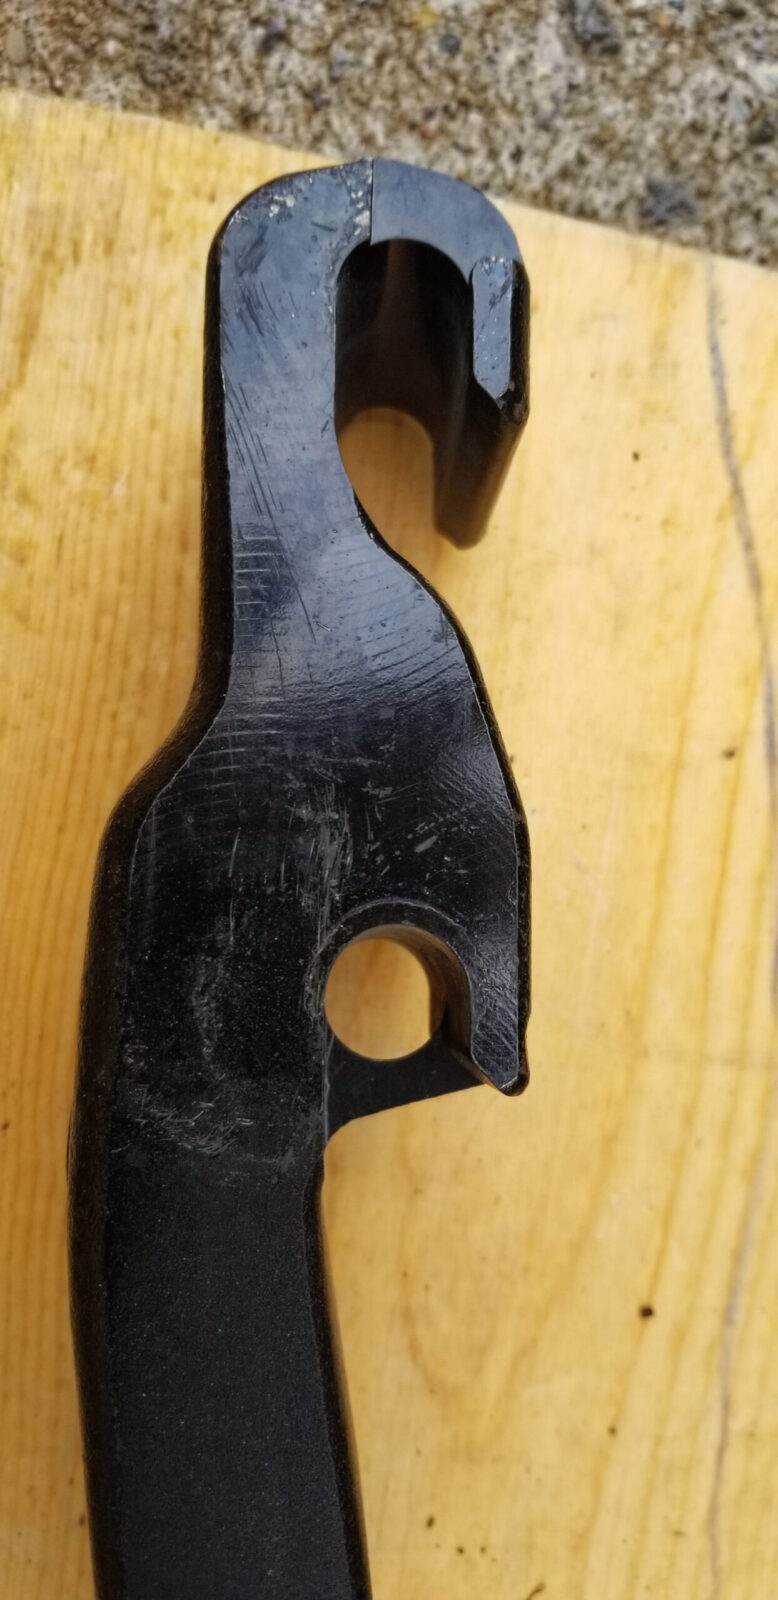
I wanted you to see the side profile of where the bolts engage the hook. The front groove actually has a retaining ring cast into it. I installed the front bolt first – and it will take some wiggling around to get it in and then I did the rear. I did all of this with the truck on the ground by the way, Also, I think the design is pretty interesting. They know the force will be applied by pulling forward so that is where they put their emphasis. The sides of the frame rail clamping against the sides of the hook will further lock it in place not to mention the inevitable rust that will happen sooner or later.
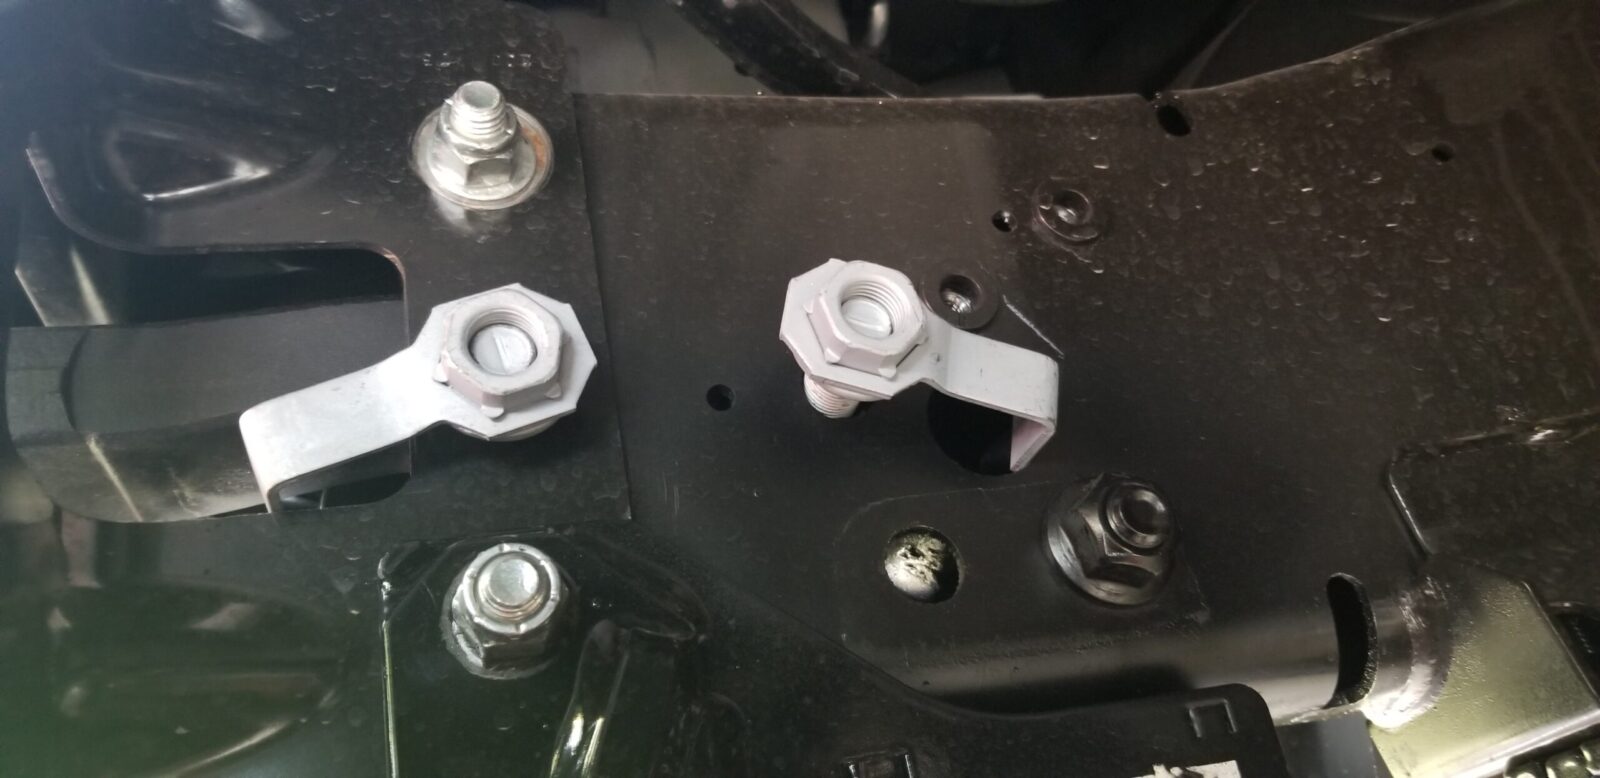
/lbThese are the four Mopar bolts and lock nuts. The wings/tabs on the nuts go into openings in the frames so you can focus on tightening the bolt down to 80-90 ft/lbs. They also limit travel of the nut over time to keep the whole assembly secure.
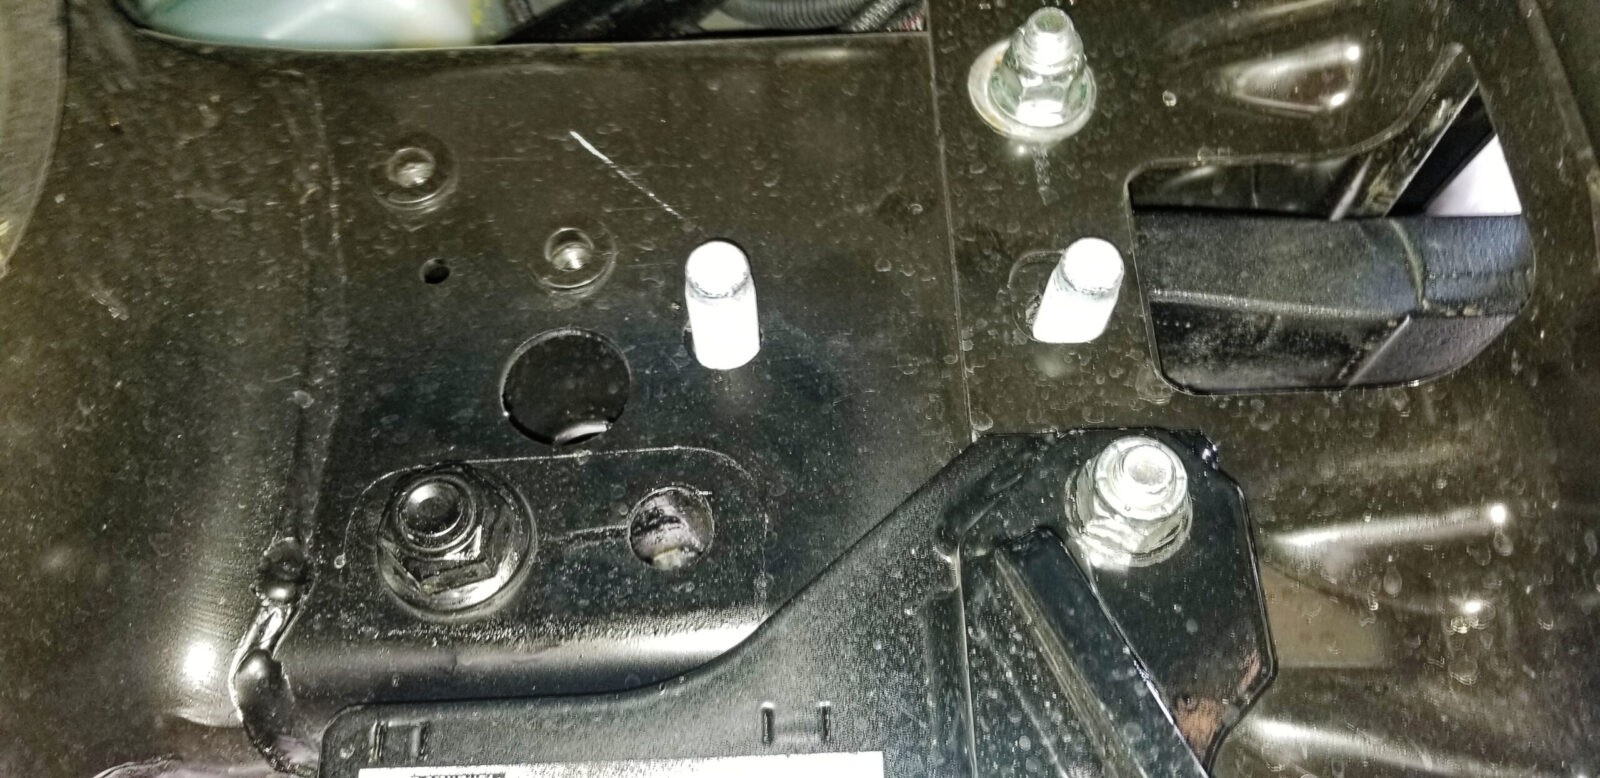
So push the bolts from the outside of rain through to the inside. This is the driver’s side.
So here you can see the bolts with the lock nuts in place.
This is the passenger side. I had just started the bolts into the nuts when I took this picture.
Torque Down The Bolts
Some guys reported that their hooks rattled and I think they were not torquing them down enough. Yes, they will rattle when you insert them in the frame but not once you tighten them down. Thanks to the WWW, I could not find an absolute “here’s what RAM said for the 2500 tow hook” torque spec. I saw numbers all over the board.
I took a different tact, Mopar says the nut is a M16x1.5 on their website so when I look that up, a class 8.8 bolt has a 245 Nm spec and a class 10.9 has a 335 Nm spec. Converting 245 Nm to ft lbs gives us 180.7 ft lbs. Wow. I divided that by half and took the nuts to 90 ft lbs and called it even. No rattling and the hooks feel solid as a rock. If they loosen up, which I highly doubt, I’ll search around again for the torque spec and/or apply Loc-Tite. Given the design of the locking nuts, I really do not think this is going to happen.
If you don’t believe in torque wrenches, do whatever works for you. Due to a variety of nerve factors, I can’t feel how much pressure I am applying any longer so I torque stuff down to spec.
If you do know a definitive value, please email me and I’ll adjust accordingly.
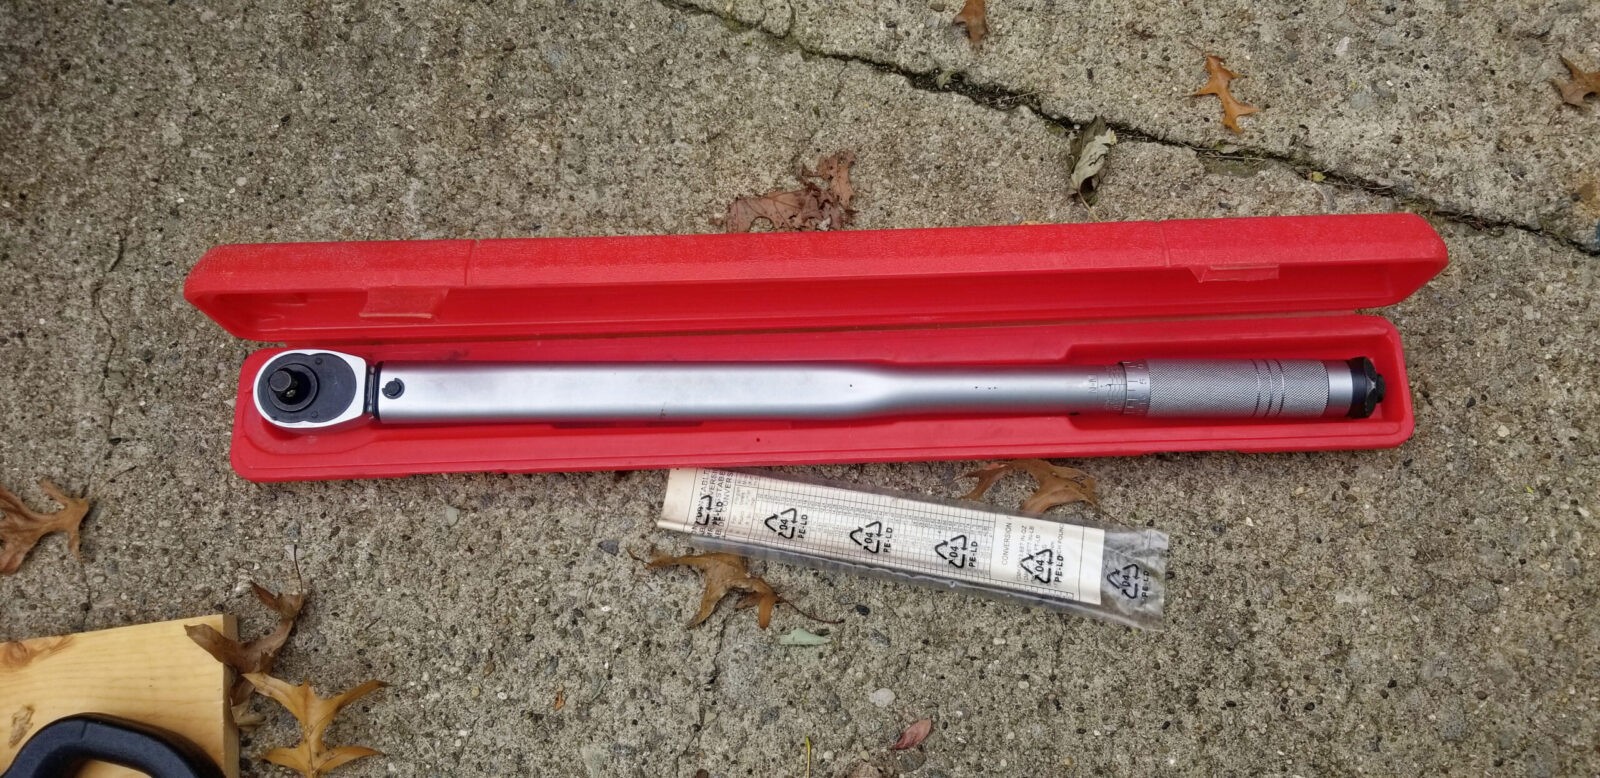
This is big Ed my 50-250 ft lb 1/2″ torque wrench. I have “bigger Ed” that is a giant 3/4″ unit. I also have a number of 1/4, 3/8 and 1/2 torque wrenches for different applications.
The Result
They are rock solid. I haven’t used them yet but am ready for winter.
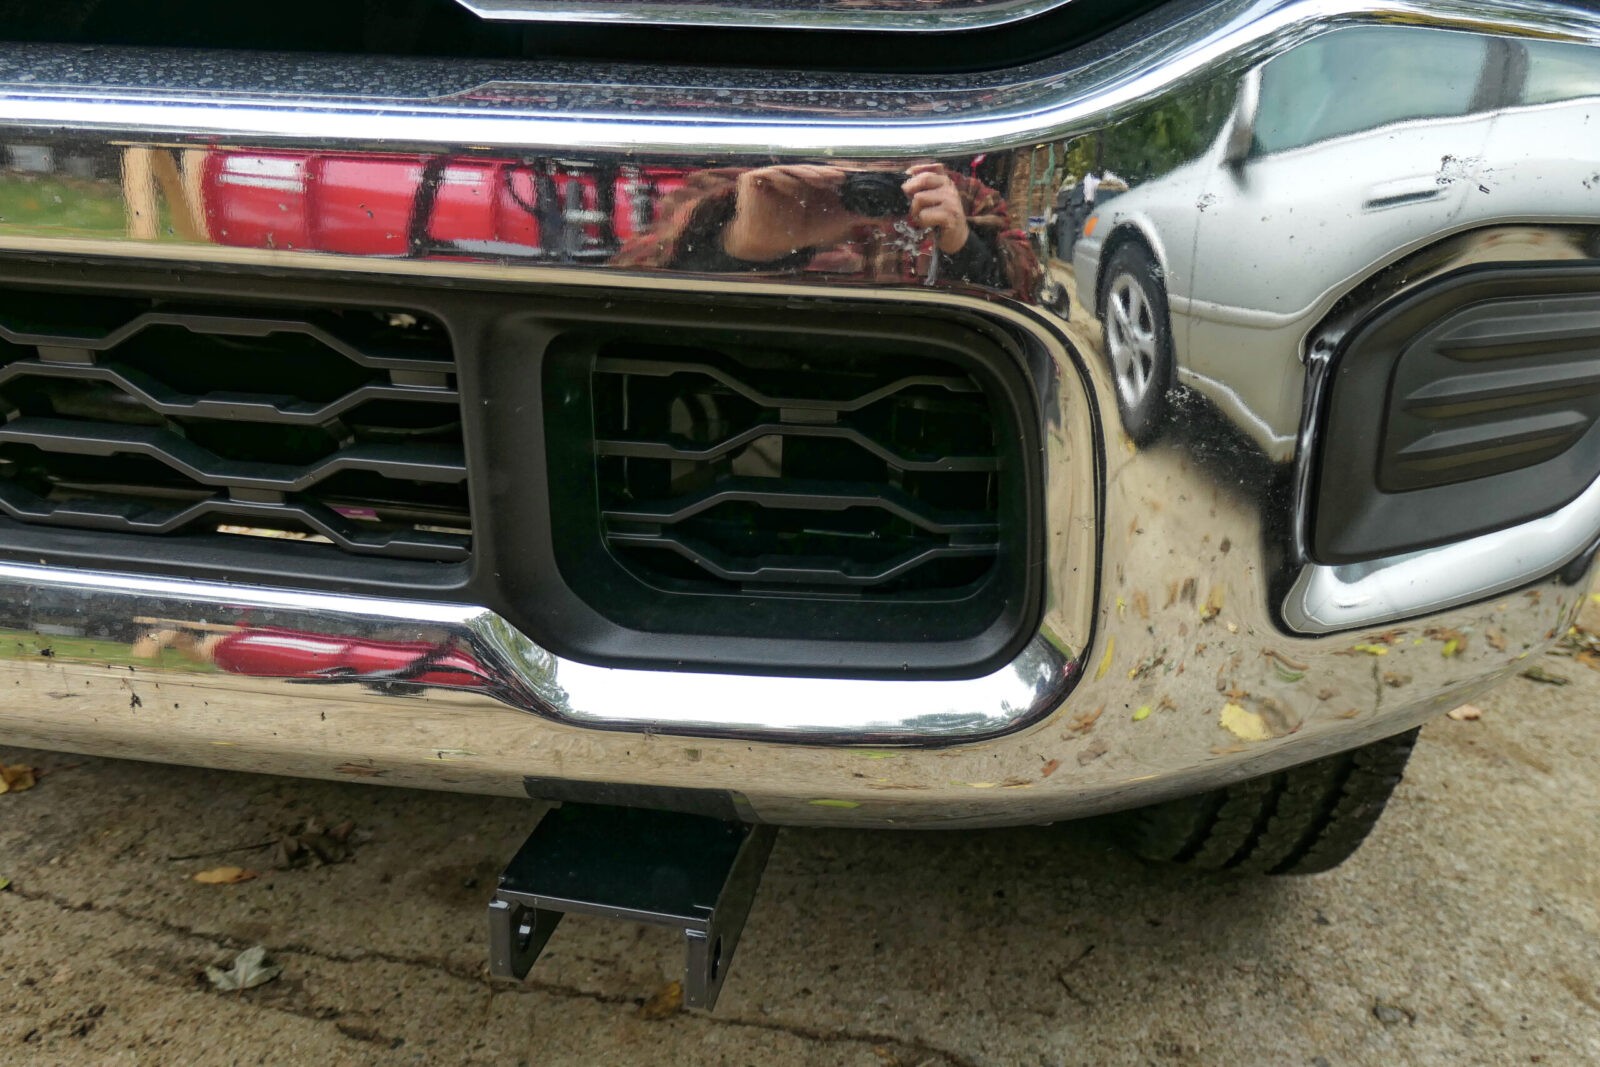
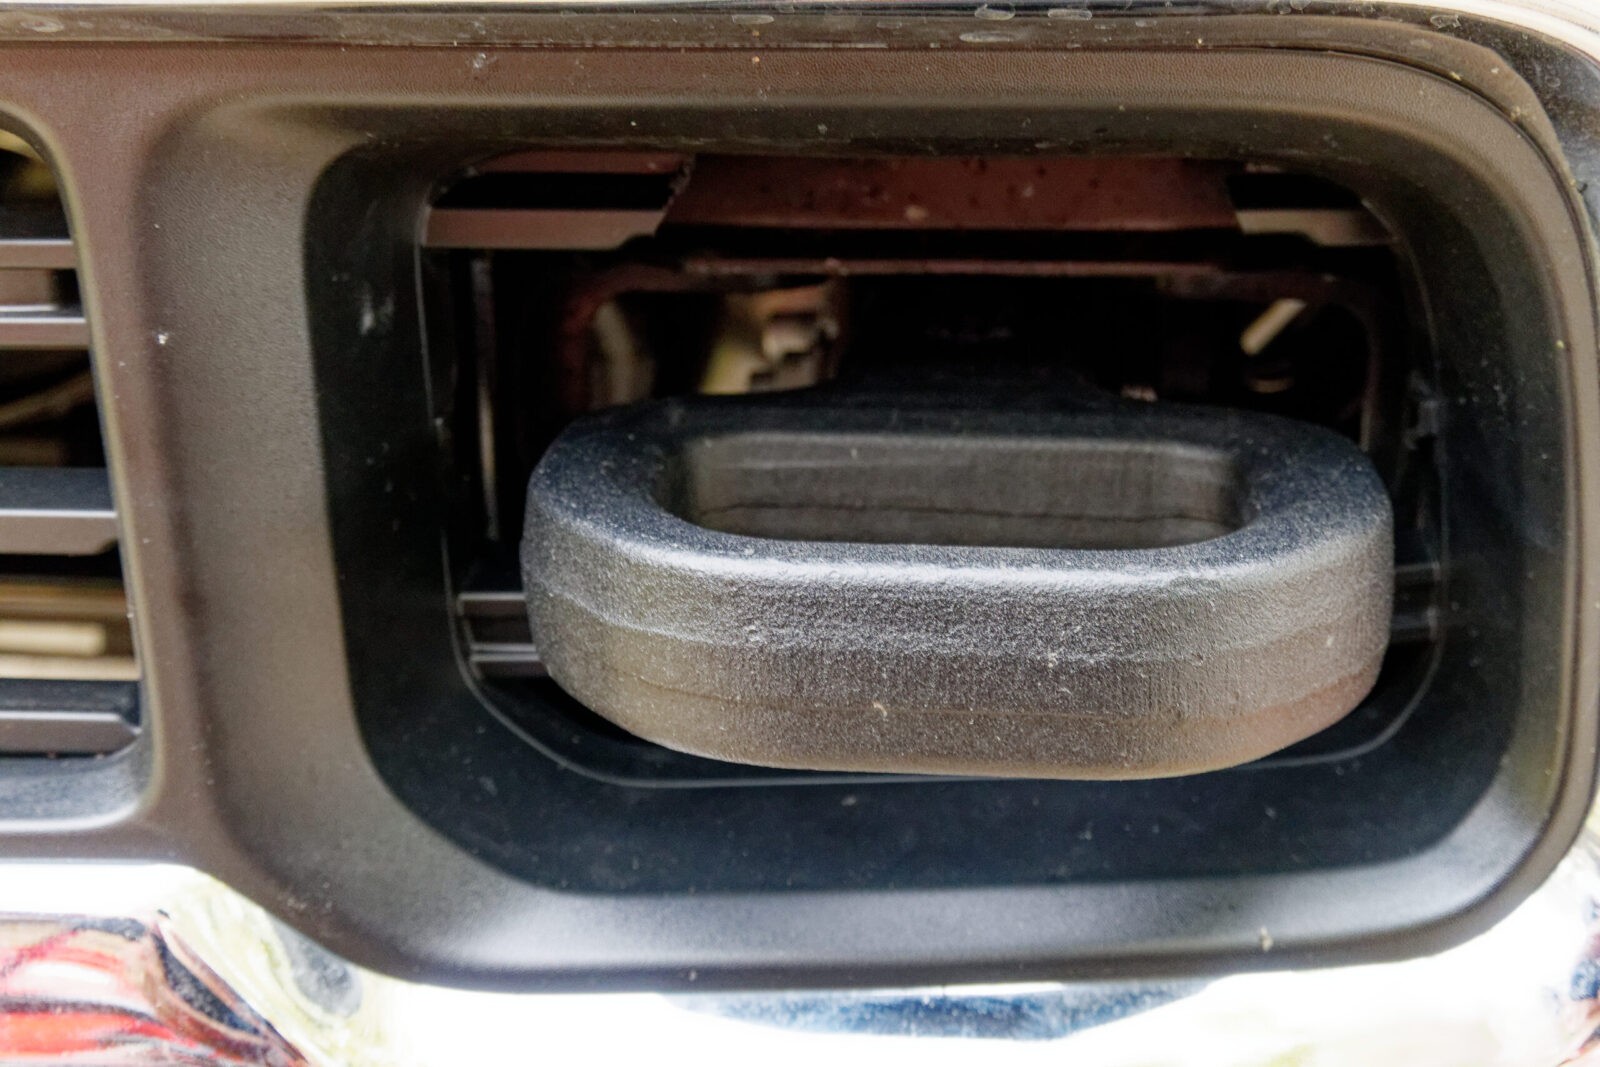
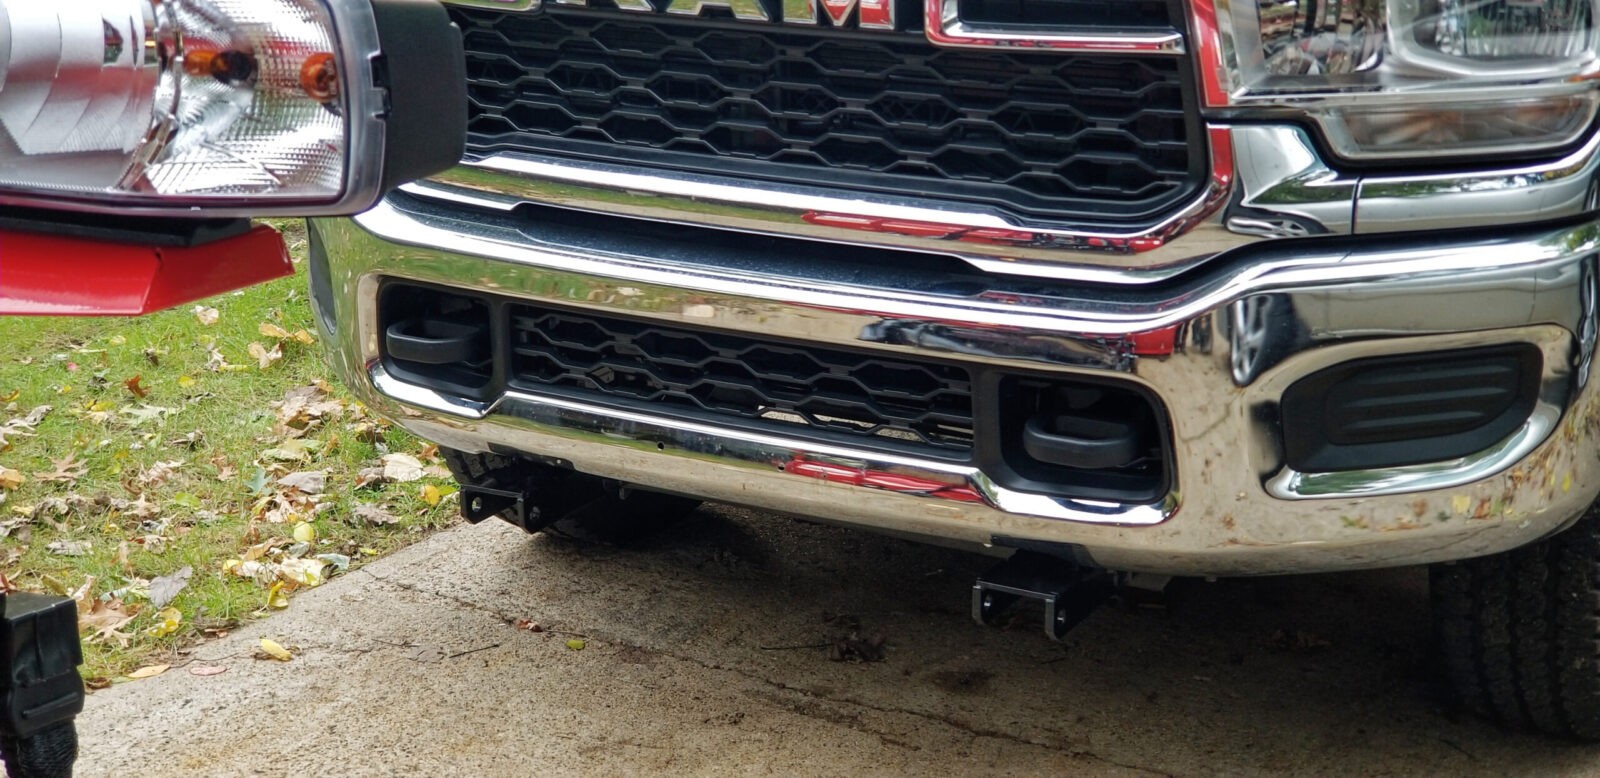
Driver’s side. I think I could have left the one top section of the grill but I am also not sure if it would have gotten busted off anyways from shackles, hooks, etc. I also can’t get rid of the slight angle of the hook left to right despite trying to make it flat several times so I am not going to worry about that either,
Passenger side
One last comment, I did go in a week or two later and spray painted all of the exposed bolts and nuts with black paint to slow up the rust on the fasteners. In Michigan, fighting rust is an art form and also a losing battle – that salt that gets put on the roads gets everywhere and eventually takes its toll but I sure do try to delay that 🙂
Summary
You can definitely do the hooks yourself. Save some money and get them off eBay, do what you want with the bolts and then trim the front grills so the tow hooks can slide in. It looks pretty good and will do the job.
Note, I have to buy all of my parts – nothing here was paid for by sponsors, etc. I do make a small amount if you click on an ad and buy something but that is it. You’re getting my real opinion on stuff.
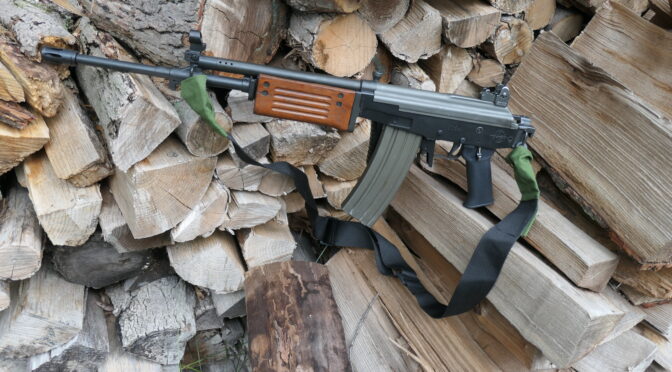
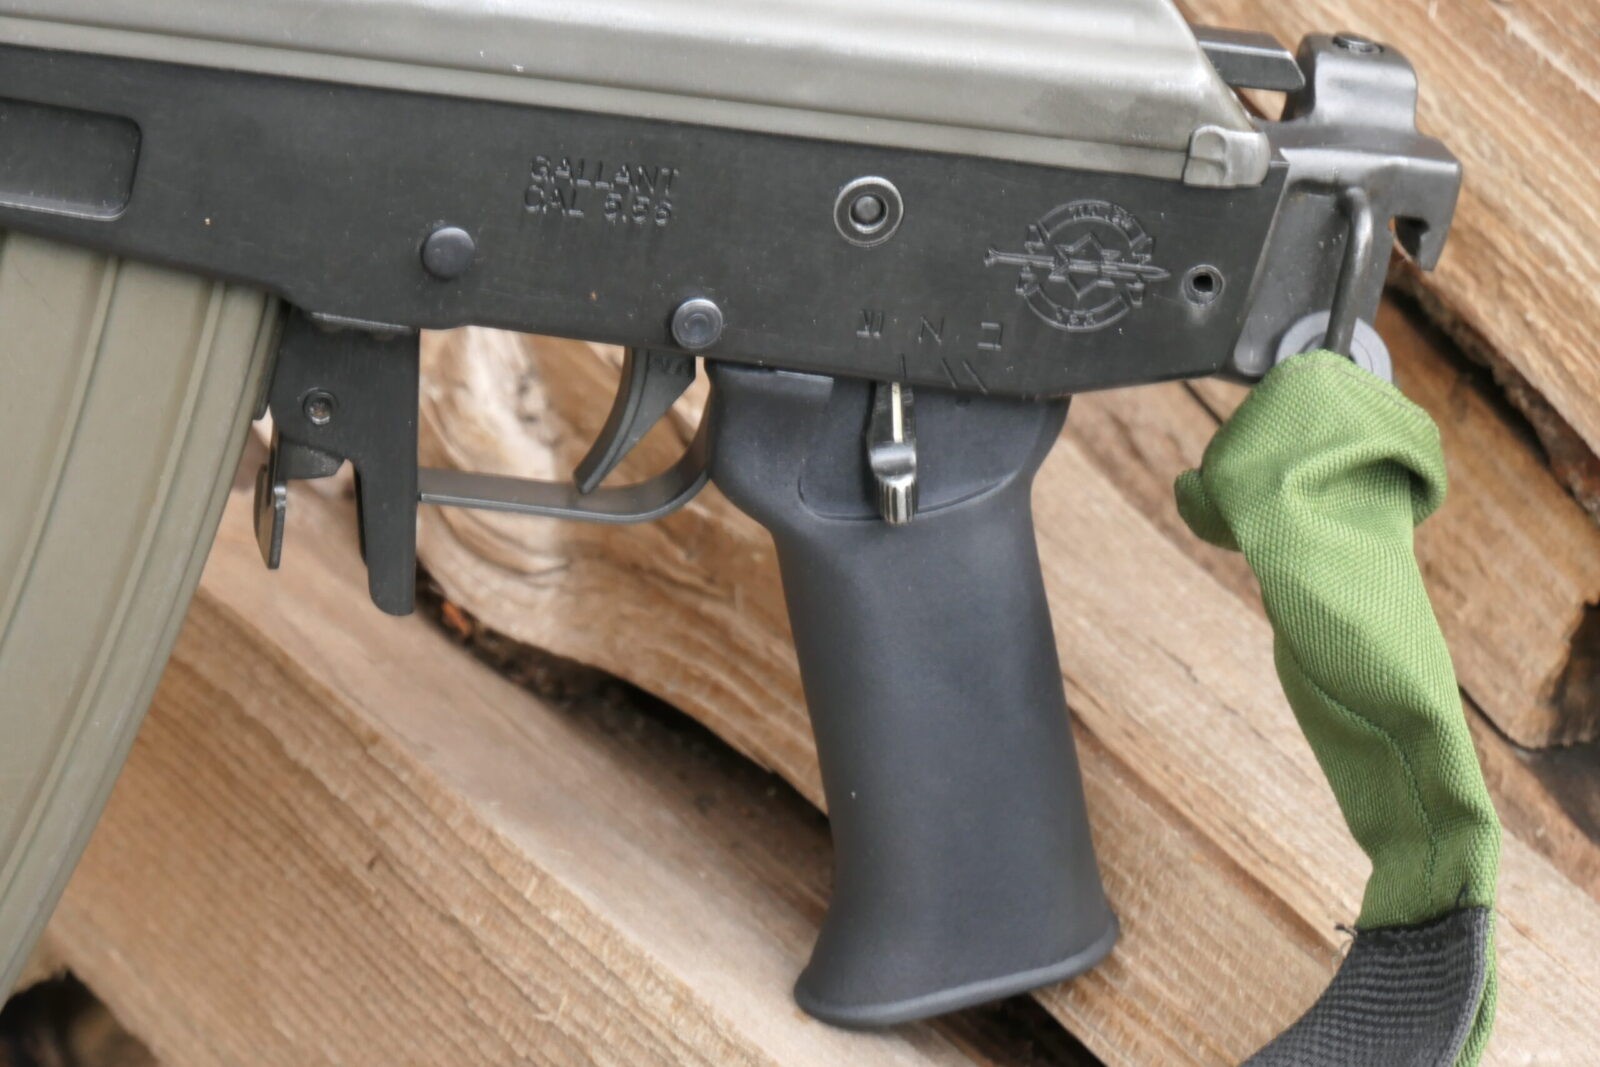
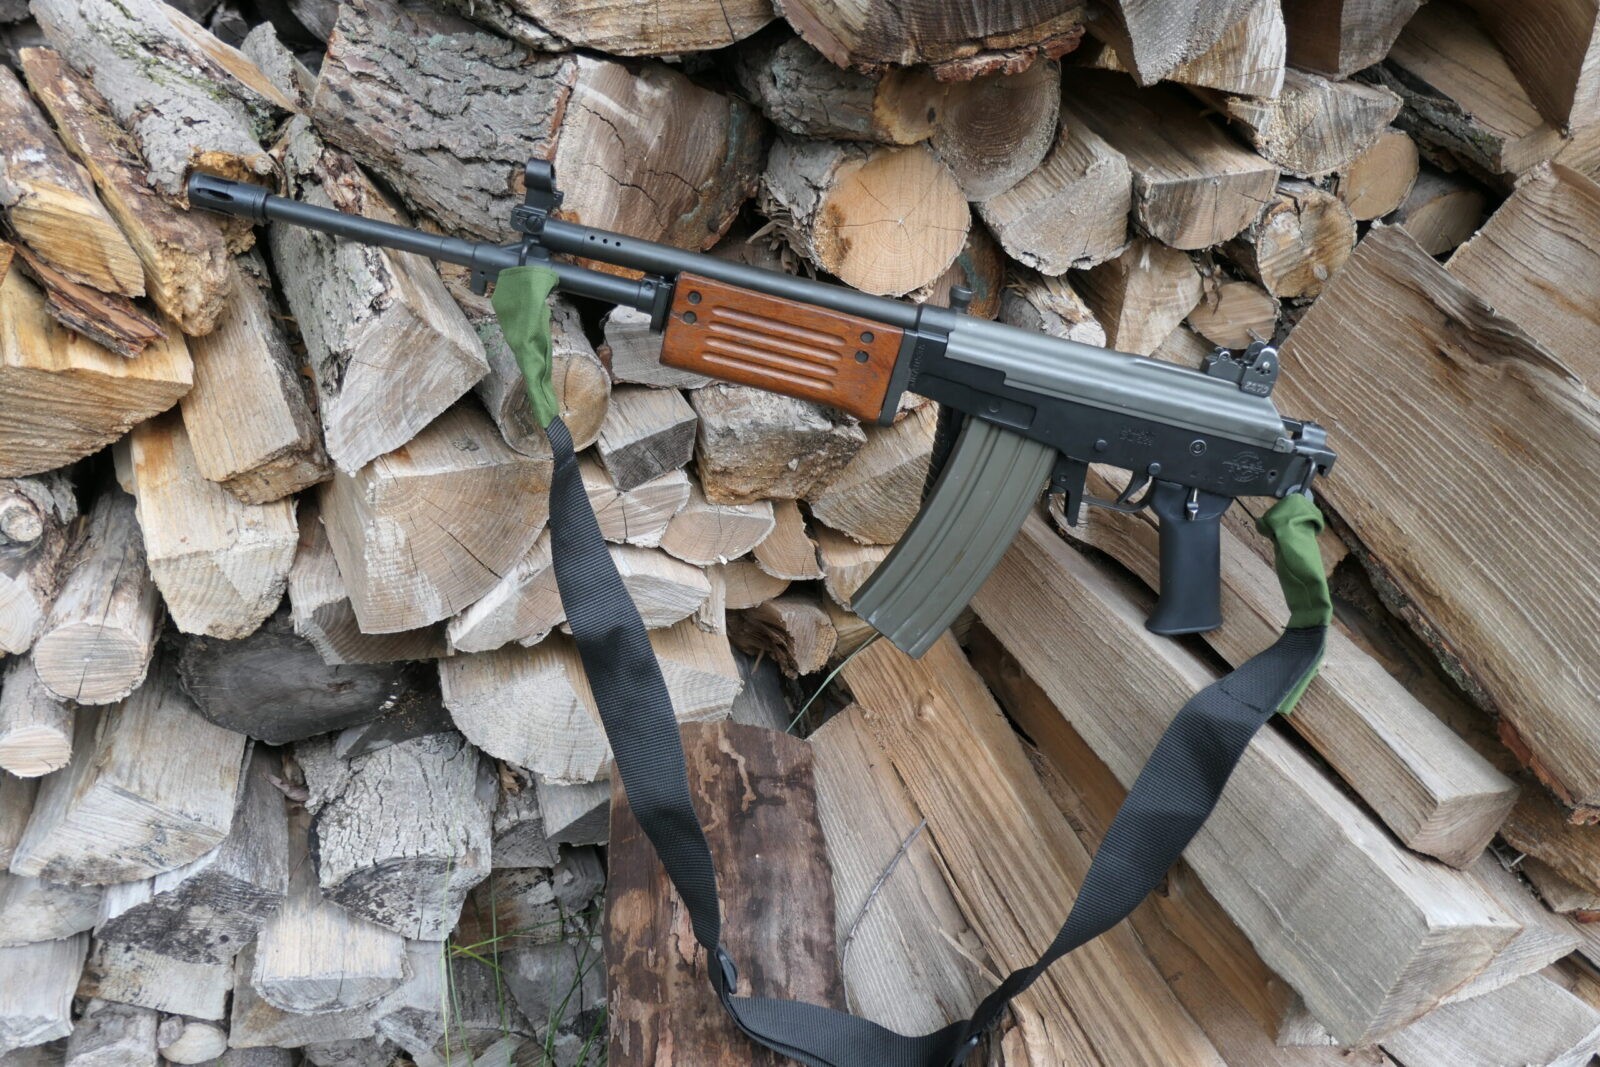
When I was tuning my JRA Gallant, I started hunting around for a good sling for it. In looking at eBay, I saw an IDF / Zahal Galil Sling w/Laces sold by zorbal39 in Israel and bought it. Zorba was great at communicating and fast to ship. A bit over a week later the sling showed up, installed it on my Gallant for photos and then I forgot about mentioning it until a reader wrote and asked what sling it was and for more details — so it seemed like a good blog post.
Details
The sling is made in Israel and seems to be made from quality materials with good stitching.
It’s a standard 2-point sling meaning it connects at two points on the rifle.
The strap appears to be about 1.9″ (just shy of 2″ in other words) wide nylon
It does come with laces if you need to tie it to something – the seller says he has a mix of the slings and some have shoe lace looking optional ties and some have thin cord – mine came with laces
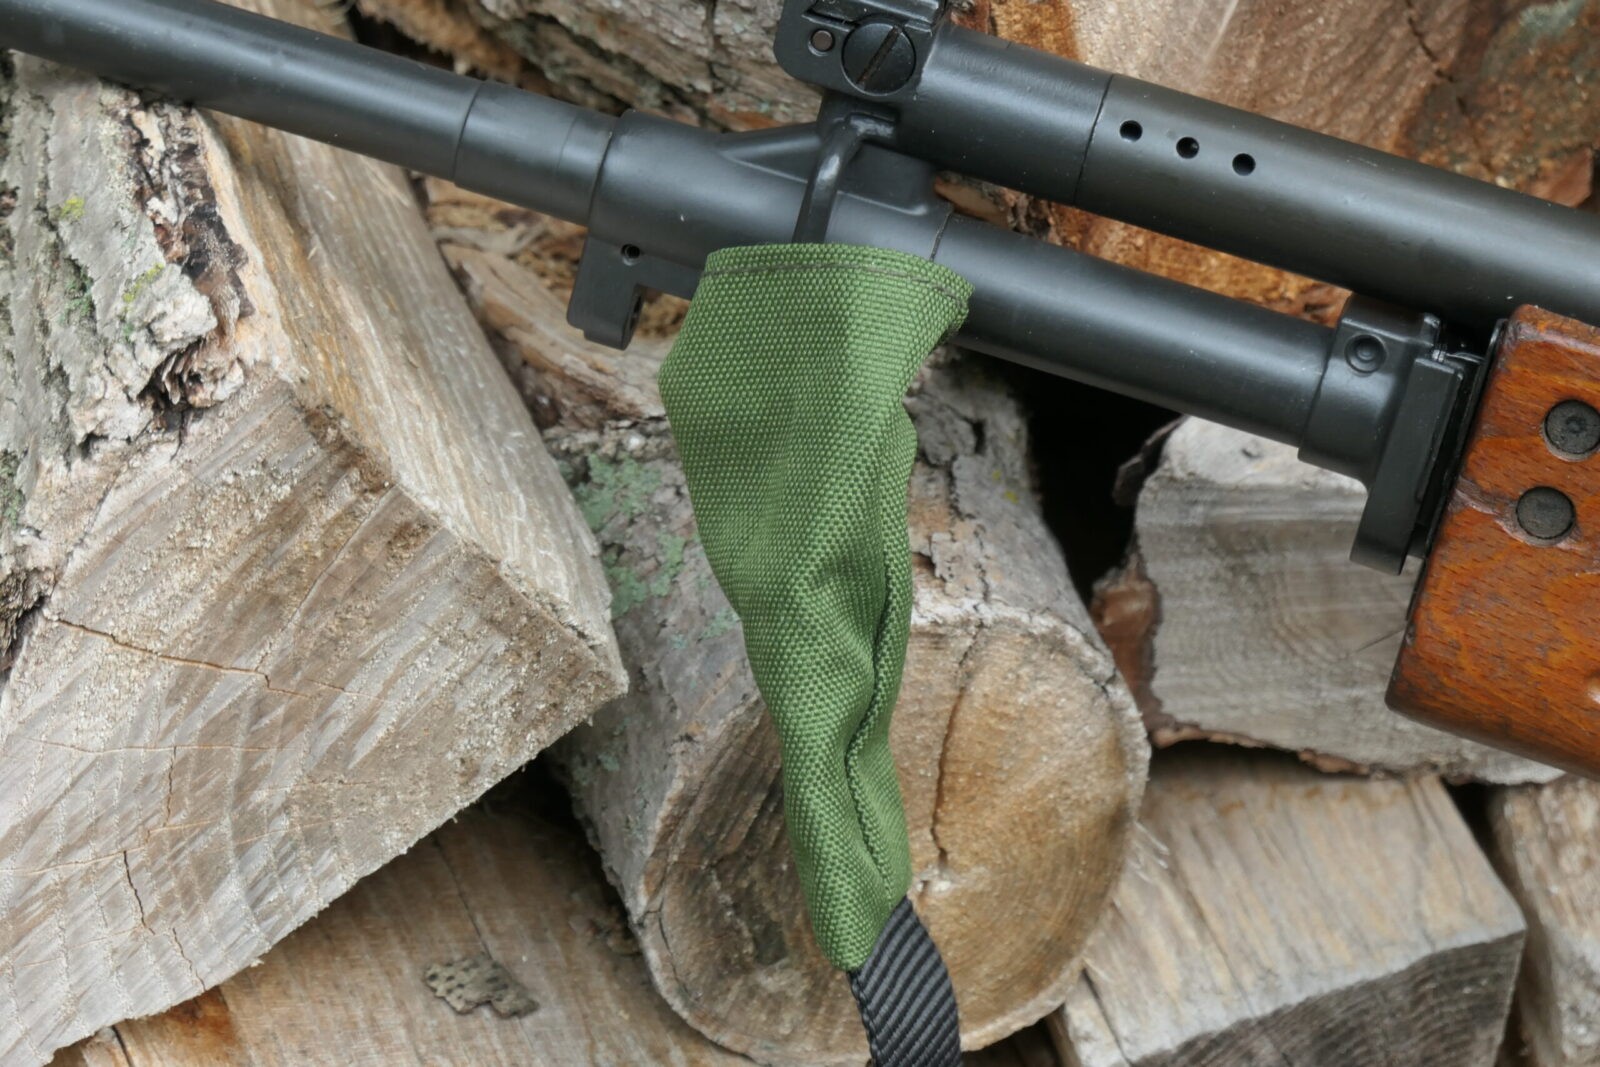
The attachment points are a high-temp strong plastic with sheaths to protect the rifle’s finish and quiet down movement.
The strap is black and the sheaths are a rich green color.
The strap does have a buckle / adjuster tri-glide midway to allow for adjustments to the length of the sling.
Some Photos
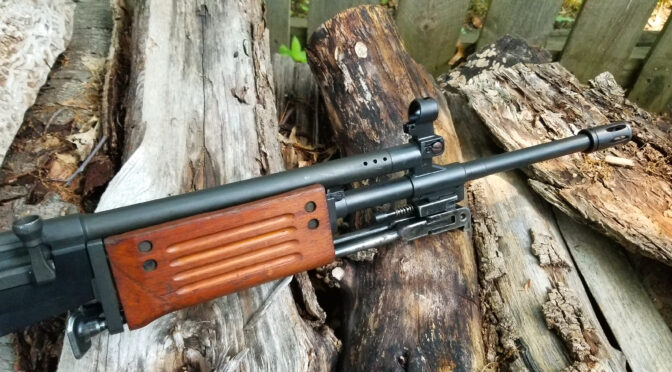
Here’s the sling attached to the sling loop on the gas block.
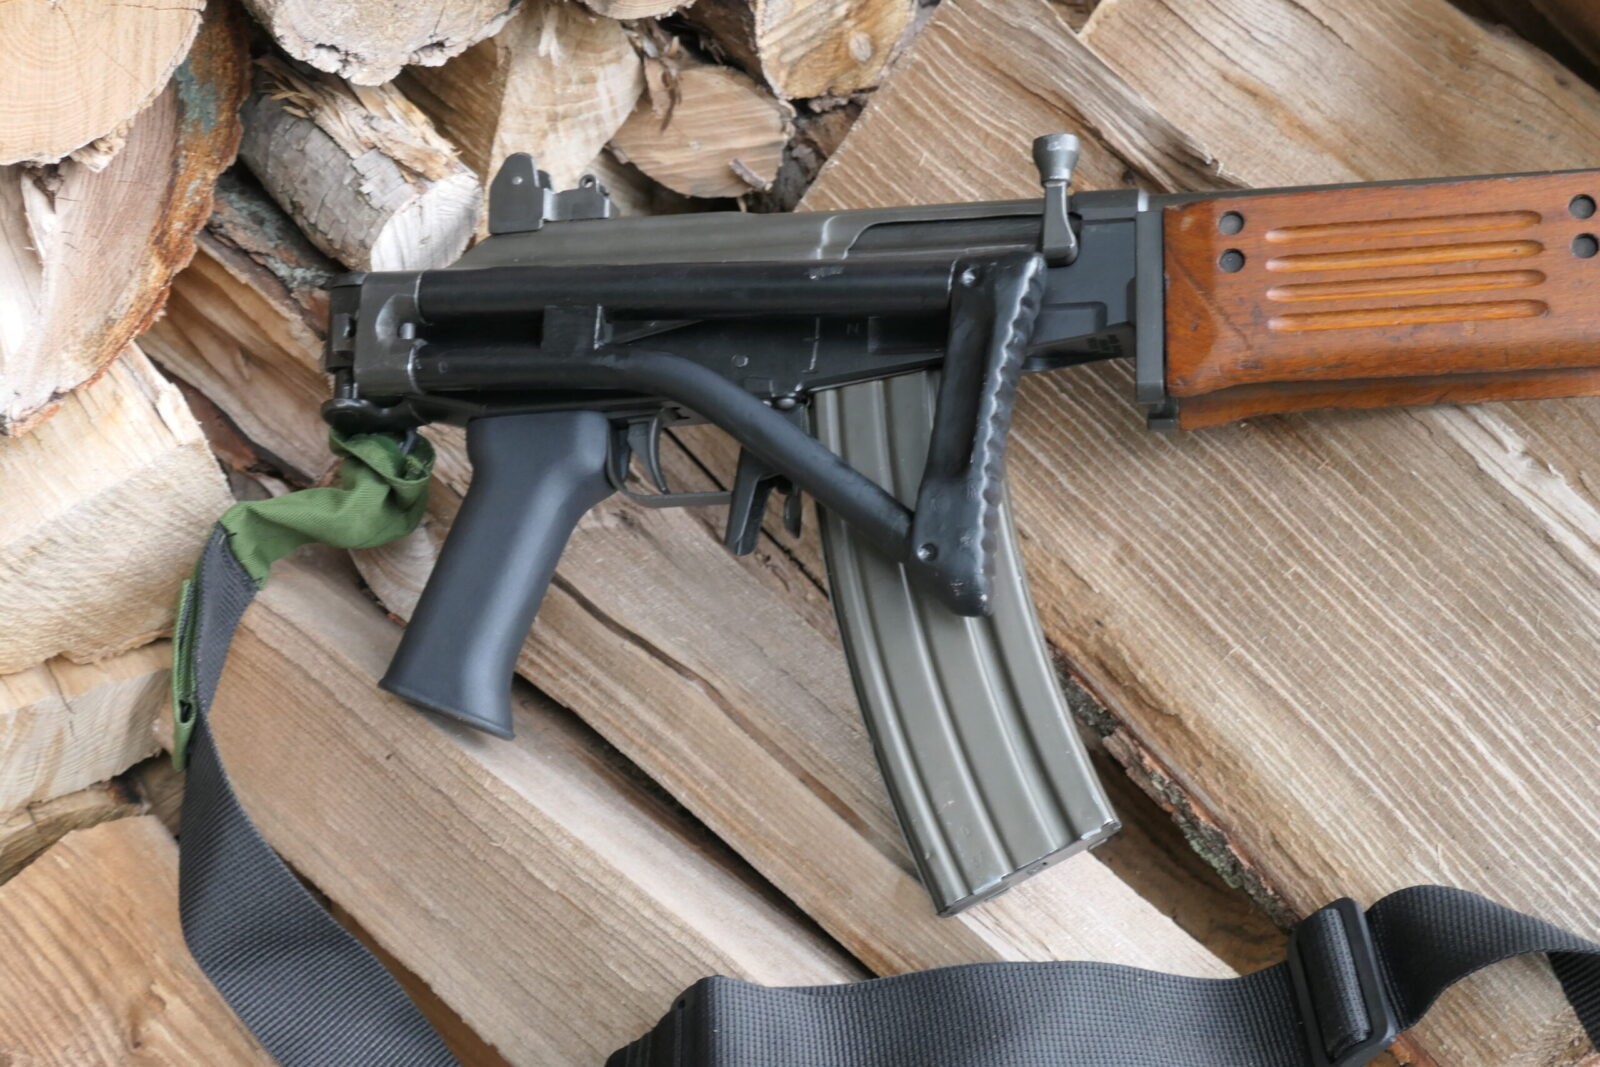
The rear attachment point is the sling loop on the Galil’s unique rear stock.
Here’s the reverse side of the rifle, note the buckle / tri-glide on the sling near the lower right corner. This let’s you adjust the length of the sling.
Note, I have to buy all of my parts – nothing here was paid for by sponsors, etc. I do make a small amount if you click on an ad and buy something but that is it. You’re getting my real opinion on stuff.
Okay, I’m the proud new owner of a 2021 Ram 2500 Tradesman and the original halogen lights were pretty anemic. I did two things to address this – first, I replaced the high beams with Lasfit LED emitters and that’s a story for another day. With that said though, I’ll tell you that upgrading to the Lasfit LED high beams was stunningly worth it – I can’t tell you the last time I was so happy with an upgrade.
2/13/24 Update: Lasfit is no longer an Amazon seller. If you search on LED headlight options, there are a bunch of sellers out there getting good reviews. Click here to see them in a new tab.
Now that I am done gushing over the high beam upgrade, the second thing I did was to investigate installing a LED light bar on the truck. That’s really the focus of this post.
I guess it must be the pandemic because there aren’t a lot of custom fit aftermarket options right now but there are still a ton of lighting options using general fit LED light bars – the kind that you normally bolt on to a bumper, roll bar, etc.
My first thought was to mount a light on the bumper but I run a Western plow in the winter. I could have mounted a 26″ bar behind the front lower plastic grill in the bumper or even cut it out for a clear shot but it wasn’t really appealing to me.
Then I got to thinking about how tall the truck was. My 2021 Ram 2500 with the snow package is sitting pretty tall in the air. The top of the cab is about six and a half feet (80-ish inches) off the ground. If I mounted a light bar up there, it would have the elevation to cast a ton of light.
Lighting Options
Over the years, I’ve used a number of inexpensive light bars off Amazon and had while some brands weren’t so great due to leaking water into the LEDs, I’ve had pretty good luck with Nilight. You’ll read mixed reviews of their customer service but fortunately I’ve not needed to work with them.
So, I started looking at NiLights and was particularly interested in their triple row light bars as they can output a ton of light. Honestly, for any of these vendors, take their lumen and wattage claims with a huge grain of salt – there’s a ton of marketing hype. In general, bigger bars and more emitters give you more light – that’s just a rule of thumb to go by.
So, I’ve had light bars up to 12″ wide in the past but they were double row and nothing to spectacular in terms of light output. So, I figured I wanted another Nilight and some width greater than 20″ and they have a bunch of options.
In terms of mounting, I really didn’t want to go drilling into my new truck. On one hand I could mount a light behind the plastic lower grill in the bumper but I really wanted to go high because I do plan to install LED fog lights in the future.
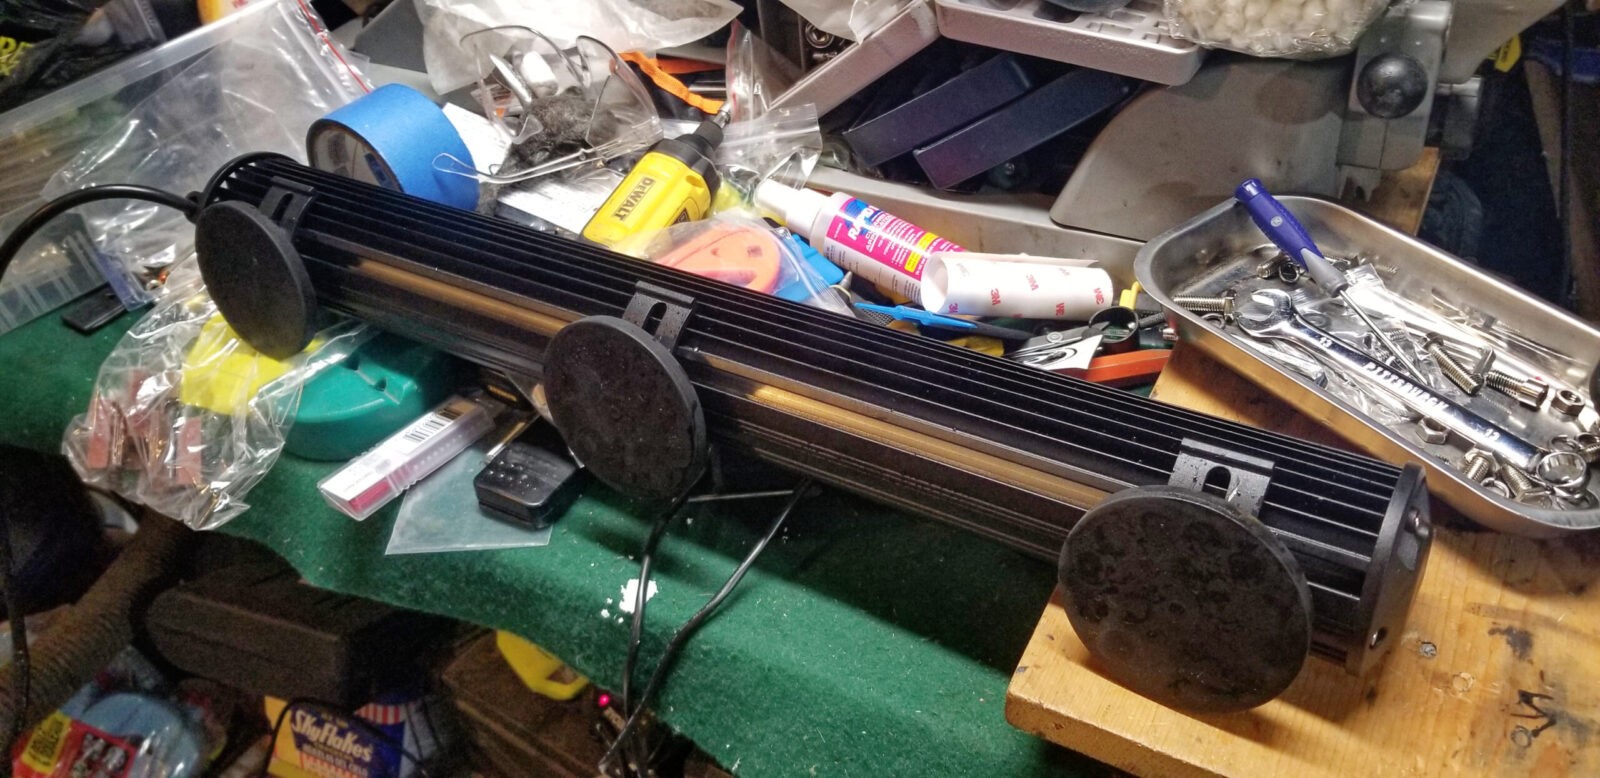
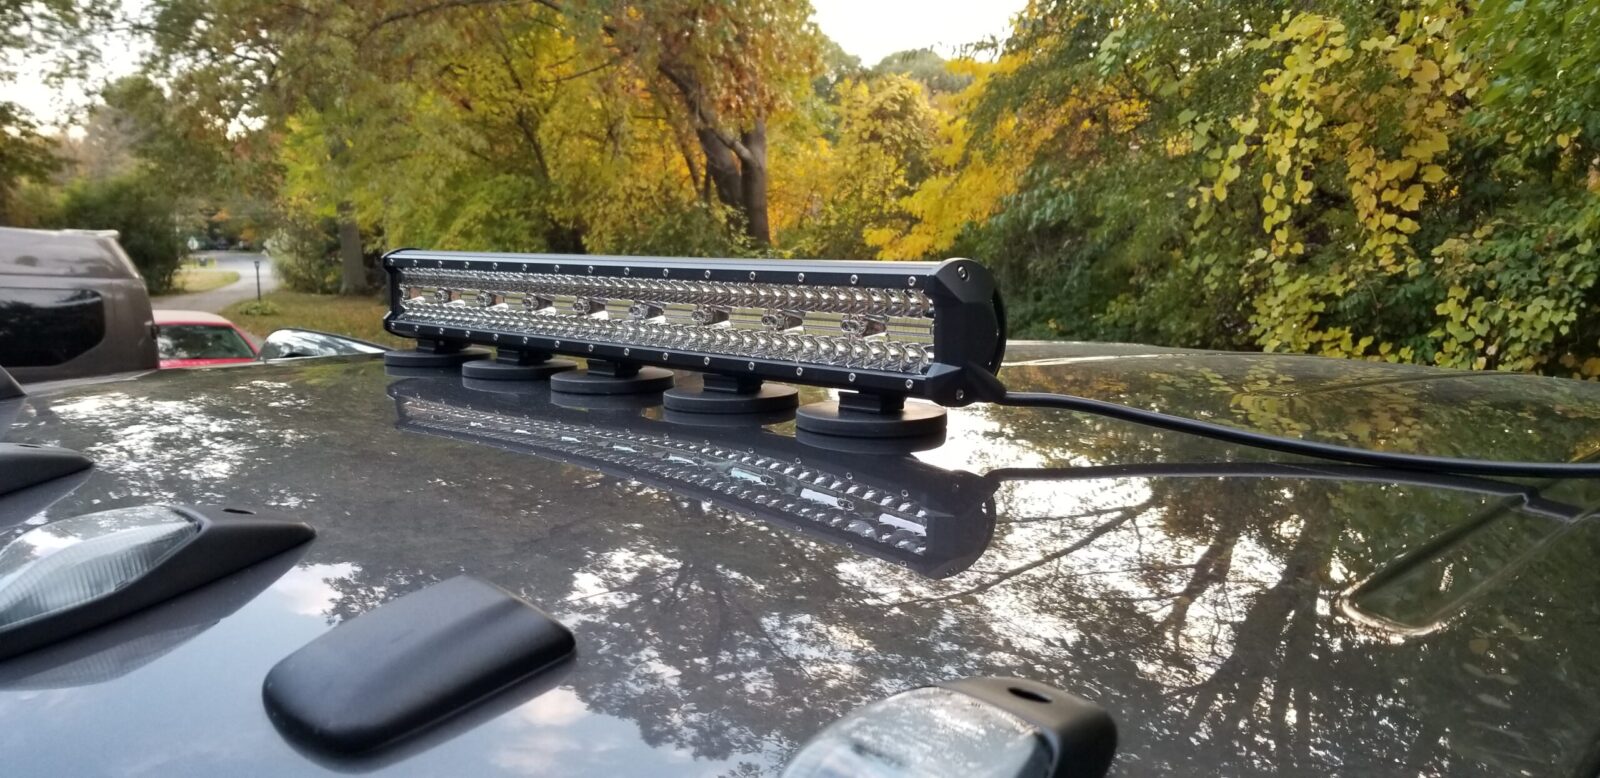
So, one way to mount is to use rubber coated magnetic mounts. They are removable and hold pretty good but they honestly do have limits and will blow off the truck if you don’t think things through carefully. I really wanted to go this route, at least for now as I could remove the light when not needed plus move it around to where I needed light.
Going with magnetic mounts does require you to think about some things. First and foremost, are they strong enough to hold the light in position? What you will find is that they tend to be very strong and pulling a magnet straight off a good metal roof is genuinely hard but that’s not the real issue. You need them to not gradually slide backward and come off at the speeds you plan. In general, the bigger the surface area of the light (width x height).
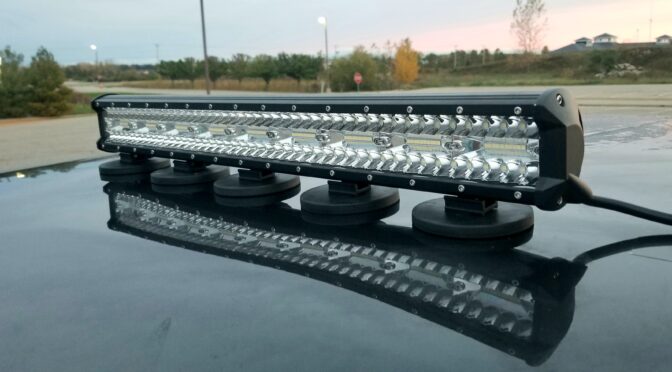
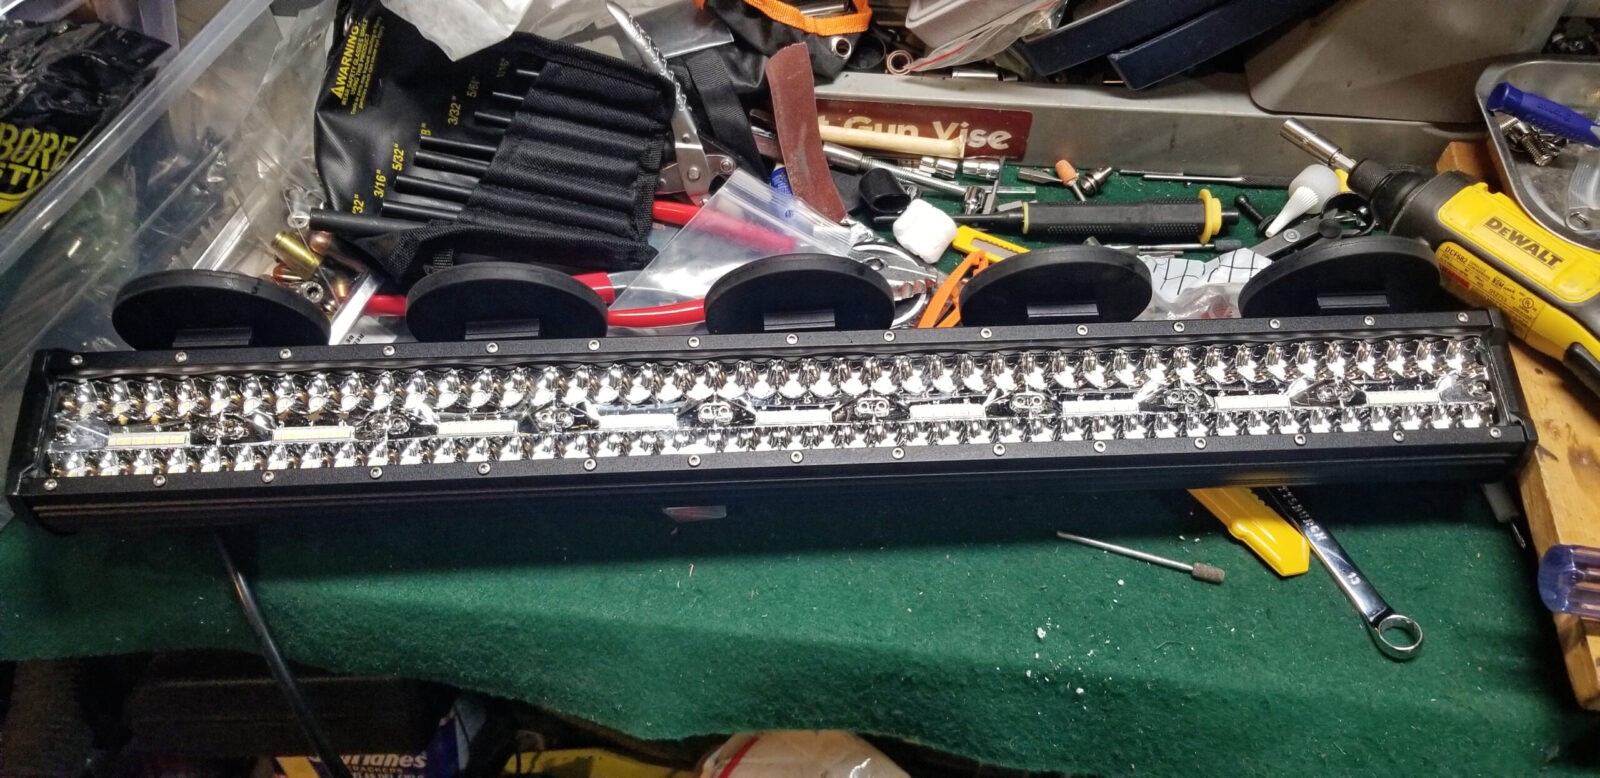
As I thought about it, I reigned in my length to 26″. I sure debated the 37″ bar but there were two reasons why I went with the shorter bar. First, guys reported that the actual draw of the 26″ Nilight 18025C-A light bar was around 5 amps and that was good because I planned to power the light from the dash mounted cigarette lighter – more on that shortly.
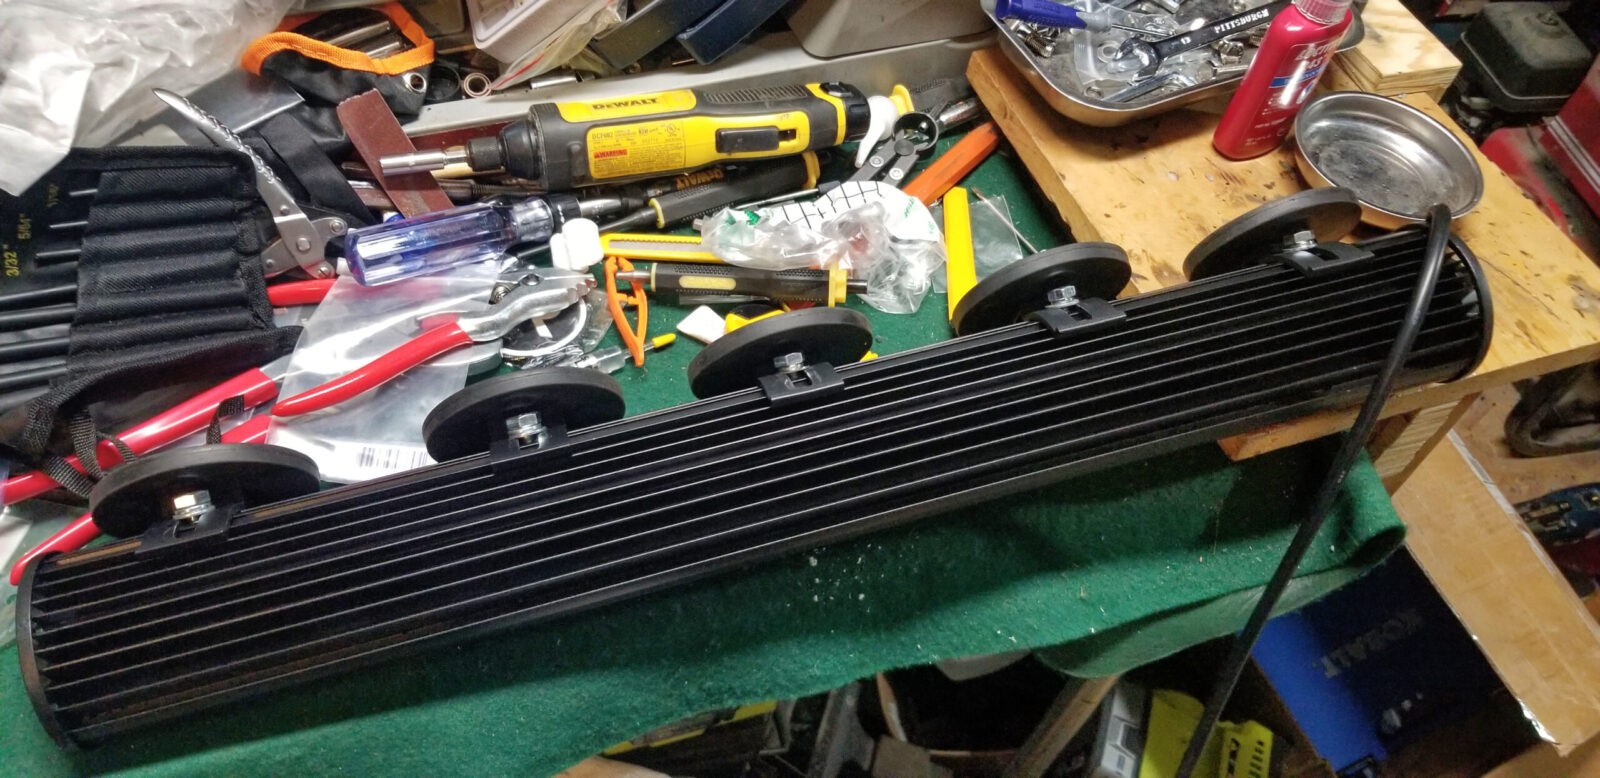
Second, I wanted to lower the risk of the light sliding around. The 26″ Nilight 18025C-A bar comes with three mounting points but I wanted to add more to make sure it didn’t move so I ordered additional set of the Nilight 90035B mounting brackets. That then gave me the ability to mount five of the magnetic bases. I figured that would do the job.
Powering the Nilight 18025C-A Bar
With all of the lighting gear on order, the next thing to consider was the power. Since it was going to be removable, I wanted the power to be mobile as well and not hardwired.
For those of us old enough to remember the old cigarette lighters you know where the name comes from. For those of you wondering what I am talking about, I am talking about the odd looking tubular 12 volt power receptacle in your car or truck. Back in the day, there was a little plug that you pushed in that would cause a little heating element to get red hot and you could light a cigarette or stogie from it … or anything else for that matter – it was like a little red hot space heater or stove element.
In most vehicles, the units can provide 15-20 amps. In a Ram, my understanding is that the center dash unit has a 20 amp fuse. If you are trying to calculate watts, volts x amps = watts so a 20 amp 12 volt circuit can provide 240 watts.
Remember my earlier comment about light bar watt and lumen claims typically being higher than reality? The 26″ bar listing says 540 watts. That is a ton of juice — maybe it’s what it would be if some old incandescent bulb was used but it’s not really drawing that.
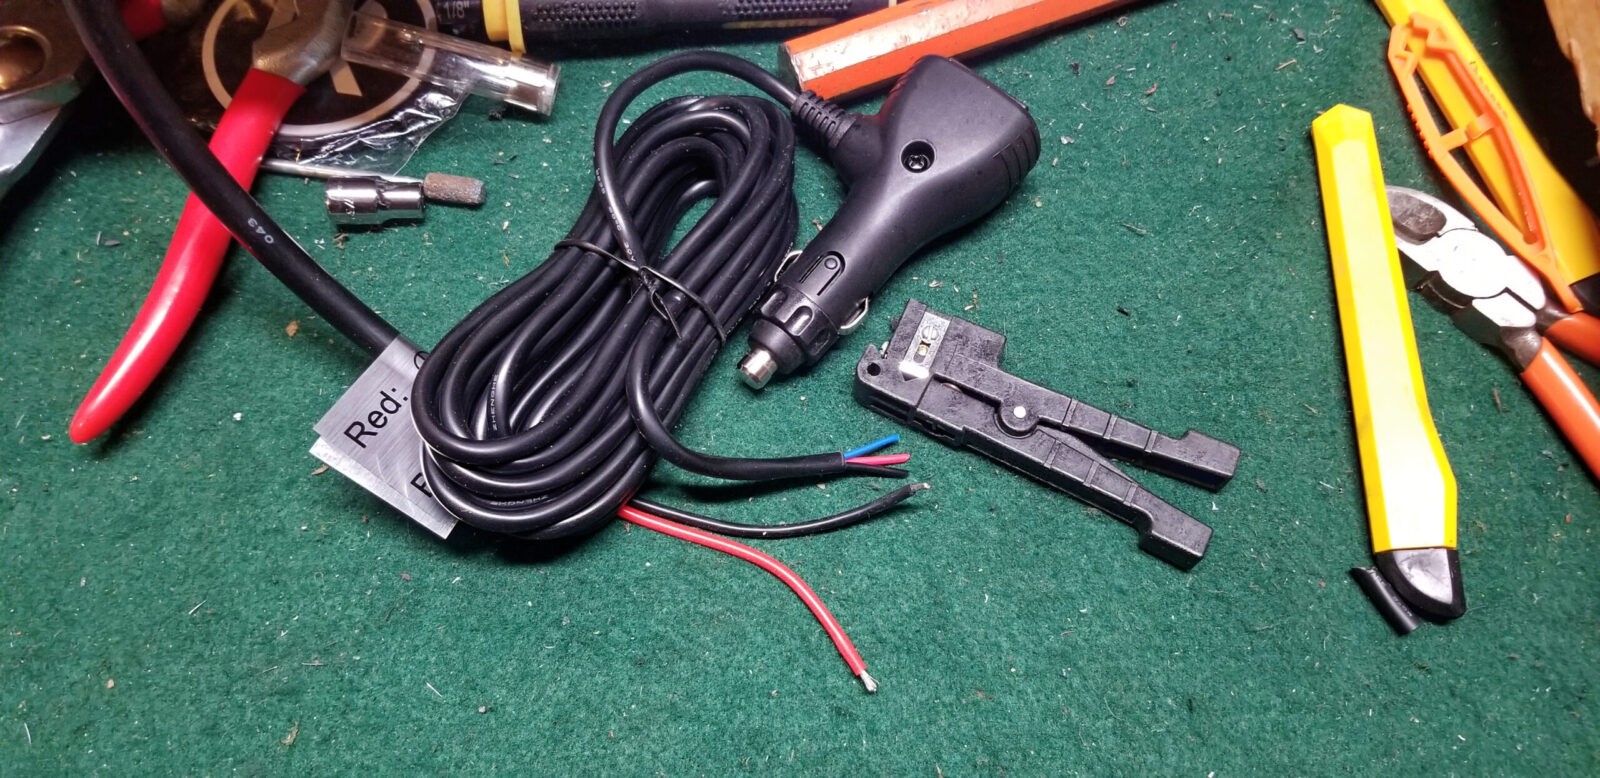
There are these really cool switched plugs that have a on/off switch along with a momentary switch and a 10 foot cord. They are well made but I do wish the wire was thicker but it didn’t cause a problem. Note, you can buy these with either the ground (negative) or positive being the momentary switched circuit. I opted for the positive momentary switch because I could just turn the light on for second, let go and it would shut off. If you don’t want it at all, you can just cut off blue momentary wire.
Adding The Mounts To The Nilight 18025C-A
I should point out that I did try just using the original three mounting points that came with the bar and three magnets. During some highway driving tests during the rain I thought it moved some and didn’t think that was secure enough, at least not to my liking. The lights are modular so adding a couple more mounts was easily done.
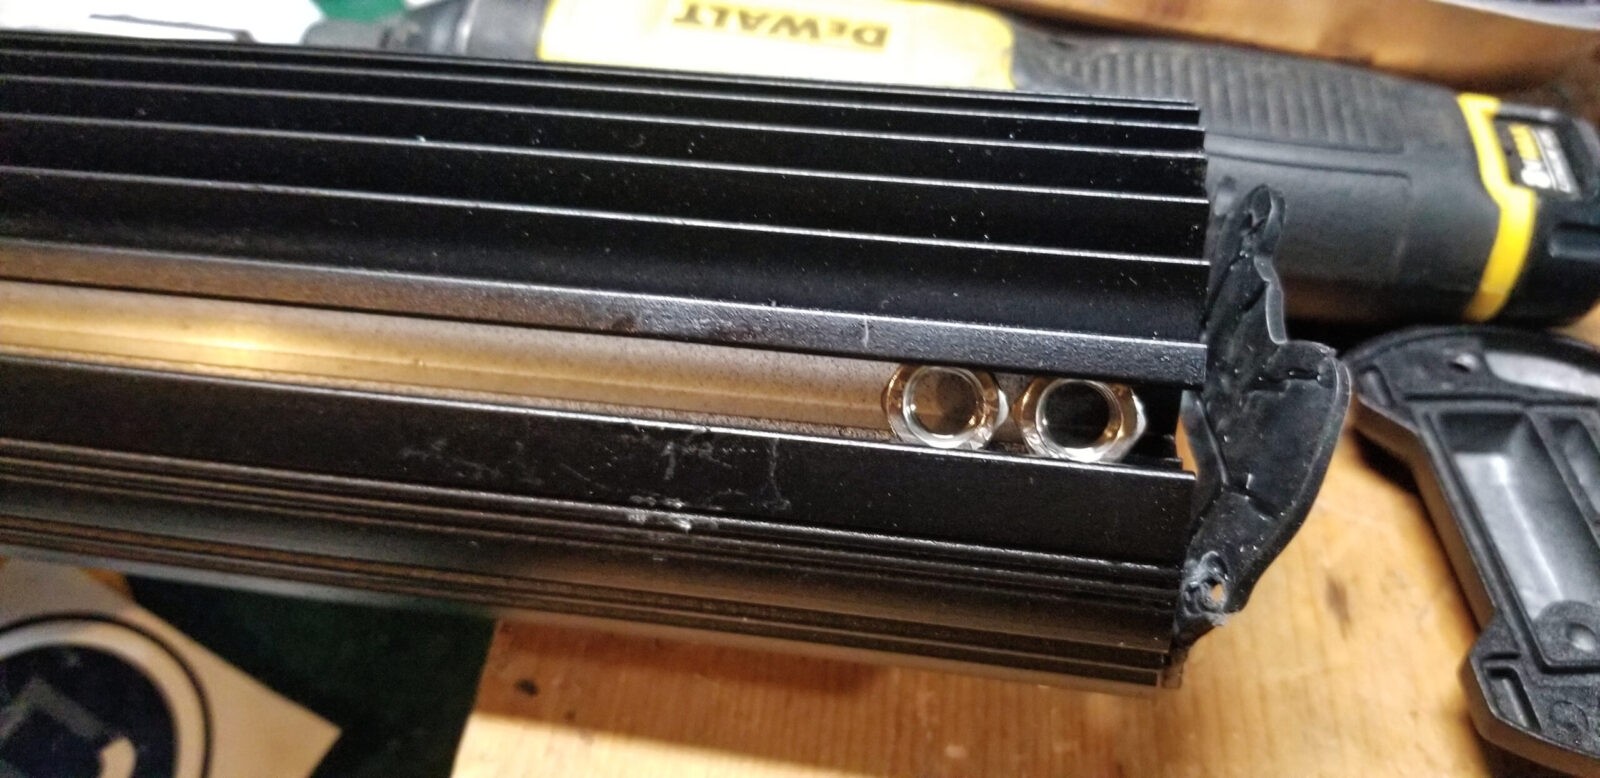
The first thing I did was to unscrew the end cap from the end without the wire. I removed the end cap and the gasket so I could then slide in two extra M8 hex nut for the two extra mounts I planned.
I removed the cap from the end with no wire, moved the gasket out the way, and slid in two new M8 nuts. I was then careful to make sure the gasket was positioned correctly when I inserted and started the little bolts by hand before using my power screw driver to run them down snug.
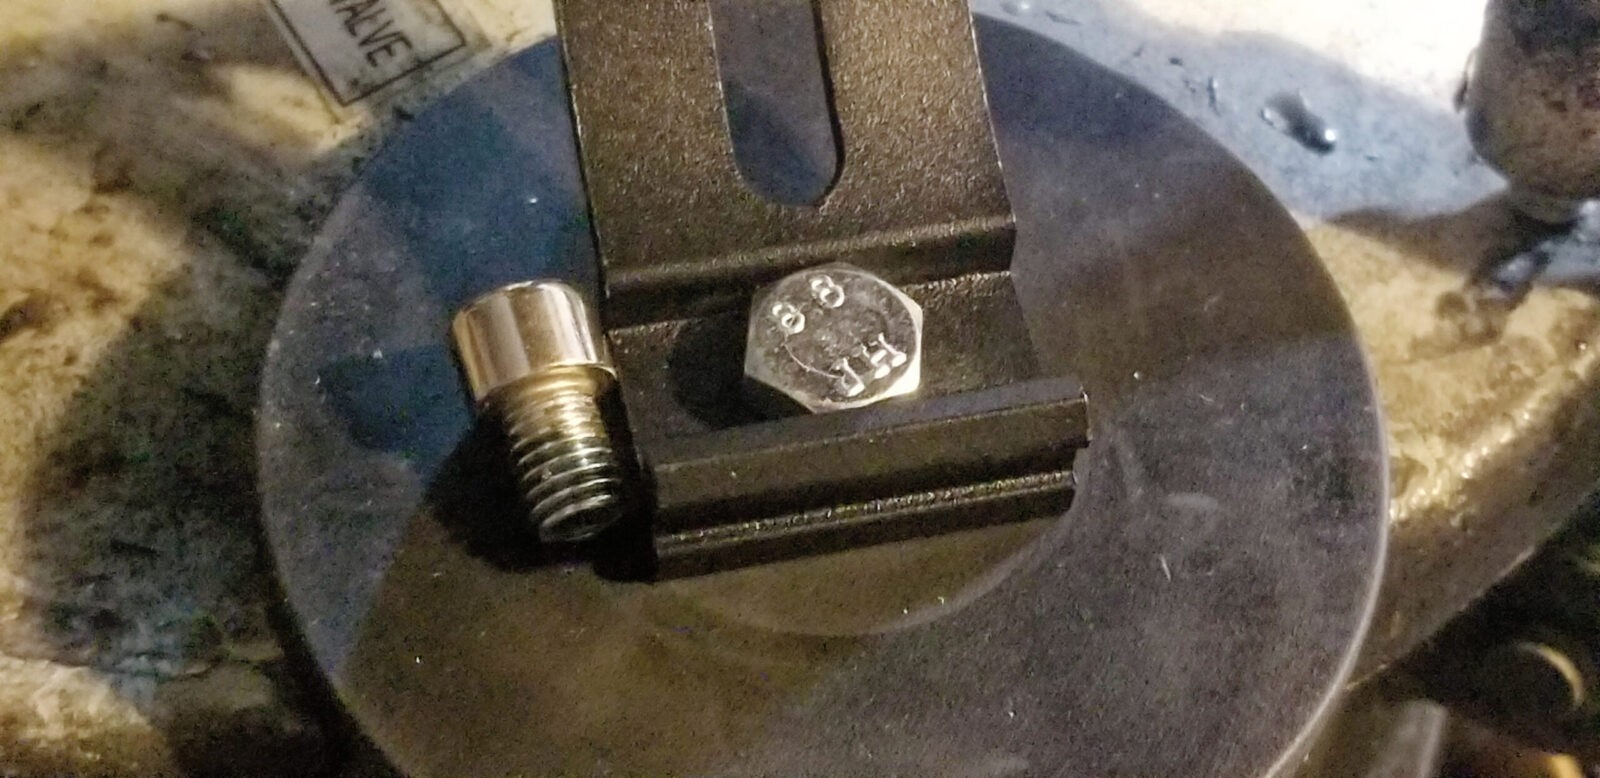
In terms of the mounts, I found that their supplied allen/hex socket screws were really a bad idea on their part. You can’t access them easily at all and they limit adjustments so I switched to regular hex head M8 bolts.
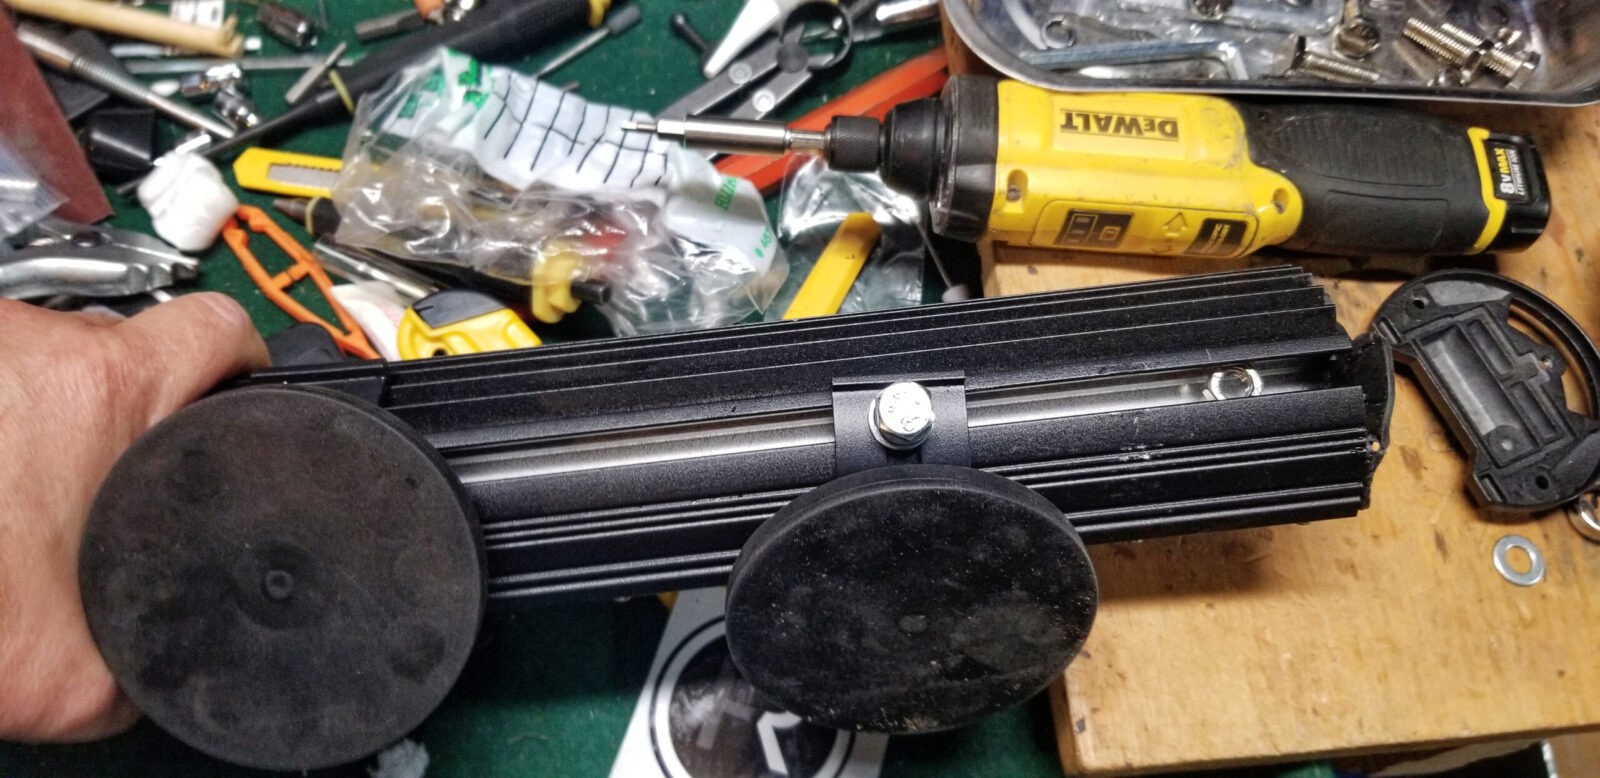
With an M8 bolt in place, you can turn the rubberized magnetic mounting disc and tighten or loosen it accordingly. I replaced all of the little hex head socket bolts with hex heads as shown above. I took the little hex socket bolt into my local Ace Hardware and found replacements of the same length.
As with the bolts on the rubber mounts, I replaced the hex sockets on the body too. I honestly have no idea why they opted for sockets vs. head head bolts. The hex heads allow for more rotation and easy access with an open end wrench.
I did apply blue Loc-tite to the bolts going into the rubber pads. In hindsight, I think this might have been overkill. If I ever want to take the pads off, it will take a bit more effort but then again they aren’t going to vibrate loose so easily either.
To make the spacing symmetrical I just moved in X screw heads from each end, centered the mounting block and tightened it down. In my case, I wanted the light to point straight head so I did have to play with that a bit and then match all of the mounts to the same angle.
Here’s the rear view. Once I figured out the position for the light to be straight ahead, I approximated the angle on the others by paying attention to the location of the top of the mount relative to the cooling fin.
Wiring The Nilight 18025C-A
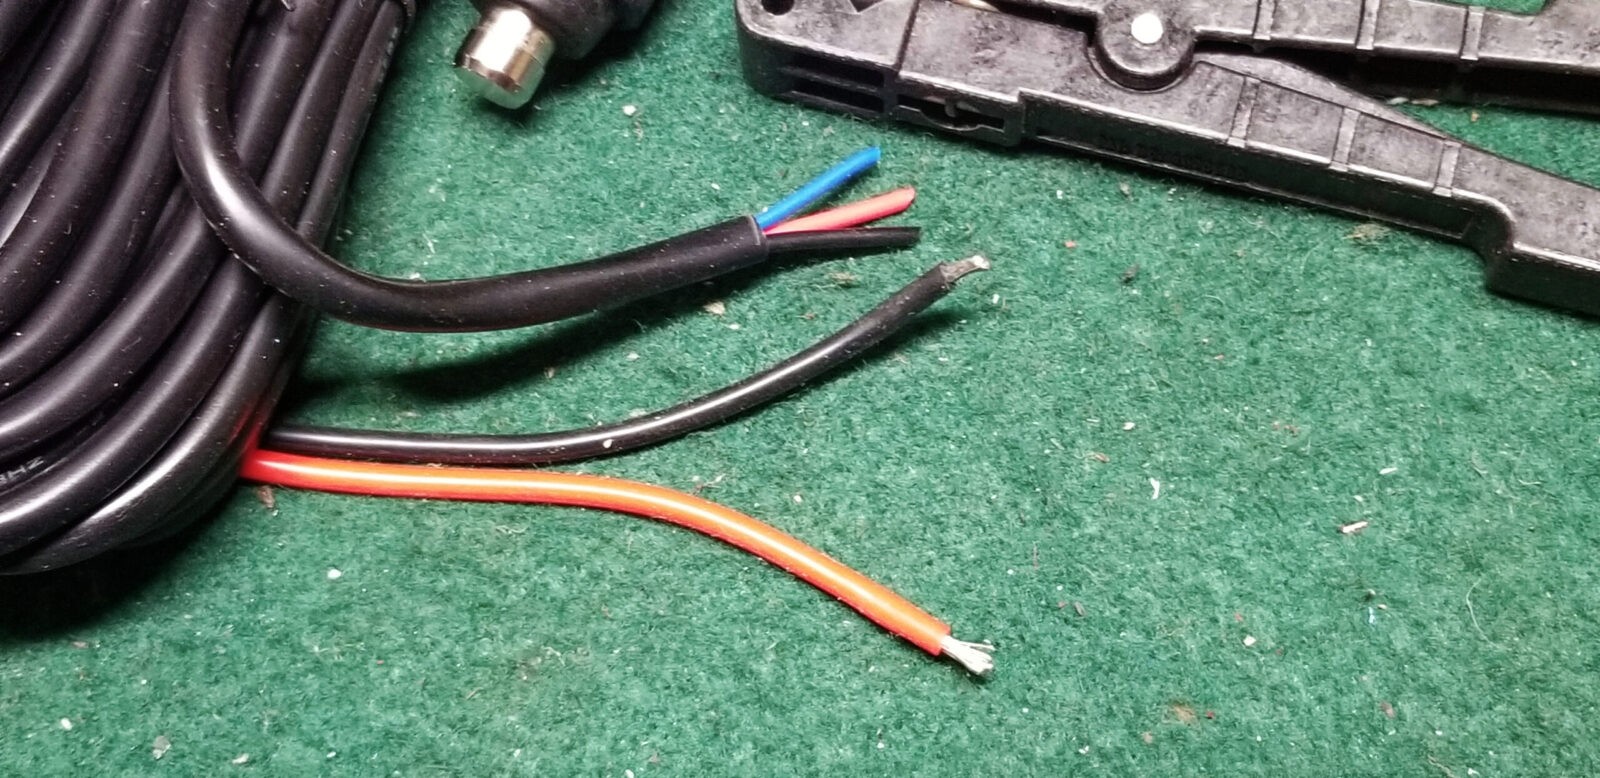
Wiring is very straight forward – red line in the light’s short lead cord to the red line on the power cord. If you want the momentary positive to trip the light also, connect the blue and red cord together. Only do this if you buy the momentary positive version of the cord.
Here’s the switch assembly and it’s cord with the black cord from the light swooping in from the top left. The small black tool is used to trim back the protective outer case on cable assemblies so you can then get to the exposed individual wires. They are cheap and very handy. The alternative is careful slitting with a box cutter/razor.
Red to Red, Black to Black and combine the blue momentary positive to the red positive on the power cord – I just twisted them together and then soldered. Only do this if you made sure to buy the momentary switched positive version of the switch. If you mistakenly bought the negative momentary version you will pop the fuse in the nose of the switch housing because that will be a dead short. That fuse is replaceable by the way.
As far as wiring goes, you can use any of the solderless crimp on connectors or you can just solder the lines together. If I know I will need to take something apart then I will use good crimp on fittings. Otherwise, if I want a slim connection that will last, I use a soldering iron and resin flux core solder.
Be sure to test everything before you close up the circuits. I tested the LED light bar itself before I did anything else.
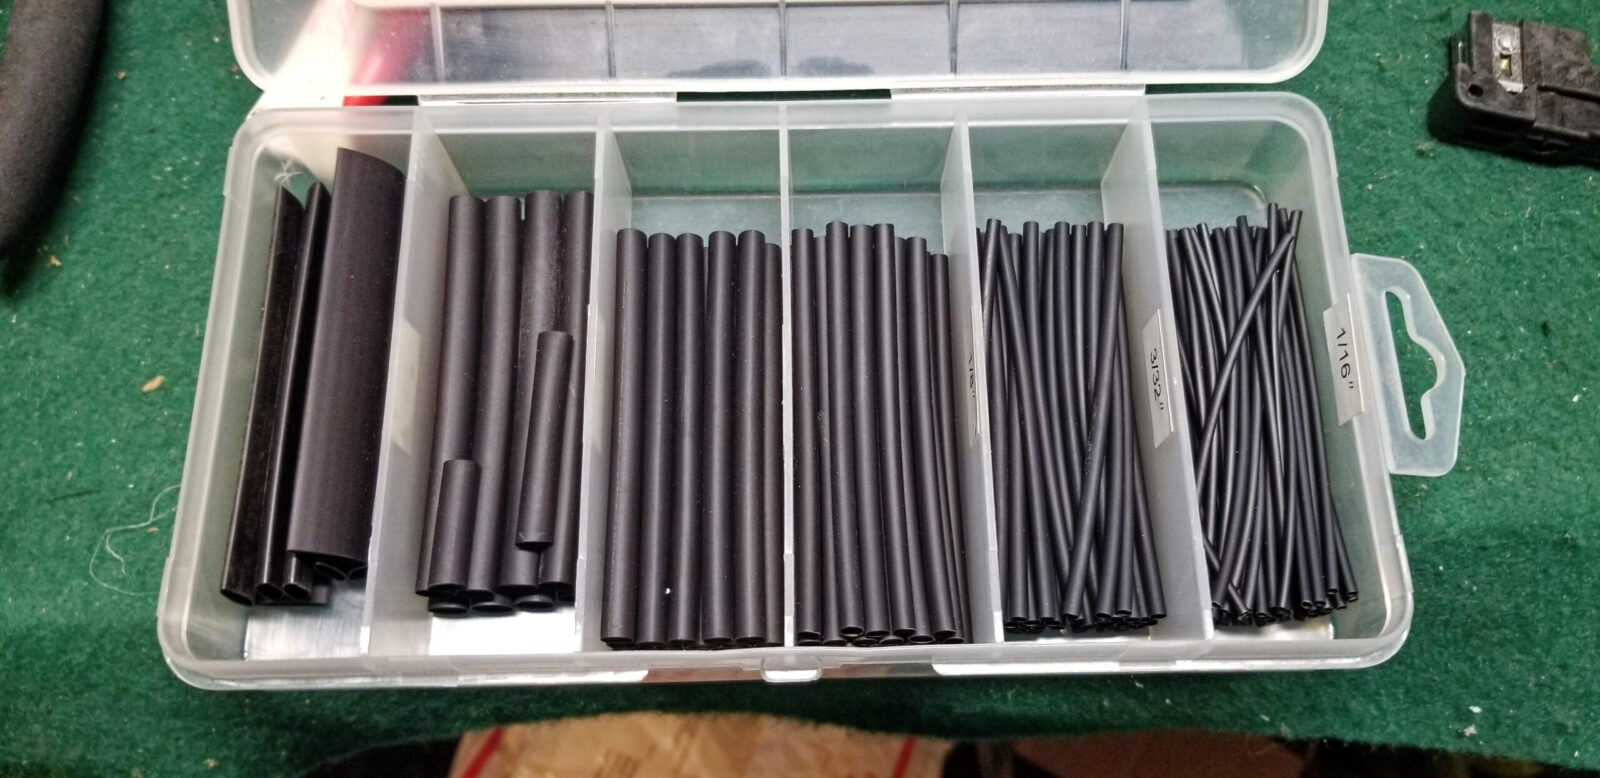
After soldering, I like to put shrink tubes over each line and then over the bundle to keep moisture out and reduce strain. By the way, if you aren’t familiar with shrink tubing, it shrinks when heated – I prefer to use a heat gun but have also used a lighter in a pinch.
If I want to reinforce it further then I may add on a layer or two of quality 3M electrical tape – overkill I know but I don’t want things to fail easily from flexing or moisture.
I also looked at where the light cord was going to rub on my truck’s roof and added a piece of thick decal vinyl to protect the paint.
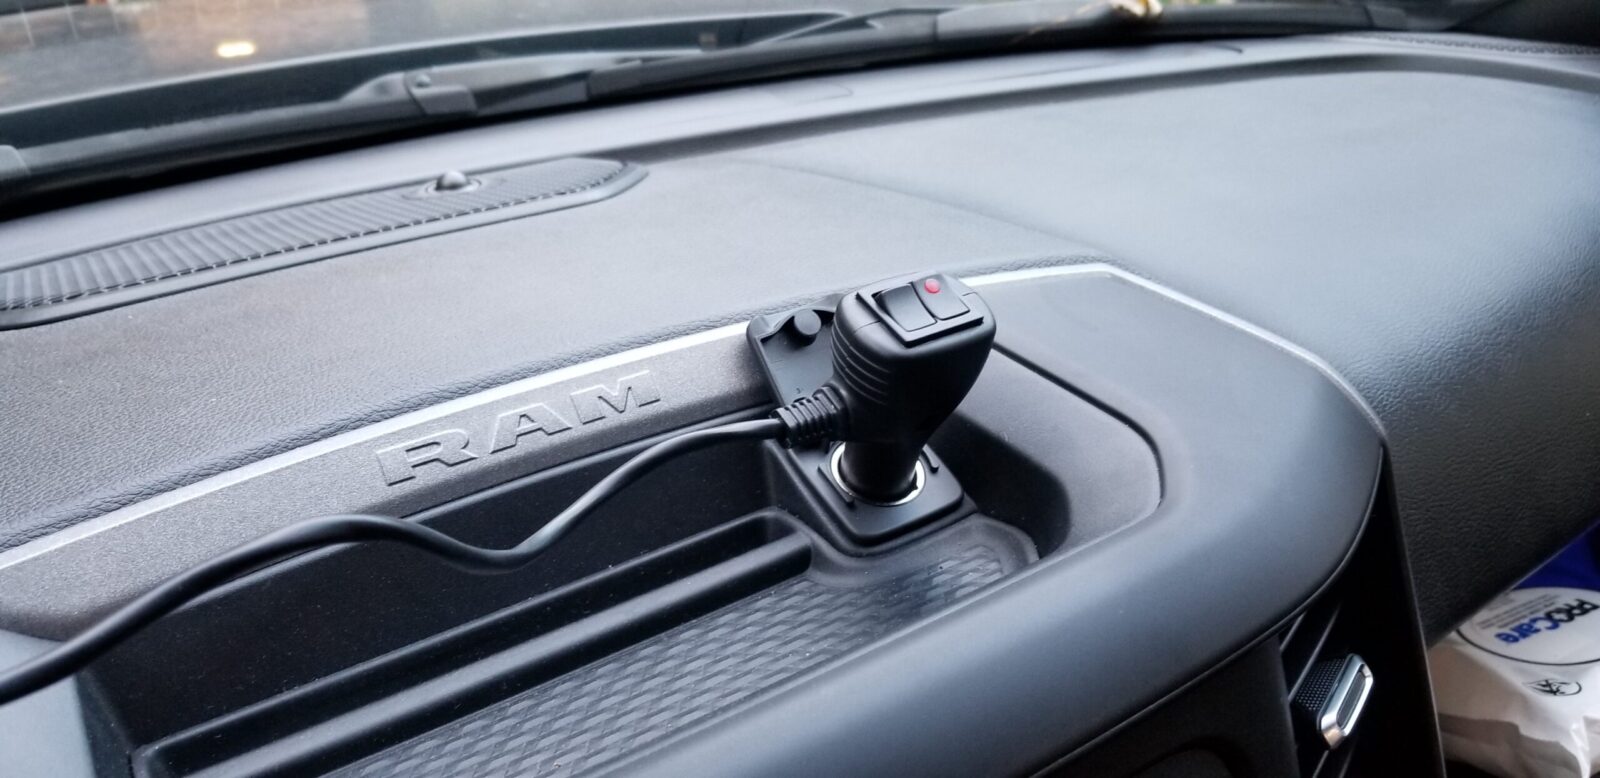
So the plug and switches work quite well being in the center dash plug like this. Very easy to reach and turn on or off. When on, the little red LED lights up so you do have an in-cab reminder that the bar is on (trust me, at night, you’ll know it’s on).
You can see how I have the cord run. Again, this is meant to be removable and something I can move around as needed. So yeah. there is a loose cord but it is manageable.
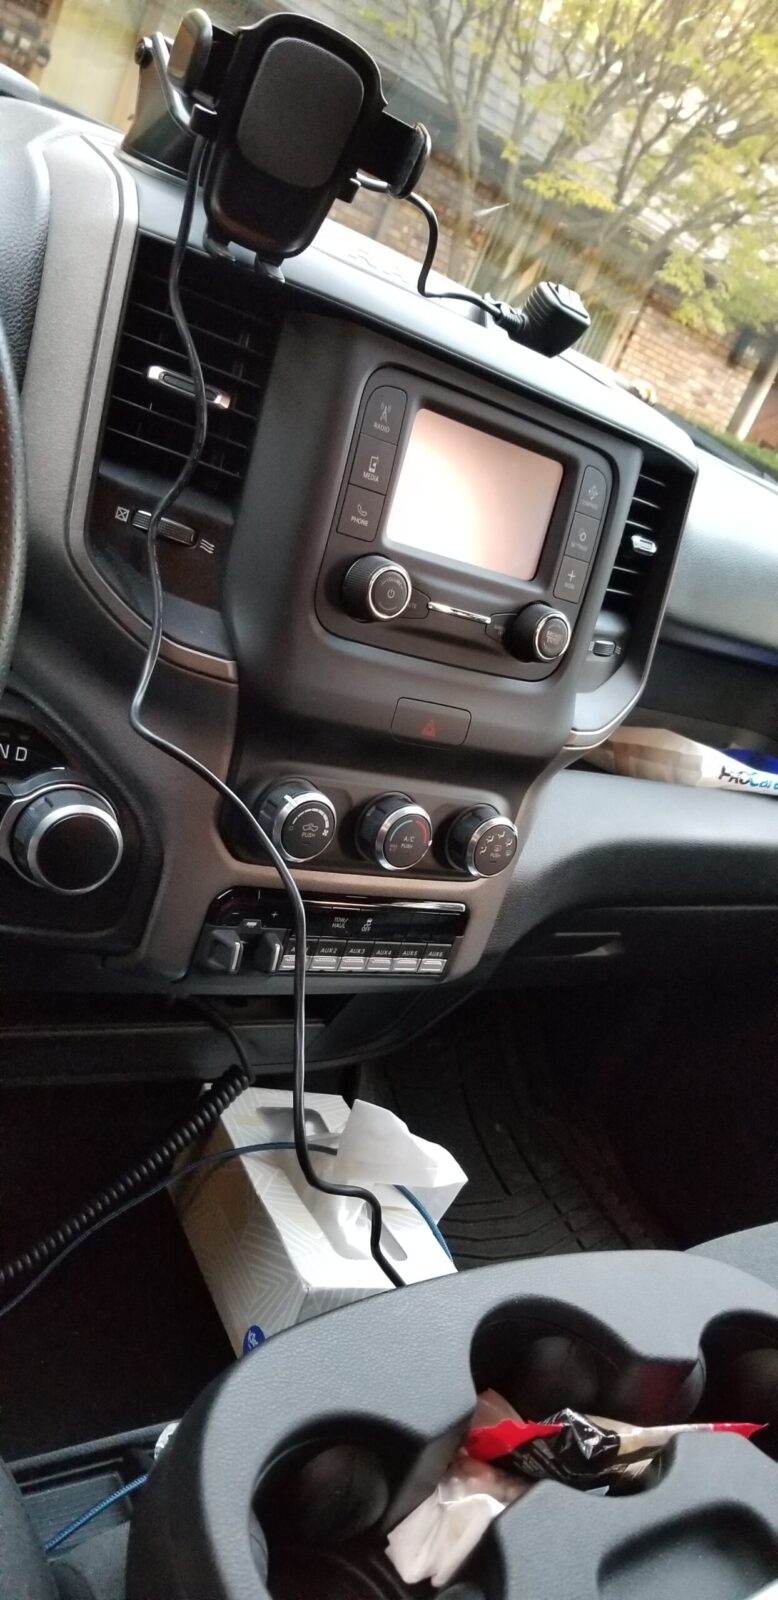
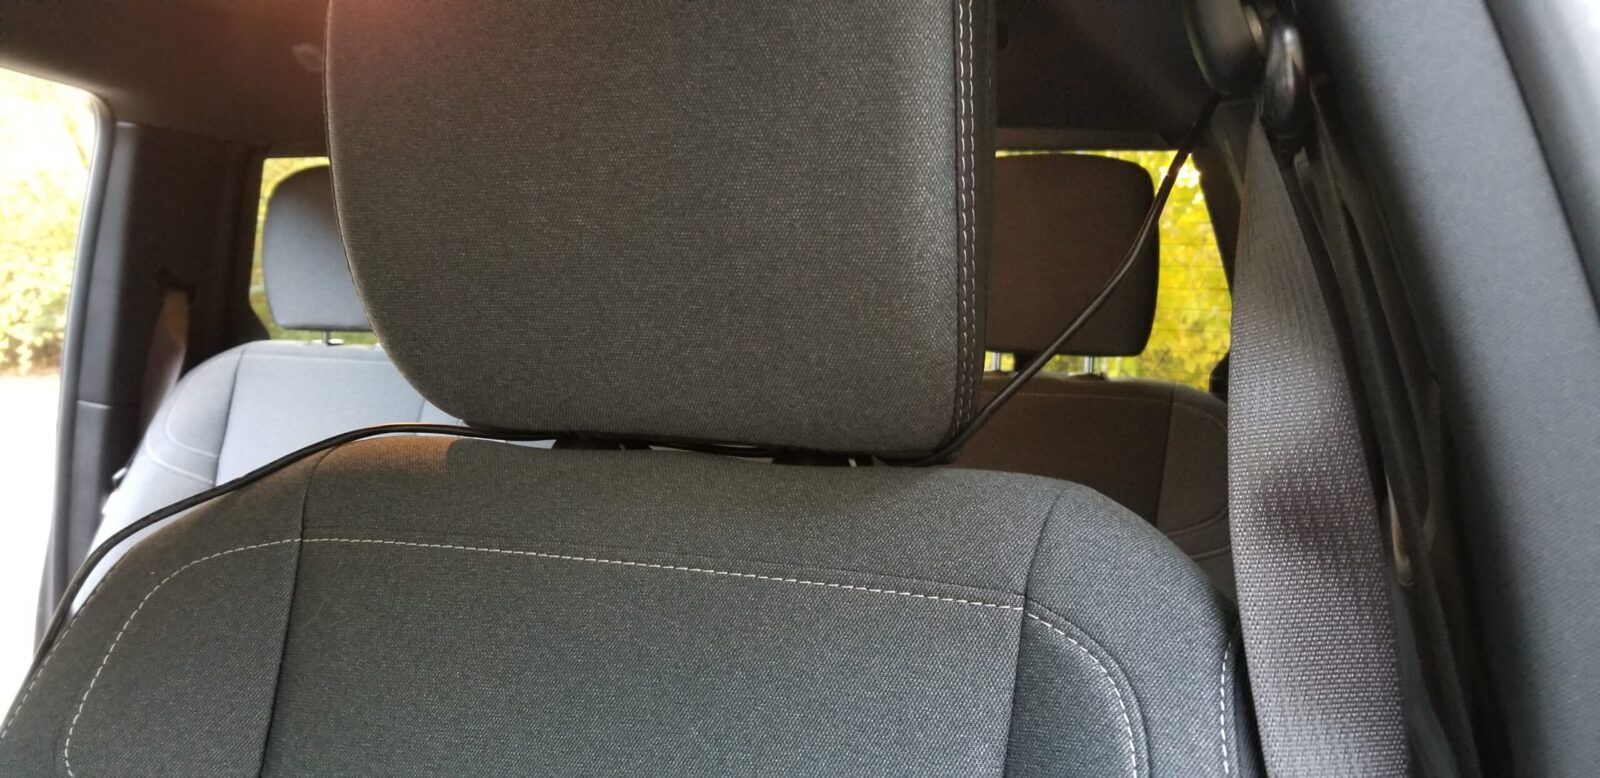
So the light us up top and I run the wire in actually just behind the pillar between the driver and passenger doors in the crew cab. I then run the wire behind the driver’s headrest and down along the center console. Note, there is thick vinyl decal paint protector where the line touches the pain – and about two inches on either side just to play it safe.
So the cord runs under the driver side headrest and then up and out the passenger rear door in the crew cab. I wish there was another 2-3 feet of cord so I could have run it to the floor and around the bottom of my chair but you know, it works. I could have spliced in more wire with pros and cons but I decided to keep it simple.
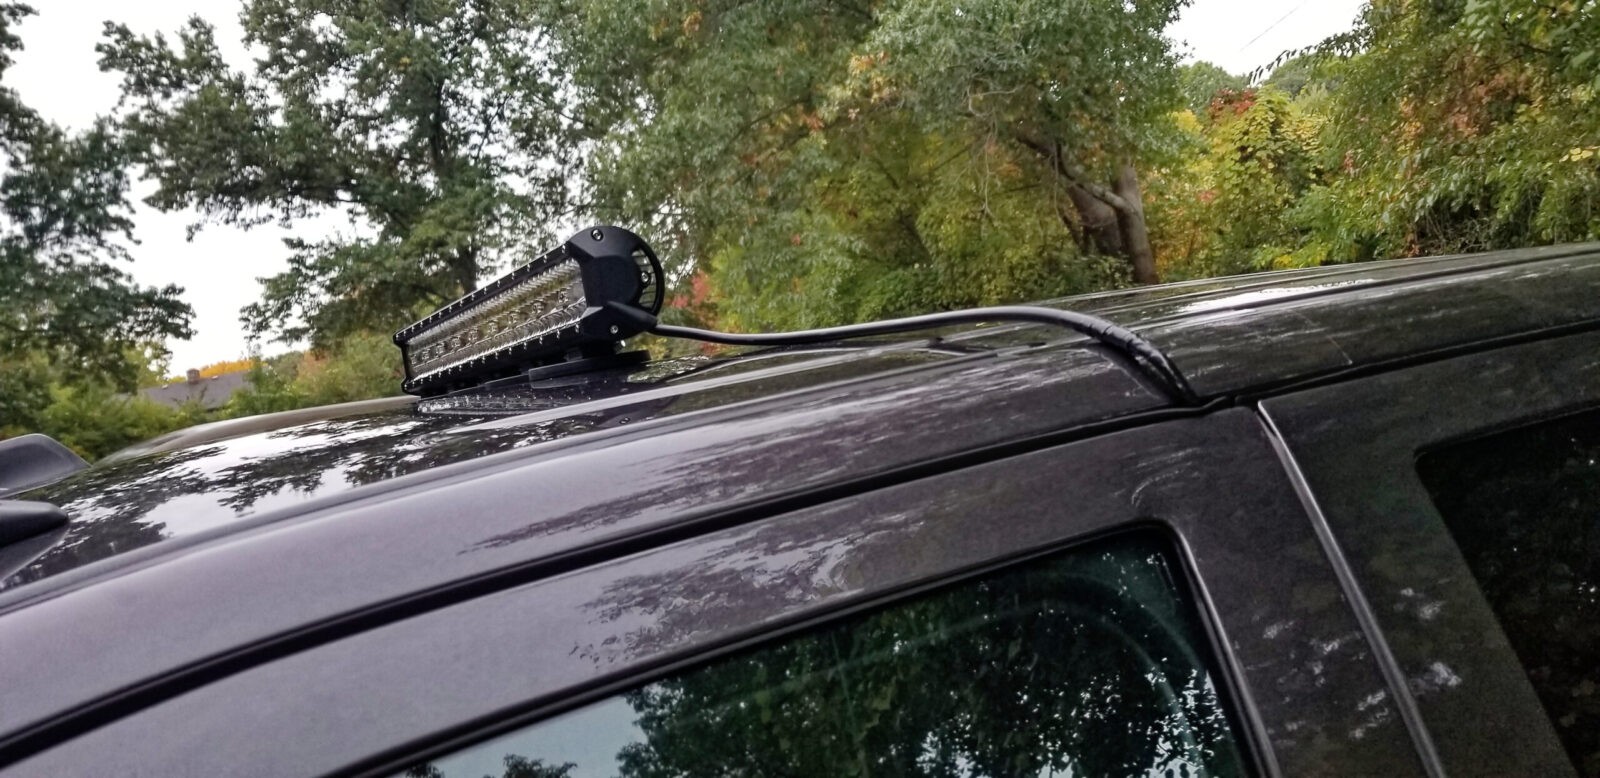
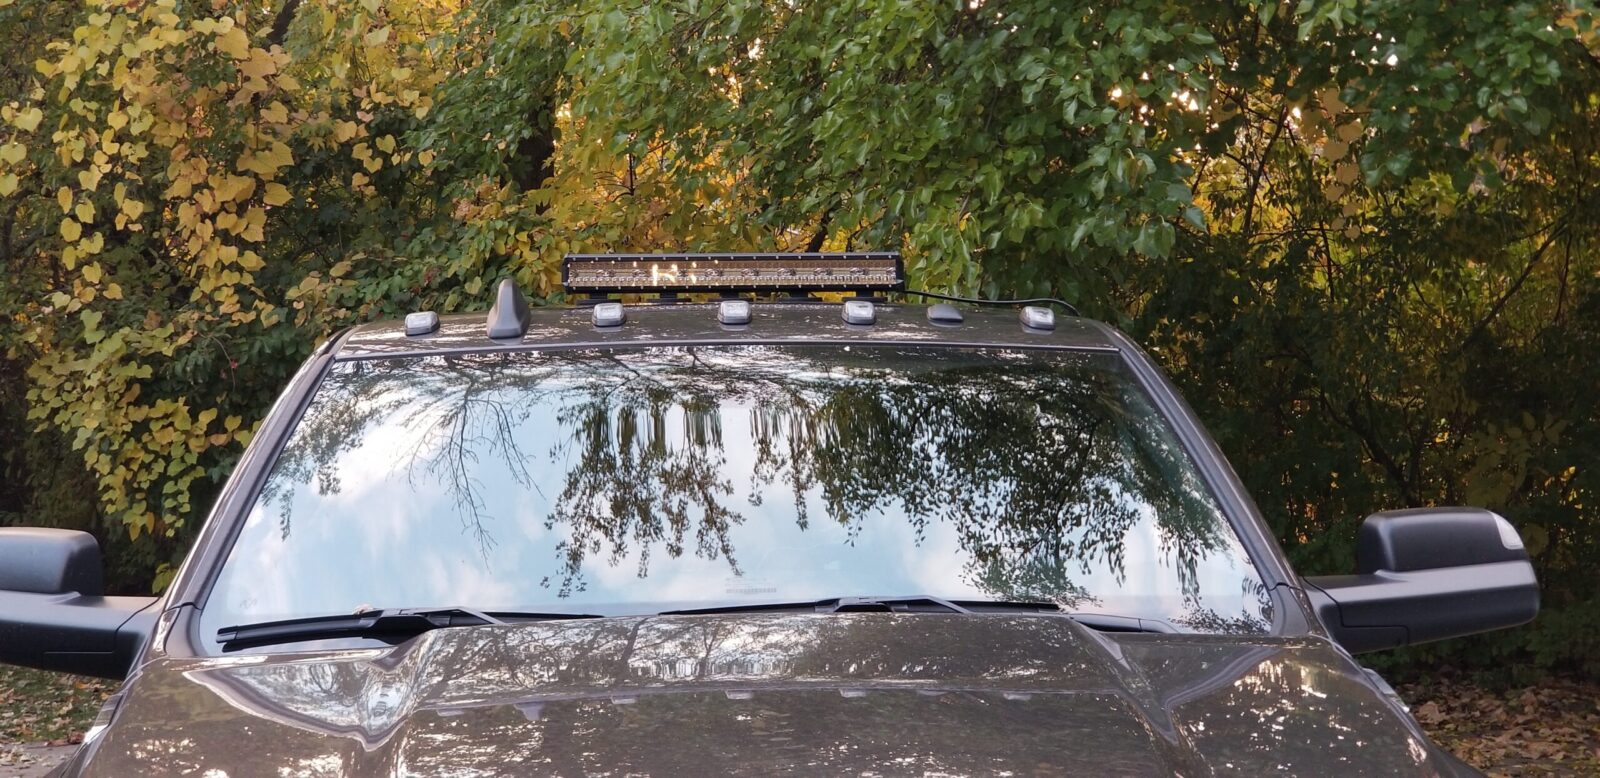
It really clamps down well on the flat portion of the roof but not in the back with the reinforcing bends. I center the light by eyeball aligning the center mount of the bar with the center roof marker light. The actual bottom of the light bar (not the mounts) is about 81-ish” off the ground. Also, you can’t see it but as mentioned, there is thick 3M Vivid vinyl decal material under the cord.
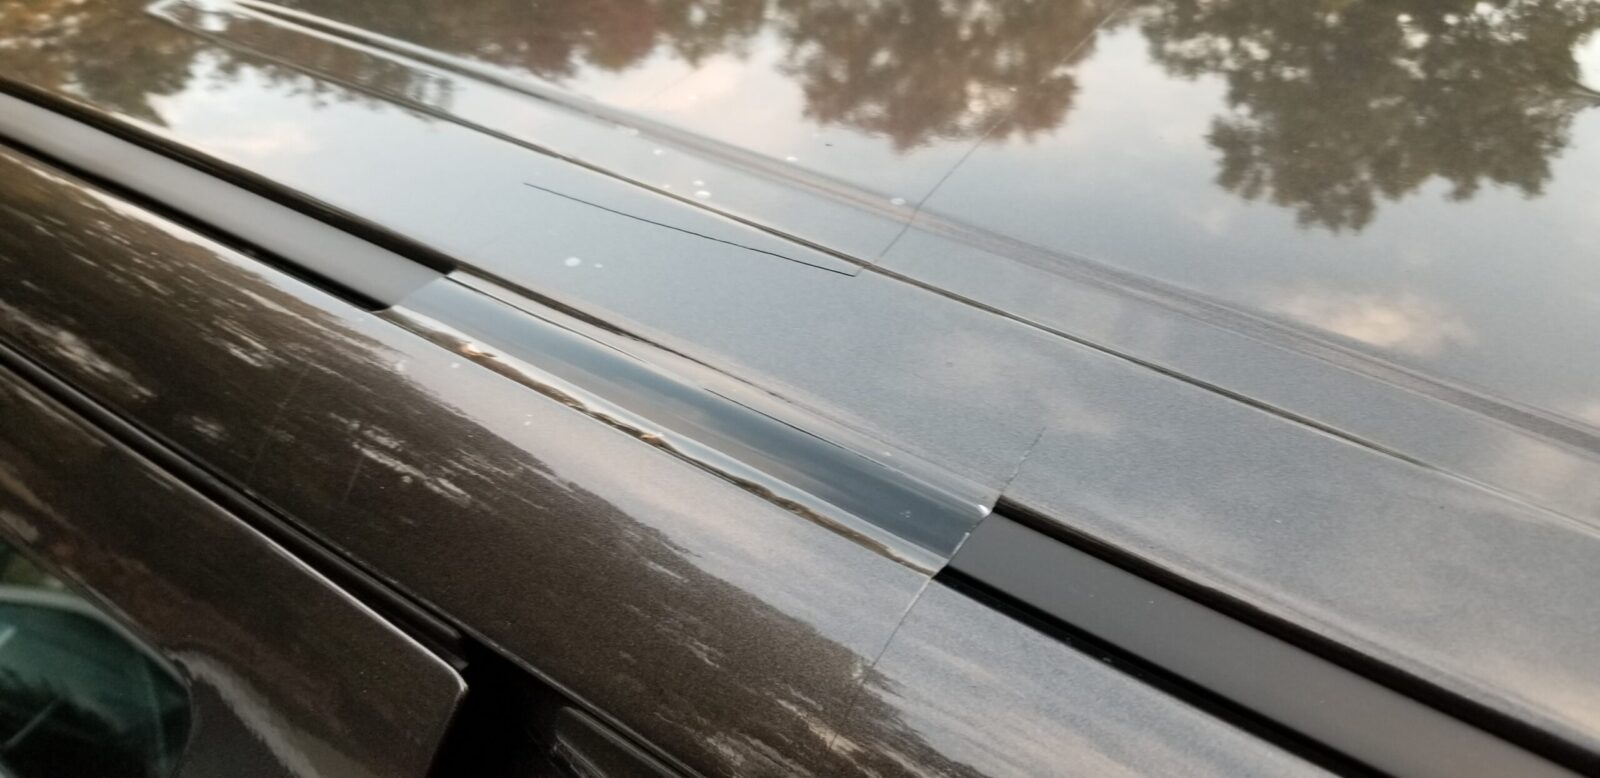
It’s hard to get the 3M Vivid tape to show up unless you get the angle just right to see the edges. There are two pieces here – one wrapping over the edge of the roof and a second wider piece to protect the paint if the cord is blowing around in the wind much.
Nilight 18025C-A Results
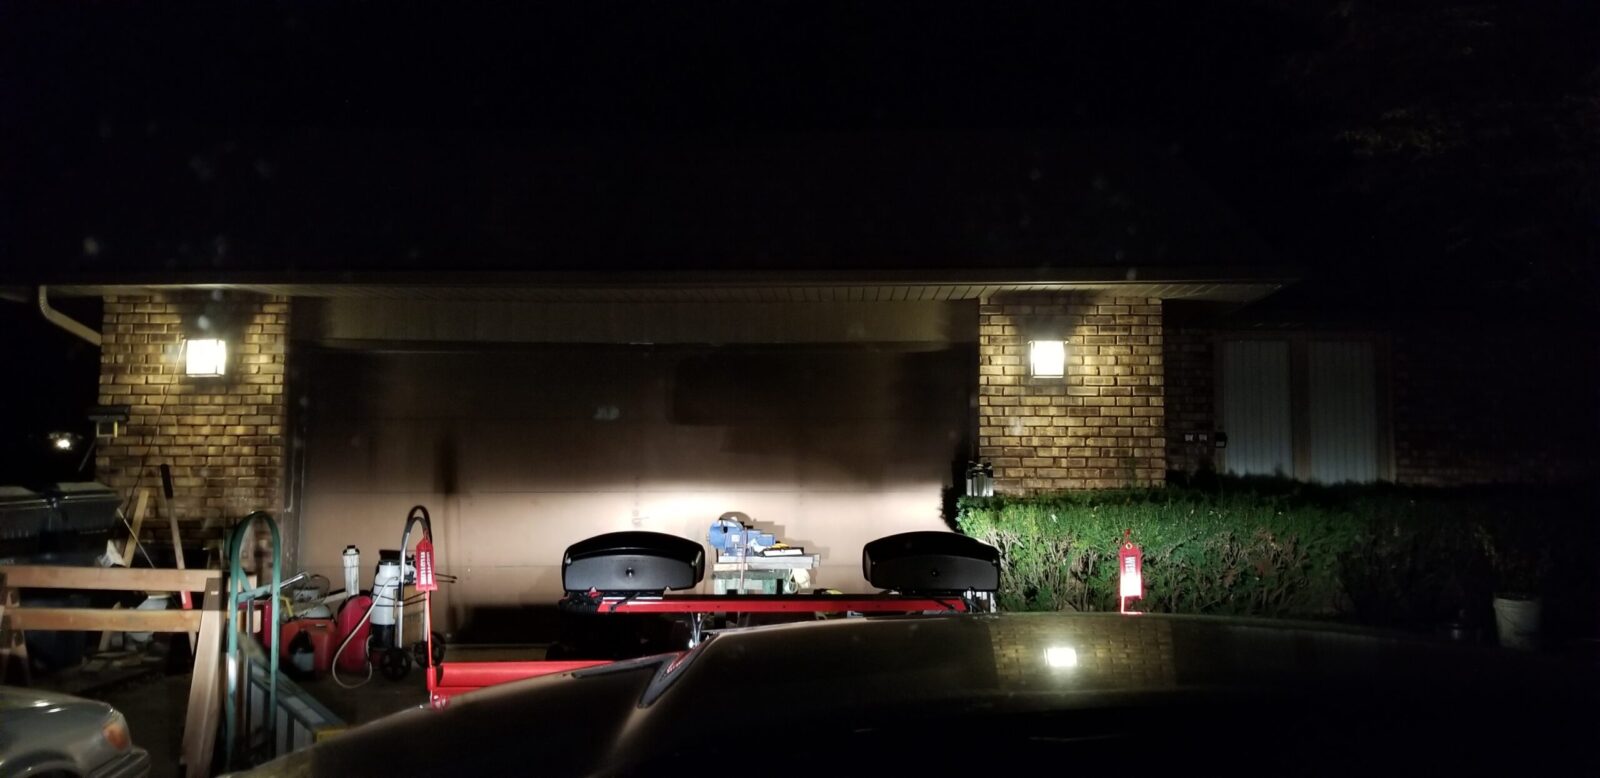
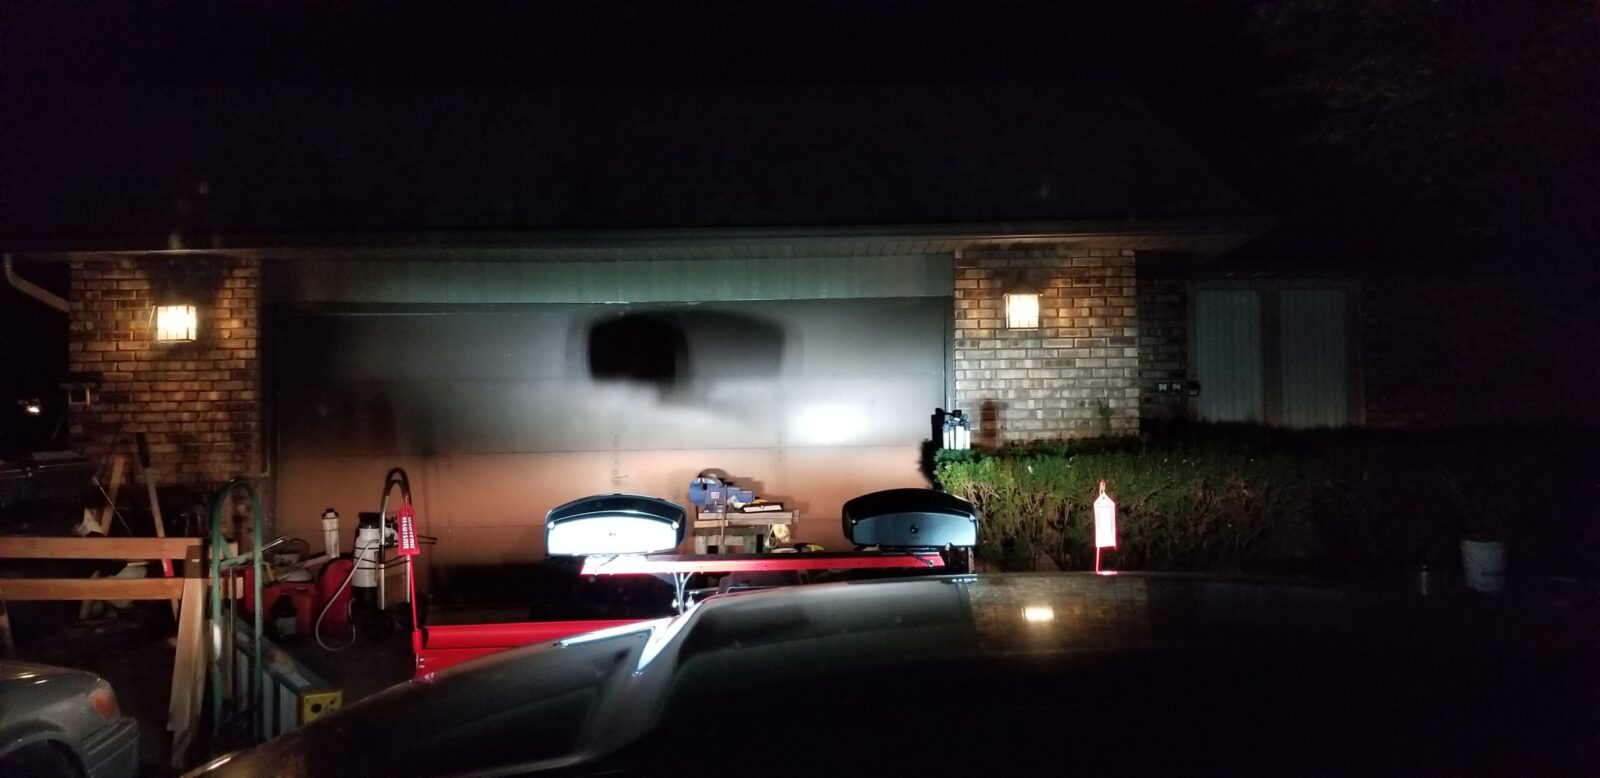
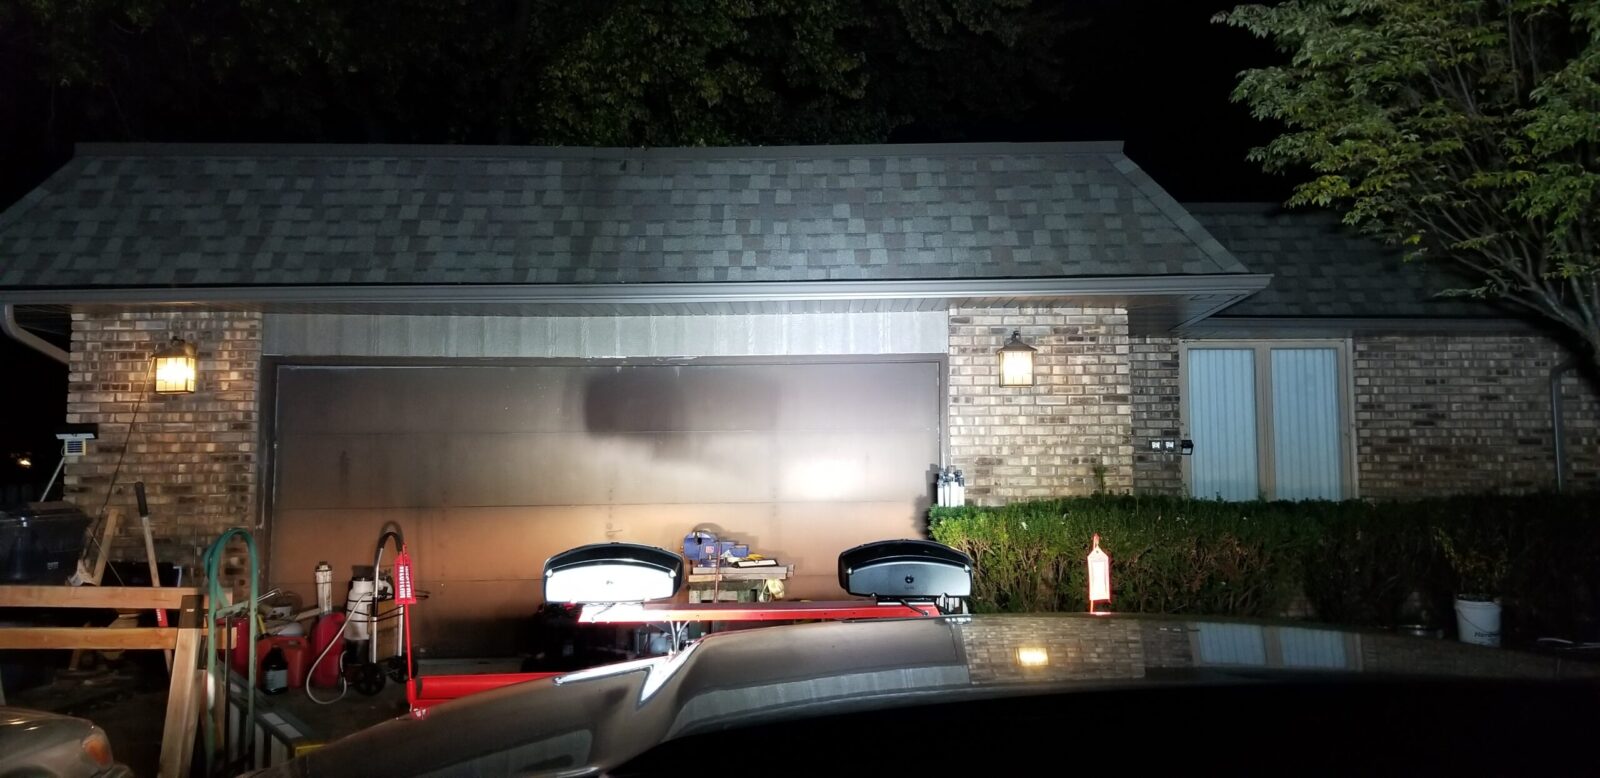
Let’s look at some photos that I took at night and the measures at all based on my laser range finder that I measured before hand from the front of the truck:
These are the stock OEM low beams. Notice how they really limit upward light. The bright oak tree trunk you see slightly left of center is at 23 yards. If you can see the silver tarp in the background, that is at 47 yards.
Ok, mow this one is with the Lasfit LED high beams turned on. The leaf pile in the woods is at 57 yards.
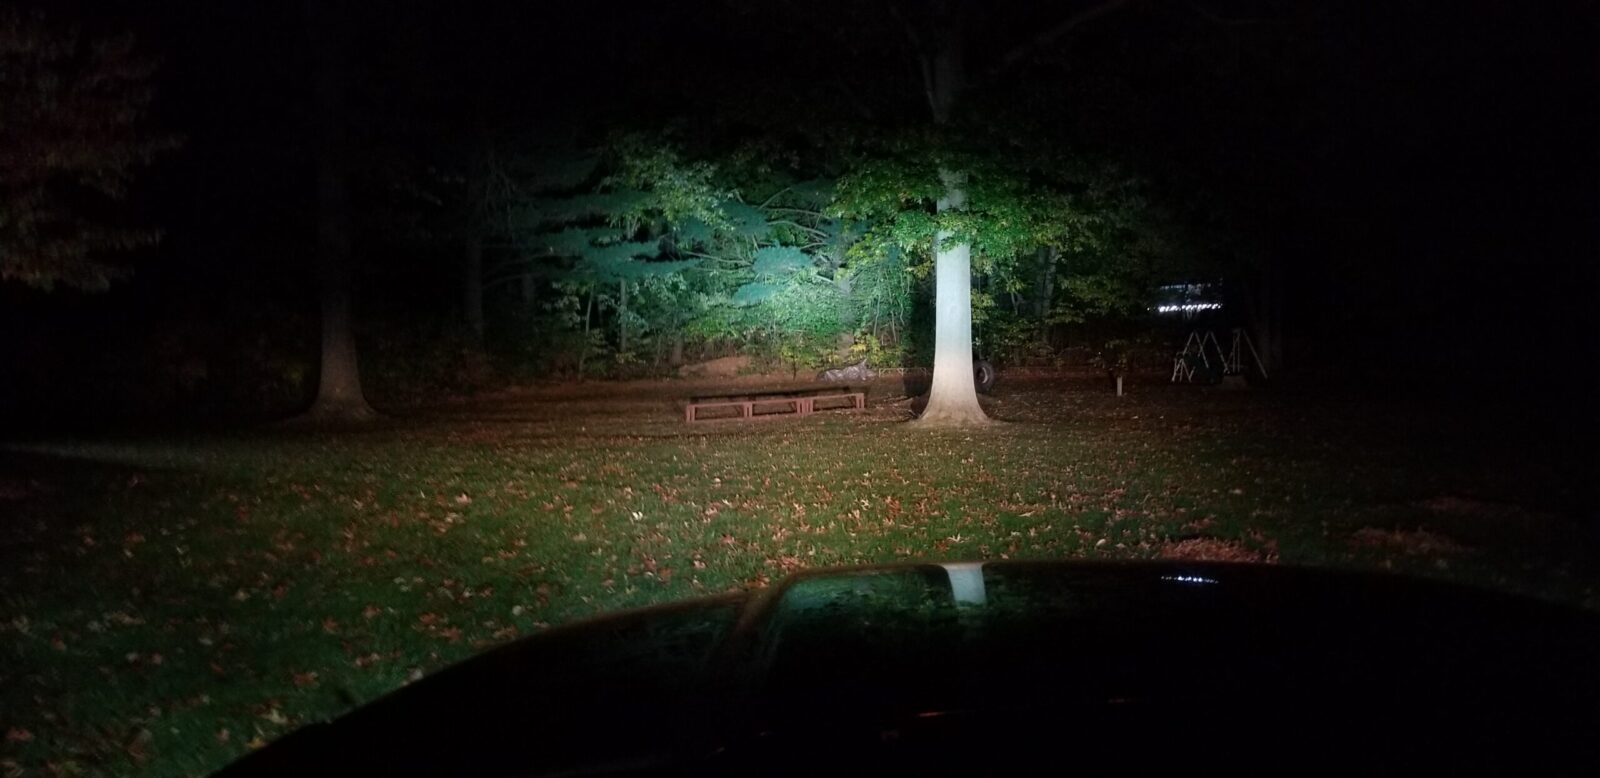
Alright, this is with the low, high and LED light bar running. The light output is amazing. You can’t see it in the photo obviously but the light bar was lighting up a ton of stuff to the left and right as well. The next big tree in the left of the photo is at 31 yards and the swing set is at 44 yards. There’s just a ton of light. This is exactly what I wanted – the Nilight LED bar I bought has a mix of flood and spot emitters to generate this much light.
Low beam only from about 7 yards.
Low and High beam lights at 7 yards. The big shadow is the top left light of my plow.
Low, High and Light Bar at 7 yards.
Summary
First off, it is stunningly bright and casts it very well both forward and to the sides – the breadth of the field of light cast actually surprised me. So, in terms of the shear volume of light it is kicking out and it’s ability to light things up in all directions, it definitely exceeded my expectations.
The switch works remarkably well. The switches have a nice feel and I like that there is a fuse in the switch assembly protecting the truck’s outlet. At no time did the cord feel warm due to excessive draw and I can’t see that it is limiting the brightness of the LEDs any so that worked out just fine.
Next, it seems to stay put – even during rain. Most of my driving has been around town and 35-45mph. I did go on the highway at 65-75mph for 10-15 minutes a few times but not for hours on end. I also have no intention of putting this through a car wash – I really am not sure how it would fare one way or the other.
I would recommend that you keep a towel in your truck to clean the roof before you clamp on the light and also inspect the magnets to make sure they are clear — otherwise you are liable to scratch up the roof or where ever you clamp the light to.
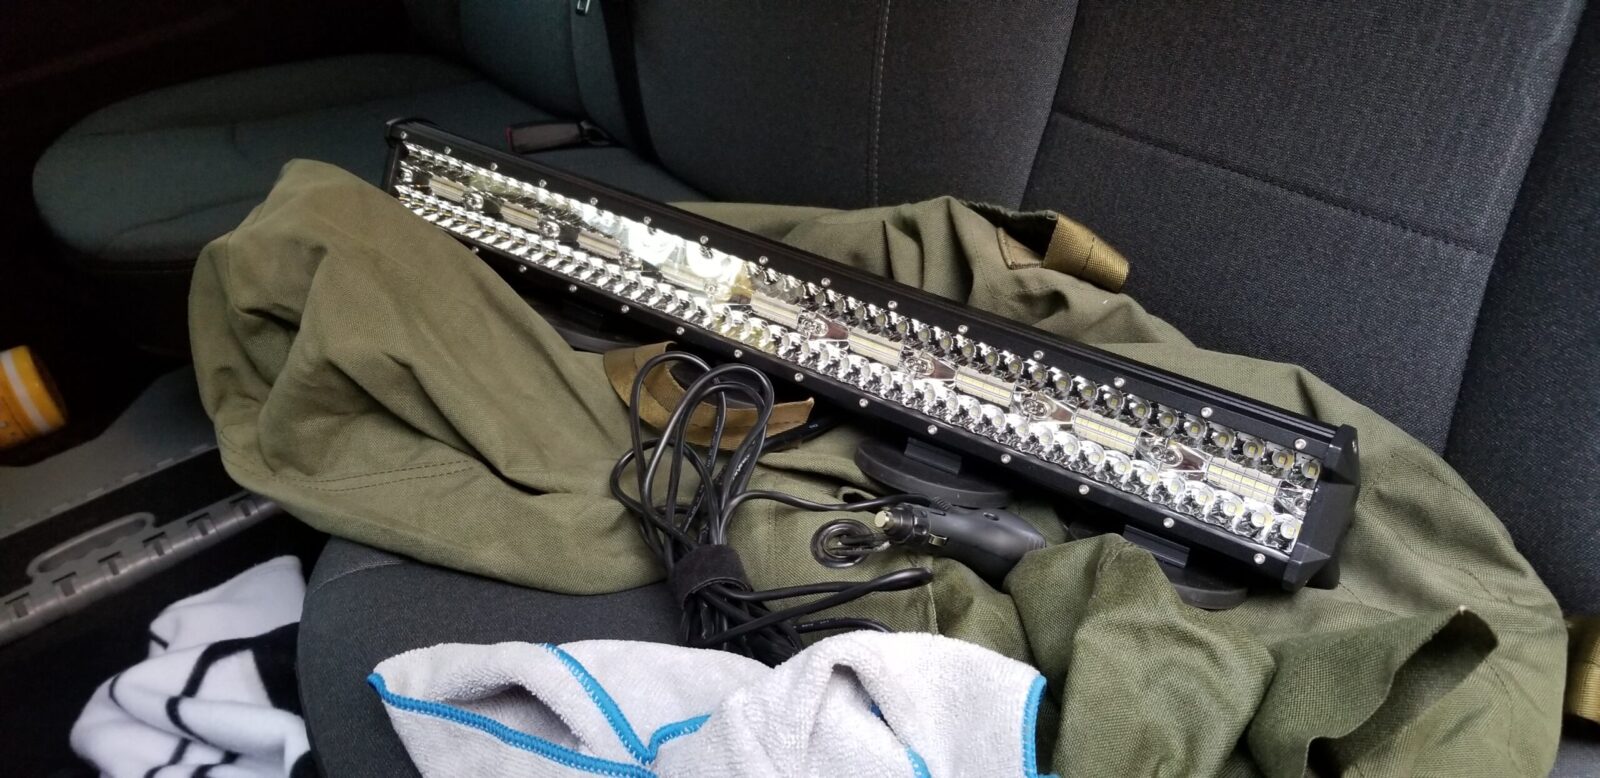
I also decided to keep the light stored in an old duffel bag under my back seat vs. having any risk of it coming off. I put a micro fiber towel in there too – I mainly bagged it to prevent stuff from getting stuck to the magnets and then scratching things up.
This is the light bar, duffel bag and towel that I stash under the rear seat.
The only downside is that I would need to know before hand that I might need the light and install it vs. leaving it attached all the time. I figure in the Spring that I’ll look into installing the flood lights and then decide if I want to do anything after that.
Last photo for now 🙂
So, I am very happy with the result and hope this gives you some ideas as well.
Note, I have to buy all of my parts – nothing here was paid for by sponsors, etc. I do make a small amount if you click on an ad and buy something but that is it. You’re getting my real opinion on stuff.
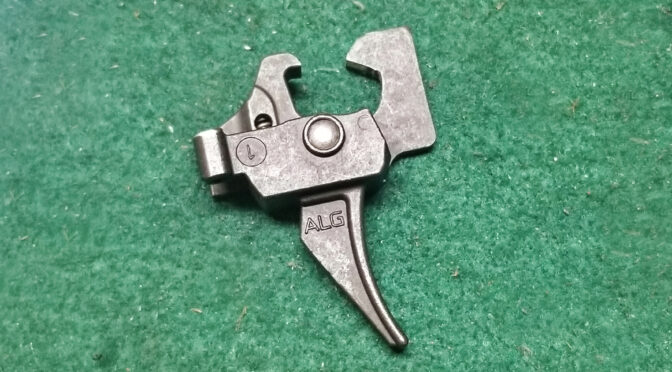
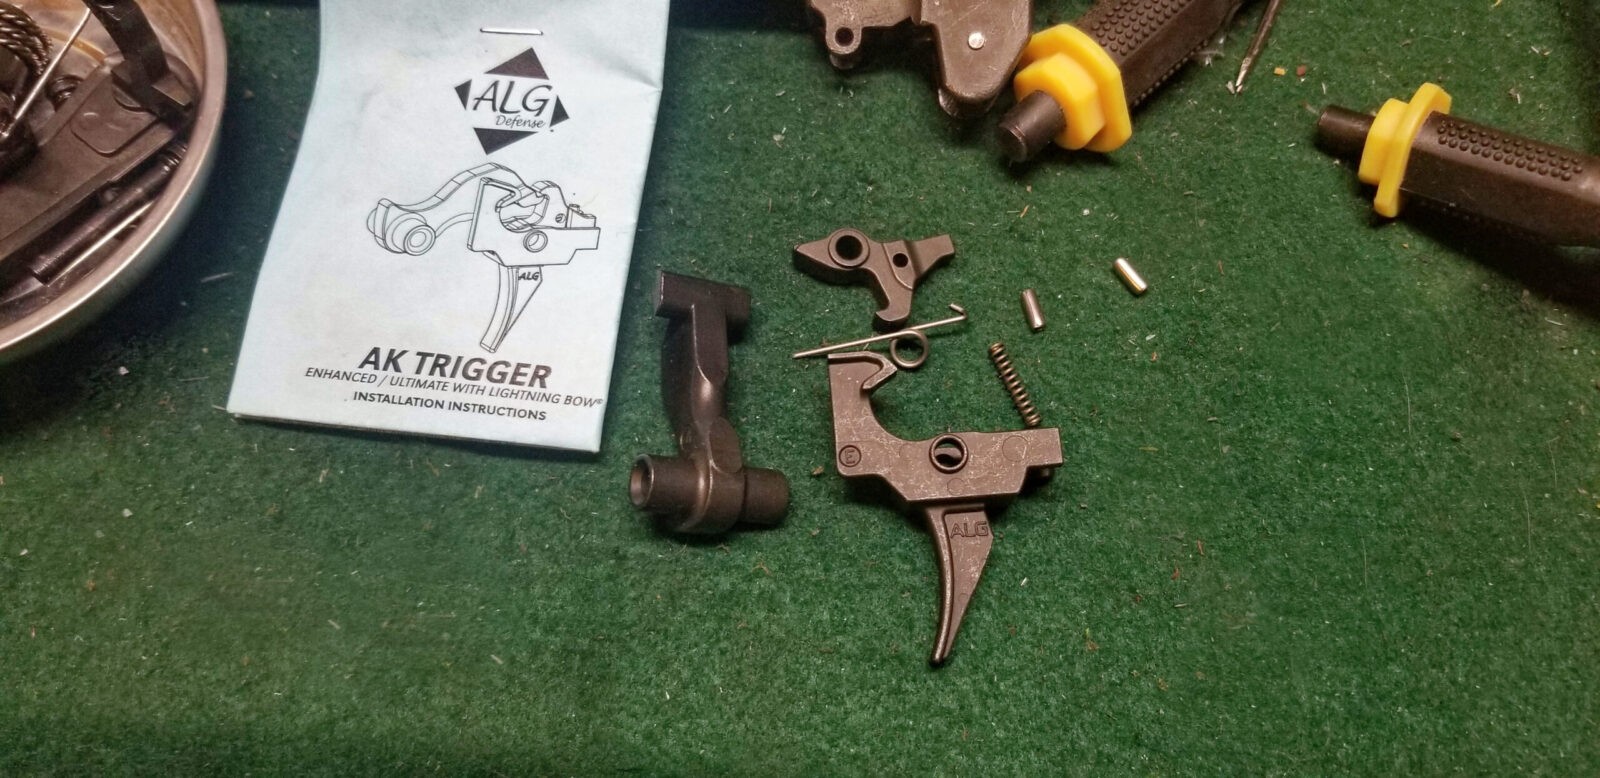
I wrote about this recently that my go-to fire control groups, meaning the trigger, disconnector and hammer, are now the ALG Enhanced Triggers – model AKT-EL. There are two challenges that interested buyers have – #1 they can’t even find them in stock at most websites and #2 even if they do, they are expensive. Let me tell you a secret.
Palmetto State Armory has made a big push into AK-series rifles and pistols over the past few years and some of their models have a unique layout inside that requires a slight change to the traditional AK trigger design. They talked to ALG, a sister company owned by the wife of Bill Geiselle of Geiselle trigger fame – and they produced a bunch of the AKT-EL triggers for PSA with the slight modification. Guess what? Any AK can use them.
For a couple of years now, I have been using AKT-EL in regular AK builds and even my IMI Galils that needed their fire control groups swapped out for 922r reasons.
So this post is short and sweet – if you are looking for a great American made AK trigger, then get an ALG AKT-EL and if you want one that is in stock at a great price, go to PSA [click here].
Note, I have to buy all of my parts – nothing here was paid for by sponsors, etc. I do make a small amount if you click on an ad and buy something but that is it. You’re getting my real opinion on stuff.
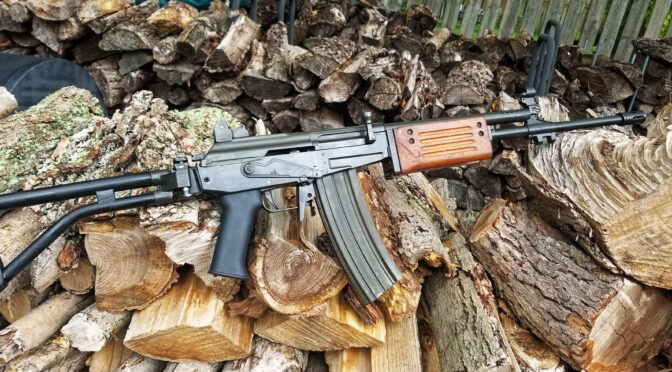
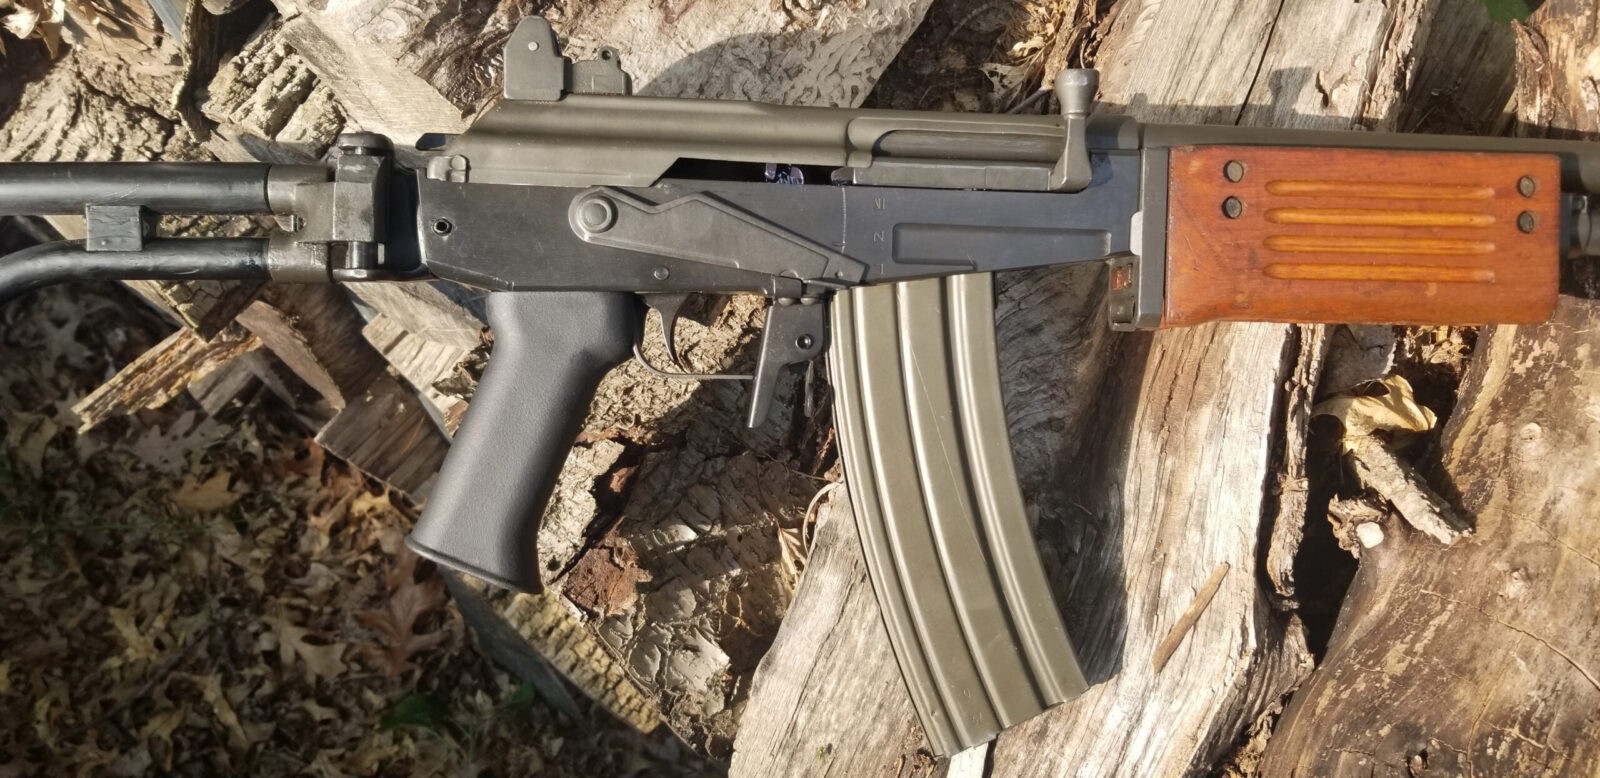
I have written a number of posts now about my purchase of a James River Armory Gallant, which is a Galil ARM. During function testing, I noticed that the surplus recoil spring that JRA used was on the weak side. I would pull the bolt carrier back just a bit and the spring couldn’t push it all the way closed.
Other ways you may find out your spring is weak is if it is ejecting brass a mile away, the recoil feels different or the back of the carrier is showing signs of hitting the rear of the receiver. I always function test new rifles or kit builds that I have done and would recommend you do the same.
What to do?
The fix is real simple – replace the old surplus spring with a new one. Now there is some confusion about the recoil spring because the Galil AR, ARM and SAR rifles are chambered in 5.56NATO. They do, in fact, use a standard AKM recoil spring even though those rifles are chambered for 7.62×39. This means you have a ton of options – surplus, new old stock (meaning old but unused usually), plus new springs from ALG, Wolff, etc. In my case, I had spare ALG recoil springs on-hand used one
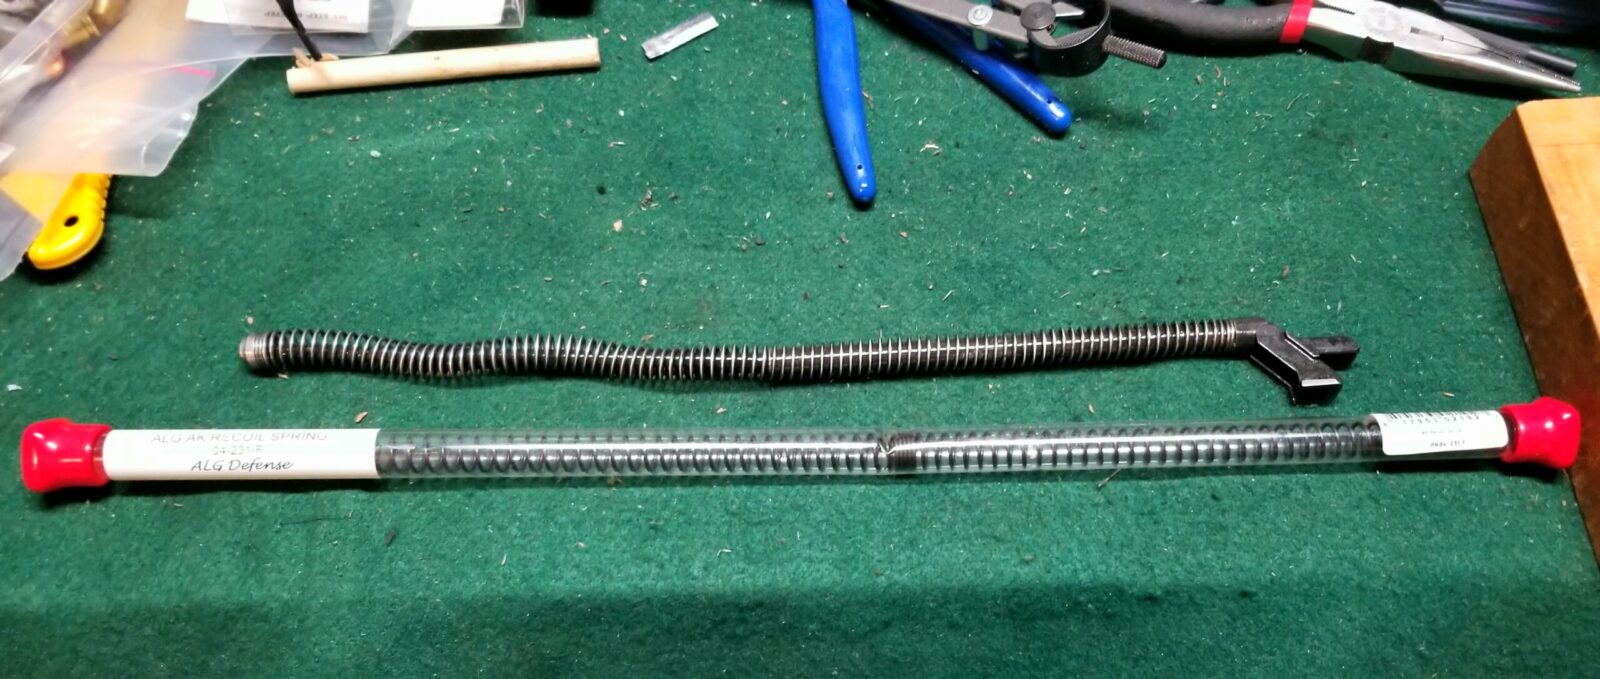
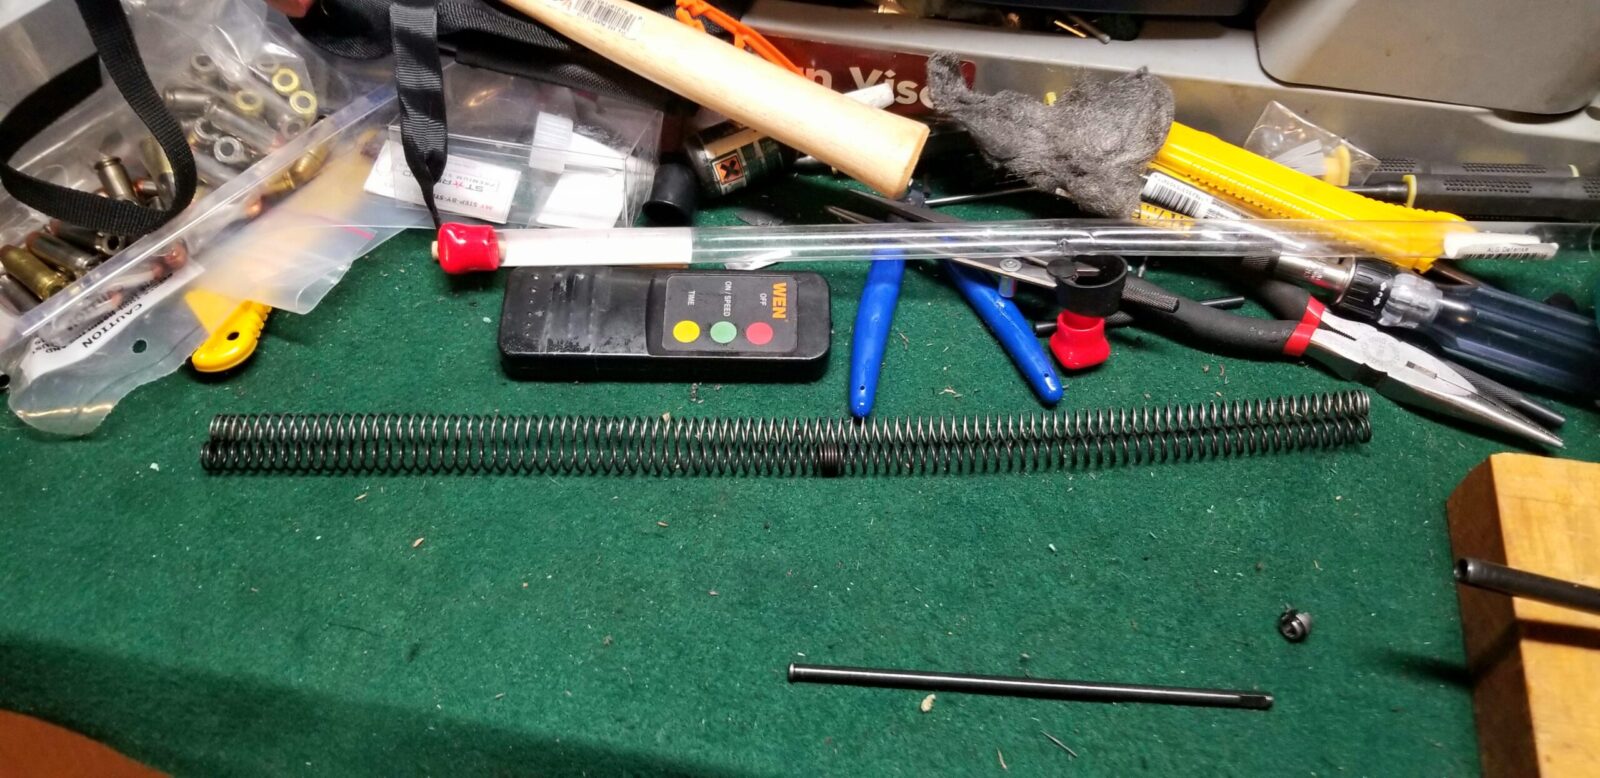
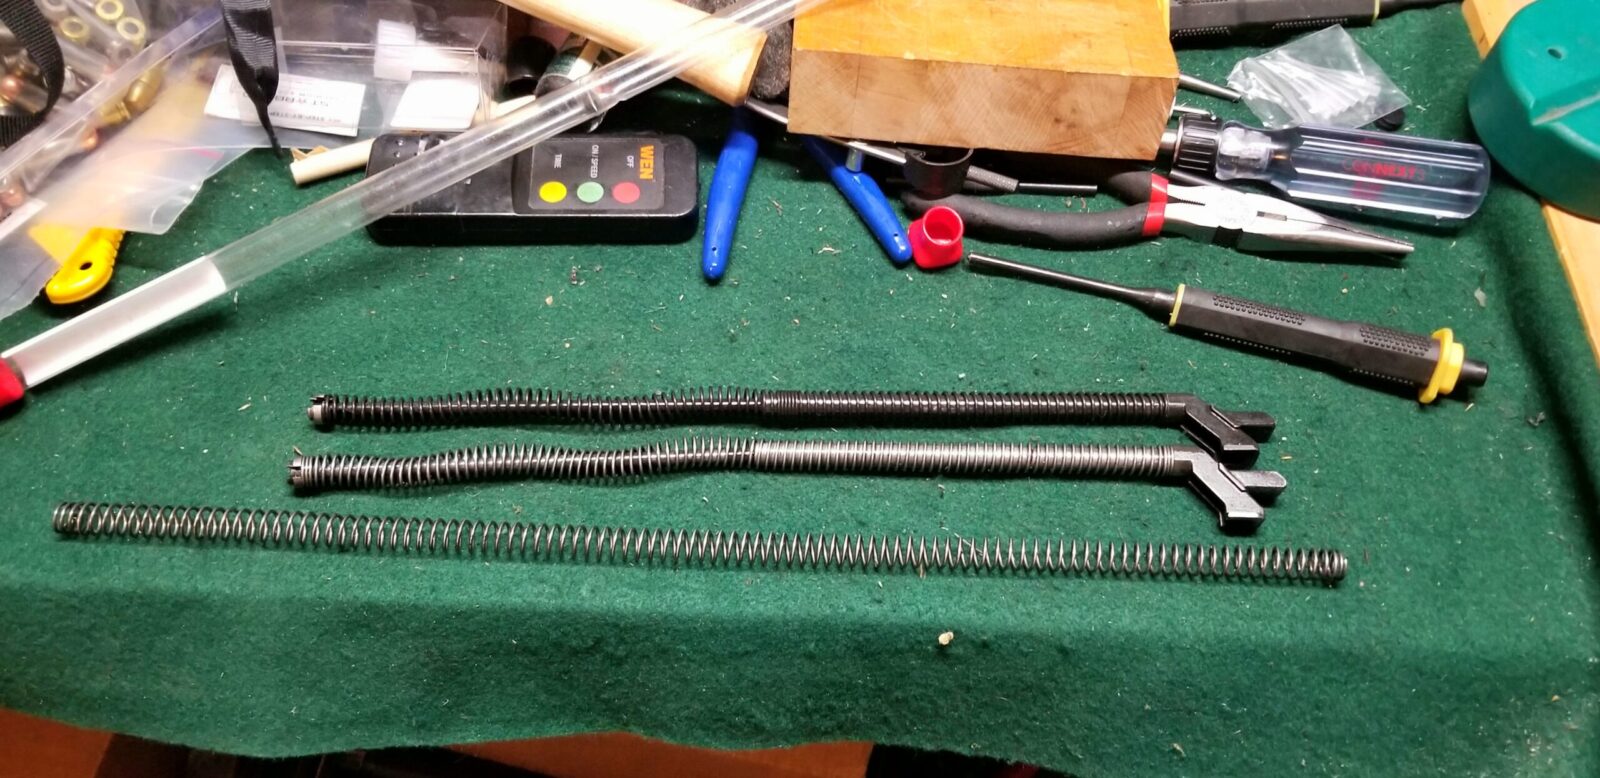
The Galil recoil assembly is above and the brand new ALG spring is below, still in it’s packaging.
The recoil spring assembly may look challenging to take apart but it is actually very simple. The rod is two pieces, the spring and then the retaining end cap. If you remove the spring pressure from the end cap, it slides right off the rod and everything comes apart. NOTE – the spring is under tension so keep everything under control or you will be chasing parts and you do not want to lose that little retaining end cap.
I usually hold the rear of the assembly in a vise, use one hand to compress the spring and then the other to remove the retainer. You can the release the tension in the spring in a controller manner. If you don’t use a vise, you’ll wish you had three hands. Note, some guys will use small vise grip pliers with rubber tube or electrical tape on the jaws to clamp down on the rod with the spring slightly pushed back. They then remove the retainer and control the release of the spring as they remove the vise grips. Whatever works for you is fine. I go with the vise route and not the pliers because I don’t want to risk deforming/marring the surface of the rod.
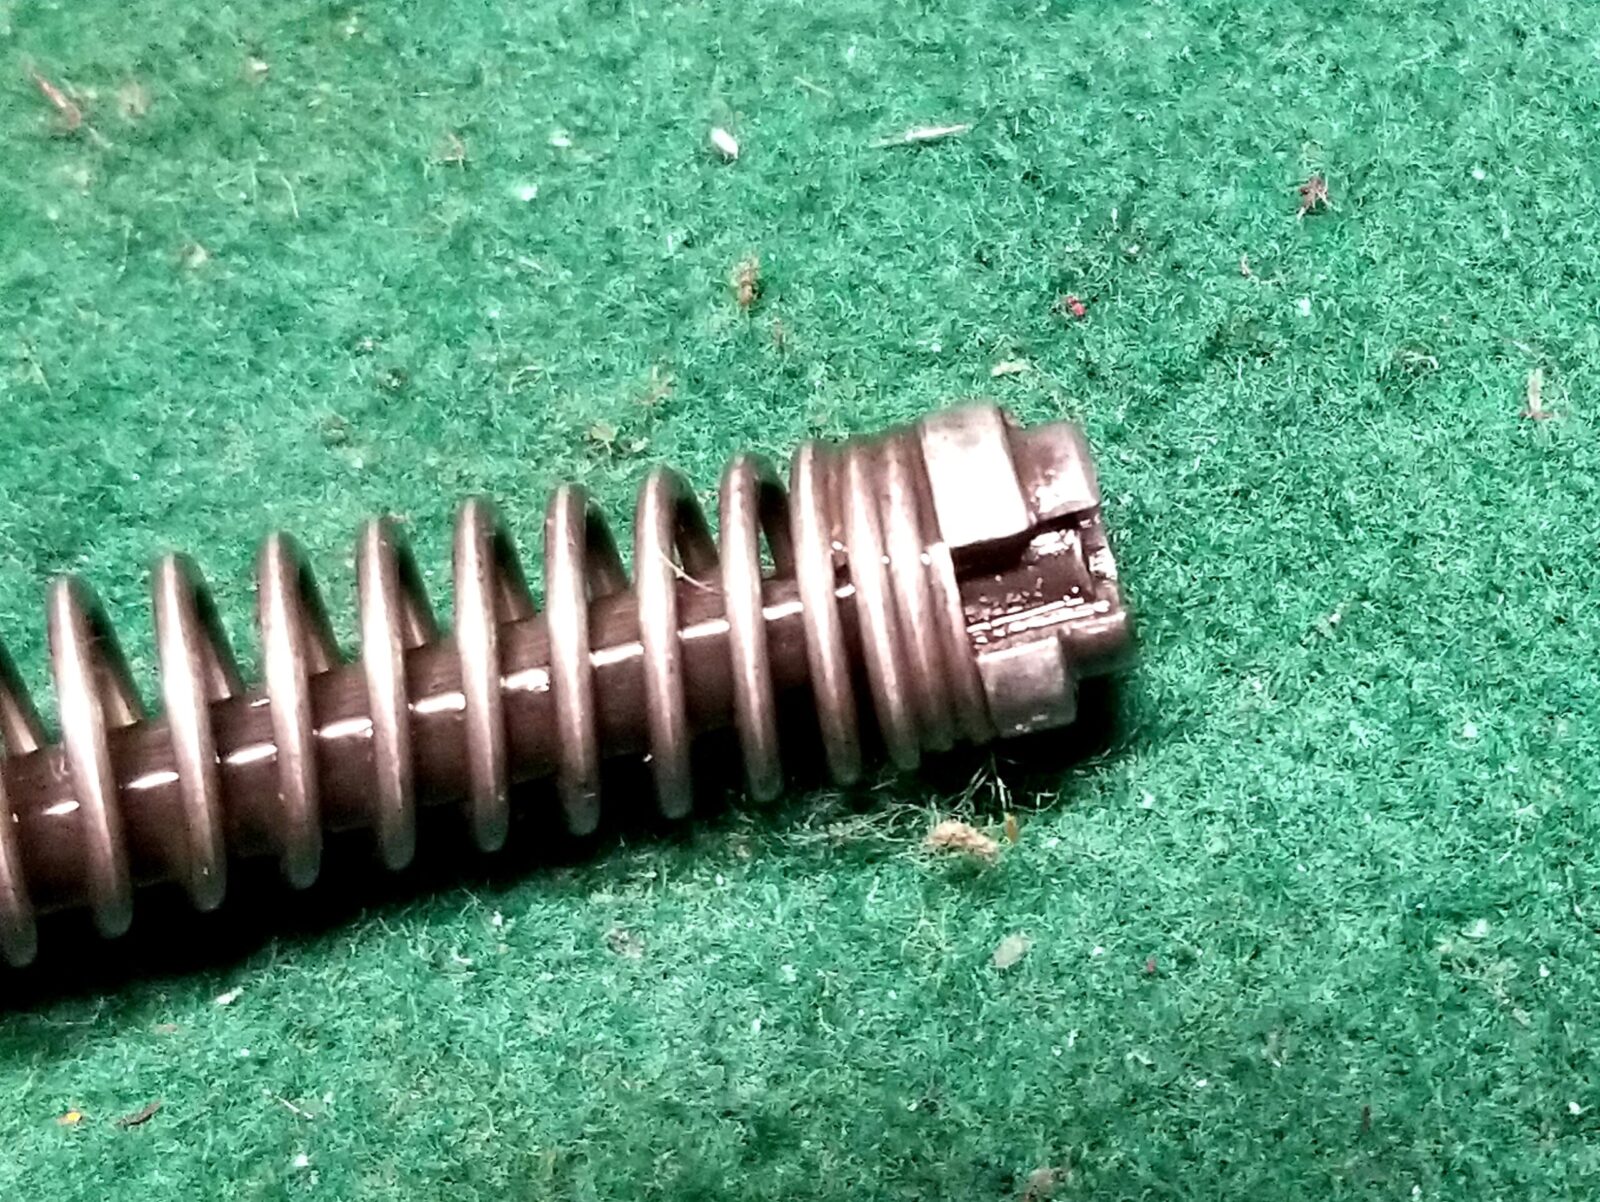
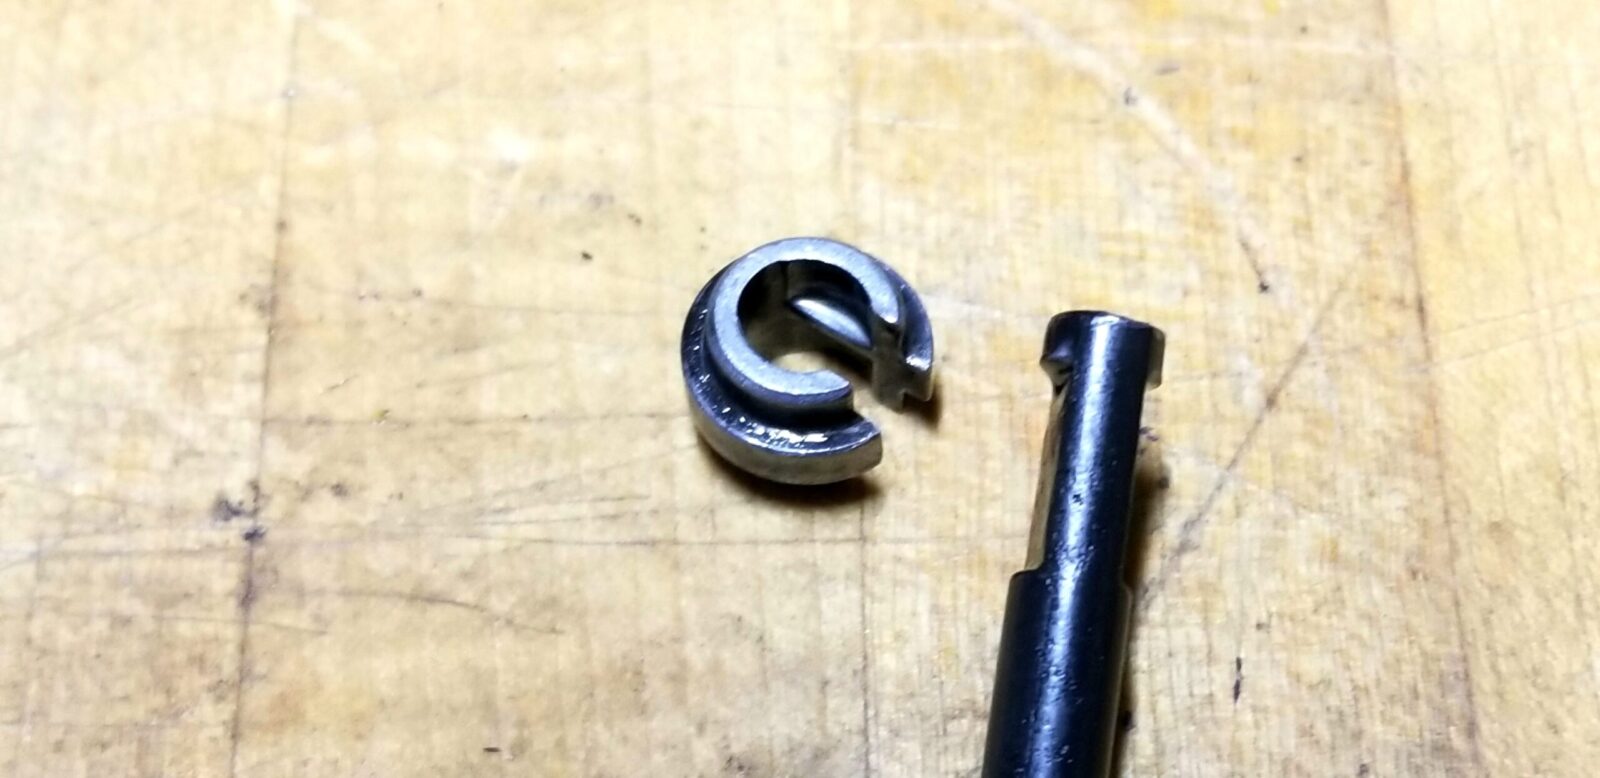
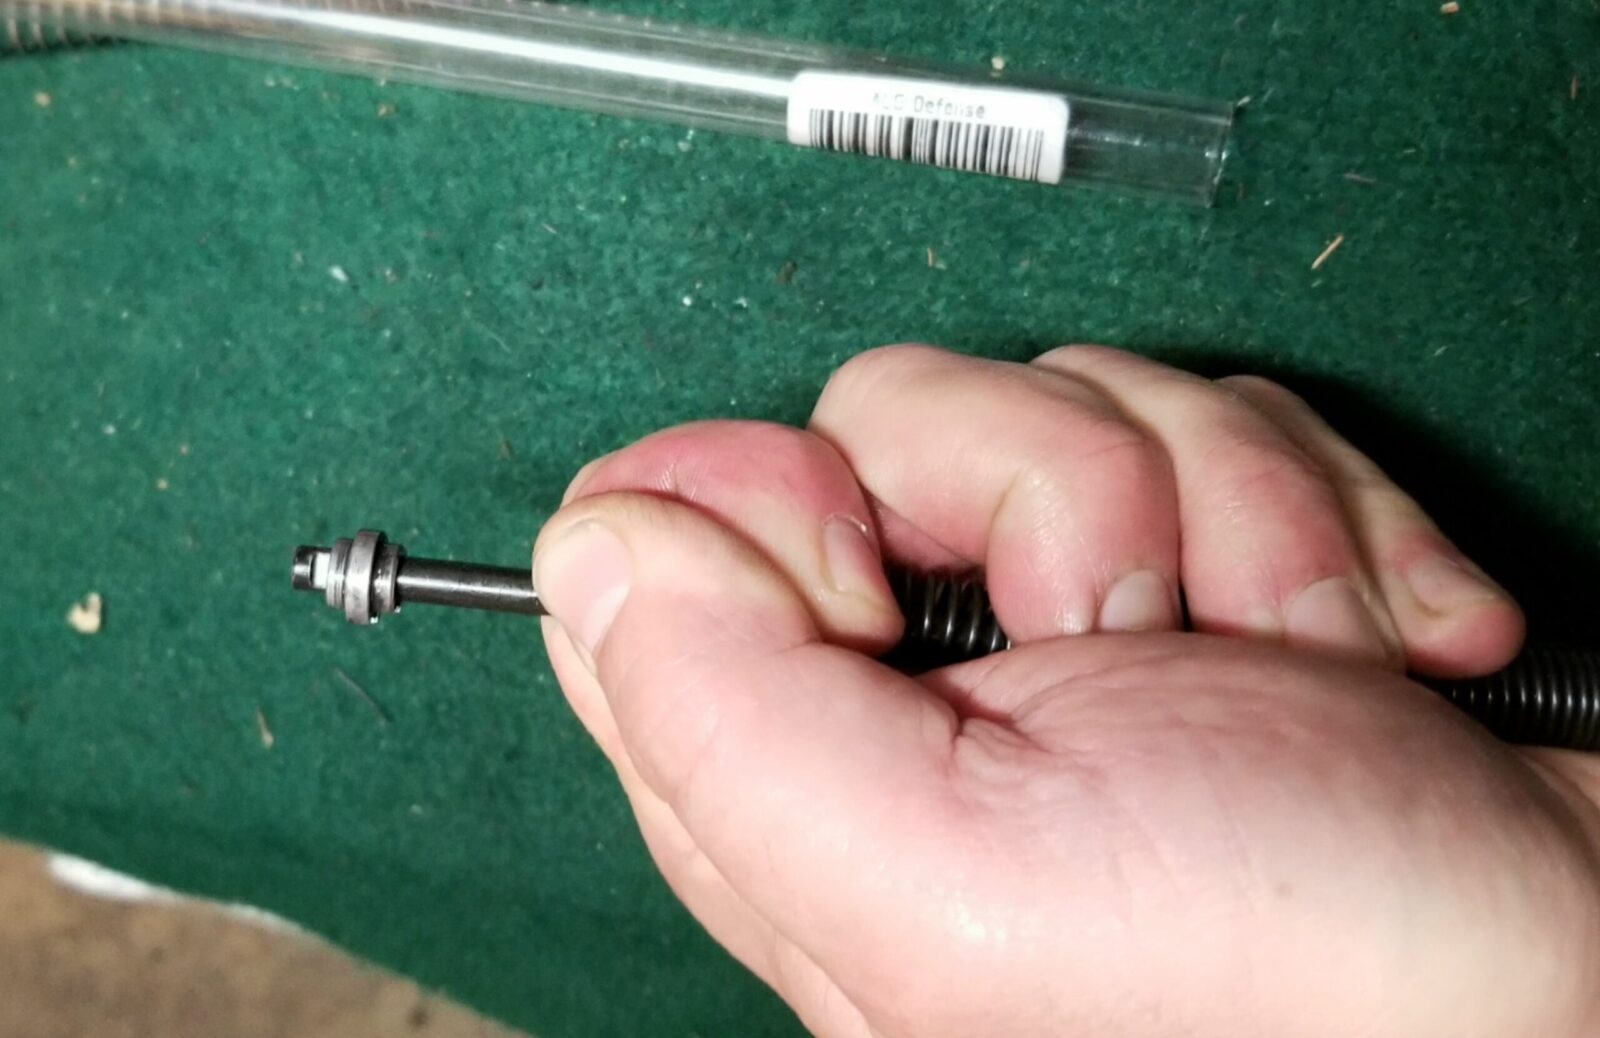
This is a photo of the retaining end cap and the end of the guide rod. See how the rod is notched? The end cap just slides right on and the spring sits on the retainer holding it in place. It’s elegant in its simplicity.
At the top is the original spring. The lower spring is the ALG unit. Note the interesting “dead” center with the spring coils that are right next to each other. ALG says “The 2 to 3 dead coils in the center change the natural frequency of the spring, which prevents harmonics from damaging the spring and reducing its free length.” It’s interesting – we’ll see how it holds up.
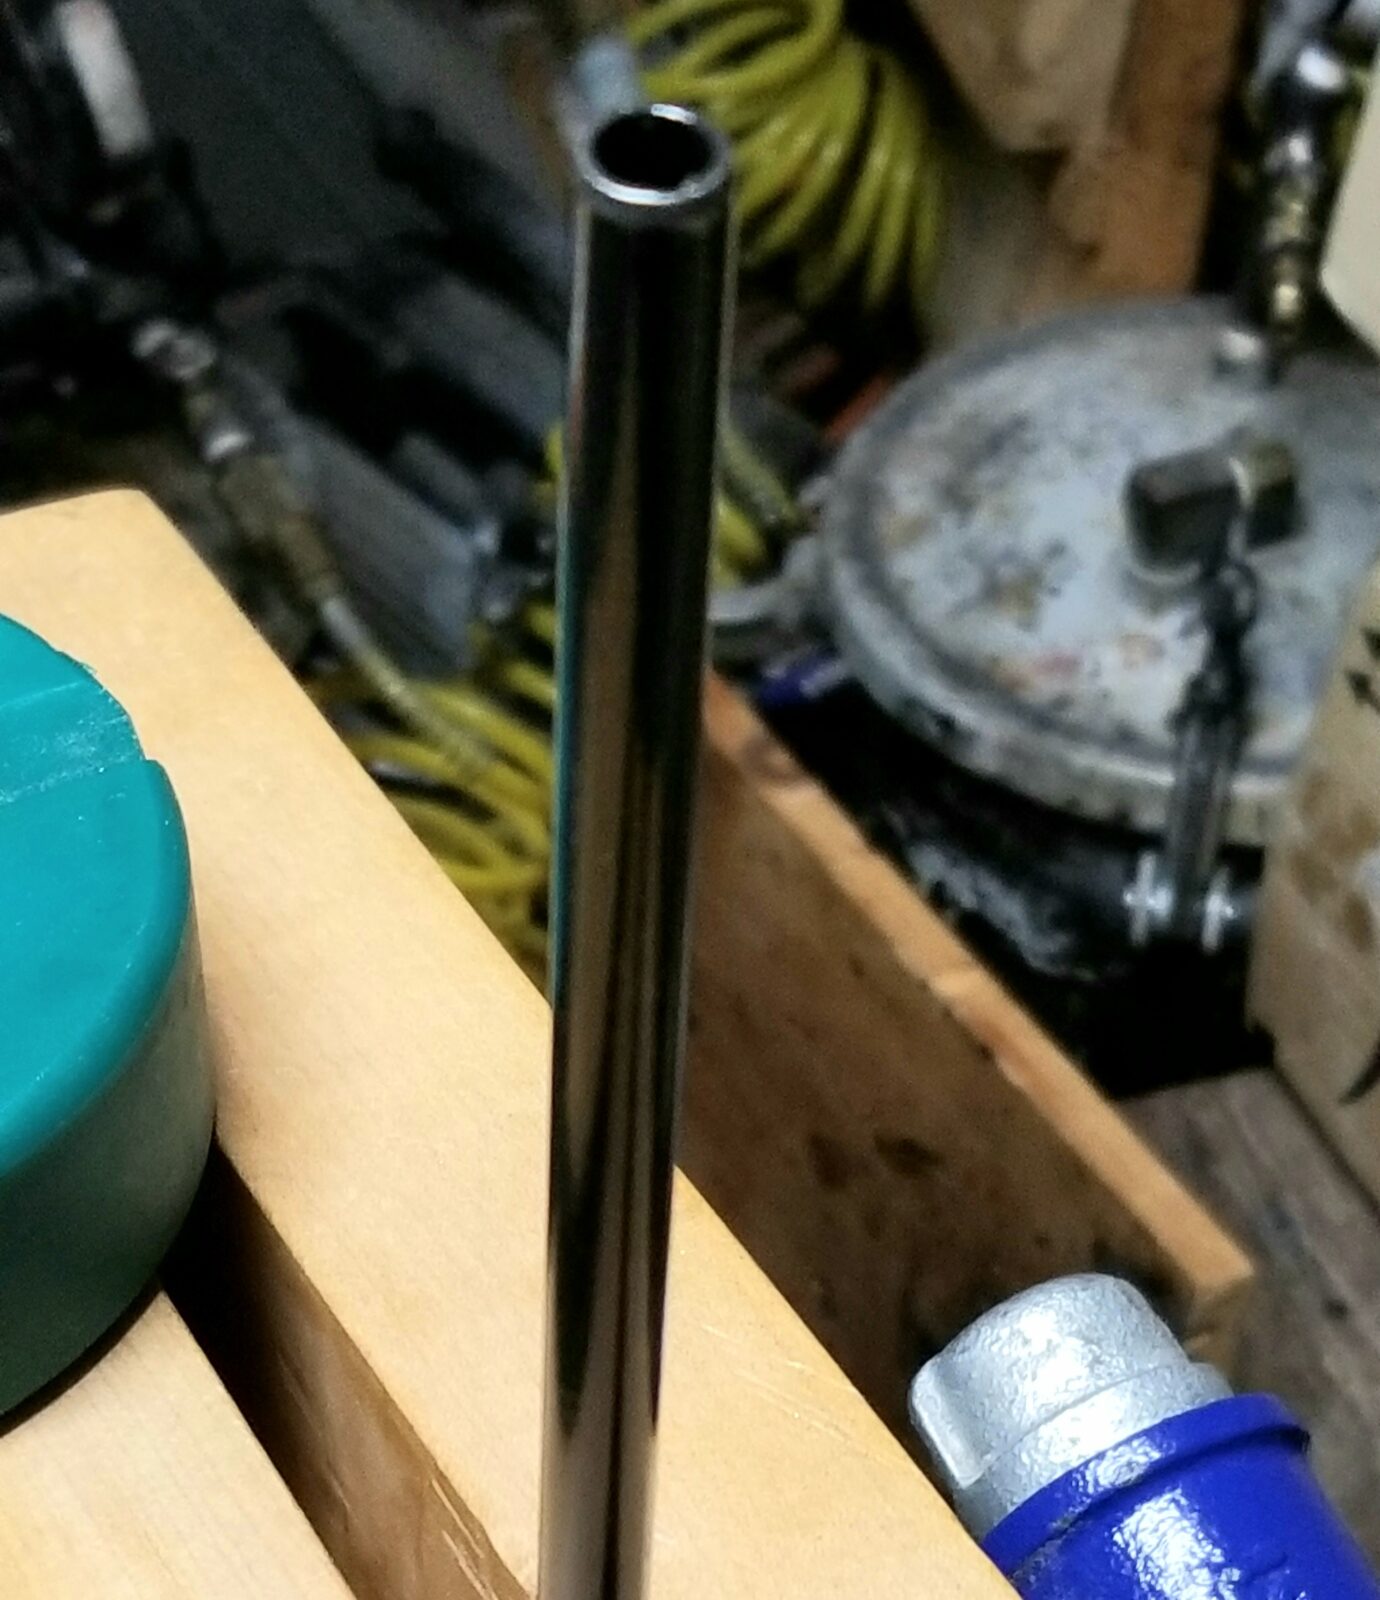
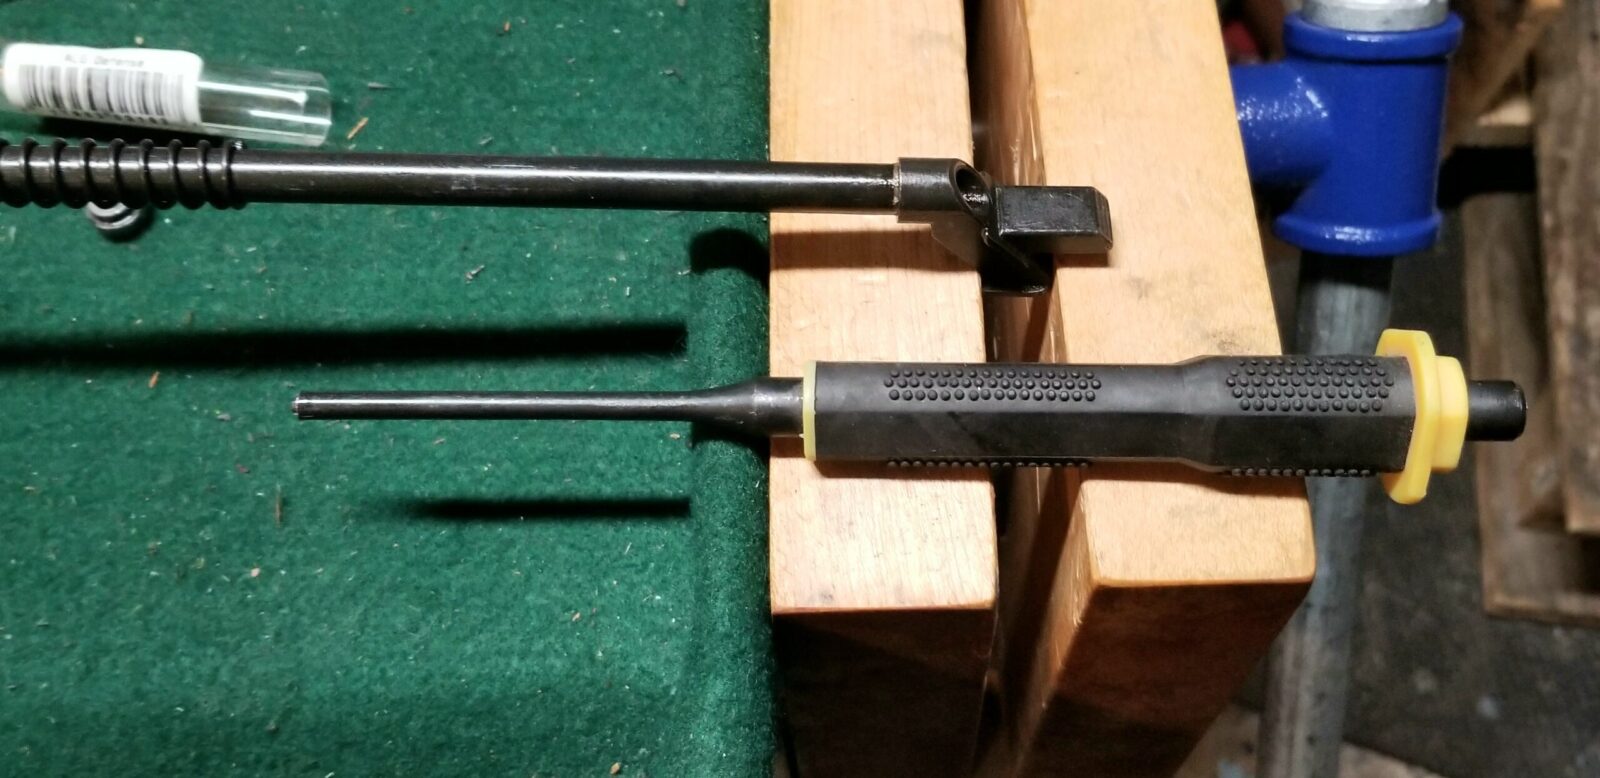
The Galil’s use a tube recoil rod that I really like. The older milled AKs used them until switching to a cheaper and easier to make linkage of two bent wires. Many RPKs still use the tube style. I tend to think it creates a more consistent return but not everyone agrees with me and that’s fine. I don’t have a mountain of collected data from experiments to support my hunch. Regardless, to re-assemble the recoil rod assembly, I use this long center punch to support the inner rod as I compress the wire. Any object small enough to fit in the rear tube to support the front rod would work.
So you push or pull the wire back as you apply pressure to keep the inner rod slid out forward.
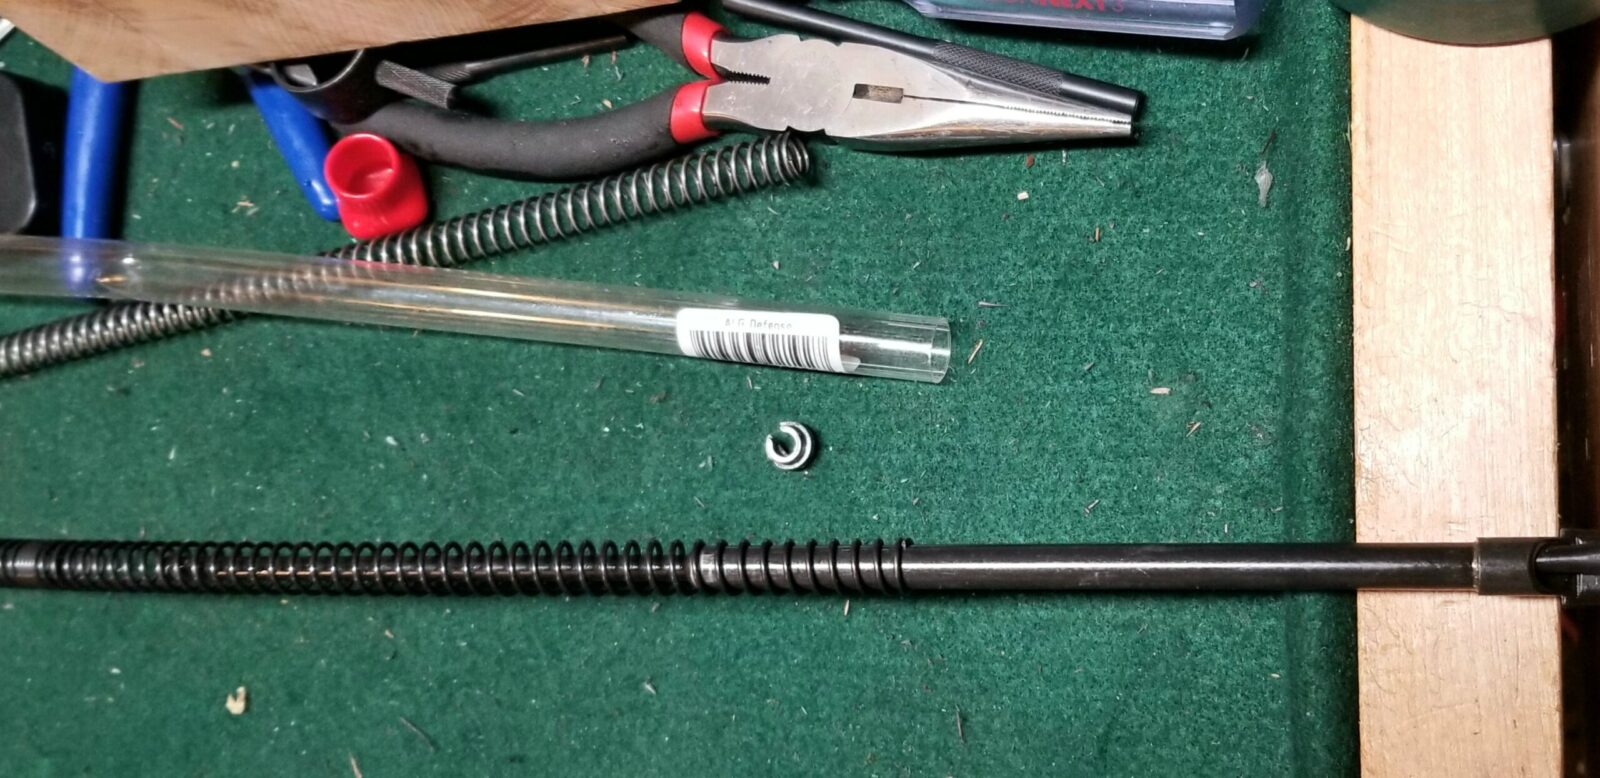
Here I have the spring easily held back and have placed the retaining cap back on. I then just guided the spring back into position and ensured it was sitting square on the end cap.
Here the end result. The newly assembled unit is to the top. A recoil spring assembly from a Galil SAR kit is under it for comparison and the old original spring is at the bottom.
In Summary
It’s easy to swap out the recoil spring and the rifle functions great with the ALG unit. Definitely function test your rifles before going to the range the first time to avoid surprises.
I hope this helps you out.
Note, I have to buy all of my parts – nothing here was paid for by sponsors, etc. I do make a small amount if you click on an ad and buy something but that is it. You’re getting my real opinion on stuff.
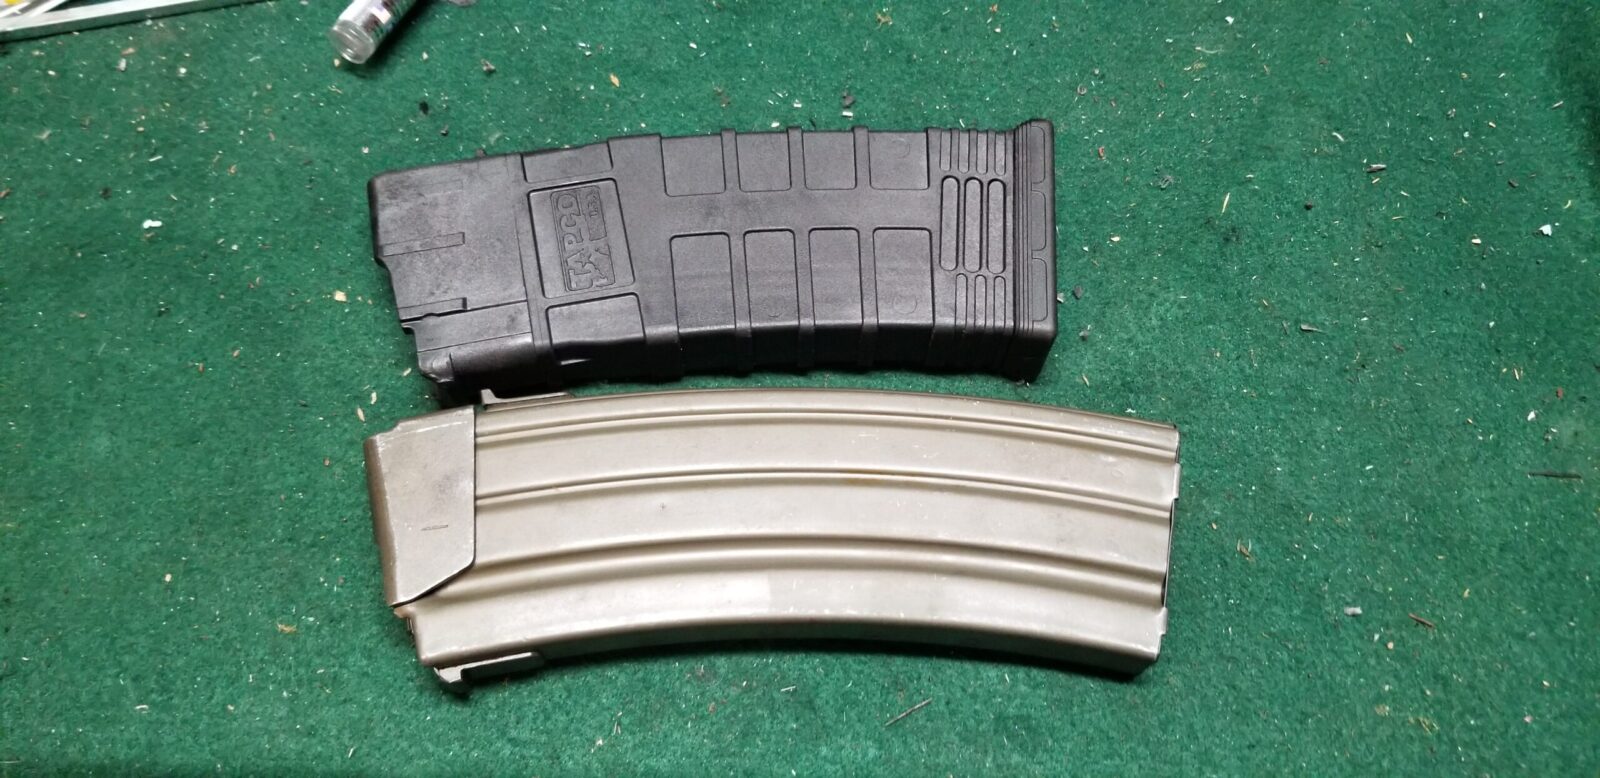
I have written a number of posts now about my purchase of a James River Armory Gallant, which is a Galil ARM wherein they provided a new US made receiver, barrel and pistol grip. They wanted to keep their costs down so the remaining three parts they needed for 922r compliance was to use a US-made Tapco Galil Magazine that is polymer and looks nothing like the original not to mention they are no longer being made!
The top mag is a polymer Tapco and the bottom is an original IMI surplus 35 round mag.
I wanted to use IMI surplus steel 35-round magazines that not only are the authentic ones to use but they are abundantly available. That meant I had to replace three more parts on the Gallant and the easiest is to swap the original Galil fire control group (the hammer, trigger and disconnector) with a US made group. The ALG AKT-EL is perfect for the job so I ordered one from PSA and installed it (click here for the big blog post I did about it). Next up was to source, clean and tune some original IMI Galil Mags, which is what this post will be about.
Finding the Mags
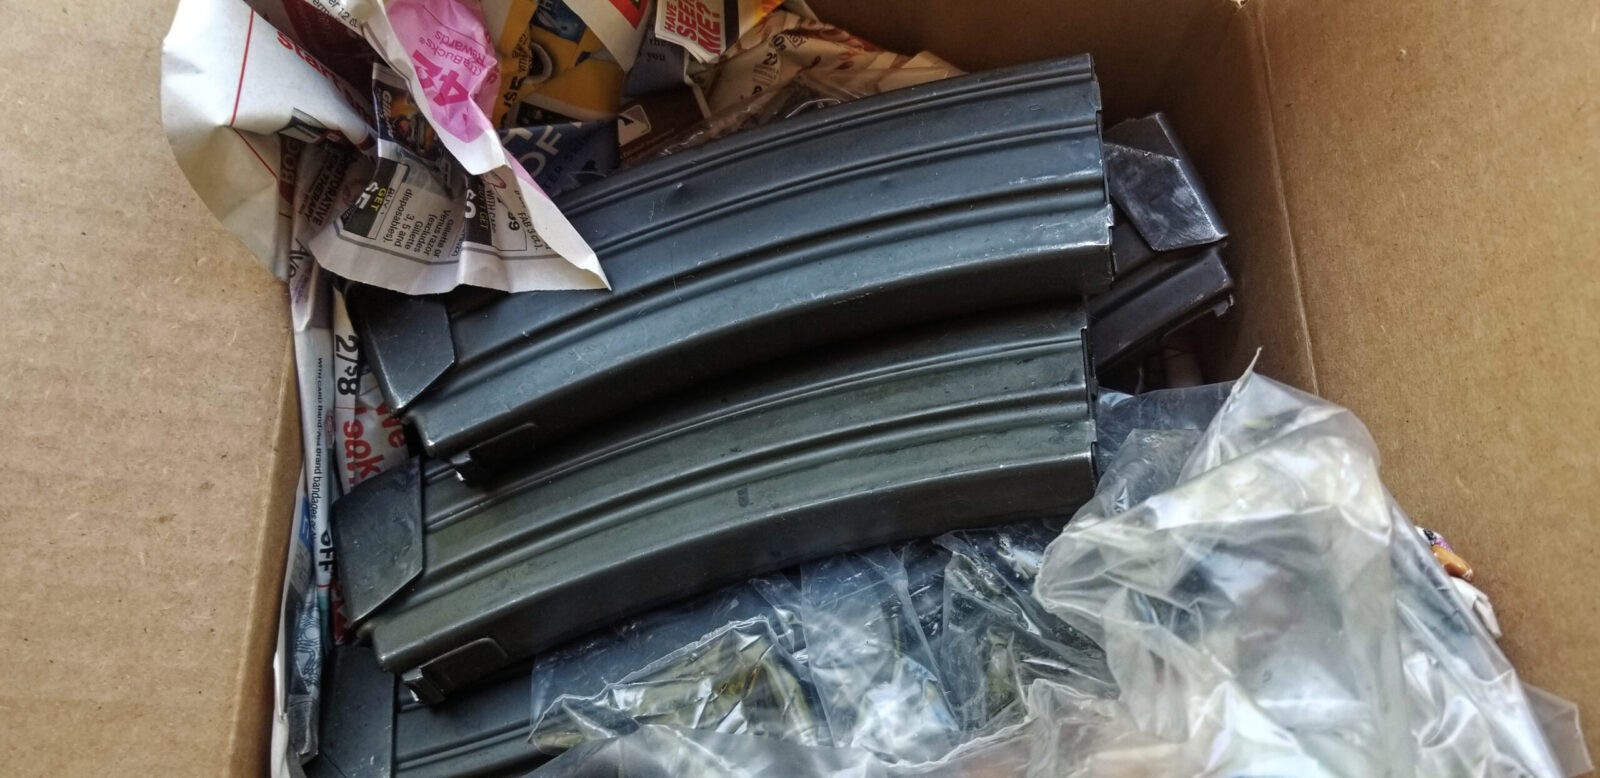
You can find surplus steel 35 round IMI Galil mags all over the place at websites that deal with surplus and gun parts. I bought all of mine from Numrich and they are in great shape at a fair price but you can also find them at Apex Gun Parts, Robert RTG, Aim Surplus and other places.
Numrich is a good firm to deal with. A few days after I ordered, a box showed up with my mags. Keep reading through because you do need to do some work.
Cleaning and Lubricating
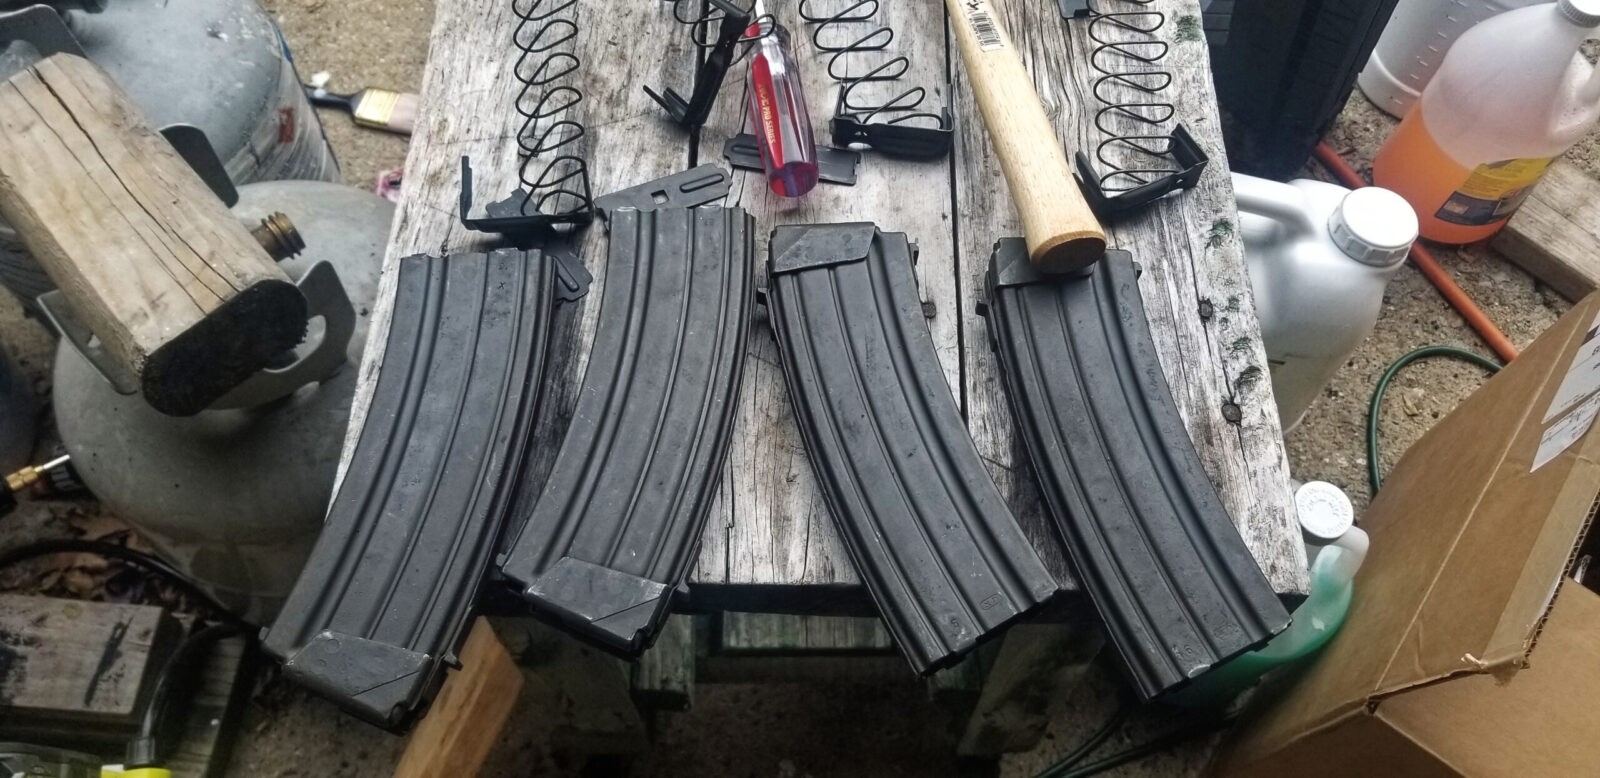
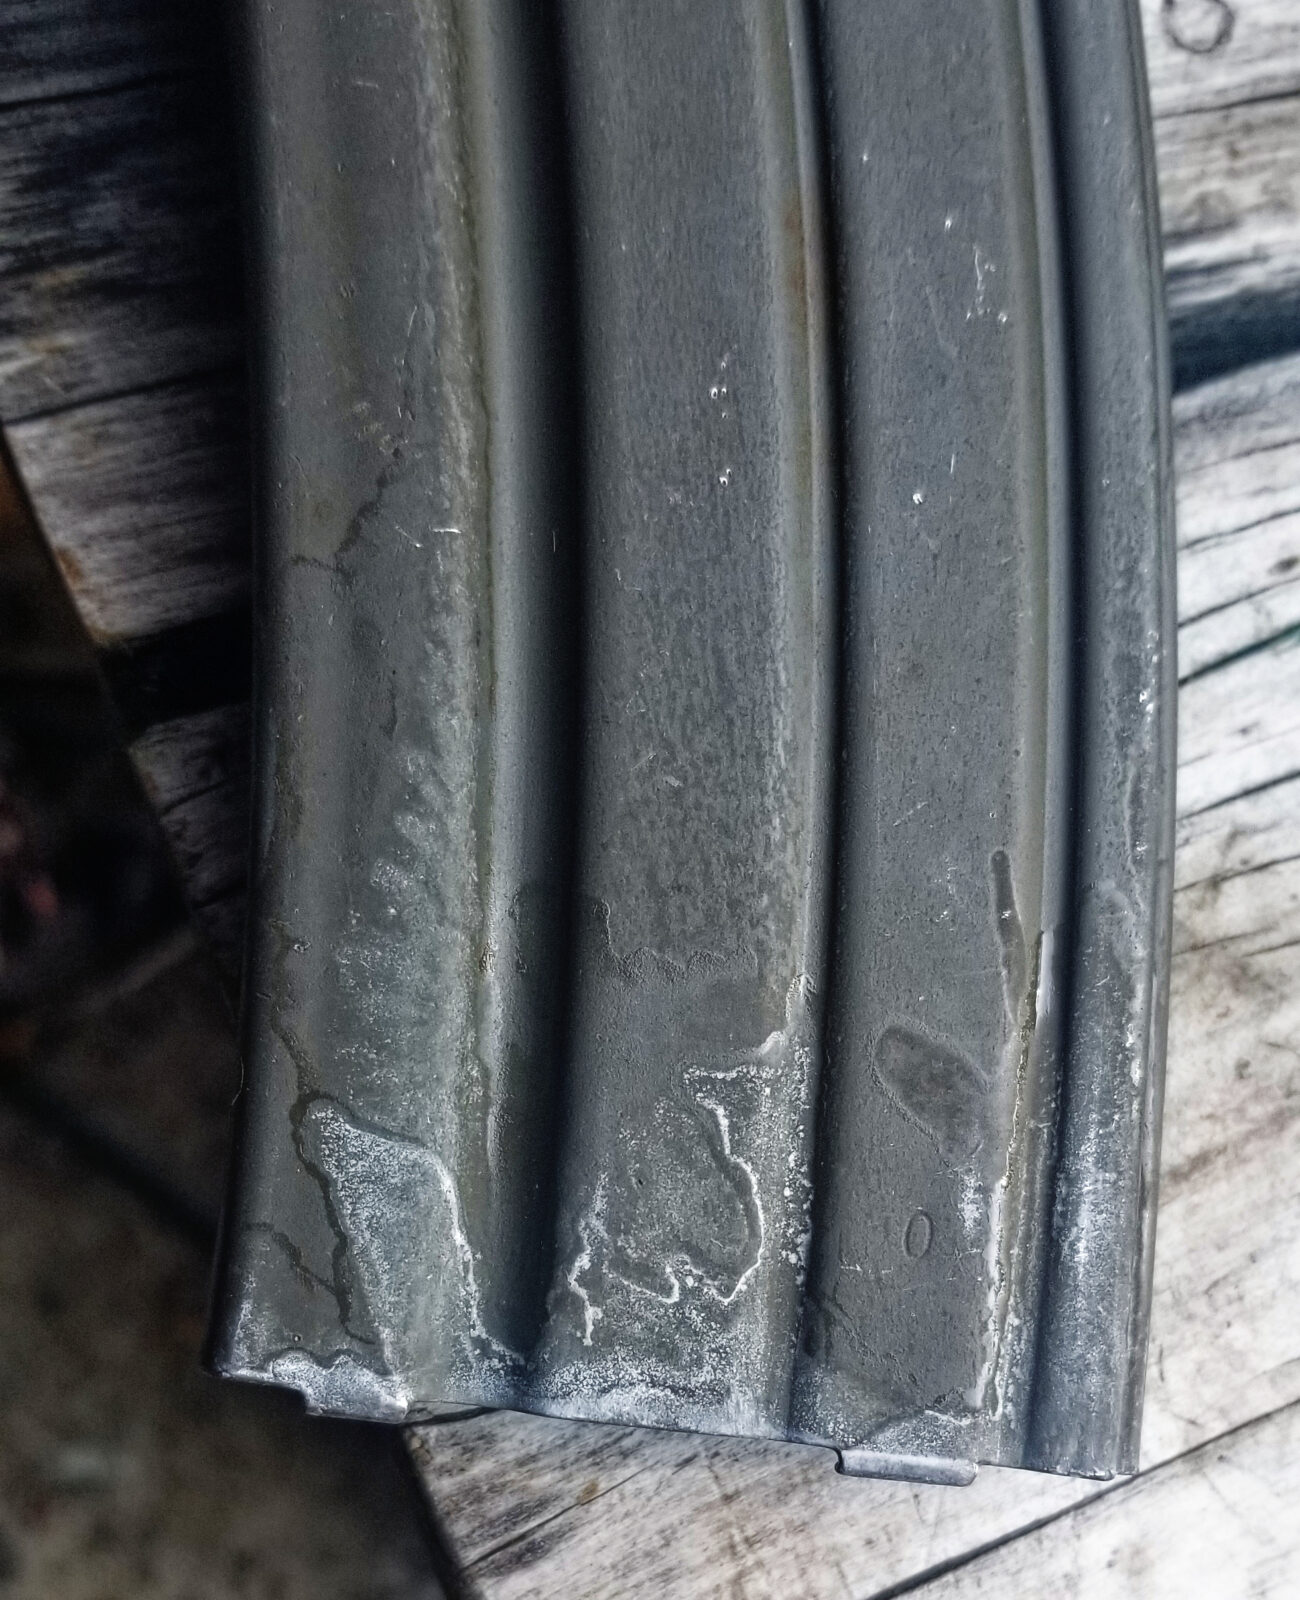
Ok, these are surplus and they have been moved all over. Most feel like they have something on them for corrosion and are sticky. Some have a slightly dirty feel as dust and what not have stuck to the surfaces.
Do NOT try to use the magazines as-is. Take a few minutes to clean and lubricate them.
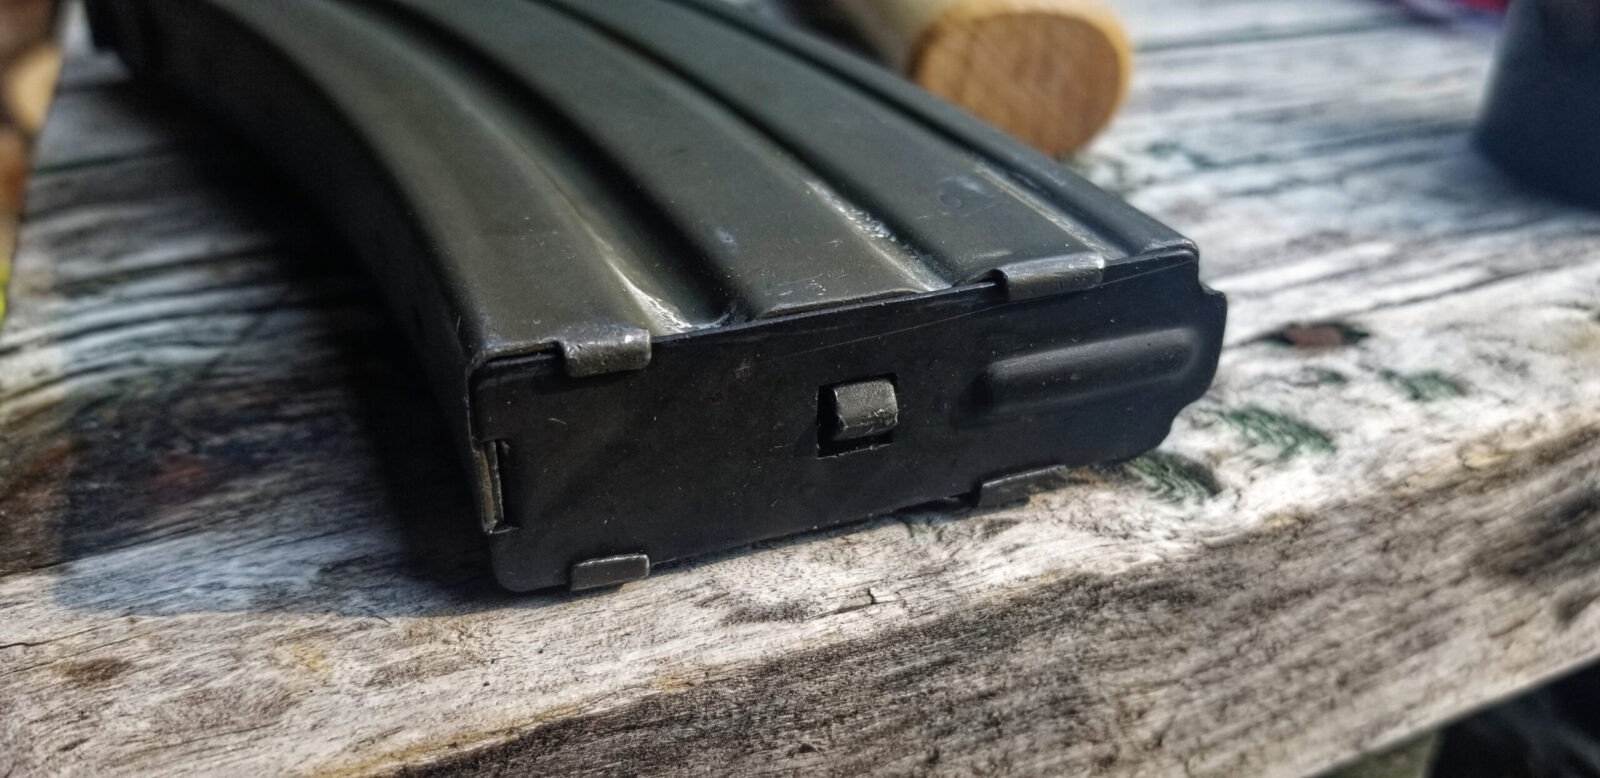
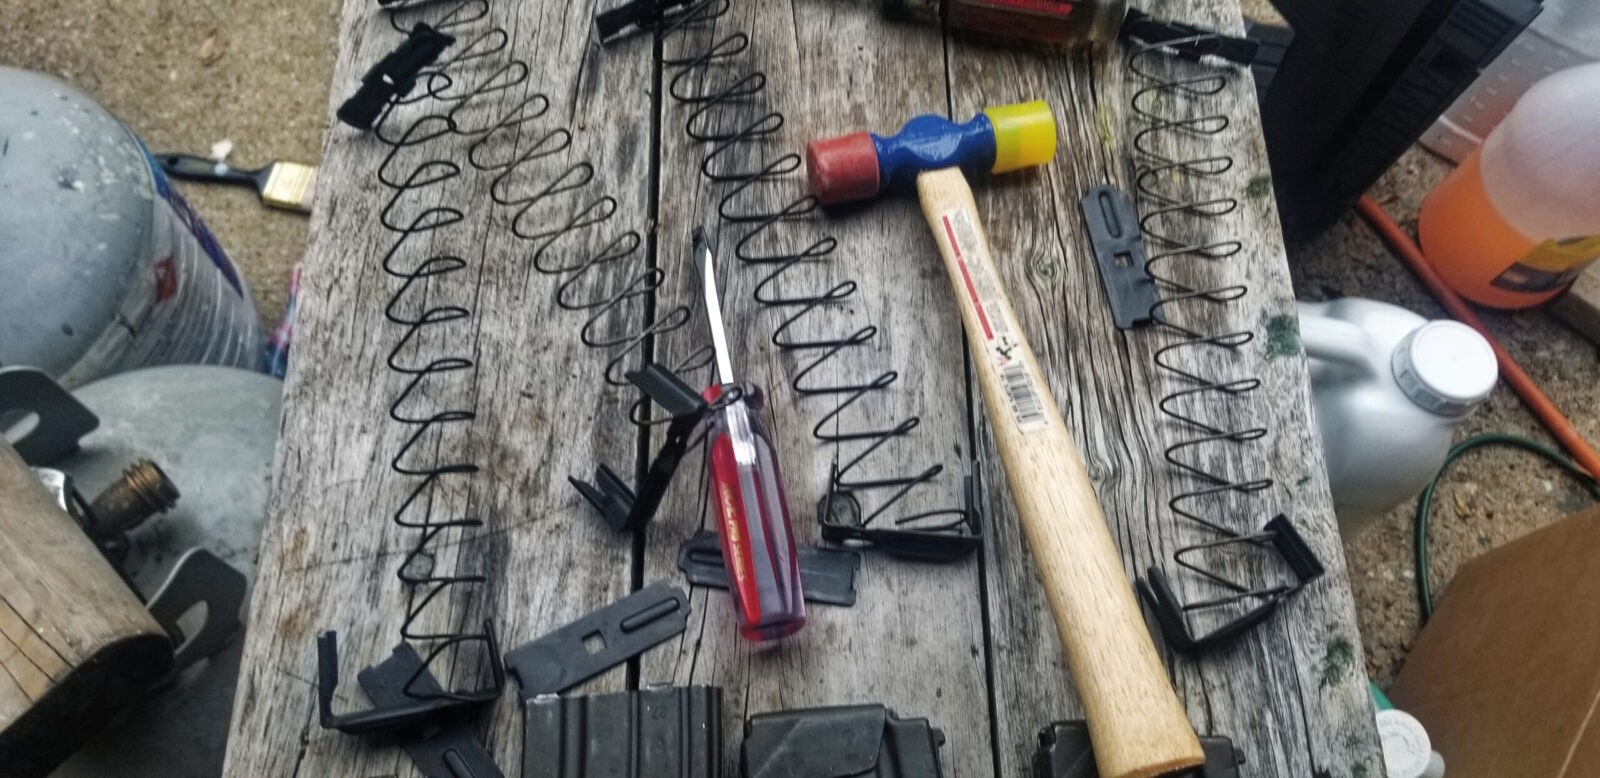
The bottom piece of sheet metal is the floor plate. Put a small blade screwdriver in the right end and pry while pushing down the locking tab you see sticking out in the middle. With the tab out of the way the base plate will come off and then the spring loaded internals are going to come flying out. To avoid this, pull the floor plate off about half way and then use your free hand to secure the internals as you remove the floor plate the rest of the way.
Once you have them all apart. you’re going to have a table like this.
I cleaned everything with brake cleaner and let it dry.
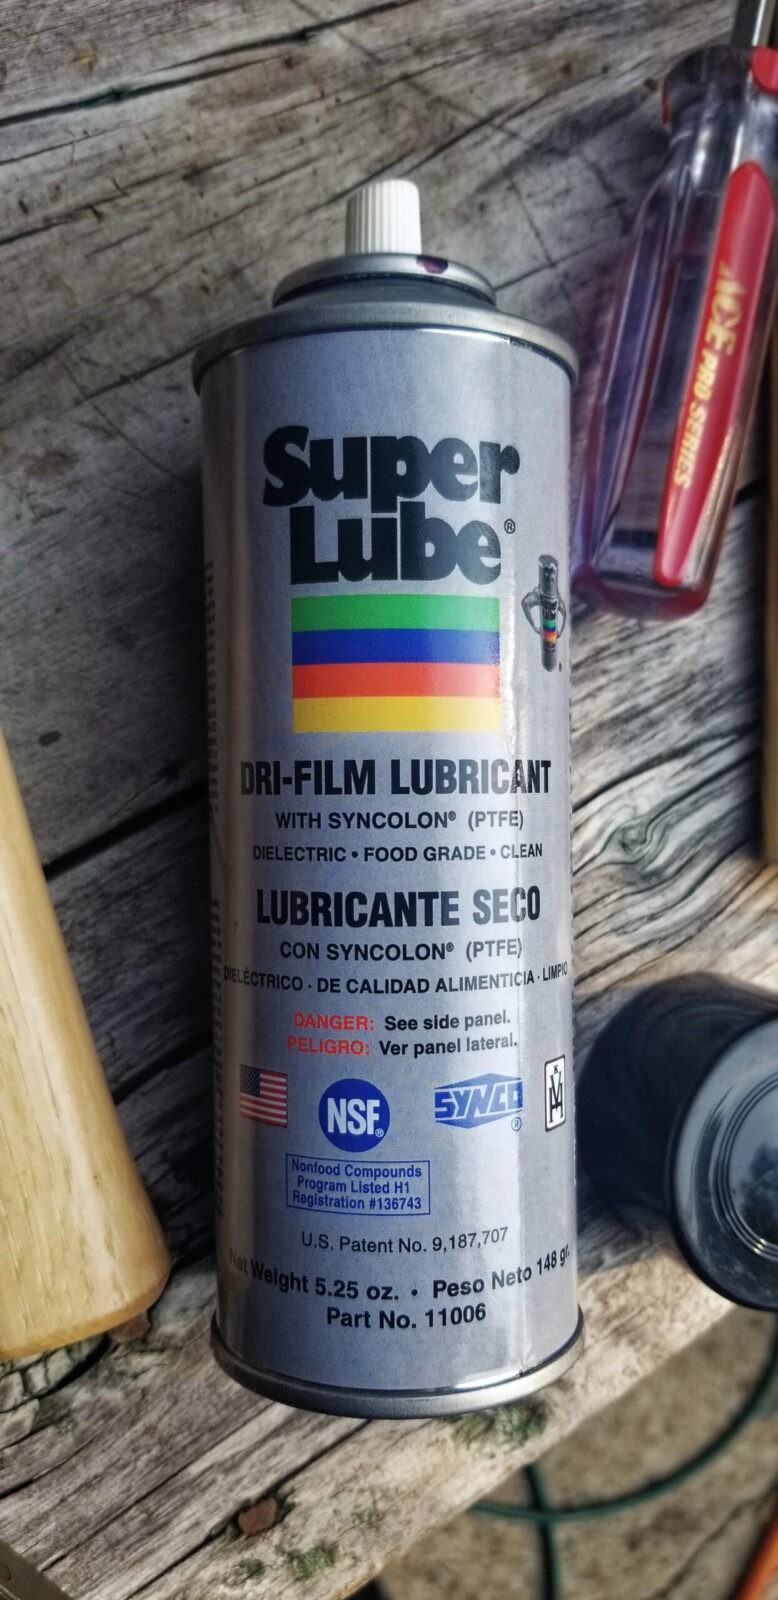
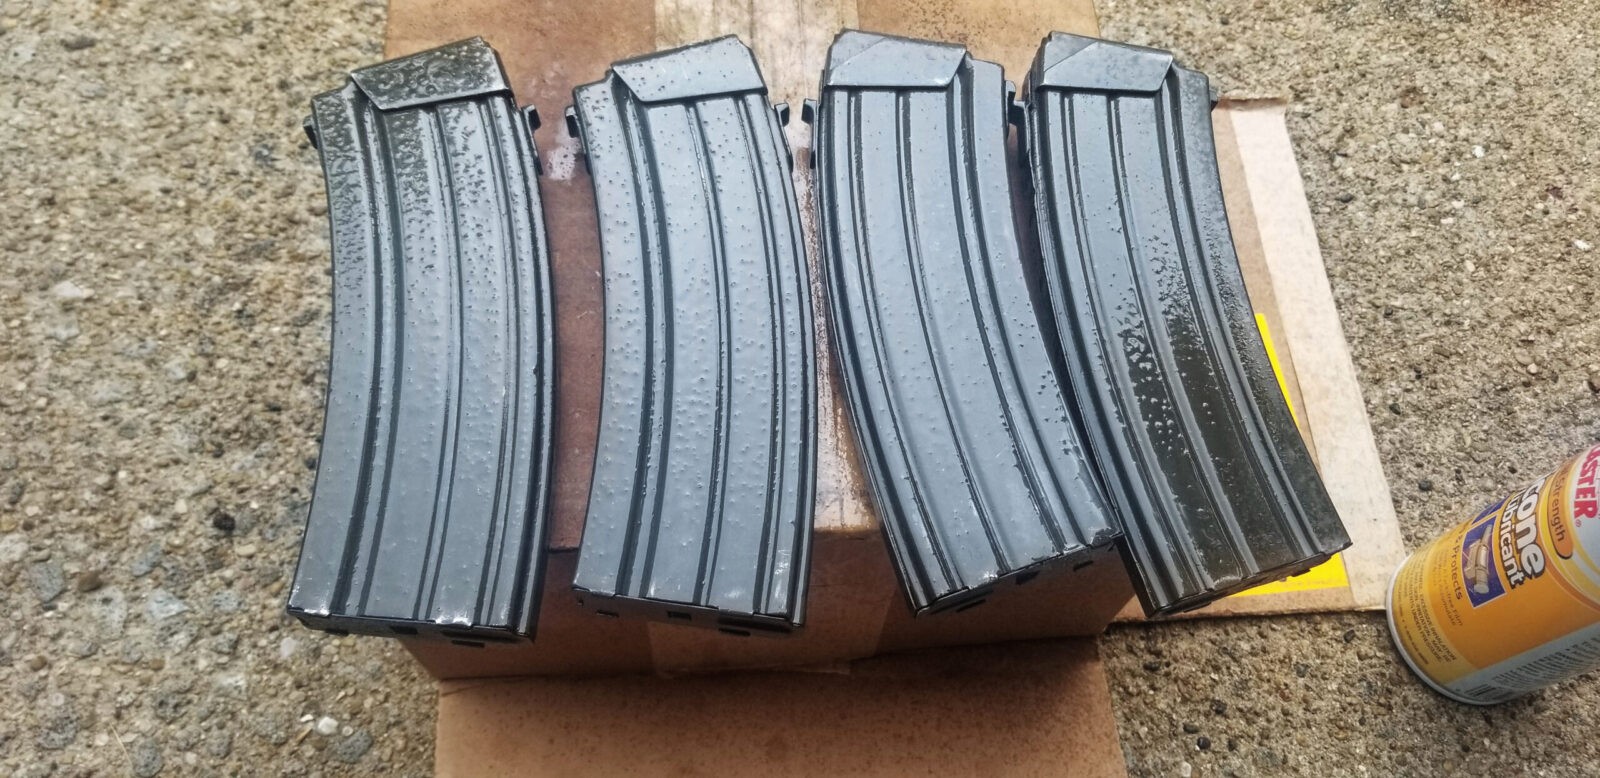
The parkerized finish did not let the follower slide as easy as I would like so I coated the inside of the magazine, follower, and spring with Super Lube Dri-Film Lubricant. Basically it is a PTFE (Teflon) in a solvent. So, you spray it on, the solvent evaporates and a film of PTFE remains. I like this because it lubricates without attracting dirt.
The white are the PTFE particles left after evaporation. All you need to care about is the inside. This is just extra that leaked out and I thought it would help to show what it looks like. Super Lube sounds like an infomercial brand but their lubricants are really good. The PTFE made a remarkable difference in how smooth the follower moved. Parkerized surfaces are rough and either they need to wear in or have something like PTFE to help.
To clean them up and make them look nice, I apply silicone spray and then wipe it off with a towel. I then let them evaporate for a while.
Fitting the Mags
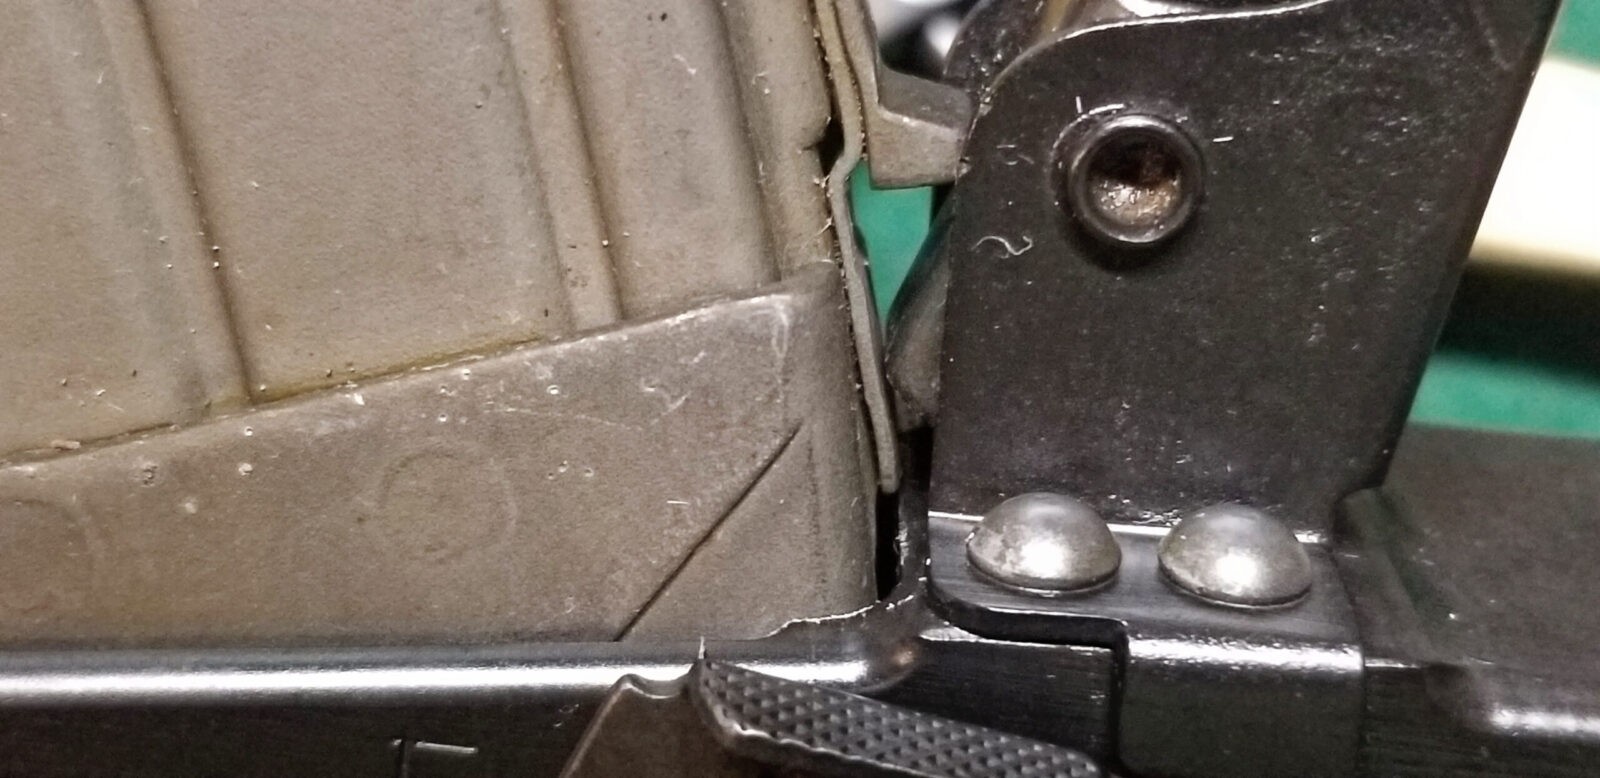
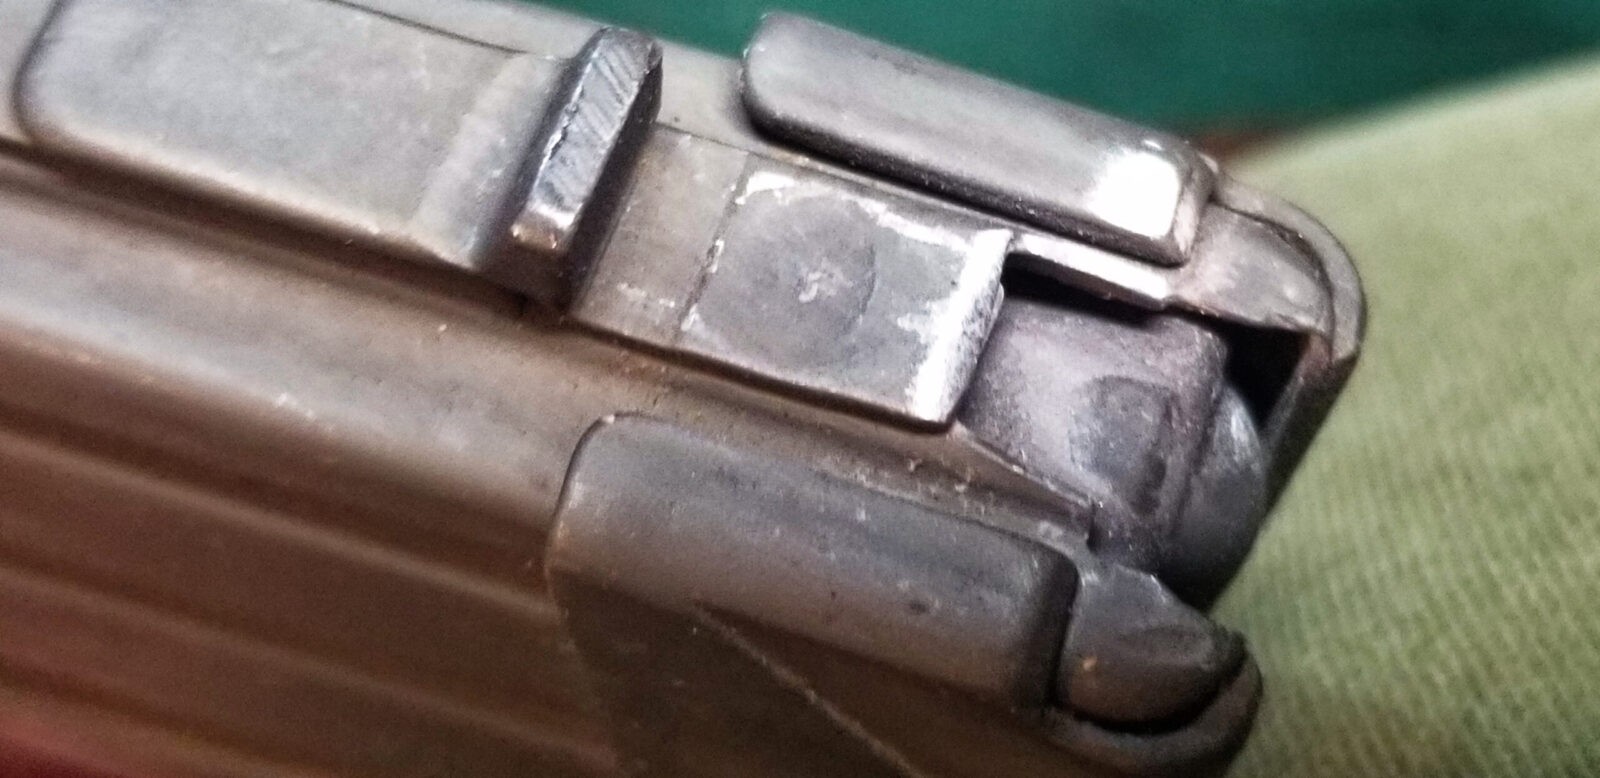
Out of the eight mags I bought, three of them needed some help as they would not seat fully. In these cases, modify the magazine. If you told me none fit, I would look at the mag catch but in this case most fit so the issue was the mags.
I did not have a problem with any feed lips. The problems were all with the strip of sheet metal that is holding the mag catch tab. If you look close, it’s the strip hitting the receiver that is blocking seating the mag fully.
To resolve the issue, I used a small flap sander on my Dremel and put a beveled edge on the strip where it was hitting. Problem solved.
To do any testing with dummy rounds – not live rounds. I use A-Zoom brand dummy rounds, just FYI and I also was using my surplus steel Galil mags at this point because my 922r parts count was being met thanks to the new fire control group.
To test, I loaded up 10 of the blue A-Zoom snap caps and made sure they would cycle. In terms of hand feeding and extracting, I have to say JRA nailed it. The action was smooth and the Gallant fed from the surplus mags just as smoothly as the Tapco mag.
The mags look and function great as a result. Some of the mags did require some fitting so let me explain that next.
In Summary:
I can now use surplus mags like I wanted thanks to the ALG fire control group and these cleaned up mags. I hope this post helps you out.
Note, I have to buy all of my parts – nothing here was paid for by sponsors, etc. I do make a small amount if you click on an ad and buy something but that is it. You’re getting my real opinion on stuff.
ALWAYS Function Test Before You Go To The Range With a New or Modified Galil or AK Rifle or Pistol!!
Seriously – don’t wait to go to the range to do this. You can find out a lot of things at home with all your tools and supplies on hand vs. being somewhere wishing you were home.
Before function testing, I clean and lube the rifle. I like to use Super Lube grease during break in on all sliding surfaces and a few drops of Super Lube liquid lubricant on anything that rotates.
Use whatever your favorite bore cleaner is to clean out the barrel and the chamber. You will be surprised to see all of the dirt / dust / junk that comes out of a new barrel. Just because a given weapon is “new” does not mean it is clean.
Function Testing
First, I just test the mechanism without mags or dummy rounds. You can find out a lot by doing this and I do it without the dust cover on so I can see what is going on:
Pull the bolt bolt carrier back and let it go. It should slam home without binding or sticking. If it does, try cycling the action 10-20 times and see if it smooths out. Some guys will cycle their AK a couple of hundred times before the range to smooth things out. I tend to find they are okay after a few dozen cyclings with lubrication or I need to take it apart and fix something such as a burr or rough surface.
Pull the trigger, you should see it be released and it should firmly whack the firing pin. If it seems lame, the spring may be worn out or broken. I would recommend converting over to an ALG fire control group (PSA sells a custom version of the ALG-EKT that will work fine in any Galil or AK rifle – they are in stock and at a great price) and replace both the hammer and disconnector springs (the ALG will come with the disconnector spring but not the main hammer spring. ALG sells them and that’s what I use but I prefer the double wound spring model vs. the single spring unit they also sell. The Russians went with a double or “spiral wound” spring to increase the fault tolerance risk of a single spring breaking).
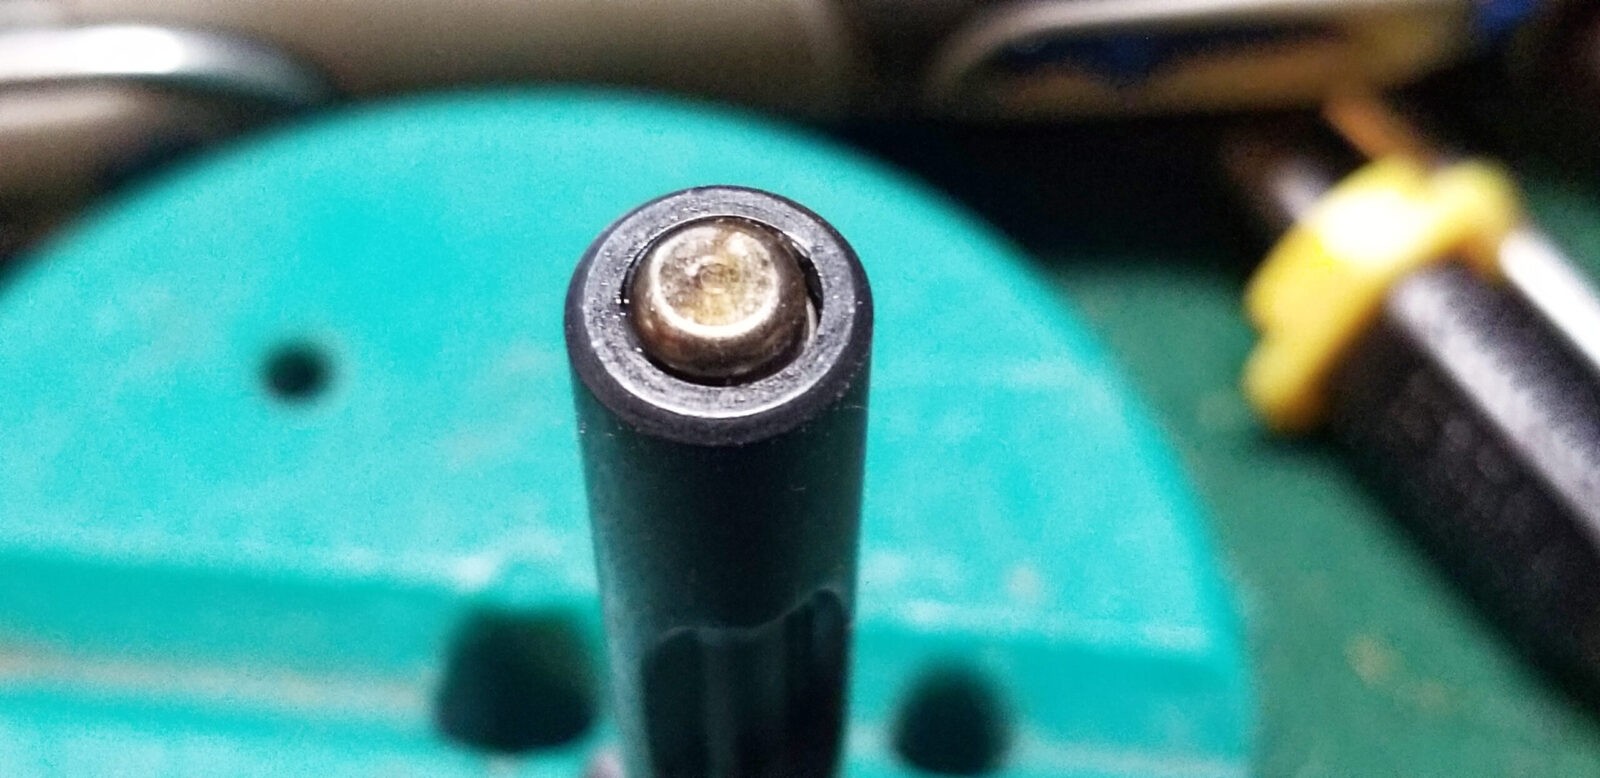
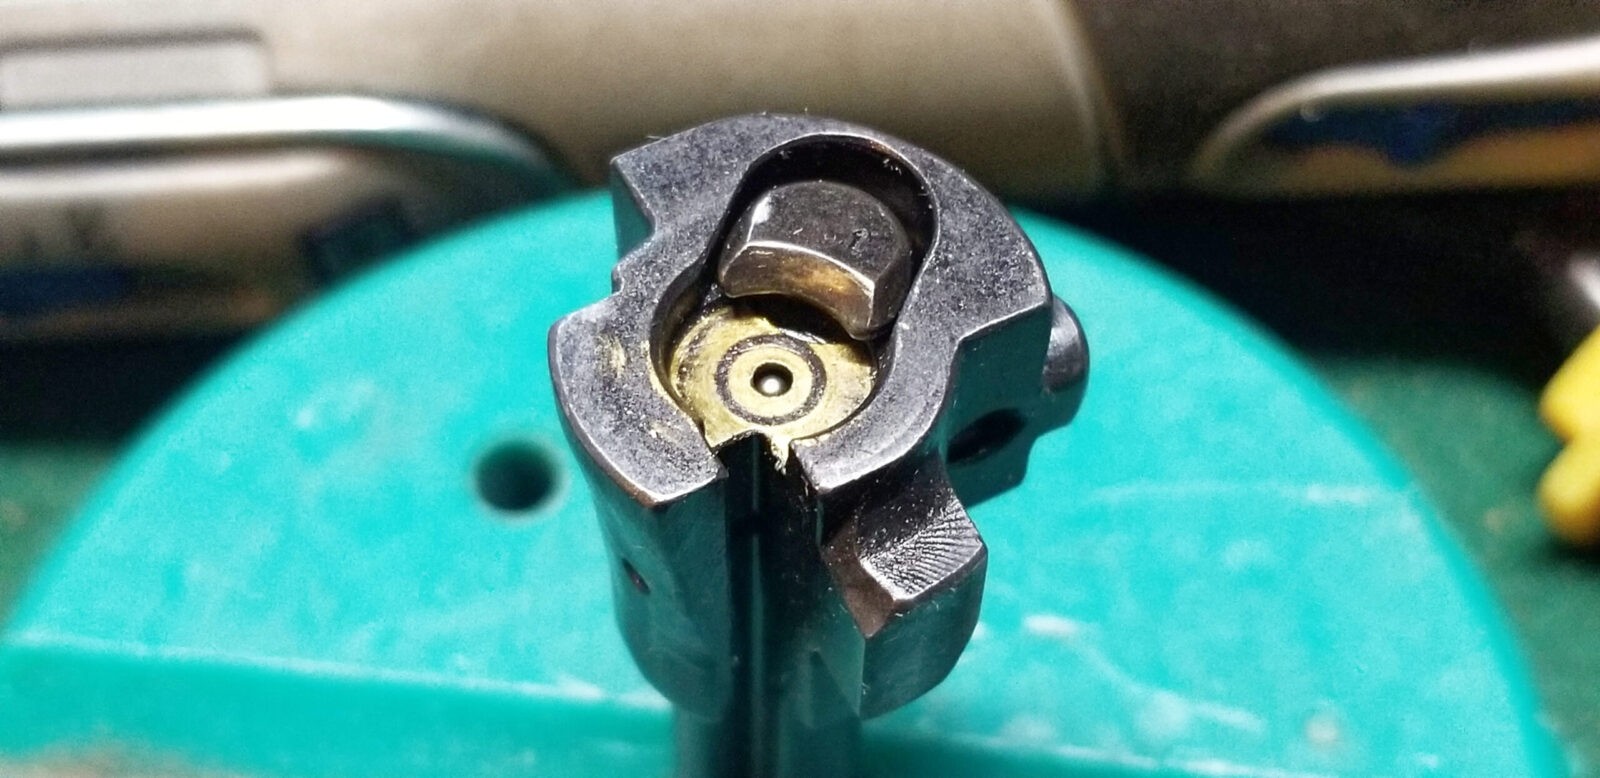
Something unique to Galils is that they have a spring loaded firing pin whereas regular AKs just have a floating firing pin in the bolt body. You can get into arguments about this one. AKs work fine without a spring but you do have a risk of a pin sticking out or slamming home with enough force to cause a sensitive primer to detonate and cause a misfire. Thus some like putting a spring in the bolt that forces the firing pin backwards to reduce the odds of a misfire. Others will argue there is more risk of debris causing the spring to jam or the spring itself breaking and jamming the pin. Folks, this is like arguing Chevy vs. Ford – you aren’t going to convince a staunch believer of one side or the other that you are right and he is wrong. The Galil is not the only firearm design to do this and they work just fine. At any rate, just make sure the pin does not stay stuck out on a Galil. You should be able to push the exposed firing pin at the back of the bolt and both see and feel it freely move.
Next, cycle the bolt carrier to cock the hammer, engage the safety lever next to block the trigger and try to squeeze the trigger – you should not be able to pull the trigger and have it fire. If you can then you will need to adjust the gap between the trigger and safety bar. With the ALG, this means you trimmed off too much, need to remove the first roll pin and start over with the second. If you don’t have an ALG, you will need to decide if you want to weld on some material onto the trigger leg or safety bar and then trim to fit.
This next one tests the disconnector – with the trigger pulled back, cycle the action and you should see the hammer get caught/captured by the disconnector. When you let go of the trigger, the hammer should switch from the disconnector to the front hammer hooks on the trigger. This is a fascinating display of geometry. Now, if the disconnector does not catch the hammer or release it, you may need a new disconnector spring or have forgotten to install the spring.
Photos of the Bolt
This is the rear of the unique Galil spring loaded firing pin. Other AK variants do not have this. Put a drop or two of oil on the back side and let the lubricant run in. When you push on this button, it should depress and return smoothly and easily. If it sticks, it needs to be disassembled, inspected and cleaned to be safe. The reason I bring this up is that if the other end of the pin is sticking out of the bolt face, it will fire a primer when the bolt slams into a cartridge at some point of the feeding process.
I make sure the extractor at the top can move freely in and out. It has a fairly stiff spring in there so a cartridge’s rim slides against the ramped face of the extractor pushing it out of way until it snaps back into the slot of the extractor slot of the 5.56NATO cartridge. Note the brass coloring. The Galil ARM parts kit that JRA used to assemble this Gallant saw a lot of use. I did headspace it also just to be safe and it was properly headspaced by JRA.
Next, do the above with magazines and with dummy rounds – not live rounds. I use A-Zoom brand dummy rounds, just FYI and I also was using my surplus steel Galil mags at this point because my 922r parts count was being met thanks to the new fire control group.
Comments about the above:
When it comes to step one above, I want to see the dummy round get stripped from the magazine and be fed up into the chamber nice and smooth. I will do this 10-20x to make sure it looks good. Things that can mess this up are: magazine not seating fully, bent magazine feed lips, no bullet guide installed, needing a slight radius at the start of the chamber to help line up cartridges, or if you bent the receiver while building or using the rifle (I’ve done both over the years so it happens.
When I am cycling the rifle, does it stall/slow down at any point during the feeding of the ammo? Guess what? The Gallant failed this – the old surplus spring was too weak and I replaced it with an ALG spring – (Any AKM spring will work even though the Galil is 5.56 NATO and the AKMs are 7.6×39).
I then Install the dust cover and make sure that nothing is binding. At this point, your rifle should be good for testing at the range. Always, always, always test combinations of ammo and magazines on a given weapon before you rely on them. Do the function testing and take them to the range.
I hope this helps you out.
Note, I have to buy all of my parts – nothing here was paid for by sponsors, etc. I do make a small amount if you click on an ad and buy something but that is it. You’re getting my real opinion on stuff.
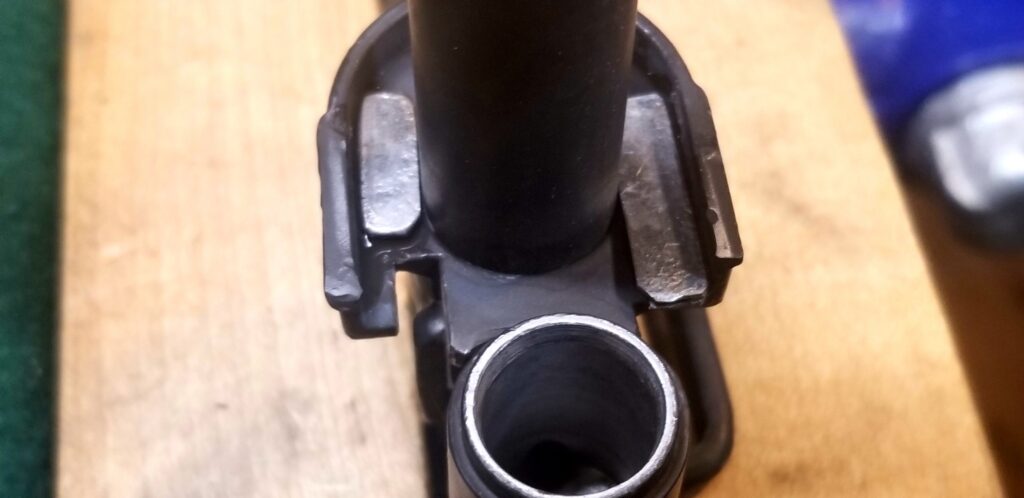
Second on the list of things I needed to fix right after the buttstock was the loose handguard. It’s a personal preference thing but I don’t like handguards that wiggle and this thing could move front to back as well as side to side. The reason this happens is usually because the handguard retaining slot on the barrel was cut too far forward such that the cam lever on the retainer couldn’t push the handguard far enough backward.
I expected this. Classic Firearms, and presumably James River Arms (JRA) were up front in the product listing that the handguard would probably be loose and it was. Thankfully, from years of working on AK rifles, I knew I had a number of options:
I could weld the handguard retainer channel closed on the barrel and cut a new one. Pro – the right way to do it. Con – would take more time than I wanted to invest.
Some guys will add layers of epoxy liquid or putty inside the retainer but I am not a huge fan of that one due to the epoxy getting warm and likely breaking down under the relatively sharp edge of the sheet metal nose of the Galil handguard.
I could extend the front edge of the handguard retainer by building it up with small welds. Pro – easier than redoing the barrel channel. Con – would take more time than I wanted plus it’s really hot out and welding did not sound pleasant.
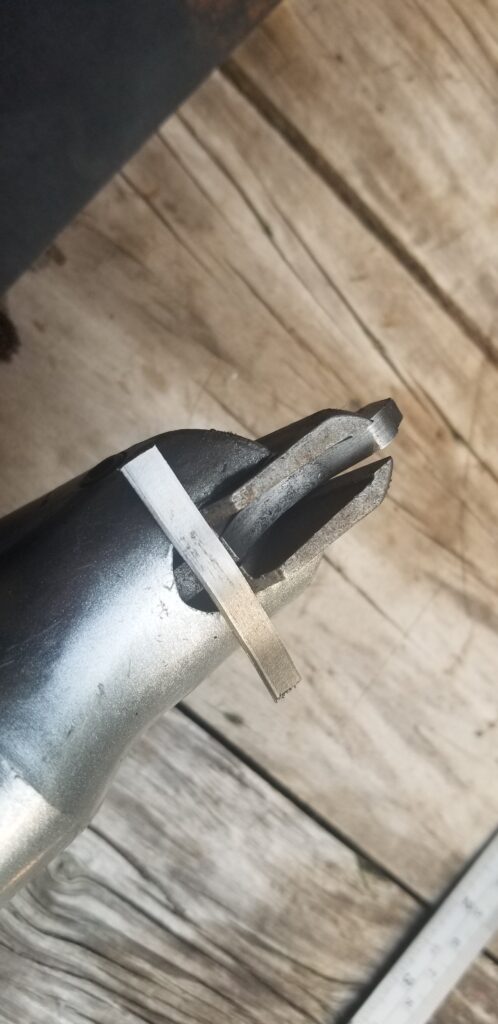
I could fabricate some shims and insert them into the handguard retainer. Pro – an age old method with soliders putting everything from wood and gum wrappers to folded steel and aluminum cans in there Cons – can fall out when you remove the handguard.
I opted for the fourth one and decided to make shims. You’ll notice a common theme – I do not have a ton of time and am dancing around the battle worn theme with the rifle leaning more towards the newer end of the spectrum vs. extremely worn.
To shim a handguard, I prefer a metal vs. wood, paper or plastic as they tend to all break down with time. An age old trick on the AK community is to take an aluminum soda or beer can and then cut either into strips or in an approximate shape that fits inside the retainer.
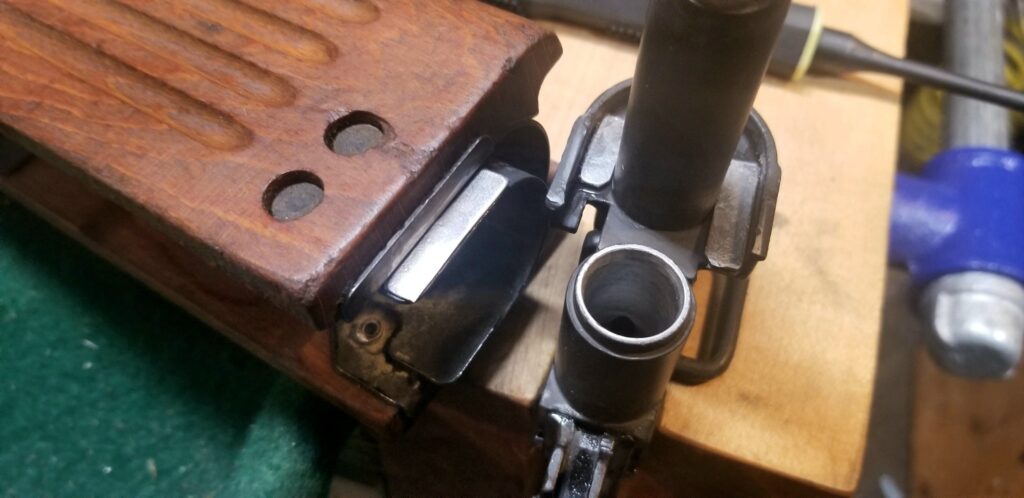
The shape of the Galil handguard added a bit of a challenge in that it is a “U” shaped piece of sheet metal that slides into the retainer. The front edge is relatively thin vs. the old days of a big thick piece of wood or plastic going into the retainer. This approach can be seen elsewhere also such as in modern Bulgarian and Russian handguards.
So, given the shapes of the handguard and the retainer,I decided to cut two strips that would closely fit between the barrel and the inside lip of the retainer and also be sufficiently think to secure the handguard. Given the “U” shape I was betting that I would get enough support from the left and right sides and that I would not need to worry about supporting the bottom.
I measured the gap from the barrel to the inside wall/edge of the retainer on the left and right sides and it was about 6mm (0.236″). That meant I needed something that either started at a 1/4″ and grind it down or find something closer to 6mm.
My first try was to look for 6mm wide shim sets and none was to be had. A shim set or shim assortment is a collection of steel of varying thicknesses so you can combine whatever thicknesses you neeed to get your final thickness plus you cut them to what is needed.
I ordered in a steel shim assortment set as I haven’t needed any for quite a long time. I also scrounged around for what sheet metal I had in stock. I had some rediculously thick 16 (0.0598″) and 18 (0.0478″) gauge pieces plus a good sized piece of 22 gauge (0.0299″) sheet metal. I decided to start with the 22 gauge set and fine tune with the shim assortment but a bigger question was forming – what did I have to cut this stuff cleanly that wouldn’t make a big mess.
Good old fashioned sheet metal shears / tin snips were an option but I’ve never been that consitent with the things. I had an air nibbler that I could set up with a straight edge to cut strips … and then it dawned on that I had a Harbor Freight 14 gauge swivel head double cut sheer (item #92115) that might do the trick and – here’s the plus – it cuts a metal strip out of the source stock to avoid deformation.
I dug the thing out and lubed the cutter. It had probably been at least a year since I had used it. Guess what? That “waste” strip turned out to be about 6mm and gave me what I needed.
Here’s the business end of the double cut shear. Note the strip it cuts out. I just ran it into the stock with a straight edge just to keep the donor sheet clean and had all I needed and then some in a few seconds of actual cutting.
Plain 22 gauge sheet metal is 0.029″ thick and I knew I had a fair sized gap to address so I tried folding it in half and then trimmed to to fit in each side of the handguard. The best way I found for test fitting was to clamp the whole rifle with the muzzle down in my big woodworking vise. From there I could rest the shims in the handguard retainer, insert the handguard and pull up on everything trying to get the locking lever to flip.
Much to my surprise, that double thickness of the sheet metal worked perfectly. I had expected to get close and then keep adding pieces of shim stock until I had a solid lock up.
The next thing I had to consider was how to hold the shims in place when I normally assembled the rifle. I decided to keep things simple – I super glued them in. My reasoning was that I rarely take off handguards and if the two shims fell out in the future I could glue them back.
These are the two shims. Notice I made them as long as I could for each siide but I did not make one for the bottom and that has not proven to be a problem thus far.
Now one thing was still bugging me – there was too much movement left to right in the retainer as well. What I did to fix that was to glue a shim on on the outside edge of one part of the metal handguard’s front steel U-shaped nose.
Here is the single 22 ga shim I needed to stop lateral movement. It turned out that the shim was visible in the gap between the retainer and the handguard, I wound up painting it with some of the Rustoleum Satin Black pain also.With the shim painted black, you don’t even know it is there.
The Results
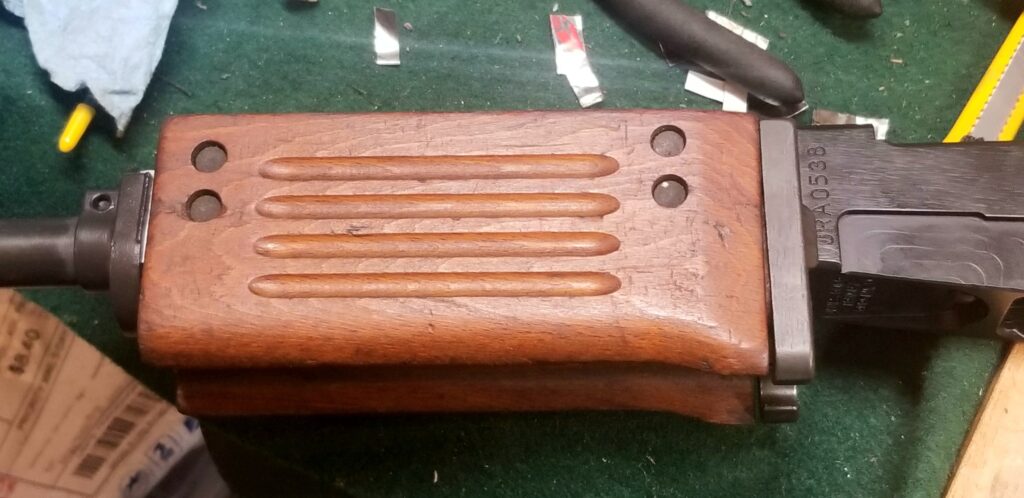
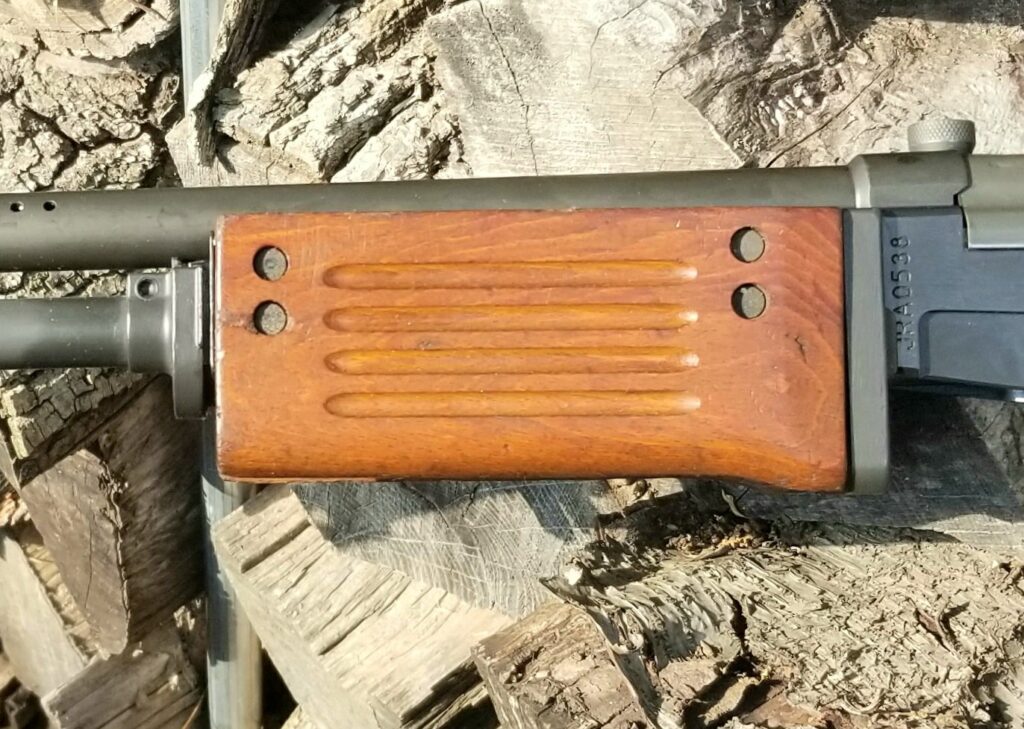
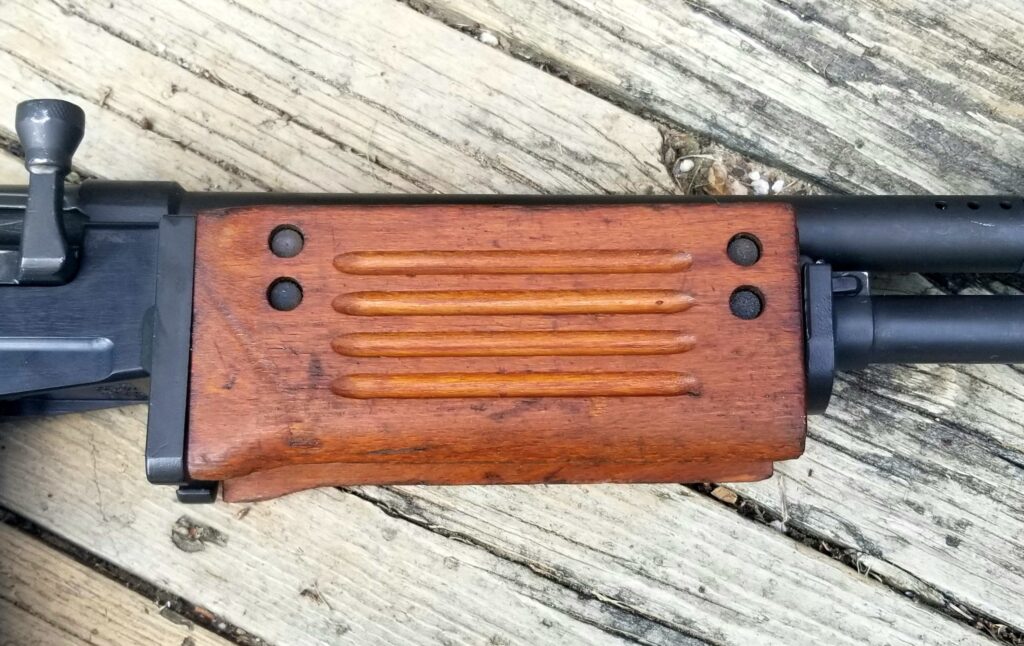
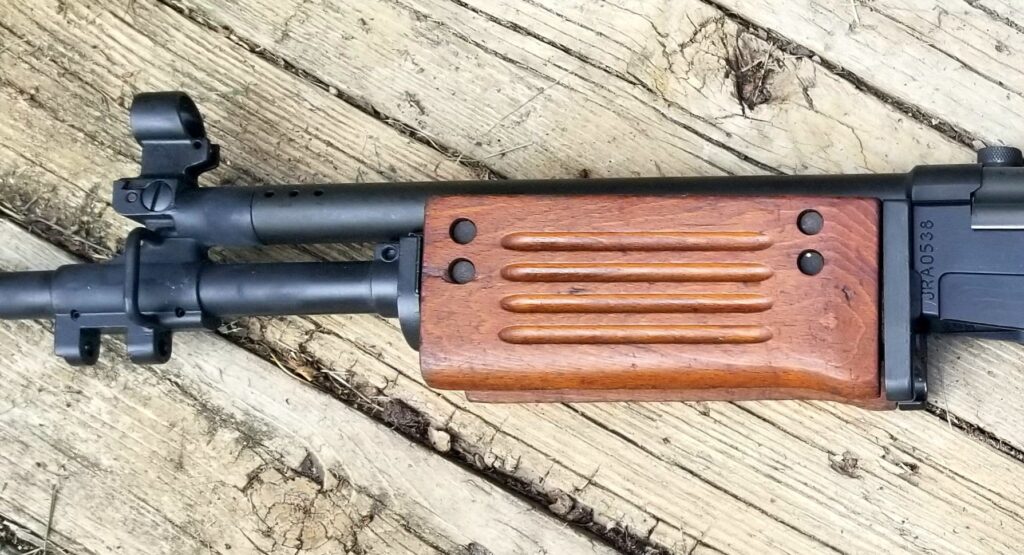
The handguard is now rock solid. I decided not to change the wood at all. I really like the coloring and for me it’s really part of the iconic look of this rifle.
With the handguard done, next up was to switch the fire control group to an ALG enhanced set so I can have the appropriate 922r parts count and be able to use some of the cool IMI surplus mags that are out there.
Note, I have to buy all of my parts – nothing here was paid for by sponsors, etc. I do make a small amount if you click on an ad and buy something but that is it. You’re getting my real opinion on stuff.