I bought my 2021 Ram 2500 in September 2021. It was my first brand new truck and when I saw what the dealer was charging for oil changes, I knew there was no way I was going to have them work on my truck – I’ve always done my own work but because this may well be my one and only new truck, I knew I better do some homework.
First off, I did not want to void my warranty. In talking with the dealership their recommendation was that I only use Dodge/Mopar brand oil filters and Pennzoil Platinum 0w40 engine oil plus I should keep a log of when I changed the oil, filter and with what. Okay I thought – I can do that.
This is a great example of where the Internet and the web can just drive you nuts. If you search about what oil and filter to use, you will get just a ton of search results with guys offering up their weird home brew concoctions, using different weights, brands, etc. That was all fine and dandy but I did not want to void my warranty or give a dealership some excuse to charge me because I didn’t use the approved oil.
Which filter does it use?
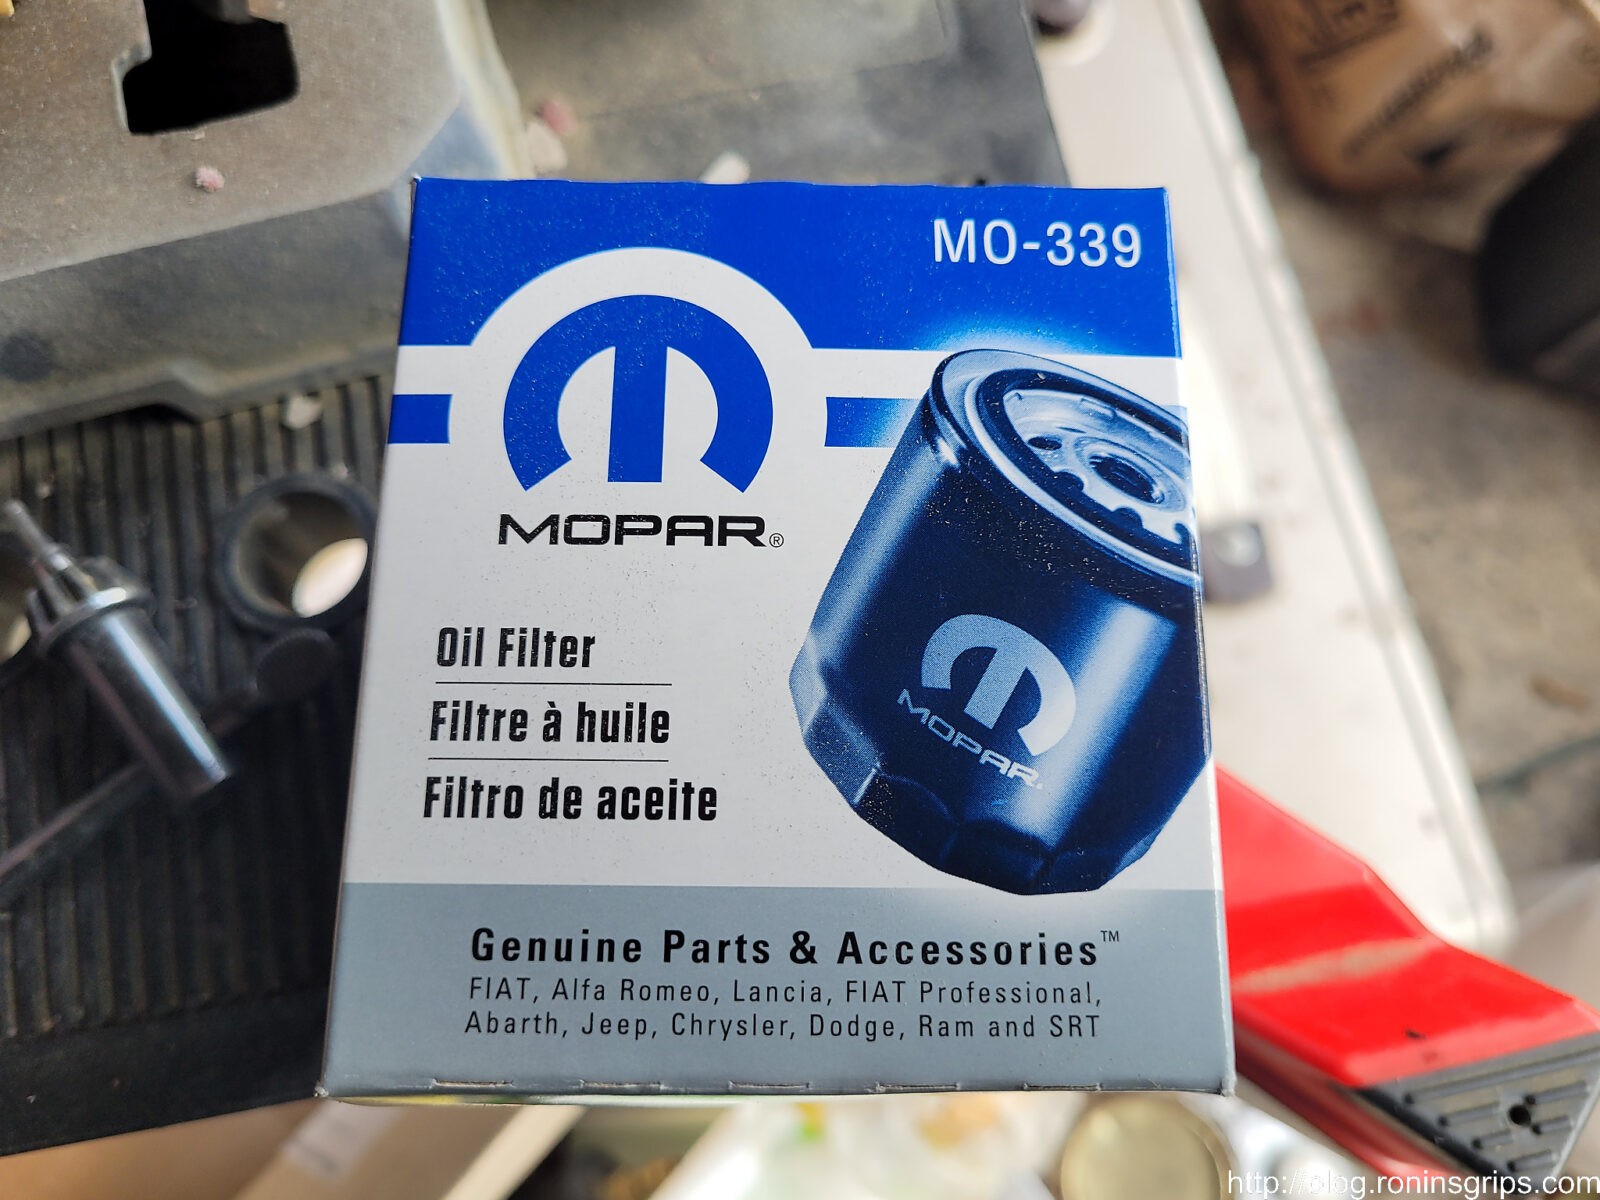
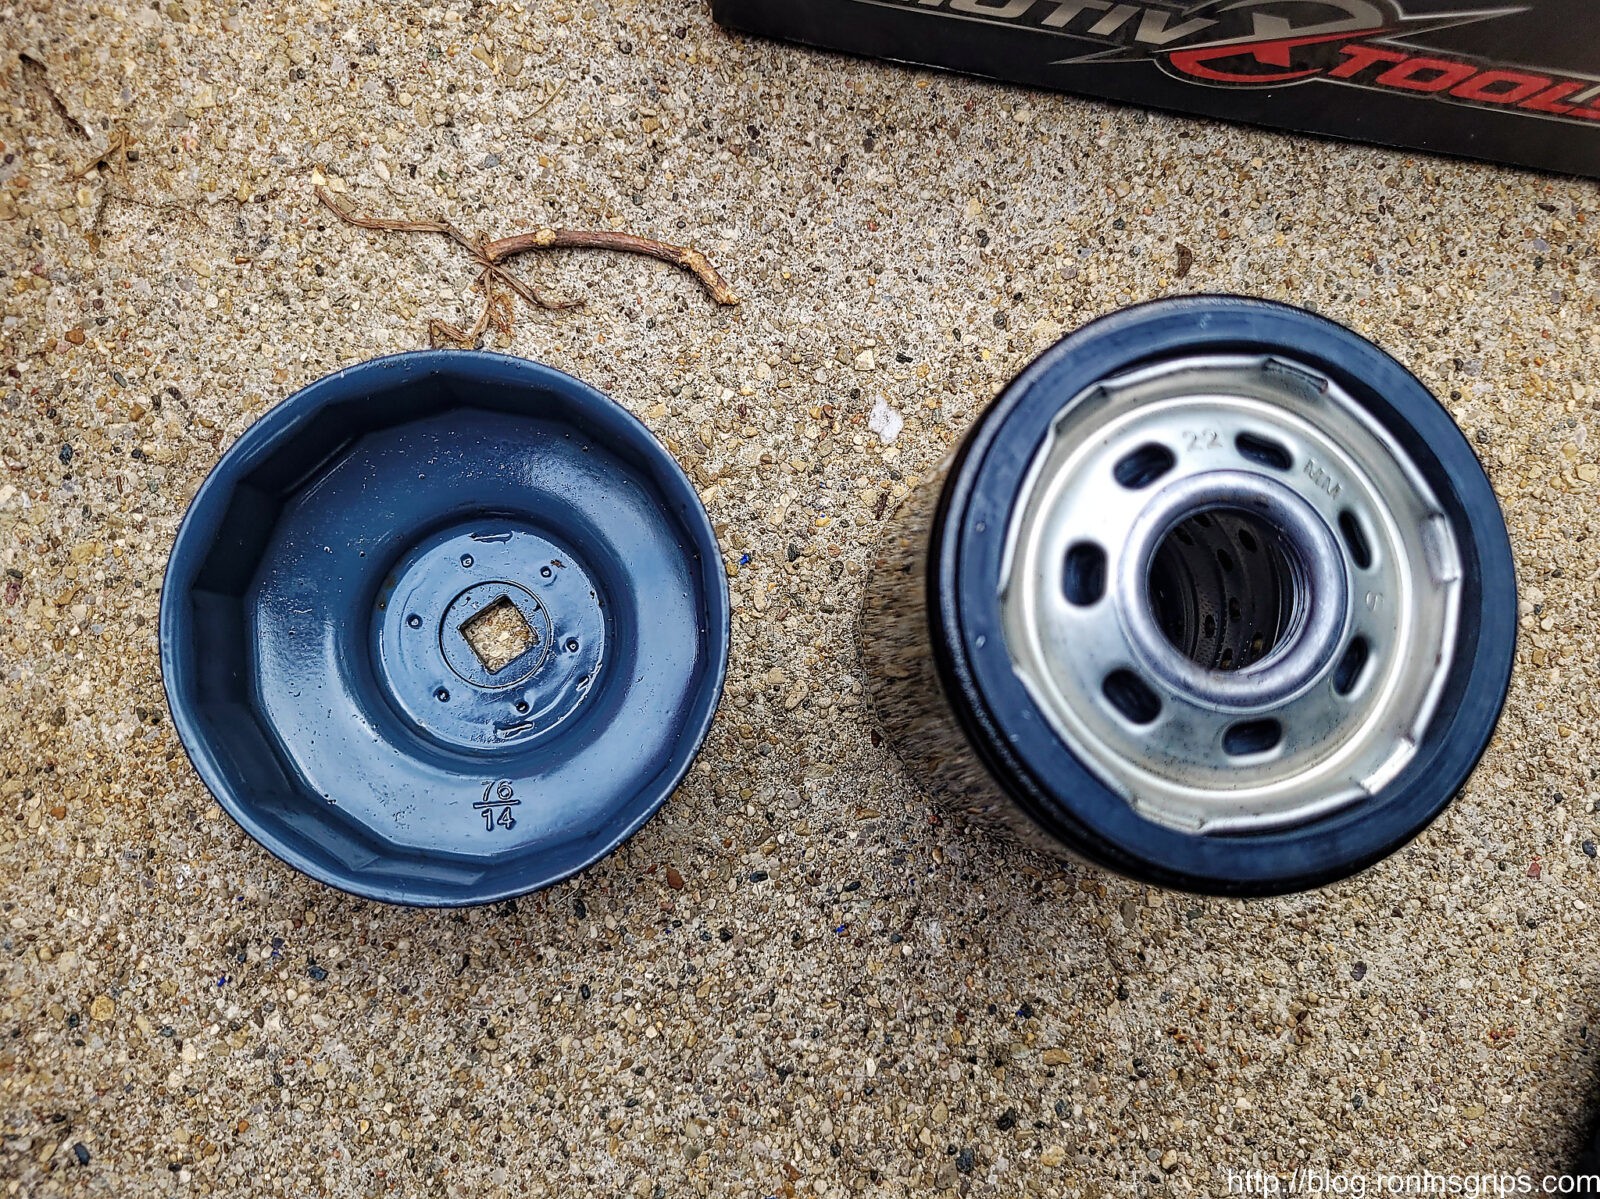
If you want to stick with factory parts to avoid warranty headaches, you need the Mopar MO-339 filter. I am using the 04892339AB but am told there is now an AC part number. Regardless of the letters, I would not be concerned if searching turned up an AA, AB or AC. The main thing is that the correct model is MO-339 and you can buy it from Amazon.
This is the correct model number – Mopar MO-339. Sure, there are other quality brands of filters out there such as Wix but my intent is to use Mopar filters until the warranty expires. Then I will move to Wix or whoever is best at that time.
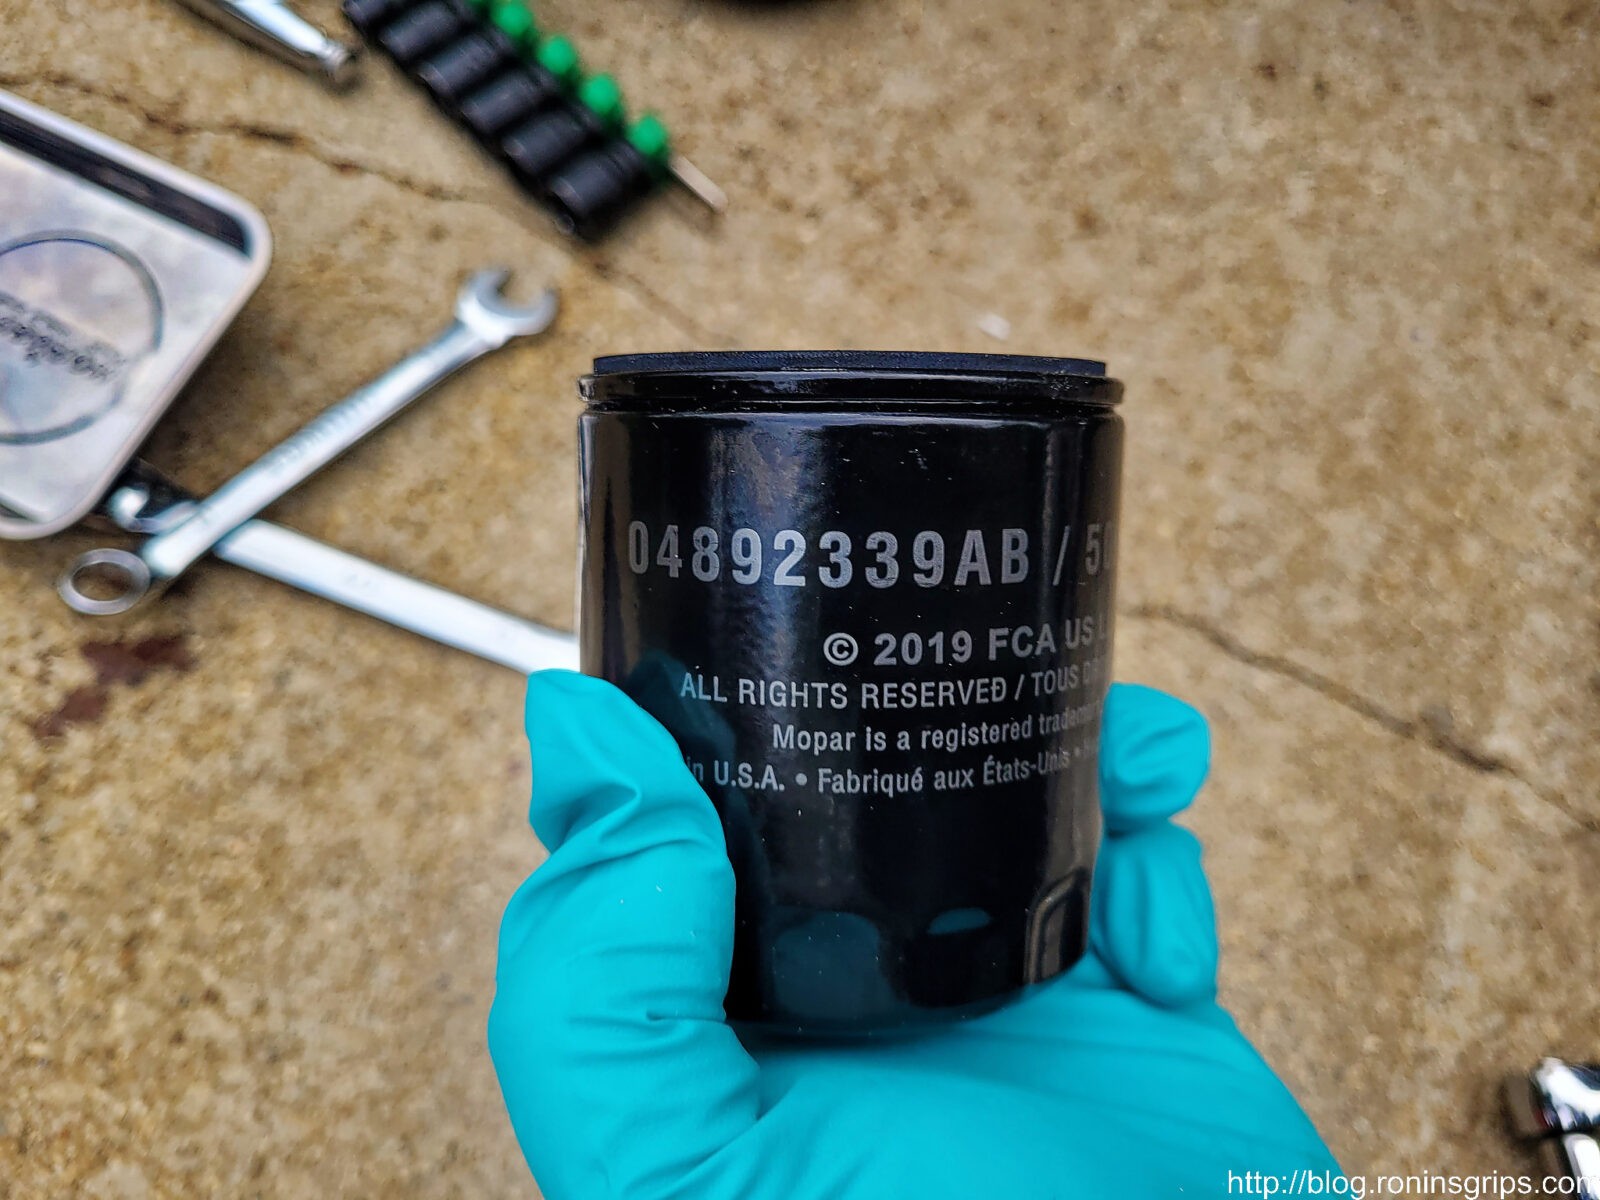
FCA is Fiat Chrysler Automobiles. They are now owned by Stellantis – just FYI. The part number is 04892339AB. The last two letters reflect minor revisions to the base numeric part. For example, 04892339AA would have been a previous version of the part. Odds are it would work ok if you find it. I always go for the most current part number I can find because usually they are trying to improve/fix design issues. The AB series started in 2019. I saw an AA filter that was marked 2009-2011 and recently read there is an AC series but I have not seen it personally.
Where can you find the Pennzoil Ultra Platinum Full Synthetic 0W40 Oil?
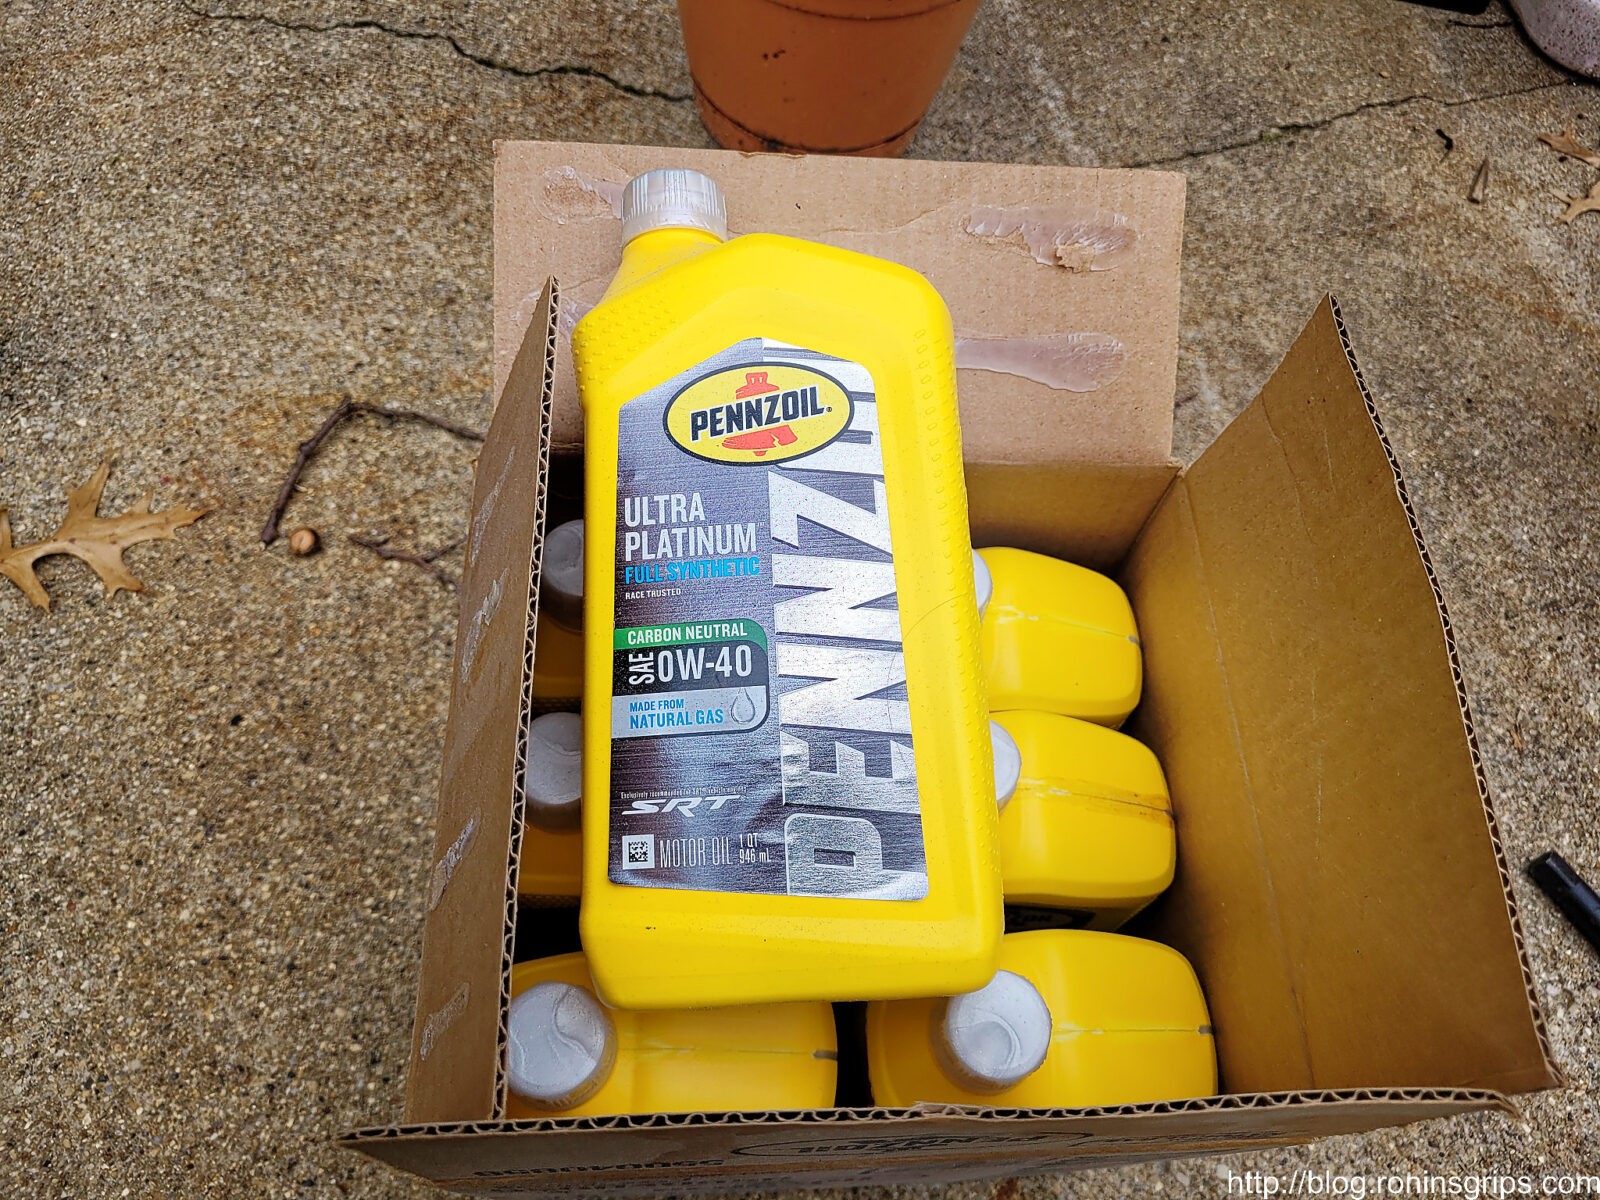
You are going to need 7 quarts of oil if you change the filter and I always change the oil and the filter. I am used to walking into Autozone, O’Reilly’s or Walmart and buying oil. They do not carry this weird Pennzoil “Ultra Platinum Full Synthetic” 0W40 that Dodge was specifying. Apparently there were some office politics about switching to Pennzoil and to lock people into using Pennzoil plus being more likely to go to the dealership for oil changes they (I’m not entirely sure who “they” are but will blame both Dodge and Pennzoil) – they came up with this odd spec that really wasn’t required. Stuff like that irritates the hell out of me – they could have specified something else and made it easier for all of us.
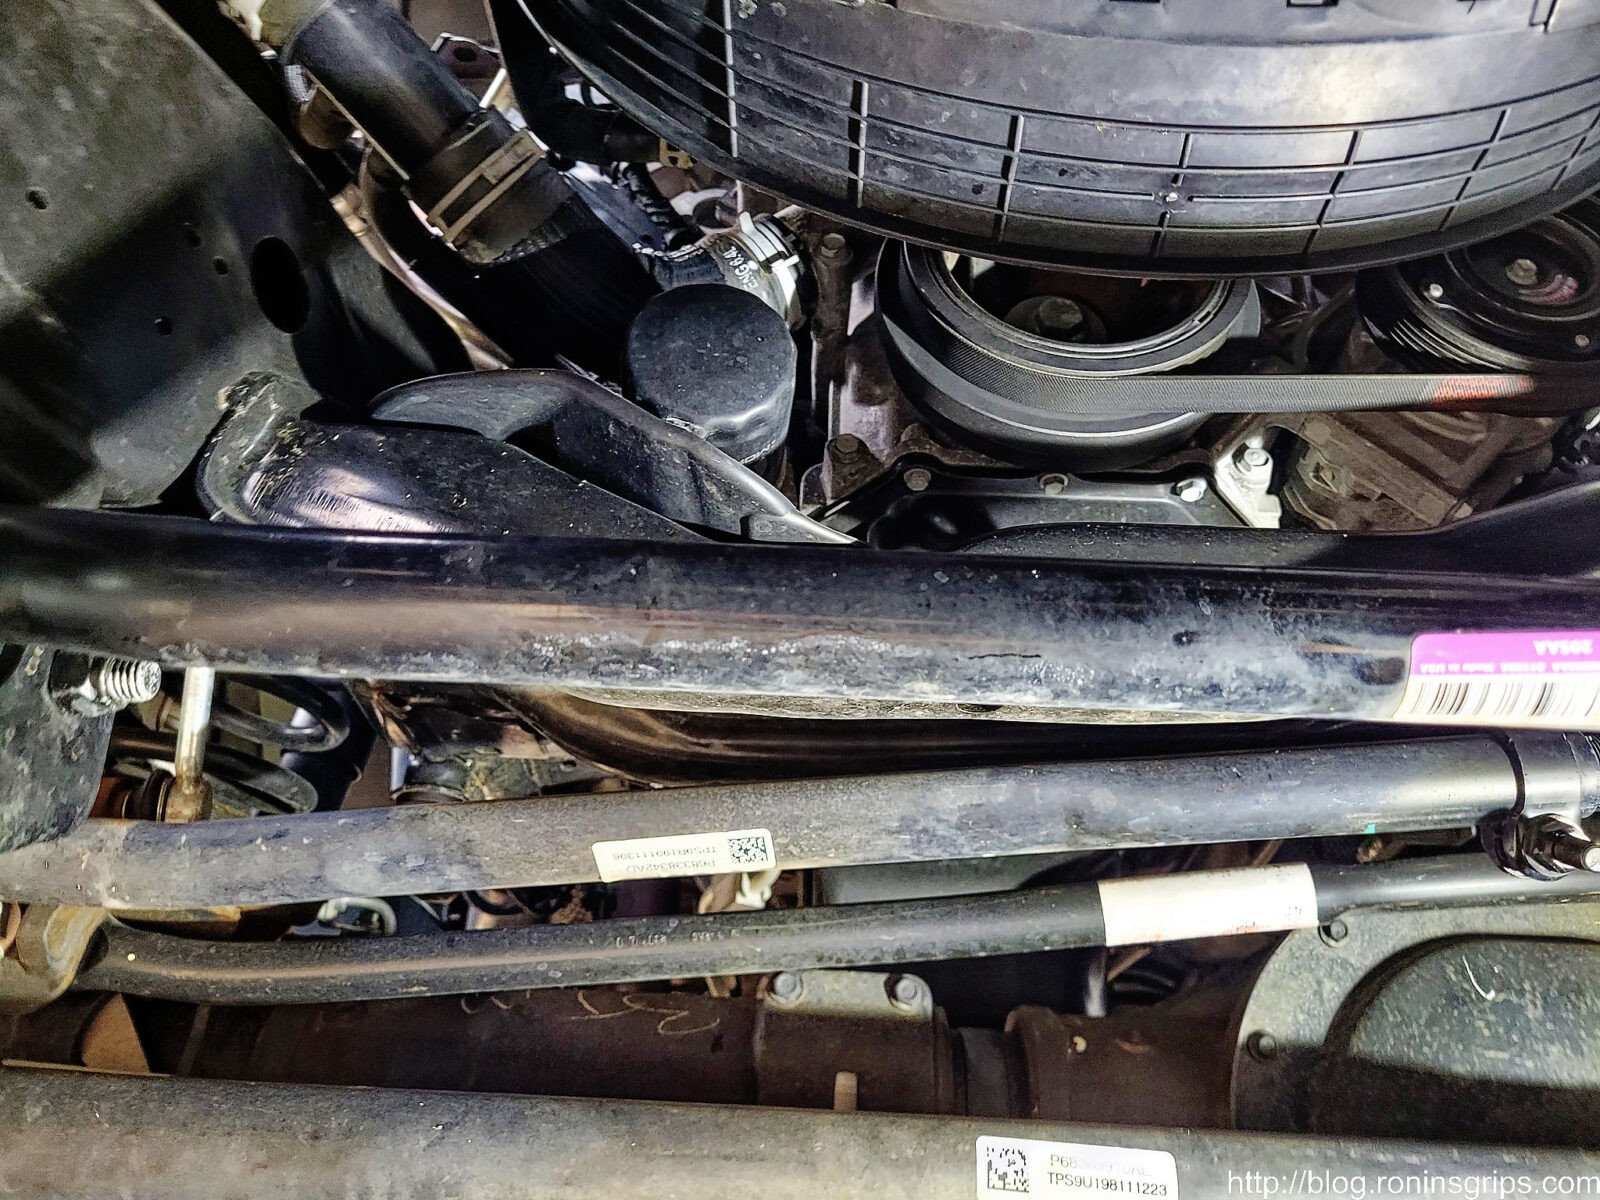
My first oil change some time late last year was quite an experience. The oil filter had “factory installed” printed on it and boy, it did not want to come off. I wound up using a vise-grip type oil filter wrench to get a good enough hold to finally break the seal and spin it off.
I just did my second oil change getting ready for Winter and rotated the tires also [click here for a post about how to do that the easy way]. I figured I would take a minute and share with you where to buy the filter and oil from and hope this helps you out.
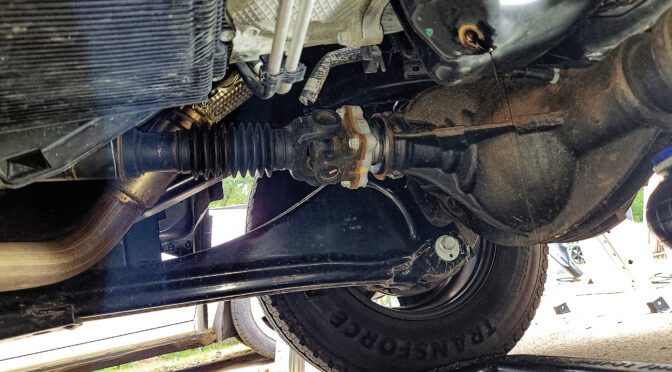
The filter is located just to the left of the bottom of the lower engine’s crank pully. An end cap filter wrench/socket makes changes really easy. For the first one, the factory installer went nuts either torquing it down or the seal stuck to the block – I’m not sure which it was but I had to really crank down with a locking oil filter wrench to get it off.
By the way, the torque spec for the oil drain plug is 20 foot pounds. Now I know some guys just feel how tight to go by hand and I did that for over 30 years but now do to nerve and muscle damage, I can’t tell how tight I am pulling so I torque to spec – totally up to you.
Note, I have to buy all of my parts – nothing here was paid for by sponsors, etc. I do make a small amount if you click on an ad and buy something but that is it. You’re getting my real opinion on stuff.
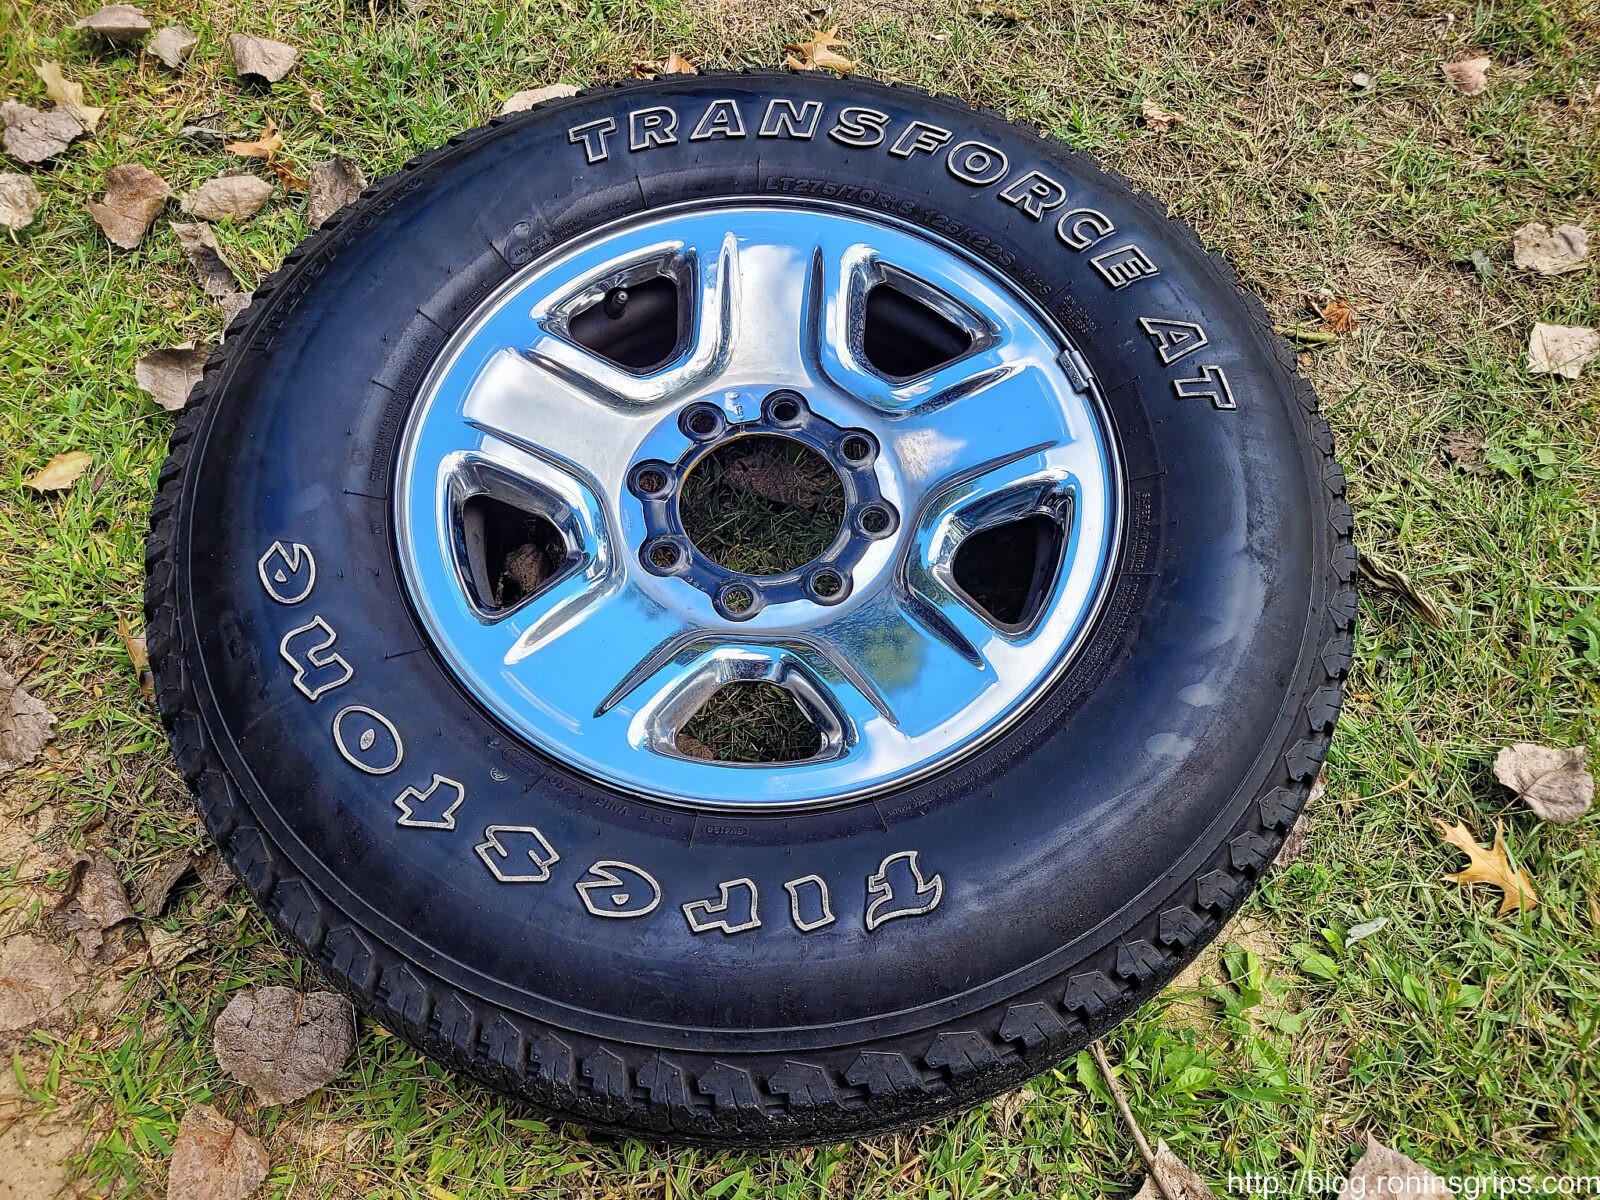
I bought a new 2021 Ram 2500 in September of 2021. It was my first heavy gasser with a 6.4L Hemi and a piece of advice a lot of guys gave me was to make sure I rotated the tires with every oil change. It sounded reasonable – it’s heavy truck and the tires need to be rotated so they will wear evenly. If you don’t do this your handling may suffer such as picking up a wobble or you may wear the tires such that they must be replaced prematurely. Ok, I was totally on board with concept but then started thinking about how heavy they probably were – I sure knew they weren’t going to be light.
Factoid: FCA (Fiat Chrysler Automotive – who owns Dodge now – and FCA is now part of Stellantis – for those keeping track of who owns who) reports the LT275/70R18E Firestone Transforce AT tires as weighing 50.7 pounds. The 16×8 steel chrome clad wheel comes in at 45.2 pounds. Add them together and you get 95.9 pounds not including any wheel weights, TPMS, etc. So you might as well say that each weighs 96 pounds. Yeah, that’s quite a bit for me.
Weighing in close to 96 pounds, these tires are too heavy for me easily lift and hold in place when it comes time to mount them on the lugs. For you younger guys who muscle them around all day, good for you. I can’t any longer.
From years of doing stupid stuff, my back and hands are nowhere near as strong at 55 as they were in my 20s and 30s. I’ve always done my own oil changes, tire rotations repairs in general and didn’t plan to stop and pay the ridiculous prices the dealer was quoting. I knew it would be a heck of a struggle for me to lift the tires up and hold them in place while getting the first couple of lug nuts on to hold it. I needed to figure out a way I could lift the 33″ 96 pound tires up into place using mechanical advantage.
So I started by searching on the web for tire/wheel lifts and most of what turned up had to do with moving truck tires across a shop on a dolly. I wasn’t finding anything that said “use this to lift your tires up and down at the vehicle.” My next stop was the local Harbor Freight store to look at various automotive tools and jacks to get ideas. It was there that I got an idea.
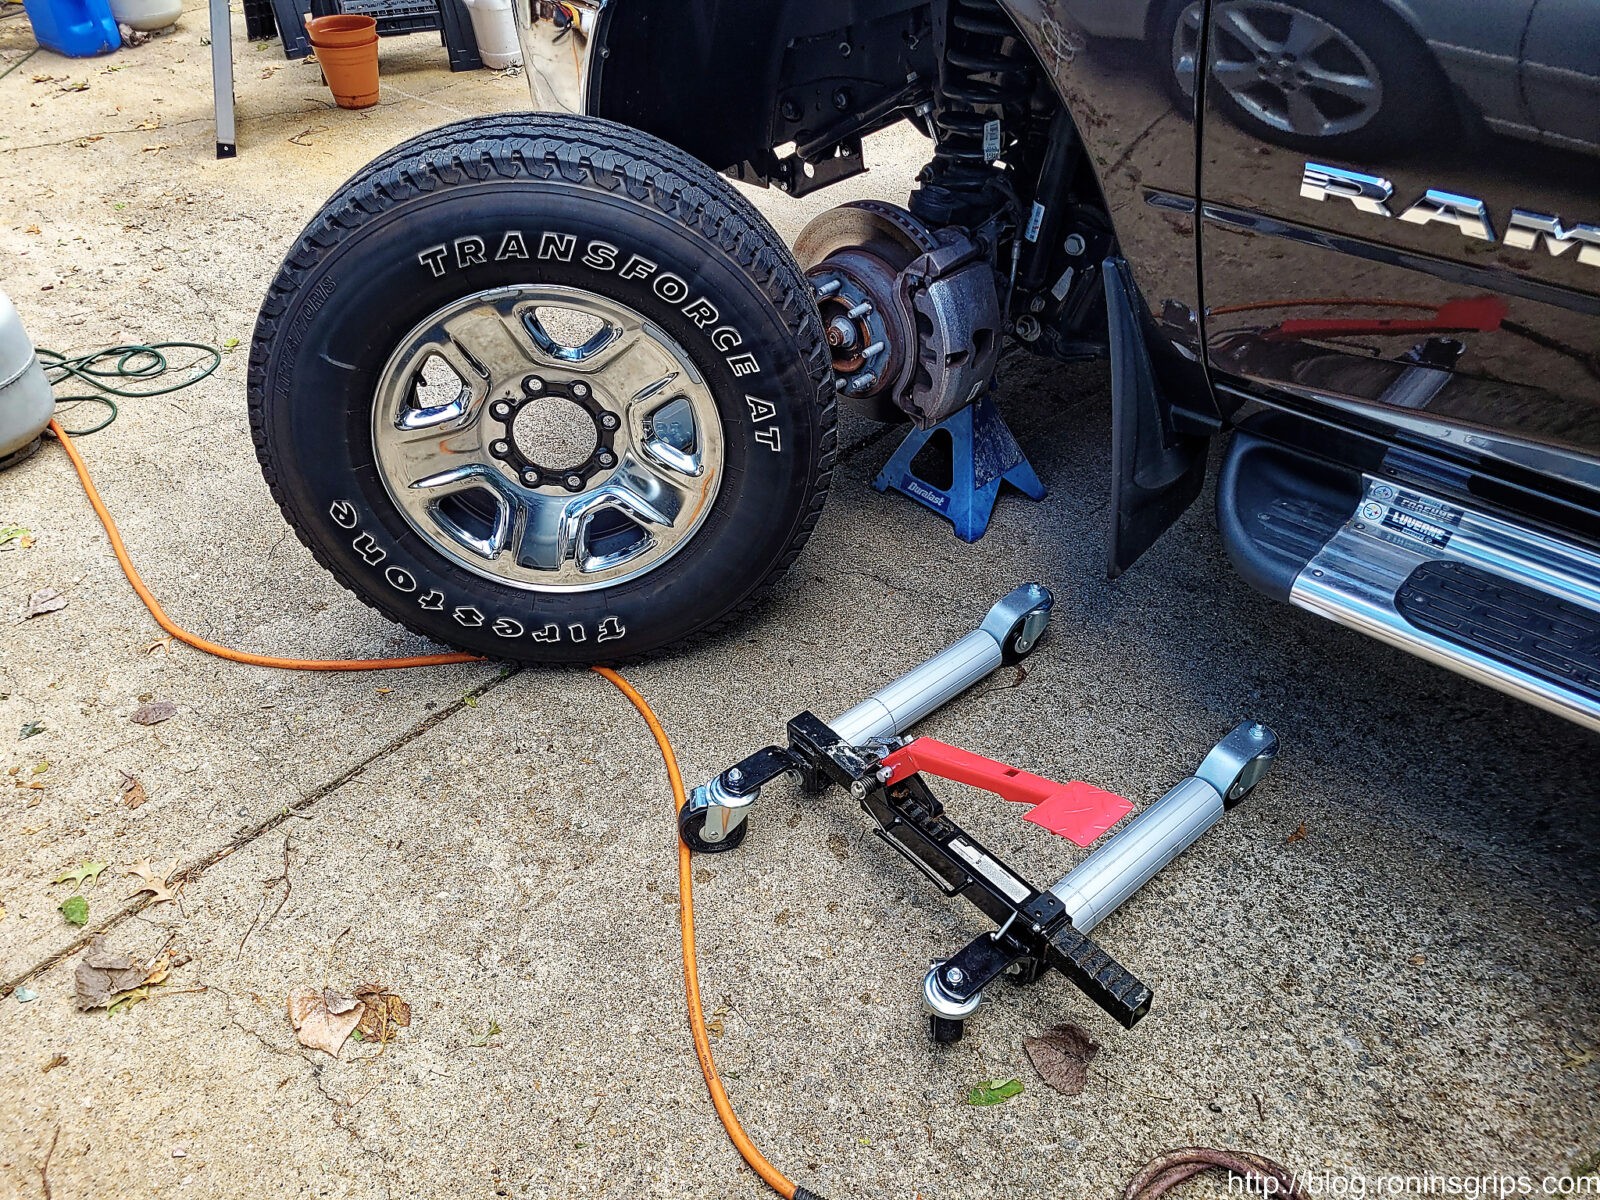
There are ratcheting vehicle dollies for garages where there is one dolly for each wheel. You pump a foot pedal and a pawl engages a notch and pushes two cylinders together under the tire. As it does this, the tire and vehicle are lifted up. You do this on all four corners. The dollies have caster wheels under them and if you have a clean concrete floor, you can then slide the vehicle all over the place to either store or work on it. One early trade name was “Gojak” and since then tons and tons of companies have made them.
Hmmm…. I could take one of those and use it to lift the tire into position and hold it as long as I could lift the tire high enough. These jacks are rated at over a 1,000 pounds and my truck’s tires were going to be far, far less than that. No, it was the height that concerned me because I needee to lift the truck high enough to remove the tires in the first place.
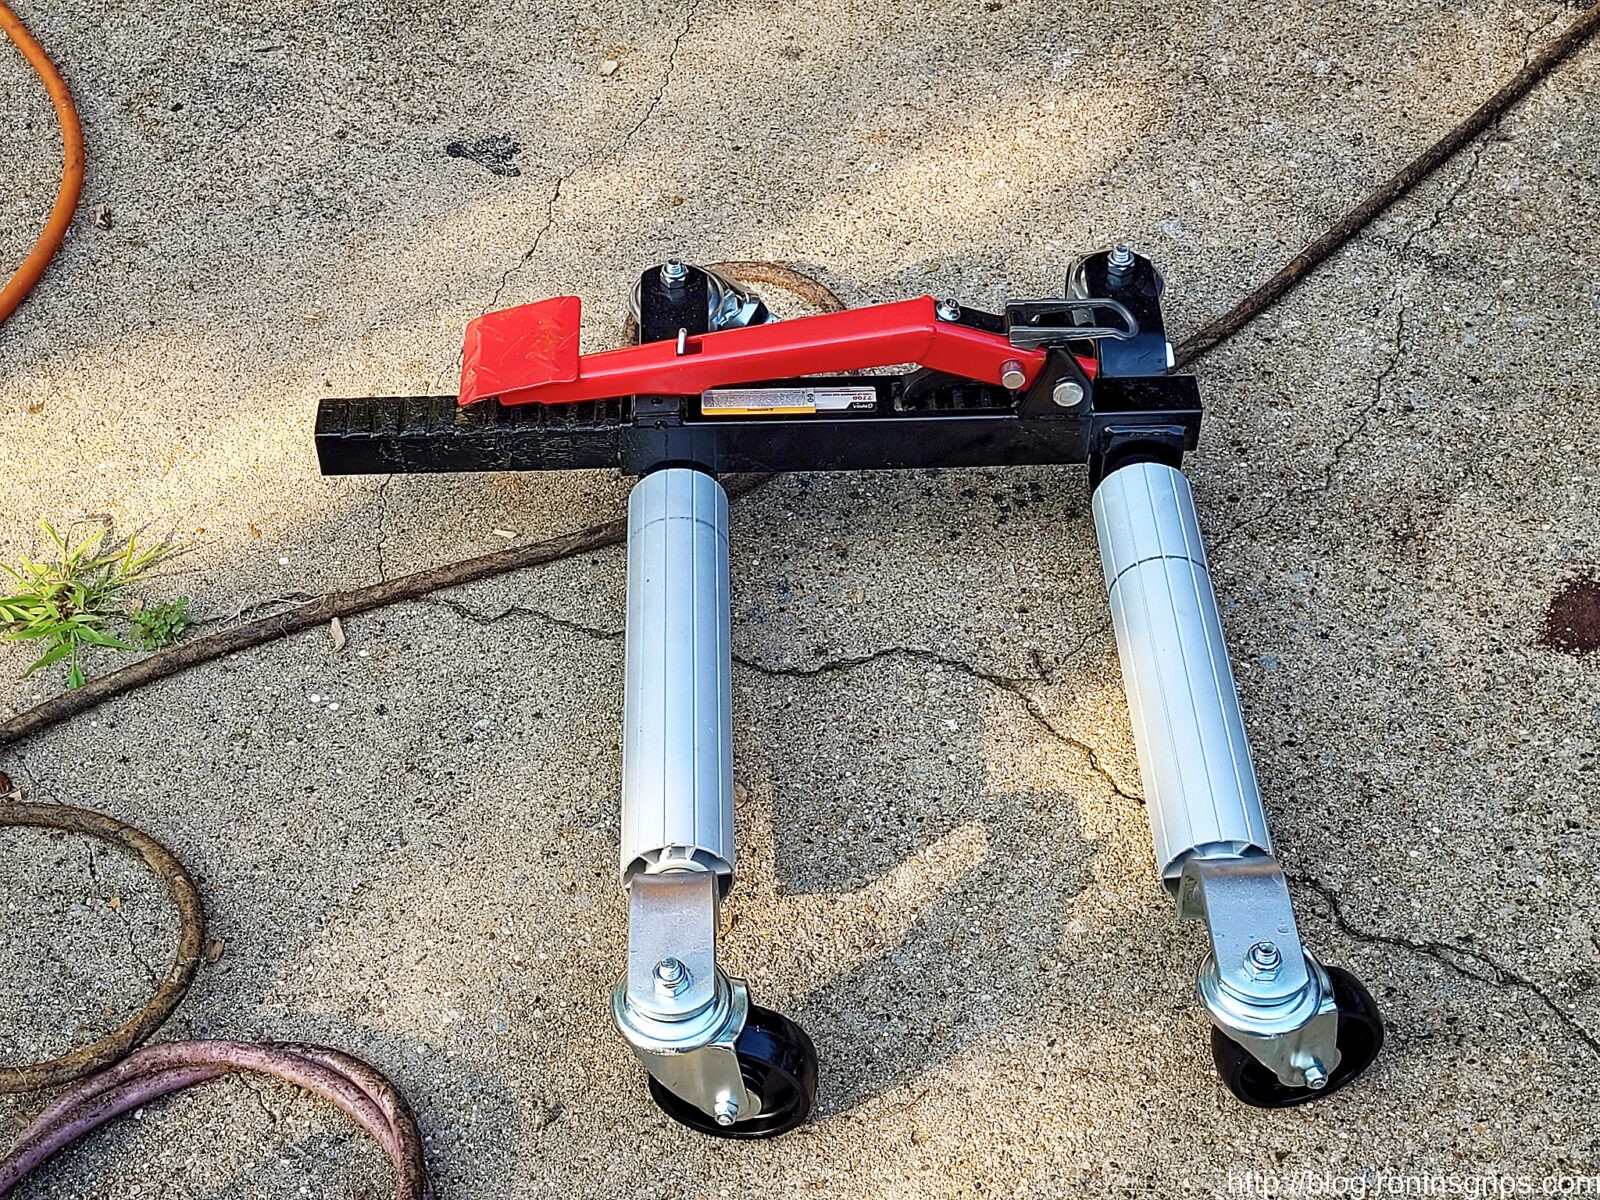
I didn’t particularly care for the looks of the Harbor Freight model so I did some digging and found a Sunex unit on Amazon that works in a purely mechanical manner – some hydraulic models from other brands are reported to leak.
It arrived and took just a few minutes to install the caster wheels. I did make one mistake, I was curious if it could lift one corner of the truck – the answer is a resounding “NO” and I did bend the outriggers that hold the casters slightly. I really didn’t expect it to bend but it also didn’t really hurt the unit from an intended use perspective.
This is a Sunex model 7708 1,500 pound car dolly. I’m not really sure it can handle 1,500 pounds but it works great for lifting tires into place.
Most importantly, it worked perfect. I would roll the tire over to my truck, slide the jack in by the edges of the tire and then pump the foot lever until it was the right height. I could then install the lug nuts in an amazingly easy manner. It worked so well I did it both on my Ram 2500 and on our Highlander.
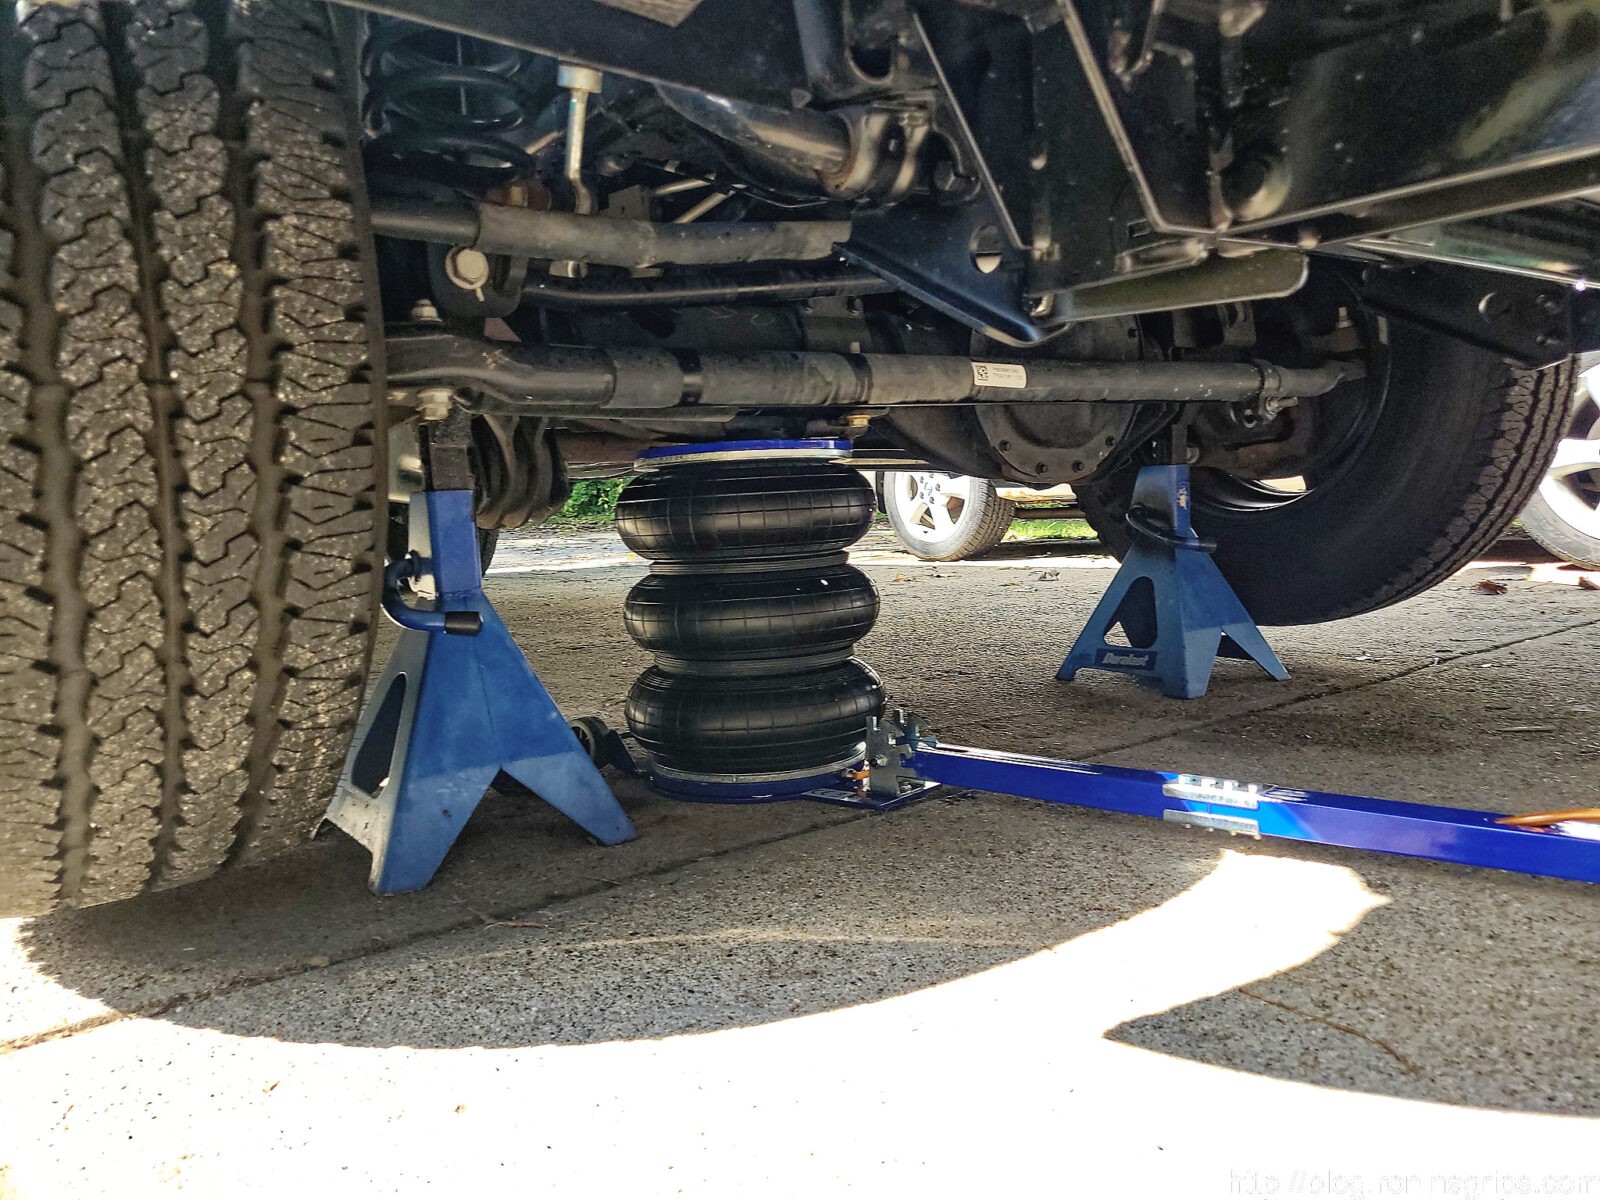
I used my Vevor 11,000 pound pneumatic jack to lift up the truck a side at a time and put 6 ton jack stands under each side of the axle. Never trust any jack to hold up a vehicle while you are working on it – especially not a heavy truck. By the way, I really like the Vevor air jack.
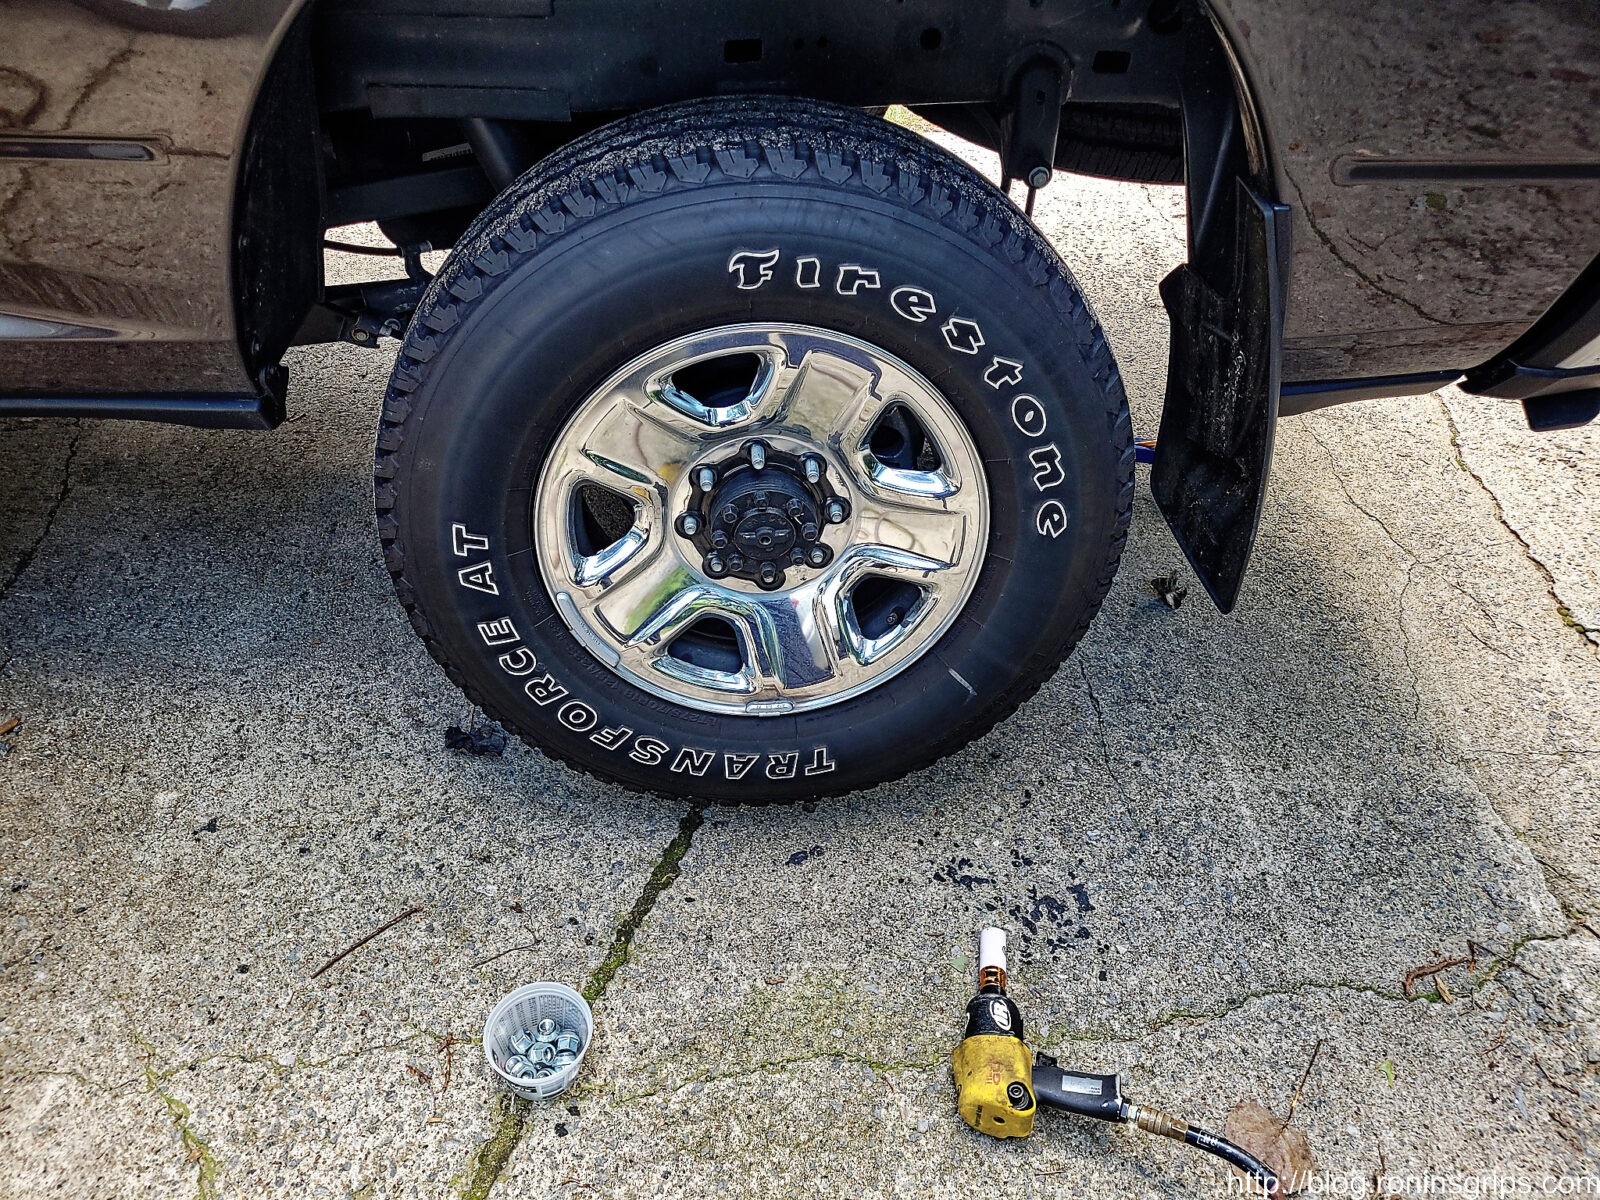
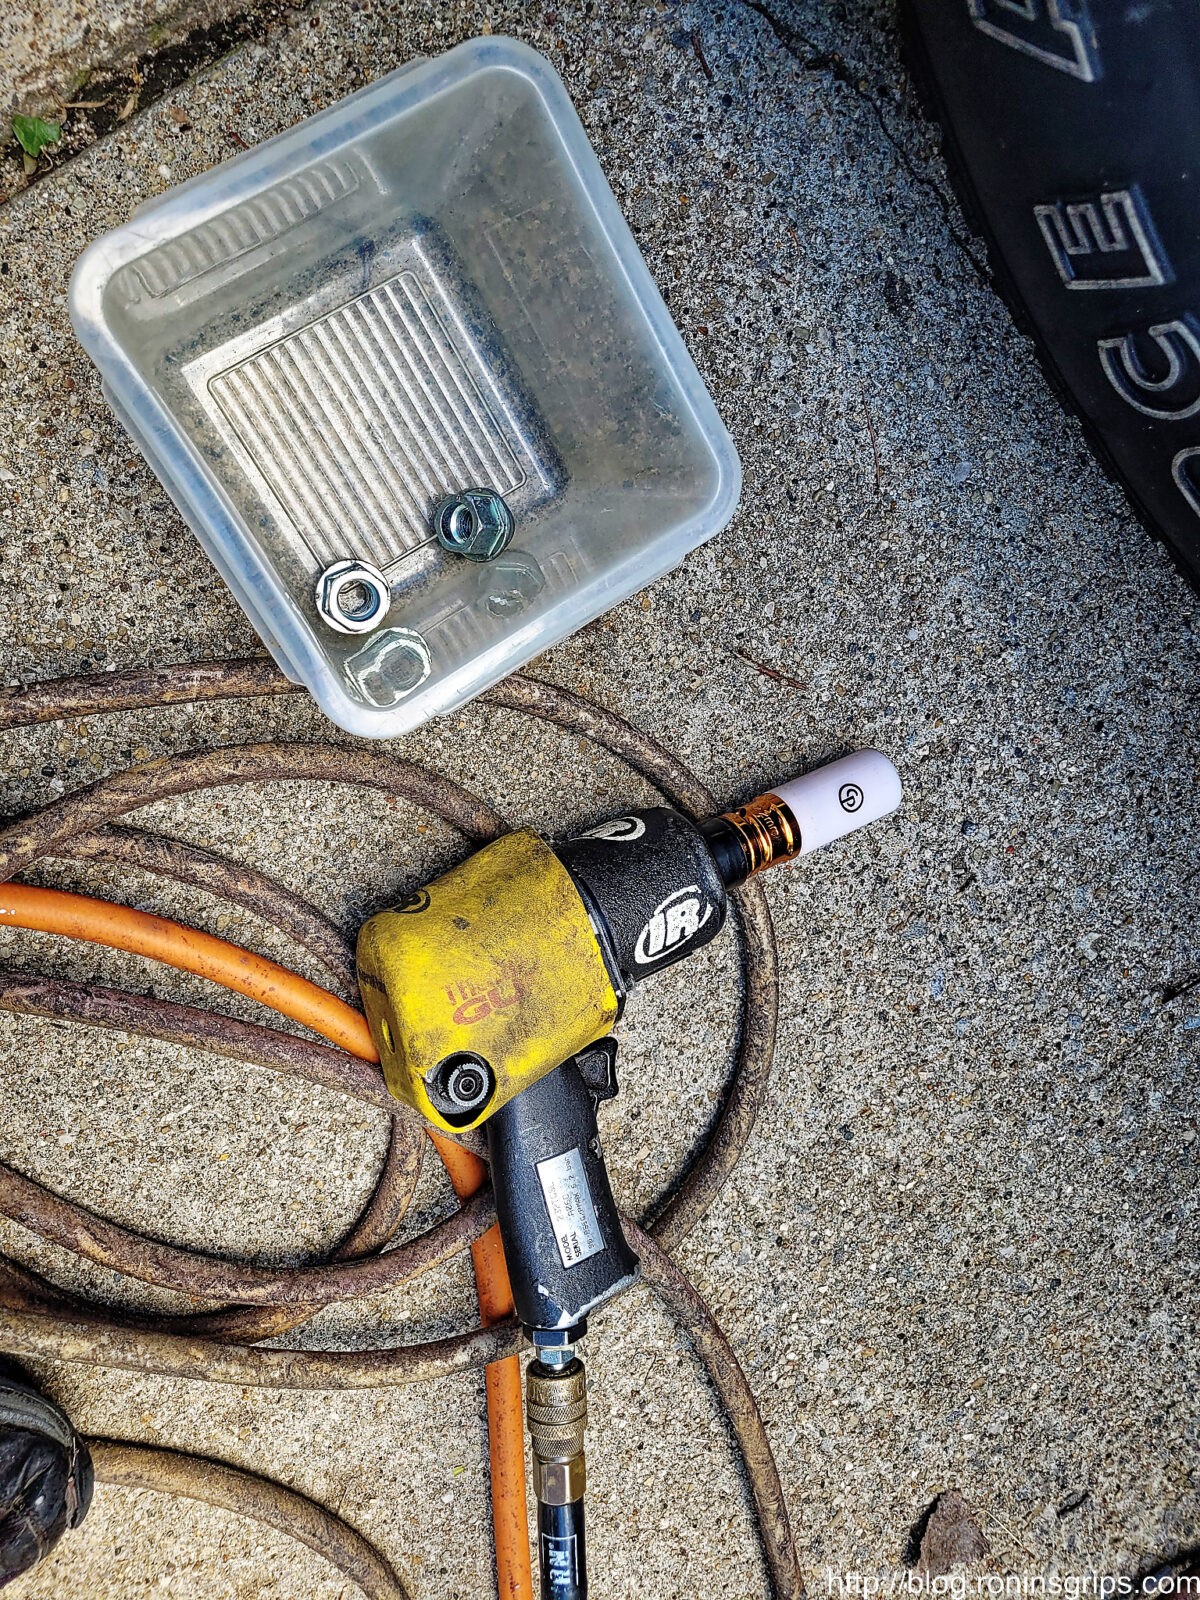
Pulling the tires off is easy – gravity is working with you. I use an IR 232TGSL Thunder Gun impact wrench that has held up remarkably well over the years- I bought it after wearing out a couple of cheap ones. I also use a Chicago Pneumatic (CP) SS4211 lug nut socket set to avoid damaging the rims. The sockets have a plastic protective sheath around them and are thin walled for tight areas.
The 2500’s lugs are 14mm and the lug nuts need a 22mm socket. What I like about the CP set is that they are color coded. This copper colored socket is 22mm and I can find it fast due to the coloring. Note, CP stands behind their products. I bought the set in 2018 and shortly after, one plastic jacket started cracking. I called customer service and they mailed me a free replacement. I’ve not had any problems since. Again, let me plug the Thunder Gun. I want to say I wore out two or three cheap impact wrenches before this one. They claim 625 ft lbs max torque in reverse and 550 ft lbs in forward. I can tell you I have busted loose some really rusted nuts with this.
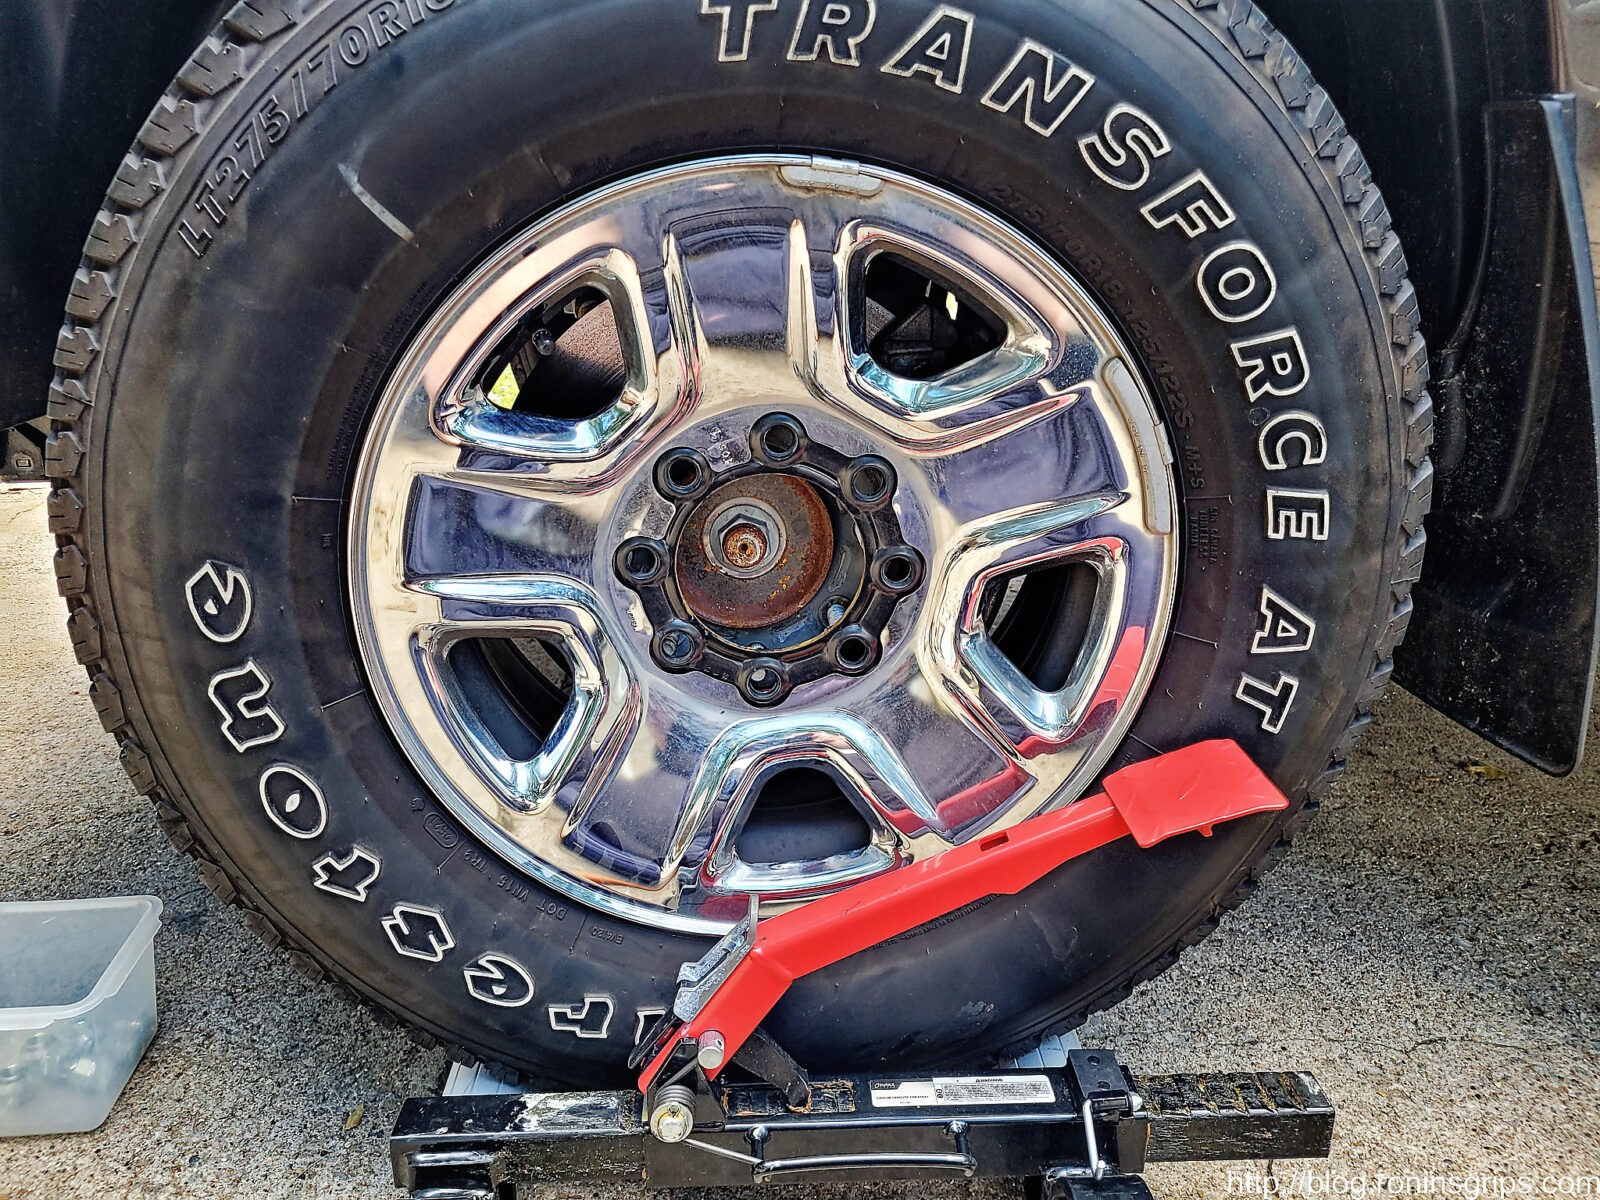
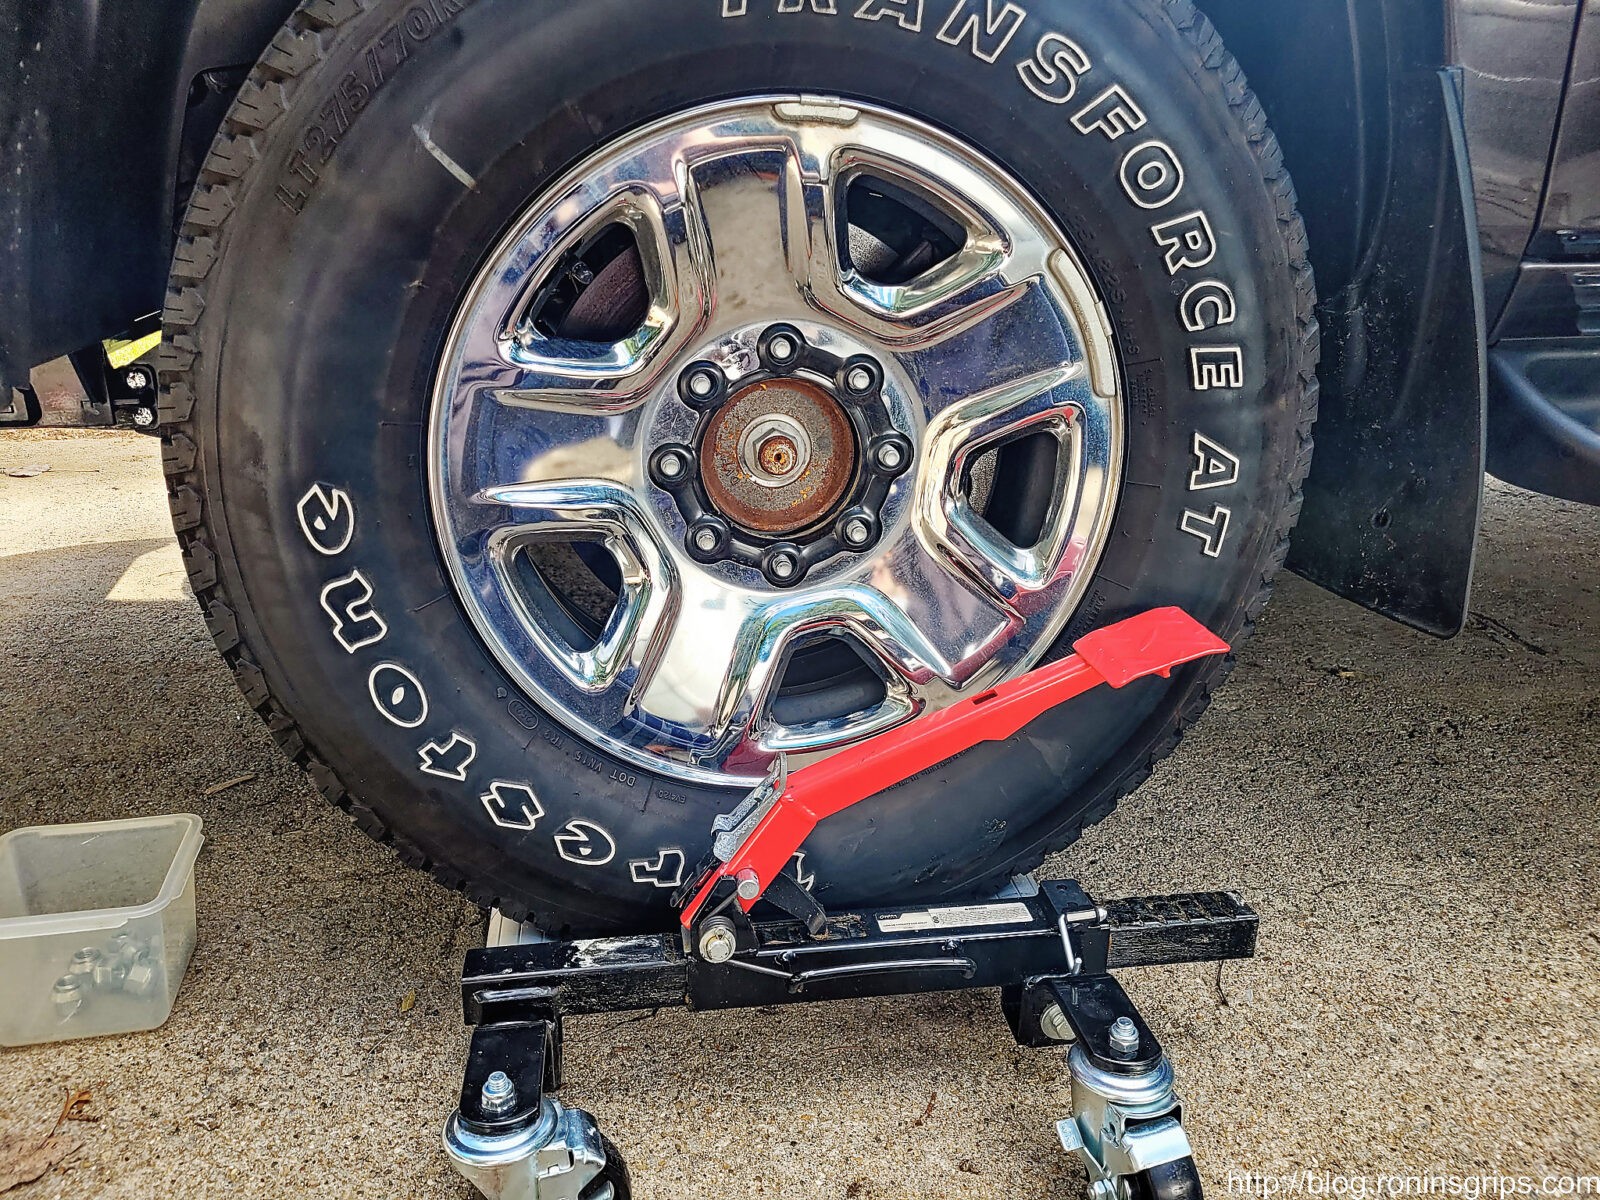
To mount the tires in their new location, I’d get the tire over in front of the hub and then slide the dolly into place to do the actual lifting. You put the silver cylinders on each side of the tire and pump the red lever (you can very easily do it by hand) to lift the tire up.
So the silver toggle on the left side of the red foot lever allows you to change whether the pawl under the lever is pushing the bar and drawing the silver cylinders together or if it moves the pawl out of the way so you can lower it.
So you use the foot pump to get the height right and then you can rotate the tire – the silver cylinders in the dolly turn so you can perfectly line up the wheel on the lugs and put on the lug nuts. Folks, it makes installing the 96 pound tires stunningly easy.
So, in hindsight after actually using the dolly, it really doesn’t take much actual lifting distance to get the tire into place. When I jack up any vehicle, I typically only lift until the tire is 2-4″ off the ground after I put the jack stands in place – so the gap between the floor and the bottom of the tire is not huge. I also realized you can go with just about any of these jacks – you don’t need super heavy duty because the weight of the tire is relatively small. Just read the review for whatever before you buy it.
Additional Details For Fifth Gen Ram 2500 Owners
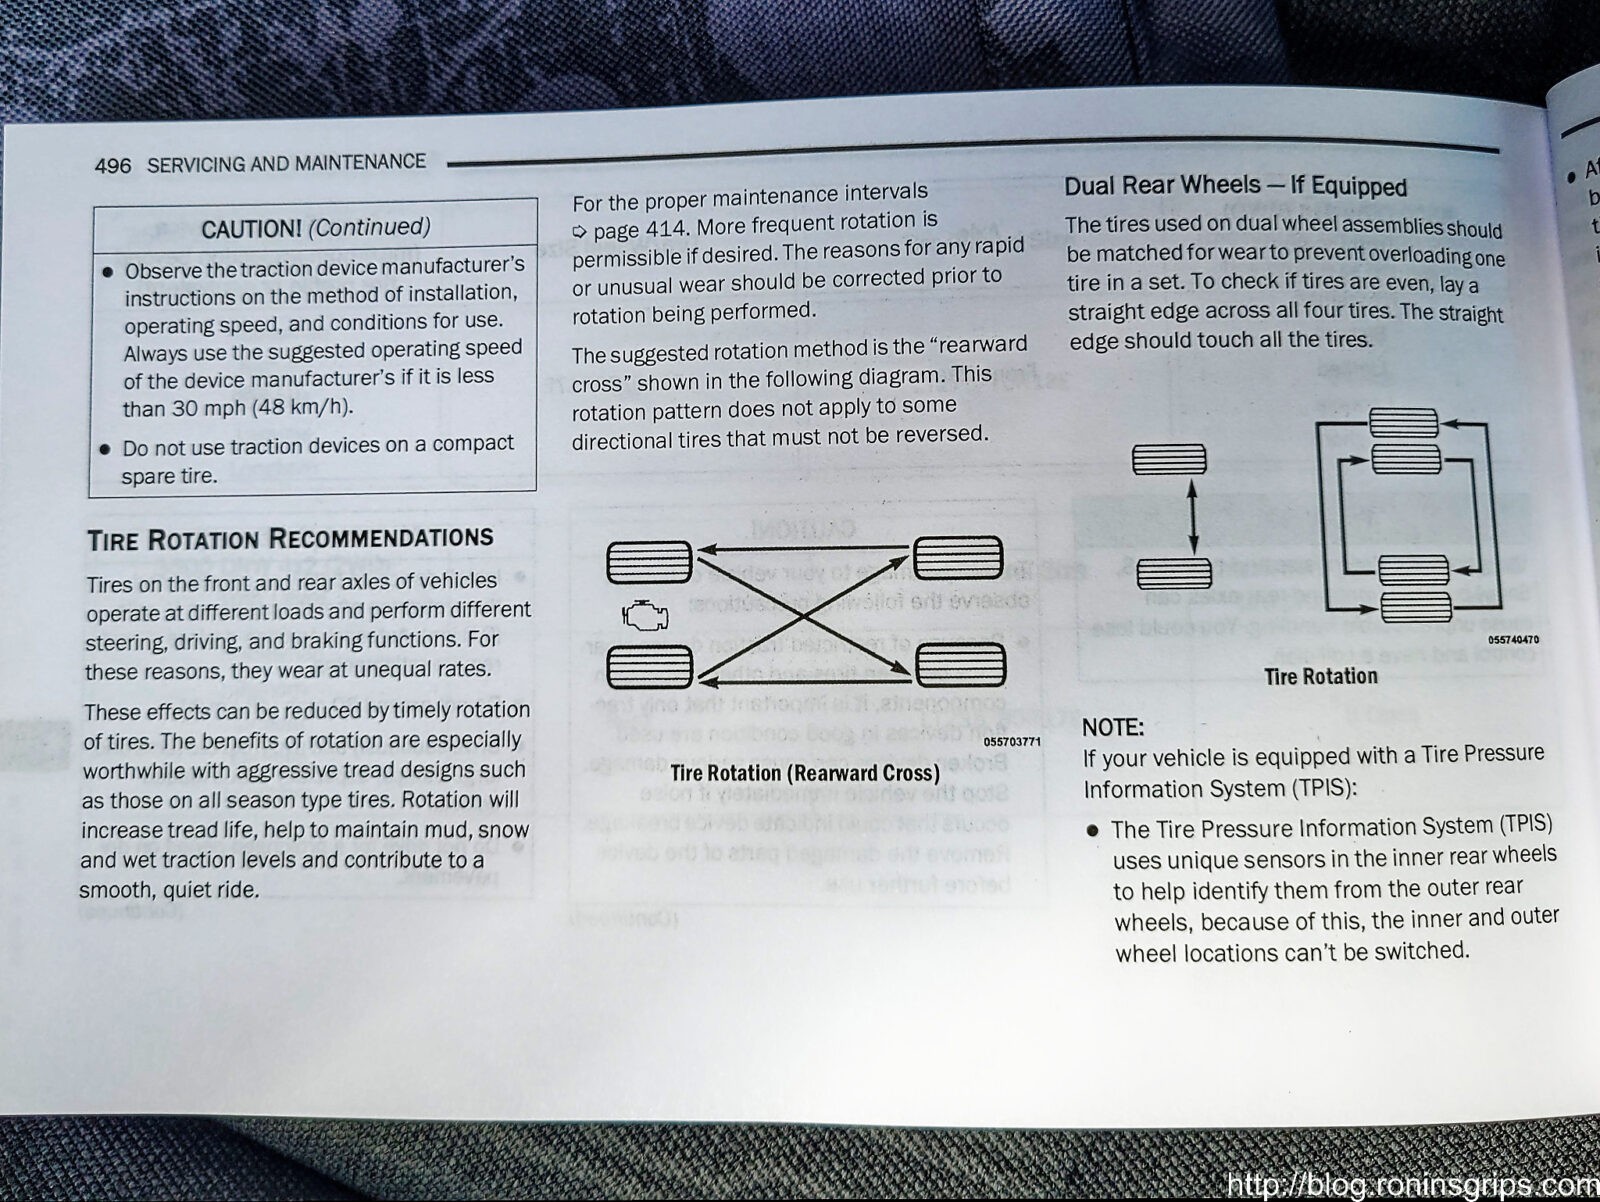
By the way, in case you are trying to find the rotation pattern, it is a reverse cross meaning the front driver’s side goes to the back passenger side. The front passenger side goes to the back driver. The two former rear tires move straight up – rear driver to front driver and rear passenger to front passenger.
Tires on the 2021 Ram 2500 move in a reverse cross pattern. Rotating them with each oil change is recommended. (Source: Photo of page 496 of the 2021 Dodge Ram 2500 Owner’s Manual)
If you are looking for the lug not torque spec, it is 130 foot pounds for cone lug nuts – mine had cone lug nuts. If you have flanged lug nots, it is 140 foot pounds.
On the topic of torquing the nuts down, I start mine by hand to avoid cross-threading the nuts and then I run them in quickly with my impact wrench using a torque limiting “torque extensions” – these extensions work with impact wrenches and twist at a predetermined torque but get weaker with time so they are great for bringing the nut down to the rim but not for setting the torque. I do the final torquing down with a 1/2″ torque wrench. Do NOT keep tightening with the impact wrench or bad things may happen such as cracking your rim.
Lastly, the Tire Pressure Monitoring System (TPMS) will learn where the tires are automatically. Note, you can’t change the minimum tire pressures for the front and rear without going to the dealer or knowing how to re-program the appropriate computer settings. At least, I can’t in my Tradesman. If you can in another model, that is something I don’t know about but count yourself lucky – I wish I could.
In Summary
The car dolly idea to do the lifting and positioning really paid off and now I can do the tire rotations safely and easily. I hope this helps you out.
2/19/23 Update: It’s still working great. This is one purchase I am very happy with.
Note, I have to buy all of my parts – nothing here was paid for by sponsors, etc. I do make a small amount if you click on an ad and buy something but that is it. You’re getting my real opinion on stuff.
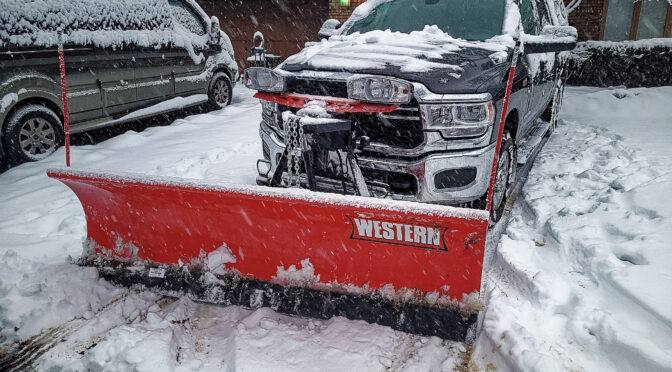
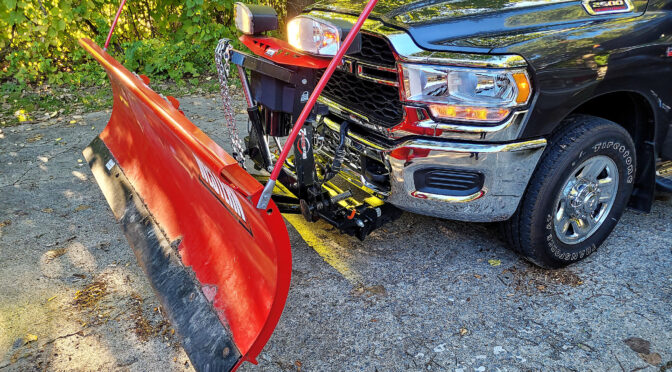
Ok, quick post today. I’m getting ready for Winter here in Michigan and that includes getting my 2021 Ram 2500 Tradesman and 8′ Western Pro Plow 2 ready. Which, by the way, is why you are seeing a bunch of truck posts vs. firearm posts right now. At any rate, last year was my first year plowing with the truck and plow and knew I needed a better solution for holding the ballast weight. That’s the topic for today’s blog post.
What is ballast for a snow plow and why does it need it?
Simply put, ballast is weight that you add at the far back of your truck to balance the weight of the plow in the front and improve traction. Now I like Western plows but if you want a really good explanation of what ballast is and how to use with graphics, click on this link to Boss Plows. Western has one but it’s not as good in my honest opinion.
The important thing that the Boss page explains very well with the diagram is that ballast goes all the way to the rear behind the rear axle and not in front of it or on top of it. Just imagine a long lever arm – by adding weight to the far back, you are levering up the front and offsetting the weight of the entire plow bolted on to the front of your truck.
It does help to understand how much ballast you need and it’s not necessarily the same weight as the plow. A lot of factors go into the calculation. Again, I use a Western plow so I use their Quick Match web page to calculate how much ballast I need and it’s 240 pounds. I do add a bit for more weight to improve traction as well but that is the minimum I need.
What material to use for ballast? I like sand
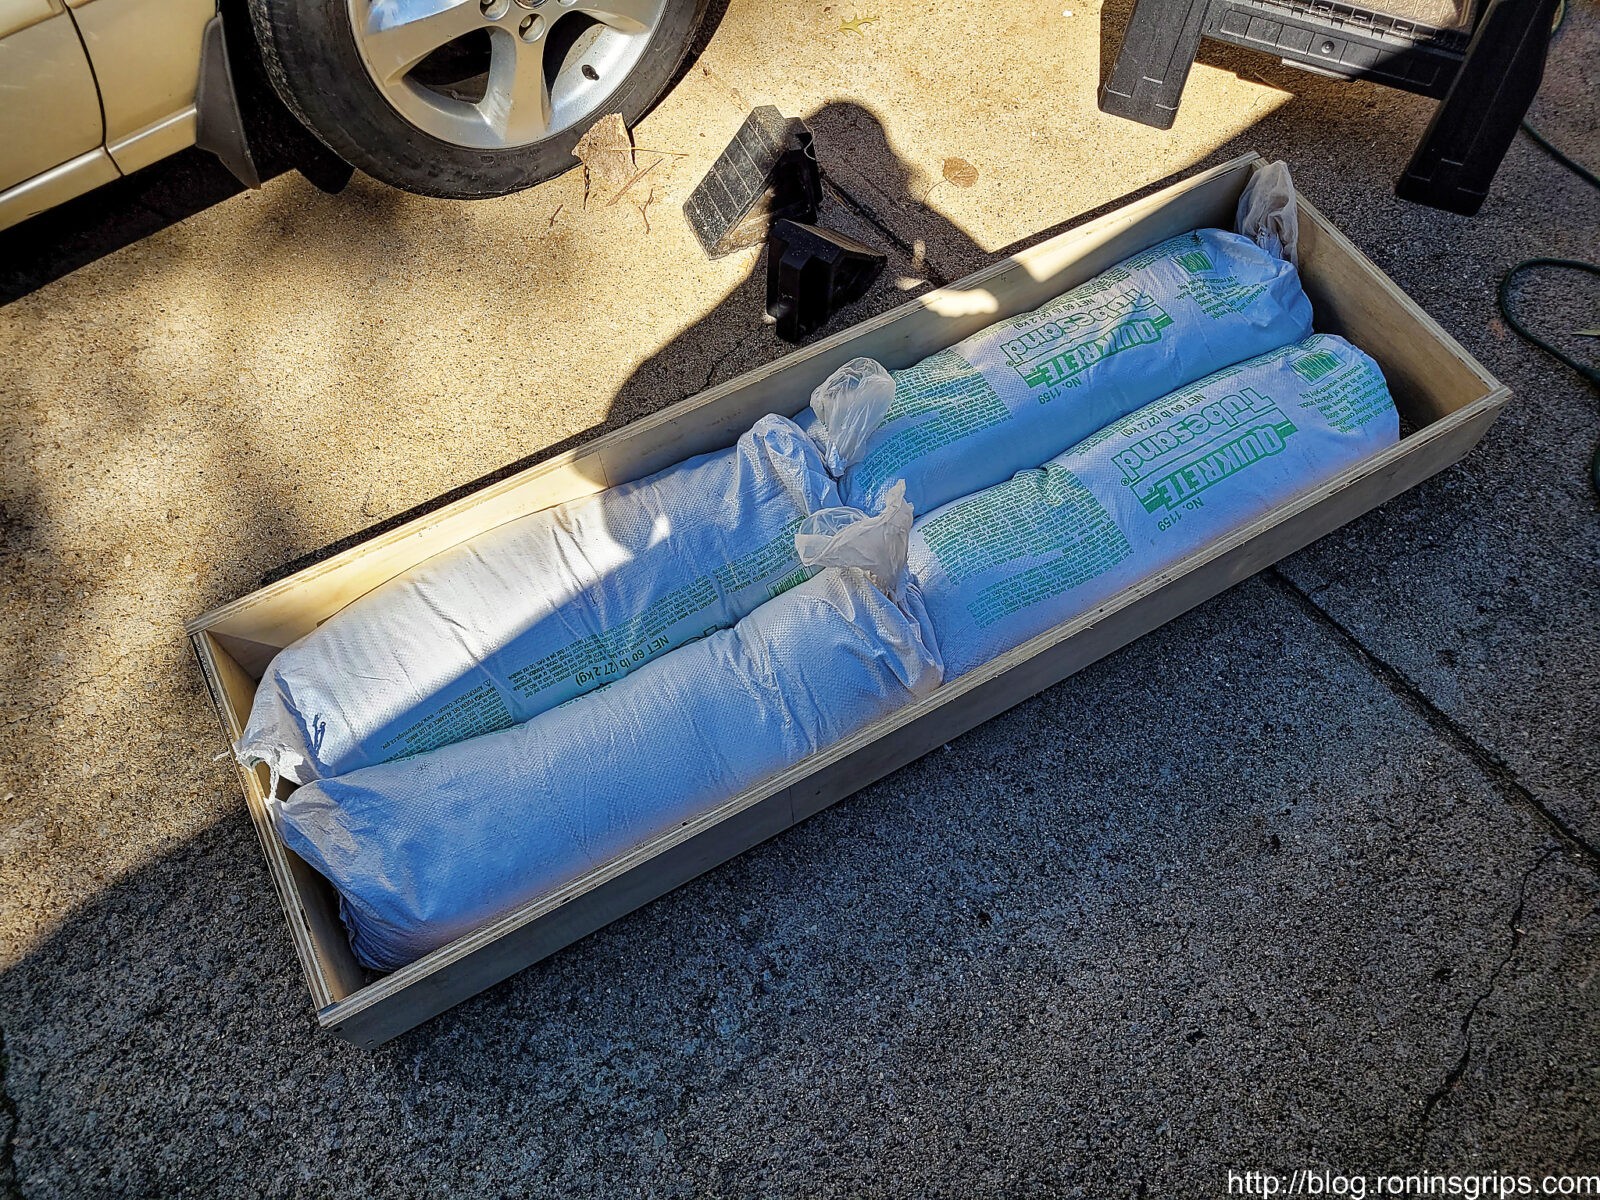
When I bought my RAM, I looked in the bed and there are very shallow pressed indents on the left and right side to secure the ballast. Ideally they would be deeper so you could drop a 2×6 or 2×8 in there to hold your ballast. I like to use the 60 pound tubes of sand that you can buy. First off they are a great source of dense weight – meaning you get a lot of weight for the volume they take up and second, if I get stuck on ice or need more traction on ice pulling something, I can cut open a tube and use the sand for traction. This is why I don’t use something like steel or lead back there. Back in the day, my dad used clay cat litter bags for the weight and in case traction was needed. He’d use the bags over the summer for our cats’ litter boxes and then buy any new bags he needed in the fall. He pulled my sister’s Tercel out of a lake after spreading the cat litter all over the icy road behind the tires of his 81 Bronco — it definitely works but we don’t have cats so I just use sand.
By the way, a Quickrete 60 pound tube of sand is $5.37 as of my writing this. It’s definitely affordable. By the way, I like Quikrete because they know guys are using this for weight and put it in a durable woven bag that holds up.
One word of caution – some guys use rock salt for balast. I highly recommend against that. It’s going to leak salty water at some point and cause accelerated rusting. Sand or cat litter will not. Some guys fill specialized balast water containers – that’s fine too. If you want your truck to last longer, just don’t use salt is my heart felt recommendation.
Why build a box?
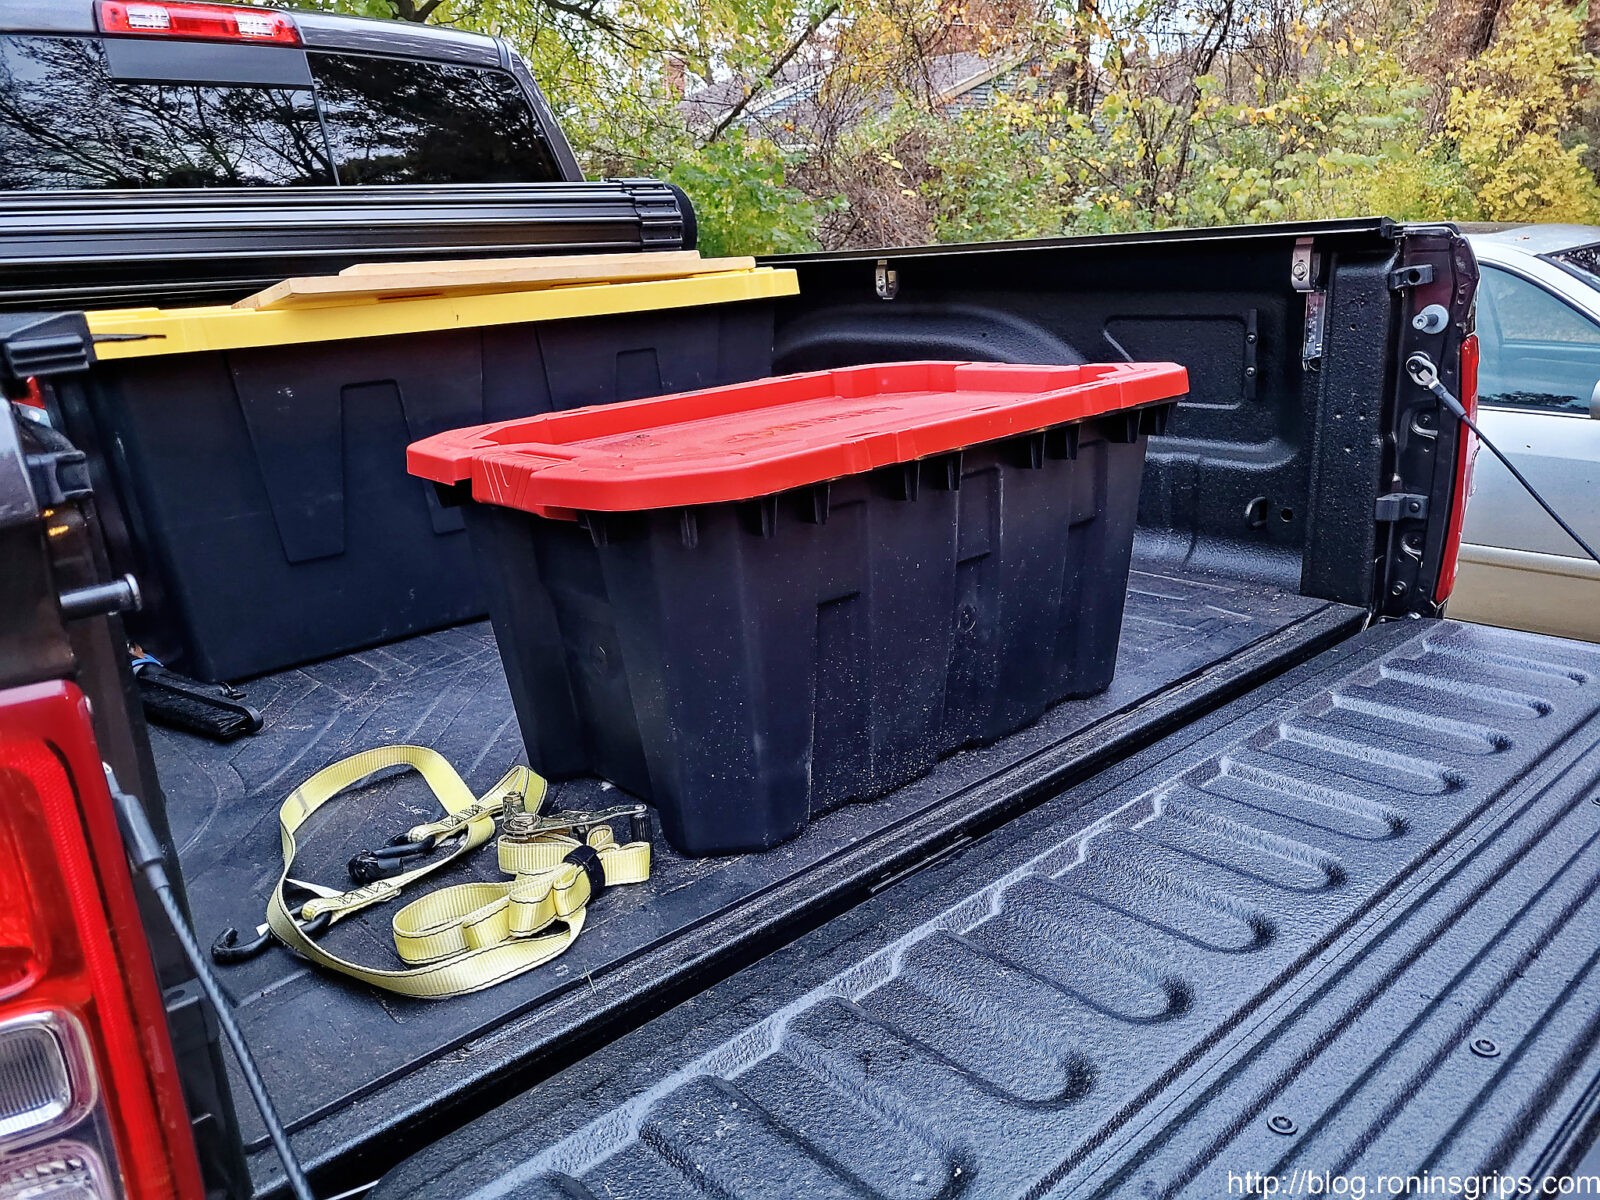
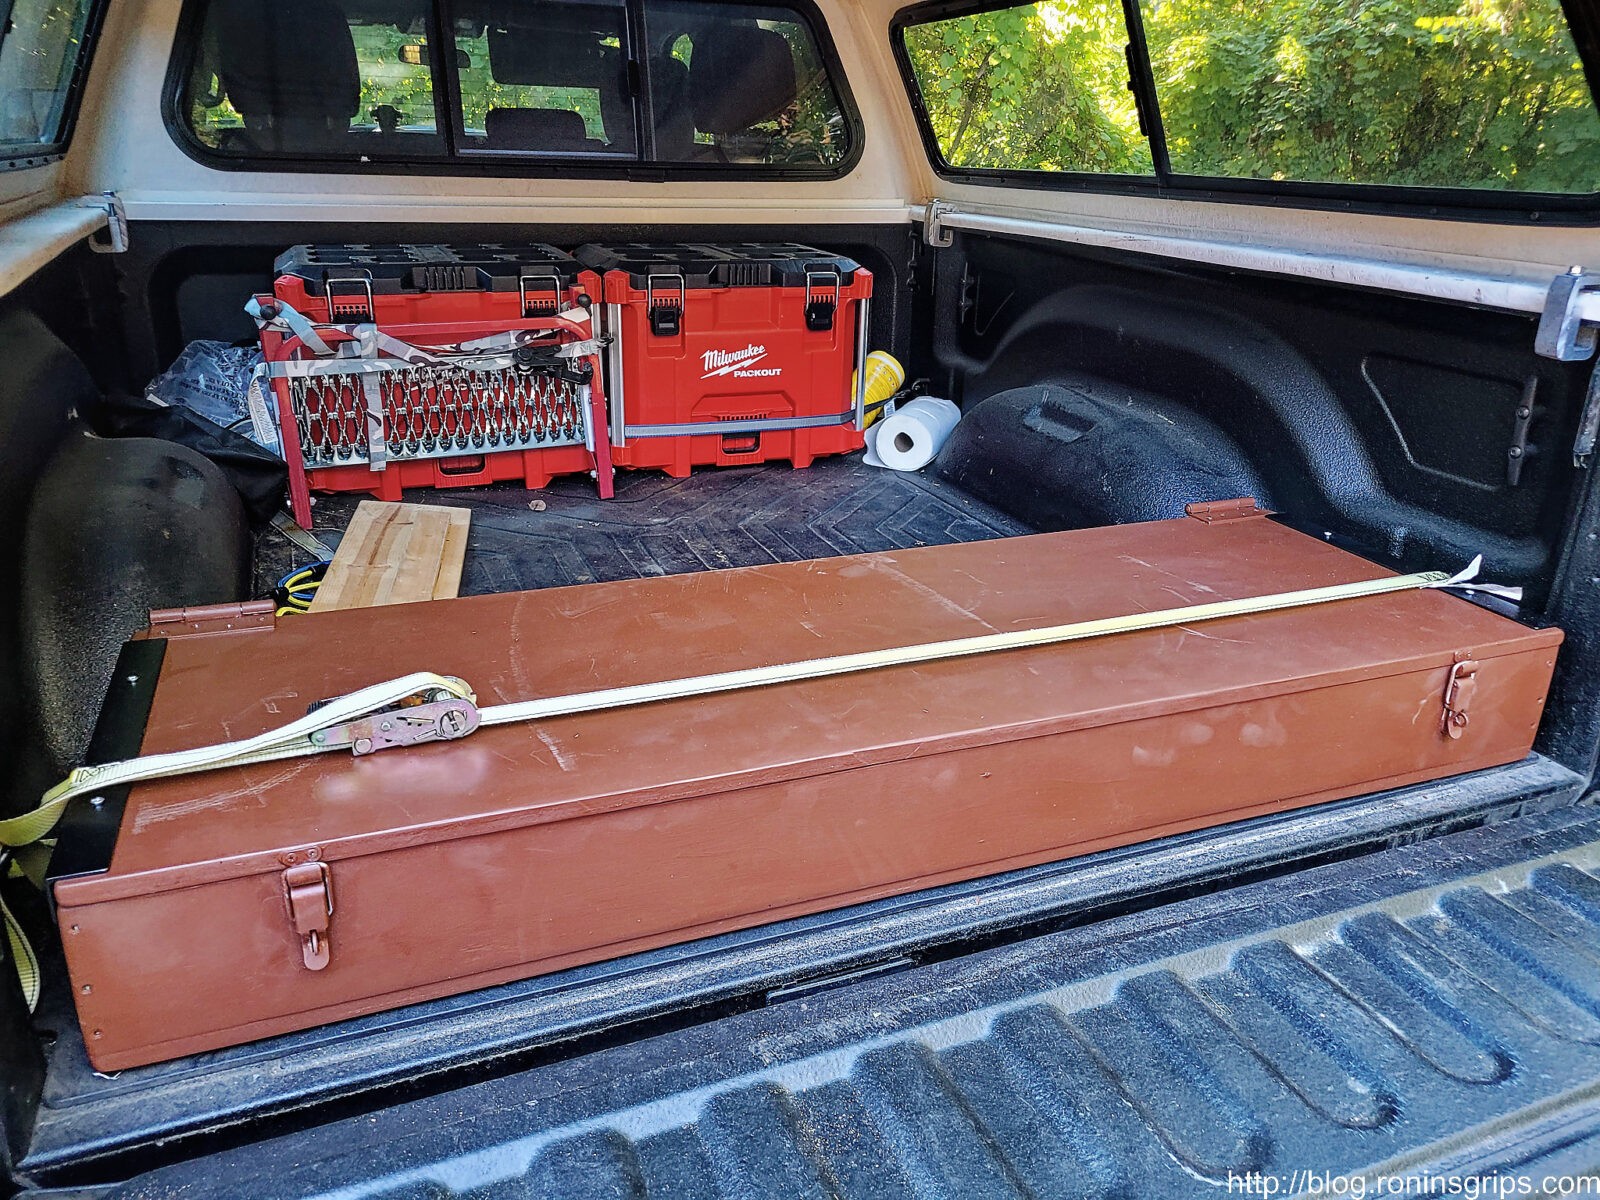
Simply put ballast is in the way and can be a pain in the butt to work around. Last year, I put the four tubes of sand and 100 pounds of old weight lifting plates in a way too tall plastic tote. That turned out to be a mistake. First off, the tote was way too tall and made getting things into and out of the bed a headache. Second, even though I strapped it to the tie downs using a ratchet strap and a board on top, there are limits to how tight you can strap down the load. I had a couple of times last Winter where I stopped fast and the very heavy ballast tote slid forward – that is not good. You certainly do not want a ballast to come flying at the cab during an accident. Bottom like, the plastic tote box was a bad idea.
This was a very bad idea. The plastic wasn’t strong enough and a few times it still slid forward last year. Also, it was way too high and in the way. I was in a rush and bought this tote at Home Depot. It’s a fine tote but don’t try to use it to hold heavy balast – it will move on you. Mine shot forward and slammed into my toolboxes. I regretted ever doing it and immediately started figuring out how to secure the tubes of sand.
Solution: Make a box out of 3/4″ plywood
I did some digging and there really weren’t any ballast solutions out there that I cared for because I wanted something very strong, with minimal height that could also be walked on, stacked on, etc.
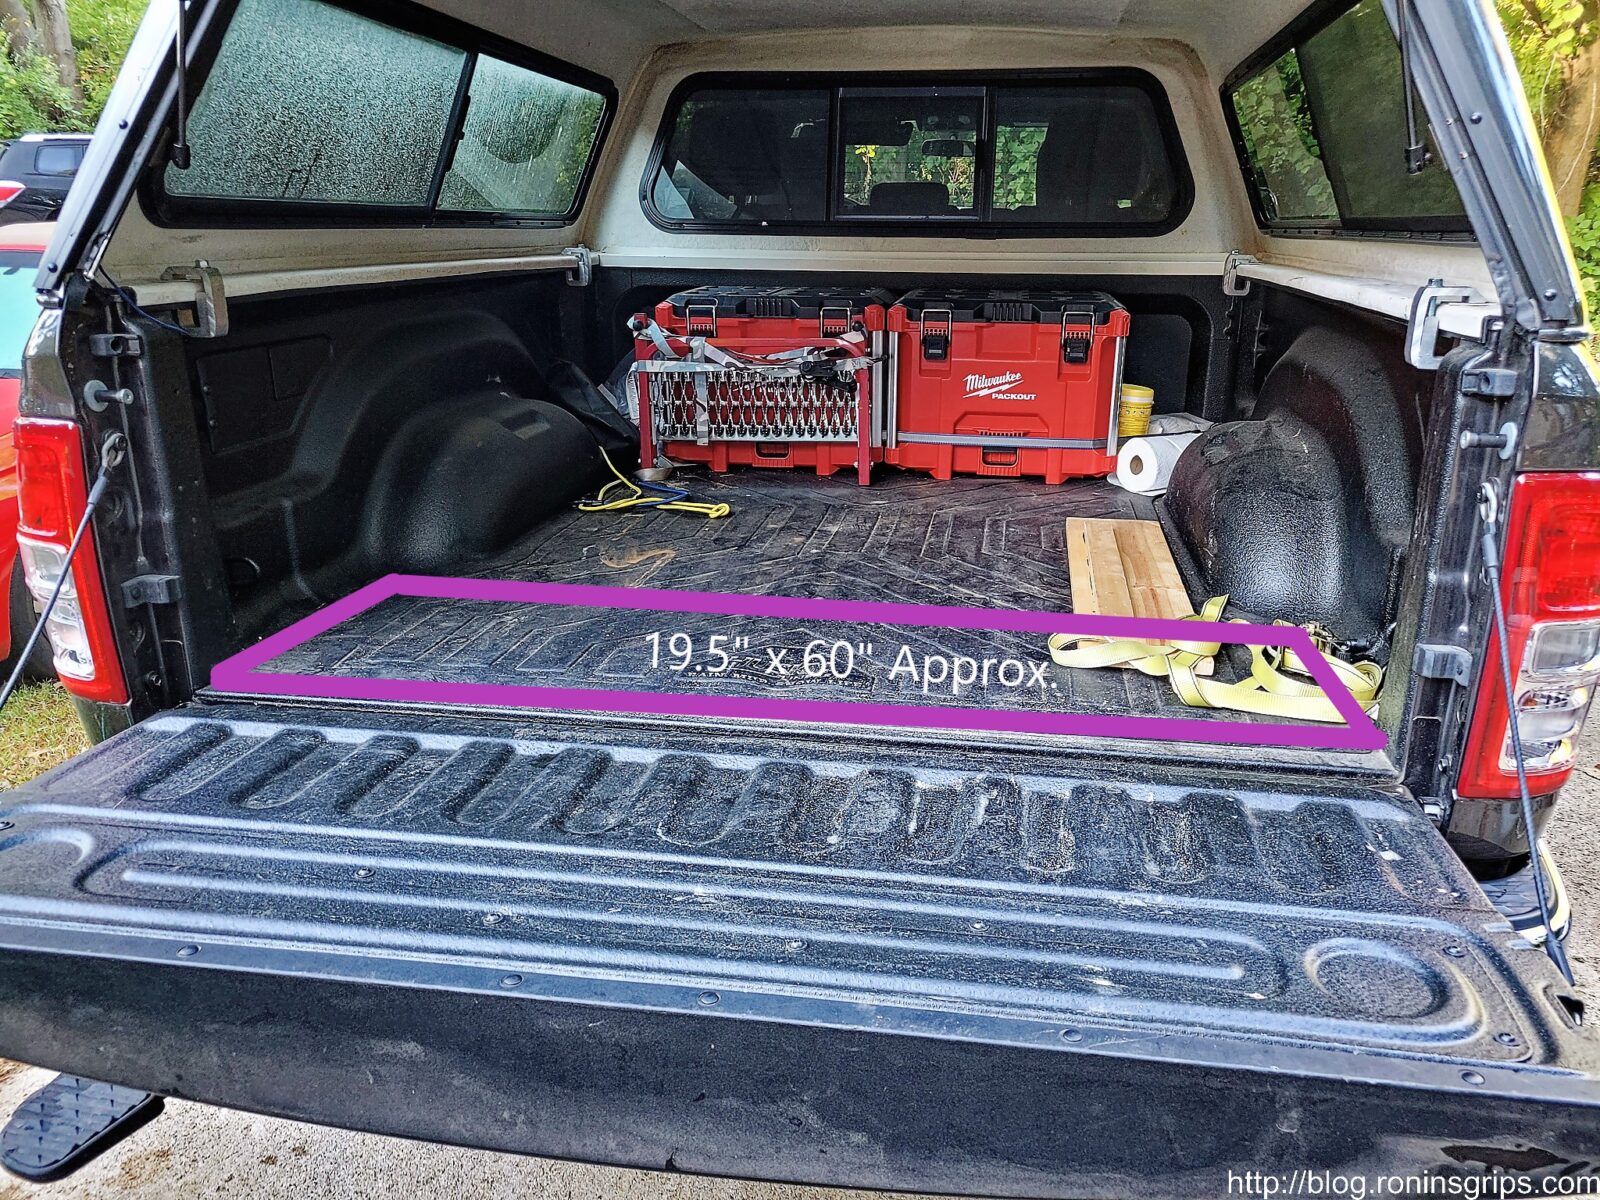
I decided to make a very stout box and it all started with understanding the dimensions I had to work with.
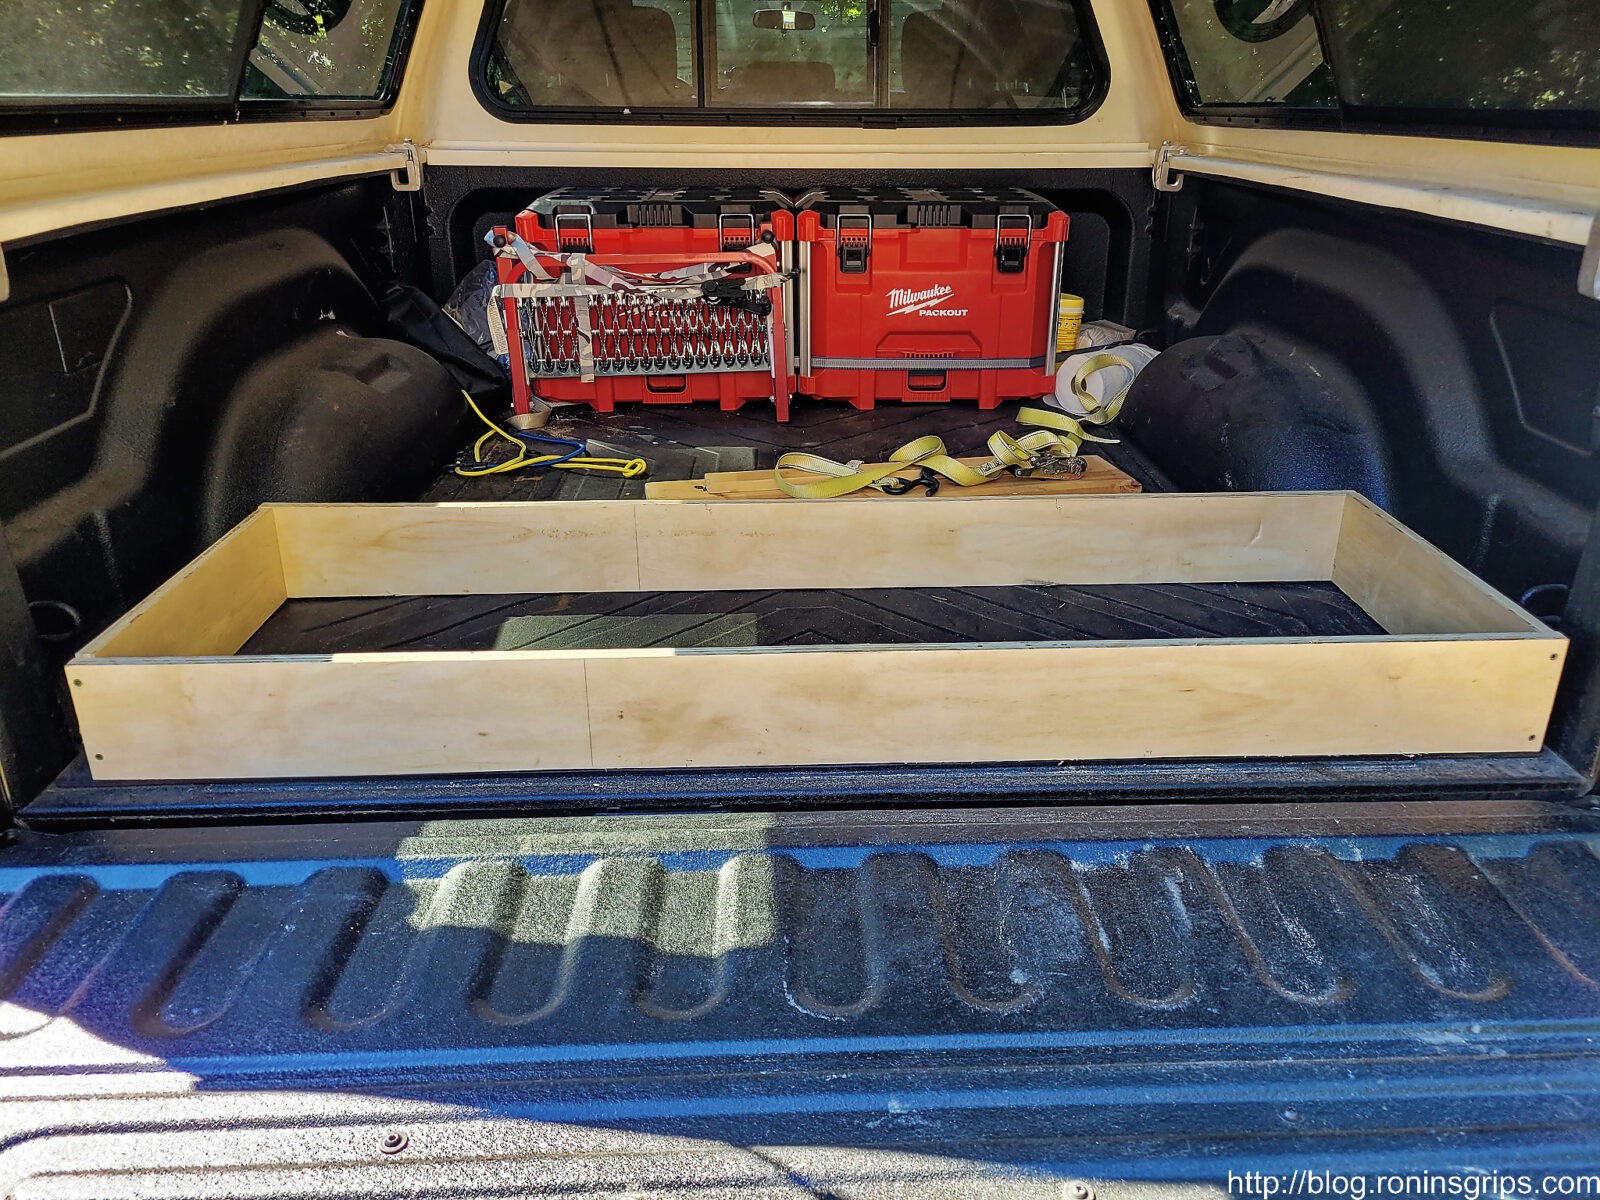
This is about 19.5×60 – I only went back as far as my floor mat plus didn’t want any box latches to hit the tailgate. I decided to only do 19″ deep and about 57-59″ wide. The box would be held down by a ratchet strap.
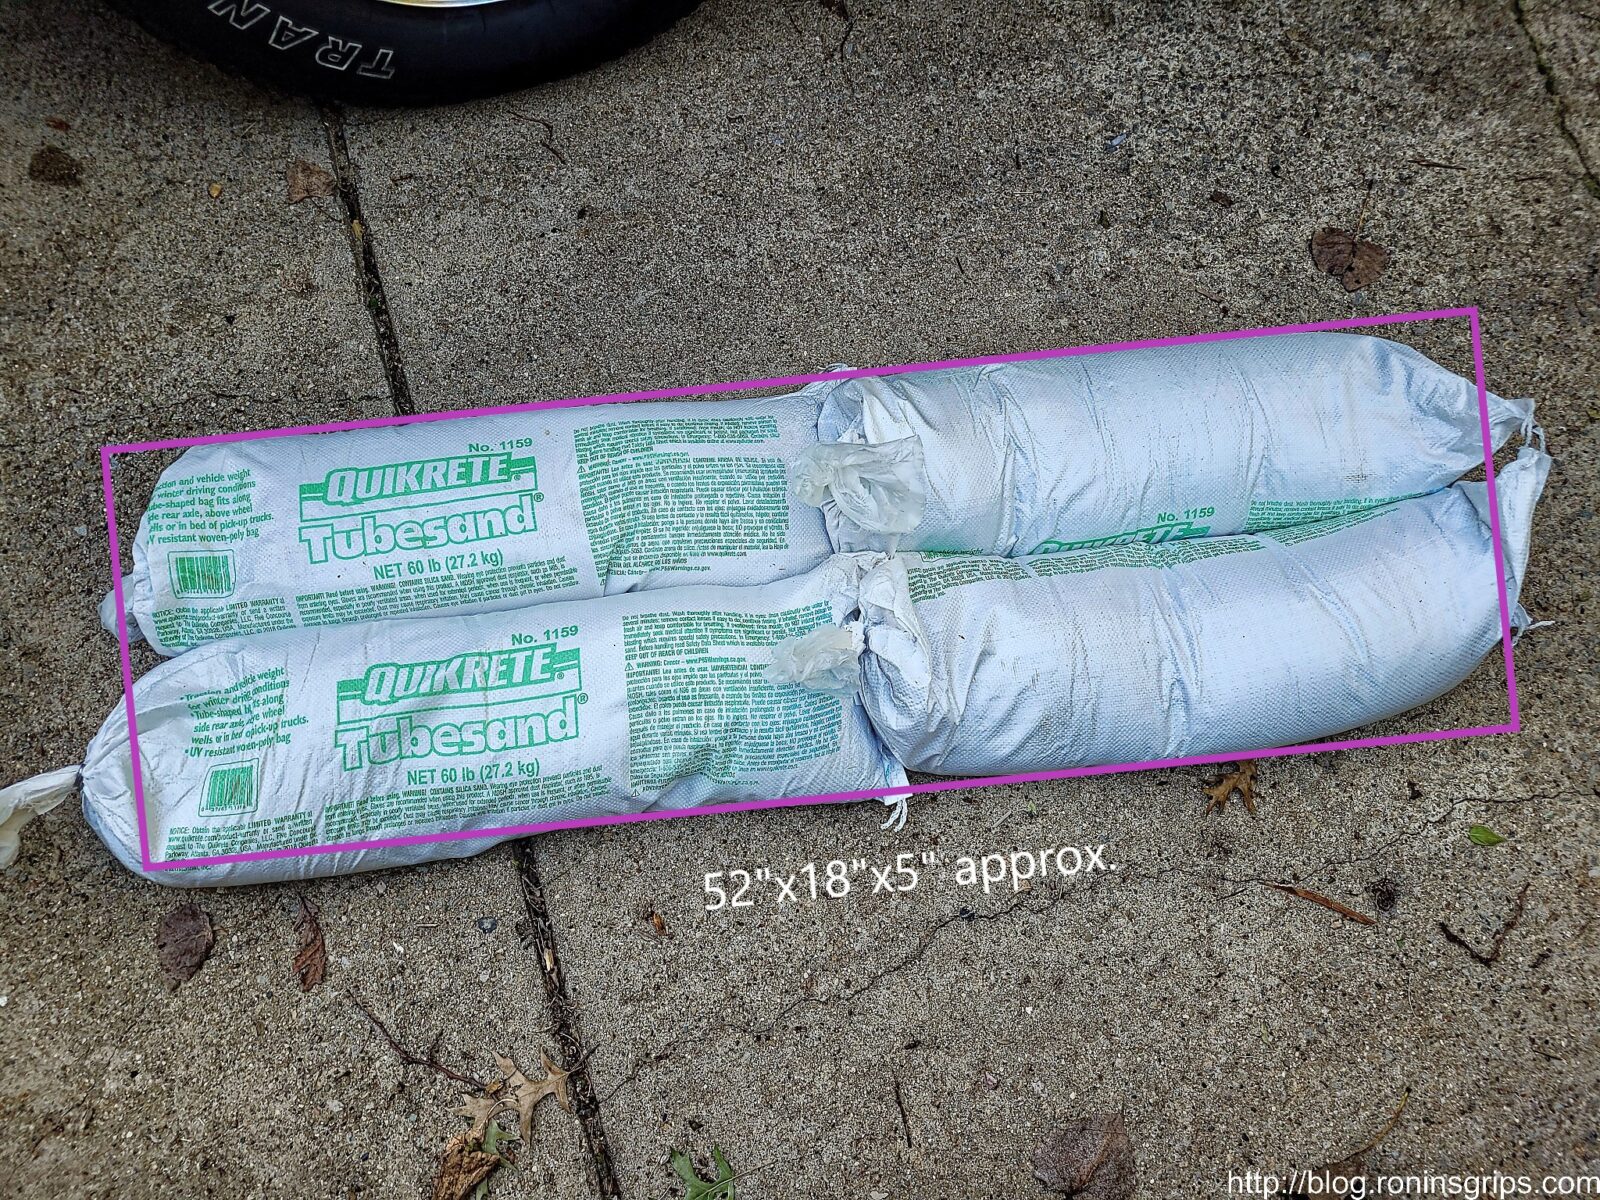
240 pounds is four 60# tubes of sand. Laying them out on the ground and doing some measurements that worked out to 18″ deep, 52″ wide and right around 4″ tall. Now this was some guesswork because the tubes are somewhat malleable – you can push the sand around some and make them shorter, longer, thinner, or fatter.
Given the above dimensions, I knew a box with an internal dimension of 18x52x5 would work. The question then became what wood to use. I have had very good luck with 3/4″ plywood. That stuff is remarkably strong. I then considered whether to do framing around it or not with 2x4s or make the walls out of 2x6s but finally just decided to do it all with 3/4″ lumber. The good news is that you can make the entire box from one 4×8 sheet – the top, bottom and four walls.
To hold it together would use #8 1-5/8″ treated deck screws – the new ones with some serious coating and Torx heads. Given they would be in the bed of the truck, I wanted to reduce the odds of rusting plus wanted their strength – both in terms of shear strength and how well the threads would bite into the plywood. I thought about gluing things together as well but changed my mind. If I ever needed to replace a damaged board, then I could with just screws but not so if I glue was used as well.
I wanted the top to have a strong hinge so I could access the sand inside if I needed to cut open a bag and use the sand for traction. I also wanted a strong hinge that wouldn’t bend easy so I went with 4″ gate hinges from Ace and used #10 wood screws. To hold the front down, I used draw clasps from Home Depot. I used the screws in the package and they looked to be about a #6.
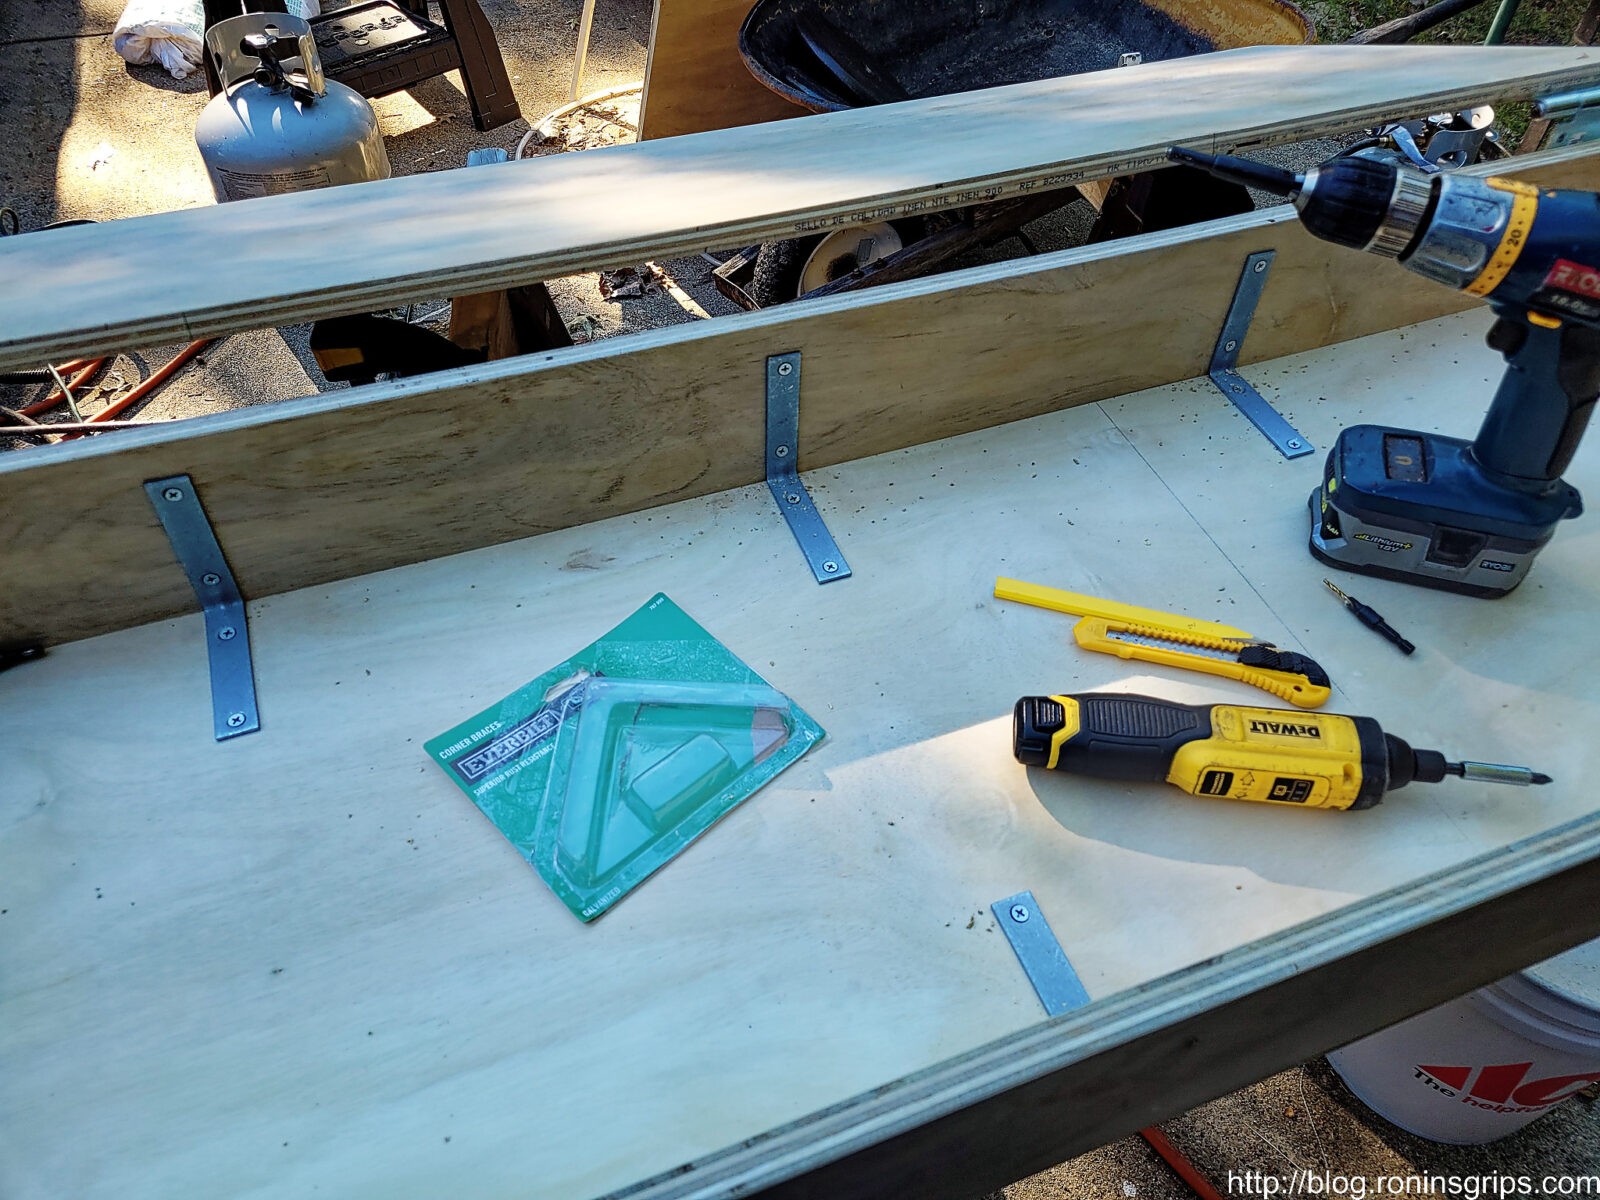
To further reinforce the plywood I would use eight 4″ inside angle braces. The intent was to spread out the support and fastening duties without taking up a ton of space. Three braces on each long wall and one on each short wall. I used #10 wood screws.
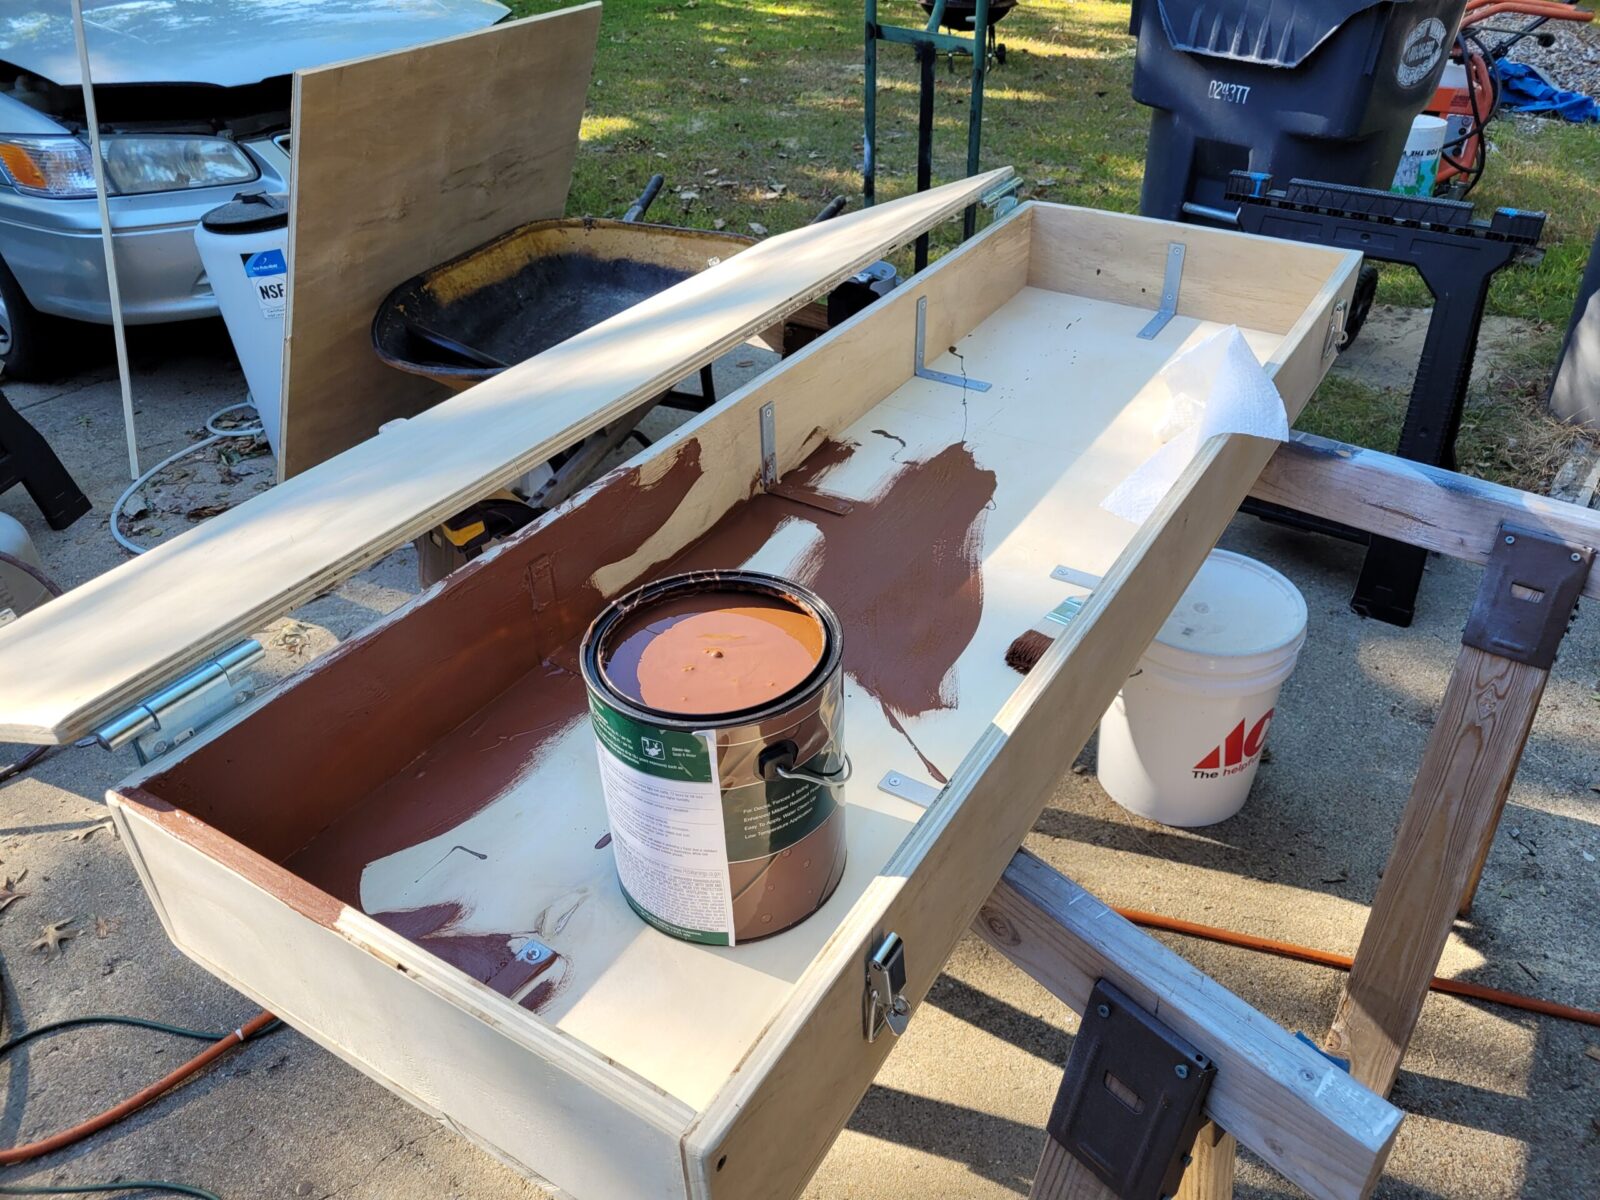
Lastly, I wanted the wood to be protected so I went with a deck stain. We’ve had very good luck with Home Depot’s Behr deck stain so I just grabbed a can of Russet. It’s a decent medium brown but in hindsight I wish I had gone darker.
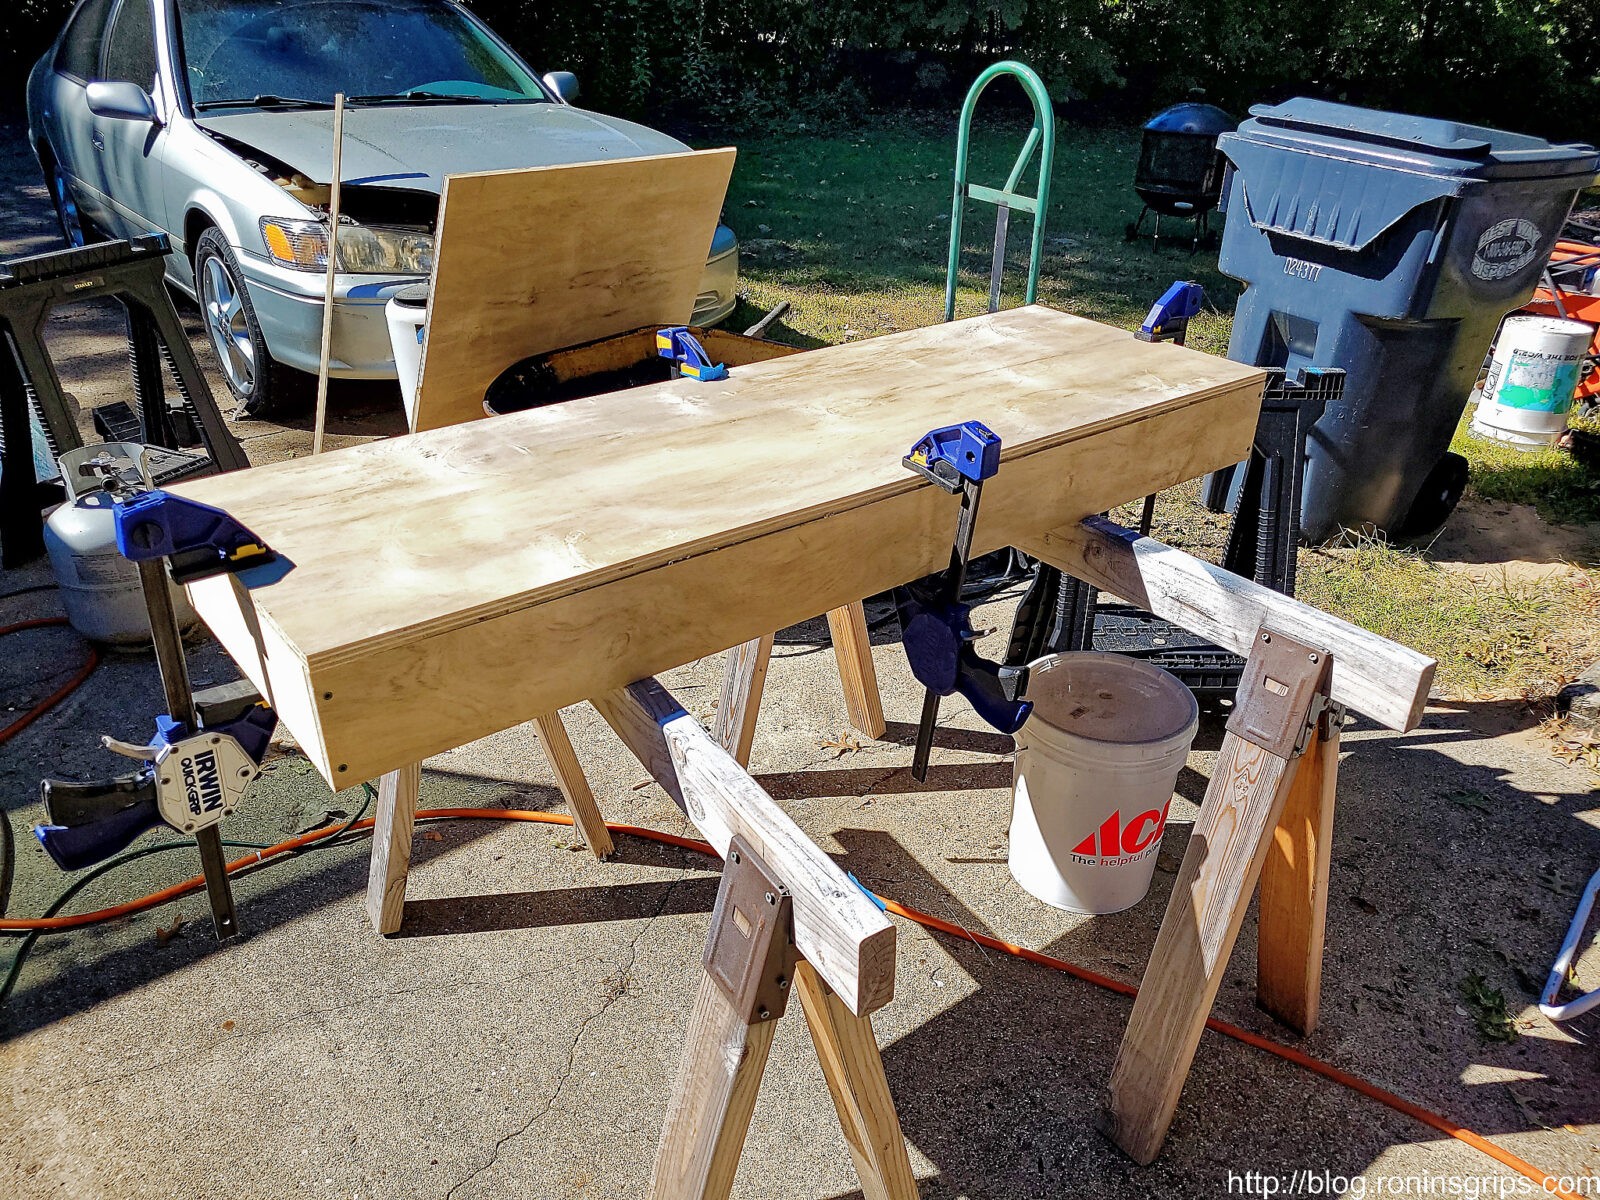
Here’s the frame. The long pieces are 57.5″ long x 5″ wide. The short sides are 17.5″ long x 5″ tall. That gives an outside diameter of 57.5″ wide x 9″ long for the frame. I could have made it maybe 0.5-1″ shorter but wanted to make sure I had enough room.
I test fit it around the sand tubes and I was good to go. I was a bit higher than needed but decided to slip a couple of 25 pound steel barbell waits in the top. To be clear, there will be a bottom piece of plywood too along with the hinged top.
The top and bottom pieces of 3/4″ plywood are 57.5″x19″. I repeatedly did test fittings to make sure I didn’t mess up a cut.
I installed the Ace Hardware brand 4″ gate hinges with #10×3/4″ wood screws. Self-centering drill bits are worth their weight in gold when you are installing hinges and brackets. I’m using a Bosch set now – the cheap import models fall apart too easy.
Installed eight of the 4″ inside angle braces with #10×3/4″ wood screws.
One recommendation I would tell you is to use a sander and round over all of the edges so reduce splintering in the future. It also reduces the “ow!” factor if you run into it while moving things around.
I bought pre-tinted Behr deck stain. I like it because it does have an opaque pigment and ran over the steel parts to as I was in a rush. I’m not a huge “it’s gotta look perfect” kind of guy. I’m more of a “If it’s sealed it is good enough” guy. My friend John looked at it and declared the color was “baby shit brown” but it was what it was, I didn’t really care about the color.
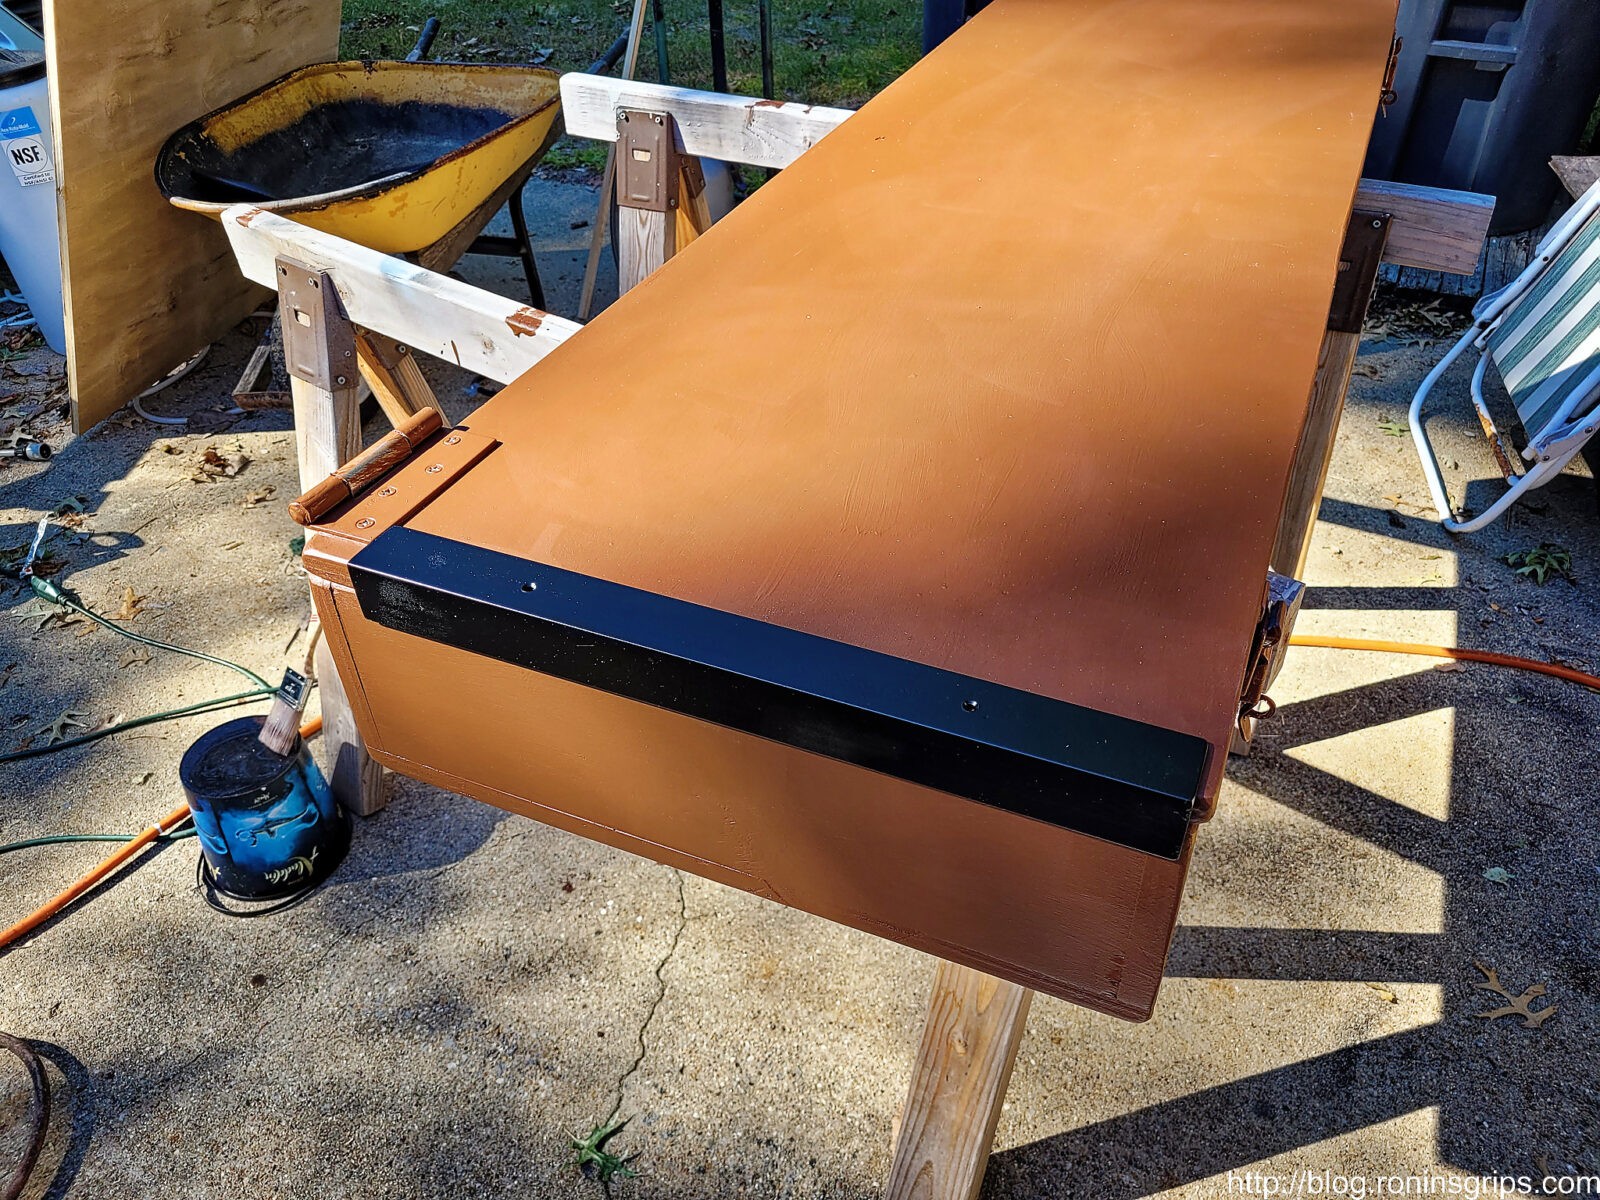
I did have some spare 1-1/4×1/8″ thick” angle iron that I cut, drilled and painted to protect the sides of the lid from the ratchet strap and to also distribute the downward pressure of the strap more evenly.
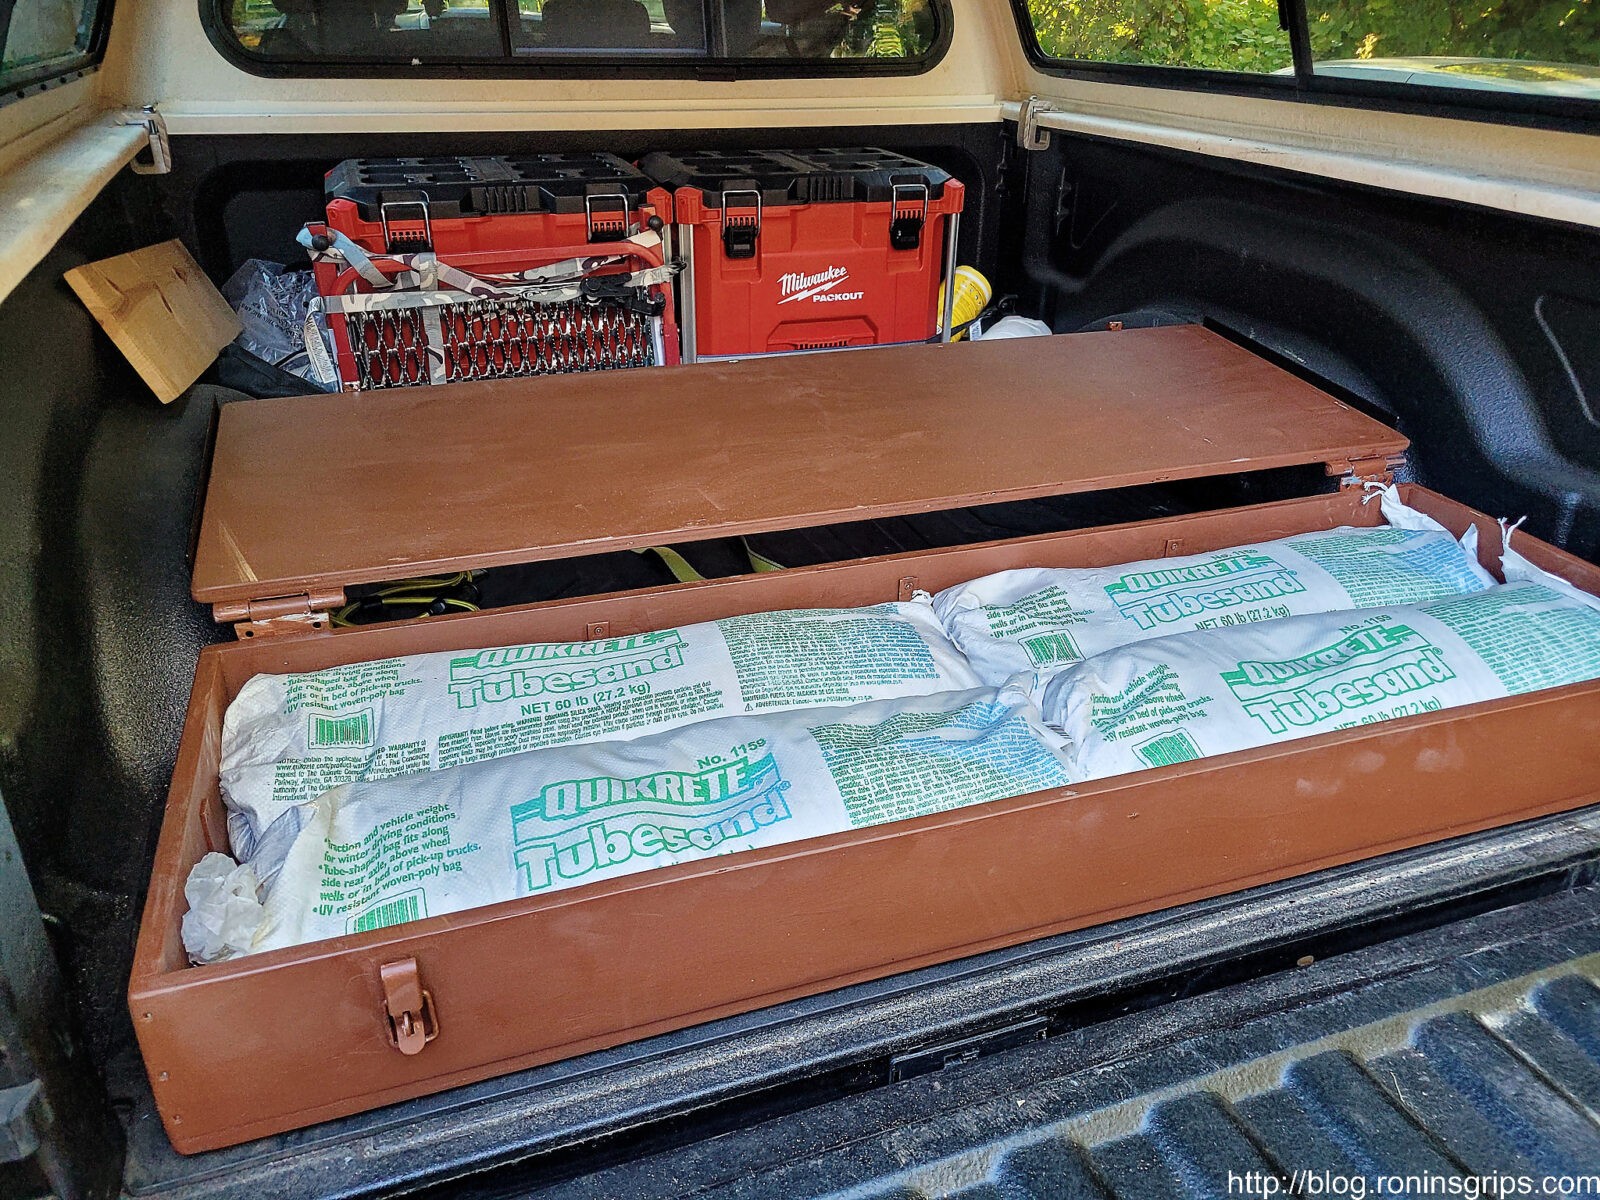
The box fit the back and I did have some room as I flattened the tubes out. By the way, I let the deck finish cure for a day before I put in the truck and part of the second before I installed the tubes. I didn’t want the deck stain to glue itself to the rubber floor mat if I pushed it down too early.
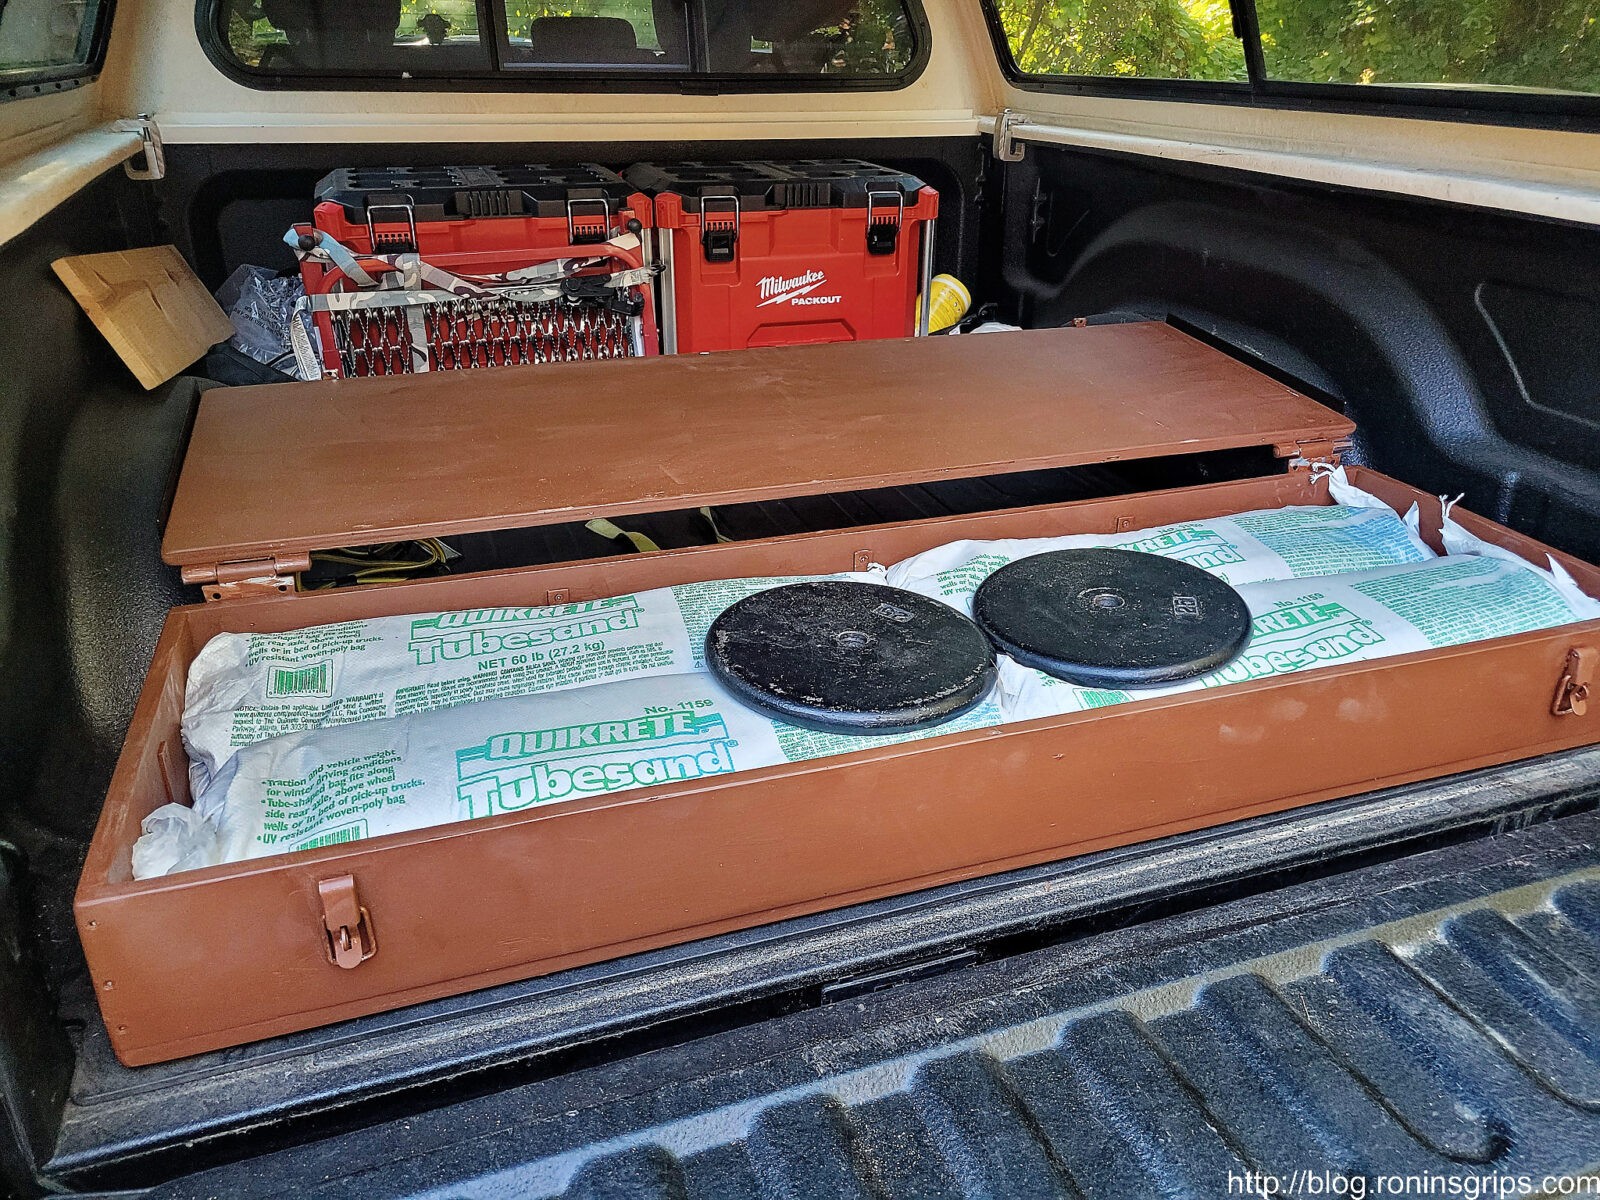
Added in two 1″ 25 pound plates that date back to my early days of weight lifting – late 80s if I were to guess. I had four but there wasn’t room towards the sides. Now that the box was at 290 pounds that was good enough for me.
The box is secured by the 1.25″ ratchet strap to the tie down eyelets of the truck. I really didn’t want to drill holes in the bed and invite rust plus the box will only be installed during the winter. The box can’t slide forward because of the wheel tubs plus the rubber floor mat really has a healthy grip on it and the bed floor thanks to the strap.
Summary
The box feels very sturdy and can’t move at all now that it is strapped in place. I think the truck has the weight it needs and I don’t have to worry about it shifting around.
I hope this helps you out!
10/31/24 – I am still using this setup and it works great. If I had installed a rubber matt or something on top the lid would have been protected better. I have scuff marks all over mine from pushing stuff in and pulling it out. I may get add some rubber floor mat on top but it’s near the bottom of the to-do list.
Note, I have to buy all of my parts – nothing here was paid for by sponsors, etc. I do make a small amount if you click on an ad and buy something but that is it. You’re getting my real opinion on stuff.
My one big disappointment with my 2021 Ram 2500 with the 6.4 Hemi is it’s lack of sufficient electrical power to run my Western Pro Plow 2 snow plow and the heater on full – yeah, that combo has issues. My truck came with the Snow Chief option package that was supposed to make it snow plow ready with a 220 amp alternator plus anti-spin rear differential, aux switches, LED clearance lamps, LT275/70R/18E tires on 18″ wheels and a transfer case skid plate. One would think it’s good to go but it’s not – at least not in terms of the alternator. Can’t say I am overly thrilled by the tires but at least they work even though not ideally on ice and snow.
At any rate, back to the point of the post – my bone to pick with DC power system (the combination of alternator and battery) is that it can’t keep up with my raising my 8′ Western Pro Plow 2 while having the defroster on full. The truck’s computer senses that there is too much of a power draw and it literally shuts off the blower motor … in the middle of winter while I am trying to plow. When this first happened last year, I couldn’t believe it. I thought for sure something was wrong.
The local Dodge dealer, Siemens in Bridgman, Michigan, was next to no help even though I bought the plow from them — they said the battery and alternator were just fine. Honestly, I am usually not impressed by car dealership service departments and SIeman’s underwhelming response didn’t surprise me although it was disappointing. Bear in mind that 2500-series Ram trucks were hard to find due to COVID and a shortage of chips so I decided to figure this out myself despite being more than a little ticked off that my brand new plow ready truck wasn’t exactly plow ready – which for me means that the heater on full and the plow’s hydraulic motor should be able to run at the same time.
So what was happening?
The newer Ram 2500 computers (technically it is the ECU or Electronic Control Unit), maybe all newer RAMs actually, have their computers programmed to protect electronics by using a strategy that prioritizes some loads over others. This means it shuts off some high draw loads before others to prevent a brownout (a drop below the recommended power levels) that would cause damage. This is known as “load shedding” or just “shedding”.
On one hand, yes, I am thankful that the electronics were protected and the computer shut off the blower and not the plow itself – either of those cases would have really ticked me off. On the other hand, I need heat in the Winter and sometimes the blower set on high is needed. Why was this even happening? Yeah … that was the big question.
Note, I could not find any official details behind how the 2021 Ram’s computer handles load shedding. If you have some any official details, I would sure like to learn more. Email me at in**@*********ps.com
The Western Pro Plow 2
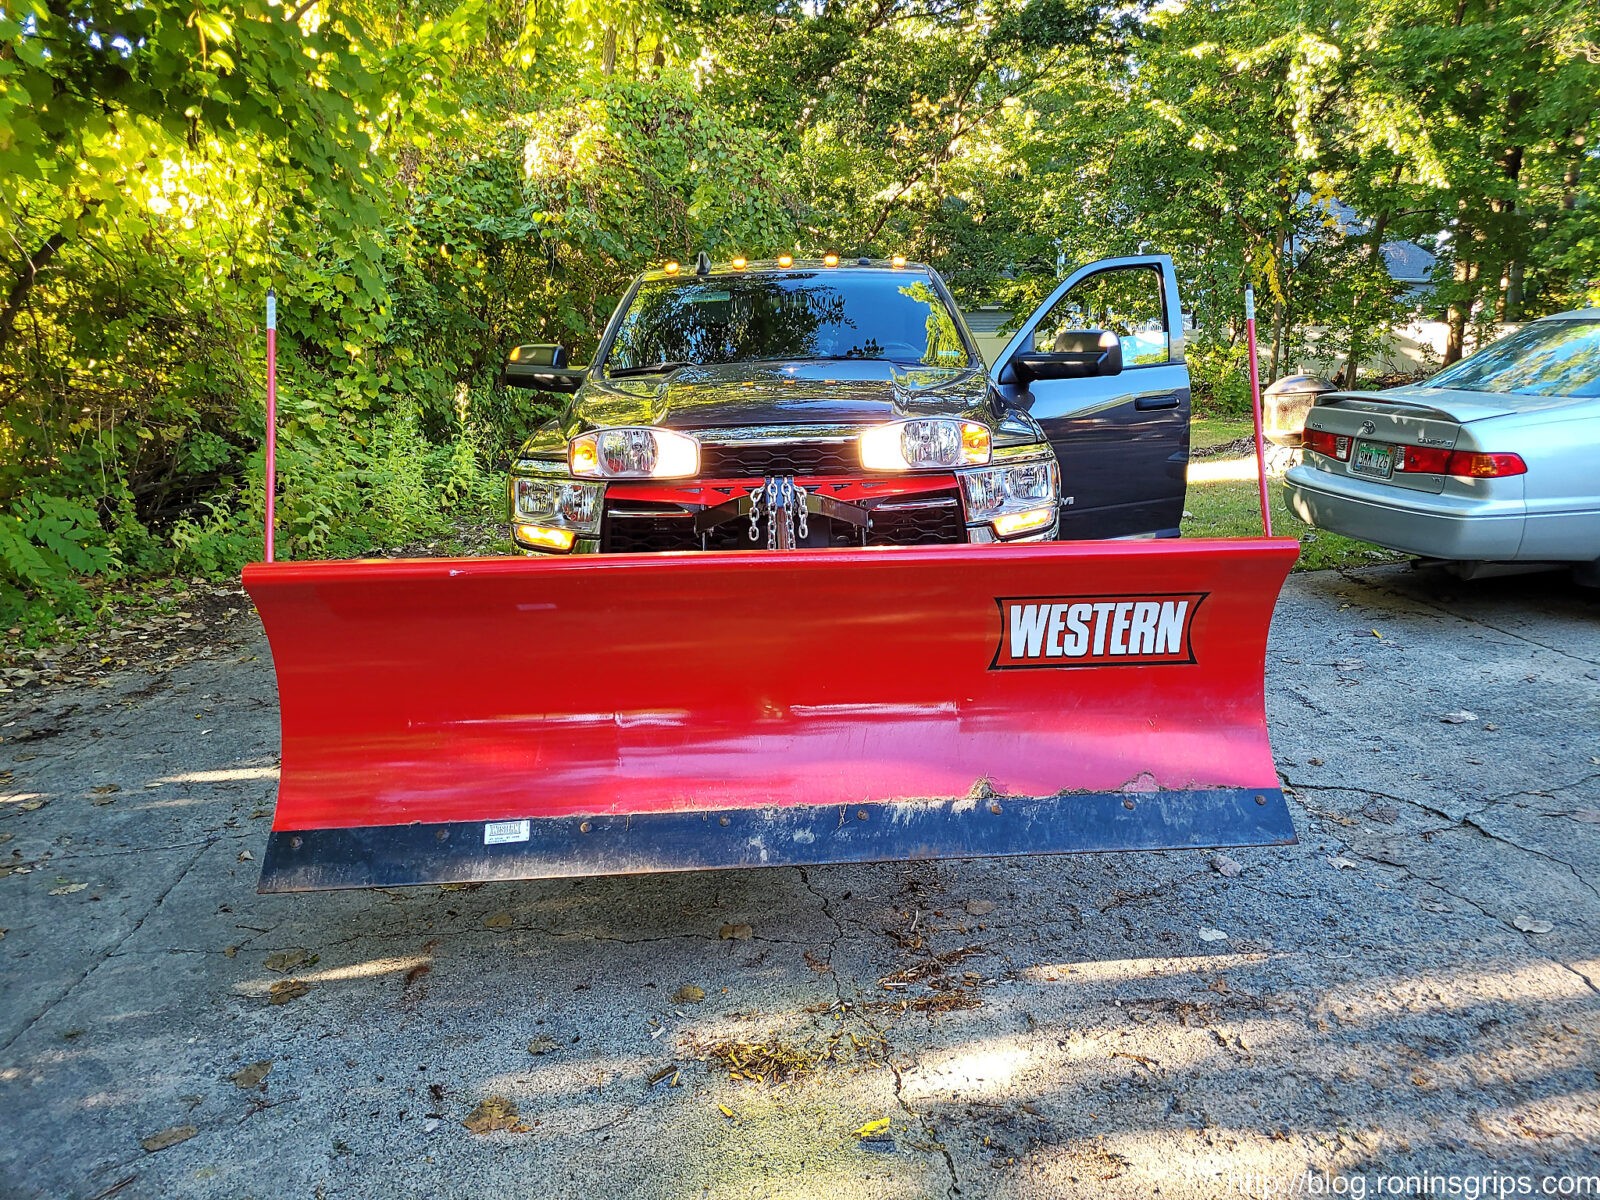
To give some background, I bought a brand new Western Pro Plow 2 with the truck and financed them together. It has an 8′ steel blade and Western’s documentation rates the motor’s draw at 205 amps at 2,250 PSI. There are a few other relatively small draws – 1.5 amps for the solenoid coil, motor relay draw 2.2 amps and switched accessories of 0.75amps.
This is a Western 8′ Pro Plow 2. The plow assembly less the mount weighs 668 pounds.
So. running the hydraulic motor to lift the big 8′ steel blade is substantial – probably pushing near or even past the rated 205amps. I don’t think I ever had shedding happen with left and right pivoting but I can’t say for sure.
The problem scenario was that I would get in the truck, warm it up, turn the blower on high, lift the plow and the computer would shut off the blower completely. I was told it would restart after some time but did not experience that – I would turn off the truck, turn the blower motor down one notch and things would be fine. That was my work around though – I would warm up the cab, reduce the blower by one notch and then use the plow. As the cab warmed up, I reduced the blower speed further and further. Now if I forgot that then the computer would shut off the blower. Man, it was frustrating.
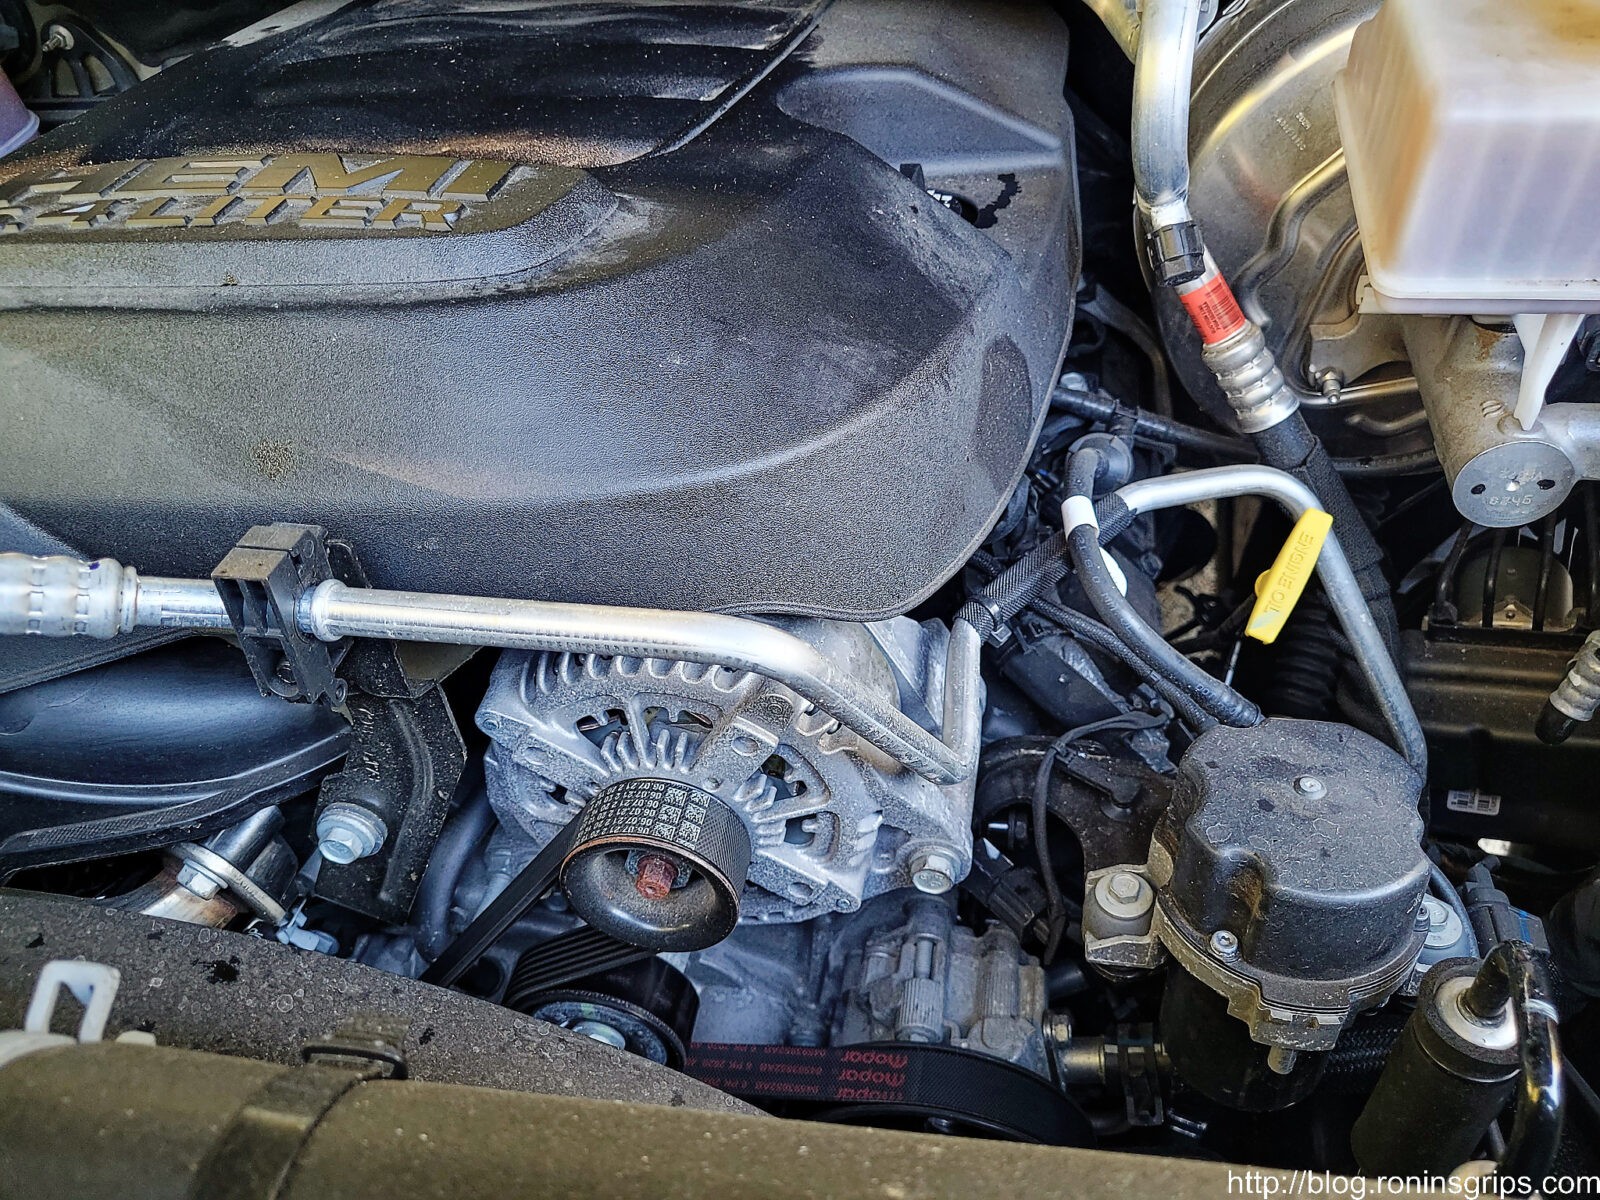
The 220 Amp Alternator
To be very candid, Dodge’s decision to put in place both an underpowered alternator and battery and claim it to be plow ready is bogus. I am not running an abnormally large plow for a 2500 – 8′ is the recommended blade width.
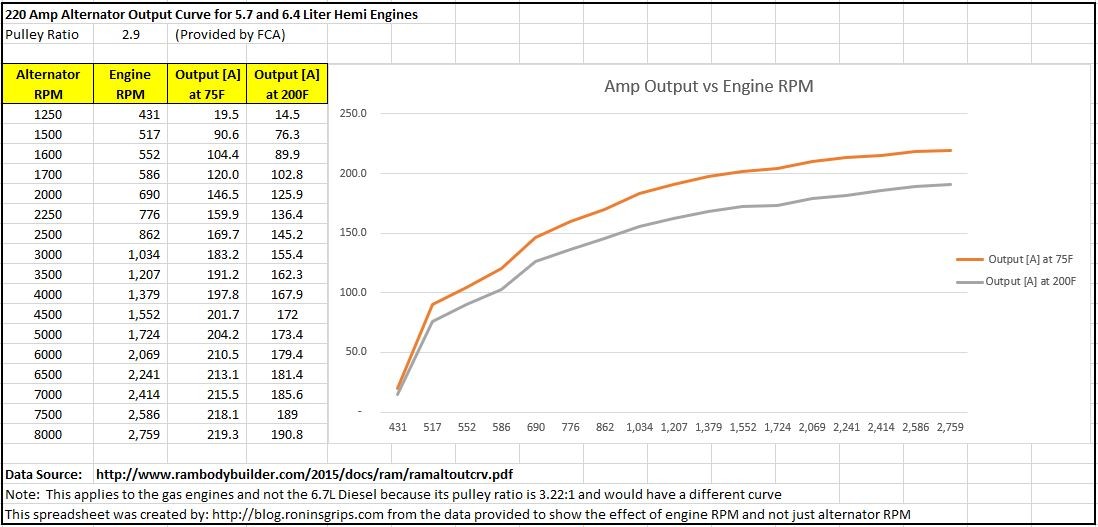
Yes, it is a 220 amp alternator but it is not cranking out that many amps all the time – it depends on the engine RPM. In doing some reading, many/most alternators rate their full output at 6,000 RPM. The RPM is of the alternator itself and the pulley will likely have some multiplier vs. engine RPM. I found a FCA technical bulletin on the smaller 160 amp alternators and they have a 2.9:1 ratio and show the steepest power output between 1,250 and about 2,500 alternator RPM. The power increases much more gradually until they stopped the curve at 8,000 RPM.
The Snow Chief option package includes a 220 amp alternator. The problem is that while 220 amps sounds great it is not producing that level of output all of the time.
My point is that even with the bigger alternator, given that I am plowing, the RPMs are going up and down over and over plus I am never going very fast. Hmmm….. I usually was idling when I had the blower running and went to lift the plow. With an engine idle speed of 720 RPM (I just went out and got that from my ODB2 scanner), we’d get an alternator speed of 720 x 2.90 pulley ratio = 2,088 alternator RPM. Using the output chart that FCA has at 2,000 RPM the alternator is producing about 146.5 amps.
Hmmmm…. far less than the plow’s draw of 205amp let alone having the blower on high. I did some digging and while I couldn’t find an absolute number from Dodge, the range mentioned seems to be 15-20amps. I don’t often plow in the dark so I am not factoring in lights. Regardless, the alternator would not be producing enough amps so the demand would need to tap into the battery’s reserve but that wasn’t enough obviously.
To make this more approachable, I took the data from FCA and generated the following table that shows you engine RPM and the amp output. If you click on the photo you can see a larger version.
Quick comment: I did not know it but there is a dual alternator option for the Hemi-powered 2500. With two alternators, both are contributing amps even at lower RPMs. Had I known, I would have tried to negotiate adding this option in as part of the purchase and at least had it financed. Then again, it would have been a gamble to avoid this problem that I didn’t even know existed.
The Original 730 CCA Battery
Let’s now consider a second important element – The battery powers the starter to start the truck of course but it also serves as a reserve buffer to even out power delivery when there are surges in demand that the alternator is unable to cover. Dodge went mediocre here. Why they didn’t use a bigger battery or even dual batteries – I don’t know. Well, I do know – either they went cheap to make more money or the engineers didn’t have real world snow plowing experience or didn’t talk to any real snow plow owners. Sorry guys – I have to call it the way I see it.
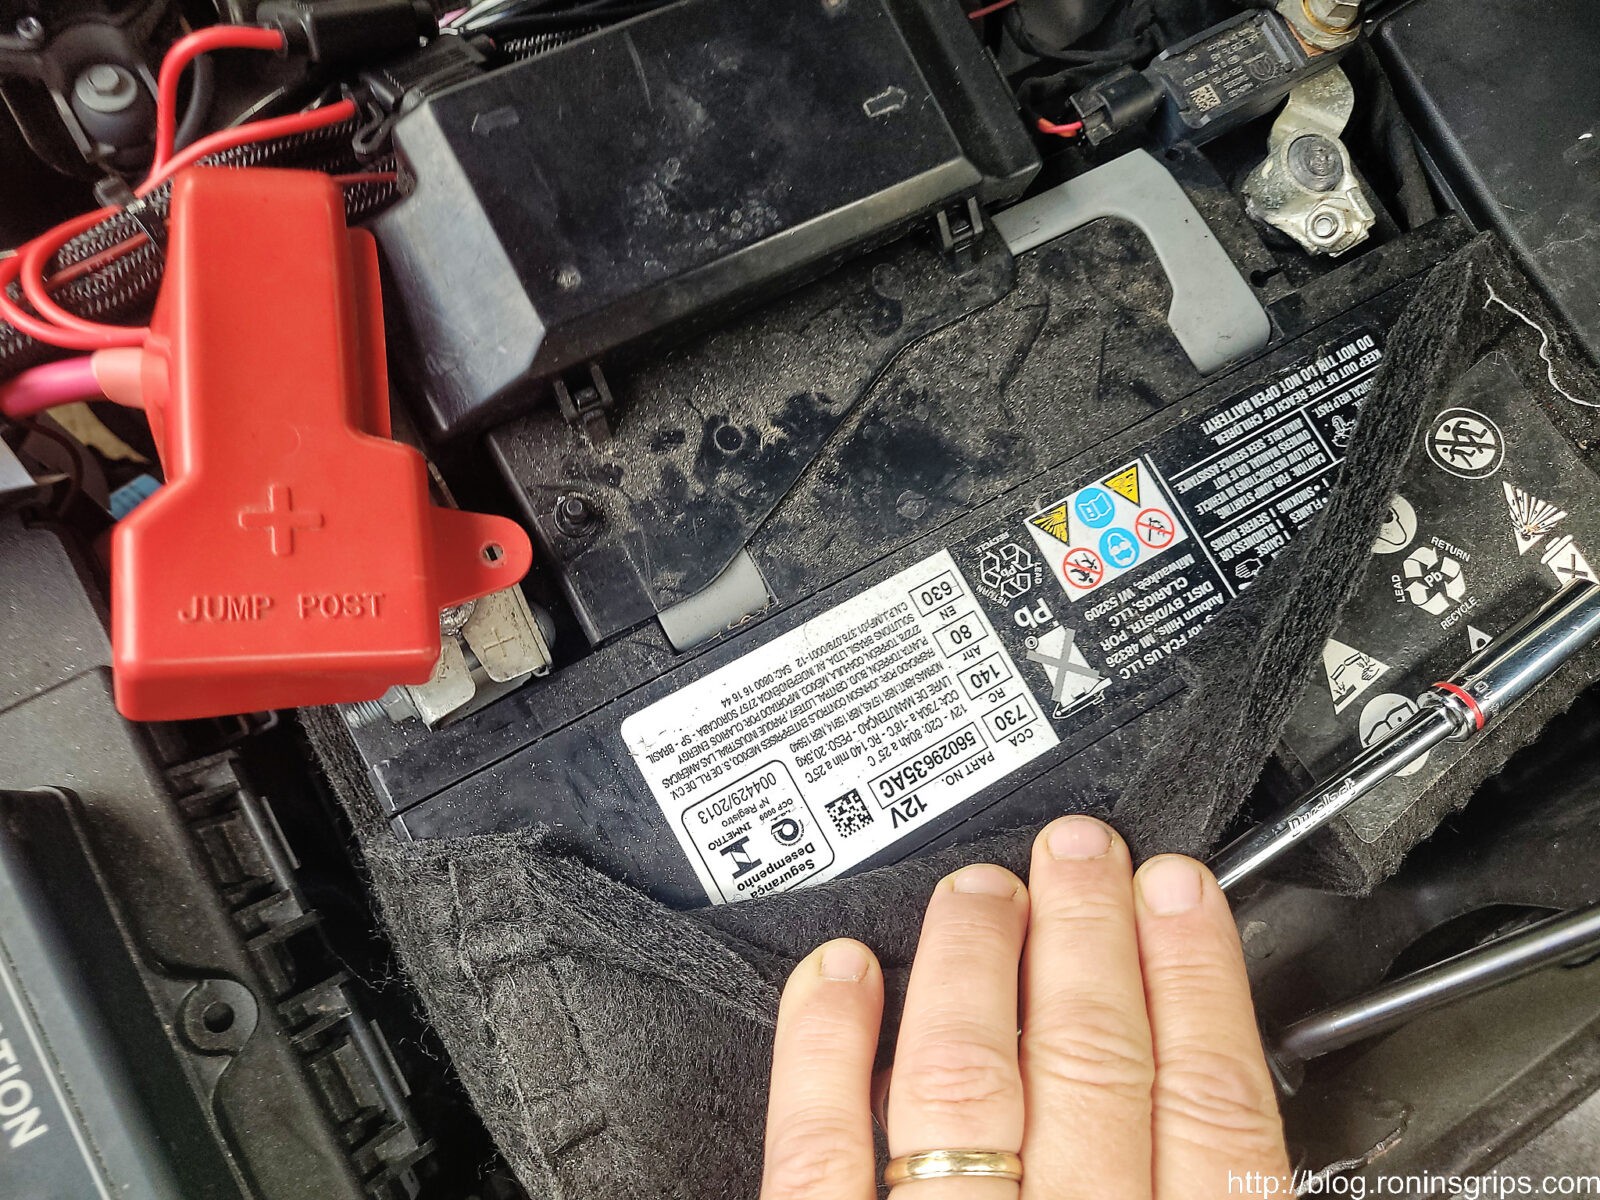
The OEM (Original Equipment Manufacturer) battery that came with the truck brand new was only rated for 730 cold cranking amps (CCA). While that is enough to start a 6.4 liter Hemi and run the stock electronics, it would appear to not enough to compensate for a plow at lower RPMs – at least not my Western 8′ Pro Plow 2 anyways. A smaller plow would likely have lower power demands and conversely, a larger plow would likely have higher power demands.
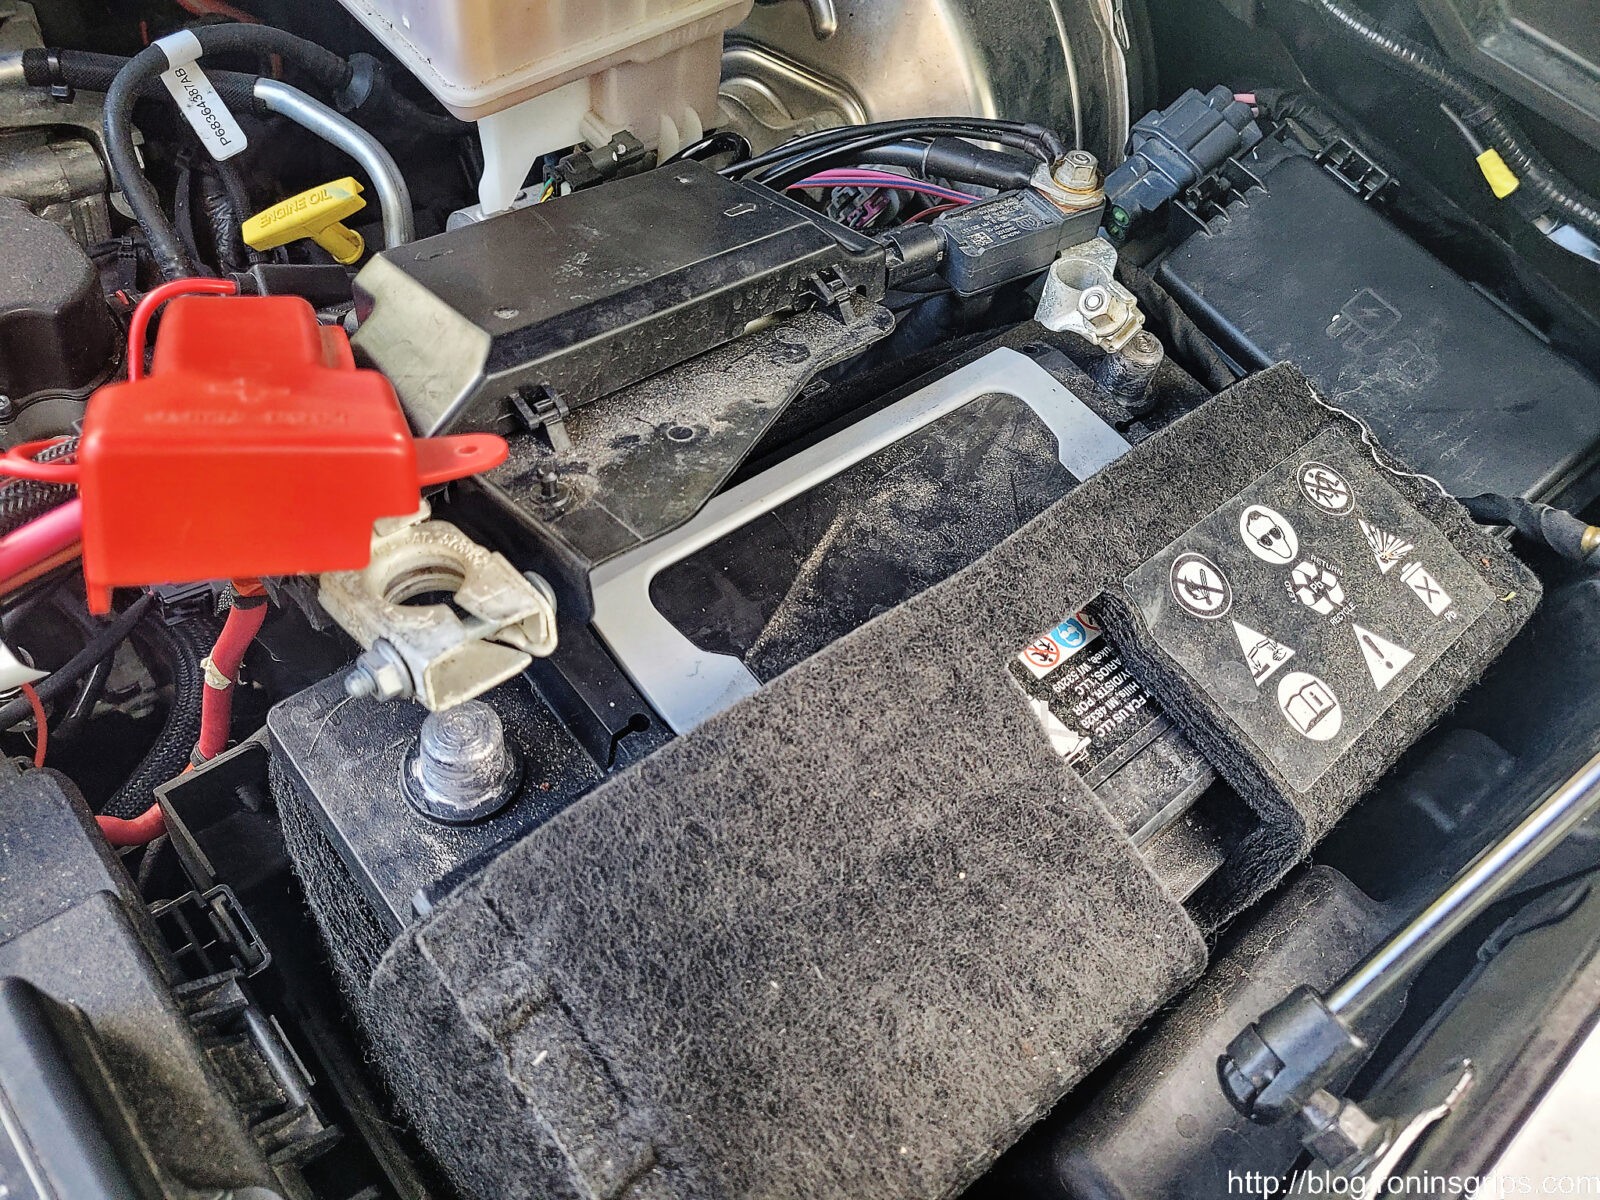
Here’s a peek at the label that partially covered by insulation. Having the right battery is critical to serve as a buffer for when power draw is higher than what the alternator is currently producing.
By the way, cold cranking amps identifies the battery’s potential amp output at 0 degrees Fahrenheit or -18 Celsius. They measure the output of the new battery for 30 seconds and it has to maintain at least 7.2 volts (technically it is 1.2 volts per cell of the battery).
Because I live in Michigan and it has Winter weather, CCA is what I care about. Cranking Amps (CA) is measured at freezing which is 32F or 0C and not really something that matters to me. I need more CCA both because of starting the big Hemi in the cold winter (the stock battery did fine at that) but also to support all of the electronics plus the plow’s hydraulic motor … and this is where the stock battery fell short.
What did I do?
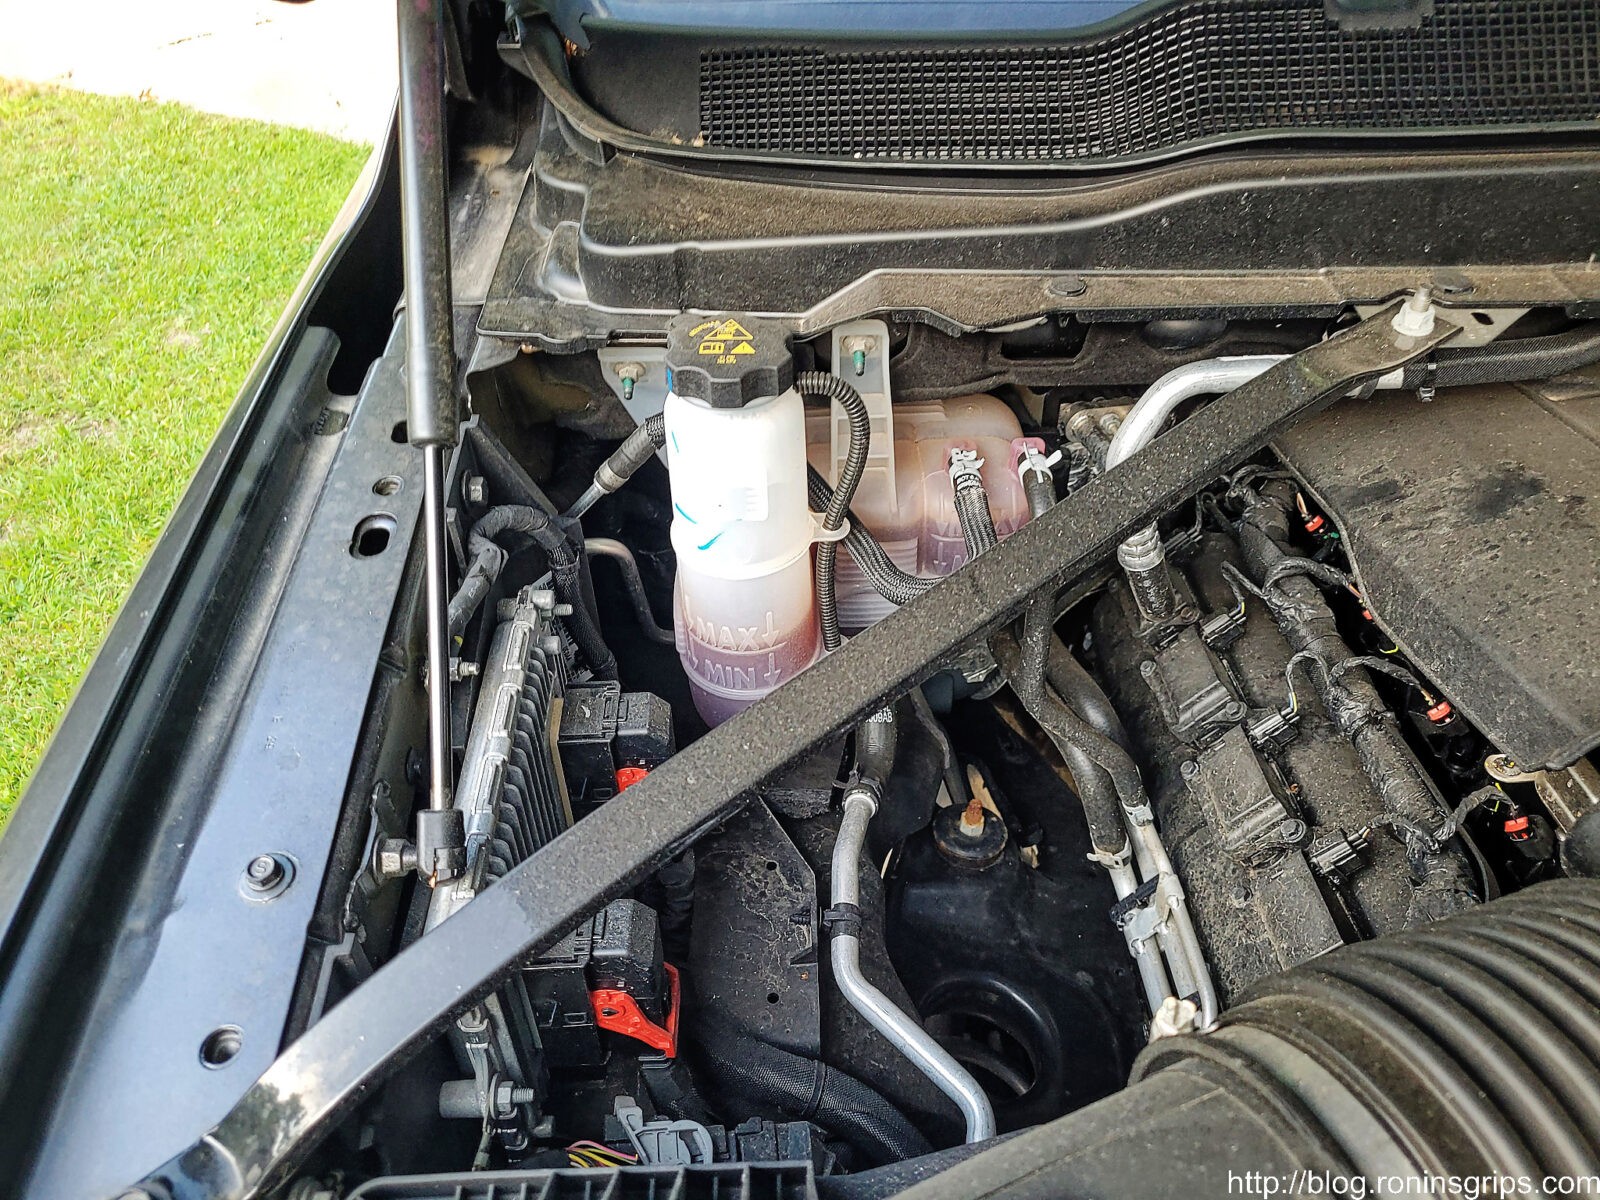
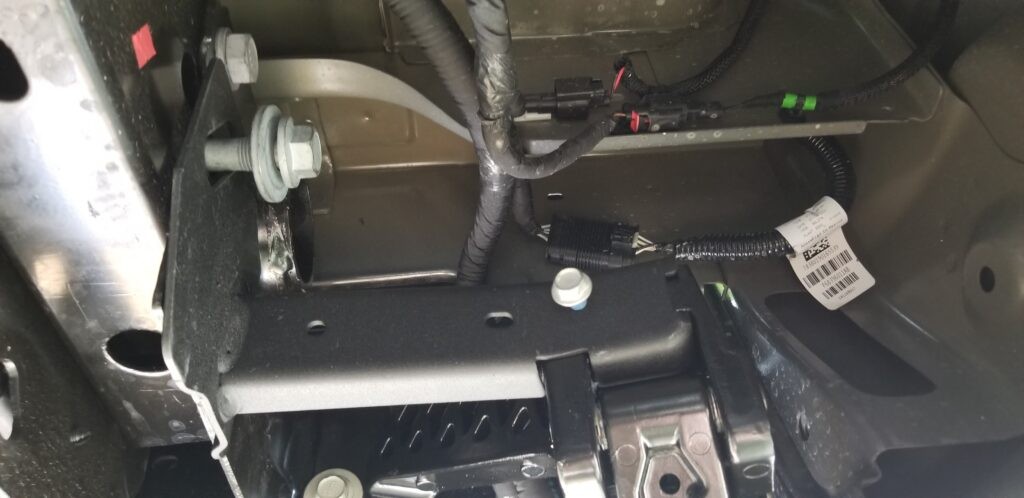
Well, I couldn’t afford to add a second alternator and aftermarket second battery mounts in the engine compartment were expensive (unless I wanted to mount something underneath on the frame which I did not want to do). By the way, I actually bought and tried to test fit the passenger side battery tray for the Cummins diesel models and it will not fit due to the location of the computer/ECU on the fender wall and there wasn’t enough space between the air box and the engine coolant reservoir.
Even though you can buy the passenger side battery tray from the Cummins version of the 2500, the ECU is in the way and there is not enough room between the coolant reservoir on the firewall and the air filter box. So the hope for a Mopar OEM second try and that would fit in there went out the window.
So, once I realized I couldn’t afford to add a second battery given my budget, I opted to buy the best AGM (Absorbed Glass Mat) battery I could find with the highest CCA rating in the H7 form factor. It also had to be affordable (sorry Optima – you’re too expensive).
I talked all of this over with my friend John – who is a professional mechanic with a ton of experience. He recommended that I go with an Interstate H7 size AGM battery. Now let me explain a bit more about why this was the case.
Starting with the brand, Interstate works with a number of manufacturers who actually build their batteries – namely Clarios and Exide. They are sold through a series of 200,000 dealers including Costco.
H7 relates to the shape of the battery that the RAM 2500 is designed to hold. An H7 measures 12-3/8″ x 6-7/8″ x7-1/2″ (315x175x190mm).
AGM is a relatively newer battery technology (it was invented in 1980) that can produce both higher CCA and reserve power compared to traditional flooded lead acid batteries of the same size. AGMs are still lead acid but there is a thin fiberglass matt sandwiched between the lead plates and they are bundled together. There are tons of websites out there with far more details on AGM where you can read more.
The Interstate AGM battery is rated at 850 CCA – almost 120 more than the OEM battery. That really sold me. I’ve used AGM batteries in the past and had very good luck with them so I had John pick one up for me the next time he visited Costco. Thanks to inflation, it was about $217 out the door.
Installing The New Battery
Okay, before you do anything else – make sure the battery you just bought is the same size and the terminals are still in the right place. Stuff happens. It’s better to find a mistaken purchase out before you do anything to your truck.
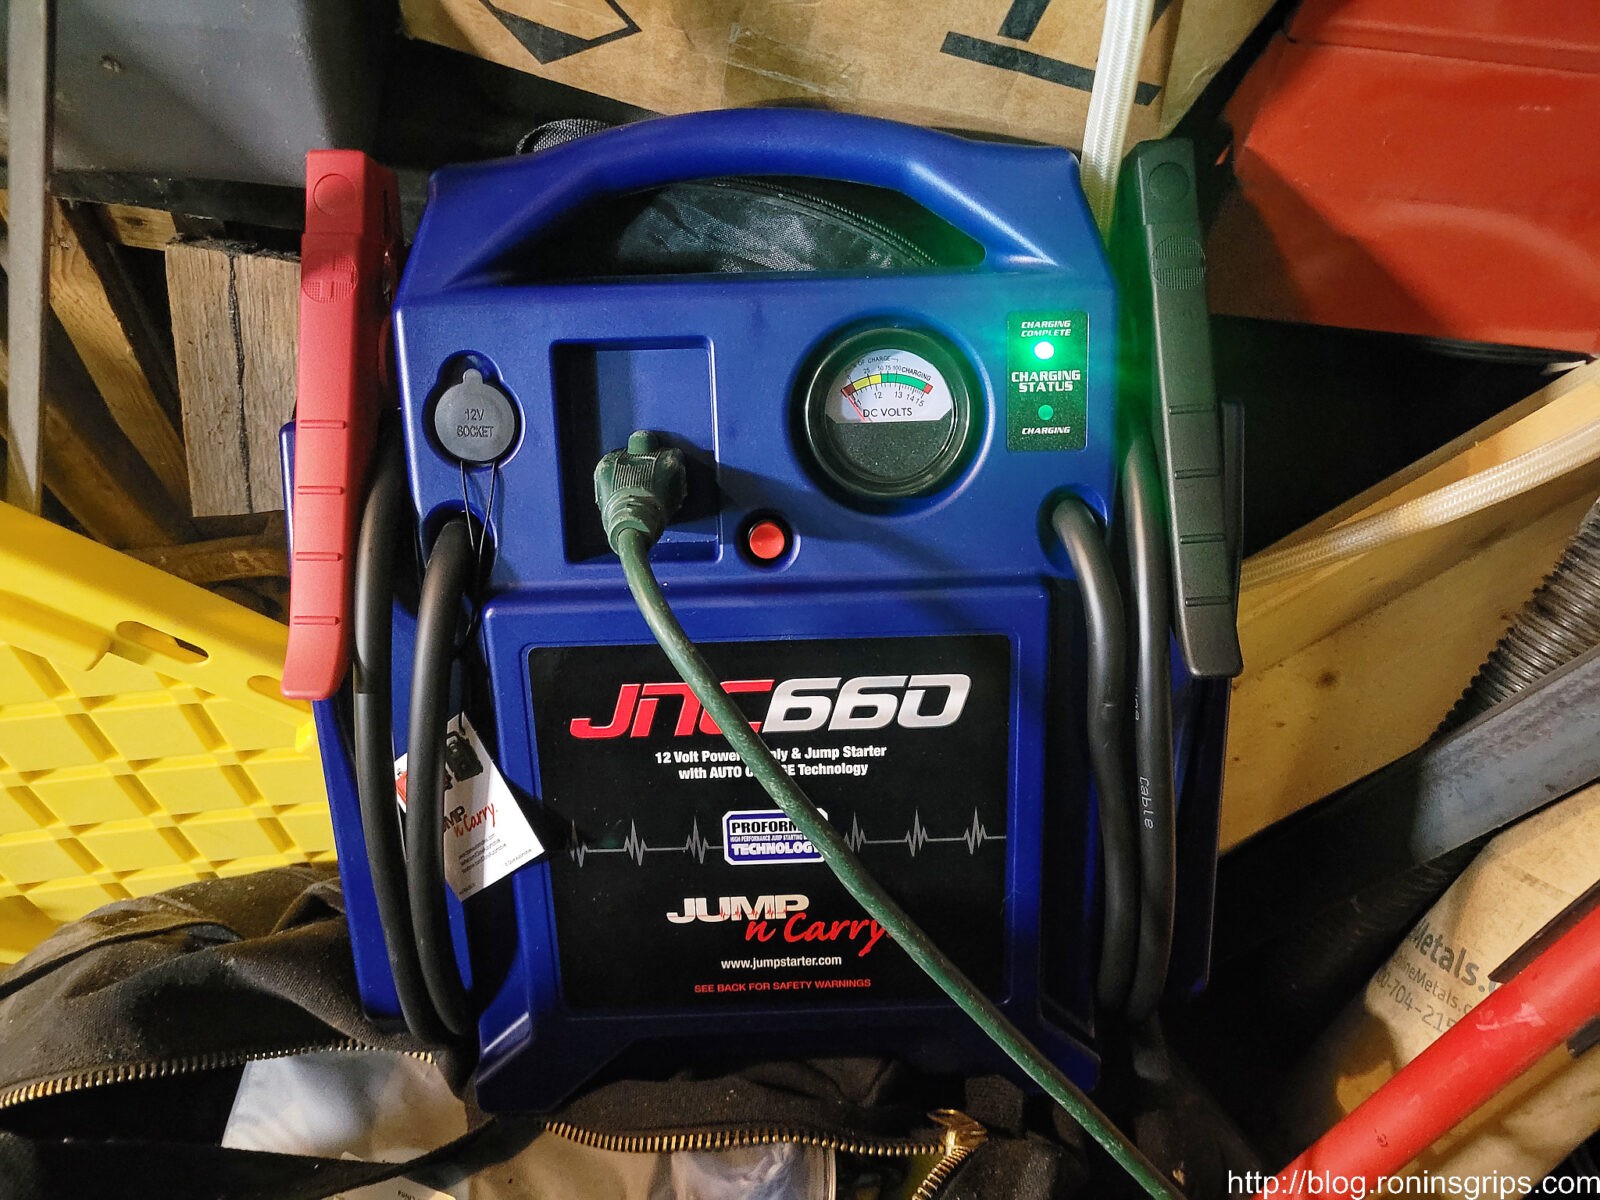
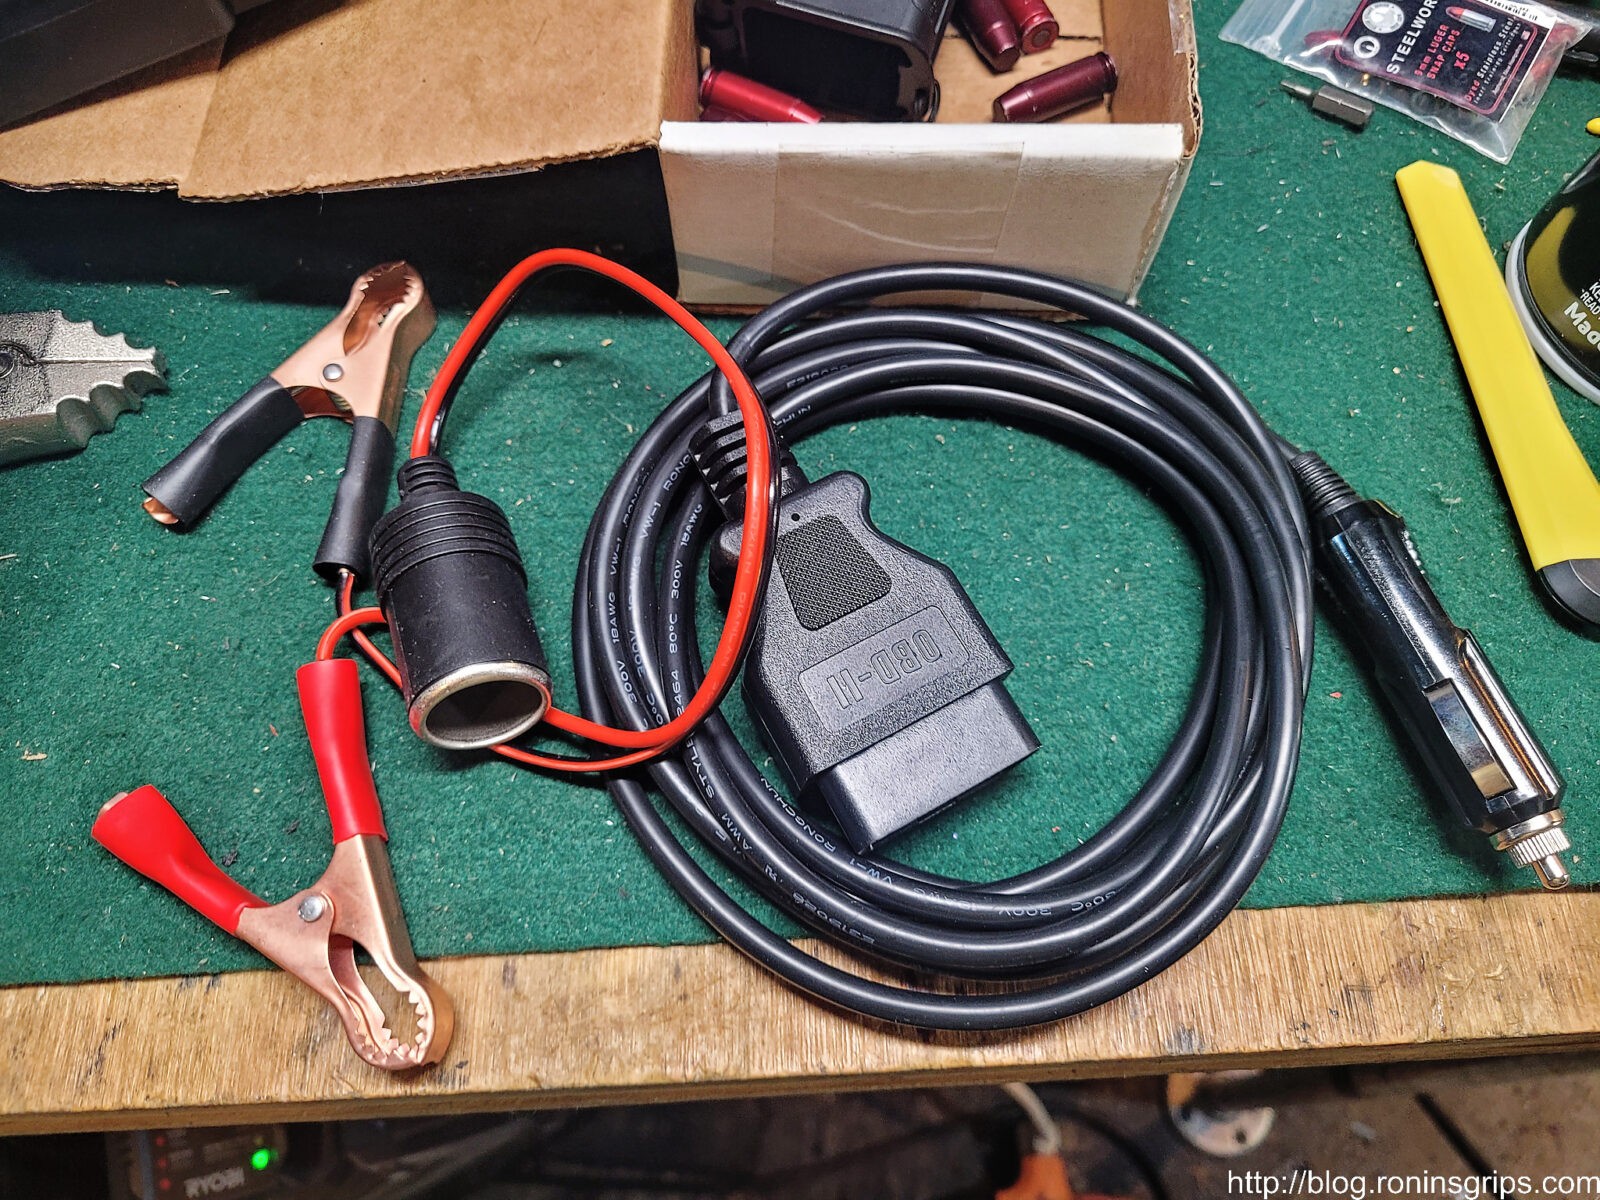
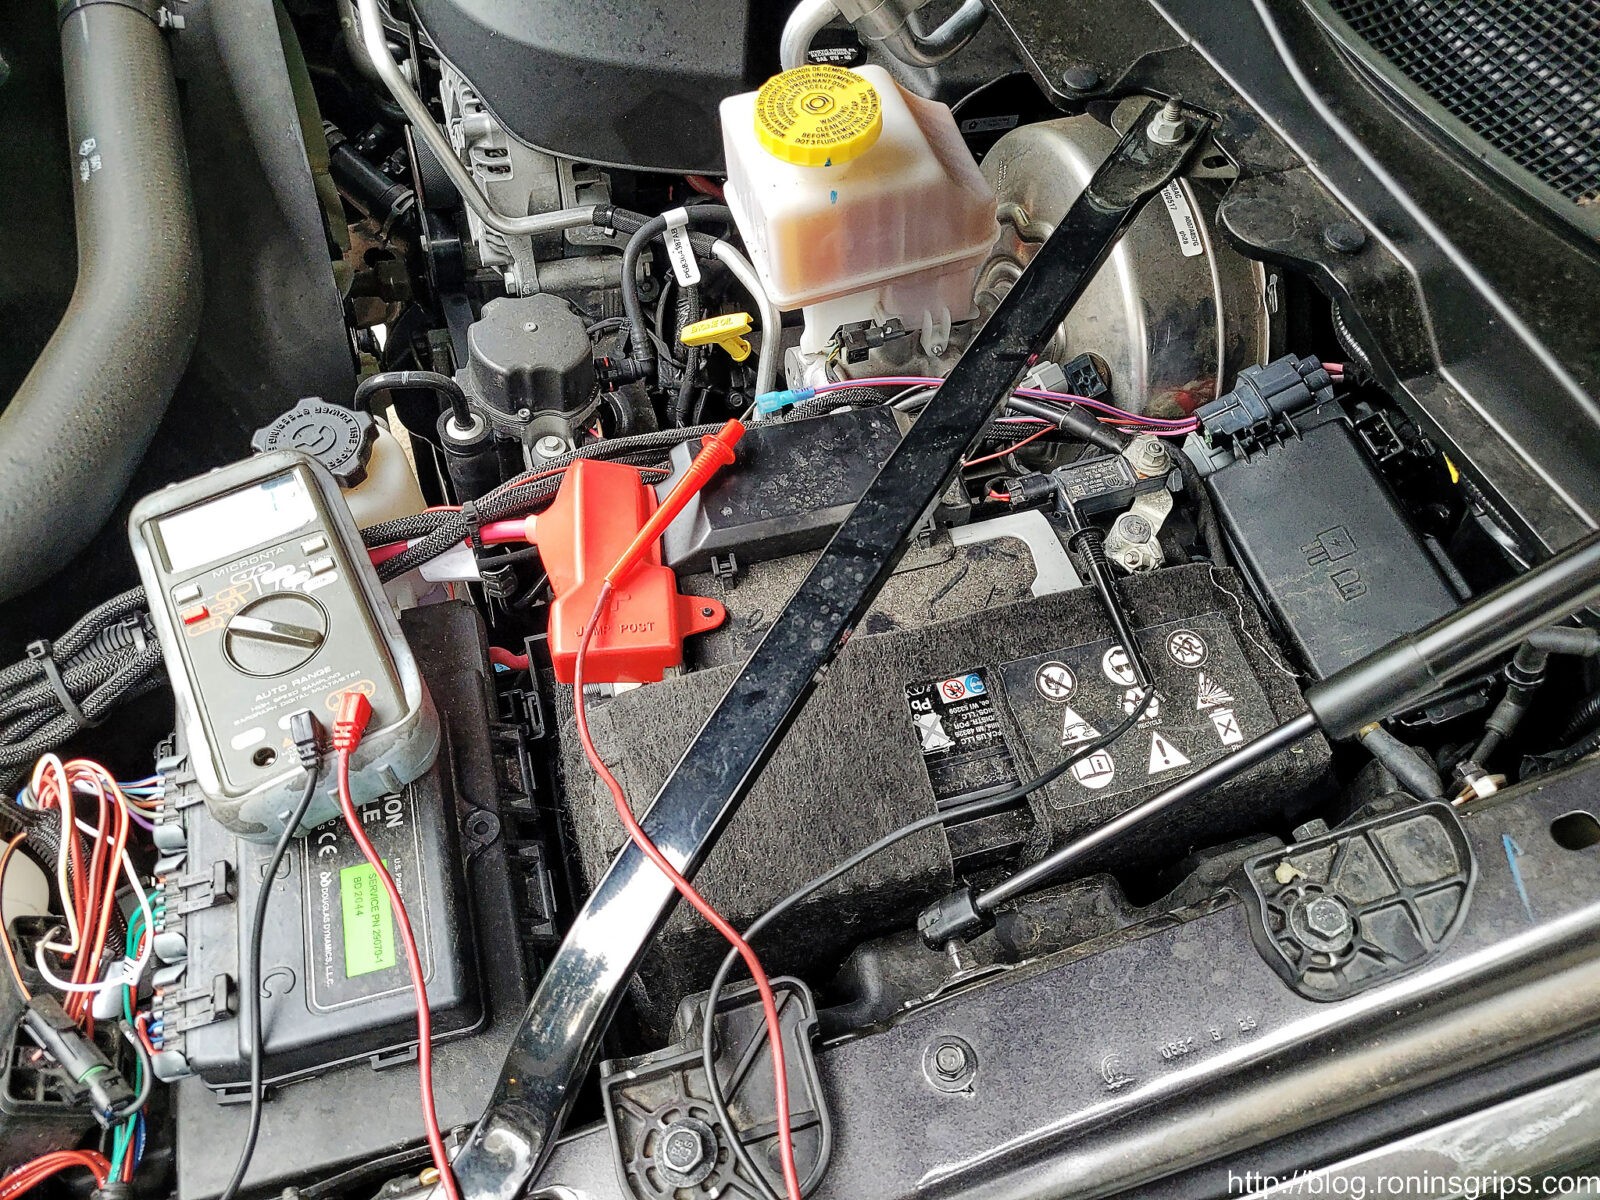
Modern vehicles have a ton of info in their computer and a lot of it disappears when the power is lost – either when your battery completely dies, or in our case, if the battery is disconnected. A lot of it will be re-learned as the computer communicates with the sensors and figures out what is normal. Now what all gets lost in the UConnect system after a power loss tends to get different answers. Let me just say I didn’t want to deal with any problems so what I did was power the computer (ECU) through the OBD2 port under the dash using a purpose built cable from VSTM and a Clore Automotive JNC660 jump pack. This combination provides electricity to the computer so none of your settings are lost – it makes changing a battery very straight forward.
I ran into a situation this summer with our Highlander that had a completely drained battery and my little Noco jump pack couldn’t start it so I decided to get a bigger one. The Clore Automative jump packs got really good reviews so I bought this one plus it has a 12 volt cigarette lighter-type outlet on the left side that I can use to power ECUs via the ODB2 port. I had to charge it and the male prongs for plugging into an extension cord are conveniently located on the front. The green light means it is fully charged,
This is an ODB2 power cord from VTSM. You can plug it into a cigarette outlet in a jump pack or used the supplied adapter and connect it to any 12 volt power source such as another battery.
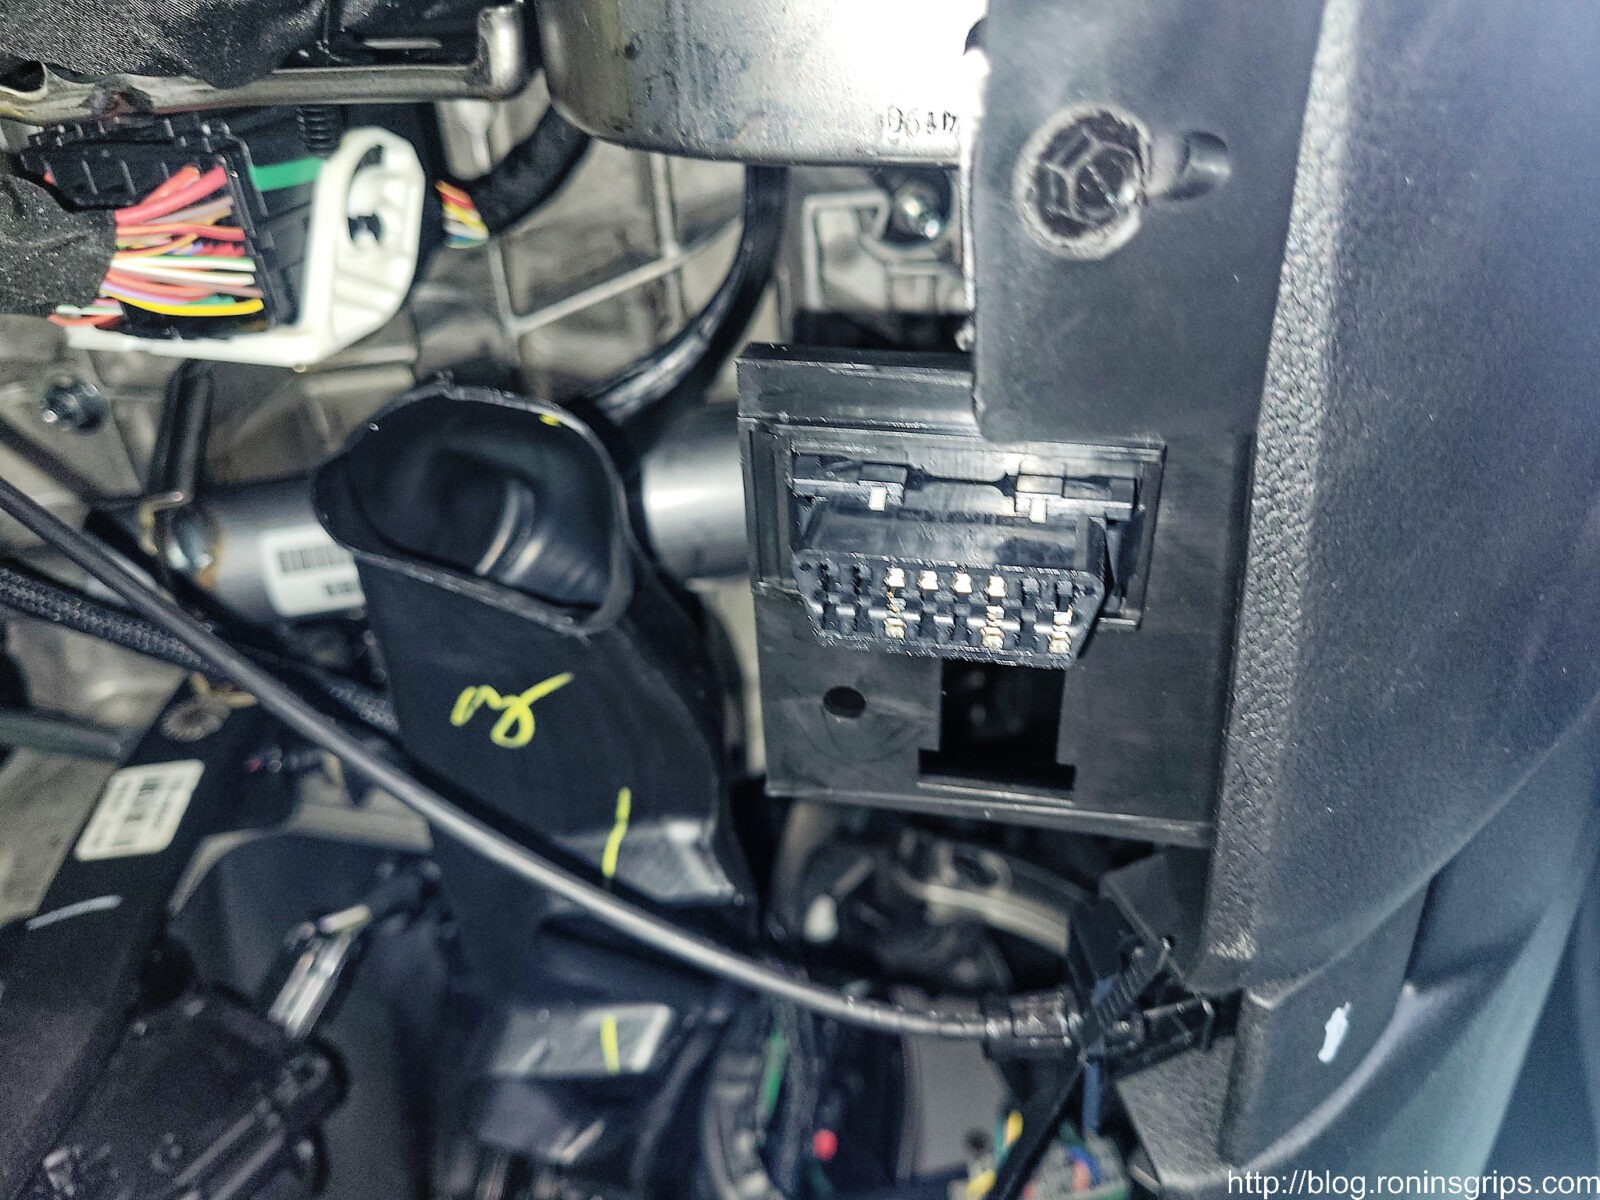
The photo is from a weird angle – I’m down in the foot well looking up – you can see the hood release in the lower right portion of the photo. The V-ish shaped female receptacle is the ODB2 port where we can connect the power charger or connect any ODB2 device such as a code scanner for that matter.
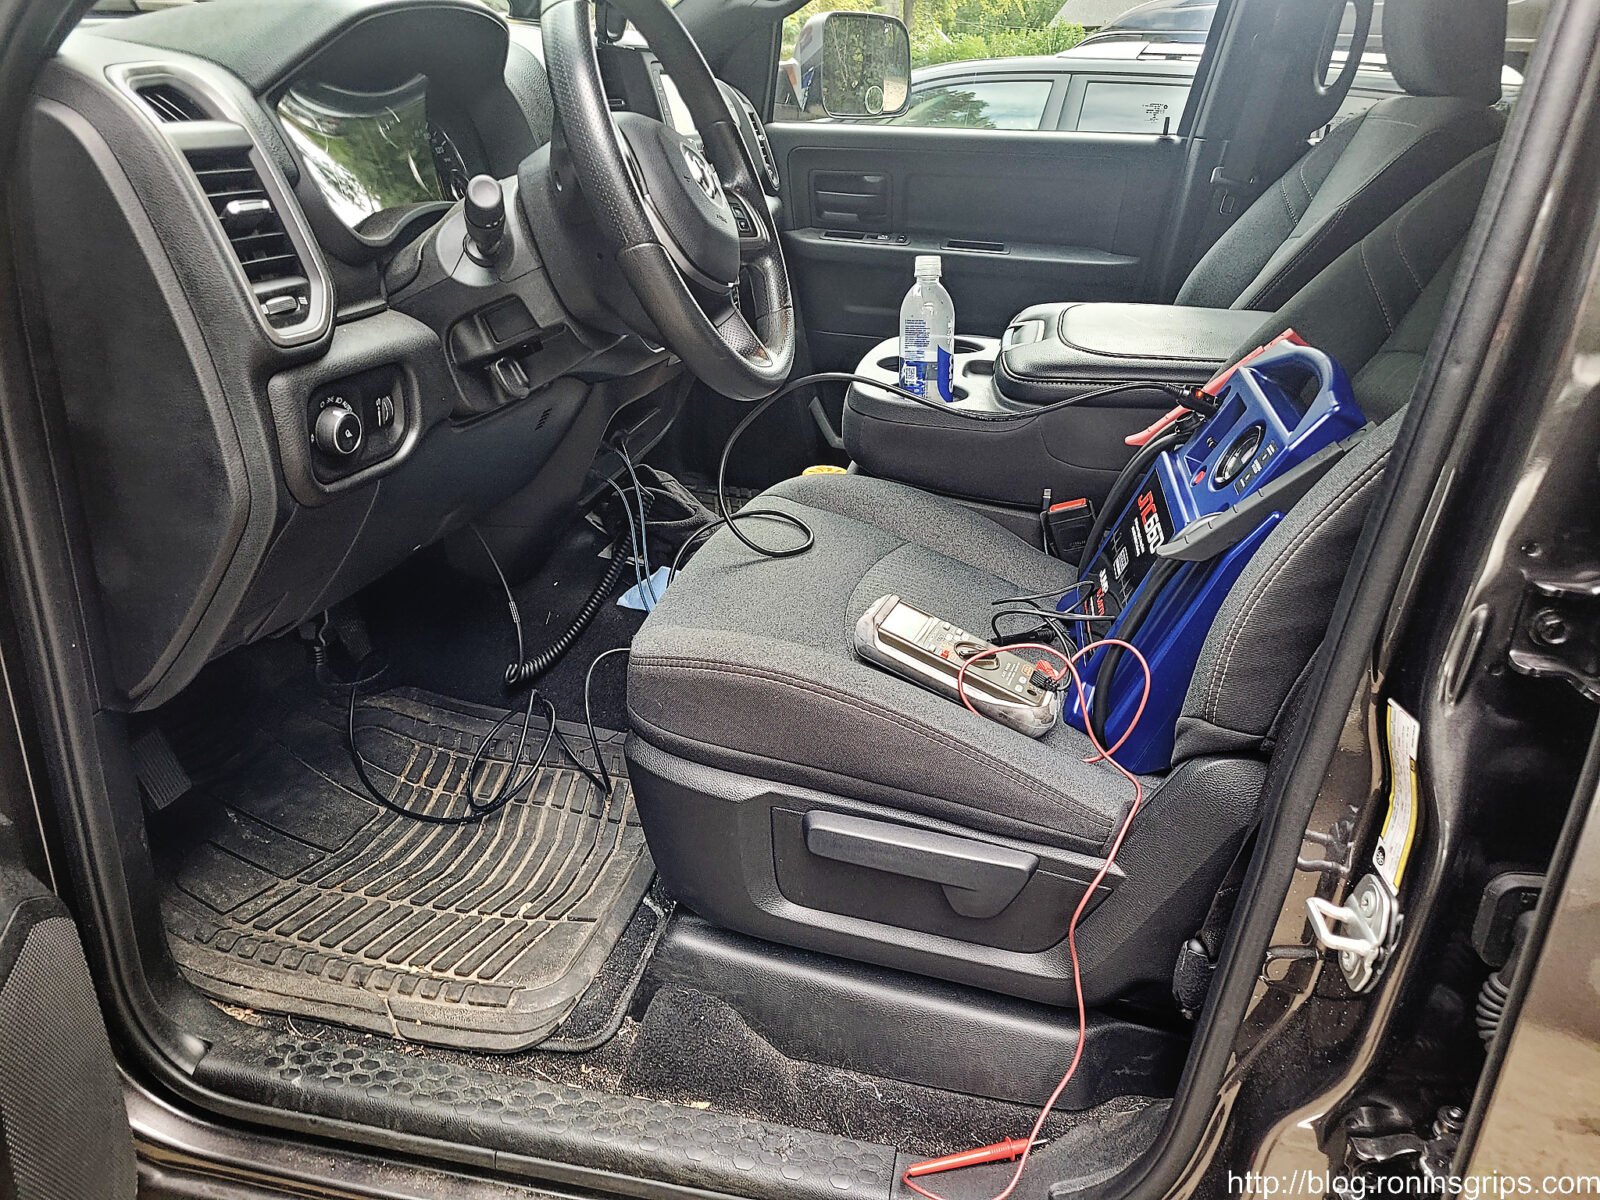
With the ignition off, plug the power cord from the jump pack to the ODB2 connector. My multimeter is on the seat because I wanted to make sure the jump pack was putting out 12-14 volts and the polarity was right before I plugged it into my truck.
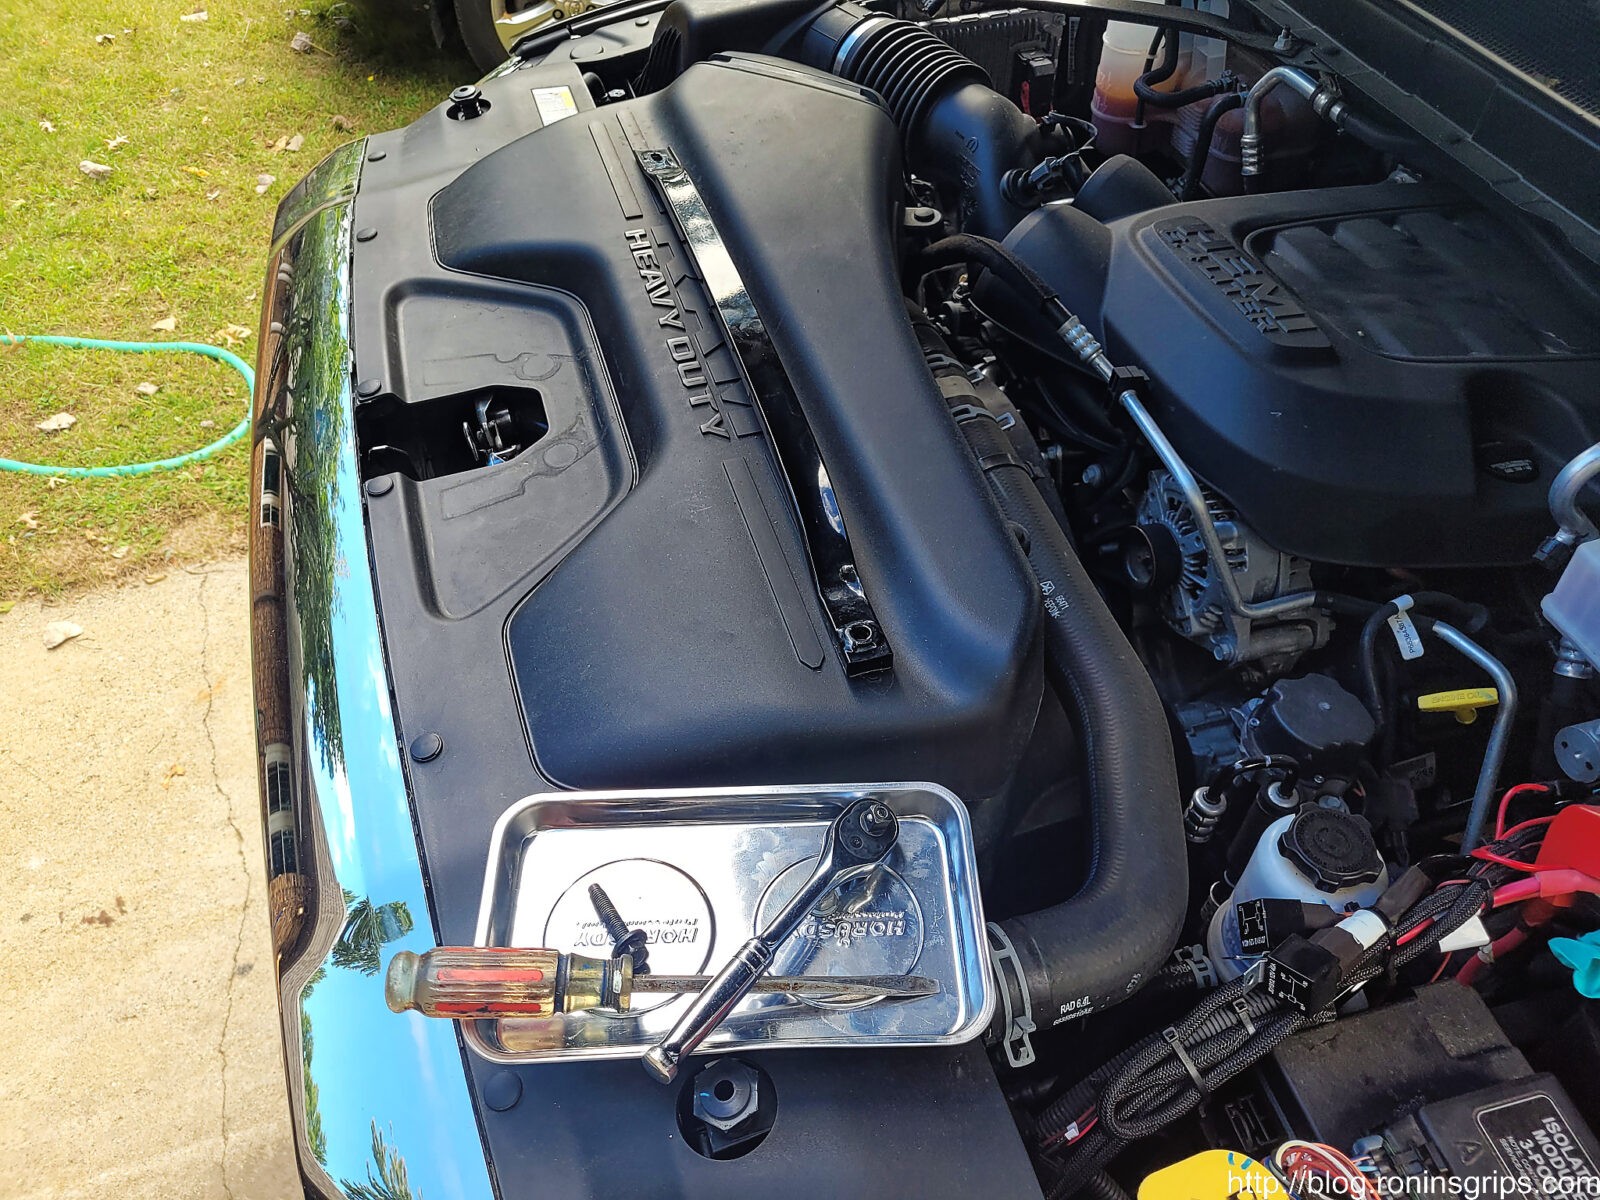
To get started under the hood, I disconnected the stiffening brace that is located right above the battery and set it to the side out the way. I really like magnetic trays to avoid losing parts.
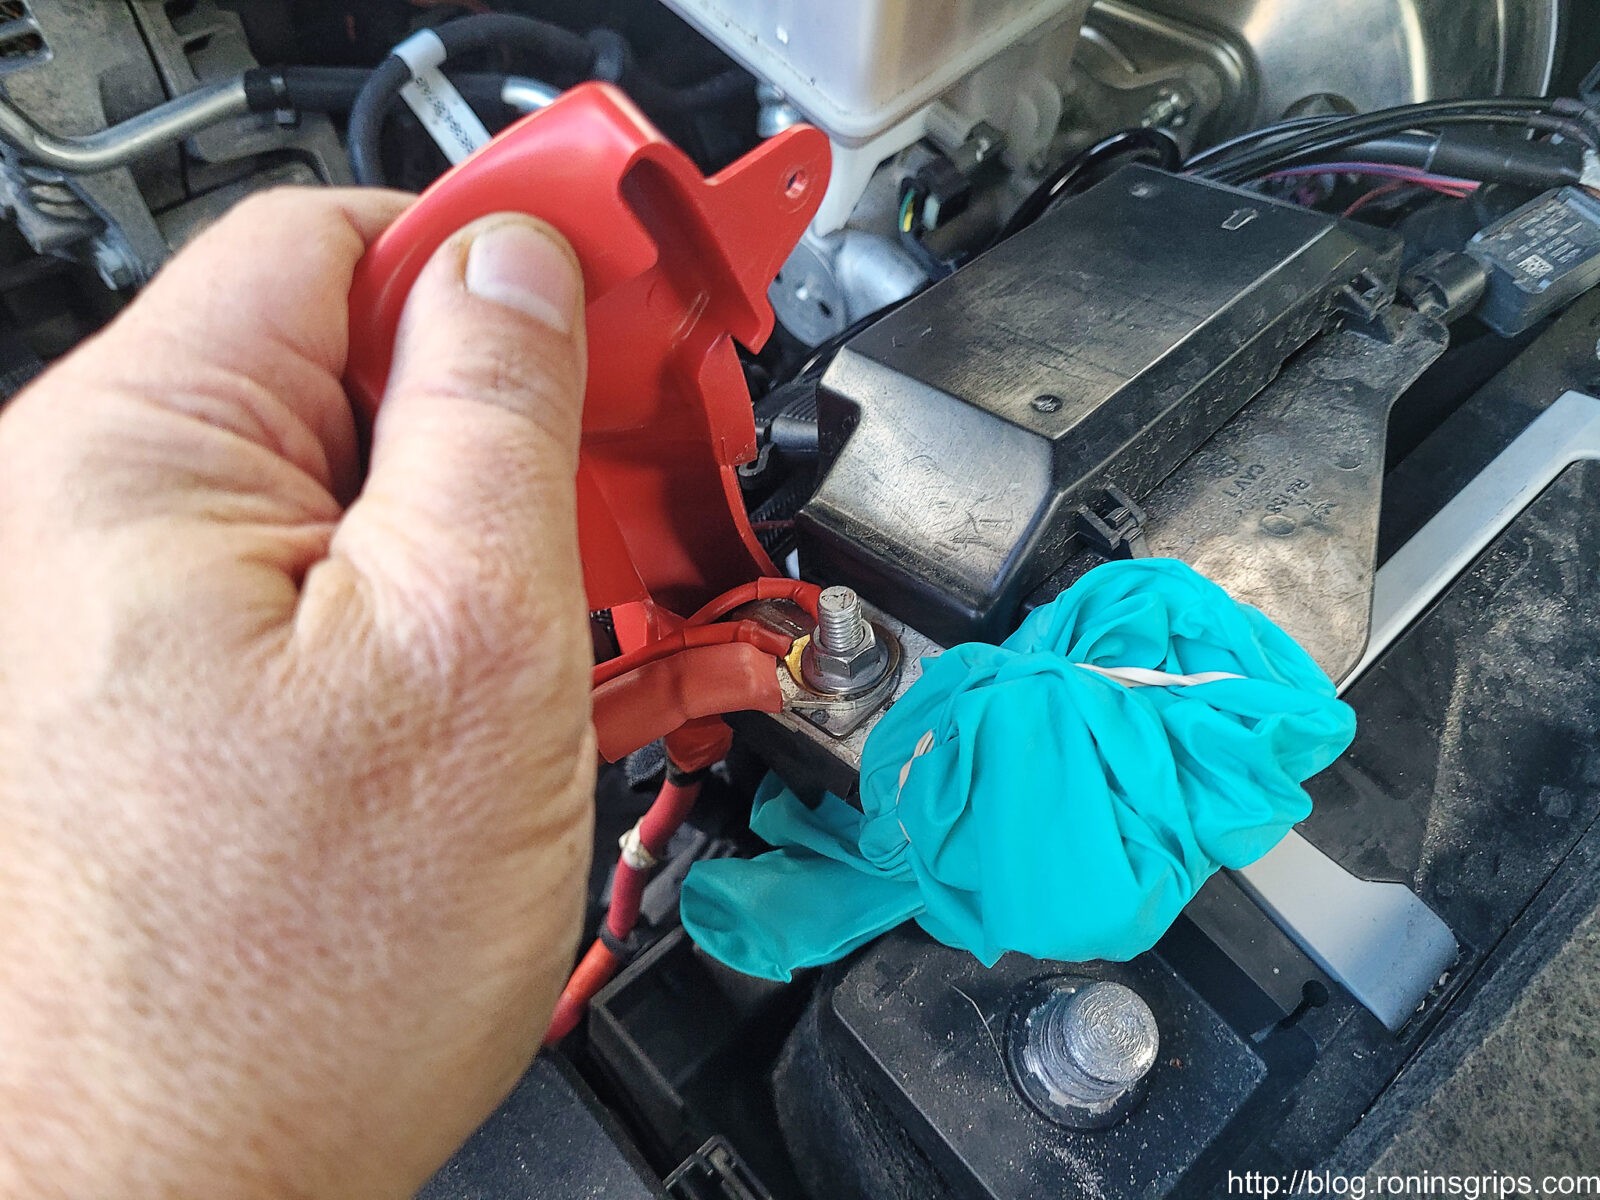
The next step was to disconnect the battery. I removed the negative terminal first and pushed it to the side. I disconnected the positive terminal assembly from the battery’s top post and covered it with a Nitrile glove. In most cars, and I am assuming it is the case with my truck, the powering of the computer through the OBD2 port also sends 12 volt power to the now-disconnected positive power cable and I did not want a surprise from something shorting. Cheap insurance in other words.
With the plow and everything, there is a lot of additional stuff on the positive (red) side but they are all connected to the terminal. When you loosen the terminal and lift it up, everything comes with it. There wasn’t anything else securing the positive terminal assembly in my case.
If it looks stupid but it works then it’s not stupid. Yeah, I wrap the exposed positive terminal with a nitrile glove that is an electrical insulator and rubber band it in place. I don’t want any surprise sparks/shorts. In many cars if you power the ECU via the ODB2 connector then the positive battery wire is energized. I didn’t confirm my Ram was this way – I just assembled it to be clear. I just wrapped the terminal with a glove and called it even out of an abundance of caution.
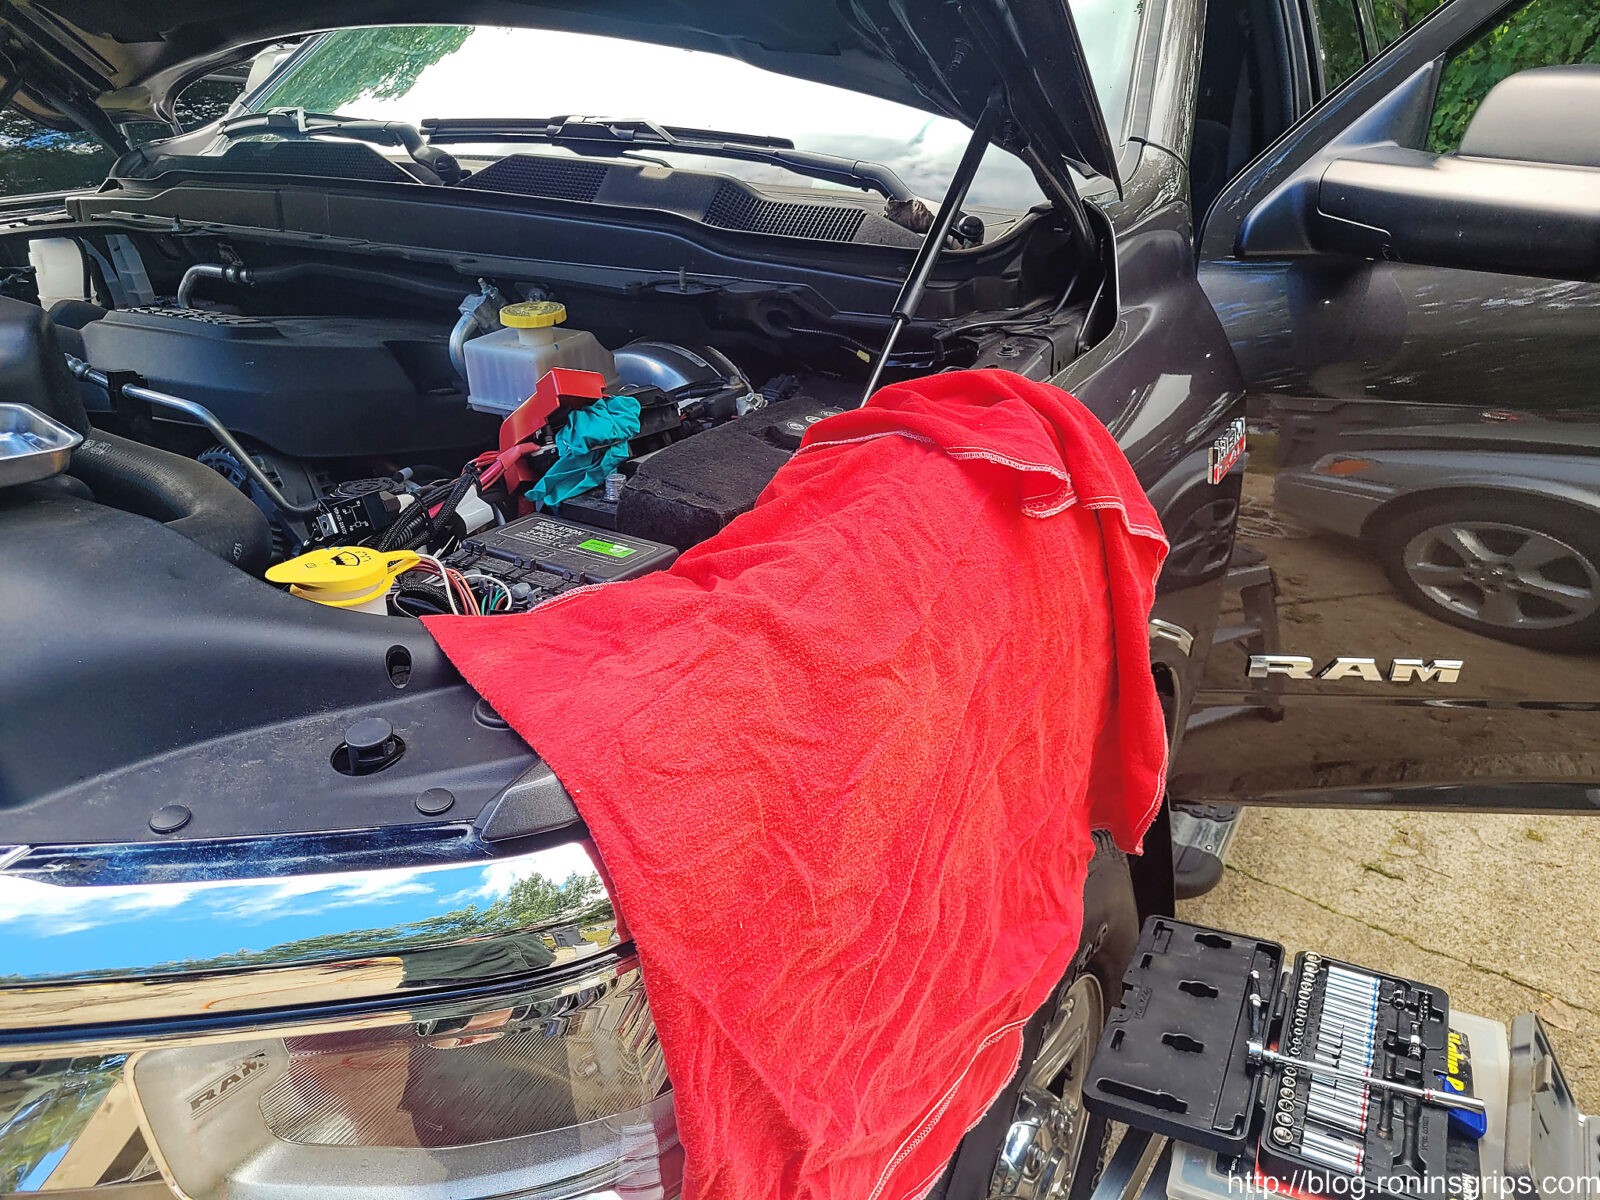
I should mention that I have an aluminum work platform that I stand on to reach in the engine compartment and I also put a fender protector (in this case a thick red fabric) to make sure I don’t scratch anything. Many years ago I scratched a car with a belt buckle and felt like an idiot. Lesson learned. I protect fenders now.
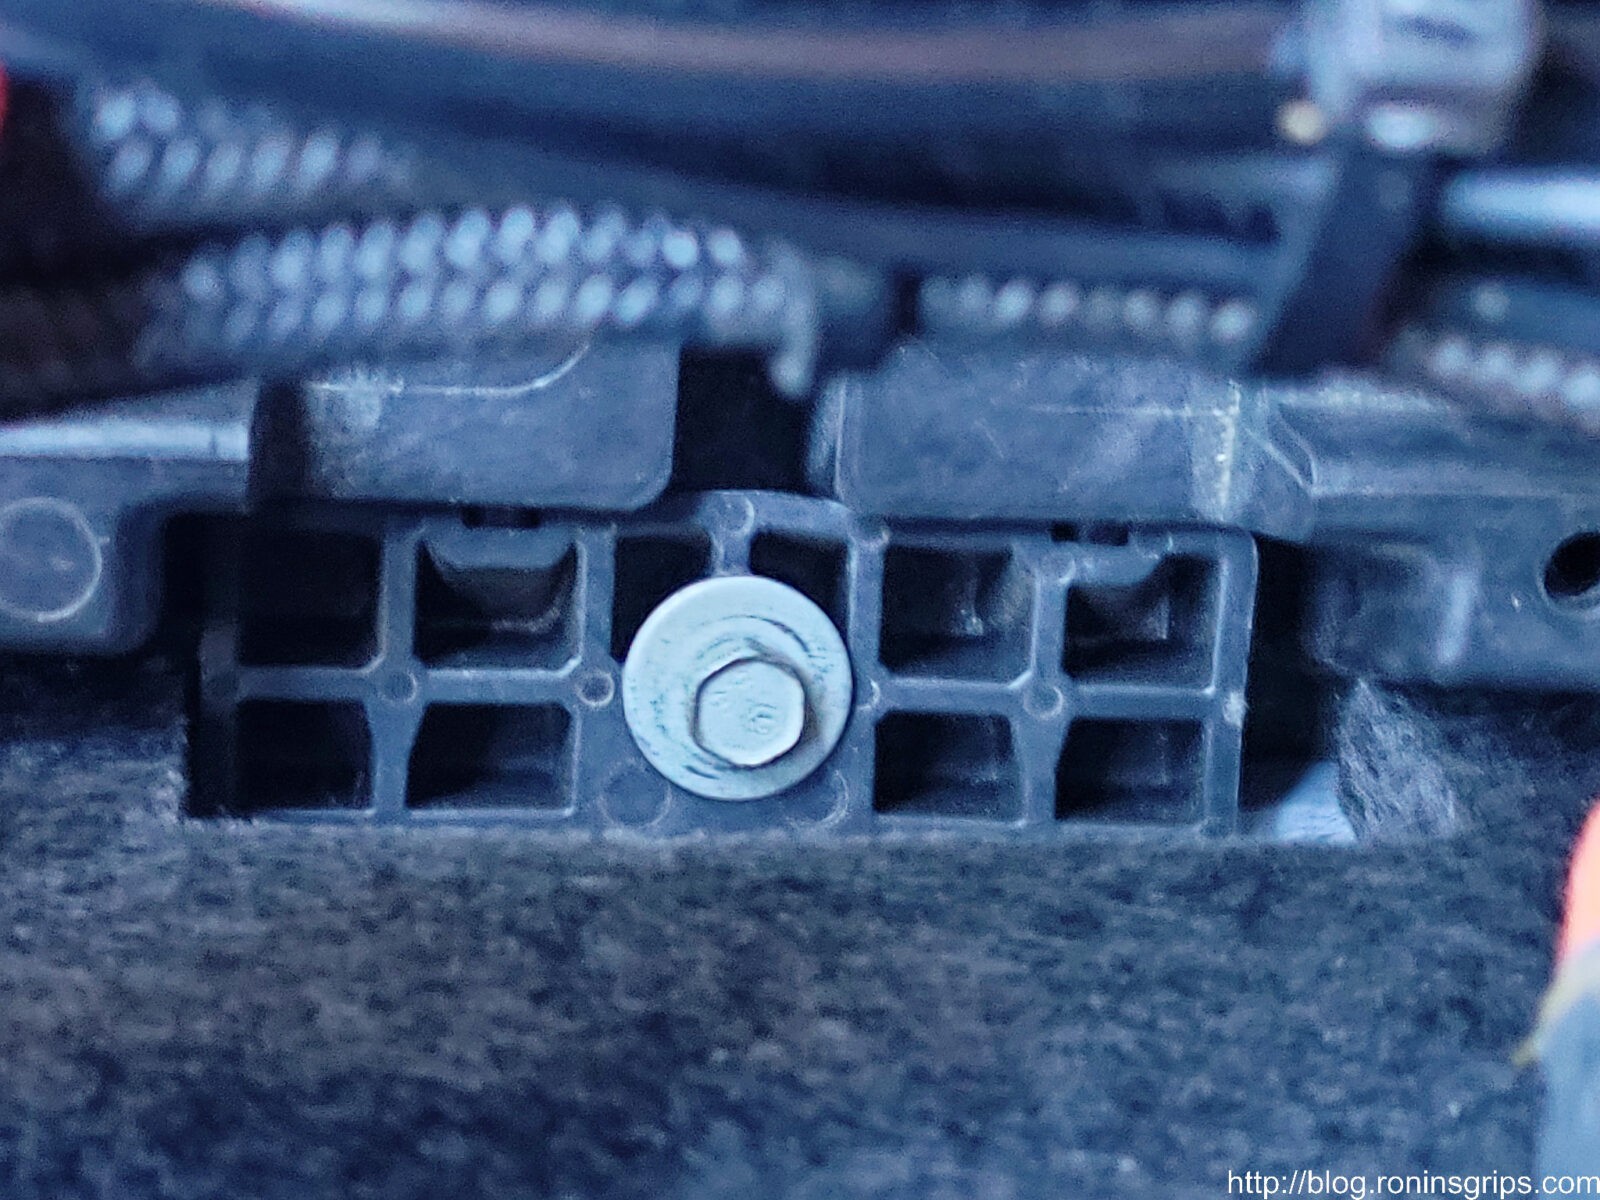
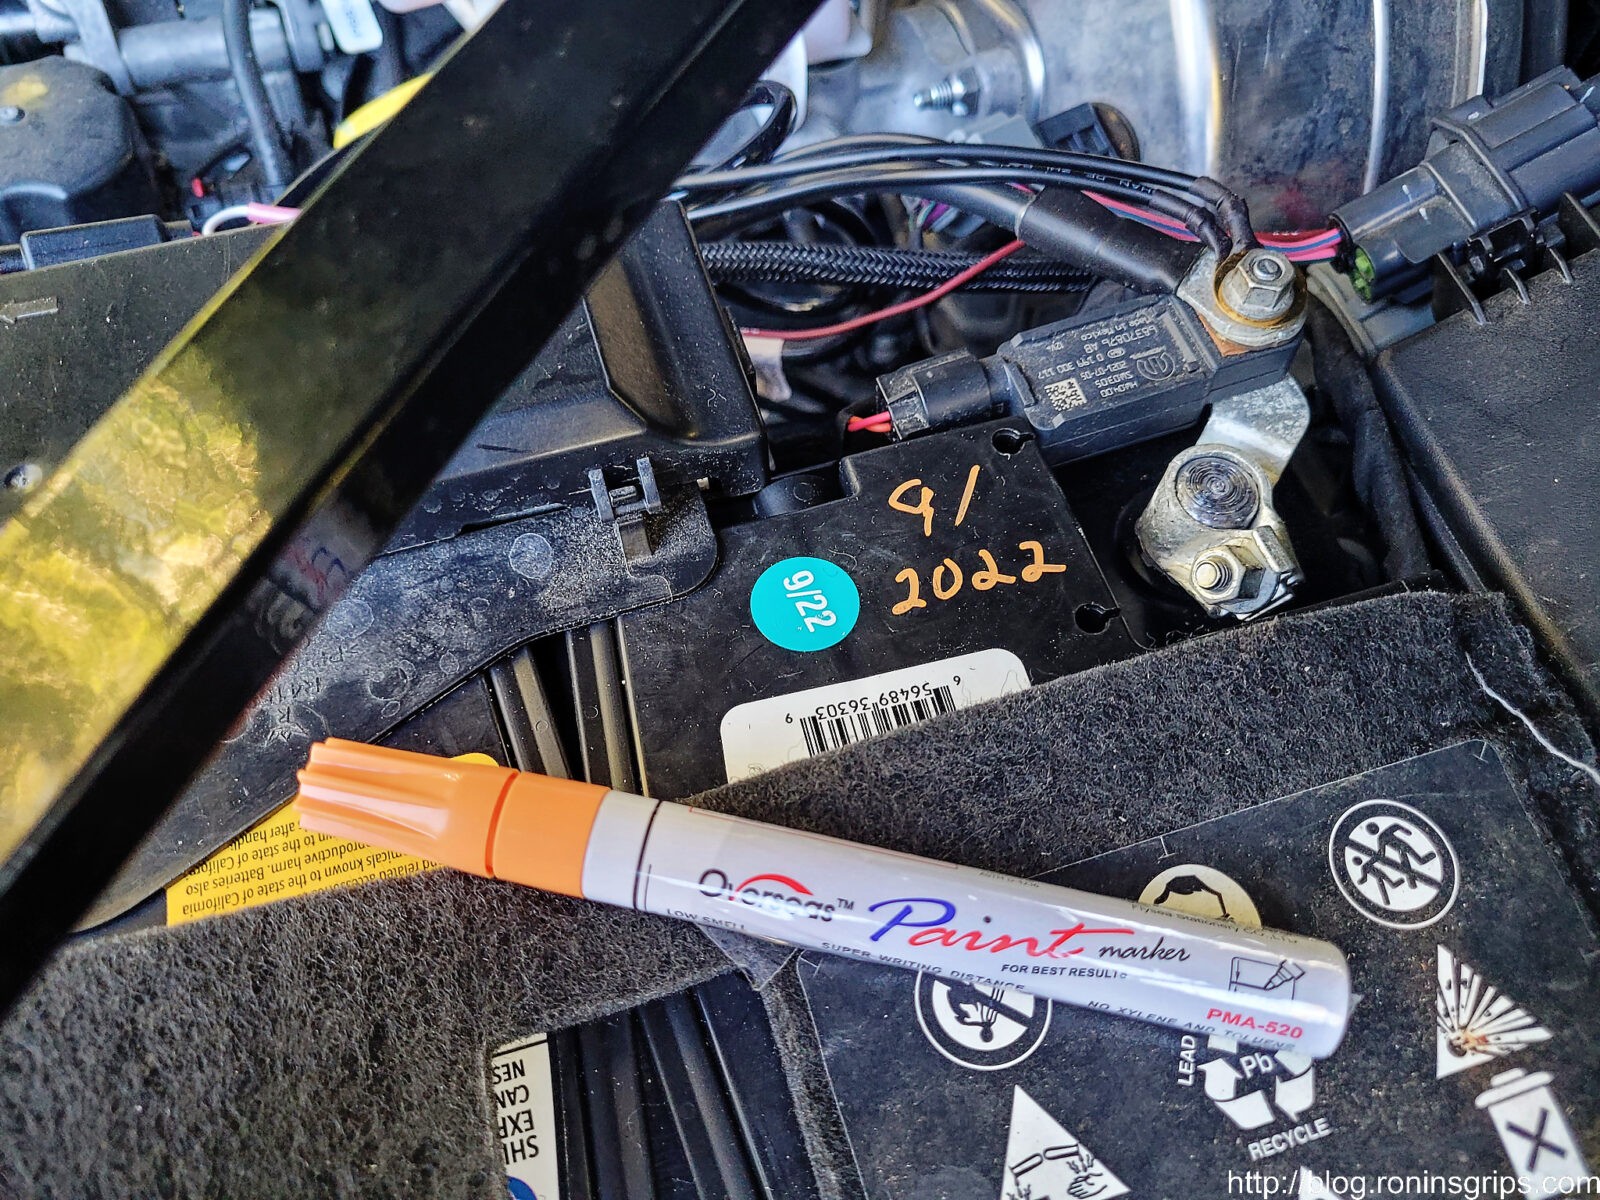
This is the battery clamp that is a plastic wedge and bolt. I removed mine and put them in the magnetic parts holder. Note the orientation of the clamp – if you try to reassemble it smooth side up you will be wondering why it doesn’t line up. Yeah, I tried to install it upside down and spent a few minutes trying to figure out why that was so. The photo shown is the correct orientation.
Starting a few years ago I realized it was a really good idea to take a paint pen and write down when I installed the battery. I went to write on the battery and noticed an aqua colored sticker with 9/22 printed on it. Maybe Costco put it there – I don’t know. Knowing my lousy memory I could see me looking at the sticker years from now wondering if it was the install date so I went ahead and wrote 9/2022 on it anyways because I still recognize my own handwriting at my current age 🙂
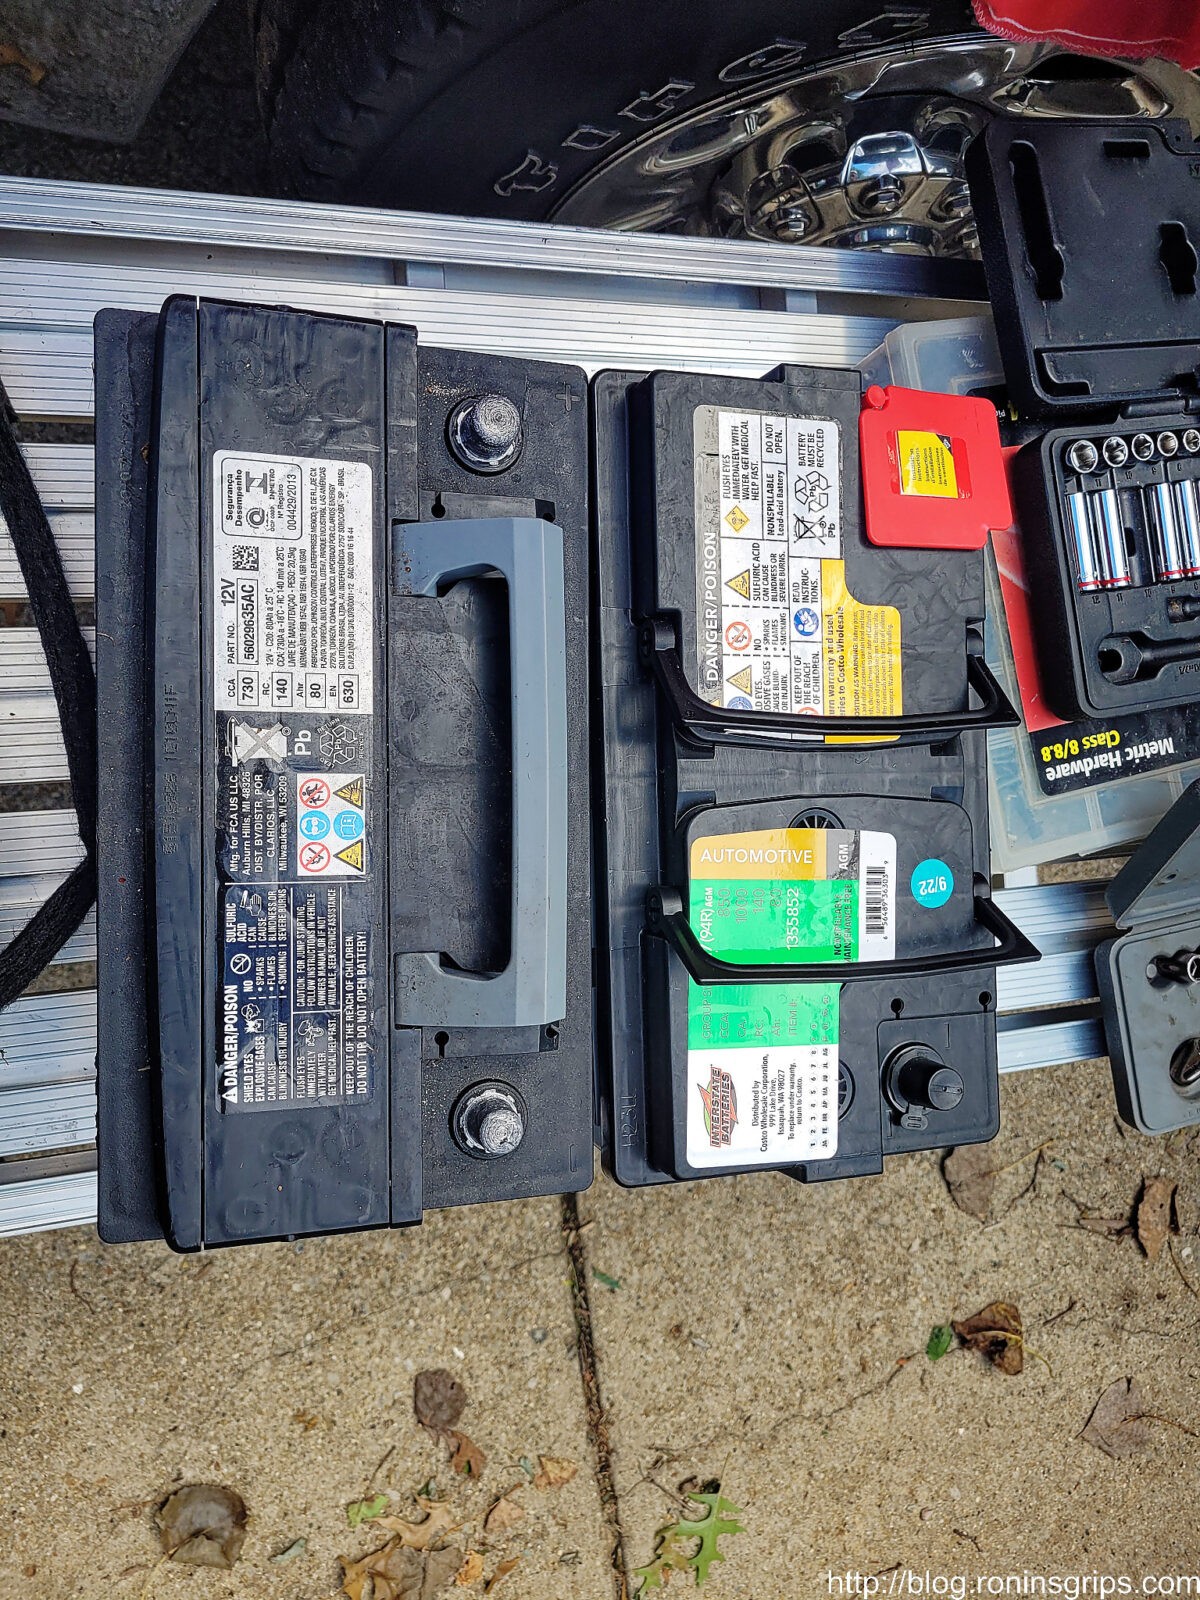
Left is the OEM battery and right is the new Interstate. I always put batteries side by side one last time to make sure the layout matches. I’ve made my share of mistakes in the past and don’t mind sharing with you that it pays to verify things several times before you get too far.
I did take the insulated jacket off the OEM battery and put it on the new Interstate AGM battery. It’s not necessarily to keep it warm – it protects it to some extent from high heat in the engine compartment as well.
Batteries are heavy. Make sure you have a step or something so you can line things up and protect your fender. Installing the new battery is just a reverse of what I listed. Re-install the clamp, the positive side terminal, the negative side terminal and then the reinforcing strut.
Be sure to remove the ODB2 power cord at this point. The battery tested over 12 volts so I turned on the ignition and everything seemed to work – the truck started, ran fine, all of my phone settings and stored Sirius XM stations were there, etc.
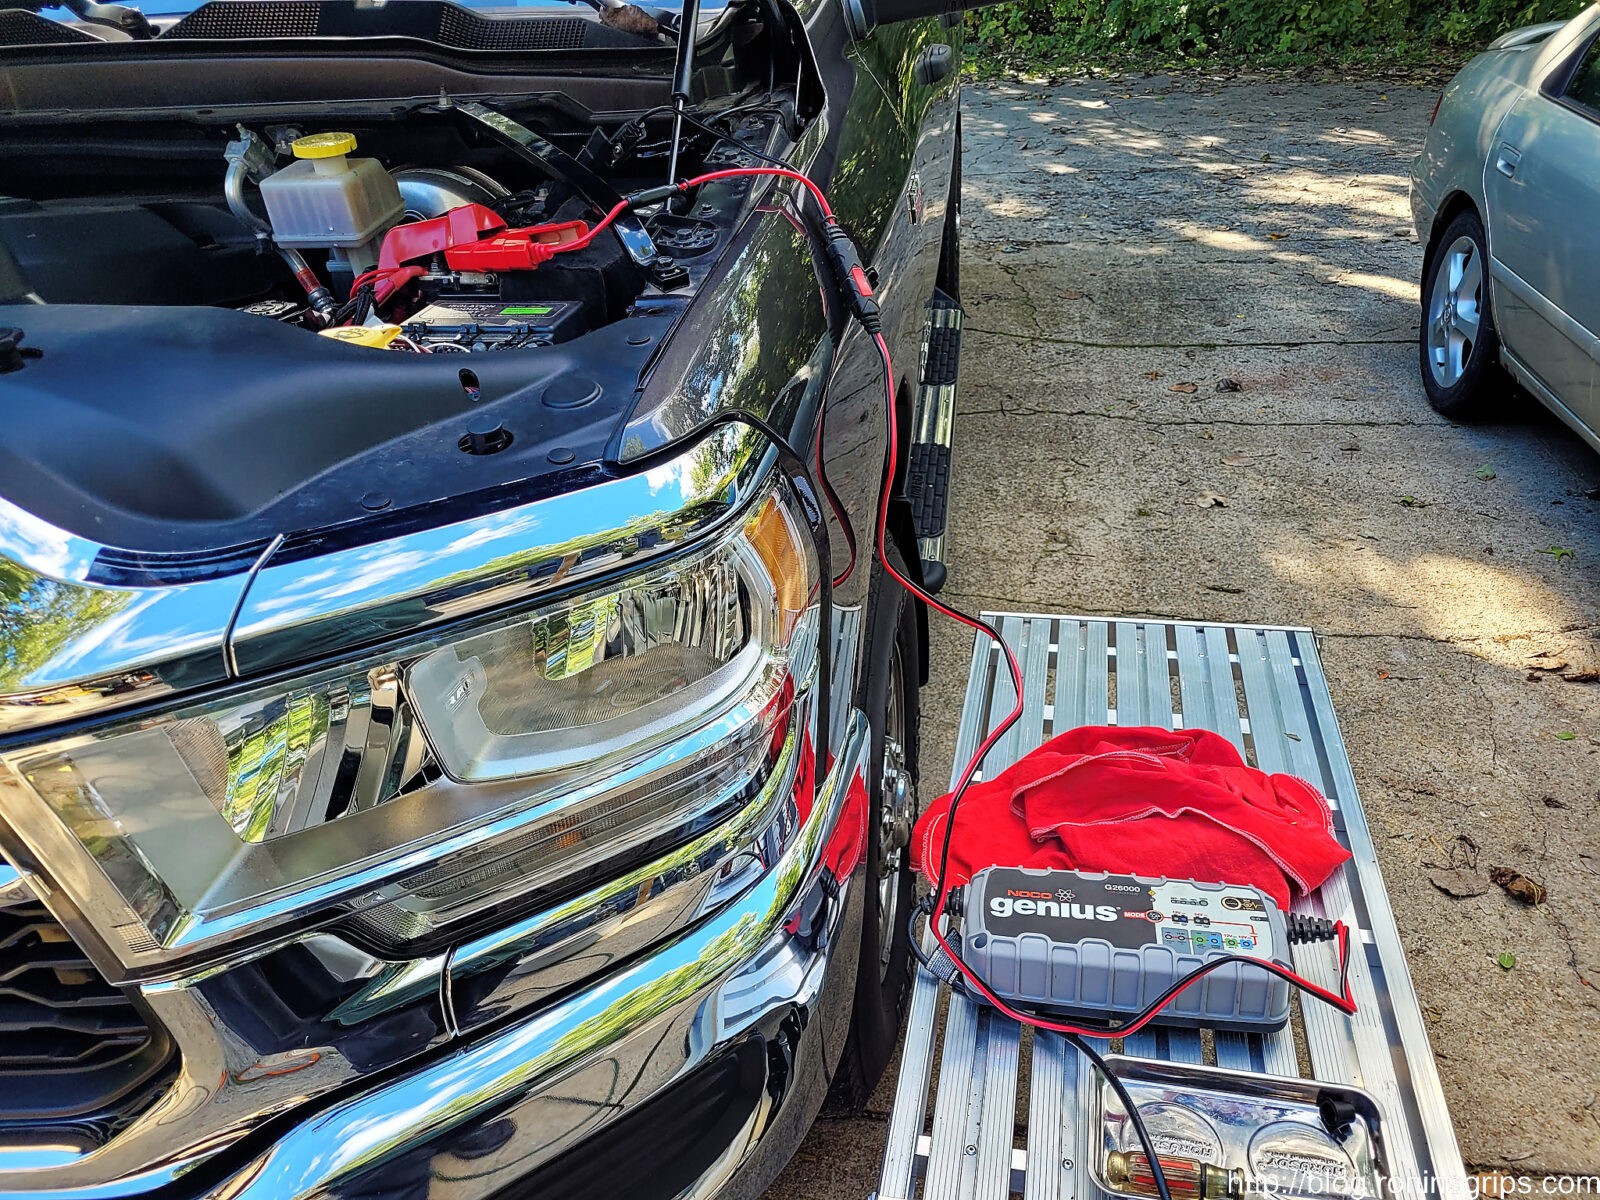
The truck is back together at this point. I do like to make sure any new battery is fully charged. If I had thought about it, I would have done this before I installed the battery – that’s what I usually do. I forgot and just stuck my Noco 26 amp charger on after testing and it went to full very fast meaning the battery was practically full.
Truck & Plow Testing
Starting the truck and running the base electronics are one thing but could it actually support the plow better? Now that was the big expensive question. I sure hoped it would.
For the first time this fall, I hooked up the big plow, lifted it up and brought it over to the driveway. The fact the truck could lift the plow was the first promising sign.
I tested the truck and plow three ways and did short videos of each:
The first test was turning on all of the lights, AC on full, defroster and then running the plow.The second test was running the heater on full plus the lights and defroster then running the plow.I forgot the truck’s voltmeter gauge until I was doing the tests. This lets you see what happens to the volts when each item is turned on. I never thought to do this with the original battery but wasn’t going to bother swapping to do this either – too much work and I am not that curious.
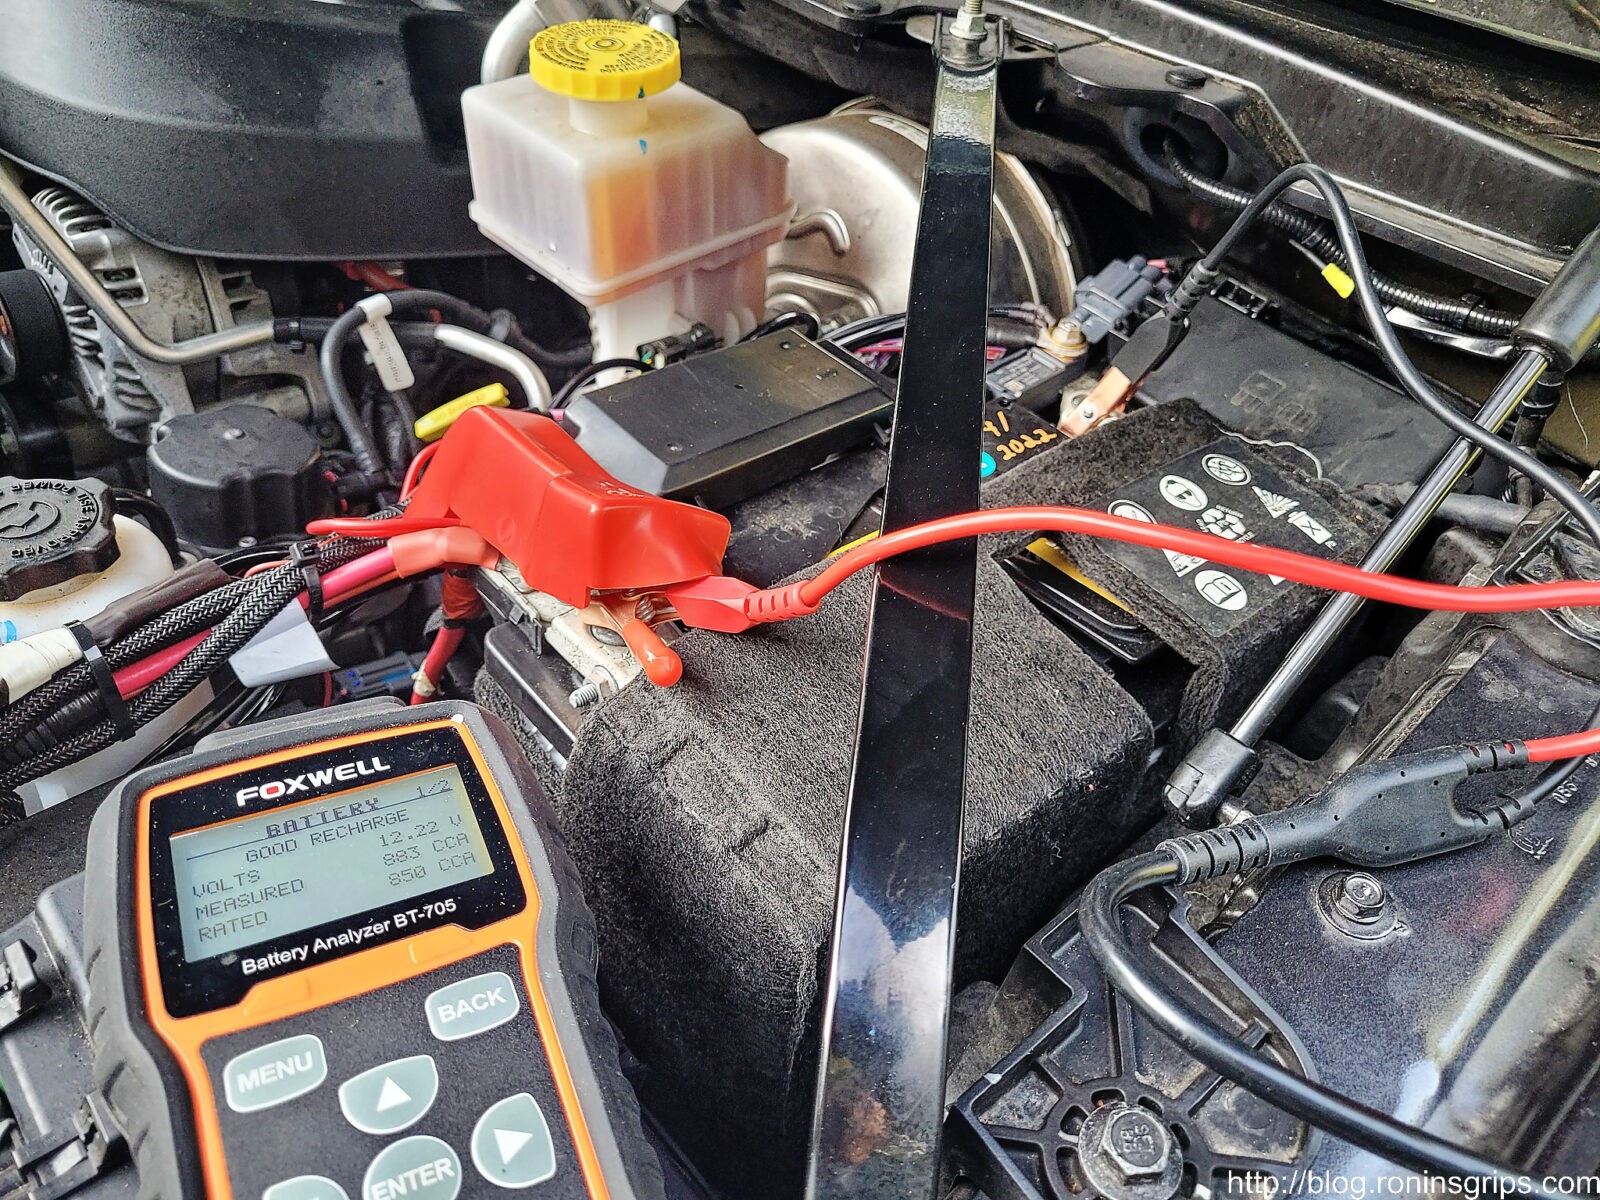
Battery Testing Via Foxwell BT705
The company that actually makes the OEM battery for FCA/Dodge is Clarios. They were a spin off from Johnson Controls and were bought by Brookfield Business Partners, an equity firm, in 2019. My point is that they know how to make batteries and also point out on their website that 1 in 3 cars on the road are running a battery made by them.
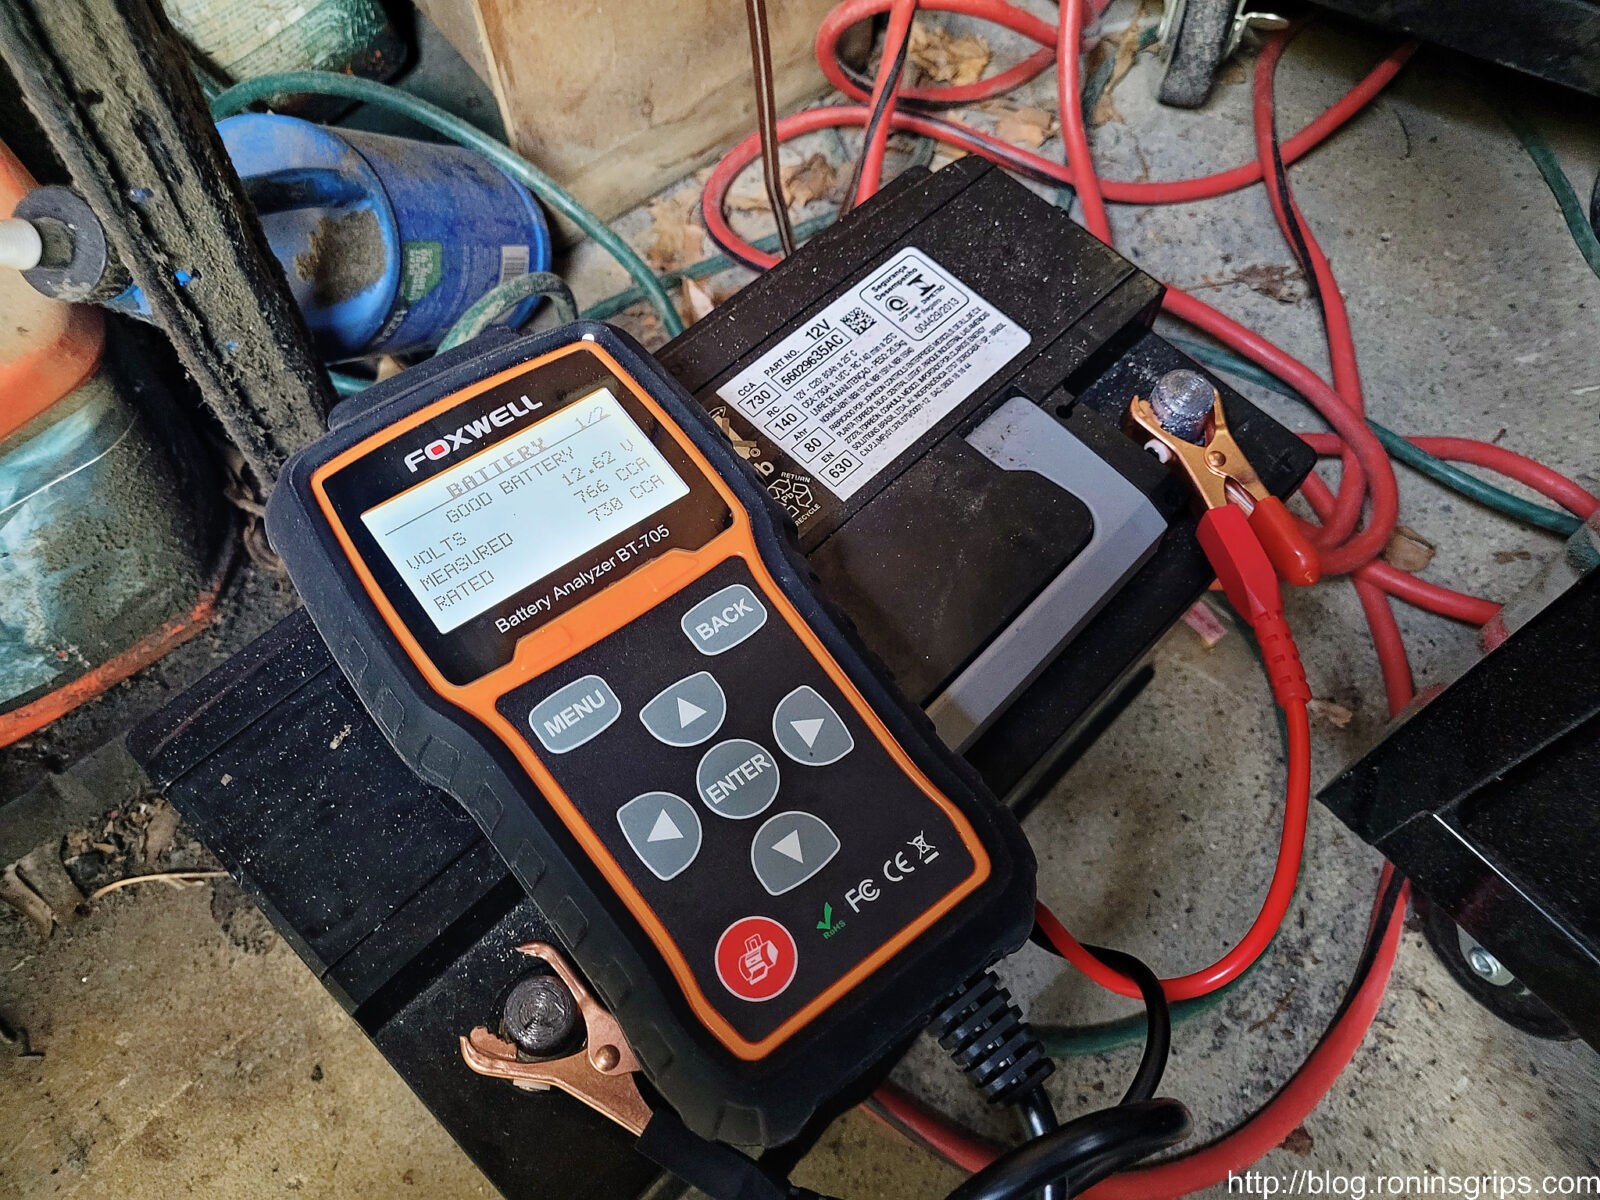
The reason I am bringing the lineage up is that the shortcoming is not their fault or something defective during the manufacture of the actual battery in my truck. The factory battery label claims 730 CCA and in testing with my Foxwell BT705 with the temperature at 46F, it delivered 760 CCA and this is despite being out of the truck without any charging for 7 days. No, the battery was just fine in terms of hitting its declared specification but Dodge should have put a bigger one in.
The OEM battery made by Clarios delivers in excess of the amps claimed (766 as measured vs 730 on the label). It’s not their fault that Dodge under-spec’d the battery or failed to do the right pairing of alternator and battery.
In terms of the Interstate, whew. It is packing some amps. The label claims 850 CCA and the digital BT705 meter is reporting 883 CCA. That is 133 amps more than the flooded lead acid OEM battery. The truck hasn’t been used for over 24 hours – closer to 36 if I were to estimate it – so no last minute charging there either. The temperature was still 46F so neither battery was tested at 0F just to be clear.
The Interstate AGM tested at 883 CCA vs 850 on the label. It also scores higher.
By the way, I’ve owned the BT705 battery tester since January 2018 and have found it to be quite reliable. The tester gets great scores on Amazon and I have never had it tell me that a battery was ok that then failed. This matters to be a lot in the Winter as I don’t want family or friends getting stranded with a dead battery.
Test Conclusion
Based on the tests conducted above, the Interstate AGM battery provides enough of a buffer that the problem appears to be fixed. There is one variable though and that is the temperature. You can see from the dash that it was 61F when I did these tests. When I plow it might be anywhere from 0 to 40F. In general, the colder a battery is, the less output it will have. I still have the Interstate’s higher 850 CCA (measured at 0F) to make me hopeful but winter will be the real test. I can hope, right? If I were to bet though, I bet the shedding problem is solved because real world I will not be running all of those accessories at once either.
It’s Not A Perfect Solution — AGM Batteries Still Have Limits
I do need to make one thing very clear – a battery is a buffer. If you are using power faster than the battery can be charged, then eventually load shedding will happen. Think of water behind a dam. If the water goes out slowly or once in a while and the reservoir can refill, everything is good. In contrast, if you use the water too fast or for too long, the reservoir will empty and there will be little to no water running from the dam. Same idea.
An AGM battery contains quite a bit of reserve power and can sustain higher loads longer than a flooded lead acid battery designed for starting and lights. Even an AGM has limits though
I tend to do a bit of plowing and then drive. A bit of plowing and then drive. If you are doing a ton of plowing before the alternator can replenish the battery sufficiently then shedding will still happen. You will then need to decide if you add battery capacity via a second battery or invest in a dual alternator set up. One trick is to hook up a battery charger – I like Noco Genius smart chargers – to fully charge your battery over night if need be. It all comes down to how much you plow and how long the alternator has to catch up.
Summary
Let’s wrap this post up. Despite Dodge’s claim that the Snow Chief package makes a 2500 truck plow ready, that is not necessarily the case. It would appear that the single 220 amp alternator running at realistic engine speeds during plowing will not produce enough amps to support the plow and the blower motor. In addition, the original battery doesn’t provide enough buffer to temporarily compensate either for the lack of alternator output relative to demand.
There is no indication that anything is defective – let me be clear on that. Instead, these are design issues and should not have surprised anyone. Plows have been around for decades. The dealership who sold me the truck and the plow, not to mention the installers they contracted with, should have known whether there would be an issue or not but nobody raised a flag and said “stop” or “hey, just so you know – you can’t run your blower motor on high and raise your plow at the same time.”
Given the test results of placing a full load on the combination of the original 220 amp alternator and new Interstate AGM battery, it would seem that the load shedding problem has been solved. While the temperature during testing was 61F and thus 30-60 degrees higher than what would be encountered during my typical plowing work, the higher CCA rating of the new battery and the likely load on the battery during real use being lower, the probability is quite high that the problem is fixed. That’s a mouth full.
If you are having problems with load shedding, your first least expensive option is to go get a good AGM battery from a reputable dealer with as high of a CCA rating as you can get for the size battery your truck uses – again, my 2021 Ram 2500 Tradesman with the 6.7L Hemi uses an H7 size battery.
I’ll post updates after I actually use the plow in the Winter but I’m betting the problem is fixed. $50 says I never hear a peep from Dodge about fixing this, paying for the battery or even just providing any further insight. So, for all of you folks that snowplow and have a Ram 2500, I hope this helps you out.
01/21/2024 Update: Well, winter hit us hard this past week. Temperatures in the single digits and pushing 20″ of snow not including drifts. The truck is working like a champ – I can plow with the blower on whatever and no shedding happens. I can definitely say now that the AGM battery fixed the problem. Still not thrilled with what Dodge did but then again, the 2500 and 8′ plow are doing an amazing job. I’m very happy. If you’re reading this and are experiencing shedding, get a solid AGM battery such as the Interstate I bought, and it will fix the problem.
12/27/2022: It was 19F and I was plowing about 8-12″ of snow in places. Defrost was on high and my regular plow (halogen) lights were running. I could hear the defrost slow down when I lifted the plow but the computer never shut off the blower. I still wish a better alternator or pair of alternators had been used but the AGM battery seems to have solved my problem.
Note, I have to buy all of my parts – nothing here was paid for by sponsors, etc. I do make a small amount if you click on an ad and buy something but that is it. You’re getting my real opinion on stuff.
In September 2021, I bought my first new truck – a 2021 Ram 2500 Tradesman. Something about it being straight forward without a ton of bells and whistles appealed to me and I managed to buy it – I’ll be making payments for four more years 🙂 At any rate, there were a number of things I did to customize it more to my needs – one area was lighting. For whatever reason, Dodge went cheap and used halogen bulbs and they were anemic.
The first thing I did was to buy a set of Lasfit LED replacement bulbs and upgraded the high beams. Wow – what a difference. I considered doing the low beams too but changed my mind. First, I could not get my hands into the low beam housings to make the swap without taking more of the truck apart. Second, after seeing how bright the high beams were, I was worried about blinding oncoming drivers so I just settled and left the low beams alone. I don’t really regret it – when I am on country roads at night and turn on the high beams, wow – there’s a HUGE difference.
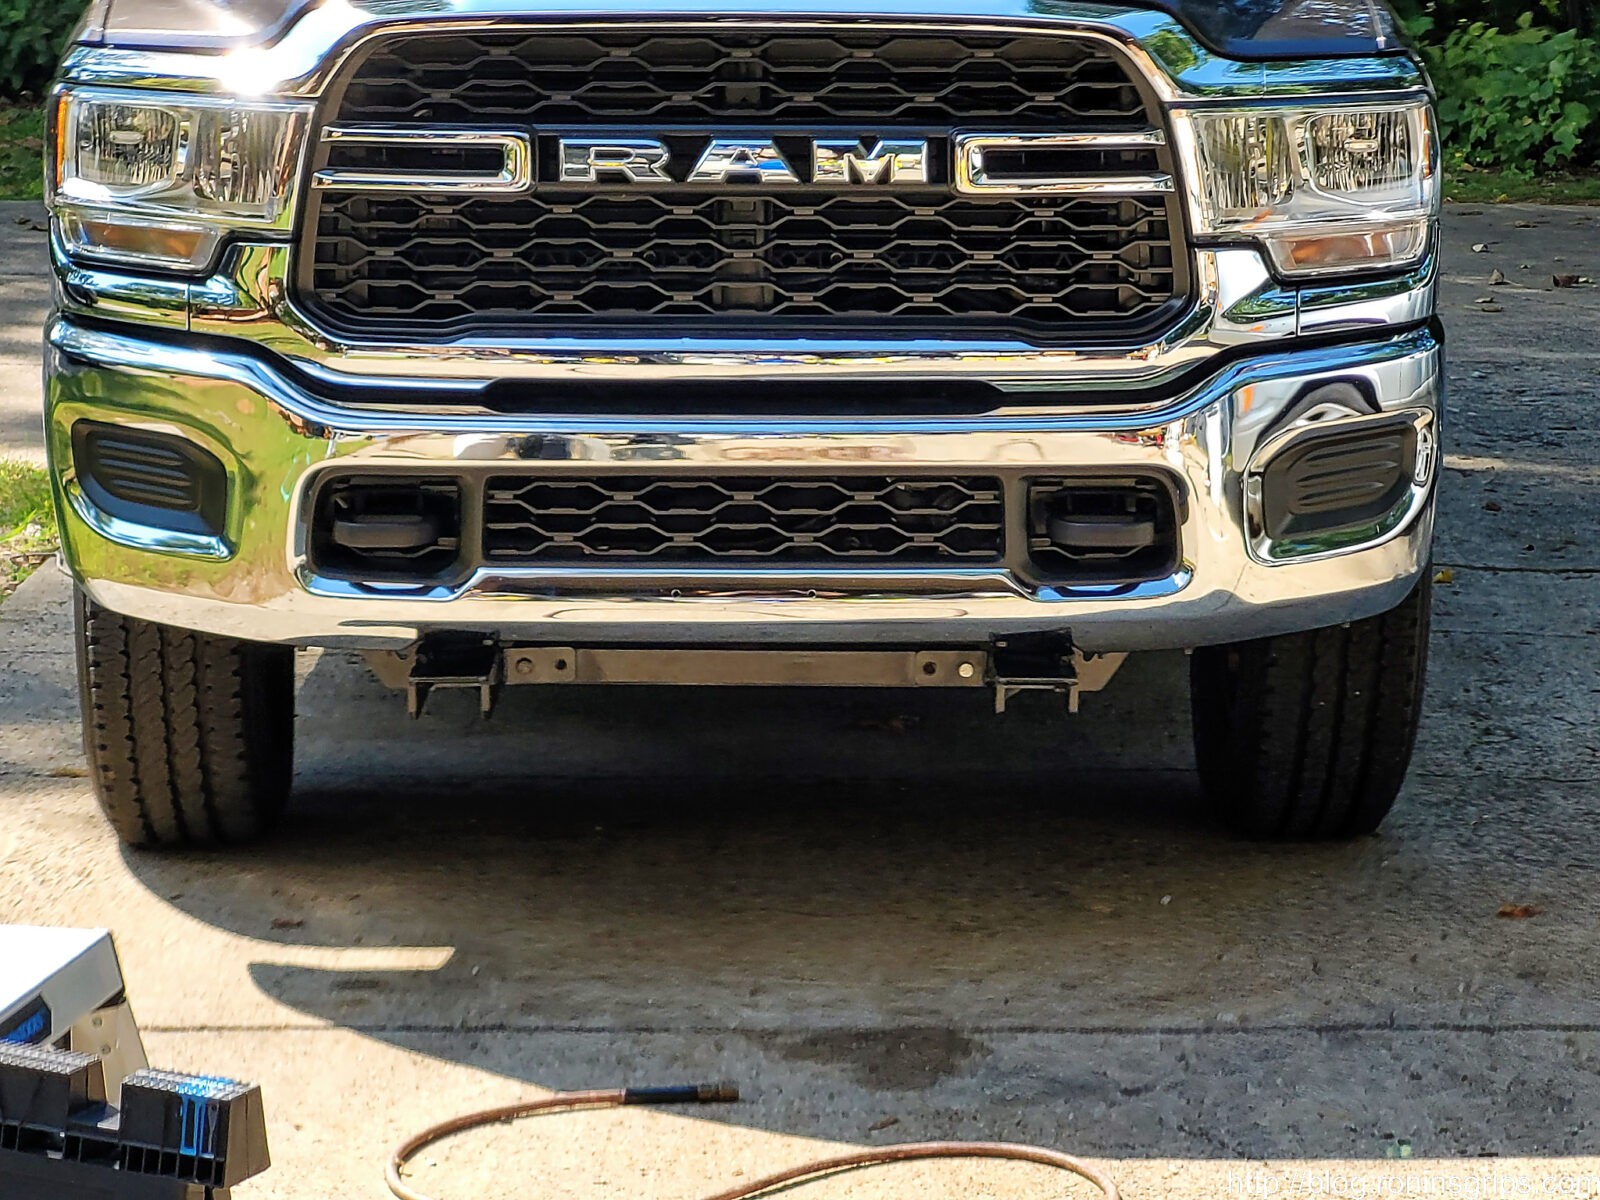
Until you drive rural farm roads at night or go off-road, you don’t really appreciate having good lights. The new high beams were good but I wanted even better – I really wanted a light bar but I wanted it without making a ton of alterations to the truck. My 2500 has a cap and no roll bar or headache bar to mount on so that left the bumper, the A-frame or some form of roof mount. I did some thinking and decided to go with a non-traditional approach – I would mount the light bar behind the lower grill and add a yellow light bar for fog and snow below it angled downwards.
Legal Disclaimer: The LED light bars are rated for off-road use only. Be considerate and don’t blind other drivers. Not to mention you would likely get a ticket operating these on public roads.
What LEDs To Use
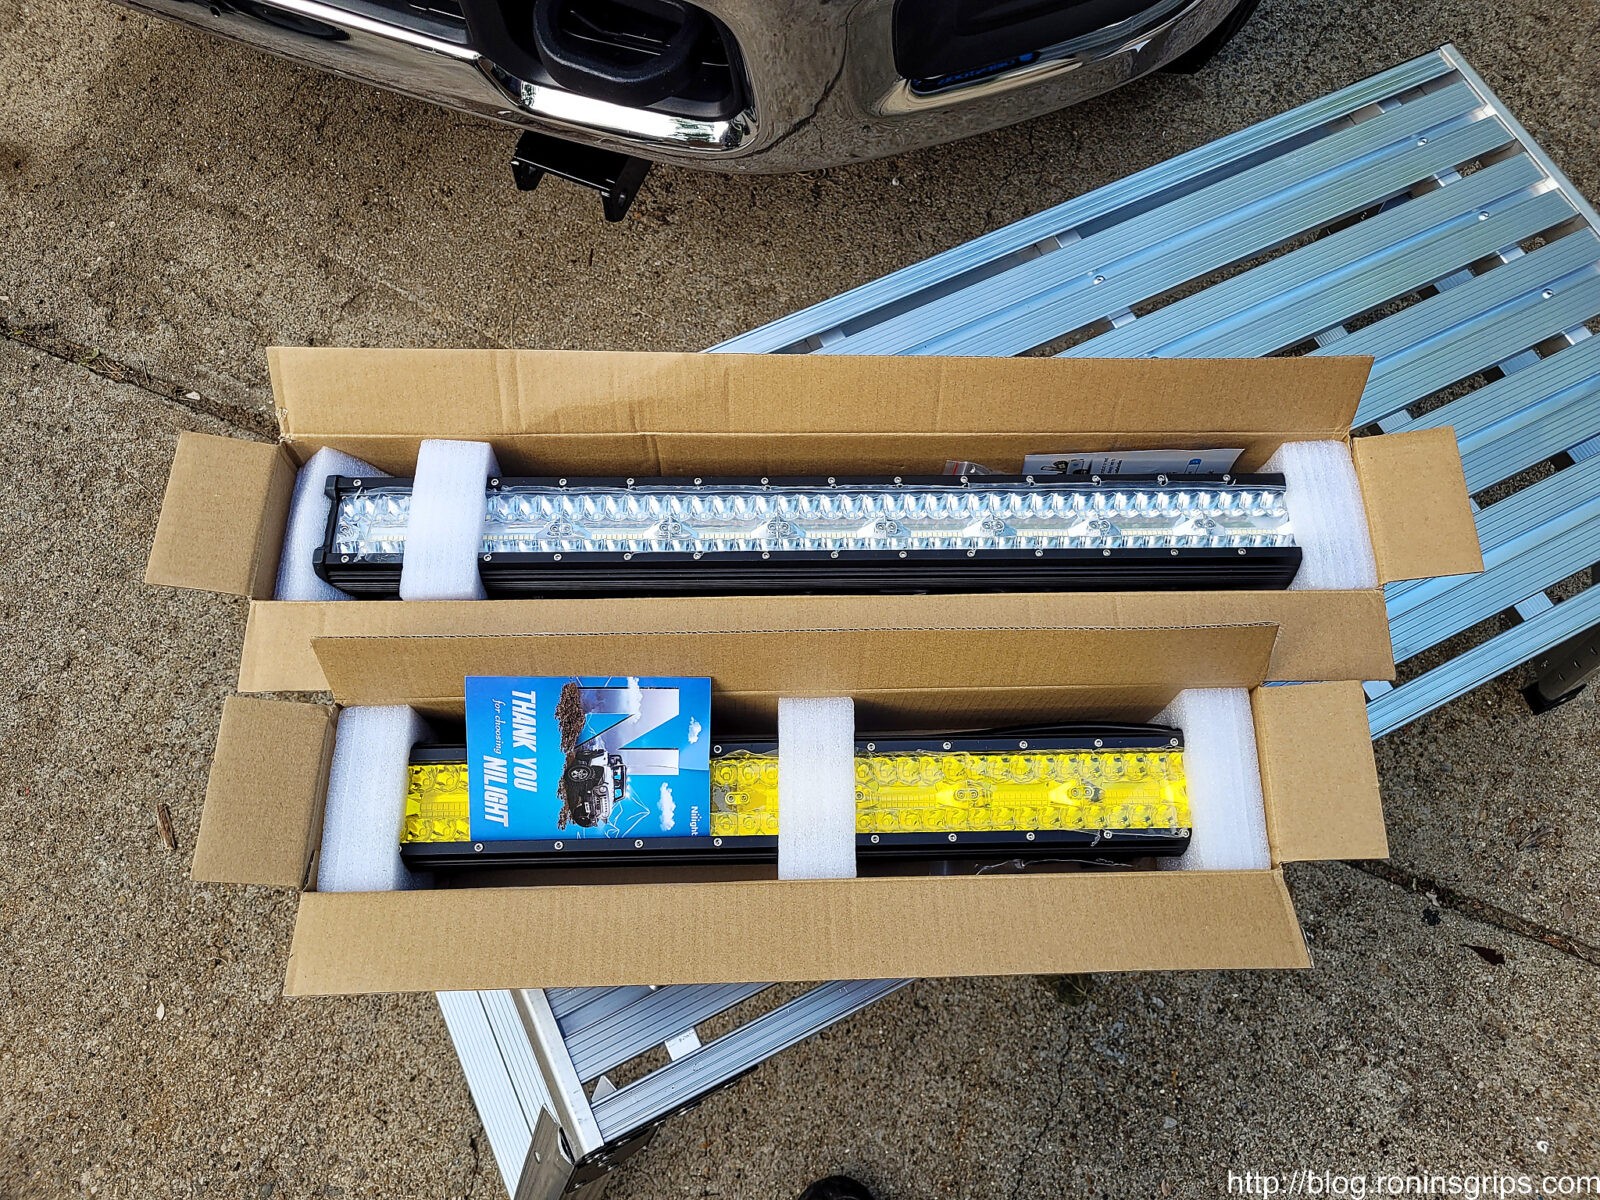
Okay, I am short on funds right now and needed good enough parts. I’ve had pretty good luck with Nilight LED bars that you can get really good pricing on from Amazon plus they also have wiring harnesses with relays that you can use.
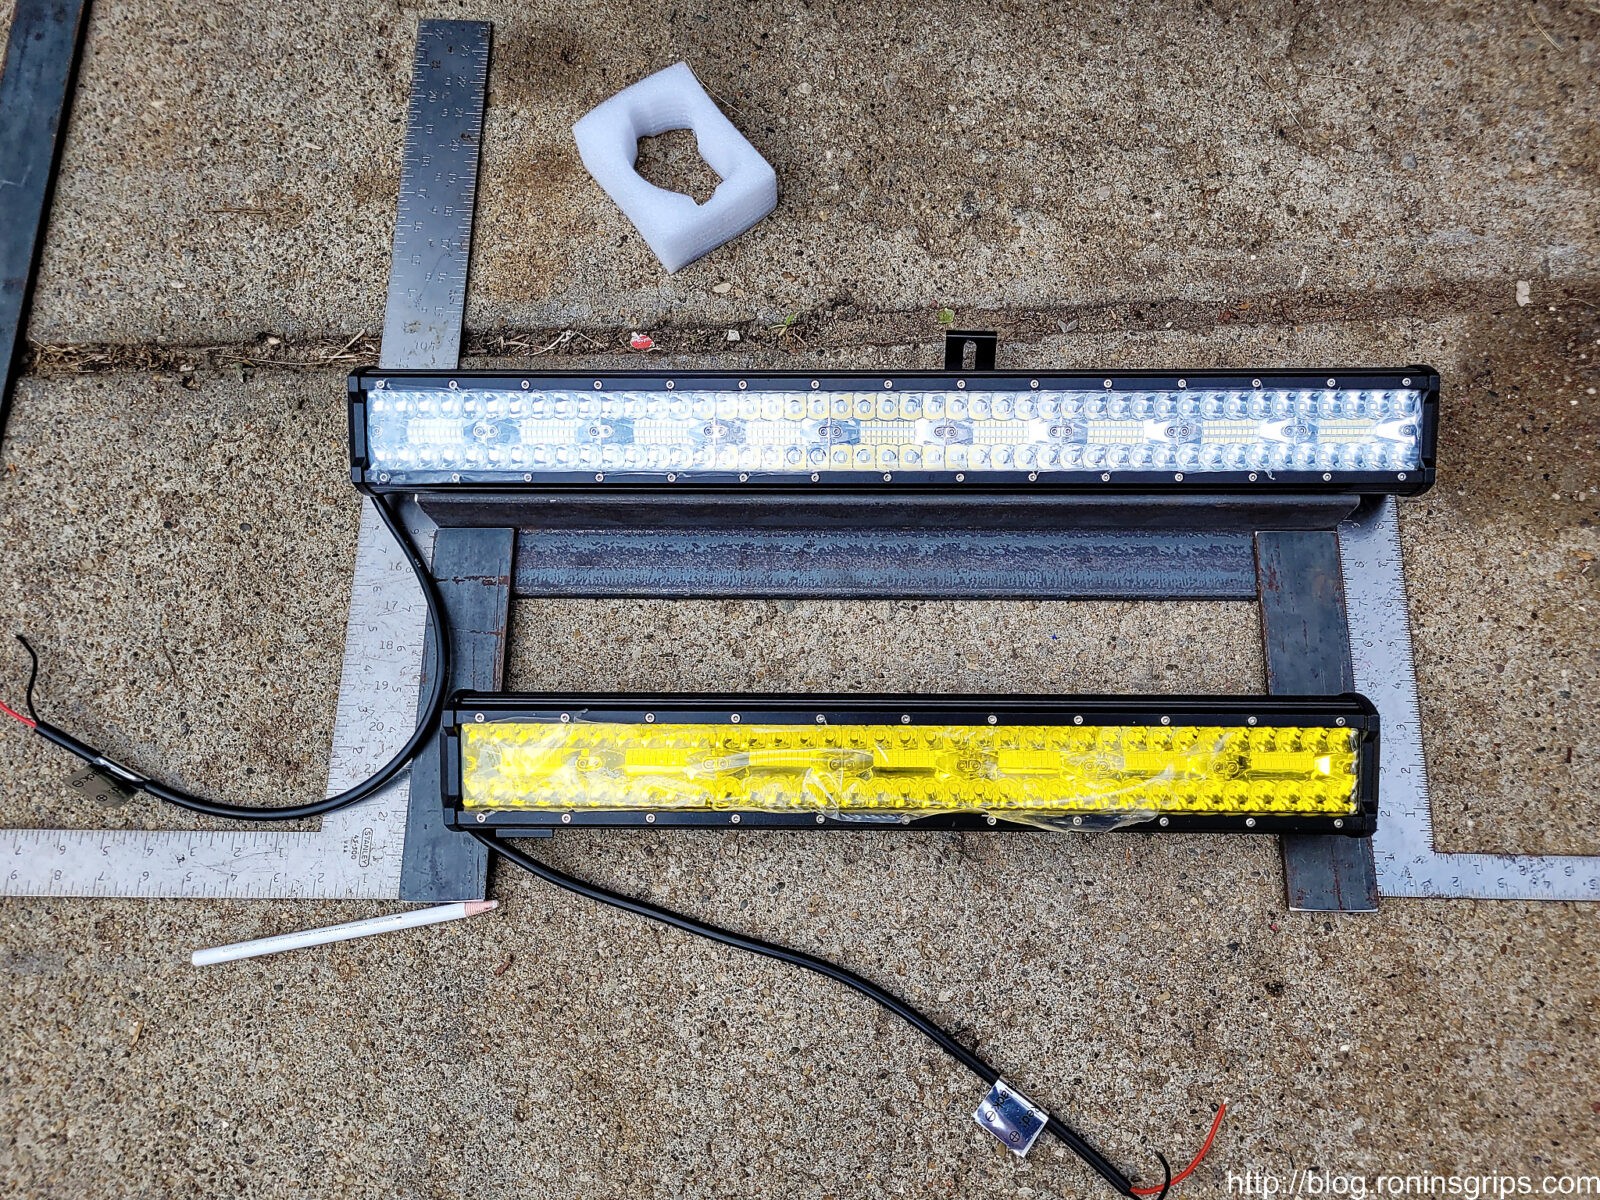
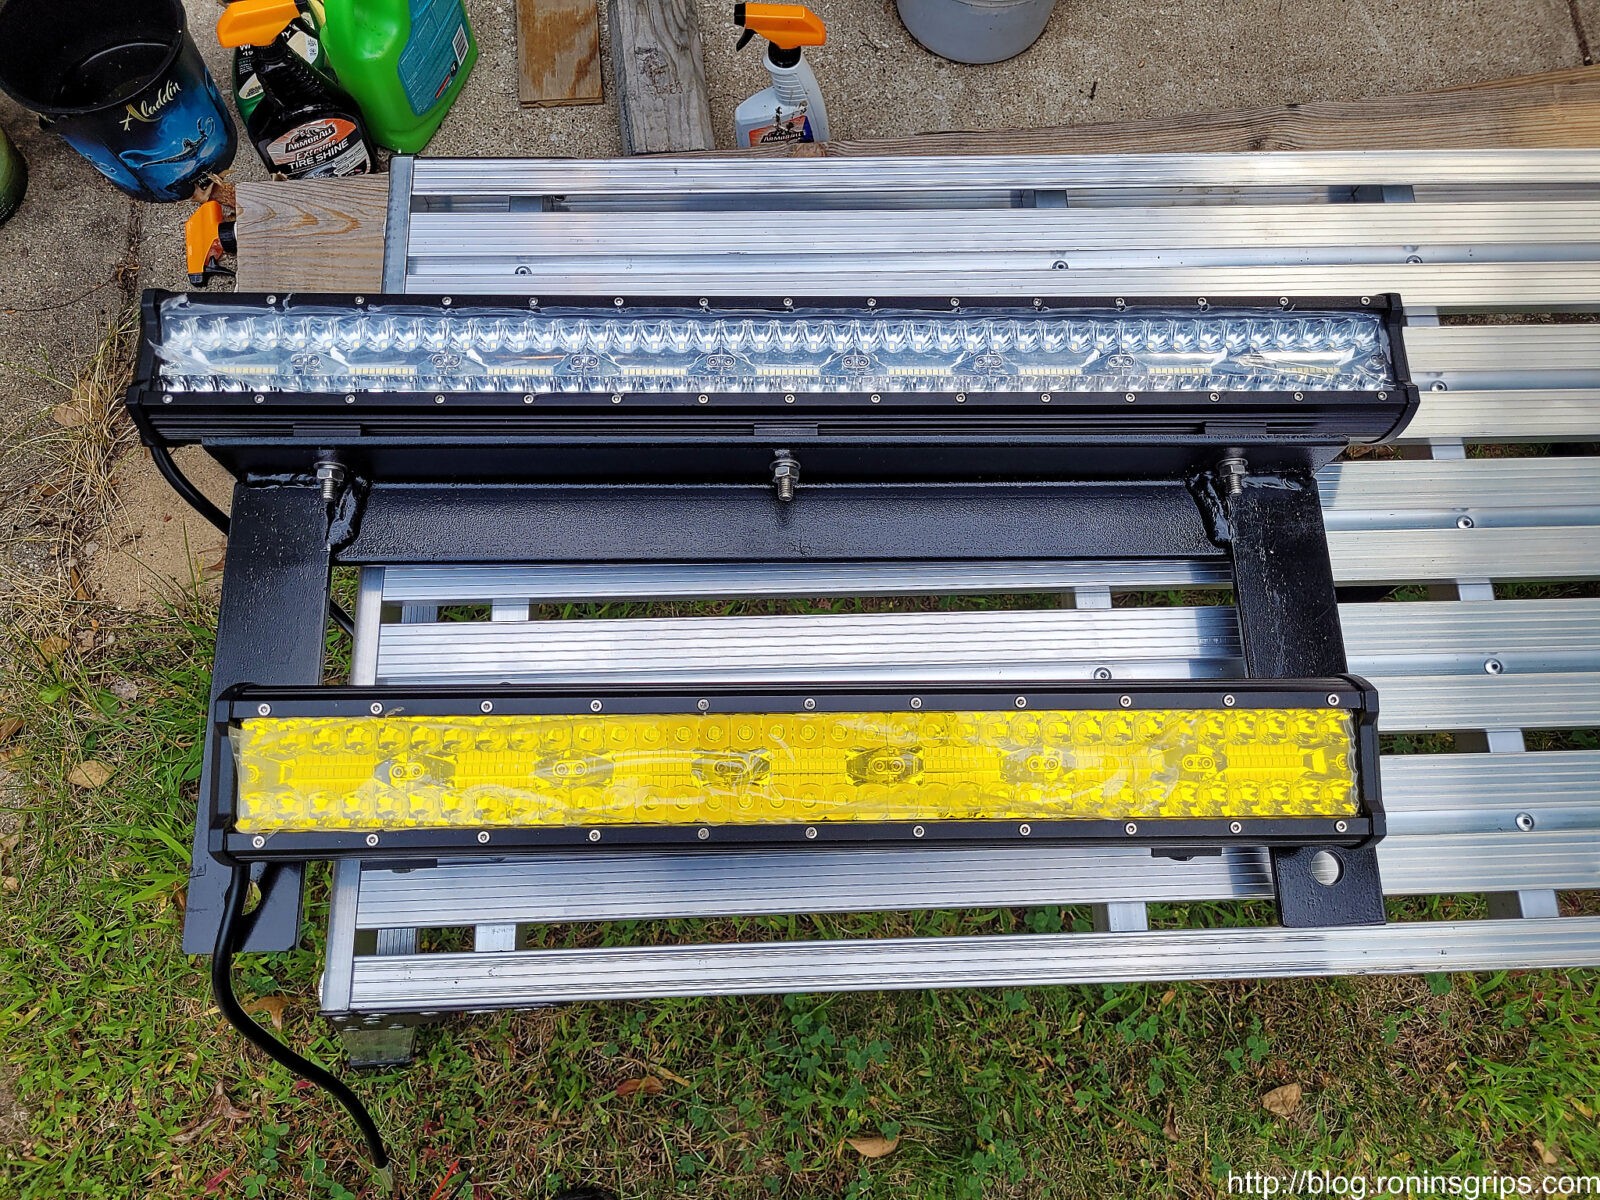
I wanted to fill the lower bracket from left to right so that meant about a 26″ light bar. To project the light both far and wide, I bought a triple row unit that combines flood and spot lighting.
For the amber LED, the biggest they had was 20″. I didn’t really want massive light from it because it is for snow and rain. In case you didn’t know, amber/yellow lighting is preferred for fog lights because that wavelength of light does a better job penetrating and letting you see objects in those conditions.
We were in the Smoky Mountains near Wears Valley between Pigeon Forge and Townsend a few years back trying to get to a cabin during heavy rain at night. Our old Highlander had so-so white fog lights that were better than nothing but I became a believer after that. Tons of white light just bounces back at you in rain, fog and snow. Go with amber lights.
In terms of the wiring harnesses, I bought two 14 gauge Nilight sets. I planned to remove their switch and plug into the Ram upfitter switches. The upfitter switches are an option and a truck is prewired with a number of access ports to let you plug in things like lights, pumps, etc. If your truck doesn’t have upfitter switches then just run their switches into your cab and mount them on the dash. I’ve used 3-4 Nilight light bars and switches over the years and none have failed on me – they look good too because they light up when turned on.
When it comes to wiring lights, I prefer to use relays when possible. This allows you to use a switch with fairly low amperage that then powers the relay and closes the switch that then feeds current from the battery through a thicker gauge wire. This avoids choking the power running too thin long wire to the switch and back. When your lights are properly powered, they will produce their maximum light is what it boils down to.
Designing the Bracket
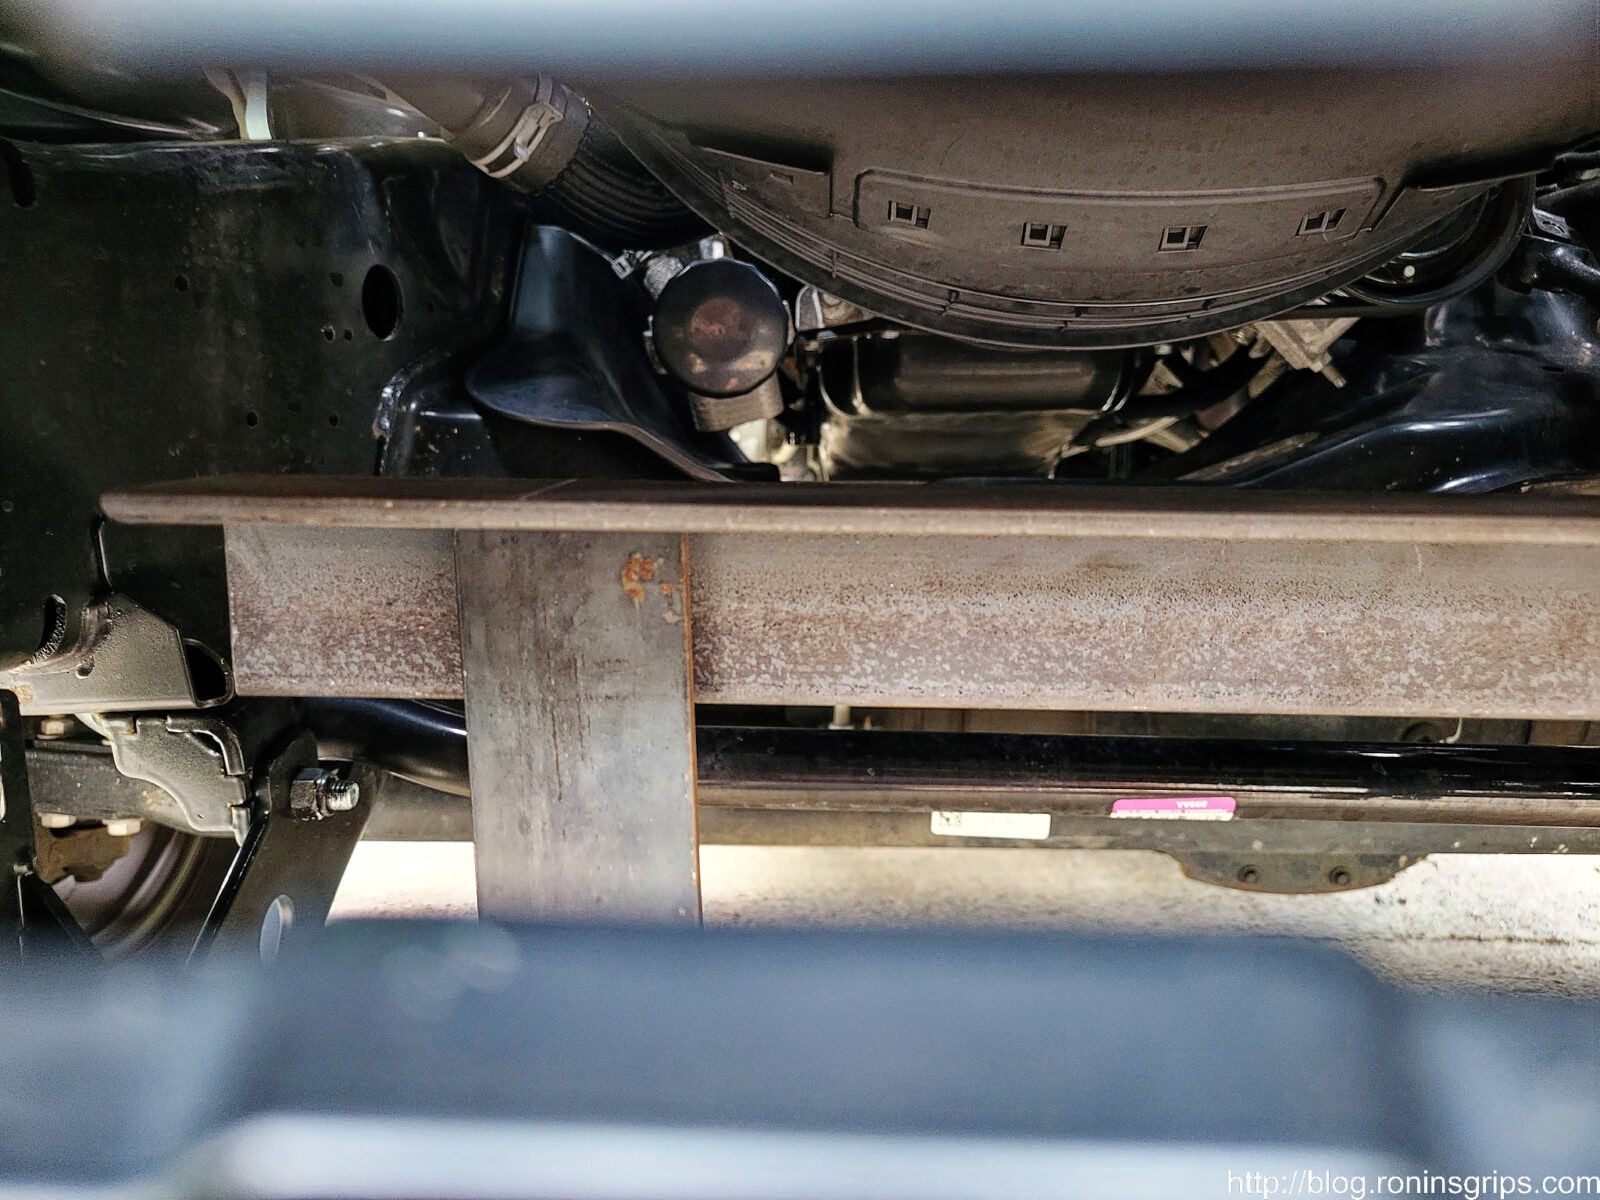
Sticking with not wanting to alter the truck, I wanted to bolt the lights to a bracket and then the bracket to the truck. Since the truck was relatively new and not rusted like crazing, I had tons of potential bolts to use – I could have secured the bracket to the bolts of the tow hooks for example. What really caught my eye was the subframe for my Western Pro Plow 2. I’m a big Western plow fan – my dad had one when I was growing up and while I’ve had others – notably a Meyer and a SuperPlow – I still liked Westerns.
To mount the plow, Western creates bolt on sub frames that will connect to a given truck and then there are receivers that the plow connects to. Part of the sub frame is a 2″ x 1/4″ thick cross member that is secured by four bolts – two on each side. That was perfect. The inside bolts were on about 20″ centers. I would connect the bracket to that and go up with a cross member and a top shelf of angled steel. The material would be 1/4″ hot rolled mild steel – why? Because I didn’t want the bracket to bend or stress crack over time from the wind hitting the lights. On one hand, I figured the aerodynamics around the truck would stop some of the air flow but on the other, I’d seen guys in the past run big old school KC Daylighters on cheap light bars and they broke. So, yeah, I overbuilt the heck out of it.
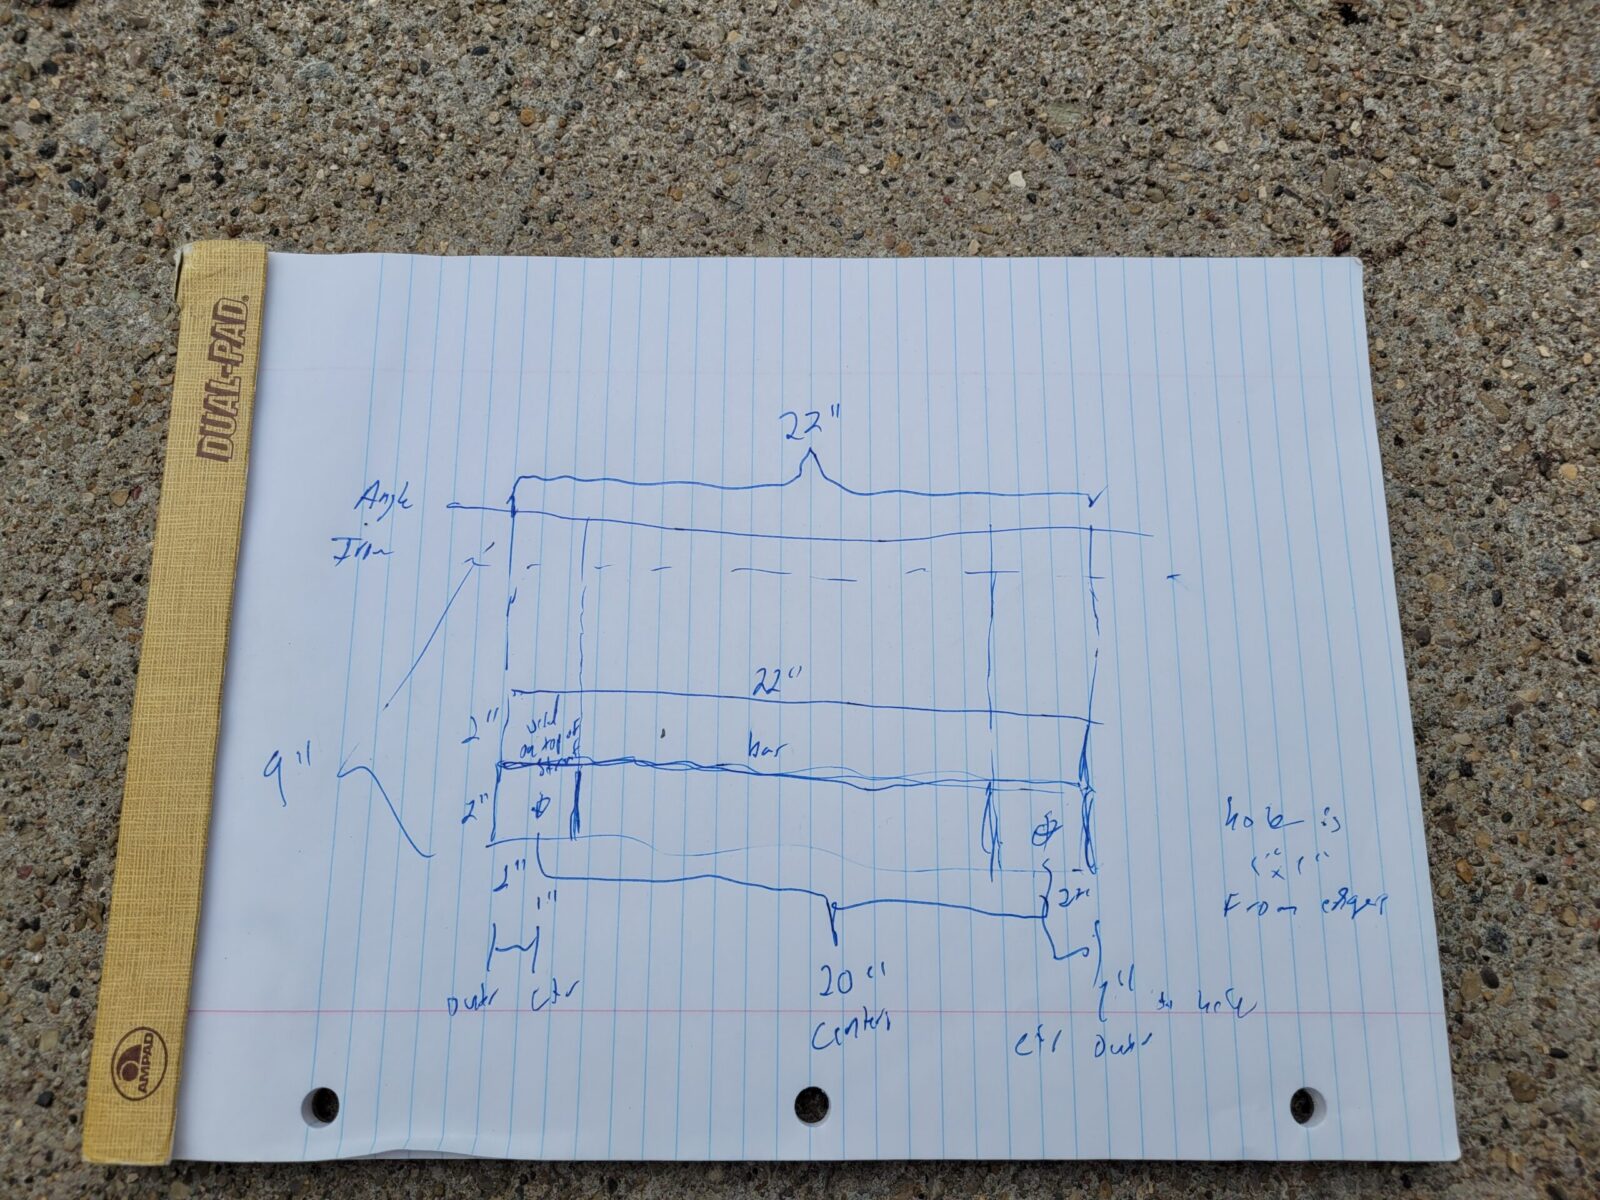
I credit junior high shop class and the instructor, Mr. Tack, with teaching me the benefit of sketching a layout before starting work. Over the years, I’ve learned to sketch, mock up, and test fit before finalizing stuff. With that in mind, I sketched the bracket with pin and paper – young people will certainly think this is from the stone age but it works for me.
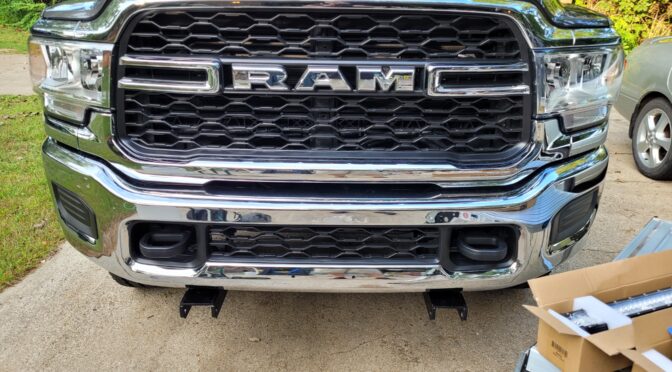
This super low-tech sketch was me thinking through what I wanted to do. It all began with knowing the grill’s hole was 26″, the distance between hole centers of the Western plow sub-frame was 20″ and I had to cut a upright pieces about 9″ tall.
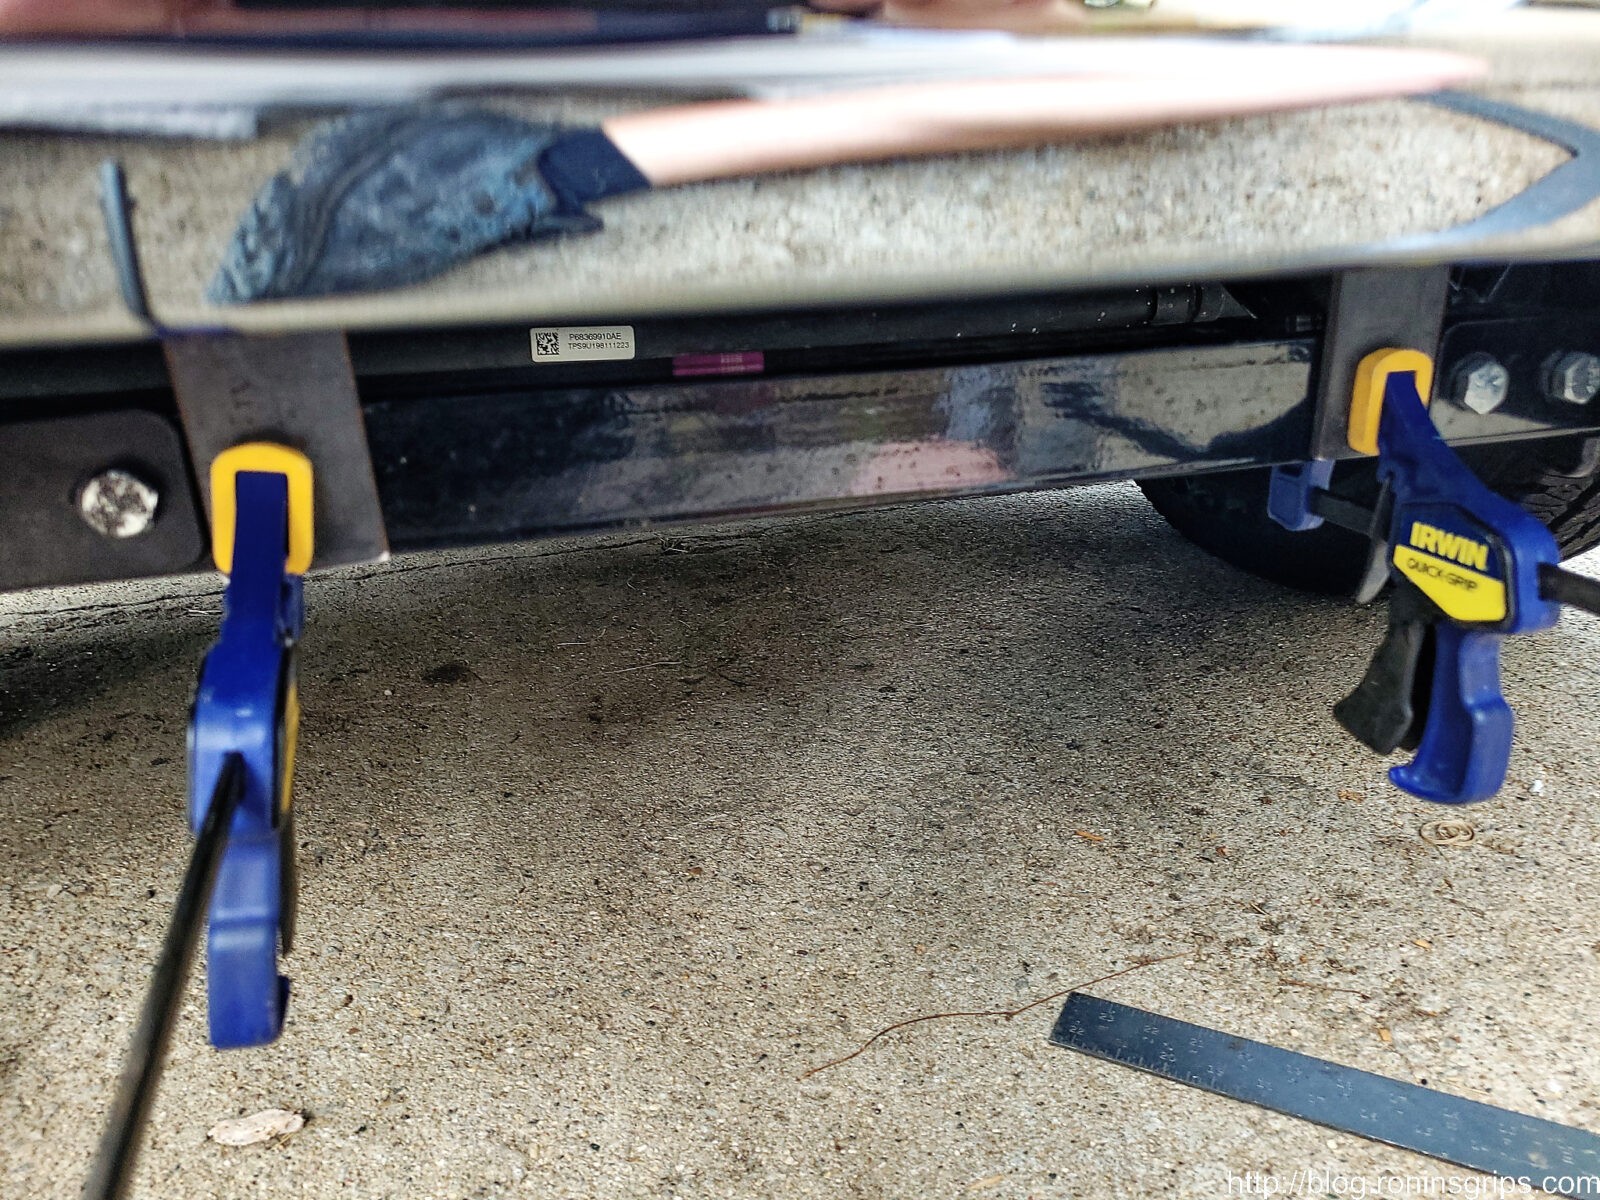
I figured out the vertical by clamping a steel square rule to the plow’s sub-frame and then ran a piece of steel through the grill to measure the height where the two met.
Before You Start!
When it comes to lighting in general, trust but verify. Before you do anything else, take the lights out of the boxes and connect them direct tot he battery to make sure they work.
Each light bar has a short lead. You need to either touch them directly to the battery and make sure the bar turns on or use some short jumper cables. I clipped the negative to the battery and bridged the positive to the battery using a remote starter switch that I had handy. Really, you can use just about any short length of wire to make the connections and make sure they turn on – quick and dirty is all you need.
Fabricating the Bracket
With the design roughed out, the next step was to begin cutting out the pieces of steel. Over the years, I’ve learned that I am better off to work on a section at a time vs. cutting everything at once. This way, if I make a mistake or need to adjust the design, it’s easier. I tend to find design mistakes earlier on this way.
I cut two 9″ pieces of the 2″x1//4″ bar stock and clamped them to the frame. Note they are not in the final position. I planned to pull the inside set of bolts, drill holes in the bar stock and mount them there. What this let me do was to test if I had the height right.
With the uprights clamped in place, I then cut the 2″x1/4″ angle iron to a length of 22″. I did 22 because I wanted plenty of material surrounding the bolt holes that I would drill but also had to be mindful that I would clear the outer bolts of the sub-frame’s cross member. I then set the LED light bar on this, took a step back and looked to see if I had it right and thought it looked good enough to proceed. Note, this puts the LED light bar close to the top of the bumper hole’s top edge.
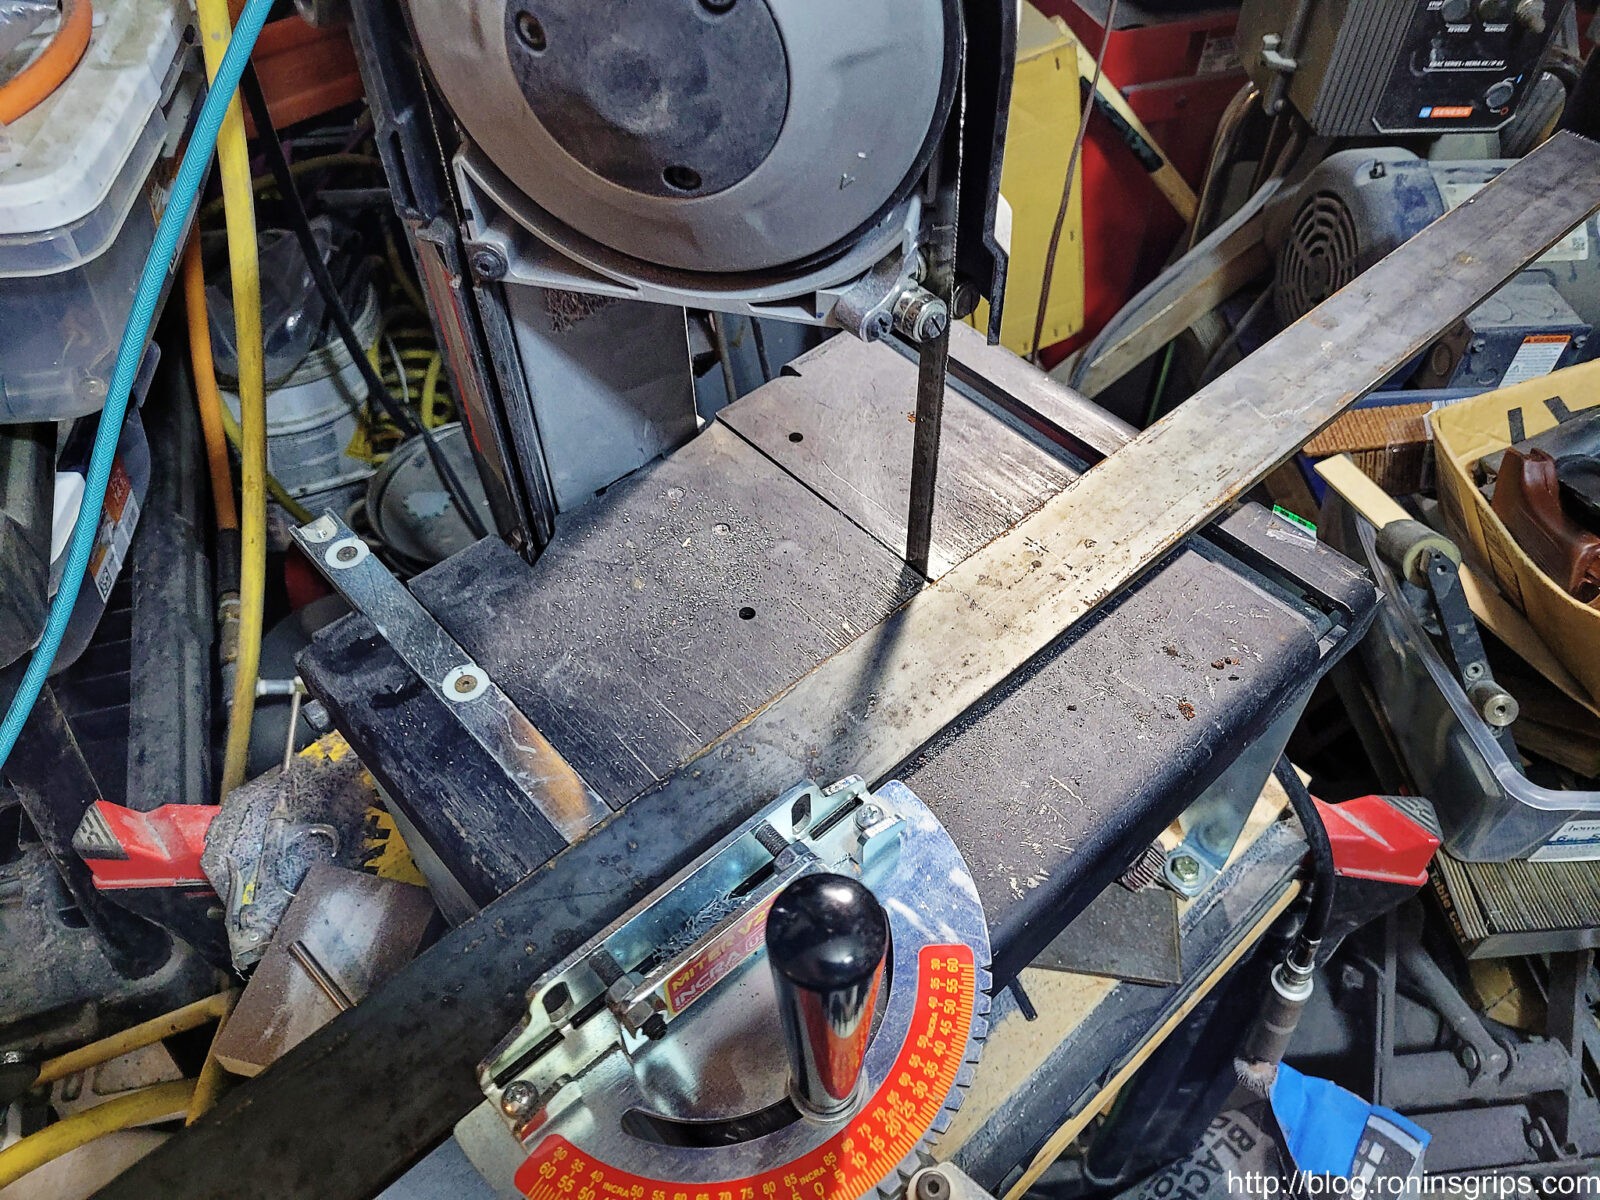
Armed with the dimensions confirmed, I then cut out the horizontal cross member that would hold the amber fog light. This is my SWAG Offroad table holding a Milwaukee Portaband. I use this all of the time for cutting steel and composites in my small shop.
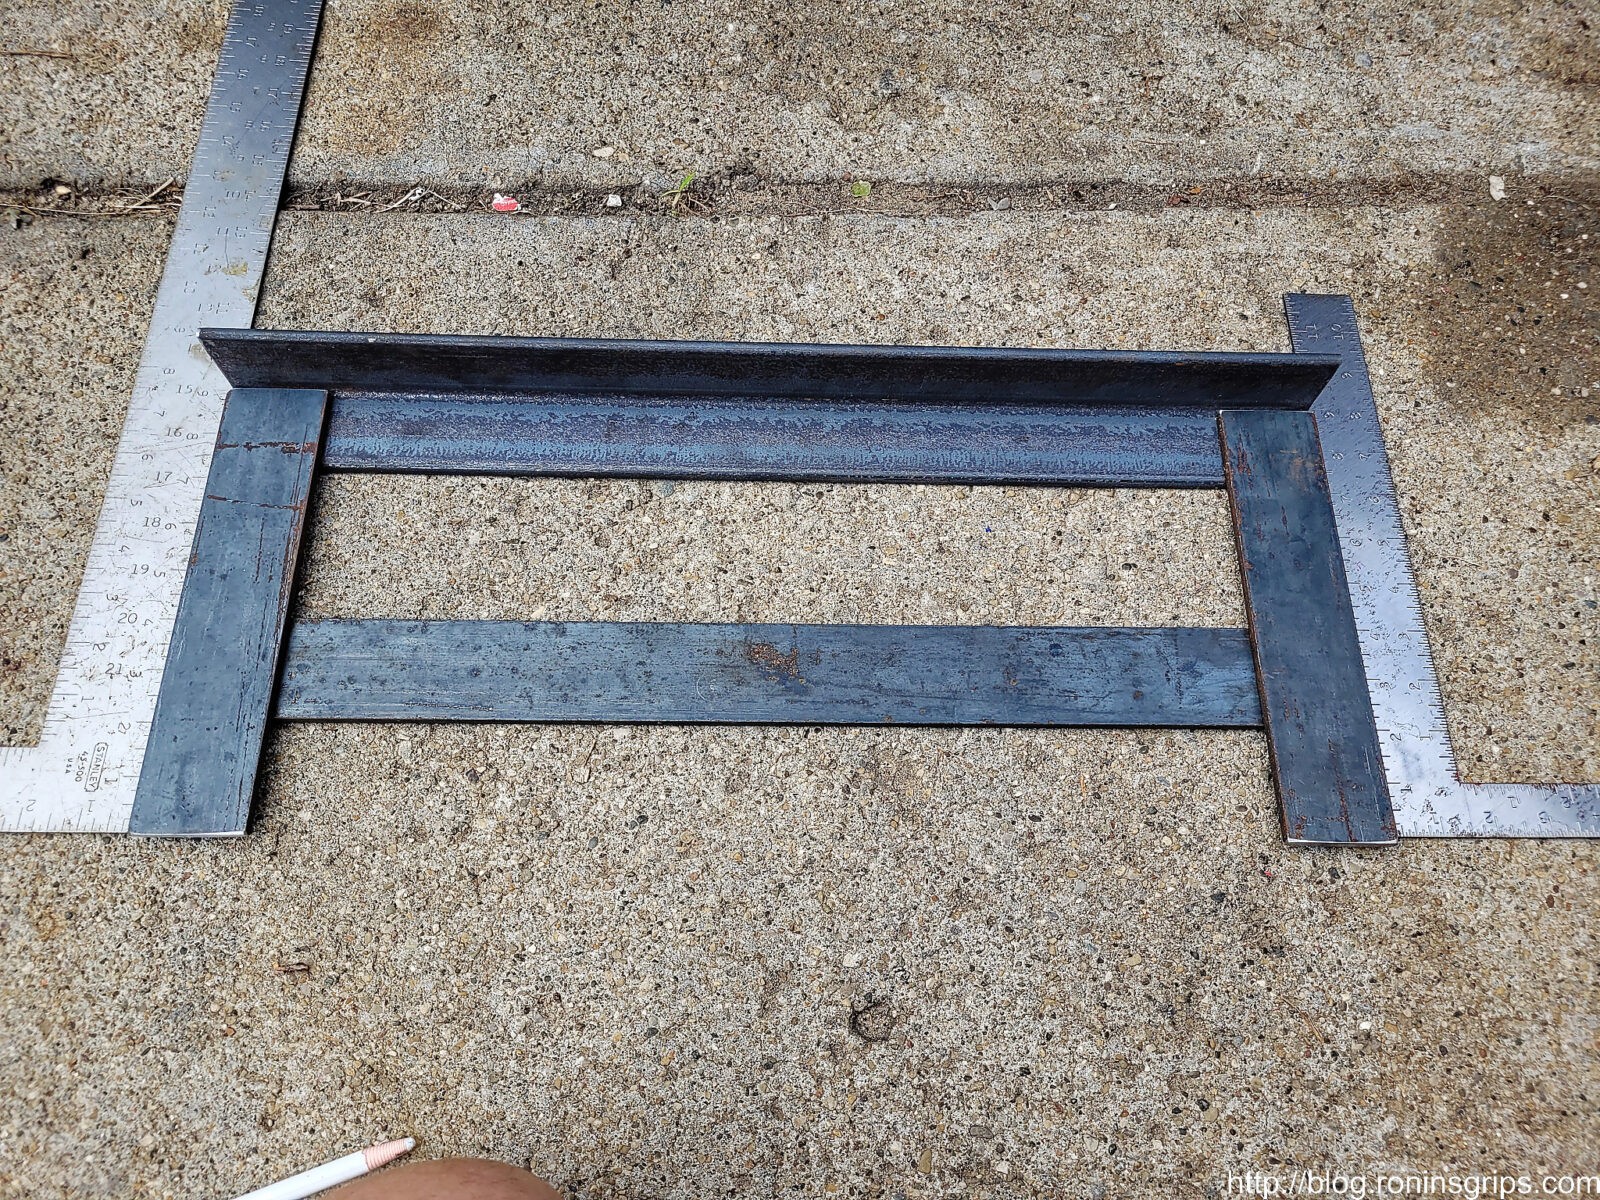
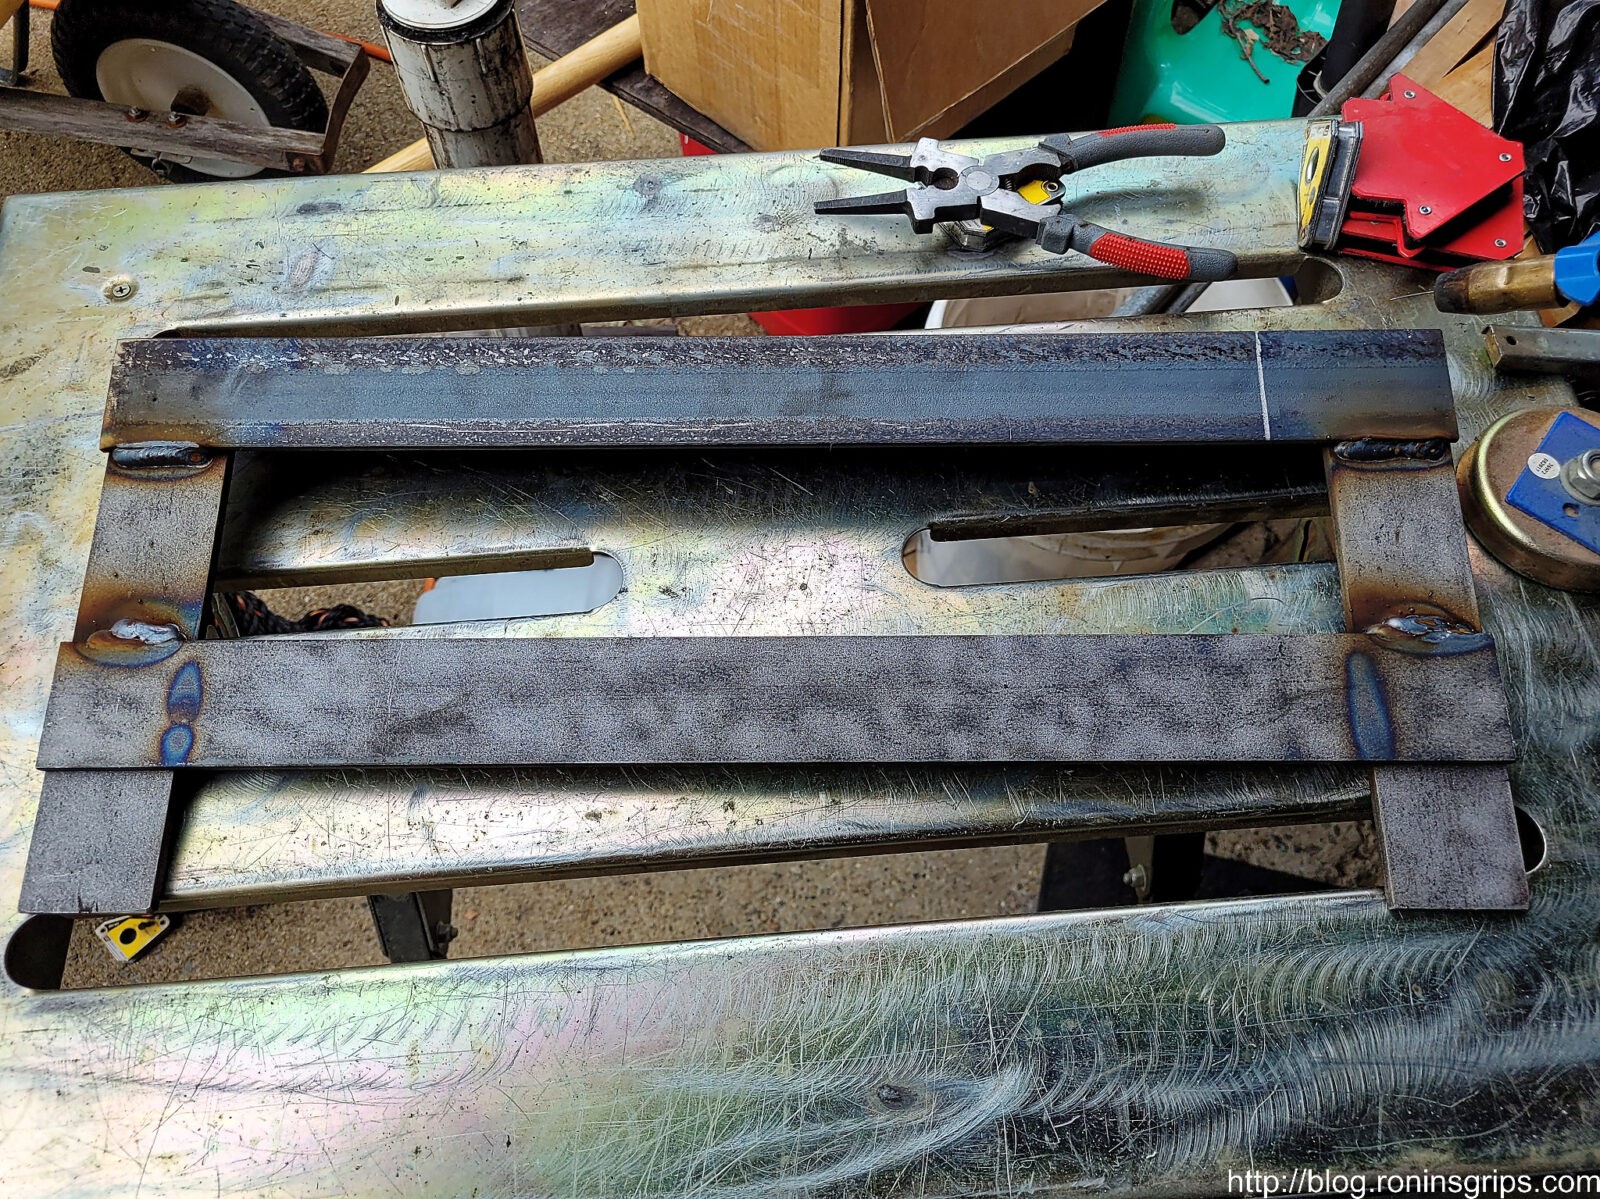
This is the mocked up bracket. I confirmed the dimensions one more time. Note, I planned it this way because with the cross member to the back, it will be sitting just fraction of an inch above the plow sub-frame’s cross member. I wanted the fog lights to be low . I debated about using a piece of angle iron for that lower portion but at some point design overkill isn’t worth it. Also, I welded the bracket together. If you prefer, you could bolt them together also.
Part of the mockup was to check the lights. Note, I did not drill the mounting holes until after welding in case I wanted to adjust something.
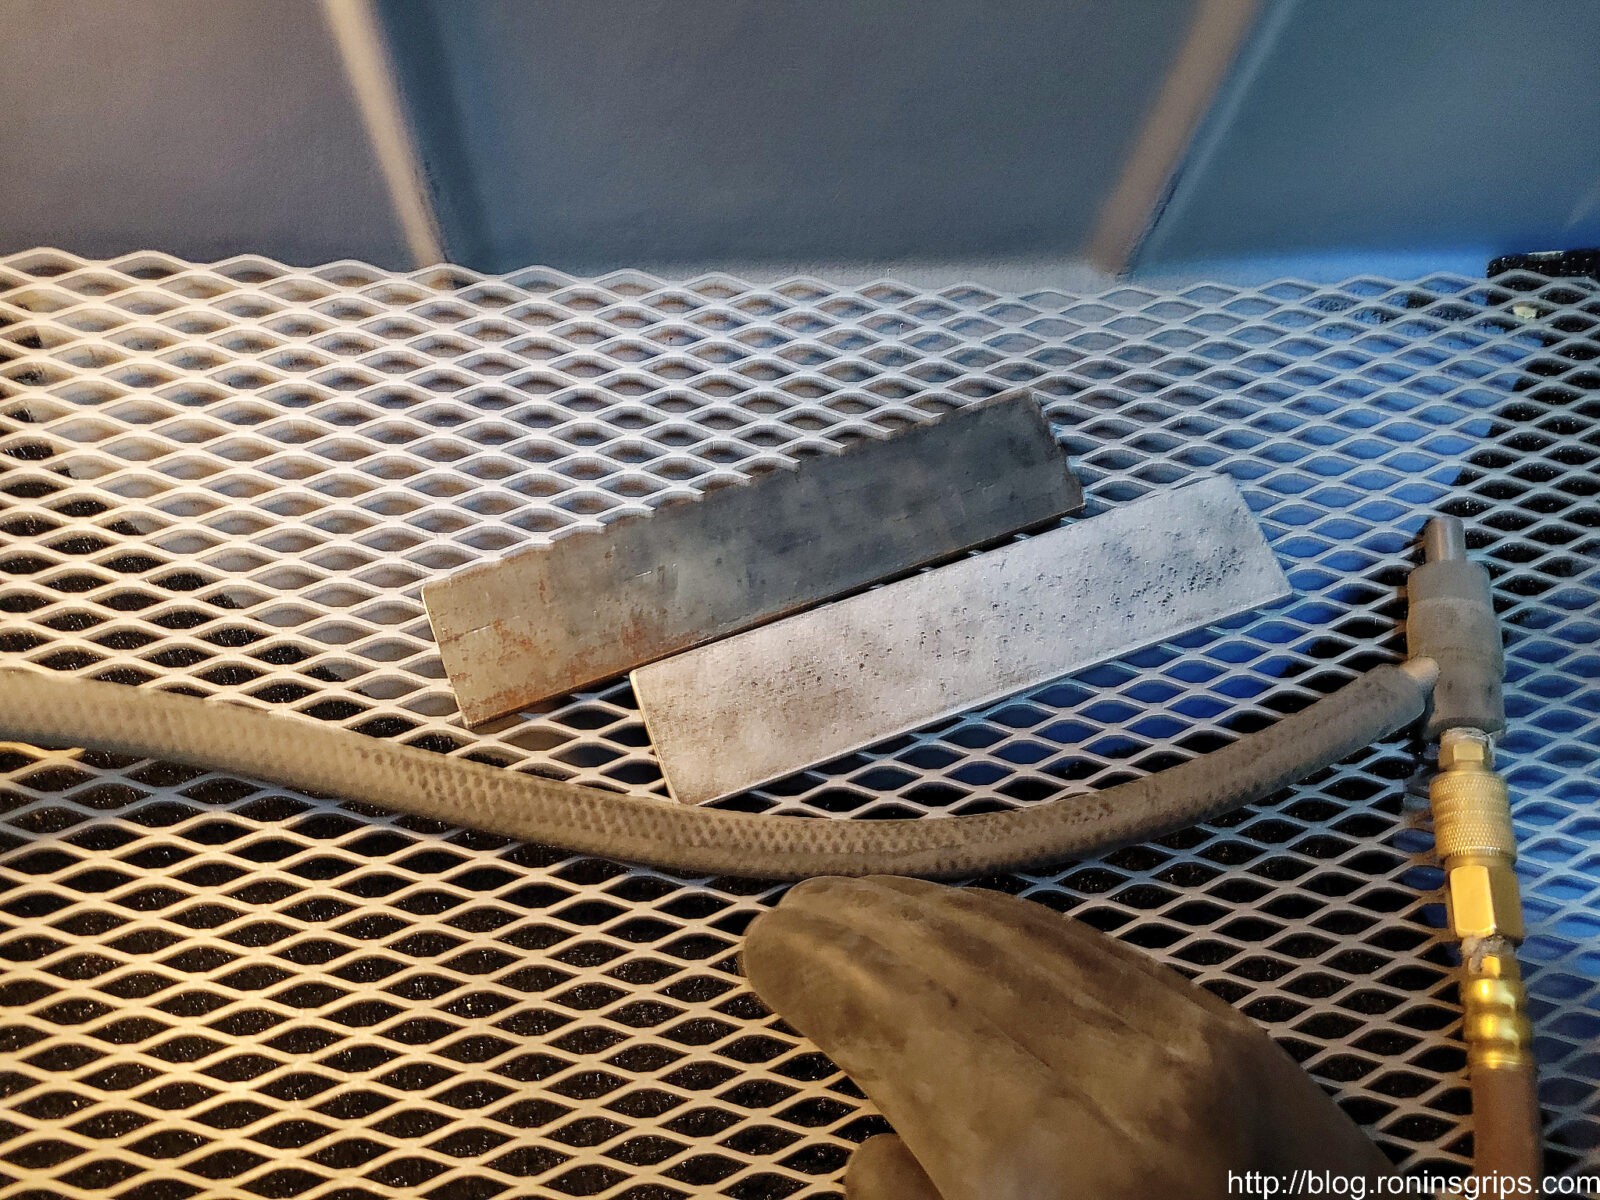
I did remember to take a quick photo while cleaning up the steel prior to welding. Note, if you want good welds, sand, grind or abrasive blast down to the shiny silver steel. The grey coating on the metal is known as mill slag which will contaminate your welds and the brown is rust which will do the same. I didn’t bother getting all of the steel equally clean. I did make a quick pass through everything so the paint would have a good surface to adhere to but I really focused my cleaning on where the welds would be.
Welding the Bracket
I used my Miller Millermatic 211 MIG running 75/25 shielding gas and .030 wire. I set the thickness to 1/4″ and let the machine figure things out. I bought this machine years ago and it really does a great job for me – most of my work is light fabrication anyways with thicknesses usually at or under 3/8″ thick and relatively short weld times.
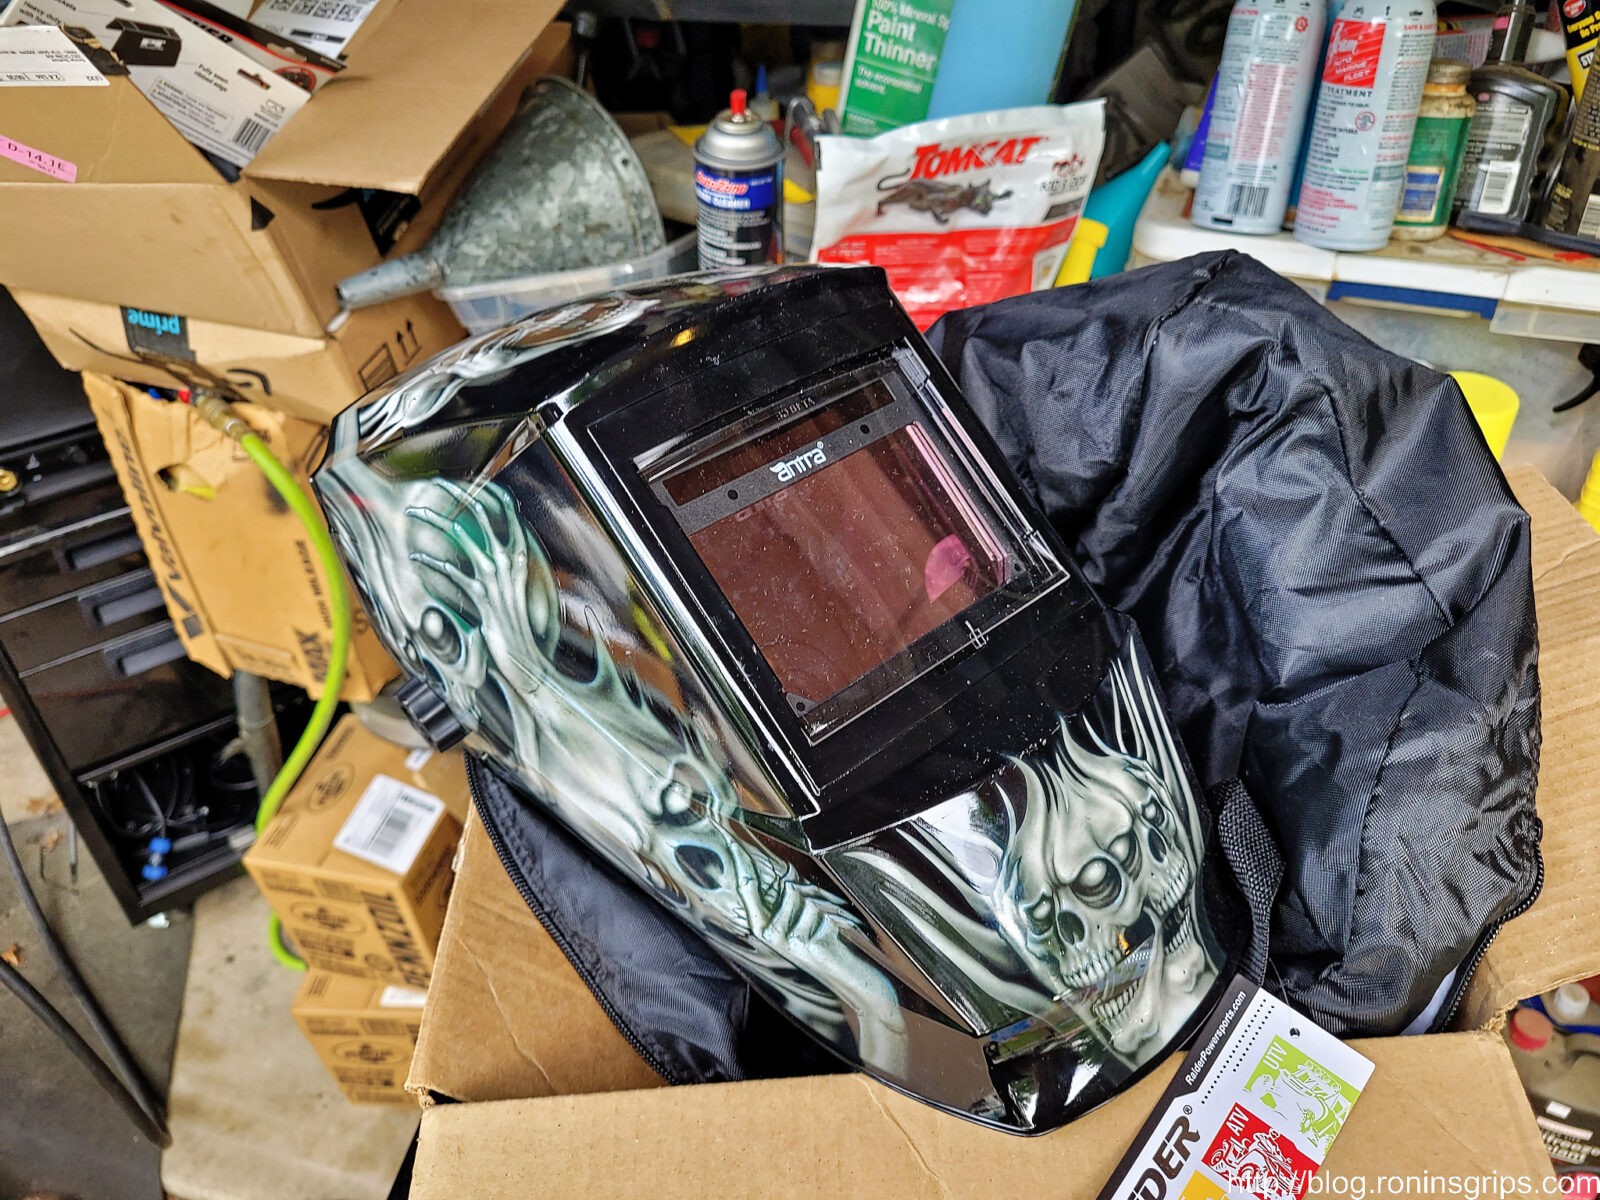
This past summer I bought a new Antra welding helmet with a large view port. I had an older Antra helmet that I bought in 2014 that still works it just looks very used. The cool skull graphics and larger viewing area tipped me to buying a new one. I like Antra helmets – not only do they work well but they also come with spare lens protectors.
I did some quick tack welds with my Miler MIG. The purpose of small welds like these is to get the assembly basically held together so things don’t move plus you can take and confirm the fitment one more time — which is what I did. If a mistake was made or something shifted, you could grind the small tack weld off. The photo doesn’t show to but I clamped everything together very securely to make sure things didn’t move. It really pays off to make sure everything is laid out tight and clamped together before you weld. I’ve had stuff get messed up so many times over the years that I am now very careful.
With everything confirmed, I proceeded to weld the joints front and back. Note, do a small bead and then move to another area to weld so you don’t cause the bracket to get too hot and warp. None of these beads were done all at once. The discolorations reflect the welding on the other side.
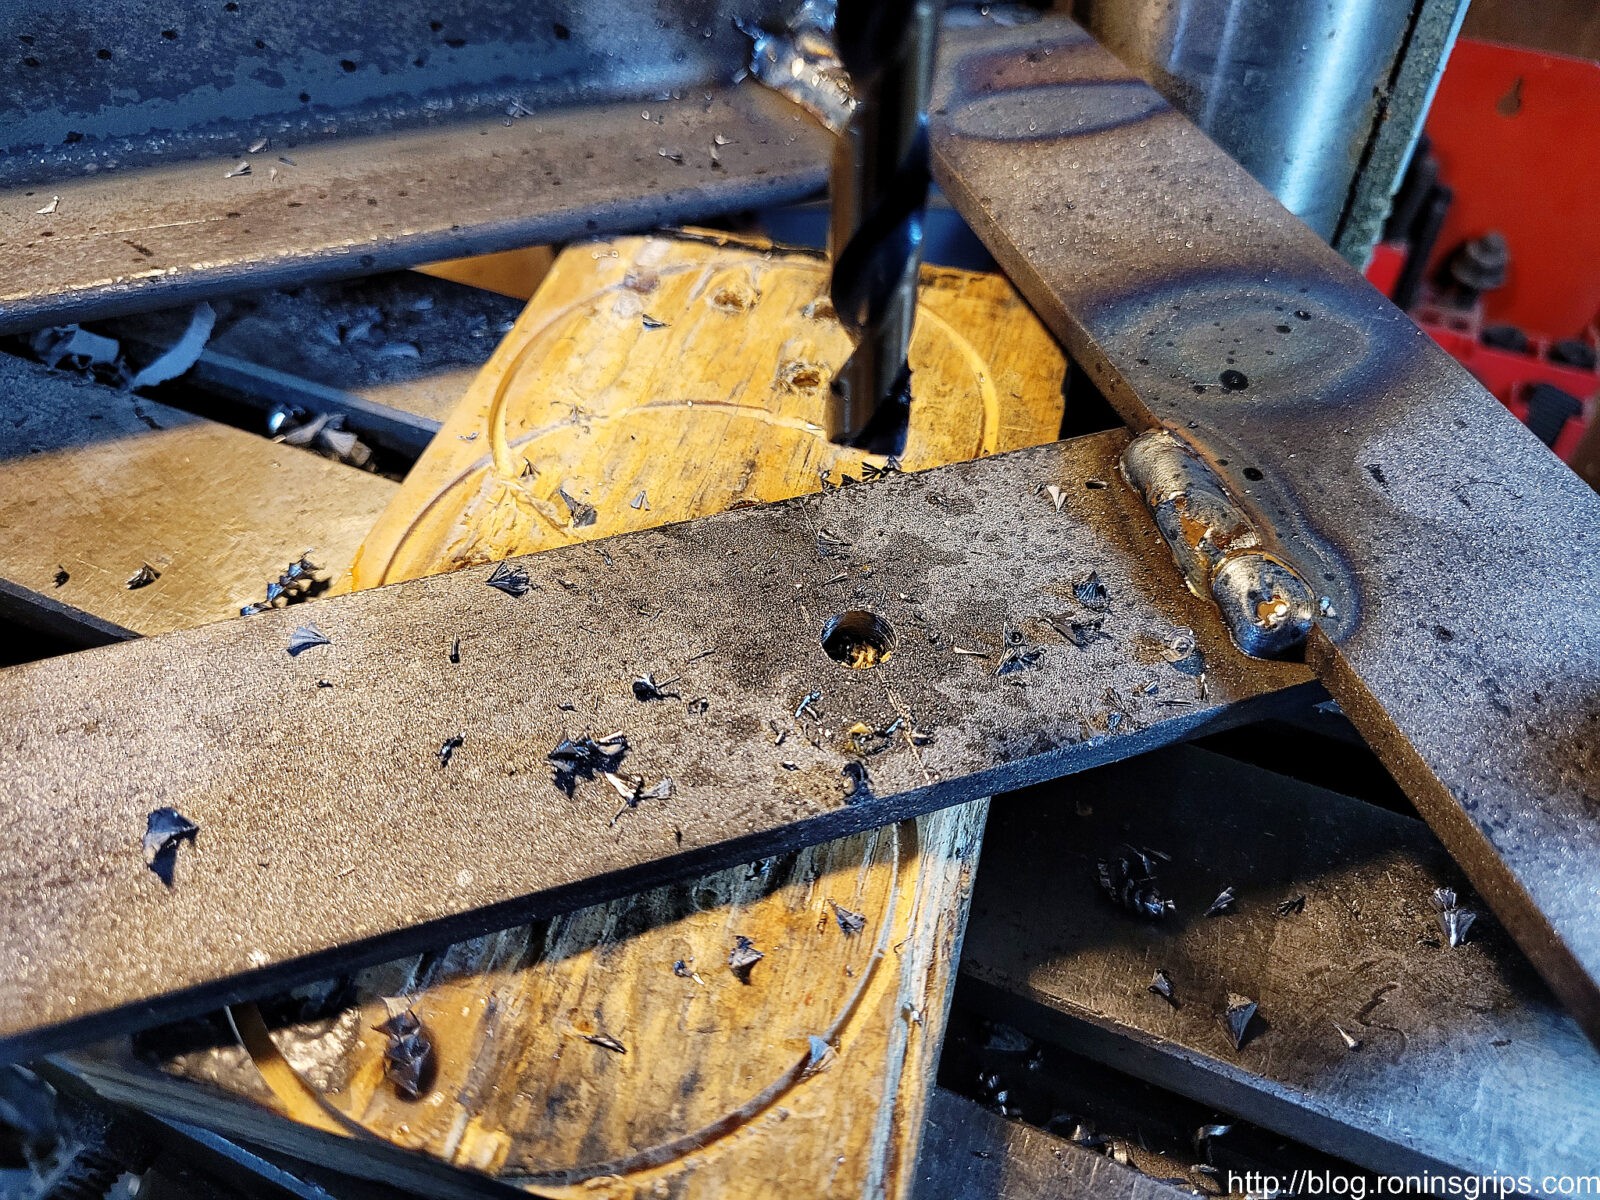
Before painting, I drilled the various mounting holes I needed for the LEDs. Note, not all have the same number of mounts – the 20″ light bar and two and the 26″ light bar had three. You can slide them all around to get the angles you want. Be sure to use cutting fluid to making cutting easier – your bits will last longer.
I like to drill the holes slightly oversized so I can wiggle the bolts around a bit if needed. I’ll own the mistake this photo shows — I forgot to drill the third hole in the middle. I fixed that later. By the way, the cross-member bolts are quite large. I used a Silver & Deming reduced shank 5/8″ bit. When bits are that big, using a drill press really helps.
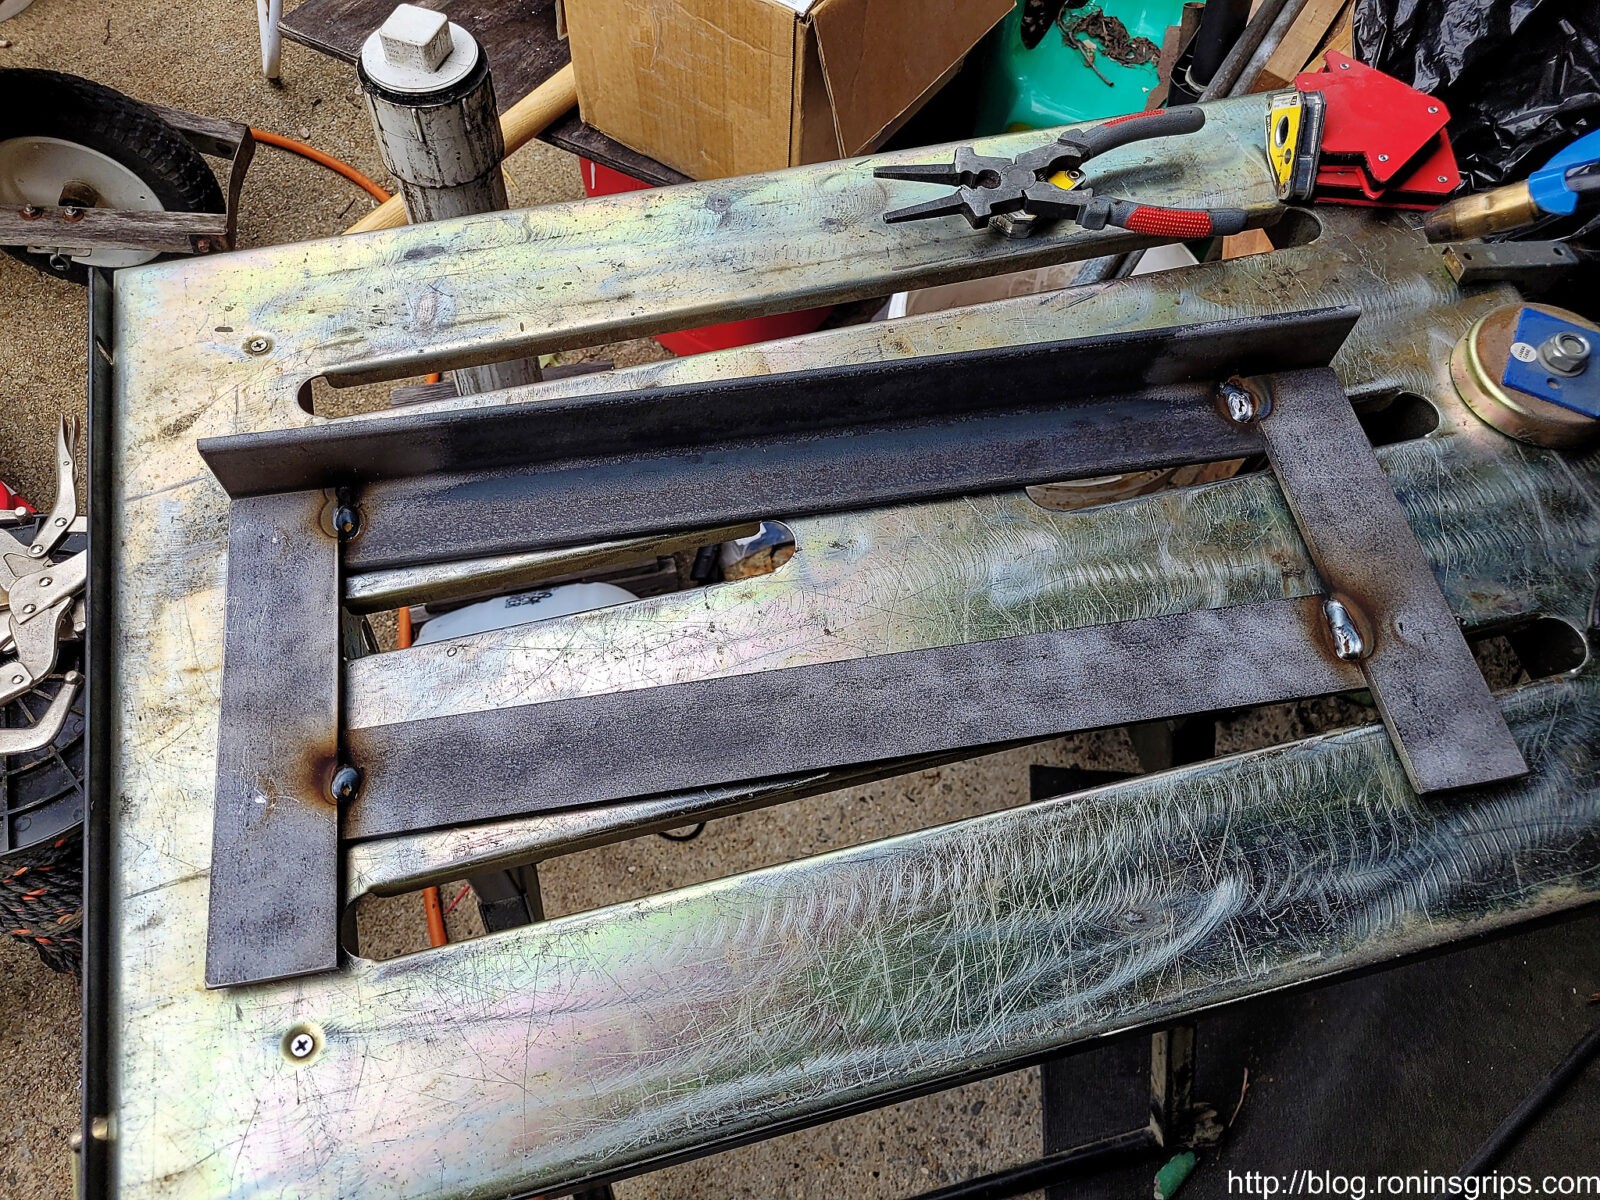
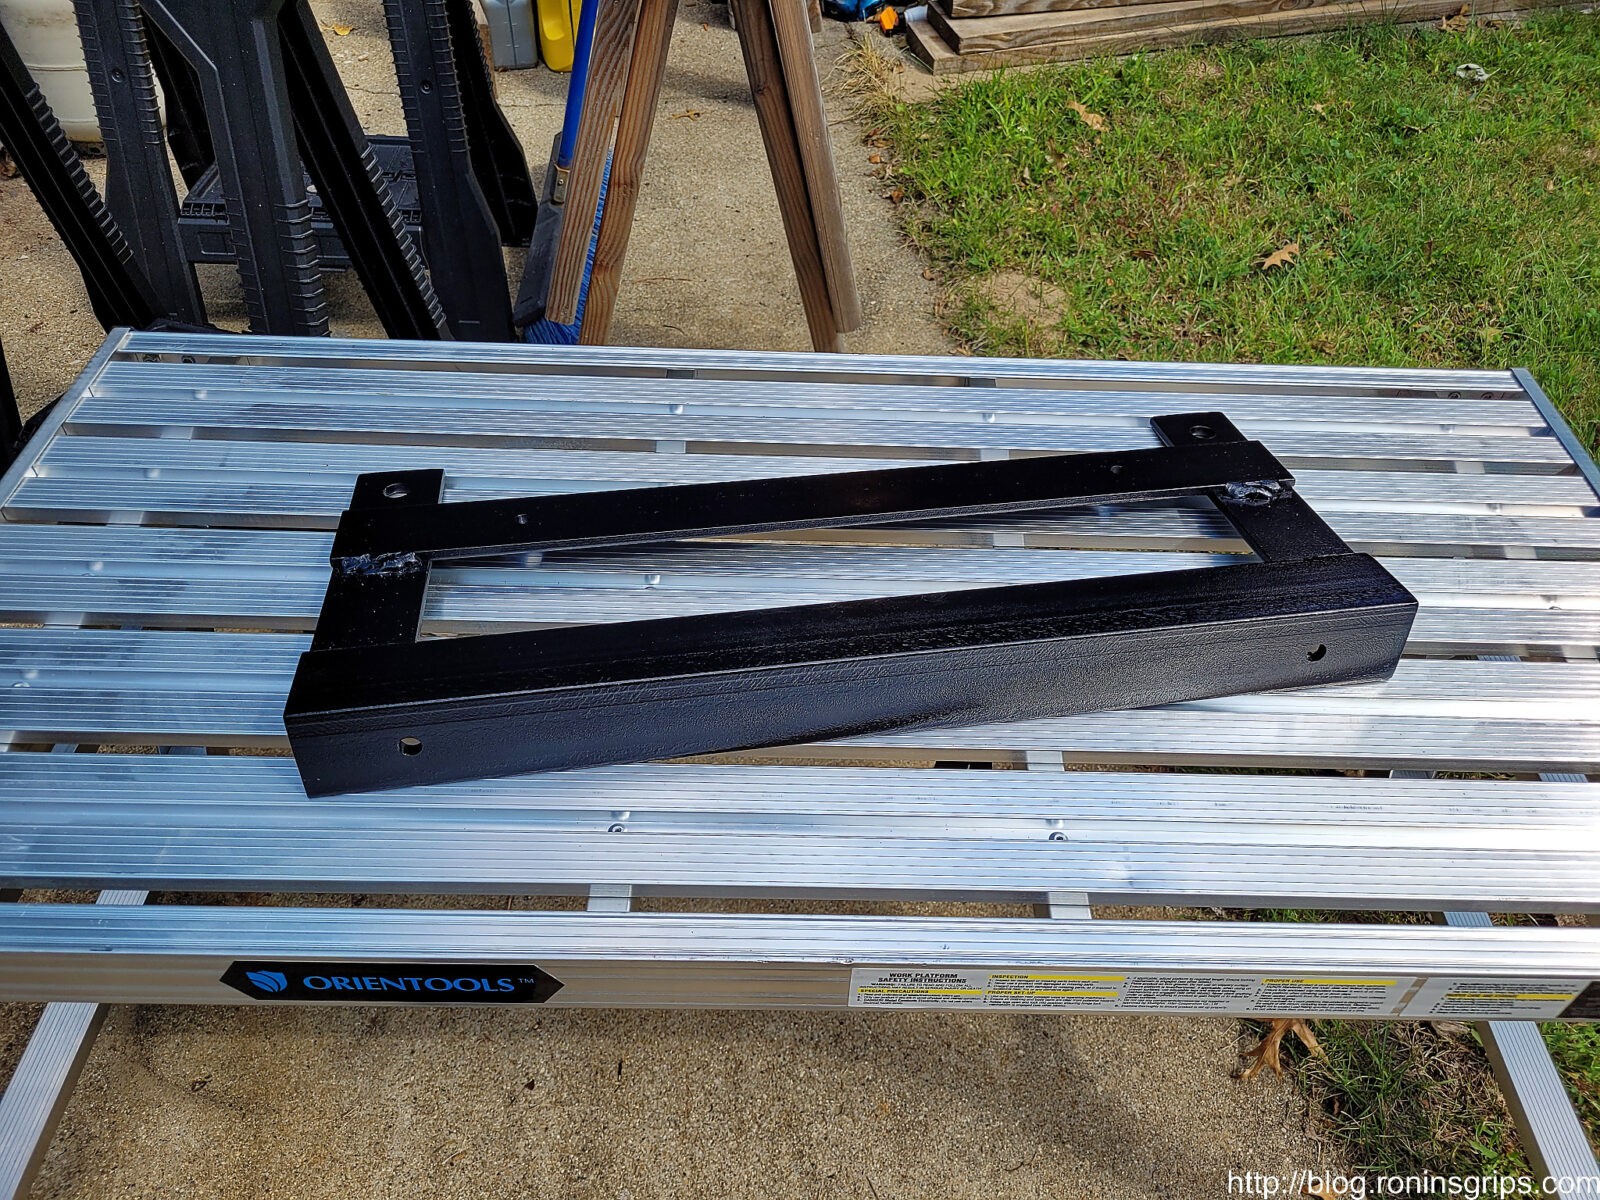
The front of the bracket has four coats of black Rustoleum all in one and the back has three. It’s impossible to stop rust in Michigan due to our salting roads in the winter but we can at least try and delay it. Yeah, still no third hole on the top yet. I don’t think I have a photo of the bracket before mounting the lights with the third hole. For all of the holes, try and make sure they are true to one another and horizontally parallel .
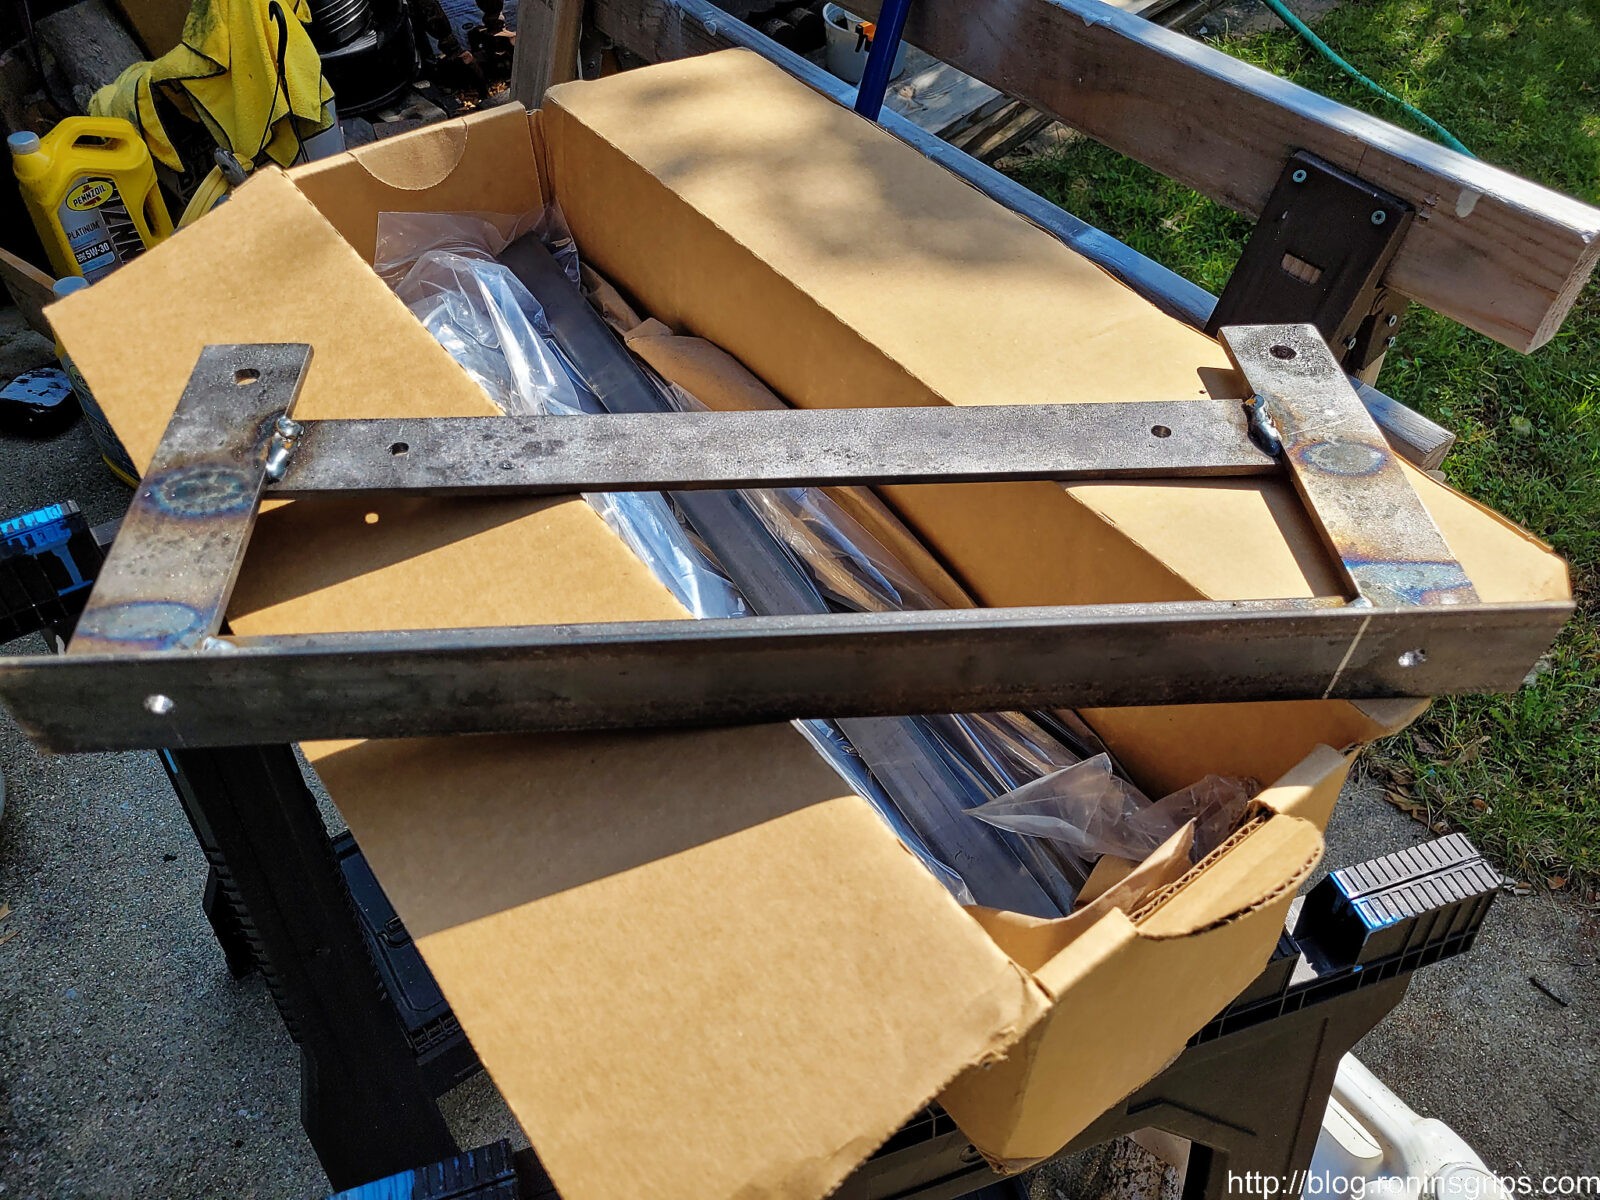
Before mounting the lights, I did test mount the bracket just to make sure. One interesting thing surfaced – when the tech installed the plow sub-frame, he did not true the left side. The right side is properly parallel to the ground. The left side’s bracket is clocked up a degree or two. If you look at the cross member where it bolts together you can see the left side is not true. I plan to find out what they did wrong and fix it but didn’t do so when I installed the lights.
By the way, this was not light by any means. The bracket weighed just under 12.5 pounds prior to the lights.
Mounting the Light Bars
With the bracket completed, next up was to mount the light bars. I wanted to do that and then install the whole assembly into the truck vs. installing the bracket and trying to install everything in an awkward position under the truck.
Here are the lights in their mounts. As you can see, the third bolt on the top is now in place. I did put a couple of coats of black paint in the new hole to slow down the rust. The top white LED is pointing straight ahead. The amber light is angled down as far as the bracket allows. I could have filed the slots a tad and been able to angle it down another degree or two but it turned out to be enough to keep the amber light out of the eyes of oncoming traffic.
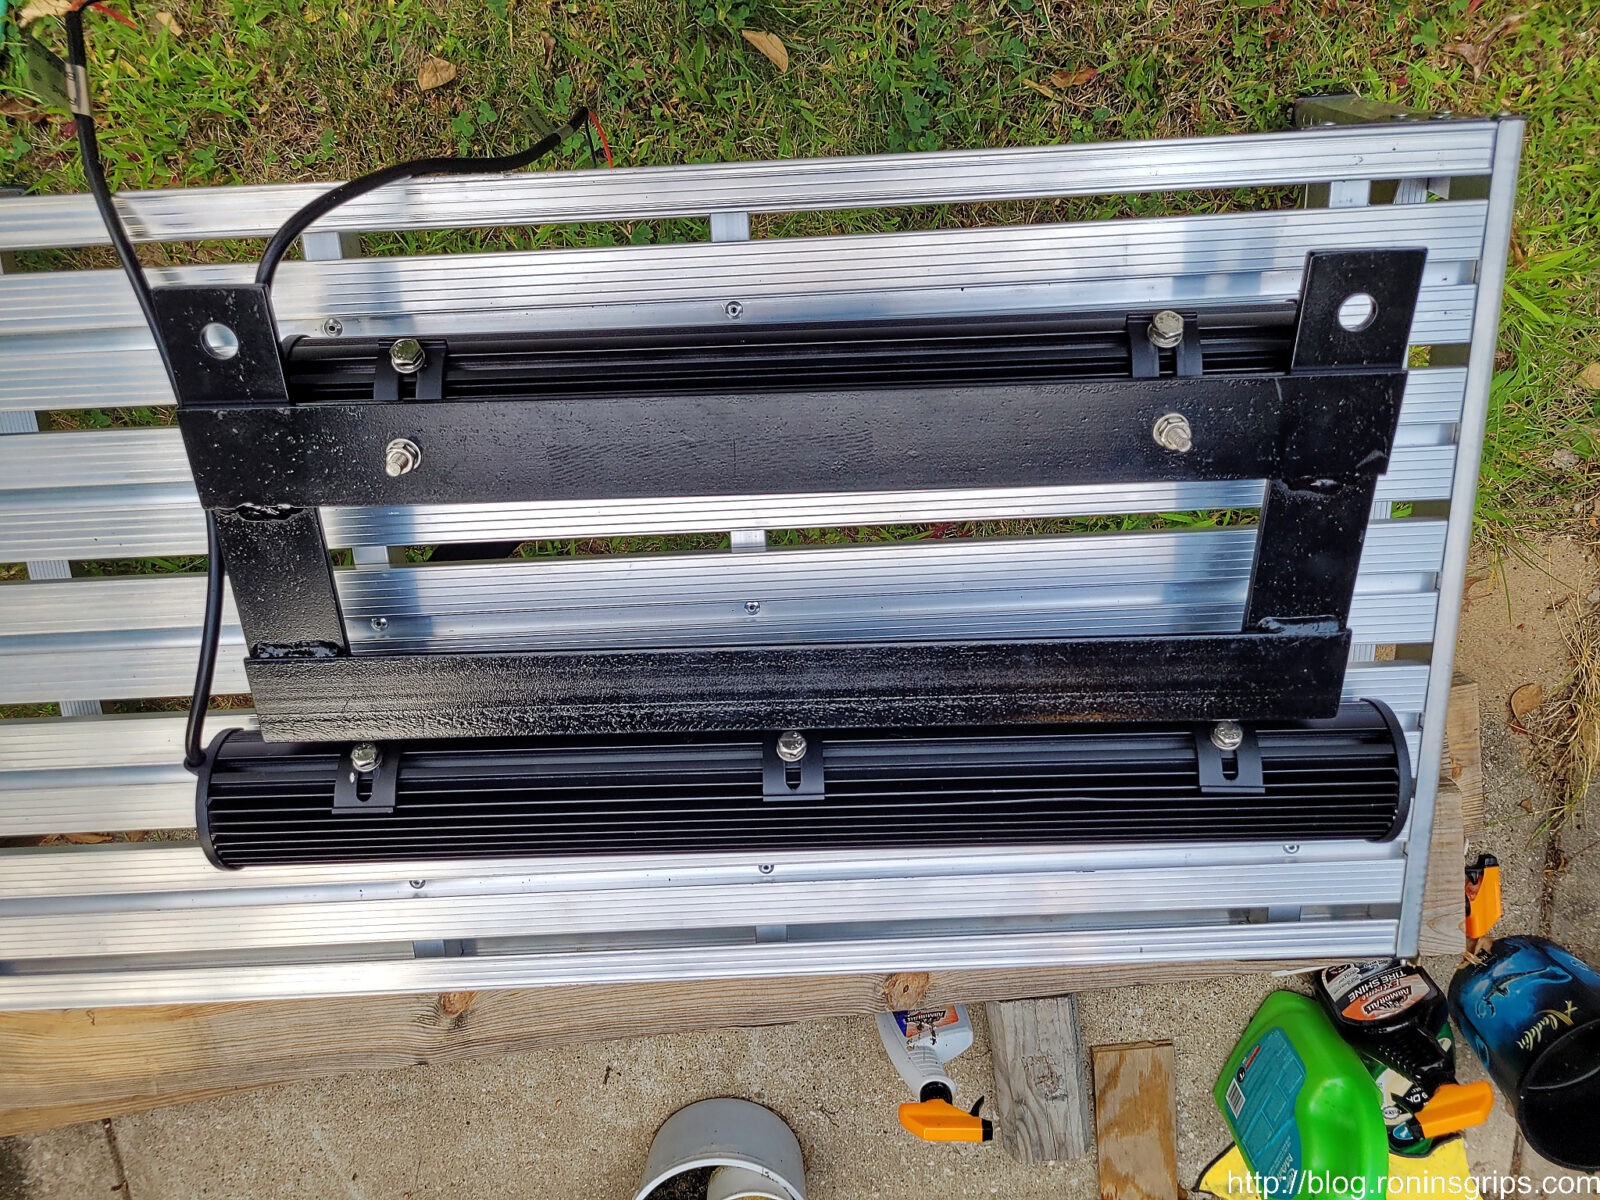
Here’s a rear view where you can see Nilight’s brackets better. Each one has a slight arc and you have quite a bit of adjustment.
Wiring Up The Lights
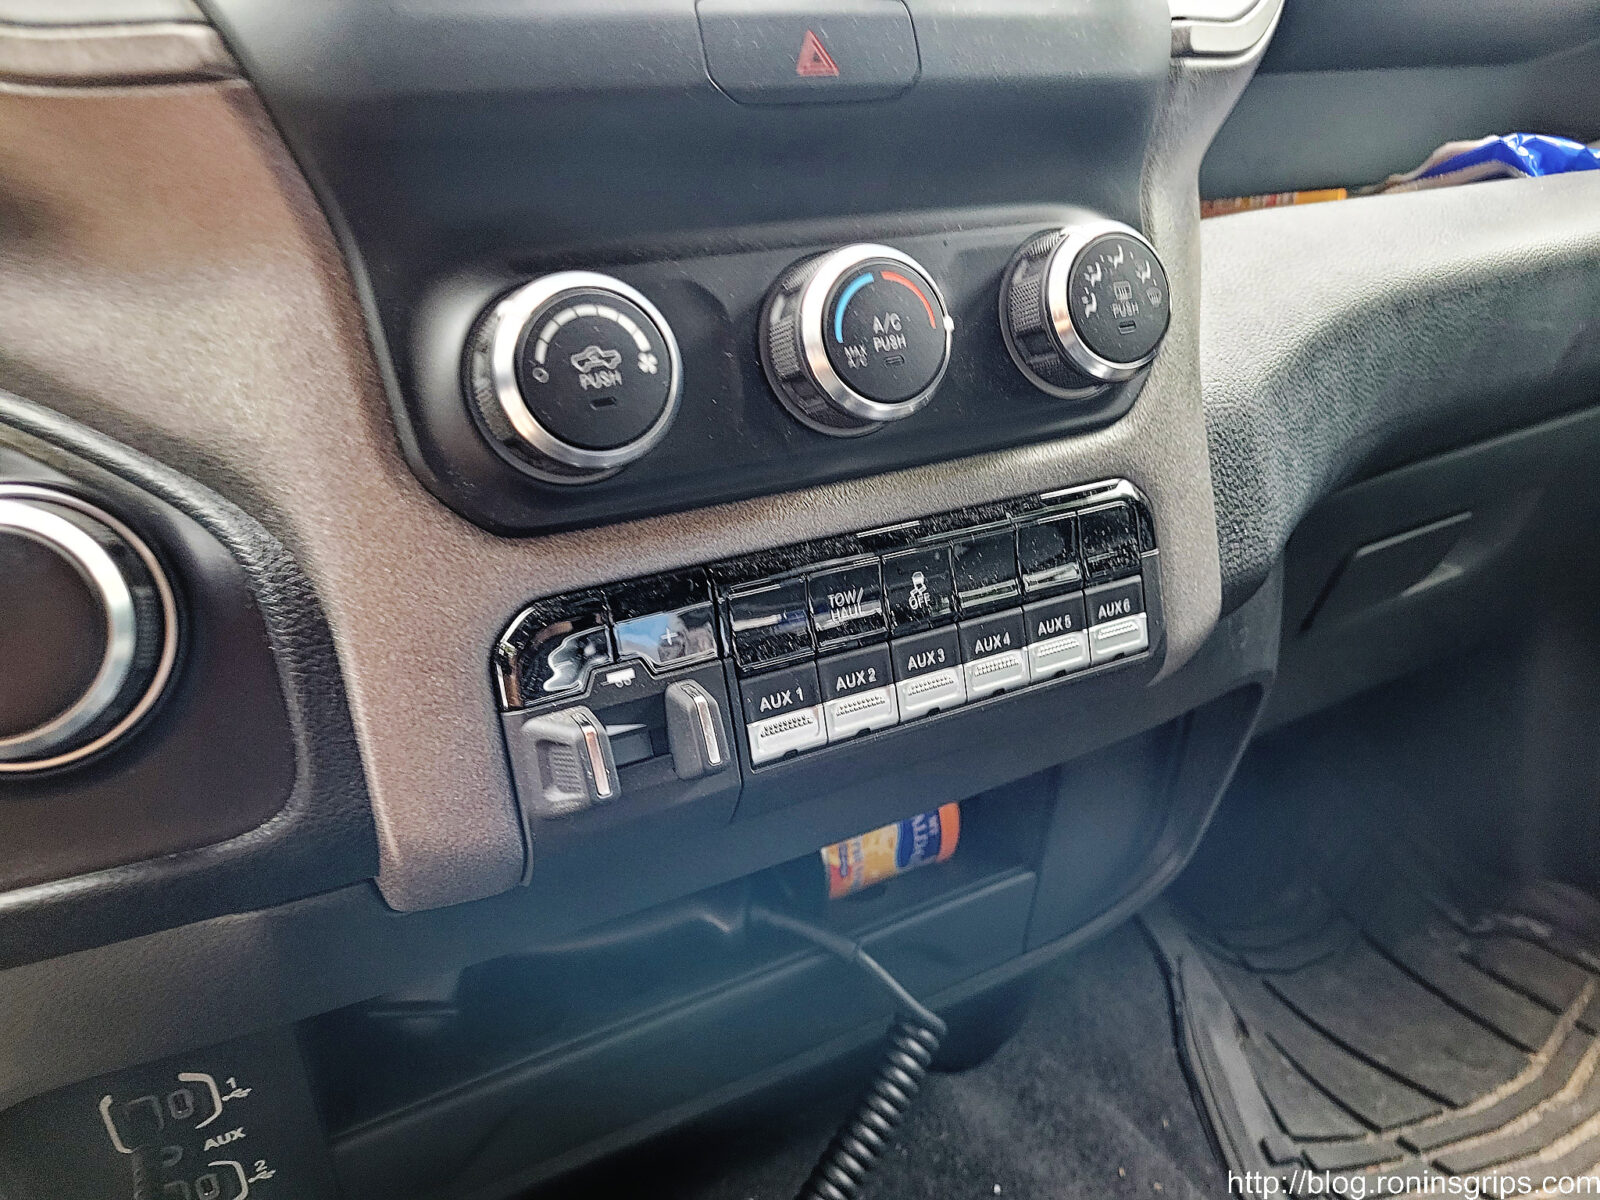
As mentioned my plan was to use the upfitter switches and I did. If you do not plan to, then use the Nilight switch. I am going to detail what I did with the upfitter wiring. Why use the upfitter switches? Personally, I think it makes for a very clean look. You have the nice integrated switches in the dash and then RAM also did the wiring out to a number of different terminal locations for you hook up accessories.
These are the upfitter switches. If you do not see something like this in your truck then you do not have that option package and can just go ahead with using a separate switch – such as the one that comes with Nilight’s wiring harness. My plan was to use Aux 1 for the 20″ amber fog light and Aux 2 for the 26″ white LED bar.
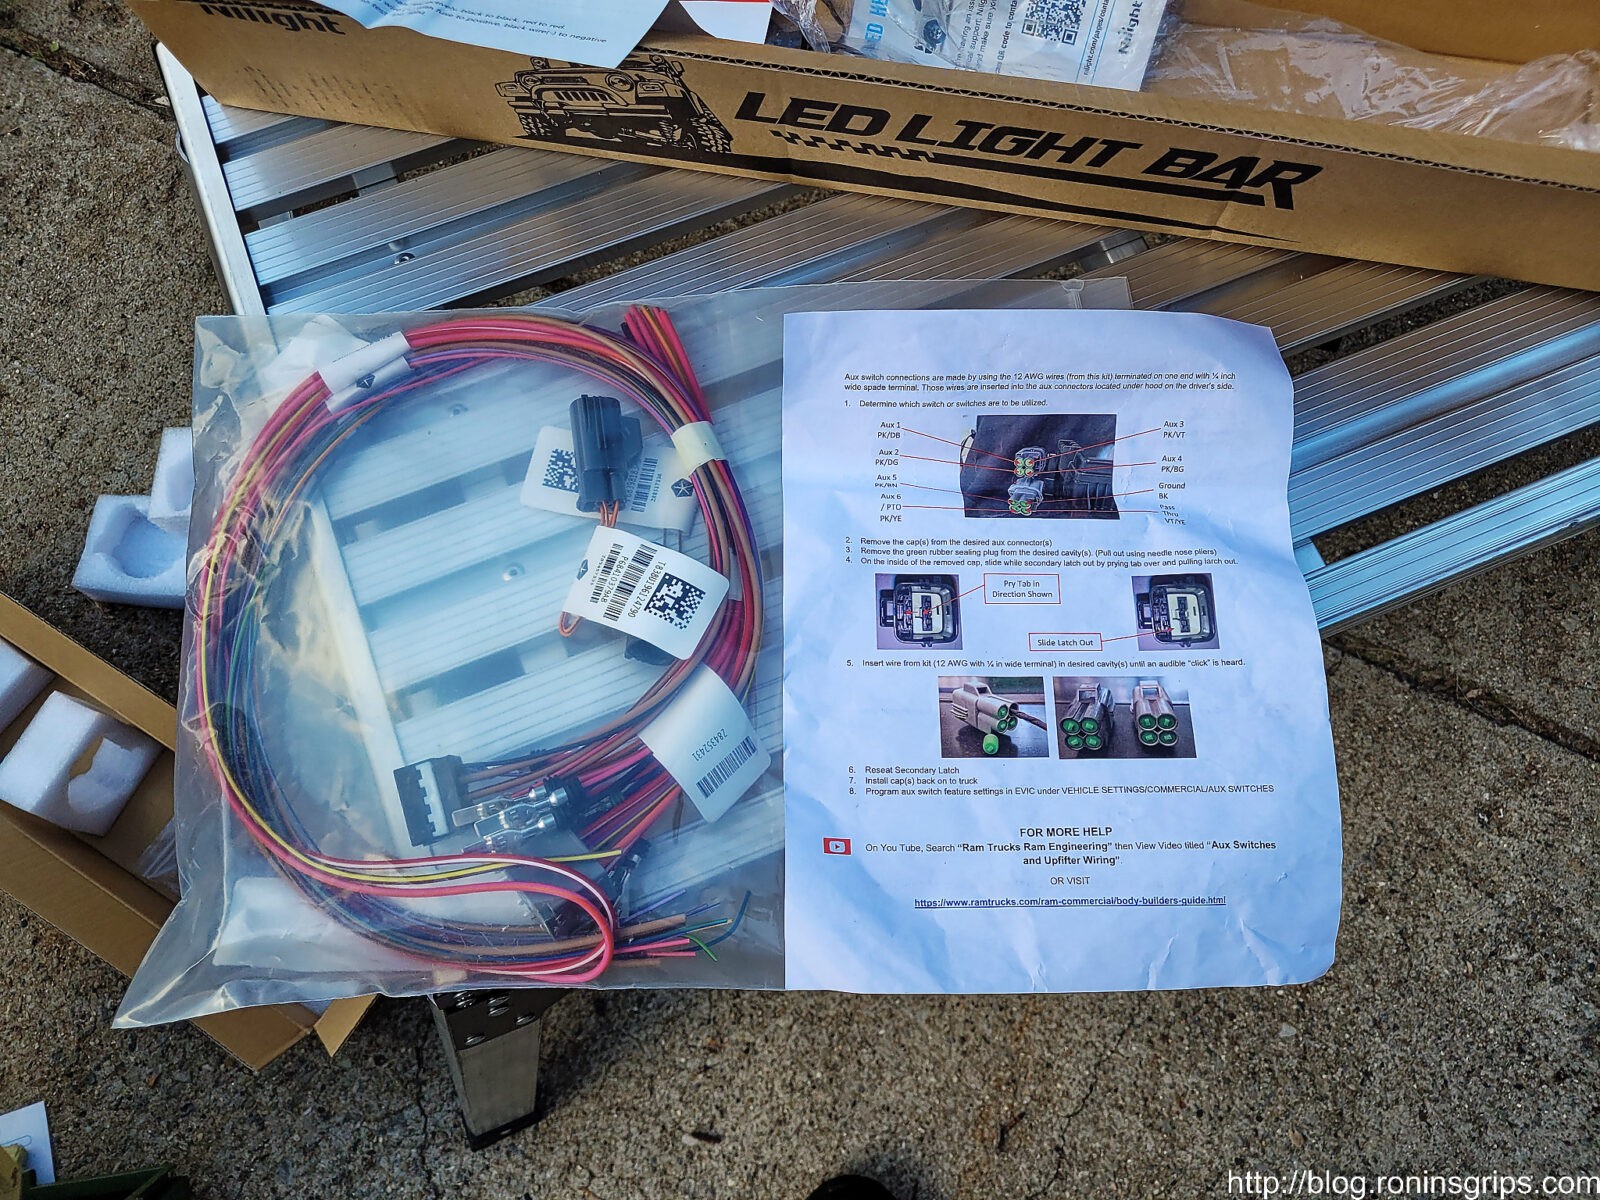
In addition to the switches you should have a bag of wires and a brief guide in a plastic bag. My bag was under my back bench when I bought the truck. You need the wiring in this kit. There are aftermarket wiring kits if you lost your’s but bottom line is that you need the wiring.
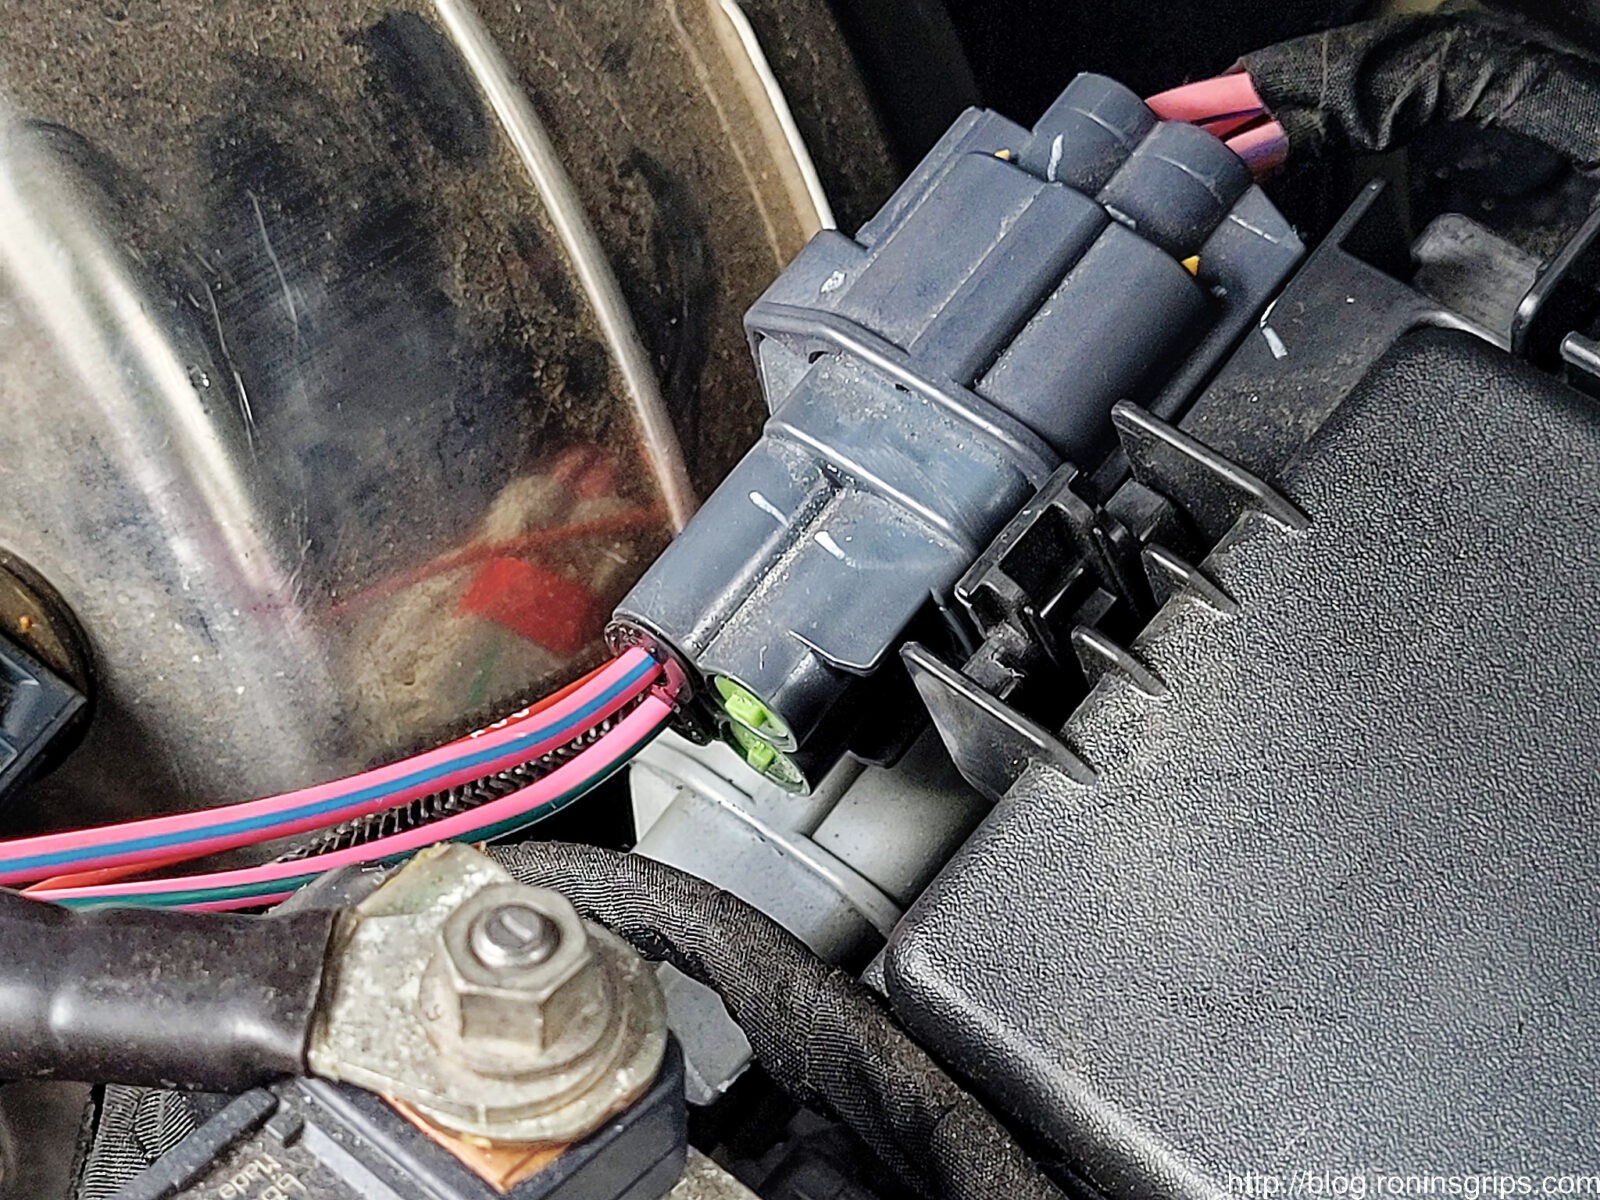
We are using two of the 12 AWG wires – the color code for Aux 1 is Pink with a dark blue line abbreviated PK/DB. The Aux 2 is Pink with a dark green line abbreviated PK/DG.
See the funny looking grey connector with the green plugs on the left side of the fuse box? That is the upfitter terminals for Aux ports 1 through 4. Aux 1 is top left. Aux 2 is bottom left. Aux 3 is top right and Aux 4 is bottom right. Now there is another grey connector block under that which we do not need.
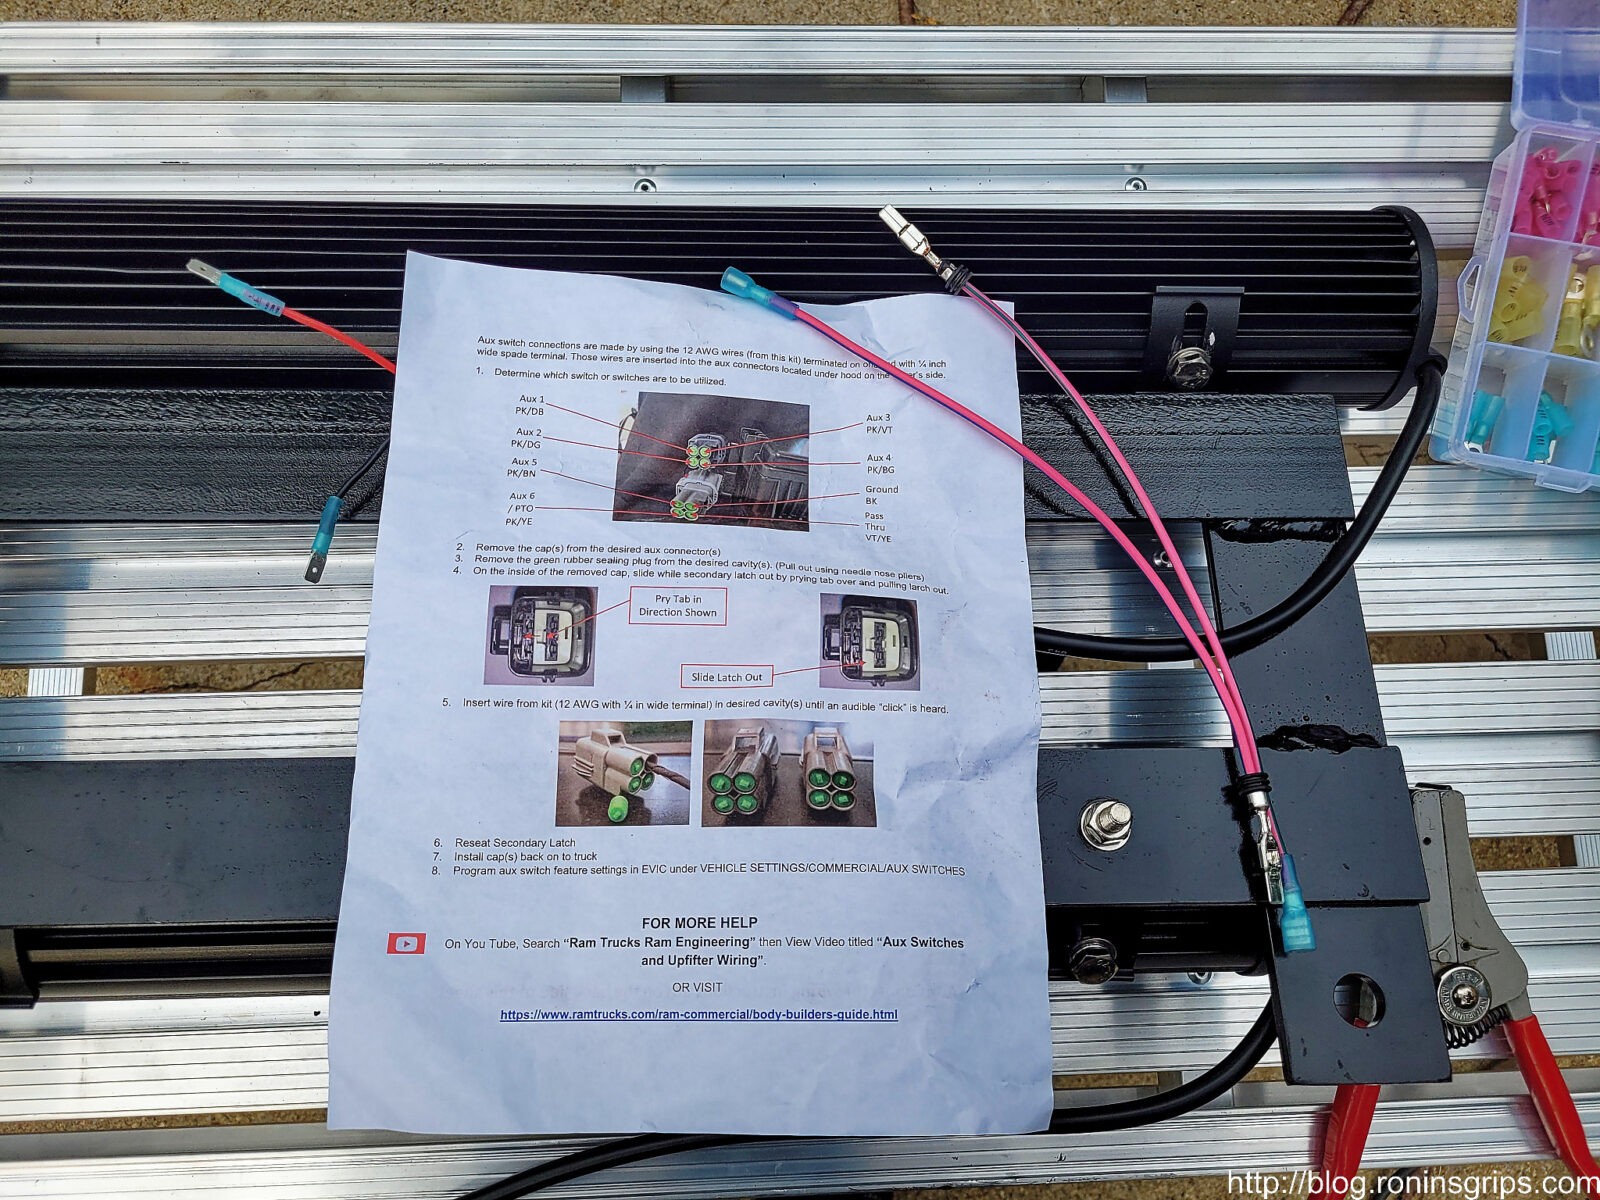
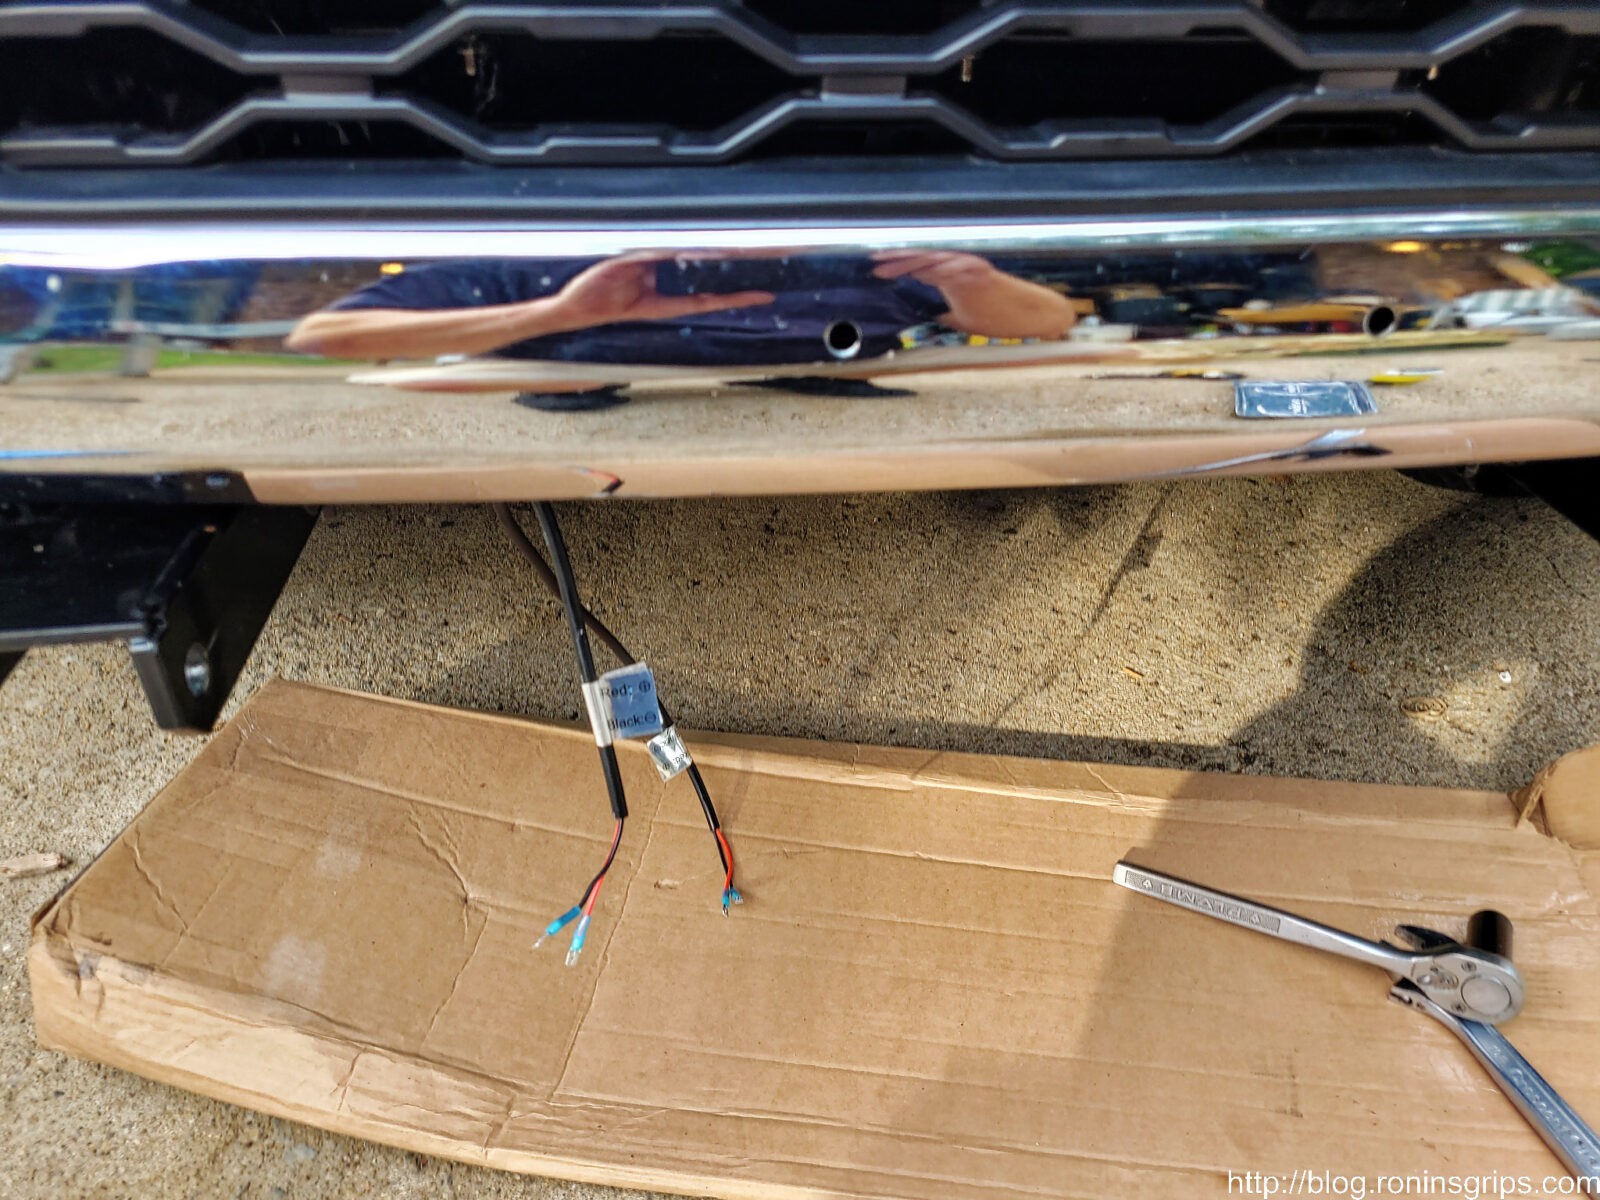
With the male spade fitting installed, I then went ahead and mounted the light bar assembly under the truck and tightened down the bolts. I put a cardboard box there because if I dropped the assembly I didn’t want to trash the paint. Thankfully, I didn’t drop it but I have fumbled stuff in the past hence the relatively soft landing zone.
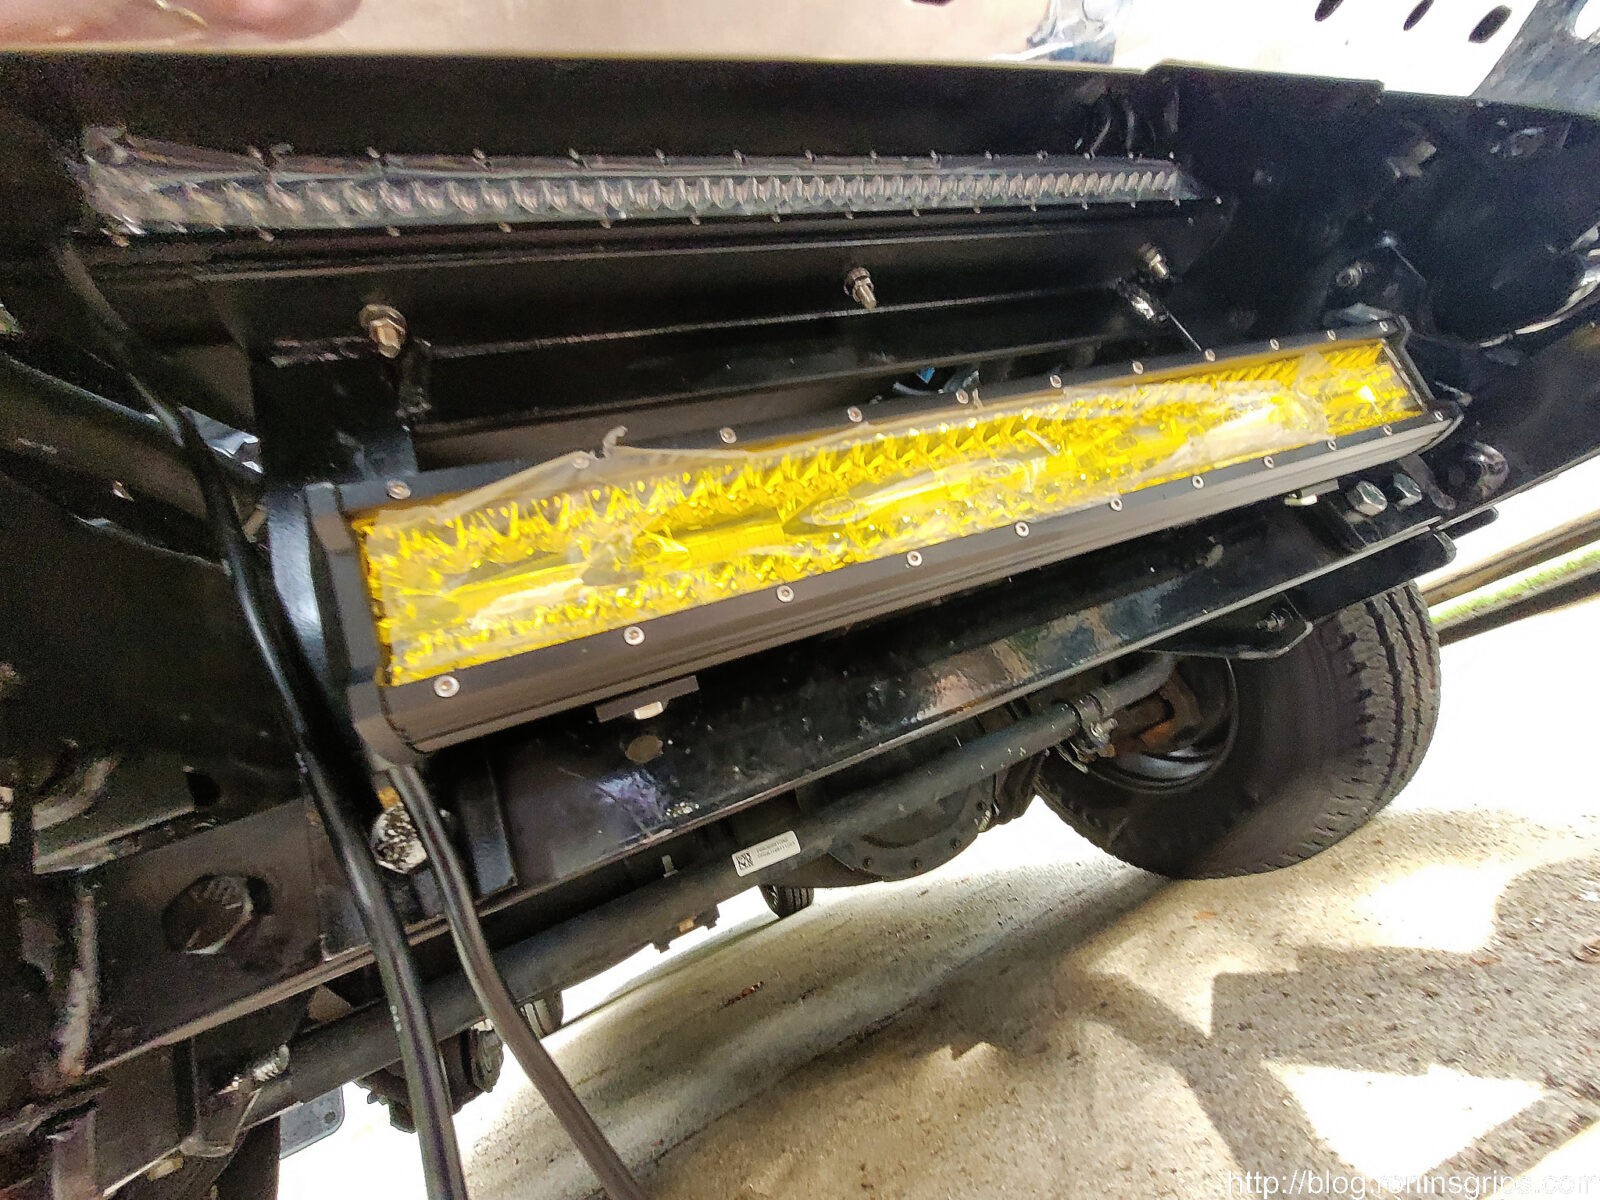
Peeking up from ground level this is how things looked. I did not pull the protective lens cover film off until it was time to test the lights.
The white LED is located back from the grill. LEDs can get surprisingly hot and I didn’t want to melt the plastic. I may be losing some of the projected light being set back like that but the end result is still remarkable and I don’t have to worry about melting the grill if the truck is standing still with the LED on.
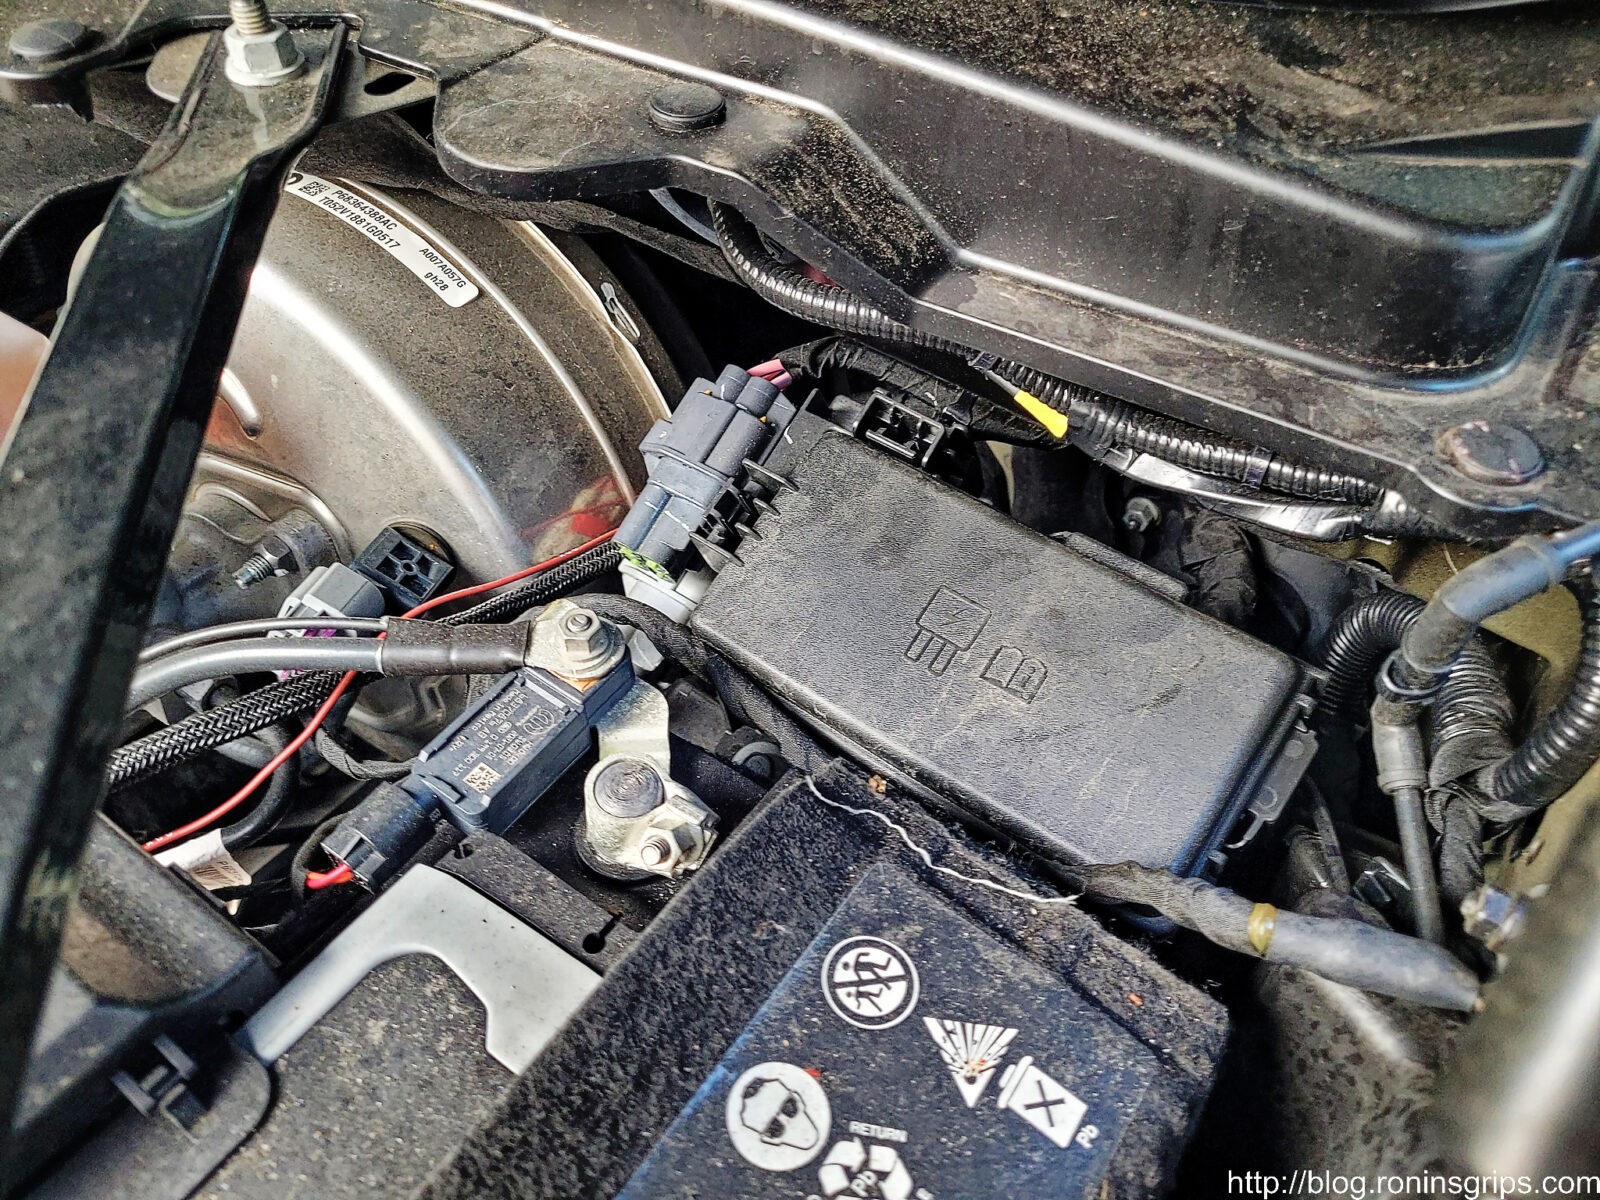
The green rubber plugs are pulled out using needle nose pliers. As you can wee, we have the pink & blue wire in the Aux 1 port and the pink and green wire in Aux 2.
Even when it comes to the upfitter switches and wiring, I wanted to make sure they worked. I turned on Aux 1 and got over 12 volts and when I turned it off, no volts. Same with Aux 2. We are using power from the Aux switches to switch relays on or off. Relays have a very low current draw so I don’t need to worry about blowing fuses relating to the upfitter wiring.
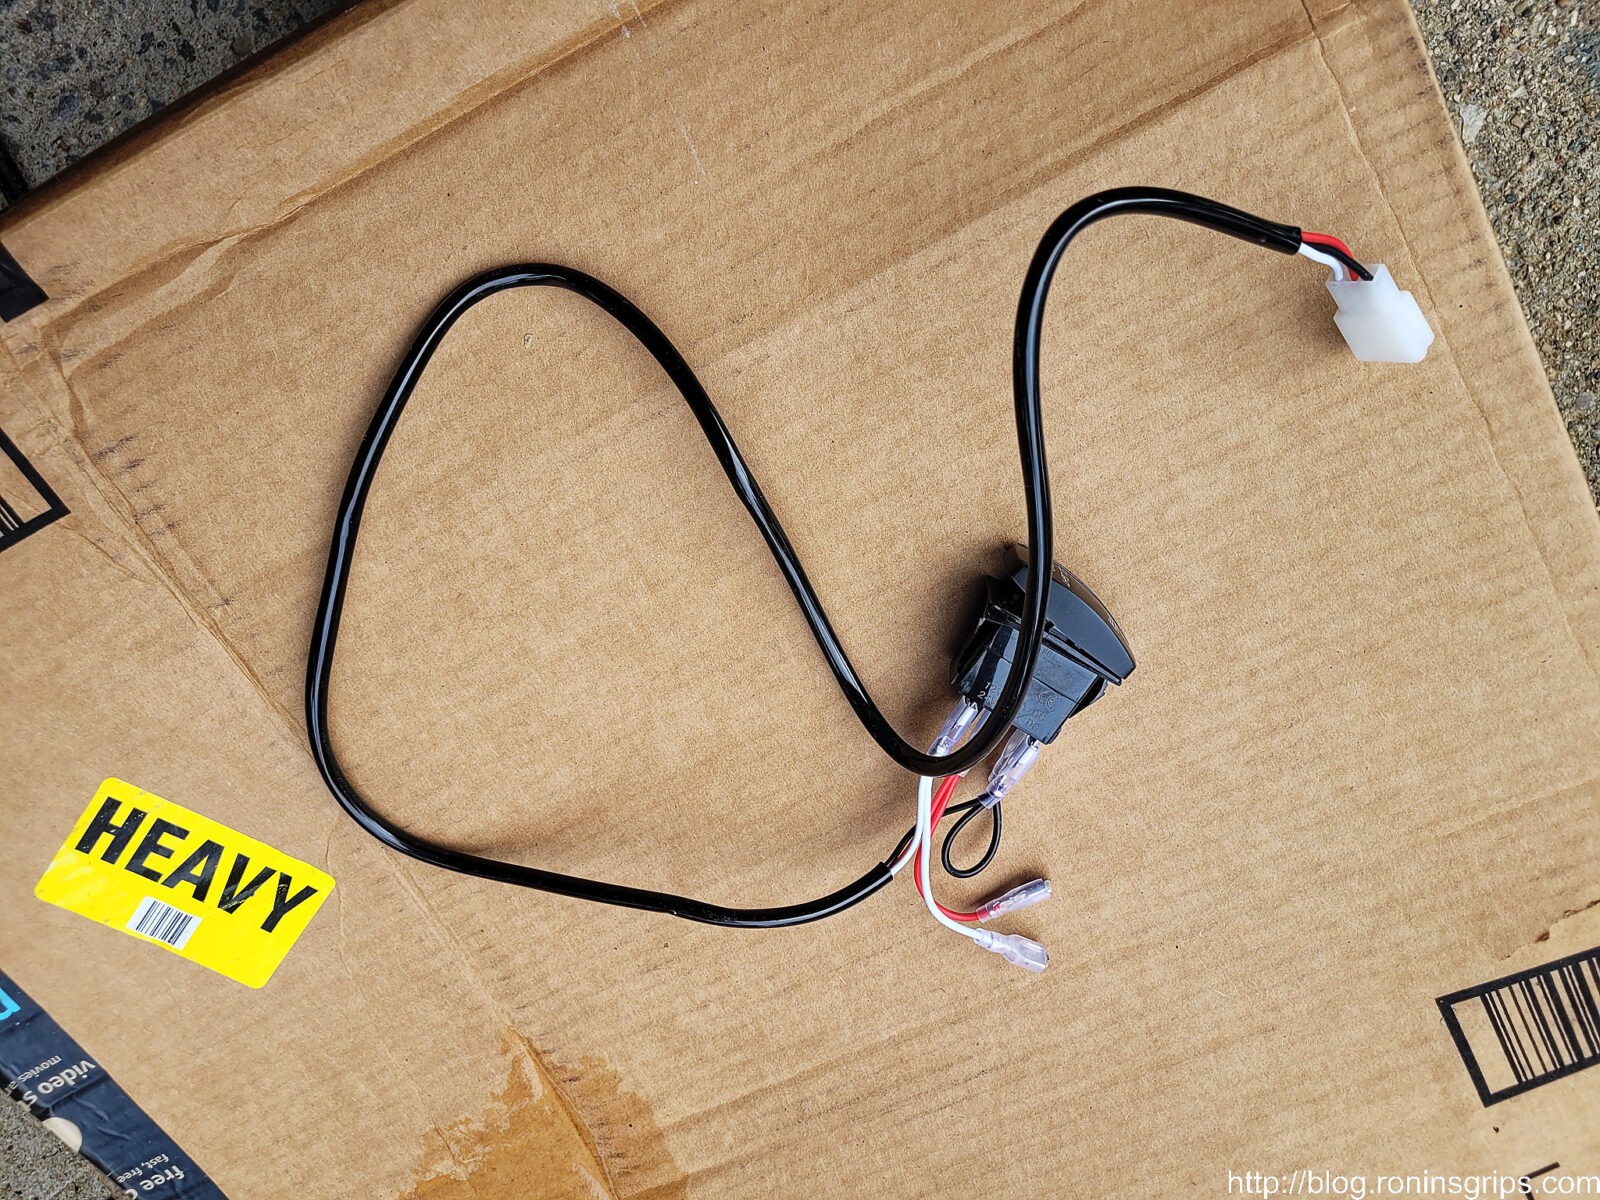
This is the modular swith portion of the Nilight wiring harness, Red is positive, Black is negative and White is switch circuit for the relay. In other words, positive comes in on red, when the switch turns on, power then goes through the white circuit, the relay switches and then the larger/heavier 14 gauge wires carry the current from the battery to each light bar. You will connect the white wire of the wiring harness to the relevant Aux pigtail lead. As mentioned, I used spade connectors but you can solder them if you wish, You will not use/need the red or black so make sure they are cut back and protected to prevent any surprises.
I trimmed the switch wire back and then zip tied everything in place so it wasn’t flopping around. One thing I did was to wrap yellow electrical tape at the base of the fog light relay so I would rapidly know which of the two it was and I wrapped white electrical tape at the base of the relay for the white 26″ bar. You want them secure so the wires don’t flex around unnecessarily and break down over time.
Testing and Results
I turned the switches on and confirmed the lights work then I waited for it to get dark. The following photos are of a tree line about 40 yards from the front of the truck plus are straight out of the camera – no color changing, sharpening, etc.
Low beam – these are the stock halogens.
High beams – Lasfit LED upgrade
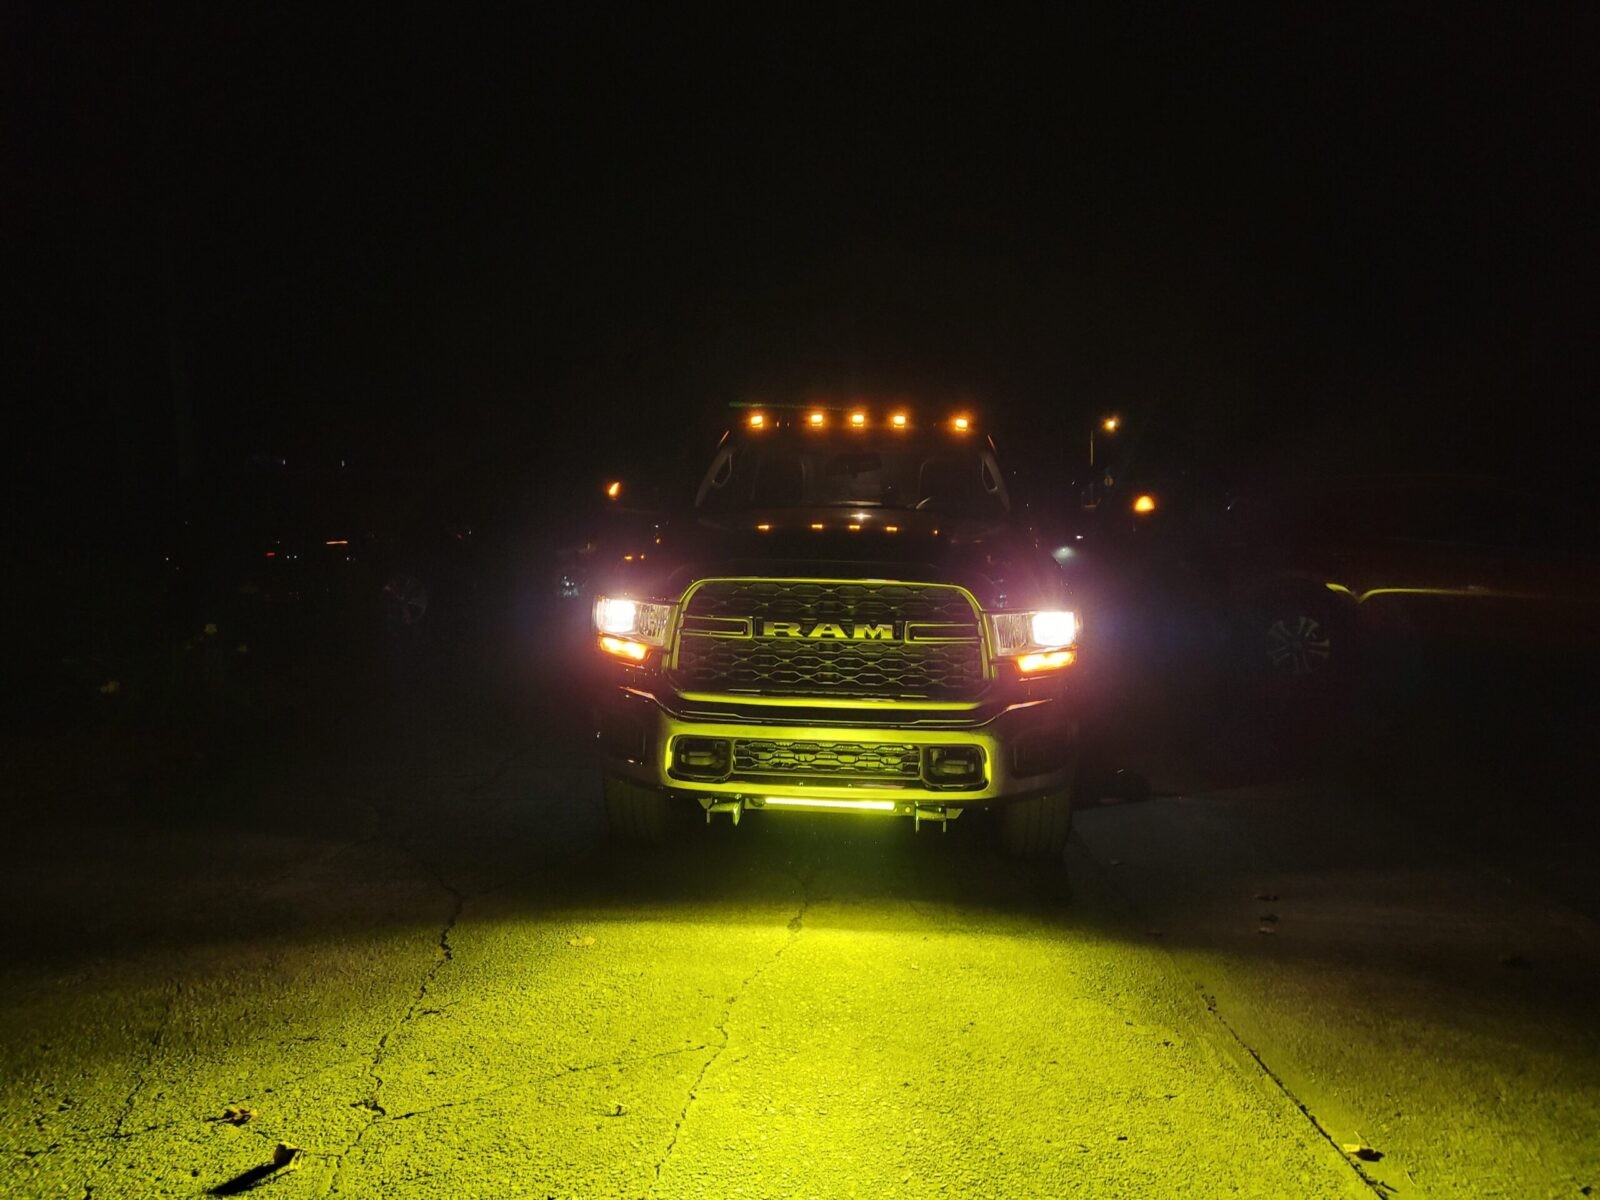
High beams and new Nilight 20″ yellow fog light bar turned on.
High beam, yellow fog and 26″ light bar all on. What you can’t see in this photo is that peripheral light increased dramatically. If you were on a trail and wanting to see a deer or something coming in from the side, it’s a definite improvement. Just to be clear though, this is not street legal.
Here’s a video of the testing:
This really helps you see the results.
Here’s looking at the truck with low beams on and the yellow LED bar. I really like how it lights the road up directly in front of the truck. You can see the clocking issue I mentioned because the amber light bar is slightly lower on the right than on the left.
Oh man, do not run that 26″ bar on the road. It is like looking at a camera flash going off continuously. It’s incredibly bright and will blind anyone looking at it. It took a few minutes for my vision to come back after quickly snapping this photo.
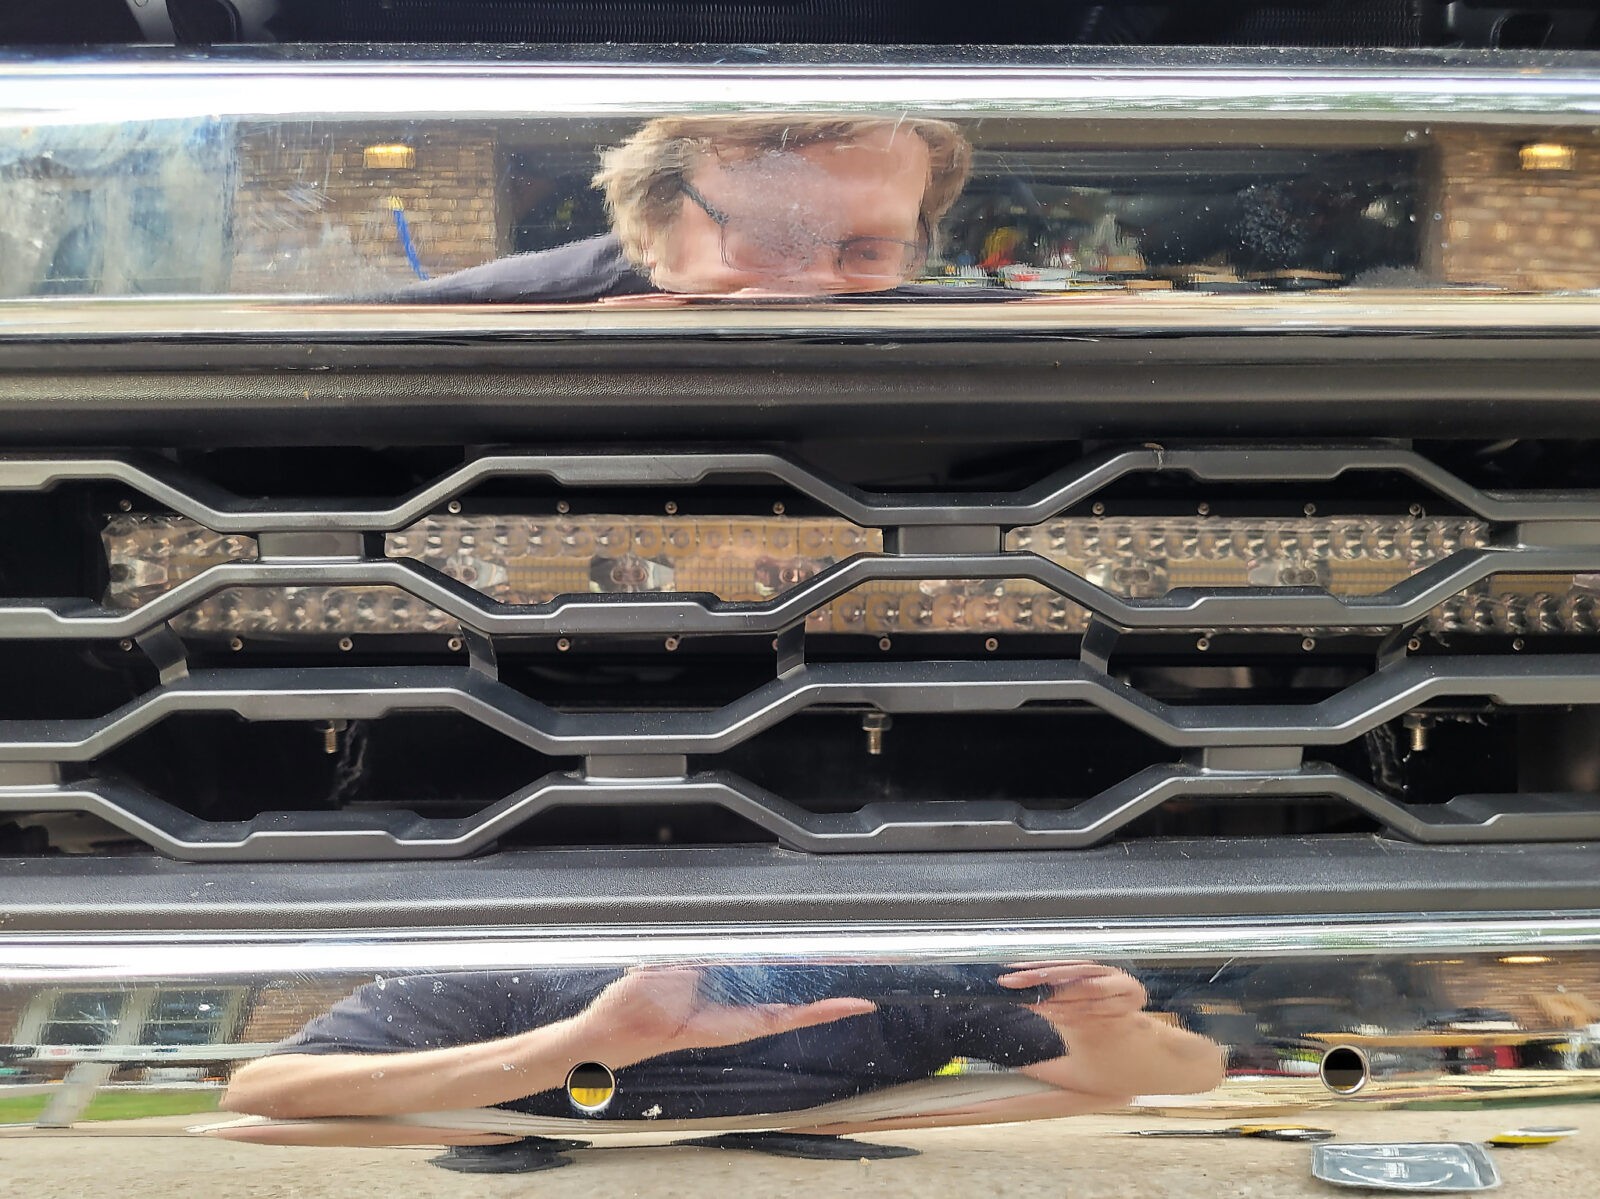
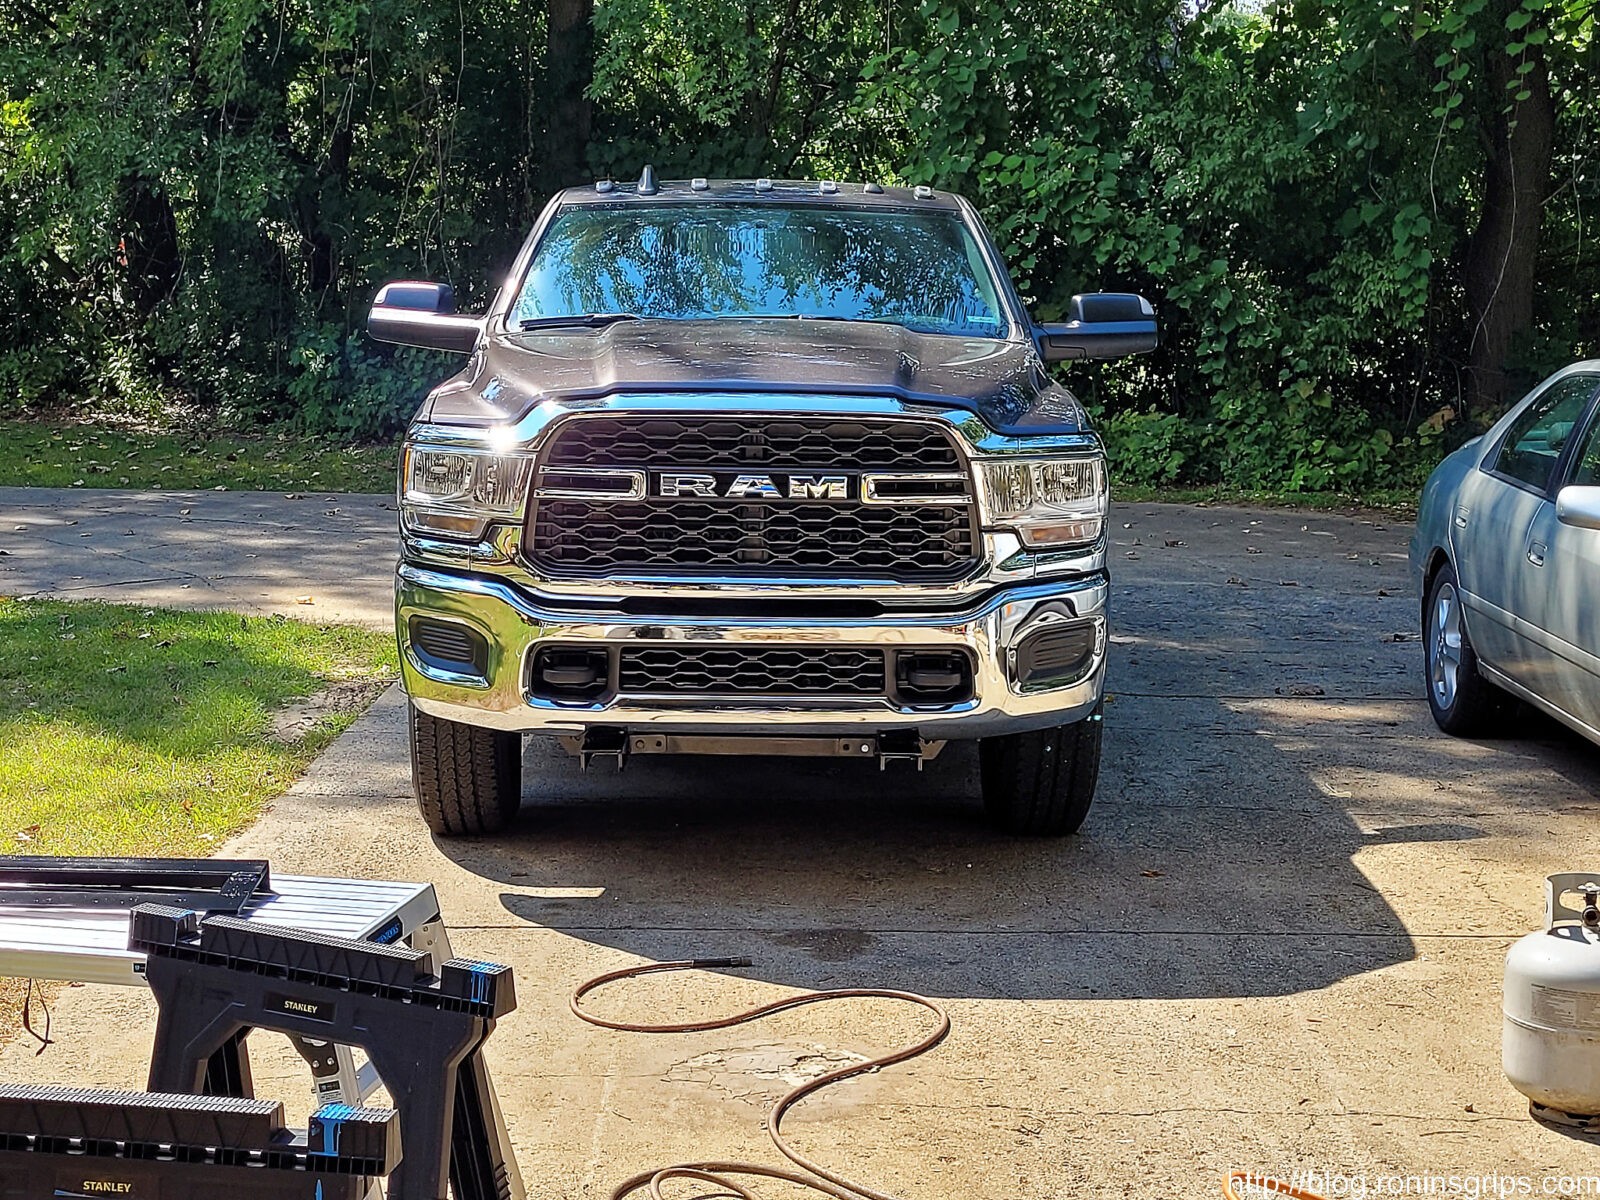
From a distance you really don’t see the lights blatantly there – you have to look for them.
You get in closer and you can see them but you have to be looking for them.
Conclusion
I like how things turned out. I’ve been using the set up for about a month now and am very happy. I’ll post updates down the road. Lighting may look daunting but it is actually quite straight forward. Nilight is a cost effective way to get started.
I hope this helps you out!
4/7/24 Update: Everything has held up just fine – no problems of any kind since I installed them.
Note, I have to buy all of my parts – nothing here was paid for by sponsors, etc. I do make a small amount if you click on an ad and buy something but that is it. You’re getting my real opinion on stuff.
We had a 2,200 mile trip planned expensive things are with a 2016 Ford Transit 150 that had six year-old tires on it – yeah, they need to be replaced but money is tight with inflation thanks to the politicians. The tread was definitely above the wear bars but the outer layer of rubber was starting to crack. So, I really wanted something to let me know how the tires were doing during the trip.
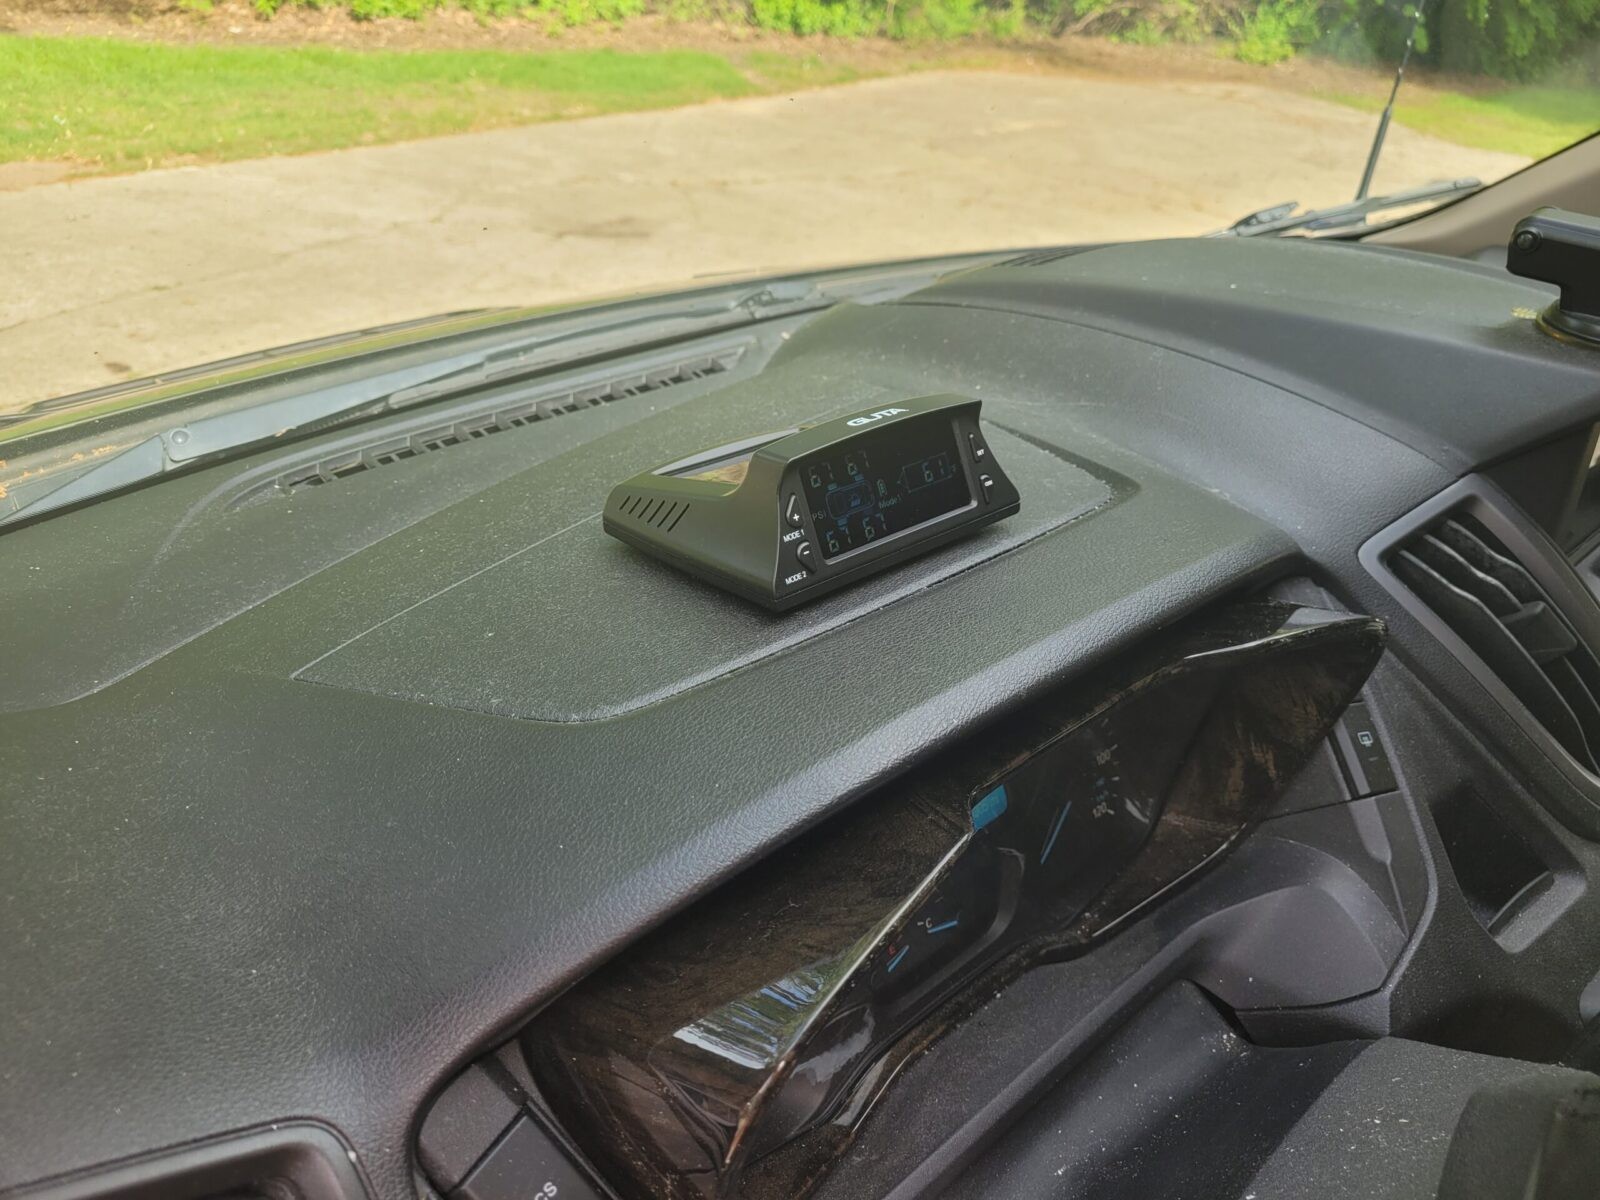
One thing I really like with my 2021 Ram 2500 is that I can see the tire pressure in real time. Our 2016 Transit has a basic tire pressure monitoring system (TPMS) but doesn’t report to you what the pressure is – it has has an indicator light if something goes wrong. I really wanted something real time for the van and had seen aftermarket TPMS units that had a receiver and sensors that went on the tire valve stems in place of the caps before.
I started doing some research and while there were a lot of different cheaper models out there, I went with the M20-4 (meaning 4 sensors included) model from GUTA on Amazon based on reviews. I’m actually writing this 1,100 miles into our trip and am quite happy with the unit so let me tell you more about it.
Out of the Box
Literally, the unit comes ready to go other than needing a quick topping off of the main receiver’s battery using a Micro USB cord. The sensors have their batteries loaded and are already programmed to the unit.
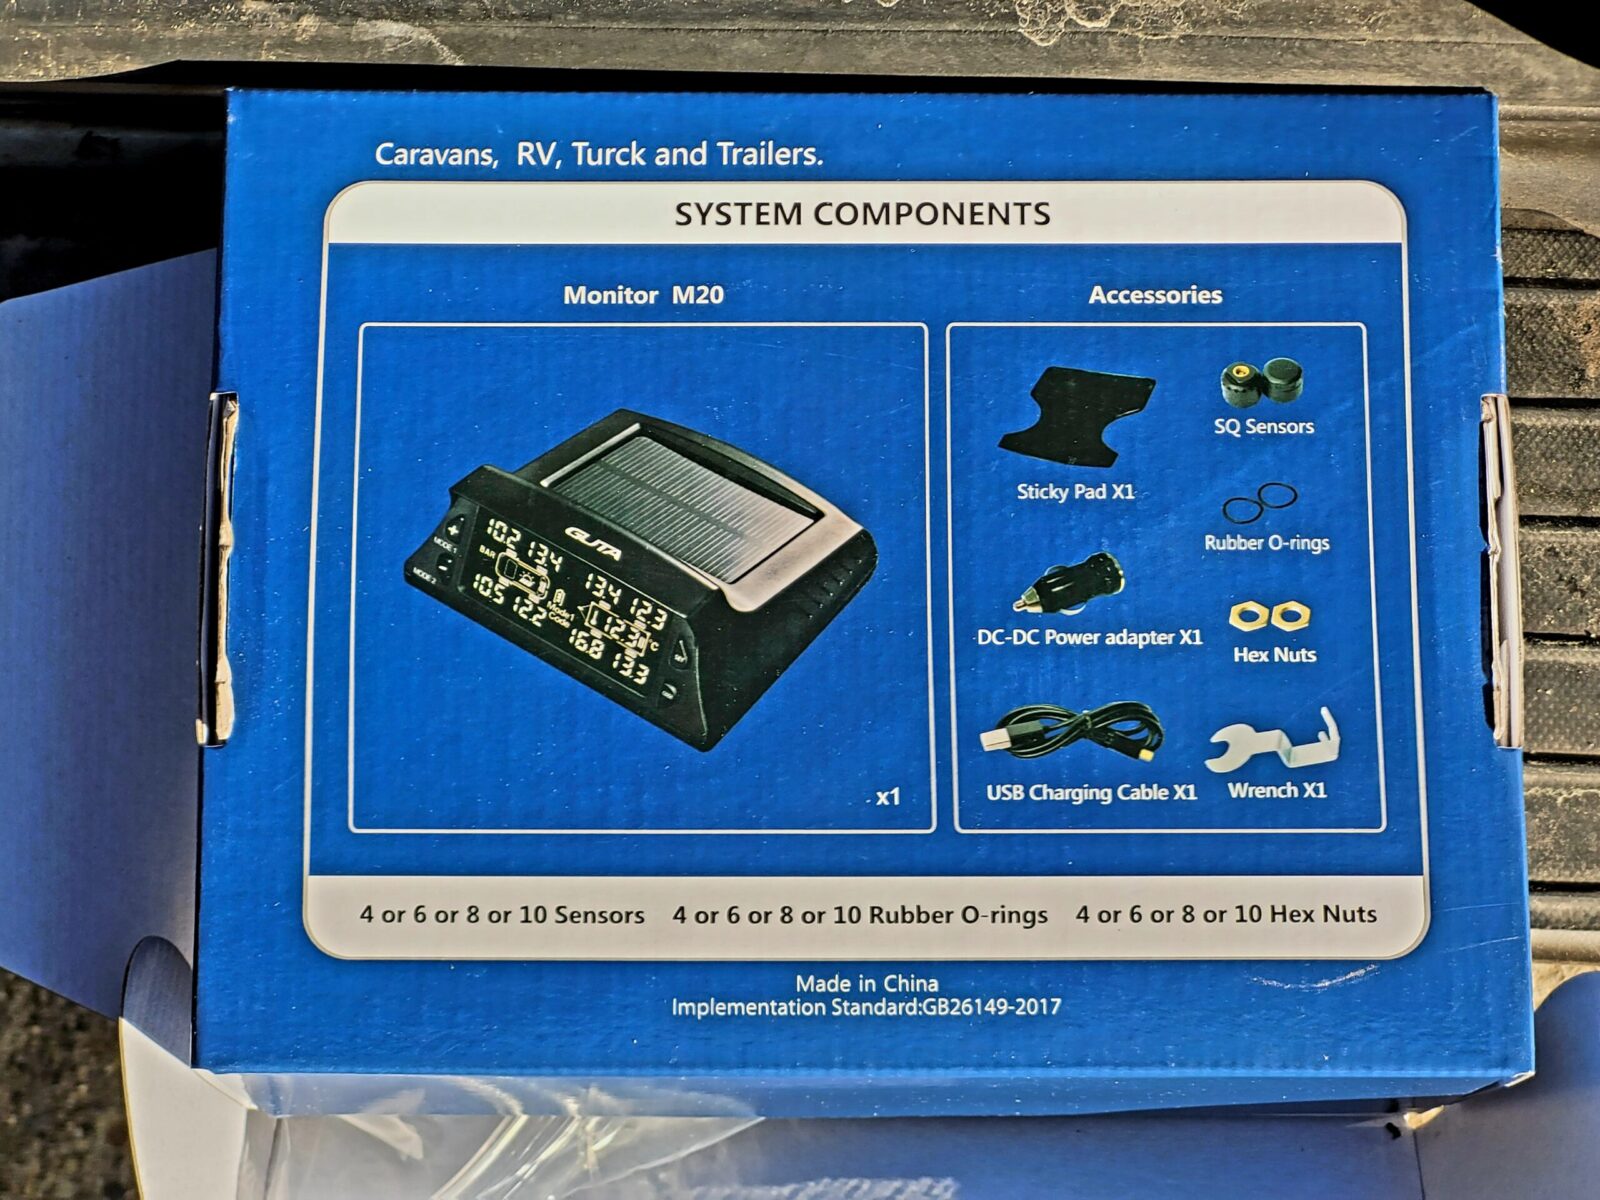
What you see on the box was included along with 4 sensors and 4 spare O-rings. I didn’t use their adhesive pad and just opted for a couple small pieces of velcro.
The unit recharges its batteries via the solar panel or you can plug it in – the provide both a car/truck cigarette lighter to USB adapter as well as a short cord, I planned to just run via solar so I didn’t bother.
I bought the four sensor model and in the box there are four ready to go sensors with their batteries installed already programmed to the receiver. The are labeled LF (Left Front), LR (Left Rear), RF (Right Front) and RR (Right Rear). Left and right are from the driver’s perspective looking forward.
All of the sensors were labelled, had the 2032 battery already installed and were programmed to the M20 receiver.
One of the reasons I bought the GUTA M20-4 was that nobody reported needing any extra antennas to pick up the data from the TPMS sensors. Our Transit is a full size 150 model so the wheelbase is about 148″ so I wanted to make sure I wouldn’t have a problem.
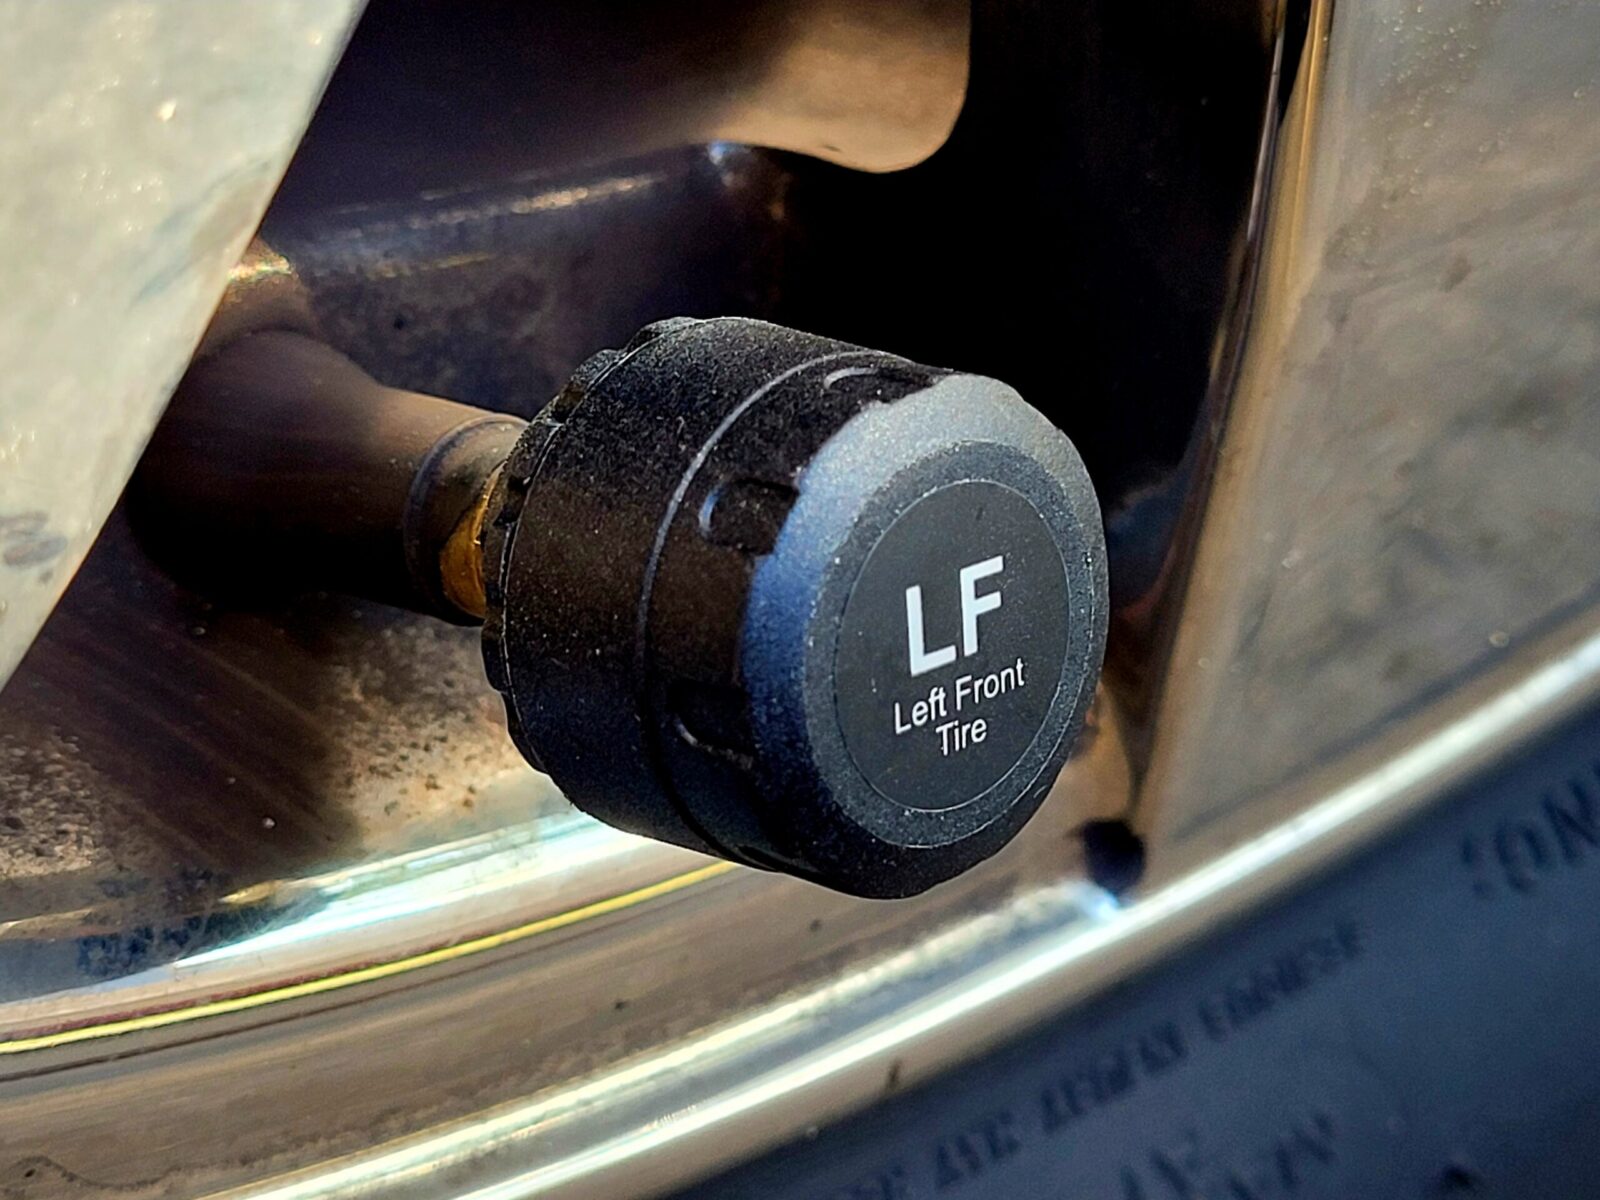
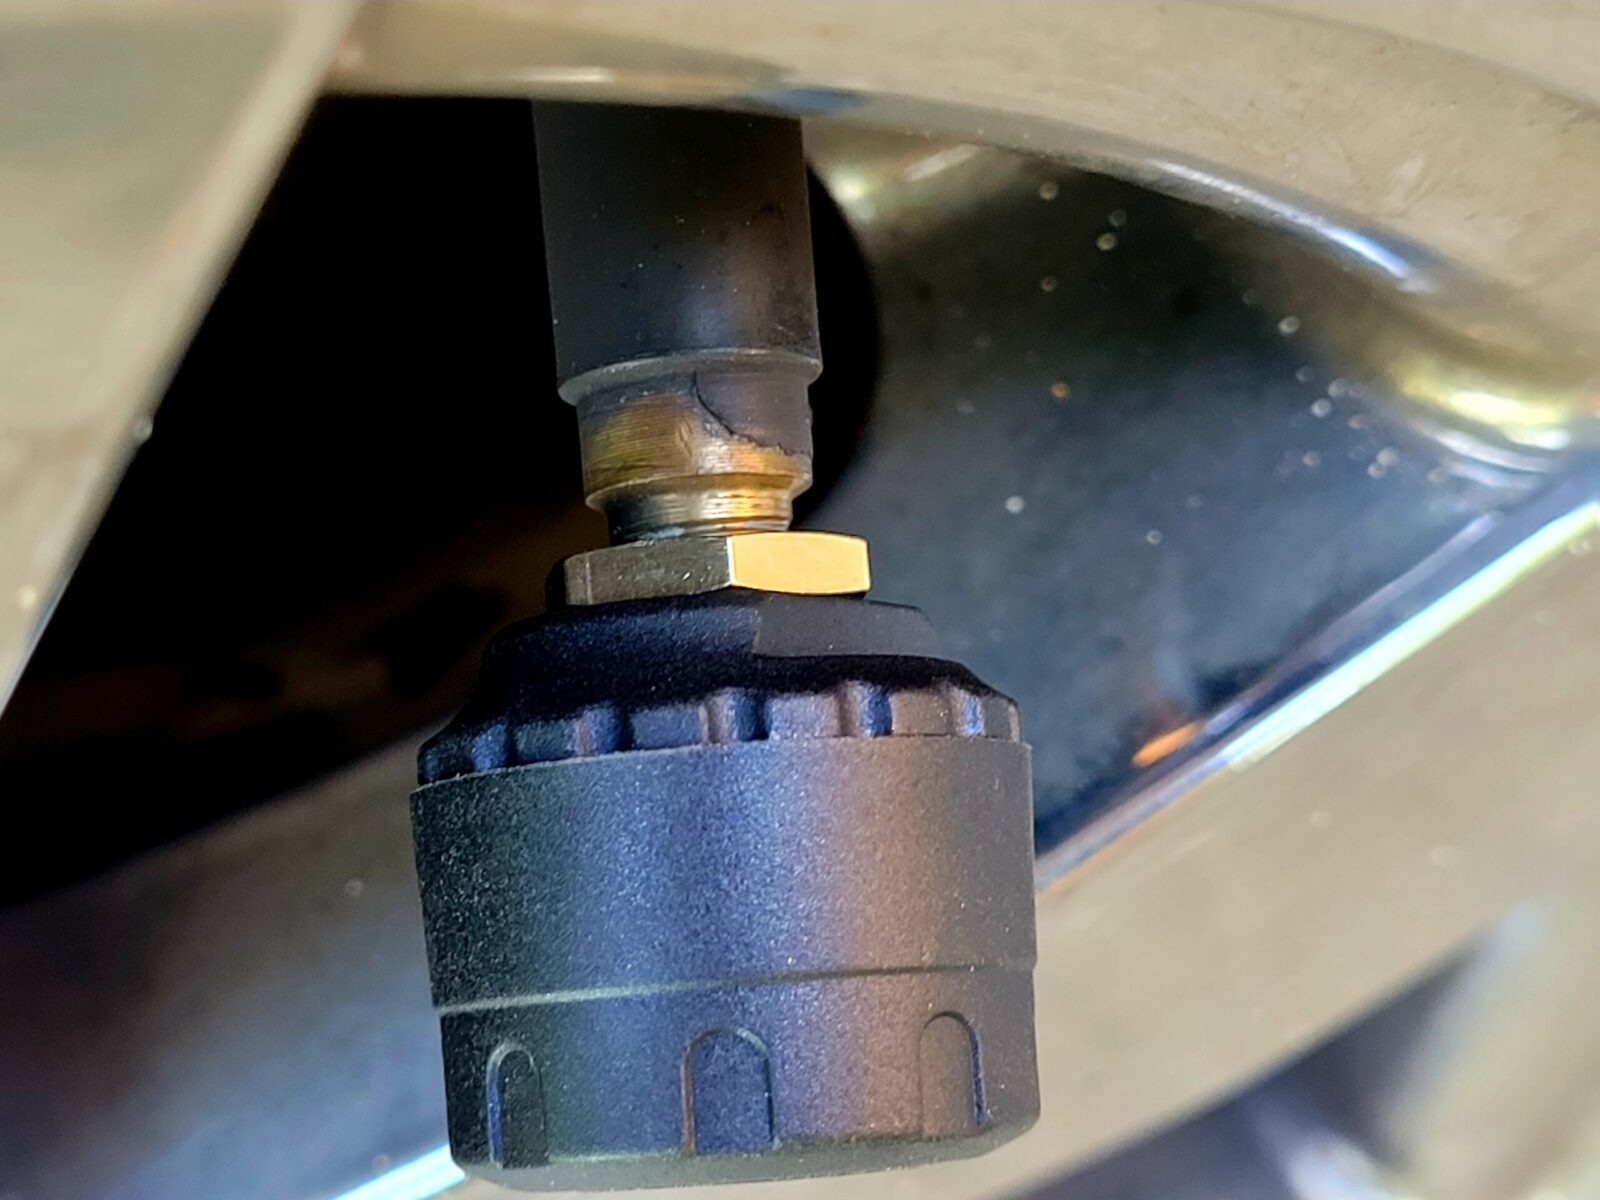
In terms of the sensors, they just go on the valve stem in place of the valve cap. Be sure to put the right sensor, such as the LF- Left Front – sensor on the right tire of course.
To install them you put the jam nut on first and thread it to the bottom. Then screw on the sensor until it stops – you will hear air leak for a second until the sensor seals as you continue threading it on. You then use their special wrench to snug down the jam nuts to lock the sensor in place. Done.
Here you can see the brass jam nut. By snugging this up against the back of the sensor you are pretty much locking the sensor in place due to the tension it creates. Note the elevated black plastic on the sensor under the jam nut – this is where you use the other end of the wrench to open the sensor to replace the battery when it dies.
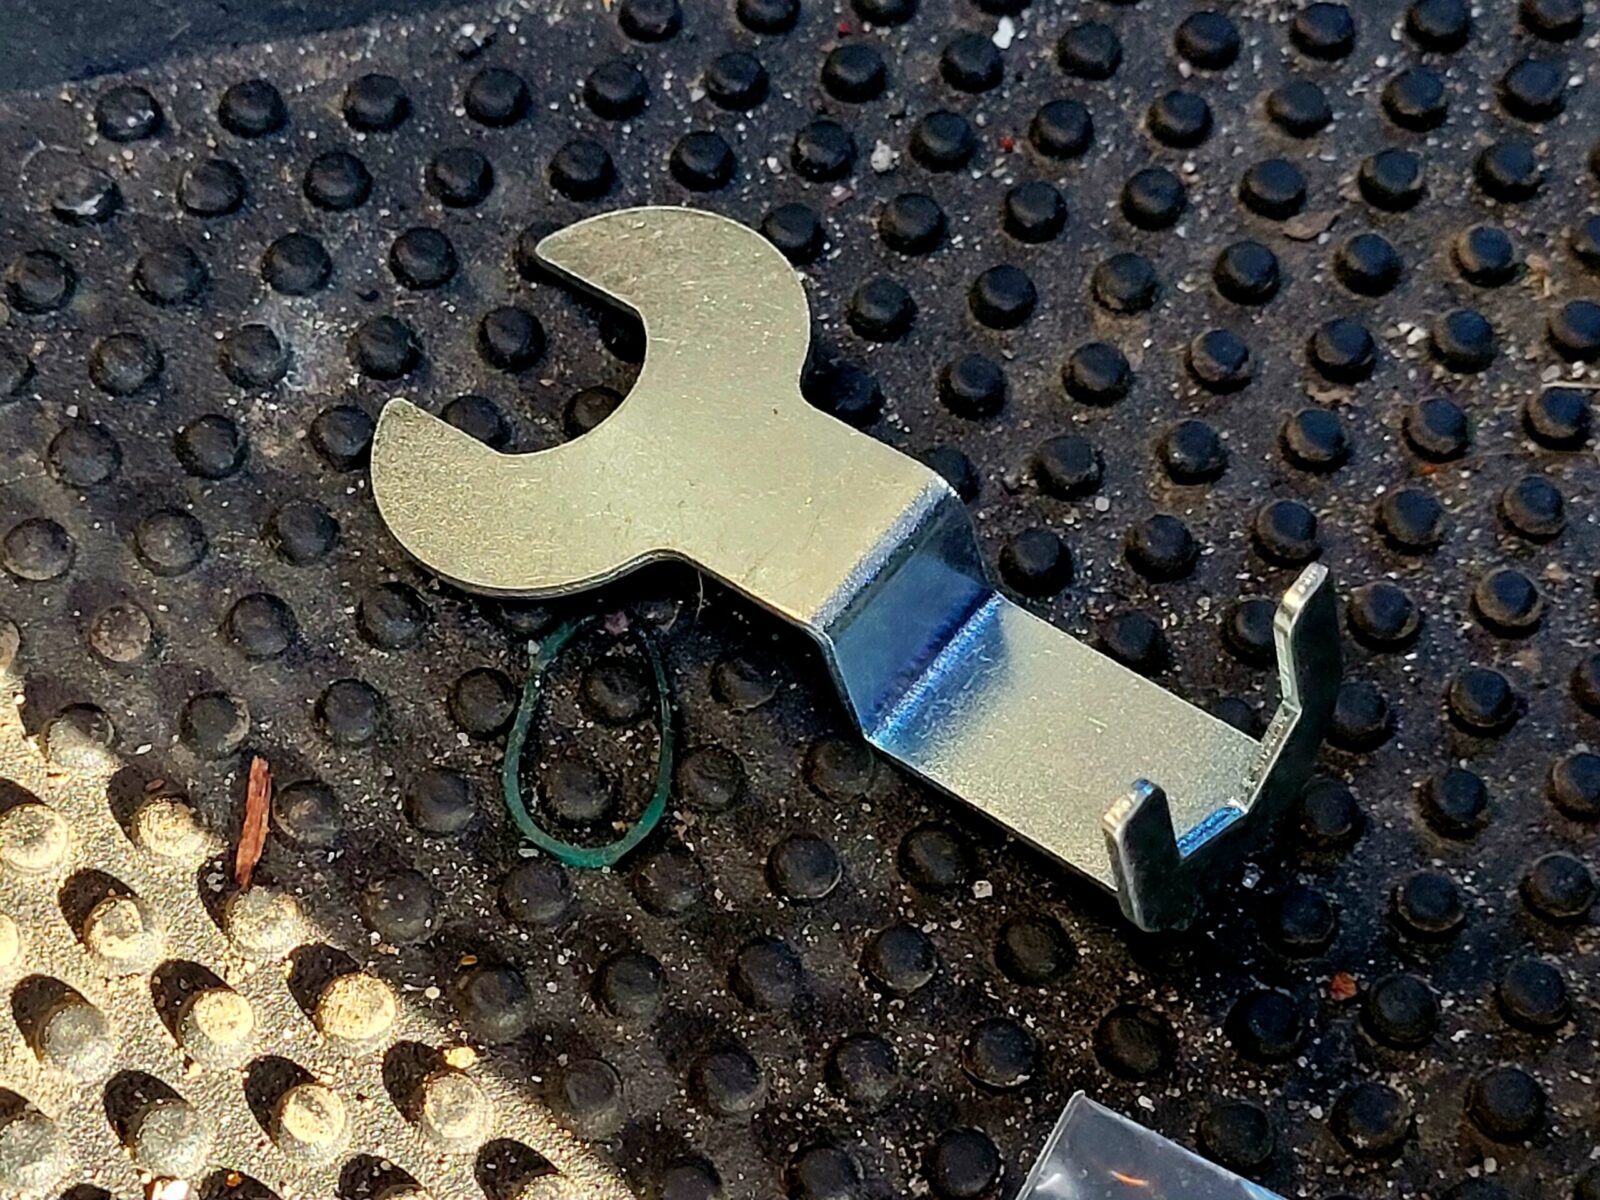
This odd looking wrench serves two purposes – the left end us for unscrewing the battery cap on a sensor unit. The right end is offset to make reaching behind the sensor to tighten or loosen the jam nut easier. The offset allows the wrench to clear the sensor body and appropriate engage the jam nut. I put this wrench and the spare O-rings to seal the battery compartment in a clear plastic storage bag and put them in the van for future use.
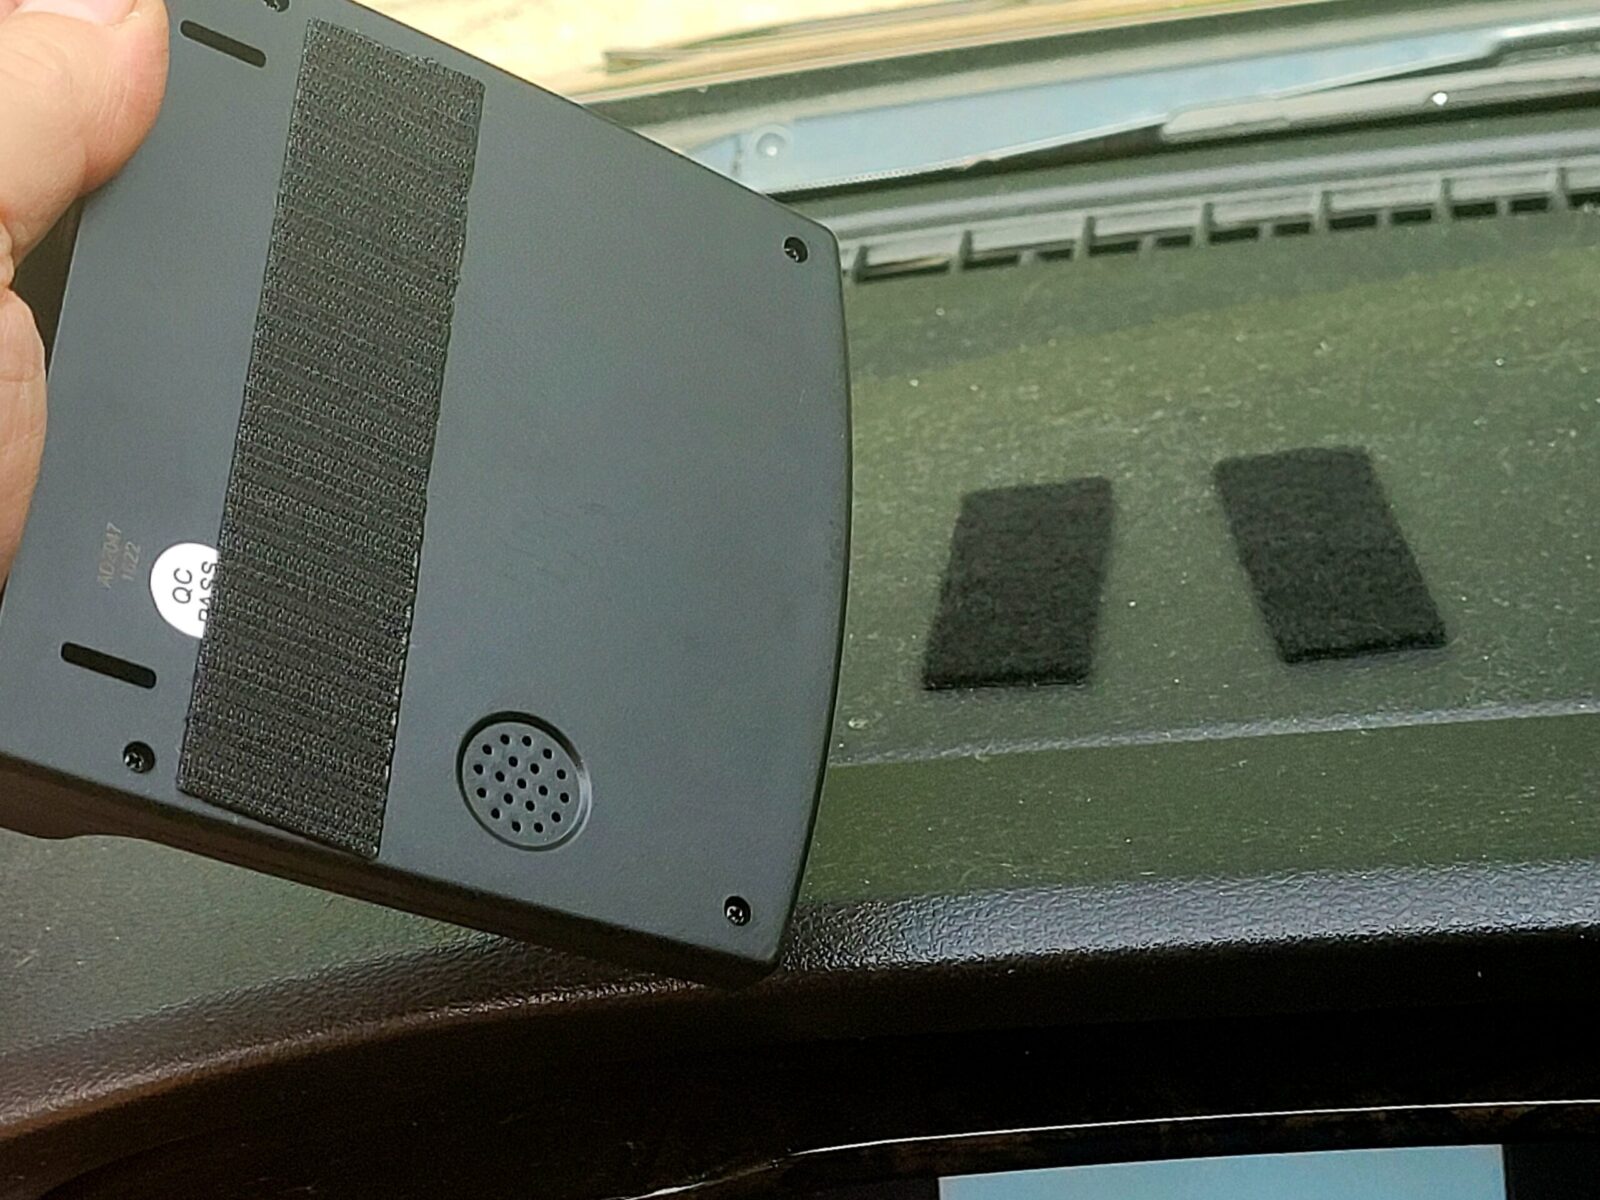
Rather than use their supplied mounting material, I used some industrial Velcro. You stick it on to a clean surface and let it cure for 24 hours. It does a great job after that. The reason I did this was I wanted to be able to move the unit around some without the Velcro showing.
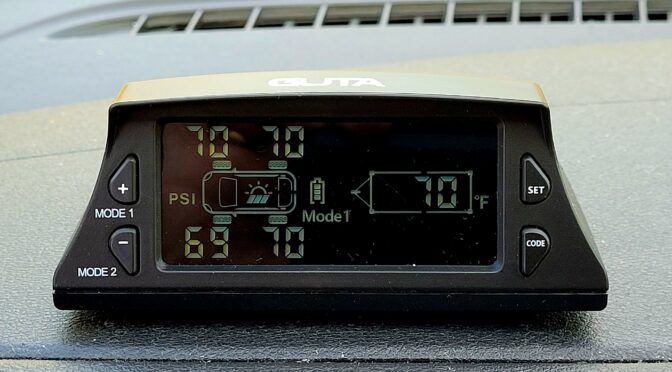
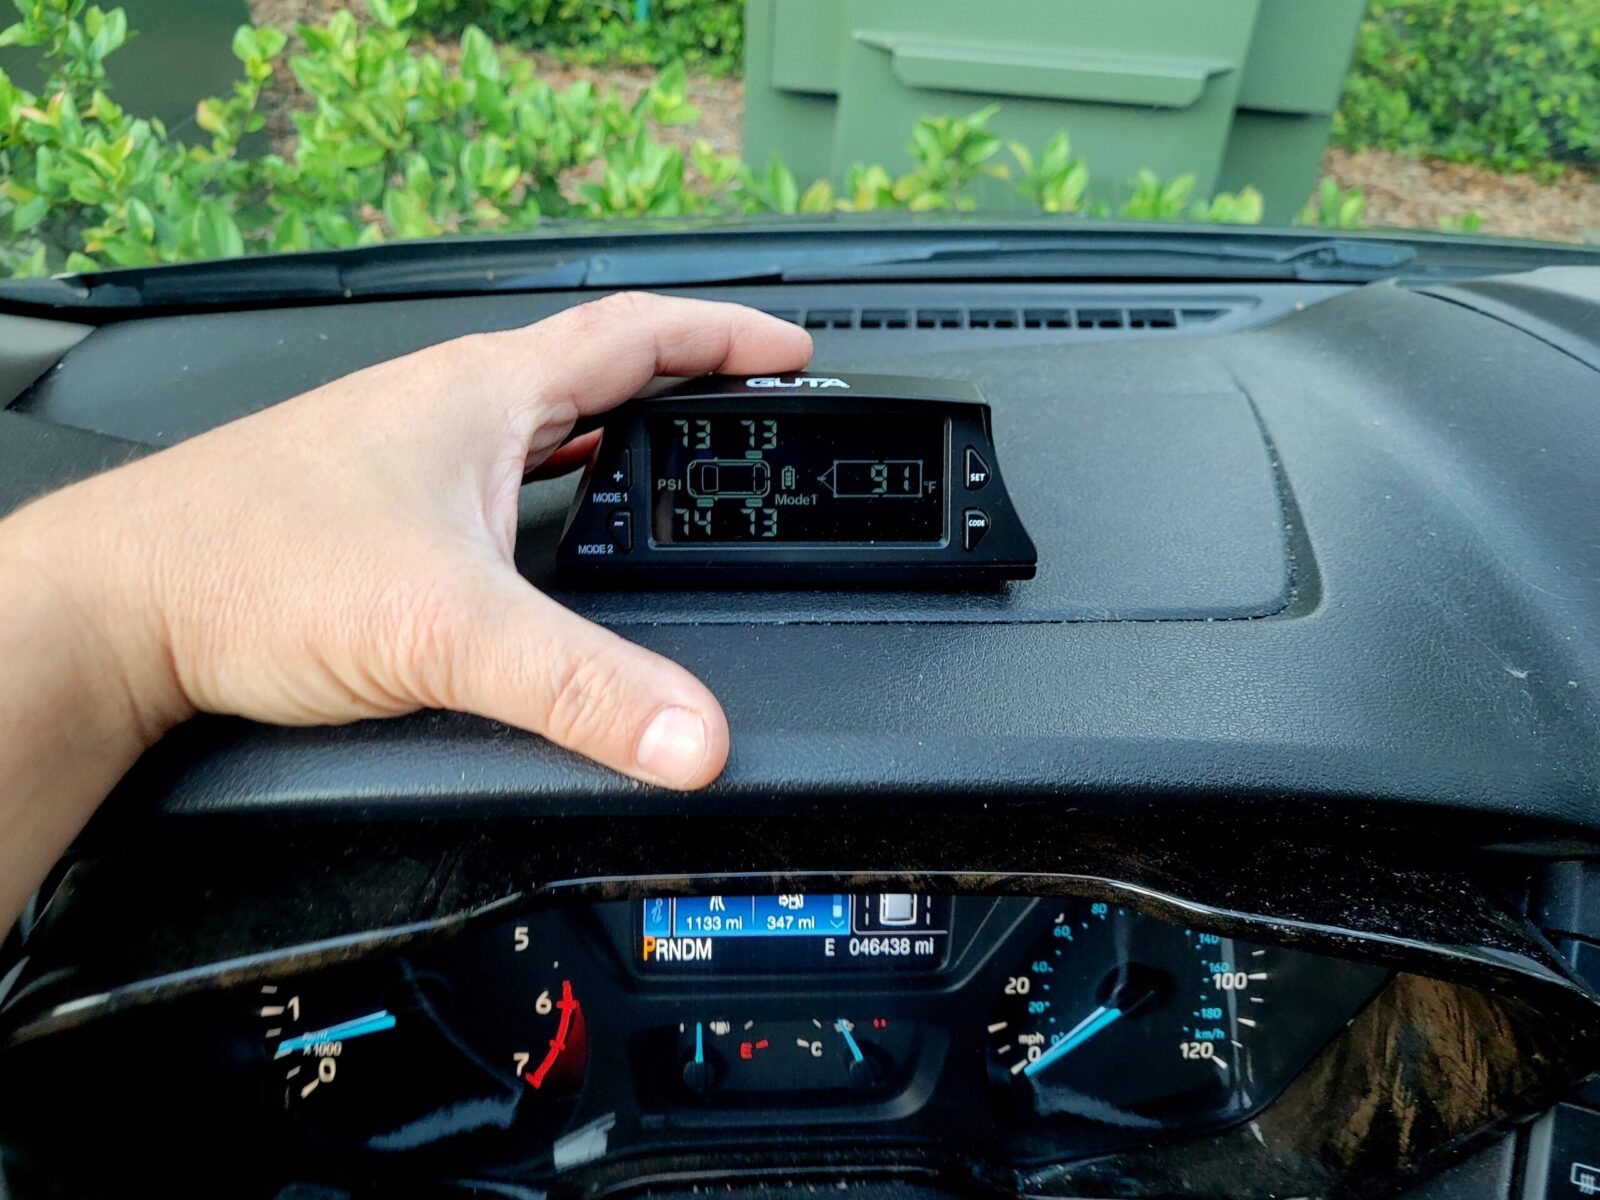
To give you a sense of scale, you can see the van’t instrument console and my hand – I wear an XL-sized glove. The receiver is small but I find the numbers of the display very easy to read from a normal driving position.
The top back of the unit has the solar cells and I have found they do the job. I let them charge during the day and just let the unit run. I don’t turn it off. By the way, there’s a little sun icon that means it is charging and there is also a battery charge indicator in the display as well.
The Device’s Configuration Screens
Well, the mechanical installation was very easy. The set up screen took a few minutes to figure out but wasn’t too bad. The set up screen lets you select pounds per square inch (PSI) or Bar, whether you want Farenheit or Celsius and then the Low and High pressure literally for each tire. An alarm will sound if either the low or high pressue is exceeded – I’ve experienced that. There’s also a high temperature tire warning that applies to all tires.
For the van, I set the low pressures all to 65 PSI and I set the max to 100. The tire temperature was set to 158F by default and I left it at that figuring I would see what happens and adjust accordingly – I had no idea what to expect actually. I did do some reading and somewhere between 190-225F is the maximum safe temperature for a tire to reach – it depends on your tire’s temperature rating.
The unit supports two modes – Mode 1 is for normal street driving and Mode 2 is for offroad or something. I had no need to explore this as our van isn’t going to go offroad.
By the way, you can add sensors or reprogram/pair sensors if need be and the instruction manual tell you how. They sell versions of this system with more and more tires supported and different displays let you see the status. Again, I just bought the model for four tires. I could add sensors to support a trailer though even with the model I have.
The Results
Honestly, I am very happy. It’s been intriguing to see how temperature affects tire pressure – that one I expected. In general, as temperature increases, the volume of a gas increases so this means that the pressure would increase in the tire.
What I didn’t really expect was to see that with driving, the back tires were a tad warmer than the front and also had about 2 PSI more pressure than the front. Tire temperatures where about 10-15 degrees warmer than the outside tire temperature when driving. It’s 95F here and when we were parked on asphalt the heat of the day would take the tires up to about 101-104F and then they would cool down as we drove.
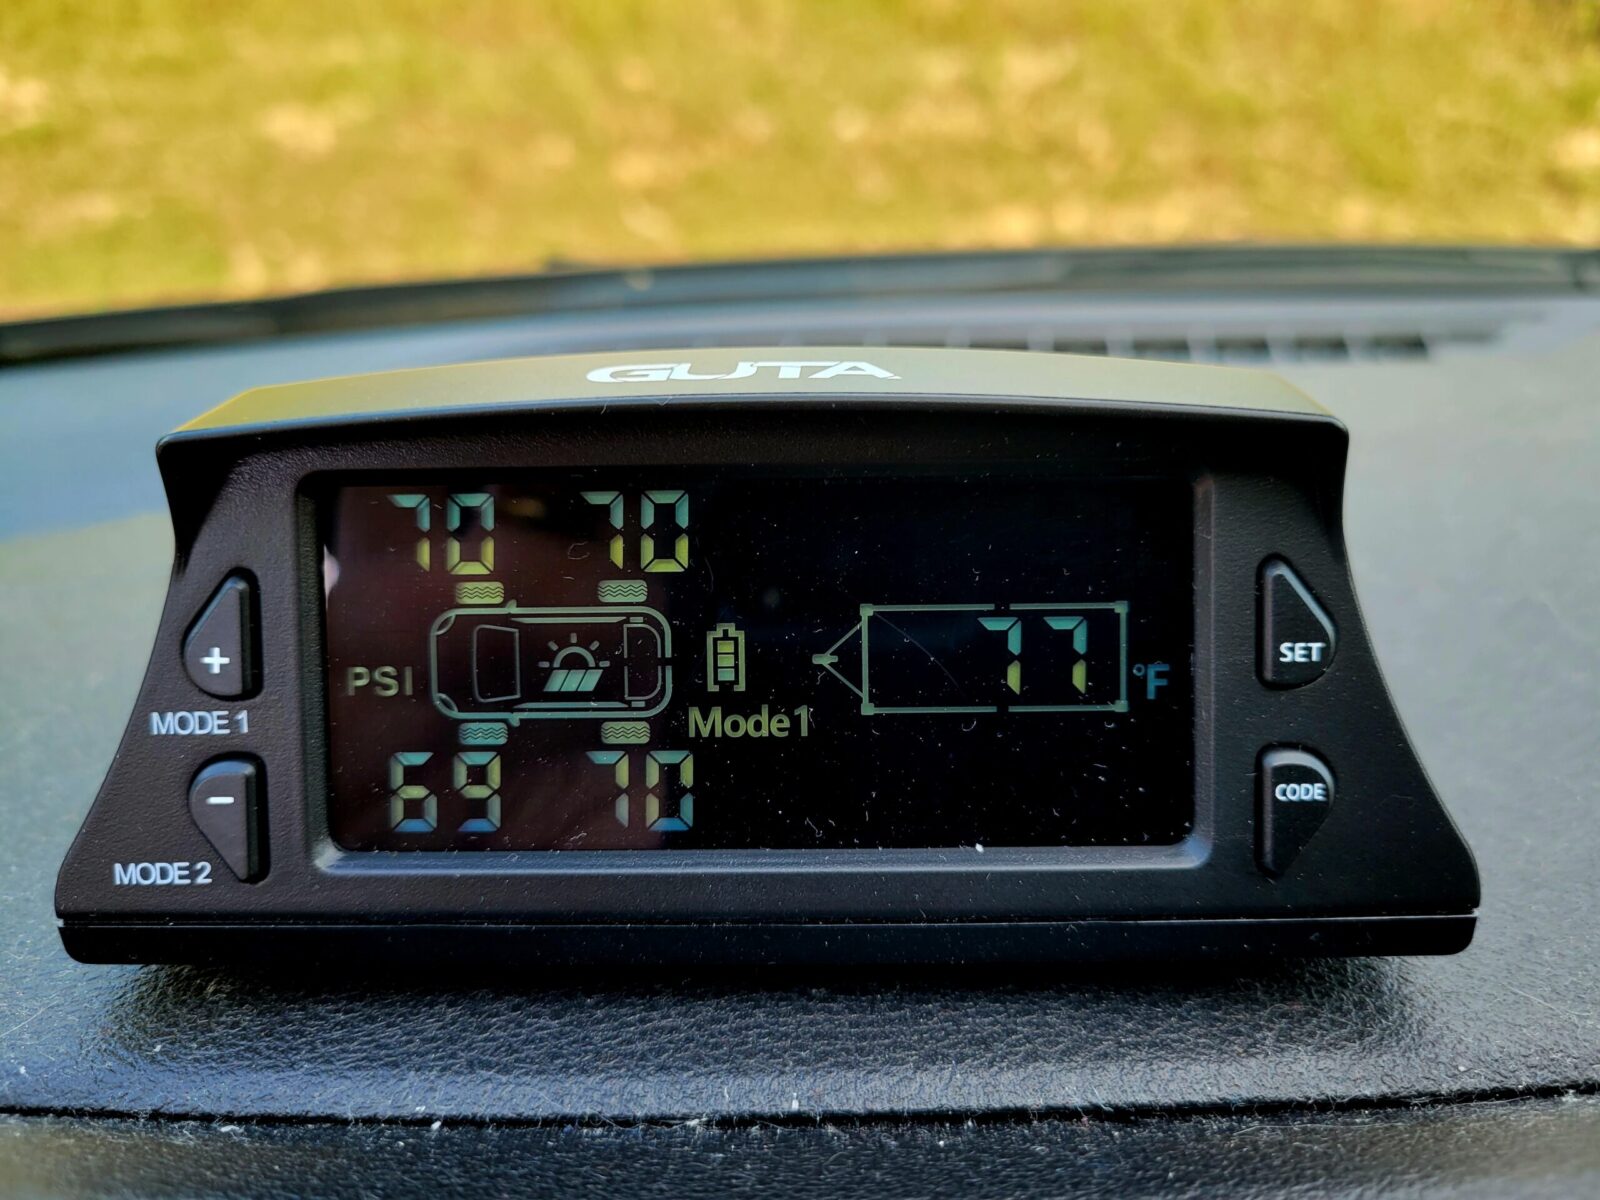
The pressure is real time but the temperature cycles from tire to tire every 5 seconds, Note the pressure when the temperature was 61F. So you can’t tell which tire was sending the temperature in the photo but in real like, the little tire part of the graphic would be flashing so you’d know what it’s temperature is.
Here are the pressures at 77F – again, one tire was at 77F and I bet the others would have been very close to that.
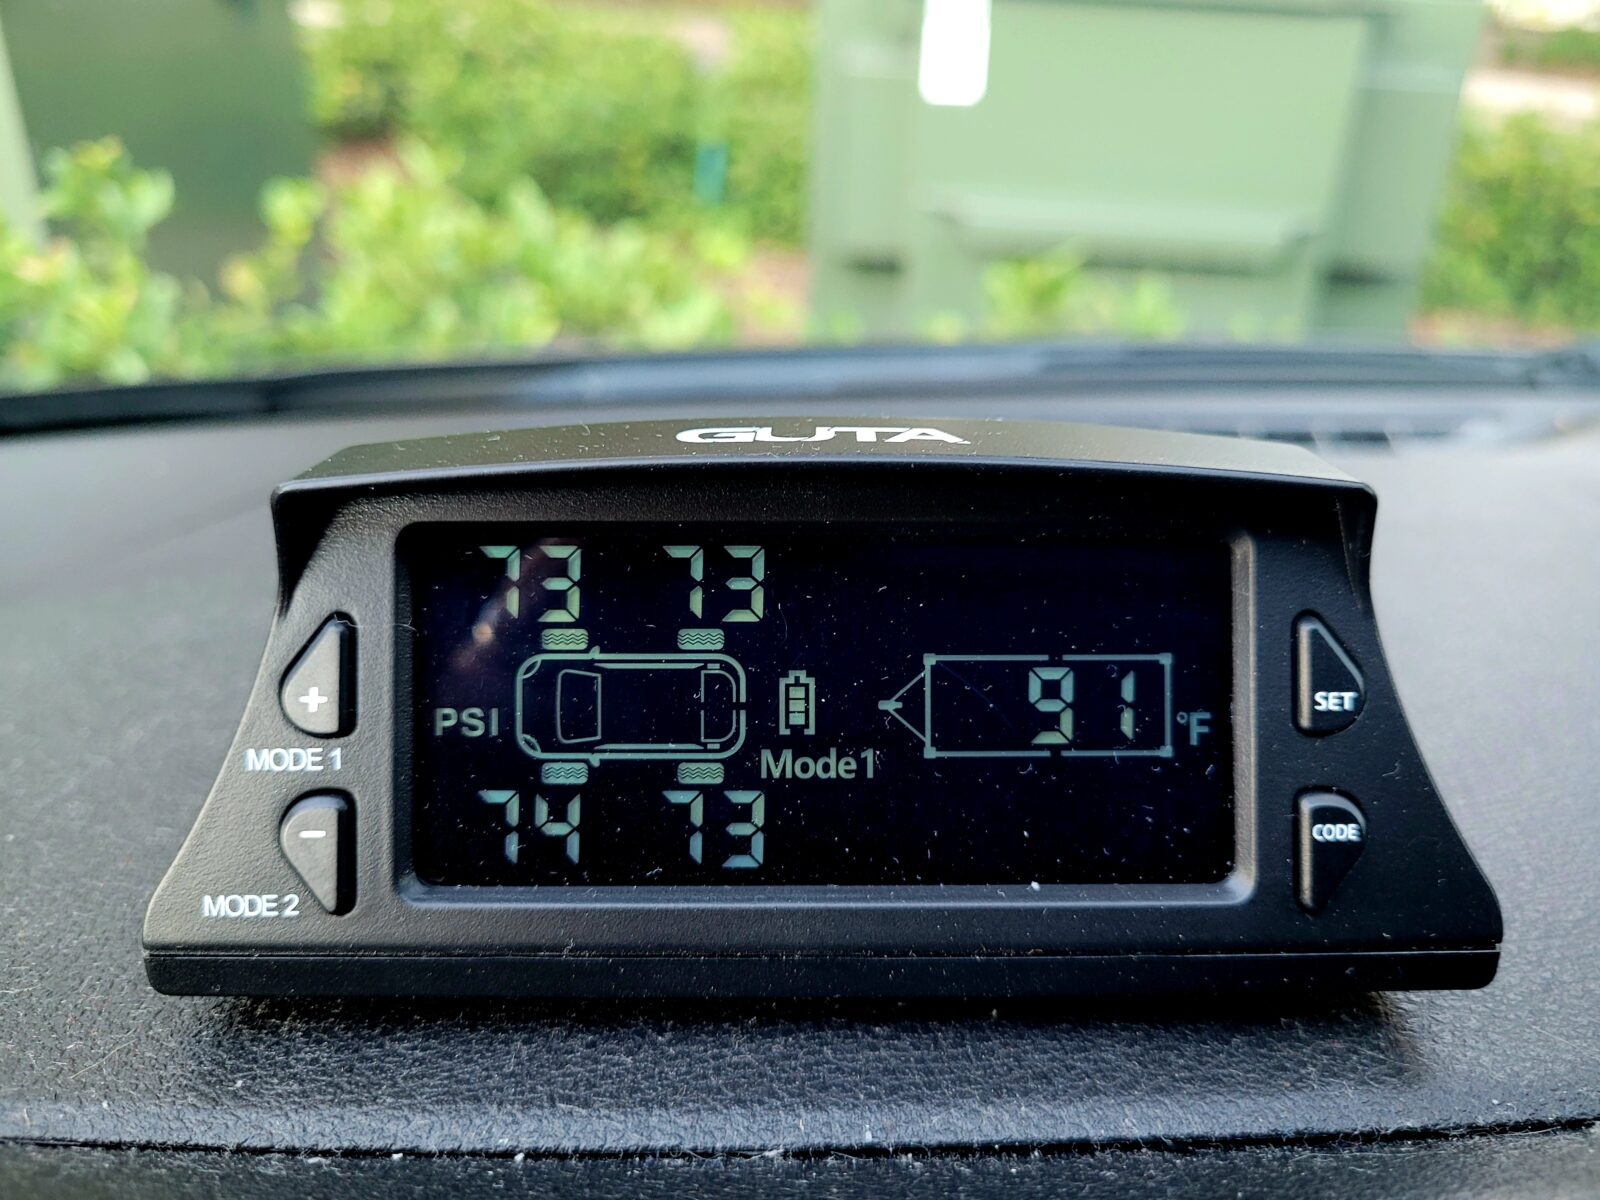
This one is close to 91F. Note, all of these photos are with the same tire pressures. I filled the tires, installed the sensors and have just watched the numbers change. We had ten hour days with me driving so it gave me something to do in addition to staring outside, self-mediation and pondering existience 🙂
I think the manual said the 2032 batteries in the sensors would last about 6 months. I guess we’ll just have to see about that. Cold Michigan Winter weather takes its toll on batteries because as the temperature drops so does the chemical reaction in the batteries and thus less voltage is produced. I’m really not worried because I did open a sensor and it is real easy to replace the batteries.
To sum it up – The installation was very easy and I like being able to see the pressures at a glance. Knowing that there would be an alarm if a threshold is passed or the pressure starts dropping rapidly too are all reassuring.
So, I like the system and would buy it again.
10/28/2022 Update: Finally had a sensor go out or so I thought. We were driving down a rural highway and all of a sudden the alarm went off with the front driver’s side tire showing 0 PSI. The van was driving fine and when I pulled over the tire looked ok. To make a long story short, the battery in the sensor died. I knew it would sooner or later but there is no low battery warning. It uses CR2032 lithium batteries – one in each sensor. I went to a nearby Walgreens and bought four Energizer batteries and changed them in all four units – if one fails, odds are they are all close to it if you changed them at the same time. To replace the battery, remove the sensor, unscrew the top, slide out the old battery, slide in the new battery and then pair the unit. Pairing is pretty easy – hold down CODE on the main unit to go into setup. Push + or – to move around to the sensor, put the sensor right next to the main unit and push code. It will beep when it pairs. Hold down CODE until the system exits and goes back to standby. Between the battery being probably at least a year old and the system comes with the sensors running plus the temperature was 45F, I wasn’t surprised. Weak batteries tend to fail in cold weather. So, everything is set and I still really like the unit.
Note, I have to buy all of my parts – nothing here was paid for by sponsors, etc. I do make a small amount if you click on an ad and buy something but that is it. You’re getting my real opinion on stuff.
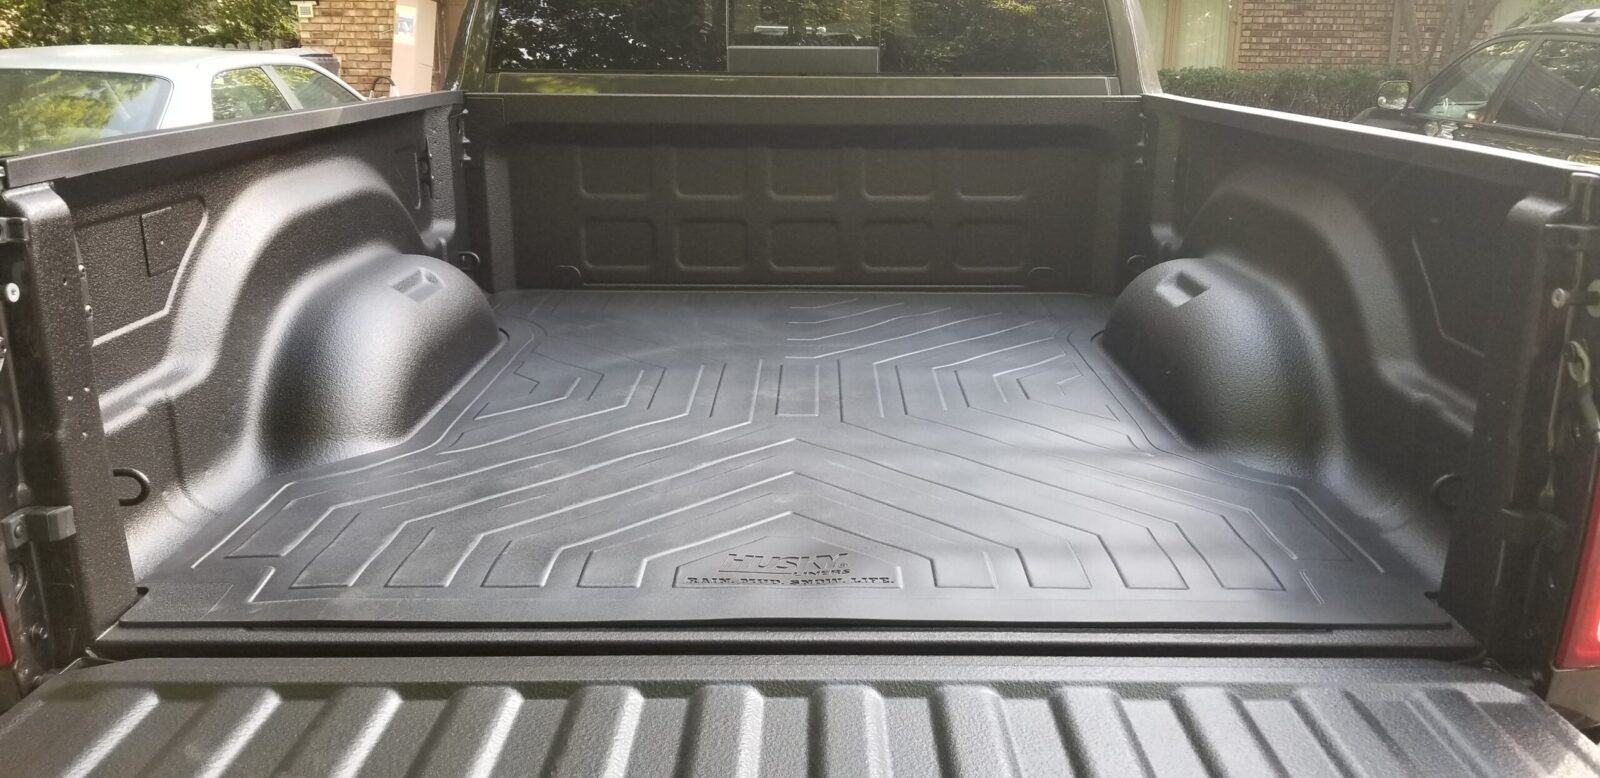
When I bought my 2021 Ram 2500 Tradesman, I purchased a spray in bed liner to protect the bed. Because people throw stuff in the back of their truck, bare metal will eventually be exposed and then the rust starts. Well, I need this truck to last for a long time so a friend recommended that I put in a rubber bed mat on top of the spray in liner.
The idea behind the rubber bed mat is that it will take the abuse rather than the liner. Eight months later, I really thing this idea paid off just based on what I’ve hauled so far but I am jumping ahead.
I did some digging and found Husky Truck Mats on Amazon. Now Amazon’s “Does it Fit” feature isn’t perfect so I did some measurements and confirmed before I bought. My 2021 Ram 2500 Tradesman has the 6′ 4″ short bed because it has the crew cab. Amazon says the following mat shouldn’t fit my truck but it actually does perfectly:
Installation
You have to love stuff like this – I just rolled it into place. No trimming, no drama – it fit.
It lliterally rolled right into place with no trimming.
Results
I honestly couldn’t be happier. It’s thick enough to protect the bed and was affordable — if it tears or gets real beat up then I can afford to replace it. So far though, it’s doing just fine. It’s dirtier sure but is still in great shape.
The mat looks great and is holding up very well. Granted the above was right after I bought it in October 2021 but other than being dirty in May 2022, it’s held up great despite hauling a variety of junk (literally), furniture and other stuff.
The mat is relatively thick. One thing to note, it did have a bit of a smell but it dissipated quickly. Some guys report their brand and model of truck matt as being really smelly but I did not have that problem with the Husky.
I’m going to list all of the Husky truck bed mats next so you’ll need to look for your Ram, Chevy, Ford or Toyota truck and bed size.
Note, I have to buy all of my parts – nothing here was paid for by sponsors, etc. I do make a small amount if you click on an ad and buy something but that is it. You’re getting my real opinion on stuff.
On September 11th, 2021, I took possession of my first new truck – a 2021 Ram 2500 Tradesman. I love the truck but have a challenge – I am 54, heavier than I should be and different muscle groups and joints compete to see who will hurt the most at a given time. Getting into the bed when the tailgate is a mile off the ground is no trivial matter for me. I did find an awesome solution though and want to share it with you.
There are a number of options on the market – steps and tailgate ladders too but I ruled the ladders out given the space they take. If you want something that does the job, is small, and folds out of the way when you are done, you want a bumper step.
I wanted a step that was simple to install, durable and looked good. After a while, I decided my best bet was to go with the actual Mopar step for my truck – 82215842AH. That step will work on the fifth gen 2500 and 3500 Rams – so, 2019-2022 so far.
By the way, what sold me is that a few guys recommended it online and it is a bolt in installation – you remove a few bolts and then install step and use the longer replacement bolts they send you – there is no drilling.
I ordered mine for $287 + $13 S&H — it’s not cheap but worth it. When I wrote this post, the good news was that there are a lot of sellers on eBay that you can check and the are prices both lower and higher than what I paid – just be sure to go with a reputable seller is my advice.
What Arrived
A few days later, UPS arrived with a surprisingly heavy box. When I opened it, there was the step and the bolts that would be needed.
The step is sitting vertically on the left then you can see the bracked and bolts to the right.
Installation
I’d say installation took me less than an hour and that was with a few interruptions. Interestingly enough, the RAM instructions are really illustrations without words. You can find the PDF if you search for it and want to read it in advance.
I did spend some time laying on my back getting oriented. The one thing I’ll point out is that all of the bolts are metric – gone are the days of SAE inch fasteners. So, have your metric set out.
It was all very straight forward – I just followed the instructions. For someone new to installing stuff like this, one tip I’d give you is to leave all of the bracket bolts lose so you can wiggle things into place and then tighten them down.
When I was younger and worked on cars a lot, we did “farmer tight” meaning we went by feel. Now, many, many years later, I use torque wrenches and set the fasteners to the torque specified. I’d recommend you use a torque wrench to do the final tightening of the bolts – the installation sheets provides the torque specs – you need one or more torque wrenches to tighten down the bolts to 16.6, 50 and 140 foot pounds. I put it this way because each torque wrench will have a stated range. Little torque wrenches may not be able to go up to 140 and large torque wrenches may not go below 50 foot pounds.
Torque wrenches are a good investments and ince you have them, you’ll find uses for them all the time if you work on cars, tractors, and other machinery. Note, if you buy a clicker style wrench where you set the torque at the bottom of the handle, and it “clicks” when you reach the specified torque, just be sure to reset the scale to zero when you are done so the spring doesn’t weaken over time.
Results
It’s fantastic. I installed it in October of 2021 and have used it a ton getting into the bed, loading stuff, etc. I weight about 230 pounds and it is rock solid – even when I am carrying stuff. It’s one of the best accessories that I have bought for my truck and highly recommend it.
The design is really slick. The step is spring loaded and folds very smoothly – both when you pull it out and push it in.
The step itself is textured and non-slip. Boy is it rugged – no flexing despite my weight and me carrying stuff.
Even my wife likes the Mopar bumper step.
Conclusion
Honestly, I can’t recommend this step enough. Easy install, rugged, easy to deploy and retract — it’s a really nice accessory for your truck if you want an easy option to get in and out of the bed that doesn’t take up much space at all.
If you are looking for a step – I’d recommend this one.
Note, I have to buy all of my parts – nothing here was paid for by sponsors, etc. I do make a small amount if you click on an ad and buy something but that is it. You’re getting my real opinion on stuff.