We had a 2,200 mile trip planned expensive things are with a 2016 Ford Transit 150 that had six year-old tires on it – yeah, they need to be replaced but money is tight with inflation thanks to the politicians. The tread was definitely above the wear bars but the outer layer of rubber was starting to crack. So, I really wanted something to let me know how the tires were doing during the trip.
One thing I really like with my 2021 Ram 2500 is that I can see the tire pressure in real time. Our 2016 Transit has a basic tire pressure monitoring system (TPMS) but doesn’t report to you what the pressure is – it has has an indicator light if something goes wrong. I really wanted something real time for the van and had seen aftermarket TPMS units that had a receiver and sensors that went on the tire valve stems in place of the caps before.
I started doing some research and while there were a lot of different cheaper models out there, I went with the M20-4 (meaning 4 sensors included) model from GUTA on Amazon based on reviews. I’m actually writing this 1,100 miles into our trip and am quite happy with the unit so let me tell you more about it.
Out of the Box
Literally, the unit comes ready to go other than needing a quick topping off of the main receiver’s battery using a Micro USB cord. The sensors have their batteries loaded and are already programmed to the unit.
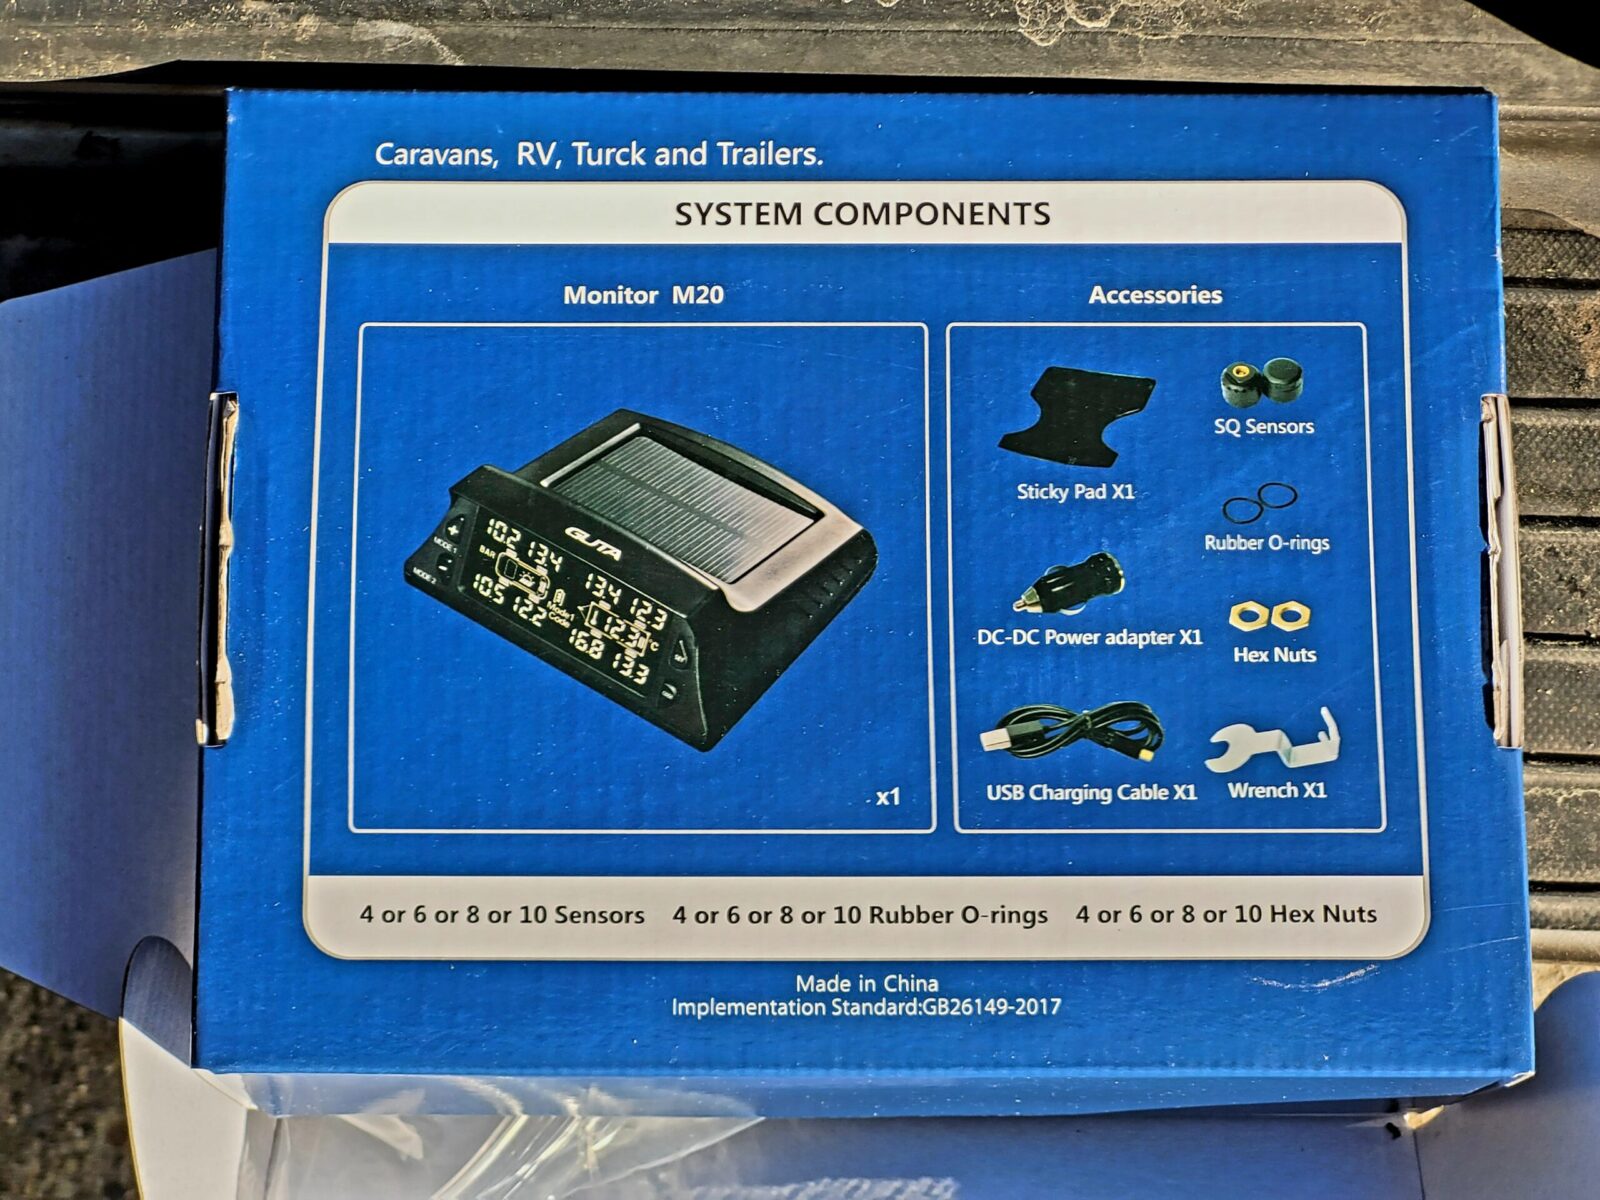
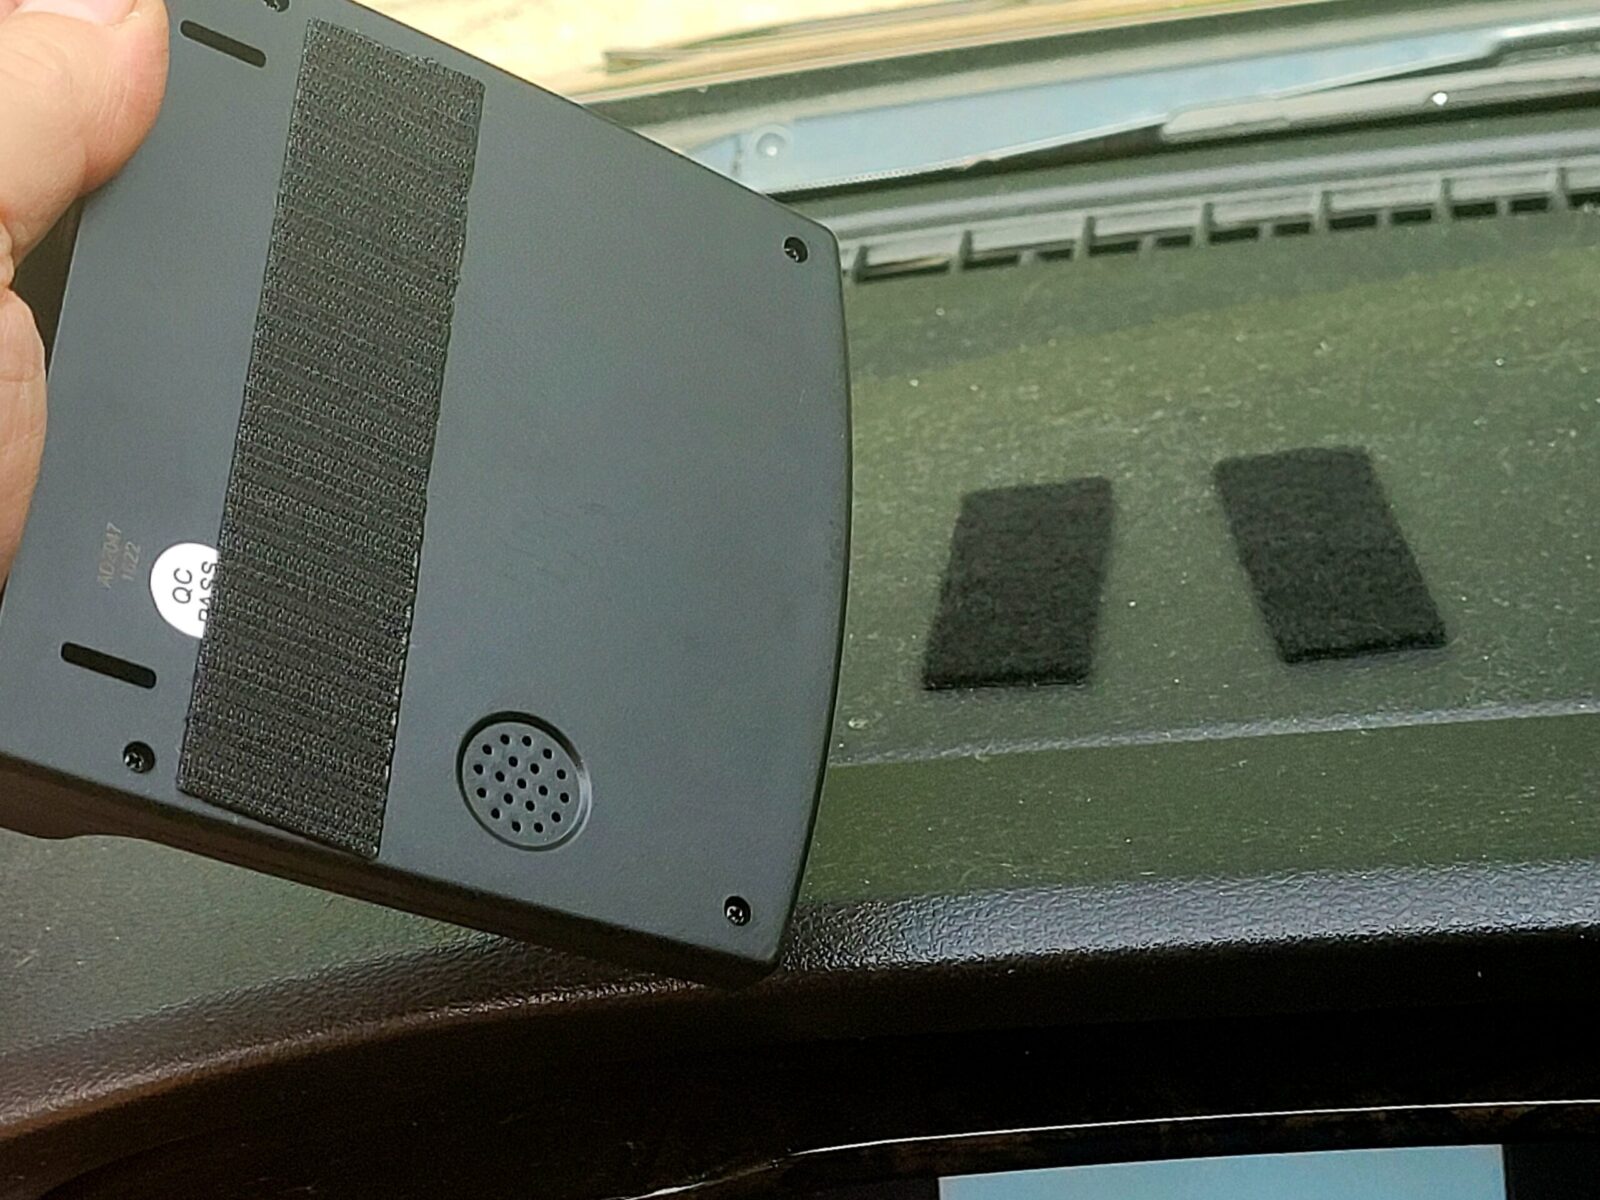
The unit recharges its batteries via the solar panel or you can plug it in – the provide both a car/truck cigarette lighter to USB adapter as well as a short cord, I planned to just run via solar so I didn’t bother.
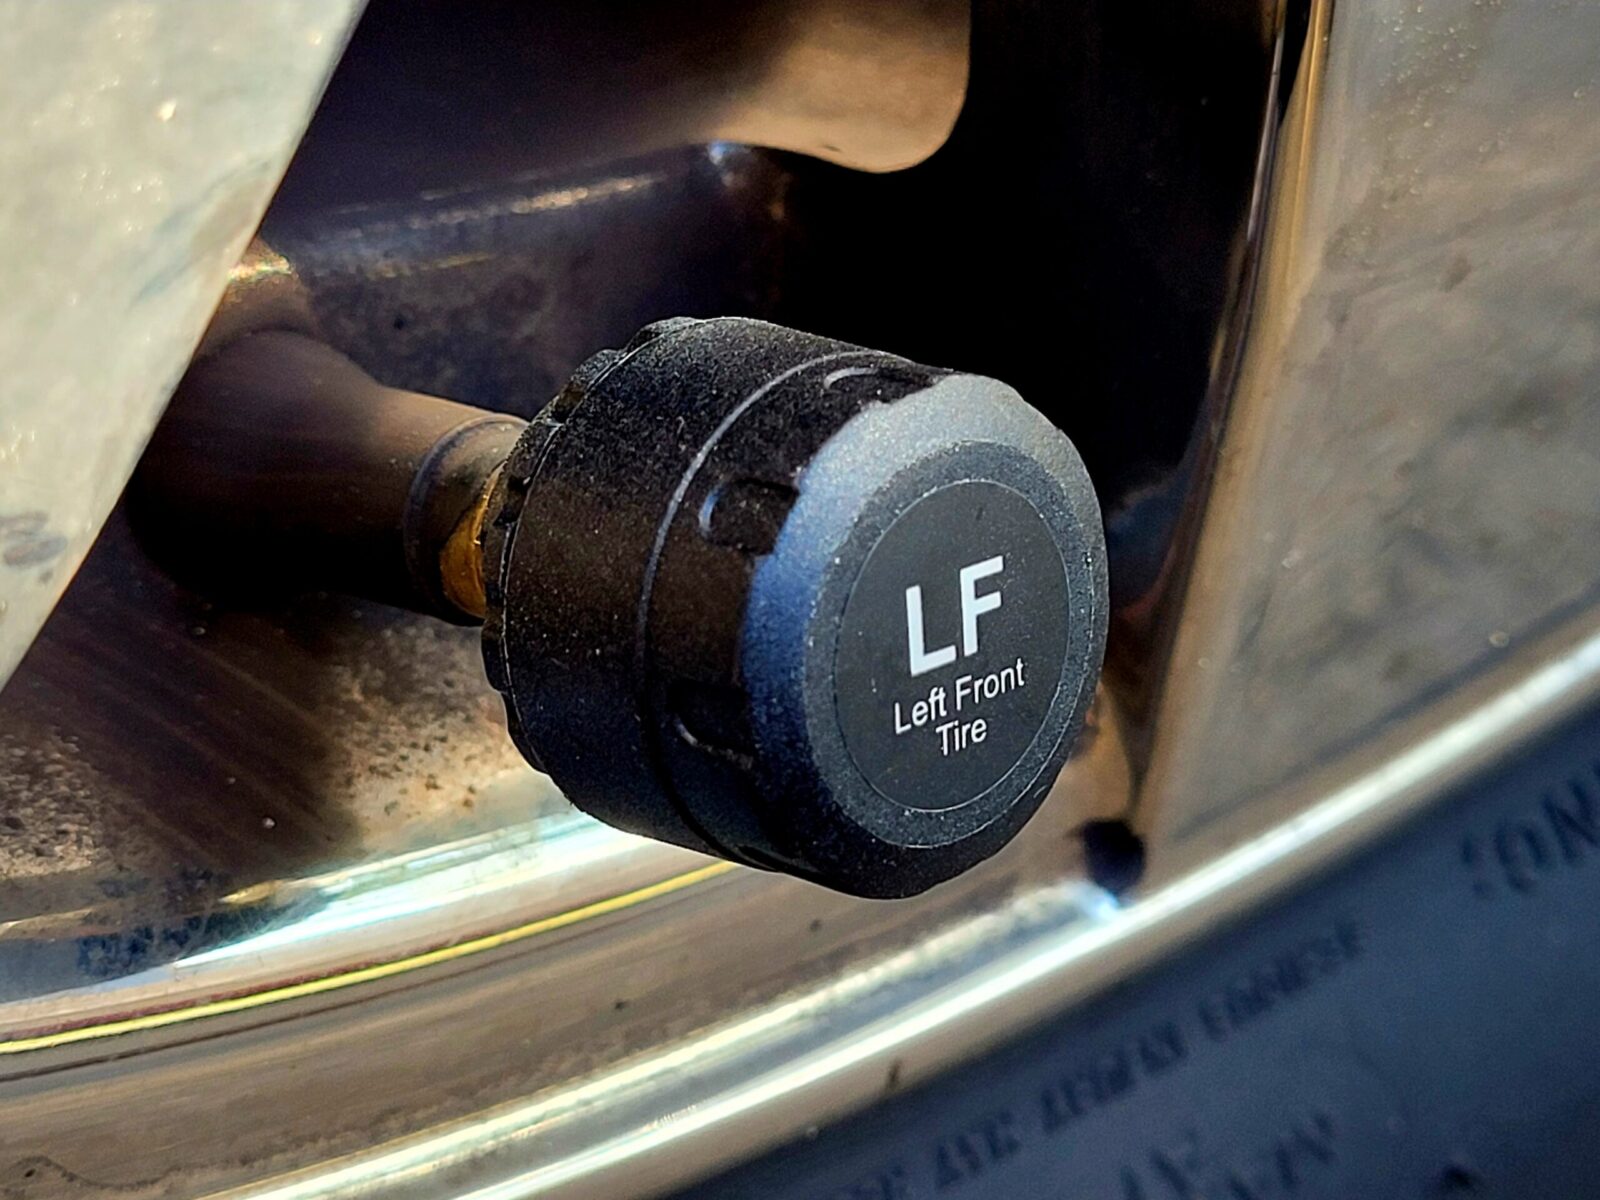
I bought the four sensor model and in the box there are four ready to go sensors with their batteries installed already programmed to the receiver. The are labeled LF (Left Front), LR (Left Rear), RF (Right Front) and RR (Right Rear). Left and right are from the driver’s perspective looking forward.
One of the reasons I bought the GUTA M20-4 was that nobody reported needing any extra antennas to pick up the data from the TPMS sensors. Our Transit is a full size 150 model so the wheelbase is about 148″ so I wanted to make sure I wouldn’t have a problem.
In terms of the sensors, they just go on the valve stem in place of the valve cap. Be sure to put the right sensor, such as the LF- Left Front – sensor on the right tire of course.
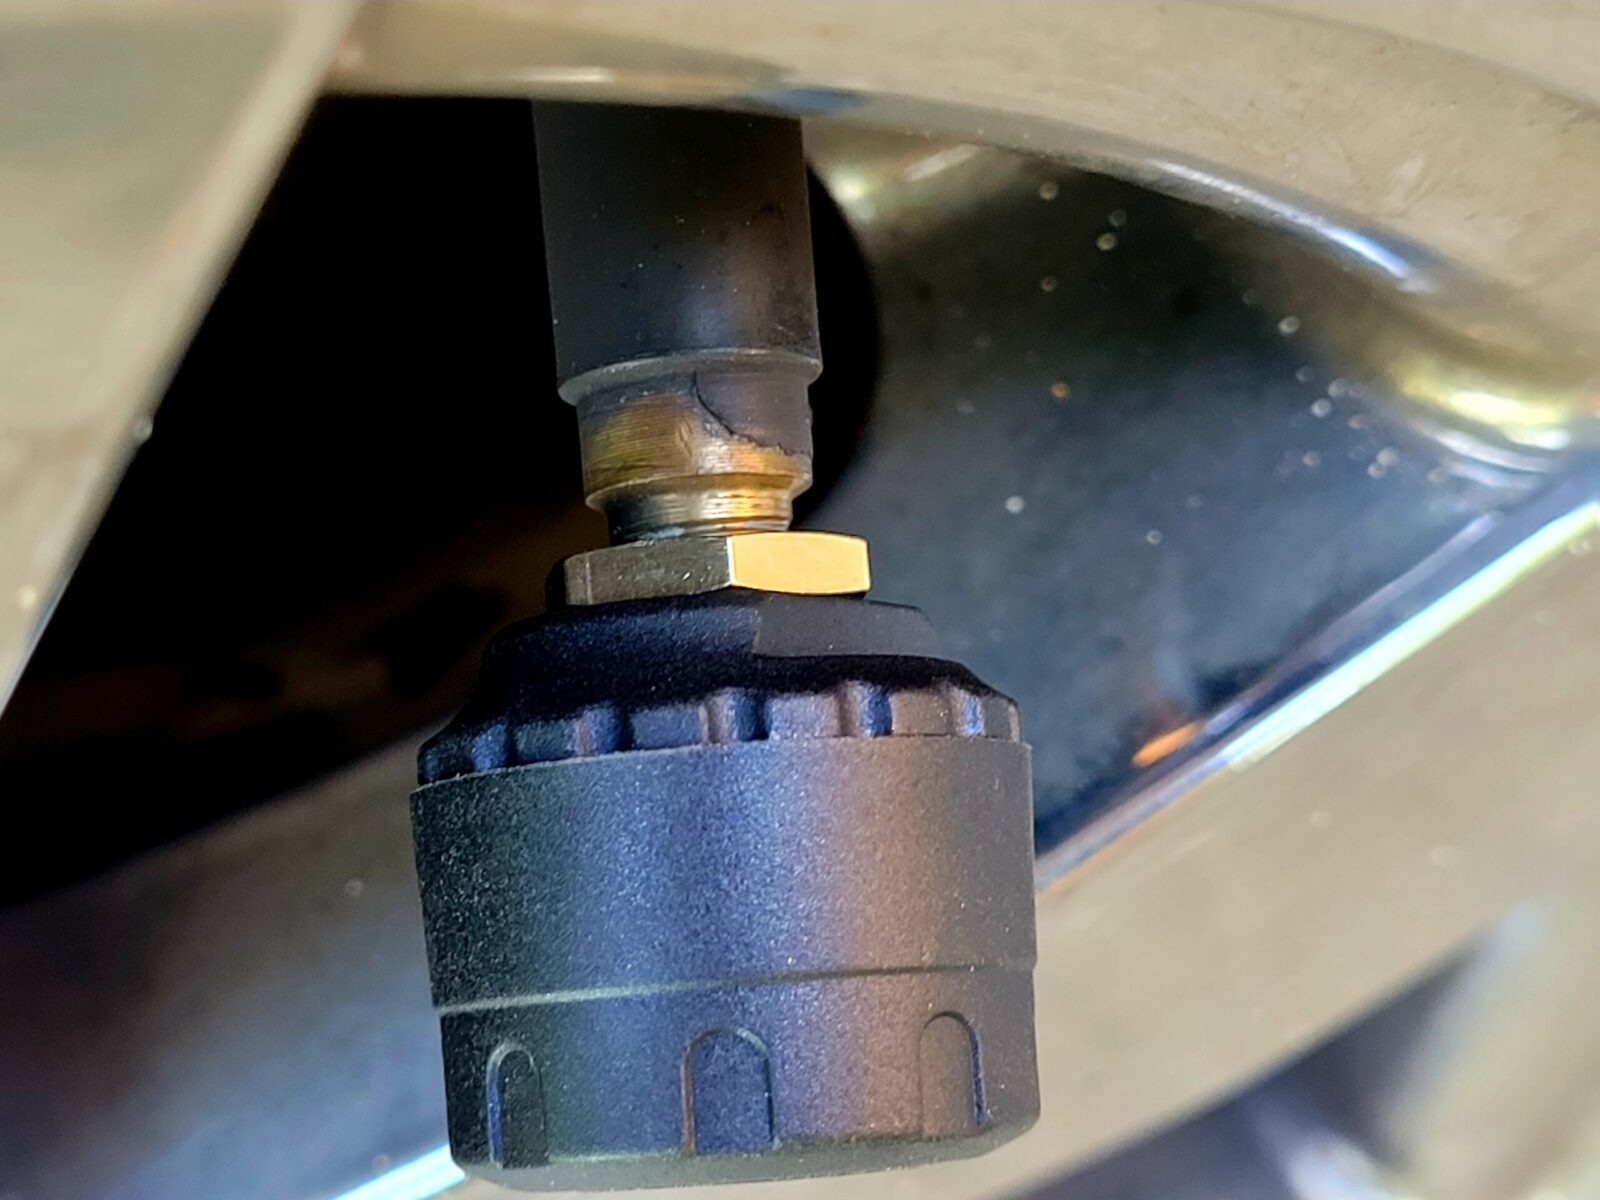
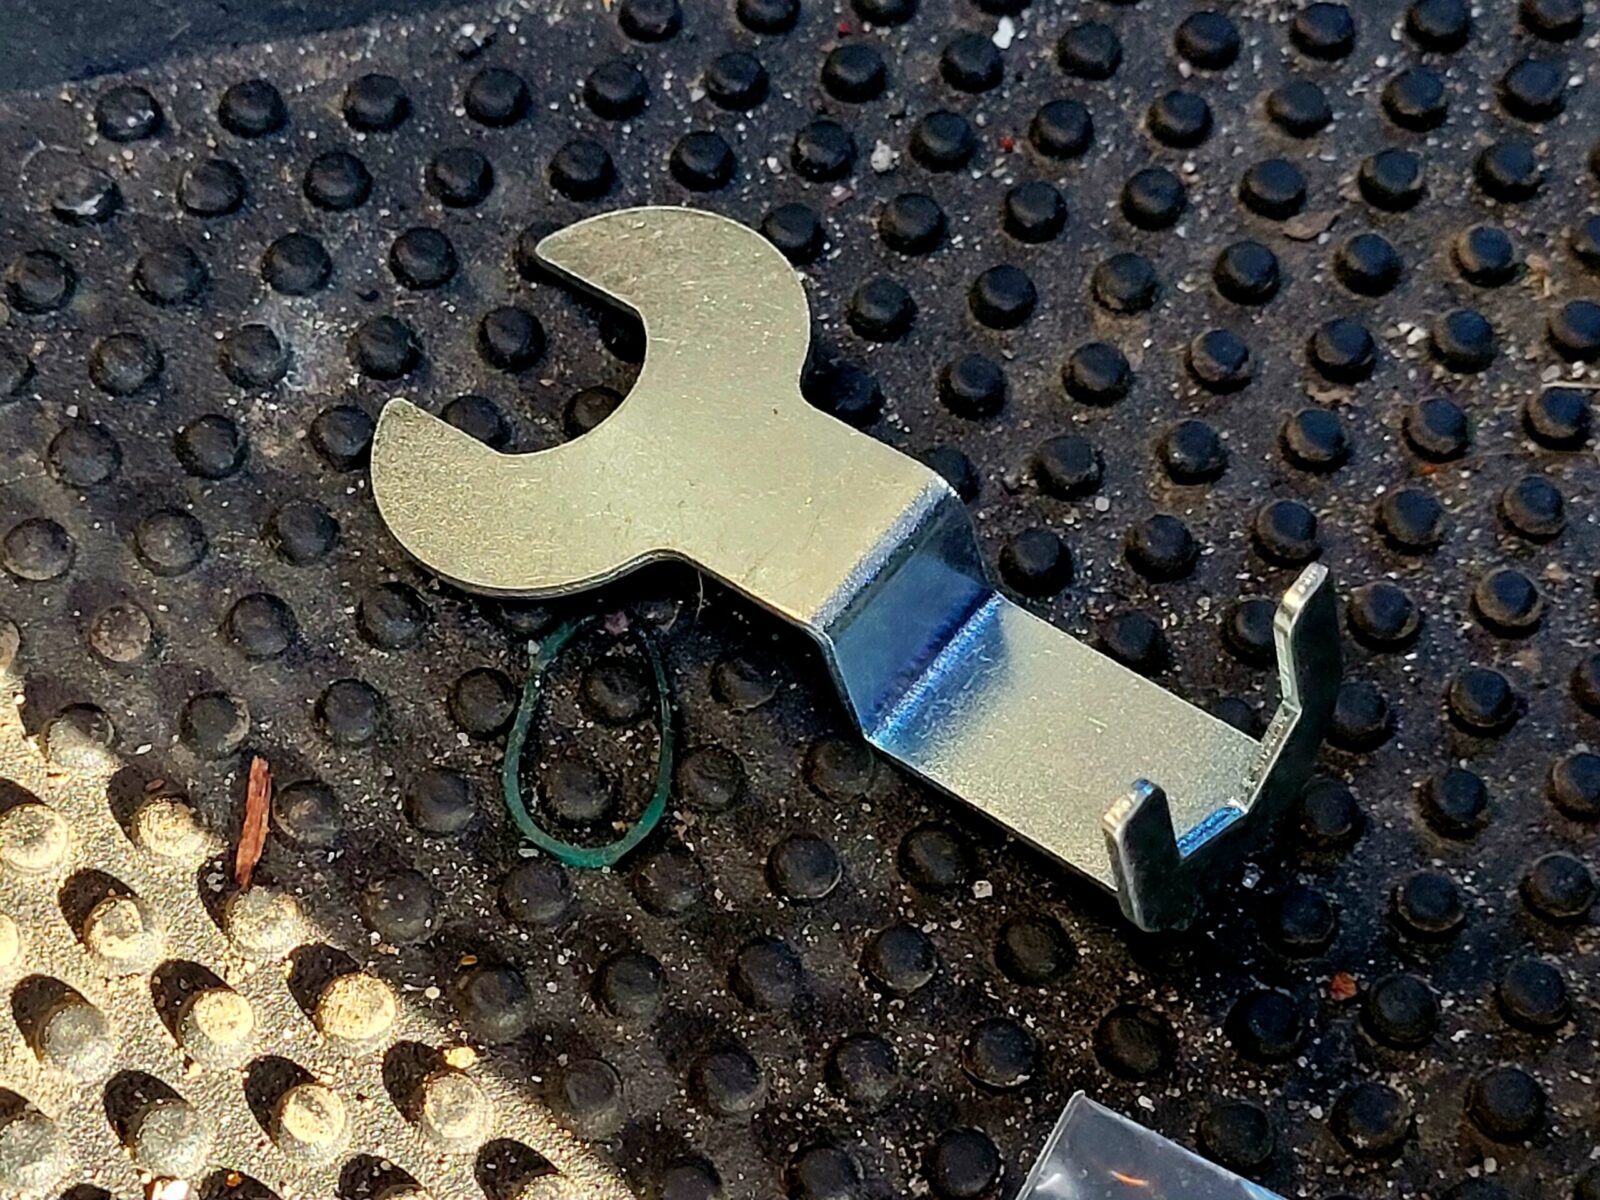
To install them you put the jam nut on first and thread it to the bottom. Then screw on the sensor until it stops – you will hear air leak for a second until the sensor seals as you continue threading it on. You then use their special wrench to snug down the jam nuts to lock the sensor in place. Done.
The Device’s Configuration Screens
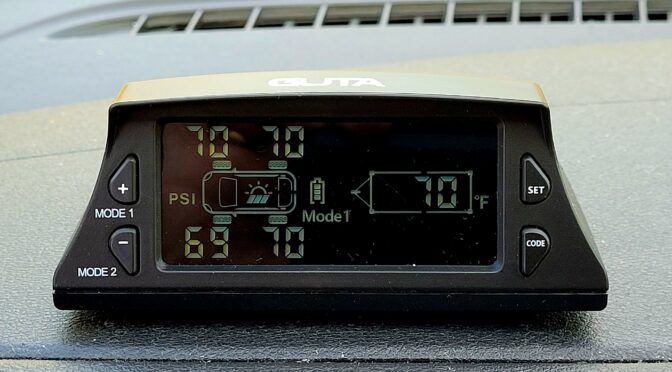
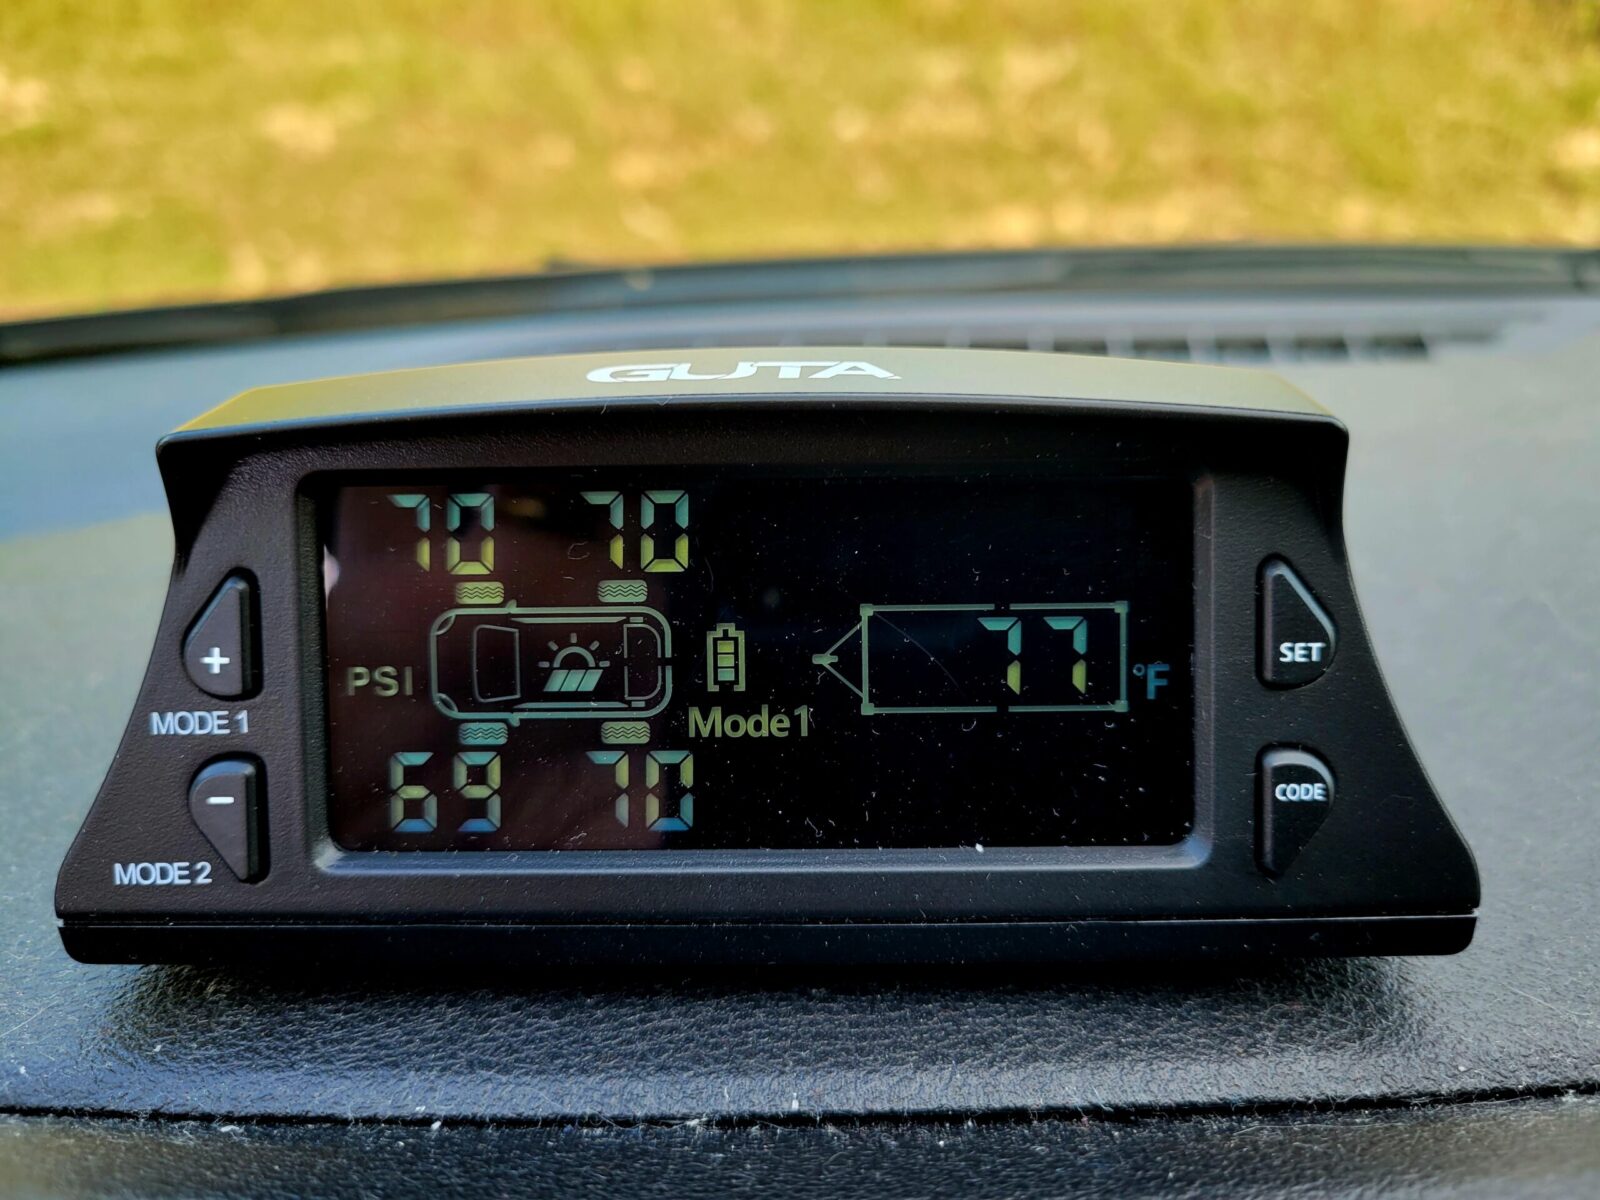
Well, the mechanical installation was very easy. The set up screen took a few minutes to figure out but wasn’t too bad. The set up screen lets you select pounds per square inch (PSI) or Bar, whether you want Farenheit or Celsius and then the Low and High pressure literally for each tire. An alarm will sound if either the low or high pressue is exceeded – I’ve experienced that. There’s also a high temperature tire warning that applies to all tires.
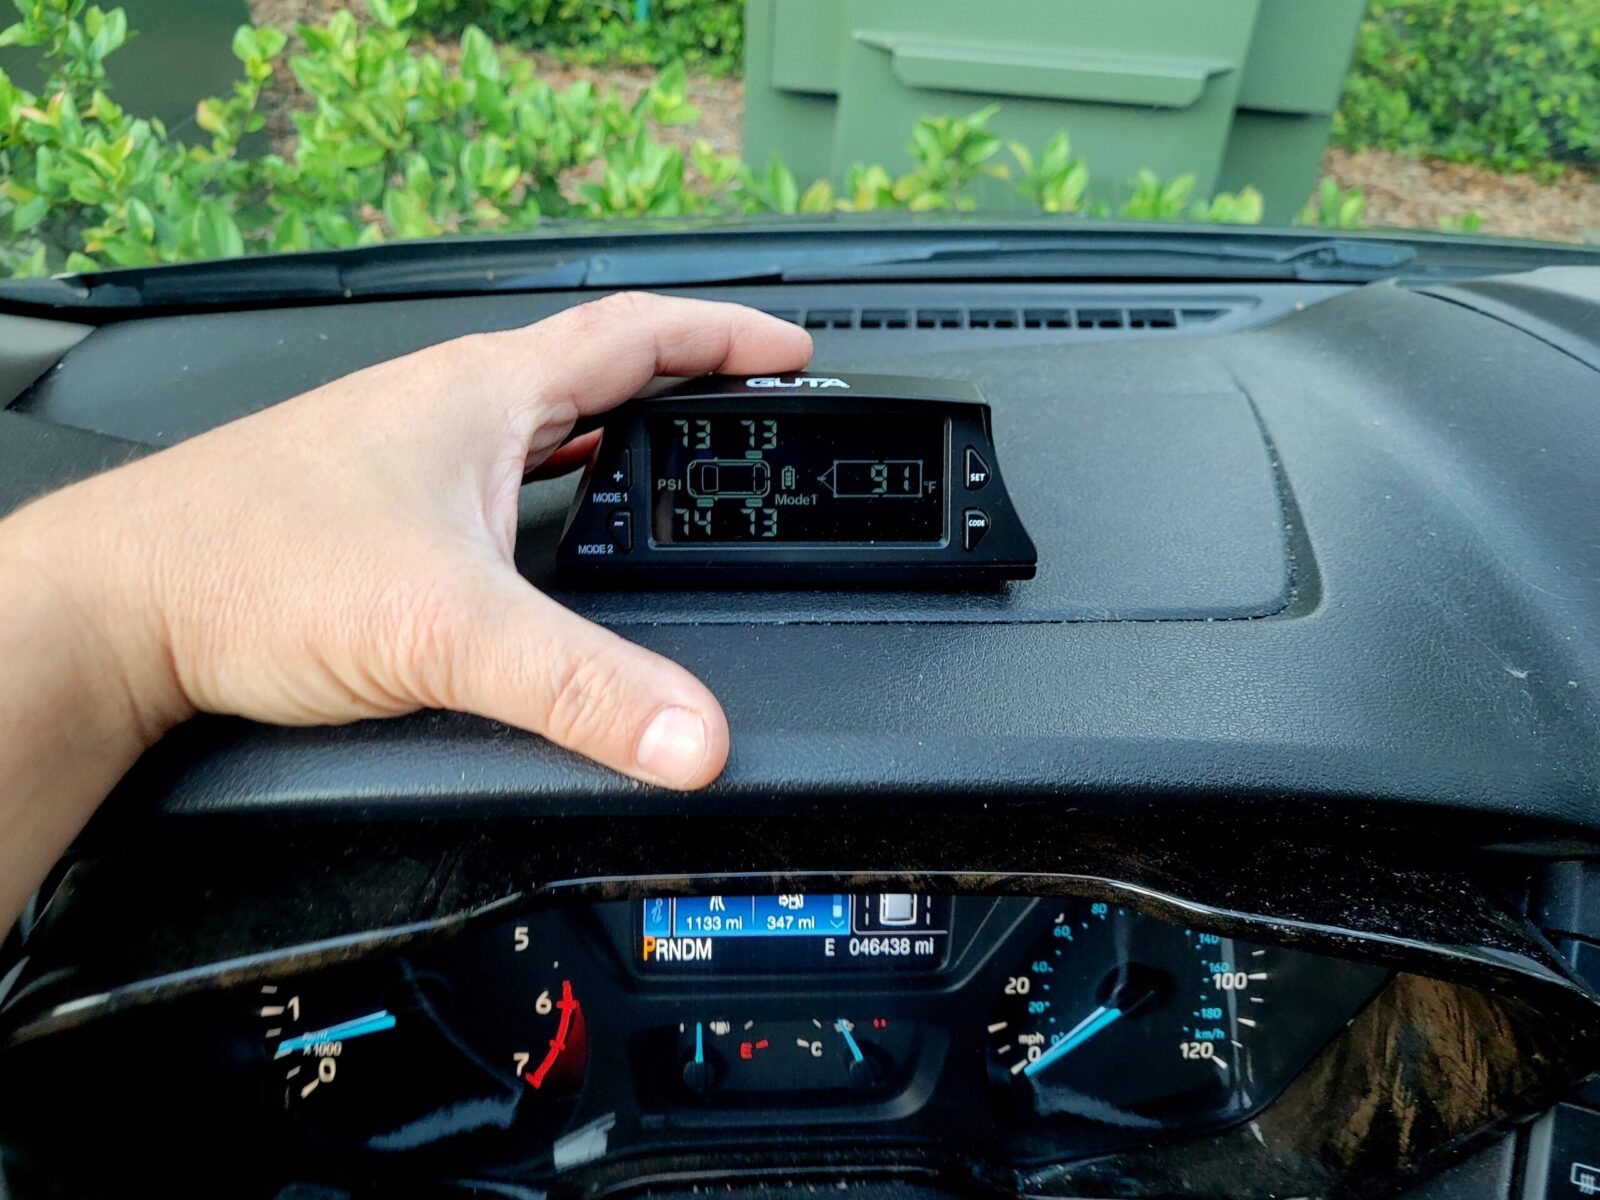
For the van, I set the low pressures all to 65 PSI and I set the max to 100. The tire temperature was set to 158F by default and I left it at that figuring I would see what happens and adjust accordingly – I had no idea what to expect actually. I did do some reading and somewhere between 190-225F is the maximum safe temperature for a tire to reach – it depends on your tire’s temperature rating.
The unit supports two modes – Mode 1 is for normal street driving and Mode 2 is for offroad or something. I had no need to explore this as our van isn’t going to go offroad.
By the way, you can add sensors or reprogram/pair sensors if need be and the instruction manual tell you how. They sell versions of this system with more and more tires supported and different displays let you see the status. Again, I just bought the model for four tires. I could add sensors to support a trailer though even with the model I have.
The Results
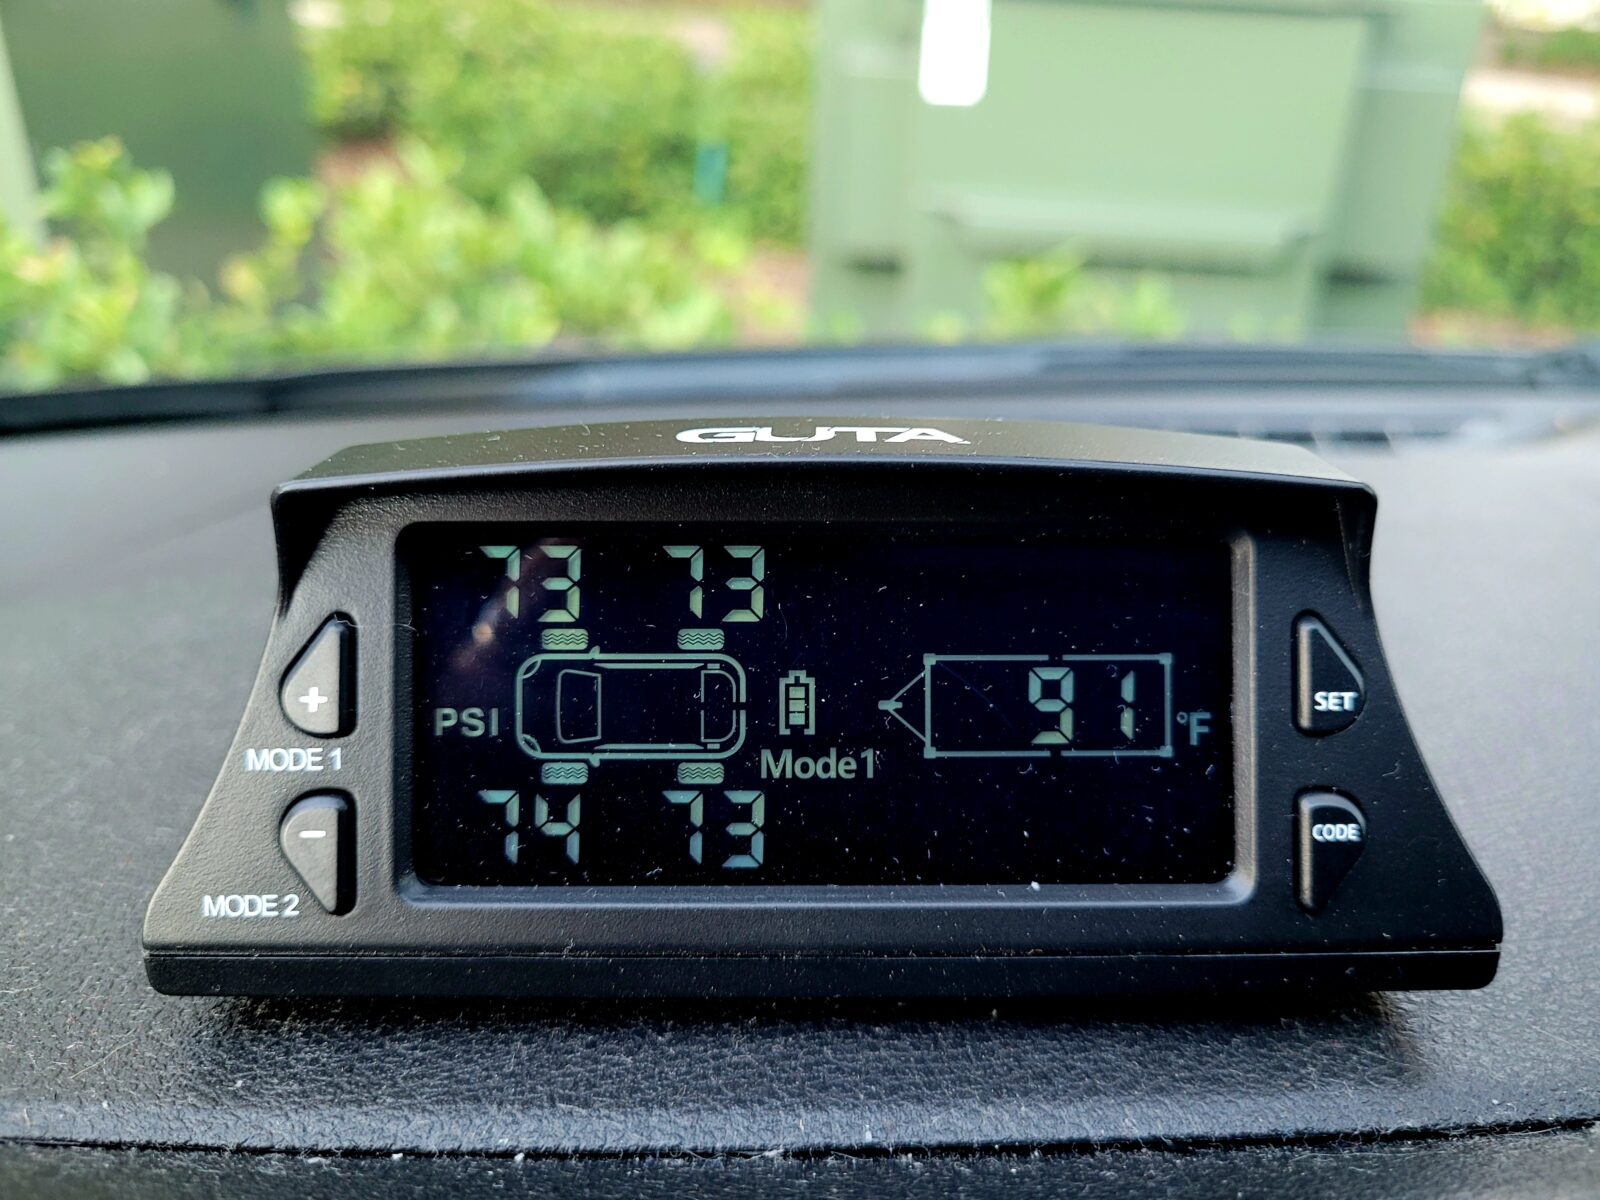
Honestly, I am very happy. It’s been intriguing to see how temperature affects tire pressure – that one I expected. In general, as temperature increases, the volume of a gas increases so this means that the pressure would increase in the tire.
What I didn’t really expect was to see that with driving, the back tires were a tad warmer than the front and also had about 2 PSI more pressure than the front. Tire temperatures where about 10-15 degrees warmer than the outside tire temperature when driving. It’s 95F here and when we were parked on asphalt the heat of the day would take the tires up to about 101-104F and then they would cool down as we drove.

I think the manual said the 2032 batteries in the sensors would last about 6 months. I guess we’ll just have to see about that. Cold Michigan Winter weather takes its toll on batteries because as the temperature drops so does the chemical reaction in the batteries and thus less voltage is produced. I’m really not worried because I did open a sensor and it is real easy to replace the batteries.
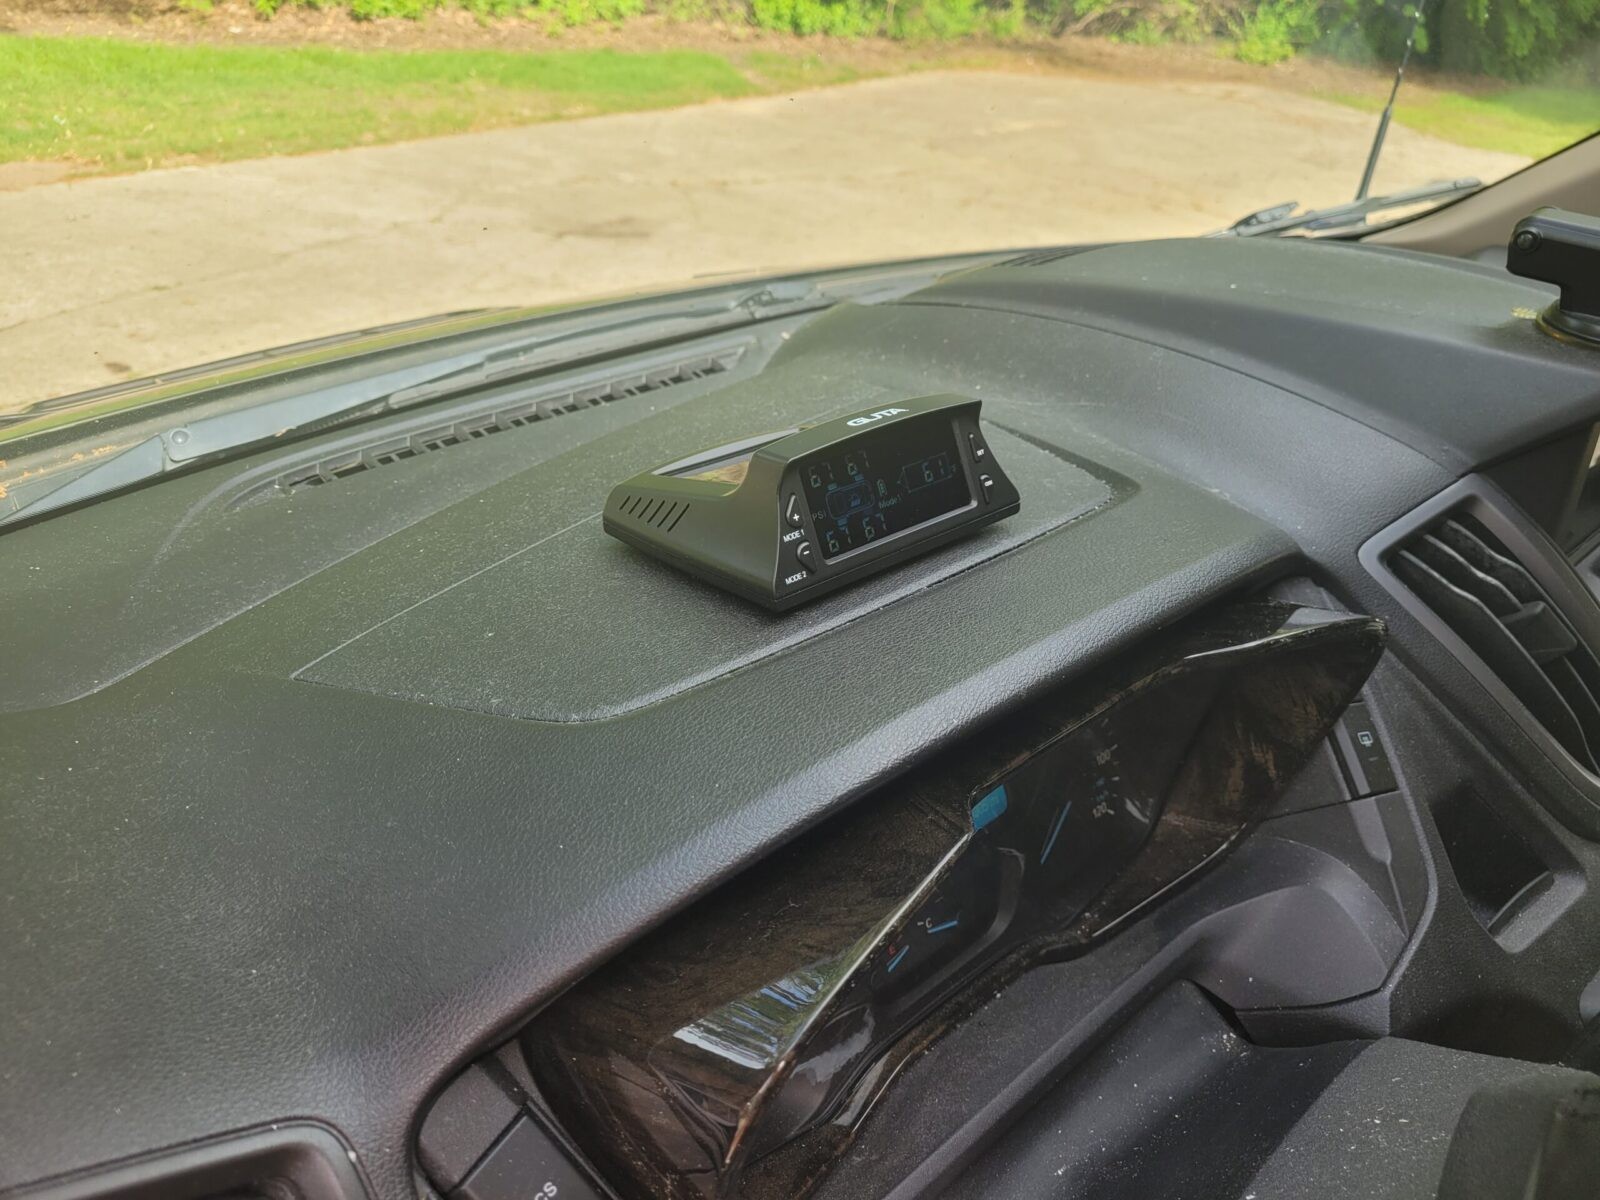
To sum it up – The installation was very easy and I like being able to see the pressures at a glance. Knowing that there would be an alarm if a threshold is passed or the pressure starts dropping rapidly too are all reassuring.
So, I like the system and would buy it again.
10/28/2022 Update: Finally had a sensor go out or so I thought. We were driving down a rural highway and all of a sudden the alarm went off with the front driver’s side tire showing 0 PSI. The van was driving fine and when I pulled over the tire looked ok. To make a long story short, the battery in the sensor died. I knew it would sooner or later but there is no low battery warning. It uses CR2032 lithium batteries – one in each sensor. I went to a nearby Walgreens and bought four Energizer batteries and changed them in all four units – if one fails, odds are they are all close to it if you changed them at the same time. To replace the battery, remove the sensor, unscrew the top, slide out the old battery, slide in the new battery and then pair the unit. Pairing is pretty easy – hold down CODE on the main unit to go into setup. Push + or – to move around to the sensor, put the sensor right next to the main unit and push code. It will beep when it pairs. Hold down CODE until the system exits and goes back to standby. Between the battery being probably at least a year old and the system comes with the sensors running plus the temperature was 45F, I wasn’t surprised. Weak batteries tend to fail in cold weather. So, everything is set and I still really like the unit.
Note, I have to buy all of my parts – nothing here was paid for by sponsors, etc. I do make a small amount if you click on an ad and buy something but that is it. You’re getting my real opinion on stuff.
Please share the link on Facebook, Forums, with colleagues, etc. Your support is much appreciated and if you have any feedback, please email us in**@*********ps.com. If you’d like to request a report or order a reprint, please click here for the corresponding page to open in new tab.