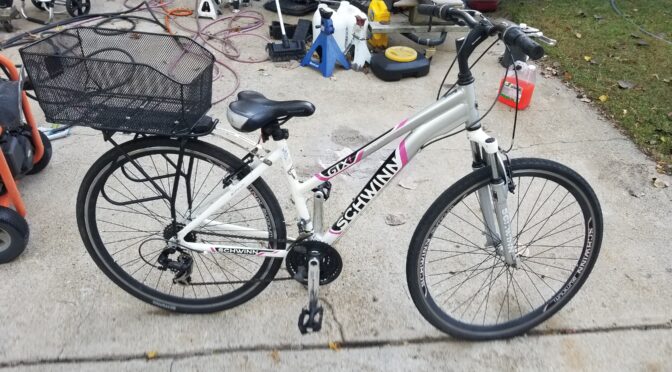
Growing up in the 70s, Schwinn bikes were real popular as there was a dealer in town. Over the years, the brand has been bought and sold and is owned by Pacific Cycle now. The bikes are made in Chang Zhou China and are sold through places like Walmart and Sam’s Club.
With that said, my daughter needed a bike and we bought her one in 2016 from Sam’s Club. It was already assembled so I was happy I didn’t have to mess with it. Growing up in a rural area with few kids around, one of my hobbies was fiddling with my Sears Free Spirit 10-speed and often needing my dad to bail me out when I messed things up — I tend to learn a lot by screwing up 🙂
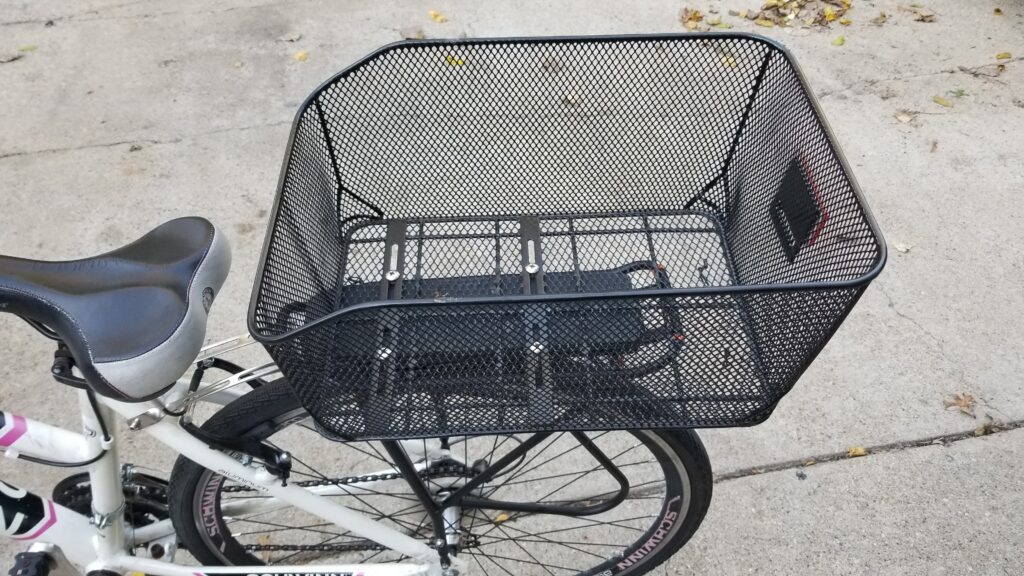
At any rate, the big went with us on a number of trips over the years and went with my daughter to college. It’s hard to beat having a bike on campus to get around and we invested in a basic rear basket for two reasons – the obvious was to let her throw stuff in it. The other was that it could block the water and mud that otherwise throws a stripe up your back when you have to bike in the rain.
Here’s the exact Ibera rack I bought:
And this is the wire mesh basket:
The Call…
The bike worked great until I got a call – “Dad, I have a flat – what do I do?” Well, we live just over an hour drive away so the next time we went up, I brought the bike back.
What Size Inner Tube?
Many bike tires, such as this Schwinn, have an inner tube and eventually it cracks or a hole gets poked in it. Some folks patch their inner tubes but I just replace them – especially given the age of the bike and that I knew it was an original tube.
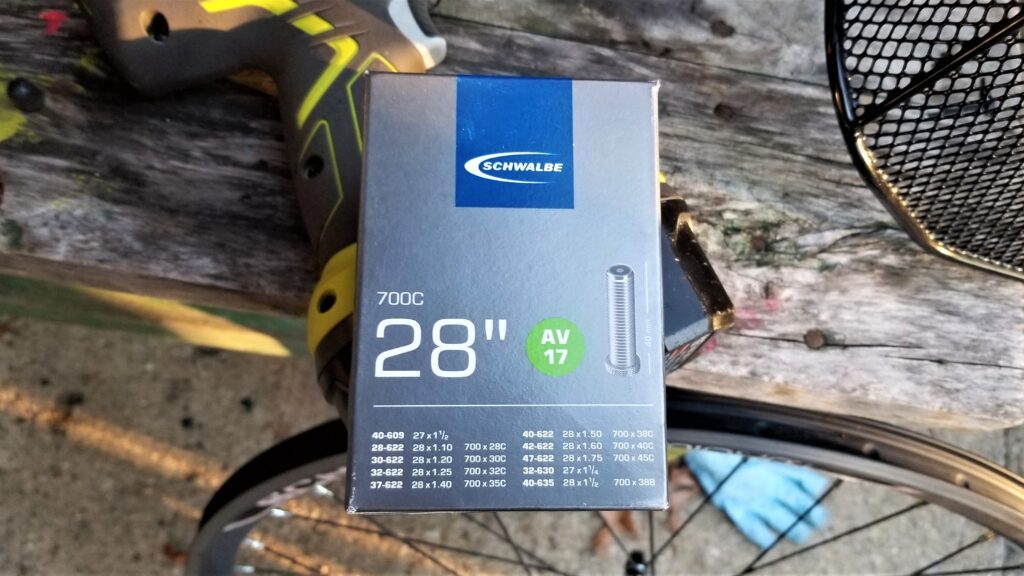
The info you will need to get a replacement tube is on the side of the tire (not the tube). You may see the ETRTO (European Tire and Rim Technical Organization – or ISO) number marked as XX-YYY where XX is the tire’s inner width and YYY is the inner tire diameter. On this Schwinn, it is 40-622.
You may also see an older French sizing that is marked something like AAAxBBm. AAA is the approximate tire outer diameter and BB is the width. There will be a letter at the end “m” is the inner diameter. I ike the ERTO method better – it just makes more sense to me. At any rate, the Schwinn had this code also: 700x38C.
Okay, so armed with that info, I hopped on Amazon and started reading reviews. I didn’t want to buy a cheap tube and have it give out prematurely so I looked at Schwalbe – an old name in German inner tubes. I also used their website to confirm the size I needed – their AV17 model. which fits 700x38C, 28×15 or 40-622 tires and has a Schrader air valve. I bought two because if the one was aging, which was my suspicion, I bet the other was as well.
| Tip: If you are in the US, you will want a tube with a basic Shrader Valve to inflate your tube. This is the most common type of valve and you will find it on cars, trucks, tractors, and so forth sold in America – it’s nickname you may hear in other countries is the “American Valve” for that reason. There is another type known as a “Presta Valve” and it is unique. Only buy a tube with that type of valve if you know you need it. There is a third type called the “Woods Valve” or “Dunlop Valve” but that tends to only be in the Netherlands and parts of Asia. |
Last comment – there are a ton of bike tubes on Amazon and at stores. There are also different types such as ones that are self-sealing, etc. The choice is up to you, your budget and whether you mind changing the tubes or not. Since my daughter is not readily available and the bike is a big help to get at school, I spent $14 per tube vs. $5-6/tube for tube-shaped objects that may or may not hold up. Read the reviews and you decide.
Replacing The Tube
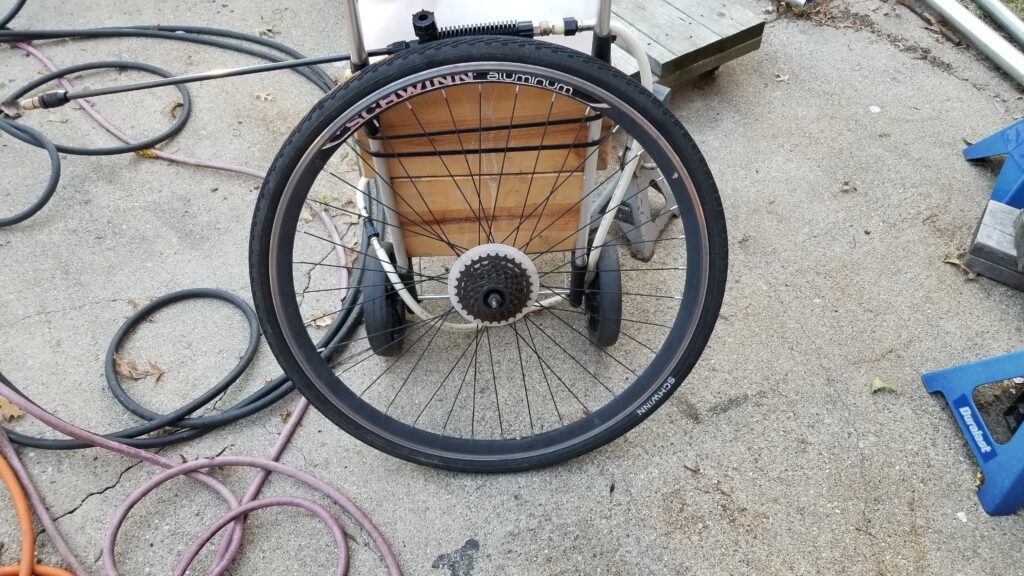
There are how-to videos out there you can watch if you want. Basically if the tube is already flat, you pull the tire off the rim a side at time. You can use a blade screw drive to help get it started off the rim but I find most of the time if I push the tire away from me while lifting off the rim, I can get it started and then just work my way around. The old tube should just lift right out of the tire unless it stuck due to glue or something from a past patch.
Note, if there is no inner tube on your bike, you have a tubeless tire and the leak may well be in the tire itself.

Before you install the new tire, look at the rim and make sure there are no spokes protruding into the area where the tube is at. Your rim should have either have something rubbery to protect the tube glued in place or at least some type of tape. They sell protective inner tube pads or you can even try putting in 2-3 layers of PVC electrical tape. If you go the tape route, you will need to cut a hole for the inflation tube to stick out.
To install the new tube, put in the tire. Yes, put it in the tire – not on the rim. It’s designed to fit the outside diameter of the tire and will not fit otherwise. So, tuck it into the tire and then push the air valve through the hole the rim. A perk of using Schwalbe tubes is that they have a lock nut you can snug down to hold the tube in hole.
You then tuck the tire into the rim. Depending on the fit, you may need to do a side at a time or be able to do both at once. Take care not to pinch or cut the tube.
A trick I learned years ago is to partially inflate the tube and then gently bounce it all the way around to try and ensure the tube is not caught between the tire and the rim. Not everyone does this so it’s up to you. I then bring it up to pressure and re-install it. I check the air pressure a few hours later to make sure it’s sealed and no punctures happened.
Again, because I suspected the age of the tires was the culprit, I did both tubes. It’s up to you.
Videos
In case you have questions, here are some videos that others have created and posted on Youtube that demonstrate how to remove and install inner tubes:
Conclusion
I hope this helps you out when it comes to the tubes.
thought I was done and then I felt the cranks were grinding horribly. That bugged the heck out of me because I knew it meant to bearings were history and that will be the topic of the next blog post.
Please share the link on Facebook, Forums, with colleagues, etc. Your support is much appreciated and if you have any feedback, please email us in**@*********ps.com. If you’d like to request a report or order a reprint, please click here for the corresponding page to open in new tab.