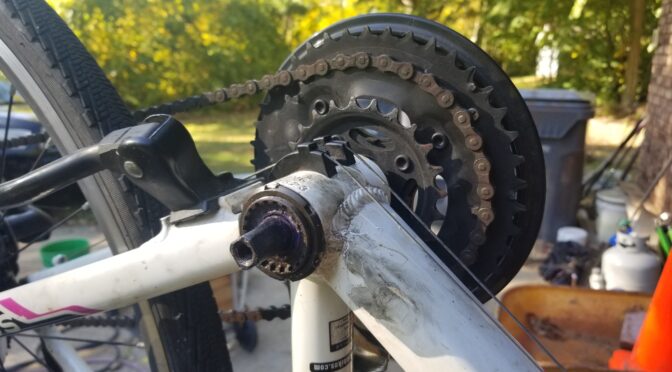
In the last post, I described changing the inner tube on my daughter’s bike and then finding that the crank was grinding. It was so bad that it felt like metal on metal. When we brought her home last year, I noticed the crank had a ton of play in it and had a grinding feel when turning and knew that meant the bearings in the crank/lower-bracket were bad.
I’ve not worked on the crank of a bike for probably 40 years – literally. I had a vague idea of what to do but some details have changed over the years and I had to do some reading. Given that I had to really dig to figure out what to do, I figured it was worth sharing this also in case someone else has “what in the heck is this?” moment with one of these Schwinns or a bike with a similar setup.
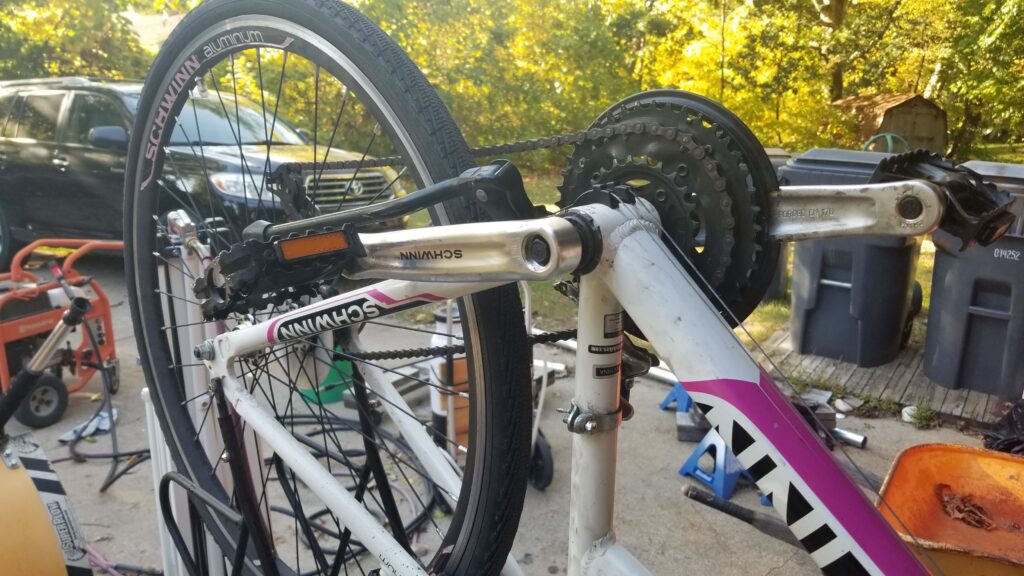
I had to watch a bunch of videos and read some blog posts to get an idea of what to do. I thought “crank” applied to the whole assembly but it turns out the correct term for the innards is the “bottom bracket” and cranks just appear to the lever arms the pedals attach to.
Here’s the approximate sequence of what to do
I’m writing this a few weeks after doing the actual work but hope it helps if you find yourself in a similar bind:
Step 1: Remove the left and right cranks. They are pressed in place and I had to buy an actual purpose built puller to get them off. None of my generic gear pullers would work.
You remove the obvious bolt and then use a purpose-built puller that threads into the crank all the way and then tighten the center bolt to push the crank off. The Schwinn needs a puller that has 22mmx1mm threads made for a square crank.
Park makes two tools – the one I used and the one I bought for future use. I bought and used the CCP-22 crank puller but I would not recommend it. Both cranks were on so hard that I had to hit the handle with a dead blow mallet to get it to turn. At least for the bike I was working on, the integral handle wasn’t sufficient to remove the crank.
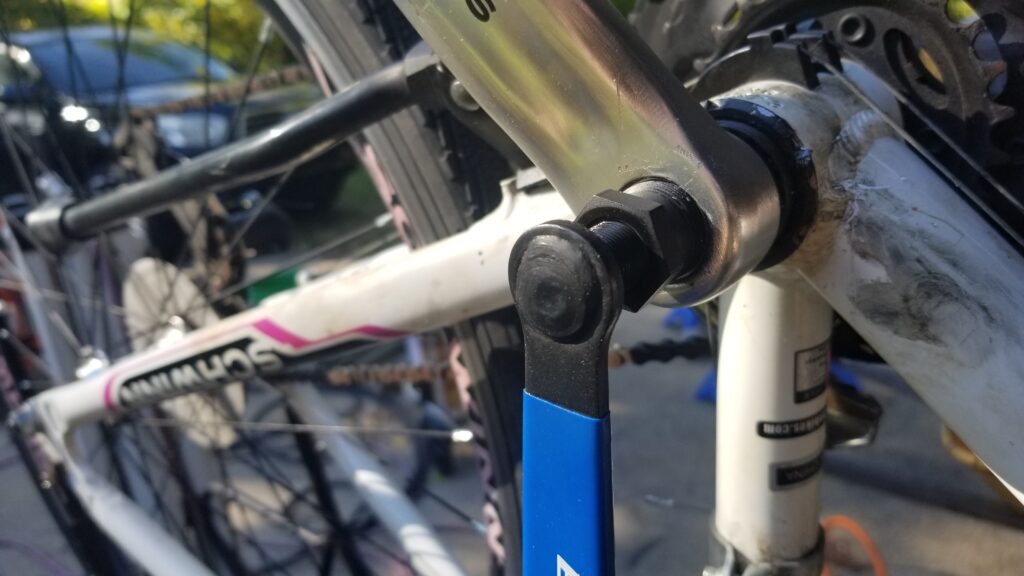
After I got done with this bike, I bought a CWP-7 that they call the compact version but what is appealing is that it has a hex head that I will engage with a socket or impact wrench to do the job far easier, I wouldn’t recommend the CCP-22 unless you know the crank is going to come off easy.
Step 2: Loosen the lock ring. When you look at the bracket, you will notice it is threaded and goes into the frame. Securing it is a locking ring that is threaded and is tightened against the frame to apply pressure. You loosen the locking ring by putting a punch in one of the little “notches” and tapping the ring so it will turn counter clockwise. It will come lose and turn very easily. Just move it a few turns from the frame but leave it on the bracket – you do not need to remove it all the way.
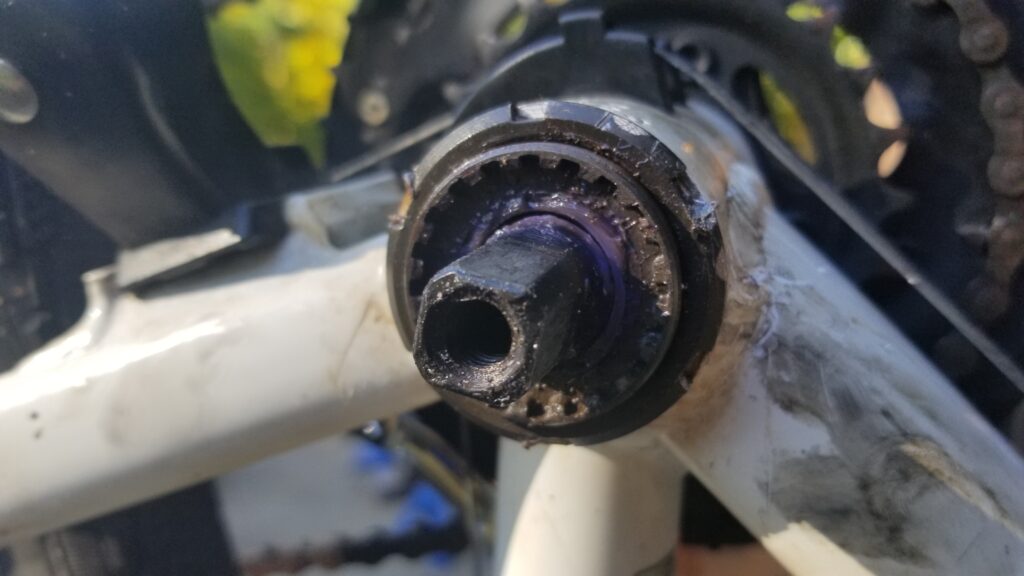
Step 3: Remove the non-geared side of the lower-bracket. If you look at the photo above, you will notice there are splines radiating inwards on the bracket. You need to measure the diameter and count the number of splines in order to buy the correct size wrench to remove this part of the bracket. This one was about 31.5 mm inner diameter and had 22 splines. The Park BBT-22C tool fits these. There are many different sizes so you really to confirm this.
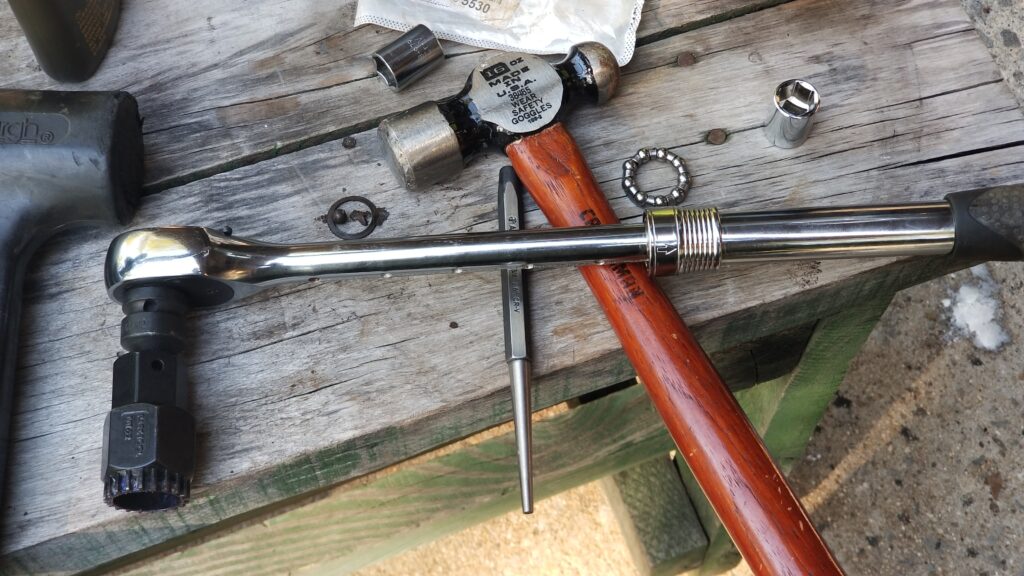
I used the above pictured E-Z Red wrench and BBT-22C adapter to remove the bracket, When the bracket came out of the frame, I kid you not, ball bearings fell out. What a mess.
None of the ball bearing assemblies were intact, there was no grease to speak of and the rusty sludge that I had to clear out of the frame had remnants of the ball bearings and the cages/retainers. There were literally no ball bearings supporting the crank axle/spindle. The axle was just turning directly on the ends of the lower bracket! No wonder she was complaining it was hard to pedal
Step 4: Remove the geared side of the bracket. This comes off very similar to the non-geared side with two exceptions. First, it is reverse threaded. Turn clockwise to remove the bracket on that side. Second there is no lock nut. The proper tensioning of the bracket is done from the non-geared side. By the way, if you maneuver the crank and gear assembly around a bit, you can leave the chain in the derailer.
Step 5: Thoroughly clean and grease the frame’s tube where the bracket was at. You do not want debris to get into your brand new bearings. I had a ton of crud to get out and then I liberally greased the walls.
Step 6: Reinstall the geared side of the bracket. Remember that it is reverse threaded and it goes in all the way. The final adjustment is done from the non-geared side. Note, I put a lot of grease in the dome before screwing it back into the frame.
| Tip: Re-install all threaded pieces such as brackets and bolts by hand to make sure the thread is properly aligned and not cross-threaded. Use a wrench to tighten things down only once you know the threads are properly mated. |
Step 7: Grease and install the bearings. I had grease everywhere at this point and didn’t want to touch my phone. Normally you would be able to see your old bearings and have an idea of what to buy. All I had were some rusty ball bearings and pieces of the retaining rings. So, I did some digging on Amazon only knowing I had a Schwinn bike and needed bearings with an inner diameter based on the axle or shaft between the cranks of about 0.72″ and an outside diameter of about 1.14″ (29mm).
Okay, I got lucky. In reading the comments of a lot of different bearings, a 1/4″ x 9 ball unit from Jaceyon popped up with people reporting they worked on Schwinn bikes. I was running out of time so I ordered them and they worked! Click here for the bearings on Amazon – a new tab will open.
Use wheel bearing grease to pack the bearings as best you can. I apply a lot of grease to all surfaces including the bracket face, the axle/shift and the bearings. I like to use a synthetic wheel bearing grease, such as Mobil’s, because I find it doesn’t ooze oil like normal grease does. In the end, use what you have but just be sure to grease the bearings before installation.
When you install them, there is a proper orientation. Please look at the inside ends of the brackets – they are domed. This means the exposed bearings will engage with these ends. The flat part of the housing faces the inside of the tube.
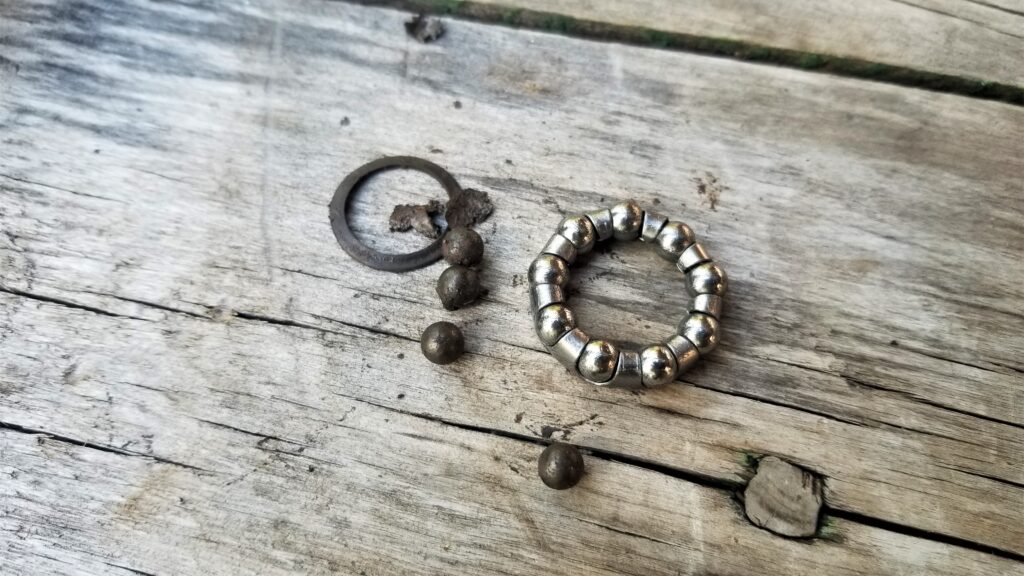
I slide the geared side bearing and the axle in. Again, make sure the bearings are facing outward so they will engage with the bracket. I then put a bunch of grease in the non-geared bracket end dome and hand screw it back into place.
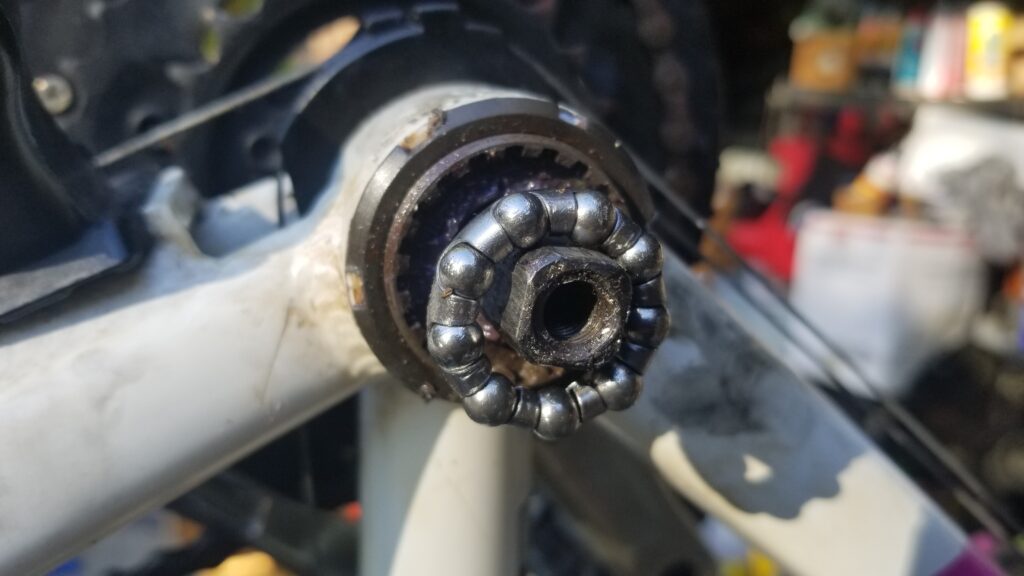
Step 8: Tighten the bracket and install the lock ring. Now this part may take some tuning. By tightening the non-geared side, you are compressing the bearings into place. Tighten the bracket until the crank axle can no longer wiggle but it can still turn. Do not use a huge wrench here or rush – you can smash the bearings – I’ve done it. Tighten a little and feel the axle, over and over.
Step 9: Tighten the lock ring. Use a punch and hammer to rotate the ring clock wise and lock the bracket back in place.
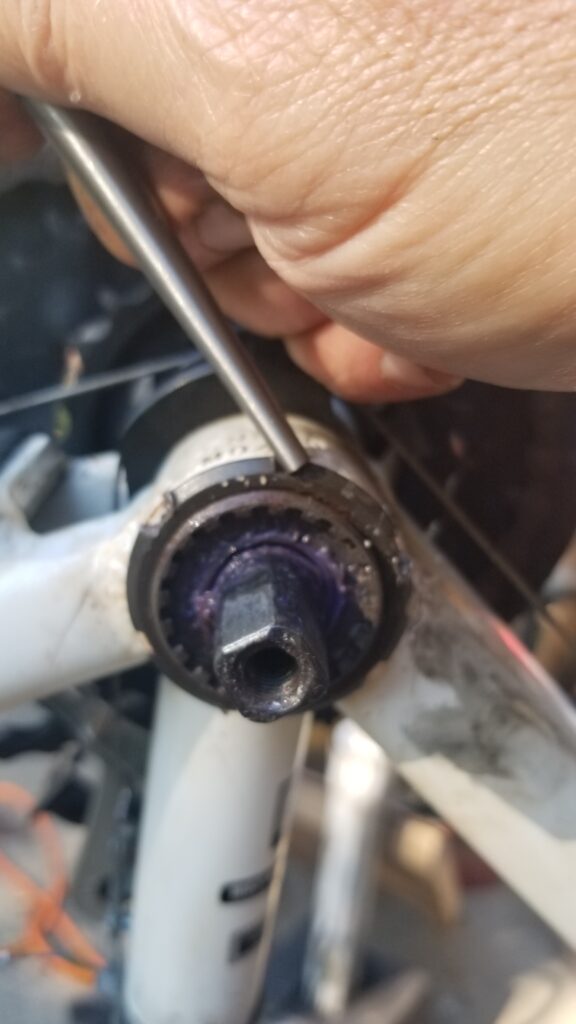
Step 10: Reinstall the cranks. Situate them on the shafts and use the center bolt to press them back into place on the axle as well as lock them there. Each crank arm should be 180 degrees opposite of the other. The square ends of the axle are intended to make this easier 🙂
Reinstall your chain too when you are wrapping up the gear-side if you haven’t already,
Step 11: Give it a test ride. If it makes a creaking or groaning noise when you pedal either the bracket needs more tightening or you trashed the bearings. If the sound will not go away, you will need to take it back apart because the bearing probably failed for some reason. That means you go back to step 3. Hopefully you will not have this happen. It did to me the first time and luckily the bearings I bought were four sets to a bag. I’m really not sure why it busted but I am glad I had a spare.
Videos
I didn’t find any exact videos, which is one of the reasons why I wrote this post, but there are videos that can give you a better idea of what is needed. I’m hoping that between my post above and your watching these videos, you will have a pretty good idea of what needs to be done.
Conclusion
With this done, the bike was all set for my daughter to use again. I don’t think a ton of care was taken during assembly and really wouldn’t be surprised if little to no grease was applied to the bearings.
I hope this helps you out.
4/30/2924 Update: The bike is still going. I am sure that greasing them really well is a big factor for longevity. Go to your local car parts store and get any normal wheel bearing grease – you do not need any that says it is a high-temp formula, extra thick or whatever.
6/27/2021 Update: The bike is still doing just fine. No problems with the crank and bearings at all.
If you find this post useful, please share the link on Facebook, with your friends, etc. Your support is much appreciated and if you have any feedback, please email me at in**@*********ps.com. Please note that for links to other websites, I may be paid via an affiliate program such as Avantlink, Impact, Amazon and eBay.
