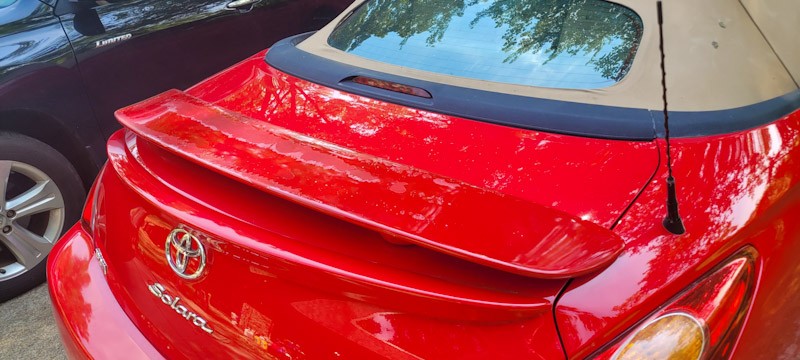
My wife’s convertible Solara is her pride and joy in the summer time. We bought it back in 2017 and it has proven itself to be a reliable and fun car. One issue it had was related to an aftermarket spoiler the previous owner had installed.
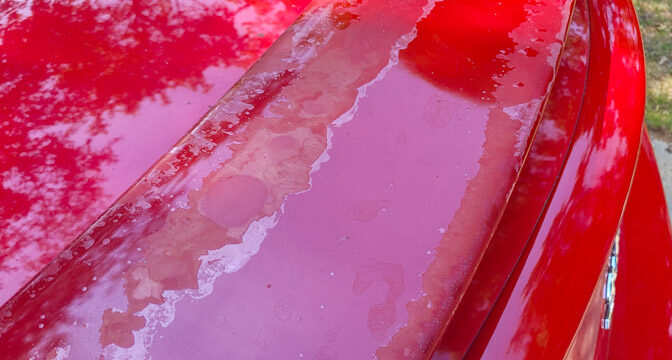
In 2021 we waited to take the cover off and there had been a number of hot and humid days. When we removed it, the clear coat on the spoiler was popping off. The factory paint on the car was just fine – the spoiler on the other hand looked tough and by the end of the 2022 Summer driving season it really looked bad so I knew I needed to surprise her by refinishing it.
The clear coat was peeling all over the top of the spoiler but not the bottom.
I do own a full set of automotive paint sprayers but I didn’t feel like getting them out and set up just to do a spoiler. I decided to go with AutomotiveTouchUp.Com who I had bought touch up paint from in the past and had pretty good luck with. The only issue I have ever had with them is that you will wait around four weeks for them to make and ship your paint.
The paint code for a Toyota is one the door sticker and her Solara was “Absolutely Red – 3PO” which describes the bright red on the car very well. I knew I would need primer, that base color and clear coat. I always buy extra just in case so I bought two cans 12-oz cans of each and then I waited for it to show up.
Before you do anything – read their instructions. I went with spray cans so I focused on that section – click here.
Getting Ready to Paint
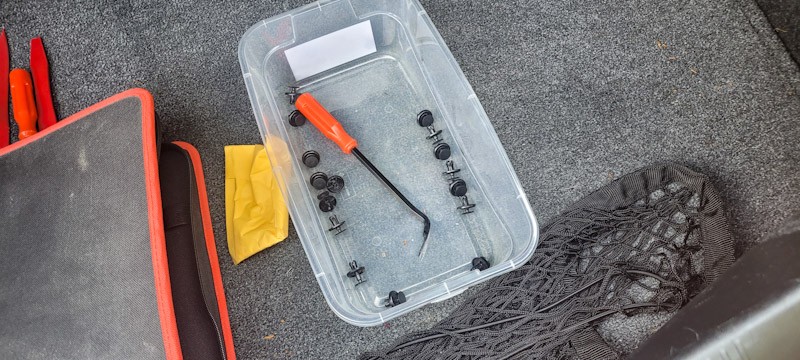
The first step was to remove the spoiler from the car. This was done by removing the body push pin rivets and moving the interior cover out of the way. Don’t be surprised to find out some of the rivets are missing or broken on an old car. You can easily get them on Amazon along with a tool that makes removal very easy.
Those little push pin rivets do the job and the tool you see makes it really easy to pull them out. If you don’t have a tool use a small blade screw driver or flat edge to get under the pin-part of the rivet and lift it up.
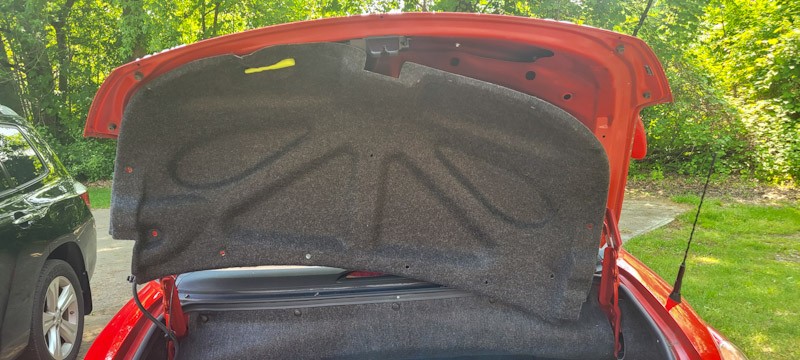
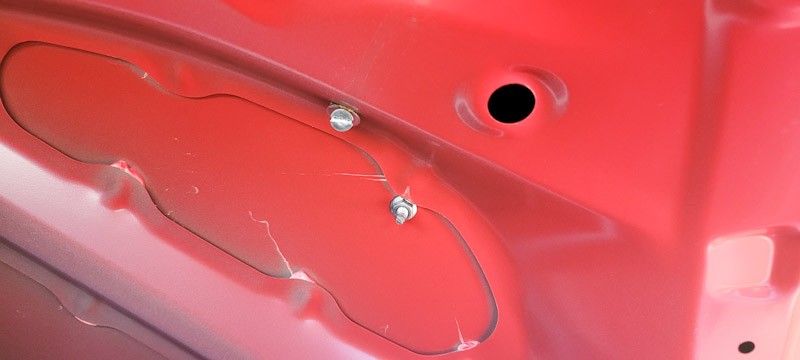
You don’t need to completely remove the cover – just remove as many as you want to get access to the onme screw and one stud on each side that holds the spoiler.
You will see something like this on each side. Remove the machine screws first and start to back off the nut on the stud. If the spoiler stays in place, then remove the nuts completely and the spoiler will lift straight off. In my case, my wife held the spoiler so it wouldn’t fall off when the nuts were removed.
I took one look at the old stuck on seals and left them alone. Trying to remove them would only tear them up. I decided to leave them alone, re-use them and if there was a leak then I would decide whether to replace them or just put a bit of black silicone RTV gasket glue around the two holes to seal it. I didn’t want to jump right to that because if I needed to remove the spoiler again, it would tear up the seals. You can buy black rubber seal material in sheets and you cutt out whatever shape you need but I wanted to avoid that path if I could.
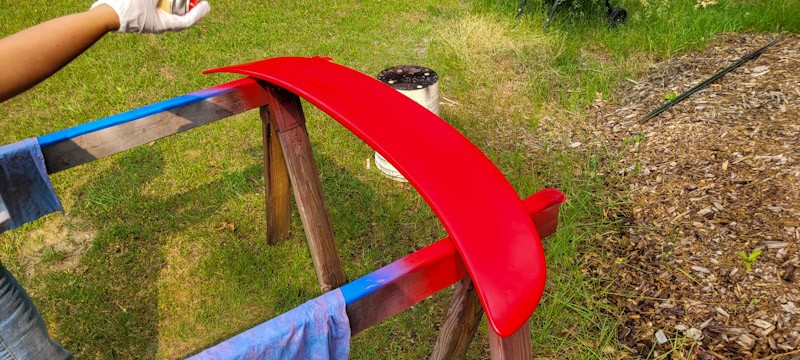
I put the spoiler on two wood sawhorses to do the refinishing work. Note, I added blue painter’s tape to the sawhorses right after this was taken.
I have a 5″ Dewalt orbital sander that I used with 150 then 220 grit sandpaper to remove all of the bubbled/loose clear coat. I wasn’t worried about removing everything down to the bare bare material underneath but did want a solid surface on the top and edges for the primer to grab hold of.
Painting the Car
With the surface prepped, let’s get into the painting process.
This is red primer – not the base paint. I did three coats with wet sanding at 150 grit. No matter how hard and long I shook the rattle cans, the primer would spatter / blow larger drops into the paint vs. the fine mist you want. To be honest, I was regretting not just getting out my spray guns at this point.
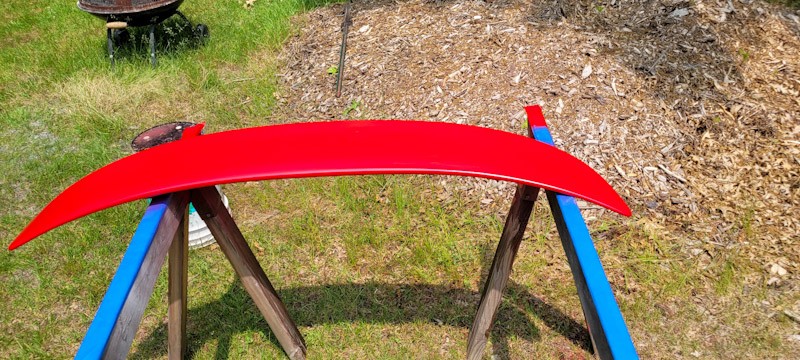
I applied five coats of red paint. Light coats are the way to go and what you are looking for is a nice even rich color. I was still fighting the spattering even with the paint. So I did wet sand a few times. There instructions tell you not to do this but they also didn’t have their paint spattering everywhere.
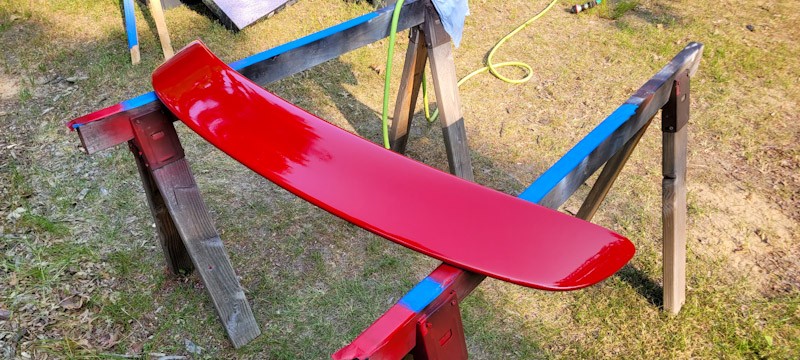
This had six coats of clear coat. I did not wet sand between. The trick is to build up a relatively thick clear coat so you can wet sand it even and then later polish it.
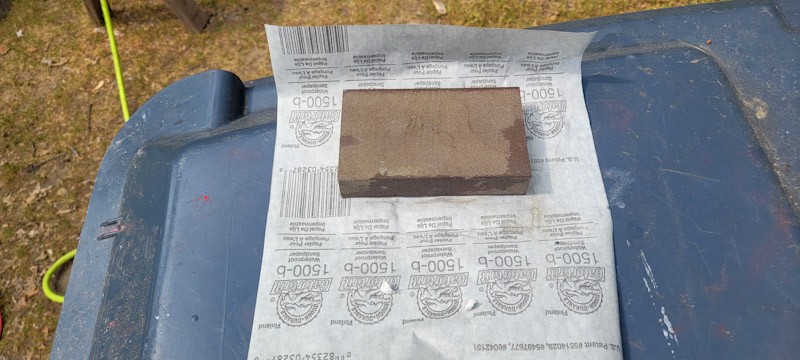
Let it cure for an honest day so that it is hard enough to wet sand and then use rubbing compund to polish it. Water acts as a lubricant in the very fine 1500 grit sandpaper. If you don’t use it, the grit will fill with material and be useless. I keep a bucket of water next to me and keep dunking it in there. In this photo you see a sheet of 1500 grit sand paper that I wrap around the foam block to support it when I sand. I sand the clear coat using 1500, 2000 and 3000 grit sandpaper.
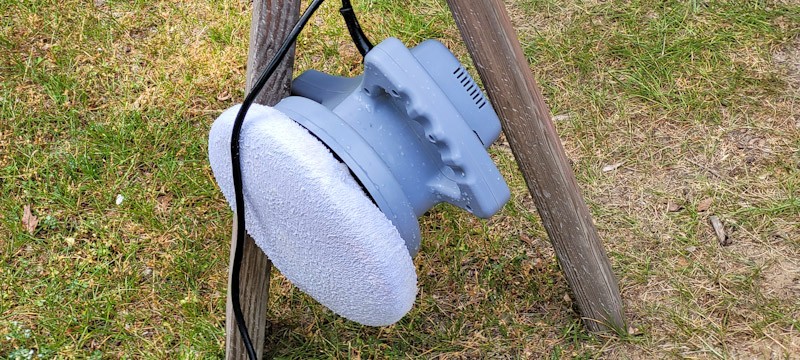
This is a random orbit 6″ bonnet washer. The terry cloth surface holds the rubbing compound and you keep moving around the clear coat removing all of the fine scratches.
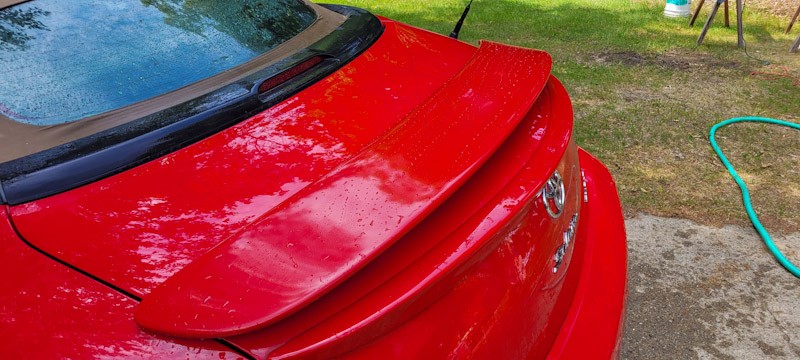
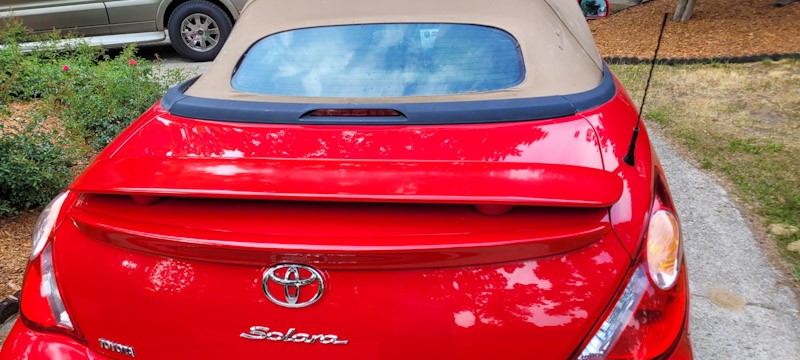
The result turned out great. One important thing to remember – it looks and feels cured but it isn’t. There normal one part clear coat needs 30 days to cure the rest of the way. If you wax it, you will probably watch your finish peel right off so be sure to wait.
It wasn’t perfect but way, way better and my wife as thrilled.
The spoiler had rubber bumpers under the front part where it was close to the body. I bought these little 1/4″ tall rubber self-adehsive bumpers at Ace. They looked identical to the originals and will prevent the spoiler from hitting the body for whatever reason.
Summary
Because I had the sprayers, I regretted using the rattle can approach with the spattering that I could not get rid of for whatever reason. The time I thought I would save by not setting up my finishing automotive paint sprayer I lost doing extra sanding to get a relatively smooth finish.
In terms of color, they did a great job matching. I’m writing those blog almost two months after painting and it is nearly an exact match. Only at certain angles and lighting do I think I might see a difference – it’s that close. I’ve used them for other vehicles for bottles of touchup paint and their matching is always really good.
Here’s my advice – if you don’t have a good car air sprayer, these rattle cans (spray cans) from the company will do the job. Just be prepared to do extra wet sanding but not between the clear coats.
What is the ultimate gauge of success? My wife is really happy with the results.
3/2/24 Update: The paint is still holding up just fine. No bubbles, peeling or fading.
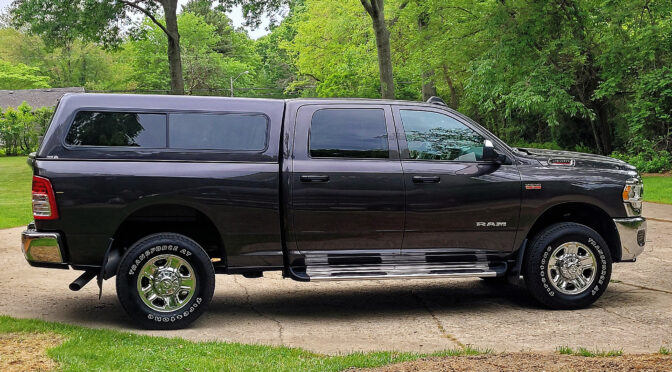
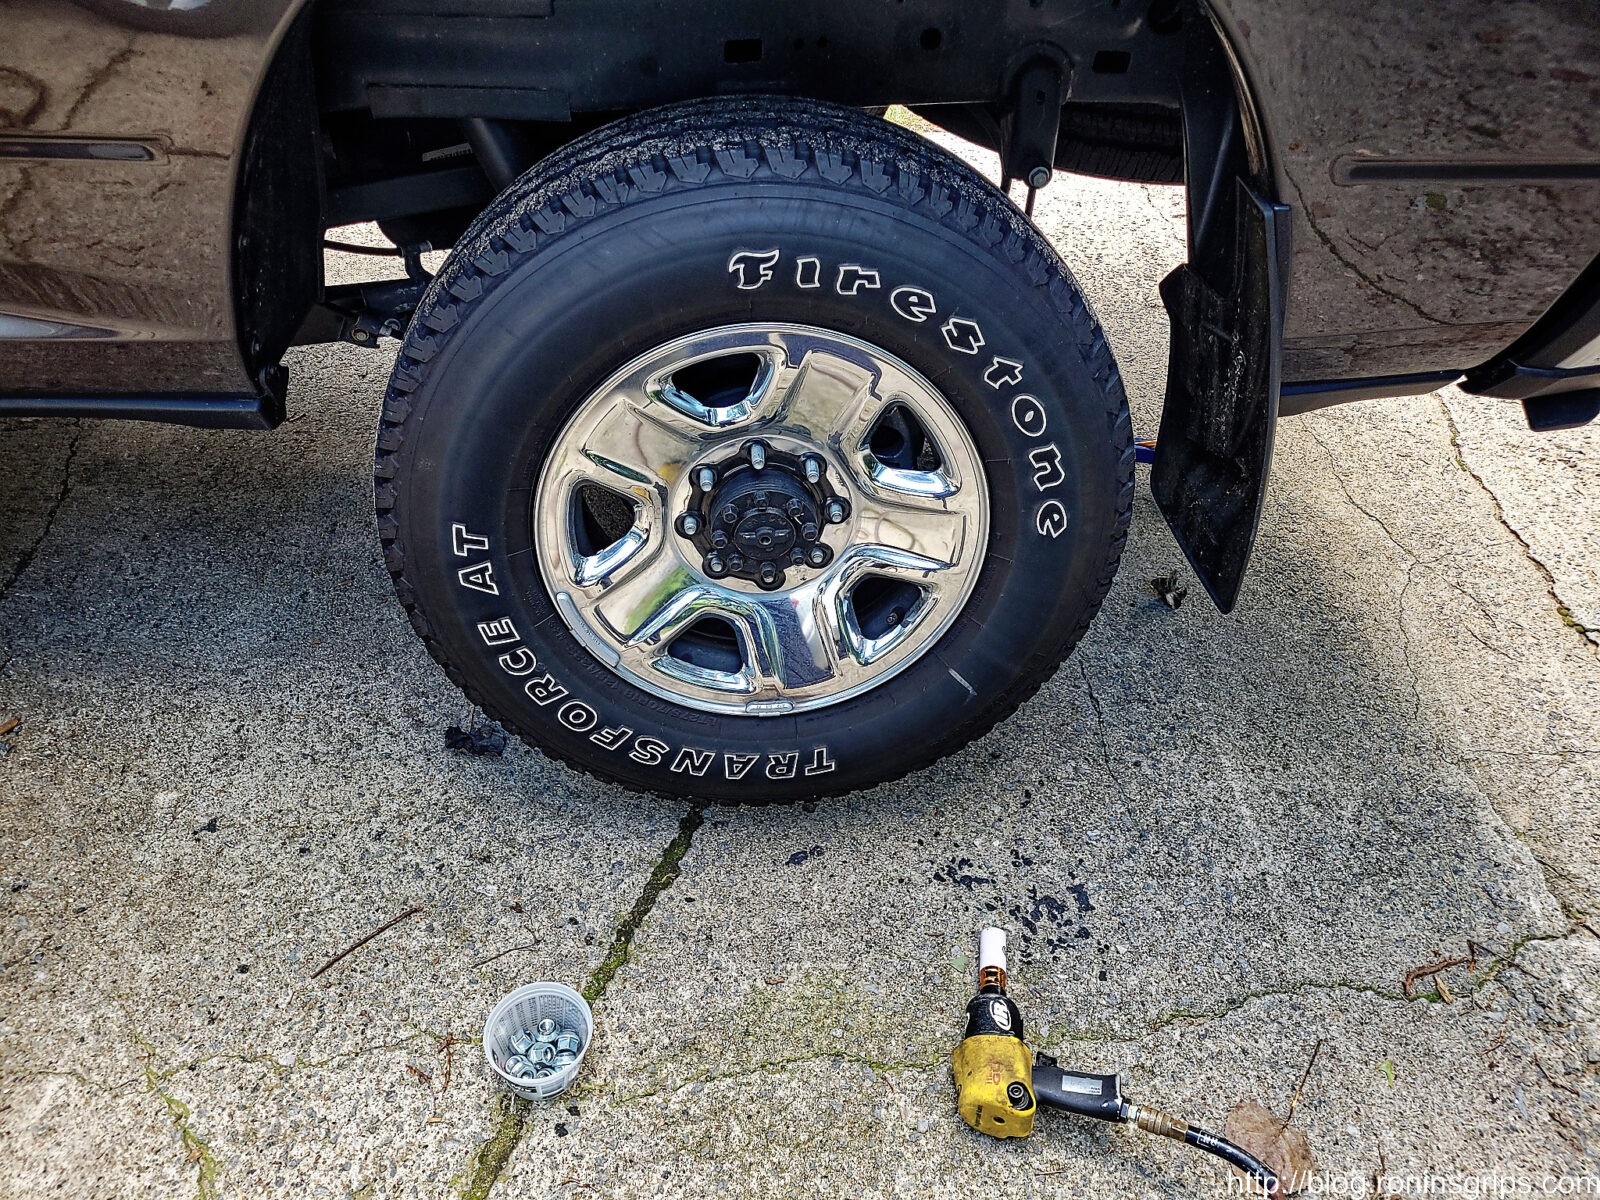
I bought a new 2021 Ram 2500 in September of 2021. It was my first heavy gasser with a 6.4L Hemi and a piece of advice a lot of guys gave me was to make sure I rotated the tires with every oil change. It sounded reasonable – it’s heavy truck and the tires need to be rotated so they will wear evenly. If you don’t do this your handling may suffer such as picking up a wobble or you may wear the tires such that they must be replaced prematurely. Ok, I was totally on board with concept but then started thinking about how heavy they probably were – I sure knew they weren’t going to be light.
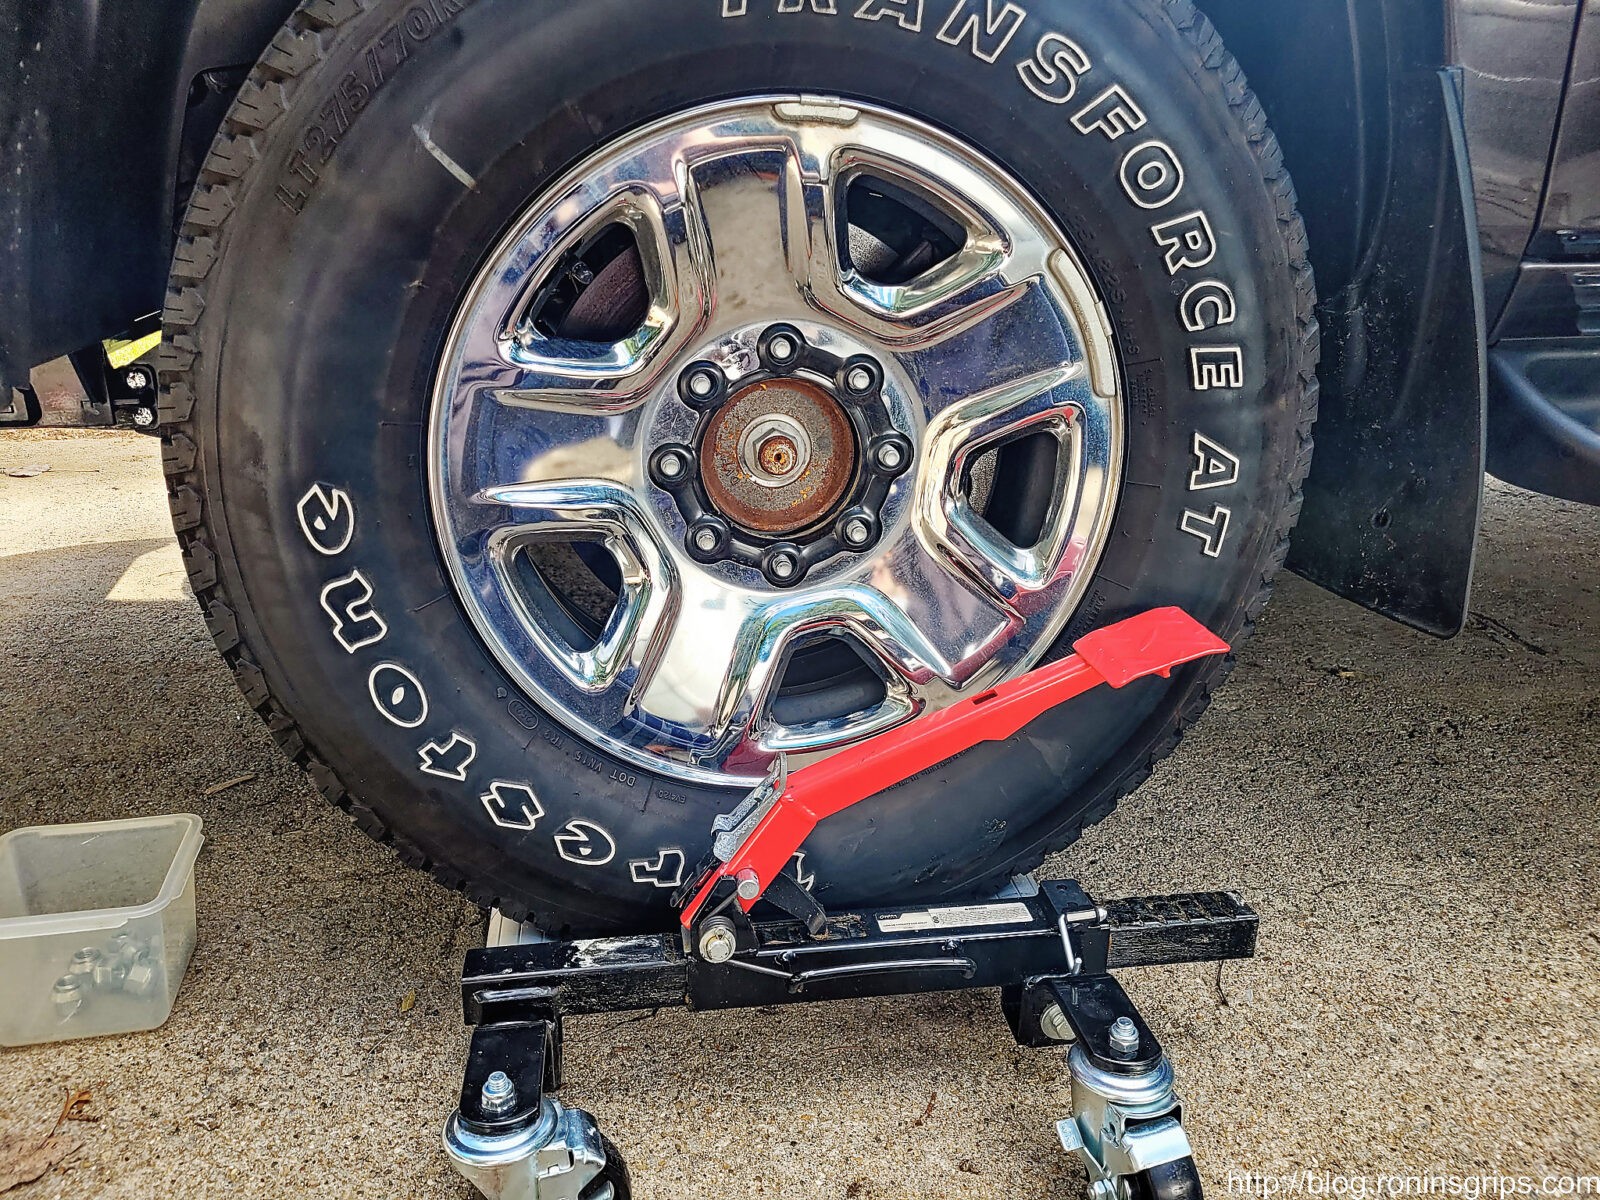
Factoid: FCA (Fiat Chrysler Automotive – who owns Dodge now – and FCA is now part of Stellantis – for those keeping track of who owns who) reports the LT275/70R18E Firestone Transforce AT tires as weighing 50.7 pounds. The 16×8 steel chrome clad wheel comes in at 45.2 pounds. Add them together and you get 95.9 pounds not including any wheel weights, TPMS, etc. So you might as well say that each weighs 96 pounds. Yeah, that’s quite a bit for me.
Weighing in close to 96 pounds, these tires are too heavy for me easily lift and hold in place when it comes time to mount them on the lugs. For you younger guys who muscle them around all day, good for you. I can’t any longer.
From years of doing stupid stuff, my back and hands are nowhere near as strong at 55 as they were in my 20s and 30s. I’ve always done my own oil changes, tire rotations repairs in general and didn’t plan to stop and pay the ridiculous prices the dealer was quoting. I knew it would be a heck of a struggle for me to lift the tires up and hold them in place while getting the first couple of lug nuts on to hold it. I needed to figure out a way I could lift the 33″ 96 pound tires up into place using mechanical advantage.
So I started by searching on the web for tire/wheel lifts and most of what turned up had to do with moving truck tires across a shop on a dolly. I wasn’t finding anything that said “use this to lift your tires up and down at the vehicle.” My next stop was the local Harbor Freight store to look at various automotive tools and jacks to get ideas. It was there that I got an idea.
There are ratcheting vehicle dollies for garages where there is one dolly for each wheel. You pump a foot pedal and a pawl engages a notch and pushes two cylinders together under the tire. As it does this, the tire and vehicle are lifted up. You do this on all four corners. The dollies have caster wheels under them and if you have a clean concrete floor, you can then slide the vehicle all over the place to either store or work on it. One early trade name was “Gojak” and since then tons and tons of companies have made them.
Hmmm…. I could take one of those and use it to lift the tire into position and hold it as long as I could lift the tire high enough. These jacks are rated at over a 1,000 pounds and my truck’s tires were going to be far, far less than that. No, it was the height that concerned me because I needee to lift the truck high enough to remove the tires in the first place.
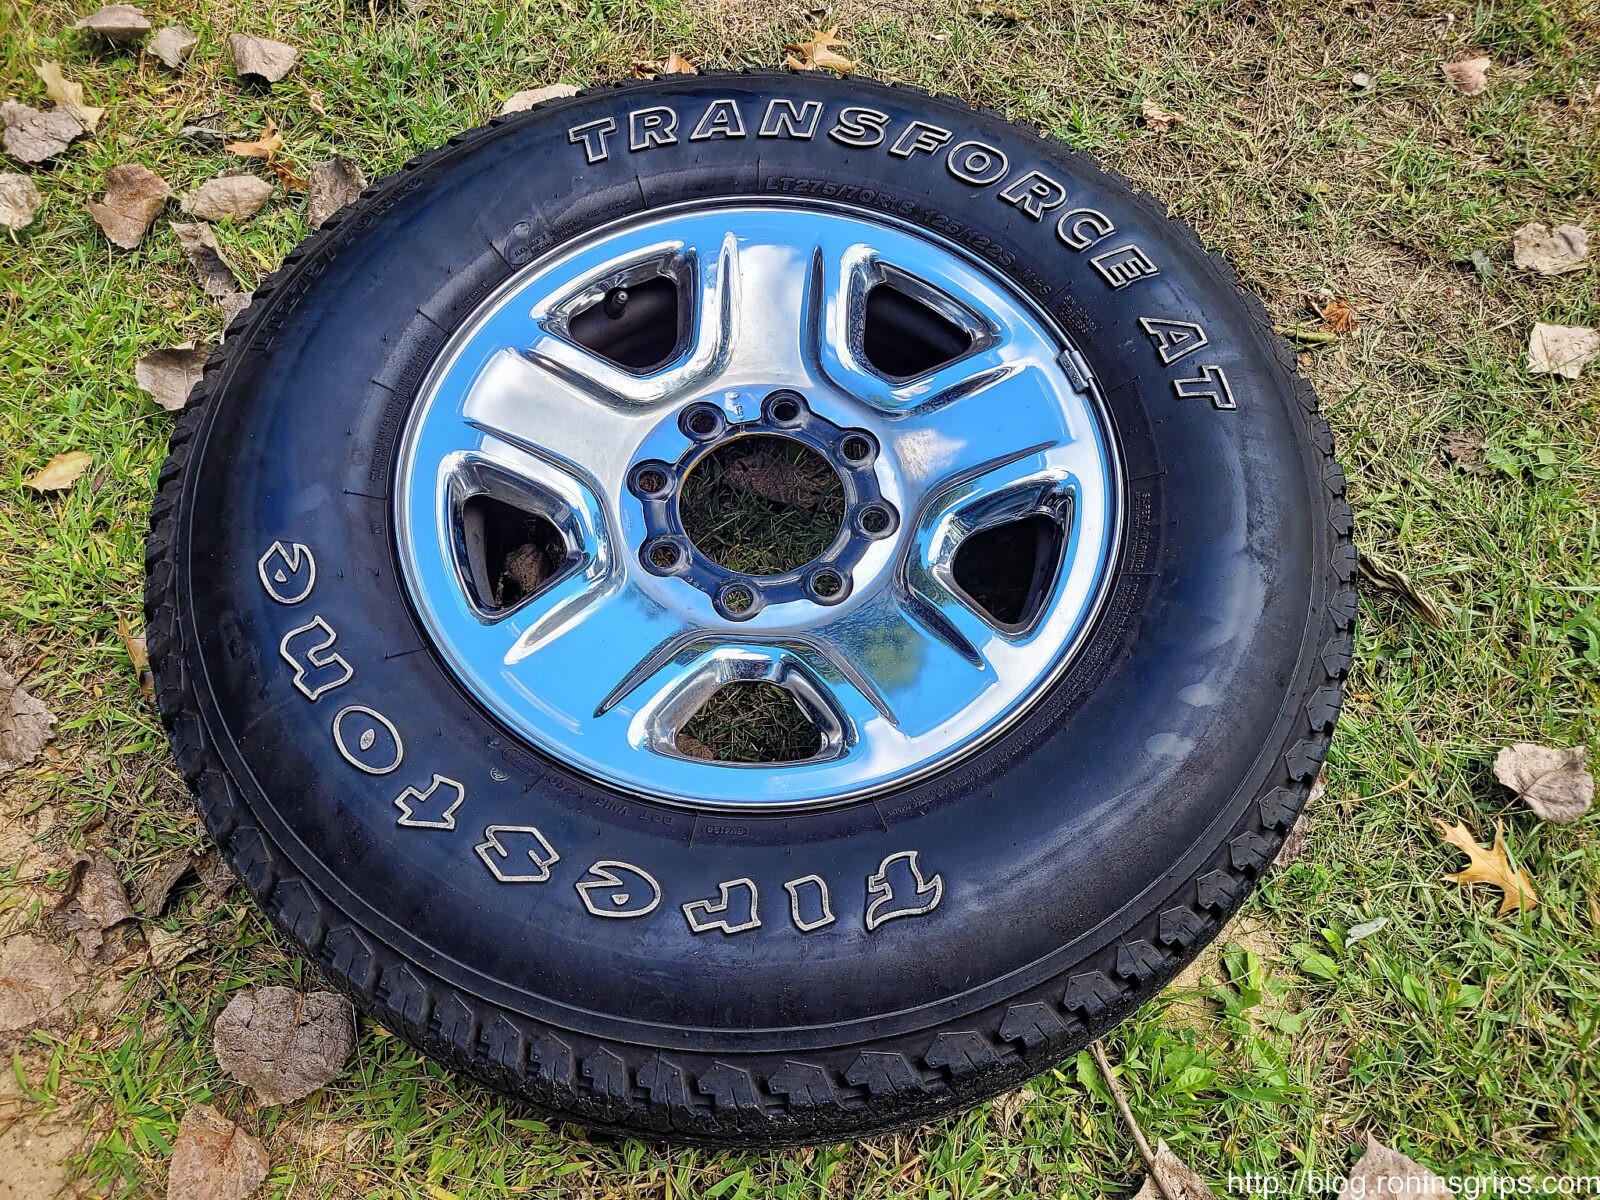
I didn’t particularly care for the looks of the Harbor Freight model so I did some digging and found a Sunex unit on Amazon that works in a purely mechanical manner – some hydraulic models from other brands are reported to leak.
It arrived and took just a few minutes to install the caster wheels. I did make one mistake, I was curious if it could lift one corner of the truck – the answer is a resounding “NO” and I did bend the outriggers that hold the casters slightly. I really didn’t expect it to bend but it also didn’t really hurt the unit from an intended use perspective.
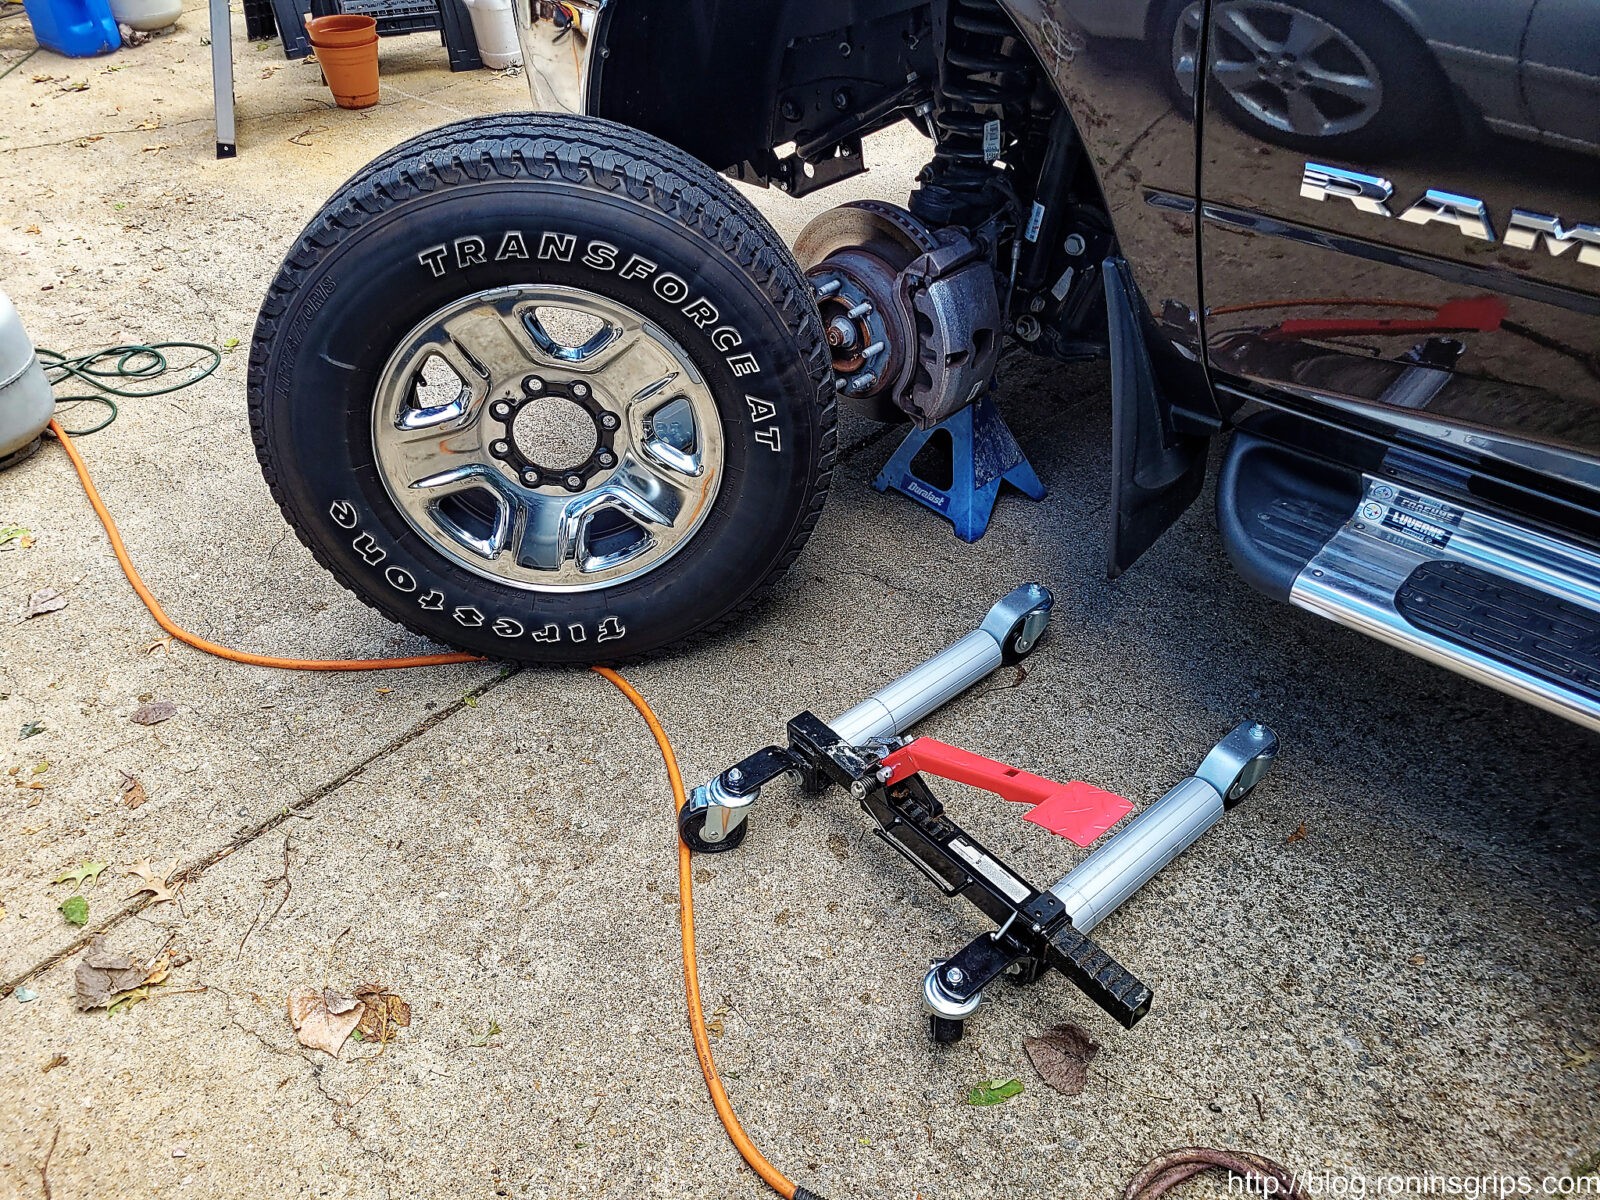
This is a Sunex model 7708 1,500 pound car dolly. I’m not really sure it can handle 1,500 pounds but it works great for lifting tires into place.
Most importantly, it worked perfect. I would roll the tire over to my truck, slide the jack in by the edges of the tire and then pump the foot lever until it was the right height. I could then install the lug nuts in an amazingly easy manner. It worked so well I did it both on my Ram 2500 and on our Highlander.
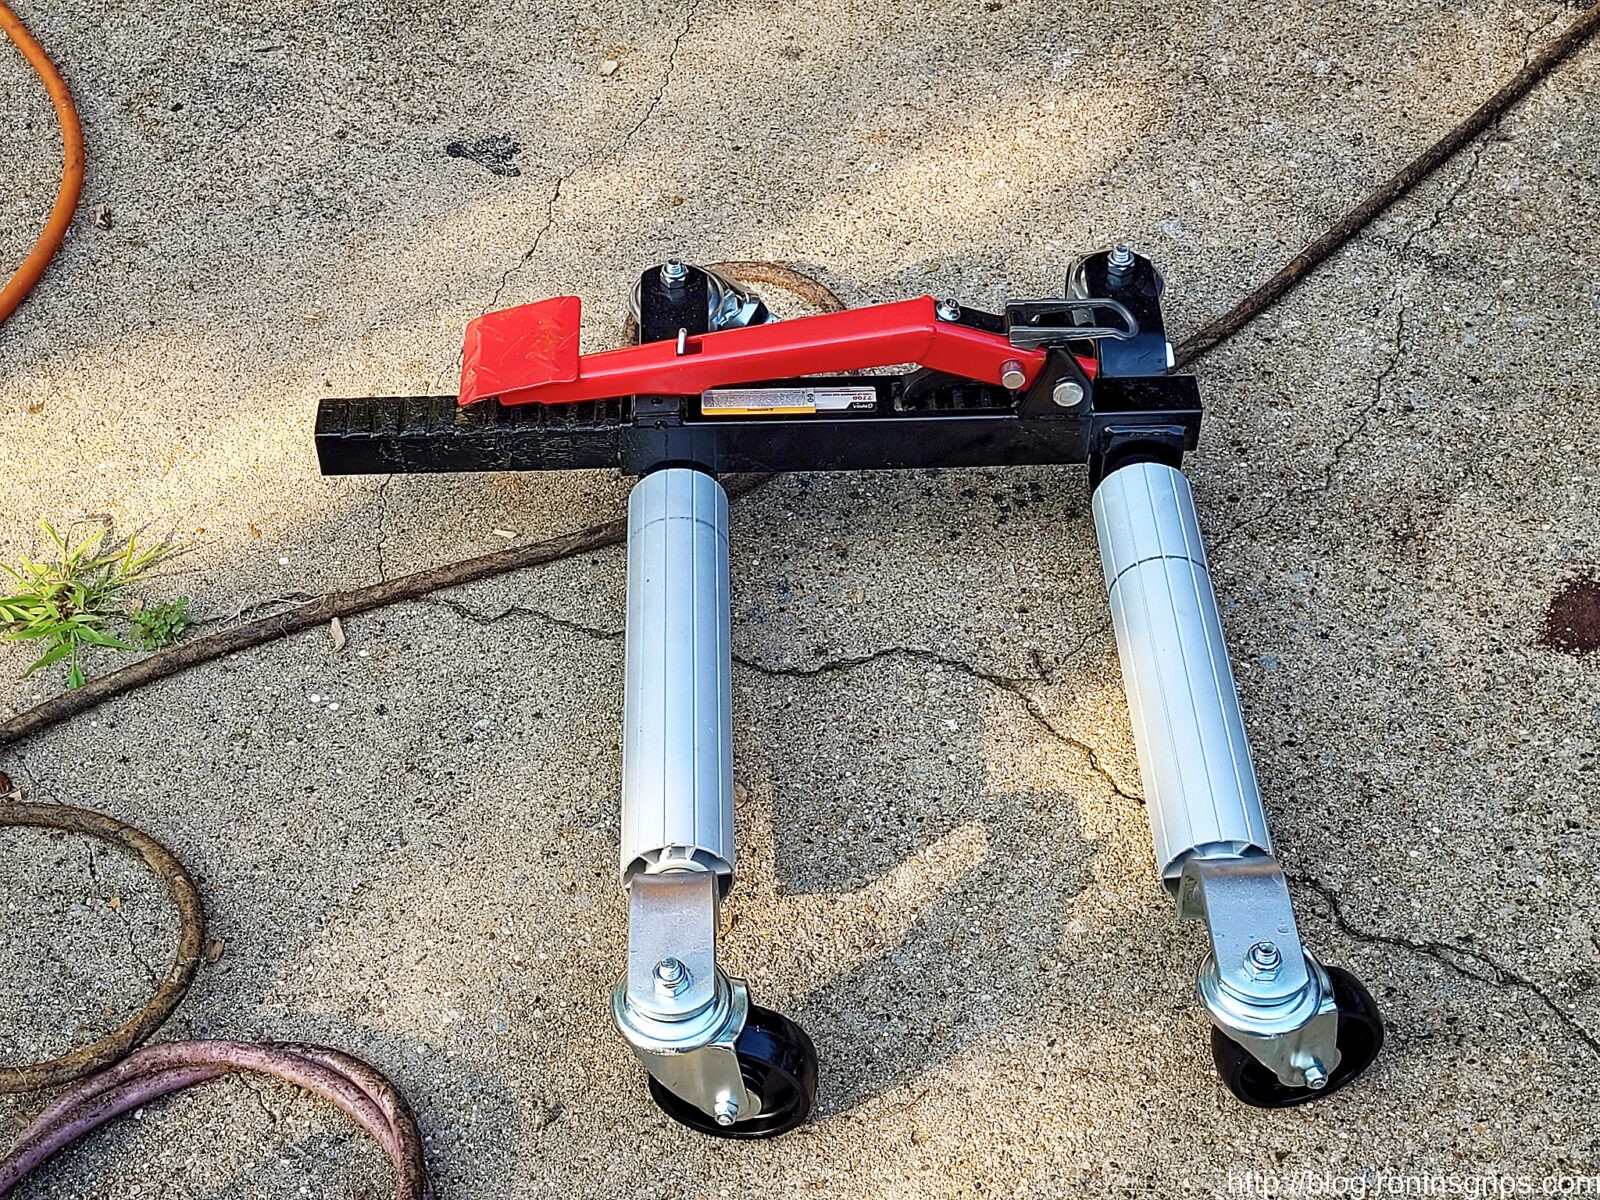
I used my Vevor 11,000 pound pneumatic jack to lift up the truck a side at a time and put 6 ton jack stands under each side of the axle. Never trust any jack to hold up a vehicle while you are working on it – especially not a heavy truck. By the way, I really like the Vevor air jack.
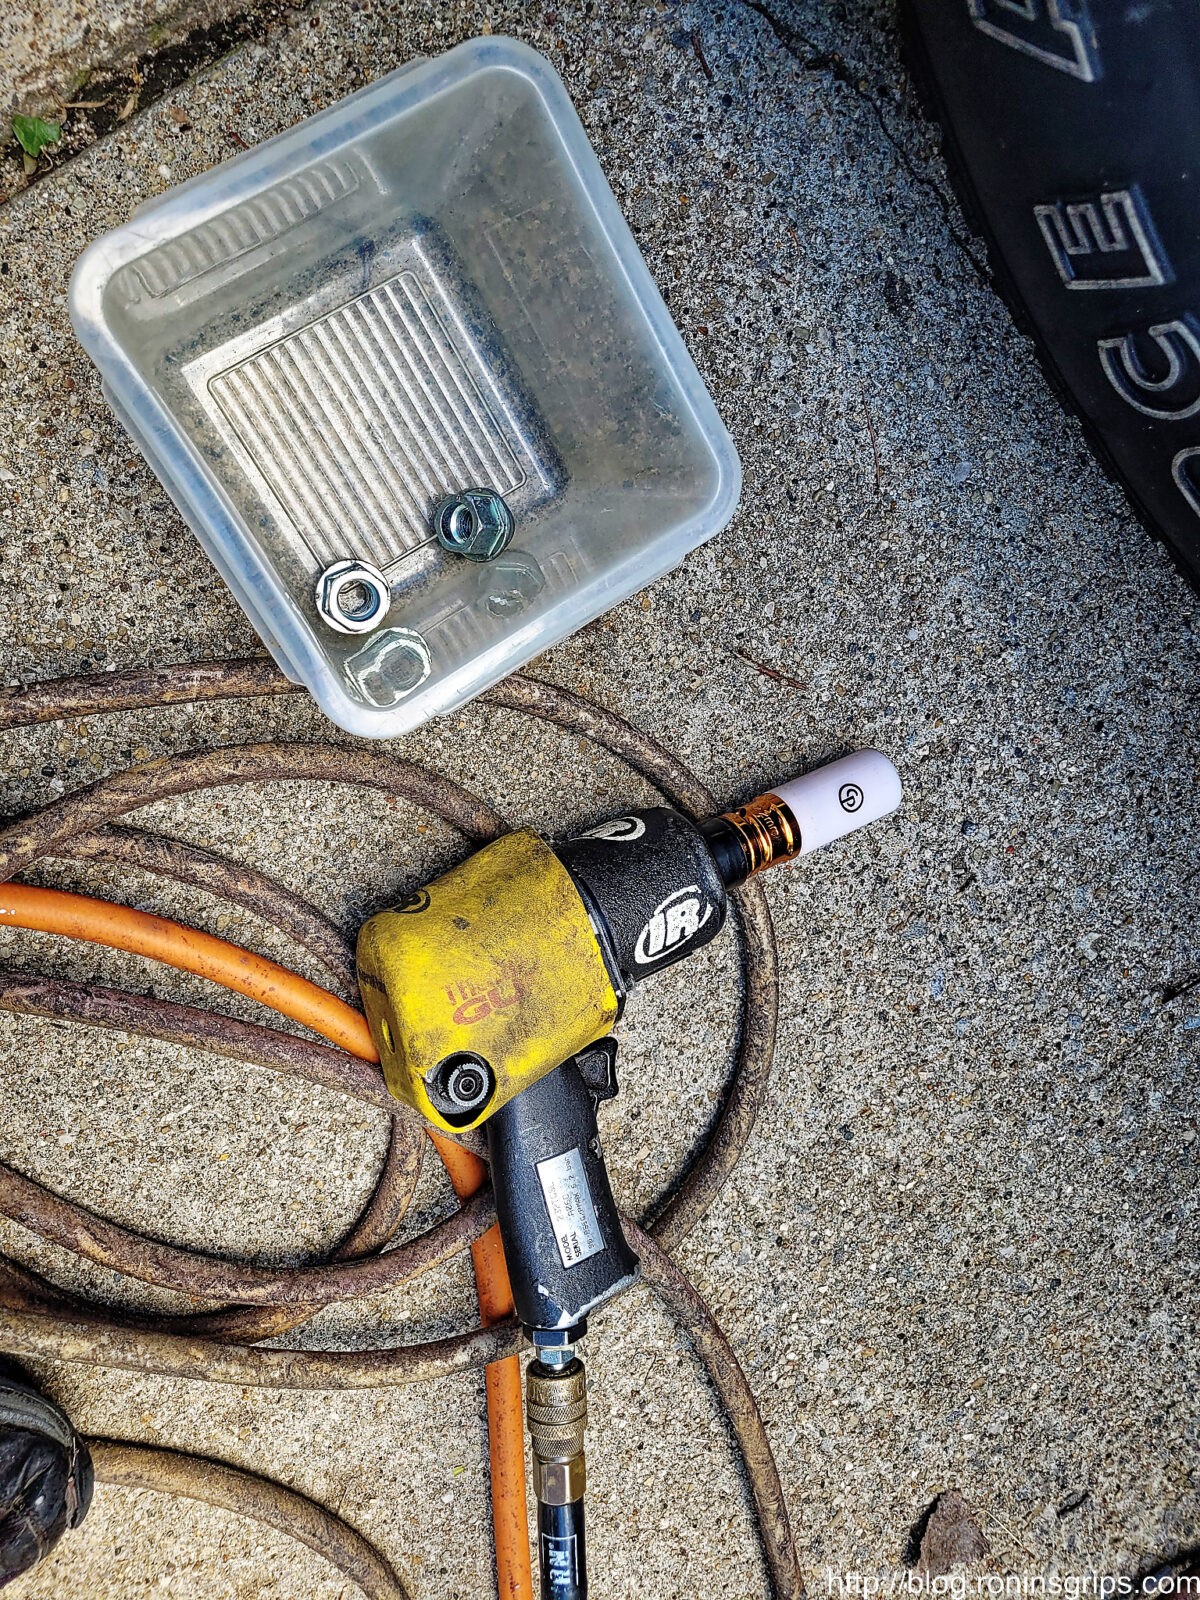
Pulling the tires off is easy – gravity is working with you. I use an IR 232TGSL Thunder Gun impact wrench that has held up remarkably well over the years- I bought it after wearing out a couple of cheap ones. I also use a Chicago Pneumatic (CP) SS4211 lug nut socket set to avoid damaging the rims. The sockets have a plastic protective sheath around them and are thin walled for tight areas.
The 2500’s lugs are 14mm and the lug nuts need a 22mm socket. What I like about the CP set is that they are color coded. This copper colored socket is 22mm and I can find it fast due to the coloring. Note, CP stands behind their products. I bought the set in 2018 and shortly after, one plastic jacket started cracking. I called customer service and they mailed me a free replacement. I’ve not had any problems since. Again, let me plug the Thunder Gun. I want to say I wore out two or three cheap impact wrenches before this one. They claim 625 ft lbs max torque in reverse and 550 ft lbs in forward. I can tell you I have busted loose some really rusted nuts with this.
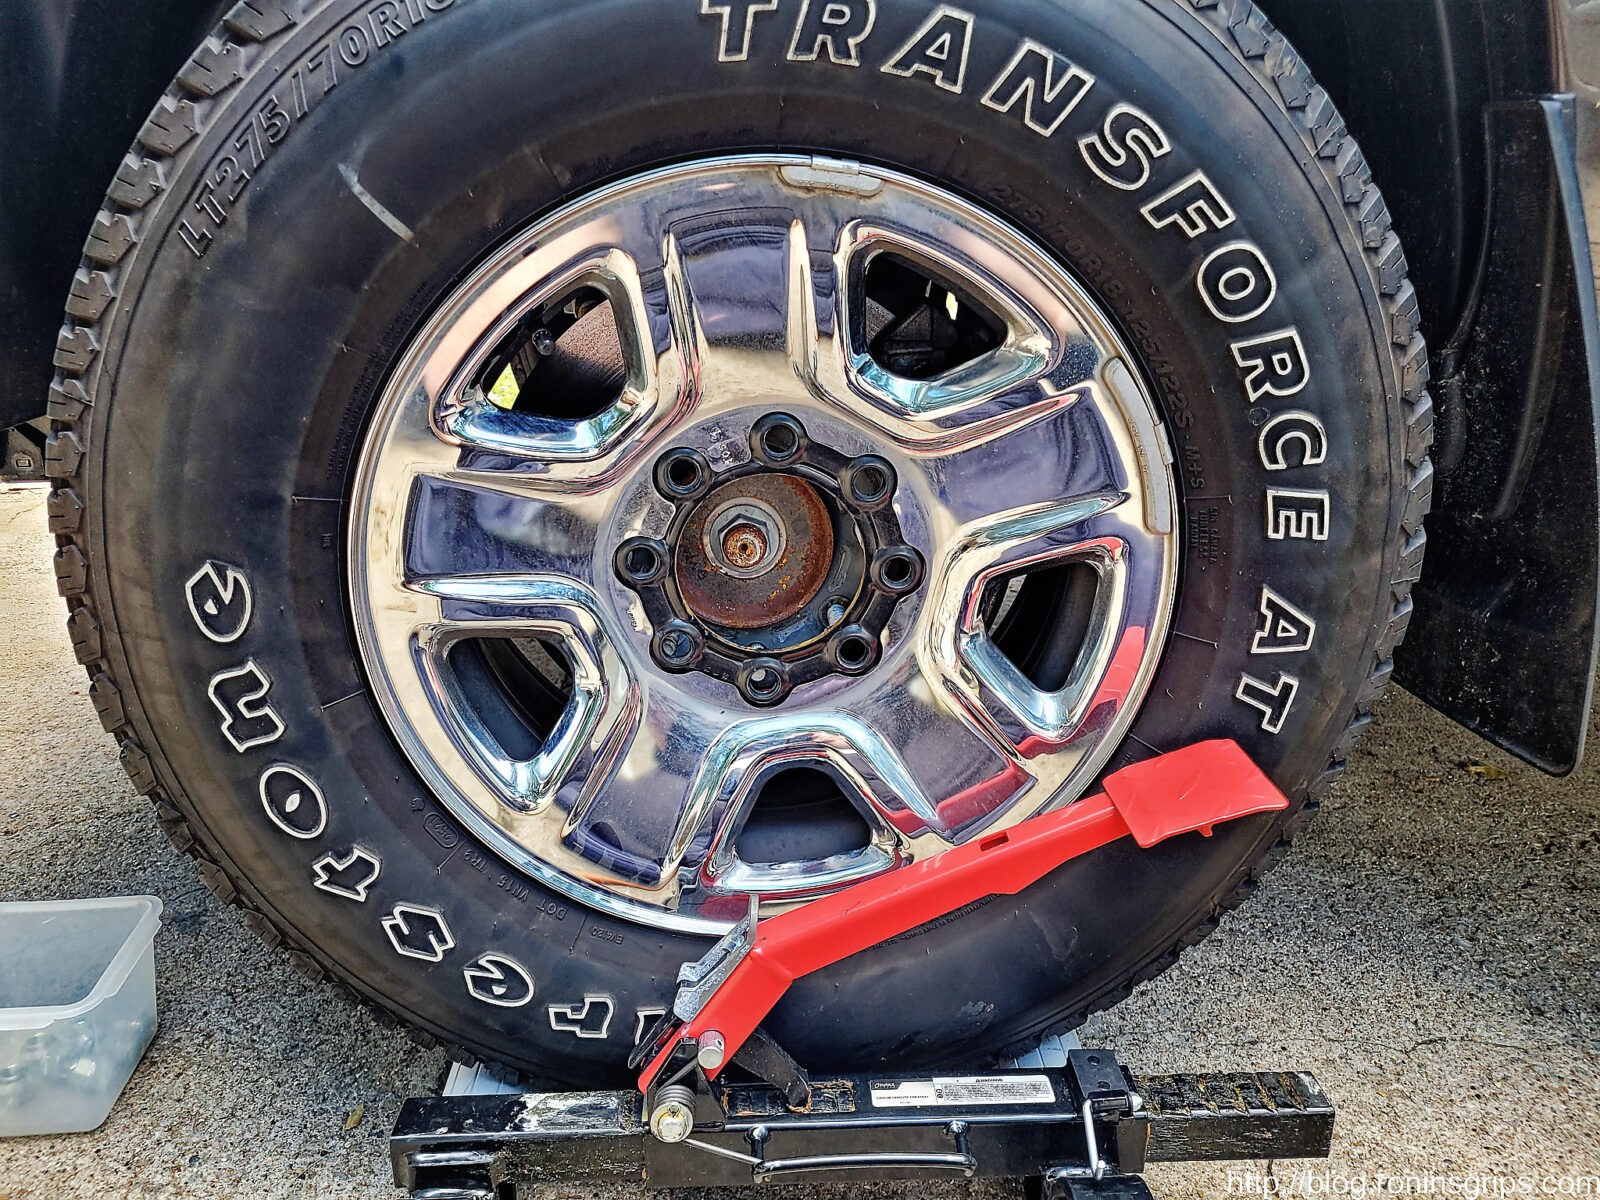
To mount the tires in their new location, I’d get the tire over in front of the hub and then slide the dolly into place to do the actual lifting. You put the silver cylinders on each side of the tire and pump the red lever (you can very easily do it by hand) to lift the tire up.
So the silver toggle on the left side of the red foot lever allows you to change whether the pawl under the lever is pushing the bar and drawing the silver cylinders together or if it moves the pawl out of the way so you can lower it.
So you use the foot pump to get the height right and then you can rotate the tire – the silver cylinders in the dolly turn so you can perfectly line up the wheel on the lugs and put on the lug nuts. Folks, it makes installing the 96 pound tires stunningly easy.
So, in hindsight after actually using the dolly, it really doesn’t take much actual lifting distance to get the tire into place. When I jack up any vehicle, I typically only lift until the tire is 2-4″ off the ground after I put the jack stands in place – so the gap between the floor and the bottom of the tire is not huge. I also realized you can go with just about any of these jacks – you don’t need super heavy duty because the weight of the tire is relatively small. Just read the review for whatever before you buy it.
Additional Details For Fifth Gen Ram 2500 Owners
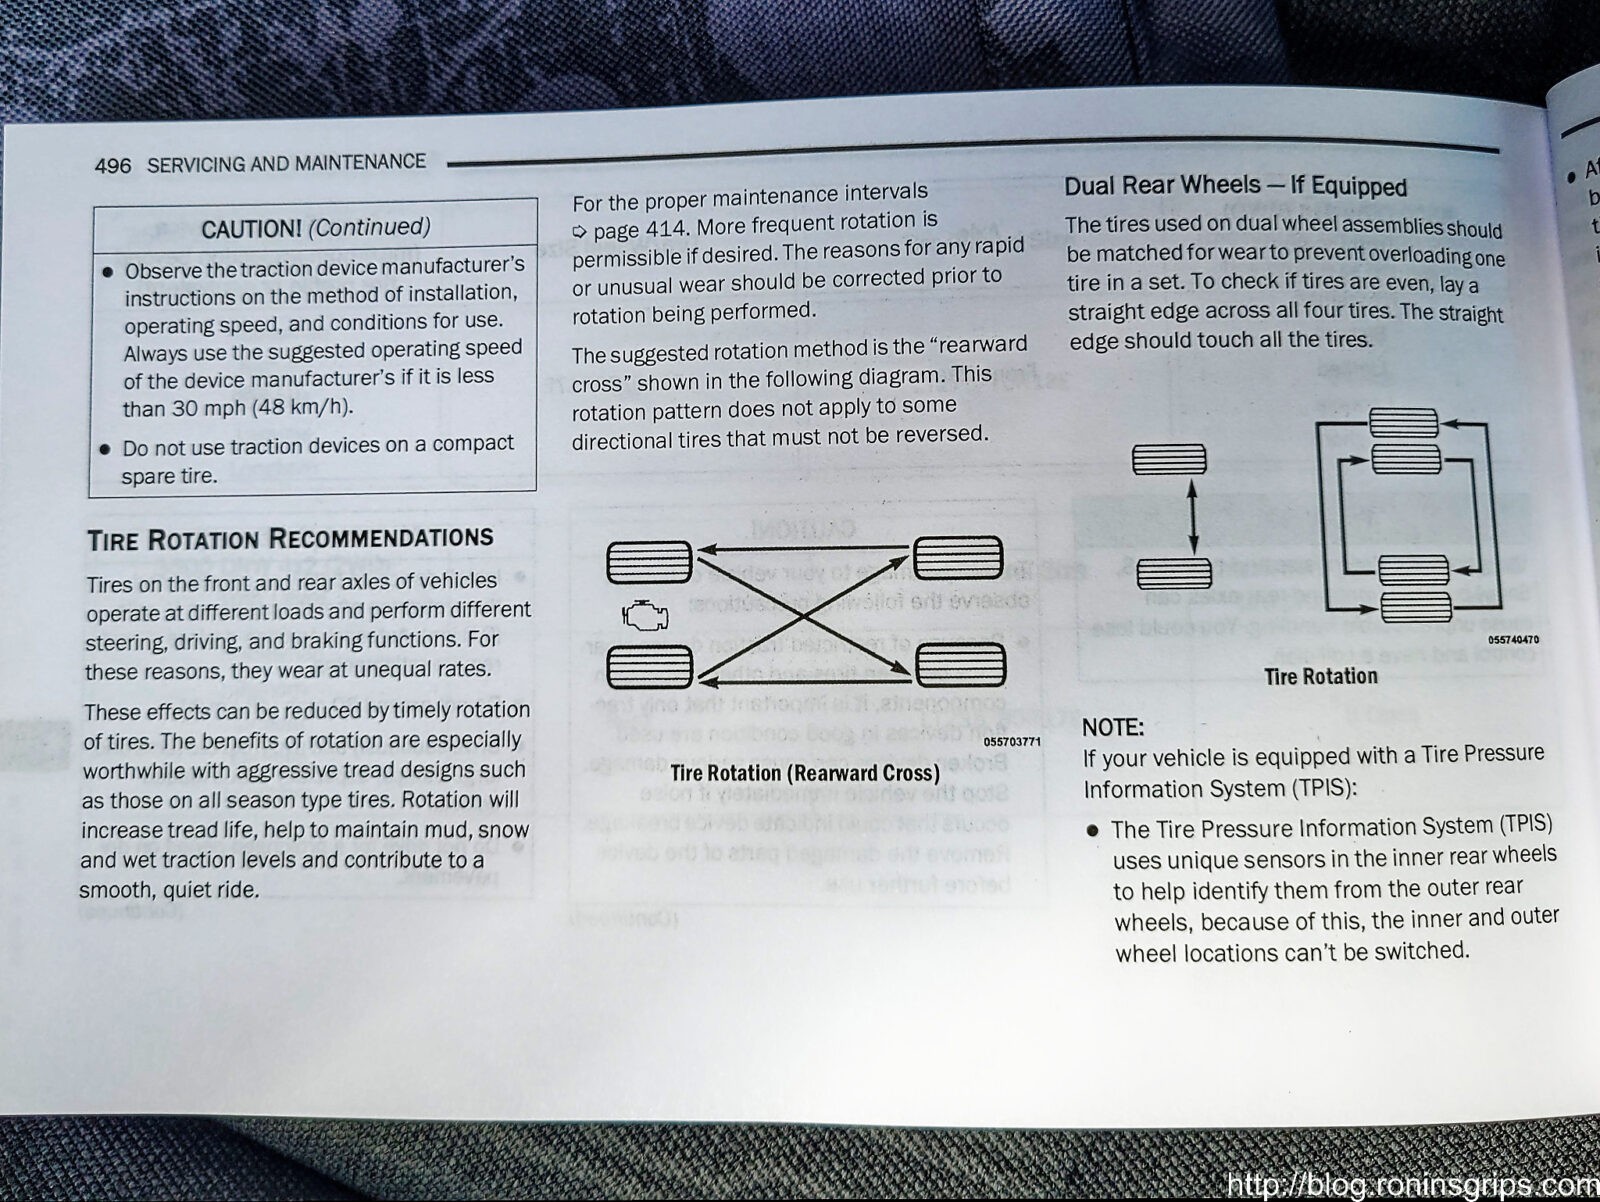
By the way, in case you are trying to find the rotation pattern, it is a reverse cross meaning the front driver’s side goes to the back passenger side. The front passenger side goes to the back driver. The two former rear tires move straight up – rear driver to front driver and rear passenger to front passenger.
Tires on the 2021 Ram 2500 move in a reverse cross pattern. Rotating them with each oil change is recommended. (Source: Photo of page 496 of the 2021 Dodge Ram 2500 Owner’s Manual)
If you are looking for the lug not torque spec, it is 130 foot pounds for cone lug nuts – mine had cone lug nuts. If you have flanged lug nots, it is 140 foot pounds.
On the topic of torquing the nuts down, I start mine by hand to avoid cross-threading the nuts and then I run them in quickly with my impact wrench using a torque limiting “torque extensions” – these extensions work with impact wrenches and twist at a predetermined torque but get weaker with time so they are great for bringing the nut down to the rim but not for setting the torque. I do the final torquing down with a 1/2″ torque wrench. Do NOT keep tightening with the impact wrench or bad things may happen such as cracking your rim.
Lastly, the Tire Pressure Monitoring System (TPMS) will learn where the tires are automatically. Note, you can’t change the minimum tire pressures for the front and rear without going to the dealer or knowing how to re-program the appropriate computer settings. At least, I can’t in my Tradesman. If you can in another model, that is something I don’t know about but count yourself lucky – I wish I could.
In Summary
The car dolly idea to do the lifting and positioning really paid off and now I can do the tire rotations safely and easily. I hope this helps you out.
2/19/23 Update: It’s still working great. This is one purchase I am very happy with.
Note, I have to buy all of my parts – nothing here was paid for by sponsors, etc. I do make a small amount if you click on an ad and buy something but that is it. You’re getting my real opinion on stuff.
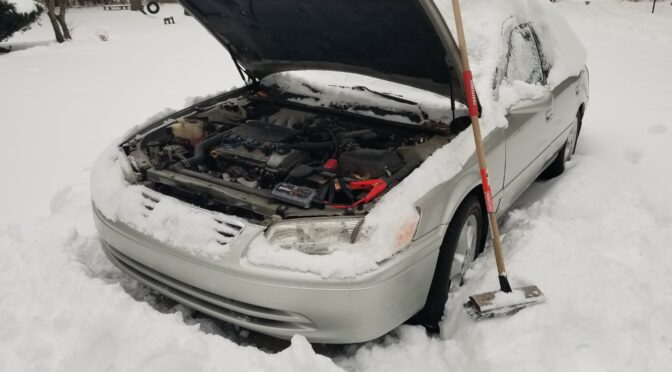
So I went out to move my wife’s 2000 Camry with a V6 engine. It had been sitting for about a month, it was about 20 degrees outside and, of course, the battery had discharged enough that it wouldn’t turn the car over – I could hear the solenoid click and the starter would just begin to crank and then stop. Great…..
In the old days, I would have wheeled my truck or tractor over with jumper cables, given the battery a bit of a charge and the started the car. Starting some years back, I started using various battery backs with jumper cables – man do they come in handy.
I’ll tell you though, I had a bad experience with four DB Power 1200 battery packs. I wrote about them back in February 2019 and it’s interesting that I can see people searching my blog 2-4 times per month about why their DB Power pack will no longer work. Don’t buy one is all I can tell you.
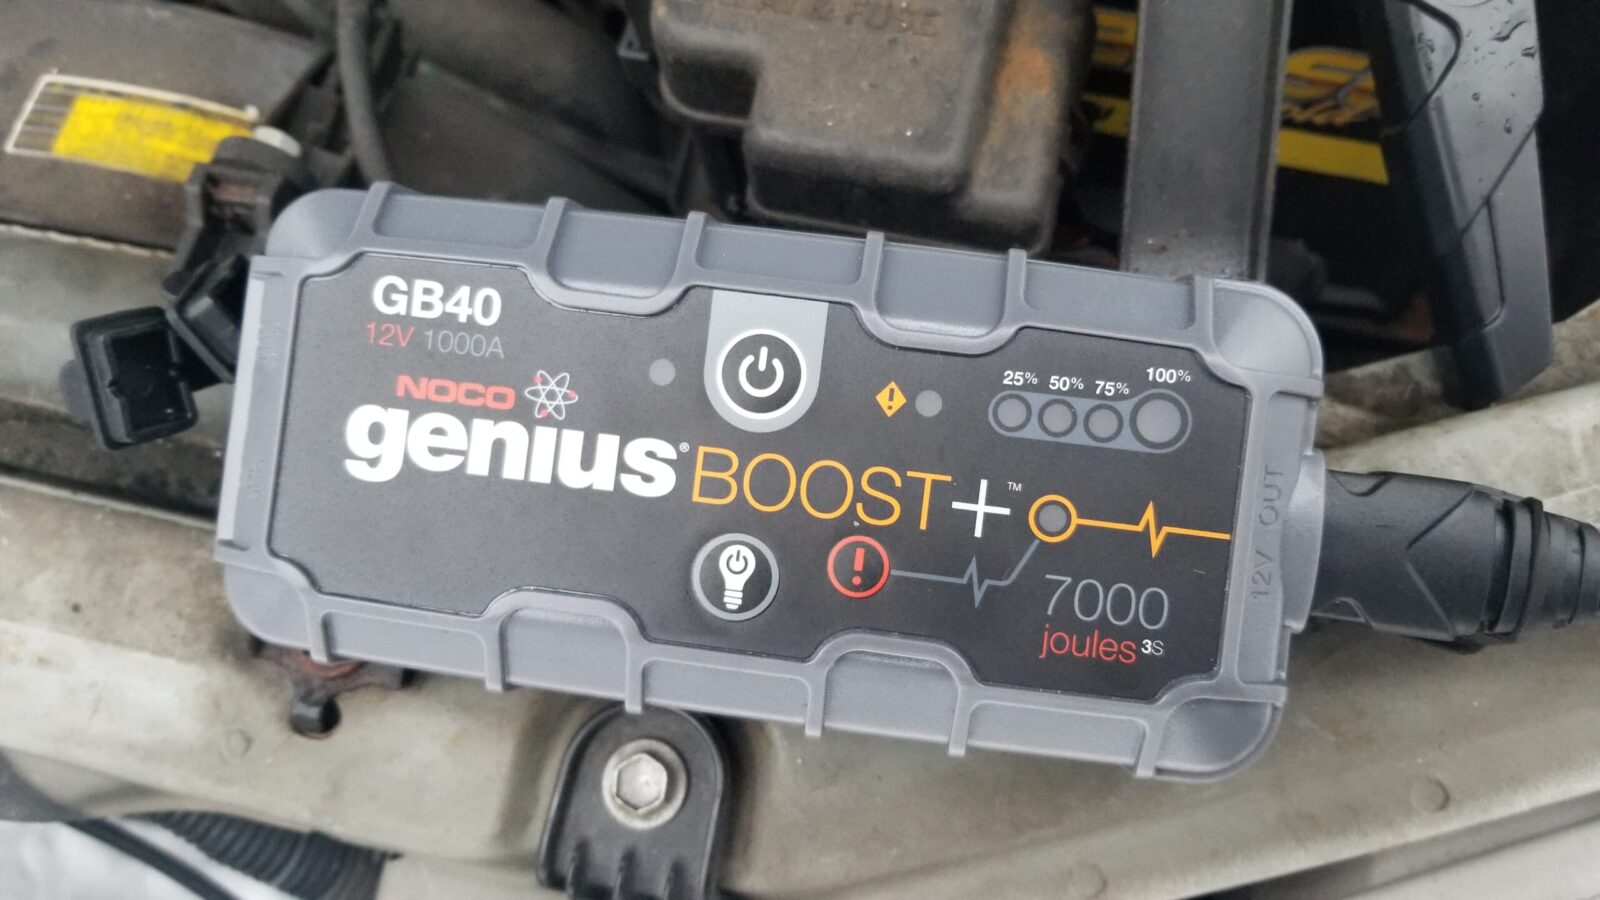
What was my go-to unit with my wife’s car and in general now? A Noco Genius Boost GB40 1000 amp starter. I’ve used it to start our lawn tractor, my 1996 Land Cruiser, her car once or twice — it’s reliable and it works. I fished it out of another car where it had sat for a month in the cold and it started her car no problem.
This is my GB40 jump starter – I bought it and a storage case to protect it when bouncing around in our vehicles. It has never failed me. I do get it out before a long trip and charge it just to be safe but it’s never empty and it has always worked when I needed it.
I bought the GB40, a storage case and the combination is always with us when we go on trips. They certainly make other models as well so you can pick the combination of size and price that works for you. For our regular cars and trucks – the GB40 has worked just fine. I definitely recommend the Noco products.
Note, I have to buy all of my parts – nothing here was paid for by sponsors, etc. I do make a small amount if you click on an ad and buy something but that is it. You’re getting my real opinion on stuff.
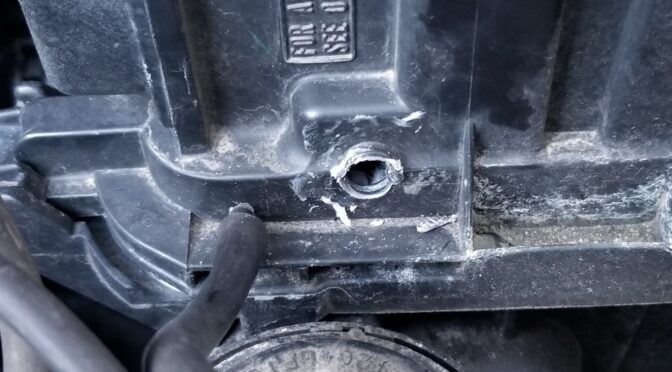
I’m going to leverage my inner Forrest Gump – used cars are like a box of chocolates. You never know what you are going to get. In this case, it was our 2008 Toyota Highlander. I decided to check the air filter just in case and noticed both that the vacuum lines had cracked and that someone had done a “creative” fix on a 4mm vacuum port that had snapped off.
So this vaccum line was just resting in the hole. There’s some white glue – maybe silicone and som odd metal insert.
If there’s one thing I have learned with modern computerized cars – don’t mess with their sensors or vacuum lines. You can get odd random codes thrown, lose performance, fuel efficiency, etc. So, I knew this needed to be fixed. The big problem – the vacuum fitting was cast into the airbox!! By the way, the air box is the car part that holds the air filter in this case – the air filter housing is another way of thinking of the part.
Let me start by telling you the expensive and time consuming way – buy a replacement air box. Yeah, this is going to cost you a bundle. A OEM Toyota air box will run you $275-400, used is about $100-185 and aftermarket tends to be under $60-90 and maybe iffy quality. Then there is the labor to do the actual swap – it’s going to either take your time or you are going to pay a mechanic to do it and the cost is going to go up fast. There is an easier and faster way.
My Recommended Approach
The magic fraction for today is 5/32″. Why? Because 5/32″ is almost exactly 4mm. If we get a small brass, aluminum or stainless barbed 5/32″ hose fitting with a threaded rear, we can easily fix this. I live in a rural area and this isn’t something I can easily walk into a hardware store and find so I did some searching for NPT to 5/32″ hose barb and found both 1/16″ NPT and metric fittings plus some were brass, aluminum and mystery metal. I discounted anything plastic/nylon because I wanted a stronger fitting.
Another reason I went with 1/16″ NPT is that it can fill a pretty big hole all by itself up to about 0.31″ given the taper plus I could then use a 1/16″ to 1/8″ bushing adapter if I needed to go larger.
After much digging around using Google and Amazon, I opted for an Aeromotive #15630 hose fitting made from 6061-T6 aluminum that I did order off Amazon [click here for the Amazon listing]. There was a no-name generic brass one but no spec so I didn’t go with it. By the way, searching for fittings like this really shows the limitations of general search engines to find parts. I spent a ton of time filtering through tons and tons of search results that turned up the wrong products. What a headache.
Aeromotive 15630 fitting that has 1/16″ NPT thread on ne end and a 5/32″ hose barb on the other.
Installation
The first thing to point out is that the molded vacuum fitting is above the air cleaner so you can safely work on the box without removing it from the vehicle! Any debris from drilling or sanding will land on the filter and you can vacuum it out later. If you have a used car, peak inside and make sure the air cleaner is there and intact.
If you have just the old busted remains of the hose fitting to contend with then Dremel or sand the area flat. You want the installed barb to be able to sit flat against the wall of the box.
Next, pick a drill bit that is just the same size as the tapered bottom of the thread. NPT thread is tapered so the bottom has a smaller diameter than the top. If the air box was steel, we would use a letter “C” drill bit to make a 0.242″ hole. Notice how this is slightly smaller than 1/4″ but I am betting most people do not have lettered drill bit sets so you pick a close size and run with it. We do want the hole slightly smaller in order to thread it. Because this is plastic, we are going to push forward with the metal adapter fitting while turning and let the thread on the adapter cut the thread into the plastic. We aren’t going to bother tapping it first. That’s right – don’t buy a tap to do this uness you are a tool junky and perfectionist, which is fine if you are – I get accused of that a lot.
I’d recommend you start with a bit smaller than 1/4″ where the bit is slightly smaller than the bottom of the adapter, drill the hole and see if you can press it in. If not, go to a bigger bit. If you mess up and have a slightly too big hole, all is not lost – read the “Well crap” section below 🙂
Let’s say that everything goes great and you can screw the fitting into the plastic – Once threaded in, it’s done. Just screw it in and quit. Don’t put too much torque or you can strip it. That works just fine unless the previous guy bubba’d it, which takes us to the next part of the story.
Well crap….
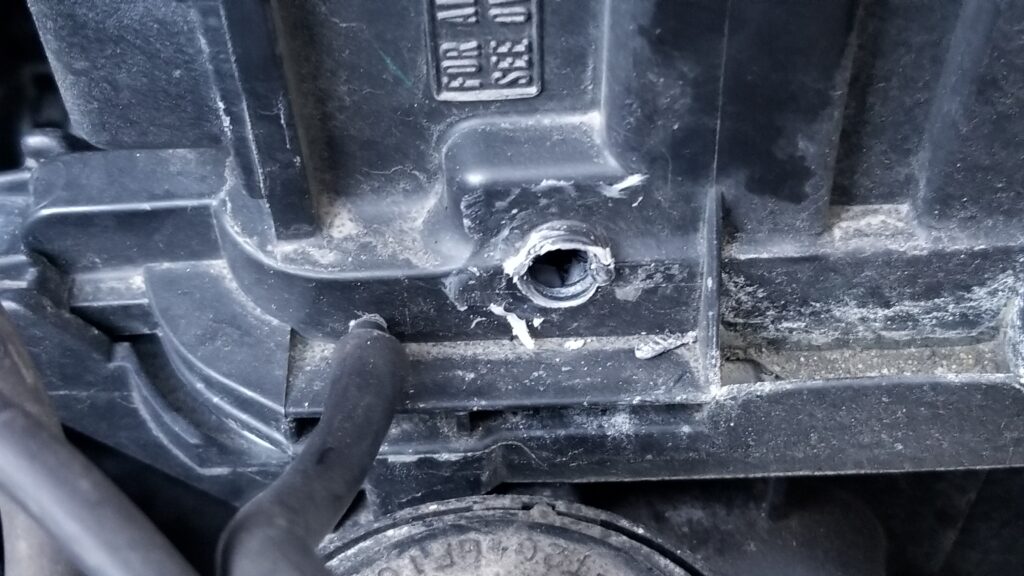
In my case, I had a box of chocolates moment. The previous owner or a mechanic had drilled the hole out and installed some small metal bushing that was hidden due to the white silicone on it. I have no idea what it was from. Once I discovered and removed it, the hole in the air box turned out to be just a tad bigger than the entire 1/16″ tapered thread. Argh… not what I wanted to deal with.
Dear bubba, thank you for hiding this under the white silicone. You just made my fix a bit more complex but not impossible.
Okay, I wanted to get this job and had three options, go to the hardware store and try and find a 1/16 to 1/8″ bushing, install a 1/16″ NP threaded nut on the back to hold it in position, which I also did not have, or glue the hell out of it and call it even.
This is what I had on hand at the time and worked great. I could have used any quality black silicone RTV glue/gasket maker and gotten the same results. I tend to either have Permatex or LocTite brand products that I use the most.
First, I scuffed the surface around the hole with 100 grit sand paper so the glue could get a better grab on the surface. The second thing I did was to spray brake cleaner on the area to remove any trace oils that might prevent a good bond.
I was wearing nitrile gloves and also sprayed brake cleaner on the fitting to make sure it was clean. Gloves both keep your hands clean and also prevent you from getting oils from your skin on the parts — assuming the gloves are clean of course. Having a clean surface makes a HUGE difference in terms of how well any glue is going to stick.
Next, I applied a bead around the top of the NPT thread of the fitting and pushed it into the hole. Since I was wearing nitrile gloves, I just took a finger and smoothed the glue out a bit and let it cure for about an hour or so. You want it cured enough to hold the adapter in place – you don’t need it fully cured yet. With warmer weather it will cure faster and in cold weather it my take a long time and need a hot light or something to warm it up above 70F to get things done. Depending on what I am working on, I try to get somewhere between 60-110F. The warmer it is, the faster it will cure but don’t burn it or melt the plastic either!
This is the first pass. It’s not pretty but it will dry strong enough to hold the fitting in place while the second thicker coat is applied.
I then put a second layer of black gasket maker on and fanned it out to get a good grip and to securely hold the fitting. I then let this all cure overnight. I’ve learned long ago not to rush faster than what the adhesive’s manufacturer recommends or you are liable to ruin an otherwise good job.
Here is the second heavier coat this was meant to reinforce the part.
So, once it was fully cured I then needed to change the cracked vacuum lines which are what I noticed in the first place.
4mm Vacuum Lines
What got me started on all this in the first place was noticing that two 4mm vacuum lines were very cracked where they slid onto their respective hose barbs. This happens as rubber ages and gets brittle so finding them wasn’t surprising.
This is one of the ends that was badly split.
Fixing this is easy. You just need either real 4mm vacuum hose or 5/32 vacuum hose. You can either go with one formulated from rubber or more expensive silicone. The advantage to the latter is that it ought to last longer.
You can see the two pieces I replaced because the new silicone hose is shiny black and a thicker diameter.
Conclusion
Going this route saved us a ton hundreds of dollars and has held up just fine. I did this repair last fall and have not had a single problem. Yeah, the glue does make it a big of a bubba fix but it is revsersible and the fitting isn’t going to fall out. The black gasket maker has held the little barb in just fine and the hose is very supple and shows no wear at all. I hope this helps you out as well.
2/12/24 Update: My repair is still just fine. A reader pinged me that none of the Amazon links worked so I went through and updated them.
7/28/2023 Update: Everything is holding up just fine and we’ve put quite a few miles on the car since this was written in March of 2020.
4/9/2021 Update: Still holding just fine. Not one problem to report.
Nothing like getting old and realizing that most of your joints hate you. I bring this up because I have two manual pump floor jacks that I have used countless times over the years and the oldest is probably 25 years old – literally. Well, let me put it this way – I had no problem pumping the handle to lift cars and trucks 25 years ago but starting about two years ago, the action really started to cause elbow and shoulder injuries I had to flare up. It got so bad that I had to make a choice either to stop working on vehicles or to find a different approach.
I work on cars and trucks in our driveway so a permanently installed lift was not an option. It had to be something portable. My first thought was to get a low profile air-over-hydraulic jack that is mounted in its own wheeled carrier. They have an incredible lifting capacity (around 22 tons) but they are heavy (around 80 pounds), slow (air over hydraulic is many things but fast is not one of them) and expensive (they start around $200 and just go up from there). What really stopped me was the weight and the cost. I can’t lift or drag as much weight as I used to and the entry-level units were a tad more than I wanted to spend.
So, I kept digging and ran across pneumatic/air jacks. Think of the air suspensions you see under a big rig. Basically one or more air bladders fill with air and lift the top of the jack. They max out in terms of lift height around 18 inches and 3 tons of lift but it depends on the model. Definitely spend some time researching before you buy. I found that I needed to think about:
How low I needed the unit to collapse down to fit under our cars to get in position prior to lifting
How much weight did I need to lift
How high I needed the unit to lift
How much did it weigh?
What was it going to cost?
I then started reading listings on Amazon plus paying careful attention to review scores. I also talked to a mechanic friend of mine about the safety of the unit and what his thoughts were. He told me to consider two things: 1) always immediately put jack stands in place and 2) don’t lave the unit out in the sun and weather thus harming the rubber. Those suggestions made a lot of sense to me.
On January 8, 2019, I wound up buying a Mophorn Pneumatic Jack, 3 Ton, Triple Air Bag, with a 16″ lift height for about $150 with free shipping. The unit arrived with just little bit of assembly needed. I recall I had to install the handle and the pressure line but that was it.
I get about 15″ of lift at 90 PSI.Left lever is the exhaust and due to the lever design, you can adjust how slow you want to drain air out. Even if you hit it and have an “oh shit” moment, you typically have a few seconds before the vehicle starts to go down. The middle unit with the pull ring is the safety blow off valve. The far right lever is the air inlet and there is a Milton M-series male plug under the Milton quick connect female fitting. If you want a reliable air system, use Milton fittings – they last.
As you can guess from the sticker above, the lift is made in China and the instruction sheet is pretty terse but it’s really not that hard to figure out. I do want to cover a few specifications with you and convert them from metric to US customary measures – these are from the owner’s manual included in the kit unless otherwise noted:
Description
Metric
US
Capacity
3,000 kg
6,613 lbs
Air Pressure
5-10 Kg/cm^2
71 to 142 PSI
Air pressure from label on handle – presumably the recommended pressure
8 kg/cm^2
113 PSI
Minimum Height
145mm
5.71 in
Maximum Height
400mm
15.75 in
Lifting Time
5 seconds
5 seconds
Working Temperature
-69C to +50C
-92F to 122F
What have I lifted with it?
When I say “lift”, I am talking about the front end or the back end – not the whole vehicle.
1994 Toyota Corolla DX
1996 Toyota Land Cruiser
2000 Toyota Camry
2006 Toyota Solara
2008 Toyota Highlander
2016 Ford F150 Transit
Others more or less along the lines of a Camry or Highlander
There are a few things I have noticed
First, let me point out that I like this unit and would recommend it but there are a few things I want to point out:
The highest my lift will go is 15″ and that may be a function of my only running 90 PSI to the jack
I don’t think it actually can lift 3 tons. It bogs down on the front of our old 96 Landcruiser and also our full size F150 Transit. Again, I think it’s my lower air pressure. This summer I might plumb a dedicated 120 PSI line and see what that does. It will depend on time and money.
There are stabilizing cones made from steel inside the jack. Maybe 1 in 20 lifts they need a whack to start coming down. I may polish and lube these if I get a chance.
The rubber is pretty thick on the bladders. With that said, I do store it indoors away from the sun and the weather. I’m writing this a year later and the bladders show zero signs of wear.
The One Little Thing You Must Do: Blue Loctite Your Screws!!
I have used my jack many times since I bought it. Starting around September I was hearing faint air leak and thought the jack had bent. When I had time I found out that the bottom screws had loosened up and air was simply escaping from between the gasket and the bottom plate. I was surprised and disappointed to note that none of the screws had any thread locker applied to any of them. Many were in varying states of coming lose.
The unit is well made. The air bladders secure to that steel plate you see on them and then that assembly bolt to the dolly. It’s the screws that attach the bladder to the while disc-shaped plate in the previous photo that came loose. Here are the metal stabilizing cones. I wish I had polished and lubed them when I had it apart and will go back and do that at some point. I did apply air tool oil to the cones after cleaning them of a gritty dust that probably dated back to when they were manufactured.Before re-assembly I put a thin bead of Permatex Blue RTV gasket seal on the rubber gasket and then applied Blue medium-strength Loctite to each srew and brought them down lightly. I then went criss-cross lightly bringing down each screw to firm and then applied a final torque of 11 NM (about 8 ft-lbs or 97 in-lbs.
I then did the same thing to the top plate as well just to play it safe. No more leaks.
The reassembled bladder assembly then screws back down to the baseplate of the dolly. Note, this photo is actually from when I was taking it apart. The screws were so scuffed up that I just replaced them. Did I mention I use this a lot?
The following is the exact jack on Amazon that I bought and this review is about:
Bottom Line
I would buy this again and recommend it as well – just due the Loctite thing I mentioned. Note there are other Chinese suppliers on Amazon also but they do not get as good of reviews as the Mophorn units so my recommendation is only for that brand.
Okay, while researching what to do with my 2008 Toyota Highlander’s flaky alarm, I ran across some good videos you can watch on how to diagnose the switch and even how to replace the microswitch. As for me, I wrote up how I bypassed the sensor by creating a loopback plug from the old sensor’s wire. My approach still allows the rest of the alarm system to work just fine and can be done in less than an hour with little to no cost. With that said, let’s take a look at these really well done videos that helped me think out my approach – especially the first one on diagnosing the switch.
Diagnosing the Switch
The following is the best video I found on diagnosing the problem and he even disassembles the latch to show you what is going on in detail – it’s very well done. This video helped me figure out my approach and kudos to Ozzstar for making it:
If You Want To Replace the Microswitch
This next video is really well done and is specific to the 2008 Highlander. He ordered the same Panasonic automotive grade micro switch that Toyota used: ABS1413409 from Digikey.
We recently became the new owners of a 2008 Toyota Highlander. It was in great shape and I thought we got a pretty good deal on it. The previous owner disclosed to us that the hood alarm switch was flaky and the car alarm would go off randomly.
After we bought the Highlander and returned home I did some research that night. There is in integral microswitch in the hood latch assembly that detects if the hood is open or closed. The alarm system will not arm if it detects that the hood is open and it will sound an alarm if someone tries to open the hood. Uhm… ok. My first thought was “you can only open it from the inside lever that is protected by the door alarms so why have this one?”
Unfortunately, or fortunately depending on your perspective, the switch is a known problem. It’s also one of the rare times where I will say Toyota did a bad design. Putting a basic microswitch in the front of a car where it will get wet all the time and corrode, not to mention the impacts and grease/oil from the latch itself, is not really that good of an idea — at least not to me.
After reading and watching videos, it seemed like there were three options:
Replace the whole hood latch assembly that includes the sensor. Third party, these latch assemblies were about $56 on Amazon and $50-60 on eBay. Original Toyota would be higher, of course. Pro: It is pretty easy to remove the assembly and install this one. Con: It’s a relatively expensive and will fail sooner or later unless someone fixed the switch design and sealed it better.
Replace just the microswitch. You can get the unit real cheap from Digikey and other suppliers plus there are Youtube videos that show you what to do. The previous owner did this and it worked for about two years he said. Pro: Real cheap (under $10 including shipping). Cons: Takes time and will not last without figuring out some better way to seal the original design.
Simply bypass the switch. As mentioned earlier – you can’t open the hood from the outside so what are the odds that someone will successfully break into the car and then open the hood without setting off the alarm? The risk is real low – low enough for me to go with this option. Pro: Easiest of all and is a permanent solution. Con: The hood alarm sensor will no longer work. This is the one I went with.
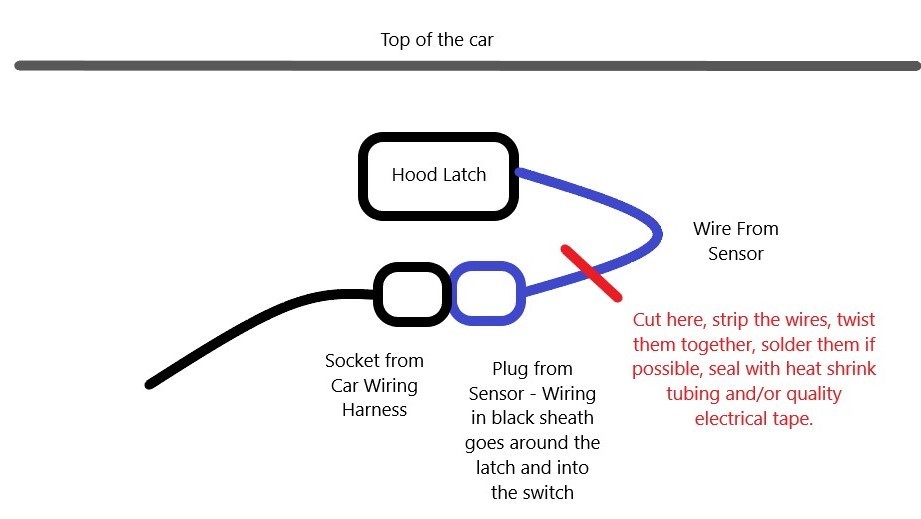
I’d like to point out that just unplugging the sensor is not an option. Doing that will make the computer think the hood is open and the car alarm will not arm at all. This means you must pick one of the three options listed above. I opted for the last one – I bypassed the sensor by creating a loopback plug – a fancy term meaning I joined the input and output wires together thus making it look like the switch was always closed so the computer would think the hood was closed regardless of whether it was or not.
What I want to do next is walk you through what I did. If you are not comfortable with basic wiring, I’d recommend against your trying this just to be up front. Always ask yourself if you can reverse what you are about to do or can you recover if something goes wrong – if the answer is “no”, then don’t do it. For example, don’t cut wires off right next to a fitting – leave yourself some pigtails in case you need to reconnect them.
One last comment – these directions are just based on my 2008 Highlander. Different years and models may not be like this. Research your vehicle before doing anything like this.
Bypassing the Sensor
So, to bypass the sensor we just need to create a circuit that normally exists when the switch is closed. First, I needed to get a better look at the location of the wiring so the cover needed to come off.
The plastic cover between the grill and the frame needs to come off. It is held in place by Toyota push-type retaining clips and two 10mm screws. The screws are to the front on the left and right sides. Note that two of the clips on the right side are bigger than the others – this will help you with reassembly later.
I use a small flat screw driver to pop the middle part up. You then grab hold of that, lift up and the clip comes right out.
Just remove the clips and then the plastic cover simply lifts off. I found one more that anchors the grille in the middle of the grille vertically and I removed it. That gave me ample room to work and I did not need to remove the grille given what I planned to do.
I did not take as many photos as I should have so let me explain. With the plastic cover off and the middle anchor clip removed, I had plenty of access to the switch and wiring to see what to do. The wire assembly runs from the hood latch – and there is only one wire – do not pick the hood cable used to open the hood. The wire runs from a small switch in the latch assembly and then plugs into a connector shortly below it.
I inserted a small blade screw driver to release the plug from the socket. To be safe, make sure you confirm the wires that you plan to cut lead up to the sensor and are *not* the wires going to the harness / wiring loom.
Why care? Because if you cut the wires on the sensor side and connect them together, you can easily replace the hood latch assembly and go back to having a sensor if you want. However, if you cut the wiring loom, it’s gone. You can manually splice in but it simply is not an elegant approach.
Note I am saying wires and when you look at the plug it looks like just one black wire. What you are seeing is the insulation tube that is black. Inside are two thin green wires that run from the plug to the sensor switch.
I’ll not get awards for artwork but hopefully this will give you an idea. When I faced the front of my Highlander, the wiring from the sensor was on the right hand side. You need to confirm this just in case. It is the wire to the sensor switch wire that you want to cut and not the wiring from the harness. On my 2008 Highlander, the harness wiring was on the left.
Once I was certain which wire to cut, I reached in with some snips and cut the wire leaving a couple of inches to work with. DO NOT CUT THE WIRES FLUSH TO THE PLUG!! You need a short length of the wires to connect together to make the circuit loop back.
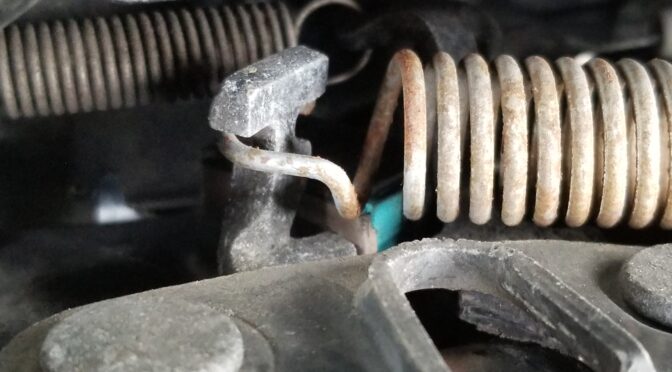
To make work easier, I took the short wire with the plug on it and worked at a bench where everything was handy, I stripped a bit off the end of each wire, twisted the bare wires together, soldered them, bent them over the small wire pigtail and then used heat shrink tubing and electrical tape to secure everything. Total overkill but I never wanted to bother with this again.
Here’s the finished result. The front of the car is to the left. Part of the hood latch spring is to the upper right and we are looking down at the newly made loopback plug. As far as the alarm system is concerned, the hood is closed. The red color is the heat shrink tube I had on hand. I folded the heat shrink tubing over at the end and then applied electrical tape to seal it.
I installed the newly created loopback plug back into the socket. I then tested the system by turning the alarm on with the key fob, putting the key fob out of signal range in the garage and waited for the system arm. Once the alarm indicator light went solid on the dash, I simply reached in through the open window and tried to open the door from the inside and the alarm went off. Yeah, I had to run back to that fob to shut it off 🙂
If the system thought the hood was open, it would never have armed by the way. That’s why you can’t just unplug the switch. I then reinstalled the plastic cover by installing the clips and then pushing the middle piece down to lock it in place. By the way, remember that the right two clips are bigger than the others. The two 10mm screws went back in with a dab of non-seize on each just in case they ever need to come out again.
That was it – the alarm is happily armed and protecting the Highlander as I write this and not one single false alarm since. I hope this helps you out.
5/23/2020 Update: This has worked great for me. Not one single problem since.
We recently bought a new van and I wanted to undercoat it so it would last — being old school that was the first thing I thought of anyways. The next was to do some searching around with Google about undercoatings so I could get the best product to use. You know what I found out? When most cars and trucks are made, the manufacturers do a ton of stuff now to prevent corrosion straight from the factory – so much so that you may find it hard pressed to find a shop that even does undercoating/rust proofing any more. The car companies have improved their alloys, finishes and even learned not to leave exposed lips for mud to settle in to and sit – think about how the old wheel wells had the reinforcing lip all the way around that dirt/mud could sit in and hold salty water or even just water against the metal – of course it would rust. So now you look in to wheel wells and through one method or another that flange is either not there or protected.
So I want to share some things I learned. First, rubberized spray on undercoatings often caused more problems than they solved. Now, you may be wondering why – I know I did. You see, it is a spay on finish the adheres to whatever surface it can stick to – paint, rubber, metal, dirt, etc. Over time, that undercoating develops small holes from stuff hitting it and then a pocket starts to form, salty water enters in and is held against the very steel it is trying to protect! So to make a long story short, after reading tons of posts about the various spray on rubber undercoatings one must conclude they are not worth investing in any longer.
Second, rust proofing sounds great but there really is no such thing. You are delaying the inevitable if we are talking about steel and salt water – eventually something is going to rust.
Okay, enough doom and gloonm, let’s say you live in a state, like Michigan, where they salt the heck out of the roads in the winter. What do you do to protect new cars even more than what the factory did *or* you want to try and save older vehicles even if they have started to rust? The answer, interestingly enough, was developed long ago – Fluid Film. Eureka Chemical Company, yes that really is their name – started in the 1940s when they developed a product with an unlikely source to help the Navy prevent corrosion – the not-so-secret ingredient is lanolin from sheep. If you want to read the whole story, click here.
Let me cut to the chase – the reason this stuff works is that it oozes and seals itself if nicked. DoD, NASA, Coast Guard, Delta and others are still using this stuff! After doing a lot of reading, I bought a five gallon pail off Amazon, an applicator gun and a pail pump dispenser. They sell an aerosol can version but I really don’t have much experience with it but am a bit leery of it because the liquid is so thin that comes out compared to what I can spray with the applicator gun.
This is my second year using it on our vehicles and it almost makes it a few months before you can tell it has dried out / faded. In other words, it doesn’t quite make it the whole winter. I get rid of looser dirt by spraying it down, let it try and go to town spraying this stuff on everything – even the exhaust as it will just bake off after the first time it gets good and hot.
Honestly, I think the FuildFilm helps – our newest car after our van is a 2002 Camry and I spray the heck out of it and our other older cars (the oldest is a 1992 Corolla) and my old 1996 Land Cruiser. I go through about a quart per car/truck liberally applying it real thick all over the under carriage. I also spray door hinges, locks and hood latch. The stuff smells funny for the first day or so but seems to really do the trick. I just finished putting it on our vehicles for the second year. I’m about half way through the five gallon pail so if you want to test it out some, you could start with a gallon pail – that would do 4-6 cars or trucks depending on how thick you apply it.
So, thought I would pass along what I learned – don’t bother with rubberized undercoatings and definitely check out FluidFilm.
Note, my local Autozone also sells the below aerosol cans. I really do not know how long it will protect what you spray it on. It is way, way thinner than the stuff that comes in the pails.