Replacing the IMI Galil / JRA Gallant’s Fire Control Group with a New ALG AKT-EL set

The AR, ARM and SAR IMI Galil rifles use an AK-style fire control group. I didn’t include the little Micro Galil as I am not sure about them. For the others though, this means you can swap out the IMI-designed group for the AK group of your choice.

I needed to do this because my JRA Gallant (which is a kit assembled rifle using an IMI Galil ARM kit) came with a single Tapco plastic Galil magazine and I wanted to use steel surplus magazines. Now, there is a regulation known as 922r that requires a foreign rifle not approved for importation into the US (read that as military style weapons typically like AKs, Uzis, etc.) certain number of American made parts to be legal based on a list the ATF came up with. In the case of the Galils, you need to replace 6 parts.

The Gallant has American made: receiver, barrel, and pistol grip. The Tapco magazine gave it the other three. To use the surplus mags, I needed to replace another three – the trigger, disconnector and hammer. I like ALG triggers and while I prefer the Ultra, the Enhanced trigger is still really good. Let me give you a tip – you can get a great deal on enhanced ALG triggers from Palmetto (PSA).

The Thumb Selector

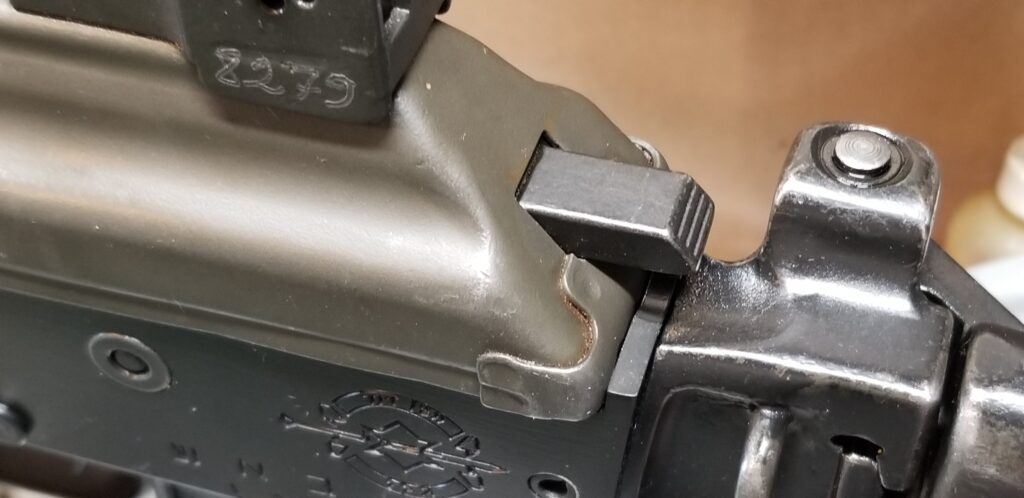
There are two unique parts to the Galil design that you need to bear in mind. First, the thumb selector lever is actually connected to the selector lever inside the receiver. This leads us to the second item – because of the thumb lever, the very popular fire control group plates can’t be used to secure the hammer and trigger pins so don’t lose whatever wire retainer comes with your weapon. If you do lose/need one, get a Dissident Arms AK retaining wire.
John's WASR rifle with a Romy Brown STK grip
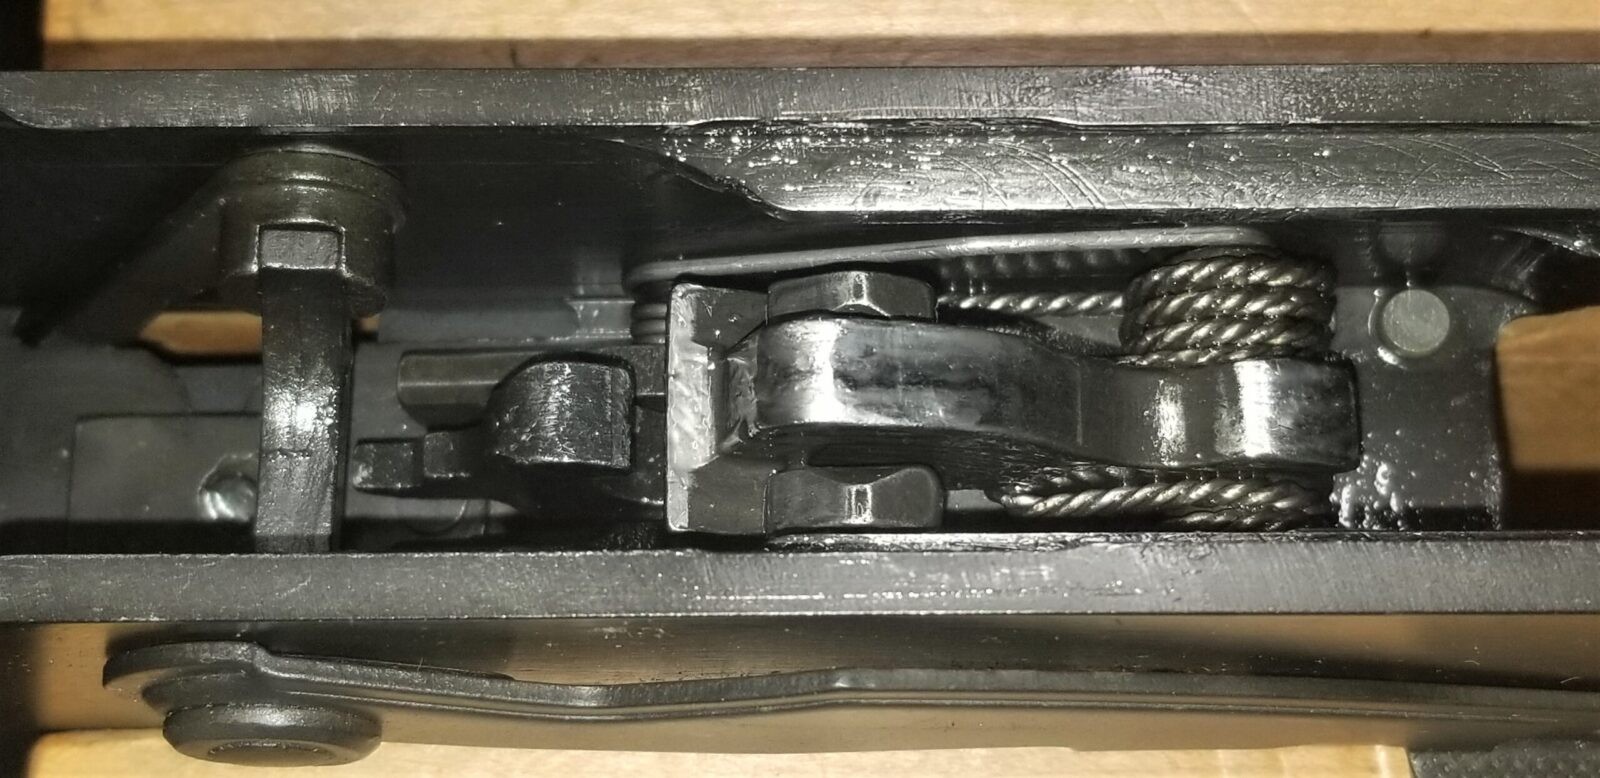
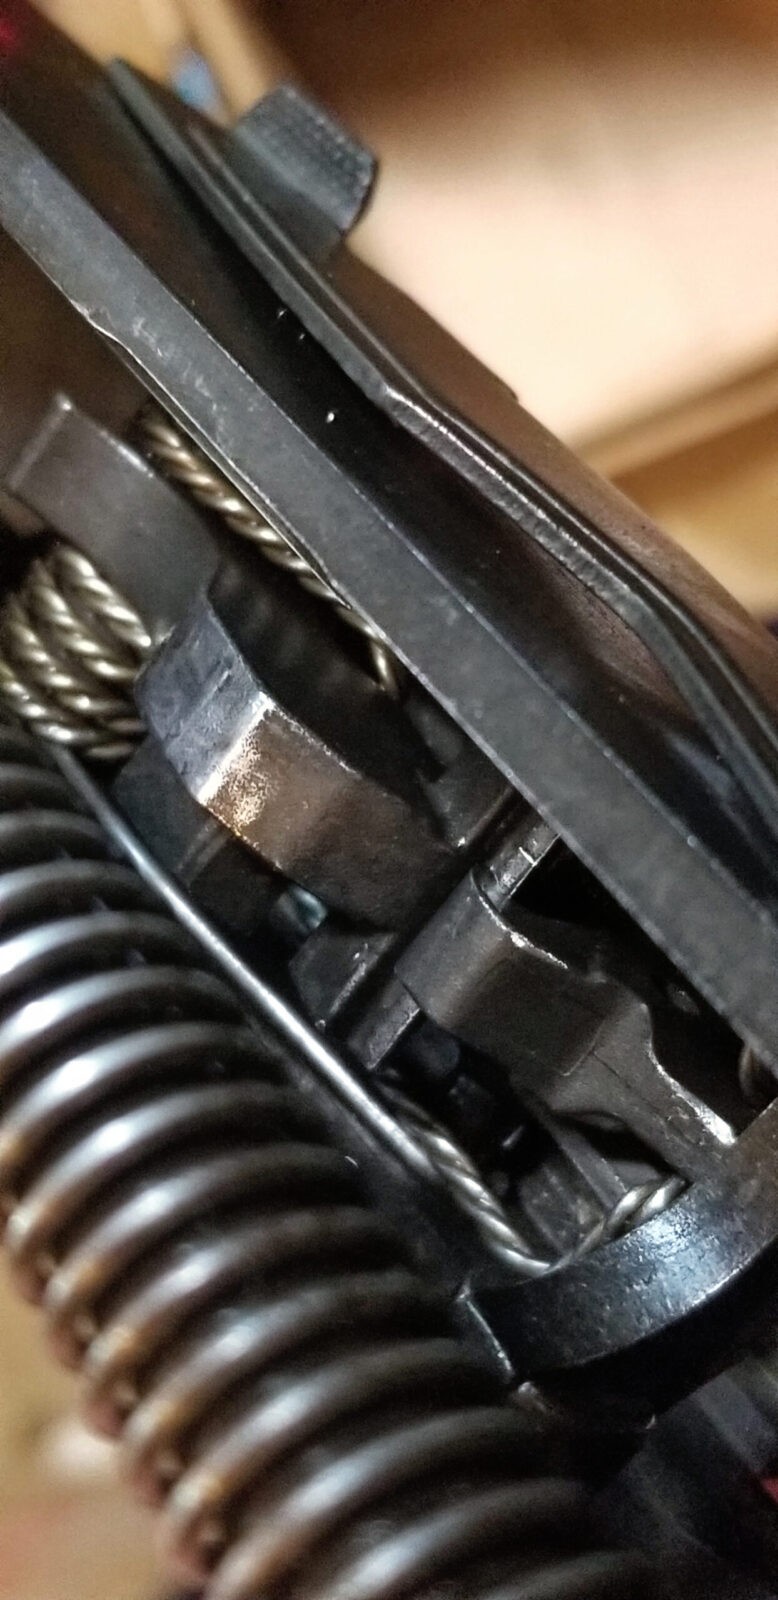
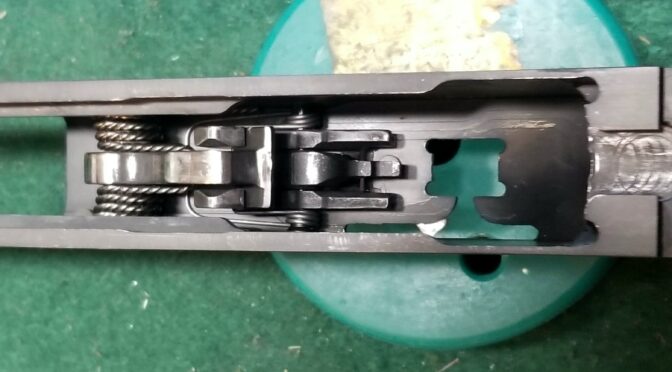
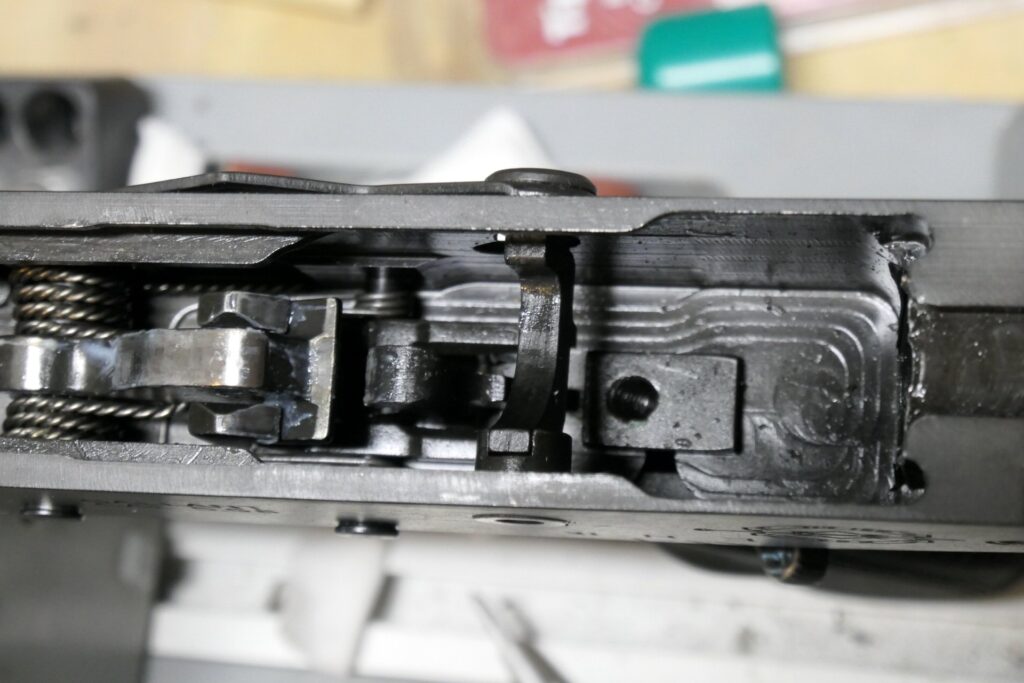
Starting from the right edge of the receiver, you can see the grip nut on the bottom. The selector lever and thumb extension are two parts located above it. You can then see selector, and the hammer retained by the twin hooks of the trigger. Note the two part springs IMI used – in an AK, there is a single fire control spring that does double duty to both handle the hammer and the trigger. With the Galil, the hammer spring is a twisted wire design but there is a unique dedicated trigger spring. Purely from a redundancy perspective, I prefer the braided AK spring the handles both. I am not too sure how the Galil design would fair if the trigger spring failed on one side. It is secured on both trigger forks independently so…. not sure how well it would work if one side failed.

Remove the IMI Group

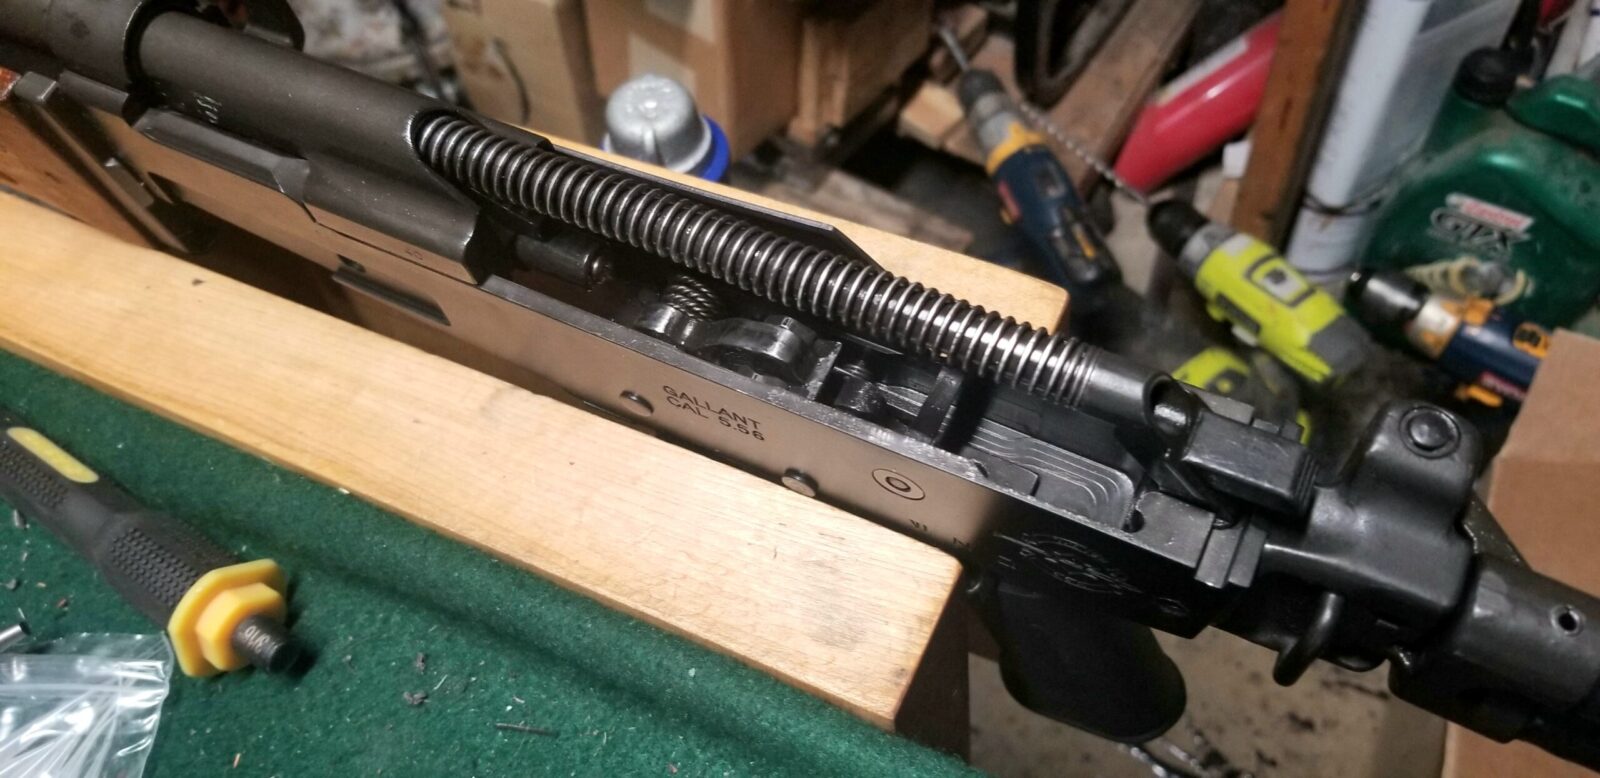
First off, remove the dust cover. Next, remove the recoil spring and bolt assembly. You can then look down right at the innards of the rifle.
John's WASR rifle with a Romy Brown STK grip
The dust cover is off and you can see the recoil spring assembly and the back of the bolt carrier. Both of these plus the pistol grip will need to be removed so you can then remove the selector lever, thumb selector and, finally, the fire control group.

Remove the pistol grip by unscrewing the grip screw on the bottom. You can then have enough room to swing the selector lever so the notch in the receiver will allow you to remove the lever from the left side.

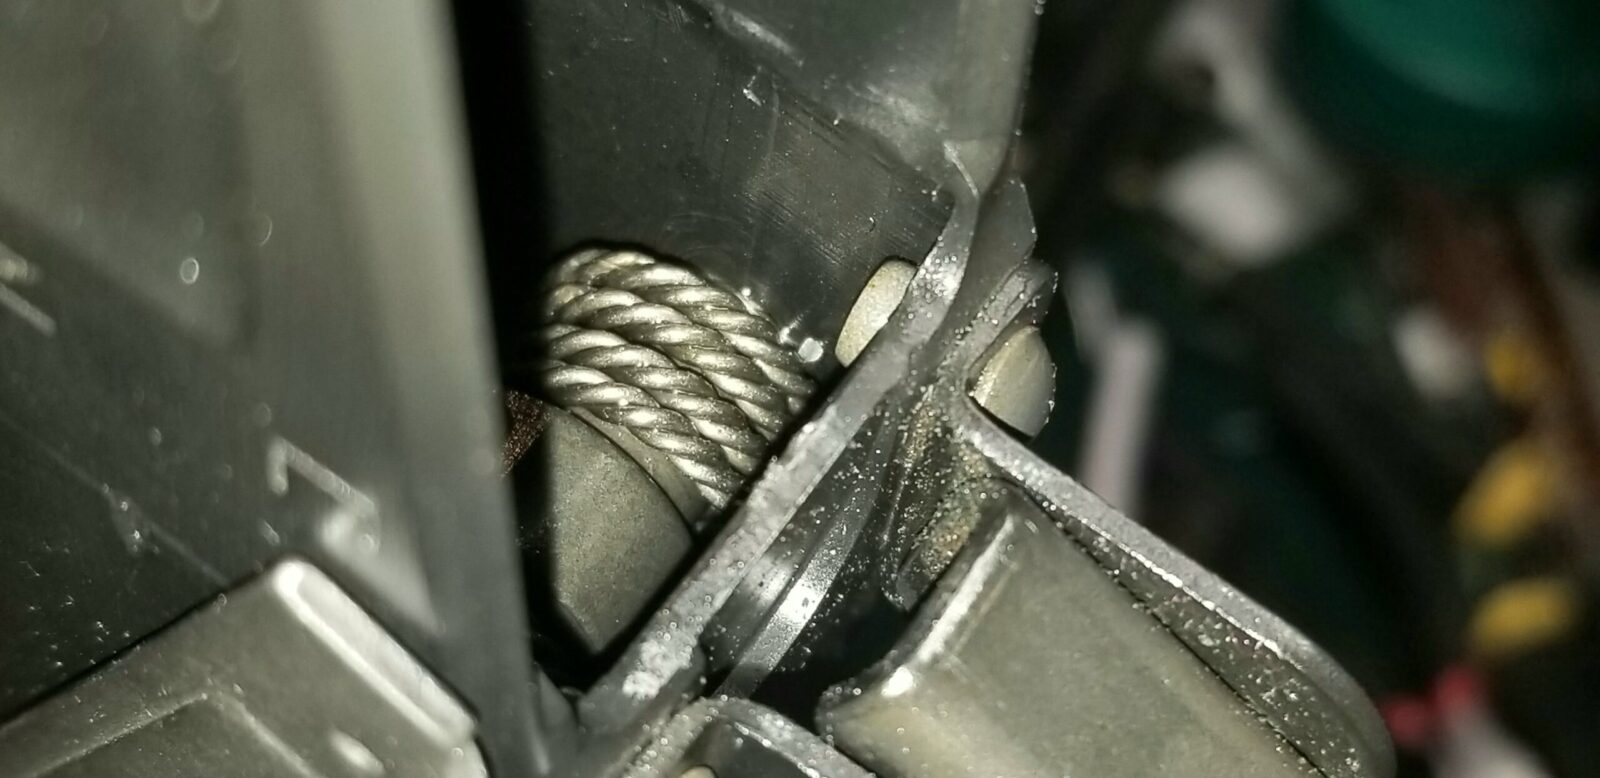
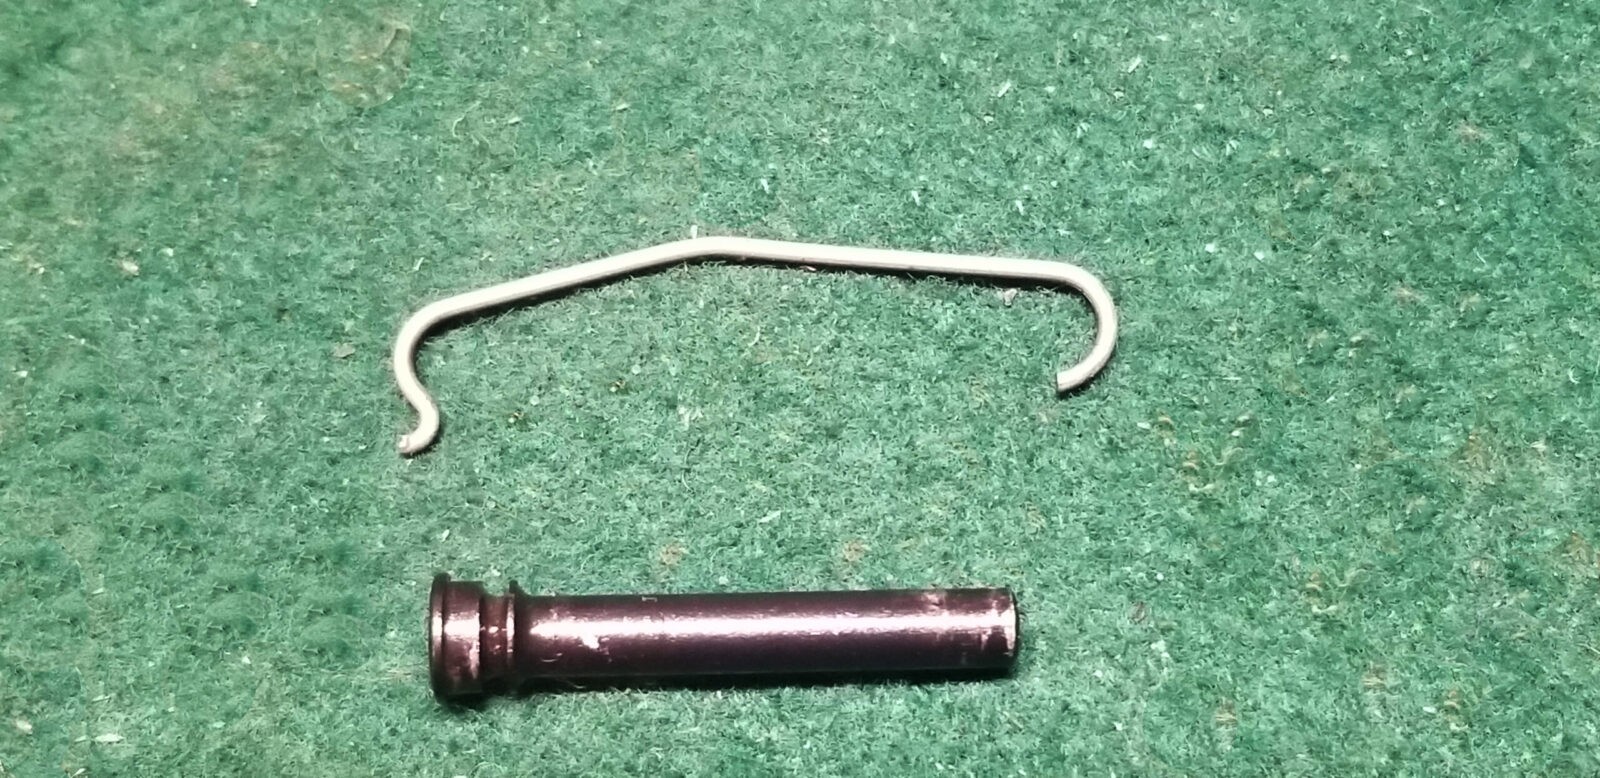
To remove the hammer and trigger pins, you must first remove whatever retaining wire the builder used. JRA used this really elegantly simple retaining wire where you push it up off the hammer pin and then can push it back and remove it from the trigger pin.
John's WASR rifle with a Romy Brown STK grip
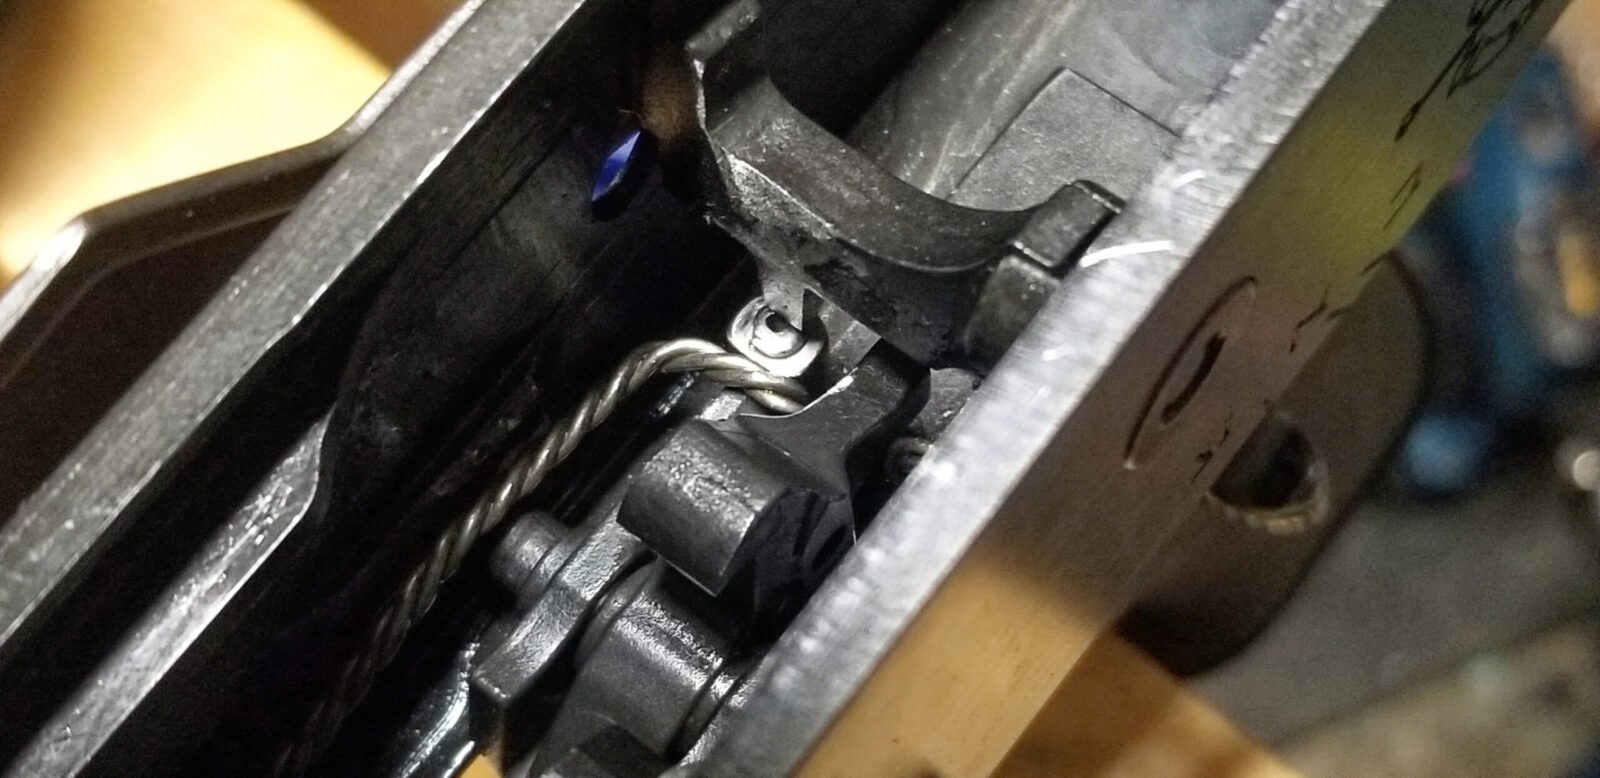
The retaining clip’s front edge is just to the right of the braided hammer spring. I inserted a small screw drive and pried upward and the clip came right off. Now not all builds use this same type of clip but it is wonderfully simple.
John's WASR rifle with a Romy Brown STK grip
This is a close up of the retaining wire and one of the fire control group pins. The pins are the same for the hammer and the trigger. The rear of the retainer that looks like a semi-circle goes into the trigger pin’s groove and then the wire is rotated down and pressed onto the hammer. The small lip on that part allows the pin to flex and snap into place into the groove of the hammer pin. It’s really quite elegant. Yes, I realize my bench cover is messy.
John's WASR rifle with a Romy Brown STK grip
Last photo of the retaining wire. It also gives you a good look at the really beefy double hook trigger that the Galil uses. If it weren’t for 922r, I would have left it in. Note the orientation of the hammer spring.

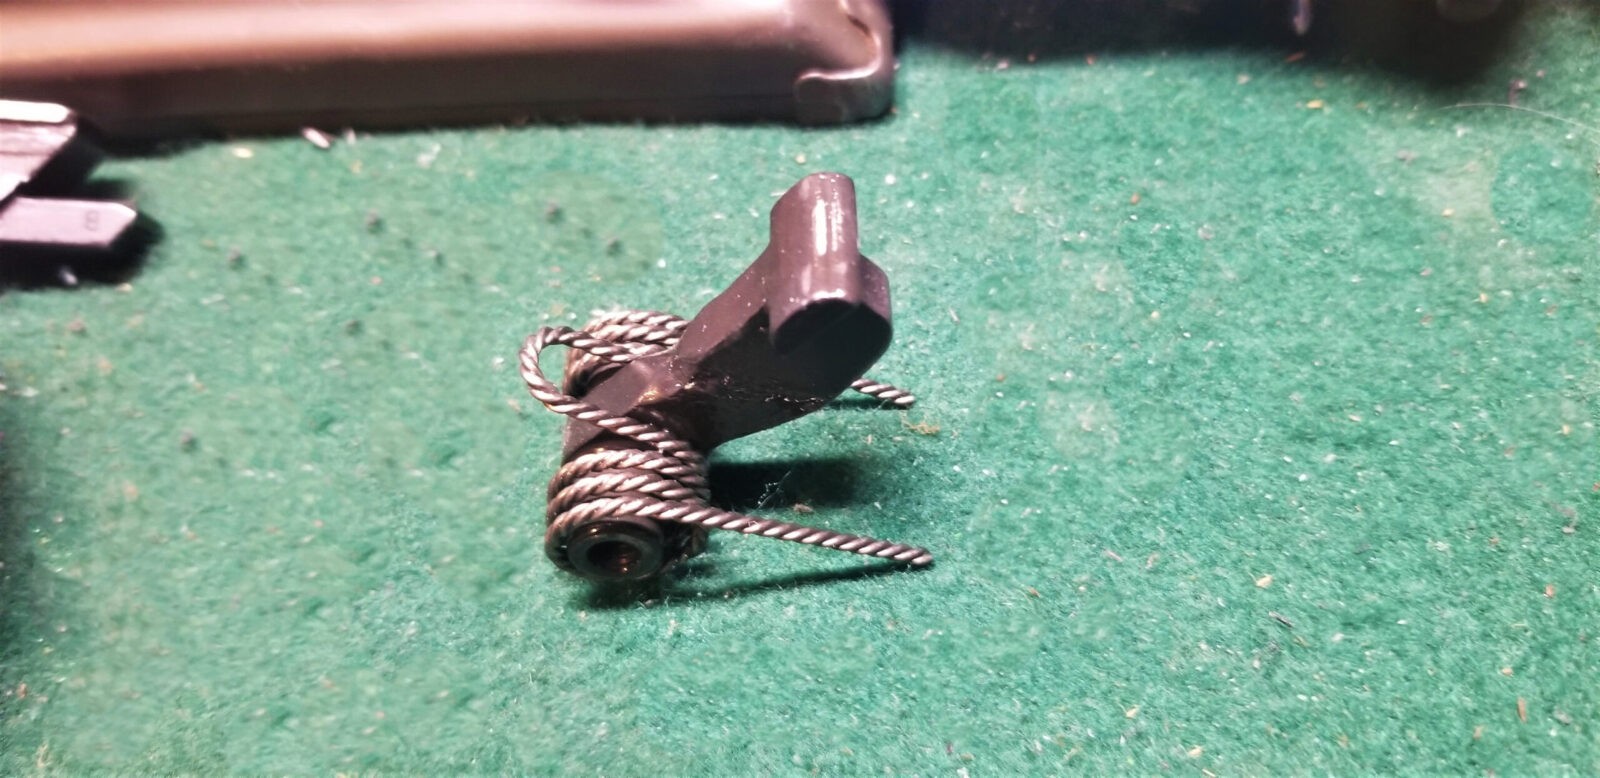
You can either remove the hammer first and then the trigger or vice versa because the springs are independent. I removed the hammer first .
John's WASR rifle with a Romy Brown STK grip
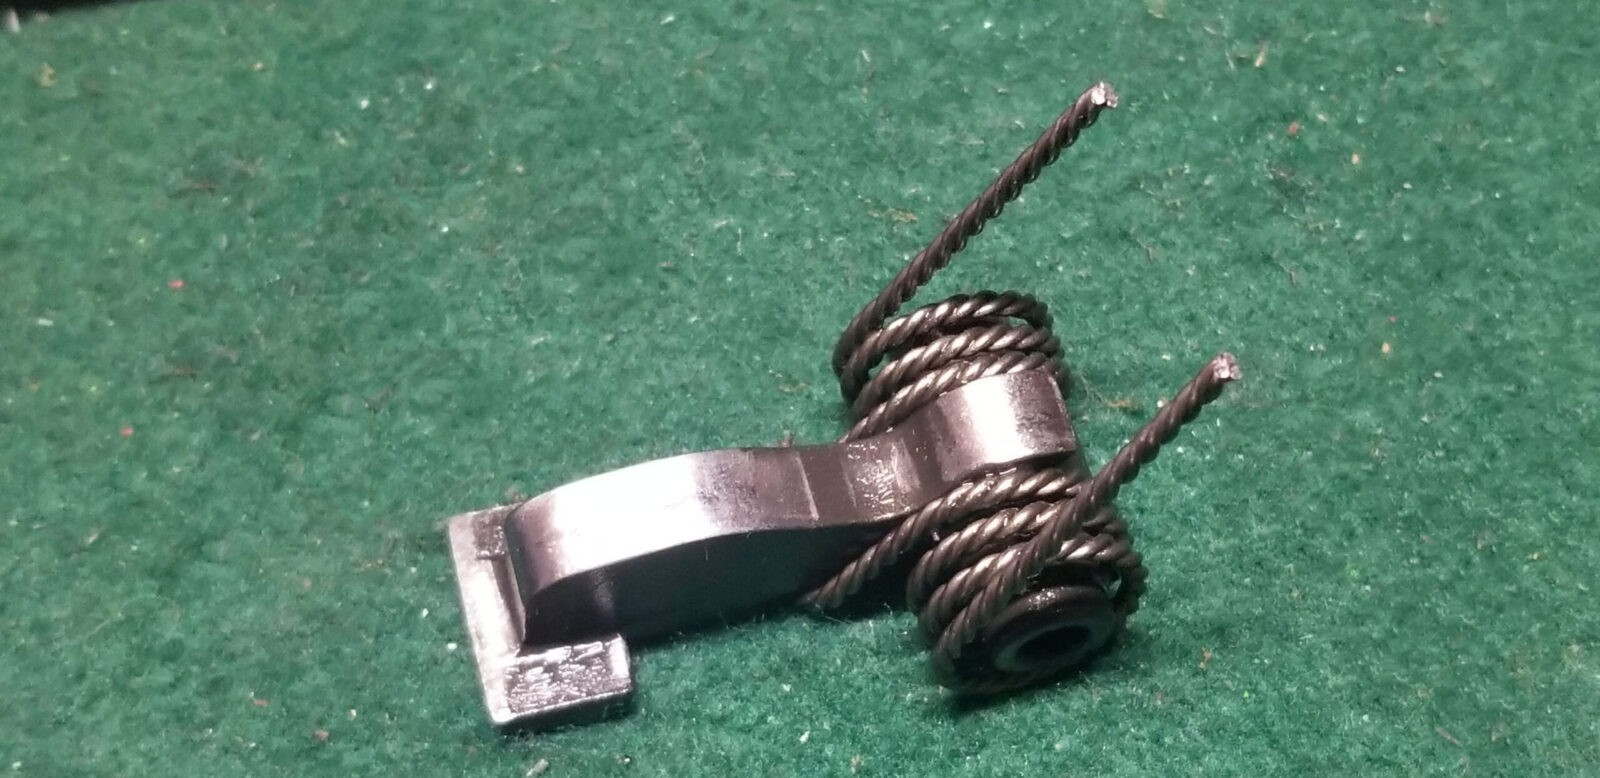
Here’s the hammer. Note the short dedicated spring. If installed, the legs would be rotated clockwise 180 degrees.
John's WASR rifle with a Romy Brown STK grip
The hammer face is polished smooth allowing for the bolt carrier to pass over it very easily. I suspect the JRA builder did this because it is uniform. When forearms “wear in” and the parts get to know each other, you see a polishing of sorts. If this was done by wear then it is surprisingly uniform. Again, if it weren’t for 922r and my wanting to use surplus mags, I would have run with it.
Close-up of the muzzle brake and front sight on a Russian Vepr 7.62x39mm rifle.
After having a few “where did that part go?” moments over the years, I now use magnetic trays and put small parts in them. I have a variety of sizes that I’ve picked up over the years and they really make keeping track of parts easier.
Close-up of the muzzle brake and front sight on a Russian Vepr 7.62x39mm rifle.
For whatever reason, IMI opted to use a single strand wire for the trigger. It’s fairly fault tolerant – if one side breaks the other would still provide some function but I do find it an interesting departure from the typical AK where the legs of the hammer spring provide the pressure to reset the trigger. At any rate, the spring shown goes into a small hole in the trigger on each side.
Close-up of the muzzle brake and front sight on a Russian Vepr 7.62x39mm rifle.
To remove the spring, use a small blade screwdriver. Insert the head between the wire and trigger and twist to remove the spring from the hole. Do this on each side and then the trigger pin can be pushed out. The pin will be under tension so don’t try beating on it before you release the spring.
Close-up of the muzzle brake and front sight on a Russian Vepr 7.62x39mm rifle.
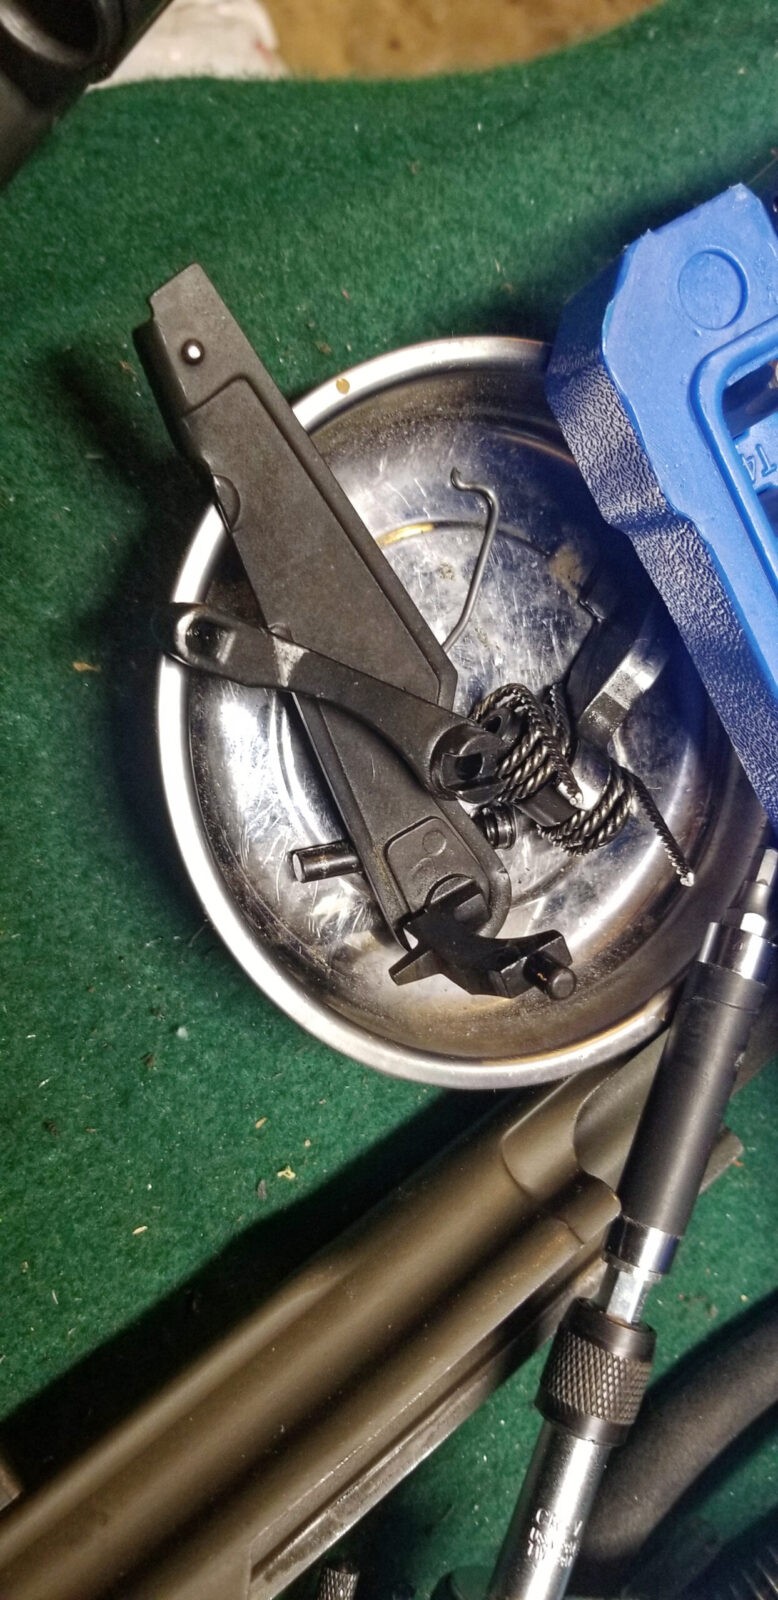
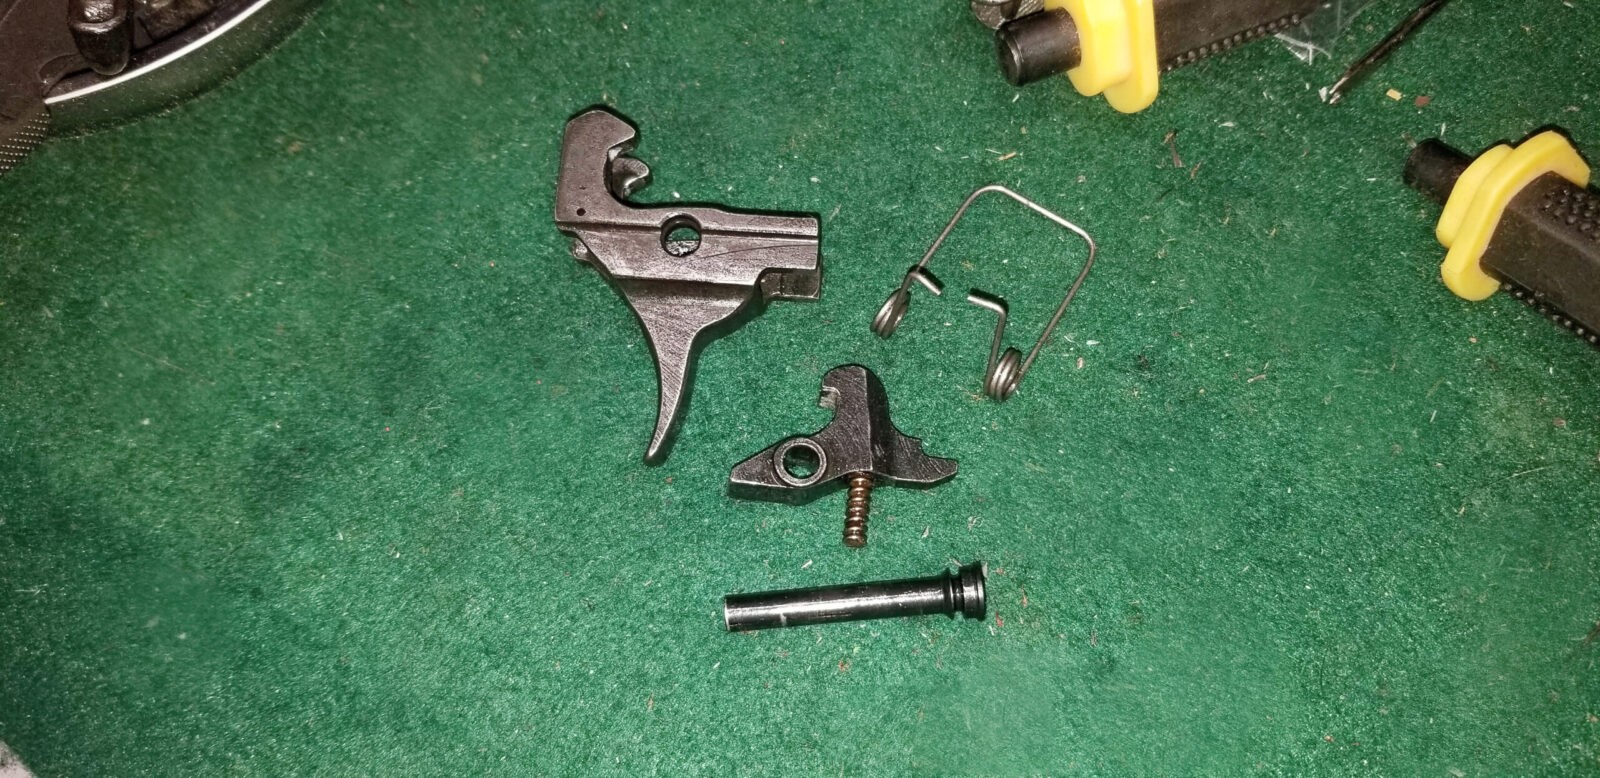
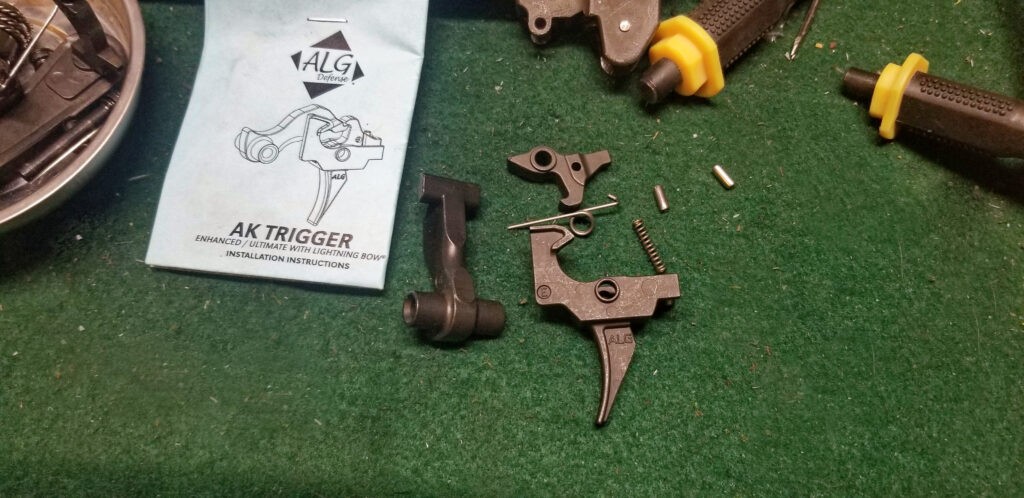
Here’s a good look at the trigger group. Top left is the trigger. It is a double hook design (meaning it has a hook on each front side to grab the hammer). You can see one of the unique holes drilled in the hook to hold the trigger spring. To the right of it is the unique IMI Galil trigger spring – single wound. In the middle is the disconnector and the spring is still in the body – those can weaken over time. At the bottom is the trigger axis pin.

Install the ALG Group

Despite the unique springs in the Galil, any AKM (AK Modern) fire control group will work in there – Tapco, Fime, ALG, etc. Right now, my favorite AK triggers are from ALG.

As a bit of background, ALG is the sister company of Geissele Automatics who make my favorite AR triggers. ALG are the initials of Amy Lynn Geissele (the wife of Bill Geissele who founded Geiselle Automatics). ALG was founded in 2012.

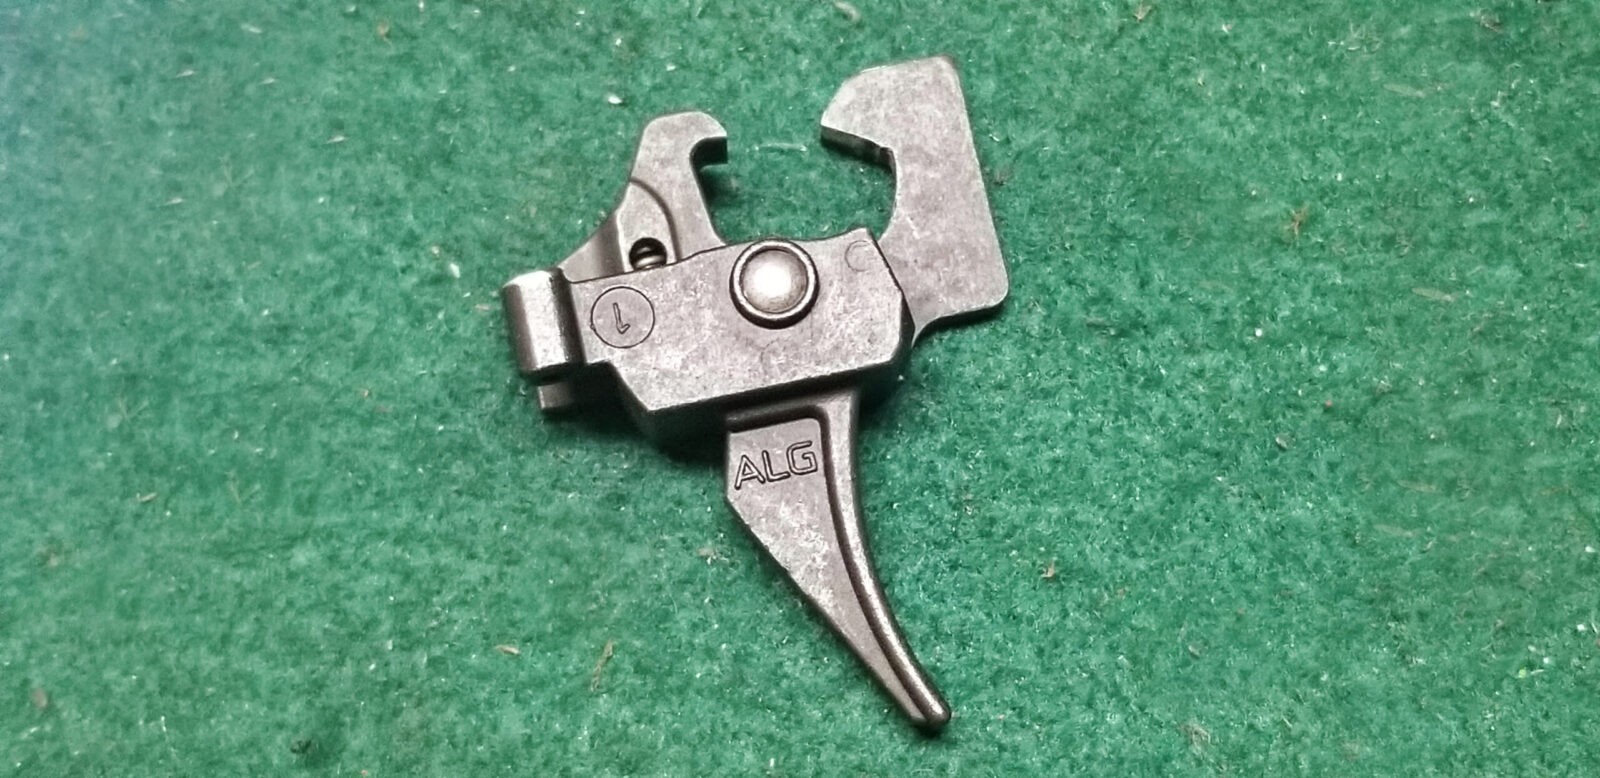
At any rate, ALG makes two AK triggers and both count towards three 922r parts (hammer, disconnector and the trigger each get one point). The AK Trigger Ultimate with Lightning Bow (AKT-UL) is hands down my favorite. It’s light, crisp and my preferred trigger for a designated marksman’s rifle (DMR) build.

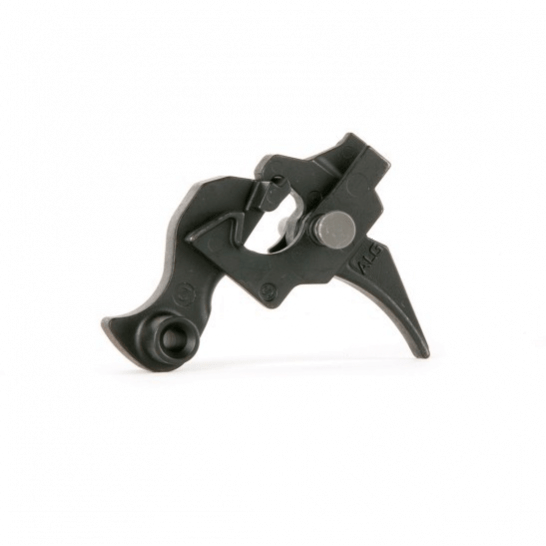
When I can’t find or afford the AKT-UL, I use the AK Trigger Enhanced with Lightning Bow (AKT-EL). It’s still far, far better than the typical OEM AK trigger and works just great for normal AK builds. Normally you can find these triggers very easily but not right now – at least not from most normal suppliers who carry them unless you are willing to sign up for in stock notifications and wait.

COVID-19 variants, democrats handing out free money incentivizing people not to work and continued panic buying have just snarled supply chains everywhere. Trying to find some parts can just be a bear an ALG triggers for an AK are a good example but I am going to let you in on a little secret.

As I mentioned earlier, Palmetto State Armory (PSA) buys tons of modified ALG triggers for use in their various AK pattern rifles plus they make the triggers available for sale on their website (click here to go to the PSA page). These triggers work just fine in other AKs and in Galils. Not only are they almost always in stock – I can’t think of a time they were not when I needed them. Folks, you can’t beat that. Bottom line, that is what I am running in my JRA Gallant and it ought to work in any Galil build.
Russian Vepr 7.62x39mm side folder with muzzle brake
This is the PSA version of the EKT-UL. It runs just fine in a Galil/Gallant.
Russian Vepr 7.62x39mm side folder FM-AK47-21 rifle close-up
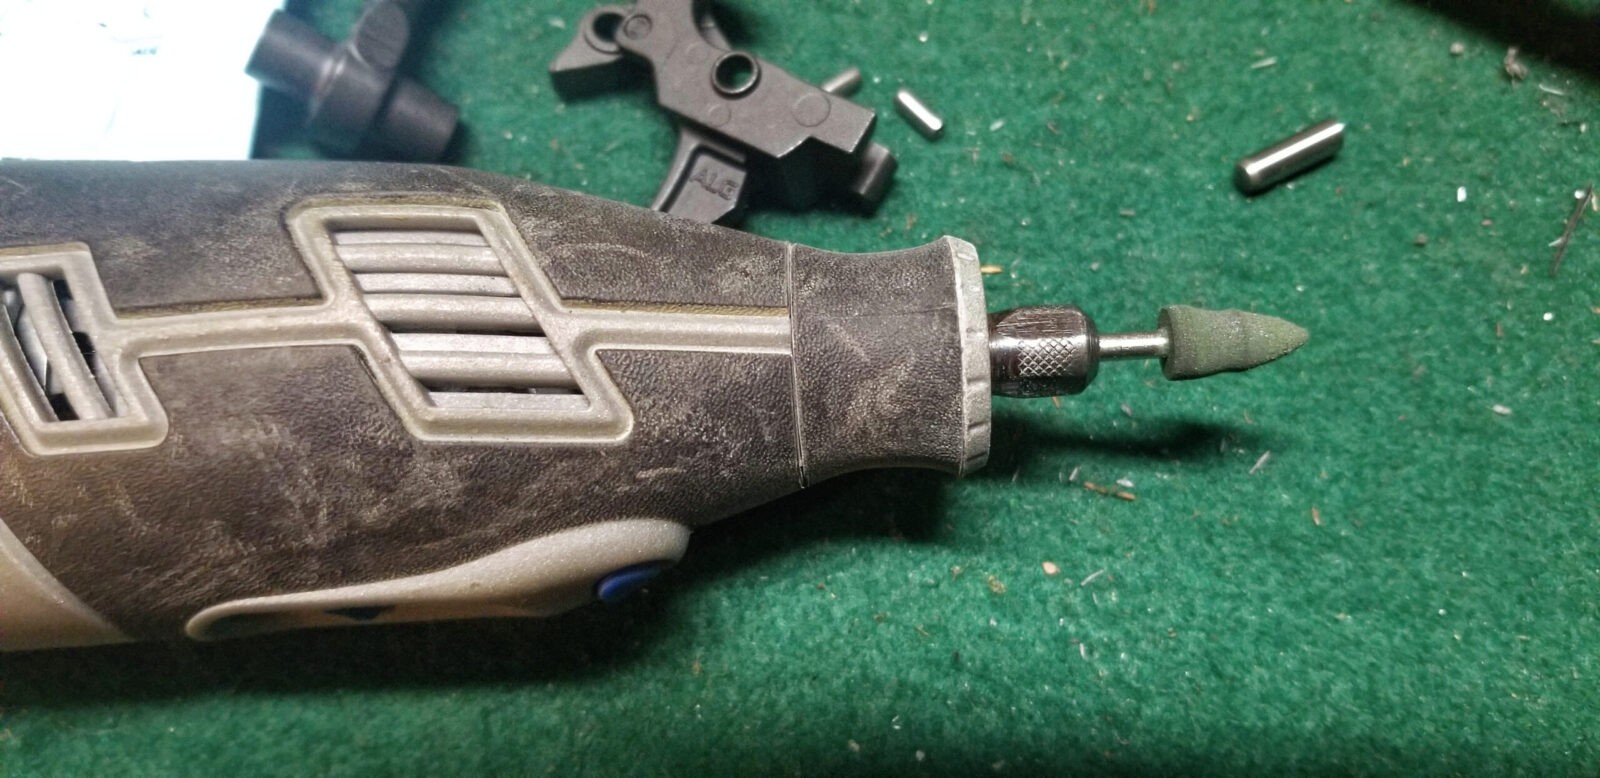
To help smooth things out, I always put a rubberized polishing bit in my Dremel and polish all surfaces that will make contact – the area on the hammer where the hooks and disconnector grab, the bottom of the hooks and the bottom of the disconnector. I can’t stress this enough – you just want to lightly polish. You absolutely do NOT want to remove material or you will likely mess up the functioning of the trigger. Never use sand paper. I like rubber polishing bits but felt bobs with polishing compound work also.
Russian Vepr 7.62x39mm side folder with muzzle brake
The fastest lowest stress way to install an AK trigger is to use a slave pin during assembly. You put the spring in the disconnector, position the disconnector in the trigger and then push in the slave pin told hold it all together. Then, when you install the actual trigger pin with the assembly in the rifle, the slave pin exits the other wise as it is pushed out by the trigger pin being inserted. It just so happens that we make and sell them. Click here to go to our store’s page.
Russian Vepr 7.62x39mm side folder FM-AK47-21 rifle close-up
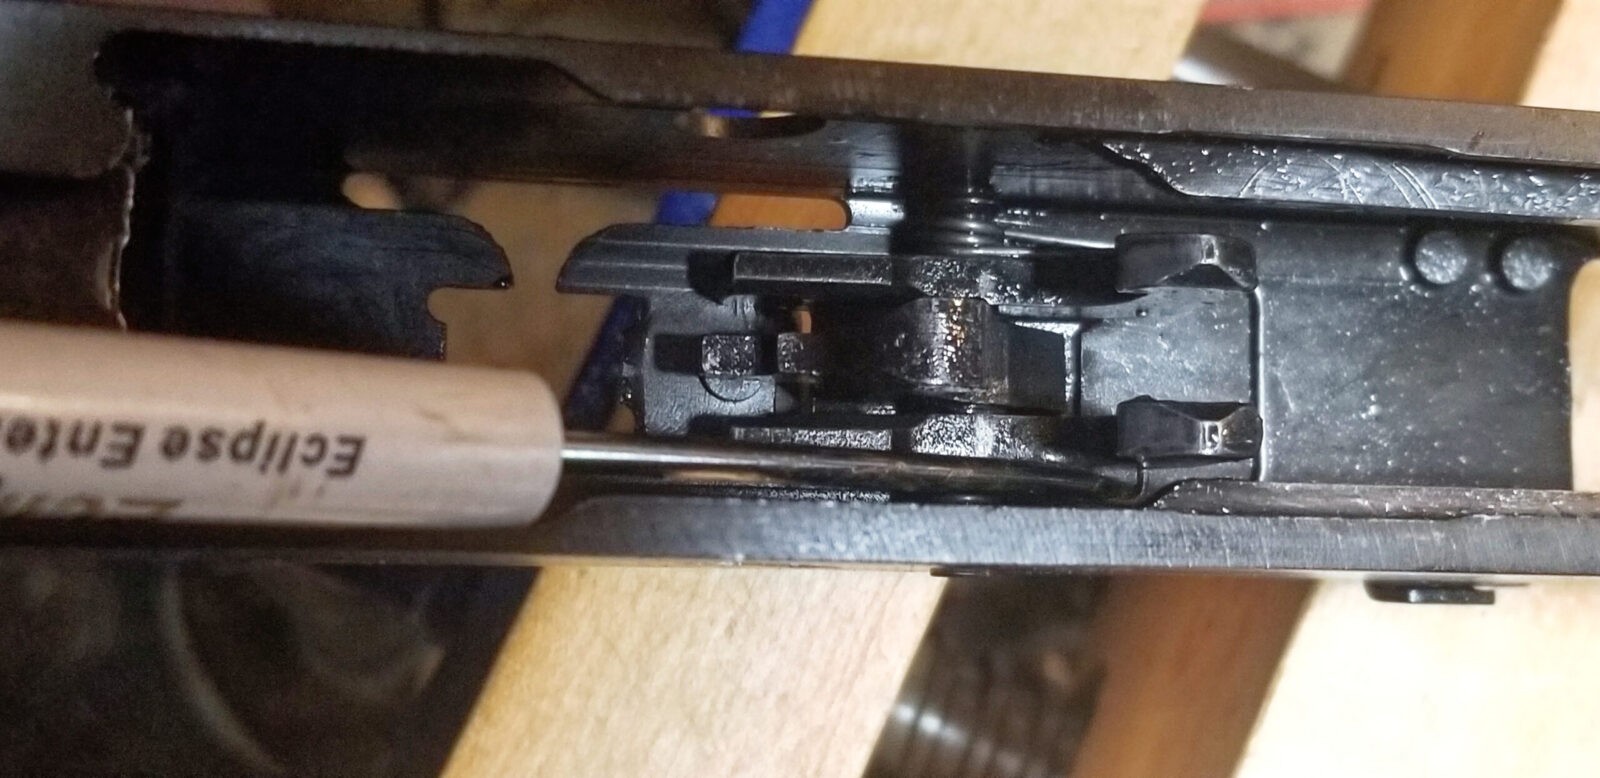
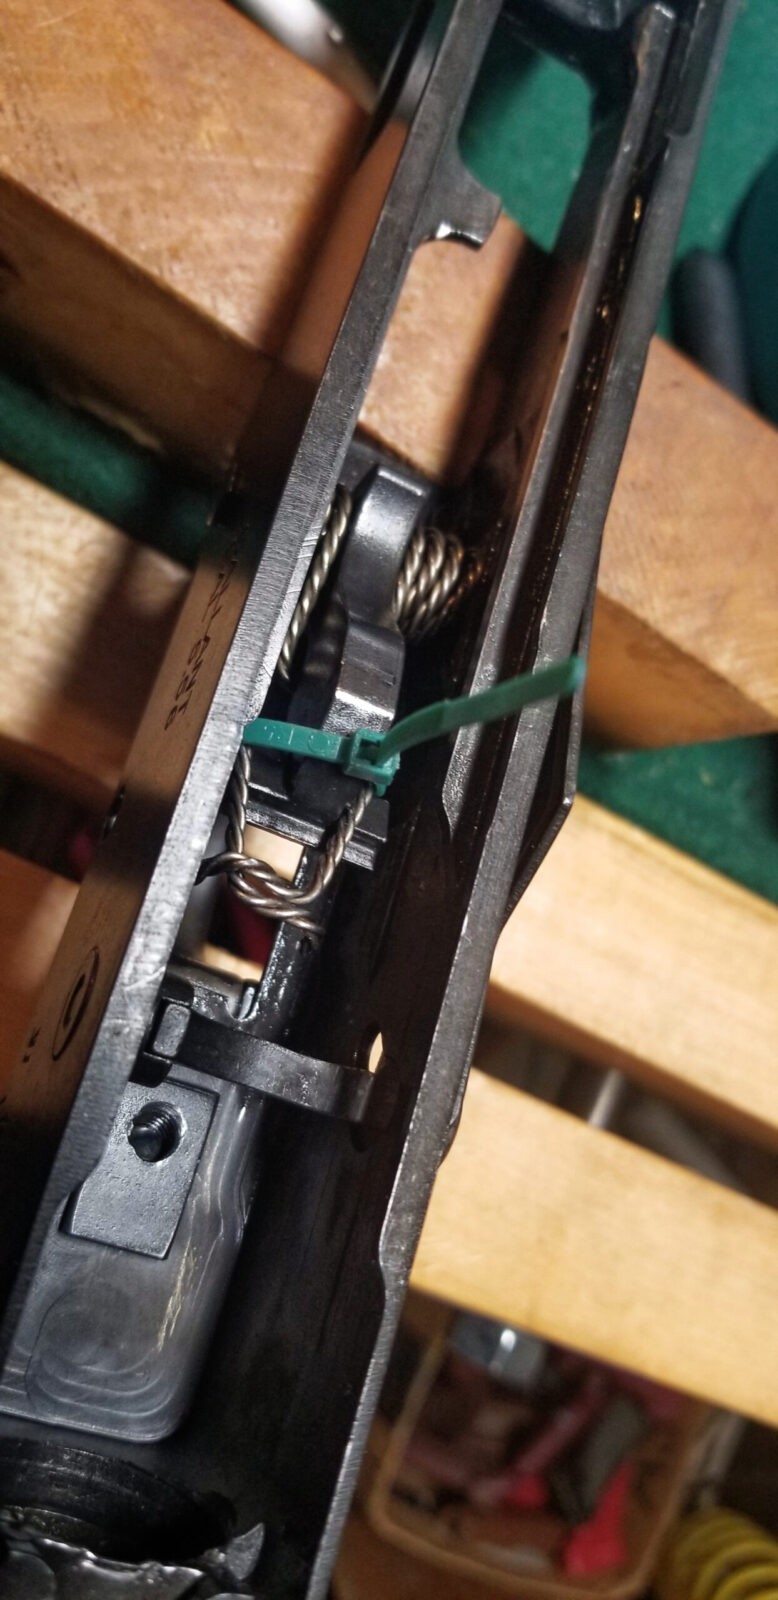
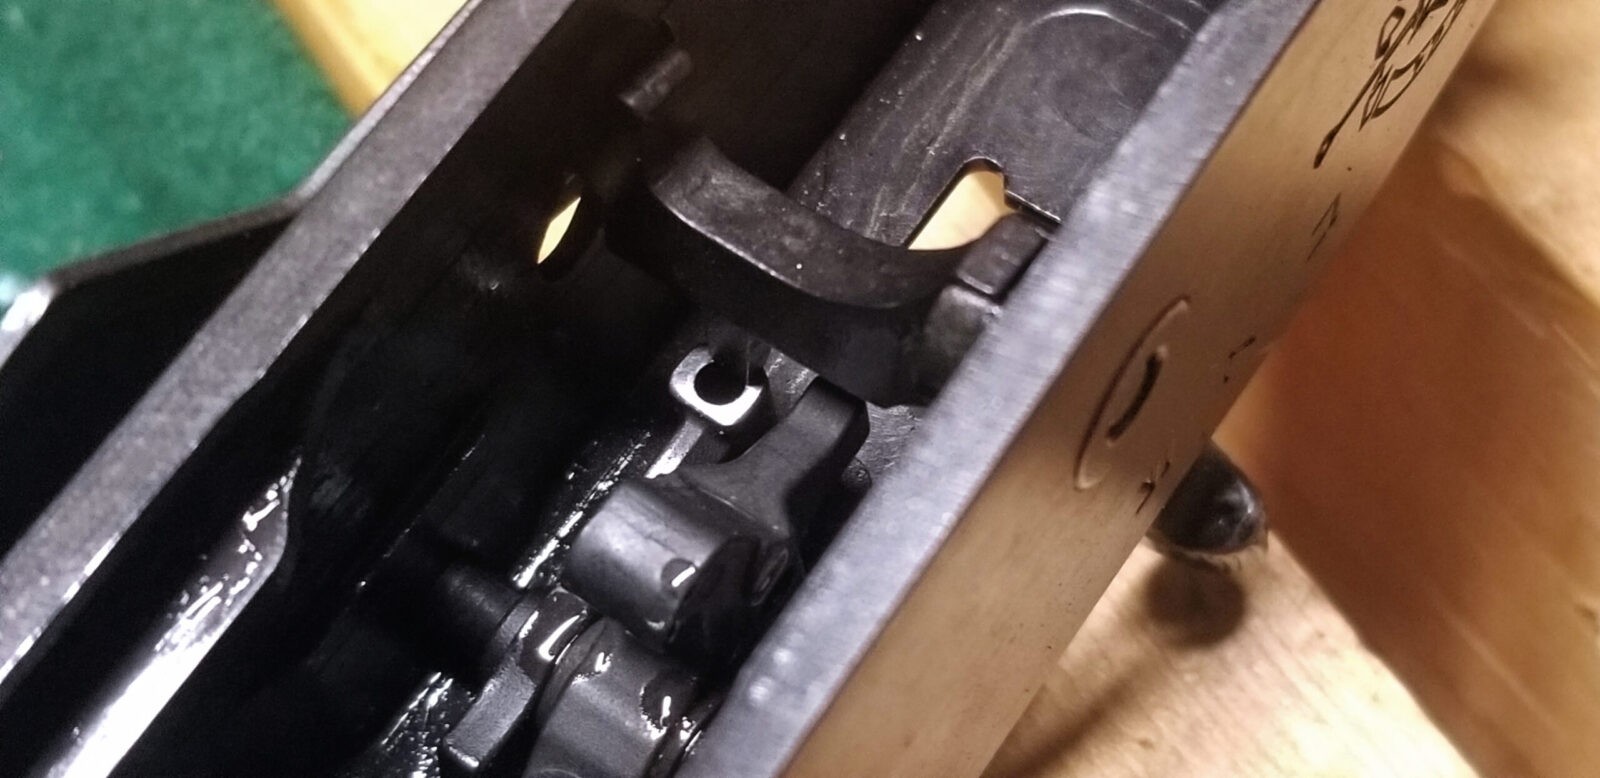
In case you aren’t familiar with AKs, note the orientation of the hammer spring. It can be a bear to install due to the torque the spring is generating. The legs of the spring set on the back legs/bars of the trigger.
Russian Vepr 7.62x39mm side folder FM-AK47-21 rifle close-up
By the way, here’s a little trick for you when you do install a hammer – use a small zip tie to secure the legs of the spring in the proper orientation. Get the hammer in place with the pin installed and then cut the zip tie. Note the positioning of the spring in the photo above so you can zip tie it accordingly.
Russian Vepr 7.62x39mm side folder with muzzle brake
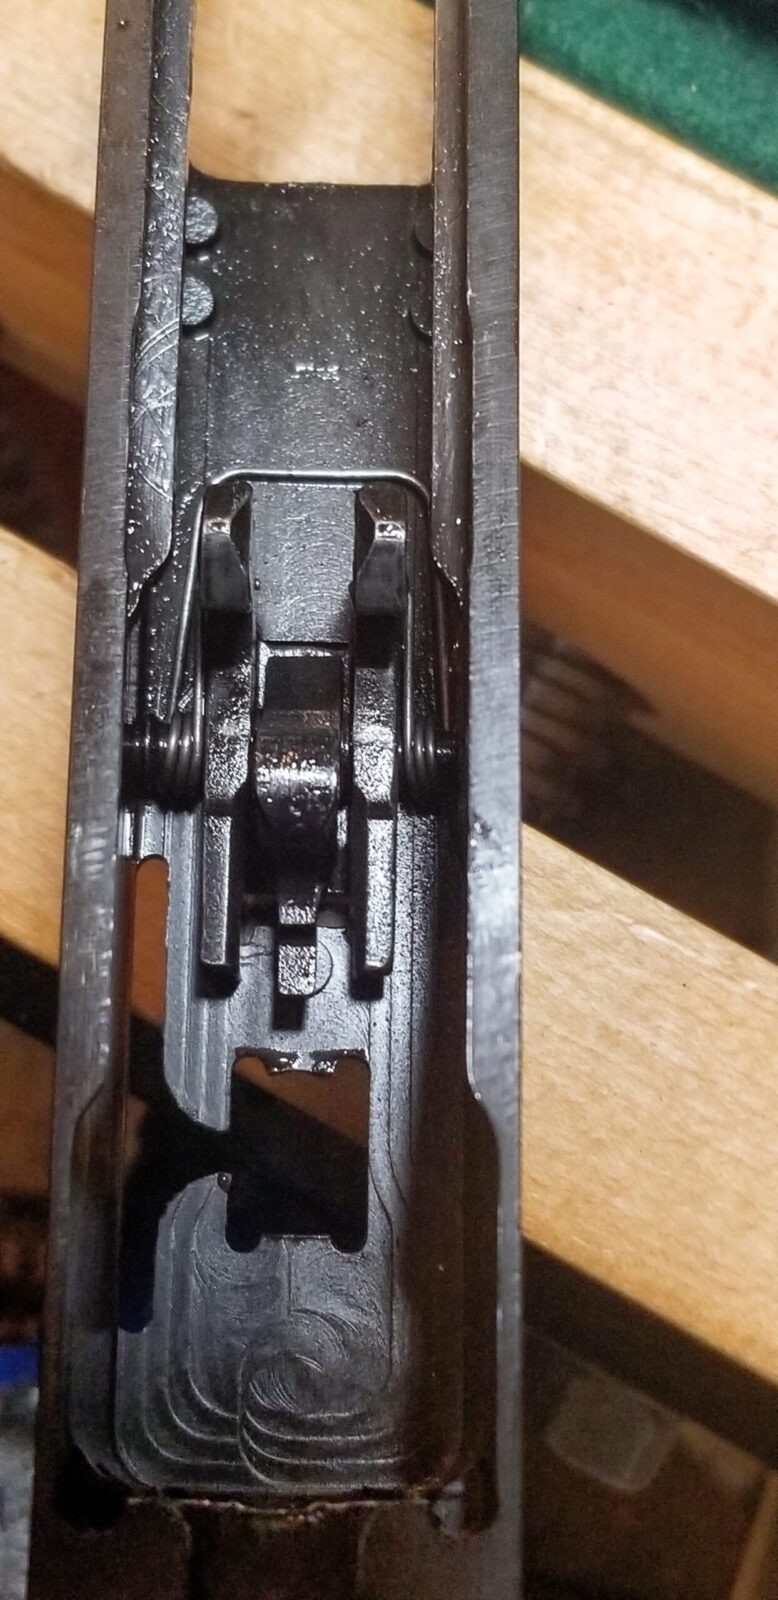
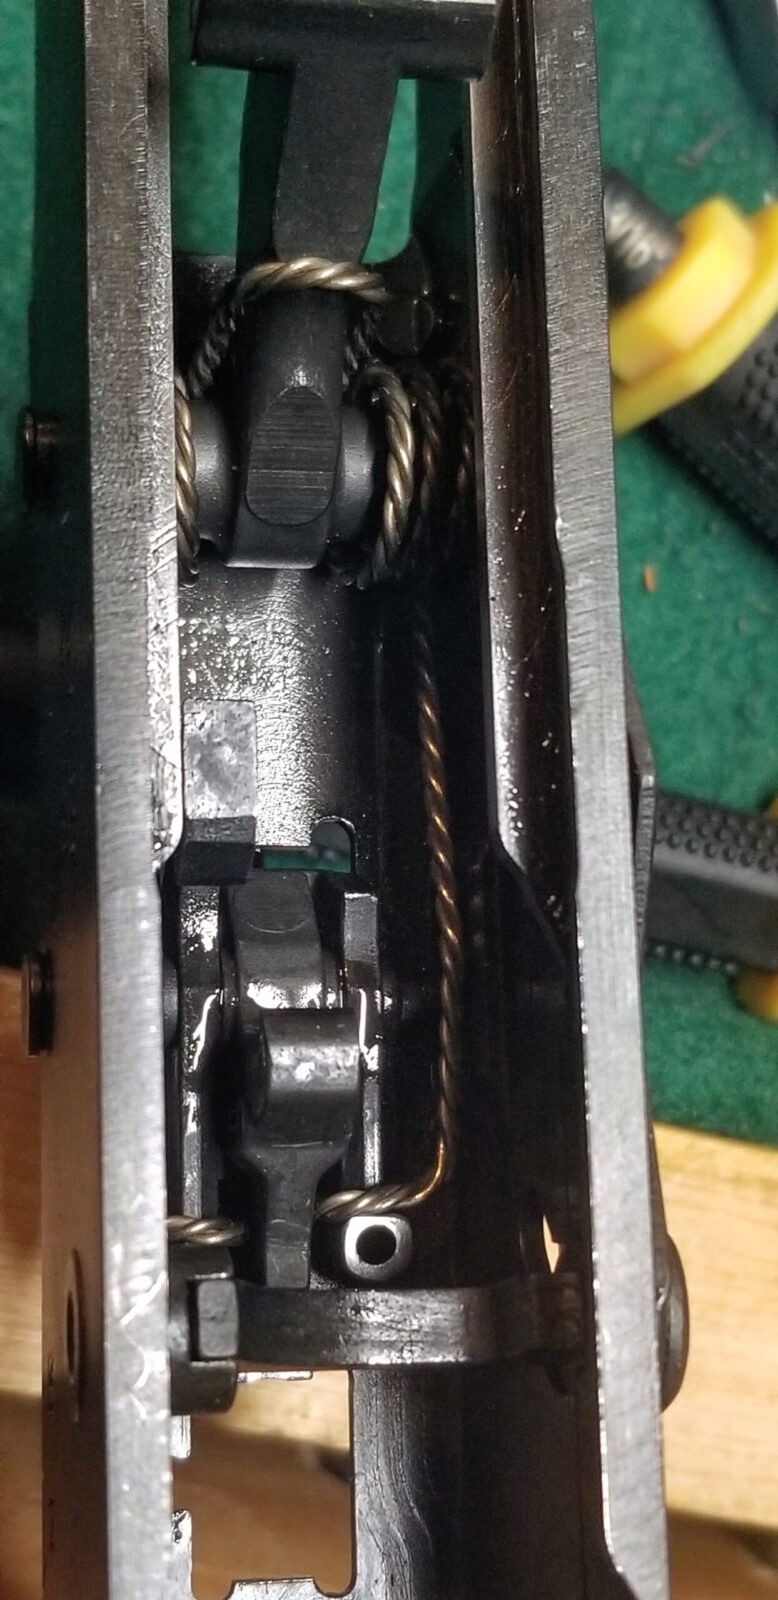
One thing with the ALG triggers, they supply you two roll pins in case you need to adjust the gap between the back leg of the trigger and the selector/safety lever. The hole you see above and to the left of the disconnector is where the roll pin goes if you need it. I installed the hammer and trigger and tried testing. Without the pin, like you see it right now, the safety does not sufficiently block the trigger and it will fire. In other words, it needs the pin or there will be no safety mechanism.
Russian Vepr 7.62x39mm side folder with muzzle brake
The fastest way I have found to install that roll pin is to tap it far enough to start and then fully seat it with a vise. You can do whatever you’d like. It will need trimming from here.
Russian Vepr 7.62x39mm side folder with muzzle brake
You can use a file, sanding drum or whatever to remove enough material so the height of the pin allows the safety bar to move into position easily but also no longer allows the trigger to move enough to release the hammer. The ALG trigger comes with two pins just in case but my recommendation is to just take your time, remove a little and test over and over until it fits just right. You can’t tell from the photos but I think it took me around six tries to get it to fit right. Don’t rush is the message.
Close-up of the muzzle brake and front sight on a Russian Vepr 7.62x39mm rifle.
I like the design of the Gallan’t fire control pin retaining wire clip so I used that. Normally with AKs, I use plates but the big Galil does have a unique non-operating/left-side to accommodate the thumb lever so a normal plate will not work. Again, I like the clip JRA made and used it (I still use it actually).

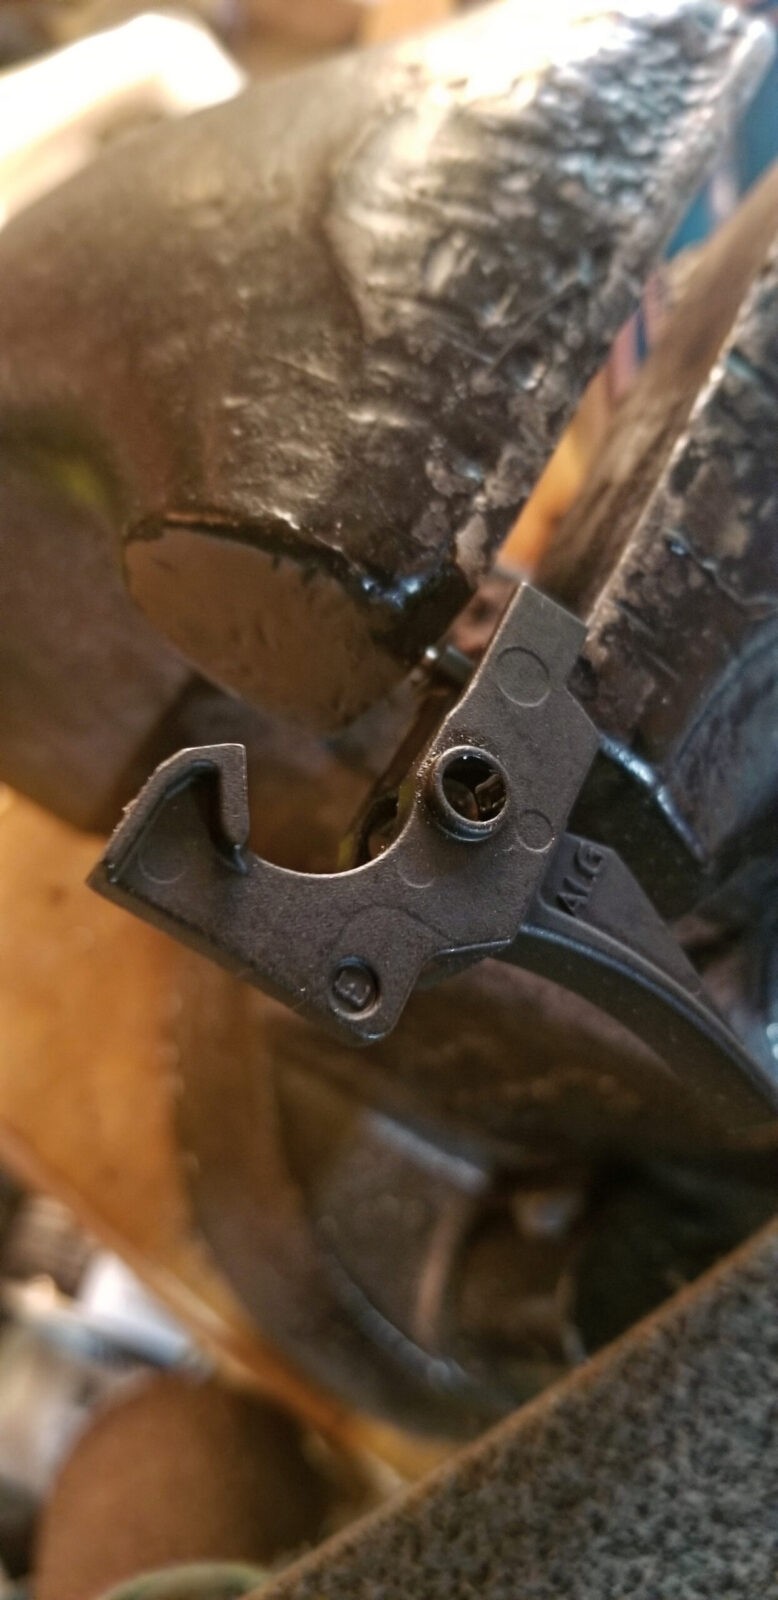
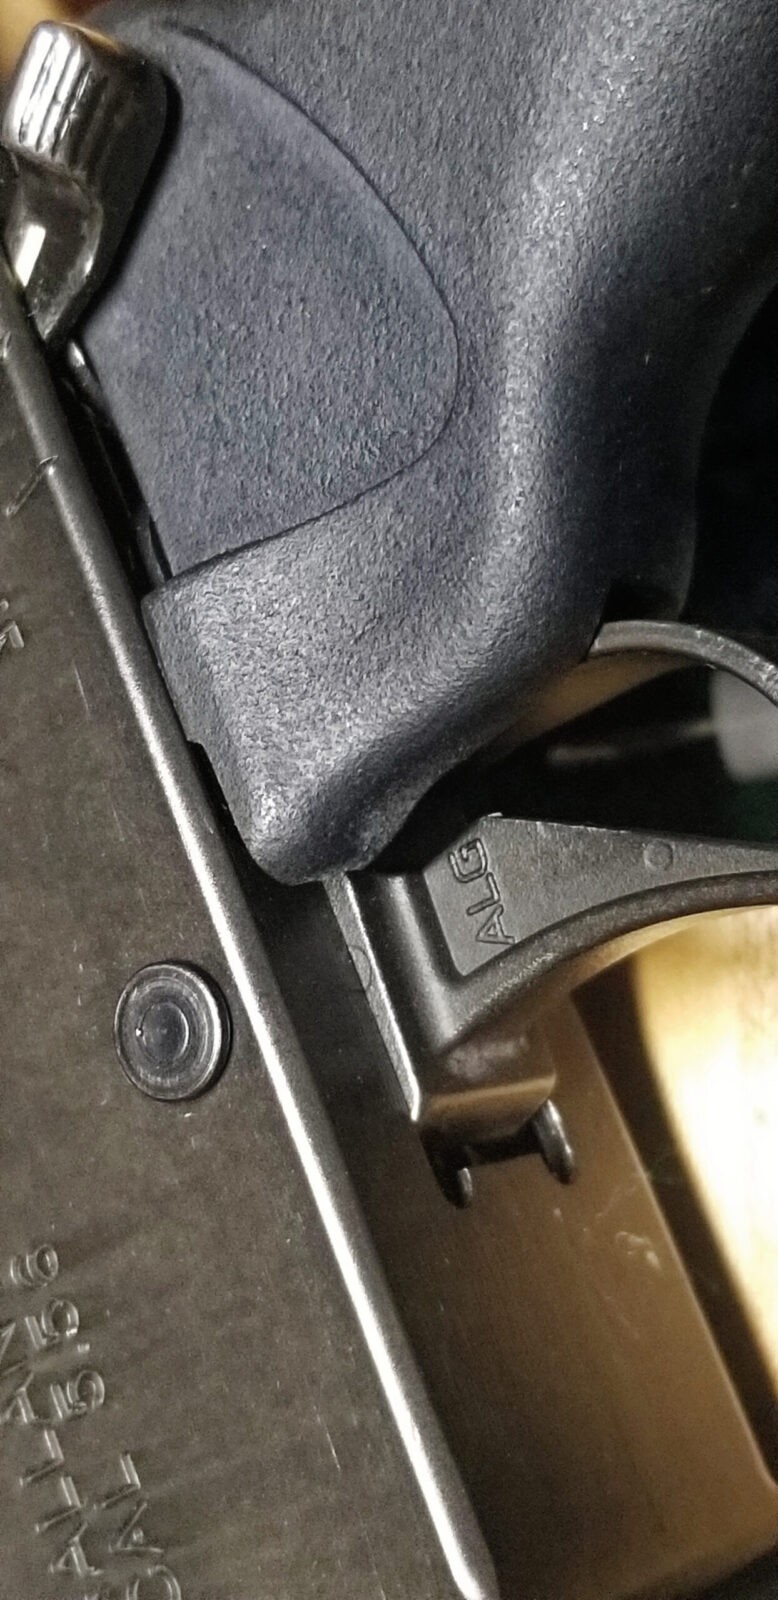
Now, there is one gotcha and I want you to know right now very clearly before you pull your hair out. The ALG trigger is slightly wider so the leading edge of the original IMI Galil grip will cause it to bind. I did all the testing without the grip and then when I installed it, the trigger no longer worked right. Seriously, I had a WTF moment because this does not happen on AKs … then I remembered the long part of the Galil grip and sure enough it was preventing the trigger from rotating freely.
Close-up of the muzzle brake and front sight on a Russian Vepr 7.62x39mm rifle.
It’s an odd angle but you can clearly see where the grip was causing the ALG to bind. I just removed a bit of material from that leading edge and it was good to go. In hindsight, I could have used a drum sander on a Dremel and just removed material from the inside edge where the problem was. I used my belt sander and that’s the only reason I removed material all the way across. I’ll go the Dremel route next time.

Done

So that’s an overview of installing the ALG fire control group in a Galil. It’s really straight forward and other than few small unique features of the Galil, it’s a straight forward swap just like any AK.
Up next, I will go over cleaning the surplus Galil mags and getting them ready.

Note, I will do a function testing post also – always clean, lube and function test a Galil or AK before you take it to the range to avoid surprises.

Note, I have to buy all of my parts – nothing here was paid for by sponsors, etc. I do make a small amount if you click on an ad and buy something but that is it. You’re getting my real opinion on stuff.


Please share the link on Facebook, Forums, with colleagues, etc. Your support is much appreciated and if you have any feedback, please email us in**@*********ps.com. If you’d like to request a report or order a reprint, please click here for the corresponding page to open in new tab.
Replacing the JRA Gallant’s Buttstock and Refinishing It

The first thing I decided to do was to replace the buttstock and it was purely for cosmetics – the original locked up solid and did the job. I happen to have two SAR kits that I hope to build some day so I could look at them and pick parts. It just so happened that one of the SAR kits had a stock that was in much, much better shape.

John's WASR rifle with a Romy Brown STK grip
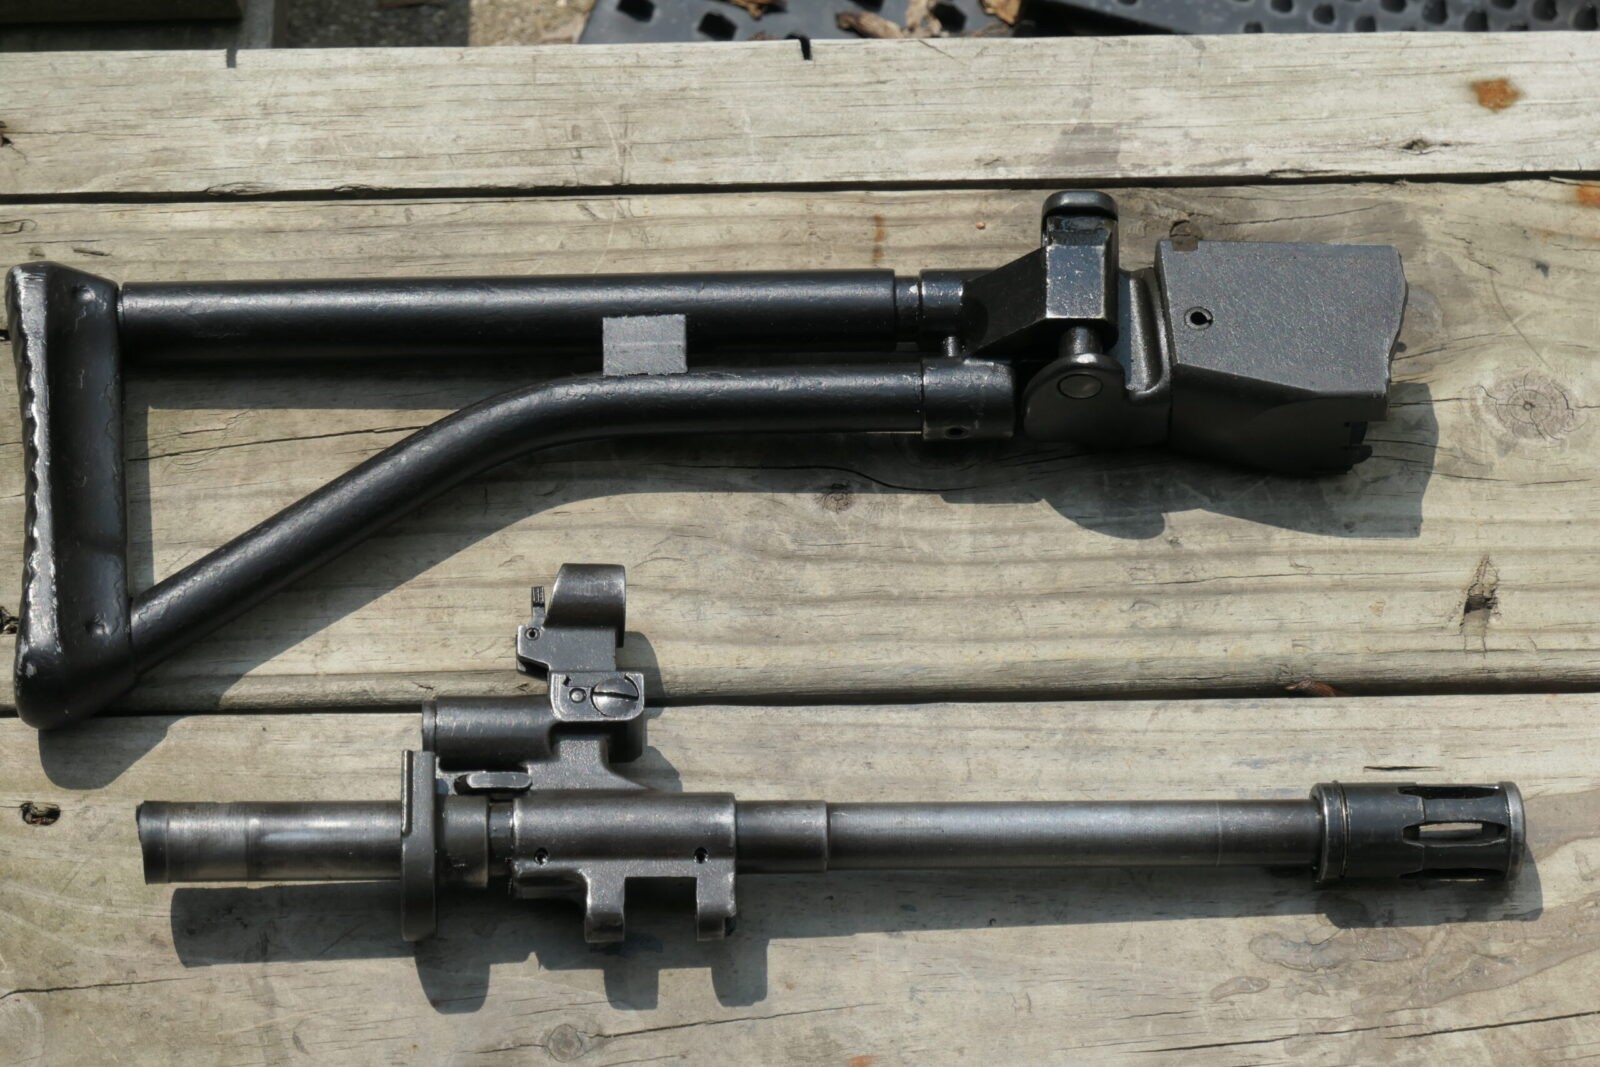
The buttstock assembly I planned to use came from a SAR kit I had. The barrel stub has the night sight and I was thinking of moving the flip sight to the Gallant but changed my mind. I figured I could at a later date should I want to but I also realistically knew I would never need them. My goal was to get the Gallant into the shape I wanted it – not to build a perfect replica.

A Galil buttstock is press fit into the rear of the rear of the receiver and held in place by a roll pin that goes through each side of the receiver.

To remove the stock, first punch out the pin using a roll pin punch. These punches have a small round hemisphere in the middle that sits inside the roll pin and the shoulder of the punch rests on the walls on the pin that enables for the punch to properly drive out the pin with even support all the way aroud.

John's WASR rifle with a Romy Brown STK grip
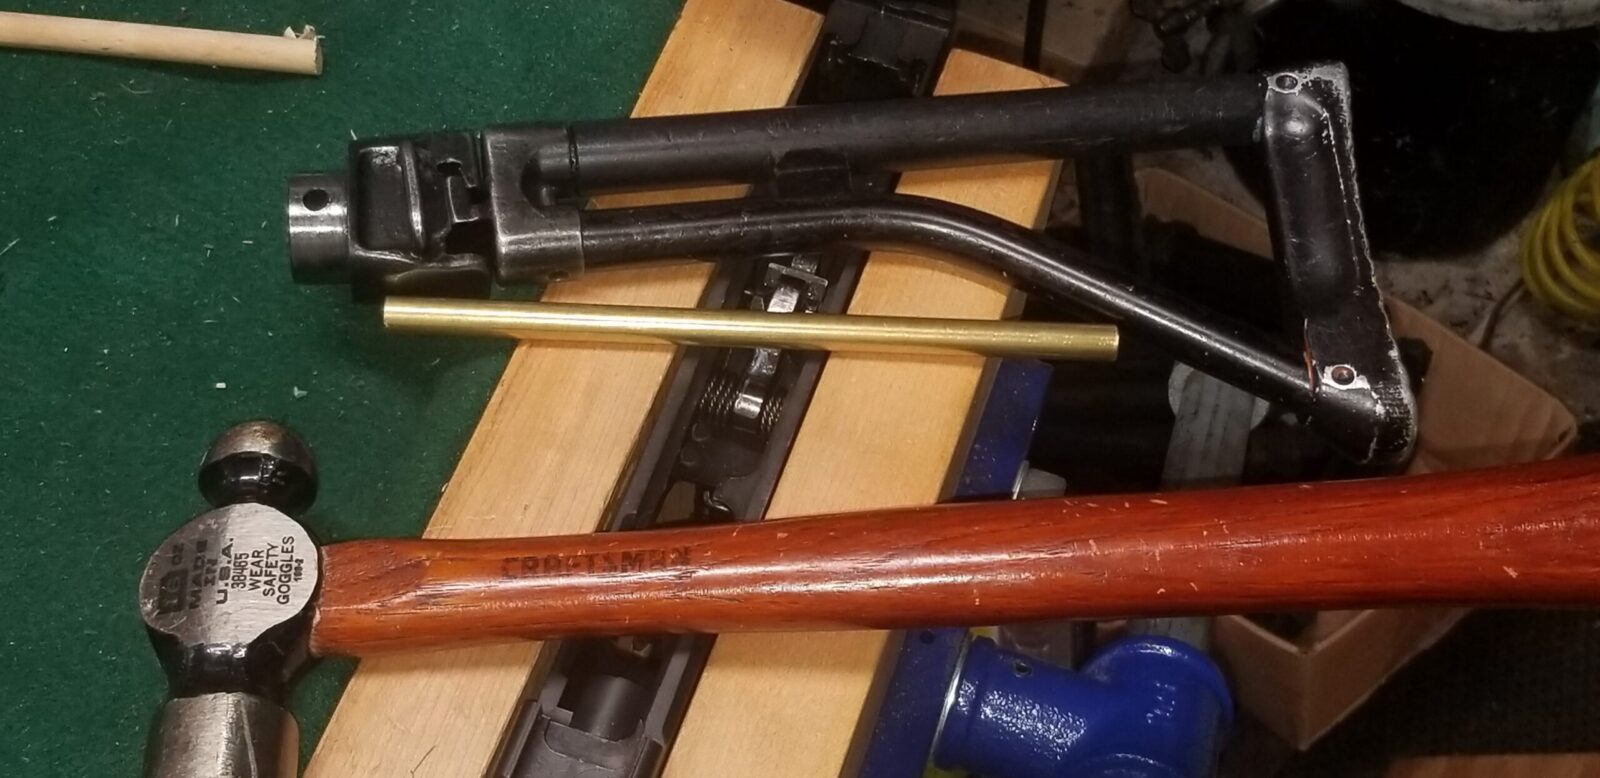
The SAR receiver stub is supported by a bench block and I am using a roll pin punch with a hammer to drive the roll pin straight out. I used a 3/8″ brass rod and hammer to drive the stock out of the stub and also out of the Gallant’s receiver.

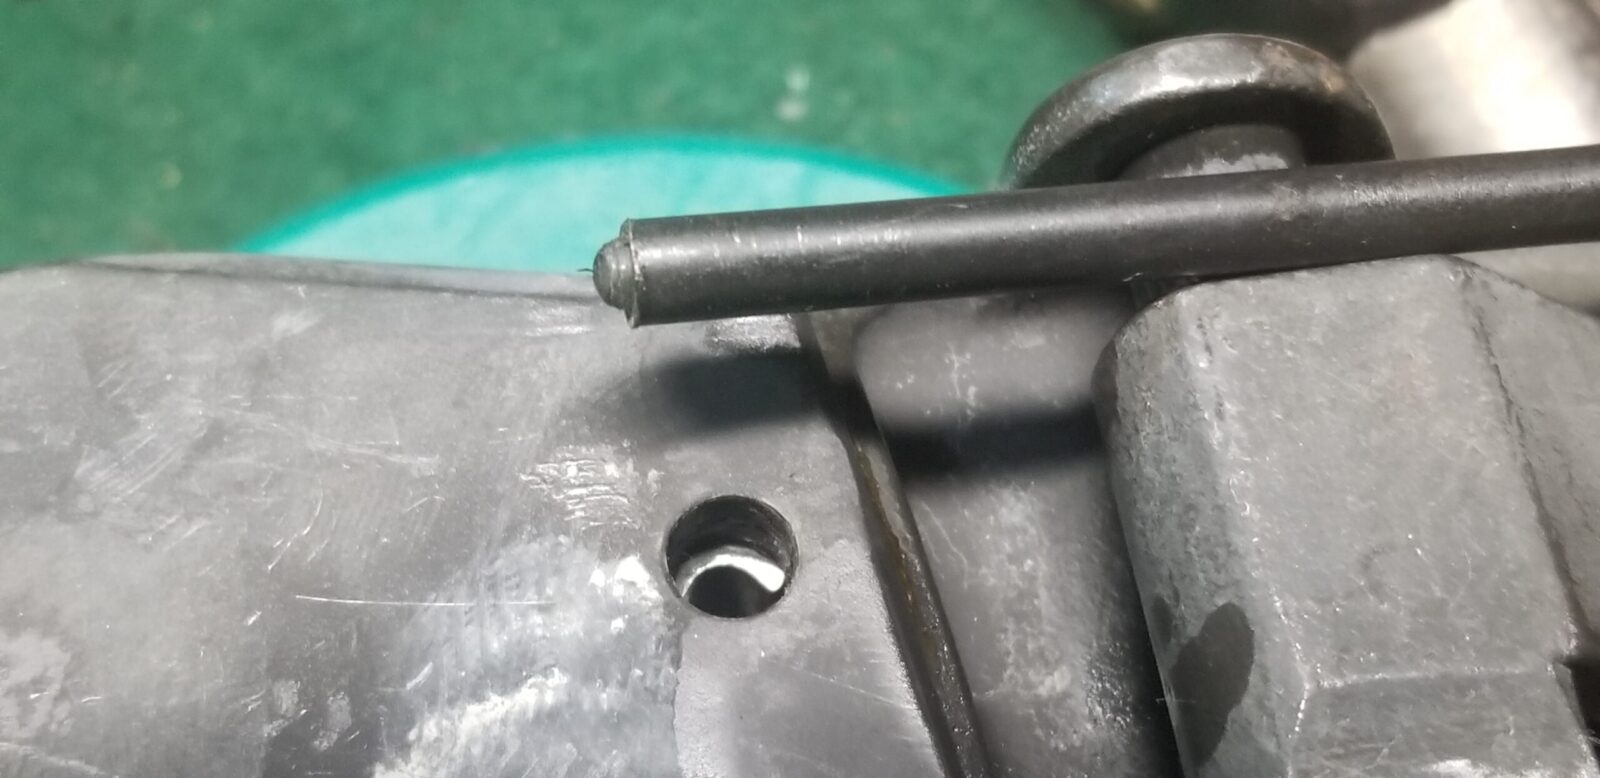
To drive the stock back out of the receiver, I would recommend a 3/8″ brass rod cut to whatever length you want/need. Before the brass rid, I tried a hardwood dowel but the end simply broke apart against the metal insert. The stronger brass rod and a hammer made quick work of pushing the stock back out without harming the surrounding steel.

John's WASR rifle with a Romy Brown STK grip
Here is the stock that came with the Gallant. I used the 3/8″ brass rod and ball pein hammer to drive/knock the butt stock out of the receiver .

I used a rubber dead blow hammer and whacked the new stock back into position. I had locked the stock in the open position and was striking the buttplate that I planned on refinishing anways.

One challenge was that tnew stock’s holes did not line up with the receiver’s holes so. I egged the hole slightly and filled the gap with epoxy, If I ever want to improve the looks, I’ll either weld the holes shut and re-drill them or go to the next size larger roll pin. I guess I just figured they would line up given it was Israeli but it’s not a big deal.

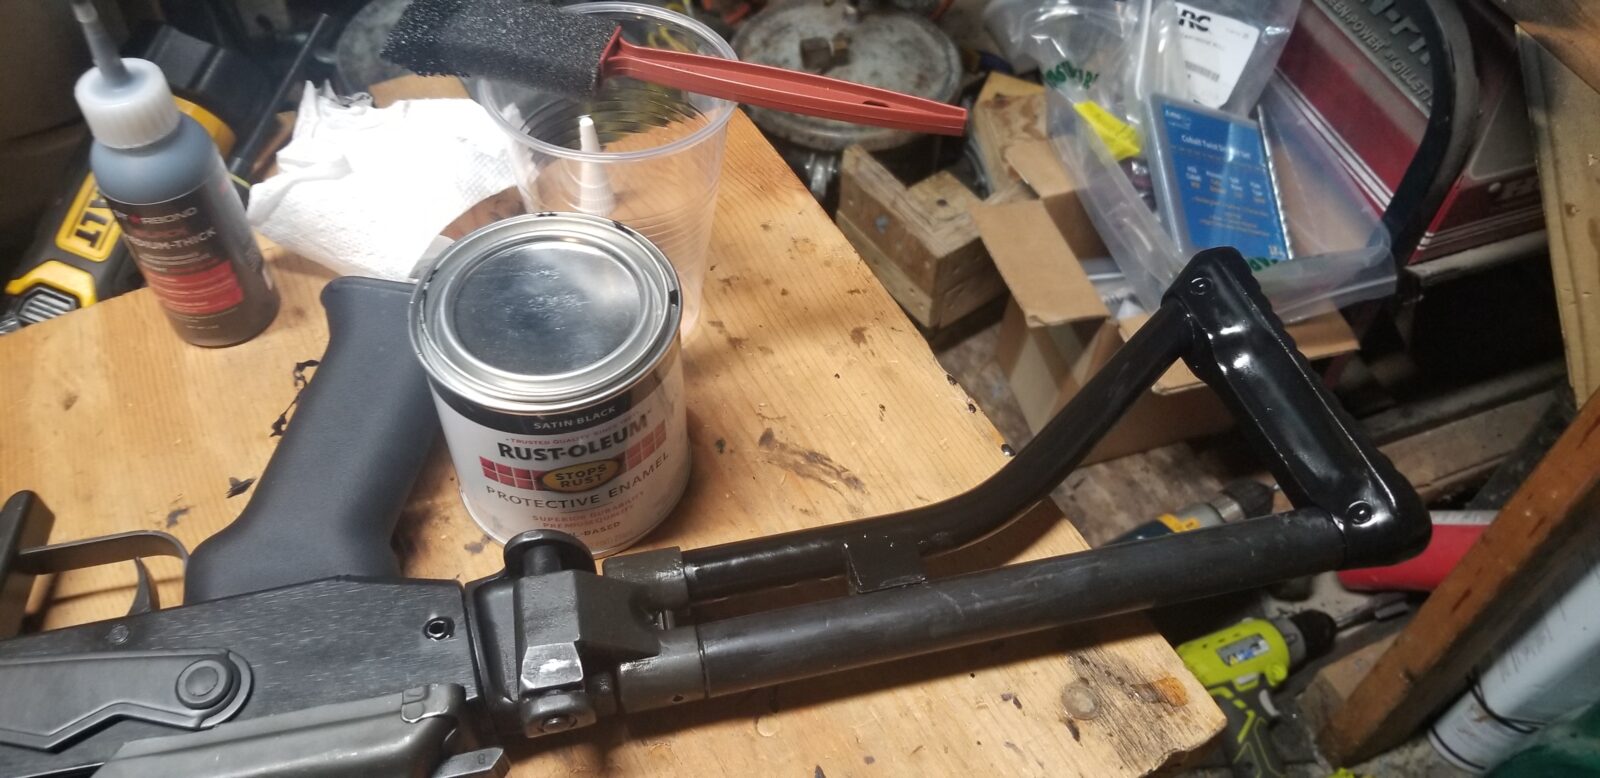
In terms of preparing the replacement stock, I used 0000 steel wool to smooth the horizontal polymer rod. and then applied Rustoleum Satin Black on the metal. What was on both stocks seemed to be something enamalish so I opted to brush on a finish using a foam brush. I did two coats at let it dry for a day before I handled it. Note, bore solvents and what not will probably attack the Rustoleoum so I’ll just try to minimize contact for now.

It came out better than I expected but it was shinier than I wanted. I let the paint harden for a couple more days and then I used 0000 steel wool to knock down the shine. What happens is that the very fine steel wool immparts very small scratches to the surface thus removing the shine. If I had it do do over, I would still use Rusoleum but I would have used flat black. If I really wanted to go nuts, I could have taken everything apart, blasted and parked the steel surface, apply Molyresin or Cerakote, bake it and then reassemble.

John's WASR rifle with a Romy Brown STK grip
The first coat of Rustoleum Satin Black is on the two aluminum portions of the buttstock – the lower angled tube and the rear. The top is some form of black polymer that I ran over with 0000 steel wool. Note how shiny the paint is. After it had a few days to harden I then knocked down the shine by lightly going over it also with 0000 steel wool.

Again, my goal was to roughly stick with a batte worn look vs brand new from the factory. If I ever change my mind, I can always go that route also. A friend once told me that once you get into building guns, it’s kind of like Barbie Dress Up for men. You can change all kinds of stuff whenever you want and your two big constraints will always be time and money.

John's WASR rifle with a Romy Brown STK grip
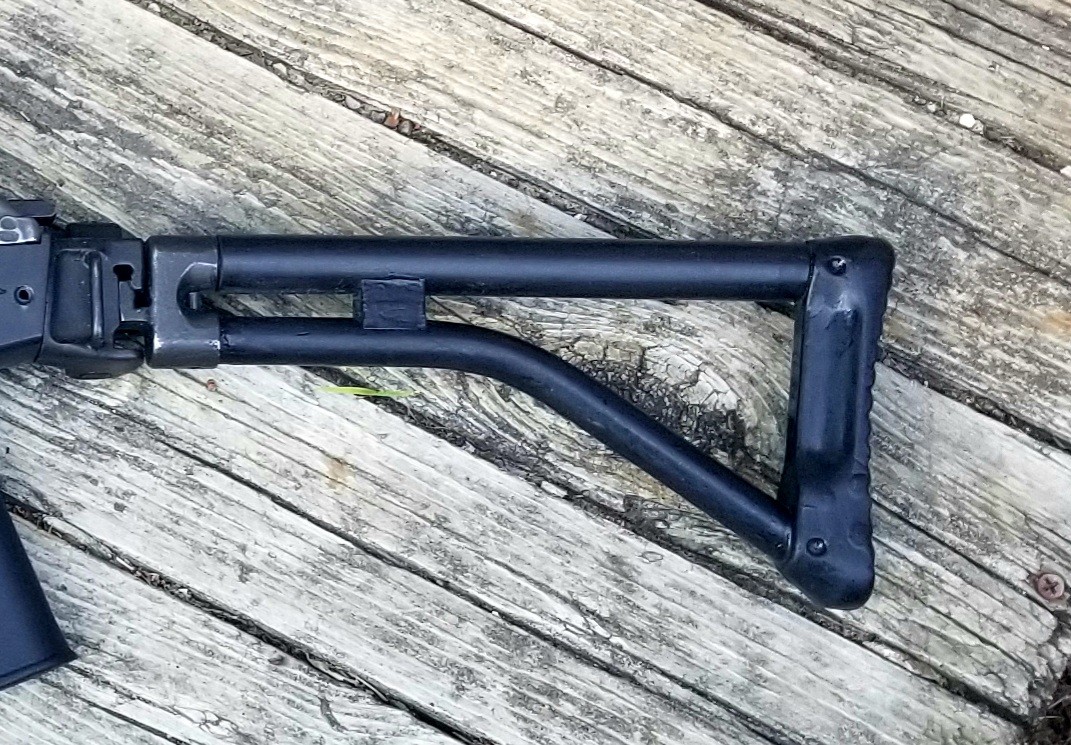
It came out pretty good. I left the steel folder surfaces alone.

So, the final product look came out pretty good – I wanted “worn and mismatched” and that’s what I stil had. Just a tad bit more to my taste. Next up was to fix the handguards so they weren’t so loose.


Note, I have to buy all of my parts – nothing here was paid for by sponsors, etc. I do make a small amount if you click on an ad and buy something but that is it. You’re getting my real opinion on stuff.


Please share the link on Facebook, Forums, with colleagues, etc. Your support is much appreciated and if you have any feedback, please email us in**@*********ps.com. If you’d like to request a report or order a reprint, please click here for the corresponding page to open in new tab.


My First IMI Galil Kind Of – First Impressions of My New James River Arms Gallant

I have wanted to build an IMI Galil from a kit for years and just never got around to it.  One thing that kept me from jumping in was that I had never really dug into the design deeply by taking one apart and looking at everything.

In 2006, like a lot of guys, I read the late Steve Matthews great article in Firearm News about building your own AK rifle or pistol.  For whatever reason, the AK building bug bit me hard and I wound up with a number of barreled Romy-G kits along with flats, rivets and tools from AK-Builder.

I read everything I could and guys kept telling me you “just gotta dig in, do it and learn”. Well sir, I did. I trashed my first flat or two – I think I messed up the bend on one and the other I ruined the top rails as I didn’t cut them right. Yes, back in those days we had to put Dykem Blue on the top rails and scribe a line to cut to using a layout jig AK-Builder eventually came out with.  I messed up a lot and I learned a lot. 

A fair amount of the mistakes were caused because I had never really studied AKs prior to trying to build my first one. Over the years I have learned a ton more but one lesson sure has stuck with me – it’s way easier to build something if you have first had experience with the design including disassembly.

Fast Forward To December 2020

Everyone was in a panic buying everything firearm oriented in sight and I was trying to figure out whether to make the slightly sideways leap from AK designs that I knew to a Galil that was based on the Finnish RK.62 and had a screw in barrel (not pressed and had to be headspaced, the extractor cut and barrel populated later), some wierd looking thumb selector (no idea what that linkage was going to look like) plus I was sure I would run into other little unque surprises.

So I took a rather odd gamble.  Other than custom shops, like the amazing Jeff Miller at Hillbilly Arms, there are two shops cranking out IMI Galil clones using original Galil ARM and AR kits married to new US barrels and receivers.  ATI and their Galeio and James River Armory (JRA) and their Gallant, which uses Galil ARM kits.  Note, they are using new receivers and appear to have corrected issues they had with their earlier 2019-ish models.

The JRA seemed to get good reviews and was affordable around $1,000.  Now, a receiver will run you $400-500 once you include S&H plus your FFL’s transfer fee.  A barrel will run you $99-199 depending on what you get and then you will spend another $300-400 for a kit.  All of a sudden, looking at that JRA rifle as a parts kit became really attractive plus they use an 18″ 1:9 twist that can stabilize up to 62 grain M855 “green tip” bullets – actually it can go up to 72 in theory but I wanted to be able to shoot M855.  The original Galil’s had 1:12 twists that could stabilize the older M193 55 grain rounds but not M855 – when you see targets where guys fired M855 rounds through a 1:12 Galil barrel, the bullets often “keyhole” or hit sideways.  So, the 1:9 twist rate really appealed to me.

Apparently JRA has an exclusive distribution agreement with Classic Firearms. It’s interesting really – Classic has a number of Gallant models and their description is actually quite thorough in hindsight – Classic was sold out but I turned on notify for the Gallant models I was interested in and maybe 2-3 weeks later I got a notice that one was back in stock so I jumped and ordered one – this is the link for the one I bought.

I wish I could say it went smooth but FedEx’s Ground Service (the old RPS group they bought years ago) threw a big monkey wrench in things. Classic shipped promptly but FedEx Ground’s South Bend office has been having huge problems due to lack of staff.  It took maybe 2-3 weeks from when they got it until they actually delivered it to my FFL.

Scott Igert, the owner of Michigan Gun Exchange is a good friend of mine and I use him for all of my FFL needs plus he has the best gun store in Southwest Michigan in my honest opinion. At any rate, Scott sent me a photo of an AK and told me my Galil was in. Leave it to Scott to pull a prank and I knew full well he knew what a Galil looked like so he didn’t get me as good this time … unlike other times 🙂 That’s what friends are for.

At any rate, I went and snagged the Gallant, took it home and promptly took it apart.  I didn’t really care about the warranty because short of some huge problem with the receiver or a bent barrel, it wasn’t going back.

Russian Vepr 7.62x39mm side folder rifle FM-AK47-21 on wooden planks
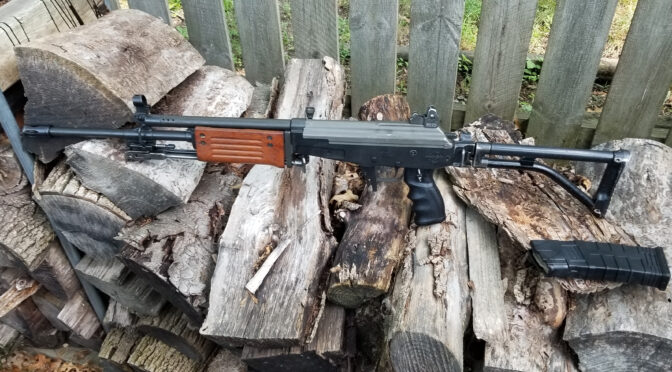
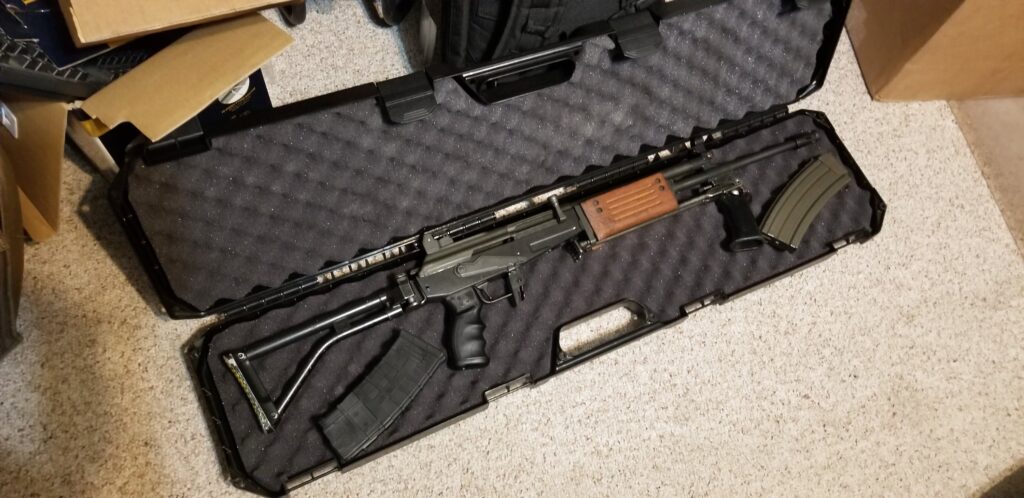
The Gallant ships in a hard case to protect the rifle. I snapped this photo literally when I got home and opened the case to take a serious look at the rifle.

So let me itemize my observations

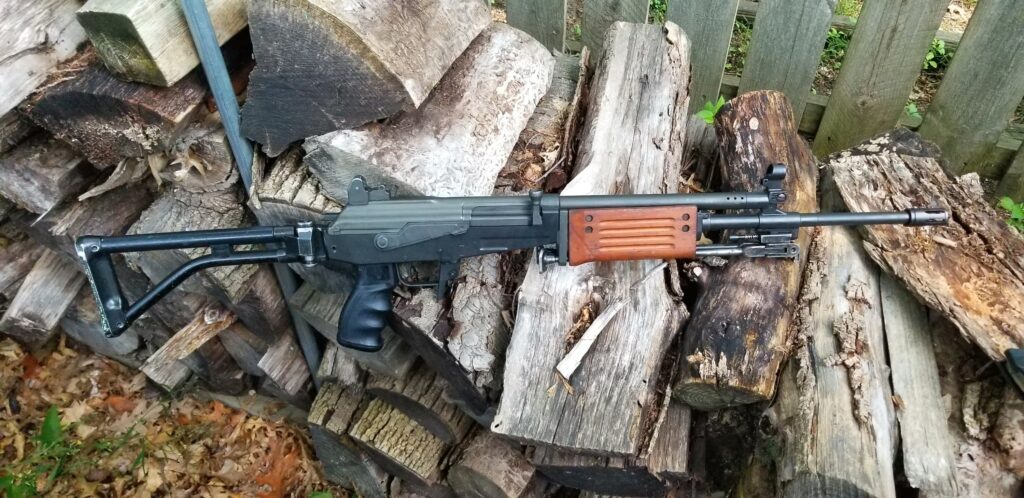
They tell you right up front it is supposed to look battle worn. The skeptic in me thinks it was a way to cut costs but another side of me likes the look – the receiver and barrel are black, parts with the original finish have the grey/green parkerized finish on them and the wood has a look that only a ton of grease oil and God knows what can achieve.  I actually found myself liking it.

Russian Vepr 7.62x39mm side folder rifle FM-AK47-21 on wooden planks
I’ve not done the battle worn look before and like it. I originally thought I would refinish the rifle but am now leaning towards leaving it the way it is  including the wood handguard.  For me, that blocking handguard is one of the iconic “signs” that tells you that you’re looking at a Galil ARM.

For 922r compliance, they have a US 1:9 barrel, a US receiver, a US Galil-Ultra looking grip made my Phoenix Technologies here in the US and a US Tapco magazine.  Now that last one gets a bit of a groan – the Tapco magazines are plastic, they work, but there are a ton of nice steel surplus 35 round mags out there that would make the rifle no longer 922r compliant if inserted.  As best as I can tell, they used an original Galil fire control group with it’s forged trigger hooks and two part spring setup – one spring for the trigger and one for the hammer – if it is aftermarket, it is not marked.

Note, I emailed JRA and asked them about the compliance parts. So far, they have not responded. Classic says on their web page that surplus mags fit (and they do by the way) but there is no mention of compliance.

Now, there are a two primary mindsets out there when it comes to 922r compliance: Some worry about it because they want to be legal. Some don’t care for whatever reason and that is their decsion. As for myself, I ensure that anything I build or modify is 922r compliant.  So, I wanted to use steel surplus Israeli mags so I decided to swap out the original IMI hammer, trigger and disconnect with a new ALG enhanced fire control group (FCG).  Yes, an AK FCG will work in an IMI Galil. If Classic tells me they actually sourced a US made IMI-style FCG, I will update this. I’m writing this post after already making the change to the ALG.

Russian Vepr 7.62x39mm side folder rifle FM-AK47-21 on wooden planks
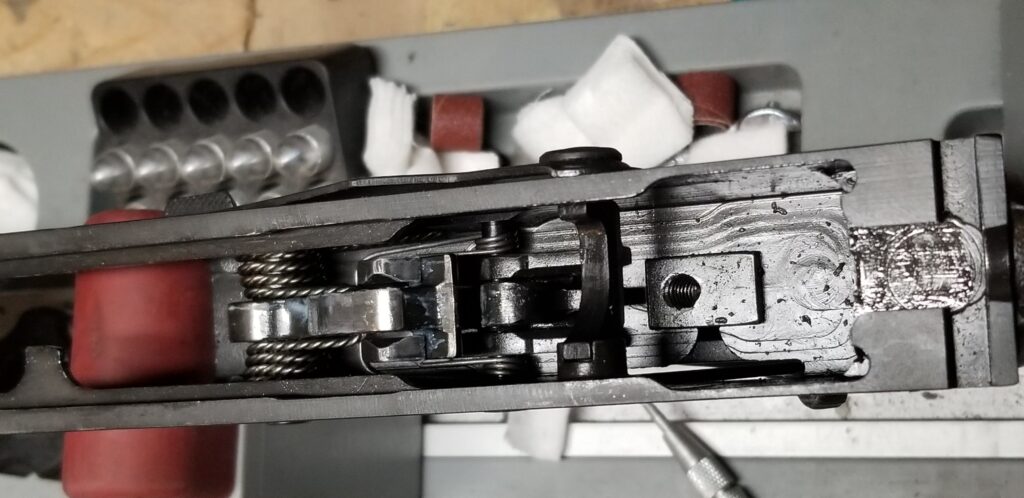
Heresa quick snapshot of the FCG that came with the JRA. Note that there hammer and trigger springs are independent. Also note that the person assembling the rifle took the time to polish the hammer face so the bolt carrier would cycle smoother. On the negative side, those are metal chips in the receiver from machining — I cleaned everything out. I’ll post more details as I do posts for each change I made.

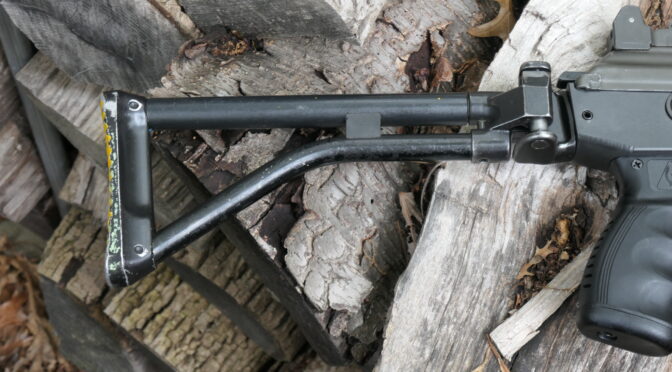
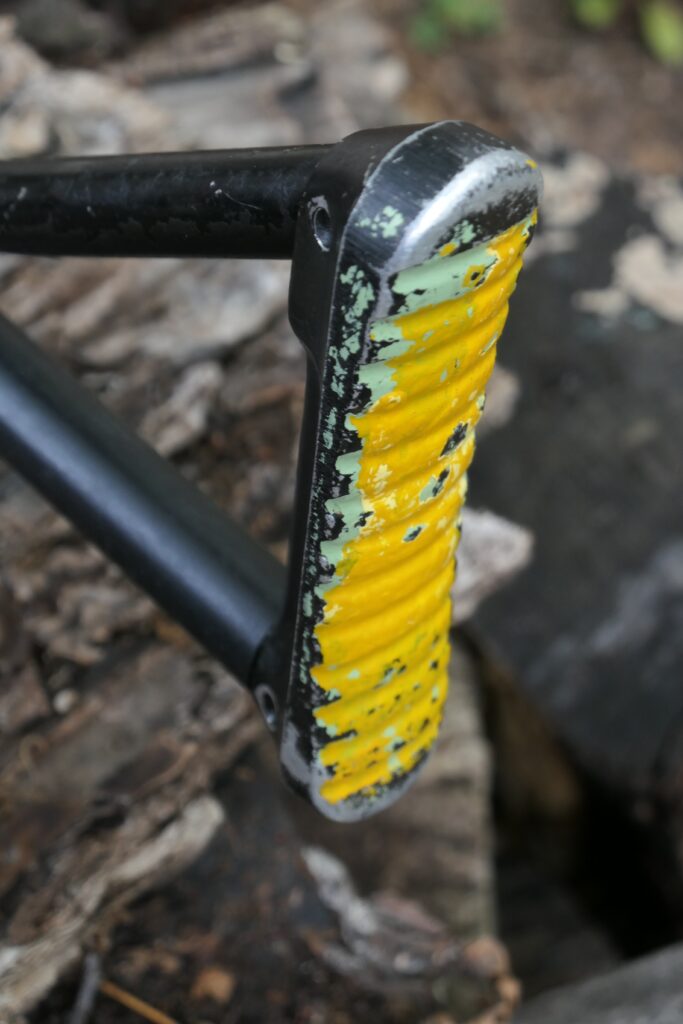
The buttstock made me groan. It had a giant splash of yellow paint on the very butt of the stock for some reason.  The color was hideous, the horizontal tube had a few small nicks, and the finish was a bit more beat up than I preferred so decided I would swap it out for one in better shape from a SAR kit I had.

Russian Vepr 7.62x39mm side folder rifle FM-AK47-21 on wooden planks
I am sure there is some meaning behind these colors but … yuck.

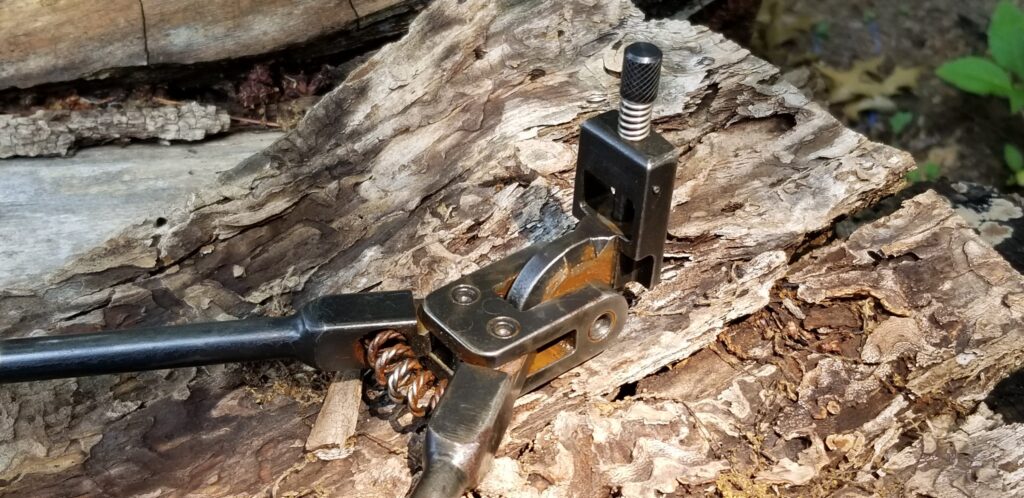
The rifle did come with an ARM bipod but it had a bunch of rust in the mechanism. It worked but definitely need cleaning and refinishing.

Russian Vepr 7.62x39mm side folder rifle FM-AK47-21 on wooden planks
The Classic Firearms listing is straight up and honest – they bought a bunch of the detachable ARM bipods in the surplus market that were in good shape but not great. Mine had most of the finish gone from the legs and some rusting in the mechanism but it was fully operational. It would be an easy refinishing job some day when I have time. The ARM already weighs quite a bit empty so having a bipod installed was not on my high priority list *but* I did want a bipod to be complete.

The handguard was way, way to loose. This was pointed out in the ad so I expected some – but not what I felt. I don’t like it when they shake and rattle so that needed to be tightened up. The wood was in good shape though and I really liked the coloring.

Russian Vepr 7.62x39mm side folder rifle FM-AK47-21 on wooden planks
Note how the rear forged retainer is canted with the top forward. There are two coil tensioning springs – one on each side – of the bottom. Because the handguard was so loose, they were causing the retainer to cant. Definitely fixable.

The barrel looked good – it was not bent and the components were installed right — other than the notch for the handguard not being close enough as mentioned previously. The bore was also nice and shiney with nice sharp rifling.

Russian Vepr 7.62x39mm side folder rifle FM-AK47-21 on wooden planks
The barrel looked good inside and out. I was happy that they picked a 1:9 twist rate as I tend to shoot M855 62 grain ammo the most.

The top cover is still driving me nuts when it comes to installation. It is a delicate balancing act to get the recoil spring assembly to stay in the receiver groove and go into the dust cover vs. going out of the groove and falling into the receiver. I  have some Galil receiver stubs and I want to see if the receiver that JRA used is too short or if the IMI suffered from the same headache. I haven’t decided yet if I just want to live with it or cut the tab down about 1/8th-3/16th of an inch shorter, cut new grooves in it and the refinish the whole rod assembly.

John's WASR rifle with a Romy Brown STK grip
Getting the recoil rod to stay in the right place and pop out of the dust cover during assembly is more of adventure than I care for. Honestly, that tab/button does not need to stick out that far sheesh.

Happily the rifle was properly headspaced and it fed rounds nicely. For a kit built rifle, it cycled and the FCG operated smoothly – surprisingly smoothly.  Okay, it looked like I had a solid foundation to build on. So far, so good.

At this point, I knew I was going to keep it so it was time to start making changes. I put the rifle back together and started thinking about what I was going to do.  I’ll detail what I did in subsequent posts.


Note, I have to buy all of my parts – nothing here was paid for by sponsors, etc. I do make a small amount if you click on an ad and buy something but that is it. You’re getting my real opinion on stuff.


Please share the link on Facebook, Forums, with colleagues, etc. Your support is much appreciated and if you have any feedback, please email us in**@*********ps.com. If you’d like to request a report or order a reprint, please click here for the corresponding page to open in new tab.


The Japanese Beetles Are Awful This Year – Use Traps To Save Your Plants

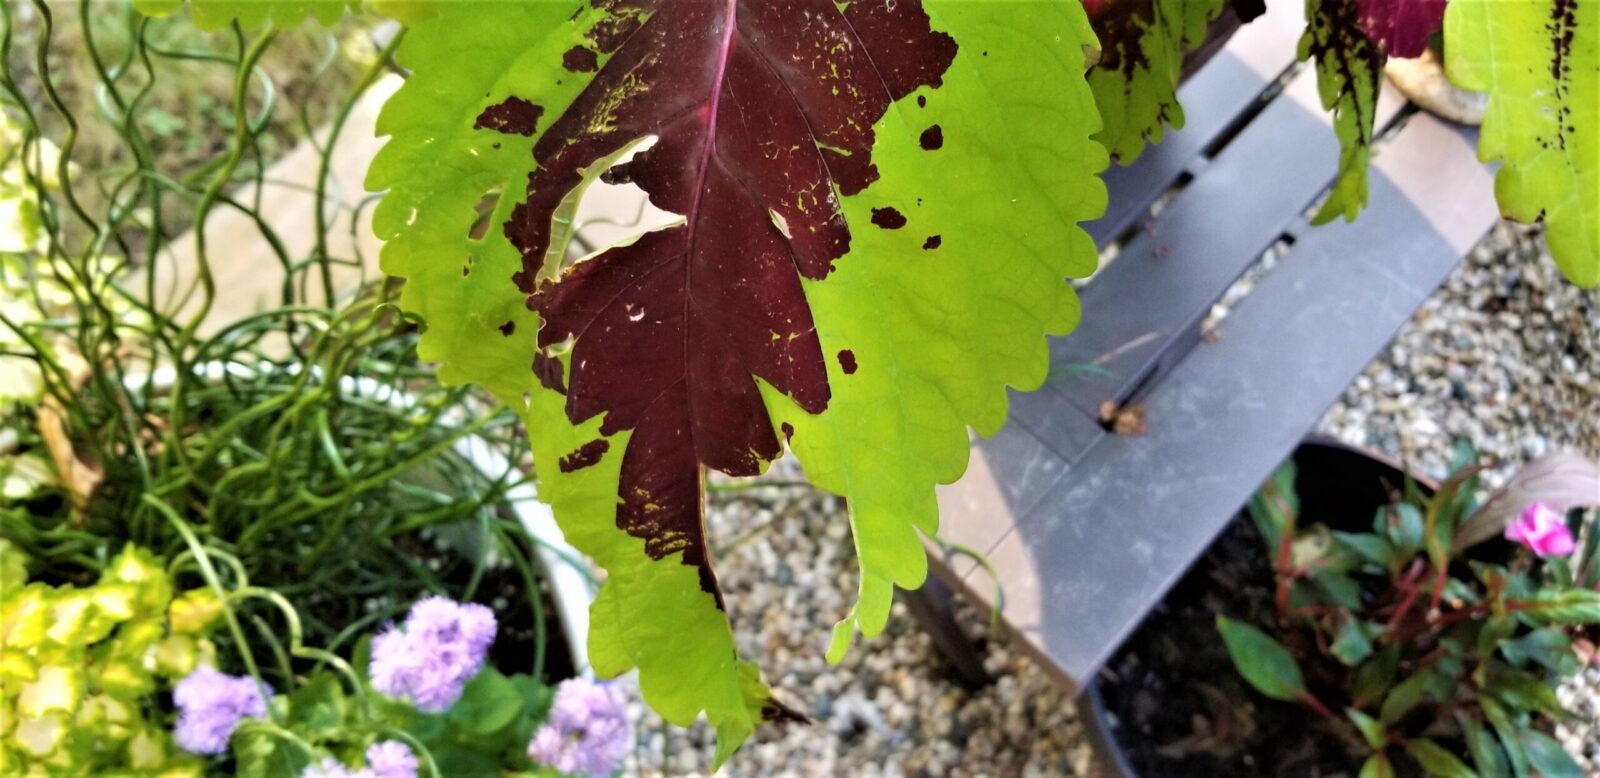
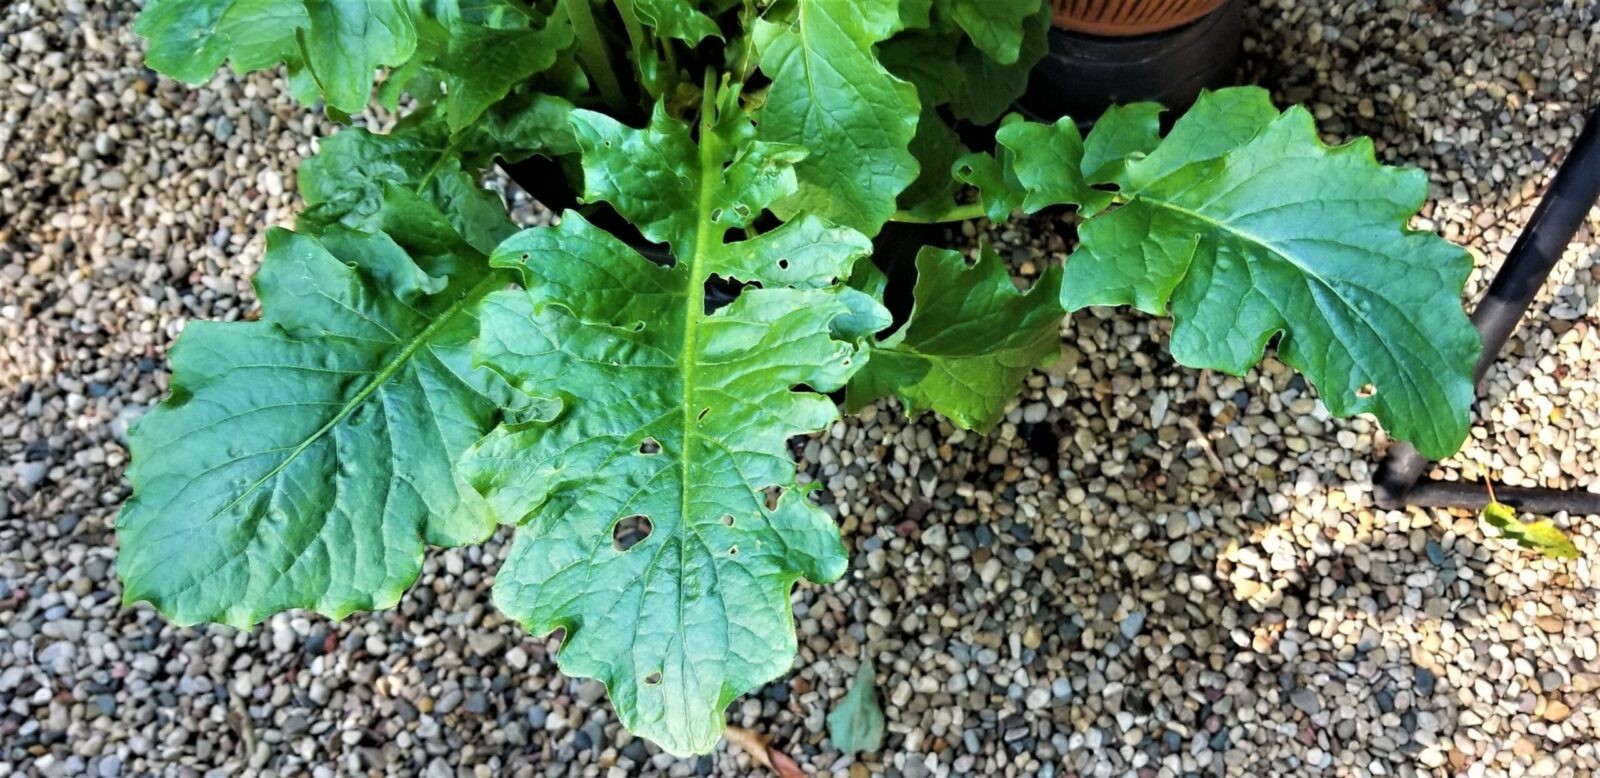
There seems to be a ton of Japanese Beetles this year – these fat little buggers can really do a number on plant leaves – eating them leaving holes or just ragged parts of leaves. Spray is one option and I know folks who use Sevin and others but another option that does not involve spraying is to put up traps that are made just for them.

Streamlight Microstream and Stylus Pro flashlights on a wooden bench
Here’s one example of the damage the Japanese beetles can do.
Streamlight Microstream and Stylus Pro flashlights on a wooden bench
Here’s another.
Streamlight Microstream and Stylus Pro flashlights on a wooden bench
This close up photo of the culprit. It’s from Wikipedia (1) shows a Japanese Beetle. You can easily catch them eating leaves during the day to confirm whether they are the actual pest or not. You can also sometimes spot them flying away from plants as well by the way.

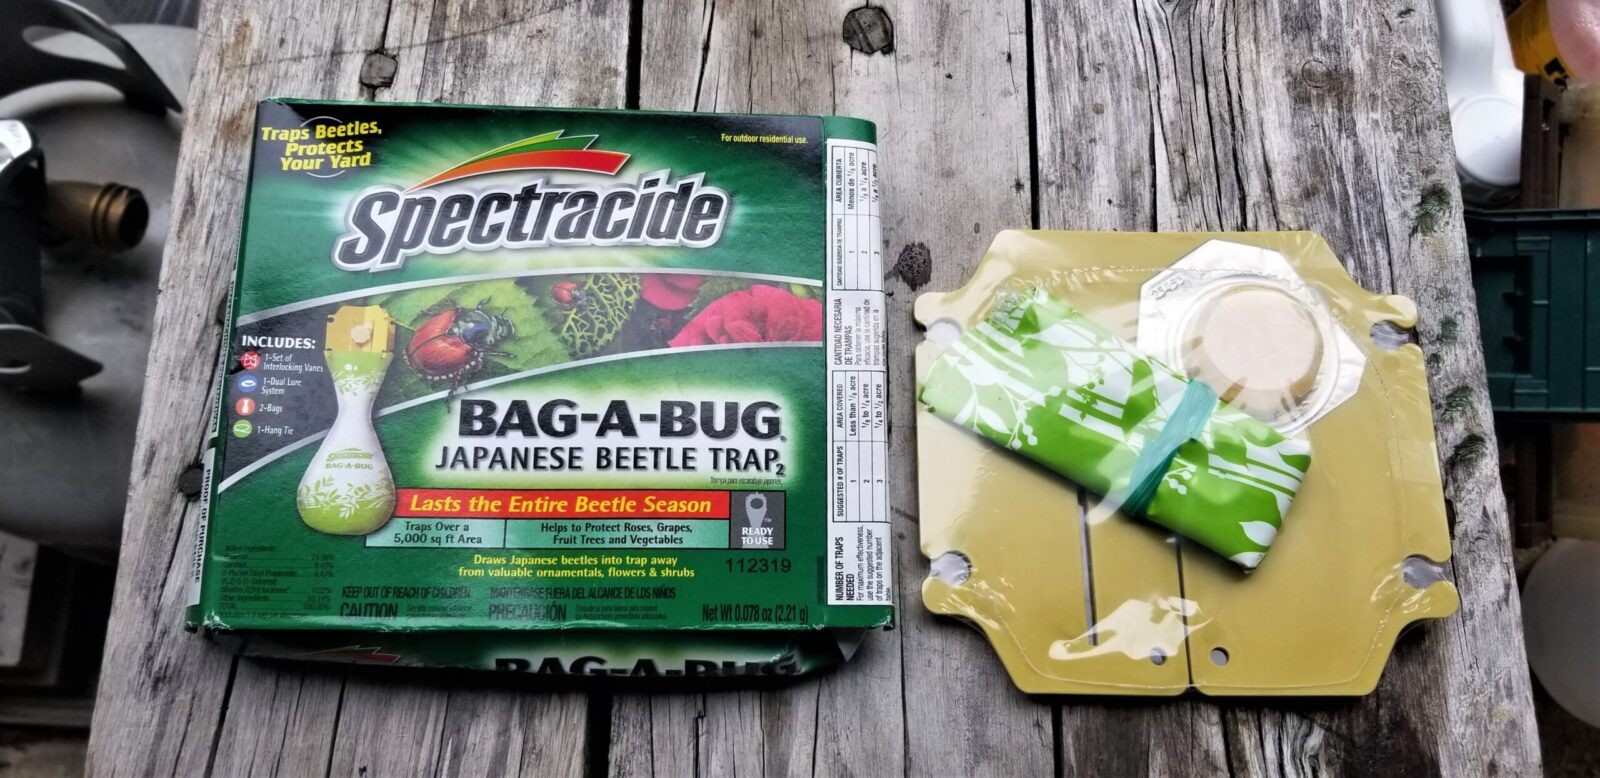
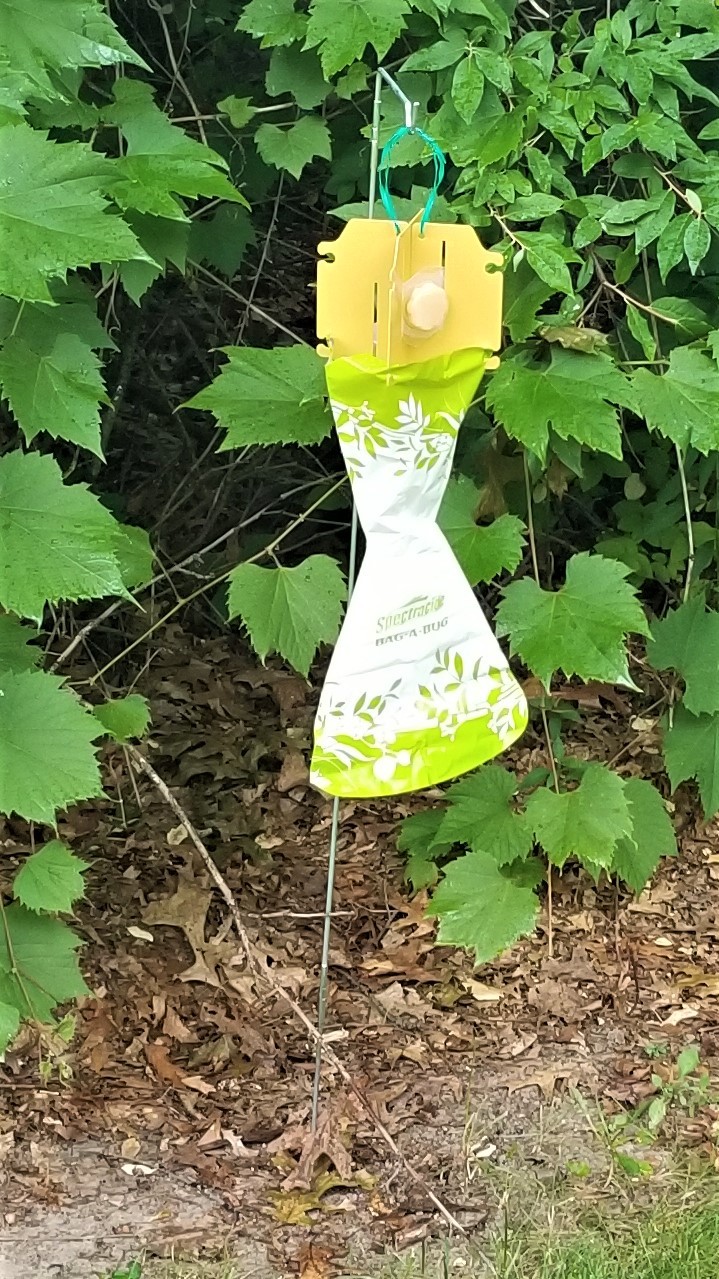
Personally, I use the Spectracide Bag-A-Bug Japanese Beetle Traps. I kind of fell into them years ago – I don’t even recall how. I think someone recommended them to me and I have used them ever since. They are very easy to assemble and definitely do the job.

Streamlight Microstream and Stylus Pro lights illuminating a backyard fence at night
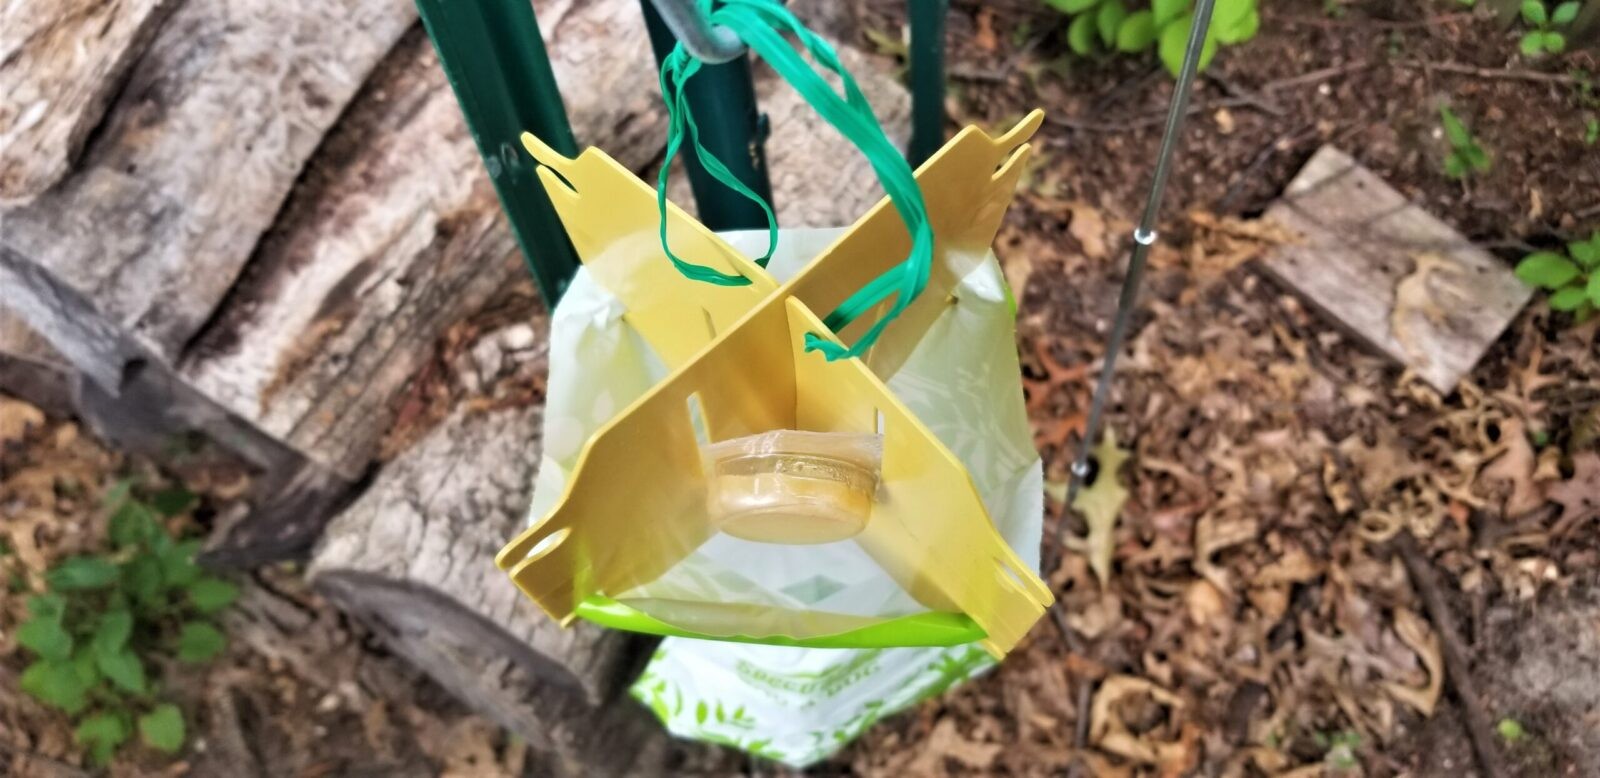
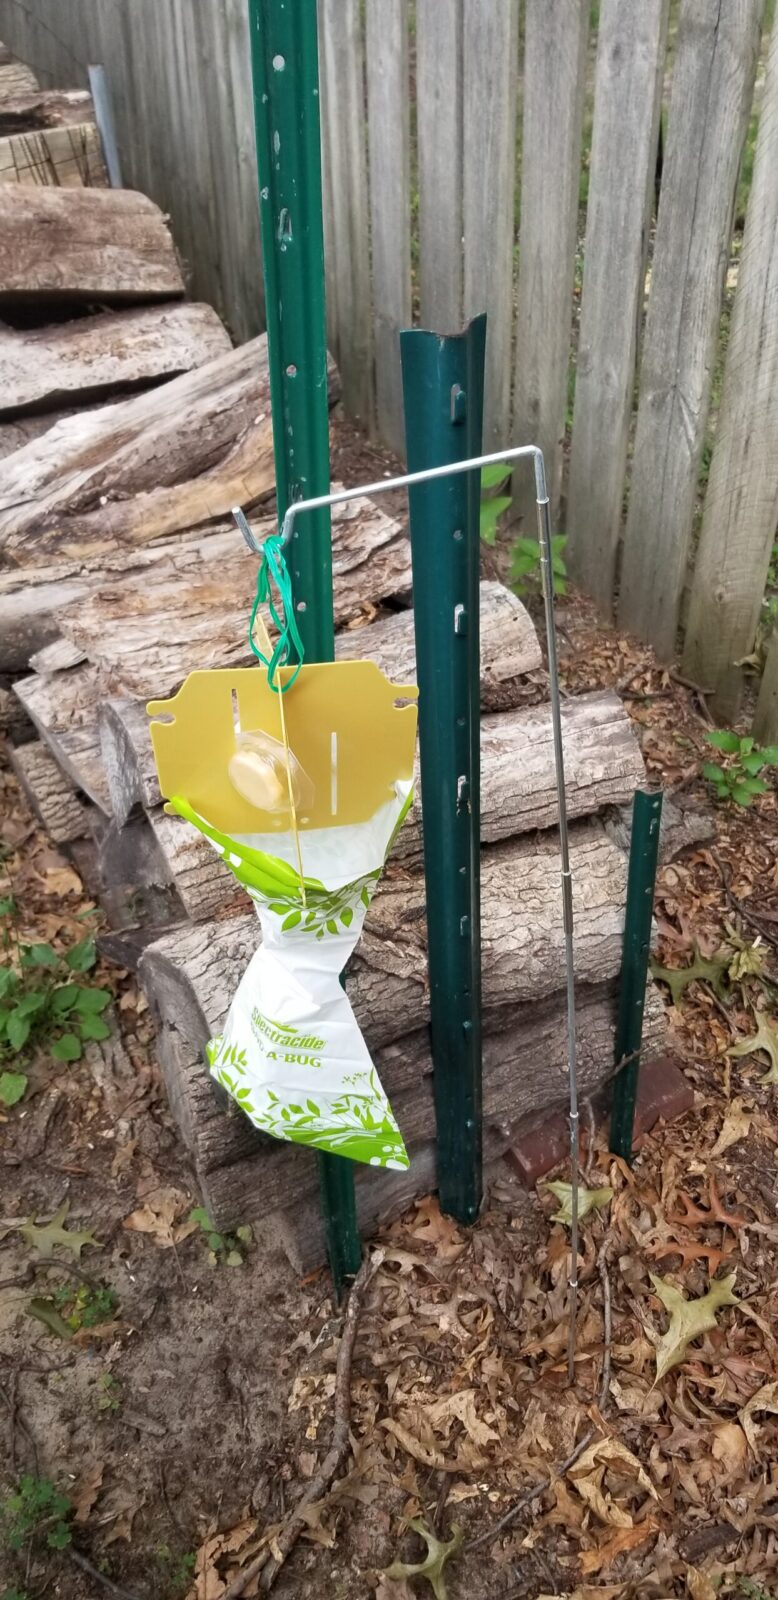
The package has the the plastic frame that holds the bag and the bait (that brown disc in the sealed aluminum package, and a long wire tie to suspend the trap and two bags. It does not come with a stand. You can buy one, make one or hang it off something that you already have – the target height should be with the bottom about a foot off the ground. The bait/lure is supposed to be good for about 12 weeks – enough for the season.
Streamlight Microstream and Stylus Pro lights illuminating a backyard fence at night
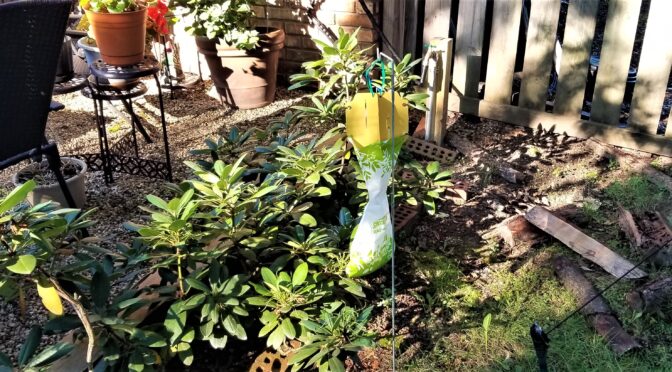
These are bushes near our garden. The recommend putting the trap 30 feet away from plants you care about because you don’t want to attract the beetles and have them decide to stop and eat your plants vs. going to the trap. I have four traps up this year protecting areas where we have plants and vegetables and have caught literally hundreds of beetles in less than a month.

The way it works is kind of interesting. You put the bait block on the trap and the rather clumsy beetles fly for the bait, hit the walls of the trap that are smooth and have nothing for them to grab onto and they fall down in the trap. Once in the trap, the walls are also smooth and they don’t have enough room to fly so they are stuck there and perish.

Streamlight Microstream and Stylus Pro lights illuminating a backyard fence at night
This is the top of the trap. The beetles are attracted by the bait, hit the walls and fall down. It really works.
Streamlight Microstream and Stylus Pro lights illuminating a backyard fence at night
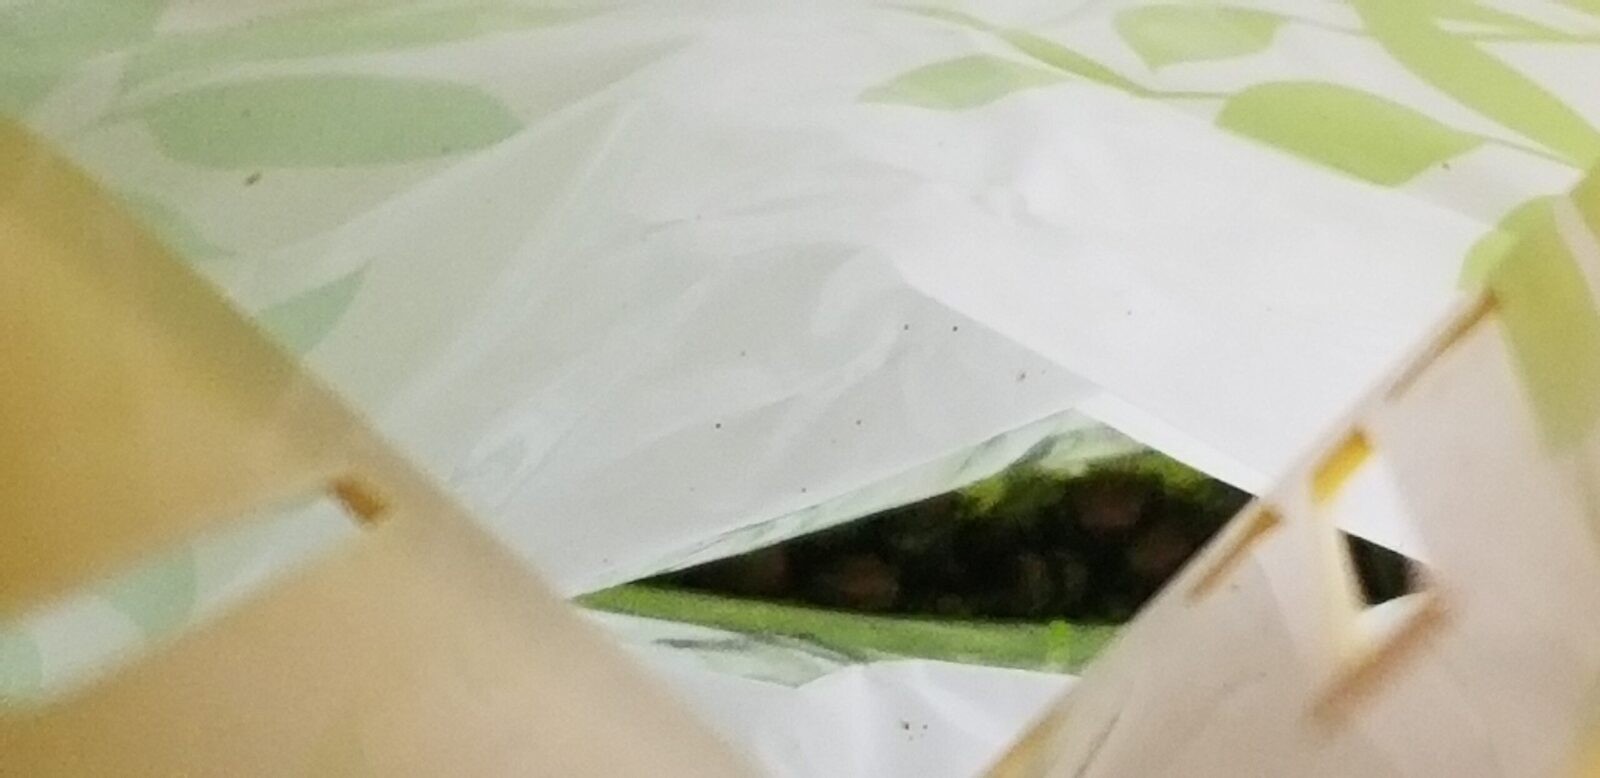
There are probably 2-3 dozen beetles in here after a few days. The most stunning situation I had was putting a trap out not far from rose bushes we have and I had dozens of beetles trapped in less than four hours.
Streamlight Microstream and Stylus Pro lights illuminating a backyard fence at night
They do make and sell a purpose built stand that comes in sections. I bought a few of them but I just make them now out of 3/16-1/4″ steel rod. The sections are easy for storage but you do need to avoid losing pieces. I lost the top hanger of one and made a replacement.

In Conclusion

The Spectracide Japanese Beetle traps work great and I have no hesitation recommending them. I have read reviews/posts where people complain about the bag ripping but I am not sure why they had a challenge. I only have two recommendations – don’t put them in amongst the plants you care about because they will absolutely lure the beetles right where you don’t want them and the second is to make a couple tiny slits at the very bottom to help water drain out.

These traps definitely work and I hope this helps you save your plants!!

Note, Amazon sellers tend to be very expensive. EBay tends to have far better prices for these traps and accessories like bags and stands:


Photo source (#1) is By Beatriz Moisset – Own work, CC BY-SA 4.0, https://commons.wikimedia.org/w/index.php?curid=78747216


Please share the link on Facebook, Forums, with colleagues, etc. Your support is much appreciated and if you have any feedback, please email us in**@*********ps.com. If you’d like to request a report or order a reprint, please click here for the corresponding page to open in new tab.


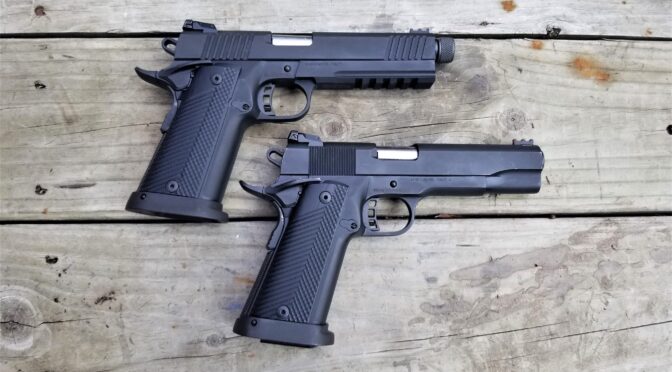
Introducing Our New Third Generation 16 Round 10mm Magazines for Rock Island Armory High Capacity FS A2 Pistols

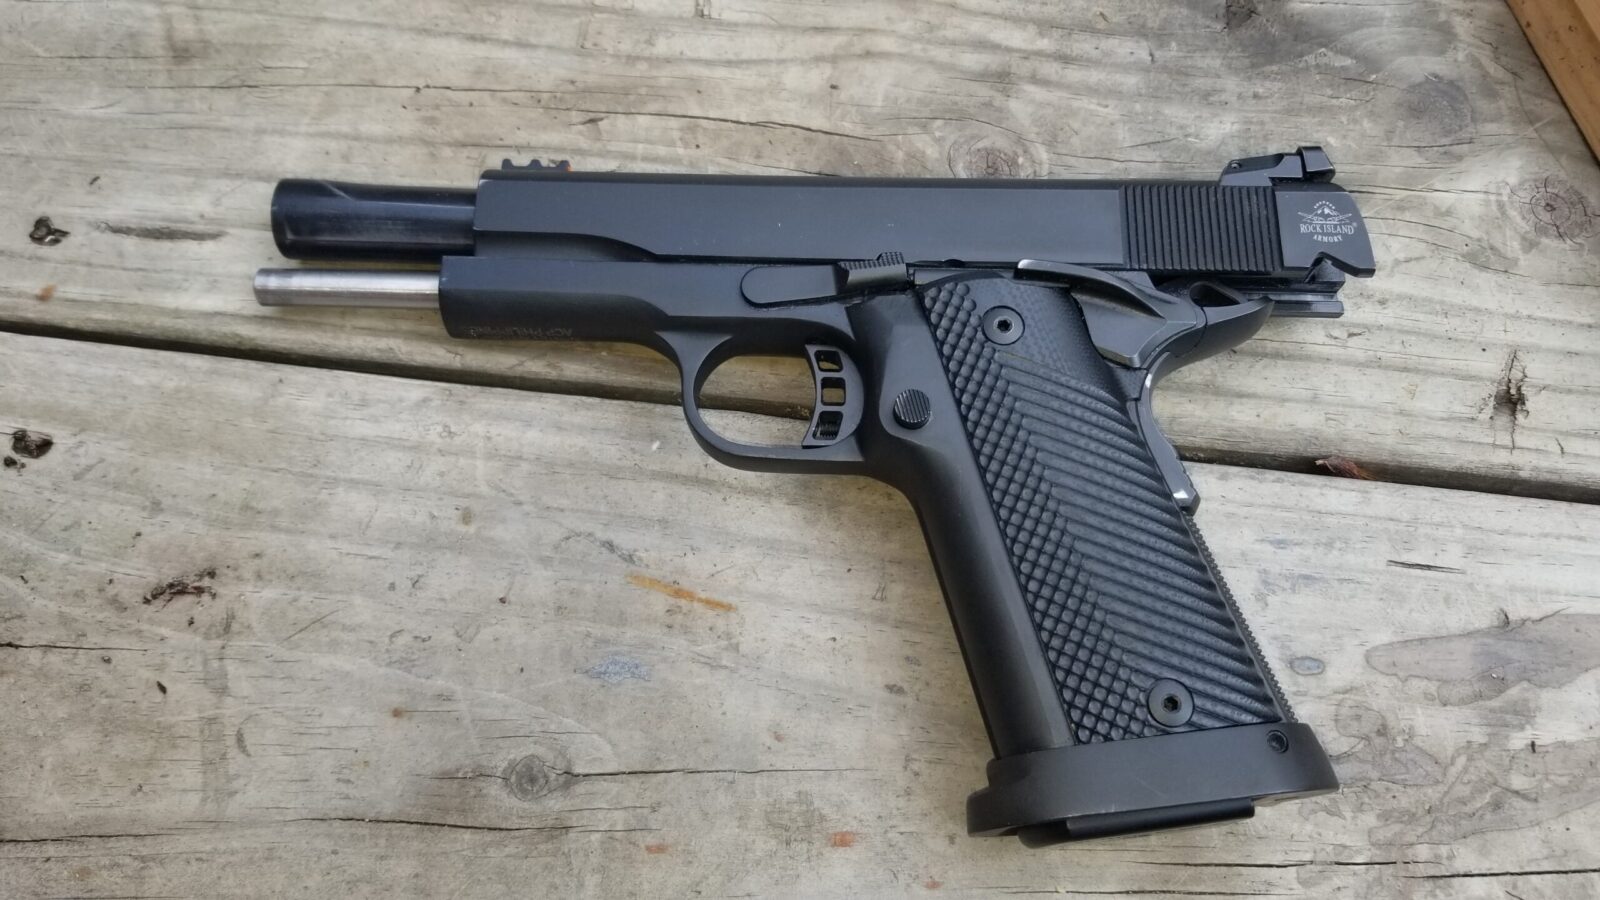
This is our third generation of magazine for the Rock Island High Capacity FS A2 10mm and .40 S&W pistols that use the 16 round magazines – not the single stack 7-8 round mags.

John's WASR rifle with Romy Brown STK grip and EOTech sight
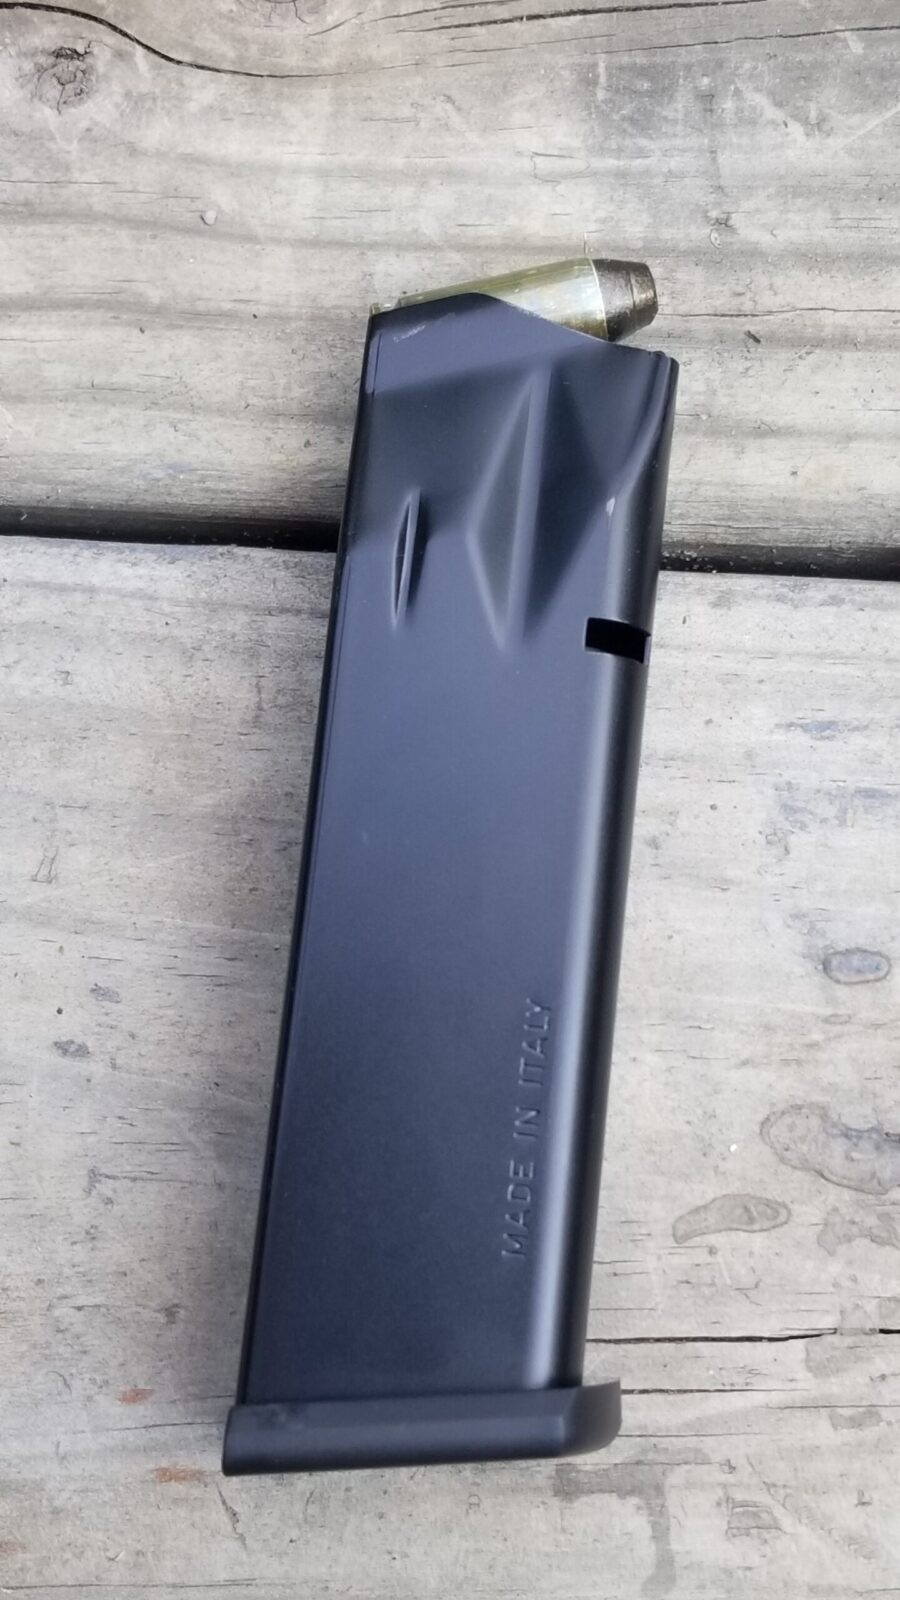
This is one of the new mags. You can see a dummy 10mm round poking out from during testing.

These are converted Mec-Gar Para P14-45 magazines that have the feedlips adjusted and fine tuned to properly retain and feed 10mm rounds.  Note, a normal P14 mag can’t securely retain a 10mm round.  These tuned mags will only work with 10mm and .40 S&W.  They will not work on any other calibers or in a pistol that requires P14 mags.

John's WASR rifle with Romy Brown STK grip and EOTech sight
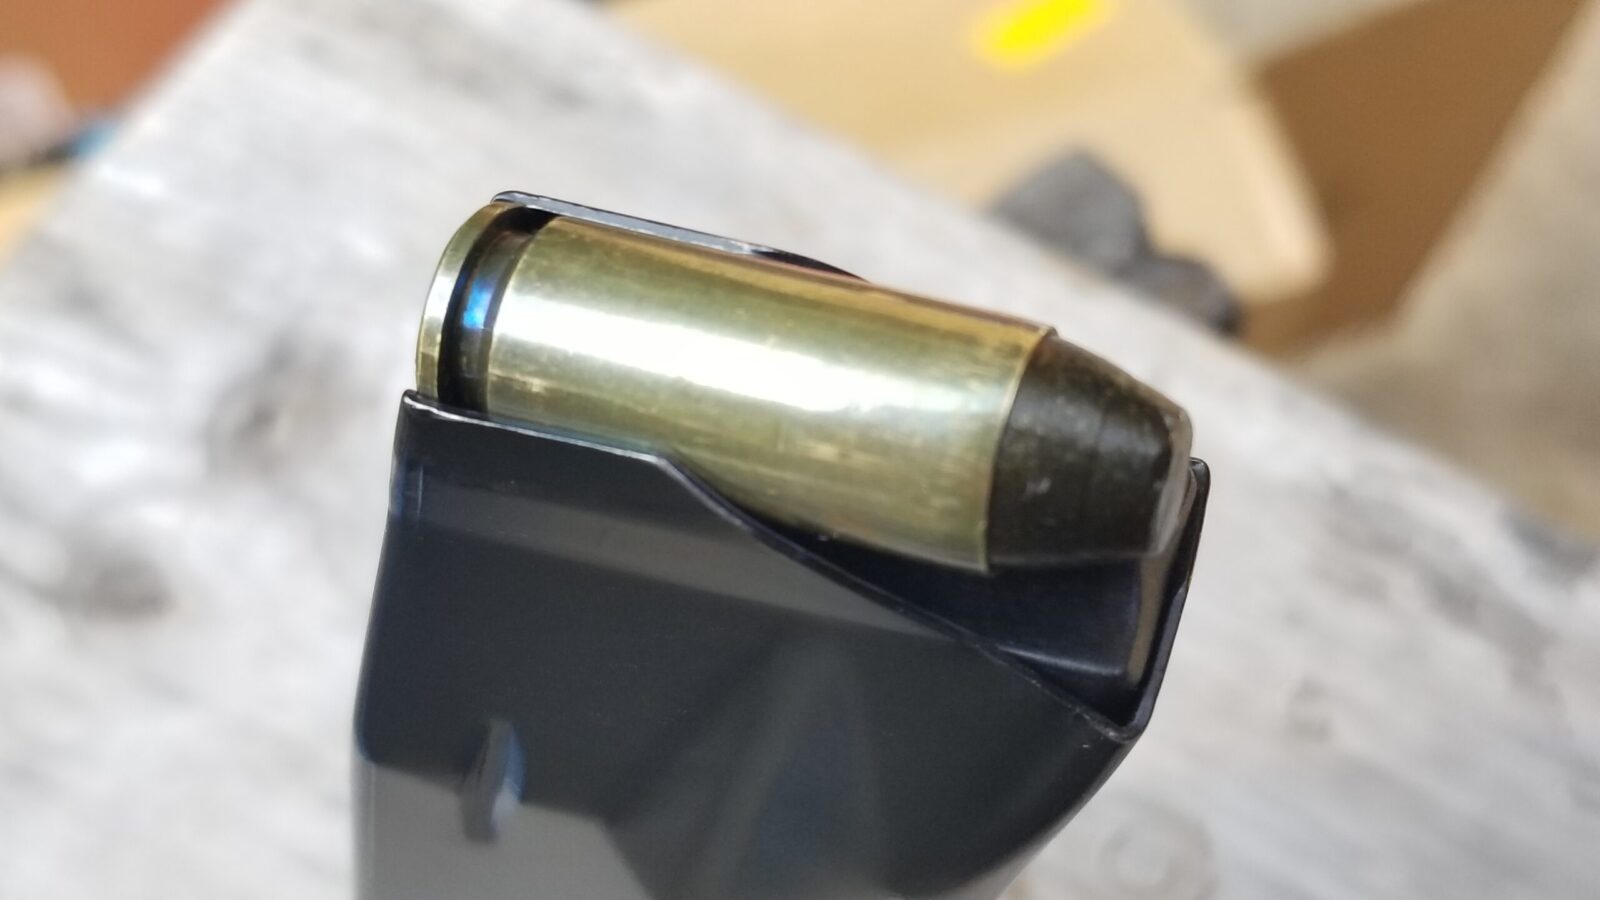
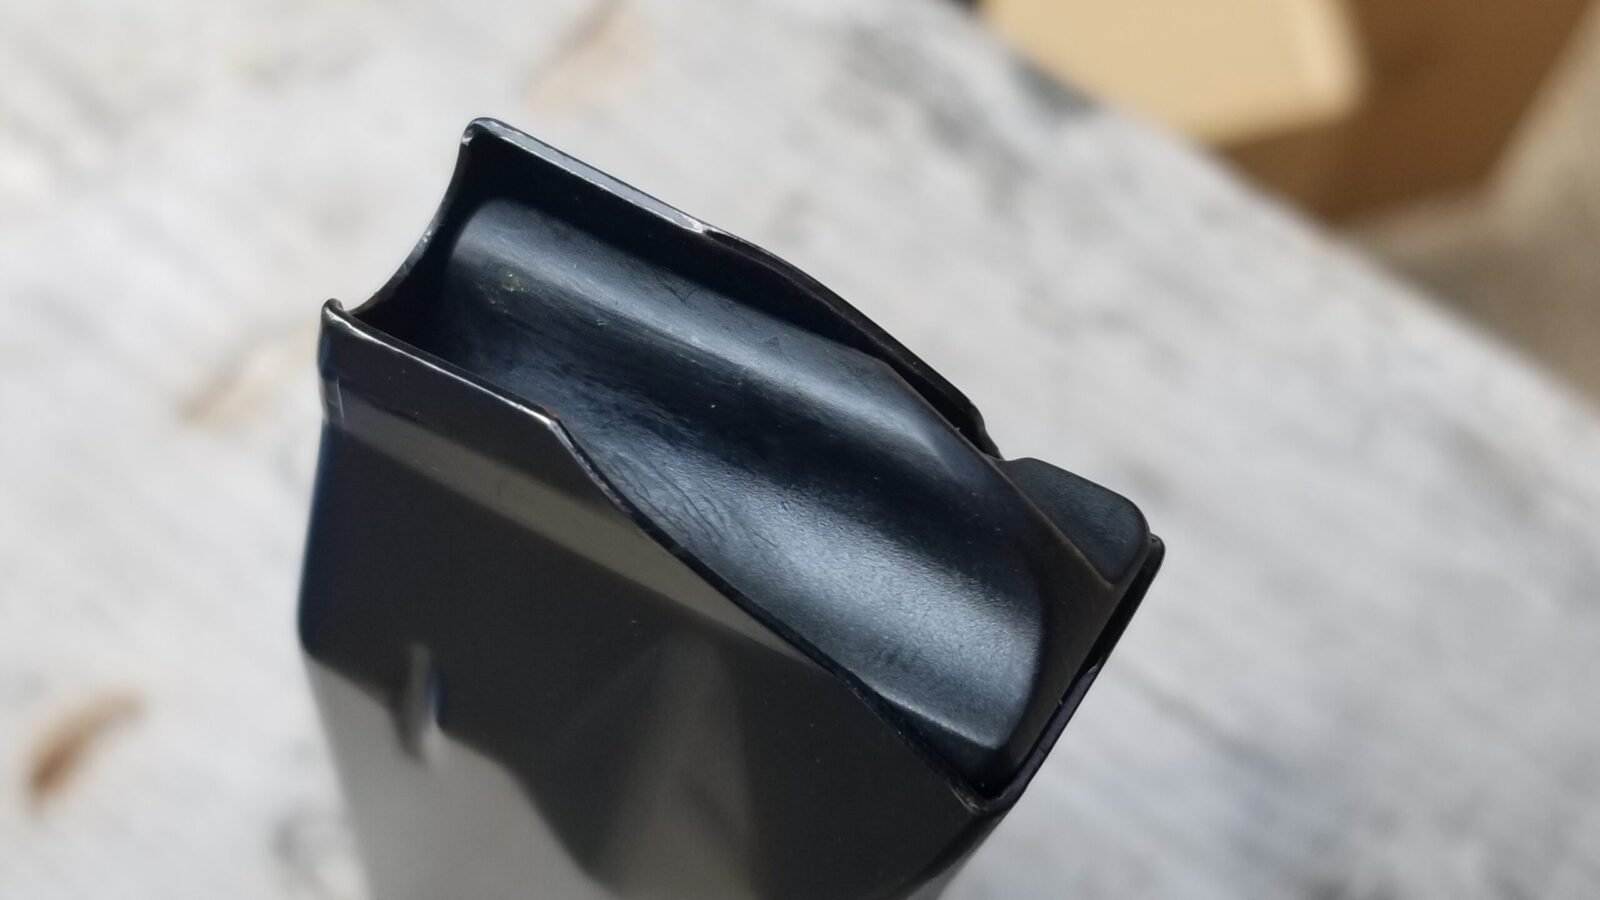
To properly retain a 10mm round, the feed lips must be properly spaced plus this must be done correctly or the feed angle will be wrong.

The adjustment process and tooling took some work because Mec-Gar uses surprisingly resilient hardened steel magazine bodies and feed lips.  I had to develop a means to convert the magazines using a forming jig I developed.

Streamlight Stylus Pro performance curve: lumens vs. hours
Here’s a closer look at the mag lips. The finish wear is from the adjustment process.

Compatibility

These custom mags should work with RIA pistols that use the OEMP164015B magazine including the following pistols:

  • 51994 TAC Ultra MS 10mm
  • 51914 TAC Ultra FS 10mm
  • 56862 TAC Ultra Threaded 10mm
  • 52000 PRO Match Ultra 6″ HC 10mm
  • 52009 Rock Ultra FS HC 10mm
  • 51738 Pro Match Ultra H – 40S&W – note, I tune for 10mm as I don’t have a .40 so some minor adjustments might be needed.

Observations

Based on my past experience and some research, there are some really cool benefits from the new Mec-Gar P14 design:

  • Hardened steel bodies and feed lips will hold up very well with extreme use
  • Mec-Gar developed an anti-friction coating that aids in feeding
  • The magazine spring is made from type “D” music wire and holds up nicely
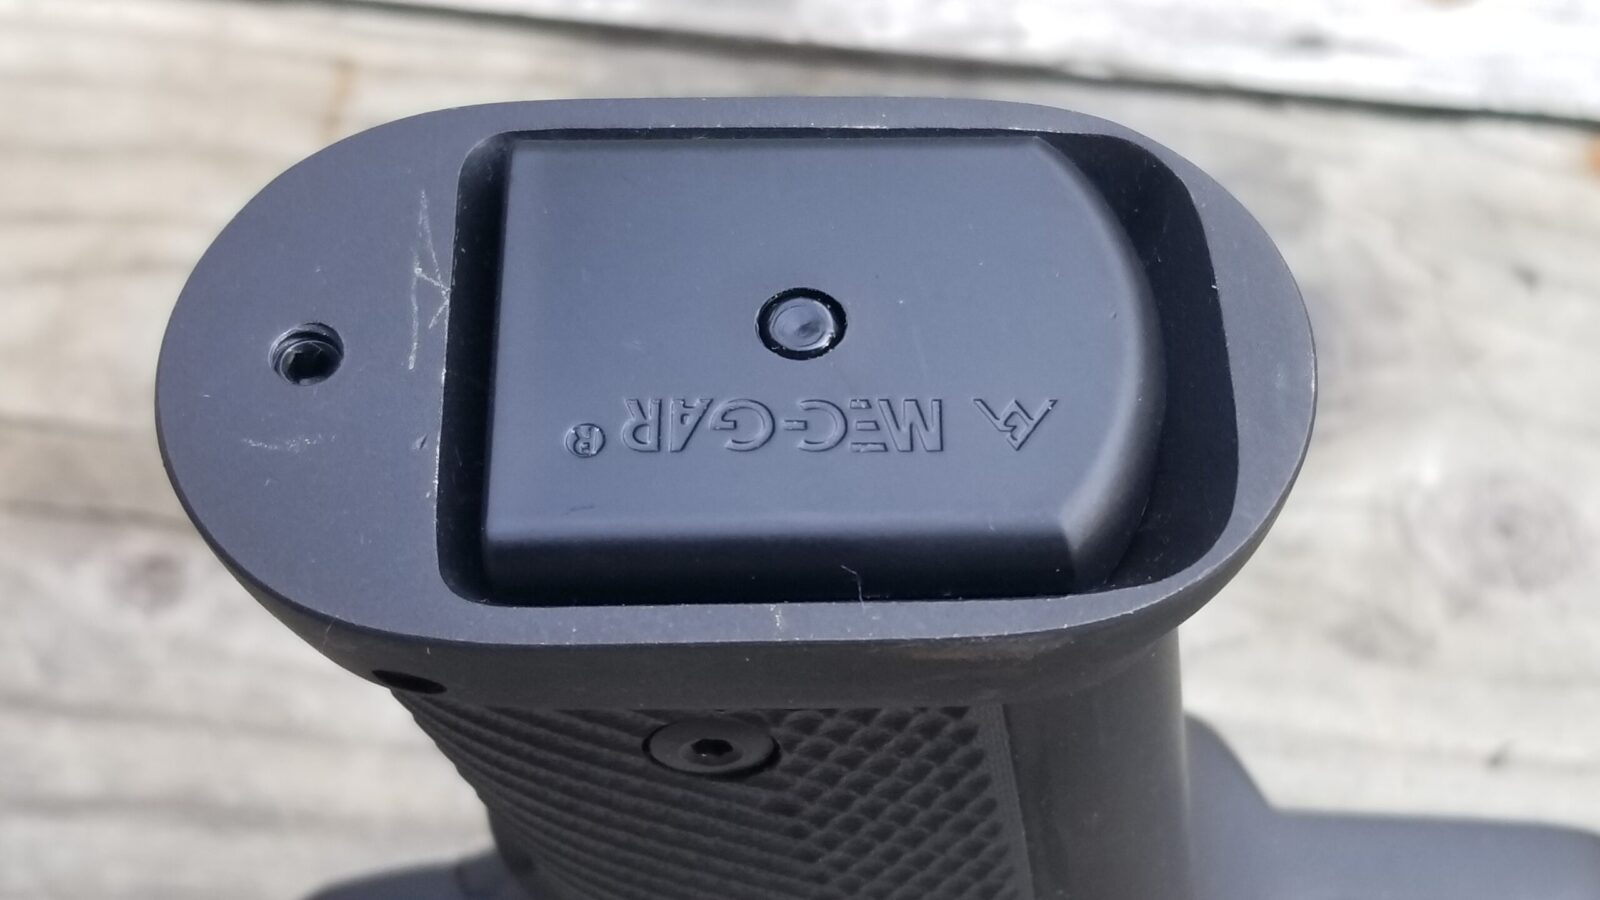
  • They developed a polymer base plate that fits very nicely in the large RIA mag well funnels
  • The slightly taller magazine body clears the RIA mag-well funnel very easily.  It’s longer than our previous generations of magazines and is even slightly longer than the original RIA/Act-Mag magazine
  • The magazine’s capacity is 16 rounds of 10mm. I was able to get 17 rounds in during testing but I feel that last round is just too tight. Thus, I am listing it as 16 rounds.

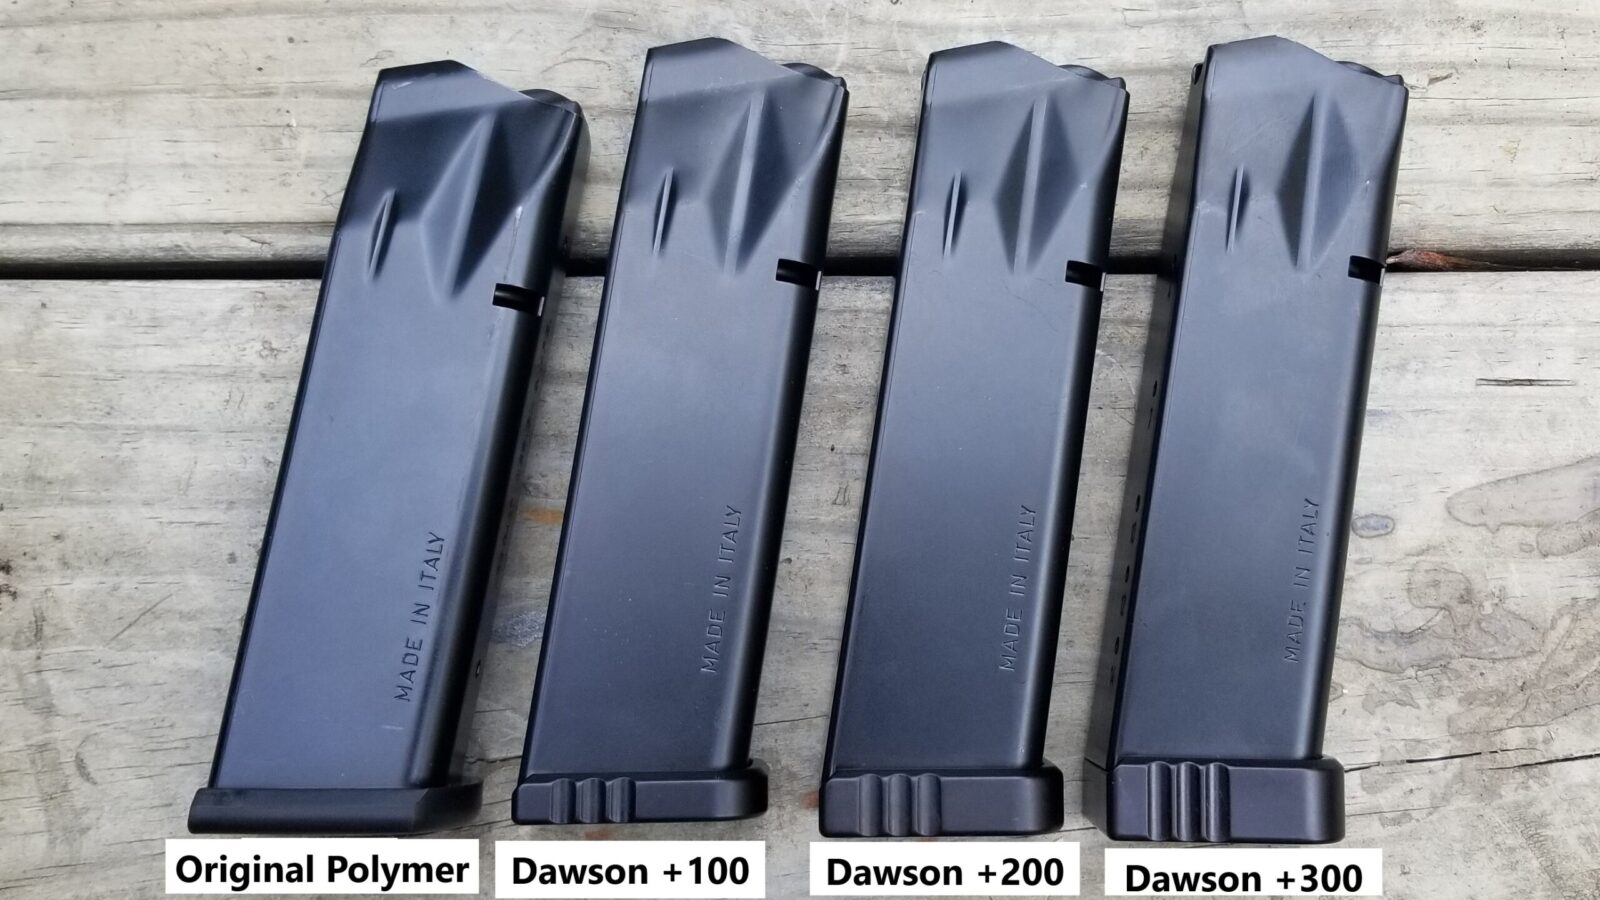
The polymer base plates work very nicely with the RIA pistols. You don’t need to change them unless you prefer longer plates. We do sell Dawson base plates if you wish to have one that extends further than the included Mec-Gar plate – The Dawson +100 plate is about the same height so if you do want the mags to be taller, you’d need either a +200 or +300 to see a difference. Please click here if you are interested in the Dawson plates.

Streamlight Microstream performance curve showing lumens over hours
These are all P14 mag bodies but with the different base plates installed so you can see the difference in thicknesses. The plates just change how tall the magazine is – they do not add capacity.
Streamlight Microstream performance curve showing lumens over hours
The OEM Mec-Gar base plate fits the RIA mag well funnel just fine. I set aside four mags for myself and am using the original base plate for them.

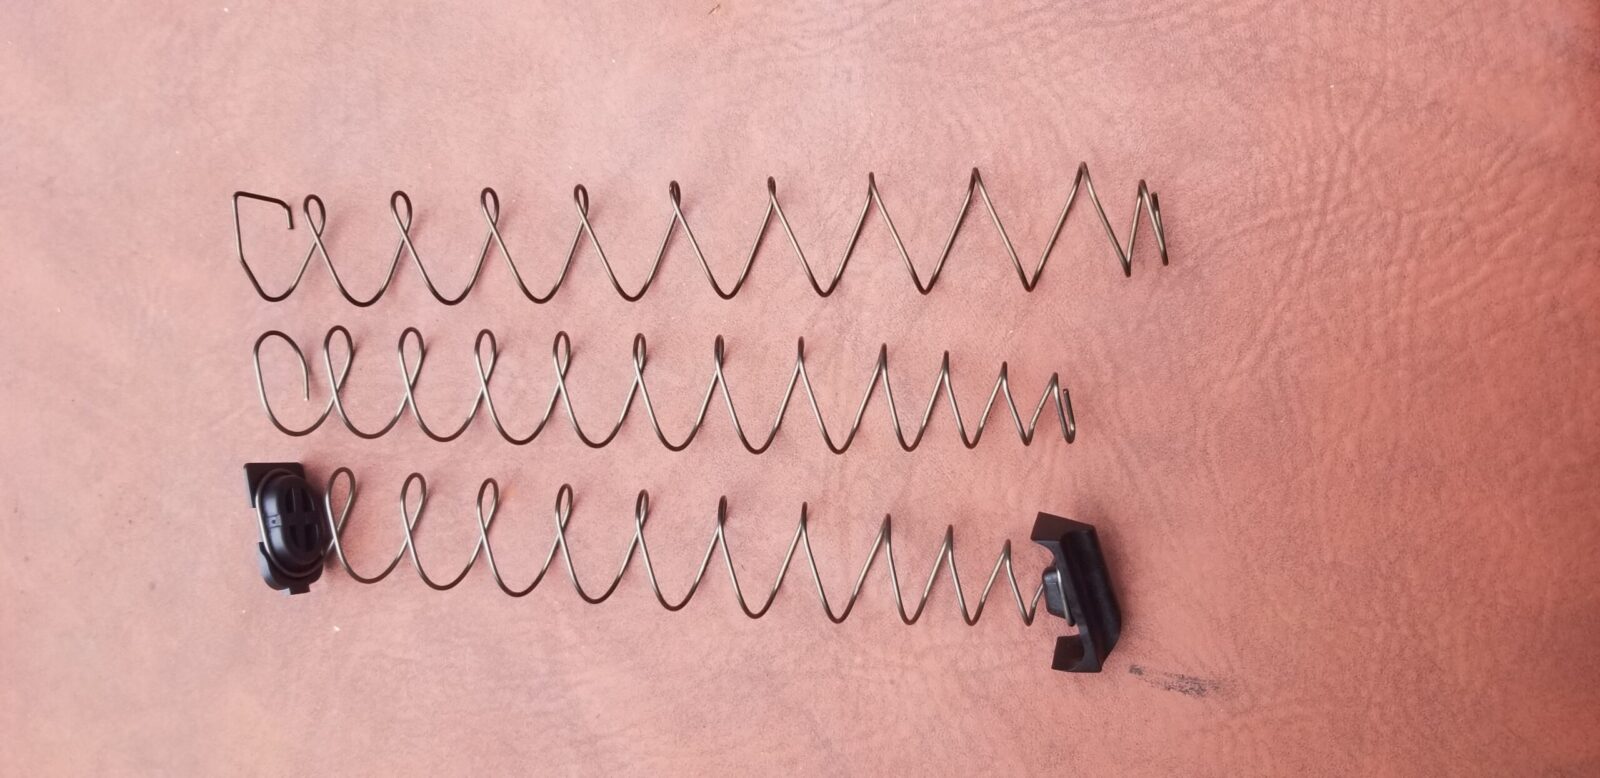
The Mec-Gar spring seems pretty robust.  If you want an even stiffer spring, we do sell Wolff magazine springs that are 10% stronger than the originals.  Please click here if you are interested.

Streamlight Microstream performance curve showing lumens over hours
The top mag is the Wolff +10% model. The middle is an OEM Mec-Gar without the floor plate and follower and the bottom is one with the floor plate and follower. Note, the Wolff Spring does require bending at the top to properly hold the follower.

After the mag lips are tuned, each magazine is tested in both my 10mm RIA 52009 Rock Ultra FS HC and 10mm 56862 Tac Ultra pistols to ensure proper fit and feeding.  You may find some final tuning is needed on your particular pistol and it is easy to do – please click here for more information.

Streamlight Microstream performance curve showing lumens over hours
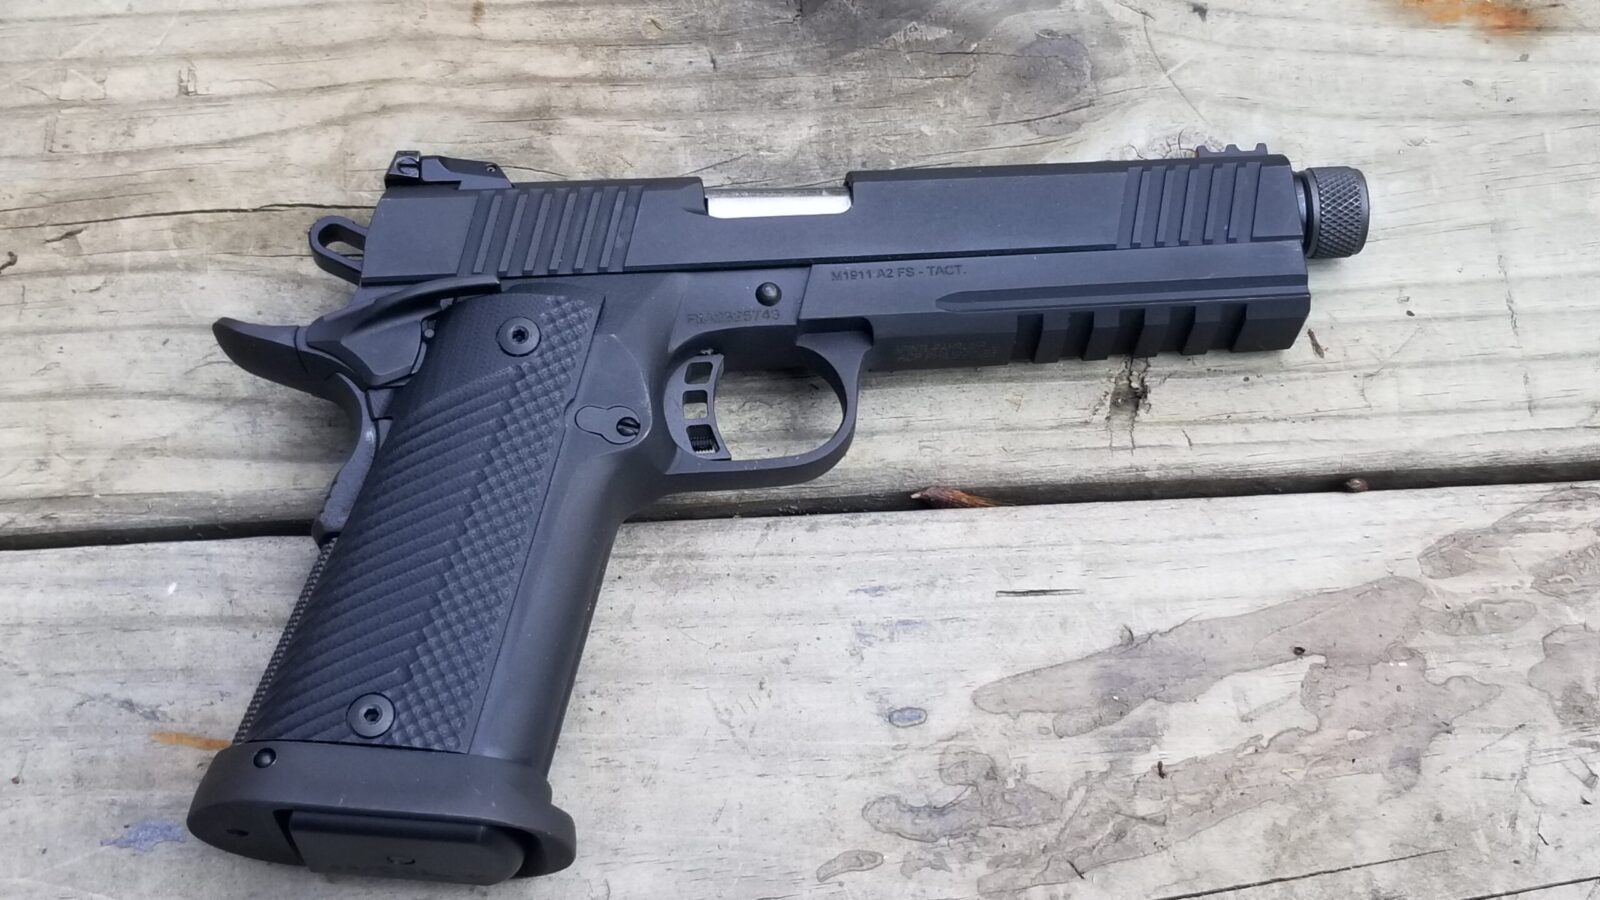
This is my 56862. You can see one of the new mags peaking out of the bottom of the big flared mag well.
Streamlight Microstream performance curve showing lumens over hours
Here, one of the new magazines is in my 52009 that is locked open.

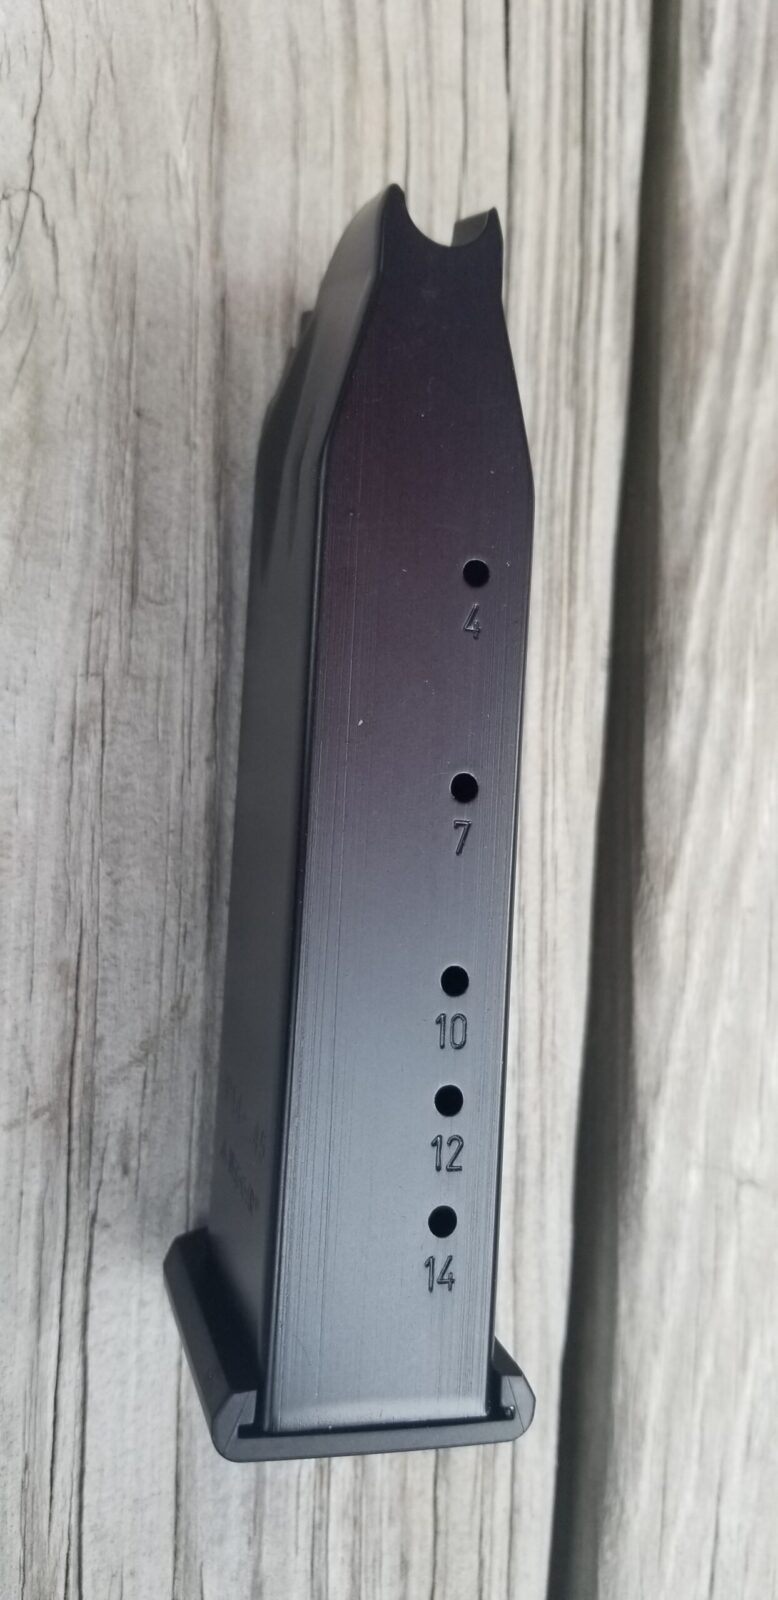
One small detail, since these were originally for .45 rounds, the mag round indicator counts doesn’t match since you will be loading either 10mm or .40 – usually you have one or two more rounds of 10mm/.40 compared to what the round count hole label says.

Streamlight Microstream performance curve showing lumens over hours
These holes were calibrated to .45 ACP rounds so the slightly thinner 10mm / .40 rounds don’t quite match up. You can fit 16 rounds of 10mm in here – not just 14.
Streamlight Microstream performance curve showing lumens over hours
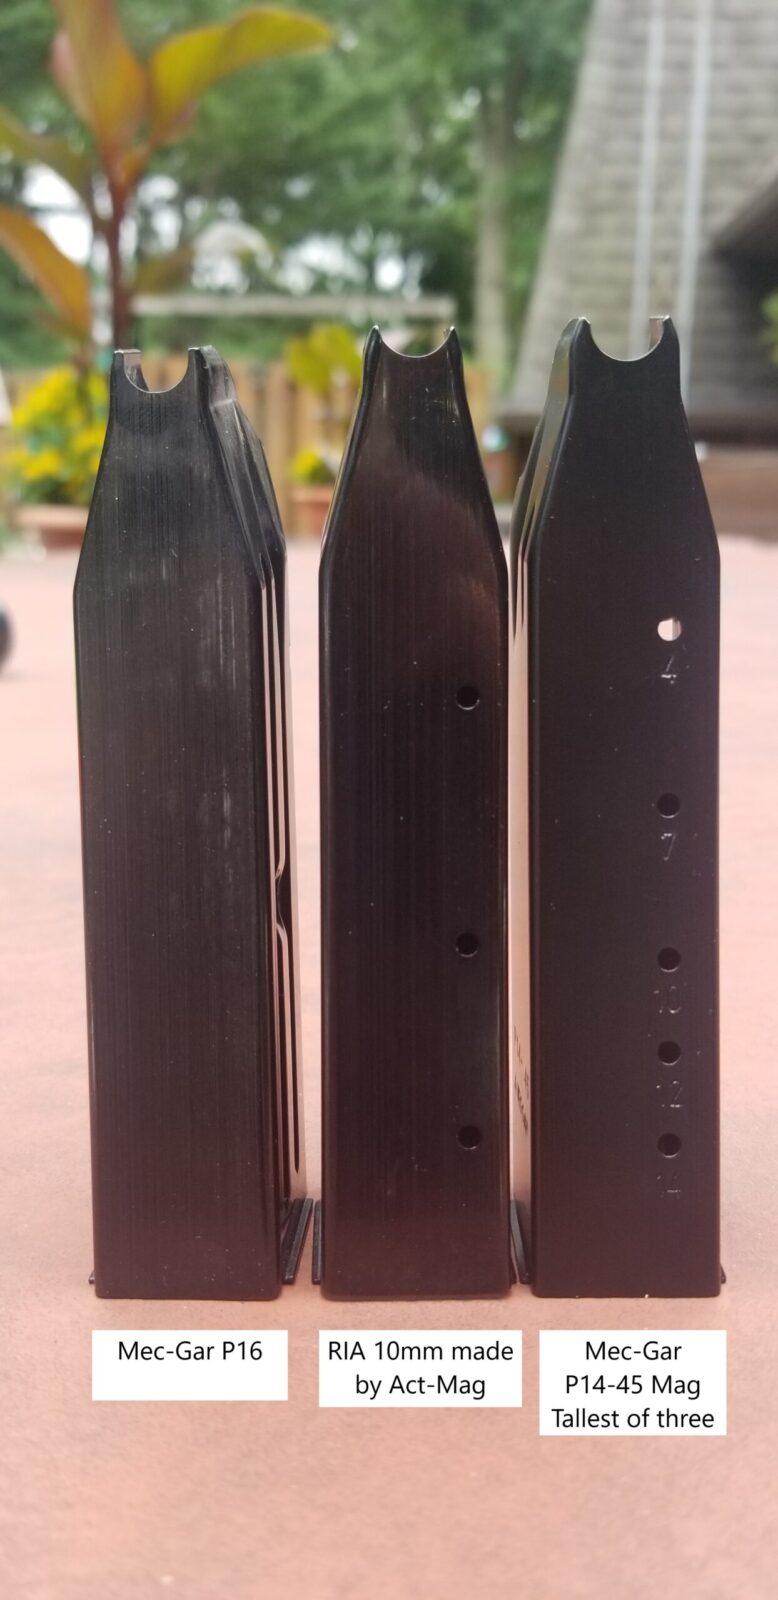
Ok, this is pretty interesting. The magazine that Rock Island ships with the high cap pistols is made by Act-Mag and is in the middle. Notice that the original Mec-Gar P16 is a bit shorter and the P14 is just a tad taller. For anyone who found our earlier mags to be a tight fit, I’d bet the new ones will fit a lot better.

Conclusion

I feel like we’ve come a long way since the first P16 conversions. This mag is solid and comes in at a far more affordable price point than the P16s that needed the Dawson base plates also.

We make 10, 15 and 16 round magazines for Rock Island A2 HC 10mm & .40 S&W.
Please click here for the product listings.


Please share the link on Facebook, Forums, with colleagues, etc. Your support is much appreciated and if you have any feedback, please email us in**@*********ps.com. If you’d like to request a report or order a reprint, please click here for the corresponding page to open in new tab.


Still Nuking Mosquitoes and Ticks With Talstar and The Ryobi Power Washer

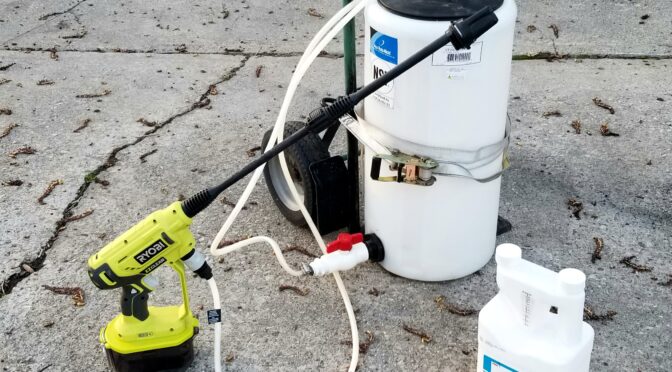
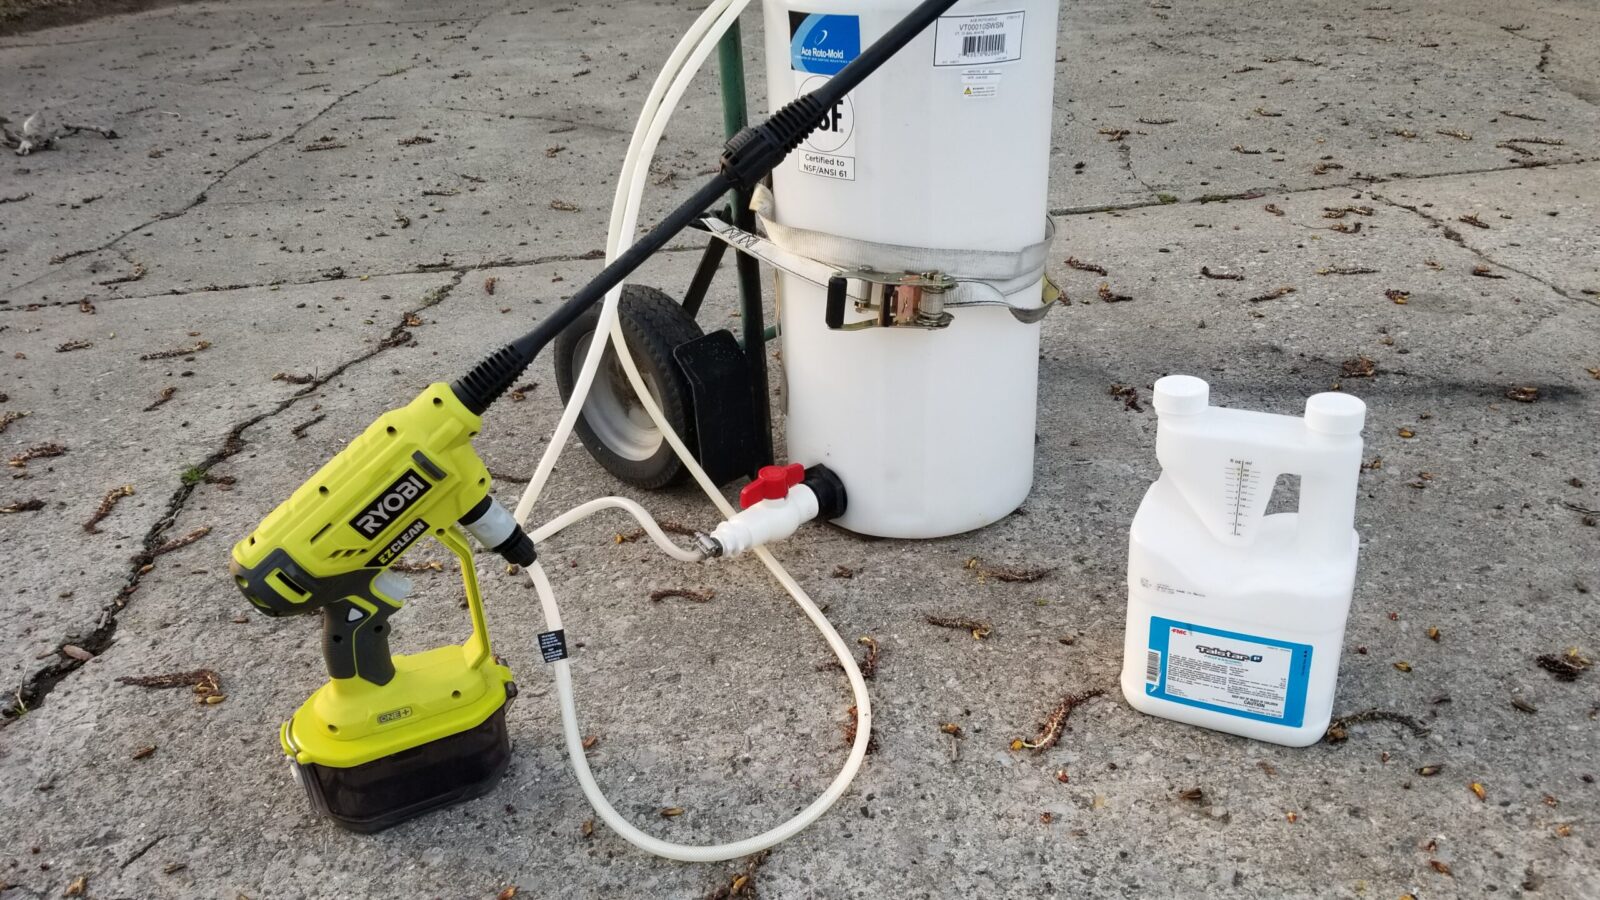
A reader dropped me an email and asked if I am doing anything new this year for mosquitoes as he read my past posts. I’m still very happy with the effectiveness of the Talstar insecticide plus the combination of the Ryobi 120350 Power Washer and 10-gallon tank strapped to a dolly continues to work fantastic.

John's WASR rifle with Romy Brown STK grip and EOTech sight

Here’s the full write up I did last year about the combination – click here.

I hope everyone has a great summer and be sure to nuke the bugs before they get to you 🙂

5/21/23 Update – still using the same set up. Everything is working great, Power washer is holding up just fine by the looks of it. I just did my first spray of the season last Monday.


Please share the link on Facebook, Forums, with colleagues, etc. Your support is much appreciated and if you have any feedback, please email us in**@*********ps.com. If you’d like to request a report or order a reprint, please click here for the corresponding page to open in new tab.


US Coast Guard Response Boat Medium (RB-M) 45754 Stationed In Saint Joseph, MI

We were walking on the south pier in Saint Joseph, MI, on a fine June evening enjoying the cool Lake Michigan air. Coming in from the lake was one of the US Coast Guard boats that are stationed here. As it came in I decided to snap a number of photos plus look up just what the boat was when I had an opportunity.

In doing some digging, the vessel was a Response Boat Medium (RB-M) and the hull number 45754. It was delivered to the Saint Joseph USCG station in May 2014.

The RB-M is a 45-foot versatile utility boat used for search and rescue, The USCG has the following to say about the design:

The 45-foot RB-M is being procured to replace the 41-foot
utility boat (UTB). It is an all-aluminum boat that has a wire-
less crew communication system and is powered by twin
diesel engines and water jet propulsion. Unlike the 41-foot
UTB, the RB-M has the ability to self-right if it should ever
capsize. This feature allows the RB-M to operate in higher
seas, ensuring the crew (and rescued survivors) comes
home safely. For example, RB-M’s survivability parameters
are 12-foot seas and 50 knots of wind, whereas the UTB’s
limits are 8-foot seas and 30 knots of wind. The RB-M has
a top speed in excess of 40 knots and cruises at 30 knots,
compared to the 41-foot UTB top speed of 26 knots. All 174
RB-Ms have been delivered.

Click here for the USCG equipment guide PDF that I extracted the above info from if you want to learn more.

So, it’s a pretty cool versatile boat. Here are the photos that I took – if you click on one it will open up full size:

We definitely appreciate the service the Coasties provide the nation and our community. I thought it would be cool to share these photos in case others might like to see them.


Please share the link on Facebook, Forums, with colleagues, etc. Your support is much appreciated and if you have any feedback, please email us in**@*********ps.com. If you’d like to request a report or order a reprint, please click here for the corresponding page to open in new tab.


June 2021 Lest We Forget Event Was Held in Benton Harbor, MI

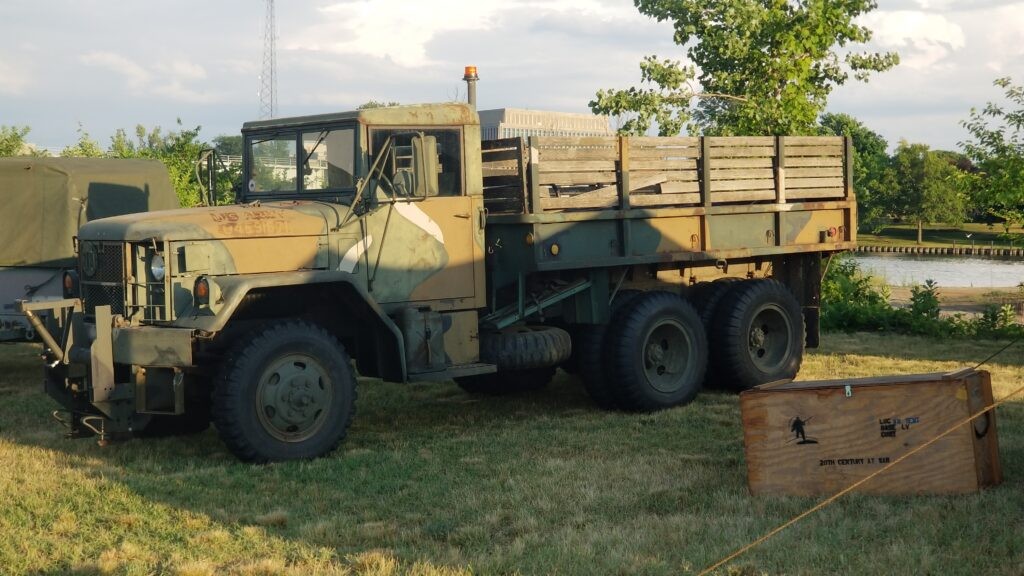
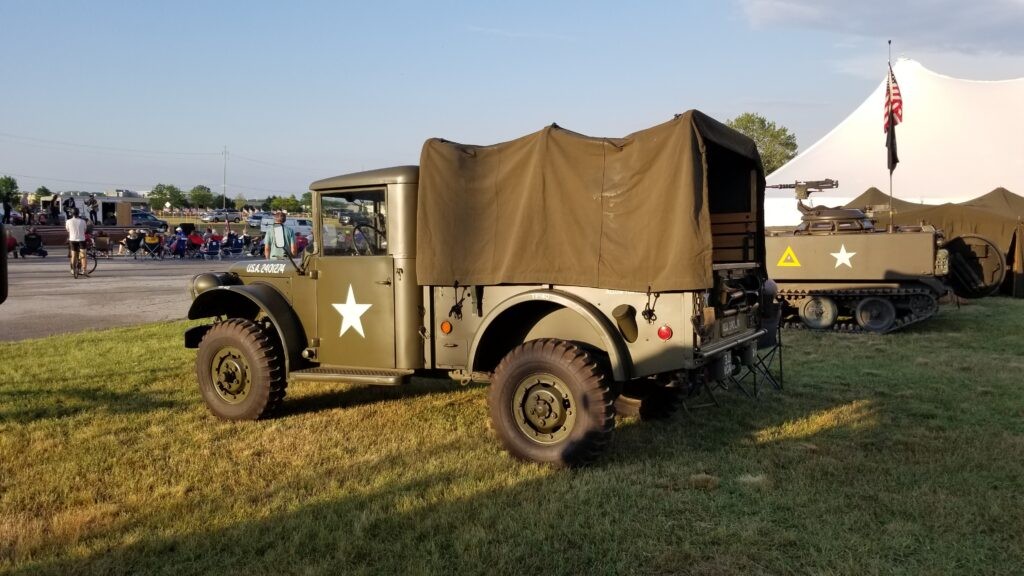
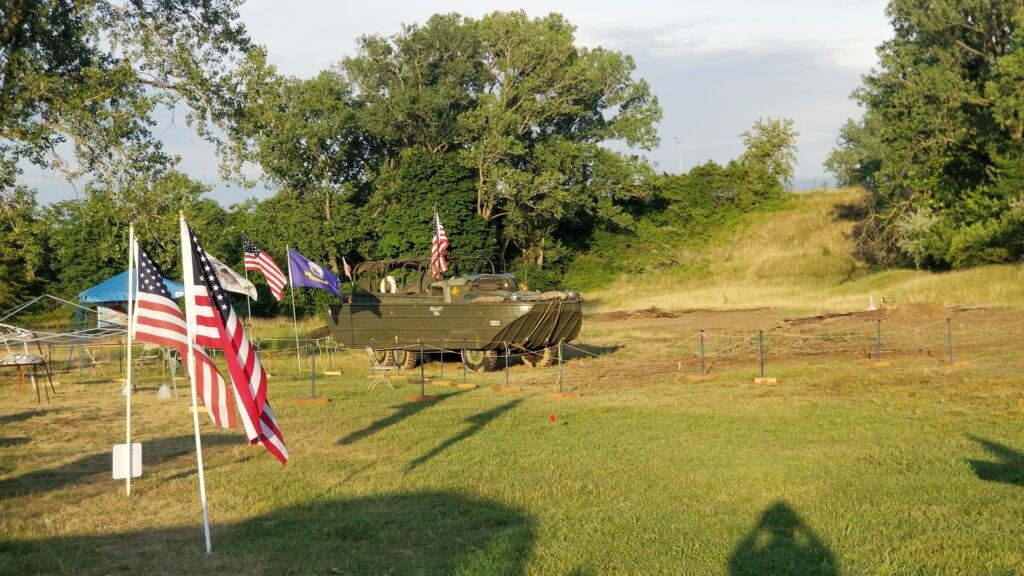
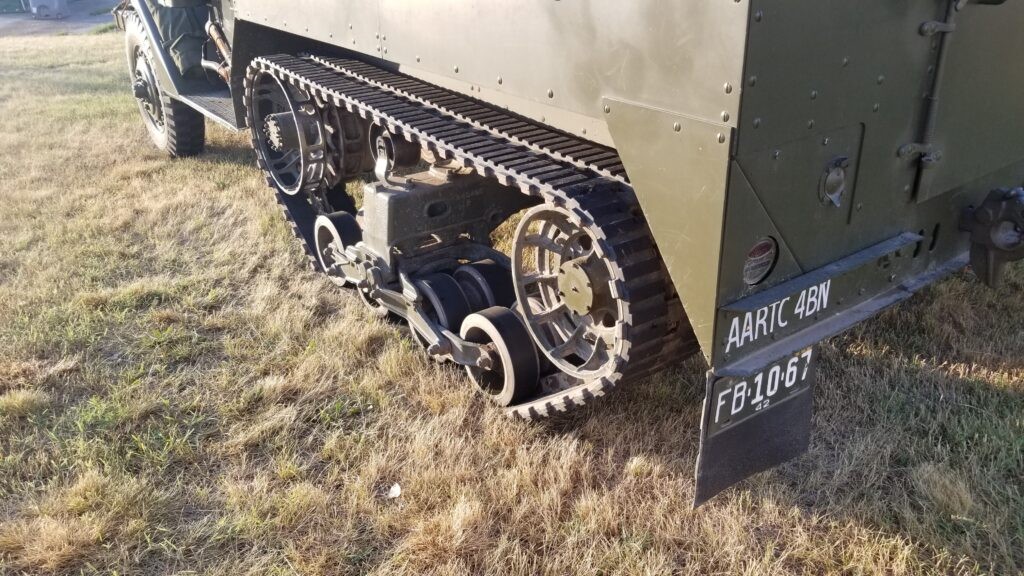
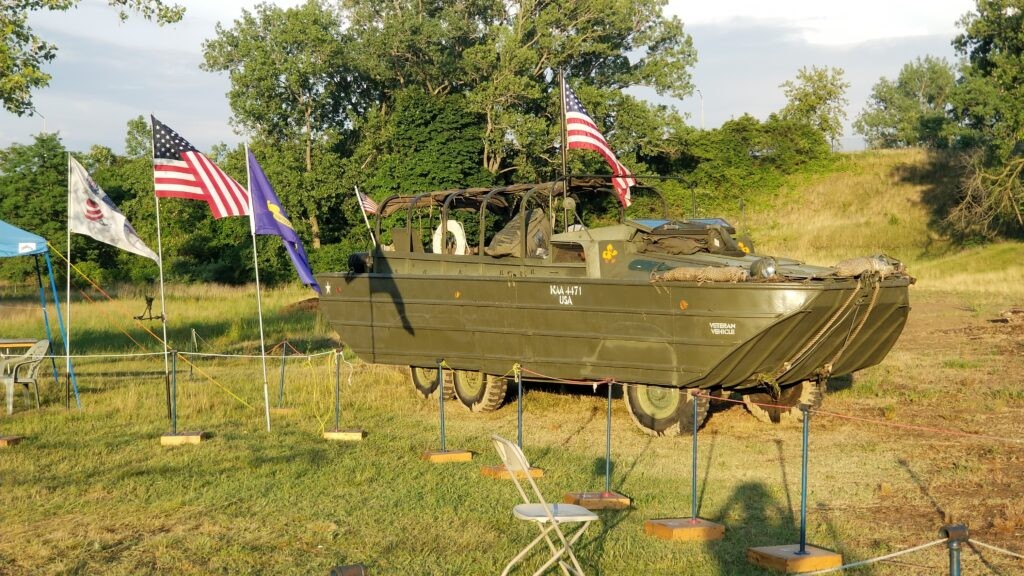
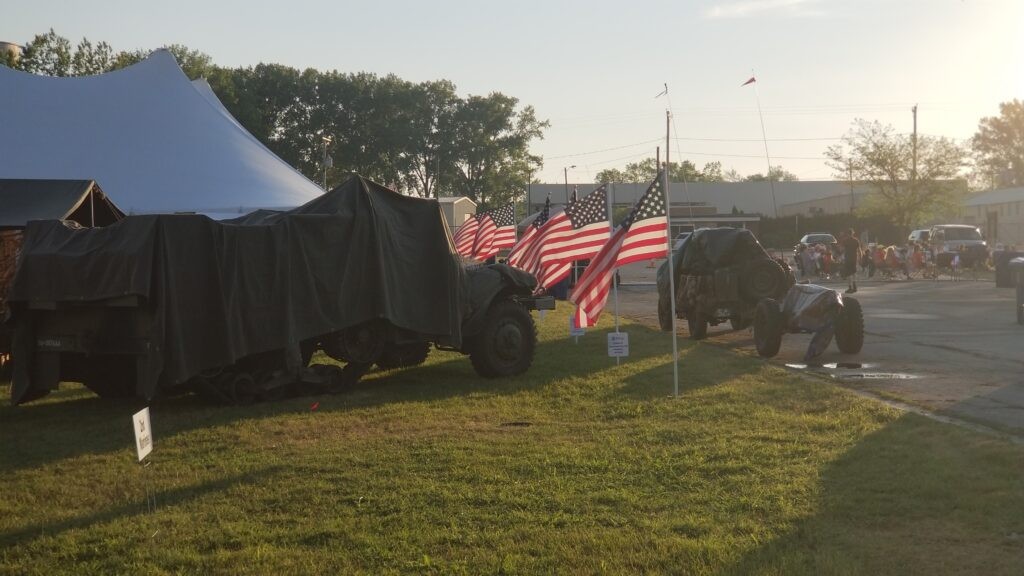
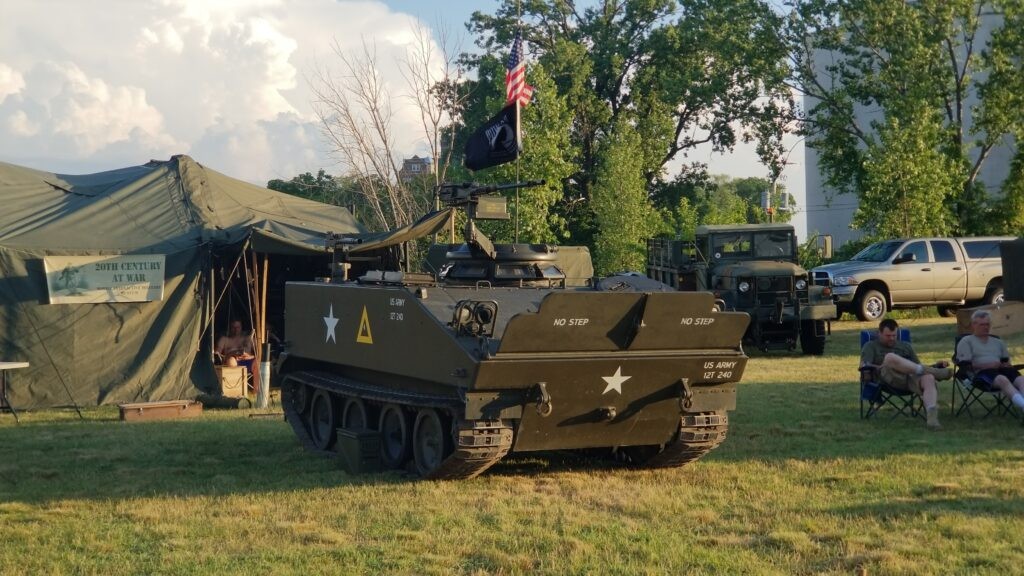
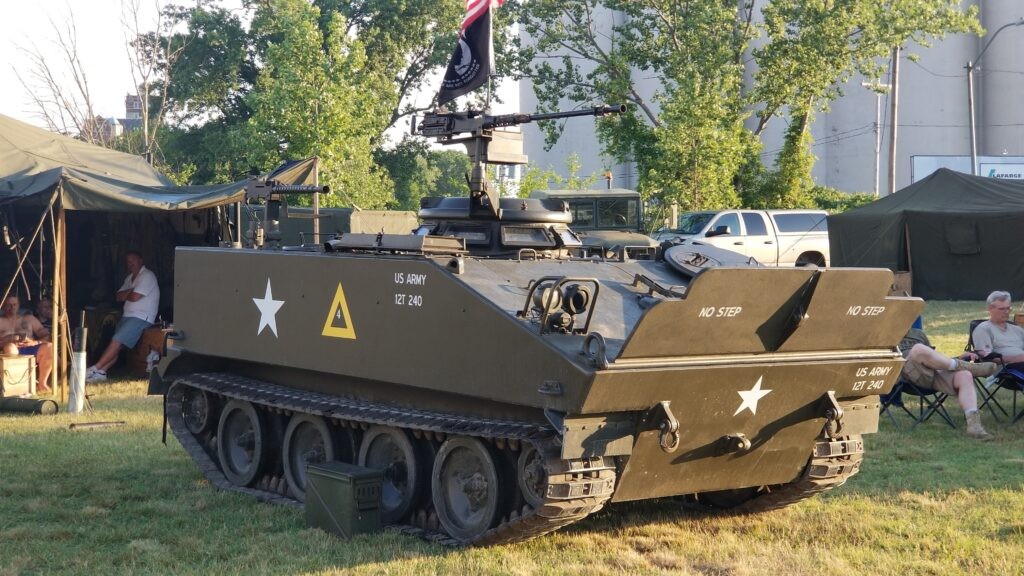
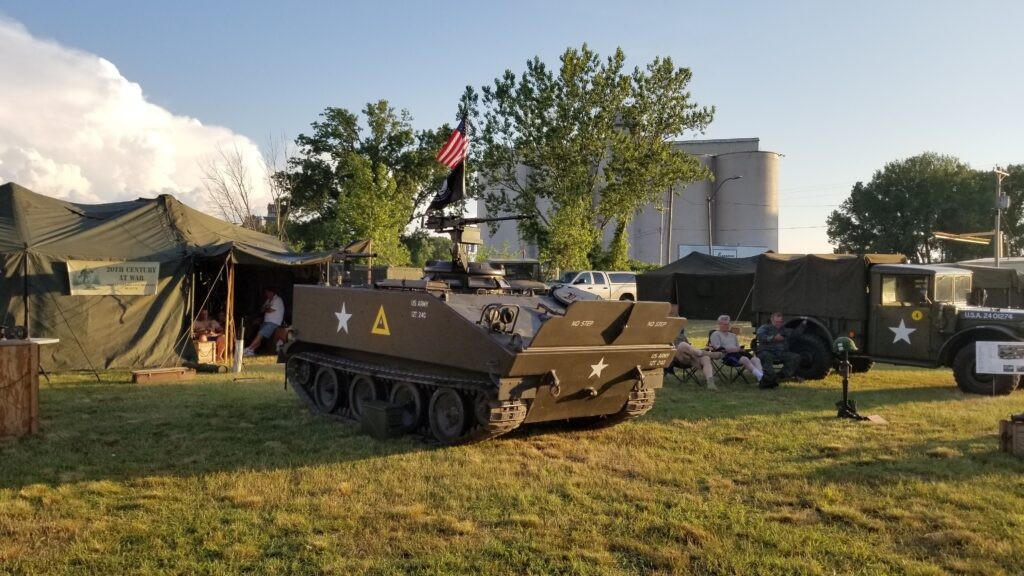
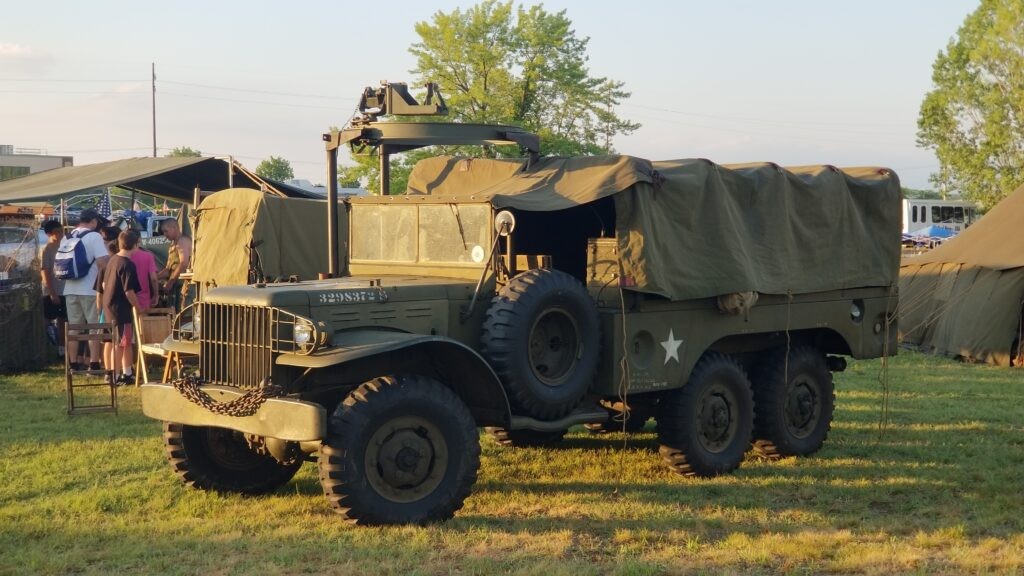
Lest We Forget is an organization dedicated to keeping the memories of what our military has done for us. The 2019 event was the last one for WWII, 2020 was cancelled due to COVID and 2021, this year’s event, remembered Korean War veterans. They have static displays, food, vehicles you can ride on and re-enactments.

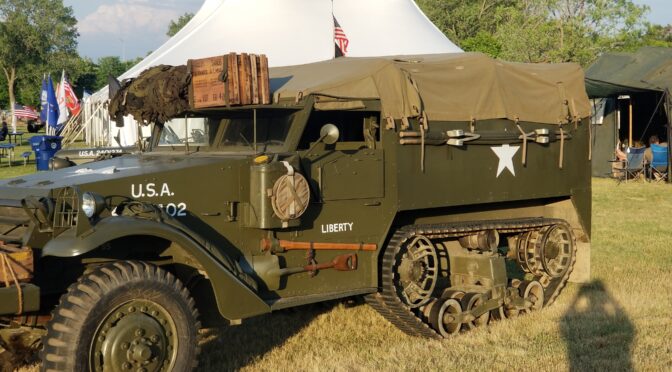
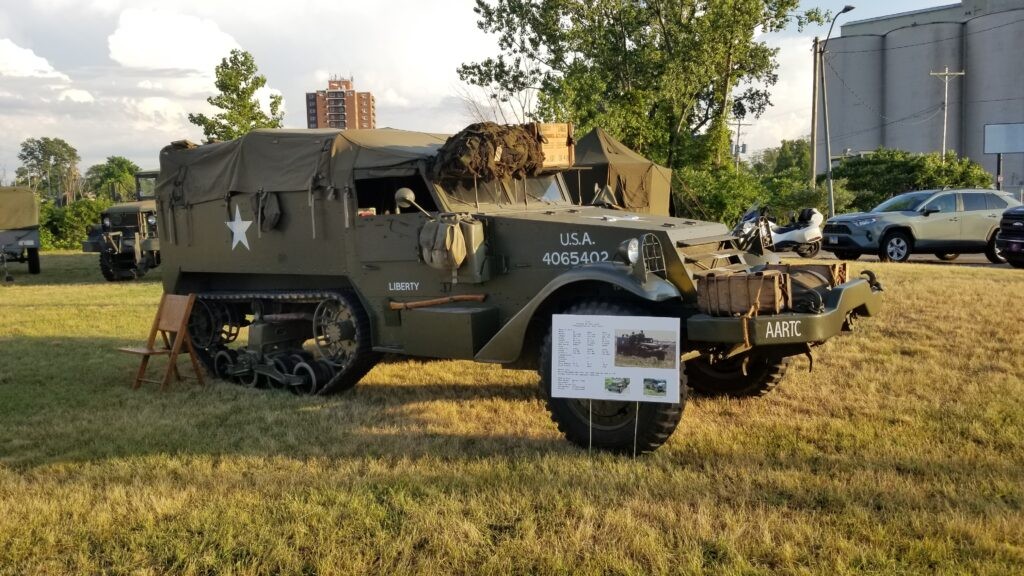
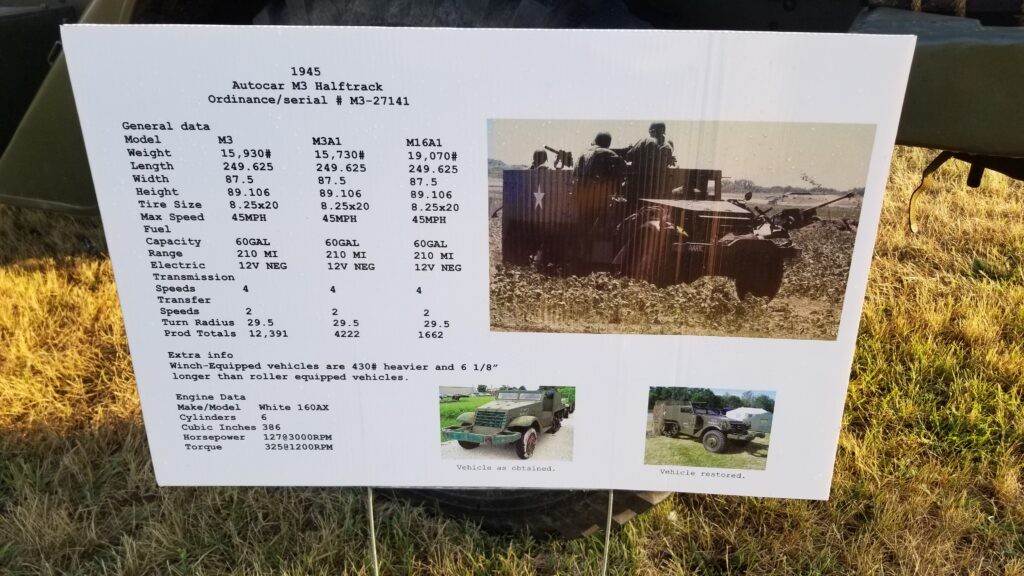
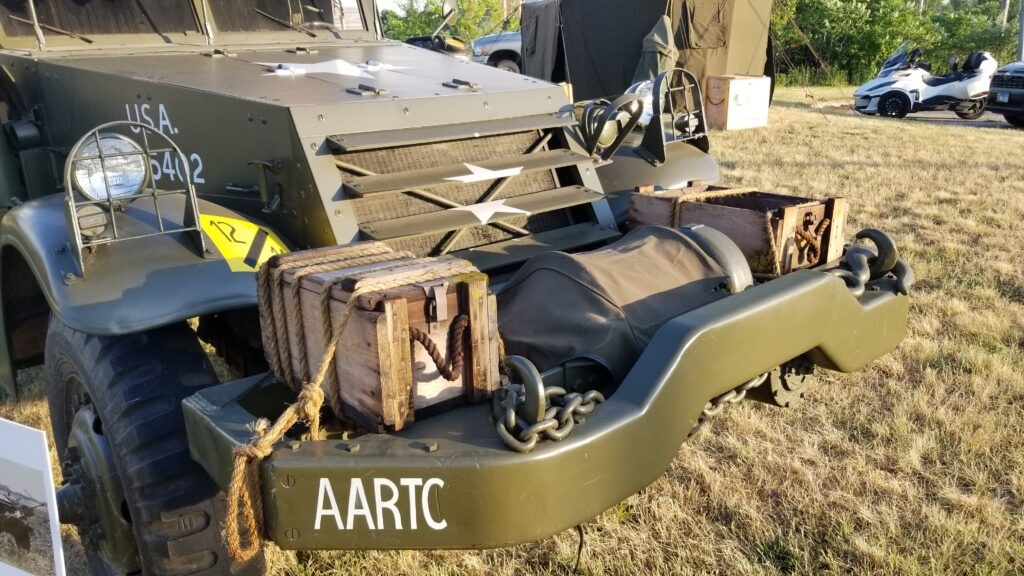
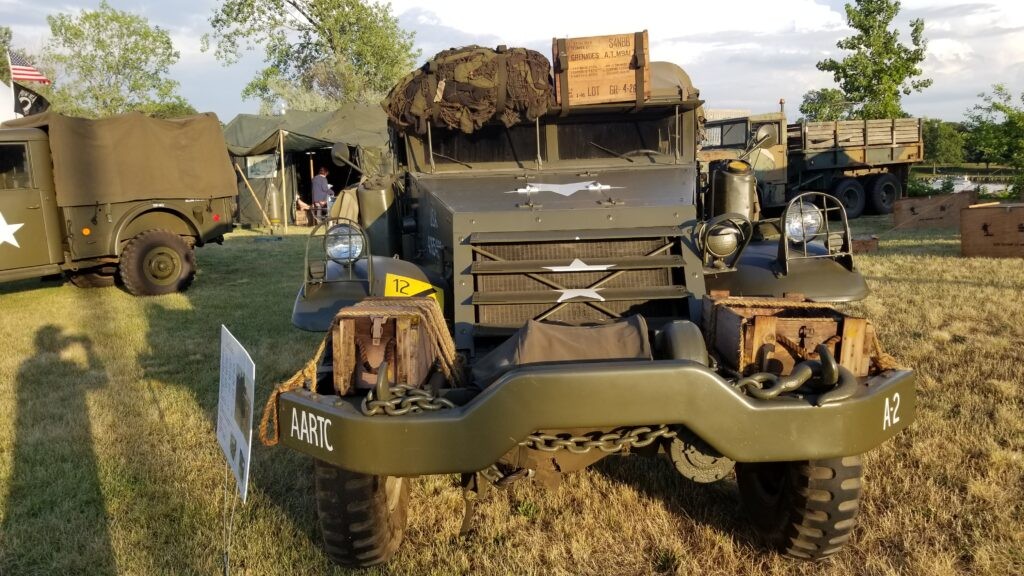
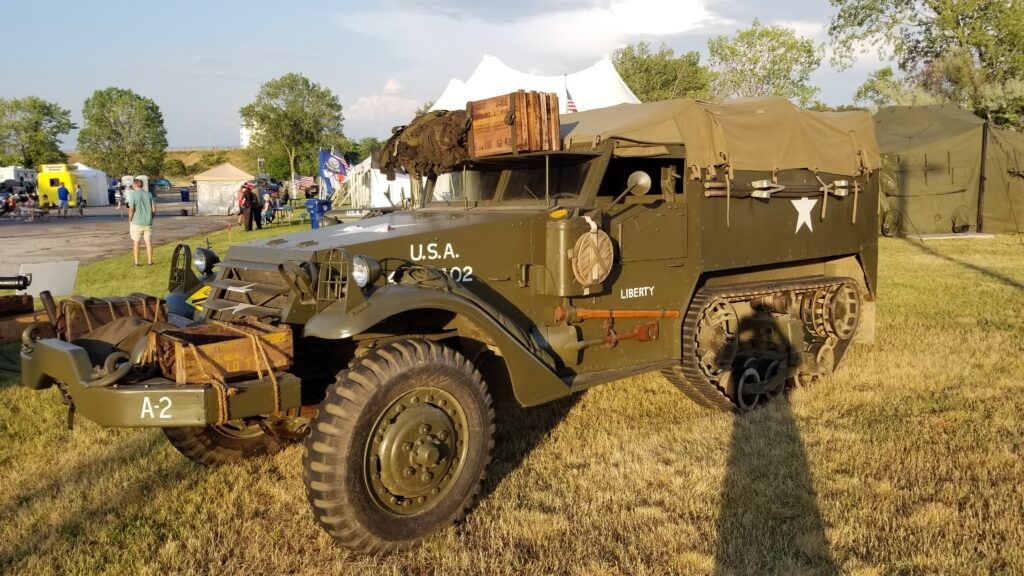
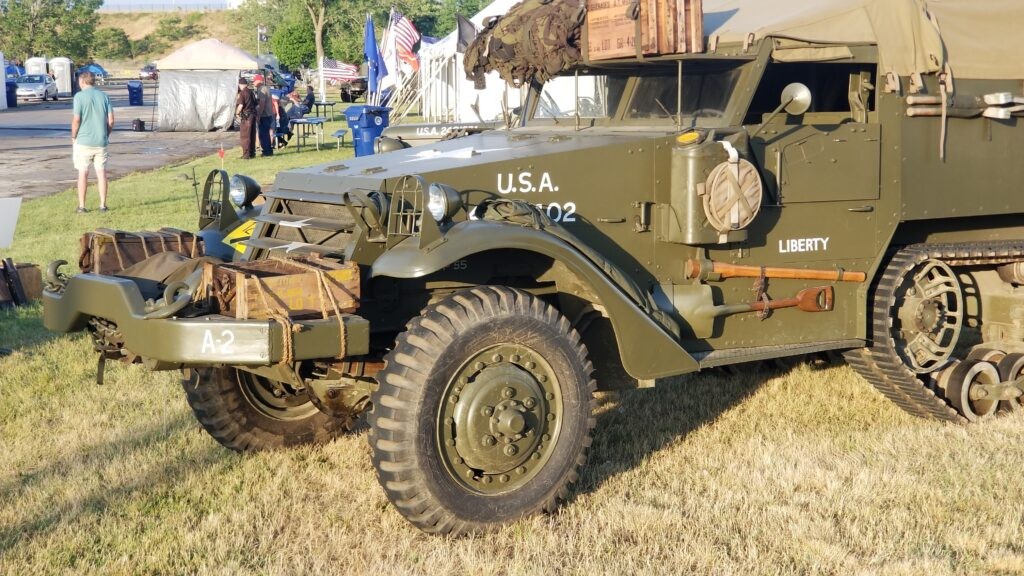
We arrived a bit late on June 19th due to family commitments but I did have a chance to snap some photos of the various vehicles on display that including a M3 halftrack, a DUKW 6×6 amphibian, an M37 dodge and a M59 APC to name a few.

Here’s the slideshow:

  • John's WASR rifle with Romy Brown STK grip and EOTech sight
  • John's WASR rifle with Romy Brown STK grip and EOTech sight
  • John's WASR rifle with Romy Brown STK grip and EOTech sight
  • John's WASR rifle with Romy Brown STK grip and EOTech sight
  • John's WASR rifle with Romy Brown STK grip and EOTech sight
  • John's WASR rifle with Romy Brown STK grip and EOTech sight
  • John's WASR rifle with Romy Brown STK grip and EOTech sight
  • John's WASR rifle with Romy Brown STK grip and EOTech sight
  • John's WASR rifle with Romy Brown STK grip and EOTech sight
  • John's WASR rifle with Romy Brown STK grip and EOTech sight
  • John's WASR rifle with Romy Brown STK grip and EOTech sight
  • John's WASR rifle with Romy Brown STK grip and EOTech sight
  • John's WASR rifle with Romy Brown STK grip and EOTech sight
  • John's WASR rifle with Romy Brown STK grip and EOTech sight
  • John's WASR rifle with Romy Brown STK grip and EOTech sight
  • John's WASR rifle with Romy Brown STK grip and EOTech sight
  • John's WASR rifle with Romy Brown STK grip and EOTech sight
  • John's WASR rifle with Romy Brown STK grip and EOTech sight
  • John's WASR rifle with Romy Brown STK grip and EOTech sight
  • John's WASR rifle with Romy Brown STK grip and EOTech sight
  • John's WASR rifle with Romy Brown STK grip and EOTech sight
  • John's WASR rifle with Romy Brown STK grip and EOTech sight
  • John's WASR rifle with Romy Brown STK grip and EOTech sight
  • John's WASR rifle with Romy Brown STK grip and EOTech sight
  • John's WASR rifle with Romy Brown STK grip and EOTech sight

If you ever get a chance to attend a Lest We Forget event, I highly recommend it. The atmosphere is family oriented and everyone there wants to share and have a good time.


Please share the link on Facebook, Forums, with colleagues, etc. Your support is much appreciated and if you have any feedback, please email us in**@*********ps.com. If you’d like to request a report or order a reprint, please click here for the corresponding page to open in new tab.


When Strength and Quality Matter Most