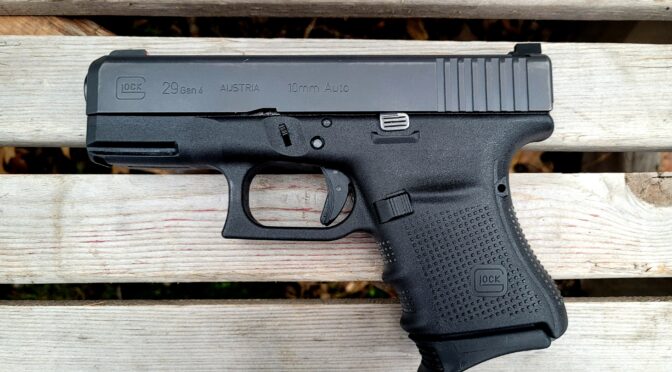
I recently wrote about my Glock 29 Gen 4 and carrying it while hiking. A fellow asked me for more details on what I was using to carry it ands I told him I was using a 5.11 Select Carry Pouch – which is a fancier product name than “tactical fanny pack”. Joking aside, it really does a great job.
Ok, why the fanny pack? I’m on the heavy side and when I go hiking I am usually wearing shorts or sweatpants depending on the weather. Jeans are a “maybe” but I’m at the point in life where I go for comfort. I’m sure not dressing to impress anyone.
If I am wearing jeans and can use a pistol belt then I might use a holster but it depends on the weather. I’d rather conceal the firearm vs. dealing with people staring at my pistol as we are walking along. If I am wearing a coat or open long sleeve shirt then I might wear a belt holster. My preferred option is a Galco shoulder holster.
What I find is that I am often hiking or fishing and it’s too hot for a coat or loose shirt so I had to figure out what to do. I knew a fanny pack might look goofy but would work great if I could find the right one given how it could distribute the weight while concealling the pistol.
The Glock 29 gen 4 is relatively compact but it is not tiny by any means and once you load it down with 10 rounds of 10mm and have a couple of back up mags of 10mm, you’ve got a lot of weight to deal with.
A couple of years ago I ordered in some different models of the no-name import fanny packs that claim to support concealed carry and the quality was very disappointing – light fabrics, lousy sewing and poor zippers across the board. They weren’t an option for the Glock 29 gen 4 because they would never hold up to real world use.
There are a lot of carry options out there but I think I can make the blanket generalization that you get what you pay for – you need a well thought out design, rugged materials, a rock solid zipper and these aren’t cheap.
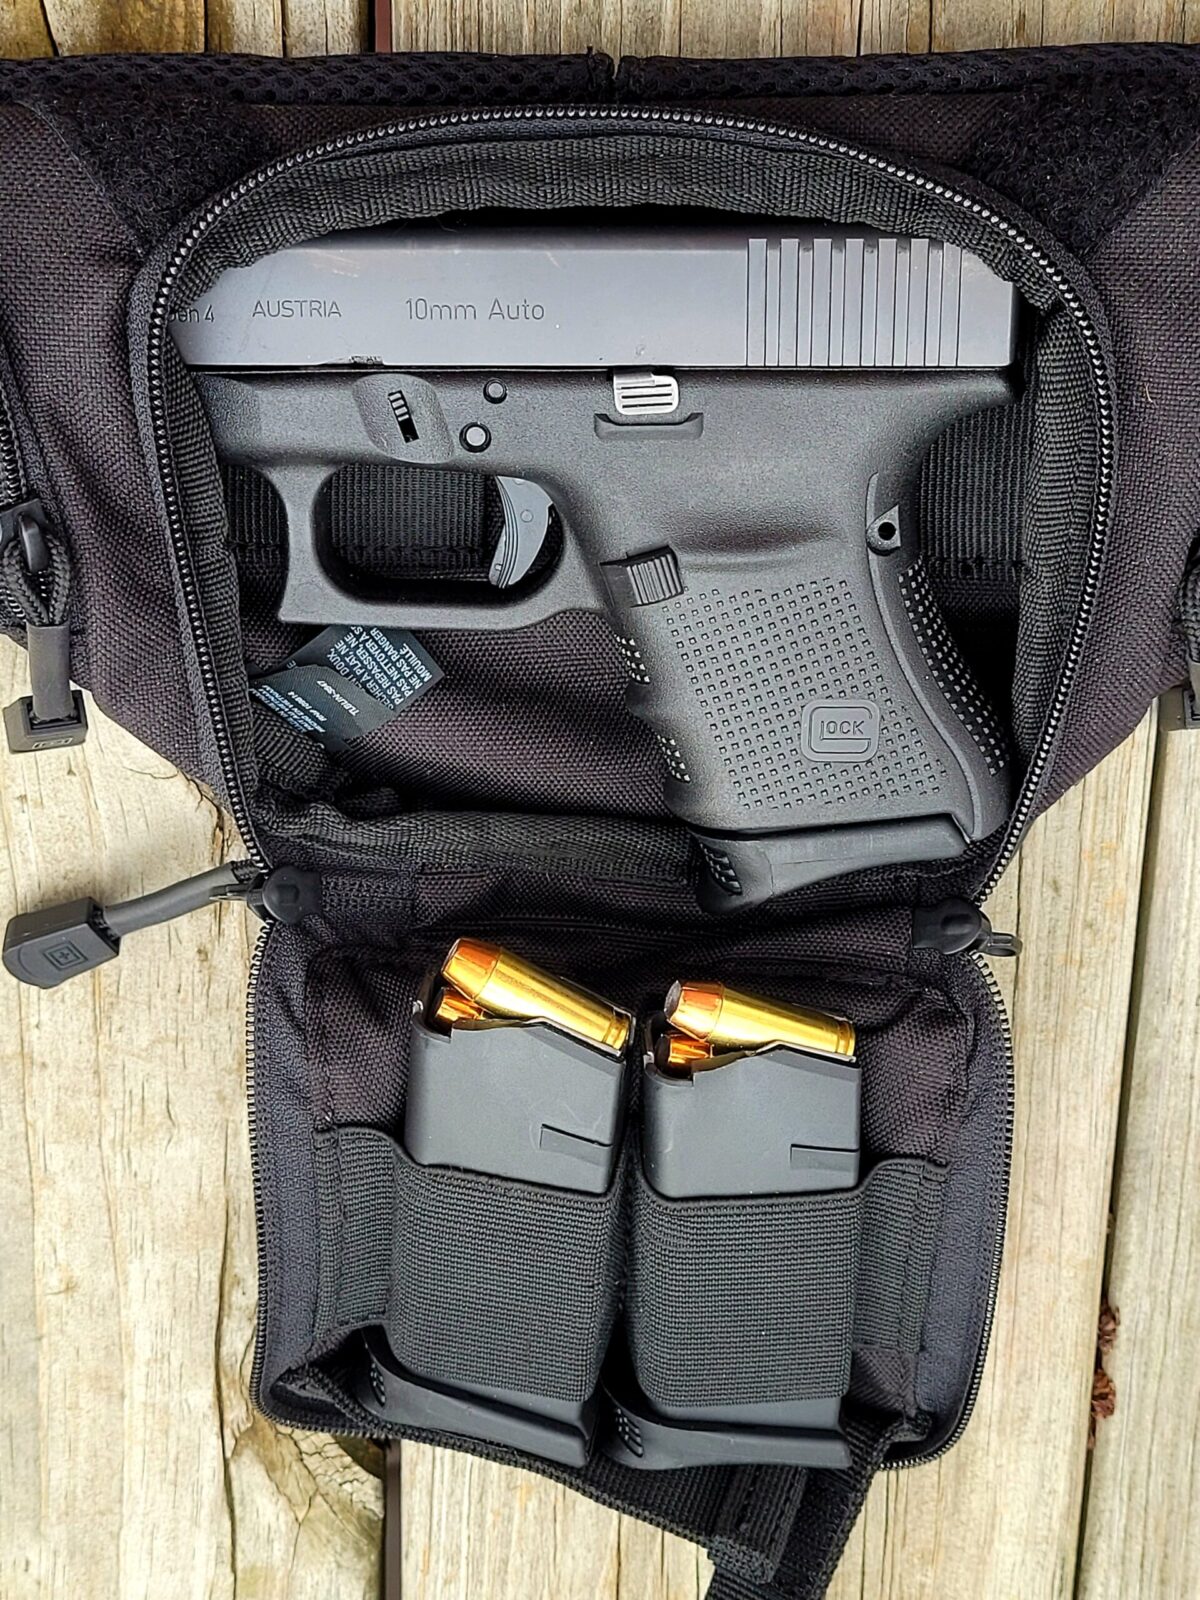
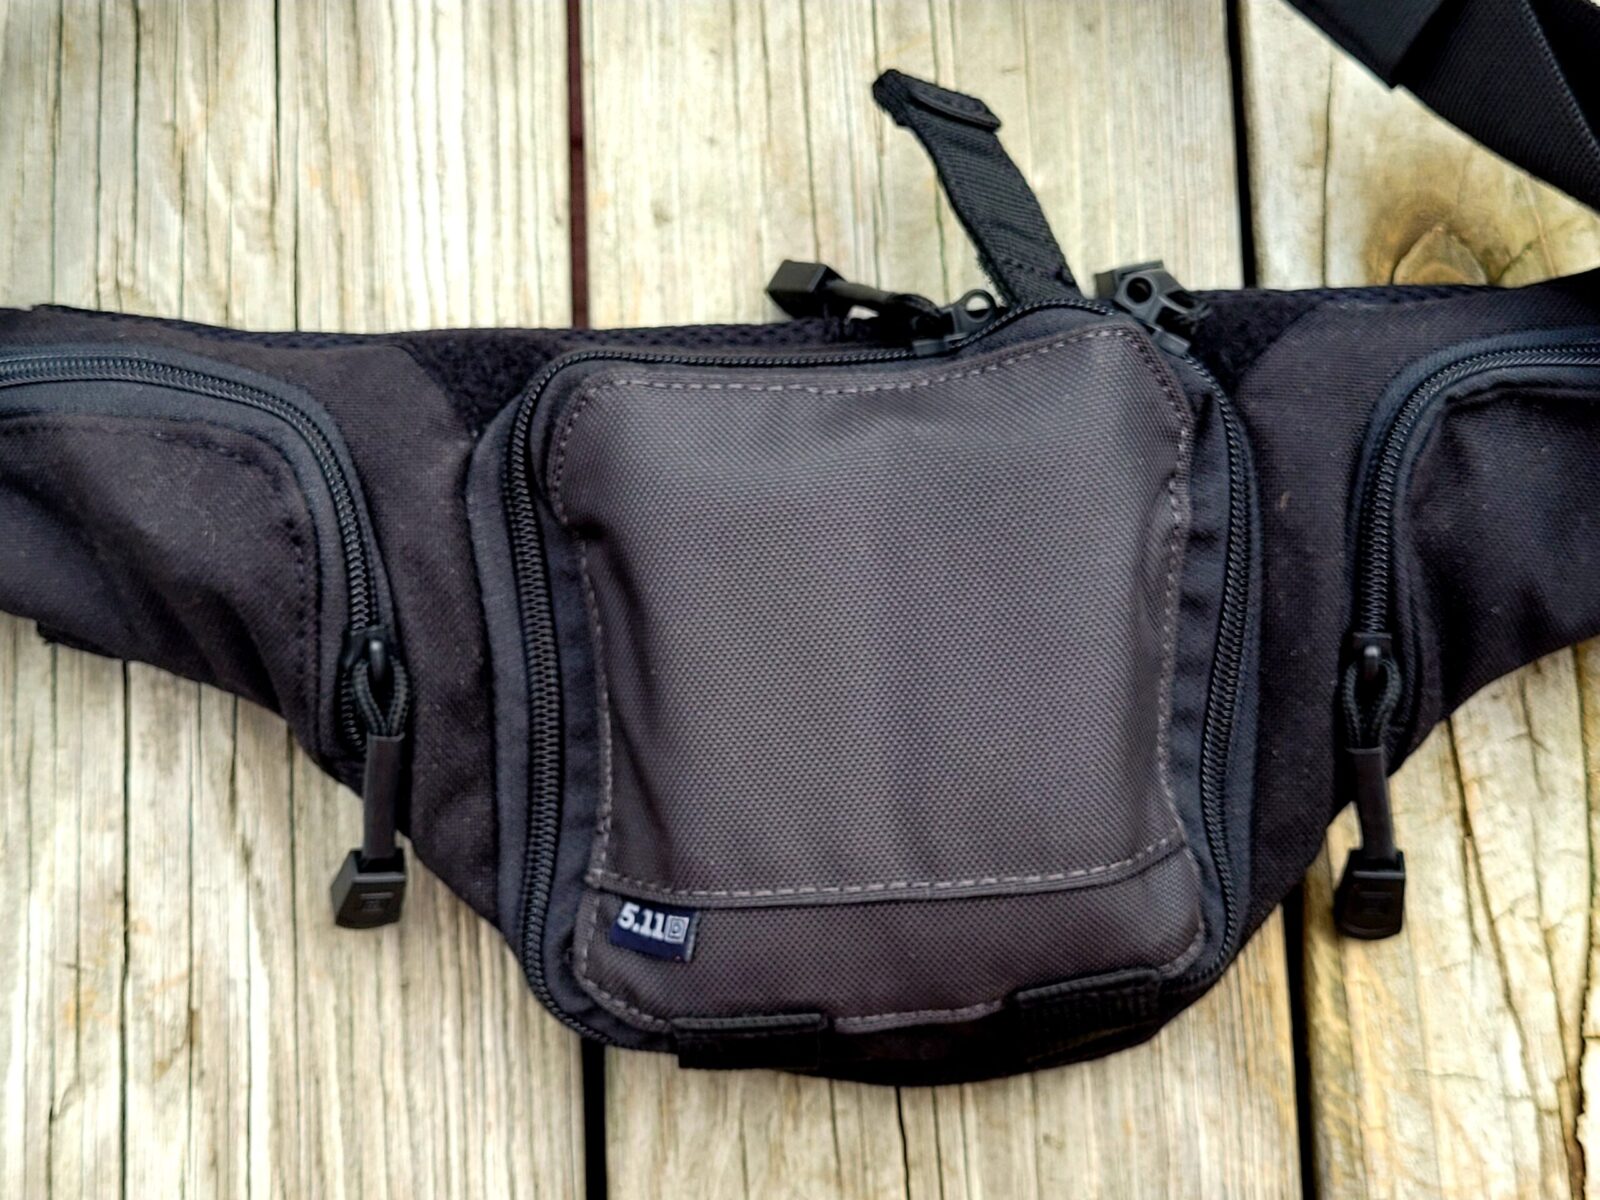
One company I like is 5.11. Their gear is reasonably priced and has never let me down. Yes, I am getting to my point – their 51804 Tactical Select Carry Pouch is very well made, looks good and doesn’t attract attention. It’s a tight fit but I can squeeze in my G29 with the Pearce magazine base plate so I have a place to rest my pinky finger, two more 10 round mags and a Streamlight TLR-8 that I keep in a side pouch.
The main pouch is a tight fit but I can squeeze in what I need. It’s symmetrical so you can insert the pistol facing either left or right. I have mine set up to rip open with the left and pull the pistol out with my right hand.
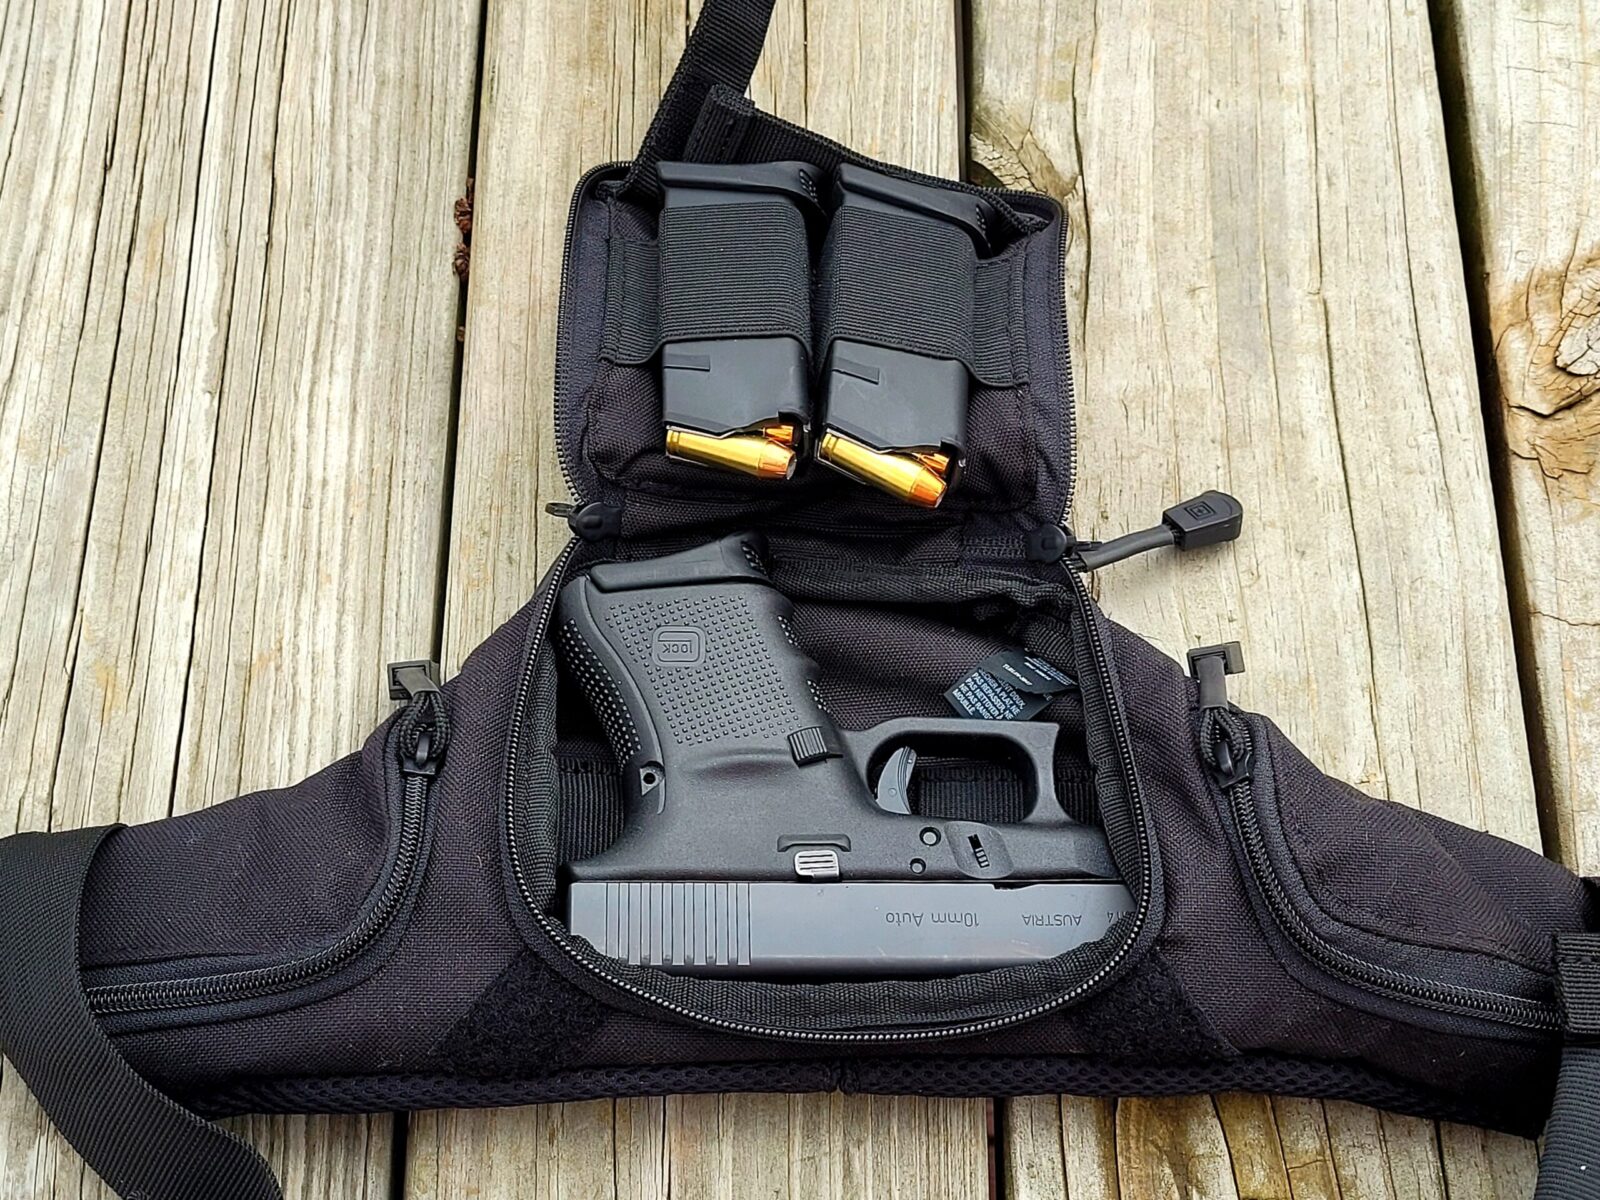
Here’s another angle. When you have the load shown, there is very little extra space.
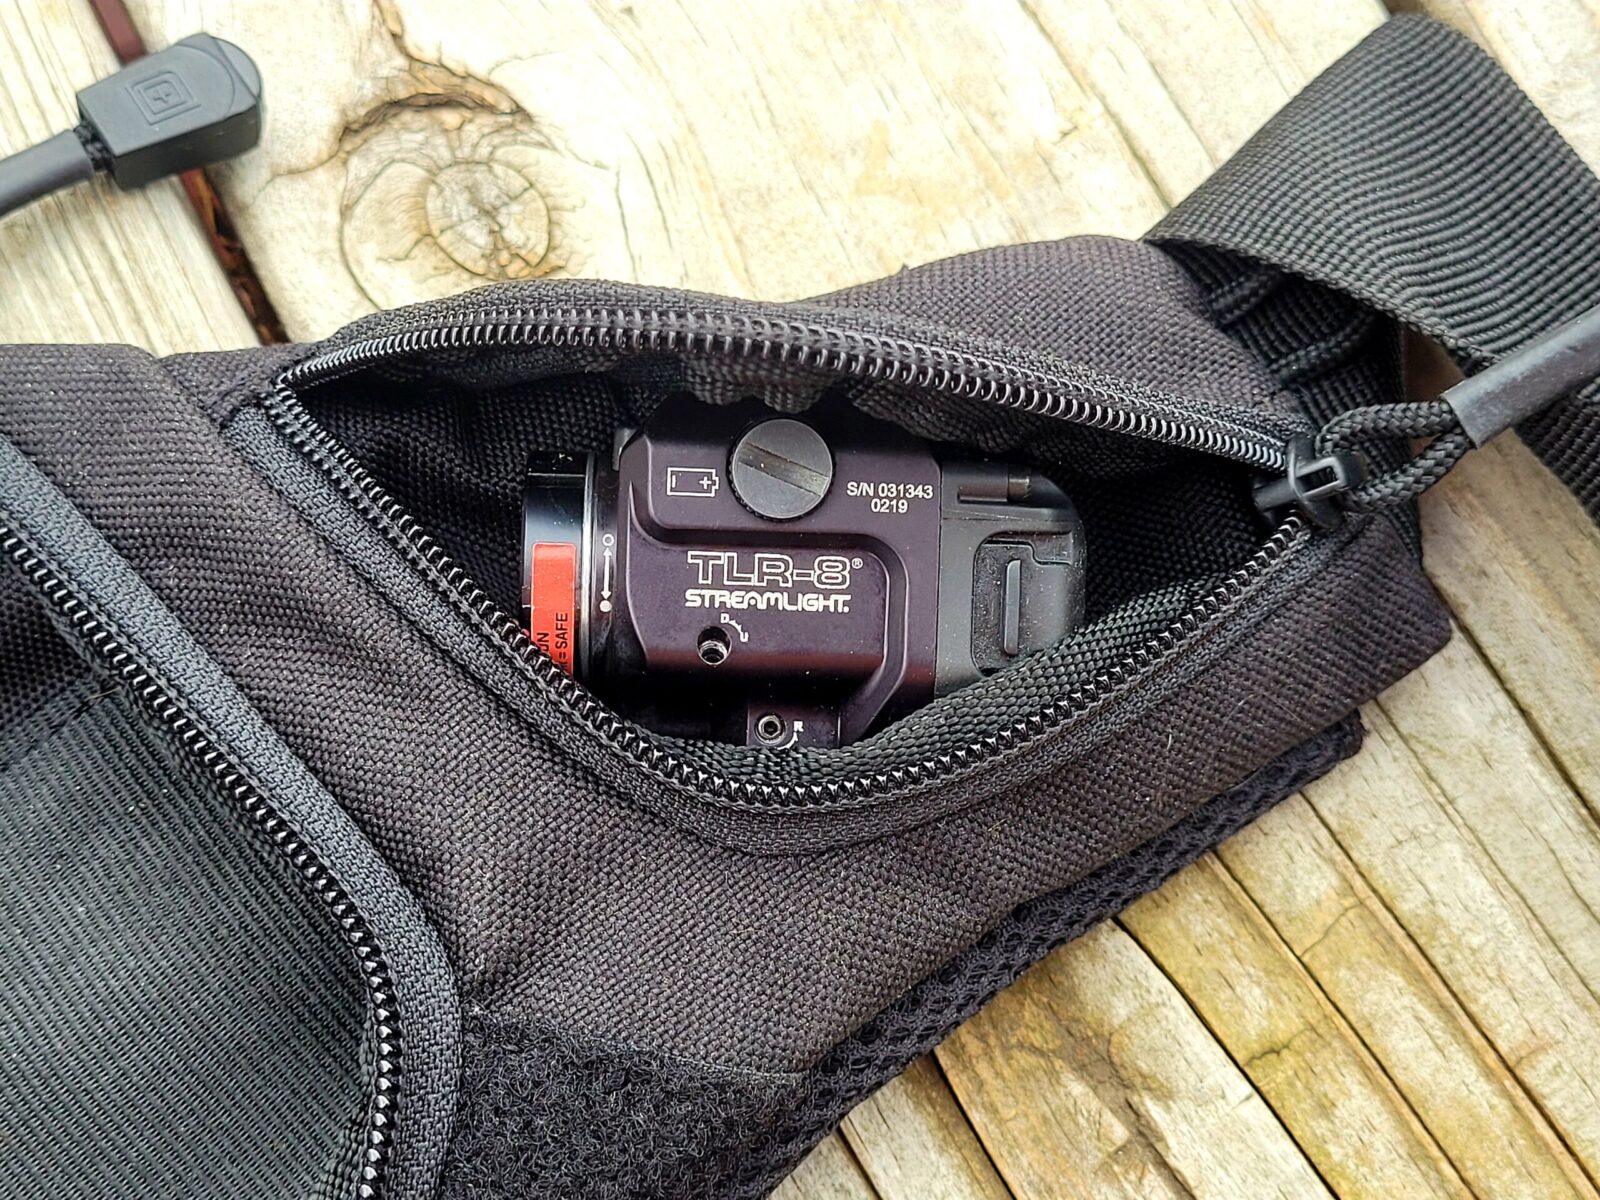
I keep a TLR-8 stored in the right side pouch. It’s a snug fit also.
They call that thing sticking up a “hot pull strap” that you can use to yank the compartment open in a rush. Now that folks is one heck of a good idea. If you are in a hurry and the adrenaline is kicking in, fumbling with a zipper is going to suck. Grabbing that pull strap and yanking open the pouch is very do-able.
To give you an idea of real world sizing, a G29 Gen 4 is about 7″ long andjust over 4.5″ with a regular mag. Let’s just round that to 5″ in my case with the Pearce base plates. You can see in the photos that it is a snug fit. My Sig P365 fits no problem.
Note, I have to buy all of my parts – nothing here was paid for by sponsors, etc. I do make a small amount if you click on an ad and buy something but that is it. You’re getting my real opinion on stuff.
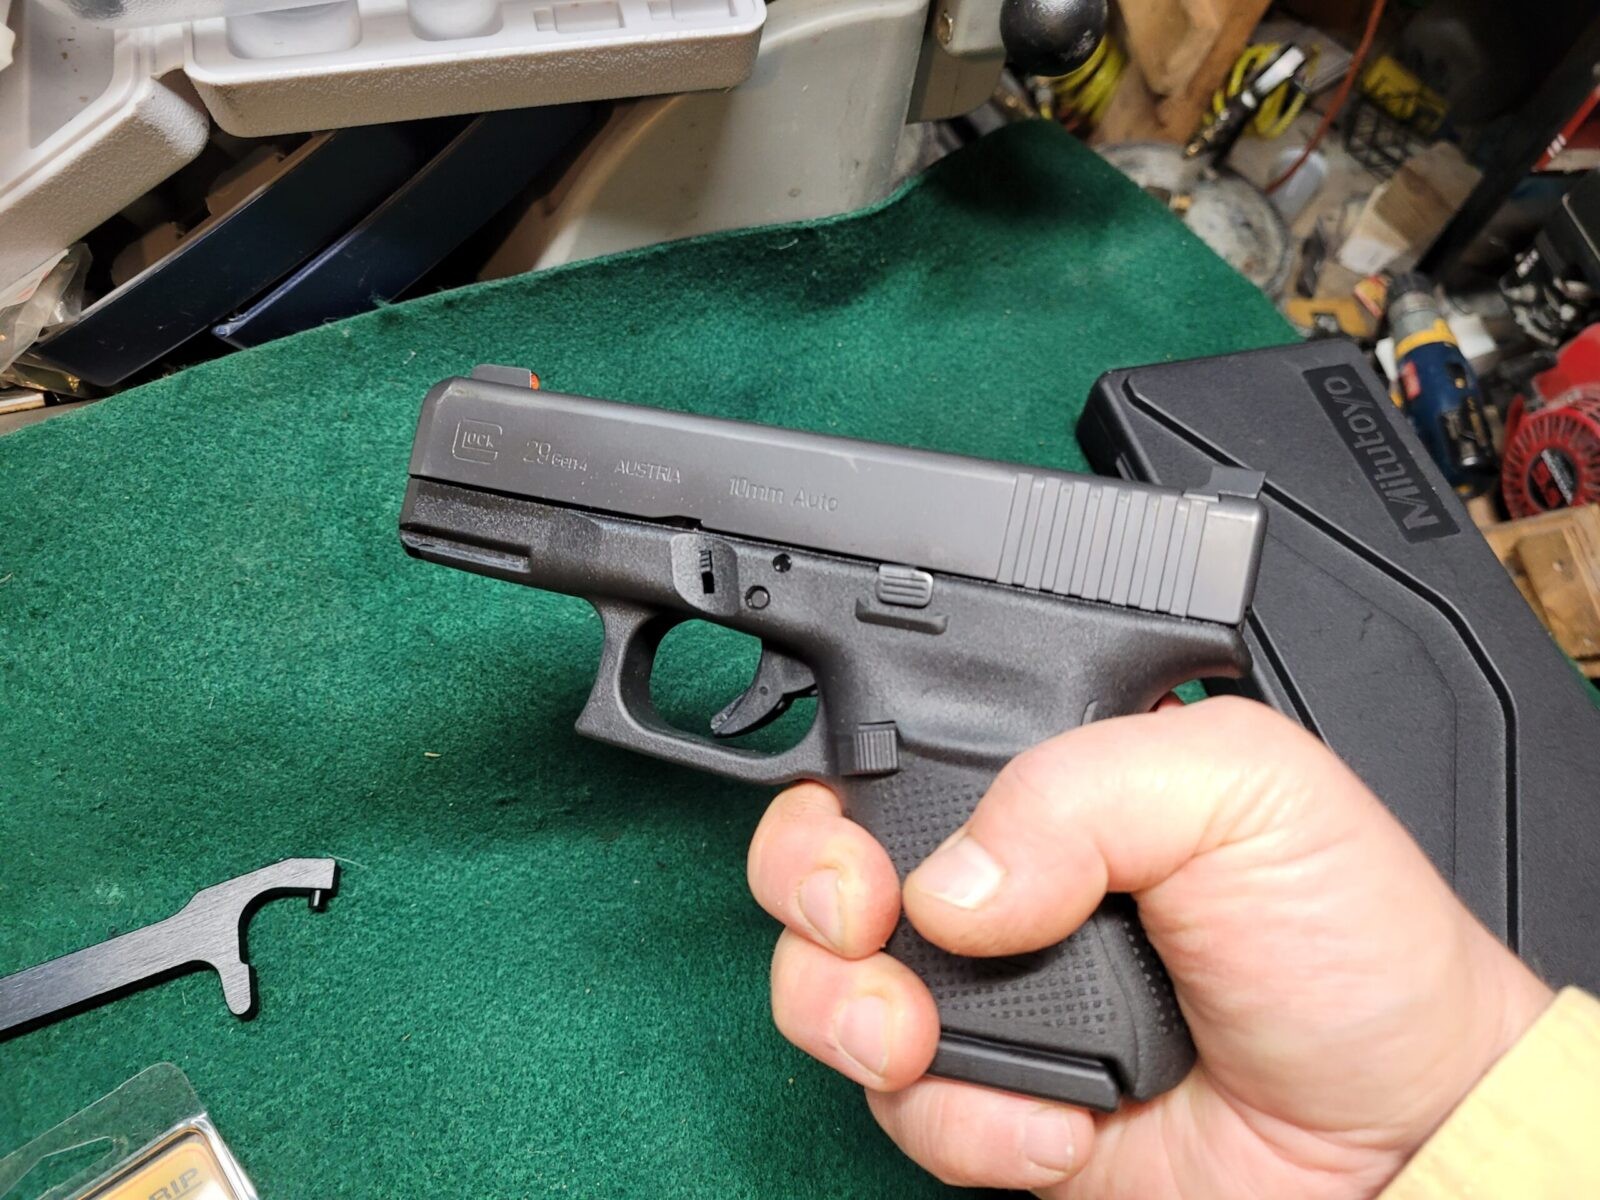
The Glock 29 Gen 4 offers a solid platform out of the box and for many, that is all they want. For me, after building a few Polymer80s and having a better idea of what I liked, I knew I wanted to upgrade some of the parts to personalize it plus run heavier loads.
Wait – Not The Trigger You Ask?
You may look at that list and be surprised that I left the trigger alone – yes, I did. I’ve used Zev, Overwatch and other aftermarket triggers along with other aftermarket parts like connectors, springs, etc. My personal choice, and this is just me, was to go with the tried and proven OEM Glock parts and let them wear in. I’m not shooting matches or precision targets – this was to be a defensive pistol so I wanted reliability and a trigger with enough pull that I wouldn’t have an accidental discharge. There are guys that will agree with me and ones that will strongly disagree – the trigger decision is totally up to you. Mine was to go with the original Glock trigger parts.
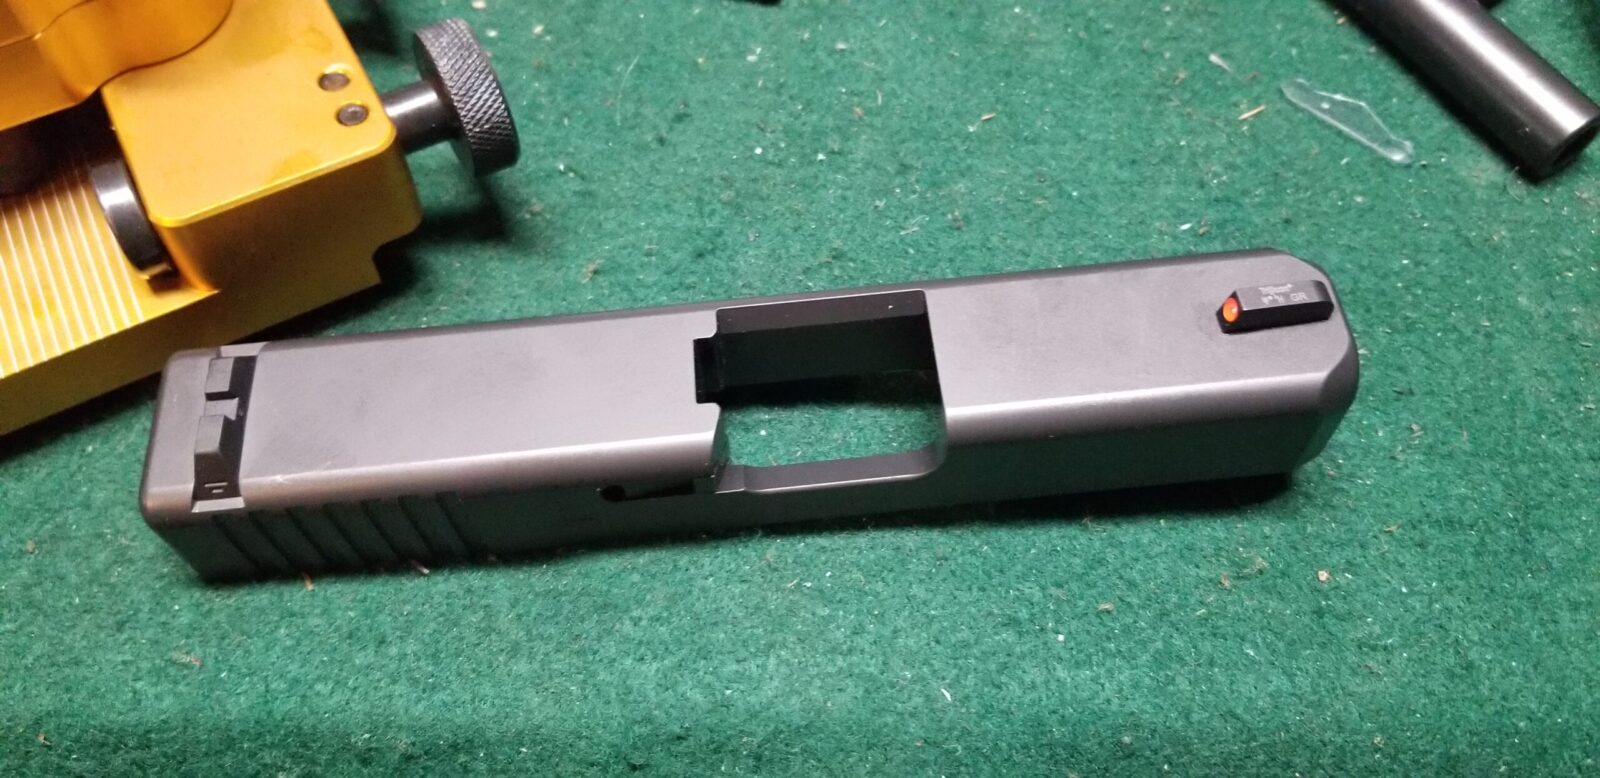
New Sights
The original Glock sights are better than nothing but I really do not care for them. Others must feel the same way because there are a ton of aftermarket sight vendors. By the way, go for a brand name – some are just total junk and not sufficiently rugged.
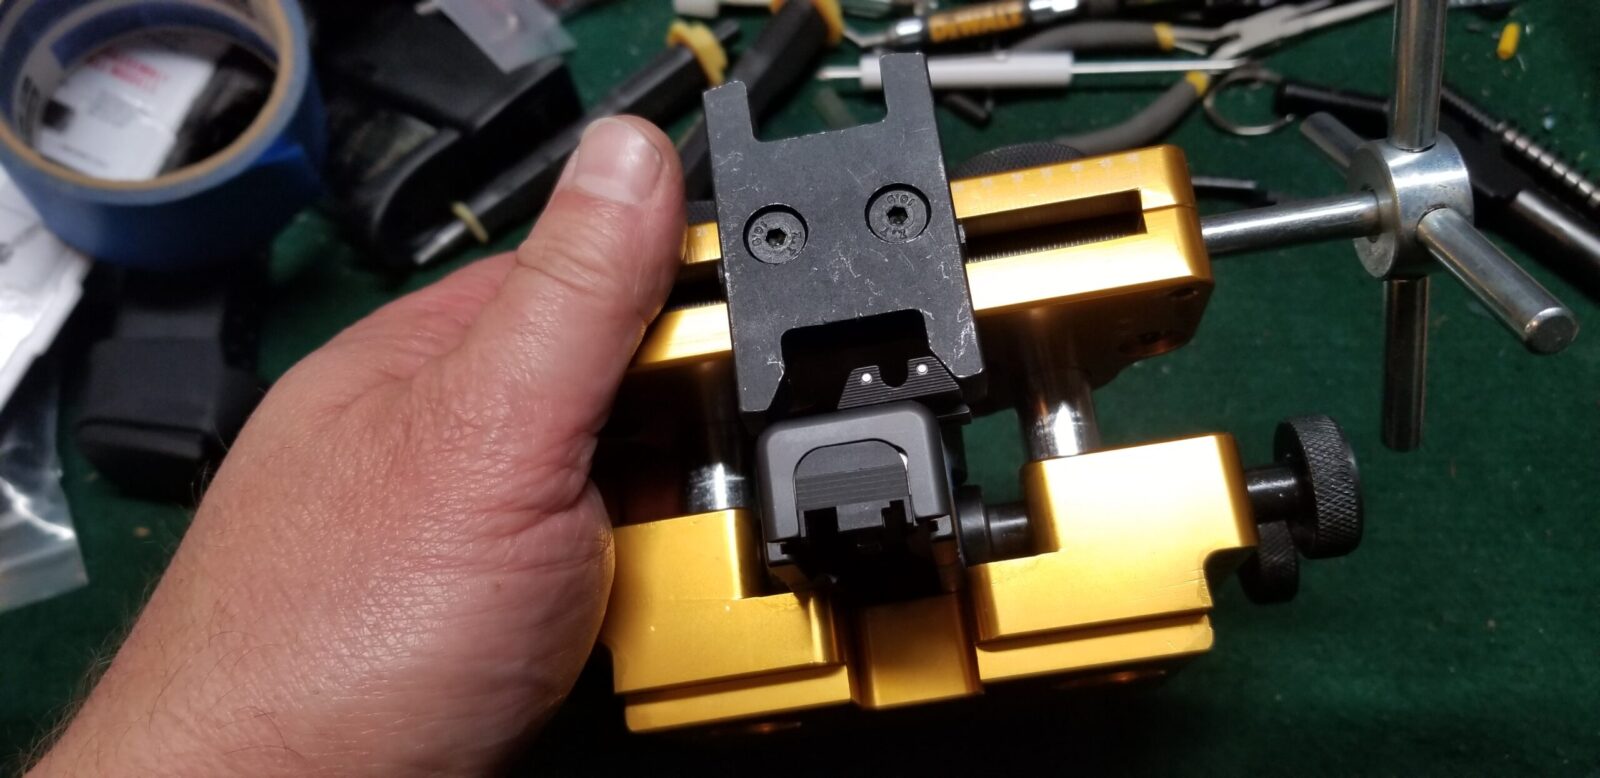
I’ve had very good luck with TruGlo and Trijicon and I tend to favor the latter more. Trijicon sights are very well designed, make aiming super easy and are incredibly rugged. I opted for the Trijicon HD Night Sights (GL1040) for large frame night sights that have an orange ball in the front and tritium illumination. I intentionally wanted a low-light sight but not to add an optic.
I used a Wheeler Sight Tool for pistol sights and really like it. Installing and removing Glock sights is a breeze with this tool. You can’t see it from this angle but I do have blue painter’s tape on the slide to protect the finish just in case.
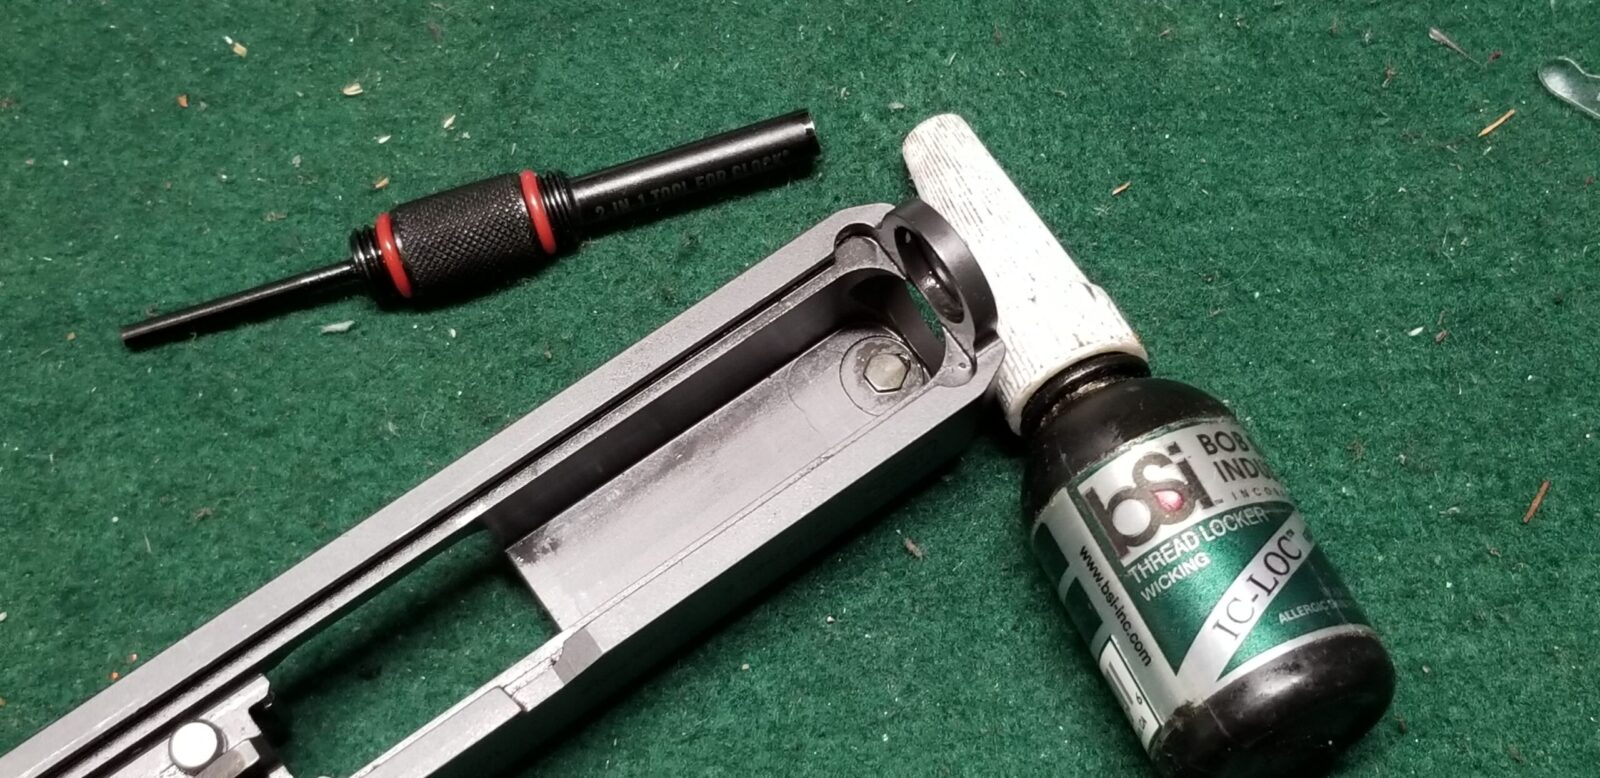
My current tool for removing and installing Glock sights is this 2-in-1 Real Avid tool that has a pin pusher on one end and a pin pusher on the other. What makes a good tool? The little bolt you see requires a 3/16″ thin wall socket. Having a rare earth magnet at the right depth makes all the difference in the world to properly hold the bolt while you are trying to get it threaded into the sight. Cheap tools do not have the socket properly formed, don’t have a magnet, etc. The Real Avid tool gets it right. Cheap imports are just that – I’ve seen them useless right out of the box.
Done. It took me maybe 10-15 minutes including taking these photos. The right tools make it very easy.
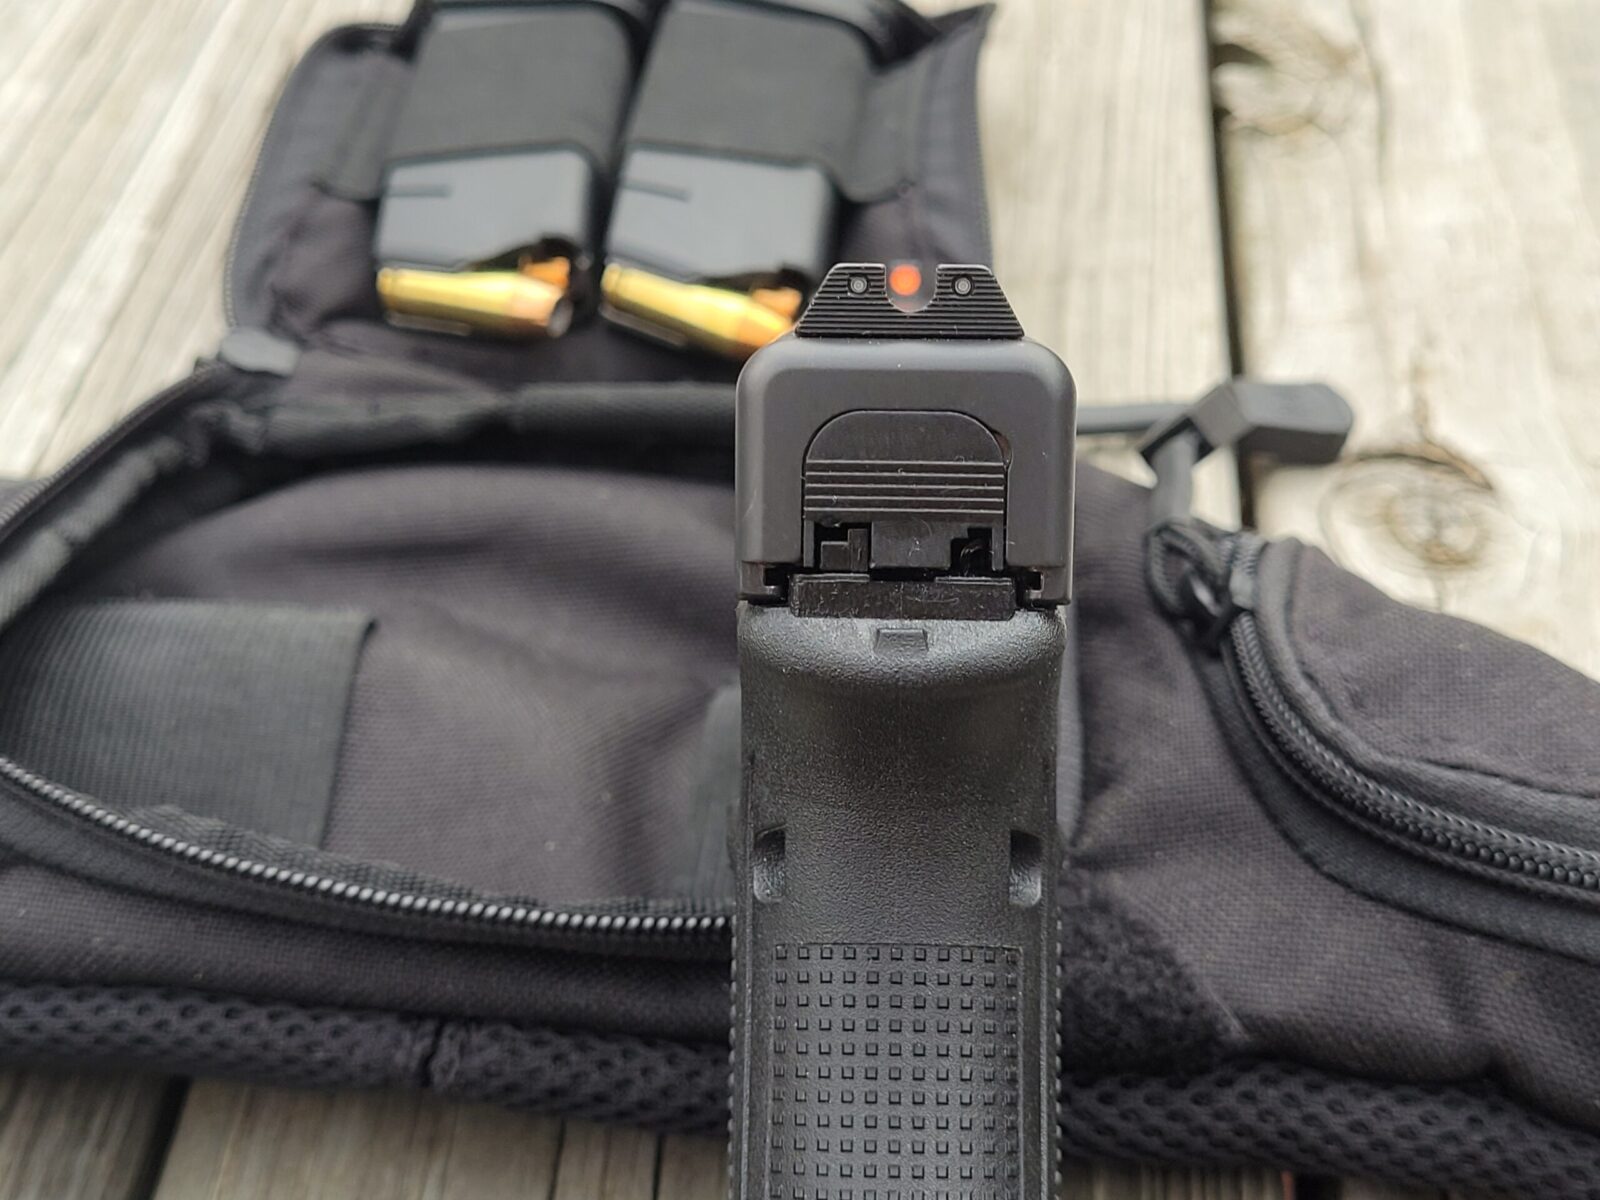
The dots glow green in low light due to tritium inserts.
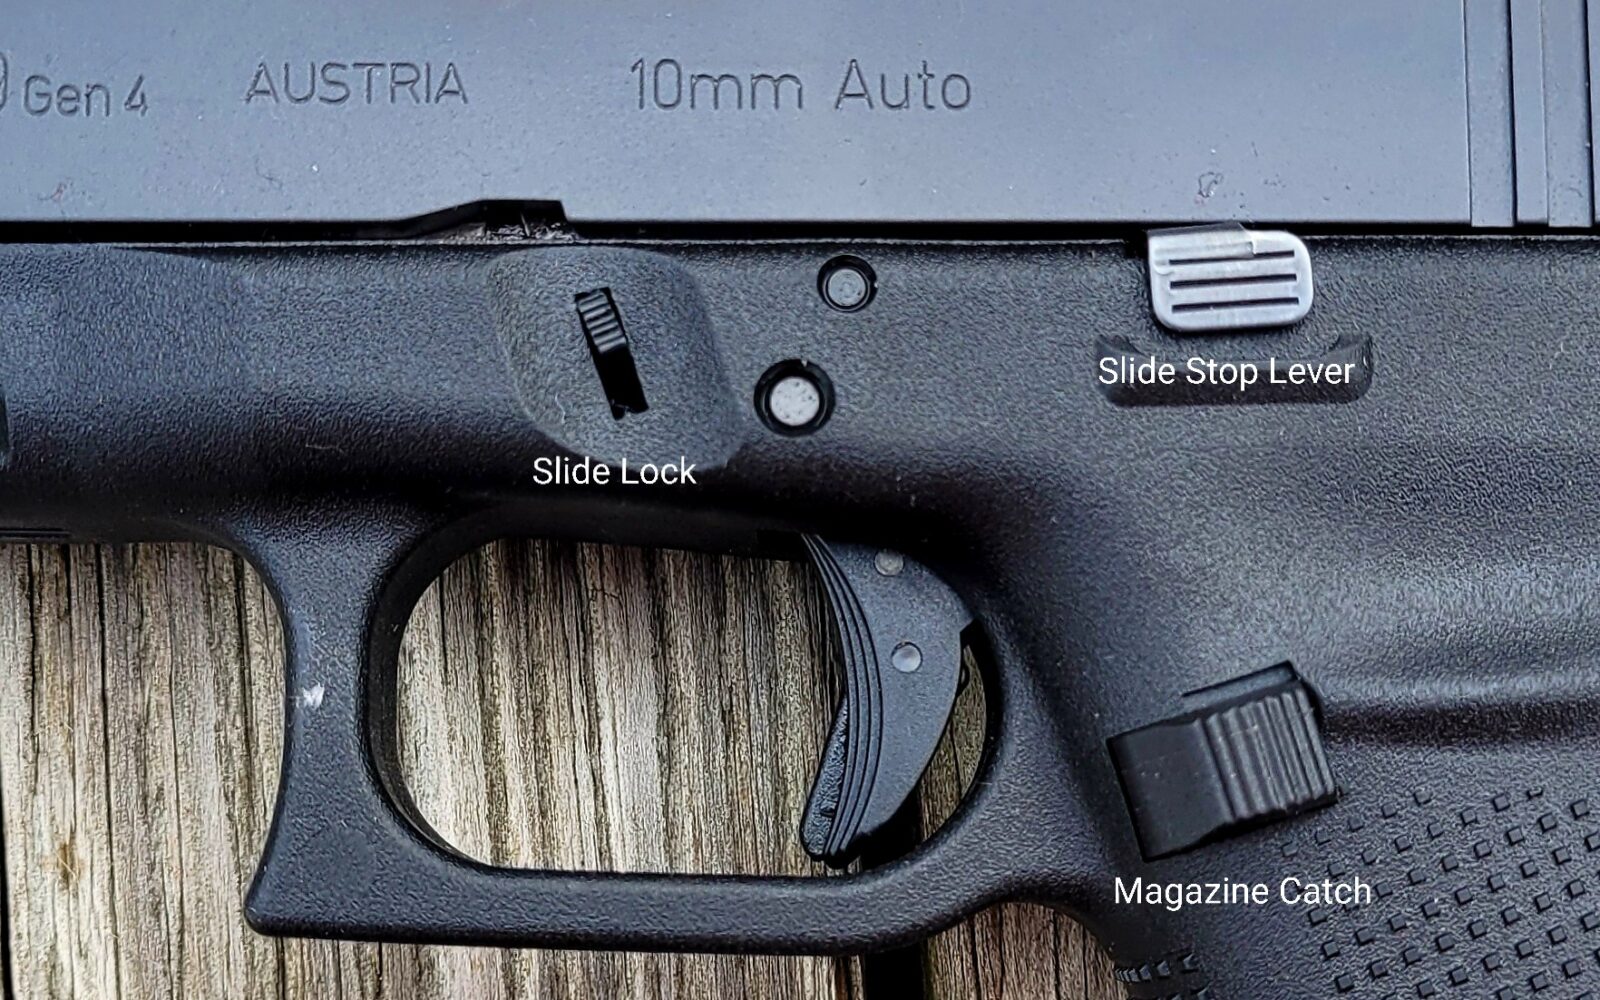
Changing The Controls
That is a Rival Arms Extended Slide Lock. An OEM Glock Slide Stop Lever and a Tango Down Vickers Tactical Magazine Catch.
I like to replace the slide lock, slide release and mag catch normally. The slide stop is actually a big problem for me as I have a hard time grabbing, even feeling, the two sides to pull it down to remove the slide. This really drives me nuts and is one thing I always replace. I installed a Rival Arms extended slide release that sticks out just enough for me to get a much better grip on it. I wish I could find the packaged but I installed a no-name unit online and it had problems from the start – the Rival Arms unit is what I went to next and am still using. Point of the story – beware of cheap parts and test your stuff.
For the Slide Stop Lever, I actually am still using the Glock unit. Normally I would replace it but had a hard time finding one that would fit a Glock Gen 4 model 29. I can use the Glock lever, it’s just not my first choice.
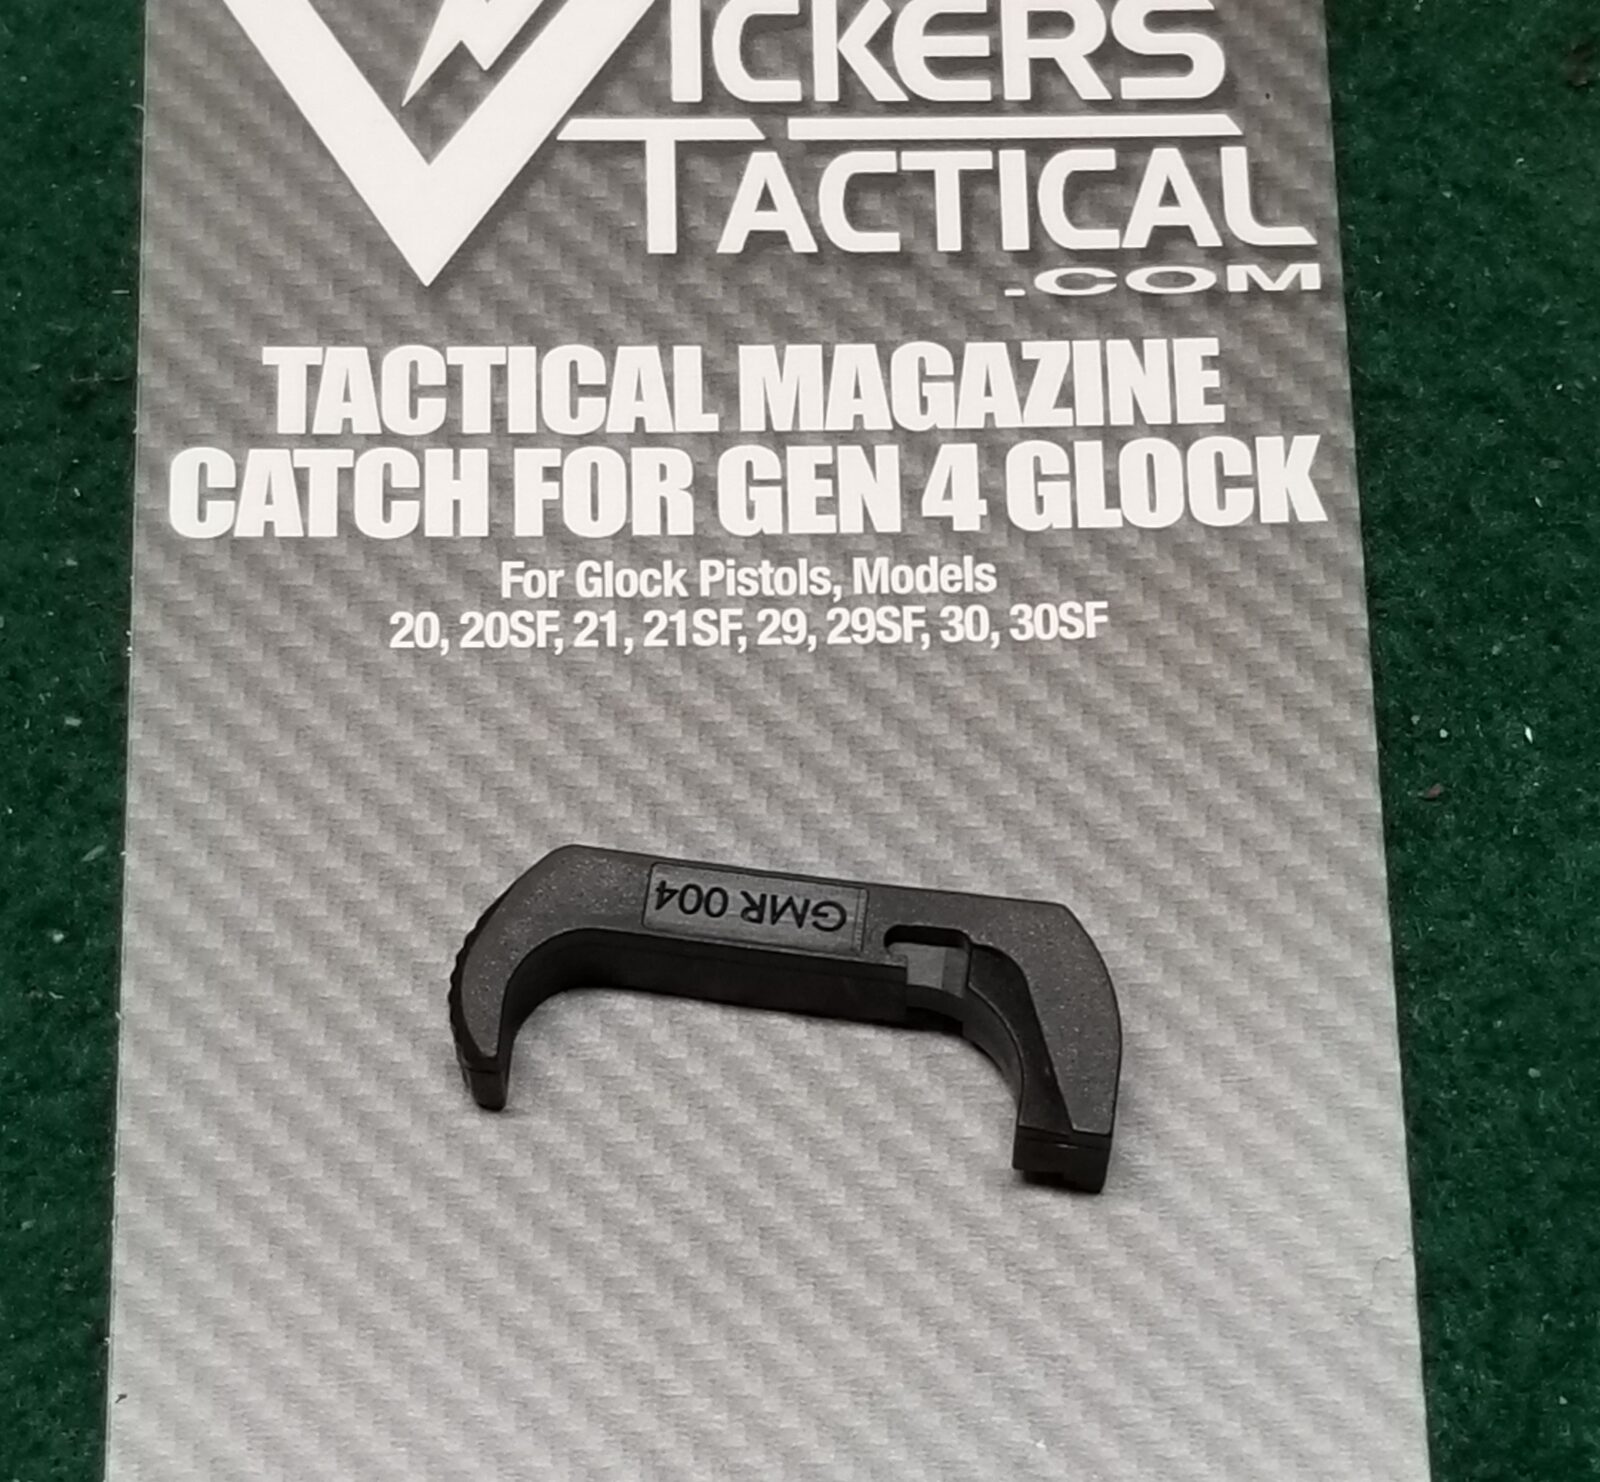
For the Magazine Catch, I went with a Tango Down Vickers Tactical model. I’ve used these a number of time of times now because I like how it sticks out just a bit more than the original but not too much. I’ve tried ones that stick out so far that if you even lay the pistol on its side, the catch is depressed enough to release the magazine and then the next round fails to feed because the mag isn’t properly seated.
The Vickers Tactical Magazine Catches are really my preferred unit these days for Glocks and Polymer80s.
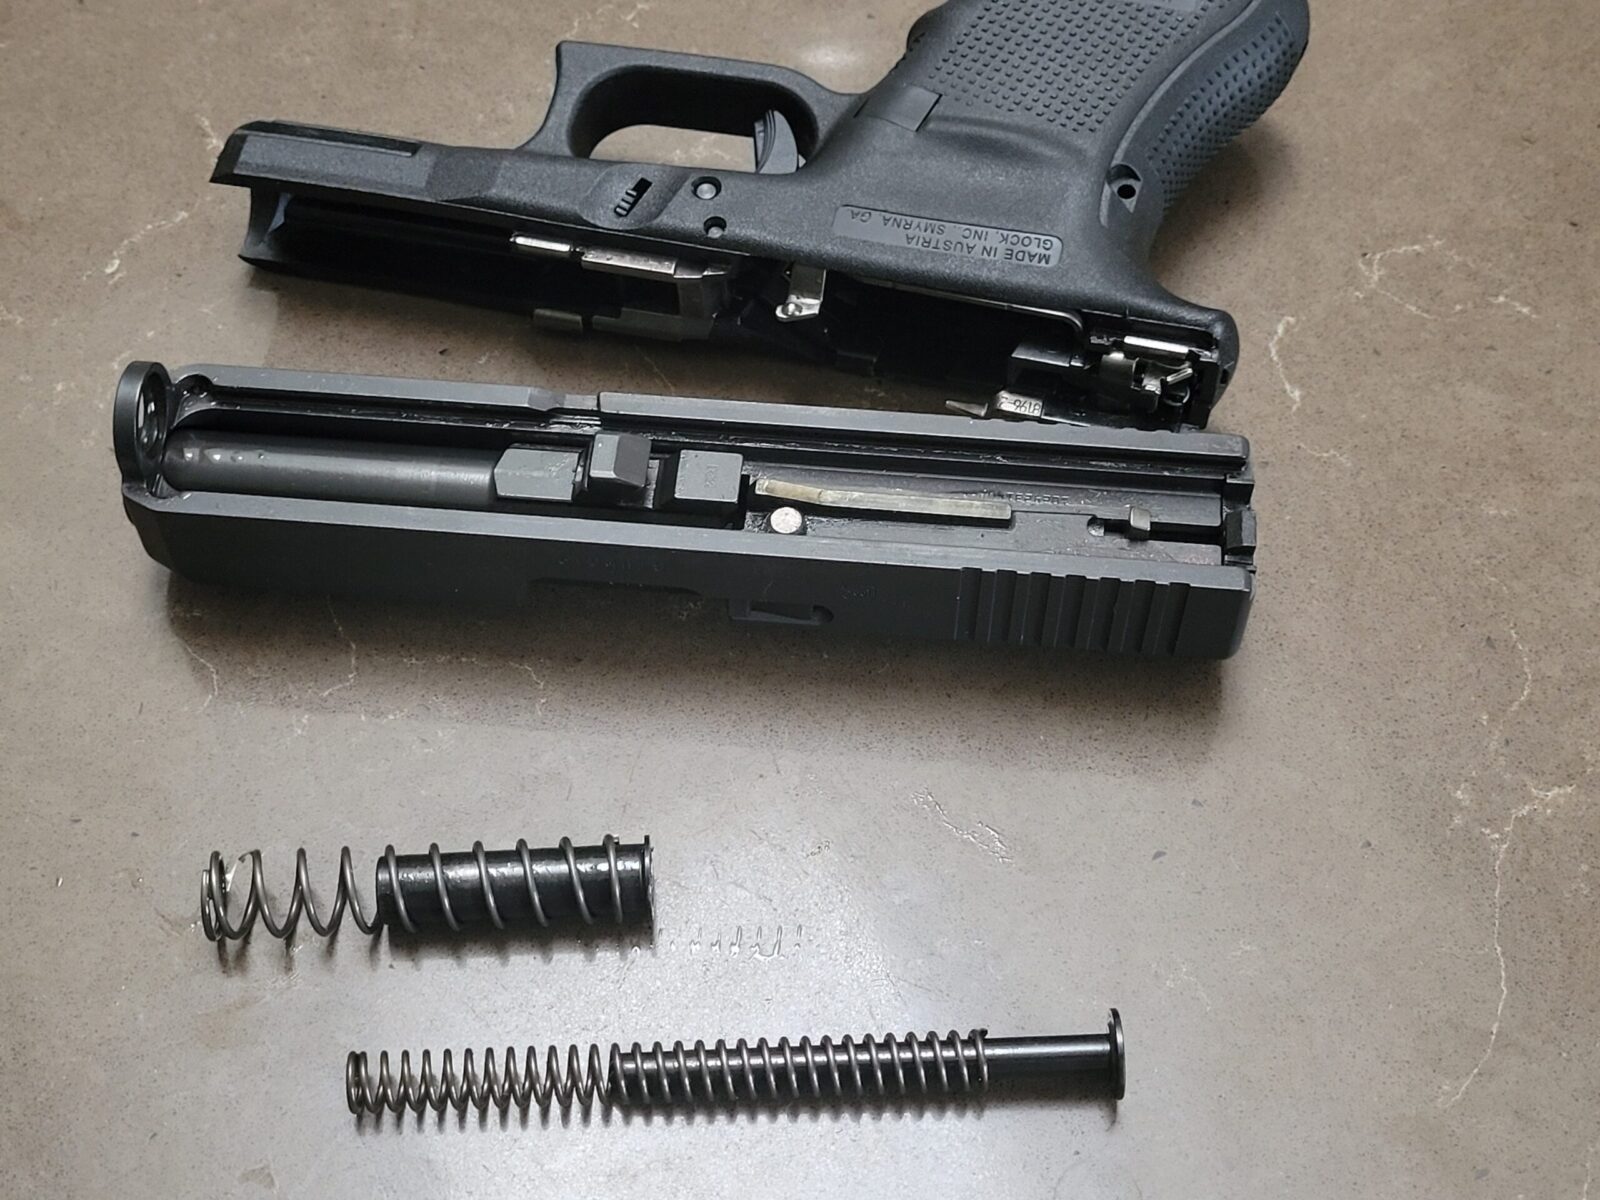
Recoil Spring Upgrade
The stock Glock 29 spring is rated for 17 pounds as I understand it. To better run the hotter loads from Buffalo Bore and Underwood, I wanted to put in a stiffer spring but I wasn’t exactly sure what to go with. This helps with obtaining both higher and more consistent velocities with these loads. Yes, the OEM recoil spring will still work – this is an improvement is all. However, if you run too stiff of a spring, your pistol may not cycle reliably with other loads you want to run.
Wolff Gun Springs makes this decision super easy for you. They sell what they call a “Recoil Calibration Pak” with springs at 17, 19 and 21 pounds. They have a variety of these assortments for different Glock models as well.
To install the spring, you need to get a two piece guide rod assembly and Wolff sells them as well. The native Glock springs are in a captured assembly that really isn’t designed to come apart. The Wolff guide rods make it super easy for you to try different springs and do not affect accuracy or reliability in terms of the rods themselves.
That is the Wolff two piece guide rod and springs. It’s worked great so far.
I installed a 19 pound spring and found it functioned just fine with all of my Buffalo Bore, Ammo Inc, S&B, and Underwood loads. That’s what I am running at this point and haven’t had any reliability issues so far.
In Conclusion
The pistol is configured the way I want it and as reliable as ever. The end of the day, what you do is your choice but just be sure to test your combinations (the new parts, magazine and ammo) before you rely on them.
Note, I have to buy all of my parts – nothing here was paid for by sponsors, etc. I do make a small amount if you click on an ad and buy something but that is it. You’re getting my real opinion on stuff.
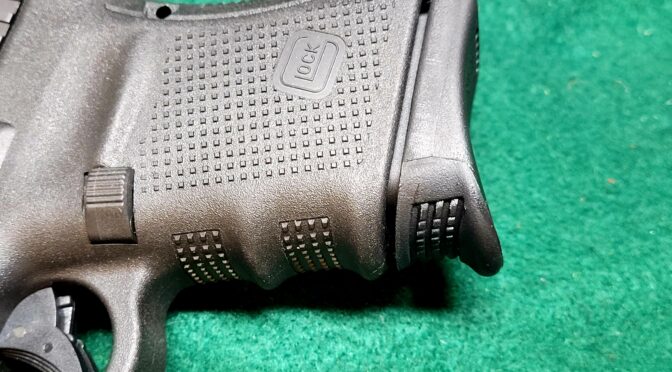
The first thing I noticed with the Glock 29 with its stock 10 round magazine was that the grip was way too small for my hands. Granted I wear XL sized gloves and have big palms courtesy of my dad and grandpa but literally, my pinky finger had nothing to grab on to and I really didn’t want to control a 10mm pistol running hot loads with just two fingers – excluding my trigger finger that is. I had a trick up my sleeve though – I knew I could get grip extensions that would make holding the pistol way more comfortable.
Yeah, sorry, I can’t stand this kind of grip.
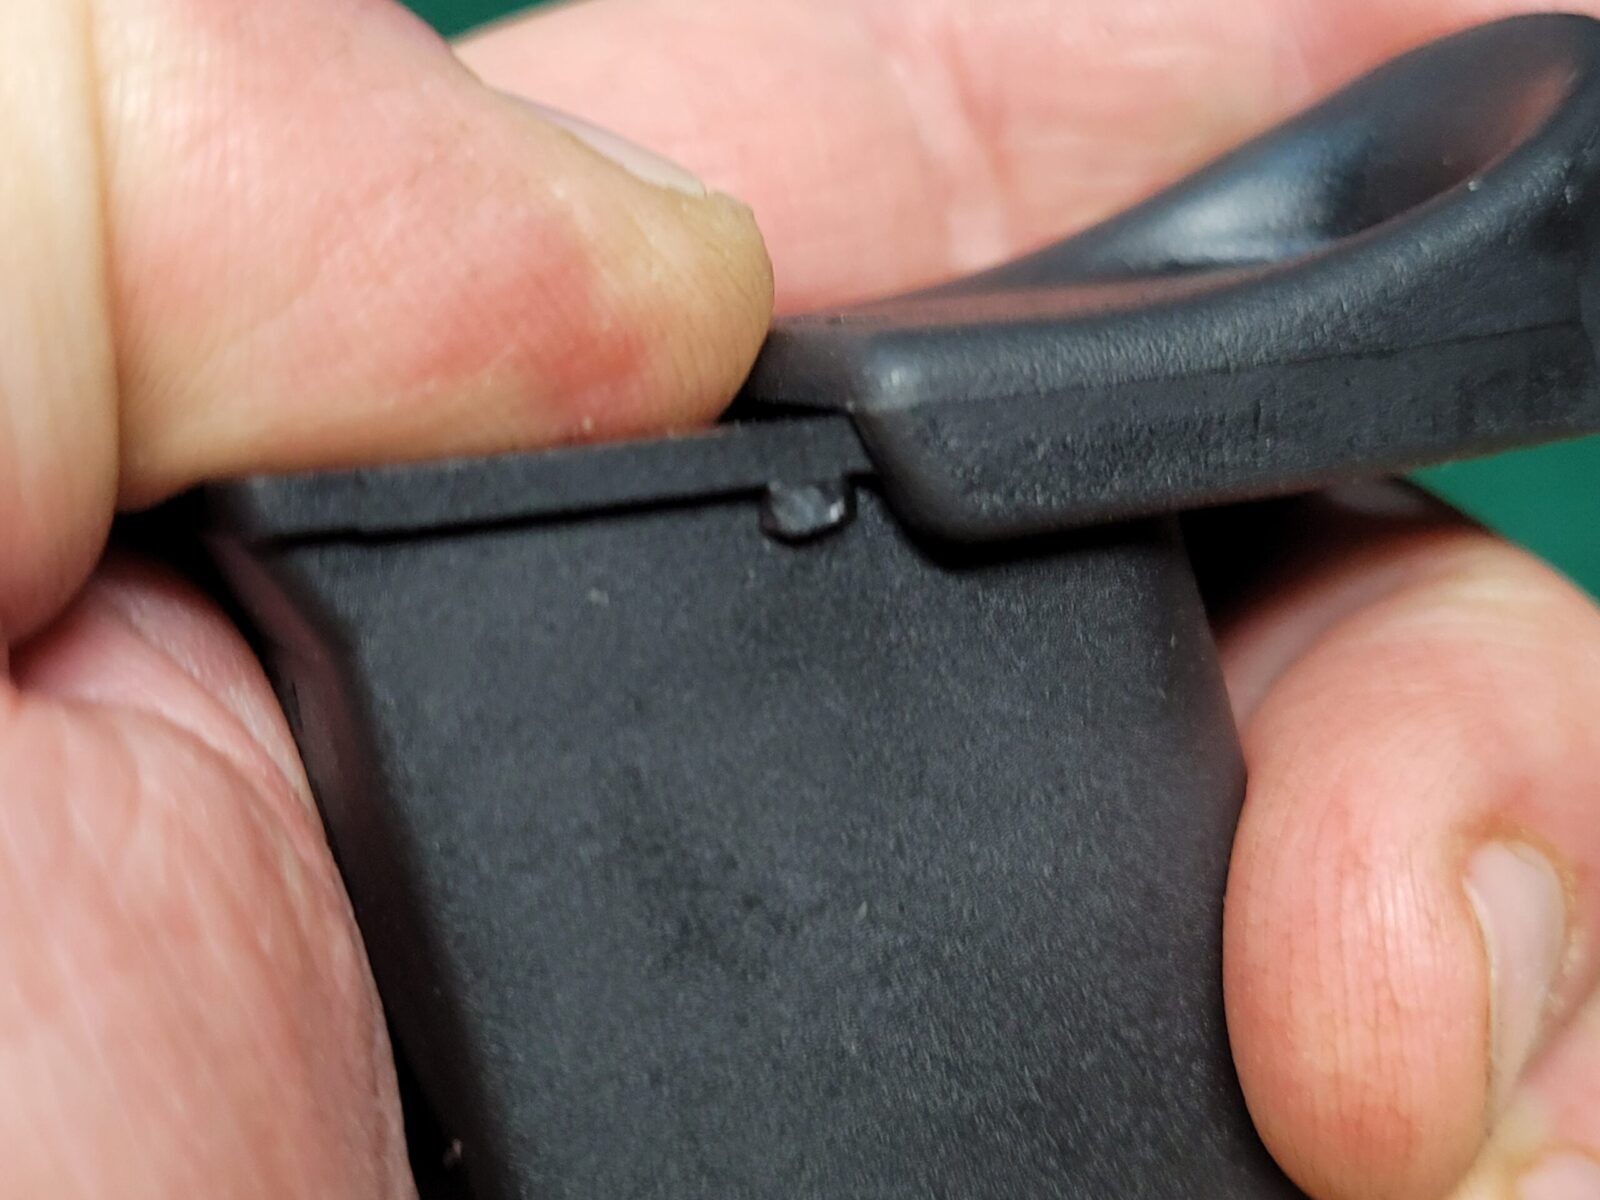
The solution comes from Pearce – they make a really nice injection molded base plate replacement that gives us just enough of an extension to comfortably hold the pistol. Since Pearce released their’s some knock offs have come out that look identical but I stick with Pearce.
That little lip makes all the difference in the world.
How To Install Them
There’s two reasons for this post – first is to tell you that there is a grip extension for the 10 round magazines and the second is to give you a tip on installing them that will save you some real grief and this pertains to Glock mags in general.
On most magazines, you push the locking button down that holds the baseplate in position and while you are doing that, you then push the baseplate off while capturing the floor plate and spring so they don’t come flying out. Trust me, those suckers can come out like a rocket.
A Glock is close but not quite. Everything I said above is true but there is also a ridge case in the middle of the magazine’s rails that the base place slides on that makes it an absolute bear to do without a Glock magazine tool. Honestly, the first time I went to disassemble a Glock magazine I could not get it off and then started searching – people said to get the tool. I thought the tools were a scam because I never needed one before other than something to push a recessed dimple down or pry off a base plate with 30-50 years of junk on it. Well, with a Glock magazine, you really need the tool and everybody and there brother makes them or imports cheap knock offs that work as well.
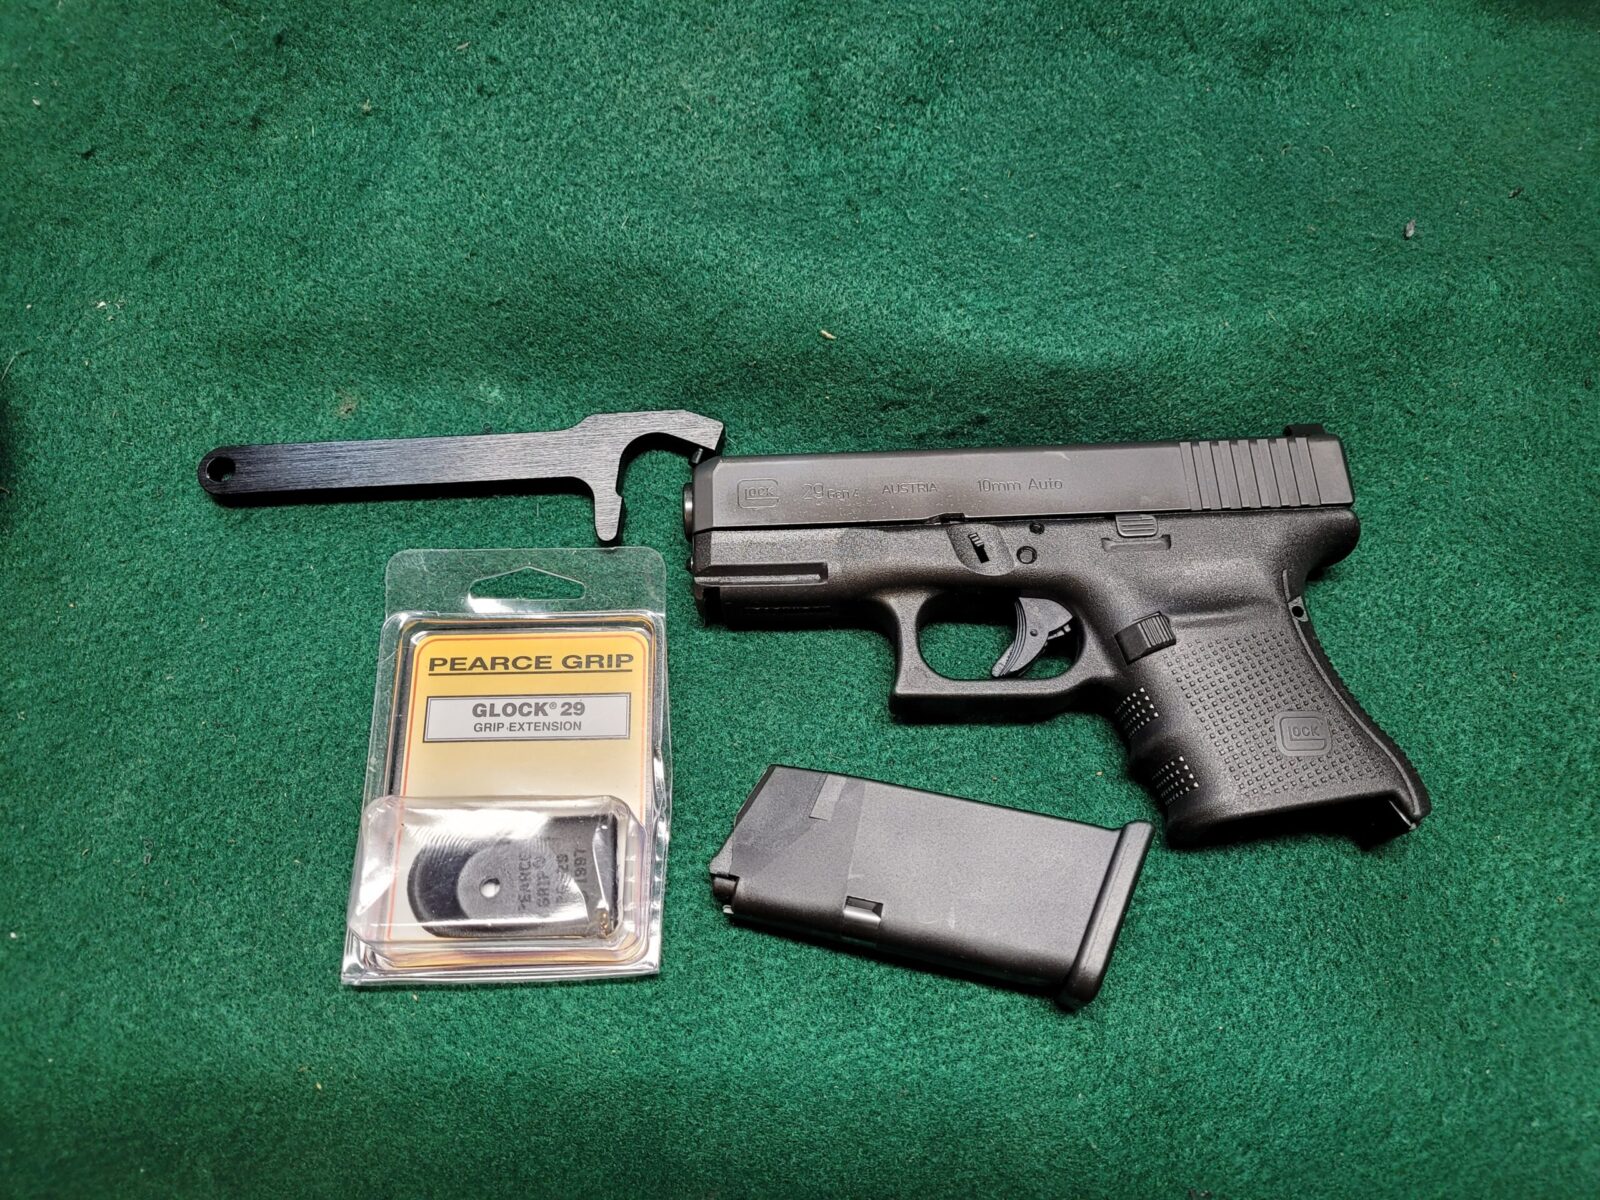
Here’s what you need- A G29 otherwise I don’t know why you are reading this :-), however many Pearce grip extensions and 10 round Glock magazines you need and you can see the magazine tool I use in the top left. Note, I can’t speak to whether these extensions will fit on any other brand magazine – all of my 10 round mags are Glock models.
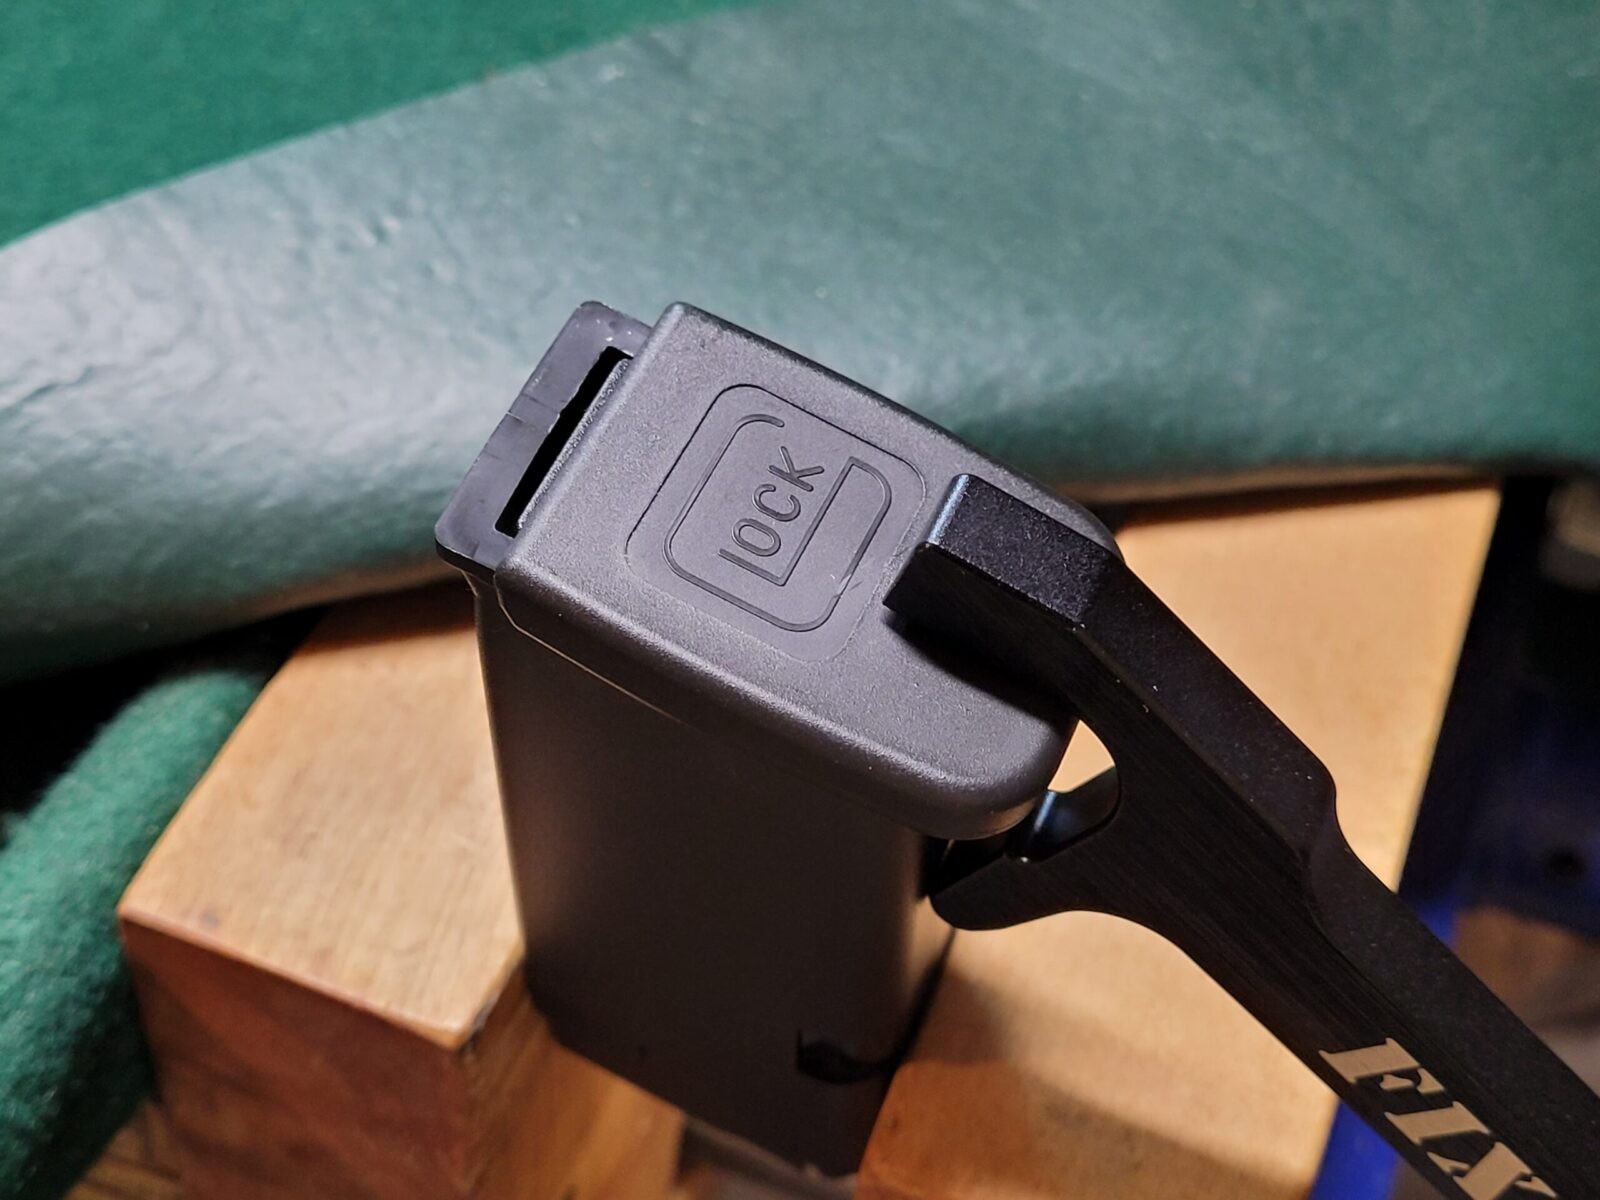
When you look at the tool. it has a nose that pushes the dimple down on the floor plate while also allowing you to have enough leverage to then pry the base plate off thanks to the mechanical leverage it gives you.
I secure the magazine in a vise to hold it while I use the magazine tool to remove the base plate. By pushing down on the handle of the tool. you have enough leverage to remove the base plate. Go slow and capture the internals – notice how I am saying this over and over.
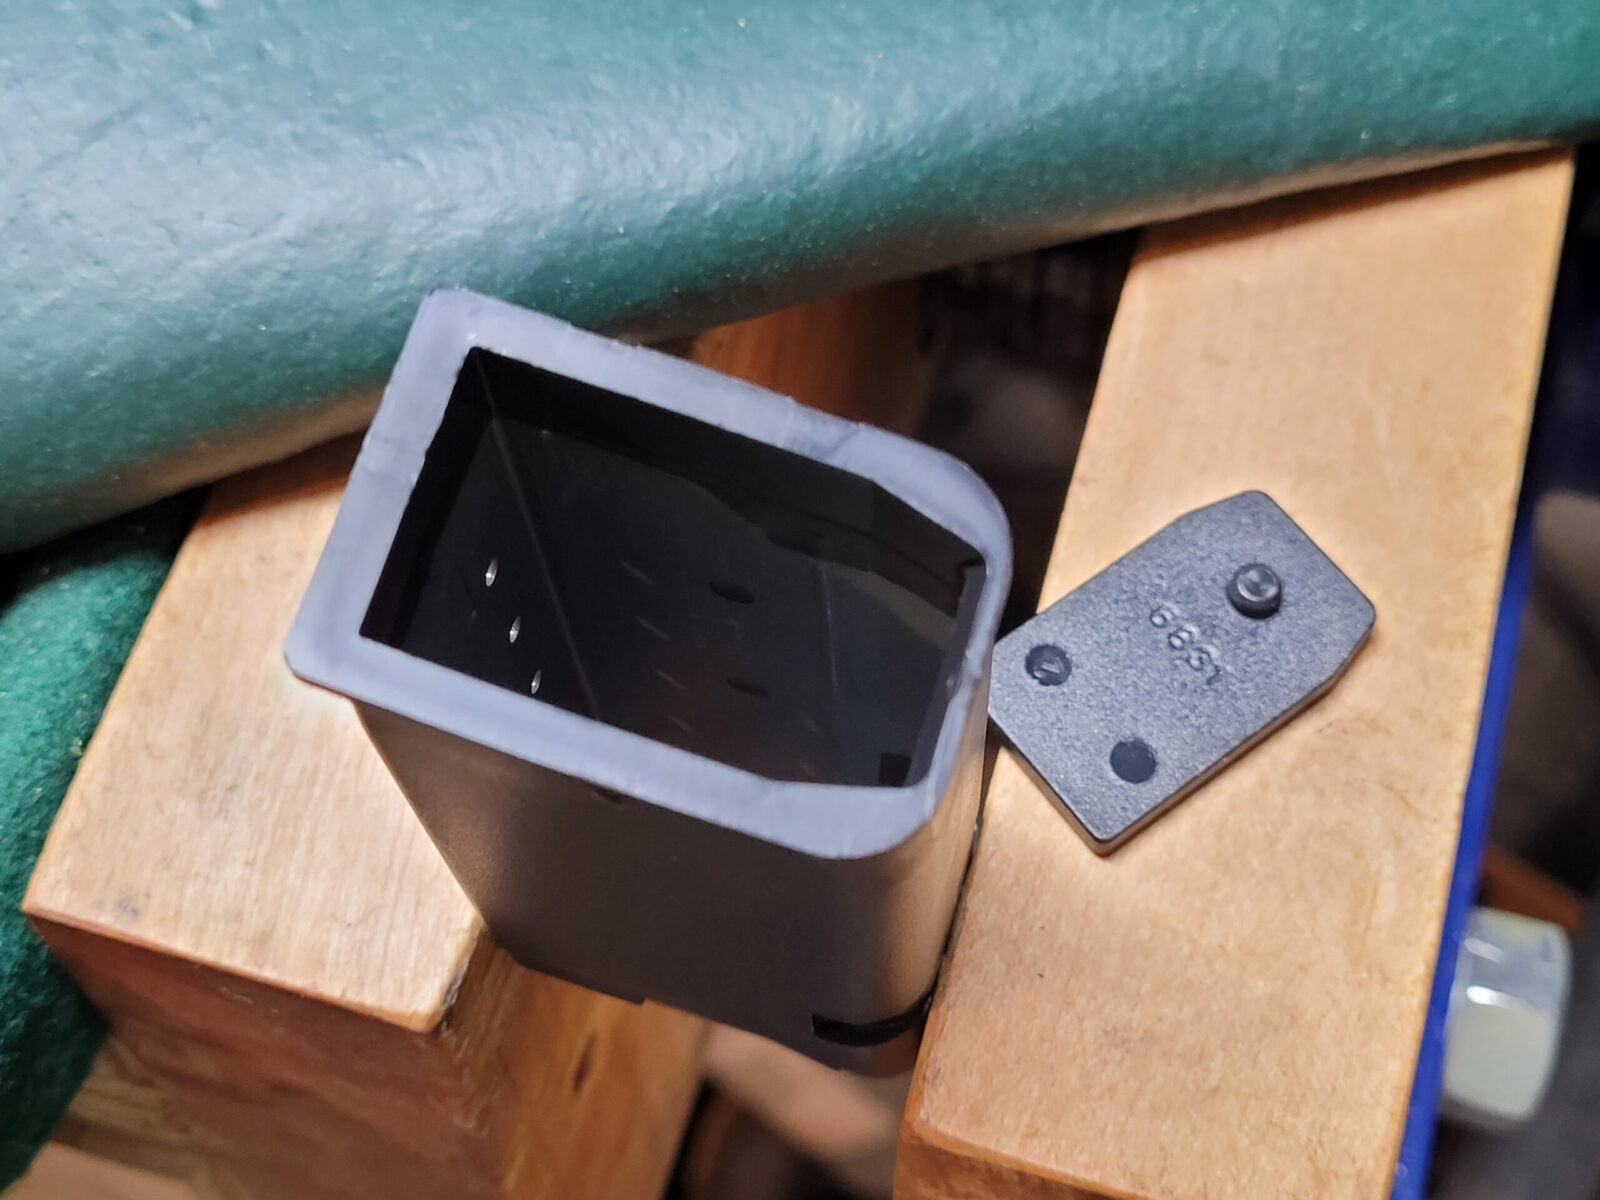
Again, be prepared to grab/capture the floor plate and spring assembly or they will rocket out. Yeah, I’m making light of this but a lot of people have suffered eye injuries from not being prepare and getting hit by the parts as they fly out.
The floor plate (the little grave stone looking plastic tab with the dimple on it resting on the wood vise jaw) that pushes the magazine spring down and also locks the floor plate in place is shaped to go in the magazine one way. You just need to make sure that little dimple is face up to lock the grip extension in place. If the grip extension doesn’t want to snap in place then you probably installed that floor plate upside down.
Reinstall the spring assembly and make sure the follower (the plastic thing that pushes the bullets up) is oriented properly. Note that the dimple is face up in the photo in order to lock the base plate in place. What I do is to hold the floor plate and spring with my thumb as I slide the base plate, or in this case the Pearce Grip Extension, on to the magazine tube. You will probably hear the dimple click ino the hole of the base plate or at least feel that the extension can’t move / that it is secure.
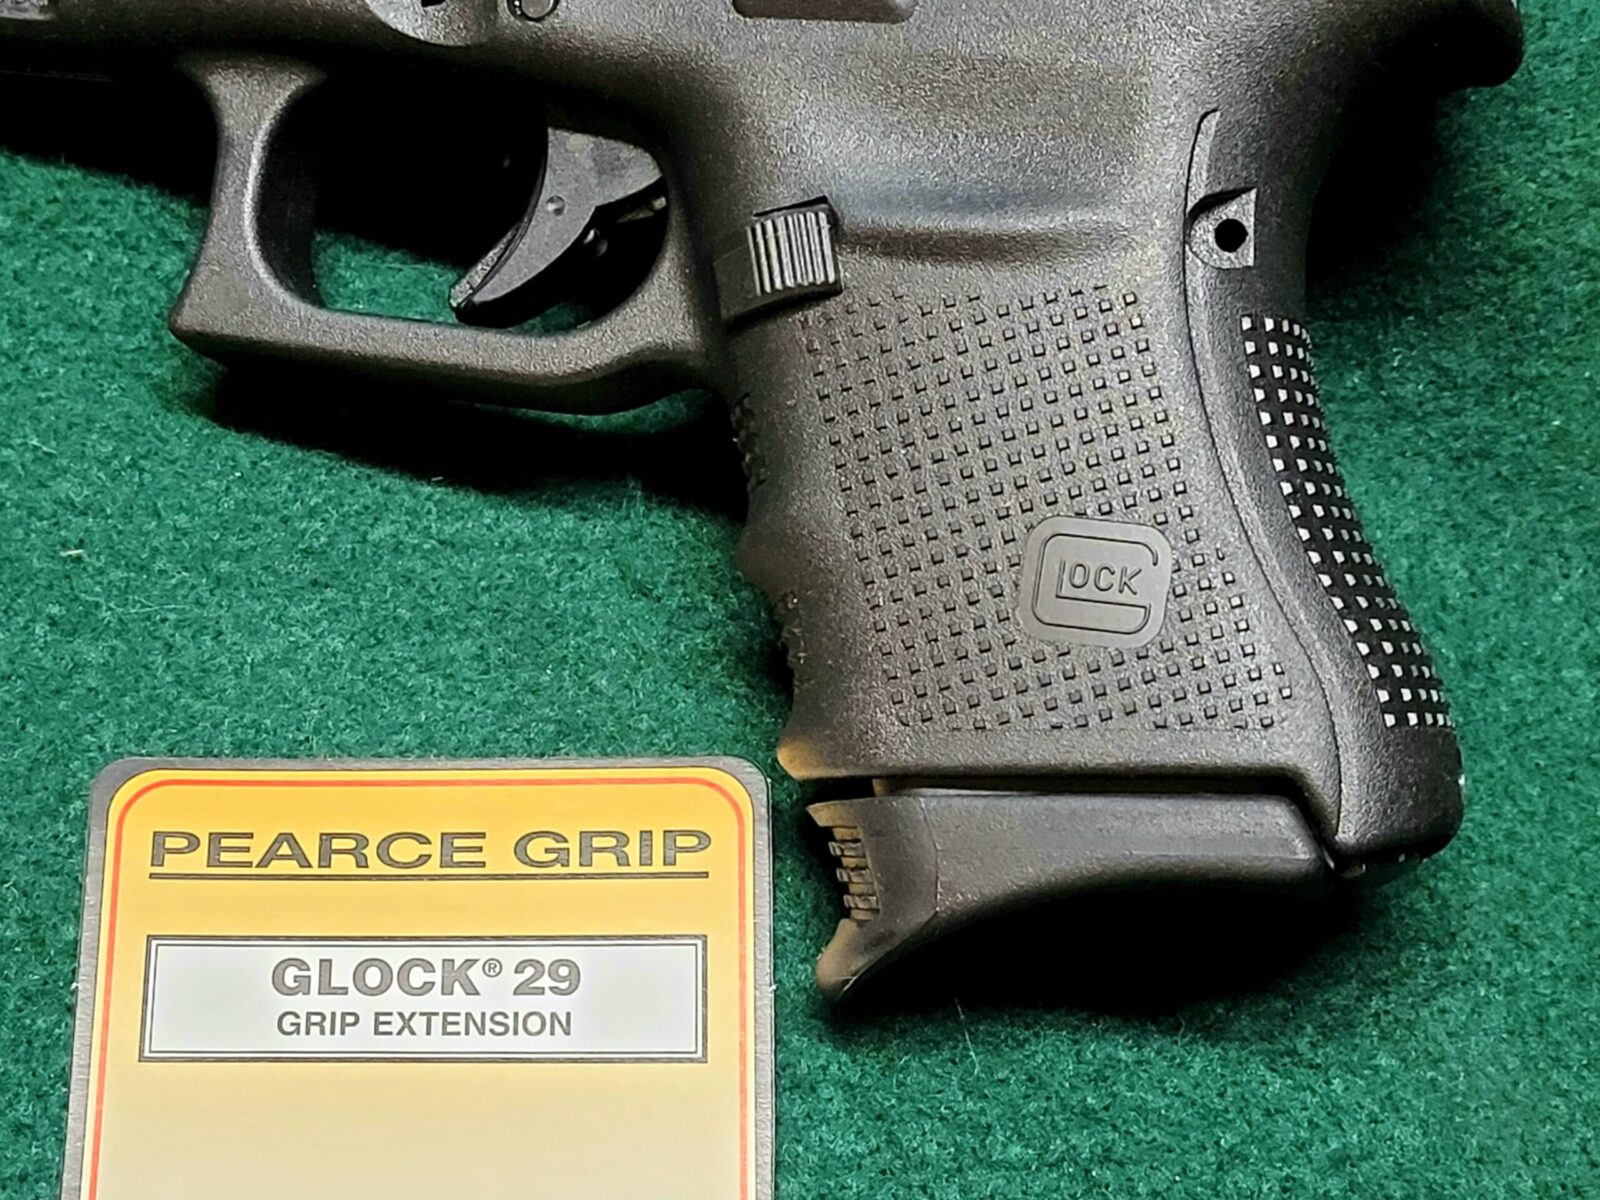
This is a good photo of the ridge, or tab, that is cast in the magazine’s body that really holds the base plate on and makes removal so hard.
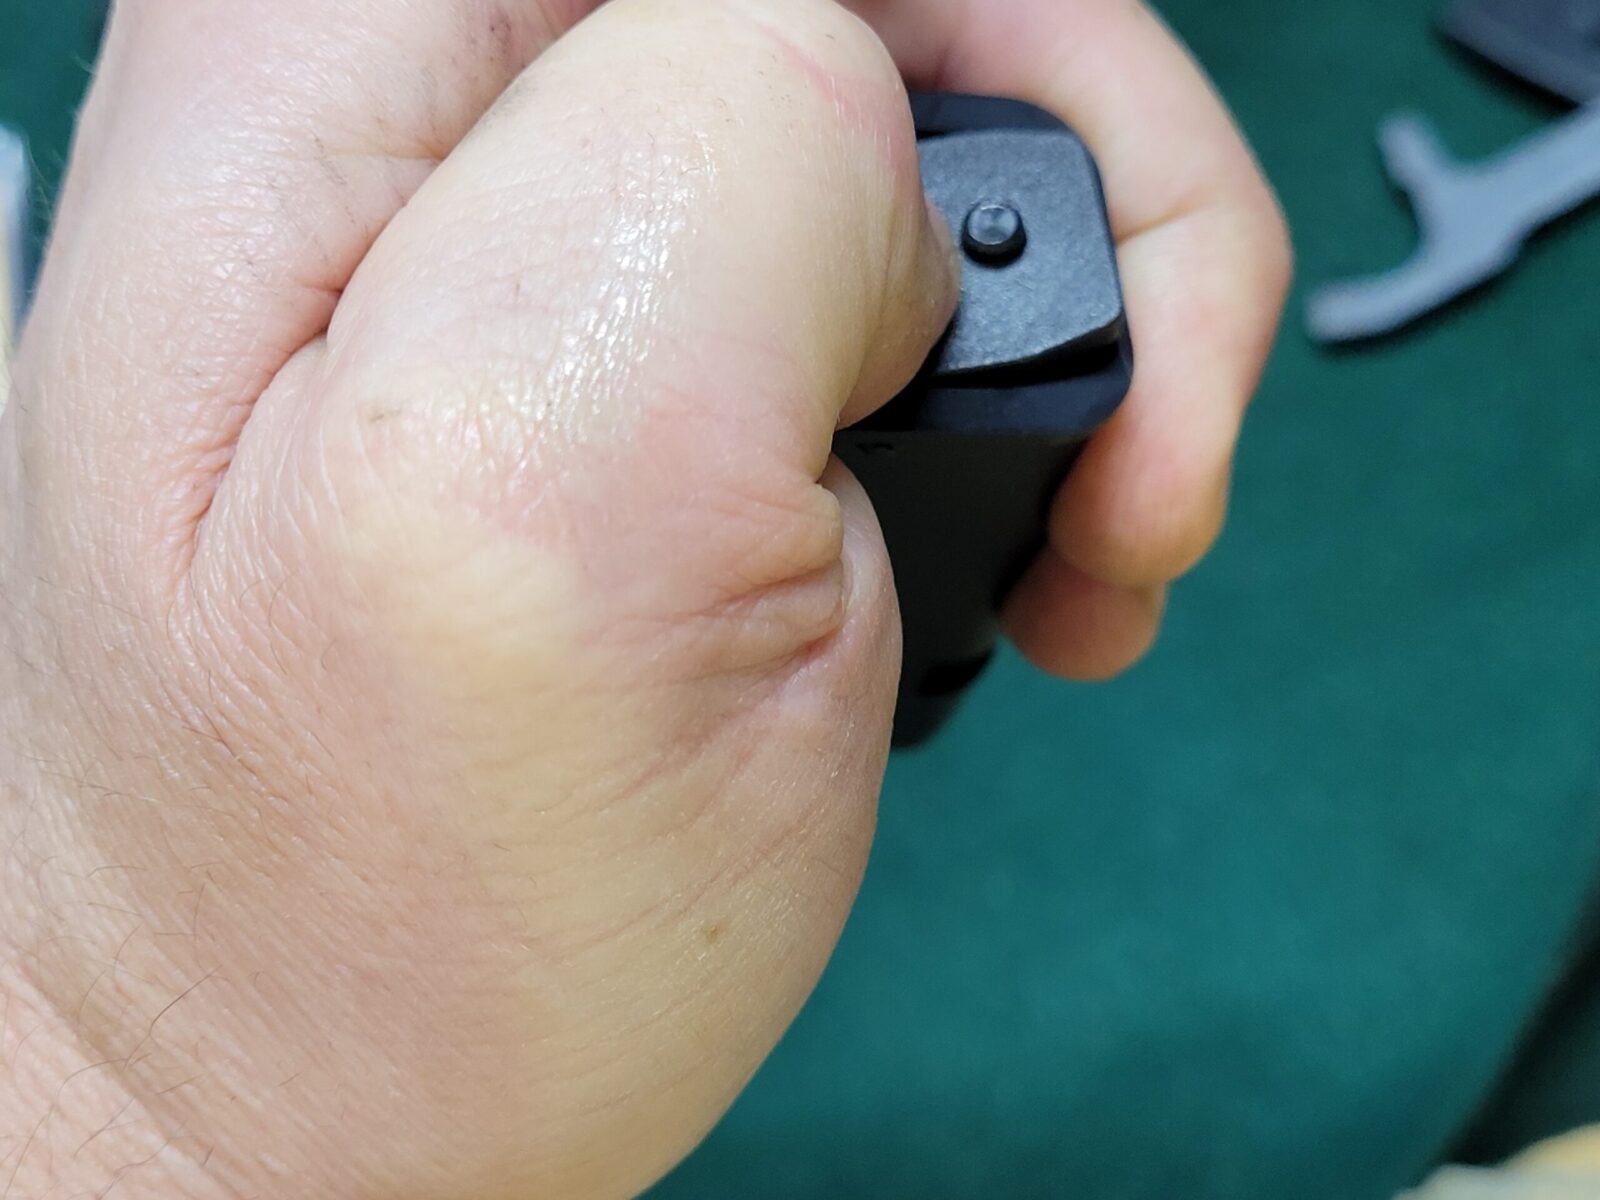
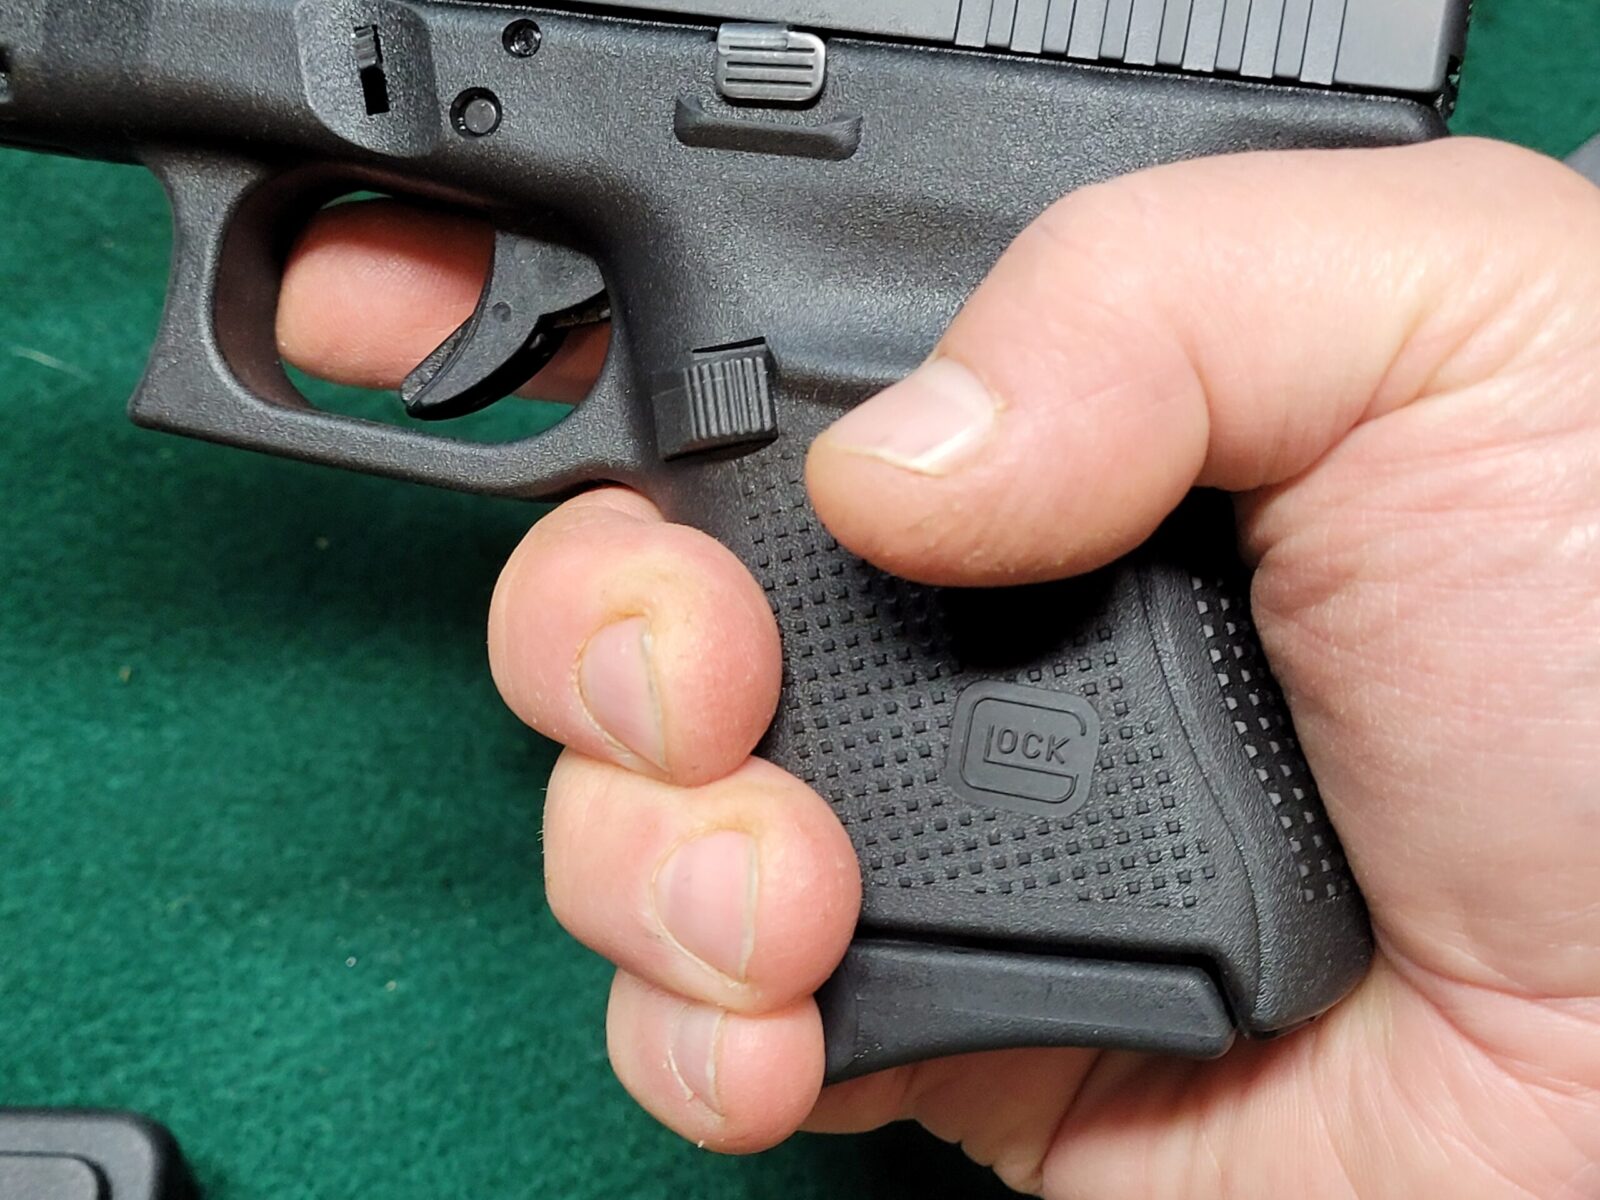
This is the end result. Notice how my little finger can now firmly grip the pistol.
If you have big hands or just want to make the grip a tad taller for whatever reason, I absolutely recommend the Pearce Grip Extensions and have four of them on my OEM Glock 10 round magazines. I have shot a ton of hot Underwood and Buffalo Bore ammo and had no problem controlling the pistol. So far, they have held up just fine.
Note, I have to buy all of my parts – nothing here was paid for by sponsors, etc. I do make a small amount if you click on an ad and buy something but that is it. You’re getting my real opinion on stuff.
I’ve never been a huge Glock fan preferring 1911 & 2011 pistols. A few years ago I built a few Polymer80 pistols and that chipped away at my dislike because the engineering was really very cool. In terms of calibers, I mainly focus on 9mm and 10mm these days – the former for general self -defense and shooting at the range and the latter for defense including potentially black bears. The problem I’ve had for the past year is that my 1911 and 2011 10mm pistols weigh quite a bit and are large. With this in mind, I started hunting around for a smaller 10mm that would also given me at least 10 rounds of ammo in the magazine. This brought me to Glock and either the full size model 20 or compact 29. I opted for the latter because I wanted something smaller and easier to carry concealed.
First, Why 10mm?
I suppose the first thing that made me even consider a G29 is that it uses 10mm and I am a big fan of the 10mm cartridge. Folks, it hits hard. It’s not a magnum but it does pack a wallop substantially beyond what a 9mm can do while feeding from a semi-auto.
My plan was to use this pistol when hiking in the back country for self-defense from someone with malicious intents or a black bear. This was not to be my every day concealed carry pistol and while I do have quite a selection of hollow points (HPs), my plan was to load the pistol up with ammo designed to penetrate, not to mushroom like a HP bullet does.
While I have carried my Sig P365 on many hikes mainly because it’s small and lightt, let’s compare some rounds between 9mm +P and 10mm so you can get an idea:
9mm +P Penetrating Rounds
Muzzle Velocity (FPS)
Muzzle Energy (Ft/Lbs)
Hornady 9mm Critical Duty 135gr +P
1,110
369
Hornady 9mm Critical Duty 124gr +P
1,175
380
Buffalo Bore 9mm Outdoorsman 147gr Hard Cast +P
1,100
394
Underwood 9mm 147gr Hard Cast +P
1,100
395
Underwood 9mm 115gr Xtreme Penetrator +P
1,250
399
10mm Penetrating Rounds
Muzzle Velocity (FPS)
Muzzle Energy (Ft/Lbs)
Buffalo Bore 10mm Dangerous Game 190gr Mono Metal
1,100
510
Hornady 10mm Critical Duty 175gr
1,160
523
Buffalo Bore 10mm Outdoorsman 220gr Hard Cast
1,100
591
Underwood 10mm Hard Cast 200gr
1,250
694
Underwood 10mm Hard Cast 220gr
1,200
704
So if you want to read more on the ballistics of 9mm, 10mm or comparisons, there are tons out there by people who know far more than I do. You may also argue that Critical Duty was never designed for dangerous game and you are right but I wanted to give some comparisons mainly about the energy levels. Bottom line for me is that 10mm hits a lot harder and penetrates further based on lots of examples I have seen of 10mm rounds being fired into ballistic gelatin, phone books and real world self-defense stories against bears that you can search and read about.
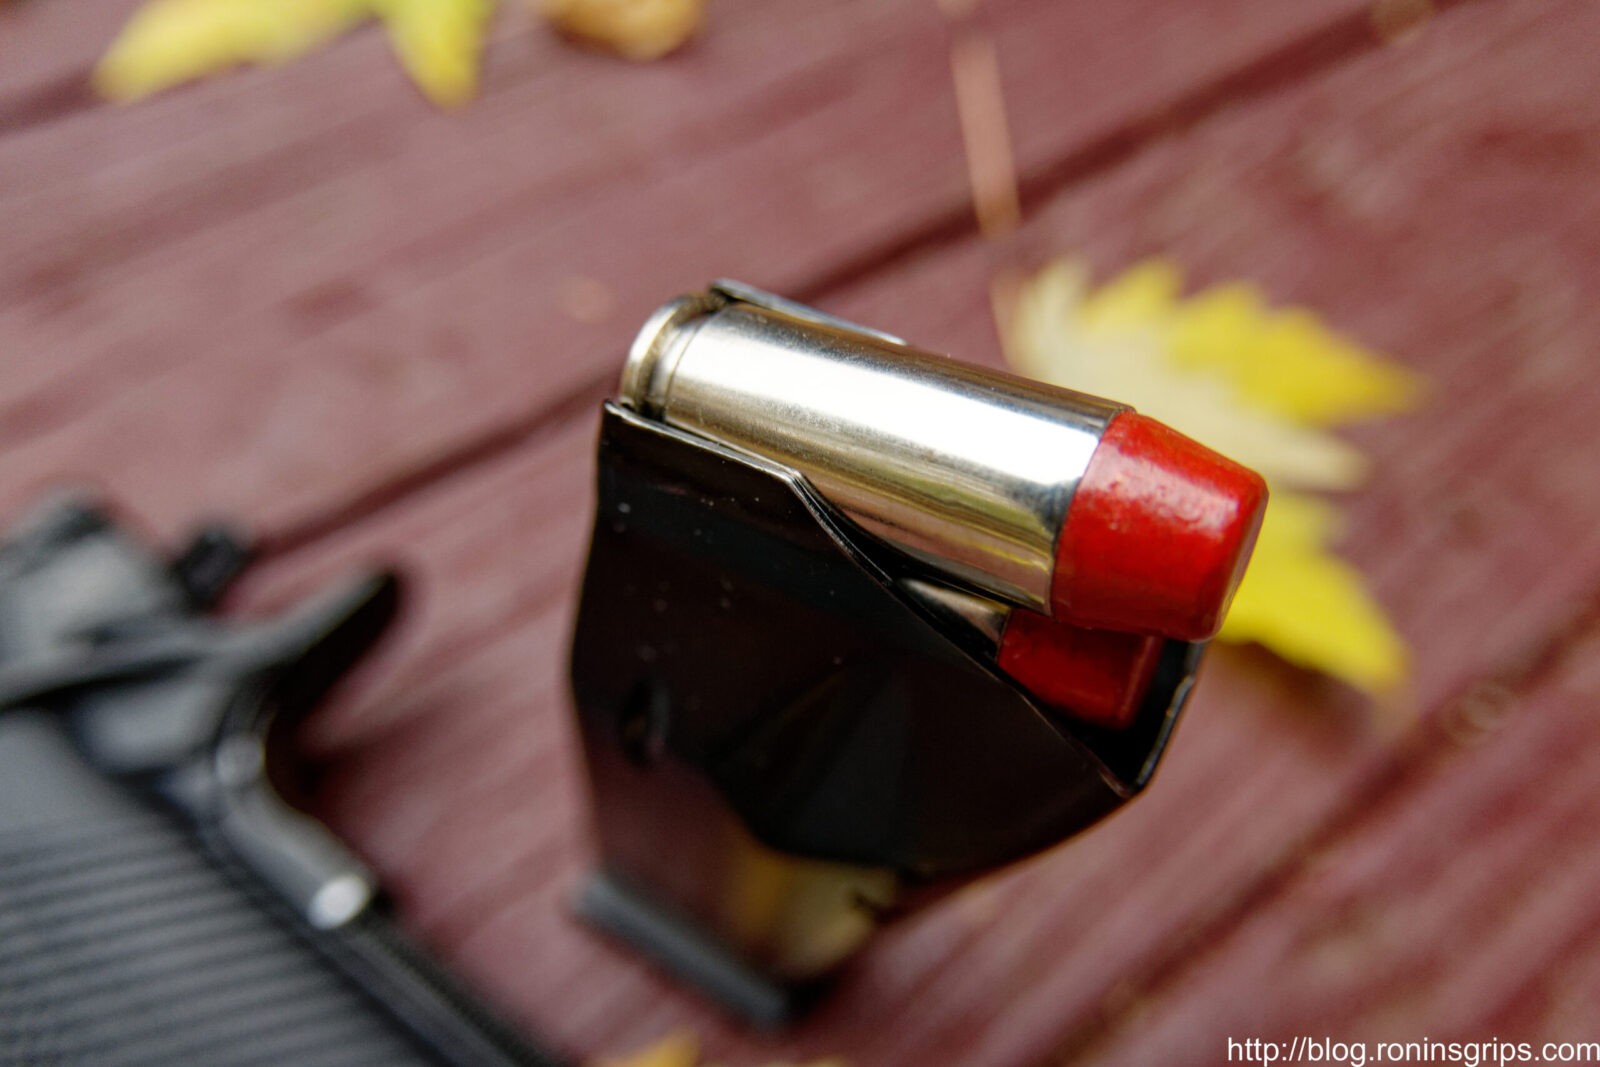
This is one of Underwood’s Hard Cast 220 grain 10mm rounds loaded in one of our custom double stack mags for RIA 10mm and .40 S&W pistols [Click here to learn more about our magazines]
But Why Glock?
I’ve not been a Glock fan to be perfectly honest. I preferred 1911/2011 pistols and CZ-75s to the Glocks mainly because of the grip angle and a bit of a bias against the blocky boring lines of the factory Glock pistol.
What is cool about Glock? First and foremost, the Glocks are amazingly reliable pistols. They are going to work when you need them to work. Note, you still need to clean, lube and thoroughly test them before relying on them but this is true of any firearm. A pet peeve of mine, maybe it’s even a fear for the safety of others, are the people who are new to any type of firearm, buying one and ammo from the store, loading it straight out of the box and then thinking they are safe – Please, don’t do this.
Second, Glocks do not weigh a bunch because of their polymer frames. My Desert Eagle 1911 in 10mm is an amazing pistol – easily the best factory-built 1911 pistol I have ever bought but it is not light. Unloaded it comes in at 36.2 ounces – folks, that is just over two and a quarter pounds!! In comparison, an empty Glock 29 weighs 24.34 ounces or just over a pound and a half – That is almost a third less weight.
Third, a Glock 29 Gen 4 pistol holds 10 rounds with the little magazines made for it but it can also use the 15 round magazines made for the Glock 20. For me to carry 15 rounds in a 1911-ish pistol means I need to move up to a wide grip 2011-style pistol such as the offerings from Rock Island Armory (RIA). Again, it’s big and heavy – 2.5 pounds empty – even heavier than the Desert Eagle.
Fourth, there is an absolutely stunningly large aftermarket parts industry supporting Glock pistols. Now you will have fewer options than the wildly popular model 17 and 19 Glocks but still, you have a ton of sights, triggers, magazine releases, slide stops and what have you to select from,
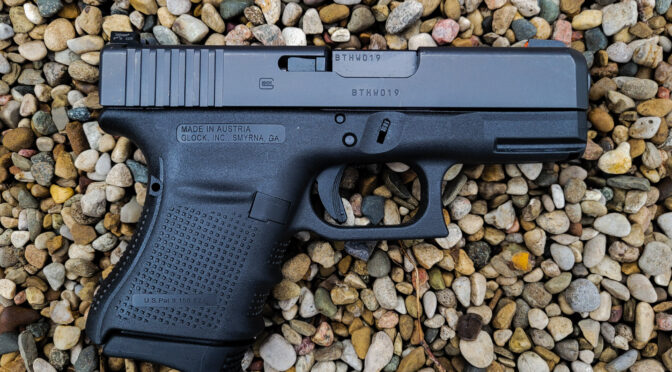
I originally was going to stop with four but I do need to add in one more – The G29 is small relatively small and far easier to conceal or even stow away than any of my big 1911/2011 pistols. The length of the G29 Gen 4 is just under 7″ with the slide being just over 6.75″. Height with the stock 10 round magazine is just over 4.5″.
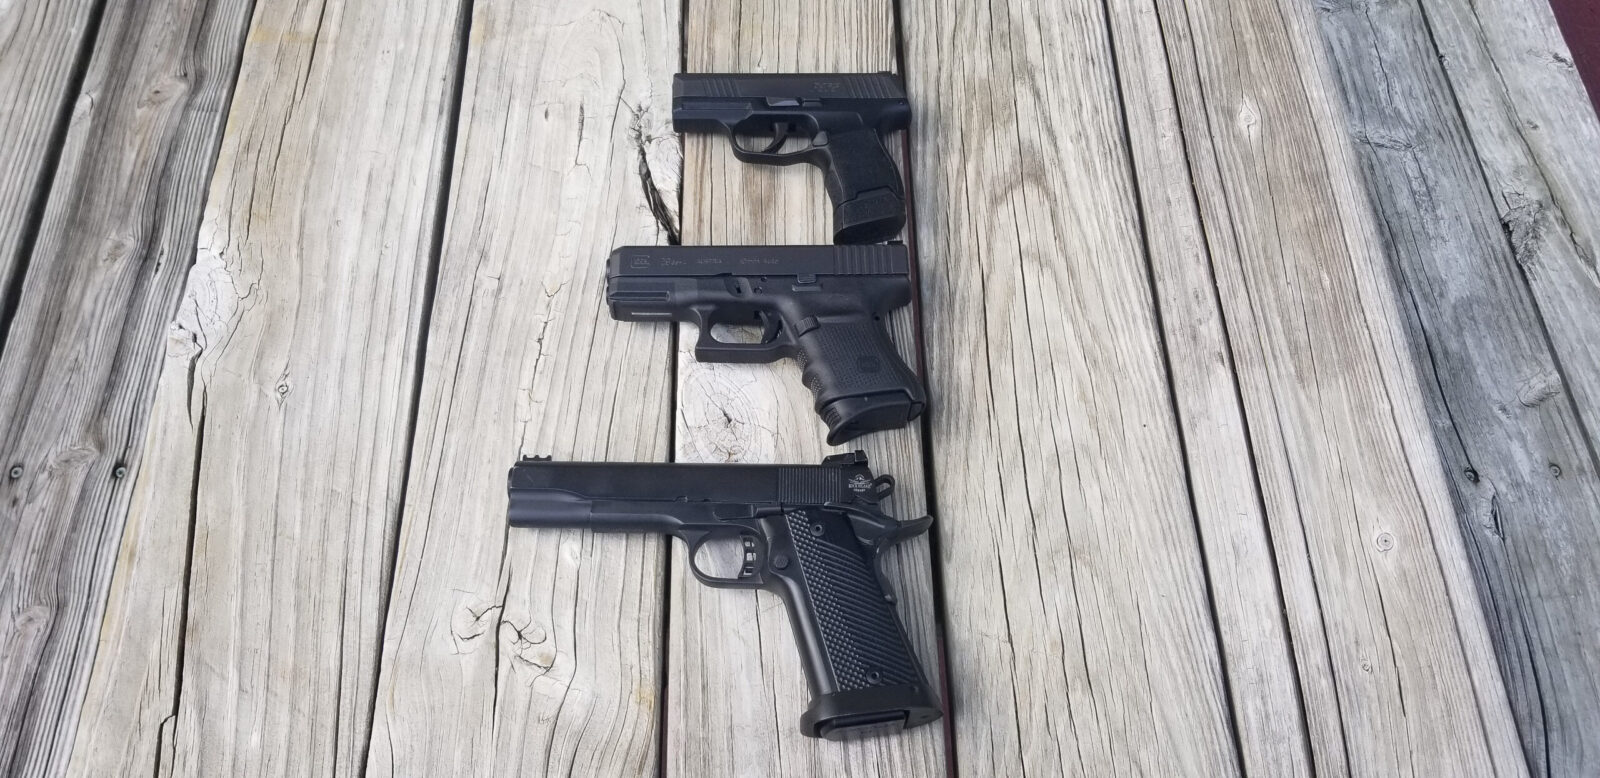
The top pistol is my SIG P365 with a 12 round magazine, The middle is the Glock 29 Gen 4 with a Pearce magazine base plate. The bottom is a RIA 52009 Rock Ultra FS HC with its 16 round magazine sitting flush under the big mag well funnel. They are all great pistols but each has a time and a place in terms of use.
All of these points finally pushed me to buy my model 29 gen 4 pistol. I’ll do some more posts about the mods I have done to make it more to my liking – namely the controls, sights and changing magazine base plates so I can more comfortably hold the pistol.
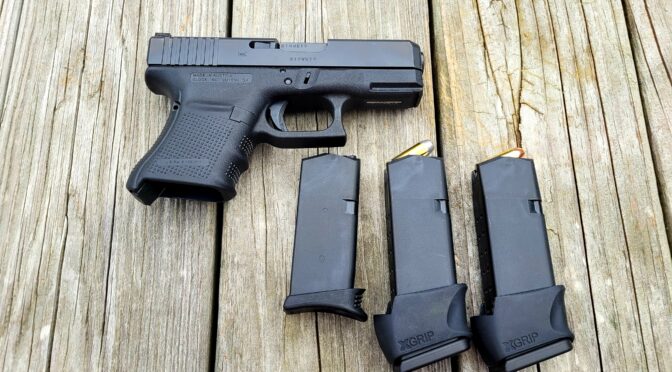
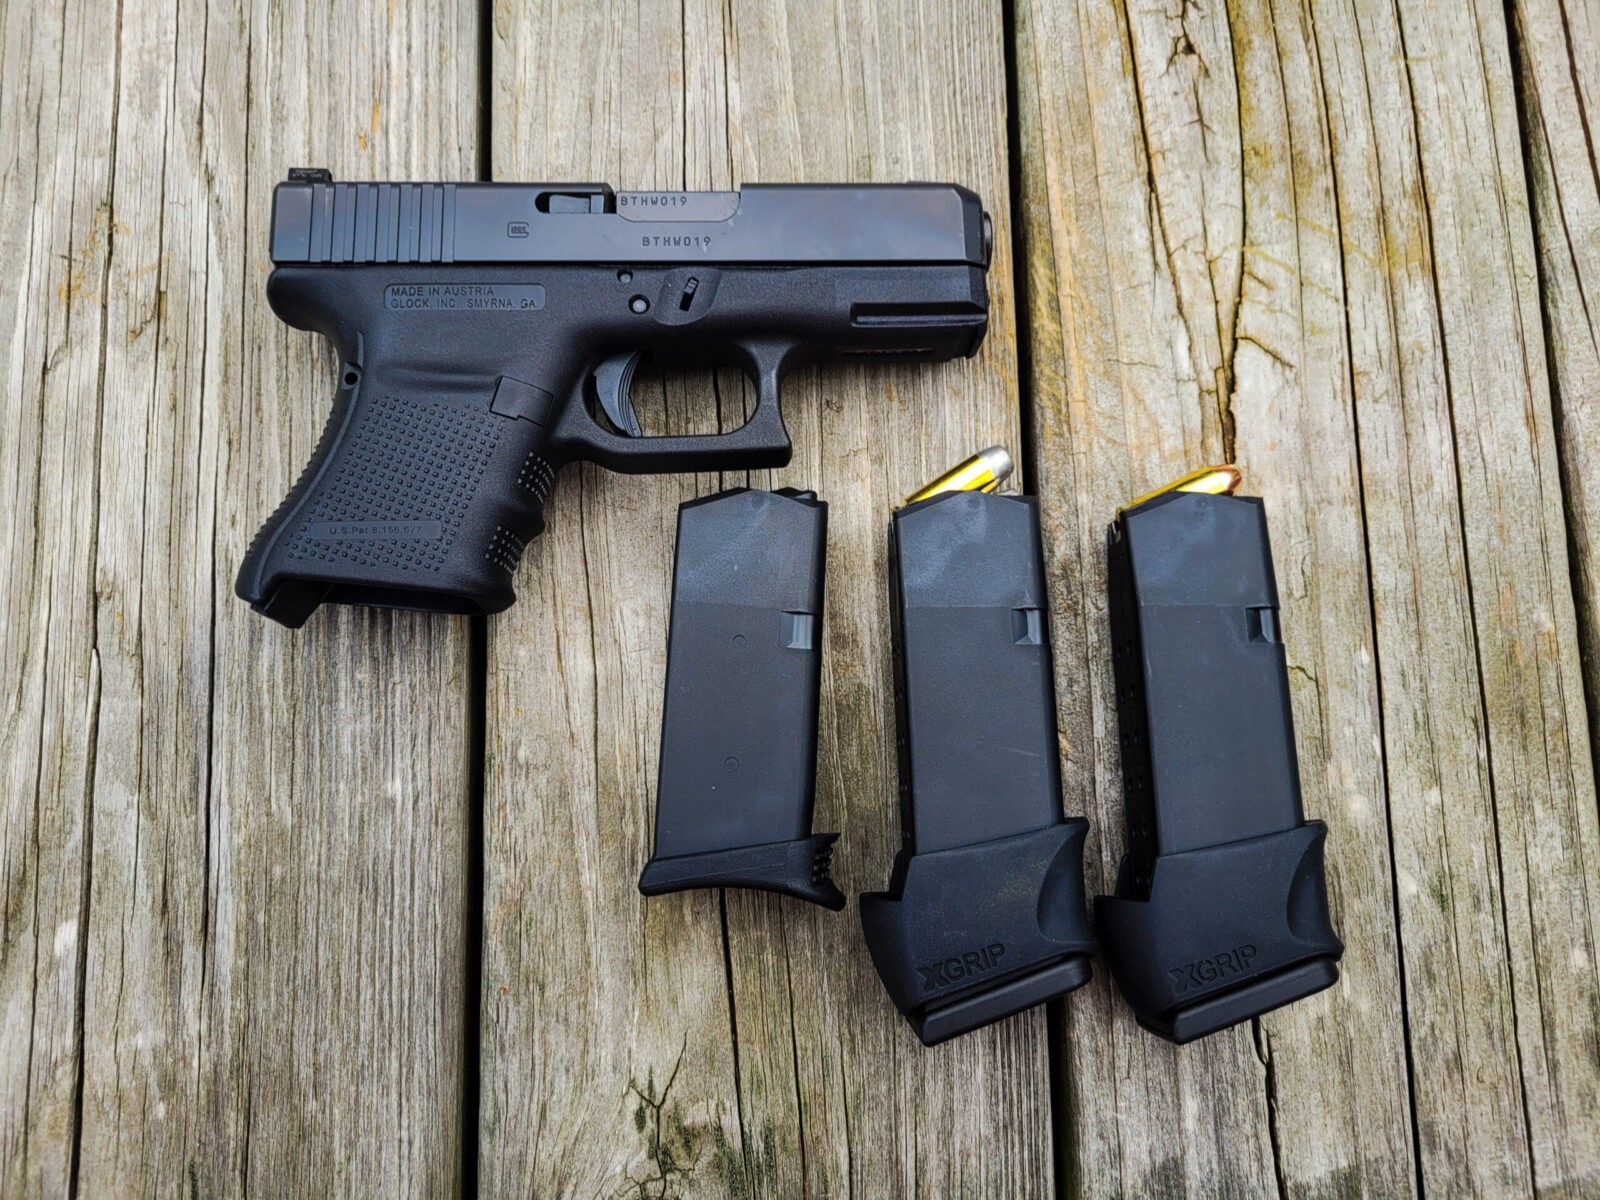
Here’s the G29 with three magazines – on the left is a 10 round magazine with a Pearce replacement base plate that makes the pistol way more comfortable to hold. The middle is a full size G20 15 round magazine with an X-Grip adapter that makes it very nice to hold. Note that one is loaded with Buffalo Bore 220 grain hard cast rounds. The right magazine is the same as the middle but is loaded with 180gr Underwood HPs.
One quick comment – I’ll tell you that I am still training myself on aiming with it. I’ll bring it up and a conciously have to align the sights because my natural point of aim happens with the 1911 grip angle, not the Glock’s. I do plan on trying the new M&P that is out and will see how that goes but for now, my backwoods carry pistol is my G29.
So, I definitely like it but will stop short of saying I love it just due to the grip angle. Now some guys absolutely love their Glocks. My recommendation would be for you to go to the gun store or try a friend’s pistol and see how your natural aim is relative to the sights and decide for yourself. Personally, I can live with it and will train more because the quality of the pistol justifies the extra work on my part.
Note, I have to buy all of my parts – nothing here was paid for by sponsors, etc. I do make a small amount if you click on an ad and buy something but that is it. You’re getting my real opinion on stuff.
H folks – I’ve had a few questions come in about my Springfield Armory TRP Operator 10mm 6″ pistol. I answered the emails but figured a blog post might help others out so I am going to list the question and my answer to each.
Was it reliable out of the box?
The short answer is “no” and for the price you’d expect better reliability out of the box. This is my third 6″ 10mm 1911 style pistol – I had a Rock Island Big Rock (their Tac Ultra (arguably a 2011-style given the double stack magazine) and a Dan Wesson Bruin. Only the Bruin was flawless in terms of operation out of the box. I wish I hadn’t sold it actually.
I am to the point in life where I trust nothing out of the box and have found that ammo, lubrication, magazines, and design factors all can impact reliability. The TRP Operator had issues until I sent it back to Springfield Armory for repair – the slide was randomly locking open so they replaced that and I also noticed the magazine release button was far stiffer. I’d heard that they go over the pistols carefully when they go back for repair and I guess they do. I lubricated it carefully, took it to the range and only then did it run without any surprises. It does run very well now.
At any rate, I learned from my friend Scott Igert what I needed to do to improve chambering for the Big Rock and wrote a blog post about it. I did the same to the TRP and it did solve the chambering problem. I did a blog post on that too.
It does beg the question why did I need to do this in the first place – the TRP wasn’t reliable with any model of mag I had or any type of ammo including FMJ. What it tells me is that they really didn’t put a lot of care into assembly. It also reinforces that you should never trust a pistol out of the box for something critical – hunting or defense – ever.
Note, I am to the point where I also immediately replace the mags of 1911s which leads us to the next point.
What magazines do you run?
I’ve had so many feed problems caused by 1911 magazines over the years that I always replace the mags that come with the pistol with Wilsons or Tripp Research Cobras. I did not have magazine related problems with the 8 round magazines.
Guys ask this quite a bit. My go-to ammo maker for 10mm is Underwood. They have a number of offerings and a great reputation. So, I have a number of HP and hard cast rounds from them and they all work just fine. For range ammo, I use 180gr S&B FMJ and it all works fine,
I simply can’t afford to buy a ton of brands and types of ammo to test – the above is just my experience.
Does it use a barrel bushing like a traditional 1911?
In short, no it does not. A match bull barrel is fitted to the slide.
There is no barrel bushing like a traditional 1911 uses. The bull barrel fits directly into the slide. The three piece operating rod and free spring make re-assembly a challenge at first but you get used to it after a while.
Does it use a captured recoil spring?
No, it uses a unique setup of a rod, spring and end cap (see the above photo) that fit together but are not held together in any way. I’ve not seen this setup before and while it makes re-assembly a different experience, it does work and I am used to it now. I would gladly have replaced it with a captured model but I was unable to find anyone who makes one for the 6″ TRP.
Is the 6″ model worth it vs the 5″ model?
I’m to the point that a 6″ pistol really is for hunting and I’d prefer shorter for easier carrying. The weight and balance of a 6″ 1911-style pistol, including the TRP, really soaks up the recoil of the 10mm and makes it easy to shoot – even heavy loads. I really like the 10mm cartridge and think I will get either a 4.25″ or 5″ 1911 model in the future. I may just get a Rock Island and plan on tuning it up out of the box – they are good base pistols in my honest opinion.
I do have a custom shoulder holster from Tucker Custom Gunleather that is a work of art but your’s truly who stands 5′ 8″ is maybe 2-3″ too short to pull it off comfortably. I’d go with a 5″ or even a commander next time if I wanted it for EDC. I have a Blackhawk Spec Ops chest holster that works great for the TRP for field use.
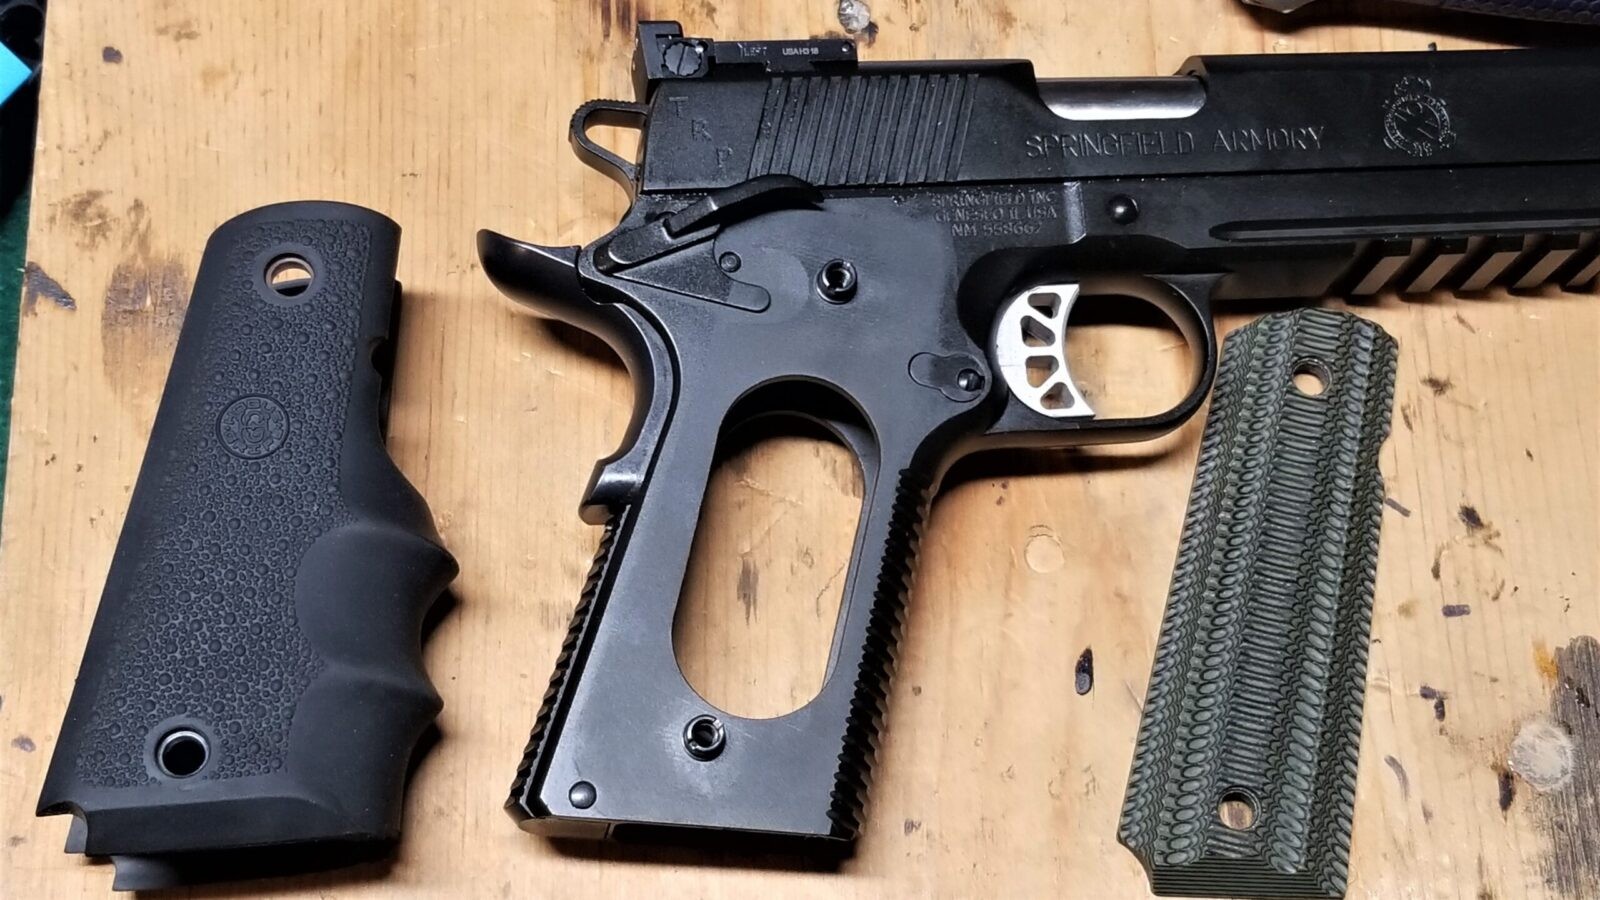
Why did you replace the grips?
The short answer is that I have carpal tunnel and rubber grips are way easier on my hands.
I find Hogue wrap around grips really help my hands.
Do you like your TRP Operator and would you recommend it?
This is a weird question for me to answer. The reliability sucked out of the box and really disappointed me – especially given the cost. It runs great now though and I think I am to the point that I trust it. I only have maybe 100 rounds through it since it came back from Springfield Armory to fix the random slide locking open issue and want to get 100-200 more through it before I decide for sure.
After I did my tuning and SA did the slide lock repair, the pistol ran great. It also needed lubrication when it came back from repair but during the last range trip it worked great with all the magazines I bought and types of ammo including FMJ and HPs.
I will say that Springfield Armory’s customer service was good but the repair turnaround was slow due to all of the pandemic buying – I sent it in for repair in late June or early July and got it back in about six weeks. No telling how long it would be now if someone needed to send in their pistol. I always have a “can I trust this now” thing going on in my head when a pistol comes back from repair.
So I am thinking as I write this. I guess I would say the TRP Operator is a decent pistol but it does not wow me – especially for the cost and what I needed to do. If you buy one, I would absolutely recommend you test the hell out of it before relying on it. That’s a recommendation I would make regardless of weapon to be fair. In conclusion, I do think it is reliable now and may very well keep it – we’ll see how it performs over time.
Note, I have to buy all of my parts – nothing here was paid for by sponsors, etc. I do make a small amount if you click on an ad and buy something but that is it. You’re getting my real opinion on stuff.
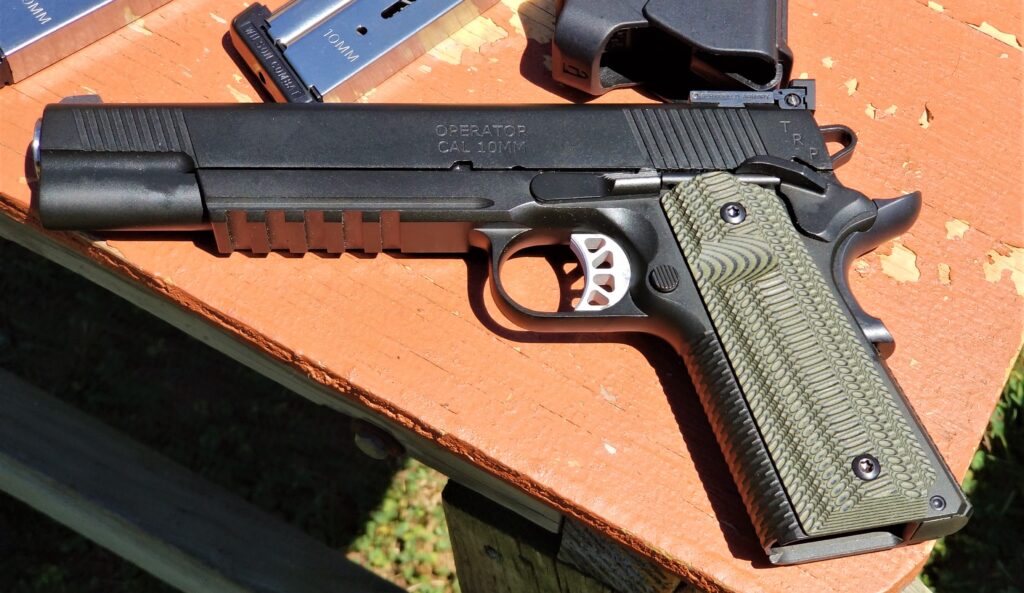
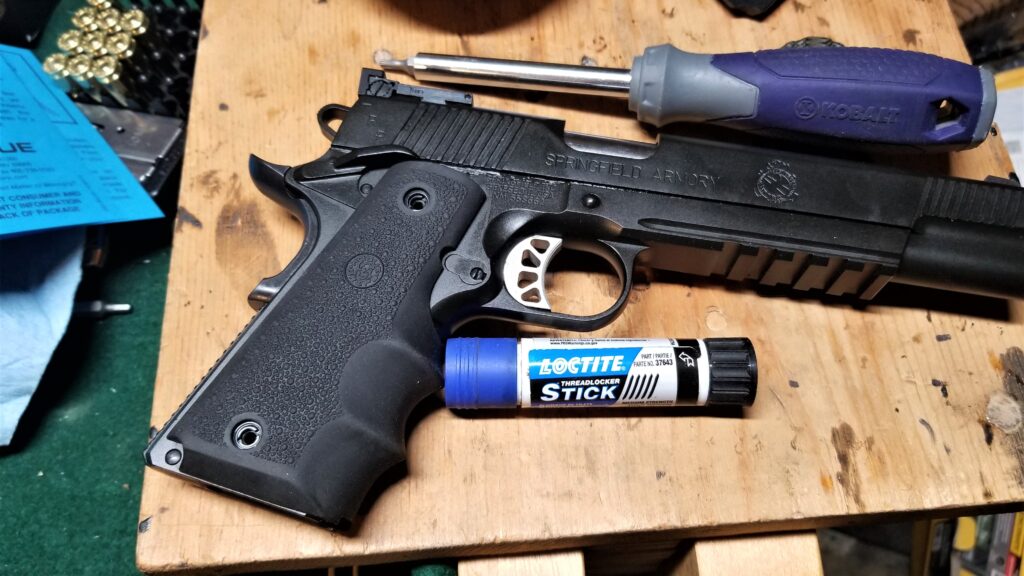
After I finished polishing the chamber of my new 10mm TRP Operator Longslide, I also replaced the VZ Grips. Maybe it’s my carpal tunnel but I really prefer rubber grips on my single-stack 1911-style pistols. Fortunately, the Hogue 45000 wrap around rubber grips fits great.
The VZ-Grips that come with the TRP are very nicely executed. Replacing them is as easy as removing the two Torx screws you see on each side.
Replacing the Grip Panels
I did some digging and the Hogue 45000 rubber grips are a drop in replacement rubber grip set for Colt-Government size frames including Springfield Armory pistols. Sure enough taking them out the package they lined up just fine.
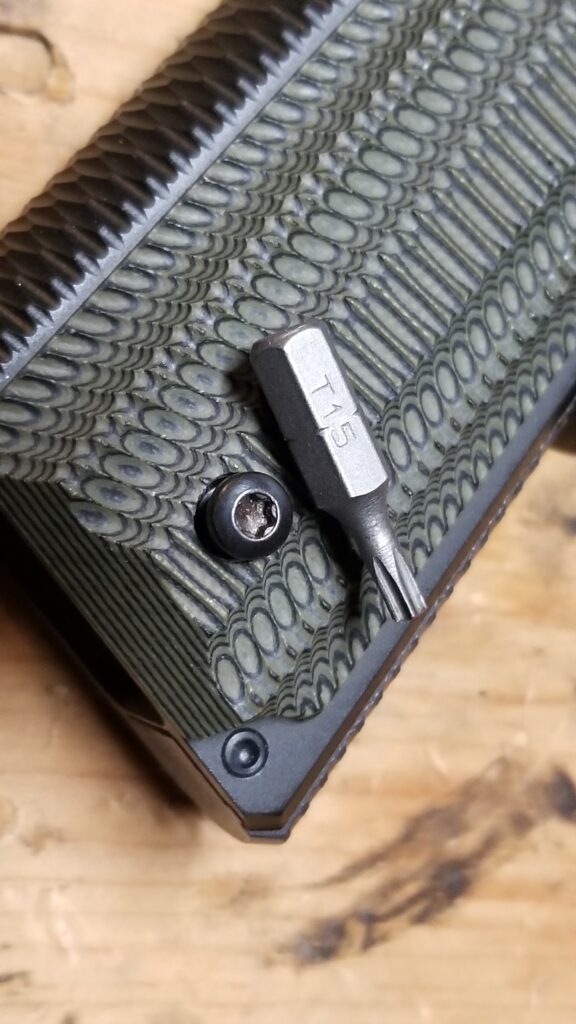
To remove each panel, you will need a Torx 15 (T15) bit and I would recommend a container to hold the screws. I like using a magnetic tray to avoid them bouncing around.
My factory screws backed out using a T15 bit and I was surprised that there was no threadlocker or much torque.. You have to love the easy stuff when it comes along. The original grips lift off the threaded inserts and then you slide the Hogue into place until the holes align. Yeah, it’s that easy.When you go to re-install the screws, use a medium-strength threadlocker. I’ve been using the Loctite “stick” series for a while now as you avoid the traditional liquid making a mess as it drips. Would the liquid work – for sure. The stick is just convenient. In terms of torque, I just brought them down snug.
On the topic of grip screws, you have some options to avoid lost screws. First is to use a medium-strength threadlocker and another is to put an O-ring under the head of the screw. Some guys use #61 plumbing O-rings and others use 1.5x3mm Buna-N O-rings. I’d recommend one of the two vs. nothing.
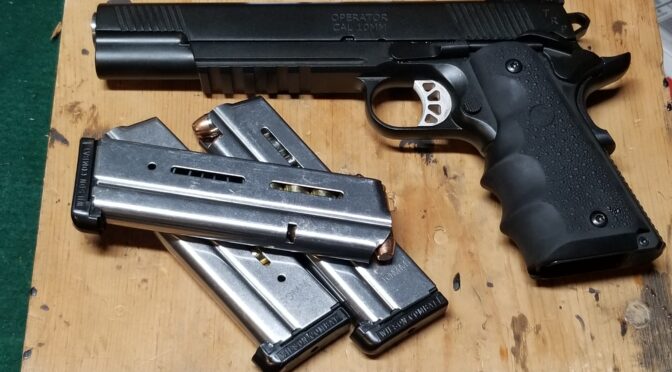
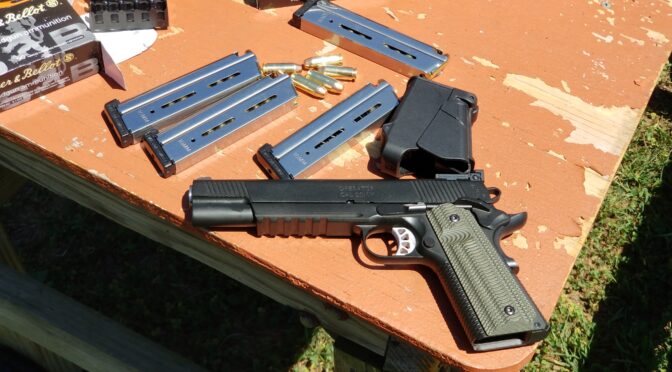
The Hogune 45000 is an easy install. If you are wondering about the Wilson 47NX 9-round mags, I really like them too.
Conclusion
The pistol passes testing with flying colors – it now cycles fine, the slide and everything operate very smoothing during manual testing and the grip makes a huge difference for me in terms of comfort. Now, I just need to get some range time 🙂
After the very disappointing performance of my new 6″ 10mm TRP Operator at the range, I knew I had two options. First, I could send the pistol back to Springfield Armory for repair or two, I could try just a bit of light polishing first. I had good reason to want to try the second option first.
In looking at the brass coming out of the TRP during test firing, it was getting very scratched and in some cases actually nicked/gouged as it went up the feed ramp and pivoted to then be pushed into the chamber. The rounds that stopped dead and would not feed had to be tapped out with a cleaning rod. They all had a slight nick/gouge in the case where the edge of the barrel literally bit into the brass effectively locking the round in question in place.
I sure wasn’t happy at the range but at least I had a plan of attack. When I had time a few days later, I waded in to try fix the problem.
Before you ever work on a firearm, make sure it is not loaded. Be sure to check the chamber and do not have a loaded magazine in it either.
Disassembly
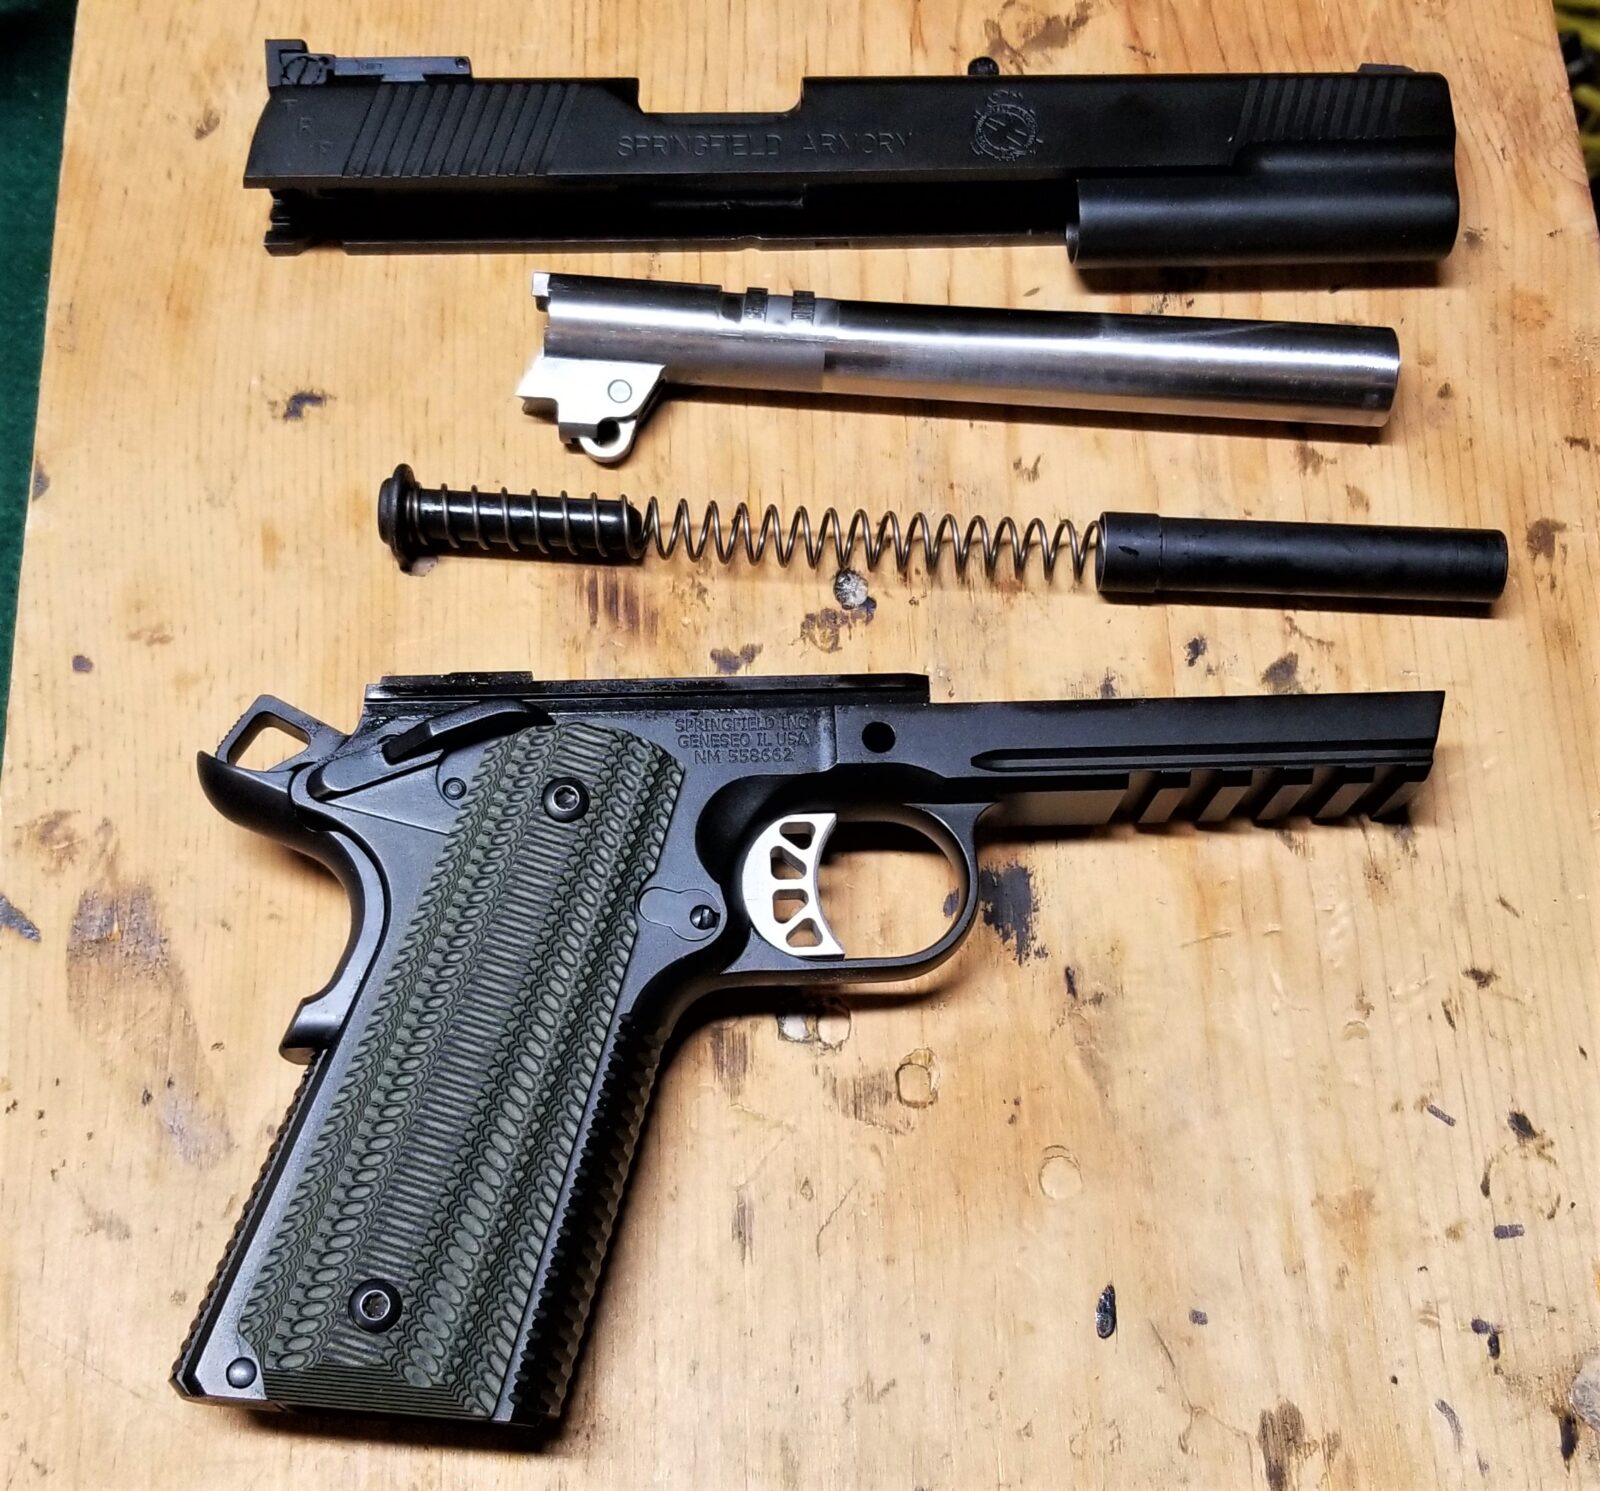
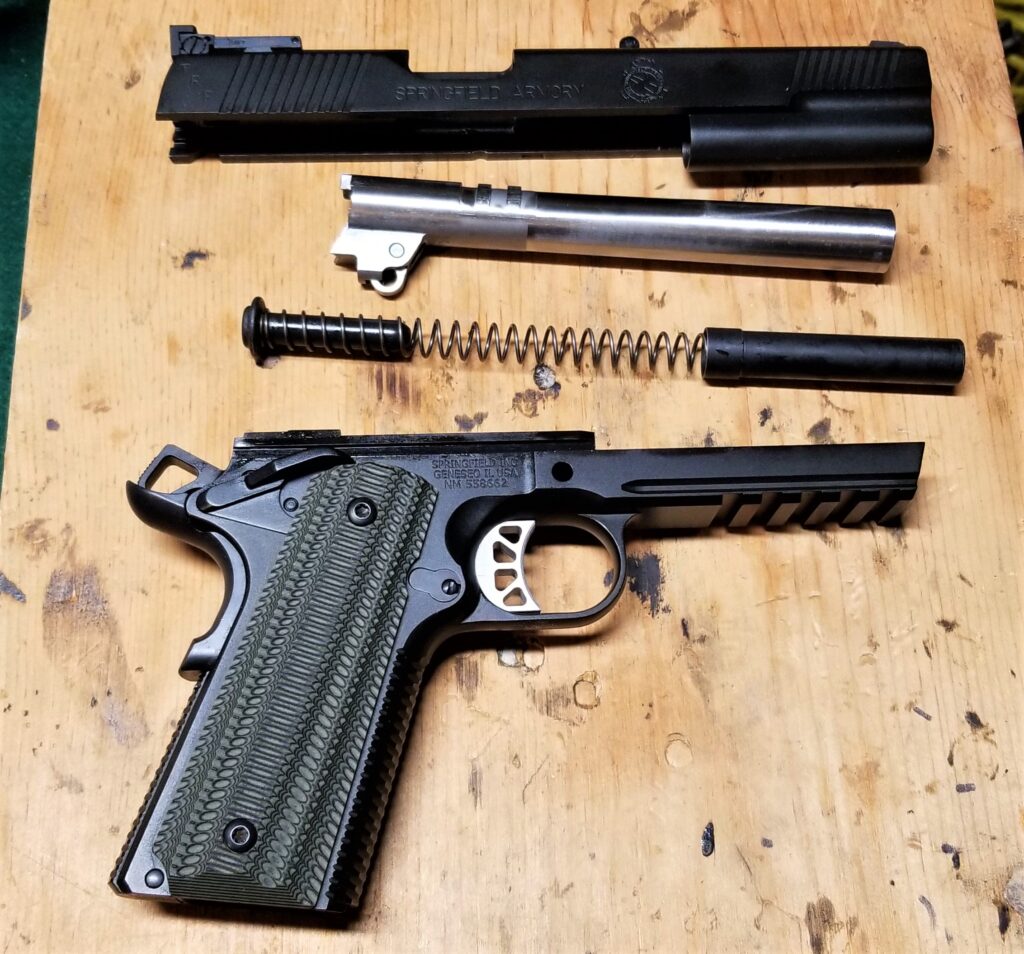
The 6″ TRP is a slightly odd beast. It does not have a traditional guide rod. You disassemble it just like any other 1911 by pushing the slide forward to the point the slide stop aligns with the disassembly notch and pushing the slide stop out. I don’t know of any tricks to unload the unique recoil spring system the 6″ Longslide TRP has.
As you move the slide forward off the receiver, be prepared for the spring to want to jump out so be sure to have a hold of it before you get the slide half way off exposing it forward of the browning link.
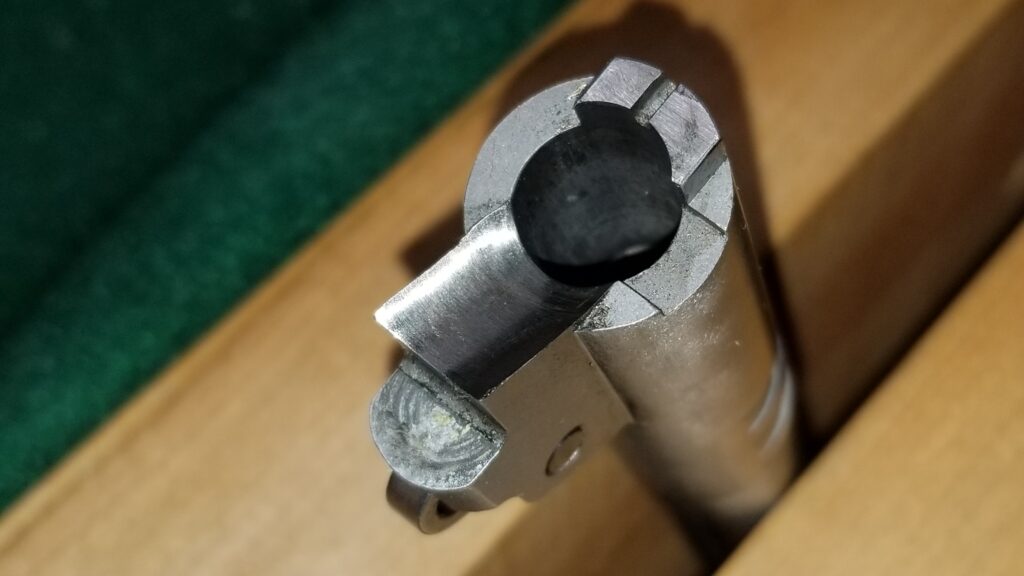
Notice the heavy bull barrel with no bushing and also the unique recoil spring. There is that stubby little guide rod and a long plug that the spring goes into. As far as I know, this is unique to the 6″ Longslide model and is not found in the 5″ TRP.
The spring system is annoying during disassembly and re-assembly but I am getting used to it. I checked with Wilson and Dawson plus did some googling around and nobody has anything to replace it so I’ll just deal with it.
The Barrel
Okay, I took the barrel and looked at the point where the steel transitions from the feed ramp to the chamber. It wasn’t polished and it was practically a knife edge. No wonder the rounds where getting torn up or even caught on that sharp edge.
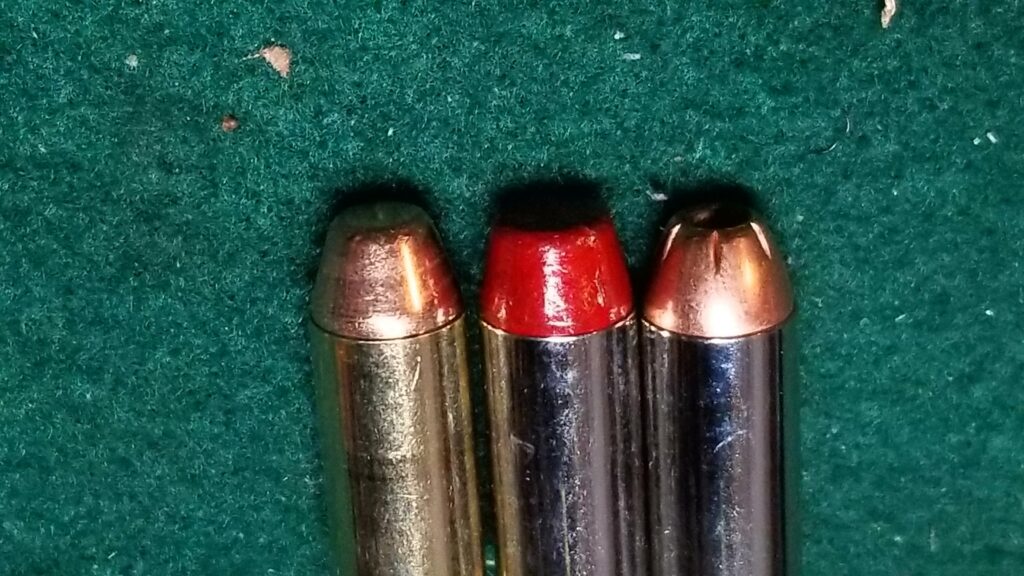
This is the barrel straight out of the TRP without any cleaning or work done. The ramp is fairly smooth but I wanted to polish it more – same for the chamber but boy is the top of the feed ramp an abrupt sharp angle. No wonder cases were scraping on it and/or getting hung up.If you look at the angles of the three types of rounds I was test firing with, the most successful was the 220gr hard cast in the middle. The S&B 180gr FMJ on the left has more of angle and the XTP on right has an even greater angle. None of the bullets were damaged during testing it was the cases. Notice that the greater the angle the worse the round fed and the more chewed up the case was.
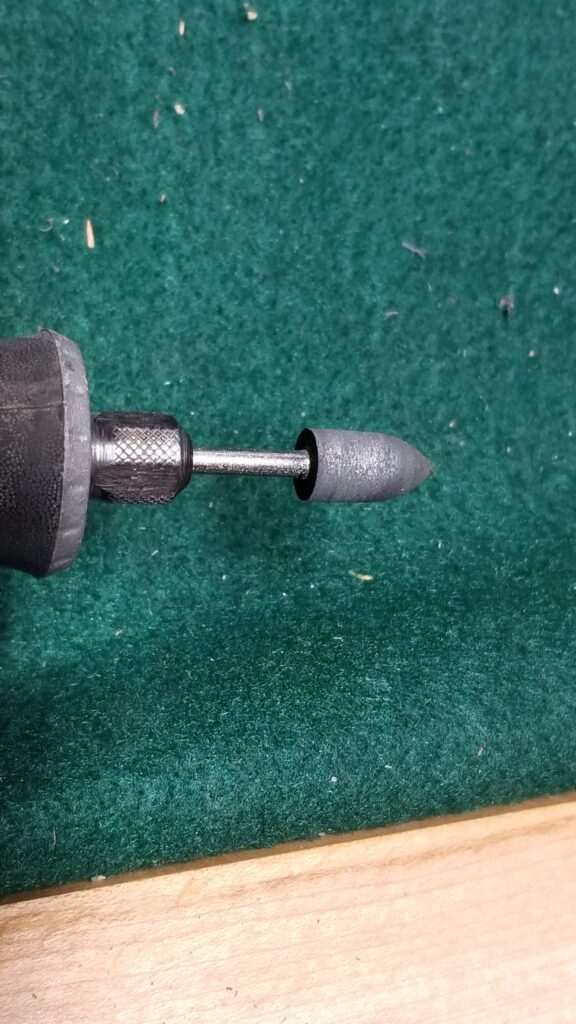
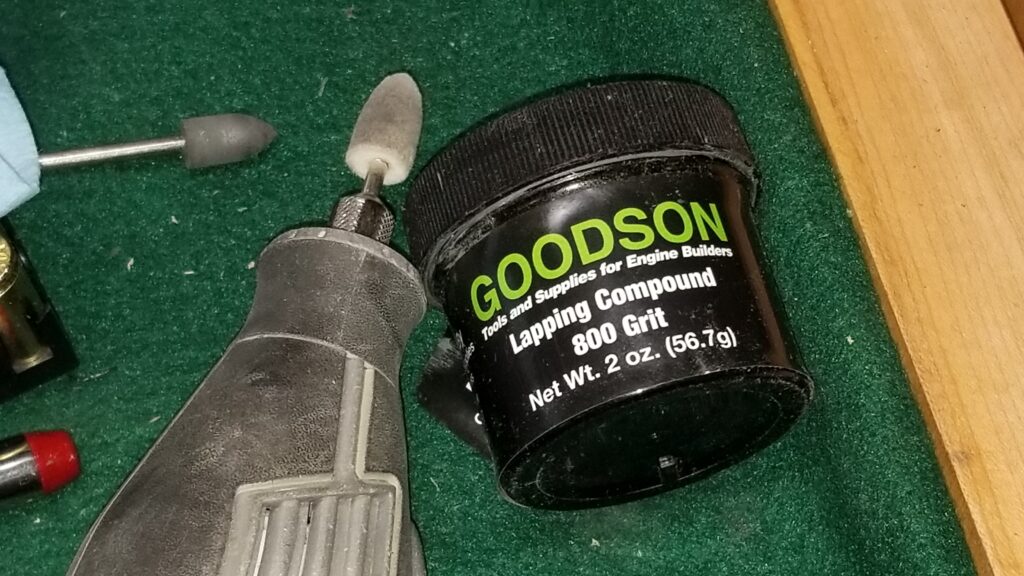
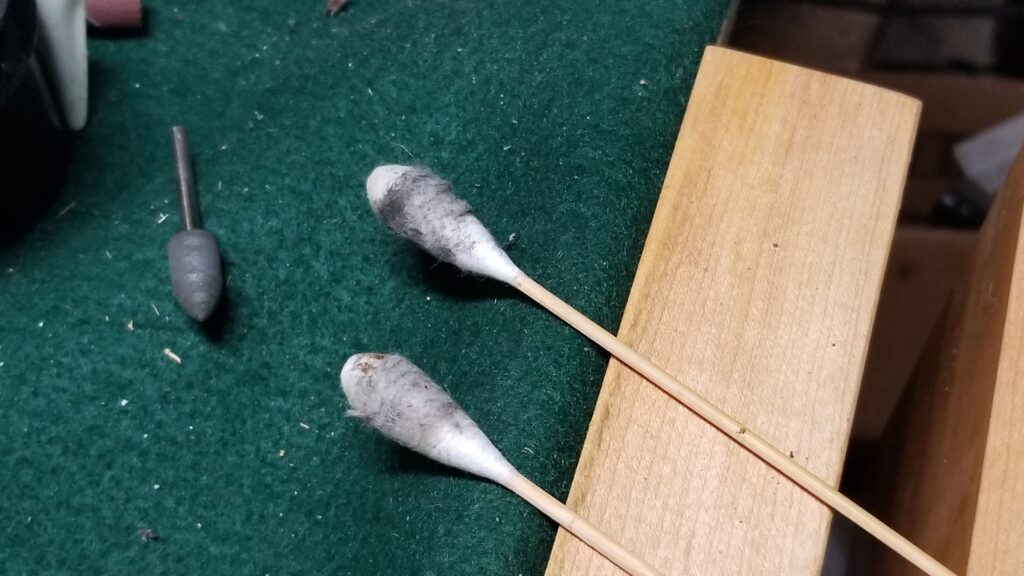
To address this, I got out my Dremel, rubber abbrasive bits, some felt bobs and also a bit of 800 grit polishing compound.
One thing to remember up front – you do not need to take off a ton of material so use a fine grit abrasive and a relatively low speed. You want to work a bit and test until you get it right where you want it.
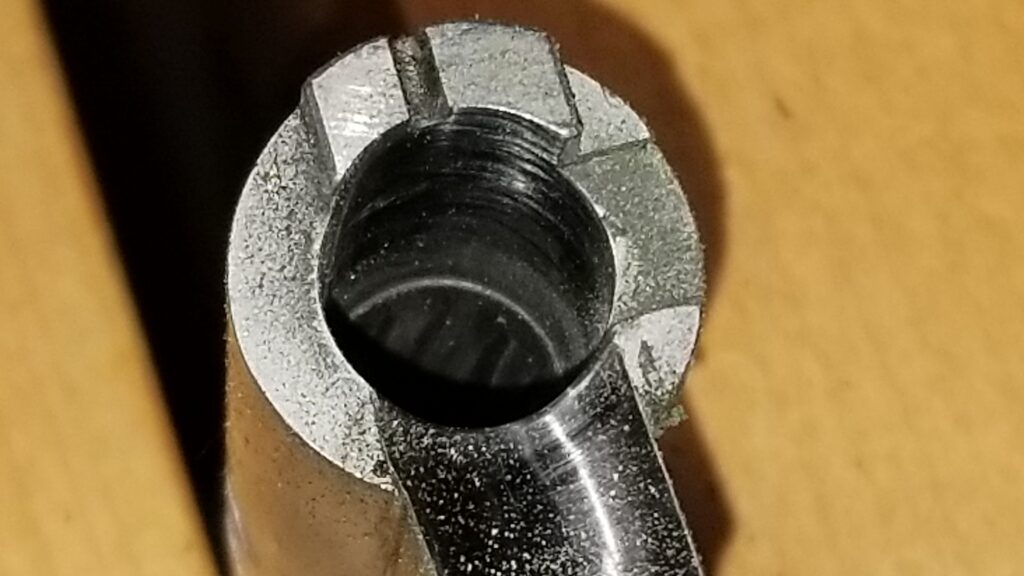
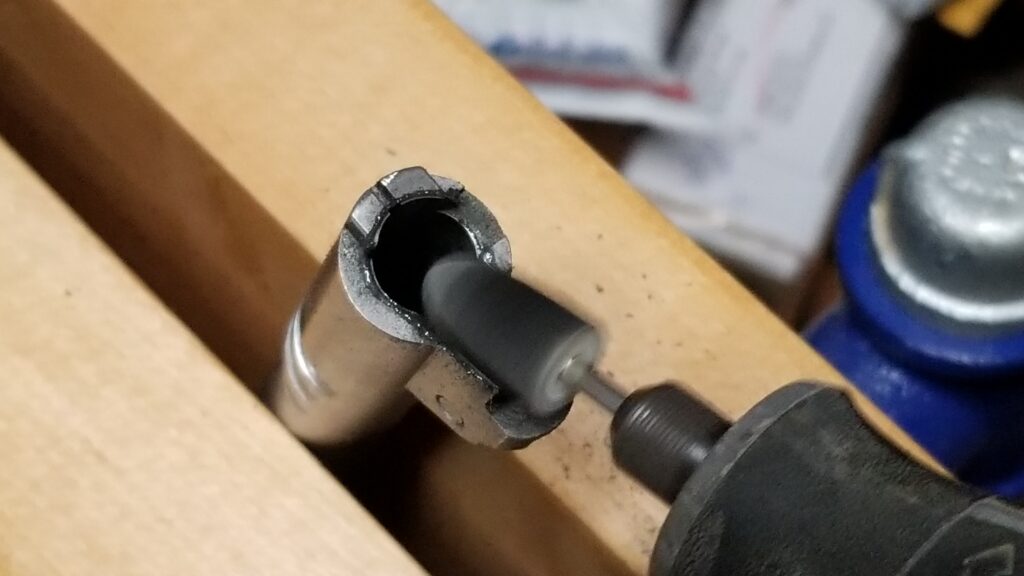
That’s a close up of the TEMO rubber polishing burr that I use to round over transition from the ramp to the chamber. Basically you want to get rid of that abrupt sharp edge and round it so that it is easier for a cartridge to tip over and get pushed into the chamber.You can see the rubber that came off the bit during polishing and also note the slight rounding at the top of the feed ramp – that is exactly what we want.Next up is to polish the ramp and the chamber. To do this I used a 10mm felt bob and 800 grit grease-based lapping compound. I’ve used Flitz in the past too by the way and it works. I like the Goodson compound due to it being petroleum based. It seems to cut better and doesn’t fly all over the place. Note, this is 800 grit and we just want to polish – our goal is to remove as little material as possible while getting the job done.Okay, here’s an action photo. I polished the chamber and the ramp already. You move the bob around and don’t sit in one place – back & forth, up & down, in & out. Think of it this way – you are your own random orbit sander and don’t want to stay in any one place too long and remove any more than needed.I put CLP on a 10mm Ramrodz (think of a Q-tip made for cleaning a 10mm pistol barrel) and cleaned it it out followed by a second to mop any remaining debris. I carefully cleaned the other surfaces as well.
Greased the parts that slide
When we were at the range, I noticed the action was sluggish at times. This is to be expected during the break-in/wear-in period of any firearm. What I do to help the parts get to know each other is to use an acid brush to apply a light film of SuperLube grease to the parts that slide. Not a ton – just a film. For the TRP, I put it on the slide rails, the bottom of the slide. the exterior of the bull barrel and in the slide where the barrel passes. Wow – what a difference. The slide feels smooth as glass now. I also again put a drop of SuperLube oil on the trigger, hammer, browning link, etc.
Re-assembly
Putting it back together takes some practice – re-install the barrel and try to hold the recoil assembly in place as you slide on the receiver. For me, it’s easier if I do it with the slide inverted (bottom up), hold the slide and spring with the left hand while guiding the receiver into place with my right. One the receiver is on about half-way, the spring is adequately captured. Now, this also means that when you go to re-install the slide lock, you are fighting the tension of the spring. I support the pistol on a table during this step and am getting better at it. If someone has found a magic trick, please email me 🙂
Test Feeding
The proof is in the pudding right? I had to test in my shop vs. the range so that meant I needed to be very careful about where the pistol was pointed. Do what you are comfortable with and be safe.
I loaded up three magazines with three rounds of each to start. All hand cycled just fine. Prior to the above tuning, I could not do that. I then loaded up full mags of each and repeated the tests – everything hand cycled just fine.
Conclusion
I hope to get to the range at some point this week to verify the results. I fully expect it is good to go now. Also, let me again use this opportunity to point out this is why you always need to test your combinations of pistols, magazines and ammo. The TRP Operator is an excellent pistol but I knew not to rely on it out of the box. There are just way too many variables to take that gamble.
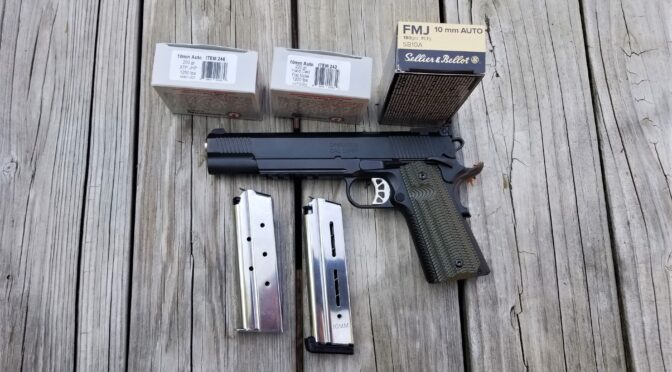
This post is continuing on the story of my newly purchased Springfield Armory TRP Operator 10mm Longslide. I’m going to touch on three topics – the initial mags, ammo and my first trip to the range.
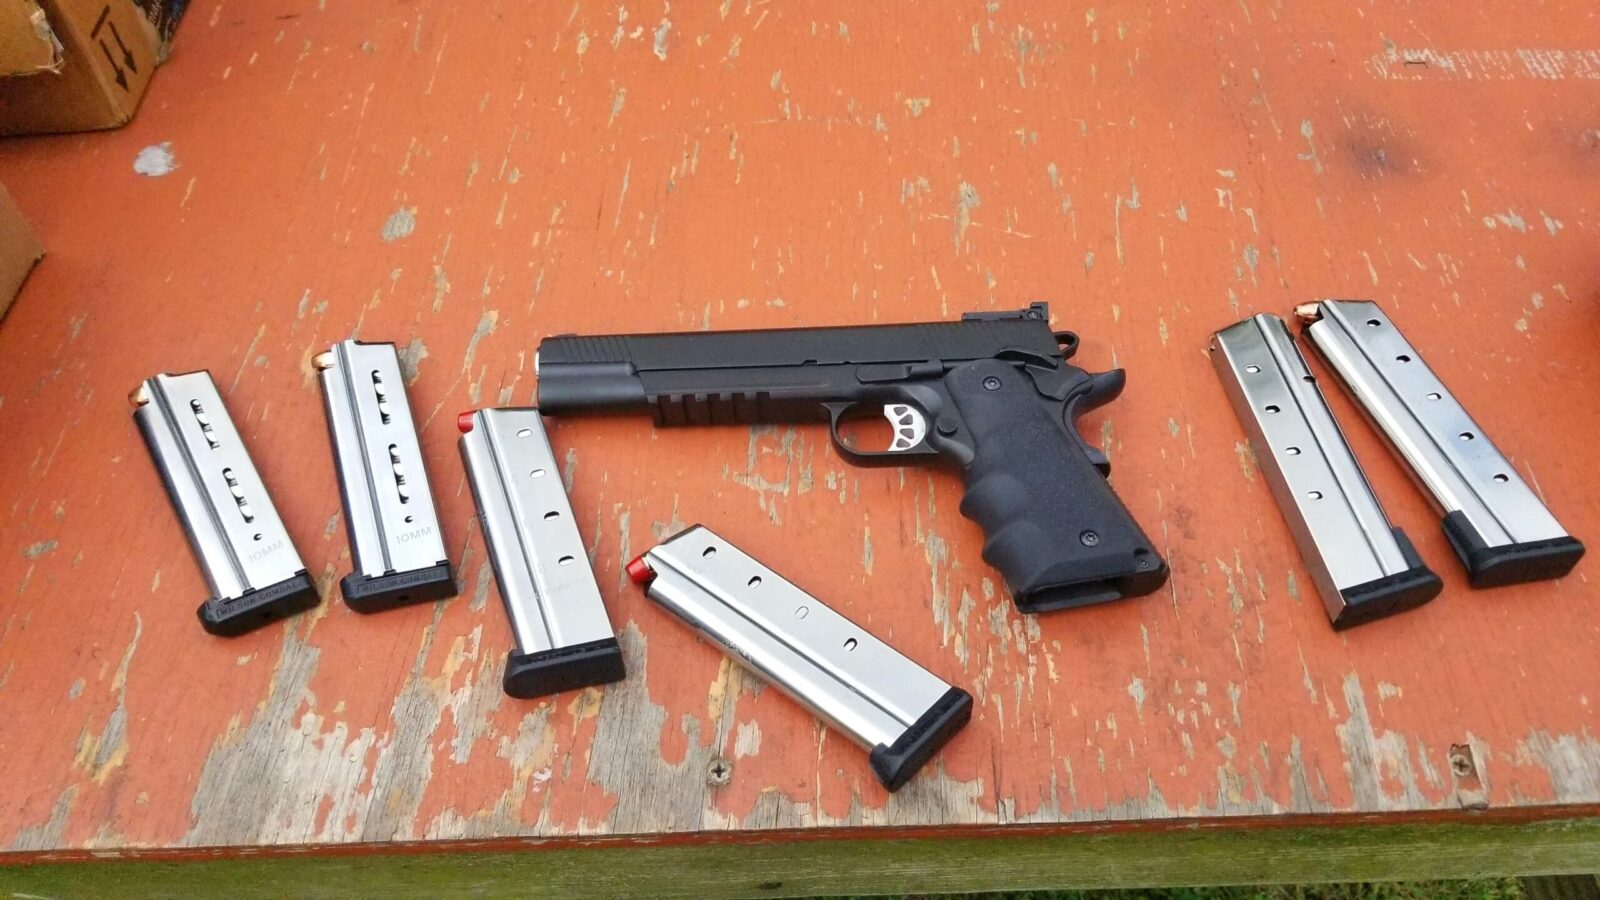
The Magazines
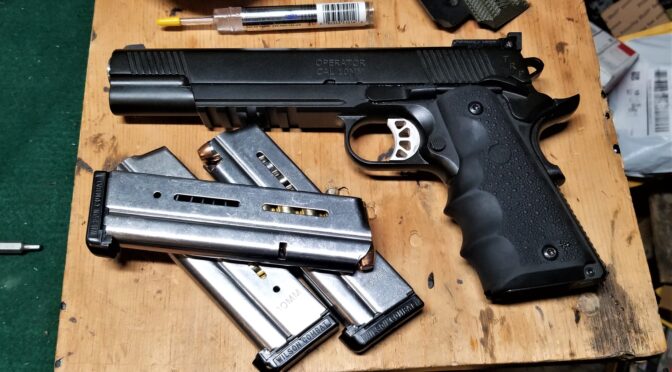
The pistol comes with two 8-round magazines that flush fit with the bottom of the grip. My experience with factory mags is mixed so I bought four Wilson Combat 47NX magazines to use as well plus they hold 9 rounds and have a bumper on the bottom.
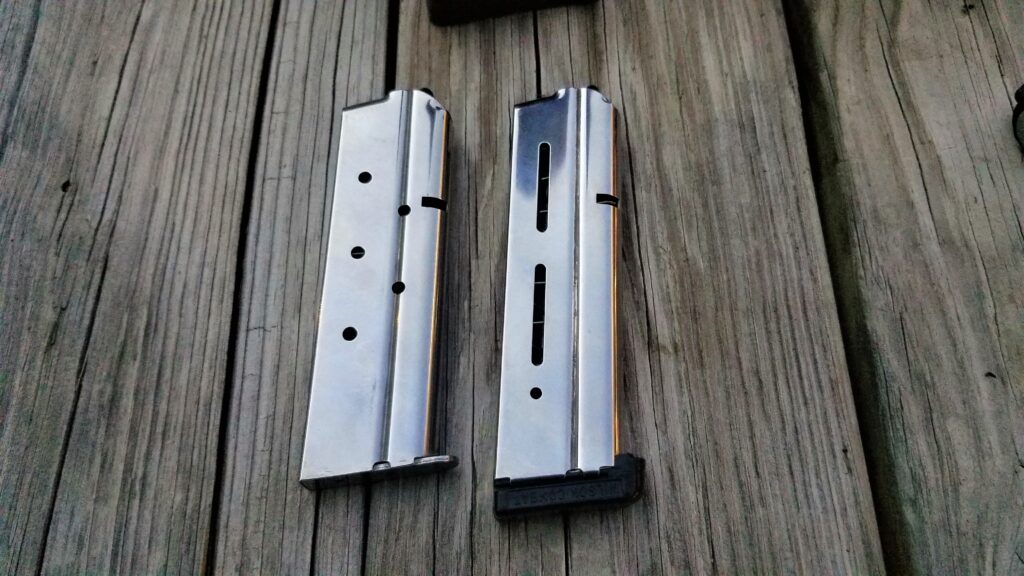
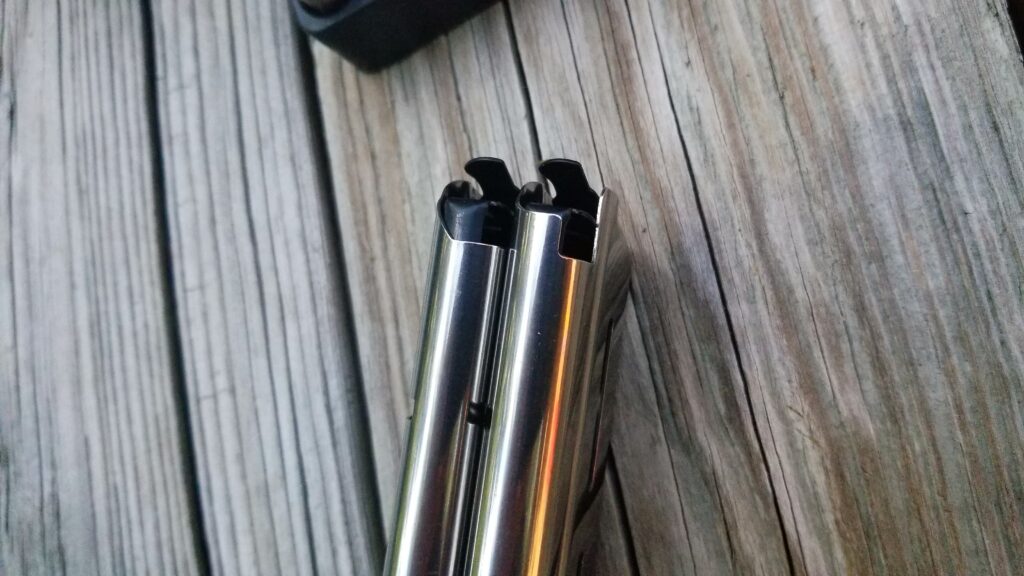
On the left is one of the two 8-round magazine that Springfield Armory supplied with the pistol. On the right is one of the four Wilson Combat 47NX 9-round magazines I bought.Left is the factory mag and on the right is the Wilson. Note the slightly different shape to the magazine body at the top. Interestingly, both followers are stamped with the same patent number. The followers are identical but not the bodies or the floor plates.
I tried a factory magazine with one of the S&B 180gr FMJ rounds I bought and it immediately jammed on the first test, and the second and the third. Okay, I really wasn’t surprised given past poor experiences and tried one of the Wilsons. The round went right in. I thought that fixed the problem and we’ll come back to that later when we discuss the range.
The Ammunition
With my Rock Ultra and Bruin, S&B 180 grain FMJ proved to be a very decent range ammo so I bought a few hundred rounds of it to break in the TRP.
In the 10mm community, Underwood has a great reputation and I had also used it with both of my previous 10mms. This time though, I bought 5 boxes of 220gr hard cast for bears and 4 boxes of 200gr XTP to try out.
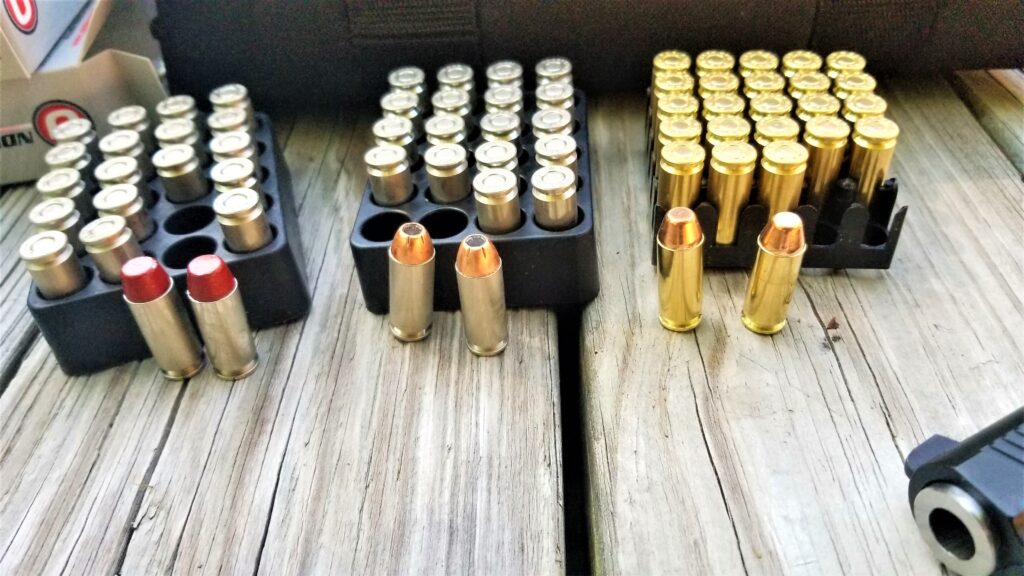
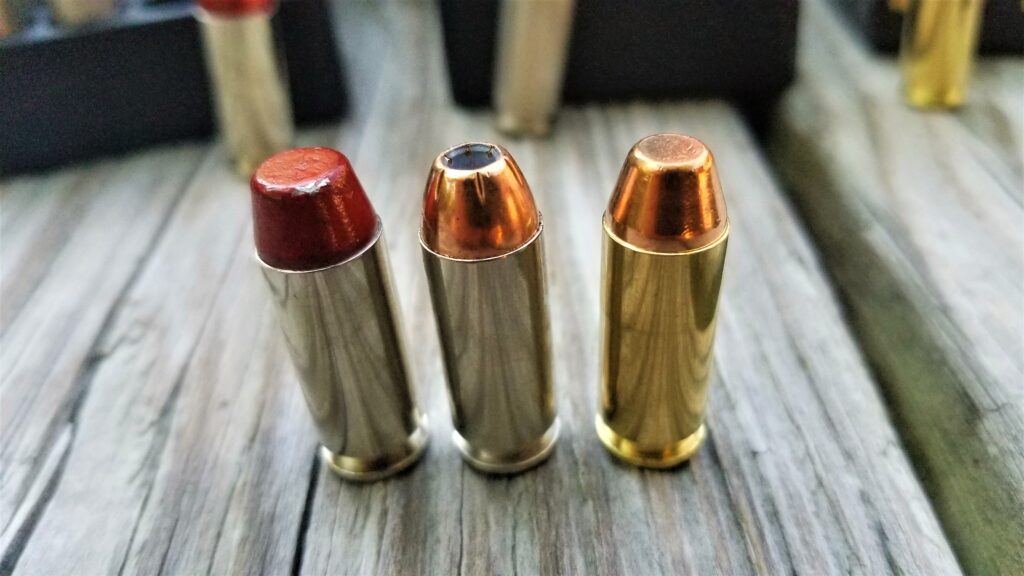
From left to right: Underwood 220gr hard cast (the bullet is colored red and easy to spot), Underwood 200gr XTP HP and last, S&B 180gr FMJ.So here is a side-by-side in the same order – Underwood 220gr Hardcast, Underwood 200gr XTP and S&B 180gr FMJ.
The hardcast comes in at 220 grains and the bullet is a “Hi-Tek Coated Hard Cast Flat Nose” and the Brinell Hardness Number (BHN) is 41. That puts it somewhere between copper at 35 BHN and Hardened 6060 Aluminum at 75BHN. Pure lead comes is at 5 BHN. In short, you’d expect it to penetrate without mushrooming easily – which is what I would want for a bear’s skull for example. The round pushing the bullet 1200 FPS and 703 ft/lbs at the muzzle makes sure it gets delivered hard.
The 200 grain XTP was what the vendor had in stock at the time. I like XTP bullets in general as they perform well in terms of mushrooming so this is not something I would use on a bear but two legged predators maybe. Underwood reports that the muzzle velocity is 1,250 FPS with 694 ft/lbs.
The S&B 180 grain FMJ is for the range. In the past I found it affordable, reliable and accurate enough for practice. S&B USA reports that it’s exiting the muzzle at 1,165 FPS with 544 ft/lbs of energy.
A Quick Cleaning and Lubrication
I ran a couple of 10mm RamRodz down the bore to clean out the accumulated gunk from the factory and travel. I then applied Superlube to the frame rails and other lubrication points on the pistol.
The First Range Experience
The weather was perfect for going to the range and both Niko and I commented that as we lugged firearms, ammo, targets and what have you down the shooting lane we planned to use.
Getting ready to shoot. Ignore the MagLula – we had some Polymer80s and SIGs to shoot after the TRP.
First up for testing was the TRP operator. We loaded the Wilson Combat mags up with the S&B ammo, loaded the first round, fired and it jammed. Well crud. It was jamming hard too – the bullet was hitting the top of the chamber during feeding but not rotating enough to then go the rest of the way forward. After a few of these we noticed that the transition point between the feed ramp and the chamber was actually indenting the brass enough to cause a notch and stop the round hard. So much for the S&B at that point.
We then switched to the hard cast and the TRP relatively liked that. It fired a lot more with fewer jams. What we noticed was that the angle on the hard cast bullet seemed to be such that it helped the round to properly chamber most of the time. So, we shot about 20 rounds in total and decided to move on to the 200gr HP.
Wow – the Underwood 200gr XTP load was jam city. I could not get them to feed at all. So, disappointed, we stopped shooting the TRP and put it away. In looking at the cases, I was betting that I needed to slightly bevel the transition point and polish both the ramp and chamber. Doing that will be the topic of our next post — and yes, it did make a world of difference.