What can a custom 21″ HI Sirupati look like?

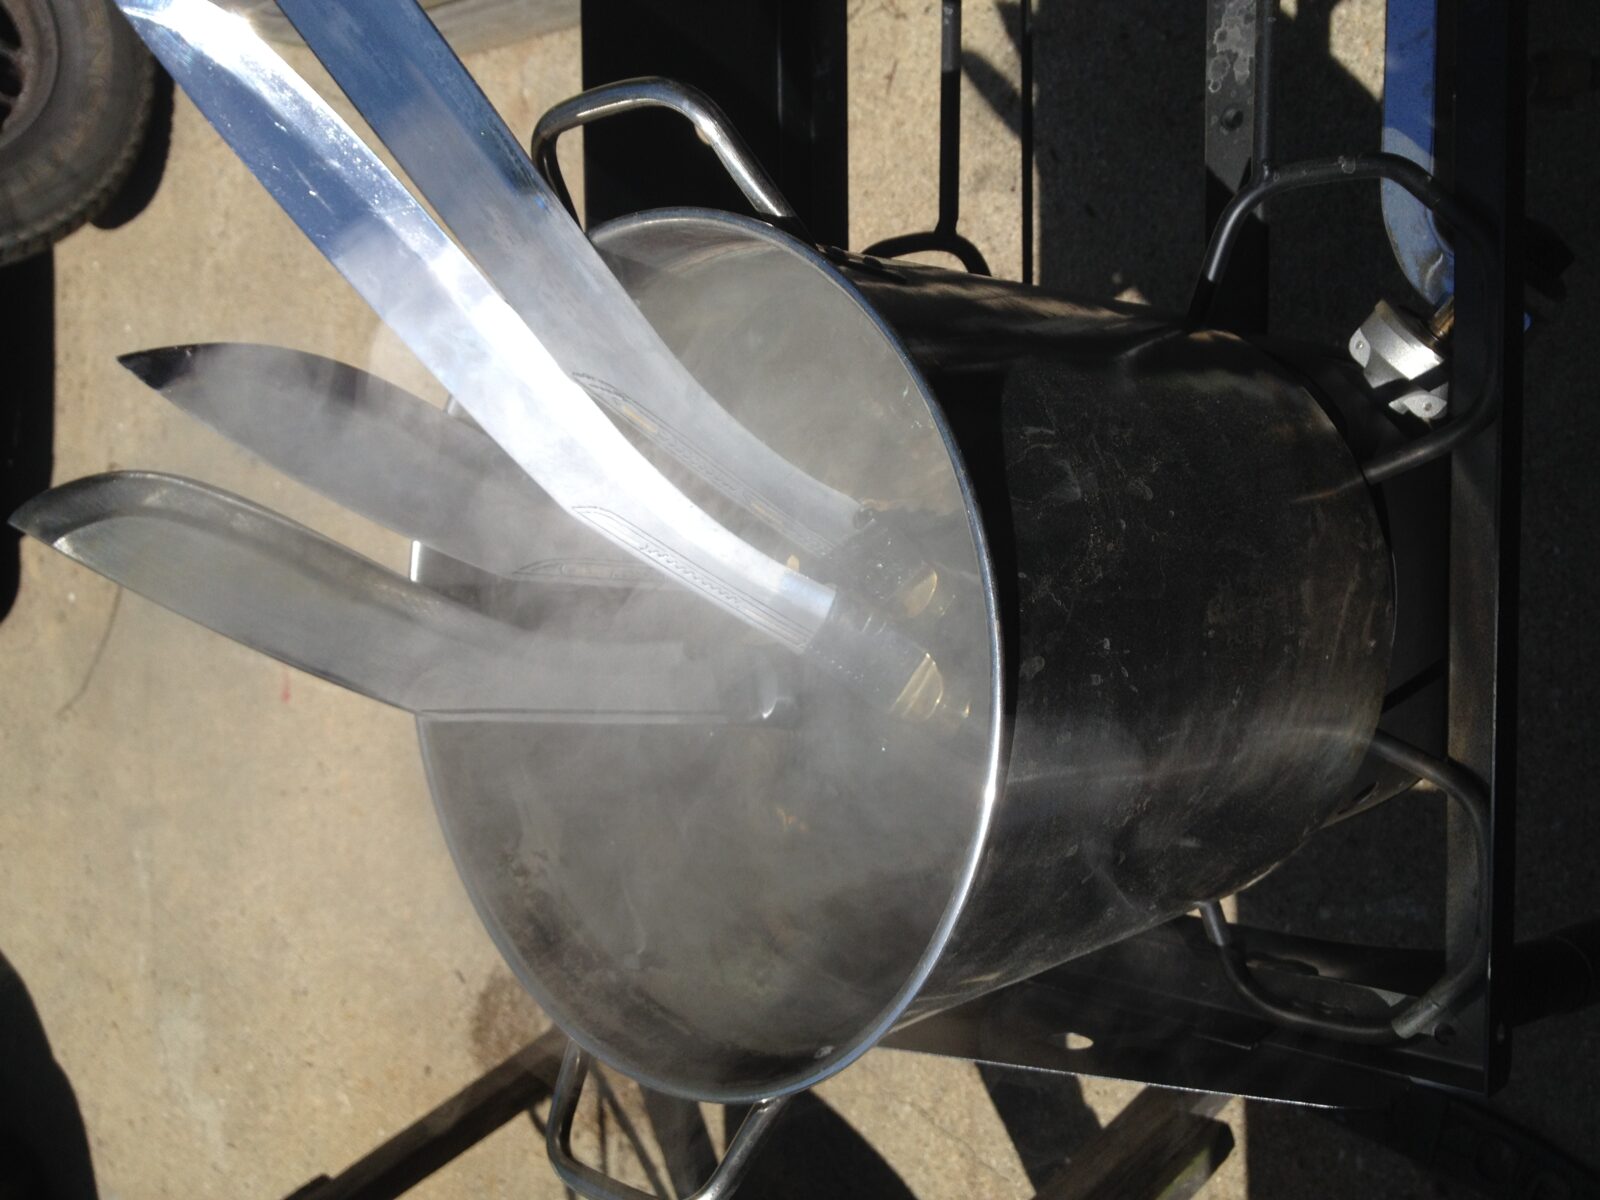
This HI Sirupati had a 16-17″ blade and was about 21″ overall when it arrived to us with a busted handle so the first step was to boil it and a few others with bad handles and then pry it off:

Custom 21" HI Sirupati rotisserie spit with steam rising Close-up of antique silver cutlery with engraved details in a pot  Custom 21-inch HI Sirupati knife with dark horn handle and metal ferrule. Four custom 21" HI Sirupati kukris in progress on a wooden surface.

I made two new handles by gluing assembled blocks around the tangs of the two Sirupatis.  I didn’t mention it before, but they are twins – both about 21″ long so you can see a before and after shot.  The trick was to form a block made of black paper micarta and black glass reinforced Acraglas epoxy.  I then used my new Esteem grinder to remove the parts of the micarta that didn’t feel like a handle:

Custom 21" HI Sirupati machete handle and bladeCustom 21" HI Sirupati belt grinder with motor and controls

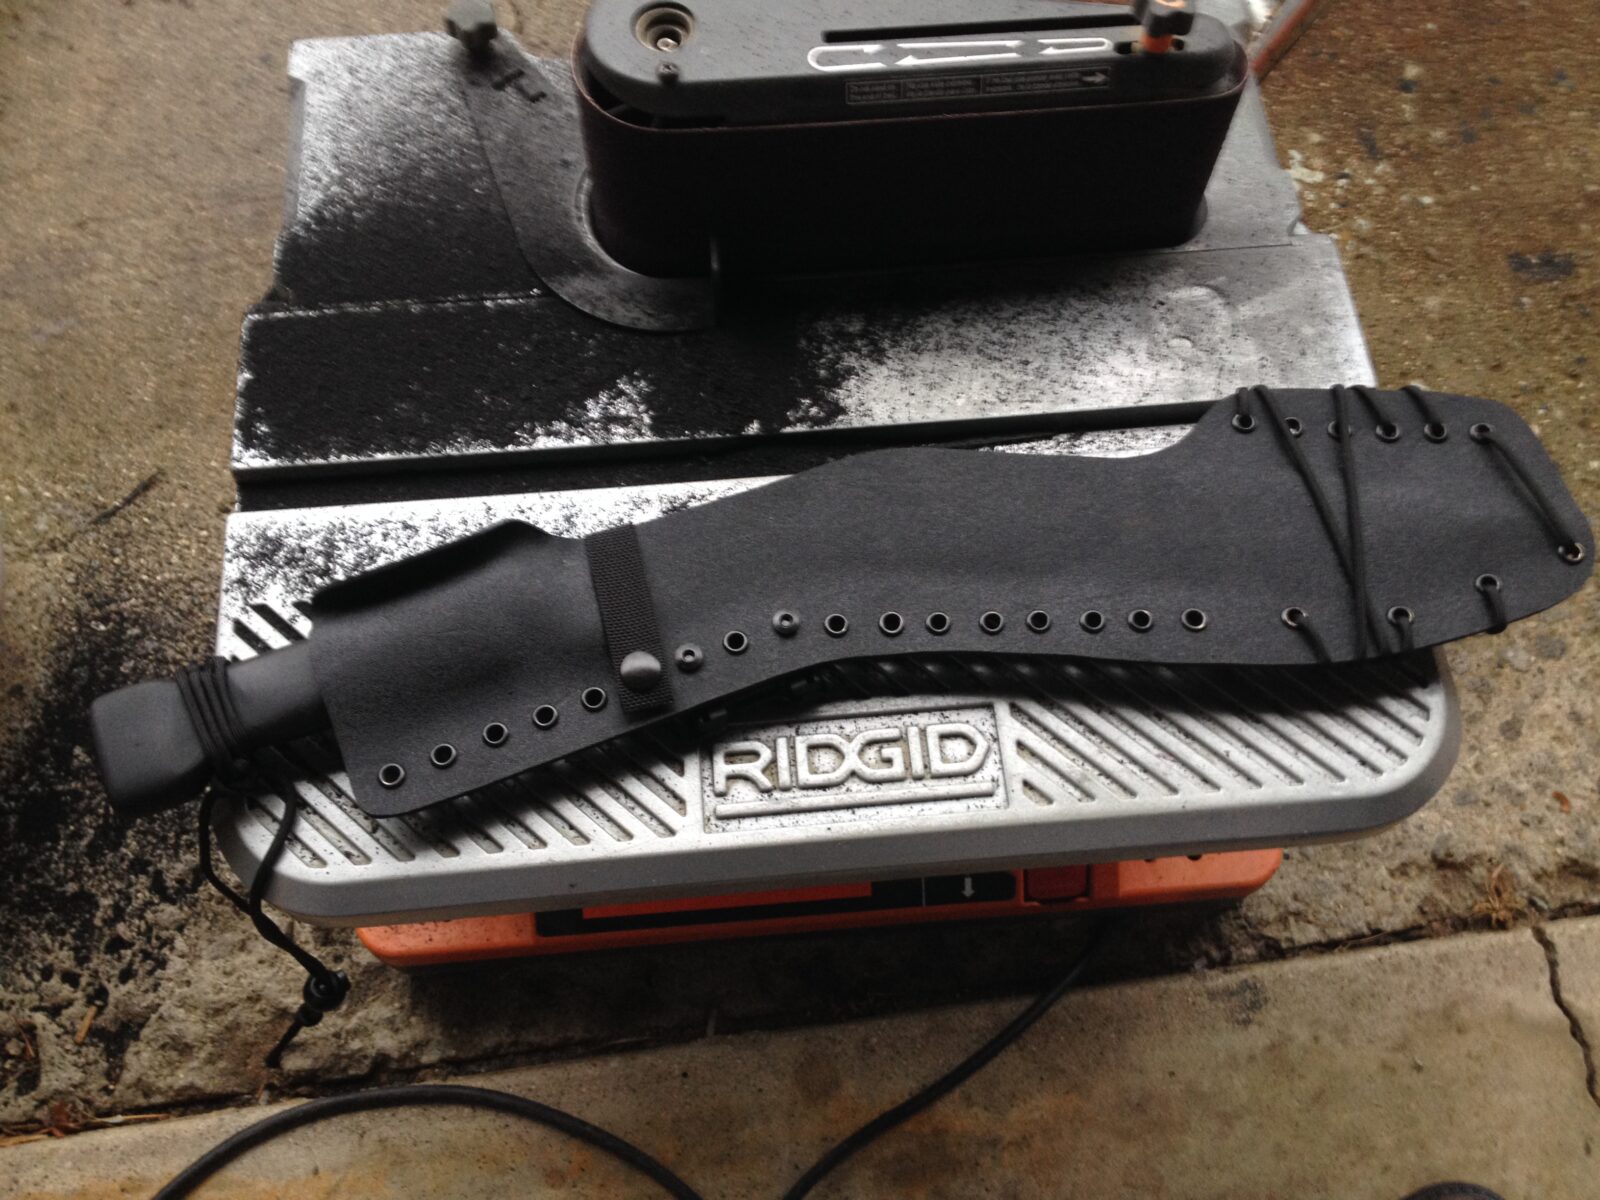
The following photos are of the first completed Sirupati that has an acid etched blade and its custom sheath made from 0.093″ thick Kydex:

Custom 21" HI Sirupati kukri knife on a Ridgid tile saw Custom 21-inch HI Sirupati knife on metal surface with leather sheath Custom 21" HI Sirupati knife and sheath with paracord wrap Close up of custom 21-inch HI Sirupati sheath with blade on metal surface Close-up of a custom 21" HI Sirupati kukri, showing ornate handle details. Custom 21" HI Sirupati knife and sheath Custom 21" HI Sirupati kukri with sheath on a belt sander

The intent of posting this is to show how a very traditional looking khukuri can look after some modernizing.

Eric’s M92 with our Plum Second Generation Molot Grip

Eric's M92 PAP pistol with plum Molot grip and red dot sight

Eric’s build is looking very slick!!

Manticore triangle stock w/ Stormwerkz hinge
Stormwerkz rail for M92
Primary Arms red dot
Ironwood Designs Russian Red laminated handguards
Tapco G2 trigger
Dark Russian Plum Molot 2nd Gen grip

What is a Ferrule on Yugo and AK Rifles?

A ferrule is a metal end cap found on some wood grips and handguards to protect the end grain of the wood from being hammered and splitting open.  They were used on different country’s weapons and are usually not interchangeable between countries.  For example, Bulgarian and Yugo ferrules are different.

Near and dear to me are the metal ferrules on Yugoslav / Zastava wood lower handguards.  The following photo shows a M92 lower and the black metal cap is the ferrule.  This ferrule does not fit everything Yugo – just the M70, M85/92, and M77.  The M72 and M76 are unique sizes.

Ronin's M92 handguard wood with damaged mounting bracket

You have three options when you need a ferrule:  1) Find a used one and this is real hard – try posting in the Marketplace of http://www.akfiles.com and see if they have one.  2) Buy a replica ferrule from us or 3) Simply pry the old ferrule off, put it on the new handguard and the squeeze the tabs shut again with a pair of pliers.

Close-up of a tool removing wood from a M92 handguard for Ronin's Grips installation.
Black plastic clip for Ronin's Grips M92 handguard installation

Note if you are putting it on one of our plastic handguards either just set it on it with the ears closed or glue it in place.  Absolutely do not try to squeeze the ears shut — the little metal divots will not dig into our plastic and you risk snapping the handguard tabs.  Again, either slide it on or glue it in place with something like rubber glue or Goop that you can later remove if you want.  Epoxy works too but it is pretty permanent.

For example, I just slid the ferrule on the M70 bulged handguard in the next photo.

LiteXpress X-Tactical 101 flashlight with rotary selector and green LED indicator

We manufacture ferrules that fit the Yugo/Zastava M70, M77, M85 and M92 lower handguards. Note, they are specific to those models and will not fit other nationalities or models.

Click here to visit our store with the ferrules for sale.


Please share the link on Facebook, Forums, with colleagues, etc. Your support is much appreciated and if you have any feedback, please email us in**@*********ps.com. If you’d like to request a report or order a reprint, please click here for the corresponding page to open in new tab.


What the M92 Looks Like After All the Mods

This shows what the M92 looks like today.  I haven’t had time to go to the range yet but the “feel” is fantastic in terms of weight, balance and length. CNC Warrior nailed the folding arm brace.  Wow – how cool it is!

Here is a list of the modifications made:

  1. CNC Warrior Folding Arm Brace
  2. CNC Warrior 4 Piece Brake
  3. CNC Warrior Detent Pin
  4. CNC Warrior Picatinny Rail Scope Mount
  5. Ronin’s Grips M92 Ferrule Cut Handguard Set
  6. Ronin’s Grips Bulgy ARM-9 Pistol Grip
  7. Ronin’s Grips M92 Dust Cover Quick Takedown Pin
  8. Vortex Sparc Red Dot with the Low Mount
Modified M92 PAP pistol with drum magazine, red dot sight, and tactical foregrip
Close-up of the modified cylinder and latch mechanism on an M92 firearm.
M92 PAP pistol with Vortex red dot optic mounted on top
Modified M92 PAP pistol with aftermarket brace, optic, and magazine
M92 PAP pistol with pistol brace, red dot sight, and extended magazine
M92 PAP pistol with Vortex SPARC optic and tactical grip mods
M92 AK pistol with SB Tactical brace and modifications
M92 pistol modified with tactical furniture, scope, and magazine
M92 PAP pistol with tactical mods and a cleaver on a wood stump


Please share the link on Facebook, Forums, with colleagues, etc. Your support is much appreciated and if you have any feedback, please email us in**@*********ps.com. If you’d like to request a report or order a reprint, please click here for the corresponding page to open in new tab.


How to Install Ronin’s Grips M92 Handguards

This is another long overdue step by step guide.  We have been selling M92 handguards for over two years and people ask about how to install them so let’s try and take this step by step.

SAFETY STEP – MAKE SURE THE WEAPON IS UNLOADED.  NEVER ASSUME THAT IT IS – VERIFY IT IS UNLOADED BEFORE YOU BEGIN WORK.

1.  Open the dust cover so the gas tube can be removed.

Installing Ronin's M92 handguard grip on AK pistol Installing Ronin's Grips M92 handguard on AK pistol

2.  Take a look at the upper portion.  The gas tube cover is actually a semi circle held in a groove formed by sheet metal.  To remove the cover, secure the forged metal end of the tube (NOT THE SHEET METAL END OR IT WILL BEND) in a vise or use an open end wrench.  Turn the cover 180 degrees until it faces the opposite way and it will come right out of the retainer.

Ronin's Grips M92 handguard installation: close-up of wooden handguard parts. M92 handguard installation: wooden grip over metal components in a vise. M92 handguard installation: wooden jig holding barrel assembly in vise M92 handguard grip being installed in a vise, part of Ronin's Grips installation. Installing Ronin's Grips M92 handguard: wood grip removal M92 handguard part secured in a vise for Ronin's Grips installation.

3.  See the metal clip in the gas tube cover?  You will want to move that clip to our gas tube cover as it helps secure it in place.


Hand adjusting Ronin's Grips M92 handguards on a wooden rifle Ronin's Grips M92 handguard installation: close-up of black polymer grip Inside view of a black M92 handguard for Ronin's Grips installation.

4.  Next, look at the lower handguard.  In the front of the guard on the left side you will see a small lever that needs to be rotated inward.  Once that is done, the handguard retainer can be slid forward.

M92 handguard installation detail with Ronin's Grips Hand holding Ronin's Grips M92 handguards, close-up of black barrel Hand holding Ronin's M92 handguards with tools and paint in background Ronin's Grips M92 Handguards installed on a wooden gun stock

4.  The lower handguard is then pulled forward and down to be removed.

Installing Ronin's Grips M92 handguard: Close-up of wooden handguard assembly. Installing Ronin's M92 handguards on a firearm Hand adjusting Ronin's Grips M92 handguard on an AR-15 rifle

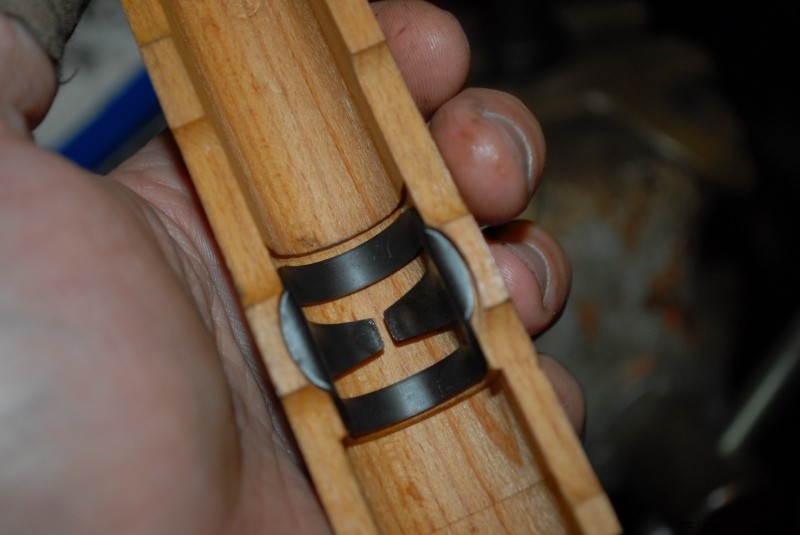
5.  I am asked regularly about what a ferrule is.  Folks, that black metal cap on the end of the lower is a ferrule.  It protects the end grain of the wood from being split open.  We sell a handguard that can use a ferrule if you like the looks of it plus we sell a version that does not need the ferrule.  It is entirely up to you.  I sometimes use the ferrule to accent whatever color handguard I am working with – for example, Dark Olive Drab to Dark Russian Plum.

Ronin's M92 handguard wood with damaged mounting bracket

6.  This only applies if you buy one of our handguards that uses the ferrule – you can use your existing ferrule by using a screwdriver to bend the tabs open on the receiver stub and then working the ferrule backward and off the wood lower handguard.  You can then glue it to our’s or even leave it loose.


Installing M92 handguard with screwdriver on wood surface Close-up of a tool removing wood from a M92 handguard for Ronin's Grips installation. Black plastic clip for Ronin's Grips M92 handguard installation

7.  When you install our lower handguard, you reverse the above steps.  We sell optional shims in case you need to tighten the fit.  The example shim here is a special orange material we tested and now we use a special hard black rubber.  You can buy our shims or make your own.  In either case, your goal is to add just enough material to get the retaining lever to turn down firmly and lock up the lower handguard.  Because AKs can vary, you may find that you need to either add or subtract material so take a careful look at your lower retainer and decide which way you need to move before you go sanding, cutting, filing, etc.

Split red rubber washer for M92 handguard installation

So that’s about it.  The following are photos of the M92 with the new ferrule cut handguards installed.

Black Ronin M92 Handguards installed on an AK-47 rifle on a wooden surface Zastava M92 with Ronin's Grips handguard installed, showing serial number M92PV030173

If you’d like to learn more or order our handguards, please visit our online store’s Yugo handguard section at:  http://shop.roninsgrips.com/Yugoslavian_c14.htm


Note, the following is a video a fellow did showing how he removes and installs M92 handguards in general.  I think this might help some of you who want to see the steps in more detail:


Please share the link on Facebook, Forums, with colleagues, etc. Your support is much appreciated and if you have any feedback, please email us in**@*********ps.com. If you’d like to request a report or order a reprint, please click here for the corresponding page to open in new tab.


Installing the CNC Warrior Picatinny Rail Scope Mount for the M92 PAP Pistol

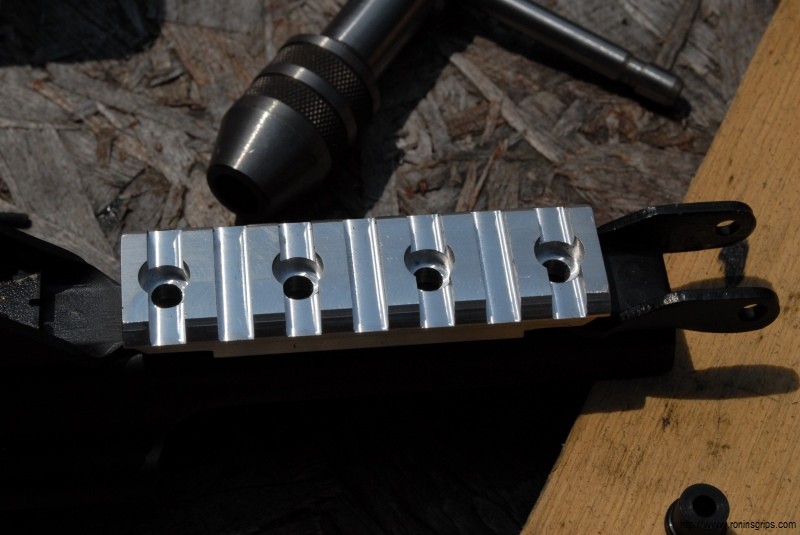
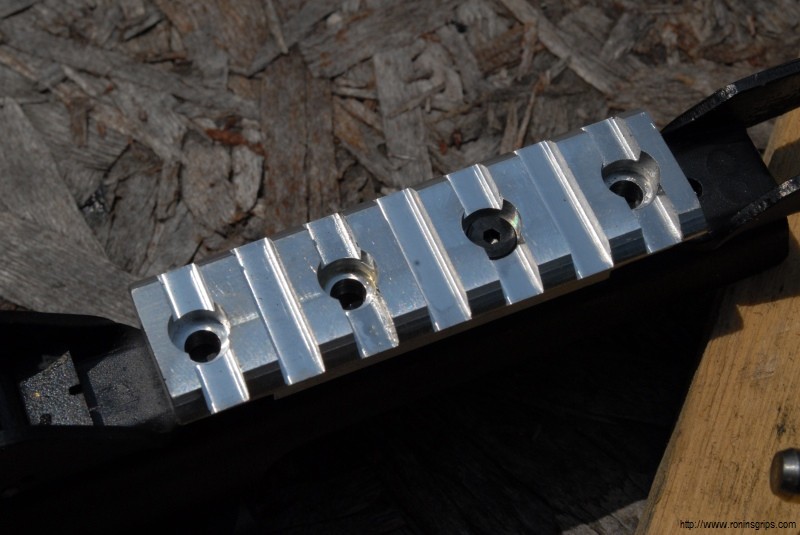
Another great accessory for the Yugo M92 or M85 PAP is the slick picatinny rail kit that CNC Warrior sells.  This thing is a breeze to install and is the best means I have seen for adding an optic to the M92. Because the screws are inserted from the rail side, it is superior to other products that require the screws to come in from underneath the dust cover and risk being hit by the bolt carrier.

All you need is the pistol, a drill and some cutting oil to do the installation.

SAFETY STEP – MAKE SURE THE WEAPON IS UNLOADED.  NEVER ASSUME THAT IT IS – VERIFY IT IS UNLOADED BEFORE YOU BEGIN WORK.

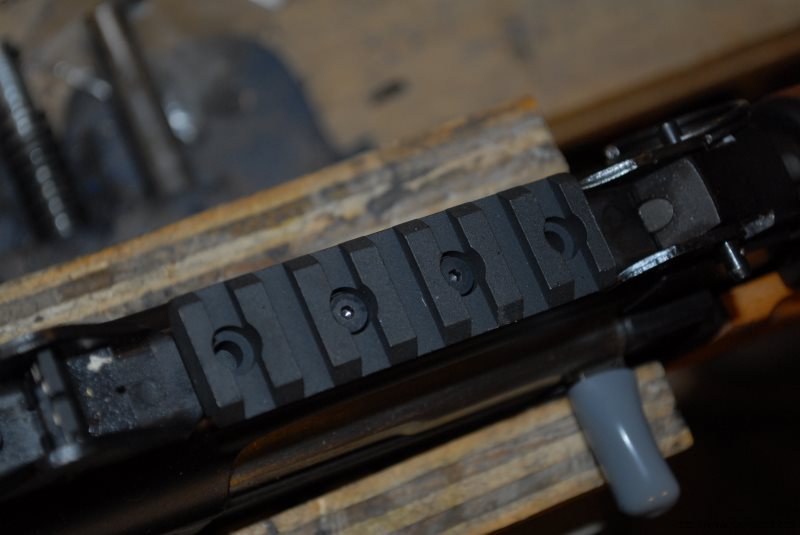
1.  This is the top thick hinge of the M85/M92 dust cover.  See the faint circles?  Those are the spot welds and they are very hard!  Do not drill into them!  The new CNC Warrior mount has four holes and you only need to use two of them.  The reason there is four is so you can pick the best two that get you around/away from the spot welds.  Please note that my rail is only silver because it was a brand new design and they hadn’t applied a finish yet.  If you order one, you will get a black rail!

CNC Warrior Picatinny Rail Scope Mount for M92 PAP Pistol

CNC Warrior Picatinny rail scope mount installed on M92 PAP pistol

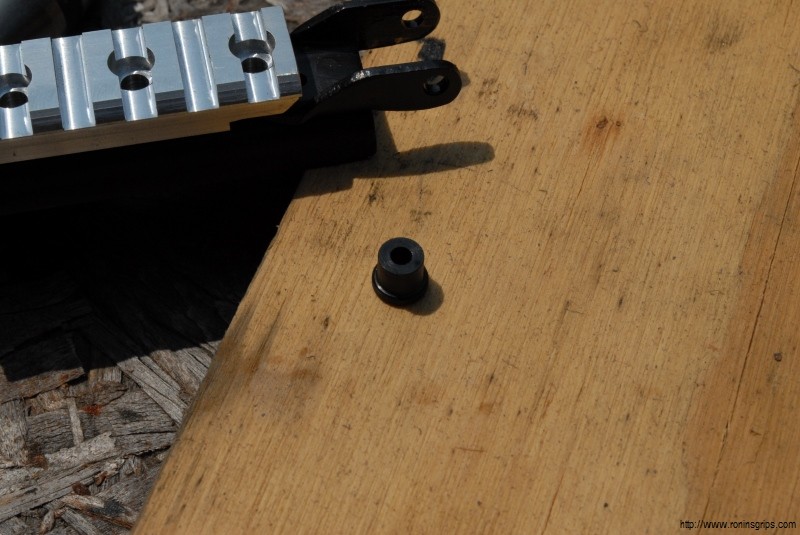
2.  Here you can see my fancy high tech tools.  My Ryobi drill, Tap Magic cutting oil to lubricate the drills and the taps.  Note, you will need to buy a tap handle if you do not have one.  Do not take the short cut of trying to start the tap with a regular socket or open end wrench.  You really want the tap to be firmly held so you can tap the threads at a right angle to the surface of the hinge.  Also, see that little black cylinder?  That is a drill guide that you put into the hole you select to guide the drill bit to the right place on the hinge.  Be sure to use the cutting oil!

Tools and parts for installing CNC Warrior M92 PAP pistol scope mount

M92 PAP pistol scope mount part on wood surface

CNC Warrior Picatinny rail scope mount for M92 PAP pistol installation

CNC Warrior Picatinny Rail Scope Mount for M92 PAP Pistol on wood

Drilling hole in M92 PAP pistol receiver for CNC Warrior scope mount

Drilled hole in M92 PAP pistol scope mount for CNC Warrior rail

Black drill bit on CNC Warrior Picatinny Rail Scope Mount

CNC Warrior Picatinny rail scope mount installed on M92 PAP pistol

CNC Warrior Picatinny rail scope mount installed on M92 PAP pistol

3.  As an aside, I blasted the mount and then sprayed on flat black Molyresin and baked it.  You’d never know it came to me unfinished.

Black and silver CNC Warrior Picatinny rail scope mounts for M92 PAP pistol

Airbrush tool resting on a cardboard box

Black Picatinny rail scope mount for M92 PAP pistol on wood

By the way, pictured above is a cheap Harbor Freight air brush.  I used to buy a bunch of them at a time and then throw them away when they hard problems.  I now use a Paasche H series air brush and am much happier with it.

4.  After you clean up the chips and are ready to do the final screwing of the mount, be sure to apply Blue Loctite so it does not come loose.

Blue Loctite applied to CNC Warrior Picatinny rail for M92 PAP pistol

CNC Warrior Picatinny rail scope mount installed on M92 PAP pistol

That’s it!  The mount is solid and it holds my Vortex Sparc red dot just great.  Note our quick takedown pin to make it easy to remove the cover and get the optic out of the way.

Vortex red dot sight mounted on CNC Warrior Picatinny rail for M92 PAP pistol

10/27/18 Note:  Vortex discontinued the Sparc red dot.  They sell a great 2 MOA red dot called the Crossfire that I really like.


Please share the link on Facebook, Forums, with colleagues, etc. Your support is much appreciated and if you have any feedback, please email us in**@*********ps.com. If you’d like to request a report or order a reprint, please click here for the corresponding page to open in new tab.


Installing the CNC Warrior M92 Folding Arm Brace – So Sweet!!!!!!

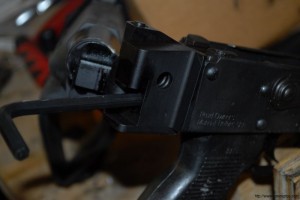
Next up on the agenda was to install the CNC Warrior folding M92 arm brace.  This thing is wickedly well done and if you get it plus the optional installation kit, just about anyone comfortable with using a drill can do it.

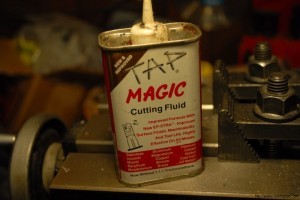
The following is a quick photo of the installation kit – you will need a hand drill and some cutting oil – I like Tap Magic but just about any oil will do vs. running dry and overheating stuff.  You do not want to work harden the sheet metal of the receiver — use cutting oil and keep it cool!
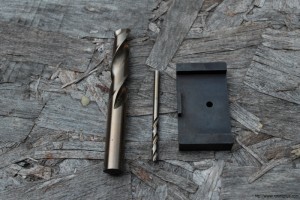
CNC Warrior M92 folding arm brace installation tools: end mill, drill bit, and clamp

Tap Magic cutting fluid can on a metalworking machine

SAFETY STEP – MAKE SURE THE WEAPON IS UNLOADED.  NEVER ASSUME THAT IT IS – VERIFY IT IS UNLOADED BEFORE YOU BEGIN WORK.

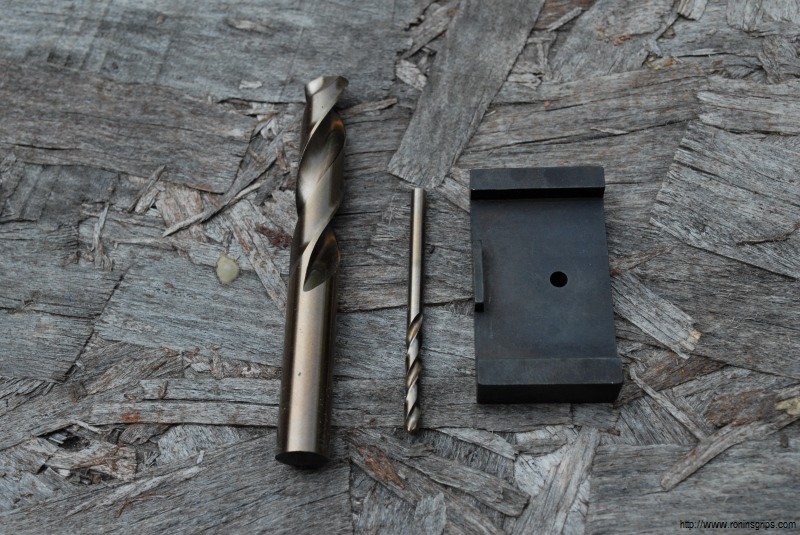
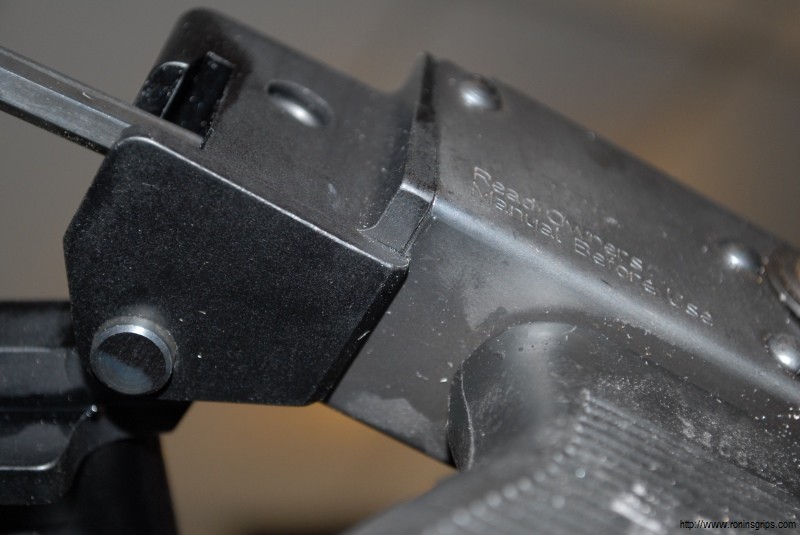
1.  Make sure your weapon is securely mounted and that you can have ready access to the rear.  The PAP buttstock drill kit has this handy little jig block to help you locate where to drill the small starter hole.
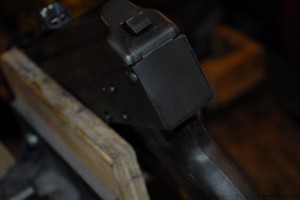
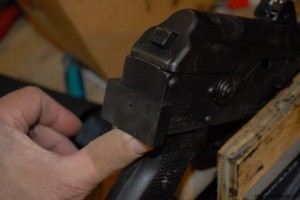
CNC Warrior M92 folding arm brace installation detail

Installing CNC Warrior M92 folding brace: Hand with bandaged finger on grip

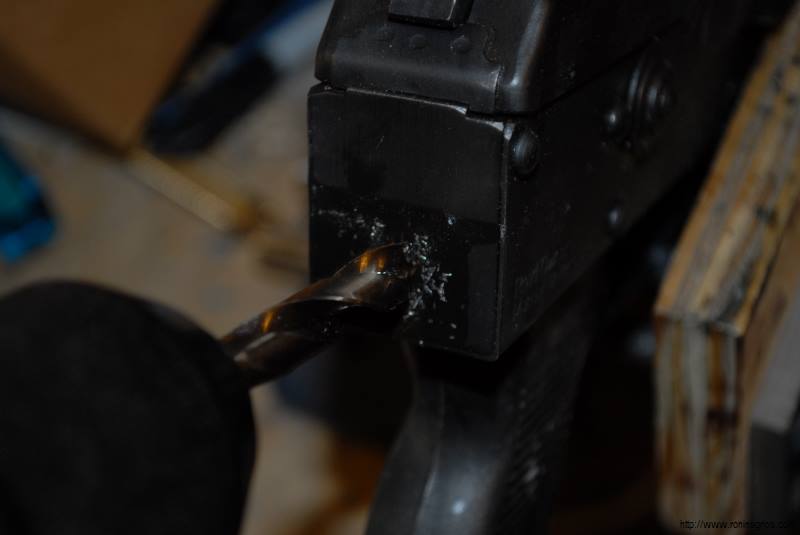
2.  With the jig in place, put in some cutting oil and drill the hole.  Note, I am just using a plain Ryobi 18volt hand drill.  The big bit is 3/8″ and I think 12 volt or better could do the job.  The small hole will help you locate and drill with the bigger 3/8″ bit.
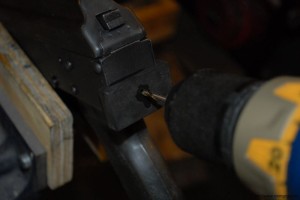
Drilling the M92 folding brace adapter for the CNC Warrior M92 PAP pistol

Close-up of a drilled hole in the receiver of a CNC Warrior M92 folding arm brace

M92 pistol receiver and brace adapter with impact marks

M92 folding arm brace installed on firearm with visible screw hole

CNC Warrior M92 folding arm brace adapter on a wooden surface

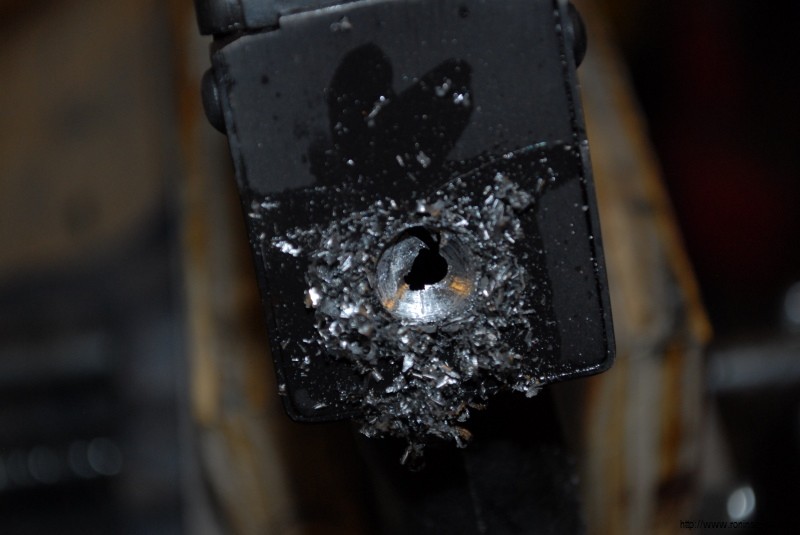
3.  Be sure to read the instructions and the caution to go real slow with the 3/8″ bit because if you try to go fast, your bit is apt to grab and thread straight into the receiver.  If this happens then you can’t drill the hole as the bit is grabbed and goes in like a powered screw with a boatload of torque.  Now, I did make this mistake but I knew how to get out – I grabbed a 3/8″ cobalt end mill, checked it in my drill and cut the big offending tabs right out of the hole.  If you run into this, you would need to either get an end mill bit or try using various Dremel bits to remove what is left.
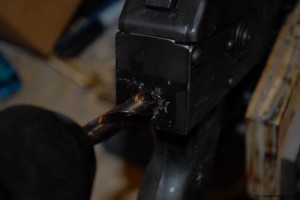
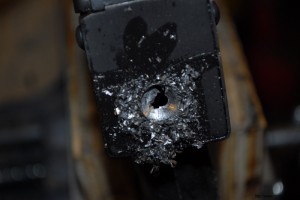
Drilling into M92 receiver for CNC Warrior arm brace installation

Drilled M92 arm brace adapter with metal shavings

Unless you have a milling machine, I would not recommend drilling the hole with the end mill – just use it for clean up if needed.  I just used it to clean the bottom of the hole and I used cutting fluid.
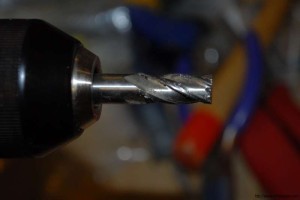
End mill bit in drill chuck, ready for CNC Warrior M92 installation.

The following is a link to a well regarded carbide mill that will work just fine in this situation.
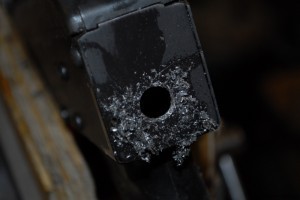
Close-up of a drilled hole in a metal receiver for the CNC Warrior M92 folding arm brace.

4.  My next steps were to use a deburring tool to make sure I didn’t leave anything nasty and sharp in the hole waiting to cut me!  I also vacuumed out the inside of the pistol and made sure it was clean.
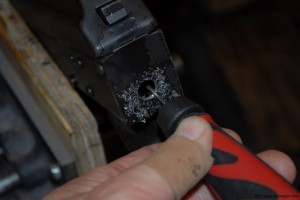
M92 pistol receiver being drilled for CNC Warrior folding brace installation

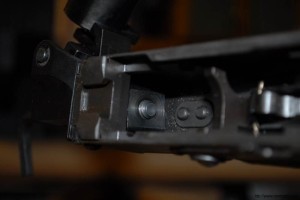
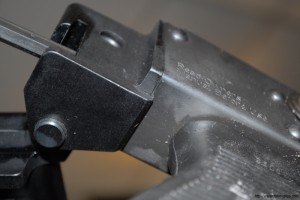
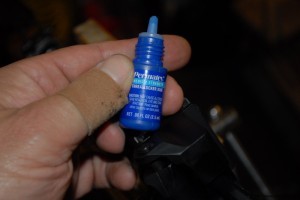
5.  The folder is connected to the receiver via a threaded block that is inserted into the receiver and you then thread the large allen screw into it.  Be sure to line things up and apply Blue Loctite so it will not come loose over time.
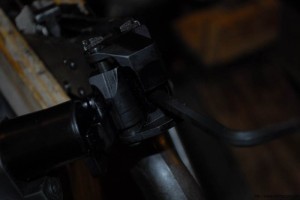
Close-up CNC Warrior M92 folding arm brace attached to a rifle

Installing CNC Warrior M92 folding arm brace with hex wrench

CNC Warrior M92 folding brace installation: close-up of receiver

Close-up of CNC Warrior M92 folding arm brace installation

Permatex Medium Strength Threadlocker Blue bottle used during M92 folding arm brace installation.

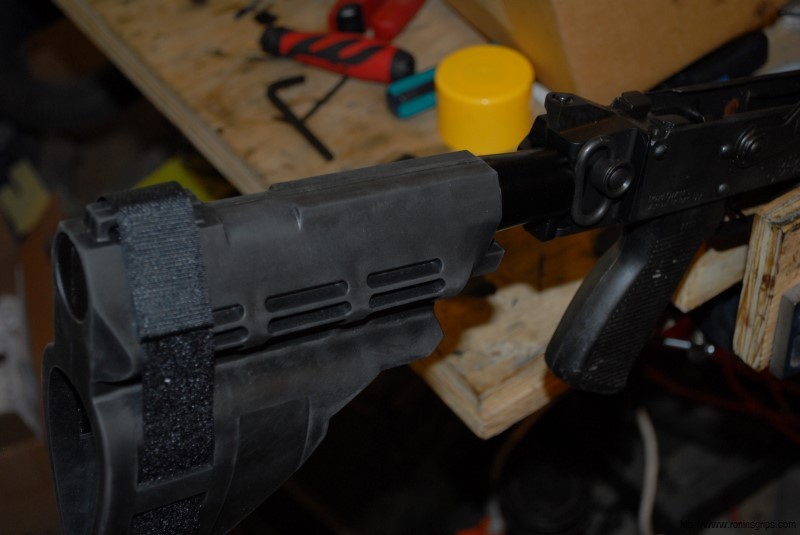
That’s all there was to it!!  This is a very well done piece of gear guys.  The folder mechanism is solid and the brace feels great either on the shoulder or on the arm plus you can fold it out the way.  Note the quick release sling swivel.  I used one of my Troy swivels – the folder has the hole to use one but it is up to you as to whether you want one or not.
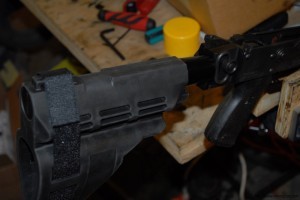
CNC Warrior M92 folding arm brace installed on firearm

One last comment – I am keeping the printed copy of the ATF approval letter (that comes with the brace) in my case with the M92 to show anyone who asks that the brace is not a buttstock and this the M92 is not a SBR.  You might want to do the same.

By the way, for any of you wondering why I am using all these CNC Warrior parts on this build – the answer is simple – they make really good stuff and this is my personal M92.  I only want solid reliable stuff on it.


Note, I have to buy all of my parts – nothing here was paid for by sponsors, etc. I do make a small amount if you click on an ad and buy something but that is it. You’re getting my real opinion on stuff.


Please share the link on Facebook, Forums, with colleagues, etc. Your support is much appreciated and if you have any feedback, please email us in**@*********ps.com. If you’d like to request a report or order a reprint, please click here for the corresponding page to open in new tab.


Removing the M92 PAP Muzzle Cap and Installing the Detent Pin

The M92 PAP pistol is brought in neutered with a muzzle cap and no detent spring.  With some careful Dremel work, some cold blue solution and a bit of patience, it is really easy to restore the pistol back to it’s original threaded muzzle state

SAFETY STEP – MAKE SURE THE WEAPON IS UNLOADED.  NEVER ASSUME THAT IT IS – VERIFY IT IS UNLOADED BEFORE YOU BEGIN WORK.

1.  Look at the muzzle of the PAP
M92 and you will see a big spot weld that is holding the muzzle cover on.  Thankfully it is both small and superficial so it can be cut through.

Extech IR thermometer and Ronin's polymer grips for heat testing. Extech IR thermometer and Ronin's polymer grips for heat testing.

2.  Now the first step is to secure the pistol so it can’t move around.  I used a wood jawed woodworking vice but you can use whatever you have handy.  If you use a regular vise, be sure to put something over the jaws to protect your M92 from getting all scratched up.

M92 PAP muzzle cap removal with detent pin installation

3.  I use my Dremel tool all the time.  These days I am using one of their cordless jobs with two Lithium batteries and I like the EZ Lock bits that make replacing cutting wheels and other tasks a breeze.  Be sure to practice with your Dremel before doing this.  Please don’t go buy a Dremel and try and do this fresh out of the box.  The secret is to make light cuts and not rush.  Let the weight of the tool do the work and carefully guide it and keep it in position.

Ronin's polymer handle being cut with a plastic knife on foil Ronin's Grips polymer samples showing heat resistance at different temperatures.

4.  Now, I came in from the front and at a slight angle to protect the front sight & gas block combo.  The cap will twist off clock-wise as it is reverse threaded.  Cut a bit and test, cut a bit and test over and over.  If you have a strap wrench or a pipe wrench, that can help with the removal.  Again, remember that this is reverse threaded just like other AKs.  It will loosen by turning clockwise.

Dremel tool removing M92 PAP muzzle cap detent pin  Dremel cutting tool removing M92 PAP muzzle cap with detent pinClose-up of M92 PAP muzzle cap removal showing detent pin slot.

5.  Hidden under that large ugly cap is the big 26 x 1.5mm LH (reverse threaded) muzzle just waiting to have your favorite brake or fake can installed but it would be real cool to get the detent pin working again – wouldn’t it?

M92 PAP muzzle cap removal: close-up of a hand unscrewing the cap M92 PAP muzzle cap and detent pin assembly

5.  Use a small sanding drum and smooth the block where the weld was and then use the cold bluing solution you like to color the steel while it is fresh and oil free.  I like Brownell’s Oxpho Blue and apply it with a Q-Tip per their instructions.

M92 PAP muzzle cap removal: Close-up of detent pin and barrel threads. Brownells Oxpho-Blue liquid gun blue solution for firearm finishing Cleaning M92 PAP muzzle cap detent pin with a cotton swab M92 PAP muzzle cap on wooden surface with detent pin ready for installation

6.  CNC Warrior sells a very small kit with the detent pin, spring and cross pin.  The PAP has all the holes there already.  You literally slide in the pin and spring, turn it the right way and then drive in the cross pin, which is a small roll pin.

M92 PAP muzzle cap, spring, and detent pin on wooden surface M92 PAP muzzle cap detent pin removal

7.  I really like the Bulgarian 4 piece Krink brakes and CNC Warrior has great version they have made for the M92.  I pretty much knew I had to go with this brake!  It does a great job reducing muzzle flash and is real high quality.  Now that the detent pin was installed, I just threaded it on until it was where I wanted it and the detent pin engaged fully.

Close-up of AK rifle with M92 PAP muzzle cap, ready for detent pin installation M92 PAP muzzle cap and detent pin installation Close-up of M92 PAP muzzle cap and detent pin installation areaM92 PAP muzzle cap removed, showing the barrel and detent pin area M92 PAP muzzle cap on wooden bench, ready for detent pin installation

So that’s all it took!  I hope this helps you with your project.

Stay tuned for more blog posts about the M92.


Please share the link on Facebook, Forums, with colleagues, etc. Your support is much appreciated and if you have any feedback, please email us in**@*********ps.com. If you’d like to request a report or order a reprint, please click here for the corresponding page to open in new tab.


When Strength and Quality Matter Most