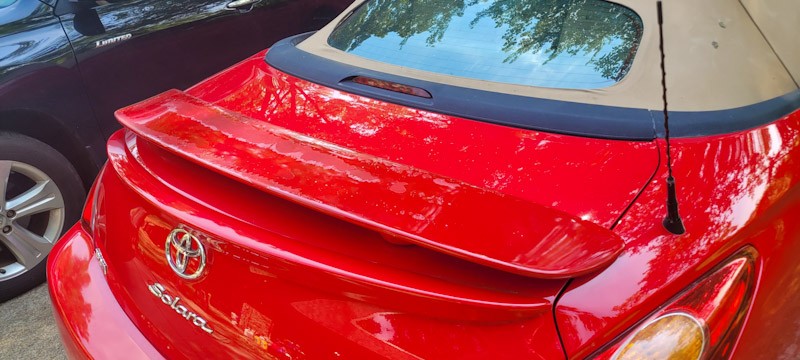
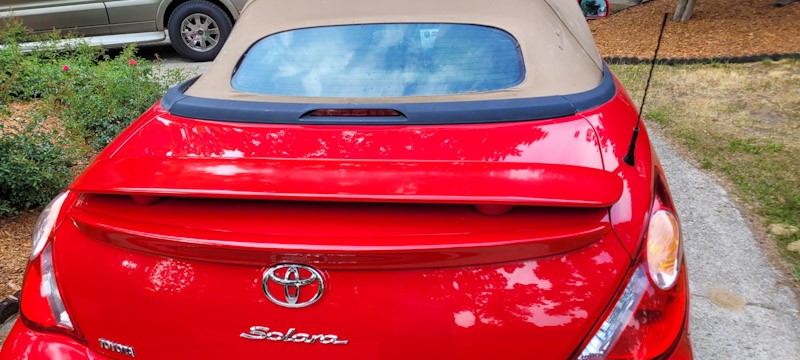
My wife’s convertible Solara is her pride and joy in the summer time. We bought it back in 2017 and it has proven itself to be a reliable and fun car. One issue it had was related to an aftermarket spoiler the previous owner had installed.
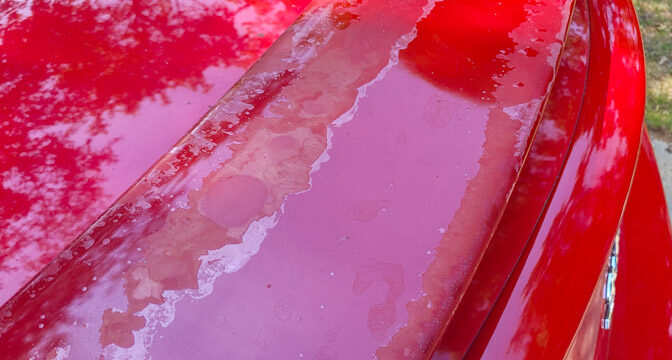
In 2021 we waited to take the cover off and there had been a number of hot and humid days. When we removed it, the clear coat on the spoiler was popping off. The factory paint on the car was just fine – the spoiler on the other hand looked tough and by the end of the 2022 Summer driving season it really looked bad so I knew I needed to surprise her by refinishing it.
The clear coat was peeling all over the top of the spoiler but not the bottom.
I do own a full set of automotive paint sprayers but I didn’t feel like getting them out and set up just to do a spoiler. I decided to go with AutomotiveTouchUp.Com who I had bought touch up paint from in the past and had pretty good luck with. The only issue I have ever had with them is that you will wait around four weeks for them to make and ship your paint.
The paint code for a Toyota is one the door sticker and her Solara was “Absolutely Red – 3PO” which describes the bright red on the car very well. I knew I would need primer, that base color and clear coat. I always buy extra just in case so I bought two cans 12-oz cans of each and then I waited for it to show up.
Before you do anything – read their instructions. I went with spray cans so I focused on that section – click here.
Getting Ready to Paint
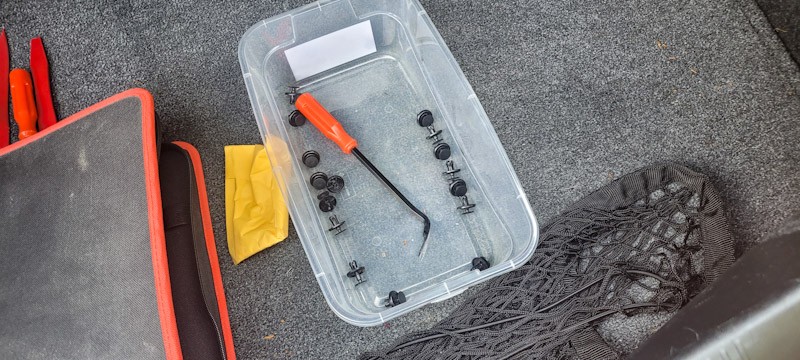
The first step was to remove the spoiler from the car. This was done by removing the body push pin rivets and moving the interior cover out of the way. Don’t be surprised to find out some of the rivets are missing or broken on an old car. You can easily get them on Amazon along with a tool that makes removal very easy.
Those little push pin rivets do the job and the tool you see makes it really easy to pull them out. If you don’t have a tool use a small blade screw driver or flat edge to get under the pin-part of the rivet and lift it up.
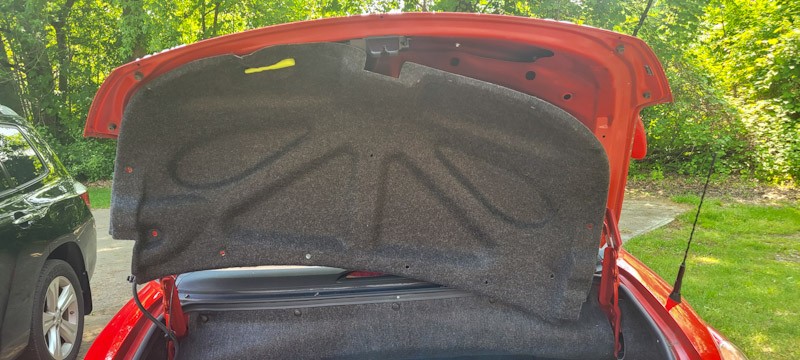
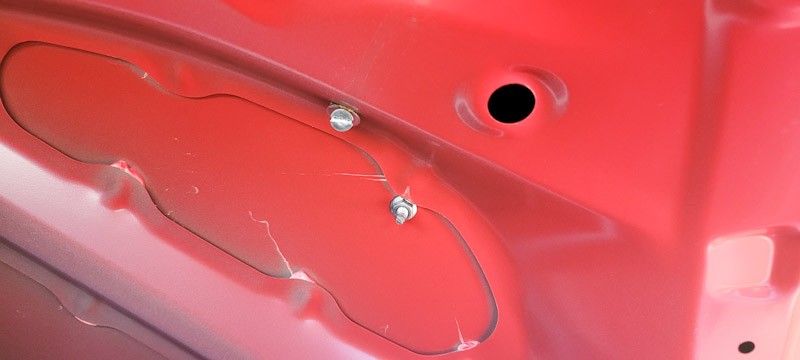
You don’t need to completely remove the cover – just remove as many as you want to get access to the onme screw and one stud on each side that holds the spoiler.
You will see something like this on each side. Remove the machine screws first and start to back off the nut on the stud. If the spoiler stays in place, then remove the nuts completely and the spoiler will lift straight off. In my case, my wife held the spoiler so it wouldn’t fall off when the nuts were removed.
I took one look at the old stuck on seals and left them alone. Trying to remove them would only tear them up. I decided to leave them alone, re-use them and if there was a leak then I would decide whether to replace them or just put a bit of black silicone RTV gasket glue around the two holes to seal it. I didn’t want to jump right to that because if I needed to remove the spoiler again, it would tear up the seals. You can buy black rubber seal material in sheets and you cutt out whatever shape you need but I wanted to avoid that path if I could.
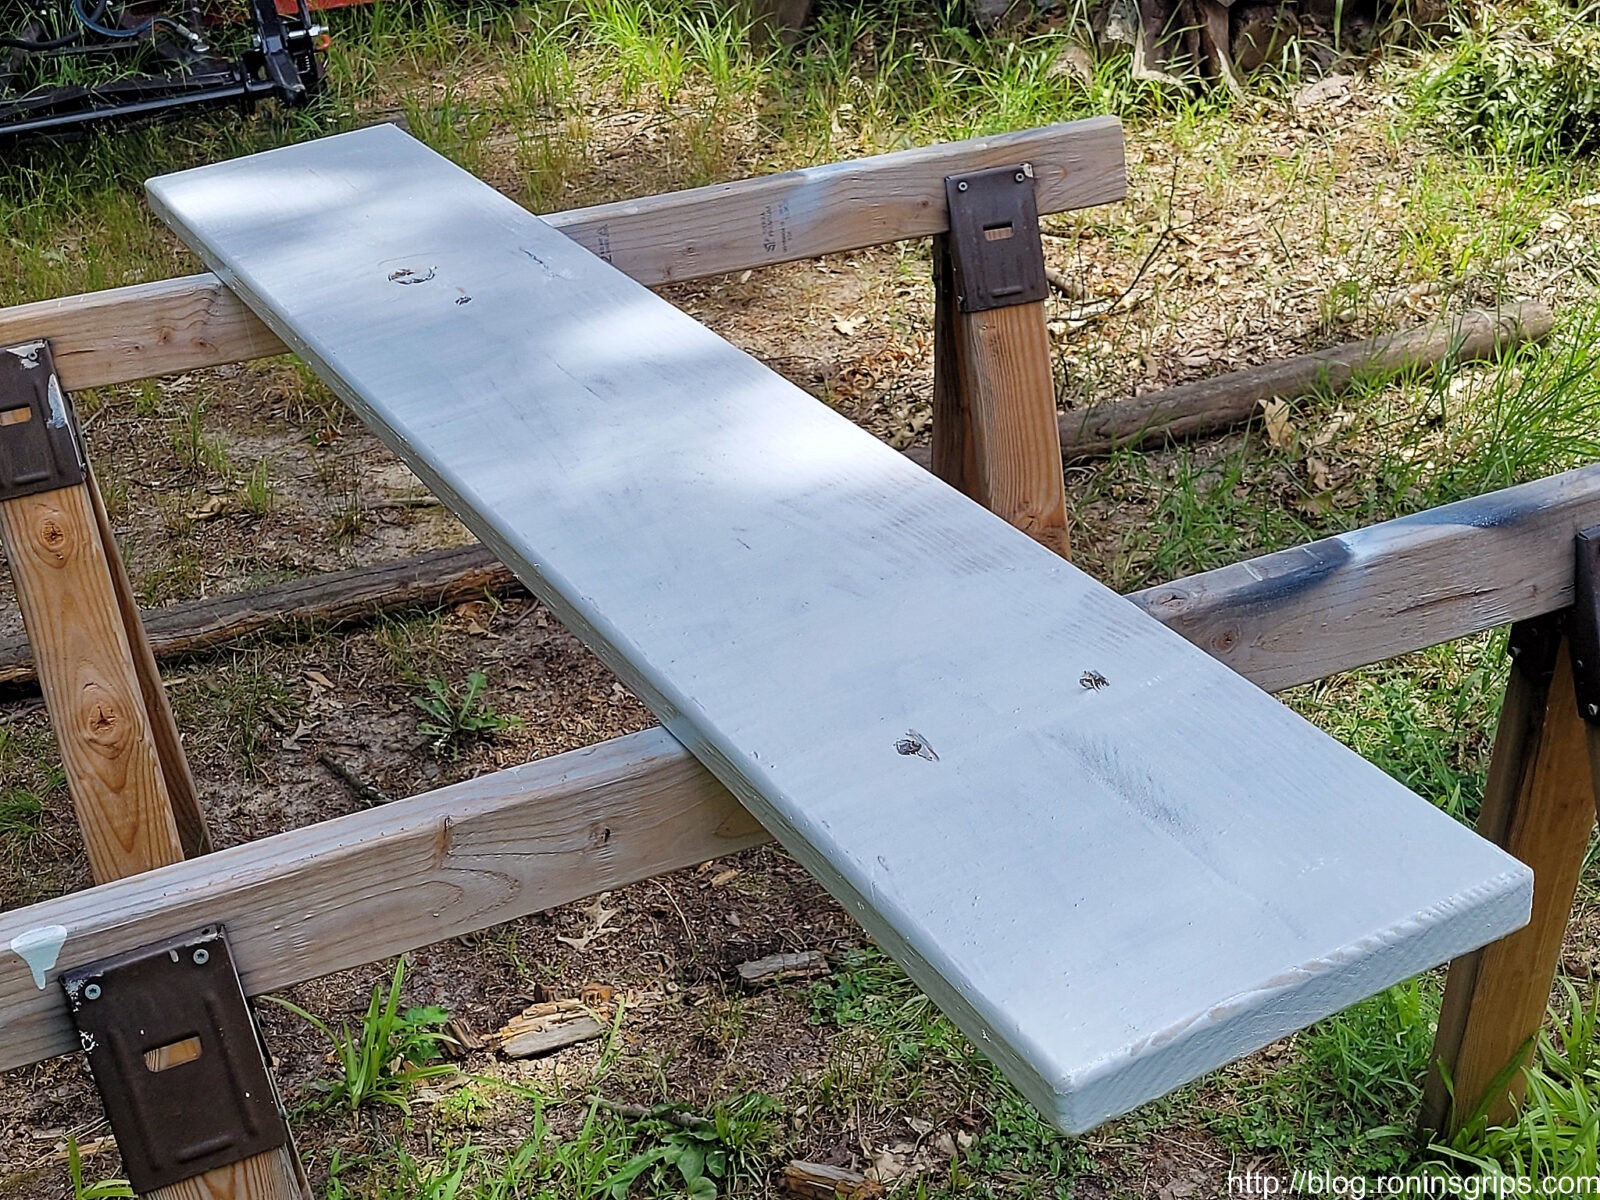
I put the spoiler on two wood sawhorses to do the refinishing work. Note, I added blue painter’s tape to the sawhorses right after this was taken.
I have a 5″ Dewalt orbital sander that I used with 150 then 220 grit sandpaper to remove all of the bubbled/loose clear coat. I wasn’t worried about removing everything down to the bare bare material underneath but did want a solid surface on the top and edges for the primer to grab hold of.
Painting the Car
With the surface prepped, let’s get into the painting process.
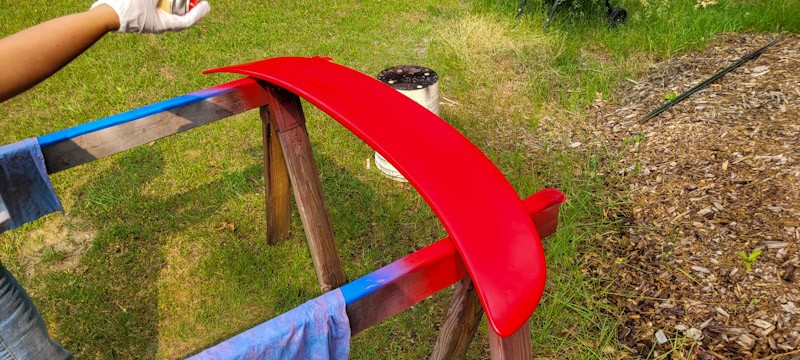
This is red primer – not the base paint. I did three coats with wet sanding at 150 grit. No matter how hard and long I shook the rattle cans, the primer would spatter / blow larger drops into the paint vs. the fine mist you want. To be honest, I was regretting not just getting out my spray guns at this point.
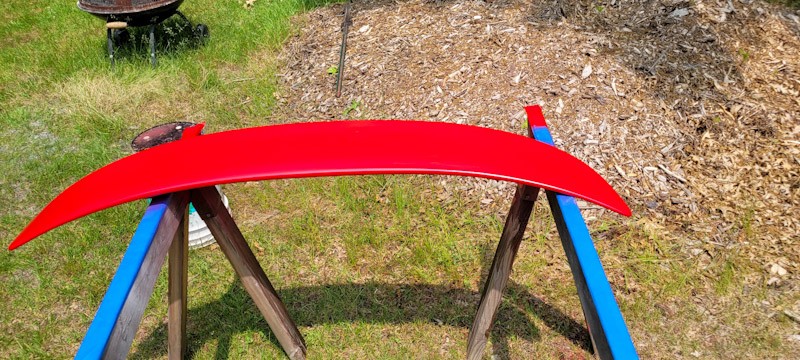
I applied five coats of red paint. Light coats are the way to go and what you are looking for is a nice even rich color. I was still fighting the spattering even with the paint. So I did wet sand a few times. There instructions tell you not to do this but they also didn’t have their paint spattering everywhere.
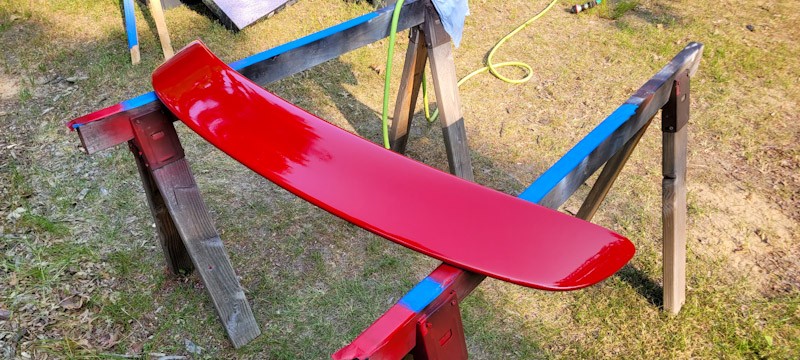
This had six coats of clear coat. I did not wet sand between. The trick is to build up a relatively thick clear coat so you can wet sand it even and then later polish it.
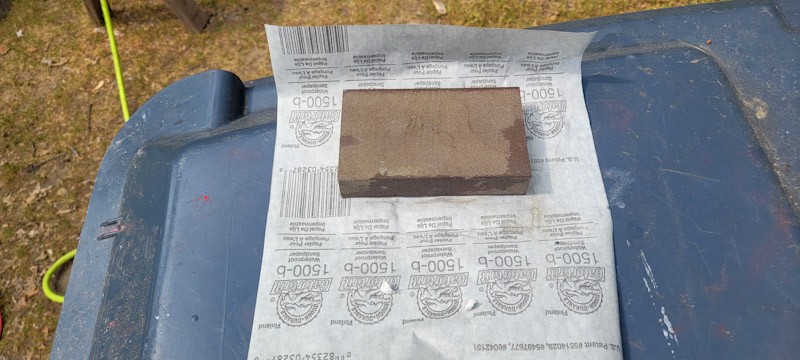
Let it cure for an honest day so that it is hard enough to wet sand and then use rubbing compund to polish it. Water acts as a lubricant in the very fine 1500 grit sandpaper. If you don’t use it, the grit will fill with material and be useless. I keep a bucket of water next to me and keep dunking it in there. In this photo you see a sheet of 1500 grit sand paper that I wrap around the foam block to support it when I sand. I sand the clear coat using 1500, 2000 and 3000 grit sandpaper.
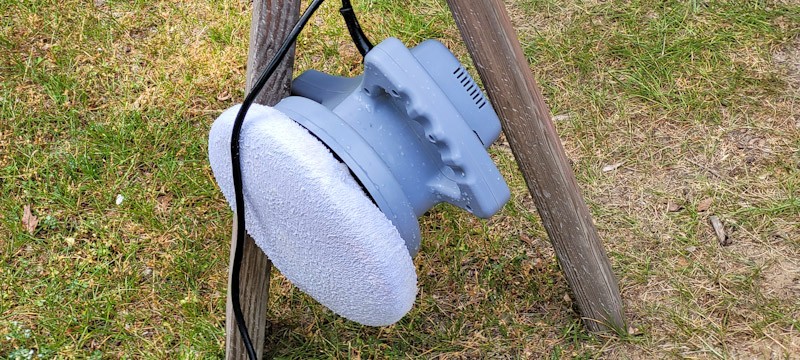
This is a random orbit 6″ bonnet washer. The terry cloth surface holds the rubbing compound and you keep moving around the clear coat removing all of the fine scratches.
The result turned out great. One important thing to remember – it looks and feels cured but it isn’t. There normal one part clear coat needs 30 days to cure the rest of the way. If you wax it, you will probably watch your finish peel right off so be sure to wait.
It wasn’t perfect but way, way better and my wife as thrilled.
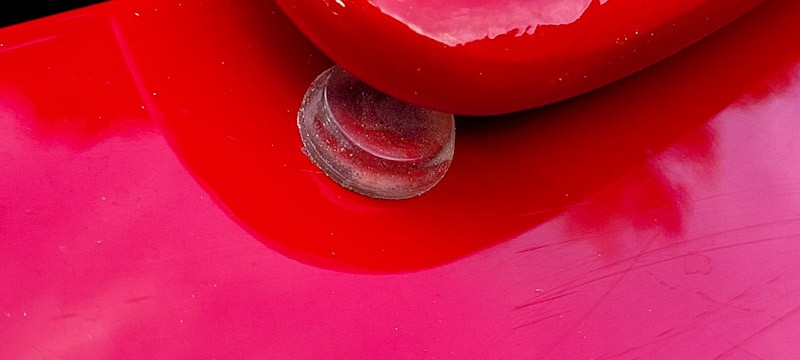
The spoiler had rubber bumpers under the front part where it was close to the body. I bought these little 1/4″ tall rubber self-adehsive bumpers at Ace. They looked identical to the originals and will prevent the spoiler from hitting the body for whatever reason.
Summary
Because I had the sprayers, I regretted using the rattle can approach with the spattering that I could not get rid of for whatever reason. The time I thought I would save by not setting up my finishing automotive paint sprayer I lost doing extra sanding to get a relatively smooth finish.
In terms of color, they did a great job matching. I’m writing those blog almost two months after painting and it is nearly an exact match. Only at certain angles and lighting do I think I might see a difference – it’s that close. I’ve used them for other vehicles for bottles of touchup paint and their matching is always really good.
Here’s my advice – if you don’t have a good car air sprayer, these rattle cans (spray cans) from the company will do the job. Just be prepared to do extra wet sanding but not between the clear coats.
What is the ultimate gauge of success? My wife is really happy with the results.
3/2/24 Update: The paint is still holding up just fine. No bubbles, peeling or fading.
Have you ever had wood that is in tough shape or is too soft to work with? A quick fix is to use super glue on the wood and let it set. Let’s talk about this for a minute.
Super glue is actually a family of glues called “Cyanoacrylates“. The patent for the original product goes back to 1942 when BF Goodrich was looking for a clear adhesive for gun sights in WWII. As they say, the rest is history.
There are many different brands and types of super glue. For the brand, I stick with name brand and usually get biggger bottles from firms such as Bob Smith Inc (BSI), Starbond, Loctite, Gorilla Glue, etc. With the no-name generics, you never quite know what is really in the formula or how good it is.
The glues are available in different viscocities/thicknesses also ranging from Super thin to normal, to gel, etc. For our purposes, we want th thinnest glue we can buy. Why? Because it will really soak into the wood and follow all of the little cracks that are opening, seal and reinforce them.
So, when I say I am using it to seal and stabilize, what do I mean? To seal means that water can’t get in. To stabilize means it is soaking into the soft wood, filling small cracks and when it dries it will harden the treated area. I’ve used this to fill small cracks in wood rifle stocks, knife handles, tools, furniture – anything with wood.
Super Glue is good for stabilizing but not filling an area. If you need to build something up, fill in a gap, or rebuild an area, then use an epoxy.
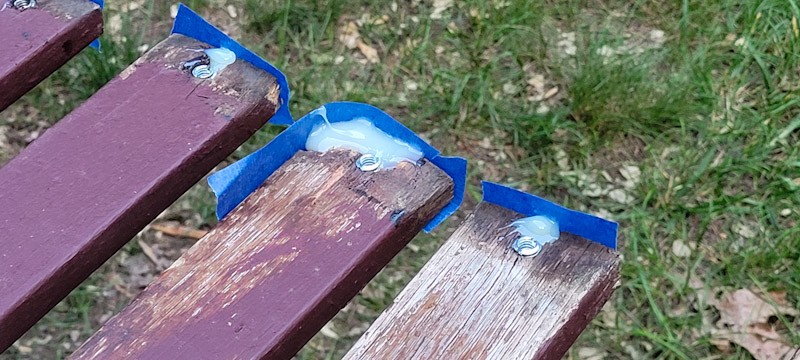
These slats bench slats had chunks of wood missing that I built up using epoxy. I sanded them down flush and then applied two coats of thin CA glue to the surrounding wood to stabilize it. I then used an opaqe wood deck stain and you couldn’t even see the repairs.
I apply several coats. The first one I apply quite a bit of glue and just let it keep soaking in. You’ll see it following cracks and what not. Once I get the surface soaked, I stop and let it cure. I typically wil do 2-3 coats/applications depending on how bad the wood looks. Usually after the second coat everything is sealed stabilized.
As it cures you will see a light white-ish smoke. Don’t get the fumes in your eyes or it really stings – you don’t want to breath them either. Small pieces like a knife handle aren’t too bad. For pieces bigger than that, all of the fumes really make this something you either want to do outside or in a room with really good ventilation.
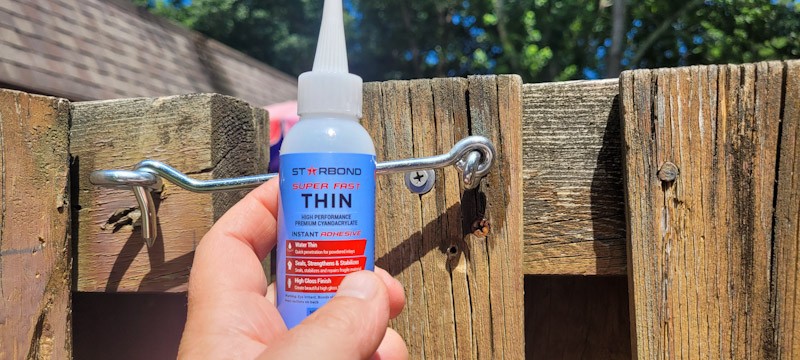
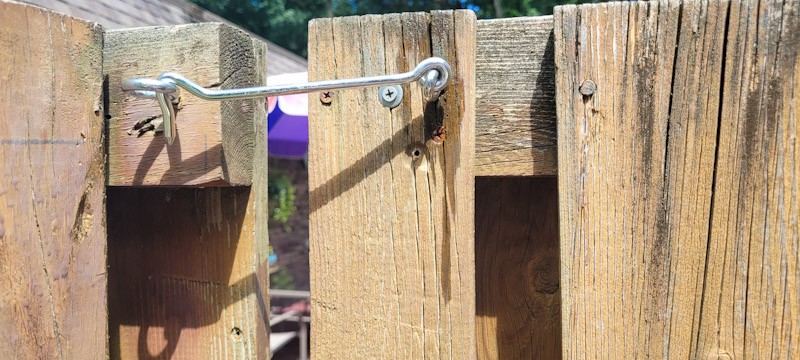
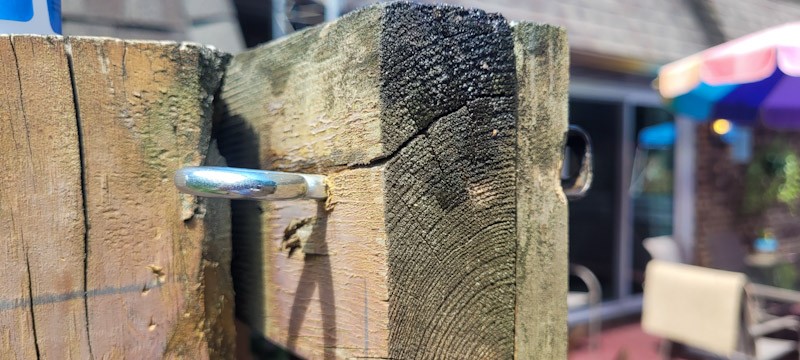
Let me show you a few photos form a recent project where I needed ro reinforce the area around a wood gate latch. The wood was in really tough shape and I didn’t have the time to go to buy the lumber, cut it and make a new one. I keep thin super glue in stock at all times for all kinds of projects so I just did that
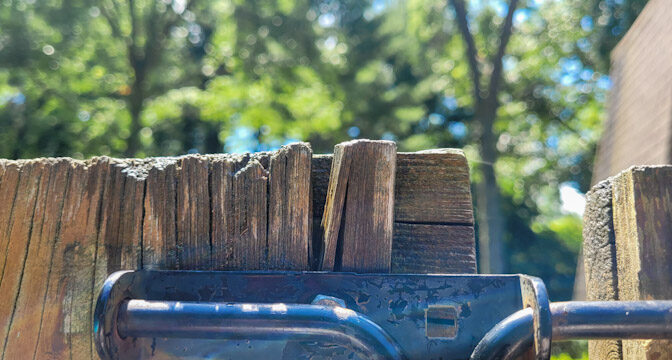
Starbond makes good CA glues from my experience. I’ve used a number of their forumlas and been happy with the results. As you can see, the wood is in tough shape. It probably should be replaced but I don’t have the time.
I let gravity work with me and apply the glue to the top of the wood and let it soak into the end grain. I could see it going down the board and the wood looking wet where it travelled. You’ll use a fair amount of glue doing this, I went across the entire top of that board and watched for the glue to penetrate – in this case I wanted it down near the screws. When it the glue cures, the stabilized wood will still a bit darker than the surrounding untreated areas.
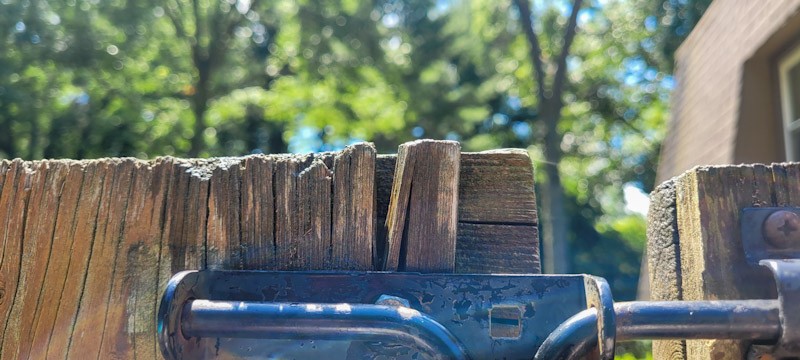
This board was in really tough shape. It soaked in a lot of glue and I kept adding it until I saw it saw it in that big crack.
Here, the CA can help seal the top and stop the small cracks but there is no way it can fill the big crack.
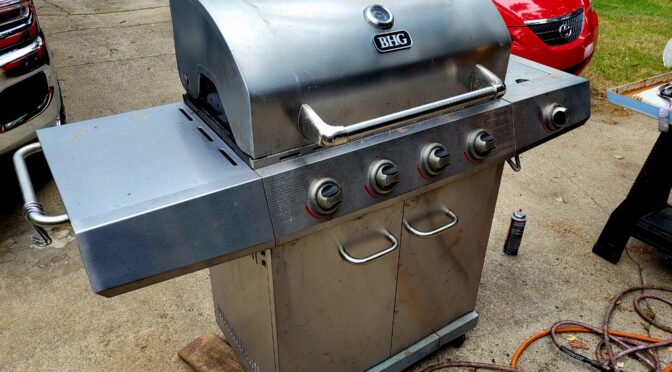
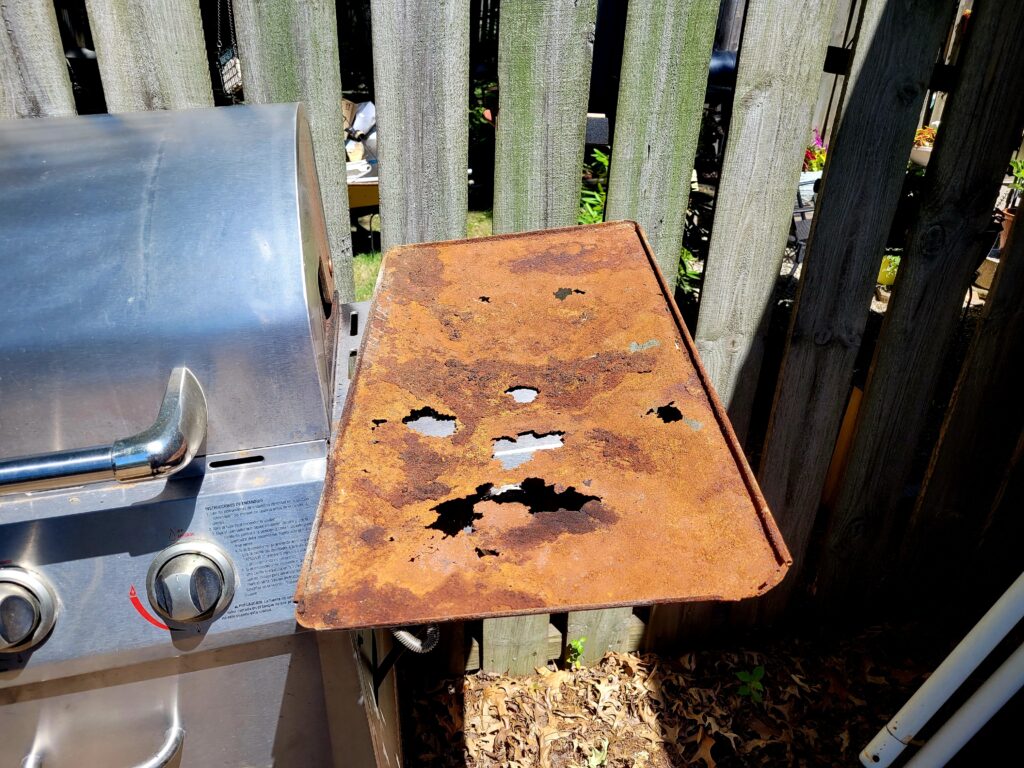
This past June, my wife and I spotted a big stainless four burner BHG gas grill with a side burner at a neighbor’s house set up for trash pickup. It looked to be in a pretty good shape so I stopped and took a look. The drip pan had rusted away and dropped rust everywhere in the grill plus there was minor rusting elsewhere but it was in very good shape otherwise. My wife asked if I could rehab it because we had a bunch of family coming for a visit a month later. I said “yes” so it went in the back of the Highlander leaving a trail of rust everywhere.
It looked like the grill was used and then left to sit and rust but it was actually in quite good shape. Besides the drip pan, the only other items in tough shape were the heat plates also sometimes called diffusers that sit over the burners. They had rusted significantly and were an eyesore.
What Gas Grill Was It?
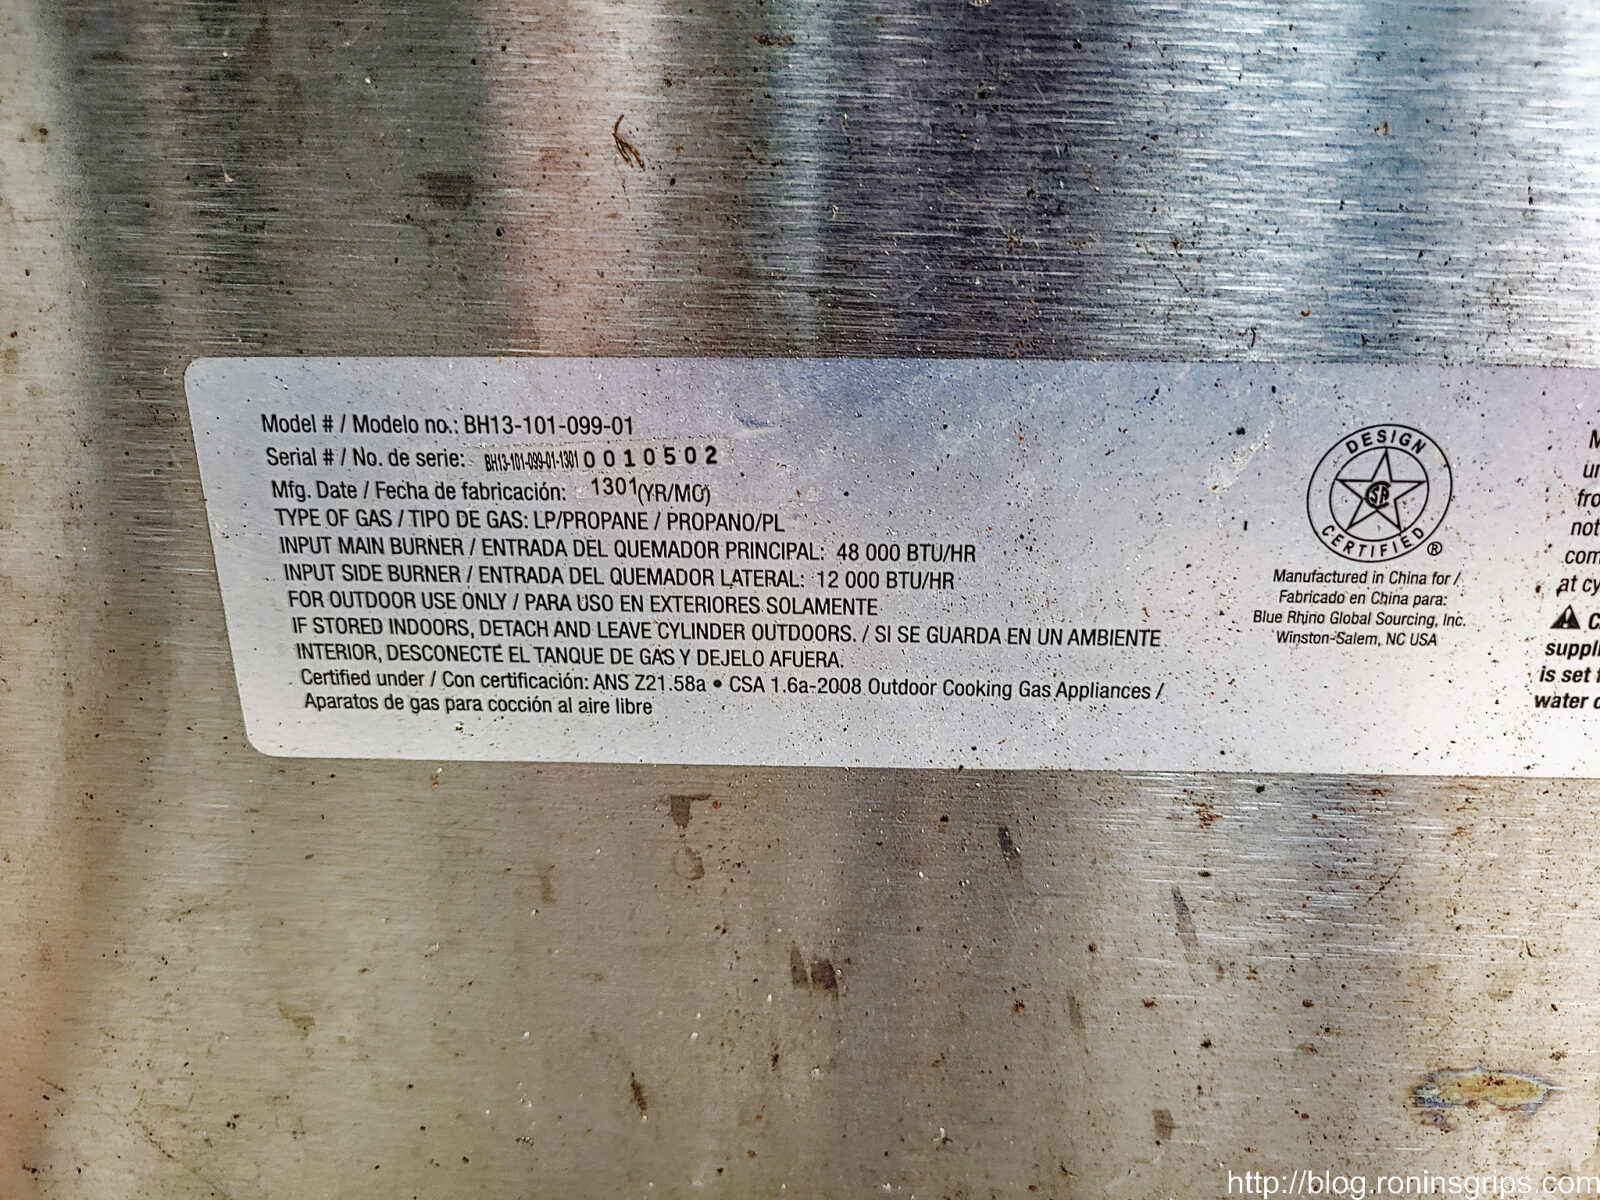
“BHG” stands for “Better Homes and Gardens” and the model number was BH13-101-099-01. I don’t really have much more info than that – it’s a big generic stainless grill that was imported from China by Blue Rhino Global Sourcing. You may not recognize the name but when you see their logo – they sell propane tanks, grills and what have you through a ton of stores under their own brand name as well as Mr. Bar-B-Q, Chef Master, Endless Summer, Grill Mark, Mr. Pizza, and Uniflame. BHG is no longer listed by them so one must surmise other brand names were used in the past as well.
According to a sticker, it was made in January of 2013. From there, I bet they were sold through retail stores but I really can’t find any more details after searching but I will say it appeared to be a decently made gas grill.
If you hunt around on a grill, you can almost always find an information sticker that at the very least has the model and maker listed.
Armed with the model number, I could go digging for parts. There is a whole cottage industry of parts suppliers out there when you search but the challenge was finding what I wanted in stock and that the price they wanted plus shipping wasn’t astronomical. In some cases, the part price was low but shipping was sky high.
Note, I also found that most parts places are selling parts that will fit the grill but most advise you to confirm dimensions before you buy. The grill is over 9 years old and these places are selling generic parts – so be sure to check dimensions and even that the seller is legit.
The Drip Pan
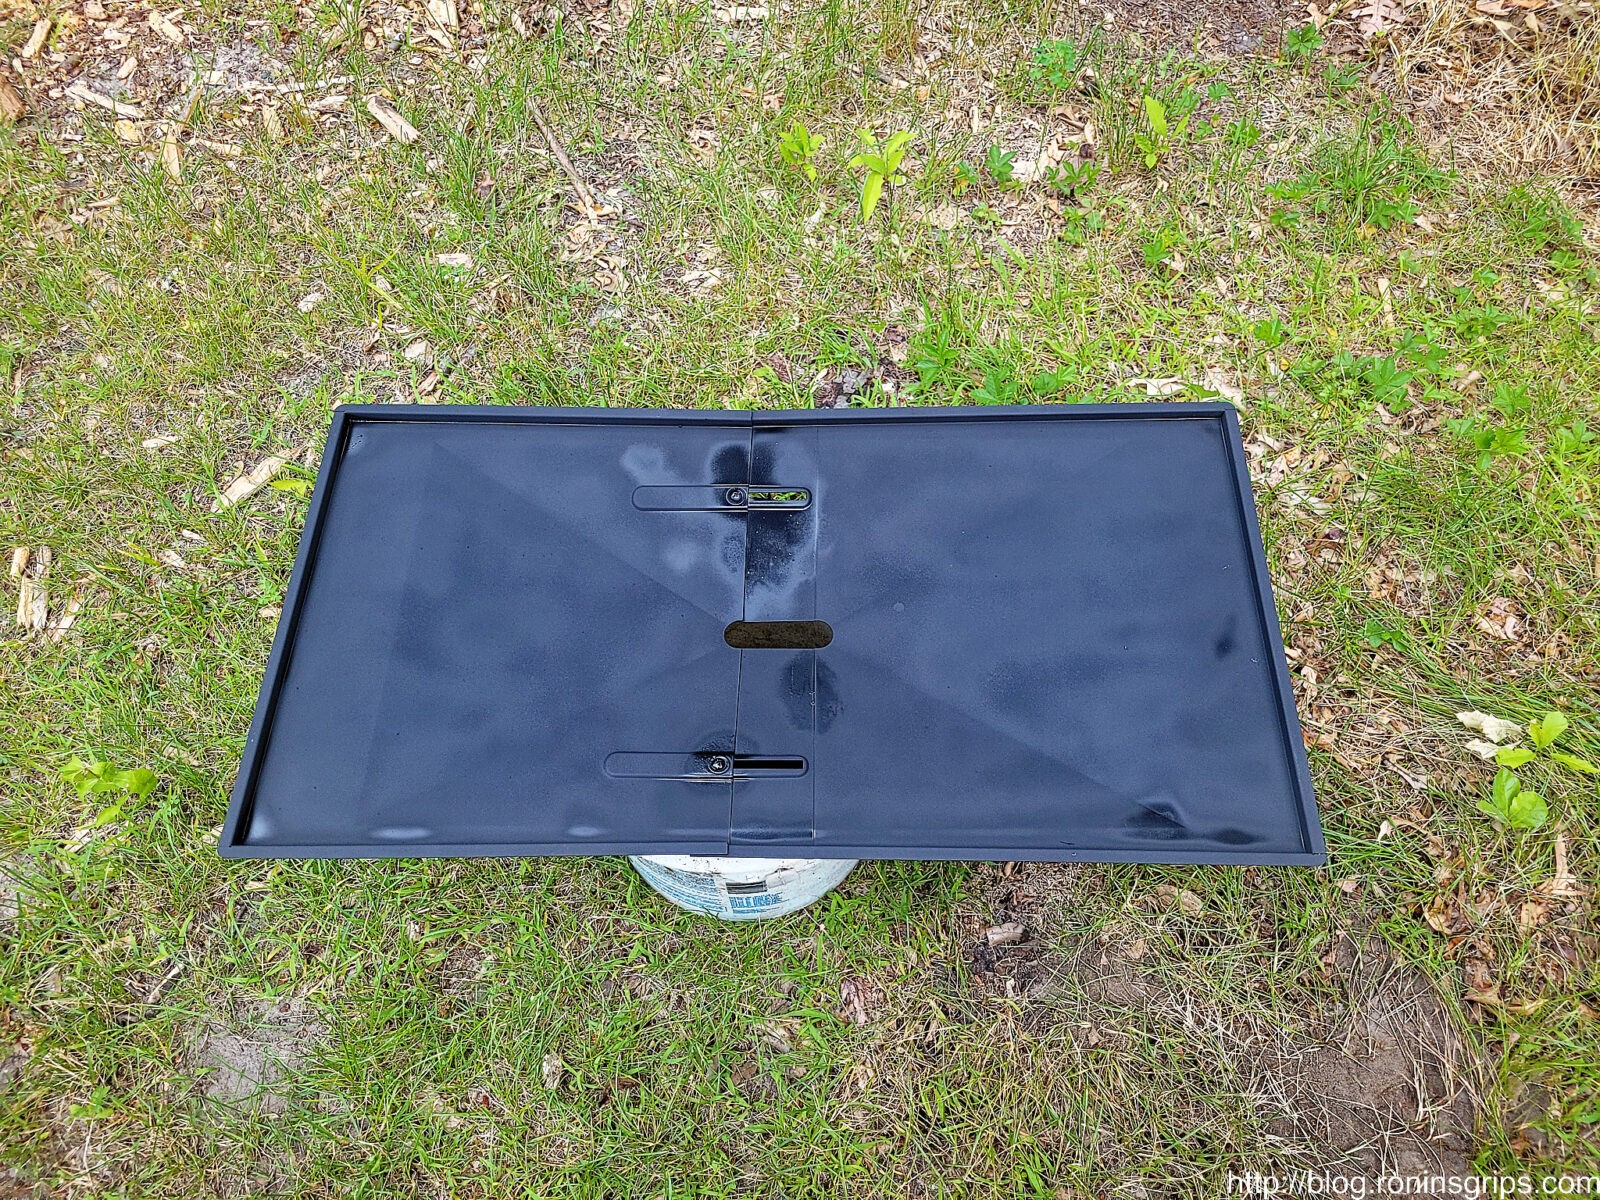
Okay, the drip pan was trash. You see, at the end of the day, they are made from steel and salty liquids are dripping on them. If you don’t keep them clean or put foil on top of them, they will eventually rust out.
The drip pan had rusted to pieces so the inside of the grill looked far worse than what it was. I think the neighbor took the cover off after maybe a season or two of no use, saw the rust everywhere and pulled it to the curb for trash pickup … or for me to pick up depending on how you look at it.
You need to double check the measurement of your pan – mine was a loose fit in the grill so you have wiggle room in terms of dimensions. Mine was about 15-1/4″ deep x 28-5/8″ wide. The replacement pans will all be in the ballpark but you want to make sure that pan reaches from left to right so it is properly supported.
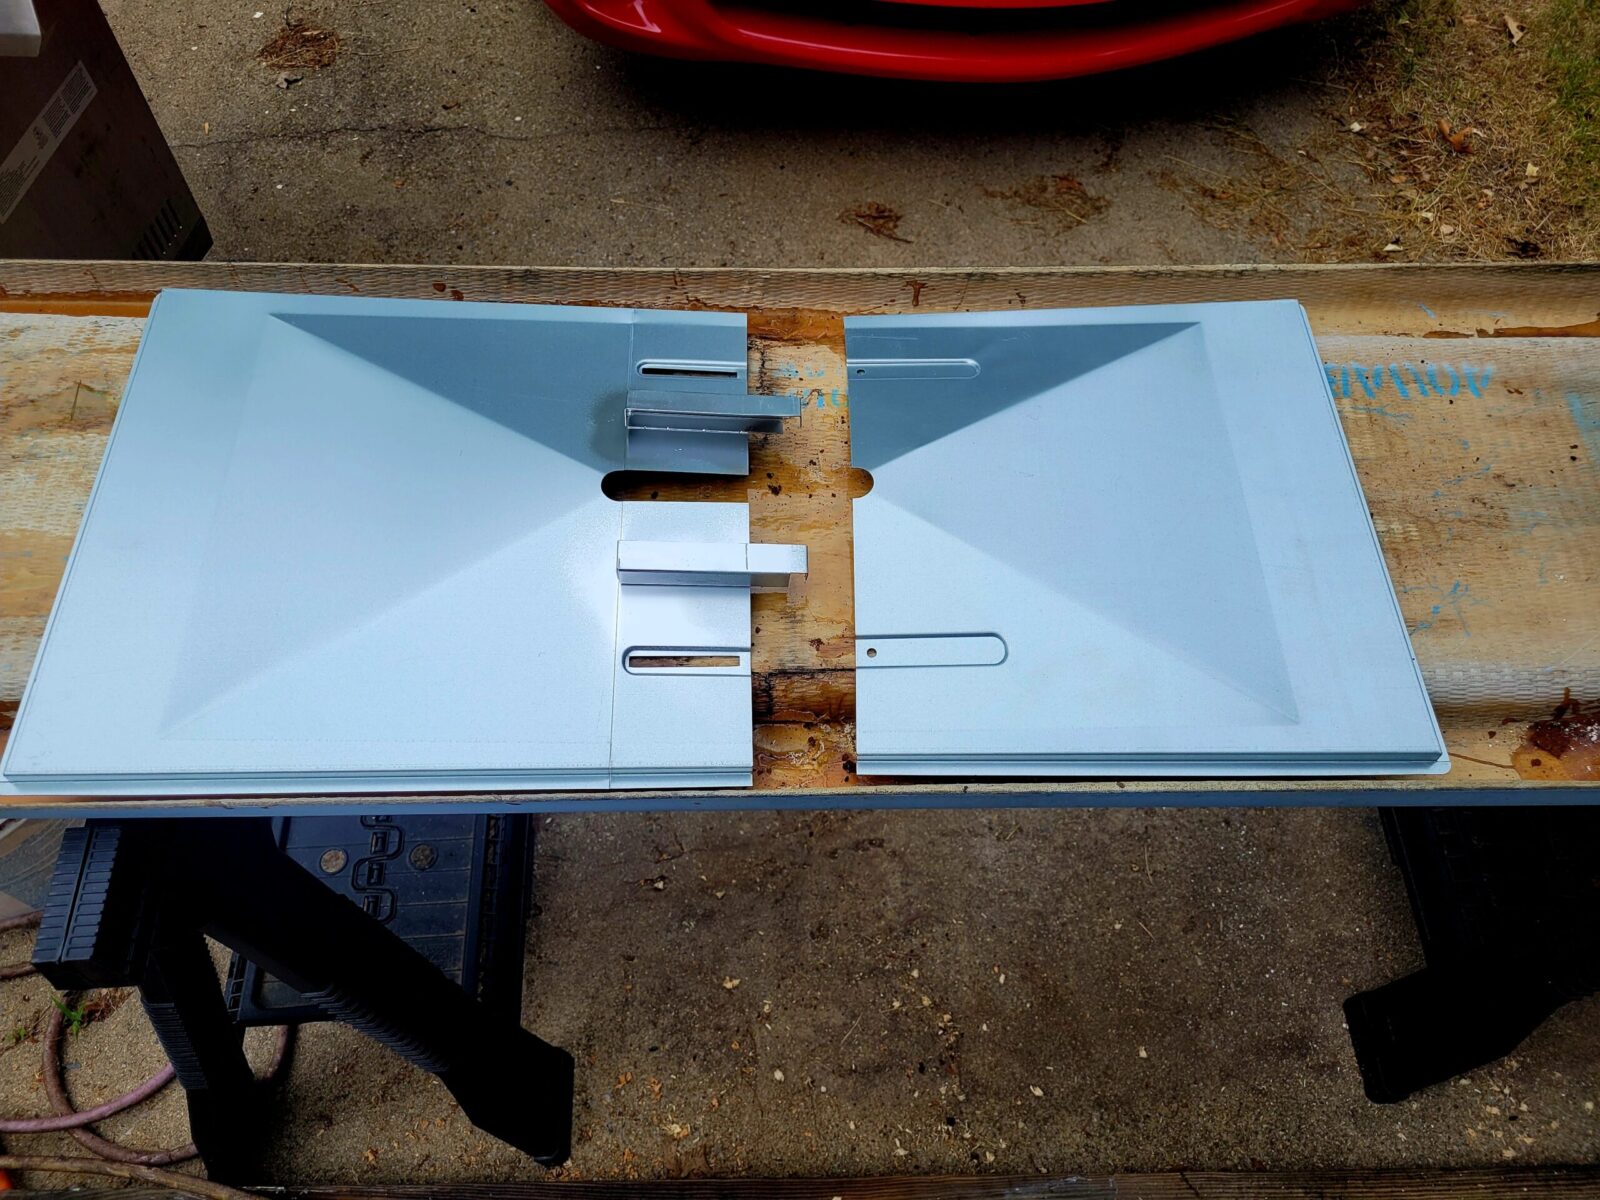
After a lot of digging looking for an affordable exact match to the original pan, I decided to order a 30″ adjustable pan off of Amazon. The problem I was running into was a combination of the total cost including shipping and also lead times and availability. So, I went with an adjustable model and you know what? It’s just fine.
The AJinTebby pan is 15.5″ deep and can adjust from 27 to 30″ wide. Yes, it is pricey at $46.99 but there is a 5% discount coupon you can apply and if you have Amazon Prime, shipping is free (technically it’s factored into the price but you get the idea – it’s a good deal). Click here to open the Amazon page in a new tab.
The drip pan comes with a nice small drip cup that slides in or out of place under the main pan. Drippings ooze into there and are collected so then you can dump and clean it as needed.
I painted the drip pan and it’s drip cup with Rusto-oleum BBQ & Stove 1200F paint to slow rusting. It has three coats of paint
To further lock and seal things, I put 3M High Temperature Flue Tape on the top of the joints. FYI – the oval hole is where fluids drip through to the aptly named “drip cup” under it that can be emptied as needed.
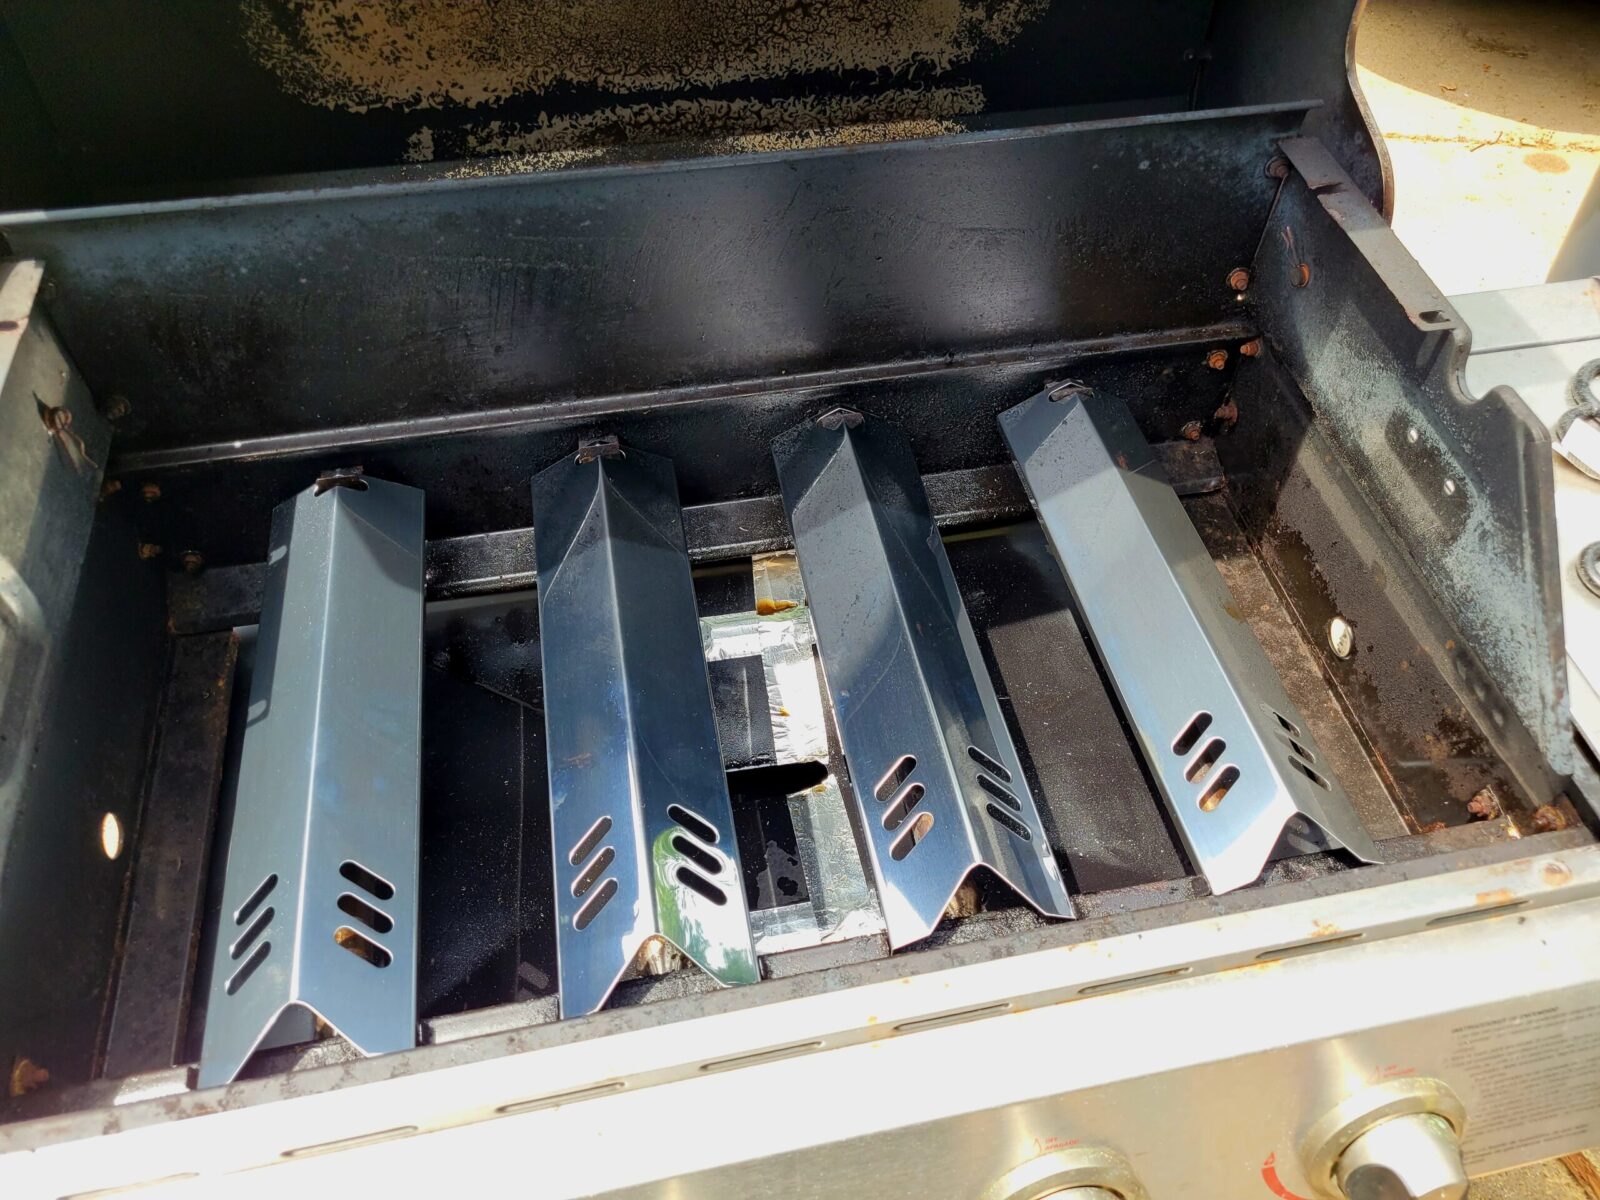
The Heat Plates
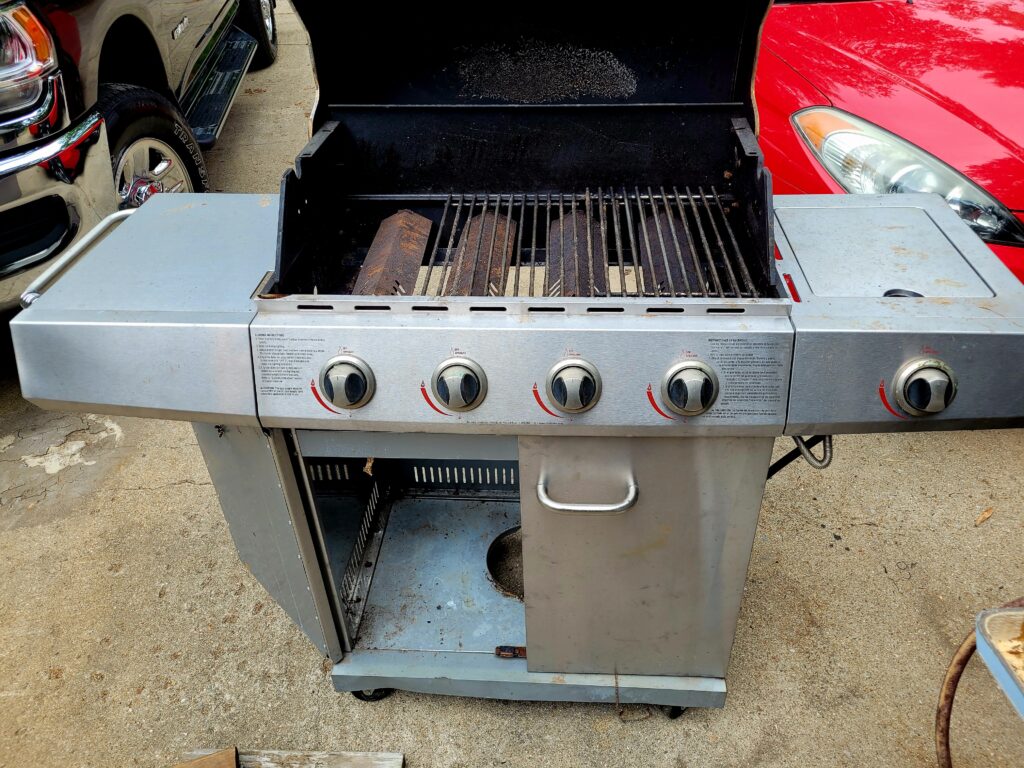
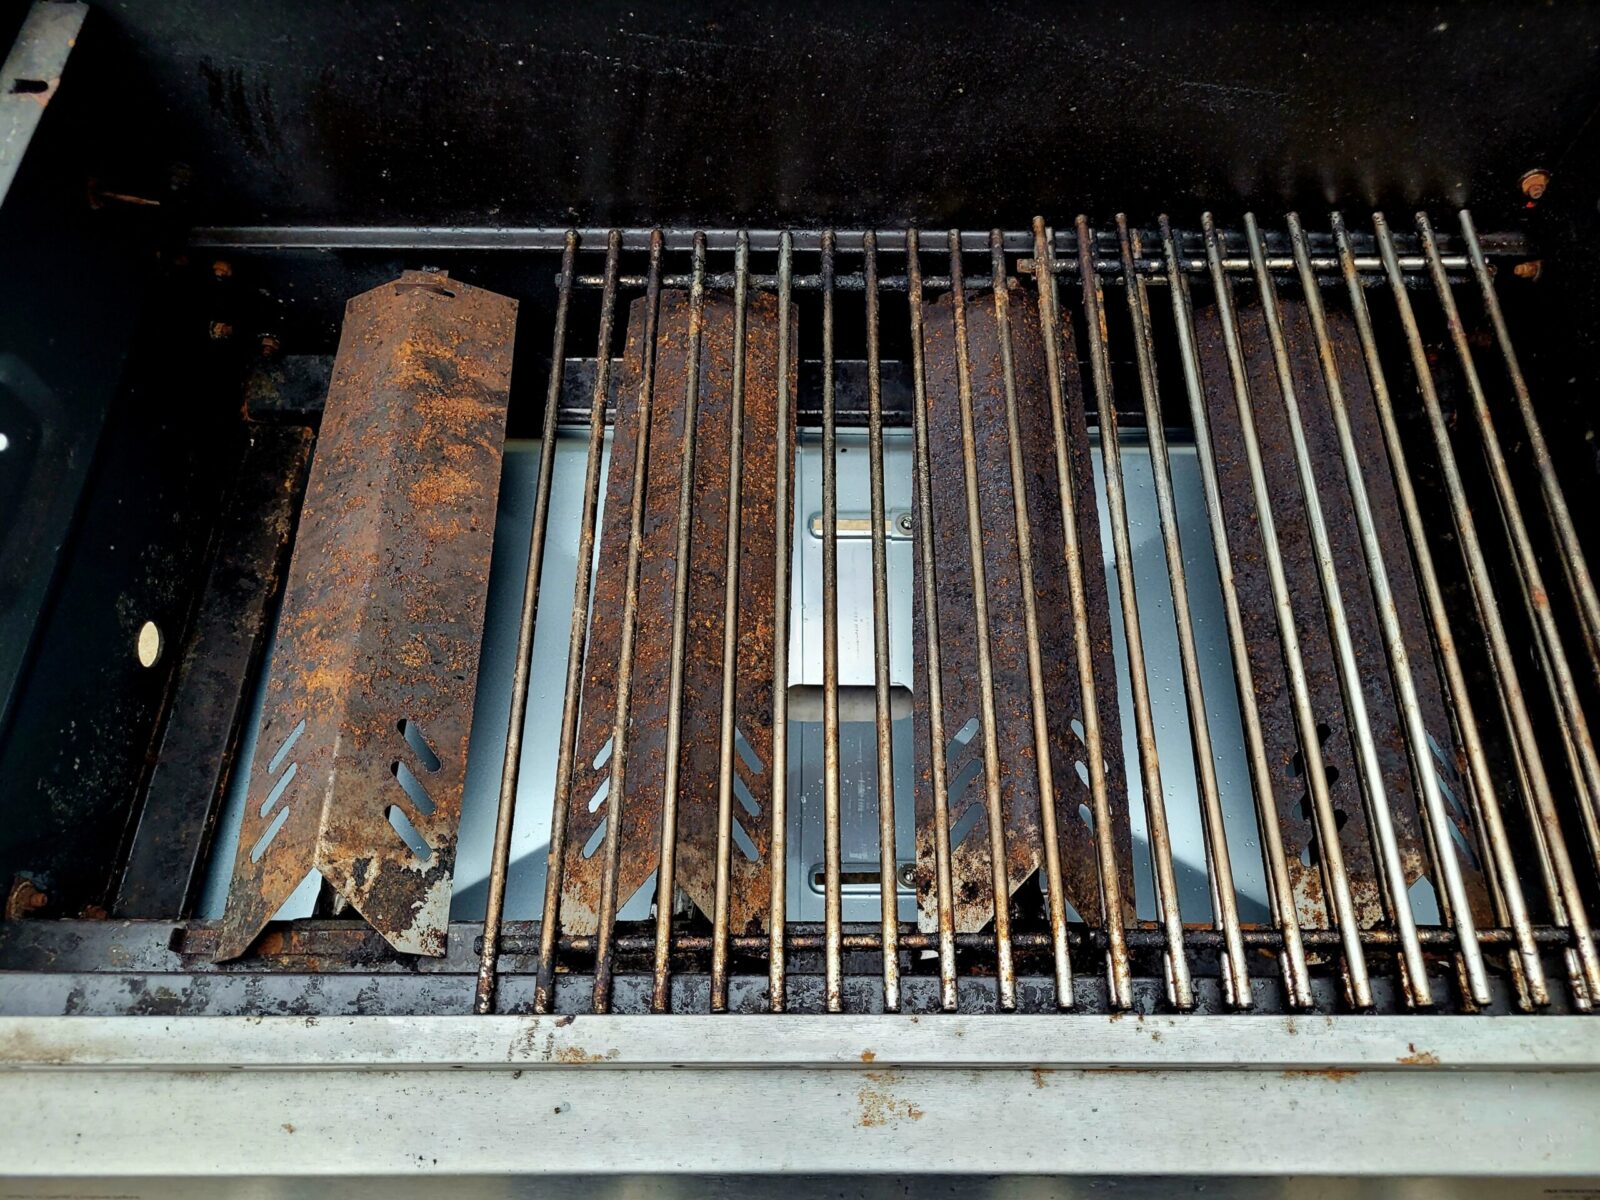
I had to decide what to do with the heat plates. They had rusted to the point of being pretty thin – the heating and lots of salty fluids had really taken their toll on them.
You can see the brand new AjinTebby drip pan under the original heat plates and they looked awful. The grill saw quite a bit of use, that I have no doubt of, and then it sat and rusted even more.
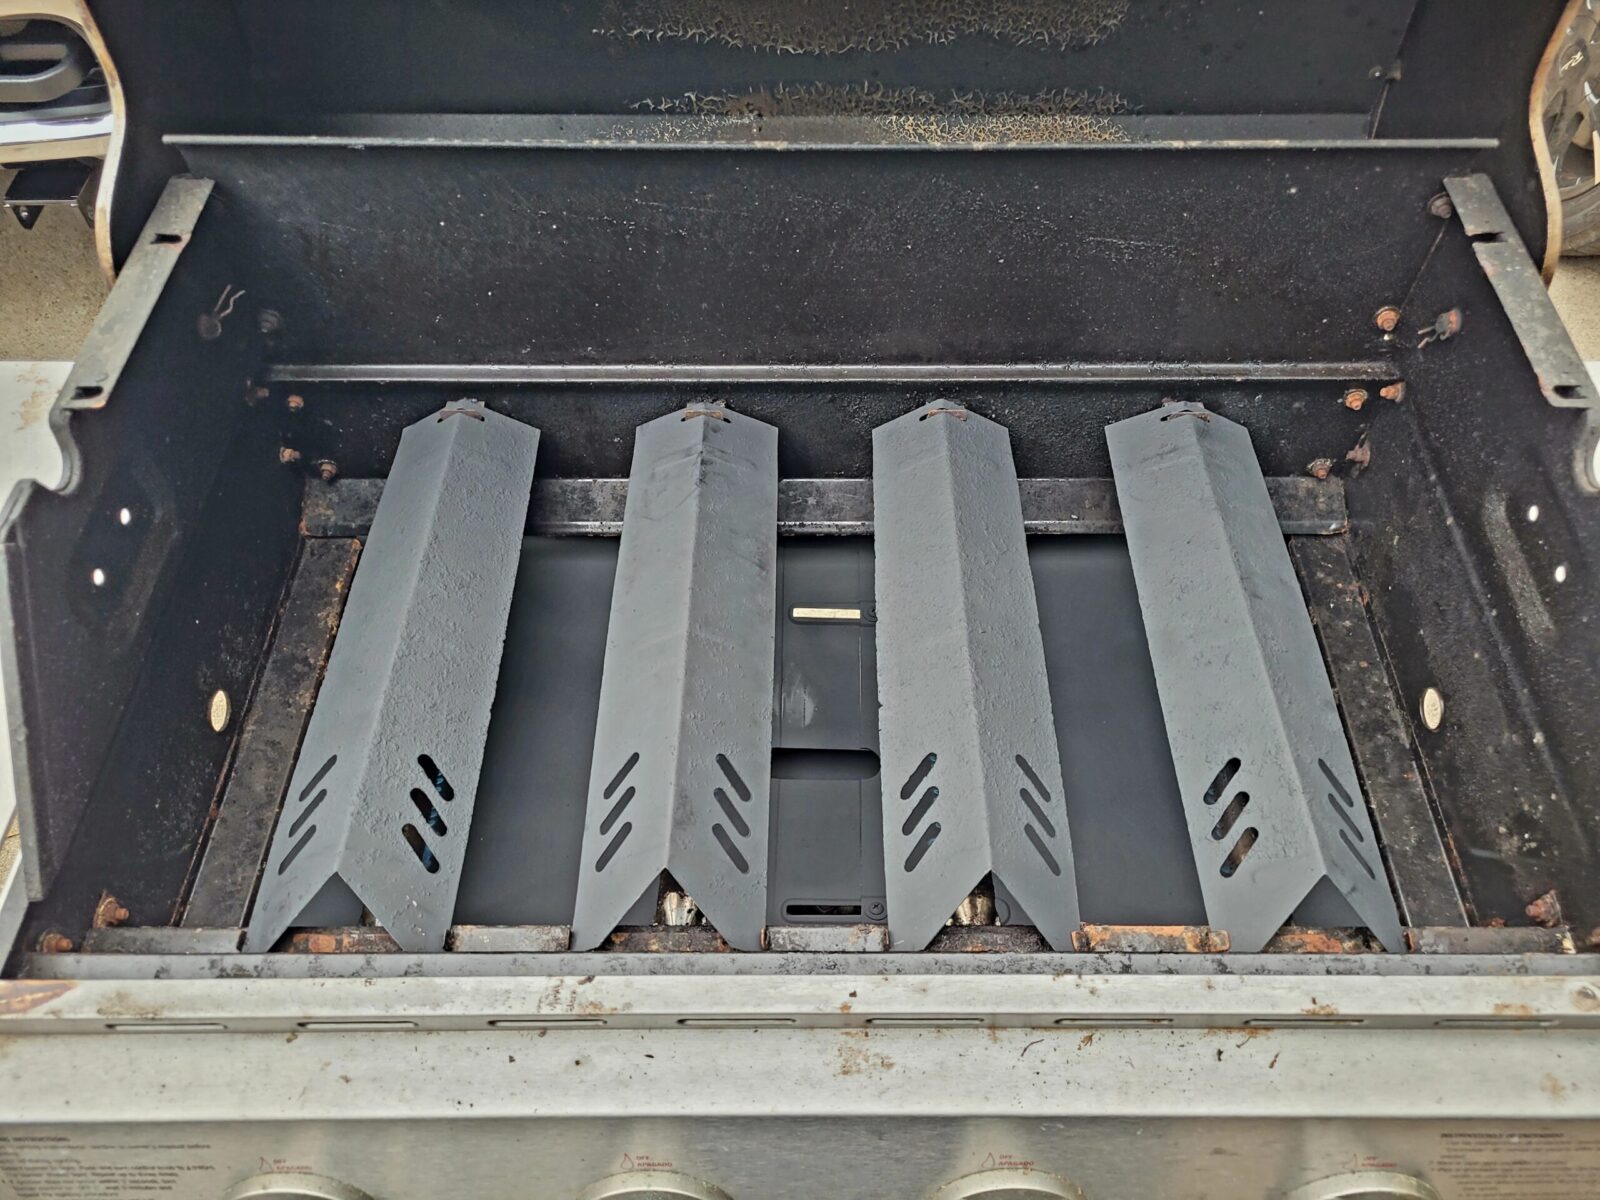
My first thought was to try and save money so painted them with Rustoleum’s Ultra High Temp BBQ paint first to try and save money but I could’t get past all the bumpy look from years of rusting. There are so many affordable replacement options, I decided to go that route.
I painted the heat plates plus I put three coats of Ultra High Temp Rustoleum on the drip pan to slow up the rust. I could have stopped here but the really worn plates were bugging me so I decided to replace them.
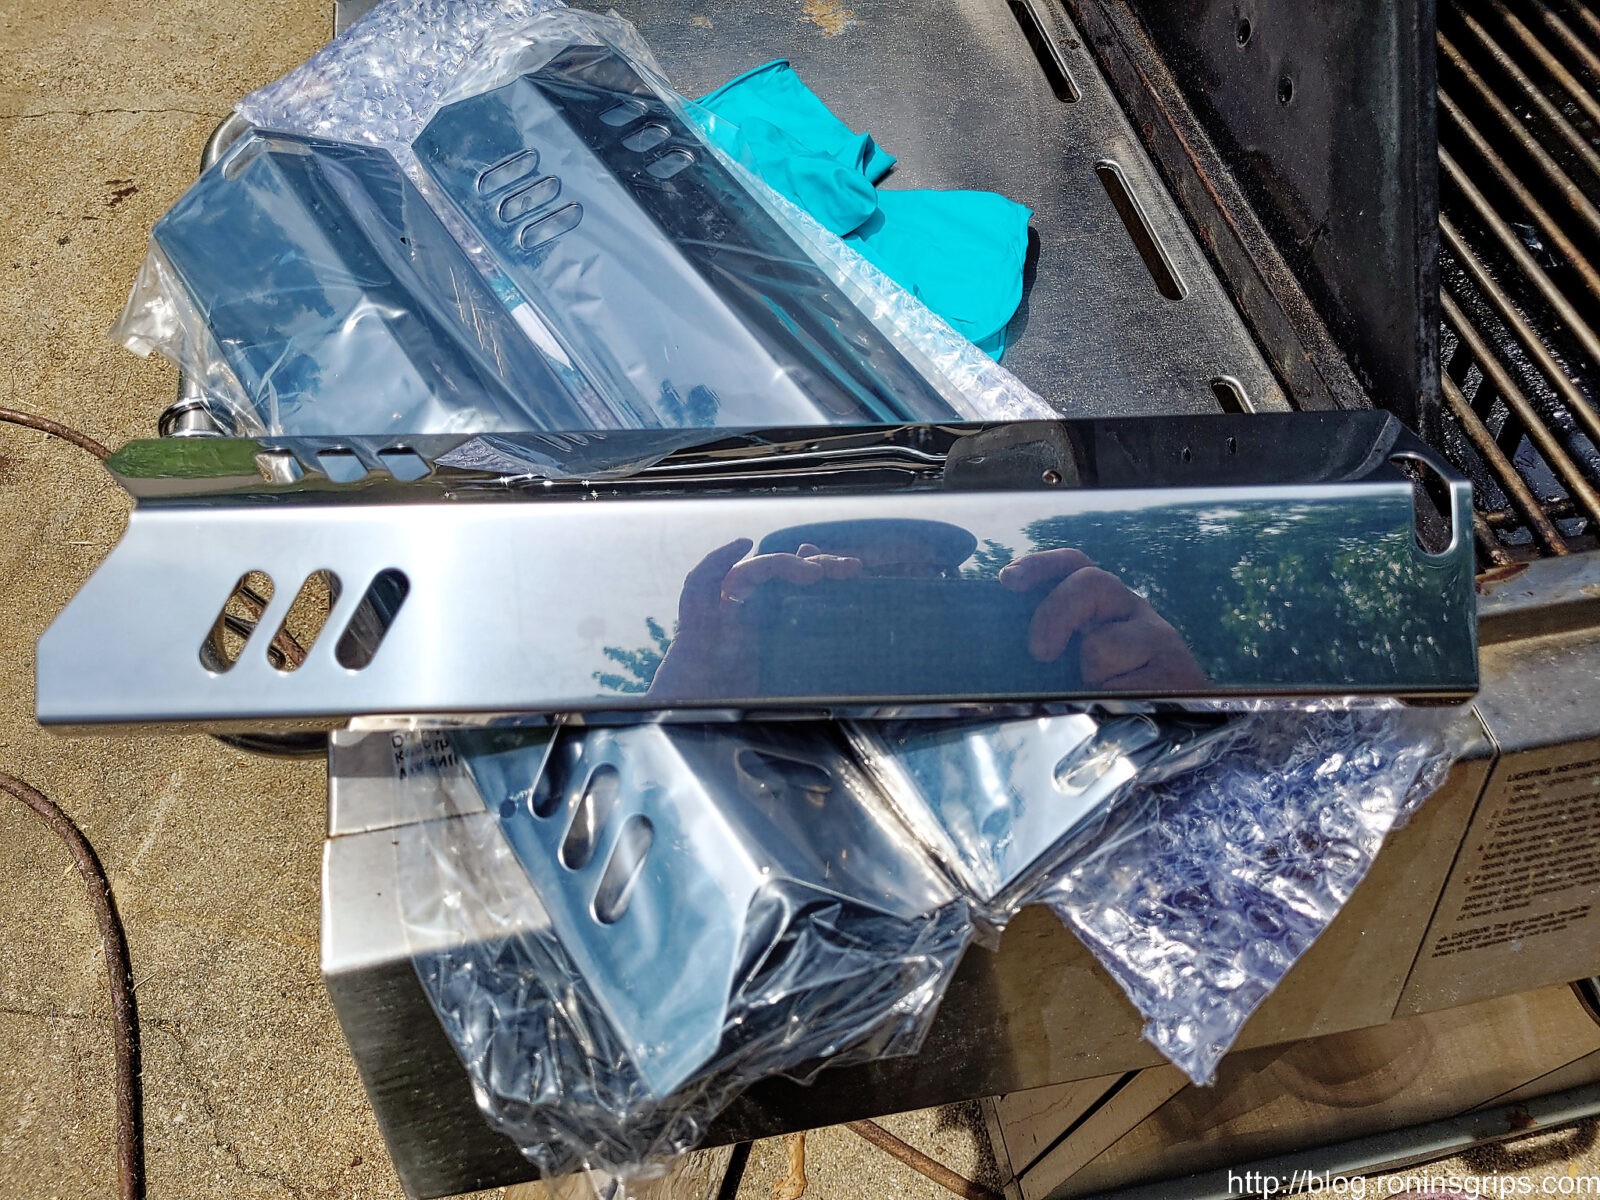
The BHG uses 15″ long x 3-13/16″ wide heat plates and they are very readily available in a variety of metals and finishes. I bought a set of five stainless steel replacement heat plates made by Shinestar off of Amazon – click here to open the listing in a new tab.
Here’s a look at the new Shinestar plates prior to installation.
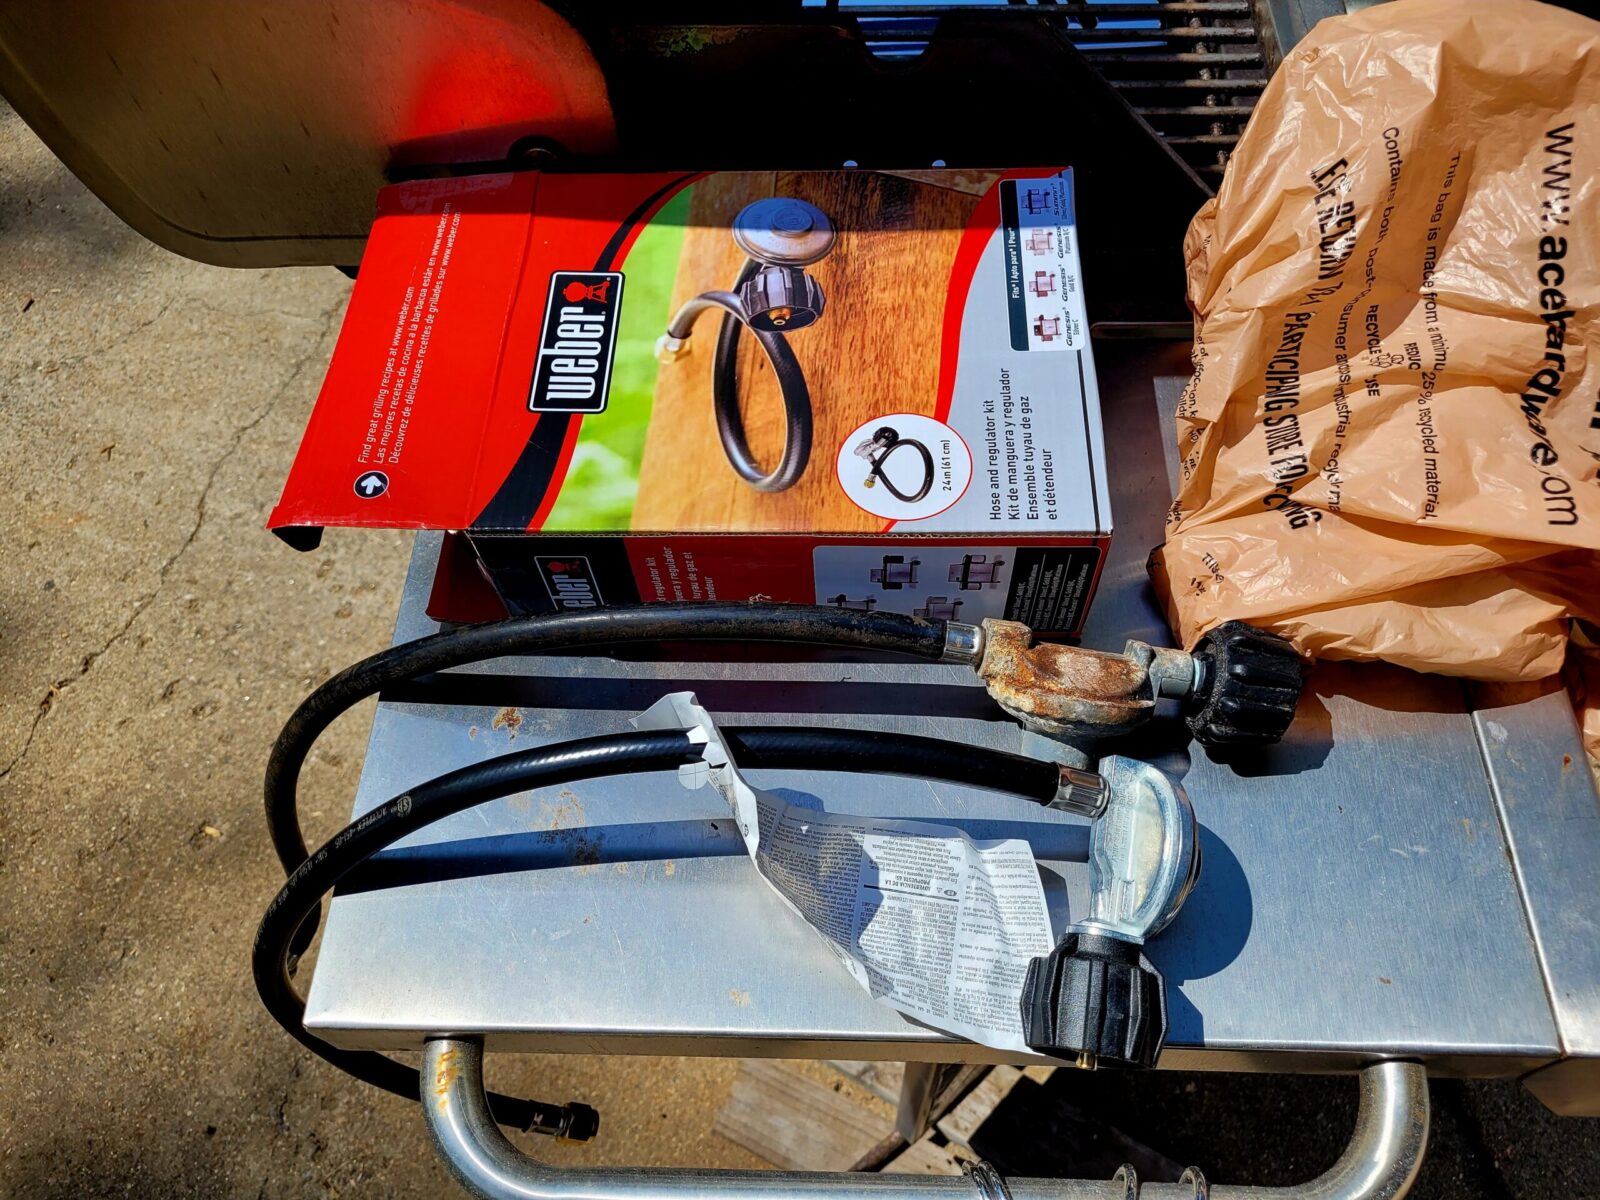
During initial testing, the grill ran just fine but then it started getting flaky and finally would barely produce flame. This is usually due to a regular failing and/or rust or a spider web getting stuck somewhere. I pulled the lines and blew everything out with compressed air. Sometimes that fixes the problem but not in this case.
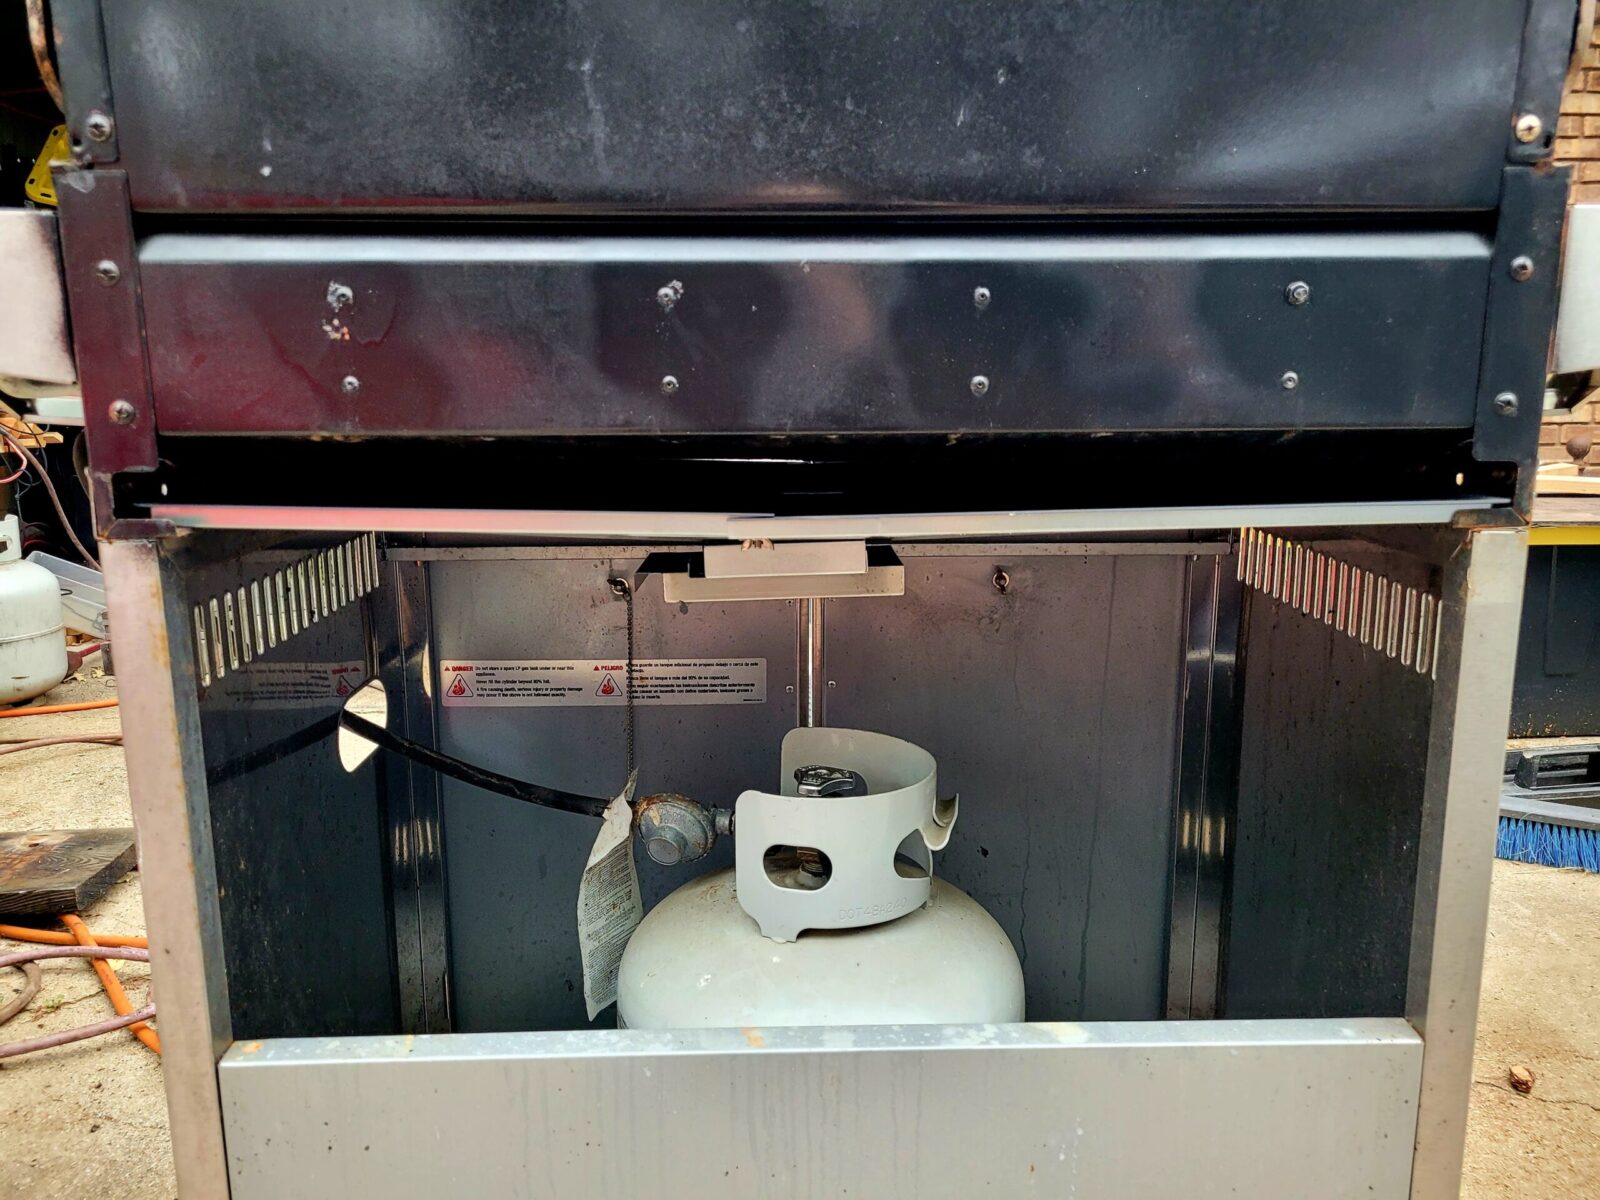
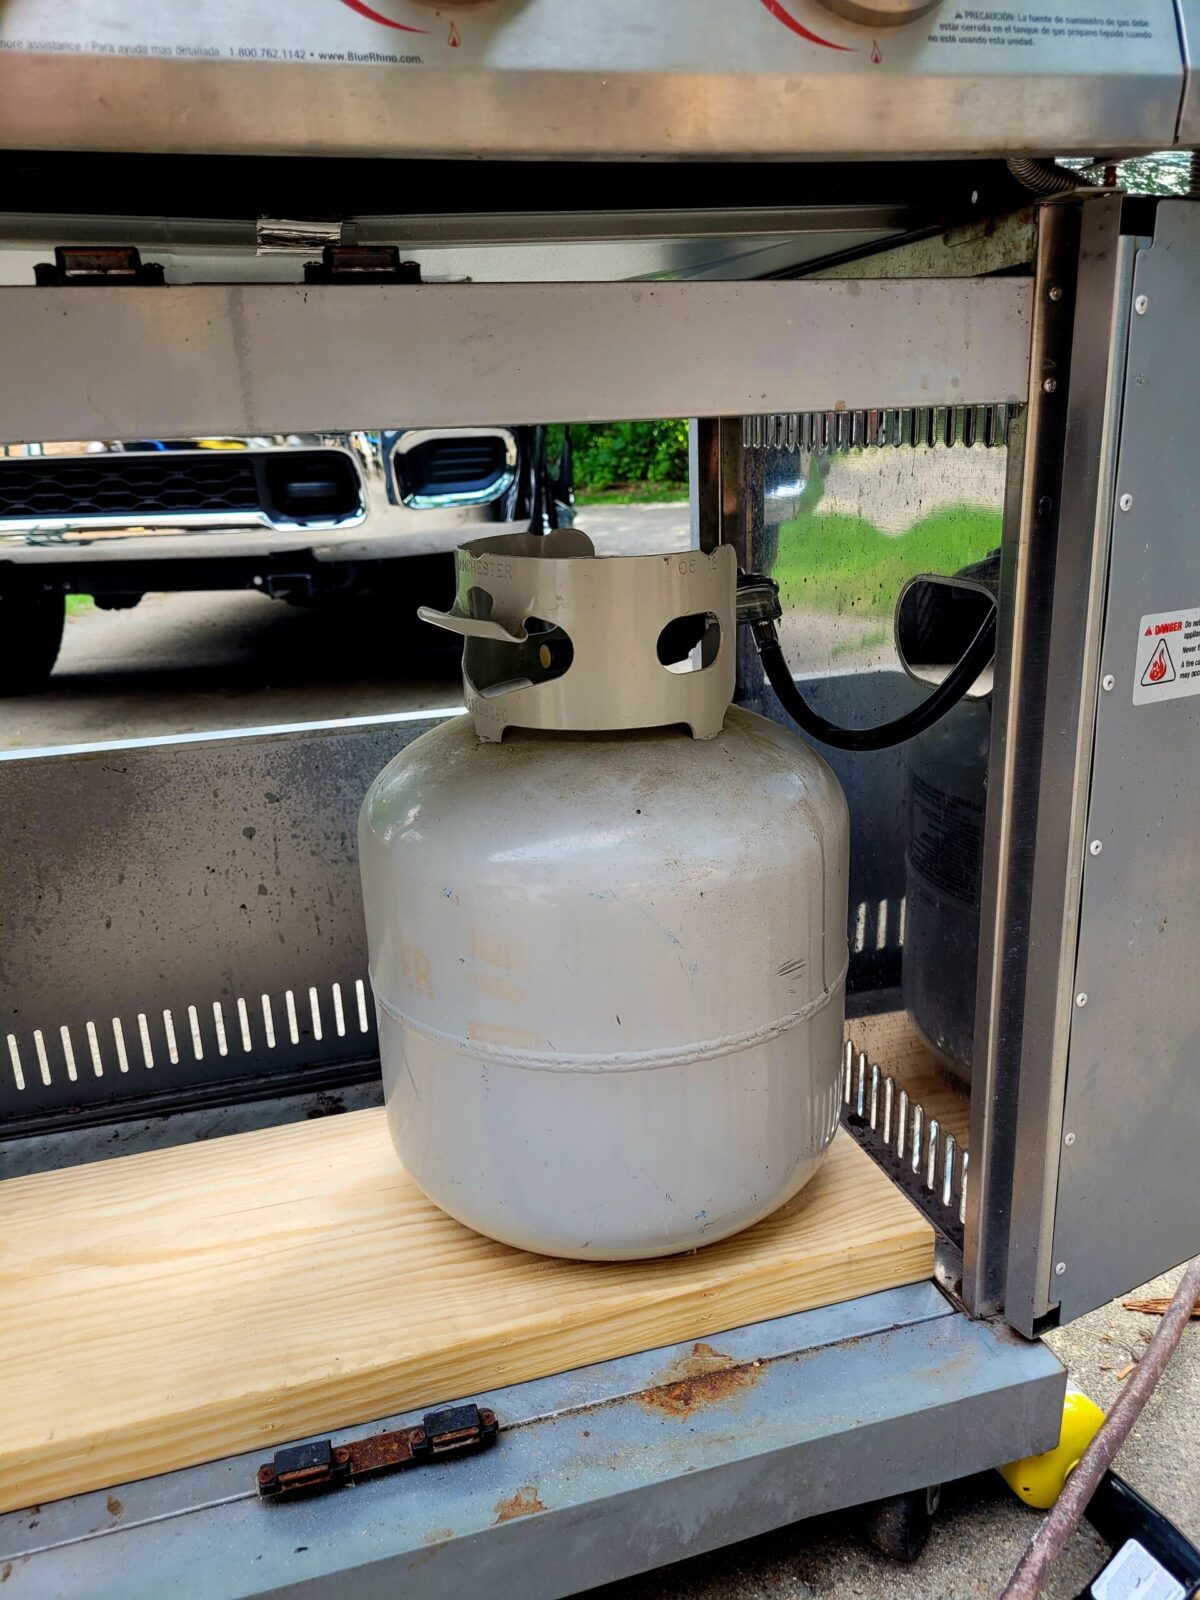
Now, I made a bit of a costly mistake here because I was in a rush. We had an Ace Hardware nearby and I bought a Weber regulator that fit but was a tad short for $44-46 if I recall rgiht. Because it was short, I took a piece of 2×12 lumber and cut a hole in it with a jig saw to hold the tank. A week later, I was in Home Depot and found out they had a ton of gas grill repair parts in stock (I didn’t know they did) including the exact hose and regulator I needed for half the price of the Weber.
The old regulator went straight in to the tank and the Weber unit is at a right angle.
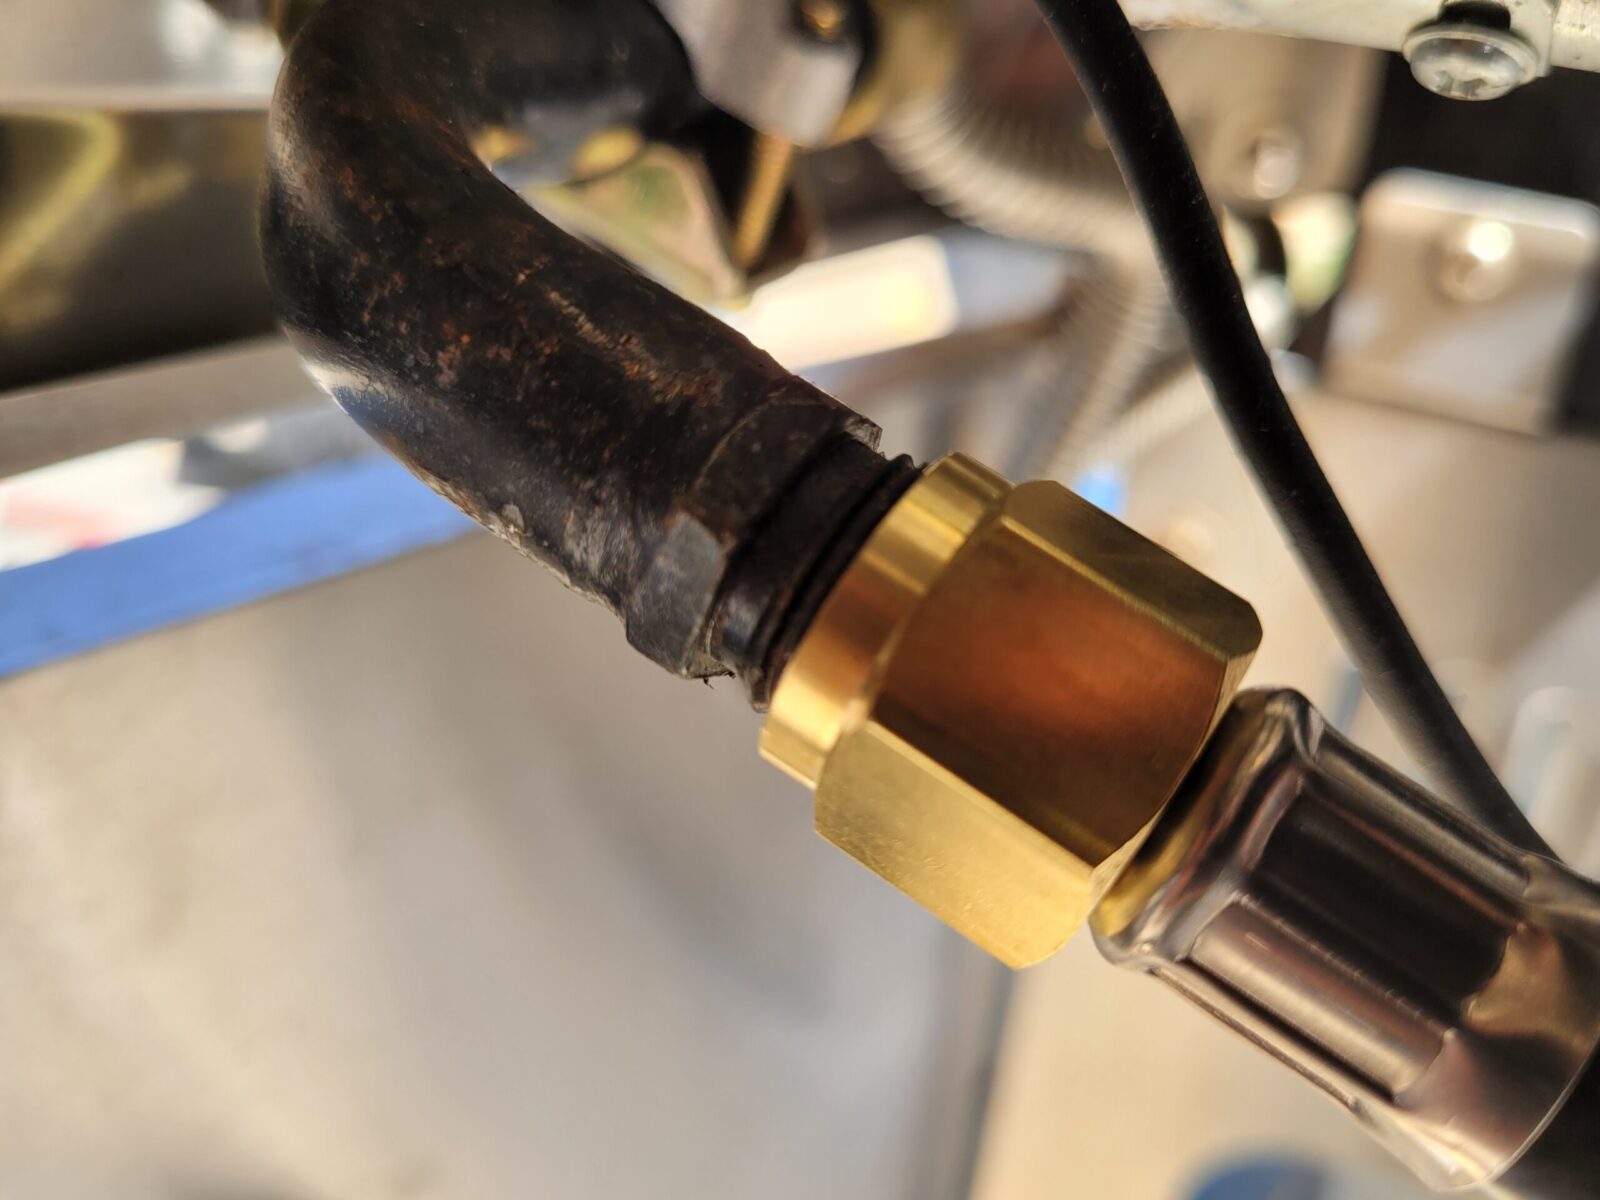
Quick comment – when you are working on gas fittings, there will almost always be a way to support the existing tube/hookup and ou need to do that. See the small nut formed into the black tube? You need to hold that with one wrench while either tightening or loosening the hose fitting. If you don’t support the tube you run the risk of it bending or breaking free. Just remember. always do what you need to do to support what your line is connecting to. Don’t just torque on the hose’s fitting alone.
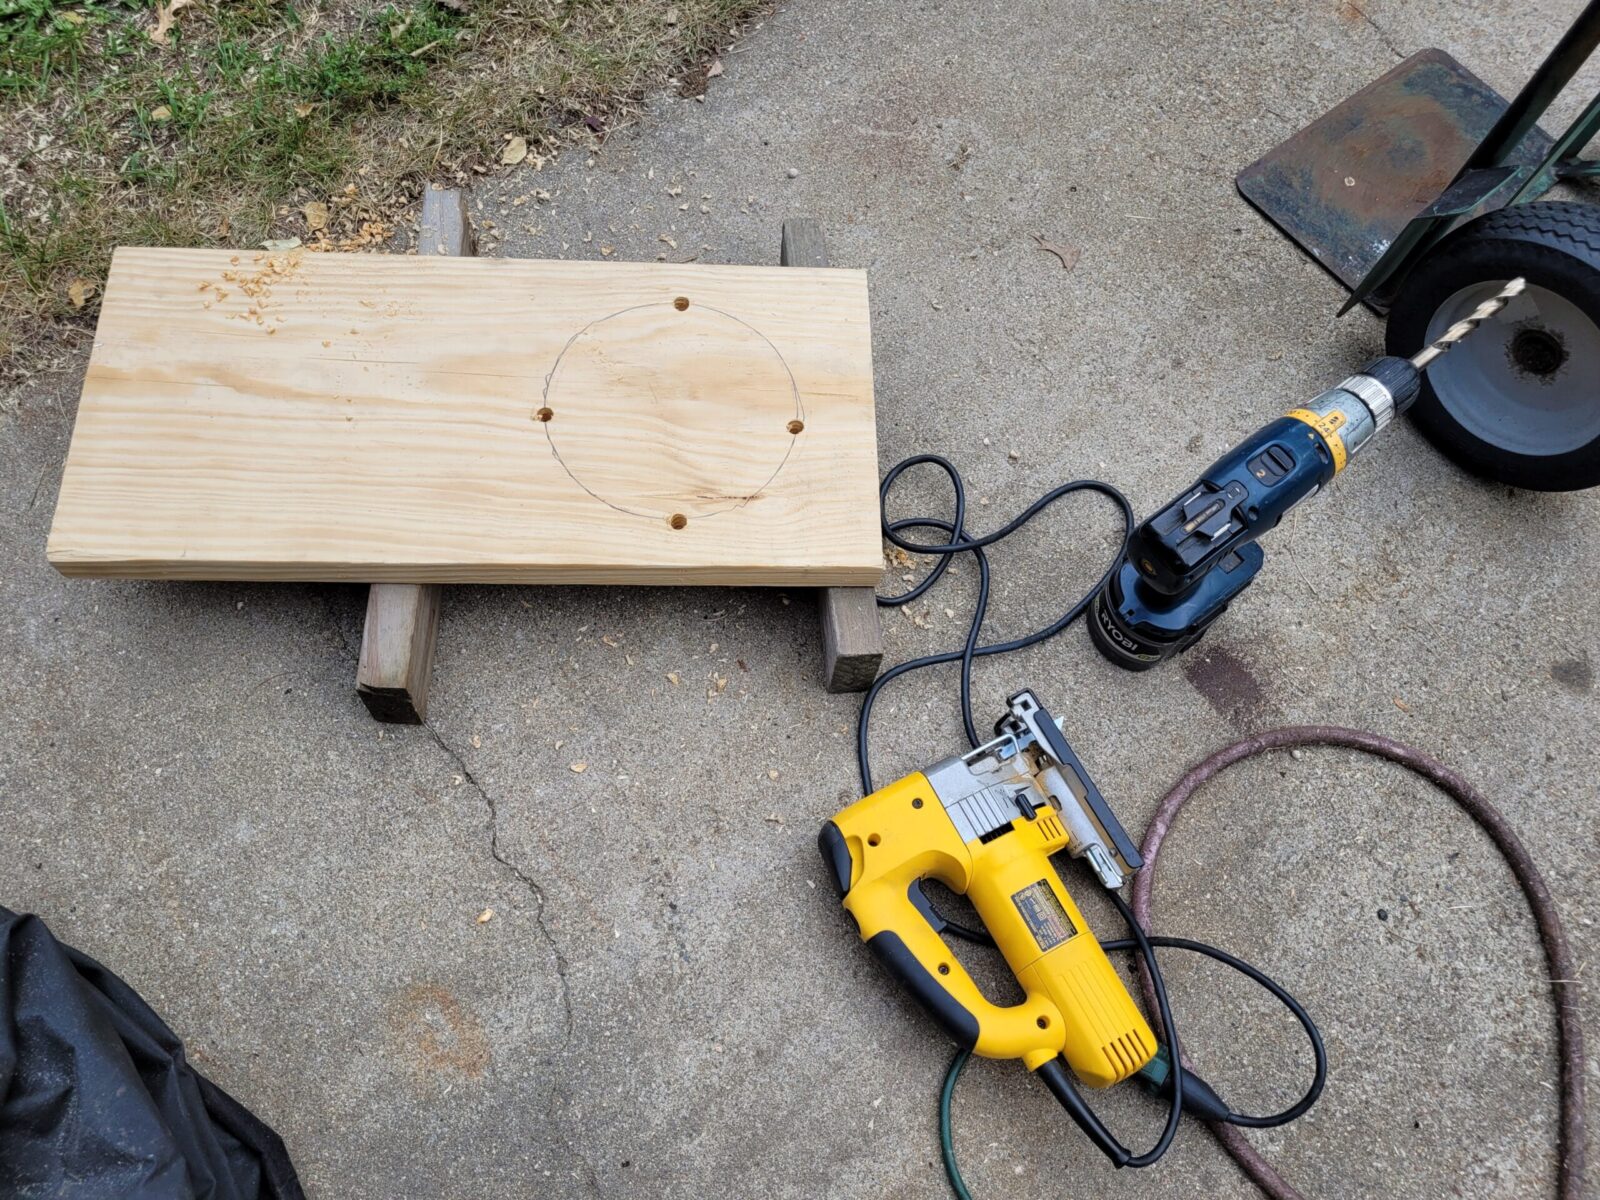
Because the Weber hose was too short, I took a piece of scrap 2×12 lumber I had, traced the outline of the tank’s botton on it and cut the circle out. Note I drilled four holes so I could start the jig saw blade that did the actual cutting.
There it is – nice and stable. Again, if I had known that Home Depot had a bunch of repair parts, I would have taken the busted regulator in there and found a match.
I ran a 180 grit sanding mop in the same direction as the stainless “grain” finish and removed surface rust.
Sprayed the inside of the grill so it looked better
One hinge had a missing Cotter key that I replaced
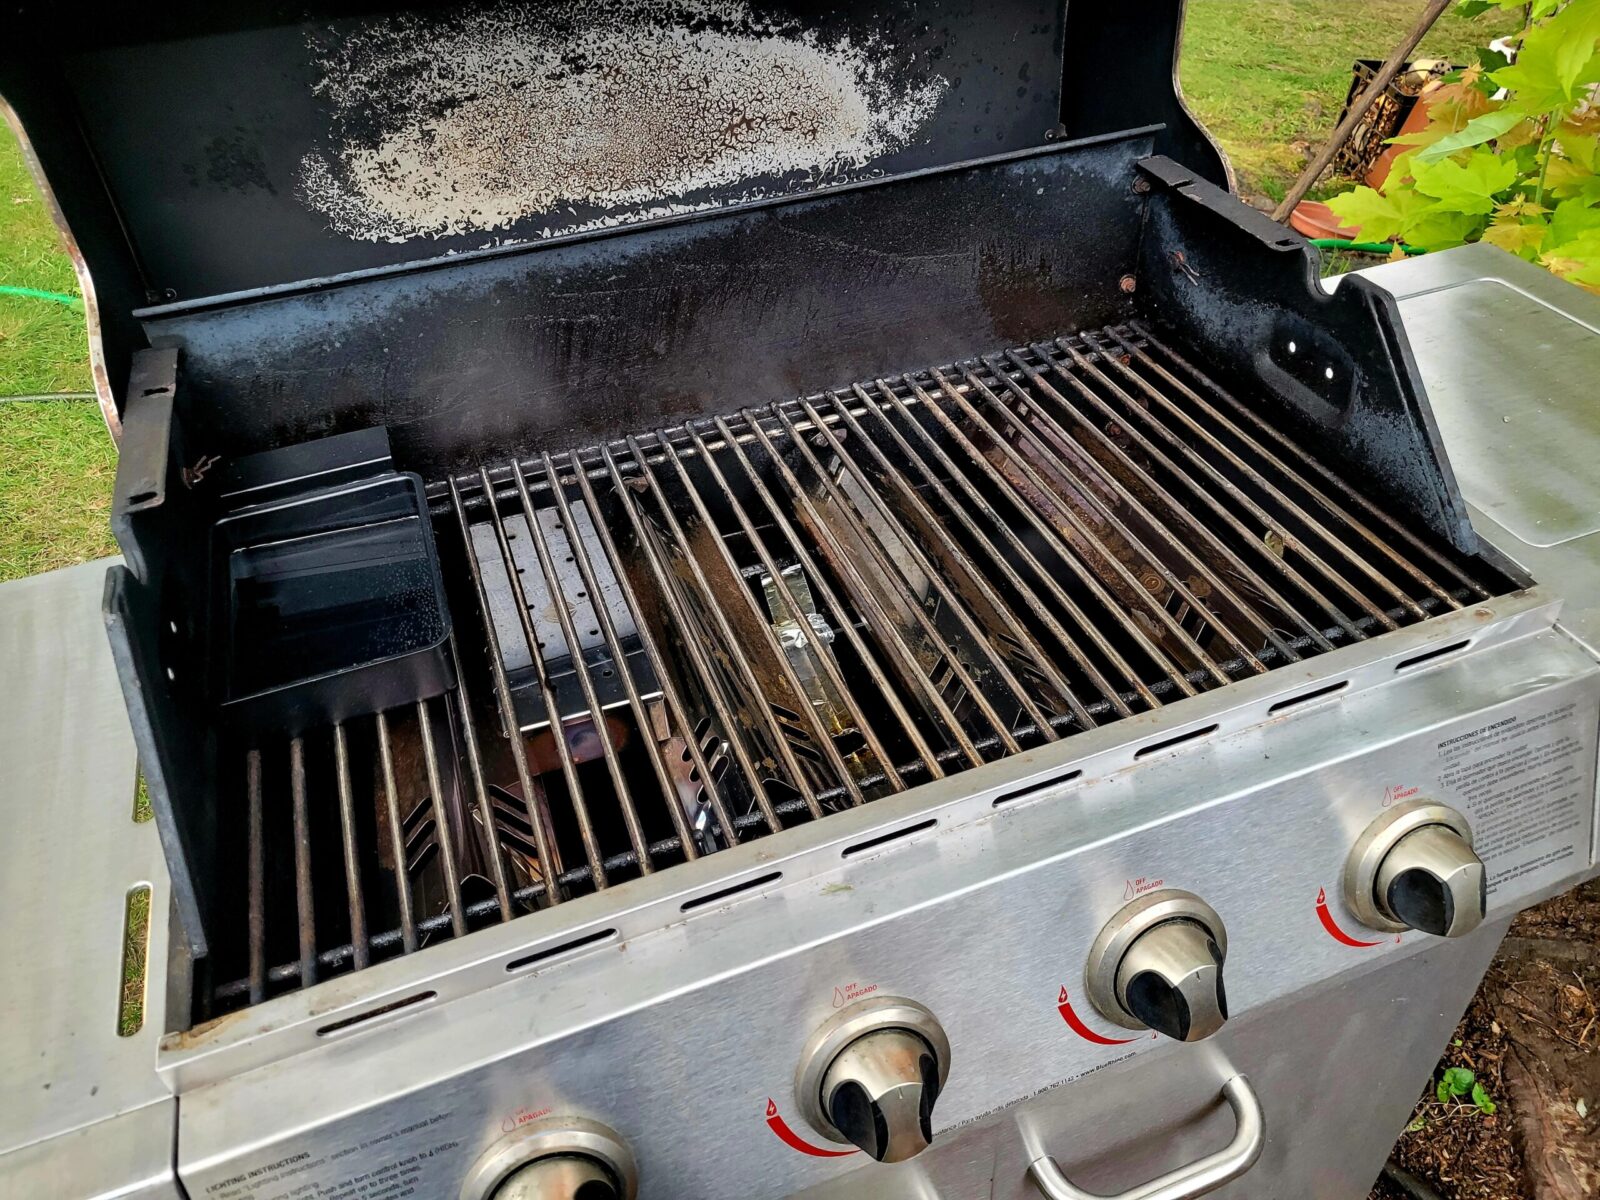
Put a wire brush wheel in my drill and cleaned up the grill grates so they had a nice clean brushed look
The Result
It turned out quite nice and gave us another grill to use during a family reunion we had during July.
The cabinet cleaned up really well.
So did the inside. There is a smoker box down on the heat plates to add a bit of smoke flavor.
Here’s the restored BHG next to my pride and joy Chargriller Competition Grill that my kids got me for Father’s Day a few years back and I converted for wood (click here if you want to read more about that).
Conclusion
One man’s trash is another’s treasure I suppose. The grill turned out nice. The only things it really needed were a new drip pan and the regulator replaced.
I hope this post helps you out.
Note, I have to buy all of my parts – nothing here was paid for by sponsors, etc. I do make a small amount if you click on an ad and buy something but that is it. You’re getting my real opinion on stuff.
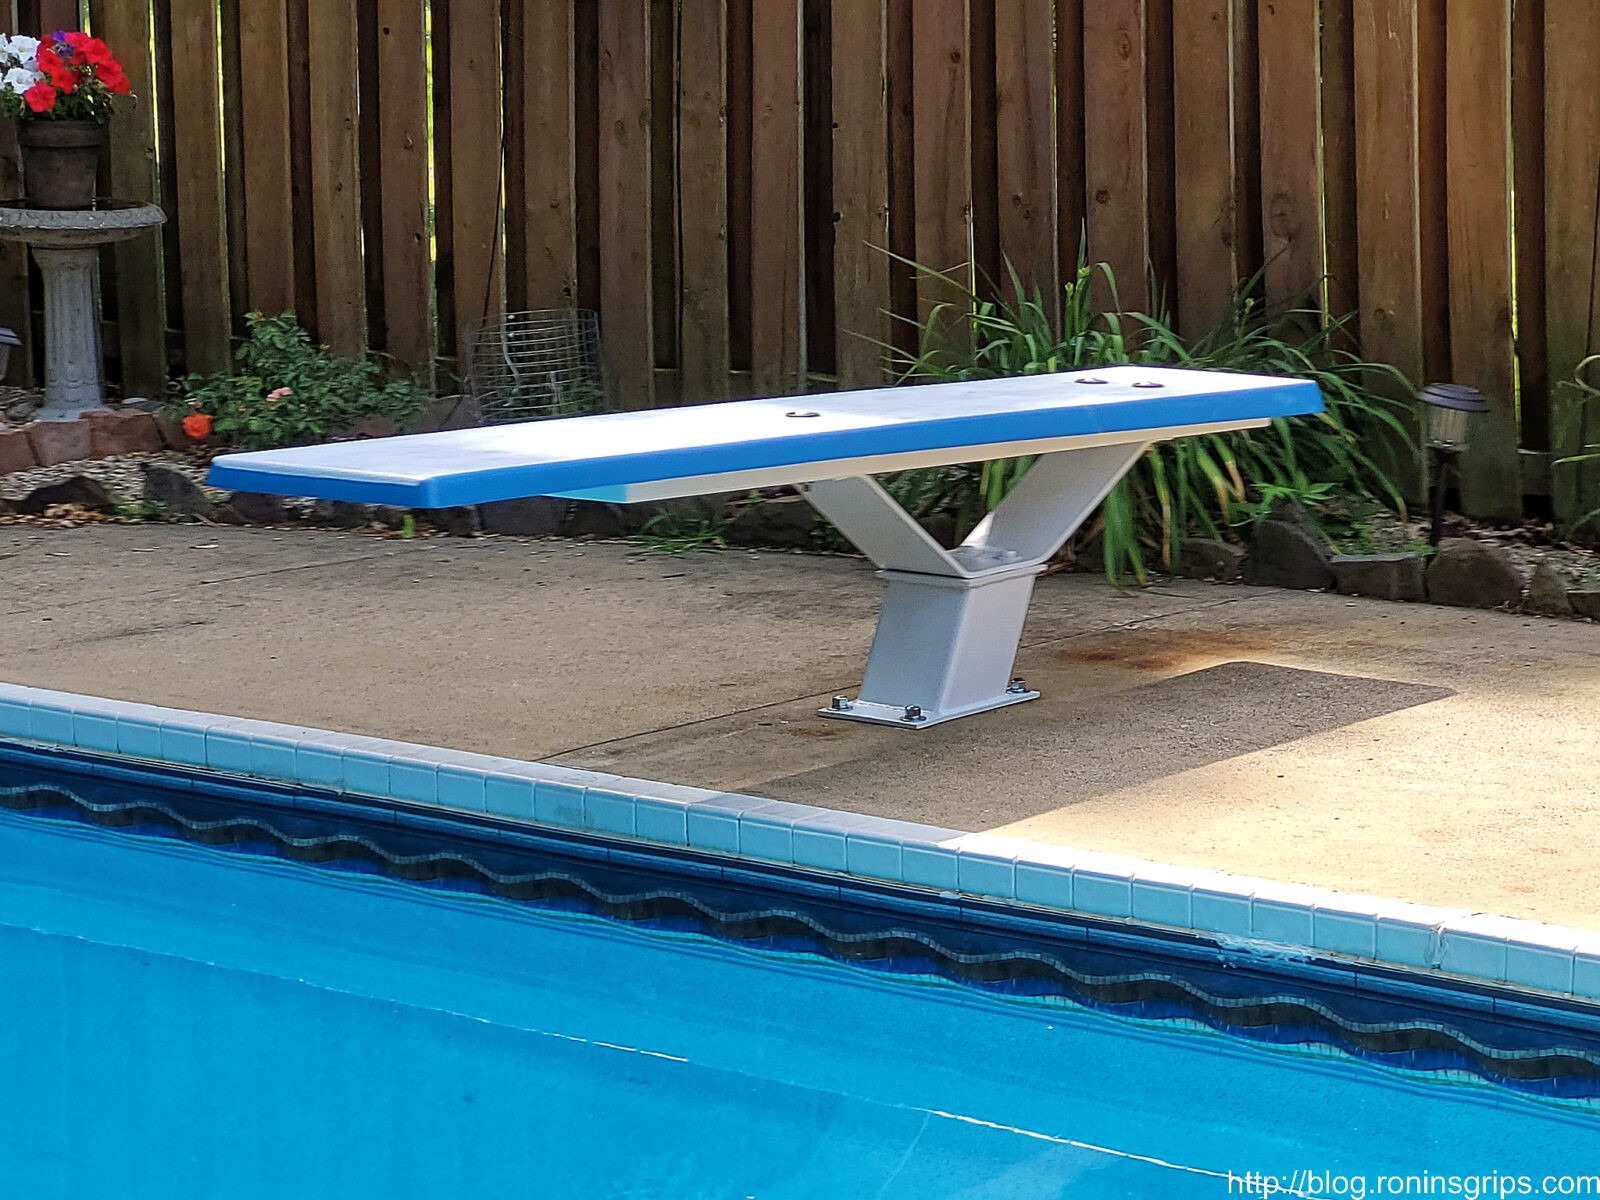
Have you ever been stuck between a rock and a hard place because you need to get something done but a vendor fumbles the ball … badly? That happened to me recently. We have a home made in the 70s and the pool is the same. While we have replaced the liner a number of times over the years, it was the original slowly falling apart diving board. We actually bought our home in 98 and the previous owner had put a 2x8x6 between the board and the spring to keep it alive.
Let’s fast forward to about a month ago. We were getting ready for a family reunion to be held at our place so I got the pool ready for the summer and decided I better check the diving board. Oh man, it was shot. The fiberglass underneath had torn around the board it encased and there was just no way it was safe.
One thing I have learned about pools over the years is that you can usually find parts. So, I new it was an 8′ residential diving board and the hole pattern for mounting it was 4.5″ on centers in the back and the front single hole was 36″. I did some digging and the hole pattern and distances from the back and sides corresponded with the SR Smith 8′ Frontier II board.
A number of vendors carried it online and the problem was that I needed it with only about a two week lead time before people started arriving for the party. InTheSwim said they had it and it would arrive in time. I used my wife’s card on the website and it wouldn’t go through so the website gave me an 800# to call. I did, the lady told me it was a fraud screen, I approved a text message sent to my wife’s phone and the InTheSwim operator told me it was all set and I should get an email shortly. She never said she resubmitted it … About an hour later, still no email so I called and I am pretty sure the same lady answered and said the order was fine …. in fact it was not.
After a week of no updates, I called and after confusion on their part, they found the order in limbo, fixed it and told me it would probably still make it in time. Okay… I kept tabs on it and finally called and said I needed the board. They told me it would not even ship until after the party. I asked that they expedite it, that I would even pay for it and they said they had no way to do that. I then told them in no uncertain terms to cancel the order. If that reads like a rant, it should. I hate it when a vendor fumbles the ball and literally does nothing to make it right.
I was left with two options – disappoint a bunch of relatives or figure out how to fix the board. I decided to do the latter and I suspect this is the part of the post you really care about.
What went wrong with the board?
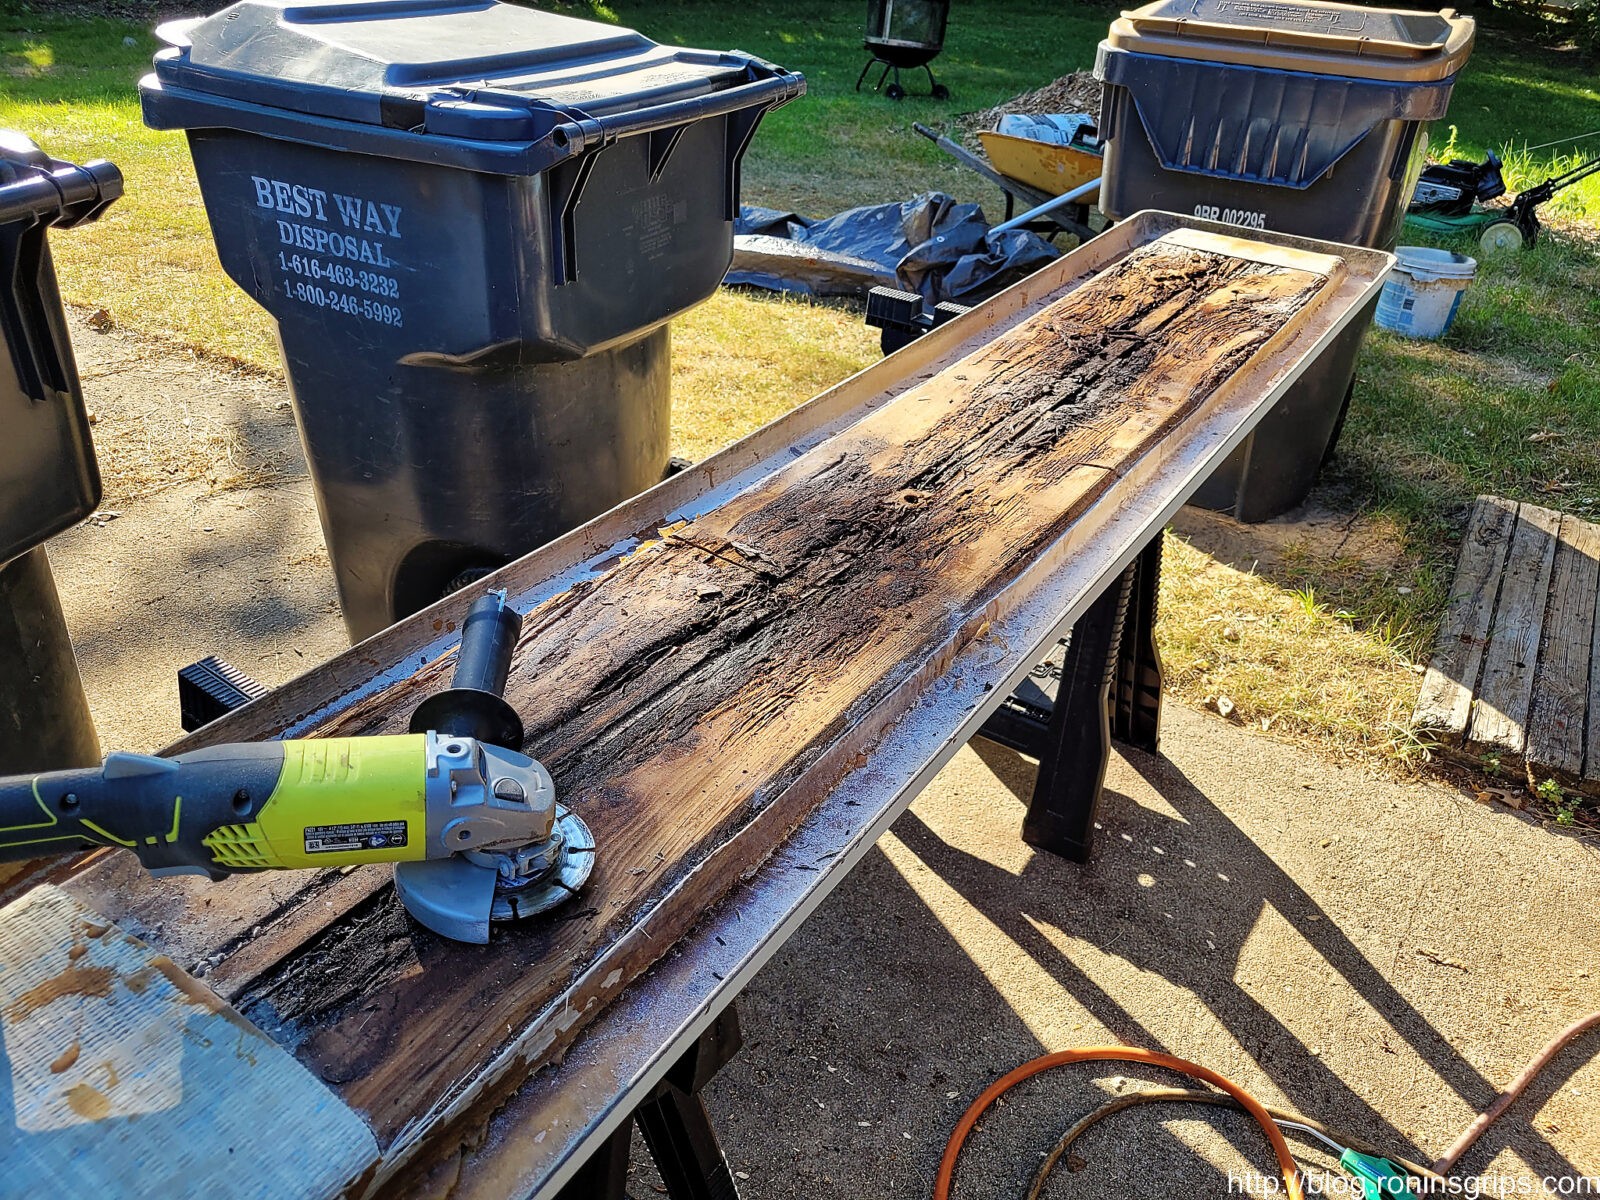
Many, if not most, residential diving boards have a fiberglass top, sides and bottom but the core is wood. Through the in the fiberglass rotting wood was plainly visible. I put the board on sawhorses, put the old supporting board underneath it and flipped the diving board over to access the bottom. Again, the diving board was resting on the old supporting board – I new that if I didn’t support it, the odds were high that it might snap. Once supported, I used a diamond masonry cutting wheel in my 4.5″ Ryobi cordless grinder to slice off the torn fiberglass to see what was going on. I had a hunch that If I could salvage the top of the board, I could fix the bottom and I was right.
Important Safety Comment: Wear eye protection and a quality face mask (N95 or better) when you are cutting or sanding on fiberglass. You don’t want stuff getting in your eyes or lungs. I also wear gloves to protect my hands.
I used a masonry cut off wheel – in this case a diamond coated one – because the glass fibers can dull saw blades, etc. Just about anything can cut open fiberglass – it just depends on whether you care about what is happening to the blade.
Once I cut open the bottom that held the wood, I could see it needed to be replaced. What was there were three pieces of wood and there was a cap on each end with nails that held it together. Over the years as holes and cracks opened up, water got in and slowly rotted the wood. I really wasn’t surprised when I went to lift the board off the spring – it weighed a ton due to the waterlogged wood.
The wood wouldn’t lift right out so I would prop it up and cut it with a small hand held Ryobi circular saw into thirds. I used a small pry bar and lifted the sections out. I didn’t cut all of the fiberglass out yet thinking that I might use some of it to make things stronger. In hindsight, I’d now tell you to remove all of the hold fiberglass wrapping on the bottom -there was no need to save it.
Wood and Fiberglass
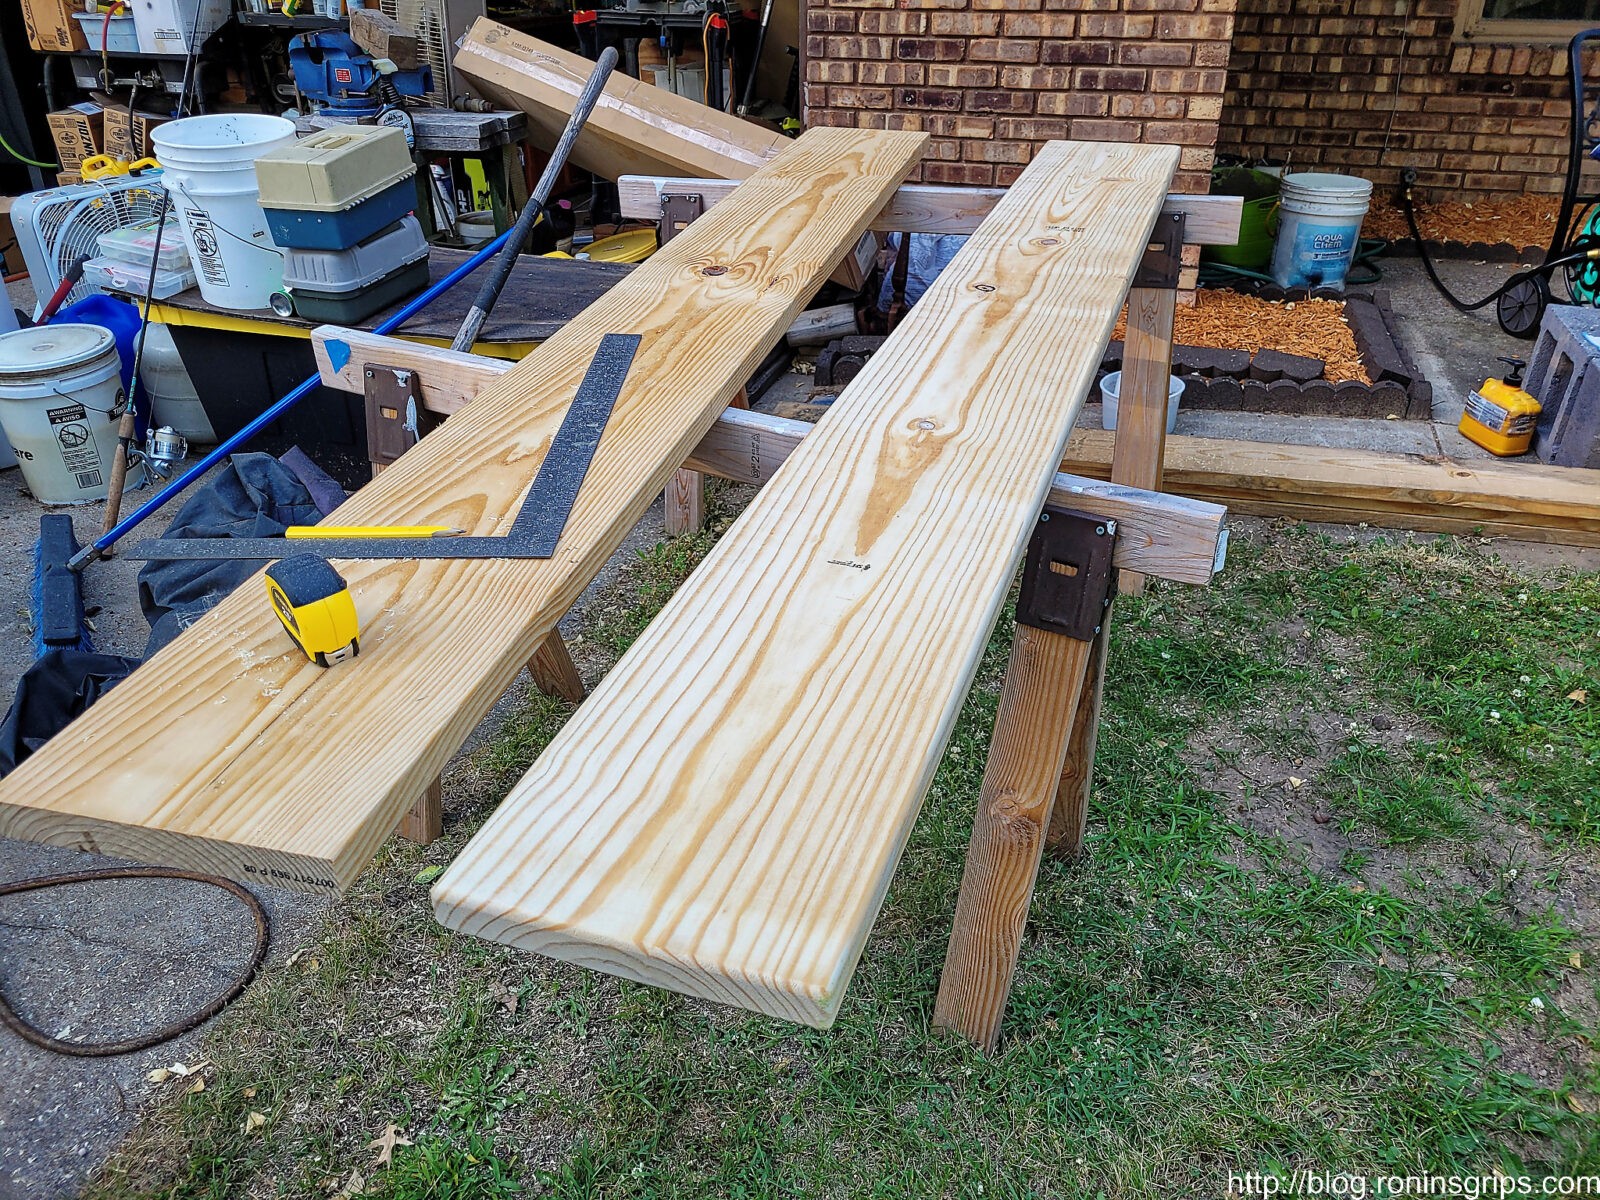
In a perfect world, I would have the exact same size of wood and better yet, treated wood, to replace the rotten wood. I didn’t have time for wet treated wood to dry so I went to Home Depot and bought two 2x12x8 pieces of dry pine lumber. One to go in the board and one to still support it even though it probably wasn’t needed.
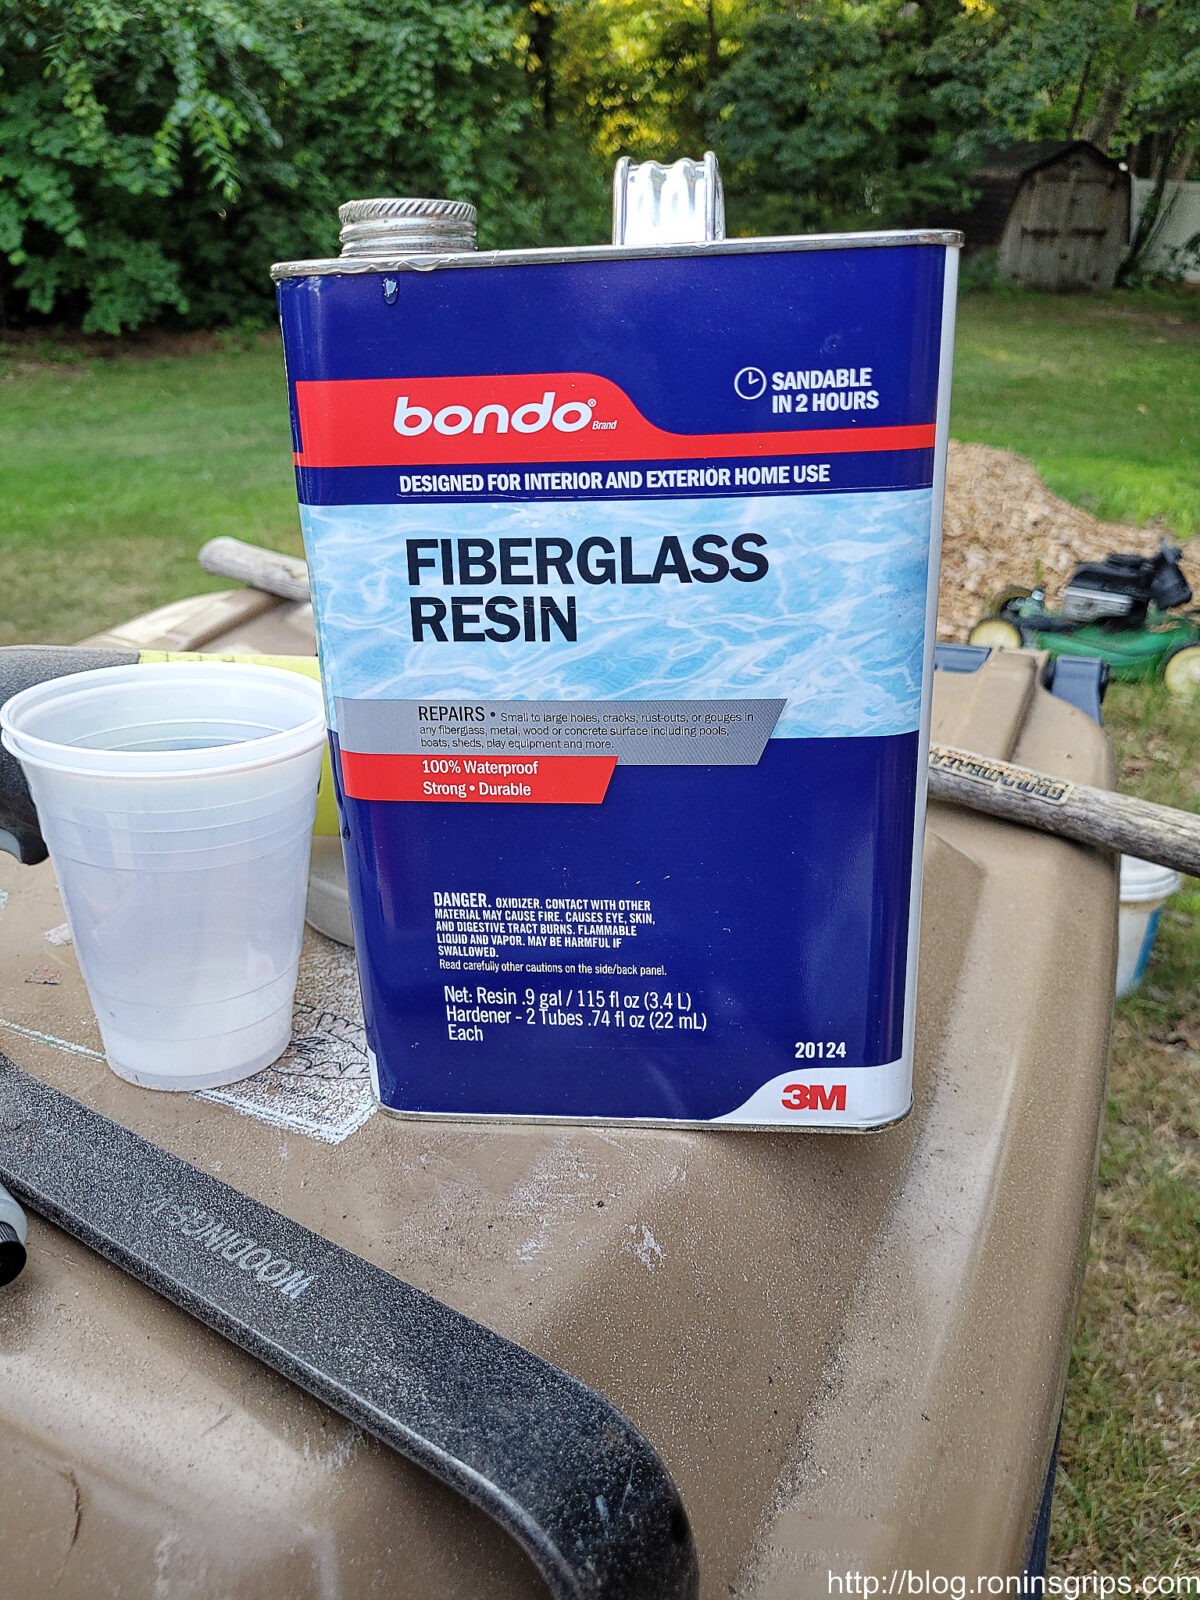
I also stopped by the adhesives section of Home Depot and picked up two 1-gallon jugs of Bondo fiberglass resin and three packages of fiberglass cloth – if I had it to do over, I would have bought a couple more for complete overkill in terms of strength. I knew I had a spare cloth at home so I had four fiberglass cloths total. I also bought a spare package of hardener just in case.
Here’s one of the jugs of resin. Because I work with plastics, I had a large selection of mixing cups and stir sticks. I used 32 oz cups and a half tube of hardener at a time. I would mix them and then pour the contents into a second 32oz cup. This is known as a double pour and reduces the odds of you pouring unmixed contents and making a mess.
Note: The Bondo fiberglass system uses a polyester resin vs. true epoxy. Polyester is cheaper than epoxy but not as strong. I’m pretty sure it will hold up and we’ll see over time. I’m writing this post a week after our reunion and the board looks just fine – no cracks.
Cleaning Up The Board and Preparing It
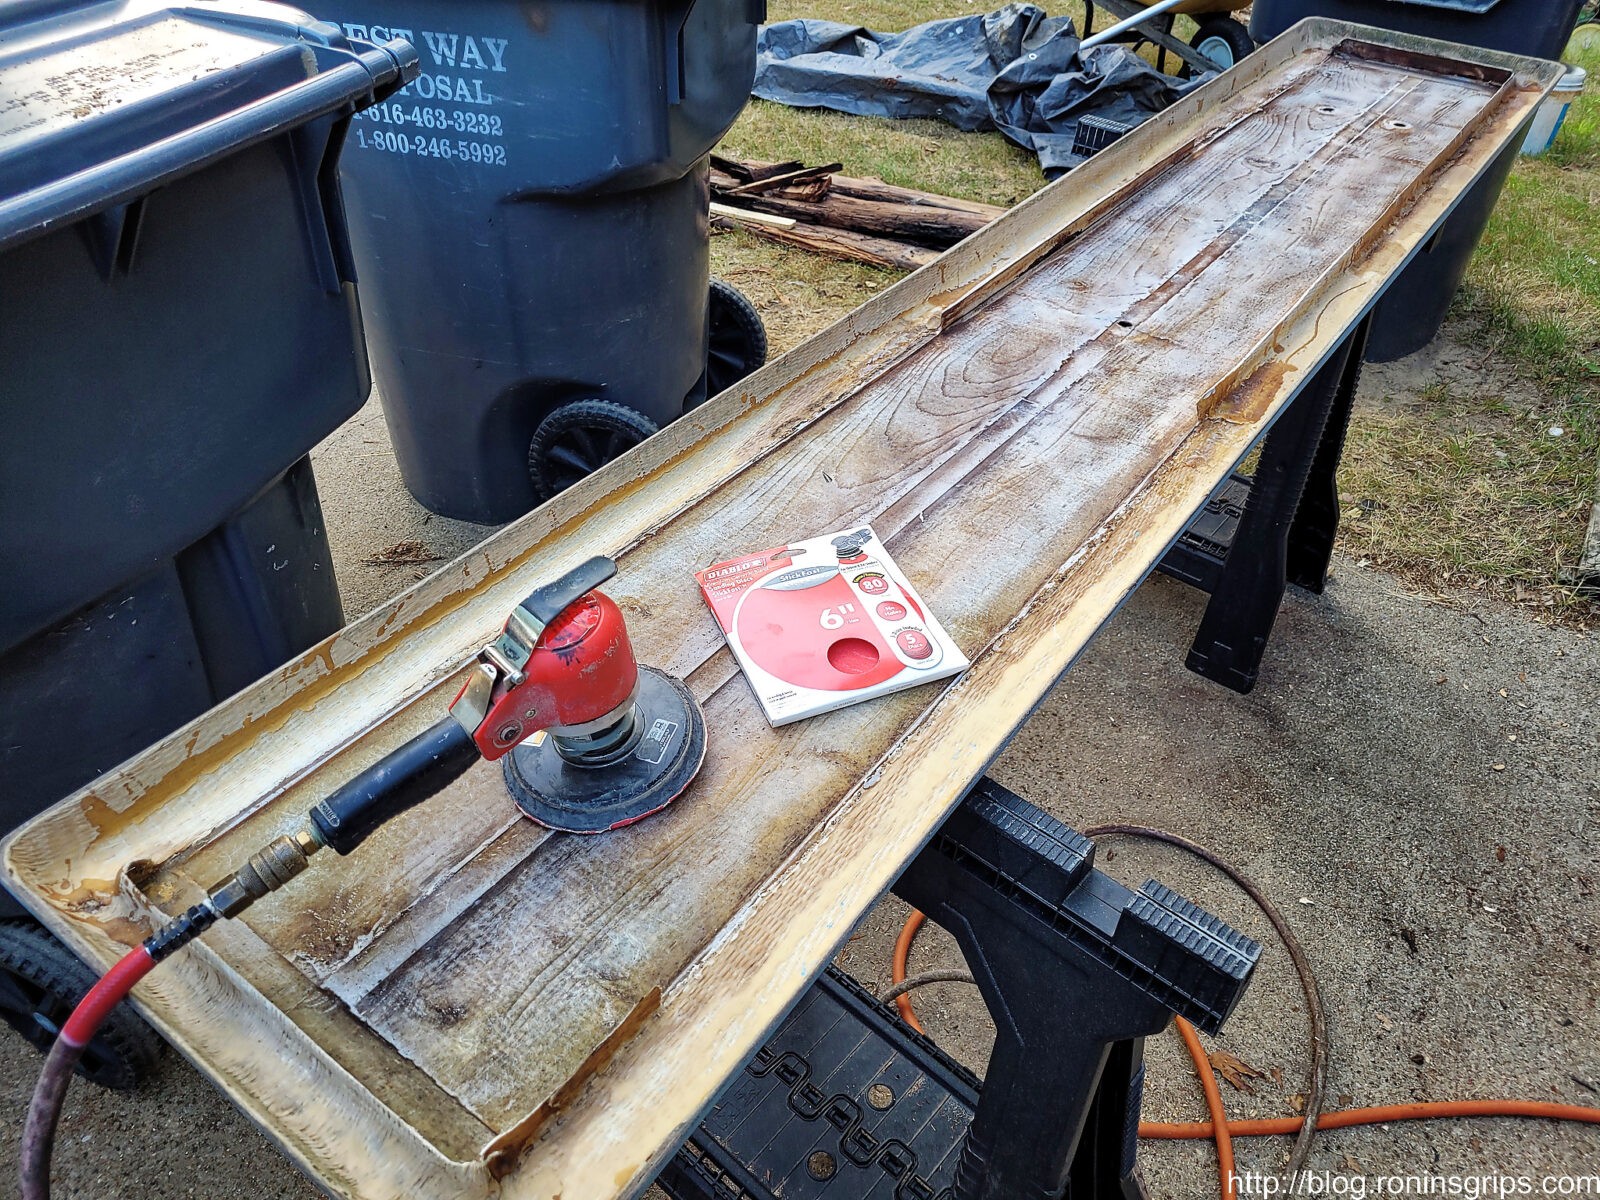
With the wood out, I then removed all of the debris to get a better look at what was going on. I removed almost all of the old fiberglass that was holding the old board – I now know I could have removed all of it.
Here I am scuffing up everything really good with 80 grit sand paper in my orbital IR 6″ sander. If you want the fiberglass to bind really well, the surface must be abraded. Just remember, if the surface is smooth and shiny, your adhesion is going to be bad. A very abraded clean surface is ideal.
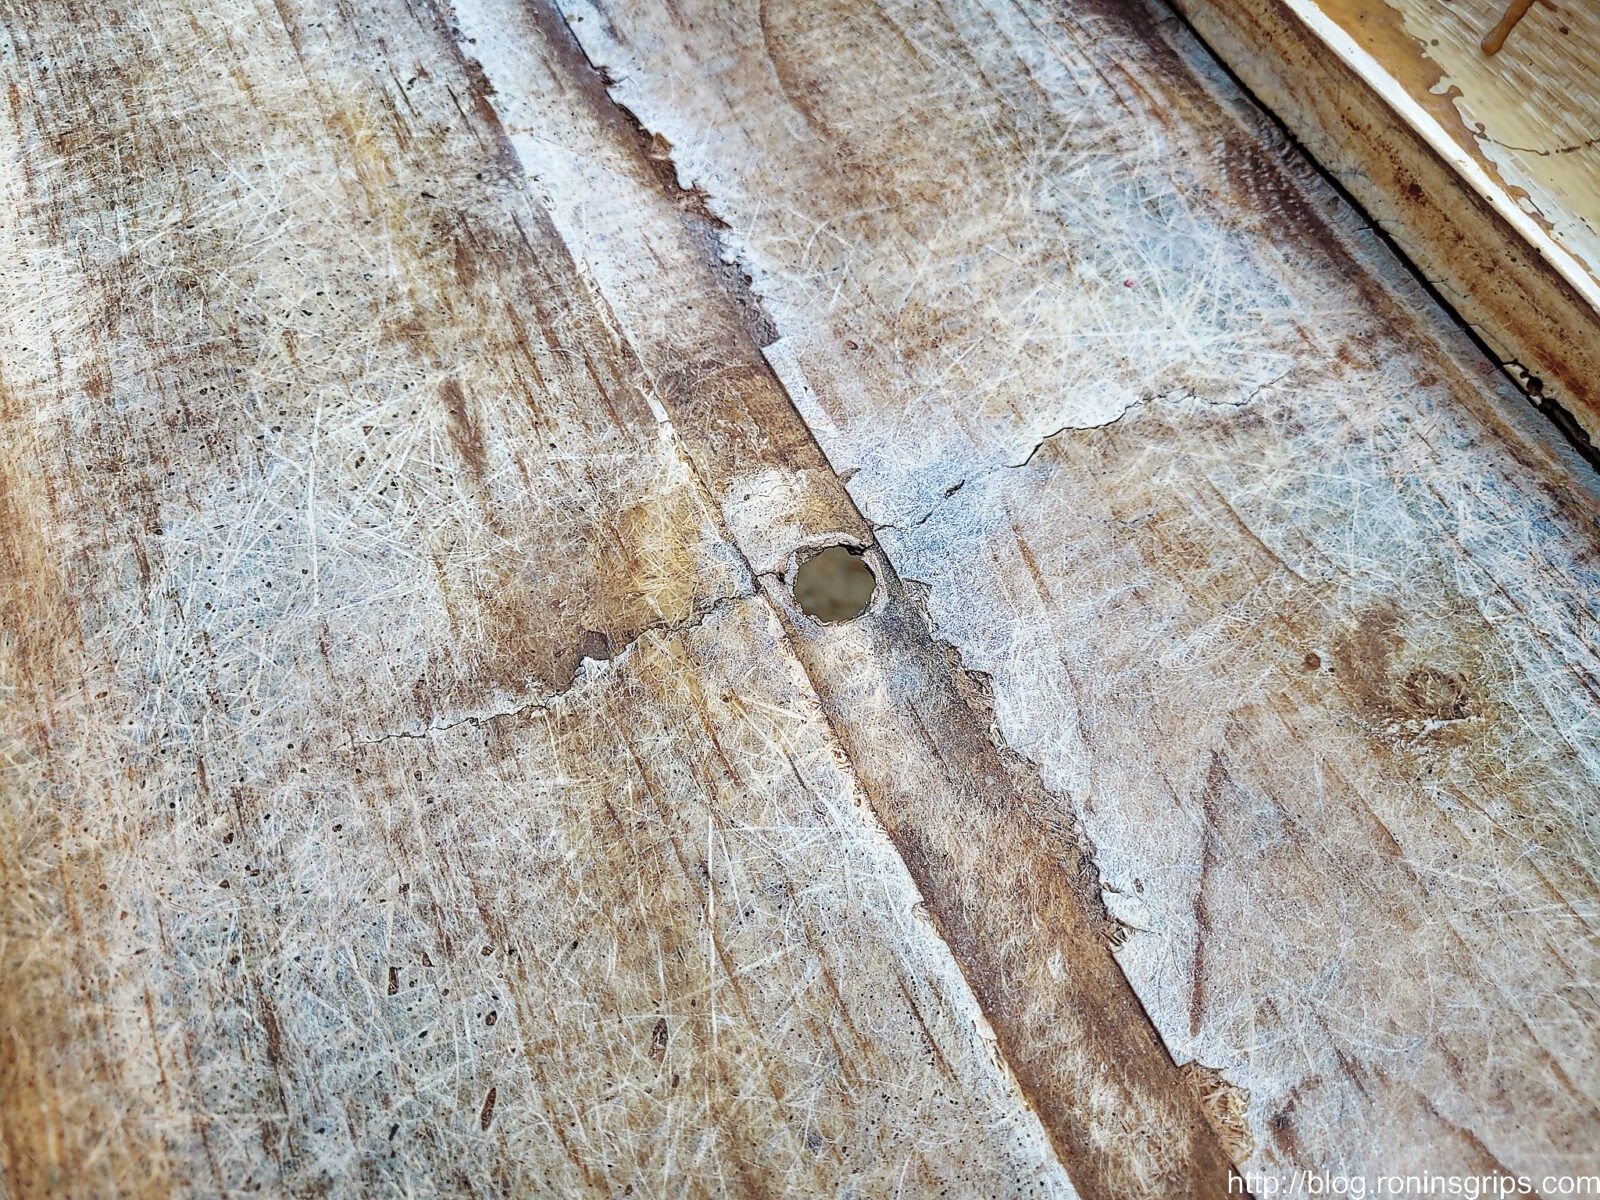
Here’s a better view of the center front hole and the big crack that went completely through the fiberglass top. Note, after sanding, cleaning and degreasing, I closed all holes with black Gorilla tape before I started apply resin. Once again, I would remove all the old fiberglass that surrounded the board. Those vertical pieces you see would be gone.
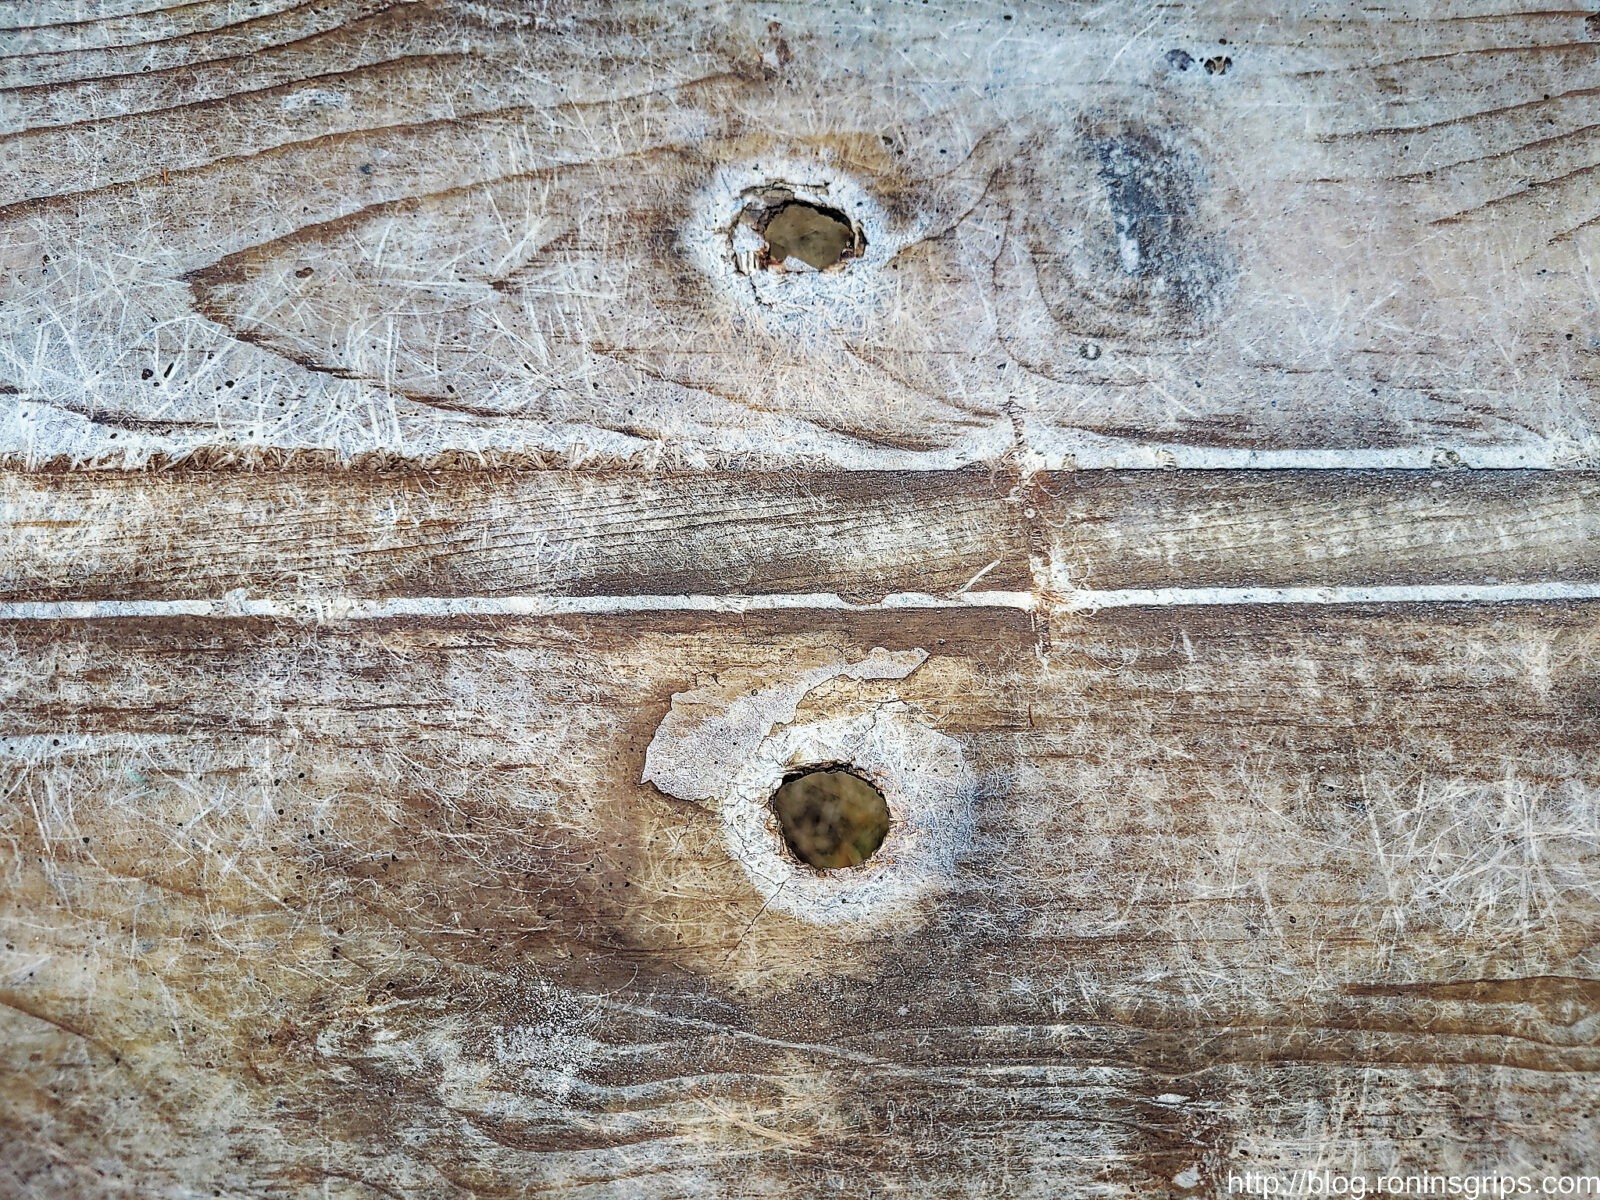
Here’s a close up of the back two holes – they are worn open and stress cracking around them.
One more view of the big crack at the center. I sanded the heck out of everything with 80 grit, sprayed down the inside with brake cleaner thoroughly to degrease it and then stuck big pieces of gorilla tape over each hole. The diving board surface was ready.
Preparing The Wood
The wood was completely dry – let me stress that. If you seal in wet wood, it will rot so make sure your wood is dry.
One thing I noticed with the rotted wood that I pulled out was that they had rounded over all of the corners/edges of the wood to not stress the fiberglass. That made a lot of sense to me. I put a 3/8″ carbide tipped round over bit in my trim router and rounded over the new board too and then sanded it with 80 grit sandpaper to prepare the surface for maximum adhesion.
The 2x12x8 boards were longer than the original so I trimmed them down. I then used a round over bit on both and sanded them. My plan was to embed one in the fiberglass but still have a support/buddy board underneath. Note, I did not drill any holes. My plan was to center the new pine board insert and drill the holes later.
I did test fit everything before I went to the next step. You don’t want to mix up resin and get part way in only to find our boards are the wrong length.
Gluing The Board In Place
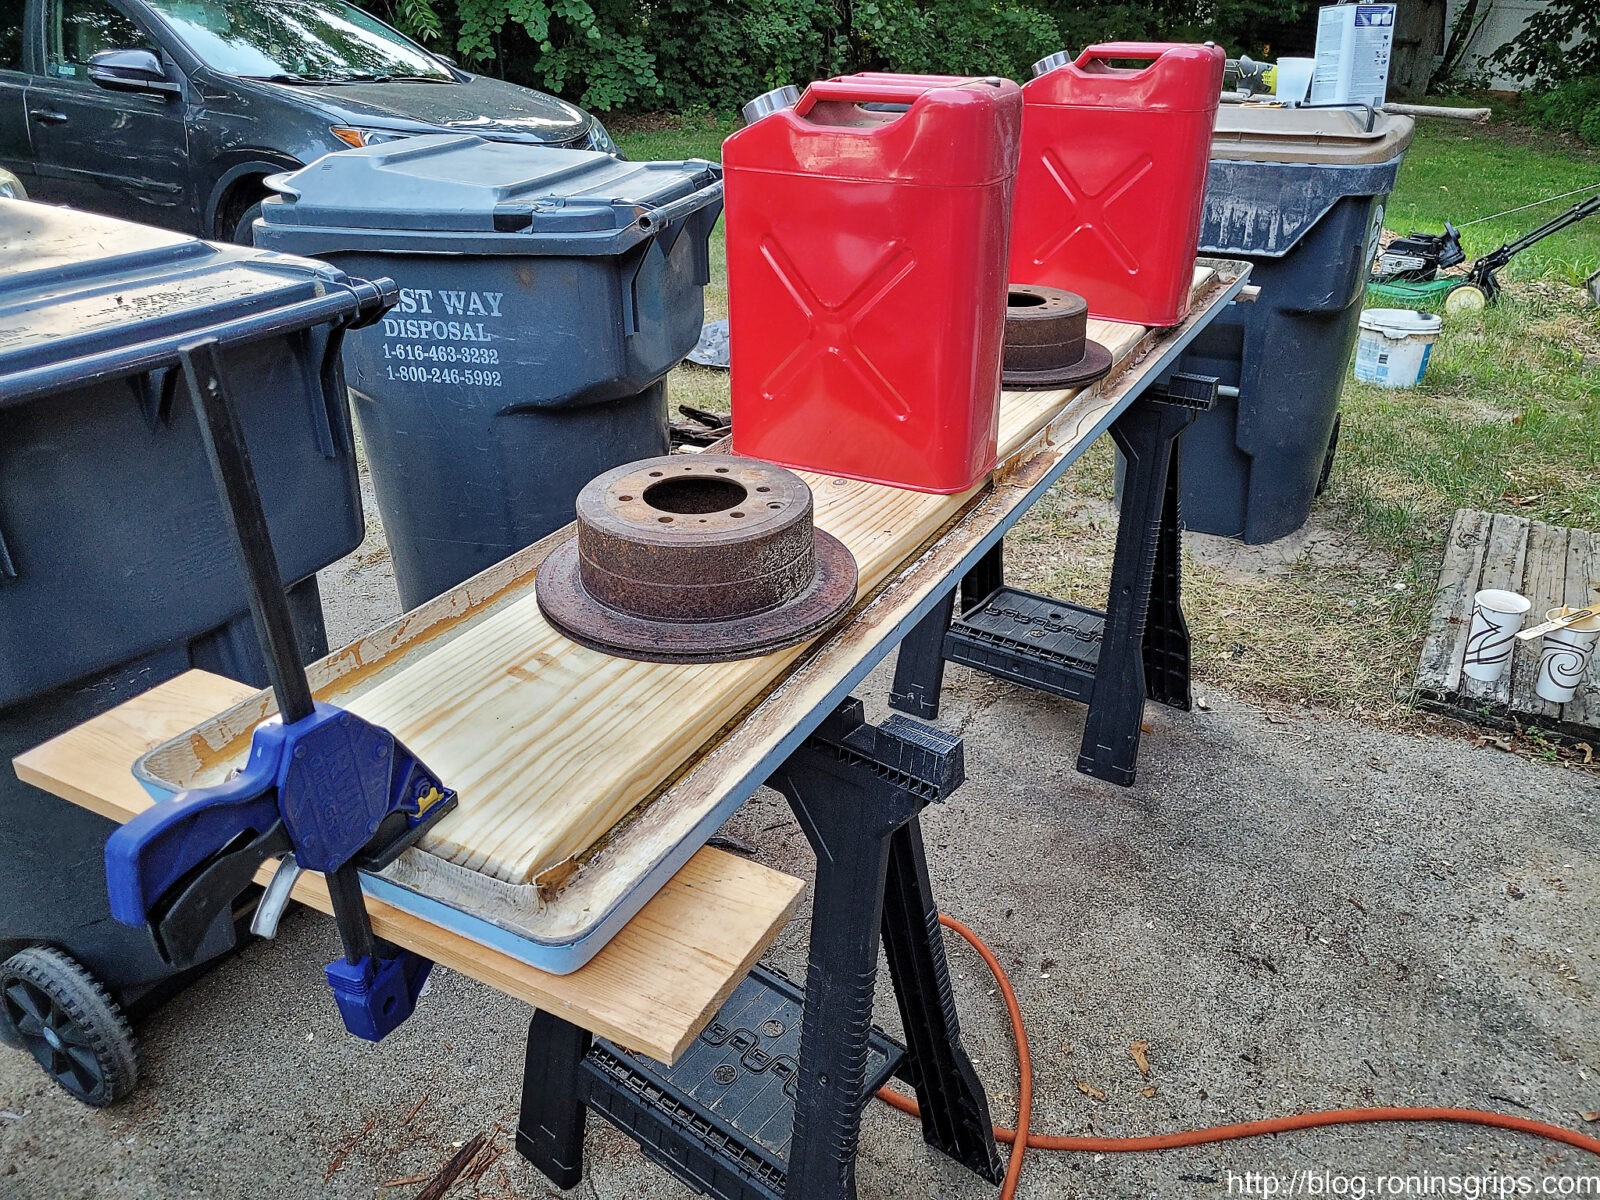
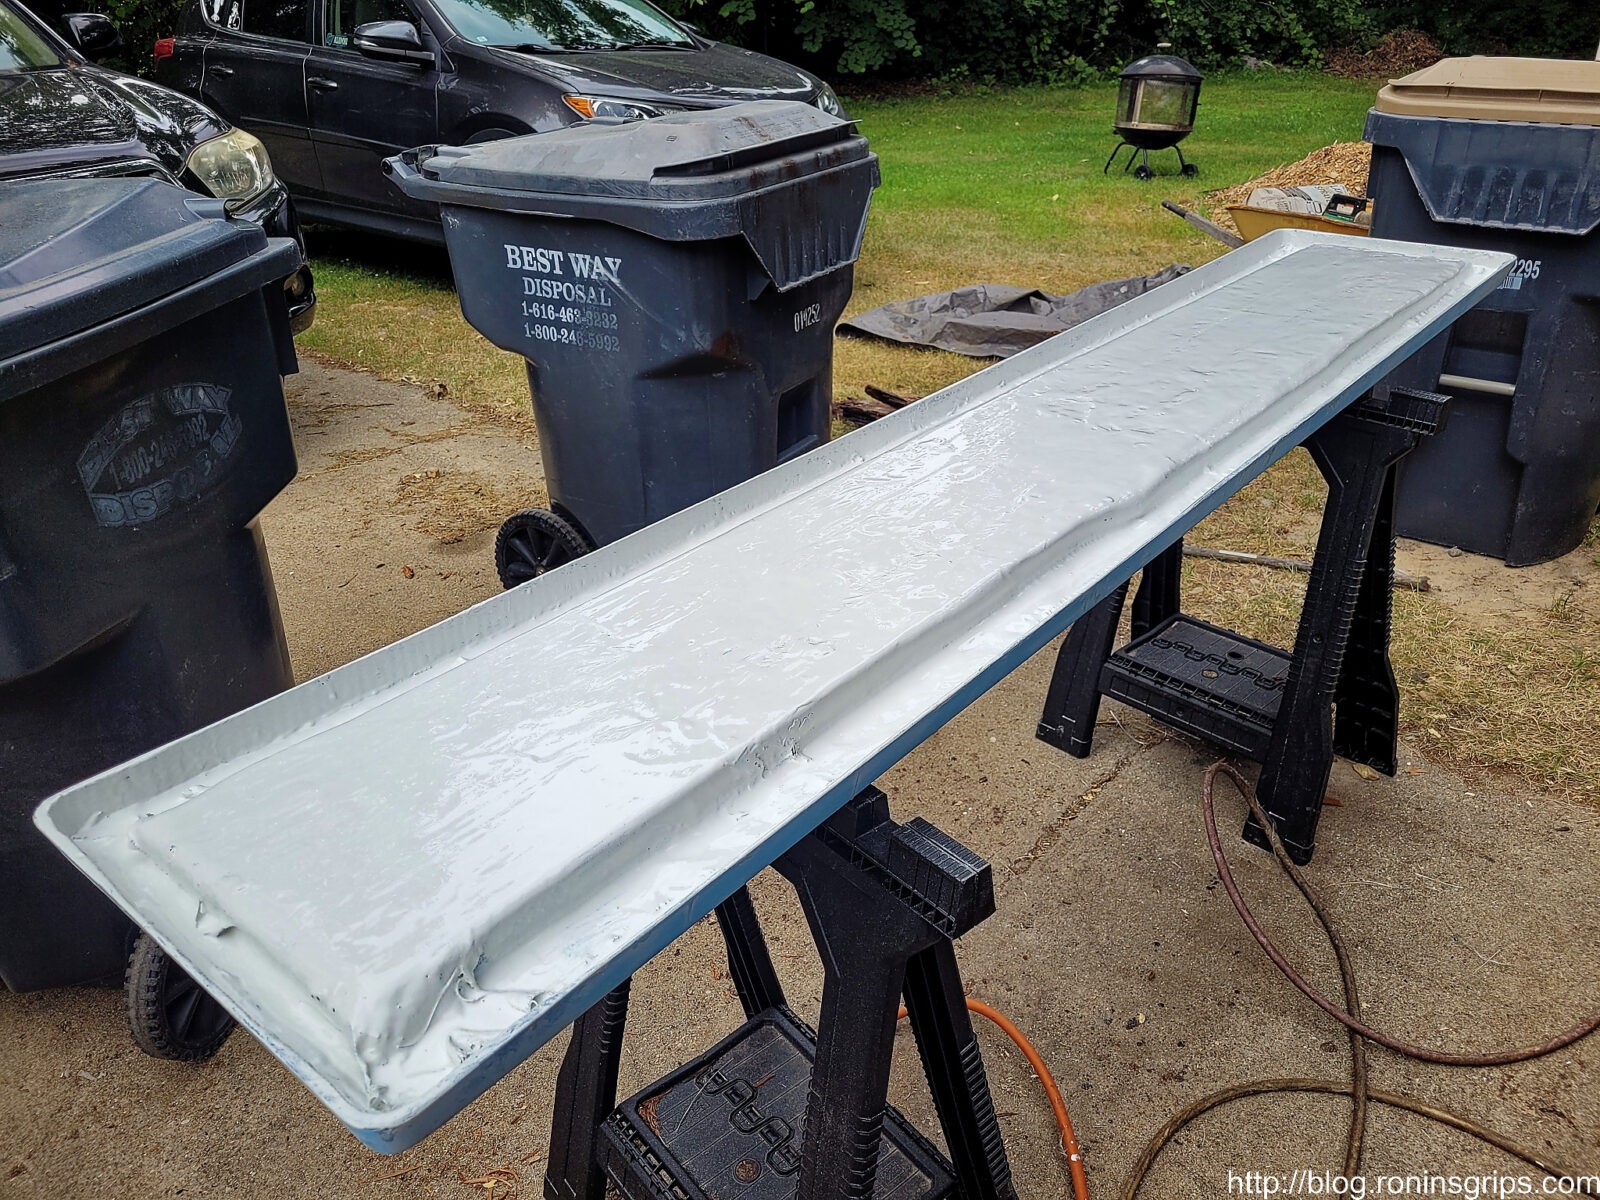
Okay, to close the bottom back up, I did it in steps. For the first one, I mixed up 32oz of resin, liberally brushed it in the bottom of the board really thick. I then clamped the ends and put weights in the middle to keep everything pushed together. You need to have this planned out because once the resin sets, it’s game over. I had the clamps and everything ready to go.
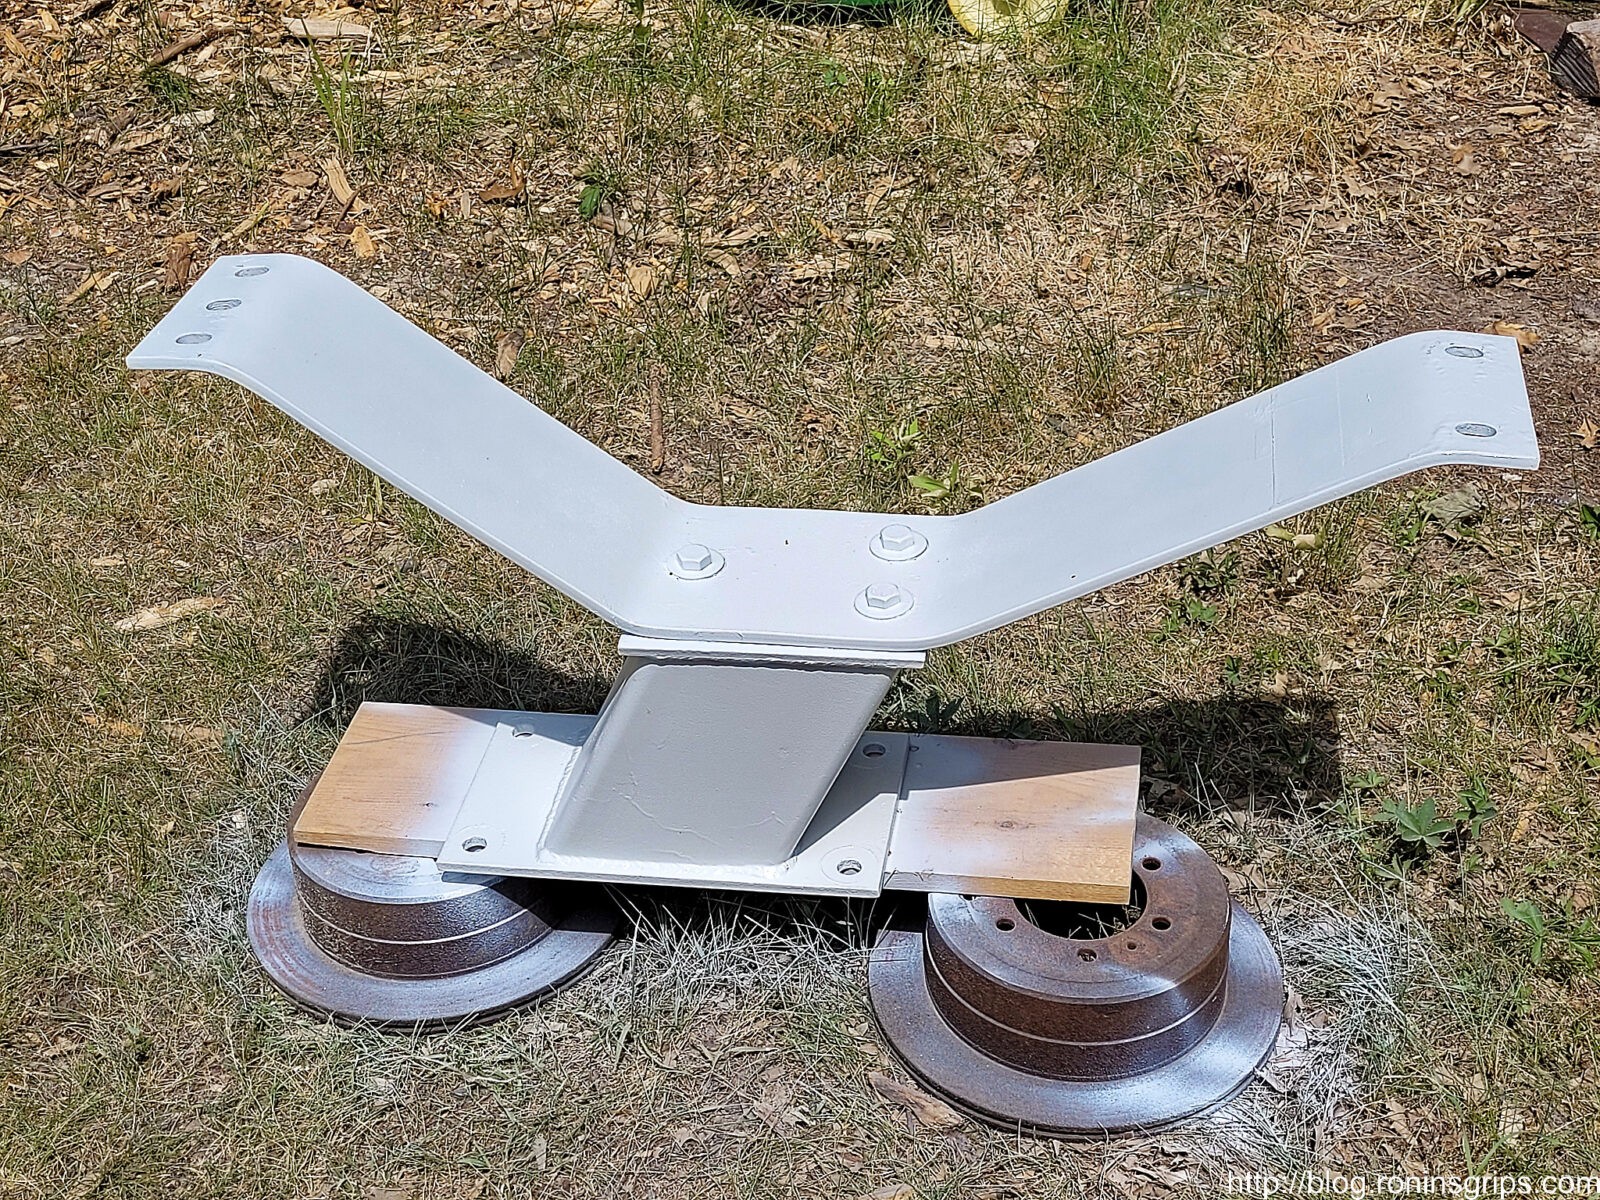
This falls under the “make do with what you have” category. The blue clamps are really strong and are on both ends. In the middle we have two brake calipers from a 96 Landcruiser and two full 5-gallon cans of gas. The more pressure pushing the parts together and the adhesive into as many spaces as possible is what you want.
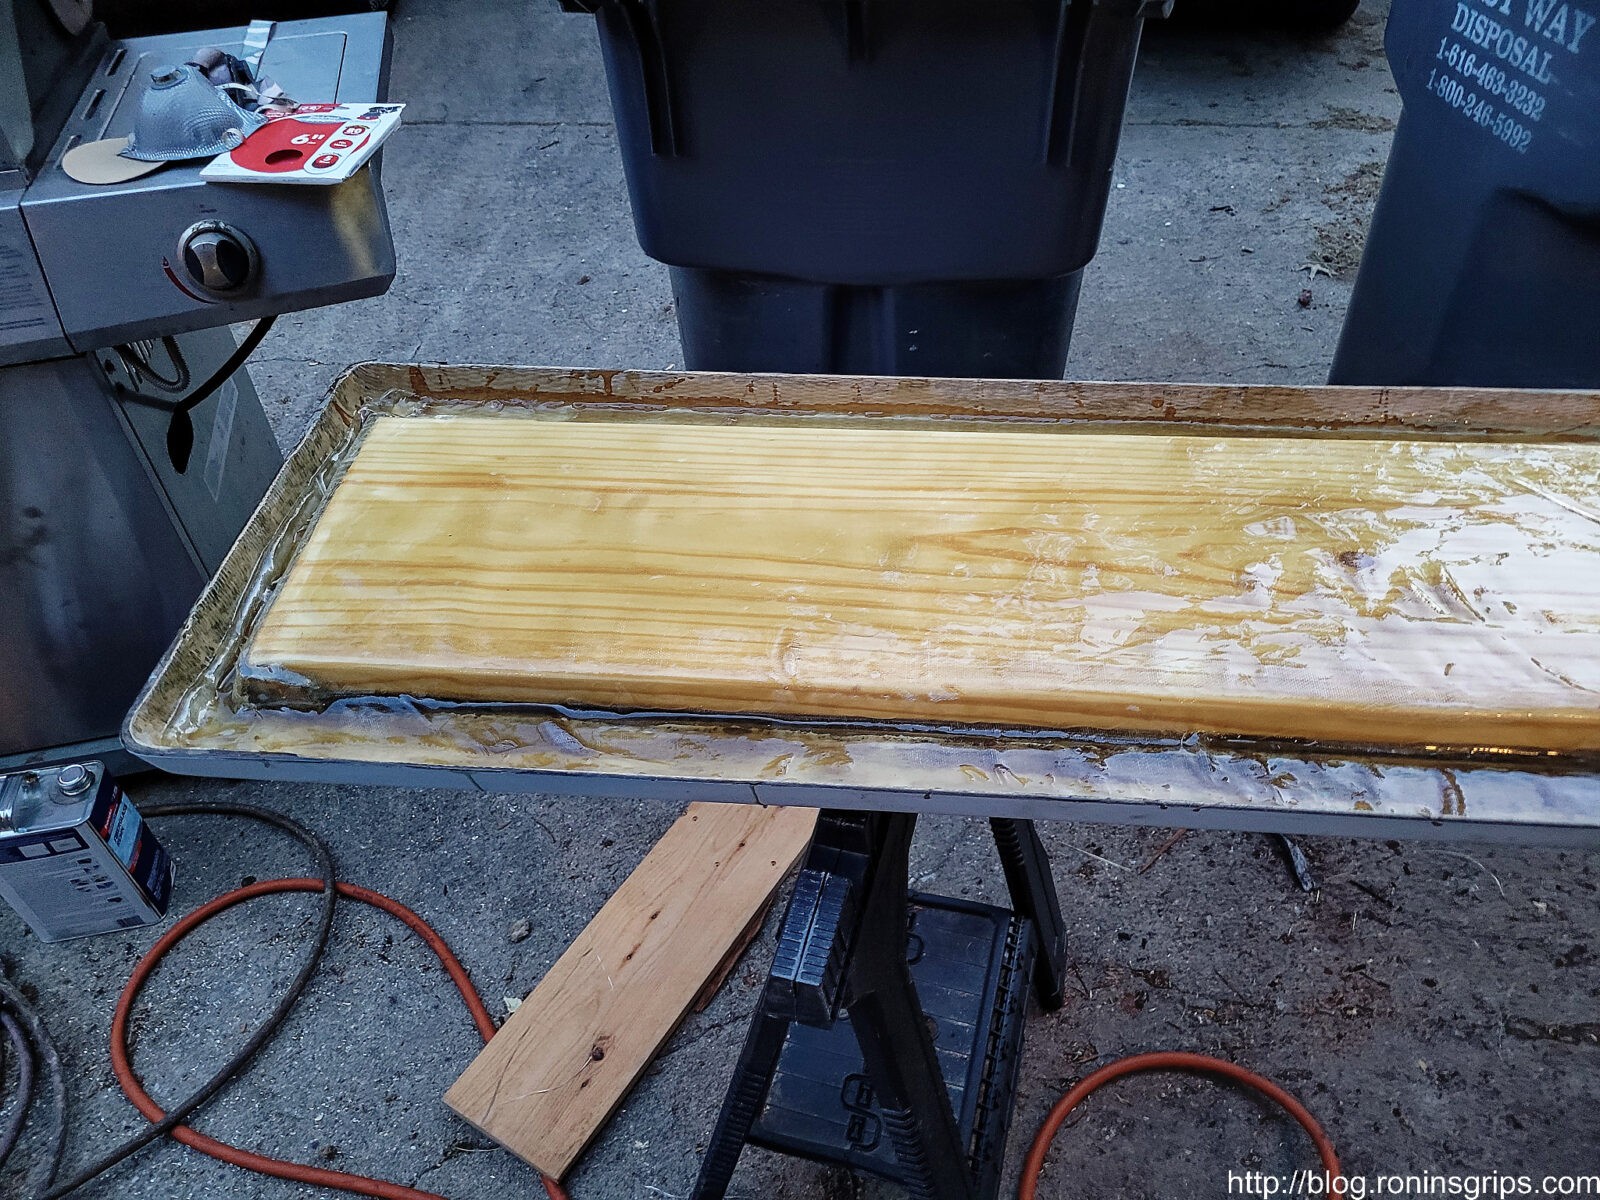
The next step was to put down the first layer of fiberglass cloth. I laid the cloth on top of the board and trimmed it to fit inside and just up the sides. I then mixed up a 32 oz container [don’t forget to do a double pour and use the right amount of hardener] and rapidly brushed it on very thick to the front area I was working on, applied the cloth and then another coat of Bondo on top. If you’ve not done fiberglass before, start with one section and learn. You want to get the cloth in place and wetted down with the liquid before it all sets. Also, have a bunch of nitrile gloves near by or you will get this stuff all over your hands no matter how hard you try. I wear gloves and have at it. I use my hands to rub the liquid into the cloth.
I did the front, the back and then the middle. If you need to stop, just sand the surface, blow it off and continue.
This is about the first half of the board. I let it cure and then sanded it before I applied more.
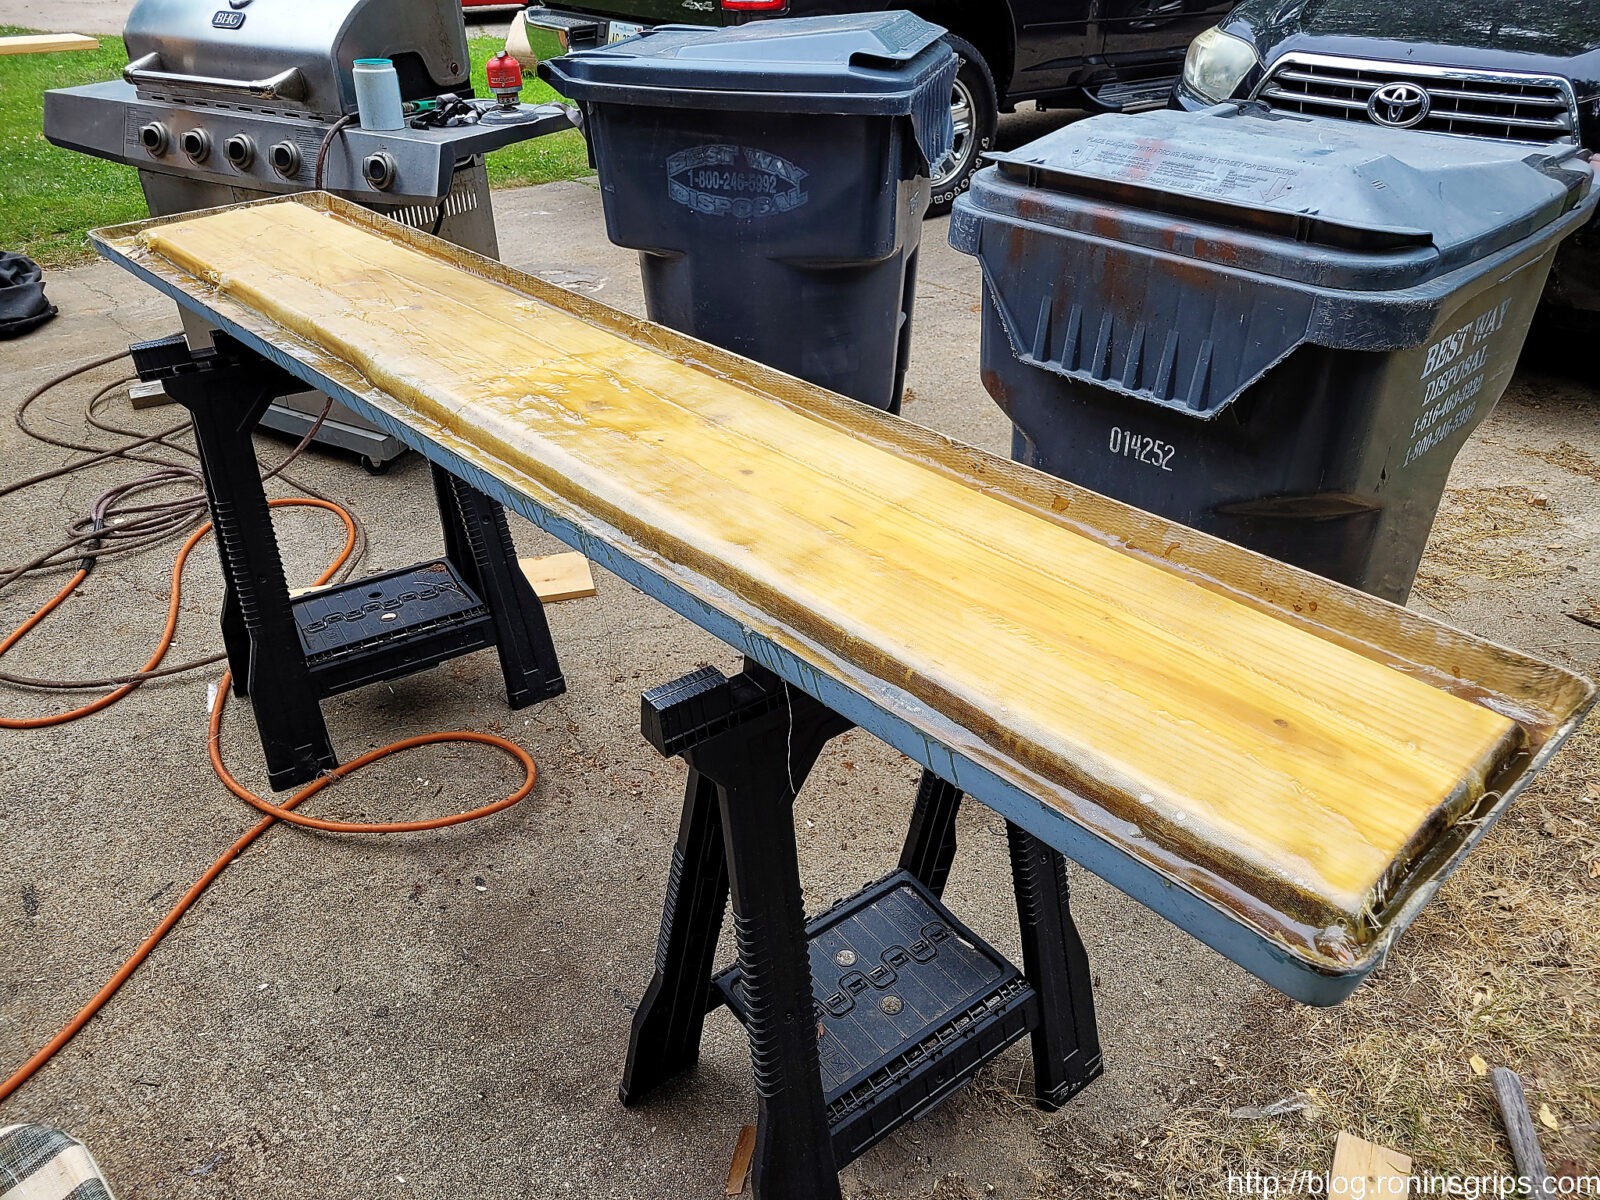
So I did the front, the back, then the middle. I used the full length of the cloths and overlapped at the middle. At this point, it was rock hard and I really wished I had just cut out all of the old fiberglass walls that surrounded the old wood. I thought it might make it stronger but then realized this wasn’t the case. I sanded again and cut my fourth and last cloth down the middle. I applied one length on the left and one on the right to strengthen those areas that still had the remnant walls that I should have removed.
Here it is with all of the layers applied. My next move was to sand and then paint it.
Drilled The Holes
Before painting, I flipped the board over, removed the Gorilla tape. The brownish color of the Bondo clearly showed me the old hole positions and drilled two 1/2″ holes in the rear and one in the front using the clearly visible filled in holes. I carefully pushed the support board under, clamped it in place and drilled it as well.
Painting The Board
To paint the board whatever color you want, use boat paint – what they call the top coat or deck paint. Years and years ago, I painted our board because it looked really tough and found out you had to add non slip grit to the paint or people would slide off. Yeah, there’s a story there about a teenager falling off so make sure you get the non-slip additive for whatever paint you buy.
I used Rust-Oleum’s Topside White for the board and a Ocean Blue paint made by Pettit for the trim. The only reason I went with the Pettit paint was that the local boat store carried it and Lowes didn’t have the blue colored Topside paint.
So, when you are applying this, do it in a well ventilated area, make sure it isn’t going to rain if you are outside (I was in my driveway) and follow the guidance carefully. One thin coat a day. If you try and do a thick coat or too many coats, the paint will not cure to a hard finish and stay in an odd tacky/smudgy state. I had this happen to me years ago because I’m not patient but I sure hard to learn patience with some of the specialty paints.
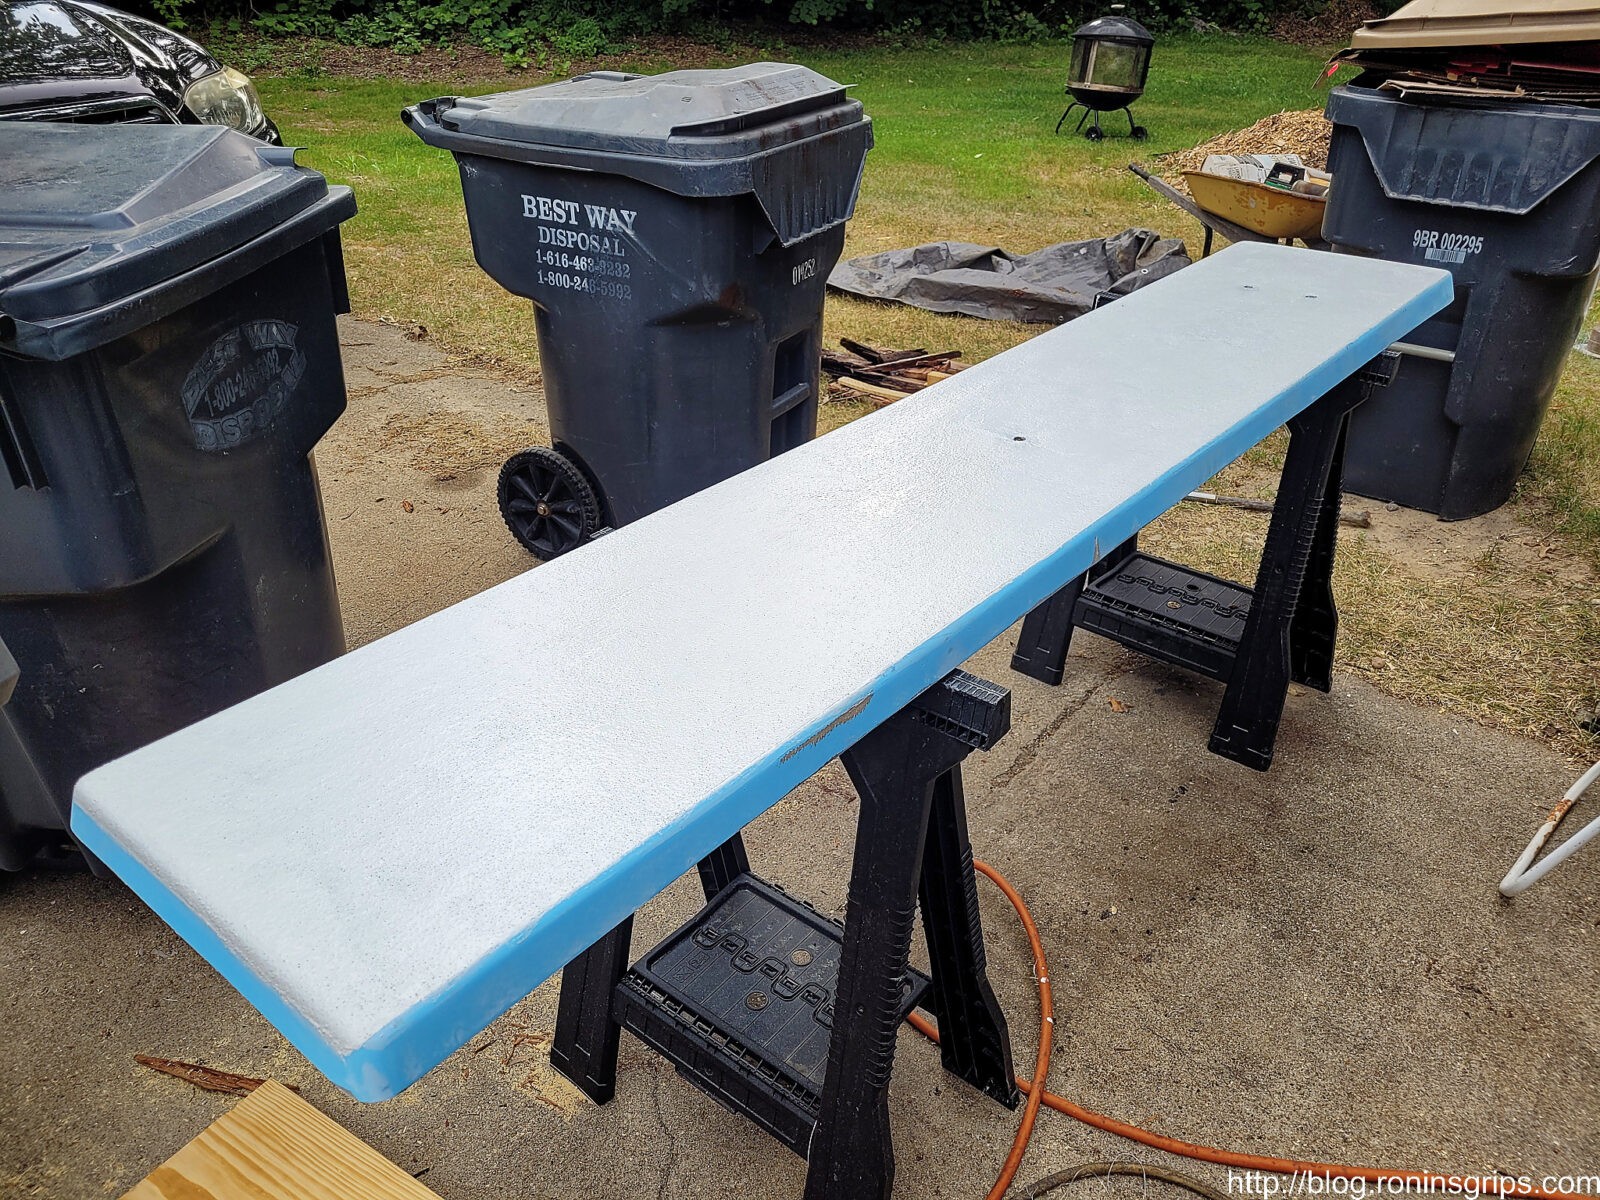
I did two coats of regular white Topside paint on the bottom to protect the fiberglass from UV rays (they really mess up plastics, epoxies and what not unless they are designed for them) and I applied two coats of the white with the grit mixed in on the top.
That’s two coats of white TopSide Paint on the bottom. I did NOT use the non-slip there.
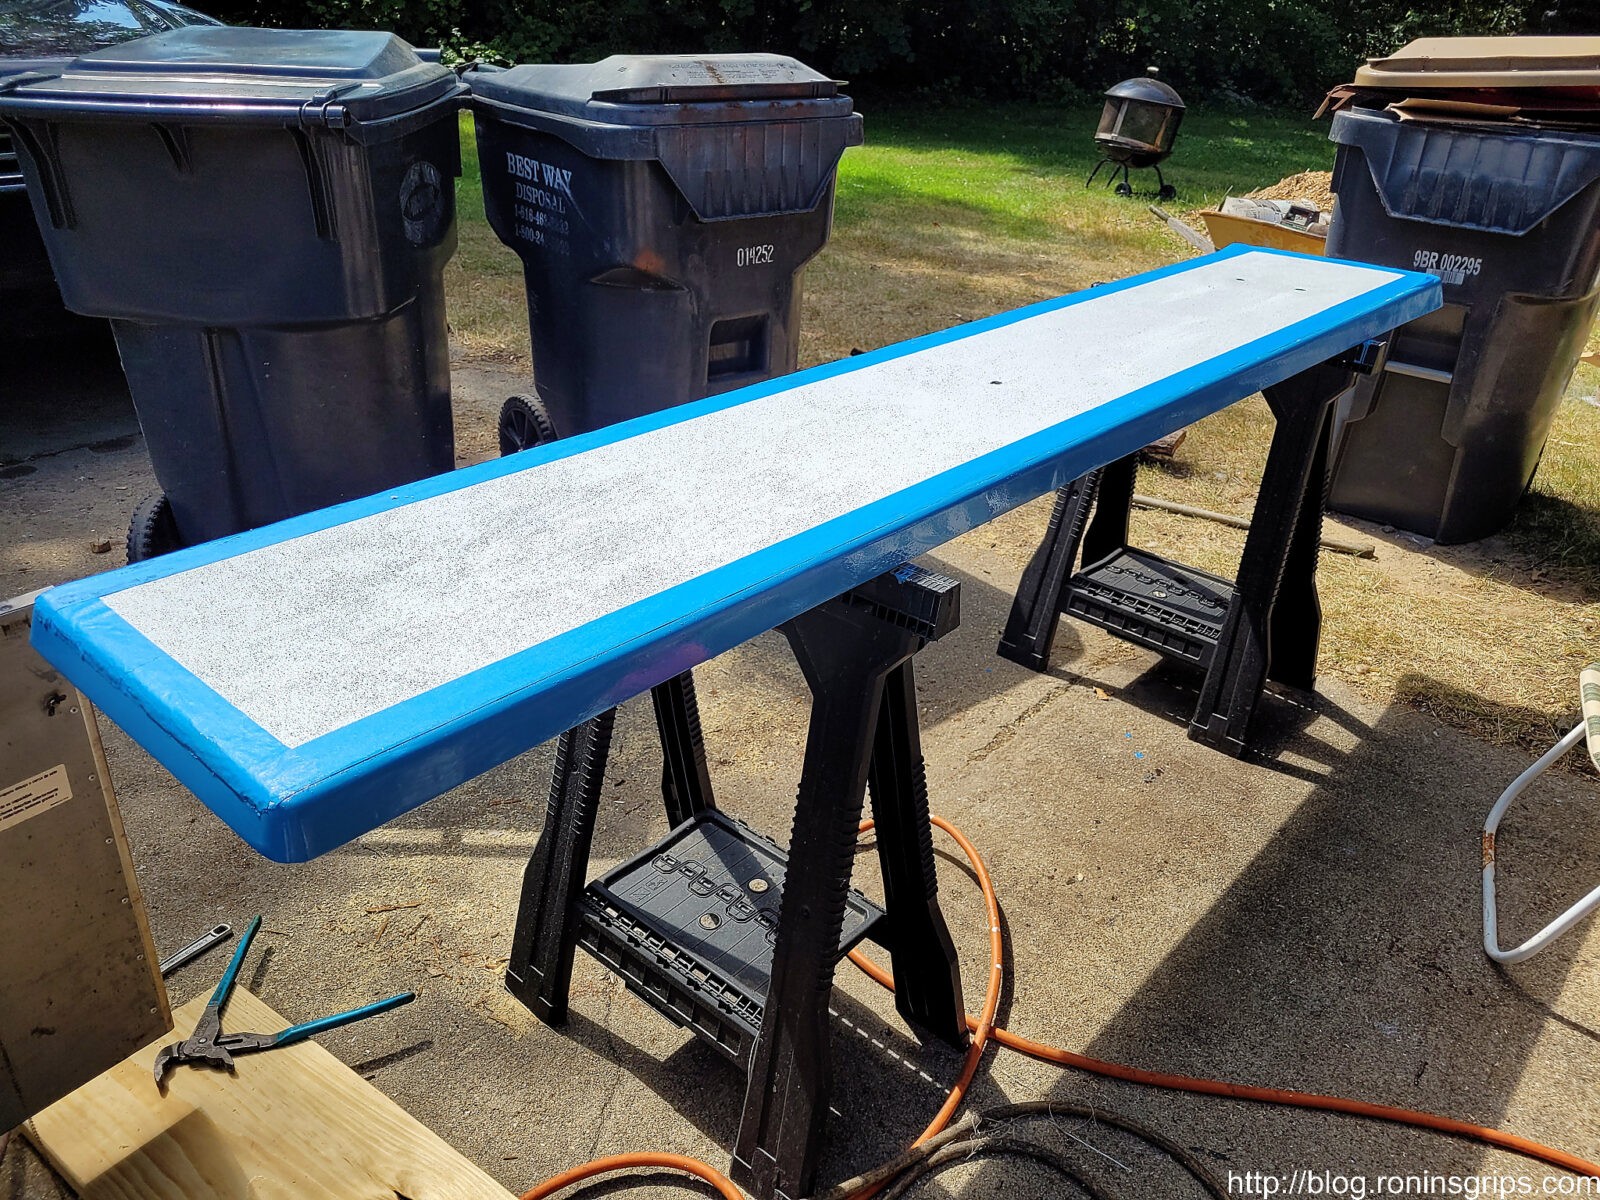
I painted the top with the non-slip additive and didn’t worry about the old blue colored side paint.
It was hot out and even so, I let the top cure for a day before I applied blue painter’s tape to protect the top while I painted the side trim blue.
Painting The Pedestal and Support Board
While waiting for coats of paint to cure on the board, we removed the pedestal and spring unit, wire brushed it, sprayed it down with brake cleaner and sprayed on three coats of white Rustoleum spray paint.
We cleaned it and applied three coats of gloss white Rustoleum spray paint.
We painted the support board too. All I had was white spray Rustoleum at that point so that’s what I used.
Wrapping Up
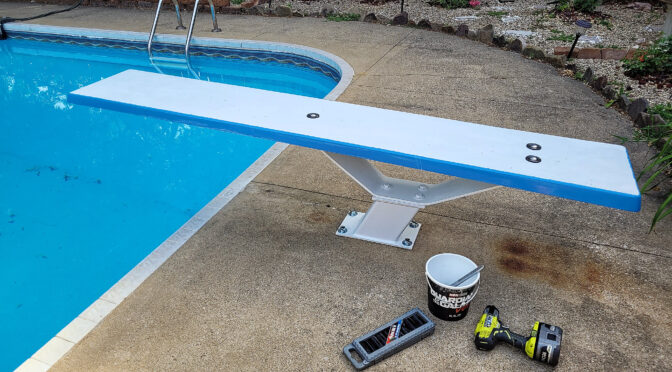
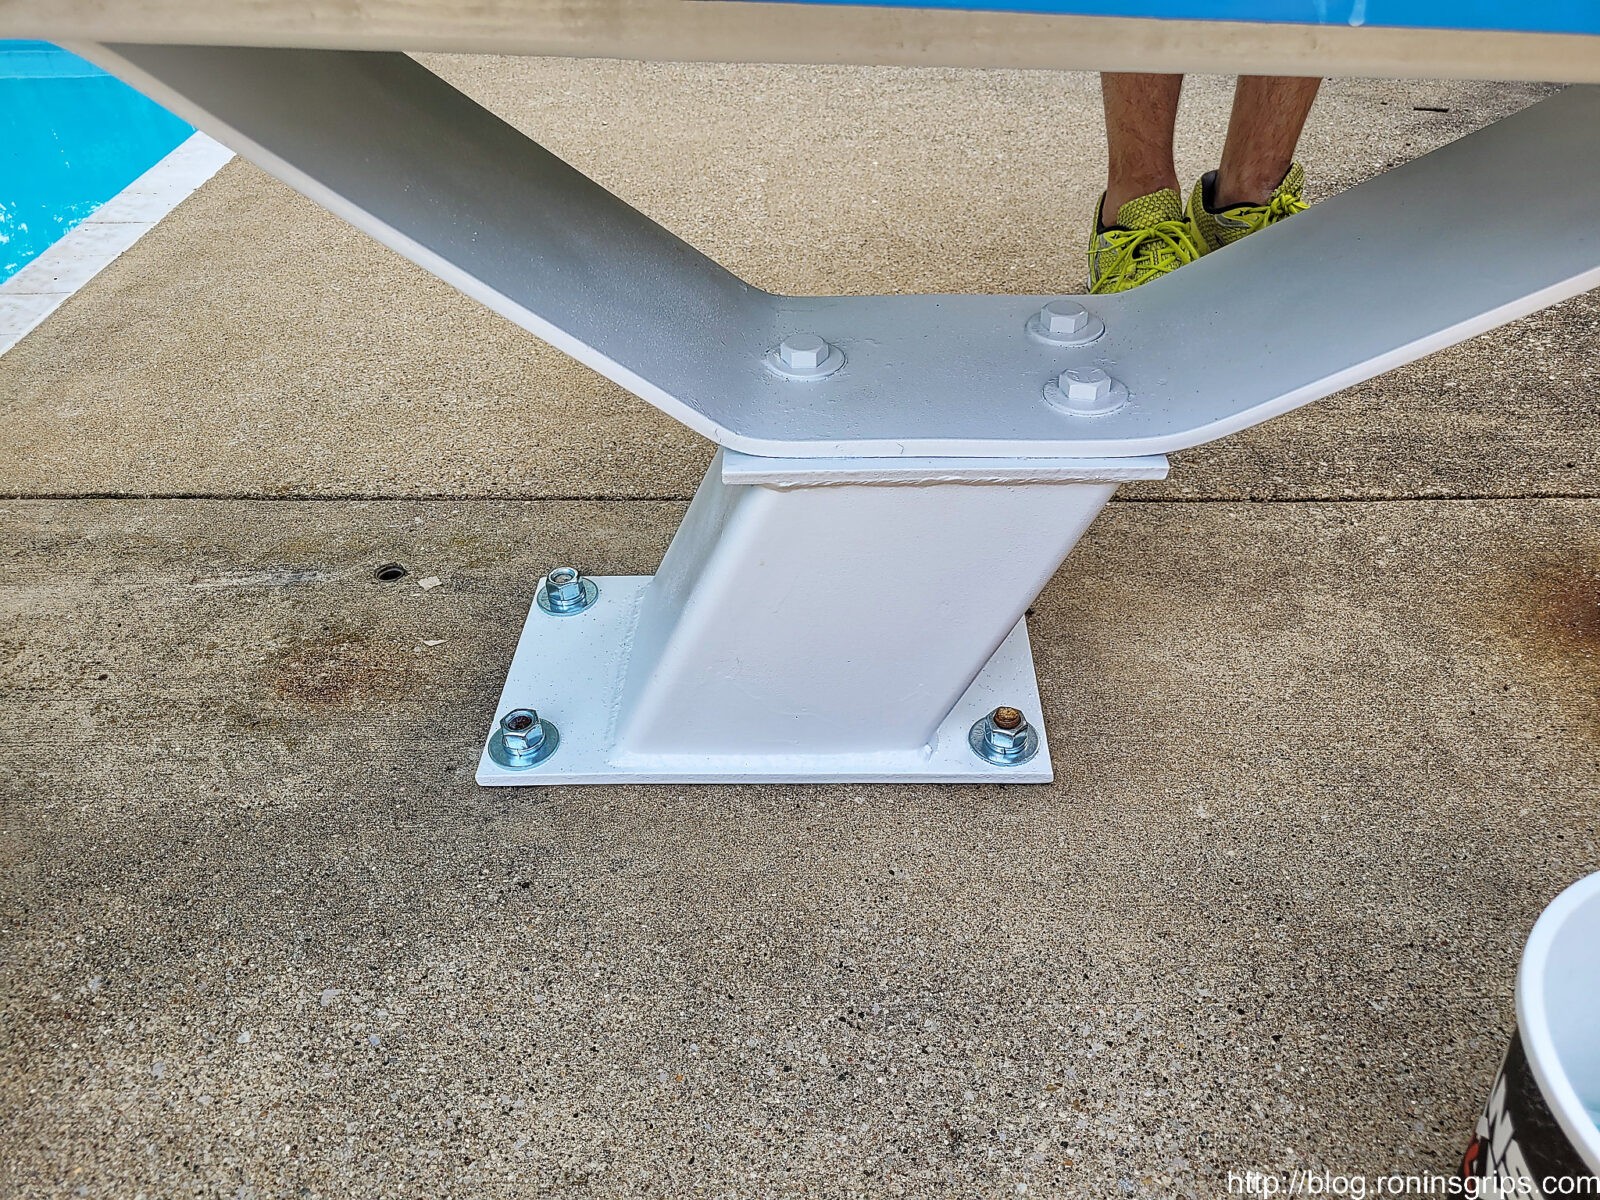
We reinstalled the pedestal and spring unit first. I bought new stainless nuts and washers so it looked better.
We installed the pedestal and spring assembly first before the diving board. Have a solid surface to put the support board and diving board really helped. They are too heavy to move all at once … at least for me. My son helped – those are his feet 🙂
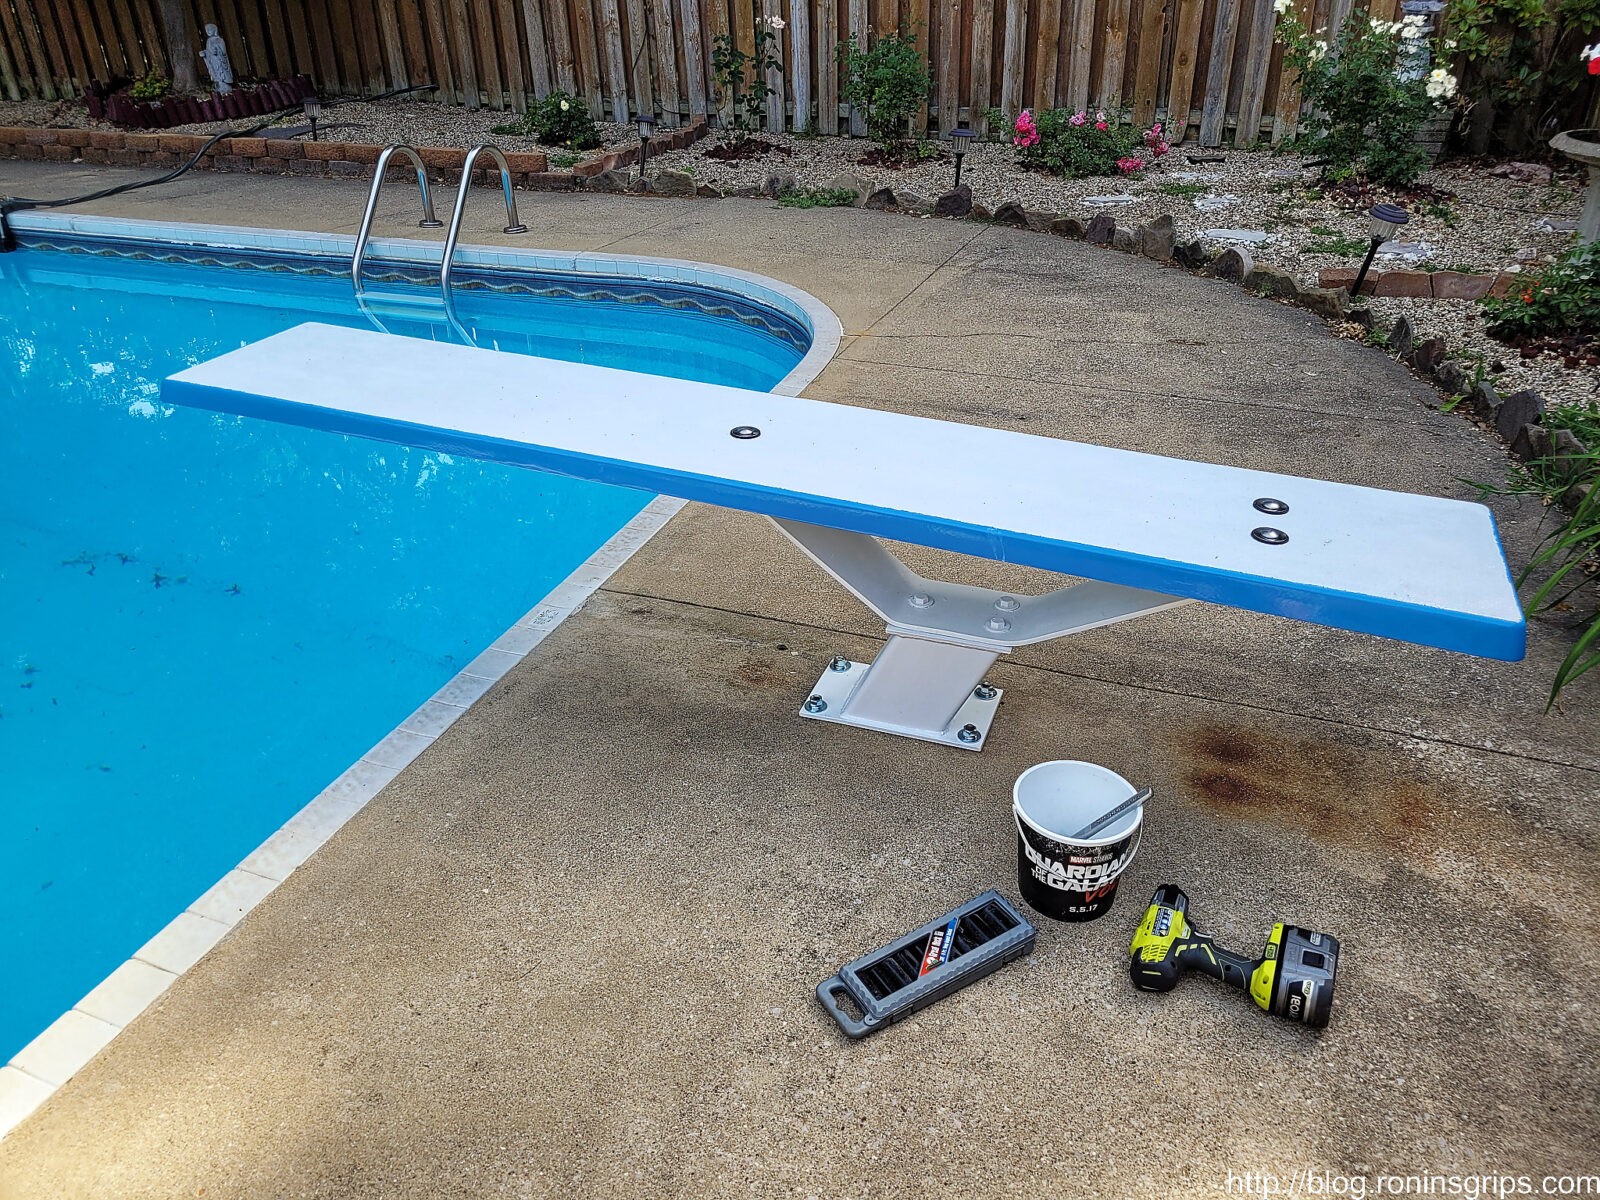
The board is held in place by stainless hardware” 6″ carriage bolts, 2″ fender washers, rubber gasket washers under the fenders on the top. On the bottom are regular washers , lock washers and nuts. Your hardware will depend on your board’s configuration and how thick it is. We salvaged the carriage bolts and I wire brushed the tops so they looked better but I bought everything else at Ace Hardware.
Another view.
In Closing
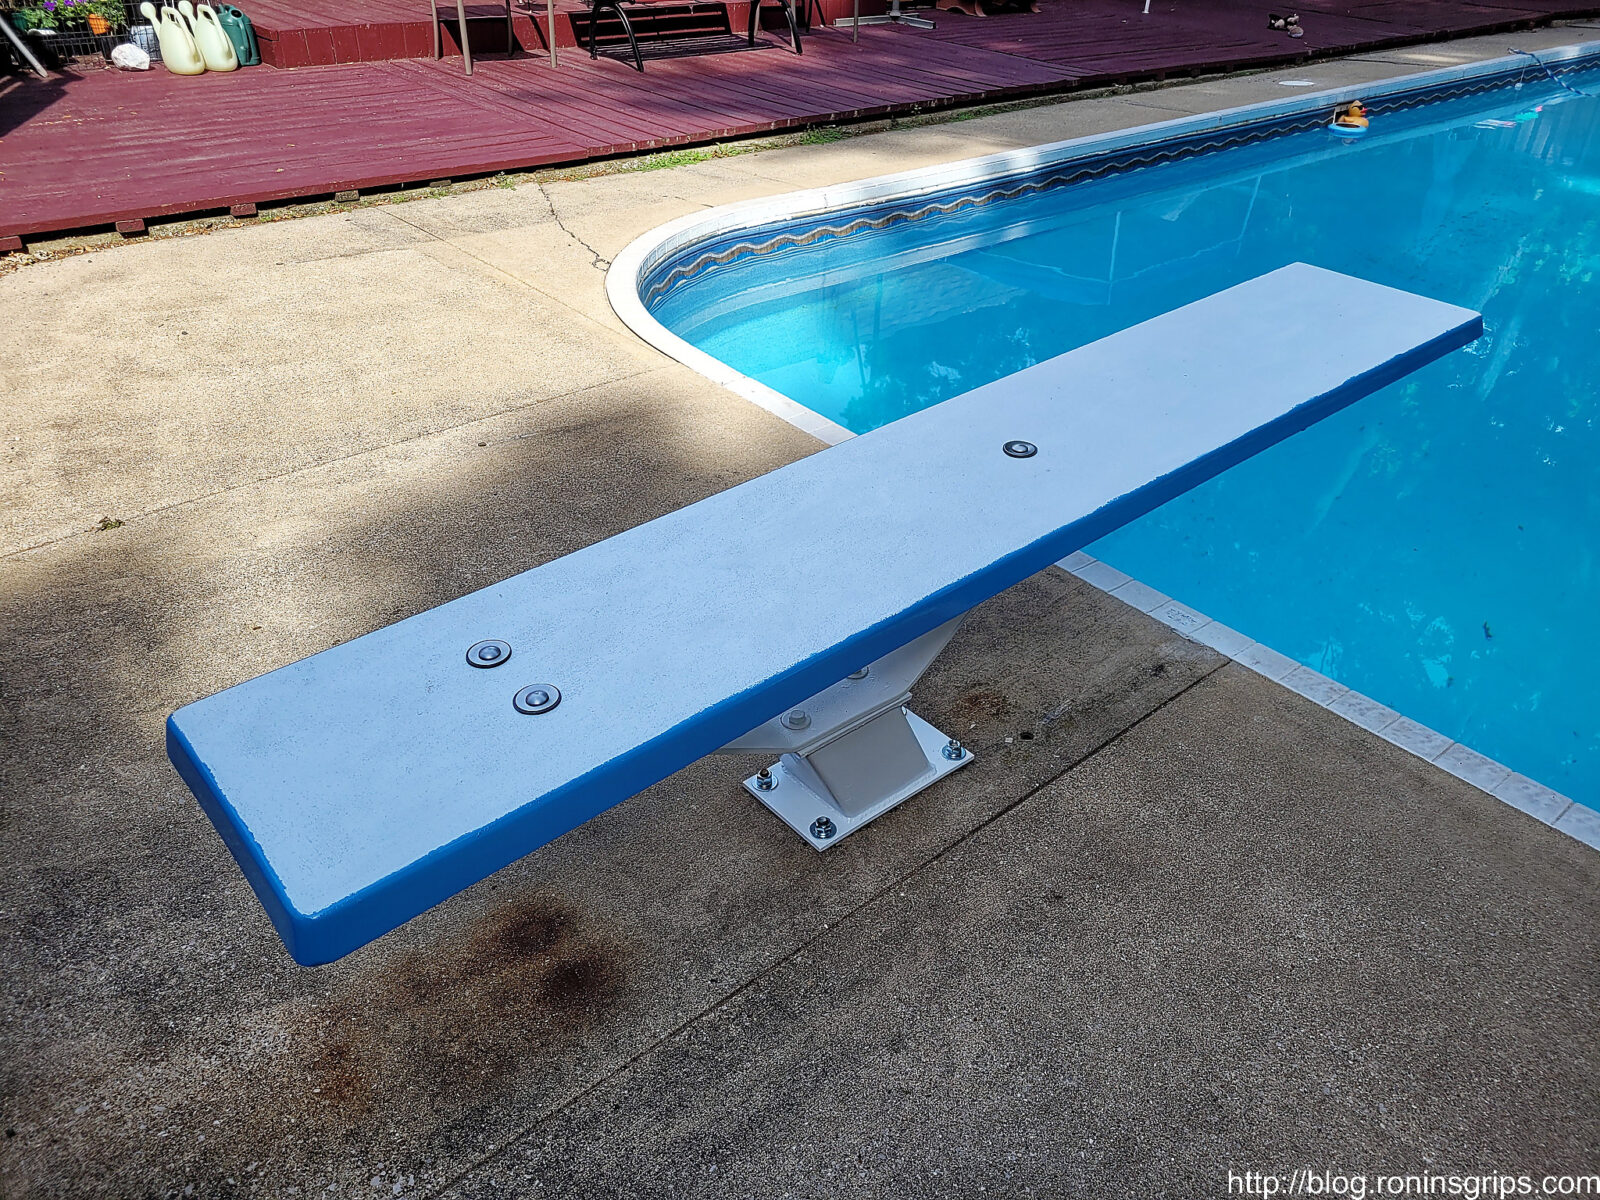
InTheSwim really damaged their reputation with me. On the other hand, this was done in a matter of days, cost us about $300 vs $800 (for the wood boards, hardware & paint) and all the kids at the reunion had a blast. So, problem solved — it worked out to our advantage actually. I’m curious to see how it holds up over time and I have high hopes given how it turned out and performed at the reunion.
One last parting shot.
If you have a diving board, I’d bet you could do the same and save time and money as well. I hope this gives you some food for thought.
7/23/2024 Update: where a number of kids used the diving board and it held up just fine.
6/15/24 Update: Just finishing opening the pool for the summer. The board is holding up just fine.
5/23/23 Update: Board is holding up great and we’re getting ready for another summer. I just inspected it yesterday – no cracks or any signs of issues.
Note, I have to buy all of my parts – nothing here was paid for by sponsors, etc. I do make a small amount if you click on an ad and buy something but that is it. You’re getting my real opinion on stuff.
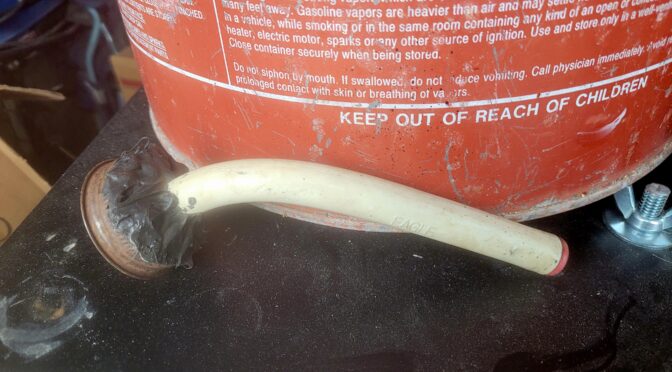
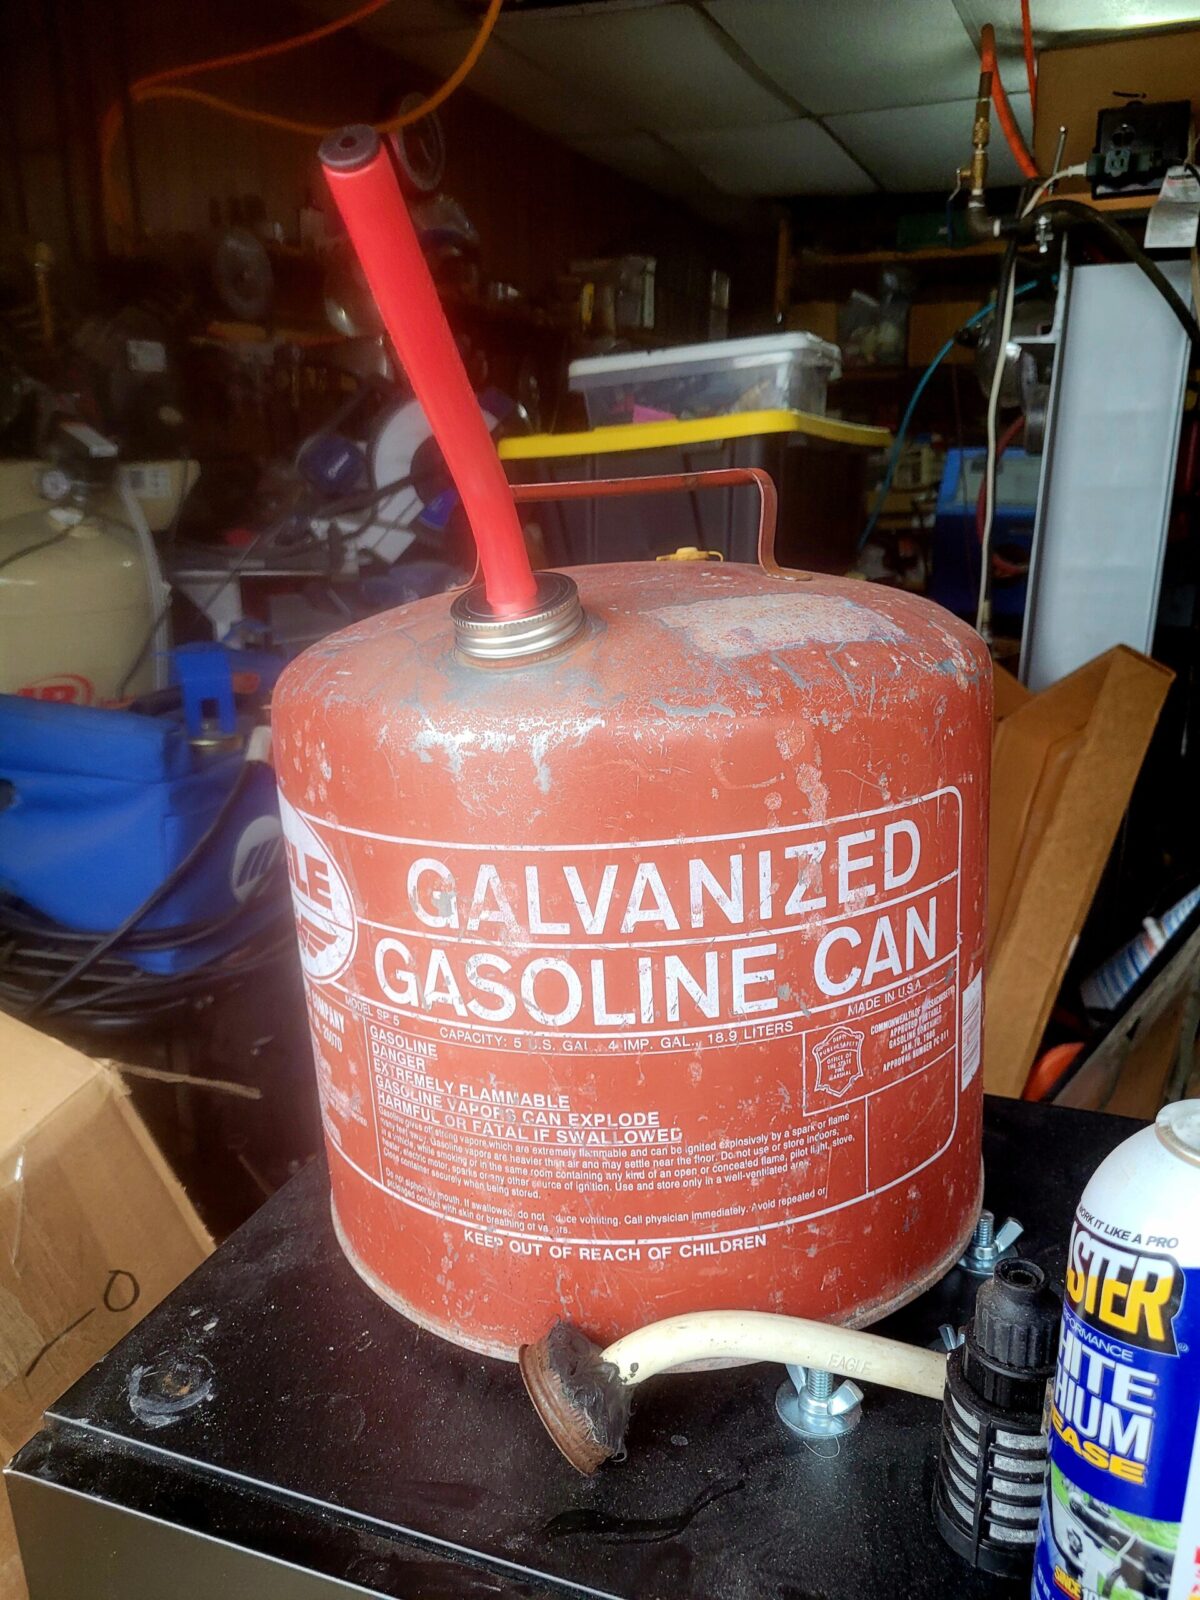
I have a really nice Eagle galvanized steel can that I bought new back in the stone age. Over time the rubberized nozzle started cracking at the base and I kept building it up with RTV silicone until I decided I better buy a new nozzle. Why did I bother? First off, the old Eagle cans are excellent – mine must be pushing 20+ years old. Second, new cans suck thanks to the EPA mandating the bizarre nozzles that you see that are simply horrid to work with. In short, I didn’t want to throw out a perfectly good can and needed to find a replacement nozzle for it.
The first thing I tried was to buy a universal spout kit off Amazon and it didn’t match up to the Eagle’s 1.75″ threaded mouth. So, I had to do some digging – what I should have done in the first place. Turns out there was an eBay listing for an exact replacement for an Eagle can *but* it was $16.95. Well, I figured the can was in such good shape that spending that much on a gamble was worth it.
The replacement cap and nozzle arrived and the first time I put it on I really had to press down on the cap to get the threads in the cap to catch the threads on the can. It’s easier now and my best guess is that the material the spout was made from needed to compress some … whatever it was, it fits okay now.
The eBay gas can spout vendors come and go. Click on this to get a list of sellers that say their spout is for an Eagle Gas Can. Some sellers list generic kits and you need to look out – I’ve bought a few of them over the years and they never seem to have the size I need at the time. Do not buy a spout unless they specifically say it fits an Eagle can. So, scroll the list, skip the generic spout kits and find the Eagle related part you need — also make sure the seller has a good reputation. Click here for the list.
I hope this helps you out. My can is back in service.
Note, I have to buy all of my parts – nothing here was paid for by sponsors, etc. I do make a small amount if you click on an ad and buy something but that is it. You’re getting my real opinion on stuff.
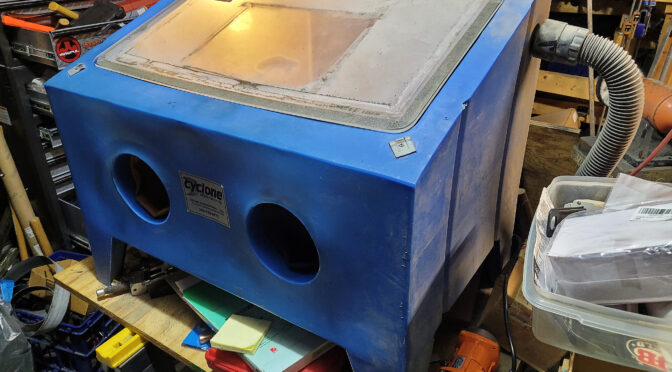
Okay, Ronin’s Grips started making Yugo M70 grips sometime around 2004 and rapidly added models – the challenge was that I hand polished each and every one of them. It took a ton of time, handwork and was putting my carpal tunnel through the roof. Jeff Miller of HillBilly Firearms told me to abrasive blast the grips for a better grip and a heck of a lot less handwork. I was sold – I had to change something. Jeff also gave me a few tips – get a foot control to protect the seals vs. being in the cabinet with all of the grit, put transparency film on the window of the unit to make it last longer and he told me to get a “thumper” to make the grit settle.
Well, way back in the day margins were super thin so I bought a large bench top abrasive blast cabinet from Cyclone Manufacturing in Dowagiac, MI – they are about an hour from my shop and I could pick it up along with the foot control, I got a box of transparency film either from Amazon or a local office supply store, but I had no idea what a “thumper” was or how important it is to productivity.
Fast forward to about a month ago. Abrasive blasting used to take me a while – blast, hit the cabinet or manually move the material around in the hopper, blast some more, whack the cabinet or move the material around … it gets old. It took me years to realize that this really sucks but blasting was so much better than polishing that I didn’t think much about it.
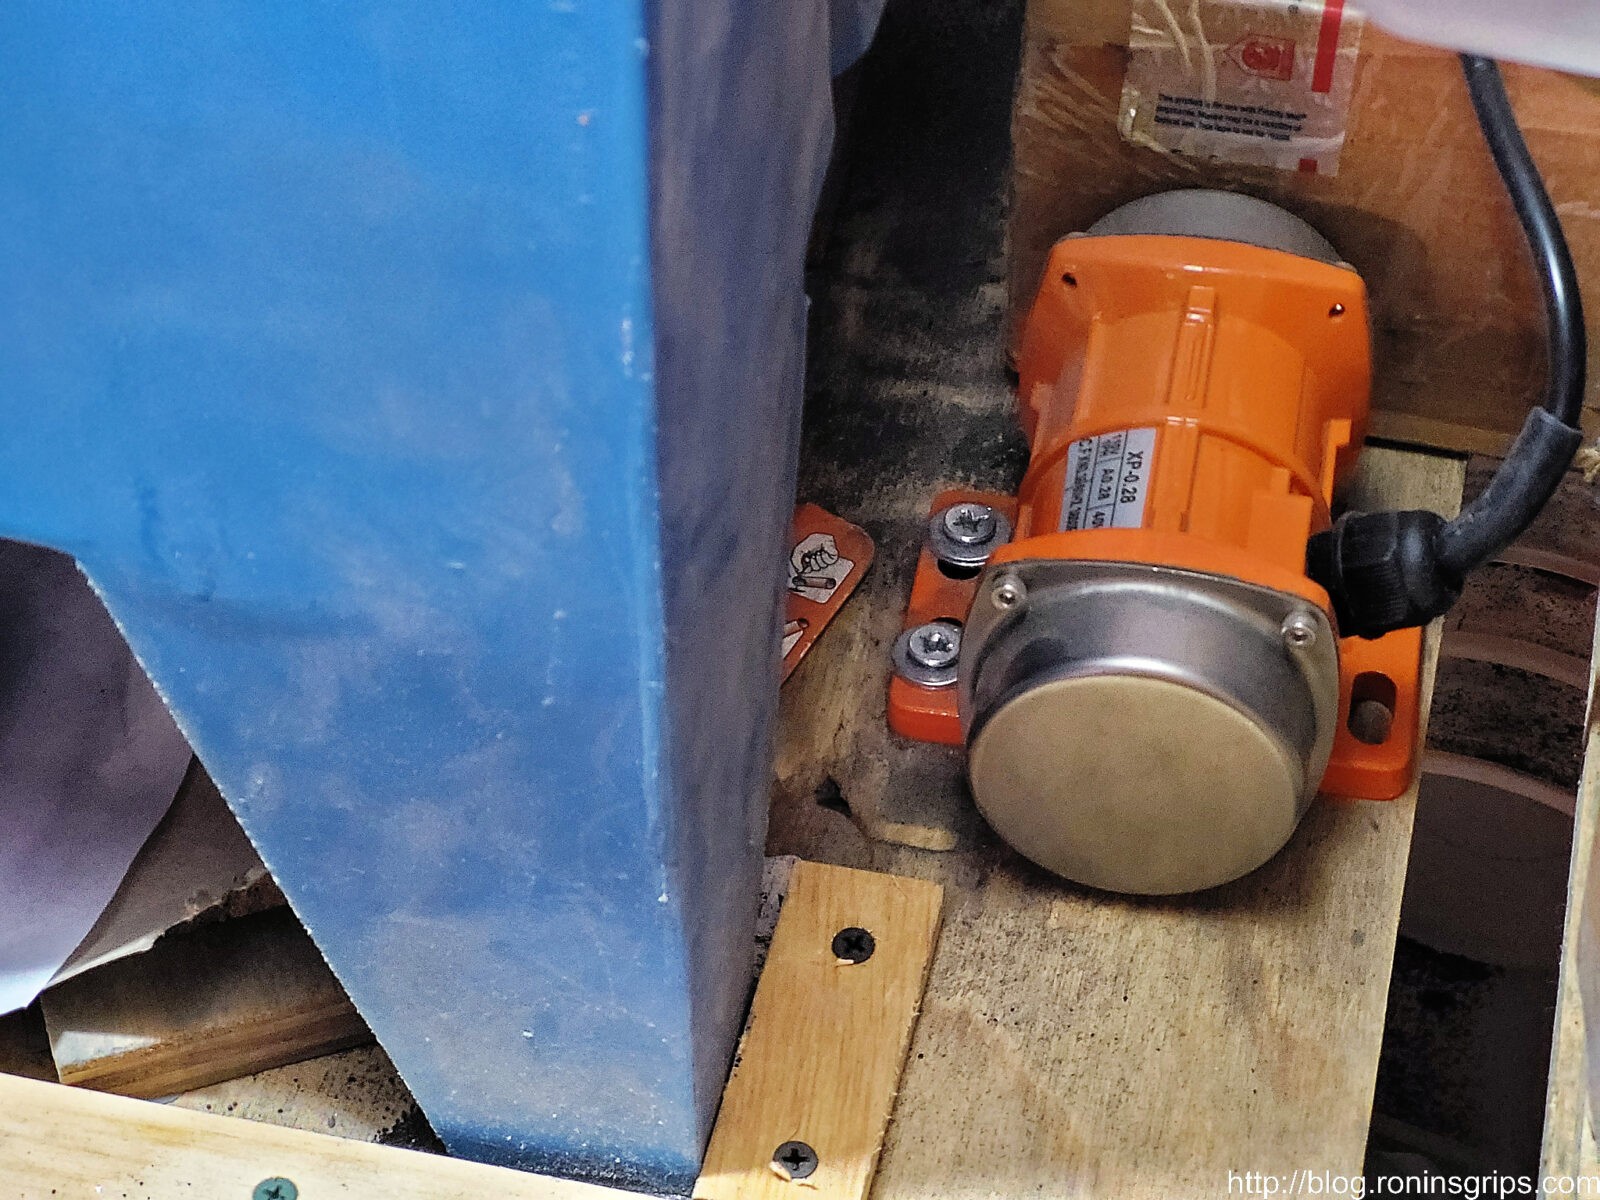
So, a “thumper” is basically and industrial vibrator (insert joke here) that uses an electric motor in a housing with off center weights on the shaft that then vibrate like crazy when the motor runs. I guess you could call it the power of Amazon but one day I was scrolling through Amazon and a suggested item came up – a concrete vibrator – and it looked like a small motor in a housing. I had 25 Galil grips I was going to blast and all of a sudden I remembered Jeff’s advice.
Okay, the power of a vibrator with a blast cabinet is that the vibrations cause the grit to shake down to the lowest point constantly. You can blast and blast and blast. The unit was $118 with free delivery and I figured I would give it a try.
It shipped from the importer, not Amazon, and showed up a few days later – it was pretty quick as I recall. The unit was very well made other than my needing to tape up a plastic junction box on the power cord that was a little cracked and I needed to attach a 120 volt plug – it was one phase and they said about 40 watts so nothing special. The machine label says – 110V, 1 phase, 40 watts, 3600 RPM – the little thing totally kicks butt and was only $49.
Here’s a close up of the label – note it says 40 watts. There are bigger units but I don’t think you need them for an abrasive blaster.
I didn’t put it on the blaster right away because I wasn’t really sure how violent it would be and I am glad I didn’t – it vibrates like you would not believe – there is nothing subtle about it – and I immediately realized two things – 1) I was going to mount it on the free standing tool bench and not the plastic blast cabinet walls or it would eventually shake loose and 2) I needed a variable speed control to tone it down some.
Try #1
Okay, so sometimes you just have to poke fun at yourself – or at least I do. I marked the bolt holes on the 3/4″ plywood bench top and mounted the vibrator. I then plugged the power cord from the vibrator into the speed controller, the controller into a surge strip and turned it on at full speed.
I wish I had a before photo or a video of what happened next but I don’t. Every single thing on that table started vibrating right off of it. Yeah, all the grit went to the bottom on the blast table but the blast table was headed to the edge of the bench too. Whoa! I hit the off switch.
Try #2
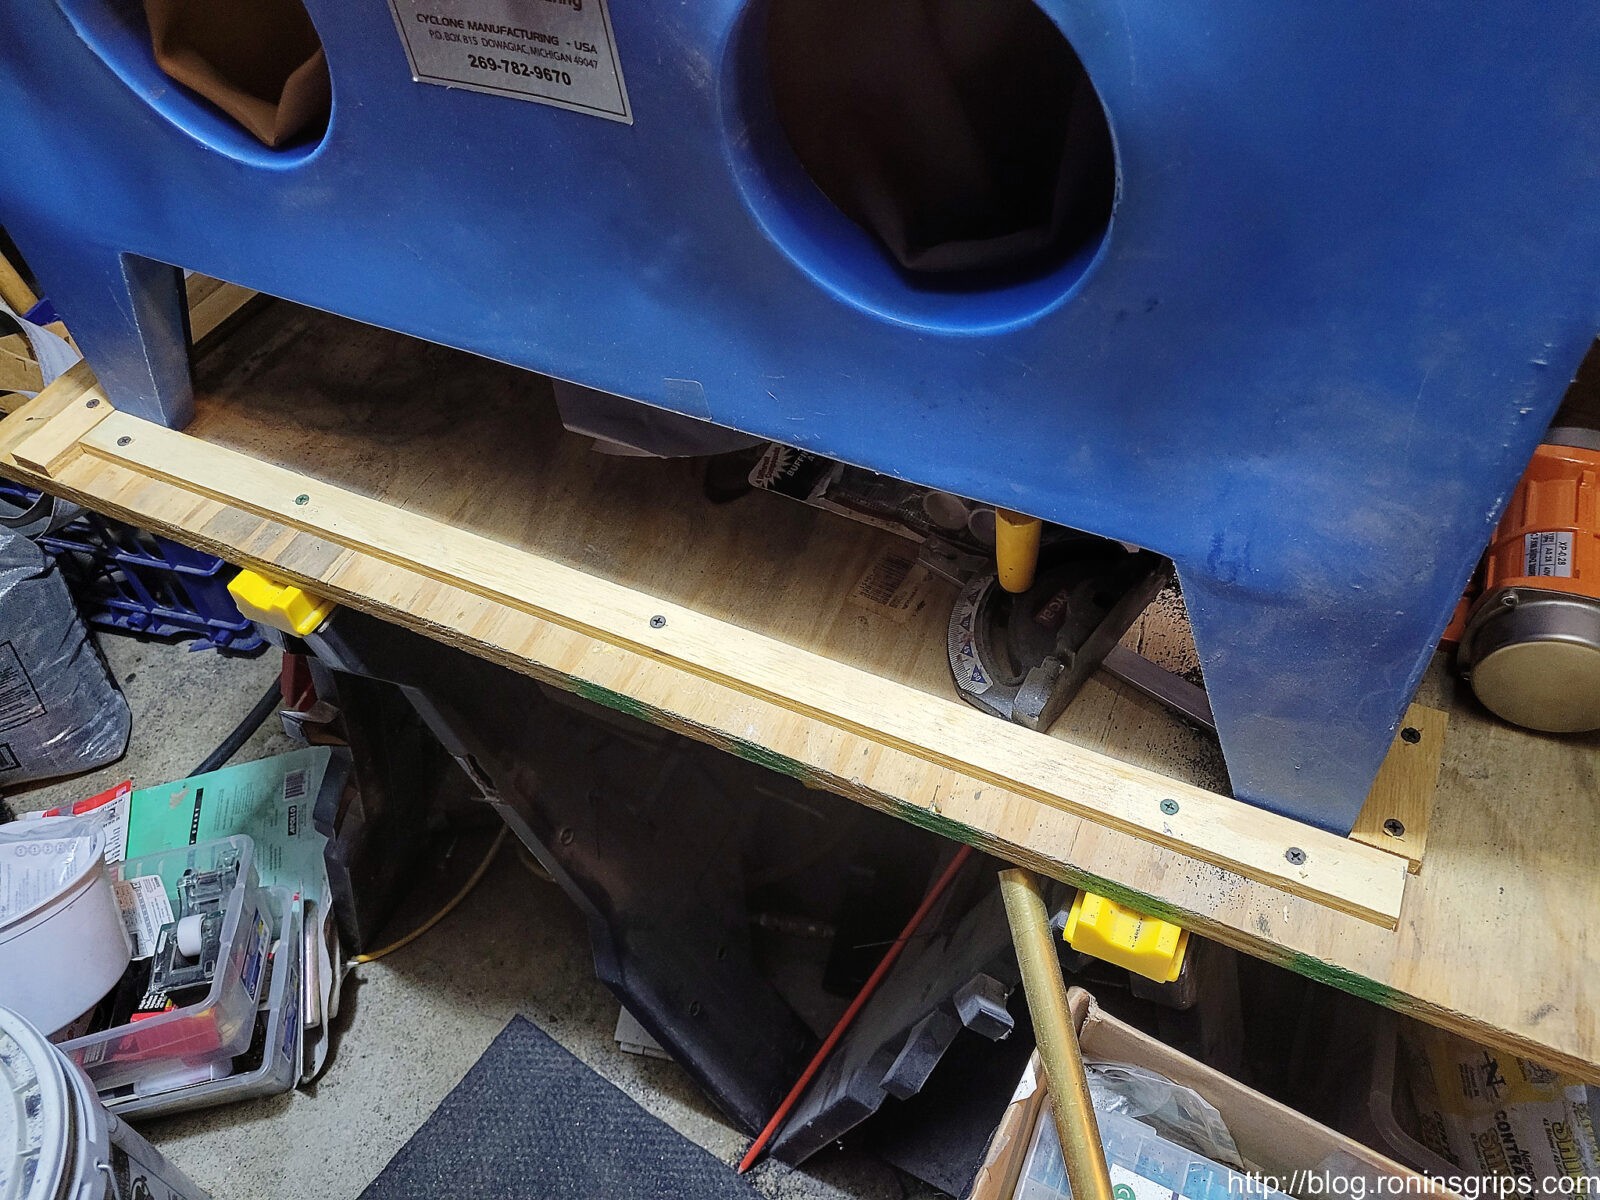
I simply took some strips of plywood and added a cradle around the legs to limit travel. That worked. Time to try blasting some stuff.
Here’s the vibrator.
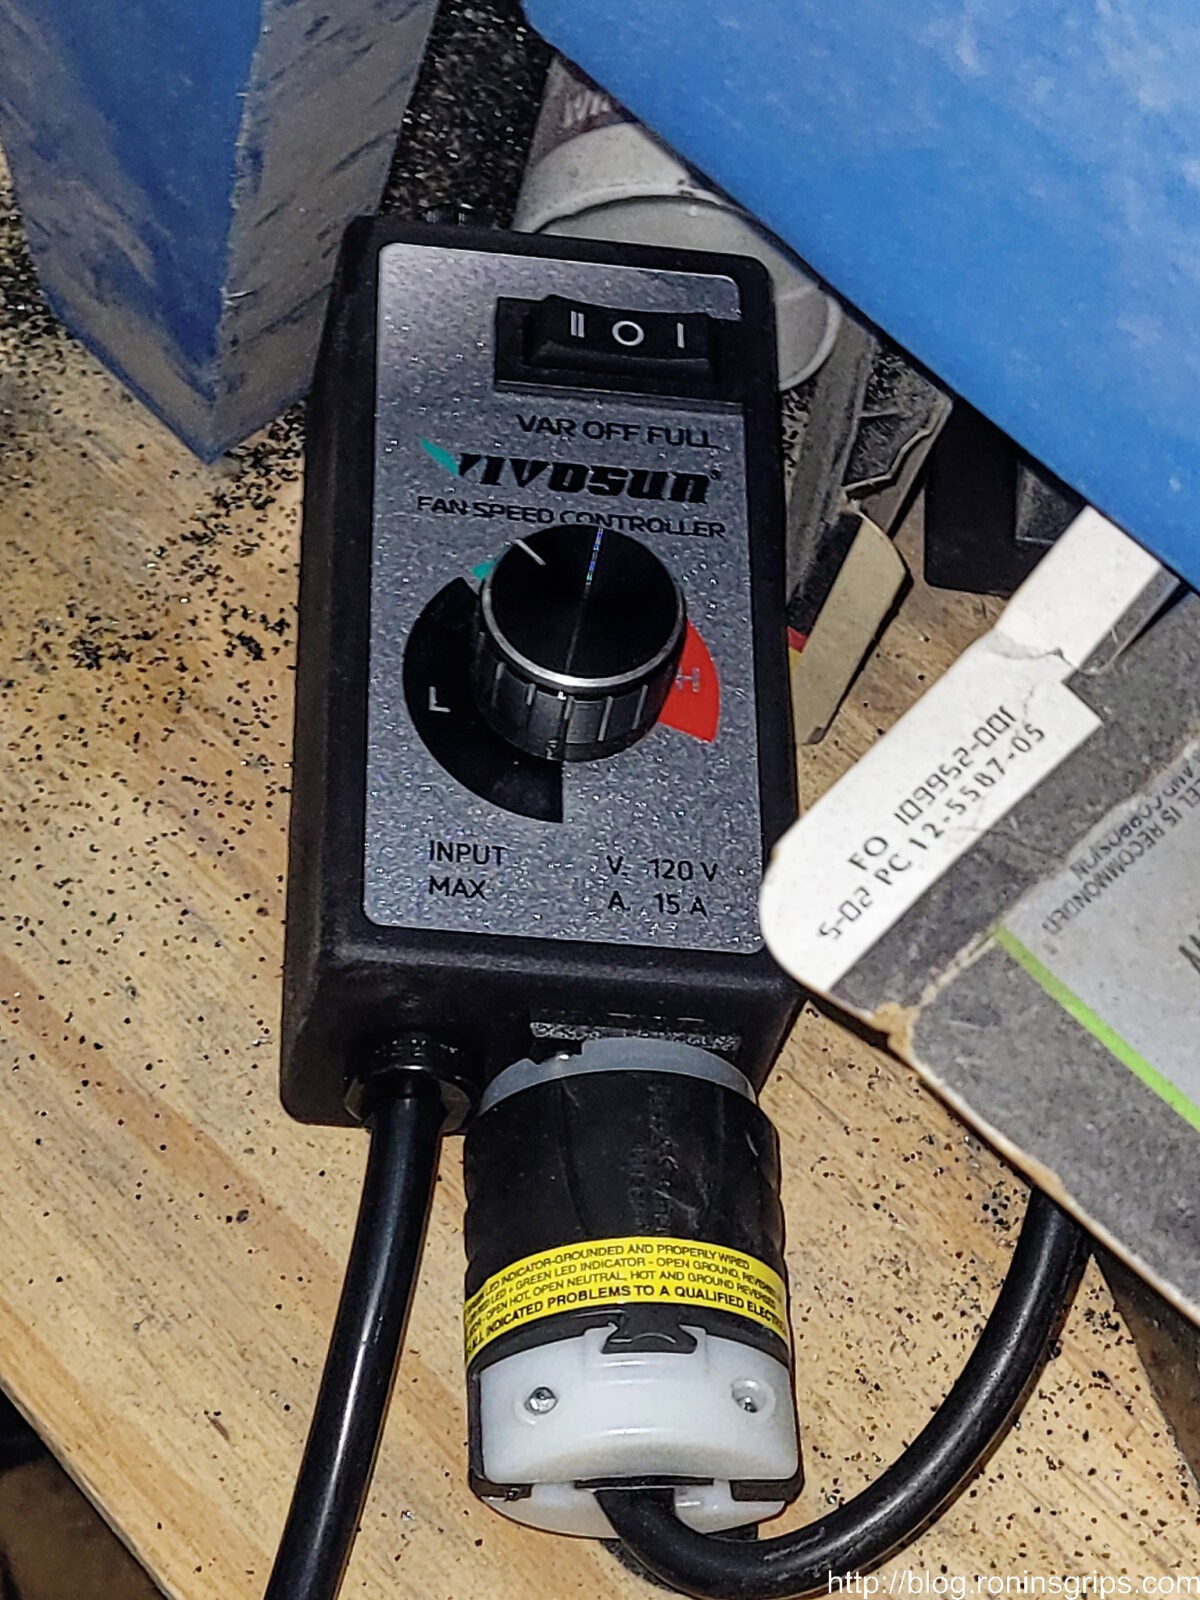
Here’s the speed controller.
Another view of the strips to limit travel. Everything on the floor had been on the workbench before I turned the vibrator on the first time 🙂 By the way, the 3/4″ plywood top is screws into the stands it is on.
Actually Blasting
Folks, it is night and day different – stunningly different. Because I don’t have to stop and whack the side of the baster or reach in and move grit around, I’d bet I’m getting work done 2-3 times faster. A bench top blaster doesn’t have a very deep bottom so without a thumper, I spent a lot of time moving grit over to the pick ,up.
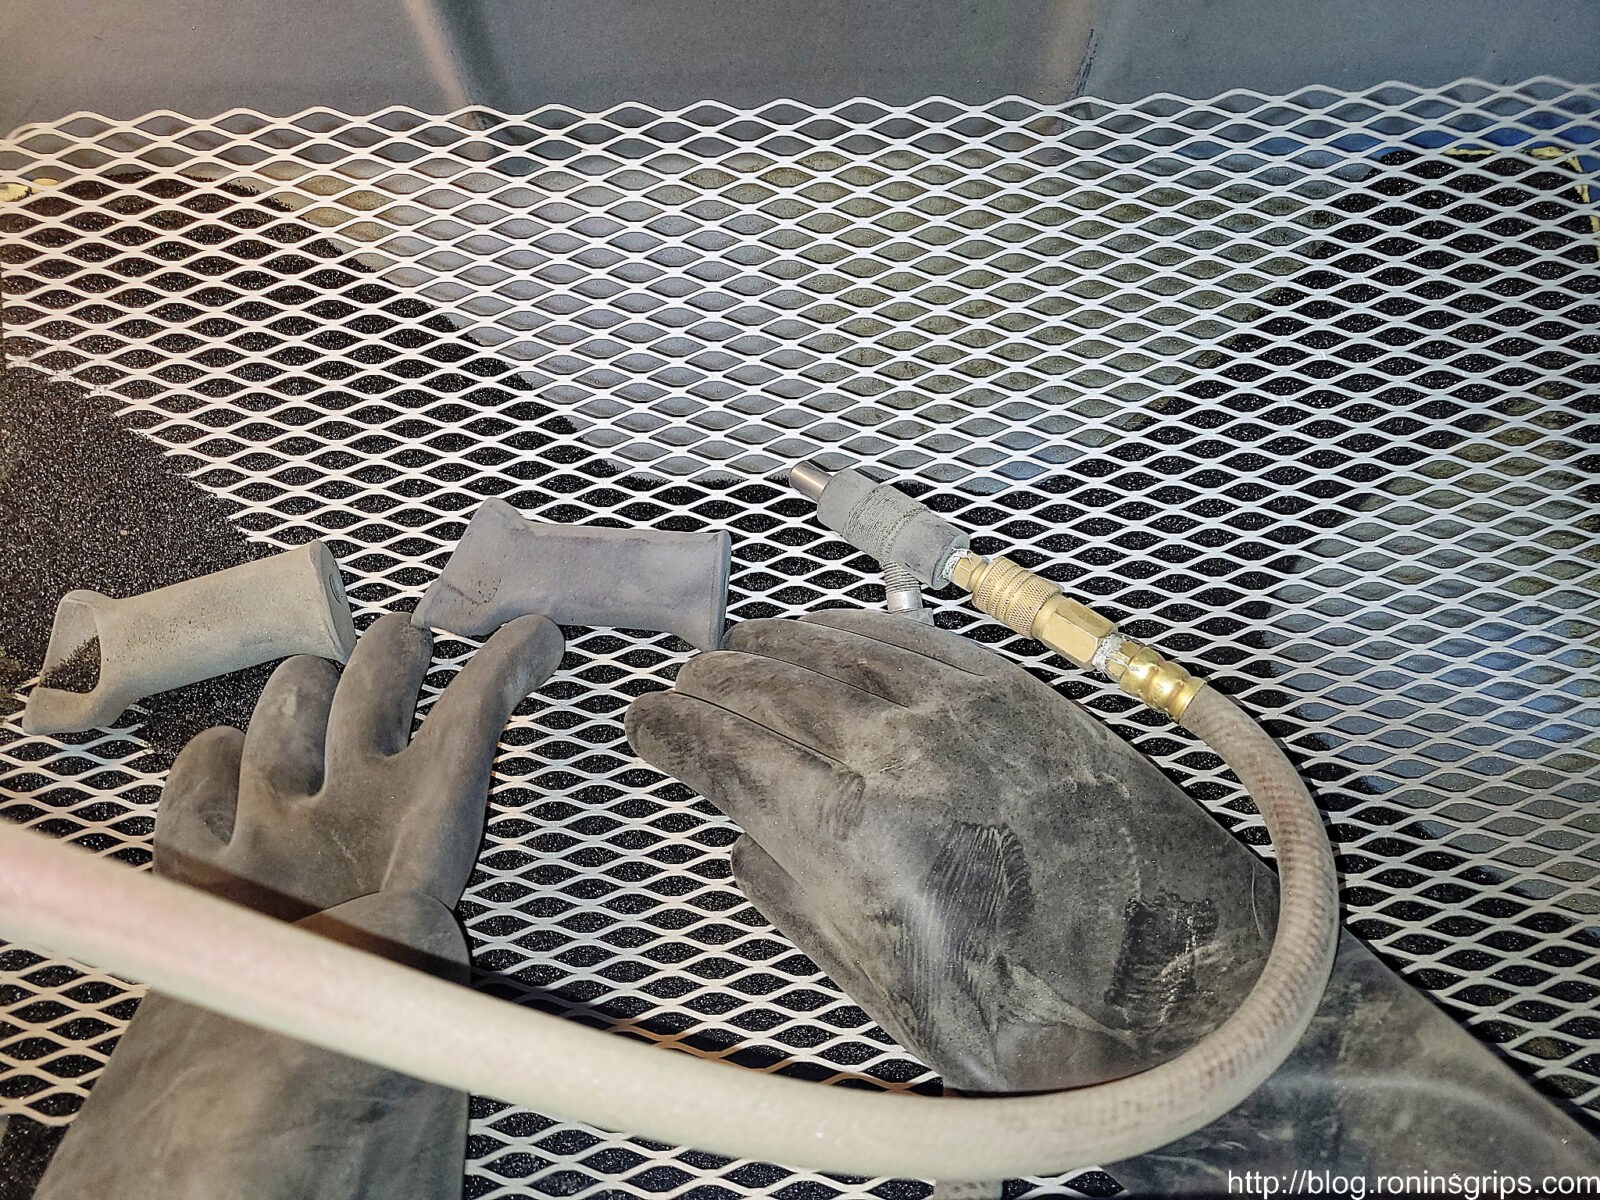
Another fun lesson learned. Over the years, I’ve developed the habit of putting my chin on the plexiglass as I focused on doing the work. Don’t do that. I put my chin down on the vibrating plexiglass and it felt like someone was playing the tambourine with my teeth 🙂
Those are two IMI Galil grips getting blasted. What an amazing difference.
In Conclusion
This is one time I can honestly tell you that I have one regret – I should have done this years and years ago. Wow. It was worth it! I’ve used vibrator and speed controller both extensively for a little over a month and it’s a great combo. I don’t use the slowest speed but I am closer to the low end on the dial than I am the fastest speed.
Note, I got lucky with my first purchase. I really wasn’t sure what size to buy but the 40 watt unit has worked great. I can’t imagine anyone needing a bigger unit for a blast cabinet. These generic industrial vibrators have all kinds of uses including for the movement of powders, grains, rock, etc. so they sell bigger and more powerful ones as well.
I’d highly recommend this to anyone who has a ton of blasting to do and is getting tired of having to stop and manually move grit around.
Note, I have to buy all of my parts – nothing here was paid for by sponsors, etc. I do make a small amount if you click on an ad and buy something but that is it. You’re getting my real opinion on stuff.
Firearms box magazines all work the same – a spring is pushing against a follower that is then pushing the ammunition on the direction needed. The follower is often pushing against at least one wall of the box magazine and dragging. This can be especially bad with steel and aluminum magazines making loading the magazines more tedious and even cause problems with feeding. It begs the question – how can I lubricate the inside of the magazine?
The knee jerk reaction is to put oil in the magazine to lubricate things. I’d recommend against this course of action because the oil will trap dirt and eventually can start causing sticking and jamming.
I’d recommend that you use a dry film lubricant aerosol instead. These sprays on and then the liquid evaporates off and what is left in place are thousands of particles that are slippery. I do not recommend any of the dry films that include a wax – like chain lubes. The wax may trap dirt as well over time.
Don’t spray anything in, or on, a plastic magazine without first checking with the manufacturer. Some plastic magazines are self-lubricating and don’t need any additional lubrication. Also, when spraying any solvent (which is basically what the dry film particles are floating in) on plastic, you risk the plastic getting gummy due to a chemical reaction – this depends on what plastic they useed. My recommendation is really for steel and aluminum magazines.
A Quick Side Note About Teflon
Up until a few years ago, I used to like Teflon, which is what Dupont, the owners of the trademark call it. Teflon was discovered by Chemours, which was a spin off from Dupont, in 1938. If you see someone selling “PTFE” – that is the generic name for Teflon. By saying their product contains “PTFE” then they don’t have to pay royalties to Dupont or risk having Dupont sue them.
So, Teflon and PTFE were selling great and then people started worrying about the safety of people eating Teflon, Teflon in the environment and so on. I’m not hear to weigh in on this but whether it was concerns over marketing, lawsuits or just the pandemic, the Dupont Teflon Aerosol Spray went on hiatus for the longest time.
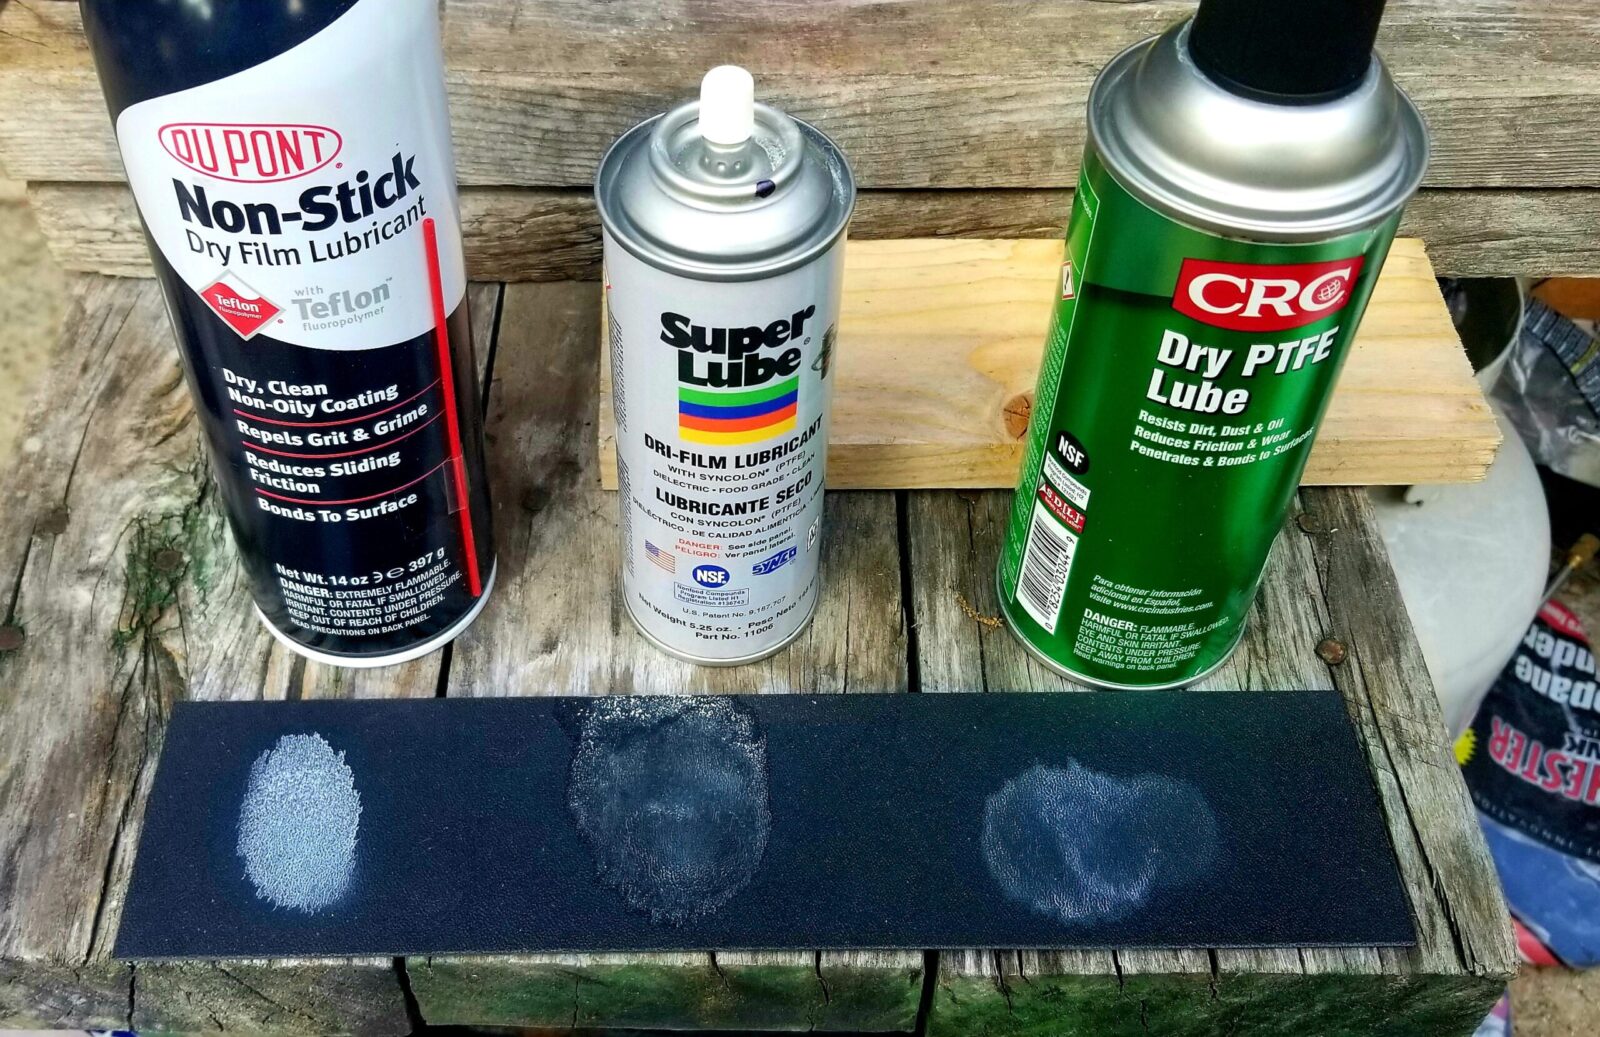
In late 2021, it re-appeared but with a different formulation. The new spray uses a ceramic now and not Teflon. I corresponded with Hank Krause the president and CEO of Finish Line Technologies – the group that actually markets the spray. I was concerned about the change in formulation because the Dupont spray had been excellent before. Want a quick way to test this? First, spray some competing dry films on a black plastic surface and see how some of them actually leave very little residue. Also look at how evenly the distribution is. Not all are the same.
I think this photo says a lot. On the left is the original Dupont spray with Teflon. In the middle is Super Lube’s Dry Film and on the right is CRC’s. This is why I swore by the Dupont dry film for years. The CRC was dry film was going to be my fall back once I ran out of the Dupont Teflon.
Nano-Ceramic Boron
At any rate, Hank told me that they have moved away from Teflon to Nano-ceramic boron nitride particles and I told him my concern that I didn’t know whether to change to a new dry film technology I knew nothing about. Hank told me the new formulation used thier same propretary technology for binding the particles to the surface and the following are benefits of the new ceramic technology over Teflon (I will copy and paste his list verbatim):
Helps extend life of the lubricant, thus delivering longer relubrication intervals
Provides enhanced lubricity
Provides better extreme pressure capabilities
Increases the high temperature operating range of the lubricant
Provides better resistance against chemicals
Helps repel water and moisture more effectively
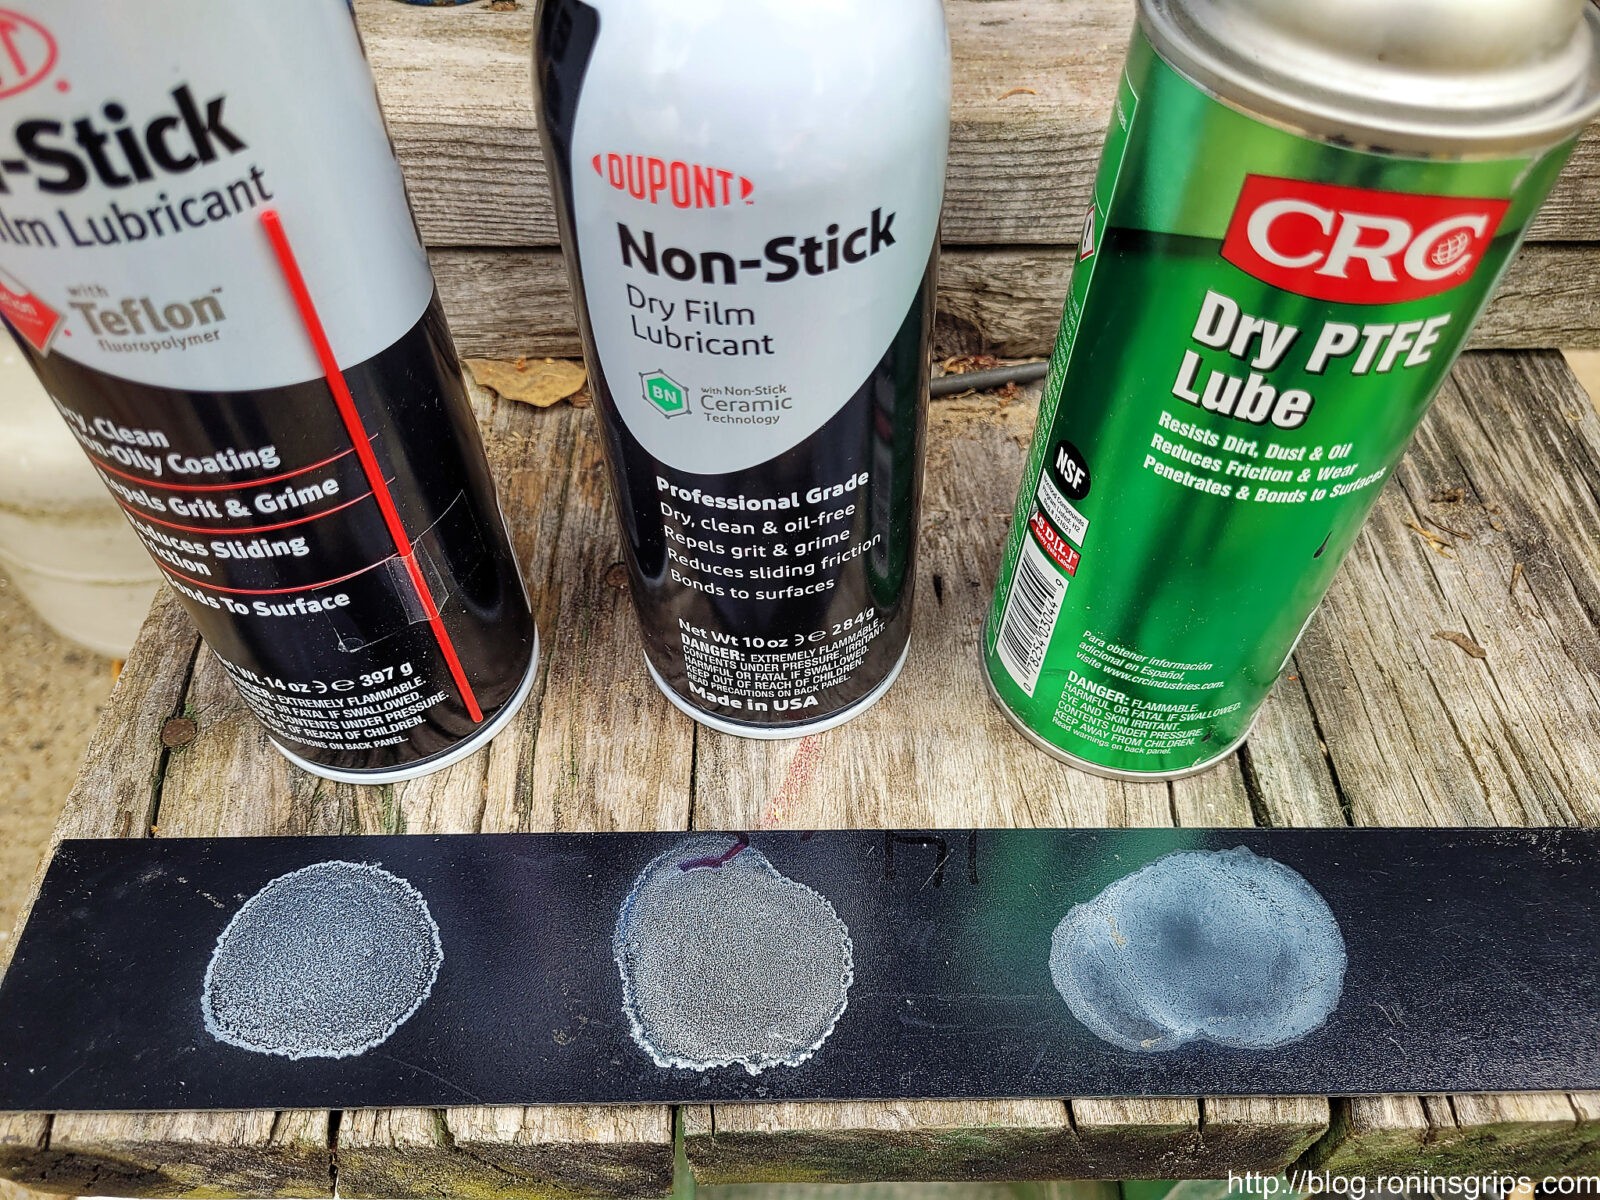
So, based on Hank’s assurances, I ordered in some cans of the spray and started testing them. The residue looked very similar to the Teflon test above – the ceramic dry film residue is also white.
The black strip is the shiny side of a piece of Kydex. I included the cans in the photo. The Dupont sprays put down the thickest coat. Interestingly enough, the CRC left a very fine film. I couldn’t find the SuperLube product – I may have tossed it – I’m not sure.
In terms of lubricity, it does the job just as well and maybe even better than the Teflon. While this may seem subjective, the lubrication seems very good with one solid spray of the ceramic both in the tube of the magazine and on the follower. Any over spray wipes right off with a rag.
With the ceramic spray, feeding rounds by hand into the magazines and unloading all feel very smooth. Bear in mind that this comment is after hundreds of loaind and unloading cycles by your’s truly.
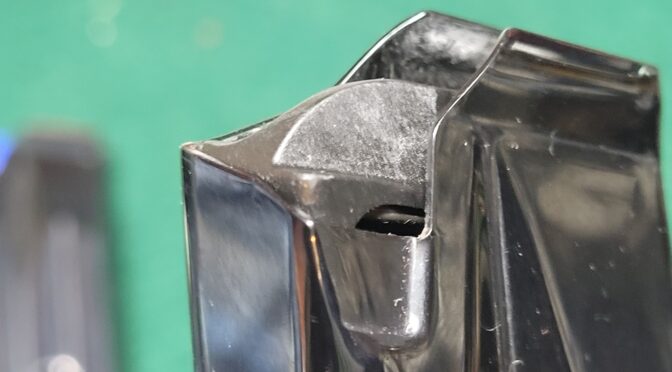
Our new second generation followers for our RIA 9mm magazines are converted from OEM followers with the final step being fine sanding paper. It’s my speculation that the ceramic particles are getting into the tiny grooves of the follower and providing excellent lubrication.
At any rate, I am very happy with the new Dupont Ceramic Dry Film aerosol for use inside firearm magazines and wanted to pass along the word. Going forward, we are using the Dupont product in all of our steel magazines that do not already have an anti-friction coating (AFC).
By the way, I cleaned out a bunch of IMI Galil magazines that I bought and you could tell there was a bunch of friction going on in the mags between the parkerized tubes and followers – the parts hadn’t worn in yet by any means. With the mags disassembled, I sprayed in a heavy coat of the Dupont Ceramic Dry Film in the tubes and sprayed both the followers and springs, let them dry and re-assembled the mags — wow! What an amazing improvement. Click here for the Amazon Listing.
I hope this helps you out.
We make a variety of magazines for the 10mm, .40 S&W and 9mm Rock Island Armory (RIA) FS A2 pistols. Click here to see them.
Note, I have to buy all of my parts – nothing here was paid for by sponsors, etc. I do make a small amount if you click on an ad and buy something but that is it. You’re getting my real opinion on stuff.
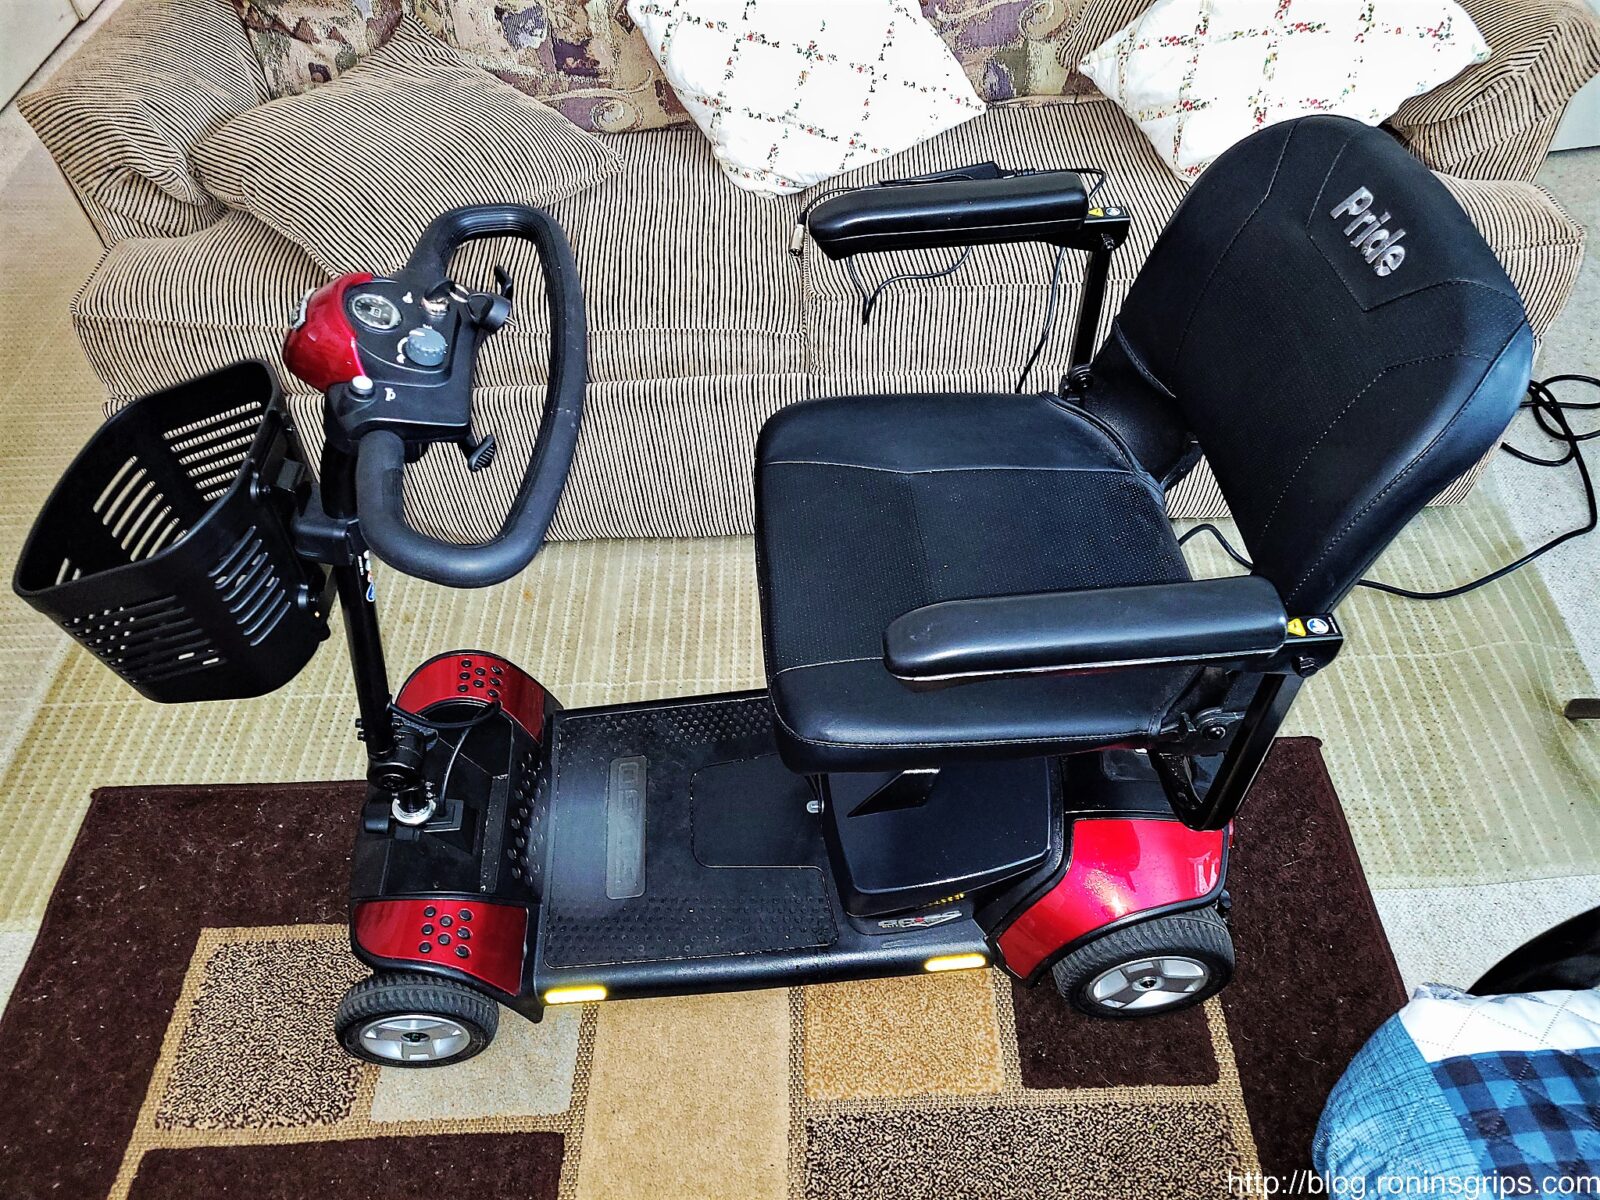
My mother-in-law is getting older and so are my wife and I. Let me tell you, It was a lot easier pushing around a wheelchair 10+ years ago compared to today. With this in mind, my wife and been watching for a good deal on one of those little electric mobility scooters. Finally, one day she saw one posted on Facebook at a local thrift store so we want and took a look.
The owner of the store buys abandoned storage units and a Pride Mobility Elite Traveller scooter was in one of them. It looked to be in great shape but it wouldn’t run. He could turn the on/off switch and a light would come on the little dashboard but that was it. He said he tried charging it for an hour but nothing happened and thought it was the batteries — this is a great example of someone giving you their diagnoses and then that affects what you do.
At any rate, it came with the original Pride Mobility charger so I figured it was probably the batteries and did a quick search on them and replacements ranged in price from $51-89/pair. With this in mind, we settled on a price of $250 and brought the scooter home.
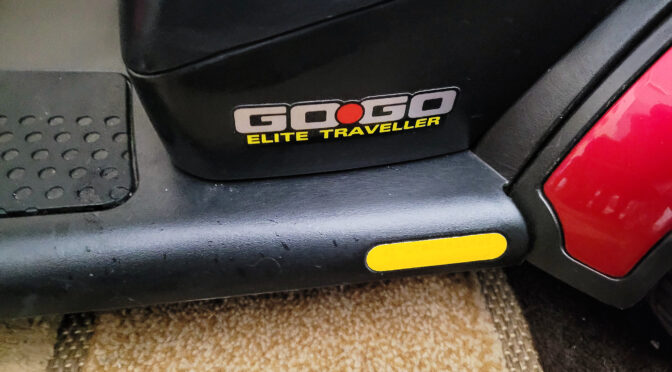
Here’s the GoGo Elite Traveller scooter. It’s remarkably well made. I was impressed the minute I started critically looking at the fit, finish and serviceability.
Note: Pride Mobility puts all of their manuals online. I really appreciate it when firms do this. You can get the brochure, owner’s manual, specification sheet and more on their website – click here. Just FYI: They do not provide a repair manual or technical guide.
A few days went buy before I could work on it. The first thing I did was plug the charger into the wall, then the cord direct to the power pack, turned on the switch and the little red power light came on. The charger’s second indicator LED was supposed to turn yellow that it was charging. It did not – it stayed off. Also, the cooling fan never started. Hmmm…. interesting but I had run into problems before with smart chargers not starting if batteries were dead.
Now, this mistaken assumption cost me some time but I learned a lot in the process that I’ll share.
Removing And Opening The Battery Compartment
Based on what I saw, the engineering and build quality of the scooter was excellent. I’ve seen people driving them around but never had the need to look at one up close or take one apart. Everything is built heavy duty with reliability and resiliency in mind not to mention they put fuses all over the place to protect the electronics. With that overview comment done, my focus was on getting to the batteries because I thought that was the problem.
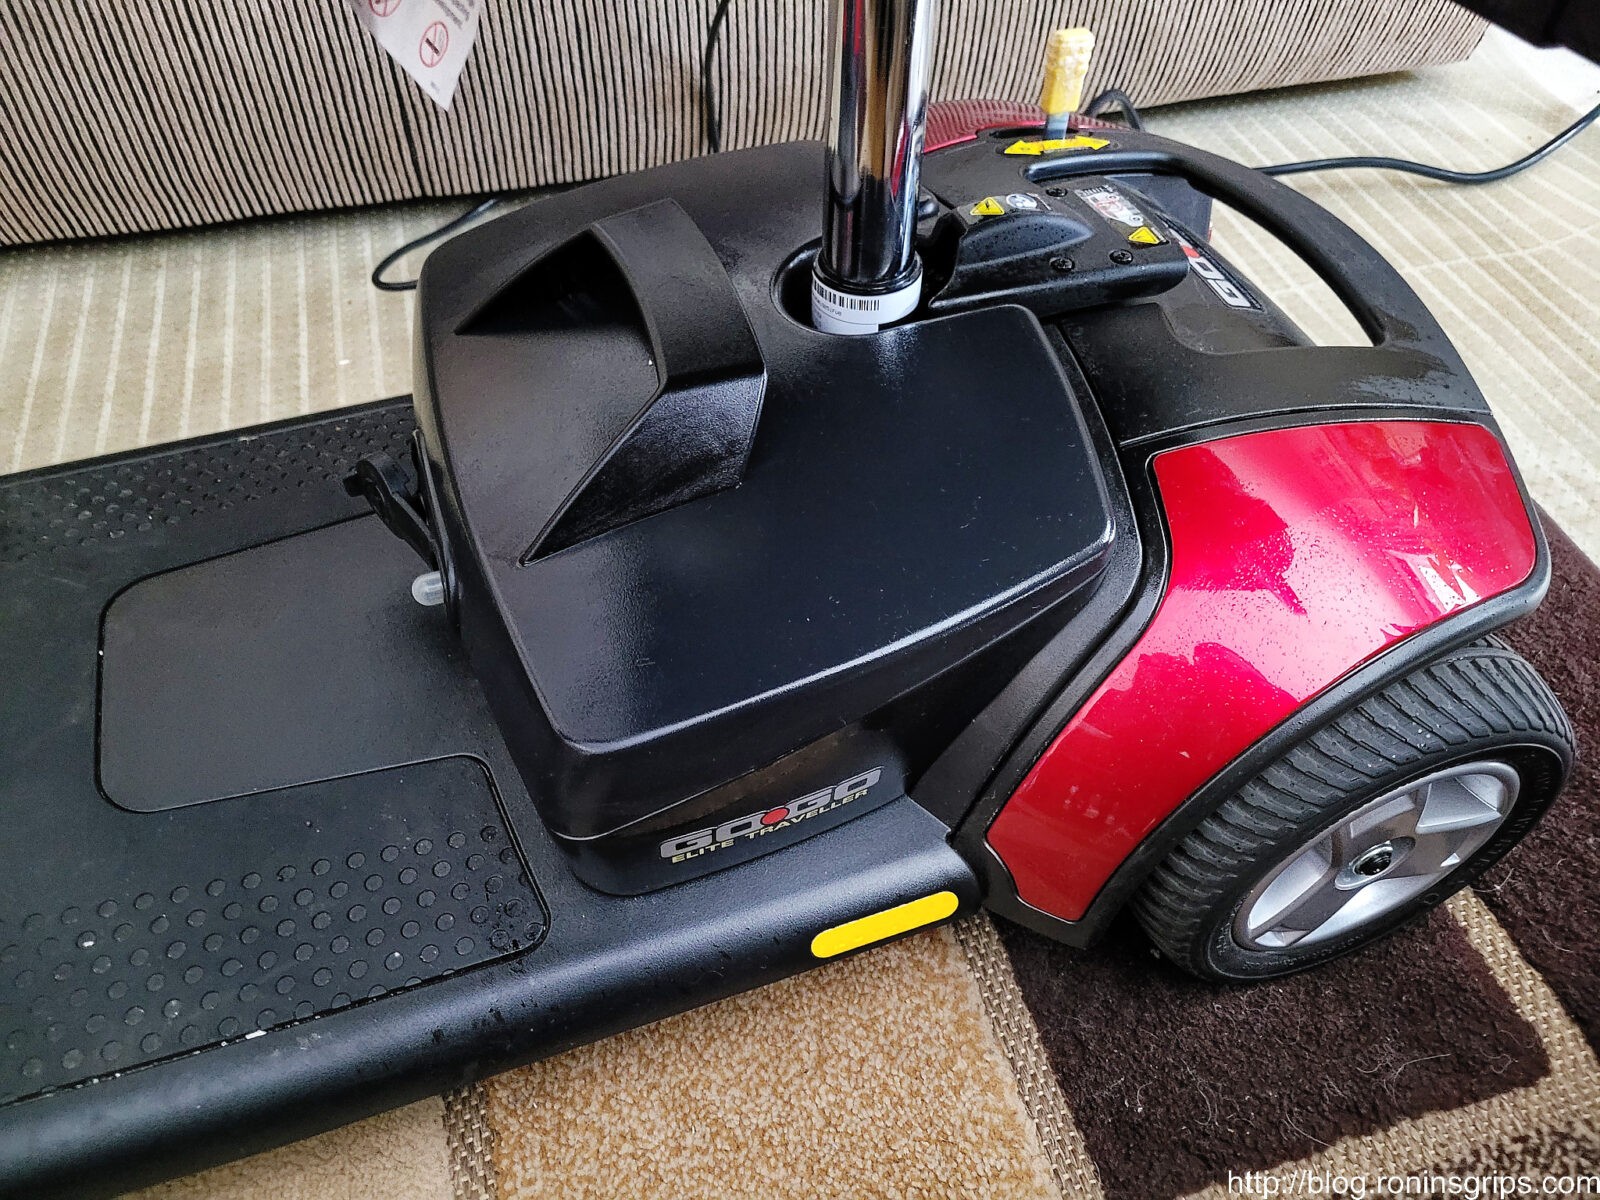
The battery pack is the black plastic “box” with a molded handle directly underneath the seat on the floorboard of the scooter and is held in place by a tab of 3M Dual-Lock fasteners on each side. Dual-Lock is a stronger than traditional velcro and it does a great job of holding the battery compartment in place both for the sake of safety as well as to prevent rattling.
To remove the battery box, lift straight up – there aren’t any bolts or clasps – just a combination of weight, the way the pieces fit together and the Dual-Loc. If you try to lift at an angle, you’ll be surprised how it will not want to budge – straight up is what you need to do.
That black molded plastic object with the handle in front of the silver set mast is the battery compartment. It comes off the scooter by lifting straight up. FYI – the white label on the seat mast has the date of manufacture.
Between the way the compartment sits into the molded floorboard and the 3M Dual-Loc tabs, the unit is very secure.
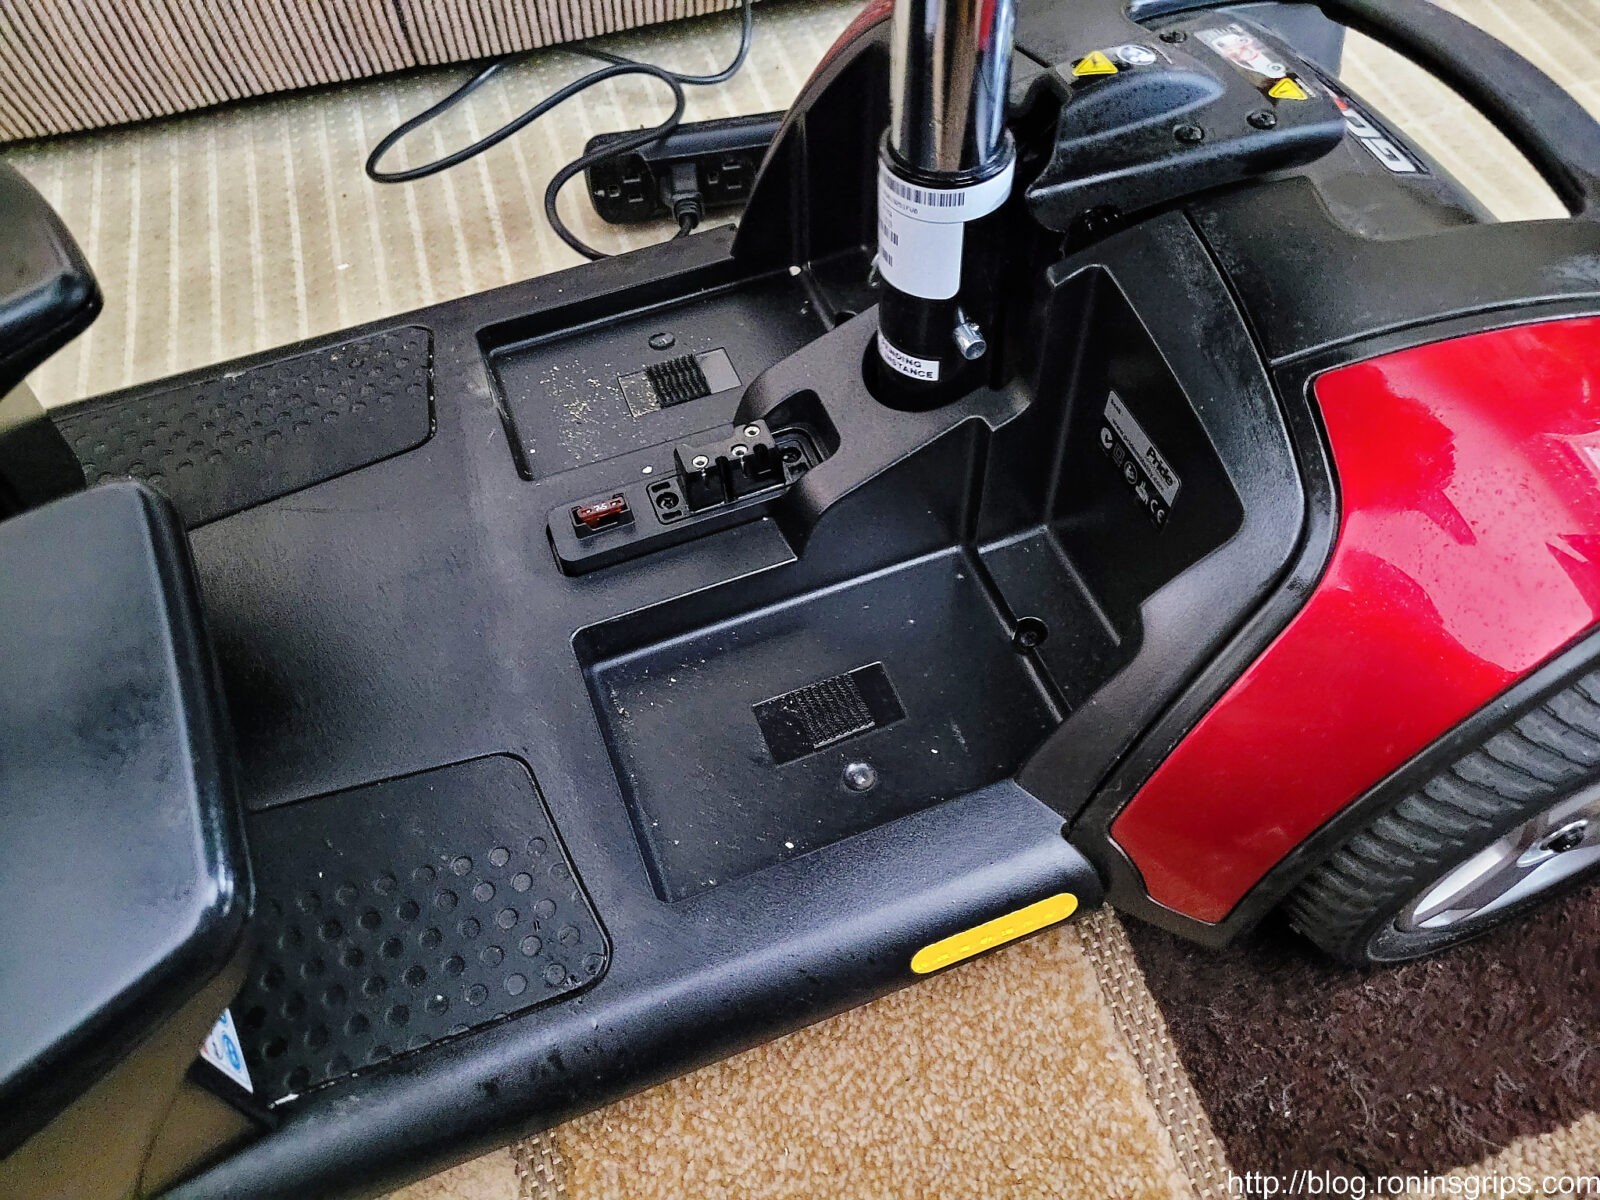
The battery compartment is very well made and to disassemble it, you need to remove six philips head machine screws. This is just an example of where I thought the design and execution was excellent – these are threaded machine screws that go into brass female inserts on the other side – they didn’t just go cheap using some self tapping screw. You flip the compartment upside down and remove the screws. The batteries are held securely in place by Dual-Lock also.
The 12 Volt Batteries Themselves
I’m going to step you through some details on the batteries but I did not change them yet. I’d recommend you read this whole post because your “problem” may or may not be the batteries.
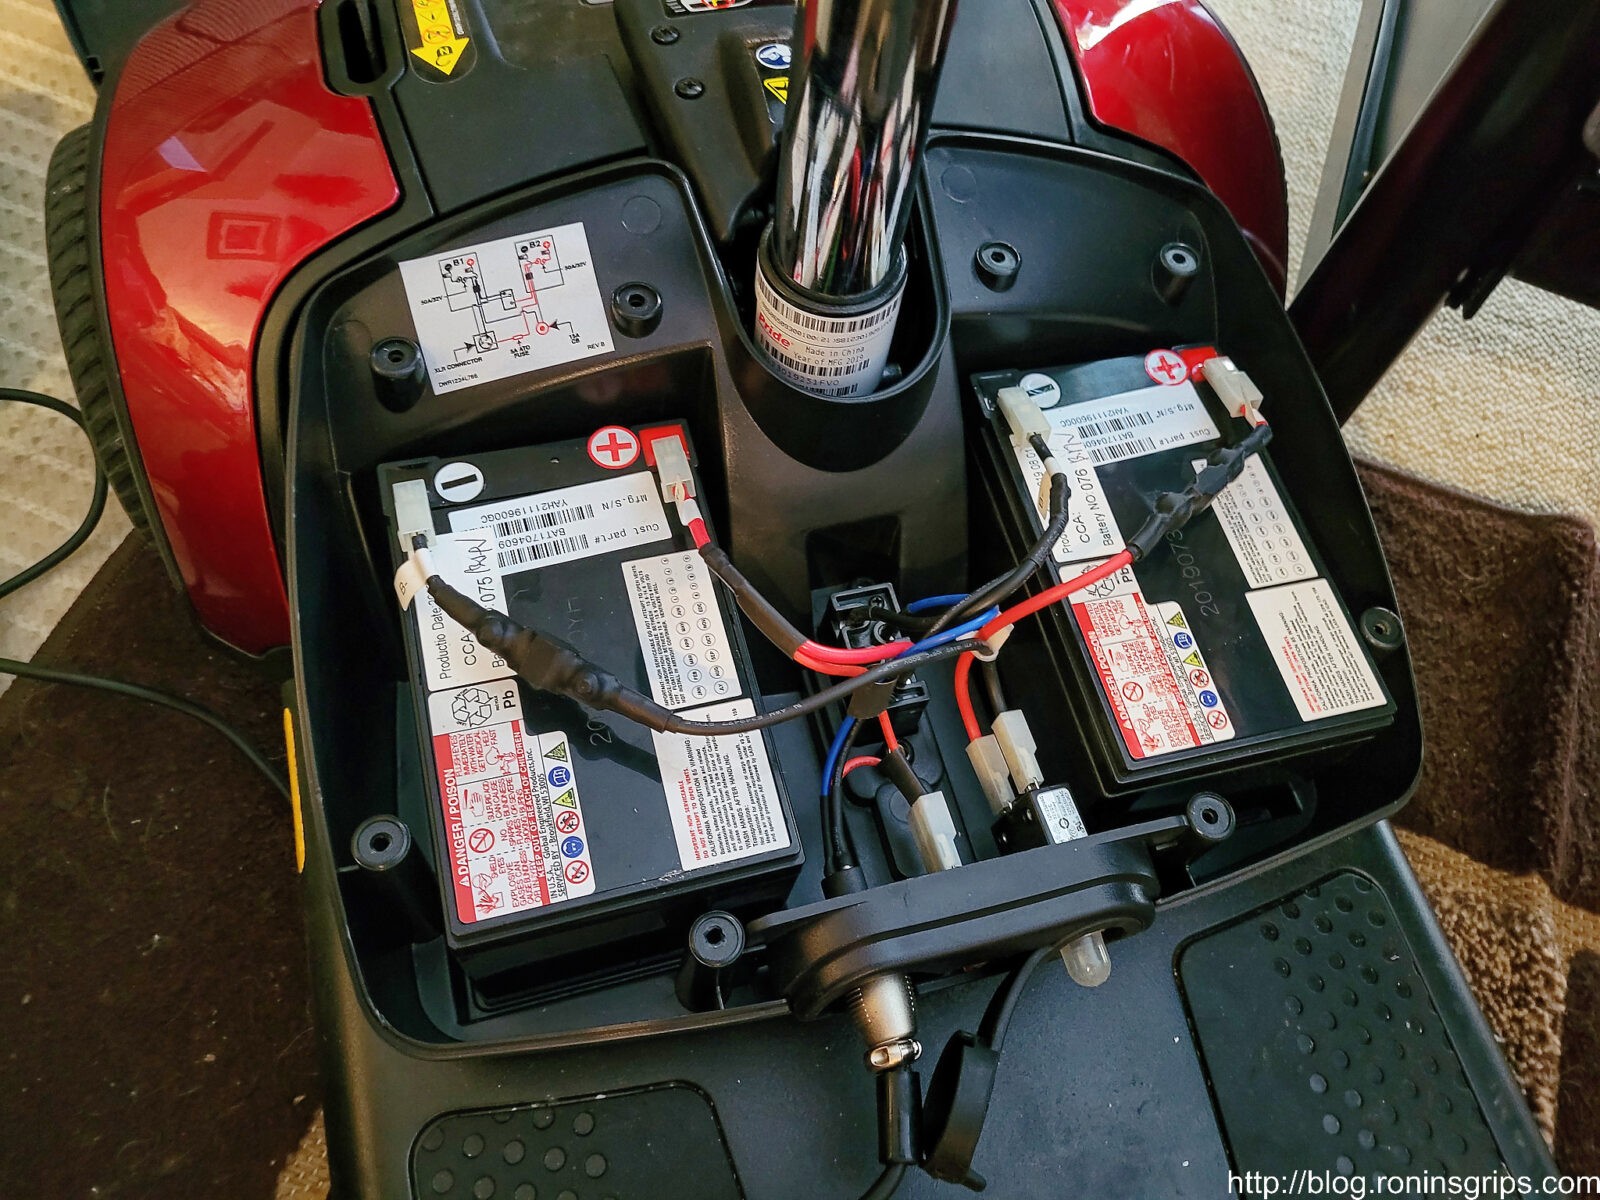
Our scooter is powered by two 12 volt 14 amp hour batteries wired in series to provide 24 volts. In the compartment is a wiring diagram and everything is done very nicely to avoid confusion – red wires to positive tabs on the battery and black wires to the negative tabs on the battery.
These are the 12 volt 12 amp hour batteries that are hooked up in series to provide 24 volts. If you look to the right of the silver plug, the two red wires white plastic connector is on a fuse assembly that protects the charger circuit that you will want to check and the far right side has a circuit breaker that is also worth checking. Pride says they can go up to 6.7 miles depending on factors such as the weight of the passenger and cargo. Note how everything is so well labeled, the wiring is very neatly done and they even provide a handy wiring diagram above the left battery. Whomever designed and then built this cared about what they were doing.
For those of you unfamiliar with direct current (DC) batteries, these two batteries are hooked up in series to produce 24 volts. This is done by connecting the negative terminal of one battery to the positive of the other and then the opposite as well. In the scooter, this is done at the wiring block in the middle. You don’t need to worry – just note the wires when you take it out (a photo helps) and do a battery at a time – black wire to negative and red wire to positive,
Note, there are at least two sizes of batteries used – their standard battery pack is rated for 6 miles and uses two 12 amp hour (Ah) batteries. There is a 9.7 mile bigger 18 amp hour (Ah) battery and it correspondingly uses a bigger cabinet so if you decide you are going to replace your batteries, confirm what is in your battery compartment first. You can change cabinets – or even buy entire battery packs ready to go. From what I have seen, the cheapest bet is to just buy the batteries and swap them out in your existing compartment. I also see batteries with other capacities like 15Ah and over 20Ah, I’d recommend you confirm that their physical sizes will fit whatever battery compartment you have.
The batteries hold the charge that runs the scooter but they must be recharged by using a battery charger. I should have checked this first but didn’t because I assumed it was the batteries but let me step you through what I did.
I put a voltmeter on each of the 12 volt batteries and they both read just a tad over 4 volts. So, not absolutely dead but boy were they spent. In doing automotive work, I would have expected the smart charger to sense the voltage and begin. Okay, something was fishy and it wasn’t adding up. It was time to look at the charger again.
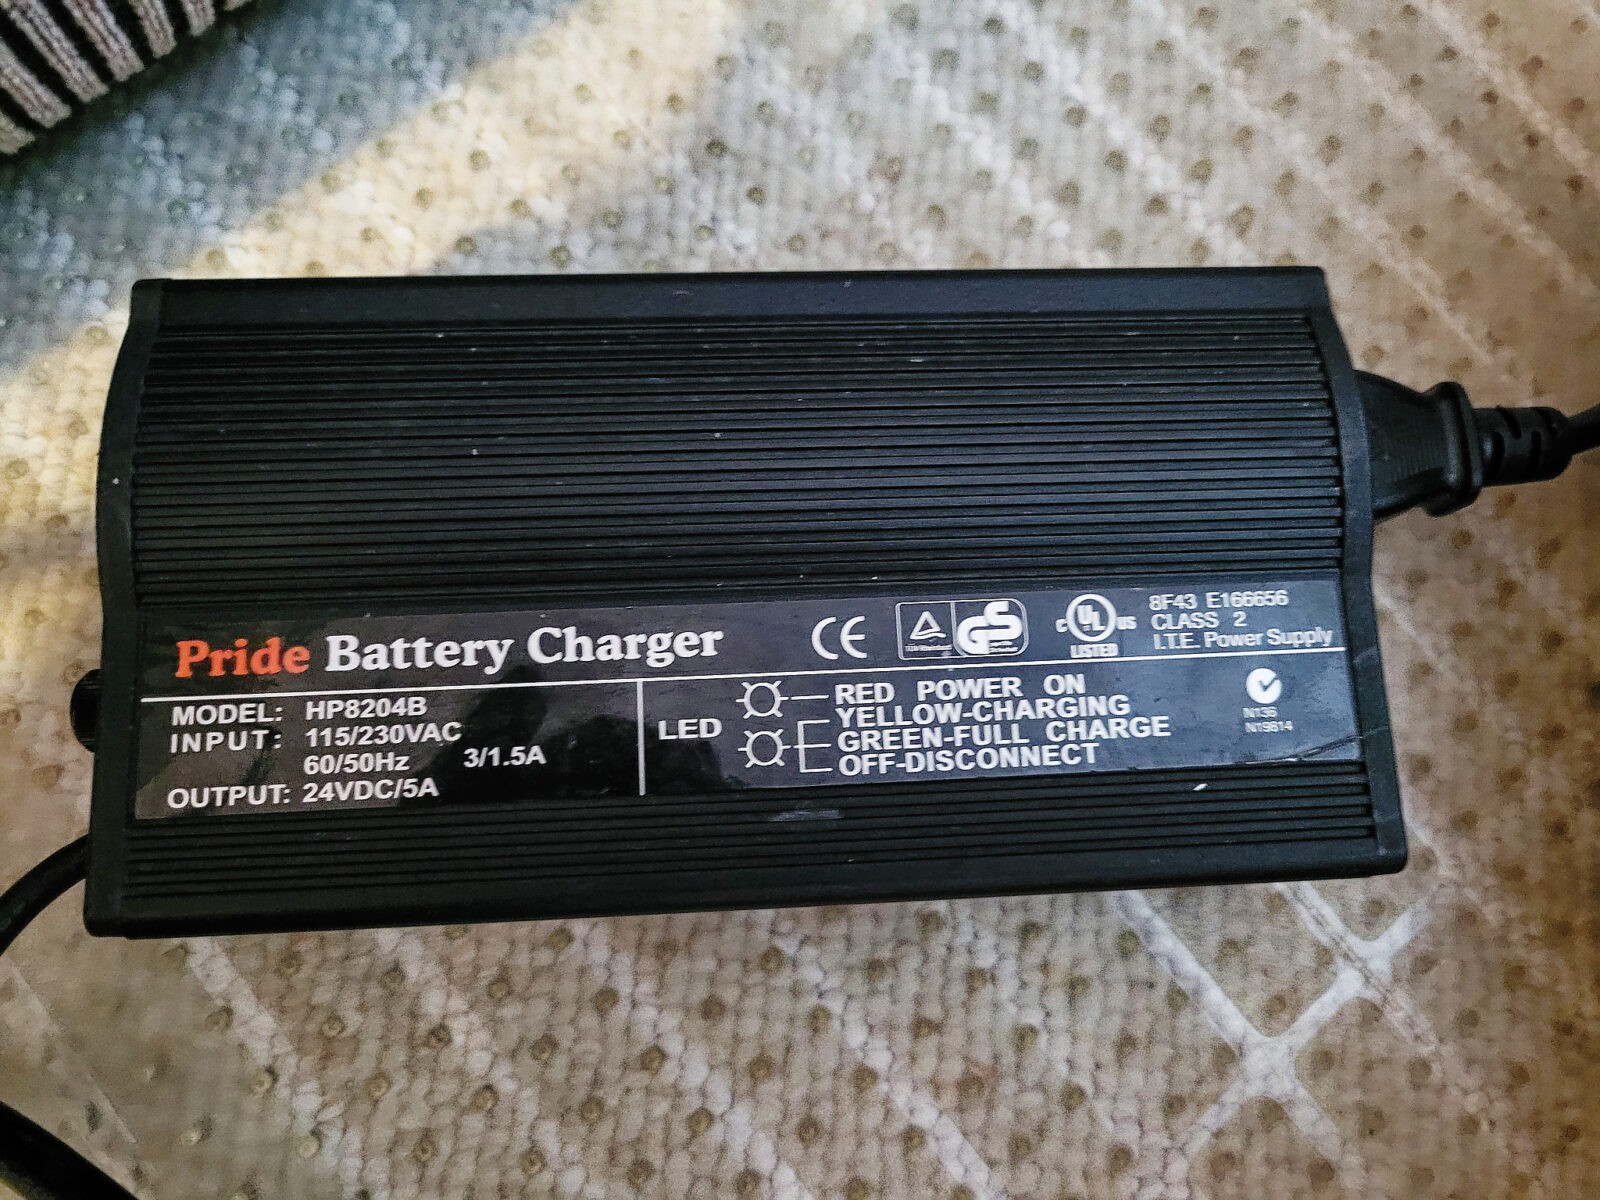
The scooter came with a Pride Mobility HP8204B charger rated for 24 volts DC at 5 amps. That would mean that if I took my meter and put it on the pins, I should read somewhere around 28+ volts (the exact volts is an “it depends” – I would have been cautiously happy with anything over 24 and stopping somewhere around 30).
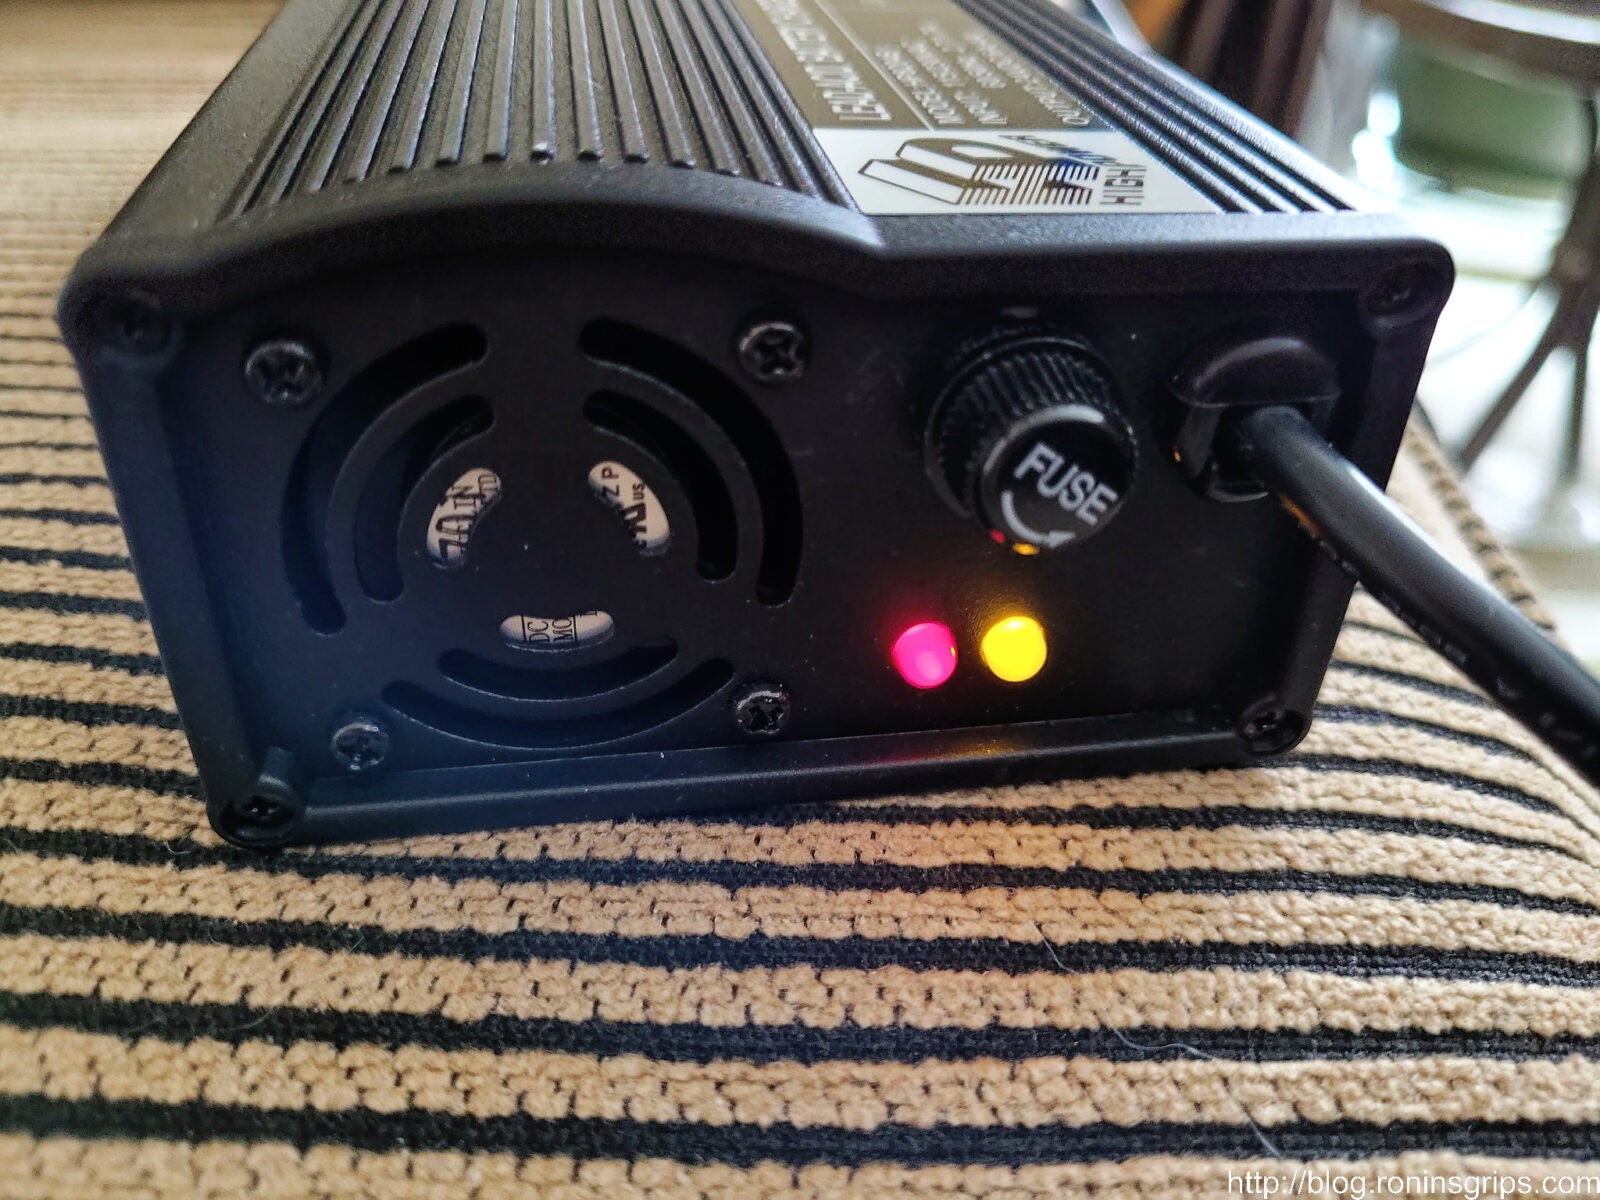
This is the original charger. Only a solid red light would come on. That indicated it had power. The cooling fan never turned on and the second LED that should turn yellow for charging or green for fully charged never turned on.
I used my multimeter on the batteries with the Pride charger connected. Only the red bulb on the charger was lit. No fan, no yellow light and no additional voltage detected on the battery terminals. I should have read 13-14 volts when doing the positive and negative tabs on each individual battery with the wires connected but I read just the 4 volts (by the way I word it like this because it was 4 and some decimal but I didn’t write down.)
The fuse you can see outside of the battery pack between the plug and a circuit breaker on the front of the battery pack looked fine and tested okay for continuity.
In looking at the battery pack, I unplugged the pin 1 should have been positive and pin 2 should have been negative. I cautiously touched my probes on the two tips because I didn’t want to unnecessarily short the system out by accidentally touching positive and negative together. Guess what? Nothing – not a thing. My auto-ranging digital meter was doing it’s usual millivolt reading garbage but there was no real voltage coming through.
The next thing I did was to turn off the original charger and remove the fuse from the end of the charger with the lights – undoing the round cap will produce a glass tube fuse. You can usually see if the wire running from one end to the other in the middle of the clear glass is intact or burned out. It looked okay and just to be sure I ran a continuity test with my meter and it was okay.
I also pulled apart the plug that goes into the battery pack just in case something was lose and it read zero volts too. In case you are wondering why there are three pins (I wondered why) – pin three provides voltage to the scooter so the little computer knows the charger is still attached and will not let the driver move the scooter – pretty good idea.
Okay, it was time to Google the scooter and the charger to learn more. The fact that only the red light was coming on but not the fan and/or the yellow charging light was making it look the the charger had failed. I did the “sniff” test to see if I could smell if anything had burned out but if it had, it must have been some time ago as I didn’t detect anything. In short, the charger was history.
There are tons of charger options on Amazon but I want to caution you against the little sealed chargers. They do work but they are going to get hot and they will probably fail at some point due to all of that heat. There’s a reason Pride went with the a fan cooled charger – they get hot converting AC (wall outlet) current to 24 volts DC (direct current).
Companies like Pride rarely make their own chargers. They will either use an existing charger on the market and not bother covering up the name of the maker or they will pay for it have their brand name on the decal. Pride opted for the latter or at least that’s what I think they did. The trick to realize here is that by searching on HP8204B, you can find either the original maker or another firm who did the same thing – had their name put on the charger. Regardless, you can save a bundle off a new Pride charger.
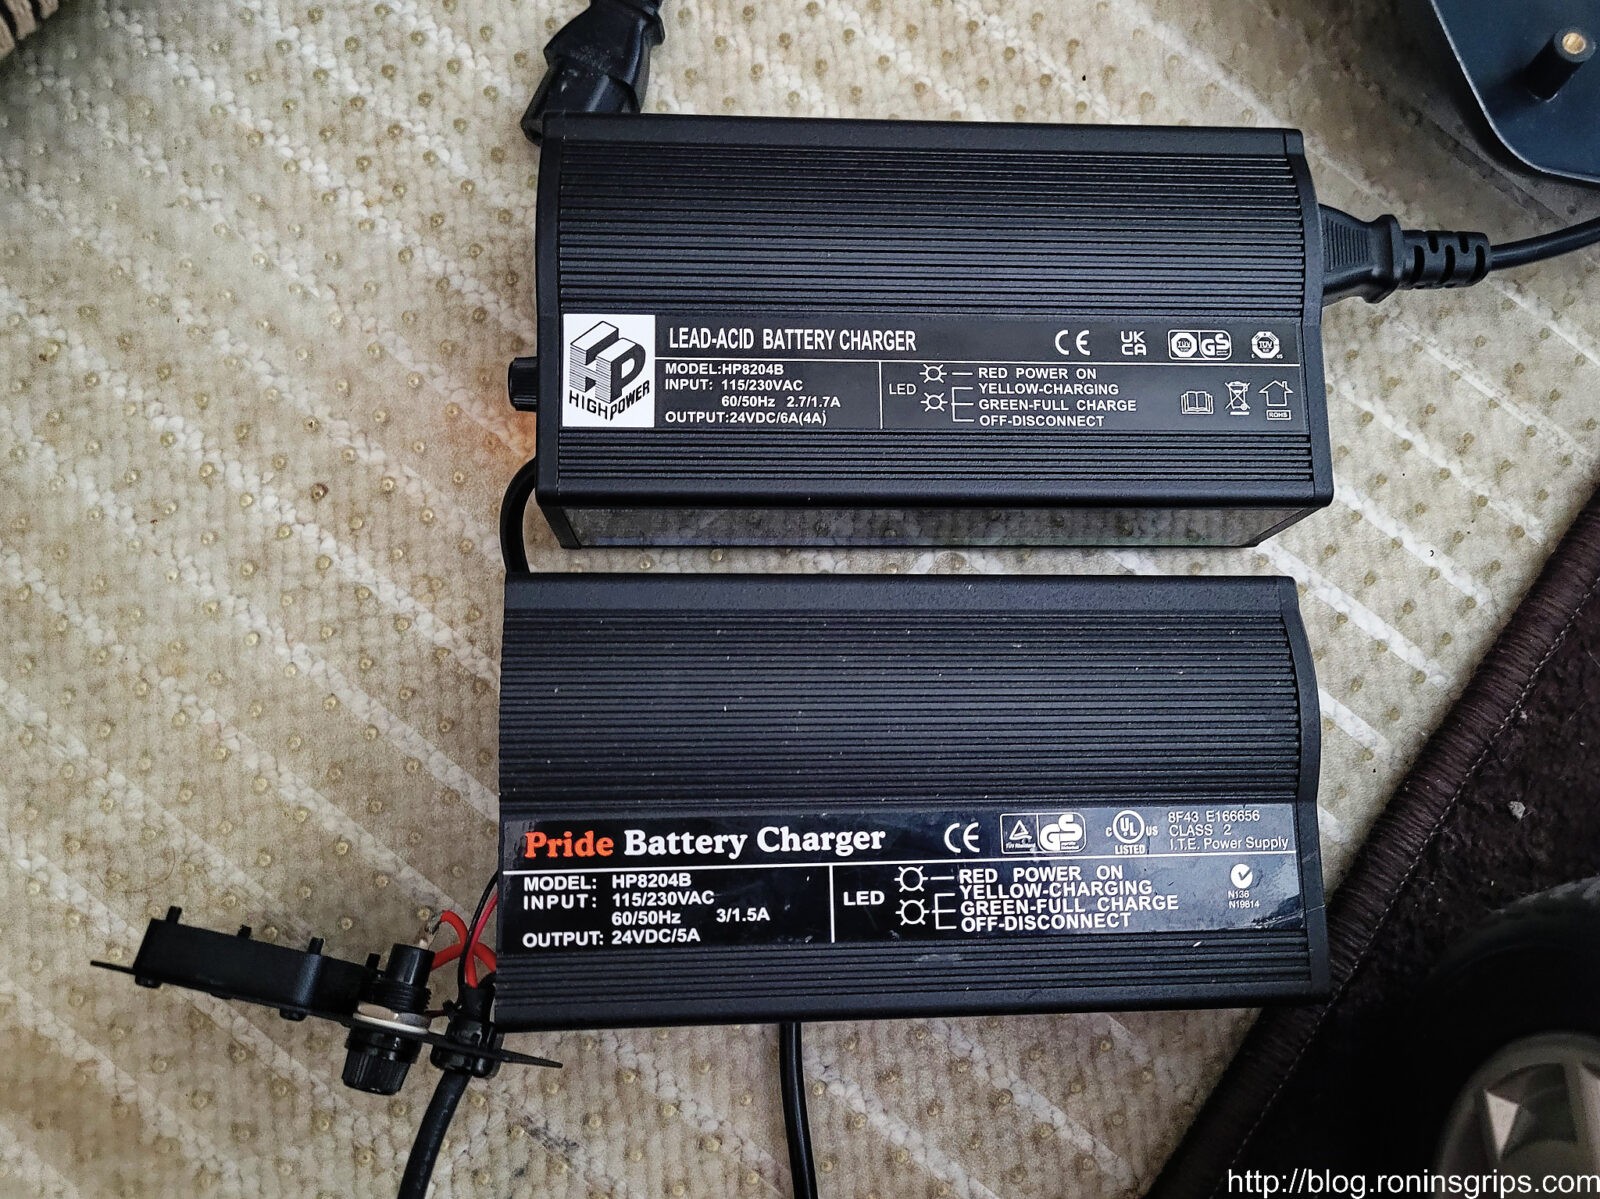
In my case, I found a seller named “ENCAREFOR” on Amazon selling what seemed to be the exact same charger but with the label “High Power” on it. Besides the label, the rated output is at 4 amps vs. 5 which means it will just charge a tad slower. It was going for $89.99 with Prime One Day shipping but I held off as I realized I needed to test the batteries and the scooter before I spent more money. In other words, I knew the charger was bad but didn’t want to spend more money if the scooter itself was burned out – if it was just the batteries, I could still order them.
By the way, you can buy used OEM Pride chargers off of eBay. I’ve had mixed experience with used chargers in general so I tend to just buy new. If you don’t mind gambling on a used one, they are on eBay.
Used a Noco Genius Car Battery Charger For Testing
At this point I was pretty sure it was charger and also thought that the batteries might be okay. Why? First off, there is a sticker on the mast pole of the seat that said the scooter was made in 2019 – that meant it was three or just under three years old (especially given I was doing my troubleshooting in mid-February 2022). Batteries can last maybe five years give or take. If the voltage was zero, I’d bet they were junk but since I was getting just over 4 volts from each battery independently, they weren’t completely dead. I started to wonder if a good reconditioning and charge might work to bring them back to life. I had just the charger to try.
Any 12 bolt charger can do the job provided you charge the batteries one at a time.
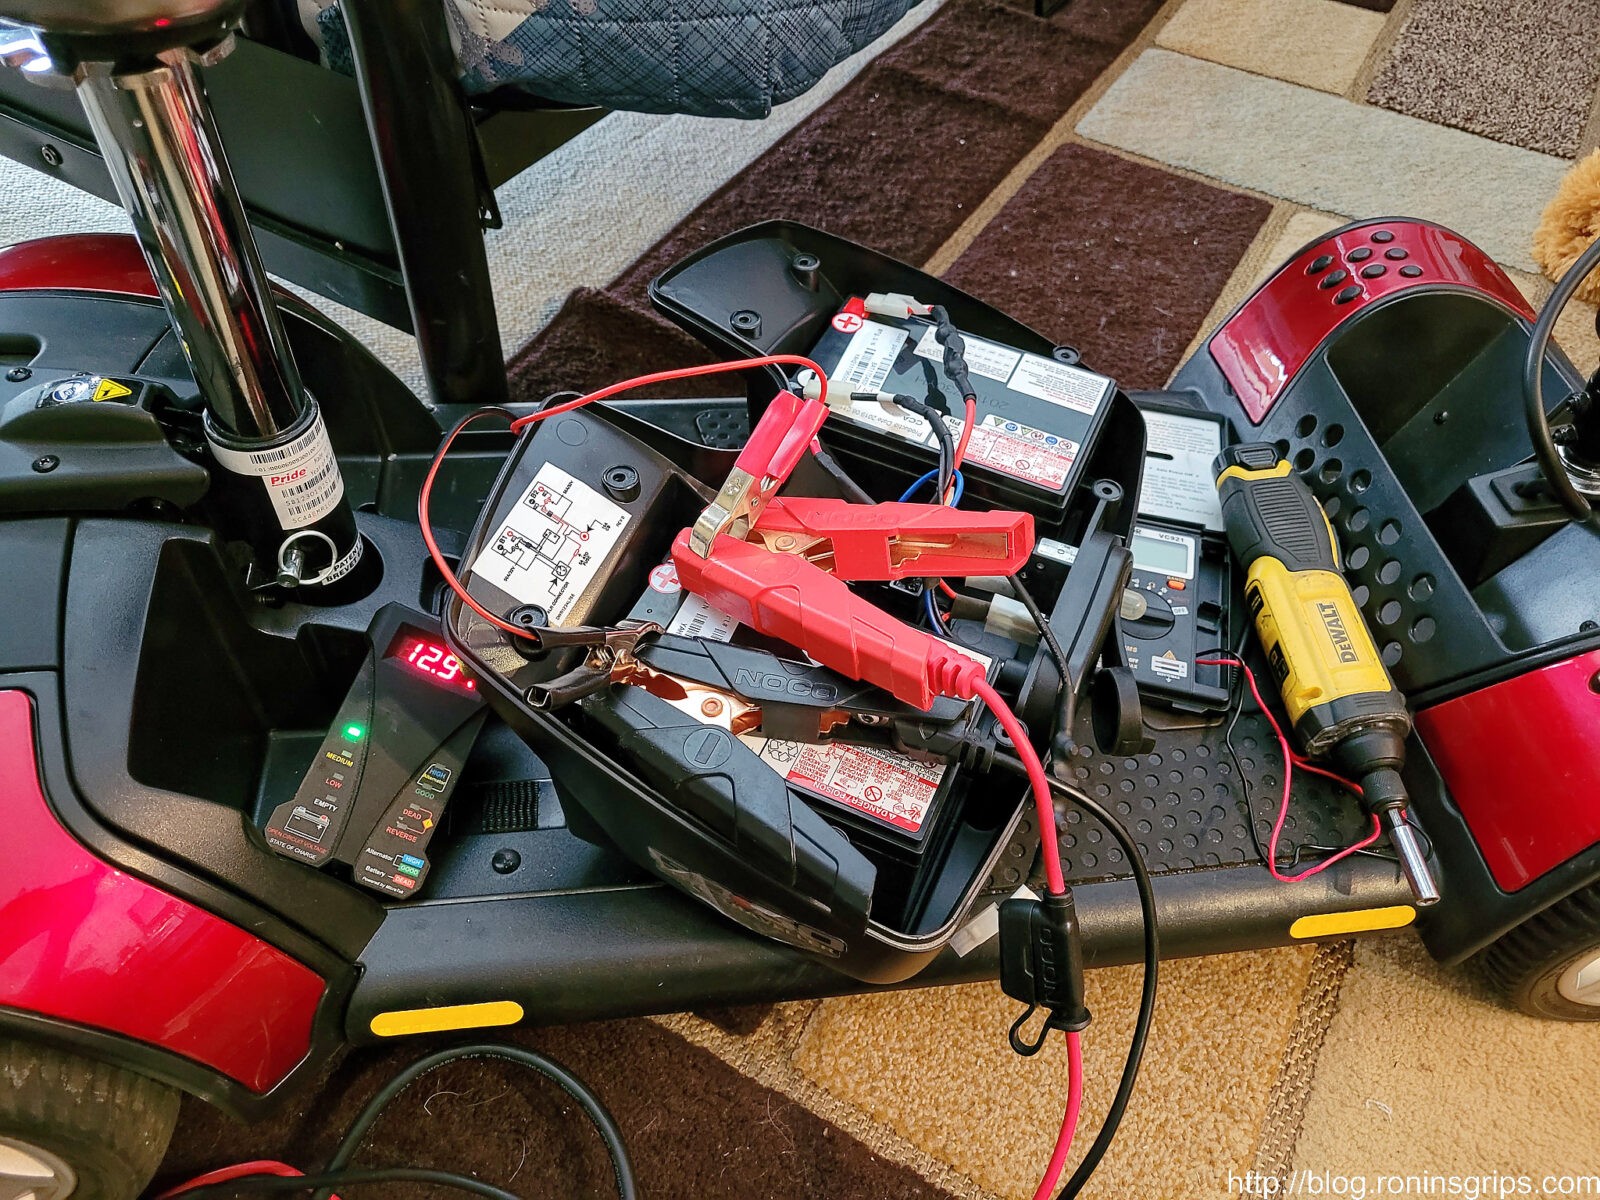
I undid the battery cables from the first battery only and directly connected the Noco to it. I charged for one cycle and then ran a repair cycle. During repair, the charger pulses the battery to desulfinate it.
Don’t let all the wires intimidate you. I hooked the plus (red) clamp of the Noco to the plus (red) terminal of the battery on the left, I then hooked the negative (black) clamp from the Noco to the black terminal of the same battery. I have a small voltmeter that clamps ,on attached also so I could monitor progress — that’s strictly optional.
Results
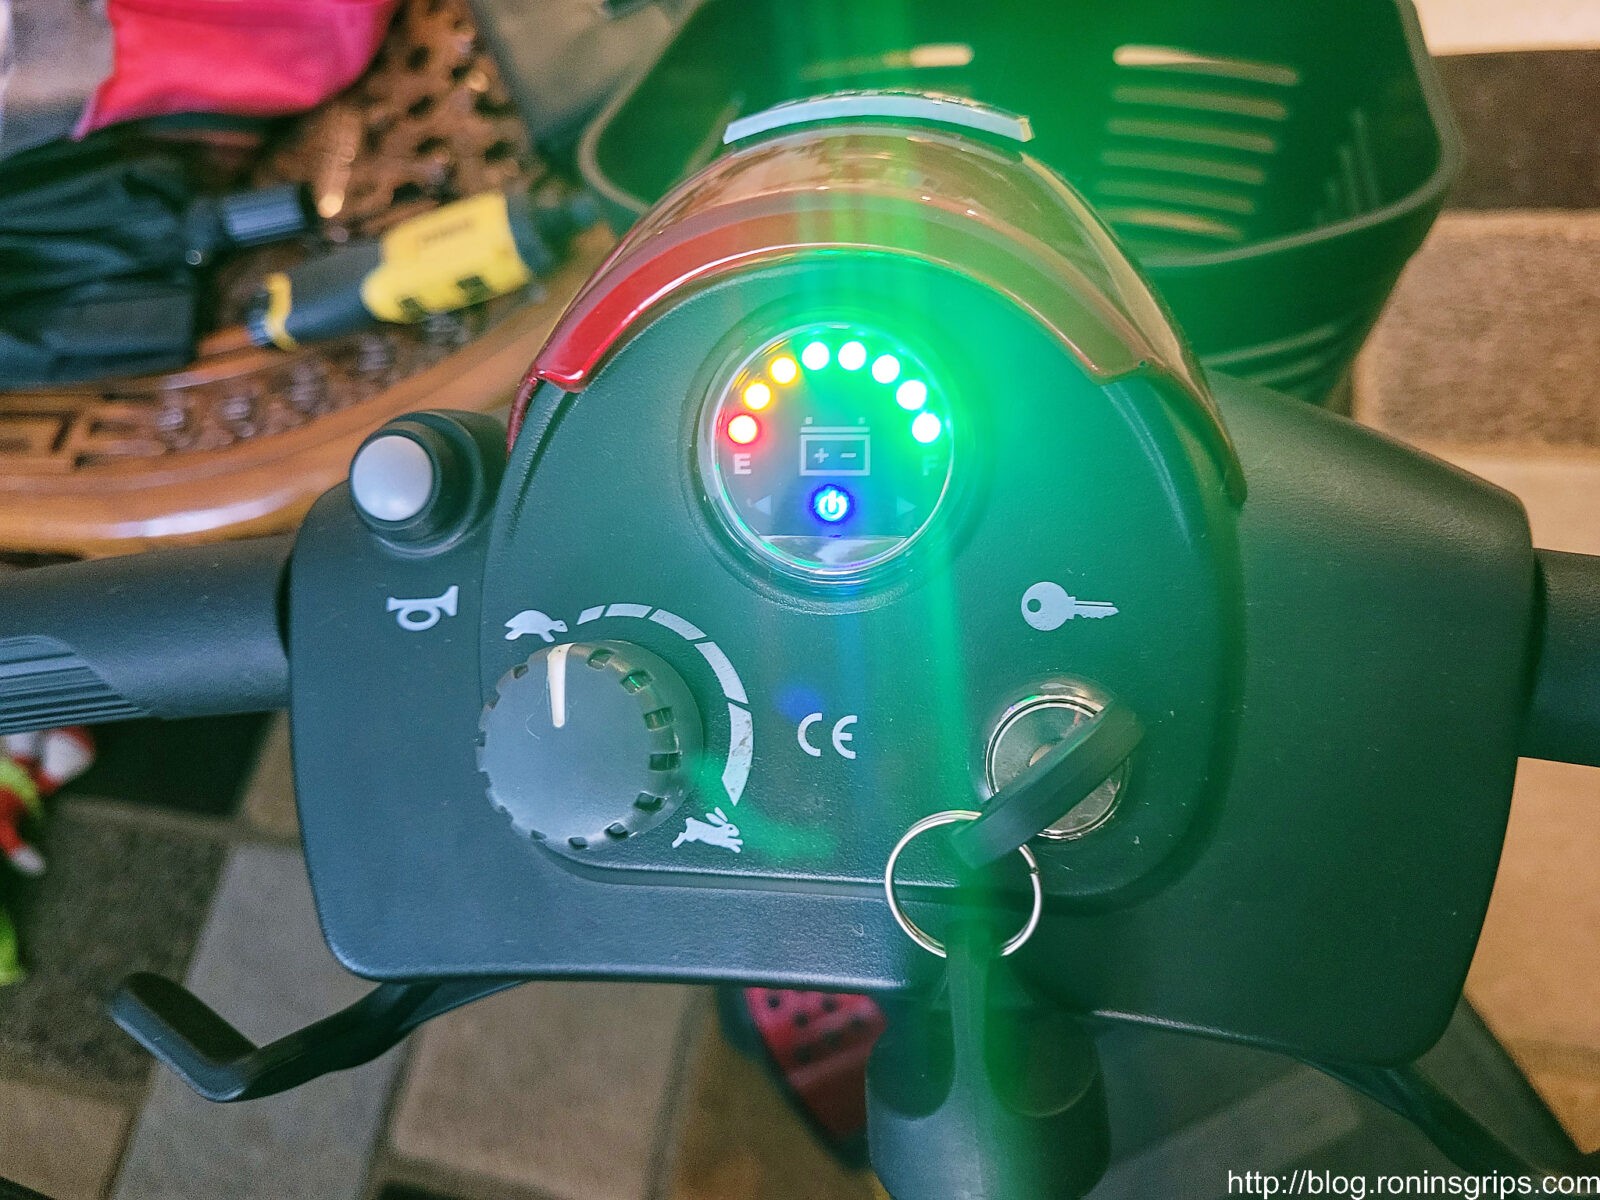
When the charging was done with both batteries, I connected the scooter’s cables back and seated the battery back into its cradle. I then turned the key on for the scooter and moved it forward and backward. It worked just fine. I checked the batteries and the voltage was holding – it wasn’t dropping down.
This is what I wanted to see — the batteries were fully charged. I drove the scooter around the house and the charge never went down. I also learned that scooters are bizarre little things to drive – their turning is like sitting upright on sensitive go cart.
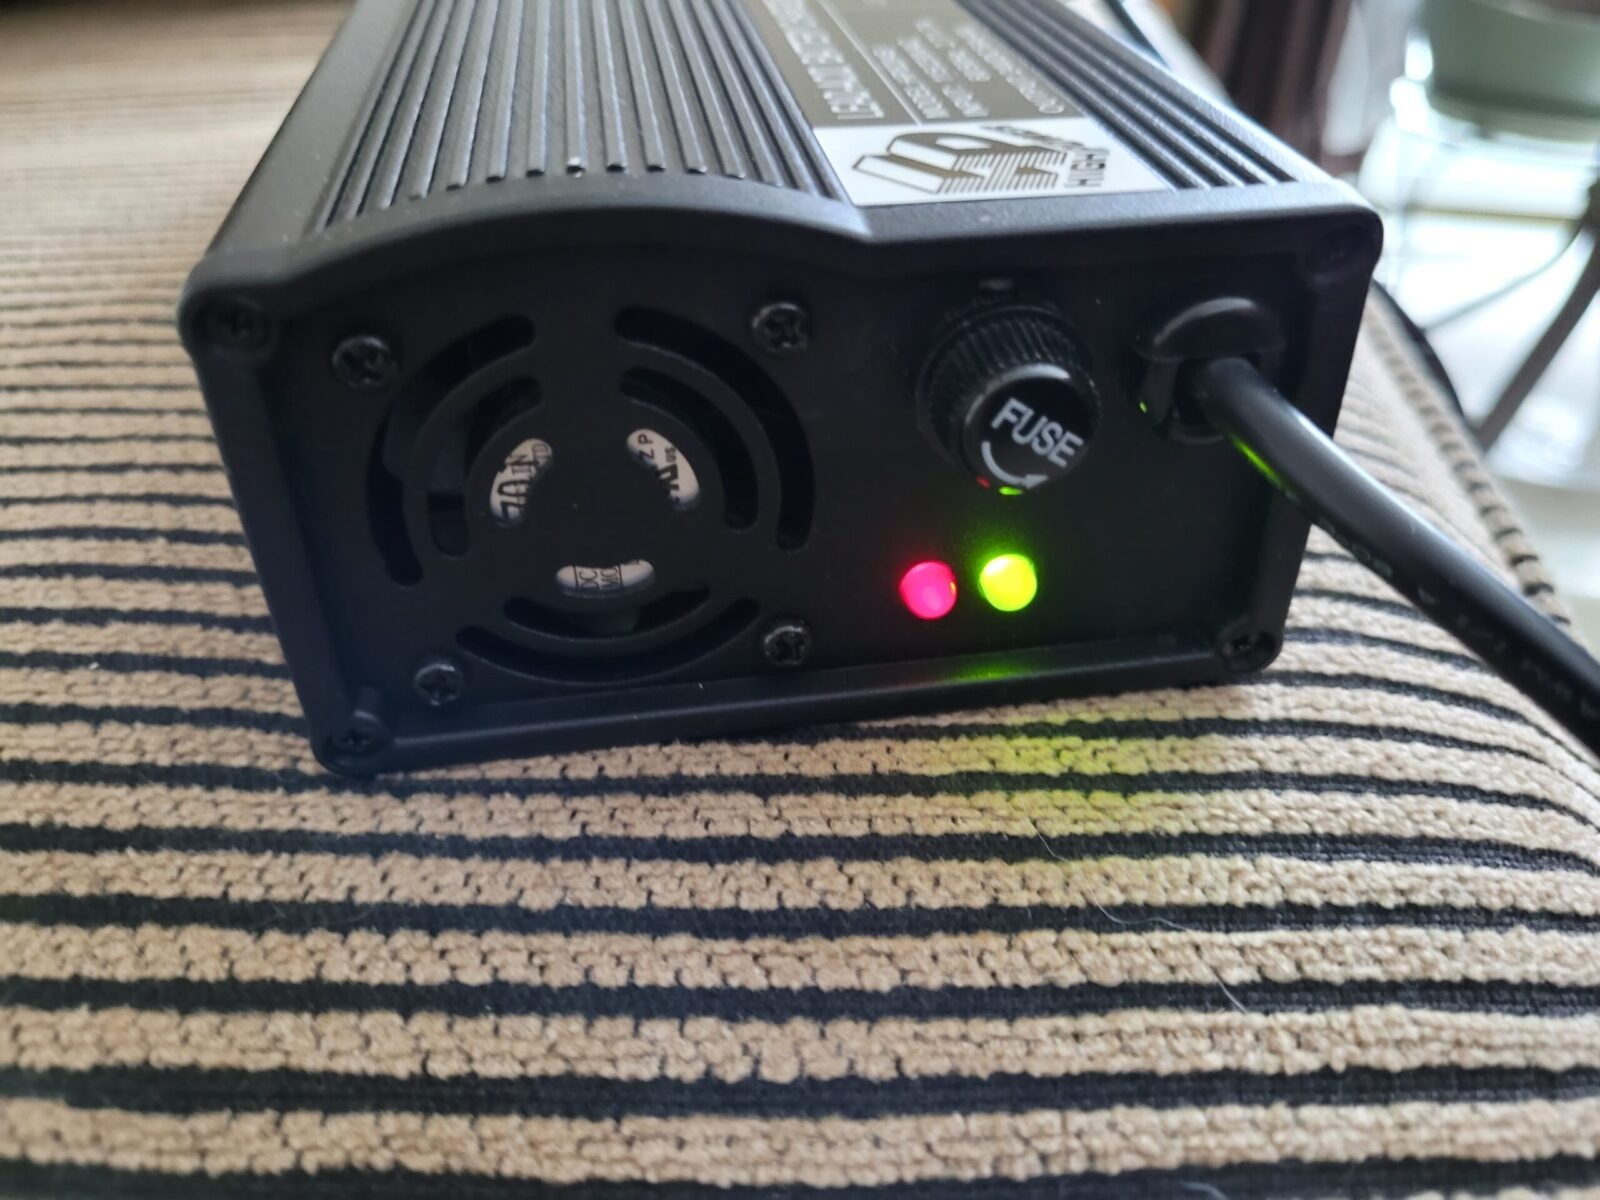
Other than the decals and the lower 4 amp output, the new “High Power” charger looks identical to the Pride unit. Note, I’d opened the front of the unit up to inspect the inside — the front panel is what is dangling in the bottom left of the photo.
As soon as I plugged in the new charger and turned it on, the red power light and yellow charging lights came on.
By the way, the charger’s fan will make a pulsing or surging sound as the speed changes as it nears the end of charging. This is normal and will give you an indicator that charging is almost complete.
When the scooter’s batteries are fully charged, the yellow light will turn green. The fan will make a pulsing sound as the charging nears completion.
Bottom line, the batteries and scooter were fine – it was just the charger that had failed so I ordered the replacement above from Amazon and it topped off the batteries. I drove it around the house some and everything was working just fine.
In Conclusion
So I learned a few things. The scooter was exceptionally well made is my first comment. Second, I should have started from the wall and worked towards the scooter vs. focusing on the batteries to start based on what the fellow told me.
I should have confirmed power to the charger, then that there was no power from the charger to the scooter and ordered a new charger. I’d bet a new charger could have recovered the batteries – the documentation says they can recondition a battery but who knows. Even though I started with the battery, at least I could run the Noco charger through charging and repair cycles – I’ve used it to recover a number of really compromised batteries over the years.
The scooter is ready and now we need to wait for warmer weather to let my mother-in-law practice in the driveway. I hope this story helps you out.
Note, I have to buy all of my parts – nothing here was paid for by sponsors, etc. I do make a small amount if you click on an ad and buy something but that is it. You’re getting my real opinion on stuff.