Tag Archives: Home repair

Use Super Glue to Seal and Stabilize Wood

Have you ever had wood that is in tough shape or is too soft to work with? A quick fix is to use super glue on the wood and let it set. Let’s talk about this for a minute.

Super glue is actually a family of glues called “Cyanoacrylates“. The patent for the original product goes back to 1942 when BF Goodrich was looking for a clear adhesive for gun sights in WWII. As they say, the rest is history.

There are many different brands and types of super glue. For the brand, I stick with name brand and usually get biggger bottles from firms such as Bob Smith Inc (BSI), Starbond, Loctite, Gorilla Glue, etc. With the no-name generics, you never quite know what is really in the formula or how good it is.

The glues are available in different viscocities/thicknesses also ranging from Super thin to normal, to gel, etc. For our purposes, we want th thinnest glue we can buy. Why? Because it will really soak into the wood and follow all of the little cracks that are opening, seal and reinforce them.

So, when I say I am using it to seal and stabilize, what do I mean? To seal means that water can’t get in. To stabilize means it is soaking into the soft wood, filling small cracks and when it dries it will harden the treated area. I’ve used this to fill small cracks in wood rifle stocks, knife handles, tools, furniture – anything with wood.

Super Glue is good for stabilizing but not filling an area. If you need to build something up, fill in a gap, or rebuild an area, then use an epoxy.

These slats bench slats had chunks of wood missing that I built up using epoxy. I sanded them down flush and then applied two coats of thin CA glue to the surrounding wood to stabilize it. I then used an opaqe wood deck stain and you couldn’t even see the repairs.

I apply several coats. The first one I apply quite a bit of glue and just let it keep soaking in. You’ll see it following cracks and what not. Once I get the surface soaked, I stop and let it cure. I typically wil do 2-3 coats/applications depending on how bad the wood looks. Usually after the second coat everything is sealed stabilized.

As it cures you will see a light white-ish smoke. Don’t get the fumes in your eyes or it really stings – you don’t want to breath them either. Small pieces like a knife handle aren’t too bad. For pieces bigger than that, all of the fumes really make this something you either want to do outside or in a room with really good ventilation.

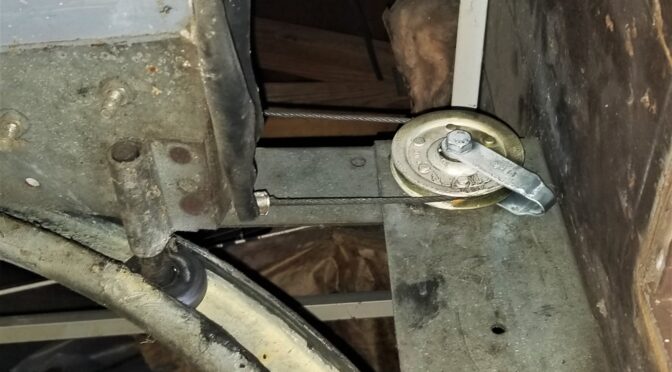
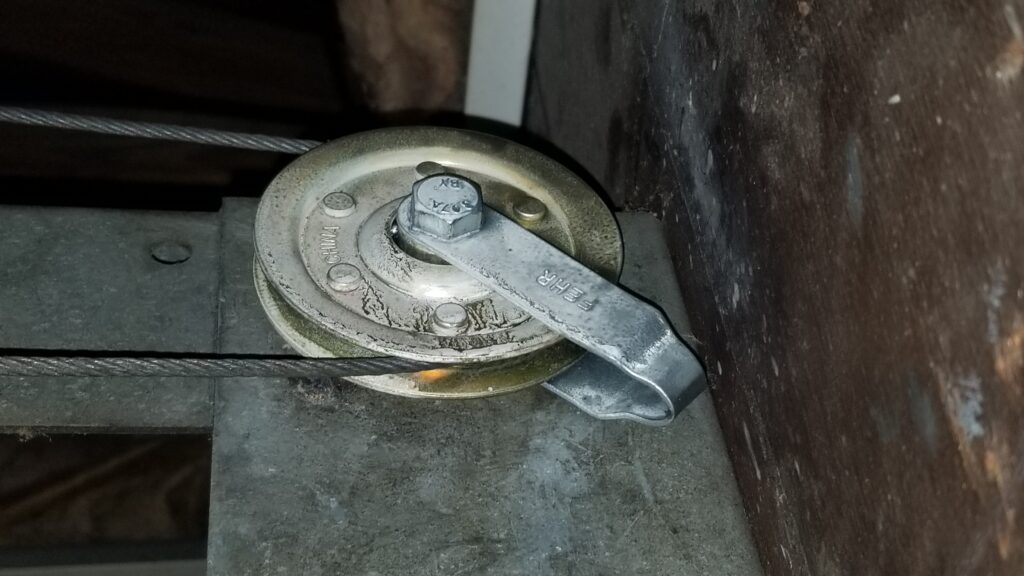
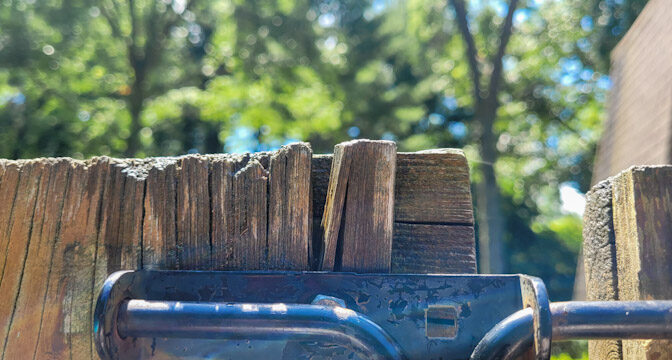
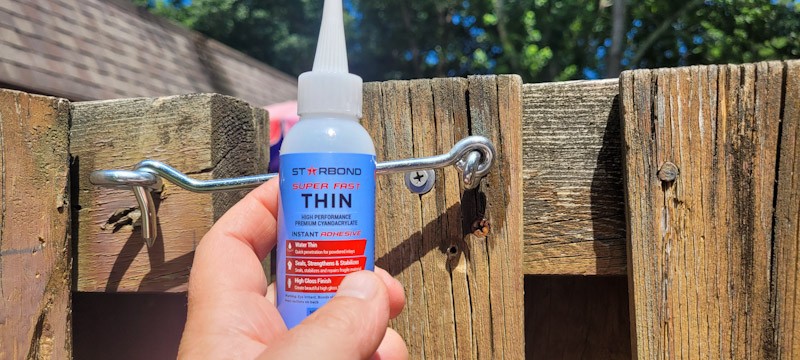
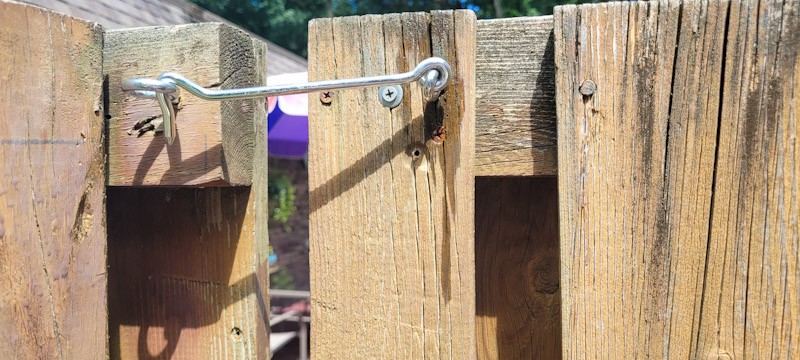
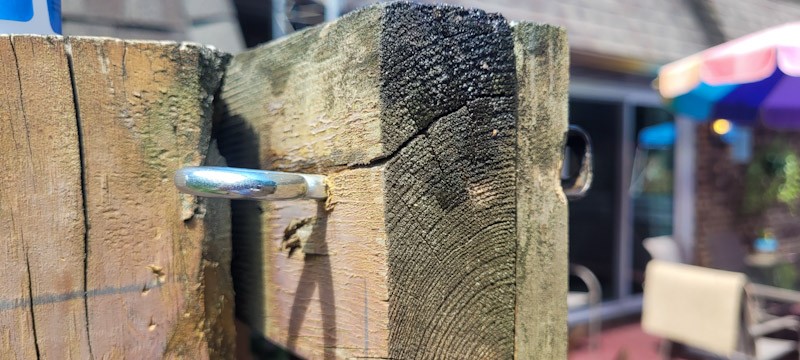
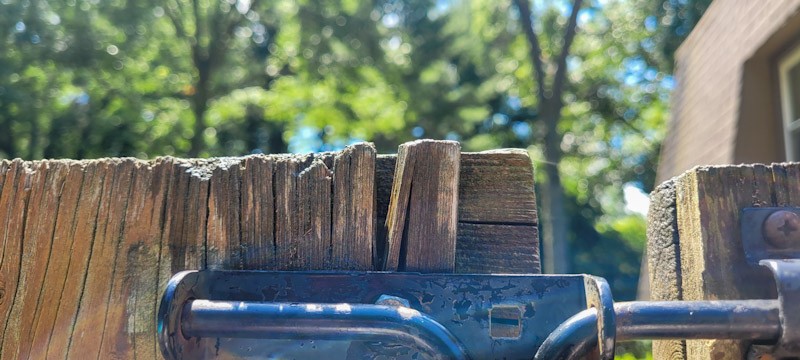
Let me show you a few photos form a recent project where I needed ro reinforce the area around a wood gate latch. The wood was in really tough shape and I didn’t have the time to go to buy the lumber, cut it and make a new one. I keep thin super glue in stock at all times for all kinds of projects so I just did that

Starbond makes good CA glues from my experience. I’ve used a number of their forumlas and been happy with the results. As you can see, the wood is in tough shape. It probably should be replaced but I don’t have the time.
I let gravity work with me and apply the glue to the top of the wood and let it soak into the end grain. I could see it going down the board and the wood looking wet where it travelled. You’ll use a fair amount of glue doing this, I went across the entire top of that board and watched for the glue to penetrate – in this case I wanted it down near the screws. When it the glue cures, the stabilized wood will still a bit darker than the surrounding untreated areas.
This board was in really tough shape. It soaked in a lot of glue and I kept adding it until I saw it saw it in that big crack.
Here, the CA can help seal the top and stop the small cracks but there is no way it can fill the big crack.

Summary

You can definitely use thin super glue to seal and stabilize wood. Use a reputable brand and work in a well ventilated area. What I have been using the most lately is Starbond and they have a full lineup – click here to see them on Amazon.


If you find this post useful, please share the link on Facebook, with your friends, etc. Your support is much appreciated and if you have any feedback, please email me at in**@ro*********.com. Please note that for links to other websites, I may be paid via an affiliate program such as Avantlink, Impact, Amazon and eBay.


An Excellent Garage Door Pulley Replacement Is Available on Amazon

Folks, I have a really heavy garage door – I don’t know the exact weight but it uses springs rated for a 400 pound door – that much I can tell you . Some years back I replaced the pullies with two units I got from Home Depot. They did last maybe three years (I’m not exactly sure how long but it wasn’t very long relatively speaking) and then the door started jamming and the cable was jumping the pulley so I needed to get some replacements. Note, I was only having a ton of trouble on one side but garage door pullies are best replaced in pairs.

I got a good look at the pulley and it was fried. For whatever reason, I did not get a picture of it before I threw it in the trash. The pulley was bent away from the axle, the bearing were very loose and the outside lip of the pulley that should hold the cable in place was bending/rolling outward and no longer retaining the cable – no wonder there were constant problems.

So, I first went to Home Depot and was not impressed. I then started reading on pullies on Amazon and found the units I am now running. They are amazingly more beefy than what our local Home Depot had.

The sides of the pulley are stampings but they are made from heavy gauge steel and the groove in the pulley is deeper than what I originally had.
The bearings turn smoothly and there is no play. I was very impressed.

If you are looking for a new 3″ diameter pulley that uses a 3/8″ bolt to mount, I’d definitely recommend these. There’s a good reason they have almost five stars with 158 reviews.

Installation

I’m to the point where anything that is easy really makes me happy. This was really easy. I’ll tell you what I did for my door and your design may require different or additional steps.

  1. I opened the garage door to remove the tension on the cables.
  2. I worked on one pulley at a time.
    • I removed the cable from the pulley
    • Used one wrench to hold the nut in the back and a socket in the front to remove the old pulley (it was a wreck)
    • Installed the new pulley along with the shackles to keep the cable in place just in case – that means running the bolt through the assembly and back into the hole on the garage door’s wall frame.
    • Put the cable back on the pulley
    • Sprayed Teflon dry lube on the bearings. I don’t like oil as it collects dust and dirt but that’s just me.
  3. Moved stuff out of the way
  4. Tested the door
  5. Done
You can see the new pulley mounted on the frame. The powdery look is the Teflon dry lubricant. I moved the shackle around some to try and figure out where it might do the best to keep the cable from jumping out. The pulley’s groove is so deep that I honestly don’t think it matters in my case but it is there for added insurance.

Conclusion

Happy to report that these are rock solid replacements – it came as a pack of four so I have two for the future as well – if I ever need them. I’m very happy with the results – the door opens and closes very smoothly and the cable no longer jumps the pulley. It’s also much quieter I notice.


Note, I have to buy all of my parts – nothing here was paid for by sponsors, etc. I do make a small amount if you click on an ad and buy something but that is it. You’re getting my real opinion on stuff.

If you find this post useful, please share the link on Facebook, with your friends, etc. Your support is much appreciated and if you have any feedback, please email me at in**@ro*********.com. Please note that for links to other websites, I may be paid via an affiliate program such as Avantlink, Impact, Amazon and eBay.