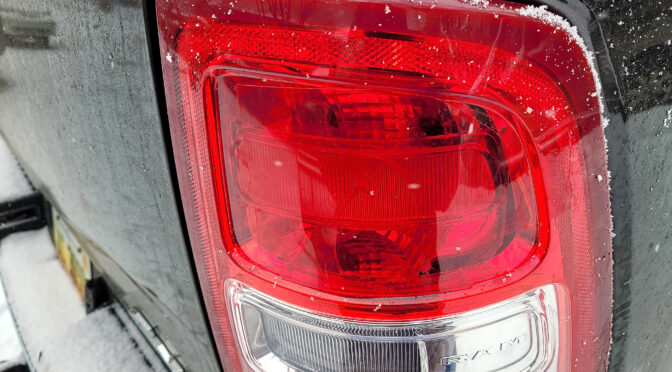
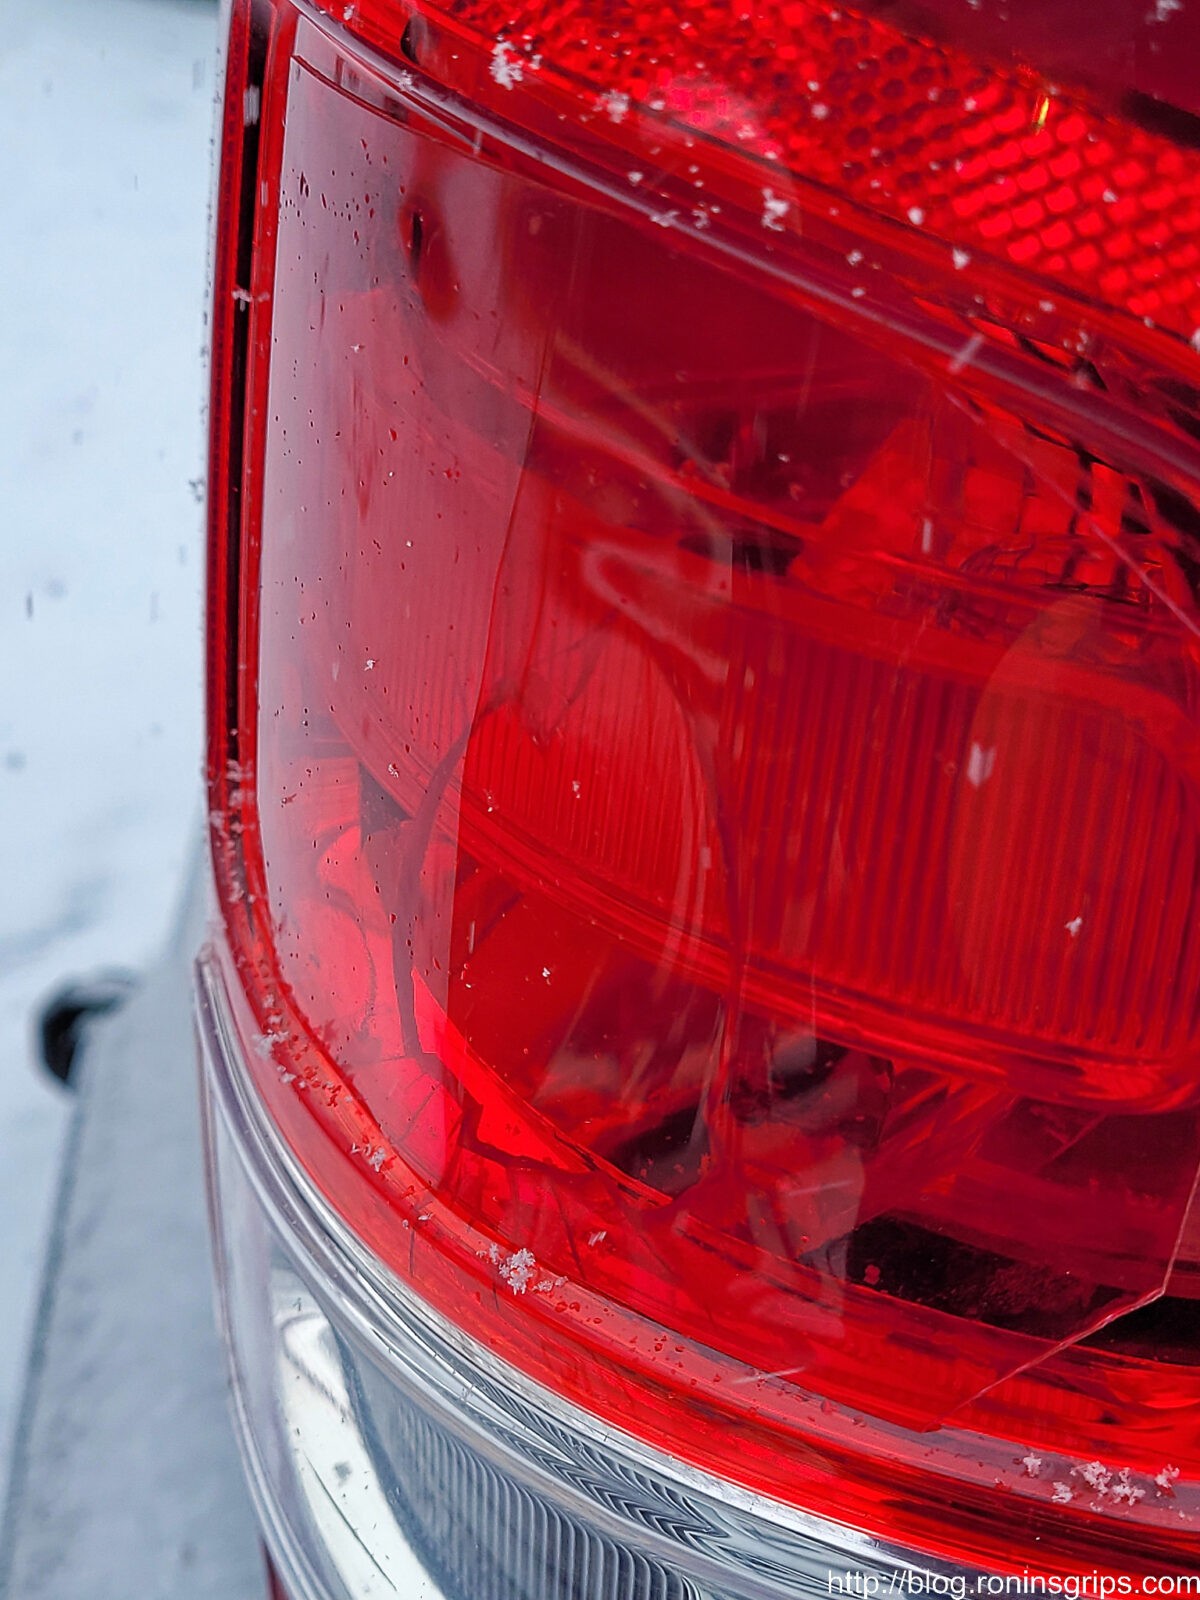
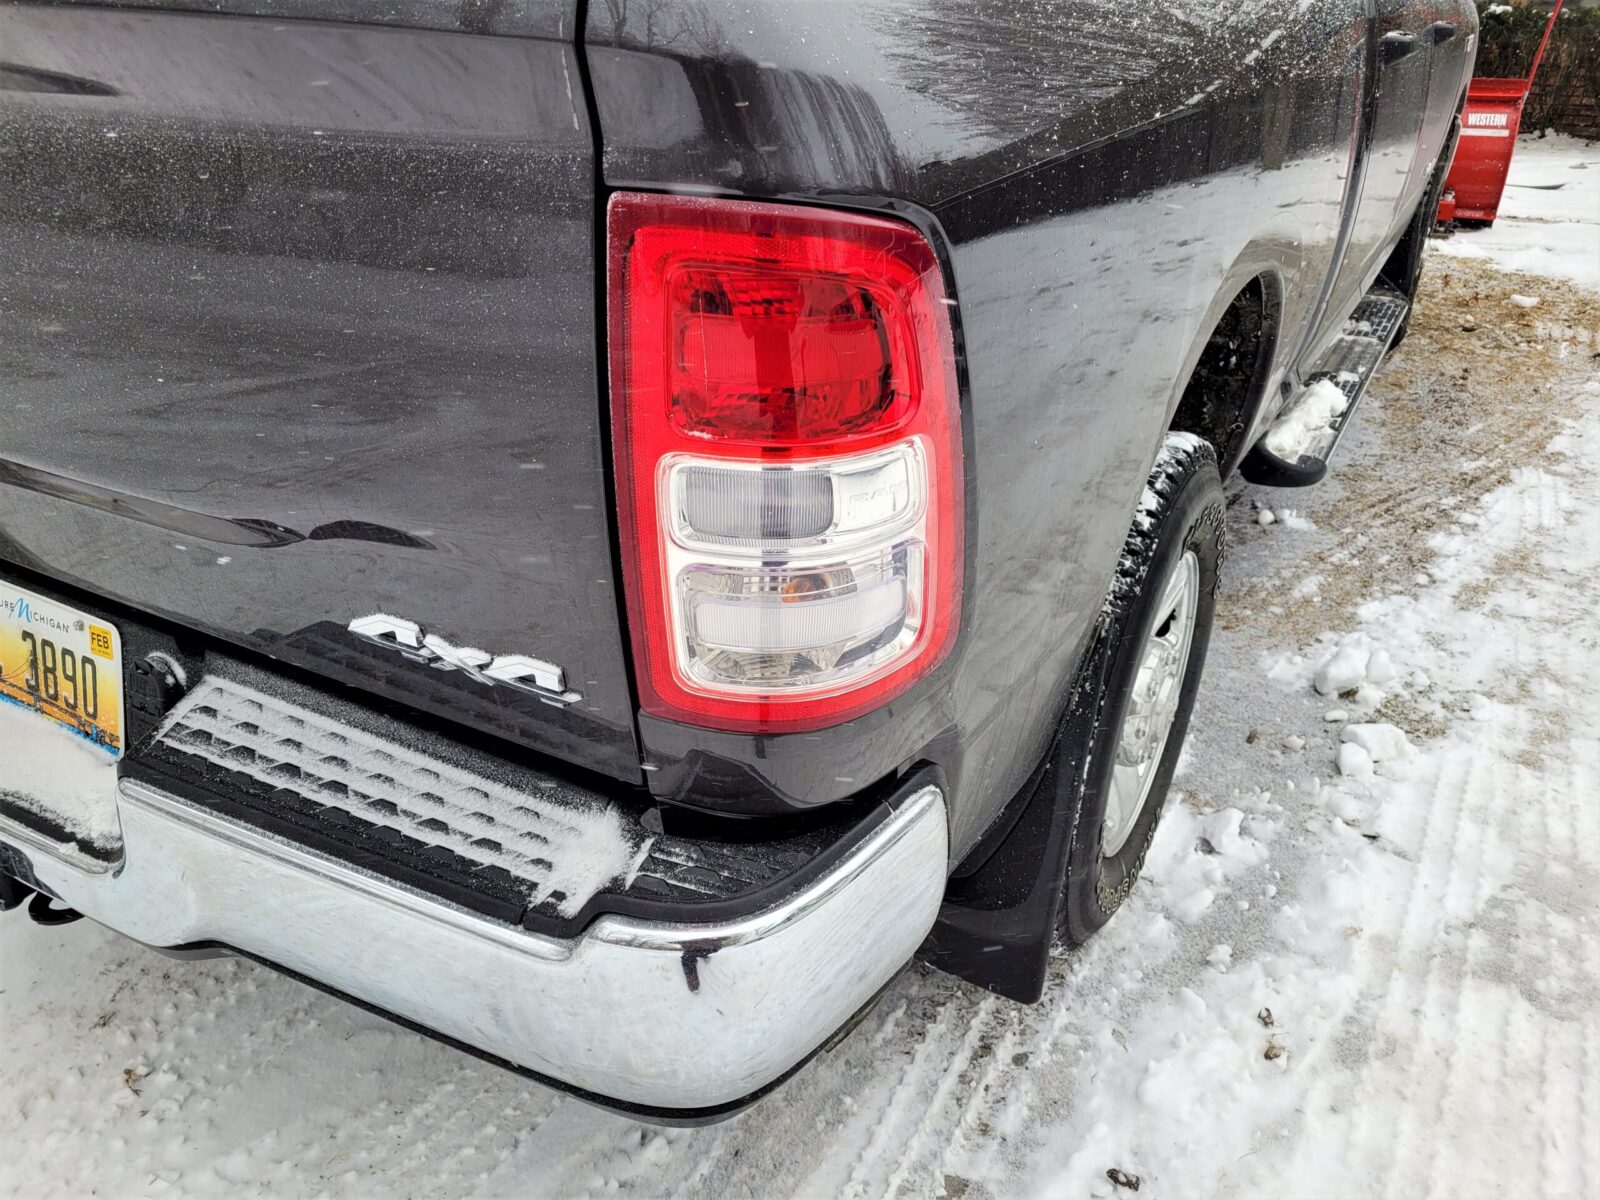
Okay, it was late the other night and I was tired. I backed up my 2021 Ram 2500 and heard the truck hit something. “Crap” I thought as I remembered my Western plow was disconnected and sitting on the ground in the area where I was backing up. Well, I hoped I had just nudged the plow frame with my rear bumper but when I got out, it turned out that one of the lights on the plow frame had busted out a golf ball sized part of the passenger side red brake light lens – it was a good thing I was going slow at least but what to do?
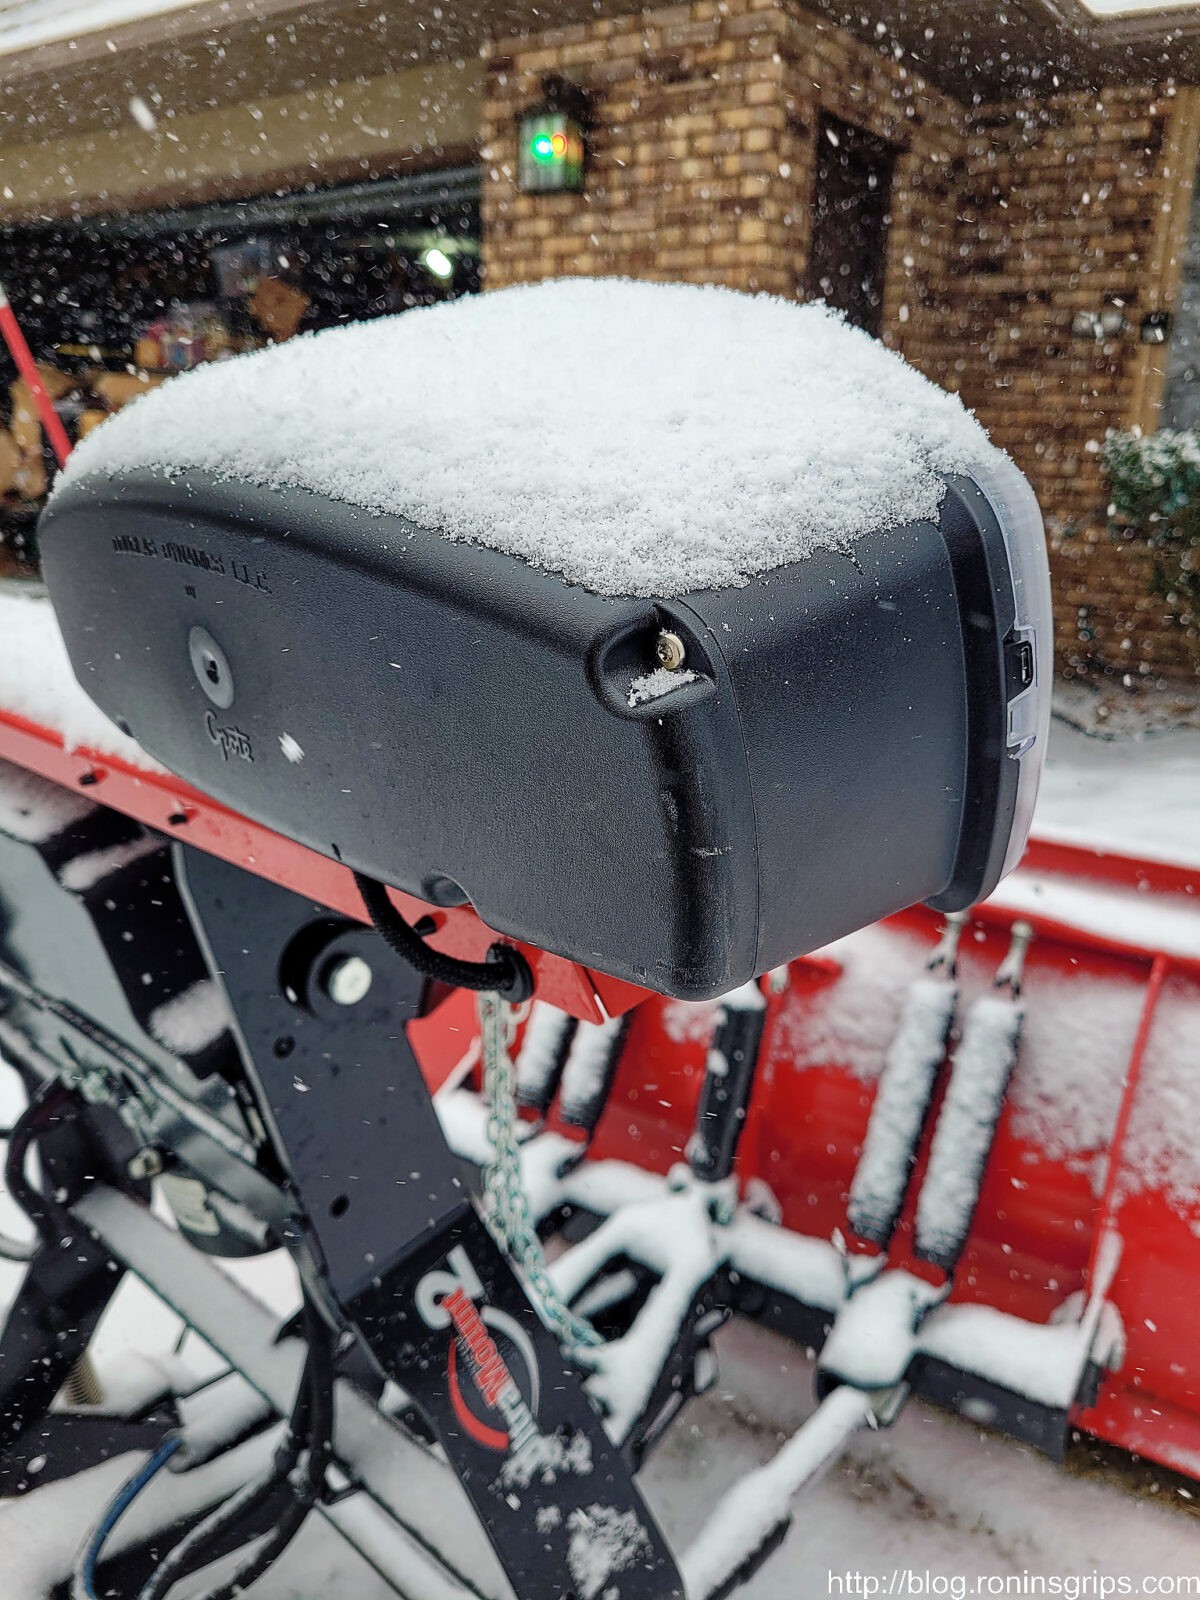
If you notice the scuff mark on the back edge of the light, that’s what hit the passenger side tail light and busted the lens. I’m definitely glad I wasn’t going fast.
Well, first I have to tell you I felt pretty stupid. I literally forgot the plow was back there but then my next thought was “how do I fix this?” It was about 11:15 at night, 9 degrees out and snowing. If there’s one thing I have learned about myself, it’s that my patience is gone when I am tired and that was the not the time to try and fix something. I didn’t want the light assembly to get a ton of snow in it so I just lightly stuck some duct tape on it and work on it the next day.
Looking For A Quick and Easy Fix
First thing I did was to get online and order a new right side tail light assembly (68361714AD for my Tradesman) and that will take some time to come arrive – I literally ordered it yesterday morning and am waiting as I write this. At any rate, I needed to apply a temporary fix to the busted lens. In college, I’d used a red self-adhesive tape to “patch” a busted brake light. I figured I would do something similar because I wanted the lens closed and also you can get a ticket for having either a white light showing from a brake light or an inoperable light. The other thing was given the weather and supply chain problems these days, I wasn’t sure how long I would be waiting for the replacement light assembly so off to Autozone I went.
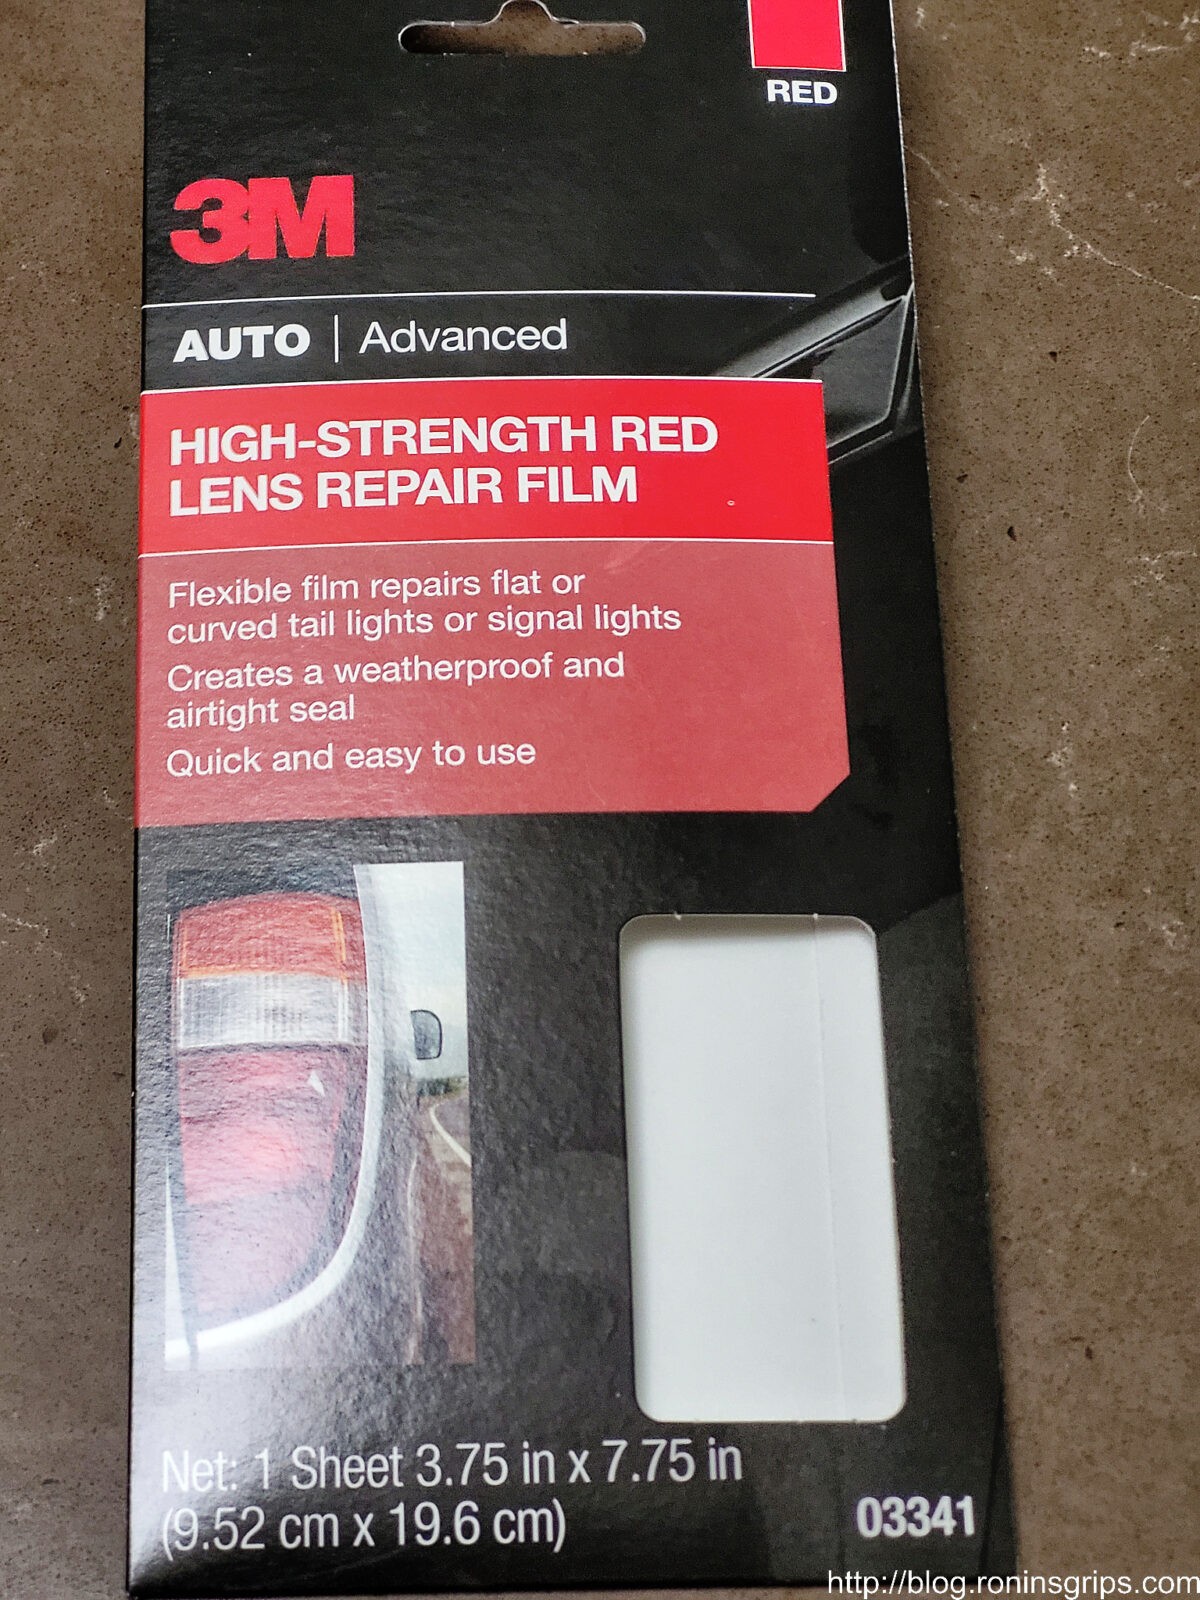
Autozone carries two type of repair kits both from 3M – one was a roll of red colored translucent tape ($4.99) and the other was a semi-rigid red translucent film ($8.99). I opted for the latter because I could cover the hole without seams and figured it would blend in a lot better. Now I have not used the 3M tape but the one I used in college 30+ years ago faded in the sun and didn’t stick to red hot so I just wasn’t that gung ho on it but I will tell you that my general experience with 3M is that they turn out top notch stuff so I am sure it would have been better but I went with the film and not the tape.
This is the front of the package in case you are hunting for it.
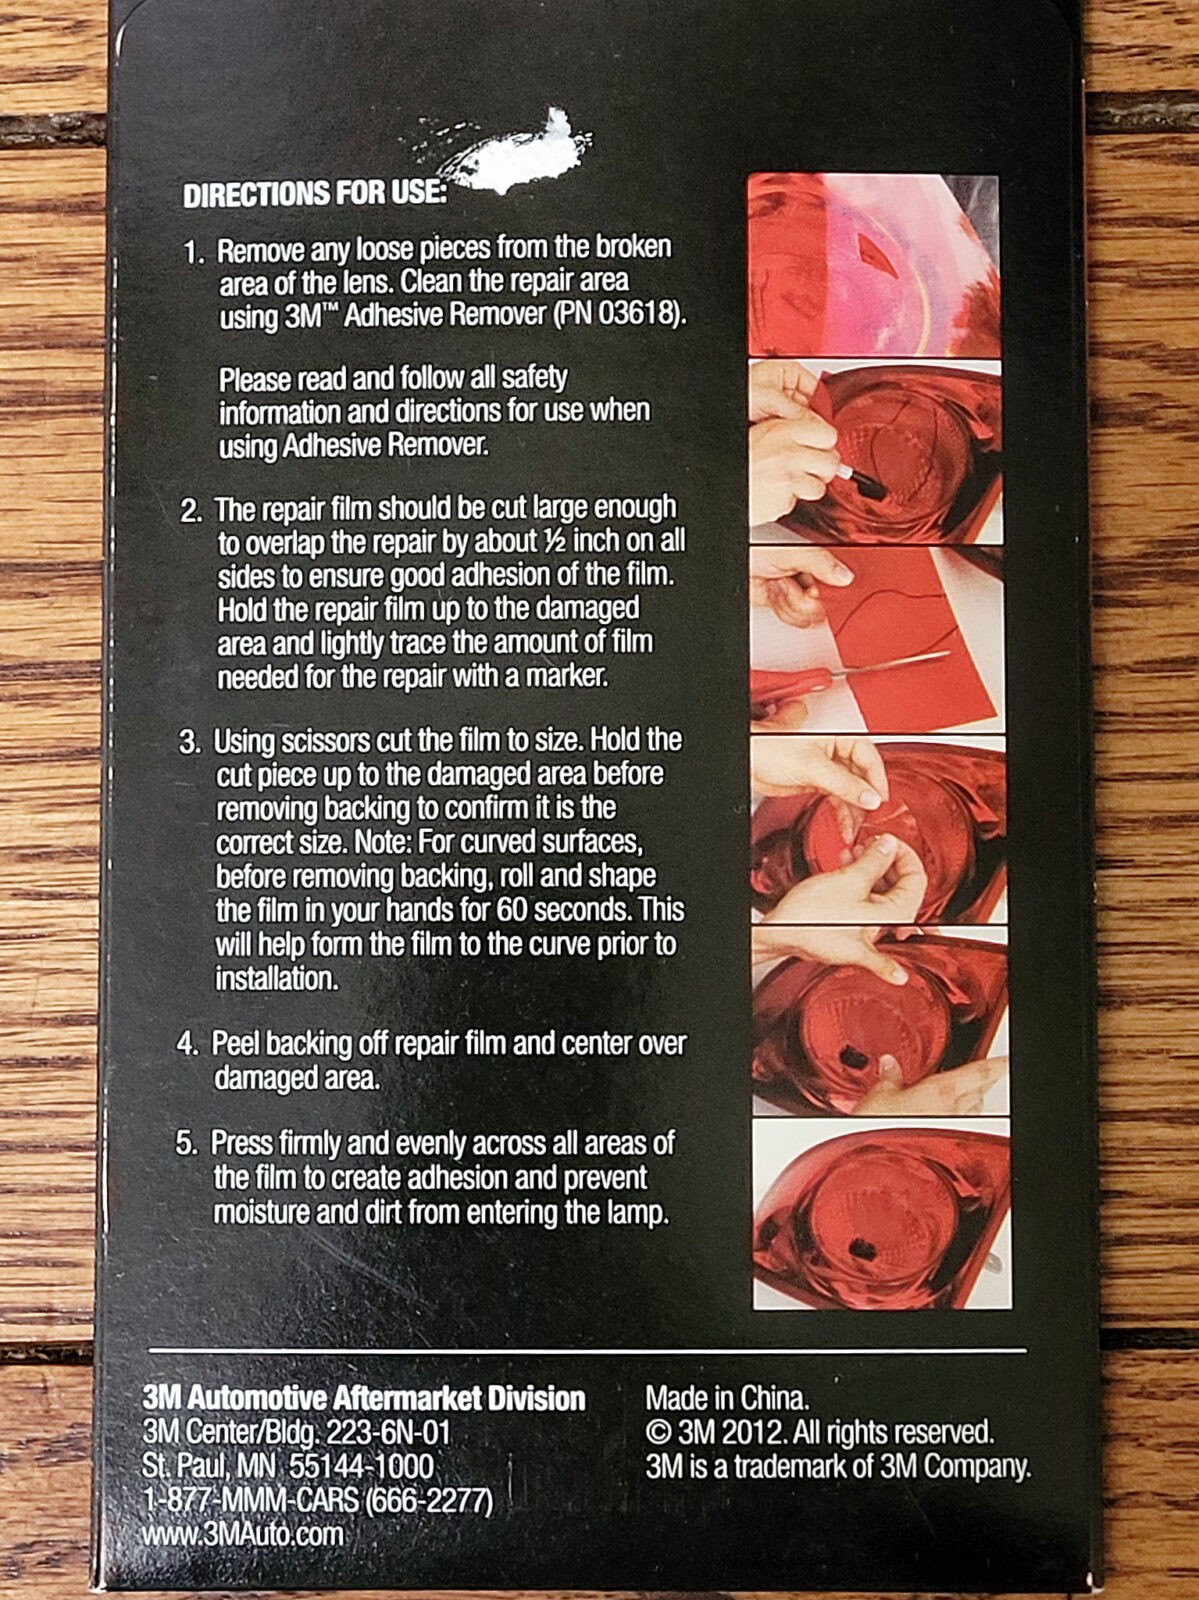
I read and followed the instructions.
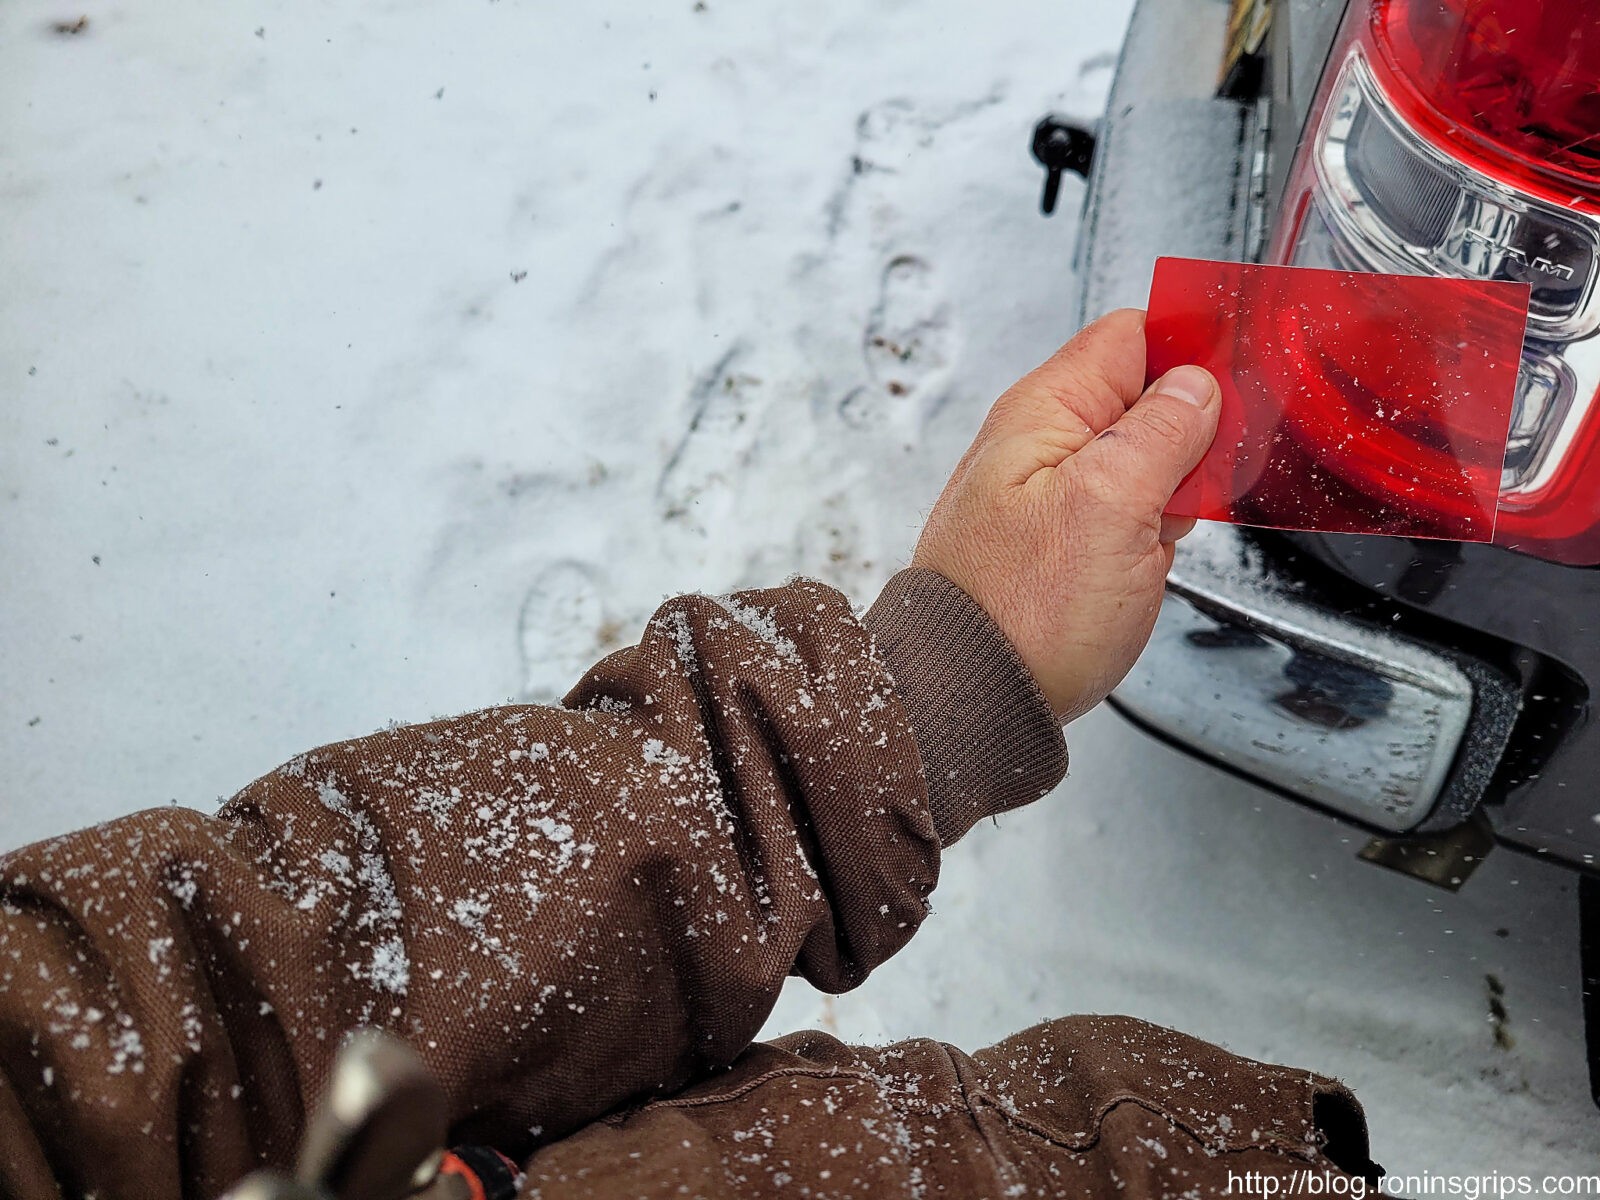
As you can see in the photos, it was snowing and 16 degrees out when I did the repair. I cleaned the lens real quick with 409 – a general purpose cleaner. I then wiped it dry and brought over the film and a pair of scissors.
The break in the lens had a slight curve so I worked the material around in my hands to get the basic curve I needed and trimmed the material so it could sit flat on the surface. I then removed the rear backing materials and kept pressure on it while working out air bubbles. I figured it might need the heat of my hands to both stay bent and to bond so I did this for 1-2 minutes. For some reason, after I applied the patch was when it dawned on me that I did not take a photo of the hole – why? I have no idea.
Here you can see the hole covered with the film. I have a pretty good seal except for at the bottom where all the cracks are. There’s a raised ridge there that the film cant conform to so I called it good enough and stopped there. I figure this only needs to last maybe 2-4 weeks but wanted it good enough that it can go longer if need be.
It was definitely snowing and cold. This is a piece of film left over after the patching so you can see it.
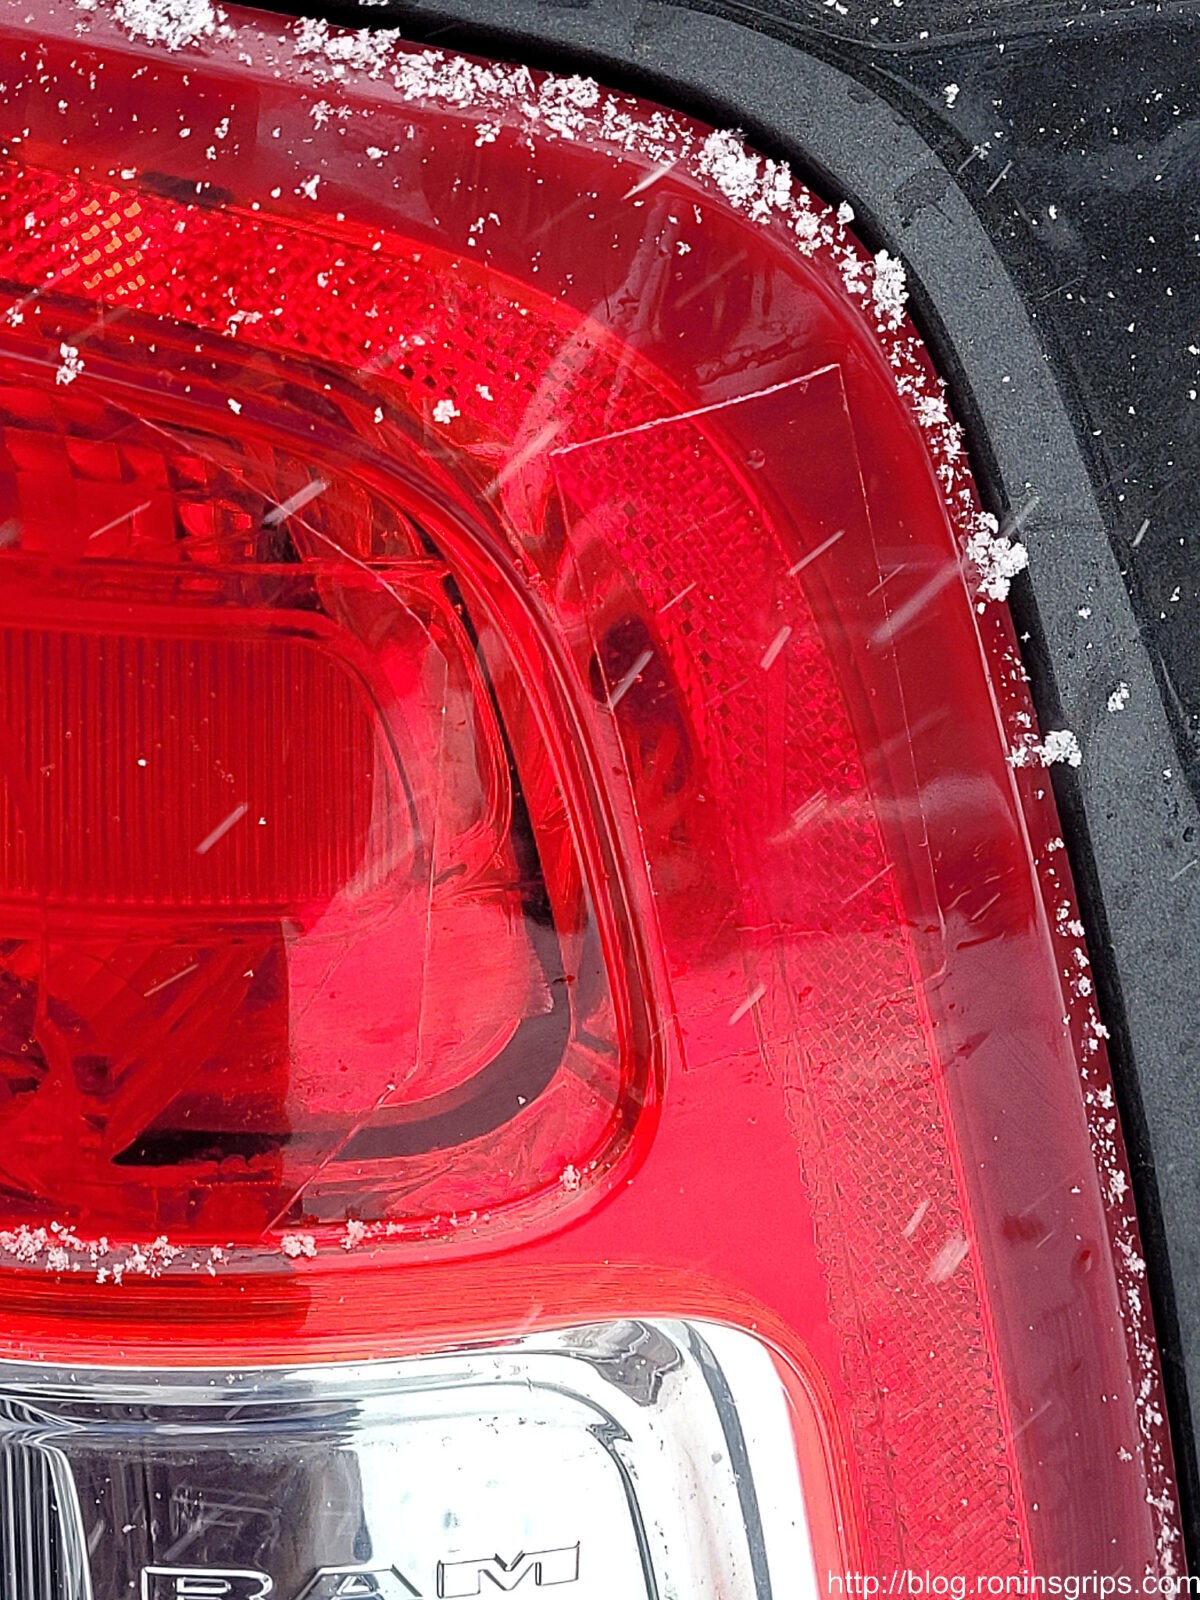
The lens cracked but did not come apart of the top right side. If you look close you can see a rectangular piece of film I stuck there just to make sure the track doesn’t get worse.
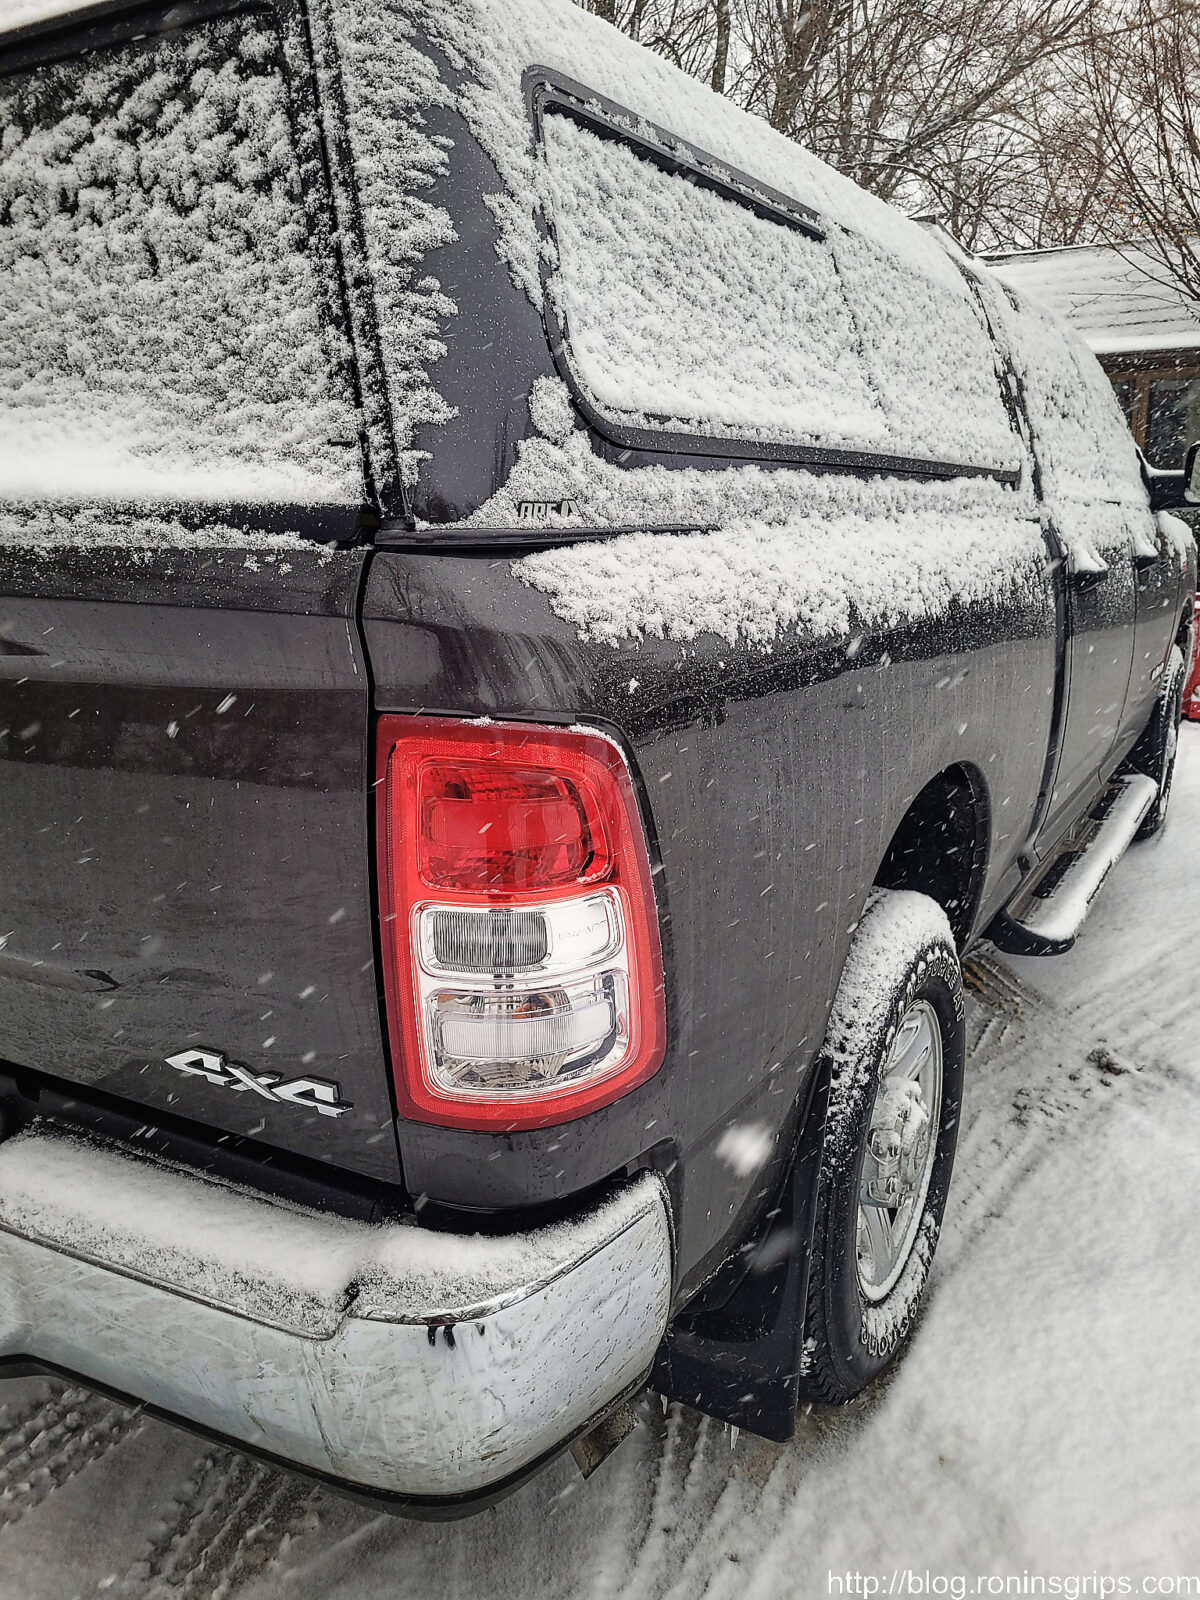
You step back a few feet and you can’t even see the film. I checked the bond the following day and it feels like the film has really bonded to the lens. I’m genuinely impressed.
The Results
I’m surprisingly happy. I didn’t know for sure if it would work but it’s holding up just fine and from a distance you wouldn’t even know it is there.
If things change, I’ll be sure to post an update but so far, so good.
3/17/24 Update – still working. This appears to be a long-lasting fix. I’ve done nothing to it and it still looks just as good as the day I applied it. No color fading or coming loose. I’m even more impressed.
2/19/22: Still holding up just fine. Nothing has changed at all – adhesion and color are just fine. I’m still waiting on the Mopar parts dealer to send me the tail light assembly. Thanks to the film I’m not in a rush and it looks just fine from a few feet away – you wouldn’t even know it is there.
2/19/2022 – still holding up just fine a week later. No sign of the plastic film letting go from the base tail light lens. It’s solid. We’ve had weather ranging from snow and 12 degrees to rain and 15 degrees. It seems to be a solid repair.
Note, I have to buy all of my parts – nothing here was paid for by sponsors, etc. I do make a small amount if you click on an ad and buy something but that is it. You’re getting my real opinion on stuff.
I’ll keep this post short and sweet. A couple of my many-year old plastic gas cans are getting brittle and I needed to replace them. Some years back I bought some steel Chinese ones off Amazon that are doing relatively okay other than starting to rust a bit inside – I looked it up and I bought them in 2014 for $54.50 each so that’s not too bad. I wondered what some higher quality options might be so I did some digging and came across Wavian.
Honestly, when I saw their name I assumed it was some cheap import but then started reading more. Wavian cans are made in Latvia and they are a NATO supplier. After getting mine, I can tell you they are the highest quality cans I have seen since my dad’s old surplus cans from WWII or Korea.
A Bit of History
The “Jerry Can” design dates back to 1937 created the Vinzenz Grügenvogel, the chief engineer of Müeller engineering in Schwelm, Germany. An interesting design requirement of the Wehrmacht-Einheitskanister was that a German soldier needed to be able to carry two full cans or four empty ones hence the size and triple top handle design.
There’s a far more complete historical narrative on Wikipedia including what America did if you are interested – click here.
Fast Forward To Today
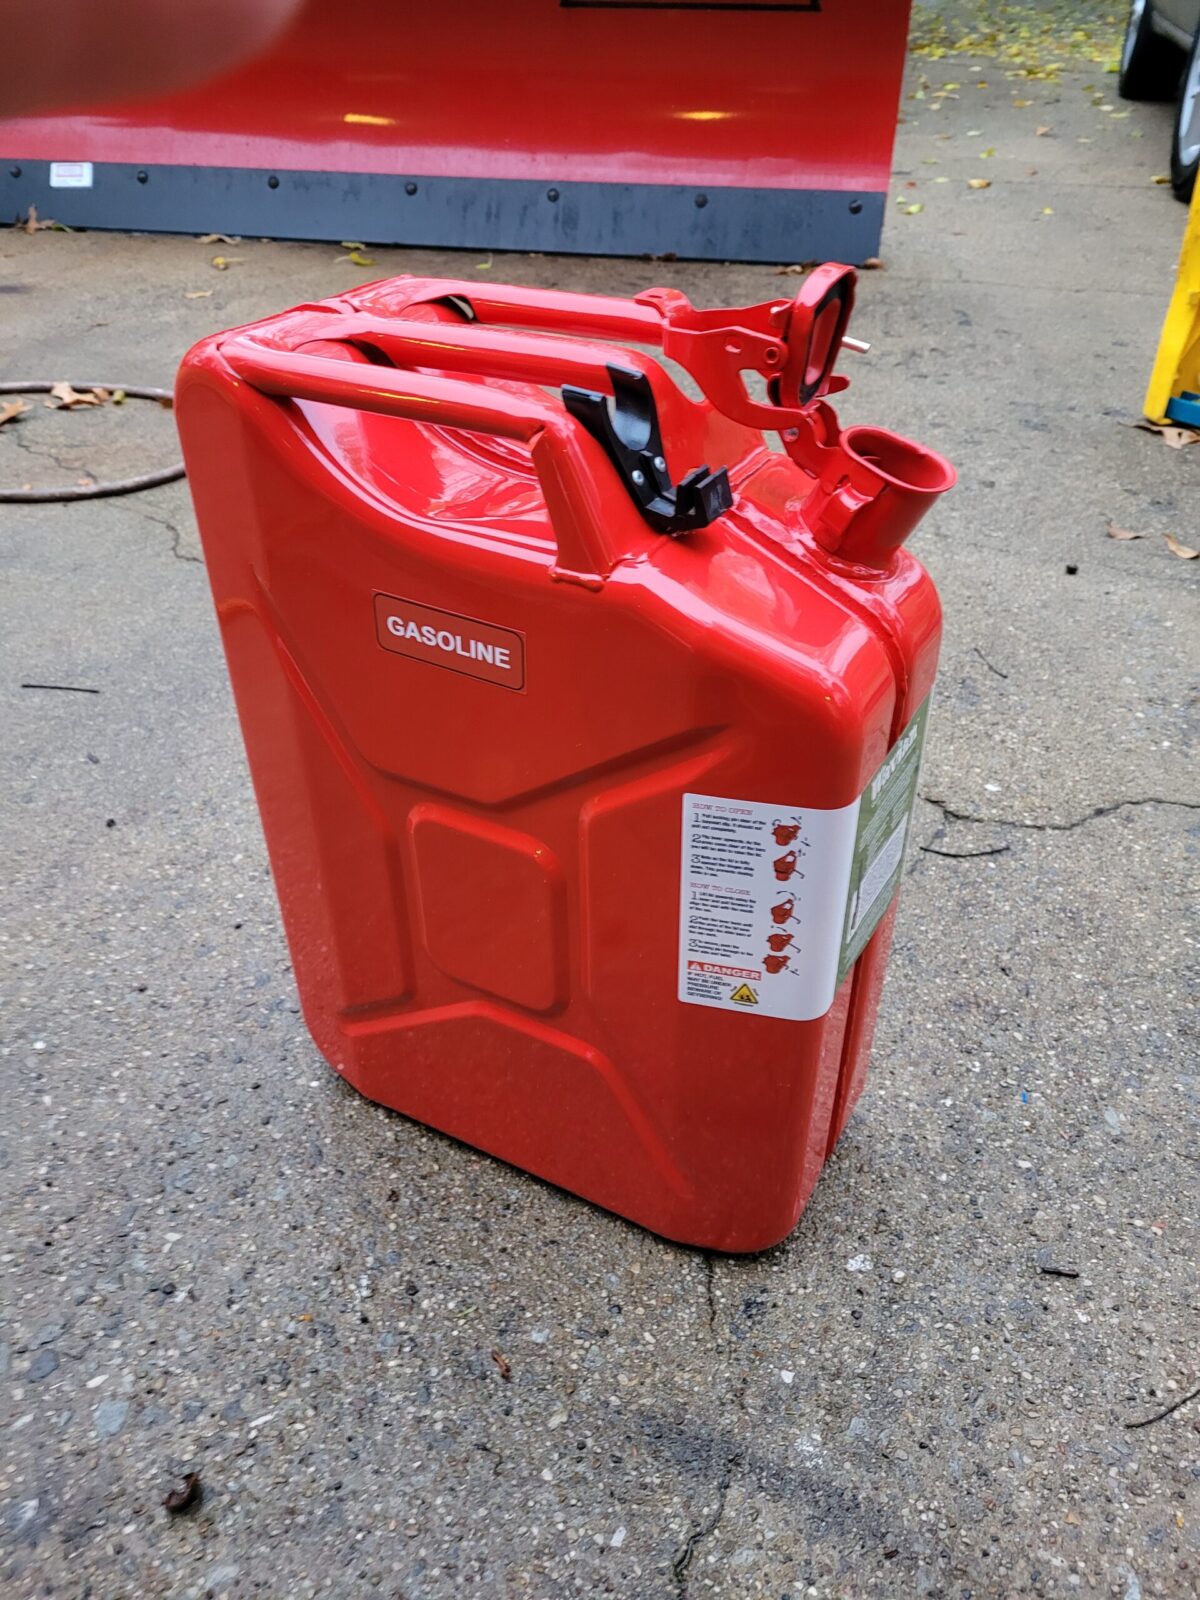
Folks, these are really nice cans. At any rate, they have some cool features and I just want to highlight the ones I noticed and want to share:
They are rated for 20 liters which is actually 5.28 gallons of gas
The color you choose, I picked red, is powder coated on and a nice deep color and is gas resistant
The welding and assembly is excellent – cheap cans use tack welds that do let go.
The steel body is 0.9mm (which is 0.0354″ and puts it a tad thicker than 21 gauge (.034375″ 0.873mm)). Cheaper cans use thinner metal.
There is an internal coating to protect the steel – I doubt you will see this in a cheap can – it’s not present in my Chinese cans.
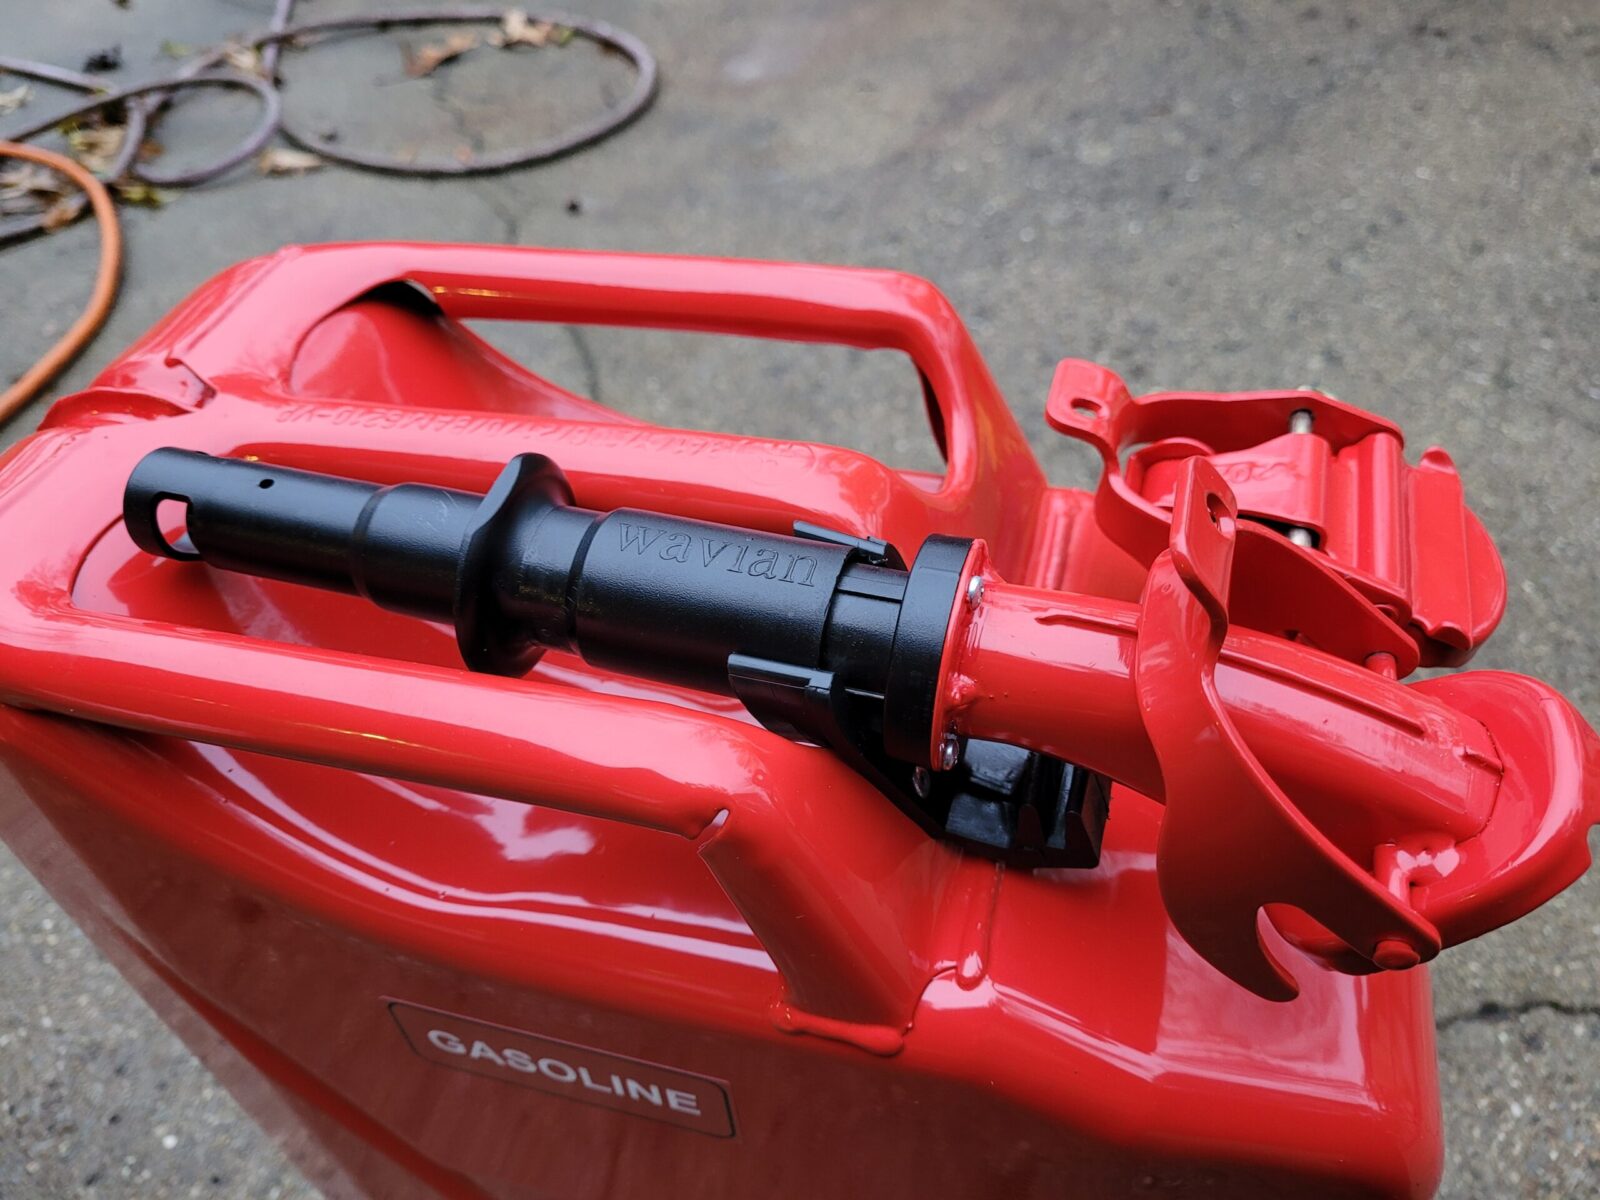
Leave it to the EPA to screw up easy to use gas can spouts. At least Wavian tried to do what they could with the mandate.
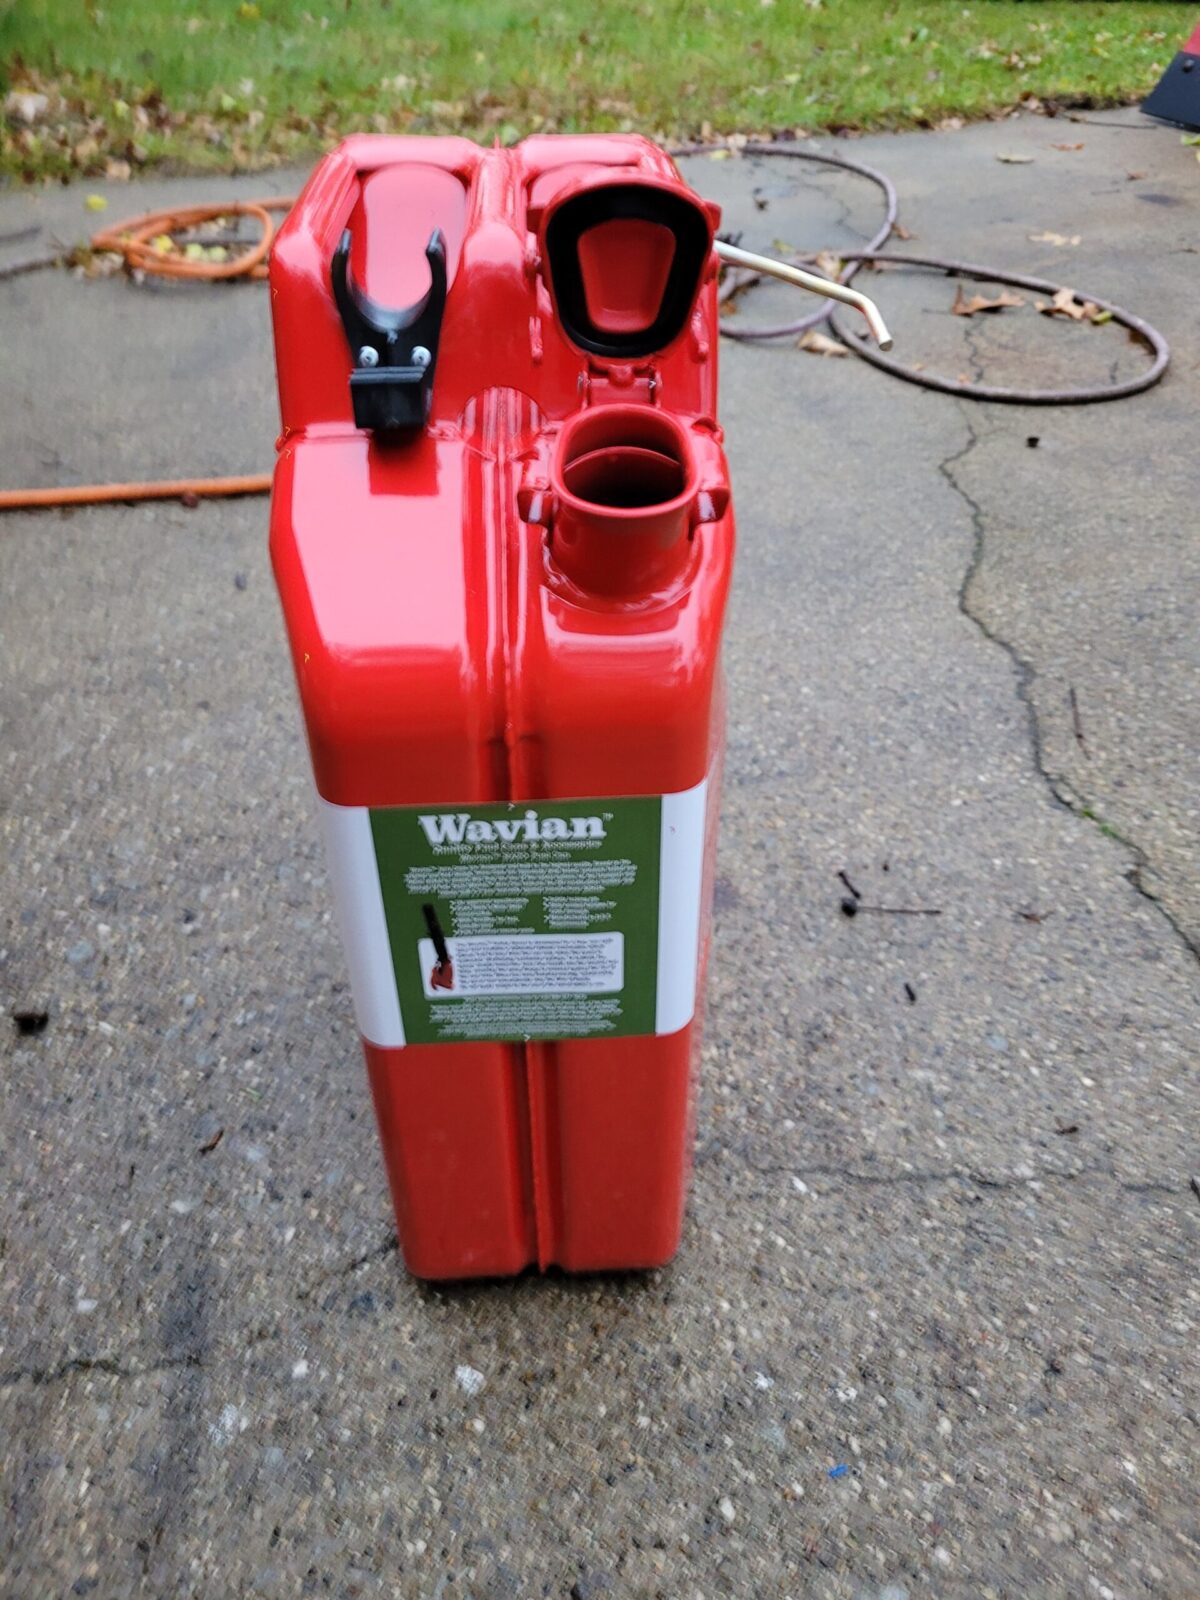
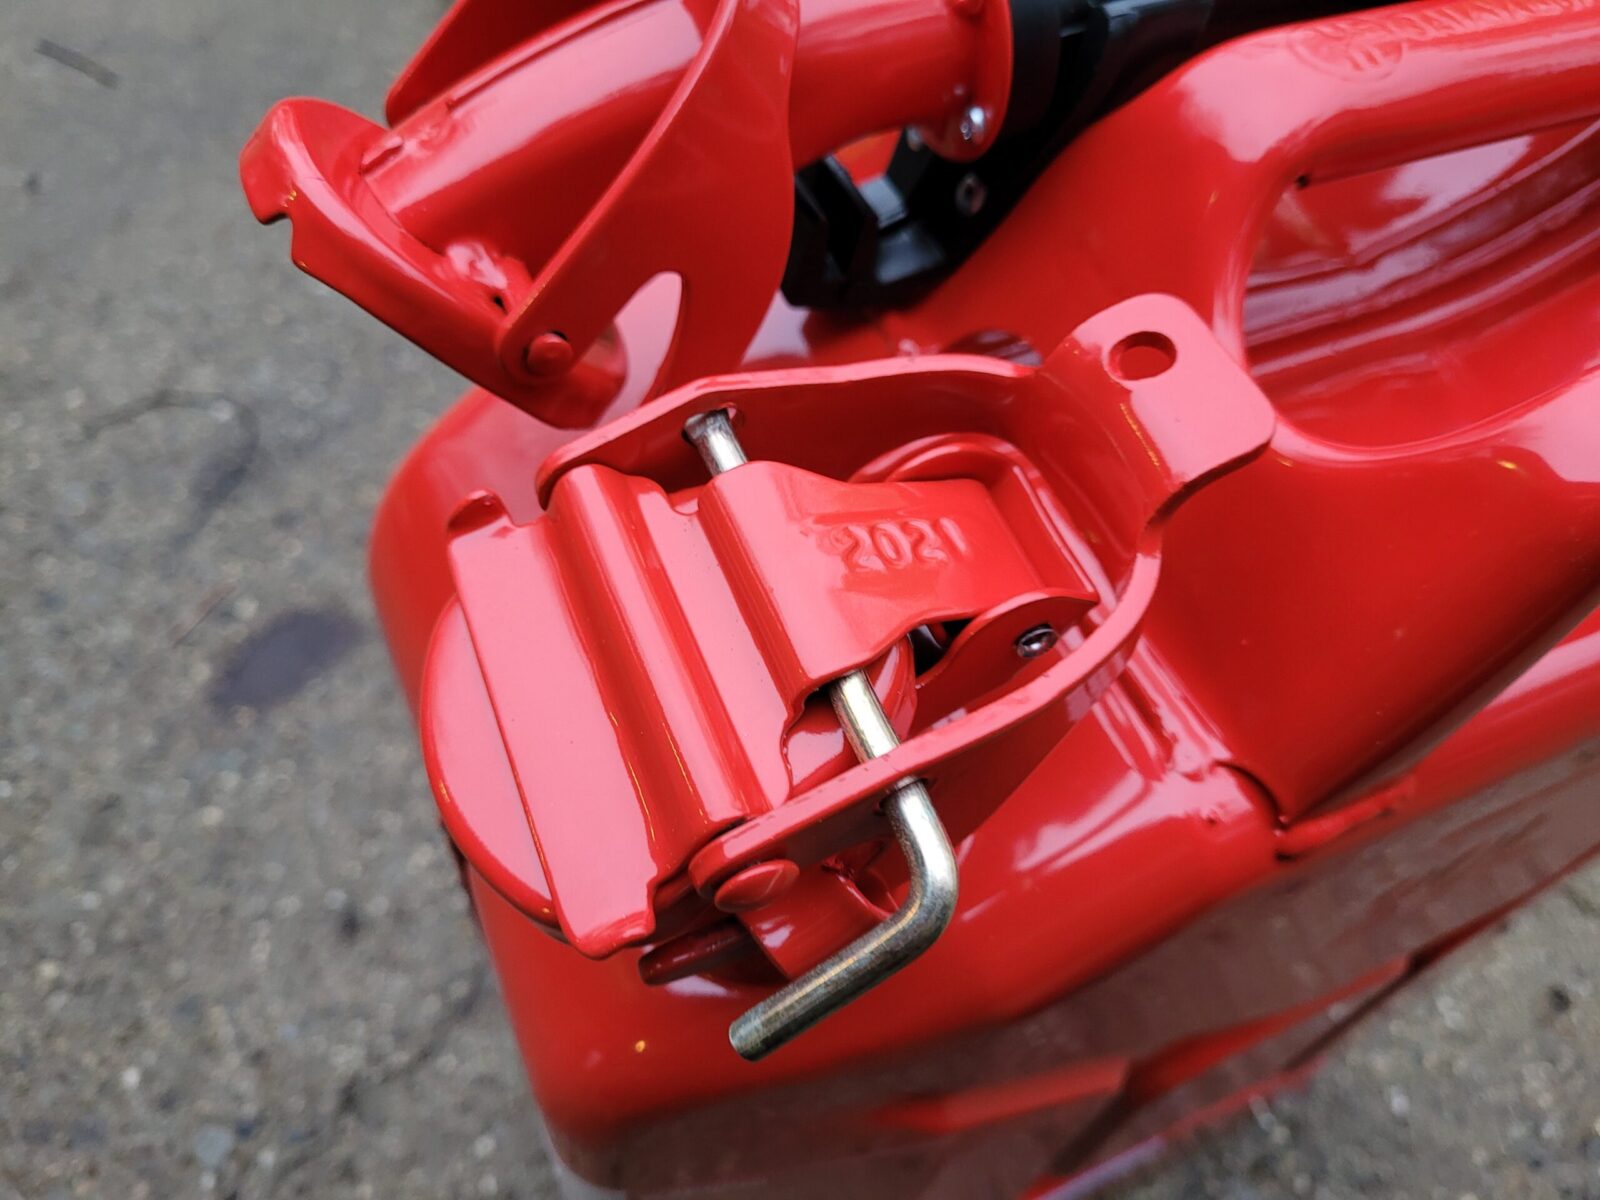
The cap closes very securely and the cadmium colored pin you see locks it in place. The pin itself is flared on the far end on purpose so it can’t be accidentally removed all the way and lose – that’s a nice design detail I think.
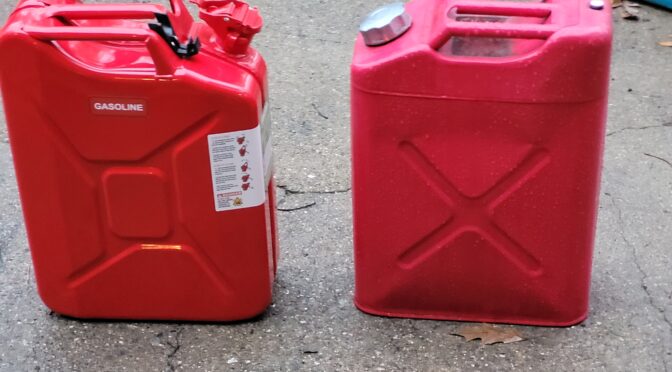
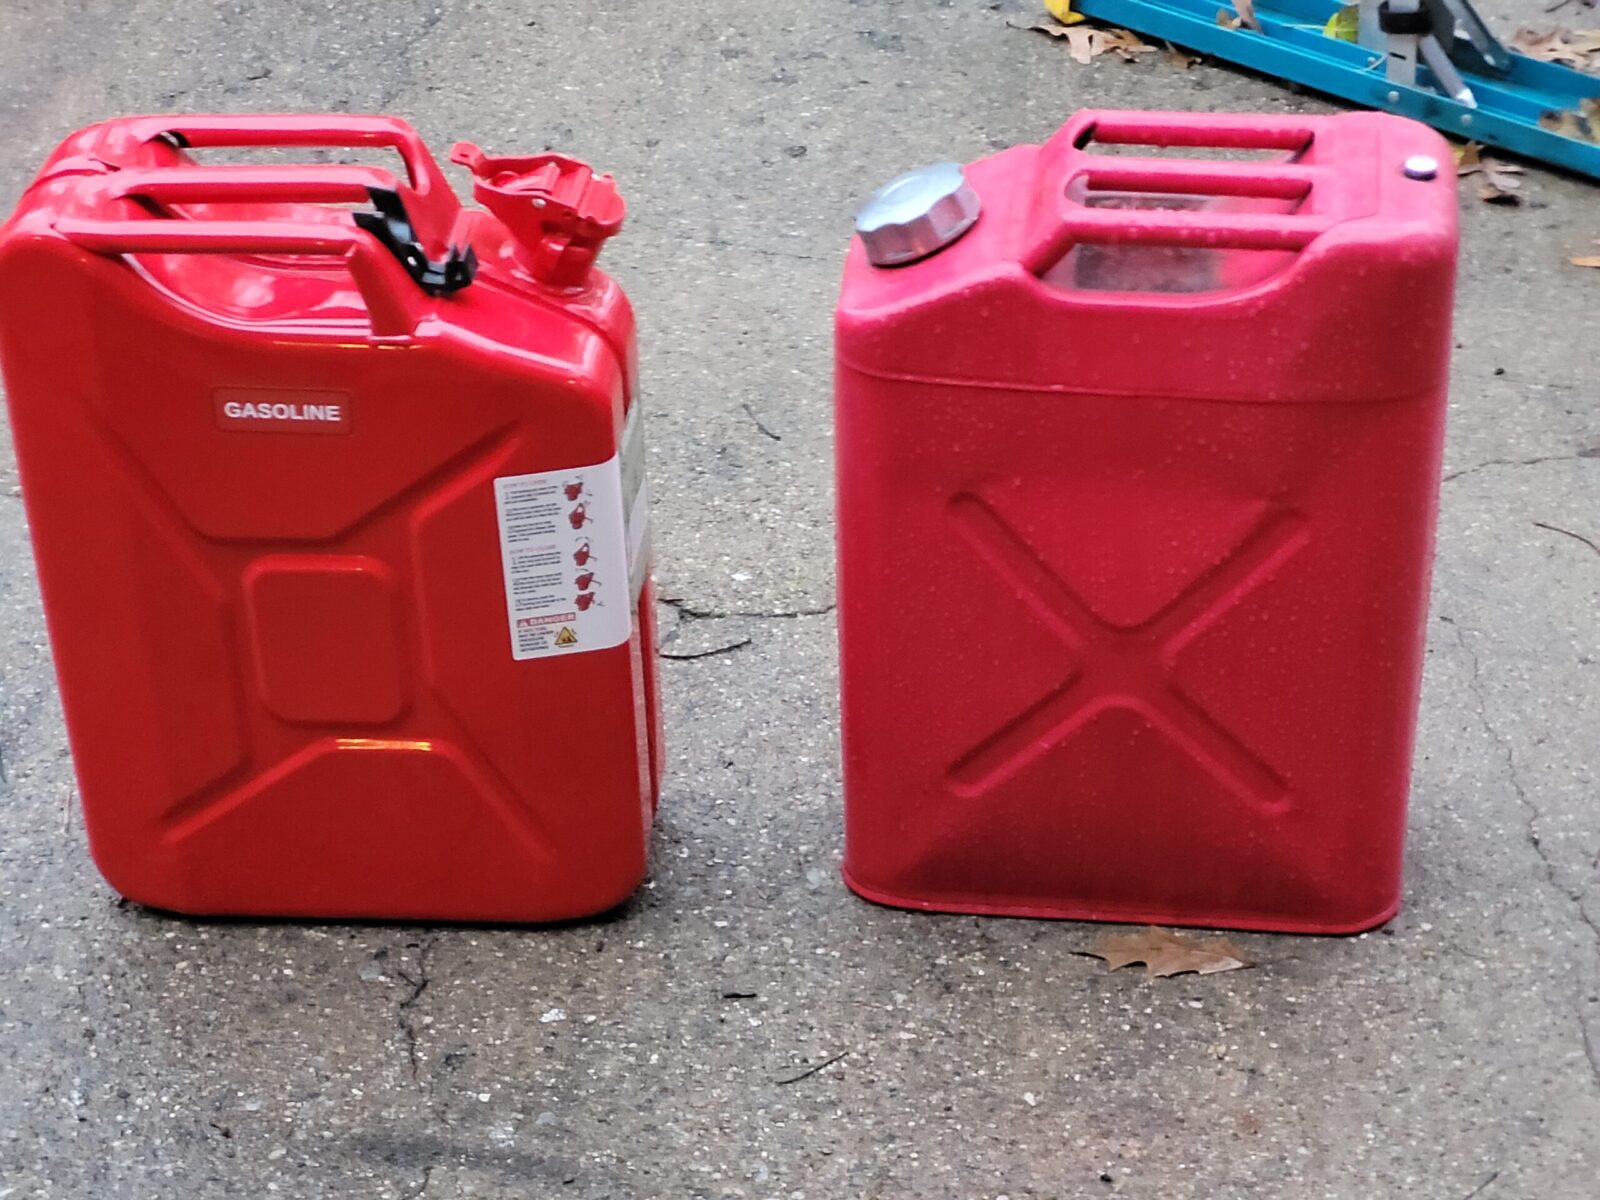
Brand new Wavian on the left – cheap 8 year old Chinese can is on the right. In all fairness, it’s held up for holding gas but I don’t really transport gas in it. The Wavian is built like a tank.
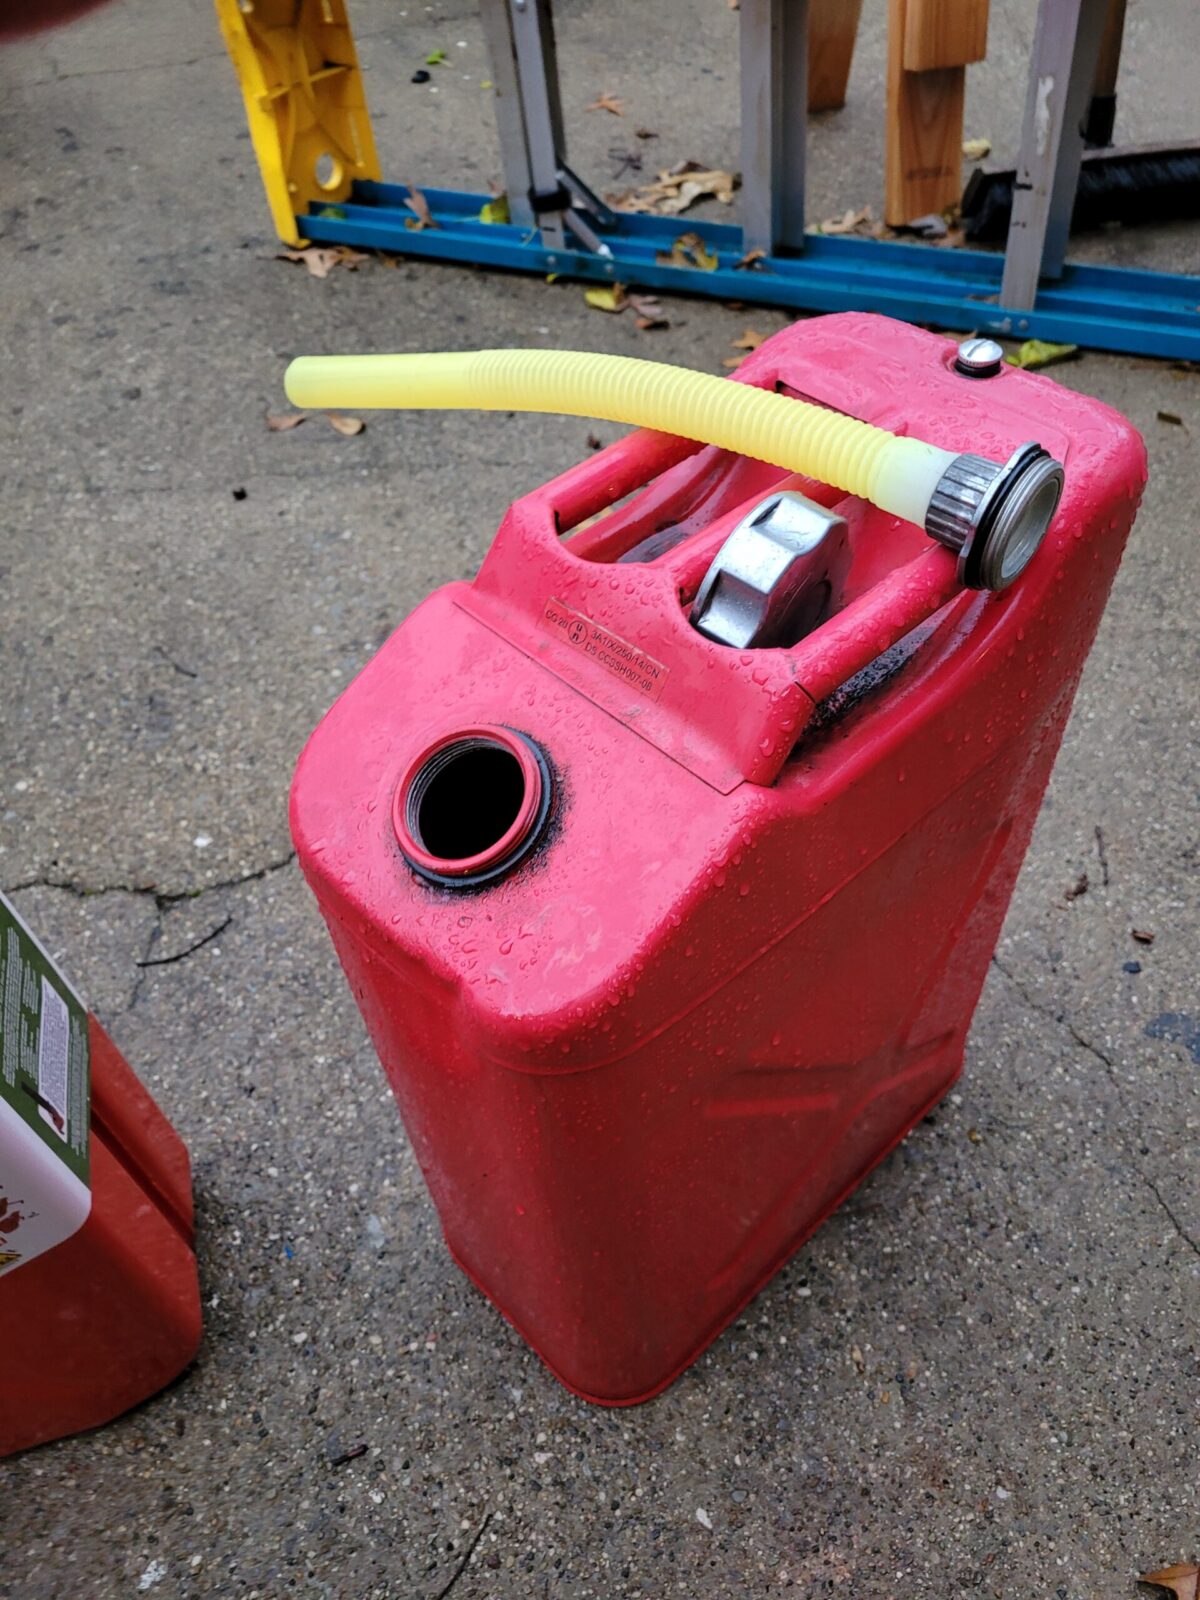
Here’s a close up of the Chinese can’s filler tube, It’s discolored with age but it works. The con is the it does flip-flop around when you are trying to start pouring. Again, it’s held up being outside all year long so I can’t knock it too hard.
The negative is that they come with a God-awful EPA compliant nozzle. I absolutely hate any nozzle where I have to pull something back and hold it back while trying to hold a can with up to 33.8-37.7 pounds of gasoline in it. Folks, I am 54 and it’s not that easy any longer. At least Wavian tried to do what they could with the mandate. In many cases, if you can push the spout into a filler port on a vehicle, the pressure would keep the spout open but not all gas tank filler ports are shaped that way – for example it will not work on my lawn tractor or generator that both have horizontal gas tank filler ports.
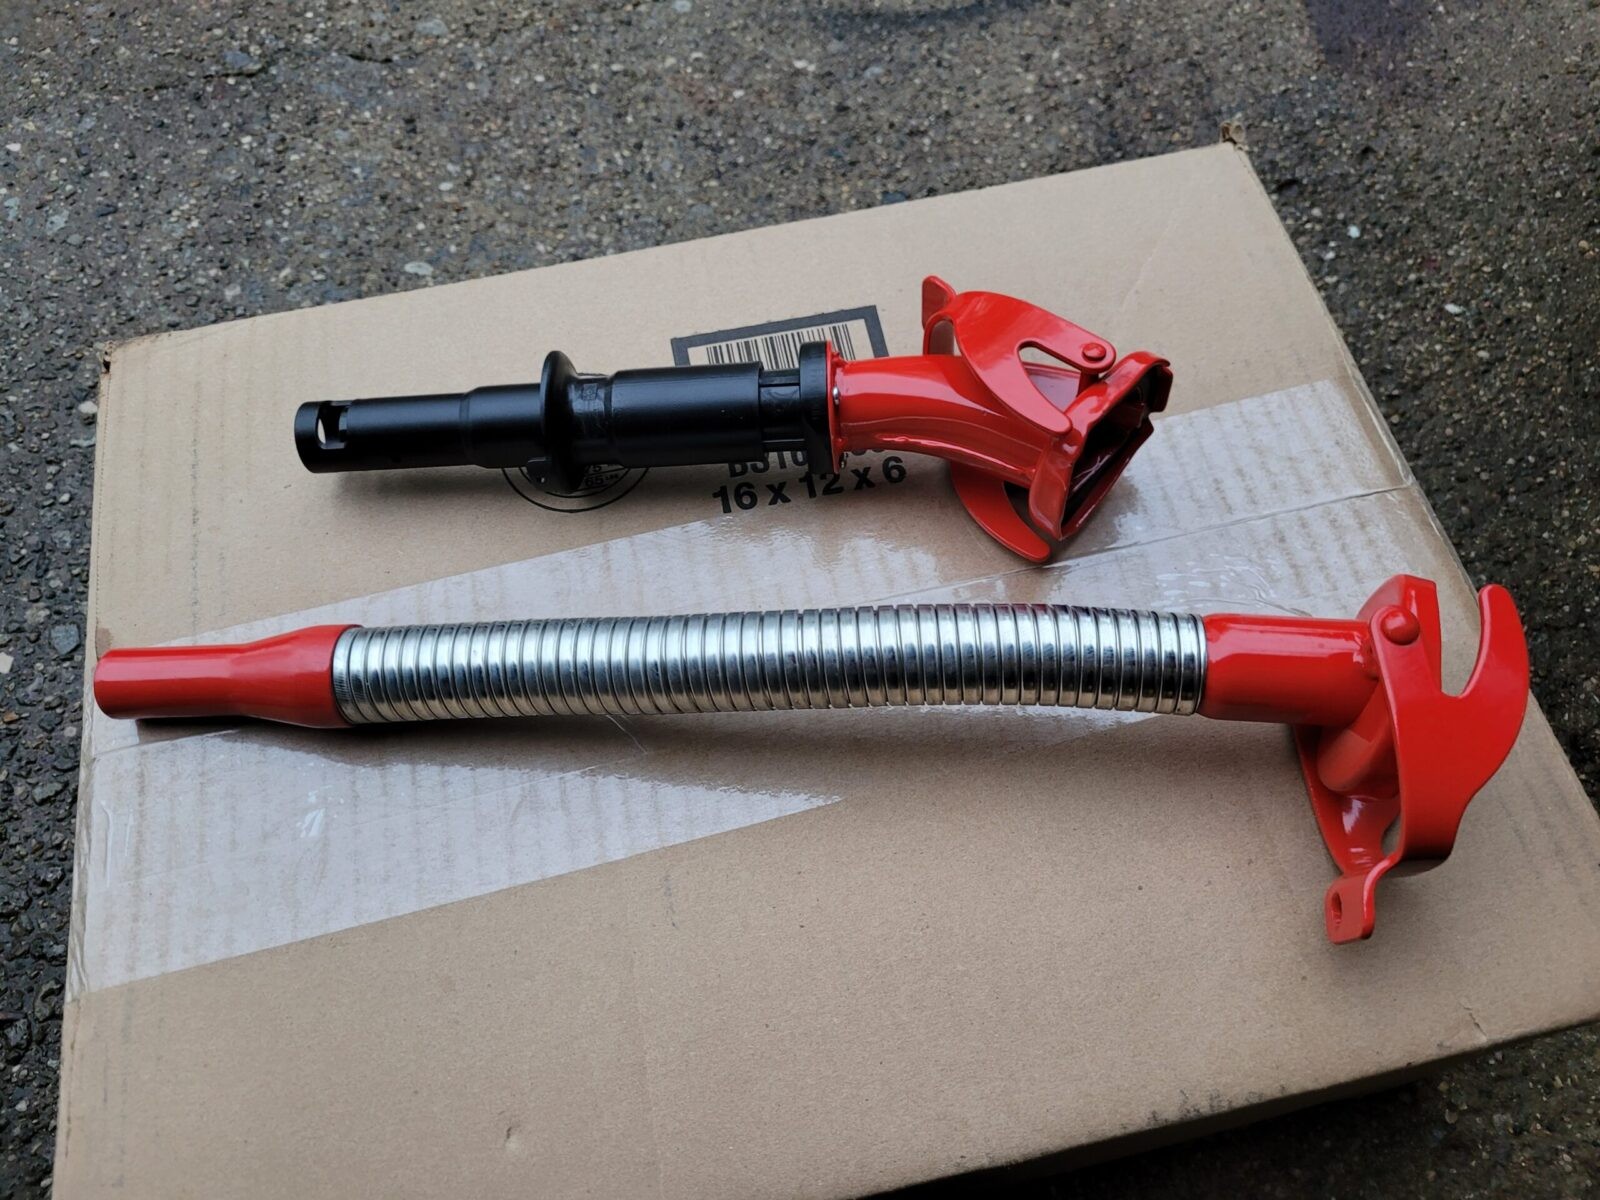
So, I did spend the extra money for a more traditional steel goose neck nozzle that does not have all that EPA stuff on it so I can manage holding and positioning the can with both hands and let the nozzle do it’s thing. By the way, it’s not like Wavian really has a choice – they are mandated to supply a self-closing nozzle but at least they can still sell the aftermarket nozzle.
The EPA-compliant spout is on top. The optional spout that you can buy separately is on the bottom and far easier to use. I will install the longer spout when and where I need it vs. leaving it on the can.
Note, growing up my dad had the old style Jerry cans and kept his nozzles separate from the tanks. I’m going to do the same thing. I’ll grab the nozzle and the gas can I need when it’s time to pour gas.
So, do I like the Wavian can? Absolutely – I just bought a second. If you are looking for just about the best can out there. Get a Wavian. I’ve not seen a modern can even remotely close to this level of quality. I bought both of mine and the fill spout from Amazon:
Note, I have to buy all of my parts – nothing here was paid for by sponsors, etc. I do make a small amount if you click on an ad and buy something but that is it. You’re getting my real opinion on stuff.
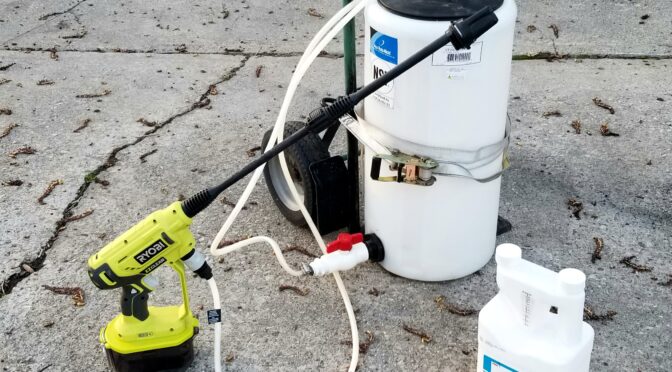
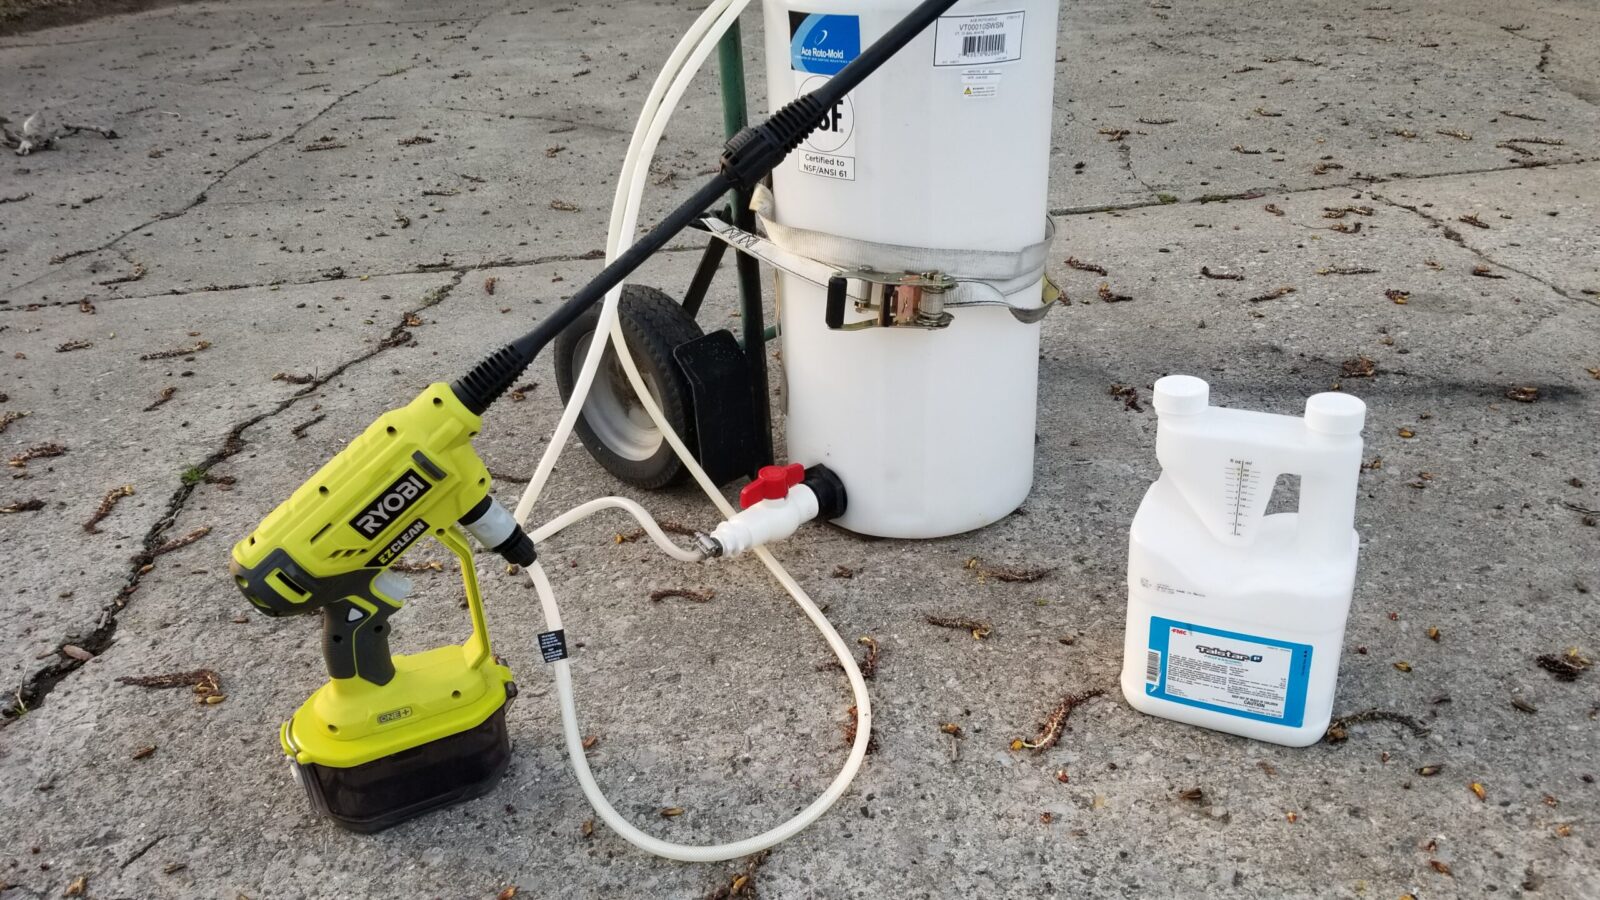
A reader dropped me an email and asked if I am doing anything new this year for mosquitoes as he read my past posts. I’m still very happy with the effectiveness of the Talstar insecticide plus the combination of the Ryobi 120350 Power Washer and 10-gallon tank strapped to a dolly continues to work fantastic.
I hope everyone has a great summer and be sure to nuke the bugs before they get to you 🙂
5/21/23 Update – still using the same set up. Everything is working great, Power washer is holding up just fine by the looks of it. I just did my first spray of the season last Monday.
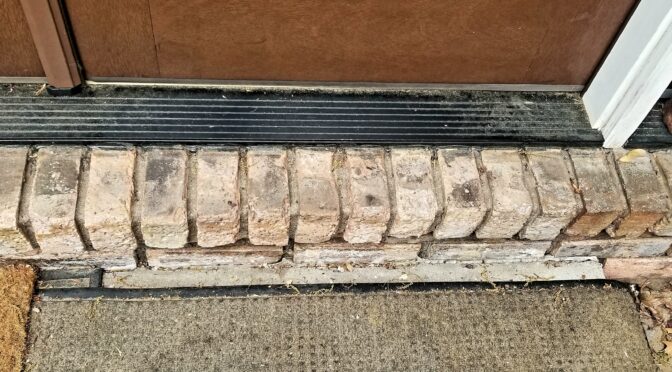
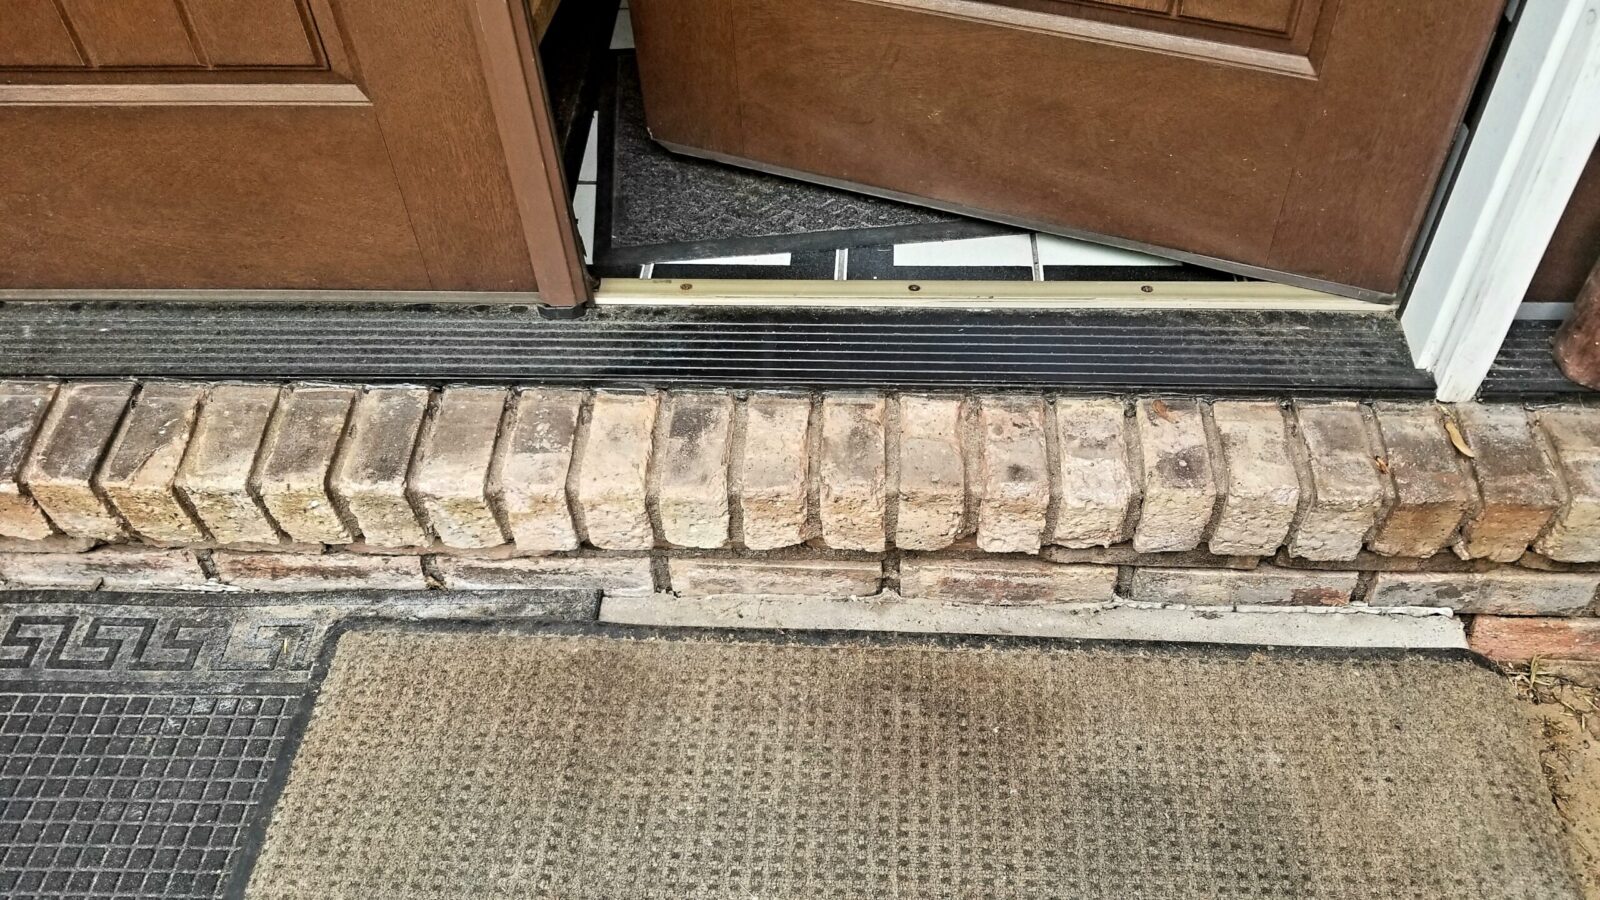
Our home was built in the early 1970s and someone decided to use same relatively soft red brick at the threshold of the door as the rest of house’s exterior walls. I noticed in the fall of 2020 it was really starting to spall – meaning the brick was starting to flake apart. This happens when water gets in, freezes, expands and causes parts of the brick to crack and split. The above photo gives you and idea of what it looked like.
I did what I normally do – I started reading about how to stop spalling brick. The consensus was that sealing the brick before spalling started was the best approach but you know what – that really didn’t help me much because I already had spalling going on but the core of the bricks was intact.
Let me tell you something – there are a ton of brands of masonry sealer and based on the forecast, my procrastination was forcing me to get something applied within three days of cold weather really setting in. This meant and I had to rush and get something on-hand at a local store.
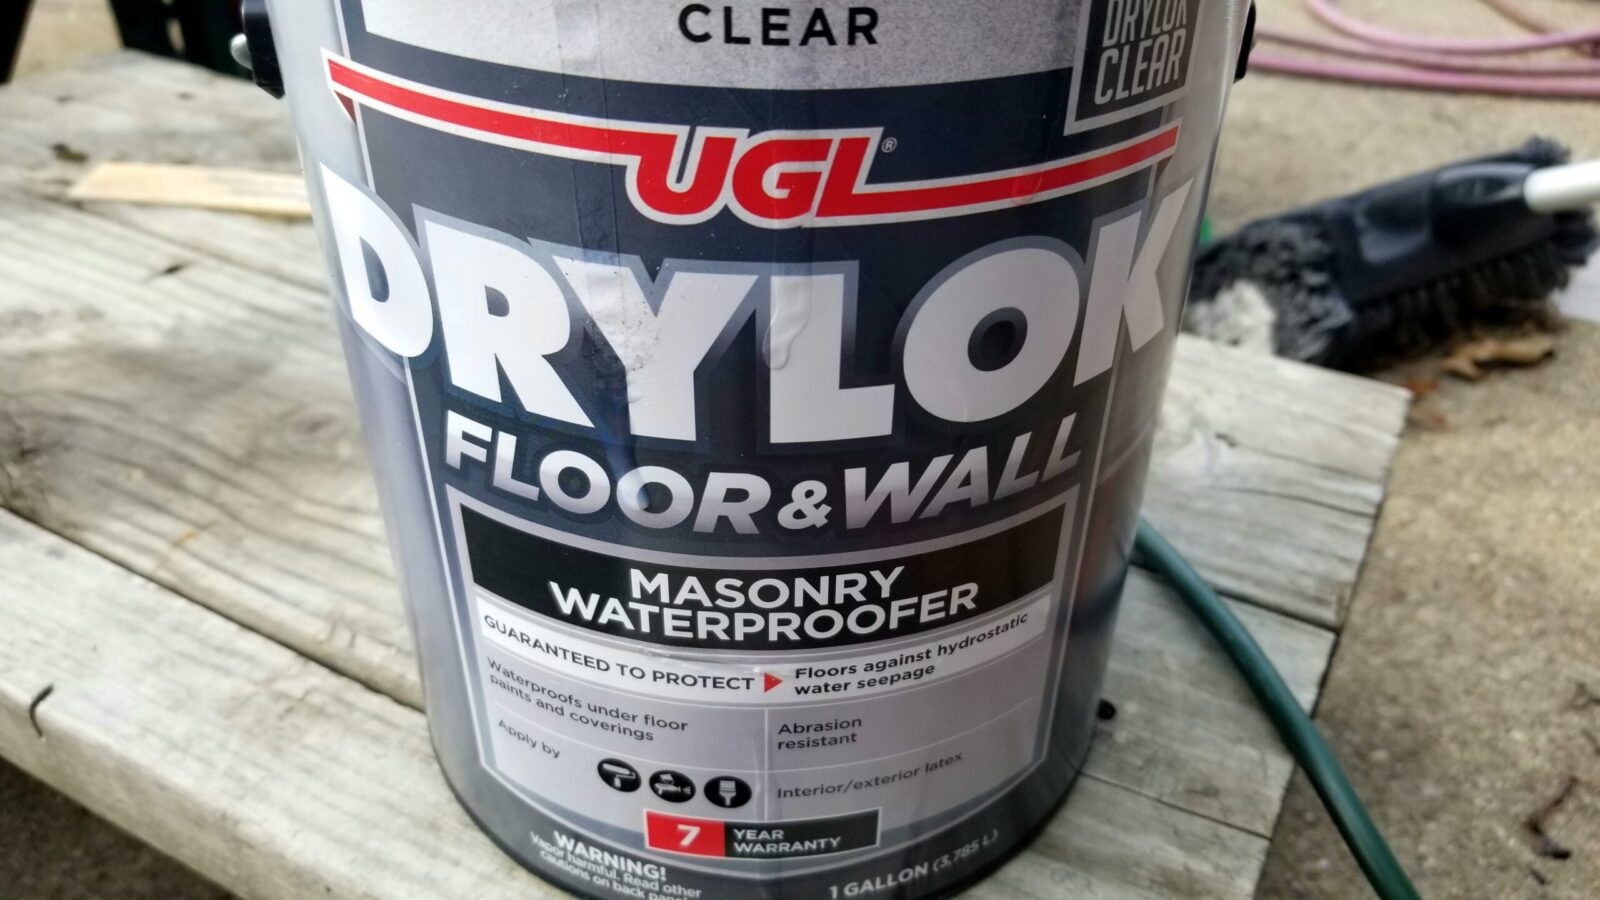
The closest hardware store to me is Ace so I want to the section where they had masonry sealers and started googling and reading reviews of each one that they had in stock. Again, I was pressed for time so I had to move. What I wound up buying was UGL DryLok Floor and Wall Masonry Sealer.
This is what I bought.
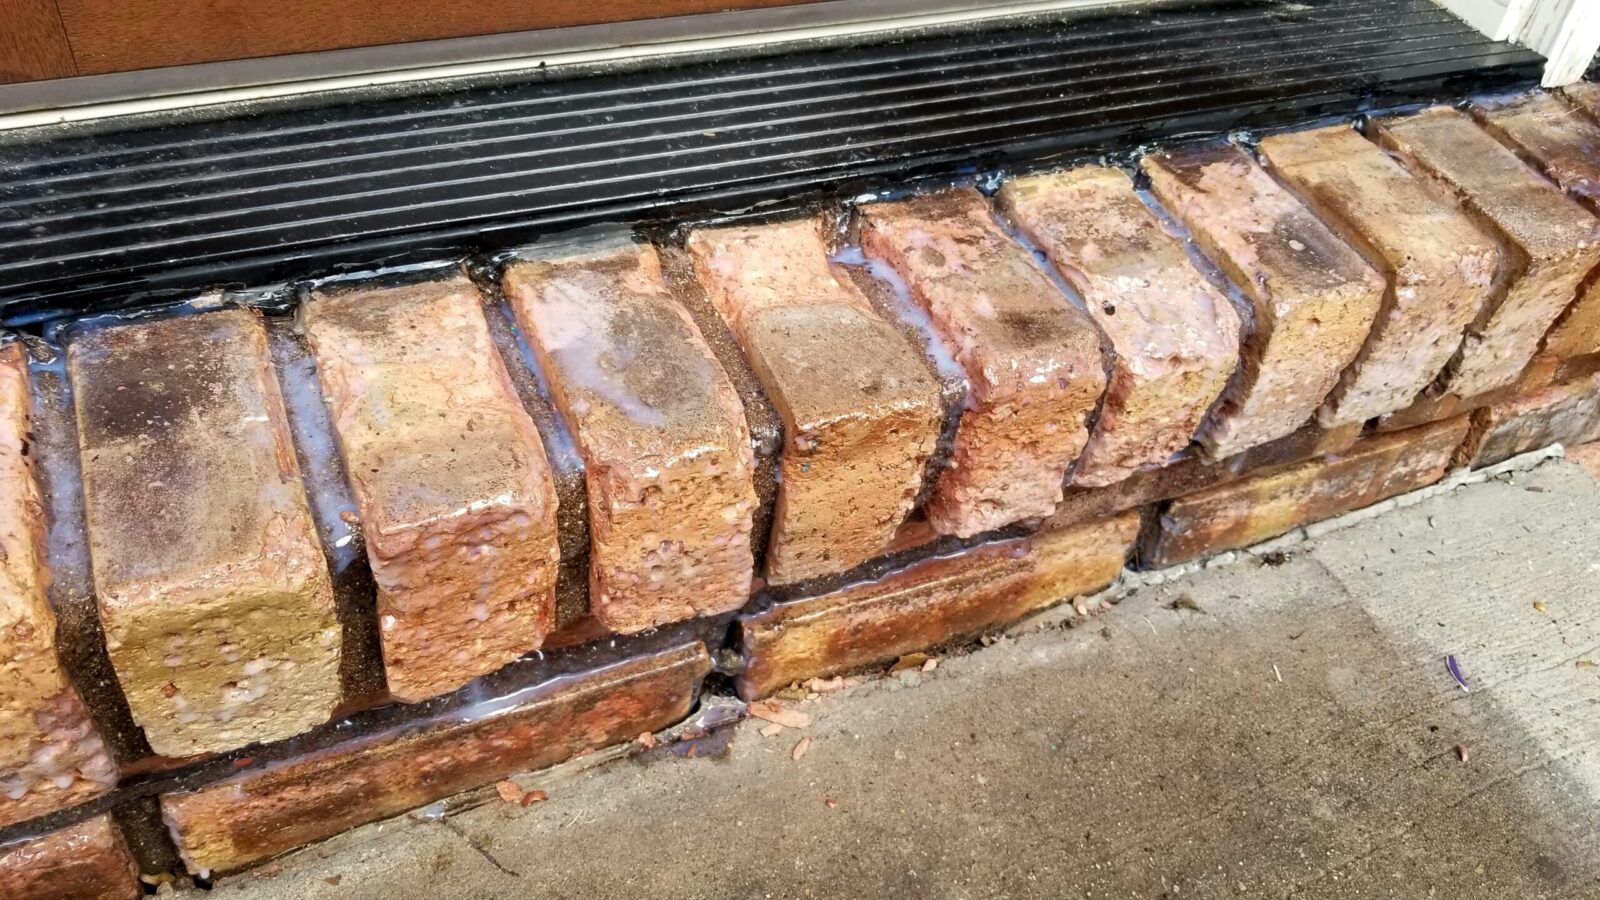
I got home, read the instructions, cleaned the brick off, put down a piece of cardboard to catch the drips and applied it fairly thickly with a painbrush taking care to daub it into all of the corners. The stuff seriously reminded me of Elmer’s Glue but not such a bright white.
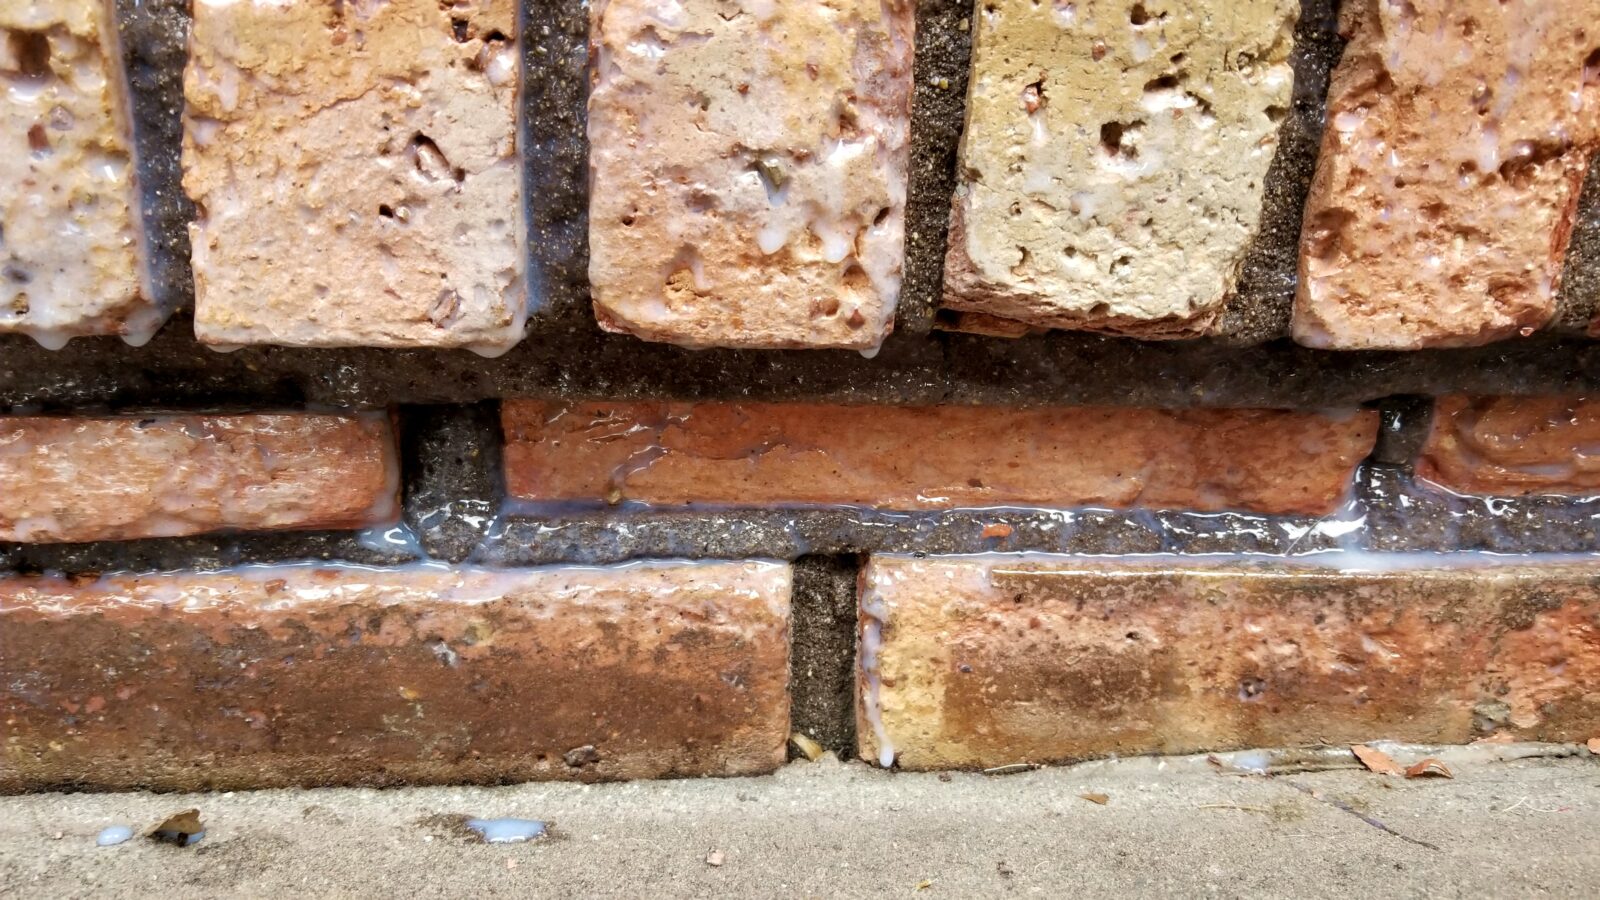
This is the second coat. I applied the first coat the day prior and I took care to make sure I worked the sealer into all of the cracks.
I literaly laid down on my side and worked the sealer into every crack – including where the masonry was gone. I did this for both the first and second coat.
I let it dry overnight and then applied the recommended second coat . After drying, the bricks had a “wet” look to them – they were slightly darker and shinier than before but they appeared sealed. So, I crossed my fingers and hoped it would at least make it through the winter and I would plan a new approach if it failed.
Okay, I am now writing this in June of 2021, about seven months later and the DryLok worked. Not one bit of new spalling and even more surprising, the sealer looks the same. I can’t say that I see any wear in teh shiny finish. I guess now I will just wait and see how long it holds up.
THis photo is from June 21, 2021. No new spalling and the sealer does not show any sign of wear. You can see that the wet look faded as the sealer dried but the bricks are still slightly darker and shinier than the uncoated bricks. All of the bricks in this photo were coated by the way both the top protruding threshold and all of the bricks underneath it.
I Was So Impressed I Used It On Our Chimney Cap
A project on my list for this June was to seal my poured concrete chimney cap. It was starting show some surface cracks and when I ran my hand across it, I could feel loose grains of sand. It definitely needed to be sealed.
Guess what I used? I bought a gallon of the DryLok to do the threshold and only used a tiny amount to do it. I went and got the gallon and used over half of it applying two decents coats to the chimney cap and flue covers. We’ll see how long it holds up but I suspect it will be a few years at least given the threshold.
You want to protect the integrity of your chimney cap as it prevents water from running down into your chimney and causing the bricks to crumble. We replaced the original cap with this new one about 3-5 years ago and the sealer I applied then was long gone. I honestly don’t recall what I used.
That crack is what got my butt in gear to get up and seal the cap. As with the threshold, I applied the recommended two coats and I do put it them on iberally. It was scorching hot up there so the sealer dried fast but I still waited until the next day to put on the second coat.
If I can take an easy path I will. I noticed the caps to the flues were starting to rust so I sealed them as well. I was there … I had the sealant … it just seemed a lot easier than going down to the shop, getting black Rustoleum, climbing back up, etc. We’ll see how it holds up – that is a pretty brutal surface when you think about it – full sun and heat in the summer and full sun and cold in the winter … time will tell.
In Summary
The UGL DryLok Floor and Wall Masonry Sealer did a great job stopping the spalling of our front door’s brick threshold and it made it through one winter. Given how it performed, I just used it to seal our chimney cap and we’ll see how long it lasts there as well.
I hope this helps you out.
Note, I have to buy all of my parts – nothing here was paid for by sponsors, etc. I do make a small amount if you click on an ad and buy something but that is it. You’re getting my real opinion on stuff.
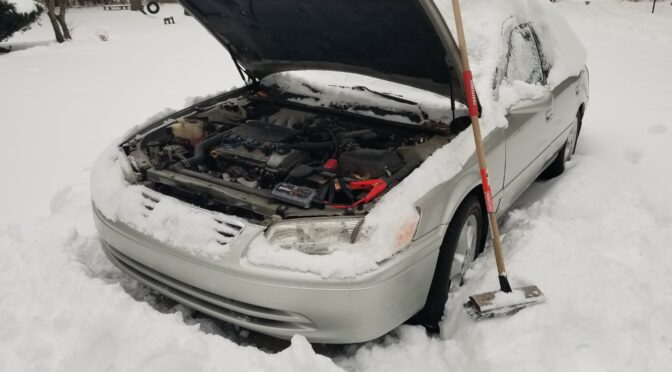
So I went out to move my wife’s 2000 Camry with a V6 engine. It had been sitting for about a month, it was about 20 degrees outside and, of course, the battery had discharged enough that it wouldn’t turn the car over – I could hear the solenoid click and the starter would just begin to crank and then stop. Great…..
In the old days, I would have wheeled my truck or tractor over with jumper cables, given the battery a bit of a charge and the started the car. Starting some years back, I started using various battery backs with jumper cables – man do they come in handy.
I’ll tell you though, I had a bad experience with four DB Power 1200 battery packs. I wrote about them back in February 2019 and it’s interesting that I can see people searching my blog 2-4 times per month about why their DB Power pack will no longer work. Don’t buy one is all I can tell you.
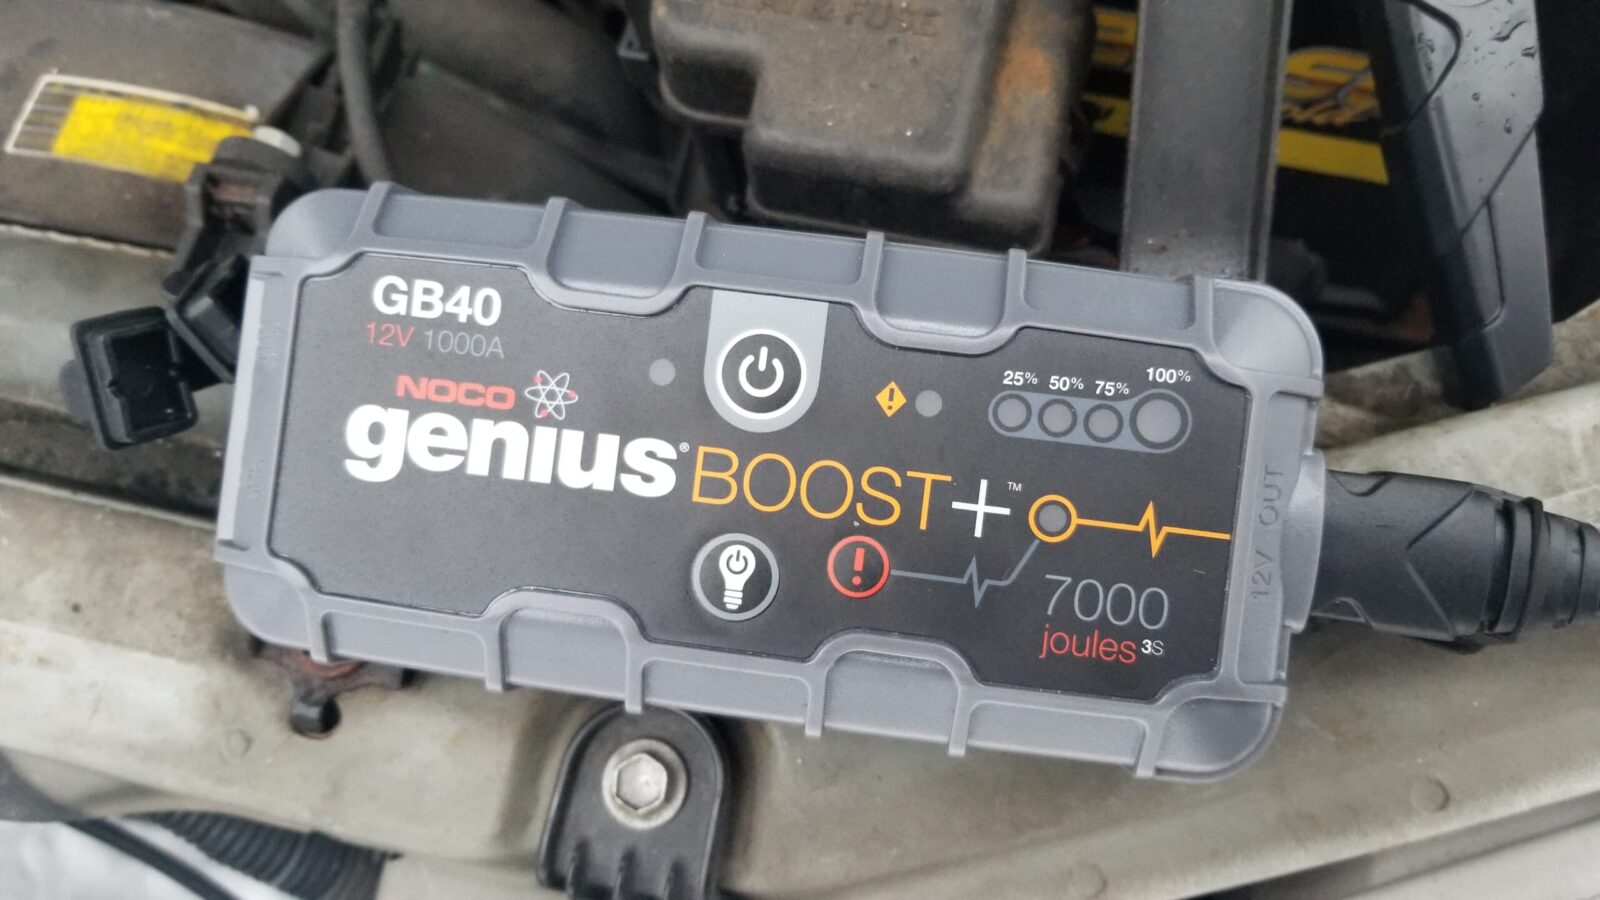
What was my go-to unit with my wife’s car and in general now? A Noco Genius Boost GB40 1000 amp starter. I’ve used it to start our lawn tractor, my 1996 Land Cruiser, her car once or twice — it’s reliable and it works. I fished it out of another car where it had sat for a month in the cold and it started her car no problem.
This is my GB40 jump starter – I bought it and a storage case to protect it when bouncing around in our vehicles. It has never failed me. I do get it out before a long trip and charge it just to be safe but it’s never empty and it has always worked when I needed it.
I bought the GB40, a storage case and the combination is always with us when we go on trips. They certainly make other models as well so you can pick the combination of size and price that works for you. For our regular cars and trucks – the GB40 has worked just fine. I definitely recommend the Noco products.
Note, I have to buy all of my parts – nothing here was paid for by sponsors, etc. I do make a small amount if you click on an ad and buy something but that is it. You’re getting my real opinion on stuff.
Years ago we invested in a water filter unit that sits on top of a regular water cooler. This lets us have clean good tasting cold water – at least it did until about a year ago. My wife was the first to notice that the water wasn’t getting as cold and finally it got to the point where it was only just a tad cool first thing in the morning. Because this thing was older, my first thought was that it was low on refrigerant because we’d had this happen before with old fridges.
Refrigeration systems are sealed but over time the seals age and slowly the refrigerant leaks out. At some point, there isn’t enough left to effectively cool whatever it is in questions – a fridge, freezer or a water cooler.
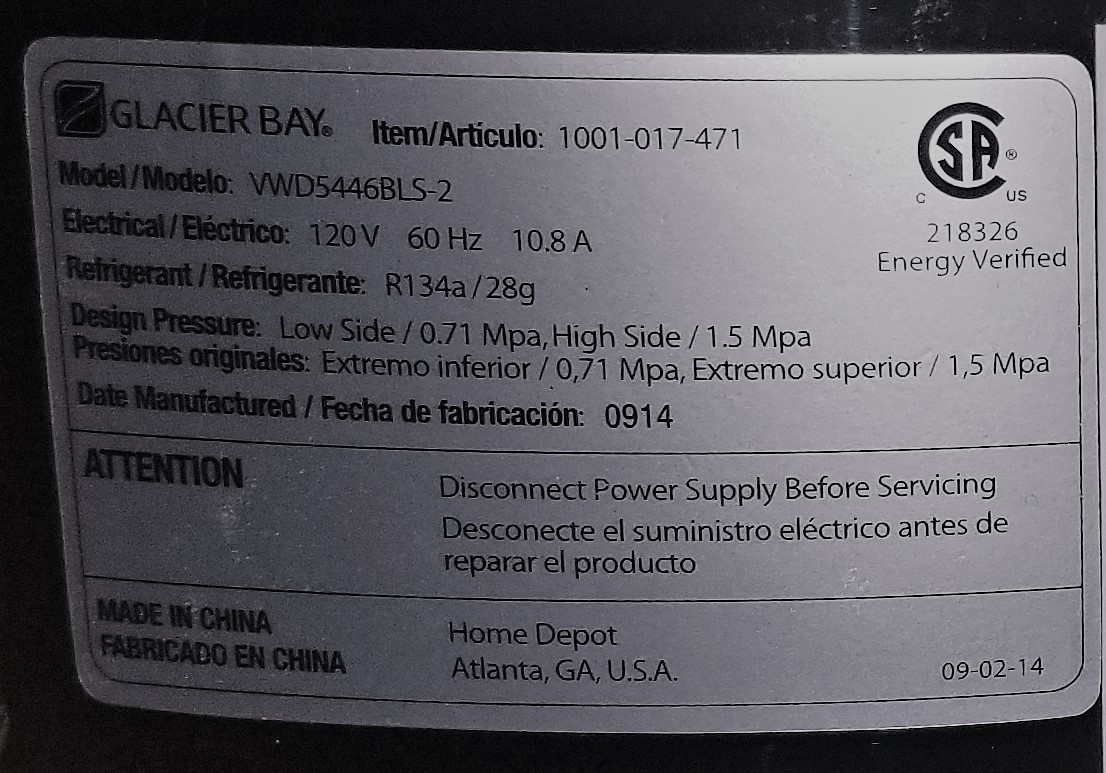
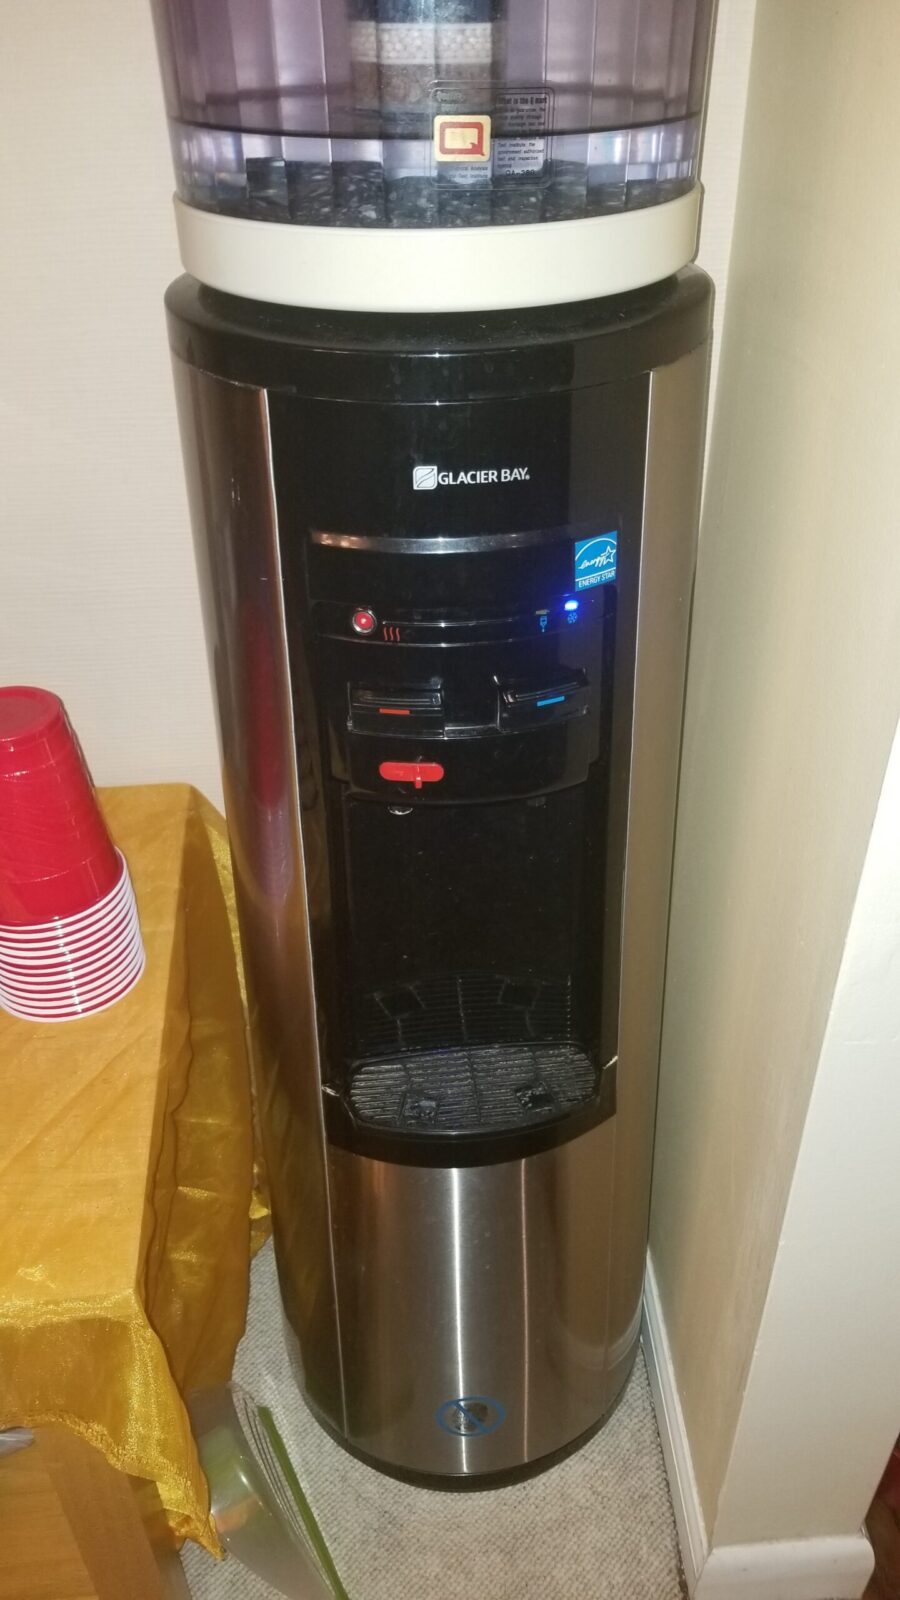
So, step one was to pull the cooler out and look at the manufacturer’s sticker on the back. Glacier Bay is a Home Depot house brand – no surprise there. The refrigerant used was R134A – definitely needed to know that, which was nice because I keep R134A around for use on cars. The sticker also told me the unit was made back in September of 2014 — yeah, this thing was just over six years old and we bought it new way back when.
This is the manufacturer’s sticker off the back of the unit.
Note: If you need R134A refrigerant, go to your local discount car parts store. Odds are you can get a can cheaper there than mail ordering one.
Now there’s one thing I have learned – do some research on things that need to be repaired before you make the wrong assumptions and really screw things up. Boy, I’m glad I did that in this case because these small refrigeration units work at way, way lower pressures than a car or truck.
Watch this great video
What helped me out the most was an amazing video that a fellow put together about how to recharge small fridges. It was exactly what I needed to know and I only made a few small adjustments to his recommendations:
What I did
The first thing I had to figure out was how to get to the low pressure line to attach the bullet valve. While you may think to come at it from the back, which was my first thought, it will be a nightmare. It turns out that you remove the water tray by pulling it straight out and you are then looking at the one screw you need to remove to then pull off the front lower cover – voila – you are looking right at the lines.
I got my bullet valves off Amazon and you definitely need to back off the valve or it will pierce the line when you clamp it on. The gentleman mentions it in the video and I just want to reinforce you better make sure it is backed off.
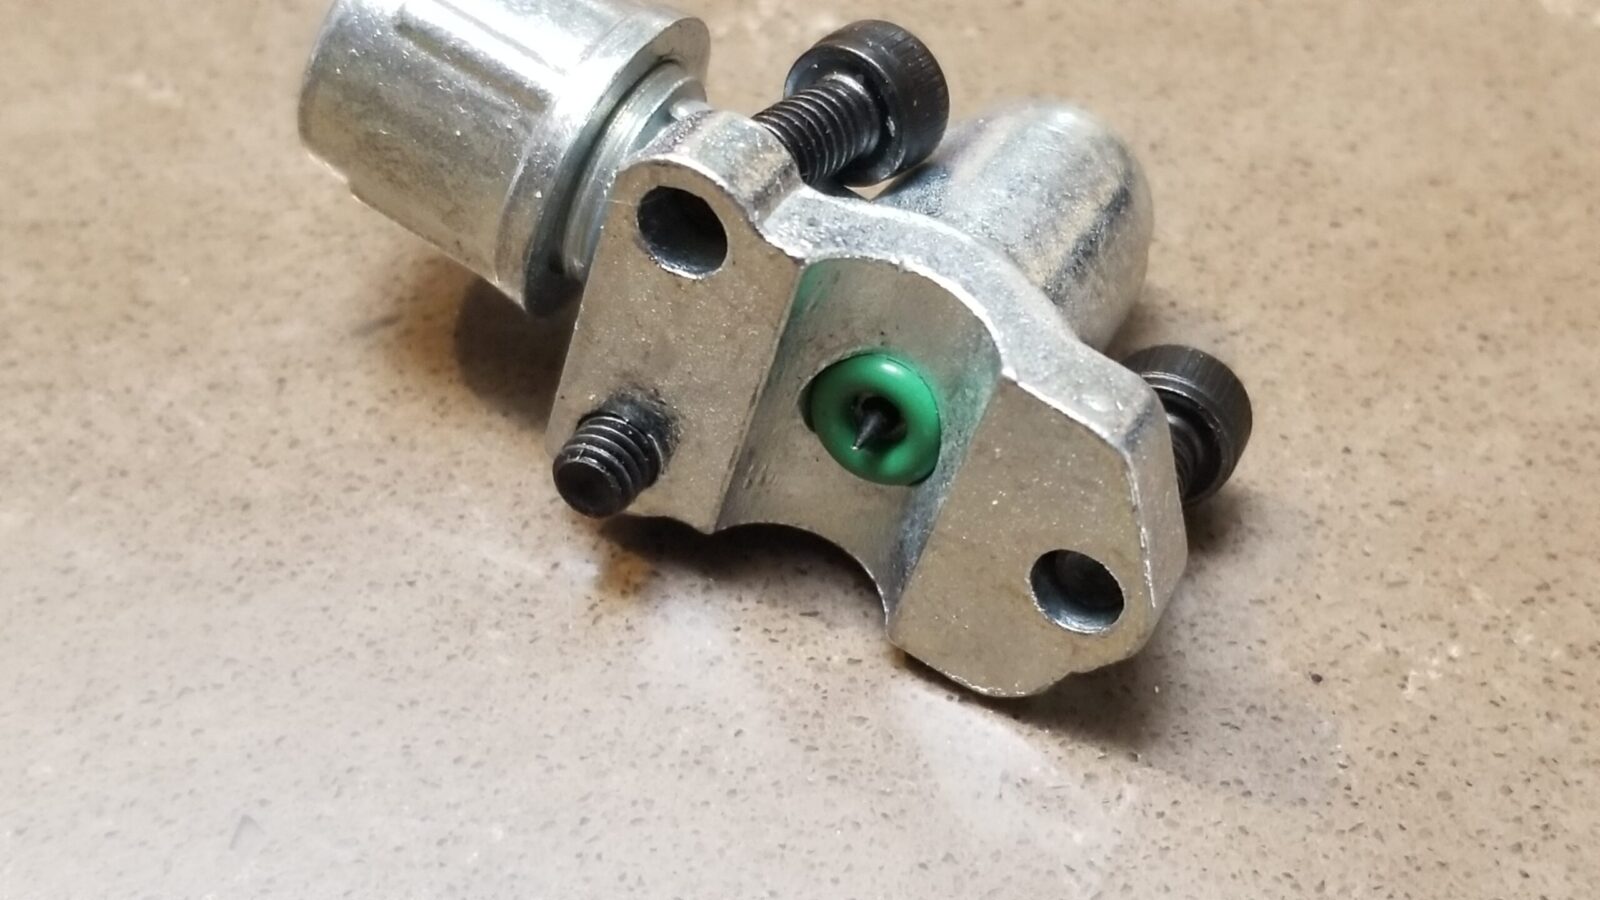
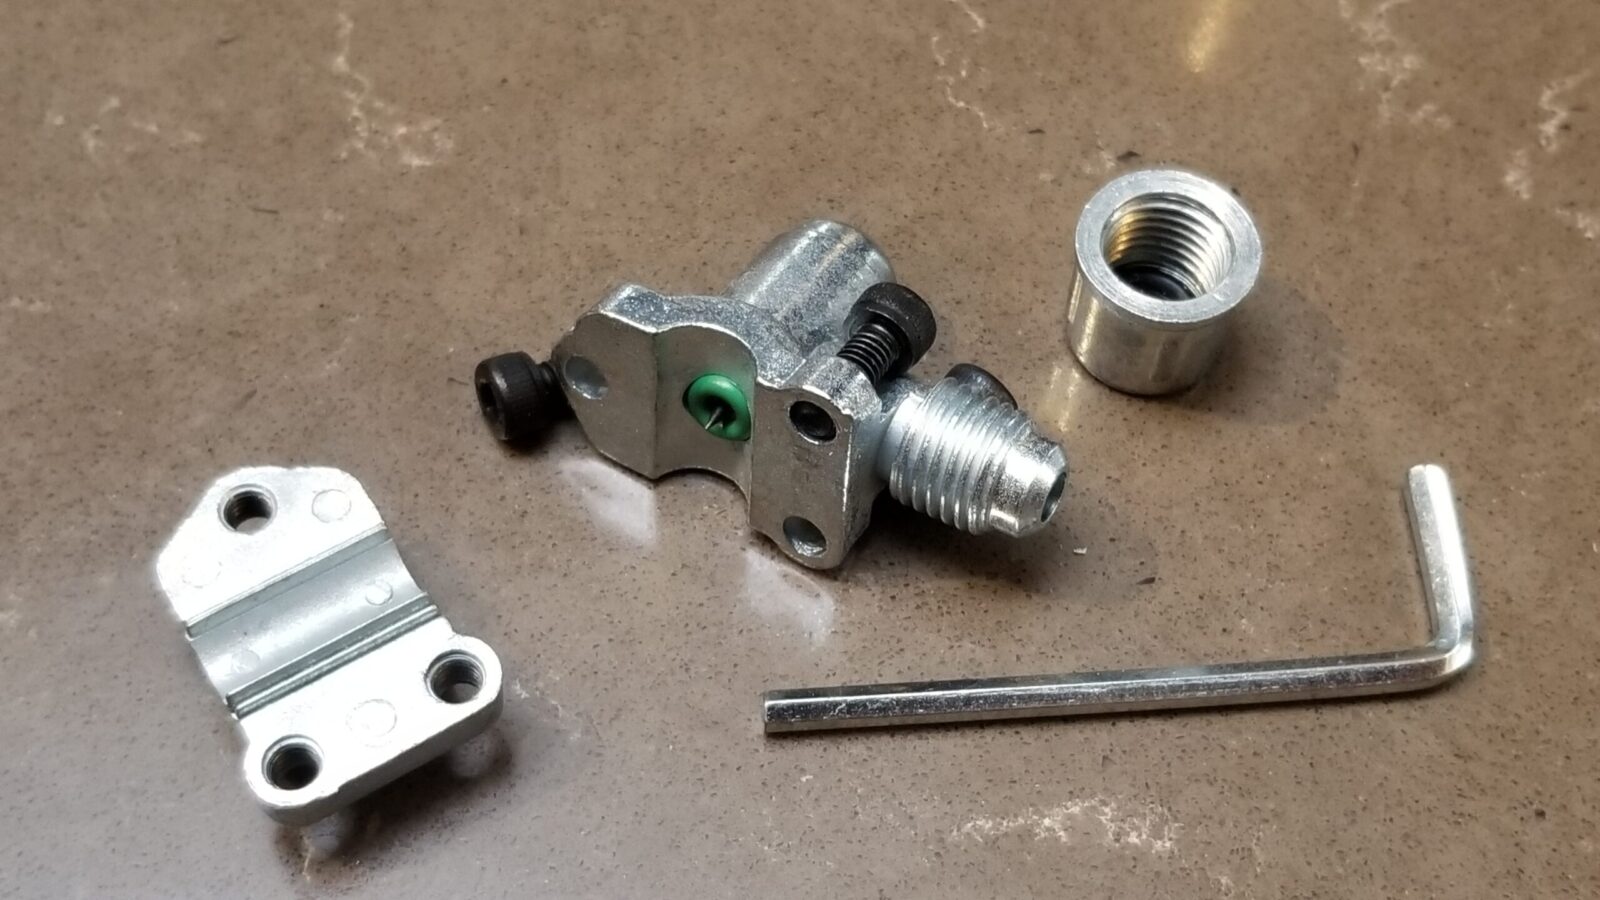
This is the way the tap looks when I first disassembled it for installation. You can see the hardened steel point is extended. If you don’t first use the supplied hex wrench to back the valve out, this point will pierce your copper line while you are trying to install the valve and you don’t want that.
Seriously, this is a wickedly simple elegant valve. Everything you need to tap into the line is there with the exception of using sand paper or a brillo pad to clean any oxidation off the copper line where the piercing tap and the green rubber o-ring seal will go.
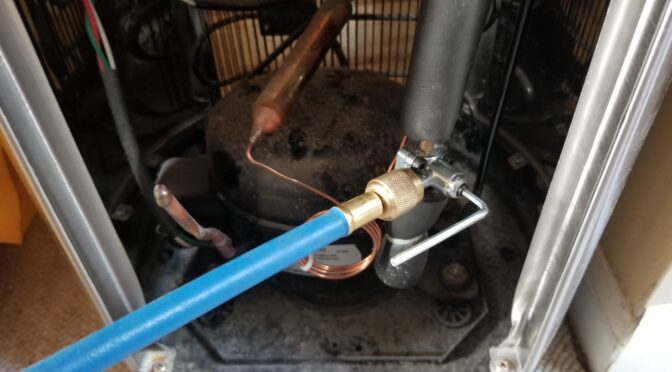
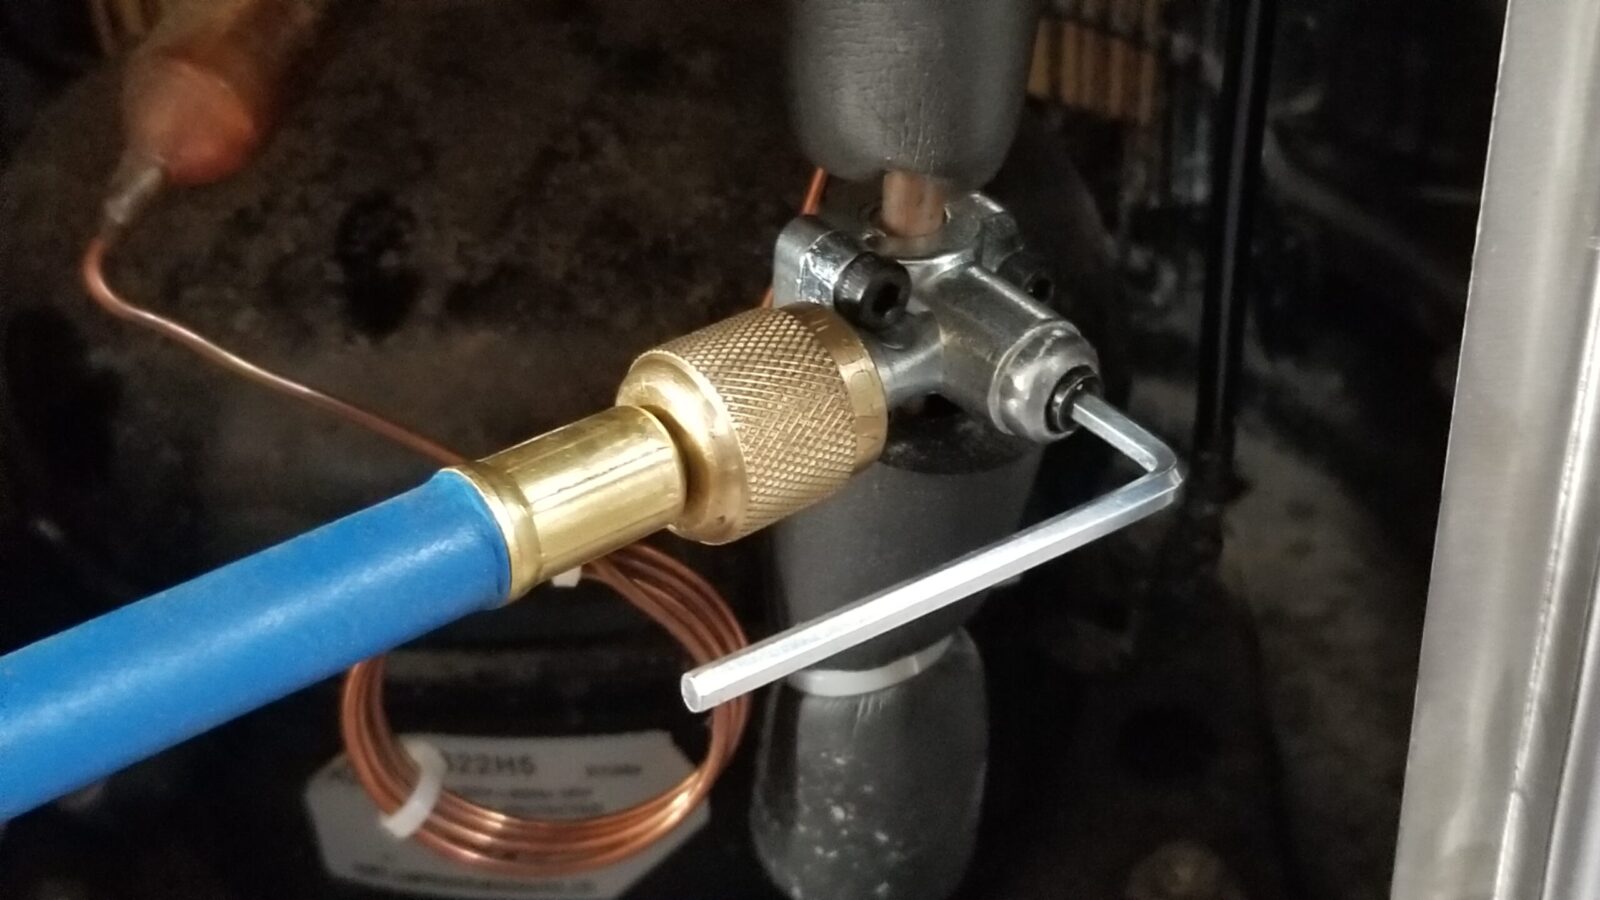
The line you need to attach the valve to has the insulation on it. I slid the insulation out the way, installed the valve assembly so it was just barely snug and then did the final positioning so I had easy access to the valve hex screw and could also attach the refrigerant line.
I moved the valve around until I found a good spot for it where I would have easy access to the valve screw where the hex head wrench is in the photo and also be able to easily get to the refrigerant line. Make sure your copper line is clean. I’d recommend using very fine sandpaper to make sure there’s no oxidation that will interfere with the seal.
The compressor was drawing a vacuum and it appeared to be working and holding the vacuum so I did not use a vaccum pump to draw down the whole system. For me, this worked.
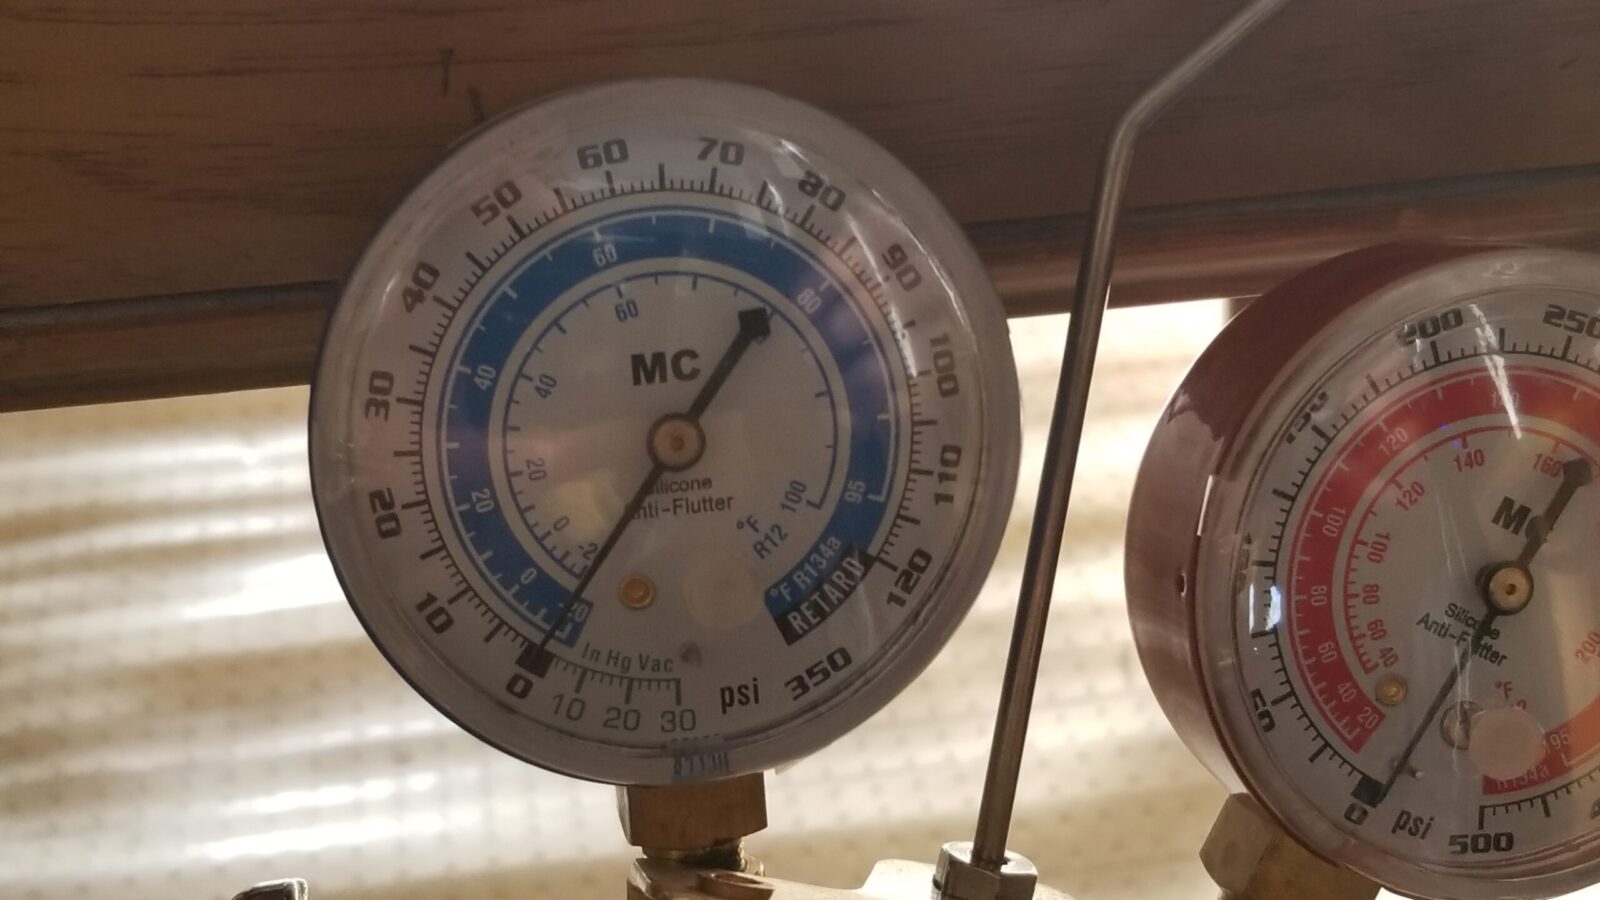
The fellow mentioned these things run at 1-3 PSI on the suction side so I opted to slowly fill it until it was at 2 PSI. Note, I did purge my manifold line before I opened the valve so as to get rid of any air first.
Now when I say slowly fill, I would add a bit with the cooler’s compressor running and then wait a few minutes to see what happened. I did this over and over for almost 30 minutes until the pressure gauge read 2 PSI. Don’t try to do it all in one step.
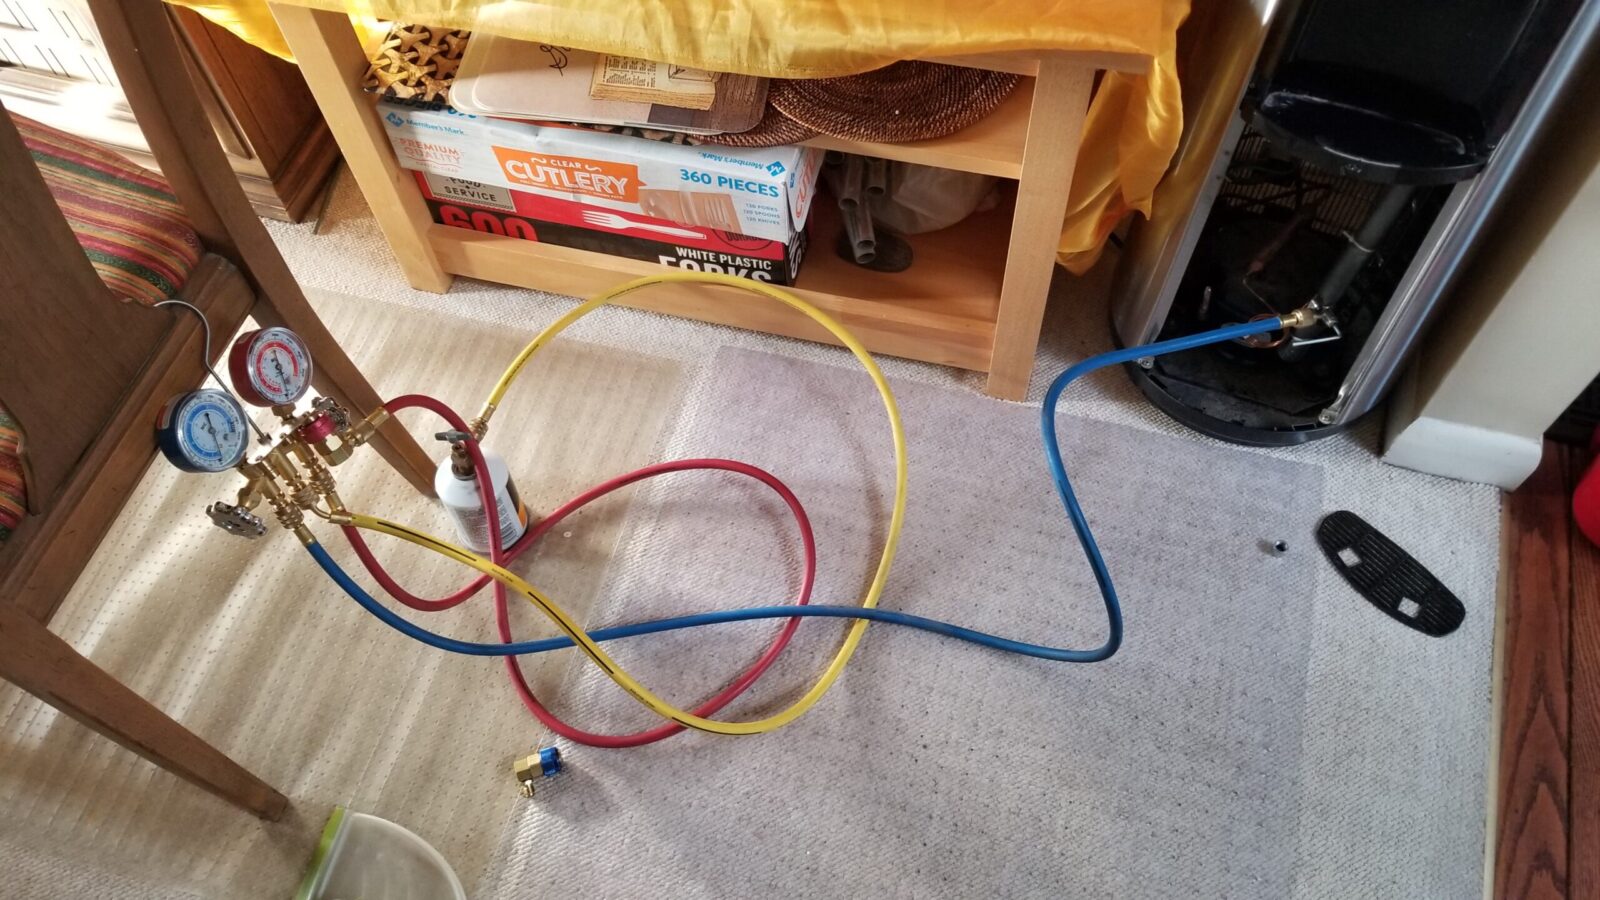
This is the Master Cool model 66661 air conditioning manifold gauge set that I use on cars and the low-pressure blue side started with a low enough marked increments on pressure and vacuum to work. You can definitely use what the fellow has in the video – I just used what I had. The red hose was not needed in this case.
The blue gauge shows vacuum in inches of mercury (In Hg) colored green down in the lower left and then it switches to pressure in PSI in black above the 0. Again, you just need 1-3 PSI and I stopped at 2.
If you don’t have air conditioning tools, there are tons of them for sale on Amazon. There are whole kits with everything you need to start – vacuum pump, manifold with gauges and more. Click here to see them.
The cooler is working great once again and it’ll be easy to add refrigerant again if needed.
In conclusion
It’s been two weeks and the water cooler is still working just great. I have a spare bullet valve should I need it but other than those, since I already had the gauge set and the R134A, the repair didn’t cost me anything. Even if I had gone with complete repair kit, it would have been cheaper than having a repair person visit.
Note, I have to buy all of my parts – nothing here was paid for by sponsors, etc. I do make a small amount if you click on an ad and buy something but that is it. You’re getting my real opinion on stuff.
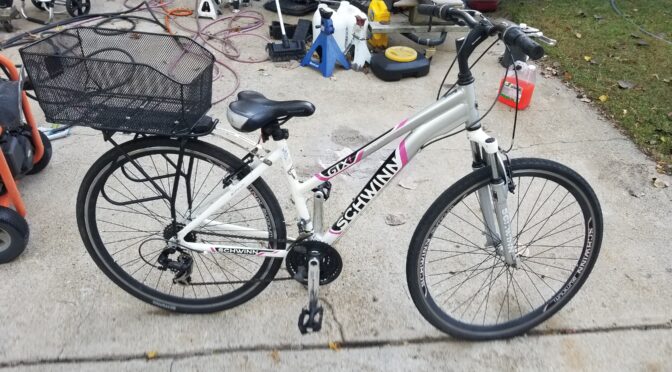
In the last post, I described changing the inner tube on my daughter’s bike and then finding that the crank was grinding. It was so bad that it felt like metal on metal. When we brought her home last year, I noticed the crank had a ton of play in it and had a grinding feel when turning and knew that meant the bearings in the crank/lower-bracket were bad.
I’ve not worked on the crank of a bike for probably 40 years – literally. I had a vague idea of what to do but some details have changed over the years and I had to do some reading. Given that I had to really dig to figure out what to do, I figured it was worth sharing this also in case someone else has “what in the heck is this?” moment with one of these Schwinns or a bike with a similar setup.
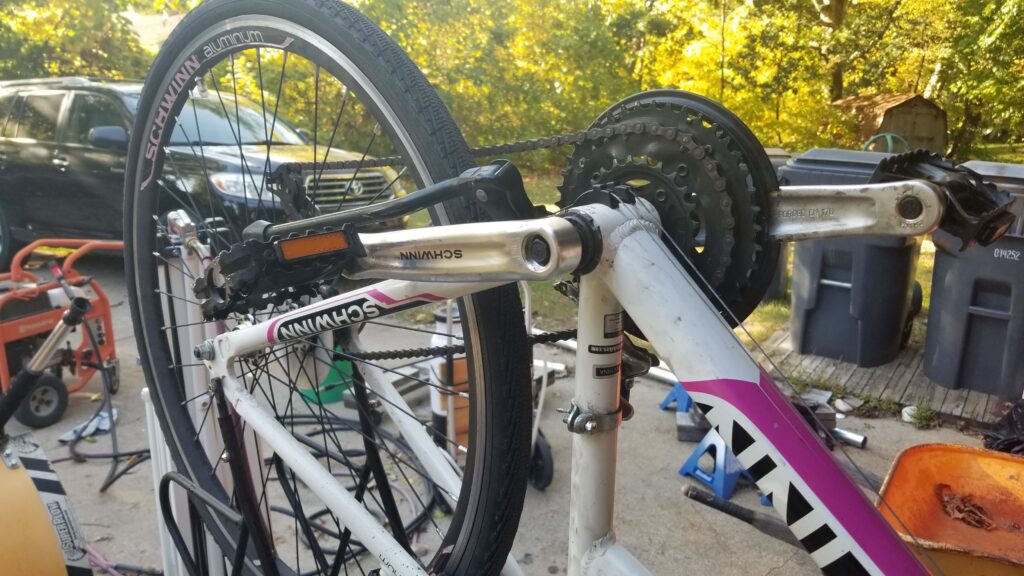
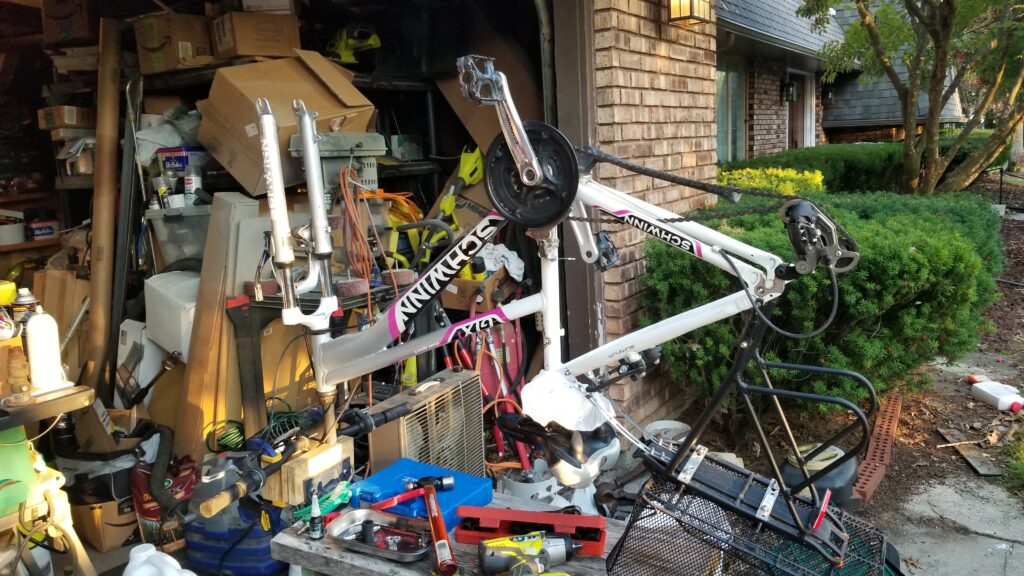
Here’s the bike upside down. I have it resting on a work table with the handbars clamped onto a wood working vise. A weird way to hold it but it worked. It just so happens the bike basket helped stabilize things.
I had to watch a bunch of videos and read some blog posts to get an idea of what to do. I thought “crank” applied to the whole assembly but it turns out the correct term for the innards is the “bottom bracket” and cranks just appear to the lever arms the pedals attach to.
Here’s the approximate sequence of what to do
I’m writing this a few weeks after doing the actual work but hope it helps if you find yourself in a similar bind:
Step 1: Remove the left and right cranks. They are pressed in place and I had to buy an actual purpose built puller to get them off. None of my generic gear pullers would work.
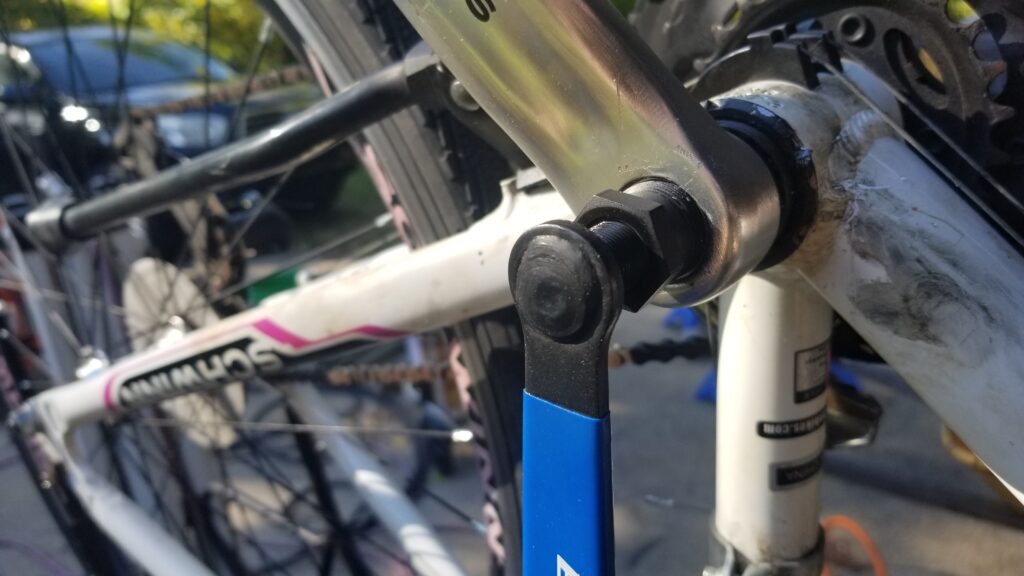
You remove the obvious bolt and then use a purpose-built puller that threads into the crank all the way and then tighten the center bolt to push the crank off. The Schwinn needs a puller that has 22mmx1mm threads made for a square crank.
Park makes two tools – the one I used and the one I bought for future use. I bought and used the CCP-22 crank puller but I would not recommend it. Both cranks were on so hard that I had to hit the handle with a dead blow mallet to get it to turn. At least for the bike I was working on, the integral handle wasn’t sufficient to remove the crank.
Here’s the Park CCP-22 crank puller in use. It did the job but the handle alone didn’t give me the torque I need.
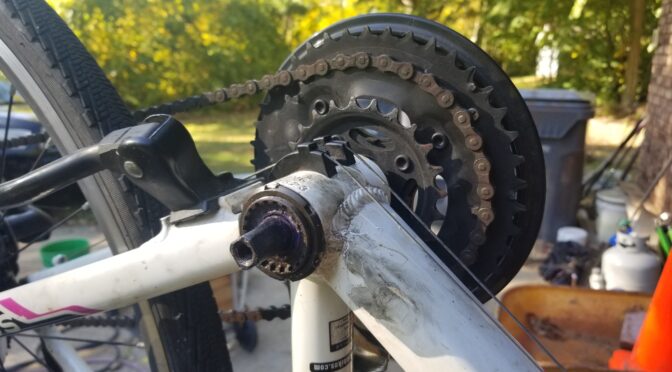
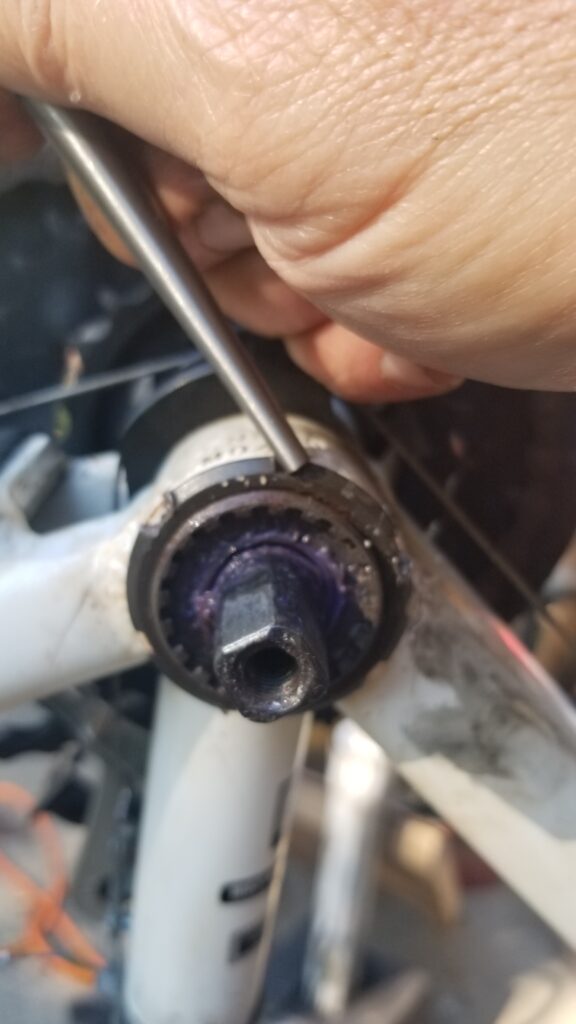
Step 2: Loosen the lock ring. When you look at the bracket, you will notice it is threaded and goes into the frame. Securing it is a locking ring that is threaded and is tightened against the frame to apply pressure. You loosen the locking ring by putting a punch in one of the little “notches” and tapping the ring so it will turn counter clockwise. It will come lose and turn very easily. Just move it a few turns from the frame but leave it on the bracket – you do not need to remove it all the way.
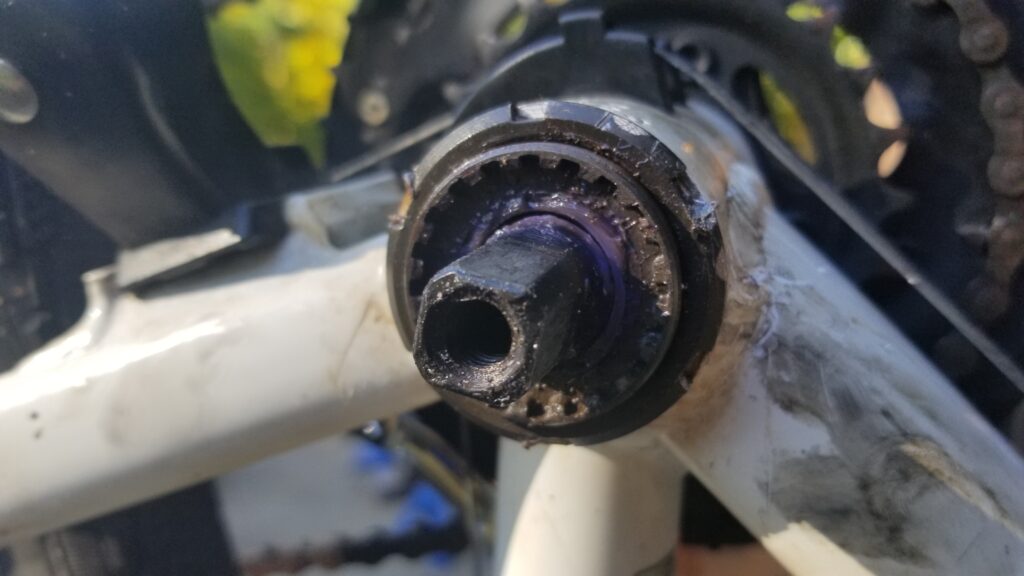
The locking ring is the part with the little rectangular notches right against the bike frame. The first evidence of this think being whipped together is here. Look how “smashed” the notch is at about the 2pm position. Regardless, it came free quite easily.
Step 3: Remove the non-geared side of the lower-bracket. If you look at the photo above, you will notice there are splines radiating inwards on the bracket. You need to measure the diameter and count the number of splines in order to buy the correct size wrench to remove this part of the bracket. This one was about 31.5 mm inner diameter and had 22 splines. The Park BBT-22C tool fits these. There are many different sizes so you really to confirm this.
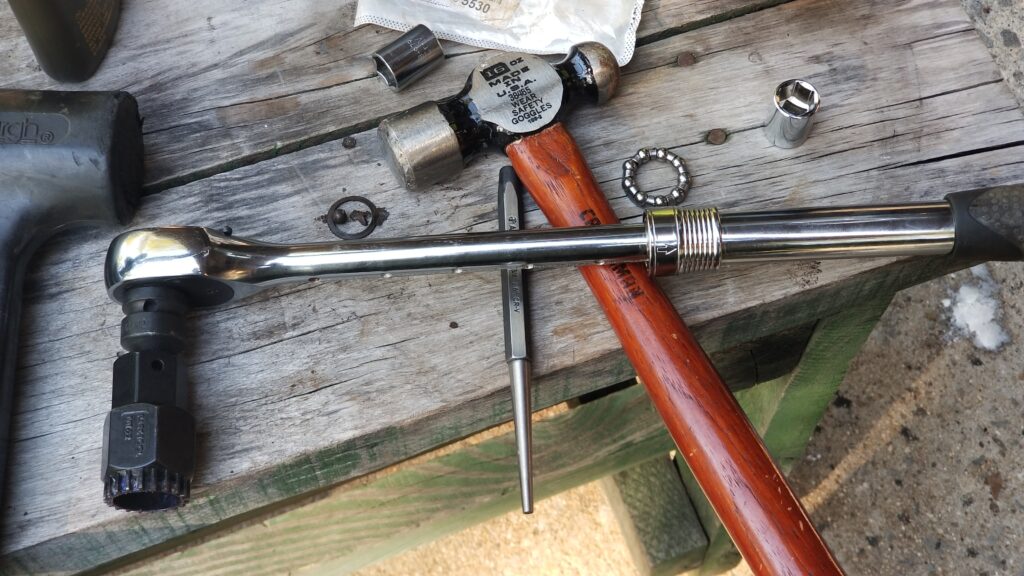
Here you can see my BBT-22C tool on the end of a big 1/2″ E-Z Red extendable wrench with a Tekton 1/2″ to 3/8″ socket adapter. I like to have plenty of torque when I need it. You can also see the dead blow hammer on the left that I had to use to beat the Park wrench to remove the cranks. You can also see the punch and hammer used to tighten and remove the bracket’s locking ring one one of the two bearing assemblies.
I used the above pictured E-Z Red wrench and BBT-22C adapter to remove the bracket, When the bracket came out of the frame, I kid you not, ball bearings fell out. What a mess.
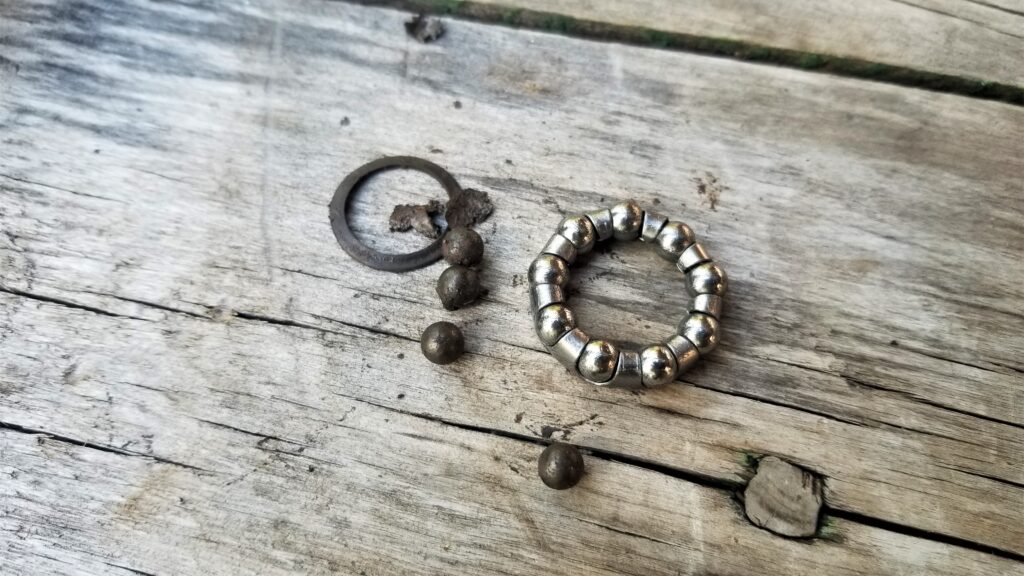
None of the ball bearing assemblies were intact, there was no grease to speak of and the rusty sludge that I had to clear out of the frame had remnants of the ball bearings and the cages/retainers. There were literally no ball bearings supporting the crank axle/spindle. The axle was just turning directly on the ends of the lower bracket! No wonder she was complaining it was hard to pedal
Step 4: Remove the geared side of the bracket. This comes off very similar to the non-geared side with two exceptions. First, it is reverse threaded. Turn clockwise to remove the bracket on that side. Second there is no lock nut. The proper tensioning of the bracket is done from the non-geared side. By the way, if you maneuver the crank and gear assembly around a bit, you can leave the chain in the derailer.
Step 5: Thoroughly clean and grease the frame’s tube where the bracket was at. You do not want debris to get into your brand new bearings. I had a ton of crud to get out and then I liberally greased the walls.
Step 6: Reinstall the geared side of the bracket. Remember that it is reverse threaded and it goes in all the way. The final adjustment is done from the non-geared side. Note, I put a lot of grease in the dome before screwing it back into the frame.
Tip: Re-install all threaded pieces such as brackets and bolts by hand to make sure the thread is properly aligned and not cross-threaded. Use a wrench to tighten things down only once you know the threads are properly mated.
Step 7: Grease and install the bearings. I had grease everywhere at this point and didn’t want to touch my phone. Normally you would be able to see your old bearings and have an idea of what to buy. All I had were some rusty ball bearings and pieces of the retaining rings. So, I did some digging on Amazon only knowing I had a Schwinn bike and needed bearings with an inner diameter based on the axle or shaft between the cranks of about 0.72″ and an outside diameter of about 1.14″ (29mm).
Okay, I got lucky. In reading the comments of a lot of different bearings, a 1/4″ x 9 ball unit from Jaceyon popped up with people reporting they worked on Schwinn bikes. I was running out of time so I ordered them and they worked! Click here for the bearings on Amazon – a new tab will open.
Use wheel bearing grease to pack the bearings as best you can. I apply a lot of grease to all surfaces including the bracket face, the axle/shift and the bearings. I like to use a synthetic wheel bearing grease, such as Mobil’s, because I find it doesn’t ooze oil like normal grease does. In the end, use what you have but just be sure to grease the bearings before installation.
When you install them, there is a proper orientation. Please look at the inside ends of the brackets – they are domed. This means the exposed bearings will engage with these ends. The flat part of the housing faces the inside of the tube.
This is the front or top of the bearing. It will be facing outward from the bicycle such that the bearings are engaging on the domed surfaces of each end of the bracket. Those are some remnants of the original. I don’t think any grease was applied during assembly. By the way, some will refer to the ball bearing group as a set or say that the bearings are caged. No matter how you look at it, the retainer properly positions the balls around the crank’s axle to allow it to turn freely. You can imagine that if they rust it will be game over pretty fast. The retainer is just folded sheet metal.
I slide the geared side bearing and the axle in. Again, make sure the bearings are facing outward so they will engage with the bracket. I then put a bunch of grease in the non-geared bracket end dome and hand screw it back into place.
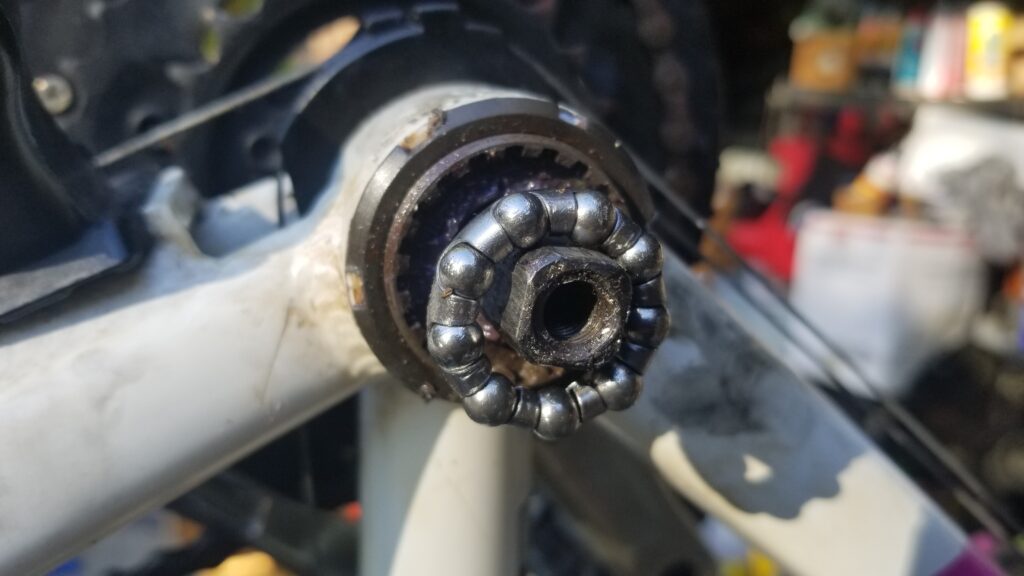
They will go in like this with the ball bearings facing out on each end. I have not greased these yet and this set of bearings is just sitting on the end of the installed bracket for the purpose of this photo. If it were really being inserted, I would have it covered in synthetic wheel bearing grease.
Step 8: Tighten the bracket and install the lock ring. Now this part may take some tuning. By tightening the non-geared side, you are compressing the bearings into place. Tighten the bracket until the crank axle can no longer wiggle but it can still turn. Do not use a huge wrench here or rush – you can smash the bearings – I’ve done it. Tighten a little and feel the axle, over and over.
Step 9: Tighten the lock ring. Use a punch and hammer to rotate the ring clock wise and lock the bracket back in place.
Use a punch or whatever tool you want and a hammer to tighten the lock ring and secure the backet.
Step 10: Reinstall the cranks. Situate them on the shafts and use the center bolt to press them back into place on the axle as well as lock them there. Each crank arm should be 180 degrees opposite of the other. The square ends of the axle are intended to make this easier 🙂
Reinstall your chain too when you are wrapping up the gear-side if you haven’t already,
Step 11: Give it a test ride. If it makes a creaking or groaning noise when you pedal either the bracket needs more tightening or you trashed the bearings. If the sound will not go away, you will need to take it back apart because the bearing probably failed for some reason. That means you go back to step 3. Hopefully you will not have this happen. It did to me the first time and luckily the bearings I bought were four sets to a bag. I’m really not sure why it busted but I am glad I had a spare.
Videos
I didn’t find any exact videos, which is one of the reasons why I wrote this post, but there are videos that can give you a better idea of what is needed. I’m hoping that between my post above and your watching these videos, you will have a pretty good idea of what needs to be done.
Conclusion
With this done, the bike was all set for my daughter to use again. I don’t think a ton of care was taken during assembly and really wouldn’t be surprised if little to no grease was applied to the bearings.
I hope this helps you out.
4/30/2924 Update: The bike is still going. I am sure that greasing them really well is a big factor for longevity. Go to your local car parts store and get any normal wheel bearing grease – you do not need any that says it is a high-temp formula, extra thick or whatever.
6/27/2021 Update: The bike is still doing just fine. No problems with the crank and bearings at all.
Growing up in the 70s, Schwinn bikes were real popular as there was a dealer in town. Over the years, the brand has been bought and sold and is owned by Pacific Cycle now. The bikes are made in Chang Zhou China and are sold through places like Walmart and Sam’s Club.
With that said, my daughter needed a bike and we bought her one in 2016 from Sam’s Club. It was already assembled so I was happy I didn’t have to mess with it. Growing up in a rural area with few kids around, one of my hobbies was fiddling with my Sears Free Spirit 10-speed and often needing my dad to bail me out when I messed things up — I tend to learn a lot by screwing up 🙂
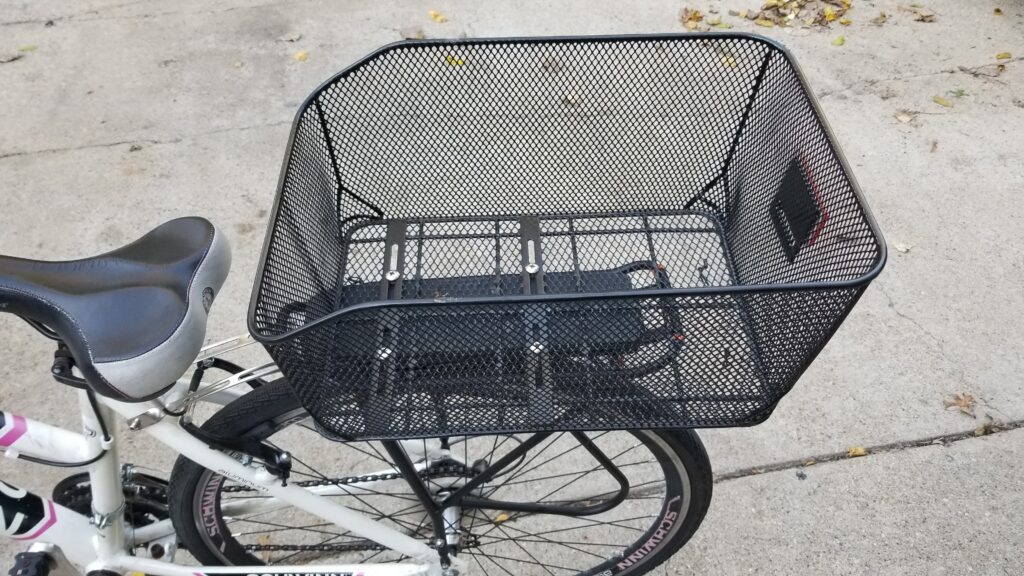
At any rate, the big went with us on a number of trips over the years and went with my daughter to college. It’s hard to beat having a bike on campus to get around and we invested in a basic rear basket for two reasons – the obvious was to let her throw stuff in it. The other was that it could block the water and mud that otherwise throws a stripe up your back when you have to bike in the rain.
Installing the basket required buying the Ibera adjustable rear rack, installing a piece of wood that I painted black to block the water (you could use any solid you want) and then the Axiom wire basket. I found them on Amazon and bought based on specs and reviews. I did have to get longer bolts from Ace Hardware to connect the basket to the rack due to the wood insert.
Here’s the exact Ibera rack I bought:
And this is the wire mesh basket:
The Call…
The bike worked great until I got a call – “Dad, I have a flat – what do I do?” Well, we live just over an hour drive away so the next time we went up, I brought the bike back.
What Size Inner Tube?
Many bike tires, such as this Schwinn, have an inner tube and eventually it cracks or a hole gets poked in it. Some folks patch their inner tubes but I just replace them – especially given the age of the bike and that I knew it was an original tube.
The info you will need to get a replacement tube is on the side of the tire (not the tube). You may see the ETRTO (European Tire and Rim Technical Organization – or ISO) number marked as XX-YYY where XX is the tire’s inner width and YYY is the inner tire diameter. On this Schwinn, it is 40-622.
You may also see an older French sizing that is marked something like AAAxBBm. AAA is the approximate tire outer diameter and BB is the width. There will be a letter at the end “m” is the inner diameter. I ike the ERTO method better – it just makes more sense to me. At any rate, the Schwinn had this code also: 700x38C.
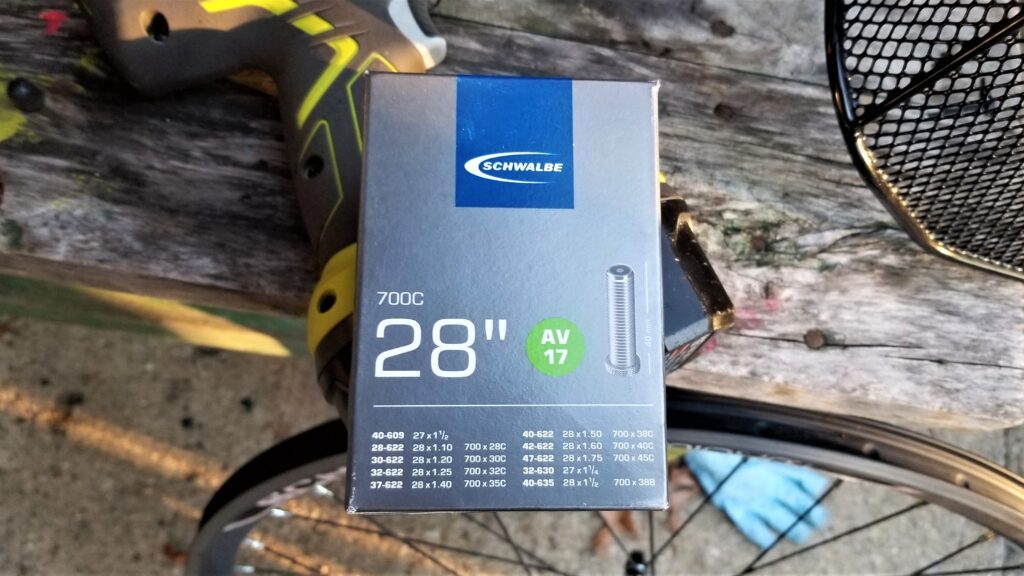
Okay, so armed with that info, I hopped on Amazon and started reading reviews. I didn’t want to buy a cheap tube and have it give out prematurely so I looked at Schwalbe – an old name in German inner tubes. I also used their website to confirm the size I needed – their AV17 model. which fits 700x38C, 28×15 or 40-622 tires and has a Schrader air valve. I bought two because if the one was aging, which was my suspicion, I bet the other was as well.
Tip: If you are in the US, you will want a tube with a basic Shrader Valve to inflate your tube. This is the most common type of valve and you will find it on cars, trucks, tractors, and so forth sold in America – it’s nickname you may hear in other countries is the “American Valve” for that reason. There is another type known as a “Presta Valve” and it is unique. Only buy a tube with that type of valve if you know you need it. There is a third type called the “Woods Valve” or “Dunlop Valve” but that tends to only be in the Netherlands and parts of Asia.
Schwalbe AV17 tubes are the right size.
Last comment – there are a ton of bike tubes on Amazon and at stores. There are also different types such as ones that are self-sealing, etc. The choice is up to you, your budget and whether you mind changing the tubes or not. Since my daughter is not readily available and the bike is a big help to get at school, I spent $14 per tube vs. $5-6/tube for tube-shaped objects that may or may not hold up. Read the reviews and you decide.
Replacing The Tube
There are how-to videos out there you can watch if you want. Basically if the tube is already flat, you pull the tire off the rim a side at time. You can use a blade screw drive to help get it started off the rim but I find most of the time if I push the tire away from me while lifting off the rim, I can get it started and then just work my way around. The old tube should just lift right out of the tire unless it stuck due to glue or something from a past patch.
Note, if there is no inner tube on your bike, you have a tubeless tire and the leak may well be in the tire itself.
A nice part of the design is that you can pull the rear tire without having to remove the derailer. Back in the dark ages, that was not the case so you wound up with some really dirty hands.
Before you install the new tire, look at the rim and make sure there are no spokes protruding into the area where the tube is at. Your rim should have either have something rubbery to protect the tube glued in place or at least some type of tape. They sell protective inner tube pads or you can even try putting in 2-3 layers of PVC electrical tape. If you go the tape route, you will need to cut a hole for the inflation tube to stick out.
To install the new tube, put in the tire. Yes, put it in the tire – not on the rim. It’s designed to fit the outside diameter of the tire and will not fit otherwise. So, tuck it into the tire and then push the air valve through the hole the rim. A perk of using Schwalbe tubes is that they have a lock nut you can snug down to hold the tube in hole.
You then tuck the tire into the rim. Depending on the fit, you may need to do a side at a time or be able to do both at once. Take care not to pinch or cut the tube.
A trick I learned years ago is to partially inflate the tube and then gently bounce it all the way around to try and ensure the tube is not caught between the tire and the rim. Not everyone does this so it’s up to you. I then bring it up to pressure and re-install it. I check the air pressure a few hours later to make sure it’s sealed and no punctures happened.
Again, because I suspected the age of the tires was the culprit, I did both tubes. It’s up to you.
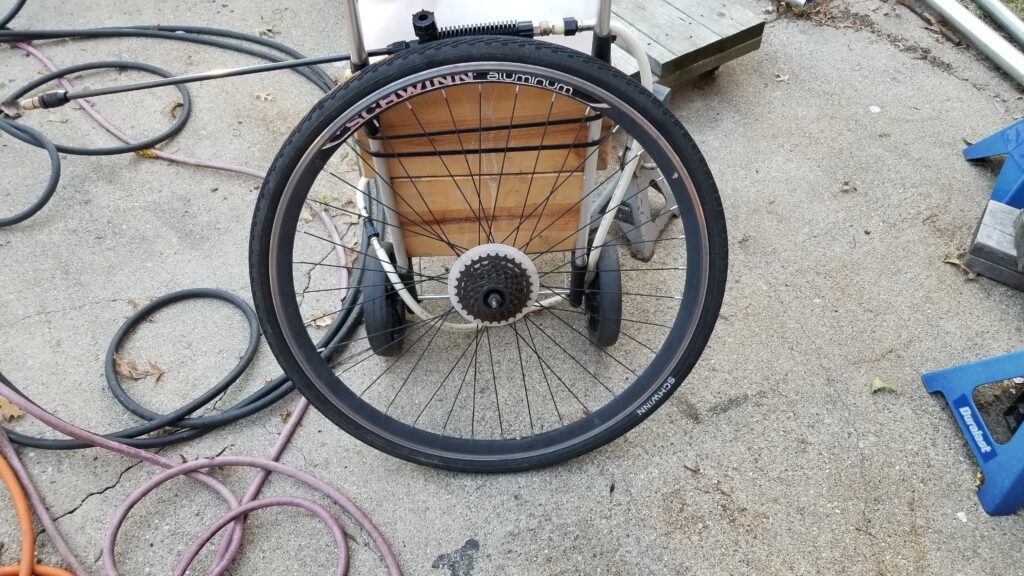
Here’s the finished rear.
Videos
In case you have questions, here are some videos that others have created and posted on Youtube that demonstrate how to remove and install inner tubes:
Conclusion
I hope this helps you out when it comes to the tubes.
thought I was done and then I felt the cranks were grinding horribly. That bugged the heck out of me because I knew it meant to bearings were history and that will be the topic of the next blog post.