Acid Etching With Ferric Chloride and Apple Cider Vinegar – Wicked Results on High Carbon Steel

I recently did two posts about building a new heated tank out of PVC pipe and a digitally controlled heating element that is both effective and affordable. This also marked my first batch of blades where I moved from my traditional hot apple cider etching to using a mix of 70% ferric chloride and 30% apple cider vinegar heated to 90-94F.

The Chemicals

Let me give you a quick overview of the two chemicals I used to make my blade etching solution:

The primary ingredient is liquid ferric chloride from MG Chemicals. It’s available in quarts and gallons and is about 38-42% ferric chloride by volume. The MG Chemicals product is well regarded and that played a big factor in my selecting it. I purchased mine from Amazon and it arrived quickly and well packed.

The second chemical is regular apple cider vinegar from the grocery store. They tend to be normalized around 5% acetic acid by volume. The brand I used was at 5% and there were other brands at 4% that I passed over – go for 5% because you need the acetic acid. I literally bought this at my local grocery store – nothing special.

The solution I made was 70% of the ferric chloride and 30% apple cider vinegar. I wore lab goggles, nitrile gloves, old clothes and am in a well ventilated area when I slowly add the ferric chloride to the relatively weaker apple cider vinegar.

The ratio was based on looking at the end results from other blade smiths and talking about what they learned. In my case, I can tell you that this combination makes for a very nice dark etch.

The Process

  1. Heat the etching solution up to 90-94F before I put in the first blade. MG Chemicals recommends the operating range from 94F to 131F and not to exeed 131F. [Click here for their technical data sheet and MSDS]
  2. The blades need to be at least 70F prior to dunking in the solution. The warmer the solution and blade, the better chemical reaction you are going to have.
  3. Clean the blade with brake cleaner throughly
  4. Abrasive blast the blade – I am using Black Beauty these days. It is a coarse coal slag based product. Note, not all guys blast their blades – some just clean them very carefully.
  5. From this point on, wear nitrile gloves when handling the blades to avoid any oils and contaminants from your skin
  6. I again use brake cleaner to do a final cleaning and make sure it fully evaporates. Some guys rub down with acetone – do what works for you but it must not leave a residue
  7. Fully submerged the blade in the heated etching solution for 10 minutes
  8. Remove the blade and wipe off the remaining solution with a paper towel [as a reminder, you must be wearing gloves to not contaminate the blade]
  9. Used clean/bare 0000 steel wool to buff the surface of the blade and remove any loose particles. Note, this 0000 steel wool is bare wool – no cleaners or anything. You find these in woodworking / hardware sections of stores – not in the kitchen area.
  10. Submerge the blade for another 5 minutes and again wiped and rubbed the blade down with steel wool. I think I repeated this process three times per blade but experiment and see what works for you.
  11. Soak the blade in warm water with baking soda to neutralize the acid
  12. Spray the blade down with WD-40 to displace the water
  13. Apply finish – I like to use a 50-50 mix of boiled linseed oil and turpentine to apply severa thin coats. This gives my blades the worn post-apocalypse look. Many guys just coat the acid etched surface with oil to inhibit rust.
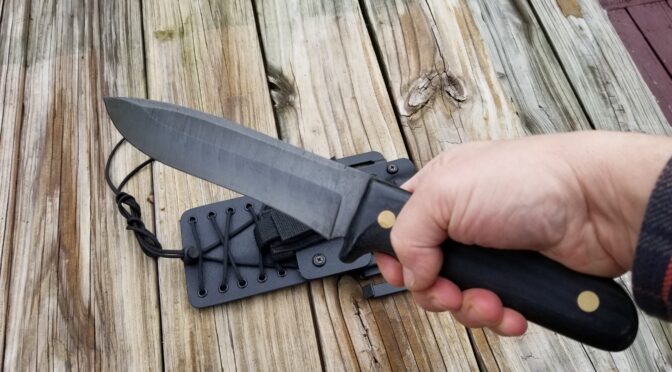
Lexol leather conditioner next to knife and sheath for moisturizing.
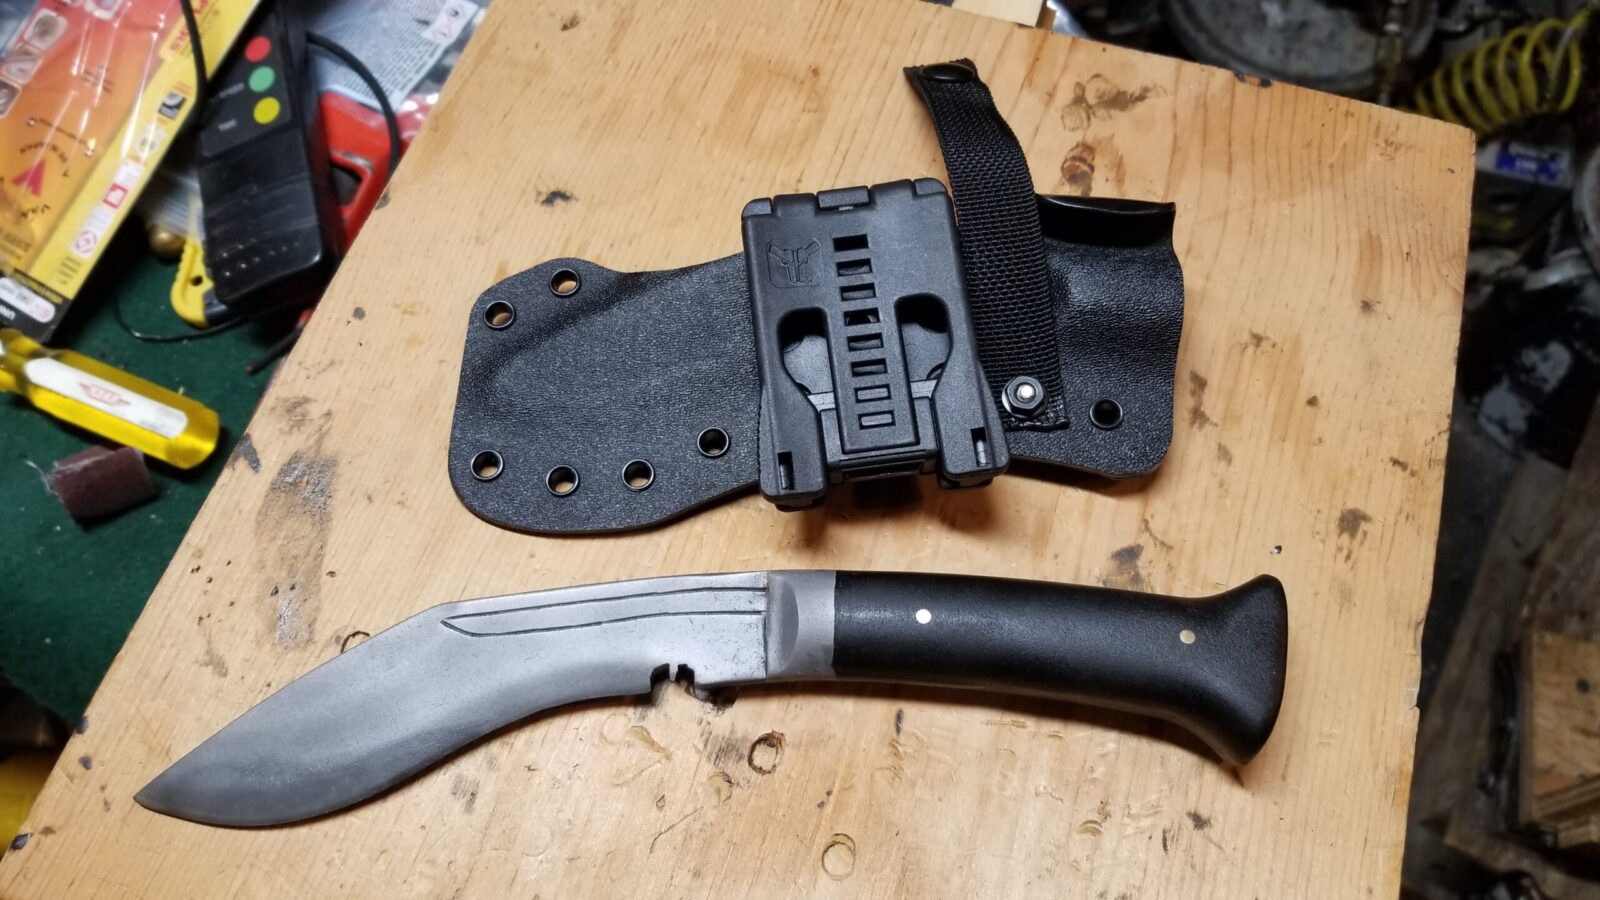
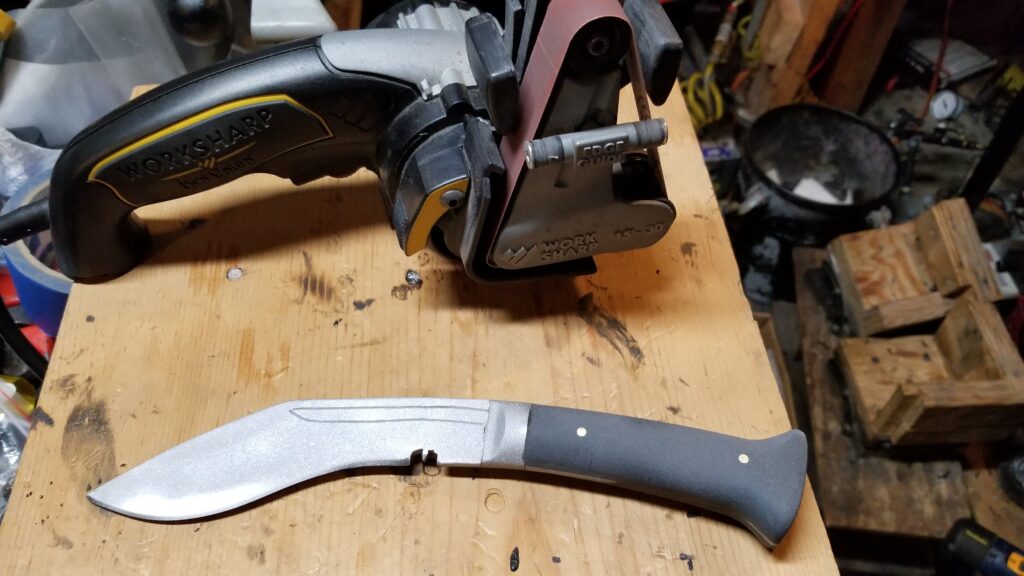
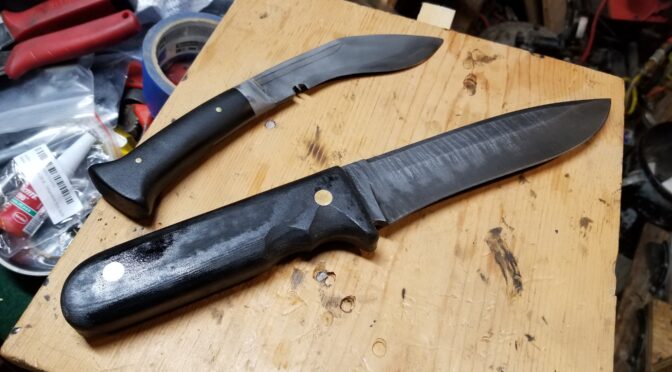
Here’s a small 5″ khukuri where all steel surfaces have been blasted.
Lexol leather conditioner next to knife and sheath for moisturizing.
Here’s the finished khukuri just before I mailed it to its new owner.
Lexol leather conditioner next to knife and sheath for moisturizing.
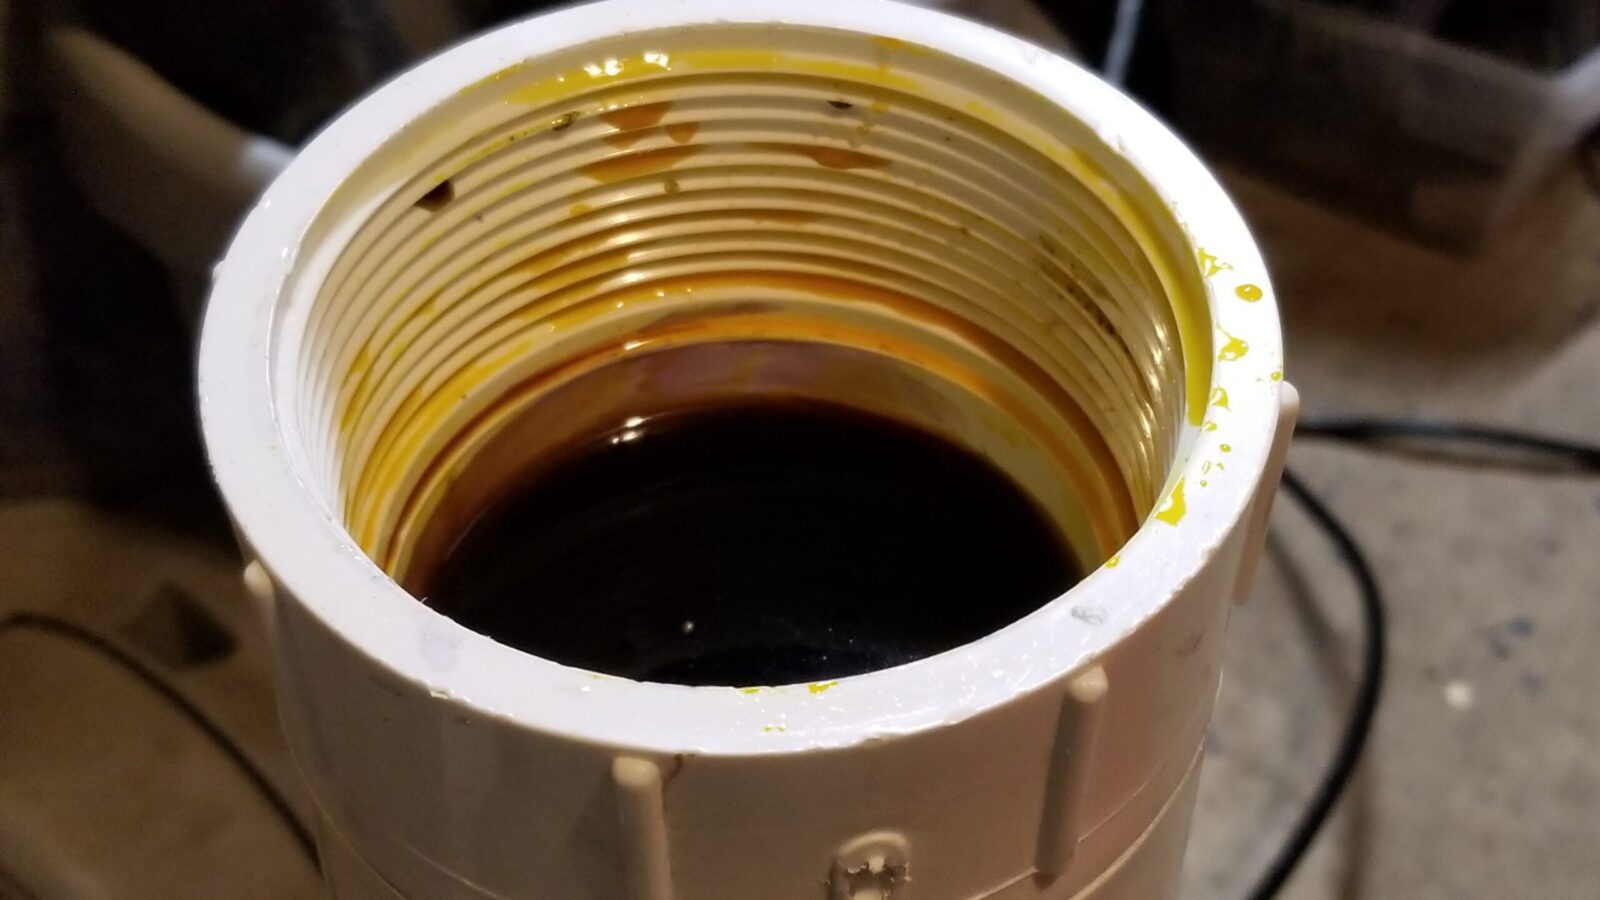
Here’s a look at the solution in the tank.
Lexol leather conditioner next to knife and sheath for moisturizing.
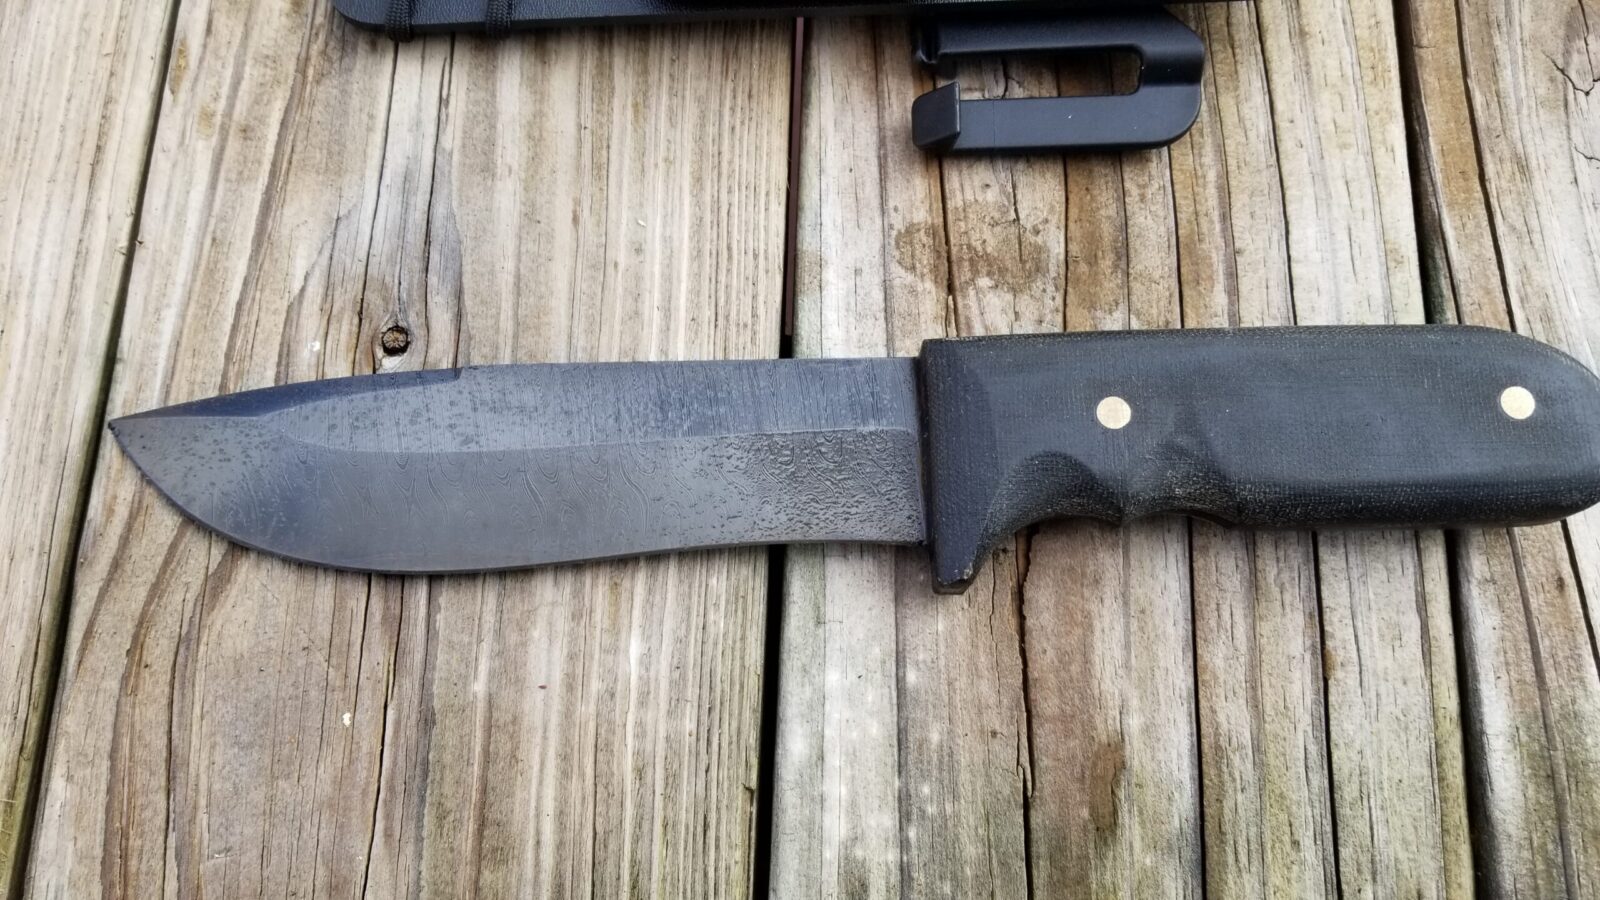
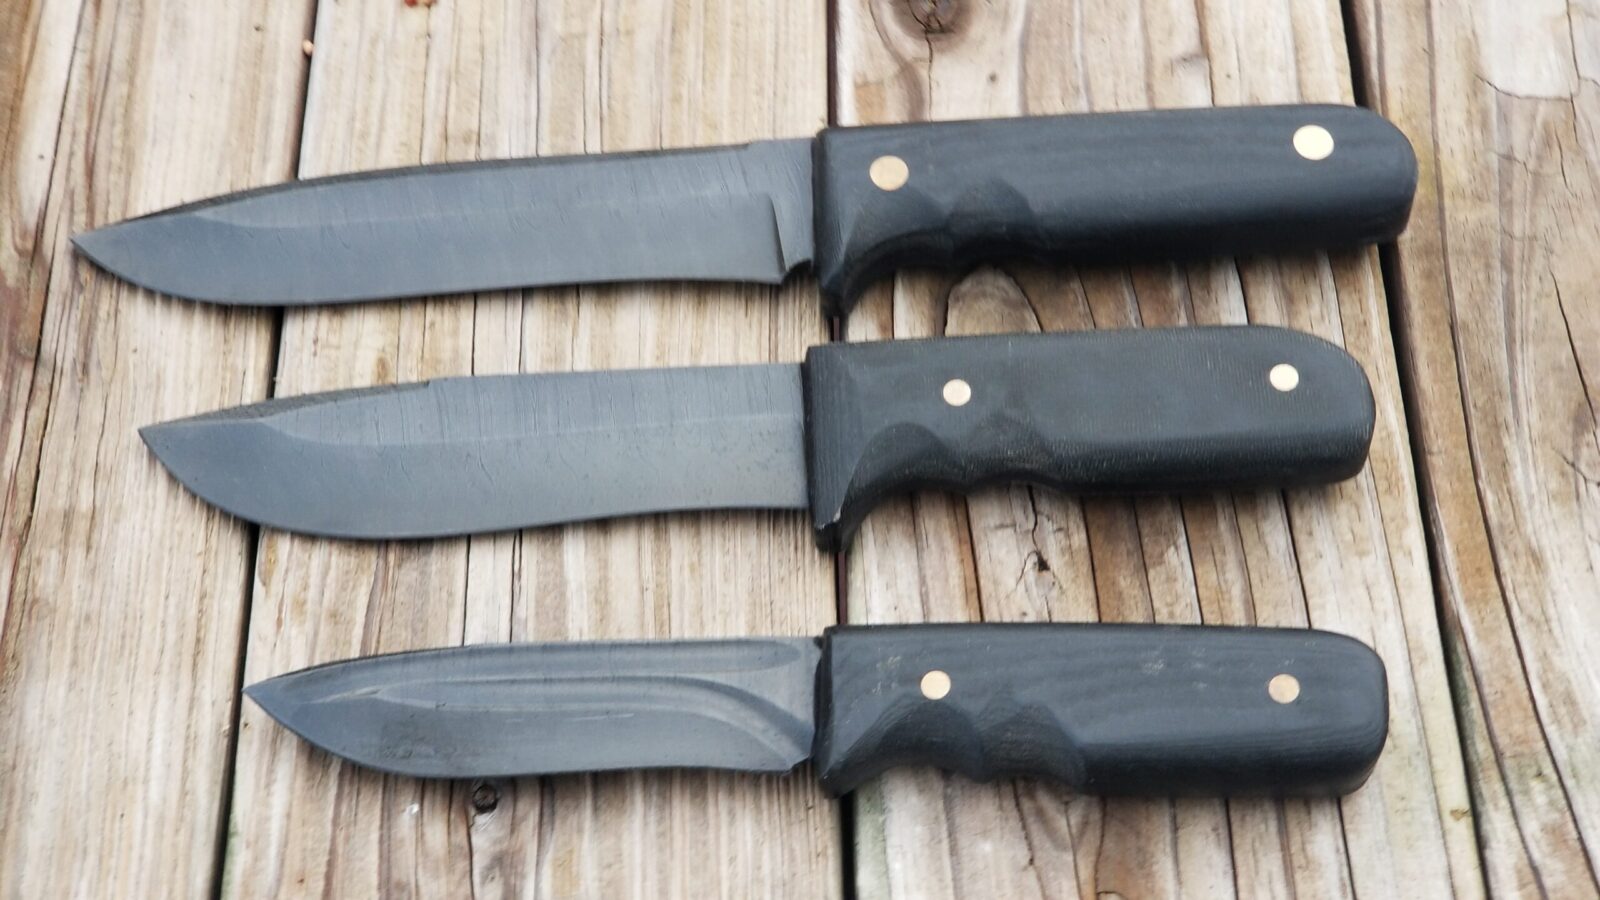
Here is one of the etched damascus blades. The beads on the blade are oil.
Lexol leather conditioner next to knife and sheath for moisturizing.
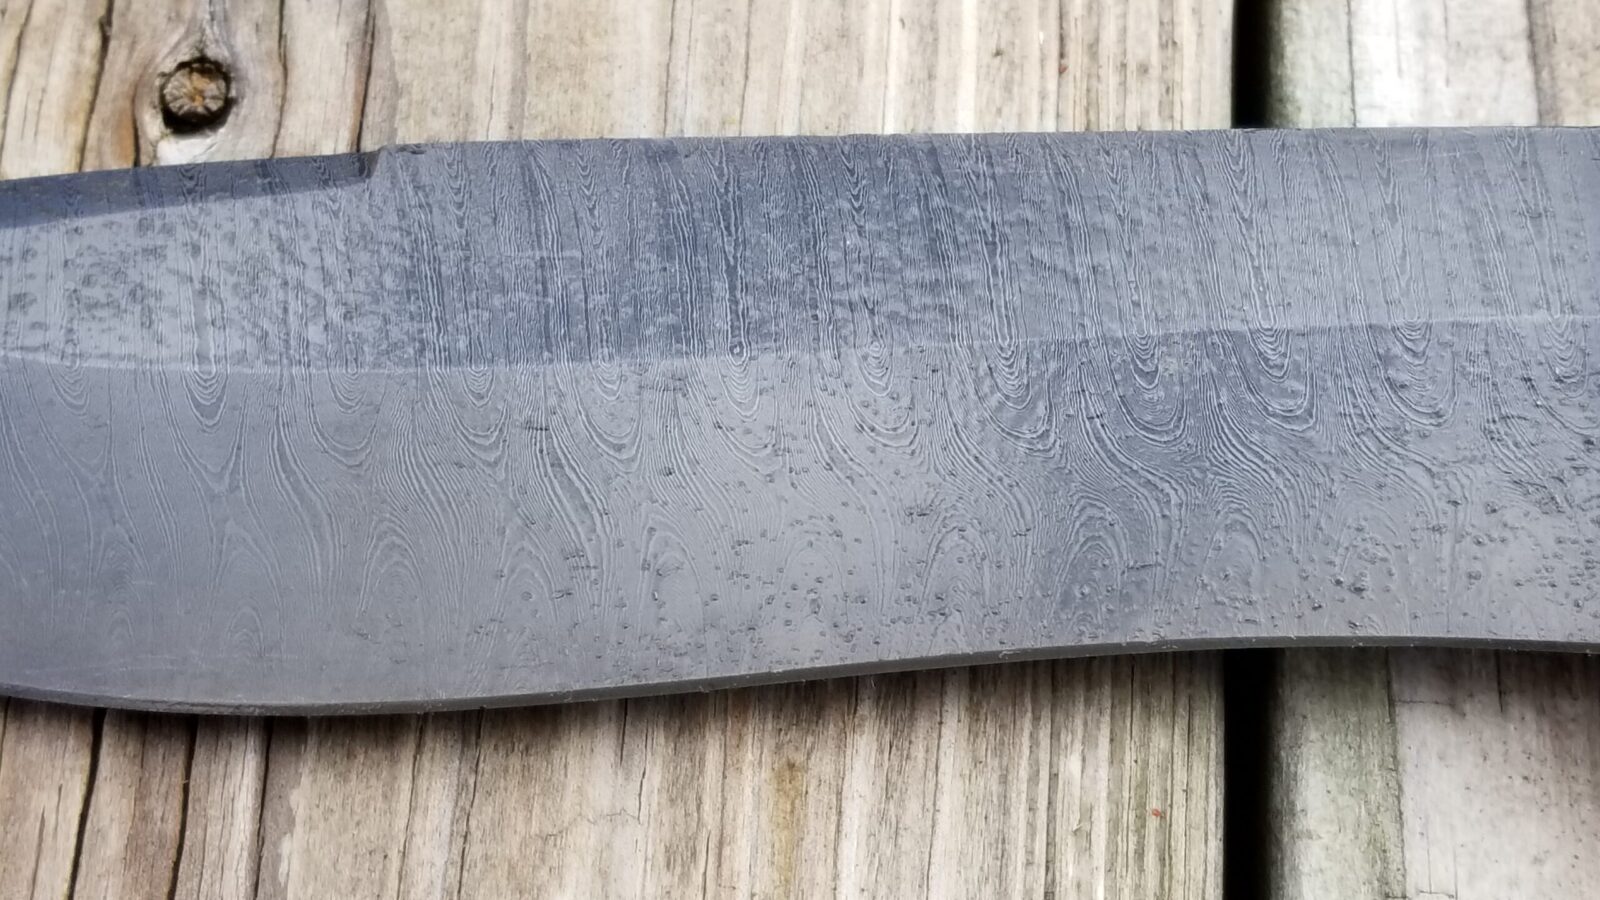
Here’s an even closer look at the finished blade.

Summary

I’m definitely very happy with the results and will be using this solution going forward.


Please share the link on Facebook, Forums, with colleagues, etc. Your support is much appreciated and if you have any feedback, please email us in**@*********ps.com. If you’d like to request a report or order a reprint, please click here for the corresponding page to open in new tab.


How to Make An Affordable and Effective Heated Tank For Acid Etching – Part 1

I like to acid etch blades that I build using apple cider and/or ferric chloride. I also manganese park firearms and tools. Assuming the part is prepped properly, there are two common needs in all of the above – the part must be submerged and the solution heated. So you have two options, buy a stainless tank and heat source or build one using PVC pipe. These next couple of posts are going to dive into how you can build an affordable and very effective heated tank to finish you parts plus have some fun doing it.

PVC or CPVC?

We can use rigid PVC pipe as the container to hold the etching solution. It’s cheap, easy to find and easy to work with. I need to explain a few things first about what we can and can’t do with it.

In plumbing, rigid PVC pipe has an operating temperature of 140F degrees. The reason for this is that PVC is a thermoplastic and begins to soften with heat and will burst due to the pressurized water. We don’t have much pressure to worry about other than atmospheric pressure but you don’t want to push plain PVC towards 200F – it really isn’t designed for it.

If you want to do parkerizing at 190F, then you need to use CPVC pipe. CPVC rigid pipe has extra chlorination that allows it to withstand 200F while delivering water under normal household pressures. Fun trivia, CPVC was invented by Genova Products in Michigan.

If you are trying to figure out what you are looking at, if the pipe is white, it is probably PVC. If it is cream colored, it is probably CPVC. It ought to be labeled/printed on the side of the pipe also but be on guard for people putting stuff in the wrong bins at a store or clerks not knowing what is what.

In this post, I am working with regular PVC purchased from my local Ace Hardware because the tank is for acid etching knives and will the liquid will be 90-110F on average. If I ever build one for parkerizing, it would be in CPVC. The reason it’s an “if” is that I already have a big stainless steel parkerizing tank but it’s a headache to drag out and set up whenI need it.

The Parts List

Basically, we are going to build a tube with a cemented permanent cap on the bottom and a threaded cap at the top. You can go with any size you want. For most blades I work with, 3″ is plenty and I wanted it to be portable.

Let me give you a piece of advice – it’s aways better to be a little bigger than you think you need than to find that out later. When in doubt, make it wider and taller — within reason of course. Note, I knew a 3″ diameter and about 16″ tall would meet most of my needs but not all and I was fine with that. I’ll pull out my four foot stainless tank when I need to do something huge like a cleaver.

In terms of parts, you need the following:

  • A length of pipe of the diameter that is needed
  • A coupling for that size
  • A threaded adapter for that size – you cement it onto the end of the pipe and it gives you a national pipe thread on the other end
  • A threaded plug that fits into the adapter
  • An end cap of one type or another. If you use 3″ or 4″ pipe, you can use a toilet flange adapter to actually both plug the end and allow you to connect it to the wood if you aren’t making it very tall. I would be worried about torque on a tank with an overall length of 24″ or more. In those cases I would cement on a normal end cap and build up a crade around the pipe to support it.
  • You may want a drain for a big tank – I didn’t need one for this little unit because I can easily lift it even when it is full of the acid etching solution.
  • PVC cleaner and cement (note, PVC and CPVC use different cement)
  • Wood to form a base to keep the pipe from tipping over so it needs to be both wide and heavy enough. Really it’s up to you as to how you secure it to be vertical. I like a mobile base but you could tie it to something, etc.
  • A heating source and controller – we’ll get into more detail in the next post.

Weight Considerations and a Drain

Bear in mind that this tank can get pretty heavy if you plan on using really big piple (6″ or bigger). Water weighs 8.34 pounds per gallon. You will find that other liquids can weigh more. Apple cider vinegar may be around 8.6 pounds and ferric chloride might weigh 10-12 pounds per gallon depending on the concentration.

I bring the weight up because if you are thinking of building a big tank, the weight is going to add up and you may want to install a drain near the base. There are two big reasons you need to think about this – you may want to move the unit around plus you will need to change the solution as it ages and breaks down from use.

Lexol leather conditioner next to knife and sheath for moisturizing.
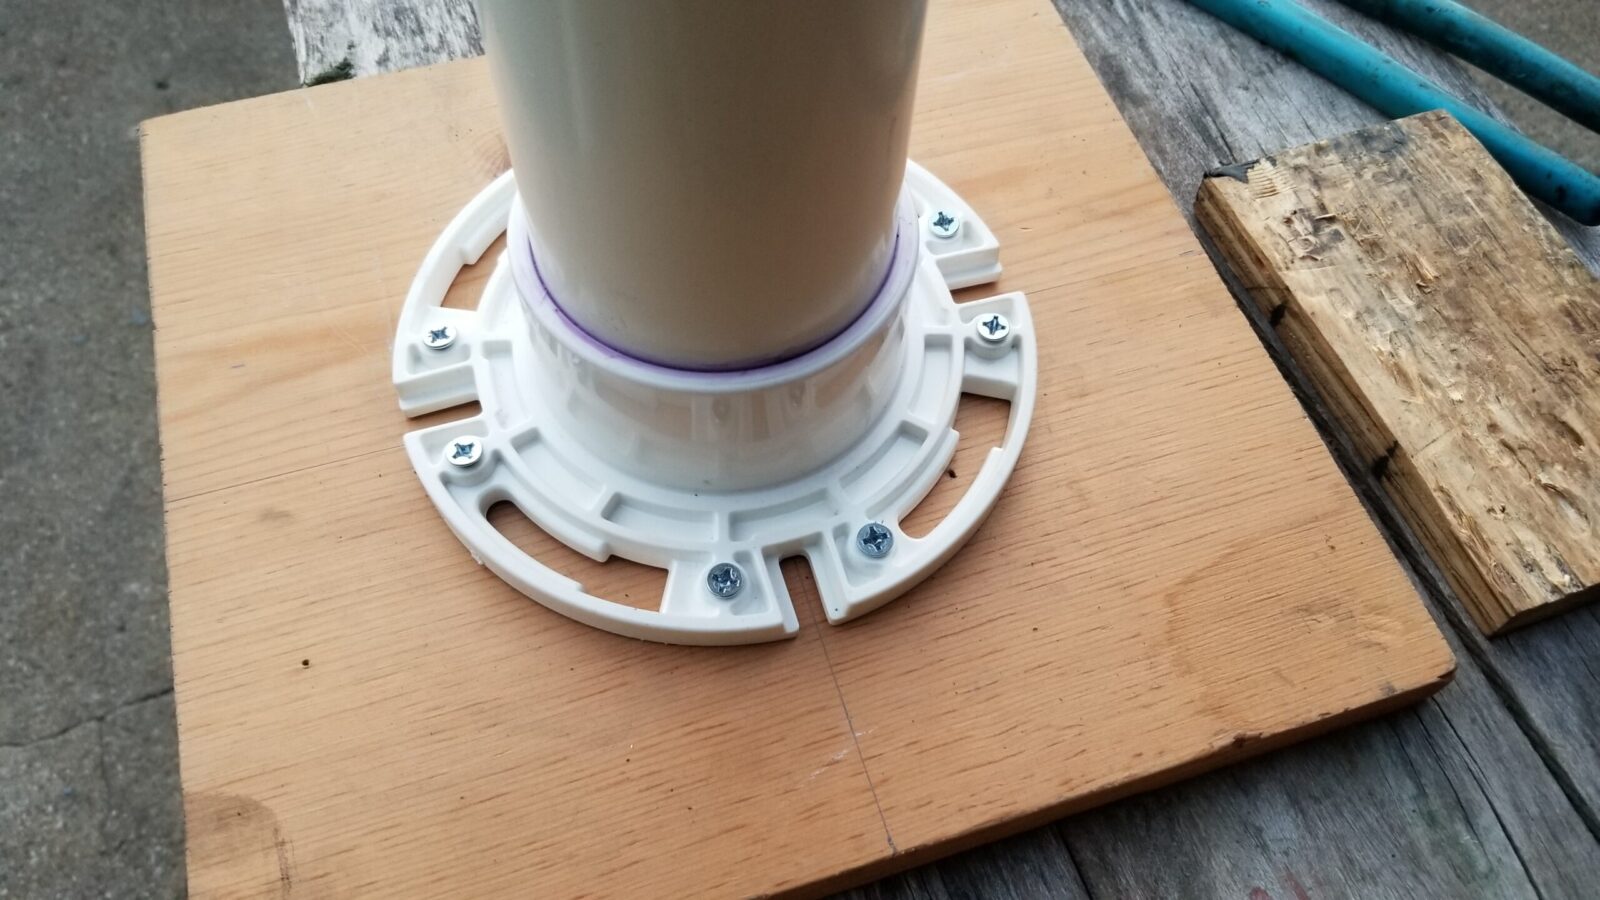
This is my 3″ tank I just built. The toilet flange us availab;e for 3″ and 4″ pipe and is handy for smaller tanks. I’d build a cradle/surrounding frame to support a bigger tank.

The pictured tank is about 16″ tall with 3″ pipe and has about a gallon of 70% ferric chloride and 30% apple cider vinegar in it. I can move it around very easily and portability was one of my design goals.

Assembling The Pipe

PVC is really easy to work with. You cut the pipe to the length you want or have the store do it for you. I use a big miter saw for stuff like this to get nice square ends and use an airline to blow all the loose plastic out (wear safety glasses).

To “glue” the pipe together, you first prime the surfaces and then apply the cement. Note, PVC and CPVC use the same primer but different cement. In this case,I use Oatey’s purple primer and clear cement. Read the directions on their box just to make sure. Bear in mind the solvent is really thin and is going to run everywhere – especially in cold weather.

Lexol leather conditioner next to knife and sheath for moisturizing.
I’m a creature of habit. I’ve had very good luck with Oatey products so I stick with them. There are other brands out there such as Ace’s own private labled stuff, but I stick with Oatey to avoid surprises. When following their directions and using their products, I’ve not had a joint fail/leak yet,

The Base

To make the tank stable, you need a big enough base both in terms of area and weight. I had some old 1×12 stock that I chopped into squares and stacked if four deep for weight. You can do whatever you want and your goal is stability, however you get it.

Lexol leather conditioner next to knife and sheath for moisturizing.
I centered the flange on the first board and screwed it in. I’m not sure I would trust the flange to handle the potential torque of a long pipe. For me, once I get around 24″ overall, I am going to build a cradle and not subject that flange to a ton of stress.
Lexol leather conditioner next to knife and sheath for moisturizing.
I then applied epoxy and clamped the layers together. I was kind of experimenting as I went. Just one piece of wood wasn’t heavy enough so I then added the additional layers after. I could have glued the base and then used longer screws to secure the flange had I known more up front. I wound up with four layers of wood in the end.

I have another tank that is full of a boiled linseed oil an turpentine mix that I use for hydrating wood handles in khukuris and cleavers that I restore. It has a rounded end bap on the bottom and the base is more like a heavy cradle made up fo 2×4 lumber that gives it weight and then goes up the sides to provide support.

This is a 4″ pipe with a wood scaffold base. It’s very stable. This is a tankI use for moisturizing and treating long wood hanndles.

Summary

That’s it for now. In the next post we are going to talk about heating the tank. This is where I did the most experimenting and can share some ideas with you.


Please share the link on Facebook, Forums, with colleagues, etc. Your support is much appreciated and if you have any feedback, please email us in**@*********ps.com. If you’d like to request a report or order a reprint, please click here for the corresponding page to open in new tab.


How to Make An Affordable and Effective Heated Tank For Acid Etching – Part 2

In the last post, I covered the basic construction of the tank. In this post I want to talk about heating the tank. Thanks to mass production of digital temperature switches, you can build a digitally controlled heated tank for a very reasonable price.

Why Does Heat Matter?

In case you are wondering, heating the solution does matter. Years ago, in 1889, a chemist by the name of Svante Arrhenius proposed an equation that would later bear his name. Basically, a chemical reaction increases as the level of activation energy increases. The reason temperature enters in as that you are raising the energy in the liquid, more energetic particles are bouncing around and increasing the volume of reactions which means that more successful reactions will occur as well. We can use a rule of thumb that for each 10C increase in temperature, the reaction rate will double and for each 10C drop, it will be cut in half. To sum it up, cold=bad for chemical reactions. As a side note, this is also why marginal batteries fail when cold weather hits.

So what this means to acid etching is that in my cold unheated shop in the Winter, reactions are going to be real, real slow. Thus, I must have a way to heat the chemical and the submerged part to improve the reaction.

The Heating Element For The Tank

The first thing I wanted to do was to keep the cost down and the second was that I didn’t want something that would get so hot that it would melt the PVC. I had a 30 foot length of roof heating tape from when we cleaned out my dad’s garage that I had been thinking about for a while. It always makes me feel good when I use something that was my dad’s. (There are tons of options on Amazon – click here.)

These roof heating cables use AC voltage to warm up and melt ice are readily availble and are designed not to get so hot that they melt the shingles but also are designed to be spread out and not right next to each other so I was going to need to test the design. I planned to wrap the tape from the bottom of the tank until I ran out cable with each coil right against the previous. I was counting on convection of move warmer fluid up and cooler fluid down but I wasn’t really sure how it would sort out.

Another nice things about these heating cables, or heating tapes, is that they do not use a lot of electricity. The 30 foot model my dad had was spec’d to draw only 150 watts at 12 volts. That makes for a nice portable unit that you can run off just about any extension cord.

So, step one, I applied the tape to the empty tank and secured it just with 3M 3340 aluminum HVAC tape. This is the tape made for higher temperatures with an aluminum foil backing – it’s not dcut tape. I then watched the temperature with my Fluke 62 Max IR thermometer. You need an accurate thermometer and the Fluke has served me very well – it’s proved itself to be accurate, reliable and durable – it’s been bounched around a lot in my shop.

So, the temperature slowly climbed but made it all the way up to 170F before I shut it down. The PVC still felt pretty good but it was way hotter than what I wanted. Just plugging the tape in and calling it done was not the answer. Sure it would heat the liquid up fast but I couldn’t safey leave it unattended. I needed something to control the temperature but use the heat tape.

Please note that there are pipe heaters that are a different creature. Some of them need to be submerged in water or wrapped around a steel pipe. Do not use those types of heaters. There are a ton of different names buy you are looking for the cable or tape that is put on roofs to melt ice dams, etc.

Solution – Use A Digital Temperature Controller

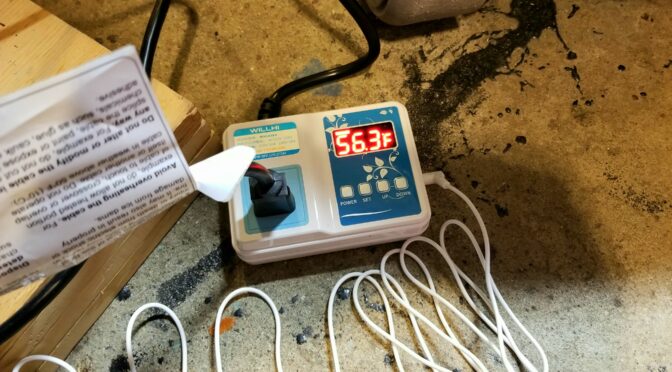
I thought I knew the switch I was going to buy until I did some further research. Some controllers are very easy to set up and others seem a bit more confusing. I opted for the WILLHI WH1436A Temperature Controller 110V Digital Thermostat Switch. All you do set set the temperature for ON and the temperature for OFF. That’s it. If you want them, there are some more advanced settings that you can explore if you want but this seemed like just what I needed.

I undid the top few coils of the heat tape and rewound them with the temperature probe wrapped in them. I then used aluminum HVAC tape to secure the top. I set ON to 90F and Off at 95F and plugged the roofing tape into the controller.

Lexol leather conditioner next to knife and sheath for moisturizing.
I inserted the temperature probe a few coils down and secured the top with 3M Aluminum HVACtape. Note the small cable clamp screwed into the wood base securing the bottom of the heater tape and preventing it from unwinding.

I started watching with the Fluke meter and since the temperature based on the probe was 40.2F, the controller turned on power to the switch and the tape heated. It did cut power around 95F but the tape continued to warm up even so by about 10F so the peak temperature was between 103-105F according to the Fluke. This was actually within my acceptable range. I was just ballparking 90F but even 105F was fine by me.

Lexol leather conditioner next to knife and sheath for moisturizing.
The digital controller works well. I’m going to leave it loose some I can move it around depending on what I am working on and were.

There was one minor hitch I noticed during experiments – the controlled heat took over an hour to warm up the fluid. If I unplugged the tape from the controller and plugged the tape straight into AC power, the fluid heated way faster and the pipe never felt soft – probably because the tape was heating part of it and the acid was cooling it. This was the fastest way but risky because if you forget, it’s going to get quite hot. I let the fluid get up to 160F during one run and decided that I would only do this if I was in a big rush and going to be there working the whole time. If I wanted to play it safe, letting the controller keep things safe was a better bet. I could have also sped things up by setting the OFF temperature higher, say at 110F and that’s something I will experiment more with.

Lexol leather conditioner next to knife and sheath for moisturizing.
The temperature controlled tank worked out great on these high carbon steel damascus blades.

Operating Temperature Range

Do not heat ferric chloride past 131F. Remember that the heating element will still heat the chemical another 10 degrees or so past the upper limit you set as OFF.

The operating temperature range from MG Chemical is 95-131F. Based on my results, I don’t see a need to push the upper limit.

Click here both for their technical sheet and MSDS sheet,

Conclusion

I had about $30 in the PVC and fresh glue, nothing for the base, the controller was $29.99 and the roof heat tape was free but if you bought it, the price would be around $30. This definitely falls in the affordable category plus I turned out some really cool etched damasus blades using the controlled tank. If you want to know a bit more about the chemicals and my process, click here.

Lexol leather conditioner next to knife and sheath for moisturizing.
When I was done, I let the tank cool down, screwed on the lid, cleaned things up, coiled the cords up and stored the tank for the next use.


Please share the link on Facebook, Forums, with colleagues, etc. Your support is much appreciated and if you have any feedback, please email us in**@*********ps.com. If you’d like to request a report or order a reprint, please click here for the corresponding page to open in new tab.


James’ Sweet M92 SBR WIth Our Handguards

I think James’ M92 SBR looks pretty wicked!! That’s our handguard set on the front. It looks great James!

Lexol leather conditioner next to knife and sheath for moisturizing.


Please share the link on Facebook, Forums, with colleagues, etc. Your support is much appreciated and if you have any feedback, please email us in**@*********ps.com. If you’d like to request a report or order a reprint, please click here for the corresponding page to open in new tab.


Supplement with Zinc and Multivitamins to Help Boost Your Immune System

You might want to start supplementing with zinc and a good multivitamin as a hedge against the COVID-19 corona virus from Wuhan, China. It’s not going to absolutely prevent it but it might give you an edge and/or lessen the impact some. This post is not a magic cure claim. At my age, I’ll take any cheap advantage I can get.

Wash Your Hands Frequently

#1 prevention tip – wash your hands with soap and water frequently – the virus has a lipid coating that soap breaks down fast. Take the time to wash your hands before you eat, rub your eyes, go to sleep, after you go to the bathroom, etc.

I used to say “or use hand sanitizer if you must” but finding commercial hand sanitizer is almost impossible these days unless you try to make your own and even then finding the ingredients is very difficult but not impossible.

Supplementing with Zinc, Multivitamins and Vitamin C

Do be aware of any drug interactions before you start. For example, some antibiotics are negated by zinc supplements – I learned that first hand.

Now you may be thinking this is a crock, but there really are studies that show that zinc can help ward off and/or reduce the impacts of viruses, including corona viruses.

Here are some resources for you to look at in addition to the video above:

Do some reading and decide. My family and I are doing a multivitamin, 50mg Zinc and 500mg of vitamin C per day to try and help prevent the flu. We’ll see how it goes.

Face Masks – Making Your Own Is An Option

The CDC is now recommending face masks when you go into public settings such as to get groceries. The problem is in finding good masks and a huge community effort is under way with people sharing information about designing and making face masks. I recently added a blog post to help folks learn more – click here.

COVID-19 Resources

In Conclusion

I hope this helps some. You need to read and keep up on what is going on. You will also need to figure out what makes the most sense for you and your family – mass media isn’t always the best source so try and confirm information from more than one source before you act.


Please share the link on Facebook, Forums, with colleagues, etc. Your support is much appreciated and if you have any feedback, please email us in**@*********ps.com. If you’d like to request a report or order a reprint, please click here for the corresponding page to open in new tab.


Image source: By https://www.scientificanimations.com – https://www.scientificanimations.com/wiki-images/, CC BY-SA 4.0, https://commons.wikimedia.org/w/index.php?curid=86358105

Video: Birth Of the Alien Tiger Czech Hind Attack Helicopter

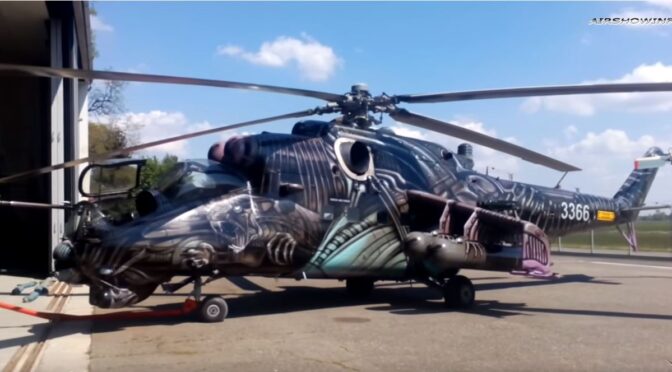
I recently posted a video that shows the amazing paint job the Czechs did to one of their Mi-35 Hind-D attack helicopters. Little did I know that there was a “behind the scenes” short documentary about the decision making that went into that paint job and that they won an award for it.

Alien Tiger Czech Hind attack helicopter artwork with number 3366
They had a number of conventional ideas that didn’t really wow anybody until they thought of a guy who specialized in the bio-mechanical look.
Airbrush painting of an Alien Tiger Czech Hind helicopter in progress.
They do have some footage of the fellow doing the work. It was he, his brother and a few technicians who spent about 200 hours doing the paint job. I wish they had more footage of it and at a higher resolution.
Czech Mi-24 Hind attack helicopter, "Alien Tiger" livery, on tarmac
Alien Tiger Czech Hind attack helicopter with detailed artwork on display
Alien Tiger Czech Hind attack helicopter with custom paint scheme flying

The Documentary Video

Again, if you haven’t seen it already, check out the other post with a ton of footage of this awesome Hind. I hope you enjoyed these!


Please share the link on Facebook, Forums, with colleagues, etc. Your support is much appreciated and if you have any feedback, please email us in**@*********ps.com. If you’d like to request a report or order a reprint, please click here for the corresponding page to open in new tab.


Ever Hear About The Time US Special Ops Snatched a Mi-25 Hind D Attack Helicopter?

Back in 1987, a damaged Libyan Mi-25 Hind D attack helicopter was captured by French and Chadian troops. The US wanted to inspect the helicopter and negotiated with the government of Chad to retrieve it.

Gold automatic drain valve for air compressor on wooden surface
Libyan MI-24 Hind D captured by Chadian forces at Wadi Doum, Chad .
Source: Wikipedia

On June 10, 1988, Operation Mount Hope III commenced to retrieve the Hind. The famous NightStakers (the 160th Special Operations Regiment) flew almost 500 miles at night with two MH-47 Chinooks to successfully retrieve the Hind and load it on a C-5.

Gold automatic drain valve for air compressor on wooden surface
On 21 June 1988, the captured Mi-25 arrived in N’Djamena where it was loaded into a USAF C-5
Source: Wikipedia

Videos

There are a couple of cool videos on Youtube that can give you some good background. The first one is very informative but please note the Hind D is not the fastest helicopter currently.

The next video has the same cover photo but is different:

Reading

If you want to read more, check out:

I hope you found this as interesting as I did.


Please note that the still photos are from the Wikipedia page listed above.


Please share the link on Facebook, Forums, with colleagues, etc. Your support is much appreciated and if you have any feedback, please email us in**@*********ps.com. If you’d like to request a report or order a reprint, please click here for the corresponding page to open in new tab.


Why The Mophorn Pneumatic Lift Is a Huge Help When Working On Cars and Trucks But Has One Small Issue You Need To Address

Nothing like getting old and realizing that most of your joints hate you. I bring this up because I have two manual pump floor jacks that I have used countless times over the years and the oldest is probably 25 years old – literally. Well, let me put it this way – I had no problem pumping the handle to lift cars and trucks 25 years ago but starting about two years ago, the action really started to cause elbow and shoulder injuries I had to flare up. It got so bad that I had to make a choice either to stop working on vehicles or to find a different approach.

I work on cars and trucks in our driveway so a permanently installed lift was not an option. It had to be something portable. My first thought was to get a low profile air-over-hydraulic jack that is mounted in its own wheeled carrier. They have an incredible lifting capacity (around 22 tons) but they are heavy (around 80 pounds), slow (air over hydraulic is many things but fast is not one of them) and expensive (they start around $200 and just go up from there). What really stopped me was the weight and the cost. I can’t lift or drag as much weight as I used to and the entry-level units were a tad more than I wanted to spend.

So, I kept digging and ran across pneumatic/air jacks. Think of the air suspensions you see under a big rig. Basically one or more air bladders fill with air and lift the top of the jack. They max out in terms of lift height around 18 inches and 3 tons of lift but it depends on the model. Definitely spend some time researching before you buy. I found that I needed to think about:

  • How low I needed the unit to collapse down to fit under our cars to get in position prior to lifting
  • How much weight did I need to lift
  • How high I needed the unit to lift
  • How much did it weigh?
  • What was it going to cost?

I then started reading listings on Amazon plus paying careful attention to review scores. I also talked to a mechanic friend of mine about the safety of the unit and what his thoughts were. He told me to consider two things: 1) always immediately put jack stands in place and 2) don’t lave the unit out in the sun and weather thus harming the rubber. Those suggestions made a lot of sense to me.

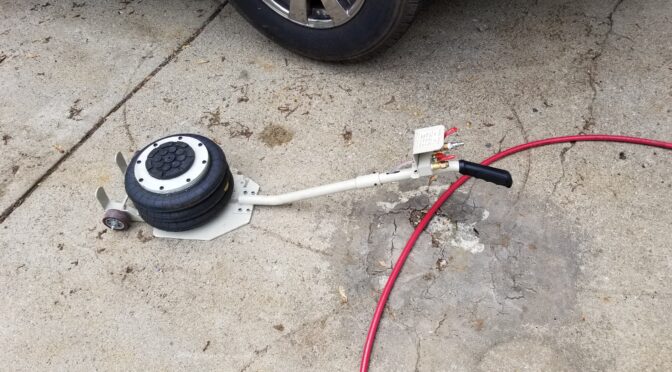
On January 8, 2019, I wound up buying a Mophorn Pneumatic Jack, 3 Ton, Triple Air Bag, with a 16″ lift height for about $150 with free shipping. The unit arrived with just little bit of assembly needed. I recall I had to install the handle and the pressure line but that was it.

Cleaning an air compressor automatic drain valve with a blue cloth
Disassembled air compressor automatic drain valve components
I get about 15″ of lift at 90 PSI.
Disassembled air compressor automatic drain valve components
Left lever is the exhaust and due to the lever design, you can adjust how slow you want to drain air out. Even if you hit it and have an “oh shit” moment, you typically have a few seconds before the vehicle starts to go down. The middle unit with the pull ring is the safety blow off valve. The far right lever is the air inlet and there is a Milton M-series male plug under the Milton quick connect female fitting. If you want a reliable air system, use Milton fittings – they last.

As you can guess from the sticker above, the lift is made in China and the instruction sheet is pretty terse but it’s really not that hard to figure out. I do want to cover a few specifications with you and convert them from metric to US customary measures – these are from the owner’s manual included in the kit unless otherwise noted:

DescriptionMetricUS
Capacity3,000 kg6,613 lbs
Air Pressure5-10 Kg/cm^271 to 142 PSI
Air pressure from label on handle – presumably the recommended pressure8 kg/cm^2113 PSI
Minimum Height145mm5.71 in
Maximum Height400mm15.75 in
Lifting Time5 seconds5 seconds
Working Temperature-69C to +50C-92F to 122F

What have I lifted with it?

When I say “lift”, I am talking about the front end or the back end – not the whole vehicle.

  • 1994 Toyota Corolla DX
  • 1996 Toyota Land Cruiser
  • 2000 Toyota Camry
  • 2006 Toyota Solara
  • 2008 Toyota Highlander
  • 2016 Ford F150 Transit
  • Others more or less along the lines of a Camry or Highlander

There are a few things I have noticed

First, let me point out that I like this unit and would recommend it but there are a few things I want to point out:

  • The highest my lift will go is 15″ and that may be a function of my only running 90 PSI to the jack
  • I don’t think it actually can lift 3 tons. It bogs down on the front of our old 96 Landcruiser and also our full size F150 Transit. Again, I think it’s my lower air pressure. This summer I might plumb a dedicated 120 PSI line and see what that does. It will depend on time and money.
  • There are stabilizing cones made from steel inside the jack. Maybe 1 in 20 lifts they need a whack to start coming down. I may polish and lube these if I get a chance.
  • The rubber is pretty thick on the bladders. With that said, I do store it indoors away from the sun and the weather. I’m writing this a year later and the bladders show zero signs of wear.

The One Little Thing You Must Do: Blue Loctite Your Screws!!

I have used my jack many times since I bought it. Starting around September I was hearing faint air leak and thought the jack had bent. When I had time I found out that the bottom screws had loosened up and air was simply escaping from between the gasket and the bottom plate. I was surprised and disappointed to note that none of the screws had any thread locker applied to any of them. Many were in varying states of coming lose.

Mophorn pneumatic lift parts, oil, and tools for car repair
The unit is well made. The air bladders secure to that steel plate you see on them and then that assembly bolt to the dolly.
Mophorn pneumatic lift airbag with metal mounting plate and cylinder.
It’s the screws that attach the bladder to the while disc-shaped plate in the previous photo that came loose. Here are the metal stabilizing cones. I wish I had polished and lubed them when I had it apart and will go back and do that at some point. I did apply air tool oil to the cones after cleaning them of a gritty dust that probably dated back to when they were manufactured.
Torque wrench on Mophorn pneumatic lift with notes: 11 Nm, blue loctite, BTU gasket seal.
Before re-assembly I put a thin bead of Permatex Blue RTV gasket seal on the rubber gasket and then applied Blue medium-strength Loctite to each srew and brought them down lightly. I then went criss-cross lightly bringing down each screw to firm and then applied a final torque of 11 NM (about 8 ft-lbs or 97 in-lbs.

I then did the same thing to the top plate as well just to play it safe. No more leaks.

Mophorn pneumatic lift base with screws, showing wear and tear.
The reassembled bladder assembly then screws back down to the baseplate of the dolly. Note, this photo is actually from when I was taking it apart. The screws were so scuffed up that I just replaced them. Did I mention I use this a lot?

The following is the exact jack on Amazon that I bought and this review is about:

Bottom Line

I would buy this again and recommend it as well – just due the Loctite thing I mentioned. Note there are other Chinese suppliers on Amazon also but they do not get as good of reviews as the Mophorn units so my recommendation is only for that brand.


Please share the link on Facebook, Forums, with colleagues, etc. Your support is much appreciated and if you have any feedback, please email us in**@*********ps.com. If you’d like to request a report or order a reprint, please click here for the corresponding page to open in new tab.


When Strength and Quality Matter Most