I now have built my second Beowulf and guys ask me about the recoil all the time – the short answer is that it’s very manageable. With just a bit of tuning, I’d put it somewhere between a 20 and a 12 gauge shotgun shooting 2-3/4″ magnum loads. Now that there are a ton of options both from Alexander Arms as well as generic 12.7×42 uppers (the metric designation for the Beowulf so they don’t have to pay royalties to Alexander Arms), a lot of guys are getting into the .50 Beowulf cartridge and ask me about what brake to run with.
My favorite is the Timber Creek Heartbreaker. It does a remarkable job of venting gasses backwards to compensate for the recoil it would otherwise have. I liked it so much on my first build that it was what I used in my second build. It’s very affordable and I’d be surprised if you can find a brake that does a better job!
Side view of the Heartbreaker and you can see where it gets its name.
View from the top. Note the brake includes a jam nut.
Finding The Brake
You may need to go direct to Timber Creek. Primary Arms is out of stock and they are sometimes on eBay.
My Alpha Wulf
I did a series of blog posts when I built my second rifle. My pet name for it was the “Alpha Wulf” or the leader of the pack. It’s all premium parts and probably my best AR build when it comes to paying careful attention to details during assembly. Here are the posts:
I’m a big fan of the .50 Beowulf cartridge and hope you find this post helpful!
3/6/24 Update: I’m not sure if Timber Creek is still making these or just what. I haven’t built a Beowulf for a few years and don’t have any alternative suggestions.
Note, I have to buy all of my parts – nothing here was paid for by sponsors, etc. I do make a small amount if you click on an ad and buy something but that is it. You’re getting my real opinion on stuff.
I’m a huge fan of the Hind family of attack helicopters. This video is of the Czech Air Force’s Mi-35/24V that they painted special for the NATO Tiger Meet exercise. This is one of the most badass paint jobs seen on a Hind. It’s got the H.R. Giger Alien feel for it and the result is just wicked. I had to screen shot a few photos to share but boy, you have to watch the video below.
The Video
Kudos to the team that did the filming as well as the Czech 22nd Helicopter Air Base and the 221st Helicopter Squadron.
What a wicked video! I sure hope you liked it as well.
Please note that all images were extracted from the video and are the property of their respective owner.
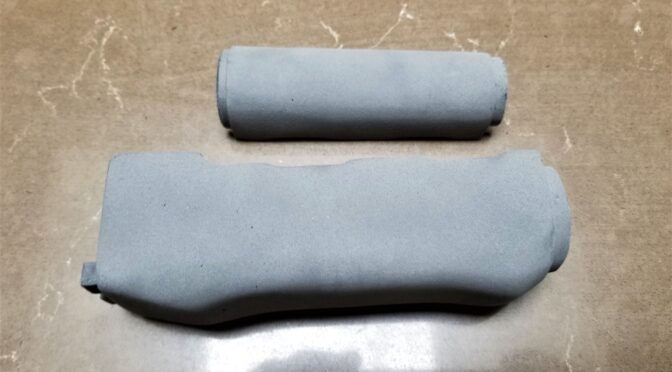
I’ve had guys ask why the color of my grips or handguards seem to fade with time. The short answer is that it has to do with the liquid wax finish oxidizing and not the plastic – the color is actually in the plastic. You see, we sand every grip and handguard to get rid of mold imperfections and then we blast each with abrasive media (currently it’s Black Beauty or Black Magic depending in the store I go to) and that turns the plastic almost white as you can see in the photo above. We blast the surface to create a very sure grip when you grab hold – your hand doesn’t slide easily. The polished finish we used to do resulted in a surface that is slick when wet due to sweat, water, blood, etc.
So, the blasting abrades the surface and messes up the colors being reflected back to your eyes. To solve this problem, I tried a ton of different oils and waxes and the best was Atsko Sno-Seal. It really brought out the color and it did not fade – or at least I never saw it fade. The problem is that Sno-Seal is a paste wax and I have carpal tunnel. Rubbing it into grips and handguards every day over and over was killing by wrists so I had to stop it.
This pushed me back to the drawing board and this time I looked at liquid waxes. Some of them really smelled as the liquids evaporated and the best option I could find find was the various butcher’s block finishes that combine mineral oil and a wax – often a bee’s wax. This stuff goes on like a dream but does fade with time. There’s nothing wrong with the color – it’s just the finish oxidizing and drying out.
What to do about the fading?
As mentioned above, the finish I apply will fade. The good news is that the owner with a number of options and I’ll shorten it down to the four I recommend:
Buy Sno-Seal and apply it. This stuff is awesome for boots and I actually had it for my boots when I tested it. It’s my #1 recommendation and what I do for furniture I make for myself.
Shoe polish holds up really well and you can nudge the colors/hues one direction or another depending on the color of the wax. This goes on pretty easy and seems to last. Just buff it well so you don’t get any color on your hand. I’ve had very good luck with Kiwi products.
Any fine wax for boots, leather, wood or preservation ought to work. Just follow the directions. Absolutely do not use super thick floor wax or it will be a disaster as one customer found out.
Put another coat of butcher’s block conditioner on it. Easy to apply but it will not last.
Atsko Sno-Seal is my #1 choice. Kiwi shoe polish works great. Howard’s Butcher Block Conditioner is what I use in production and is also what fades with time.
How to Apply Sno-Seal
My first recommendation to customers is always Sno-Seal. It takes just a little it to polish a grip or handguard plus you can use it to waterproof your boots.
I did this corner at room temperature and you can tell it takes a bit more effort to rub it in and buff it off.
You can either warm it up on your hand and then rub it in or you can use a heat source to warm up the grip or handguard just a bit – meaning warm to the touch not hot – and it goes on even easier. When I did the M72 hanguard set shown, for example, it was warm after about a minute and 20 seconds in our microwave. You rub the wax in and buff it off – done.
Hello Mr. Microwave! You can optionally warm your piece of furniture up with a microwave, oven turned on at 150F or less, hair dryer, etc. You want it to be warm, not hot. If you can’t pick it up, it’s way too hot. The plastic will not begin to deflect until around 250F and there’s no way you can pick that up hence the rule of thumb. [Click here if you want to read about a heat test we did] So here’s the finished handguard set after I buffed off the remaining wax.
Again, if you ask me what I do for my own grips and handguards, it’s Sno-Seal and I rarely use extra heat – usually just I just warm it up with my hands and rub it in. Sno-Seal lasts the best of anything I have found.
Folks, as my wife will tell you, I like my baseball-style caps and seem to have accumulated a ton of them over the years. With that said, there seem to be just a handful of them that I wear all the time. The problem was that they got pretty dirty with use so what should one do?
I tried putting one in the clothes washer once and ruined my favorite hat at the time. So, since I didn’t have a way to wash my hats, I wound up having piles of “wearable in public” hats, work hats that look bad but feel good and “oh man this is filthy but I don’t want to throw it away in case I ever figure out how to clean it” hats. In the back of my head, I knew I wanted to find a way to wash them but never seemed to find the time.
How To Clean A Ball Cap
One quick comment – what I am about to tell you works on modern caps with plastic liners in the brim (the part that sticks out). Prior to 1983-ish, the liners were often cardboard and getting them wet would ruin them. If you flick the brim of an old hat and it sounds hollow, it’s probably cardboard and you should not do what I am about to outline. All of my hats are modern and have plastic liners.
One day while reading, I ran across the solution and it was so easy I was skeptical that it could work. Not only did it work, but it worked amazingly well. The near miracle fix is to hand wash your hats so they don’t get beat up. You soak your hats in a soapy solution using HE clothes washing soap. In our case, we use Tide for our clothes and that’s what I used. Note, don’t use a detergent with bleach or your hats will fade.
I took a bucket, poured in about a 1/4-1/3 cup of Tide HE and then just over a gallon of warm water. I took my dirtiest “what do I have to lose” hats and let them soak for a few hours, came in and pushed them around in the water to break things up and then let them sit another few hours – these hats were incredibly dirty folks. I was working outside and forgot about the first test batch and they probably soaked for 6-8 hours at least with no ill effects.
There are two hats in there with this load. The first time out I probably had six really dirty hats in there.
With everything wet, I really was just hoping they were done and rinsed them 2-3 times. I then hung them to drip dry in our shower. I’ve since found that even a small fan pointed at the hats speeds up drying dramatically.
Dripping dry – a small fan pointed in their direction dried these two in just a few hours.
The results were remarkable. Oil and sweat marks largely disappeared. Detergents are pretty remarkable – these days, they include enzymes to help break things down and they probably played a role on cleaning the hats so well. Tide Original, which we have, includes three enzymes – amaylase (starch based stains), mannanase (vegetable based stains) and protease (for protein based stains). Seriously, some of the hats were horribly dirty and now they are clean!!
I’ve now got all my hats back in service and they look great. This means my favorite work and shooting hats are back in business! I’m going to guess I’ve done about four batches of hats – maybe a bit over a dozen or so and 3-4 of them have been washed twice. In other words, I’ve done this a number of times and it really seems to work well.
Now that I know how easy it is, I can routinely clean my hats. I’m really happy with the results and hope this helps you out.
By the way, here are some links to what others did so you have some other perspectives to consider:
Rick sent me these cool photos of his new build and I had to share them. He also gave me some details as well.
The rifle has a “Polish FB Radom barrel, trunion, and optic rail. Childers polish cg1 receiver. To stay with the polish theme, I found an unissued polish soviet era laminate stock. I was originally going to use a bakelite grip. But, since this is a hard use rifle. I wanted something more robust. But correct for the polish theme. Your grip delivered and then some. So here are some pictures of my polish AKM-Beryl transitional rifle. At least I call it that for lack of a better term. “
Yes sir Rick – that is definitely one slick build!
Folks, my shop is unheated and the space where my 60 gallon oil lubricated Ingersoll Rand (IR) 2340L5-V sits can get well below freezing – sometimes even well under 20F. That presents a challenge because the lubricating oil gets thicker as it gets colder and this puts more and more of a load on the motor to start. What usually results is a tripped breaker -I know my 30amp breaker would trip regularly until I took some corrective actions.
One option you can run with is to run variable weight thinner synthetic oil in the winter. I don’t want to run into issues with my pump so I stick with IR straight weight compressor oil so I’m not really keen on doing that. There are guys who will disagree with me and that’s why I point out the option.
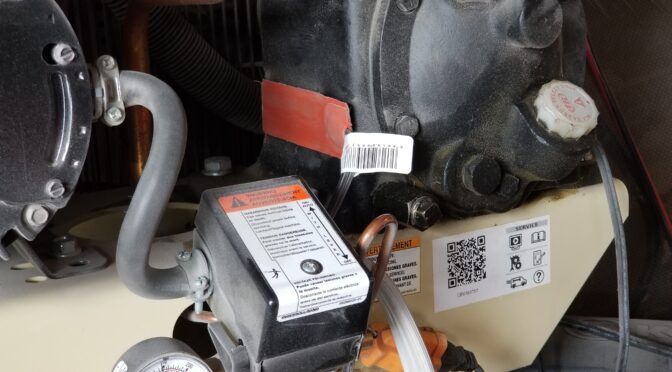
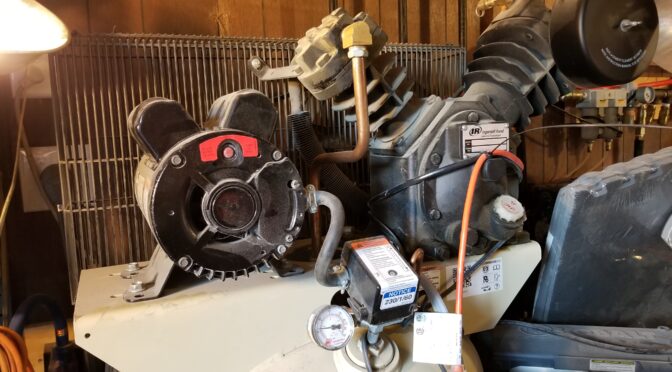
The solution I put in place works great. I simply put two Kat’s 24025 25 watt heating pads that measure 1″x5″ on each side of my pump level next to the oil reservoir. These heaters were designed to warm fluid reservoirs including those with oil. I’ve used a ton of them over the years for warming pressure tanks and what have you and have not had one fail yet. My oldest units are probably 3-5 years old and no problems — I just use them during the Winter.
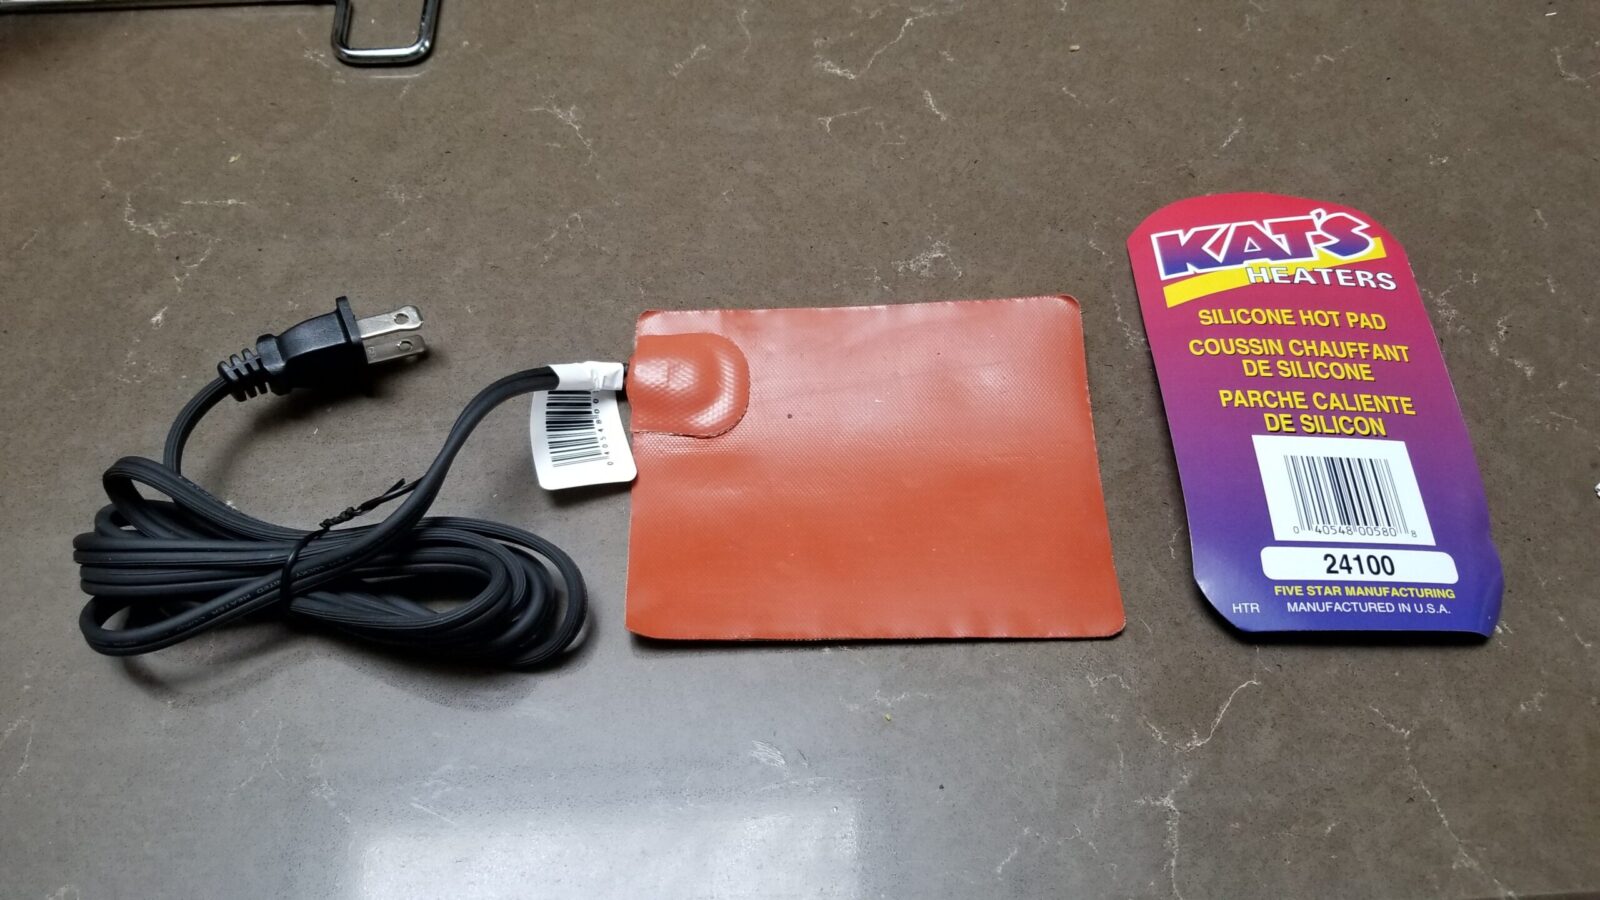
This is the Kat’s 24100 4×5 heater that I have at the bottom of my compressor to keep the condensate from freezing.
In terms of heating my compressor’s pump, I just run mine non-stop in the Winter but if you’d really rather only run them when it is at or below freezing, there are thermal power plug adapters that only turn on when it is that cold. Note, at 25 watts they do not heat fast. If your pump is real cold it could take it a while to get up to an acceptable temperature. That’s one reason why I just let them run and I can turn the compressor off independent of the heaters.
Along with the little 1×5 units, I use one larger 4×5 Kat’s 24100 pad at the bottom of my compressor to allow me to drain the condensate that would otherwise freeze. I do not run that non-stop as it is 100 watts. It’s on a thermally switched outlet that turns on at 35F and off at 45F. Yeah, it may run more than I need it to but I haven’t invested in a better controller yet for that part. I will list the digital controller I plan on getting some day so you can decide.
Installing is about as easy as it can get. The Kat’s units have a self-adhesive back and must be installed before you plug them in or you will ruin them. Clean the surface of oil and dust, peel the cover off the adhesive, stock the heater on and wait the prescribed time then plug it in and it warms up. Note, I have only used them on steel surfaces. They get hot and I would not be inclined to install them on plastic for example.
Kat’s products are made by Five Star Manufacturing and they have a ton of different products for different applications. Click here for their website.
Note: There aren’t as many Kat’s brand heating pads around now but there are a lot of different brands and sizes on Amazon – click here to see them.https://amzn.to/3J1Hpzn
I live in a rural area and wind up doing a lot of my own repairs. About 2-3 years ago I invested in a 60 gallon Ingersoll Rand (IR) 2340L5-V air compressor which is their entry-level “Value Line” of industrial compressors. In hindsight, had I known more about “value” meaning “we made it cheaper”, I would not have made the purchase. Yes, it’s held up way better than my consumer air compressors but a buddy’s big Quincy compressor rocks and that is another story.
At any rate, I use a ton of compressed air for pressurizing my casting tanks and running all kinds of air tools. One of the reasons I went with the 2340L5-V was that I kept burning out the little 30 gallon consumer compressors. Failure is a big deal for me because when a compressor goes down in my shop, almost all work stops.
At any rate, I knew something was going on with my compressor before it stopped running completely. At the end of the air fill cycle that brings the tank back up to pressure, the switch would shut off but then there wasn’t any bleed down to relieve the pressure on the pump. This meant that the compressor may or may not restart without tripping the 30A breaker and it got worse with time. After this got really annoying, I decided it was time to fix it.
I did some reading and it turned out there were two likely culprits – either the check valve was leaking air back or the pressure switch was failing. I had problems with the check valve on other compressors so I jumped to conclusions and replaced that first. It didn’t fix the problem. Argh.
This is the 23474653-R pressure switch. It is just the switch and does not include the gauge, blow off valve or bleed off line (unloader) that you see.
So that left the pressure switch and this is where things just went sideways and I got frustrated. In searching online and calling the parts department, IR’s own parts department sold me the wrong switch and I was down for almost a week. So you don’t go nuts, you must make sure people know if you have the 2340L5 or the 2340L5-V because their pressure switches are different. You can make the better switch from the 2340L5 work but it will take a bit of re-plumbing the lines to do so. I may actually try that some day.
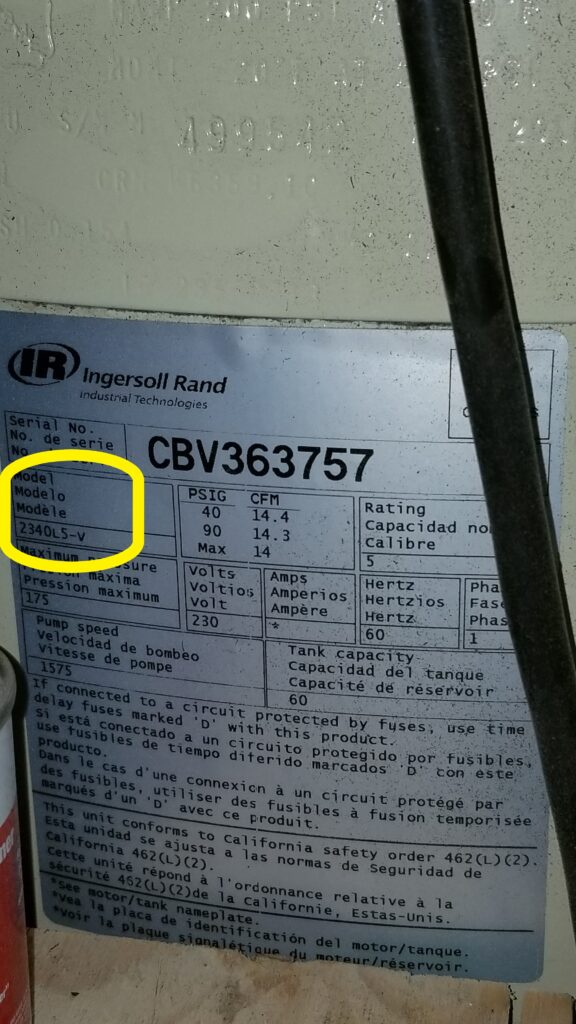
Next comment, do not go with the model number on the pump housing itself. The model number you need is printed on the big silver decal on the tank – not on the pump. The pump will say “2340” but that is not your specific model.
Right there outlined in yellow is the model number you must go by. 2340L5-V in my case.
For whatever reason, IR parts sold me the wrong part even though I asked the fellow to confirm it was right. So, frustrated and with my compressor down, more discussions were held and web searches done and the correct part for the 2340L5-V’s pressure switch is a 23474653-R. Interestingly enough, Tractor and Supply Company (TSC) is an IR dealer and the local store had one of these switches on the retail shelf. This gives you an idea that they are viewed as a wear item if a retailer is going to tie up the money and shelf space to stock one. It was $79.99 and they only had one so I called and confirmed with the clerk that they had one before I drove over. I’ve had way too many situations where a website said “X” was in inventory and when I went to the store, it was not so I try and confirm now. Thankfully, I drove to the store and picked it up.
I removed the cover already but this is what comes in the box. You will need to move your gauge, blow off valve, bleed down line, rear pipe plug and electrical lines over from the old switch to the new one.
Comments On The Swap
So, when it comes to the repair, it’s a fairly easy swap. I took a few photos from different angles to make sure I didn’t forget anything plus I labeled anything that might get turned around. Gone are the days when I try to keep it all in my head. Between my age and interruptions, I find it way too easy to forget things.
Two real important safety comments. Fully drain the compressor – in other words let all of the air out and open the floor drain. Why open the floor drain? Because it’s your double check that it is empty.
Second, please make sure the power is cut. I use a heavy stove/appliance cord going to a wall outlet. I both cut the breaker and unplug the cord. Why do both? It’s your double-check. If you are in a multiperson environment, follow lock out procedures.
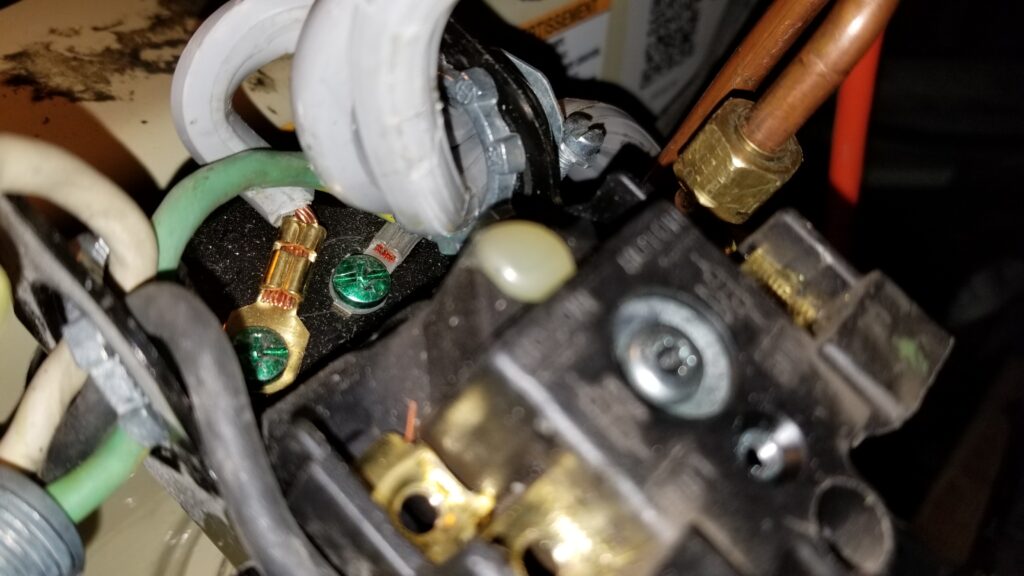
Note the top two poles are the hot legs coming from the wall. Folks when you go to remove the blead-off / unloader line, it is held on by a compression nut fitting. Let me give you a piece of hard won advice – use a flare nut wrench if you can to support as many sides of the nut as you can or worst case use a proper fitting box end wrench. Don’t ever use an adjustable wrench or you will likely round the corners off the nut as the jaws of the wrench give. Now IT does give you a new nut and that is plain 1/4″ copper tube if you screw up bad but you can re-use that whole piece if you are careful with removal and re-installation.Okay so the top two terminals are the hot legs from the wall. The middle set of terminals are the hot legs going to motor. Down on the bottom you have the neutral from the extension cord and the green/neutral going to the motor. These are thick wires in a tight space so be careful working things into position.Here’s an odd little thing I encountered. The pipe plug that goes in one unused position of the switch is actually 10mm. Why? I have no idea. The 10mm fit best so I ran with it. Everything else was SAE. For example, the housing itself that you see just above the wrench uses a 3/4″ wrench.Use pipe thread tape on all fittings and properly support the pipes and what not so the right things you care about are moving in the right direction. For example, I used a pipe wrench on this nipple to keep it from turning while I both removed the old pressure switch and installed a new one.Lesson learned, stay organized. That is a small magnetic tray. I cleaned all fittings and installed new pipe thread tape before reinstalling them.
Bottom line is that I installed the new pressure switch and the compressor proper bled off the pressure from the pump after cycling. In talking to IR parts they mentioned to me that this is the most common reason for the bleed down not to happen in my series of compressor – not the check valve. I believe that now. The pressure switch seems cheep and really strikes me as a consumable part now. Lesson learned.
By the way, I found out during the actual swap that IR printed the part number on the inside of the switch cover. Why hidden inside? If they had it on the outside, then this would have all been way simpler.
Also, next time my compressor stops unloading, I am going to order one of these switches vs. waiting for failure and having to scramble. It’s my fault for putting it off but I had a ton of other things going on and eventually it bit me.
I hope this helps you out as well. Bottom line, if you have a 2340L5-V then the correct pressure switch you need to order is the 23474653-R. That way you can avoid the drama I ran into.
One last shot of the right pressure switch box with the part number on the top right 🙂