Uzi Part 3 of 7: Preparing and Permanently Attaching the Wood Stock

Uziel Gal considered a number of different stock designs until they settled on the final design in December 1950 and did the first production run in 1951.  The wood stock evolved as they corrected breakage issues and you will see stocks with different profiles over the years.  Purely FYI, The steel folding stock was added in 1956 due to Israeli paratroopers requesting a shorter weapon.

Legal Disclaimer – I tried to sort through how to permanently attach the wood stock to avoid creating a SBR.  There aren’t any ATF letters specific to this method. My approach is based on a method documented on Uzi Talk and that approach has not been legally questioned since the forum posted it – click here to read their guidance.  You will need to decide if this approach is acceptable to you.  I am not a firearms attorney nor do I claim any regulatory expertise and you accept all responsibilities and liabilities for compliance with all federal and local laws that pertain to you.

The problem is that if you remove a quick detach stock from an Uzi with a 16″ barrel, then it falls under 26″ then it is a short barreled rifle (SBR).  Thus, the Uzi’s wood stock must be permanently attached.  Let me point out there is a ton of fear, uncertainty and doubt (FUD) in terms of the converting the quick detach wood stock to be considered permanently attached.  The consensus of cooler heads seems to be that if you attach the stock to the Uzi such that it can only be removed with tools, then it is considered permanently attached by the ATF.  If you think about it, most shotguns and rifles would be too short if their stocks were removed for maintenance and they all require tools to have their stocks removed and, thus, are no longer “quick”.  The Uzi wood stock bracket is modified by having the rear receiver attachment point ground down and connected via a blind screw that can’t be accessed without first removing three external screws and pulling the wood stock off.  Most of my long arms have the stock secured by one screw that may or may not be exposed.  For example, a shotgun’s stock screw is typically located under the recoil pad.  Many rifles have one or two exposed screws under the action.  In short, the Uzi’s stock is now permanently attached following the same logic.  This is a well trod path as many individuals have posted write ups and videos about the conversion plus JJ Custom actually sells brackets that have already been converted.


Preparing the wood stock for the Uzi may take you a bit depending on repairs and the finish you choose to use.  I looked at the stocks in both of my Uzi kits and the first one was in the best shape so that is the one I used.

Uzi parts kit disassembled: receiver, barrel, and wooden stock

There are a number of things that must be done at this point.  To reach the minimum 26″ overall length requirement, the stock must be permanently attached so I’ll talk about what I did for that plus the stock needed to be stripped, the gouges fixed and the wood refinished.

In my first kit, the screws were all in very good shape.  In the second kit they were chewed up.  I can’t stress this enough – use bits that fit the entire screw – this means both the length and width of the blade edge.  By full supporting the slot, you can turn quite a bit.  If you have an ill-fitting bit then you will tear up the metal.  Here is the Weaver set that I use all the time – I may use the included screwdriver handle or put the bit in my Dewalt screwdriver to save my wrist – it just depends on what I am doing:

Uzi stock attachment tool kit with various bits and hammer
This is the 88-piece Weaver Deluxe Gunsmith Kit.

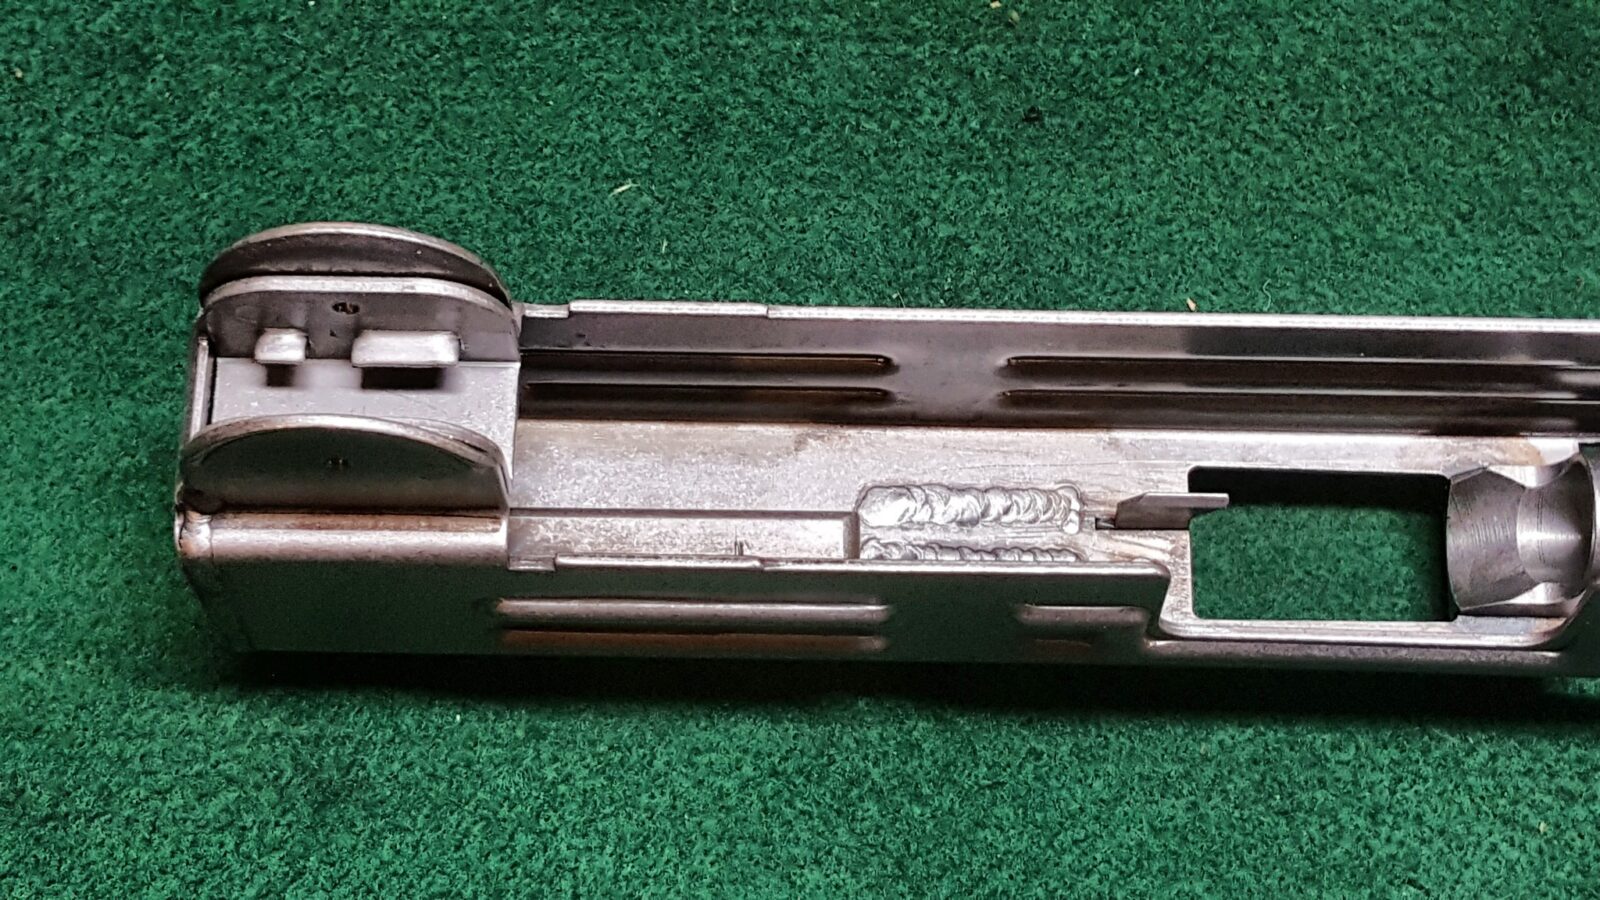
1] Remove the screws that attach the stock mounting bracket to the stock.  You can see the big one at the rear and then the two screws towards the front.  I used a big bit to get each screw moving – that is why they came out without damage.  By the way, you can see how the old quick detach method worked – the front of the bracket slid into the grip lug, the pressure plate between the screws supplied tension with the rear cylindrical receiver attachment point slid into the receiver.  The lower catch just locked the assembly in place.  It was an elegant design really but one we need to eliminate.

Uzi parts kit: close-up of wooden stock with metal components and screws

Here’s what the bracket looks like.  By the way, you can see one of the big blade bits in my DeWalt power screwdriver.  The quick release lever engages or releases the notch in the receiver and the cylinder pushes into the receiver to lock it in place.  We’ll come back to the in a minute.

Uzi wood stock attachment hardware and tool

2] The next step is to strip the wood.  Use your favorite wood stripper, such as BIX, or brake cleaner to get rid of the tons of oil that is in the wood.  I used a ton of brake cleaner as it was snowing outside and I just wanted to get it done 🙂  If it were warm weather, I would have used Bix 2-3 times to get all the crud out.

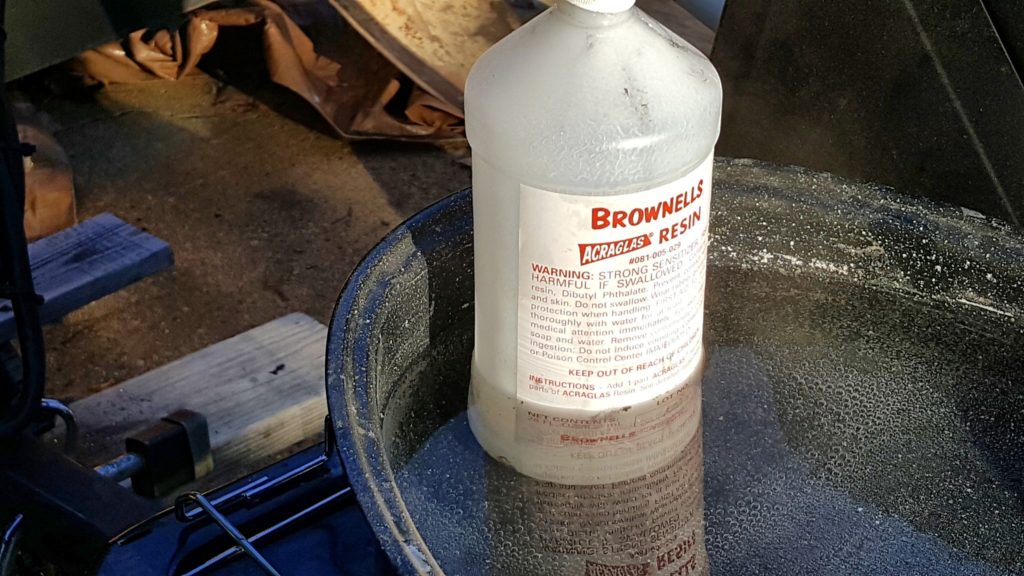
3] I then mixed up a batch of Brownells Acra-Glas liquid epoxy, added black dye and glass fibers and then filled in all the gouges.  The epoxy then sat overnight and cured.  In cold weather, make sure you do something to keep the epoxy warm so it will cure properly.  (Click here if you want tips on how to work with epoxy).  Also, I added links to it at the end of this post.

Note, you can barely see two hairline cracks in the front of the stock to the left and right of the bracket.  They were repaired with quality thin viscosity super glue — I like the Bob Smith brand personally and use his different formulations all the time.  This stuff is very thin and readily runs into cracks.  I just push the crack open, pour in the glue and then clamp the work for a minute while it cures.

Brownells Acraglas Resin bottle in a mixing bucket, for epoxy tips.

4] I then sanded the stock down starting with 100, 150, 220 and finally 400 grit sandpaper to get it smooth.  I purposefully used black so they would look like repairs or burns.  I figured this Uzi was older than me and ought to have some character marks to remind people of its age.

Wooden Uzi stock being prepared for attachment in a workshop
Wooden Uzi stock being prepared for permanent attachment in a workshop.

5]  I rather liked the color of the wood in the parts kit so I used a 50/50 combination of boiled linseed oil (BLO) and black pine tar.  Now this old school blend actually protects the wood and gives it a really nice slightly darker matte finish bringing out the color of the wood.  So you can see we went from a yellowish color above to warmer orange-ish brown below.  You apply the finish using a foam brush and chase it into the wood using a heat gun.  Literally this stuff should be bubbling from the heat.  You then wipe it down with a clean rag and repeat until you get the finish you want.  I then go over with 0000 steel wool to make sure it is nice and smooth.

Note, properly dispose of BLO soaked rags as they may spontaneously combust from the heat of drying.  The proper method is to lay them flat on a noncombustive surface and let them dry thoroughly.  The length of time depends on many factors.  I burn mine.  Never ever just throw them in the trash.

Wooden Uzi stock prepared for permanent attachment in blog part 3
Uzi wooden stock, prepared for permanent attachment in Uzi Part 3.

6]  Next up we need to convert the stock bracket to be permanently attached – meaning it must screw into the receiver.  I have seen several methods used and I’ll share with you what I did and you can decide how you wish to proceed.  If you are uncomfortable with the machining required, a firm known as “JJ Custom” sells the brackets already converted.

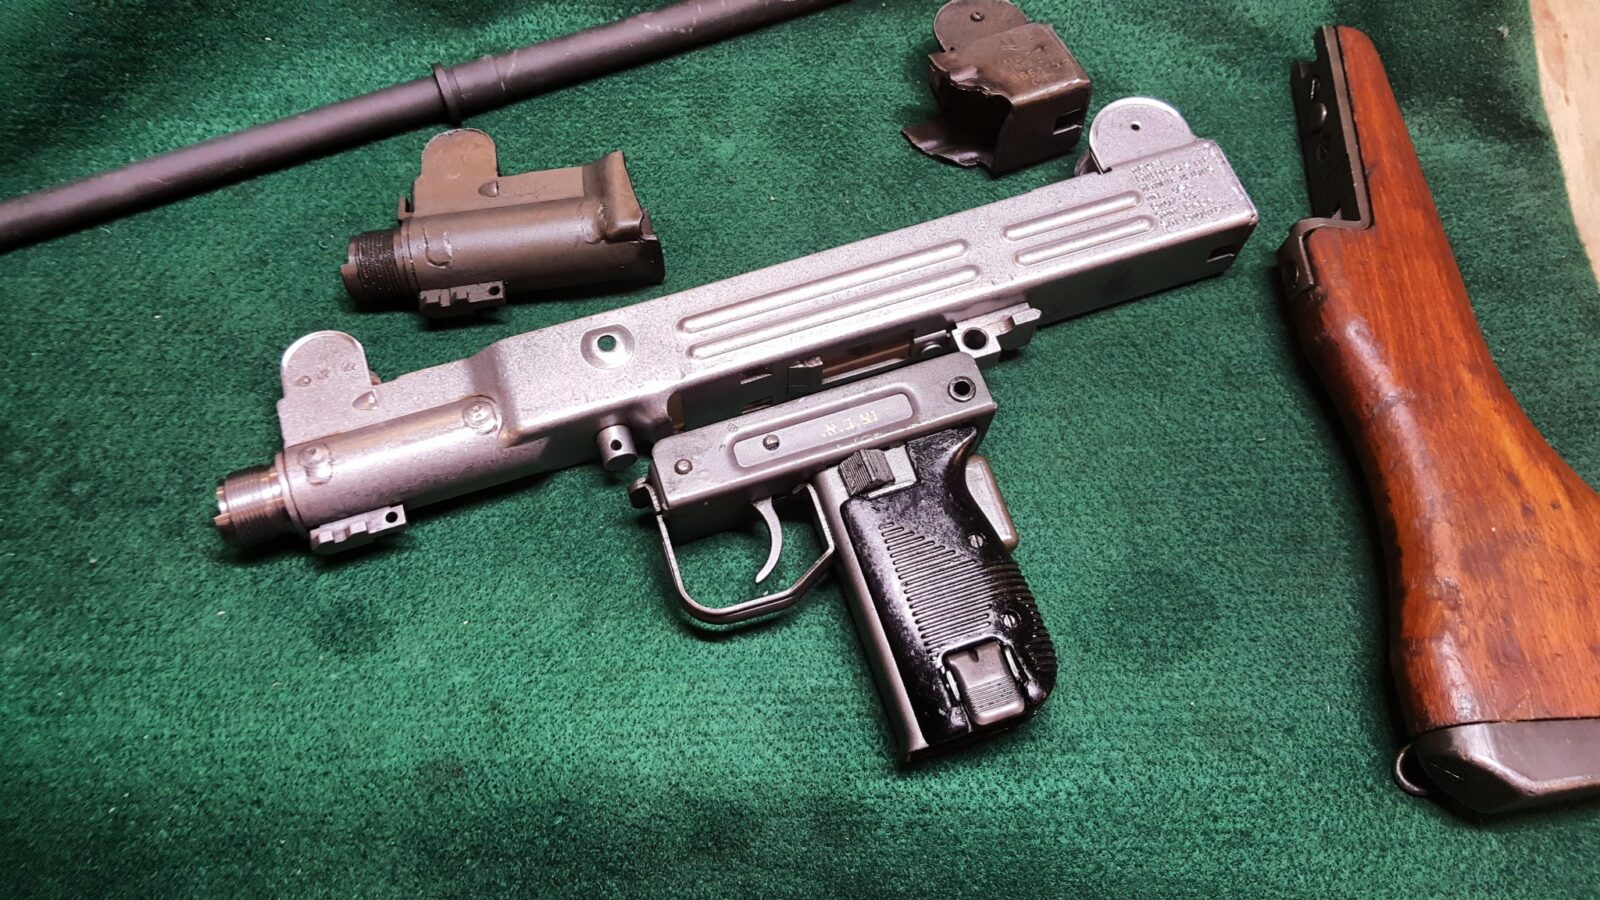
6.1]  This is what the quick detach stock bracket looks like in the first picture and the cylindrical protrusion normally slides into the circular hole in the end of the receiver shown in the second photo.

Uzi wood stock attachment hardware and tool
Uzi stock adapter comparison: silver Uzi receiver vs. black Uzi stock adapter.

6.2] What we are going to do is to sand the cylinder almost completely away so it just barely goes into the hole to locate/position the assemby.  Before that, I would recommend removing the catch from the bottom by pressing out the pin and removing the assembly.  Be careful with the spring – mine launched into orbit and I never found it so I used a second one off my spare kit.  Note, you can’t order this spring – you have to buy either an entire stock assembly or just the bracket if you can find it.  I bought a third stock assembly and the moral of this story is to carefully catch that little spring vs. letting it launch.  Note, the next photo shows it after I drilled and sprayed Molyresin on the part but I wanted to share a close up of the sanded down cylinder.  I have a big 2×72 grinder (sander) that I use for knives that makes this work very quick.  Just take your time and sand it square.

Close-up of a metal Uzi stock attachment mechanism on a green surface.

6.3] Next I took a folding stock mounting nut and ground it down until it just barely fit in the receiver hole from the inside.  This nut is tapped for a 1/4-20 screw so this made sense to me.  I carefully center punched the middle of the cylinder and drilled it with  9/32″ bit to give a bit of wiggle room to line up with the mounting nut.  Again, the photos are after finishing.  I went this route as the bolt buffer has a channel at the bottom that allows room for this nut and the dimensions had already been sorted out.  I bought the folding stock nut from Robert RTG.

Uzi wood stock adapter nut for permanent attachment
Uzi wood stock adapter parts and tools for permanent attachment

6.4] I have a lot of 1/4×20 button head screws so used one of them to attach the bracket and then drilled a recess in the stock to allow it to fit.  I simply stuck the stock on the bracket and marked where to drill a 1/2″ recess.   The intent is that the bracket can’t be removed without first removing the stock.  A 1/4″ alloy bolt can handle a lot of sheer stress as can the thick receiver – that bracket is no longer quick anything.   Also, it took a lot of filing and fitting to the the front of the stock bracket to slide under the grip frame lug on the receiver and I intentionally left the fit very tight to avoid slop.  This was just a test fitting as I still needed to do the front screws on the stock.

Uzi wood stock attachment point and trigger mechanism
UZI firearm trigger assembly with tools for stock attachment
Uzi wood stock preparation for permanent attachment in part 3 of blog series.

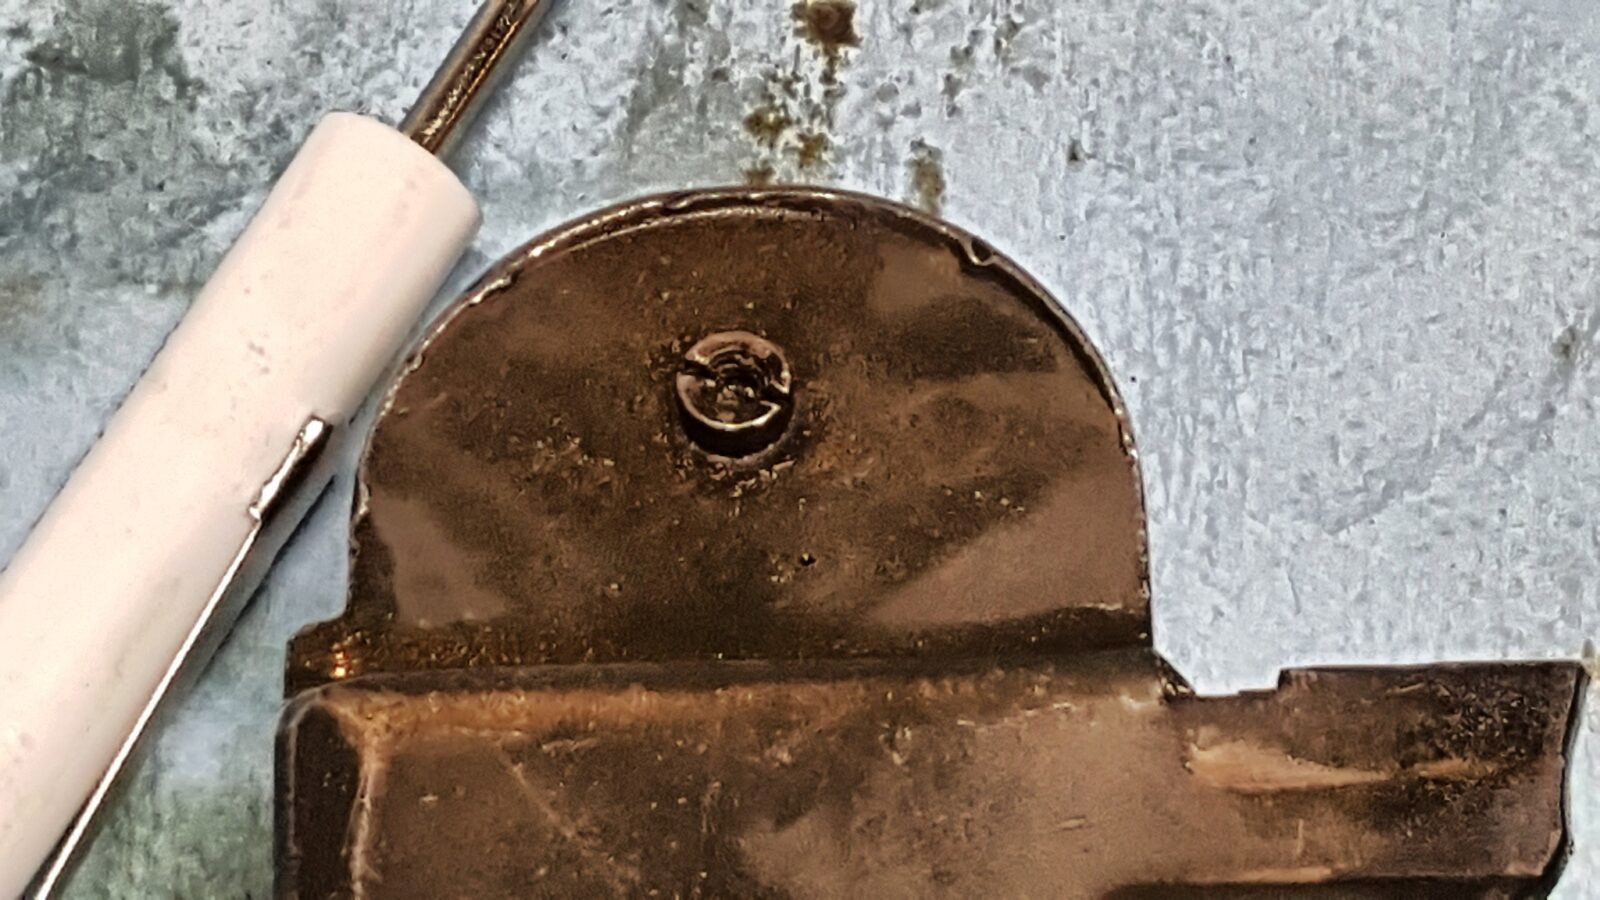
6.5] In looking at the stock and bracket, I decided to countersink the wood from the bottom and insert screws from the bottom.  This is not a traditional look but I don’t think it messed the lines up too bad.  The one point I did pause and think about was limited material to thread into on the bracket.  Because the Israelis recessed the screw head holes, I had about an 1/8″ of material to thread so I debated welding the holes closed and then drilling and tapping new ones.  I decided to skip welding for now and give it a go with bigger 1/4×28 NF flat head screws that I turned down the heads by chucking them in a hand drill and pressing the spinning screw head against my spinning sander.  This trick works great by the way. I used a 1/2″ counter sink and a 9/32″ bit to open up the two stock holes.   The holes in the bracket were opened up with a #3 cobalt bit and tapped with a quality 1/4-28 tap with cutting oil.

The second photo below shows the front hole opened up and then I did the same to the second one.  The result seems very solid and I can always go back and weld the holes shut and start over if I have problems though I doubt I will.  A 9mm doesn’t have much recoil, the Uzi is actually pretty hefty and the inertia will soak up the recoil plus I will be shooting this as a semi-automatic.  I do not expect a ton of stress on those two screws and big top wood screw and recessed tang pushing into the surrounding wood will bear the brunt of it.

I then inserted the screws, tightened them down and used the sander to make them flush with the bracket.  I then disassembled it so I could apply the Molyresin finish later.

Drill chuck holding a hex screw, preparing to attach Uzi wood stock
Uzi wood stock with prepared holes for permanent attachment.

6.6] The stock was ready to go other than one minor detail – the sling swivel was a bit bent so I installed the brass protector plates on my vise’s jaws and then tightened them down on the wire loop to straighten it out.

Uzi wood stock adapter attached to a vise for permanent attachment.

So at this point, the stock was done.  I had it in pieces waiting to apply the Molyresin finish that I will cover in post six.

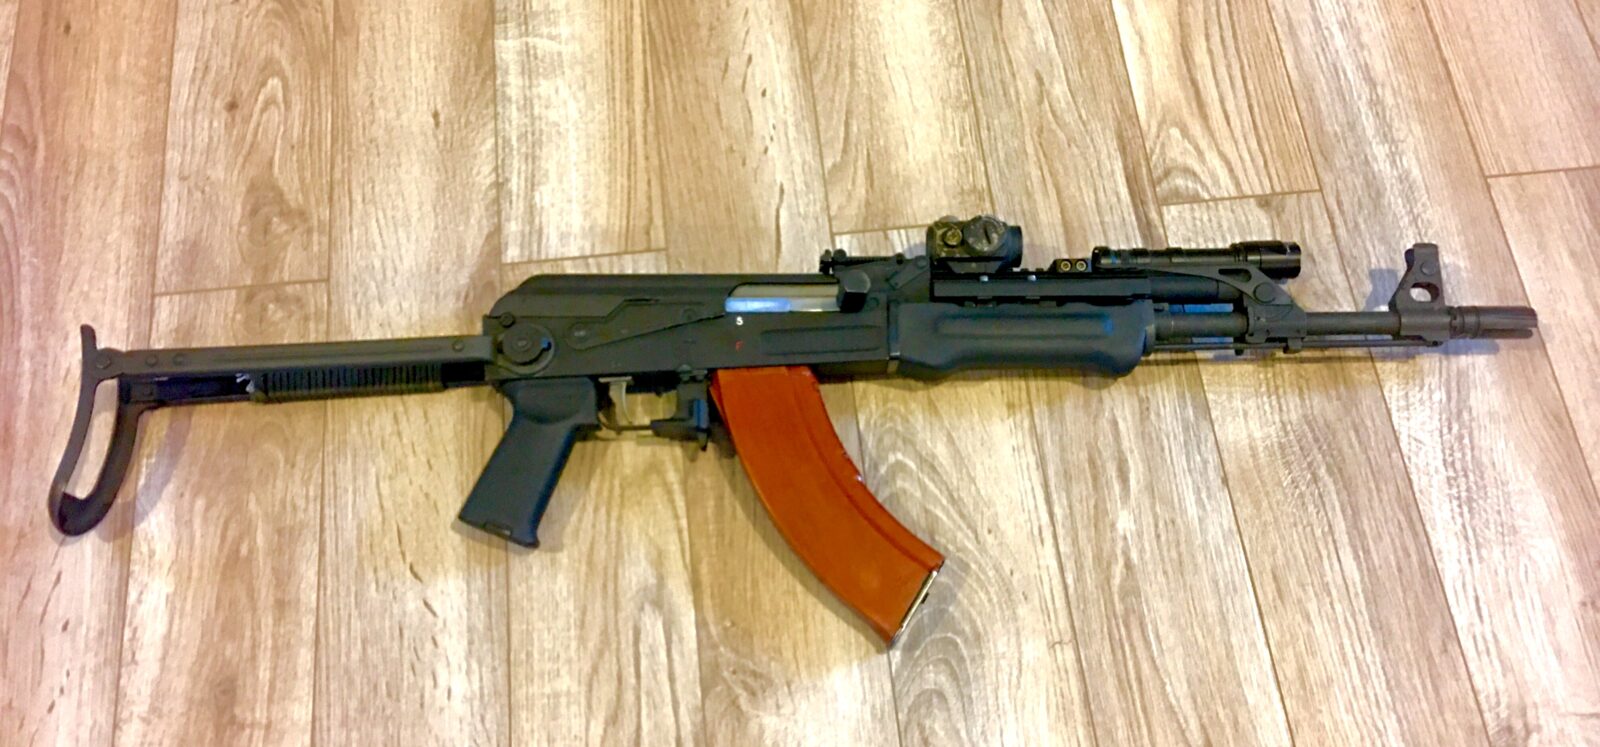
It’s a bit out of sequence but for folks just reading this post about the stock, here is the end result.  With the new permanently attached stock, the overall length is a safe 31″.  Here are some up close photos of the finished product so you can see how it turned out:

Close-up of a wooden Uzi stock being prepared for permanent attachment.
Uzi wood stock preparation for permanent attachment

Uzi wood stock, showing attachment points and maker's marks.


Please share the link on Facebook, Forums, with colleagues, etc. Your support is much appreciated and if you have any feedback, please email us in**@*********ps.com. If you’d like to request a report or order a reprint, please click here for the corresponding page to open in new tab.


Uzi Part 2 of 7: Stripping the Parts Kit

Now there are parts you need from the kit to do your assembly so let’s step through them.  I would highly recommend that you have a means to organize your parts and not lose them.  Zip-Loc bags, parts tray, etc.

Also, another fellow did a great write up on his disassembly – click here to read it.

1] Remove the handguards – they are held in place by two slotted screws.  I highly recommend you always use gunsmith/hollow ground screw driver bits that fill the whole slot of a screw to avoid tearing the screws up.  These screws are not under much torque and mine very readily came out.  You may want to replace these with new handguards.  Mine were in tough shape due to being bounced around in the parts kit bag.

2] You will need the front sight assembly.  It is comprised of the inner sight itself, a locking nut and a washer underneath.  A real Model A Uzi front sight tool makes a world of difference as you can easily loosen the locking nut and then unscrew the whole assembly.

Uzi receiver and barrel parts, showing threaded components and internal mechanisms.
Uzi receiver parts: comparison of two Uzi receiver sections, one with a screw.
Uzi parts kit: bolt, barrel nut, and charging handle assembly


3] Remove the barrel nut catch assembly.  It is comprised of the catch itself and a spring.  Reach in from the rear under the sight, push the tab down with your finger and pull the assembly out.  You can do this with your fingers.  If you look at the first photo in step one, you can see the catch still in the old receiver stub – it is the L-shaped protrusion over the threads.  You’ll notice the new receiver (which is still in the white in these photos) does not have it.  Now, in the second photo, if you look at the old stub on the right you will see the tab of the catch sticking out – this is what you push down with your finger while pulling out of the front.

4] You will need to salvage the front sling swivel.  I sanded mine down flat, center punched the middle of the rivet, start with a small 1/8″ drill bit and worked my way through larger and larger bits until the swivel separated from the old rivet.  I then used a punch and removed the remnants of the old rivet from the center of the swivel.  By the way, I’ll tap the sling and mount it with a button head screw and Loc-Tite in a later post.  Don’t worry about tracking down a replacement rivet and squishing it unless you really want to.

Drilling a hole in an Uzi parts kit component for disassembly.
Uzi parts kit: sling mount being drilled in a vise with metal shavings.

5] Remove the rear flip sight assembly.  Now, there is a slotted screw on one side and a tiny nut on the other.  Be careful when you loosen the nut as it will come right off.  I used a long punch to push the screw back far enough to then grab the screw and pull it out.

Uzi parts kit: close-up of a dirty, oiled trigger mechanism during disassembly.
Uzi parts kit: close-up of a small screw on a metal component
Close-up of a Uzi parts kit component with a screw
Close-up of the Uzi parts kit showing the bolt carrier and receiver.
Uzi parts kit: close-up of a small metal ring with pliers

6] The next step removes the top cover catch.  The rear sight spring actually covers the catch assembly so just pry the spring upward and you will see the top catch and the captive spring.  Now be careful – this spring will launch if it slides over the rear lip so carefully remove the top catch itself by sliding it out the front.

Uzi parts kit disassembled: receiver, bolt, screw, and spring on cloth
Uzi parts kit disassembled, showing spring and metal components.

7] You will need the barrel nut.  Mine was in a small bag in the parts kit.

8] You need the top cover.  Now I bought a modified one with a picatinny rail attached.  If you use the original cover, there is a small wedge called the “cocking pawl” that you will need to remove.  My cover was lose in the bag so I just set it to the side.

9] You will need the return spring assembly but you will need to cut the buffer plate off at the end of the guide rod.  I just took a pair of diagonal wire cutters, made one snip from the side and it literally came right off the return spring guide rod.  Be careful not to bend the guide rod – you will use this spring assembly with the new bolt.

Pile of Kalashnikov ammunition, relevant to US Dept of Treasury sanctions.

10] You need two things from the submachine gun open bolt.    Put the bolt on a bench block and push/tap out the extractor retaining pin from the side of the bolt – tap/push on the small side with a punch.  The extractor looks like a screw from the rear end of the bolt but it actually presses right out.  Push from the end with a punch or small screw driver and it will push right out the front of the bolt face.  Note, the slot is so you can use a screw driver to rotate the extractor into proper position when you install it.

11] In my parts kit, the entire grip frame assembly was in the bag.  Now there are some critical changes that must be made to it but for now, set it to the side.  The grip panels were chewed up so I bought a new set of those along with handguard panels.

Uzi parts kit disassembled: receiver, stock, barrel, and sights

12] You need the complete wood buttstock assembly with the entire wood stock mounting bracket system and all the hardware on the stock.

Uzi parts kit disassembled: receiver, barrel, and wooden stock

That’s it for now.  The next blog post will get into the details of how to refinish the wood stock plus permanently attach it.


Please share the link on Facebook, Forums, with colleagues, etc. Your support is much appreciated and if you have any feedback, please email us in**@*********ps.com. If you’d like to request a report or order a reprint, please click here for the corresponding page to open in new tab.


Uzi Part 1 of 7: The Uzi Kit, Receiver and Barrel

One of the firearms that had an impact on me growing up was the iconic Israeli Uzi.  In the 1980s you would see them in the news, TV shows and movies all the time.  Today, being quite a bit older, what interests me is the history and engineering that led up to this weapon.  Suffice it to say that Israel has known conflict even before the country was founded in May 1948 and certainly ever since.  Israel first fielded the Uzi in

Soldier with an Uzi submachine gun stands by a Red Cross ambulance
Two soldiers with Uzi submachine guns stand in front of a helicopter.

I’m not going to duplicate the history as there are some excellent resources out there that explain the political climate and how the Uzi came into being.

  1. The first is a book by David Gaboury entitled “The Uzi Submachine Gun Examined” that is the single best reference guide I found. I can’t recommend it enough and you will not regret buying it.
  2. There are three overview videos on Youtube that provide good context – especially if you prefer watching  a video to reading.
  3. The Wikipedia entry provides a decent overview as well.

The Uzi has evolved into a variety of weapons including the micro uzi, semi-auto versions and so forth.  What interested me was the full size Uzi that I had grown up hearing so much about and you’d see them with the original wood stock and the metal folding stock.

Uzi submachine gun receiver and wooden stock
Uzi submachine gun with sling, part of Uzi kit receiver and barrel

Over the years, I’ve made many AKs and ARs for personal use.  I’ve been really busy but wanted to build something different.  For the past several years I have noticed that there are a ton of Uzi kits for sale from the various parts kits vendors and this sparked my interest.  For me, part of the challenge of building from a kit is learning how to do so legally and finding all the parts.

I knew I wanted to build a carbine vs. a pistol so that shifted me in the direction of a wood stock for a number of reasons:

  1. To be classified as a rifle, the barrel needed to be at least 16″ with an overall length of 26″.
  2. To get the overall length, that meant I either needed an even longer barrel or a permanently attached stock that would surpass that 26″ minimum.
  3. The resulting carbine would be front end heavy and the wood stock would help balance things out.
  4. I am not a huge fan of my cheek being on sheet metal – I prefer wood with a gently bend.

Now you many have a different perspective and that is just fine but due to this I ordered two wood stocked Uzi kits from Robert RTG.  I only planned to build one Uzi but purchased a spare kit for donor parts just in case.  What arrived were two seriously oiled kits.  The wood was a tad beat up as were the pistol grip and handguard panels – probably from being packed with the parts.  The bolt and fire control group honestly looked like new.

In terms of the receiver, all my research pointed me to buying one from McKay.  They offer just the bent receiver shell and you can do all the welding or a fully welded receiver that is all set for semi-auto use and ready for you to assemble with.  I opted for the ready-to-go model and based on McKay’s reputation, I also ordered my 16″ 1:10 twist 9mm NATO chambered barrel from them also.  I placed my order direct with McKay, had them ship it to my FFL, Scott Igert, and it arrived a week later.

McKay really did a real nice job on the receiver.  Here it is with some of the original stubs sitting by it:

Uzi receiver, barrel, and wooden stock laid out for assembly
Uzi receiver and barrel assembly, part of a Uzi kit, with visible markings.
Uzi receiver front with barrel threads and sight assembly
Uzi receiver interior showing welds and internal components.
Close-up of an Uzi receiver and barrel assembly, part of a gun kit.
Uzi receiver assembly with internal parts visible
Uzi receiver part, showing internal mechanism and metal construction.
Uzi receiver part with welds and internal components, Uzi kit receiver
Uzi receiver part, showing welds and internal components of the firearm kit.
Uzi receiver and barrel components, showing threaded ends and internal mechanisms.
Uzi receiver and barrel components. Uzi kit part 1.
Uzi receiver parts: comparison of two Uzi receiver sections, one with a screw.
Uzi receiver and barrel parts, showing threaded components and internal mechanisms.
Uzi receiver parts, showing two different Uzi receiver assemblies.
Uzi receiver section with open slots and metal components
Uzi receiver and barrel assembly on a green surface
Uzi kit components: receiver, barrel, stock, and sights

Here are the details that McKay took care of when they make their fully welded receiver:

  1. The front trunnion has a reduced inner diameter to prevent installation of a military model
  2. The rear barrel support ring must not allow a military barrel to be installed
  3. The bottom of the semi-auto feed ramp will block a full auto sear – in other words, it is just a tad too long for the full length original sear to fit.
  4. The right side of receiver behind the ejection port has a block bar welded in place that prevents the installation of an original full auto open bolt.

The other plus is that everything above is American made so that means the receiver and the front trunnion count as US-made parts.  By the way, in terms of 922r, an Uzi has 13 parts on the 922r parts list so that means three must be replaced with US parts to meet the maximum limit of 10 foreign parts.  The McKay receiver, front trunnion and US-made barrel will enable you to meet the parts count requirement.

By the way, there are a lot of other posts about how to do an Uzi:

For Uzi parts, my go-to sources are:

At any rate, let’s wrap this post up and will discuss the the parts you will want to remove from the old kit.


Note, I have to buy all of my parts – nothing here was paid for by sponsors, etc. I do make a small amount if you click on an ad and buy something but that is it. You’re getting my real opinion on stuff.


Please share the link on Facebook, Forums, with colleagues, etc. Your support is much appreciated and if you have any feedback, please email us in**@*********ps.com. If you’d like to request a report or order a reprint, please click here for the corresponding page to open in new tab.


Zastava PAP M70 and Military M70 Buttstocks and Recoil Pads No Longer Match

Hello everyone,

We make a recoil pad for the military Yugo M70, M72 and M76 rifles [click here for the listing]. The original was rubber over a steel pad and was often very beat up when guys bought kits or rifles made from kits.  So, I hunted down pristine original recoil pads and made molds to cast rubber replacements.

Zastava PAP M70 and M70 rifle buttstock recoil pads

Here are the approximate measures for the stock this pad fits on:

  • Screwhole centers are about 3.25″ apart
  • From top inside lip of butt of the stock to bottom inside lip is: 4.20″
  • Top to bottom of the butt outside or overall height is 4.48″
  • Left to right inside lip edge of the butt at the widest point s 1.29″
  • Outside edge left to right at the widest point is 1.63″
  • The lip that the recoil pad sits on all the way around is about 0.17″

Starting in mid-2017 we started getting word from our customers that our military-sized pads were not fitting the new commercial PAP M70 rifles being imported into the US.  It would appear that Zastava has changed the buttstock — presumably to cut cost.  It is smaller and the telltale for consumers is that it has a solid steel stamped butt plate.  The following photo is of an original Yugo M70 military-style recoil pad next to the new commercial PAP steel butt plate:

Two Zastava M70 buttstock recoil pads: one ribbed, one smoothTwo black rifle recoil pads, one worn and one new, for Zastava PAP M70

This next photo just shows an edge view – the white box is just propping them up:

Accessories box next to a Zastava M70 buttstock

Bottom line is that the stocks are different and our recoil pad will not fit the PAP M70.  I’m hoping to get the word out to reduce confusion.

Please note that at this time, I do not have plans to make a commercial PAP-sized recoil pad as there has not been sufficient demand thus far.


Please share the link on Facebook, Forums, with colleagues, etc. Your support is much appreciated and if you have any feedback, please email us in**@*********ps.com. If you’d like to request a report or order a reprint, please click here for the corresponding page to open in new tab.


Clean Your New Airgun’s Bore Before use

When any projectile weapon is made, there are machining operations, dust and lubricants.  Now a lot of this is down in the bore of your new purchase.  This is true of any arm – including air guns of all types and firearms.  If you shoot your weapon without cleaning it, you do risk hurting the barrel or maybe even a jam.  Think of it this way – all that crud has to go somewhere.  It may go out the end of the barrel or it may get pressed into the walls of the barrel affecting accuracy going forward.

So, clean the barrel.  Now, I’m going to focus on airguns going forward as there are some peculiarities to consider.

#1 – The steel used in air rifles and air pistols is relatively soft – way softer than that found in a firearm.  You must take care not to nick the crown of the muzzle and create a burr that will affect accuracy.  I would recommend aluminum or carbon fiber cleaning rods and not steel.  Look out for the pull through cords as many (not all) have a wire brush as part of the unit.  There are flexible wire units that allow you to pull the patch in from the breach and out the muzzle end.  Personally, I swear by carbon fiber rods and mainly use Tipton brand rods now.  I have 4-5 of them now for different calibers and lengths of barrels.

AK barrel back out tool assembly detail

#2 – Because of the soft steel, do not use any form of wire brushes as they may hurt the rifling and accuracy going forward.  I just use a simple mop for the given caliber that screws into the end of your cleaning rod.  Tip – make sure the thread of your tip(s) match the size of your cleaning rod – for example, that if the rod is 8-32 (size 8 with 32 threads per inch) then the tips should be the same.  I have the following jag set from Tipton.  These impale a patch and allow you to push it down the bore while scrubbing the sides.

Set of brass bore cleaning jag set for airgun barrel cleaning

#3 – Look out for strong solvents.  I’d recommend something light such as WD40, CLP or any modern synthetic transmission fluid.  If you didn’t know it, automatic transmission fluid (ATF) is a great cleaner and lubricant for airguns and it lubricates the O-Rings.  Regardless of what you use. Run dry patches after to remove any extra lubricant.  By the way, WD40 can help with cleaning but it will not prevent rust.

The following is an example of a clean and dirty mop after going through my brand new Hatsan Gladius and note you would see this from just about any brand and I’m not saying anything bad about Hatsan.  My Gladius is fantastic.  To do the initial cleaning, I used WD40 with the mop and then ran patch after patch after patch until it was relatively clean.  You can decide where you want to stop or you may spend the rest of your life running patches down a barrel.

AK barrel back out tool assembly detail

#4 – This is a bit of a general comment, but be aware of where all the junk is going when cleaning.  For example, don’t use a cleaning and was all the crud down into your action.  Unlike a firearm, it can be nearly impossible to clean from the breach end so you have to clean from the muzzle.  Thus, be sparing with the cleaner and inspect the breach end to see if you need to clean the weapon further.  My advice would be to go light on the cleaner and just make how ever many passes are needed with the mop and/or patches until the bore is shiny.

#5 –  I recommend using a decent gun vise to hold what you are working on to free up your hands.  I sure have cleaned a lot of rifles and pistols over the years sitting on the floor and still do from time to time but the Tipton “Best Gun Vise” has worked well for me.

So with that, you are done.  Guys ask how often should they clean and the answer is surprisingly little – you may choose to do it on a regular preventive basis or when you notice accuracy tapering off.  One thing I had told to me that I took as gospel and will pass on – beware of the harsh cleaners that have ammonia as it will attack/harm aluminum parts in airguns and airguns tend to use a lot of aluminum.

This last comment has to do with lubrication vs. cleaning.  Note, if you are ever lubricating the main spring, areas around the piston or other high pressure areas, you must what is recommended and it is probably some form of  silicone based lubricant vs. petroleum.  Be sure to read up on what is recommended for your application before doing anything in those areas.

In reading the above it sounds like a Tipton commercial but it wasn’t planned – the listed items are what I actually use.  I was not paid to write this.  I’ve bought all my Tipton stuff over the years from Amazon and Midway depending on pricing and availability.

At any rate, I hope these tips help you with your next project.


Please share the link on Facebook, Forums, with colleagues, etc. Your support is much appreciated and if you have any feedback, please email us in**@*********ps.com. If you’d like to request a report or order a reprint, please click here for the corresponding page to open in new tab.


Video: Forgotten Weapons: British Submachine Gun Overview: Lanchester, Sten, Sterling, and More!

AK barrel back out tool mechanism with metal and wood components

I have lately become very interested in sub machine gun class weapons, or SMGs.  I’ve built a number of 9mm ARs over the years and while they are interesting and fun to shoot, there’s not much history to dig into.  So, I have been researching British Stens for a while now and the history that led up to them and the thinking behind “good enough” to get the job done vs. perfection is fascinating.  It’s really intriguing when you see what folks can create when expediency is the name of the game.

To launch the series, I am posting this awesome video from Ian over at Forgotten Weapons.  He always does an excellent job researching what he is going to cover and then walking the viewer through what he is presenting.  In this video he provides an overview about the British Lanchester, Sten and Sterling.


Please share the link on Facebook, Forums, with colleagues, etc. Your support is much appreciated and if you have any feedback, please email us in**@*********ps.com. If you’d like to request a report or order a reprint, please click here for the corresponding page to open in new tab.


20 tips for getting better results with epoxy

Applying black epoxy to metal parts for better results

I use a ton of epoxy as part of my work plus fixing all kinds of stuff at home, on cars, guns, knives and more.  I’d like to take a few minutes share some lessons learned with you to bear in mind on your next project that involves epoxy:

  1. Buy quality epoxy – not cheap junk.  Epoxy is a generic term and a lot of the no-name blister pack retail stuff is crap.  Go for brand names.  If they list real specs about the formulation then it is probably legit.
  2. I recommend industrial epoxies and not the consumer stuff.  My hands down favorite epoxy is Brownell’s Acra Glas liquid.  It is strong and resists breaking down from repeated impacts very well.  It’s one down side is that it takes a long time to set up so it may not be your best bet if you need something to be fixed and back in service quickly.
  3. Know your application and match the formula to your need – there is no magical formula that does everything.  You may need a putty, a fast cure, a short pot life, higher heat resistance, improved impact resistance, shear strength, etc.  Figure out what you need and then look for the epoxy that will work best for you.  At any given time I probably have 3-4 different formulations on hand.
  4. The longer it takes an epoxy to cure the stronger it is.  All things being equal, an epoxy that cures in 24 hours will be stronger than one that claims to do so in 5, 10 or 30 minutes.
  5. Read the package – setting up vs. curing and reaching full strength are two very different things.
  6. If you want to get epoxy to flow into wood or difficult areas, heat it up.  The liquid thins as it warms up but note this will also speed up how fast it sets up and cures.
  7. As epoxy gets colder, it takes longer and longer to cure.  If you are working outside, use a space heater, flood light or other heat source to keep the epoxy and the work piece area being repaired at least 70F.  I shoot for 80-90F.
  8. Epoxy can get really thick as it gets cold and not want to come out of the containers.  Either keep it inside where it is warm or at least warm it up before you use it,
  9. Epoxy resin can sugar with age just like honey.  What I mean is that will develop a solid mass in the resin bottle – it’s not really sugar!  If you heat up a container of water, take the resin container’s lid off and then set it the container in the water, the resin will warm up and the solid will dissolve back into liquid.  I buy 28oz or larger bottles of Acra-Glas that I don’t always use right away so when it sugars, I do this.Brownells Acraglas Resin bottle in a mixing bucket, for epoxy tips.
  10. As mentioned above, I buy my epoxy in bulk.  Acra-Glas can be measured by volume and it has a ratio of 1 hardener to 4 resin.  The way I deal with this is very simple – I use 10cc syringes without needles.  I have on syringe in a cup that I use for hardener and one syringe stored in a cup that I use for hardener.  The reason I do this is that the two parts do not react to the air very fast.  I may be able to use one syringe for a several weeks/months before it stops working so I set the syringe in its dedicated cup when done to be used again.  I do not use fresh syringes every time.  A 100 count syringe pack will last me at least a year.
  11. You can definitely color epoxy.  You can buy purpose-made dyes such as So-Strong or add in powdered tempra paint.
  12. You can add fillers for strength or looks.  When filling gaps, I mix 1/32″ milled glass fibers with the epoxy.  The ratio depends on the epoxy you are using, how thick/pasty you want the result to be or how much you want it to still flow into place.
  13. To get rid of bubbles you either need to draw a vacuum, apply pressure or at least use a heat gun to thin the epoxy once it is applied and this allows the trapped air to escape.AK barrel back out tool mechanism with metal and wood components
  14. When I am gluing big objects together, such as wood panels, forms, or other construction I will use a cartridge based epoxy.  My favorite is Hysol E-20HP.  To use a cartridge, you need the dispensing gun and also the correct mixing tip.  This allows you to squeeze the trigger and properly mixed epoxy comes out of the tip.  When you are done, you just let the tip harden in place sealing the epoxy.  When you are ready to use the gun again, you simply remove the plugged tip with a new one.  This allows for you to deploy a bead of epoxy very quickly but the con is that you throw away a tip every time you stop.  You also can’t color the epoxy first but it is fast and convenient on larger projects.Loctite EA E-120HP epoxy adhesive tube and mixing nozzles for better epoxy results.
  15. The surface must be clean for epoxy to work best.  Remove dust, dirt, oil, etc.
  16. A rough surface is always better than a smooth surface.  I always recommend sanding, brushing or blasting a surface to improve adhesion.  Not only do you increase the surface area but you also are creating a texture where the epoxy can get under the base material in thousands of tiny places to really grab hold.
  17. Wear disposable gloves to avoid making a mess.  I buy boxes of the Harbor Freight 5 mil nitrile gloves when they go on sale for $5.99/box of 100.  They really are a good value for a medium-light duty disposable glove.
  18. If you need to clamp parts together, wrap the assemble with wax paper to avoid gluing your clamps to the work piece – yeah, I’ve done that.AK barrel back out tool mechanism with metal and wood components
  19. Whenever possible, I prefer to clamp work together to get this best bond.
  20. Check, double-check and come back in again later and check your work again to make sure nothing has shifted.

I hope these tips help you with your next project.


Please share the link on Facebook, Forums, with colleagues, etc. Your support is much appreciated and if you have any feedback, please email us in**@*********ps.com. If you’d like to request a report or order a reprint, please click here for the corresponding page to open in new tab.


Check Out Ken’s M70 With Our Bulged Lower Handguard

Pretty slick set up with that Ultimak gas tube!!


AK barrel back out tool assembly detail

When Strength and Quality Matter Most