Tag Archives: parts

Finding Parts and Accessories for Norinco Firearms

Because I make and sell a variety of AK furniture, I often get asked about where to find parts and accessories for a given type of firearm.   One brand that comes up quite a bit is Norinco.

Norinco, or China North Industries Group Corporation Limited (中国北方工业集团有限公司), is a huge defense conglomerate and makes everything from small arms to big weapons systems such as tanks and missle systems (click here if you want to visit their site).  They were established in 1980 and began selling small arms to the US domestic market not long after that.

Unfortunately, they ran into a number of legal problems.  In 1993, importation of most of their firearms and ammunition was blocked other than sporting shotguns and shotgun ammo.  In 1994 US Customrs conducted a sting on the importer and in August 2003, sanctions were imposted that effectively blocked their remaining lines of firearms and ammunition not already banned.  In short, Norinco is very much still in business in China and exporting to clients elsewhere – just not in the US.

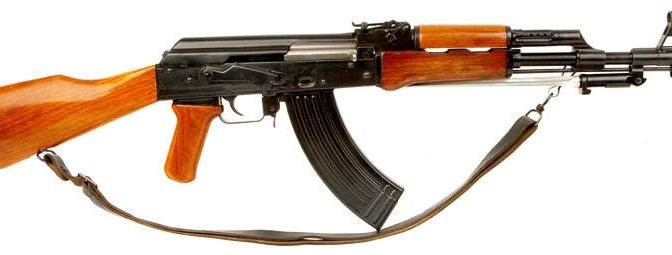
This unfortunate series of events leaves US owners of Norinco firearms such as their Type 56 SKS carbine, Type 56 assault rifle (and specifically the civilian MAK-90 and NHM-90 rifles), the NDM-86 Dragunov clone DMR, their various other rifles, pistols and shotguns wondering where to find parts.  As for myself, I wish I could afford an NDM-86!

There are two reputable businesses I have dealt with who carry Chinese firearm parts – one is Numrich and the other is PolyTechParts.  Of course, there is Gunbroker and the many sellers who use it as well.

There is another surprising source – eBay.  Below is a live feed of Norinco parts for you to peruse plus they have much more:


Just to be clear, I am not a Chinese firearms expert.  I get asked questions and have done some searching to try and help clients but that’s it.  I created this blog post to have a quick link to email people when they have questions about where to find parts and I hope this helps you out.


If you find this post useful, please share the link on Facebook, with your friends, etc. Your support is much appreciated and if you have any feedback, please email me at in**@ro*********.com. Please note that for links to other websites, I may be paid via an affiliate program such as Avantlink, Impact, Amazon and eBay.


Photo of the Type 56 is by Dhalikar – Own work, CC BY-SA 3.0, https://commons.wikimedia.org/w/index.php?curid=25006497

Uzi Part 2 of 7: Stripping the Parts Kit

Now there are parts you need from the kit to do your assembly so let’s step through them.  I would highly recommend that you have a means to organize your parts and not lose them.  Zip-Loc bags, parts tray, etc.

Also, another fellow did a great write up on his disassembly – click here to read it.

1] Remove the handguards – they are held in place by two slotted screws.  I highly recommend you always use gunsmith/hollow ground screw driver bits that fill the whole slot of a screw to avoid tearing the screws up.  These screws are not under much torque and mine very readily came out.  You may want to replace these with new handguards.  Mine were in tough shape due to being bounced around in the parts kit bag.

2] You will need the front sight assembly.  It is comprised of the inner sight itself, a locking nut and a washer underneath.  A real Model A Uzi front sight tool makes a world of difference as you can easily loosen the locking nut and then unscrew the whole assembly.


3] Remove the barrel nut catch assembly.  It is comprised of the catch itself and a spring.  Reach in from the rear under the sight, push the tab down with your finger and pull the assembly out.  You can do this with your fingers.  If you look at the first photo in step one, you can see the catch still in the old receiver stub – it is the L-shaped protrusion over the threads.  You’ll notice the new receiver (which is still in the white in these photos) does not have it.  Now, in the second photo, if you look at the old stub on the right you will see the tab of the catch sticking out – this is what you push down with your finger while pulling out of the front.

4] You will need to salvage the front sling swivel.  I sanded mine down flat, center punched the middle of the rivet, start with a small 1/8″ drill bit and worked my way through larger and larger bits until the swivel separated from the old rivet.  I then used a punch and removed the remnants of the old rivet from the center of the swivel.  By the way, I’ll tap the sling and mount it with a button head screw and Loc-Tite in a later post.  Don’t worry about tracking down a replacement rivet and squishing it unless you really want to.

5] Remove the rear flip sight assembly.  Now, there is a slotted screw on one side and a tiny nut on the other.  Be careful when you loosen the nut as it will come right off.  I used a long punch to push the screw back far enough to then grab the screw and pull it out.

6] The next step removes the top cover catch.  The rear sight spring actually covers the catch assembly so just pry the spring upward and you will see the top catch and the captive spring.  Now be careful – this spring will launch if it slides over the rear lip so carefully remove the top catch itself by sliding it out the front.

7] You will need the barrel nut.  Mine was in a small bag in the parts kit.

8] You need the top cover.  Now I bought a modified one with a picatinny rail attached.  If you use the original cover, there is a small wedge called the “cocking pawl” that you will need to remove.  My cover was lose in the bag so I just set it to the side.

9] You will need the return spring assembly but you will need to cut the buffer plate off at the end of the guide rod.  I just took a pair of diagonal wire cutters, made one snip from the side and it literally came right off the return spring guide rod.  Be careful not to bend the guide rod – you will use this spring assembly with the new bolt.

10] You need two things from the submachine gun open bolt.    Put the bolt on a bench block and push/tap out the extractor retaining pin from the side of the bolt – tap/push on the small side with a punch.  The extractor looks like a screw from the rear end of the bolt but it actually presses right out.  Push from the end with a punch or small screw driver and it will push right out the front of the bolt face.  Note, the slot is so you can use a screw driver to rotate the extractor into proper position when you install it.

11] In my parts kit, the entire grip frame assembly was in the bag.  Now there are some critical changes that must be made to it but for now, set it to the side.  The grip panels were chewed up so I bought a new set of those along with handguard panels.

12] You need the complete wood buttstock assembly with the entire wood stock mounting bracket system and all the hardware on the stock.

That’s it for now.  The next blog post will get into the details of how to refinish the wood stock plus permanently attach it.


If you find this post useful, please share the link on Facebook, with your friends, etc. Your support is much appreciated and if you have any feedback, please email me at in**@ro*********.com. Please note that for links to other websites, I may be paid via an affiliate program such as Avantlink, Impact, Amazon and eBay.