Tag Archives: M70

Check Out John’s O-PAP With Our Bulged Handguard

John’s Zastava O-PAP looks good with our Bulged M70 handguard set.

Ronin's polymer handle being cut with a plastic knife on foil

Click here to open a new tab for our webstore page with the Bulged M70 handguard set.


Please share the link on Facebook, Forums, with colleagues, etc. Your support is much appreciated and if you have any feedback, please email us in**@*********ps.com. If you’d like to request a report or order a reprint, please click here for the corresponding page to open in new tab.


Zastava PAP M70 and Military M70 Buttstocks and Recoil Pads No Longer Match

Hello everyone,

We make a recoil pad for the military Yugo M70, M72 and M76 rifles [click here for the listing]. The original was rubber over a steel pad and was often very beat up when guys bought kits or rifles made from kits.  So, I hunted down pristine original recoil pads and made molds to cast rubber replacements.

Zastava PAP M70 and M70 rifle buttstock recoil pads

Here are the approximate measures for the stock this pad fits on:

  • Screwhole centers are about 3.25″ apart
  • From top inside lip of butt of the stock to bottom inside lip is: 4.20″
  • Top to bottom of the butt outside or overall height is 4.48″
  • Left to right inside lip edge of the butt at the widest point s 1.29″
  • Outside edge left to right at the widest point is 1.63″
  • The lip that the recoil pad sits on all the way around is about 0.17″

Starting in mid-2017 we started getting word from our customers that our military-sized pads were not fitting the new commercial PAP M70 rifles being imported into the US.  It would appear that Zastava has changed the buttstock — presumably to cut cost.  It is smaller and the telltale for consumers is that it has a solid steel stamped butt plate.  The following photo is of an original Yugo M70 military-style recoil pad next to the new commercial PAP steel butt plate:

Two Zastava M70 buttstock recoil pads: one ribbed, one smoothTwo black rifle recoil pads, one worn and one new, for Zastava PAP M70

This next photo just shows an edge view – the white box is just propping them up:

Accessories box next to a Zastava M70 buttstock

Bottom line is that the stocks are different and our recoil pad will not fit the PAP M70.  I’m hoping to get the word out to reduce confusion.

Please note that at this time, I do not have plans to make a commercial PAP-sized recoil pad as there has not been sufficient demand thus far.


Please share the link on Facebook, Forums, with colleagues, etc. Your support is much appreciated and if you have any feedback, please email us in**@*********ps.com. If you’d like to request a report or order a reprint, please click here for the corresponding page to open in new tab.


Video: Zastava Arms 160 Years Marketing Video, 2015

CRKT HalfAChance machete cutting through a tree branch

I like Zastava firearms – notably their rifles – M70, M72, M67, M77, and M92.  I’ve owned variants of all of those at one time or another and think highly of the designs and the quality of manufacturing.  I ran across this short 160 year commemorative video released in 2015 and thought I would share it:


Please share the link on Facebook, Forums, with colleagues, etc. Your support is much appreciated and if you have any feedback, please email us in**@*********ps.com. If you’d like to request a report or order a reprint, please click here for the corresponding page to open in new tab.


Check Out Derreck’s M70B1 with our Bulged Handguards

Here’s Derreck’s M70B1 with the wood furniture:

M70B1 rifle with bulged handguards on a workbench

and here it is with our handguard and a Magpul Zhukov-S stock:

M70B1 rifle with black bulged handguards installed Derreck's M70B1 rifle with Bulged Handguards displayed on white background 

M70B1 rifle with bulged handguards on a workbench


Please share the link on Facebook, Forums, with colleagues, etc. Your support is much appreciated and if you have any feedback, please email us in**@*********ps.com. If you’d like to request a report or order a reprint, please click here for the corresponding page to open in new tab.


Converting a Milled M70 Front End for a Sheet Metal Receiver Using Screws

Let me open this article with a comment for people new to building AKs – the best proven method is to use rivets.  The Soviets did a lot of testing and the best mechanical join of the forged trunnions to sheet metal was a mechanical rivet.  To this day, all commercial and military AKs are built using rivets.  In my journeys, I have built AKs using welds, screws and rivets – all have pros and cons.  What would I build an AK with that I care about?  The answer is easy – rivets.  This blog post documents my building a prototype using screws.  Has it held up to casual non-military non-full-auto use?  Yes.  What would I recommend to you to build your AK?  The answer is rivets.


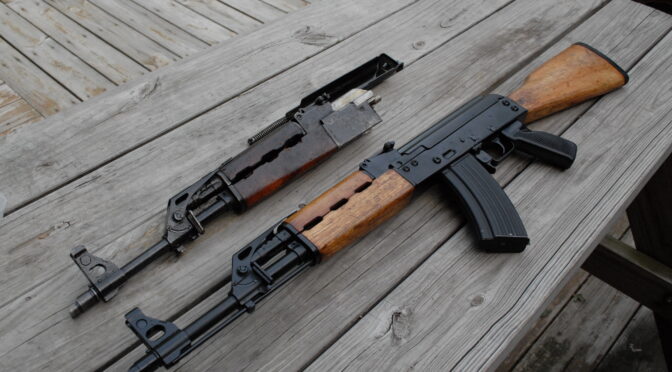
In a previous post I described taking a milled stub and welding it to a sheet metal receiver.  Another approach is to drill, tape and use alloy screws.  So, let’s talk about that a bit.  I did this build back in 2010 also.  I actually still have the rifle and it’s one of my most reliable AKs.  It takes about any ammo I stuff in it and I don’t recall ever having any issues.

For those of you who are wondering why I didn’t do rivets – I was bored and wanted to try something different plus this is a range gun and not something mission critical.  Here we are 7 years later and it’s still doing fine – no cracks, no loose screws … but it isn’t stressed either.  When in doubt, do rivets or a milled gun.

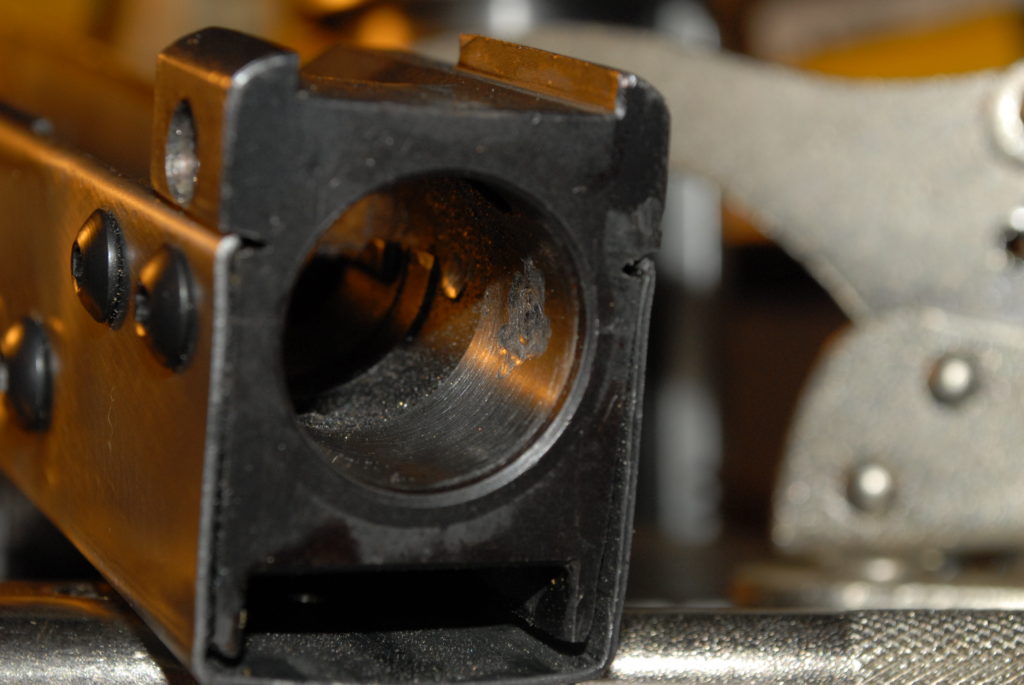
Also, bear in mind that the front trunnion was made from the milled receiver stub so screws made it real easy.

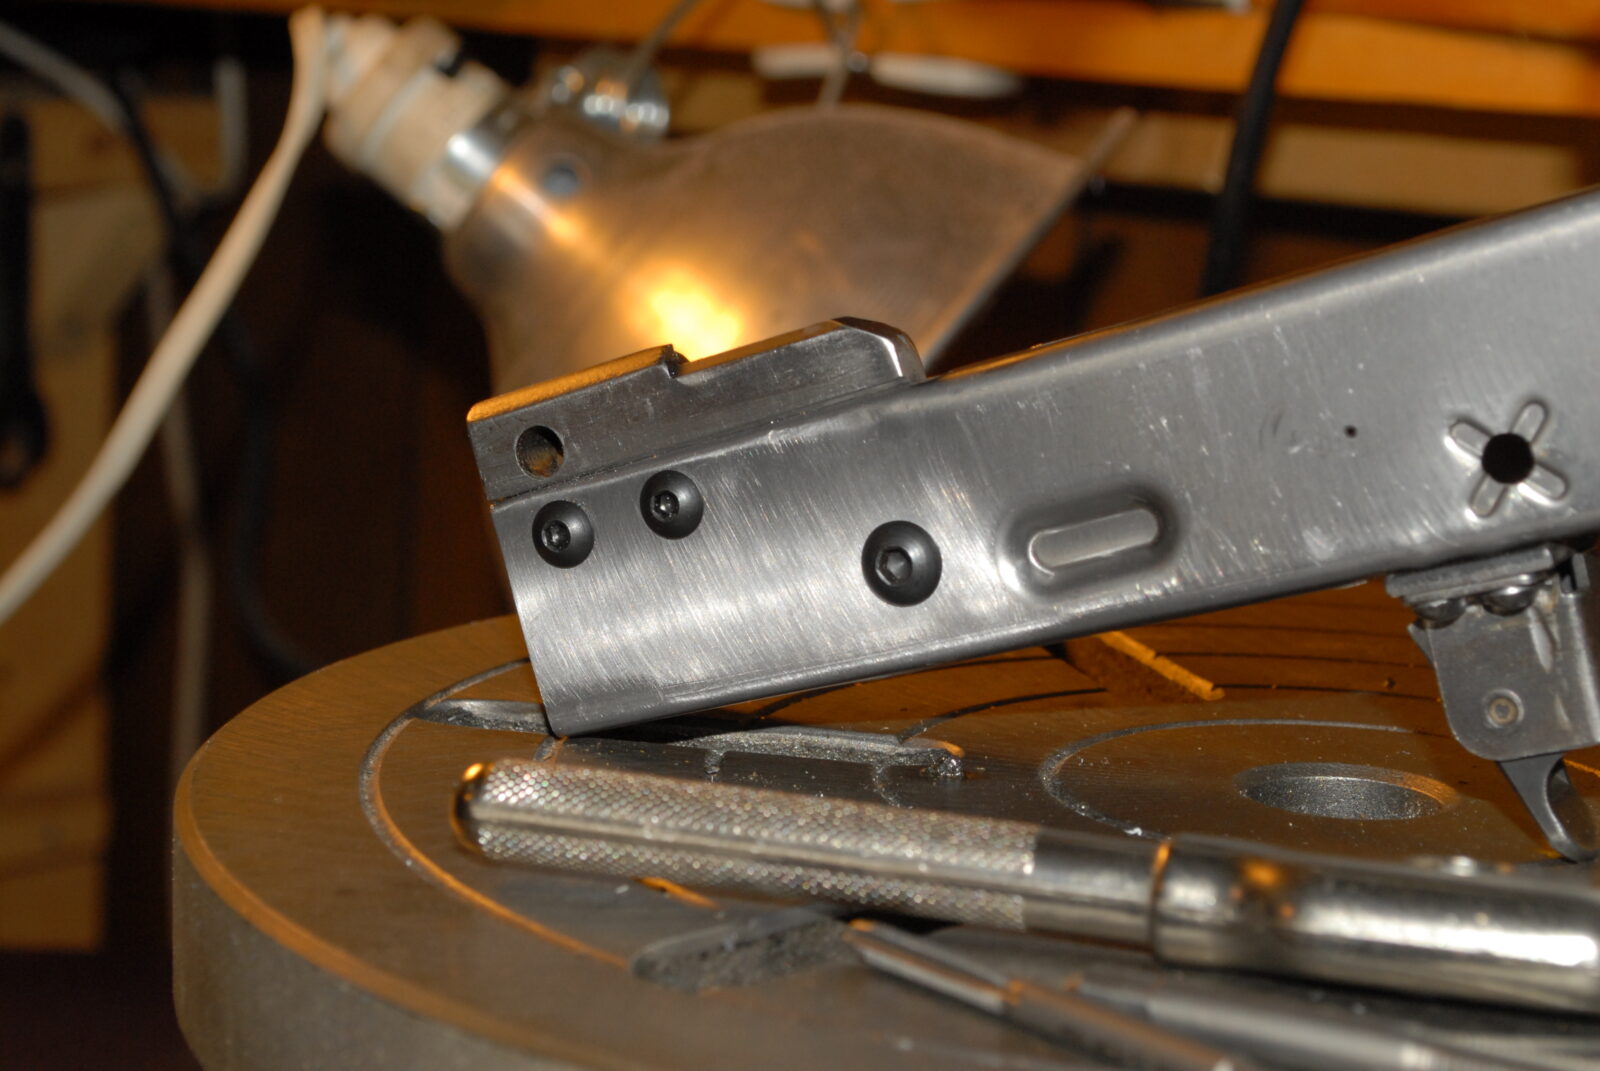
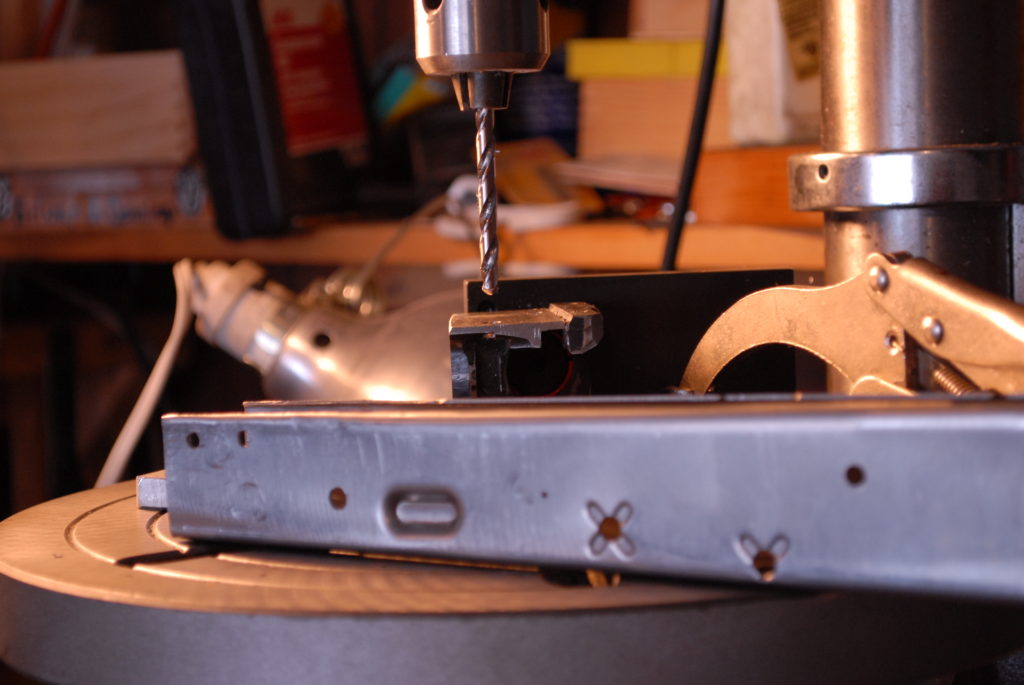
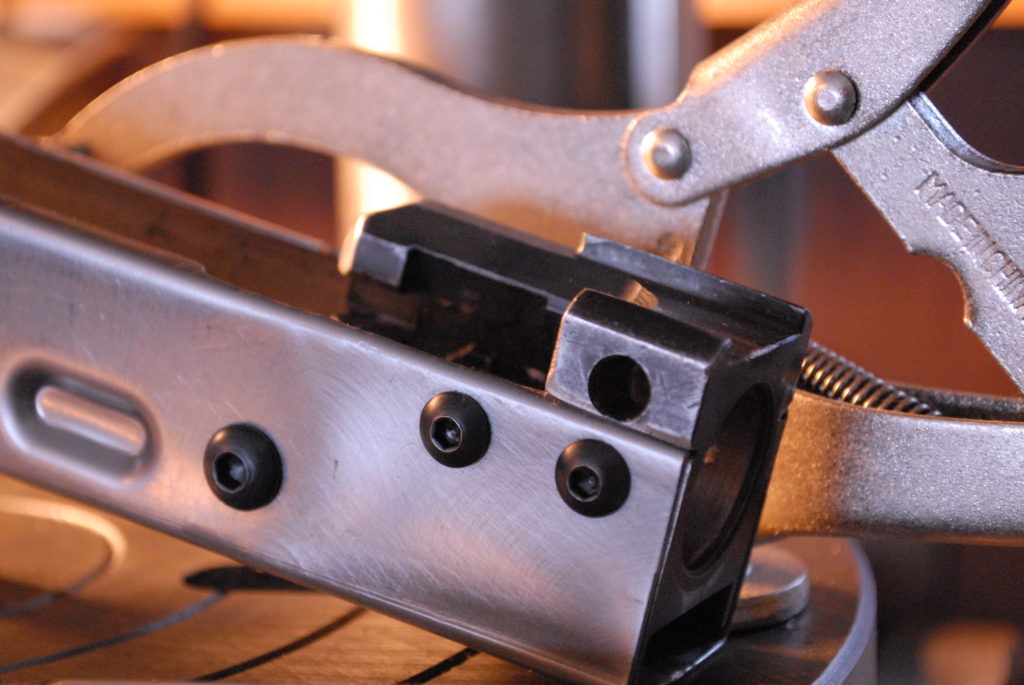
In terms of this build, I milled the trunnion down the same as I did for the weld build.   I used my Hungarian AMD trunnion as an approximate guide for locating the holes and used two #10 screws for the front top and a 1/4″ for the rear.  In both cases, I opted for national fine.  10-32 and 1/4-28.  So, for 10-32, I used a #21 drill bit to make the hole  and for the 1/4-28, I used a #3.

Drilling Milled M70 front end for sheet metal receiver conversion

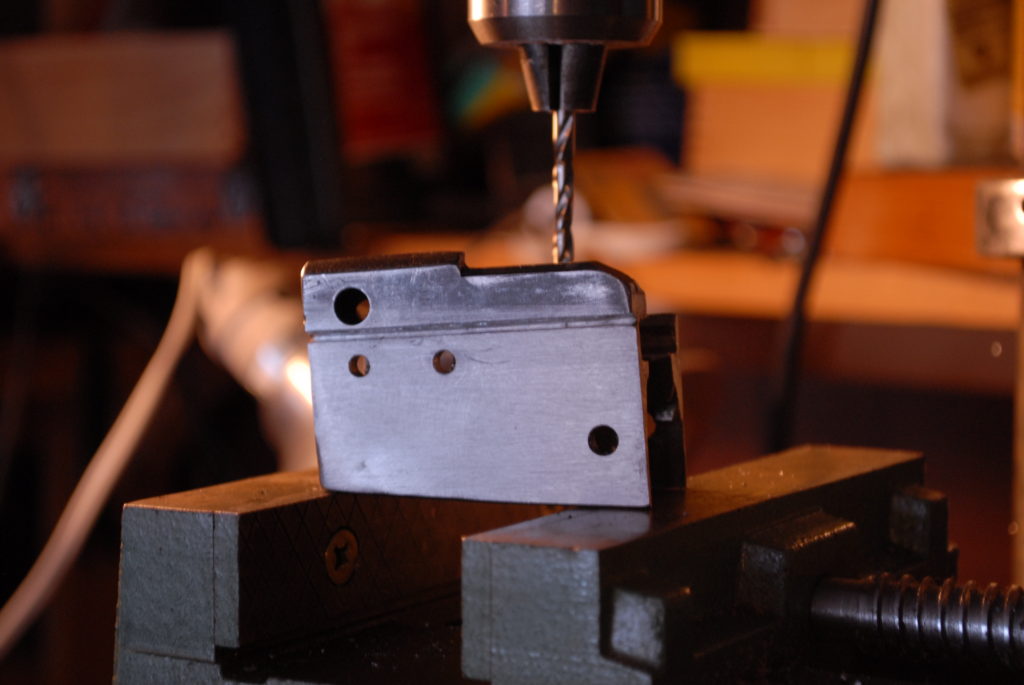
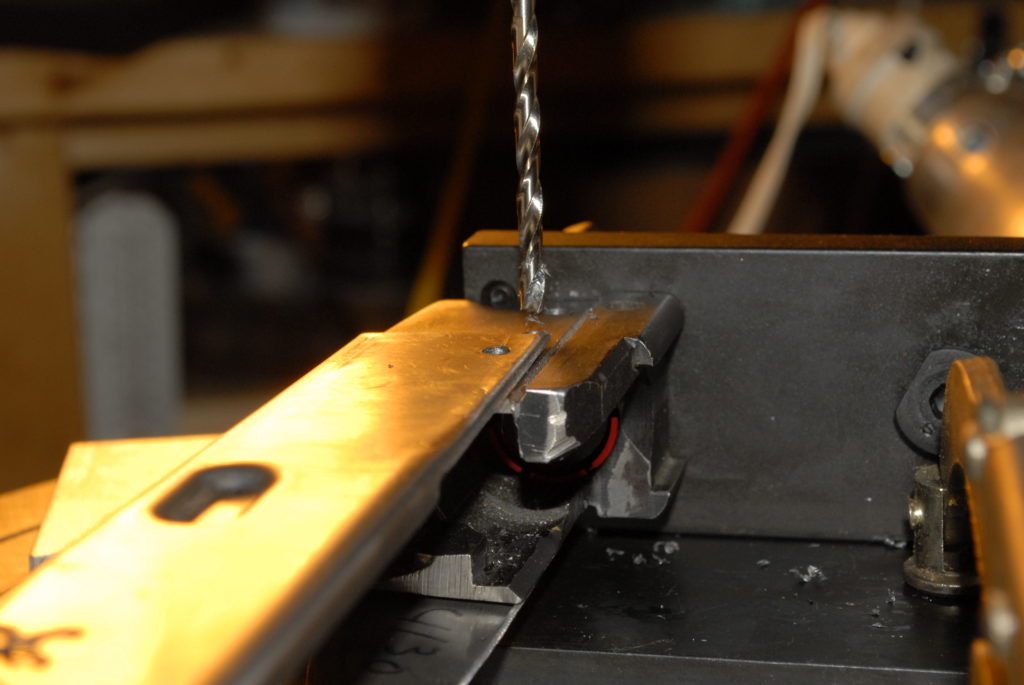
For drill locating and drilling the receiver holes, I used the AK-Builder trunnion rivet locating jig.  You just put the trunnion on the jig, locate the hole, slide the receiver on and drill the hole.

Drill bit precisely piercing a milled M70 front end for sheet metal receiver conversion.

Drill bit creating screw holes in milled M70 front end for sheet metal receiver conversion.

Drill press creating screw holes for M70 sheet metal receiver conversion

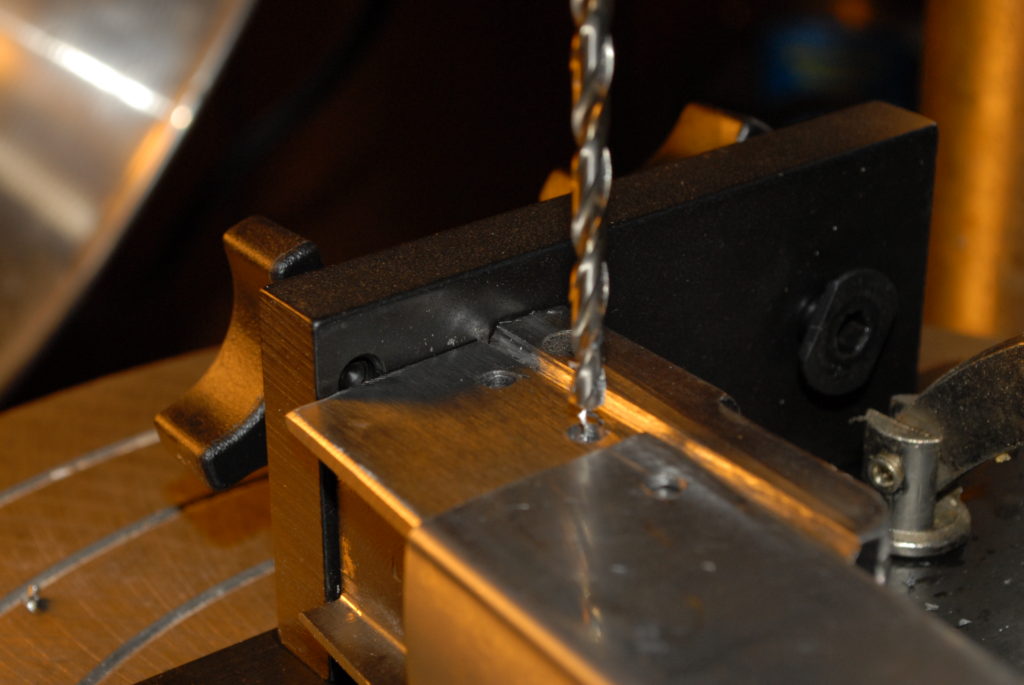
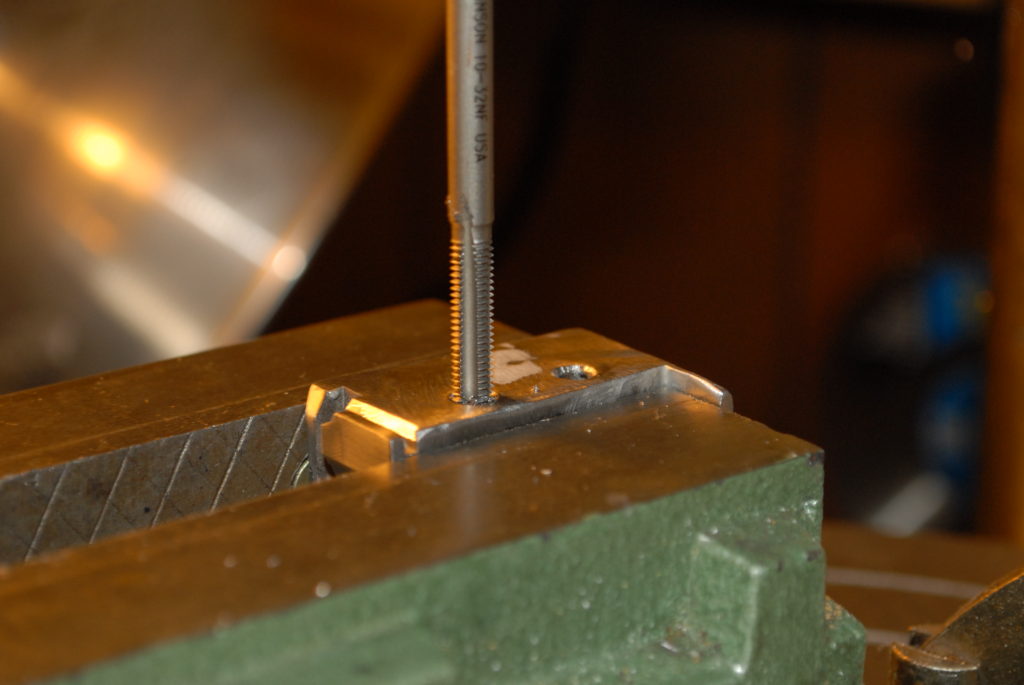
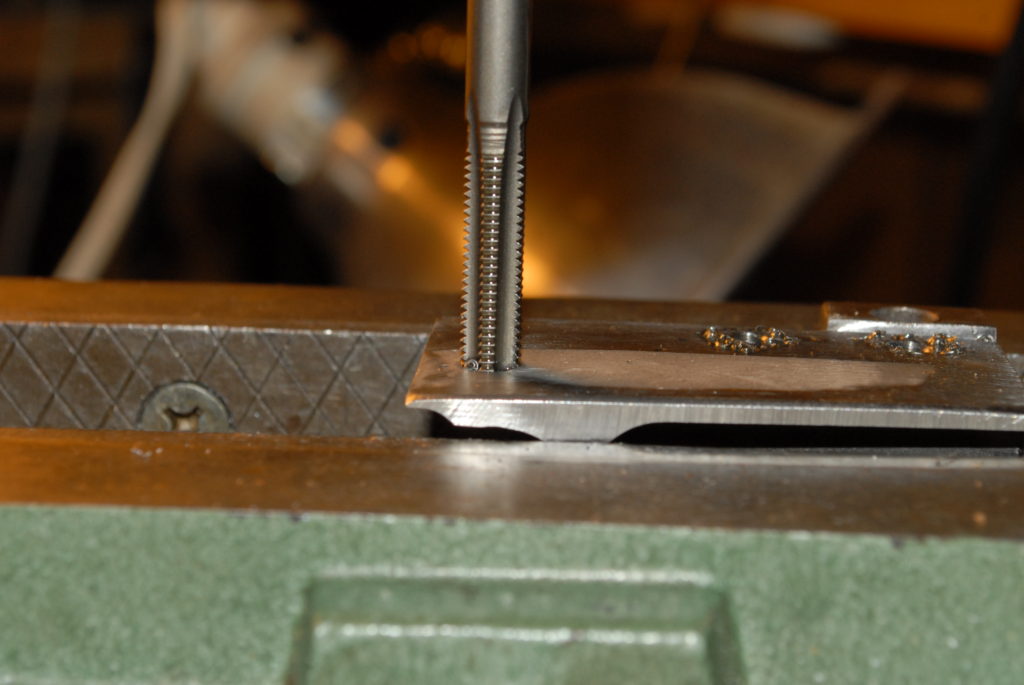
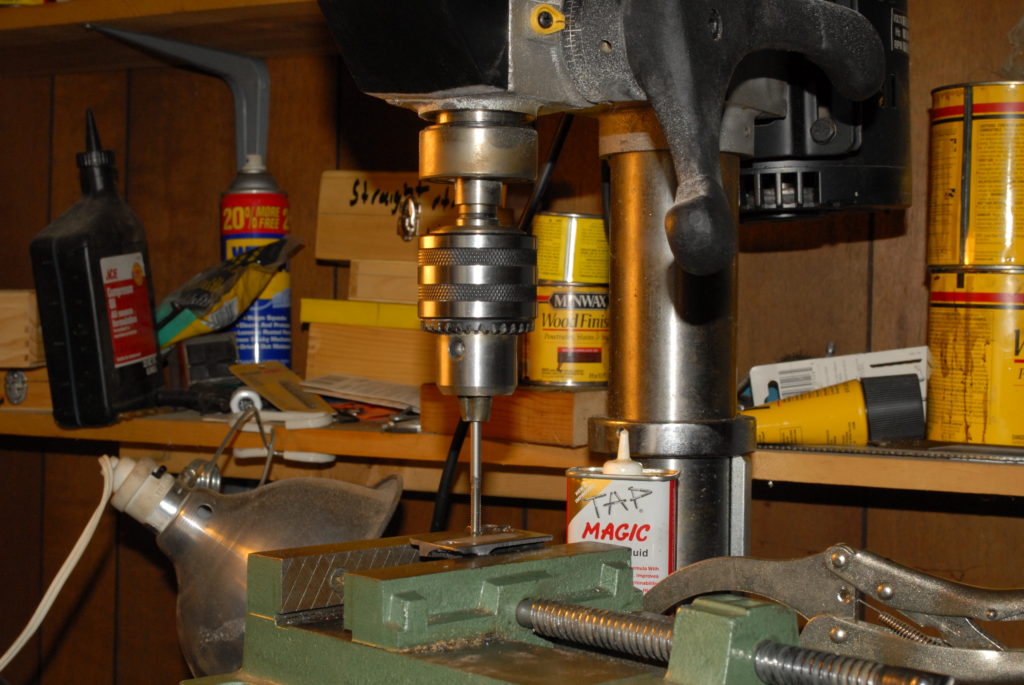
Now for tapping, being square is a good idea.  I squared my table to the drill press’s chuck and used it to hold the tap.  I use Tap Magic cutting fluid to lubricate everything.

Tap threading a hole in a milled M70 front end for sheet metal receiver conversion.

Tap threading a sheet metal receiver for a milled M70 front end conversion.

Drill press with vise and sheet metal receiver for M70 front end conversion

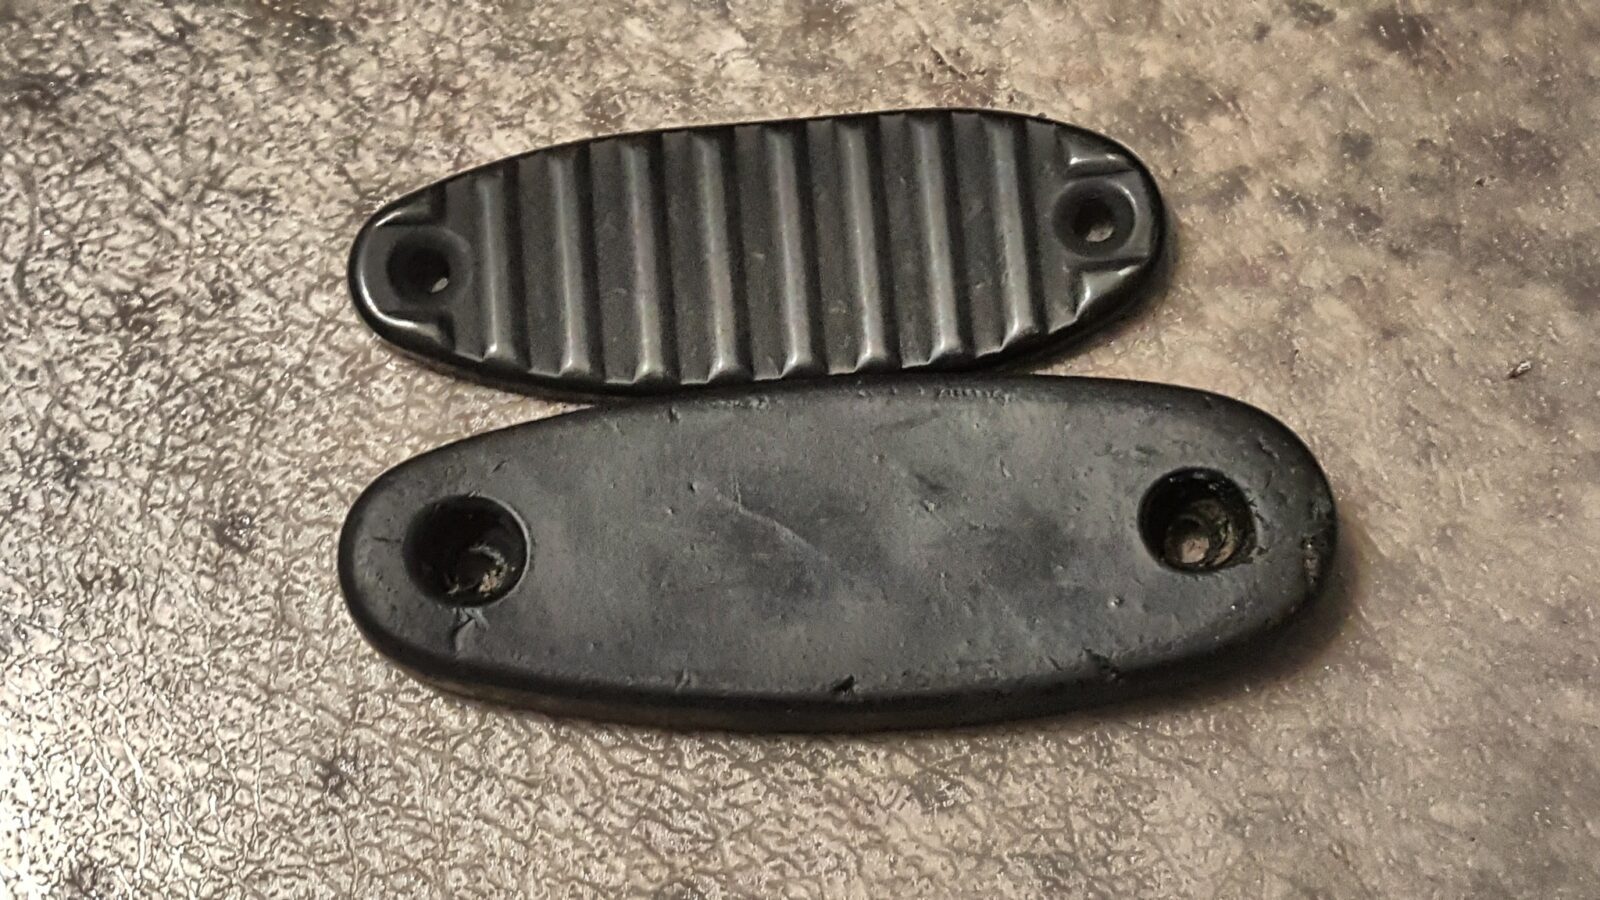
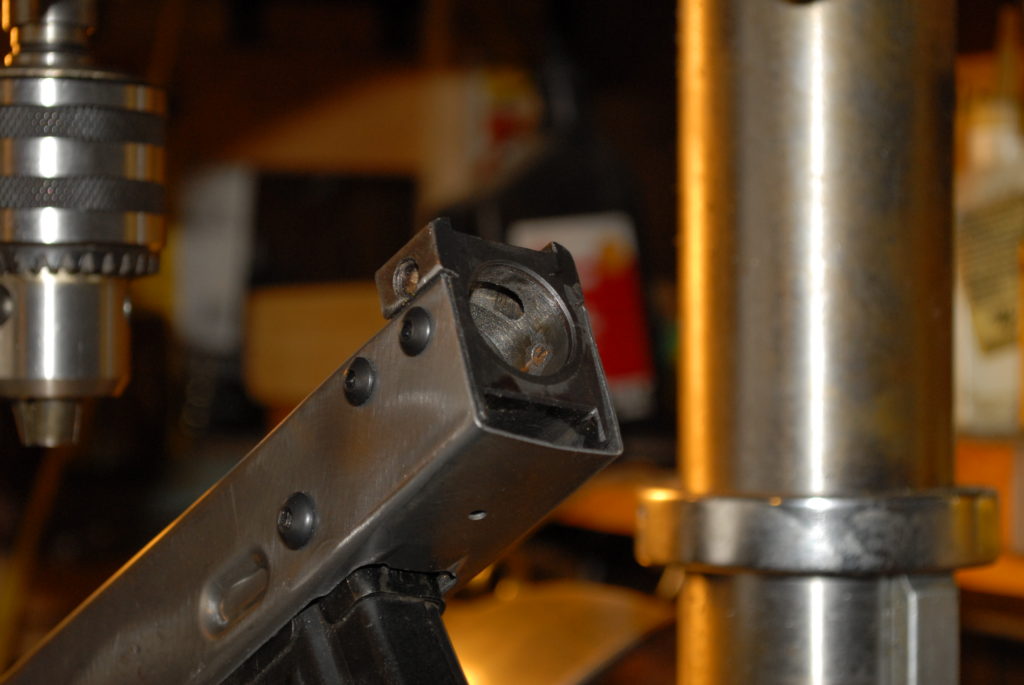
For the screws, I used alloy button heads and secured them with red thread locker.  I reached in with a Dremel and ground down protruding screws.

Milled M70 front end conversion for sheet metal receiver with screws

Milled M70 front end with sheet metal receiver using screws

Milled M70 front end conversion for sheet metal receiver using screws

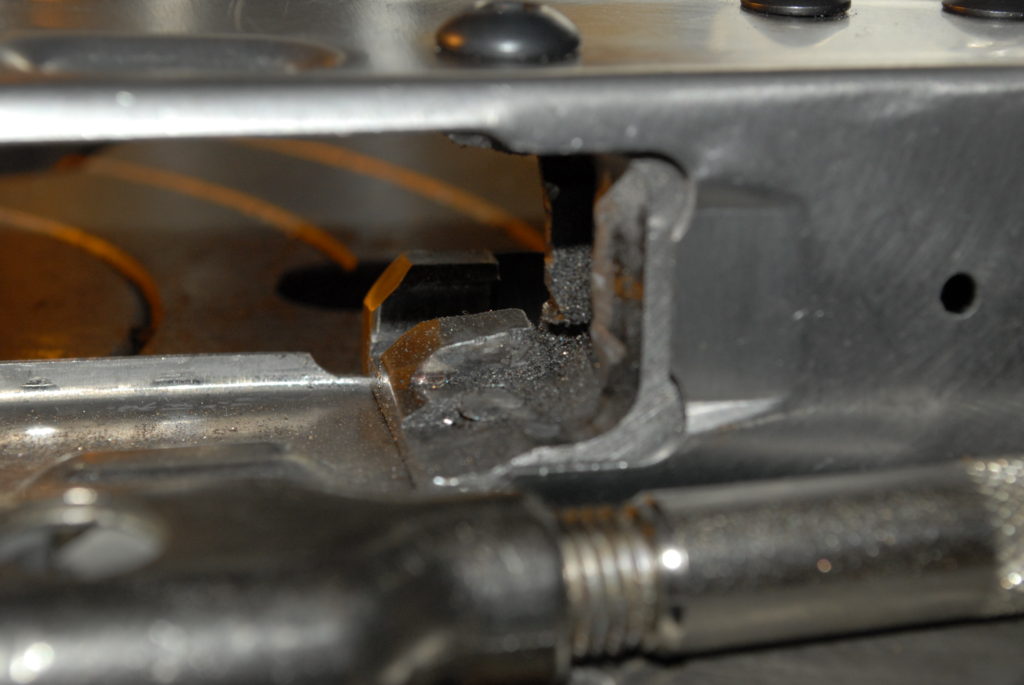
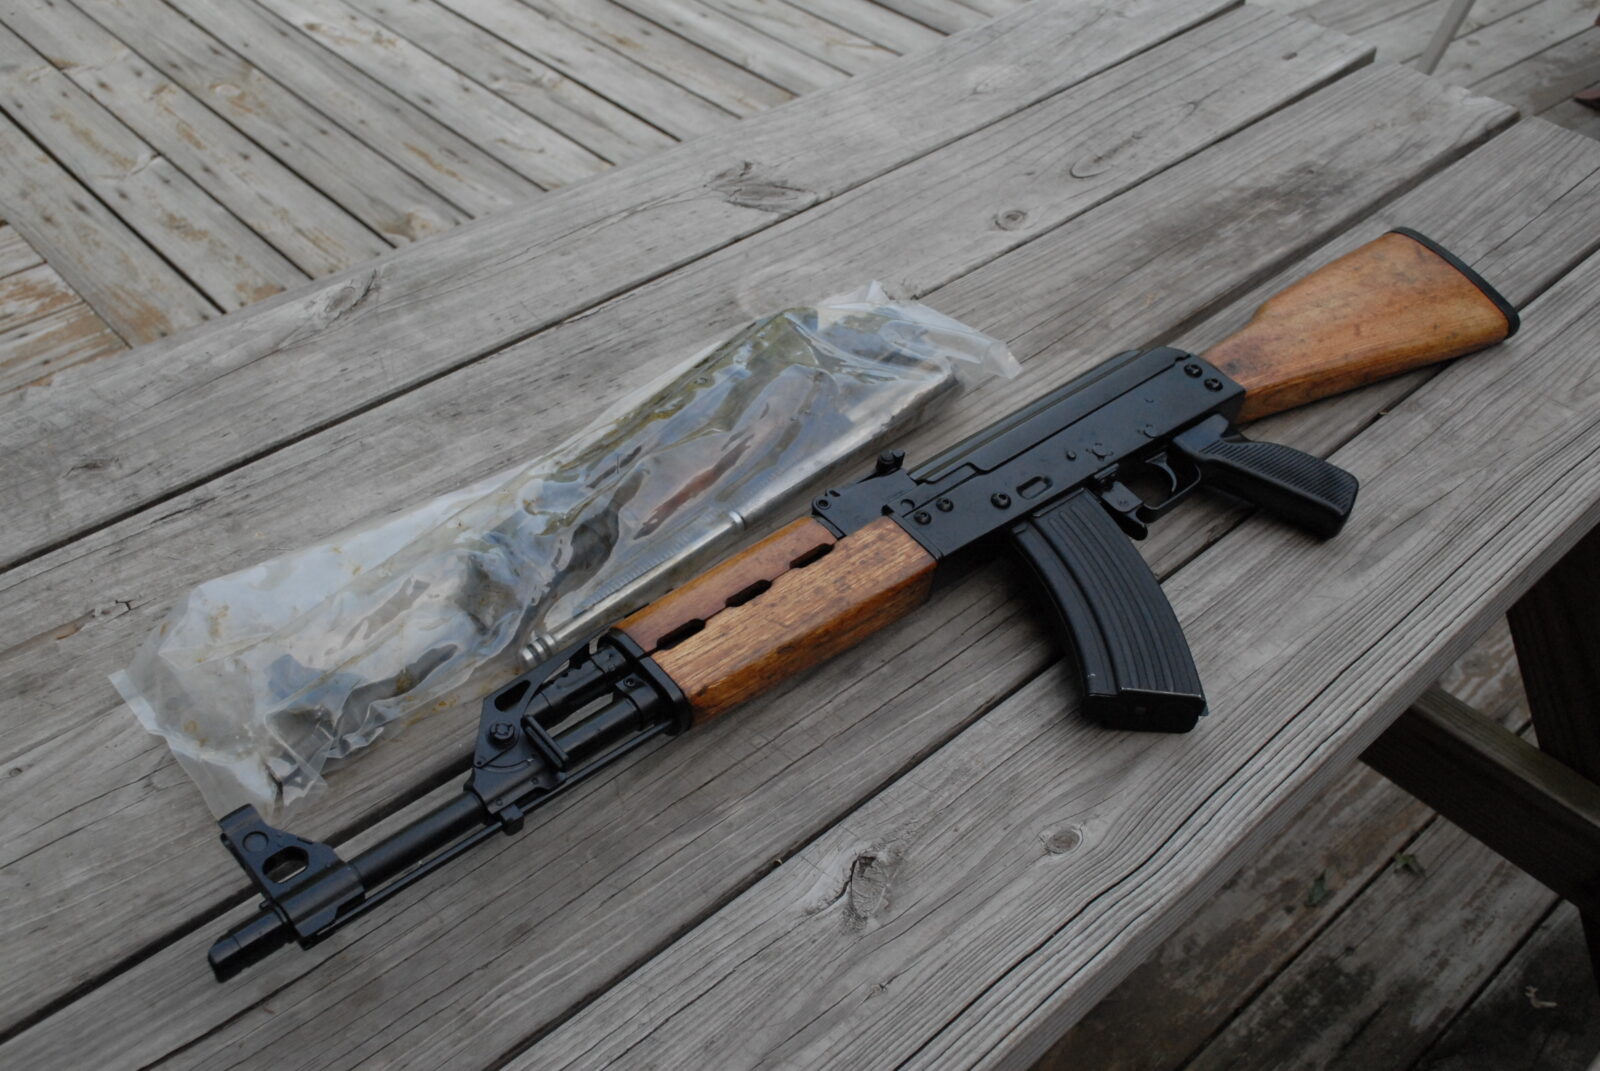
So there’s the front.  I used an air riveter to do the trigger guard.
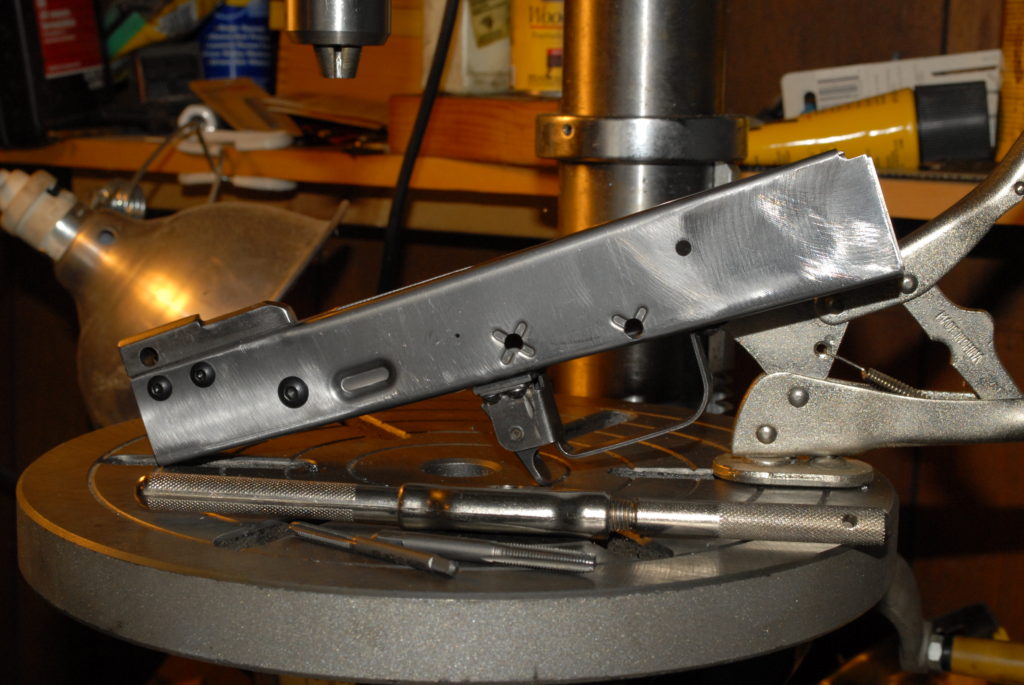
Sheet metal receiver front end conversion with screws and tools on drill press

Milled M70 front end conversion with screws on sheet metal receiver

Milled M70 front end conversion with screws and vise grip

End Result

Milled M70 front end parts for sheet metal receiver conversion

Here’s a link to the AK-Builder Trunnion Hole Jig.


Please share the link on Facebook, Forums, with colleagues, etc. Your support is much appreciated and if you have any feedback, please email us in**@*********ps.com. If you’d like to request a report or order a reprint, please click here for the corresponding page to open in new tab.


Joseph Put One Of Our M70 Grips On His OPAP

Joseph’s OPAP definitely looks much better with our grip that has the correct shape!

Black M70 grip on Joseph's AK47 rifle on wooden surface

Our grip is online at:  http://shop.roninsgrips.com/Yugoslavian-M70-M72-M85-M92-Grip-Yugo-M70-M72-M92.htm


Please share the link on Facebook, Forums, with colleagues, etc. Your support is much appreciated and if you have any feedback, please email us in**@*********ps.com. If you’d like to request a report or order a reprint, please click here for the corresponding page to open in new tab.


Stephen’s M70 – Check Out the Wood!!

You have to love the traditional lines of a Zastava M70B1.  Stephen did something neat with his – notice the M76 buttstock and great looking wood.  I think it’s fantastic.  We’re honored he picked one of our M70 grips to go on his rifle!

Stephen's M70 rifle with attractive wooden furniture

If you are interested, our grip is online at:  http://shop.roninsgrips.com/Yugoslavian-M70-M72-M85-M92-Grip-Yugo-M70-M72-M92.htm


Please share the link on Facebook, Forums, with colleagues, etc. Your support is much appreciated and if you have any feedback, please email us in**@*********ps.com. If you’d like to request a report or order a reprint, please click here for the corresponding page to open in new tab.


What is a Ferrule on Yugo and AK Rifles?

A ferrule is a metal end cap found on some wood grips and handguards to protect the end grain of the wood from being hammered and splitting open.  They were used on different country’s weapons and are usually not interchangeable between countries.  For example, Bulgarian and Yugo ferrules are different.

Near and dear to me are the metal ferrules on Yugoslav / Zastava wood lower handguards.  The following photo shows a M92 lower and the black metal cap is the ferrule.  This ferrule does not fit everything Yugo – just the M70, M85/92, and M77.  The M72 and M76 are unique sizes.

Ronin's M92 handguard wood with damaged mounting bracket

You have three options when you need a ferrule:  1) Find a used one and this is real hard – try posting in the Marketplace of http://www.akfiles.com and see if they have one.  2) Buy a replica ferrule from us or 3) Simply pry the old ferrule off, put it on the new handguard and the squeeze the tabs shut again with a pair of pliers.

Close-up of a tool removing wood from a M92 handguard for Ronin's Grips installation.
Black plastic clip for Ronin's Grips M92 handguard installation

Note if you are putting it on one of our plastic handguards either just set it on it with the ears closed or glue it in place.  Absolutely do not try to squeeze the ears shut — the little metal divots will not dig into our plastic and you risk snapping the handguard tabs.  Again, either slide it on or glue it in place with something like rubber glue or Goop that you can later remove if you want.  Epoxy works too but it is pretty permanent.

For example, I just slid the ferrule on the M70 bulged handguard in the next photo.

LiteXpress X-Tactical 101 flashlight with rotary selector and green LED indicator

We manufacture ferrules that fit the Yugo/Zastava M70, M77, M85 and M92 lower handguards. Note, they are specific to those models and will not fit other nationalities or models.

Click here to visit our store with the ferrules for sale.


Please share the link on Facebook, Forums, with colleagues, etc. Your support is much appreciated and if you have any feedback, please email us in**@*********ps.com. If you’d like to request a report or order a reprint, please click here for the corresponding page to open in new tab.