Tag Archives: Galil

My First IMI Galil Kind Of – First Impressions of My New James River Arms Gallant

I have wanted to build an IMI Galil from a kit for years and just never got around to it.  One thing that kept me from jumping in was that I had never really dug into the design deeply by taking one apart and looking at everything.

In 2006, like a lot of guys, I read the late Steve Matthews great article in Firearm News about building your own AK rifle or pistol.  For whatever reason, the AK building bug bit me hard and I wound up with a number of barreled Romy-G kits along with flats, rivets and tools from AK-Builder.

I read everything I could and guys kept telling me you “just gotta dig in, do it and learn”. Well sir, I did. I trashed my first flat or two – I think I messed up the bend on one and the other I ruined the top rails as I didn’t cut them right. Yes, back in those days we had to put Dykem Blue on the top rails and scribe a line to cut to using a layout jig AK-Builder eventually came out with.  I messed up a lot and I learned a lot. 

A fair amount of the mistakes were caused because I had never really studied AKs prior to trying to build my first one. Over the years I have learned a ton more but one lesson sure has stuck with me – it’s way easier to build something if you have first had experience with the design including disassembly.

Fast Forward To December 2020

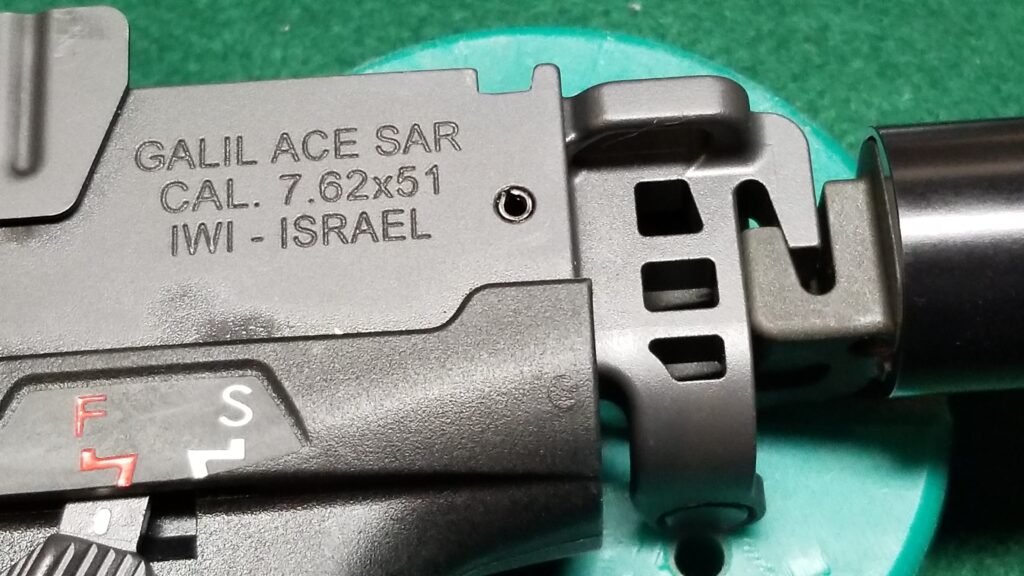
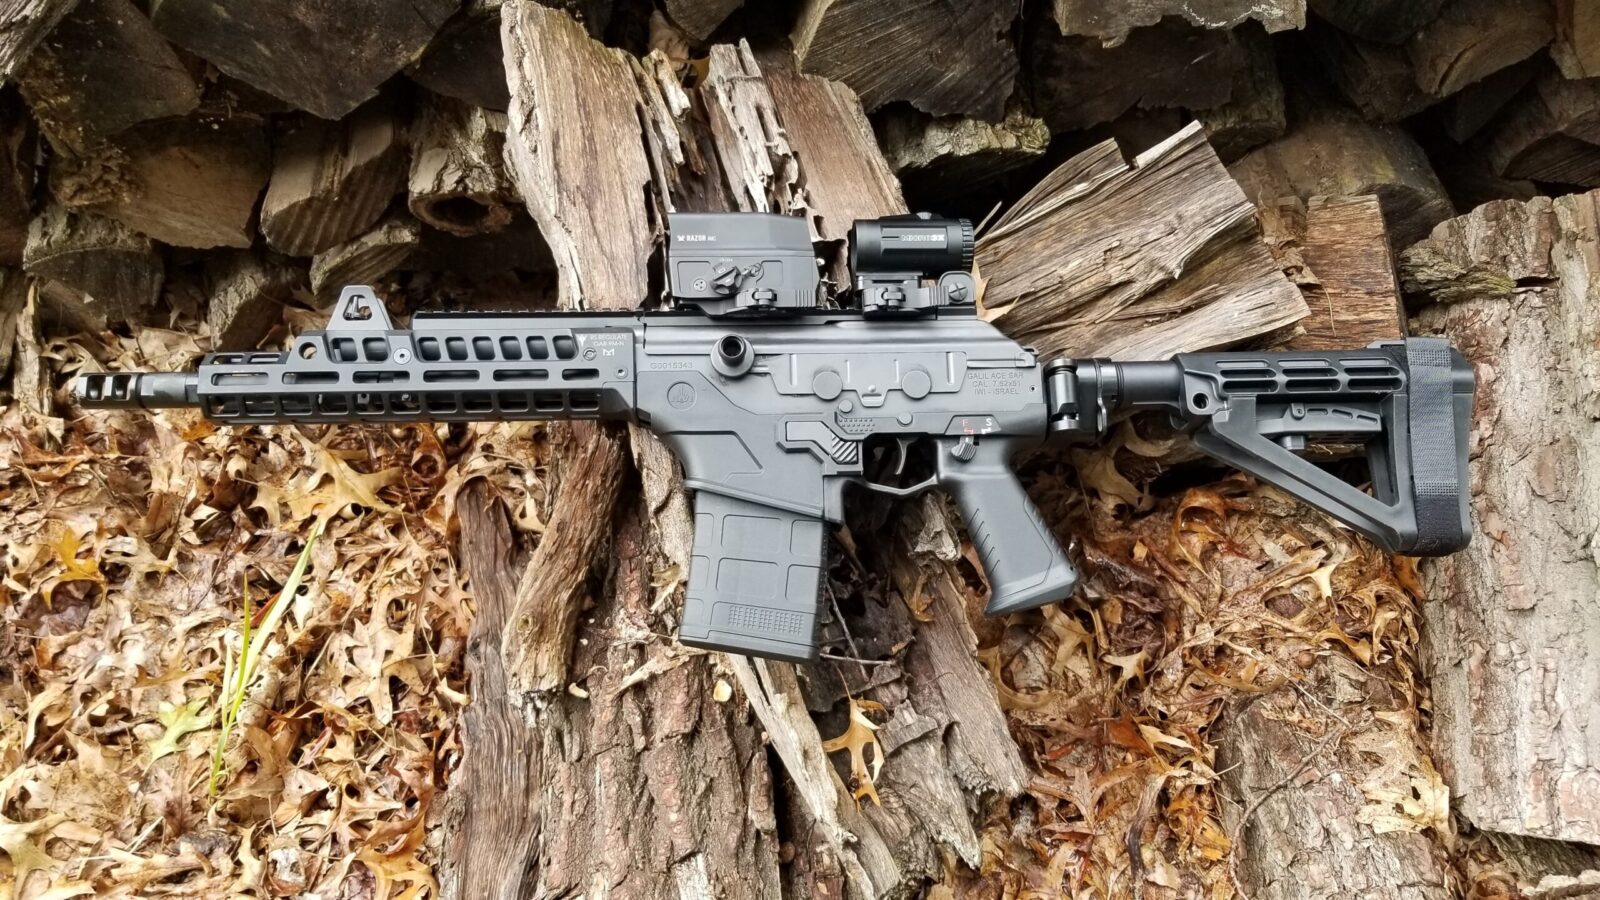
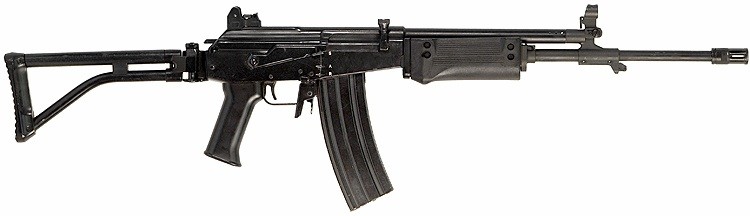
Everyone was in a panic buying everything firearm oriented in sight and I was trying to figure out whether to make the slightly sideways leap from AK designs that I knew to a Galil that was based on the Finnish RK.62 and had a screw in barrel (not pressed and had to be headspaced, the extractor cut and barrel populated later), some wierd looking thumb selector (no idea what that linkage was going to look like) plus I was sure I would run into other little unque surprises.

So I took a rather odd gamble.  Other than custom shops, like the amazing Jeff Miller at Hillbilly Arms, there are two shops cranking out IMI Galil clones using original Galil ARM and AR kits married to new US barrels and receivers.  ATI and their Galeio and James River Armory (JRA) and their Gallant, which uses Galil ARM kits.  Note, they are using new receivers and appear to have corrected issues they had with their earlier 2019-ish models.

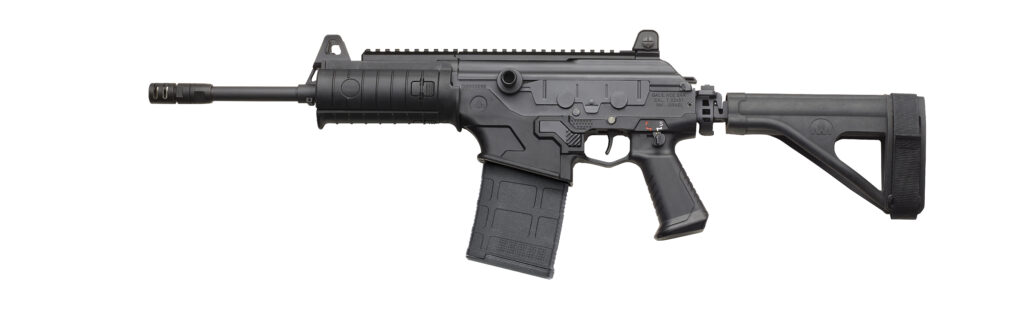
The JRA seemed to get good reviews and was affordable around $1,000.  Now, a receiver will run you $400-500 once you include S&H plus your FFL’s transfer fee.  A barrel will run you $99-199 depending on what you get and then you will spend another $300-400 for a kit.  All of a sudden, looking at that JRA rifle as a parts kit became really attractive plus they use an 18″ 1:9 twist that can stabilize up to 62 grain M855 “green tip” bullets – actually it can go up to 72 in theory but I wanted to be able to shoot M855.  The original Galil’s had 1:12 twists that could stabilize the older M193 55 grain rounds but not M855 – when you see targets where guys fired M855 rounds through a 1:12 Galil barrel, the bullets often “keyhole” or hit sideways.  So, the 1:9 twist rate really appealed to me.

Apparently JRA has an exclusive distribution agreement with Classic Firearms. It’s interesting really – Classic has a number of Gallant models and their description is actually quite thorough in hindsight – Classic was sold out but I turned on notify for the Gallant models I was interested in and maybe 2-3 weeks later I got a notice that one was back in stock so I jumped and ordered one – this is the link for the one I bought.

I wish I could say it went smooth but FedEx’s Ground Service (the old RPS group they bought years ago) threw a big monkey wrench in things. Classic shipped promptly but FedEx Ground’s South Bend office has been having huge problems due to lack of staff.  It took maybe 2-3 weeks from when they got it until they actually delivered it to my FFL.

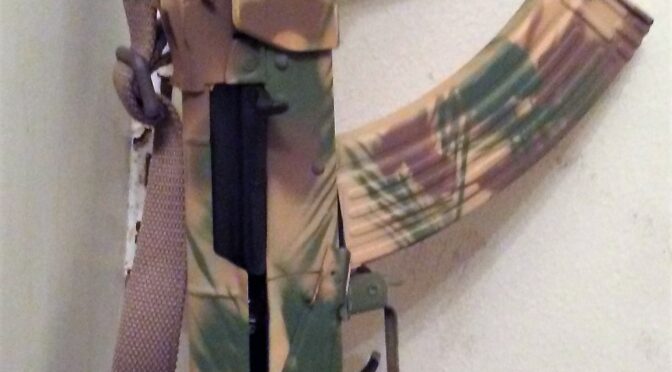
Scott Igert, the owner of Michigan Gun Exchange is a good friend of mine and I use him for all of my FFL needs plus he has the best gun store in Southwest Michigan in my honest opinion. At any rate, Scott sent me a photo of an AK and told me my Galil was in. Leave it to Scott to pull a prank and I knew full well he knew what a Galil looked like so he didn’t get me as good this time … unlike other times 🙂 That’s what friends are for.

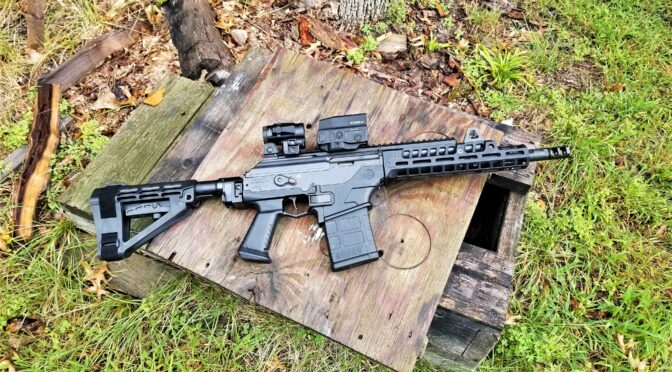
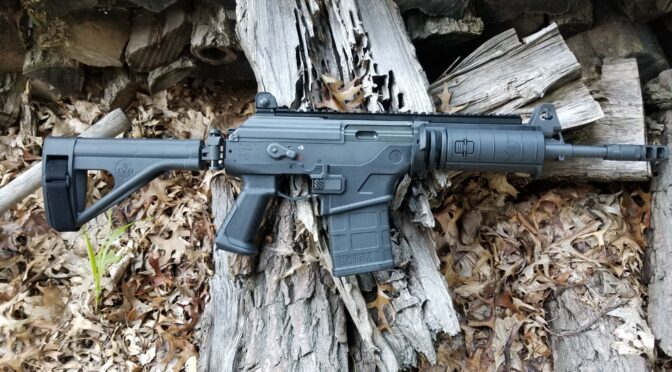
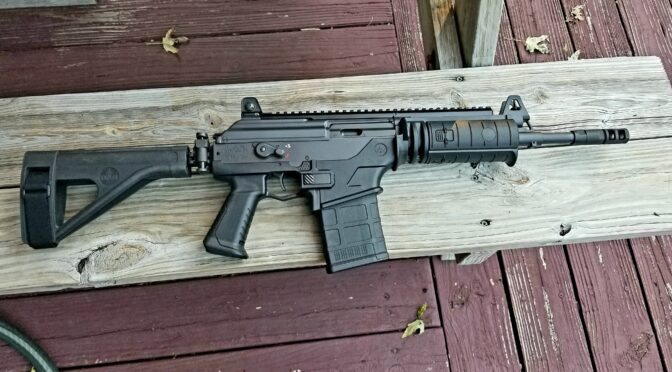
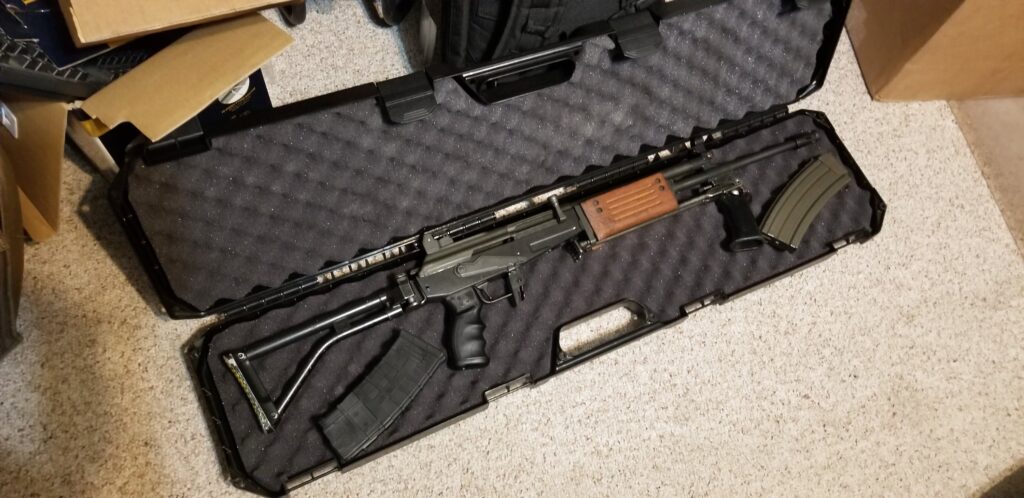
At any rate, I went and snagged the Gallant, took it home and promptly took it apart.  I didn’t really care about the warranty because short of some huge problem with the receiver or a bent barrel, it wasn’t going back.

The Gallant ships in a hard case to protect the rifle. I snapped this photo literally when I got home and opened the case to take a serious look at the rifle.

So let me itemize my observations

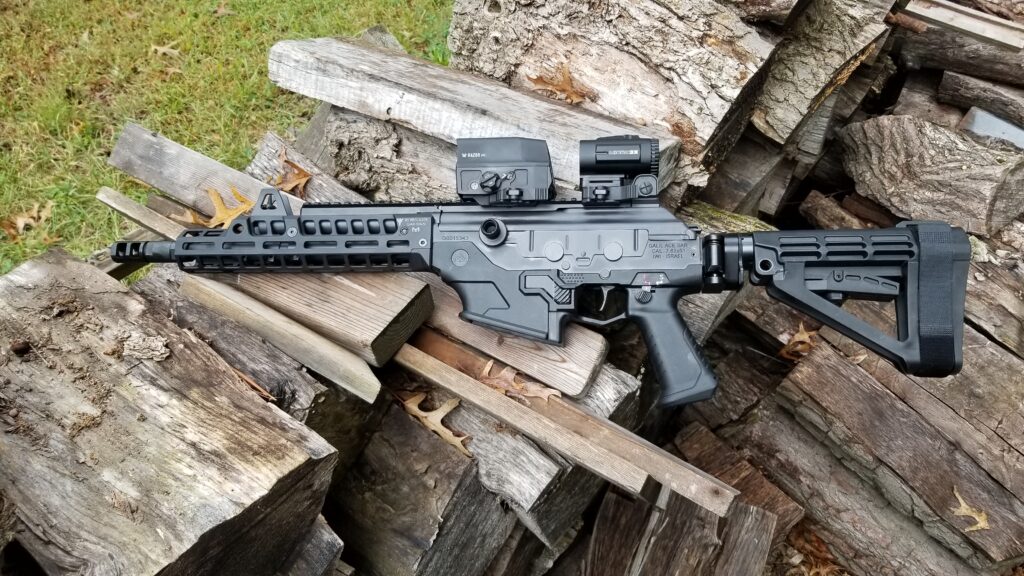
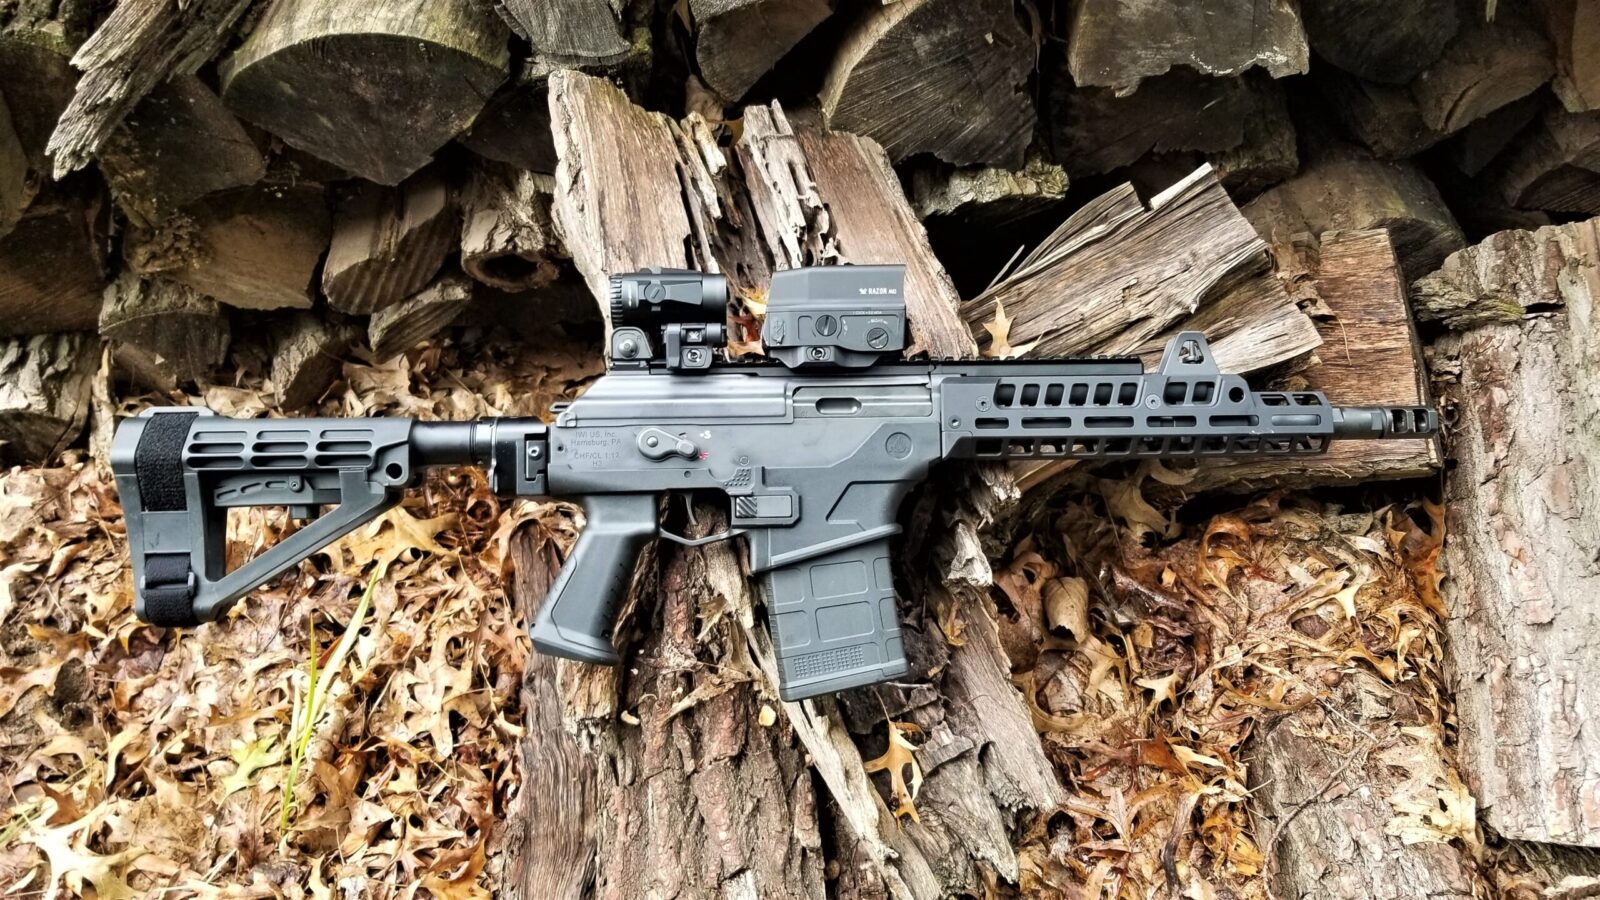
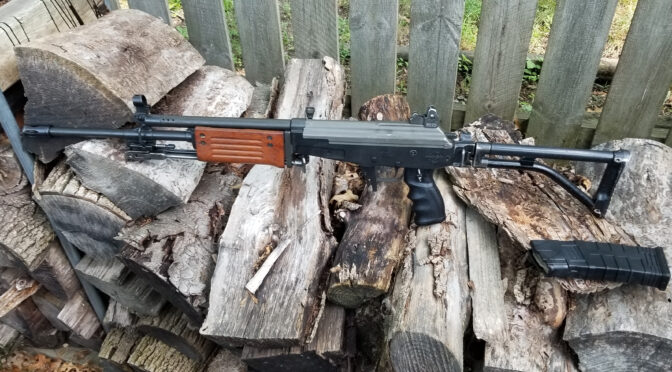
They tell you right up front it is supposed to look battle worn. The skeptic in me thinks it was a way to cut costs but another side of me likes the look – the receiver and barrel are black, parts with the original finish have the grey/green parkerized finish on them and the wood has a look that only a ton of grease oil and God knows what can achieve.  I actually found myself liking it.

I’ve not done the battle worn look before and like it. I originally thought I would refinish the rifle but am now leaning towards leaving it the way it is  including the wood handguard.  For me, that blocking handguard is one of the iconic “signs” that tells you that you’re looking at a Galil ARM.

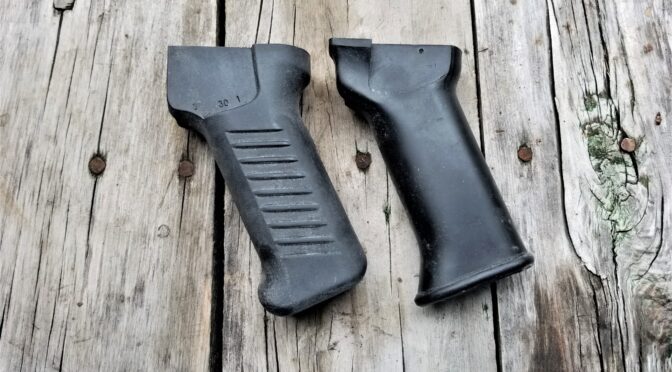
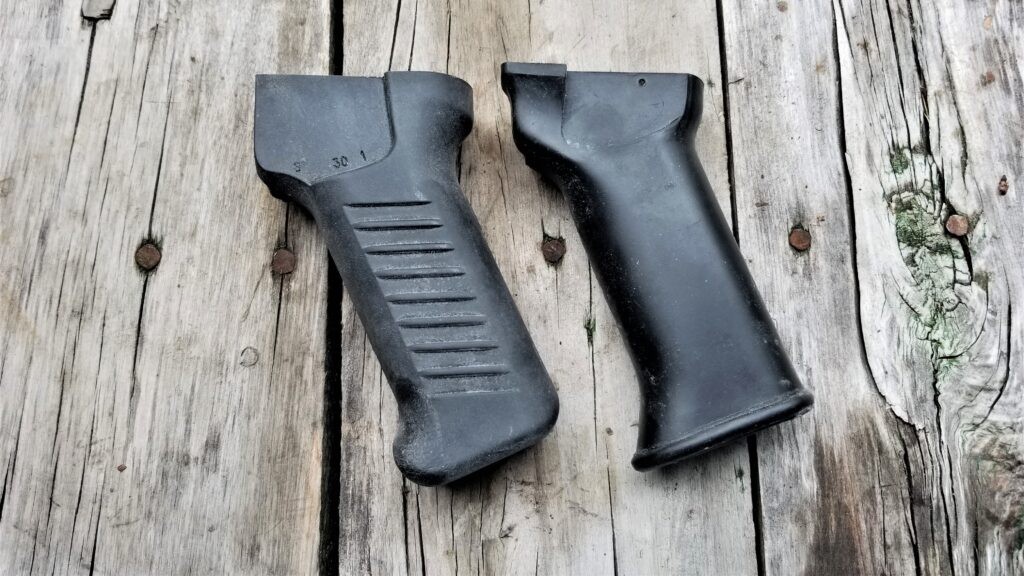
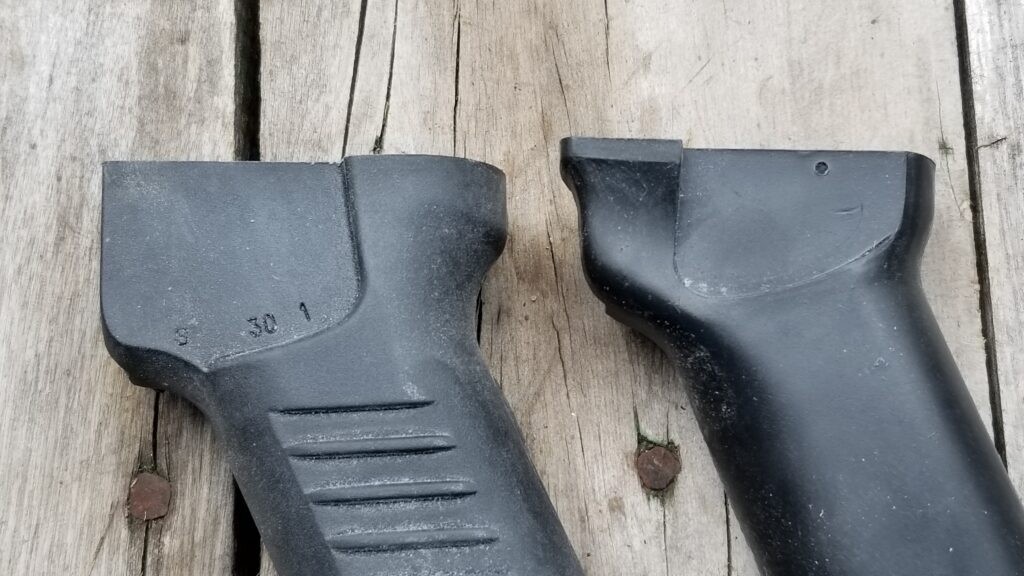
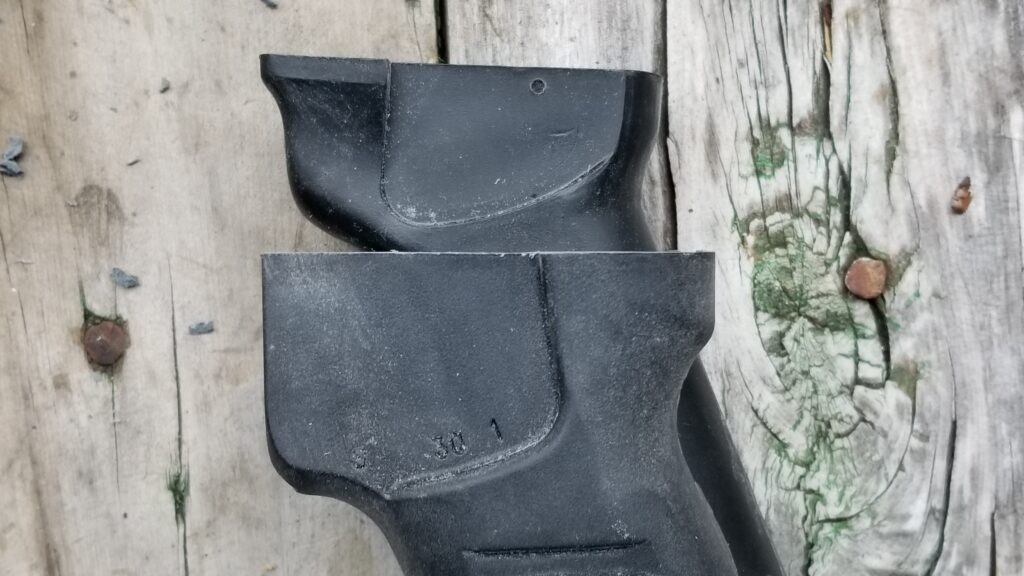
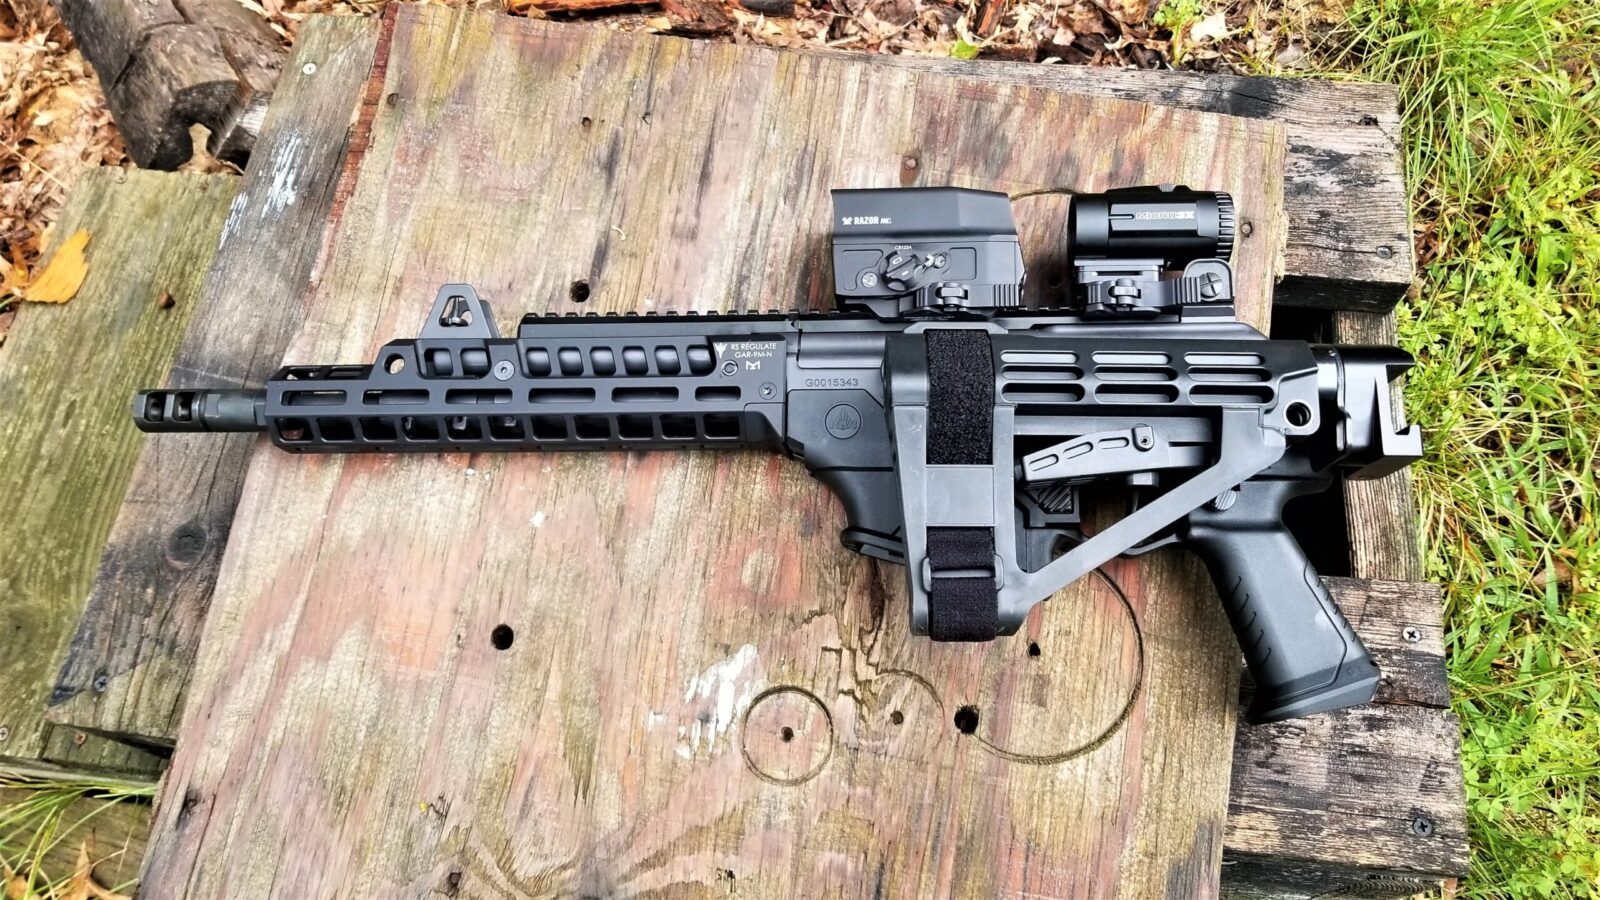
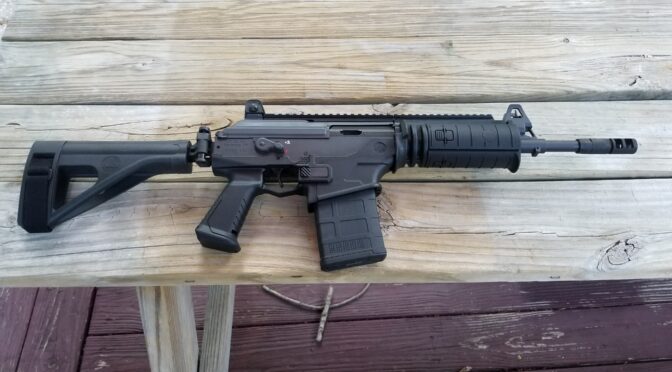
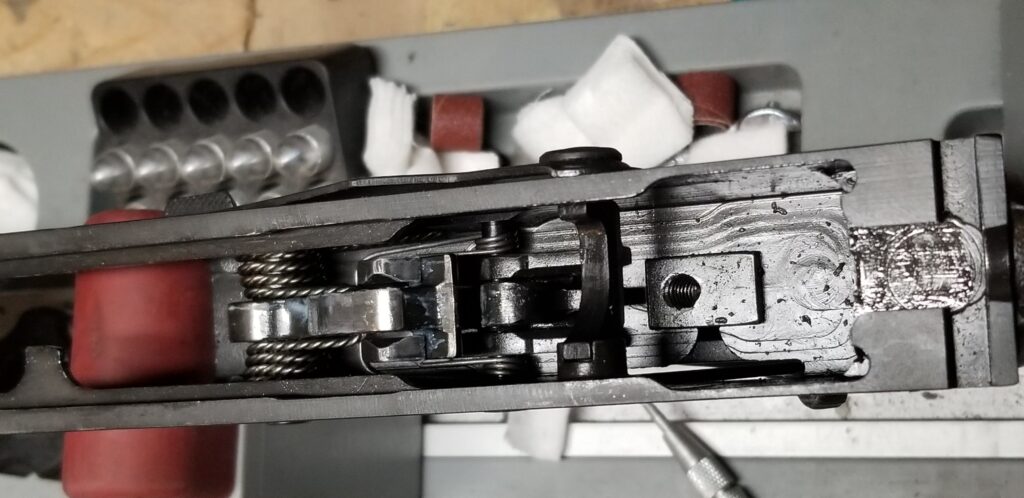
For 922r compliance, they have a US 1:9 barrel, a US receiver, a US Galil-Ultra looking grip made my Phoenix Technologies here in the US and a US Tapco magazine.  Now that last one gets a bit of a groan – the Tapco magazines are plastic, they work, but there are a ton of nice steel surplus 35 round mags out there that would make the rifle no longer 922r compliant if inserted.  As best as I can tell, they used an original Galil fire control group with it’s forged trigger hooks and two part spring setup – one spring for the trigger and one for the hammer – if it is aftermarket, it is not marked.

Note, I emailed JRA and asked them about the compliance parts. So far, they have not responded. Classic says on their web page that surplus mags fit (and they do by the way) but there is no mention of compliance.

Now, there are a two primary mindsets out there when it comes to 922r compliance: Some worry about it because they want to be legal. Some don’t care for whatever reason and that is their decsion. As for myself, I ensure that anything I build or modify is 922r compliant.  So, I wanted to use steel surplus Israeli mags so I decided to swap out the original IMI hammer, trigger and disconnect with a new ALG enhanced fire control group (FCG).  Yes, an AK FCG will work in an IMI Galil. If Classic tells me they actually sourced a US made IMI-style FCG, I will update this. I’m writing this post after already making the change to the ALG.

Heresa quick snapshot of the FCG that came with the JRA. Note that there hammer and trigger springs are independent. Also note that the person assembling the rifle took the time to polish the hammer face so the bolt carrier would cycle smoother. On the negative side, those are metal chips in the receiver from machining — I cleaned everything out. I’ll post more details as I do posts for each change I made.

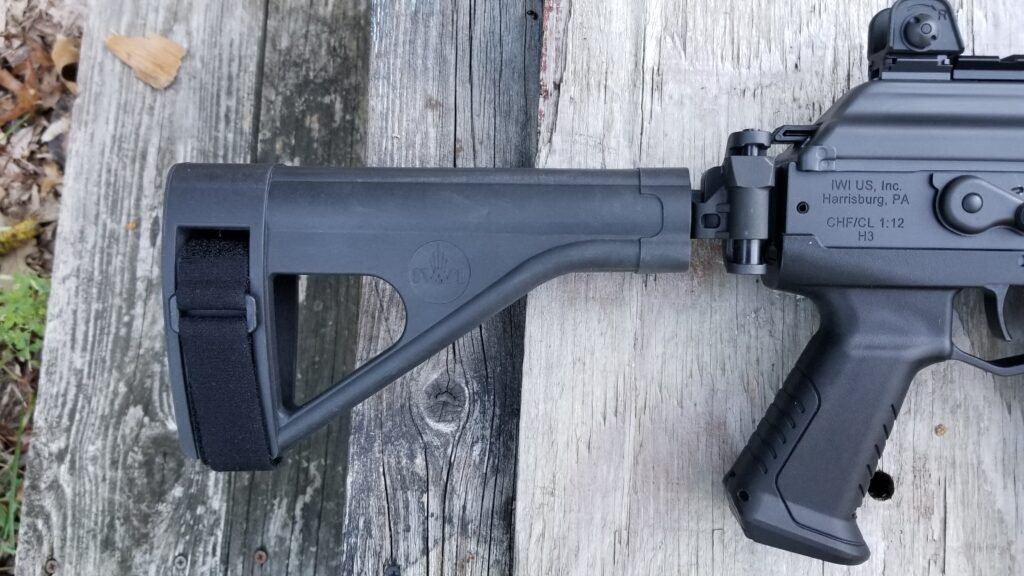
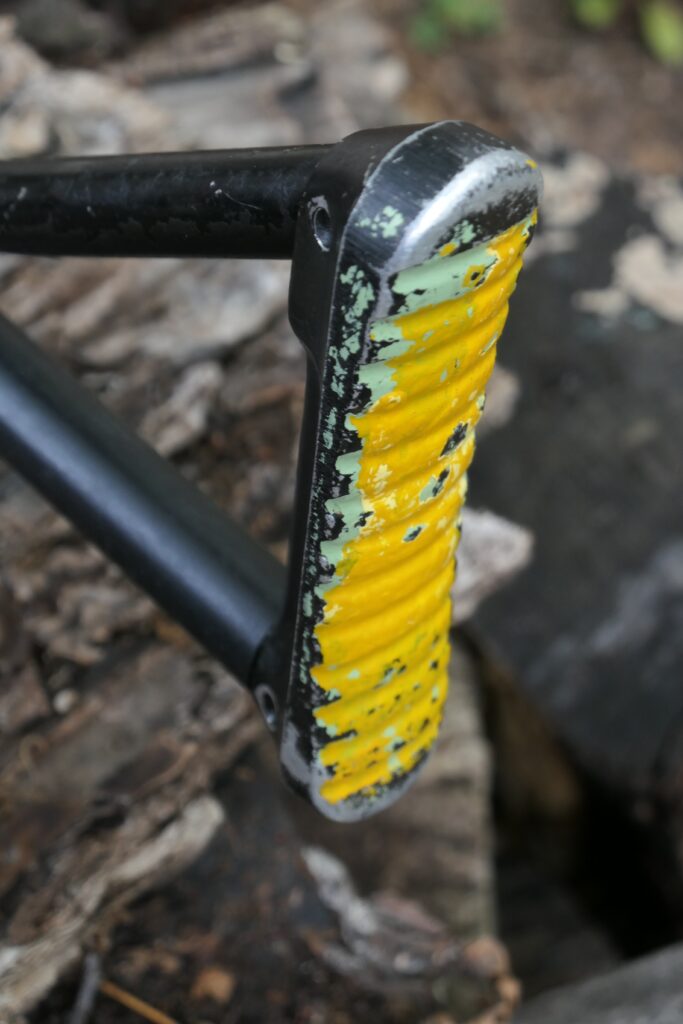
The buttstock made me groan. It had a giant splash of yellow paint on the very butt of the stock for some reason.  The color was hideous, the horizontal tube had a few small nicks, and the finish was a bit more beat up than I preferred so decided I would swap it out for one in better shape from a SAR kit I had.

I am sure there is some meaning behind these colors but … yuck.

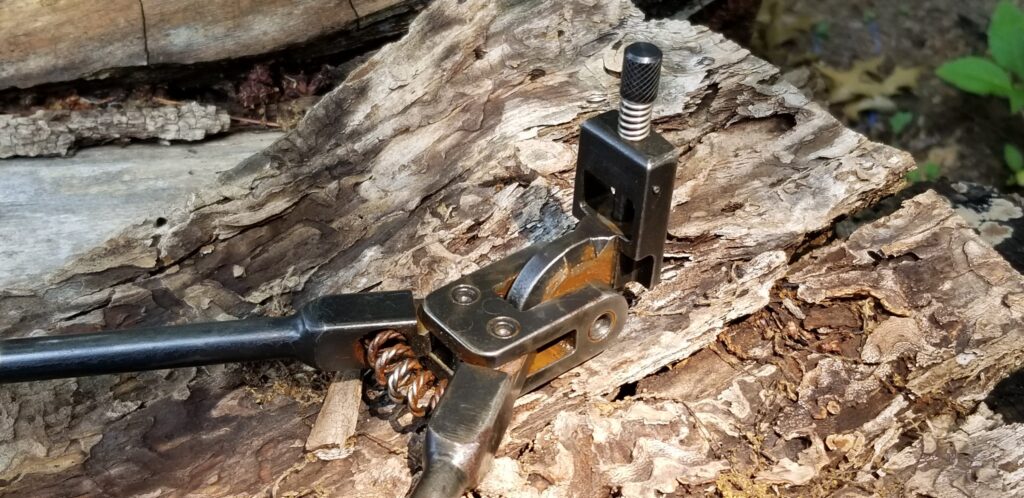
The rifle did come with an ARM bipod but it had a bunch of rust in the mechanism. It worked but definitely need cleaning and refinishing.

The Classic Firearms listing is straight up and honest – they bought a bunch of the detachable ARM bipods in the surplus market that were in good shape but not great. Mine had most of the finish gone from the legs and some rusting in the mechanism but it was fully operational. It would be an easy refinishing job some day when I have time. The ARM already weighs quite a bit empty so having a bipod installed was not on my high priority list *but* I did want a bipod to be complete.

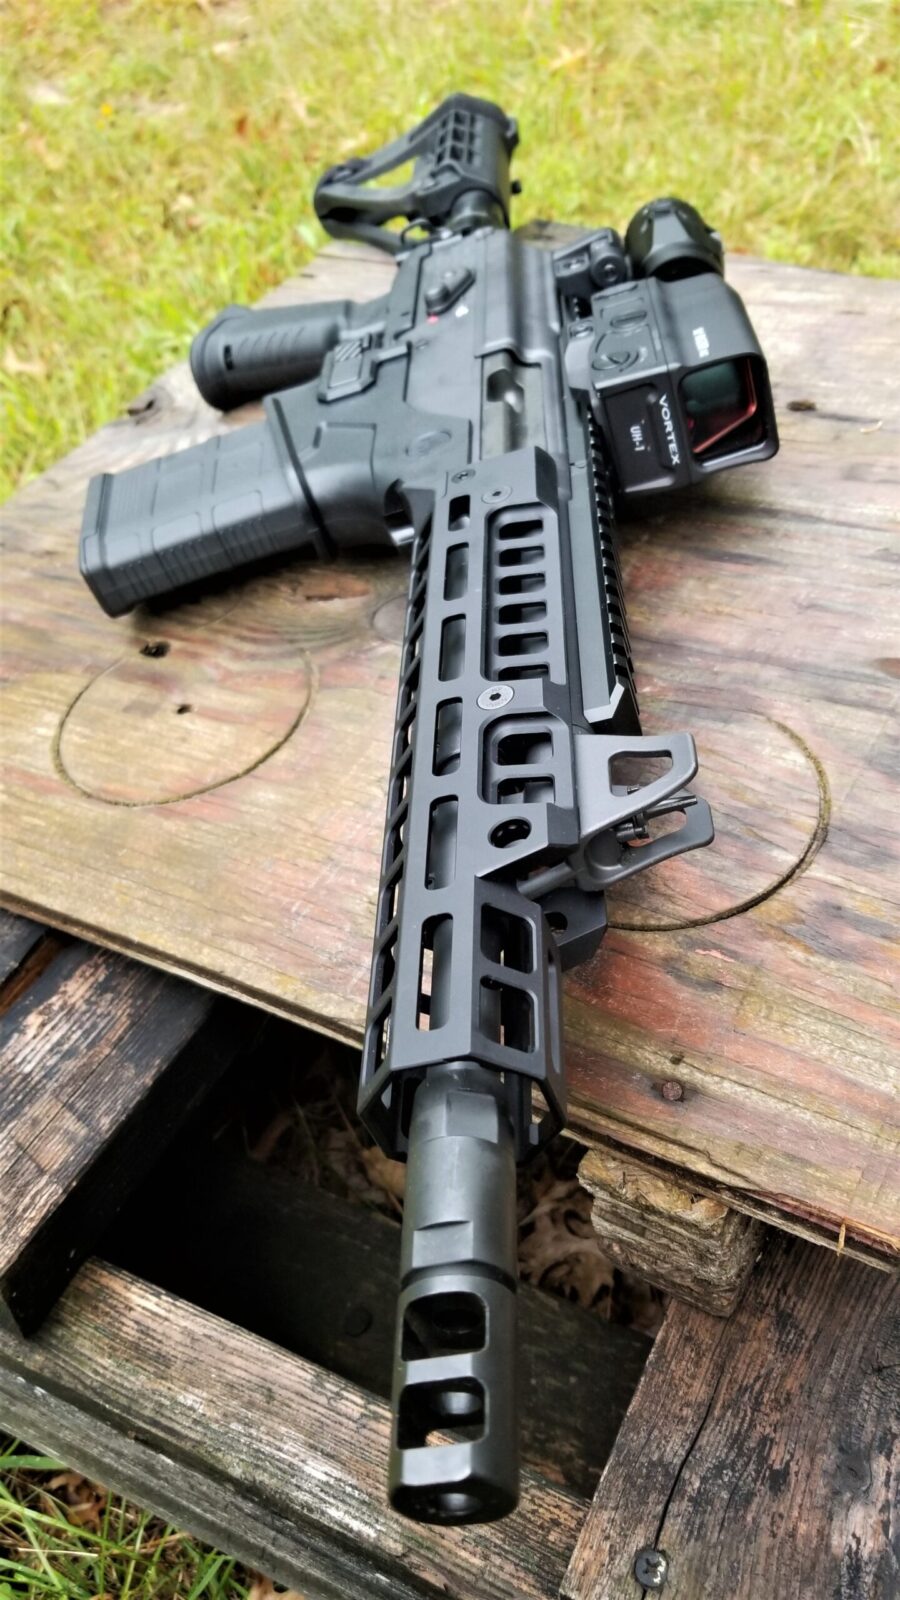
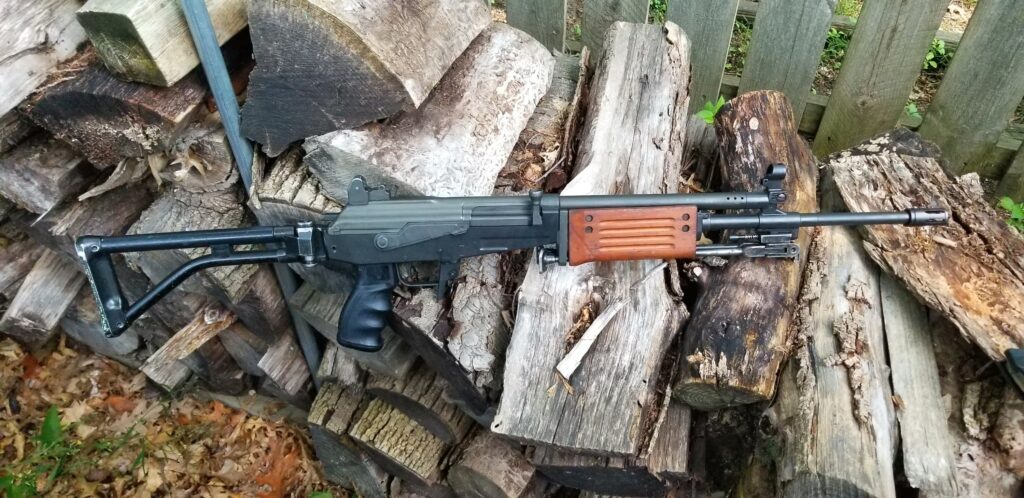
The handguard was way, way to loose. This was pointed out in the ad so I expected some – but not what I felt. I don’t like it when they shake and rattle so that needed to be tightened up. The wood was in good shape though and I really liked the coloring.

Note how the rear forged retainer is canted with the top forward. There are two coil tensioning springs – one on each side – of the bottom. Because the handguard was so loose, they were causing the retainer to cant. Definitely fixable.

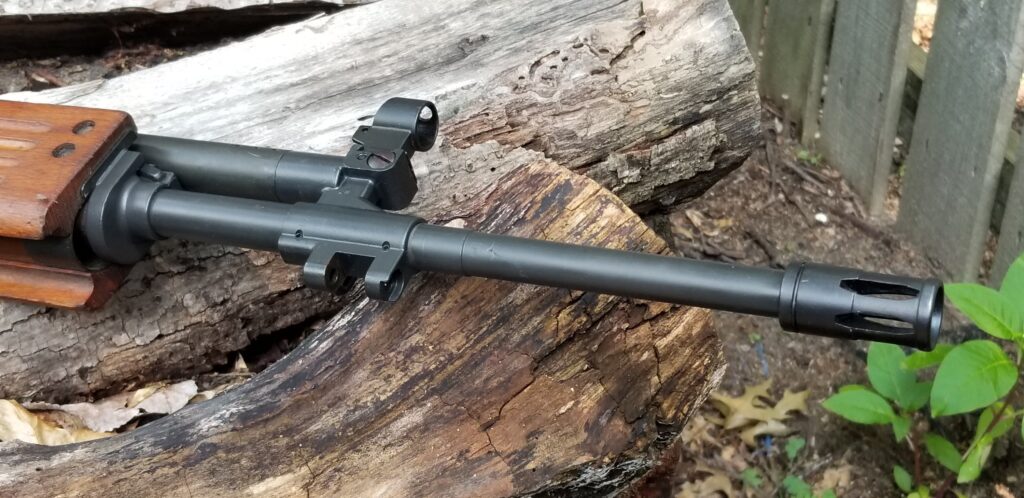
The barrel looked good – it was not bent and the components were installed right — other than the notch for the handguard not being close enough as mentioned previously. The bore was also nice and shiney with nice sharp rifling.

The barrel looked good inside and out. I was happy that they picked a 1:9 twist rate as I tend to shoot M855 62 grain ammo the most.

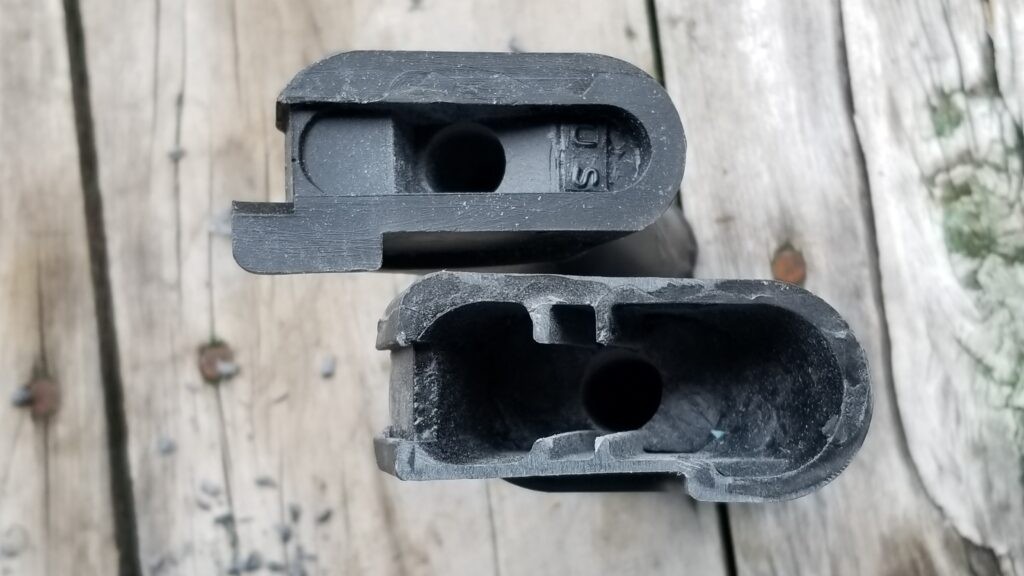
The top cover is still driving me nuts when it comes to installation. It is a delicate balancing act to get the recoil spring assembly to stay in the receiver groove and go into the dust cover vs. going out of the groove and falling into the receiver. I  have some Galil receiver stubs and I want to see if the receiver that JRA used is too short or if the IMI suffered from the same headache. I haven’t decided yet if I just want to live with it or cut the tab down about 1/8th-3/16th of an inch shorter, cut new grooves in it and the refinish the whole rod assembly.

Getting the recoil rod to stay in the right place and pop out of the dust cover during assembly is more of adventure than I care for. Honestly, that tab/button does not need to stick out that far sheesh.

Happily the rifle was properly headspaced and it fed rounds nicely. For a kit built rifle, it cycled and the FCG operated smoothly – surprisingly smoothly.  Okay, it looked like I had a solid foundation to build on. So far, so good.

At this point, I knew I was going to keep it so it was time to start making changes. I put the rifle back together and started thinking about what I was going to do.  I’ll detail what I did in subsequent posts.


Note, I have to buy all of my parts – nothing here was paid for by sponsors, etc. I do make a small amount if you click on an ad and buy something but that is it. You’re getting my real opinion on stuff.

If you find this post useful, please share the link on Facebook, with your friends, etc. Your support is much appreciated and if you have any feedback, please email me at in**@ro*********.com. Please note that for links to other websites, I may be paid via an affiliate program such as Avantlink, Impact, Amazon and eBay.


Will A Bulgy ARM9 Grip Fit An IMI Galil? The Notch Is Definitely Different

A recurring question I get is if a Bulgarian ARM-9 grip can be used on an IMI Galil rifle. Not easily is my answer and I took a bunch of photos so you can decide for yourself. You would need to add black epoxy to the inside back of the ARM in order to Dremel or mill it open further to duplicate the swing of the Galil’s lever – at least that’s how it looks to me because I don’t own an IMI Galil to experiment with.

So, here are some photos so you can see what I mean:

Note the difference in the shape of the ARM-9 grip’s notch on the left vs. the IMI Galil’s notch on the right
Here are the notches even closer.
Here’s the ARM sitting on top of the Galil for another perspective.
Here’s where you can see that the ARM-9’s original wall design is hollow behind the notch. It’s not an impossible change – if you were to abrasive blast the inside of the ARM grip and then use wax stripper, you could then fill that back in with black epoxy. It wouldn’t be an exact color match by any means.

Summary

So there you have it. They are different and definitely not a simple swap with out doing some epoxy work and then maybe a top coat of some finish if you want the colors to match. I hope this helps you out as you think through your options.


If you find this post useful, please share the link on Facebook, with your friends, etc. Your support is much appreciated and if you have any feedback, please email me at in**@ro*********.com. Please note that for links to other websites, I may be paid via an affiliate program such as Avantlink, Impact, Amazon and eBay.


The Vortex UH-1 Sight and V3XM Magnifier Are An Amazing Combination On A Galil Ace Pistol

Well, the pandemic threw all my plans right out the window including having time to go to the range. I bought and customized my 7.62×51/.308 Galil Ace Pistol in the Fall of 2019 and just recently was able to take it to the range with my daughter and good friend Niko.

Niko having fun with the Ace and optic combination.

When I was planning the customization of the Ace, I wanted a holographic sight for rapid target acquisition in close, parallax free viewing and also a magnifier to help me out to a hundred yards or so. By the way, tons of guys go further even without a magnifier but this is just me.

Being a Vortex Optics fan and having read good reviews of their Razor AMG UH-1 optic, I bought one plus the V3XM Micro 3x magnifier. I have to admit that I was nervous. Years back I built an AR-15 and installed both a full size red dot and a full size 3x magnifier and honestly did not like it. The combination used a ton of top rail space due to the size of the two parts and it was heavy. To be honest, I found myself wishing I’d just bought a 1-4x or 1-6x optic at the time.

Why Bother With A Magnifier?

In case you are wondering why I even wanted the 3x magnification, it’s s a simple answer. As I get older,I find myself needing more magnification for any degree of target shooting as I get closer to 100 yards and beyond. Yeah, make fun of me but in talking with a lot of 50+ year old guys, I’m not the only one. I tend to favor 1-6 and 1-8x Vortex Strike Eagles for relatively close in optics – they are light, rugged and allow me to trade off field of view and magnification.

The optics combo fits nicely on the Ace. I like the quality quick release levers they used. The levers clamp very well and have a repeatable zero when removed and re-installed.
Here the magnifier is swung out of the way for 1x viewing through the UH-1. All controls are very easy to use.

At any rate, back to the UH-1, the UH-1 itself weighs about 11oz and the Micro 3X (V3XM) magnifier adds 9.55oz. So you are looking at about 20-21oz or just over 1.25 pounds for the combination. A 1-6x Strike Eagle weighs 18.5oz and then you need to add at least a basic cantilever mount at 1.3oz, you are totalling 19.8oz.

Why am I bringing this up? Some situations really require variable magnification optics and the 1-6x and 1-8x Strikefires are hard to beat. In other cases, you are expecting situations where you will need little to no magnification then the UH-1 wins hands down. Why? Target acquisition is screamingly fast and you don’t have parallax. No parallax means that no matter how you look at the projected recticle (the hologram), the recticle is on the target. With regular scopes, as your eye position changes relative to the recticle, the point of impact changes. This is one reason why a good consistent cheek weld is so important with a traditional optic. Bottom line is that holographic sights seriously rock when it comes to speed of target acquisition.

A 7.62×51 Galil Ace Is Not A Distance Weapon

Another thing to point out is that this weapon is not a target rifle by any stretch of the immagination – it’s for close in work. The 7.62×51 Galil Ace pistol has an 11.8″ barrel and that short length is really going to limit the weapon to less than 200 yards and that is just my opinion because that short length will reduce the velocity of the bullet and there will be more bullet drop at a given distance. The reason is simple – the 7.62×51 and .308 cartridges are still burning powder, generating more pressure and bullet speedwhen the bullet exits the muzzle – all that burning powder makes for an impressive muzzle flash but that’s actually a waste of powder and why it will have less velocity than a weapon with a longer barrel.

How far do I intend to shoot the Ace? Now that’s the real question and is what drove the selection of the optic. I honestly plan to shoot it under 50 yards the majority of the time. I can flip the magnifier out of the way if I don’t need it.

A Bit Of Range Time

How did it work at the range? It was fantastic. The Ace itself ran great with PPU M80 FMJ ammo and the optic pairing was way better than I expected. The recticle was nice and bright even during mid-day son and it was easy to swing the magnifier in and out of position. All three of us liked the Ace and optic combination. After shooting the Ace for the first time, I can definitely see why they have such a excellent reputation.

Even in close the magnifier worked nice. It still has a pretty wide field of view — 38 feet at 100 yards. I went from being cautiously hopeful to really liking the combo.
In this photo, Niko is getting ready to shoot with the magnifier swung out of the way.
I’m still trying to learn the art of getting a decent photo of a recticle. With the UH1 you have 1- brightness levels to select from and I really like it.

In Summary

I really like the pairing of the UH-1 optic and the V3XM magnifier on my Galil Ace. The pairing works really, really well and I am already planning on getting one of the new second generation UH-1 optics for a new build I am planning – a 7.25″ 12.7×42 (Beowulf) pistol 🙂


If you find this post useful, please share the link on Facebook, with your friends, etc. Your support is much appreciated and if you have any feedback, please email me at in**@ro*********.com. Please note that for links to other websites, I may be paid via an affiliate program such as Avantlink, Impact, Amazon and eBay.


Customizing An IWI Galil Ace Pistol – Installing a RS Regulate Handguard, SBA4 Brace & Vortex Optics

In my previous posts, I covered a bit of the history of the Galil Ace, did two posts about the differences between the Ace and an AKM that I observed (click here for the first and here for the second) and now that leads up to me making a few tweaks of my own to my 7.62×51 Ace pistol.

Moved to a SB Tactical SBA4 Brace

My Ace came with a SB Tactical SOB brace mounted on a proprietary IWI tube with a very heavy hinge. While the SOB is rugged, it is not adjustable so I installed and SB Tactical SBA4 brace. Seriously, the SBA4 is the most rugged brace I have found yet.

The SOB4 brace is what comes with GAP51SB pistols. Palmetto had a great deal on this model and that’s why I bought it. If I could have found the pistol model without a brace cheaper, I would have done that.
The SBA4 brace is beefier and more rigid that previous braces. The bottom e dges do not flop around like they do on the SOB and SBA3 braces. The FSM-AR adapter is between the tube and the receiver.

Now some may wonder why I didn’t just file for a short barreled rifle (SBR) tax stamp and run a normal stock. I may very well do this in the future but I didn’t want to deal with it right now. Both PSA and Brownells have the brace available.

The Ace design allows for very easy changing of a rear block by simply driving out one roll pin. The block can the be lifted straight out and whatever you want installed in its place.

The Ace is resting on a green bench block and I used a roll pin punch to tap out that single pin. That’s all you need to do and then the rear plate of the receiver that holds the hinge, or anything else for that matter, will lift right out.
With the pin removed, it literally lifts out. Notice how the “plate” or “block” sits in a groove and that’s what provide the bulk of the strength. The roll pin is just stopping vertical travel and is more than enough.

Since the SBA4 is ATF approved, I opted for a modular adapter block from KNS Precision going to an Ace Limited (owned by Doublestar and not IWI) folding M4 adapter – the FSM-AR. Note, if you install a folder, buy one with the boss – the raised oval shape. It will fit into the groove in the KNS Precision adapter and make for a very solid connection.

This is the external face of the KNS Precision adapter. The groove is where the boss from the FSM-AR adapter will sit to limit movement. I’d recommend always getting adapters with the bosses unless you intentionally do not want them. The two screw holes allow for variations in mounting.
This is the back side of the KNS adapter. The one roll pin goes through one of the grooves to hold it in place. It is very nicely done – kudos to KNS Precision.
The KNS adapter just slides right in and is secured by the roll pin.
This is the Ace Limited (owned by Doublestar and not IWI) FSM-AR adapter. You can see the oval boss on the left part of the folder. This gets flipped over and screwed into the KNS adapter. Also, oil the hinge at some point before you close it. Sometimes they can be a bear to actuate when dry — personal experience talking there. Also, use blue Loctite on all screws or they will shoot loose.

Special note – the charging handle for my Ace pistol is on the left side. In my case, I was not worried about operating when folded. If you want to fire with the stock folded, you must go with a right side folding mechanism. If I had it to do over, I would have used a right-side folder but I simply used what I had in this case to cut cost plus I don’t plan on folding it much.

Here’s the Ace folder open to the left and the brace assembly does interfere with the charging handle. If you want a weapon that will operate with the brace folded, then go with a unit that folds to the right.

The SBA4 comes with a Mil-Spec receiver extension (buffer tube) and I used a generic castle nut that I had in my tool box along with an end plate that has hoops to connect a sling.

The SBA4 comes with a Mil-Spec receiver extension/buffer tube. You will need to supply your own castle nut .

I only use my Magpul wrench now for installing castle nuts as it enables a very positive/sure connection. I’ve done my fair share of scratching stuff with tools that used older methods and the MagPul is the way to go. I also used an automatic center punch to stake the nut.

For dealing with castle nuts, you simply can’t beat the Magpul wrench. I don’t use the combo wrench below it any more because I have scratched a ton of tubes accidentally with it.

The Magpul armorer’s wrench is available from both Brownells and PSA. Again, I highly recommend this wrench over others that I have used.

All in all, it was a very straight forward swap and allows for some adjustment now. In case you are wondering, the SBA4 is very beefy. I do not like the SBA3 as the end is soft and and ears that go around the shooter’s forearm just kind of bend and flop around. The SBA4 is very well done.

I definitely will SBR it at some point down the road but am happy with what I have for now.

Installed a RS Regulate GAR-9M-N Handguard

I was not fond of the original handguards and was pretty sure I would like the GAR-9M-N handguard from RS Regulate based on photos that Scot Hoskinson had posted. Let me tell you, it is a huge improvement. First off, it’s way longer and second it uses a M-LOK attachment method for accessories so you don’t have unnecessary rails bulking up the girth like you do with the originals.

This is the RS Regulate GAR-9M-N handguard for Ace pistols. It’s machining and finish are excellent. Installation was very easy.

Scot Hoskinson, the owner of RS Regulate, has put together a real nice installation guide with plenty of illustrations. The one thing I’ll tell you is that the two original handguard screws from IWI have threadlocker on them.

Just behind the mouth of the gas tube & front sight block is the mounting point that holds the two screws that retain the original Ace handguards. They do have threadlocker on them so warm them up to make removal easier.
I used a 1/4″ ratchet with a 4mm allen bit and the retaining screw on each side came right out. Note, you will see two rivets on each side – one rivet head is visible between the wrench handle and the bit. You don’t need to do anything to those. You just need to remove the two screws. You can see one of the above just forward of the bit.

You can heat them up and make them easier to loosen, use a 1/4″ ratchet with a 4mm allen/hex head to break the screws free or, what I did, was a bit of both. With the gas tube off and out of the way, you can see where the two screws mount on the barrel. I heated that up and backed them out with the ratchet pretty easily.

Once the screws are removed, slide the handguard forward slightly and pull the rear down. It will come right off.

From there, you basically pull the stock handguard down nose first and pull forward. Then, follow Scot’s instructions. You will need to pay attention and install a small spacer between the barrel mounting point and the handguard when you install the new screws. I applied blue Loc-tite and torqued them down to 25 in/lbs per Scot’s instructions. You also have to install one long screw at the rear that you’ll want to use the blue Loc-tite and torque to 25 in/lbs also.

The RS!Regulate comes with the three screws, two spacers and an allen wrench. I applied medium-strenght Blue Loctite and used my Vortex Optics torque driver to tighten the screws to 25 in/lbs. o
The installation instructions where spot on and I did not encounter any surprises at all. The unit bolted right up with no fitting needed.
The fitment is really superb. Here the rail is sliding over the rear block and will be secured later with the long screw that squeezes the rail’s walls together further locking it in place.
I like the RS!Regulate unit far, far more than the original. It’s longer and it fits my hand way better in terms of girth.

This is a slick handguard – the fit and finish are superb. I’ve come to expect that from all RS!Regulate products. Scot’s created another great product in my honest opinion. His AK scope mounts are the best hands down in case you aren’t familiar with them.

Opted For a Vortex Razor AMG UH-1 Optic and 3x Magnifier

I figure this will be a close in weapon – certainly within 200 yards probably – and will figure that out when I get it to the range. With that in mind, putting a high power optic on it just does not make a lot of sense but I also wanted magnification just in case so I checked out what Vortex Optics had to offer.

I’ve now used a boat load of their red dots and scopes on all kinds of firearms including 12 gauges, .50 Beowulf and .338 Lapua. They’re solidly built, good glass and back by a no-nonsense warranty. So they are my go-to for optics and have been for several years. Yes, I do actually have to buy them and no, they do not pay me to say that.

At any rate, I’d been eyeing the Razor AMG UH-1 for a while. Now that is a mouthful and I notice a lot of guys just refer to it has the “Huey” due to the UH-1 helicopter. It’s a true holographic sight which means a laser image (a hologram) is projected into the viewing window. The benefit of this is that regardless of the angle you look through the lens at, if the dot is on the target, it’s going to hit there.

The Razor AMG UH-1 or “Huey” mounts easily with its quick release lever and is ruggedly built.
It has a large viewing window that makes sight acquisition very fast.
The controls are well laid out and easy to use.

Battery life is somewhere around 1,500 hours and there are a lot of variables that can influence that including the brightness of the reticle (there are 14 levels), whether you are using a CR123A battery or a rechargeable LFP123A. Note, Vortex found that recoil kills the basic rechargable RCR123 batteries in 2-300 rounds. They stopped testing the LFP123A at 10,000 rounds and it was still working. I’m using the supplied CR123A still at this point and will likely use Surefire CR123A batteries going forward as I keep them in stock for lights.

In short, the Huey is very slick and it’s getting great reviews. I’ve been a long-time red dot fan and the UH-1 is my favorite at this point.

To get a better view at 100-200 yards, what I did was to pair the Huey sight with the Vortex V3XM Micro 3x magnifier. What this does is give me the ability to install, remove or even swing the installed optic out of the way when I need or don’t need the target to be magnified 3x.

Some assembly was required and I applied medium-strength Blue Loctite to the screws.
Here’s the Vortex Micro 3x magnifier paired with the Huey.

The V3XM is small, light, has a quick release lever also, just like the Huey, and pairs very nicely with it.

Magpul PMags and Drums

The 7.62×51 Ace uses Magpul’s 7.62×51 PMags. You can get them in a number of sizes as well as a drum if you really want to rock and roll. I bought some 20s, 25s and one of the D50 drums. I’ve not tested the pistol yet but expect it will work great with all of them. Note, both PSA and Gun Mag Warehouse have a variety of mags and drums that will fit.

Here’s the end result with the SBA4 brace, RS!Regulate rail and Vortex Optics combo.

Summary

The pistol really turned out slick. It balances well and ought to be a blast. Now just to find some time to get to the range before it really gets cold 🙂 Here are some photos for you:


Note, I have to buy all of my parts – nothing here was paid for by sponsors, etc. I do make a small amount if you click on an ad and buy something but that is it. You’re getting my real opinion on stuff.

If you find this post useful, please share the link on Facebook, with your friends, etc. Your support is much appreciated and if you have any feedback, please email me at in**@ro*********.com. Please note that for links to other websites, I may be paid via an affiliate program such as Avantlink, Impact, Amazon and eBay.


How A Modern IWI Galil Ace Differs From A Traditional AKM – With Lots Of Photos – Part 2

This is the second part of my review of the differences I saw between a 7.62×51 IWI Galil Ace pistol and a typical AKM-type rifle. [Click here if you would like to open the first post in a separate window.] The following round out my observations:

Railed handguard

AK handguards have evolved from wood to bakelite to elaborate affairs made of polymers or aluminum. In the case of the Ace, no rhyme intended, an aluminum handguard with Picatinny rail is covered by sculpted rail covers.

The handguard is U-shaped with rails at the the 3-, 6- and 9-O’clock positions. The top rail is integral with the gas tube. Note now they have a cut out read for a pressure switch and the rails are open on the middle for wiring. There is one socket screw on each slide to fasten the handguard to the weapon.
The two socket screws thread into a retainer and have thread locker on them. When you look at the top of the rail, you see a small circle indentation on each side and then just a bit further back a rectangular shaped indentation. The screws are on each side. Also, you also get a good view of the front sight .
These are the three rail covers for the handguard. They lock into place and can be released by pushing the visible button at the back. The panel in the middle is the bottom piece and it has a lip that serves to help you index your hand.

So, two differences to note – a unique railed handguard and it is held in position with screws vs. the traditional AK front handguard retainer.

As a personal comment, I stopped buying tri-railed handguards some time ago because they feel too fat for me once you add on rail covers. The Ace handguards aren’t too terrible but they are fat and shorter than I would like. The stock unit will be replaced by one of the excellent handguards from RS Regulate – the GAR-9M-N model to be exact and that will be in a future post.

The Gas tube has tabs and a rail but no locking lever

This is a unique little item right here. The gas tube slides into place via tabs on the unit that mate with slots on the rear base. It does not have a locking lever like an AK does.

The top has a Picatinny rail and the whole unit is locked into place when the dust cover is installed, which pushes the gas tube forward into position. The fitment is so well done that the Picatinny rail is level all the way across the top.

The gas tube goes over the nipple on the front sight block. The relieved tube you see with the screws are where the handguard retainer screws thread in from each side.
This is the gas tube with the rail on top. Note the tabs at the bottom rear and the groove on the rail that mates with the rail from the dust cover.
Here’s another angle – you can see the heat shield on the handguard and the slots on the rear block. We can’t call it a Rear Sight Block (RSB) like we would on an AK because the sight is on the dust cover on the Ace. Here, all it is doing is securing the gas tube.
The fitment of the dust cover and the gas tube are so well done that despite being two separate parts, their two respective rail sections align very nicely.

Integral lower plastic assembly – grip, magazine guide

Part of the revisions from the IMI Galil to the IWI Ace was changing 12 parts from steel to plastic. To be honest, I did not hunt down all 12 and itemize each. What I did readily see was the plastic lower assembly that connects with the steel forged receiver. It has the following:

  • An integral grip that has a hollow storage area
  • Ambidextrous magazine releases
  • An enlarged integral trigger guard
  • A natural hand hold curve just forward of the magazine

Folding Brace Assembly

IWI makes two models of the 7.62×51 pistol – the GAP51 without a brace and the GAP51SB with the brace. I really just needed the GAP51 but went with the GAP51SB because the price was so good from Palmetto State Armory at the time.

What you get with the GAP51SB is an IWI designed integral folder with a 1.25″ diameter pistol tube and an SB Tactical SOB brace. The SOB part makes me smile every time I write it. So, it does give you a well designed fixed length brace and a rock solid folder.

The SB Tactical SOB Brace with the unit locked into position.
That hinge is soooooo cool.
A close up with the brace folded alongside the receiver.
The unit is very compact and functional with the brace closed. Note the IWI logo on the brace but it is definitely an SB unit and the butt end has their logow. SB Tactical OEMs for others as well – meaning they will sell units with the logos of other firms displayed.

Magpul Pmags

No AK ever used Magpul magazines so I think this counts as a difference 🙂 The 7.62×51 Ace uses Magpul’s 7.62×51 PMags. You can get them in a number of sizes as well as a drum if you really want to rock and roll. I bought some 20s, 25s and one of the D50 drums. I’ve not tested the pistol yet but expect it will work great with all of them. Note, both PSA and Gun Mag Warehouse have a variety of mags and drums that will fit.

The 7.62×51 Ace uses readily available Magpul Pmags.

The Manual

I can’t say that I’ve ever read a very good AK manual that has tons of illustrations and covers a lot of topics – operating, cleaning, trouble shooting, and a detailed parts breakdown. The IWI Ace manual really is exceptional. The PDF copy is 88 pages long!

IWI puts all of their operator manuals online – click here to visit their site.

Summary

That’s it for differences I’ve noted thus far. In the next post, I’ll share a number of reviews and videos that I watched before I purchased the unit. By the way, this pistol is amazingly well made. It’s the most impressive firearm in terms of design and execution that I’ve seen in a long time. If you get a deal on one, buy it.


References


If you find this post useful, please share the link on Facebook, with your friends, etc. Your support is much appreciated and if you have any feedback, please email me at in**@ro*********.com. Please note that for links to other websites, I may be paid via an affiliate program such as Avantlink, Impact, Amazon and eBay.


How a Modern IWI Galil Ace Differs From A Traditional AKM – With Lots Of Photos – Part 1

The Ace is definitely a modernized AK weapon. One look inside confirms that. The Colombian defense firm of Industria Militar (INDUMIL) began a commercial relationship with Israeli Military Industries (IMI) that would later carve out the small arms division to become Israeli Weapons Industries (IWI). Their collaboration was on the Galil Automatic Rifle (AR) and INDUMIL obtained exclusive rights to it.

What the two organizations accomplished is remarkable. The two collaborated and modified 43 of the 96 parts in a base Galil AR to reduce the weight by approximately 1 KG (about 2.2 pounds). 12 of the parts shifted from steel to plastic. The goal wasn’t just to reduce weight, they improved precision as well.

In my last blog post, I mentioned that I bought a Galil Ace pistol chambered in 7.62×51. It’s IWI model GAP51SB. [Click here to see what PSA current has for sale] Because there was a relationship between IWI and INDUMIL, I asked IWI USA to confirm where the Ace series is made and they told they are all made in Israel. I asked more out of curiosity than anything else.

I decided to see how many differences I could observe between it and a traditional AK. I wish I knew enough about Galil’s to compare a traditional Galil AR to the Ace but being an AK guy, I was very curious to see how the Ace compared.

I tried to be objective about things and started out that way but the more I took the pistol apart, the more genuinely impressed I became. So, let me try and catalog the differences with as many photos as I can.

Two Chamber Muzzle Brake

One thing that caught my eye was the two chamber muzzle brake and that it is held on by a jam nut, which is a nut that is tightened uo from the rear against the brake to lock it in place. The thread is 5/8-24 for the 7.62×51 Ace models.

In comparison, an AK-47 typically has a 14mm diameter by 1mm pitch left hand thread (14x1mm LH). They are held in place by a detent pin that protrudes from the front sight block (FSB) and engages a timing groove that secures the brake in the correct orientation. Now, 14×1 LH is typical for AK-47s but once you add in the variants, threads are all over the place with different style brakes and boosters.

Improved Sights

Note the longer sight radius, integral gas block with front sight, aperatrue rear and protected front sight.

There are five things I noticed right away

  • The Ace has a longer sight radius, which is a fancy term meaning the distance from the rear to the front sight is longer. In general, the longer the sight radius, the more accurately the weapon can be aimed.
  • Aperture rear sight – The Ace sports an aperture (meaning a hole you look through) rear sight that has flips to show either a small circular hole for distance work (300-500 meters) or a larger circular hole for close quarters work (0 to 300 meters).
  • Integral Front Sight and Gas Block – The Ace sports a combination gas block that combines the gas and front sight blocks. Note, AK folks use the term “blocks” to refer to the three sub-assemblies that sit on the top of the barrel – the front sight block (FSB), gas block (GB) and rear sight block (RSB).
  • Both the front sight post and the larger rear aperture have Beta Lights – Tritium Gas – for low-light visibility. In general, tritium is radioactive and will last about 10 years. After that, the sights still work but you will not have the glowing effect.
  • The height of sights enables co-witnessing with optics such as red dots.
View of the front sight and you can see the tritium (white dot) painted on the post.
Rear sight with the close quarters aperture flipped up. Note the tritium circles for low light. This close quarter aperture is 0-300 meters.
View of the rear sight showing the smaller aperture sight flipped down. It is used for distance work and the manual identifies it as 300-500 meters.

Ok, this pistol is in 7.62×51 and has an 11.8″ barrel – I’m real curious to see what it can do within 100 yards. The sights are the same used on the full size 16.5″ barreled rifle so I really don’t think the smaller aperture would ever realistically be needed but we will see.

Railed Dust Cover

The dust cover of the Ace is pretty interesting. Most of the cheap aftermarket railed AK dust covers simply aren’t very stable or consistent when the dust cover is removed, installed and the weapon fired – in short, they don’t really work very well.

The Ace dust cover is beefy and installs very firmly with no travel it is a stable platform to build on. The top of the dust cover has a Picatinny rail section on the top that is welded in place. It aligns with the rail section on the gas tube via a small tab.

This tab slides into a corresponding groove on the gas tube to align the two rail sections,

The rear of the dust cover has a second layer of sheet metal wrapping the bottom making for snug fit and reducing flexion.

This is the dust cover = you can see the rail, dual aperature rear sight and the double reinforced rear bottom that mates with receiver.
You can see the welds that secure the rail to the dust cover plus the reinforced rear.

In short, the dust cover is remarkably solid. I actually have to give it a knife hand chop on the rear to get it to seat down fully into the receiver. It needs to fit tight as the installation of the dust cover also locks the gas tube in place.

Milled Receiver

Speaking of the Ace’s receiver, it’s milled and built like a tank. I found it very well machined with nice touches like a funnel design to help guide the recoil rod assembly into position.

As an example of the care taken in the design, note how the seat for the operating rod assembly is funnel shaped to help with installation.

Note, while the modern AK (AKM ) uses a stamped receiver, the Type 2 and Type 3 AK-47s used milled receivers so it’s not entirely new but it does differ from the AKM. In fact, some countries continued to use milled receivers such as Bulgaria, Finland and Israel in at least some of their weapons.

Milled Recoil Assembly With Rubber Seal

The recoil rod and spring assembly is of a tubular style you typically see in RPKs. The benefit of this is a more consistent pressure being applied to the bolt carrier particularly when it comes to lock up. The thumb tab that locks the dust cover in place seems a tad longer than what I see in other AKs. Last comment is that they added a rubber seal at the rear of the assembly to seal out debris.

Here’s the recoil rod assembly with the dust cover removed. You can see the long thumb tab and also the rubber seal. It also gives you a good view of the plat that seals the length of the groove where the bolt cocking lever passes
Shows the recoil spring, tubular rear, round front shaft and retainer. In an AKM, rather than a tube and rod, two pieces of folded wire form the central element and can bounce all over the place. Not a big deal in a typical AK but it does matter when you want to improve consistency.

Forged Galatz Fire Control Group (FCG)

The Ace FCG is very nice. Let’s face it, most AK FCGs reflect and elegantly utilitarian design that isn’t very refined. I have always been impressed by the simplicity of the AK design and what the Ace designers decided to do was to take the enhanced FCG from the IWI Galatz designated marksman’s rifle (DMR) and used it in the Ace weapons.

Here are some differences I noted:

  • A single large forged trigger hook for holding the hammer
  • Engagement surfaces are polished such as where the disconnector grabs the hammer
  • Hammer and trigger springs are separate whereas the AK has two wires spiral wound together that power the hammer and push down the rear of the trigger’s rear ears/bars.
  • The top of the hammer is asymmetrical with only half of the normal bar that adds mass to the top rear of AK hammers. This is what normally gives an AK hammer the hammer-head shark hook.
View of the hammer. Note the polishing. You can see the double-wound hammer spring and a part of the single-wound trigger spring sitting on the left ear of the trigger.
Here it is from another angle. You can see the top rear of the hammer is asymmetrical vs. having the hammer-head shark design typically found in AK rifles.

Out of the box, it felt fair but once I used Superlube grease on the surfaces and Superlube oil on the rotating pins … wow. It is very smooth. [Click here for a blog post I did on Superlube – I use it on all of my firearms now]

Two Selector Levers

An AK has a single selector lever on the right side of the rifle that also serves to seal the receiver. It’s about as basic as you can get. On a semi-auto AK, the selector either physically blocks the trigger from actuating by moving a bar directly above the rear ears of the trigger or it moves out of the way allowing the trigger to move freely. On an automatic weapon it also allows the user to select full-auto or semi-automatic.

The Ace has a thumb control on the left side and more of a switch vs. the traditional long lever on the right side. Internally, the linkages do the same thing for semi-automatic in terms of moving the block bar into or out of position. The Ace has a separate plate for sealing the groove where the cocking handle reciprocates so the selector lever is not doing double-duty in that regard.

Visible are the thumb selector switch at to top of the grip and so is the charging handle and the very interesting articulating plate that pivots down and allows the charging knob to pass by in both directions.
Here’s the right side selector switch located where the traditional long AK selector lever would have been.

Note, the thumb selector connects to the safety bar via a linkage. The movement of the lever is an arc and not a horizontal slider. It is stiff and definitely needs lubrication when you get the weapon. I’ll comment more about that below when reviewing the pistol grip base.

Pistol Grip Base vs. Grip Nut

With AK’s, there tends to be a grip nut or in the case of Yugo-patterned AKs, a grip strap with an integral nut that the grip screw threads into. For the Ace, there is a “pistol grip base” that is uniquely shaped because it has a tube on top and my best guess is that it is to limit travel of the thumb selector and possibly to trap the pin so it can’t back out if it were ever to come loose.

The “barrel” in the middle of the receiver is the top of the “pistol grip base” as IWI terms it in the manual. You can also see the linkage – you’ll definitely want to oil this.
Another angle on the grip nut and thumb selector linkage.
Just behind the selector bar you can see a 6mm thread protruding from the bottom of the receiver. It is threaded into the unique “pistol grip base”.

Bolt Carrier and Bolt

The moment you open up a Galil Ace, you know you are looking at a rifle with an AK heritage and the bolt system clearly is AK inspired. When you look at the bolt and carrier, the refinements are interesting:

  • Most obvious perhaps, the traditional right-hand side cocking left on the bolt carrier has been moved to the left side and is tubular to reduce mass.
  • The bolt carrier has a lightening cut – that would lower mass and impact energy
  • Bolt and carrier do not appear to have serial numbers. While I can’t find confirmation of what I am about to say, perhaps the manufacturing tolernces are so good that the traditional hand fitting and matched components are no longer required.
  • At least for the 7.62×51 version the gas pistol is significantly shorter and has a collar on it.
  • While an AK’s firing pin is free floating, the Ace has a spring loaded firing pin that is pushing it back away from the bolt face. Now some will argue whether this was really needed or not but it is a design difference.
Note the short piston with the collar and that the cocking tube in on the left side.
A better view of the very short gas piston
Here’s a view of the underside of the carrier with the bolt installed. Note the knurling on the kocking lever. I am curious about the pin hole under the cocking tube. It may allow for the swapping out of the lever – some dayI will take it apart and see if this is the actual case.
Here’s the bolt. Definitely a good sized extractor.
Lightening relief/cut on the carrier.
Bottom of the carrier with the bolt removed. Curiously, notice the machining marks where the bolt’s lug would engage with the carrier.

Wrapping Up The First Post

There’s definitely more ground to cover and that will be in the next post. Click here to read it.


References


Note, I have to buy all of my parts – nothing here was paid for by sponsors, etc. I do make a small amount if you click on an ad and buy something but that is it. You’re getting my real opinion on stuff.

If you find this post useful, please share the link on Facebook, with your friends, etc. Your support is much appreciated and if you have any feedback, please email me at in**@ro*********.com. Please note that for links to other websites, I may be paid via an affiliate program such as Avantlink, Impact, Amazon and eBay.


IWI Galil Ace Pistol In 7.62×51: Development History And Photos Out Of The Box

The Israelis definitely understand the need for quality armaments and let’s start with a quick recap of the history leading up to the Galil. In the 1950s, the Israeli Defense Force (IDF) adopted the Belgian FAL but found that their regular drafted troops had a hard time keeping it clean. On one hand, you can blame the troops but on the other you also need to realize that factoring in the dusty environment of the desert, maybe the FAL wasn’t the best design for the situation not to mention its size.

Israeli heavy barrel FAL
Photo Source: Wikipedia

In June 1967, Israel was embroiled in the Six Day War and captured thousands of AK-47 rifles that they then evaluated due to its reliability. The IDF then decided to seek an alternative to the FAL and ultimately went with a design by Yisrael Galil, who had previously helped with the design of the Uzi submachine gun.

Galil’s design was based on the Finnish Valmet Rk 62. The Finn’s also wanted a more refined AK-type rifle and evolved their highly regarded design from the AK that Poland licensed from the Soviets. Compared to the typical AK of the time, the Rk 62 had better metallurgy, a better barrel, an improved sight radius by mounting the rear sight on the dust cover and more.

Valmet Rk 62 rifle with later version plastic furniture and Galil-style roll pin secured buttstock. Photo source: Wikipedia

In terms of the Galil, they took the Rk 62 pattern and evolved the design to the point that it was adopted in 1973 with several models being used. Due to the Military Assistance Program from the United States, 60,000 M16A1 rifles were delivered to the IDF and put into use. Troops liked the M16A1 because it was lighter and more accurate. By 2000, the Galil was mostly phased out of main units and by 2005, it exited the remaining units.

Israeli Military Industries Galil Automatic Rifle (AR) in 5.56x45mm NATO.
Photo from Wikipedia.

The Columbian Connection

Image source: IWI US Media Kit

In 2005, the small-arms division of Israeli Military Industries (IMI), known as “Magen”, was privatized and named Israeli Weapons Industries (IWI). IWI sells small arms all over the world. In 2006, the Colombian company INDUMIL secured exclusive worldwide rights to make GALIL automatic rifles (AR) worldwide – they even sold them to IWI.

With IWI suprevision and technology sharing, from 2006 to 2010, INDUMIL modified 43 of the 96 parts in the Galil AR. Of the 43, 12 steel parts were replaced with plastic and a cumulative savings of approximately 1 KG (2.2 lbs) was achieved. The other 30 parts were modified to improve precision. Thus, in 2010, INDUMIL introduced the Galil Ace. It is now offered in rifle, SBR and pistol configurations chambered for 5.56×45, 7.62×39, and 7.62×51. Here are some photos direct from IWI US:

Galil Ace Rifle chambered in 7.62×51. IWI model GAR1651
Image Source: IWI US Media Kit
Galil Ace Rifle chambered is 7.62×39. IWI model GAR1639.
Image Source: IWI US Media Kit
IWI Galil Ace SBR in 7.62×39. This is the GAR3SBR model.
Image Source: IWI US Media Kit
IWI Galil Ace SBR in 7.62×51, IWI model GAR51SBR.
Image Source: IWI US Media Kit

At this time, Galil Ace rifles are being used in a number of countries including Chile, Columbia and Vietnam. As usual, civilian versions followed including rifles, short barelled rifles (SBRs) and pistol versions to allow people to buy the shorter weapons either with or without braces.

What’s Your Point?

Well, being very interested in Kalahsnikov-related arms, I’ve long wanted to own a Galil. There are a ton of Galil kits available and other projects kepts popping up that precluded me from building a Galil AR. It’s still on my to-do list but I don’t know if I will ever get to it.

So along comes the even more refined Galil Ace weapons. Every single guy I talked to who had one loved it. This includes Scot Hoskinson of RS!Regulate. So, after seeing tons of photos from Scot, I knew I had to get a .308/7.62×51 model and definitely planned on replacing the short handguard with his longer GAR-6M-N unit and I’ll cover that in more detail later.

I started my journey of trying to find one. They were all over Gunbroker with a folding SB Tactical brace installed. To be clear, it’s the SOB brace (I giggle every time I write that product name) on IWI’s folding tube that is dimensioned like some AR pistol buffer tubes at 1.208″. Note, pistol buffer tubes can vary and their outside diameter does not need to be Mil-Spec (1.146″) or Commercial (1.17″). My PSA pistol buffer tube is 1.25″ purely as an example.

This definitely caught my eye – it is the Galil Ace pistol in 7.62×51 with an SB Tactical SOB brace.
Image Source: IWI US Media Kit

I found out a while ago to watch Gunbroker for a while to get a feel for prices so I didn’t jump. As luck would have it, Palmetto State Armory (PSA) ran a sale on the .308 Ace Pistol with the SOB brace for $1,499 and undercut everybody. I jumped on the deal and told PSA to ship it to my friend and FFL, Scott Igert, who owns Michigan Gun Exchange and is now quite used to my billion and one quirks.

Note, PSA sells a variety of IWI Galil Ace rifles and pistols. I find they have very good prices and are reliable. Click here for a current list of what they have and you can order direct from them – they will ship it to your FFL of course.

PSA shipped the unit in a few days and it arrived about a week later. As usual, I had to look it over and was amazed at all the changes from the base AK platform. I took the pistol apart and tried to jot down all the differences to then share with folks and that is what I will do in an upcoming post. What they accomplished is very impressive.

Photos

Until I get the more detailed post done, here are a bunch of photos of my unmodified GAP51SB pistol.


References


Note, I have to buy all of my parts – nothing here was paid for by sponsors, etc. I do make a small amount if you click on an ad and buy something but that is it. You’re getting my real opinion on stuff.

If you find this post useful, please share the link on Facebook, with your friends, etc. Your support is much appreciated and if you have any feedback, please email me at in**@ro*********.com. Please note that for links to other websites, I may be paid via an affiliate program such as Avantlink, Impact, Amazon and eBay.


Rick’s R4 Forgery

I always love it when folks send me photos of their firearms using our parts. Rick sent in these cool photos of what he calls his “R4 Forgery” and it is using one of our Galil grips.

Very cool Rick!


If you find this post useful, please share the link on Facebook, with your friends, etc. Your support is much appreciated and if you have any feedback, please email me at in**@ro*********.com. Please note that for links to other websites, I may be paid via an affiliate program such as Avantlink, Impact, Amazon and eBay.