Category Archives: Gunsmithing

Posts that touch on gunsmithing topics such as improving function, finishes, changing parts, and anything else that alters a weapon

Three Simple and Inexpensive Must Have Upgrades on Glock 17 Gen 1-3 Type Pistols To Improve Handling

I am learning a great deal about Glocks via the Polymer80 frame based Gen 3 model 17 and 34 pistols I built. In working with the pistols, I found there are three upgrades that were required immediately for me to more readily operate the pistols. Anybody can do these three – replace the slide stop, slide release lever and the magazine release. Fortunately they are relatively inexpensive so let’s step through each in this post.

Slide Lock Lever

Okay, when I started the Glock 34 compatible pistol using the Polymer80 PF940v2 frame, I had never really stripped a Glock before. As soon as I was working with the slide I absolutely hated the barely protruding OEM Glock slide lock lever. Because of my carpal tunnel and years of abusing my hands, I could barely feel the blasted thing let along get enough grip to easily pull it down. Seriously – I hate that little part. It turns out that I’m not alone. A ton of groups make a replacement unit and they just make the slide stop a hair longer and it makes all the difference in the world.

This will take about five minutes. Procedure:

  1. Ensure the weapon is clear, meaning unloaded and no cartridge in the chamber.
  2. Remove the slide
  3. Before you remove the slide stop, note which way the depression is oriented at the top of the slide stop – the new one will need to face the same way.  The hooked face should face rearward.
  4. Use a Glock takedown tool or a small screw driver to reach in and depress the spring that pushes the slide stop up.
  5. When you push the spring down, the existing slide stop can slide right out
  6. While continuing to press the spring down, slide the new one in.
  7. Confirm the orientation is correct – the hooked surface should face rearward.
  8. Test by pressing down on the release – it should spring back up. If not, look to see if the spring fell out or there is debris in the spring channel preventing it from pushing the release back up.
  9. Re-assemble and test your pistol.

Slide Release Lever

The Glock 17 has one of the worst slide releases I have ever felt. It’s a vertical tab that gives you virtually no surface to really push down on. Now, the 34 came with an extended release and that’s where I learned that it is a way better design than what the 17 has. A ton of vendors make and sell their versions. I just bought and installed a Glock 34 slide release on my 17. If you’re keeping count, this means the 34 really on has two upgrades I would recommend as it already has the improved slide release.

The first slide release I tried to do was a pain and took probably 15-30 minutes as I tried to figure things out I’d not seen a Glock’s insides before first hand. The second one took about 10-15 minutes and the third time (when I actually replaced the 17’s slide release lever with the 34 model), it probably took me about 5-10 minutes. In short, there is a learning curve.

Procedure:

  1. Ensure the weapon is clear, meaning unloaded and no cartridge in the chamber.
  2. Remove the slide.
  3. Use the first punch to push the trigger pin almost all the way out from right to left when you are looking down at the pistol with the front facing away from you. This should not take a ton of force. I find some light taps with a small hammer help me but some guys do it entirely by hand.
  4. I said stop short of pushing the pin all the way out because you just need to get it out of the slide release. You thin pull your pin punch back out of the release also but still capturing the trigger.
  5. The slide release lever will lift right out.
  6. Put the new slide release lever in its place.
  7. Push the pin punch back into the release lever to orient it. This worked for me vs. trying to get the pin itself back in. Keeping it all aligned was the trickiest part when I first started.
  8. Push or lightly tap the trigger pin back into place while driving the old pin punch out. Again, the punch is there keeping everything aligned so it’s acting like a slave pin. As you tap the real trigger pin in, the punch backs out.
  9. Re-assemble and test your pistol.

Magazine Release

The other issue I found was that the OEM Glock magazine release was too short for me to easily reach forward with my thumb and drop the mag. Again, found I was in good company because a ton of other people feel the same way. Now, I opted for the Tango Down Vickers extended magazine release because it just sticks out maybe an extra millimeter or so and it makes a huge difference. Some other magazine releases are really only suited for competition because they are easily bumped and the mag released.

This is another quick and easy one. I did it one with a screw driver, once with needle nosed pliers and once with curved hemostats. All three work but I think the curved hemostat is easiest.

This will take about five minutes. Procedure:

  1. Ensure the weapon is clear, meaning unloaded and no cartridge in the chamber.
  2. Remove the slide so you have a clear view down into the magwell
  3. Remove the spring wire from the magazine release by working it out of the groove cut in the side of the mag catch. Look at the replacement unit and you will see the slot I am referring to in the middle of the magazine release that is just big enough for the wire to slide into.
  4. Remove the old unit and slide in the new unit
  5. Move the wire back into the slot and test – it should spring back out when you depress it,

Conclusion

I hope this helps you out. I find my two pistols a lot more manageable with the above upgrades and well worth it.


If you find this post useful, please share the link on Facebook, with your friends, etc. Your support is much appreciated and if you have any feedback, please email me at in**@ro*********.com. Please note that for links to other websites, I may be paid via an affiliate program such as Avantlink, Impact, Amazon and eBay.


Check out Gunstreamer for Firearms Videos

Folks, if you are like me and are sick and tired of the assault by liberals on our second amendment freedoms, you are always looking for sources of firearms advice. Youtube used to be a great source for videos on firearms – everything from reviews, to gunsmithing to build-it-yourself (BIY) guidance. Unfortunately, that is no longer the case – Youtube has turned anti-gun also and I resent it.

So, where can you see videos about firearms? One promising source is Gunstreamer – http://www.gunstreamer.com. I’ve watched a few videos there now and find the site easy to navigate and there are definitely some quality videos showing up there. Definitely check them out and consider supporting them – I am.


If you find this post useful, please share the link on Facebook, with your friends, etc. Your support is much appreciated and if you have any feedback, please email me at in**@ro*********.com. Please note that for links to other websites, I may be paid via an affiliate program such as Avantlink, Impact, Amazon and eBay.


How to Defeat WiFi censorship around Firearms, Military and Law Enforcement with VPN Apps on Mobile Devices

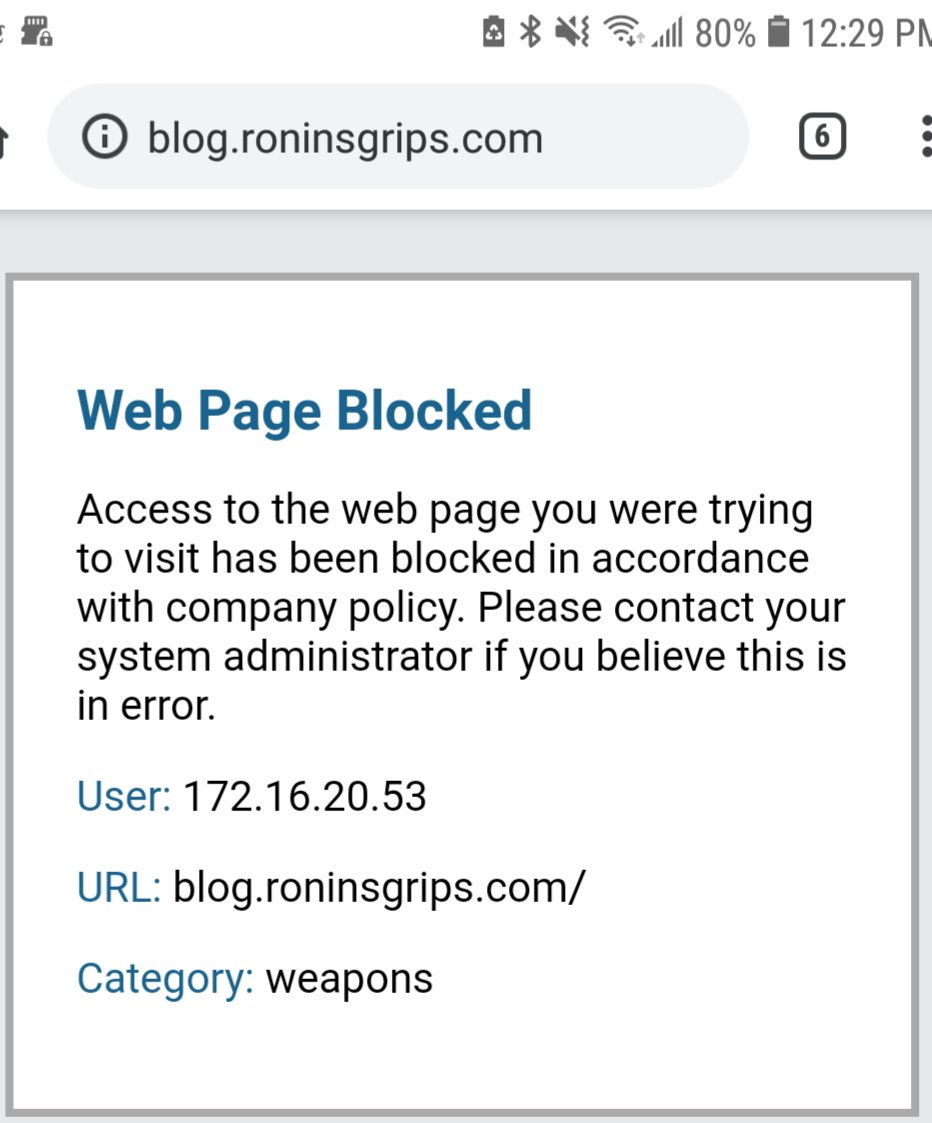
I am sick and tired of businesses and other groups telling me that something that is perfectly legal is not acceptable. Have you ever tried to use your phone or mobile device in an establishment and got some kind of message like the following instead of the web page you wanted:

Or perhaps something like this when you know full well the website is working:

What is happening is some pain in the butt liberal is blocking your web access based on the website address you’re going to.

I’m really sick and tired of messages like these when I try to access websites from my phone or tablet that involve firearms, law enforcement, military, or anything else perfectly legitimate that the provider of the Wi-Fi services feels is inappropriate. Screw them.

What happens with Wi-Fi is that your phone is connecting to a wireless network which in turn passes through any number of devices that can subscribe to what is known as a “block list.”

The block list is provided either by the vendor of the network device or from a service provider and is updated regularly with a list of websites with different categories that the subscriber can then block. So if you try to go by name to my website like the above image shows, you will be blocked at many public venues.

Use Virtual Private Network Apps

The way to get around this is to run virtual private Network (VPN) software on your phone or tablet. It basically works by using an application that encrypts all of your phone’s WiFi data traffic to the VPN provider who then routes the data on their servers and network to your desired destination. The group trying monitor your traffic has no idea where it is going or what the contents are due to the encryption in the VPN

There are free providers that can be very slow and your security might be in question or, like me, you can use a commercial service.

I prefer a service called “IPvanish” and I’ve been using it for a year and a half. I have no affiliation with them and get absolutely zero money for this recommendation. It just so happens that I’m at a major theme park right now and I’m royally pissed off because they are blocking my access to sites I normally go to that are perfectly legal. This is censorship.

So I’m sitting here ticked and figured writing a blog post to help you guys out so you can get to these sites whenever you want would be my best revenge.
IPvanish

I have a Samsung Note 8 phone that runs Android and IPvanish makes an app that is very affordable. You can get it through the Play Store for Android plus other platforms are supported such as Apple and they are in the Apple store.
Getting going is pretty easy.  You simply sign up, pay, install the app, enter your user ID and password and you’re ready to go.  Yes, you do pay but this means you have fast connections because they can afford to have adequate capacity.

If you want to read more first go to their website at http://www.ipvanish.com

Some interesting options

There are a few interesting options to point out to you. You can have the software start automatically if you wanted to, you can tell it what country or maybe even what city you want to say it’s accessing from. For example if I wanted to make it look like I am in Canada, I can do that. If I am in another country and I want it to look like I’m in the United States, I can do that too. It gives you some interesting capabilities if you run into a situation involving digital rights such as situations where content you normally use in the United States is not licensed for people outside of it and so forth.

In summary

If you are sick and tired of being blocked, get yourself some VPN software. Ipvanish is my preference but you definitely have others to choose from. Don’t let other people dictate to you what you can and cannot do when it comes to perfectly legal topics such as Firearms, law enforcement and Military websites.


If you find this post useful, please share the link on Facebook, with your friends, etc. Your support is much appreciated and if you have any feedback, please email me at in**@ro*********.com. Please note that for links to other websites, I may be paid via an affiliate program such as Avantlink, Impact, Amazon and eBay.


Wheeler Tool Makes AR Trigger Guard Installation or Removal a Breeze

I was asked how I install AR trigger guards to minimize scratching up the receiver or even risking snapping an “ear” off.  On one hand, you can use a solid backing block to support the ear and then use a roll pin punch to drive in the pin.  That’s what I used to do but it’s a headache to be honest.  As some of you may know, I have a tremor that makes fine motor stuff a headache so finding methods that are simpler really helps me get work done.

This is a Brownells Billet 7075 aluminum trigger guard (078-101-164) and it has a bulge to accomodate gloves.  The set screw goes in the end with a blind hole.  The roll pin goes through the end that is drilled all the way through.

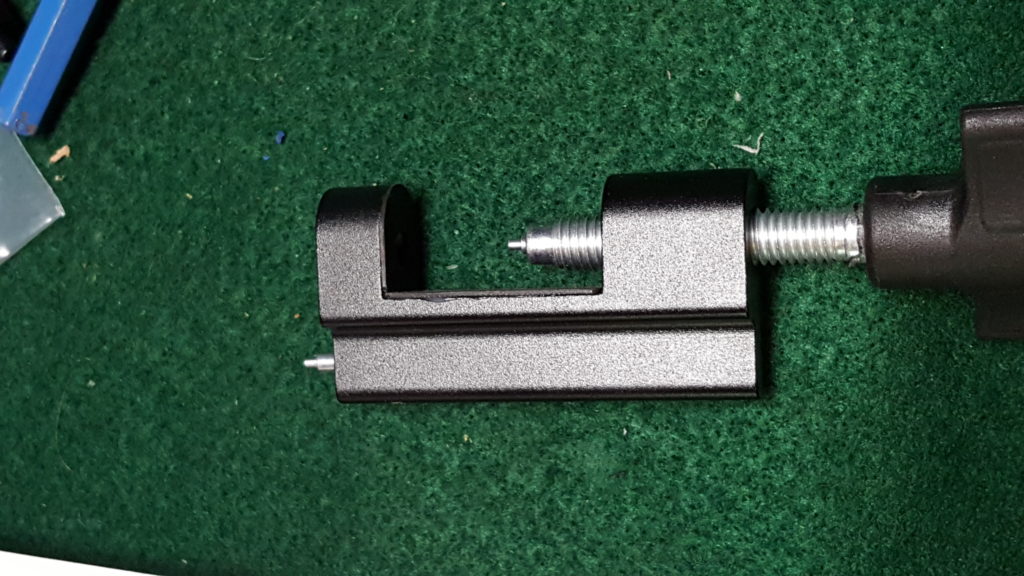
A few years ago I started using the Wheeler trigger guard tool and it works great.  Click here to see it on Amazon.

This is how I use it:

  1.  Install the end of the triggerguard that uses the set screw.  That’s the end with the blind hole – the roll pin goes in the end where a hole goes all the way through.
  2. I lightly oil the pin to make things easy and tap it with a small hammer just to get it started.
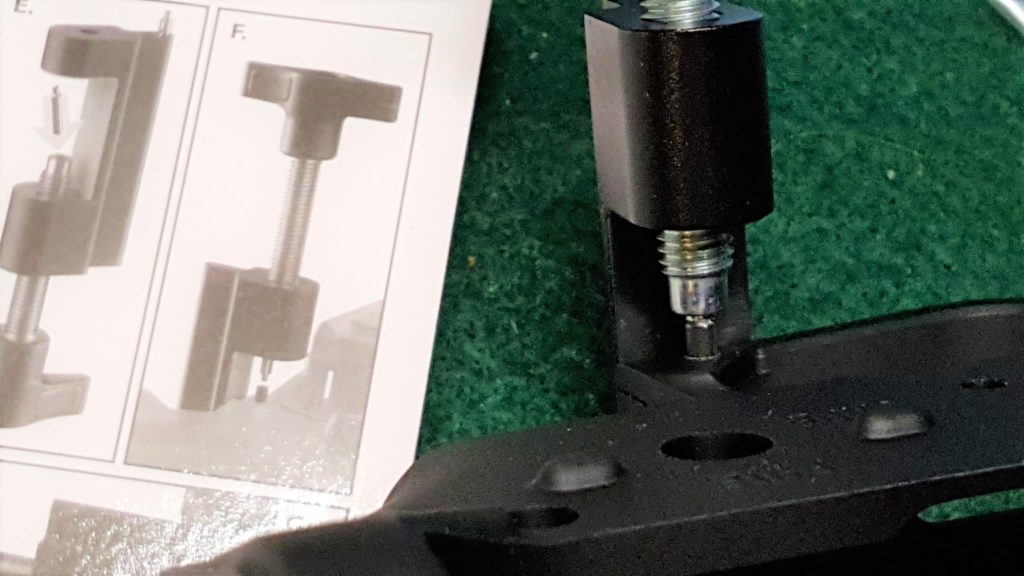
  3. I then use the Wheeler tool with the shorter starter pin.  The starter pin has a nipple that centers it on the roll pin.
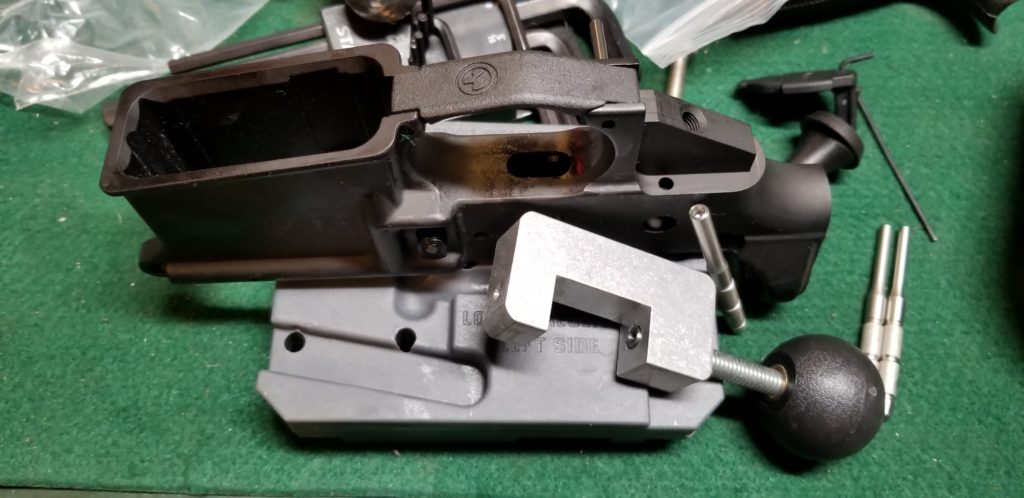
  4. Keep the parts aligned and turn the knob to drive the pin in.
  5. Stop when you have inserted the pin – it’s that easy.

Note, Scott Igert of Modern Antique Firearms recommends you put a business card or something between the frame and your receiver to protect it from scratching.

It has two tips – here you can see one installed and one stored in the frame of the tool.  The short one is for installing and the long one is for pushing a roll pin out.
Simply stop once the pin is flush.

Note, I actually have one from another maker also.    I’m holding it in my hand.  It does the same conceptually but is heavier made.  I’ve built probably 4-6 ARs with the Wheeler unit and it seems to be holding up fine.  The other is a Little Crow unit from Brownells for about $39.99 + S&H and its built like a tank but you do pay more for it.

Little Crow Trigger Guard Pin Pusher

I hope this helps you out.  


If you find this post useful, please share the link on Facebook, with your friends, etc. Your support is much appreciated and if you have any feedback, please email me at in**@ro*********.com. Please note that for links to other websites, I may be paid via an affiliate program such as Avantlink, Impact, Amazon and eBay.


Fitting a Csspecs Steel Magazine To A SDS Lynx 12ga Shotgun

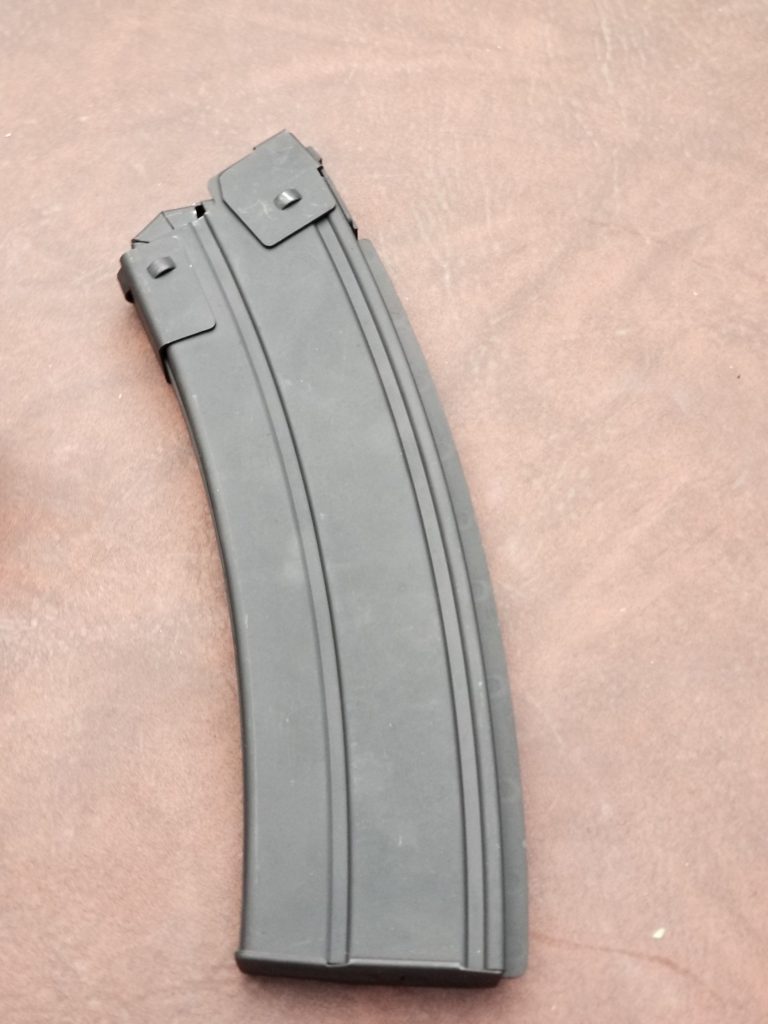
Csspecs makes wicked steel magazines for a variety of niche weapons. They make a well respected magazine for 12 gauge Saiga shotguns. That meant it would fit my SDS Lynx 12ga also.

I placed my order on their website and within a week receive to magazines that were built like a tank. I had a problem with some of the plastic SDS 10 round magazines in terms of the follower going all the way to the top. The Csspecs follower shot up in the top so fast I think you could take off a body part 🙂 just kidding but it is very well done.

You have to love a magazine that is so heavily made it can be used as a defensive weapon all by itself 🙂  Seriously, Csspecs makes some wicked mags and they tell you right up front that you may need to do a bit of fitting and I did.

Fitting The Magazines

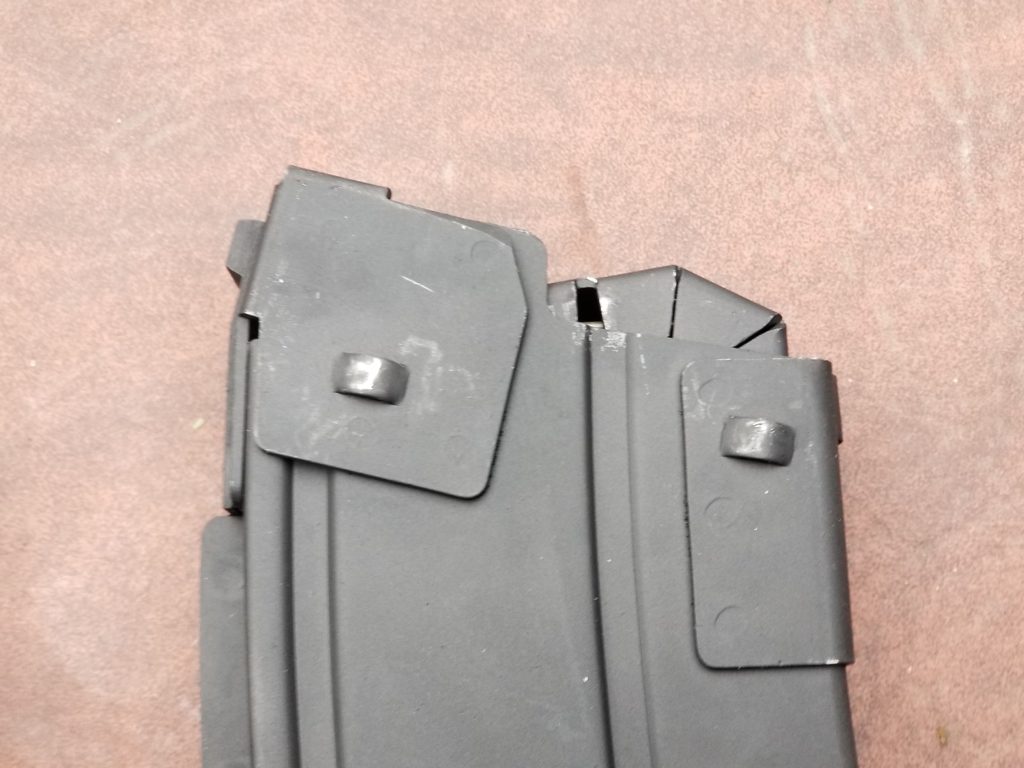
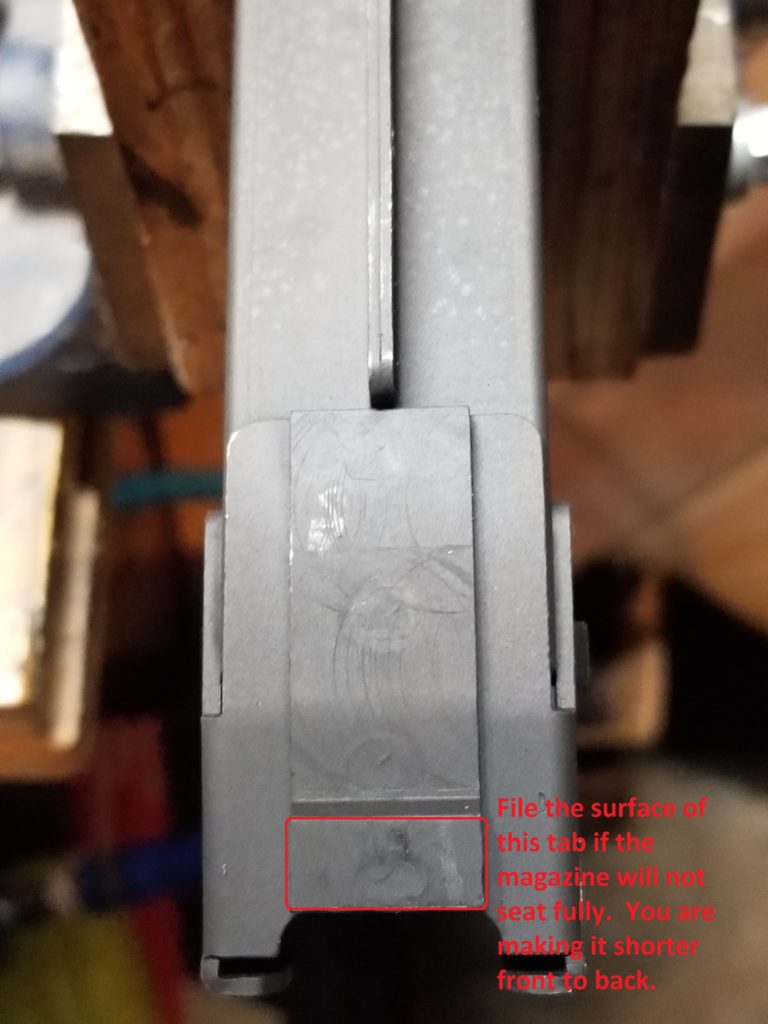
The magazines come with a small instruction pamphlet for fitting that makes perfect sense to anybody who’s ever had to fit AK magazines. Step one is to make sure that the magazine fits correctly from front to back. If it does not you trim a little bit off the back tab of the magazine.

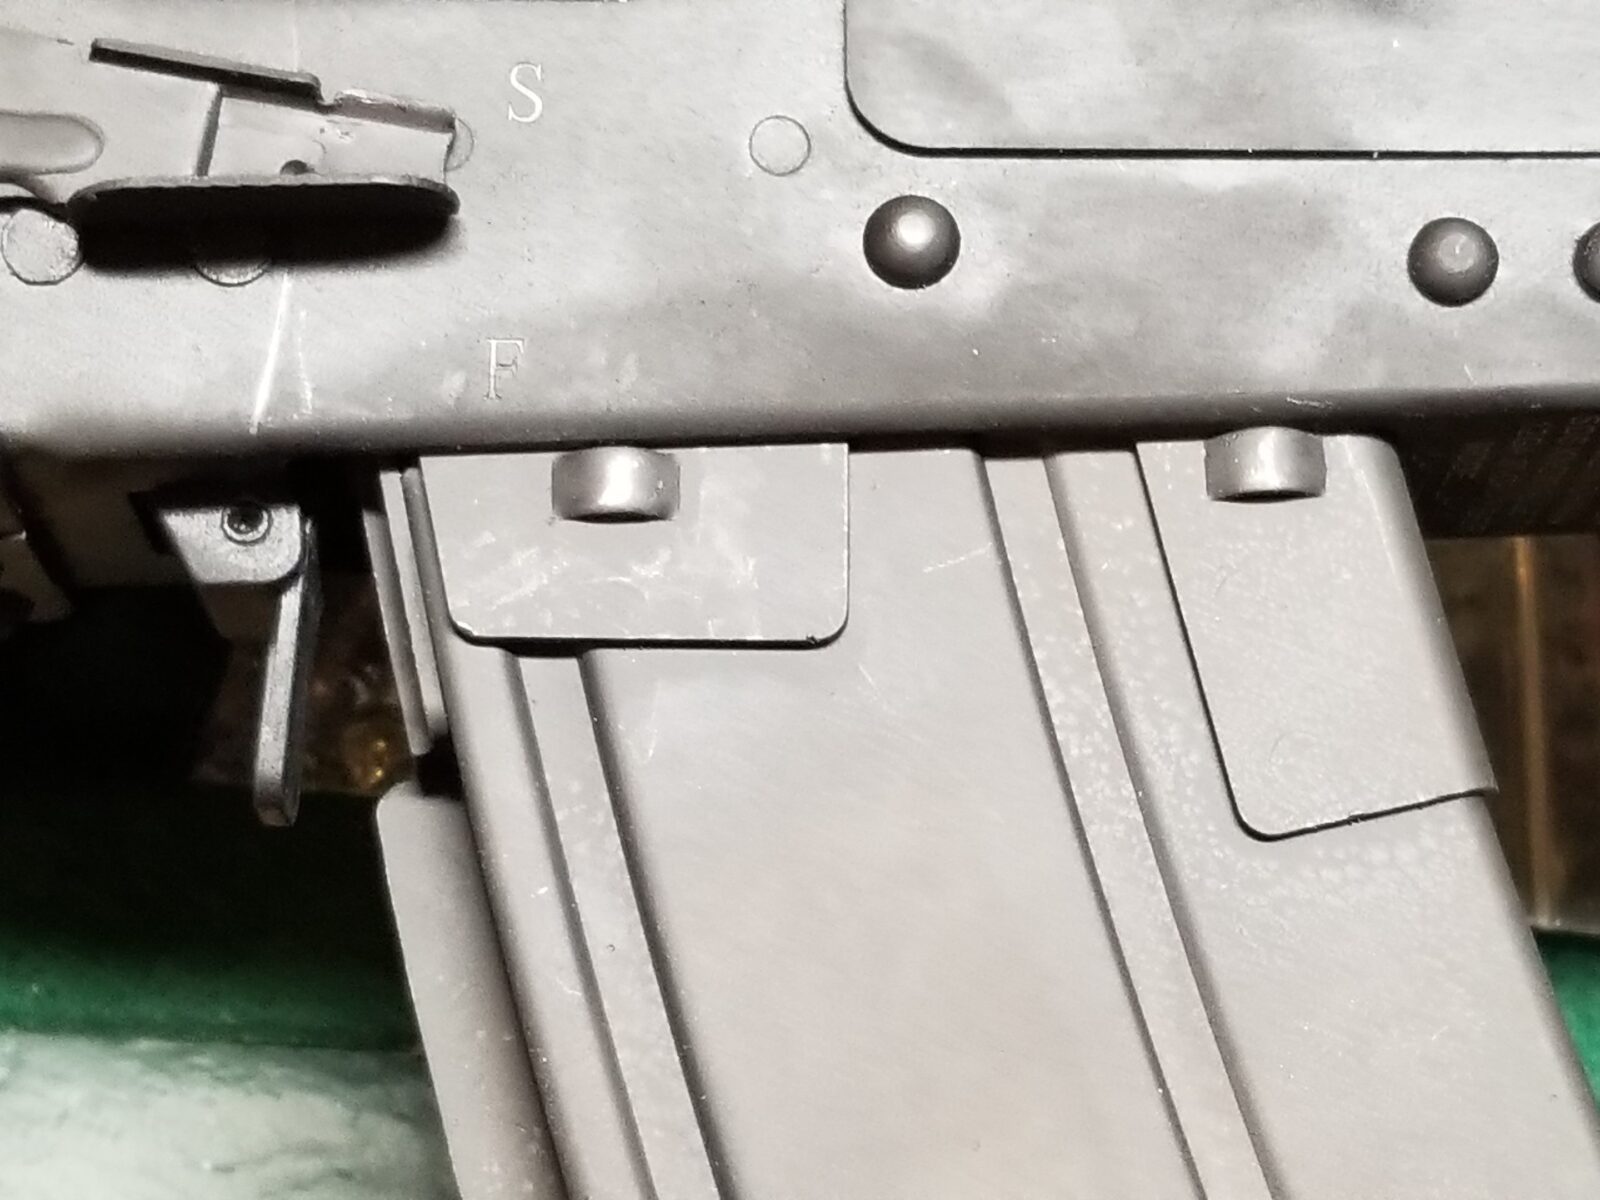
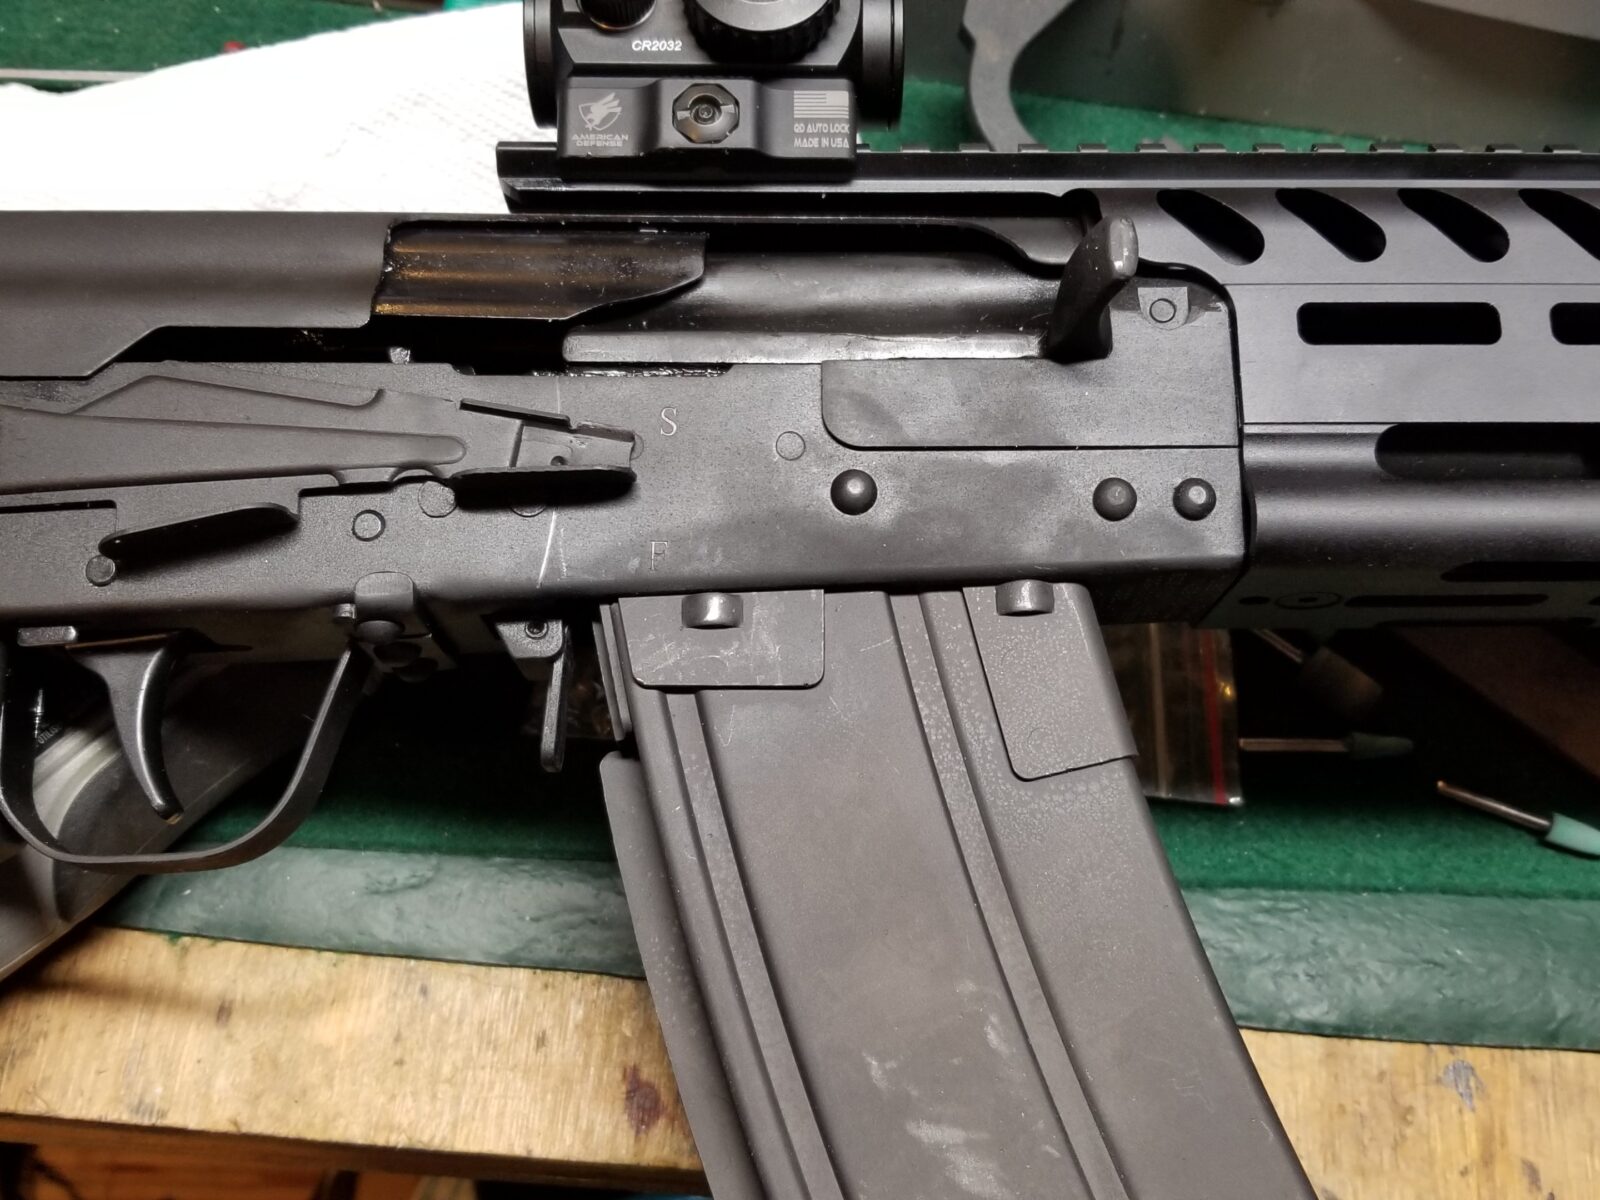
In my case it set right in. You can see how the mag stops are coming right against the bottom of the receiver.  This is good!  If I did need to trim it, I would have carefully filed a bit and tested over and over until the mag stops contacted the receiver, polished the surface and applied cold blue per the details in the next step.

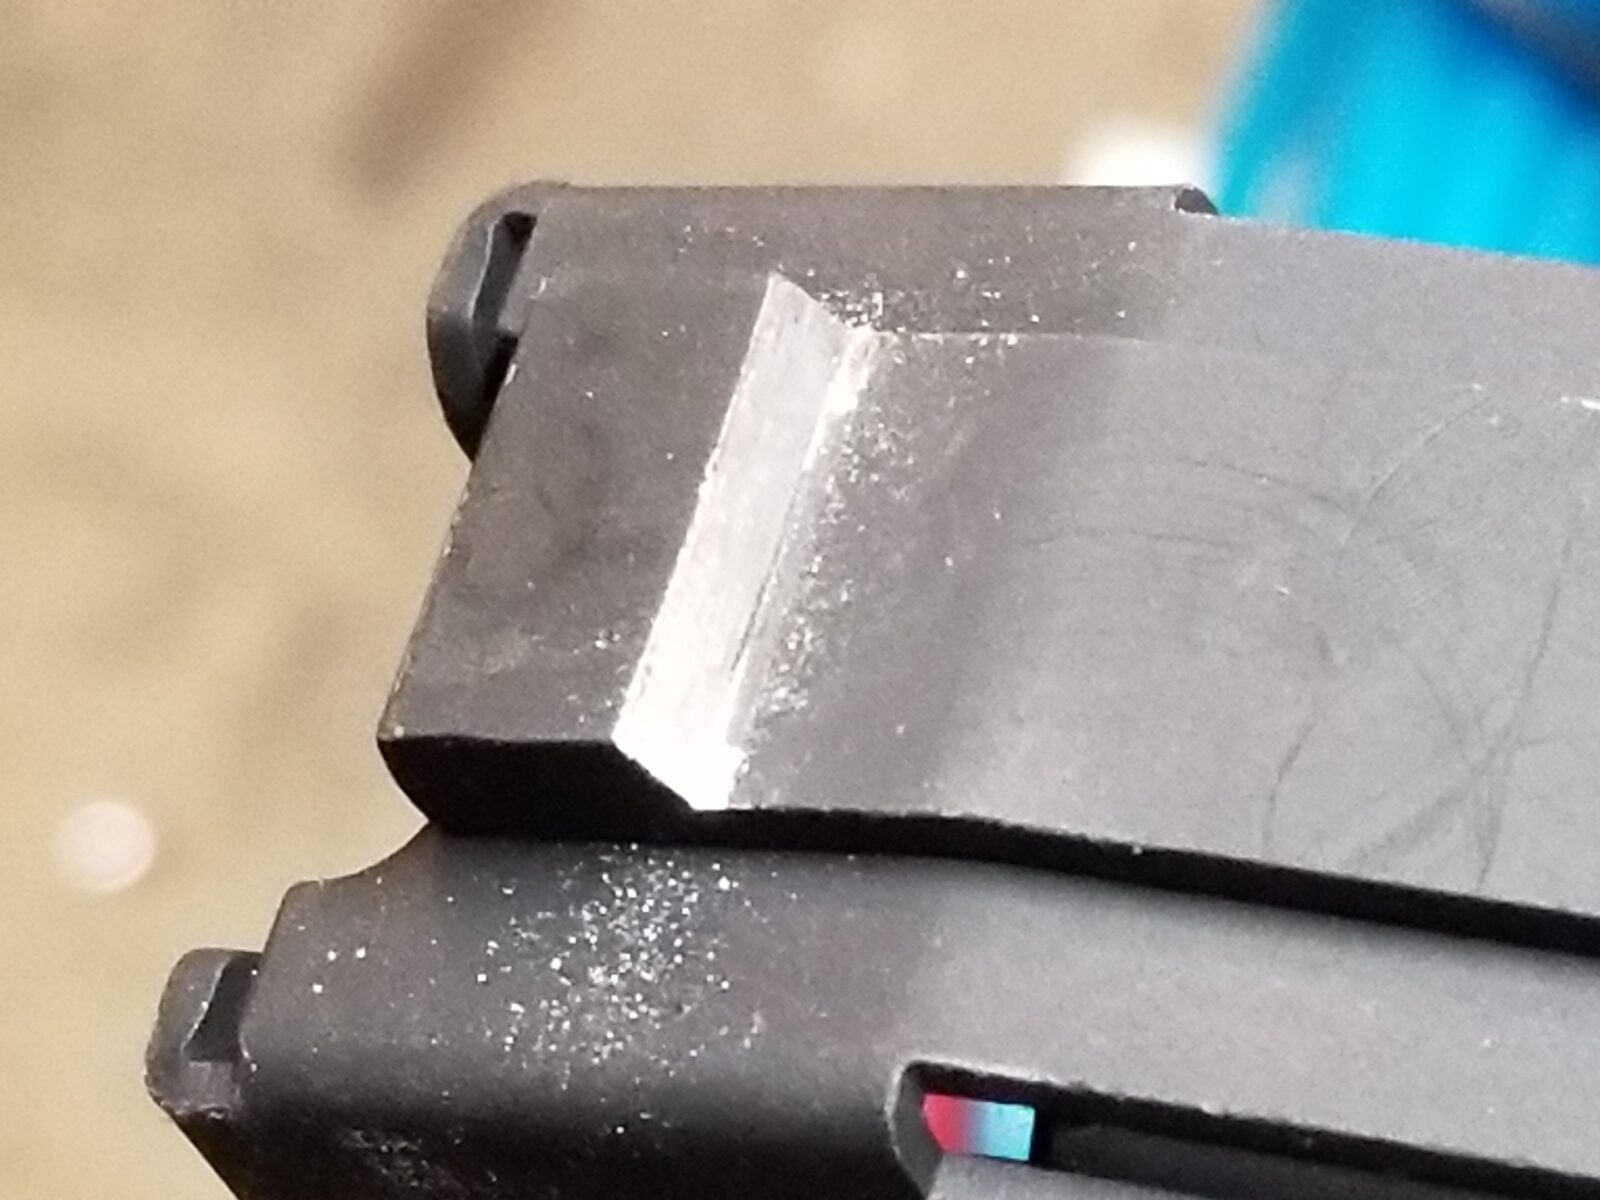
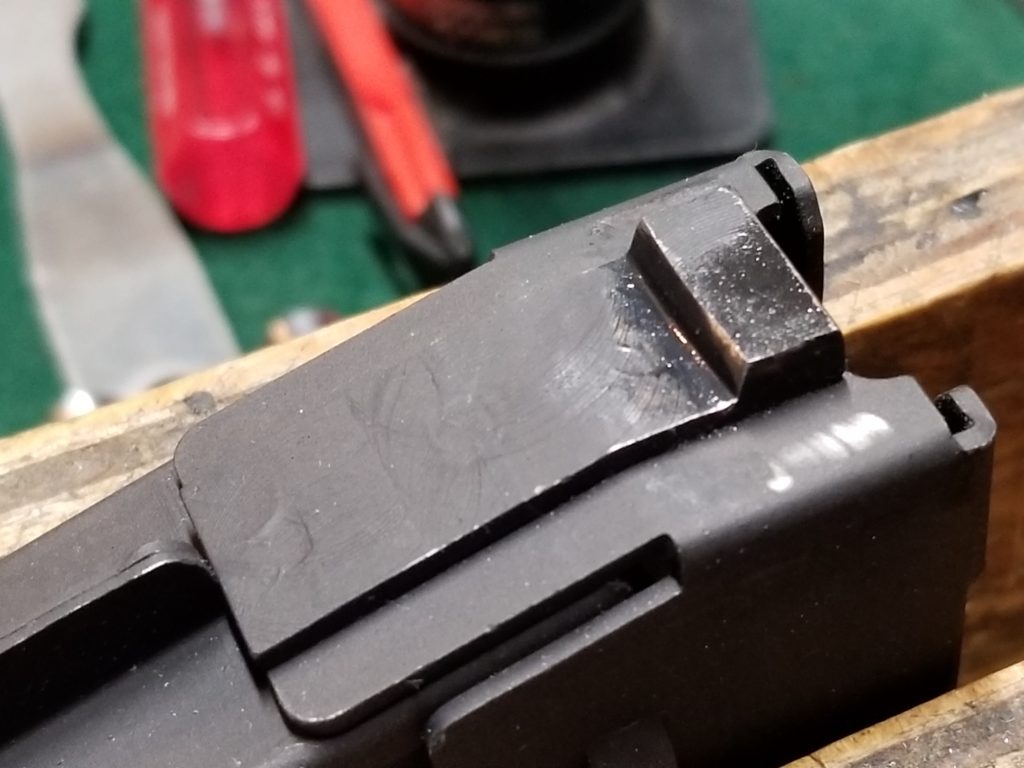
In my case, the magazine locking lever would not engage the mag’s tab at all. That means that little tab was too thick and needed to be filed down. This is really a situation where you want to use a fine hand file and take off a little bit at a time and test – don’t rush this. Take care to maintain the slight angle. This helps with the lock up.  Do not make it flat and try to keep it as straight across as possible.

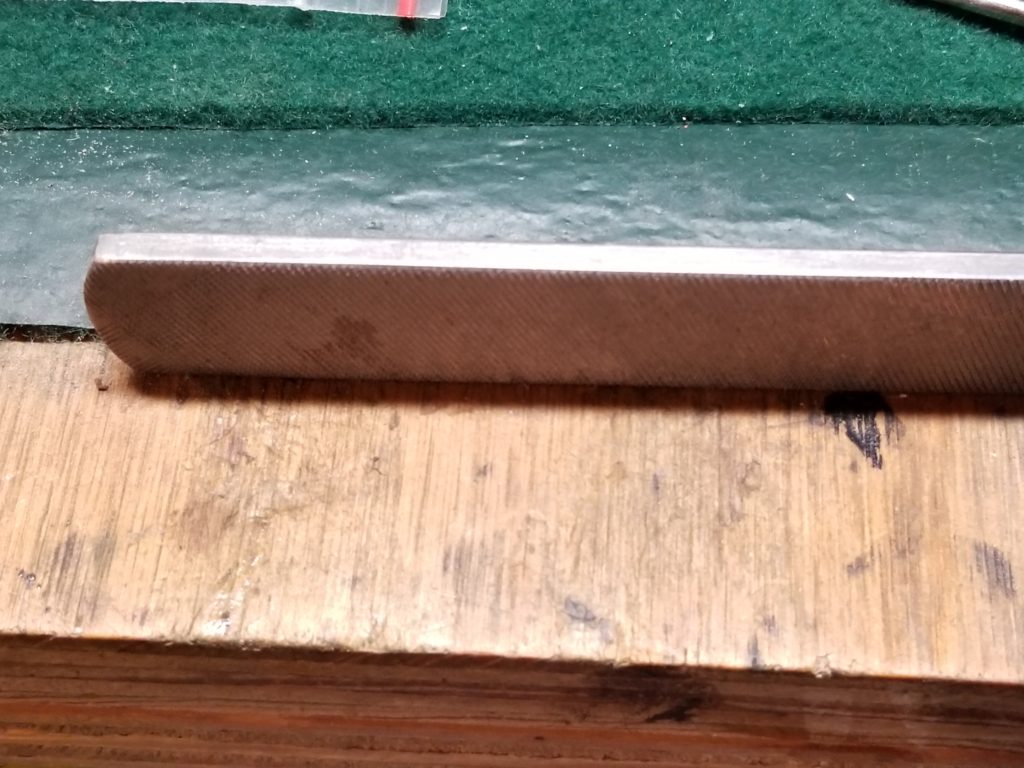
I can’t stress enough, take your time.  The above was done with a single-cut file where one edge was ground down so I can make cuts like this with out damaging the surface.  You can sometimes buy files like I show below with one or both edges left plain.  In my case, I used my belt sander to remove the teeth on that side.

This is not a situation where you want to rush. Take a little bit off at an angle and test over and over. It probably took me about 5 minutes per magazine. You want the magazine to lock into place firmly. If it is really loose I would recommend welding some material back on and fixing it.

After the filing, I did use a fine rubber abrasive polishing but in my Dremel to smooth the surface out so the lock up process would be smoother.

After I had the fitting correct, I use the little bit of Brownells Oxpho blue liquid on Long dobbers and blued the surface followed by some oil.

That is all there was to it. I hope this helps you out. Kudos to CS specs for making some very nice magazines. These things are rock solid and I may very well pick a couple more up at some point.


If you find this post useful, please share the link on Facebook, with your friends, etc. Your support is much appreciated and if you have any feedback, please email me at in**@ro*********.com. Please note that for links to other websites, I may be paid via an affiliate program such as Avantlink, Impact, Amazon and eBay.


Tuning SDS 10 Round Magazines for Saiga and Lynx Shotguns

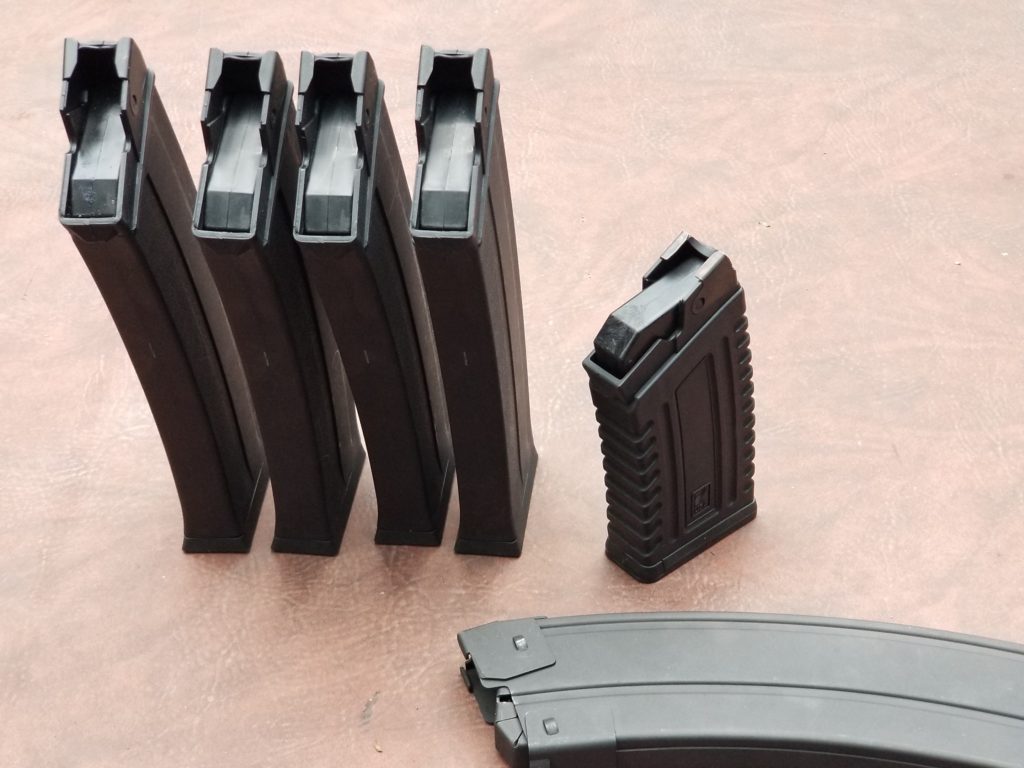
Well, Scott, Brooks and I went shooting a few weeks back. I was really excited to take my new SDS Lynx out and I had bought four brand news SDS 10 round magazines that I took out of the wrapper and threw in my range bag. That turned out to be a mistake. The photo above is of Scott trying to clear yet another jam from the Lynx with one of the 10 round magazines inserted – they had feed failures constantly.

One of the things I was told years ago was to test everything before you rely on it. Now granted I was just going to the quarry to shoot with my friends but I really should have tested those magazines. Of the four, only one kind of worked. The followers were all hanging up about an inch from the top. The five round SDS magazine that came with the shotgun ran great but five founds at a time is not the most exciting thing. It was frustrating and disappointing at the same time.

The Lynx and the mags went back in the gun case and I felt pretty stupid for not checking the mags before going. On the other hand, they were brand new and should have worked. I was more than a bit miffed also – clearly there was a manufacturing issue, Followers should spring to the top of a magazine like a rocket – not get stuck part way down. A person should not need to buy magazines and then tune them inside – getting them to fit an AK-style weapon, sure that happens all the time, but not needing to redo the internals.

In the following photos notice how the followers are not all the way to the top compared to the small 5 round magazines.

At that point I made a decision – the SDS magazines really did look well made and rather than send them back, I decided to tune them and document what I did to share with others.

The Lynx shotgun uses Saiga magazines so this design is common and writing up what to do might very well help others out. So with my mind made up, it was just a matter of finding the time to do it.

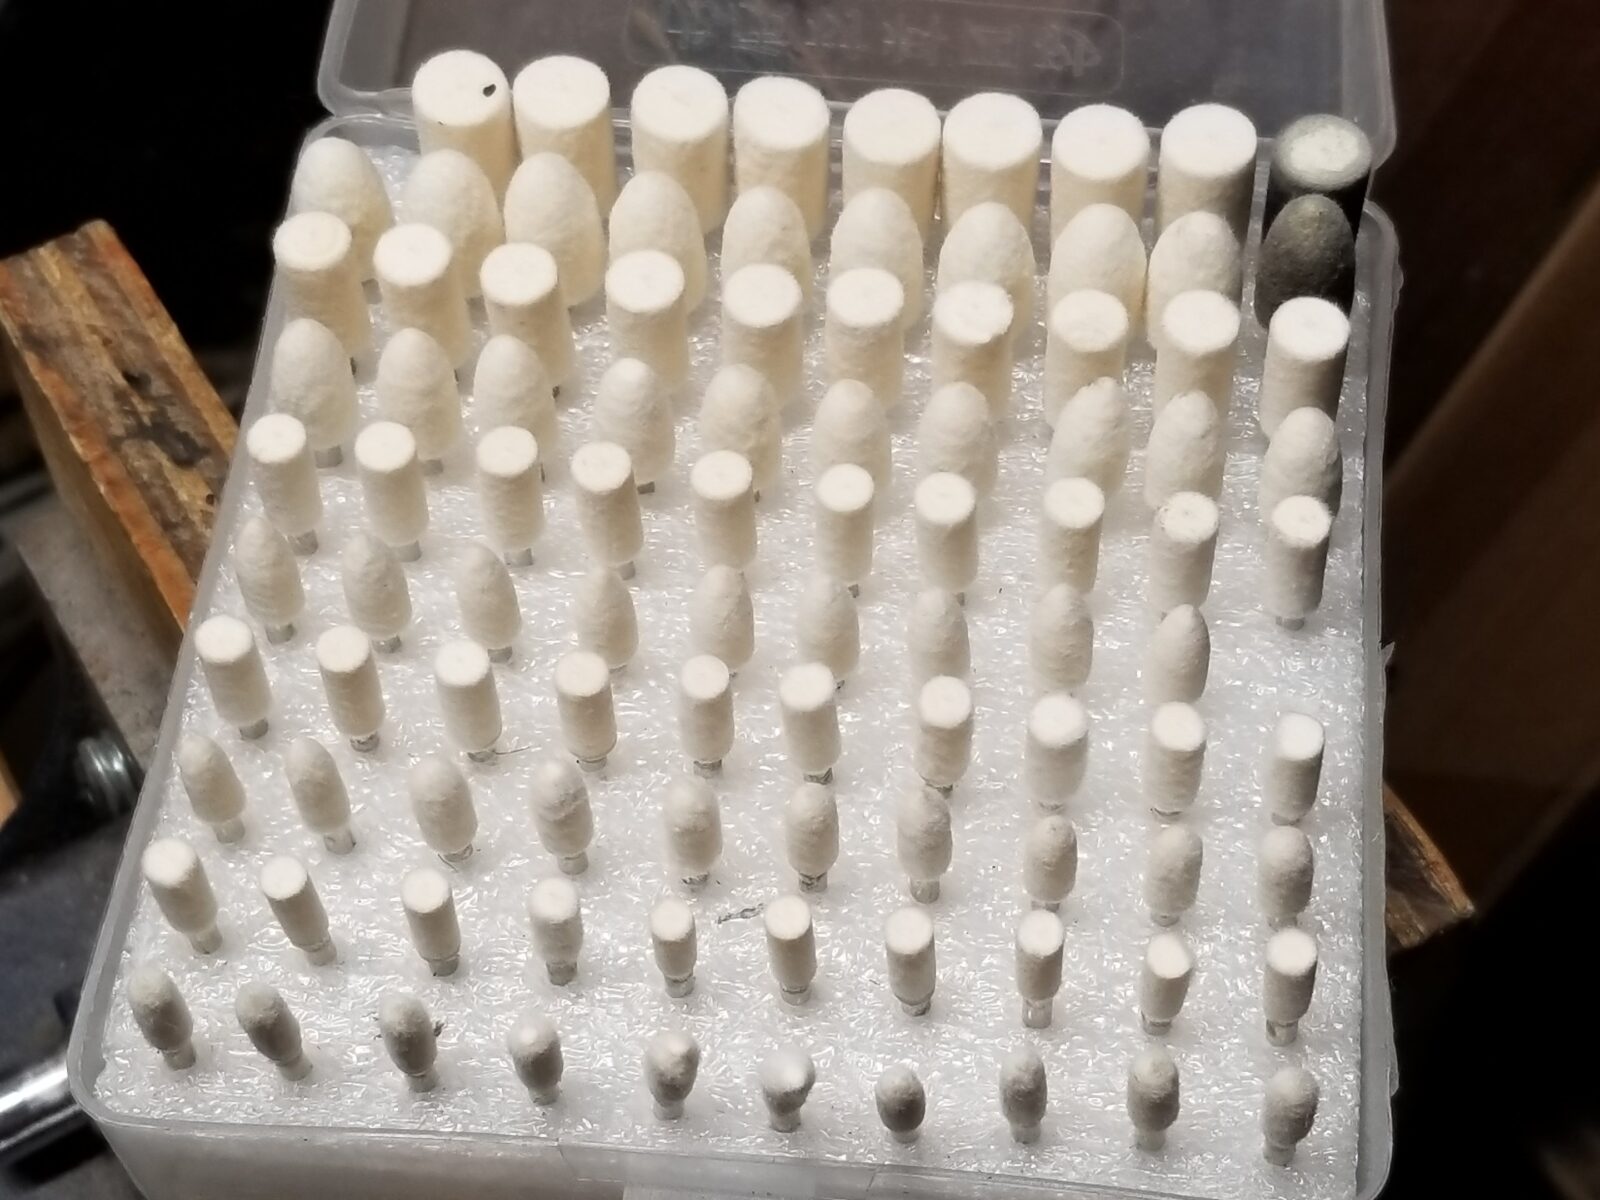
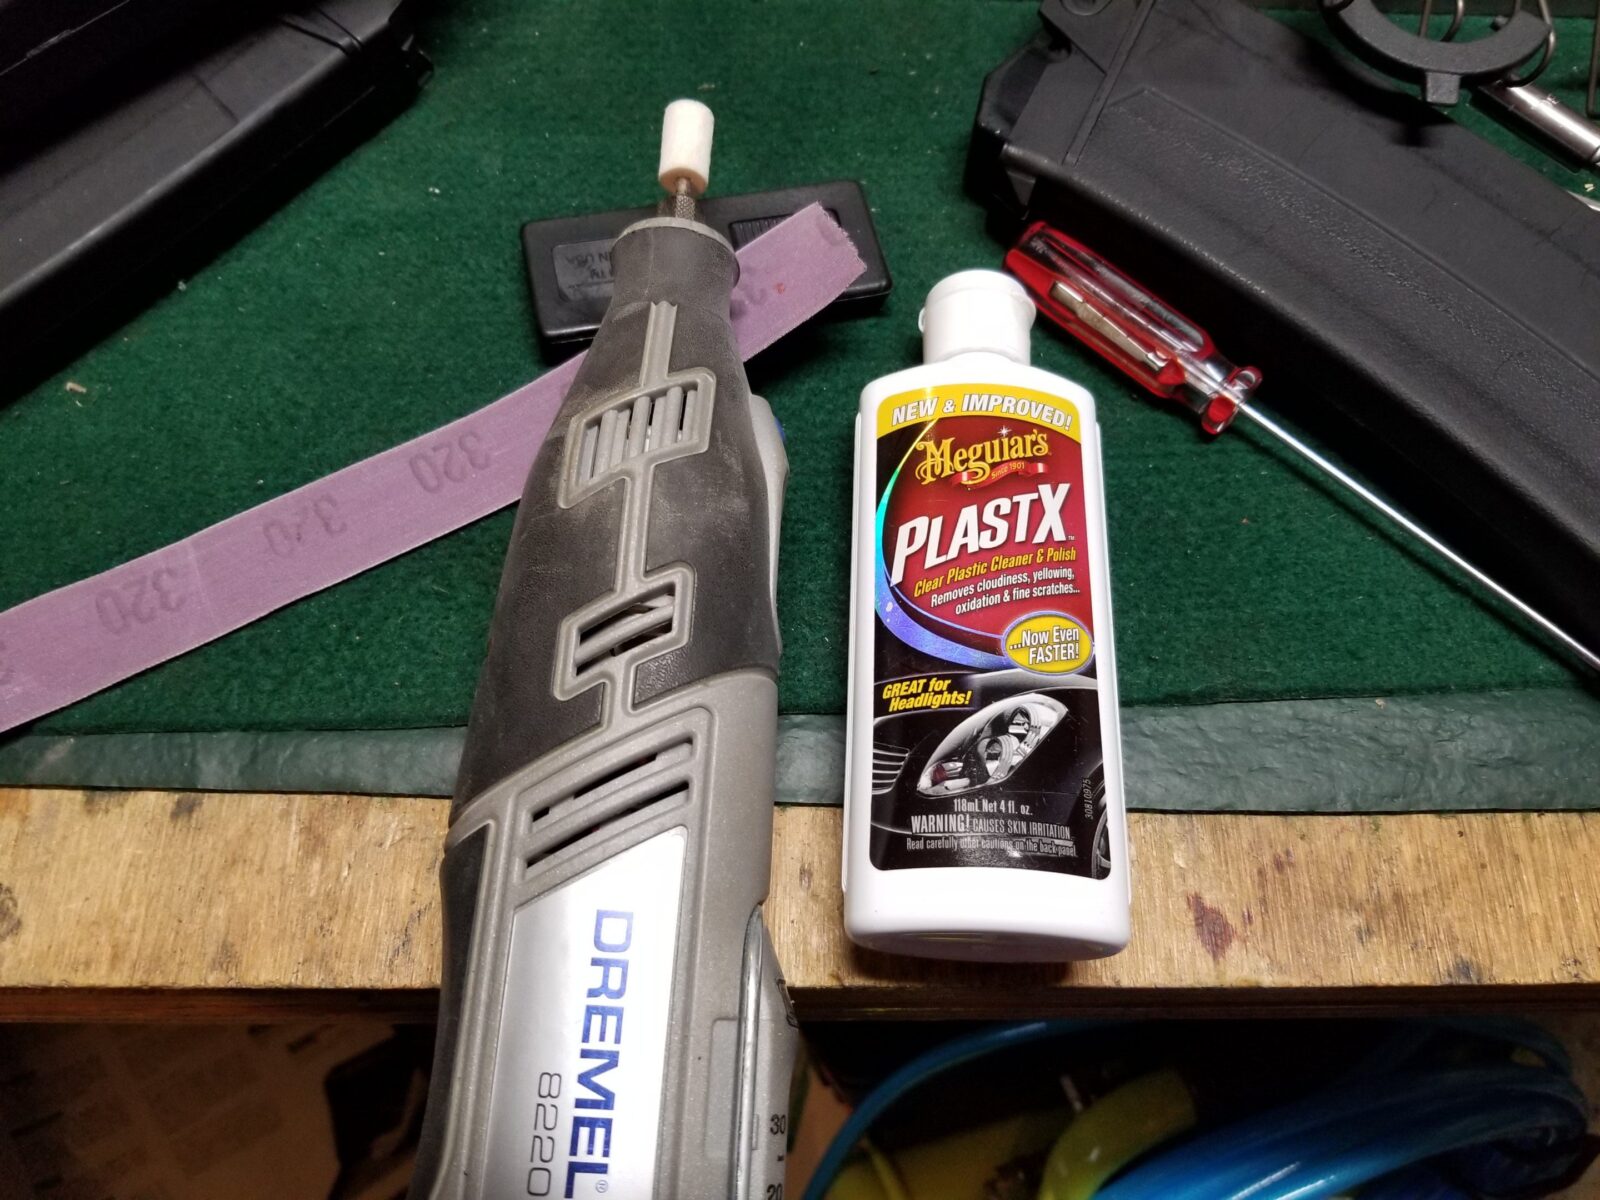
A couple of weeks went buy before I could dig in but finally the time came. I’m going to try and show you what I found and explain what you need to do to correct it. You’re going to need a Dremel (or similar rotary tool), rubberized polishing bits, felt/wool polishing bits, and a plastic polish – I use Plastix a lot but even toothpaste would work. Yes, toothpaste is a very fine grit polish – you can even use it to polish plastic headlights.

Disassembling a SDS Magazines

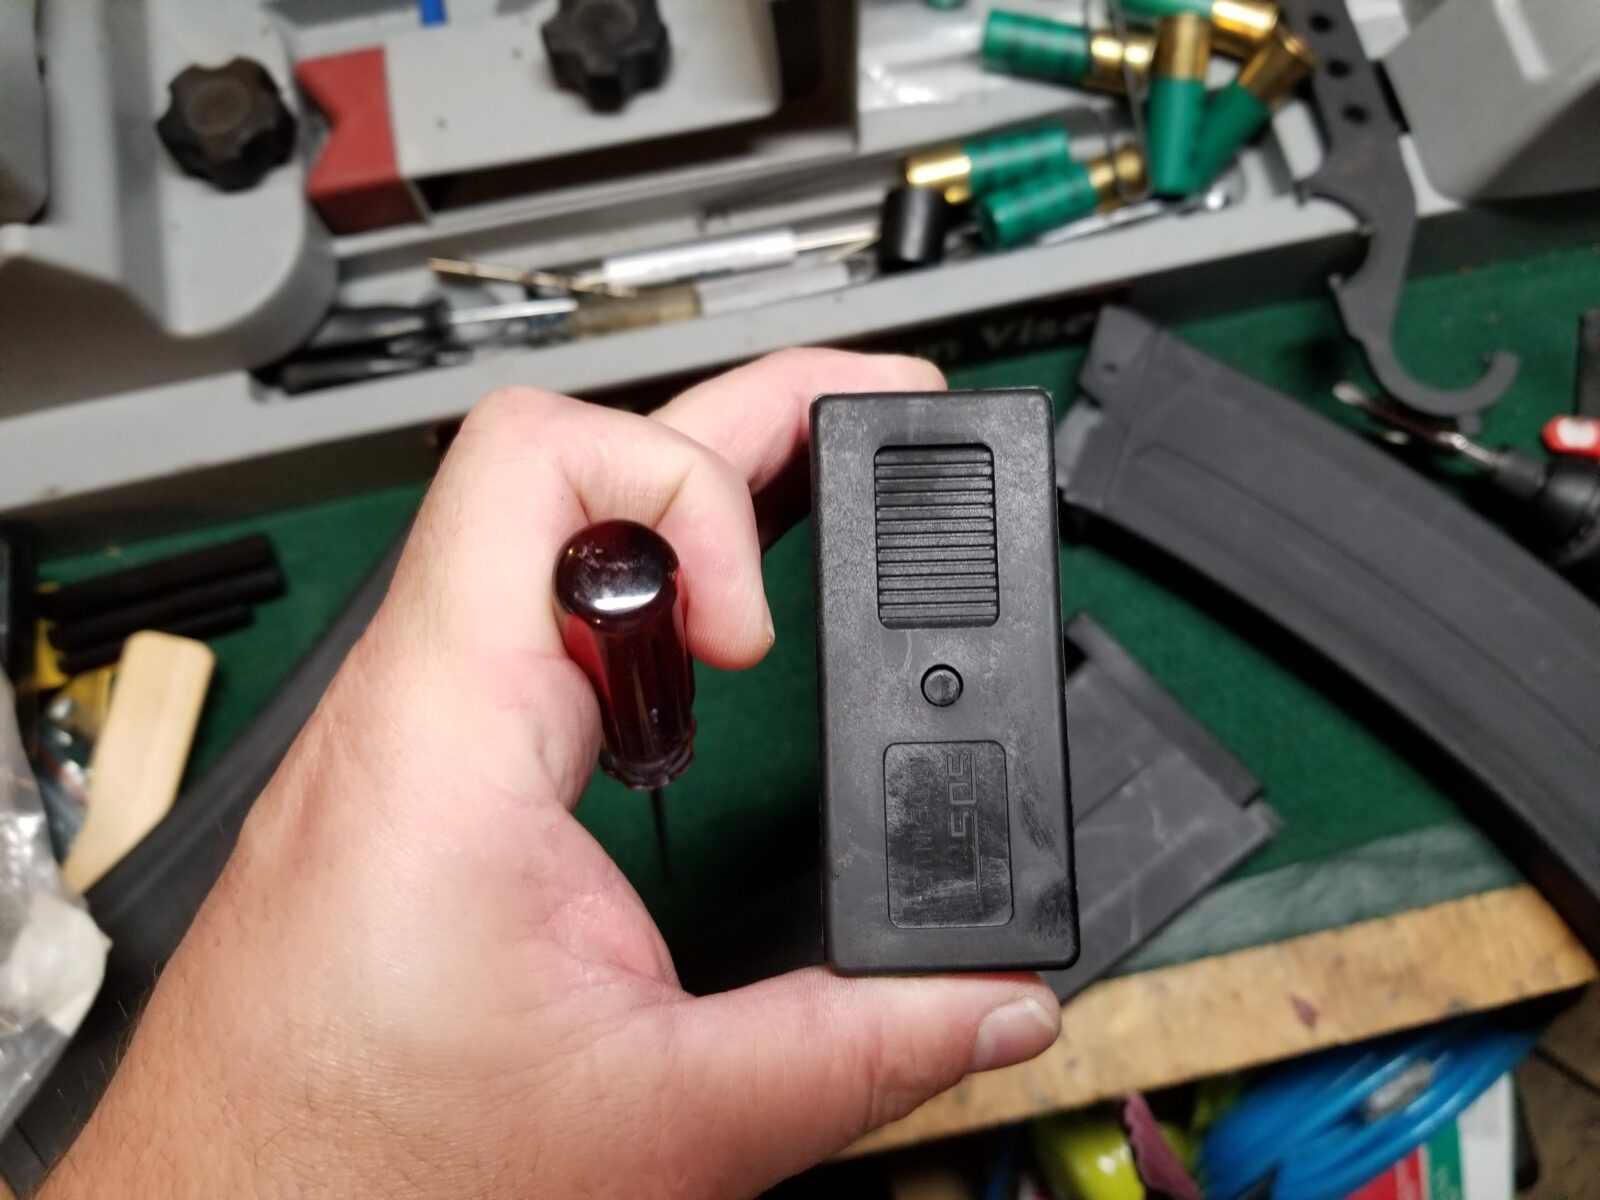
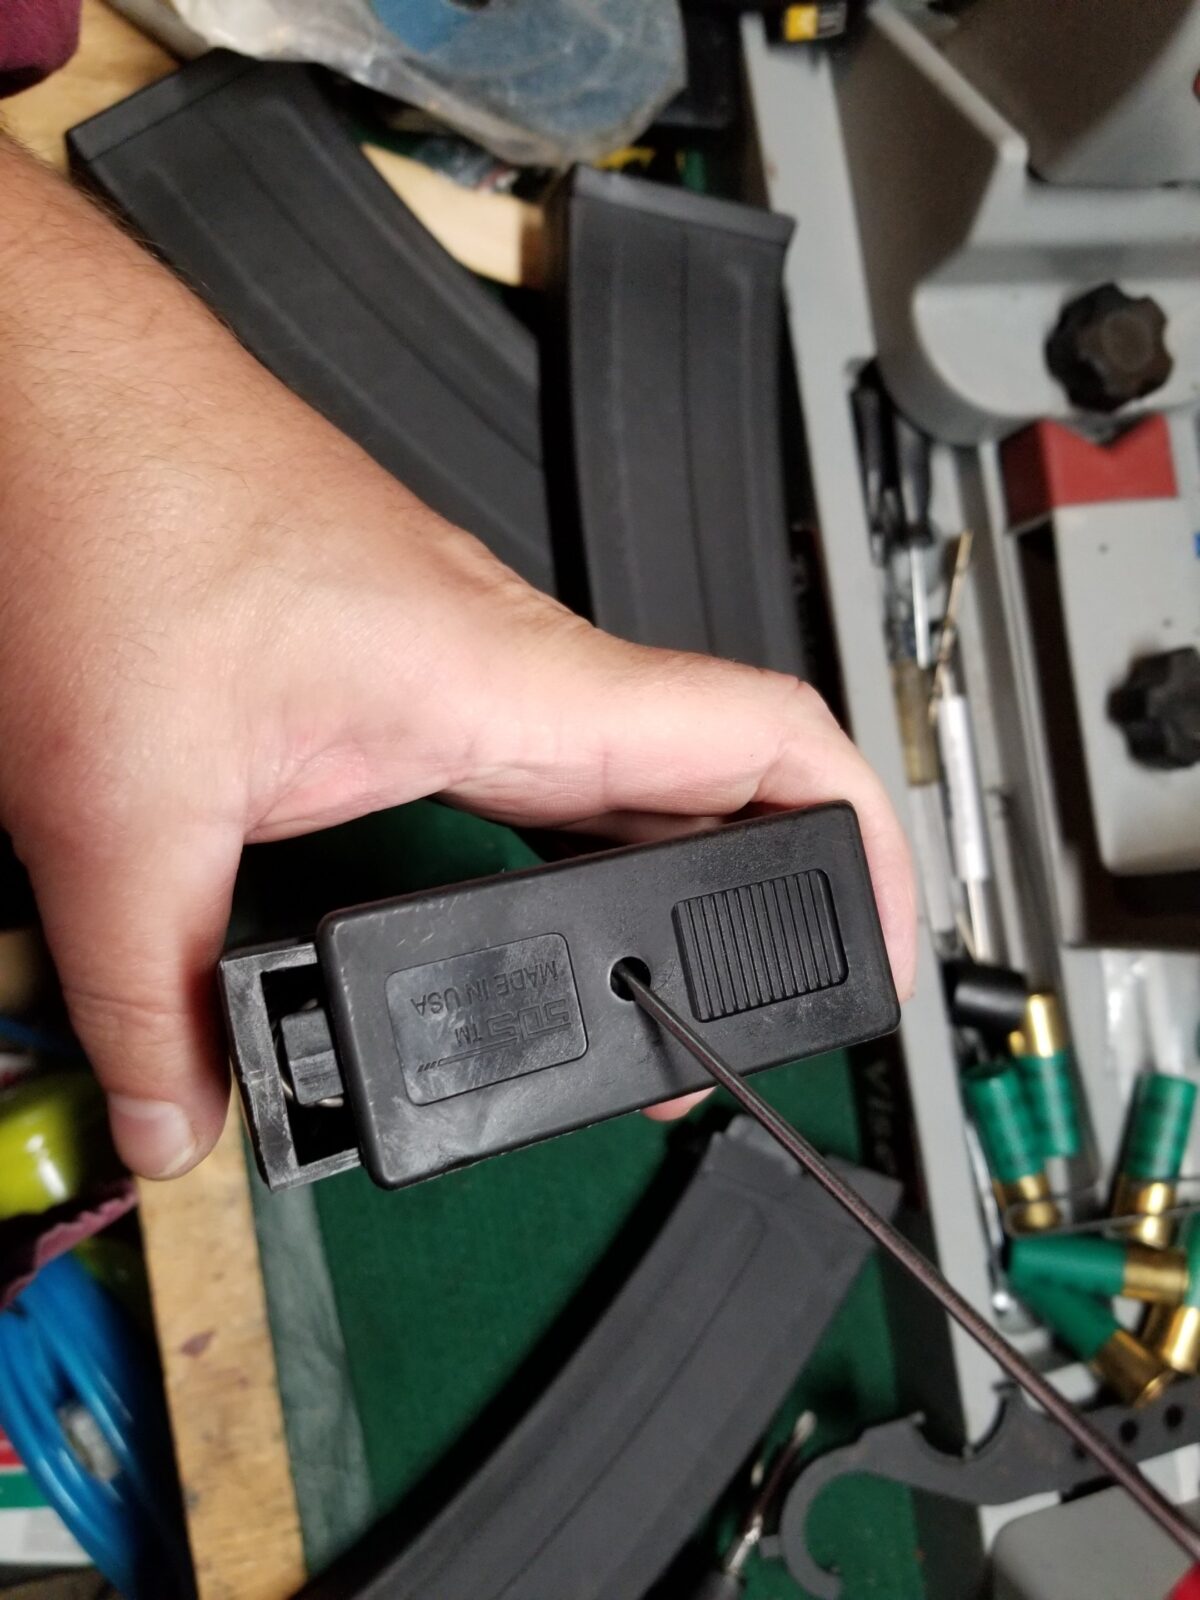
The SDS magazine comes apart just like any AK magazine – you push the button on the bottom with a screw driver and slide the floor plate off of the magazine body. Now take a look at it. It can only push off one. All of the magazine Parts in the SDS can only go one way.

So push the button down and shove the floor plate in the direction of the opening. You may need to use a small Mallet or something hard to give it a little bit of a whack to get it started.

Now once you get that floor plate off the rest is going to want to spring out so use your thumb to keep it from flying across the room or in your face.

Fixing The Problem Area

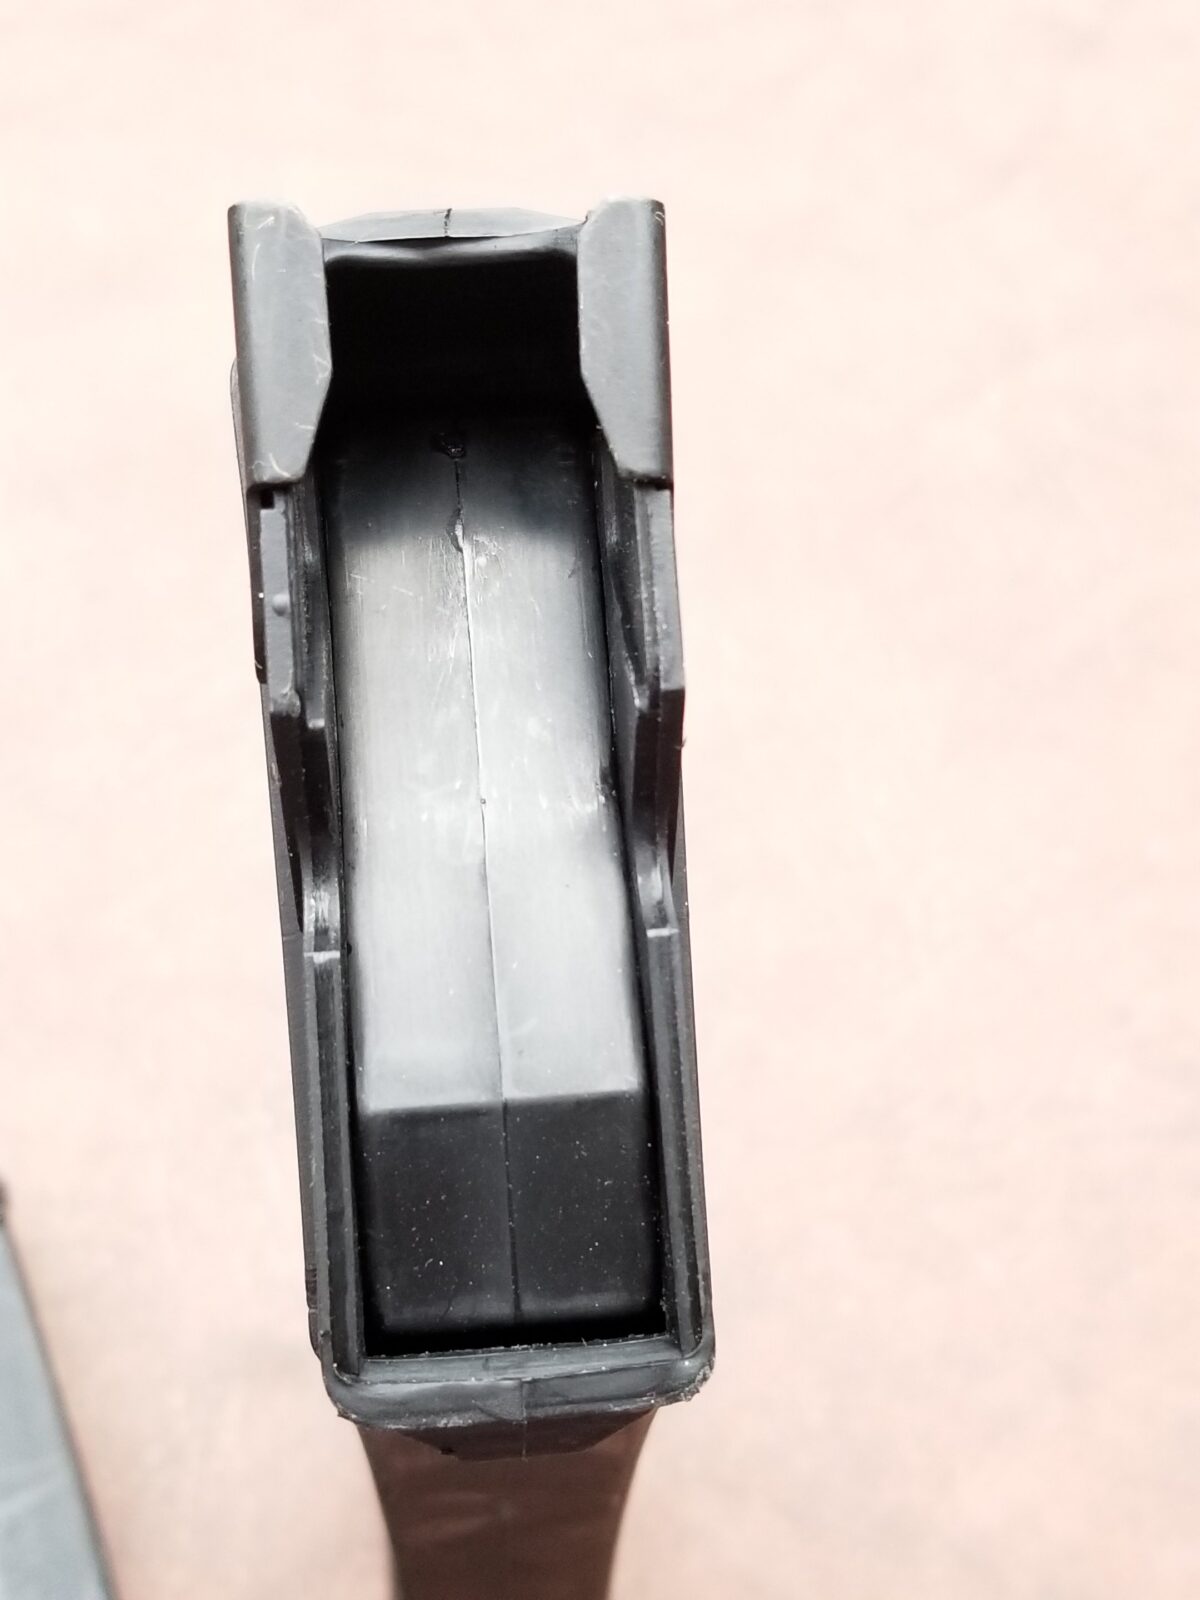
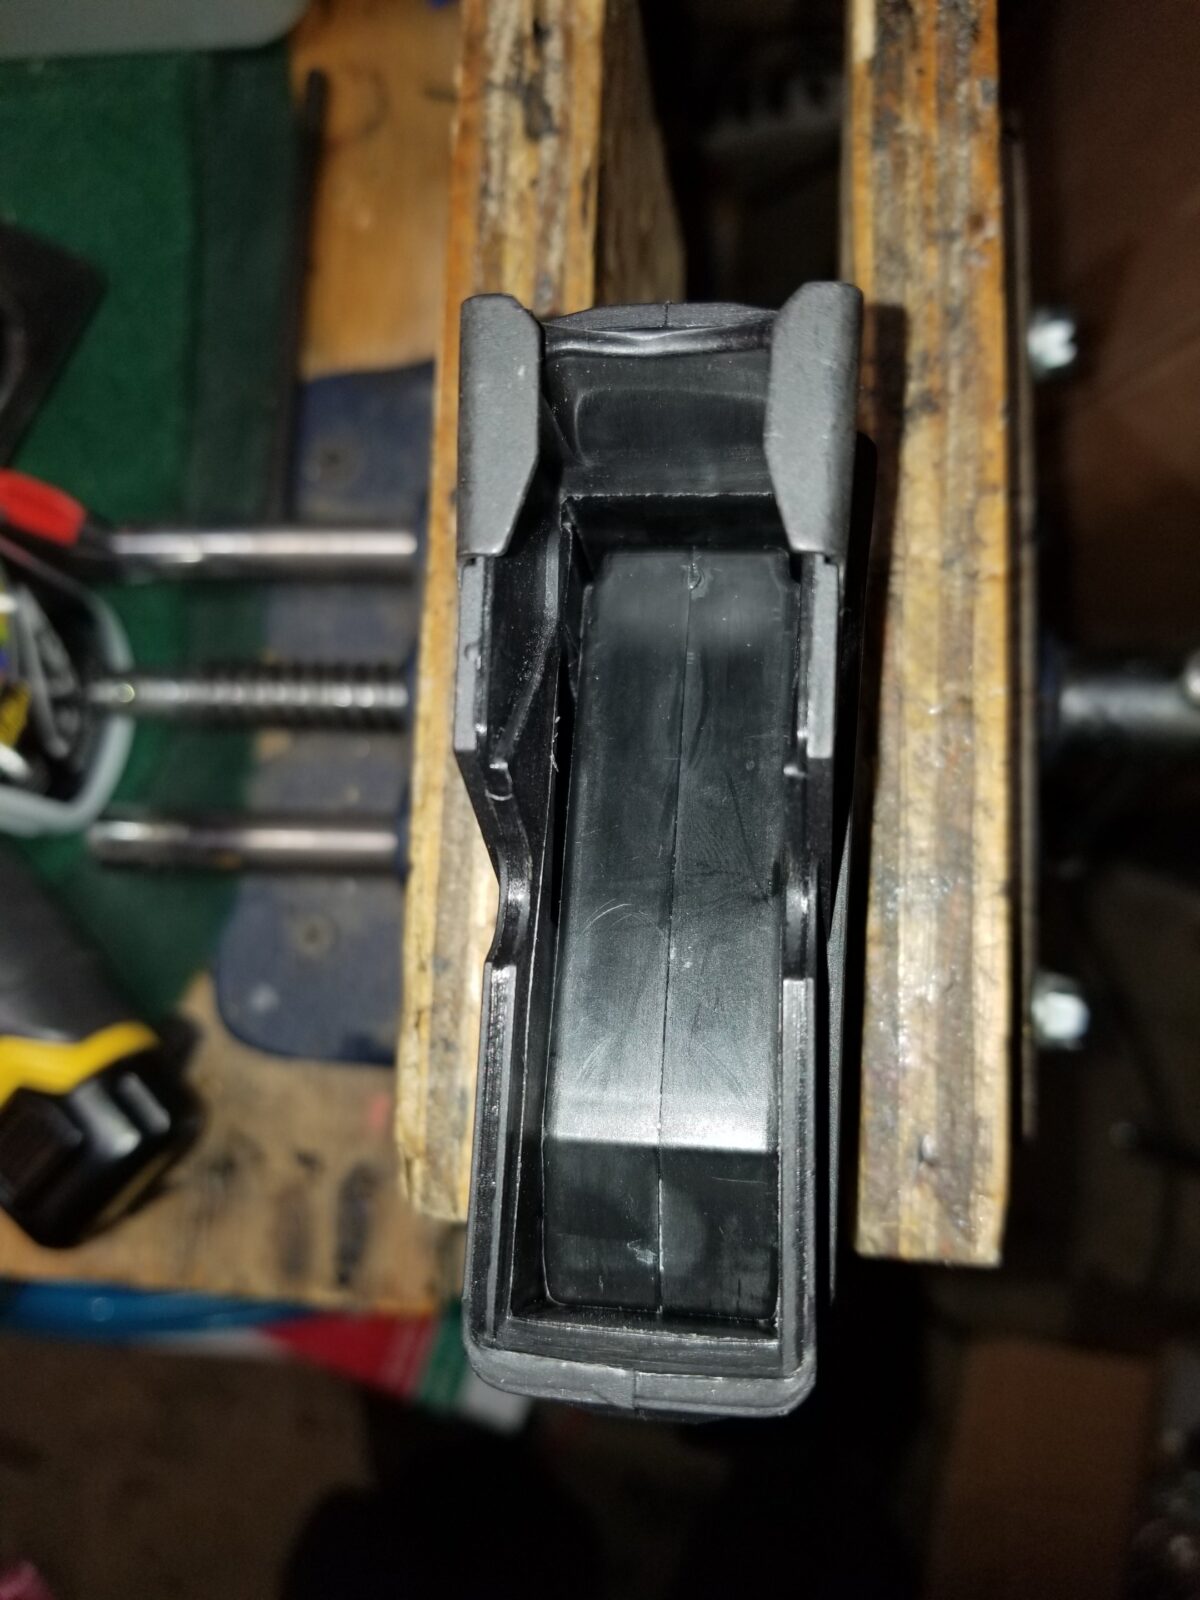
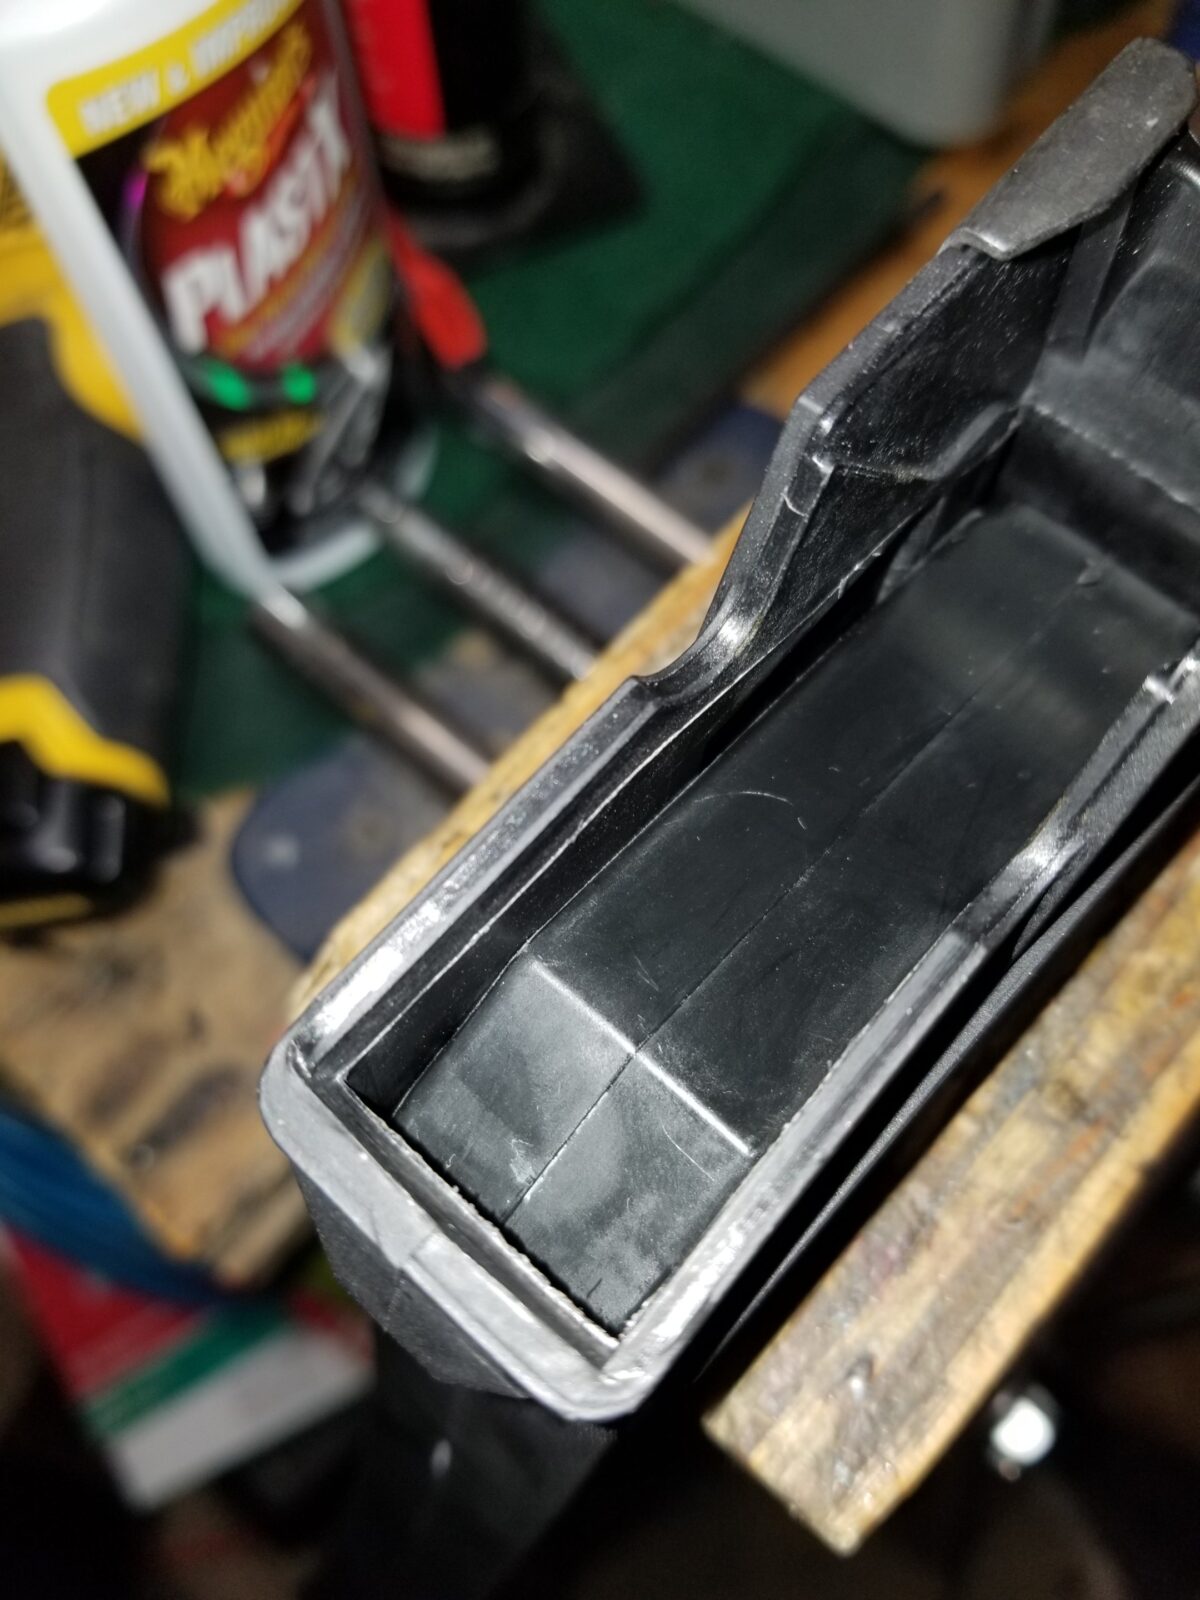
The problem area in the magazines seem to be in the upper inch to inch and a half. You’ll see a mold seam that needs to be erased using the Dremel tool with the rubberized abrasive tips as well as it being tight in general all the way around.

So the first thing I did was to use a small rubberized abrasive tip to erase the mold seemed entirely that runs around the inner area of the magazine. In the next two photos you’ll see a shiny protruding lip inside the magazine that is just above the follower — that is the mold seam I am speaking of. It’s important to note that the follower is binding even before getting to that seam.

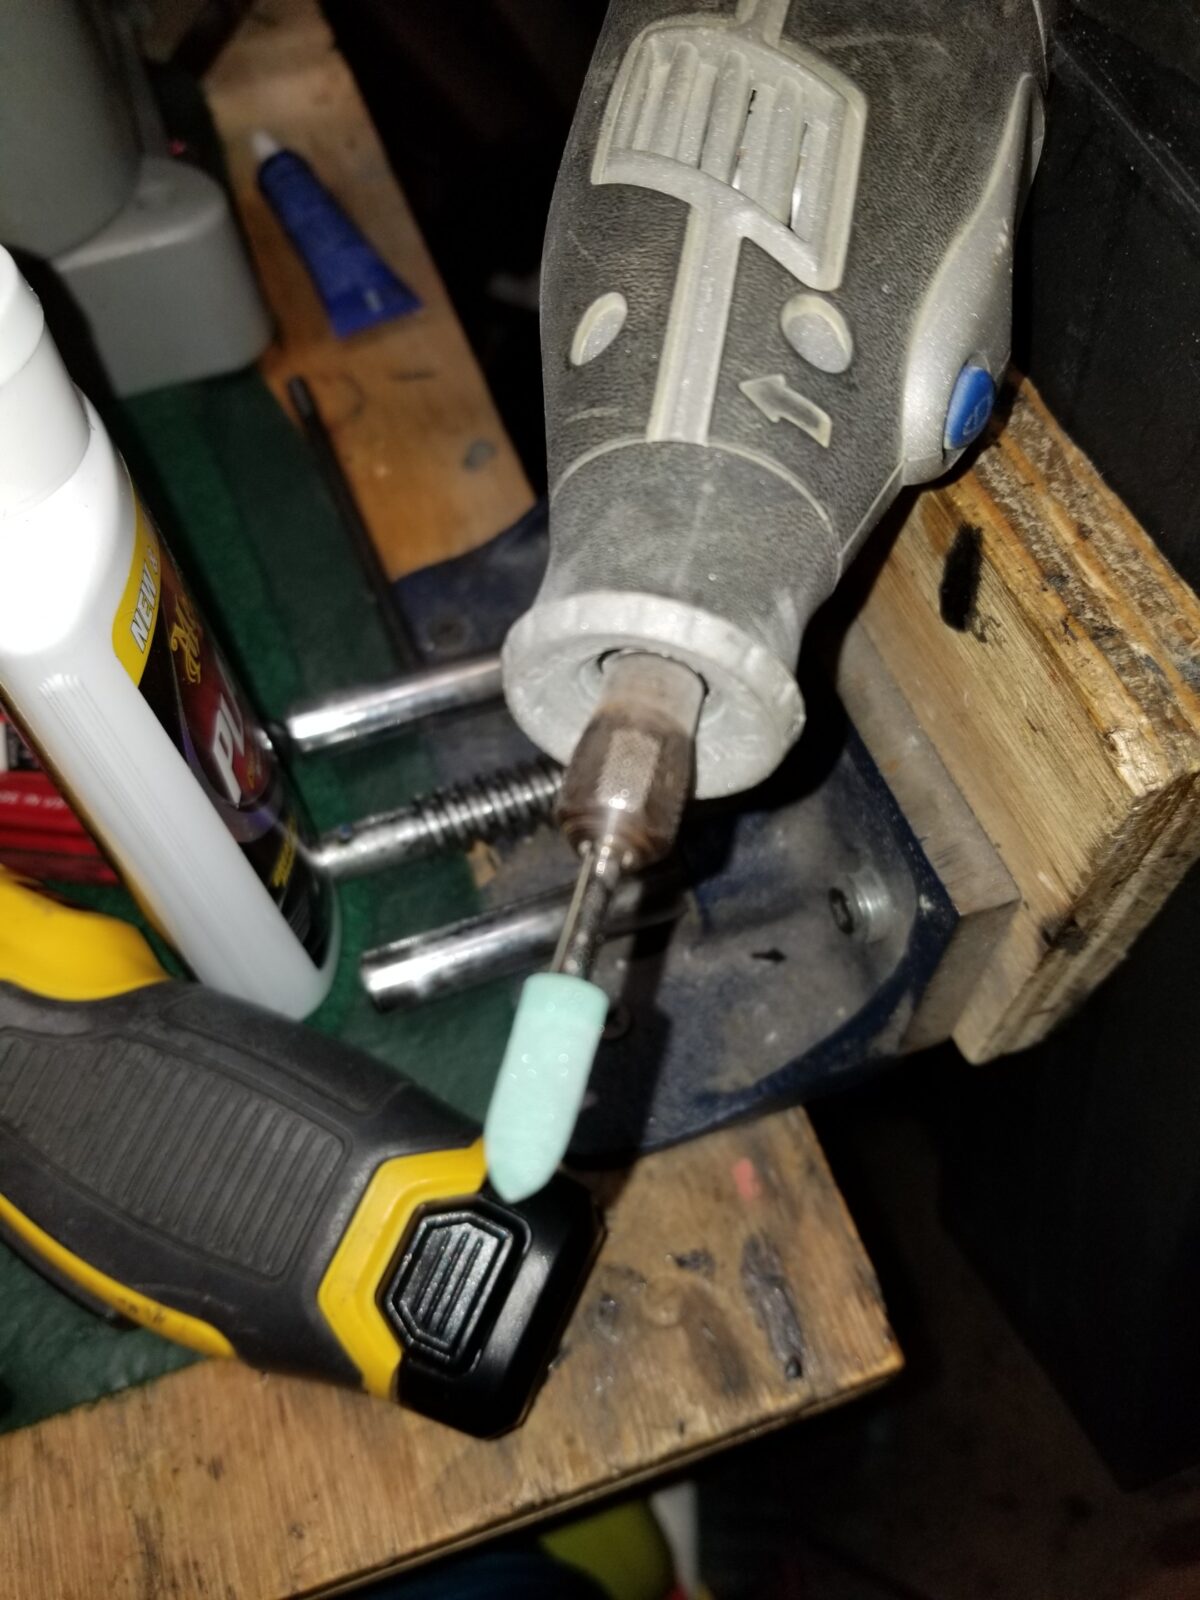
I used a small rubberized fine abrasive tip in my Dremel to literally erase the mold seam flush with the rest of the mold body.

At this point I blew out the magazine body with compressed air and the overall fit of the follower to the magazine body was just too tight. It and the body needed to be thinned a bit – not a bunch, just a bit.

In terms of the trimming, I would definitely recommend that you use the abrasive tip to remove just a little and test over and over. I can’t stress this enough – don’t try to do it all at once. As the saying goes, it’s easier to take more material off than to try and put it back on.

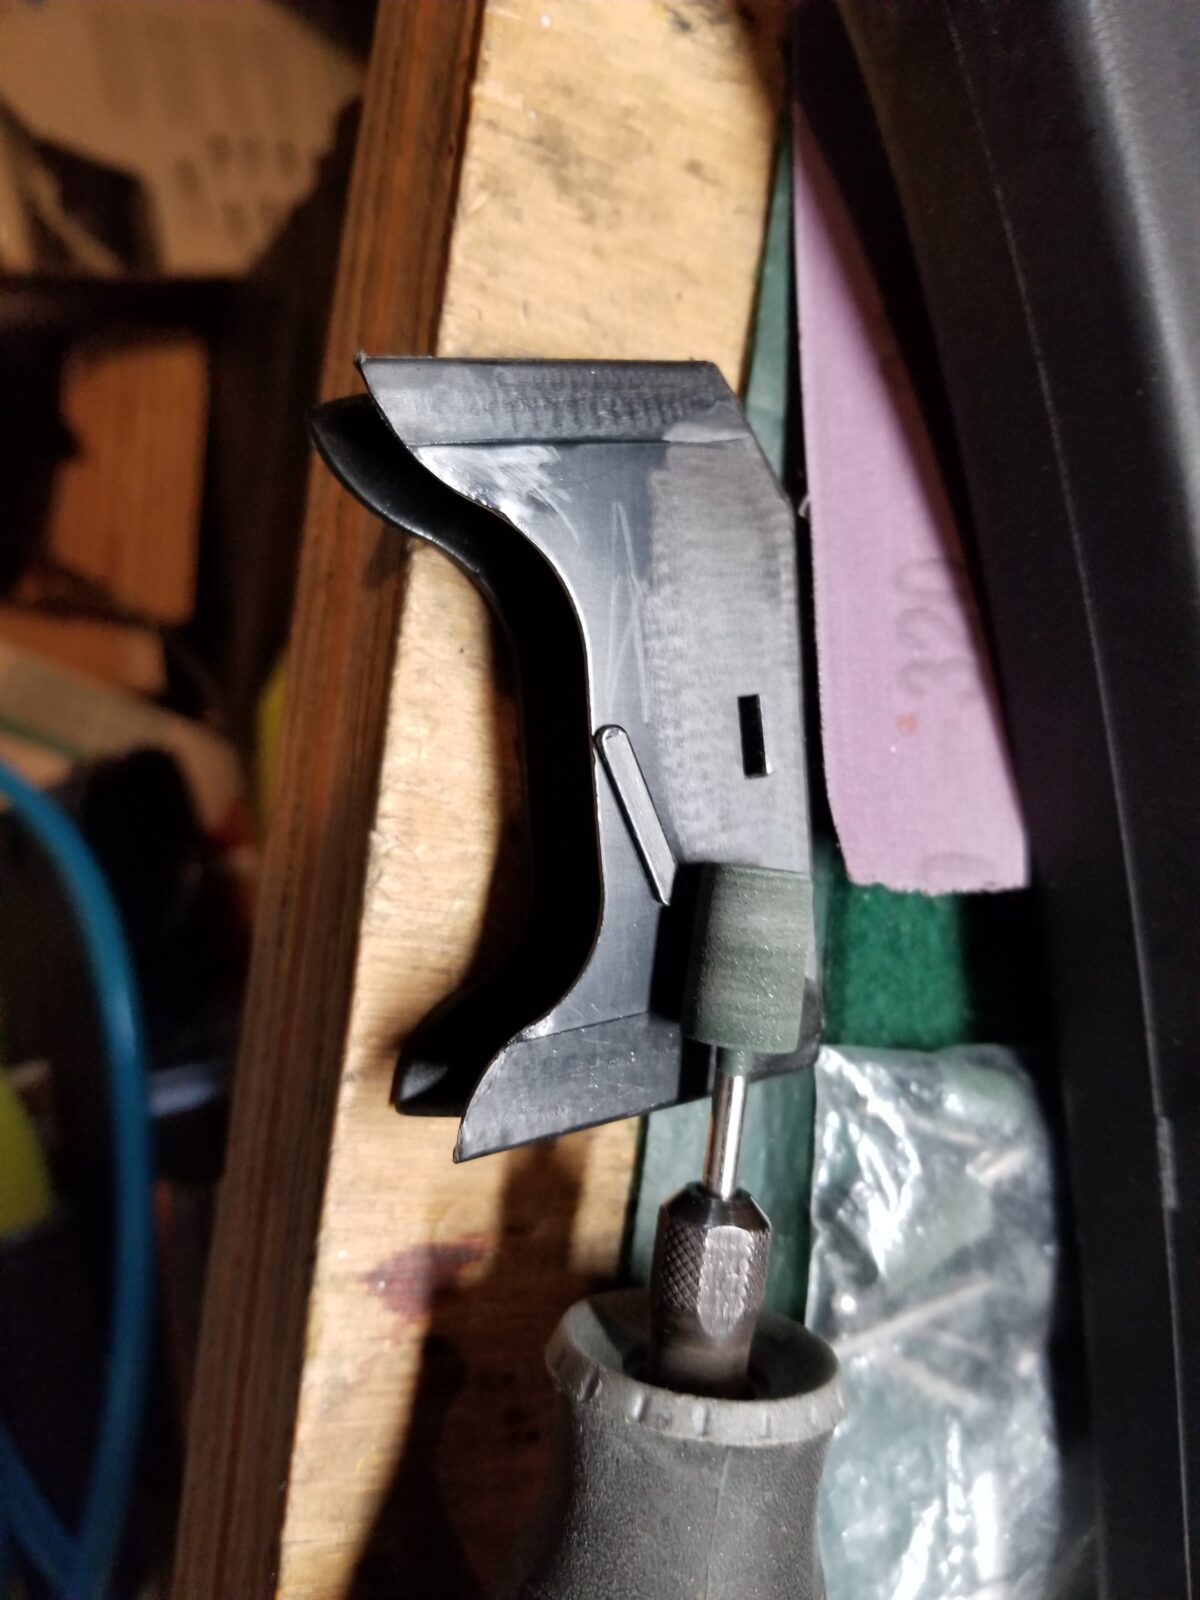
I wound up switching to a bigger rubber abrasive wheel when I did the follower and as far as I could reach in with the bit on the Dremel. The bit is still fine, I would not recommend using anything very aggressive. I used this bit on the follower and the inside of the magazine body. You just need to take a little bit of material off. I went all the way around the magazine body and the follower in that top area. You’ll see just below the scene there is a little elevated area inside the magazine that guides a follower up into position that is too tight.

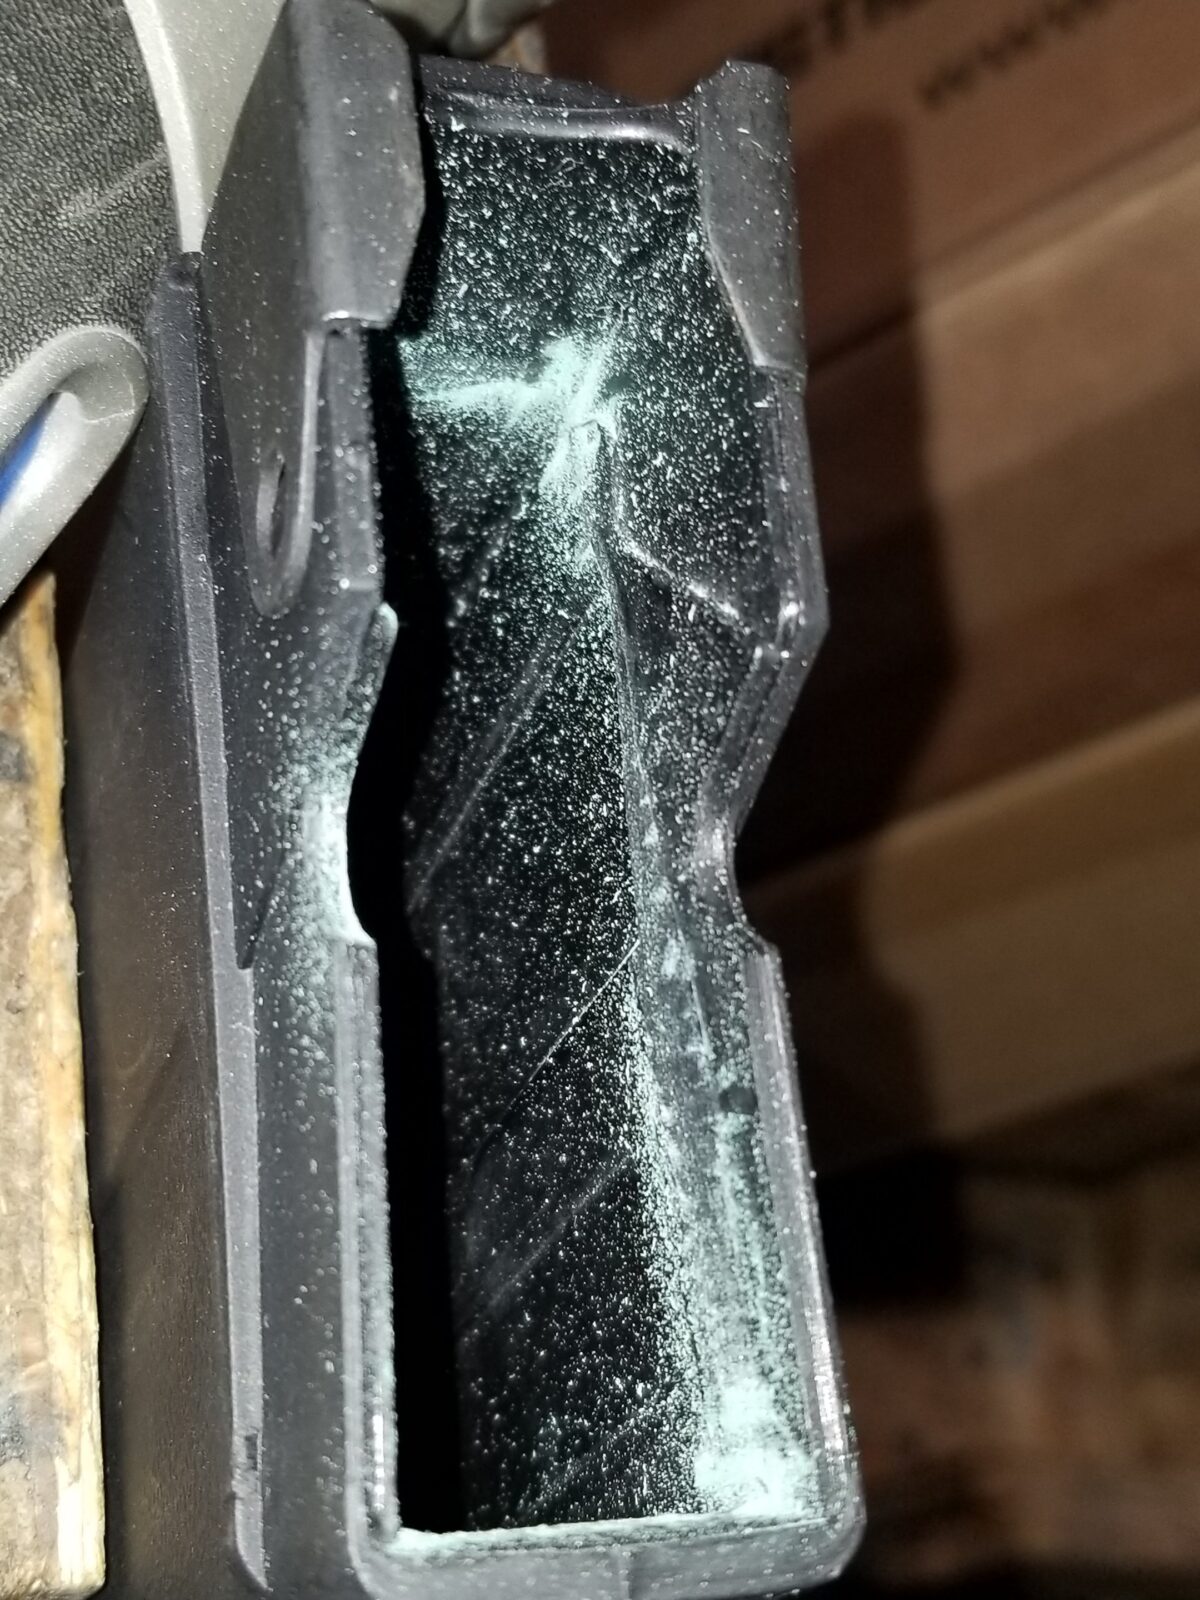
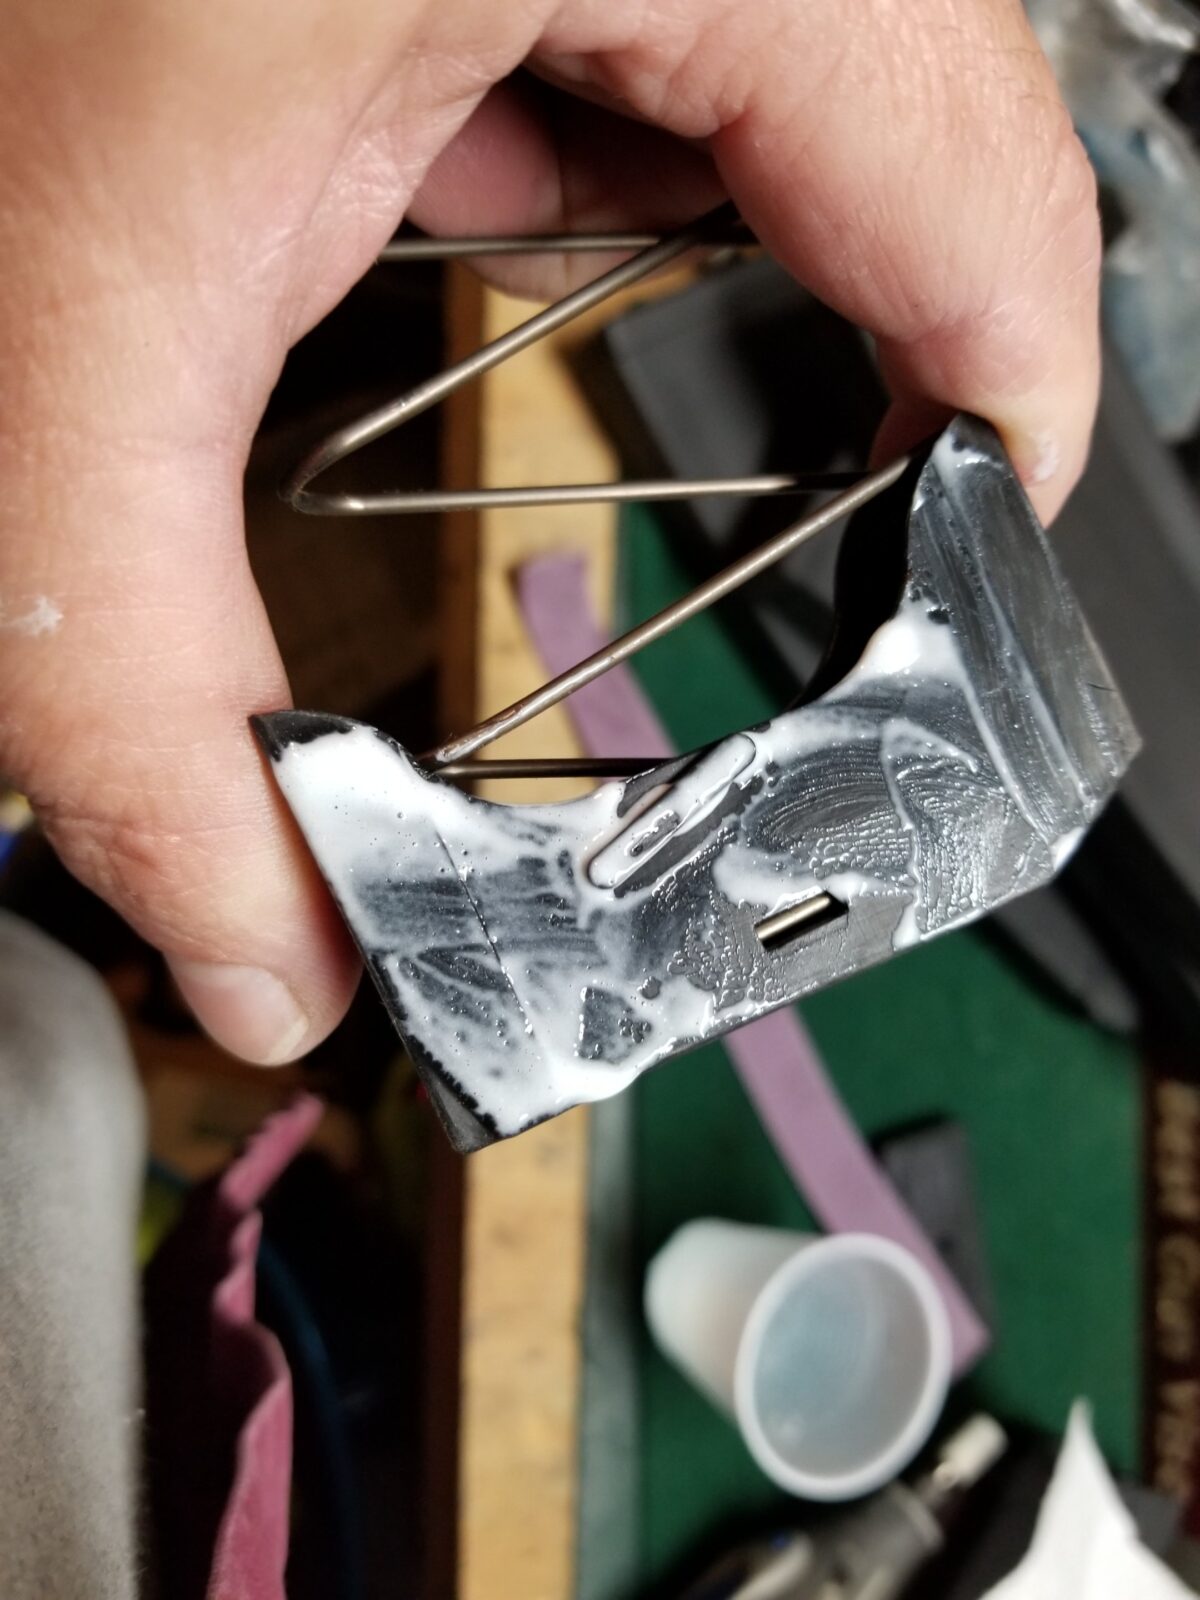
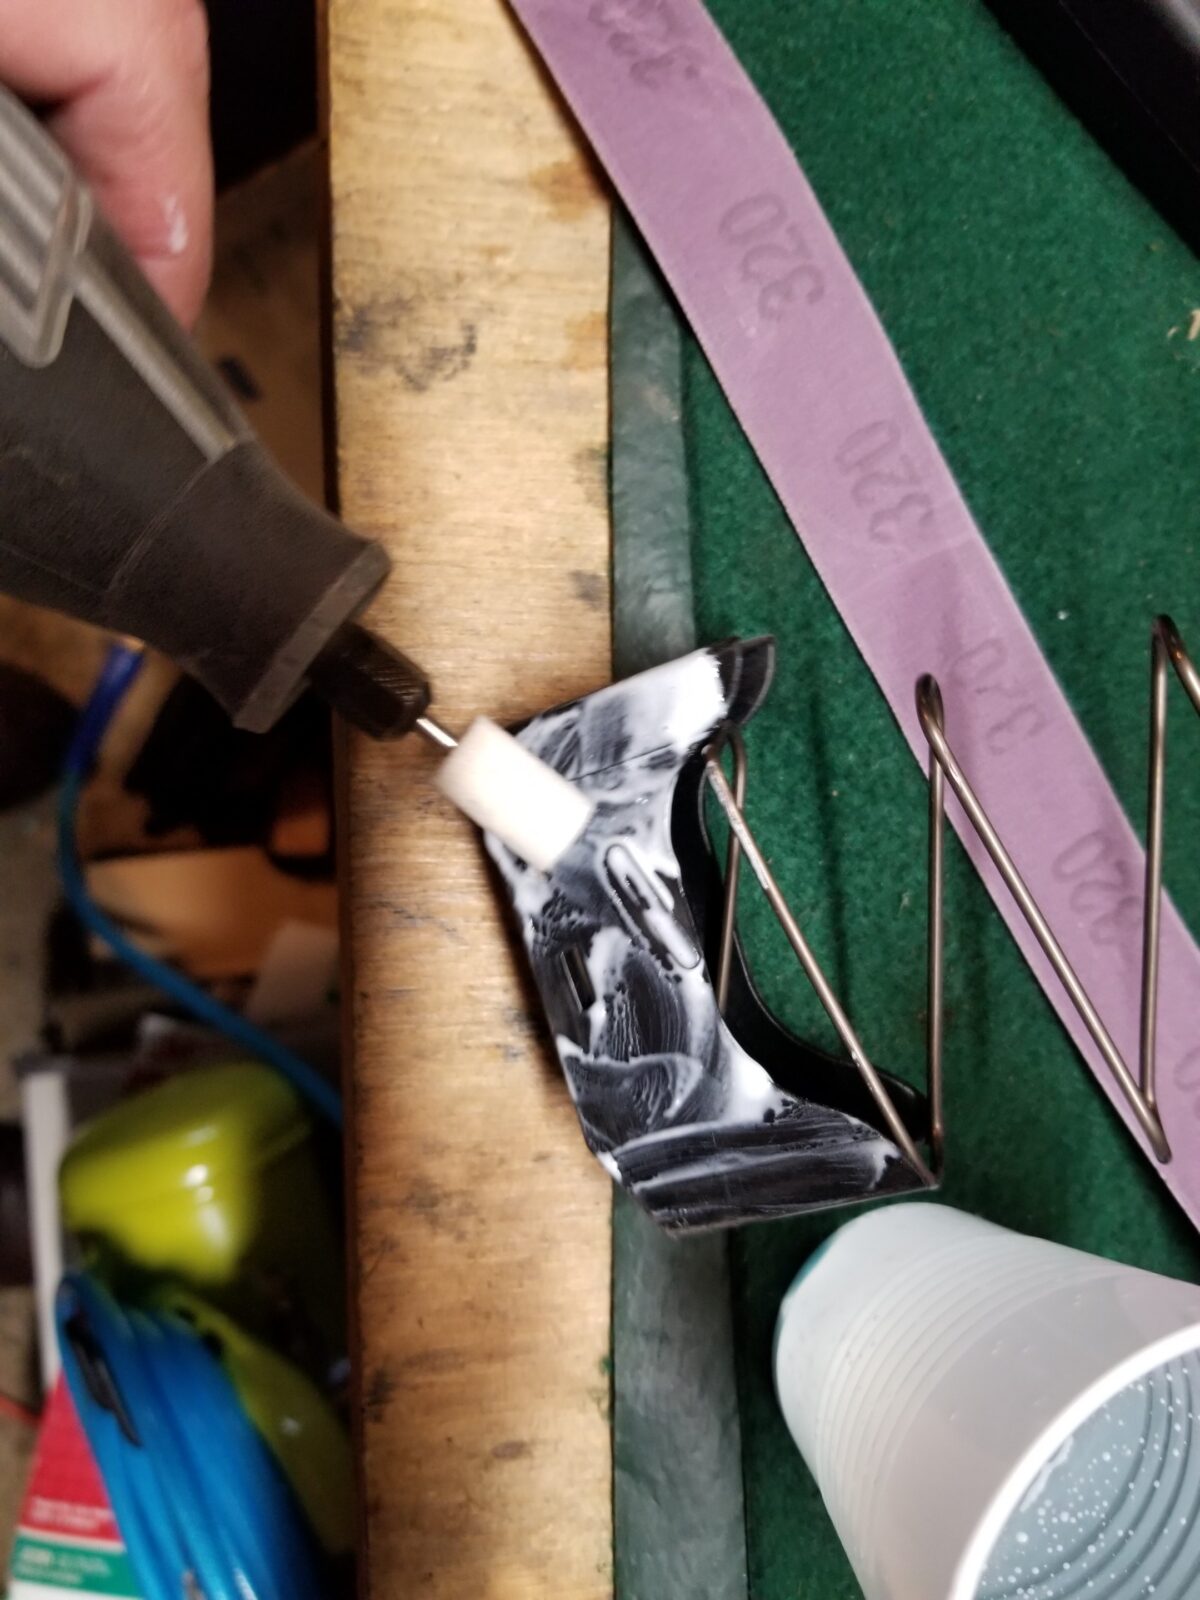
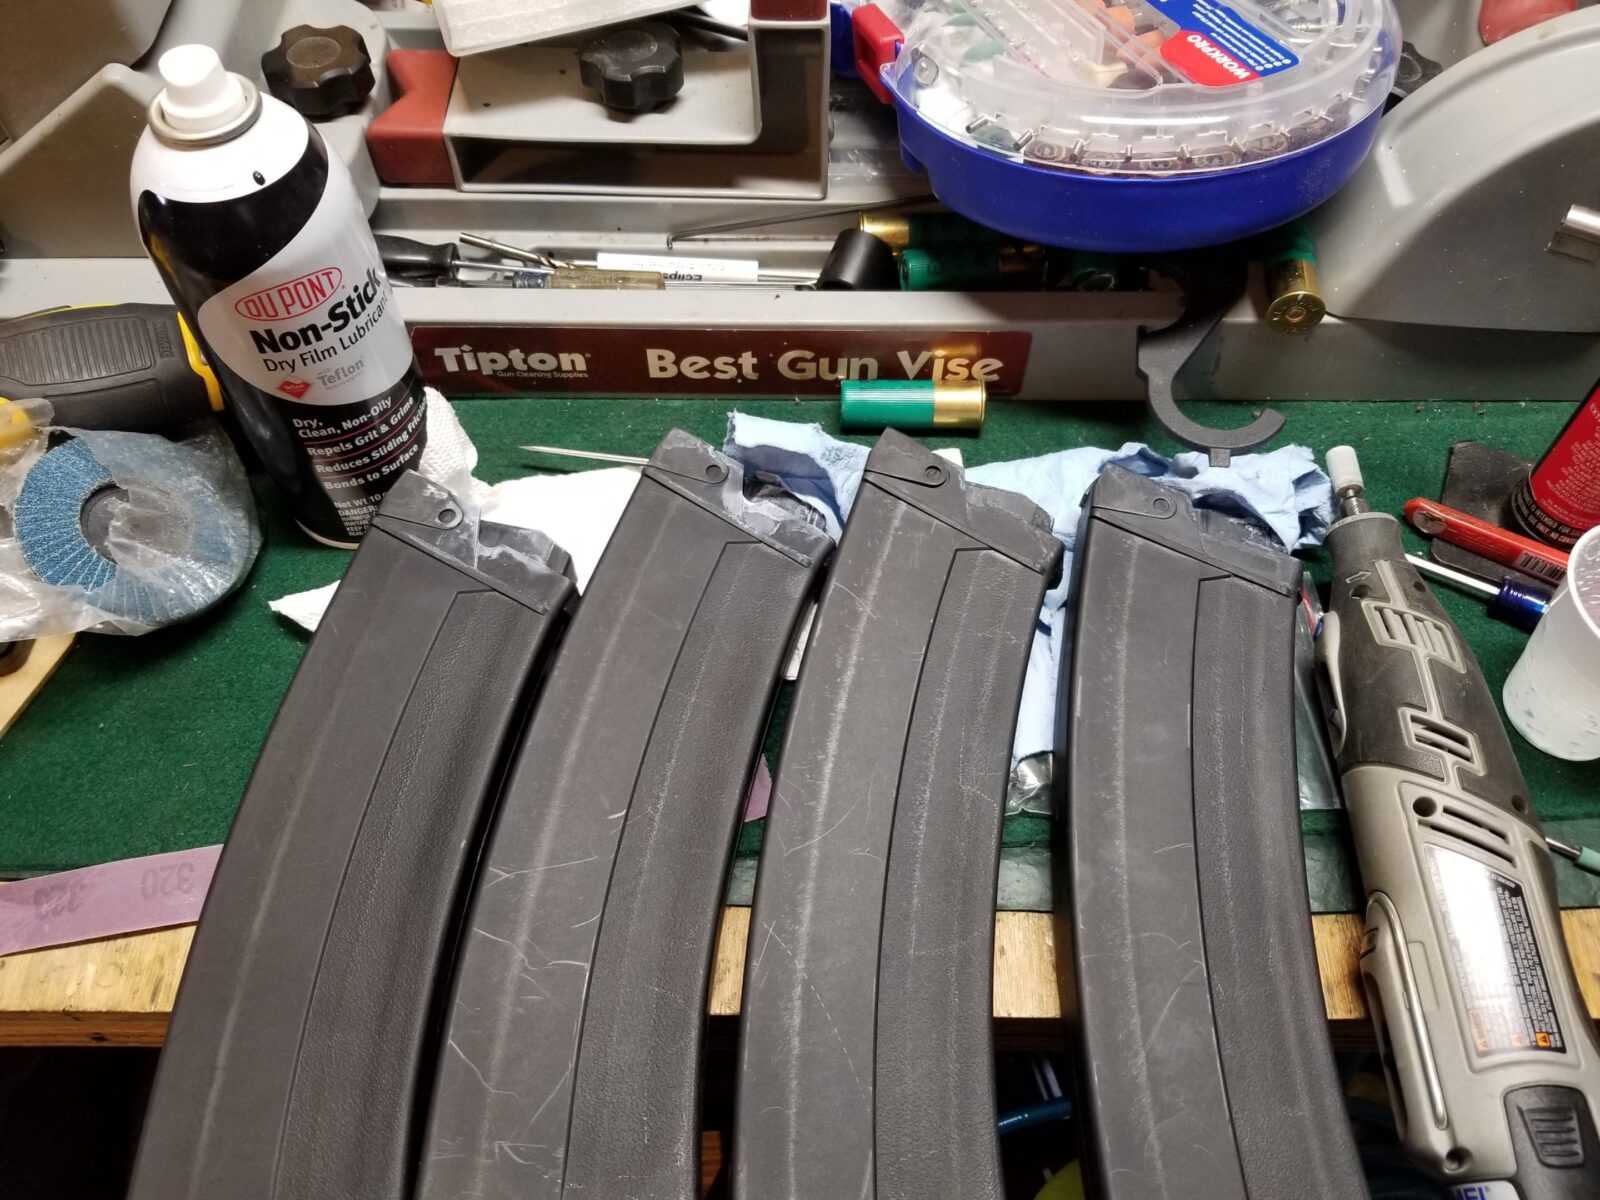
Now I found I needed to do a second step to really smooth things out. The abrasive bit leaves a rough surface and the next thing I did was to use a felt bob/bit with felt on the end in my Dremel along with Plastix polish to finely polish all the surfaces. I tried skipping this step with a couple of the magazines and the end result was so much better that I went back and polished the surfaces I worked on in all of the magazines.

The polishing with the Plastix really made a big difference and I would recommend you do it as well. You could tell the parts were smoother. Definitely wipe everything down and do not leave the grit in the magazine.

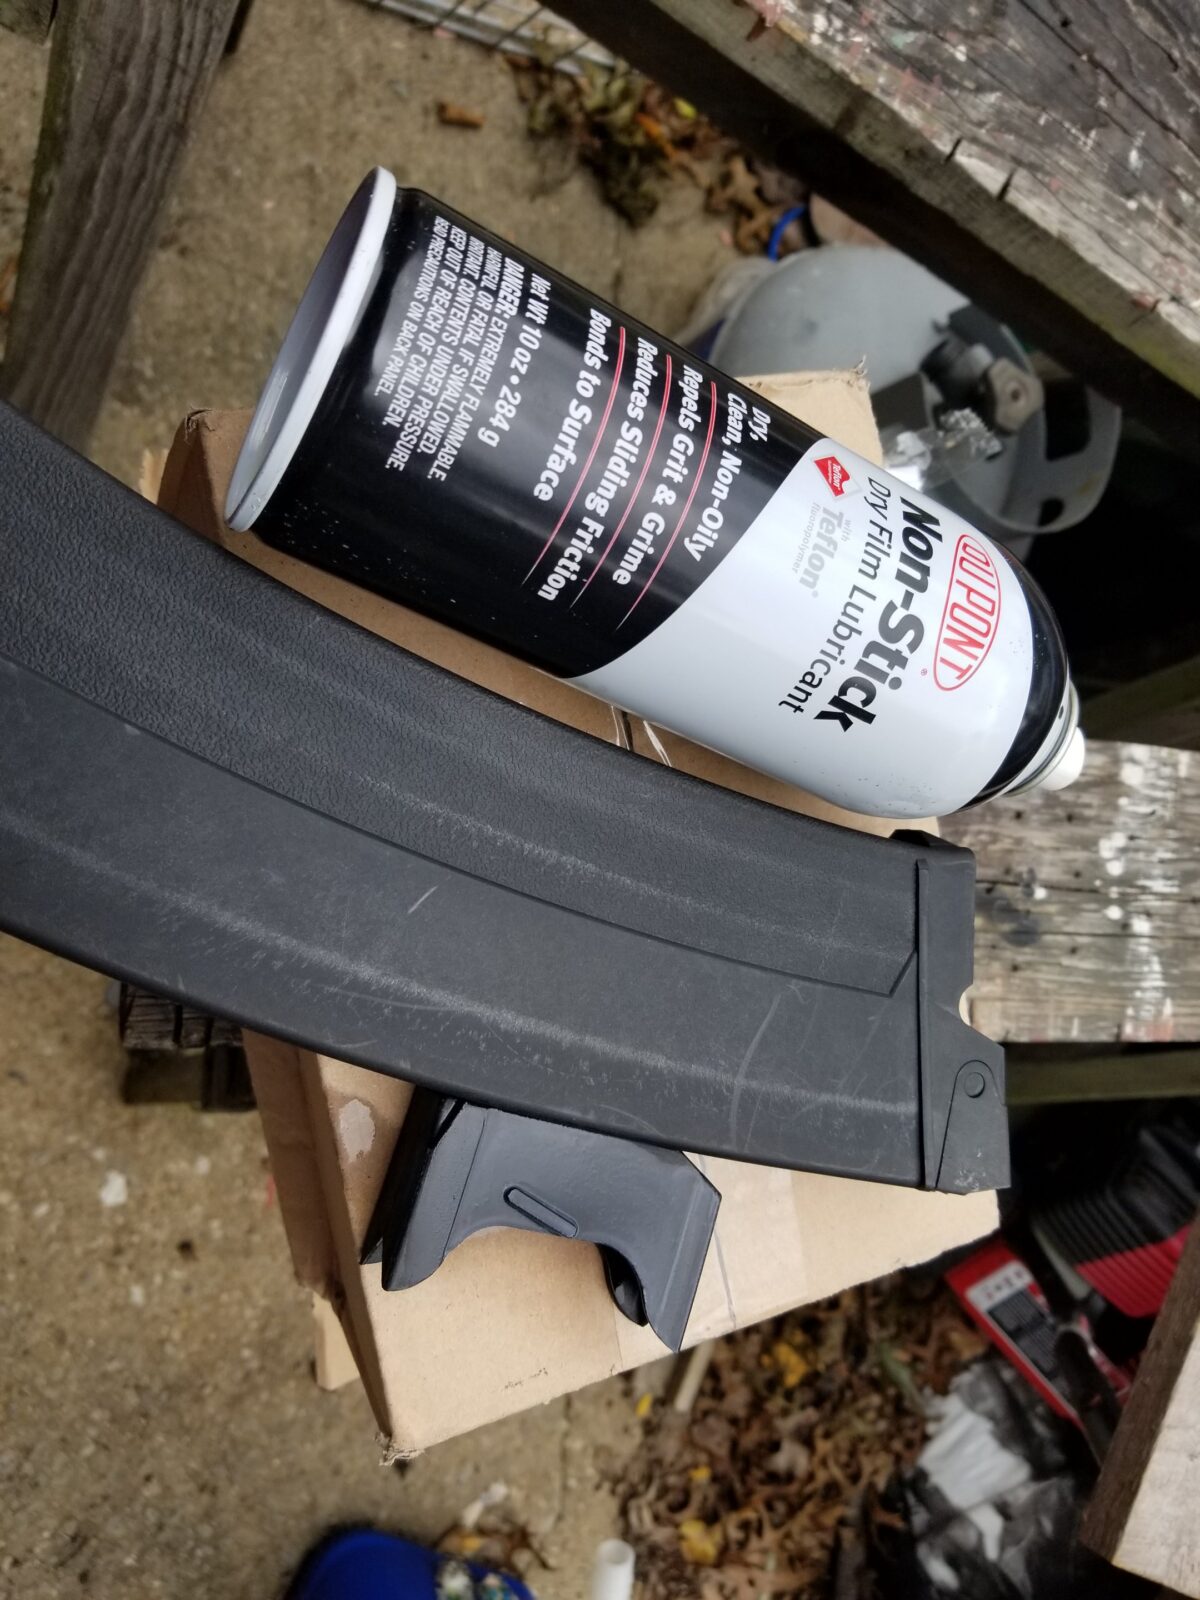
Next, I sprayed the Dupont Teflon dry film lubricant in the magazine body and on the follower. I would not recommend using oil or anything that leaves a residue that dirt will stick to. Instead you want something that is going to leave a dry film behind. This really fixed everything once and for all.

9/21/23 Update: Dupont no longer sells a Teflon spray due to environmental and health concerns. They sell a ceramic-based spray now that I use instead.

I then reassembled the magazines. As mentioned the parts can only go one way. I never took the spring off the bottom plate so I didn’t have to worry about its orientation.

I went ahead and did one final spray of Teflon around the follower and let it run down in. While it is still a liquid, the lubrication will not be very good. You need to let it dry. In my case, it shot up like a rocket. Job done.

End Result

The magazines all seem to work fine now. I think the problem was a combination of the mold seam and that inside area being just a tad too tight. I hope this post helps you out. Small side note to SDS – you really ought to fix this.

10/15/18: First thing this morning SDS reached out to me and is sending replacement magazines. I will test them and report back. They have sold over 3,000 magazines with just a few problems so I might just literally have a bad batch.


If you find this post useful, please share the link on Facebook, with your friends, etc. Your support is much appreciated and if you have any feedback, please email me at in**@ro*********.com. Please note that for links to other websites, I may be paid via an affiliate program such as Avantlink, Impact, Amazon and eBay.


How to Convert an Aluminum AR-15 5.56/223 Magazine For .50 Beowulf Rounds

When Bill Alexander decided to make the .50 Beowulf round, he really got me excited 🙂  The idea of a heavy thumper round in an AR platform really appealed to me so I bought one and one issue that popped up was where to find magazines that were not really expensive.

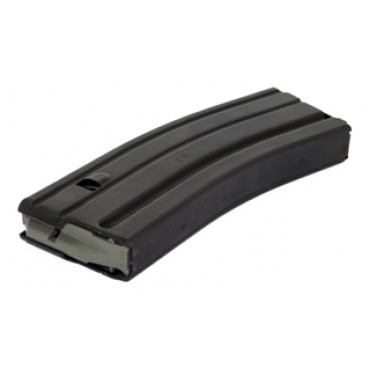
D&H 5.56 30 RD Aluminum Magazines are perfect for this.

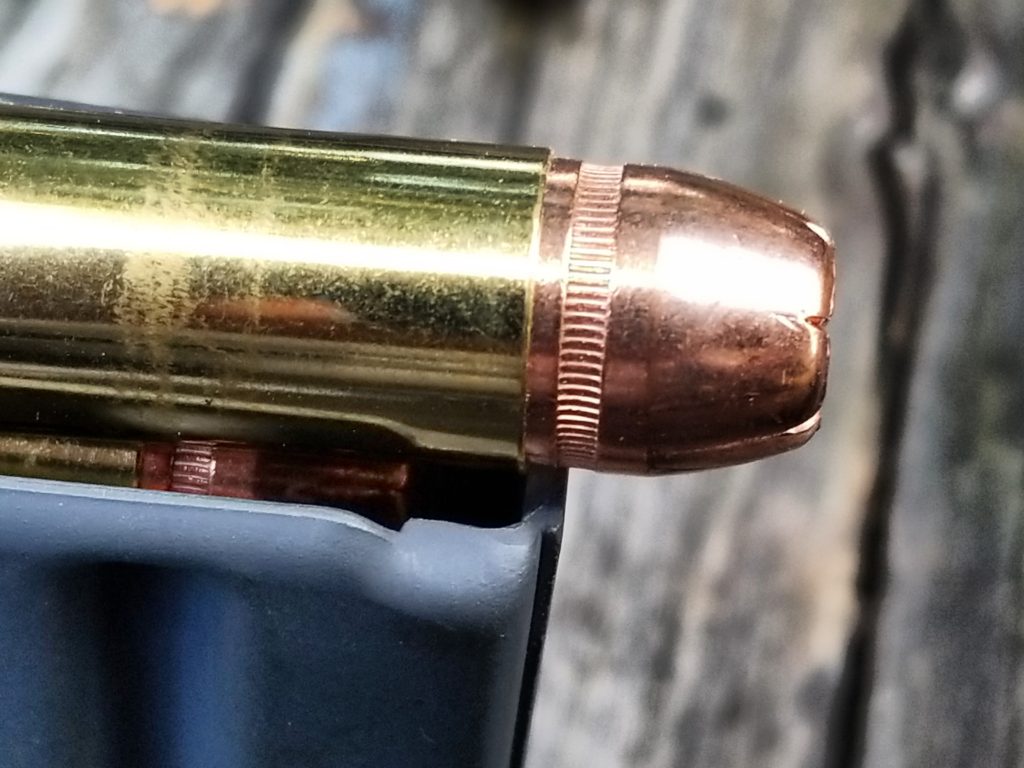
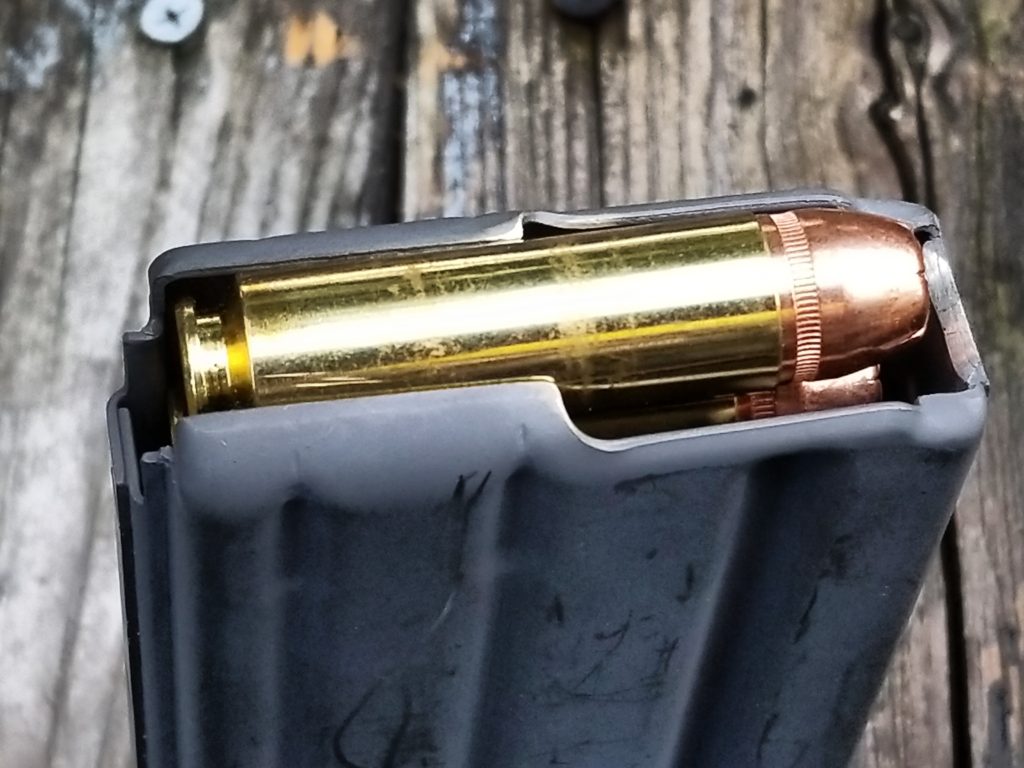
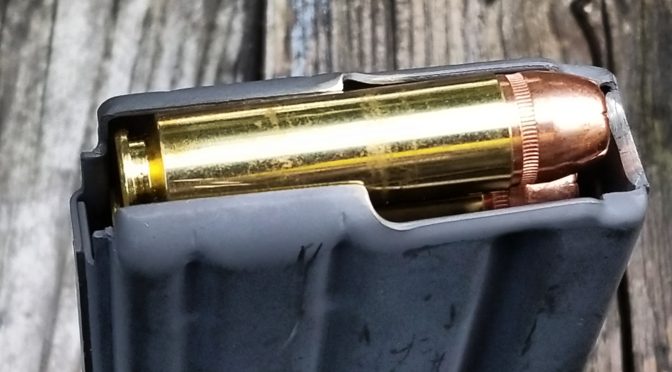
Once in a while the answer is really straight forward and this is one of those times.  You do not need to change the feed lips or the follower on a standard 5.56/.223 magazine, you just need to bevel the front lip at about 45 degrees (the exact angle doesn’t seem to be a big deal) so the giant .50 Beowulf bullet goes up and, this is the key part, the leading lip of the brass case hits the little ramp and goes up it vs. hanging. In this next photo – see how the lip of the case will catch?  It may catch sometimes or all the time – for me it was practically all the time.

The magazines I convert are D&H 5.56/.223 magazines that Palmetto State Armory sells. They are reliable and well made plus they are very affordable with sales prices starting around $8.99 and normal price around $12.99 for buyers in a rush. They also have regular combo deals such as a case and seven mags for $89.99. You have to love PSA’s deals. Click here to see what they have.

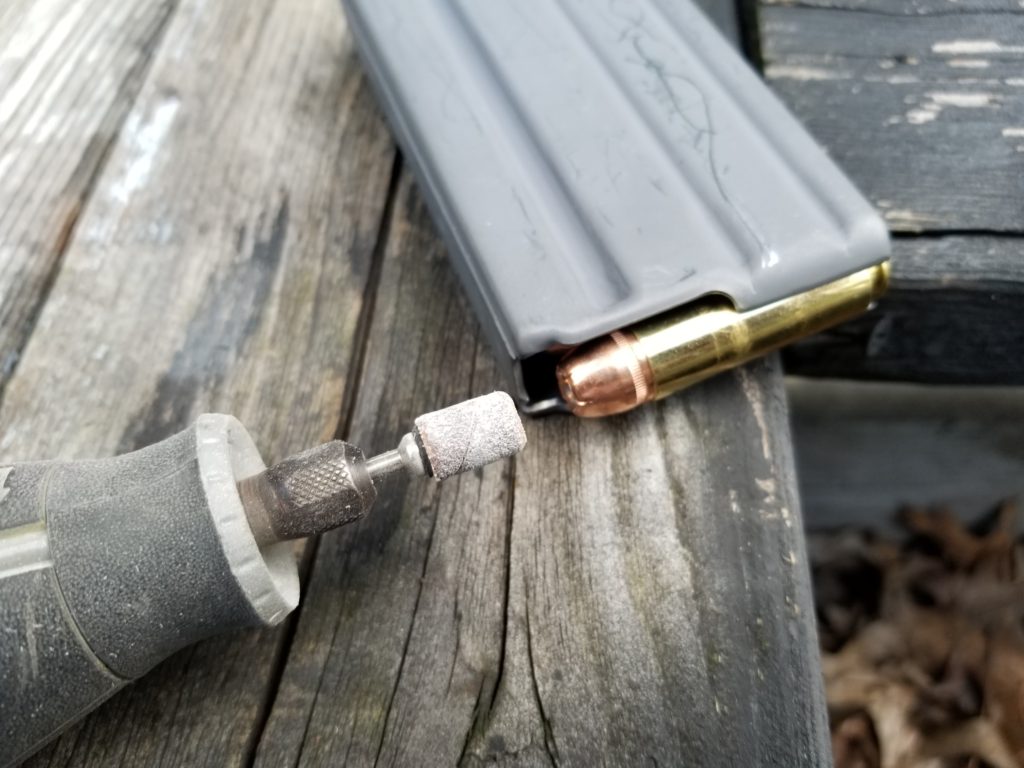
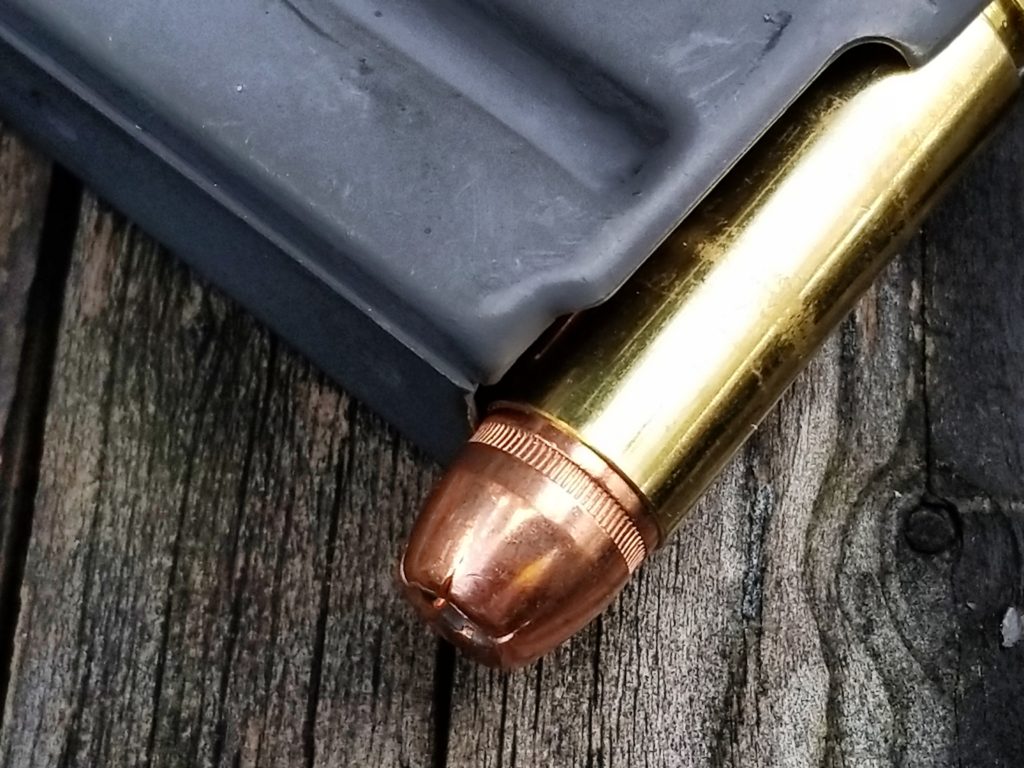
All I did was use a medium grit little sanding drum in my Dremel to bevel the magazine’s front lip – you are basically making an ad hoc feed ramp so the case doesn’t catch.  The round you see has the big 350 grain XTP bullet – they hit like a freight train.

Note this is just to show the drum. The magazine is empty when I do the sanding.

This is a really quick operation and you don’t need to take a ton off.  I do it with the magazine empty of course, insert a round into the magazine and test then do a bit more.  I’d repeat the removal and testing until the round went right up into the chamber.  After the first few magazines, I had it down pat.

In this next photo, see the shiny little ramp?

That’s all there is to it.  I just used quality aluminum magazines and did the tweaking.  Polymer mags, such as MagPul take more work and I simply didn’t feel like bothering with them.  I did use quality magazines and avoided cheap stuff and I also used the anti-tilt followers – just regular 5.56 followers – nothing special.

In a standard 20 round aluminum 5.56/.223 magazine, you can fit up to seven Beowulf rounds.  In a 30 round magazines, you can fit up to 10.  I never tried any of the higher capacity magazines so I can’t speak to them at all.

This approach worked great for me and I hope it helps you as well.


I came up with an even faster way to convert the magazines that I wrote about in December of 2019 – click here to read it.


If you find this post useful, please share the link on Facebook, with your friends, etc. Your support is much appreciated and if you have any feedback, please email me at in**@ro*********.com. Please note that for links to other websites, I may be paid via an affiliate program such as Avantlink, Impact, Amazon and eBay.


Fixing a Bent Sight and Cocking Lever Tube Bur On The PTR PDWR

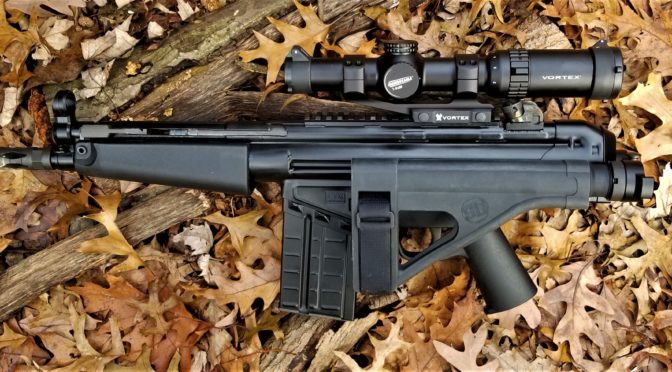
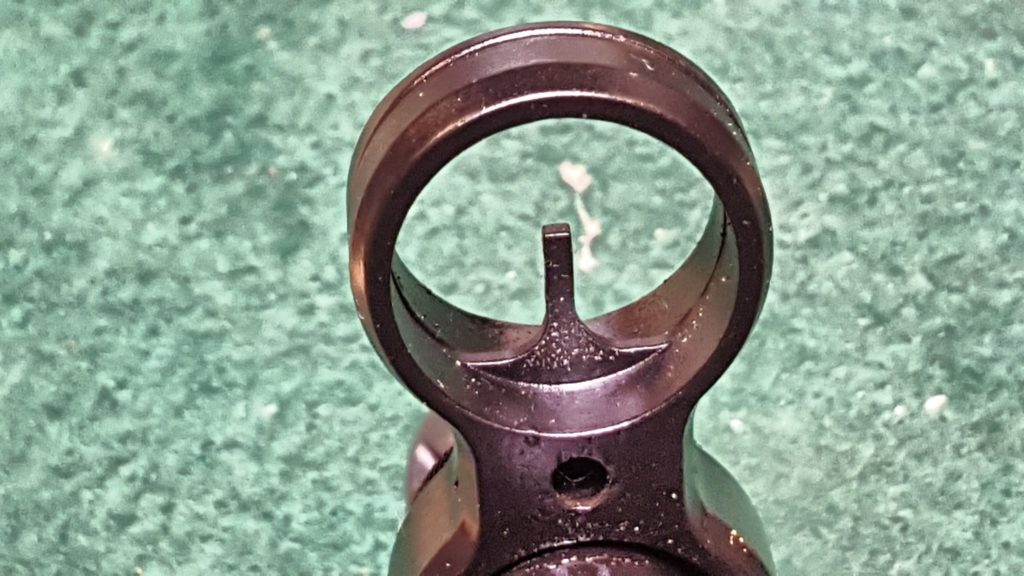
Okay, when I received the PTR PDWR I did a quick inspection and noticed two small problems that needed fixing.  I’m a bit disappointed that PTR quality control did not catch these two items but they are small issues.

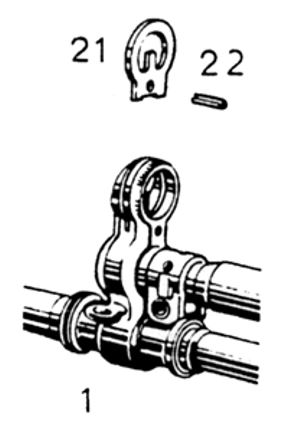
First, the front sight blade was bent sideways – to canted, bent.  I’m not sure how this happened but thankfully the HK-style hooded sight uses a sheet metal insert for the front post.  The following illustration is from the HK G3 Armorer’s Manual:

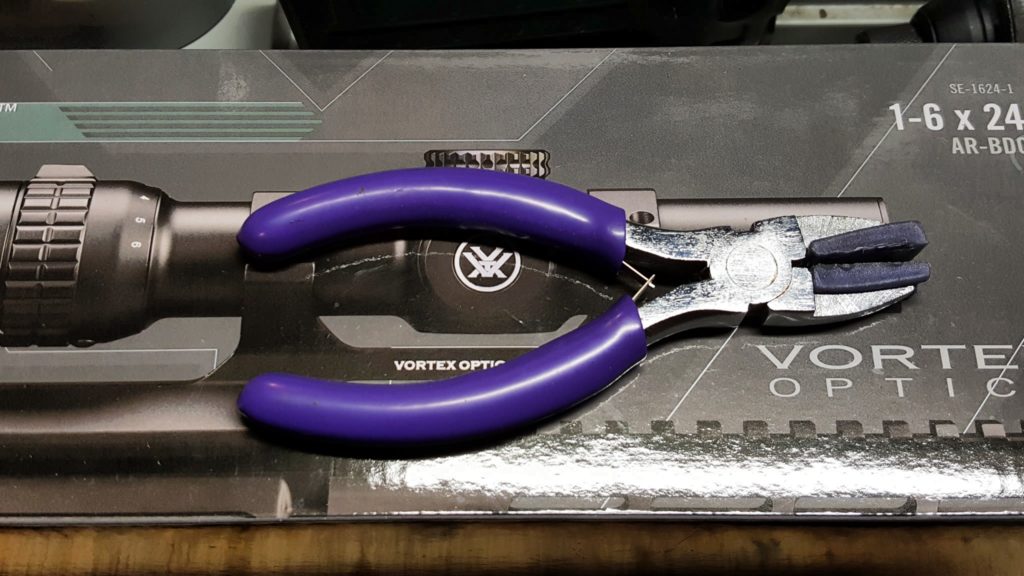
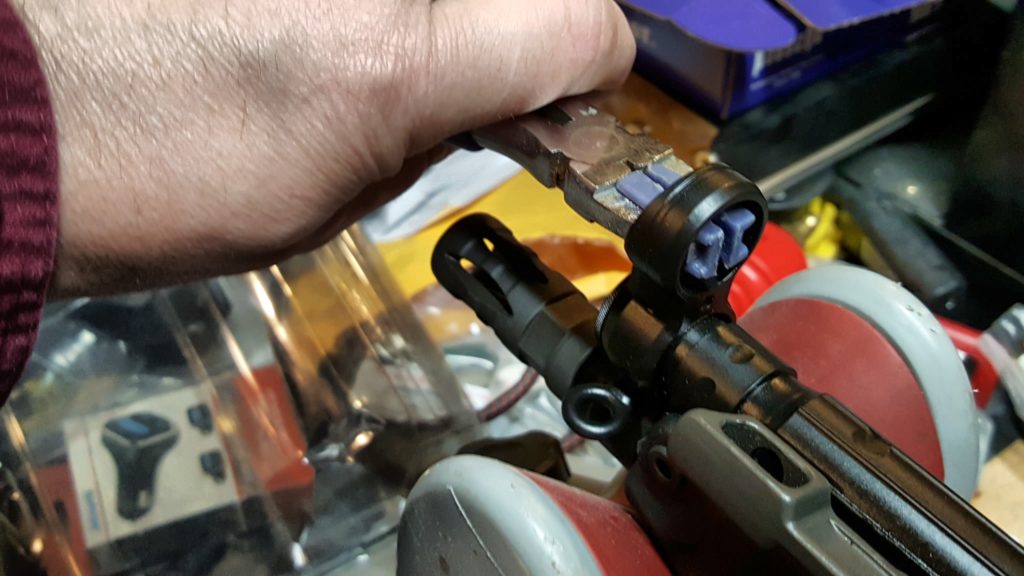
I figured the easiest thing to try was to simply reach in with pliers with padded jaws and see if I could simply bend it to the right to straighten it.  Out came my purple art pliers 🙂  I literally bought these things back in 2013 for some kind of work that required padded jaws.  I don’t recall what and as odd as they look, they have held up to light use.  My only complaint is that the nylon jaw covers can slide off under very much stress but that was not an issue here at all.

They actually fit perfectly and I was able to bend the sight post straight.  Plan B would be to take a pair of needle nose pliers and slide rubber fuel line hose over the jaws.  My one concern would be whether the relatively thin jaws could adequately support the post during bending.  The art pliers below fit and did the job perfectly.

Fixing a Bur on the Cocking Lever Tube

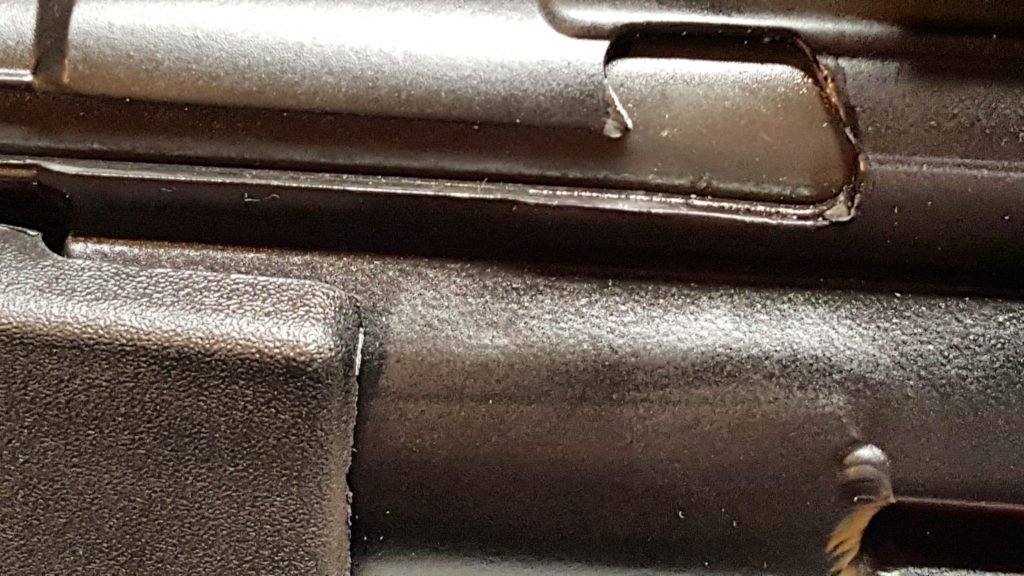
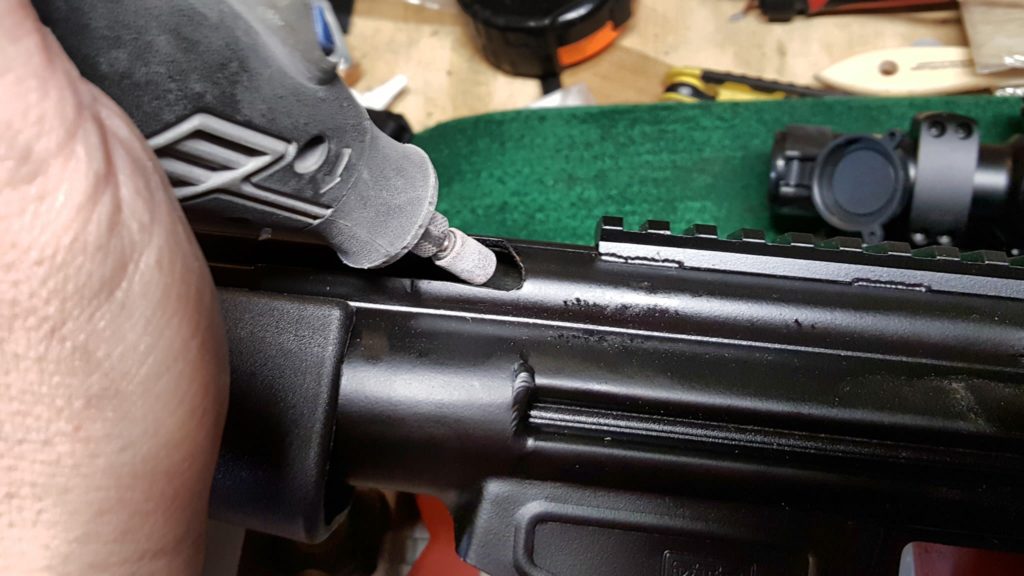
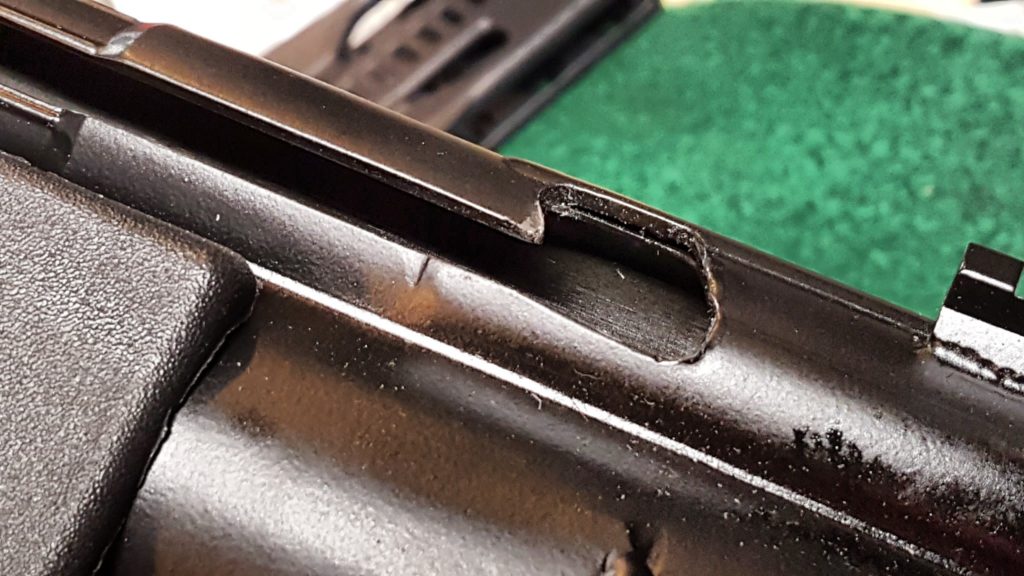
The second problem I needed to fix was a steel bur on the tip of the cocking handle catch.  It bugged me every time my hand hit it and should not have been there.  Here it is in the next photo – sharp and pointing out.

In terms of the repair itself, first, I reached in with a Dremel using a small medium grit sanding drum and the tool on slow speed to knock down the sharp irregular edge from the inside.  Take your time – remove a little and look.  Your goal is always to remove as little material as possible.  As the old saying goes, it is easier to take more off than try and put it back on 🙂

In the next photo, you can see the “point” has been sanded down but there is still material on the surface:

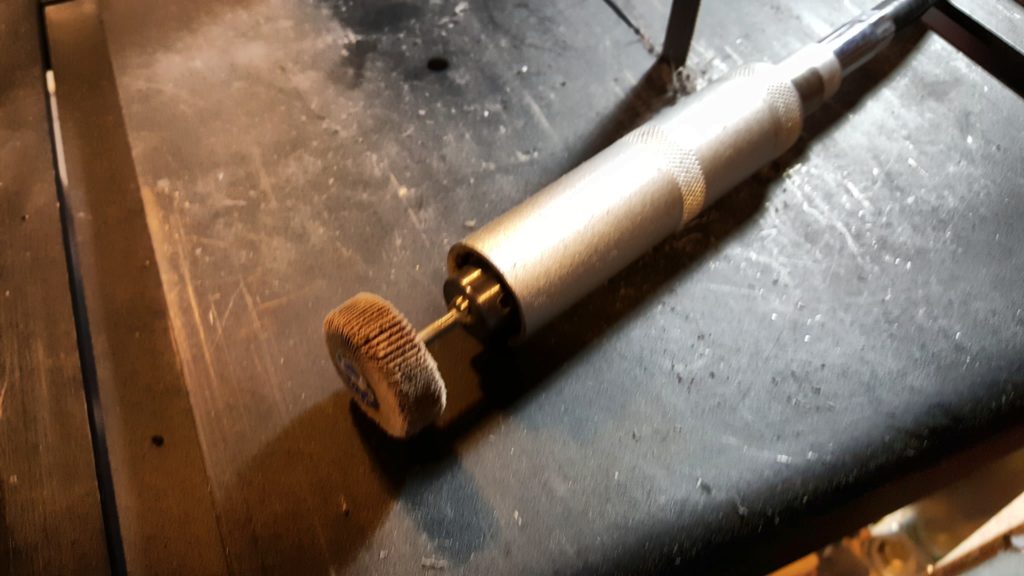
Next, I used a 120 grit small flap sander in my bench mounted rotary tool to sand down that lip.  I could have used my Dremel but I use the little flap sander attachment so much that I routinely leave it in my bench tool.

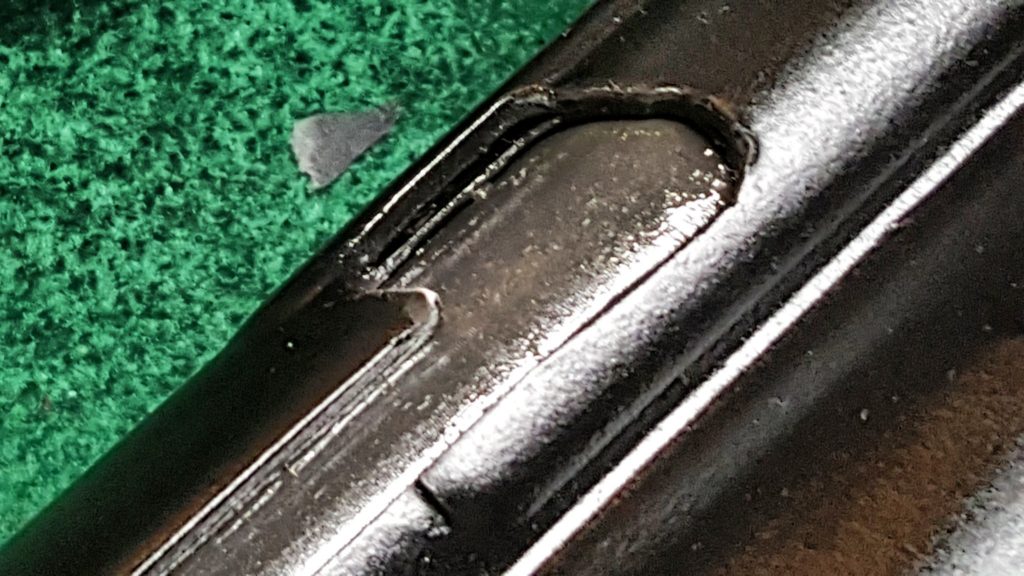
Again, the trick is to go slow and take your time.  After that, I used compressed air to blow out the tube and receiver and then used carb cleaner spray to “wash out” anything that might have stuck and blew it out one last time.  The bur was gone and now it was on to lubricating the weapon.

(Note, that last photo above has the bolt back in when I was testing it later).


If you find this post useful, please share the link on Facebook, with your friends, etc. Your support is much appreciated and if you have any feedback, please email me at in**@ro*********.com. Please note that for links to other websites, I may be paid via an affiliate program such as Avantlink, Impact, Amazon and eBay.