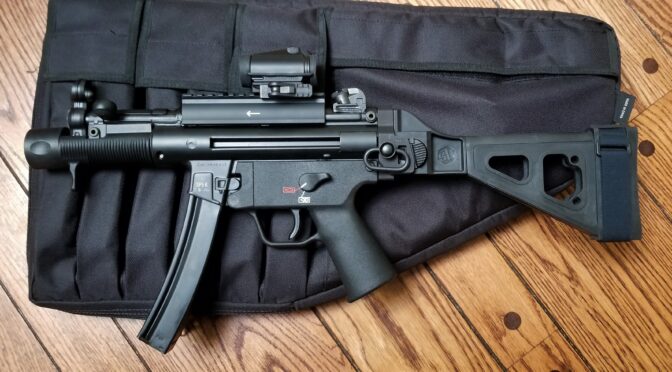
It seems like roller-locked firearms are having a resurgence as of late with a number of vendors making them. My first roller lock was from a company that is still around and I actually just bought a MP5 clone from them that I need to write about. Before I do that, let’s review how PTR came into existence.
Timeline
Origins (1997-2005): The story begins with Jose Luis Diaz, a Cuban-American entrepreneur with a passion for firearms. In 1997, he established JLD Enterprises in Connecticut, aiming to manufacture American-made versions of the G3 rifle. JLD’s PTR-91 (Precision Tactical Rifle) gained traction among enthusiasts seeking a domestic alternative to imported G3s.
Acquisition of FMP Tooling (2003-2005): A pivotal moment occurred when JLD acquired the original tooling and machinery from Fábrica Militar de Braço de Prata (FMP) of Portugal, a licensed manufacturer of H&K G3 rifles. This acquisition included blueprints, gauges, and thousands of parts, granting JLD the capability to produce rifles using the same equipment that produced the original G3s. To be clear, PTR did not license the designs and what not from H&K – they bought them from FMP.
Formation of PTR Industries (2006-Present): In 2006, Diaz partnered with P. Everett Weed, an experienced manufacturer, to form PTR 91 Inc. This marked a rebranding and expansion of JLD Enterprises who was folded into PTR. Diaz left in late 2010 and the direction of PTR changed from a focus on assembling firearms from surplus parts to one of new designs and innovation. Currently, PTR has the in-house capabilities to make all of the parts of their firearms.
I really like MP5 and MP5K-type weapons, so let’s add key dates in for them:
2017: PTR Industries first announced their plans to produce MP5 clones at the 2017 SHOT Show.
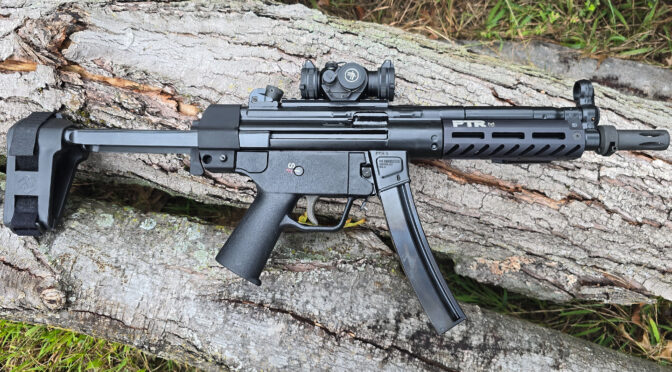
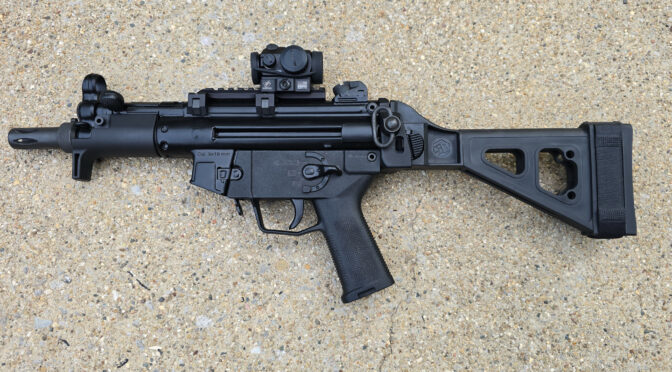
Late 2018 / Early 2019: PTR began shipping their first MP5 clones, the PTR 9CT pistol and the PTR 9KT pistol. These were essentially clones of the HK SP5K, a semi-automatic pistol version of the MP5K.
2020: PTR expanded their MP5 clone lineup with the release of the PTR 9R rifle, a clone of the HK94 carbine.
2021: PTR introduced the 5R rifle, a clone of the HK SP5, a semi-automatic rifle version of the MP5.
Key Individuals
Jose Luis Diaz: Was the founder of JLD Enterprises and the visionary behind bringing G3 rifle production to the United States. He left PTR in 2010.
P. Everett Weed: Instrumental in the formation of PTR 91 Inc. and the company’s growth through his manufacturing expertise and business acumen.
Conclusion:
PTR Industries has carved out a niche around the family of HK-related roller-locked weapons. Given the continued popularity of those types of firearms, they are well positioned. PTR is working on reselling and perhaps later making weapons such as the Archon B and D pistols and both Jack and Reacher shotguns.
So, PTR continues to evolve. I’ve found their products to be well done in the past and own a 9CT (MP5) currently. It will be interesting to see where the firm heads. I’ve owned a few PTR firearms over the years – a 91 clone, a 7.62x51PDWR and now the 9CT – I have no hesitation in recommending them.
Note, I have to buy all of my parts – nothing here was paid for by sponsors, etc. I do make a small amount if you click on an ad and buy something but that is it. You’re getting my real opinion on stuff.
HK MP5K, SP5K – for the SP5K, slight trimming of the front locking plate on the grip will be required
POF 5PK
PTR 9KT
Zenith ZF5-P, ZF5-T, and ZF5-K
There are three required features for these to fit:
It must be an MP5K pattern weapon and not an MP5 or other variety of roller lock.
It must have an HK MP5K patterned top rear hole.
It must have a front shelf that the grip’s front locking plate rests on.
Technically, our Contract Contour and Navy SEF grips do support the front lower pin that some MP5Ks use. However, our converted Magpul SL grip does not have a front lower pin and does not need it because it is pushed forward against the weapon’s shelf and can’t slide out of position.
How They Are Made
Interestingly enough HK33, HK91/G3, HK93, HK94, MP5, and MP5K grips all have the same size polymer core grip albeit with different metal “tails” sticking out of the rear to accomodate whatever weapon they are meant for. Now there may be other models out there as well – but those are the ones that I know of so far.
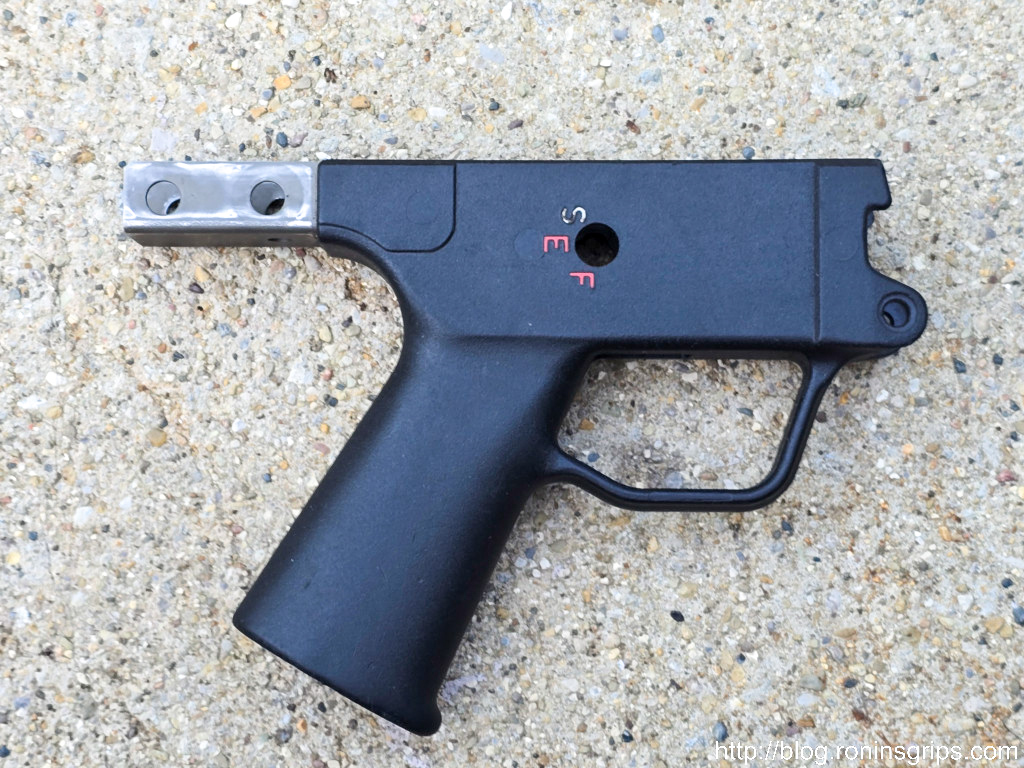
This is a used HK G3/91 Navy SEF grip. The core black polymer shape is the same size as what we need for an MP5K.
The first step if you have one of these model grips is to removed the “tail” so the length will be correct for a MP5K, I would recommend cutting off the tail and then deburring it. Do not remove any polymer so you can get a firm fit when you install whatever stock, brace or end cap you plan to use.
This is a new HK 91/G3 Navy SEF grip with the tail cut off. I use a bandsaw to cut them with a fine tooth blade.
Measure the Existing Rear Hole Centers and Countersink Depths
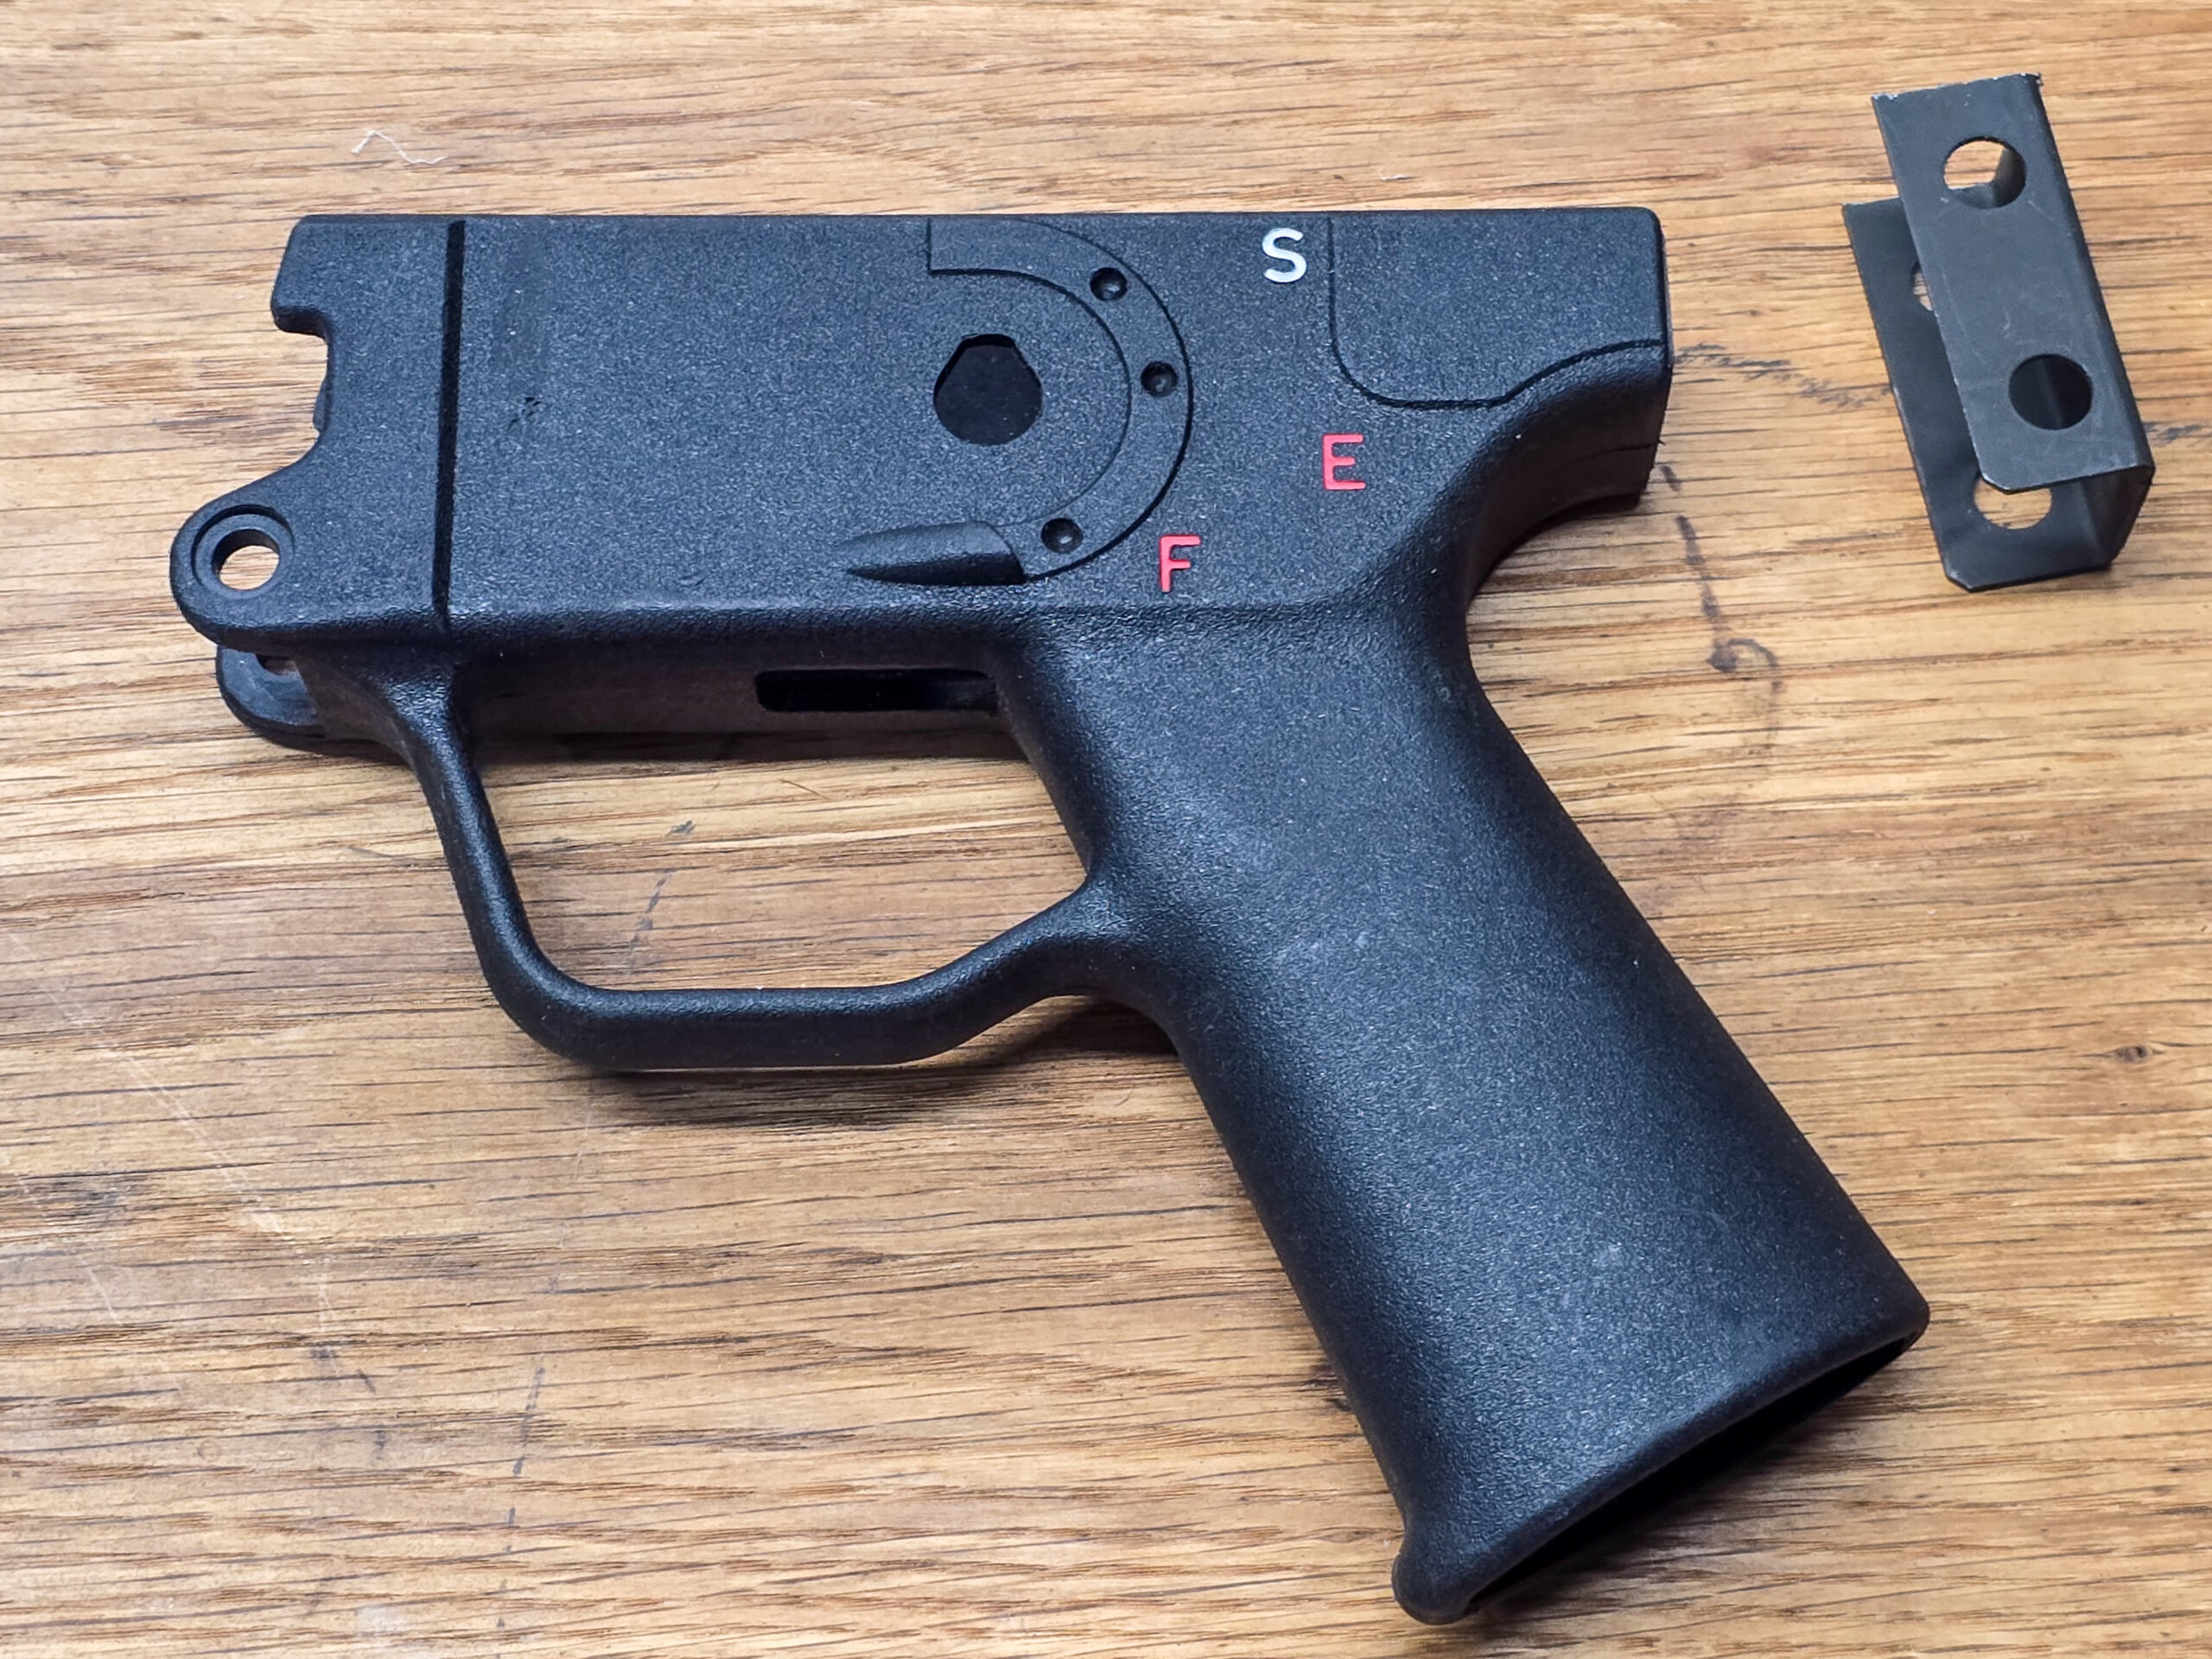
To cut the rear holes is a bit more involved. First, you need to locate the centers of your existing MP5K grip’s rear holes. I’d recommend using quality calipers but you can do whatever you are comfortable with as long as the method is relatively accurate.
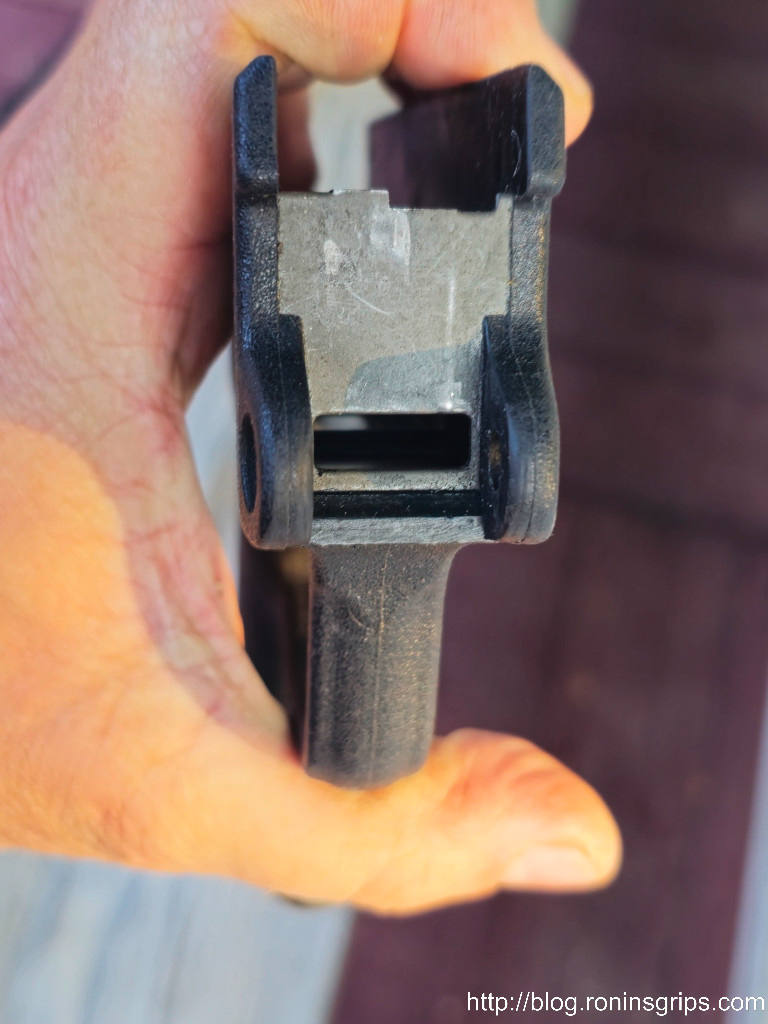
I would also recommend you measure from the front of the steel plate inside the front of the grip back to the center of the hole on your existing grip. That gives you the horizontal distance. To get the vertical distance, measure down from the top.
Measure from the front of this plate (the surface facing you in this photo) back to the center of the hole.
You should measure this on both sides of the grip. You may find they are not exactly the same. Regardless, double and triple check the horizontal and vertical measures on both sides.
The other measurement you need to find out is how deep to drill the countersink hole – the recession in the grip where the head sits on the left side (looking down) and the end with the wire retainer protrudes on the right. You may well find that the two measures are different again.
What you need to ensure is that the rear takedown pin’s working distance can span from the left side to the right side. The working distance of a takedown pin is the measured length from just under the head to just before the retaining wire comes out of it. The pin that sticks out of the other end of your calpers is for measuring depth. There are also far more accurate tools purpose-built for measuring depth also.
When you do you plan your countersinks, you need the distance the pin spans to look something like this:
Minimum depth of countersink = outside grip dimension – takedown pin working length
Now how you make that happen is up to you. For example, if you need to remove 3mm and want to split it to 1.5-1.6mm per side – that’s fine. Ideally, you want the pin to stick out far enough on the right side so the wire retainer can pop up and help hold the pin in place.
Milling the Countersink & Pin Holes
These operations require end mills that can make plunge cuts – meaning the end mil has cutting surfaces at the bottom and not just the sides. These are sometimes called “center cutting” end mills also. I would also recommend four flutes for a smooth finish.
The actual countersink diameter is 9.5mm but if you don’t have access to that, a 10mm end mill will work also. The takedown pin hole is 6mm. How much you want to spend on the quality of the mills is up to you. The polymer will not wear the 9.5-10mm bit much but the 6mm bit will need to keep its edge long enought to cut through the steel reinforcement on both sides. I’d recommend the6mm be either cobalt or carbide and not just high speed steel – or at least not cheap high speed steel.
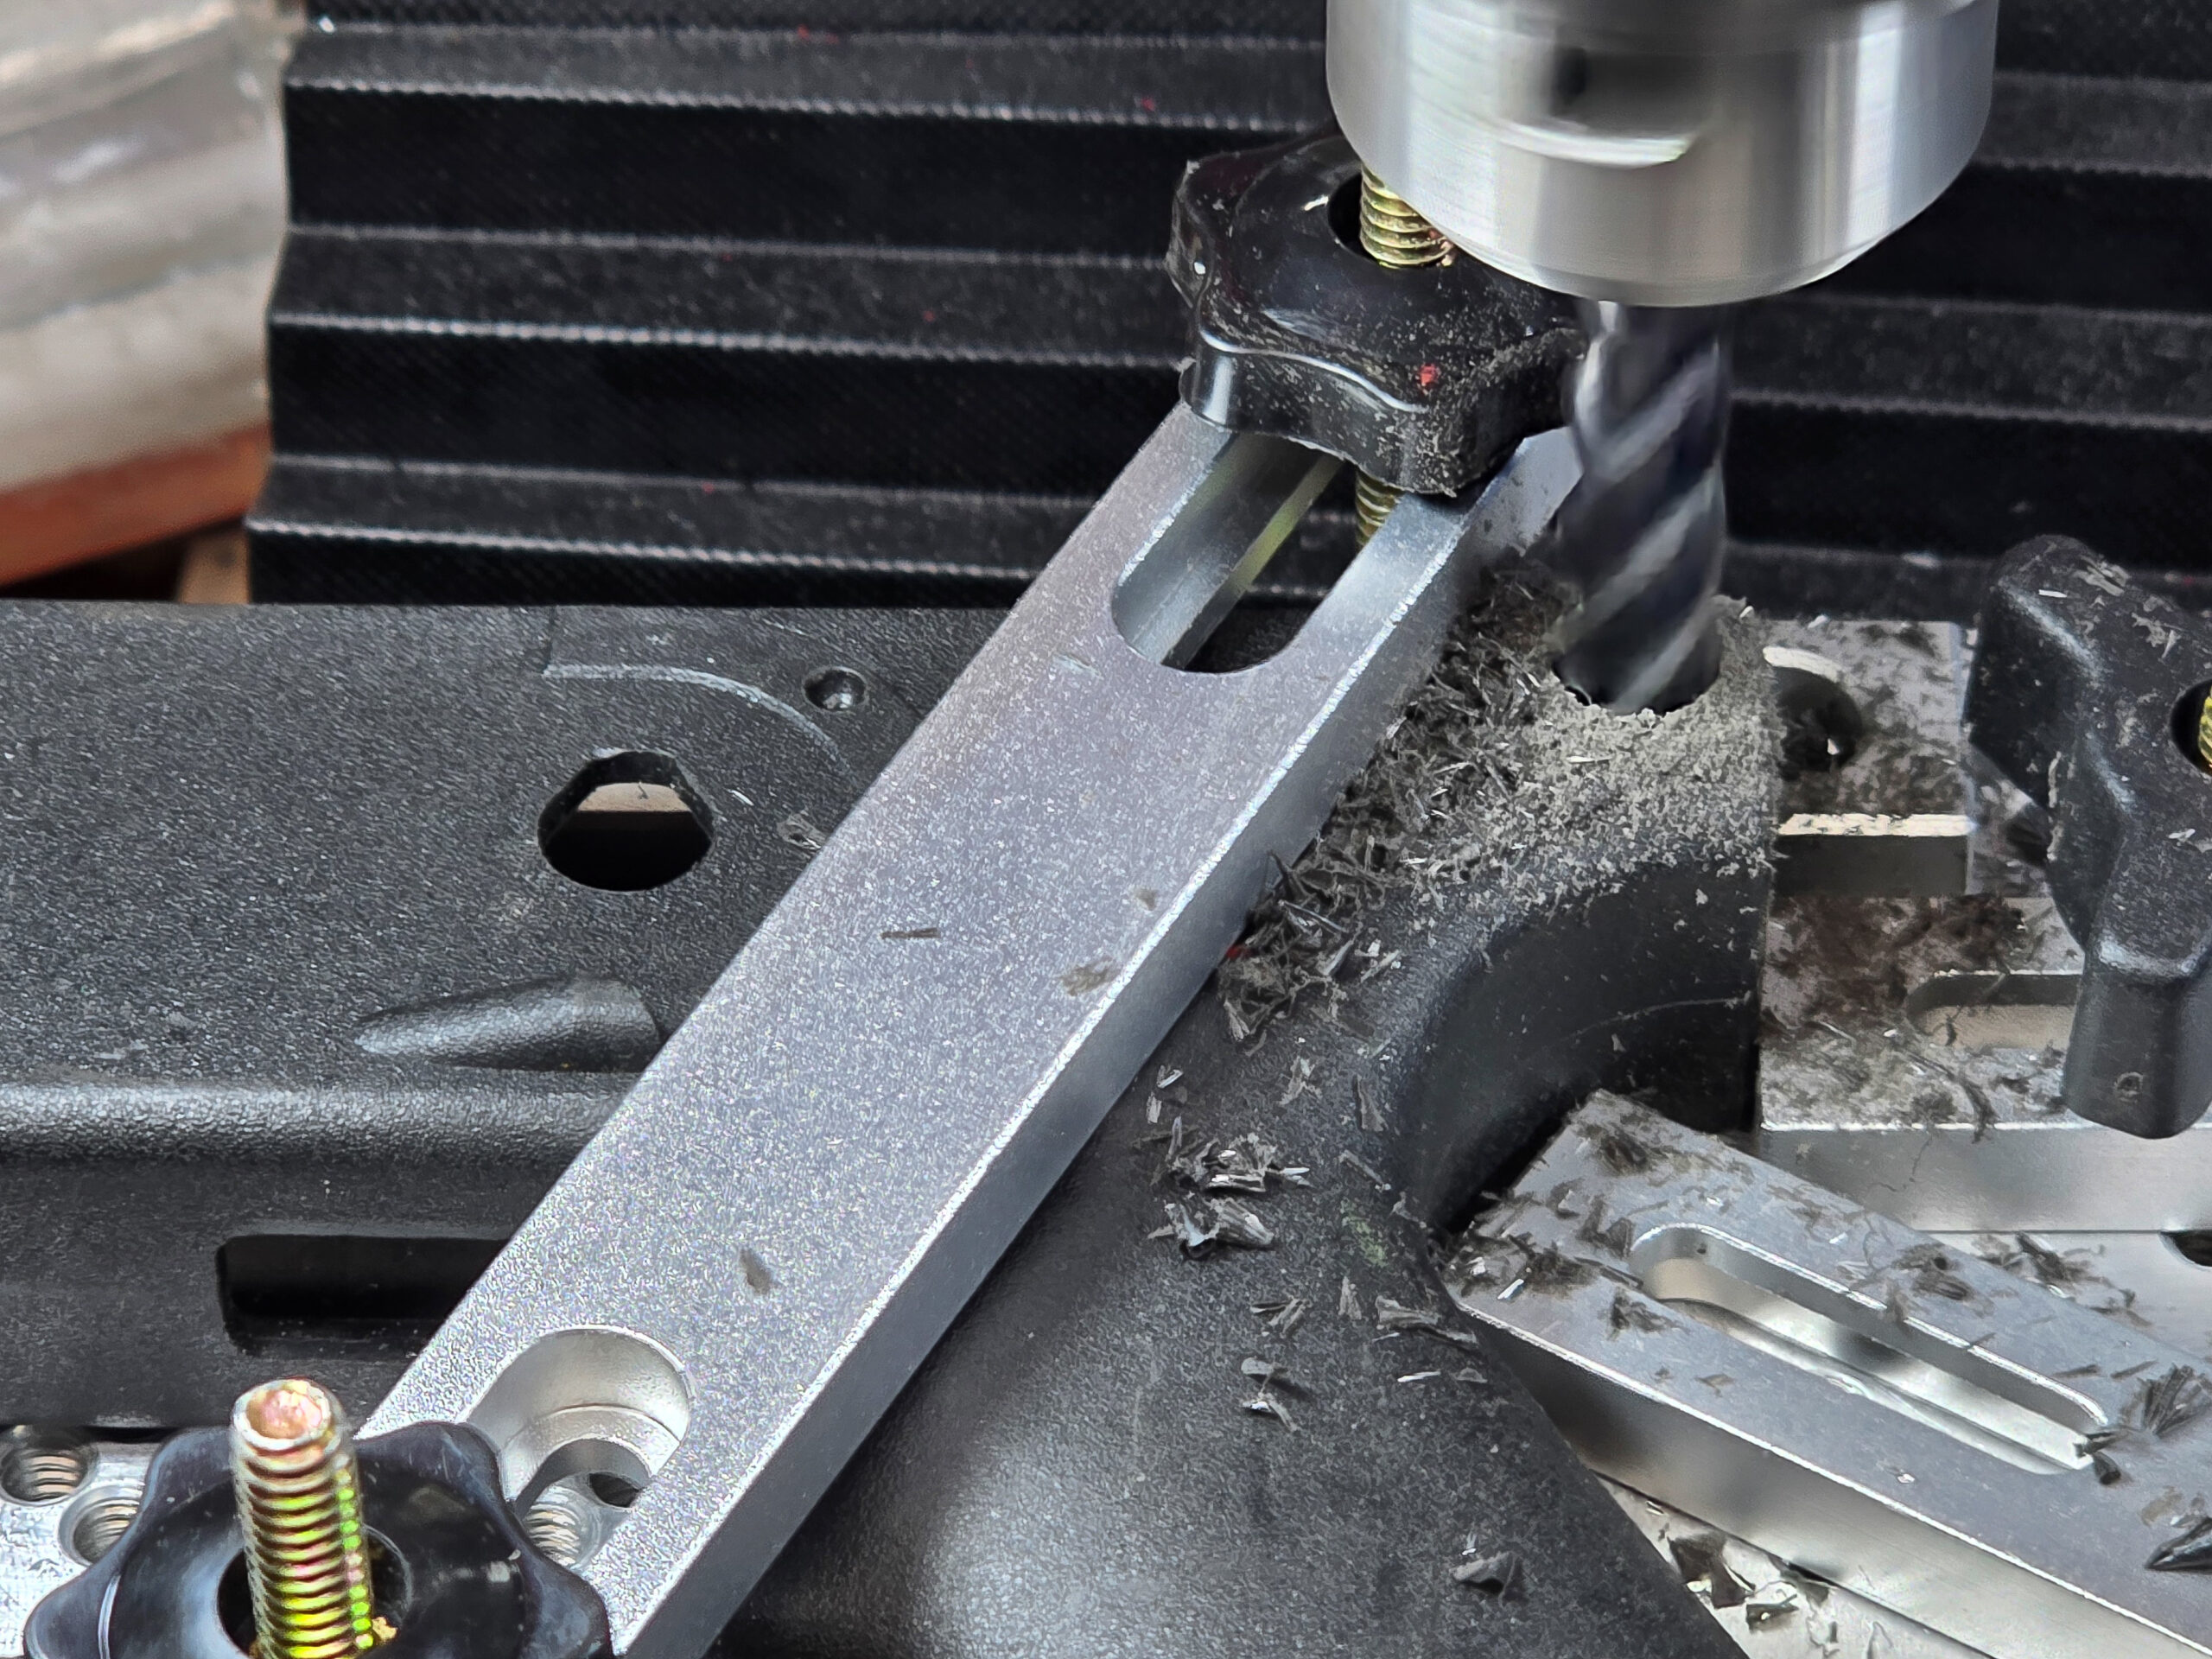
Milling the 10mm countersink. My mill has a Digital Read Out (DRO) so I know how deep to go.
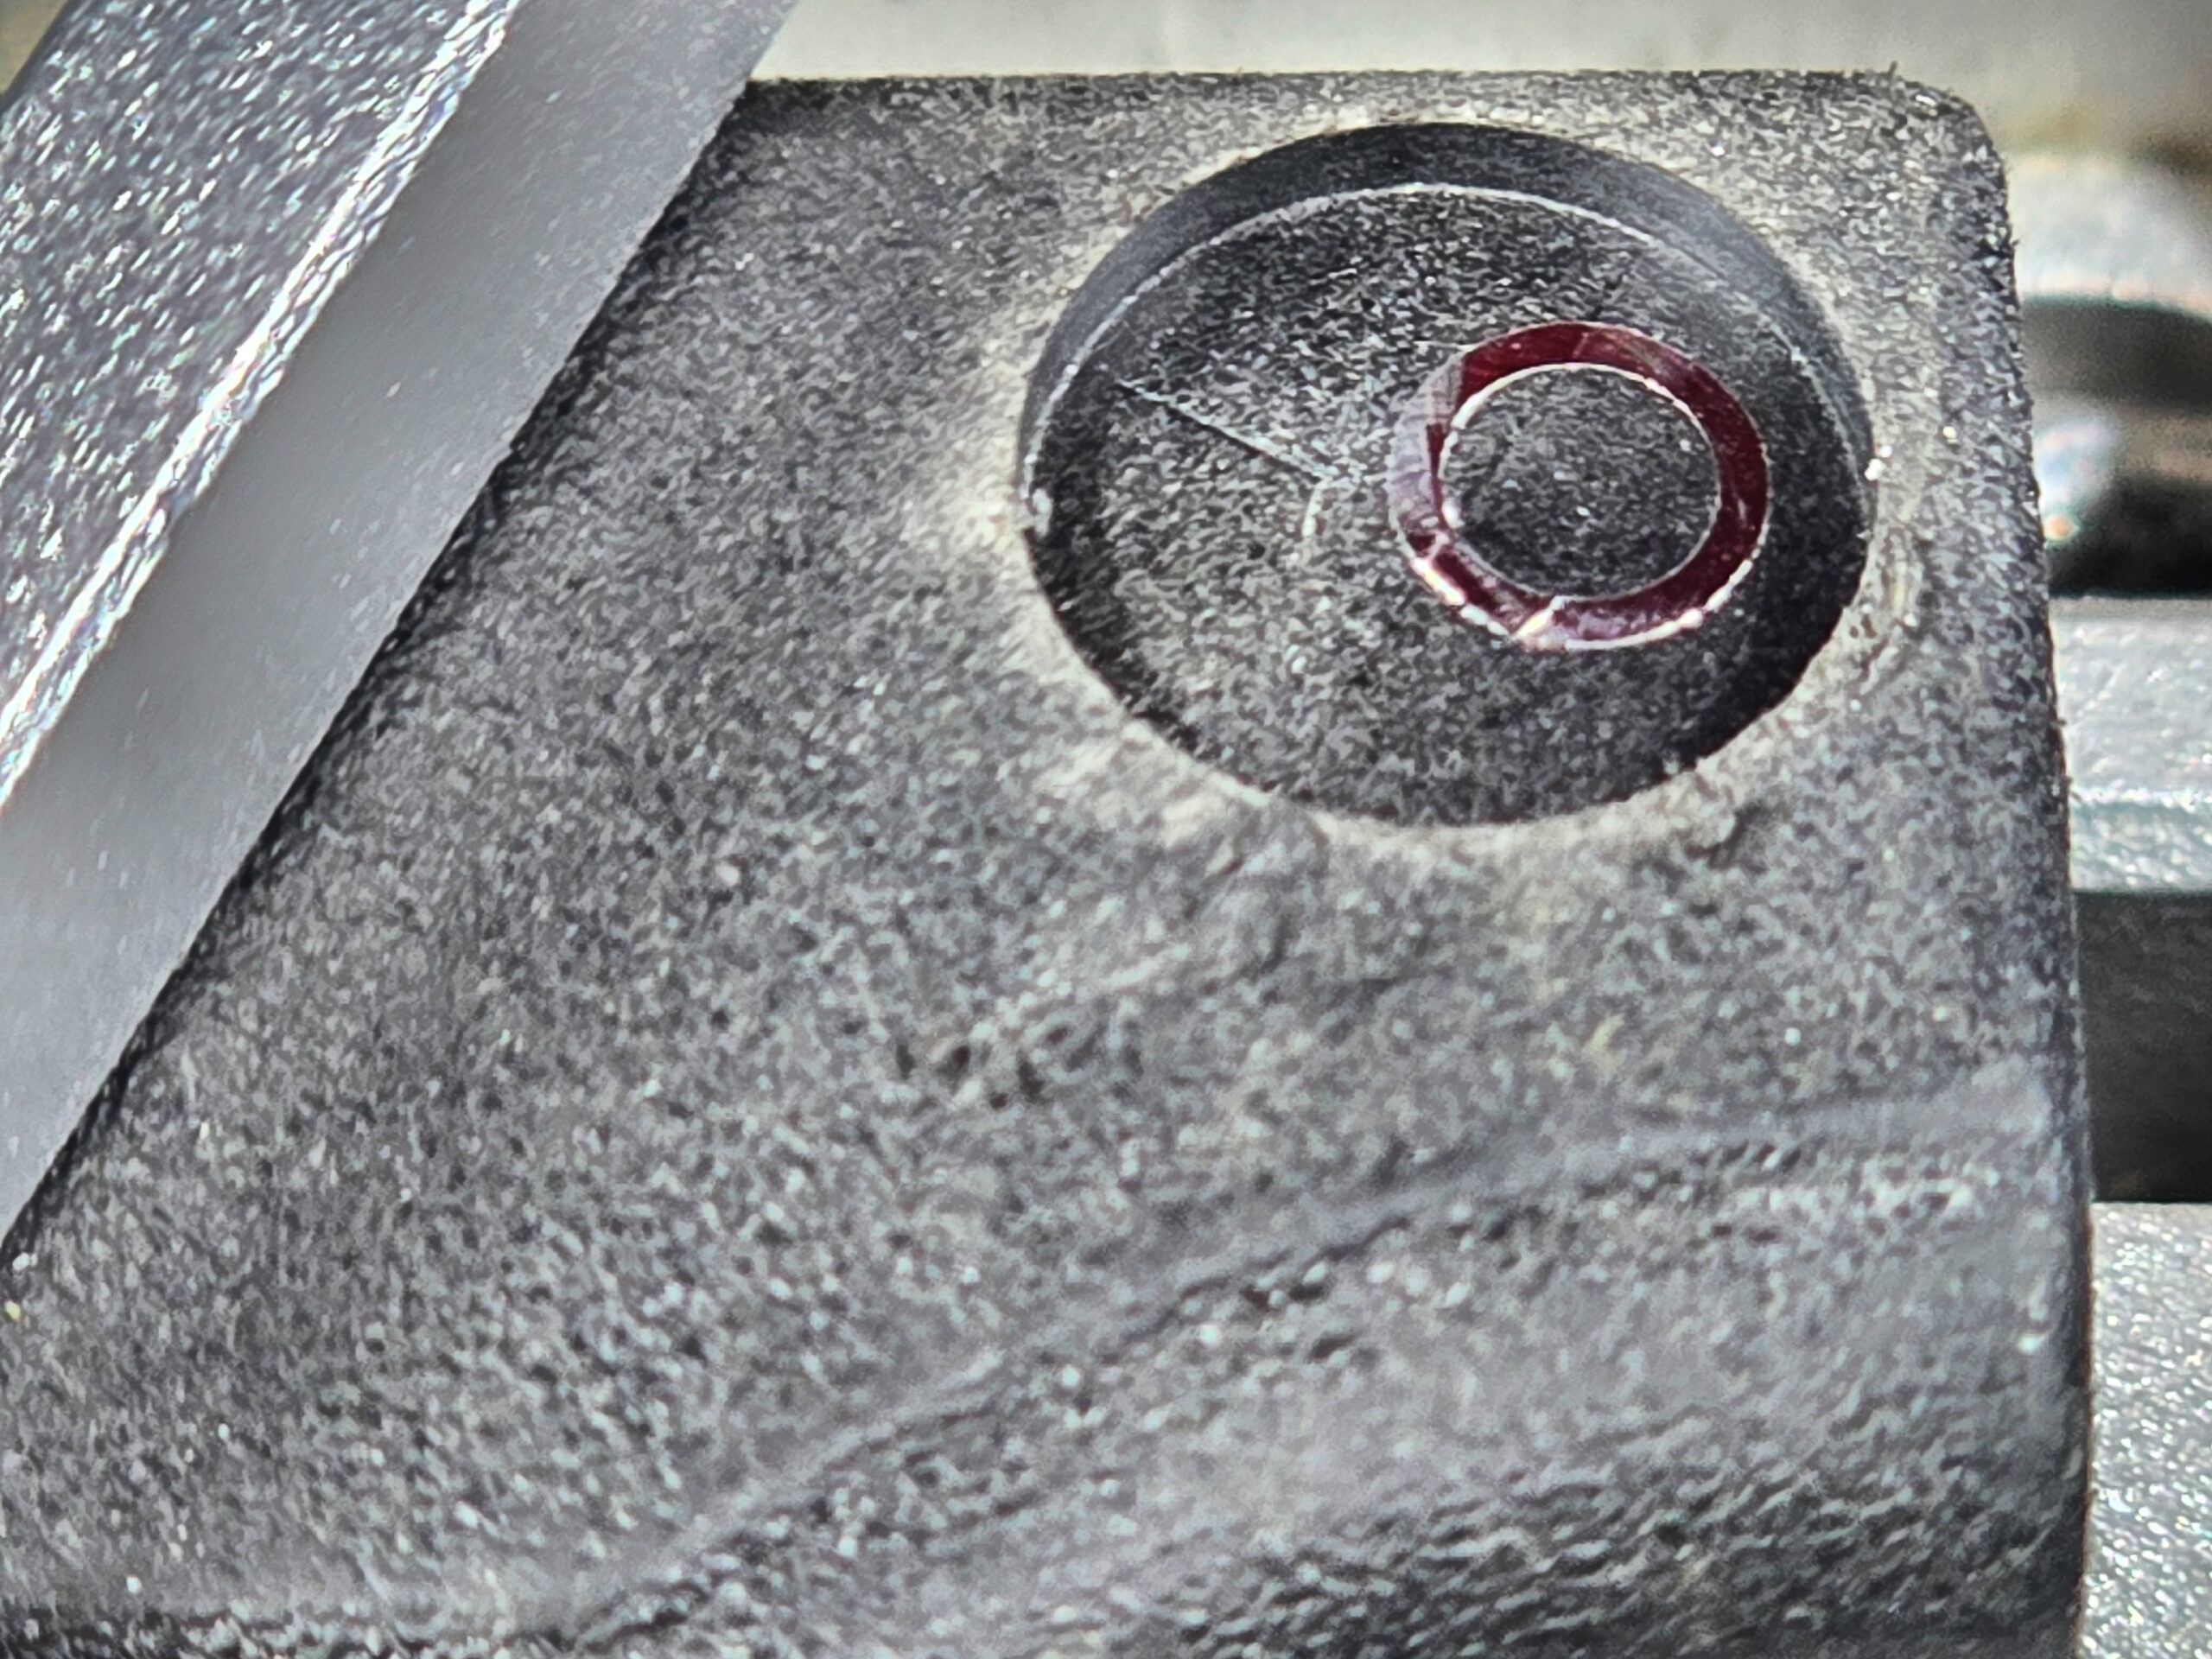
If you are wondering why not use a 6mm drill bit, it is because you will likely encounter a hole in the reinforcing plate that was cast into the grip during injection molding. A drill bit will hit that hole and want to yank the workpiece upwards as the edge of the opened hole rides up the flute and makes a mess. An end mill doing a plunge cut will not have this problem as it will cut off the open circle’s ends.
That slightly offset circle is exposed when you do the countersink. A drill bit will cut open the circle and then the grip will want to ridge the bit up.
So, yes, you can use a drill press but what is incredibly important is that you have the workpiece held firmly so you need to clamp it down.
Make a wood or plastic insert that you can put in the top of the grip to keep it from deforming when clamped and then milledd/drilled. If the grip moves at all, your new grip will be ruined.
Honestly, 99% of my challenge was figuring out how to securely hold the grips so they wouldn’t move and also not introduce angles/canting, etc. I’m still working on improving this as the overwhelming amount of my defects are caused by unintended workpiece movement.
You need to locate your new hole centers and then set up your milling machine or drill press to do the cuts. You need to figure out what works best for you. If you have digital read outs (DROs) then you probably didn’t need to read this blog post. If you are new to this, locate the hole center and mark the hole with a very fine point then use either a small drill bit or hole finder to center your machine on the hole.
To get the depth you need on the countersink, either use the features of your machine if it has some form of depth indicator or wrap a piece of tape at whatever limit you need and stop when you reach it.
I would highly recommend you do the countersink cut and then the hole cut on each side before you move on to the next. In other words, do a side at a time before you move the workpiece.
If you are wondering why I am not mentioning how to locate and cut the front pin holes, it’s because you don’t really need them if your weapon uses a shelf, which most current HK grips do. For example, the Magpul SL grip does not have the front holes. The way the polymer is formed, you would likely need a longer pin and it’s not going to give you a better connection. The front plate of the grip is shoved against the shelf by whatever you have on the end of the weapon and the top rear pin keeps the grip from swinging down – that’s really all that you need.
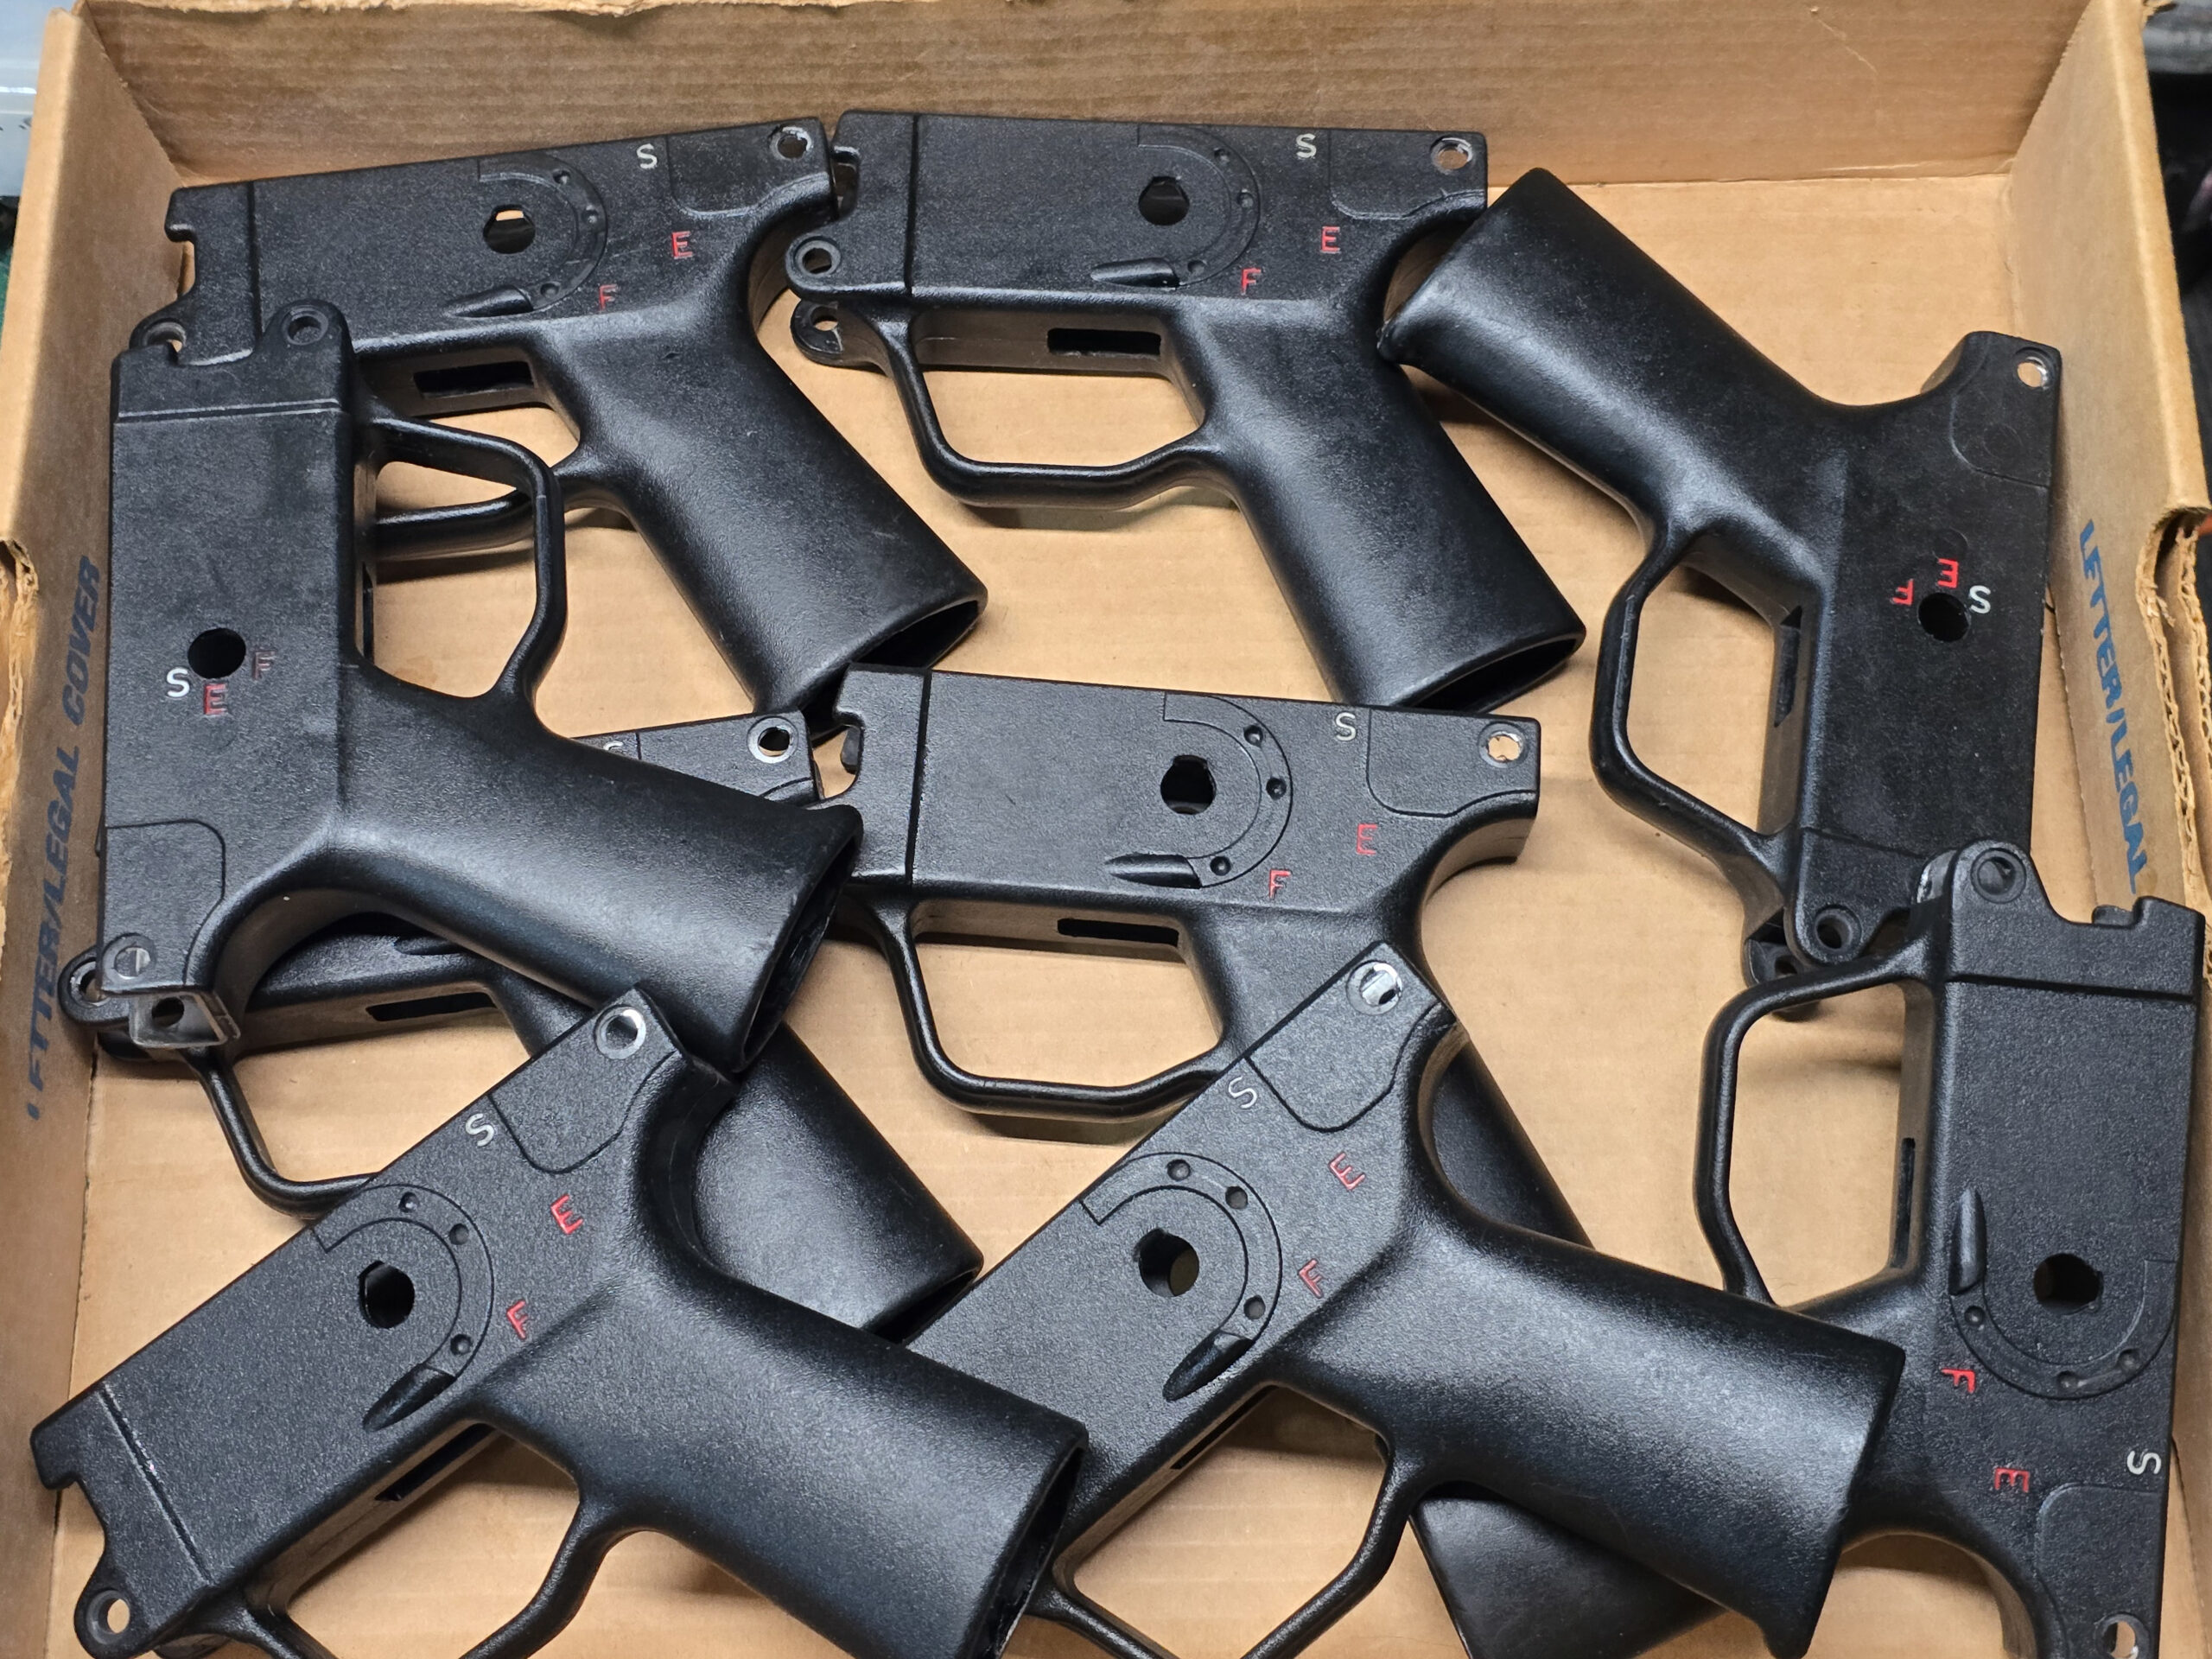
Here is a batch of converted “good condition” real HK Navy SEF grips getting ready to go to their new owners. We do repair any minor gouges and apply a restorative finish to make them look good. That’s the original HK paint by the way. Click here if you are interested.
Summary
You can do the conversion or buy our ready to go grips. You may need to do some final fitting but we’ve done the hard parts. If you’re interested, click here to go to our HK Grips page.
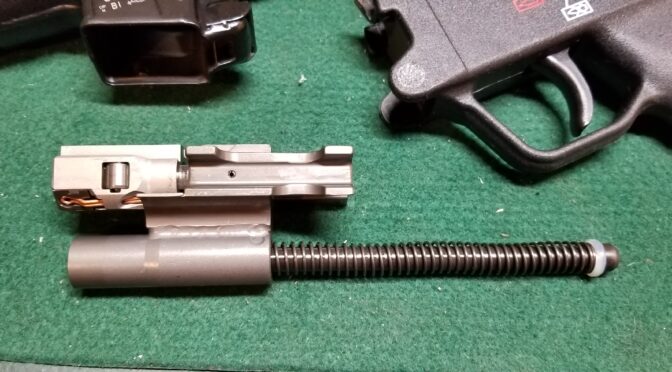
I’m a fan of the Roller Delayed Blow Back firearms for a while and have had opportunities to own and shoot ones from HK, POF, and PTR. I knew the rollers were locking the bolt head in place but never really understood the details of the action. I’ve tracked down two great videos to help show you what is going on.
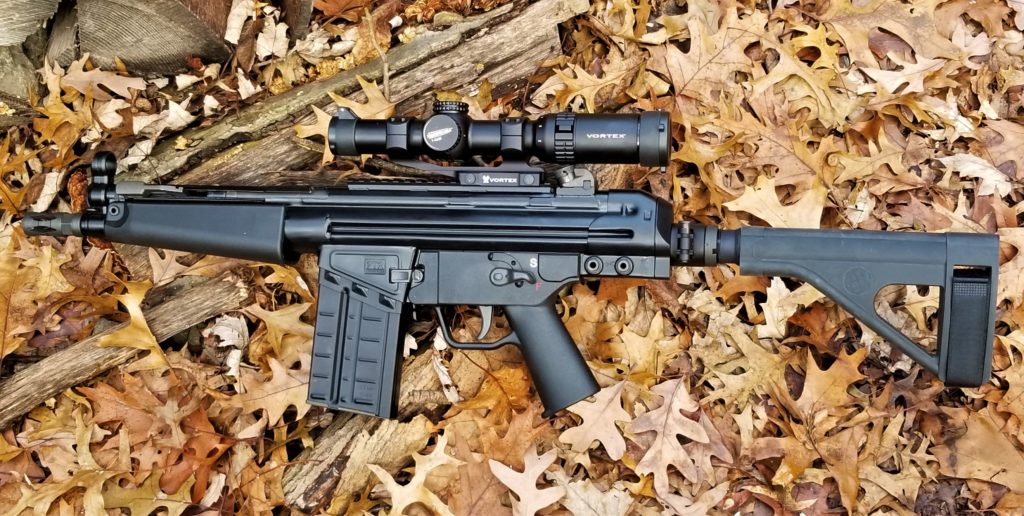
This is a PTR PDWR in .308 – basically a cut down HK-91 style pistol with a SB Tactical SOB Brace and a Vortex Optic.
Forgotten Weapons
In this short video, Ian @ Forgotten Weapons does a great job explaining just how this system works.
MouseGunner
This is one of MouseGunner’s cool x-ray renderings where he shows the MP5’s action at work. He’s done this for other weapons as well and watching the weapon operate really helps.
When the ATF reversed the ruling about braces and enabled folks to use them however they saw fit, the demand and supply of pistol braces went into orbit. I have carpal tunnel and a hereditary tremor so for me, using a brace is the only way I can wield a heavy pistol – such as one based on an AR, AK or MP5 type of action.
PSA has come a long way. I’ve used them as my go-to AR parts supplier for years and now they have great deals on parts, kits, receivers, and firearms. They also offer some great deals on braces – by themselves as parts, as part of a kit offering or even on firearms.
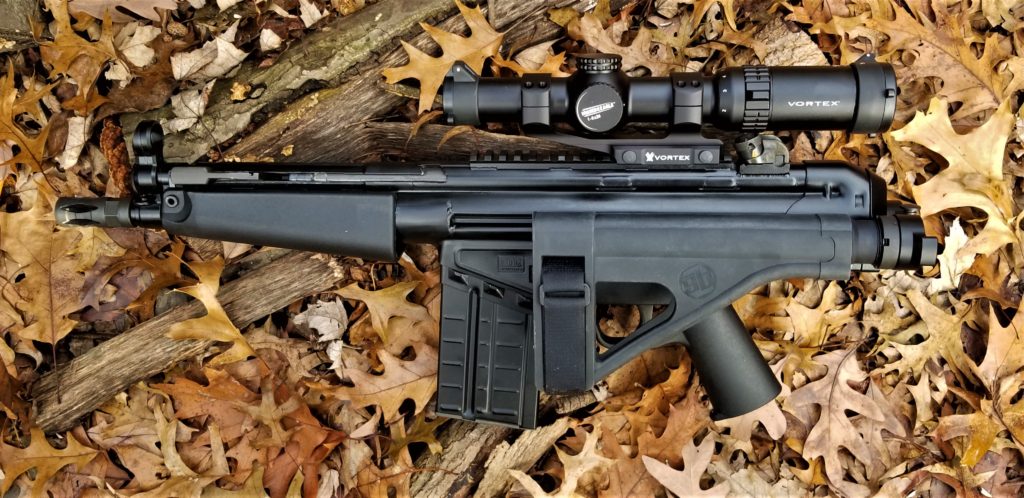
The lighting was right, the leaves were on the ground and it was a great chance to get some new photos of my PTR 105 PDWR pistol. This big pistol is the interesting brain child of PTR. It’s essentially a cut down HK 91.
The PTR 105 configuration has a PTR metal handguard installed. After messing with it some, I decided to install an MP5 handguard as I like the angle on the MP5 handguard more. This also means I should have just bought the PTR 110 that comes with that handguard.
Now, the only problem is that the MP5 handguard is not as rigid as I would like. I’ll experiment some with different handguards in the future.
The PTR 195 and 110 are big pistols at 23.5″ overall, 8.5″ barrels and weigh about 8 pounds. I wanted to install a brace but needed to be mindful of Michigan’s odd 26″ maximum pistol length law. This isn’t legal advice, but my understanding is that the Michigan State Police say that a pistol with a brace is measured from one end to the other in the minimum operable condition. So, by installing a side folder, I could have a brace for when I wanted to use it but also had the minimum operable length at 23″. What you see in the photo is an SB Tactical BTFA folding mechanism, buffer tube and SOB stock. When open, the weapon measures 32.5″.
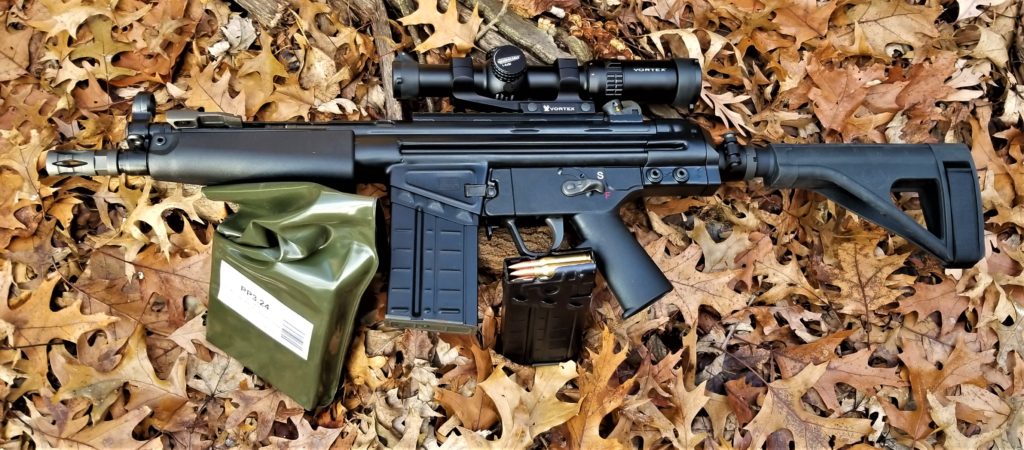
Thanks to the BTFA folding mechanism, I can swing the SOB brace to the left and it locks open. This keeps the brace out of the way of the ejection port. You can configure the BTFA to go either left or right.It definitely has clean lines.The PDWR definitely likes the PPU battle packs of .308 FMJBT 145 grain ammo. It works great and is plenty accurate within 100 yards. I’ll need to try and shoot the PDWR for accuracy some day and see what it can do.
As you can see, the brace is folded open and operating side of the PDWR is nice and clear of any obstructions.
Given the PDWR is chambered in .308 and uses 20 round HK G3 magazines, that is a lot of firepower in a small package. Overkill? Sure. Fun at the range? Absolutely.
One of the challenges when starting out working on guns is building your tool collection. It’s hard to find cost effective tools so you wind up making do with stuff, creating tools ad hoc, etc. Interestingly enough, this is where eBay just might help. While I’m not happy with their anti-gun position, there are a lot of tools that pop up there – ranging from low-end Chinese stuff all the way to some beautiful vintage tools.
So, I want to show some example searches with 20 live feeds from each section:
Gunsmith and Gunsmithing Tools
The trick is in the searching. For example, here are the top 20 matches for gunsmith tools or gunsmithing tools and you will probably see a mix:
Of course there are brands I will steer away from such as NCStar and others that I will look closer at such as Brownells, Lyman, Tipton, Weaver, etc. I also read the ratings of the seller. If a seller has a good rating and more than 30 sales, that’s a good sign. Less than that and you are taking a gamble.
Vintage Gunsmith Tools
“Vintage” seems to be a popular term for “used”. You tend to find a lot of unique stuff that was made by a gunsmith to fit a special need as well as high-quality tools that were made with care vs. mass produced. Be careful though. I’ll zoom into the photos as much as I can plus look at the seller’s description and the rating of the seller to try and decide if the tools are in good shape or beat to death.
Brownells has been around a long time — they were founded in 1939 and have always been known for their quality tools, parts and supplies to gunsmiths. Because they have been around for so long, you tend to see a fair amount of Brownells stuff hit eBay by name so that is worth searching. Still look at the photos closely and the seller’s rating to play it safe. By the way, if you have never read their Gunsmith Kinks books – be sure to pick them up.
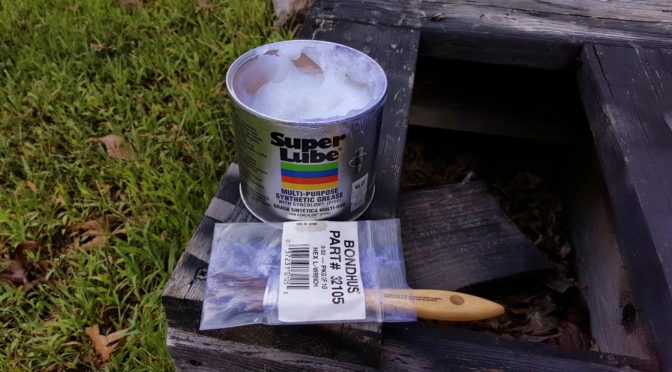
I’m always searching for better lubricants. Many of the so-called specialty weapons lubes are just marketing hype with some bulk lubricant poured into their container. In terms of greases, I’ve used quite a few over the years including wheel bearing grease and Tetra Gun Grease. I wanted to find something effective, non-toxic and less expensive.
A name popped up when surfing – Super Lube. To be honest, the first few times I totally dismissed the name because it sounds like some overly-hyped wonder lube that is sold in infomercials. However, the name did keep popping up so I actually started reading up on it.
Super Lube products are made by Synco Chemical Corporation of Bohemia, NU, that was founded in 1980. Their specialization is in the space of synthetic food grade lubricants and hold a number of patents.
There are a number of interesting characteristics about their grease that should be noted:
To apply it, I use either a chip brush that I store in a zip loc bag to keep from getting dirty (as shown in the featured photo above) or a small flux / resin brush that I also keep in a baggy.
So, for the last few months I have been testing it. When I cleaned one of my rifles or pistols, I would replace whatever I had been using as grease with the Super Lube Multi-Purpose grease.
I go by the old saying that if it rotates, oil it. If it slides, grease it. That is my rule of thumb so it goes on AK rails, bolt carriers, where the trigger hook grabs the hammer, etc.
It works great! The weapons feel well lubricated after cleaning and they function great. When I take them apart again for cleaning, the Super Lube shows no sign of breaking down, drying out, becoming gummy, etc.
If you are looking for an excellent affordable grease, check out Super Lube. I’m definitely very happy with it.
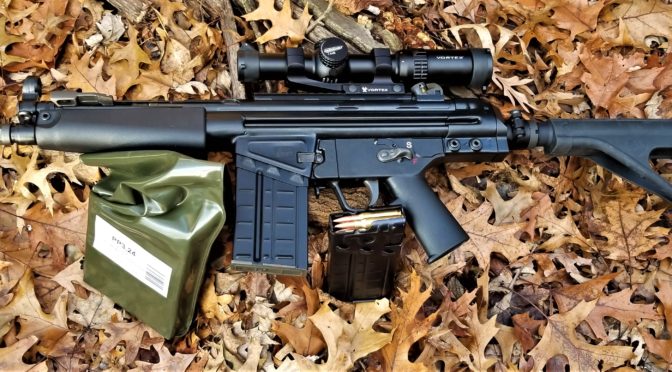
Plain and simple, it ran like a top. We did not have one single problem of any kind. We were running surplus aluminum mags from Robert RTG. The ammo was Prvi Partizan (PPU) .308 M80 145gr FMJ. I’ve had great luck with PPU ammo over the years and have run a variety of their calibers and loads. This .308 ammo comes in a heavy plastic sealed “battle pack” that SGAmmo sells. If you don’t know SG Ammo, they are a great ammo supplier that is a family run business. I buy most of my ammo from them and have nothing but good things to say about them.
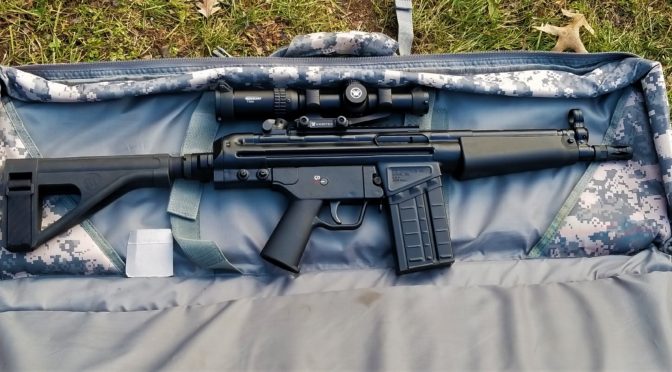
We sighted the Vortex 1-6×24 Strike Eagle scope in at at about 25 yards and then just had fun. We weren’t shooting for accuracy but were having fun shooting “zombies” as we called them with the big Splatterburst 18×24 silhouette targets that I really like.
This time out, I was using my new Howard Leight electronic ear muffs. These are cool because they have directional sound amplification for normal sounds – like talking with your friends. When you shoot, they immediately cut the sound off and protect your ears. This is a real nice feature for me as I can’t hear a thing when I wear ear muffs due to my hearing loss and have to take them off to talk to someone. At any rate, these Howard Leights have a great reputation and I must say that I am very happy with them.
One of my brother-in-laws was wearing my new MPOW headphones and thought they did a really good job on cutting down the sound. These are a bargain price at Amazon and work way better than my old cheap Silencios in terms of hearing protection.
Now we did have a funny lesson learned – see how short the barrel is relative to the Caldwell front bag? Yeah, if you get the muzzle brake over that bag and fire, it will rain some kind of brown pebbles (corncob media maybe?) down on you as the muzzle blast shreds the top of the bag 🙂 I have to confess, I am the one who did it and had to use duct tape to seal the top up so we could use it the rest of the day.
The whole point of the range visit was for me any my two brother-in-laws to have fun and function test the PDWR. It performed admirably – neither of them are shooters and, for Jamie, this was his first time shooting anything – I think he did great.
Not one single problem – no feed issues, no ejection issues – it just performed great through about 200 rounds.
At any rate, I did learn a few things:
It upheld the good opinion I have of PTR firearms.
The SOB brace can handle .308 recoil just fine and lines the eye up for the scope great.
As expected, the Vortex scope was great.
The weight of the PDWR absorbs quite a bit of recoil making it a pleasant shooter but there is still recoil that moves you off target with any kind of rapid fire.
The muzzle brake does an okay job but I am going to check into alternatives to cut the recoil down further. The bird cage design is okay but there are definitely better designs out there. The PDWR has a 5/8″-24 TPI threading so there are definitely options.
The PDWR handguard moves forward and backward more than I care for. I am going to experiment on tightening it up or either moving to a DTAC handguard or back to the original PTR handguard. Note – the PDWR uses a MP5-style handguard.
Bottom line, I am very happy with the PDWR and plan to work with it some more on the above plus see how it does as I work my way back to 100 yards. Everything in this sessions was at 25 yards or less and I am curious how it performs as the distance grows. I would recommend the PDWR to anyone looking for a short HK91/G3-type roller lock for short distance use.