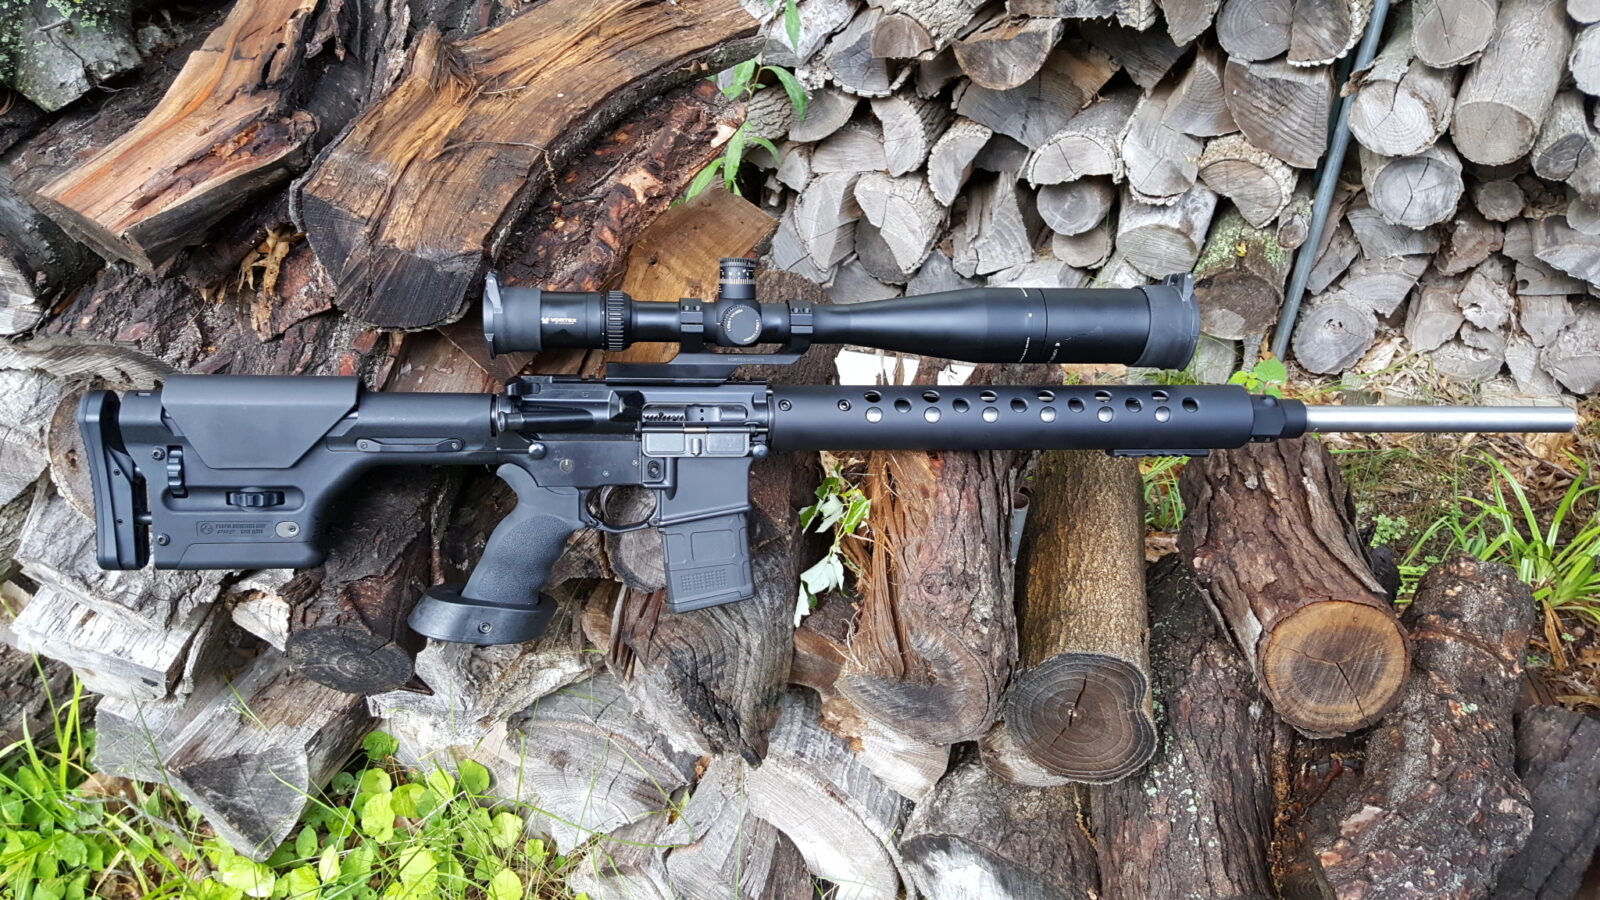
This is a purpose-built target rifle. I like my precision rifles to be very heavy as the weight helps absorb my tremor. Granted I still have to control my breathing and pretty much meditate to get to the right point to pull the trigger but the weight really helps. The rig as shown without ammo weighs 13.7 pounds. Now let’s get into the details of the components used in this rifle.
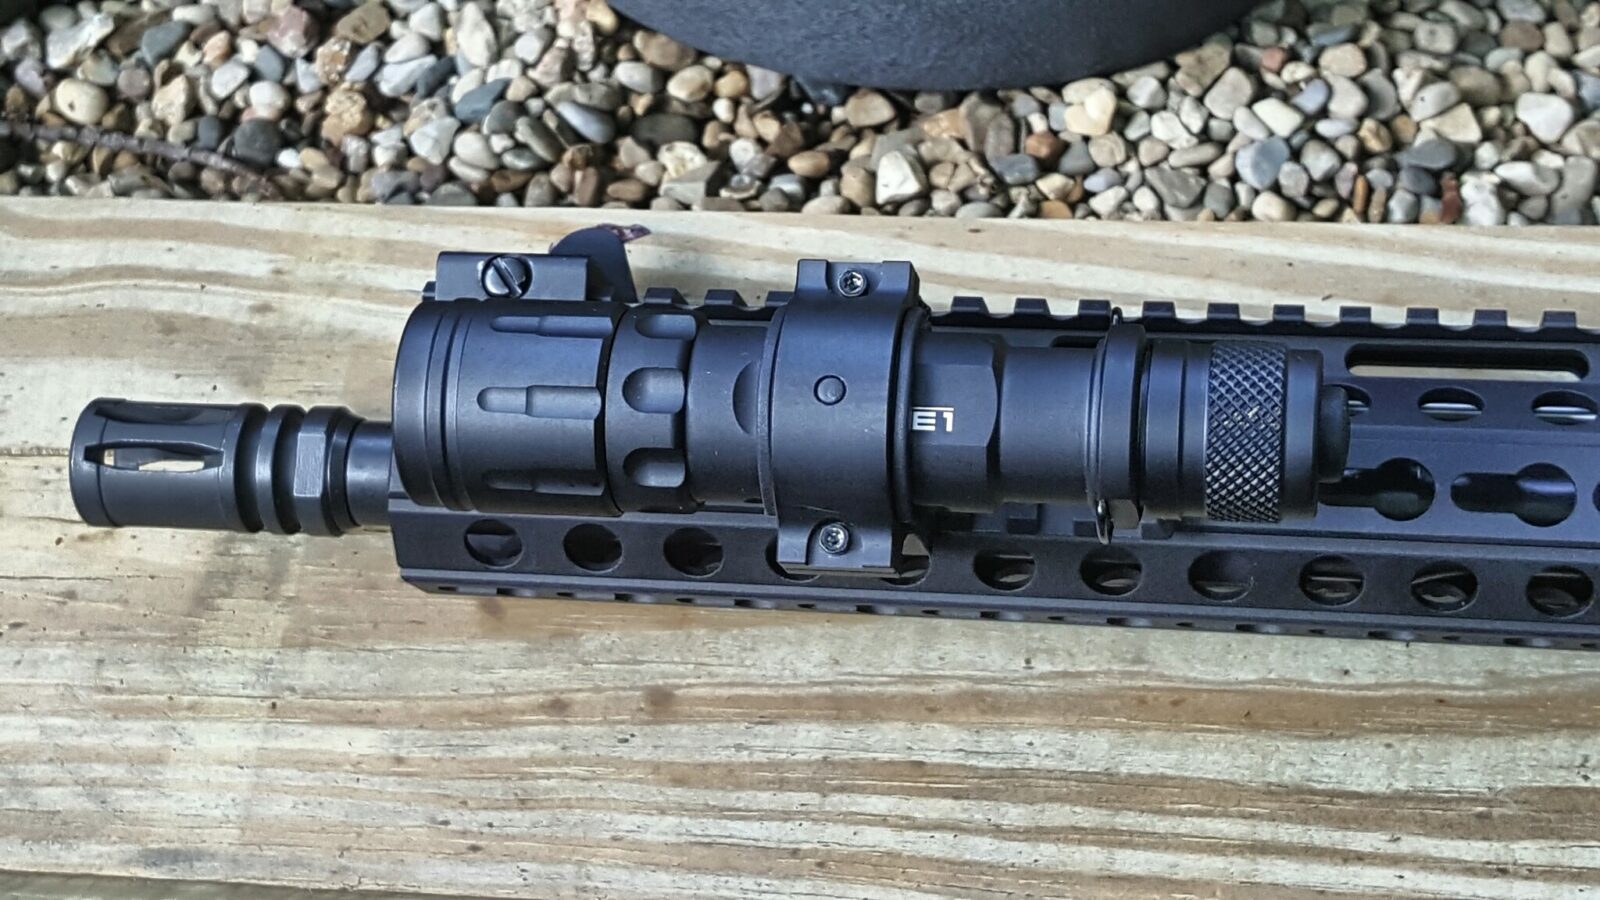
In this case, the upper was the most important item I focused on first. This is a 26″ White Oak Armory (WOA) complete upper and these folks are known for building accurate rifles. White Oak Armament is in Carlock, IL, and owned by John Holliger. John has a ton of experience with competition shooting starting in 1980 finishing 15 times in the Presidents 100, earning the Distinguised Rifleman Badge, 2000 CMP Pershing Trophy winner and more. Needless to say, he knows his way around a competition firearm. John founded White Oak Precision in 2000 and then While Oak Armament after that as he noticed that custom gunsmiths and picky shooters (me) needed a reliable source of high end AR parts. What I think is especially remarkable is that his prices are very fair especially given the quality of what he delivers.
From their website they note “Receivers are all forged and mil spec or higher quality, and have the baked-on, anti-friction coating on the inside for long life. Bolts are held to proper tolerances for correct headspacing. Bolt carriers have M-16 style shrouded firing pins for reliable function and added weight. Handguards are top quality compression molded and fiberglass reinforced, not the cheap injection molded plastic. Our NM floating handguard assembly is our own design using heavy walled tubing, a solid welded end cap, and a sling swivel. Many parts are custom manufactured to our specifications. And of course everything is 100% made in the USA!“
What I decided on was one of their 26″ varmint upper. Now at 26″, it’s pretty much overkill but is nice and heavy weighing in at 7.88 pounds all by itself. While WOA does offer fluting, I did not opt for it as I wanted the weight. By the way, fluting increases surface area for cooling and reduces weight but it is not something magical. The unfluted barrel is stiffer. I am going to try and word this very carefully – a fluted barrel is stiffer than another barrel of the same final weight due to the thicker walls. In other words, take a thin barrel that weighs X pounds and a fluted barrel that weighs the same X pounds, it will be stiffer because it has the thicker walls around the fluting but it is not as stiff as a the original unfluted barrel. Now this matters if you are shooting a lot and the barrel is warming up such as lots of target or varmint shooting at prairie dogs. So, stiffer and heavier is the route I will always take. If you told me I would have to carry a rifle around a lot then my answer would change 🙂
The barrel itself is a 26″ stainless match grade unit with an 11 degree crown to protect the muzzle and their own “WOA Varmint Chamber” to allow the use of either .223 or 5.56 ammo. The twist rate is 1:8. I like to shoot heavier bullets to buck the wind and 1:8 will stabilize bullets from 75-80 grain quite well. I have both Black Hills match ammo as well as just got some IMI RazorCore specifically for this rifle.
Last point, this complete upper – including the matching BCG and charging handle – was only $645 + S&H. That, my friends, is quite a deal. [Click here if you want to see what other complete uppers they have for sale.]
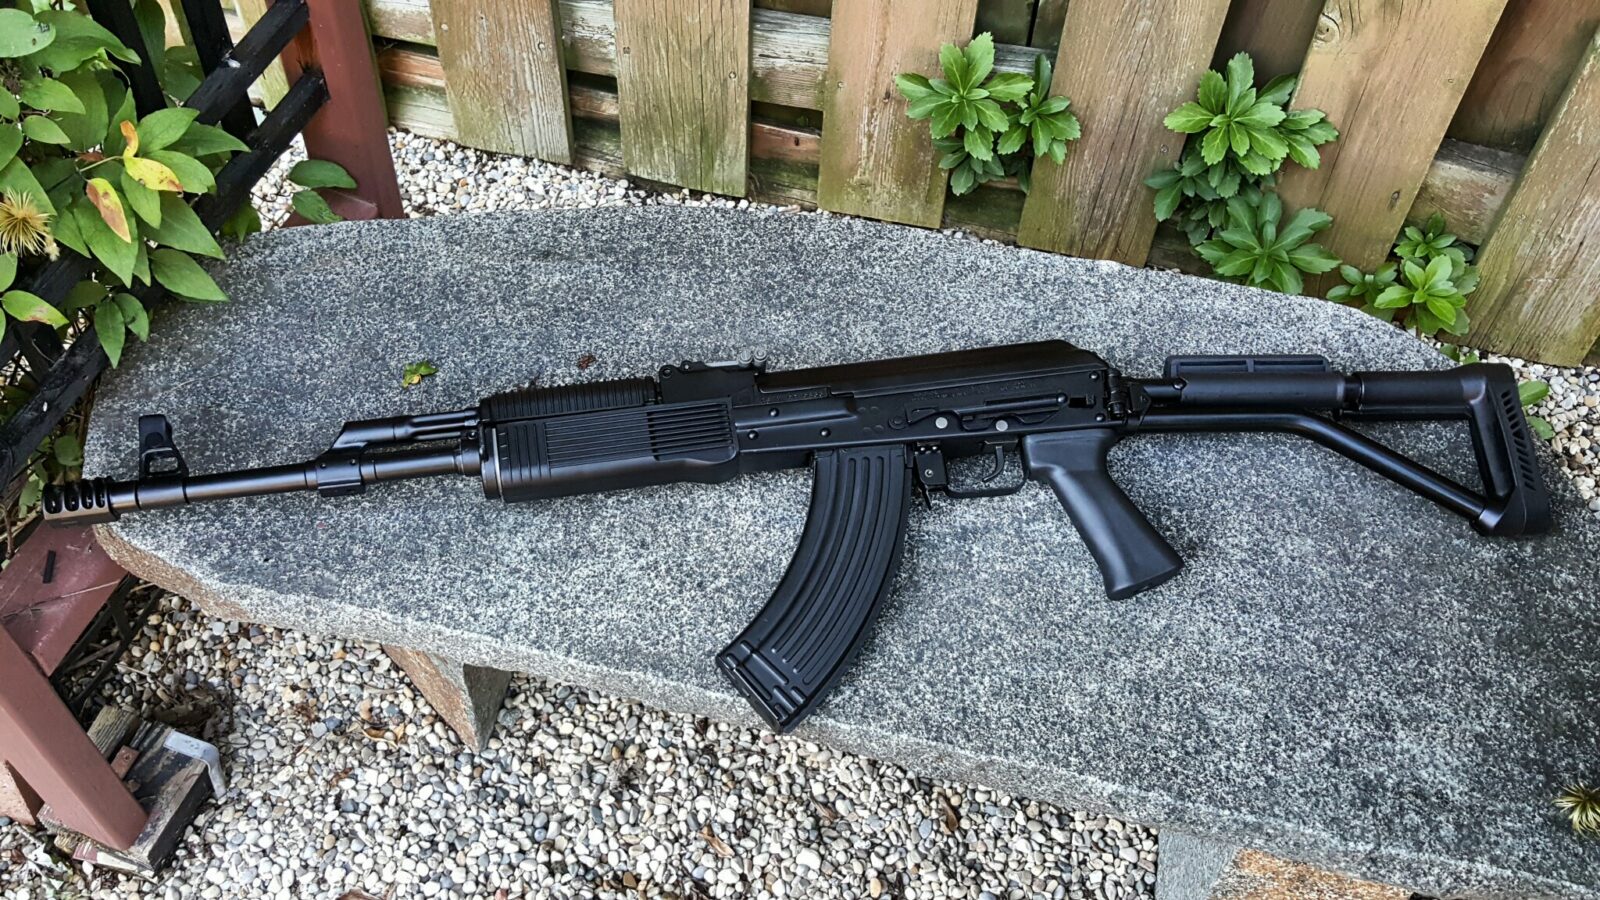
The lower is an Anderson. They are my goto lower receiver as they are mil-spec and work just fine. I’ve never had an out-of-spec problem with them actually.
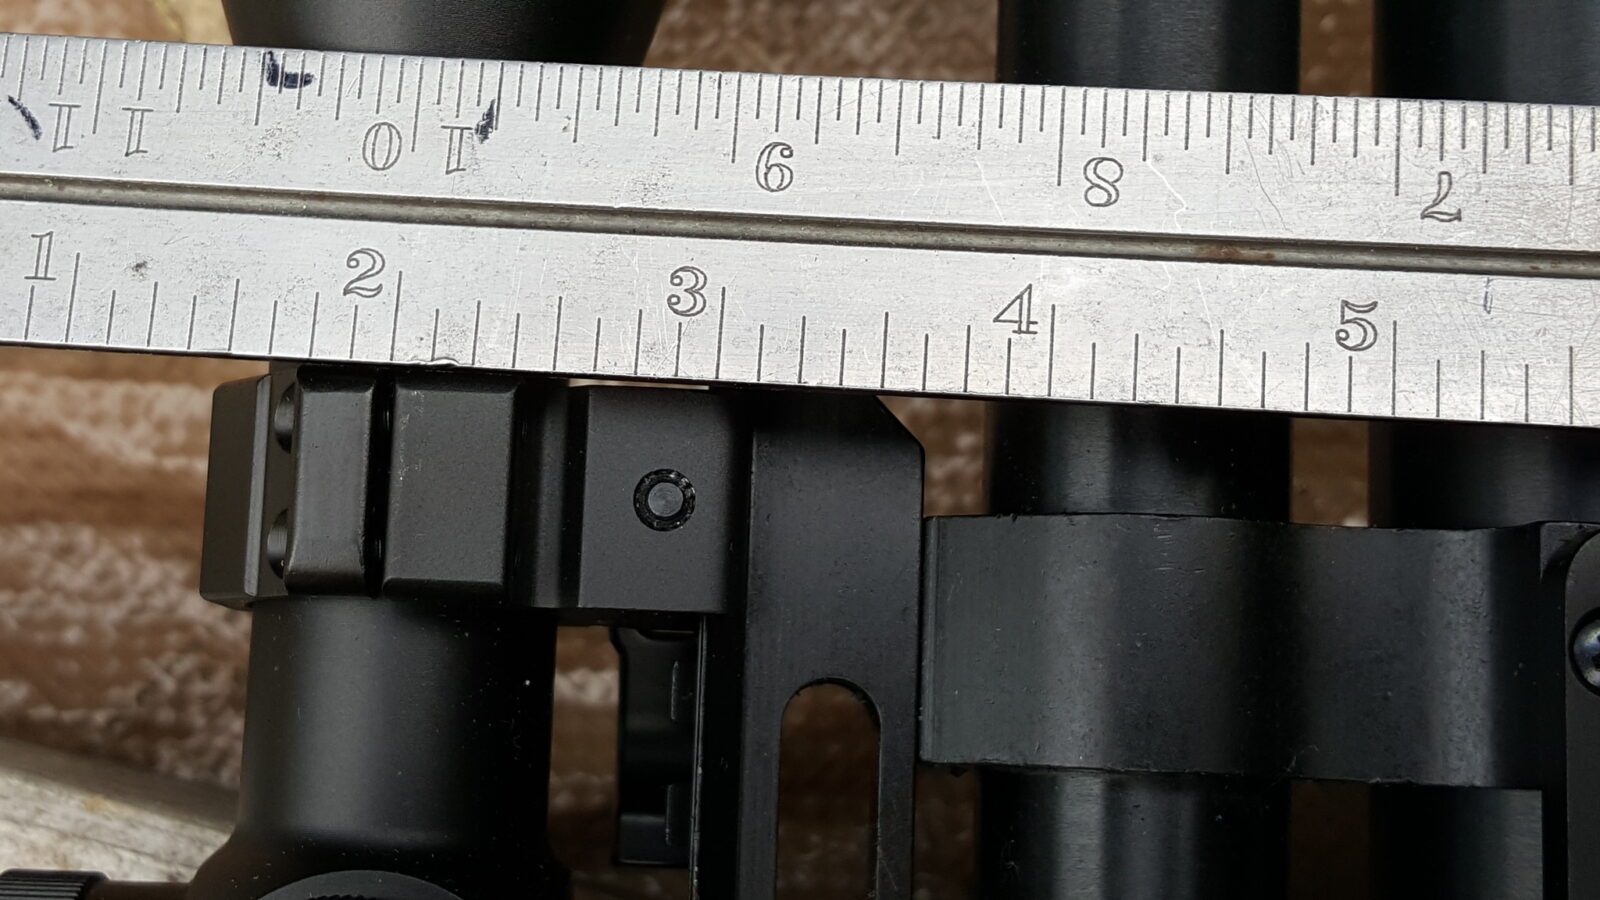
It has Yankee Hill Machine (YHM) oversize pivot and takedown pins. I just like the extra leverage when I have to open or remove the upper.
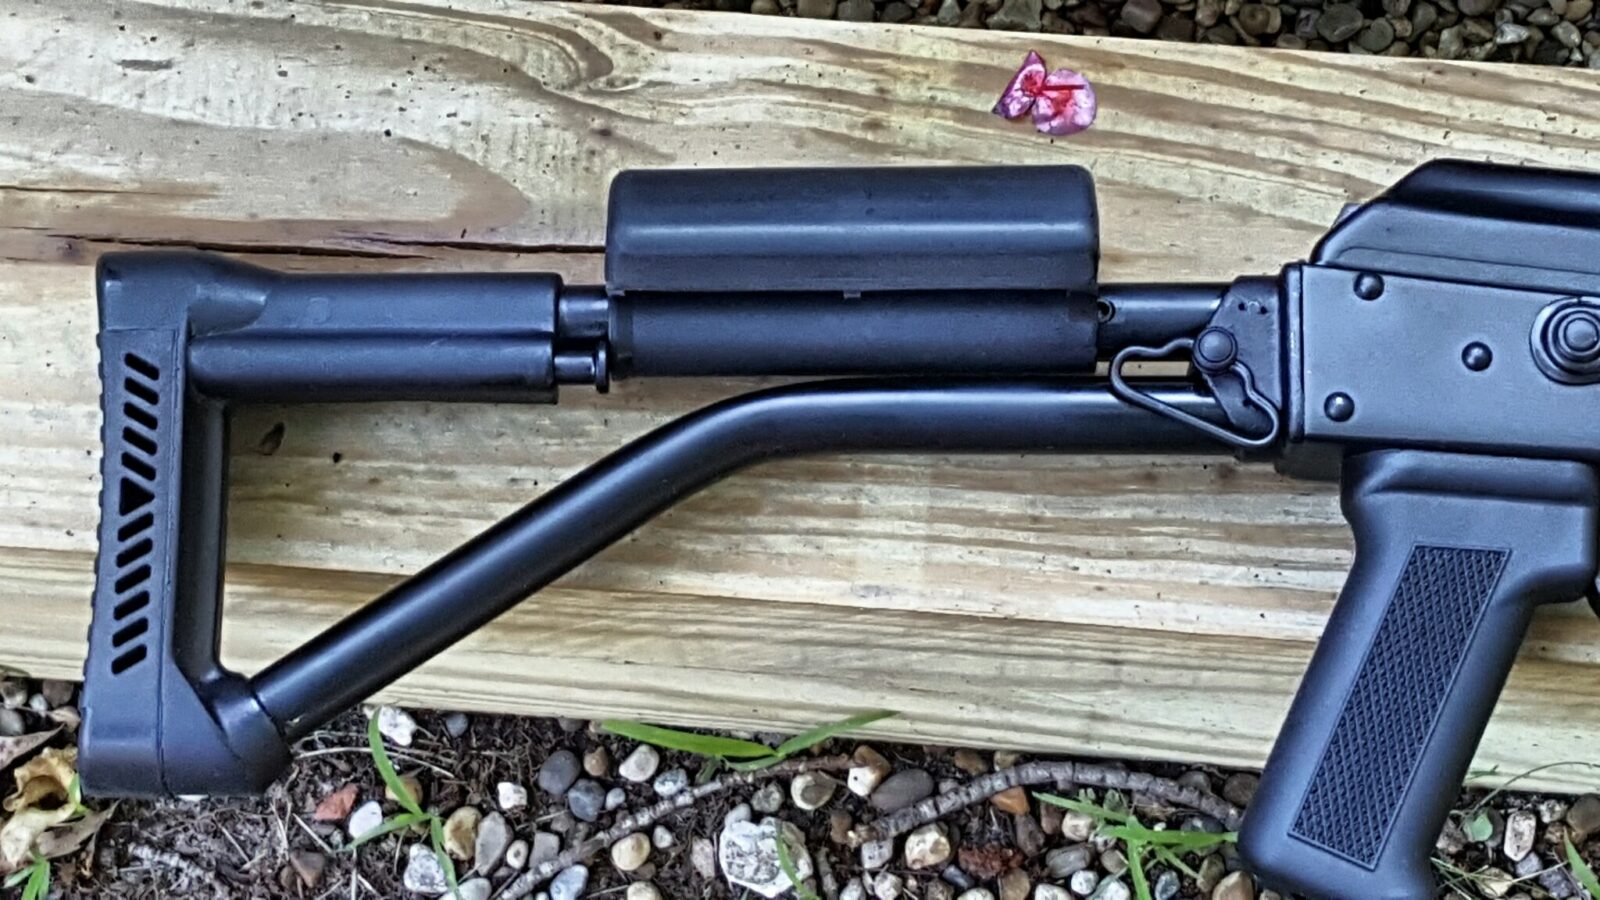
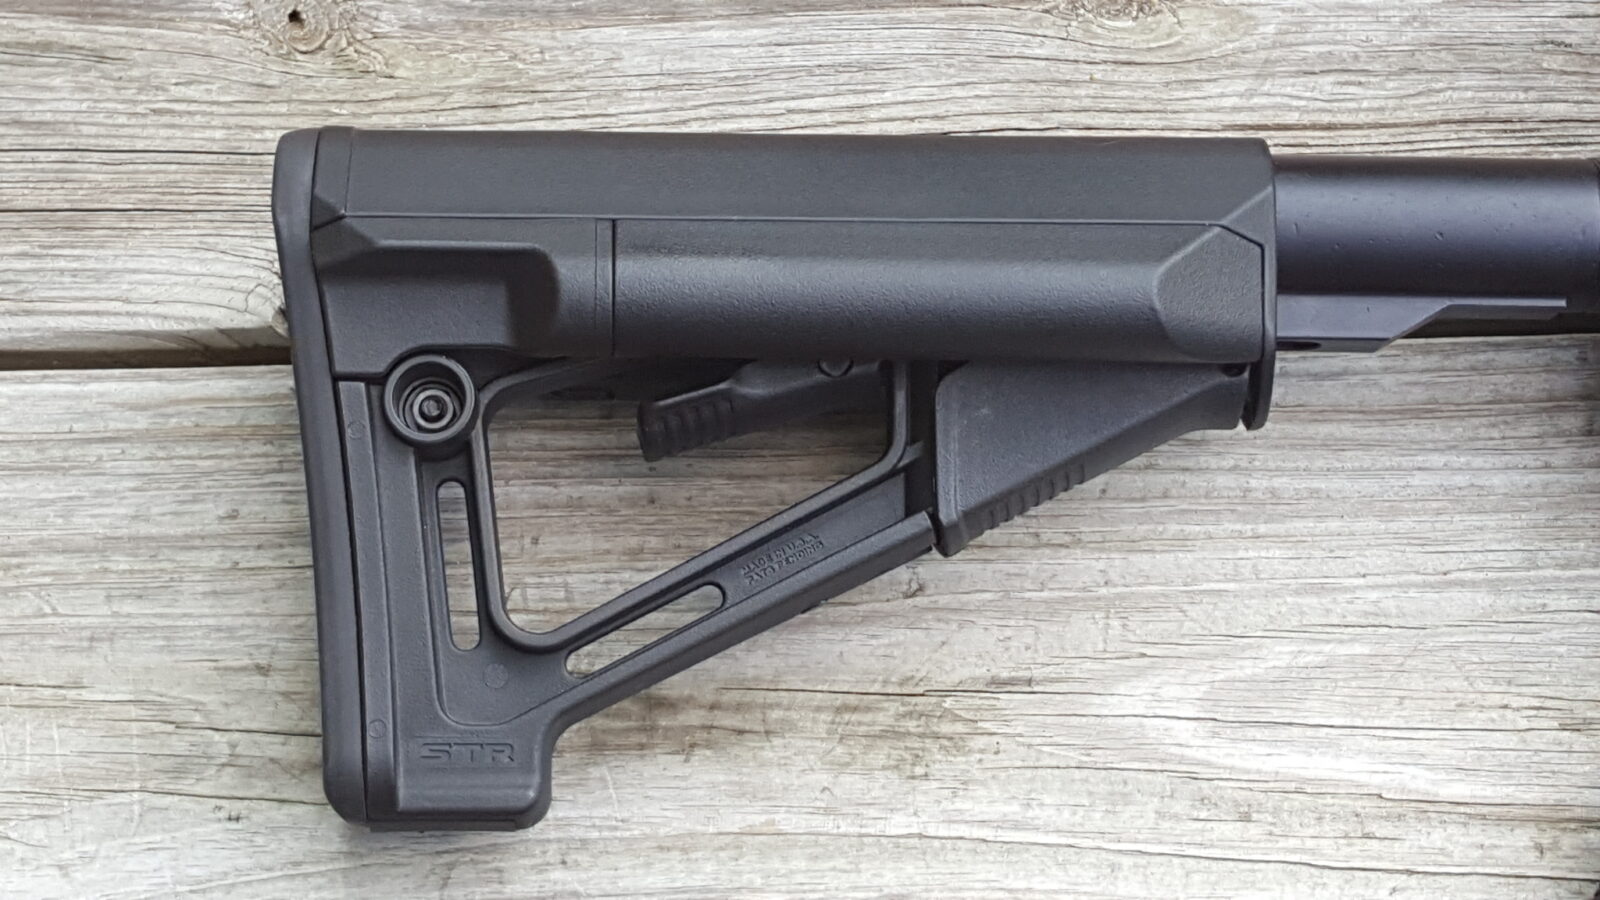
The buttstock is a Magpul PRS II. I always like these stocks as I can get my length of pull and cheekweld exactly the way I want. Under the stock is a rifle length tube with a normal spring and an H2 buffer.
The grip is an Ergo Tactical Deluxe with palm shelf. I like the rubber overmold they do and appreciate the palm rest on a target rifle.
I’m proud of the trigger – it’s a Geisselle (pronounced like “GuysLee”) Super Semi-Automatic Enhanced (SSA-E) and feels fantastic. The first stage is 2.3 pounds, the second is 1.2 pounds, which totals 3.5 pounds. It’s not adjustable but that’s no big deal to me. For now on, if I build a target rifle, this is the trigger I will use. Wow.
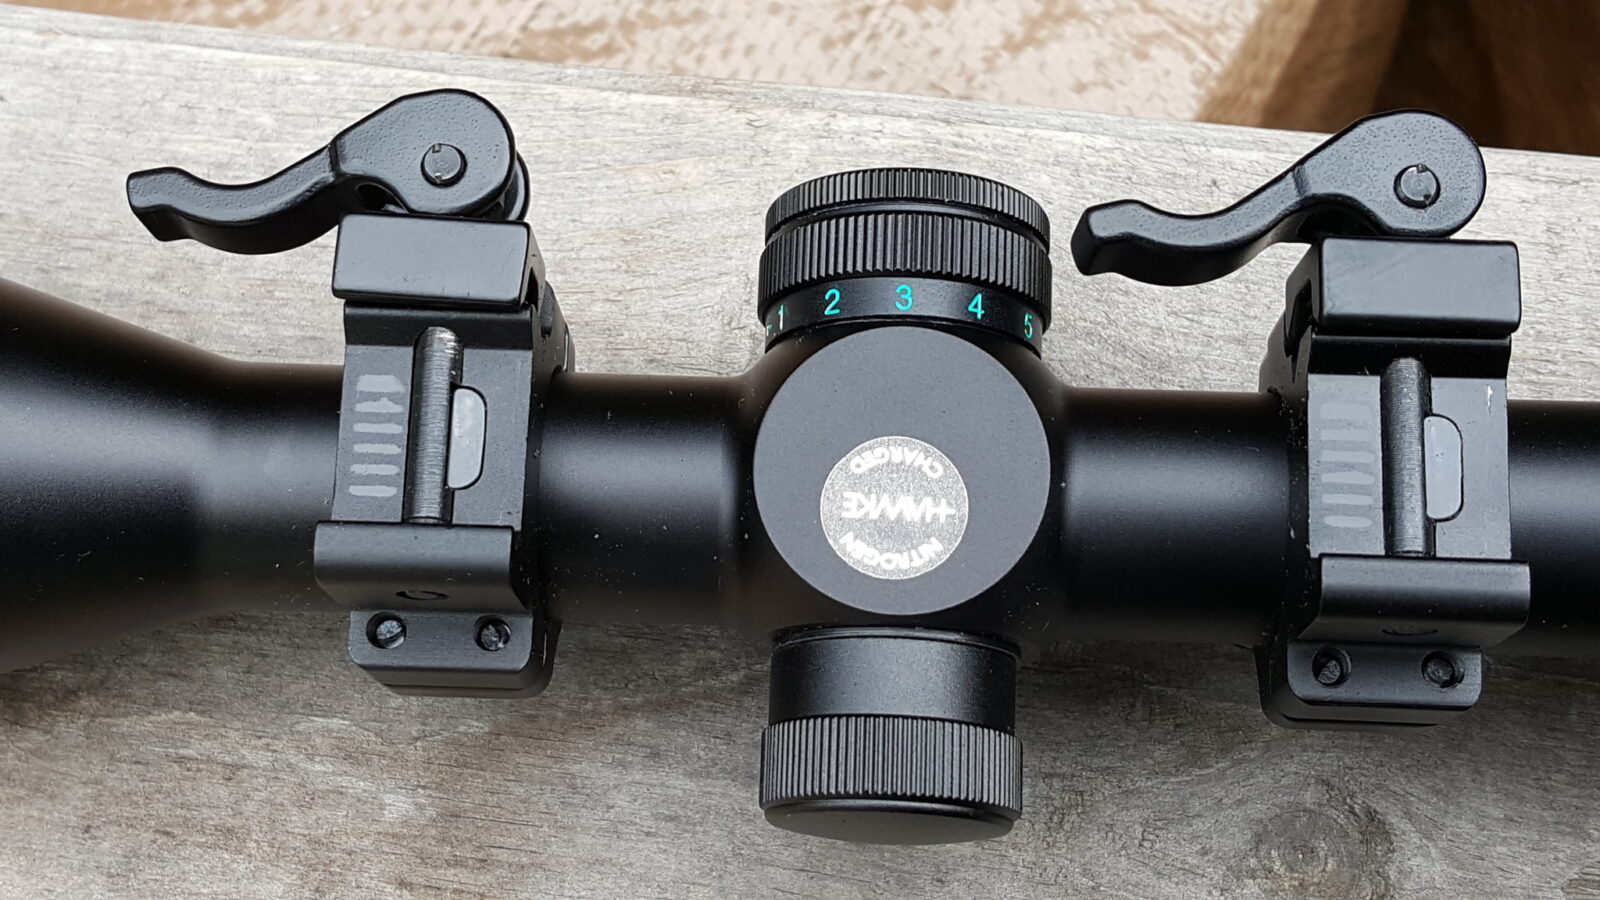
The Vortex is a bright, clear and rugged Vortex HS-T 6-24×50 scope with a MOA reticle. Normally I would go with MRAD but Vortex was sold out at the time so I went with MOA. I’m firing from known distances so it’s not a big deal for me. The offset scope mount is also from Vortex and gives me a better distance from my eye to the optic. I used to go with generic rings and mounts but am pretty much just using Vortex now unless I need something specialized such as an RS!Regulate mount for an AK. Lastly, those are Vortex’s new Defender Scope caps and they are way better than their old ones. They stay on well and are rugged.
With the big scope, I have a BVM Mod 3 charging handle sticking out. It really pays off with big optics.
So, this rifle is a lot of fun. I just fired off 20-30 rounds to break it in and need to get back to the range with some match ammo I have from Black Hills and IMI’s RazorCore ammo to see what it can do.


Please share the link on Facebook, Forums, with colleagues, etc. Your support is much appreciated and if you have any feedback, please email us in**@*********ps.com. If you’d like to request a report or order a reprint, please click here for the corresponding page to open in new tab.


![The Gerber Suspension Multi Tool [22-01471] is Pretty Nice!](https://blog.roninsgrips.com/wp-content/uploads/2017/07/IMG_20170705_195345.jpg)