I have always liked Yugo AK rifles. One of my favorites is the M72B1 RPK. It’s a big rifle and really overkill for me with the long barrel and bipod. For quite some time I wanted to either build or buy a carbine length RPK. I was talking to Tim at Two Rivers Arms one day and he said he could absolutely make one and custom fabricate a side rail to boot. That was just what I wanted so I sent him my parts and then waited my turn in the build line as those guys are so busy. After a few months Tim called and said it was ready and he shipped it to my FFL, Scott Igert at Modern Antique Firearms in the Fall of 2015.
Seriously, this rifle shoots like a dream but I didn’t get a chance to take some decent photos until now. The most telling difference is that this is a 16″ cut down Green Mountain barrel vs. the normal 21.3″. It has a 1:9.5″ twist and not chrome lined – I’m going to keep it clean and will not be burning through tons of mag dumps so I wasn’t really worried about the chrome.
Here’s a run down of the parts:
Yugo M72B1 kit from Apex with a new Green Mountain barrel [cut down]
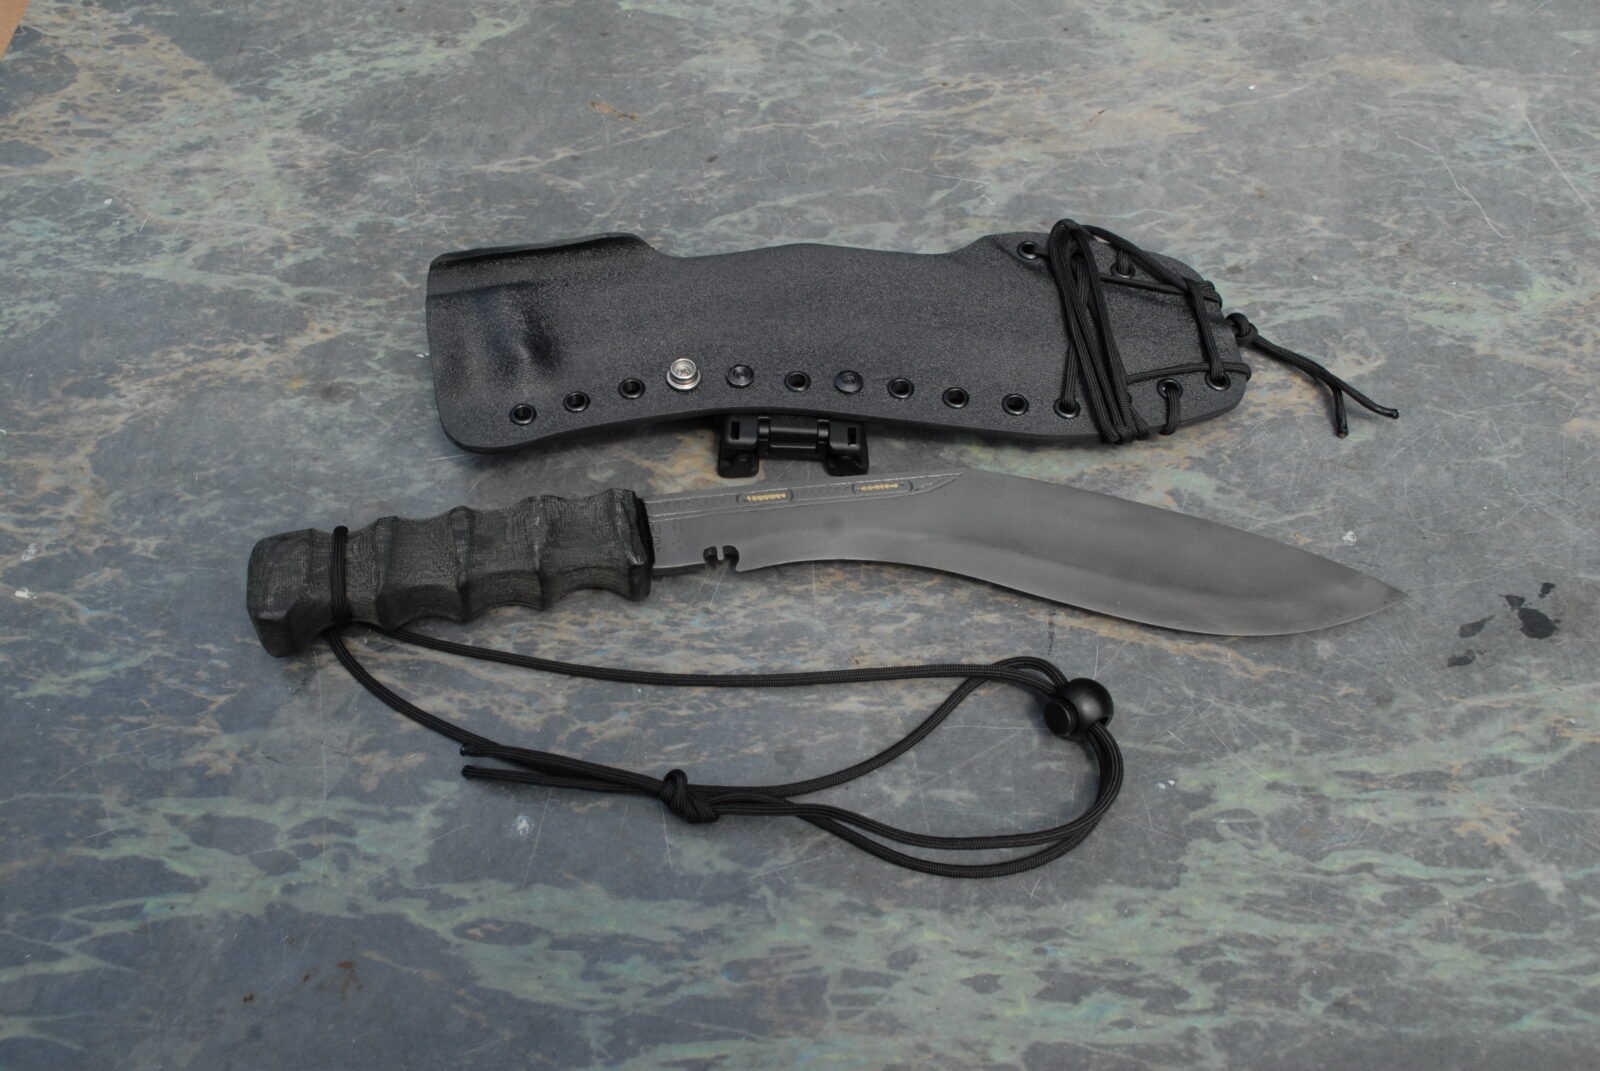
I am a huge fan of Nepalese khkuris including ones from Himalayan Imports and GK&Co (Deepak Sunar). I do like customizing them also and have made handles many ways for both the full-tang and rat tail tang blades. What I am going to show below is a rat tail tang and you’ll notice the curve the tang has. This is the traditional tang and is very strong. Westerners have a mistaken belief that full-tang is better.
The Nepalese bladesmiths, known as “kamis”, have evolved their design over centuries based on real world experience. Their rat tail tang is very strong, allows for the traditional handle to be changed relatively easily and since the handle can flex somewhat on the tang, some of the shock is absorbed there vs. by the wielder’s hand. When the British arrived they mandated a full tang on their Army models based on their experience and beliefs. In short, when you are looking at khukuris, do not discount rat tails as weak because they are not.
The first step I do is to blast my slabs of Micarta to prepare them for maximum adhesion. I am a zealot on cleaning too before gluing. Do not attempt to glue the shiny micarta to the blade or it will knock right off with the first shock. Basically we are going to make a handle by sandwiching a piece in the middle that has the tang outline cut out between two outer slabs. These are black canvas micarta slabs that have already been blasted – that is why they are dull.
The thickness of the middle slab needs to be the same thickness as the thickest part of the tang to keep things simple.
Next, I lay the middle slab under the tang and trace its outline.
I was doing two blades at once. See the one above sitting in the cut out notch and the one below I have just traced the outline with a Sharpie marker. Please note I have not taped the edge of the khukuri’s blade yet. I would recommend you do that at some point to protect yourself.
This is slightly out of sequence but see the two round drill holes at the end of the tang? I did them before sawing to make turning around at the end easier. The numbers marked on the micarta correspond with which of the two blades I was working with.
I would then use a jig saw or band saw to cut the section out where the handle went. Note, I more often use a band saw these days and you can do whatever works for you.
[Update 7/19/18: Don’t buy the above Skilsaw. It’s not strong enough and I wound up giving it to a friend. Either get a Dewalt scroll saw or use a band saw]
See how the tang fits in? It does not need to be perfect as this will all be filled with structural epoxy.
I do not have a photo, but I would abrasive blast the tang until it was clean shiny steel. I would wear nitrile rubber gloves and hose everything (tang and slabs) down with brake cleaner to make sure no oils from my skin contaminated the work pieces. Note, I often drive a 1/8″ brass cross-pin in through the thick part of the tang to lock everything in place just in case and also use a piece of thick wall 3/8″ brass tube at the rear to make a lanyard hole. I did not do these things on this particular model and they are features to consider. For people new to this, I would recommend the brass cross pin. I always do this now even though I have never had a handle fail but I evolved this method and learned over the course of a number of years.
Next, take the outer slabs and round the outside edges over. What you want to do is to create the taper you want before you glue the handle on. It is hard to sand up front on the handle once it is glued together. I would take the three pieces, clamp them together and then work on the belt sander until I got the shape I wanted on the front leading edge. This is all we want to shape at this point. I always preferred to do the majority of my shaping once the handle was epoxied onto the blade.
For gluing the handle, I will only recommend Brownell’s AcraGlas liquid. It is a very strong, durable, and shock resistant epoxy. Absolutely do not use a cheap epoxy as it will likely break down and crumble (“sugar”) over time with repeated heavy blows. Always bear in mind that the big khukuris are choppers and heavy. What you do needs to hold up under extreme use compared to many knife handles that see very light relative use. To be safe, I would recommend you always abrasive blast the steel and the micarta before applying the epoxy – don’t try and just get by with sanding or otherwise scuffing the surface. By blasting you are almost doubling the surface area for the epoxy to adhere to and the irregular surface creates countless shapes where the epoxy can get under “ridges” in the micarta and the steel to really securely hold the parts together.
Follow the AcraGlas mixing instructions to the letter. I add in a bit of milled 1/32″ glass fiber to increase the strength in the filled areas. The ratio for AcraGlas liquid is 1 part hardener to four parts resin and I’d add about 1 part of the glass fiber. It is a bit of a balancing act because you do not want to make the resulting epoxy too thick. You need it to run in, fill voids and seep into the micarta as much as possible. [To get the most out of your epoxy, please click here to read a post I did a while back detailing my lessons learned over the years.]
Next, cut a piece of wax paper to wrap the handle. You want to apply a ton of epoxy, clamp the heck out of it and let it sit and cure for 24 hours. When you remove the wax paper, if there are any imperfections you need to fix by adding more glue, first blast the surface, clean it and then glue it. Do not just put epoxy on top of epoxy without preparing the surface first.
Next, if you haven’t done so yet, tape your blade’s cutting edge to make sure you don’t get sliced when sanding the handle. When working with a belt sander it can grab hold of the work and surprise you – you don’t want a sharp edge to be flying around!!
I do a lot of my handle work on a Rigid oscillating belt edge sander from Home Depot with 40-80 grit sand paper. Hook your shop vac up to suck up the dust and be sure to wear both a good dust mask (such as a N99 rated mask/respirator) and eye protection. The dust goes everywhere so be sure to have the vacuum hooked up and stop periodically to clean up and also to inspect your work.
In terms of shaping the handle, I will relay a piece of funny sounding advice – remove all the material that isn’t part of the handle. Really useful, right? When the fellow told me this years ago his point was that making a handle is applied art. You are sculpting a handle by removing material and working towards a shape you have thought out. I would remove a bit and test the feel, remove a bit and test the feel over and over.
I have experimented with many shapes over the years and it is really up to you. I would stick with coarse sanding to keep the handle from being slippery and did both one handed and hand-and-a-half models. In all cases, I wanted to user to have control while chopping / hacking with the blade. One real strong recommendation: ALWAYS build a finger stop or hand stop into your design. You do not want a hand to slide forward onto the blade. I always built the stop into the handle but you could certainly make your own metal cross guard or do something else — just be sure to protect the user’s hands.
The below blade is acid etched with a combination of apple cider vinegar and phosphoric acid and then everything, including the handle, had boiled linseed oil (BLO) applied to it. [Click here for my post about acid etching blades.]
This is a handle from a big HI WWII model blade. Note the lanyard hole at the end. I would drill the hole both for a friction fit and I would cut the tube longer than needed, blast it, clean it and then apply epoxy liberally before inserting it into the blade. I would then sand it down to size as part of the final shaping of the handle.
This is black paper micarta that comes out a beautiful obsidian black. It is on a long, elegant 24″-ish Sirupati. Notice the oversized pommel to serve as a hand stop and the finger groove up front for indexing and grip. This is a hand-and-half design meaning a person could grab hold with their second hand if they really wanted to.
The cool thing with the handles is that you have a ton of materials and options to consider to make a very unique functional piece. I hope this blog post gives you some ideas.