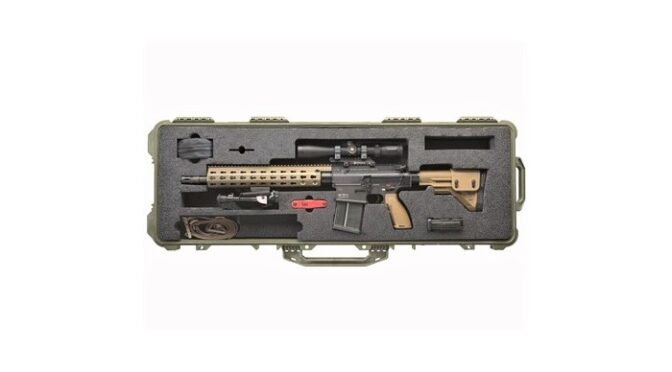
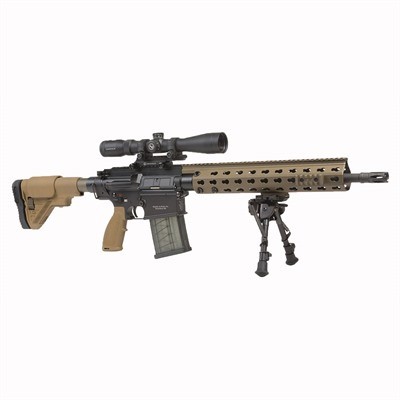
Folks, the HK MR762A1 LR is a heck of a rifle. I’ve been tracking them for a while and am always wishing I could afford one for myself. They are consistent sub-MOA rifles and reliable as well. Check out this great MAC review:
Brownells has a good deal going for the MR762LRPA1 package. These LRP packages are not cheap by any means. List is $7,499.99 and Brownells is selling them for $6,499 and they have them in stock. Click here to go there now. Again, they have them in stock as well!
These MR762A1 LR rifles are really something and I sure hope to own one some day.
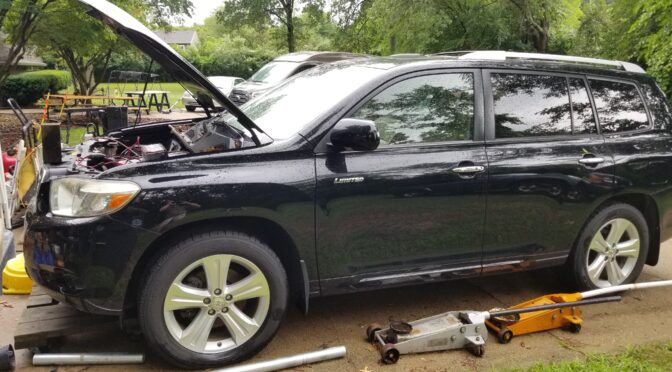
My wife and I ran into a first for us – she went to unlock our 2008 Toyota Highlander and it wouldn’t unlock with either remote. Yeah, I figured the battery was dead as we hadn’t run it for maybe two months due to the pandemic crap. We put it on storage and I really hadn’t thought about the battery … until the doors wouldn’t unlock.
How to get in the highlander with just the key fob?
Okay, I tried both key fobs and my wife was right – no sounds of any kind came from the Highlander. There was a key slot in the door so I figured Toyota must have had some kind of plan. We bought the car… truck… thing, used and never needed to get in manually until now.
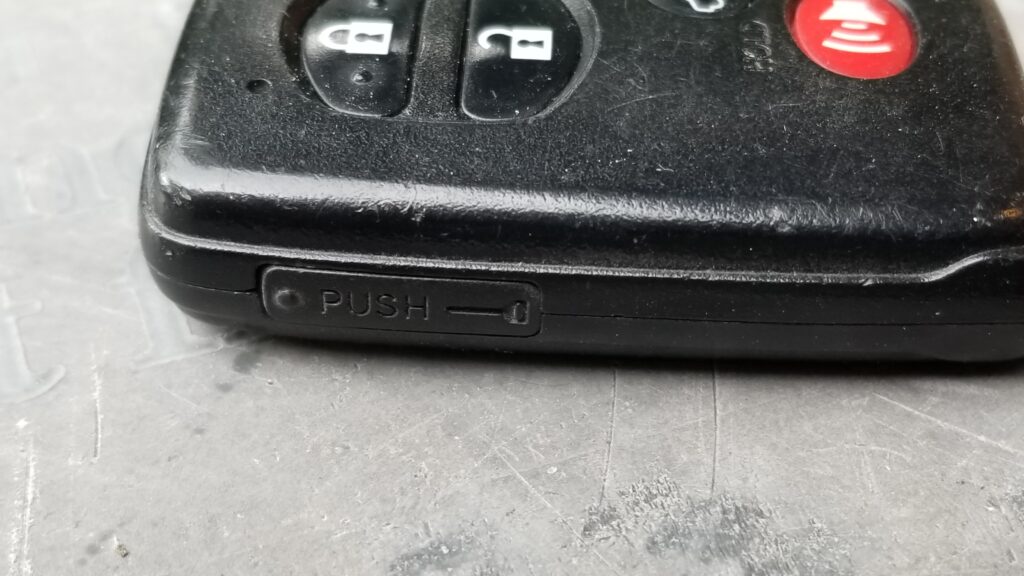
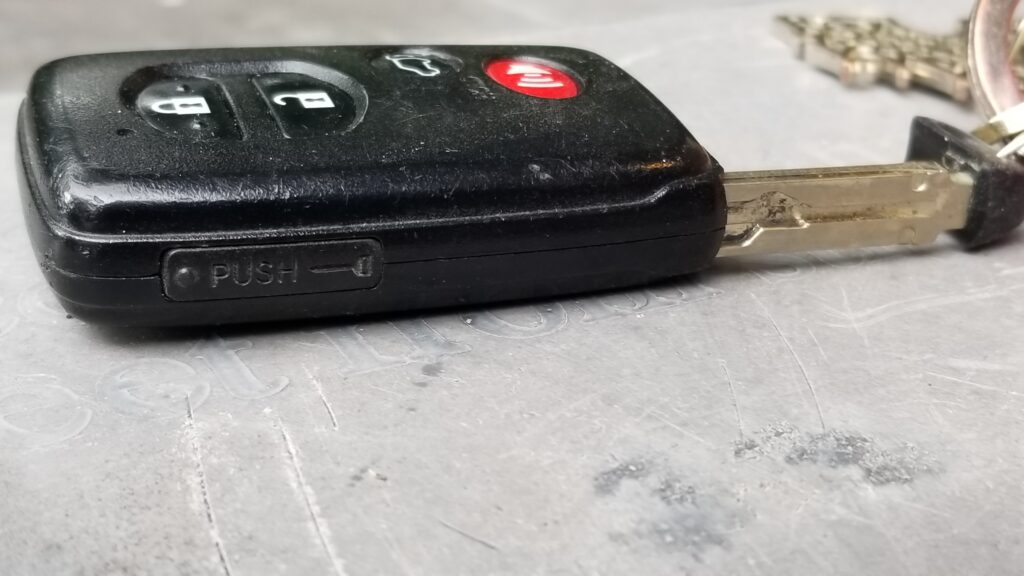
I knew with other keyless cars that I had seen in the past there was a backup key that could flick out of the fob so I took a close look at the fob for the Highlander. There was a small rectangular button on the side with the image of a key on it.
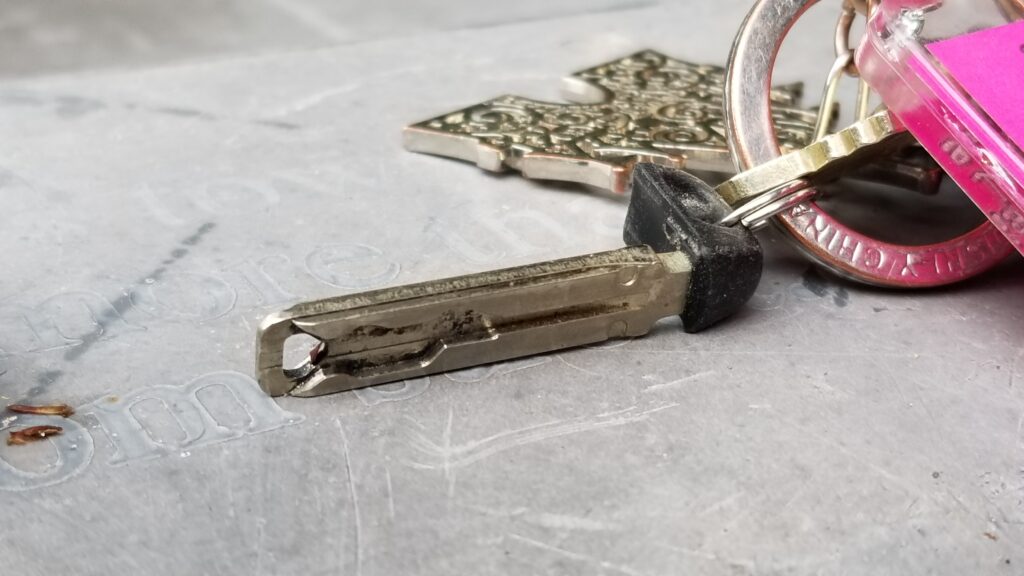
I pushed on it and nothing happened. I then looked at the attachment where the key ring connected and noticed it looked really beefy. The button wasn’t the key, it was a rocker that unlocked the key to pull out.
There’s the release button right there. Push on the circular dot for that end of the release to push in.So push the dot in and pull from the end and the key slides right out of the end with your key ring.So there’s your skeleton backup key. Just reverse the operation to push it back in.
Not Home Free – Expect to Lubricate the Lock
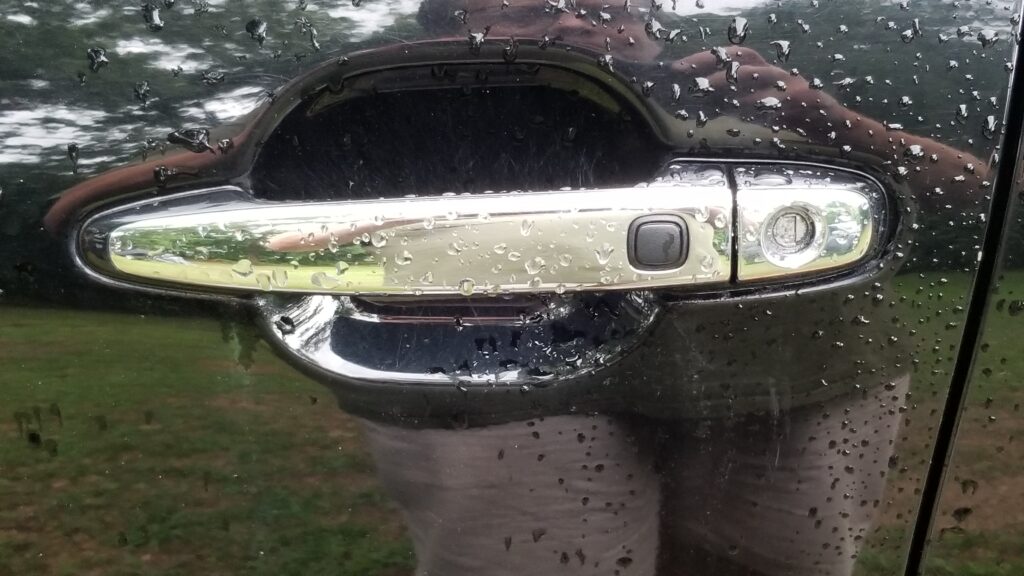
Okay, I saw one key slot in the driver’s door and thought I was home free. Nope. Wouldn’t turn. Not only that, there were no other key slots because I thought I would simply try another one.
There’s the one manual key slot to the right of the handle. You do not want to break your little key off in there.
Okay folks, piece of advice here from past mistakes – don’t crank on the key or you will break it and then you are completely out of luck and will need to pay a ton to get help. I busted a key in college trying to do just that and had to enter from the passenger side and slide across for almost a year before I could afford to have the door fixed.
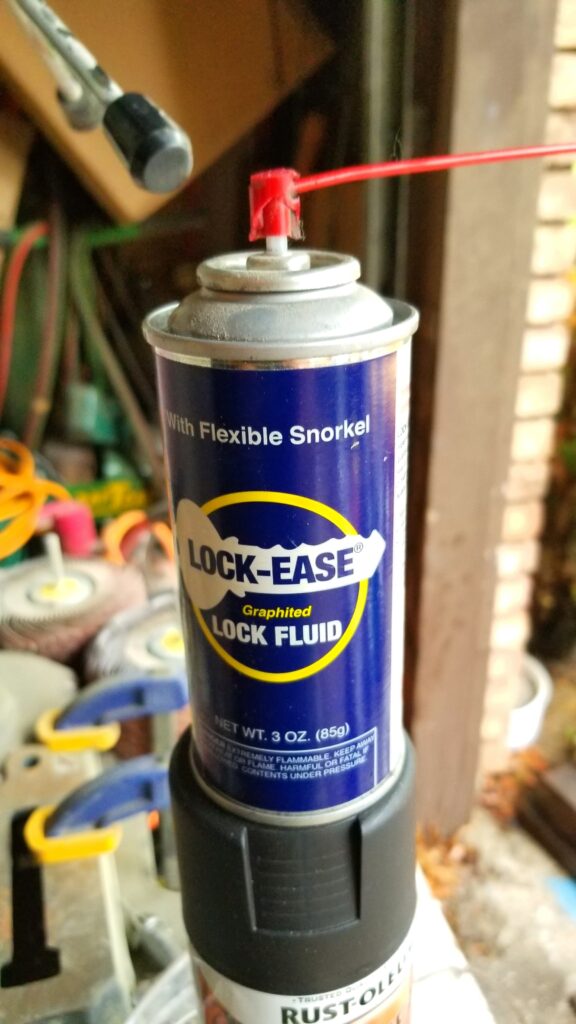
Push the red tube all the way to the back of the lock and start spraying as you pull it out. Why that way? I tend to find I make less of a mess. I am still standing their with a towel to wipe up the black goo as it runs out. I sprayed and tried the key three times. After the third spray and testing, the mechanism freely turned. This stuff works great for sticking door and ignition key cylinders by the way. I keep it in stock.
So, if the key will not turn, spray lubricant in the slot. You will get a ton of conflicting advice on the Internet. What I have always used is Lock-Ease. Put the little red tube on the nozzle and hose down the inside of the key slot starting as far back as you can. Try and turn the key. If it still will not turn then spray it again. What I have found is that most of the time things turn fee with the first try and almost always by the third. I think the solvent that is carrying the lubricating graphite helps free up what is sticking and then the graphite takes it from there.
Okay, so the door was open and now I could open the hood. The battery read 0 volts – empty and introduced a new hurdle.
Why Smart Chargers Aren’t Always
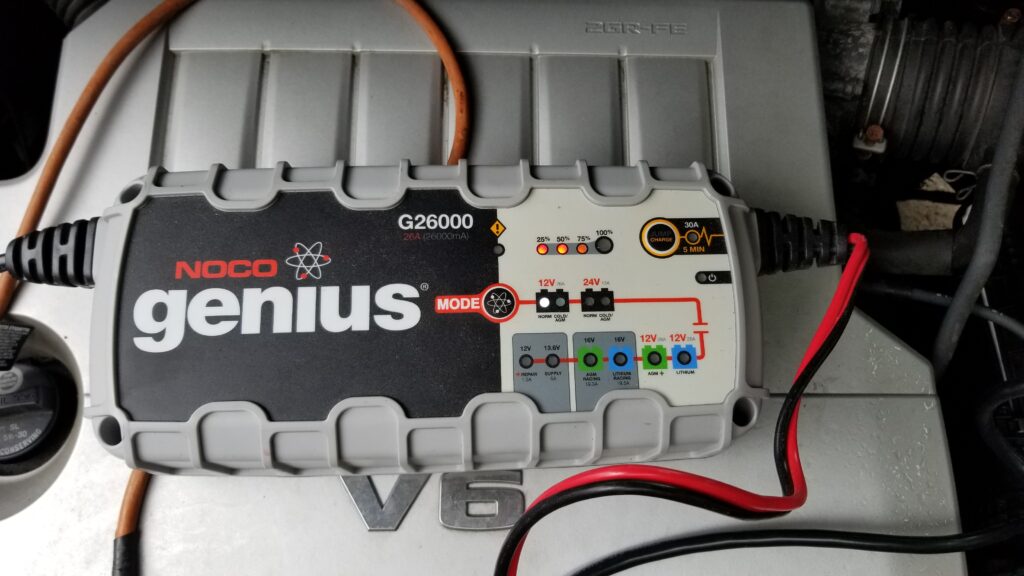
So this takes us to the topic of smart chargers. The designers built in all kinds of safe guards including the need for a voltage to be present before they start. I really like my NOCO Genius chargers and was using one of the G26000 models. Here’s what I tried:
Just attached the charger – it would not switch to charging
Went to boost mode – it would sense the lack of voltage and switch off
I tried turning on the 5A 12 volt supply mode and that was just enough to make the security system chirp and reset over and over … crap.
So much for the easiest ones. That meant I needed to try and trick the charger. I brought my 96 Landcruiser over and connected good old jumper cables to start charging the “dead” battery and also hooked up a digital meter. It showed the alternator was cranking out 14.09 volts and as soon as I disconnected the positive cable from the Landcruiser, the meter showed the volts dropping down through 13 volts down into the 12s and so forth over the space of a few seconds.
Now this is the trick, for about 5-7 seconds the “dead” battery would appear to have enough juice for me to connect and start the NOCO. So, I staged stuff and had the gear ready to go. I charged the battery for a minute or two, disconnected the positive jumper cable from the Landcruiser, safely moved it out if the way and quickly attached the NOCO charger and it started charging. I jumped the dead battery just enough for it to show a charge to the NOCO that then turned on and did the rest. By the way, I am not faulting the NOCO. They are great chargers and I own three of them right now.
I really like the NOCO G26000 charger and definitely recommend it and their other chargers. Here. the battery is past 50%. It just so happens my camera caught the flashing 75% light while it was illuminated.
After about 12 hours the battery was fully charged and I then set the NOCO to repair mode to desulfinate the plates. The battery appears to be okay and we’ll see what it looks like come this fall when the temperatures start cooling off — the colder it is the harder it is for batteries to work and the marginal ones fail.
Lessons Learned
First, I now know where the spare key is. Second, I plan to hook up my smaller NOCO G7200 charger and run the cable under the power out of the hood so I can periodically top the battery off. Modern vehicles have a ton of electronics in them so I am not overly surprised it ran out of juice.
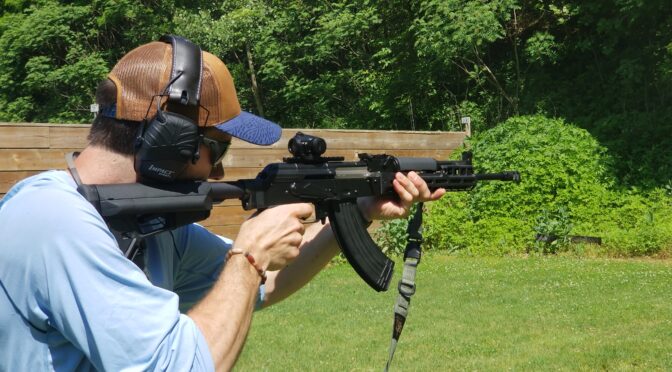
Well folks, we finally had a chance to go to the range for the first time this year. It was a beautiful day and the only shortcoming was that we had a number of rifles and pistols to test and not enough time to shoot a ton of rounds through each. To be honest, we had a blast 🙂
Palmetto State Armory (PSA) has a stunning array of Kalashnikov firearms now. AK-47s, AK74s, 100 series, rifles, pistols … it’s impressive. Click here to go to their main AK menu.
We were shooting 124 grain 7.62×39 FMJ ammo by Golden Tiger. This is great ammo and my favorite to use. For AK bulk ammo, it’s relatively accurate, reliable and consistent — notice that I say relatively. It will hold its own with any of the bulk steel case ammo or even do better. I’m not comparing it to hand loads or specialty ammo.
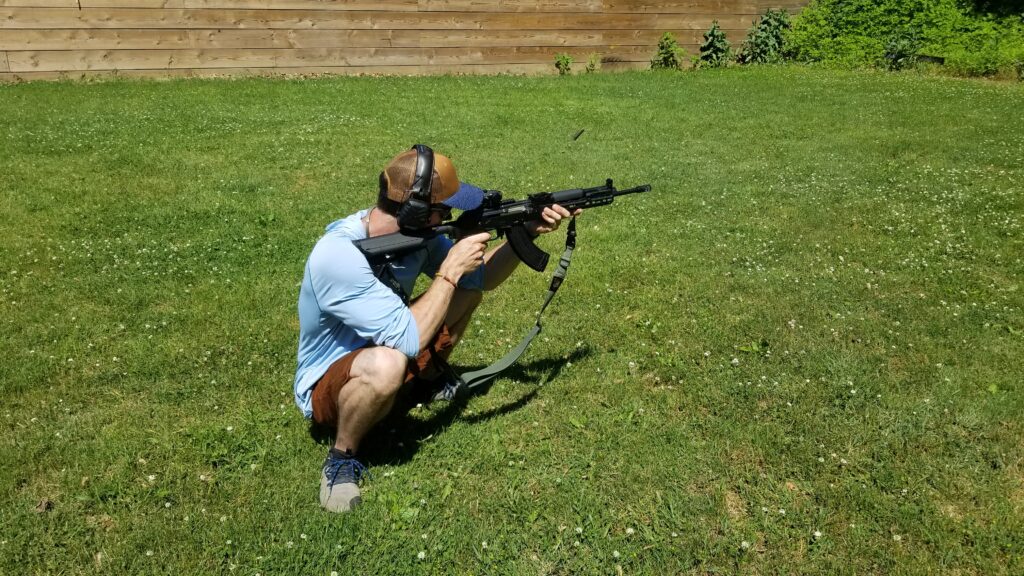
Niko is a heck of a shot and is familiar with AKs as well. He had to do Slavic Squat shot 🙂
I wish I could tell you that we shot hundreds of rounds but there just wasn’t time. We shot three mags through it – 90 rounds and did not have one problem. Yeah, it’s not many rounds but I figured some of you would like an update and I’ll post again after the next range trip.
Observations:
The little Vortex Crossfire did a great job and we had fun punching paper. The scope and the RS!Regulate optic mount worked out just fine. I’ve used the combo before and expected such.
The rifle functioned just fine with no feed or ejection problems
The rounds were grouping pretty well – we were not shooting for accuracy – more for function testing
The trigger was very nice – ALGs are great in general and what I like to use these days.
The brake did a decent job. I think a JMAC RRD-4C brake would have reduced recoil further but out of the box the recoil was not bad at all. When you think about it, even an AK with no brake is surprisingly pleasant to shoot during semi-auto fire
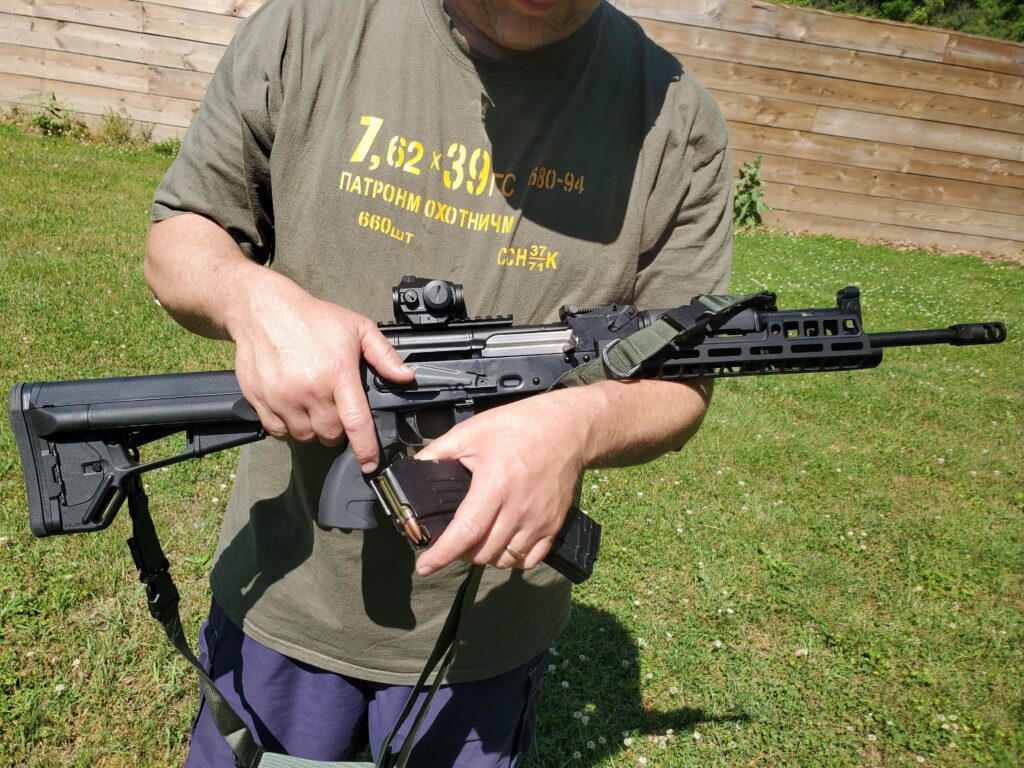
I definitely liked the feel – the weight and balance – of the rifle – the RS!Regulate handguard, our AK-12 grip and a Magpul ACS stock worked very well together
Me with my favorite AK shooting shirt 🙂
When we were done, I did take the rifle apart and did not see anything concerning. So, I definitely want to shoot it more and the rifle is off to a good start.
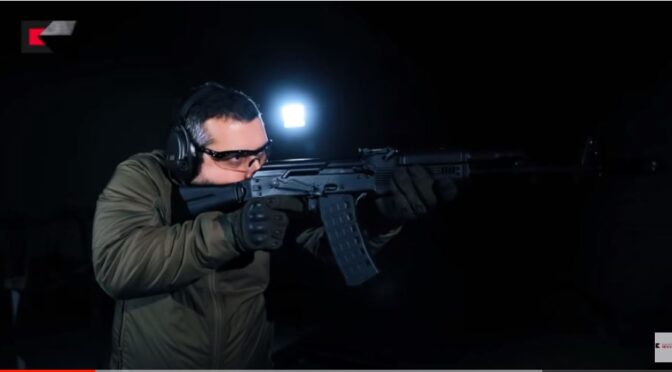
You know, it’s interesting how people will argue over stuff on the Internet. Give them a picture of a stick and they will argue about it! Now, turn the topic to AK rifles and debating what is the right or wrong way to do something, things get colorful fast and a lot of energy is wasted over trivial points.
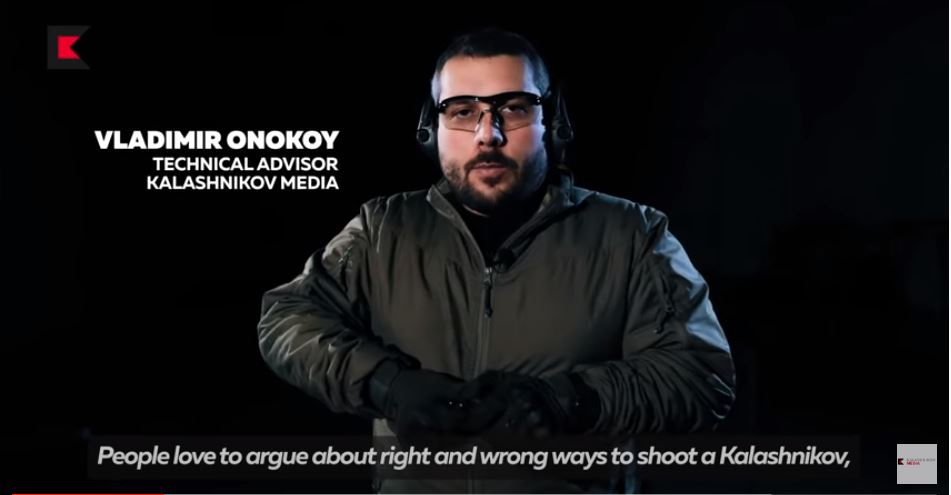
In this video, Vladimir Onokoy, who always does a great job, goes over different reloading approaches. Now most folks do not know Vladimir but I will tell you he is the real deal with considerable Russian military experience and armorer-level experience with the AK platform. In short, I would recommend you listen real close to what he says plus bear in mind that this is a Kalashnikov Media video and they know their stuff as well 🙂
Watch the Video
Normally I give some screen shots and make some color commentary but this video is only 3:05 seconds and seeing is believing.
I fully agree with his conclusion – train and become proficient. They all work the question is what works best for you and only training and experience can answer that.
Please note that all images were extracted from the video and are the property of their respective owner.
Interested in an American made AK? Consider Palmetto State Armory (PSA) as a source. Click on the following links for the associated webstore categories for AK-related rifles, pistols and parts at PSA:
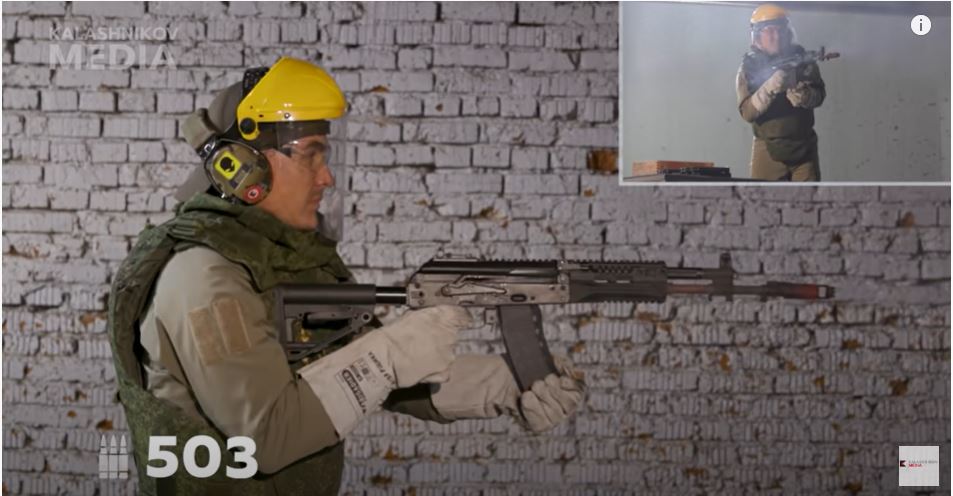
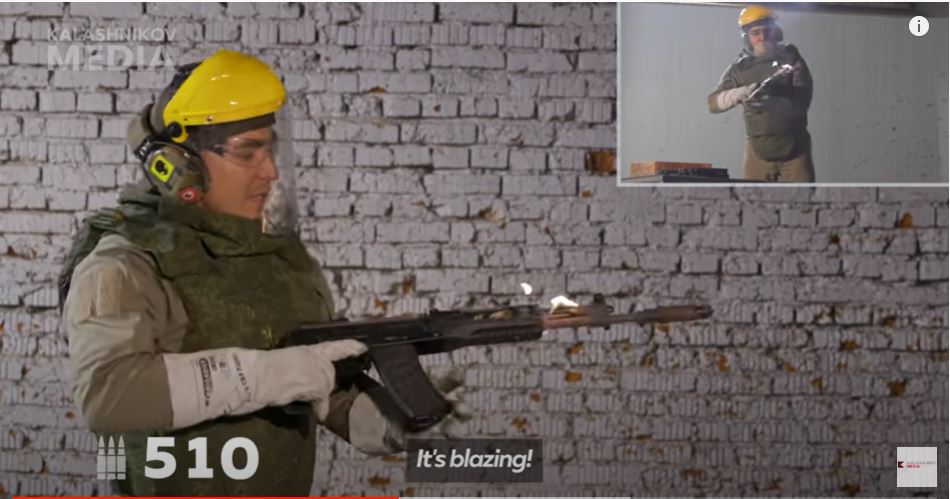
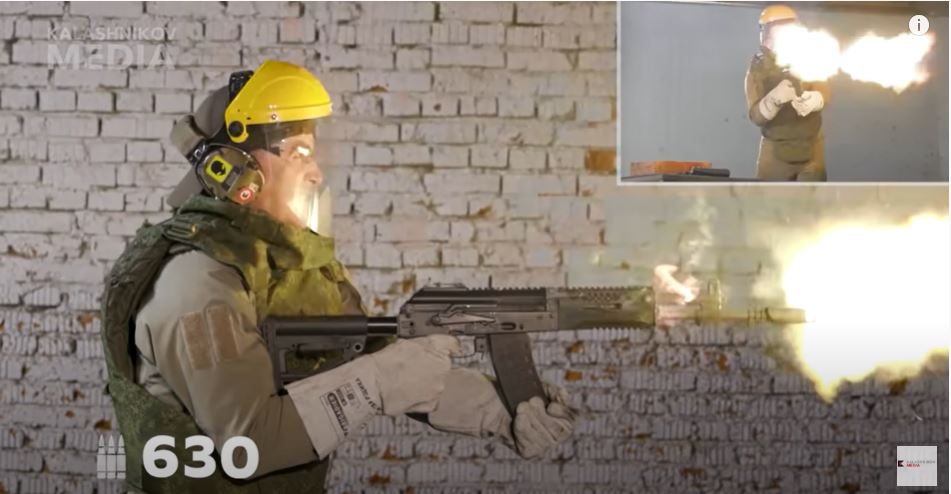
In this episode, Georgiy Gubich operates a 5.45×39 AK-12 on full auto until it fails. You’ll notice he is wearing body armor and for good reason as you’ll learn from the video.
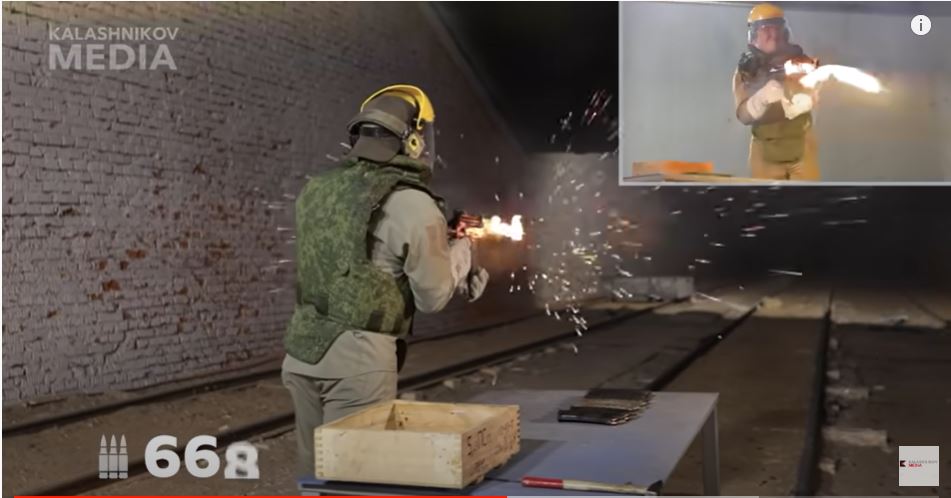
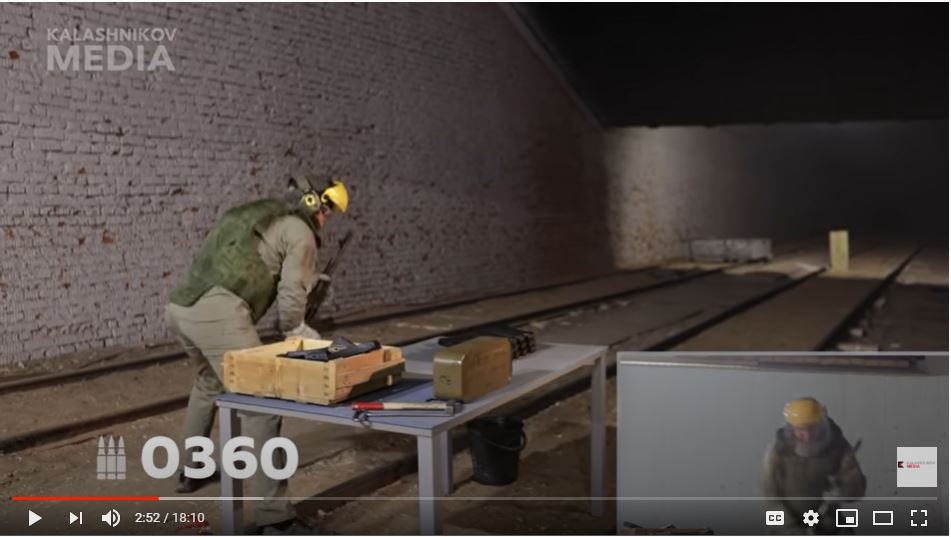
He starts by loading up a case of 7N6 ammo into 30 mags and then dumping one after another. You get views from several angles and a shot counter plus his observations during the process.
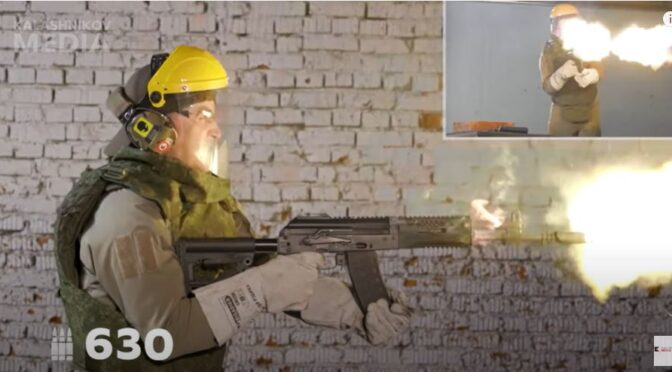
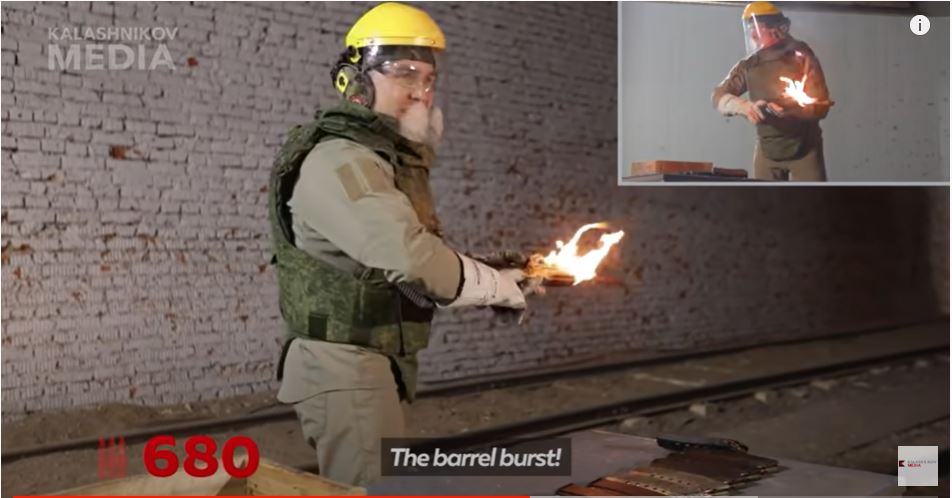
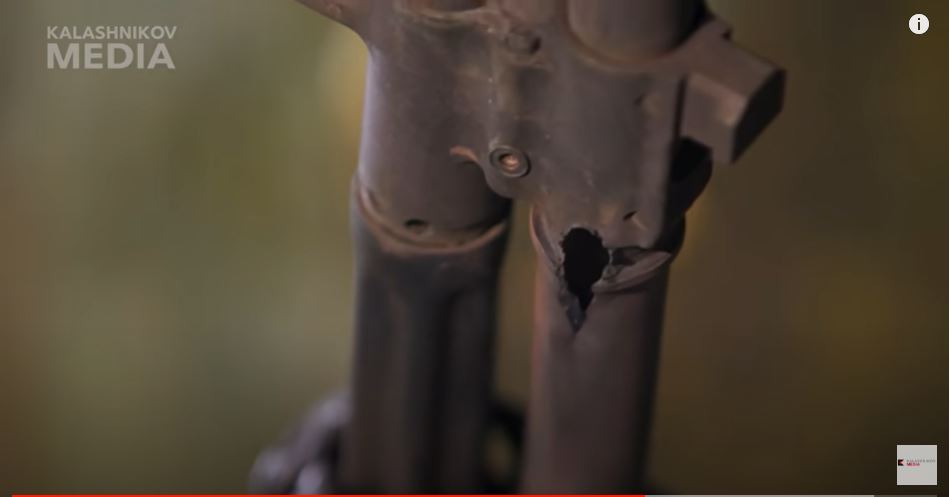
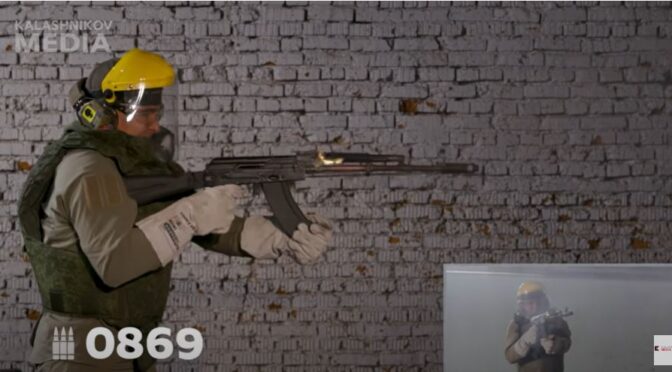
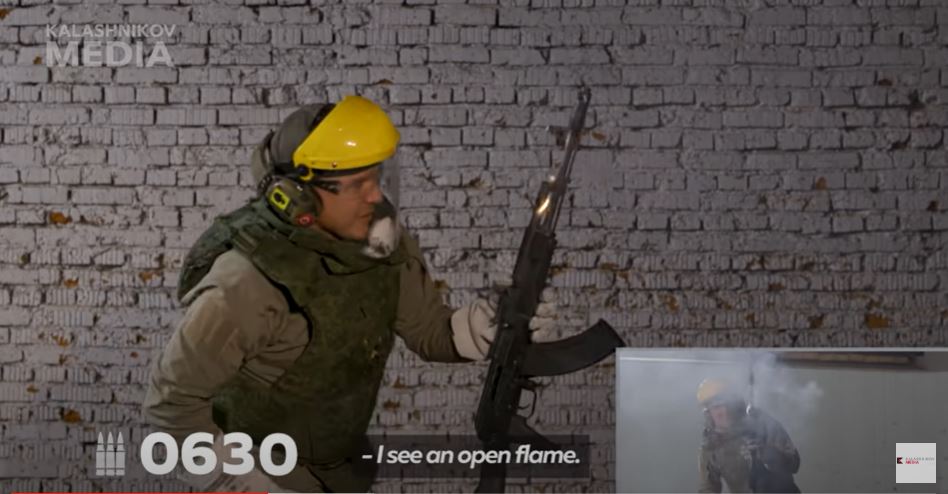
The handguards are starting to smoke and Georgiy mentions he smells burning plastic.Note the barrel and brake care glowing red at 503 rounds. It’s hard to say for sure, but this puts the temperature at 930-1175F (500-635C) degrees. I don’t know if it is the camera lens distortion but the brake looks like it is drooping. In later photos it does not so I’m thinking the wide angle lens might be causing distortion.The handguard is on fire by round 510. It’s hard to say for sure but the temperature might be closer to 1490F (810C). She is hot!! Depending on the polymer they are using for the handguards, the ignition flash point could be from 572-1292F (00-700C). I would guess they are using something good because we can see the barrel is well past 1000F and there is an air gap plus the thermal mass of the handguard to consider which is why it took a while to reach the heat of ignition.Round 630 – Wow! That is an impressive photo. The handguard is on fire and by luck the camera caught one hell of a muzzle flash. I can’t help but wonder what the temperature of the barrel is under the handguards at this point. The barrel is started to rupture just prior to this point. Sparks could well be burning powder and there is definitely shrapnel flying as well. Yeah, right about now the body armor, gloves and face shield are making a lot of sense!Georgiy inspects the rifle and sees the burst barrel.This is where the barrel ruptured and it looks like it took out part of the gas block. Georgiy mentioned this is a common failure areas for 5.56 and 5.45 rifles due to the heat and pressure compare to larger calibers (I assume is he is referring to 7.62×39 and x51 variants). The rust you see is “flash rust” caused by the heat and being cooled down by water.It definitely took a beating.
Time for the Video!
Summary
The rifle held up three times as long as the Russian Ministry of Defense 180-round burst requirement. Practically, you would expect pauses during firing to allow it to cool down some. I thought his comments about the high-pressure 5.56 x 5.45 rounds causing significant stresses on the barrel was very interesting and hope you enjoyed this video as well.
By the way, a big shout out to Kalashnikov Concern for making these videos available. They are very good!
Please note that all images were extracted from the video and are the property of their respective owner.
Interested in an American made AK? Consider Palmetto State Armory (PSA) as a source. Click on the following links for the associated webstore categories for AK-related rifles, pistols and parts at PSA:
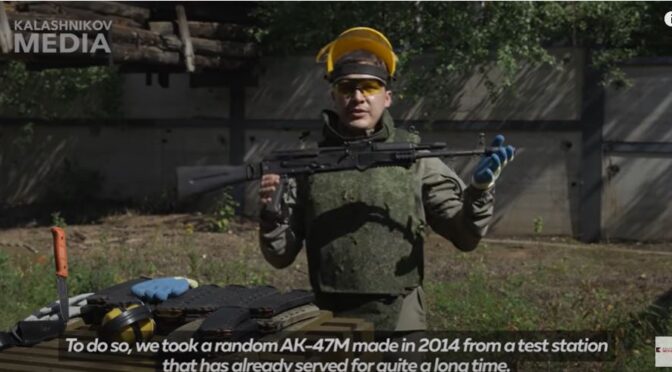
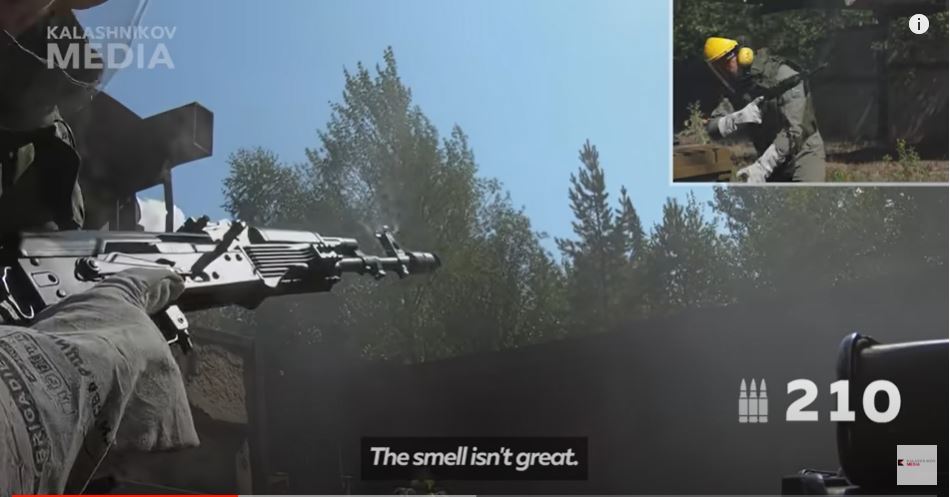
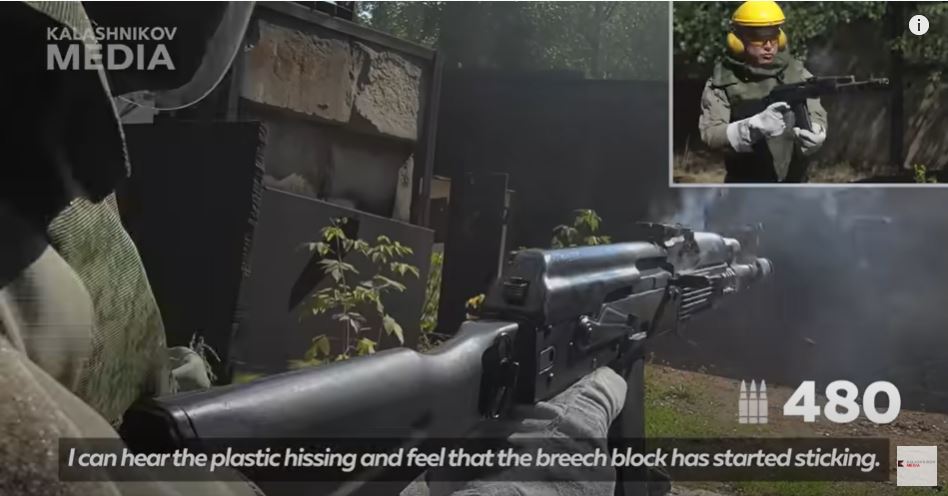
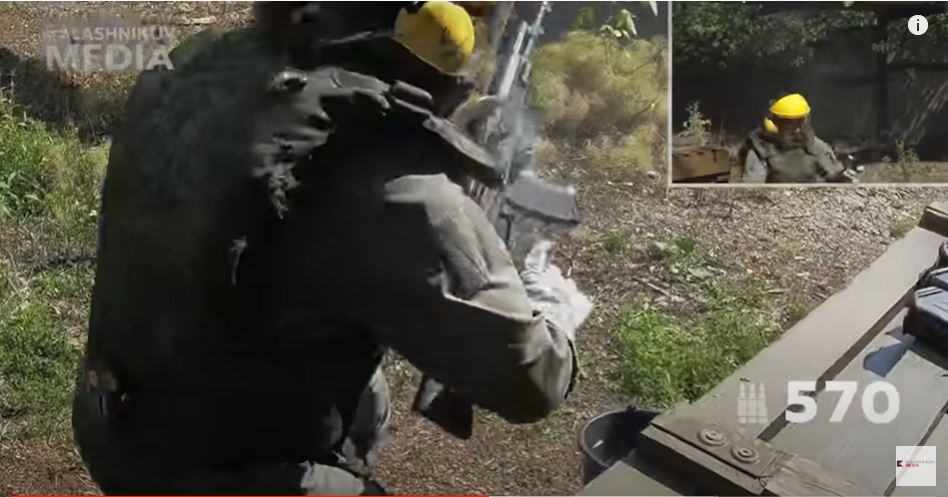
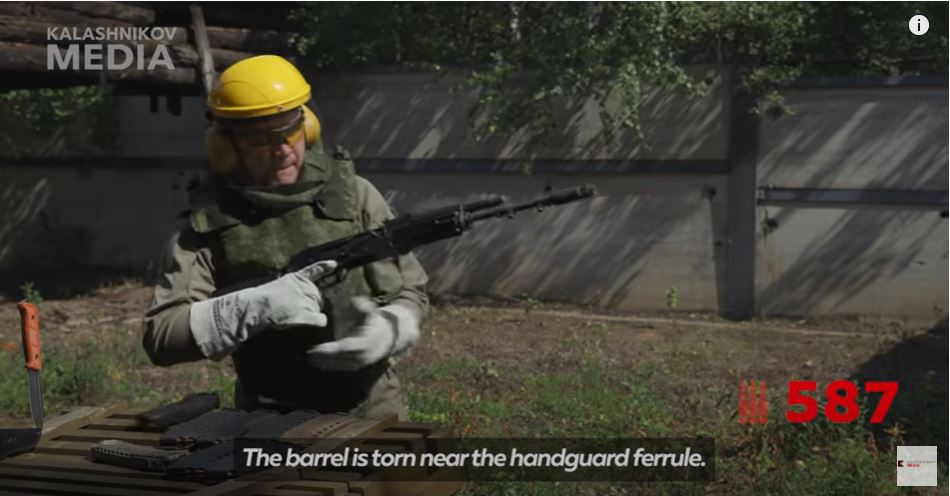
In this episode, Georgiy Gubich operates a 5.45×39 AK-74M built in 2014 on full auto until it fails. You’ll notice he is wearing body armor and for good reason as you’ll learn from the video.
As with his other videos, you definitely want to watch it to hear his observations during the testing and the post mortem review afterwards.
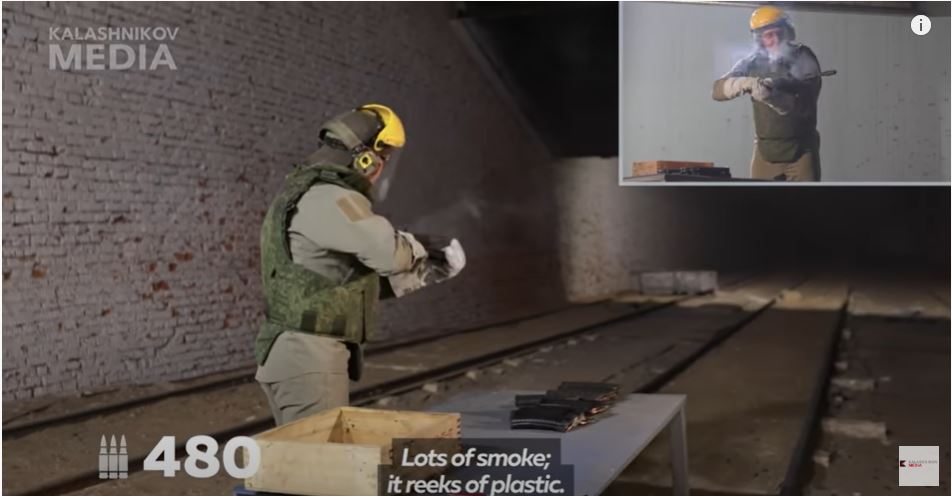
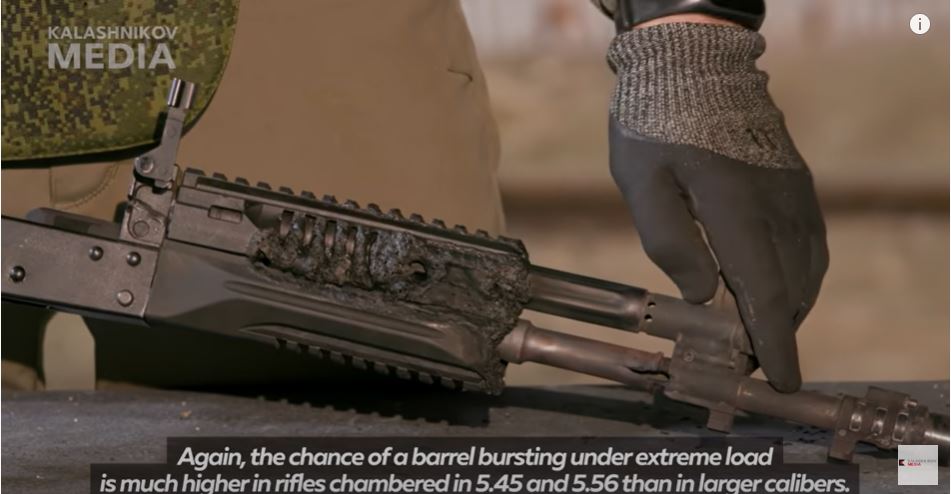
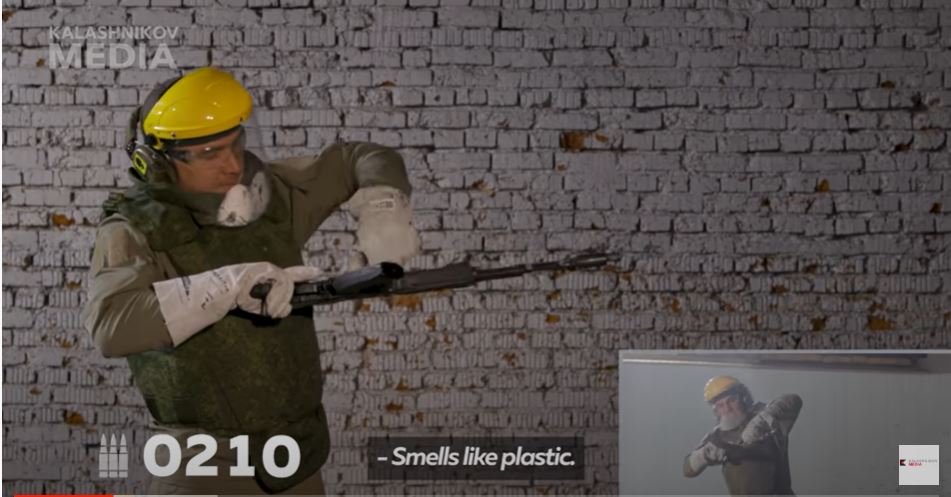
Georgiy is 210 rounds and gives us a great quote “The smell isn’t great”!!480 rounds into the test he can hear the plastic hissing as the bolt carrier is starting to stick when he is reloading. The plastic is still holding its shape.When he went ,to reload after round 570, he had so slam the rifle on the ground to get it to cycle. I’ve heard of this but it’s my first time seeing someone really do it and does it smoothly.Round 587 – the barrel ruptured just in front of the lower handguard retainer. Note, the Russian Ministry of Defense requires the weapon to handle a 180-round burst so they passed that test more than three times over.Here’s the rupture. Note the cooked plastic.Now this fascinates me. They are using a polyamide plastic and it held up remarably well. The solid parts closest to the barrel and gas tube were definitely decomposing but you will notice the horizontal ribbing was able to dissapate the heat fast enough to that point to retain its shape and structural integrity. That pattern makes even more sense to me now after seeing this.
Watch the Video!
Summary
Definitely a cool video and I appreciate Kalashnikov Concern making it possible. Georgiy rocks and really like how he changes mags and cycles the action not to mention his running observations during and after the test.
The biggest take-away for me by far is the understanding of why they ribbed the lower handguards – enabling the ribs to cool enough to maintain structural integrity is fascinating. In theory there will be a upper round-count limit causing more heat than can be dissipated but under practical use, they ought to hold up great.
I hope you found it interesting as well.
Please note that all images were extracted from the video and are the property of their respective owner.
Interested in an American made AK? Consider Palmetto State Armory (PSA) as a source. Click on the following links for the associated webstore categories for AK-related rifles, pistols and parts at PSA:
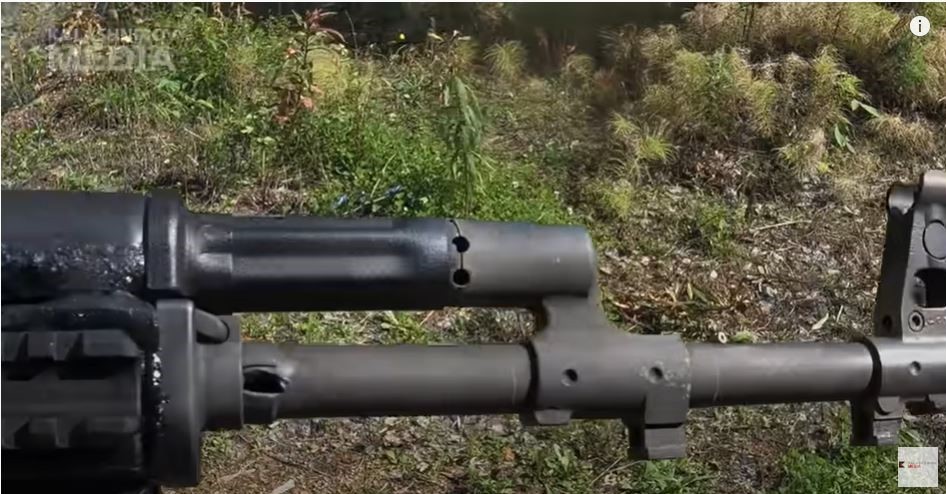
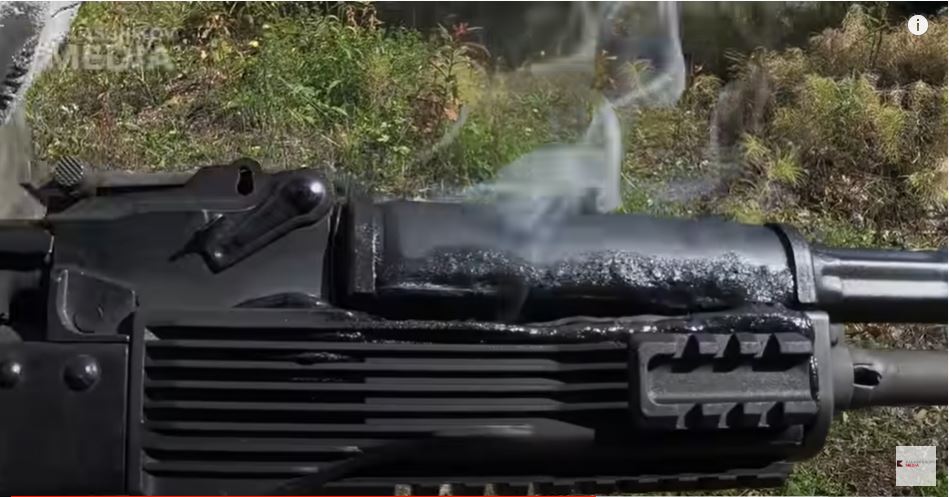
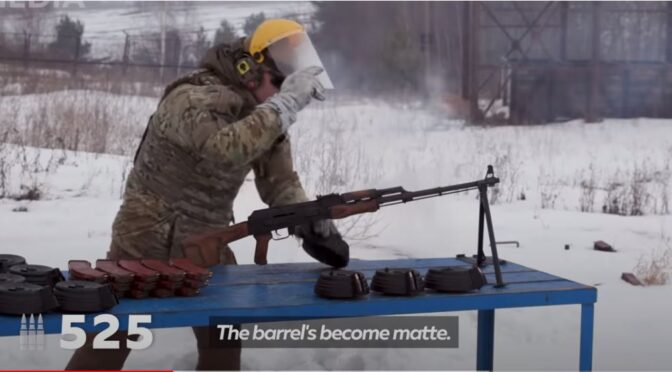
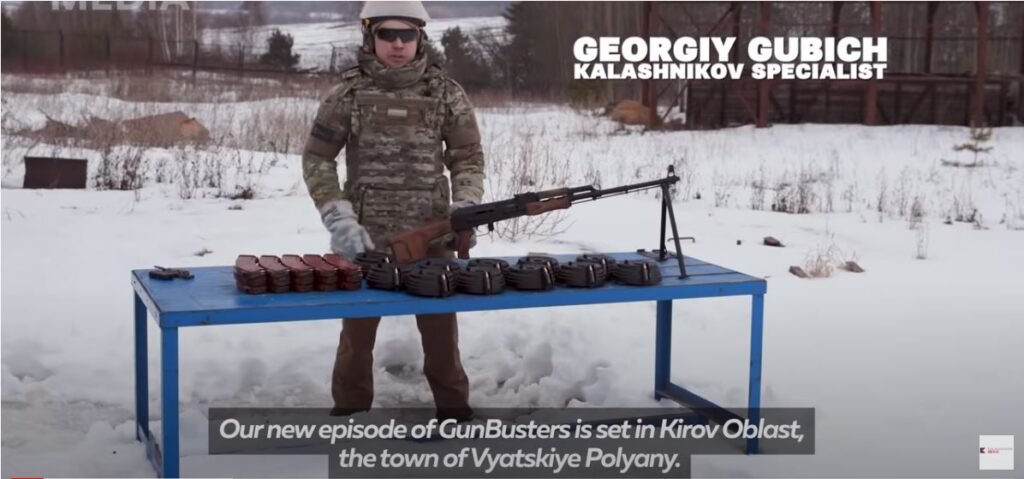
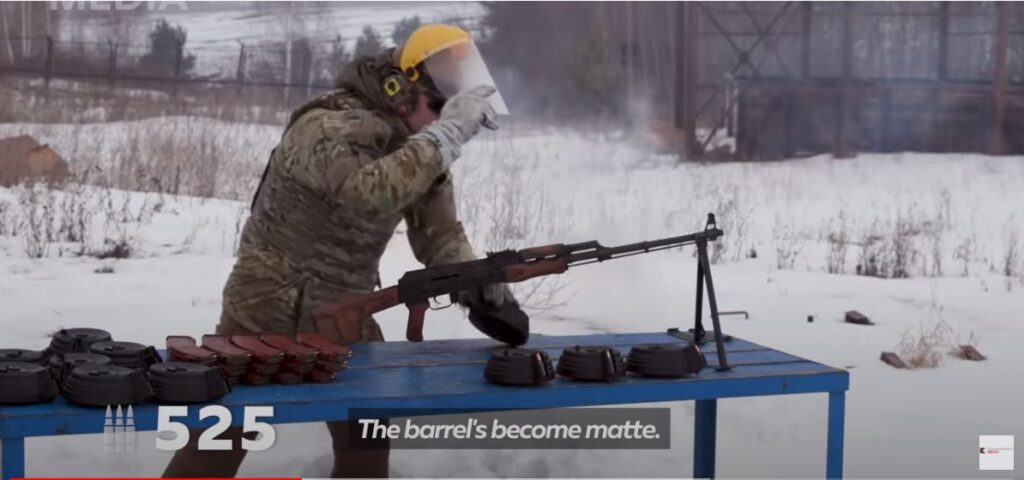
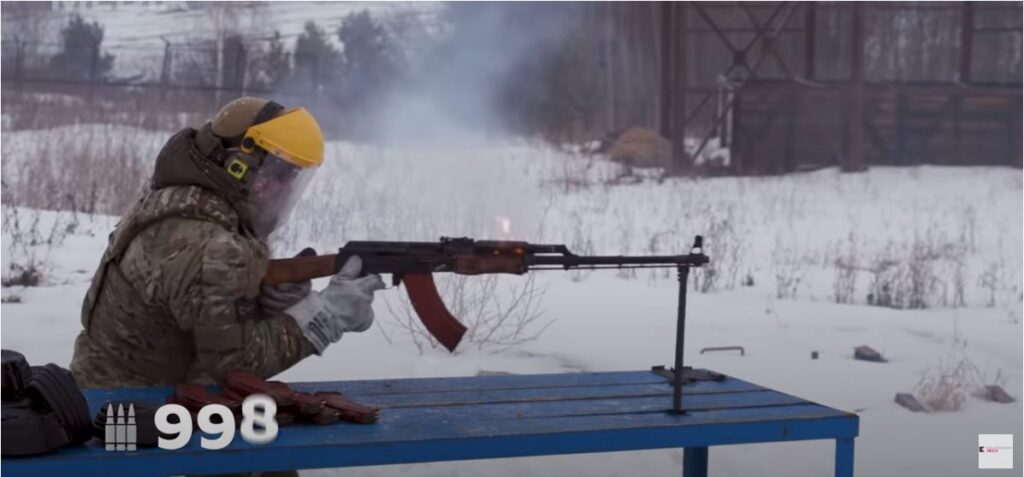
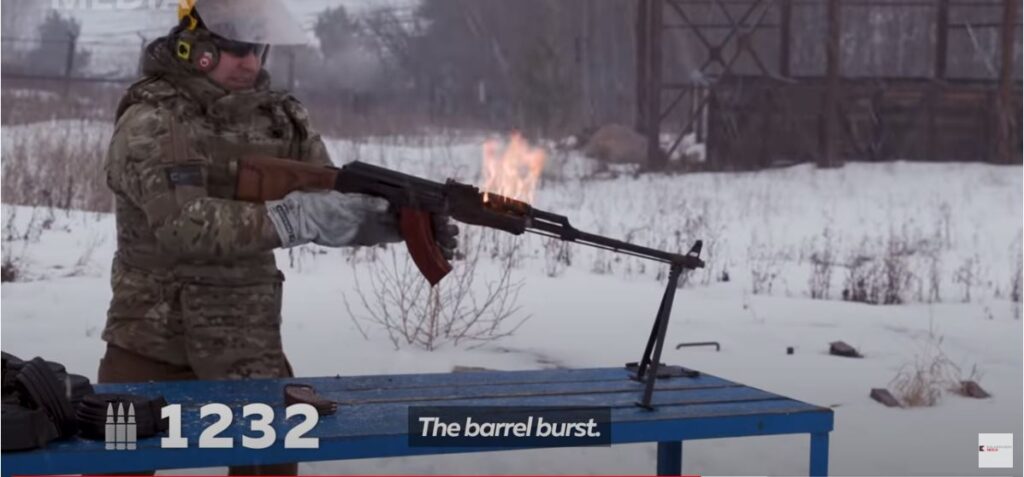
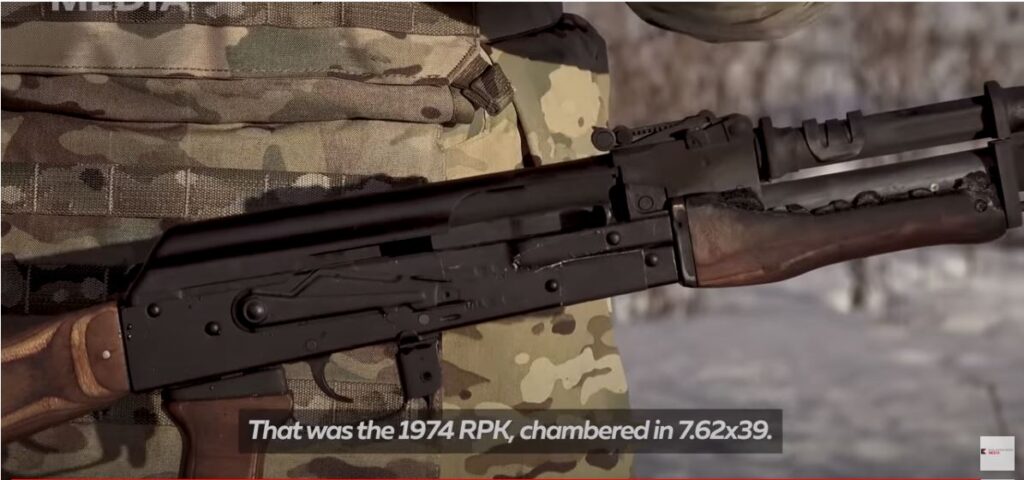
Ever wonder how long a heavy duty 1974 Russian RPK in 7.62×39 can fire almost non-stop until failure? Now’s your chance. This video features Georgiy Gubich firing in an episode of the Russian series Gunbusters firing an RPK as fast as he can doing drum and mag dumps on full auto. Yes, he’s wearing armor because he literally shoots it while it starts to burn an ultimately fails.
That is a ton of ammo and a RPK I would much rather own than see them fry it.Somewhere near 500 rounds being dumped from 75 round mags the handguards are starting to smoke.About round 997 or 998 the handguard bursts into flameEven though the handguard were on fire, he shot it until the barrel burst at round 1232.For me, it’s fascinating that the only thing that truly failed were the handguards and barrel. Everything else could still be used if the barrel was pressed out and replaced.
So you need to watch the video!!
Summary
You might be surprised by the seemingly fast failure of the rifle. Near the end Georgiy takes the RPK apart, notes what happened and points out that the problem for the rifle was the intense heat of the 75 round drums being dumped one after another. Normally you would fire a 2-1/2 30 round magazines and the pause in firing during reloads gives the barrel a chance to cool down plus practical applications aren’t going to see that type of sustained firing. One would assume that if all he had were drums that the RPK would have failed even sooner than round 1,232.
This was really a fascinating video to watch. Part of me really wants to bring that poor abused RPK home and repair it and part of me was interesting to see a video detailing testing to failure with this level of detail. A big thank you to Kalashnikov Group for helping put this video together.
Please note that all images were extracted from the video and are the property of their respective owner.
Interested in an American made AK? Consider Palmetto State Armory (PSA) as a source. Click on the following links for the associated webstore categories for AK-related rifles, pistols and parts at PSA:
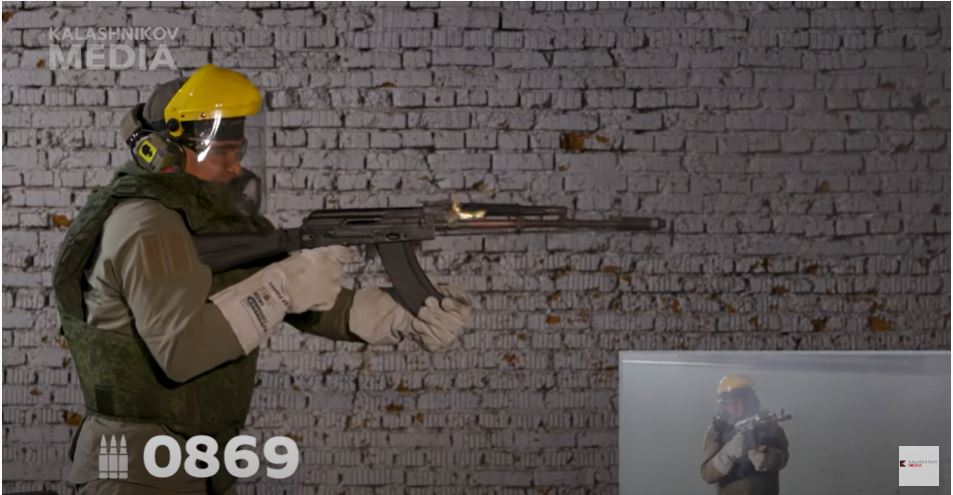
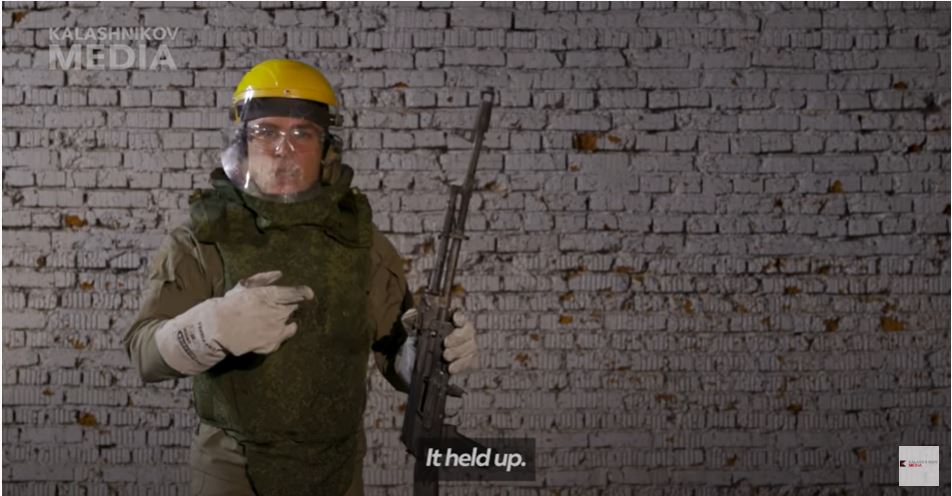
In this episode, Georgiy Gubich operates a 7.62×39 AK-103 built in 2019 on full auto trying to get it to fail. The AK-103 is a remarkable rifle as you will see in the video
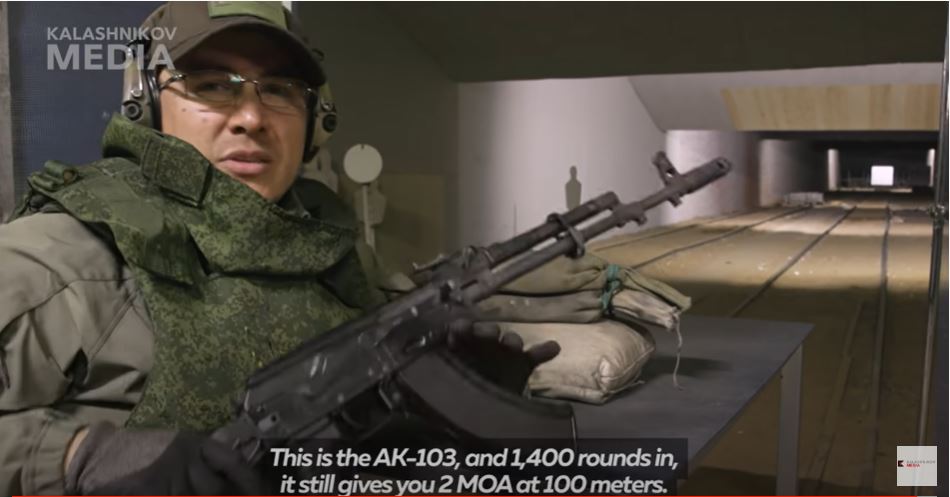
He’s smelling hot plasticStarting here forward he really needs to struggle to get the bolt to exit the chamber. It seems to return and cycle just fine when firing.He’s seeing flame from the handguardsThe lower handguard had already fallen off during a previous reload but look at the barrel glowing red.The rifle survived through two spam cans, 1,400 rounds, of ammo!After all that, it could still shoot 2 MOA at 100 meters. Definitely a remarkable rifle.
Watch the Video!
Summary
I’m a fan of both the 7.62×39 round and the AKs that shoot it so I was rooting for the rifle the whole time. It’s pretty amazing that it still ran after 1,400 rounds.
I hope you enjoyed this!
Please note that all images were extracted from the video and are the property of their respective owner.
Interested in an American made AK? Consider Palmetto State Armory (PSA) as a source. Click on the following links for the associated webstore categories for AK-related rifles, pistols and parts at PSA: