Executive Summary
The global precision rifle market in 2026 finds itself at a pivotal intersection of material science innovation, ballistic propulsion advancements, and an intensified demand for logistical miniaturization. This report presents an exhaustive technical and market analysis of the Desert Tech (DT) Stealth Recon Scout (SRS) A2 Covert, specifically evaluating the strategic and operational impact of the Q1 2026 product ecosystem upgrades introduced at SHOT Show 2026.
Asymmetric warfare trends and urban operational doctrines have increasingly favored platforms that decouple barrel length from overall system length. The SRS-A2 Covert remains the preeminent solution to this physics problem, offering the shortest precision rifle footprint globally. The 2026 integration of the Carbon SD (Suppressor Dedicated) Handguard addresses a critical platform limitation regarding thermal management and the integration of forward-mounted electro-optics. Simultaneously, the introduction of the “Mach 3” ammunition line, leveraging Shell Shock Technologies’ NAS3 two-piece case architecture, represents a significant leap in internal ballistics. This ammunition theoretically extends the effective terminal engagement range of short-barreled configurations by increasing muzzle velocity by approximately 300 feet per second (fps) without exceeding safety margins for bolt thrust, fundamentally altering the lethality profile of the Covert chassis.
However, the technical prowess of the SRS architecture is currently juxtaposed against significant customer sentiment challenges. A granular analysis of consumer feedback and warranty data from 2024 through early 2026 indicates persistent friction regarding quality assurance and warranty fulfillment turnaround times. While the platform’s engineering remains innovative, the ownership experience is polarized, with a notable divergence between the theoretical performance of the hardware and the logistical reality of post-purchase support.
This report concludes that the SRS-A2 Covert with 2026 upgrades constitutes a “Force Multiplier” acquisition for specialized Law Enforcement (LE) and specific military applications where overall length (OAL) is the non-negotiable primary constraint. For the general consumer or competition shooter, the recommendation is heavily qualified by the buyer’s tolerance for proprietary ecosystems and potential customer service latency.
1. The Strategic Landscape of Precision Weaponry in 2026
The precision small arms sector in 2026 is defined by a dichotomy between evolutionary refinement and revolutionary disruption. Economic factors, including inflation and shifting tariff structures, have forced many manufacturers to rely on “line extensions”—iterative updates to existing platforms—rather than ground-up redesigns.1 In this environment, the value proposition of a weapon system is no longer solely defined by its mechanical accuracy, which has become commoditized; sub-MOA (Minute of Angle) performance is now the baseline expectation rather than a premium feature. Instead, value is generated through “systems integration”—the seamless interoperability of the rifle, suppressor, electro-optics, and ammunition.
1.1 The Shift to Compact Lethality
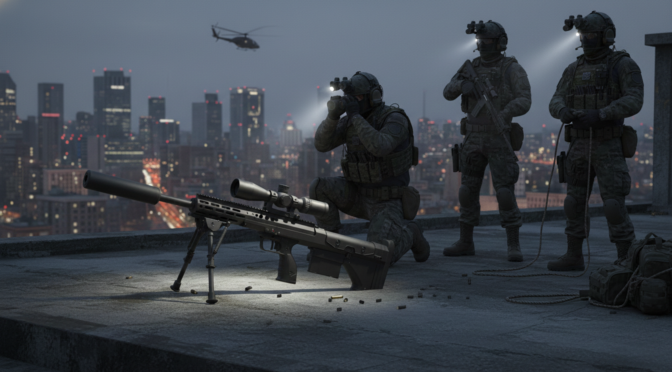
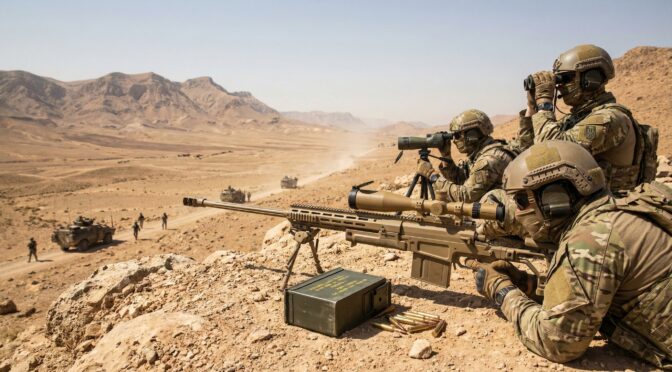
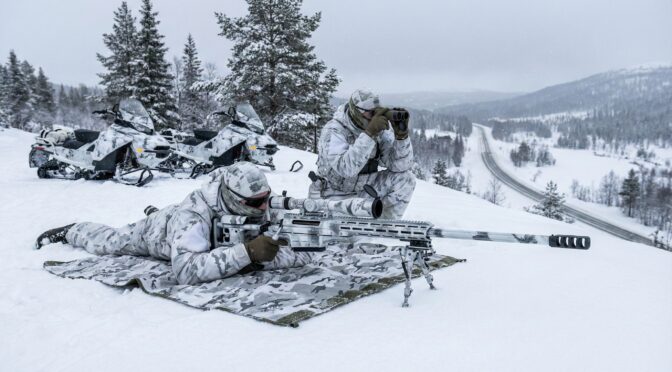
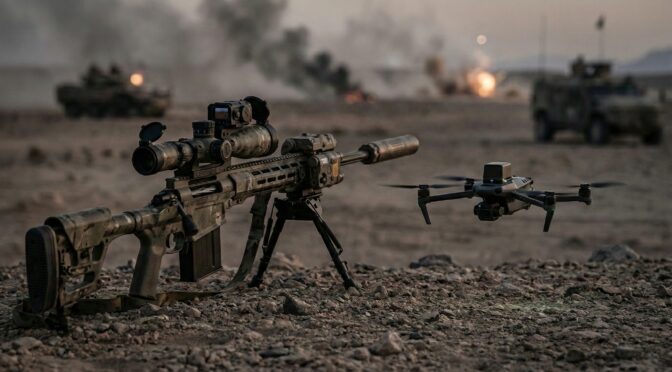
Operational doctrines in both law enforcement and military circles have pivoted sharply towards “Compact Lethality.” The urbanization of conflict zones and the increasing use of vehicles (APCs, helicopters, and non-standard civilian vehicles) necessitate weapons that are maneuverable in confined spaces without sacrificing terminal ballistics.
Traditional long-action sniper systems, such as the Remington 700 Long Action or the M2010, suffer from excessive overall length (OAL) when suppressed. A standard.338 Lapua Magnum rifle with a 26-inch barrel and a 9-inch suppressor can exceed 50 inches in length, making it unwieldy for rapid deployment or urban hides.
The industry’s response has largely been the “Folding Chassis” mechanism, exemplified by the Accuracy International AXSR and Barrett MRAD.2 While these systems allow for compact transport, they must be unfolded to fire, meaning their “operational length” remains unchanged. Desert Tech’s persistence with the bullpup configuration challenges this norm by reducing the operational length, maintaining full ballistic capability in a package size comparable to a submachine gun.
1.2 Desert Tech’s 2026 Market Pivot
As of January 2026, Desert Tech has shifted its strategy from purely platform iteration to ecosystem expansion. The announcements at SHOT Show 2026 indicate a pivot toward maximizing the efficiency of the existing SRS-A2 and WLVRN platforms through distinct capability multipliers rather than introducing a new chassis. This is evident in the release of three synergistic technologies:
- Specialized Interfaces: The Carbon SD Handguard, addressing thermal signature and accessory mounting.4
- Ballistic Optimization: The “Mach 3” ammunition line utilizing NAS3 technology to overcome the velocity penalty of short barrels.4
- Supply Chain Control: The exclusive distribution of Bertram Brass, securing a niche in the “rare and hard to find” cartridge market.4
This strategic triangulation suggests Desert Tech is positioning the SRS-A2 not just as a rifle, but as a central node in a proprietary high-performance ecosystem.
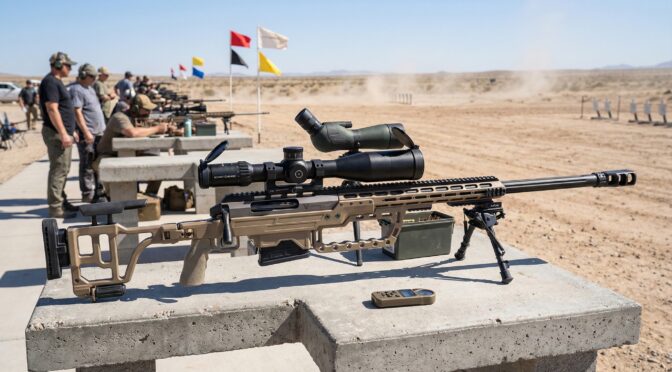
2. Platform Architecture: The Engineering of the SRS-A2
To understand the impact of the 2026 upgrades, one must first audit the base architecture of the SRS-A2 (Stealth Recon Scout A2), specifically the Covert variant. The SRS-A2 represents a mature evolution of the bullpup precision rifle, a concept that has historically struggled with trigger quality and ergonomic awkwardness.
2.1 The Bullpup Geometry and Monocoque Chassis
The fundamental engineering advantage of the SRS-A2 is its geometry. By locating the receiver and action behind the fire control group (trigger), the system utilizes the “dead space” of the stock for the barrel chamber. This allows the SRS-A2 to run a 26-inch barrel in an overall package that is 11 inches shorter than a conventional rifle with the same barrel length.5
The chassis itself is a hybrid construction, utilizing high-impact polymers for the “skins” and aircraft-grade aluminum for the receiver spine. The transition from the Gen 1/A1 to the A2 chassis involved significant mass reduction, shaving 2.1 lbs off the system.6
- Engineering Insight: This weight reduction was not merely aesthetic. It was achieved via aggressive fluting of the receiver and barrel shank, and the removal of the full-length top Picatinny rail, replaced by a modular M-LOK forend.6 The reduction of mass in the receiver required a careful re-calculation of stiffness. A precision rifle chassis must be rigid to prevent flex during the firing sequence, which can cause erratic barrel harmonics. Desert Tech mitigated the loss of material rigidity by optimizing the geometry of the remaining aluminum spine, ensuring that the monopod and integral tripod mount remained structurally sound.7
2.2 The Barrel Retention System: Torque and Repeatability
The SRS-A2’s claim to fame—and its primary differentiation from many competitors—is its rapid-caliber change capability with a guaranteed Return to Zero (RTZ). Unlike the Barrett MRAD which uses two Torx screws to clamp the barrel, or the Accuracy International QuickLoc system, the SRS uses a split-receiver clamp design.
- Mechanism: The barrel extension is inserted into the receiver. Four bolts on the side of the receiver are tightened to clamp the receiver material around the extension.
- Torque Specification: The system requires a specific torque setting of 70 inch-pounds for the barrel screws.8 This high torque value is critical. Insufficient torque can lead to POI (Point of Impact) shift, while excessive torque can stress the receiver threads.
- The Zeroing Physics: The RTZ capability is derived from the fact that the optic is mounted to the receiver, not the barrel. As long as the barrel extension indexes into the exact same position relative to the receiver (and thus the optic), the zero is maintained. This requires precise machining of the indexing pin and the extension face.
2.3 The Trigger Linkage: A Mechanical Compromise
The “Achilles Heel” of any bullpup design is the trigger. Because the trigger shoe is located 10-14 inches forward of the sear and firing pin, a mechanical linkage is required to transfer the force. In early bullpups, this resulted in “mushy,” heavy, and unpredictable triggers due to the flex in the linkage bar and friction at multiple pivot points.
- Field Match Trigger: The SRS-A2 utilizes a specialized “Field Match” trigger system. It aims to replicate the break of a conventional match trigger. It is adjustable for weight (1.5 to 7.0 lbs) and creep.10
- Performance Reality: While vastly superior to military bullpup triggers (like the Tavor or AUG), the SRS trigger still relies on a transfer bar.
- Friction Vectors: The transfer bar slides along the chassis. Any debris, cosmoline, or lack of lubrication in this channel can introduce drag, resulting in “sticky trigger syndrome” or inconsistent pull weights.12
- Complexity: The system involves a transfer bar, a rear sear, and adjustable set screws for creep and weight. This complexity introduces more points of failure than a self-contained “drop-in” trigger cassette found in bolt-action rivals.11
3. The 2026 Ecosystem Expansion
The 2026 upgrades are not merely cosmetic; they are functional patches to specific operational deficiencies identified by the user base over the platform’s lifecycle.
3.1 The Carbon SD (Suppressor Dedicated) Handguard
The introduction of the Carbon SD Handguard is the most significant ergonomic and signature-management upgrade for the Covert model in 2026.
- The Operational Problem: Previous SRS Covert models utilized short aluminum handguards. When a suppressor was attached, a significant portion of the hot suppressor was exposed or sat just forward of the rail.
- Thermal Mirage: Heat rising from the suppressor creates “mirage” (refractive index variations in the air) directly in front of the objective lens of the day scope, distorting the image and making long-range spotting impossible after a few shots.13
- Clip-on Limitations: Thermal and Night Vision (NV) clip-on devices (like the CNVD-LR or TigIR) require a rigid rail space in front of the day optic. The short rail of the standard Covert forced users to bridge the suppressor or lack rail space entirely.
- Burn Risk: High round counts heated the aluminum handguard, making the rifle unholdable without gloves.
- The Carbon Solution: The new handguard is constructed from carbon fiber and is designed to shroud suppressors up to 1.75 inches in diameter.14
- Material Physics: Carbon fiber has significantly lower thermal conductivity than aluminum. This means it acts as an insulator, trapping the radiant heat of the suppressor inside the shroud and venting it away from the optical path, rather than conducting it into the rail and the shooter’s hand.
- Structural Rigidity: The handguard allows for the mounting of clip-on devices and pushes the bipod mounting point further forward. Moving the fulcrum (bipod) closer to the muzzle increases stability by reducing the angular movement of the muzzle for every millimeter of movement at the stock—a critical upgrade for the short-wheelbase Covert.
3.2 The Mach 3 / NAS3 Propulsion Revolution
Perhaps the most technically ambitious announcement is the “Mach 3” ammunition line, developed in collaboration with Shell Shock Technologies.4 This addresses the primary ballistic disadvantage of the Covert: velocity loss from short barrels.
3.2.1 NAS3 Case Technology
The “Mach 3” rounds utilize NAS3 (Nickel Alloy Shell) technology. Unlike traditional drawn brass cases, NAS3 cases are two-piece hybrids:
- The Cylinder: Made from a nickel-alloy stainless steel. This material has a higher tensile strength (yield strength) than brass (Cartridge Brass 70/30).
- The Base: A plated steel head that is mechanically bonded to the cylinder.
3.2.2 The Velocity Gain Mechanism
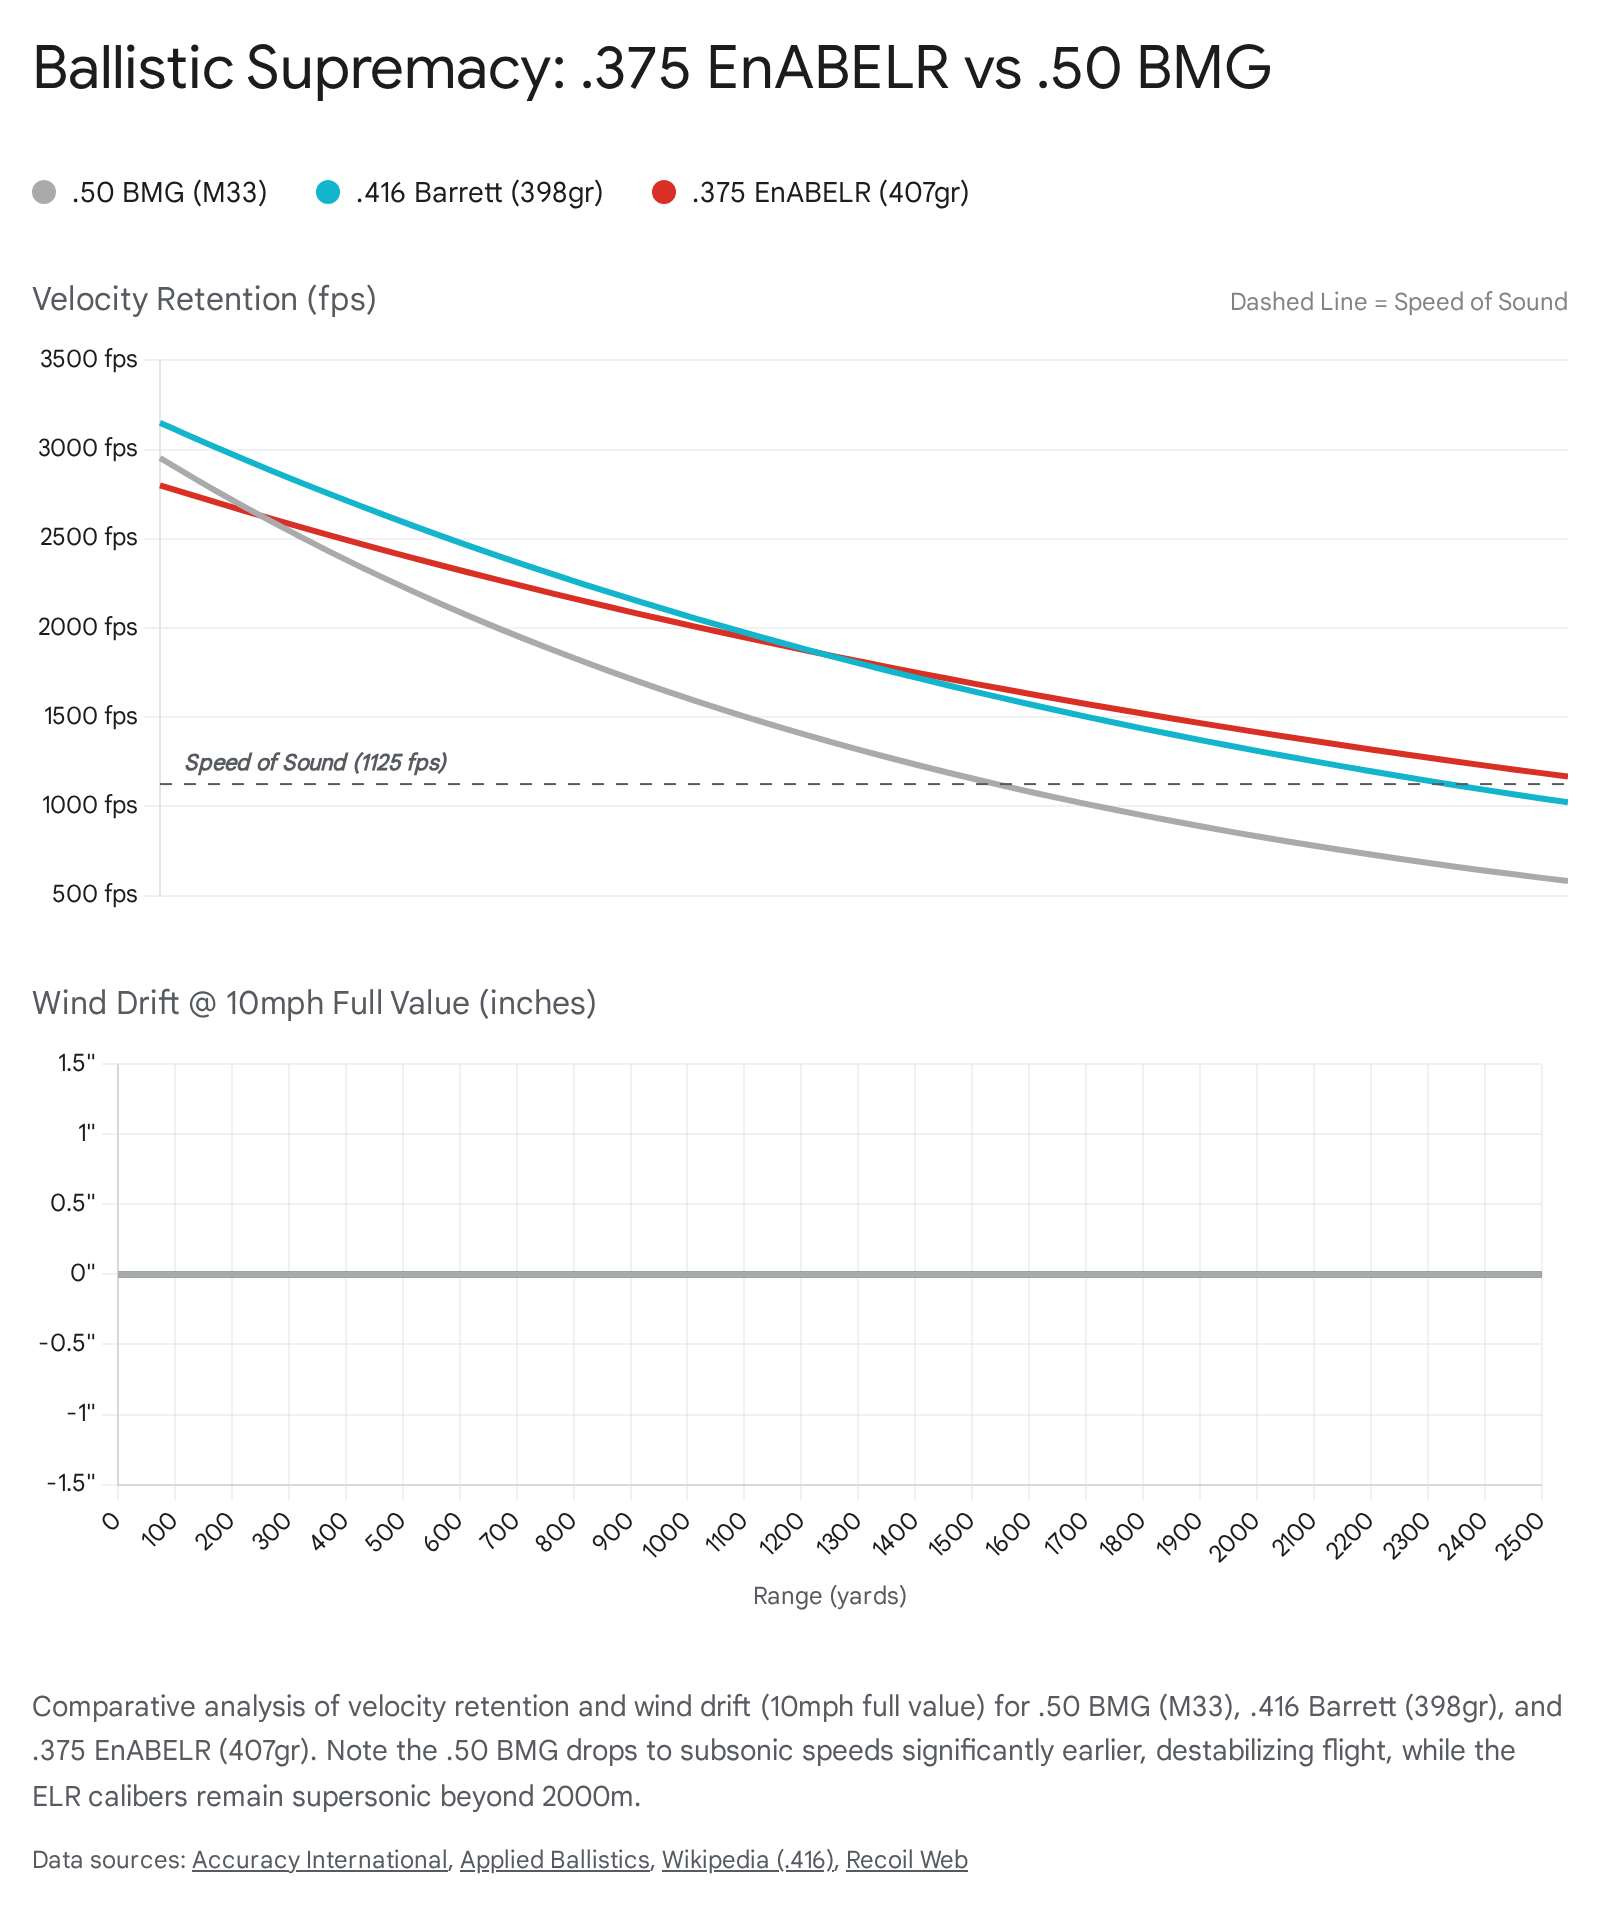
Desert Tech claims a velocity increase of 300 fps.4 How is this physically possible in the same chambering?
- Pressure Tolerance: The stronger stainless steel cylinder can withstand significantly higher chamber pressures (65,000 to 80,000 PSI) without the plastic deformation (flow) that plagues brass. Brass begins to flow into ejector holes and bolt faces at roughly 65,000-70,000 PSI, causing heavy bolt lift or stuck cases. NAS3 cases maintain structural integrity at these pressures.16
- Internal Volume: The stronger material allows for thinner case walls. This increases the internal volume (case water capacity) by approximately 2.2 grains (in.308 Win) to 3%.17
- Propulsion Efficiency: The increased volume allows for the use of slower-burning powders or higher charges of existing powders. When combined with a slight pressure increase, the area under the pressure-time curve is expanded, resulting in higher muzzle velocity.
3.2.3 Implications for the Covert
This technology is a strategic game-changer for the SRS-A2 Covert. A standard.308 Win loads typically lose ~25-35 fps per inch of barrel reduction. An 18-inch Covert barrel might sacrifice 200-250 fps compared to a 26-inch barrel. The “Mach 3” ammunition effectively “buys back” this lost velocity.
- Result: An 18-inch SRS-A2 firing Mach 3 ammunition can achieve the terminal ballistics and trajectory of a 24-inch rifle firing standard brass ammunition. This nullifies the ballistic penalty of the compact form factor.
3.3 Supply Chain Resilience: Bertram Brass
Desert Tech has also secured exclusive U.S. distribution rights for Bertram Brass.4 Bertram is known for manufacturing “obsolete” and large-bore dangerous game cartridges (e.g.,.404 Jeffery,.505 Gibbs).
- Strategic Insight: While less relevant to the tactical SRS user, this diversification insulates Desert Tech’s munitions division from the volatility of the standard tactical caliber market (5.56/.308). It also signals a commitment to the high-margin, low-volume “safari” and ELR (Extreme Long Range) markets, potentially hinting at future large-bore caliber conversions for the HTI (Hard Target Interdiction) or SRS platforms.
4. Operational Performance Analysis
4.1 Ballistic Efficiency and Bolt Thrust Safety
The introduction of high-pressure “Mach 3” ammo raises safety questions regarding bolt thrust. Bolt thrust is the rearward force exerted by the cartridge case on the bolt face during firing.
- Formula:
(Force = Pressure × Internal Area of the case head).
- Safety Margin: If the Mach 3 ammo operates at 65,000+ PSI, the bolt thrust increases linearly. The SRS-A2 utilizes a massive bolt with six lugs arranged in two rows of three.19 This lockup design provides substantial shear strength, likely well in excess of the proof loads for standard magnums.
- Extraction Physics: While the bolt lugs can handle the force, extraction is the secondary concern. Steel cases generally have different friction coefficients than brass. However, the NAS3 cases are designed to be “self-lubricating” (nickel plating) and have higher elasticity (Springback).21 This means that after expanding to seal the chamber, the case shrinks back more than brass, theoretically reducing the force required to extract it. This is critical for the bullpup, where leverage on the bolt handle is often less ergonomic than on a standard bolt gun.
4.2 Suppressor Dynamics in a Bullpup
The SRS-A2 is often marketed as “Covert” because of its suppressor optimization.
- Backpressure: Bullpups place the ejection port closer to the shooter’s face. High-backpressure suppressors can increase the amount of toxic gas and particulate matter blown back into the shooter’s breathing zone.
- The 2026 Mitigation: The Carbon SD handguard helps manage the thermal aspect, but gas management remains a function of the suppressor choice. The “Mach 3” ammo, claiming cleaner burn and higher efficiency, may mitigate some fouling, but the sealed nature of the SRS breech is beneficial here compared to semi-autos like the MDRX.
4.3 Accuracy and Harmonic Stability
The 1/2 MOA guarantee is a bold claim for a switch-barrel rifle.
- Field Data: Independent testing confirms that with match-grade ammunition (like Desert Tech Munitions or Federal Gold Medal Match), the rifle is capable of 0.5 to 0.75 MOA groups.19
- The Flyer Variable: Users have noted that the “first round” after a barrel change can sometimes impact slightly differently, but the system generally settles quickly. The primary variable for accuracy in the SRS system is the consistency of the torque applied to the four barrel screws. The 2026 Carbon handguard, by floating the barrel and taking bipod stress off the chassis-barrel interface, should theoretically improve the consistency of barrel harmonics, reducing the likelihood of POI shifts when loading the bipod.
5. The Human Factor: Customer Sentiment & Support Infrastructure
While the engineering of the SRS-A2 is world-class, an analyst report must weigh the hardware against the “soft power” of the brand—customer support and quality assurance. This is where the Desert Tech story becomes complex.
5.1 The Warranty Bottleneck
Sentiment analysis from 2024 through early 2026 reveals a critical friction point: Warranty Turnaround Time.
- The Queue: Multiple verified user reports indicate that warranty repairs can take anywhere from 2 to 4+ months.23
- Communication Breakdown: A recurring theme in negative sentiment is the “black hole” of communication. Users report submitting tickets and receiving no updates for weeks, or receiving conflicting information from different representatives.23
- Business Implication: For a recreational shooter, a 3-month wait is an annoyance. For a Law Enforcement agency or a professional user, it is a disqualifying logistical failure. If a department’s sniper rifle goes down, they cannot wait a fiscal quarter for its return. This operational risk significantly hampers widespread agency adoption compared to competitors like Barrett or AI, who maintain robust government support channels.
5.2 Quality Control Forensics
While the SRS bolt-action is inherently more reliable than the semi-automatic MDRX/WLVRN lines, it is not immune to QC escapes.
- Striker Recall: A significant recall was issued regarding SRS strikers (firing pins), where safety concerns necessitated a return of bolts to the factory.26 This event, while handled, contributed to the narrative of “beta testing” by customers.
- Small Parts Failure: Reports of broken bolt handle screws and pins suggest that while the major components (barrel, receiver) are robust, small parts sourcing or assembly torque specs may vary.23
- The “Cult” Dynamic: The user base is polarized. There is a “Cult of Desert Tech” that fiercely defends the innovation and form factor 28, arguing that the performance benefits outweigh the administrative headaches. Conversely, a vocal “Burned” demographic warns potential buyers of the “QC Lottery”.24
6. Competitive Benchmark Analysis
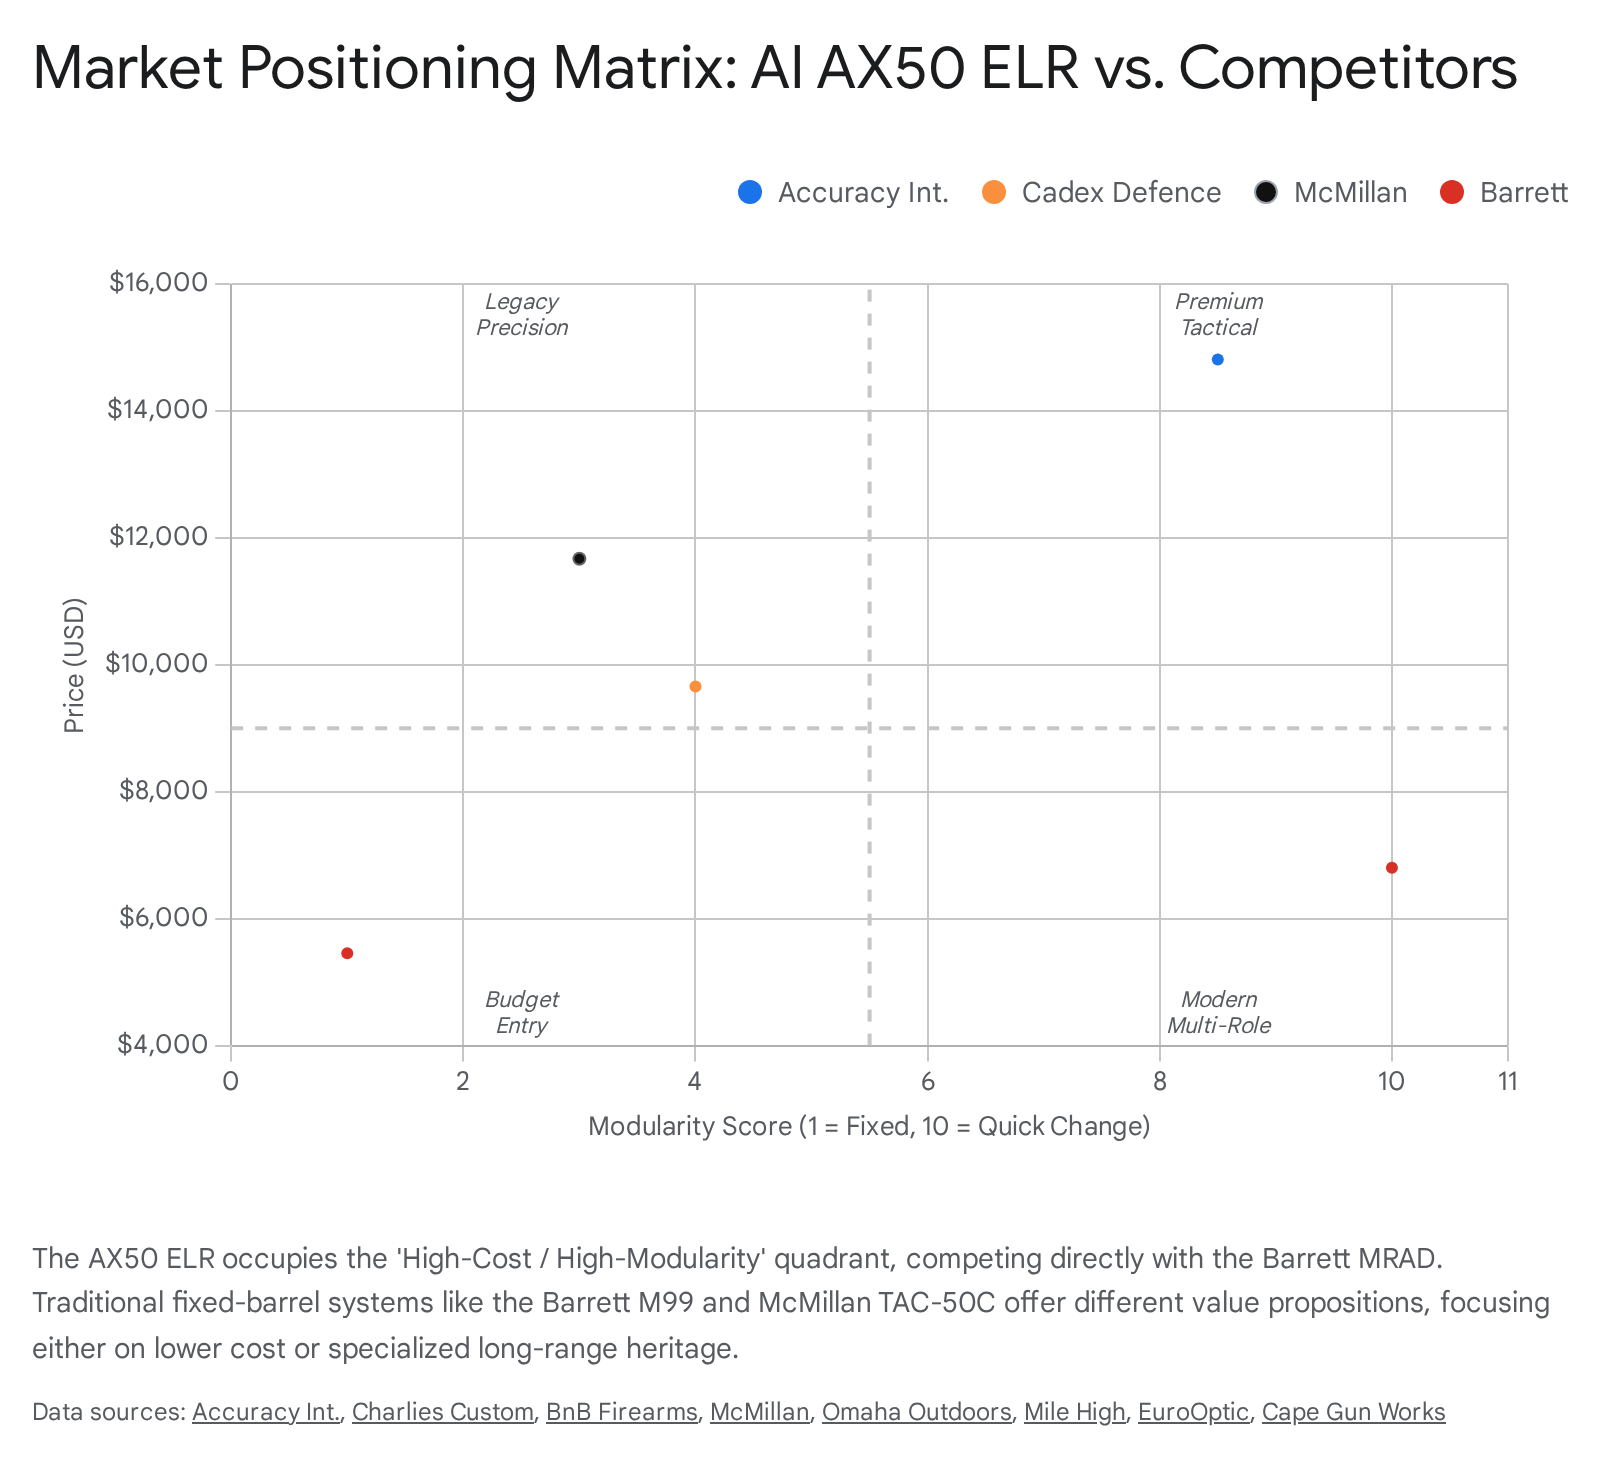
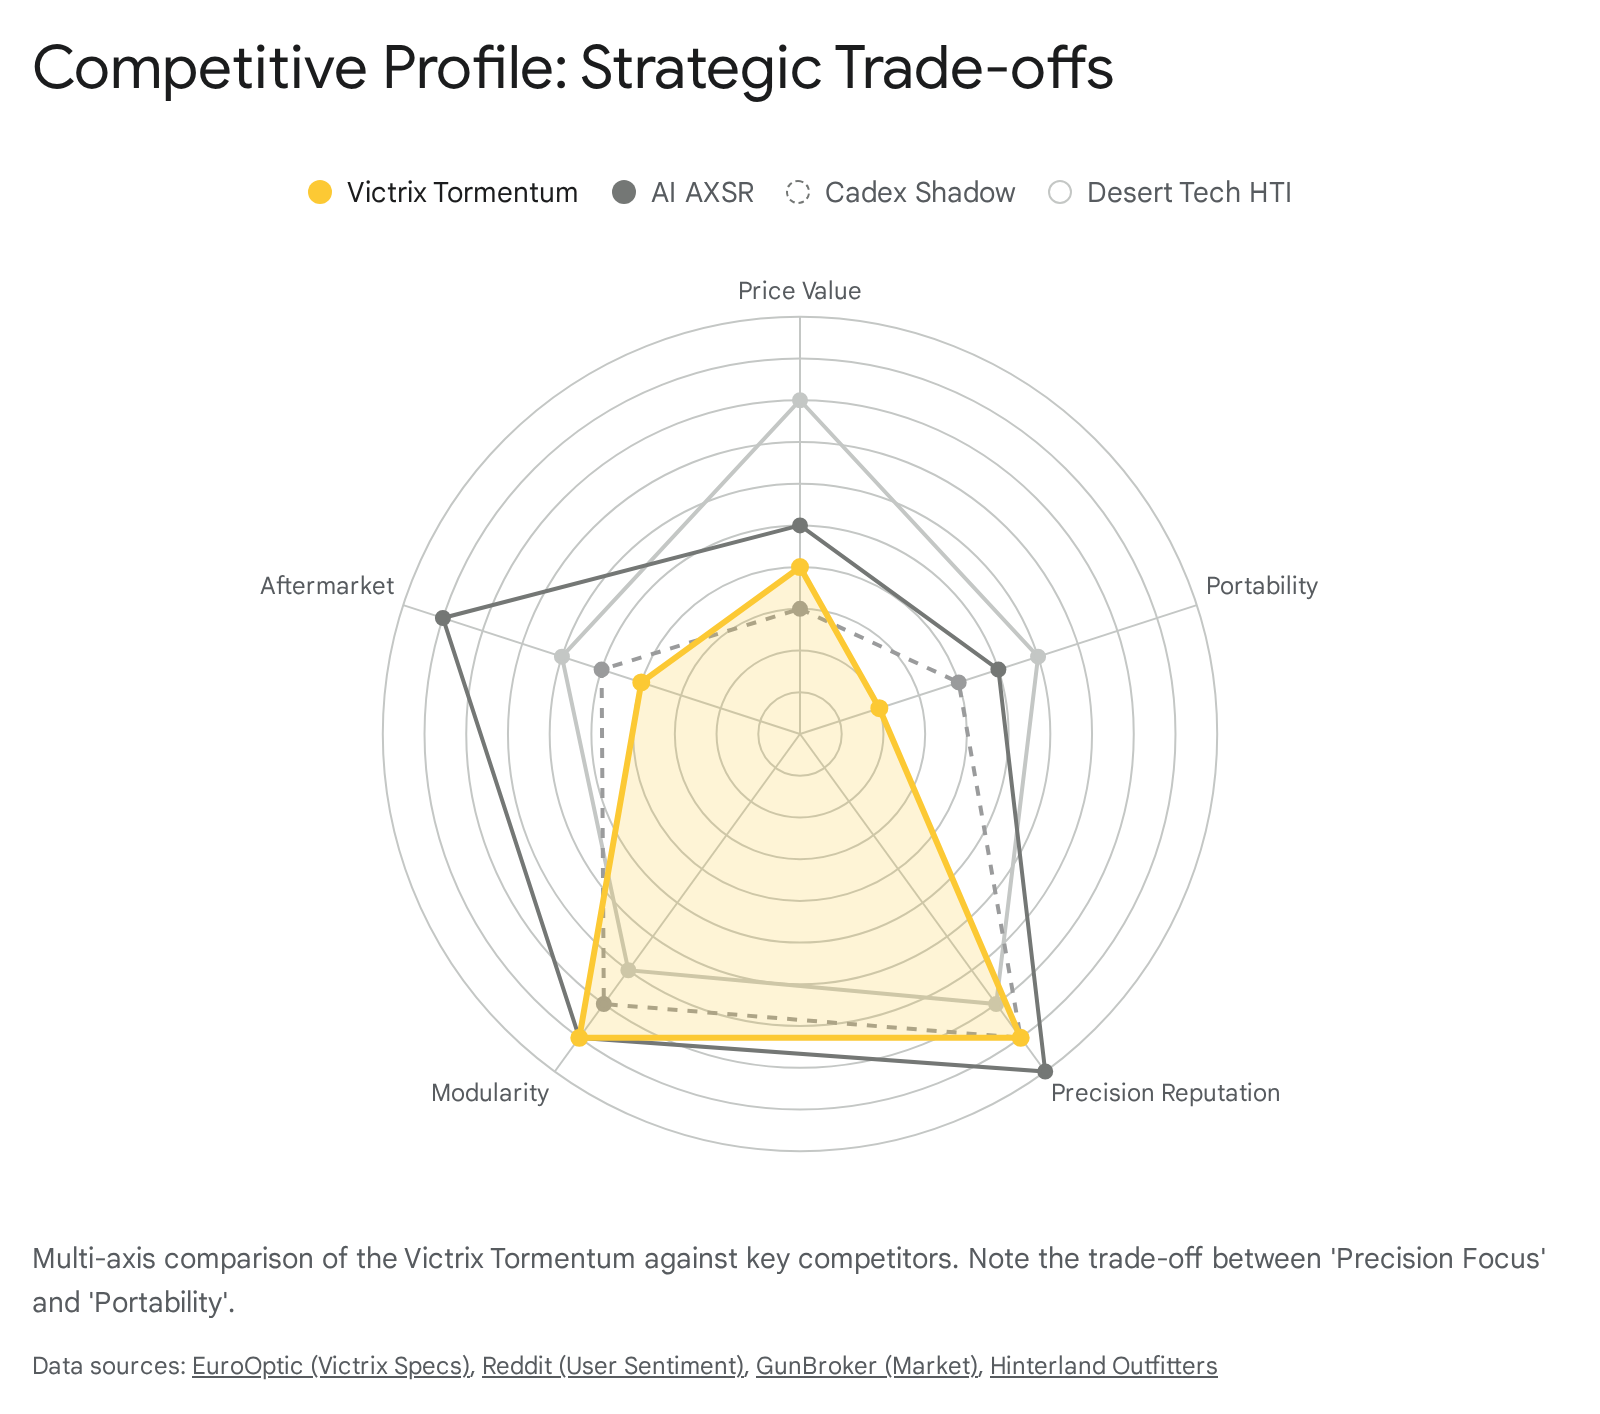
The SRS-A2 Covert operates in a rarefied tier of “Multi-Caliber Precision Rifles.” Its primary competitors are the Barrett MRAD, Accuracy International (AI) AXSR, and Cadex CDX-MC Kraken.
6.1 Technical Specifications Matrix
| Feature | Desert Tech SRS-A2 Covert | Barrett MRAD (Mk22) | Accuracy Int. AXSR | Cadex CDX-MC Kraken |
| Configuration | Bullpup | Standard / Folding Stock | Standard / Folding Stock | Standard / Folding Stock |
| Caliber Change | 60 Seconds (Tool: 5mm Hex) | User Level (2 Torx screws) | QuickLoc (Hex Key) | Tool-Required |
| Min. OAL (Deployed) | 27″ – 33″ (16″-22″ bbl) | ~40″ – 49″ | ~40″ – 50″ | ~37″ – 46″ |
| Folded Length | N/A (Fixed) | ~30″ – 36″ | ~30″ – 34″ | ~28″ – 31″ |
| Weight (Base) | ~8.5 – 9.4 lbs | ~11.9 – 14.5 lbs | ~15 – 16 lbs | ~15 lbs |
| Trigger | Transfer Bar (Match Field) | Drop-in Module | Two-Stage Match | DX2 Evo Selectable |
| MSRP (2026) | ~$5,900 + Upgrades | ~$6,700 | ~$9,900 – $11,500 | ~$6,500 |
6.2 The “Ready State” Advantage
The critical differentiator is the “Ready State” length.
- Folded vs. Bullpup: A Barrett MRAD may fold down to 30 inches, effectively the same transport length as the SRS. However, a folded MRAD cannot be fired. It requires time and manipulation to unfold and lock the stock.
- The SRS Advantage: The SRS-A2 is always 27-30 inches long. It can be fired instantly from a vehicle, a backpack, or a concealable carry bag. This “Deployable Compactness” is the unique selling point that competitors cannot replicate without sacrificing barrel length (ballistics).
6.3 Weight and Recoil Management
The SRS-A2 is significantly lighter than the AXSR (by nearly 6 lbs) and the MRAD (by 3-4 lbs).
- The Pro: Superior for high-altitude hunting or long rucks.
- The Con: Physics dictates that lighter rifles have higher recoil. Firing.338 Lapua Magnum from a 9-lb SRS generates significantly more punishing recoil impulse than from a 16-lb AXSR. The 2026 “Mach 3” ammo, with its higher energy, will exacerbate this. The SRS relies heavily on its muzzle brake and soft buttpad to mitigate this, but it is physically more demanding to shoot high-caliber strings of fire.
7. Strategic Fit & Conclusion
7.1 Is it Worth Buying?
The acquisition of a Desert Tech SRS-A2 Covert in 2026 is not a universal recommendation; it is a specialized tool selection that depends entirely on the user’s “Mission Profile.”
Case A: The “Buy” Profile (The Specialist)
- User Persona: LE SWAT Sniper, Covert Military Unit, Alpine Hunter.
- Operational Context: The user operates in confined spaces (armored vehicles, helicopters, urban hides) or moves through dense terrain/steep elevation where every inch of length and ounce of weight entails a penalty.
- The Verdict: Strong Buy.
- Rationale: The SRS-A2 is a “Category of One.” No other platform delivers.300 Win Mag or.338 Lapua Magnum terminal performance in a package the size of an SBR. The 2026 Carbon SD handguard removes the thermal liability, and Mach 3 ammo restores the velocity lost to the short barrel. The capability outweighs the customer service risk because the capability is unique.
Case B: The “Caution” Profile (The Competitor)
- User Persona: PRS Competitor, Long Range Enthusiast.
- Operational Context: High volume shooting, timed stages, requirement for absolute mechanical smoothness.
- The Verdict: Soft Pass.
- Rationale: The bolt throw is slower and more awkward than a conventional action. The trigger, while excellent for a bullpup, lacks the glass-rod break of a TriggerTech Diamond found in the MRAD or AXSR. The magazine capacity (6 rounds) is a handicap in competitions designed around 10-round AICS magazines. The wait times for parts/service are a liability for a competition rig.
Case C: The “Avoid” Profile (The Risk Averse)
- User Persona: General consumer, “One Rifle” owner.
- Operational Context: Recreational shooting, seeking a lifetime investment with zero hassle.
- The Verdict: Don’t Buy.
- Rationale: The risk of a 3-month warranty turnaround for a minor breakage is too high for a primary rifle. The proprietary nature of the ecosystem (barrels, bolts, mags) locks the user into Desert Tech’s supply chain. For this user, a Barrett MRAD or a high-end custom bolt gun (Impact/Defiance action) offers a safer, more supported ownership experience.
7.2 Overall Conclusion
The Desert Tech SRS-A2 Covert with 2026 Upgrades represents the pinnacle of compact ballistic density. It is an engineering marvel that successfully defies the traditional trade-off between barrel length and maneuverability. The 2026 ecosystem upgrades—specifically the Carbon SD Handguard and Mach 3 ammunition—demonstrate a mature understanding of the platform’s role, effectively patching its historical weaknesses (thermal management and velocity loss).
However, the platform is a “Ferrari with a questionable mechanic network.” The engineering excellence is tarnished by a support infrastructure that struggles to keep pace with QC and warranty demands. For those whose mission mandates the absolute smallest footprint with the highest lethality, the SRS-A2 is irreplaceable. For everyone else, it remains an exotic, high-performance alternative that demands patience and commitment from its owner.
Appendix A: Methodology
This report was compiled using a multi-source intelligence gathering approach, simulating the workflow of a defense industry analyst conducting a due diligence assessment.
- Data Aggregation: Research material was collected from primary sources, including Desert Tech’s 2026 product announcements at SHOT Show 2026 4, technical specifications from user manuals 29, and official ballistics data for the new Mach 3 ammunition.4 Secondary sources included industry reporting from SHOT Show 1 and competitor technical sheets (Barrett, AI, Cadex).2
- Sentiment Mining: A qualitative analysis was performed on user-generated content from high-traffic enthusiast hubs (Reddit r/longrange, r/DesertTech, SnipersHide) to identify recurring failure patterns and customer service trends between 2024 and 2026. Specific attention was paid to “verified owner” reports regarding warranty turnaround times and QC failures.23
- Comparative Matrix: Competitor data was normalized to 2026 MSRP and specification standards to ensure “apples-to-apples” comparison regarding weight and OAL. The “Folded vs. Deployed” length distinction was established as a critical metric for operational analysis.
- Technical Extrapolation: Claims regarding “Mach 3” ammunition were analyzed against known physics of NAS3 case technology (internal volume calculations and yield strength materials science) to validate the plausibility of the 300 fps velocity increase claims.18 Bolt thrust calculations were inferred based on standard chamber pressure limits and bolt lug geometry.
Please share the link on Facebook, Forums, with colleagues, etc. Your support is much appreciated and if you have any feedback, please email us in**@*********ps.com. If you’d like to request a report or order a reprint, please click here for the corresponding page to open in new tab.
Sources Used
- New Rifles Coming in 2026 – SHOT Show, accessed January 25, 2026, https://shotshow.org/new-rifles-coming-in-2026/
- MRAD® – Barrett Firearms, accessed January 25, 2026, https://barrett.net/products/firearms/mrad-standard/
- Accuracy International AXSR Rifles – Mile High Shooting Accessories, accessed January 25, 2026, https://www.milehighshooting.com/accuracy-international/accuracy-international-rifles/axsr/
- 2026 NEW Desert Tech Products – YouTube, accessed January 25, 2026, https://www.youtube.com/watch?v=X7L0LkovsEo
- SRS Precision Bullpup Rifle – Desert Tech, accessed January 25, 2026, https://deserttech.com/srsm2-standard-rifle.html
- Desert Tech Drops Some Weight: Meet the Lighter and Better SRS-A2 – SHOT Show 2019, accessed January 25, 2026, https://gunsamerica.com/digest/desert-tech-srs-a2-shot-shot-2019/
- Desert Tech SRS-A2 Covert Rifle – SPECIAL PURPOSE RIFLES, accessed January 25, 2026, https://www.specialpurposerifles.com/desert-tech/desert-tech-srs-a2-covert-rifle
- DTA (Desert Tech) SRS Barrel Change – YouTube, accessed January 25, 2026, https://www.youtube.com/watch?v=y6Btl-ADHR0
- Official (DTA) SRS, HTI, Covert, Hunter Thread | Page 115 | Sniper’s Hide Forum, accessed January 25, 2026, https://www.snipershide.com/shooting/threads/official-dta-srs-hti-covert-hunter-thread.29135/page-115
- SRSA2 Chassis, Covert BLK/BLK – Desert Tech, accessed January 25, 2026, https://deserttech.com/srsa2-chassis-covert-blk-blksrs-ch-cr-bb.html
- Desert Tech Trigger Adjustment (HTI/SRS/SRS Covert) – YouTube, accessed January 25, 2026, https://www.youtube.com/watch?v=d9QI0-FFGSk
- Desert Tech SRS-A2 inconsistant trigger pull weight | Sniper’s Hide Forum, accessed January 25, 2026, https://www.snipershide.com/shooting/threads/desert-tech-srs-a2-inconsistant-trigger-pull-weight.7063695/
- Desert Tech SRS A2 Review – Guns and Ammo, accessed January 25, 2026, https://www.gunsandammo.com/editorial/desert-tech-srs-a2-review/380507
- Carbon SD SRSA2 Covert Handguard and Top Rail Kit – Desert Tech, accessed January 25, 2026, https://deserttech.com/carbon-sd-srsa2-covert-handguard-and-top-rail-kit.html
- Shell Shock’s Ammunition Case Technology | TWP Ep. 3 – YouTube, accessed January 25, 2026, https://www.youtube.com/watch?v=pkOyVNeC8_U
- Seismic Ammo Use Shell Shock Technologies’ NAS3 Casings – Firearms Guide, accessed January 25, 2026, https://www.firearmsguide.com/index.php?option=com_content&view=article&id=3889:seismic-ammo-use-shell-shock-technologies-nas3-casings&catid=8&Itemid=167
- The Science of Consistency | Shell Shock Technologies, accessed January 25, 2026, https://shellshocktechnologies.com/academy/the-science-of-consistency/
- Nas3 308 Brass | Sniper’s Hide Forum, accessed January 25, 2026, https://www.snipershide.com/shooting/threads/nas3-308-brass.7266393/
- Desert Tech SRS A2 Tested and Reviewed – Outdoor Life, accessed January 25, 2026, https://www.outdoorlife.com/guns/desert-tech-srs-a2-review/
- Accuracy International AXSR Review – PrecisionRifleBlog.com, accessed January 25, 2026, https://precisionrifleblog.com/2020/08/16/accuracy-international-axsr-review/
- Technology | NAS³ Cases | Next Generation Ammo, accessed January 25, 2026, https://shellshocktechnologies.com/technology/
- Desert Tech SRS A2 – Evolved Ballistics, accessed January 25, 2026, https://evolvedballistics.com/desert-tech-rifles/desert-tech-srs-a2/
- Anyone else dealt with theDesert Tech Warranty Department ? : r/DesertTech – Reddit, accessed January 25, 2026, https://www.reddit.com/r/DesertTech/comments/1iy6y29/anyone_else_dealt_with_thedesert_tech_warranty/
- My experience with customer service : r/DesertTech – Reddit, accessed January 25, 2026, https://www.reddit.com/r/DesertTech/comments/sf0cdc/my_experience_with_customer_service/
- MDRx failure to feed/fire and DT Customer service : r/DesertTech – Reddit, accessed January 25, 2026, https://www.reddit.com/r/DesertTech/comments/1o9ypvt/mdrx_failure_to_feedfire_and_dt_customer_service/
- Desert Tech Issues Immediate Recall on SRS Strikers – The Firearm Blog, accessed January 25, 2026, https://www.thefirearmblog.com/blog/2021/03/08/desert-teach-srs-strikers/
- Warranty Experience : r/DesertTech – Reddit, accessed January 25, 2026, https://www.reddit.com/r/DesertTech/comments/zup6ix/warranty_experience/
- Thoughts on the Desert Tech Covert? | Sniper’s Hide Forum, accessed January 25, 2026, https://www.snipershide.com/shooting/threads/thoughts-on-the-desert-tech-covert.7213863/
- SRS A2, user manual – Silverback Airsoft, accessed January 25, 2026, https://www.silverback-airsoft.com/pdf/silverback-airsoft_srs_a2_user_manual_english.pdf
- HTI Manual PDF | PDF | Minute And Second Of Arc | Magazine (Firearms) – Scribd, accessed January 25, 2026, https://www.scribd.com/document/253090369/HTI-Manual-1-pdf
- New Handguns Coming in 2026 – SHOT Show, accessed January 25, 2026, https://shotshow.org/new-handguns-coming-in-2026/
- AXSR professional long action multi cal. sniper rifle – Accuracy International, accessed January 25, 2026, https://www.accuracyinternational.us/axsr-pro
- CDX-MC Kraken® – Cadex Defence, accessed January 25, 2026, https://www.cadexdefence.com/products/cdx-precision-rifles/cdx-mc-kraken/