Ran across these photos of two riot shotguns I built – a Winchester 1200 I bought new in the early 1980s and a Remington 870 Express I got a good deal on from Gander Mountain in the early 2000s. One thing I learned is that the Blackhawk recoil reducing stocks really make a difference.
To be honest, I think Remington makes a lot cheaper guns than they used to and their quality has suffered. Some years back I picked up a Remington 870 express in great shape but one thing that drove me nuts was that the little orange plastic follower would spring out and jam the action. I did some quick digging and found a machined aluminum replacement that I installed and never had a problem since.
Also, from a pure “keep it simple” angle, I have since stopped installing anything on a tactical shotgun other than a light. It took to long to turn on the red dot plus worries around battery life, was it still zeroed, etc.
For lights and lasers, I really like the Streamlights. I use a TLR-1 300 lumen LED light on my home defense 870 to this day. They are rugged, simple, easy to operate and durable. Having had a ton of cheap Chinese imports fail over the years, I only use proven lights and lasers on critical firearms. To save on the CR-123 batteries, read my post on that topic.
The red fiber optic sight really worked out better than I thought. It made target acquisition fast. I eventually ditched the red dot optic, installed a side saddle shell holder and used just that sight.
The flashlight on the Winchester was a Hellfighter with a xenon bulb. It was ok but I would only buy LEDs going forward and my preferences are Streamlight or Surefire.
The Blackhawk recoil reducing stocks do a very good job but make sure you buy the right model. They sell stocks both with and without the recoil reduction system. Also make sure you get the right model – they make them for Winchester and Mossberg. The following is an automated search from eBay so you need to double check the product and that the buyer has plenty of trades and good feedback.
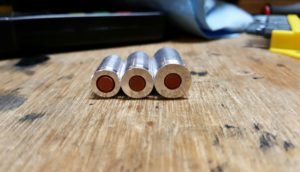
I tend to use a lot of dummy rounds due to working with Kydex or whatever and normally you pay quite a bit for them. Recently I stumbled across a very good deal on Amazon. There is a company called KP Tactical making very decent dummy rounds by machining them out of aluminum and inserting silicone rubber in place for the primer and they are only about $1/round in bags of 10. So, I ordered 9mm, .40 and .45 and they arrived the other day. I’m quite happy – the machining is well done and it’s a very fair price.
Okay folks, with all the sanding of plastic I do, my shop has tons and tons of dust in it. In 2015 I read an article about how small fine dust particles are unhealthy – in general, the smaller the particle, the more it gets to places in your lungs where you don’t want it to and it may get stuck there. Now I may be a slob, as my wife will readily agree, but I do get concerned about safety. Now I investigated improving my dust collection off the tools and that was way too expensive.
At some point I will upgrade my dust collection at the tools but that will have to wait. What you will notice when talking to a lot of the vendors, and Grizzly is one example, is that they only warranty their products for wood. What this tells you is that they are using open bearings (not sealed bearings) and if other materials get in there (like my glass reinforced plastic), it will shred them. Grizzly product support was real cool about answering my questions and cautioning me up front before I dropped a big amount of cash on one of their dust systems so kudos to them for being up front and honest.
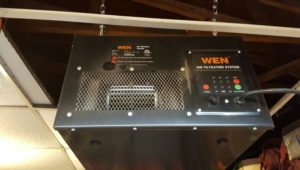
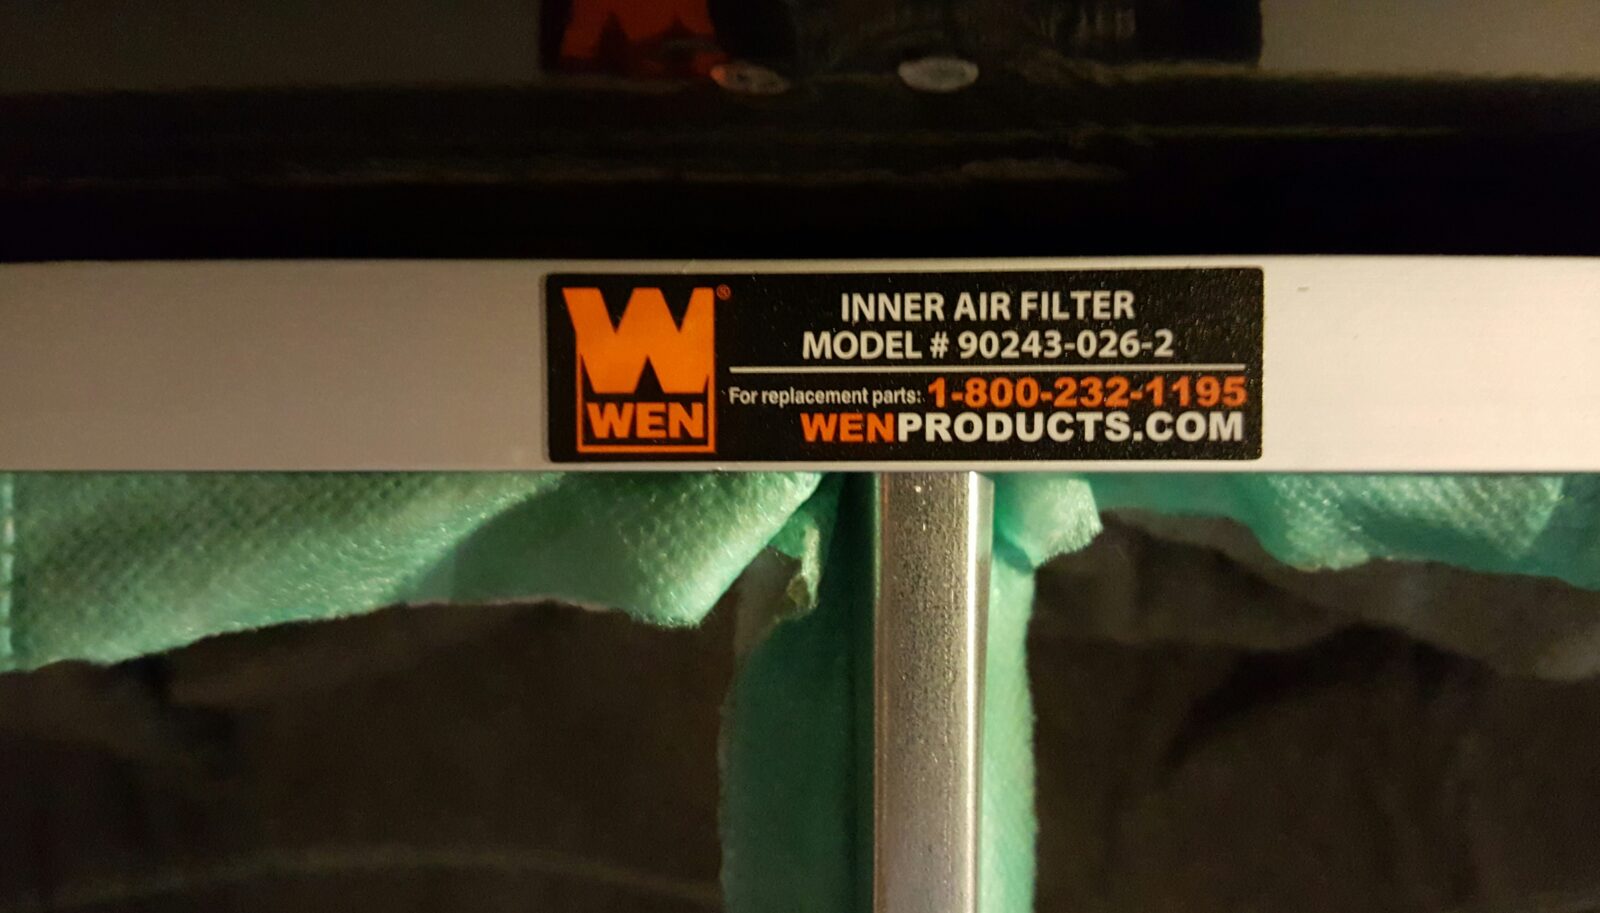
Fine air filter systems are supposed to be on layer of a multi-layered defense but at this point, I was really worried about were the fine particles as I already have some basic dust management in place. In addition, I always wear a quality Moldex 2310 N99 particulate respirator when drilling and sanding but all that junk was just floating around and getting on stuff in the shop, etc. So the immediate need was to get rid of that fine dust. I did some digging and there is a model of suspended fine air filter that seems to be sold under many brand names. I did some digging on Amazon, read the reviews and went with the Wen 3410. Just to be clear, I actually bought this – you are reading a review from a real user and not someone who got something for free in exchange for a review.
The unit arrived on November 9, 2015, and I have used it a ton – replacing both the outer and inner filters many times. Let me tell you a bit first.
Before I did anything, I plugged the unit in and tested it. I learned years ago not to do a ton of work installing something and then test it! Test it up front so it is easy to send back or get tech support on the line and work on it.
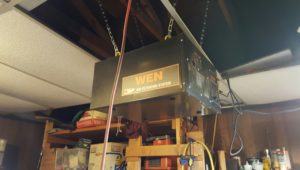
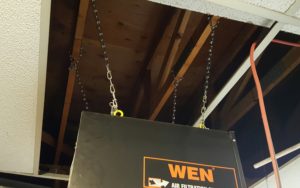
I figured out where I wanted to hang the air filter and bought some heavy sign chain from Ace Hardware so I could get it just where I wanted it. The unit isn’t very heavy but given me and some expensive tools would be right under it, I went for overkill. It’s around 30 pounds and the chain is around 120 pounds if I recall right. At any rate, I hung the unit and adjusted the hooks until I got it level. I then ran an extension cord over to it and turned it on. It was a tad loud on the highest setting but definitely something I could live with – I usually have the stereo cranked in my shop anyways so that wasn’t a big deal.
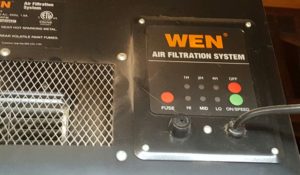
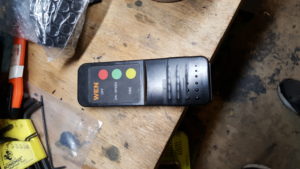
The unit comes with a remote for turning the unit on and off, setting the speed (low, medium or high) and whether to use a timer setting for 1, 2 or 4 hours. I really like the timer as I can have it set to constant on while I am in the shop and then set it to the timer so that it can keep cleaning the air after I leave to get remnants out of the air. Truth to tell, the remote’s battery door has been the only casualty since I bought it. The little tab that held the battery cover in place was never very firm so I resorted to a couple of layers of black electrical tape wrapped around the remote and have never had a problem since.
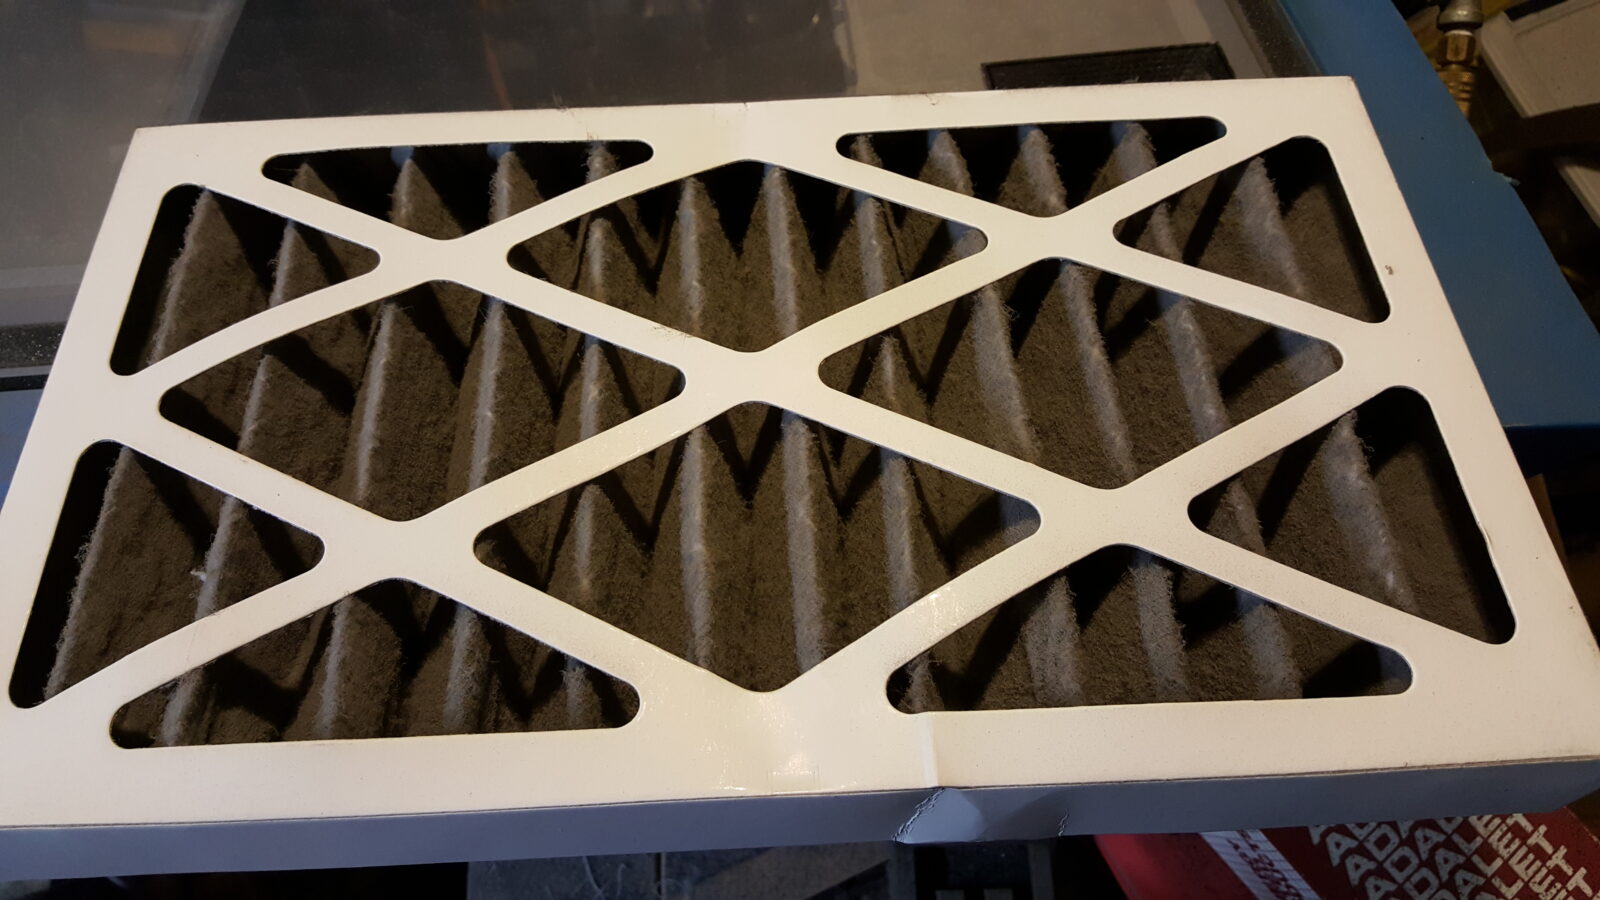
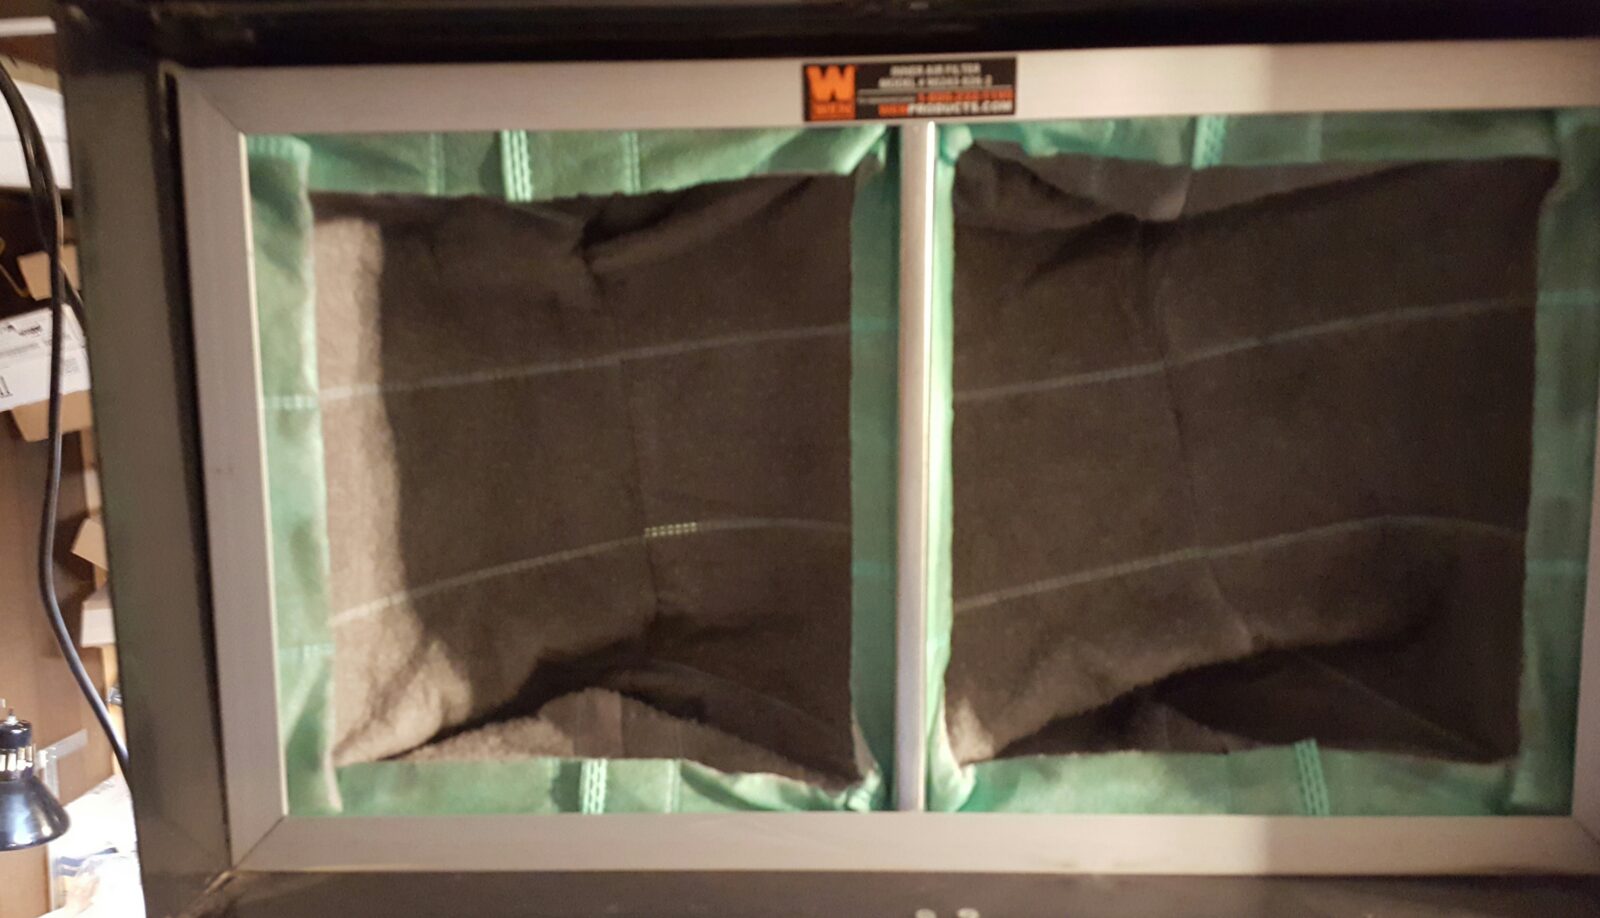
What I noticed over the coarse of the next few days was that stuff in the shop was not getting a thin layer of dust on it like it was in the past. The unit has an outer coarse filter that is 5 microns and an inner filter at 1 micron. It’s good that it is two stage like that as you can see them both getting filled with dust or at least I can. I probably make it about 2-3 months before I have to change the outer filter and in general I make it about two outer filter changes before I change the inner filter. The life of the filter really depends on how much sanding I am doing and the material I am working with. Once I saw all the crap in the filters, it made me realize that some percentage of that junk was going in my lungs – probably more than I knew.
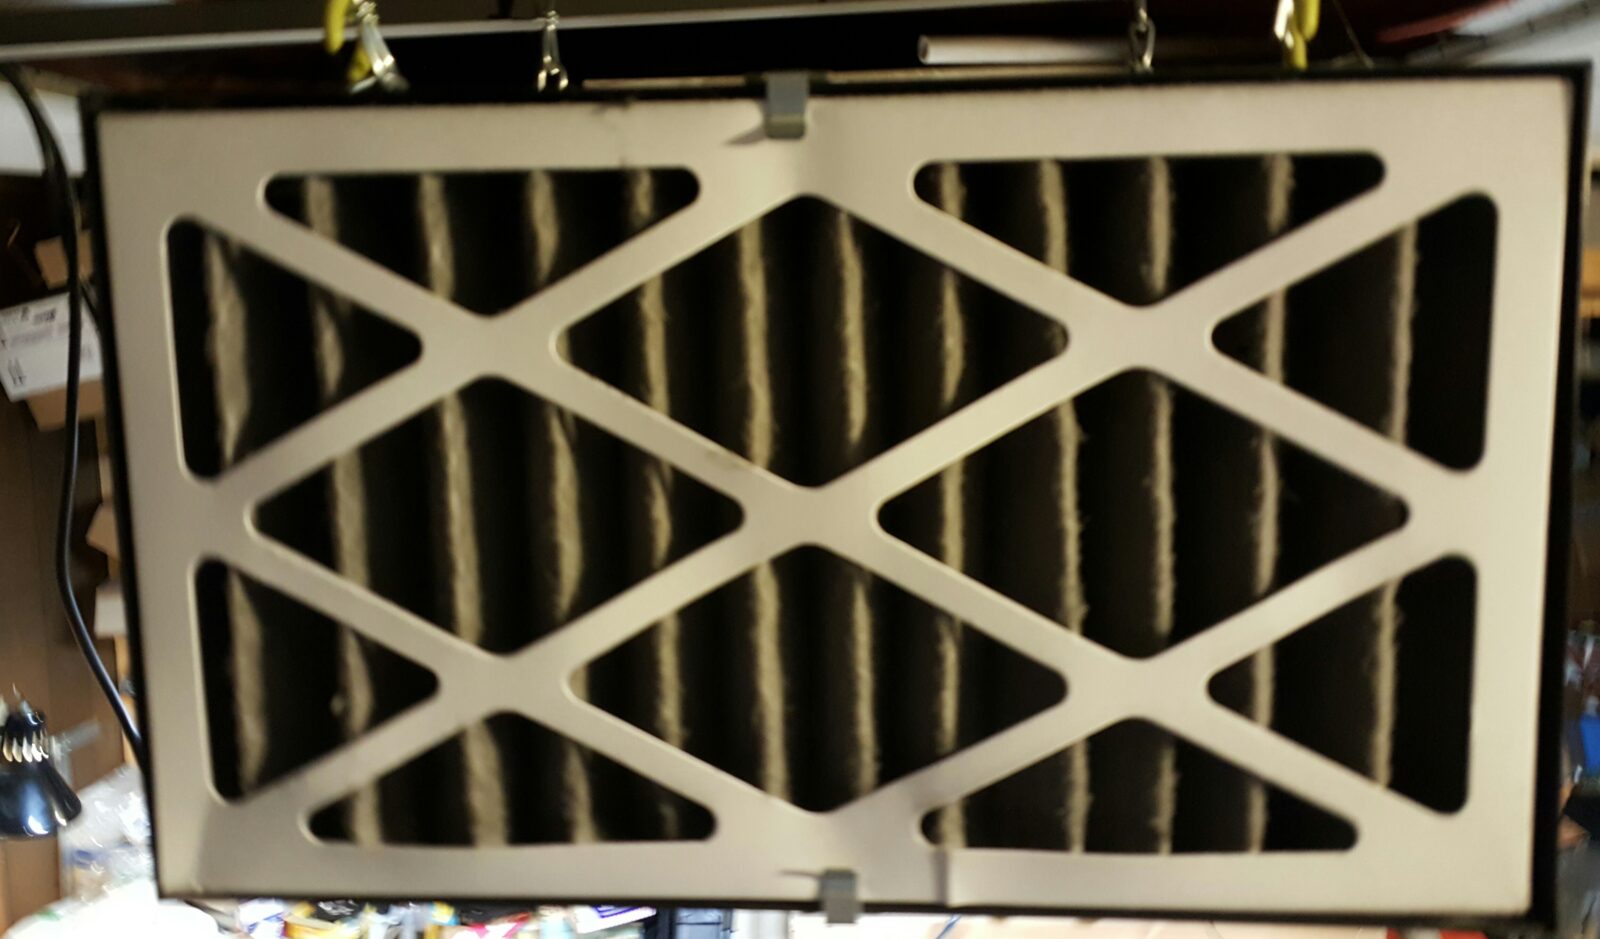
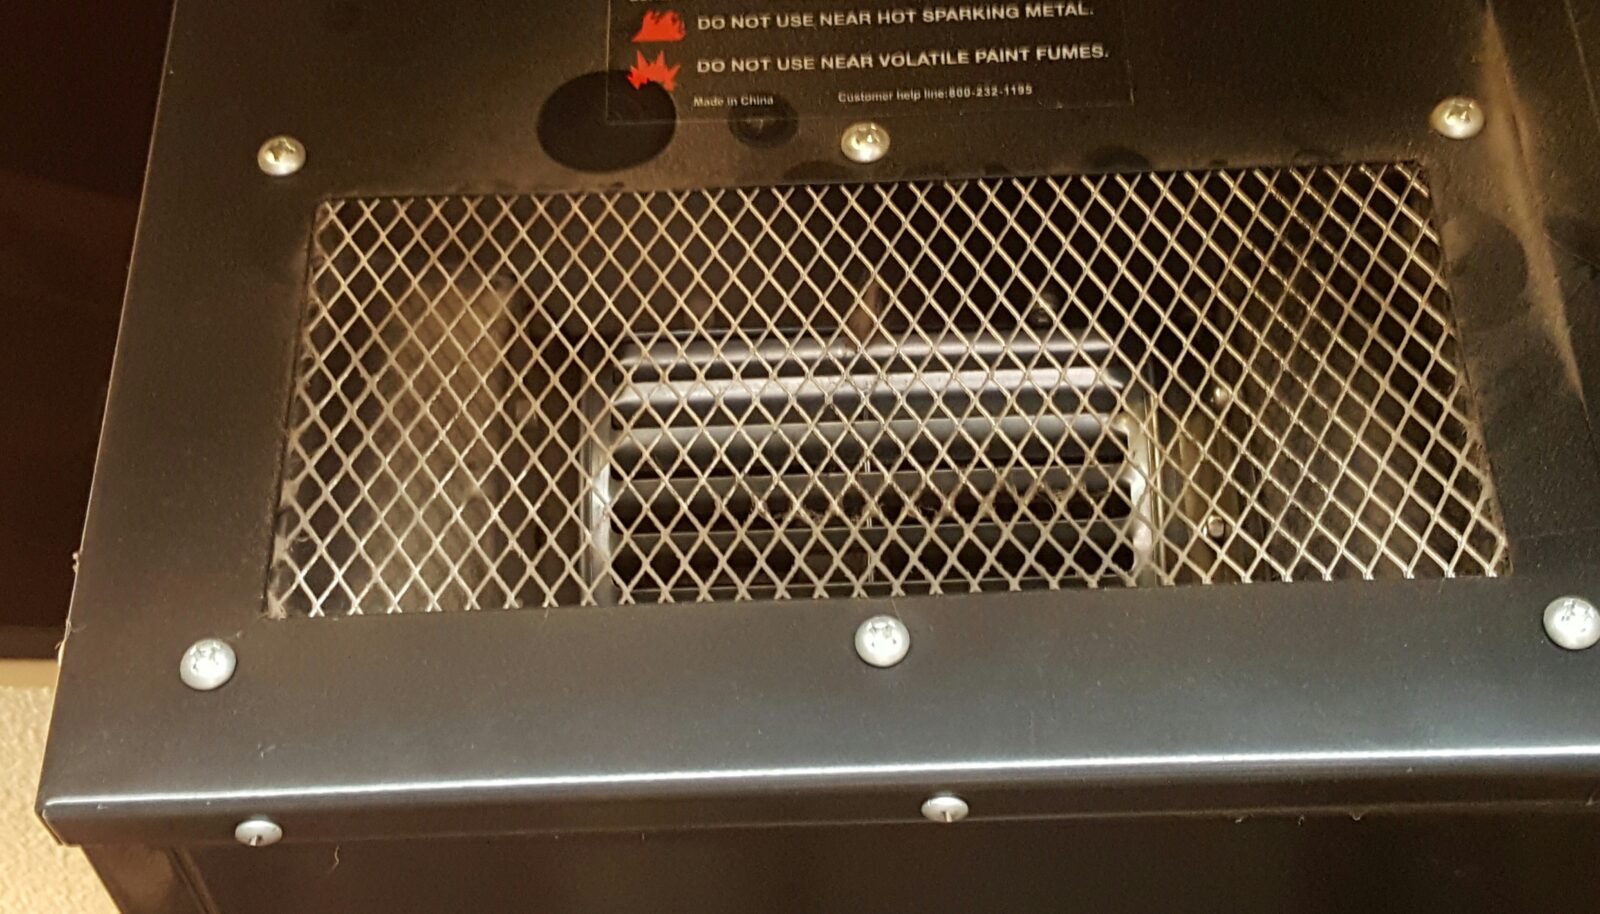
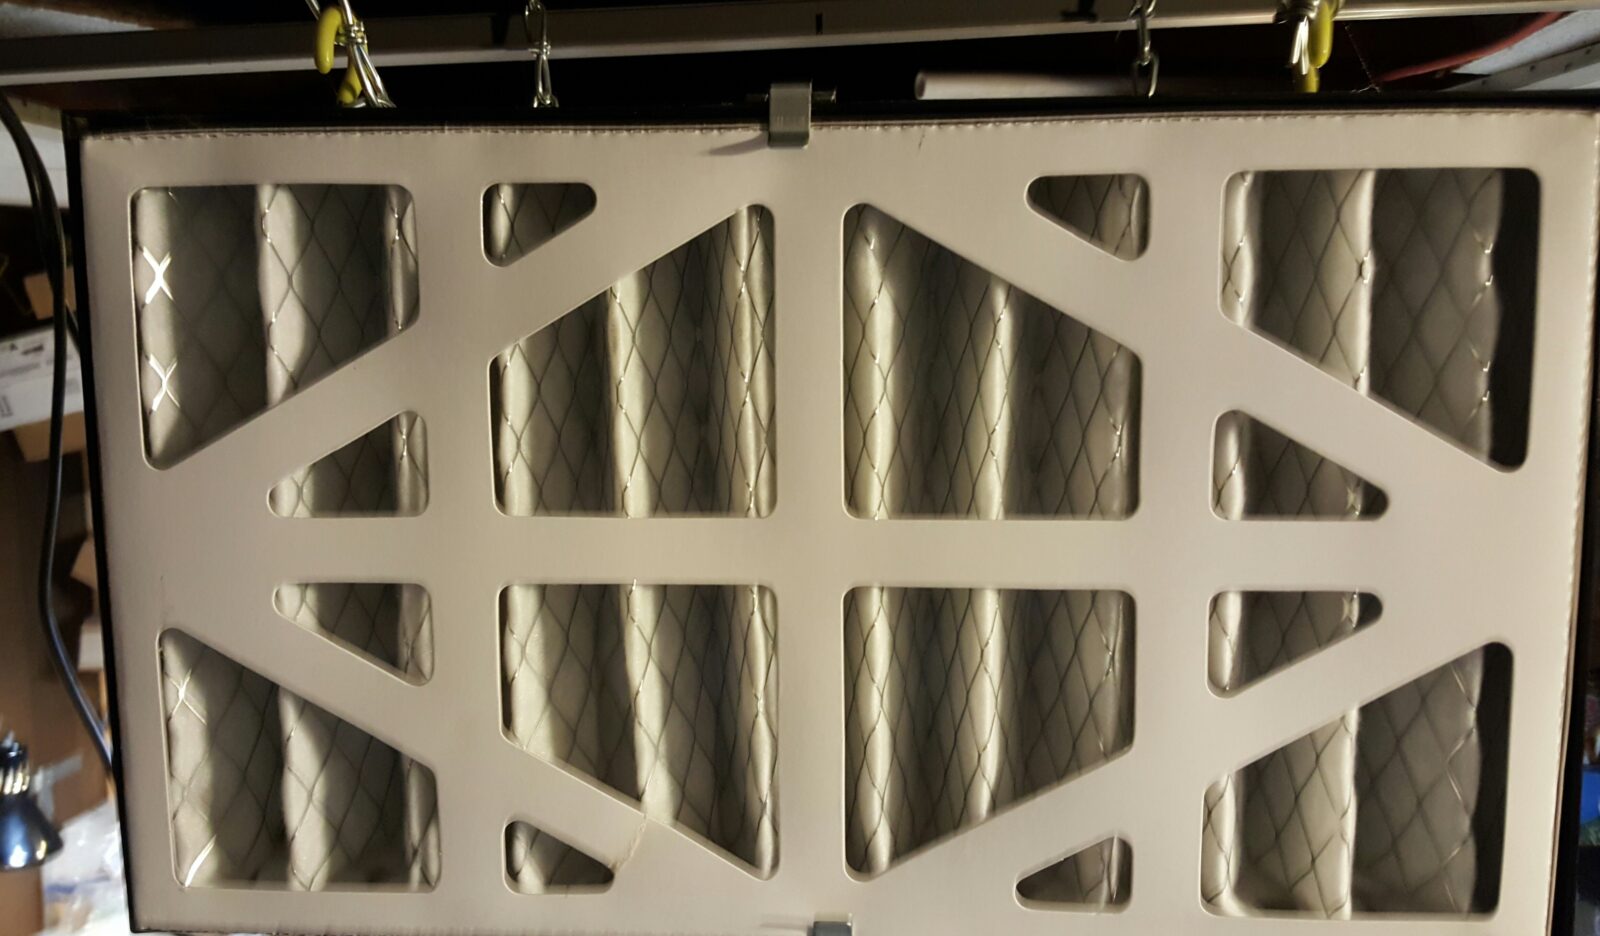
The next photo is telling – this is the exhaust side of the Wen. After using the unit for over a year with a ton of hours, look how clean it is. I have never cleaned it. That gives you an idea how effective the filters are.
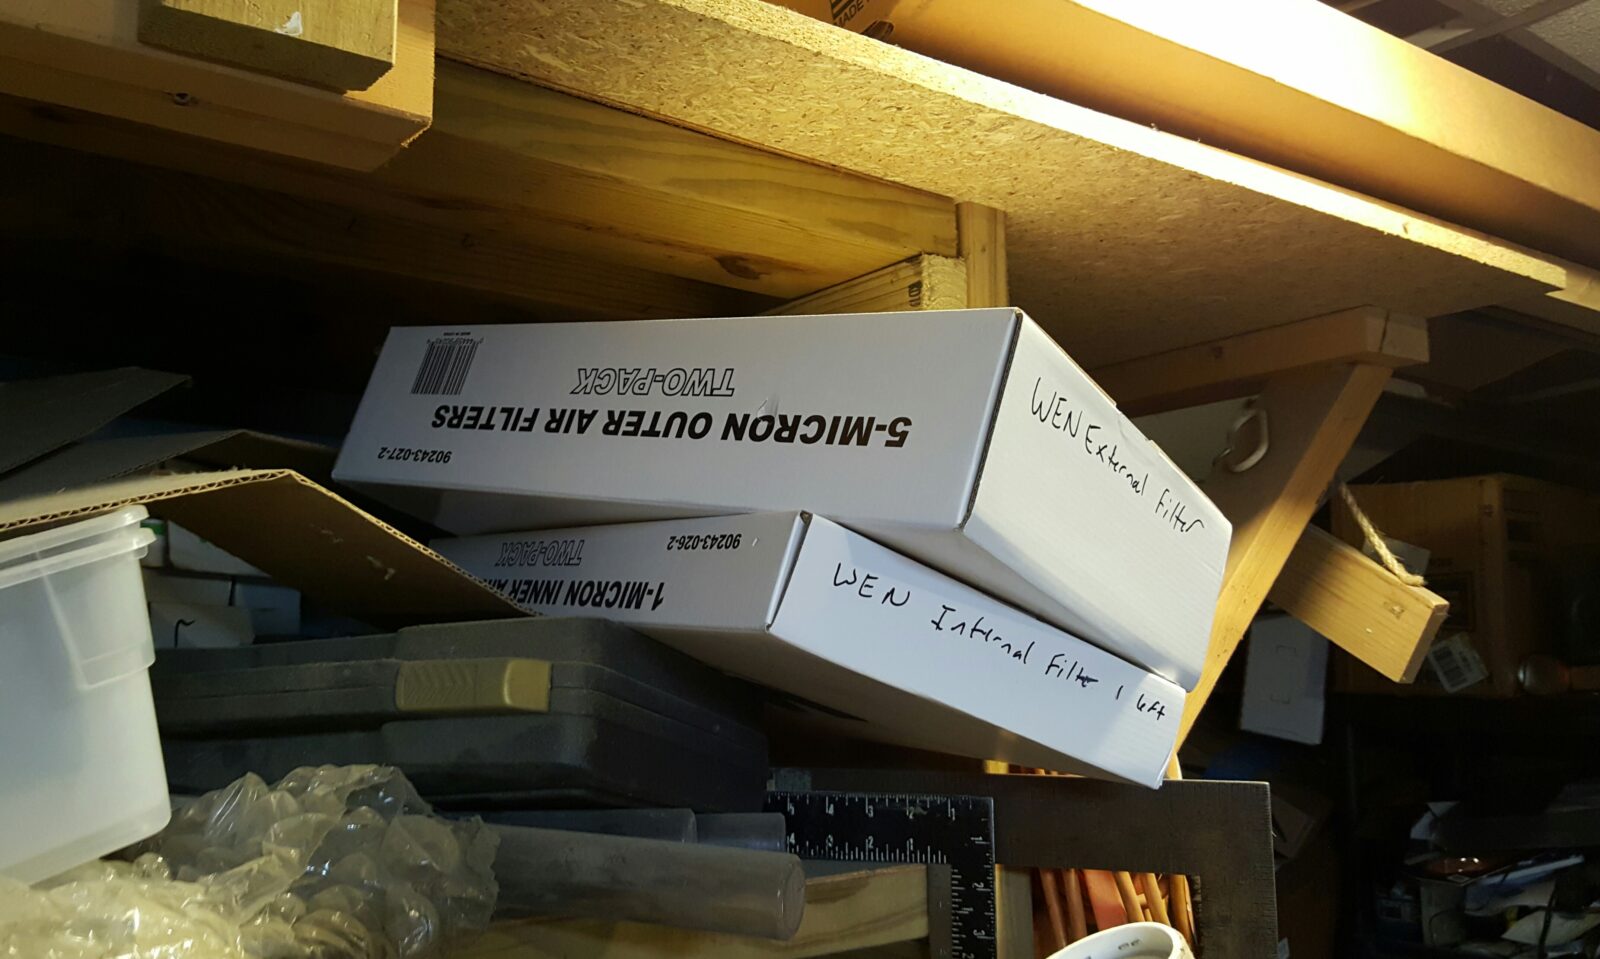
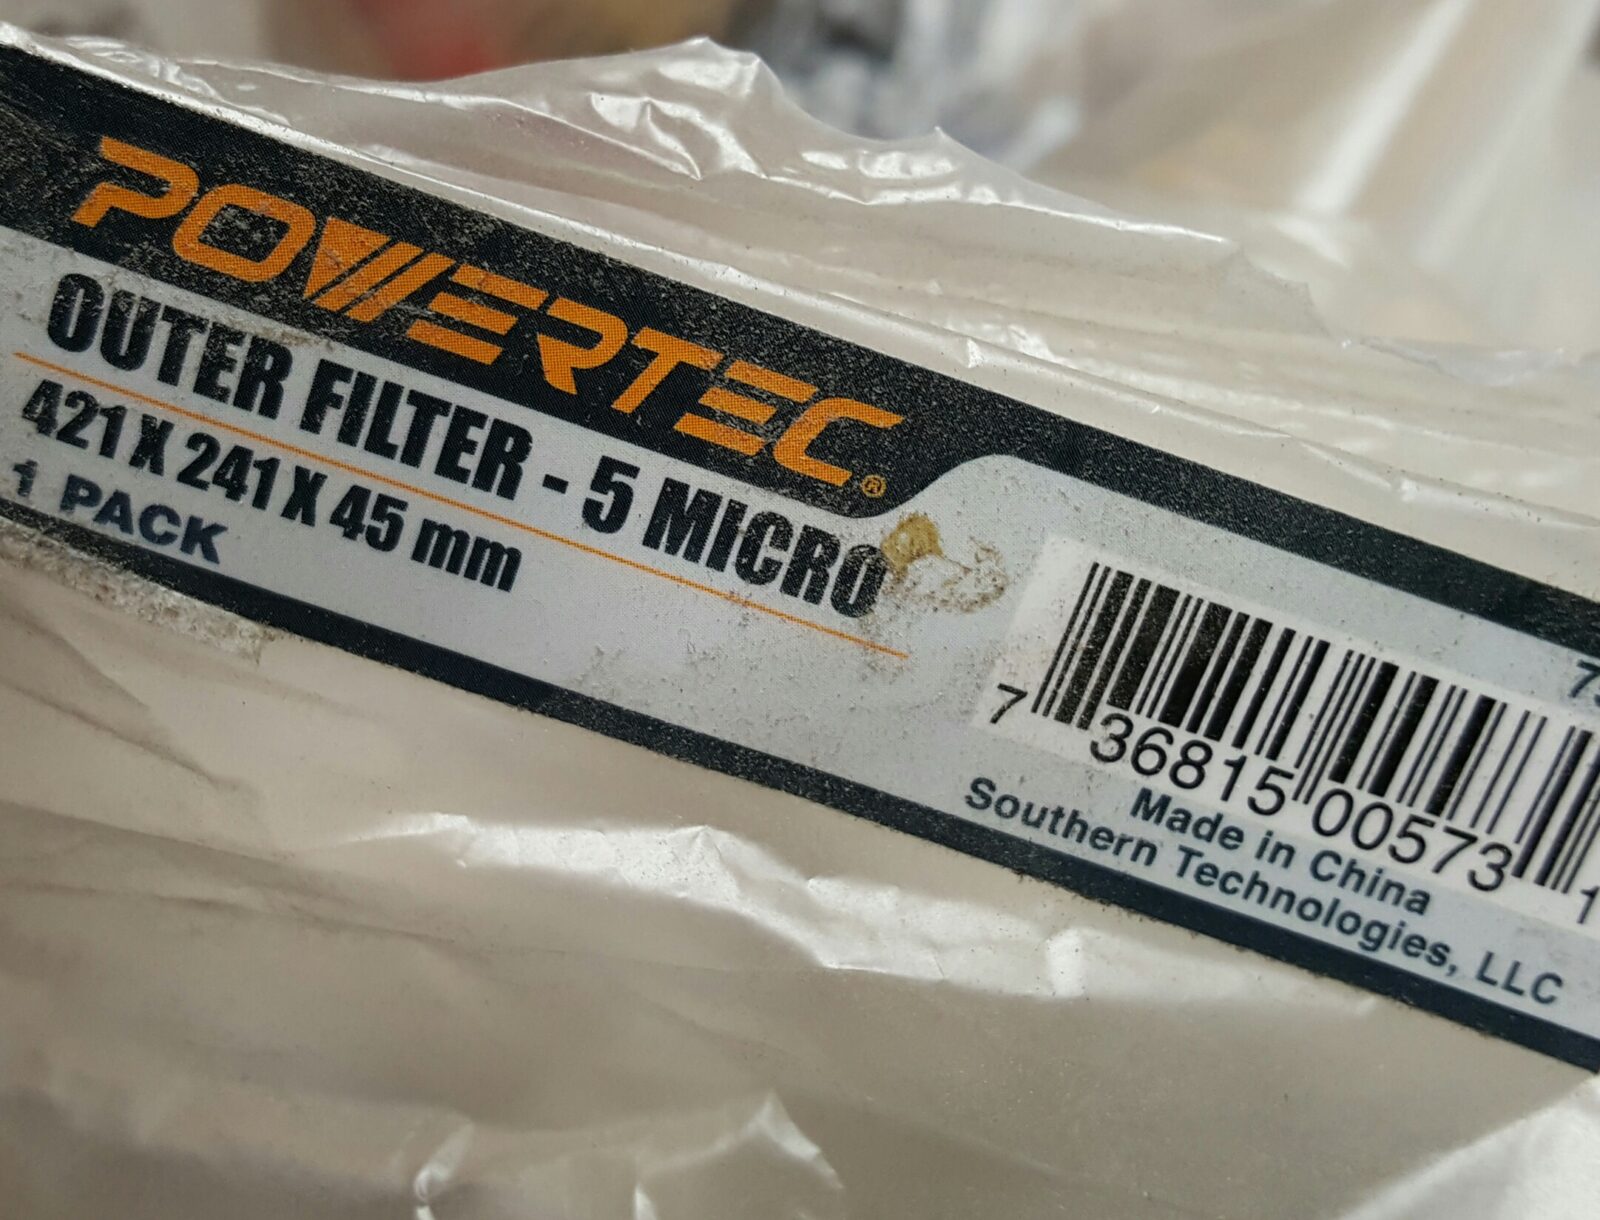
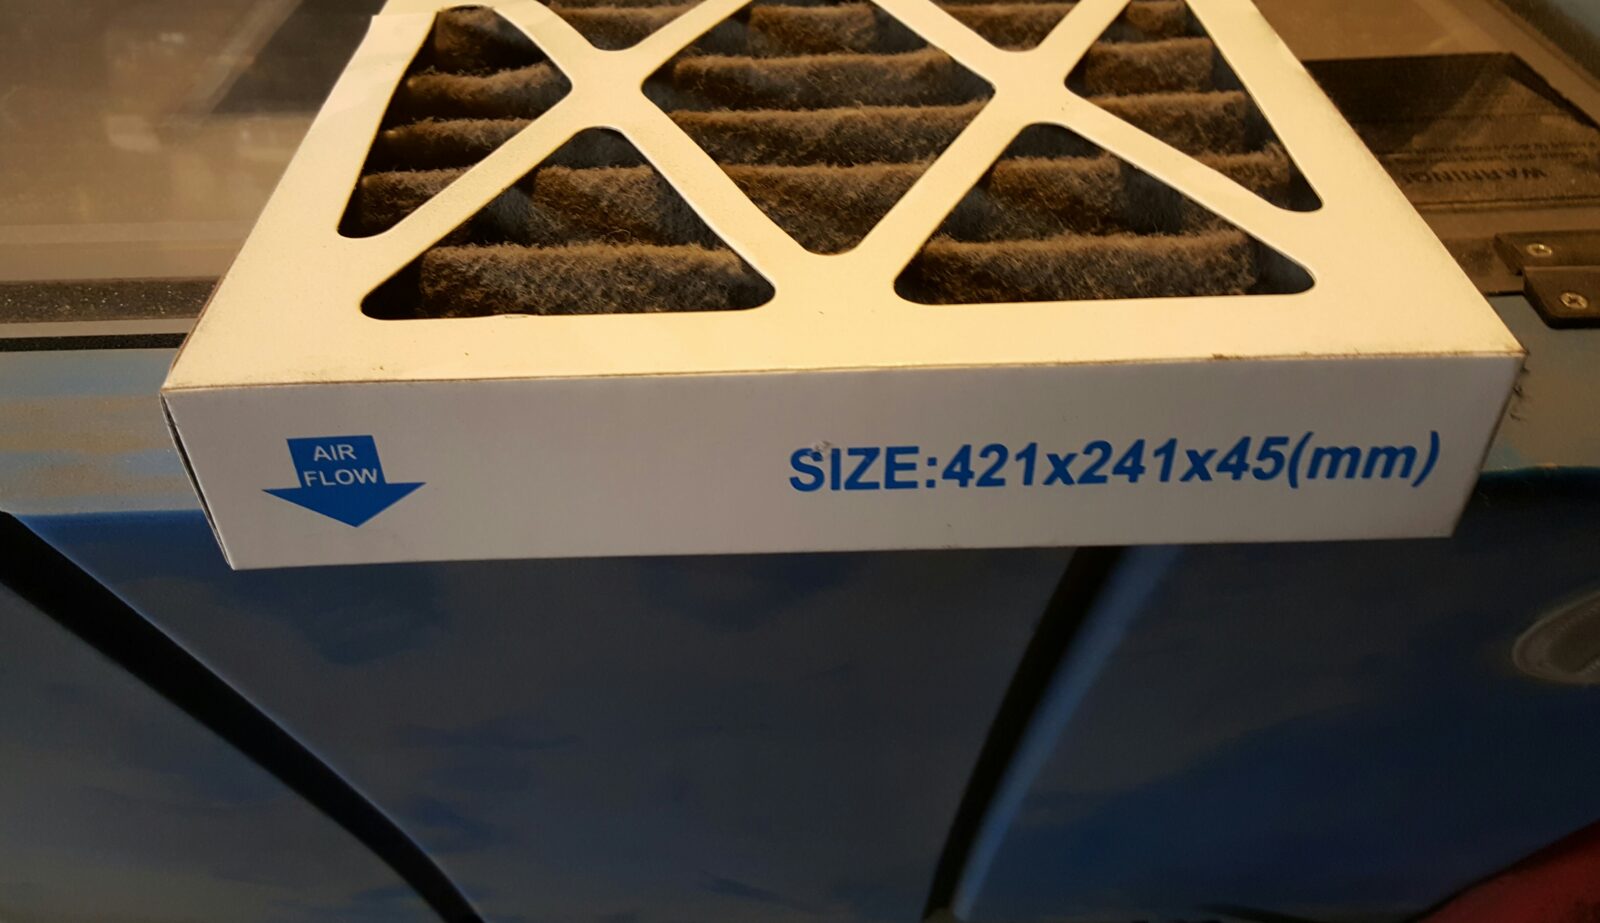
I go by the looks of the filters as to when I change them and I definitely keep spares on hand. The Wen brand filters come in two packs and I’ve noted some of the sizes in case you want to try other brands of external filter. For example, I used a few Powertec 421x241x45, 5 micron external filters worked fine. In general, I try to use Wen. I have only used Wen for the internal 1 micron filter but have seen other identical looking filters but have not tried them. Note how white a new filter is (that is a new Powertec in the machine) vs. the filthy used one sitting on the blast cabinet.
So, I am very happy with the Wen and am actually thinking about a second for the other end of the shop. If you are looking for a fine air filter, I’d recommend this one for sure.
2/22/2018 Update: The Wen is still going strong. No problems at all and I’m still very happy with it.
1/2/2019 Update: Still going strong. No problems.
5/21/2019 Update: Still using it all the time. This has really held up great.
2/19/20 Update: Still holding up great. Just replaced all the filters.
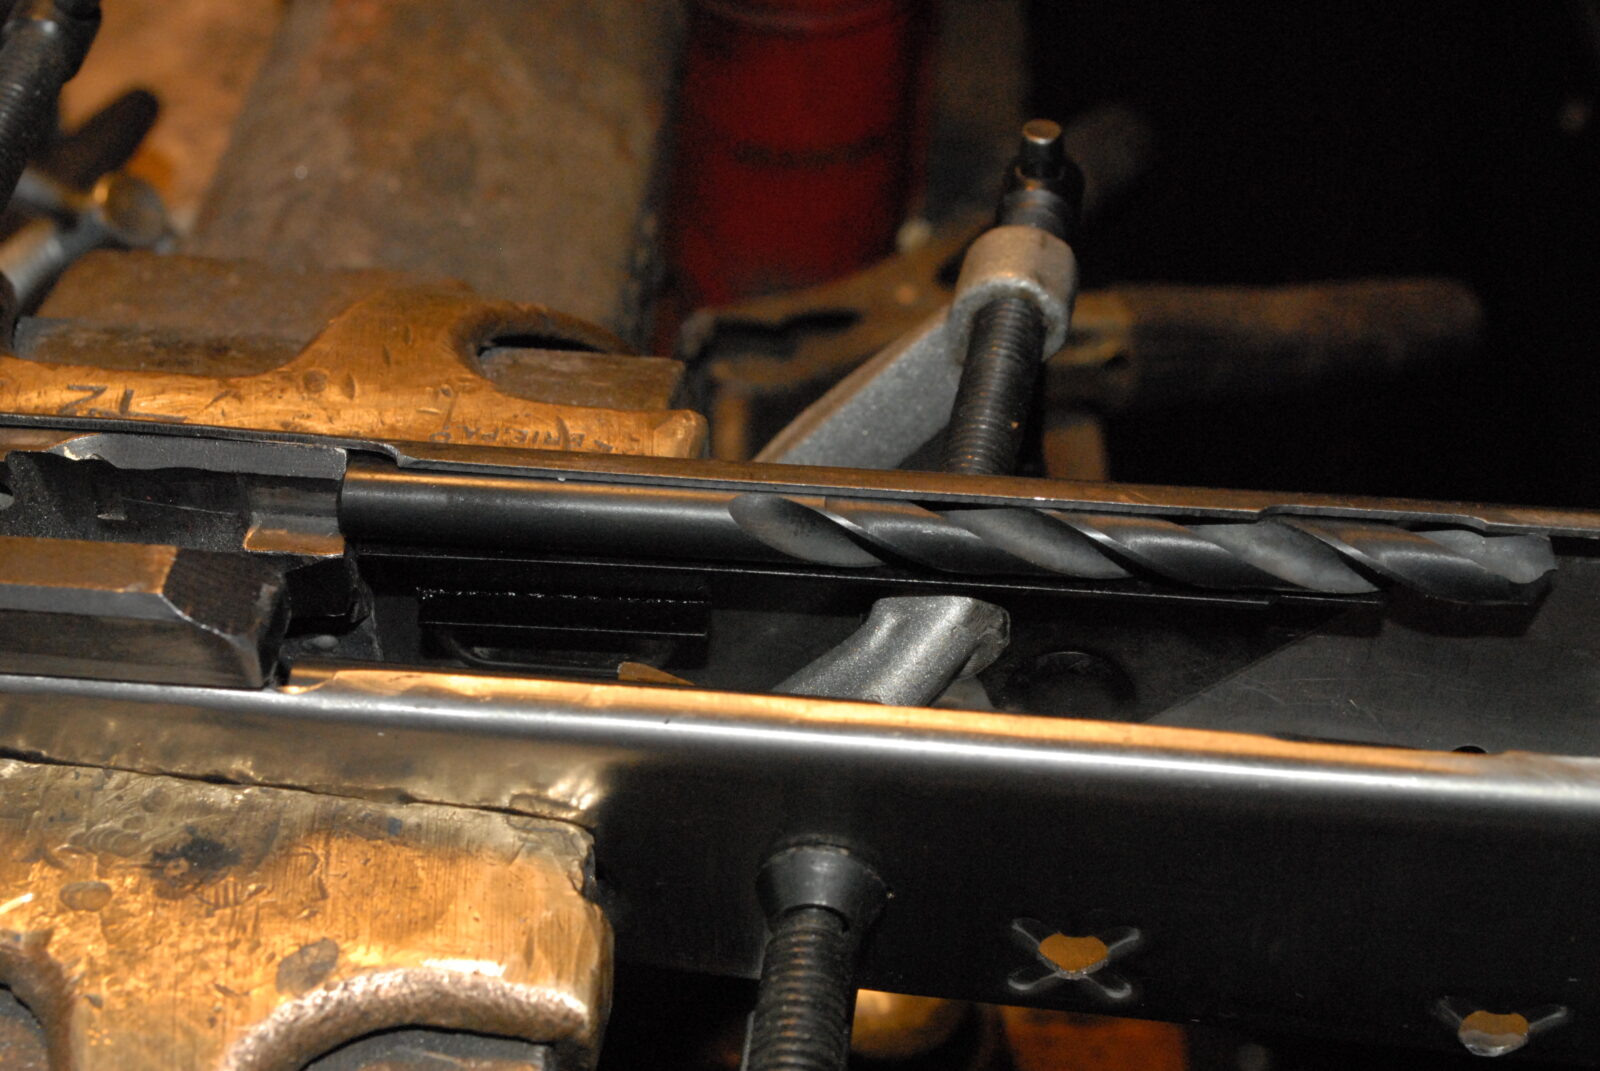
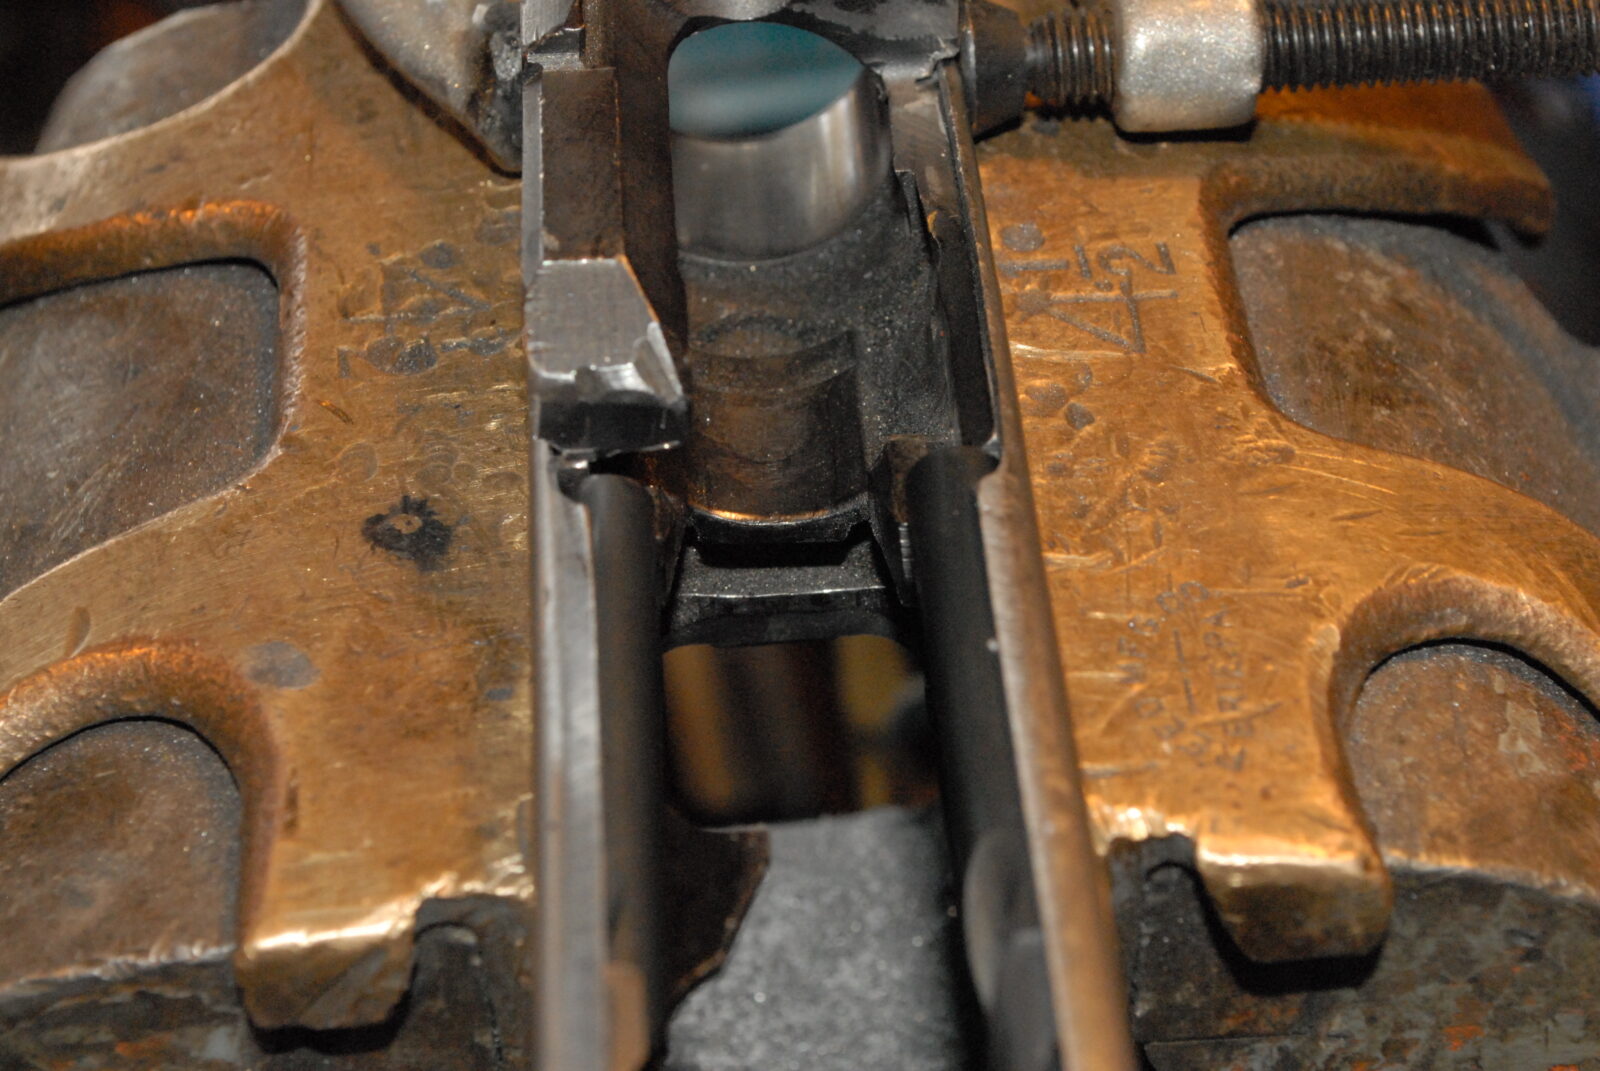
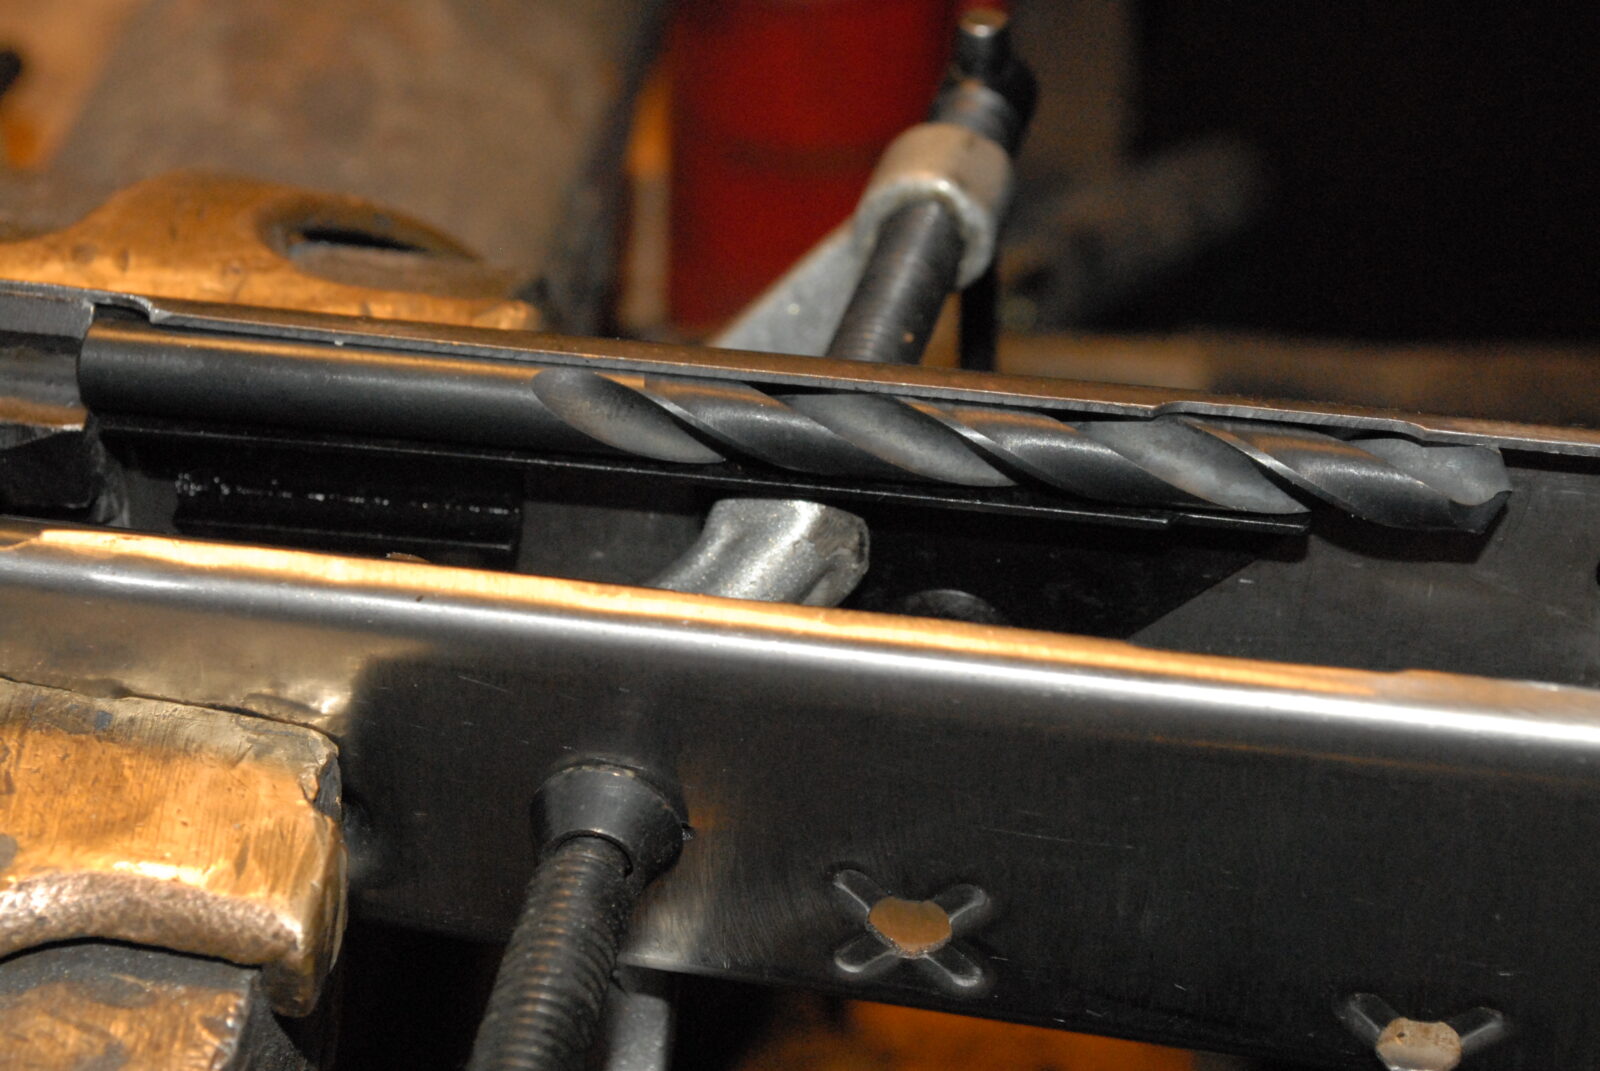
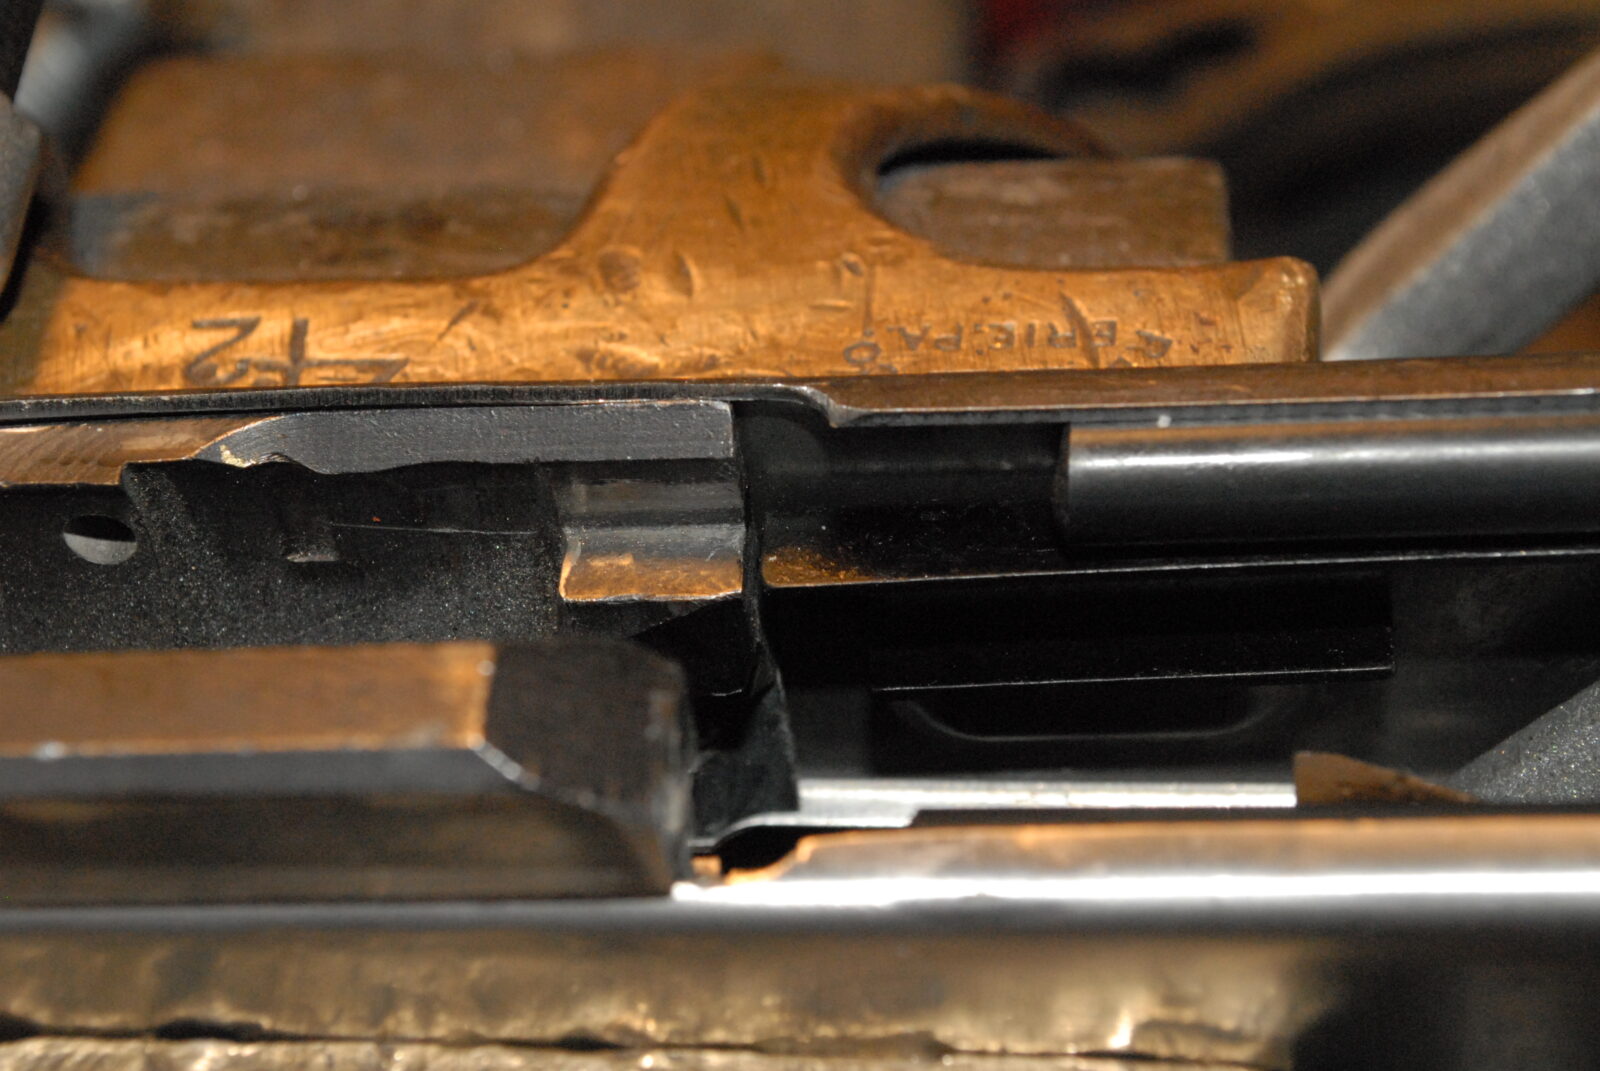
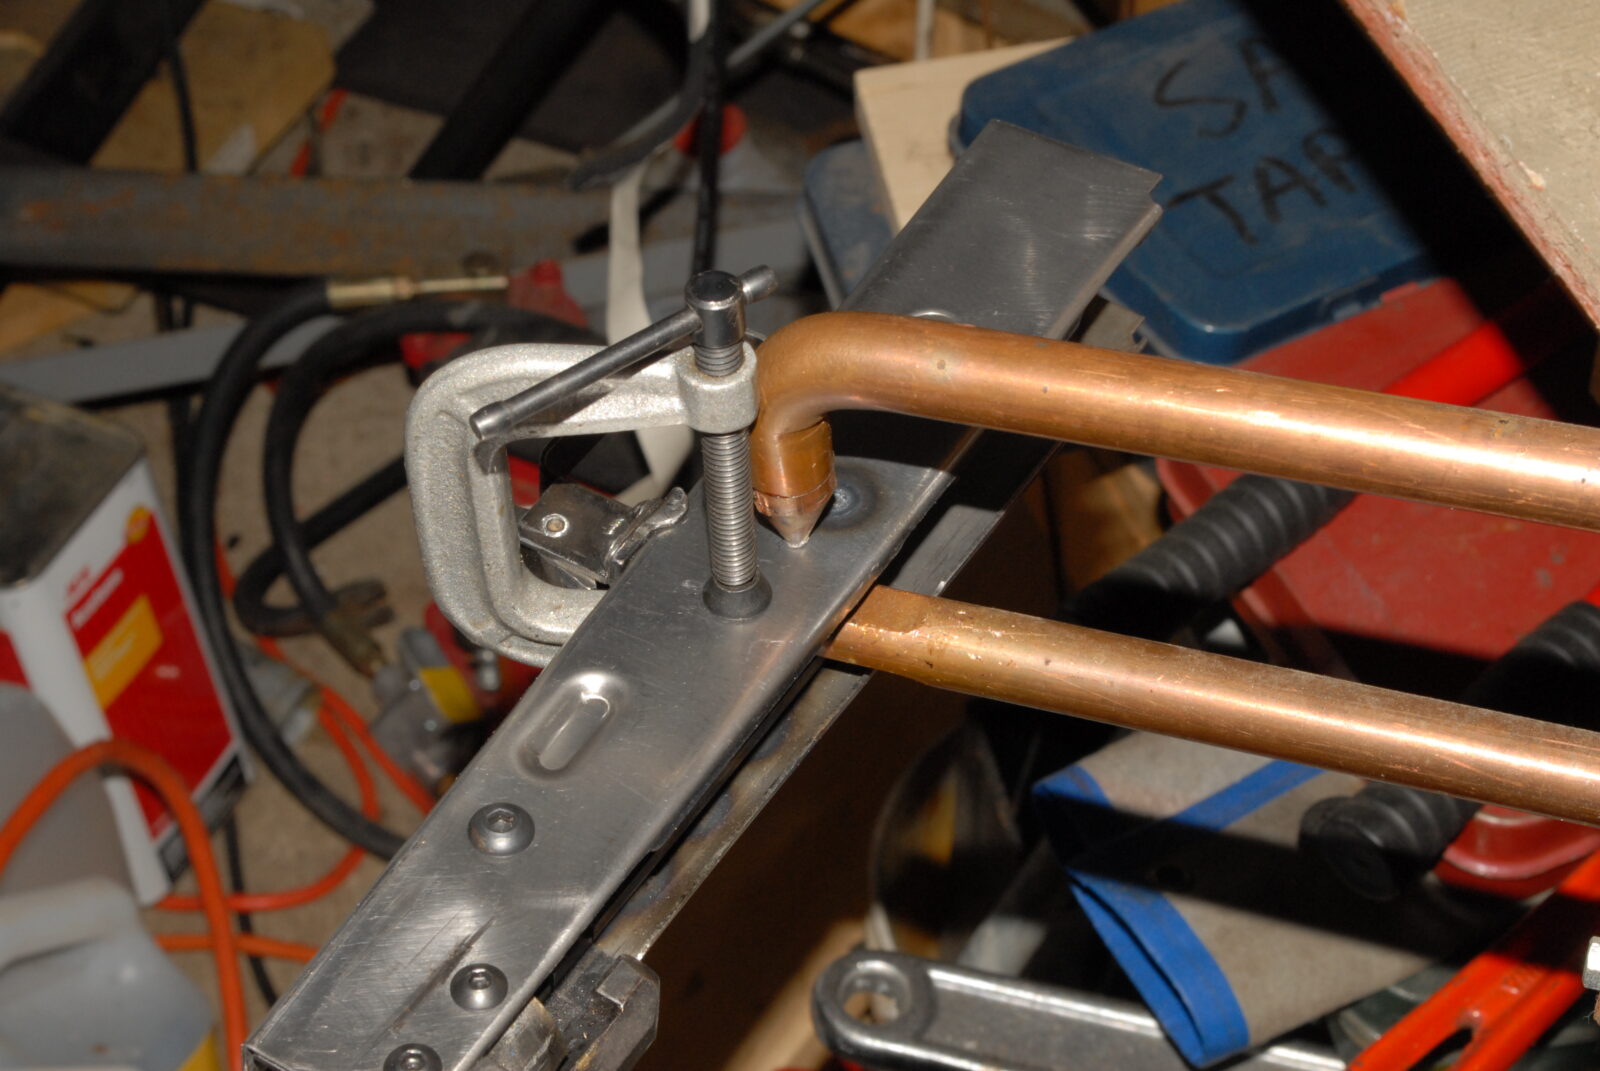
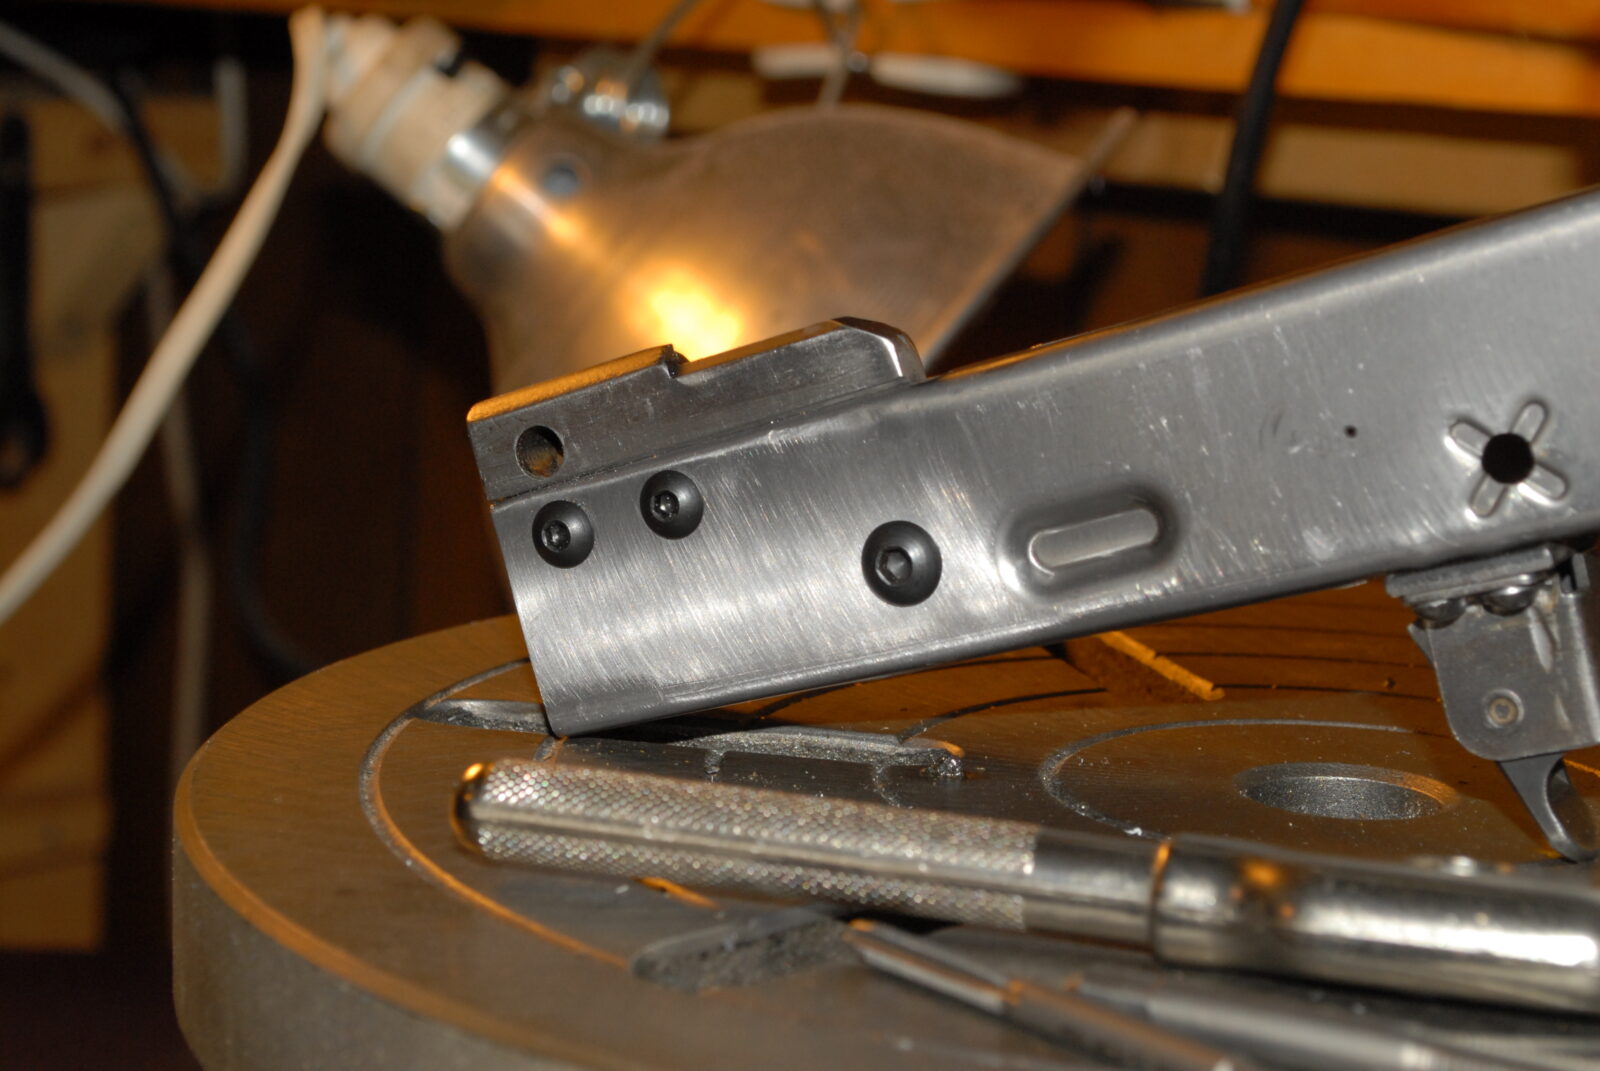
I heat treat the lower rails before I install them. The best way I found to align the lower rails in a flat so they were both parallel with the upper rail and aligned with the trunnion was to use a drill bits of the proper size to locate the lower rail and I would then clamp the lower rail in place prior to spot welding. This is one of those things where you want to check and double-check prior to and after each weld to make sure nothing shifted on you.
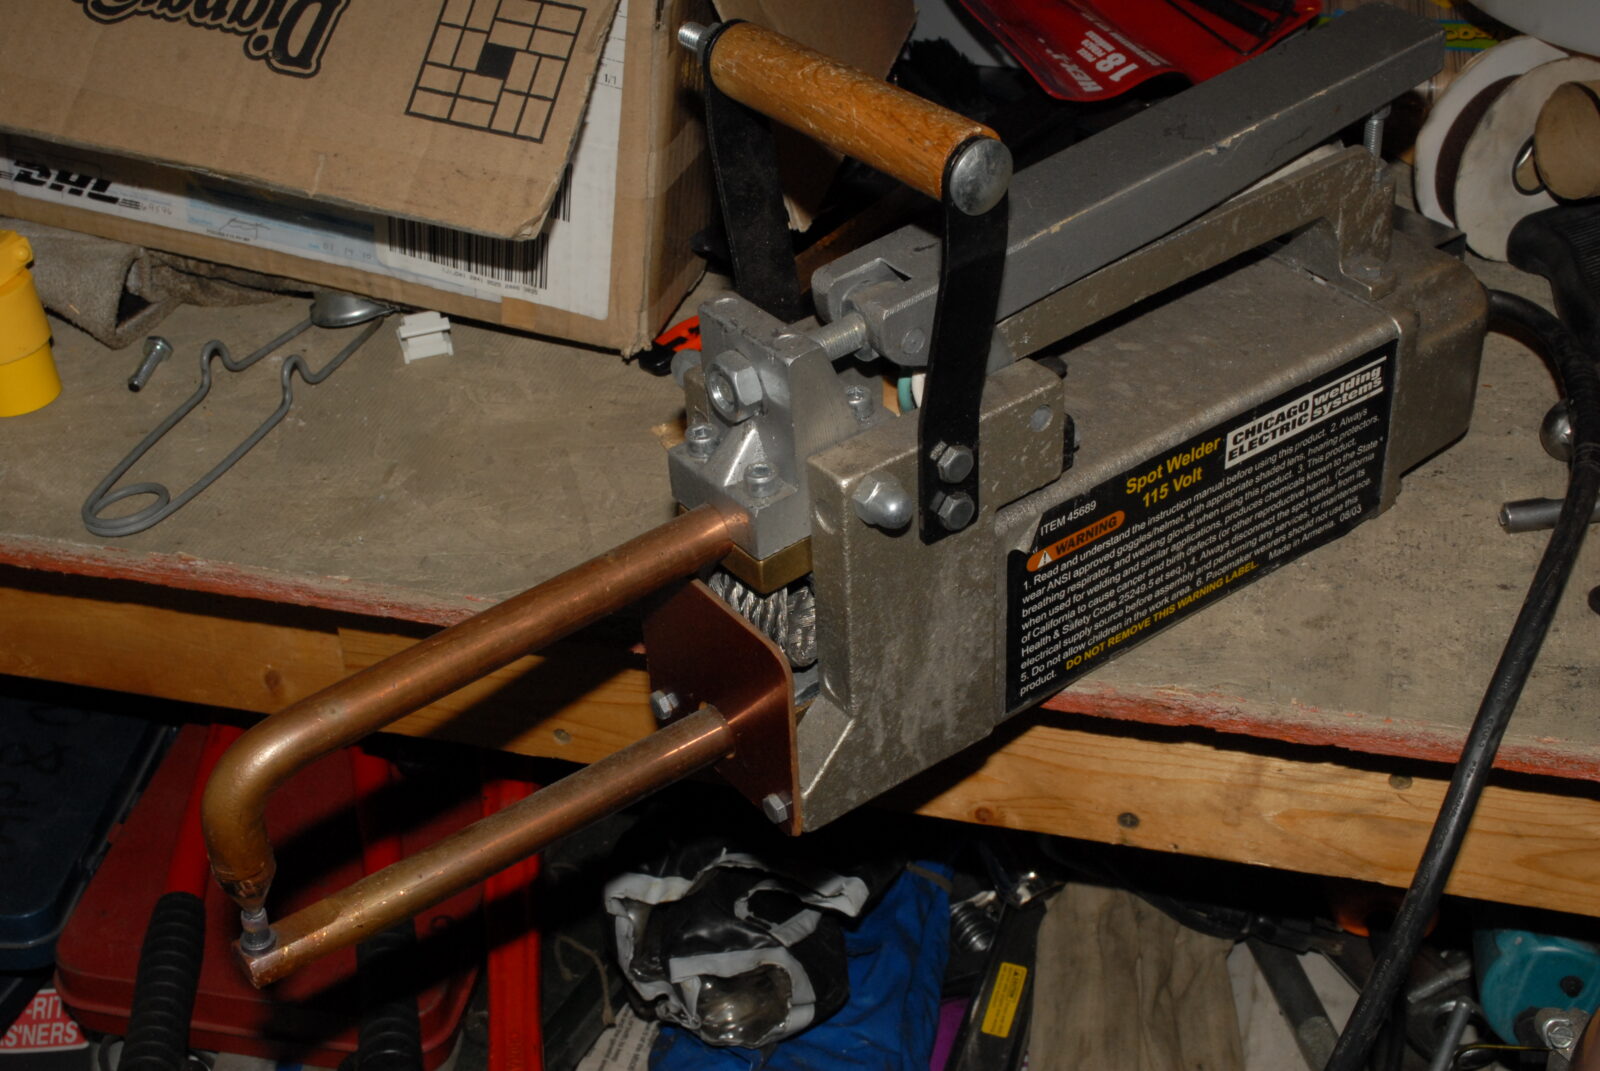
I use a Harbor Freight #45689 115 Volt spot welder with AK-Builder upper replacement tong and also tips. It’s lasted me through quite a few builds over the years and is still going strong. The tong makes it way easier to reach in and make the weld and the tips make the spot weld look a lot more like the real ones. I have had to replace the tips once so far, just FYI. You need to keep them clean to be most effective.
For beginners, there is no way to tell you how long to clamp and trigger the current for – many factors can affect how long it takes to heat the steel up enough for the two pieces of sheet metal to weld together. You need to practice and you’ll notice the color, sound of the welder. the amount of time it takes to get a good weld and especially the feel of the clamps as they come together during the weld. With practice you’ll feel when you have a good weld especially but it all adds up but you need to actually do it to learn.
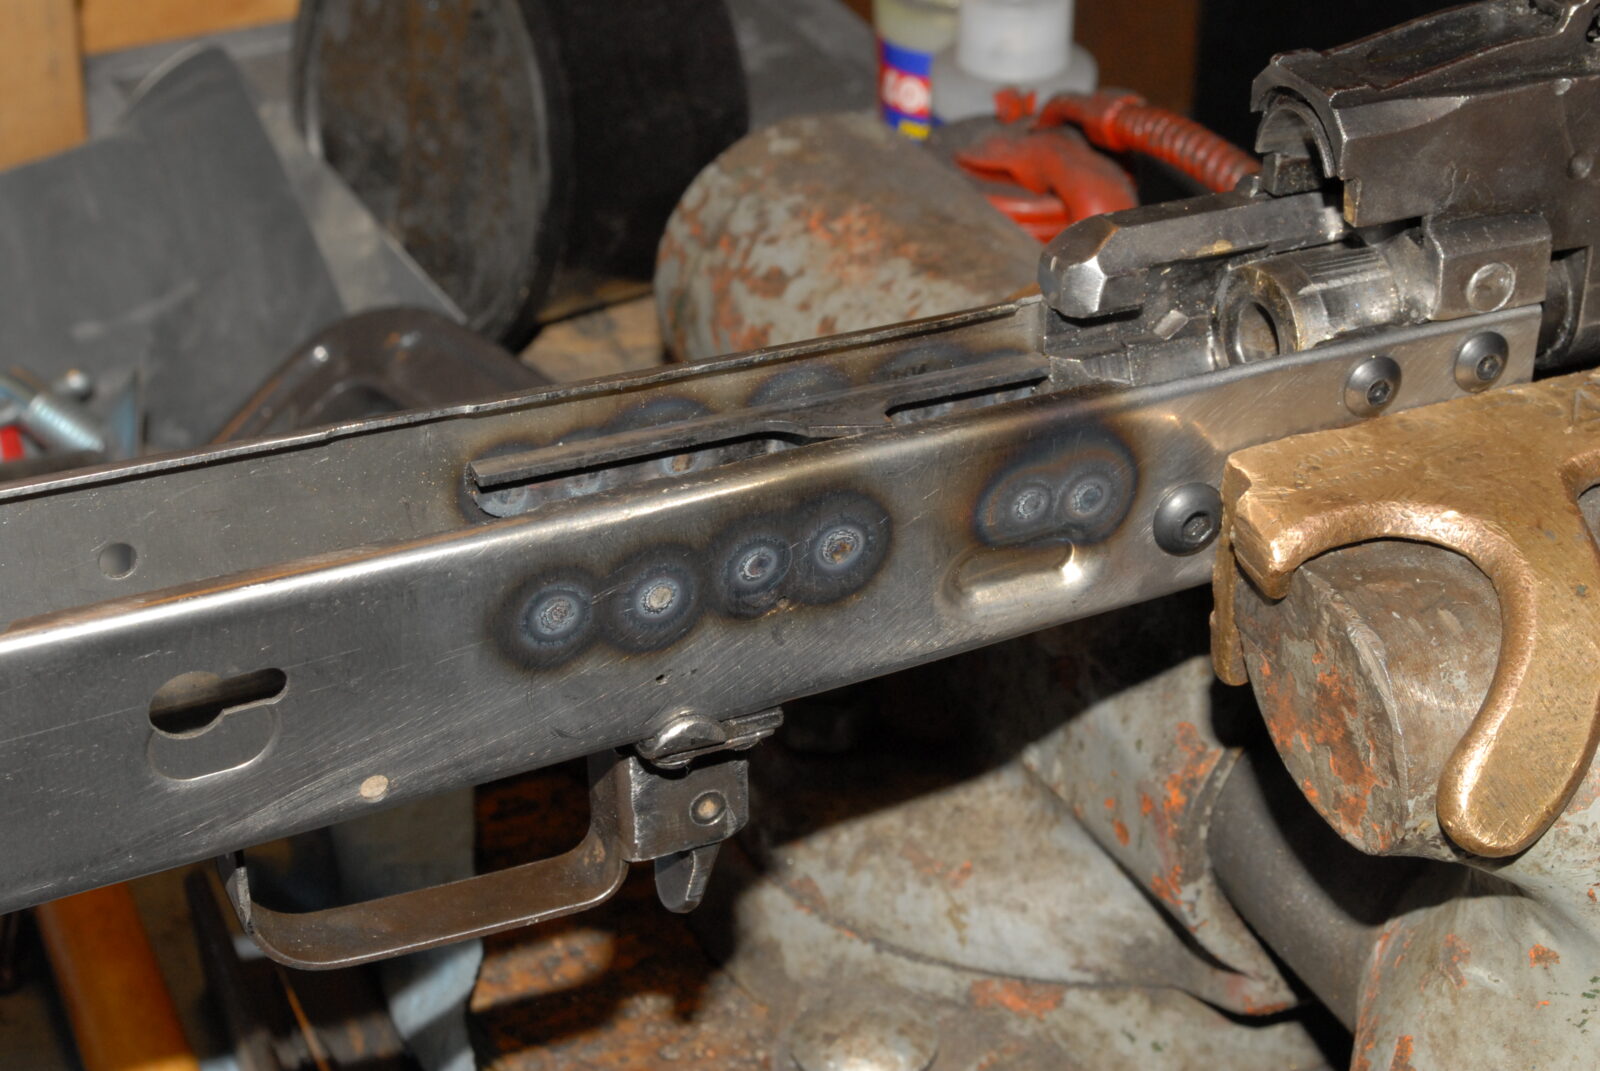
Get scrap metal of about the same thickness to practice with. AKM receivers are 1mm thick. 18 gauge is 1.02mm so it is good to practice with and old scrap receiver stubs are another. With your first practice weld, go long and let the pieces really melt together so you can see. You want to burn a hole to understand how long it takes, the sound and the feel of the tongs. Then practice with less amounts of time until you find the sweet spot. These welds should be pretty strong and not pull apart easy. I do more spot welds than most and some guys look at photos of the rifle they are building and try to approximate the count and location, which is just fine. One thing, if you do heat treat your rails before hand like I do, be careful you do not get the tongs up against the ejector and ruin the heat treat. I’ve done it and the tell tale sign is that the ejector will be discolored from the heat. If you do make this mistake you will need to heat treat the tip while it is in the receiver or else it will definitely peen over and be deformed in its softened state. By the way, the steel should be relatively clean also and not have tons of grease or other contaminants on it either that might inhibit a good weld.
Just double check alignment very carefully before you spot weld and also that your welder’s tong does not get against the ejector and ruin the heat treat – assuming you did that before installation.
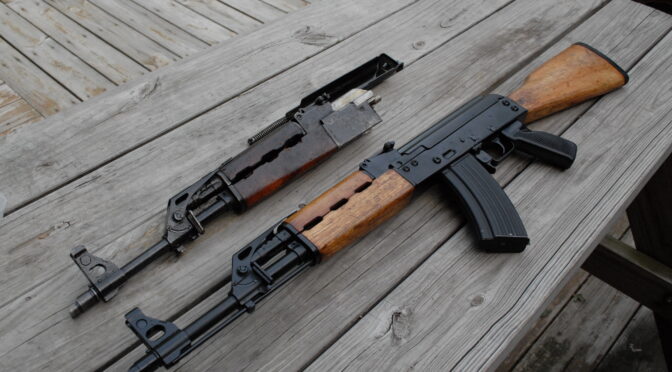
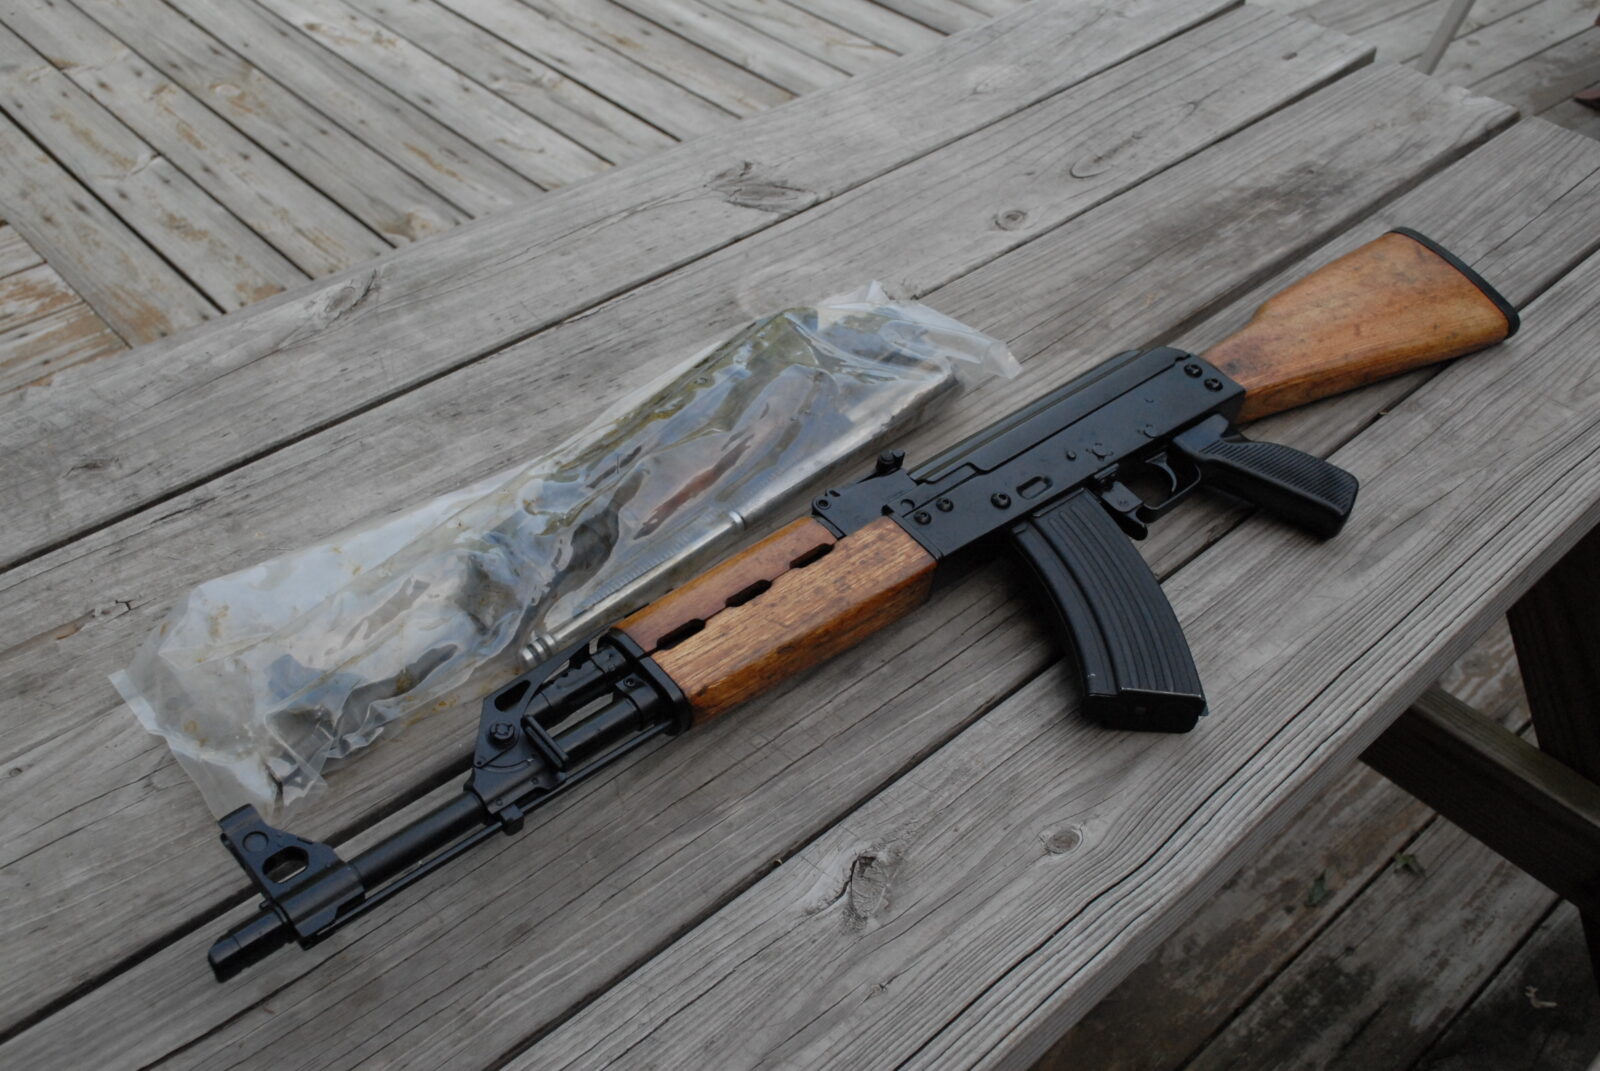
Let me open this article with a comment for people new to building AKs – the best proven method is to use rivets. The Soviets did a lot of testing and the best mechanical join of the forged trunnions to sheet metal was a mechanical rivet. To this day, all commercial and military AKs are built using rivets. In my journeys, I have built AKs using welds, screws and rivets – all have pros and cons. What would I build an AK with that I care about? The answer is easy – rivets. This blog post documents my building a prototype using screws. Has it held up to casual non-military non-full-auto use? Yes. What would I recommend to you to build your AK? The answer is rivets.
In a previous post I described taking a milled stub and welding it to a sheet metal receiver. Another approach is to drill, tape and use alloy screws. So, let’s talk about that a bit. I did this build back in 2010 also. I actually still have the rifle and it’s one of my most reliable AKs. It takes about any ammo I stuff in it and I don’t recall ever having any issues.
For those of you who are wondering why I didn’t do rivets – I was bored and wanted to try something different plus this is a range gun and not something mission critical. Here we are 7 years later and it’s still doing fine – no cracks, no loose screws … but it isn’t stressed either. When in doubt, do rivets or a milled gun.
Also, bear in mind that the front trunnion was made from the milled receiver stub so screws made it real easy.
In terms of this build, I milled the trunnion down the same as I did for the weld build. I used my Hungarian AMD trunnion as an approximate guide for locating the holes and used two #10 screws for the front top and a 1/4″ for the rear. In both cases, I opted for national fine. 10-32 and 1/4-28. So, for 10-32, I used a #21 drill bit to make the hole and for the 1/4-28, I used a #3.
For drill locating and drilling the receiver holes, I used the AK-Builder trunnion rivet locating jig. You just put the trunnion on the jig, locate the hole, slide the receiver on and drill the hole.
Now for tapping, being square is a good idea. I squared my table to the drill press’s chuck and used it to hold the tap. I use Tap Magic cutting fluid to lubricate everything.
For the screws, I used alloy button heads and secured them with red thread locker. I reached in with a Dremel and ground down protruding screws.
So there’s the front. I used an air riveter to do the trigger guard.
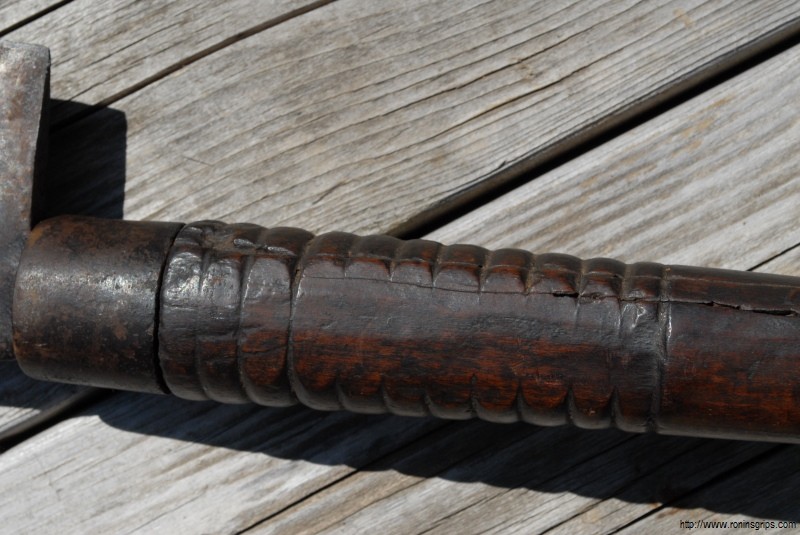
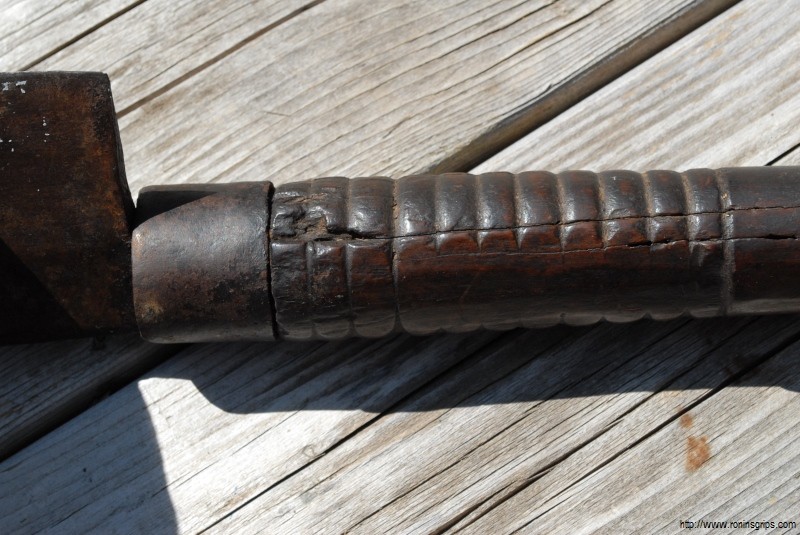
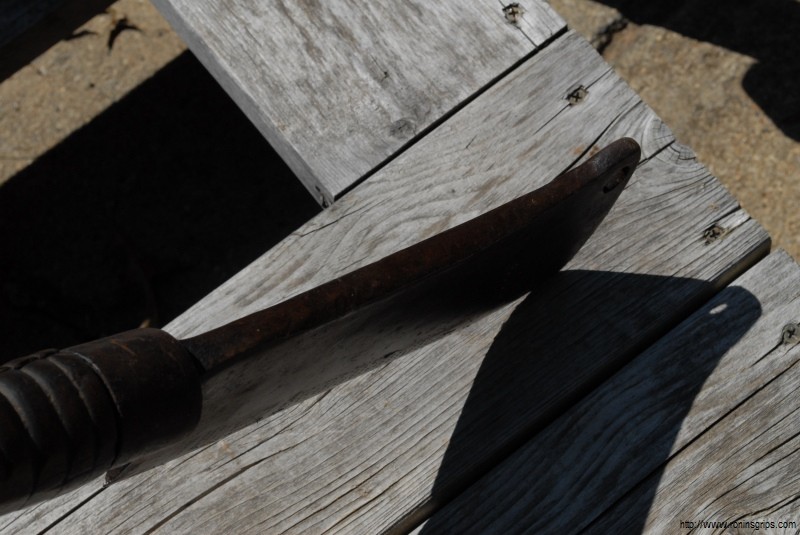
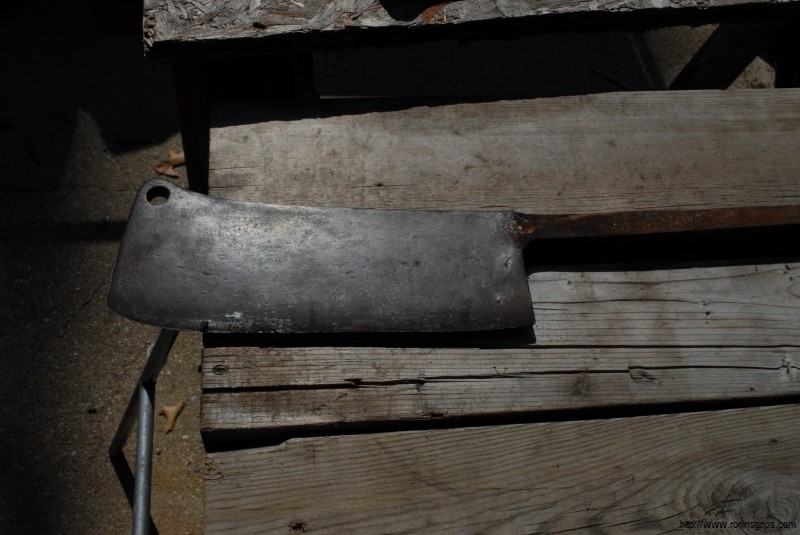
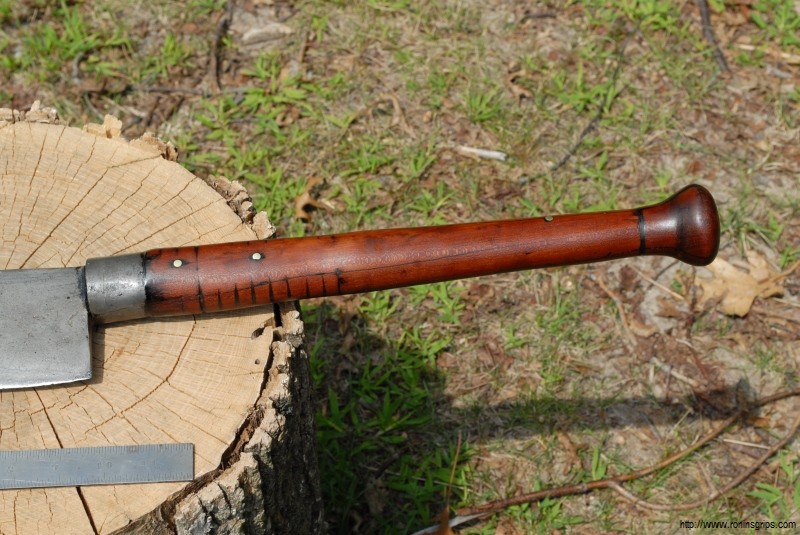
Everyone needs a hobby. I guess mine is creating or fixing things in my own way. Back in 2014, I bought an absolutely massive beat to hell 24-1/2″ hog splitter off eBay. This thing was absolutely a diamond in the rough. Clearly it had been used very heavily – probably for decades – yet there was an amazing design in that beat up cleaver as well. First off, the blade was almost a half inch thick and it weighed about five pounds. Back in the days before machinery, you need mass to butcher big animals and this was (and still is) the most massive cleaver I have personally worked with – imagine a baseball bat with one hell of a heavy end is what it boils down to.
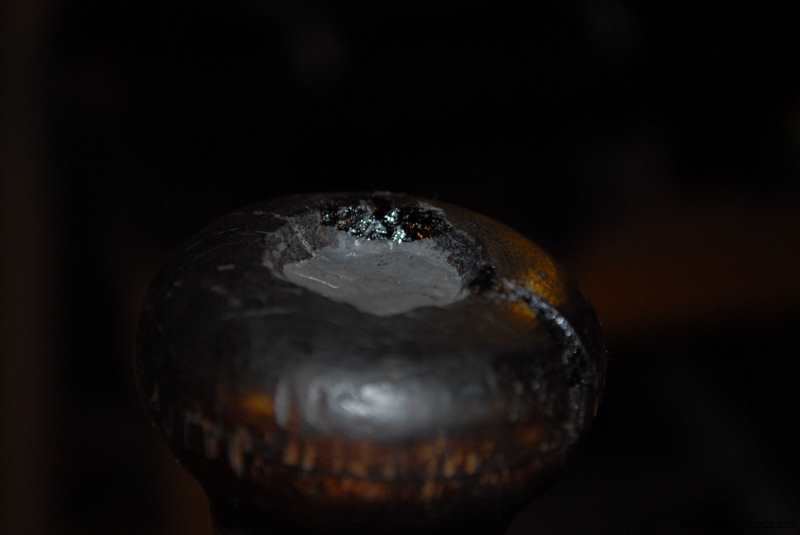
In the eBay listing, the seller was up front – this thing was on its last leg. The wood was all busted up, dirty as heck and the blade was loose. Of course, I had to buy it! Here’s what it looked like when it arrived. Why I did not get an overall photo at the start, I do not know.
There were no maker’s marks anywhere but it was too professionally done to have been a village blacksmith. I still wonder who made this as I would love to track down more of them. If you have one, or find one, and are interested in potentially parting with it, let me know. I’d even be happy with just the giant blade.
Getting back to the story, I had to look it over and take stock. This thing was stunningly heavy and the wood was busted up because it was thin and hollow.
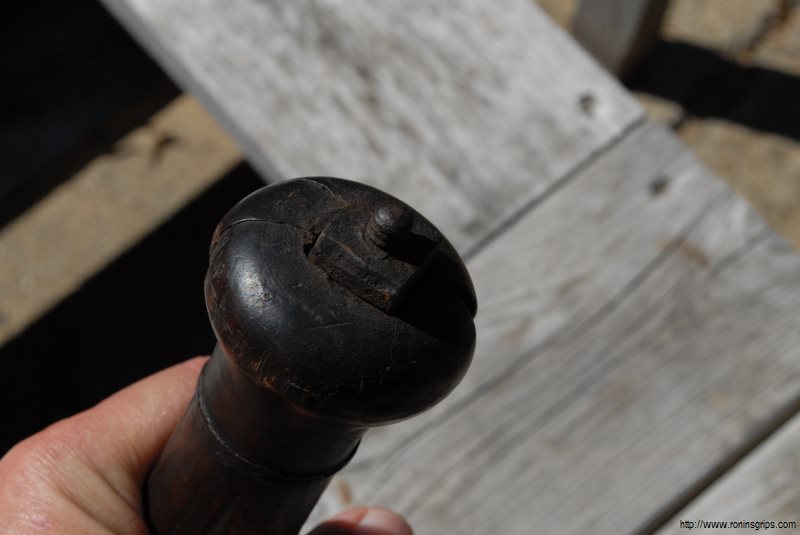
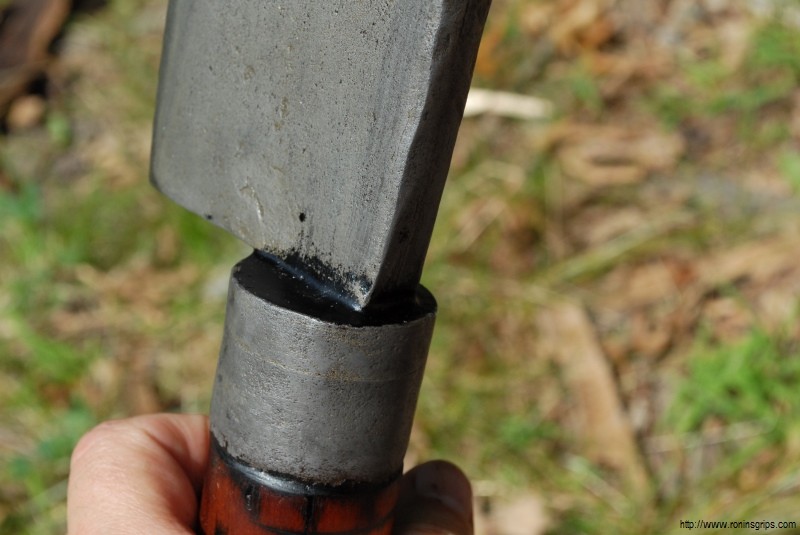
There had to be more than what I was seeing so I broke the frozen on nut and pulled the handle off. Wow. There was the largest rat tail tang I had ever seen – and still haven’t seen one bigger!! That’s how they spread the load. What an interesting design.
Now, the wood totally intrigued me. There was something about the color that caught my eye so I decided to fill it with glass reinforced epoxy. Now not all epoxies are equal. When you do structural work like this, you need an excellent shock resistant epoxy. My go to epoxy for stuff like this is Acraglas liquid epoxy from Brownells.
I but it in quart bulk containers and meter it out using syringes or a digital scale. I use 5/32nds milled glass fibers and black dye to color it. Fortunately, it’s the same dye I use for my plastics but you can either buy from Brownells or elsewhere. So, over the course of several days, I mixed, poured and let it sit overnight as it takes Acraglas 24 hours to cure so this work is done in steps.
I used wood stripper to try and get all the grease and oils out of the handle plus I drilled open the end to fill it easier. By the way, if you heat epoxy with a heat gun, it will get thinner and flow more readily until it cools. Gentle warmth also accelerates curing of the epoxy but remember that just because epoxy feels dry to the touch does not mean it has fully cured – read the instructions for whatever brand you go with.
Next, I sanded, sanded and sanded. The wood was very interesting – maybe a cherry or mahogany. I’m not really sure.
The rat tang was HUGE. I carefully marked where it was at and drilled holes for two brass pins just to play it safe. I’ve never had Acraglas let go from a clean prepped surface but never say never. The pins are a cheap insurance for a giant blade like this. I inserted the 3/16″ pins with epoxy and then added epoxy to all the imperfections followed by more sanding. Notice how I blasted the pins before gluing? Epoxy always, always, always does better on a rough surface. Do not epoxy two shiny metal surfaces together and expect them to last – they probably will not.
Now this took my breath away. I used a 50/50 combination of turpentine and boiled linseed oil (BLO), put it in a tank I have just for these big cleavers and let it sit for a few hours before I pulled it out. The color blew me away. Wow!! I wiped it down and then applied additional coats of BLO to seal it.
My last steps were to acid etch the blade (click here for our guide to acid etching), seal everything with BLO and then make a blade guard. Mission accomplished.
To protect the blade edge, not to mention protect other things from the edge, I made a protective cover out of 0.093 Kydex and 3/8″ shock (bungee) cord.
That bad boy weighed 5-1/4 pounds and was solid as a rock. I keep looking for another one like it. I never did find out where it was made but it sure was a stunner. This is another project that part of me wishes I had kept it but it went to a very happy new owner shortly after I finished it.
3/4/2020 Update: This is still the most wicked restored cleaver I have done. The wood was simply gorgeous.
The following is a real-time search of eBay using keywords that have worked for me in the past and I hope they help you find something (note a few odd items might show up just like any other search does):
Plenty of AK barrel have seen heavy use and some are pretty much sewer pipes at this point – blown out, dirty and most of the rifling a distant memory. A quick way to check is to take a cartridge of the correct caliber, such as 7.62×39, and put it in the muzzle. If it stops before the case hits, there is hope. It the case hits or even goes into the muzzle, the barrel is pretty much history.
Pass:
Fail:
I’m not saying the barrel is perfect but it may still be useful. I built both M70 stubs on their original barrels and they shot good enough – about 8-10″ – at 100 yards fired with iron sights with cheap ammo. Still a fun rifle to shoot though.
If a barrel fails, I would definitely get a replacement and not even bother trying to use it but that’s just me. I’ve known a few guys over the years that proudly built and fired sewer pipe rifles.
Some folks have asked how I get the dull grey look on khukuris that I used to work on. The answer is simple – apple cider vinegar straight from the grocery. I’ve also experimented with various ratios of Prep-and-Etch, which contains Phosphoric Acid, and gotten a darker color but apple cider works remarkably well. Apple cider vinegar contains 5-10% acetic acid (CH3COOH) depending on how it is made. For example, I read that Heinz is about 5%. My local store carries Spartan brand, which is their store brand, and it works just fine – again, this is apple cider vinegar from the grocery store.
This process only works with steels that can rust. For example a mild steel or high carbon. It will not work on stainless, aluminum, etc.
Safety Notes:
I would recommend doing this outside or some place very well ventilated or else if the acetic acid condenses on metal surfaces in your shop/garage, it will cause rust.
Wear safety glasses and don’t goof around with the stuff. I’ve never had a problem but probably need to say some kind of warning here.
Process:
Clean the part and remove all oil and grease. Either hose it down really well with brake cleaner or soak it in acetone. Any oil, even from your skin, will mess you up.
Abrasive blast the part – I use “The Original Black Beauty” media that I get at my local farm supply store. It’s made from coal slag and is fairly environmentally friendly. It does break down quick so if you use your blast cabinet a lot, be prepared to clean it out and add new media when performance starts to suffer. Blasting will get you a really nice uniform surface color. I suppose you could try sanding or wire brushing but blasting has worked the best for me and is all I do now. My only recommendation is not to use sand because as it breaks down it creates a fine dust that will never come out of your lungs – read that as “bad”. I do use a blast cabinet with a vacuum to get rid of dust, you could do this outside with a hand blaster or tank blaster and dust mask if you needed to. I wear a hood when blasting outside as the media goes everywhere. Just protect yourself is the bottom line.
Wear rubber gloves and clean the part again – the gloves are to keep oils from your skin from contaminating the part and preventing etching. Cleanliness is critical.
Put the part in cider that is at least 70 degrees. I like 100-150. If it is too cold the reaction slows waaaaay down. I don’t like to get it super hot or boil it as you lose a ton of cider with no real benefit. I have done this in everything from stainless steel containers to plastic containers and even plastic trays used for wallpaper with halogen lights warming it up. In general the colder the cider the slower the etching and the hotter the cider the faster the etching bearing in mind you will have the cider evaporating faster. Note: If you do not see bubbles coming off the part then either the solution is too cold (especially on cold days under 70F), the part is not clean or ready (so clean and blast it) or the cider too weak. I’ve never had an issue with weak cider – always the first two.
Submerge the part in the acid and let it sit for 15-30 minutes. It’s not a strong acid so there’s no rush. Just check the part and stop at the color you want. The warmer the water and the part, the faster the reaction and vice versa.
Rinse with hot water
Rub down with WD40 and steel wool to get the loose particles off
Then I like to seal it with boiled linseed oil (BLO). Some of you may know BLO for woodworking but it is an old school rust inhibitor. If you don’t want BLO, then thoroughly oil your part.
I like the results. No real harmful chemicals are used, it’s cheap and looks great.
3/4/2020 Update: I recently did some blog posts on building a cost effective digitally controlled heat tank from PVC pipe that is perfect for acid etching – click here for that one. I’m also using a ferric chloride and apple cider etching solution now – click here for that one.
Photos:
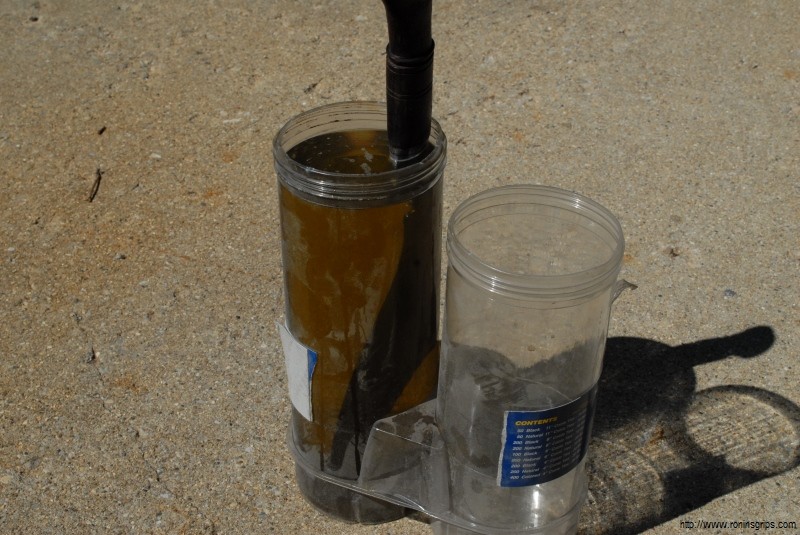
The light brown solution is just apple cider. If it is darker, it was 25-50% Prep-and-Etch + the vinegar.
Use whatever container works. These were from a bunch of zip ties I bought once.You can see the abraded surface from the abrasive blaster. You can acid etch without this step but I find doing this first really makes for a good finish plus all the tiny nooks and crannies really let the BLO grab hold.This one is getting ready to go it. I use WD40 when done to remove the water – it literally means “Water Displacement” forumula 40 and excels at that.You will see lots of little bubbles. I go by the color of the etched steel more than I do the degree of fizzing or time.These two have already gone through the process.I like the post apocalyptic look it gives.This giant cleaver was acid etched and then sealed with BLO.Another angle of the big “splitter”. The blade is over a 1/2″ thick!Another cleaver.
Abrasive Blasting
You can usually get a coal slag blast media very, very cheap from farm stores. Check there first because off Amazon you are paying a pretty penny for shipping whether they bury it in the item’s price or call it out separate. I think I pay $7-9 per 25# bag at Family Farm and Home.
Now for the blasting, you have tons of options – hand blaster for small work, siphon blaster, pressurized tank or cabinets. It all depends on how much blasting you plan to do. I started out with a siphon blaster – dirt cheap but very slow. I then got a tank and it was very fast and portable but media went everywhere. I still have that for working on cars and big parts. However, for my grips, gun parts and knives, I use my blast cabinet. I have a Cyclone brand large bench unit and am relatively happy. If I had it to do over, I would have gotten a free standing unit with a bigger and deeper hopper so I’m not constantly hitting the side or moving media around by hand. I have a foot control pedal and that really helps plus it gets a the pneumatics out of the cabinet where they would normally be subject to abrasive dust and wear.