Category Archives: Blades and Edged Weapons Including Khukuris

Blades and Edged Weapons Including Khukuris

How To Make a Kydex Cross Draw Khukuri Sheath

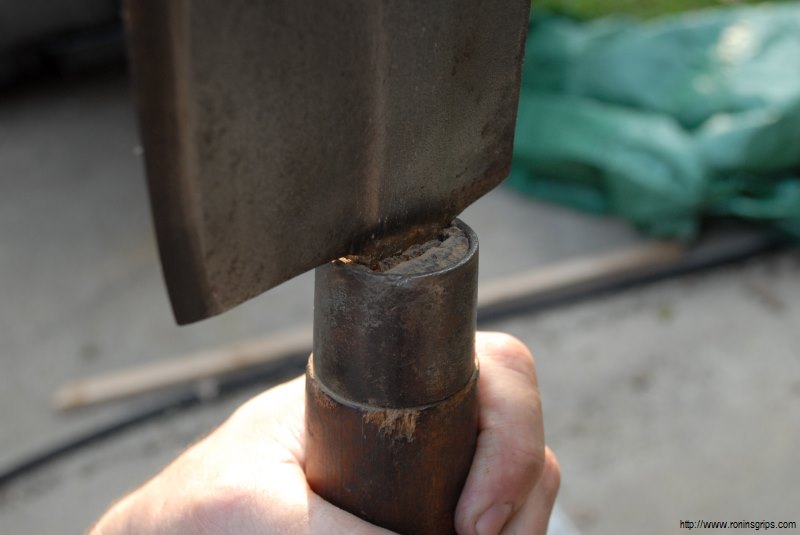
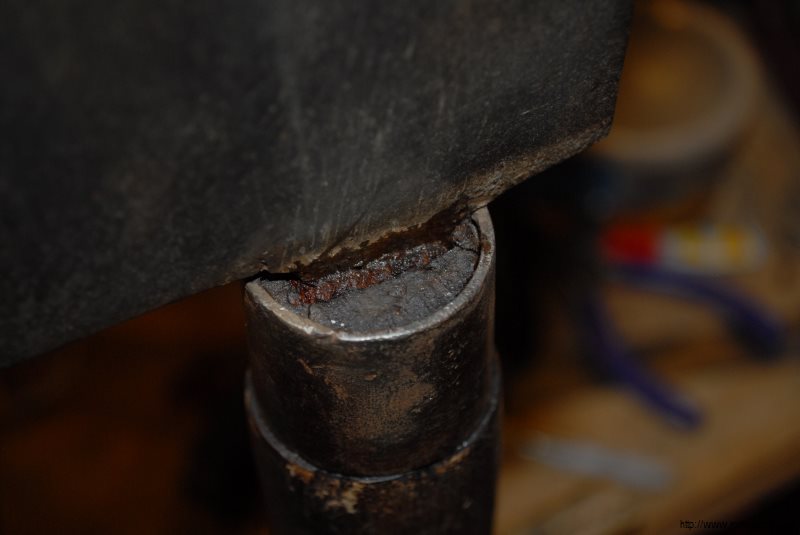
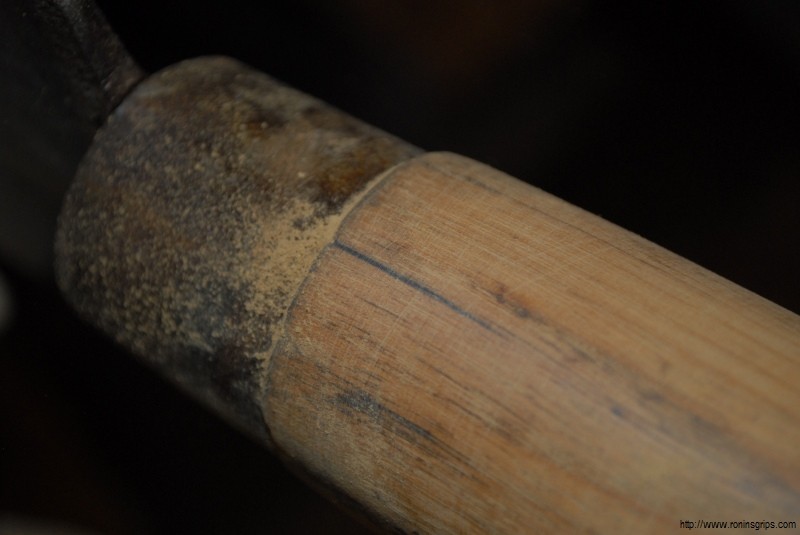
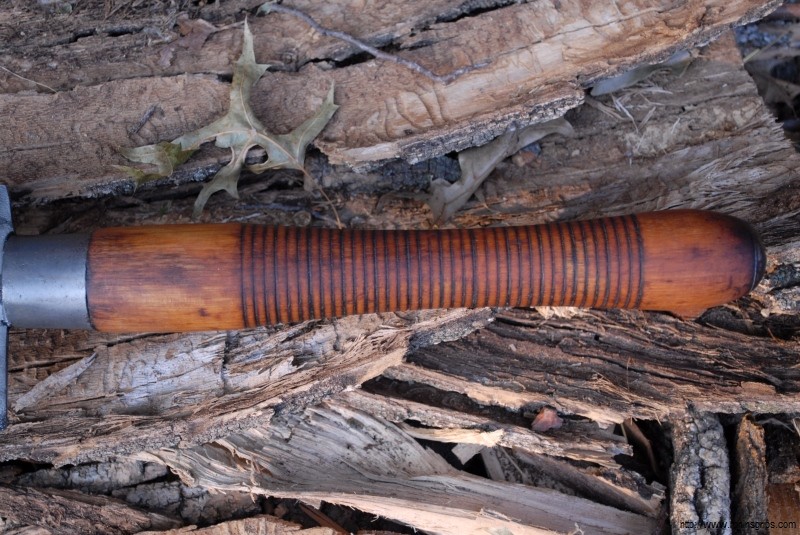
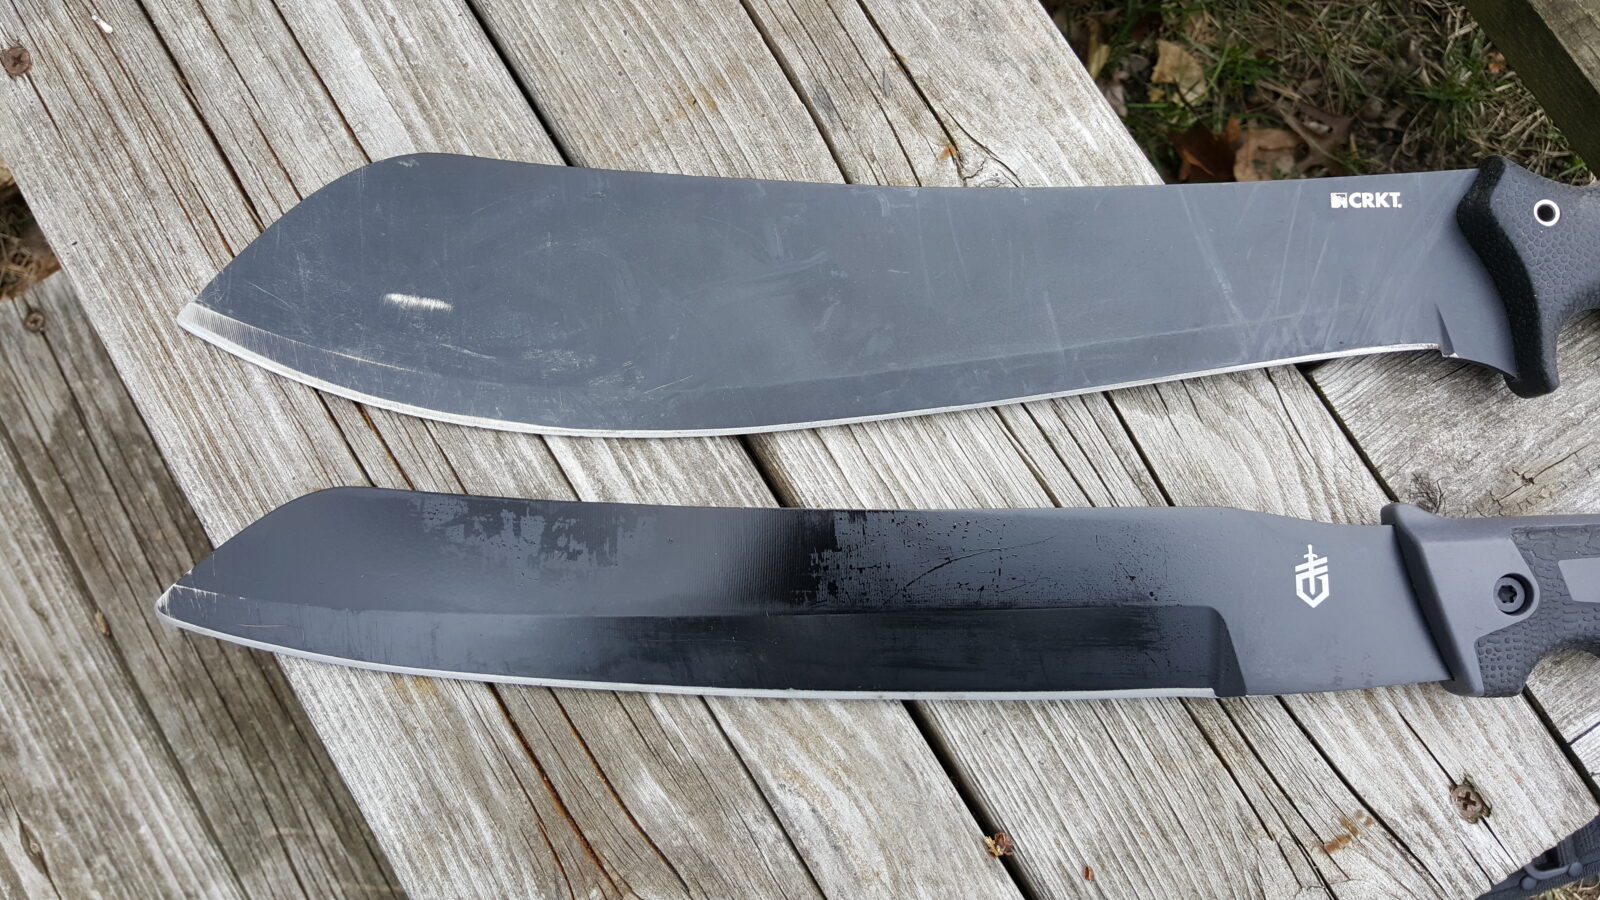
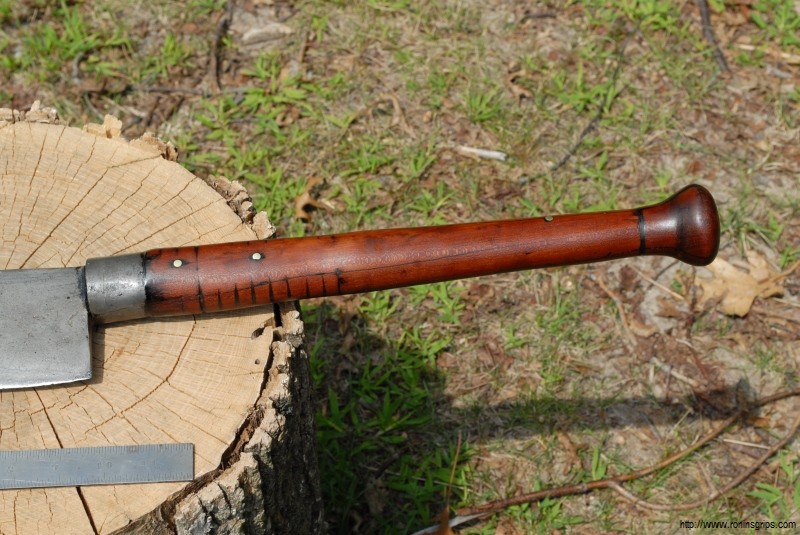
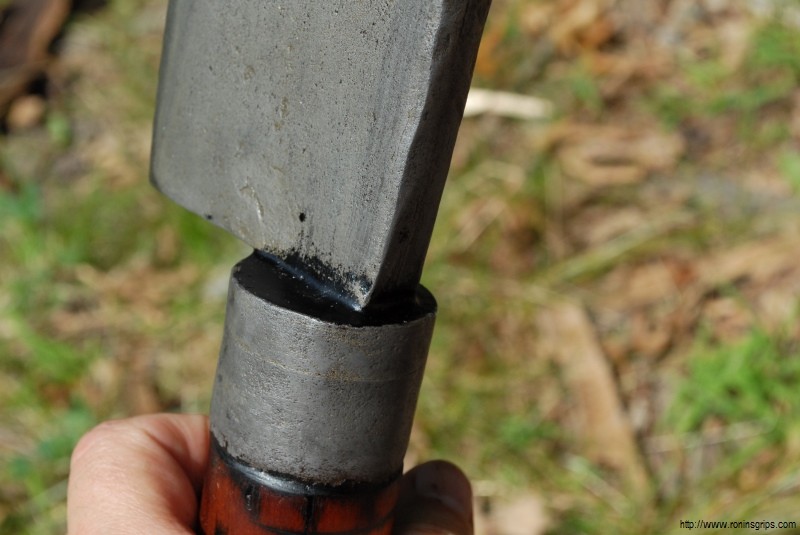
I recently made a sheath for a khukuri with serrations on the back of the spine and it was a bit of a learning experience compared to how I normally make a khukuri sheath and though I would share what was done.  The khukuri in question had a nicely done blade and fitment was good.  It had about a 10″ blade, 6″ handle and 16″ overall.  The spine was between 1/4-3/8″ thick.  All in all, it was a medium weight nice khukuri though I am not really sure who made it

Close-up of a black horn khukuri handle with decorative carving and metal bolster Close-up of a black horn khukuri handle with decorative carving and metal bolster Close-up of a black horn khukuri handle with decorative carving and metal bolster

Now for this weight range, I could go with .080 or .093″ Kydex.  I went on the heavy side and used .093″ thick black Kydex that I buy in 12×24″ sheets – usually from www.knifekits.com.

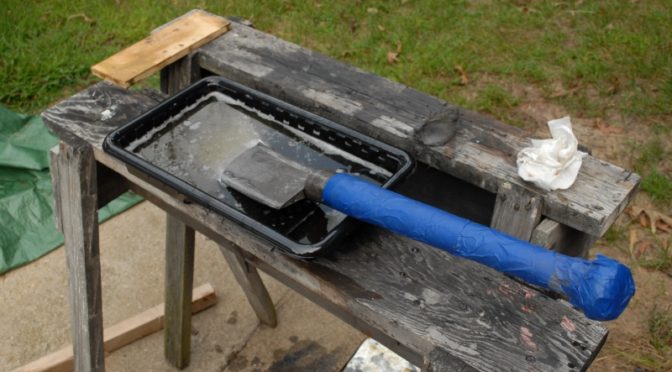
So, first up I do two layers of blue painters tape on each side to allow for some “wiggle room” between the blade and the Kydex.  If you want it tighter, use just one layer.  I would recommend having this space to allow for dust, dirt, etc.  Next up is to trim the Kydex so it is long enough to have a bit of material past the end of the blade, a few inches onto the handle and then an about 1.5″ or so on each side when the Kydex folds over.  If you want to use two pieces, you certainly can.  The final sheath I did for this khukuri uses two sheets of Kydex trimmed to size.

Khukuri knife with blue tape on blade, ready for Kydex sheath making.

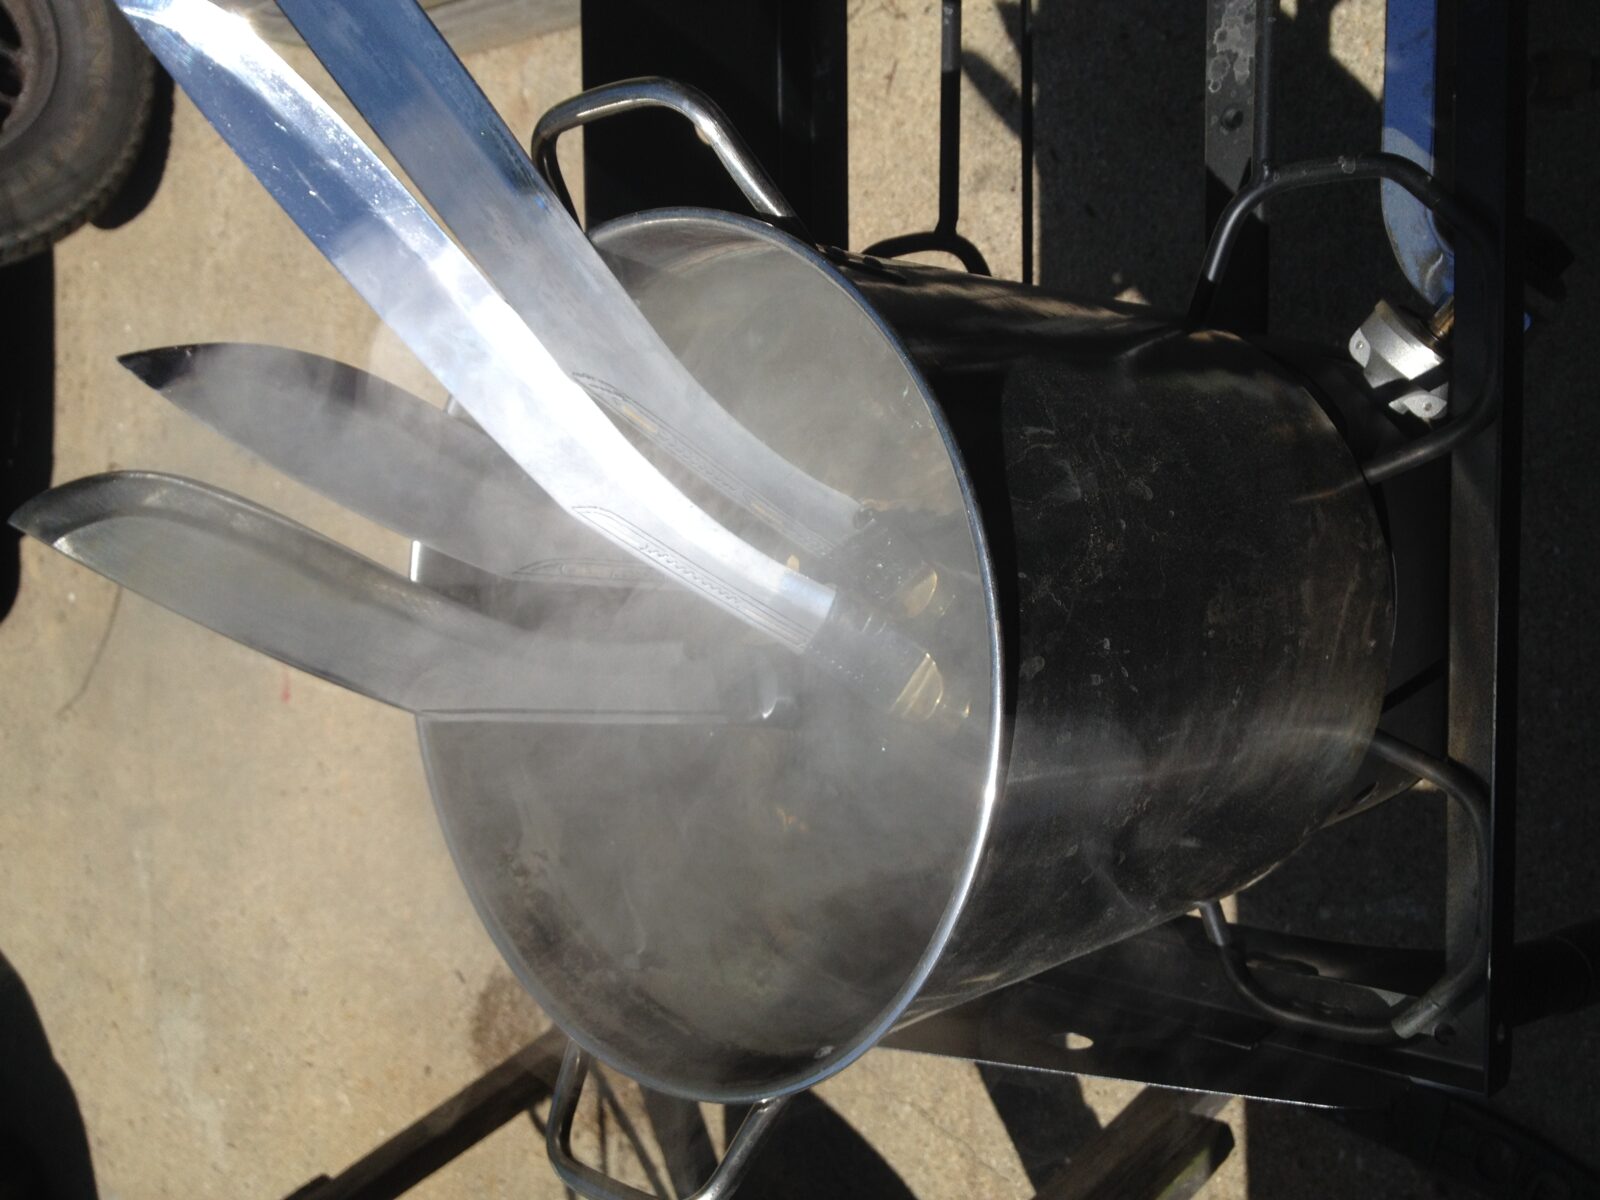
Once the Kydex is trimmed to size, you need to heat it to around 360F but less than 400F.  I Use a 16×20″ MPress Heat Press with a digital controller to set the temperature at 360F and to heat the Kydex for 40 seconds.  Note that I also have Teflon/PTFE sheets attached with rare earth magnets to protect the press’ faces if the Kydex were to melt.

Kydex cross draw khukuri sheath in workshop with tools and materials Empress heat transfer press machine used for Kydex sheath making

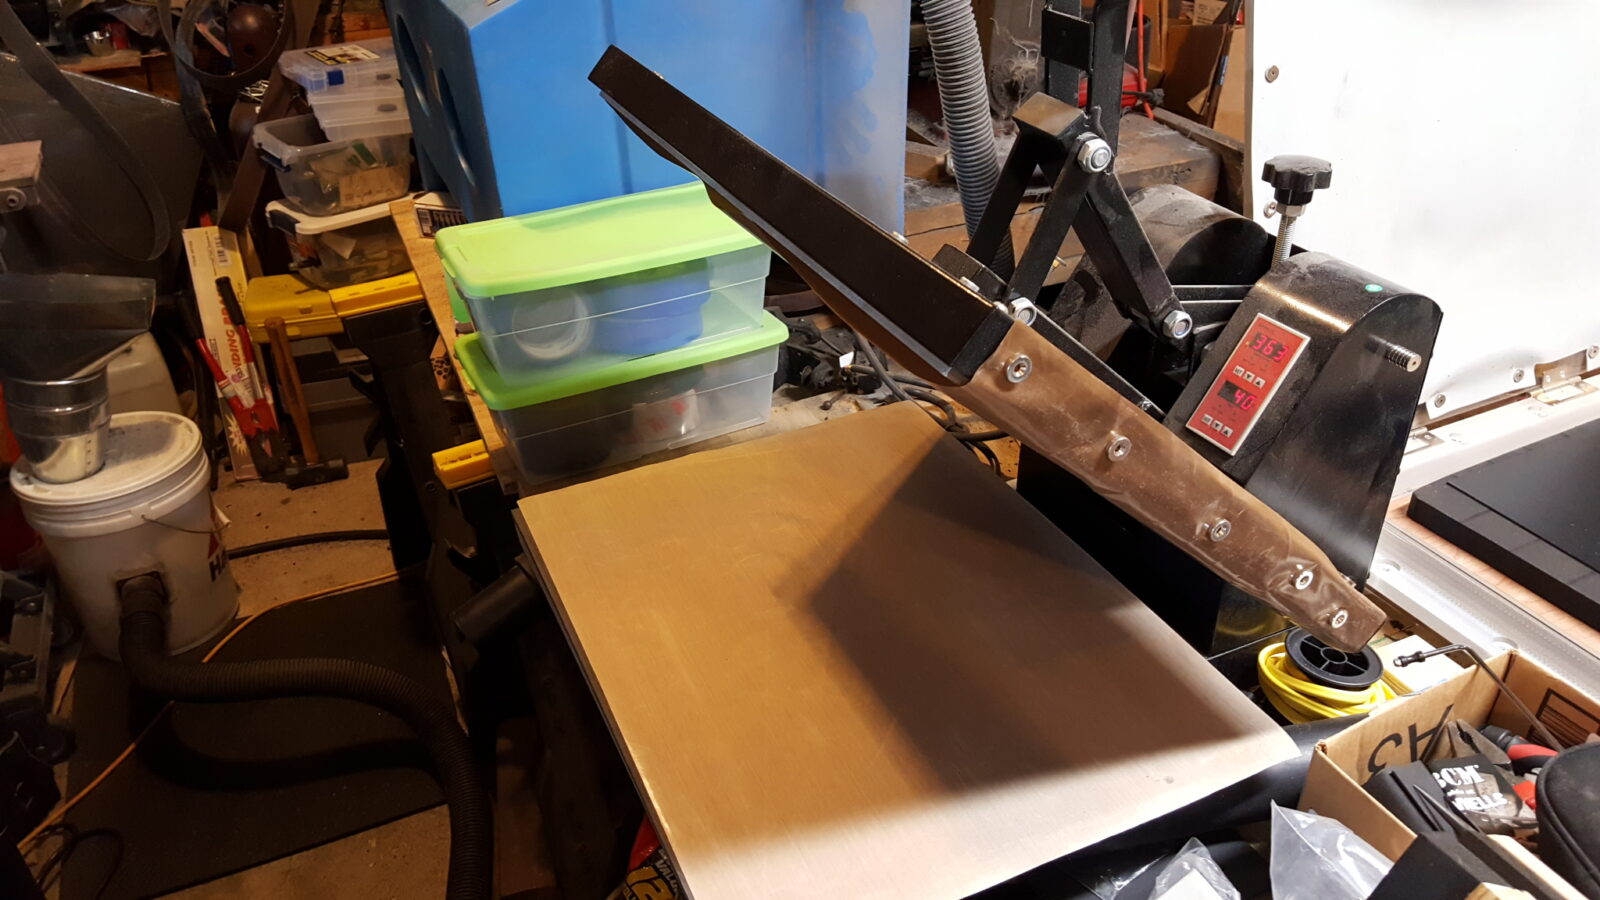
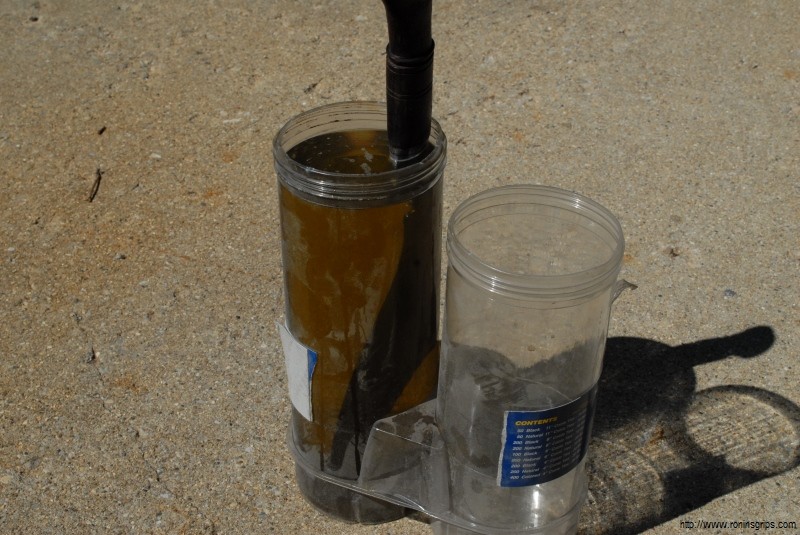
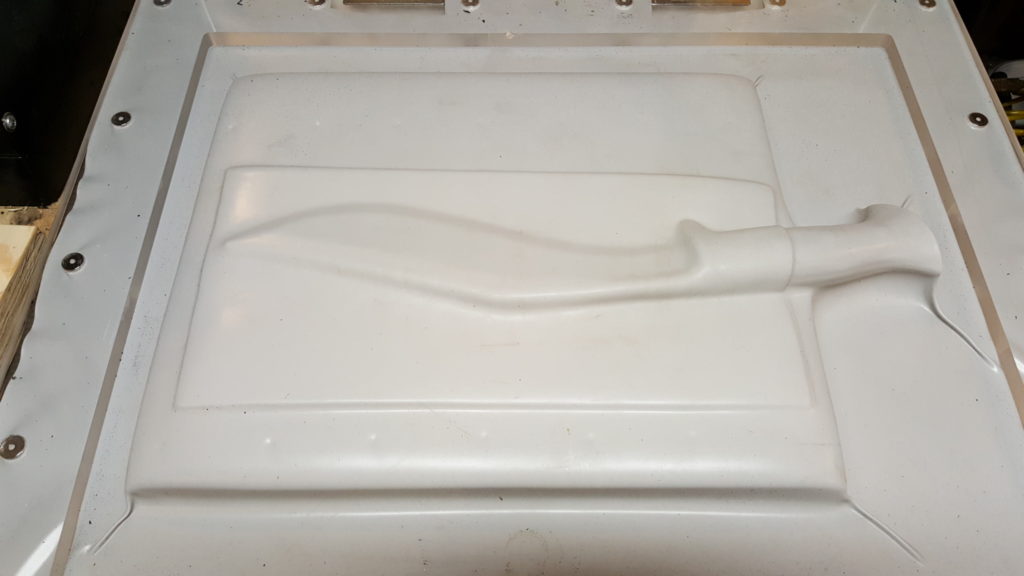
In years past, I used a modified hot plate / electric griddle to heat my Kydex.  For a tad over two years now I have had the MPress and really like it.  At any rate, once the Kydex is hot and pliant, you need to mold the Kydex to the blade.  In this first take, I used my HD Industrial vacuum press to do the work.   You draw the vacuum down and let the membrane do the work and cool down so the Kydex stiffens again.

Kydex cross draw khukuri sheath mold with handle impression Kydex sheath being formed around a khukuri knife handle in a vacuum former.

Next up, draw your planning lines around the blade.  You need to figure out your rivet pattern and then drill the holes.  I do 0.75″ centers to accommodate large Tek-Lok belt fasteners among other options.  Notice the big flap drawn at the top above the handle.  That creates the “funnels” that will guide the khukuri into the sheath and then lock it into place.

Kydex cross draw khukuri sheath with handle and tool

Next, debur the holes with a deburring tool such as the Mango II in the above photo.  Then, install the correct size rivets in the holes.  Orient the larger factor finished end of the rivet to be facing viewers when the blade is carried.  It looks better than the small end that results after compressing the rivets.  After that, use a rivet tool to flare and secure the rivets.  I use purpose-built dies in my 1/2 ton arbor press to do that but there are cheaper manual units for use with hammer.  If you plan on doing many sheaths or holsters, go with the arbor press.

Kydex sheath with drilled holes for a khukuri knife Press tool with punch and die for making Kydex sheath Kydex sheath being punched with eyelets for a khukuri knife. Kydex sheath material with evenly spaced eyelets for a khukuri knife.

Here’s the result.  Note that the round tools are what I use to form the funnels.

Kydex sheath and Khukuri knife, ready for cross draw sheath making.

Next, I use a band saw to cut close to the outside cut-off line I drew.

Kydex cross draw khukuri sheath in progress, showing eyelets and cut plastic.

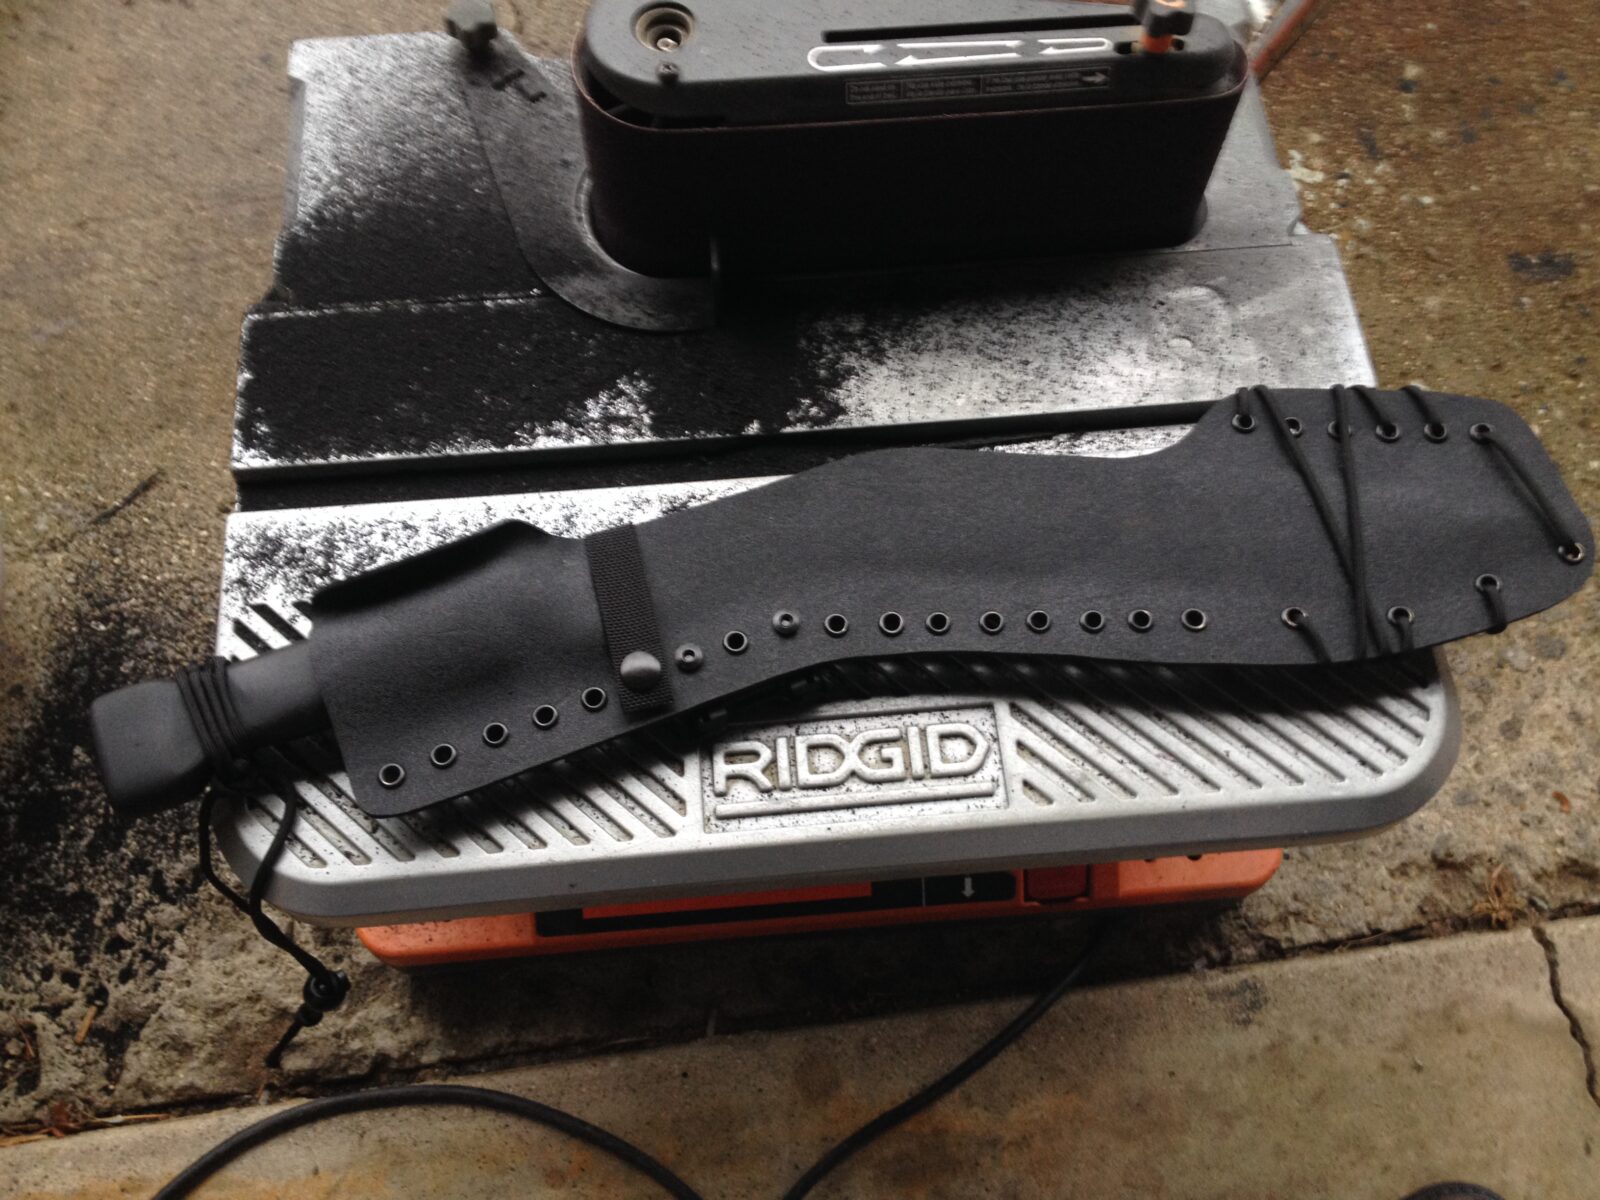
I then use a Rigid Oscillating End Sander to do the shaping.  I bought thebunitat Home Depot two years ago and it works great for this.  I use a 40-60 grit belt to quickly do the grinding.

Kydex cross draw khukuri sheath on a Ridgid belt sander Kydex cross draw khukuri sheath and red tool on a workbench

Now I did the test fitting and had an “oh crap” moment.  I normally expose the blade to allow for quick insertion and extraction but I couldn’t do that with this model due to the serrations.  They were exposed and would clearly hang up on everything so it was time to come up with a plan B.  It dawned on my that I needed something to serve as a “sheath” for the serrations that would give me work room inside the sheath once it was formed.  So after thinking about for a few minutes, I took some 3/16″ fuel line, slit it down the middle and pulled it onto the khukuri.

Kydex cross draw khukuri sheath in progress, taped blade

I also wanted the khukuri to push a lot further into the rear piece of Kydex so that meant I needed to use the khukuri press that I designed just for this.  It is built like a tank from layers of 3/4″ plywood and uses four 500# Quick Clamps to compress the Khydex.  The results is tight uniform clamp around the handle and blade of a khukuri.

Irwin Quick-Grip clamps used in making a Kydex sheath Khukuri knife with wooden handle on brown Kydex for cross draw sheath.

Next, it was time again to mark, cut and rivet the sheath.  Again, note the tabs drawn above the handle to form the funnel.

Kydex blank for a cross draw khukuri sheath with drawing lines Kydex sheet marked for cross draw khukuri sheath construction

After cutting, I use a heat gun to heat each tab and bend it over a round mandrel.  I have a 1/2″ round piece of aluminum that I normally use.  Note, I have burned out a number of cheap heat guns.  The DeWalt is over two years old and still going strong.

DeWalt heat gun and tools for making a Kydex sheath Khukuri handle with Kydex sheath, part of a DIY sheath making project. Kydex sheath material being shaped around a khukuri handle Kydex sheath molding in a vise, with tools for making a cross draw khukuri sheath.

I use MEK solvent on a rag to smooth over the edges of the Kydex and make it look good.  If you use MEK, be sure to wear solvent gloves and work outdoors or in a very well ventilated area.  That stuff is hot – meaning it evaporates fast and is not something you want to be breathing.

I used 1″ heavy duty nylon webbing for the retention strap along with a snap stud and quality heavy-duty #24 snap head.  I heat an old small screw driver to melt a hole in the strap for the stud and the snap head and then a purpose built die in my arbor press to actually open the rivet head inside the snap.

Kydex sheath attachment for a khukuri, showing hardware. Black nylon strap with a brass snap fastener for a Kydex sheath.

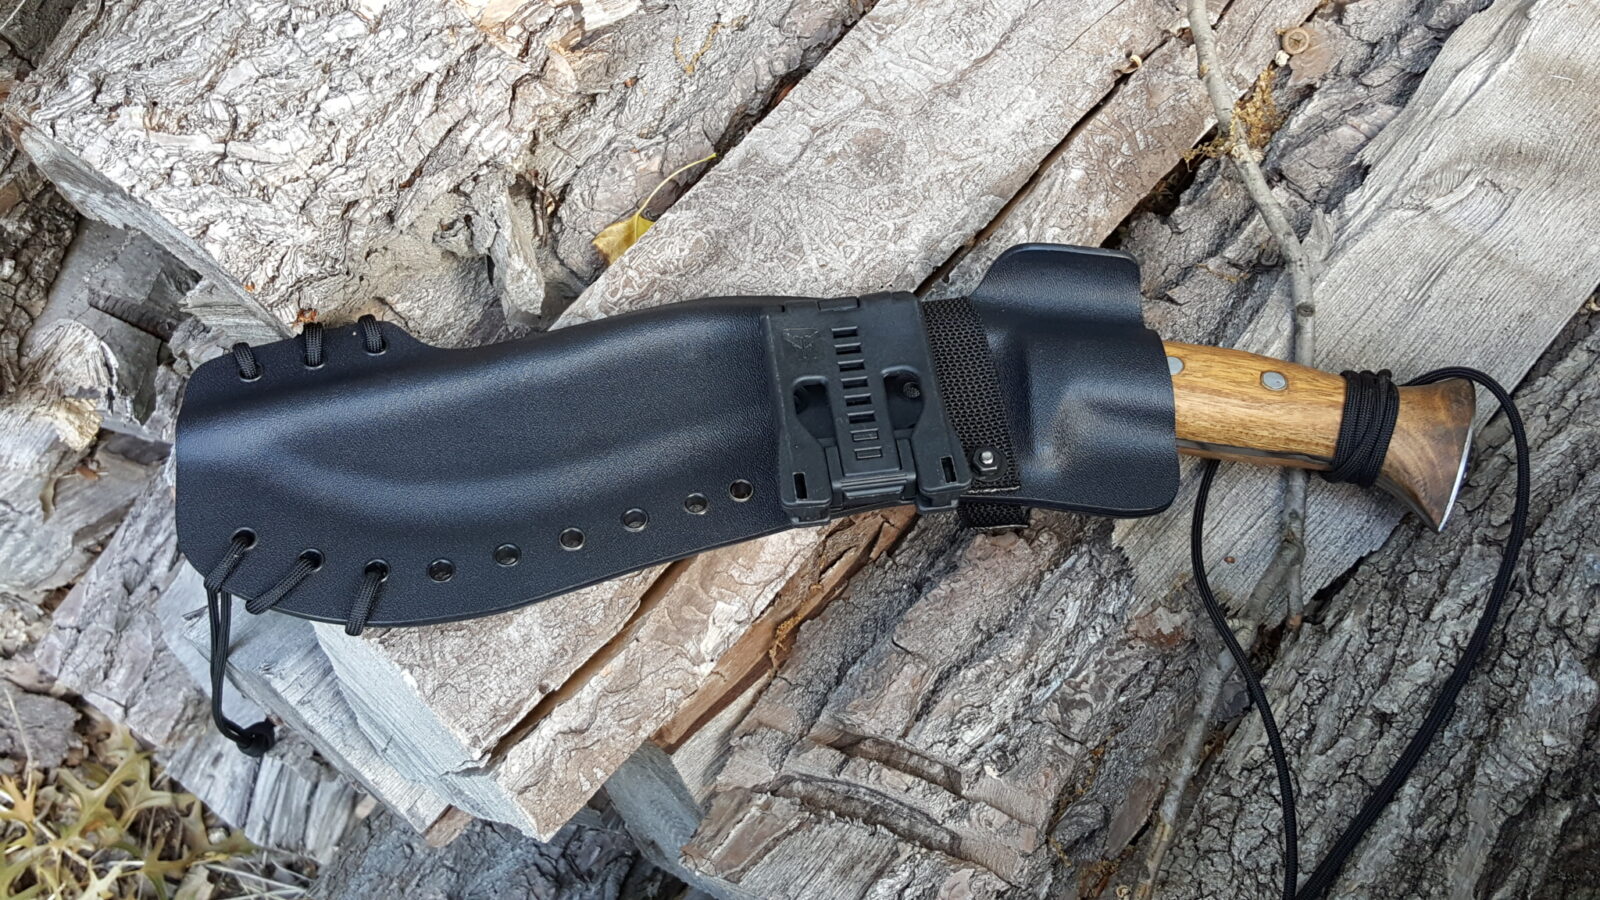
The Tek-Lok is secured to the sheath via slotted posts, screws and rubber spacers cut to the length needed.  Note, use Vibra-Tite or blue Loc-Tite to secure the screws and nuts or they will work lose and fall off.

Kydex khukuri sheath attachment with "Made in the USA" text.

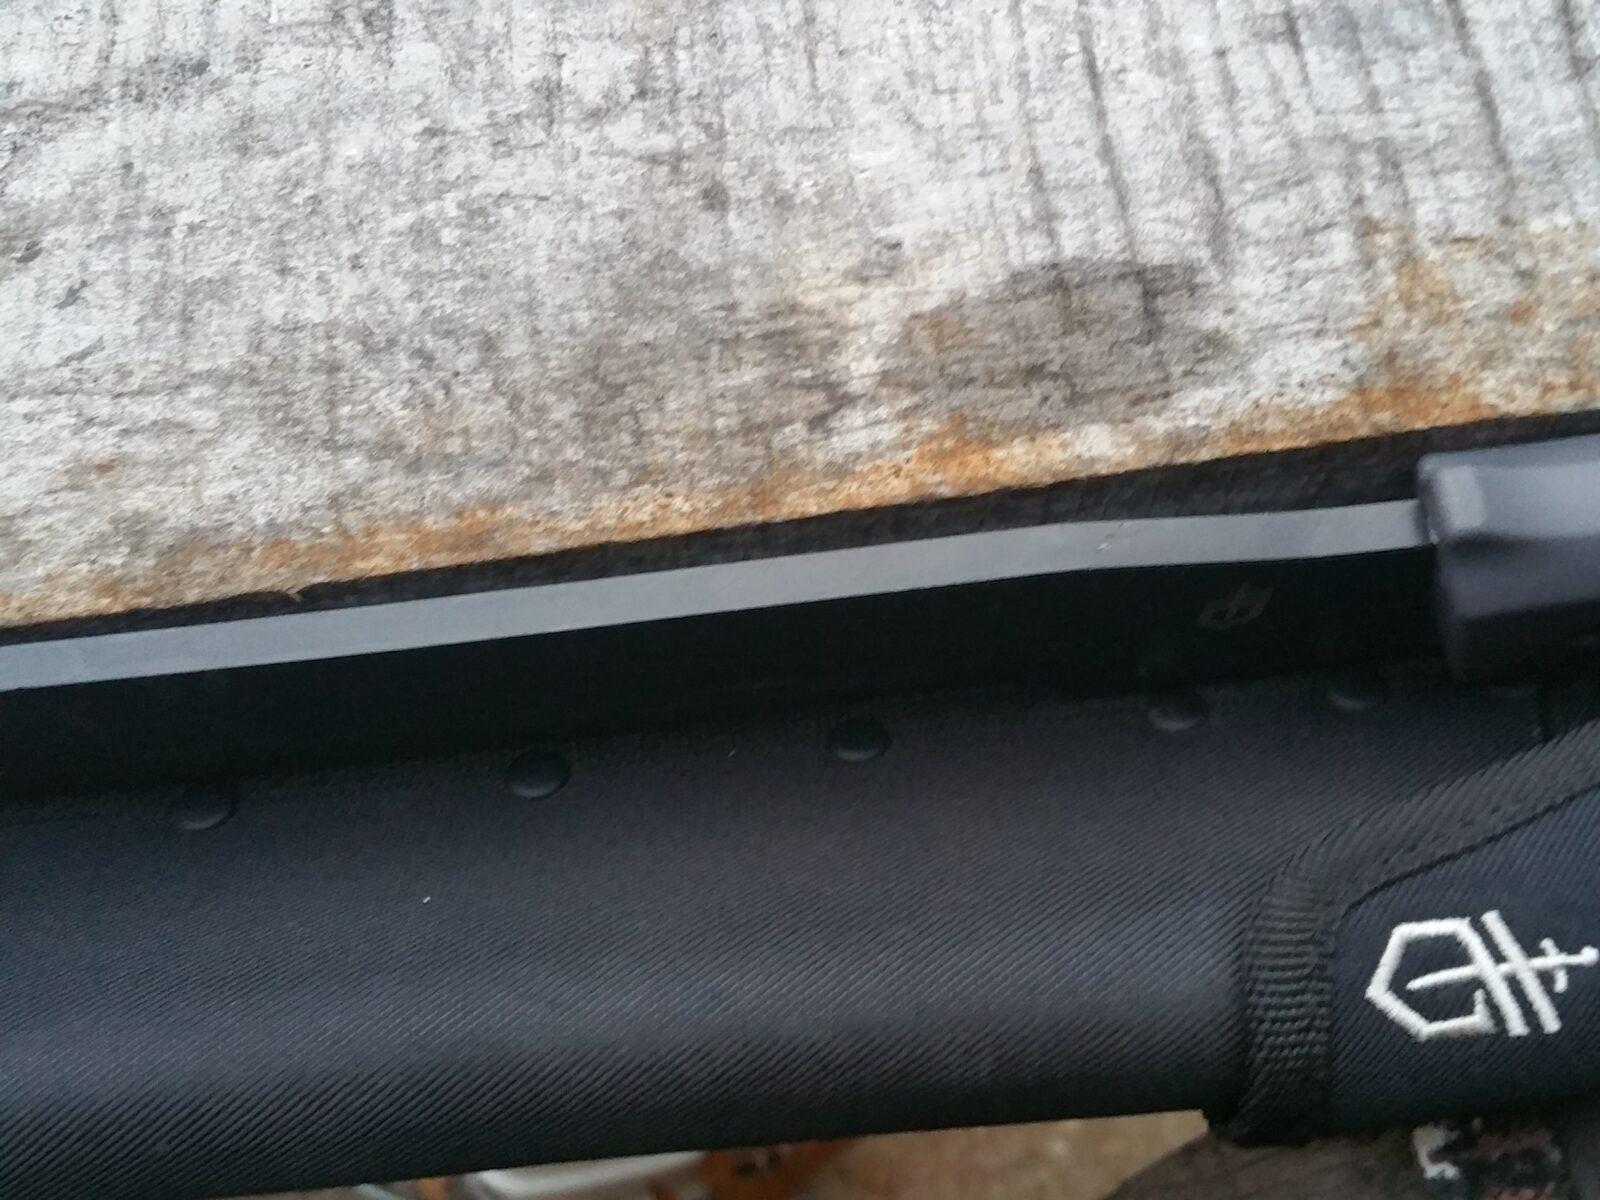
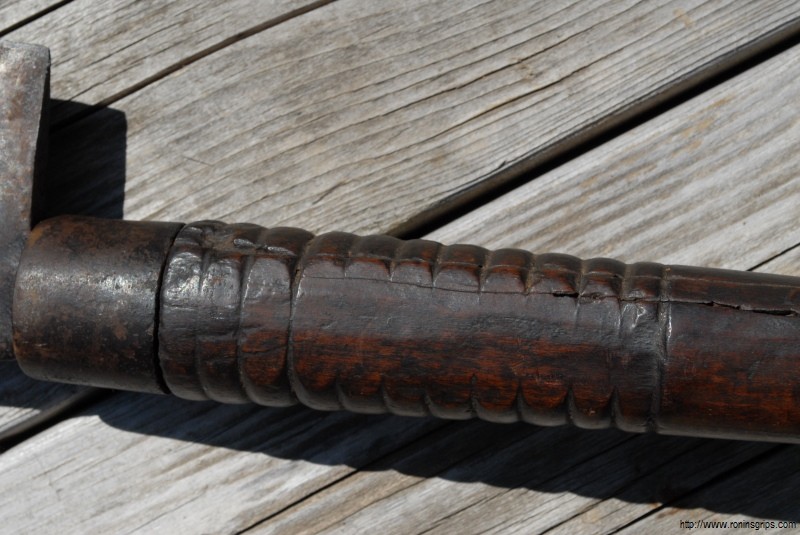
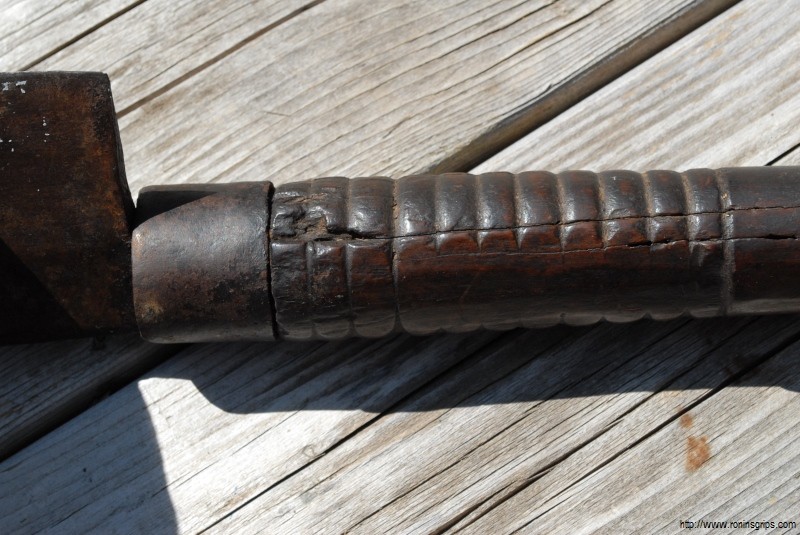
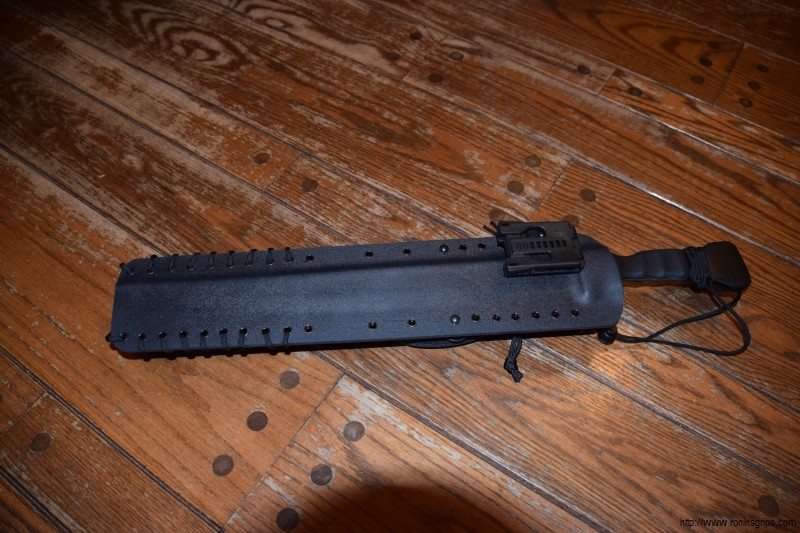
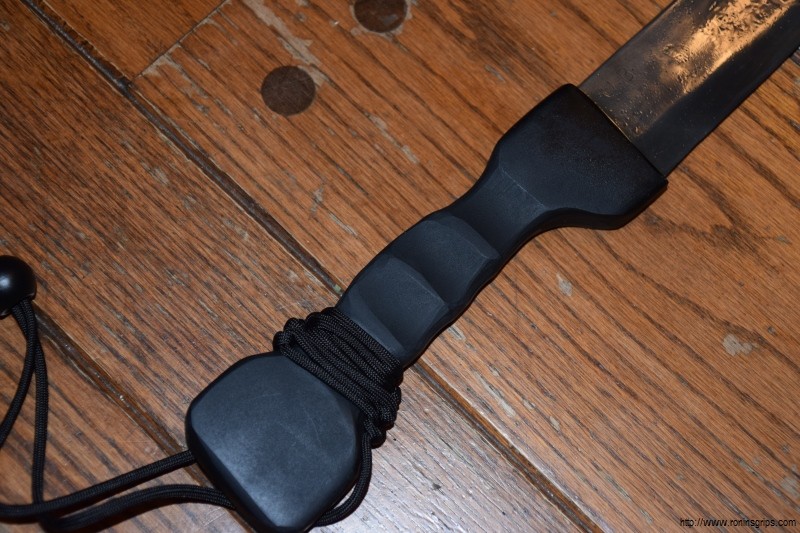
Here is the end result.  The old buffalo hide and wood sheath is above for reference.  I like adding paracord for lashing and survival use.

DIY Kydex cross draw khukuri sheath next to a traditional leather sheath. DIY Kydex cross draw khukuri sheath next to a traditional leather sheath.

In the next photo you can see the opening for the tip of the khukuri to slide into – that pocket is essential.  Once the tip is inserted, the handle is pushed towards the funnels that open, allow the handle to pass and then spring closed locking the handle in.  To truly lock it in and protect against brush, you need a retention strap that serves to keep the sheath closed – if the sheath is held shut then the blade can’t come out.

Kukri knife with wooden handle and black Kydex sheath, next to a leather sheath.

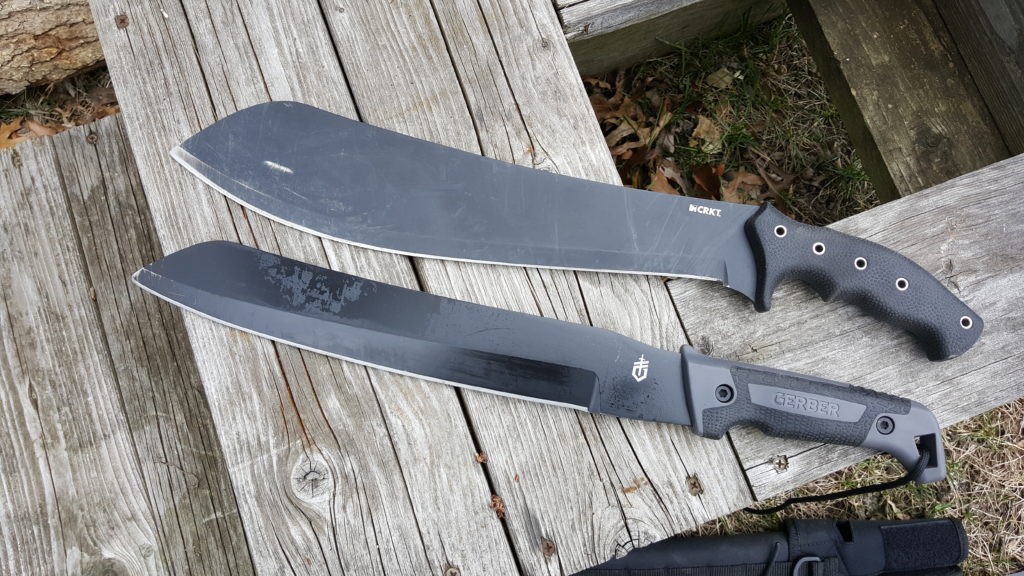
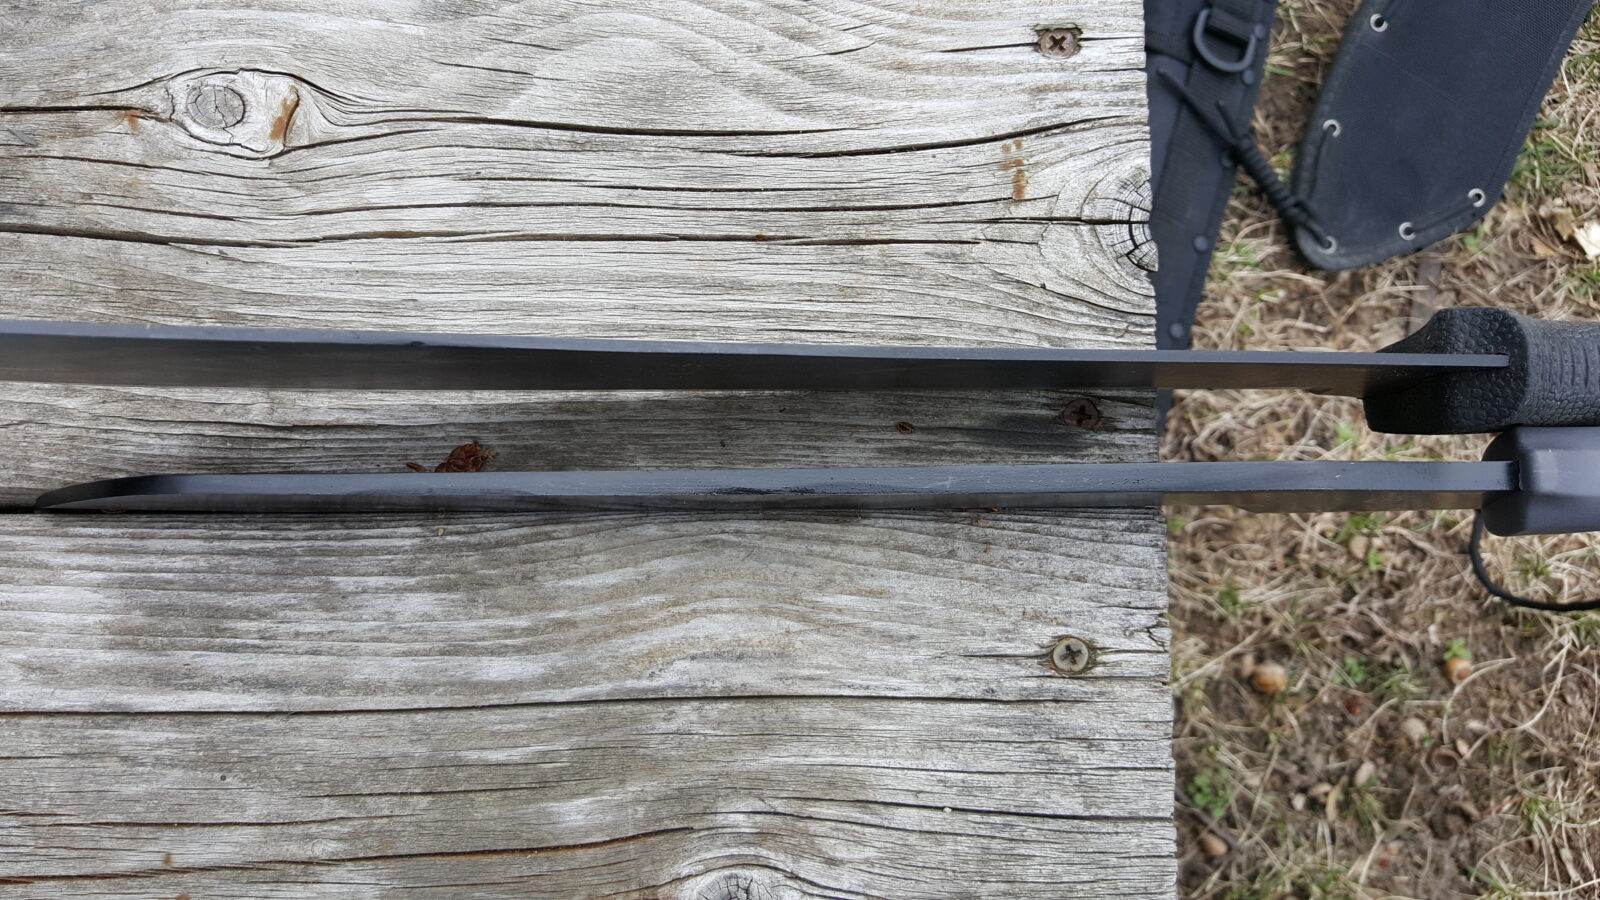
Here are two more shots

Kydex cross draw sheath for a khukuri knife on logs Kukri knife in a black kydex cross draw sheath on a log

I hope you found the post of interest!


Please share the link on Facebook, Forums, with colleagues, etc. Your support is much appreciated and if you have any feedback, please email us in**@*********ps.com. If you’d like to request a report or order a reprint, please click here for the corresponding page to open in new tab.


April 2017 – My EDC Knife is a ZT 0350BW

 ZT 0350BW Ken Onion Design EDC knife with black blade and handle.

A while back I screwed up the blog and re-posted an old post about my every day carry (EDC) knife being a Kershaw Compound.  While that was a great knife, I did eventually replace it – with my daughter’s approval.  I have always liked Zero Tolerance knives.  Think of them as a higher end brand to Kershaw.  Both are owned by KAI USA, so I think it is fair to say that.  In the past I owned a ZT 200 and that was just way too big to be an EDC.  It’s a huge folder but not something I wanted to lug around in the shop all the time.  I actually sold it and wound up buying a ZT 350.  The 350 is way slimmer and lighter but still has assisted opening.  It’s a hair over 4-1/2″ long when closed and about 7-5/8″ when open.  It’s about 0.518″ wide not including the belt clip and my digital scale says it weighs 6.2 oz.

Size and weight are important to me because I keep this in my front pants pocket.  I don’t want a ton of weight dragging down jeans, sweats or shorts nor do I want to have it really noticeable or uncomfortable.  On that last note, big and heavy knives suck in the front pocket – they need to go in a belt sheath, which I don’t want to wear unless I am camping or hunting.

The knife is designed by Ken Onion, who happens to be one of my favorite designers.  In addition to the very ergonomic handle he designed, the blade is made from S30V steel, which is excellent.  Now this is not a safe queen.  I dug back in my records and I’ve been using this since 2015.  I can’t tell you how many boxes, cords, ropes and plastic pails this thing has opened.  I don’t recall ever using it to pry things open but suspect it would hold up pretty well.  The following photos are of the blade in April 2017 and I didn’t bother cleaning it up.  The ZT black finish has held up remarkably well.

ZT 0350BW pocket knife open on a marble surface ZT 0350BW EDC knife, black handle, side view ZT 0350BW EDC knife with Ken Onion design and serial number ZT 0350BW knife blade with Ken Onion Design and S30V steel markings ZT 0350BW pocket knife with black handle on gray surface ZT 0350BW EDC knife with black handle on a speckled countertop ZT 0350BW EDC knife, black textured handle, on a speckled countertop

The S30V steel really holds an edge but it can be a bear to sharpen.  If you want a working edge, a Lansky Blade Medic pocket sharpener or diamond rod can help.  If you want a razor edge, I would recommend a Ken Onion Work Sharp (KOWS) belt sharpener or it will take forever by hand.  I use my KOWS all the time because it is quick and easy but do take both the Blade Medic and the rod on camping trips.

If you are interested in how I clean and lubricate my flipper knives so they continue to open smoothly, please click here.

So, there you go – that is my current EDC and I highly recommend it.


Please share the link on Facebook, Forums, with colleagues, etc. Your support is much appreciated and if you have any feedback, please email us in**@*********ps.com. If you’d like to request a report or order a reprint, please click here for the corresponding page to open in new tab.


2014 Restoration of a 21-1/8″ New Haven Edge Tool Co #3 Cleaver

2014 restored 21-1/8 inch New Haven Edge Tool Co #3 Cleaver on wooden bench 2014 restored 21-1/8 inch New Haven Edge Tool Co #3 Cleaver on wood New Haven Edge Tool Co cleaver handle and blade during 2014 restoration New Haven cleaver head showing rustic wear on the wooden handle during restoration. Restoring New Haven Edge Tool Co cleaver: removing old handle from socket Hand holding a restored 21-1/8 inch New Haven Edge Tool Co #3 Cleaver Close-up of a vintage New Haven Edge Tool Co cleaver handle during restoration Wooden handle of a New Haven Edge Tool Co cleaver during restoration. New Haven Edge Tool Co cleaver restoration: close-up of worn edge Bob Smith Industries Insta-Cure glue bottle near New Haven cleaver restoration New Haven Edge Tool cleaver restoration: close-up of worn metal edge. Close up of a cracked wooden handle of a New Haven Edge Tool Co cleaver during restoration

This dates back to August 2014.  I scored a beat up but fascinating New Haven Edge Tool Co #3 Cleaver.  It was quite large measuring approximately 21-1/8″ long and 3.187 pounds.  The exact age was hard to say – it could be anywhere from 100-150 years old given the way it is made.   After doing some digging, one person doing research said that “New Haven Edge Tool Company” was  a Sargent Brand and the listed it discontinued in their 1911 catalog so that would mean this cleaver is likely older than that.  Regardless, you would never know it now.

It would appear to be cast iron and is just a big no nonsense brute of a cleaver.  It’s either ready to go to work or to be one heck of a conversation piece.  Let me tell you a bit about what we did after we bought it:

The handle was cracked and we stabilized it internally with a special Cyanoacrylate glue that penetrates wood very deeply.  We also used glass reinforced epoxy to seal the front of the handle where the blade is inserted.  The blade is actually secured via rat tail tang that goes through the whole handle and is peened over at the pommel to firmly secure it.  Once we had the handle all fixed up, we sanded it and then applied four coats of a penetrating combination of boiled linseed oil (BLO) and turpentine.

Close-up of a New Haven Edge Tool Co cleaver handle and ferrule Restoring a New Haven Edge Tool Co cleaver handle, showing wood grain and wear. Close-up of a restored wooden handle with grooved texture from a New Haven Edge Tool Co cleaver Close-up of wooden handle of 21-1/8 inch New Haven Edge Tool Co #3 Cleaver New Haven Edge Tool Co cleaver handle end, showing wood grain and metal cap New Haven Edge Tool cleaver handle restoration: metal ferrule on wood Restored handle of a New Haven Edge Tool Co cleaver, secured in a vise Close-up of 21-1/8" New Haven Edge Tool Co #3 Cleaver in restoration process Restoring a New Haven Edge Tool cleaver handle in oil.

The blade was actually in very good shape and most of our work was cosmetic.  We did some sanding to shape it, abrasive blasted it and then used an acid etching based on apple cider vinegar and phosphoric acid (click here to learn more).  Once it was all set, we applied a thick coat of engine oil to stop the rusting.  If you plan to use this to cut meat, and it definitely will do the job, be sure to was the blade and then apply a cooking oil to the blade.  This will avoid making your food taste funny plus it will prevent rust.

New Haven cleaver restoration: tool soaking in cleaning solution with brush Restoring a New Haven Edge Tool Co cleaver in a vinegar bath. Restored 21-1/8" New Haven Edge Tool Co cleaver being washed Restoring a New Haven cleaver in a bubbly cleaning solution Restoring New Haven Edge Tool cleaver in vinegar bath with foam applicator

So, here’s how it turned out before it found a new home:

Approximate Dimensions

Overall length:  21-1/8″

Blade length: 9-5/8″

Blade height by the handle:  3-7/8″

Blade height at its tallest point:  5-1/2″

Handle at its thickest point: 1-5/8″

Handle at its thinnest point in the middle:  1-1/4″

Weight:  3.187 pounds

New Haven Edge Tool Co cleaver restoration: close-up of blade and wooden handle Wooden handle of a New Haven Edge Tool Co cleaver, restored in 2014. New Haven Edge Tool Co #3 cleaver, 21-1/8" restoration project Black 21-1/8-inch New Haven Edge Tool Co #3 Cleaver with a wooden handle on a wood surface New Haven Edge Tool Co #3 cleaver handle restoration: close-up of wooden handle with grooves Restored New Haven Edge Tool Co #3 cleaver handle and blade detail 21-1/8 inch New Haven Edge Tool Co #3 Cleaver on wood Restored New Haven Edge Tool Co #3 cleaver with wooden handle on wood Restored 21-1/8" New Haven Edge Tool Co #3 cleaver with wooden handle on wood

By the way, the BSI Super Thin glue is fantastic for taking care of cracks.


The Gerber Golok Machete is Pretty Wicked and Surprisingly Hefty!!

Ok, so I wind up clearing brush pretty regularly.  Usually its pine, vines, scrub oak and junk like that.  Back in June 2014, I bought a Ken Onion designed Half-A-Chance machete (CRKT K920KKP) from CRKT that has served me well (click here for my review).  On my last trip to clear brush this past fall, I accidentally left the Half-A-Chance at home and had to get a replacement machete.  Thankfully SMKW was on the way so I stopped in and tried out a bunch of different ones in terms of heft and balance.  When I got to the Gerber Golok, I was really surprised.  It’s surprisingly thick and that mass makes a big difference when taking out saplings so I bought it and used it to clear the small stuff.

It seems like an opportune time to compare the two and share my thoughts.  In the next photo, the top is the Half-A-Chance and the bottom is the Golok.

Two Gerber machetes, including the hefty Golok, rest on weathered wooden planks.

What really surprised me was that the thickness of the Golok’s blade.  Why Gerber doesn’t make a big deal about this, I don’t know because there are fans of knives with big blades.  The blade is 12″ long and made from MN65 steel, which is a spring steel that is roughly equivalent to 1065 steel, which is fairly common in machetes.  The blade comes in at 0.2566″ when I mike it and weighs 1 pound 10.8oz (26.8 oz). That is a lot of steel!  It’s like you are moving the design from being a classical machete more towards a chopper with that kind of width.  When I was hitting some dried oak and ash, the Half-A-Chance bit deeper than the Golok and I think it reflects the relatively thin blade of the Ken Onion design that mikes at 0.1147″ which is less than half the Golok.  The Half-A-Chance also weighs 20.3oz.

The blade on the left is Half-A-Chance and the right is the Golok on a piece of dried ash.

Gerber Golok machete chopping into a log, showing its heft and sharpness.
Gerber Golok machete poised over a pile of chopped firewood

You can definitely see the the thicker Golok blade right away.  It’s the top blade on the left photo and the bottom blade on the right photo:

Gerber Golok machete with sheath on weathered wooden planks
Gerber Golok machete blades on a wooden surface

Just a closer view of the Half-A-Chance on top vs. the Golok on the bottom.  The Half-A-Chance’s handle is more ergonomic but the rubber coated Golok isn’t too bad.

Gerber Golok machete and CRKT heavy-duty survival knife on wooden surface
Gerber Golok machete and CRKT jungle knife handles and blades on wood

The Half-A-Chance’s sheath is fancier while the Golok is simple and to the point.

Gerber Golok machete with sheath, showing its hefty blade and durable construction.
Gerber Golok machete and sheath on a wooden surface
Gerber Golok machete with orange handle and black sheath
Gerber Golok machete in black sheath on wooden bench with packaging behind
Gerber Golok machete with sheath and packaging

Folks, in the end, the Golok is a chopper.  It’s heavy but too thick for the traditional fast slices you are doing with a machete.  I’d recommend the Half-a-Chance for thin stuff like vines and stuff under 3/8″ ballpark and the Golok for thicker vegetation where you need to chop but you are also starting to cross over into where a heavy khukuri or hatchet might serve you better.

Gerber Golok machete blade and sheath on a textured surface

While clearing the lot I did put a nick in the Golok and used my Work Sharp Ken Onion edition sharpener to take it right out when I got back to my shop. [Click here for my post on the KO sharpener.]

Work Sharp knife sharpener with belt, clamped to a workbench.

Bottom line, the Half-A-Chance machete is still my favorite and the first one I would grab to clear brush but the Golok is a keeper also because I like its mass and balance.  It’s a lot of blade for the money and I do like big blades.  You ought to take a look when you get some time or even pick one or both machetes up from Amazon.


Please share the link on Facebook, Forums, with colleagues, etc. Your support is much appreciated and if you have any feedback, please email us in**@*********ps.com. If you’d like to request a report or order a reprint, please click here for the corresponding page to open in new tab.


Restoring a Giant 24″ Hog Splitter

Everyone needs a hobby.  I guess mine is creating or fixing things in my own way.  Back in 2014, I bought an absolutely massive beat to hell 24-1/2″ hog splitter off eBay.  This thing was absolutely a diamond in the rough.  Clearly it had been used very heavily – probably for decades – yet there was an amazing design in that beat up cleaver as well.  First off, the blade was almost a half inch thick and it weighed about five pounds.  Back in the days before machinery, you need mass to butcher big animals and this was (and still is) the most massive cleaver I have personally worked with – imagine a baseball bat with one hell of a heavy end is what it boils down to.

In the eBay listing, the seller was up front – this thing was on its last leg.  The wood was all busted up, dirty as heck and the blade was loose.  Of course, I had to buy it!  Here’s what it looked like when it arrived.  Why I did not get an overall photo at the start, I do not know.

RS Regulate rifle mounts on a black rifle sitting on a wooden bench
Close-up of cracked wooden handle of a 24" hog splitter
RS Regulate rifle mounts on a black rifle sitting on a wooden bench
Close-up of RS Regulate mount on a rifle with a scope attached.

There were no maker’s marks anywhere but it was too professionally done to have been a village blacksmith.  I still wonder who made this as I would love to track down more of them.  If you have one, or find one, and are interested in potentially parting with it, let me know.  I’d even be happy with just the giant blade.

Getting back to the story, I had to look it over and take stock.  This thing was stunningly heavy and the wood was busted up because it was thin and hollow.

There had to be more than what I was seeing so I broke the frozen on nut and pulled the handle off.  Wow.  There was the largest rat tail tang I had ever seen – and still haven’t seen one bigger!!  That’s how they spread the load.  What an interesting design.

Close-up of RS Regulate mount on a rifle with a scope attached.

Now, the wood totally intrigued me.  There was something about the color that caught my eye so I decided to fill it with glass reinforced epoxy.  Now not all epoxies are equal.  When you do structural work like this, you need an excellent shock resistant epoxy.  My go to epoxy for stuff like this is Acraglas liquid epoxy from Brownells.  

I but it in quart bulk containers and meter it out using syringes or a digital scale.  I use 5/32nds milled glass fibers and black dye to color it.  Fortunately, it’s the same dye I use for my plastics but you can either buy from Brownells or elsewhere.  So, over the course of several days, I mixed, poured and let it sit overnight as it takes Acraglas 24 hours to cure so this work is done in steps.

I used wood stripper to try and get all the grease and oils out of the handle plus I drilled open the end to fill it easier.  By the way, if you heat epoxy with a heat gun, it will get thinner and flow more readily until it cools.  Gentle warmth also accelerates curing of the epoxy but remember that just because epoxy feels dry to the touch does not mean it has fully cured – read the instructions for whatever brand you go with.

Close-up of RS Regulate mount on a rifle with a scope attached.
Restoring a 24" hog splitter: close-up of shaft in vise
Syringe dispenses black grease into cup during hog splitter restoration.
Close-up of aged, dark wood handle with lighter grain detail, part of hog splitter restoration.
Close-up of a damaged hog splitter head showing a cracked and melted surface.
Close-up of a dark, weathered wooden handle with a crack and dripping black substance, possibly from a hog splitter.
Cracked handle of a 24" hog splitter during restoration

Next, I sanded, sanded and sanded.  The wood was very interesting – maybe a cherry or mahogany.  I’m not really sure.

Restored 24-inch hog splitter cleaver on rustic wooden bench
Restored 24" hog splitter with wooden handle on weathered wood
Close-up of weathered 24 inch hog splitter resting on wooden surface
Close-up of a restored 24" hog splitter handle with carved grip.

The rat tang was HUGE.  I carefully marked where it was at and drilled holes for two brass pins just to play it safe.  I’ve never had Acraglas let go from a clean prepped surface but never say never.  The pins are a cheap insurance for a giant blade like this.  I inserted the 3/16″ pins with epoxy and then added epoxy to all the imperfections followed by more sanding.  Notice how I blasted the pins before gluing?  Epoxy always, always, always does better on a rough surface.  Do not epoxy two shiny metal surfaces together and expect them to last – they probably will not.

Black AK rifle with RS Regulate scope mount and tactical scope

Now this took my breath away.  I used a 50/50 combination of turpentine and boiled linseed oil (BLO), put it in a tank I have just for these big cleavers and let it sit for a few hours before I pulled it out.  The color blew me away.  Wow!!  I wiped it down and then applied additional coats of BLO to seal it.

Black AK rifle with RS Regulate scope mount and tactical scope
Close-up of the wooden handle of a 24" hog splitter, showing grain and black detailing.

My last steps were to acid etch the blade (click here for our guide to acid etching), seal everything with BLO and then make a blade guard.  Mission accomplished.

Restoring a hog splitter: tool soaking in a tray on sawhorses
Restoring a hog splitter: blade soaking in cleaning solution, handle taped
24-inch hog splitter being cleaned in soapy water
Restored giant 24" hog splitter with wooden handle and metal blade
Restoring a giant 24" hog splitter: close-up of the tool on a workbench.
Restored 24-inch hog splitter cleaver on a log with ruler
Close-up of a restored hog splitter handle, showing wood grain and metal ferrule.
Restored 24-inch hog splitter cleaver with wooden handle on log
Restored 24-inch hog splitter handle and blade on a wood stump
Close-up of a vintage 24" hog splitter blade, showing wear and marks on the steel.
Measuring a 24" hog splitter with a ruler against a wood log
Restored 24" hog splitter cleaver with wooden handle on a tree stump
Close-up of a hog splitter blade secured to its handle with black epoxy
Close-up of 24 inch hog splitter blade with worn edges
Close-up of the dark wood handle of a restored hog splitter
Restored hog splitter with wooden handle rests on a log.

To protect the blade edge, not to mention protect other things from the edge, I made a protective cover out of 0.093 Kydex and 3/8″ shock (bungee) cord.

Restored 24-inch hog splitter cleaver with leather sheath on wood
Giant 24" hog splitter cleaver resting on a tree stump.

That bad boy weighed 5-1/4 pounds and was solid as a rock.  I keep looking for another one like it.  I never did find out where it was made but it sure was a stunner.  This is another project that part of me wishes I had kept it but it went to a very happy new owner shortly after I finished it.

3/4/2020 Update: This is still the most wicked restored cleaver I have done. The wood was simply gorgeous.


Please share the link on Facebook, Forums, with colleagues, etc. Your support is much appreciated and if you have any feedback, please email us in**@*********ps.com. If you’d like to request a report or order a reprint, please click here for the corresponding page to open in new tab.


The following is a real-time search of eBay using keywords that have worked for me in the past and I hope they help you find something (note a few odd items might show up just like any other search does):


Acid Etching Steel With Apple Cider Vinegar

Some folks have asked how I get the dull grey look on khukuris that I used to work on.  The answer is simple – apple cider vinegar straight from the grocery.  I’ve also experimented with various ratios of Prep-and-Etch, which contains Phosphoric Acid, and gotten a darker color but apple cider works remarkably well.  Apple cider vinegar contains 5-10% acetic acid (CH3COOH) depending on how it is made.  For example, I read that Heinz is about 5%.  My local store carries Spartan brand, which is their store brand, and it works just fine – again, this is apple cider vinegar from the grocery store.  

This process only works with steels that can rust.  For example a mild steel or high carbon.  It will not work on stainless, aluminum, etc.

Safety Notes:

I would recommend doing this outside or some place very well ventilated or else if the acetic acid condenses on metal surfaces in your shop/garage, it will cause rust.

Wear safety glasses and don’t goof around with the stuff.  I’ve never had a problem but probably need to say some kind of warning here.

Process:

  1. Clean the part and remove all oil and grease.  Either hose it down really well with brake cleaner or soak it in acetone.  Any oil, even from your skin, will mess you up.  
  2. Abrasive blast the part – I use “The Original Black Beauty” media that I get at my local farm supply store.  It’s made from coal slag and is fairly environmentally friendly.  It does break down quick so if you use your blast cabinet a lot, be prepared to clean it out and add new media when performance starts to suffer.  Blasting will get you a really nice uniform surface color.  I suppose you could try sanding or wire brushing but blasting has worked the best for me and is all I do now.  My only recommendation is not to use sand because as it breaks down it creates a fine dust that will never come out of your lungs – read that as “bad”.  I do use a blast cabinet with a vacuum to get rid of dust, you could do this outside with a hand blaster or tank blaster and dust mask if you needed to.  I wear a hood when blasting outside as the media goes everywhere.  Just protect yourself is the bottom line.
  3. Wear rubber gloves and clean the part again – the gloves are to keep oils from your skin from contaminating the part and preventing etching.  Cleanliness is critical.
  4. Put the part in cider that is at least 70 degrees.  I like 100-150.  If it is too cold the reaction slows waaaaay down.  I don’t like to get it super hot or boil it as you lose a ton of cider with no real benefit.  I have done this in everything from stainless steel containers to plastic containers and even plastic trays used for wallpaper with halogen lights warming it up.  In general the colder the cider the slower the etching and the hotter the cider the faster the etching bearing in mind you will have the cider evaporating faster.
    Note:  If you do not see bubbles coming off the part then either the solution is too cold (especially on cold days under 70F), the part is not clean or ready (so clean and blast it) or the cider too weak.  I’ve never had an issue with weak cider – always the first two.
  5. Submerge the part in the acid and let it sit for 15-30 minutes.  It’s not a strong acid so there’s no rush.  Just check the part and stop at the color you want. The warmer the water and the part, the faster the reaction and vice versa.
  6. Rinse with hot water
  7. Rub down with WD40 and steel wool to get the loose particles off
  8. Then I like to seal it with boiled linseed oil (BLO).  Some of you may know BLO for woodworking but it is an old school rust inhibitor.  If you don’t want BLO, then thoroughly oil your part.

I like the results.  No real harmful chemicals are used, it’s cheap and looks great.

3/4/2020 Update: I recently did some blog posts on building a cost effective digitally controlled heat tank from PVC pipe that is perfect for acid etching – click here for that one. I’m also using a ferric chloride and apple cider etching solution now – click here for that one.

Photos:

The light brown solution is just apple cider.  If it is darker, it was 25-50% Prep-and-Etch + the vinegar.

Steel etching in apple cider vinegar solution with a handle in a plastic container
Use whatever container works. These were from a bunch of zip ties I bought once.
Hand holding a gray steel knife with apple cider vinegar in background
You can see the abraded surface from the abrasive blaster. You can acid etch without this step but I find doing this first really makes for a good finish plus all the tiny nooks and crannies really let the BLO grab hold.
Steel knife blade acid etched in apple cider vinegar
This one is getting ready to go it. I use WD40 when done to remove the water – it literally means “Water Displacement” forumula 40 and excels at that.
Close-up of metal rod submerged in yellow liquid for acid etching steel with apple cider vinegar.
You will see lots of little bubbles. I go by the color of the etched steel more than I do the degree of fizzing or time.
Two kukri knives with weathered steel blades, one resting on top of the other.
These two have already gone through the process.
Kukri knife with dark wood handle and black sheath
I like the post apocalyptic look it gives.
Antique meat cleaver with wooden handle on a tree stump, ruler for scale
This giant cleaver was acid etched and then sealed with BLO.
A cleaver rests against a tree stump, ready for use
Another angle of the big “splitter”. The blade is over a 1/2″ thick!
Antique cleaver on wood stump with ruler for scale
Another cleaver.

Abrasive Blasting

You can usually get a coal slag blast media very, very cheap from farm stores.  Check there first because off Amazon you are paying a pretty penny for shipping whether they bury it in the item’s price or call it out separate.  I think I pay $7-9 per 25# bag at Family Farm and Home.

This is the actual product I use:  http://www.blackbeautyabrasives.com/products/black-beauty-original-abrasives.php

Now for the blasting, you have tons of options – hand blaster for small work, siphon blaster, pressurized tank or cabinets.  It all depends on how much blasting you plan to do.  I started out with a siphon blaster – dirt cheap but very slow.  I then got a tank and it was very fast and portable but media went everywhere.  I still have that for working on cars and big parts.  However, for my grips, gun parts and knives, I use my blast cabinet.  I have a Cyclone brand large bench unit and am relatively happy.  If I had it to do over, I would have gotten a free standing unit with a bigger and deeper hopper so I’m not constantly hitting the side or moving media around by hand.  I have a foot control pedal and that really helps plus it gets a the pneumatics out of the cabinet where they would normally be subject to abrasive dust and wear.

Cyclone Manufacturing
http://www.cycloneblasters.com/

My pressurized tank blaster is a Harbor Freight unit.  It’s held up relatively fine other than my constantly wearing out valves and tips.  The tank itself is just fine.
http://www.harborfreight.com/40-lb-pressurized-abrasive-blaster-68992.html

Summary

Acid etching is easy and rewarding. I like using BLO to seal things partly because of the color it imparts.

I hope this gives you some ideas!


Please share the link on Facebook, Forums, with colleagues, etc. Your support is much appreciated and if you have any feedback, please email us in**@*********ps.com. If you’d like to request a report or order a reprint, please click here for the corresponding page to open in new tab.


Custom Himalayan Imports Uddha Sword – 24″ Overall with a 16.5″ Blade by Bura

I bought a beat up HI Uddha sword about a year back where the handle was toast.  The cool part was that the blade was made by Bura, who was one of the best kamis in Nepal.  He had to retire due to health problems and his blades are collector’s items now.  At any rate, I decided to replace the trashed handled with black paper micarta, acid etched the blade and made a custom Kydex sheath.  It has a new owner now but thought you might find it interesting.

Specs:

24″ overall

16.5″ Blade

7.5″ Handle

Weight of the sword alone:  1.86 pounds

Weight of sheath:  1.08 pounds

Total weight:  2.94 pounds


Custom Himalayan Imports Uddha sword with sheath and Maxpedition pouch  Custom Himalayan Imports Uddha sword with sheath  Custom Himalayan Imports Uddha sword in black sheath on wooden floor  Close-up of a black sword handle wrapped with black paracord Close-up of a black sheath with a belt clip attached to a Himalayan Imports Uddha sword  Close-up of a black sheath with paracord lacing for a Himalayan Imports Uddha sword.  Black Custom Himalayan Imports Uddha sword with sheath on wooden surface  Himalayan Imports Uddha sword handle and sheath with Maxpedition pouch Maxpedition pouch attached to a custom Uddha sword sheath with paracord lacing.  Custom Himalayan Imports Uddha Sword with black handle and blade on wooden surface

What can a custom 21″ HI Sirupati look like?

This HI Sirupati had a 16-17″ blade and was about 21″ overall when it arrived to us with a busted handle so the first step was to boil it and a few others with bad handles and then pry it off:

Custom 21" HI Sirupati rotisserie spit with steam rising Close-up of antique silver cutlery with engraved details in a pot  Custom 21-inch HI Sirupati knife with dark horn handle and metal ferrule. Four custom 21" HI Sirupati kukris in progress on a wooden surface.

I made two new handles by gluing assembled blocks around the tangs of the two Sirupatis.  I didn’t mention it before, but they are twins – both about 21″ long so you can see a before and after shot.  The trick was to form a block made of black paper micarta and black glass reinforced Acraglas epoxy.  I then used my new Esteem grinder to remove the parts of the micarta that didn’t feel like a handle:

Custom 21" HI Sirupati machete handle and bladeCustom 21" HI Sirupati belt grinder with motor and controls

The following photos are of the first completed Sirupati that has an acid etched blade and its custom sheath made from 0.093″ thick Kydex:

Custom 21" HI Sirupati kukri knife on a Ridgid tile saw Custom 21-inch HI Sirupati knife on metal surface with leather sheath Custom 21" HI Sirupati knife and sheath with paracord wrap Close up of custom 21-inch HI Sirupati sheath with blade on metal surface Close-up of a custom 21" HI Sirupati kukri, showing ornate handle details. Custom 21" HI Sirupati knife and sheath Custom 21" HI Sirupati kukri with sheath on a belt sander

The intent of posting this is to show how a very traditional looking khukuri can look after some modernizing.