Are you looking for a family friendly kitchen knife sharpener?

Smith's kitchen knife sharpener with chef and pocket knives Smith's knife sharpener with coarse and fine sharpening slots 

I seriously like my Ken Onion Work Sharp knife sharpener to put any kind of edge on just about any kind of knife – folder, fixed, kitchen or even a giant khukuri.  However, that is not exactly family friendly.  To make it easier on my wife, daughters and even me in the kitchen, I bought a nice Smith’s 50090 sharpener that has a coarse carbide side and a fine ceramic side.  This is about as simple as you get.

The unit is rubberized and easy to hold.  I set the unit on the edge of the table so I don’t hit anything when I pull the knife backwards and down and do 10 strokes on coarse and 10 on fine.  This puts a great edge on kitchen knives.  You can actually see the metal shavings on the coarse carbide side pile up.

Smith's kitchen knife sharpener with two sharpening slots

We use it on all kinds of kitchen knifes other than serrated.  So if you are looking for a sharpener that is simple and effective for the kitchen, pick up one of these Smith units.

2/27/20 Update:  This thing has had a ton of use and is still going!  I use it several times a month to sharpen kitchen knives.


Please share the link on Facebook, Forums, with colleagues, etc. Your support is much appreciated and if you have any feedback, please email us in**@*********ps.com. If you’d like to request a report or order a reprint, please click here for the corresponding page to open in new tab.


Need Dryer Shop Compressed Air? – Step 3: Add two stage air filters to remove contaminants

If you are just jumping into this three part post, an inline compressed air filter by itself does not work very well when it comes to removing moisture from compressed air but it definite works good as a third step in a thought out moisture control strategy.  If you haven’t read them yet, please read these other posts first:

  1. Need Dryer Shop Compressed Air? – Step 1:  Drain Your Tank Regularly
  2. Need Dryer Shop Compressed Air? – Step 2:  Add a Moisture Separation System

Now, as a third step, good filters are definitely needed.   In line filters remove even more moisture and protect your regulators and equipment from debris such as rust.  Filters are a good example of you get what you pay for.  Those really cheap air filters aren’t up to demanding tasks.  Setting shoddy construction to the side for the moment, you will notice that some do not say how fine their filter is (as measured in microns) or give you any indication of the cubic feet minute (CFM) the filter can handle.  You at least need to know the first part.

Buy quality units from a reputably manufacturer.  I like Milton, Parker and PneumaticPlus and they are three of many that are out there.  Everything I am going to write about here, I bought with my own money and actually use or have used so this is not some thinly veiled advertisement.  I’m recommending the various items because they work for me.

In terms of construction, some have a plastic/polycarbonate bowl and they are rated for lower pressures (usually 125-150 PSI) and others have metal bowls and are rated for higher pressures.  For example, my Ingersol Rand 2340 stores the compressed air at 175PSI so I use metal bowls on my filters and drains exposed to that pressure.  In downstream areas with lower pressure, I use filters with polycarbonate bowls.

If you are serious about filtering, you need at least a two stage unit.  The first stage is a coarse air filter and will range from 5-40 microns in terms of filtering element size.  The second stage will be a fine air filter and be remove even smaller particles often down to the 1 to even .01 micron level.  You must have the coarse filter in front or you will plug up the fine air filter real fast and negatively impact your CFM.

When you are shopping for filters, there is an ISO standard to be aware of that some reputable filter companies will reference – ISO8573.1.  Here is a good blog post if you want to learn more.

With that said, let me show you what I actually use.

My inlet air for the filter is 1/2″ because I wanted to provide a lot of flow.  All of my plumbing up to that point is 1/2″ also.  After doing a lot of digging, I opted for a PneumaticPlus SAU4030M-N04DG-MEP which is a combination three stage unit with a 10 micron coarse air particulate filter first, then a 0.3 Micron Coalescing Filter followed by a pressure regulator.

In researching the unit, I found that the rated inlet pressure was 250PSI and the outlet was rated at 150PSI — note these are metal bowls hence the higher pressure rating..  I planned on setting the regulator to 90PSI for my tools and found that the maximum flow would be around 38 SCFM (standard cubic feet per minute) @ 90 PSI, which also met my needs.  The two filters also have automatic drains so I don’t have to worry about purging them.

LiteXpress LXL439001 flashlight held in hand, showing LED and reflector

LiteXpress LXL439001 flashlight held in hand, showing LED and reflector

LiteXpress LXL439001 flashlight held in hand, showing LED and reflector

You’ll note the black warmer cable in the last photo – that’s because my shop is unheated in the winter.  The heated cable is on a thermal switch and only turns on at 32F.  This keeps the condensate from freezing in the bowls.  You’ll also note the 1/8″ tubing removing routing the condensate to drain where I want it to.

They both still collect moisture – the first filter more than the second.  Every day, I can see the condensate coming out of the tank, the moisture separator and to a much lesser extent, these filters.   I have been using this set up since August 2016 and really like it.  I usually find zero moisture downstream but I still run basic coarse filters just before my various regulators.  Attached to my plasma cutter, I still run one of their #128647 1 micron air filters just to play it safe.

Downstream, I still have in-line air filters just in case

As a rule of thumb, it is always a good idea to have an air filter just before a regulatory.  Before a couple of my downstream pressure regulators, I run Milton 1018 filters and they are nice.  40 micron coarse filters with 48 SCFM.  This one right here has been in use for a few years and predates the elaborate moisture control system I have in place now.  Look at the rust in the bowl from when I cleaned it!  I still have two of these in daily use and have no complaints.

Close-up of a LiteXpress X-Tactical 101 flashlight held in a hand. Close-up of a LiteXpress X-Tactical 101 flashlight held in a hand. Close-up of a LiteXpress X-Tactical 101 flashlight held in a hand. Close-up of a LiteXpress X-Tactical 101 flashlight held in a hand. Close-up of a LiteXpress X-Tactical 101 flashlight held in a hand.

These inline filters are all bone dry which helps me conclude the upstream moisture control is working pretty well.  They are probably 50-75 feet from the tank in terms of how much line the air must flow through before reaching them.  The dirty bowls are from the mess I had before the current system.  I cleaned them while I was at it hence the above 1018 being disassembled.  A nice feature of this model Milton is that it automatically drains when the pressure in the bowls drops to the point that a spring can pop open and let the condensate out. You can also push the rubber nipple sideways to manually drain it while pressurized.  They are simple and effective coarse filters.

Close-up of a LiteXpress X-Tactical 101 flashlight held in a hand. Close-up of a LiteXpress X-Tactical 101 flashlight held in a hand. Close-up of a LiteXpress X-Tactical 101 flashlight held in a hand.

Now the red and black filter is a Craftsman 16009 and it is pretty low end.  When my dad passed away, he left a couple of Sears gift cards that I used to buy three of these filters and some air hose.  When I google them now and read on the Sears website, they do not list the microns.  I suspect it is a 40-50 micron coarse filter but that lack of a rating should throw up flags.  I don’t have the original packaging so I don’t know if it listed it or not.  The one unit left in place was inserted a few years ago to protect the one regulator from backflow from the two airlines just before it The Milton’s drain when the pressure in the bowls drops to the point that a spring can pop open and let the condensate out.  With the Craftsman, you need to turn that little valve screw on the bottom and manually drain it.  Not too bad for casual use but I would not use them again for my stuff.  I should point out that on one filter, the pipe hole not straight!  Also, guys report bowls cracking and no replacement parts so at least that hasn’t happened to me.  I just include them here so you can see what I would not recommend.  You can see the angled/not true pipe hole in the second photo especially.  These are in my parts bin just in case.

Close-up of a LiteXpress X-Tactical 101 flashlight held in a hand. Close-up of a LiteXpress X-Tactical 101 flashlight held in a hand.

5/2/2019 Update – I have replaced all Craftsmen filters with Milton filters.  The PneumaticPlus gear is all still running great.

I hope this three part blog post has given you some ideas on how to reduce moisture in your air lines.  I don’t consider myself an expert or anything close, but just wanted to share what worked for me.  There are some great resources on the Internet if you want to learn more:

The three blog posts in the series are:


Please share the link on Facebook, Forums, with colleagues, etc. Your support is much appreciated and if you have any feedback, please email us in**@*********ps.com. If you’d like to request a report or order a reprint, please click here for the corresponding page to open in new tab.


Need Drier Shop Compressed Air? – Step 2: Build a Moisture Separation System

When compressed air leaves a compressor, the the temperature drops as it expands, and moisture condenses on the wall of whatever surface is below the dew point of the air and then runs down to the lowest spot where it is collected and dispose of.  Now the cooling part is critical – just putting an air filter immediately outside of a compressor tank will not accomplish much.  Ideally you want the air to travel and cool for a bit in a metal pipe that is at least 20 feet long.  You may wonder why I mention 20 feet – it’s because I was told 20 feet at a minimum – in other words, I have no basis in engineering, just what guys have told me over the years.  I would just use that as a rule of thumb about how far the air needs to travel at a minimum before you do another round of moisture filtering.  The further the better.

I looked at three simple options when I was considering how to remove the bulk of the moisture from my airlines:

Run your hard air lines at an upward angle and install traps

This is as simple as it sounds.  I like to always install a ball valve and then a quick connect on the tank and run a rubber/flexible airline to the hardline to isolate vibrations. Plug into the airline above a moisture trap like so:

LiteXpress LXL439001 flashlight head with rotary selector and filters

I investigated this approach but it was going to take up too much space.  I needed to start accessing dry air much closer to my compressor so this was discounted right away.  If I were to build this, I would still use the PneumaticPlus drains referenced in more detail in the next section.

Pros of this approach:  Relatively cheap and easy to build

Cons:  Takes a long distance / not very compact.  It was going to be too long or my needs.

Build a compact moisture separator

Now this is what I do in my shop and it works great.  I use a series of vertical 1/2″ pipes with PneumaticPlus SAD402-N04D-MEP water traps with automatic drains at the bottom of each riser.  Now this works very well.   The vertical pieces are 6 feet tall and the cross sections are 6″.  This is occupying an area about 24″ wide and 8 feet tall.  It’s mounted on the shop wall and out of the way.  Most of the condensation happens in the first pipe. A lesser amount in the second and very little in the third.  It cost about $120 for the plumbing, $56 for each of the automatic drains and then maybe $50 for the  short hoses and 1/2″ fittings.  I installed this in August 2016 and am quite happy with it.

For me, one of the big benefits is with the automatic drains in the water traps.  When the float rises to a certain level there is a quick “pffft” sound and the trap blows out the water and closes again.  It’s not something you have to remember to drain, which is something I am not great at.  Also, when I am doing a lot of work, I might hear the first trap drain twice in one day but that is rare.

LiteXpress LXL439001 flashlight head with rotary selector and filters LiteXpress LXL439001 flashlight head with rotary selector and filtersLiteXpress LXL439001 flashlight head with rotary selector and filters LiteXpress LXL439001 flashlight head with rotary selector and filters LiteXpress LXL439001 flashlight head with rotary selector and filters

Sorry I don’t have a photo of the whole system from top to bottom.  I have equipment in front of it now and can’t get a good overall photo.  It’s just too tall for my camera given the limited distance I have to get the photo.

For me, it is really intriguing to see how much condensate is caught in the first trap closest to the compressor.  The second trap has much less and the third is dramatically less than either of the others.  This is not perfect as I still catch moisture in my air filters but it has made a dramatic difference at the end of the line.  When I blow air at a glass or mirror, there isn’t water all over it any more 🙂  I have wondered what would happen if I used 1″ pipe in that first vertical six foot section but have never had the need to spend the money and time to experiment.  In theory, the greater the expansion, the greater the cooling and thus the greater the level of condensation all other things being equal.

By the way, I really like PneumaticPlus.  I actually bought this gear off Amazon with my own money – this is a real review.  Every time I have questions they actually answer their phones and help me.  I had one defective part in one bowl and they immediately sent me a replacement.  In short, not only is the hardware itself good but I like the company behind it too.

You can add 1/8″ tubing to drain the condensate away from the water traps.  I feel it is a good idea to get the water away from the compressor as much as possible:

Pros to this approach:  It actually works, does not need electricity, automatically drains, uses relatively little space

Cons:  The floats could freeze in cold weather so I insulate and heat them in the winter.  I did not have any problems during the 2016/2017 winter with that approach.  It’s a little pricey but it really gets the job done.

By the way, if you can’t afford the automatic drains/traps, then put in ball valves with longer pipes to hold the accumulated condensate and drain them manually.  It definitely works but you must remember to manually drain the traps.

Install a refrigerated air dryer

The last option is the most expensive and that is to install a refrigerated air dryer.  Basically, the warm moist air enters a dryer that is a series of tubes that are refrigerated causing the moisture to condense and then drain out of the unit.  There is a Harbor Freight unit that gets surprisingly good reviews plus many different industrial models to select from.  I have not needed this yet, so I do not have first hand experience.  I’ve read about guys using them to protect their plasma cutters.  I use the above compact moisture separator described above, a two stage air filter system and then a very fine final filter from Hypertherm right before the inlet of my plasma cutter and have not had a problem.

Pros:  You can definitely remove the moisture.  Guys say they really like the low-cost Harbor Freight unit.

Cons:  Expensive and you need electricity for it to work.  It will get pretty dirty in a high dust environment like my shop and need routine cleaning to stay efficient.

If you are interested, here is the link to the HF dryer:  http://www.harborfreight.com/compressed-air-dryer-40211.html

So the first stage of moisture defense in my shop is to keep the tank drained.  Then it is this separator system to get the bulk of the moisture out of the compressed air.  In the last part of the series, I’ll talk about fine air filters.

The three blog posts in the series are:


Please share the link on Facebook, Forums, with colleagues, etc. Your support is much appreciated and if you have any feedback, please email us in**@*********ps.com. If you’d like to request a report or order a reprint, please click here for the corresponding page to open in new tab.


Need Dryer Shop Compressed Air? – Step 1 Tank Draining Options

In my shop, I need clean dry air for working with the plastics, the abrasive Blaster, and my air tools. It also comes in handy when I’m spraying on finishes such as Molyresin.  I have certainly had my share of problems over the years caused by dirty air including air tool failures, water or oil spraying on paint, clumping of abrasive Blaster media and so forth. As time went on I identified a number of practices that could help reduce moisture in the air lines as well as other contaminants.  I don’t use an inline oiler so most of my issues revolve around water, rust particles (from the tank and hard air lines) and some amount of air compressor oil that makes it past the piston rings.

The fact is that all compressed air systems will have some amount of moisture when first compressed. Natural air contains moisture and as your compressor pumps it into the tank, it is both heating and concentrating it.  Once the temperature drops below where the moisture will settle out of the air, that is known as the “dew point”, that is when the water appears.   Some of it will collect in the bottom of the tank causing rust and some will likely remain in the compressed air.

Now I am not an expert on this stuff but I have had to try and learn a lot over time.  In this post and the two that follow it, I am going to try and explain options I looked at and what I did.  I’m not going to go into a ton of theory or talk about things I didn’t check out.  If I am really wrong on something, please let me know.  If you really want to get into details, check out a cool website called Compressed Air Best Practices that has tons of information.

I live in Michigan and have a ton of moisture to fight.  I have a lot of air powered wrenches and sanders plus an abrasive blast cabinet and plasma cutter so this is a big deal to me – I need clean dry air.   For me, there’s not one single cost effective solution so I approach the reduction of moisture in stages.  The first and cheapest approach is to dry your air is to Drain your tank!  I can’t emphasize this enough!!

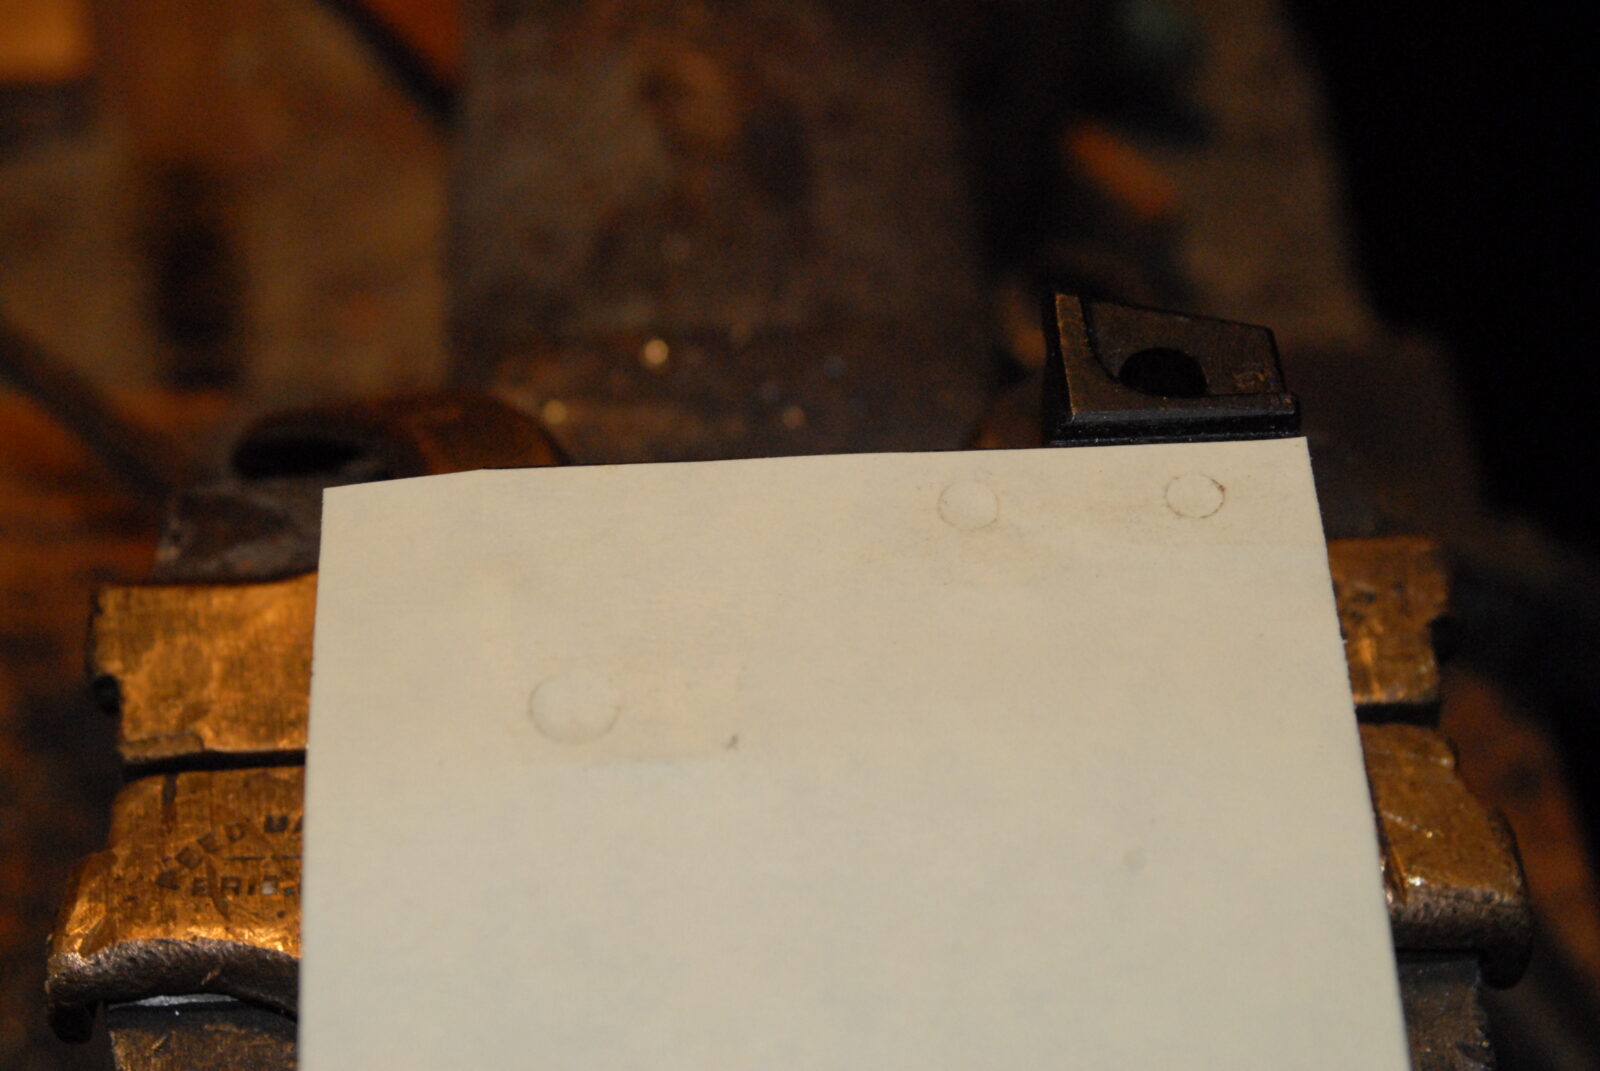
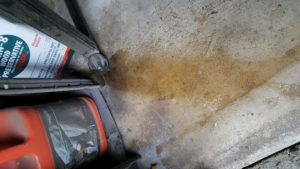
As water settles inside the tank, it gets blown all over the place during use plus it is causing your tank to rust and form sediment at the bottom. The best offense is a good defense. Get rid of the water by regularly draining your tank and this may mean several times every day.  Here’s the amount of moisture I blew out the drain after my compressor ran for several hours (and I do mean actual run time). It’s about a half a cup of water if I were to guess:

Spilled liquid on floor next to Preservative Wood Rot container

Water sitting in your tank not only means you have water blowing everywhere in your tank and potentially adding moisture to the outgoing air but it also causes rust inside your tank both adding further contaminates and weakening the tank over time.  We were all young once, right?  I bought some low end Devilbiss compressor 20-25 years ago and had it in the garage.  My dad asked if I had ever drained it and I really hadn’t been diligent about it.  We opened the valve and it was stunning as to how much smelly rusty water came out.  That sold me.  Over the years I have heard stories of blown / leaky corroded tanks but thankfully have never had that happen first hand.  For me, it is the moisture in the lines that is the problem and regular draining of the tank is the first step in combating that.

So, if draining regularly is a good idea, what are our options for small shops?

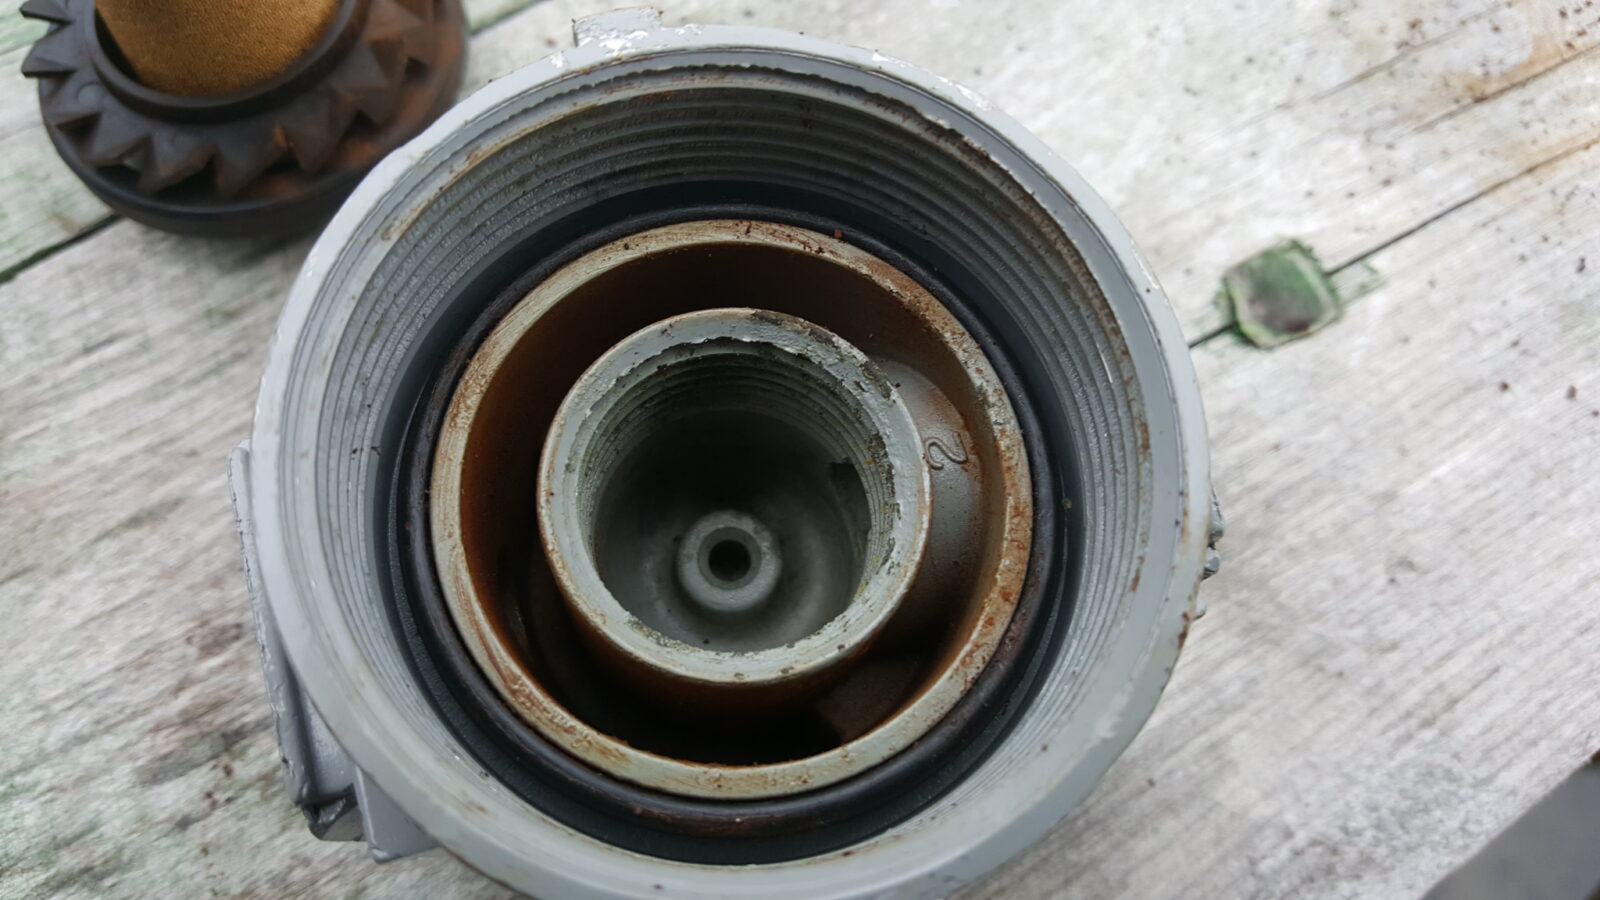
Use the drain valve that came with the compressor:

Dryer shop compressed air tank draining valve with hose attached

Every consumer or prosumer grade compressor I have seen comes with a drain valve.  When you get up to the industrial models, you may see a hole where they expect you to add something but for most small shops what you have will either look like the old petcock valve from a radiator or a round unit like the above.  Even though reaching those things is a total headache, one option is to live with it, reach under the tank and drain it.  If you are a light user, do this when you are done for the day and leave it open letting everything run out or at least let stop after the bulk of the condensation stops.  If you are doing a ton of work, you may need to drain it every few hours vs. at the end of the day.  It all depends on your experience and how much water you see coming out for a given amount of time.  In general, once is a day is fine and by doing it at the end, it doesn’t sit there needlessly for however long until the next use.

Pros with this approach:  Usually is supplied with the compressor so it is ready to go with not additional investment and it does work.
Cons:  Total headache to reach, ejects the water right under the tank waiting to evaporate and go back into the tank not to mention is messy because you can’t readily control where the condensate goes, and you have to remember to do it (which is the hardest thing always).  Also, these drain valves are pretty cheaply made, can corrode and then be a total bear to open. I really dislike these things but they are better than nothing.

If your existing drain fails for some reason, stores and vendors sell exact replacement drains but don’t do that.  Do one of the next two options to make your life easier.  Matter of fact, do one of the next two options as soon as you can to make your life easier.

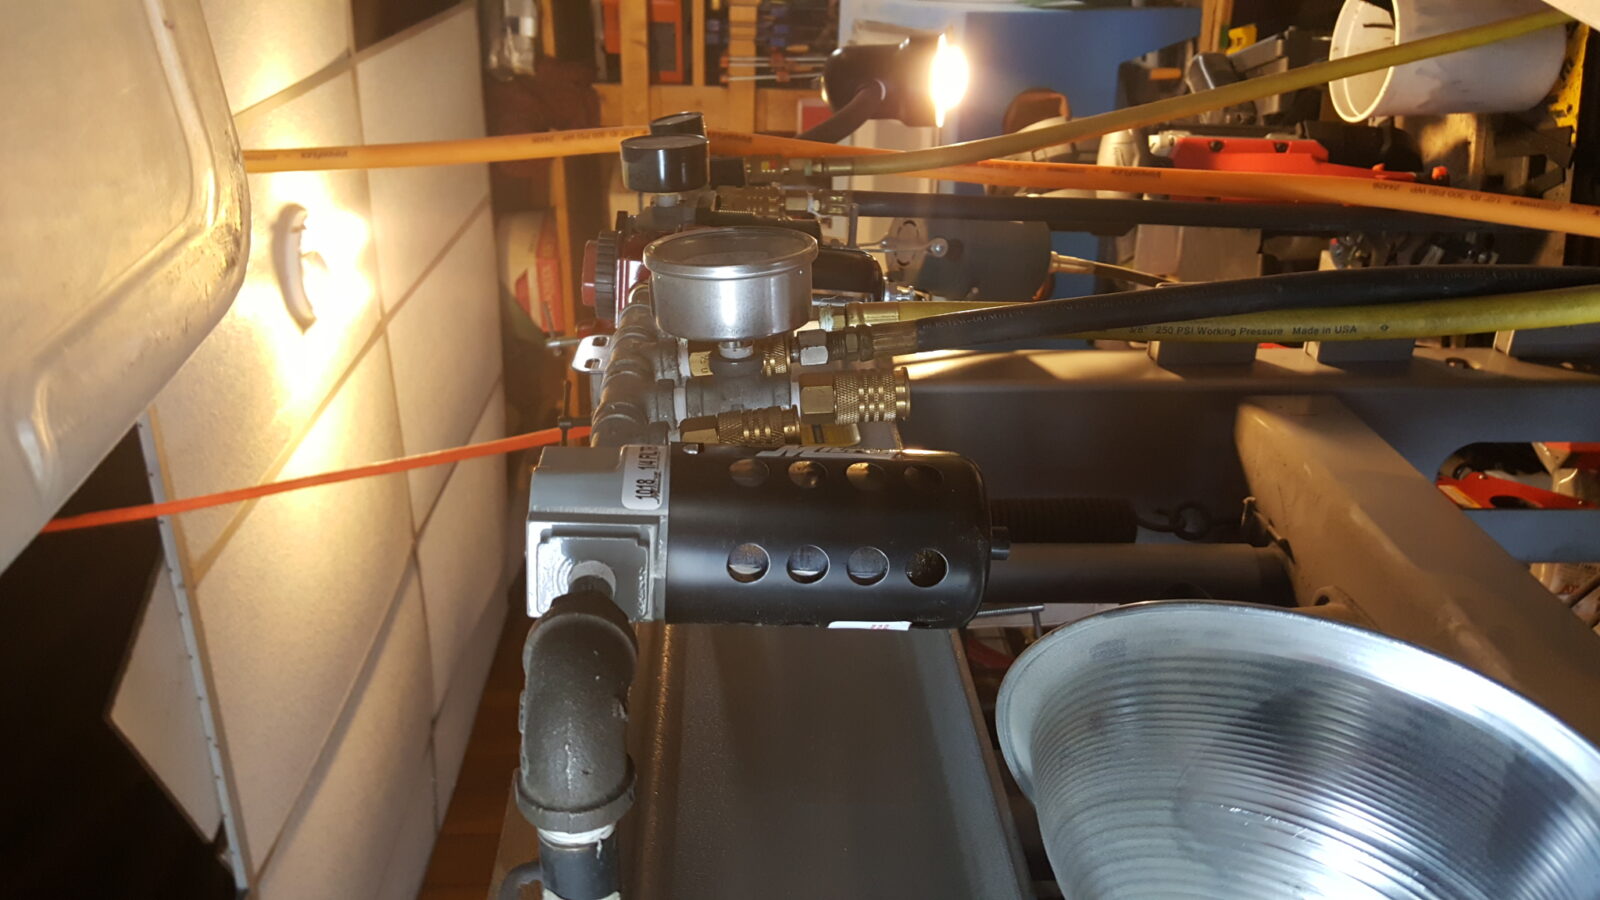
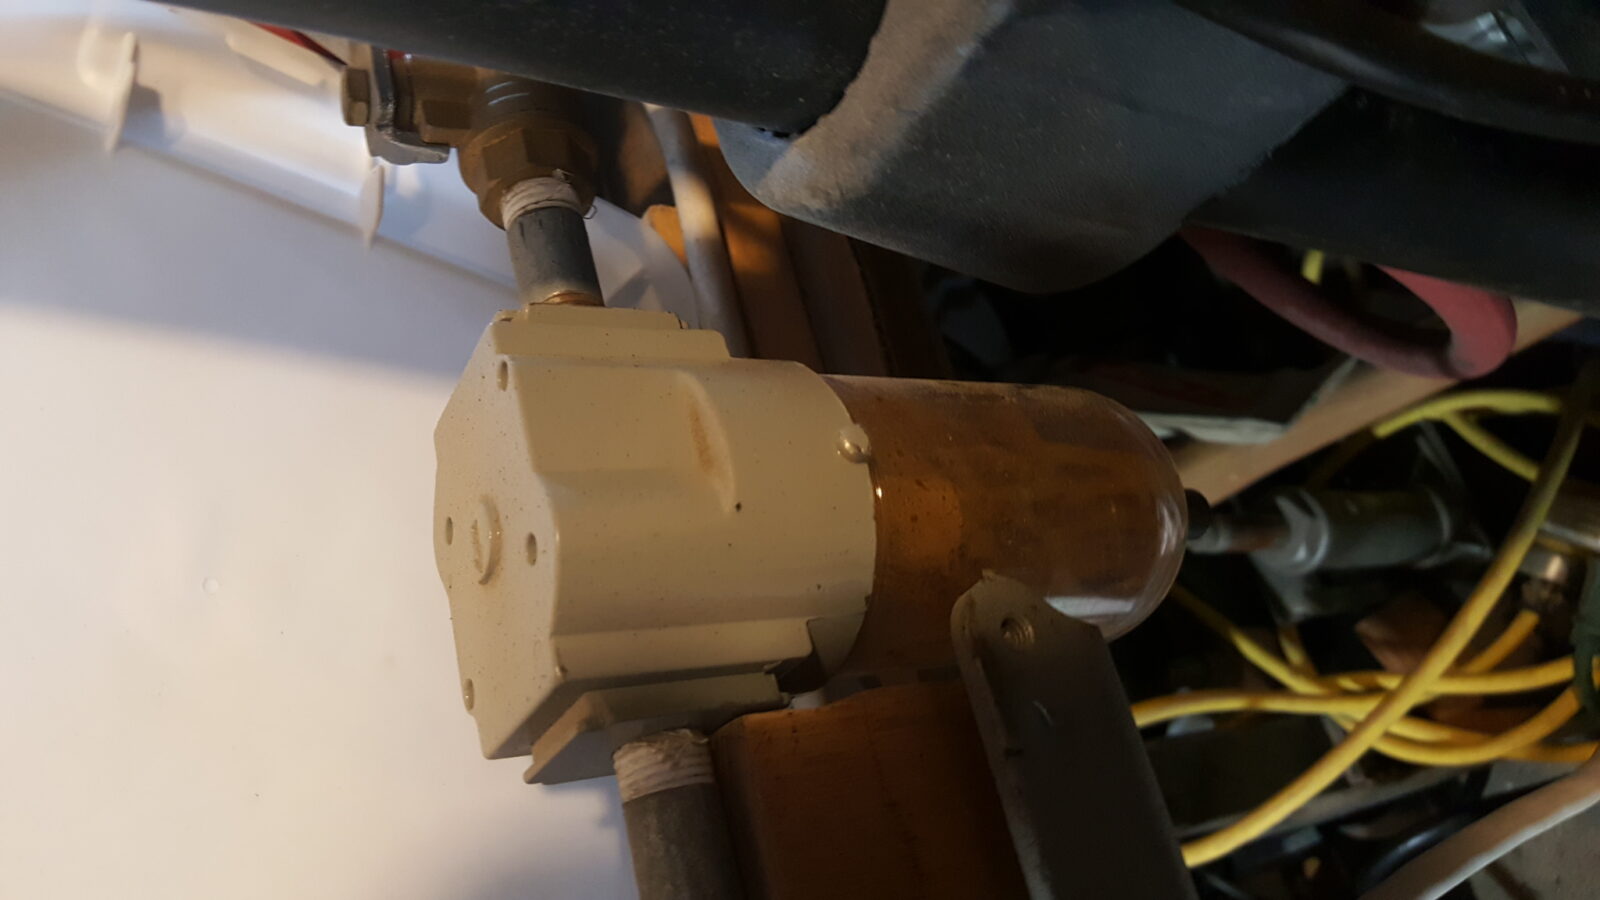
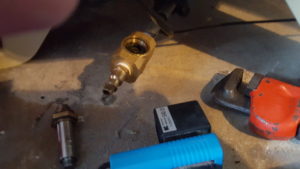
Replace the cheap original drain with a better positioned ball valve and drain hose

Ball valve with pipe fittings for compressed air tank draining Air compressor tank drain valve and plumbing Yellow drain valve attached to a white compressed air tank

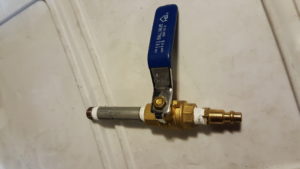
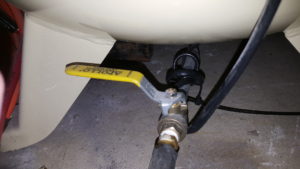
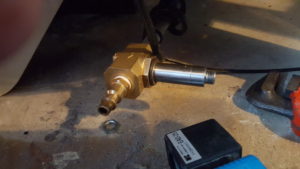
Get rid of that awful little stock valve and install a ball valve that is easier to reach.  This can make things so much simpler.  Odds are the old valve is 1/4″.  Remove it and confirm the size.  Install a nipple, a right angle fitting, a long enough piece of pipe, the ball valve itself and then a hose barb (or 1/4″ quick adapter) with a piece of hose that allows you to drain the condensate where ever you want.  Be sure to wrap all the threads with PTFE tape.  I buy most of my plumbing stuff from Home Depot.  In general, I get pneumatic parts and supplies from Amazon such as Milton quick connect fittings, filters, etc.  I always read the reviews and ratings carefully.

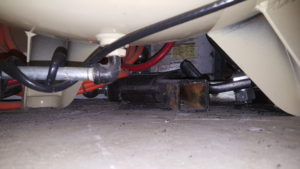
One tip, go with whatever length nipple and a female-female right angle pipe fitting to get the greatest flow.  Also, make sure you have enough room for whatever you are installing.  There is often very little clearance between the bottom of the tank and the floor.  On my IR compressor, I use a “street elbow” that, even though has a relative small internal dimension, works just fine to drain water. I have a valve with a good sized handle and it is very easy to access and to turn.

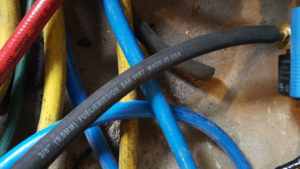
Since my shop is not heated and I live in Michigan, I need to get creative.  The black cable you see is a pipe warmer with a thermal switch that only comes on at 32F to keep the valve from freezing.  I actually have it on a timer so it will only run 7am-10pm – when I am usually in the shop.

The rubber drain line you see is 3/8″ fuel hose pushed over a regular 1/4″ male quick connect fitting and it goes out the corner of my shop’s garage door.  I’ve never needed a hose clamp and it gets the condensate out of my shop.

Pros:  Quick, easy and cheap  It’s also very reliable in cold weather.

Con:  You still need to remember to do it and you can’t constantly do it.

Now, here’s an interesting alternative for low clearance situations.  I have only seen these – I have never used one but they make sense and pretty much anything is better than that hard to reach stock valve in my opinion:

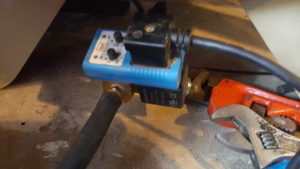
Install an automatic drain and reap the rewards!

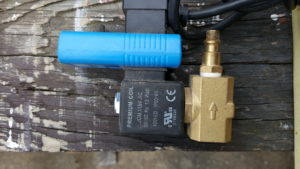
This is the last option and one I recommend – Invest in a automatic drain that has adjustments for how often to open and how long to remain open. Let me tell you, that automatic drain is worth its weight in gold when the temperatures are above freezing.  The only time I go back to the ball valve is when temperatures are below freezing and I don’t want the automatic drain to freeze open and it will do just that in cold weather.  When the warm weather comes, I reinstall the automatic drain.

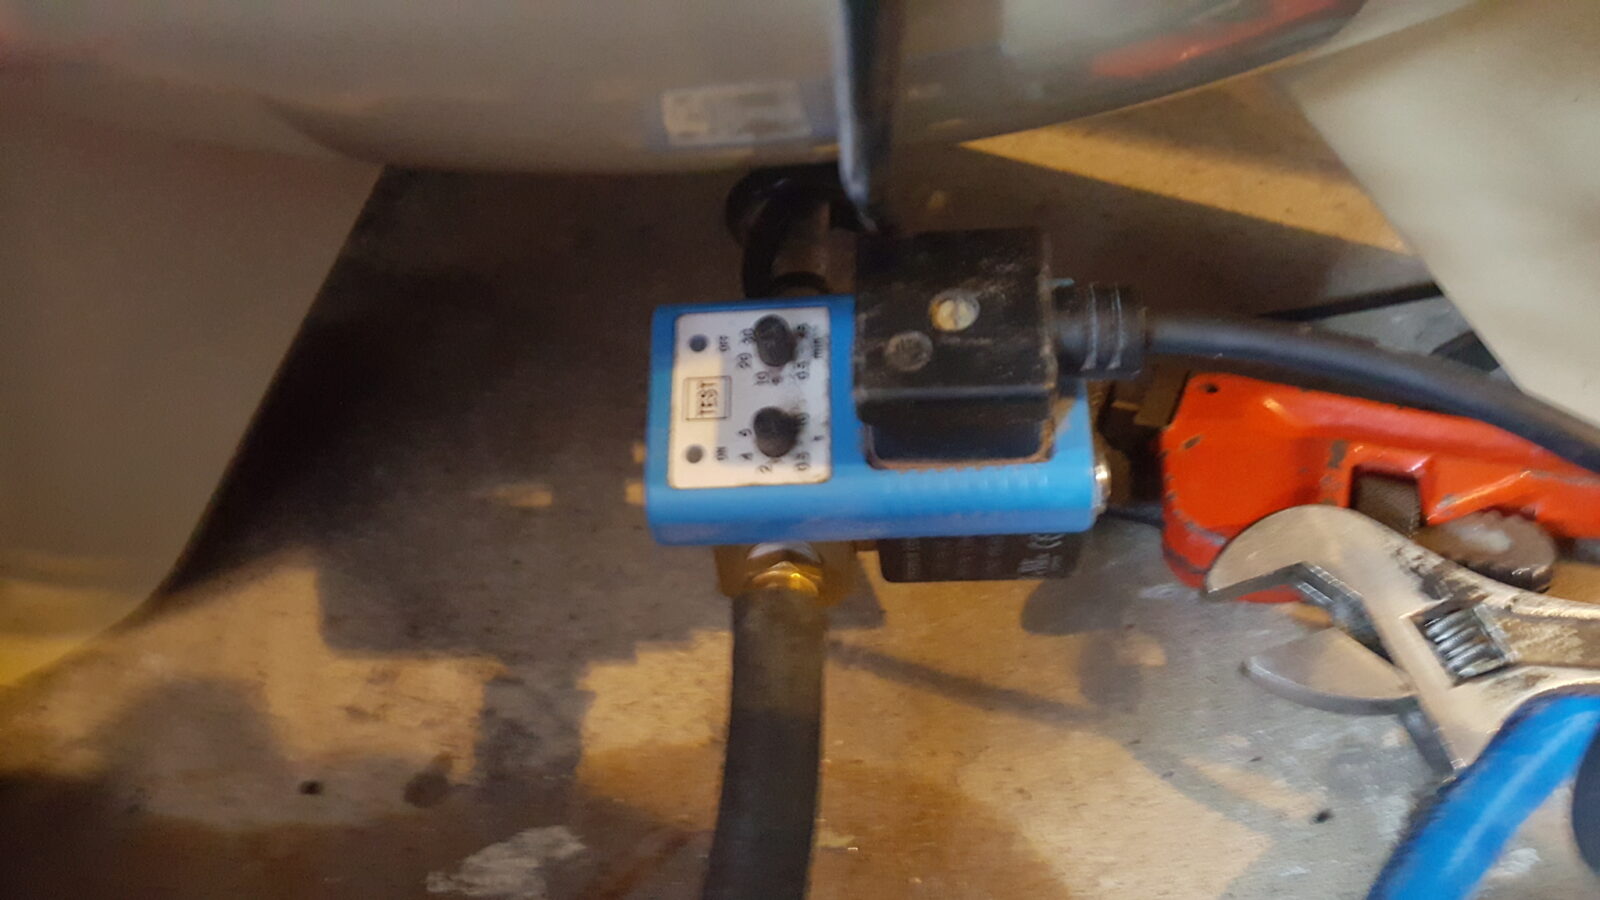
At any rate, the installation is the same as the ball valve except the automated unit goes in place of the manual valve.  My unit is a Midwest Controls EAD-25 that is probably at least 5-6 years old.  Let me put it this way, I have moved it from one compressor to the next probably three times as I wore consumer compressors out.  I currently have an IR 2340 entry-level industrial compressor that has survived for 2-1/2 years, which is remarkable given how I blew through the consumer Husky models.

Solenoid valve timer for compressed air tank draining, showing ON/OFF and time settings. Solenoid valve with brass fitting, part of compressed air tank draining options.

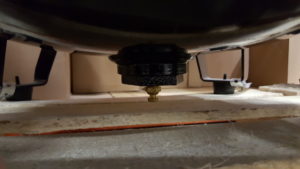
The following photos are of my doing my spring swap wherein I replace my ball valve with my freshly cleaned automatic drain valve:

Red pipe wrench on compressed air tank valve with yellow hose

Compressed air tank connection with tape, ready for draining

Brass fitting, wrench, and EAD-25 device for dryer shop compressed air tank draining. 

Brass air valve with quick connect fitting for dryer shop compressed air system 

Solenoid valve with timer for dryer shop compressed air tank draining 

Multiple hoses, including a black 3/8 inch hose made in USA

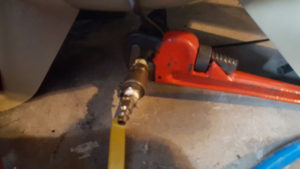
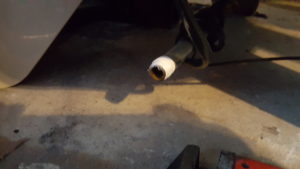
These automatic drains are simple as can be – the timer trips and an electromagnet turns on and opens the valve for the specified duration.  The timer then cuts the electricity to the electromagnet and springs shove the valve back closed.  The only wear point I can see is the rubber surface on the valve and mine still works fine all these years later.  I just have to take it apart and clean it a few times a year, which I will post about later.  The photos in this post were taken in the spring as I converted back from the ball valve to the automatic drain.

Pros:  It is actually easy to install – just add the pipe and install the automatic unit, plug it in, set the timer and blow-off duration and call it even.  It is the best approach I have found when the weather is above freezing.

Cons:  It can be expensive if you buy a name brand but they last forever (I have never tried another brand as my local tool supplier recommended this one and it is still working!).  They will freeze up in the winter (I put my ball valve back in before it gets super cold as my shop is unheated most of the time) and debris can jam it but it is very easy to clean.

This is the exact model I have:

This is my model except mine has a blue case … it’s old and still working!


Here are automatic drain with very good reviews on Amazon:


In my next post, I’ll explain how to build a condensation based moisture separator and explain some concepts for you to consider.

The three blog posts in the series are:


Please share the link on Facebook, Forums, with colleagues, etc. Your support is much appreciated and if you have any feedback, please email us in**@*********ps.com. If you’d like to request a report or order a reprint, please click here for the corresponding page to open in new tab.


2014 Restoration of a 21-1/8″ New Haven Edge Tool Co #3 Cleaver

2014 restored 21-1/8 inch New Haven Edge Tool Co #3 Cleaver on wooden bench 2014 restored 21-1/8 inch New Haven Edge Tool Co #3 Cleaver on wood New Haven Edge Tool Co cleaver handle and blade during 2014 restoration New Haven cleaver head showing rustic wear on the wooden handle during restoration. Restoring New Haven Edge Tool Co cleaver: removing old handle from socket Hand holding a restored 21-1/8 inch New Haven Edge Tool Co #3 Cleaver Close-up of a vintage New Haven Edge Tool Co cleaver handle during restoration Wooden handle of a New Haven Edge Tool Co cleaver during restoration. New Haven Edge Tool Co cleaver restoration: close-up of worn edge Bob Smith Industries Insta-Cure glue bottle near New Haven cleaver restoration New Haven Edge Tool cleaver restoration: close-up of worn metal edge. Close up of a cracked wooden handle of a New Haven Edge Tool Co cleaver during restoration

This dates back to August 2014.  I scored a beat up but fascinating New Haven Edge Tool Co #3 Cleaver.  It was quite large measuring approximately 21-1/8″ long and 3.187 pounds.  The exact age was hard to say – it could be anywhere from 100-150 years old given the way it is made.   After doing some digging, one person doing research said that “New Haven Edge Tool Company” was  a Sargent Brand and the listed it discontinued in their 1911 catalog so that would mean this cleaver is likely older than that.  Regardless, you would never know it now.

It would appear to be cast iron and is just a big no nonsense brute of a cleaver.  It’s either ready to go to work or to be one heck of a conversation piece.  Let me tell you a bit about what we did after we bought it:

The handle was cracked and we stabilized it internally with a special Cyanoacrylate glue that penetrates wood very deeply.  We also used glass reinforced epoxy to seal the front of the handle where the blade is inserted.  The blade is actually secured via rat tail tang that goes through the whole handle and is peened over at the pommel to firmly secure it.  Once we had the handle all fixed up, we sanded it and then applied four coats of a penetrating combination of boiled linseed oil (BLO) and turpentine.

Close-up of a New Haven Edge Tool Co cleaver handle and ferrule Restoring a New Haven Edge Tool Co cleaver handle, showing wood grain and wear. Close-up of a restored wooden handle with grooved texture from a New Haven Edge Tool Co cleaver Close-up of wooden handle of 21-1/8 inch New Haven Edge Tool Co #3 Cleaver New Haven Edge Tool Co cleaver handle end, showing wood grain and metal cap New Haven Edge Tool cleaver handle restoration: metal ferrule on wood Restored handle of a New Haven Edge Tool Co cleaver, secured in a vise Close-up of 21-1/8" New Haven Edge Tool Co #3 Cleaver in restoration process Restoring a New Haven Edge Tool cleaver handle in oil.

The blade was actually in very good shape and most of our work was cosmetic.  We did some sanding to shape it, abrasive blasted it and then used an acid etching based on apple cider vinegar and phosphoric acid (click here to learn more).  Once it was all set, we applied a thick coat of engine oil to stop the rusting.  If you plan to use this to cut meat, and it definitely will do the job, be sure to was the blade and then apply a cooking oil to the blade.  This will avoid making your food taste funny plus it will prevent rust.

New Haven cleaver restoration: tool soaking in cleaning solution with brush Restoring a New Haven Edge Tool Co cleaver in a vinegar bath. Restored 21-1/8" New Haven Edge Tool Co cleaver being washed Restoring a New Haven cleaver in a bubbly cleaning solution Restoring New Haven Edge Tool cleaver in vinegar bath with foam applicator

So, here’s how it turned out before it found a new home:

Approximate Dimensions

Overall length:  21-1/8″

Blade length: 9-5/8″

Blade height by the handle:  3-7/8″

Blade height at its tallest point:  5-1/2″

Handle at its thickest point: 1-5/8″

Handle at its thinnest point in the middle:  1-1/4″

Weight:  3.187 pounds

New Haven Edge Tool Co cleaver restoration: close-up of blade and wooden handle Wooden handle of a New Haven Edge Tool Co cleaver, restored in 2014. New Haven Edge Tool Co #3 cleaver, 21-1/8" restoration project Black 21-1/8-inch New Haven Edge Tool Co #3 Cleaver with a wooden handle on a wood surface New Haven Edge Tool Co #3 cleaver handle restoration: close-up of wooden handle with grooves Restored New Haven Edge Tool Co #3 cleaver handle and blade detail 21-1/8 inch New Haven Edge Tool Co #3 Cleaver on wood Restored New Haven Edge Tool Co #3 cleaver with wooden handle on wood Restored 21-1/8" New Haven Edge Tool Co #3 cleaver with wooden handle on wood

By the way, the BSI Super Thin glue is fantastic for taking care of cracks.


Post It Note Trick for Locating Front Trunnion Holes On An AK Receiver

Back before I had the AK-Builder trunnion drilling jig, I needed a quick and easy way to locate where to drill the holes for the front trunnion.  A fellow showed me the PostIt note method and boy was it simple and it worked.

The front trunnion is drilled for the rivets from the first kit so those holes need to be located and drilled on the receiver.

LiteXpress X-Tactical 101 flashlight with rotary selector and green LED indicator

Simply take a standard PostIt Note, stick it to the side of the clean receiver and then rub a dirty finger or pencil lead over the PostIt to see the outlines of the holes appear.  By the way, if the trunnion and receiver are clean, your Post-It adhesive will hold the note in place, which is what you want.

LiteXpress X-Tactical 101 flashlight with rotary selector and green LED indicator

So line the PostIt note up on the receiver’s top and right edges.

LiteXpress X-Tactical 101 flashlight with rotary selector and green LED indicator

Center punch the holes.  I like using an automated punch so I have less to juggle.

LiteXpress X-Tactical 101 flashlight with rotary selector and green LED indicator

You then have your holes to locate your drill.

LiteXpress X-Tactical 101 flashlight with rotary selector and green LED indicator

Use a hole finder to be more accurate and/or start with a small bit and work your way up in case you need to move a little bit one way or the other.

LiteXpress X-Tactical 101 flashlight with rotary selector and green LED indicator

That’s it.  Easy as pie and pretty fool proof.  Lessons learned for me was to clean the parts to protect the adhesive, make sure the edges are aligned and then that nothing moves when you punch each hole.  You do one Post-It note for each side and you can write the trunnion serial number on it and safe the Post-It for future reference.


Please share the link on Facebook, Forums, with colleagues, etc. Your support is much appreciated and if you have any feedback, please email us in**@*********ps.com. If you’d like to request a report or order a reprint, please click here for the corresponding page to open in new tab.


Gasp – not another weld build Romy G

I get one or two emails a year from a purist telling me that what I did was evil, that I am a clueless half-wit, etc. Folks, innovation happens by trying new things. I have built more AKs than most – using rivets mainly because they do work best. There are a ton of reasons why rivets are best for joining forged blocks to sheet metal.

In terms of welds, do I understand the risk of destroying the heat treat in the locking lug area, the risk of causing embrittlement around the plug welds, that the Soviets explored this and dropped the idea due to cracking? Yes, I do and tried it anyway because I wanted to explore how to compensate. So, don’t send me hate mail me because I will not bother responding.

If you want to try and experiment, go for it. Should you do this with an AK build that you want to be historically accurate or plan to use heavily perhaps even under full auto, then the answer is “no – don’t do it”.

Yeah, these things were like $79-99 in June 2006 so I did a lot of playing around including experimenting with weld builds.  I still have this one and it runs just fine.  The welds were done with a HF 120 Volt MIG welder running an ArC02 shielding gas.  Basically I did plug welds in place of rivets but did some extra welding on the back trunnion as I expected more stress there.  The lower rails were installed with a 120 Volt Harbor Freight Spot Welder with an AK-Builder tong installed.

My basic conclusion is that welding is fine for casual use rifles but rivets are the way to go with hard use.  The tricks are to take your time, do plug welds and watch your heat.  Your not trying to weld the heck out everything – just to get a decent plug weld to lock the parts into position in place of a rivet.  You’ll notice that for the critical front trunnion, I actually drilled the holes in the receiver and plug welded into the trunnion that had the rivets drilled out.

Romy G weld build: close-up of firearm receiver assembly with clamps
Romy G weld build receiver with tools and vise

I use a flap sanding wheel on my angle die grinder to smooth everything down.

Romy G receiver in vise with angle grinder and flap disc
Workshop tool setup with a welding gun, drill, and clamp

A drill bit with the right diameter to line the lower rails up with the front trunnion is used to position the lower rail for spot welding in place.

Chicago Electric Spot Welder and drill bit on Romy G parts
Welded Romy G receiver build in progress

I went for overkill welding in the rear and put in a few extra beads to take up stress.

Metal clamp tool with welding equipment in a workshop

Welding in the center support and sanded it down too

Romy G AK-47 receiver being welded in a vise for a DIY build.
Romy G weld build: Receiver in vise with drill, grinder, and spray can

This is the rifle ready for testing.

Romy G AK build in vise, with tools and workbench
Romy G AK build in vise, showcasing wood furniture and metal receiver.

I did Duracoat on this build and two big recommendations I would make to folks who choose to use the air dry Duracoat are to at least abrasive blast the surface and absolutely wait the full amount of time indicated for curing, which is 1-2 weeks or something like that.  If you don’t do these two things, when you move the selector lever, it will scratch the finish off right to the bare metal.  I only use bake on finishes now.  I’ve had great luck with blasting, parking and then applying Molyresin on top but this last step could be whatever finish you want.  The parkerizing is a terrific surface for a finish to really grab a hold of.  A bake on finish is really the way to go with the top coat.

If I new they were going to go up so much in value, I would have done rivets.  Heck, I would have done all the rifles using rivets had I known.  I was just having a lot of fun and learning a ton.


Please share the link on Facebook, Forums, with colleagues, etc. Your support is much appreciated and if you have any feedback, please email us in**@*********ps.com. If you’d like to request a report or order a reprint, please click here for the corresponding page to open in new tab.


The Gerber Golok Machete is Pretty Wicked and Surprisingly Hefty!!

Ok, so I wind up clearing brush pretty regularly.  Usually its pine, vines, scrub oak and junk like that.  Back in June 2014, I bought a Ken Onion designed Half-A-Chance machete (CRKT K920KKP) from CRKT that has served me well (click here for my review).  On my last trip to clear brush this past fall, I accidentally left the Half-A-Chance at home and had to get a replacement machete.  Thankfully SMKW was on the way so I stopped in and tried out a bunch of different ones in terms of heft and balance.  When I got to the Gerber Golok, I was really surprised.  It’s surprisingly thick and that mass makes a big difference when taking out saplings so I bought it and used it to clear the small stuff.

It seems like an opportune time to compare the two and share my thoughts.  In the next photo, the top is the Half-A-Chance and the bottom is the Golok.

Two Gerber machetes, including the hefty Golok, rest on weathered wooden planks.

What really surprised me was that the thickness of the Golok’s blade.  Why Gerber doesn’t make a big deal about this, I don’t know because there are fans of knives with big blades.  The blade is 12″ long and made from MN65 steel, which is a spring steel that is roughly equivalent to 1065 steel, which is fairly common in machetes.  The blade comes in at 0.2566″ when I mike it and weighs 1 pound 10.8oz (26.8 oz). That is a lot of steel!  It’s like you are moving the design from being a classical machete more towards a chopper with that kind of width.  When I was hitting some dried oak and ash, the Half-A-Chance bit deeper than the Golok and I think it reflects the relatively thin blade of the Ken Onion design that mikes at 0.1147″ which is less than half the Golok.  The Half-A-Chance also weighs 20.3oz.

The blade on the left is Half-A-Chance and the right is the Golok on a piece of dried ash.

Gerber Golok machete chopping into a log, showing its heft and sharpness.
Gerber Golok machete poised over a pile of chopped firewood

You can definitely see the the thicker Golok blade right away.  It’s the top blade on the left photo and the bottom blade on the right photo:

Gerber Golok machete with sheath on weathered wooden planks
Gerber Golok machete blades on a wooden surface

Just a closer view of the Half-A-Chance on top vs. the Golok on the bottom.  The Half-A-Chance’s handle is more ergonomic but the rubber coated Golok isn’t too bad.

Gerber Golok machete and CRKT heavy-duty survival knife on wooden surface
Gerber Golok machete and CRKT jungle knife handles and blades on wood

The Half-A-Chance’s sheath is fancier while the Golok is simple and to the point.

Gerber Golok machete with sheath, showing its hefty blade and durable construction.
Gerber Golok machete and sheath on a wooden surface
Gerber Golok machete with orange handle and black sheath
Gerber Golok machete in black sheath on wooden bench with packaging behind
Gerber Golok machete with sheath and packaging

Folks, in the end, the Golok is a chopper.  It’s heavy but too thick for the traditional fast slices you are doing with a machete.  I’d recommend the Half-a-Chance for thin stuff like vines and stuff under 3/8″ ballpark and the Golok for thicker vegetation where you need to chop but you are also starting to cross over into where a heavy khukuri or hatchet might serve you better.

Gerber Golok machete blade and sheath on a textured surface

While clearing the lot I did put a nick in the Golok and used my Work Sharp Ken Onion edition sharpener to take it right out when I got back to my shop. [Click here for my post on the KO sharpener.]

Work Sharp knife sharpener with belt, clamped to a workbench.

Bottom line, the Half-A-Chance machete is still my favorite and the first one I would grab to clear brush but the Golok is a keeper also because I like its mass and balance.  It’s a lot of blade for the money and I do like big blades.  You ought to take a look when you get some time or even pick one or both machetes up from Amazon.


Please share the link on Facebook, Forums, with colleagues, etc. Your support is much appreciated and if you have any feedback, please email us in**@*********ps.com. If you’d like to request a report or order a reprint, please click here for the corresponding page to open in new tab.


When Strength and Quality Matter Most